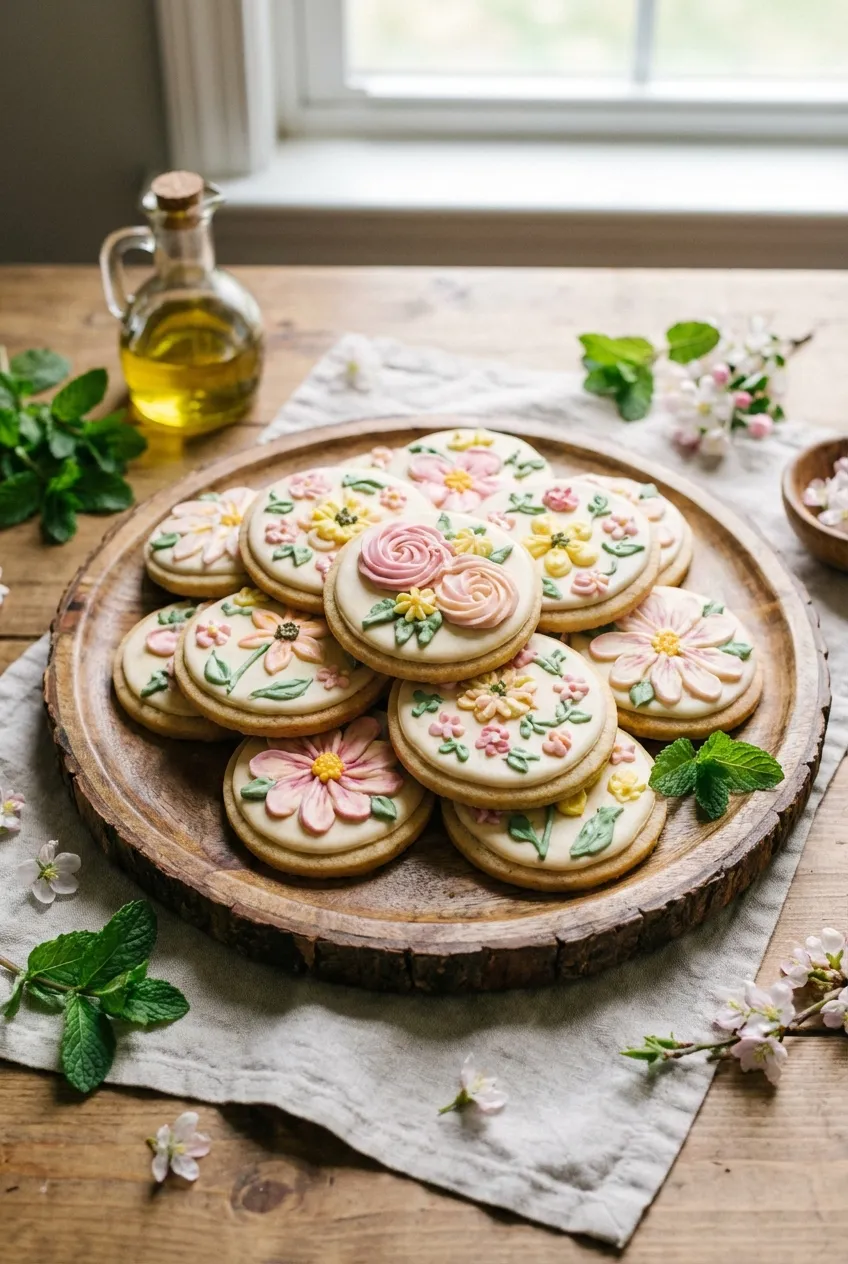
I love welcoming the new season with a fresh batch of these Spring Flower Sugar Cookies. There’s something so calming about rolling out the dough and decorating each one with pastel icing. I recently made these for a small family get-together, and they brought such a cheerful touch to the table. Julia’s note: I often make a double batch of this dough and freeze one disk; it gives me a wonderful head start for future celebrations or last-minute baking projects.
This is a recipe I trust completely for its reliability. The dough is buttery and tender, with a subtle hint of almond that gives it a classic bakery flavor. Most importantly, it holds its shape beautifully during baking, so your delicate flower petals won’t spread into blobs. This makes them a perfect, stress-free project for bakers of any skill level.
Getting the Icing Consistency Just Right
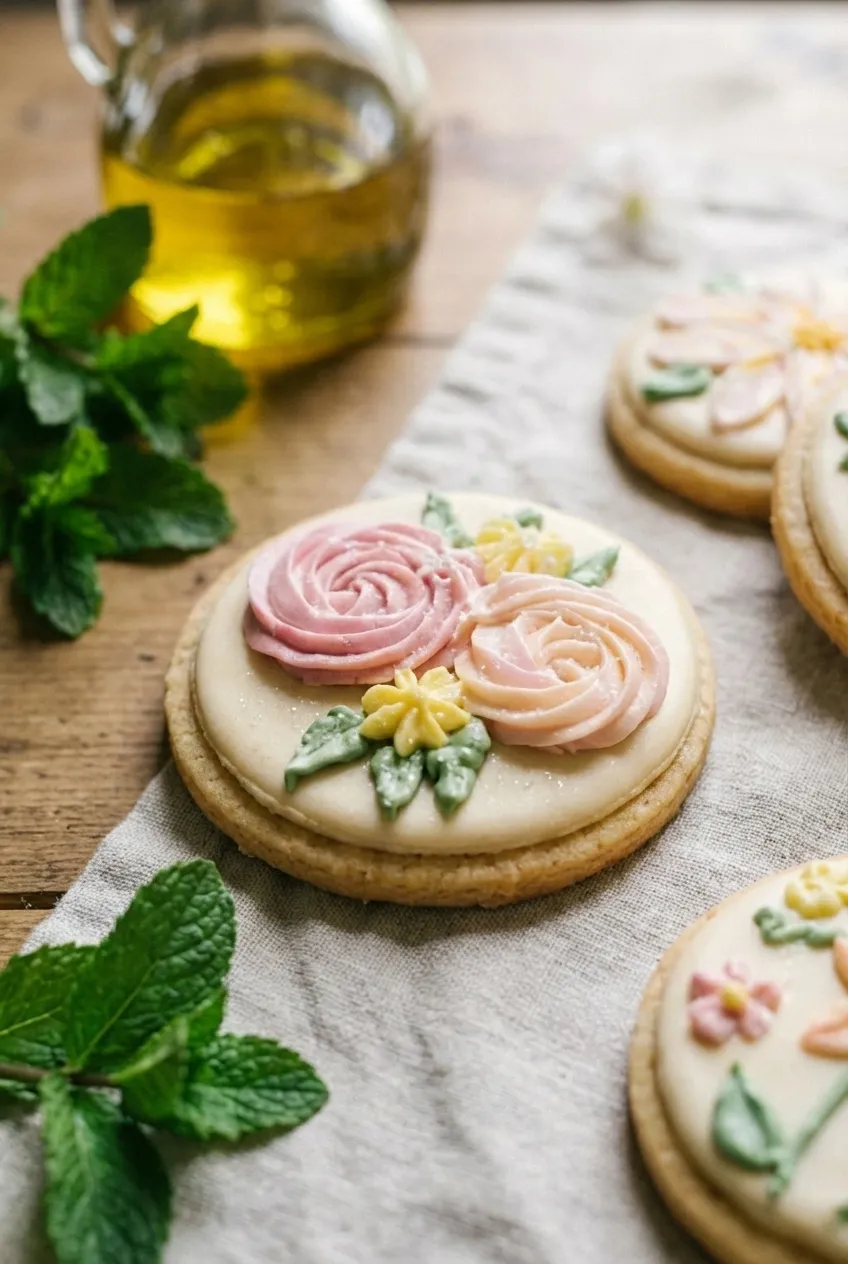
The key to professional-looking decorated cookies is mastering your icing consistency. You want an icing that is thick enough to pipe sharp outlines but thin enough to flood the cookie’s surface smoothly. A good test is to run a knife through the icing in the bowl; the line should disappear in about 10-15 seconds. If it’s too thick, add milk a few drops at a time. If it’s too thin, whisk in a bit more confectioners’ sugar. Always test a small amount on parchment paper before you begin decorating your cookies.
Tips for Vibrant, Spring-Hued Icing
To achieve those lovely pastel spring colors, I recommend using gel food coloring. Unlike liquid food coloring, gels are highly concentrated, so you only need a tiny amount to get vibrant hues without thinning out your icing. Start with just a dip of a toothpick and mix thoroughly before adding more. This gives you precise control, making it easy to create delicate shades of pink, yellow, and lavender that are perfect for a spring palette.
Achieving Crisp Edges and Tender Centers
The perfect sugar cookie has a delightful texture contrast: a lightly crisp edge that gives way to a soft, tender center. The secret lies in not overbaking. Keep a close eye on your cookies and pull them from the oven as soon as the edges are a very light golden brown. They will continue to set on the hot baking sheet for a few minutes after you take them out. This carry-over cooking is just enough to finish the bake without turning them hard or dry.
Recipe Overview
- Prep Time: 30 minutes
- Cook Time: 10 minutes
- Total Time: 1 hour
- Servings: 24 cookies
- Difficulty: Medium
Ingredients
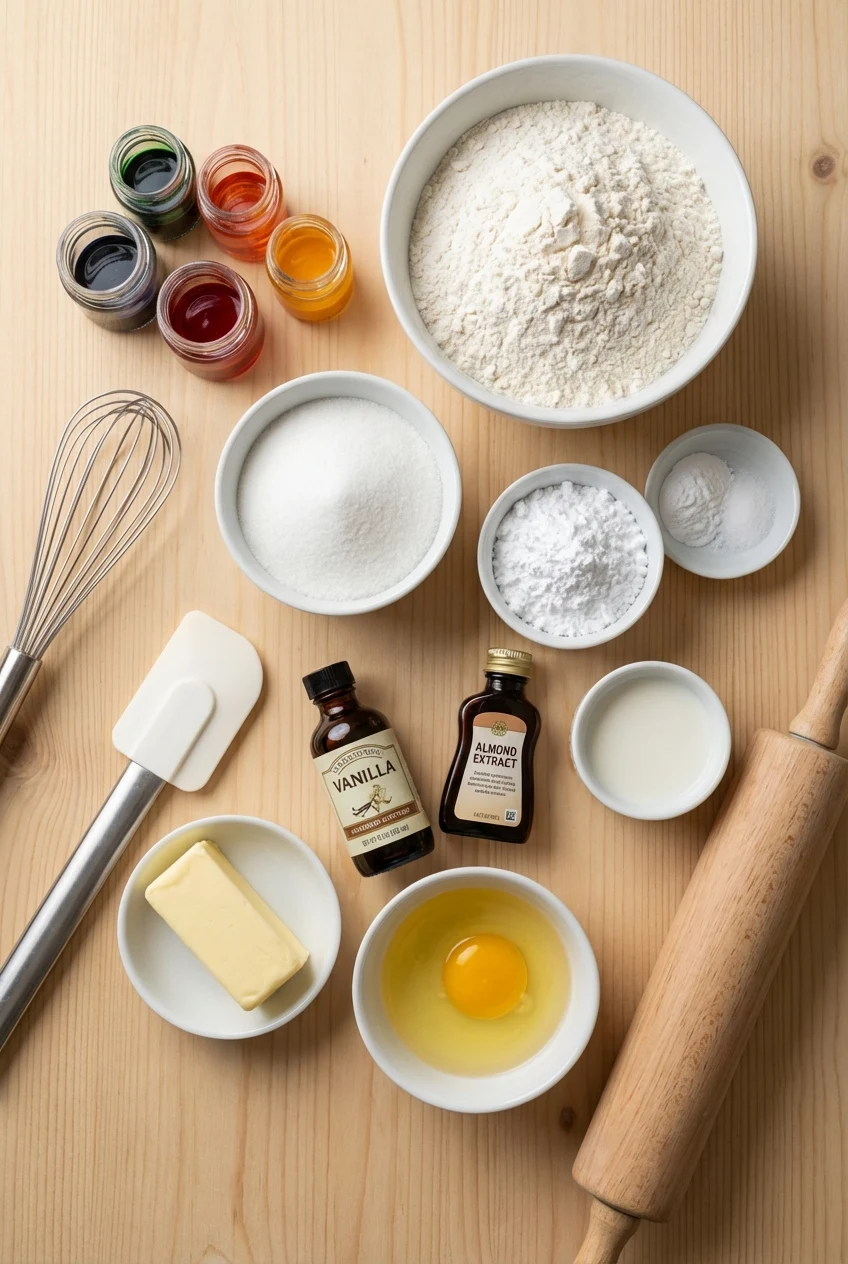
For the Cookies
- 300g all-purpose flour (2 1/2 cups), sifted
- 4g baking powder (1 teaspoon)
- 3g salt (1/2 teaspoon)
- 227g unsalted butter (1 cup), at room temperature
- 200g granulated sugar (1 cup)
- 50g large egg (1), at room temperature
- 5g vanilla extract (1 teaspoon)
- 2g almond extract (1/2 teaspoon)
For the Icing
- 240g confectioners’ sugar (2 cups)
- 30-45g milk (2-3 tablespoons)
- Gel food coloring (optional)
Step-By-Step Instructions
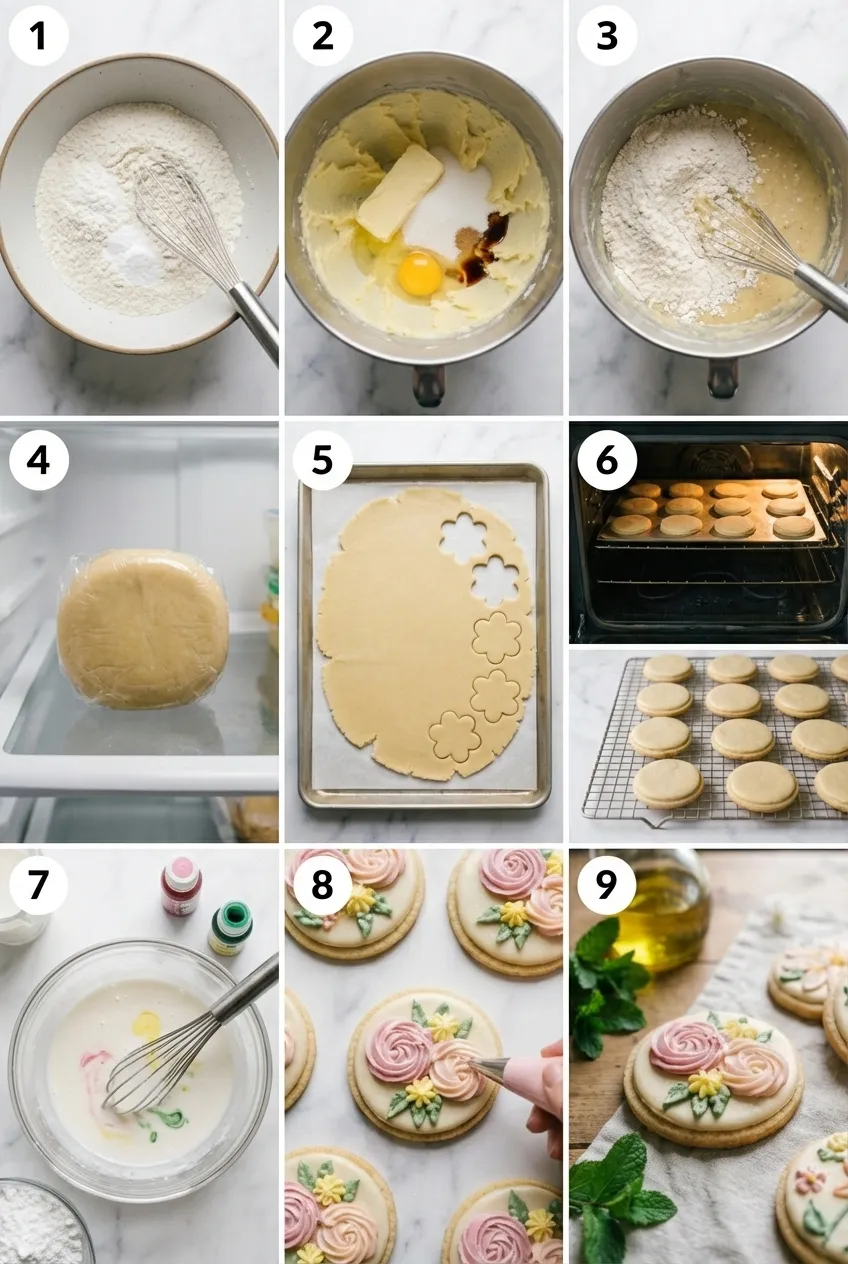
Whisk the Dry Ingredients
In a medium bowl, whisk together the sifted flour, baking powder, and salt. Sifting and whisking ensures the ingredients are evenly distributed for a uniform cookie texture and prevents lumps in your dough.
Cream the Butter and Sugar
In a large bowl with a hand mixer or in a stand mixer, beat the room-temperature butter and granulated sugar on medium-high speed until the mixture is light, pale, and fluffy, about 3 minutes. Scrape down the sides of the bowl, then add the egg, vanilla extract, and almond extract. Mix until well combined.
Combine the Wet and Dry Mixtures
With the mixer on low speed, gradually add the dry ingredient mixture to the wet ingredients. Mix until the flour is just incorporated. Be careful not to overmix, as this can develop gluten and result in tough cookies.
Chill the Dough
Form the dough into a flat disk about 1-inch thick, wrap it tightly in plastic wrap, and refrigerate for at least 30 minutes. Chilling the dough solidifies the butter, which prevents the cookies from spreading too much during baking and makes it much easier to roll out.
Preheat, Roll, and Cut
Preheat your oven to 350°F (175°C). Line two baking sheets with parchment paper. On a lightly floured surface, roll the chilled dough out to a 1/4-inch thickness. Use flower-shaped cookie cutters to cut out your shapes, placing them about 1 inch apart on the prepared baking sheets.
Bake the Cookies
Bake for 8 to 10 minutes, or until the edges are just beginning to turn a light golden brown. Let the cookies cool on the baking sheet for 5 minutes before transferring them to a wire rack to cool completely. Cookies must be fully cool before icing.
Prepare the Icing
In a small bowl, whisk together the confectioners’ sugar and 2 tablespoons of milk until you have a smooth, thick but pourable icing. If needed, add the remaining tablespoon of milk to reach your desired consistency. If using, divide the icing into separate bowls and tint with gel food coloring.
Decorate the Cookies
Use a piping bag, a squeeze bottle, or a small spoon to decorate the cooled cookies with your prepared icing. Allow the icing to set completely at room temperature, about 15-20 minutes, before serving or storing.
Substitutions & Variations
- Citrus Zest: Add 1 tablespoon of finely grated lemon or orange zest to the butter and sugar mixture for a bright, zesty flavor.
- Floral Notes: For a delicate floral aroma, swap the almond extract with 1/4 teaspoon of rosewater.
- Natural Decorations: Gently press a few small, edible flowers onto the wet icing for a beautiful and natural look.
- Gluten-Free: Substitute the all-purpose flour with a high-quality 1-to-1 gluten-free baking flour blend containing xanthan gum.
If you enjoy this dish, try our Homemade Cookies from Scratch for a perfect pairing or next-weeknight option.
Make-Ahead, Storage & Reheat
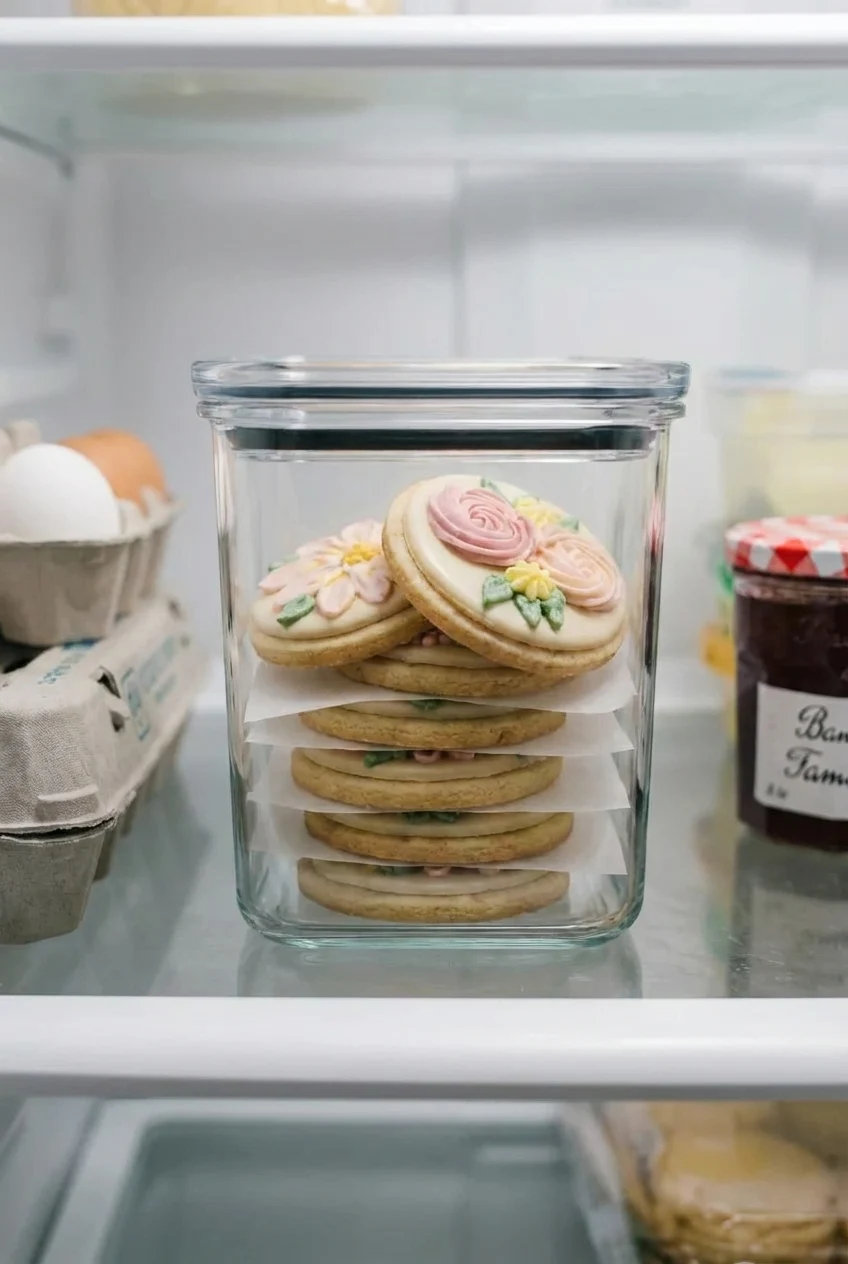
Store decorated cookies in a single layer in an airtight container at room temperature for up to one week. To prevent smudging, place a sheet of parchment paper between layers if you need to stack them. You can also freeze the decorated cookies for up to three months.
Nutrition
- Serving Size: 1 cookie
- Calories: 120
- Protein: 1g
- Fat: 5g
- Carbohydrates: 16g
Estimates only.
FAQ
How can I thicken runny icing without it tasting overly sweet?
Before adding more sugar, try chilling the icing for about 15 minutes. Cold helps the butter or fat firm up, which thickens the texture naturally without affecting the flavor.
What is the best test for icing consistency before I start decorating?
A good test is to lift your spatula and let a ribbon of icing fall back into the bowl. Aim for it to disappear in about 10-15 seconds for a good flooding consistency.
Why does my icing look grainy or separated, and is there a fix for it?
This is usually from ingredients being at different temperatures. Let the bowl sit for a few minutes to warm up, then mix on low speed until it becomes smooth and emulsified.
My cookies spread into thin, flat discs in the oven. What went wrong?
Spreading is often caused by dough that is too warm. Chilling the cut-out shapes for 15-30 minutes before baking helps the fat solidify and hold its shape better.
Can I prepare the cookie dough ahead of time to make baking day easier?
Absolutely. The dough can be wrapped and refrigerated for up to 3 days or frozen for a month. This lets you break up the work and bake whenever you are ready for them.
Will the icing crack or bleed color if I freeze the decorated cookies?
The icing holds up well to freezing if you let it dry completely first. To prevent damage, freeze cookies in a single layer before transferring to an airtight container.
Which stand mixer attachment should I use for smooth, bubble-free icing?
Use the paddle attachment on a low to medium-low speed. A whisk incorporates too much air, which creates a bubbly texture. The paddle ensures a smooth, dense result.
How do I get my simple glaze icing to set with a shine instead of dull?
Adding a small amount of light corn syrup to your icing recipe is the key. It helps the sugar crystallize in a way that creates a smooth, glossy surface as it dries.
Equipment
- Medium mixing bowl
- Large mixing bowl
- Hand mixer or stand mixer
- Plastic wrap
- Rolling pin
- Flower-shaped cookie cutters
- Two baking sheets
- Parchment paper
- Wire cooling rack
- Small bowl
- Piping bag or squeeze bottle or small spoon
Ingredients
- 300 g (2 1/2 cups) All-purpose flour sifted
- 4 g (1 teaspoon) Baking powder
- 3 g (1/2 teaspoon) Salt
- 227 g (1 cup) Unsalted butter at room temperature
- 200 g (1 cup) Granulated sugar
- 50 g (1) Large egg at room temperature
- 5 g (1 teaspoon) Vanilla extract
- 2 g (1/2 teaspoon) Almond extract
- For the Icing
- 240 g (2 cups) Confectioners’ sugar
- 30-45 g (2-3 tablespoons) Milk
- Optional Gel food coloring
Instructions
- Whisk together the sifted flour, baking powder, and salt in a medium bowl to evenly distribute ingredients and avoid lumps.
- Beat room-temperature butter and granulated sugar on medium-high speed until light and fluffy, about 3 minutes.
- Add egg, vanilla extract, and almond extract to the butter mixture and mix until combined.
- Gradually add the dry ingredients to the wet mixture on low speed until just incorporated; avoid overmixing.
- Form the dough into a 1-inch thick disk, wrap in plastic wrap, and refrigerate for at least 30 minutes.
- Preheat oven to 350°F (175°C). Line two baking sheets with parchment paper.
- Roll chilled dough to 1/4-inch thickness on a lightly floured surface and cut out flower shapes with cookie cutters.
- Place cookies 1 inch apart on prepared baking sheets and bake 8 to 10 minutes until edges are lightly golden.
- Cool cookies on the baking sheet for 5 minutes before transferring to a wire rack to cool completely.
- Whisk confectioners’ sugar and 2 tablespoons milk until smooth and thick but pourable; add more milk if needed.
- Divide icing into bowls and tint with gel food coloring if desired.
- Decorate cooled cookies with icing using a piping bag, squeeze bottle, or spoon and allow to set 15-20 minutes.