
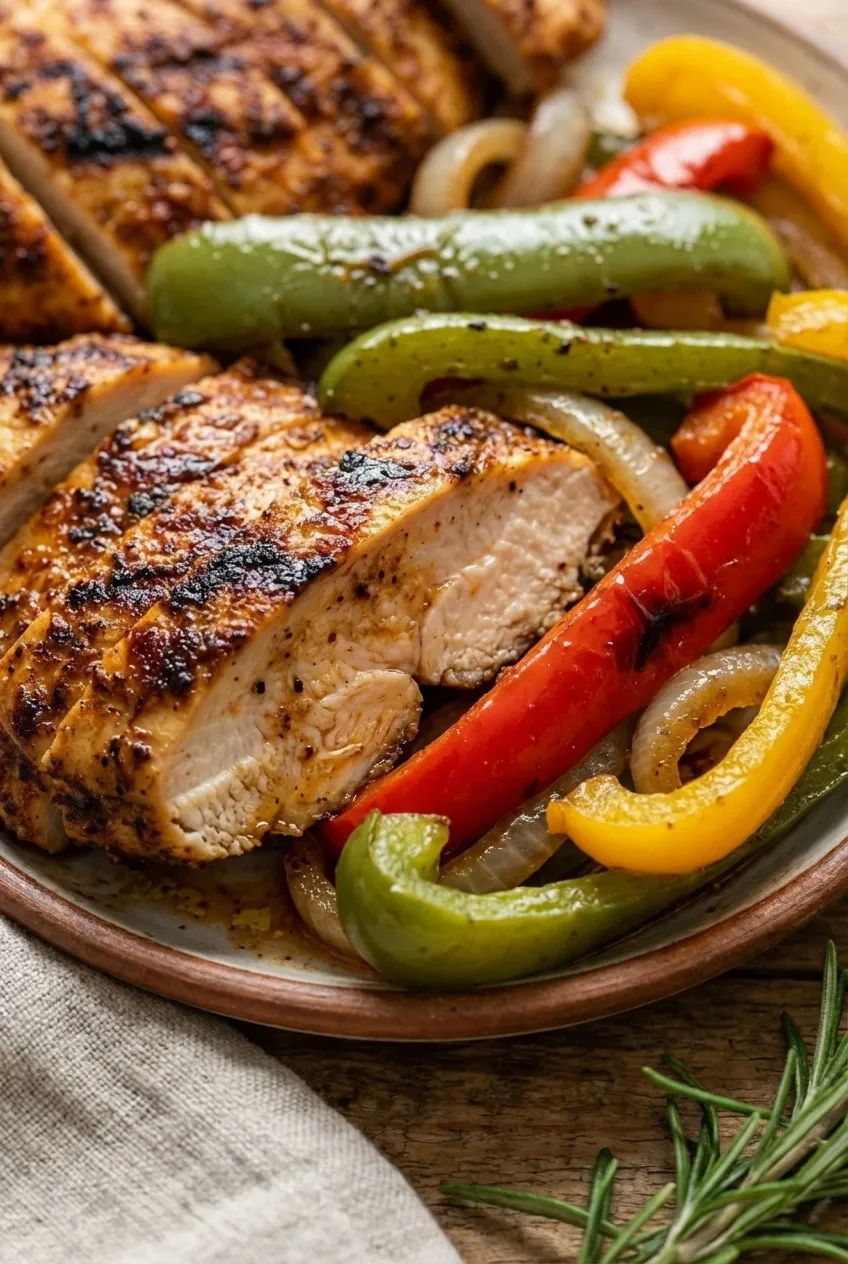
When my schedule gets hectic, having a few delicious, ready-to-go lunches in the fridge makes all the difference. These Fajita Chicken Meal Prep Boxes are a staple in my rotation because they deliver on smoky, vibrant flavor without requiring hours in the kitchen. They taste just as good on day four as they do on day one. My take: I love using a trio of red, yellow, and green bell peppers for a pop of color that makes lunchtime feel a little brighter.
This recipe is designed for reliability and ease. The chicken gets a quick sear on the grill for that classic fajita char, while the vegetables are sautéed until perfectly crisp-tender. It’s a balanced, high-protein meal that keeps you energized through the afternoon, and it comes together in just over 30 minutes. It’s the perfect solution for anyone looking to eat well during a busy week.
Mastering the Perfect Grill Marks
Achieving those beautiful, dark grill marks isn’t just for looks; it’s a technique called the Maillard reaction, which creates deep, savory flavor. The key is a properly preheated grill and patience. Make sure your grill is hot before the chicken goes on, and lightly oil the grates to prevent sticking. Once you place the chicken strips down, let them cook undisturbed for the full 4-5 minutes on each side. Resisting the urge to move them allows those distinct, flavorful marks to form.
Balancing Texture in Fajitas
A great fajita dish is all about the contrast between tender, juicy protein and vegetables that still have a bit of bite. The goal for the bell peppers and onions is “crisp-tender.” You want to cook them in a hot skillet just long enough to soften slightly and develop some char, about 5-7 minutes. Overcooking them will lead to a mushy texture that gets lost in the meal prep container. Pull them from the heat when they are still vibrant in color and have a slight crunch.
Enhancing Flavors with Fresh Lime
Acidity is crucial for cutting through the richness of grilled meats and adding brightness to a dish. While the chicken is marinated with lime juice, adding another fresh squeeze just before serving wakes everything up. The heat from reheating can sometimes mute flavors, but a splash of fresh lime juice over your heated meal prep box restores that zesty, fresh taste and ties all the smoky, savory elements together perfectly.
Recipe Overview
- Prep Time: 15 minutes
- Cook Time: 20 minutes
- Total Time: 35 minutes
- Servings: 4 meal prep boxes
- Difficulty: Easy
Ingredients

- 900g (4) boneless, skinless chicken breasts
- 450g (3) bell peppers, assorted colors
- 150g (1) onion, sliced
- 30g (2 tablespoons) extra virgin olive oil
- 24g (2 tablespoons) fajita seasoning
- 70g (1) lime, juiced
- 15g (1/4 cup) cilantro, chopped
- Salt, to taste
- Black pepper, to taste
Step-By-Step Instructions
- Prepare Ingredients
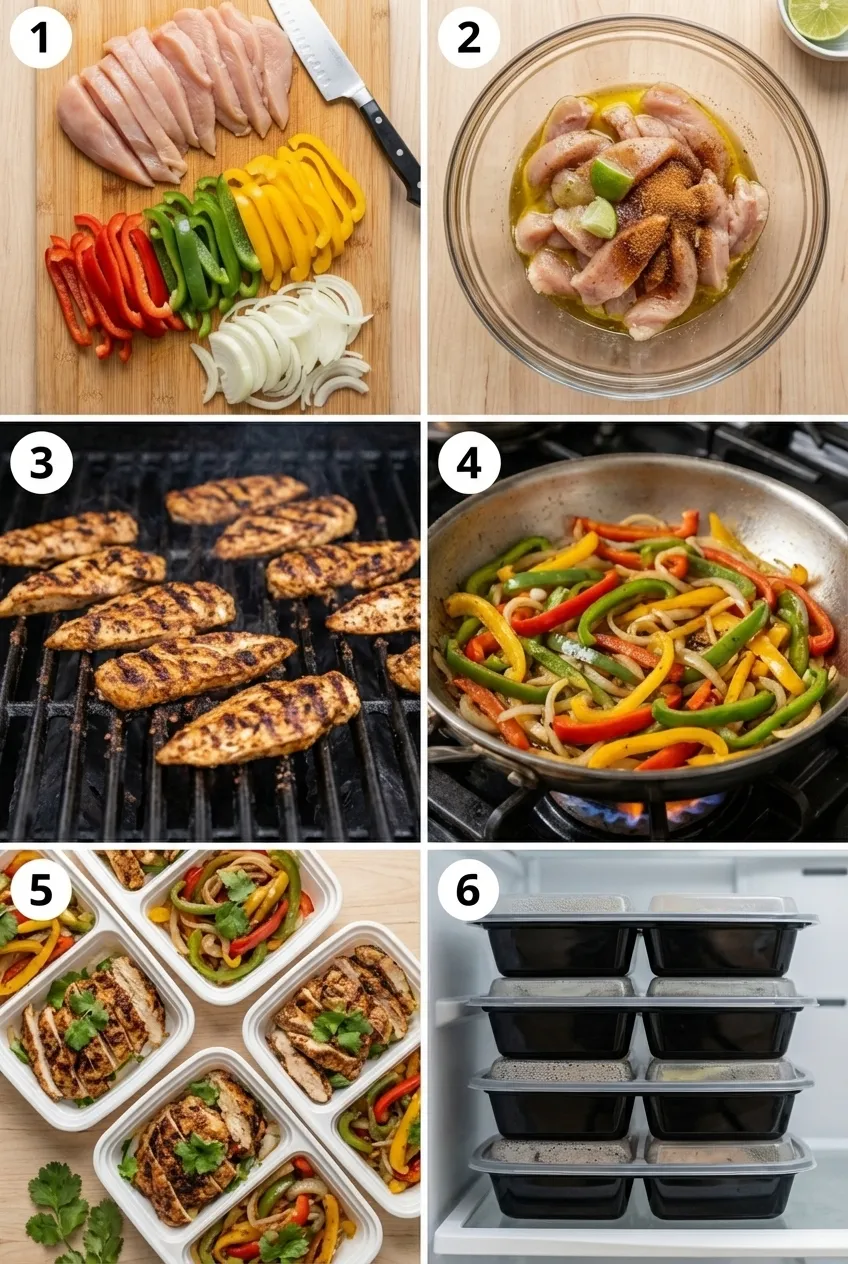
Slice the chicken breasts into thin, even strips. Cut the bell peppers into strips and thinly slice the onion. Having all your components ready—a practice we call mise en place—ensures the cooking process is smooth and efficient.
- Season Chicken
In a medium bowl, toss the chicken strips with half the olive oil, all the lime juice, and the fajita seasoning. Season with salt and pepper, and mix until every piece is thoroughly coated. This step ensures the flavor penetrates the meat.
- Grill the Chicken
Preheat your grill to medium-high heat (about 400°F / 205°C). Place the chicken strips on the grates and grill for 4-5 minutes on each side. The chicken is done when it’s charred and cooked through to an internal temperature of 165°F / 74°C. Remove from the grill and let it rest for a moment.
- Sauté Vegetables
While the chicken grills, heat the remaining olive oil in a large skillet or cast-iron pan over medium-high heat. Add the sliced bell peppers and onion. Sauté for 5-7 minutes, stirring occasionally, until they are crisp-tender and slightly charred at the edges.
- Assemble Meal Prep Boxes
Divide the grilled chicken and sautéed vegetables evenly among your four meal prep containers. Garnish with chopped cilantro. Allow the food to cool to room temperature before sealing the lids to prevent condensation and sogginess.
- Store Properly
Seal the meal prep boxes tightly and store them in the refrigerator. For the best quality and freshness, enjoy them within 4 days.
If you enjoy this dish, try our Baked Chicken Veggie Meal Prep for a perfect pairing or next-weeknight option.
Substitutions & Variations
- Protein Swap: Substitute the chicken with thinly sliced flank steak or large shrimp. Adjust cooking time accordingly; shrimp will cook much faster.
- Add Healthy Fats: Portion out fresh avocado slices or a dollop of guacamole to add to the boxes just before serving for extra creaminess and healthy fats.
- Boost Fiber: Mix in 1 cup of canned black beans (rinsed and drained) with the vegetables during the last minute of sautéing for added fiber and plant-based protein.
Make-Ahead, Storage & Reheat
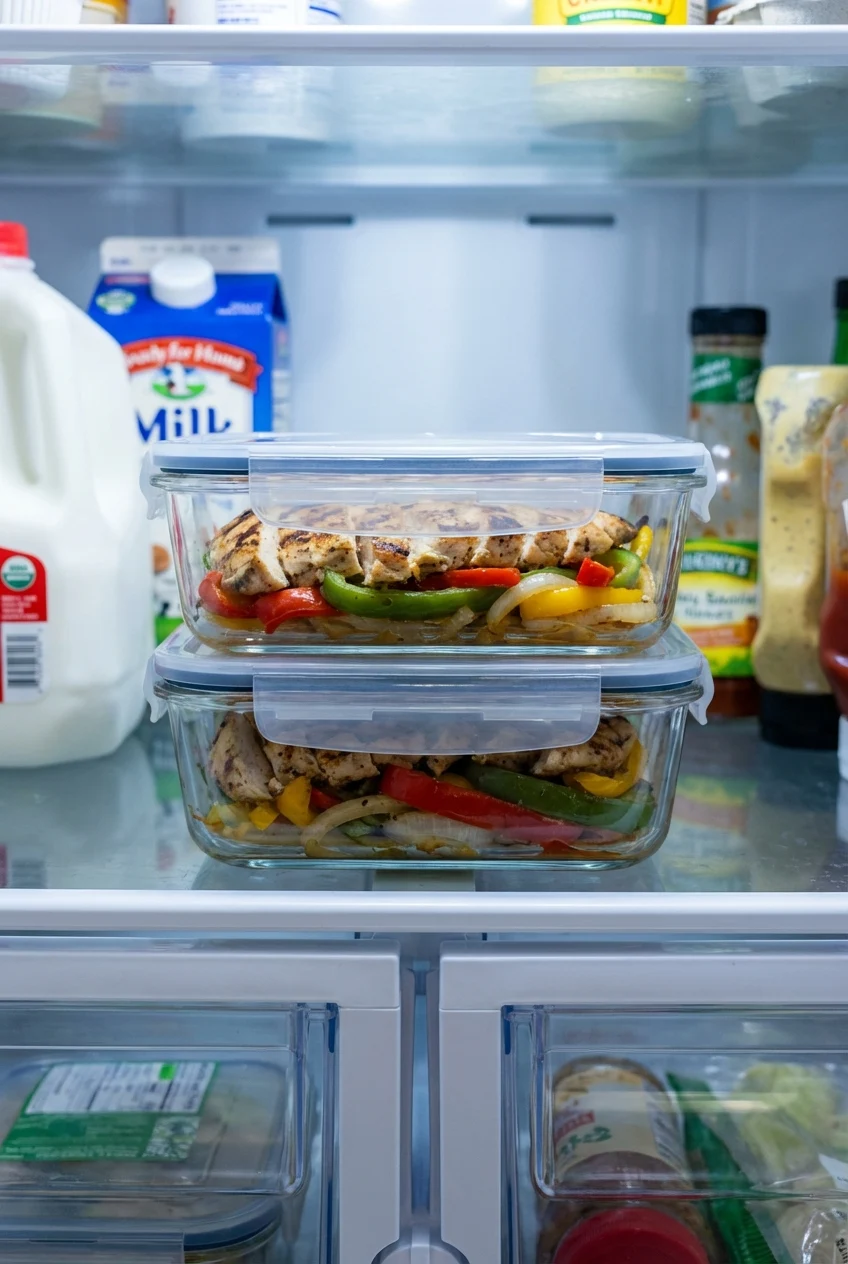
Store the assembled meal prep boxes in airtight containers in the refrigerator for up to 4 days. To reheat, vent the lid and microwave for 1-2 minutes, or until warmed through. You can also enjoy this meal cold, served over a bed of greens like a salad.
Nutrition
- Serving Size: 1 meal prep box
- Per Serving: 460 calories, 45g protein, 18g fat, 32g carbs
- Per 100g: 150 calories, 15g protein, 6g fat, 10g carbs
- Estimates only.
FAQ
Why does my chicken always stick to the grill when I try for marks?
Sticking is often caused by a grill that isn't hot or clean enough. Preheat your grates thoroughly and give them a good scrub so the protein sears instantly and releases easily.
Can I get decent grill marks using a grill pan on my stove top?
Absolutely. For best results, use a cast iron grill pan and let it get very hot. Press the chicken down firmly so the surface makes full contact with the ridges, creating a defined sear.
Is it better to oil the grill grates or the chicken itself for searing?
I recommend oiling the chicken, not the grates. A light coating on the protein helps prevent sticking and promotes even browning, without the risk of excess oil causing flare-ups.
What is the best technique for creating those classic crosshatch grill marks?
Place your protein on the hot grates at a 45-degree angle. Once seared, rotate it 90 degrees on the same side. This simple turn creates the classic diamond pattern before you flip it over.
How can I reheat my meal prep boxes without the chicken getting tough?
The key is gentle heat. Microwave your container at 50% power or add a tablespoon of water before heating. This creates steam that warms the chicken through instead of making it rubbery.
Are these meal prep boxes suitable for freezing for longer-term storage?
The chicken freezes beautifully, but the bell peppers can become soft and watery when thawed. For the best texture, I recommend freezing only the cooked chicken and adding fresh veggies later.
What other vegetables work well in these boxes and won't get soggy?
Heartier vegetables like zucchini strips, broccoli florets, or corn hold up best. Sauté them until just tender-crisp so they retain a pleasant bite after being stored and reheated.
Why do my perfect grill marks seem to fade after the meat has rested?
Marks can soften as juices redistribute during resting. To minimize this, make sure your protein is very dry and your grill is extremely hot to create a deeper, more durable crust.
Equipment
- Grill or grill pan
- Large 12-inch skillet or cast-iron pan
- Medium mixing bowl
- 4 Meal prep containers
- Tongs
- Chef’s knife
- Cutting board
Ingredients
- 900 g Boneless, skinless chicken breasts (about 4 breasts)
- 450 g Bell peppers assorted colors, sliced
- 150 g Onion sliced
- 30 g (2 tbsp) Extra virgin olive oil divided
- 24 g (2 tbsp) Fajita seasoning
- 70 g (1 lime) Lime juice
- 15 g (¼ cup) Cilantro chopped
- To taste Salt
- To taste Black pepper
Instructions
- Slice the chicken breasts into thin, even strips and cut the bell peppers and onion into strips.
- In a medium bowl, toss the chicken strips with half the olive oil, all the lime juice, fajita seasoning, salt, and pepper until thoroughly coated.
- Preheat the grill to medium-high heat (about 400°F / 205°C). Grill the chicken strips for 4-5 minutes on each side until charred and cooked through to 165°F / 74°C, then let rest.
- Heat the remaining olive oil in a large skillet over medium-high heat. Add bell peppers and onion, sautéing for 5-7 minutes until crisp-tender and slightly charred.
- Divide the grilled chicken and sautéed vegetables evenly among four meal prep containers. Garnish with chopped cilantro and allow to cool to room temperature before sealing.
- Seal the meal prep boxes and store in the refrigerator. Consume within 4 days for best quality.