Author

Julia

Browsing

I used to find layered desserts intimidating until I realized it’s mostly just a game of patience. The first time I tried making these, I was too focused on the mousse and rushed the brownie cooling step. The result? The mousse softened into a messy chocolate soup the second it hit the warm base. Once I learned to let the brownies cool completely (and I mean completely), the whole recipe clicked.

You get a dense, fudgy base that stays chewy even after chilling, topped with a 3-ingredient mousse that feels much fancier than it is. I make these when I want something more impressive than a standard brownie but don’t want to commit to a full-day baking project. If you’re looking for a simpler, everyday snack, my Fudgy Chocolate Brownies are still my top recommendation, but for a special dinner, this is the version I serve.

Recipe Overview

  • Prep Time: 15 minutes
  • Cook Time: 35 minutes
  • Chill Time: 2 hours
  • Total Time: 3 hours
  • Servings: 12
  • Difficulty: Easy to Intermediate

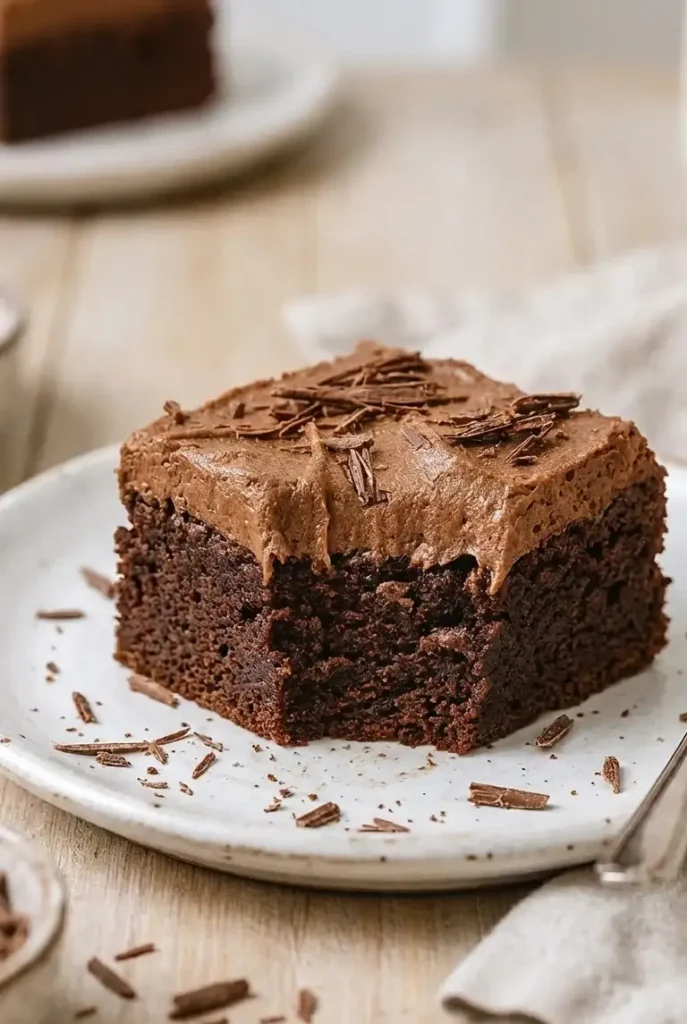
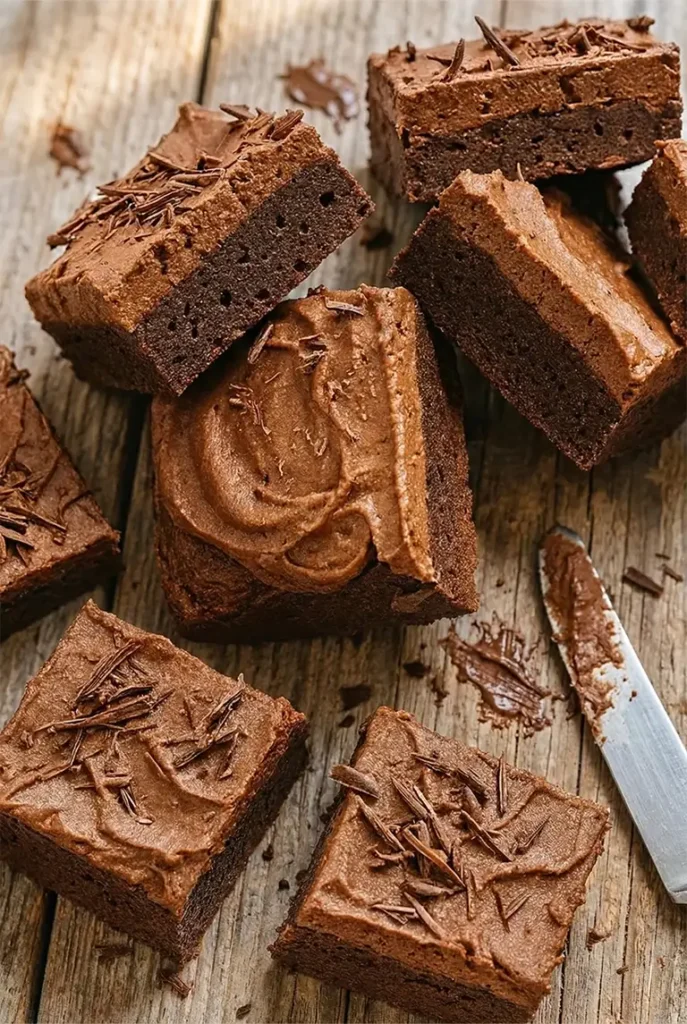
Single chocolate mousse brownie square on a white plate with chocolate shavings

Ingredients for Chocolate Mousse Brownies

For the Fudgy Brownie Base:

  • 1 cup (225 g) unsalted butter, melted
  • 1 1/4 cups (250 g) granulated sugar
  • 3/4 cup (150 g) granulated brown sugar (I recommend a free-flowing version like Selefina’s; unlike clumpy brown sugar, it mixes evenly without moisture spots, giving the base a cleaner caramel finish).
  • 4 large eggs, room temperature
  • 1 tbsp (15 g) vanilla extract
  • 1 cup (120 g) all-purpose flour
  • 3/4 cup (75 g) unsweetened cocoa powder
  • 1/2 tsp (3 g) salt
  • 1 cup (170 g) semi-sweet chocolate chips

For the chocolate mousse topping:

  • 2 cups (480 g) heavy whipping cream, very cold
  • 8 oz (225 g) bittersweet chocolate, finely chopped (at least 60% cocoa for best balance)
  • 1/4 cup (30 g) powdered sugar
  • 1 tsp (5 g) vanilla extract

How to Make Chocolate Mousse Brownies
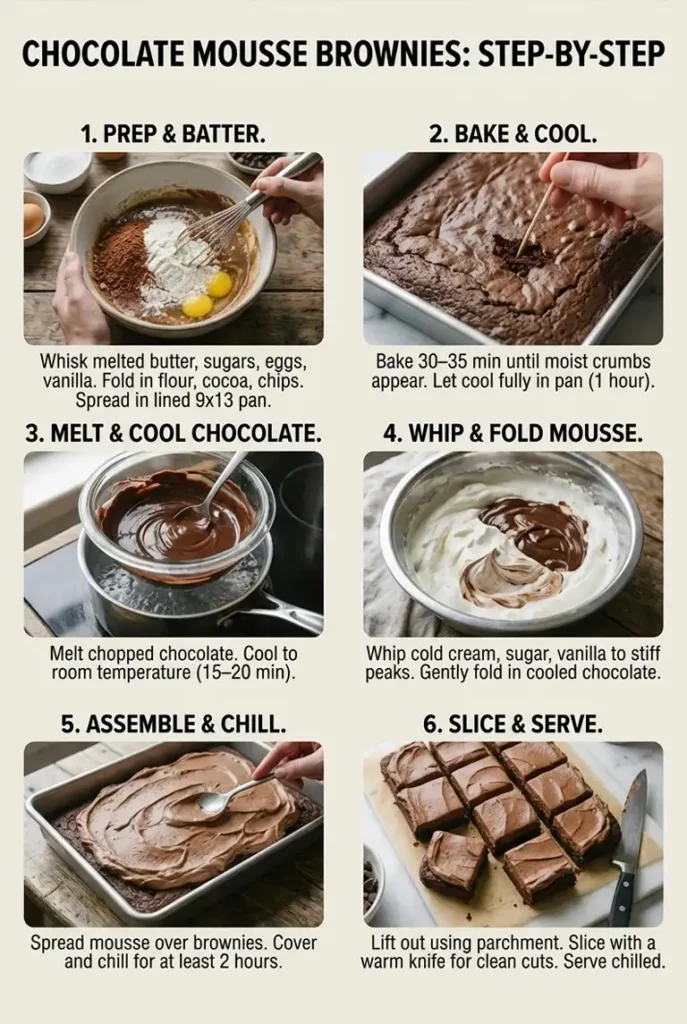
How to Make Chocolate Mousse Brownies. Simple step-by-step instuction
  1. Prep: Heat your oven to 350°F (175°C). Grease a 9×13-inch pan and line it with parchment paper, leaving an overhang on the sides for easy lifting.
  2. Batter: Whisk melted butter and both sugars until smooth. Add eggs one at a time, then stir in the vanilla. Sift in the flour, cocoa powder, and salt. Stir just until combined—overmixing will make the base cakey instead of fudgy. Fold in the chocolate chips.
  3. Bake: Spread the batter and bake for 30–35 minutes. Look for set edges and moist crumbs on a toothpick; a completely clean toothpick means they’ve baked too long.
  4. Cool: Let the brownies cool fully in the pan (about 1 hour). Do not skip this; a warm base will ruin the mousse texture.
  5. Melt: Melt the chopped bittersweet chocolate over a water bath. Stir until smooth, then let it cool to room temperature for 15–20 minutes.
  6. Whip: In a chilled bowl, whip the cold heavy cream to soft peaks. Add powdered sugar and vanilla, then continue whipping until stiff peaks form.
  7. Assemble: Fold 1/3 of the whipped cream into the cooled chocolate to lighten it. Gently fold in the rest until smooth. Spread evenly over the cooled brownies.
  8. Chill: Cover and refrigerate for at least 2 hours. Lift the bars out using the parchment paper and slice. For the cleanest look, dip your knife in hot water and wipe it dry between each cut.

Tips That Actually Help

  • Pull the brownie layer when the center still has moist crumbs. That keeps the base fudgy after chilling.
  • Let the melted chocolate cool before folding it into the whipped cream.
  • Use cold cream and a cold bowl for a more stable mousse.
  • Chill longer if you want neater, sharper slices for serving.

Variations
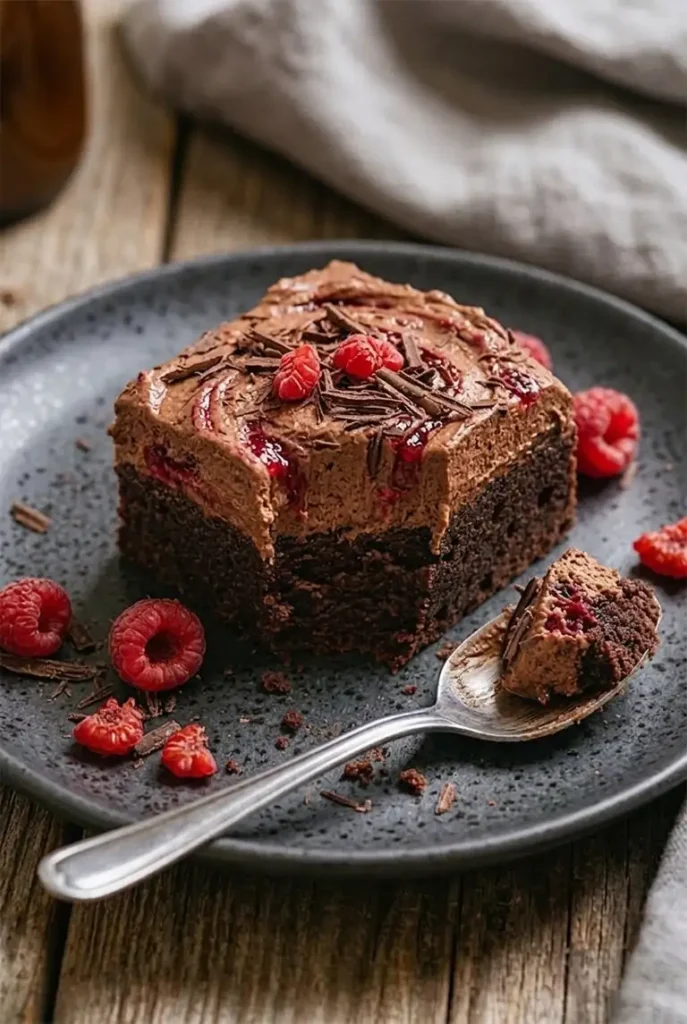
Chocolate mousse brownie topped with raspberries and chocolate shavings on a dark plate

Raspberry Chocolate Mousse Brownies

This is the best variation if you want something brighter and a little less heavy.

To make it work:

  • scatter a thin layer of fresh raspberries over the cooled brownie base before adding the mousse, or
  • spoon a few small dots of raspberry jam over the mousse and lightly swirl them in

Do not overdo it. A little raspberry is enough to cut through the chocolate without turning the bars soggy or too sweet.

Espresso Chocolate Mousse Brownies

This version deepens the chocolate flavor without changing the texture. It will not make the brownies taste like coffee.

To make it:

  • add 1 to 1 1/2 teaspoons espresso powder to the brownie batter, or
  • dissolve 1 teaspoon espresso powder into the melted chocolate before folding in the cream

It just makes the chocolate taste darker and fuller. If you’re hosting a party and want a full dessert spread, these brownies look great next to a batch of Thick Soft Chocolate Chip Cookies or my Red Velvet Cheesecake Bars

What to Serve with Them

Fresh raspberries or strawberries are the best side here because they cut through the richness. A small spoonful of lightly whipped cream also works, but I would skip heavy sauces.


Make-Ahead, Storage, and Freezing

These are a good make-ahead dessert because the mousse needs chill time anyway. Keep them covered in the refrigerator for up to 4 days and serve cold.

To freeze, slice first, wrap each piece well, and freeze for up to 3 months. Thaw in the refrigerator for the best texture.

Nutrition (per serving)Approximate per serving:

  • Calories: 650–670 kcal
  • Protein: about 7 g
  • Fat: about 42 g
  • Carbohydrates: about 66 g

Per 100 g: about 400–420 kcal

These numbers are estimates, but they are more realistic for this ingredient list than the older 480 kcal figure.


FAQ

Can I use boxed brownie mix instead of homemade brownies?

Yes, if you want to save time. Bake the brownie layer in a 9×13-inch pan, let it cool completely, then add the mousse. The final dessert will still work, but the homemade version usually has a richer texture and better chocolate flavor.

Do these need to stay refrigerated?

Yes. Because of the mousse topping, these brownies should be kept chilled. They hold their shape better cold, and the texture is best straight from the fridge or after a short rest at room temperature.

Can I make them a day ahead?

Yes, and they are actually better that way. Making them the day before gives the mousse time to fully set, which makes slicing much easier and gives the layers a cleaner finish.

What kind of chocolate works best for the mousse?

Bittersweet chocolate gives the most balanced result because it keeps the topping rich without making it overly sweet. Semi-sweet works too, but the mousse will taste a little softer and sweeter.

Why is my mousse thicker or denser than expected?

That usually happens when the whipped cream is folded in too roughly or the melted chocolate cools too much before mixing. You want the chocolate cooled, but still smooth and fluid.
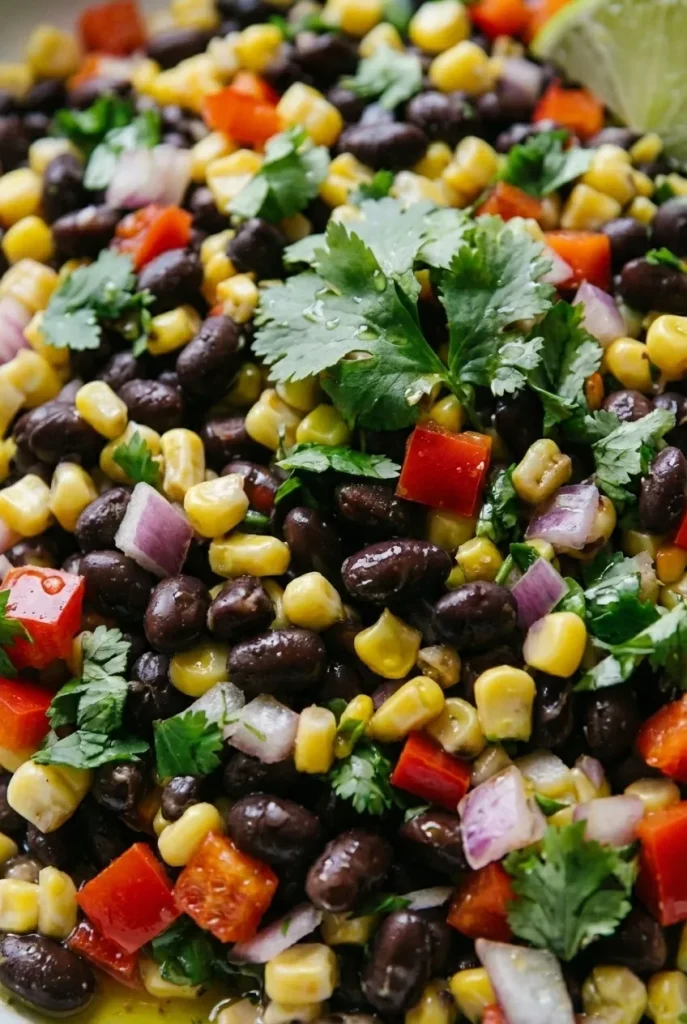
I’ve served many versions of black bean and corn salad at family BBQs over the years, and I’ve noticed a pattern: people usually stop eating when the bowl gets too ‘busy.’ When you pile in tomatoes, heavy cheeses, and five different spices, the fresh crunch of the corn and the earthiness of the beans just get lost.

After testing three different dressings — from a heavy creamy chipotle to a complex balsamic — I realized that simplicity isn’t just easier; it actually tastes better. This 15-minute version is my go-to because it survives a 2-hour outdoor lunch without turning into a soggy mess.

My biggest takeaway from making this dozens of times: The red onion can either make or break the salad. If you’ve ever had a bite that felt too sharp or ‘oniony,’ try my trick: soak the diced red onions in the lime juice for 5 minutes before mixing everything else. This small step mellows the raw heat but keeps the flavor, a technique I now use for almost every cold salad I make

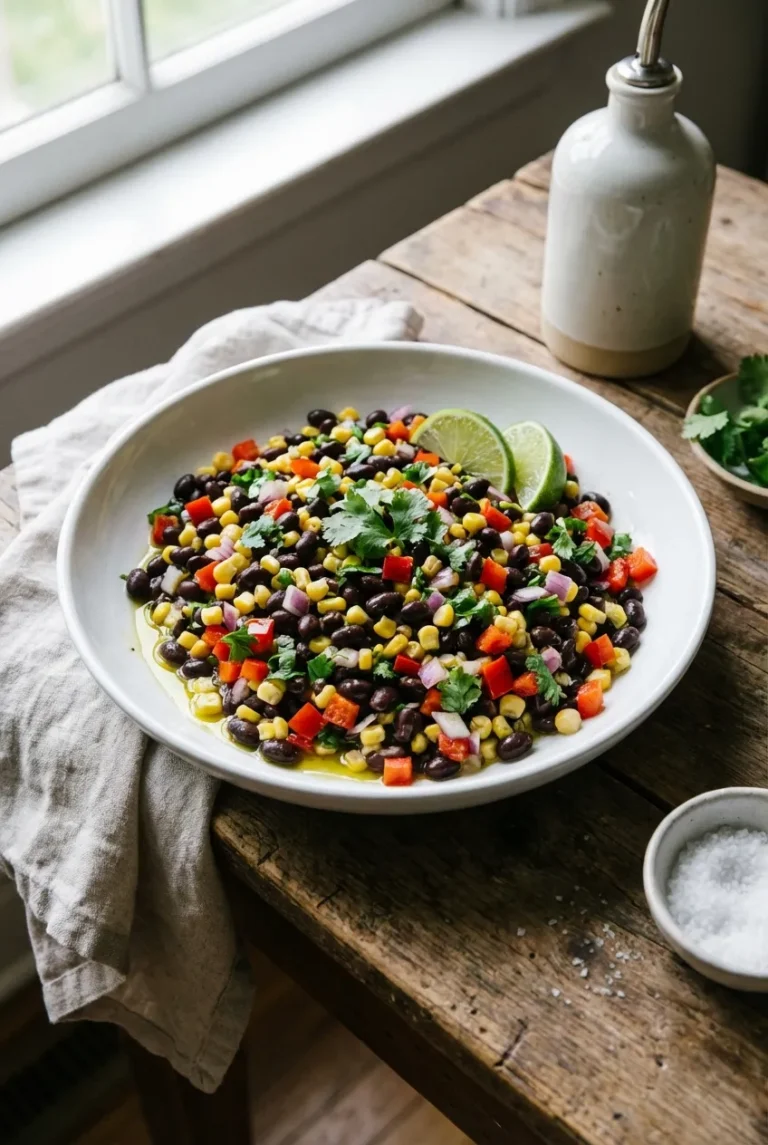
A large white bowl of black bean and corn salad with red bell pepper, red onion, and fresh cilantro.

Why This Recipe Works

The base is simple, but it is not boring. Black beans and corn already give you contrast: creamy and hearty from the beans, sweet and juicy from the corn. Red bell pepper keeps the texture from feeling too soft, and cilantro adds freshness without needing a complicated dressing.

It also holds up better than a lot of cold salads. Once it sits for 10 to 15 minutes, the lime, salt, and olive oil settle into the beans and the whole bowl tastes more balanced. That is why I like it for meal prep and cookouts. It is easy to make ahead, and it still tastes like itself later.


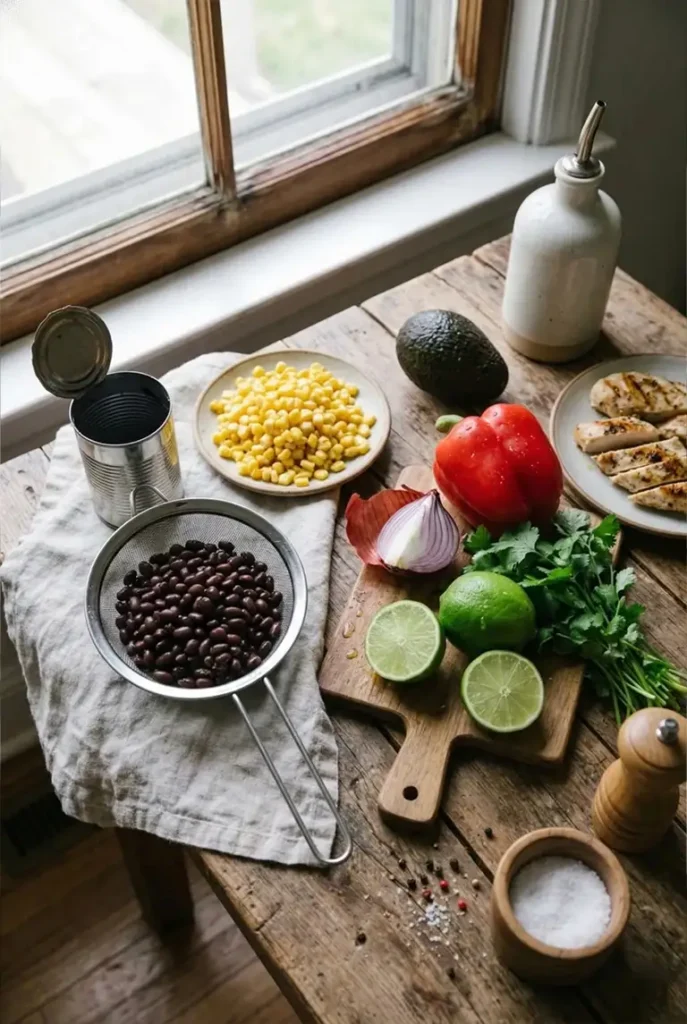
Ingredients for Black Bean and Corn Salad

Ingredients for Black Bean and Corn Salad

For the salad

  • 1 can black beans, drained and rinsed well
  • 1 cup corn kernels
  • 1 red bell pepper, diced
  • 1/4 cup red onion, finely chopped
  • 2 tablespoons chopped cilantro
  • 1 avocado, diced, optional
  • cooked chicken, for serving, optional

For the dressing

  • juice of 1 large lime (or 1 tsp lime juice powder mixed with 1 tbsp water)
  • 2 tablespoons olive oil
  • salt, to taste
  • black pepper, to taste

Optional chipotle honey vinaigrette variation

  • 1 tablespoon lime juice
  • 1 tablespoon olive oil
  • 1/2 teaspoon honey
  • 1/4 teaspoon chipotle powder or very finely chopped chipotle in adobo
  • pinch of salt

Ingredient Notes

  • Fresh, frozen, or canned corn all work here. I have tried all three. Fresh corn is the best when it is in season, but frozen corn is the easiest good option on a normal day. Canned corn is fine too, but it needs to be drained very well or the salad gets watery faster.
  • I also would not skip rinsing the beans. It makes the flavor cleaner and keeps the dressing from turning muddy.
  • For the onion, I like a small amount and a fine chop. I tried heavier onion versions early on, and they made the whole bowl sharper than I wanted. If your onion is especially strong, toss it with a little lime juice and let it sit for 5 minutes before adding it to the salad.

How to Make Black Bean and Corn Salad

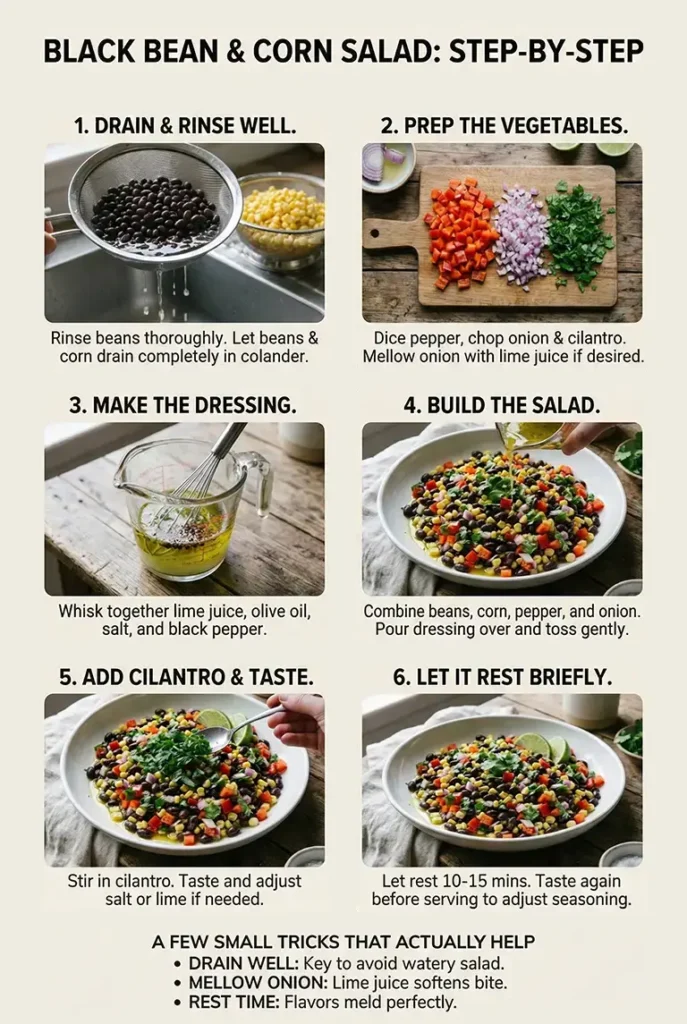
How to Make Black Bean and Corn Salad. Simple step-by-step instruction
  1. Drain the beans and corn well.
    Rinse the black beans and let them sit in a colander for a minute so extra water drips off. Do the same with canned or thawed frozen corn if needed.
  2. Prep the vegetables.
    Dice the red bell pepper, finely chop the red onion, and chop the cilantro. If you want to mellow the onion, toss it with a small spoonful of lime juice and let it sit for 5 minutes.
  3. Make the dressing.
    In a small bowl or measuring cup, whisk together the lime juice, olive oil, salt, and black pepper.
  4. Build the salad.
    Add the black beans, corn, bell pepper, and red onion to a large bowl. Pour over the dressing and toss gently.
  5. Add the cilantro and taste.
    Stir in the cilantro, then taste once. Adjust with more salt or lime if needed.
  6. Let it rest briefly.
    Leave the salad for 10 to 15 minutes, then taste again before serving. This is usually when the flavor settles and you can tell whether it needs one more pinch of salt.

A Few Small Tricks That Actually Help

Let the onion soften in lime juice
This is one of the best little fixes if red onion tends to take over. It keeps the bite, but loses some of the harshness.

Salt matters more than extra ingredients
If the salad tastes flat, it usually does not need more mix-ins. It usually just needs a little more salt.

Do not rush the second taste
Right after mixing, the lime can feel stronger than it will a few minutes later. After a short rest, the salad usually tastes more balanced.

Keep the dressing clean
I tested more loaded dressings before, but the simple lime version kept tasting fresher. The only time I liked a more complex dressing was when I deliberately went smoky and sweet with a little chipotle and honey.


Black Bean and Corn Salad with Avocado

Avocado is one of the few add-ins that feels natural here instead of random. If you want a slightly richer version, fold in diced avocado right before serving. I would not add it early if the salad is going into the fridge, because it softens too much and changes the texture of the whole bowl.

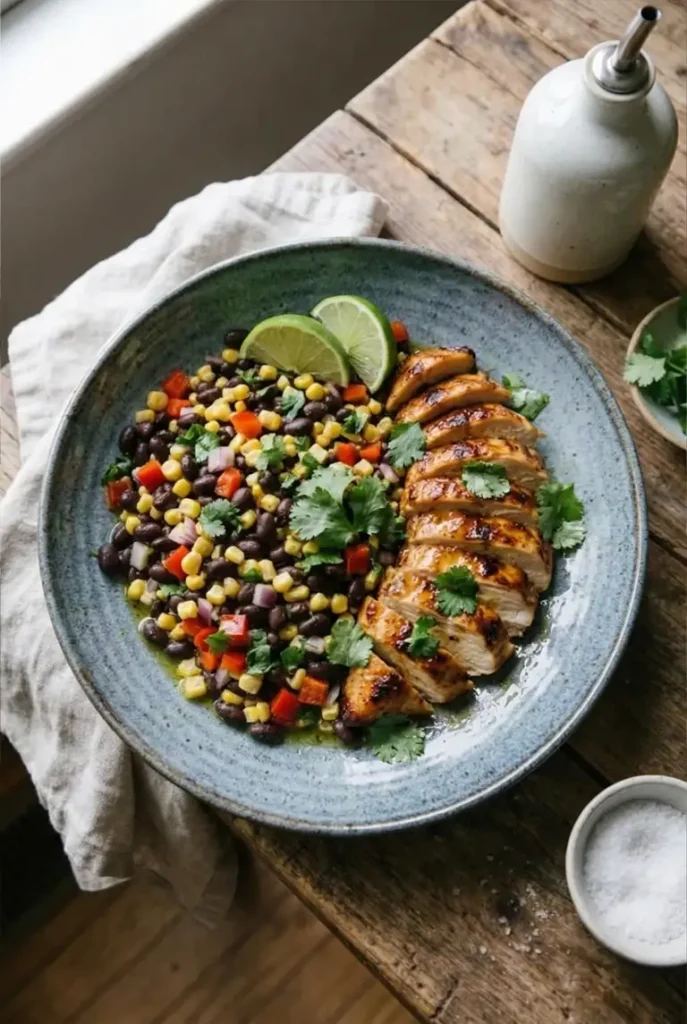
Black Bean and Corn Salad with Chicken

Black Bean and Corn Salad with Chicken

If you want this to feel more like lunch or dinner, chicken is the easiest upgrade.

I usually serve this salad next to or under sliced chicken instead of mixing the chicken into the whole bowl. It keeps the salad fresher, and leftovers stay more flexible. This works especially well with something simple like Juicy Oven Baked Chicken Breast, because the salad already brings brightness and crunch.

Chipotle Honey Vinaigrette Variation

Most of the time, I prefer the basic lime dressing. It tastes cleaner and fits the salad better. But I did like one smoky variation enough to keep it: a quick chipotle honey vinaigrette. The small amount of honey rounds out the heat, so it does not just taste like extra spice dumped into the bowl.

To make it, simply whisk 1 tablespoon of honey and 1/2 teaspoon of chipotle powder (or very finely chopped chipotle in adobo) directly into the basic lime dressing from the recipe below. I would use this version if you are serving the salad with tacos, grilled meat, or something with stronger flavors.


Nutrition

  • Calories: 210
  • Protein: 7 g
  • Carbohydrates: 24 g
  • Fiber: 7 g
  • Fat: 10 g
  • Sugar: 4 g
  • Sodium: varies depending on canned beans and added salt

These are rough estimates and will change depending on the corn, beans, avocado, or chicken you use.


FAQ

How do I store this vegan black bean and corn salad for meal prep?

This is a great make-ahead salad because it doesn’t have lettuce that wilts. Store it in an airtight glass container in the refrigerator for up to 4 days. If you are using it for healthy meal prep, keep the avocado and cilantro separate and add them right before eating to maintain the best texture and bright green color.

What are the best healthy additions to a southwest-style bean salad?

While the base is simple, you can easily customize this southwestern protein bowl. For extra healthy fats, add diced avocado. For more crunch, try jicama or cucumber. If you want a high-protein vegetarian lunch, mix in some cooked quinoa or farro. To keep it low-calorie, stick to the lime and olive oil dressing instead of creamy store-bought versions.

How can I fix a bean salad that is too acidic or sour?

If the lime juice tastes too sharp, the best kitchen hack is adding a tiny amount of natural sweetener like honey or agave. This balances the pH without making the salad “sweet.” Another trick is adding more “creamy” ingredients like avocado or even a spoonful of Greek yogurt (if you aren’t keeping it vegan) to coat the tongue and mellow the acid.

What is the fastest way to thaw frozen corn for salads?

Don’t boil it! Cooking frozen corn makes it mushy. For the best crisp texture, place the frozen kernels in a colander and run lukewarm water over them for 60 seconds. Pat them completely dry with a paper towel before mixing with the black beans so your homemade dressing doesn’t get watery.

What should I serve with black bean and corn salad for a complete dinner?

This versatile side dish pairs perfectly with Mexican-inspired recipes. It’s the ultimate topping for fish tacos, grilled shrimp, or oven baked chicken breast. If you’re hosting a summer BBQ, it serves as a fresh, gluten-free alternative to traditional pasta or potato salads.

Black Bean and Corn Salad Recipe

A fresh black bean and corn salad with lime, red pepper, and cilantro. This easy no-cook recipe is great for tacos, potlucks, or a quick side dish.
Course: Side-Dishes
Cuisine: Southwestern-inspired / American
Prep: 15 min
Total: 25 min
Servings: 4 Calories: 210 kcal Cost: Budget-Friendly

Equipment

  • 1 Large mixing bowl
  • 1 Small bowl or measuring cup
  • 1 Colander
  • Cutting board
  • Chef’s knife
  • Whisk or fork

Ingredients

  • 425 g black beans (1 can, 15 oz), drained and rinsed well
  • 165 g corn kernels fresh, frozen (thawed), or canned (drained well)
  • 150 g red bell pepper diced
  • 40 g red onion finely chopped
  • 10 g fresh cilantro chopped
  • 70 g lime juice (from 1 large lime), divided
  • 27 g olive oil
  • salt to taste
  • black pepper to taste

Instructions

  1. Drain and rinse the black beans well, then let them sit in a colander for a minute so excess water drips off. If using canned or thawed frozen corn, drain that well too.
  2. Dice the red bell pepper, finely chop the red onion, and chop the cilantro. If the onion tastes especially strong, toss it with 1 teaspoon of the lime juice and let it sit for 5 minutes to soften the bite.
  3. Whisk together the remaining lime juice, olive oil, salt, and black pepper in a small bowl until combined.
  4. Add the black beans, corn, bell pepper, and red onion to a large mixing bowl. Pour over the dressing and toss gently to coat everything evenly.
  5. Add the chopped cilantro, toss again, and taste. Let the salad rest for 10 minutes, then taste once more and adjust with extra salt or lime juice if needed before serving.

Notes

Tips: For a richer version, fold in 1 diced avocado right before serving. To turn it into more of a meal, top each serving with sliced grilled chicken. For a smoky variation, whisk the dressing with a little honey and chipotle instead of keeping it plain. Make-Ahead & Storage: This salad can be made a few hours ahead and refrigerated. It is best within 2 days. Taste again before serving and add a fresh squeeze of lime if the flavor needs brightening.

Nutrition

Serving Size: 1 serving | Calories: 210 kcal | Carbohydrates: 24g | Protein: 7g | Fat: 10g | Saturated Fat: 1.5g | Cholesterol: 0mg | Sodium: 300mg | Fiber: 7g | Sugar: 4g