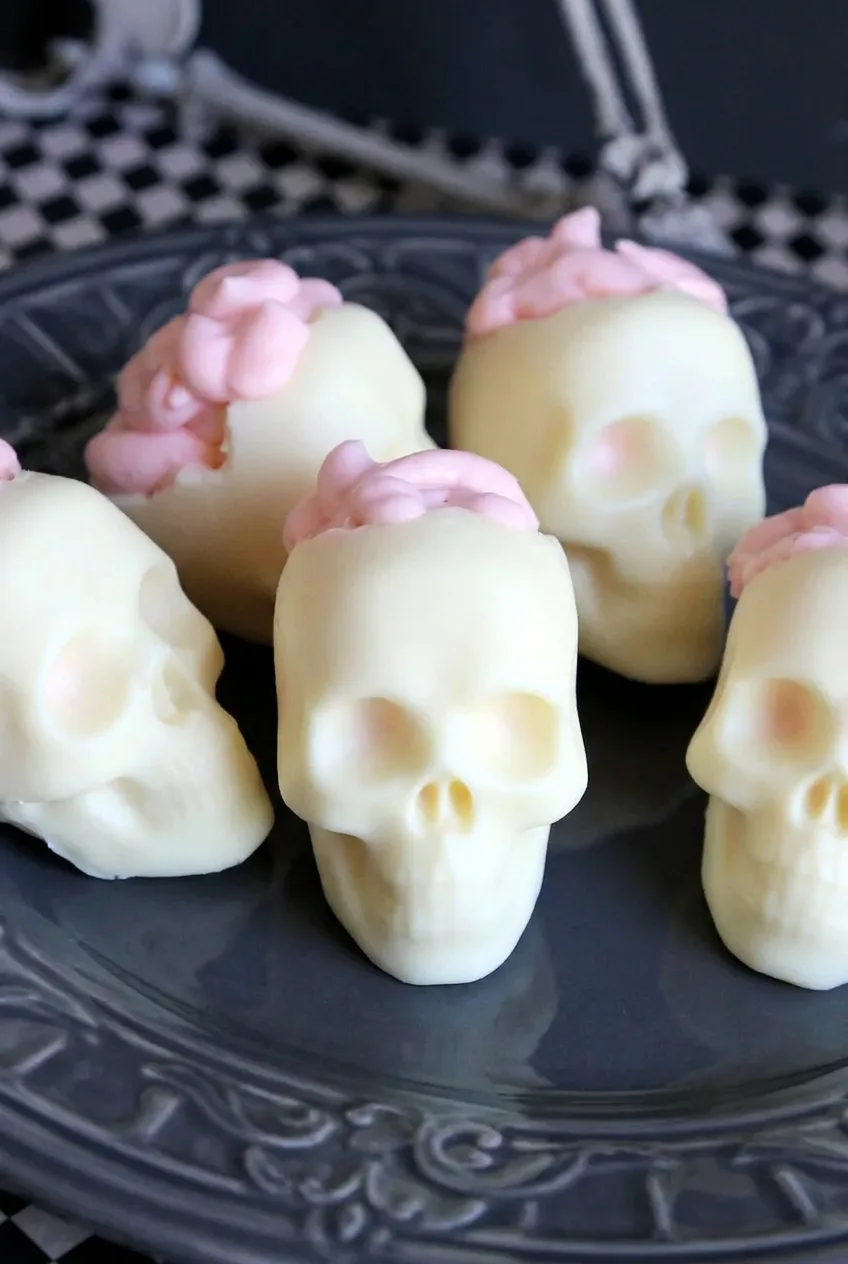
Skull / Brain Chocolates
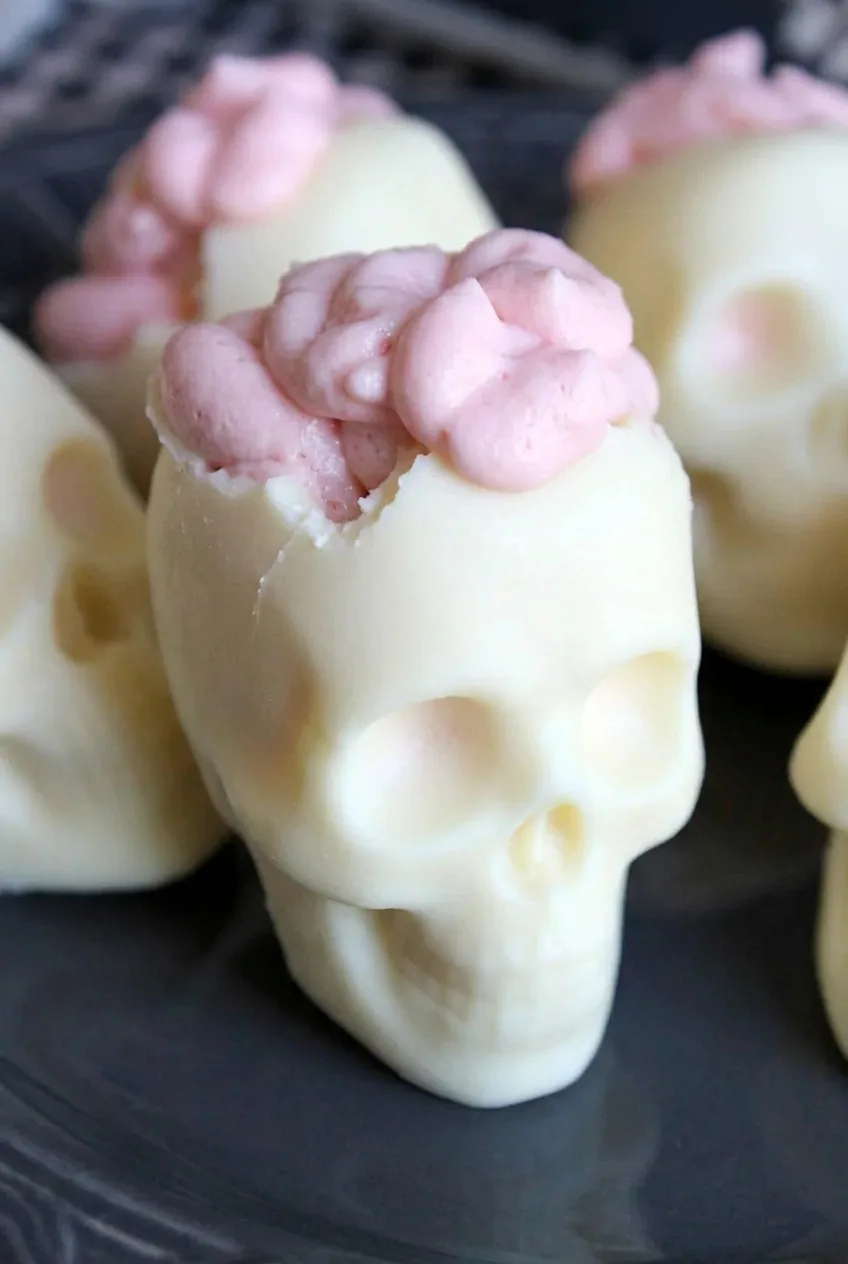
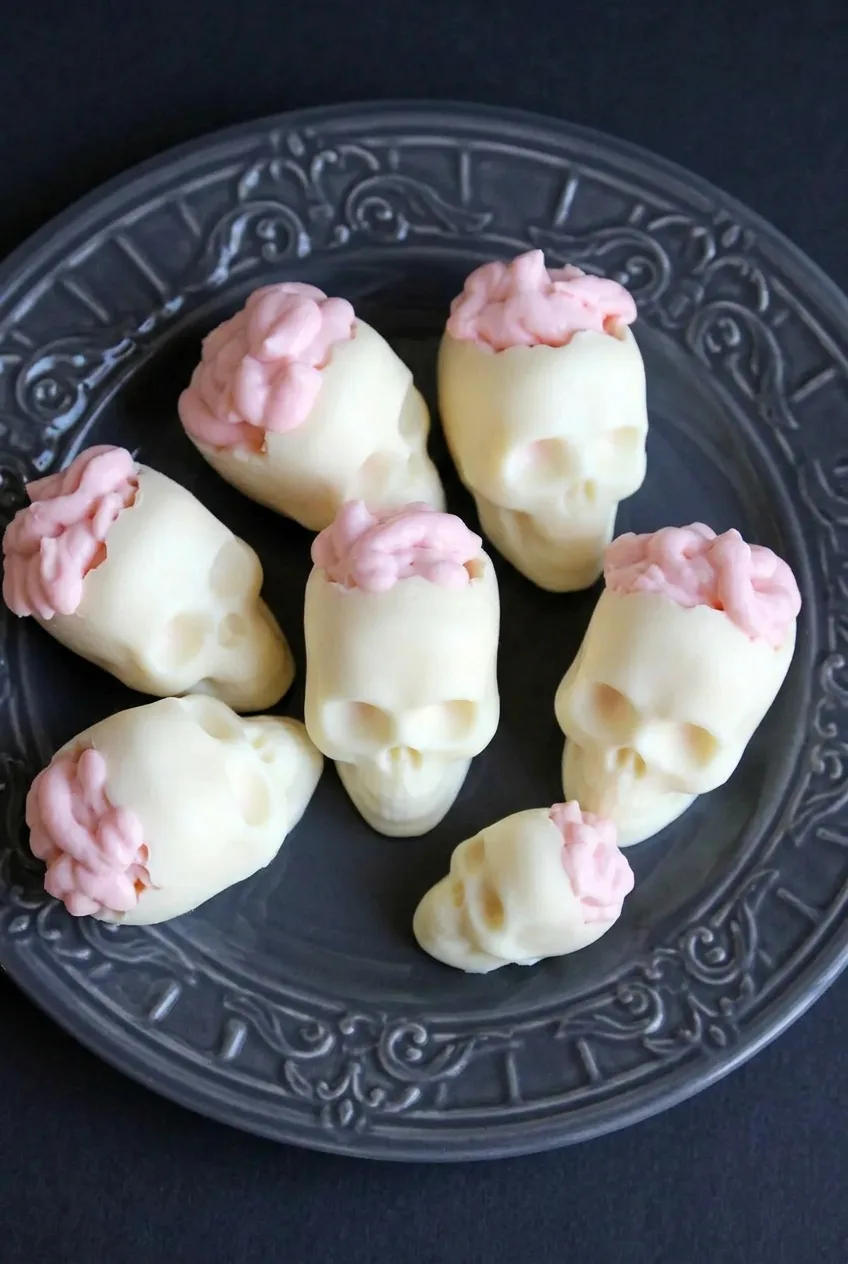
These individual Halloween desserts have hollow ivory-white chocolate skulls, jagged openings, and pale-pink cheesecake mousse piped into raised brain-like folds. The broken crowns are intentional: they make room for the filling while leaving the molded faces intact.
Two complete coats of chocolate help the shells survive unmolding and breaking. Chill the mousse until it holds a soft mound before piping, then refrigerate the filled skulls until their folds stay defined. No baking is needed.
Ingredients for Skull / Brain Chocolates
Makes approximately 6 to 8 skulls, depending on mold size. You’ll need a detailed, two-piece 3D silicone skull mold; its capacity will also affect how much shell coating you use.
- 24 oz white melting chocolate or white candy coating, for the shells (680g)
- 1 cup cold heavy whipping cream (240g)
- 8 oz full-fat cream cheese, softened (225g)
- 1/2 cup confectioners’ sugar (60g)
- 1 teaspoon vanilla extract
- 4 oz white chocolate, melted and cooled to lukewarm, for the mousse (115g)
- 2 to 4 drops red or pink gel food coloring, or enough for a pale-pink mousse
Optional for serving: 1 to 2 teaspoons grenadine for a light drizzle.
How to Make Skull / Brain Chocolates
- Melt the shell coating: Make sure the mold is clean and completely dry. Microwave the 24 oz of white melting chocolate or candy coating at 50% power in 15- to 20-second intervals, stirring after each, until smooth and fluid. Do not add liquid.
- Make the first coat: Add melted coating through the mold’s fill opening and secure the halves. Slowly rotate the mold in several directions to cover the face, crown, and back, including the fine facial details. Set it level on a tray and freeze for about 10 minutes, until the coating is firm.
- Reinforce the shells: Add a second complete coat, rotating the mold again. Redistribute excess coating so it does not pool at one edge. Freeze for about 10 minutes more, or until the shells are firm and opaque. Complete coverage matters more than one thick, uneven coat.
- Break the crowns: Gently separate the mold halves and release the skulls. Let them stand at cool room temperature for 5 to 10 minutes; breaking them while extremely cold can cause uncontrolled cracks. With a small blunt utensil, gently break an irregular opening at the upper back or crown of each skull. Leave the face and sides intact.
- Make the mousse: Whip the cold cream until it holds thick peaks but is not grainy. In another bowl, beat the cream cheese, confectioners’ sugar, vanilla, lukewarm melted white chocolate, and gel coloring until smooth. Gently fold in the whipped cream. Cover and refrigerate for about 30 minutes, until the mousse holds a soft mound and is firm enough to pipe.
- Pipe the brains: Transfer the mousse to a piping bag with a plain round tip, or snip a round opening in the bag. Pipe into each skull, then continue in thick, overlapping loops that rise above the broken edge without covering the face. If the folds begin to slump, chill the mousse briefly before continuing.
- Chill and serve: Stand the skulls upright in a single layer on a parchment-lined tray. Refrigerate for 2 to 3 hours, until the mousse is firm and the ridges stay defined when the tray is moved. If using grenadine, add a light drizzle just before serving.
How to Keep the Skull Details Intact
Stir the melted coating until completely smooth, then fill and rotate the closed mold slowly enough to reach the eye sockets, nose, and teeth. Check for thin or bare areas before chilling each coat. If the mold’s fill opening is too narrow to add the coating, carefully enlarge it or make small slits only as needed; mold designs differ.
Make the broken opening large enough for the piping bag, but work from the crown or upper back so the recognizable face stays whole. The edge should be uneven rather than neatly cut.
Make-Ahead and Storage
Make the empty shells several days ahead and keep them cool and dry. For the clearest piped folds, fill the skulls no more than a day before serving.
Refrigerate assembled skulls in a single layer in a covered container, keeping the cover off the mousse. Serve within 1 to 2 days for the best shell texture and appearance. If the shells are very hard from refrigeration, let the skulls stand for a few minutes before eating. Do not reheat them.
A dark plate makes the ivory shells and pink filling easy to see. For another brain-themed dessert on the same tray, try Halloween Brain Rice Krispie Treats.
Nutrition
Approximate nutrition per skull, based on 8 skulls and all listed core ingredients: 770 calories, 7g protein, 50g fat, and 70g carbohydrates. Approximate values per 100g: 465 calories, 4g protein, 30g fat, and 42g carbohydrates. Values vary with mold size, the amount of coating used per shell, and ingredient brands. Optional grenadine is not included.
Equipment
- Two-piece 3D silicone skull mold
- Microwave-safe bowl
- Baking tray
- Parchment paper
- Mixing bowls
- Electric mixer
- Rubber spatula
- Piping bag
- Plain round piping tip
- Small blunt utensil
Ingredients
For the White Chocolate Skulls
- 24 oz white melting chocolate or white candy coating (680 g)
For the Pink Cheesecake Mousse
- 1 cup cold heavy whipping cream (240 g)
- 8 oz full-fat cream cheese, softened (225 g)
- 1/2 cup confectioners’ sugar (60 g)
- 1 teaspoon vanilla extract
- 4 oz white chocolate, melted and cooled to lukewarm (115 g)
- 2 to 4 drops red or pink gel food coloring
Optional for Serving
- 1 to 2 teaspoons grenadine, for drizzling
Instructions
- Make sure the skull mold is clean and completely dry.
- Microwave the white melting chocolate at 50% power in 15- to 20-second intervals, stirring after each interval, until smooth and fluid. Do not add liquid.
- Pour melted coating through the mold fill opening, secure the mold halves, and slowly rotate the mold to coat the face, crown, back, and fine details.
- Set the mold level on a tray and freeze for about 10 minutes, until the first coating is firm.
- Add a second complete coating of melted chocolate, rotating the mold again and redistributing excess coating so it does not pool at one edge.
- Freeze for about 10 minutes more, until the shells are firm and opaque.
- Separate the mold halves and release the skulls. Let them stand at cool room temperature for 5 to 10 minutes.
- Use a small blunt utensil to gently break an irregular opening in the upper back or crown of each skull, leaving the face and sides intact.
- Whip the cold heavy cream until it holds thick peaks but is not grainy.
- In a separate bowl, beat the cream cheese, confectioners’ sugar, vanilla, lukewarm melted white chocolate, and gel food coloring until smooth.
- Gently fold the whipped cream into the cream cheese mixture. Cover and refrigerate for about 30 minutes, until the mousse holds a soft mound.
- Transfer the mousse to a piping bag fitted with a plain round tip or a bag with a round opening snipped from the end.
- Pipe mousse into each skull, then pipe thick overlapping loops that rise above the broken edge without covering the face.
- Arrange the skulls upright in a single layer on a parchment-lined tray and refrigerate for 2 to 3 hours, until the mousse is firm and the ridges hold their shape.
- Drizzle lightly with grenadine just before serving, if desired.
Tips
- Stir the melted coating until completely smooth before filling the mold.
- Rotate the closed mold slowly to coat the eye sockets, nose, teeth, and other detailed areas.
- Use two even coats of chocolate rather than one thick coat for sturdier shells.
- Let skulls warm for 5 to 10 minutes after unmolding before breaking the crowns to prevent uncontrolled cracks.
- Break the opening from the crown or upper back so the recognizable face stays intact.
- Chill the mousse briefly if the piped folds begin to slump.
