Author

Julia

Browsing

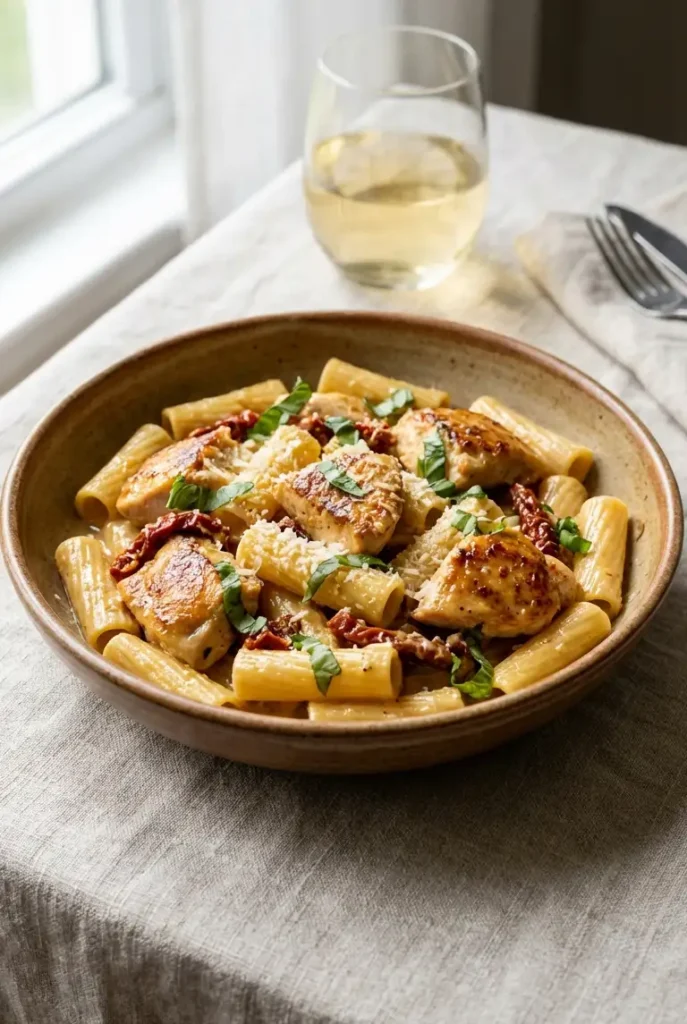
The first time I made this, I leaned too hard on cream and barely used any broth. The sauce looked fine in the skillet, but once it hit the pasta it turned heavy fast. What worked better was backing off the cream, keeping more broth in the base, and letting the sun-dried tomatoes soften right in the sauce instead of dropping them in at the end.

When it comes together the way I want it to, the sauce stays rich but loose enough to coat the pasta, the chicken keeps some browned edges, and the sun-dried tomatoes soften into the cream instead of sitting in it like chewy little strips. It feels balanced, not heavy, and the basil at the end does more for the whole pan than it seems like it should.

What Keeps This Marry Me Chicken Pasta From Turning Heavy

  • The chicken is cut into even pieces, so it cooks at the same rate and stays tender.
  • Sun-dried tomatoes go into the pan early, which softens them and lets their concentrated sweet-tart flavor move into the sauce.
  • The sauce uses both broth and cream, so it coats the pasta without turning thick and pasty.
  • Parmesan is added over lower heat, which helps it melt smoothly instead of going grainy.

Ingredients for Marry Me Chicken Pasta

  • 8 ounces penne or rigatoni (225g)
  • 1 pound boneless skinless chicken breast, cut into 1-inch pieces (455g)
  • 1 teaspoon kosher salt
  • 1/2 teaspoon black pepper
  • 1 teaspoon Italian seasoning
  • 2 tablespoons olive oil (30g)
  • 2 tablespoons unsalted butter (30g)
  • 3 cloves garlic, minced
  • 1/2 cup chopped oil-packed sun-dried tomatoes (85g)
  • 1 1/4 cups low-sodium chicken broth (300g)
  • 3/4 cup heavy cream (180g)
  • 3/4 cup finely grated Parmesan cheese (70g)
  • 1/4 teaspoon red pepper flakes
  • 1/4 cup chopped fresh basil

Best Pasta Shapes for This Sauce

Penne and rigatoni work best here because the ridges catch the sauce and the chicken pieces tuck into the tubes. Fusilli also works well.

Long pasta can work, but this sauce does better with shapes that hold the creamy Parmesan base instead of letting it slide off.

Oil-Packed vs Dry-Packed Sun-Dried Tomatoes

Oil-packed is the better choice for this recipe. They’re softer, easier to chop, and the oil carries flavor into the pan.

Dry-packed tomatoes can work, but soak them in hot water for 10 minutes first so they don’t stay leathery in the finished sauce.


How to Make Marry Me Chicken Pasta
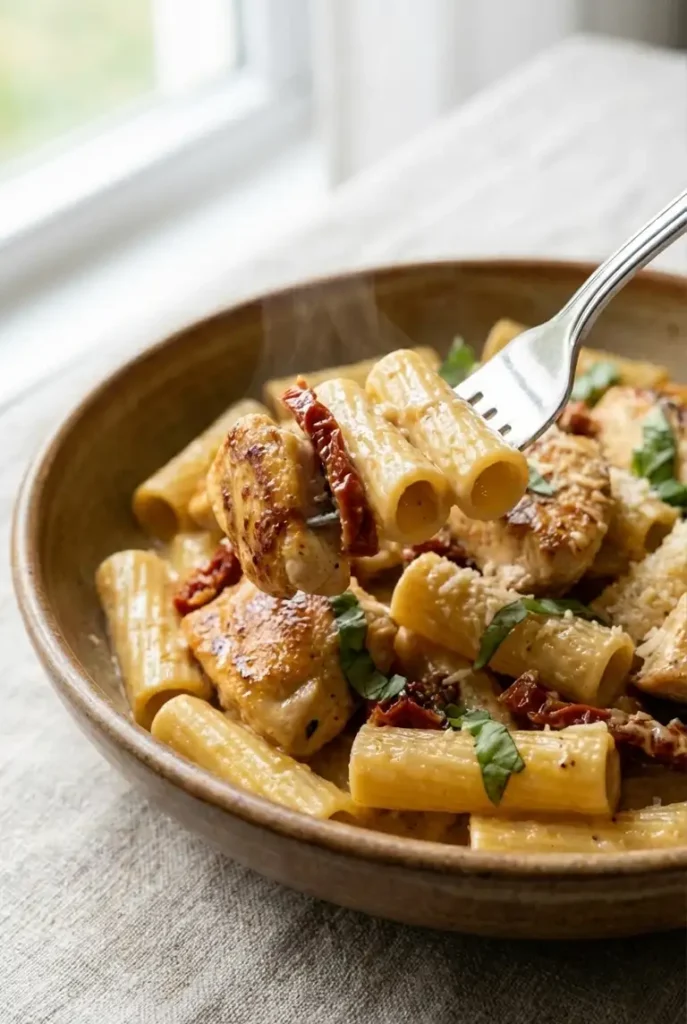
A close-up action shot of a fork lifting rigatoni coated in a glossy, creamy sauce, showcasing the dish's rich and luscious texture.

Sear the chicken for real flavor

  1. Bring a large pot of salted water to a boil. Cook the pasta until just shy of al dente according to the package directions. Before draining, reserve 1/2 to 1 cup of pasta water.
  2. While the pasta cooks, pat the chicken dry and season it with salt, pepper, and Italian seasoning.
  3. Heat the olive oil in a large skillet over medium-high heat. Add the chicken in a single layer. It should sizzle on contact; if it doesn’t, give the pan another minute. Don’t crowd the skillet. Cook in batches if needed.
  4. Cook the chicken for 4 to 5 minutes, stirring only occasionally, until the edges are golden brown and the center reaches 165°F. Transfer to a plate.

If you want extra help cooking tender chicken, this guide for Juicy Oven Baked Chicken Breast covers doneness and texture cues that also help here.

Build the Parmesan sun-dried tomato sauce

  1. Lower the heat to medium. Add the butter, then the garlic and sun-dried tomatoes. Cook for 30 to 60 seconds, just until the garlic is fragrant. If the garlic starts browning, lower the heat right away.
  2. Pour in the chicken broth and scrape the browned bits from the bottom of the skillet. They should loosen and dissolve into the liquid. Add the heavy cream and red pepper flakes.
  3. Bring the sauce to a gentle simmer for 3 to 5 minutes. You want small lazy bubbles around the edge, not a hard boil. Let it reduce until it coats the back of a spoon.
  4. Lower the heat or briefly take the skillet off the burner. Add the Parmesan a handful at a time, stirring until melted before adding more. That’s what keeps the sauce smooth instead of grainy.

Toss the pasta until the sauce clings

  1. Return the chicken to the skillet. Add the drained pasta and toss well. If the sauce looks too tight, add reserved pasta water a splash at a time until it turns glossy and coats the pasta rather than sitting thickly between the pieces.
  2. Turn off the heat and stir in the basil. Let the pasta sit for 1 to 2 minutes before serving so the sauce settles and clings properly.

For an even richer shortcut dinner, swap to cheese-filled pasta and make my Marry Me Tortellini next.


Tips for the best creamy Marry Me Chicken Pasta

Keep the sauce from separating

The main thing is heat control. Don’t boil the cream hard, and don’t add cold Parmesan to a bubbling pan over high heat.

Simmer first, then reduce the heat before adding the cheese. Finely grated Parmesan melts more cleanly than coarse shreds.

If the sauce is too thick or too thin

If it gets too thick, use the reserved pasta water, not more cream. A little water loosens the sauce without making it greasy.

If it’s too thin, simmer it a bit longer before adding the pasta. You can also add an extra spoonful of Parmesan at the end, but only after the sauce has reduced enough to hold on the spoon.

Optional tomato paste boost

If you want a deeper tomato note, stir in 1 tablespoon tomato paste right after the garlic and cook it for 30 seconds before adding the broth. It shouldn’t dominate; it should deepen the color and give the sauce a fuller base.


Marry Me Chicken Pasta Variations

Marry Me Chicken Pasta with Spinach
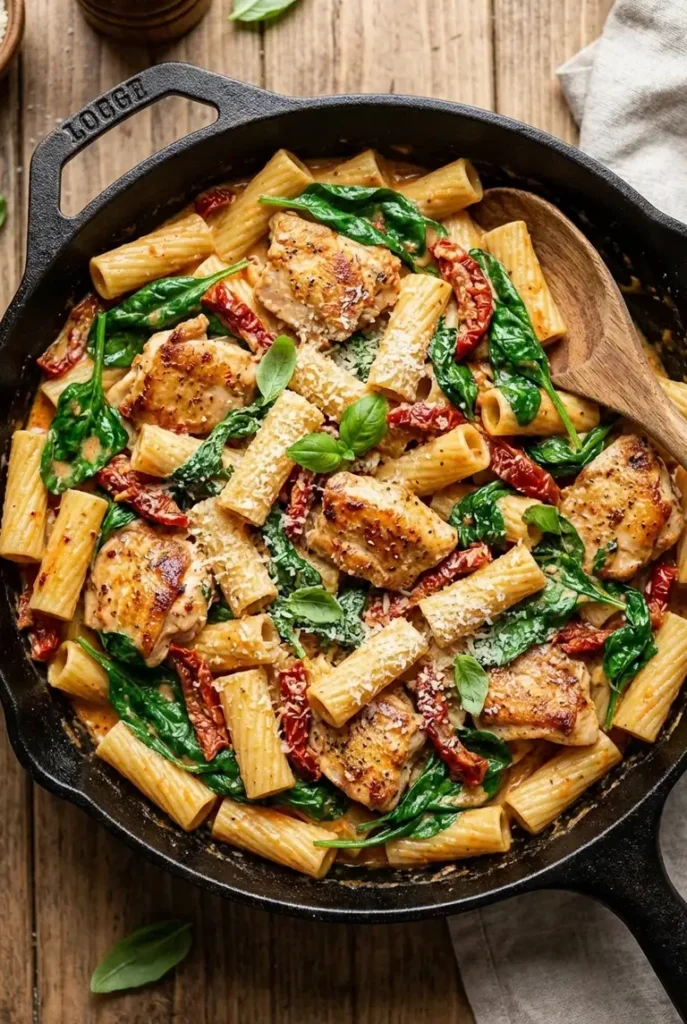
An overhead view of Marry Me Chicken Pasta with wilted spinach served in a cast-iron skillet, ready for sharing on a wooden table.

Add 3 to 4 cups fresh baby spinach (90g to 120g) after the sauce is finished and before the pasta goes in. Stir for 1 to 2 minutes until the leaves are just wilted.

If using frozen spinach, thaw it first and squeeze it very dry so it doesn’t water down the sauce. Use about 1/2 cup packed thawed spinach (75g).

Marry Me Chicken Pasta with Rotisserie Chicken

Skip the raw chicken and use about 2 1/2 cups shredded rotisserie chicken (300g). Make the sauce as written, then add the chicken to the skillet with the pasta just long enough to heat through, about 2 minutes.

This version is faster and works well on a weeknight, but because rotisserie chicken is already cooked, don’t simmer it in the sauce too long or it can turn stringy.


What to serve with Marry Me Chicken Pasta

This is rich enough that simple sides make the most sense:

  • a sharp green salad with vinaigrette
  • roasted broccoli or green beans
  • garlic bread or a piece of crusty bread
  • simple sautéed zucchini

How to store and reheat leftovers

Store leftovers in an airtight container in the fridge for up to 3 days.

To reheat, use a skillet or saucepan over low heat with a splash of broth, milk, or water. Stir gently until loosened and warmed through. The sauce thickens in the fridge, so it usually needs a little liquid to come back together.

The microwave works, but reheat in short bursts and stir between them so the sauce doesn’t split.


Marry Me Chicken Pasta FAQ

Why did my sauce separate?

Most of the time, the pan was too hot when the cream or Parmesan went in. I get the smoothest sauce when I keep it at a gentle simmer, then lower the heat before adding the cheese.

If the sauce is bubbling hard, it is too hot for Parmesan.

Can I use rotisserie chicken instead of chicken breast?

Yes. Add it at the end just to warm through. Since it’s already cooked, it doesn’t need simmering time.

Can I use frozen spinach or fresh spinach?

Both work. Fresh spinach gives a cleaner texture. Frozen spinach is fine if you thaw it and squeeze out as much water as possible first.

How do I fix the sauce if it gets too thick?

Add reserved pasta water a little at a time and toss well after each splash. I would use that before adding more cream, because it loosens the sauce without making it heavier.


Nutrition

  • Serving size: approximately 1/4 of the total recipe
  • Calories: 707 kcal
  • Protein: 43g
  • Fat: 33g
  • Carbohydrates: 57g
  • Per 100g: Calories: 191 kcal, Protein: 11.6g, Fat: 8.9g, Carbohydrates: 15.4g.

These nutritional values are approximate and can vary based on the specific ingredients and brands used.

Marry Me Chicken Pasta

Creamy Marry Me Chicken Pasta with sun-dried tomatoes, Parmesan, and juicy chicken. Balanced sauce, easy method, ready in 30 minutes.
Course: Dinner
Cuisine: Italian-American
Prep: 10 min
Cook: 20 min
Total: 30 min
Servings: 4 Calories: 707 kcal

Equipment

  • Large pot
  • Large skillet
  • Tongs
  • Cutting board
  • Chef’s knife
  • Measuring cups
  • Measuring spoons
  • Wooden spoon

Ingredients

  • 8 ounces Penne or rigatoni (225g)
  • 1 pound Boneless skinless chicken breast cut into 1-inch pieces (455g)
  • 1 teaspoon Kosher salt
  • 1/2 teaspoon Black pepper
  • 1 teaspoon Italian seasoning
  • 2 tablespoons Olive oil (30g)
  • 2 tablespoons Unsalted butter (30g)
  • 3 cloves Garlic minced
  • 1/2 cup Chopped oil-packed sun-dried tomatoes (85g)
  • 1 1/4 cups Low-sodium chicken broth (300g)
  • 3/4 cup Heavy cream (180g)
  • 3/4 cup Finely grated Parmesan cheese (70g)
  • 1/4 teaspoon Red pepper flakes
  • 1/4 cup Chopped fresh basil

Instructions

  1. Bring a large pot of salted water to a boil. Cook pasta until just shy of al dente according to package directions. Reserve 1/2 to 1 cup pasta water before draining.
  2. Pat chicken dry and season with kosher salt, black pepper, and Italian seasoning.
  3. Heat olive oil in a large skillet over medium-high heat. Add chicken in a single layer. Cook 4 to 5 minutes, stirring occasionally, until golden brown and cooked to 165°F. Transfer chicken to a plate.
  4. Reduce heat to medium. Add butter, then garlic and sun-dried tomatoes. Cook 30 to 60 seconds until fragrant, lowering heat if garlic browns.
  5. Pour in chicken broth, scrape browned bits from skillet. Add heavy cream and red pepper flakes.
  6. Simmer gently for 3 to 5 minutes with small bubbles around edge, until sauce coats the back of a spoon.
  7. Lower heat or remove skillet from burner briefly. Add Parmesan cheese gradually, stirring until melted after each addition to keep sauce smooth.
  8. Return chicken to skillet, add drained pasta and toss well. Add reserved pasta water a splash at a time until sauce is glossy and coats pasta.
  9. Turn off heat and stir in fresh basil. Let pasta sit 1 to 2 minutes before serving for sauce to settle.
Notes

Tips: Control heat to prevent sauce separation—do not boil cream hard and add Parmesan over low heat. Use reserved pasta water to adjust sauce consistency. Optionally, stir in 1 tablespoon tomato paste after garlic for added depth. Variations: Add fresh baby spinach after sauce is finished, before pasta. Use shredded rotisserie chicken instead of fresh chicken for a quicker meal. Storage & Reheat: Store leftovers in airtight container up to 3 days. Reheat gently with splash of broth or water to loosen sauce.

Nutrition

Serving Size: Approx. 1/4 recipe | Calories: 707 kcal | Protein: 43g | Fat: 33g | Carbohydrates: 57g

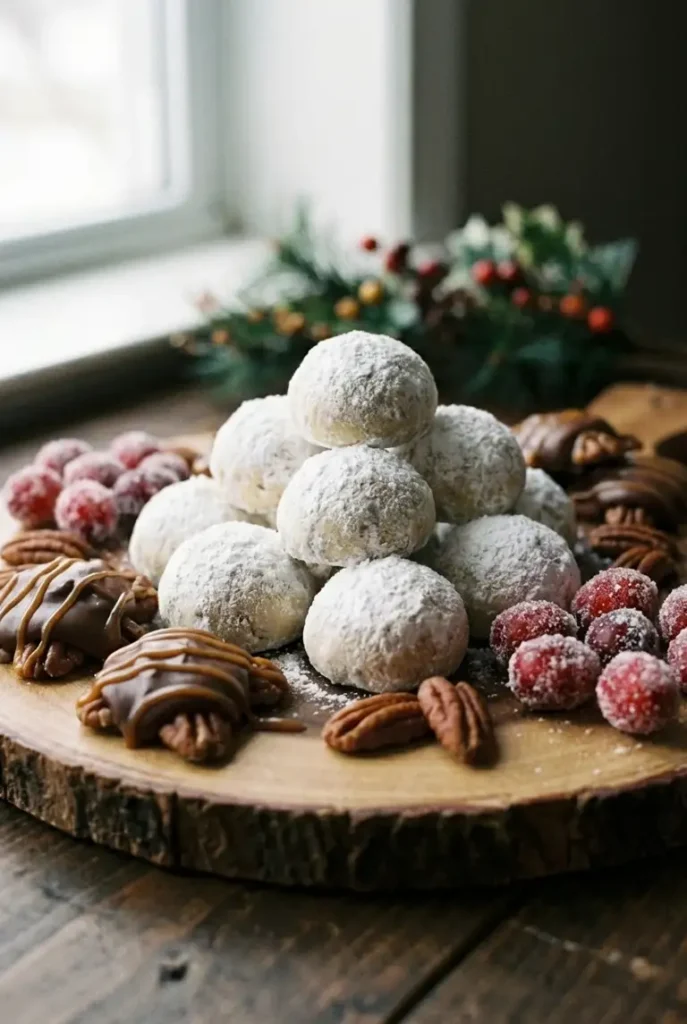
The first time I made pecan turtles, I let the caramel get hotter than it needed to because I thought it would be easier to spoon. It was not. The caramel slid past the pecans, spread too far, and set in thin sticky edges instead of thick little clusters.

What worked better was stopping as soon as the caramel turned smooth, thick, and just fluid enough to spoon. Toasting the pecans helped just as much. Untoasted pecans can get a little lost once the caramel and chocolate go on, but toasted pecans stay firmer, smell buttery, and give the finished candy a better contrast between the nutty base, the chewy caramel center, and the chocolate on top.

What Keeps These Pecan Turtles From Going Flat

  • Toasted pecans keep their structure under the caramel instead of going soft.
  • The caramel is melted with a little cream, which keeps it chewy rather than stiff.
  • Chocolate is melted gently so it sets into a smooth cap instead of turning dull or grainy.
  • A small pinch of flaky salt cuts the sugar and makes the pecan flavor stand out.

Ingredients for Chocolate Caramel Pecan Turtles

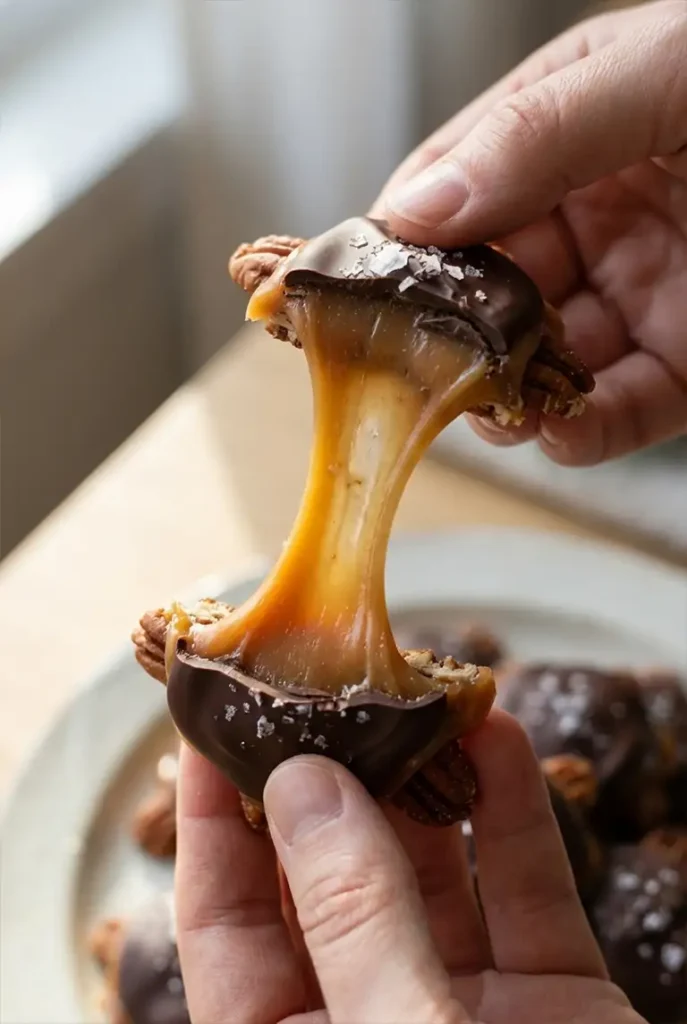
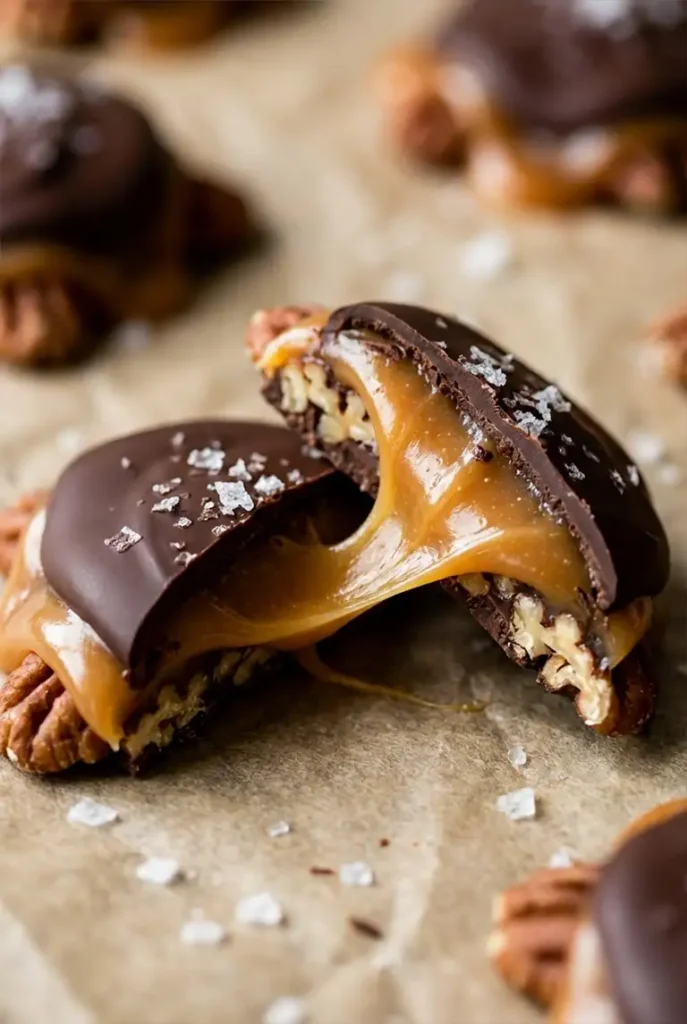
A close-up photo of a pecan turtle broken in half, revealing a thick, stretching caramel center between the chocolate cap and toasted pecan base.
  • 2 cups pecan halves (220g)
  • 20 soft caramels, unwrapped (200g)
  • 2 tablespoons heavy cream
  • 1 1/2 cups semi-sweet chocolate chips (255g)
  • 1 teaspoon coconut oil or neutral oil
  • Flaky sea salt, for finishing

The Best Caramels to Use for Pecan Turtles

Use soft, individually wrapped store-bought caramels for this shortcut version. They melt evenly and give you a chewy center without having to cook caramel from scratch.

Avoid old or dried-out caramels. If they feel firm before melting, they usually set too hard in the finished candy.

Best Chocolate for a Smooth, Glossy Coating

Semi-sweet chocolate chips work well here because they melt into a thicker coating, which helps the chocolate sit on top of the caramel instead of running off. If you want a slightly cleaner finish, chopped baking chocolate works too.


How to Make Christmas Pecan Turtles Step by Step

A close-up action shot of a pecan turtle being broken in half, revealing a delicious, stretching caramel center between the chocolate topping and pecan base.

How to Toast Pecans for Better Flavor

  1. Line a tray or large plate with parchment paper.
  2. Spread the pecan halves on a baking sheet and bake at 350°F for 6 to 8 minutes, until they smell buttery and fragrant and look slightly darker. They should not look patchy or scorched.
  3. Let them cool enough to handle.

How to Melt Caramel Without Burning It

  1. Arrange the pecans on the parchment in small clusters of 3 to 4 halves, shaped like little Xs or fans. Leave space between each cluster.
  2. In a microwave-safe bowl, combine the caramels and heavy cream. Microwave in 20-second intervals, stirring each time, until the caramel is smooth, thick, and slowly ribbons off the spoon. If it’s bubbling hard or pouring like syrup, it’s too hot.
  3. Spoon a small mound of caramel onto each pecan cluster—just enough to bridge the nuts together. Too much caramel will spread and give you messy bottoms.

How to Melt Chocolate for Turtle Candy

  1. In a separate microwave-safe bowl, combine the chocolate chips and oil. Microwave in 20-second intervals, stirring well after each one. Stop when there are still a few soft lumps, then stir until the chocolate is fully smooth and glossy. Residual heat should melt the last bits.
  2. Spoon chocolate over each caramel mound. The chocolate should fall in a thick ribbon and settle into a smooth cap. If it looks stiff or grainy, stop heating and stir before microwaving again.
  3. Sprinkle with flaky sea salt while the chocolate is still wet so it sticks.
  4. Let the turtles sit at room temperature until the tops are no longer tacky, or chill them for 10 to 15 minutes until the chocolate is set and the caramel feels firm around the edges.

If you want something fruity and a little brighter on a holiday dessert table, try this Cranberry White Chocolate Tart Recipe alongside the rich caramel-chocolate flavors here.


Tips for Better Homemade Pecan Turtles

  • Let the pecans cool before topping with caramel. Warm nuts make the caramel slide.
  • Don’t overheat the caramel. The hotter it gets, the more likely it is to spread thin and set hard.
  • Don’t keep microwaving chocolate until it looks completely melted on its own. Stirring is what finishes it smoothly.
  • For the best texture, let chilled turtles sit at room temperature for 5 to 10 minutes before eating. The caramel softens slightly and pulls cleanly instead of feeling stiff.

Pecan Turtle Variations to Try

Pecan Turtles with Pretzels

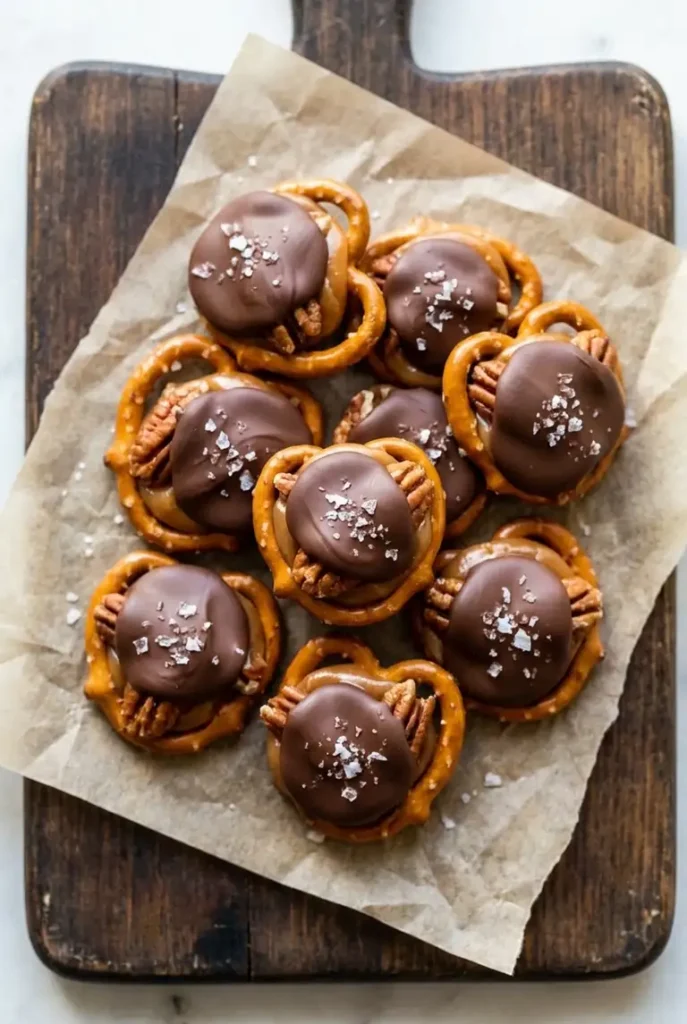
A variation of pecan turtles made with a salty pretzel base, shown on parchment paper with their layers of caramel, pecans, and glossy chocolate tops.

Add a small pretzel twist under or alongside each pecan cluster before spooning on the caramel. This gives the candy a sharper salty crunch and a little more structure on a cookie tray. Keep the caramel amount modest so it doesn’t flood the pretzel.

Pecan Turtles with Caramel Bits

Use about 1 cup caramel bits in place of wrapped caramels, plus the same 2 tablespoons of cream. Melt in short bursts and stir often. Caramel bits are convenient, but they go from firm to overheated fast, so stop when the mixture is thick and smooth.


How to Store and Freeze Christmas Pecan Turtles

Store the turtles in an airtight container at room temperature for up to 5 days if your kitchen is cool. If your house runs warm, refrigerate them for up to 2 weeks.

To freeze, place them in a single layer until firm, then transfer to a container with parchment between layers. Freeze for up to 2 months. Thaw in the refrigerator, then let them sit out for a few minutes before serving.


FAQ About Pecan Turtles

Why did my caramel get too hard?

Usually because it was overheated. Even store-bought caramels will firm up too much if you keep microwaving after they’re already smooth. Add a little cream, heat only until fluid, and stop once it spoons thickly.

Can I use caramel bits instead of wrapped caramels?

Yes. They’re a good shortcut. Use cream with them and melt in short intervals, stirring often. They should be thick and smooth, not boiling.

Why did my chocolate turn thick or grainy when melting?

Most often, it got too hot. Chocolate keeps melting after you stir it, so pause early and let residual heat do some of the work. A small amount of oil also helps keep it fluid enough to spoon.

Can I use roasted or frozen pecans for pecan turtles?

Roasted pecans are fine as long as they’re not heavily salted or seasoned. Frozen pecans work too—thaw and dry them first, then toast briefly to freshen the flavor and remove any surface moisture.

Nutrition

  • Serving size: approximately 2 turtles
  • Calories: 214 kcal
  • Protein: 2.6g
  • Fat: 14.8g
  • Carbohydrates: 20.1g
  • Per 100g: Calories: 491 kcal, Protein: 5.9g, Fat: 33.9g, Carbohydrates: 46.1g.

These nutritional values are approximate and can vary based on the specific ingredients and brands used.

Easy Christmas Pecan Turtles

No-bake holiday candy with toasted pecans, chewy caramel, and smooth chocolate. Quick and easy to make in 20 minutes, perfect for festive trays.
4 (1 reviews)
Course: Dessert
Cuisine: American
Prep: 10 min
Cook: 10 min
Total: 20 min
Servings: 2 Calories: 214 kcal Cost: —

Equipment

  • Microwave-safe bowls
  • Baking sheet
  • Parchment paper
  • Spoon
  • Microwave

Ingredients

  • 2 cups pecan halves (220g)
  • 20 soft caramels, unwrapped (200g)
  • 2 tablespoons heavy cream
  • 1 1/2 cups semi-sweet chocolate chips (255g)
  • 1 teaspoon coconut oil or neutral oil
  • Flaky sea salt, for finishing

Instructions

  1. Line a tray or large plate with parchment paper.
  2. Spread the pecan halves on a baking sheet and bake at 350°F for 6 to 8 minutes until buttery and fragrant, slightly darker but not scorched.
  3. Let pecans cool enough to handle.
  4. Arrange pecans on parchment in clusters of 3 to 4 halves, shaped like Xs or fans with space in between.
  5. Combine caramels and heavy cream in a microwave-safe bowl. Microwave in 20-second intervals, stirring until caramel is smooth, thick, and ribbons off the spoon without boiling.
  6. Spoon small mounds of caramel on each pecan cluster to bridge the nuts together; avoid too much caramel to prevent messy bottoms.
  7. In a separate microwave-safe bowl, combine chocolate chips and oil. Microwave in 20-second intervals, stirring well until chocolate is fully smooth and glossy with residual heat melting last bits.
  8. Spoon chocolate over each caramel mound, allowing it to fall in thick ribbon and settle into a smooth cap. Stop heating if chocolate looks stiff or grainy and stir before reheating.
  9. Sprinkle flaky sea salt over chocolate while still wet so it sticks.
  10. Let turtles sit at room temperature until chocolate tops are no longer tacky, or chill for 10 to 15 minutes until chocolate is set and caramel is firm at edges.

Notes

Use soft individually wrapped caramels for a chewy center, avoid overheating caramel and chocolate to keep texture perfect. Toast pecans for buttery flavor and firm crunch. For best texture, let turtles sit at room temp 5 to 10 minutes before eating. Store in airtight container at room temperature up to 5 days or refrigerated up to 2 weeks. Freeze in single layer with parchment between layers for up to 2 months.

Nutrition

Serving Size: approximately 2 turtles | Calories: 214 kcal | Protein: 2.6g | Fat: 14.8g | Carbohydrates: 20.1g | Per100g Calories: 491 kcal | Per100g Protein: 5.9g | Per100g Fat: 33.9g | Per100g Carbohydrates: 46.1g

The first time I tested this, I used too much liquid because I assumed the beef needed to be covered. It didn’t. Chuck roast gives off plenty of juice as it cooks, and if you start with too much sauce, you end up with something thin and washed out. What worked better was using just enough soy, garlic, ginger, and brown sugar to season the beef at the start, then letting the meat build the rest of the sauce on its own as it cooked.

By the end, I want the beef to pull apart with light pressure but still hold some shape. The sauce should look loose and glossy, not thick like gravy. It lands savory first, then a mild brown sugar sweetness, followed by garlic, ginger, and sesame. Over rice, it works better than takeout-style shredded beef because the meat stays moist all the way through and the sauce doesn’t drift too sweet.

What Keeps This Slow Cooker Korean Beef From Tasting Washed Out

  • Chuck roast has enough fat and connective tissue to soften properly over a long cook, so the beef shreds cleanly instead of drying out.
  • The sauce starts concentrated. As the meat releases liquid, it opens up into a fuller cooking liquid that still tastes seasoned instead of diluted.
  • Cutting the beef into chunks instead of cooking one whole piece gives you more surface area for the sauce and more even cooking.
  • Letting the shredded beef rest in the hot sauce at the end makes a real difference. The meat takes on more flavor and stays juicy.

Ingredients You Need for Slow Cooker Korean Beef

  • 3 pounds chuck roast, cut into 2- to 3-inch chunks (1360g)
  • 3/4 cup low-sodium soy sauce (180g)
  • 1/2 cup beef broth (120g)
  • 1/3 cup packed brown sugar (70g)
  • 2 tablespoons sesame oil
  • 1 tablespoon rice vinegar
  • 6 cloves garlic, minced
  • 1 tablespoon fresh ginger, grated (15g)
  • 1/4 teaspoon black pepper
  • 2 tablespoons cornstarch
  • 2 tablespoons water
  • 3 green onions, thinly sliced (45g)
  • 1 tablespoon sesame seeds

Best Beef Cut for Korean Beef in the Slow Cooker

Use chuck roast. It has enough marbling to stay soft after a long cook, and it shreds into thick, moist pieces rather than dry flakes.

Avoid lean stew meat here if possible. It can work, but it tightens up faster and gives you less room for error.

Optional Add-Ins for Heat and Garnish

If you want heat, add 1 to 2 teaspoons gochujang or a pinch of red pepper flakes to the sauce.

For garnish, green onions and sesame seeds are enough, but thin cucumber slices on the side work well too. The cold crunch helps balance the rich beef.


How to Make Slow Cooker Korean Beef

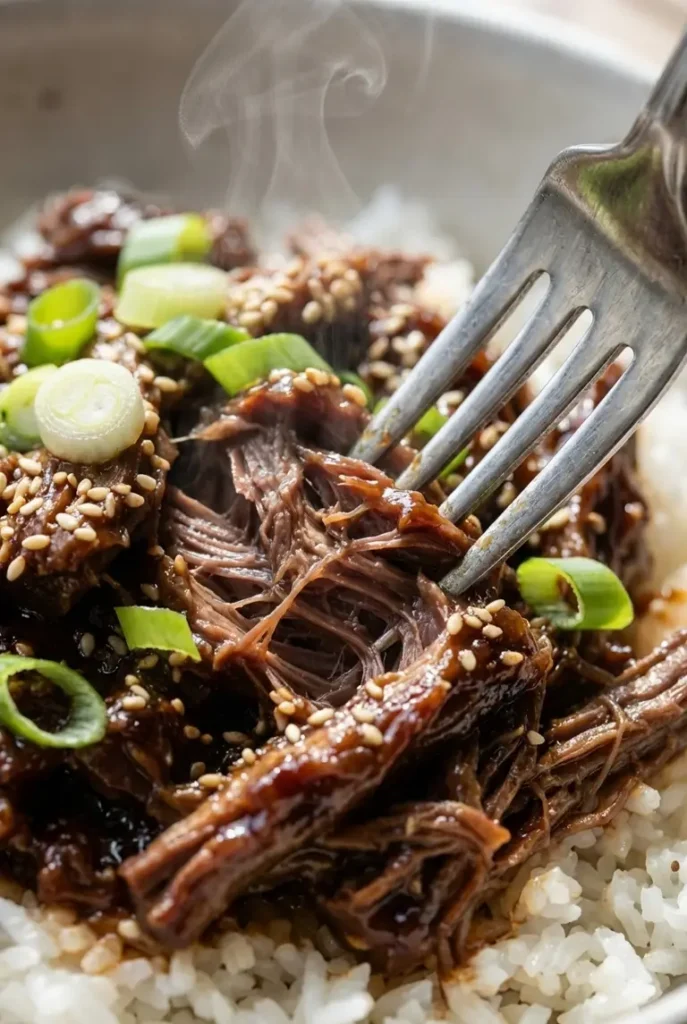
A close-up action shot of a fork pulling apart a piece of tender, saucy Korean beef, showcasing its juicy, shredded texture and glossy sauce.

Mix the Korean-Inspired Sauce

In a bowl, whisk together the soy sauce, beef broth, brown sugar, sesame oil, rice vinegar, garlic, ginger, and black pepper until the brown sugar is mostly dissolved and the sesame oil is no longer floating in visible streaks.

Add the Beef and Cook Low Until Fork-Tender

  1. Place the beef chunks in the slow cooker. Pour the sauce over the top and turn the pieces once or twice so they’re coated. The beef does not need to be fully submerged.
  2. Cover and cook on low for 6 to 8 hours. Try not to lift the lid during the first several hours. Early on, the sauce may look shallow. Later, the beef will release more liquid and the cooker will look much fuller.
  3. Start checking at 6 hours. A fork should slide in easily and twist apart a piece with very little resistance. If the meat still feels tight or shreds into long chewy strands, cook it 30 to 60 minutes longer.

Shred the Beef and Finish the Sauce

  1. Transfer the beef to a cutting board or large bowl. Shred into bite-size pieces, not fine threads. Thicker shreds stay juicier and give the dish more texture.
  2. Skim excess fat from the sauce if needed. In a small bowl, stir together the cornstarch and water, then whisk it into the slow cooker liquid. Return the shredded beef to the slow cooker and toss well.
  3. Cook on high for 20 to 30 minutes if you want the sauce thicker for rice bowls. When it’s ready, the sauce should look glossy and lightly coat the meat rather than pool like broth.
  4. Let the beef sit in the hot sauce for 5 to 10 minutes before serving.
  5. Top with green onions and sesame seeds.

Slow Cooker Korean Beef With Rice or Noodles

This is the part most recipes skip, but it matters because the sauce behaves differently depending on how you serve it.

Best Rice for Serving

Jasmine rice is the easiest choice here. The grains stay separate, and the sauce runs into the rice without making it heavy. Short-grain rice also works if you want a stickier bowl.

Spoon extra sauce over the rice right before serving. Otherwise, the rice underneath stays plain.

If rice-bowl dinners are your go-to, this One-Pan Honey BBQ Chicken and Rice is another easy family-style meal to bookmark.

Best Noodles for Serving

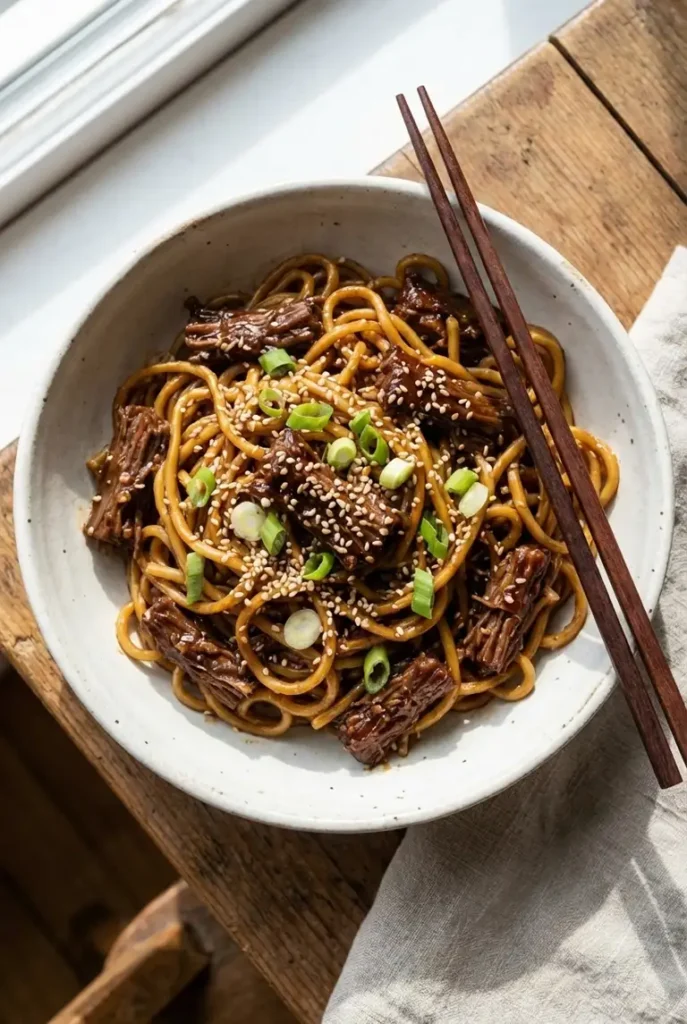
A delicious bowl of lo mein noodles tossed with saucy, shredded slow cooker Korean beef, garnished with sesame seeds and ready to be eaten with chopsticks.

For noodles, use lo mein noodles, ramen, or rice noodles. Keep in mind that noodles absorb sauce fast, so reserve a little extra liquid before mixing everything together.

If the sauce has thickened a lot, loosen it with a small splash of broth or water.

Toss the noodles with the beef while everything is still hot so the sauce coats evenly instead of clumping in patches.


Tips for Tender Beef and a Richer Sauce

  • Cut the beef into even chunks so one piece doesn’t go soft while another stays tight in the center.
  • Don’t add extra liquid at the start unless your slow cooker runs unusually hot and fast. The beef releases plenty on its own.
  • Taste the sauce only at the end. Before cooking, it can seem salty. After hours with the beef juices, it rounds out.
  • If you want deeper flavor, you can sear the beef first, but this is one of the few slow cooker beef recipes where it’s optional. The sauce brings enough flavor without adding another pan to wash.

For another dinner with the same ginger-sesame profile, these Sesame Ginger Chicken Meatballs make a great next recipe to try.


Variations

Spicy Slow Cooker Korean Beef

Add 1 to 2 teaspoons gochujang to the sauce at the start. It gives the dish deeper heat than red pepper flakes and thickens the sauce slightly.

If you want a sharper heat, add red pepper flakes at the end so the spice stays more direct.

Gluten-Free Slow Cooker Korean Beef

Use a gluten-free soy sauce or tamari, and double-check your beef broth label. The rest of the recipe is straightforward.

Serve with rice for the easiest gluten-free option.


How to Store and Reheat

Store cooled beef and sauce in an airtight container in the fridge for up to 4 days.

To reheat, warm it in a covered skillet or saucepan over medium-low heat with a splash of water or broth if the sauce has tightened in the fridge. Microwave reheating works too, but stir halfway through so the edges don’t overcook while the center stays cool.

This also freezes well for up to 3 months. Freeze it with some of the sauce, not dry, so the beef stays protected.


Slow Cooker Korean Beef FAQ

Why is my slow cooker Korean beef tough instead of tender?

Usually it just needs more time. Tough beef in a slow cooker often means the connective tissue hasn’t finished breaking down yet.

If a fork meets resistance or the meat shreds into long ropey strands, keep cooking for 30 to 60 minutes and check again.

How do I thicken the sauce if it seems too thin?

The easiest fix is a cornstarch slurry, then a short cook on high. You can also leave the lid slightly ajar and cook on high for 20 to 30 minutes to reduce it further.

For rice, a spoon-coating sauce works best. For noodles, keep it a little looser.

Can I use frozen ginger or bottled garlic in this recipe?

Yes. Frozen ginger works well here. Bottled garlic is usable, though the flavor is flatter than fresh.

Since this recipe has a short ingredient list, fresh garlic and ginger give a cleaner result if you have them.

What’s the best way to serve slow cooker Korean beef with rice or noodles?

Rice is the default because it catches the sauce better and doesn’t compete with the beef. Noodles work too, but they absorb sauce quickly, so keep extra on hand or loosen the sauce before tossing.

If you want a faster version of this same flavor direction on another night, the Easy Korean Ground Beef Bowl (20 Minutes) is the one I’d make.


Nutrition

  • Serving size: approximately 1/6 of the total recipe
  • Calories: 430 kcal
  • Protein: 38g
  • Fat: 25g
  • Carbohydrates: 12g
  • Per 100g: Calories: 145 kcal, Protein: 13g, Fat: 8g, Carbohydrates: 4g.

These nutritional values are approximate and can vary based on the specific ingredients and brands used.

Slow Cooker Korean Beef

Tender, saucy Korean-inspired beef slow-cooked with soy, garlic, ginger, and brown sugar. Perfect for easy weeknight meals served over rice or noodles with a glossy, flavorful sauce.
5 (1 reviews)
Course: Dinner
Cuisine: Korean
Prep: 20 min
Cook: 480 min
Total: 500 min
Servings: 6 Calories: 430 kcal Cost: —

Equipment

  • Slow cooker
  • Cutting board
  • Chef’s knife
  • Small bowl
  • Whisk

Ingredients

  • 3 pounds chuck roast, cut into 2- to 3-inch chunks (1360g)
  • 3/4 cup low-sodium soy sauce (180g)
  • 1/2 cup beef broth (120g)
  • 1/3 cup packed brown sugar (70g)
  • 2 tablespoons sesame oil
  • 1 tablespoon rice vinegar
  • 6 cloves garlic, minced
  • 1 tablespoon fresh ginger, grated (15g)
  • 1/4 teaspoon black pepper
  • 2 tablespoons cornstarch
  • 2 tablespoons water
  • 3 green onions, thinly sliced (45g)
  • 1 tablespoon sesame seeds

Instructions

  1. Whisk together soy sauce, beef broth, brown sugar, sesame oil, rice vinegar, garlic, ginger, and black pepper until the brown sugar is mostly dissolved and sesame oil is no longer floating in visible streaks.
  2. Place beef chunks in slow cooker and pour sauce over them. Turn pieces once or twice to coat. Beef does not need to be fully submerged.
  3. Cover and cook on low for 6 to 8 hours, avoiding lifting the lid early in the cooking.
  4. Check for tenderness starting at 6 hours; beef should pull apart with light pressure. If tough, cook 30 to 60 minutes longer.
  5. Transfer beef to a board or bowl and shred into bite-size pieces.
  6. Skim excess fat from sauce if needed. Stir cornstarch and water together and whisk into slow cooker liquid.
  7. Return shredded beef to slow cooker, toss to coat. Cook on high for 20 to 30 minutes for thicker sauce.
  8. Let beef sit in hot sauce for 5 to 10 minutes before serving. Top with green onions and sesame seeds.

Notes

Use chuck roast for best tenderness and flavor. Optional add-ins include 1 to 2 teaspoons gochujang or red pepper flakes for heat. Serve over jasmine rice or noodles. Store leftovers with sauce in fridge up to 4 days; freeze up to 3 months.

Nutrition

Serving Size: 1/6 of recipe | Calories: 430 kcal | Protein: 38g | Fat: 25g | Carbohydrates: 12g

The difference between good pecan snowball cookies and dry ones is usually just a couple of minutes in the oven. I’ve made these enough times to know that if you wait for the tops to color, you’ve already gone too far.

The best batches for me come from butter that is soft but still cool, pecans chopped fine enough that the dough rolls smoothly, and cookies pulled as soon as the bottoms barely turn golden.

What Keeps These Pecan Snowball Cookies Tender

  • Finely chopped pecans blend into the dough instead of breaking it apart. You get pecan flavor throughout, without large chunks that cause cracking.
  • Powdered sugar in the dough gives the cookies a finer, more tender crumb than granulated sugar.
  • Baking only until set keeps the centers delicate. These should stay pale on top, not brown like standard butter cookies.
  • The double coating of powdered sugar is practical, not decorative. The first coat melts onto the warm cookie; the second gives you the soft white finish that actually sticks.

Ingredients for Classic Pecan Snowball Cookies

  • 1 cup unsalted butter, softened (225g)
  • 1/2 cup powdered sugar, plus more for coating (60g)
  • 2 teaspoons vanilla extract
  • 2 1/4 cups all-purpose flour (270g)
  • 1 cup finely chopped pecans (110g)
  • 1/4 teaspoon salt

How to Make Pecan Snowball Cookies

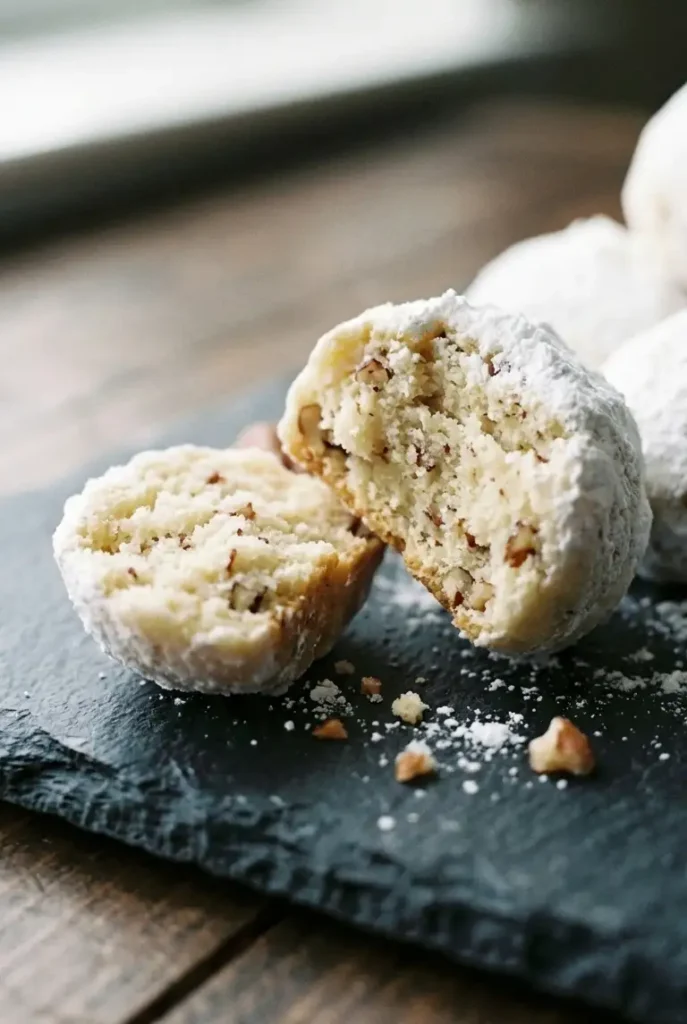
A close-up view of a broken pecan snowball cookie, showcasing its delicate, crumbly interior filled with chopped nuts and its snowy powdered sugar coating.

Preheat the oven to 350°F. Line 2 baking sheets with parchment paper.

Cream the butter and powdered sugar until pale and fluffy

  1. In a large bowl, beat the butter and powdered sugar until the mixture looks slightly paler and fluffy, with no dense streaks stuck to the bowl, about 2 to 3 minutes.
  2. The butter should dent when pressed but still feel cool, not greasy or shiny. That gives you enough aeration without making the dough loose.
  3. Mix in the vanilla.

Mix the dough just until it comes together

  1. Add the flour, chopped pecans, and salt. Mix on low just until the dough comes together. It should look soft and a little crumbly, but hold together when squeezed in your palm.
  2. Chop the pecans finely enough that there are no large sharp pieces poking through the dough balls. If the nuts are too coarse, the cookies are more likely to crack and bake unevenly.

Shape and bake the cookies until the bottoms are lightly golden

  1. Scoop and roll the dough into 1-inch balls, about 1 tablespoon each. Roll lightly—just enough to form smooth balls without warming the dough too much in your hands.
  2. Place them on the prepared baking sheets about 1 inch apart.
  3. Bake for 12 to 14 minutes, until the bottoms are lightly golden and the tops look dry and set. Do not wait for the tops to brown.
  4. Let the cookies rest on the pan for 5 minutes so they’re warm but not so fragile that they break when handled.

Double-coat in powdered sugar for the best snowy finish

  1. While the cookies are still warm, roll them gently in powdered sugar. The first coating may look slightly damp or thin; that’s what you want.
  2. Let the cookies cool completely, then roll them again in powdered sugar for a thicker, softer finish.

For a more dramatic centerpiece dessert, serve these alongside my Traditional Chocolate Yule Log (Bûche de Noël) at Christmas dinner.


My Best Tips for Tender, Melt-in-Your-Mouth Snowball Cookies

  • Don’t overmix after adding the flour. Once the dough holds together, stop.
  • Toast the pecans first if you want a deeper nut flavor. Let them cool completely before adding them to the dough.
  • Watch the bottoms, not the tops. The tops stay pale even when the cookies are done.
  • If the dough starts feeling too soft while shaping, chill it for 10 to 15 minutes before baking the next tray.
  • Use a generous amount of powdered sugar for coating. A shallow bowl works better than sprinkling from above.

If you want a mix of textures and flavors on your dessert table, add this Cranberry White Chocolate Tart Recipe for something bright and creamy next to the buttery cookies.


Pecan Snowball Cookies Variations

Gluten-Free Pecan Snowball Cookies

  1. Use a good 1:1 gluten-free flour blend in place of the all-purpose flour. The dough may feel slightly looser or more delicate, so chilling it for 20 minutes before shaping helps.
  2. Bake as directed, but handle the warm cookies carefully during the first sugar coating since gluten-free versions can be a bit more fragile until fully cooled.

Pecan Snowball Cookies with Cream Cheese

For a softer, slightly richer version, replace 2 tablespoons of the butter with 2 tablespoons softened cream cheese.

This shifts the texture a bit. The cookies stay more tender in the center and lose some of the classic sandy shortbread feel. Keep the cream cheese cool, not overly soft, and chill the dough for 15 to 20 minutes before shaping if it feels sticky.


How to Store and Freeze Pecan Snowball Cookies

Store the cookies in an airtight container at room temperature for up to 5 days. If stacking, separate layers with parchment so the sugar coating stays in place.

To freeze baked cookies, let them cool completely, then freeze in a sealed container for up to 2 months. Dust with a little fresh powdered sugar after thawing if needed.

To freeze the dough, roll it into balls and freeze on a tray until firm. Transfer to a freezer bag and freeze for up to 2 months. Bake from frozen, adding 1 to 2 minutes to the baking time.


Nutrition

  • Serving size: approximately 2 cookies
  • Calories: 172 kcal
  • Protein: 2g
  • Fat: 11g
  • Carbohydrates: 17g
  • Per 100g: Calories: 484 kcal, Protein: 4.8g, Fat: 31g, Carbohydrates: 49g.

These nutritional values are approximate and can vary based on the specific ingredients and brands used.


Frequently Asked Questions

Do I need to toast the pecans first?

No, but I usually do if I have the extra few minutes. Toasting gives the cookies a deeper pecan flavor, and it makes a noticeable difference once the dough is baked. Just let the nuts cool fully before mixing them in.

Why do I coat the cookies twice in powdered sugar?

The first coat melts slightly onto the warm cookie and gives the sugar something to cling to. The second coat is what gives you that fuller snowy finish once the cookies are completely cool.

Why did my pecan snowball cookies spread and lose their round shape?

Usually the butter was too warm, or the dough got overhandled while rolling. The dough should feel cool and soft, not greasy. If needed, chill it before baking.

Why are my snowball cookies dry instead of melt-in-your-mouth?

They were probably overbaked, or the flour was overmeasured. Spoon flour into the measuring cup and level it off, or weigh it. Also pull the cookies when the bottoms are just lightly golden.

Can I use frozen or pre-chopped pecans?

Yes. Thaw frozen pecans and pat them dry if they have any surface moisture. Pre-chopped pecans are fine if they’re small and fresh, but give them another quick chop if the pieces are too large.

Can I make pecan snowball cookies ahead and freeze the dough?

Yes. Freeze the shaped dough balls, then bake straight from frozen. It’s one of the easiest make-ahead holiday cookie options because there’s no need to thaw the dough first.

Pecan Snowball Cookies

Buttery pecan snowball cookies with a tender crumb, double powdered sugar coating, and clear tips to keep them from drying out. Delicate, shortbread-like cookies with finely chopped pecans baked until bottoms are lightly golden and tops remain pale, then double-coated in powdered sugar for a soft white finish.
Course: Dessert
Cuisine: American
Prep: 20 min
Cook: 14 min
Total: 34 min
Servings: 12 Calories: 172 kcal Cost: —

Equipment

  • Oven
  • Baking sheets
  • Parchment paper
  • Mixing bowls
  • Mixer or whisk
  • Measuring cups
  • Measuring spoons
  • Cooling rack

Ingredients

  • 1 cup unsalted butter, softened (225g)
  • 1/2 cup powdered sugar, plus more for coating (60g)
  • 2 teaspoons vanilla extract
  • 2 1/4 cups all-purpose flour (270g)
  • 1 cup finely chopped pecans (110g)
  • 1/4 teaspoon salt

Instructions

  1. Preheat oven to 350°F. Line 2 baking sheets with parchment paper.
  2. Beat butter and 1/2 cup powdered sugar until slightly paler and fluffy, about 2 to 3 minutes. Butter should feel cool but dent when pressed.
  3. Mix in vanilla extract.
  4. Add flour, chopped pecans, and salt. Mix on low just until dough comes together; should be soft and a little crumbly but hold together when squeezed.
  5. Scoop and roll dough into 1-inch balls (~1 tablespoon each). Place on baking sheets 1 inch apart.
  6. Bake 12 to 14 minutes until bottoms are lightly golden and tops are dry and set; do not brown tops.
  7. Let cookies rest on pan for 5 minutes until warm but firm.
  8. While warm, roll cookies gently in powdered sugar for first coat; let cool completely, then roll again for thicker finish.

Notes

Tips: Do not overmix after adding flour. Toast pecans for deeper flavor but cool before adding. Watch bottoms to prevent overbaking. Chill dough 10-15 minutes if too soft. Use generous powdered sugar for coating with shallow bowl. Variations include gluten-free flour and replacing 2 tbsp butter with cream cheese for softer texture. Store in airtight container up to 5 days; freeze baked or dough balls up to 2 months.

Nutrition

Serving Size: 2 cookies | Calories: 172 kcal | Protein: 2g | Fat: 11g | Carbohydrates: 17g

The first time I made this, I skipped browning the chicken properly and rushed the rice straight into the liquid. Dinner was fine, but the whole skillet tasted flatter than it should have. What makes the biggest difference here is giving the chicken real color first and letting the rice hit the pan drippings before the broth goes in. Skip either step and the whole skillet tastes flatter than it should.

Done right, the sauce comes out glossy and a little darker at the edges, the rice stays separate instead of gummy, and the chicken stays moist enough that you can cut it with the side of a fork.

It also fixes the usual problem with barbecue chicken rice dishes: too much sweet sauce sitting on top of bland rice. Here, the rice cooks in broth and fond, so it tastes seasoned on its own, and the honey BBQ mixture clings to the chicken instead of flooding the pan.

What Keeps This Honey BBQ Chicken and Rice From Tasting Flat

  • Searing the chicken first builds browned bits in the skillet, and that flavor goes straight into the rice once the broth is added.
  • Long-grain white rice holds its shape better here than quick-cooking rice or short-grain rice, so the finished pan stays fluffy instead of sticky.
  • Drizzling most of the sauce over the chicken keeps the top lightly glazed while the rice underneath cooks in a more balanced amount of liquid.
  • Baking uncovered helps the sauce reduce and darken slightly around the edges. You get caramelized spots without turning the rice soupy.

Ingredients for Honey BBQ Chicken and Rice

  • 1 1/2 pounds boneless skinless chicken breast, cut into large bite-size pieces (680g)
  • 1 tablespoon olive oil
  • 1 teaspoon kosher salt
  • 1/2 teaspoon black pepper
  • 1 teaspoon garlic powder
  • 1 cup long-grain white rice, uncooked (185g)
  • 2 cups low-sodium chicken broth (480g)
  • 3/4 cup BBQ sauce (180g)
  • 2 tablespoons honey (40g)
  • 1/2 teaspoon smoked paprika
  • 1/2 teaspoon onion powder
  • 1 tablespoon chopped parsley, optional

How to Make One-Pan Honey BBQ Chicken and Rice

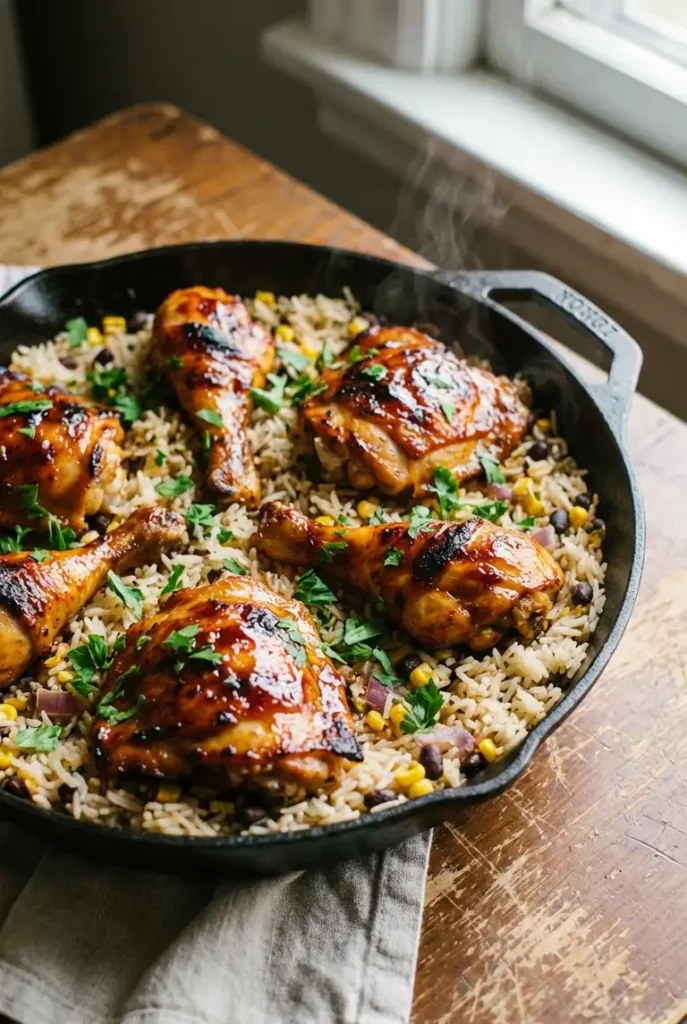
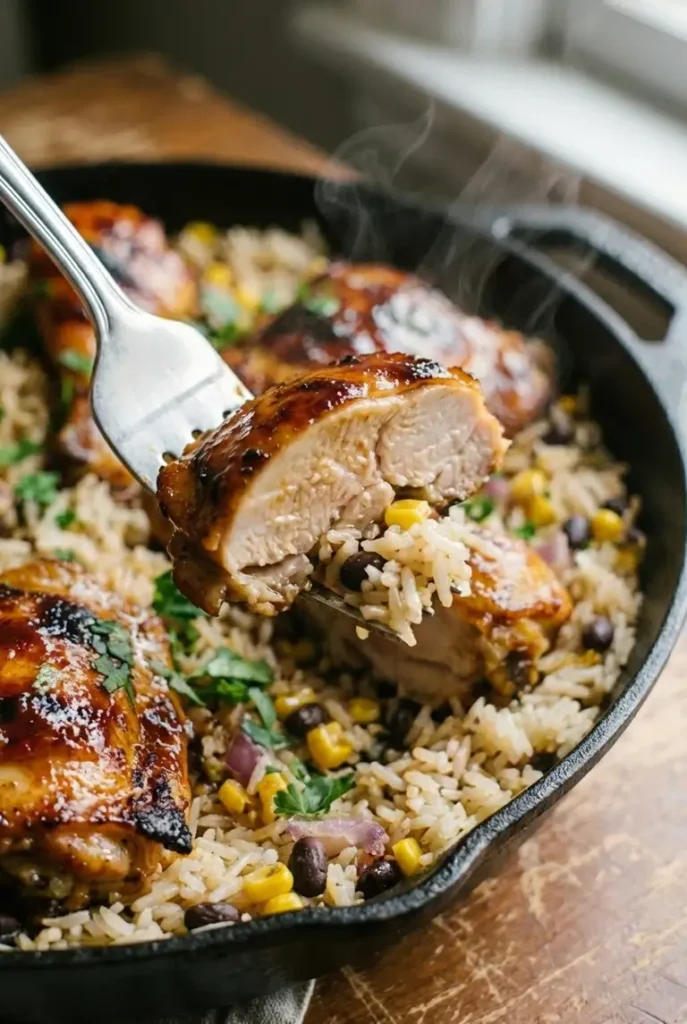
A close-up of a fork lifting a piece of juicy honey BBQ chicken and fluffy rice from a skillet, with delicate steam rising from the dish.

Use a 12-inch oven-safe skillet if you have one. Cast iron or a heavy stainless skillet works best.

If your skillet is not oven-safe, transfer everything to a baking dish after step 3.

Step 1: Sear the Chicken Until Golden

  1. Heat the oven to 400°F.
  2. Pat the chicken dry, then season it with salt, pepper, and garlic powder.
  3. Set the skillet over medium-high heat and add the olive oil. When the oil is shimmering, add the chicken in a single layer. It should sizzle on contact. If the pieces are packed too tightly or overlapping, sear in batches.
  4. Cook for 2 to 3 minutes per side, just until the chicken has deep golden edges. It does not need to be cooked through yet. Transfer to a plate.

Step 2: Toast the Rice in the Pan Drippings

  1. Lower the heat to medium. Add the rice directly to the skillet and stir for 30 to 60 seconds, scraping up the browned bits from the bottom. Some grains should look slightly translucent around the edges.
  2. Pour in the chicken broth and keep scraping until the browned bits release and the liquid looks lightly tan, not clear.

Step 3: Add Broth, Chicken, and Honey BBQ Sauce

  1. In a small bowl, stir together the BBQ sauce, honey, smoked paprika, and onion powder.
  2. Return the chicken and any juices to the skillet. Spoon or drizzle the sauce mostly over the chicken, with a little settling into the rice. The goal is a light coating on the meat, not a full layer of sauce stirred through all the liquid.
  3. At this point, the pan should look loose but not watery. The rice should be submerged, and the sauce should sit thicker on top of the chicken.

Step 4: Bake Until the Rice Is Tender and the Sauce Caramelizes

  1. Transfer the skillet to the oven and bake uncovered for 20 to 25 minutes.
  2. At around 20 minutes, check the pan. The rice should look like it has absorbed most of the broth, with small steam holes forming across the surface.
  3. The sauce near the edges may be getting darker; that is normal. If it is darkening too quickly, loosely tent the skillet with foil for the last 5 minutes.
  4. The chicken is done when the thickest piece reaches 165°F. Do not leave it in the oven waiting for every edge to turn very dark; honey and BBQ sauce can go from caramelized to burnt quickly.
  5. If the rice is still firm, add 2 to 4 tablespoons hot broth or water, cover loosely with foil, and bake for 5 more minutes.

Step 5: Rest Before Serving

  1. Let the skillet rest for 5 minutes before serving. The rice should fluff easily with a fork, and no liquid should slosh at the bottom of the pan.
  2. Sprinkle with parsley if using, then serve.

For another low-mess chicken dinner, try this Easy Parmesan Chicken Sheet Pan Recipe on nights when you want vegetables roasted right alongside the main dish.


Best Tips for Tender Chicken and Fluffy Rice

Use Long-Grain White Rice for the Best Texture

This is the right rice for this pan and bake time. Jasmine rice can work, though it may come out a little softer.

Avoid instant rice, minute rice, or brown rice unless you are ready to change the liquid and cooking time.

Choose a BBQ Sauce You Already Like

The finished skillet will taste like the sauce you start with. If your sauce is very sweet, the dish will skew sweeter. If it is smokier or sharper, that will come through too.

A balanced sauce with smoke, vinegar, and tomato gives the best result here.

Watch the Edges for Fast Caramelization

The outer ring of the skillet gets hotter, and sugary sauce will darken there first. A few sticky brown spots are good.

Blackened, syrupy patches mean it needs to come out or get tented.

Check the Rice Before Assuming It Needs More Liquid

Rice can look a little firm on top while the bottom is fully cooked. Fluff a small section with a fork before adding more broth.

If the center grain is still chalky, add a splash of hot liquid and finish covered.


Easy Honey BBQ Chicken and Rice Variations

Honey BBQ Chicken and Rice with Chicken Thighs

Use 1 1/2 pounds boneless skinless chicken thighs (680g) in the same amount. They are more forgiving than chicken breast and stay juicier if you accidentally leave the skillet in the oven a few extra minutes.

Sear them the same way and cook until they reach 165°F.

Spicy Honey BBQ Chicken and Rice

Add 1/4 to 1/2 teaspoon cayenne pepper or a spoonful of hot sauce to the honey BBQ mixture. This works best if your barbecue sauce is on the sweeter side; the heat keeps the sauce from tasting too heavy.

If this honey BBQ chicken and rice puts you in a rice-bowl mood, you may also love this Healthy Street Corn Chicken Rice Bowl for a fresher, creamy-sweet variation.


How to Store and Reheat BBQ Chicken and Rice

Store leftovers in an airtight container in the refrigerator for up to 4 days.

To reheat, add a spoonful of water or broth before microwaving so the rice softens instead of drying out. Heat in short bursts, stirring once or twice.

For oven reheating, cover the dish with foil and warm at 325°F until heated through. Covering matters here; uncovered reheating will dry the rice and toughen the chicken.


Nutrition

Serving size: approximately 1/4 of the total recipe

  • Calories: 497 kcal
  • Protein: 41g
  • Fat: 9g
  • Carbohydrates: 59g

Per 100g:

  • Calories: 136 kcal
  • Protein: 11g
  • Fat: 2.5g
  • Carbohydrates: 16g

These nutritional values are approximate and can vary based on the specific ingredients and brands used.


One-Pan Honey BBQ Chicken and Rice FAQ

Why is my rice still firm after baking?

Most of the time, the rice just needs a little more time or a small splash of hot broth. I see this more often when the skillet is crowded or the oven runs a little cool.

Add a few tablespoons of hot broth or water, cover loosely, and bake another 5 minutes. Also make sure you used long-grain white rice, not quick-cooking or brown rice.

How do I keep honey BBQ sauce from burning in the skillet?

I get the best results when most of the sauce stays on top of the chicken instead of getting stirred through all the broth. That keeps the rice from turning too sweet and gives the sauce less chance to scorch early.

Start checking around 20 minutes. If the edges are darkening too fast, tent the skillet loosely with foil for the last few minutes.

Can I use chicken thighs instead of chicken breast?

Yes. Boneless skinless thighs work very well here and are less likely to dry out. Cook them the same way and check for 165°F in the thickest part.

Can I use frozen vegetables or frozen chicken in this recipe?

Frozen vegetables are fine in small amounts, but add them near the end or they can release too much water into the rice.

Frozen chicken should be thawed first. If you try to sear it from frozen, it will steam, shed water, and prevent proper browning.

One-Pan Honey BBQ Chicken and Rice

A 35-minute easy weeknight dinner featuring seared chicken with honey BBQ sauce, fluffy long-grain white rice cooked in chicken broth, and a glossy caramelized sauce.
Course: Dinner
Cuisine: American
Prep: 10 min
Cook: 25 min
Total: 35 min
Servings: 4 Calories: 497 kcal Cost: —

Equipment

  • 12-inch oven-safe skillet
  • Small bowl
  • Oven
  • Tongs
  • Cutting board
  • Chef's knife

Ingredients

  • 1 1/2 pounds boneless skinless chicken breast, cut into large bite-size pieces (680g)
  • 1 tablespoon olive oil
  • 1 teaspoon kosher salt
  • 1/2 teaspoon black pepper
  • 1 teaspoon garlic powder
  • 1 cup long-grain white rice, uncooked (185g)
  • 2 cups low-sodium chicken broth (480g)
  • 3/4 cup BBQ sauce (180g)
  • 2 tablespoons honey (40g)
  • 1/2 teaspoon smoked paprika
  • 1/2 teaspoon onion powder
  • 1 tablespoon chopped parsley (optional)

Instructions

  1. Preheat oven to 400°F.
  2. Pat chicken dry and season with salt, pepper, and garlic powder.
  3. Heat olive oil in skillet over medium-high until shimmering; add chicken in single layer, sear 2-3 minutes per side until deep golden edges; transfer chicken to plate.
  4. Lower heat to medium; add rice to skillet and stir 30-60 seconds scraping up browned bits until grains are slightly translucent on edges.
  5. Pour in chicken broth, stir until browned bits release and liquid looks lightly tan; in small bowl, mix BBQ sauce, honey, smoked paprika, and onion powder.
  6. Return chicken and juices to skillet, spoon most sauce over chicken, and let a little settle into rice; rice should be submerged but sauce mostly coats chicken.
  7. Bake uncovered for 20-25 minutes until rice is tender with steam holes and sauce caramelizes on edges; tent with foil for last 5 minutes if sauce darkens too fast.
  8. Check chicken reaches 165°F; if rice is firm, add 2-4 tbsp hot broth or water, cover loosely with foil, and bake 5 more minutes.
  9. Rest skillet 5 minutes before serving; fluff rice with fork and sprinkle parsley if using.

Notes

Use long-grain white rice for best texture. Avoid instant, minute, or brown rice unless cooking times and liquids are adjusted. Keep most sauce on chicken to avoid soggy rice. Tent edges with foil if sauce burns. Store leftovers in airtight container up to 4 days; reheat with splash of broth to soften rice. Variations include using boneless skinless chicken thighs or adding cayenne pepper for heat.

Nutrition

Serving Size: 1/4 recipe | Calories: 497 kcal | Protein: 41g | Fat: 9g | Carbohydrates: 59g | Per100g Calories: 136 kcal | Per100g Protein: 11g | Per100g Fat: 2.5g | Per100g Carbohydrates: 16g

The first few times I made this kind of bowl, I kept stirring the corn too much and squeezing the lime in too early. The whole pan tasted flatter than it should have. Once I started letting the corn sit long enough to blister and saving the lime for the end, the bowl tasted much more like street corn and much less like plain chicken and rice.

When it comes together the way I want it, the bowl has enough contrast to keep each part noticeable. The rice stays warm, the chicken gets browned edges, the corn keeps a little char, and the avocado and cotija still feel fresh on top.

What Keeps This Street Corn Chicken Rice Bowl From Tasting Flat

  • The chicken and corn are cooked separately enough to keep their textures distinct. You get browned chicken instead of wet pieces, and blistered corn instead of steamed kernels.
  • Cotija, lime, and cilantro go in at the end, so the bowl keeps its sharp, salty finish instead of turning dull in the pan.
  • Warm rice anchors the bowl without making the avocado slump or the cheese melt away.
  • The balance is practical: enough chicken to make it filling, enough corn and toppings to keep it from eating like a plain meal-prep bowl.

Ingredients for a Street Corn Chicken Rice Bowl

  • 1 1/2 pounds boneless skinless chicken breast (680g), cut into bite-size pieces
  • 1 tablespoon olive oil (15g)
  • 1 teaspoon chili powder
  • 1 teaspoon ground cumin
  • 1/2 teaspoon garlic powder
  • 1/2 teaspoon smoked paprika
  • 1 teaspoon kosher salt
  • 1/2 teaspoon black pepper
  • 3 cups cooked white rice (480g), warm
  • 2 cups corn kernels, fresh or frozen (300g)
  • 1 small red onion (150g), diced
  • 1 red bell pepper (150g), diced
  • 1/3 cup plain Greek yogurt (80g)
  • 1/4 cup mayonnaise (60g)
  • 1 cup cotija cheese (115g), crumbled
  • 1 avocado (150g), diced
  • 1/4 cup chopped cilantro (15g)
  • 2 limes (130g), cut into wedges

A quick note on spices: I get asked about them a lot, so I linked the ones I reach for here. I usually buy from a specialty spice shop because the flavor is brighter, the heat tastes cleaner, and the quality is more reliable than the standard grocery store version.


How to Make a Healthy Street Corn Chicken Rice Bowl

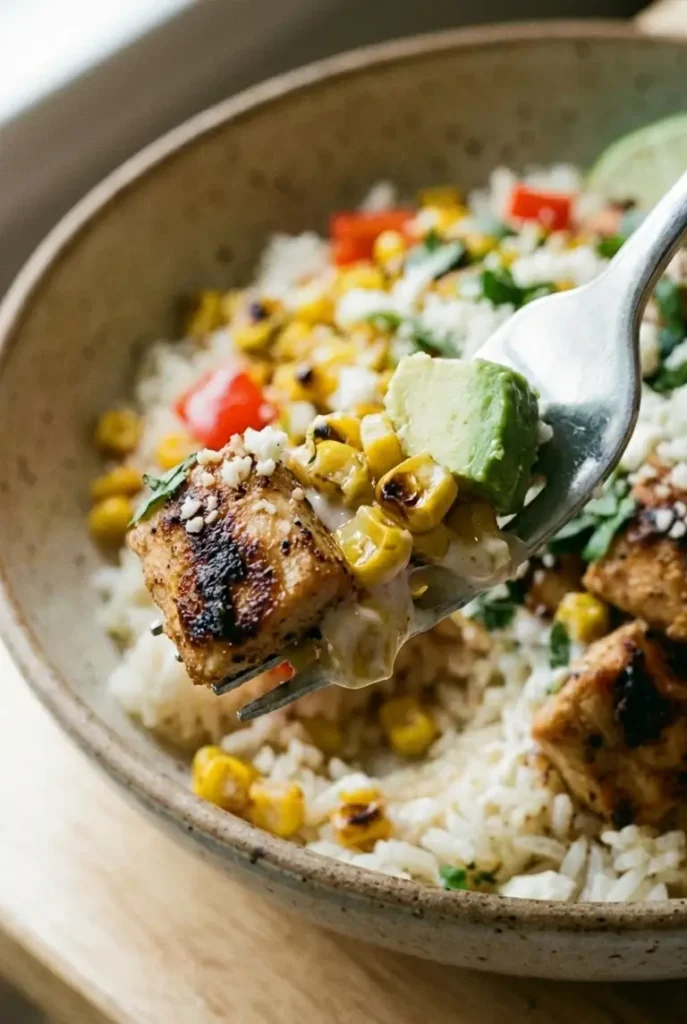
A close-up of a fork lifting a bite of juicy chicken, charred corn, and avocado from a street corn rice bowl, showcasing the creamy texture.

1. Season the chicken

In a bowl, toss the chicken with the olive oil, chili powder, cumin, garlic powder, smoked paprika, salt, and black pepper until evenly coated.

2. Cook the chicken

  1. Heat a large skillet over medium-high heat until the oil looks shimmery.
  2. Add the chicken in a single layer with a little space between the pieces. If your pan is small, cook it in batches.
  3. Leave the chicken undisturbed for 2 to 3 minutes so it can brown. Stir and continue cooking for 4 to 6 minutes, until the pieces are browned at the edges, the centers are opaque, and the thickest piece reaches 165°F.
  4. Transfer to a plate.

3. Char the corn and soften the vegetables

  1. In the same skillet, add the corn, onion, and bell pepper.
  2. Spread the mixture out and let it sit for 1 to 2 minutes before stirring. Repeat that a couple of times so the corn gets lightly blistered in spots instead of steaming.
  3. Cook for 4 to 5 minutes, until the onion is softened and glossy, not deeply browned, and the bell pepper is tender but still has a little bite.

4. Make the creamy street corn element

  1. In a small bowl, stir together the Greek yogurt and mayonnaise. Add half of the cotija and a squeeze of lime juice, if you like.
  2. Do this off the heat so the lime stays bright and the dairy doesn’t split.
  3. Return the chicken to the skillet and toss it with the corn mixture. Take the pan off the heat, then fold in the yogurt mixture lightly so everything is coated but not soupy.

5. Assemble the bowls

  1. Divide the warm cooked rice between bowls. It should be warm, not steaming hot, especially if you’re adding avocado right away.
  2. Top with the chicken and corn mixture, then add avocado, the remaining cotija, cilantro, and lime wedges.
  3. Squeeze the lime over the top right before serving. Serve immediately so the cotija stays crumbly and the avocado stays cool.

If quick bowl dinners are your weeknight lifesaver, you may also like this Easy Korean Ground Beef Bowl (20 Minutes).


Expert Tips for Charred Corn, Juicy Chicken, and the Best Texture

How to Get Corn Lightly Charred Instead of Steamed

Use a wide skillet and don’t crowd it. The corn needs contact with the pan, not trapped moisture.

If you’re using frozen corn, thaw and pat it dry first if you have time. You’re looking for a few browned spots, not fully blackened kernels.

How to Sear Chicken Without Overcooking It

The pan has to be hot before the chicken goes in. If you move the chicken too soon, it releases moisture and goes pale instead of browning.

Let it sit for those first 2 to 3 minutes. Also, cut the pieces fairly evenly so the smaller bits don’t dry out while the larger ones finish.

Best Way to Assemble the Bowl for Fresh Texture

Rice first, then the hot chicken and corn mixture, then avocado, cotija, cilantro, and lime.

If you add the avocado too early over very hot rice, it softens quickly. If you stir cotija into the hot pan, it loses the dry, crumbly texture that makes the bowl read as street corn instead of cheesy rice.

For another easy chicken-and-rice dinner with minimal cleanup, try this One-Pan Honey BBQ Chicken and Rice next.


Street Corn Chicken Rice Bowl Variations

High-Protein Street Corn Chicken Rice Bowl

To push the protein higher, use 2 pounds chicken breast (910g) and reduce the rice to 2 cups cooked rice (320g).

You can also replace part of the mayonnaise with extra Greek yogurt. That keeps the bowl creamy without making it as heavy.

Street Corn Chicken Rice Bowl with Rotisserie Chicken

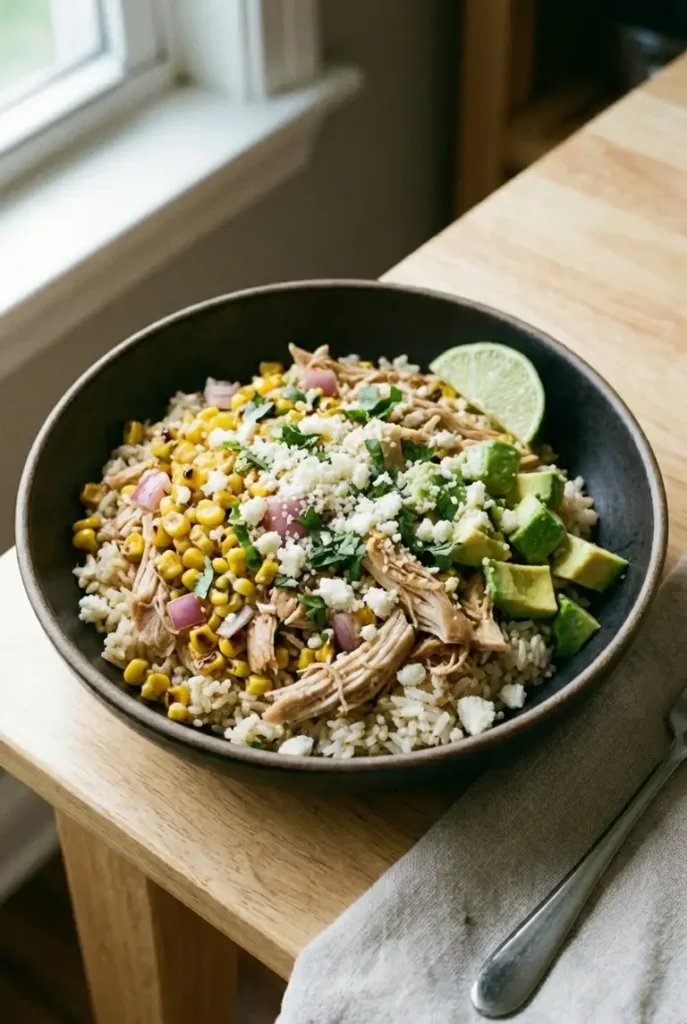
A quick street corn rice bowl variation made with shredded rotisserie chicken, corn, and fresh toppings like avocado and cotija cheese in a dark bowl.
  1. Use about 4 cups shredded rotisserie chicken (560g). Skip the raw chicken step.
  2. Cook the corn, onion, and bell pepper first, then fold the shredded chicken into the skillet just long enough to heat through, about 2 to 3 minutes.
  3. Add the creamy mixture off heat, then assemble as usual. This is the best shortcut version when you need dinner fast.

How to Store and Reheat Leftovers

Store the rice, chicken-corn mixture, and cold toppings separately if possible.

That matters more here than with a standard rice bowl because avocado and cotija lose their texture quickly once they sit on hot food.

  • Refrigerator: up to 4 days
  • Reheat: warm the rice and chicken-corn mixture separately until hot
  • Add fresh toppings after reheating

If the bowl is fully assembled already, it will still be edible the next day, but the avocado may darken and the cotija will soften.


Nutrition

  • Serving size: approximately 1/4 of the total recipe
  • Calories: 697 kcal
  • Protein: 49g
  • Fat: 27g
  • Carbohydrates: 64g
  • Per 100g: Calories: 159 kcal, Protein: 11g, Fat: 6g, Carbohydrates: 15g.

These nutritional values are approximate and can vary based on the specific ingredients and brands used.


Street Corn Chicken Rice Bowl FAQ

Can I use rotisserie chicken instead of cooking chicken breast?

Yes. It works well here. Add shredded rotisserie chicken after the vegetables and corn are cooked, and warm it through briefly.

Don’t leave it in the pan too long or it can dry out.

Can I use frozen corn for a street corn chicken rice bowl?

Yes. Frozen corn is practical and works well in this recipe.

The main thing is giving it enough contact with the pan to blister. If there’s excess surface moisture, the corn will steam before it browns.

Why didn’t my chicken brown properly?

Most of the time, the pan was not hot enough, the chicken was too crowded, or it got moved too early. I get the best browning when the pieces go into a hot skillet with a little space between them and stay untouched for the first couple of minutes.

How do I keep the bowl from getting soggy for meal prep?

Keep the avocado, cotija, cilantro, and lime separate until serving.

Store the rice and chicken-corn mixture in their own containers if you can. Assemble only after reheating, while the rice is warm but not piping hot.

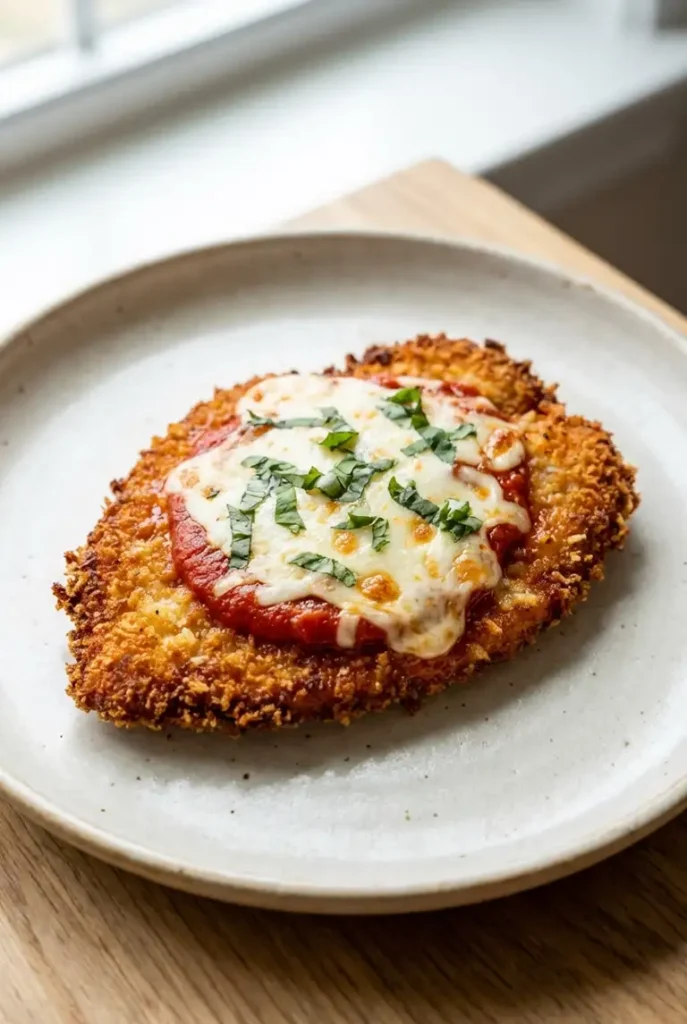
The first few times I made chicken parmesan in the air fryer, the chicken itself was never the problem. The crust was. It looked crisp when the cutlets came out, then softened fast once the sauce and cheese went on. What fixed it was keeping the cutlets thin, spraying the breading lightly with oil, and using just enough marinara to cover the center instead of the whole top.

When it comes out the way I want it, the edges stay crisp, the chicken stays tender, and the sauce and cheese add enough without weighing the cutlets down. It is a much better result than the softer versions where the crust disappears as soon as the topping goes on.

Why This Air Fryer Chicken Parmesan Works

  • Thin cutlets cook through quickly, so the breading can brown before the chicken dries out.
  • A short rest after breading helps the coating hydrate and cling better, which means less of it left behind in the basket.
  • A light oil spray helps the crust brown evenly and crisp instead of staying pale or dusty.
  • Sauce and cheese go on at the end and stay centered, so the edges keep their texture.

Ingredients You Need for Crispy Air Fryer Chicken Parmesan

  • 2 boneless, skinless chicken breasts (450g)
  • 1/2 cup all-purpose flour (60g)
  • 2 large eggs (100g)
  • 1 cup panko breadcrumbs (50g)
  • 1/2 cup finely grated Parmesan cheese (45g)
  • 1 teaspoon 👉garlic powder
  • 1 teaspoon 👉Italian seasoning
  • 1/2 teaspoon kosher salt
  • 1/4 teaspoon black pepper
  • 1 cup marinara sauce (240g)
  • 4 ounces low-moisture mozzarella, shredded (115g)
  • Oil spray
  • 2 tablespoons chopped fresh basil, optional

Best Chicken Cutlets for Even Air Fryer Cooking

I usually use chicken breasts here, but only after cutting or pounding them into thinner cutlets. Around 1/2 inch works best in my air fryer because the coating can brown before the chicken dries out. Thicker pieces tend to brown too fast on the outside.

The Best Breadcrumbs, Marinara, and Mozzarella to Use

Use panko, not fine dry breadcrumbs, if you want a crust with real texture. Finely grated Parmesan mixes into the crumbs and seasons the coating without making it dense.

I get better results with a thicker marinara here. Thin sauce runs off too quickly and softens the crust before the cheese has even finished melting. If you want a more homemade version, use my Authentic Italian Spaghetti Sauce with Fresh Tomatoes instead of store-bought marinara.

Low-moisture mozzarella works better than fresh mozzarella here. It melts well without releasing as much water.


How to Make Air Fryer Chicken Parmesan

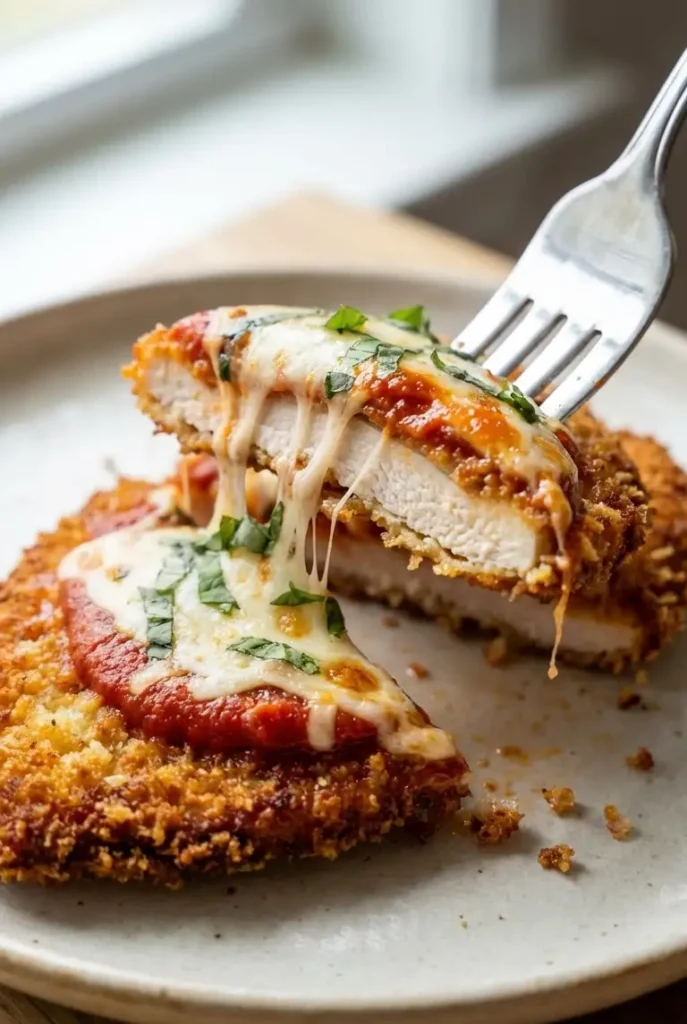
A close-up action shot of a fork cutting into chicken parmesan, creating a long, delicious cheese pull with the melted mozzarella.

Prep the Chicken Cutlets

  1. Slice each chicken breast in half horizontally to make 4 cutlets, or pound them to an even 1/2 inch thickness.
  2. Pat the chicken very dry with paper towels. I usually keep going until the surface stops feeling slick, because damp chicken is what gives me the most trouble with breading. Damp chicken gives you patchy flouring and breading that slides off later.
  3. Preheat the air fryer to 400°F for 3 to 5 minutes.

Bread the Chicken for a Crisp, Even Crust

Set up three shallow bowls:

  • Bowl 1: flour
  • Bowl 2: eggs, beaten
  • Bowl 3: panko, Parmesan, garlic powder, Italian seasoning, salt, and pepper
  1. Coat each cutlet in flour, then egg, then the breadcrumb mixture. Press the crumbs on so they adhere well. When you’re done, the surface should be fully coated with no wet egg patches showing through.
  2. Set the breaded cutlets on a plate and let them rest for 5 to 10 minutes. That short rest helps the coating hold during cooking.
  3. Lightly spray both sides with oil.

Air Fry Until Golden and Juicy

  1. Place the cutlets in the air fryer basket in a single layer. Leave space between them; they should not touch. Cook in batches if needed.
  2. Air fry at 400°F for 10 to 12 minutes, flipping halfway through. Start checking at 9 to 10 minutes if your cutlets are thin or your air fryer runs hot.
  3. When you flip them, the underside should look light golden and set, not pale or damp. The chicken is done when the coating is crisp and the thickest part reaches an internal temperature of 165°F.

Add Sauce and Cheese Without Making It Soggy

  1. Spoon 2 to 3 tablespoons of marinara over the center of each cutlet. Don’t spread it edge to edge.
  2. Top with a small handful of mozzarella. Keep the cheese mostly centered too. Too much sauce or cheese will steam the crust.
  3. Return the chicken to the air fryer at 400°F for 1 to 2 minutes, just until the cheese is melted and bubbly.
  4. Let the chicken rest for 1 to 2 minutes before serving. That gives the coating a moment to set and helps the juices stay in the meat. If using basil, scatter it over the top right before serving.

Tips for Keeping Chicken Parmesan Crispy in the Air Fryer

  • Don’t skip drying the chicken before breading.
  • Let the breaded cutlets sit briefly before cooking.
  • Spray the coating lightly with oil so it browns instead of staying dusty.
  • Don’t crowd the basket. Trapped steam softens the crust.
  • Use thicker marinara and keep it centered.
  • Add sauce and cheese only after the cutlets are nearly fully cooked.

Easy Variations

Healthy Chicken Parmesan Without Breading

Skip the flour, egg, and breadcrumbs. Season thin chicken cutlets with salt, pepper, garlic powder, and Italian seasoning, then brush lightly with olive oil. Air fry at 400°F for 8 to 10 minutes, flipping once, until the chicken reaches 165°F. Add a small spoonful of marinara and mozzarella, then cook another 1 to 2 minutes to melt the cheese.

This version won’t have the crisp crust, but it still gives you the chicken, tomato, and cheese combination with less prep.

Lemon Parmesan Air Fryer Chicken Variation

For a brighter version, add 1 teaspoon lemon zest to the breadcrumb mixture. Finish the cooked cutlets with a small squeeze of lemon after the cheese melts. Keep it light; too much lemon will overpower the sauce.


What to Serve with Air Fryer Chicken Parm

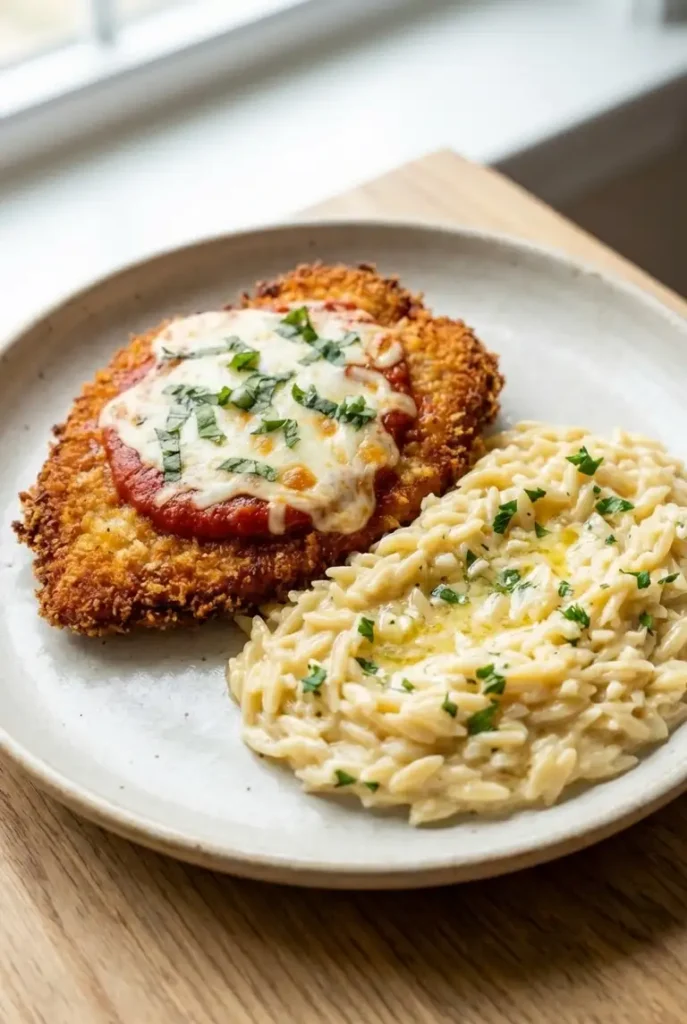
For an easy side that turns this into a full dinner, serve it with Creamy Garlic Butter One Pan Orzo.

A satisfying meal of crispy air fryer chicken parmesan plated next to a serving of creamy garlic butter orzo on a ceramic plate.

A simple green salad works too, especially if you want something crisp and cold next to the hot chicken. Garlic bread is fine, but this is already a rich plate, so I’d keep the rest of the meal simple.

If you love easy Parmesan-forward chicken dinners, you may also like this Easy Parmesan Chicken Sheet Pan Recipe.

How to Store and Reheat Air Fryer Chicken Parmesan

Store leftovers in an airtight container in the refrigerator for up to 3 days.

To reheat, air fry at 350°F for 3 to 5 minutes, or until hot. If I know I will be reheating leftovers, I try to keep a few cutlets unsauced and add fresh sauce and cheese later. That gives me the best texture. Microwaving still works, but the crust softens more.

If you know you’ll have leftovers, keep some cutlets unsauced and store the marinara separately.


Nutrition

  • Serving size: approximately 1 cutlet with sauce and cheese
  • Calories: 430 kcal
  • Protein: 40g
  • Fat: 16g
  • Carbohydrates: 28g
  • Per 100g: Calories: 190 kcal, Protein: 18g, Fat: 7g, Carbohydrates: 12g.

These nutritional values are approximate and can vary based on the specific ingredients and brands used.


Air Fryer Chicken Parmesan FAQ

Why did my breading fall off in the air fryer?

Most of the time, the chicken was still too damp or the breaded cutlets went into the air fryer too soon. I get the best hold when I dry the chicken well, press the crumbs on firmly, and let the cutlets sit for 5 to 10 minutes before cooking.

How do I keep air fryer chicken parmesan from getting soggy?

Use less sauce than you think you need. 2 to 3 tablespoons per cutlet is enough. Keep it centered, use low-moisture mozzarella, and melt the cheese briefly at the end instead of cooking the topped chicken too long.

Can I use chicken thighs or frozen chicken cutlets?

Chicken thighs can work if they’re boneless and flattened to an even thickness, but the texture will be richer and slightly softer. Frozen breaded cutlets are fine for a shortcut, though the result will taste more like a fast weeknight version than classic chicken parm. Cook them first, then add sauce and cheese at the end.

Can I bread the chicken ahead of time and air fry later?

Yes. Bread the cutlets and refrigerate them on a sheet pan or plate for up to 8 hours. That extra time actually helps the coating set. If the crumbs look dry before cooking, give both sides a light spray of oil right before they go into the air fryer.

Crispy Air Fryer Chicken Parmesan

Crispy air fryer chicken parmesan with a crunchy panko-Parmesan crust, centered marinara sauce, and melted mozzarella in about 30 minutes. Thin chicken cutlets stay tender and juicy with a crisp coating, topped with just enough sauce and cheese to prevent sogginess.
Course: Dinner
Cuisine: Italian-American
Prep: 15 min
Cook: 15 min
Total: 30 min
Servings: 4 Calories: 430 kcal Cost: —

Equipment

  • Air fryer
  • 3 shallow bowls
  • Paper towels
  • Plate
  • Cooking spray
  • Tongs

Ingredients

  • 2 boneless skinless chicken breasts (450g)
  • 1/2 cup all-purpose flour (60g)
  • 2 large eggs (100g)
  • 1 cup panko breadcrumbs (50g)
  • 1/2 cup finely grated Parmesan cheese (45g)
  • 1 teaspoon garlic powder
  • 1 teaspoon Italian seasoning
  • 1/2 teaspoon kosher salt
  • 1/4 teaspoon black pepper
  • 1 cup marinara sauce (240g)
  • 4 ounces low-moisture mozzarella, shredded (115g)
  • Oil spray
  • 2 tablespoons chopped fresh basil (optional)

Instructions

  1. Slice each chicken breast in half horizontally or pound to 1/2 inch thickness to make 4 cutlets.
  2. Pat the chicken very dry with paper towels.
  3. Preheat air fryer to 400°F for 3 to 5 minutes.
  4. Set up 3 bowls: flour; beaten eggs; panko mixed with Parmesan, garlic powder, Italian seasoning, salt, and pepper.
  5. Coat cutlets in flour, then egg, then breadcrumb mixture, pressing firmly to adhere with no wet patches.
  6. Let breaded cutlets rest on a plate for 5 to 10 minutes.
  7. Lightly spray both sides of cutlets with oil.
  8. Place cutlets in air fryer basket single layer with space; air fry at 400°F for 10 to 12 minutes, flipping halfway, checking at 9 minutes.
  9. Cutlets are done when coating is crisp and internal temp is 165°F.
  10. Spoon 2 to 3 tablespoons marinara over center of each cutlet; top with small handful mozzarella, keeping centered.
  11. Return to air fryer at 400°F for 1 to 2 minutes until cheese is melted and bubbly.
  12. Let rest 1 to 2 minutes; sprinkle with fresh basil if using and serve.

Notes

Tips: Dry chicken well before breading, let breaded cutlets rest before cooking, spray lightly with oil, avoid overcrowding in air fryer, keep sauce and cheese centered to keep crust crisp. Variations include skipping breading for a healthier version, or adding lemon zest to breadcrumbs for brightness. Store leftovers in airtight container up to 3 days; reheat at 350°F for 3 to 5 minutes.

Nutrition

Serving Size: 1 cutlet with sauce and cheese | Calories: 430 kcal | Protein: 40g | Fat: 16g | Carbohydrates: 28g

I have rushed chicken noodle soup before by letting the pot boil harder than it should and adding the noodles too early just to get dinner moving. The soup always paid for it. The chicken turned firmer, the broth lost that clear look, and the noodles soaked up more liquid than I wanted. What makes the biggest difference here is keeping the soup at a gentle simmer and waiting until the end to add the noodles.

When it is handled that way, the broth stays clearer, the chicken shreds cleanly, and the noodles stay tender without taking over the pot. The carrots soften, the celery keeps a little texture, and the whole soup feels lighter than the versions that sit too long and turn starchy.

Why This Chicken Noodle Soup Works

  • Gently simmering the chicken in the broth keeps it moist enough to shred cleanly instead of turning dry and stringy.
  • Starting with onion, carrot, and celery gives the broth a sweeter, rounder base without needing a long cook.
  • Egg noodles go in at the end, so the broth stays brothy instead of turning cloudy and starchy.
  • Parsley and a small squeeze of lemon at the end sharpen the flavor without tipping the soup into lemony territory.

Ingredients You Need for Homemade Chicken Noodle Soup

  • 2 tablespoons olive oil
  • 1 medium yellow onion, diced (150g)
  • 3 medium carrots, sliced (180g)
  • 3 celery stalks, sliced (120g)
  • 3 cloves garlic, minced
  • 1 1/2 pounds boneless skinless chicken breasts (680g)
  • 8 cups chicken broth (1920g)
  • 2 bay leaves
  • 1 teaspoon 👉dried thyme
  • 1 teaspoon kosher salt, plus more to taste
  • 1/2 teaspoon black pepper, plus more to taste
  • 8 ounces egg noodles (225g)
  • 2 tablespoons chopped fresh parsley
  • 1 to 2 teaspoons lemon juice, optional

Best Chicken for Chicken Noodle Soup: Breasts vs Thighs

I usually use chicken breasts here because they keep the broth a little cleaner and shred into lighter pieces. Chicken thighs work too and give the soup a fuller flavor, but they make it feel a little richer overall.

If you use thighs, give them a few extra minutes if needed. They are forgiving and stay tender easily.

Best Noodles for Chicken Noodle Soup

Wide or medium egg noodles are the best fit here. They cook quickly, hold their shape, and give the soup some body without taking over the pot.

Avoid adding them too early. They go from just right to over-soft fast, especially if the soup sits on the stove after cooking.


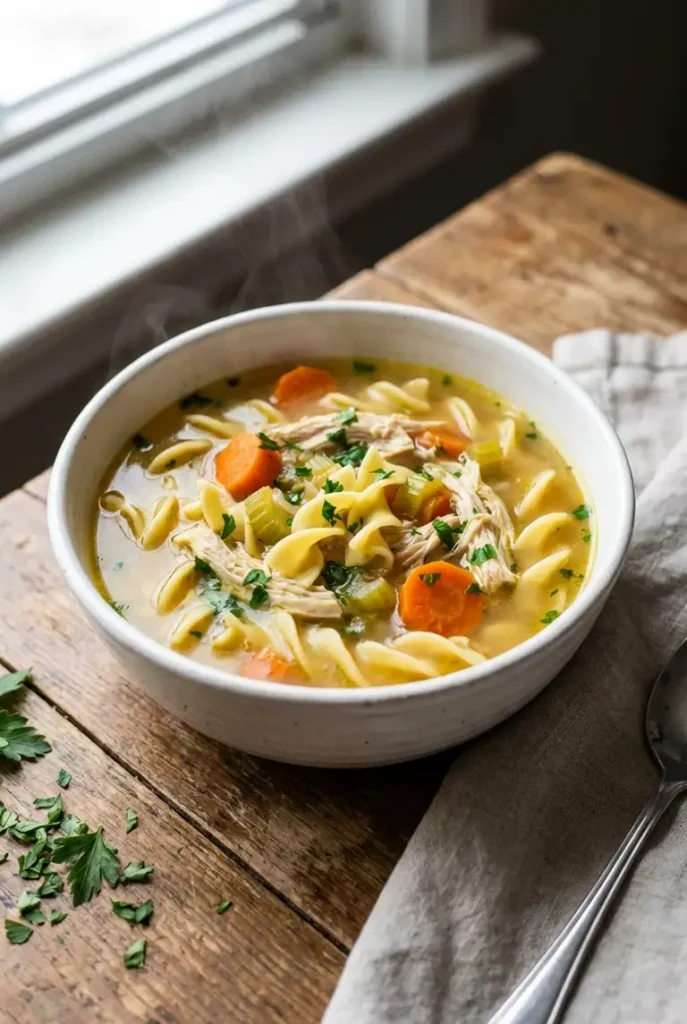
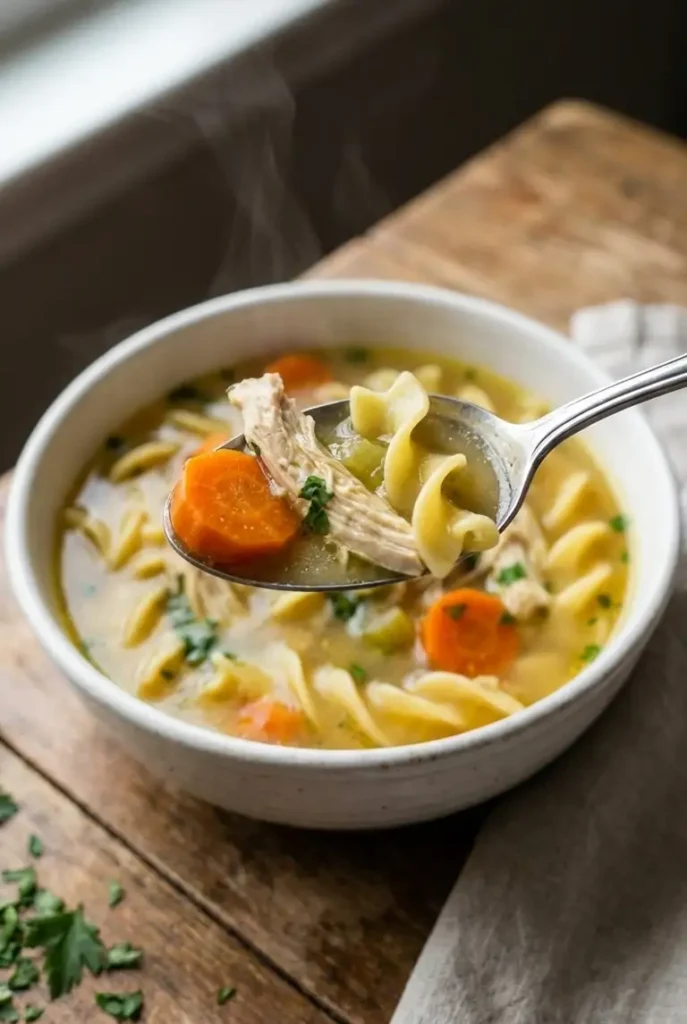
A close-up of a spoon lifting a bite of chicken noodle soup, showing tender chicken, carrots, and a noodle glistening in the clear broth.

How to Make Chicken Noodle Soup From Scratch

Build Flavor with Onion, Carrot, and Celery

  1. Heat the olive oil in a large Dutch oven or soup pot over medium heat. Add the onion, carrots, and celery. Cook for 7 to 8 minutes, stirring now and then, until the onion looks glossy and translucent and the carrots and celery are slightly softened but still holding their shape.
  2. Add the garlic and cook for about 30 seconds, just until fragrant. If the garlic starts browning, lower the heat right away.
  3. Add the chicken breasts to the pot and turn them in the vegetables for 2 to 3 minutes. You’re only looking for a pale golden edge in spots, not fully cooked chicken.

Simmer the Chicken Gently for Tender Results

  1. Pour in the chicken broth and add the bay leaves, thyme, salt, and pepper. Bring the pot up to a simmer, then lower the heat so you see small lazy bubbles, not a rolling boil. If foam collects on top, skim it off for a cleaner broth. If the surface starts moving too actively, I lower the heat right away. This soup stays better when it cooks gently.
  2. Simmer for 15 to 20 minutes, or until the chicken reaches an internal temperature of 165°F. Transfer the chicken to a plate and let it rest for a few minutes.
  3. Shred or dice the chicken into bite-size pieces, then return it to the pot. Discard the bay leaves.

When to Add Egg Noodles So They Don’t Get Mushy

  1. Bring the soup back to a gentle simmer and add the egg noodles. Cook for 6 to 8 minutes, or until they are just tender with a slight chew in the center. Turn off the heat before they become fully soft—they’ll keep cooking in the hot broth.
  2. Stir in the parsley off the heat. Add lemon juice, if using. Taste the broth again and adjust salt and pepper now, since the noodles will have absorbed some of the seasoning.

Serve hot.


Expert Tips for the Best Chicken Noodle Soup

How to Get a Richer Broth Fast

Start with a good chicken broth. If it tastes thin, let the soup simmer a few extra minutes before adding the noodles so it reduces slightly.

I usually let the broth taste a little stronger than I want before the noodles go in, because the noodles always pull some of that seasoning back out of the soup.

If you want something warm to dip into the broth, this Sourdough Discard Focaccia is an easy side for soup night.

A bowl of chicken noodle soup is served with a thick slice of golden sourdough focaccia bread on the side, ready for dipping into the broth.

The Best Way to Season Chicken Noodle Soup

Season in layers, but do the final check after the noodles cook. A broth that tastes perfectly salted before the noodles often tastes flat afterward.

Usually, a small pinch more salt and a few turns of black pepper at the end are enough to bring it back into focus.

If you like cozy chicken soups but want something richer and creamier next time, try this Creamy Chicken Gnocchi Soup.


Variations

Chicken Noodle Soup with Frozen Noodles

Use frozen noodles in place of dried egg noodles. Keep the broth at a gentle simmer, add the frozen noodles straight from the freezer, and start checking early.

Different brands cook at different rates, but most need a few extra minutes. Stop when they’re tender but still holding their shape.

Chicken Noodle Soup with Green Peas

Add 3/4 cup frozen peas (110g) during the last 2 to 3 minutes of cooking. They stay bright, add a little sweetness, and fit naturally with the carrots and chicken.


How to Store, Freeze, and Reheat Chicken Noodle Soup

Refrigerate leftovers in an airtight container for up to 4 days.

If I know I will have leftovers, I usually cook the noodles separately and add them to each bowl. That keeps the soup from turning heavier in the fridge by the next day.

To freeze, freeze the soup without noodles if possible. Broth, chicken, and vegetables freeze well; cooked noodles usually come back too soft. Freeze for up to 3 months.

To reheat, warm the soup gently on the stove over medium-low heat. If it has thickened in the fridge, add a splash of broth or water to loosen it.


Nutrition

  • Serving size: approximately 1/6 of the total recipe
  • Calories: 317 kcal
  • Protein: 31g
  • Fat: 9g
  • Carbohydrates: 26g
  • Per 100g: Calories: 68 kcal, Protein: 6.7g, Fat: 1.9g, Carbohydrates: 5.6g.

These nutritional values are approximate and can vary based on the specific ingredients and brands used.


FAQ About Chicken Noodle Soup From Scratch

Why does my chicken noodle soup still taste bland?

Most of the time, it just needs more salt at the end. I run into that more often after the noodles go in, because the broth can taste right earlier and then fall flat once the soup is finished.

Taste it again after the noodles are cooked. Add a little more salt first, then a small squeeze of lemon only if it still needs help.

How do I keep the noodles from getting mushy in leftovers?

Store the noodles separately if you can. If they sit in the broth overnight, they’ll keep absorbing liquid and soften further.

If they’re already mixed in, reheat the soup gently and expect to add more broth.

Can I use frozen noodles instead of dried egg noodles?

Yes. Add them directly from frozen to a gentle simmer and check often.

They usually need a bit longer than dried noodles, but brand differences matter, so go by texture more than the clock.

Can I make chicken noodle soup with chicken thighs instead of breasts?

Yes. Boneless skinless thighs work well and give the soup a slightly fuller flavor.

Cook them the same way, but allow a little extra time if needed to reach 165°F.

Easy Chicken Noodle Soup From Scratch

Easy chicken noodle soup with a clear, rich broth, tender chicken, and noodles added at the end so they stay just right. Perfectly simmered for tender chicken and bright vegetables.
Course: Dinner
Cuisine: American
Prep: 15 min
Cook: 45 min
Total: 60 min
Servings: 6 Calories: 317 kcal Cost: —

Equipment

  • Large Dutch oven or soup pot
  • Cutting board
  • Chef’s knife
  • Measuring cups and spoons
  • Tongs
  • Ladle

Ingredients

  • 2 tablespoons olive oil
  • 1 medium yellow onion, diced (150g)
  • 3 medium carrots, sliced (180g)
  • 3 celery stalks, sliced (120g)
  • 3 cloves garlic, minced
  • 1 1/2 pounds boneless skinless chicken breasts (680g)
  • 8 cups chicken broth (1920g)
  • 2 bay leaves
  • 1 teaspoon dried thyme
  • 1 teaspoon kosher salt, plus more to taste
  • 1/2 teaspoon black pepper, plus more to taste
  • 8 ounces egg noodles (225g)
  • 2 tablespoons chopped fresh parsley
  • 1 to 2 teaspoons lemon juice, optional

Instructions

  1. Heat olive oil in a large pot over medium heat. Add onion, carrots, and celery; cook 7 to 8 minutes until onion is glossy and vegetables slightly softened.
  2. Add garlic and cook about 30 seconds until fragrant; lower heat if garlic browns.
  3. Add chicken breasts and turn in vegetables for 2 to 3 minutes until edges are pale golden, not fully cooked.
  4. Pour in chicken broth; add bay leaves, thyme, salt, and pepper. Bring to simmer, then lower heat to maintain gentle simmer with small bubbles; skim foam if needed.
  5. Simmer 15 to 20 minutes until chicken reaches 165°F internally. Remove chicken and let rest.
  6. Shred or dice chicken into bite-size pieces; discard bay leaves and return chicken to pot.
  7. Bring soup back to gentle simmer and add egg noodles. Cook 6 to 8 minutes until just tender with slight chew. Turn off heat before noodles fully soften.
  8. Stir in parsley off heat; add lemon juice if using. Taste broth and adjust salt and pepper as needed.
  9. Serve hot.

Notes

For a richer broth, simmer a bit longer before adding noodles. Season in layers and do the final salt and pepper adjustment after noodles cook. Use chicken thighs for richer flavor but allow longer cooking time. Store noodles separately to avoid mushy leftovers. Freeze soup without noodles for best results.

Nutrition

Serving Size: 1/6 of recipe | Calories: 317 kcal | Protein: 31g | Fat: 9g | Carbohydrates: 26g

The first time I made this kind of breakfast casserole, I treated the hash browns like they would sort themselves out in the oven. They did not. The bottom stayed wet, the eggs baked up looser than I wanted, and the bacon softened into the casserole instead of standing out. What works better is drying the hash browns well and cooking the bacon fully crisp before it goes in.

When it comes out right, the casserole slices cleanly, the center stays soft, and the hash browns give it enough structure that it does not feel like plain baked eggs. You also avoid the usual problems here: greasy edges, bland eggs, and a wet middle.

A Few Details That Keep This From Turning Watery

  • Drying the hash browns well keeps the potato layer from releasing water into the eggs as it bakes.
  • Using fully crisp bacon gives you better texture after the second bake.
  • Sharp cheddar holds its flavor against the eggs and potatoes better than mild cheddar.
  • The egg-to-milk ratio keeps the center soft and custardy without turning loose.

If you’re feeding a holiday crowd and want a second hearty brunch option, this Biscuits and Gravy Breakfast Casserole is another make-ahead favorite.

Ingredients for Crack Breakfast Casserole with Hash Browns

  • 1 bag frozen shredded hash browns (600g), thawed
  • 12 slices bacon (340g)
  • 10 large eggs (500g without shells)
  • 2 cups whole milk (480g)
  • 2 cups sharp cheddar cheese (225g), shredded
  • 4 green onions (60g), thinly sliced
  • 1 package ranch seasoning mix (30g)
  • 2 tablespoons melted butter
  • 1/2 teaspoon black pepper
  • nonstick cooking spray

How to Make Crack Breakfast Casserole

Close-up of a fork cutting into a slice of breakfast casserole, revealing the creamy egg and melted cheese interior as steam gently rises.

Step 1: Dry the Hash Browns and Crisp the Bacon

  1. Heat the oven to 375°F. Grease a 9×13-inch baking dish.
  2. Cook the bacon in a skillet or on a sheet pan until fully crisp. Don’t stop at chewy bacon here; it will soften again in the casserole. Drain on paper towels, then chop.
  3. Pat the thawed hash browns with clean towels until they no longer leave visible moisture behind. This matters more than people think.
  4. Toss the hash browns with melted butter and spread them evenly in the baking dish, reaching all the way into the corners. Keep the layer loose and even rather than pressing it into dense mounds.

Step 2: Whisk the Egg Mixture Until Smooth

  1. In a large bowl, whisk together the eggs, milk, ranch seasoning, and black pepper until no clear streaks of egg white remain.
  2. Stir in about half of the cheddar, half of the bacon, and half of the green onions.

Step 3: Layer the Hash Browns, Bacon, Cheese, and Green Onions

  1. Pour the egg mixture evenly over the hash browns. Tap the baking dish lightly on the counter once or twice so the liquid settles into the potato layer.
  2. Scatter the remaining bacon, cheddar, and green onions over the top. The cheese on top gives you browned patches; the cheese mixed into the eggs keeps the interior richer and more evenly flavored.

Step 4: Bake Until Just Set in the Center

  1. Bake for 40 to 50 minutes. Start checking around 40 minutes, especially if you’re using a metal pan.
  2. The casserole is done when the edges are set and lightly puffed, the top has golden spots, and the center has only the slightest wobble. It should not show any liquid movement. If you check with a thermometer, the center should read 160°F.
  3. Let it rest for 10 minutes before slicing. That short rest helps the eggs finish setting so you get cleaner squares instead of loose scoops.

If you love the bacon-and-cheese flavor here but need something faster for weekdays, try this Quick and Cheesy Breakfast Quesadilla.

Tips for a Casserole That’s Creamy, Not Soggy

  • Thaw frozen hash browns completely before using them. Cold centers and surface frost add extra water.
  • Dry the hash browns aggressively. If the towel is still getting wet, keep going.
  • Use freshly shredded cheddar if possible. Pre-shredded cheese works, but fresh melts more smoothly.
  • Don’t undercook the bacon. Soft bacon sheds fat and loses texture during baking.
  • Pull the casserole when the center is just set. Overbaked eggs turn firm and slightly rubbery.

Make-Ahead and Overnight Instructions

You can assemble this overnight breakfast casserole the night before.

Build the casserole as directed, cover, and refrigerate for up to 12 hours. When baking straight from the fridge, expect the casserole to need 50 to 60 minutes depending on how cold it is and what kind of dish you’re using.

If the top starts browning too quickly before the center is set, lay a piece of foil over it loosely for the last part of baking.

For a sweet brunch side that pairs well with this savory casserole, these Protein Blueberry Muffins round out the menu nicely.

How to Store, Freeze, and Reheat

  • Refrigerate leftovers in a covered container for up to 4 days.
  • To reheat a slice, microwave it in short bursts until hot. For better texture, reheat in a 325°F oven, covered loosely with foil, until warmed through.
  • To freeze, cool the casserole completely, cut into portions, and wrap well. Freeze for up to 2 months. Thaw in the refrigerator before reheating for the most even texture.

Crack Breakfast Casserole Variations

Sausage Breakfast Casserole Variation

Replace the bacon with 1 pound breakfast sausage (450g). Brown it fully, break it into small pieces, and drain off the fat before adding it to the casserole.

This version is a little richer and more savory than the bacon version. If your sausage is heavily seasoned or salty, reduce the ranch mix slightly so the casserole doesn’t taste over-seasoned.

Cream Cheese Breakfast Casserole Variation

  • Add 8 ounces cream cheese (225g), cut into small cubes.
  • Scatter the cubes across the casserole with the cheese and bacon so they soften into the eggs as it bakes. This gives the center a thicker, richer texture with soft cream cheese pockets throughout. If you use cream cheese, keep the cheddar at 1 1/2 cups (170g) so the casserole doesn’t get too heavy.

Crack Breakfast Casserole with Hash Browns

Creamy breakfast casserole with crispy bacon, sharp cheddar, and thawed hash browns that bakes up with a soft, custardy center and golden top. Perfect for make-ahead brunches with tips for best texture and storage.
Course: Breakfast
Cuisine: American
Prep: 20 min
Cook: 50 min
Total: 750 min
Servings: 8 Calories: 432 kcal Cost: —

Equipment

  • 9×13-inch baking dish
  • Oven
  • Skillet or sheet pan
  • Mixing bowl
  • Whisk
  • Paper towels
  • Measuring cups and spoons
  • Knife

Ingredients

  • 1 bag frozen shredded hash browns (600g), thawed
  • 12 slices bacon (340g)
  • 10 large eggs (500g without shells)
  • 2 cups whole milk (480g)
  • 2 cups sharp cheddar cheese (225g), shredded
  • 4 green onions (60g), thinly sliced
  • 1 package ranch seasoning mix (30g)
  • 2 tablespoons melted butter
  • 1/2 teaspoon black pepper
  • Nonstick cooking spray

Instructions

  1. Preheat oven to 375°F and grease a 9×13-inch baking dish.
  2. Cook bacon in skillet or on sheet pan until fully crisp. Drain on paper towels and chop.
  3. Pat thawed hash browns with clean towels until no visible moisture remains.
  4. Toss hash browns with melted butter and spread evenly in baking dish, keeping layer loose and even.
  5. Whisk eggs, whole milk, ranch seasoning, and black pepper in a large bowl until no clear egg white streaks remain.
  6. Stir in half of shredded cheddar, half of chopped bacon, and half of sliced green onions into egg mixture.
  7. Pour egg mixture evenly over hash browns. Tap dish lightly to settle liquid.
  8. Scatter remaining bacon, cheddar, and green onions on top.
  9. Bake for 40 to 50 minutes until edges are set and puffed, top has golden spots, and center has slight wobble (160°F internal temperature).
  10. Remove from oven and rest 10 minutes before slicing to allow eggs to finish setting.

Notes

Dry frozen hash browns thoroughly before using to prevent water in eggs. Use fully crisp bacon for better texture after baking. Pull casserole from oven when center is just set to avoid rubbery eggs. Assemble casserole up to 12 hours ahead and refrigerate. When baking from fridge, expect 50-60 minutes. Store leftovers refrigerated up to 4 days or freeze up to 2 months.

Nutrition

Serving Size: 1/8 casserole | Calories: 432 kcal | Protein: 22g | Fat: 29g | Carbohydrates: 19g | Per100g Calories: 200 kcal | Per100g Protein: 10g | Per100g Fat: 14g | Per100g Carbohydrates: 9g

Yule logs are one of those desserts that look harder than they really are, right up until the sponge cracks on you. I learned that pretty quickly the first time I made one. I waited too long to roll it, the surface had already started to dry, and the whole thing fought me from the start.

What works better is rolling the cake while it is still warm, when the sponge is still flexible and easier to shape. I also handle the ganache in two stages now: softer for the filling, then a little thicker on the outside so it spreads more cleanly and holds the bark lines better.

When it comes together the way it should, the cake slices with a clear spiral, the ganache stays soft instead of heavy, and the whole thing feels rich without crossing into overly sweet.

Why This Chocolate Yule Log with Ganache Works

  • The sponge uses whipped eggs for lift, so it stays light and flexible instead of baking up dense like a sheet cake.
  • Rolling the cake warm gives it memory. When you unroll it later, it wants to curve instead of split.
  • The ganache is cooled to two different textures: soft enough to spread inside in a thin layer, firm enough outside to hold ridges.
  • A short chill firms the log just enough for neat slices, but it still cuts cleanly if you let it sit briefly before serving.

Ingredients You Need for the Sponge and Chocolate Ganache

For the chocolate sponge

  • 4 large eggs (200g without shells), separated
  • 1/2 cup granulated sugar (100g), divided
  • 1 teaspoon vanilla extract
  • 1/4 teaspoon kosher salt
  • 1/4 cup all-purpose flour (30g)
  • 1/4 cup unsweetened cocoa powder (25g)
  • 1/2 teaspoon baking powder
  • 2 tablespoons milk (30g)
  • Powdered sugar, for dusting the towel and cake

For the chocolate ganache

  • 8 ounces semisweet chocolate (225g), finely chopped
  • 1 cup heavy cream (240g)
  • 2 tablespoons unsalted butter (30g)
  • 1 teaspoon vanilla extract
  • Pinch of kosher salt

Best Chocolate to Use for Smooth, Glossy Ganache

Use semisweet chocolate in the 55% to 65% range. It gives you a ganache that sets smooth and sliceable without turning stiff or bitter.

Chocolate chips work in a pinch, but chopped bar chocolate melts more evenly and gives you a cleaner texture.

The Pan Size That Gives You the Right Cake Thickness

Use a 10-by-15-inch jelly roll pan. A larger pan makes the sponge too thin and dry at the edges. A smaller pan makes it too thick to roll neatly.

For an easy cookie to serve alongside small slices of this cake, these Classic Pecan Snowball Christmas Cookies fit the holiday theme perfectly.


How to Make a Chocolate Yule Log Without Cracking

A close-up of a knife cleanly slicing a piece of chocolate yule log, showing the perfect swirl of delicate sponge cake and smooth ganache filling.

How to Whip the Eggs for a Light, Flexible Sponge

  1. Preheat the oven to 350°F. Line a 10-by-15-inch jelly roll pan with parchment paper and lightly grease the parchment.
  2. In a medium bowl, whisk together the flour, cocoa powder, and baking powder. Set aside.
  3. In a large bowl, beat the egg yolks with 1/4 cup of the sugar until the mixture turns lighter in color and falls in thick ribbons when the beaters are lifted. Beat in the vanilla, milk, and salt.
  4. In a separate clean bowl, beat the egg whites until foamy. Gradually add the remaining 1/4 cup sugar and beat until stiff, glossy peaks form. The peaks should stand upright with only a slight curl at the tip. Stop there; if the whites start looking clumpy or dry, they’ve gone too far.
  5. Fold the dry ingredients into the yolk mixture. Then fold in the whipped whites in 3 additions. Use a wide spatula and keep the motion gentle. The batter should stay airy and voluminous. If it turns thin and runny, too much air has been knocked out.
  6. Spread the batter into the prepared pan, nudging it gently into the corners so the layer is even. Uneven thickness is one of the main reasons one end overbakes and cracks.
  7. Bake for 10 to 12 minutes, until the cake springs back lightly when touched, the edges are just beginning to pull from the parchment, and the center no longer looks wet or shiny.

How to Roll the Cake While Warm

  1. While the cake bakes, lay out a clean kitchen towel and dust it generously with powdered sugar.
  2. As soon as the cake comes out of the oven, run a knife around the edges and turn it onto the prepared towel. Peel off the parchment carefully.
  3. Roll the cake up with the towel, starting from a short end, within 1 to 2 minutes of leaving the oven while it is still hot and flexible. Set it seam-side down and let it cool completely.

How to Fill, Frost, and Decorate a Bûche de Noël

  1. Place the chopped chocolate in a heatproof bowl.
  2. Heat the cream in a small saucepan until it is steaming with tiny bubbles around the edge. Do not let it boil.
  3. Pour the hot cream over the chocolate. Let it sit for 2 minutes, then stir until smooth. Stir in the butter, vanilla, and salt. Let the ganache cool until it is spreadable like soft frosting, not pourable.
  4. Unroll the cooled cake gently. If you chilled it or made it earlier, let it sit at room temperature first so it doesn’t snap when unrolled.
  5. Spread about one-third of the ganache over the inside in a thin, even layer, leaving a small border around the edges. The filling should sit in place, not slide.
  6. Roll the cake back up without the towel. Place it seam-side down on a serving platter.
  7. Если вы хотите получить классический вид веточки, отрежьте небольшой кусочек с одного конца под углом и прикрепите его сбоку с помощью небольшого количества ганаша.
  8. Let the remaining ganache cool a bit more until it is slightly thicker than the filling. Spread it over the outside of the cake. You only need enough to cover it cleanly.
  9. Drag a fork lightly through the ganache to make bark-like ridges. If the ganache is too loose, the fork marks fade back into the surface. If it gets too cold, I usually let it sit a few minutes before trying again so it does not drag crumbs..
  10. Chill the cake for 20 to 30 minutes, just until set.
  11. Before serving, dust lightly with powdered sugar if you like. Slice with a warm knife, wiping the blade between cuts for clean spirals.

Expert Tips for a Silky Chocolate Ganache Frosting

  • If the ganache looks oily or separated, it usually got too hot or was stirred too aggressively. Let it sit for a minute, then stir slowly from the center outward.
  • For filling, the ganache should spread easily with an offset spatula and leave soft lines behind.
  • For frosting, it should be thick enough that fork marks stay visible.
  • If it firms up too much, warm it very briefly over a bowl of warm water and stir until smooth again.

If you love rich chocolate desserts, these 15-Minute Prep Chocolate Mousse Brownies are a good simpler option when you want the same flavor payoff without the rolling step.


Make-Ahead, Storage, and Serving Tips

  • You can make the full yule log 1 day ahead. Keep it covered in the refrigerator.
  • For the neatest slices, let it sit at room temperature for 15 to 20 minutes before serving. Straight from the fridge, the ganache is firmer and the sponge is less pliable.
  • Store leftovers covered in the refrigerator for up to 3 days.
  • The unfilled sponge can be baked, rolled in the towel, and held overnight before filling.

Chocolate Yule Log Variations

White Chocolate Yule Log Variation

A festive white chocolate yule log variation, covered in creamy white ganache with bark-like texture and garnished with bright orange zest on a slate platter.

Keep the same sponge, but swap the semisweet ganache for white chocolate ganache. Use 8 ounces white chocolate (225g) and reduce the cream to 2/3 cup (160g), since white chocolate is softer. Cool it well before using.

This version is sweeter, so a little orange zest in the filling helps keep it balanced.

Orange or Espresso Flavor Add-Ins

  • Add 1 teaspoon finely grated orange zest to the ganache for a sharper finish that cuts through the richness.
  • Dissolve 1 teaspoon espresso powder into the hot cream before pouring it over the chocolate. It won’t make the cake taste like coffee; it just deepens the cocoa flavor.

Nutrition

  • Serving size: approximately 1/10 of the total recipe
  • Calories: 244 kcal
  • Protein: 4g
  • Fat: 16g
  • Carbohydrates: 23g
  • Per 100g: Calories: 325 kcal, Protein: 6g, Fat: 21g, Carbohydrates: 31g.

These nutritional values are approximate and can vary based on the specific ingredients and brands used.

Chocolate Yule Log FAQ

Why did my chocolate yule log crack even though I rolled it warm?

Usually the sponge baked a little too long, the batter lost too much air, or the cake sat too long before you rolled it.

Even a couple extra minutes in the oven can dry the thin edges enough to split.

Can I use ganache for both the filling and the frosting?

Yes. That’s exactly what this recipe does. The difference is temperature and texture. Use it while softer for the filling, then let it cool longer for the outside.

Can I make this Bûche de Noël a day ahead?

Yes, and it actually slices better after a short rest in the fridge. Just don’t serve it ice-cold. Let it stand at room temperature for 15 to 20 minutes first.

What’s the best way to keep the sponge from turning dry or rubbery?

Bake only until the center springs back and the surface loses its wet sheen. Overbaking dries it out; overmixing the batter makes it rubbery.

Traditional Chocolate Yule Log (Bûche de Noël) with Silky Ganache

A flexible chocolate sponge rolled warm and filled with silky ganache for a rich, holiday-worthy dessert. Clear rolling tips and make-ahead notes ensure clean slices every time.
Course: Dessert
Cuisine: French
Prep: 30 min
Cook: 12 min
Total: 62 min
Servings: 10 Calories: 244 kcal Cost: —

Equipment

  • 10-by-15-inch jelly roll pan
  • Parchment paper
  • Mixing bowls
  • Electric mixer
  • Spatula
  • Kitchen towel
  • Heatproof bowl
  • Small saucepan
  • Knife
  • Serving platter

Ingredients

  • 4 large eggs (200g without shells), separated
  • 1/2 cup granulated sugar (100g), divided
  • 1 teaspoon vanilla extract
  • 1/4 teaspoon kosher salt
  • 1/4 cup all-purpose flour (30g)
  • 1/4 cup unsweetened cocoa powder (25g)
  • 1/2 teaspoon baking powder
  • 2 tablespoons milk (30g)
  • Powdered sugar, for dusting
  • 8 ounces semisweet chocolate (225g), finely chopped
  • 1 cup heavy cream (240g)
  • 2 tablespoons unsalted butter (30g)
  • 1 teaspoon vanilla extract
  • Pinch of kosher salt

Instructions

  1. Preheat oven to 350°F. Line jelly roll pan with parchment and grease lightly.
  2. Whisk together flour, cocoa powder, and baking powder; set aside.
  3. Beat egg yolks with 1/4 cup sugar until thick ribbons form; add vanilla, milk, salt.
  4. Beat egg whites until foamy; gradually add remaining sugar and beat to stiff, glossy peaks.
  5. Fold dry ingredients into yolk mixture gently. Fold in whites in three additions, keeping batter airy.
  6. Spread batter evenly in pan; bake 10-12 minutes until springy and edges pull from parchment.
  7. Lay out towel dusted with powdered sugar. Turn warm cake onto towel, peel parchment, roll cake with towel from short end, cool completely.
  8. Heat cream until steaming, pour over chopped chocolate, let sit 2 minutes then stir smooth.
  9. Add butter, vanilla, salt to ganache; cool until spreadable for filling.
  10. Unroll cooled cake; spread about one-third ganache evenly inside, leave border; roll cake without towel, seam down.
  11. Trim branch from one end, attach with ganache if desired.
  12. Cool ganache should be thicker for frosting; spread outside of log, drag fork to create bark ridges.
  13. Chill cake 20-30 minutes until set.
  14. Dust with powdered sugar before serving; slice with warm knife, wiping blade between cuts.

Notes

Ganache should be soft but not pourable for filling, thicker for outside. Roll cake while warm for flexibility. Store covered in fridge up to 3 days. Let rest before slicing for best results.

Nutrition

Serving Size: 1 slice | Calories: 244 kcal | Protein: 4g | Fat: 16g | Carbohydrates: 23g