Author

Julia

Browsing

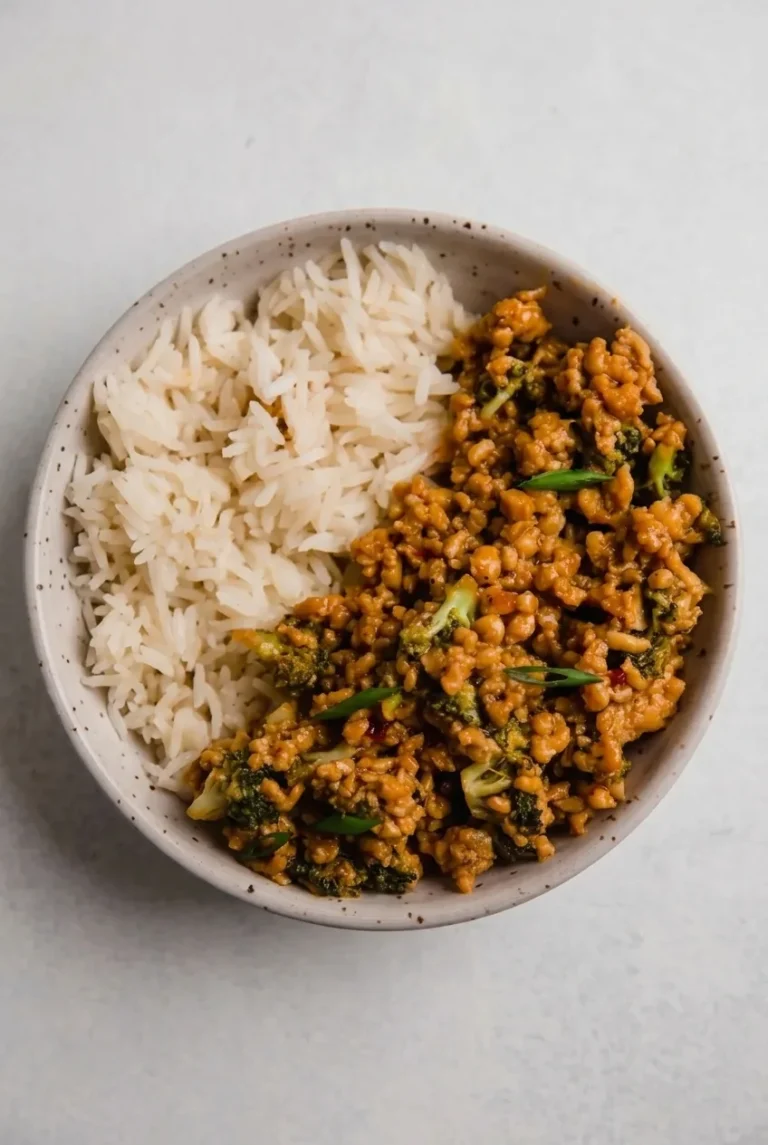
Bang Bang Ground Turkey Rice Bowls

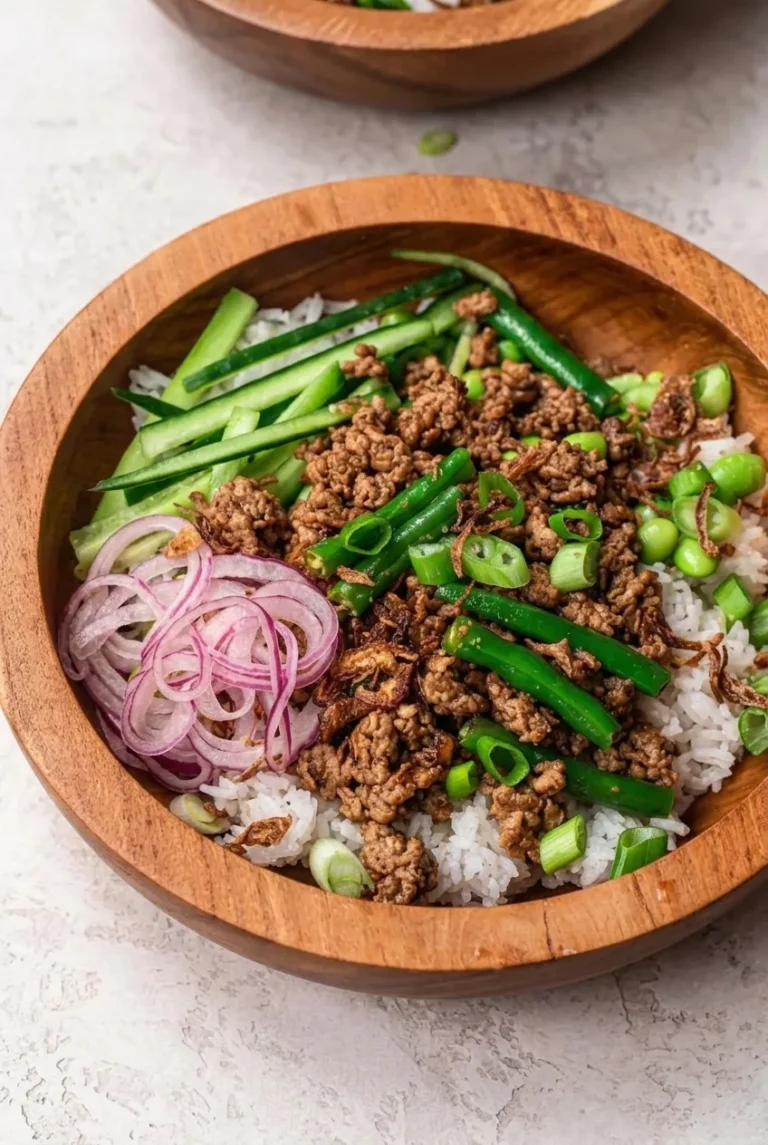
Fluffy jasmine rice forms the base for browned garlic-ginger turkey, bright green beans, and edamame. Cool cucumber matchsticks and thin red onion rings add crunch, while crispy fried shallots finish each bowl. The sweet-spicy bang bang sauce is served on the side or spooned alongside the turkey, so the rice, browned crumbles, and fresh toppings stay distinct.

Servings: 4 bowls | Prep: 15 minutes | Cook: 20 minutes | Total: 35 minutes

Ingredients for Bang Bang Ground Turkey Rice Bowls
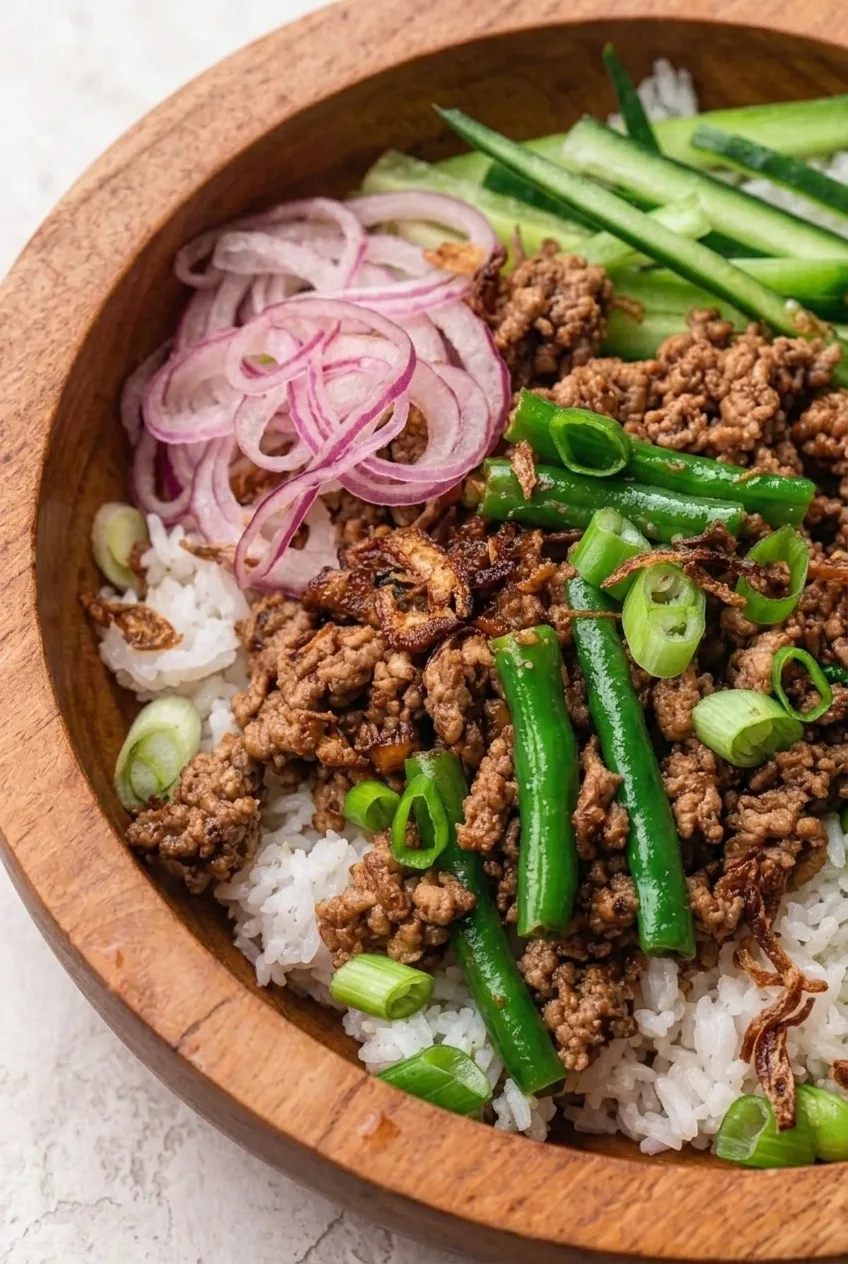
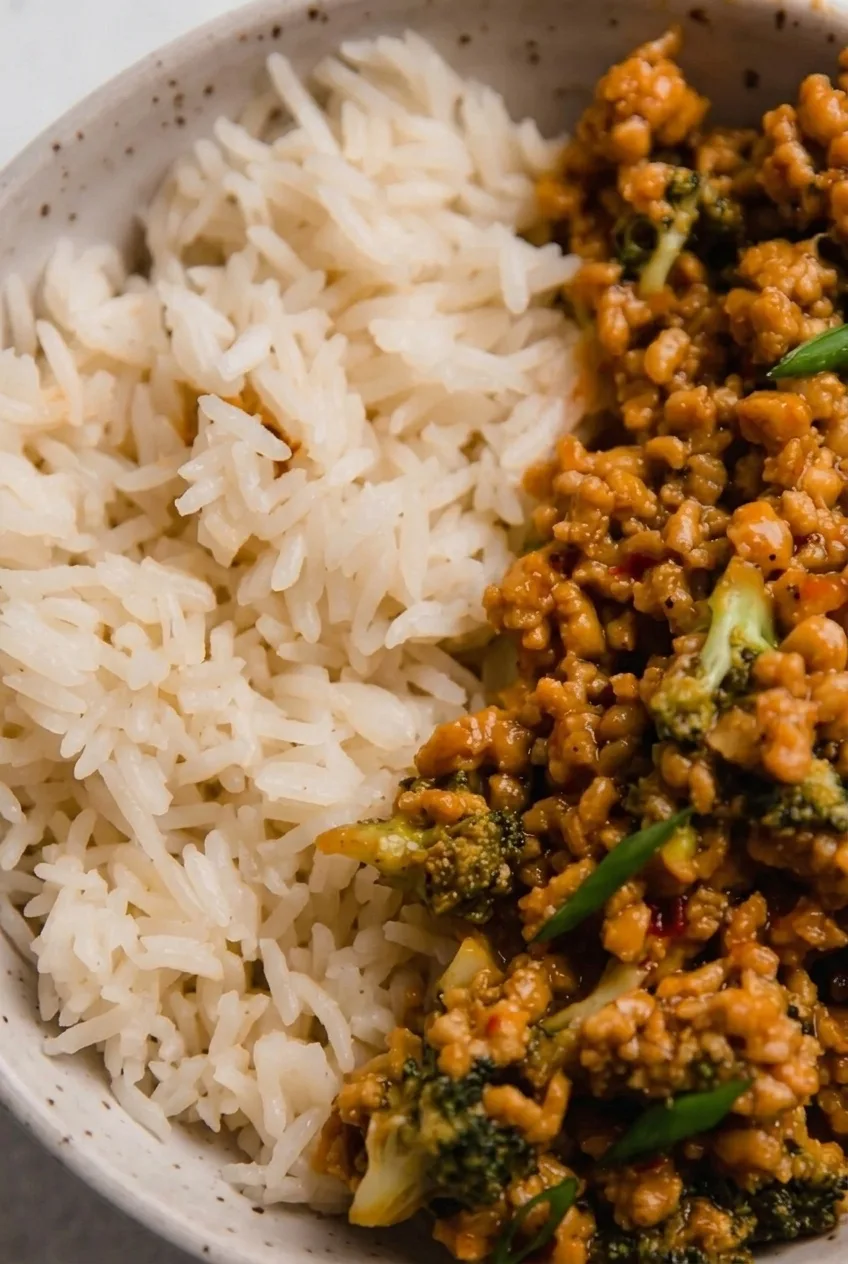
Close view of browned turkey crumbles, rice grains, green beans, edamame, and crispy shallots

Rice and turkey bowls

  • 1 1/2 cups uncooked jasmine rice (about 280g)
  • 2 cups water, or the amount directed on the rice package
  • 1 tablespoon neutral cooking oil
  • 1 lb 93% lean ground turkey (about 450g)
  • 3 garlic cloves, minced
  • 1 tablespoon grated fresh ginger
  • 2 tablespoons low-sodium soy sauce
  • 6 oz green beans, trimmed (about 170g)
  • 1 cup shelled edamame, thawed (about 155g)
  • 1 medium cucumber, cut into matchsticks
  • 1/2 small red onion, very thinly sliced into rings
  • 3 green onions, thinly sliced
  • 1/4 cup crispy fried shallots

Bang bang sauce

  • 1/3 cup mayonnaise (about 75g)
  • 3 tablespoons sweet chili sauce
  • 1 to 2 teaspoons sriracha, to taste
  • 2 teaspoons lime juice
  • 1 teaspoon honey, or to taste
  • 1 to 2 teaspoons water, only if needed to thin the sauce

How to Make Bang Bang Ground Turkey Rice Bowls
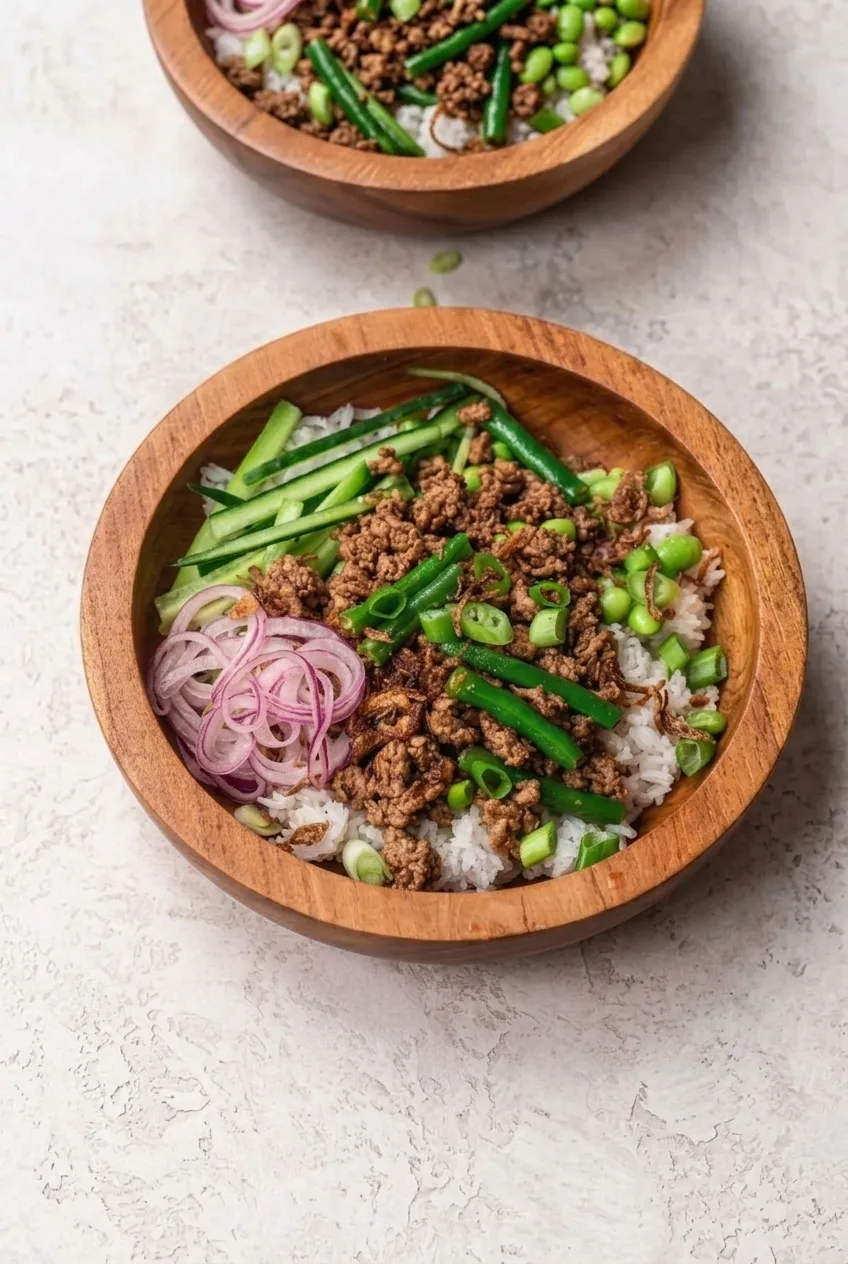
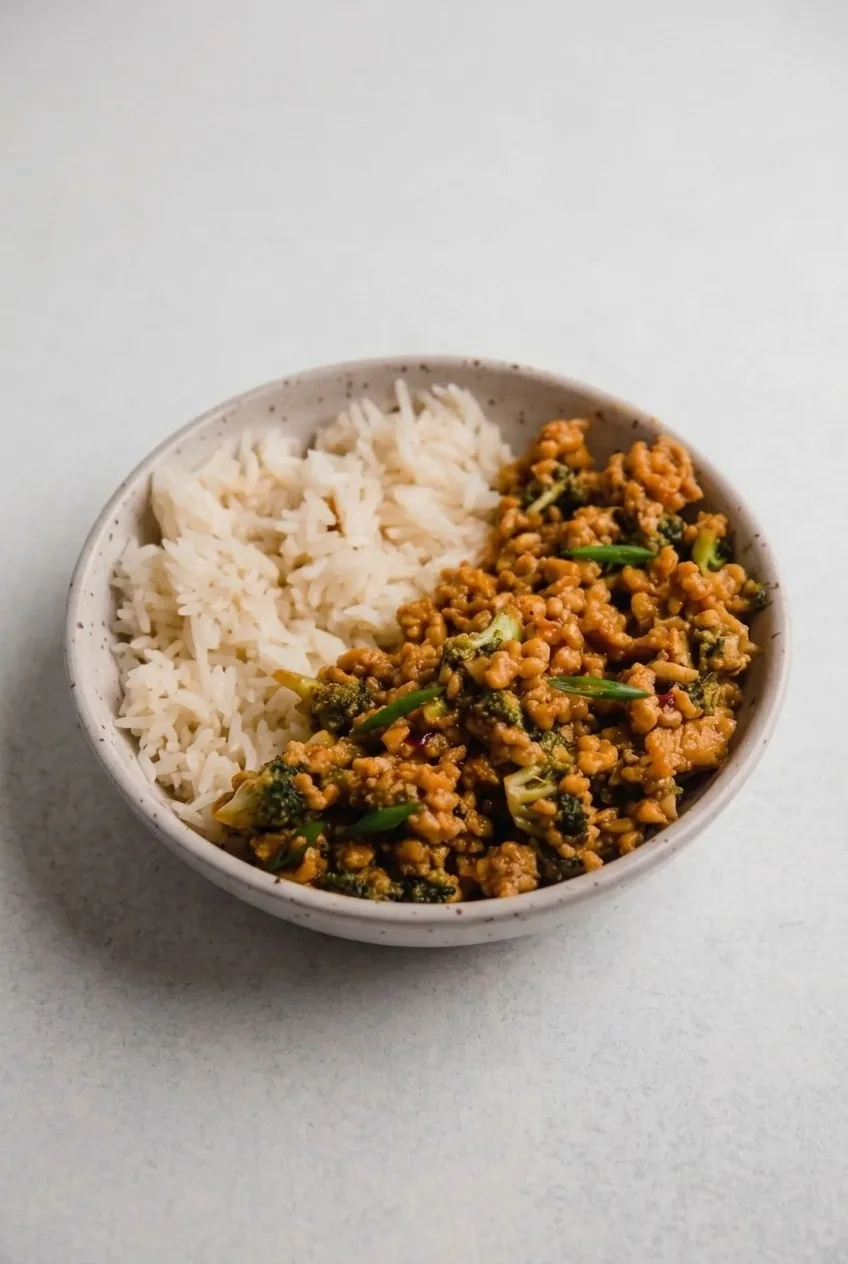
Complete ground turkey rice bowl on a pale stone table, with crisp vegetables and red onion
  1. Cook the rice: Rinse the rice and combine it with the water in a lidded saucepan. Bring to a boil, cover, and reduce the heat to low. Cook for about 15 minutes, until the water is absorbed and the rice is tender. Let stand covered for 5 minutes, then fluff. Use the package directions if they call for a different amount of water.
  2. Mix the sauce: Whisk the mayonnaise, sweet chili sauce, 1 teaspoon sriracha, lime juice, and honey until smooth. Taste before adding more sriracha or honey. If the sauce is too thick to spoon, whisk in 1 to 2 teaspoons water.
  3. Prepare the fresh toppings: Cut the cucumber into matchsticks and thinly slice the red onion and green onions. Keep them separate from the warm ingredients.
  4. Brown the turkey: Heat the oil in a 12-inch skillet over medium-high heat. Add the turkey and break it into small crumbles. Cook uncovered for about 6 to 8 minutes, leaving it undisturbed briefly between stirs so it browns rather than steams. Start checking around 6 minutes; the turkey should have browned spots, no visible pink, and reach 165°F (75°C) on a food thermometer.
  5. Season and cook the greens: Reduce the heat to medium. Stir in the garlic and ginger briefly, until fragrant, then add the soy sauce and green beans. Cook for about 3 to 4 minutes, checking after 3 minutes for bright green, crisp-tender beans. Add the edamame for the final minute to heat through.
  6. Assemble the bowls: Divide the rice among four bowls. Spoon the turkey, green beans, and edamame over part of each rice bed, leaving some rice visible. Add separate clusters of cucumber and red onion. Scatter the green onions and crispy fried shallots over the top just before serving. Offer the sauce on the side or spoon a little alongside the turkey.

Adjusting the Bang Bang Sauce

Sweet chili sauces vary in sweetness and heat. Start with 1 teaspoon sriracha, taste the mixed sauce, and adjust the sriracha or honey gradually. Keeping the sauce separate lets each person add it without covering the browned turkey or softening the crisp toppings.

Simple Variations

For a tangier sauce, replace the mayonnaise with plain Greek yogurt and serve it cold, separate from the turkey. For a richer base, use coconut jasmine rice prepared with an appropriate rice recipe or package-compatible liquid ratio instead of the plain rice.

For another dinner with crisp vegetables, try soy garlic ramen noodles. Ground beef ramen stir fry is another skillet meal built around browned ground meat.

Meal Prep and Storage

Refrigerate the cooked rice and turkey promptly in airtight containers and use within 3 days. Let hot components cool before sealing the containers. The sauce can be made ahead and refrigerated separately; pack the cucumber, red onion, and crispy shallots separately as well.

Reheat the rice and turkey until thoroughly hot. Add the cool toppings, green onions, sauce, and shallots after reheating so they keep their texture.

Nutrition

Approximate per bowl, with one-fourth of the sauce: 695 calories, 34g protein, 31g fat, and 77g carbohydrates. Approximate per 100g: 145 calories, 7g protein, 6g fat, and 16g carbohydrates. Values vary with ingredient brands, portion size, and how much sauce is served.

Bang Bang Ground Turkey Rice Bowls

Garlic-ginger ground turkey, green beans, edamame, and crisp fresh toppings are served over jasmine rice with sweet-spicy bang bang sauce.
Course: Main Course
Cuisine: Asian-American
Prep: 15 min
Cook: 20 min
Total: 35 min
Servings: 4 Calories: 695 kcal

Equipment

  • Lidded saucepan
  • 12-inch skillet
  • Mixing bowl
  • Whisk
  • Food thermometer

Ingredients

Rice and Turkey Bowls

  • 1 1/2 cups uncooked jasmine rice (about 280 g)
  • 2 cups water, or the amount directed on the rice package
  • 1 tablespoon neutral cooking oil
  • 1 lb 93% lean ground turkey (about 450 g)
  • 3 garlic cloves, minced
  • 1 tablespoon grated fresh ginger
  • 2 tablespoons low-sodium soy sauce
  • 6 oz green beans, trimmed (about 170 g)
  • 1 cup shelled edamame, thawed (about 155 g)
  • 1 medium cucumber, cut into matchsticks
  • 1/2 small red onion, very thinly sliced into rings
  • 3 green onions, thinly sliced
  • 1/4 cup crispy fried shallots

Bang Bang Sauce

  • 1/3 cup mayonnaise (about 75 g)
  • 3 tablespoons sweet chili sauce
  • 1 to 2 teaspoons sriracha, to taste
  • 2 teaspoons lime juice
  • 1 teaspoon honey, or to taste
  • 1 to 2 teaspoons water, only if needed to thin the sauce

Instructions

  1. Rinse the rice and combine it with the water in a lidded saucepan. Bring to a boil, cover, and reduce the heat to low. Cook for about 15 minutes, until the water is absorbed and the rice is tender. Let stand covered for 5 minutes, then fluff. Follow the package directions if they call for a different amount of water.
  2. Whisk the mayonnaise, sweet chili sauce, 1 teaspoon sriracha, lime juice, and honey until smooth. Taste and adjust the sriracha or honey. If needed, whisk in 1 to 2 teaspoons water to thin the sauce.
  3. Cut the cucumber into matchsticks and thinly slice the red onion and green onions. Keep the fresh toppings separate from the warm ingredients.
  4. Heat the oil in a 12-inch skillet over medium-high heat. Add the turkey and break it into small crumbles. Cook uncovered for about 6 to 8 minutes, stirring occasionally and allowing it to brown between stirs. Check from 6 minutes; cook until browned with no visible pink and it reaches 165°F (75°C).
  5. Reduce the heat to medium. Stir in the garlic and ginger until fragrant, then add the soy sauce and green beans. Cook for about 3 to 4 minutes, until the beans are bright green and crisp-tender.
  6. Add the edamame and cook for 1 minute, until heated through.
  7. Divide the rice among four bowls. Add the turkey, green beans, and edamame over part of each rice bed, leaving some rice visible. Arrange the cucumber and red onion in separate clusters.
  8. Scatter the green onions and crispy fried shallots over the bowls just before serving. Serve the sauce on the side or spoon it alongside the turkey.

Tips

  • Let the turkey sit briefly between stirs so it browns instead of steaming.
  • Start with 1 teaspoon of sriracha and adjust the sauce to taste.
  • Keep the fresh toppings and sauce separate until serving to preserve their texture.
  • Check the turkey with a food thermometer and cook it to 165°F (75°C).

Variations

  • Tangy Yogurt Sauce: Replace the mayonnaise with plain Greek yogurt and serve the sauce cold and separate from the turkey.
  • Coconut Jasmine Rice: Use coconut jasmine rice prepared with a suitable rice recipe or package-compatible liquid ratio.
Notes

Refrigerate rice and turkey promptly in airtight containers and use within 3 days. Store sauce, cucumber, red onion, and crispy shallots separately. Reheat the rice and turkey until thoroughly hot, then add the cool toppings and sauce.

Nutrition

Calories: 695 kcal | Protein: 34 g | Fat: 31 g | Carbohydrates: 77 g | Per 100 G Calories: 145 kcal | Per 100 G Protein: 7 g | Per 100 G Fat: 6 g | Per 100 G Carbohydrates: 16 g

Creamy Cajun Sausage Pasta

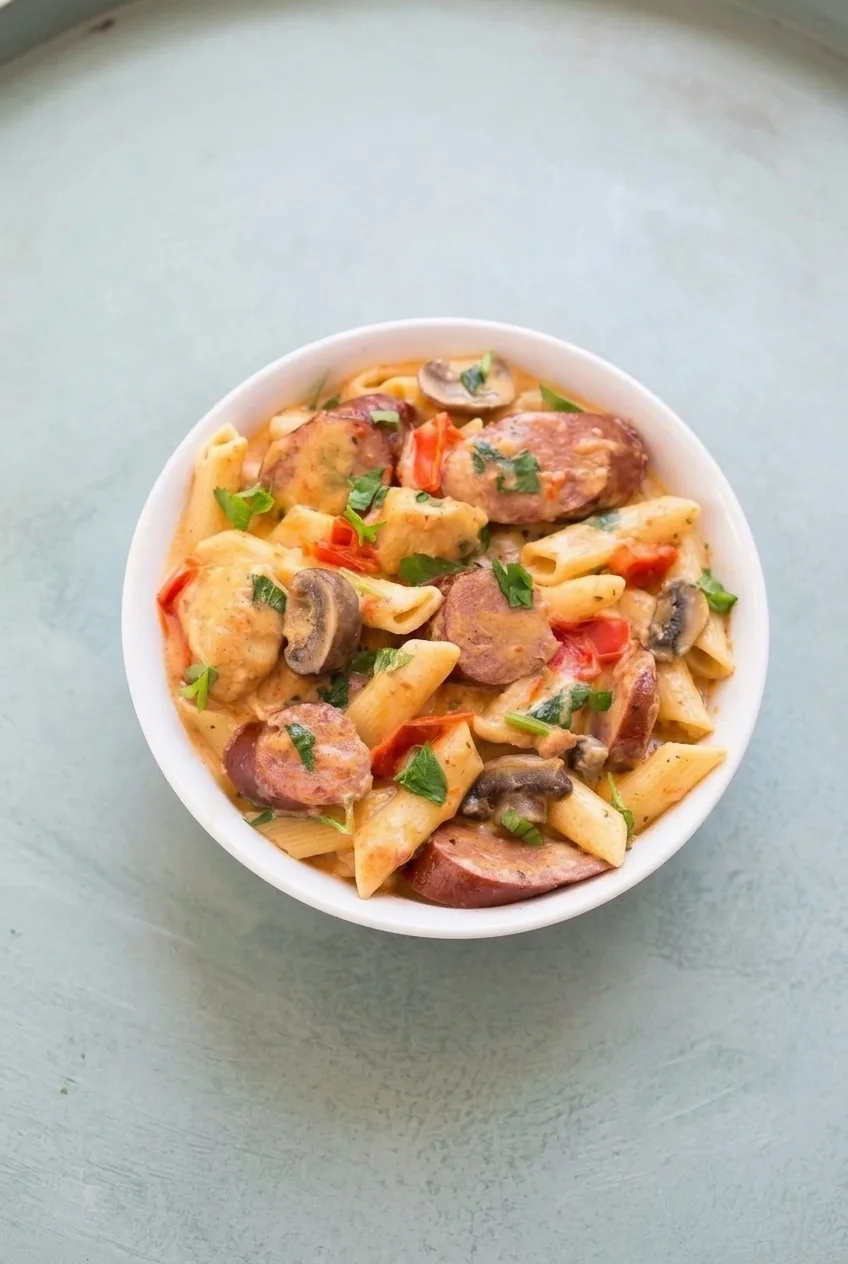
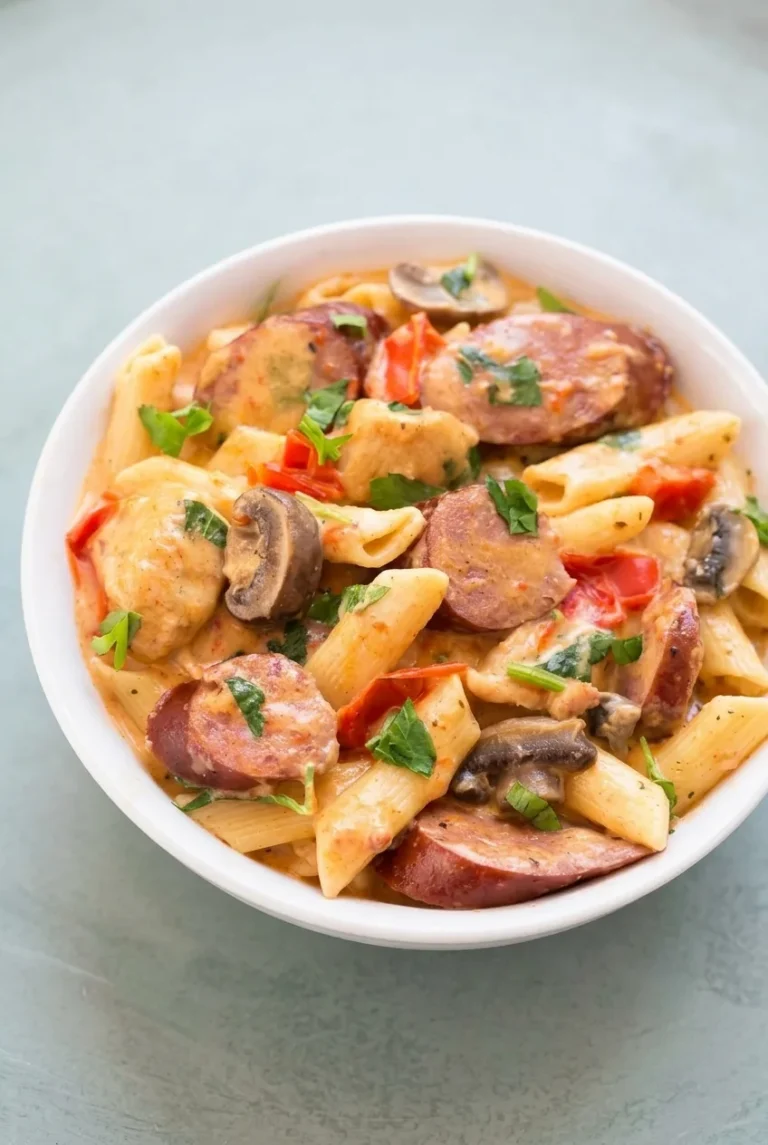
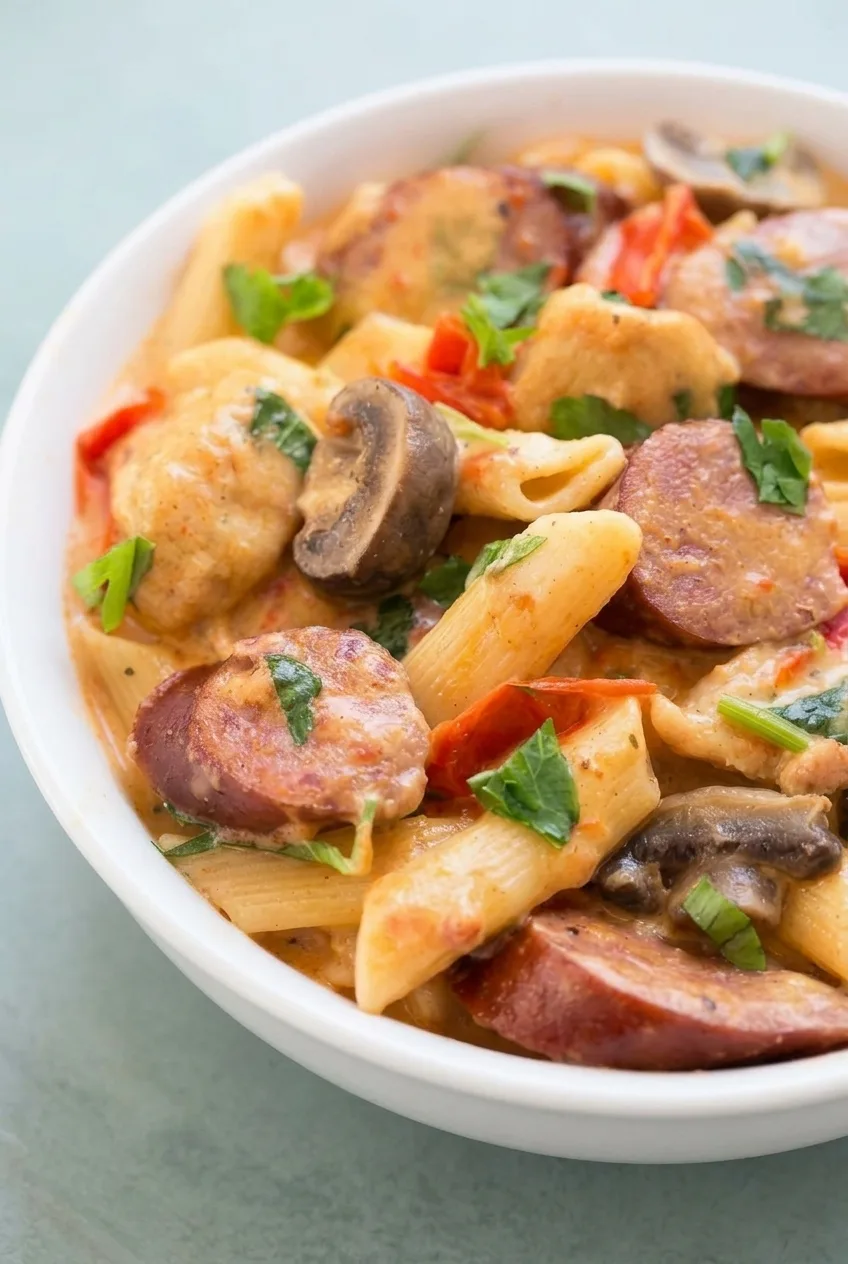
Browned smoked sausage is the leading flavor in this Cajun-inspired penne, with chicken, mushrooms, and red bell pepper mixed throughout. Tomato paste tints the Parmesan cream sauce peach-orange; it should coat the pasta while leaving the tubes distinct.

Boil the penne separately while the other ingredients cook in a 12-inch skillet. Browning them in stages gives the sausage crisp edges and lets the mushrooms release moisture before the sauce goes in. Reserve some pasta water to loosen the finished sauce as needed. Makes 4 generous servings in about 35 minutes.

Ingredients for Creamy Cajun Sausage Pasta

Close view of glossy Cajun cream sauce coating penne beside browned sausage, chicken, and mushrooms
  • 12 ounces penne pasta (340g)
  • 12 ounces fully cooked andouille or other smoked sausage, sliced about 1/2 inch thick on the diagonal (340g)
  • 8 ounces boneless, skinless chicken breast, cut into 1-inch pieces (225g)
  • 4 ounces cremini mushrooms, sliced (115g)
  • 1 medium red bell pepper, cut into short strips or bite-size pieces (about 150g)
  • 1 tablespoon olive oil, plus a little more only if needed
  • 3 garlic cloves, minced
  • 1 teaspoon Cajun seasoning, plus more to taste
  • 1 tablespoon tomato paste
  • 1/2 cup low-sodium chicken broth
  • 3/4 cup heavy cream
  • 1/2 cup finely grated Parmesan (about 45g)
  • 2 tablespoons chopped flat-leaf parsley

How to Make Creamy Cajun Sausage Pasta

Complete bowl of creamy Cajun sausage pasta on a pale gray-green table
  1. Cook the penne: Bring a large pot of water to a boil. Cook the penne according to the package directions, starting to check 1 minute before the suggested al dente time. When it is tender with a slight bite, reserve 1 cup of pasta water and drain. Cook the skillet ingredients while the pasta boils.
  2. Brown the sausage: Heat the olive oil in a 12-inch skillet over medium to medium-high heat. Cook the sausage for 4 to 5 minutes, turning until both sides are browned. Transfer to a plate, leaving the drippings in the skillet.
  3. Cook the chicken: Increase the heat to medium-high. Add the chicken, working in two batches if the pieces would crowd the skillet. Turn the pieces until lightly golden and the thickest piece reaches 165°F (75°C), about 5 to 7 minutes. Transfer to the sausage plate.
  4. Cook the vegetables: Add a little more oil only if the skillet is dry. Cook the mushrooms until their released moisture diminishes and some surfaces brown. Add the bell pepper and cook until just tender, about 5 to 7 minutes total for the vegetables.
  5. Make the sauce: Reduce the heat to medium. Stir in the garlic, tomato paste, and 1 teaspoon Cajun seasoning for about 30 seconds. Add the broth and cream, scraping up the browned bits. Reduce to medium-low and simmer gently, uncovered, until the sauce lightly coats a spoon. Stir in the Parmesan until melted. Allow about 4 to 6 minutes for this step, and do not let the sauce boil hard after adding the cheese.
  6. Toss and serve: Return the sausage and chicken to the skillet. Add the penne and toss over low heat for 2 to 3 minutes. Add reserved pasta water 1 to 2 tablespoons at a time until the sauce looks glossy and coats the penne without pooling. Taste before adding more Cajun seasoning or any salt. Serve in bowls with the sausage and vegetables visible and the parsley scattered on top.

How to Keep the Sauce Creamy

Judge the sauce after tossing it with the penne: the pasta absorbs liquid, and the cream and Parmesan thicken as they stand. If the coating becomes pasty or clumpy, keep the heat low and toss in small splashes of reserved pasta water until it flows easily.

Why Cook the Ingredients in Stages?

A crowded skillet traps moisture, making sausage and mushrooms steam instead of brown. Cooking the chicken separately also lets you check that it reaches 165°F without leaving it in the simmering sauce long enough to dry out.

Adjusting Cajun Heat and Salt

Andouille, Parmesan, broth, and Cajun seasoning can all contribute salt, while the heat of sausage and seasoning blends varies. Start with the listed teaspoon of seasoning and taste the finished pasta before adding more. For a milder version, use fully cooked smoked kielbasa instead of andouille. Add a pinch of crushed red pepper flakes only if you want more heat after tasting.

Serving and Leftovers

Serve promptly with a simple green salad or crusty bread. For a different stovetop noodle dinner with peppers, try this ground beef ramen stir fry with broccoli and peppers.

Cool leftovers promptly and refrigerate in an airtight container for up to 3 days. Reheat over low stovetop heat or in the microwave until hot throughout, adding a small splash of water or broth if the sauce has thickened.

Nutrition

Approximate nutrition per generous serving (1/4 of the recipe): 890 calories, 43g protein, 49g fat, and 72g carbohydrates. Approximate values per 100g of finished pasta: 180 calories, 9g protein, 10g fat, and 15g carbohydrates. Values vary with the sausage brand, pasta, and final amount of sauce.

Creamy Cajun Sausage Pasta

Penne is tossed with browned smoked sausage, chicken, vegetables, and a creamy Cajun-Parmesan sauce.
Course: Main Course
Cuisine: Cajun
Prep: 15 min
Cook: 20 min
Total: 35 min
Servings: 4 Calories: 890 kcal

Equipment

  • Large pot
  • 12-inch skillet
  • Colander

Ingredients

  • 12 ounces penne pasta (340 g)
  • 12 ounces fully cooked andouille or other smoked sausage, sliced about 1/2 inch thick on the diagonal (340 g)
  • 8 ounces boneless, skinless chicken breast, cut into 1-inch pieces (225 g)
  • 4 ounces cremini mushrooms, sliced (115 g)
  • 1 medium red bell pepper, cut into short strips or bite-size pieces (about 150 g)
  • 1 tablespoon olive oil, plus a little more only if needed
  • 3 garlic cloves, minced
  • 1 teaspoon Cajun seasoning, plus more to taste
  • 1 tablespoon tomato paste
  • 1/2 cup low-sodium chicken broth
  • 3/4 cup heavy cream
  • 1/2 cup finely grated Parmesan (about 45 g)
  • 2 tablespoons chopped flat-leaf parsley

Instructions

  1. Bring a large pot of water to a boil. Cook the penne according to package directions, checking 1 minute before the suggested al dente time.
  2. Reserve 1 cup of pasta water, then drain the penne.
  3. Heat the olive oil in a 12-inch skillet over medium to medium-high heat. Brown the sausage for 4 to 5 minutes, turning to brown both sides. Transfer to a plate, leaving the drippings in the skillet.
  4. Increase the heat to medium-high. Cook the chicken, in batches if needed, for 5 to 7 minutes, turning until lightly golden and the thickest piece reaches 165°F (75°C). Transfer to the plate with the sausage.
  5. Add a little oil if the skillet is dry. Cook the mushrooms until their released moisture diminishes and some surfaces brown. Add the bell pepper and cook until just tender, about 5 to 7 minutes total for the vegetables.
  6. Reduce the heat to medium. Stir in the garlic, tomato paste, and Cajun seasoning for about 30 seconds.
  7. Add the broth and cream, scraping up the browned bits. Reduce the heat to medium-low and simmer gently, uncovered, until the sauce lightly coats a spoon.
  8. Stir in the Parmesan until melted, about 4 to 6 minutes. Do not let the sauce boil hard after adding the cheese.
  9. Return the sausage and chicken to the skillet. Add the penne and toss over low heat for 2 to 3 minutes. Add reserved pasta water 1 to 2 tablespoons at a time until the sauce is glossy and coats the pasta. Taste before adding more Cajun seasoning or salt, then serve topped with parsley.

Tips

  • Cook the sausage, chicken, and vegetables in stages to help them brown instead of steam.
  • Reserve pasta water before draining; add it a little at a time to loosen the sauce.
  • Keep the sauce at a gentle simmer and avoid boiling it hard after adding Parmesan.
  • Taste before adding more Cajun seasoning or salt, since the sausage, broth, and Parmesan can be salty.
  • If the sauce thickens or turns pasty, toss in small splashes of pasta water over low heat.

Variations

  • Milder Smoked Sausage Pasta: Use fully cooked smoked kielbasa instead of andouille for a milder version.
  • Spicier Cajun Pasta: Add a pinch of crushed red pepper flakes after tasting if you want more heat.

Notes

Refrigerate leftovers in an airtight container for up to 3 days. Reheat over low heat or in the microwave until hot throughout, adding a splash of water or broth if needed.

Nutrition

Calories: 890 kcal | Protein: 43 g | Fat: 49 g | Carbohydrates: 72 g

Marry Me Chicken Orzo

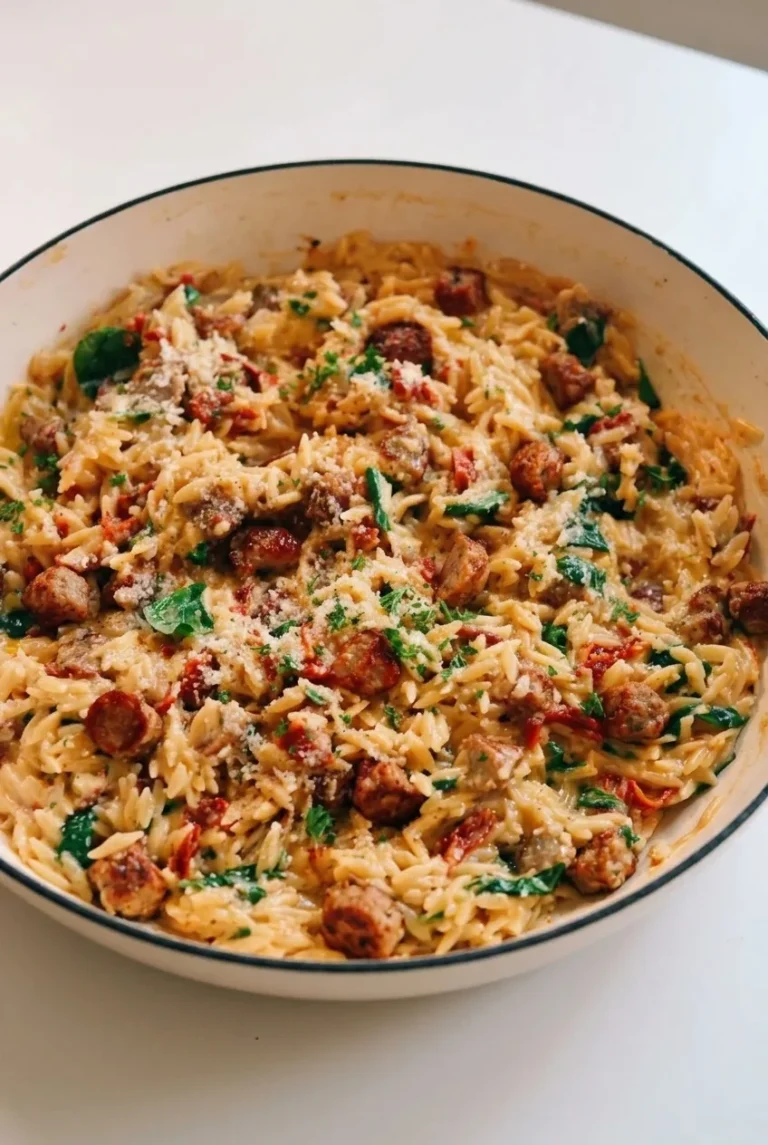
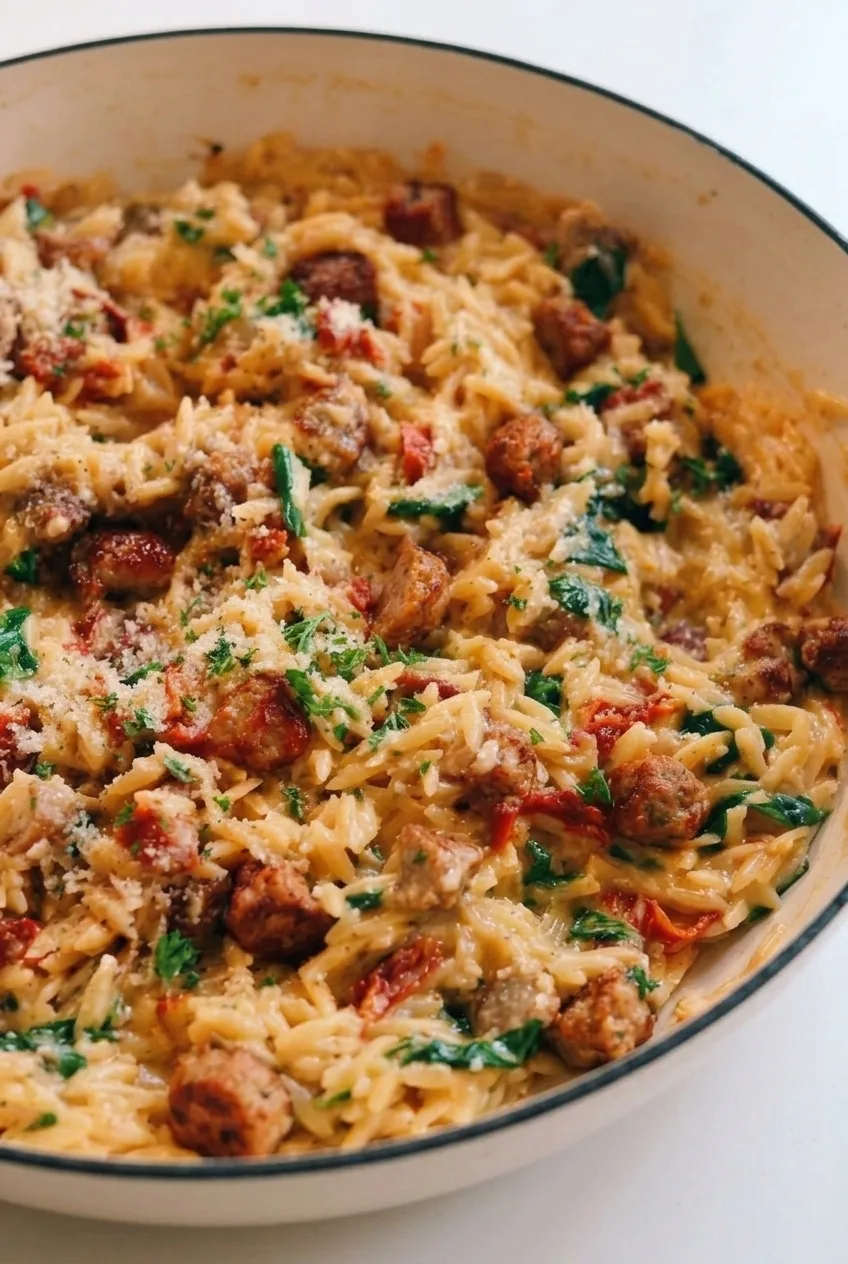
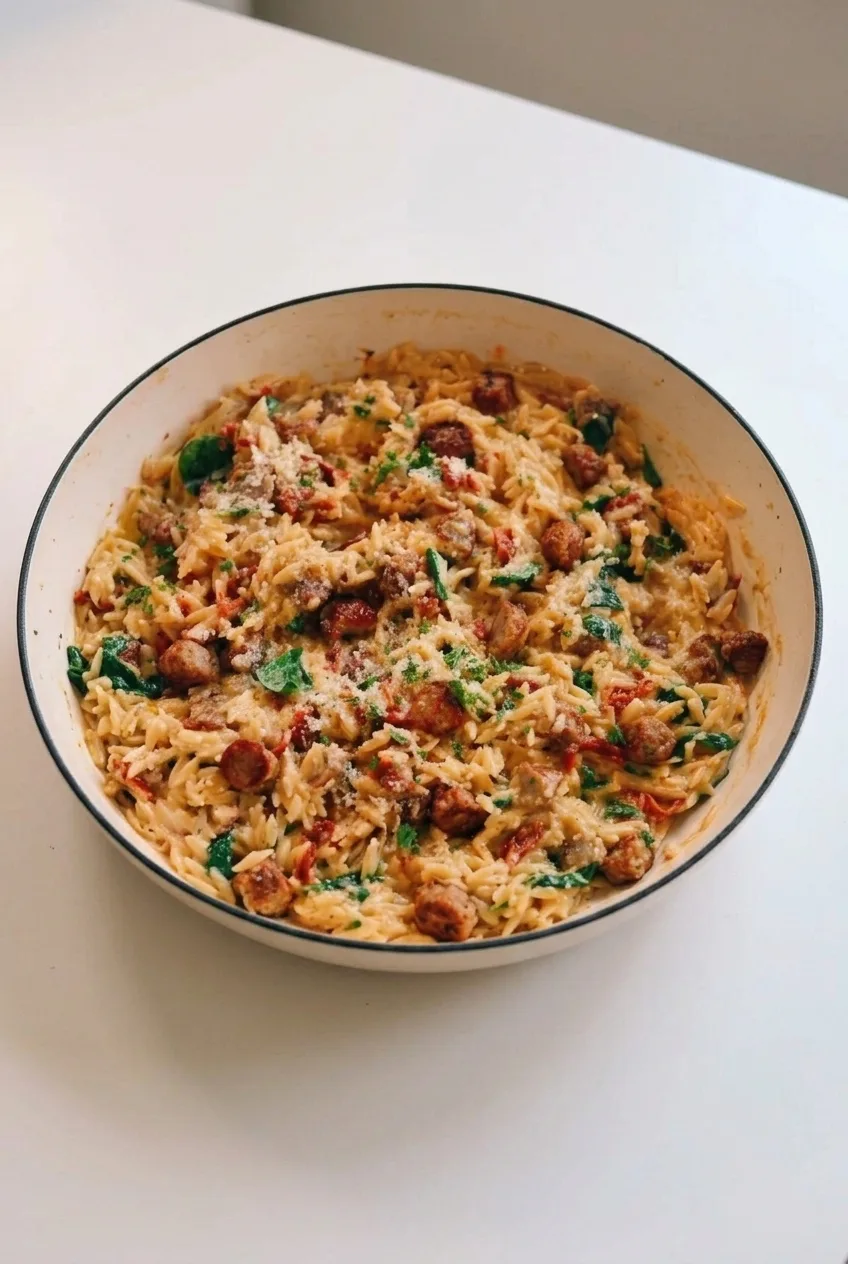
Browned bite-size chicken and orzo share a creamy sun-dried tomato and Parmesan sauce in this one-pot stovetop dinner. The orzo cooks in broth with the chicken, then cream, spinach, and basil go in near the end. Serve it while sauce still moves between the grains: orzo keeps absorbing liquid after cooking, so a pot that looks dry now will only get thicker.

Ingredients for Marry Me Chicken Orzo

Close view of saucy orzo grains, browned chicken, sun-dried tomatoes, and wilted spinach

Makes 4 generous servings. Prep time: 15 minutes. Cook time: 20–25 minutes. Total time: 35–40 minutes.

  • 1 lb boneless, skinless chicken breasts, cut into uniform ¾-inch pieces (450g)
  • 2 tablespoons olive oil
  • ¾ teaspoon kosher salt, plus more to taste
  • ½ teaspoon freshly ground black pepper
  • 4 garlic cloves, minced
  • ½ cup oil-packed sun-dried tomatoes, drained and chopped (75g)
  • 1 tablespoon tomato paste (15g)
  • 1 teaspoon Italian seasoning
  • 1½ cups dry orzo pasta (270g)
  • 3 cups low-sodium chicken broth, plus up to ½ cup more as needed
  • ½ cup heavy cream (120g)
  • ½ cup freshly grated Parmesan, plus 2 tablespoons for serving (65g total)
  • 2 packed cups baby spinach (60g)
  • 2 tablespoons finely chopped fresh basil
  • Optional: ¼ teaspoon crushed red pepper flakes, for gentle heat

How to Make Marry Me Chicken Orzo

Full pot of creamy Marry Me Chicken Orzo on a plain light surface
  1. Season the chicken: Pat the chicken dry and season with the ¾ teaspoon salt and the black pepper.
  2. Brown the chicken: Heat a wide 4- to 5-quart Dutch oven or deep sauté pan with a lid over medium-high heat. Add 1 tablespoon olive oil, then the chicken. Work in two batches if needed so the pieces brown rather than steam. Turn to brown several sides, about 5–6 minutes total, or longer if batching. Transfer to a plate; the chicken will finish cooking with the orzo.
  3. Build the tomato base: Reduce the heat to medium. Add the remaining tablespoon of oil if the pan is dry. Stir in the garlic, sun-dried tomatoes, tomato paste, Italian seasoning, and optional red pepper flakes. Cook for 1–2 minutes, stirring, until fragrant and the paste darkens slightly without scorching the garlic.
  4. Simmer the orzo and chicken: Stir in the dry orzo for about 1 minute. Pour in 3 cups broth, scraping up the browned bits, then return the chicken and any juices to the pot. Bring to a gentle simmer, reduce the heat to medium-low, and partially cover. Simmer for about 9–12 minutes, stirring and scraping across the bottom every 1–2 minutes to prevent sticking. Start tasting the orzo after 8 minutes. If the liquid disappears before the orzo is tender, add warm broth in splashes and continue simmering.
  5. Check doneness and finish the sauce: When the orzo is tender, check the thickest chicken piece with an instant-read thermometer. It must reach 165°F (75°C). If needed, continue the gentle simmer, adding a little broth if the mixture gets too thick. Reduce the heat to low or turn it off, then stir in the cream and ½ cup Parmesan until creamy.
  6. Add the spinach and serve: Fold in the spinach until just wilted, then taste and adjust the salt. The sauce should still flow between distinct orzo grains when stirred; loosen it with warm broth if needed. Let stand for just 2 minutes, scatter the basil and reserved Parmesan over the pot, and serve promptly.

How to Keep the Orzo Creamy

Pan width, simmer strength, and orzo brand affect how quickly the broth disappears. Judge doneness by tasting the pasta, not just by the clock, and keep a little visible sauce in the pot when you turn off the heat. If the mixture is very loose once the orzo is tender, uncover it briefly. If it thickens before serving, stir in a splash of warm broth.

Substitutions That Change the Result

  • Chicken thighs: Boneless, skinless thighs work if cut into similarly sized pieces. Check the thickest piece for 165°F rather than assuming the cooking time will be identical.
  • Cheese: Pecorino Romano can replace Parmesan, but taste before adding more salt.
  • Spinach: Thawed, thoroughly drained frozen spinach works, though it will not have the same distinct leaves.
  • Pasta: Orzo is rice-shaped pasta, not rice. Other pasta shapes may require different amounts of liquid and different cooking times.

Serving Ideas

Serve from the pot with a lightly dressed green salad or crusty bread. For a baked dinner instead, try this chicken and rice casserole with browned thighs. For a different chicken-and-spinach noodle dinner, see ginger garlic chicken ramen.

Storage and Reheating

Refrigerate cooled leftovers promptly in an airtight container for up to 3–4 days. Orzo absorbs sauce as it sits, so reheat it gently in a skillet with a splash of broth, water, milk, or cream, stirring until hot throughout. To microwave, add a splash of liquid and heat in short intervals, stirring between them.

You can chop the ingredients ahead, but cook the orzo near serving time for the best texture. Freezing the finished creamy orzo is not recommended as a routine make-ahead option.

Nutrition

Approximate nutrition per serving (¼ of the recipe): 665 calories, 44g protein, 29g fat, and 59g carbohydrates. Approximate values per 100g: 160 calories, 11g protein, 7g fat, and 14g carbohydrates. Values vary with ingredient brands, broth added, and moisture lost during cooking.

Marry Me Chicken Orzo

Chicken and orzo simmer in a creamy sun-dried tomato and Parmesan sauce with spinach and basil.
Course: Main Course
Cuisine: American
Prep: 15 min
Cook: 25 min
Total: 40 min
Servings: 4 Calories: 665 kcal

Equipment

  • 4- to 5-quart Dutch oven or deep sauté pan with lid
  • Instant-read thermometer

Ingredients

For the Chicken and Orzo

  • 1 lb boneless, skinless chicken breasts, cut into uniform 3/4-inch pieces (450g)
  • 2 tablespoons olive oil
  • 3/4 teaspoon kosher salt, plus more to taste
  • 1/2 teaspoon freshly ground black pepper
  • 4 garlic cloves, minced
  • 1/2 cup oil-packed sun-dried tomatoes, drained and chopped (75g)
  • 1 tablespoon tomato paste (15g)
  • 1 teaspoon Italian seasoning
  • 1 1/2 cups dry orzo pasta (270g)
  • 3 cups low-sodium chicken broth, plus up to 1/2 cup more as needed
  • 1/2 cup heavy cream (120g)
  • 1/2 cup freshly grated Parmesan, plus 2 tablespoons for serving (65g total)
  • 2 packed cups baby spinach (60g)
  • 2 tablespoons finely chopped fresh basil
  • Optional: 1/4 teaspoon crushed red pepper flakes

Instructions

  1. Pat the chicken dry and season with the salt and black pepper.
  2. Heat a wide Dutch oven or deep sauté pan over medium-high heat. Add 1 tablespoon olive oil and brown the chicken for about 5–6 minutes, working in batches if needed. Transfer the chicken to a plate.
  3. Reduce the heat to medium. Add the remaining tablespoon of oil if the pan is dry. Stir in the garlic, sun-dried tomatoes, tomato paste, Italian seasoning, and optional red pepper flakes. Cook for 1–2 minutes, stirring, until fragrant.
  4. Stir in the orzo for about 1 minute. Pour in 3 cups broth, scraping up the browned bits, then return the chicken and any juices to the pot.
  5. Bring to a gentle simmer, reduce the heat to medium-low, and partially cover. Cook for about 9–12 minutes, stirring and scraping the bottom every 1–2 minutes. Start tasting the orzo after 8 minutes; add warm broth in splashes if the liquid disappears before the orzo is tender.
  6. Check that the thickest chicken piece reaches 165°F (75°C). Continue simmering gently if needed, adding broth if the mixture gets too thick.
  7. Reduce the heat to low or turn it off. Stir in the cream and 1/2 cup Parmesan until creamy, then fold in the spinach until just wilted.
  8. Taste and adjust the salt. Loosen with warm broth if needed, then let stand for 2 minutes. Scatter the basil and reserved Parmesan over the top and serve promptly.

Tips

  • Brown the chicken in batches if needed so it browns rather than steams.
  • Stir and scrape the bottom of the pan every 1–2 minutes while the orzo simmers to prevent sticking.
  • Taste the orzo to check doneness; cooking time can vary by pan and pasta brand.
  • Keep some visible sauce in the pot when you turn off the heat, since the orzo continues absorbing liquid.
  • Serve promptly and loosen the orzo with warm broth if it thickens.

Variations

  • Chicken Thigh Orzo: Use boneless, skinless chicken thighs cut into similarly sized pieces and check that the thickest piece reaches 165°F (75°C).
  • Pecorino Orzo: Replace the Parmesan with Pecorino Romano and taste before adding more salt.
  • Frozen Spinach Orzo: Use thawed, thoroughly drained frozen spinach in place of fresh spinach.

Notes

Refrigerate cooled leftovers in an airtight container for 3–4 days. Reheat gently with a splash of broth, water, milk, or cream, stirring until hot throughout. Freezing the finished creamy orzo is not recommended.

Nutrition

Calories: 665 kcal | Protein: 44 g | Fat: 29 g | Carbohydrates: 59 g

Firecracker Ground Chicken Bowls

Browned ground chicken and crisp-tender broccoli get a glossy, sweet-spicy coating of sriracha, brown sugar, soy sauce, and rice vinegar. Serve them together beside fluffy jasmine rice, with a few sliced green onions on top.

Cook the broccoli first, then remove it while the chicken browns. Returning it for the brief sauce finish keeps the florets green and gives their steaming water time to evaporate, so the sauce clings instead of pooling in the skillet.

Ingredients for Firecracker Ground Chicken Bowls

Close view of glossy ground chicken crumbles, broccoli florets, green onion slices, and distinct rice grains
  • 1 cup uncooked white jasmine rice (about 185g)
  • Water for the rice, according to package directions (about 1 1/2 cups for many jasmine rices)
  • 3 cups fresh broccoli florets, cut into bite-size pieces (about 270g)
  • 1 tablespoon neutral cooking oil, divided
  • 2 tablespoons water, for the broccoli
  • 1 lb ground chicken (about 450g)
  • 3 garlic cloves, minced
  • 1 tablespoon grated fresh ginger
  • 1/4 cup sriracha
  • 3 tablespoons packed brown sugar (about 40g)
  • 2 tablespoons reduced-sodium soy sauce
  • 1 tablespoon rice vinegar
  • 2 green onions, thinly sliced

Sriracha heat varies by brand. For a milder sauce, use 2 tablespoons instead of 1/4 cup; the finished coating will also be less red.

How to Make Firecracker Ground Chicken Bowls

Complete firecracker ground chicken bowl with broccoli and rice on a light neutral tabletop
  1. Start the rice: Rinse the rice if directed on the package. Cook it with the specified amount of water in a covered saucepan. Let it rest, covered, for about 5 minutes after cooking, then fluff. Prepare the skillet ingredients while the rice cooks.
  2. Whisk the sauce: Combine the sriracha, brown sugar, soy sauce, and rice vinegar in a small bowl. Have the garlic, ginger, and green onions ready.
  3. Cook the broccoli: Heat a 12-inch skillet over medium-high heat. Add 1 teaspoon oil; when it shimmers, add the broccoli and stir for 2 minutes. Add 2 tablespoons water and cover briefly to steam. Uncover and let any remaining water evaporate. Start checking at about 3 minutes, and transfer the broccoli to a plate when bright green and crisp-tender, about 3 to 5 minutes total.
  4. Brown the chicken: Add the remaining 2 teaspoons oil and the ground chicken to the skillet. Let the chicken sit briefly against the hot pan, then break it into small, irregular crumbles. Cook uncovered, reducing the heat to medium as needed, until some crumbles are browned and no raw-looking chicken remains, about 7 to 9 minutes. Add the garlic and ginger during the final minute. Ground chicken should reach 165°F (75°C) if checked with a food thermometer.
  5. Coat with sauce: Reduce the heat to medium-low. Add the whisked sauce and return the broccoli to the skillet. Cook uncovered, stirring frequently, for about 2 to 4 minutes. Remove from the heat when the sauce looks glossy and clings to the chicken and broccoli, with little free liquid in the pan.
  6. Build four bowls: Divide the rice among shallow bowls, keeping it on one side. Spoon the chicken and broccoli beside it, leaving most of the rice unsauced. Scatter a few green onion slices over the chicken.

How to Keep the Sauce Glossy

Lower the heat before adding the sauce: its brown sugar can scorch over high heat. Stir frequently and judge the finish by how the sauce coats the crumbles and florets, not just by the clock. If it still looks thin after 2 minutes, keep cooking uncovered at medium-low until the excess liquid evaporates.

A 12-inch skillet gives the chicken room to brown rather than steam. If using a smaller skillet, brown the chicken in two batches before adding the aromatics and sauce.

Swaps and Heat Adjustments

Ground turkey can replace the chicken; cook it through before adding the sauce, allowing for a change in cooking time. Frozen broccoli can be used if thawed and drained well, but it may be softer and release enough water to loosen the sauce. Add a pinch of red pepper flakes to individual bowls for extra heat.

For another chicken-and-rice dinner, try Easy Mexican Chicken with Cheese Sauce and Rice.

How to Store and Reheat the Bowls

Refrigerate the cooked rice and chicken-broccoli mixture promptly in airtight containers for up to 3 days. Pack them separately to keep the rice distinct. Reheat in a skillet or microwave until hot throughout. For an assembled bowl, add a small splash of water to dry rice and cover loosely before reheating.

The cooked firecracker chicken can be frozen for 1 to 2 months. Freeze it separately from the rice and broccoli when possible for more predictable texture, then thaw it in the refrigerator and reheat it in a pan.

Nutrition

Approximate per bowl, based on 4 bowls: 450 calories, 26g protein, 13g fat, and 56g carbohydrates. Approximate per 100g of finished food: 140 calories, 8g protein, 4g fat, and 17g carbohydrates. Values vary with the ground chicken, sriracha, rice yield, and amount of sauce reduction.

Firecracker Ground Chicken Bowls

Ground chicken and crisp-tender broccoli are coated in a sweet-spicy sriracha sauce and served with jasmine rice.
Course: Main Course
Cuisine: Asian-inspired
Prep: 15 min
Cook: 25 min
Total: 40 min
Servings: 4 Calories: 450 kcal per serving

Equipment

  • 12-inch skillet
  • Covered saucepan
  • Small bowl
  • Food thermometer

Ingredients

For the Rice

  • 1 cup uncooked white jasmine rice (about 185g)
  • Water for the rice, according to package directions (about 1 1/2 cups for many jasmine rices)

For the Chicken and Broccoli

  • 3 cups fresh broccoli florets, cut into bite-size pieces (about 270g)
  • 1 tablespoon neutral cooking oil, divided
  • 2 tablespoons water
  • 1 lb ground chicken (about 450g)
  • 3 garlic cloves, minced
  • 1 tablespoon grated fresh ginger

For the Sauce and Garnish

  • 1/4 cup sriracha
  • 3 tablespoons packed brown sugar (about 40g)
  • 2 tablespoons reduced-sodium soy sauce
  • 1 tablespoon rice vinegar
  • 2 green onions, thinly sliced

Instructions

  1. Rinse the rice if directed on the package. Cook it with the specified amount of water in a covered saucepan.
  2. Let the cooked rice rest, covered, for about 5 minutes, then fluff it with a fork.
  3. Whisk the sriracha, brown sugar, soy sauce, and rice vinegar together in a small bowl.
  4. Heat a 12-inch skillet over medium-high heat. Add 1 teaspoon oil, then add the broccoli and stir for 2 minutes.
  5. Add 2 tablespoons water and cover briefly to steam. Uncover and cook until the water evaporates and the broccoli is bright green and crisp-tender, about 3 to 5 minutes total. Transfer it to a plate.
  6. Add the remaining 2 teaspoons oil and the ground chicken to the skillet. Let it sit briefly against the hot pan, then break it into small crumbles.
  7. Cook uncovered, reducing the heat to medium as needed, until some crumbles are browned and no raw-looking chicken remains, about 7 to 9 minutes.
  8. Add the garlic and ginger during the final minute of cooking. Check that the chicken reaches 165°F (75°C) with a food thermometer.
  9. Reduce the heat to medium-low. Add the sauce and return the broccoli to the skillet.
  10. Cook uncovered, stirring frequently, for 2 to 4 minutes, until the sauce is glossy and clings to the chicken and broccoli.
  11. Divide the rice among four shallow bowls. Spoon the chicken and broccoli beside the rice and top with green onions.

Tips

  • Use a 12-inch skillet so the chicken has room to brown instead of steam.
  • If using a smaller skillet, brown the chicken in two batches.
  • Lower the heat before adding the sauce to help prevent the brown sugar from scorching.
  • Cook the sauce uncovered until it clings to the chicken and broccoli and little free liquid remains.
  • Use 2 tablespoons of sriracha for a milder sauce.

Variations

  • Ground Turkey: Replace the ground chicken with ground turkey and cook it through before adding the sauce.
  • Frozen Broccoli: Use thawed, well-drained frozen broccoli; it may be softer and release extra water into the sauce.
  • Extra Spicy: Add a pinch of red pepper flakes to individual bowls.

Notes

Refrigerate the rice and chicken-broccoli mixture promptly in airtight containers for up to 3 days; store separately when possible. Reheat until hot throughout. The cooked chicken can be frozen for 1 to 2 months. Ground chicken should reach 165°F (75°C).

Nutrition

Calories: 450 kcal per serving | Protein: 26 g per serving | Fat: 13 g per serving | Carbohydrates: 56 g per serving | Calories Per 100g: 140 kcal | Protein Per 100g: 8 g | Fat Per 100g: 4 g | Carbohydrates Per 100g: 17 g

Classic Chicken and Rice Casserole

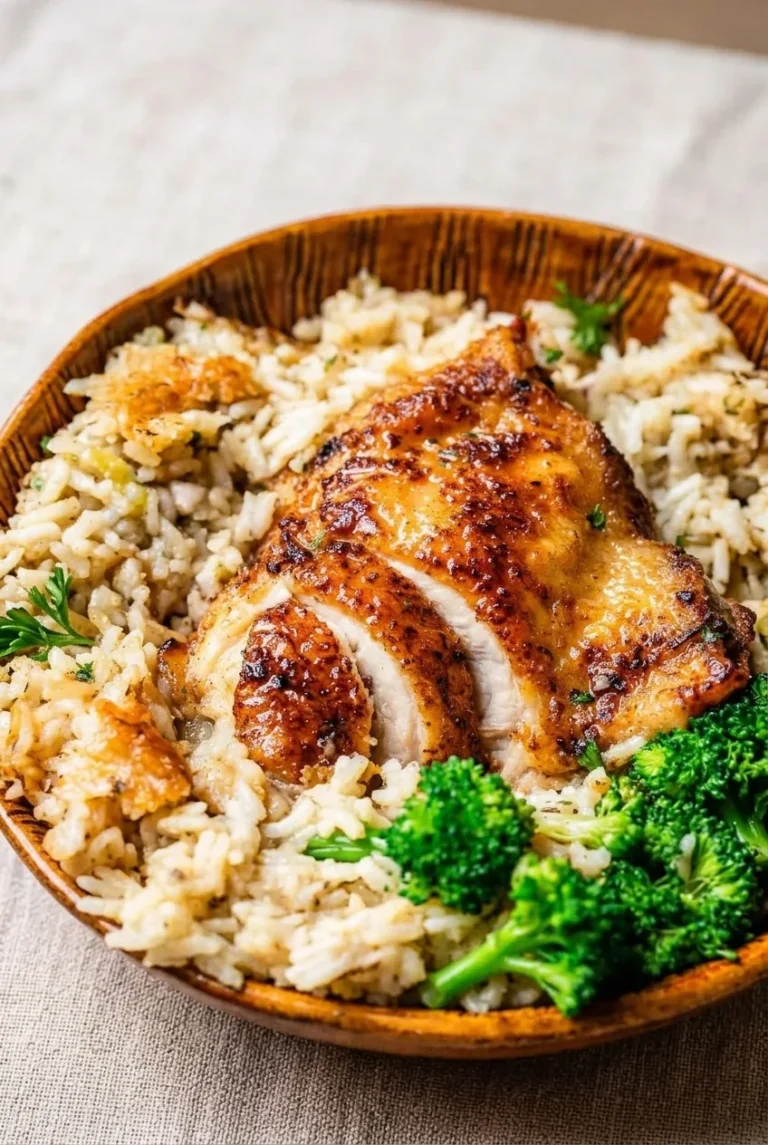
Chicken thighs and uncooked long-grain rice bake together in a lightly creamy broth-and-milk sauce. Searing the skin first gives the chicken a browned start; a tightly covered bake gives the rice time to absorb the hot sauce. Once the rice is nearly tender, a short uncovered finish browns the chicken again without exposing the rice for the entire bake.

Serve the chicken over the rice with separately steamed broccoli and a little parsley. This recipe makes 4 generous servings and takes about 1 hour 40 minutes, including a 10-minute rest. Allow longer if the rice needs more covered baking.

Ingredients for Chicken and Rice Casserole

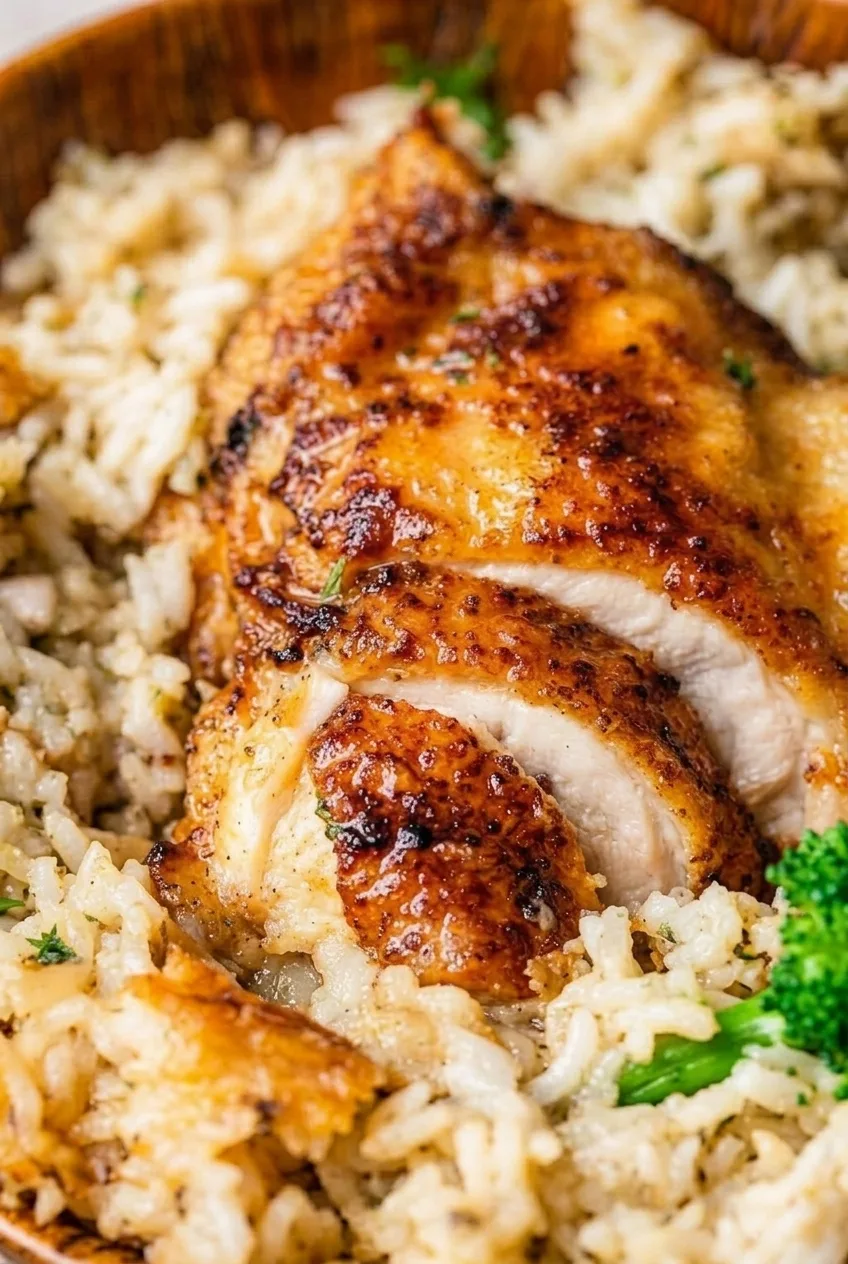
Close view of browned chicken skin, sliced cooked meat and lightly creamy long-grain rice
  • 4 similarly sized bone-in, skin-on chicken thighs, 2 to 2 1/2 lb total (about 900g to 1.15kg)
  • 1 1/2 cups uncooked long-grain white rice (280g)
  • 2 1/2 cups low-sodium chicken broth, plus up to 1/2 cup additional hot broth if needed
  • 3/4 cup whole milk
  • 2 tablespoons all-purpose flour (about 15g)
  • 1 tablespoon neutral cooking oil
  • 1 small onion, diced (about 110g)
  • 2 celery ribs, diced (about 90g)
  • 2 garlic cloves, minced
  • 1 teaspoon dried thyme
  • 1 1/2 teaspoons kosher salt, divided; adjust for the saltiness of the broth
  • 1/2 teaspoon black pepper, divided
  • About 1 lb broccoli florets (450g)
  • 2 tablespoons chopped fresh parsley

How to Make Chicken and Rice Casserole

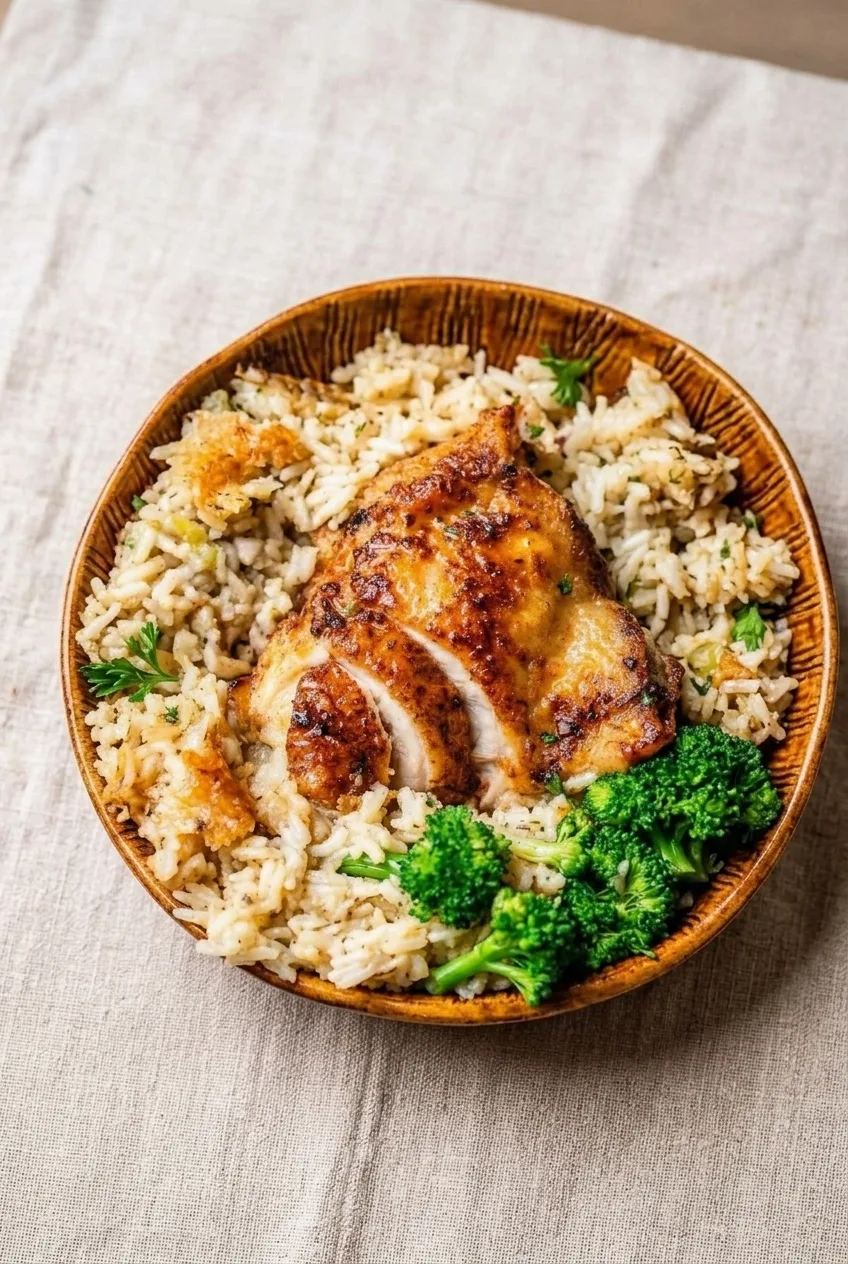
Full rustic bowl of chicken and rice casserole with broccoli alongside on a neutral tabletop
  1. Preheat and season: Heat the oven to 375°F (190°C). Pat the chicken skin dry. Season the thighs with about 3/4 teaspoon of the salt and some of the pepper.
  2. Sear the chicken: Heat the oil in a large skillet over medium-high heat. Sear the thighs skin-side down for 5 to 7 minutes, until golden with browned spots. Turn and cook for 1 to 2 minutes more, then transfer to a plate. The chicken will finish cooking in the oven.
  3. Make the sauce: Reduce the heat to medium and leave about 2 tablespoons of fat in the skillet. Cook the onion and celery for about 4 minutes, until softened. Add the garlic and thyme and cook for 30 seconds. Stir in the flour and cook for 1 minute, until no dry flour remains. Gradually whisk in the 2 1/2 cups broth and the milk. Bring to a gentle simmer; the sauce should be hot and lightly thickened but still pourable. Add the remaining salt and pepper, using less salt if the broth is well seasoned.
  4. Assemble and seal: Spread the uncooked rice evenly in a 9-by-13-inch baking dish. Pour the hot sauce over it and stir once to distribute. Push any exposed grains beneath the liquid. Arrange the thighs on top, skin-side up, with the skin above the sauce. Cover tightly with heavy-duty foil, tenting it slightly above the chicken where practical and crimping it around the dish.
  5. Bake covered: Bake for 45 to 55 minutes. Starting at 45 minutes, carefully lift a corner of the foil and taste rice from the center; it should be nearly tender before you uncover the dish. Check the thickest part of a thigh with an instant-read thermometer, avoiding the bone. If the rice is firm, reseal and continue baking. If it is firm and dry, add a little hot broth before resealing.
  6. Brown and finish: When the rice is nearly tender, remove the foil and raise the oven to 400°F (205°C). Bake for 10 to 20 minutes more, until the skin is browned, the center rice has no hard core, and the sauce clings lightly to the grains rather than sloshing. The chicken must reach at least 165°F (75°C) in the thickest part without touching bone. If the chicken reaches temperature while the rice is still firm, transfer it to a plate and keep it warm while the rice finishes tightly covered.
  7. Rest and steam the broccoli: Let the casserole stand for 10 minutes so the remaining moisture settles into the rice. Meanwhile, steam the broccoli over gently boiling water for 4 to 6 minutes, until bright green and fork-tender.
  8. Serve: Spoon the rice into shallow bowls and place a thigh skin-side up over each portion. Slice into part of the chicken if desired. Arrange the broccoli alongside, not mixed into the rice, and sprinkle lightly with parsley.

Why the Rice Needs a Tight Cover

The uncooked rice absorbs the hot sauce while the sealed dish holds in steam. Keep the grains beneath the liquid and crimp the foil around the edges rather than laying it loosely on top. Thigh size and the quality of the seal can change the bake time, so check the center rice and chicken separately. If the rice is firm but still moist, it needs more covered time—not more liquid.

Use standard long-grain white rice for this liquid amount and bake schedule. Instant or brown rice is not a direct substitute because each cooks differently.

How to Keep the Chicken Browned

Covered baking softens chicken skin even after a good sear. Keeping the skin above the sauce and uncovering only when the rice is nearly tender lets it brown again without drying out the rice during the longer covered stage.

For a different oven-baked dinner, try this Parmesan crusted chicken sheet pan dinner.

Storage and Reheating

Cool cooked leftovers promptly, pack them in airtight containers, and refrigerate for up to 4 days. Reheat covered with a splash of water or broth until thoroughly hot so the rice does not dry out.

Fully cooked, cooled portions can also be frozen airtight and thawed in the refrigerator before covered reheating. The rice and sauce may be softer afterward. Do not freeze the raw assembled casserole to bake later.

Nutrition

Approximate nutrition per generous serving (1/4 of the casserole and broccoli, about 575g): 730 calories, 37g protein, 34g fat, and 76g carbohydrates. Per 100g: approximately 125 calories, 6g protein, 6g fat, and 13g carbohydrates. Values vary with chicken size, the amount of edible meat and skin, and the broth used.

Classic Chicken and Rice Casserole

Bone-in chicken thighs bake over long-grain rice in a creamy broth sauce, with steamed broccoli served alongside.
Course: Main Course
Cuisine: American
Prep: 15 min
Cook: 85 min
Total: 100 min
Servings: 4 Calories: 730 kcal

Equipment

  • Large skillet
  • 9-by-13-inch baking dish
  • Heavy-duty foil
  • Instant-read thermometer
  • Steamer basket

Ingredients

For the Casserole

  • 4 similarly sized bone-in, skin-on chicken thighs, 2 to 2 1/2 lb total (about 900g to 1.15kg)
  • 1 1/2 cups uncooked long-grain white rice (280g)
  • 2 1/2 cups low-sodium chicken broth, plus up to 1/2 cup additional hot broth if needed
  • 3/4 cup whole milk
  • 2 tablespoons all-purpose flour (about 15g)
  • 1 tablespoon neutral cooking oil
  • 1 small onion, diced (about 110g)
  • 2 celery ribs, diced (about 90g)
  • 2 garlic cloves, minced
  • 1 teaspoon dried thyme
  • 1 1/2 teaspoons kosher salt, divided
  • 1/2 teaspoon black pepper, divided

For Serving

  • About 1 lb broccoli florets (450g)
  • 2 tablespoons chopped fresh parsley

Instructions

  1. Preheat the oven to 375°F (190°C). Pat the chicken skin dry and season the thighs with about 3/4 teaspoon salt and some of the pepper.
  2. Heat the oil in a large skillet over medium-high heat. Sear the thighs skin-side down for 5 to 7 minutes, until golden with browned spots. Turn and cook for 1 to 2 minutes more, then transfer to a plate.
  3. Reduce the heat to medium, leaving about 2 tablespoons of fat in the skillet. Cook the onion and celery for about 4 minutes, until softened. Add the garlic and thyme and cook for 30 seconds.
  4. Stir in the flour and cook for 1 minute. Gradually whisk in the 2 1/2 cups broth and milk. Bring to a gentle simmer, then season with the remaining salt and pepper, using less salt if the broth is well seasoned.
  5. Spread the uncooked rice evenly in a 9-by-13-inch baking dish. Pour the hot sauce over the rice and stir once. Push exposed grains beneath the liquid, then arrange the chicken on top, skin-side up and above the sauce. Cover tightly with heavy-duty foil.
  6. Bake covered for 45 to 55 minutes. Starting at 45 minutes, carefully lift a corner of the foil and taste rice from the center. If the rice is firm, reseal and continue baking. If it is firm and dry, add a little hot broth before resealing.
  7. When the rice is nearly tender, remove the foil and raise the oven temperature to 400°F (205°C). Bake for 10 to 20 minutes, until the skin is browned, the rice has no hard core, and the sauce clings lightly to the grains. Check that the thickest part of each thigh reaches at least 165°F (75°C), avoiding the bone. If the chicken is done before the rice, transfer it to a plate and keep it warm while the rice finishes tightly covered.
  8. Let the casserole rest for 10 minutes. Meanwhile, steam the broccoli over gently boiling water for 4 to 6 minutes, until bright green and fork-tender.
  9. Spoon the rice into shallow bowls and place a chicken thigh over each portion. Serve with the broccoli alongside and sprinkle with parsley.

Tips

  • Use standard long-grain white rice; instant and brown rice are not direct substitutes for this liquid amount and baking schedule.
  • Keep the rice beneath the liquid and crimp the foil tightly around the baking dish to hold in steam.
  • If the rice is firm but still moist, continue baking it covered rather than adding more liquid.
  • Keep the chicken skin above the sauce and uncover only when the rice is nearly tender to help the skin brown.

Notes

Refrigerate leftovers in airtight containers for up to 4 days. Reheat covered with a splash of water or broth until thoroughly hot. Cooked portions can be frozen airtight and thawed in the refrigerator; do not freeze the raw assembled casserole.

Nutrition

Calories: 730 kcal | Protein: 37 g | Fat: 34 g | Carbohydrates: 76 g

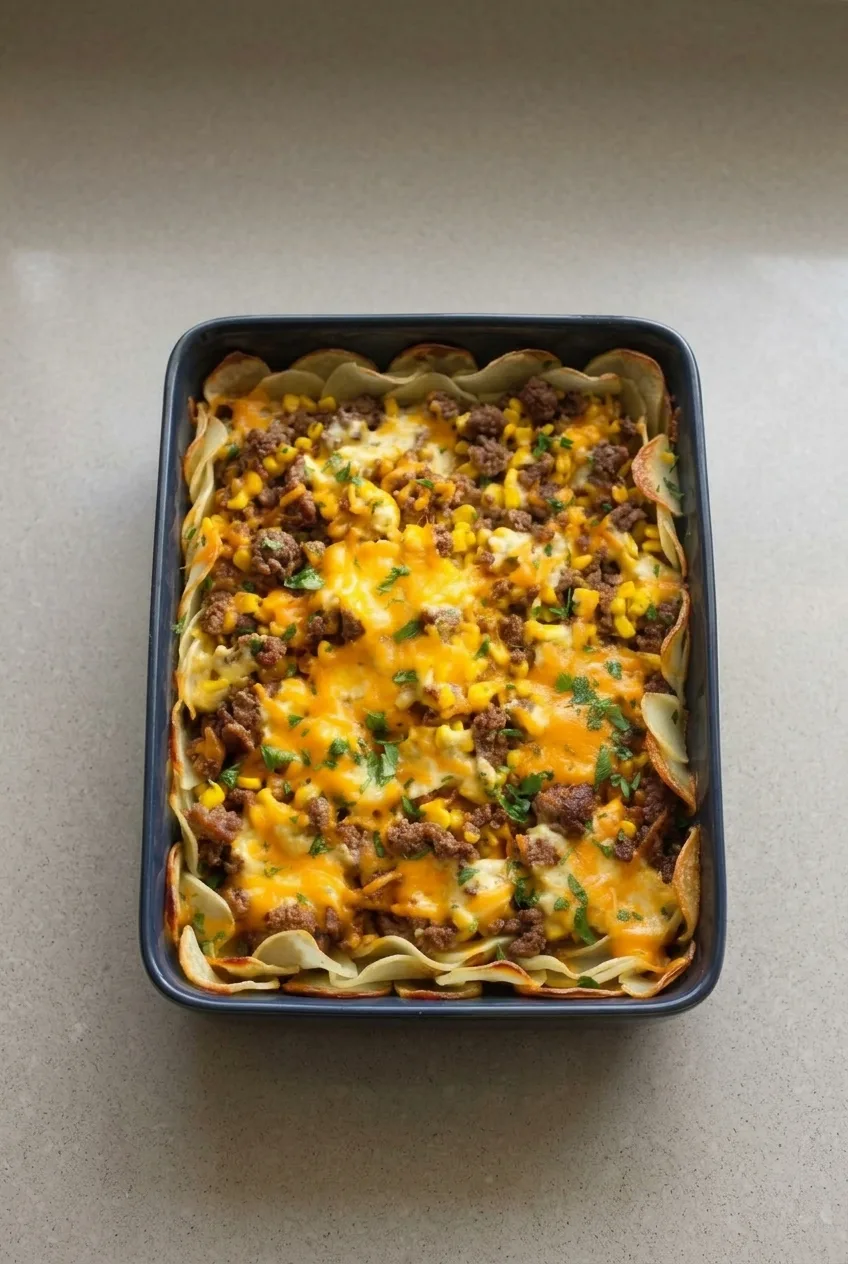
Cheesy Hamburger Potato Casserole

Overlapping potato slices line the bottom and sides of the dish, framing a creamy filling of browned beef and corn. Prebaking the potatoes gives them time to become tender before the filling goes in. Cheddar is added near the end in scattered patches, leaving the beef, corn, and lightly golden potato border visible.

The key checkpoint is the center of the potato base: a fork should slide into the slices easily before you add the filling. This casserole serves 6.

Ingredients

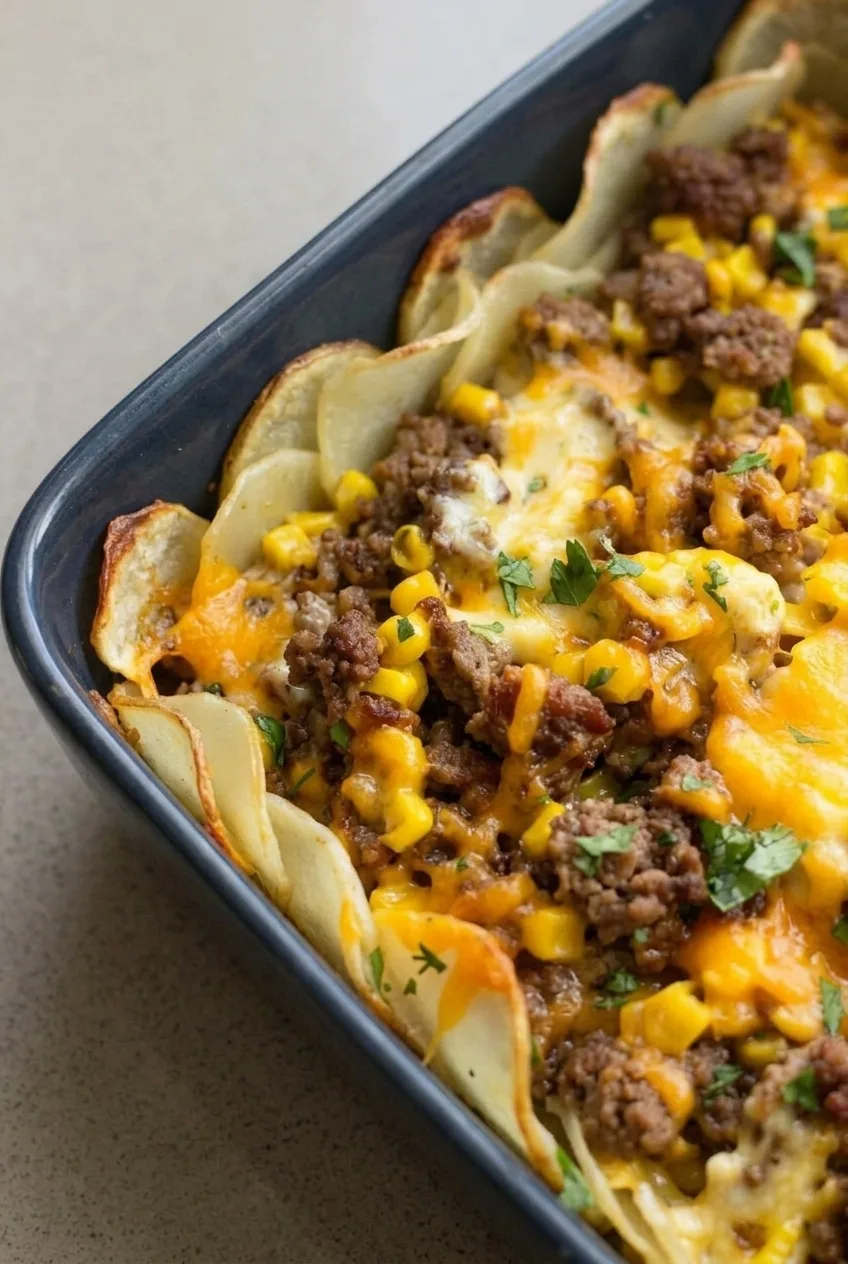
Close view of tender potato slices beside creamy beef and corn beneath melted cheddar
  • 2 pounds Yukon Gold potatoes (about 900g), sliced about 1/8 inch thick
  • 2 tablespoons butter (about 30g), melted
  • 3/4 teaspoon kosher salt, divided, or to taste
  • 1/2 teaspoon black pepper, divided
  • 1 1/4 pounds ground beef (about 575g)
  • 1 medium yellow onion (about 150g), diced
  • 2 garlic cloves, minced
  • 1 cup corn kernels (about 165g), thawed if frozen or drained if canned
  • 1 can (10.5 ounces) condensed cream of mushroom soup
  • 1/4 cup milk
  • 1 1/2 cups shredded sharp cheddar cheese (about 170g), preferably freshly shredded
  • 2 tablespoons chopped fresh parsley

How to Make Cheesy Hamburger Potato Casserole

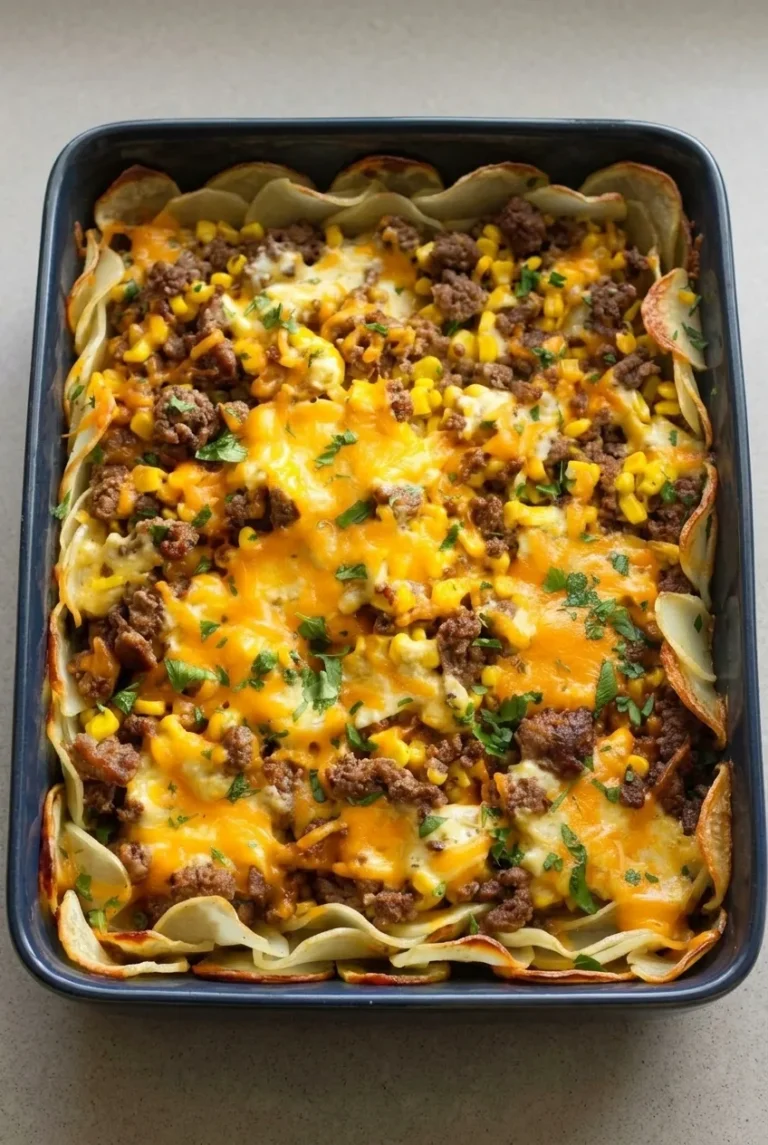
Full baking dish of cheesy hamburger potato casserole on a plain countertop
  1. Prepare the dish: Preheat the oven to 400°F (205°C). Use about 1 tablespoon of the melted butter to coat the bottom and sides of a deep 9-inch square baking dish. Slice the potatoes evenly, about 1/8 inch thick.
  2. Prebake the potato lining: Toss the slices with the remaining butter, 1/2 teaspoon salt, and 1/4 teaspoon pepper. Overlap them across the bottom of the dish and arrange more slices partway up the sides. Bake uncovered for about 30 to 40 minutes, checking at 30 minutes. Do not add the filling until a fork enters the center slices easily; bake longer if they are still firm. The exposed edges should be lightly golden.
  3. Brown the beef: While the potatoes bake, cook the ground beef and onion in a large skillet over medium-high heat for about 10 to 12 minutes, breaking up the beef, until browned throughout with no pink remaining. Reduce the heat if the beef starts to scorch. Drain excess fat, then add the garlic and cook briefly. Season with the remaining 1/4 teaspoon salt and 1/4 teaspoon pepper.
  4. Make the filling: Whisk the condensed soup and milk together in a bowl. Off the heat, stir them into the beef with the corn. The sauce should coat the beef and kernels without pooling in the skillet.
  5. Fill the potato lining: Spoon the beef mixture over the fork-tender potato base. Spread it evenly, leaving the potato slices along the upper sides exposed. Return the uncovered dish to the oven for about 7 to 10 minutes.
  6. Add the cheddar: Scatter the cheese in uneven patches, leaving some beef and corn visible. Bake for another 8 to 10 minutes, until the cheese has melted and the filling is hot and gently bubbling. If the exposed potato edges brown too quickly, loosely shield just those edges with foil.
  7. Rest and serve: Let the casserole rest for 10 minutes so the filling settles slightly. Scatter the parsley over the top and serve from the dish.

Why Prebake the Potato Lining?

The cooked beef filling needs much less oven time than the potatoes. Prebaking the thin slices uncovered helps the base become tender before the moist filling covers it and lets the exposed border begin to brown. Slice thickness, the baking dish, and the oven can all affect timing, so test near the center rather than judging by the golden edges. The potatoes beneath the filling will be tender, not crisp throughout.

Keeping the Filling Creamy, Not Greasy

Drain the browned beef before adding the soup mixture. The 1/4 cup of milk loosens the condensed soup enough to coat the beef and corn without flooding the potato base. For a different flavor, substitute one 10.5-ounce can of condensed cream of celery soup. Colby Jack can replace the cheddar, though the topping will look less distinctly orange.

What to Serve With It

Serve the casserole with a simple green salad or steamed broccoli. For another ground-beef dinner, try Ground Beef Ramen Stir Fry with Broccoli and Peppers.

Storage and Reheating

Cool leftovers and refrigerate them in an airtight container for up to 3 days. Microwave individual portions in short increments until hot, or reheat a larger portion covered in a 350°F (175°C) oven until hot throughout. The potato edges may soften after reheating.

You can assemble the casserole ahead, but a chilled dish may need longer in the oven. Check that the center is thoroughly hot rather than relying on the fresh-assembly timing. A fully baked, cooled casserole can also be tightly wrapped and frozen for up to 2 to 3 months. Thaw it in the refrigerator before reheating; the potato texture may change.

Nutrition

Approximate nutrition per serving (1/6 of the casserole): 520 calories, 30g protein, 28g fat, and 39g carbohydrates. Approximate per 100g: 150 calories, 9g protein, 8g fat, and 11g carbohydrates. Values vary with the ground beef, soup, cheese, and amount of fat drained.

Cheesy Hamburger Potato Casserole

A creamy ground beef and corn filling sits inside a tender, lightly browned potato lining and is finished with cheddar.
Course: Main Course
Cuisine: American
Prep: 20 min
Cook: 60 min
Total: 80 min
Servings: 6 Calories: 520 kcal per serving; 150 kcal per 100 g

Equipment

  • Deep 9-inch square baking dish
  • Large skillet
  • Mixing bowl
  • Whisk
  • Knife
  • Cutting board

Ingredients

Potato Lining

  • 2 pounds Yukon Gold potatoes (about 900 g), sliced about 1/8 inch thick
  • 2 tablespoons butter (about 30 g), melted
  • 3/4 teaspoon kosher salt, divided
  • 1/2 teaspoon black pepper, divided

Beef Filling

  • 1 1/4 pounds ground beef (about 575 g)
  • 1 medium yellow onion (about 150 g), diced
  • 2 garlic cloves, minced
  • 1 cup corn kernels (about 165 g), thawed if frozen or drained if canned
  • 1 can (10.5 ounces) condensed cream of mushroom soup
  • 1/4 cup milk

Topping

  • 1 1/2 cups shredded sharp cheddar cheese (about 170 g), preferably freshly shredded
  • 2 tablespoons chopped fresh parsley

Instructions

  1. Preheat the oven to 400°F (205°C). Coat the bottom and sides of a deep 9-inch square baking dish with about 1 tablespoon of the melted butter.
  2. Toss the potato slices with the remaining butter, 1/2 teaspoon salt, and 1/4 teaspoon pepper. Overlap them across the bottom of the dish and partway up the sides.
  3. Bake the potatoes uncovered for 30 to 40 minutes, checking at 30 minutes. Continue baking until a fork slides easily into the center slices and the exposed edges are lightly golden.
  4. Meanwhile, cook the ground beef and onion in a large skillet over medium-high heat for 10 to 12 minutes, breaking up the beef, until browned with no pink remaining. Drain excess fat.
  5. Add the garlic to the skillet and cook briefly. Season with the remaining 1/4 teaspoon salt and 1/4 teaspoon pepper.
  6. Whisk the condensed soup and milk together. Remove the skillet from the heat, then stir the soup mixture and corn into the beef.
  7. Spoon the filling over the tender potato base and spread it evenly, leaving the potato slices along the upper sides exposed. Bake uncovered for 7 to 10 minutes.
  8. Scatter the cheddar over the filling in uneven patches, leaving some beef and corn visible. Bake for another 8 to 10 minutes, until the cheese has melted and the filling is hot and gently bubbling. Loosely shield the exposed potato edges with foil if they brown too quickly.
  9. Rest the casserole for 10 minutes. Scatter the parsley over the top and serve.

Tips

  • Check the potato slices in the center with a fork before adding the filling; golden edges alone do not indicate that the base is tender.
  • Drain excess fat from the beef before adding the soup mixture to help keep the filling creamy rather than greasy.
  • Slice the potatoes evenly so they cook at a similar rate.
  • If the exposed potato edges brown too quickly, loosely cover just the edges with foil.

Variations

  • Cream of Celery Version: Replace the cream of mushroom soup with one 10.5-ounce can of condensed cream of celery soup.
  • Colby Jack Topping: Replace the cheddar with Colby Jack; the topping will look less distinctly orange.

Notes

Refrigerate cooled leftovers in an airtight container for up to 3 days. Reheat individual portions in the microwave or larger portions covered in a 350°F (175°C) oven until hot throughout. A fully baked, cooled casserole can be wrapped tightly and frozen for 2 to 3 months; thaw in the refrigerator before reheating. Chilled or reheated casserole may need extra time, and the potato edges may soften.

Nutrition

Calories: 520 kcal per serving; 150 kcal per 100 g | Protein: 30 g per serving; 9 g per 100 g | Fat: 28 g per serving; 8 g per 100 g | Carbohydrates: 39 g per serving; 11 g per 100 g

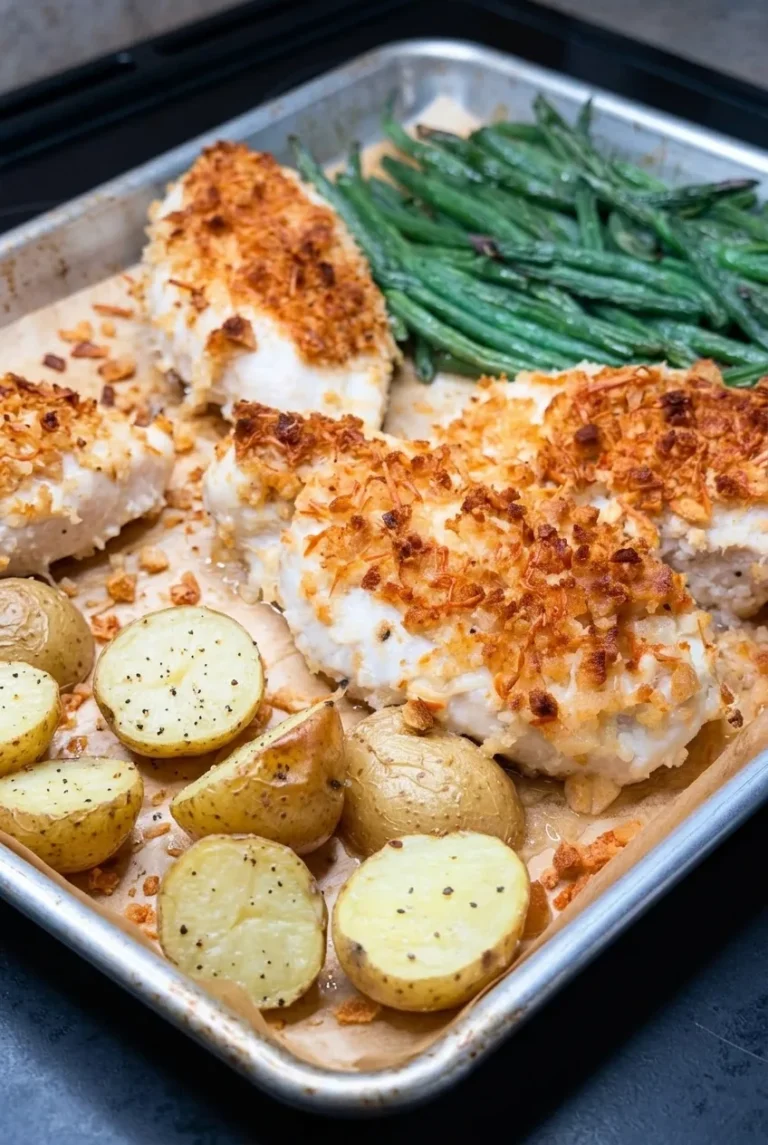
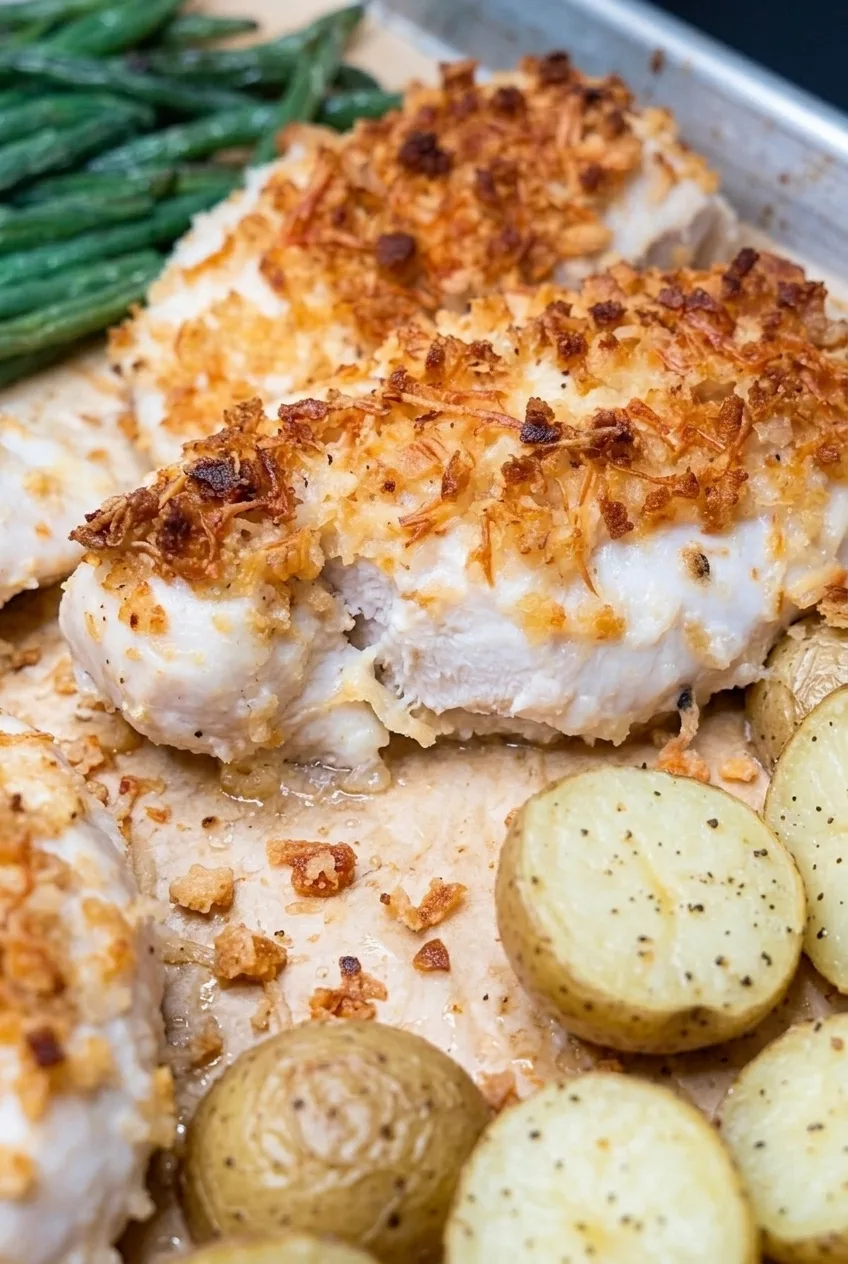
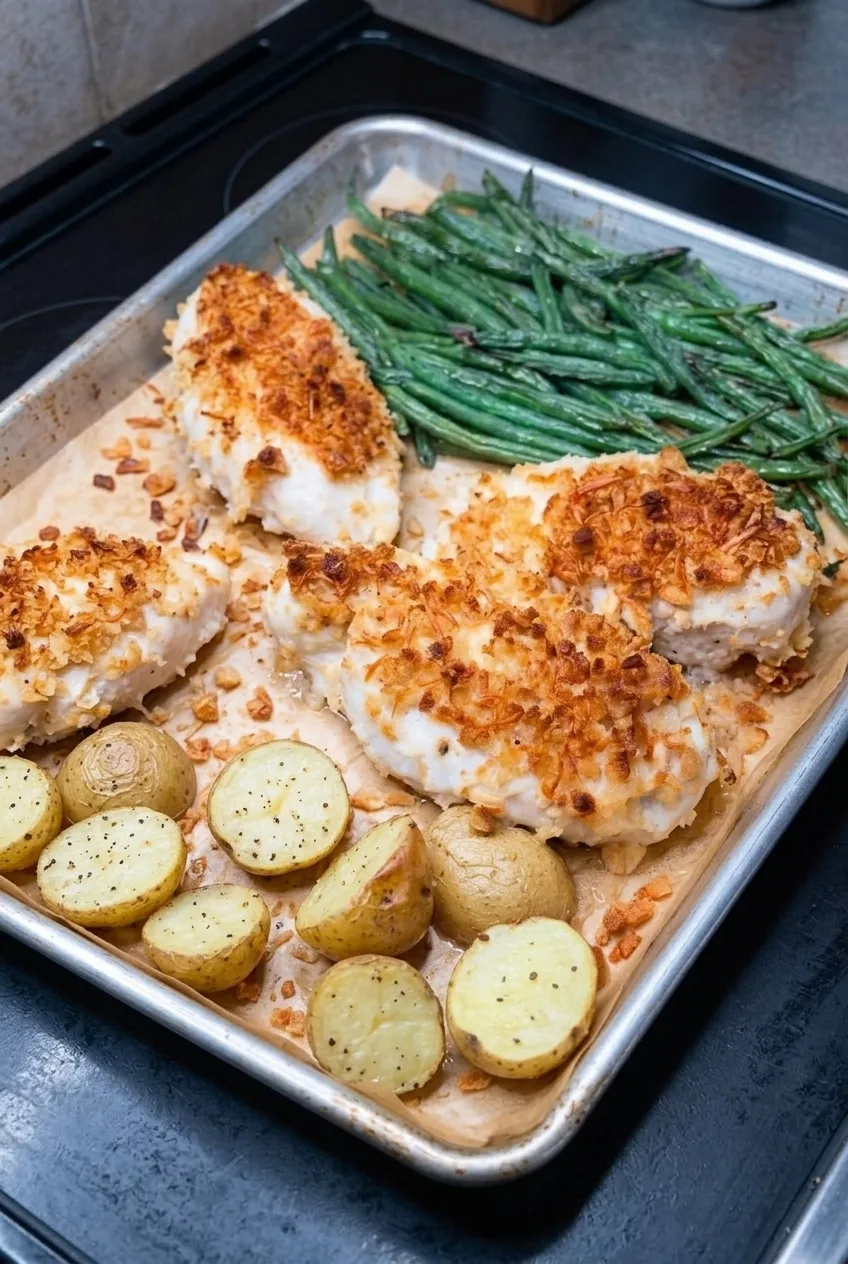
Parmesan Crusted Chicken Sheet Pan Dinner

Intact chicken breasts roast with a coarse Parmesan-panko crust on top, alongside halved baby potatoes and whole green beans. The ingredients need different amounts of oven time: potatoes get a head start, chicken goes on next, and beans are added last. Check each component on its own schedule. If the chicken reaches its safe temperature before the potatoes are tender, take it off the pan and let the vegetables finish roasting.

Ingredients

Close view of golden Parmesan-panko crust and cooked white chicken beside roasted potatoes

Servings: 4 · Prep: 20 minutes · Cook: about 35–40 minutes · Total: about 55–60 minutes

  • 4 boneless, skinless chicken breasts, about 6–8 ounces each (about 1 3/4–2 pounds total; 850g)
  • 1 pound baby potatoes, halved (450g)
  • 12 ounces fresh green beans, trimmed (340g)
  • 1/2 cup finely shredded Parmesan cheese (45g)
  • 2/3 cup panko breadcrumbs (40g)
  • 3 tablespoons olive oil, divided
  • 1 teaspoon garlic powder
  • 1 teaspoon kosher salt, divided, or to taste
  • 1/2 teaspoon freshly ground black pepper, divided

Optional for serving: lemon wedges. Regular breadcrumbs can replace panko, but the crust will be finer and less chunky. Gluten-free panko is another option if needed.

How to Make Parmesan Crusted Chicken on a Sheet Pan

Wider view of crusted chicken, halved potatoes, and green beans arranged on a rimmed sheet pan
  1. Preheat the oven: Set a rack near the center and heat the oven to 425°F (220°C). Use a large rimmed sheet pan, preferably about 18 by 13 inches. Line it with parchment rated for that temperature, or lightly oil the bare pan.
  2. Start the potatoes: Toss the potatoes with 1 tablespoon olive oil, 1/4 teaspoon salt, and 1/8 teaspoon pepper. Spread them cut-side down in one layer, leaving room for the chicken and beans. Roast uncovered for 15 minutes.
  3. Coat the chicken: While the potatoes roast, pat the breasts dry and lightly coat them with 1 tablespoon olive oil. Mix the Parmesan, panko, garlic powder, 1/2 teaspoon salt, and 1/4 teaspoon pepper. Press the mixture firmly onto the upper surface of each breast.
  4. Add the chicken: Gently move or turn the potatoes if needed, keeping them in one layer. Set the chicken on the pan crust-side up, with space between the pieces. Roast for 8–10 minutes. Do not flip the chicken.
  5. Add the green beans: Toss the beans with the remaining 1 tablespoon oil, 1/4 teaspoon salt, and 1/8 teaspoon pepper. Spread them in a separate area of the pan. Roast for about 12–15 minutes more, until tender with a little bite. Begin checking the chicken about 18 minutes after adding it to the oven.
  6. Check and rest: Remove each breast when an instant-read thermometer inserted into its thickest part reads 165°F (75°C). Rest the chicken for about 5 minutes. Check that the potatoes are fork-tender and the beans are tender; if either needs more time, keep roasting it without the chicken.

How to Keep the Parmesan Crust on the Chicken

Patting the chicken dry helps the crumbs adhere to its lightly oiled surface. Press the topping on firmly and keep the coated side facing up throughout roasting. The crust should look golden and textured, but its color does not tell you whether the chicken has reached 165°F.

Pan Space and Chicken Thickness

Keep the chicken, potatoes, and beans in separate, uncrowded areas so they roast rather than steam. If they cannot fit in one layer, use a second rimmed sheet pan.

Similarly sized breasts are easiest to manage. Check thinner pieces early and remove each one as it reaches 165°F; larger potato halves may need extra time after the chicken comes out.

Storing and Reheating Leftovers

Refrigerate cooled leftovers in an airtight container for up to 3–4 days. Reheat in a 375°F (190°C) oven until hot throughout. The coating softens in storage, though oven reheating can restore some texture. Cooked portions can be frozen, but thawing and reheating may leave the crust soggy.

Nutrition

Approximate per serving, based on 4 servings: 545 calories, 57g protein, 19g fat, and 34g carbohydrates. Approximate per 100g of ingredients before cooking: 125 calories, 13g protein, 4g fat, and 8g carbohydrates. Per-100g values will change as moisture cooks off.

Parmesan Crusted Chicken Sheet Pan Dinner

Chicken breasts with a Parmesan-panko crust roast alongside baby potatoes and green beans on one sheet pan.
Course: Main Course
Cuisine: American
Prep: 20 min
Cook: 40 min
Total: 60 min
Servings: 4 Calories: 545 kcal

Equipment

  • Large rimmed sheet pan
  • Instant-read thermometer

Ingredients

Chicken and Crust

  • 4 boneless, skinless chicken breasts, about 6–8 ounces each (about 1 3/4–2 pounds total; 850g)
  • 1/2 cup finely shredded Parmesan cheese (45g)
  • 2/3 cup panko breadcrumbs (40g)
  • 1 teaspoon garlic powder
  • 1 tablespoon olive oil
  • 1/2 teaspoon kosher salt
  • 1/4 teaspoon freshly ground black pepper

Vegetables

  • 1 pound baby potatoes, halved (450g)
  • 12 ounces fresh green beans, trimmed (340g)
  • 2 tablespoons olive oil, divided
  • 1/2 teaspoon kosher salt, divided
  • 1/4 teaspoon freshly ground black pepper, divided

For Serving

  • Lemon wedges, optional

Instructions

  1. Preheat the oven to 425°F (220°C) with a rack near the center. Line a large rimmed sheet pan with temperature-rated parchment or lightly oil the pan.
  2. Toss the potatoes with 1 tablespoon olive oil, 1/4 teaspoon salt, and 1/8 teaspoon pepper. Spread them cut-side down in a single layer and roast for 15 minutes.
  3. While the potatoes roast, pat the chicken breasts dry and lightly coat them with 1 tablespoon olive oil.
  4. Mix the Parmesan, panko, garlic powder, 1/2 teaspoon salt, and 1/4 teaspoon pepper. Press the mixture firmly onto the upper surface of each chicken breast.
  5. Move or turn the potatoes if needed, keeping them in one layer. Place the chicken on the pan crust-side up with space between pieces. Roast for 8–10 minutes without flipping.
  6. Toss the green beans with the remaining 1 tablespoon olive oil, 1/4 teaspoon salt, and 1/8 teaspoon pepper. Spread them in a separate area of the pan.
  7. Roast for about 12–15 minutes more, until the beans are tender with a little bite. Begin checking the chicken about 18 minutes after adding it to the oven.
  8. Remove each chicken breast when an instant-read thermometer inserted into its thickest part reads 165°F (75°C). Rest the chicken for about 5 minutes.
  9. Check that the potatoes are fork-tender and the beans are tender. If either needs more time, remove the chicken and continue roasting the vegetables.

Tips

  • Pat the chicken dry before oiling it so the crust adheres well.
  • Press the Parmesan-panko topping firmly onto the chicken and keep the crust side facing up.
  • Keep the chicken and vegetables in separate, uncrowded areas so they roast rather than steam; use a second pan if needed.
  • Check thinner chicken breasts early and remove each one as it reaches 165°F (75°C).
  • The crust’s color does not indicate whether the chicken is safely cooked.

Variations

  • Regular Breadcrumb Crust: Replace the panko with regular breadcrumbs for a finer, less chunky crust.
  • Gluten-Free Crust: Use gluten-free panko in place of regular panko.

Notes

Refrigerate cooled leftovers in an airtight container for up to 3–4 days. Reheat in a 375°F (190°C) oven until hot throughout. Per 100g of ingredients before cooking, nutrition is approximately 125 calories, 13g protein, 4g fat, and 8g carbohydrates.

Nutrition

Calories: 545 kcal | Protein: 57 g | Fat: 19 g | Carbohydrates: 34 g

Mexican Chicken with Cheese Sauce

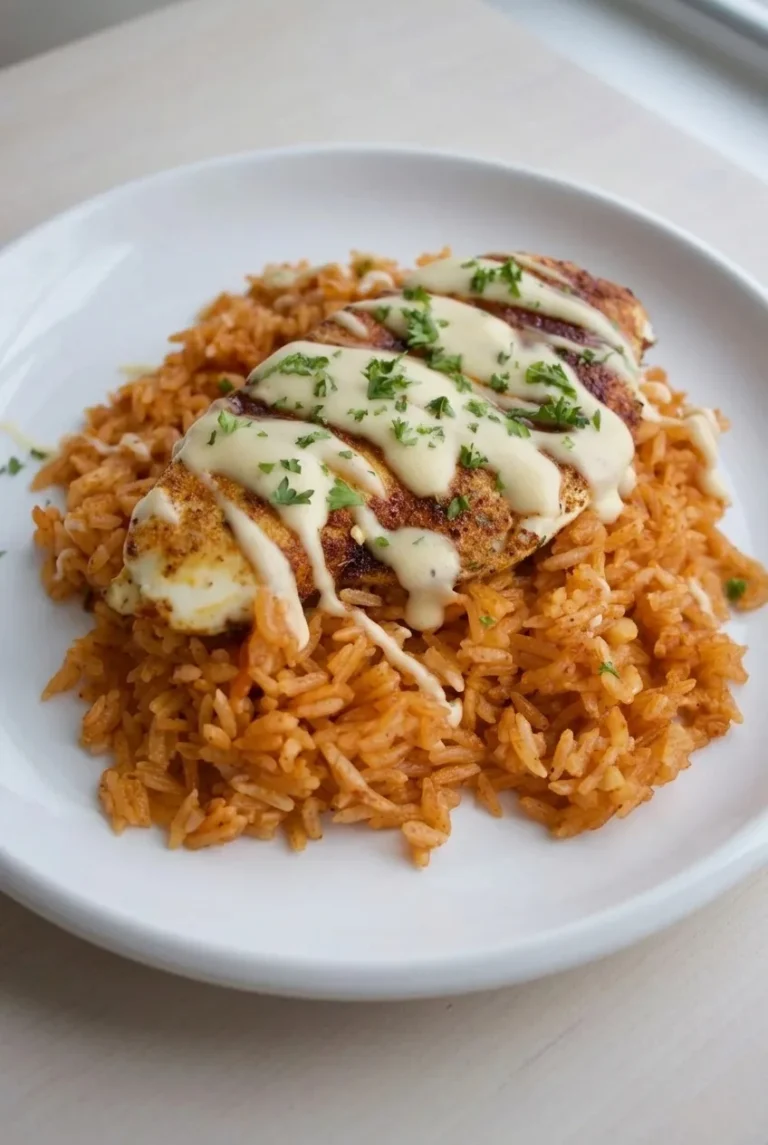
Browned chicken breast sits over Mexican-style rice, with smooth white cheese sauce drizzled across the top. The sauce is made separately rather than melted onto the chicken, so it stays pourable and leaves some of the browned surface visible. Prepared rice keeps the work focused on cooking the cutlets evenly and melting the cheese gently. Makes 4 servings in about 35 minutes.

Ingredients for Mexican Chicken with Cheese Sauce

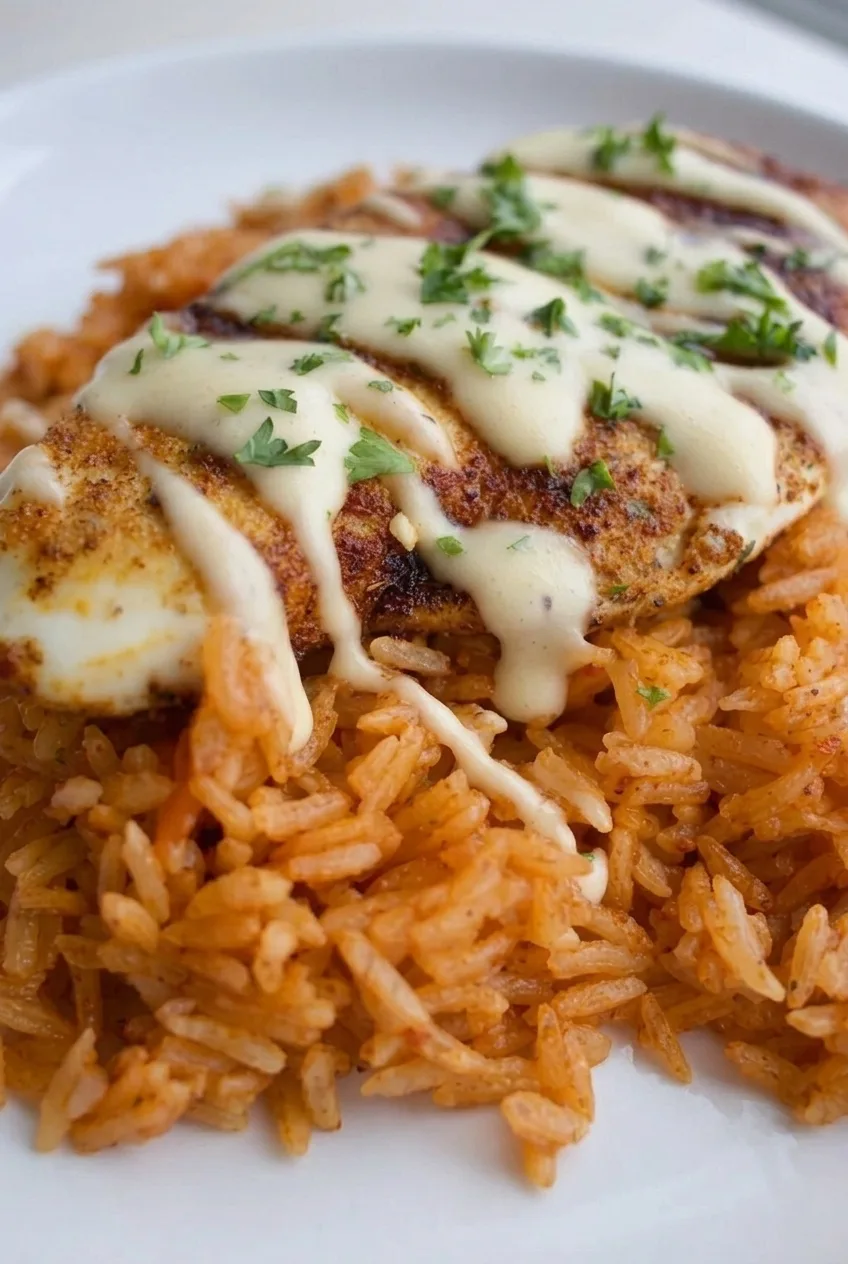
Close view of browned chicken, smooth white cheese sauce and distinct orange rice grains
  • About 1 1/4 pounds boneless skinless chicken breasts (570g), cut lengthwise into 4 cutlets
  • 1 teaspoon chili powder
  • 1/2 teaspoon ground cumin
  • 1/2 teaspoon garlic powder
  • 3/4 teaspoon kosher salt, adjusted for the type of salt used
  • 1 tablespoon neutral cooking oil
  • 1/2 cup whole milk (120g), plus more as needed
  • 4 ounces white American cheese (about 115g), torn or chopped
  • 2 ounces Monterey Jack cheese (about 55g), shredded, about 1/2 cup
  • 3 cups prepared Mexican-style rice (about 480g)
  • 1 tablespoon finely chopped fresh cilantro

The rice can be homemade or purchased. Finely chopped parsley can replace the cilantro.

How to Make Mexican Chicken with Cheese Sauce

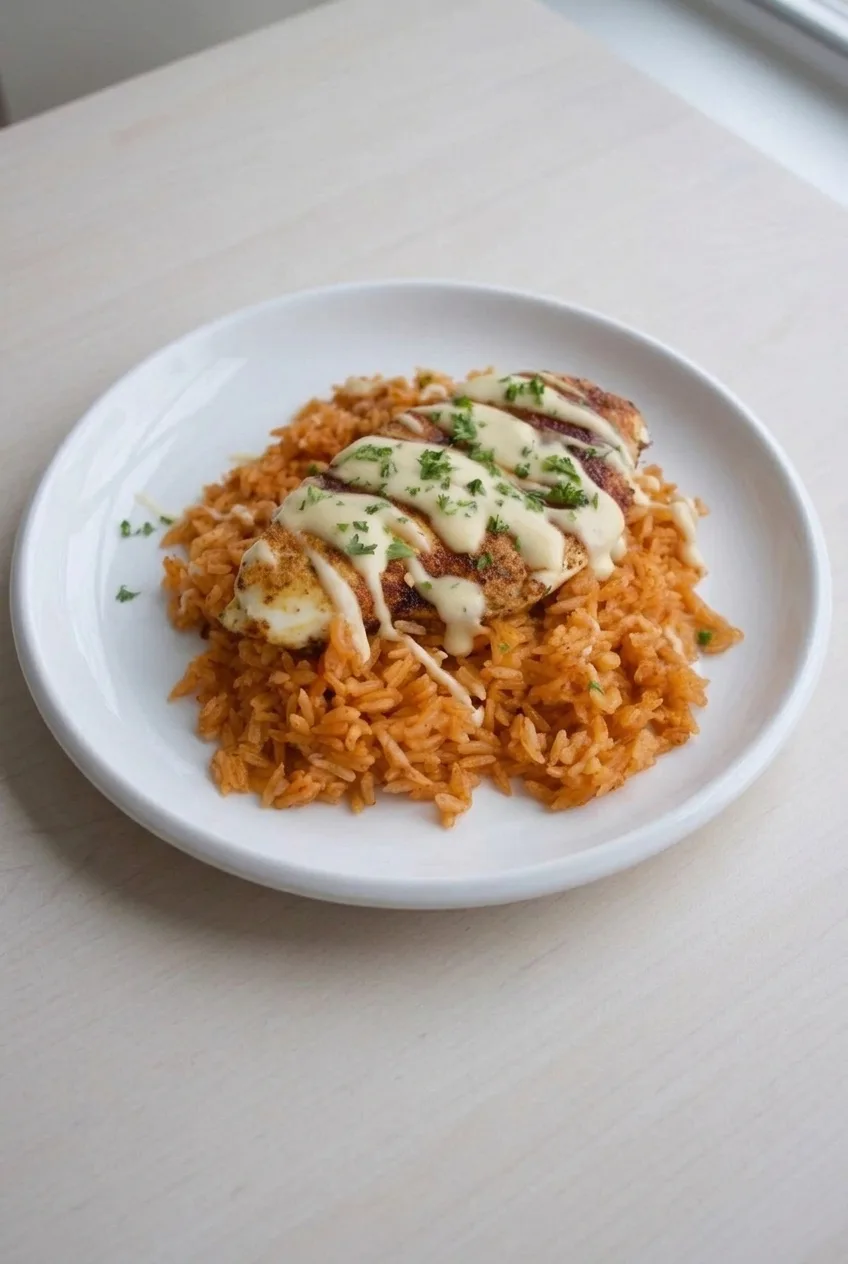
Full plate of Mexican chicken over orange rice with white cheese sauce and chopped cilantro
  1. Season the chicken: Cut the breasts lengthwise into 4 roughly even cutlets, about 1/2 to 3/4 inch thick. Pat dry, then season both sides with the chili powder, cumin, garlic powder, and salt.
  2. Cook the cutlets: Briefly preheat a 12-inch skillet over medium-high heat. Add the oil and chicken in a single layer. Cook uncovered for about 4 to 6 minutes per side, turning once, until browned. Reduce the heat to medium if the spices darken before the chicken cooks through. Start checking after about 4 minutes on the second side; remove each cutlet when its thickest part reaches 165°F (75°C). If the pan is crowded, cook in batches, adding a little more oil only if it becomes dry.
  3. Warm the rice: Heat the prepared rice separately until hot, keeping the grains loose. Taste it before serving, since prepared rice varies in saltiness. Let the chicken rest for about 3 minutes while you finish the rice and sauce.
  4. Make the cheese sauce: Gently warm the milk in a small, heavy-bottomed saucepan over low heat. Add the cheeses in handfuls, stirring frequently until melted and smooth, about 4 to 6 minutes. Do not let the sauce boil. Remove it from the heat once glossy; if it is too thick to drizzle, stir in more milk 1 tablespoon at a time.
  5. Plate: Divide the rice into 4 loose mounds and place one whole cutlet over each. Drizzle the sauce in broad ribbons, leaving some browned chicken visible, then sprinkle lightly with cilantro.

How to Keep the Cheese Sauce Smooth

Warm milk and low heat help the cheeses melt into a smooth sauce. Once the cheese has melted, prolonged heating or boiling can make it grainy. The finished sauce should fall from a spoon in thick, pourable ribbons; if it thickens before serving, warm it gently and add milk a tablespoon at a time.

Chicken Thickness and Doneness

The skillet timing is an estimate for 1/2- to 3/4-inch cutlets. Thicker pieces need longer, and browning alone does not mean the center is cooked. Check the thickest part of each cutlet with an instant-read thermometer before adding the sauce.

Serving and Leftovers

Keep the rice beneath the chicken rather than mixing everything in the skillet. Warm black beans or sliced avocado can be served alongside. For a different chicken dinner with avocado, try these baked chicken avocado roll-ups.

Refrigerate leftovers promptly in covered containers for up to 4 days, keeping the sauce separate when practical. Reheat the chicken and rice until hot throughout. Warm the sauce gently over low heat, adding a splash of milk if it has thickened. The rice can also be prepared ahead and reheated for serving.

Nutrition

Approximate nutrition per serving, based on 4 servings: 540 calories, 44g protein, 22g fat, and 39g carbohydrates. Approximate values per 100g: 155 calories, 13g protein, 6g fat, and 11g carbohydrates. Values vary with the prepared rice and cheeses used; optional sides are not included.

Mexican Chicken with Cheese Sauce

Seasoned chicken cutlets are served over Mexican-style rice with a smooth white cheese sauce.
Course: Main Course
Cuisine: Mexican
Prep: 10 min
Cook: 25 min
Total: 35 min
Servings: 4 Calories: 540 kcal

Equipment

  • 12-inch skillet
  • Small heavy-bottomed saucepan
  • Instant-read thermometer

Ingredients

For the Chicken

  • About 1 1/4 pounds boneless skinless chicken breasts (570 g), cut lengthwise into 4 cutlets
  • 1 teaspoon chili powder
  • 1/2 teaspoon ground cumin
  • 1/2 teaspoon garlic powder
  • 3/4 teaspoon kosher salt, adjusted for the type of salt used
  • 1 tablespoon neutral cooking oil

For the Cheese Sauce

  • 1/2 cup whole milk (120 g), plus more as needed
  • 4 ounces white American cheese (about 115 g), torn or chopped
  • 2 ounces Monterey Jack cheese (about 55 g), shredded

For Serving

  • 3 cups prepared Mexican-style rice (about 480 g)
  • 1 tablespoon finely chopped fresh cilantro

Instructions

  1. Cut the chicken breasts lengthwise into 4 roughly even cutlets, about 1/2 to 3/4 inch thick. Pat dry and season both sides with the chili powder, cumin, garlic powder, and salt.
  2. Preheat a 12-inch skillet over medium-high heat. Add the oil and chicken in a single layer.
  3. Cook uncovered for 4 to 6 minutes per side, turning once, until browned. Reduce the heat to medium if the spices darken too quickly. Check each cutlet with an instant-read thermometer and remove it when the thickest part reaches 165°F (75°C). Cook in batches if needed.
  4. Heat the prepared rice separately until hot, keeping the grains loose. Taste and adjust for saltiness as needed.
  5. Let the chicken rest for about 3 minutes while you make the sauce.
  6. Gently warm the milk in a small heavy-bottomed saucepan over low heat. Add the cheeses in handfuls, stirring frequently until melted and smooth, about 4 to 6 minutes. Do not let the sauce boil.
  7. Remove the sauce from the heat when glossy. If it is too thick to drizzle, stir in more milk 1 tablespoon at a time.
  8. Divide the rice among 4 plates and place a chicken cutlet over each portion. Drizzle with cheese sauce and sprinkle with cilantro.

Tips

  • Use cutlets of similar thickness so they cook evenly.
  • Reduce the skillet heat if the spices start to darken before the chicken is cooked through.
  • Check the thickest part of each cutlet with a thermometer; browning alone does not confirm doneness.
  • Keep the cheese sauce over low heat and do not let it boil to help prevent a grainy texture.
  • If the sauce thickens before serving, warm it gently and add milk a tablespoon at a time.

Variations

  • Parsley Garnish: Use finely chopped parsley instead of cilantro.

Notes

Refrigerate leftovers promptly in covered containers for up to 4 days; store the sauce separately when practical. Reheat the chicken and rice until hot throughout, and warm the sauce gently with a splash of milk if needed.

Nutrition

Calories: 540 kcal | Protein: 44 g | Fat: 22 g | Carbohydrates: 39 g

Oven-Baked Boneless Pork Chops

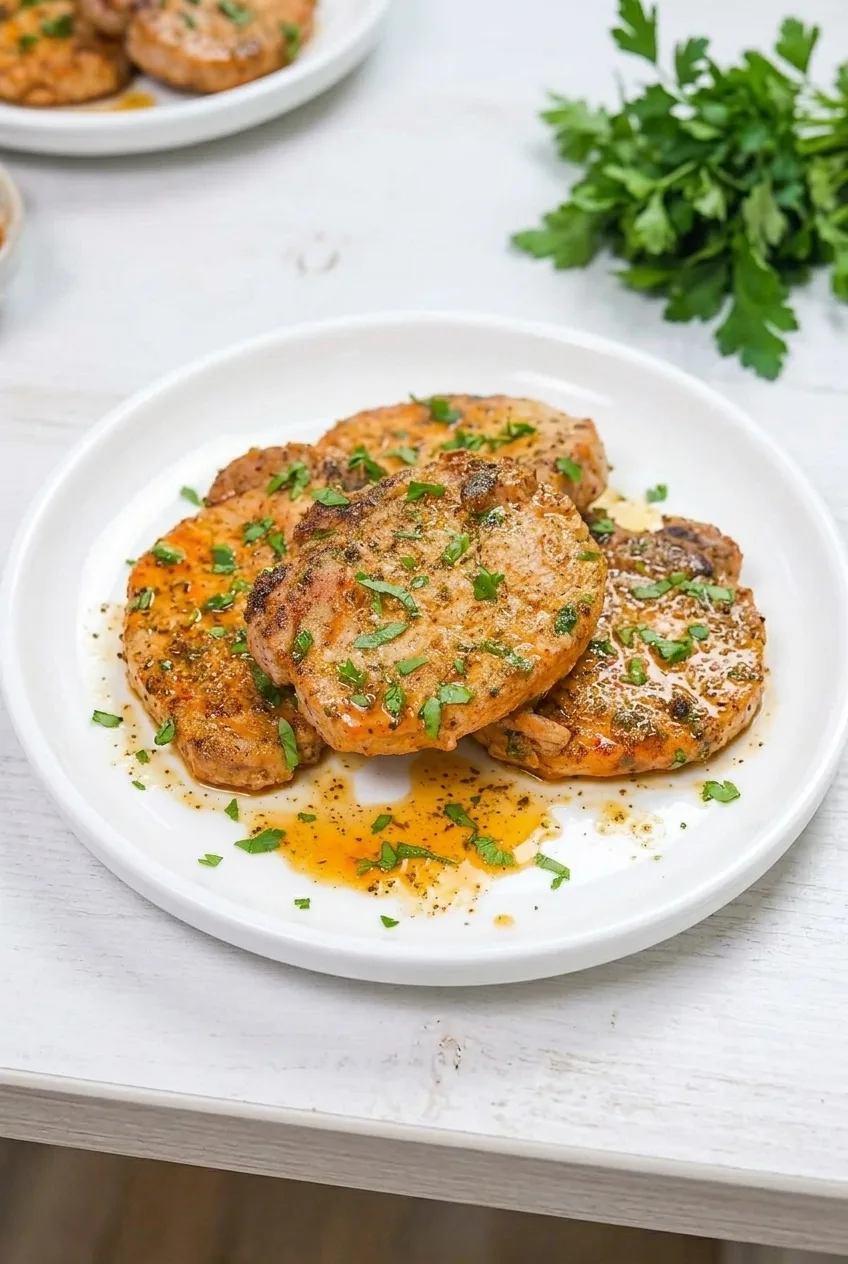
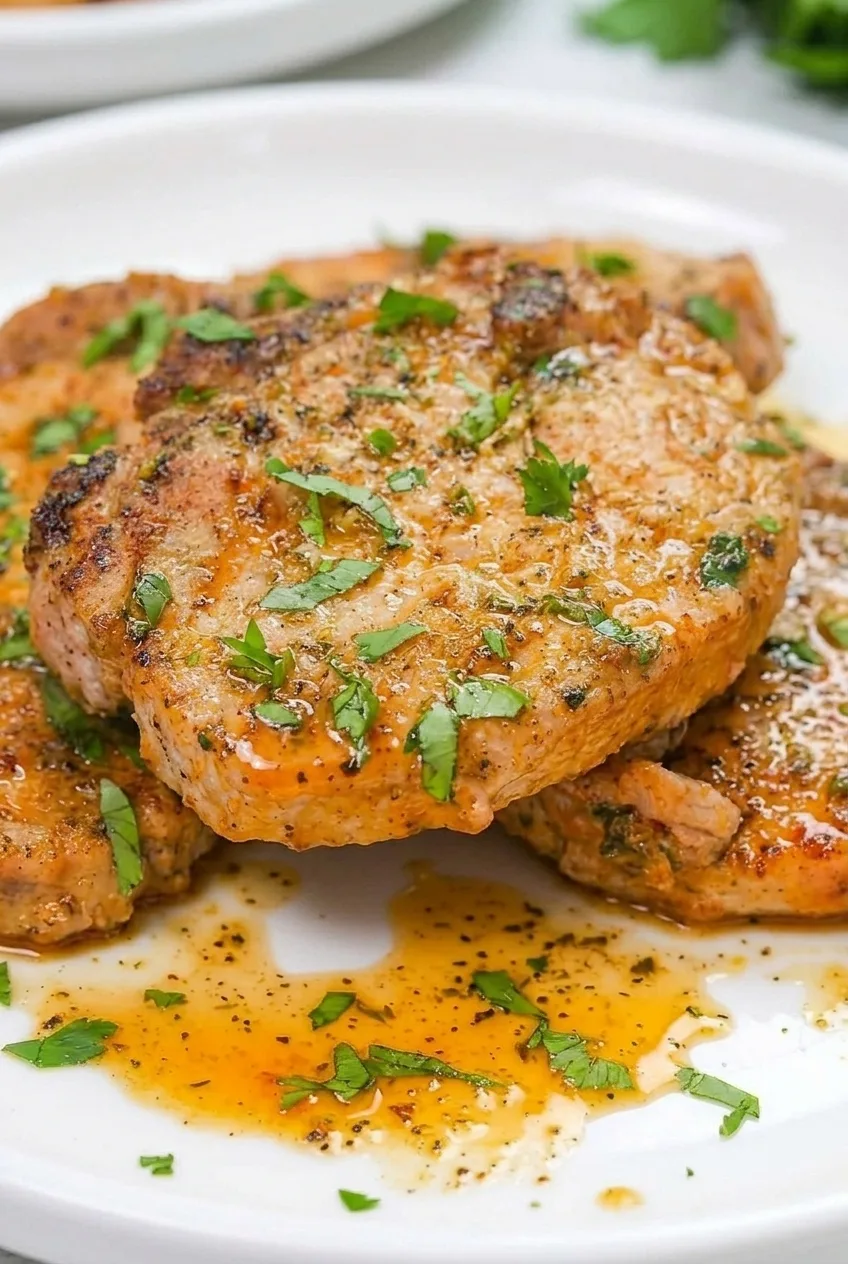
These thick boneless pork chops bake uncovered at 400°F (205°C), without a skillet sear. Paprika gives them a warm orange-gold surface with a few browned spots, while butter stirred into the baking juices makes a light, glossy finish—not a thick sauce.

Lean pork can dry out quickly, so choose chops of similar thickness and check them with a thermometer rather than relying on the clock. Remove each chop as it reaches the target temperature, then let it rest while you collect the seasoned juices.

Ingredients for Oven-Baked Boneless Pork Chops

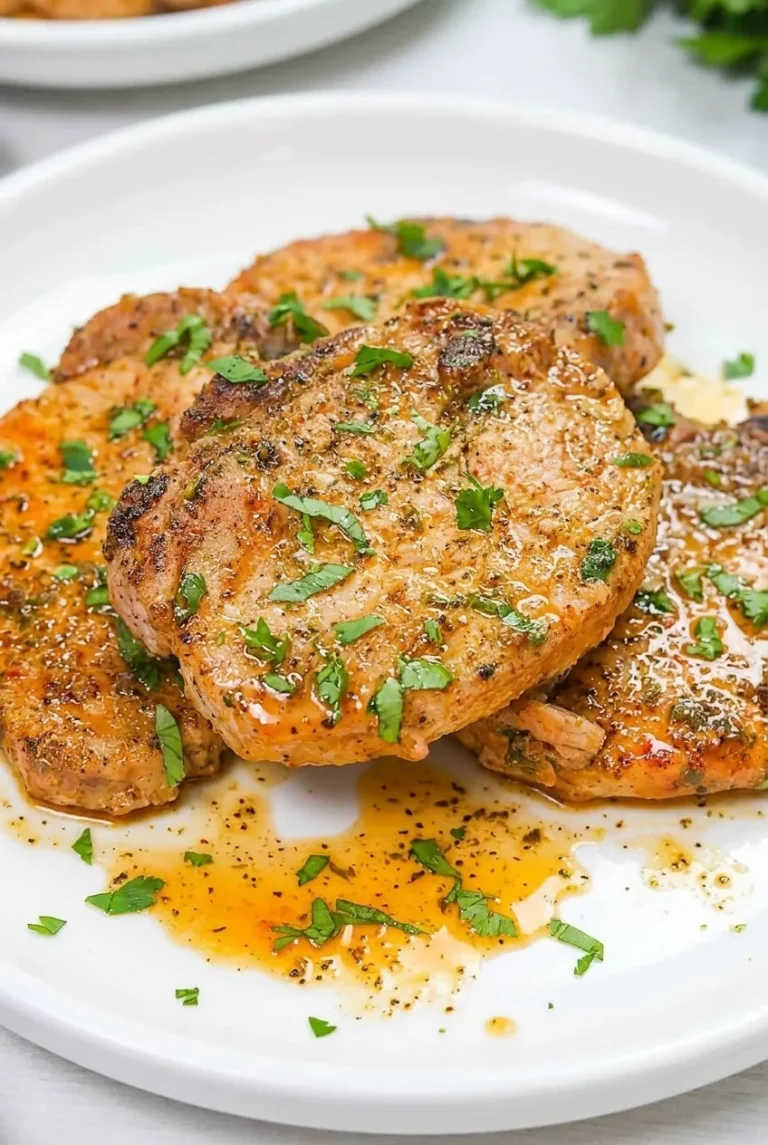
Full plate of overlapping boneless pork chops with parsley and seasoned juices on a dining surface
  • 4 boneless pork chops, about 1 inch thick and 6–8 ounces each (about 1½–2 pounds total)
  • 1 tablespoon olive oil
  • 1 teaspoon paprika
  • 1 teaspoon garlic powder
  • ½ teaspoon dried thyme
  • ¾ teaspoon kosher salt, adjusted for the brand
  • ½ teaspoon freshly ground black pepper
  • 1 tablespoon unsalted butter
  • 1 tablespoon chopped fresh flat-leaf parsley

Choose chops as close in thickness as possible so they cook evenly. Dried oregano can replace the thyme; keep the paprika for the orange-gold color.

Close view of a thick pork chop’s paprika-speckled surface, parsley, and glossy juices

How to Bake Boneless Pork Chops

  1. Preheat the oven: Set a rack in the center and fully preheat the oven to 400°F. Have a shallow 9-by-13-inch baking dish ready; lightly oil it if needed.
  2. Season the chops: Pat the pork dry, then rub both sides with the olive oil. Mix the paprika, garlic powder, thyme, salt, and pepper in a small bowl and sprinkle evenly over both sides.
  3. Bake uncovered: Arrange the chops in one layer with a little space between them. Bake for approximately 15–22 minutes, beginning temperature checks at 12 minutes. Insert an instant-read thermometer horizontally through the side of each chop into its thickest center. Transfer each chop to a plate when it reaches 145°F (65°C); smaller chops may finish first. Expect a few lightly browned spots, but do not use color alone to judge doneness.
  4. Rest and collect the juices: Rest the chops for 5 minutes. Stir the butter into the hot drippings in the baking dish until melted, then add any juices from the resting plate.
  5. Finish and serve: Loosely overlap the whole chops on a serving plate. Spoon the buttery juices over them and scatter the parsley on top.

How Long to Bake Boneless Pork Chops

The 15–22-minute estimate applies to roughly 1-inch-thick, 6–8-ounce chops. Thinner or smaller chops can cook substantially faster, so check them sooner. Remove each chop as it reaches 145°F rather than leaving the smaller ones in until every piece is done.

There is no need to flip the chops. Keep them spaced apart during baking so their surfaces can brown lightly instead of steaming; overlap them only for serving.

Making the Most of the Pan Juices

A baking dish keeps the drippings easier to collect than a wide sheet pan. Lean chops may release only a little liquid, so the butter and juices will make a light coating, not gravy. Spoon what you have over the whole chops and let a little collect on the plate. Mashed potatoes and green beans make simple sides for catching the remaining juices.

How to Store and Reheat

Refrigerate cooled leftovers with their juices in an airtight container for up to 3 days. Reheat covered in a 300°F (150°C) oven until warmed through, keeping the juices with the chops to limit drying.

Nutrition

Approximate per serving (1 whole chop with its share of seasoning and finishing juices): 320 calories, 37g protein, 19g fat, and 2g carbohydrates. Approximate per 100g cooked: 230 calories, 27g protein, 14g fat, and 1g carbohydrates. Values vary with chop size, fat content, cooking loss, and how much of the oil and juices are served.

Oven-Baked Boneless Pork Chops

Thick boneless pork chops bake uncovered with paprika and garlic, then get finished with buttery pan juices and parsley.
Course: Main Course
Cuisine: American
Prep: 10 min
Cook: 22 min
Total: 37 min
Servings: 4 Calories: 320 kcal

Equipment

  • Oven
  • 9-by-13-inch baking dish
  • Instant-read thermometer
  • Small bowl

Ingredients

For the pork chops

  • 4 boneless pork chops, about 1 inch thick and 6–8 ounces each (about 1½–2 pounds total)
  • 1 tablespoon olive oil
  • 1 teaspoon paprika
  • 1 teaspoon garlic powder
  • ½ teaspoon dried thyme
  • ¾ teaspoon kosher salt, adjusted for the brand
  • ½ teaspoon freshly ground black pepper
  • 1 tablespoon unsalted butter
  • 1 tablespoon chopped fresh flat-leaf parsley

Instructions

  1. Preheat the oven to 400°F (205°C) with a rack in the center. Lightly oil a shallow 9-by-13-inch baking dish if needed.
  2. Pat the pork chops dry and rub both sides with olive oil.
  3. Mix the paprika, garlic powder, thyme, salt, and pepper in a small bowl. Sprinkle the seasoning evenly over both sides of the chops.
  4. Arrange the chops in one layer in the baking dish, leaving space between them.
  5. Bake uncovered for approximately 15–22 minutes, beginning temperature checks at 12 minutes. Insert an instant-read thermometer horizontally through the side of each chop into its thickest center.
  6. Transfer each chop to a plate as soon as it reaches 145°F (65°C). Rest for 5 minutes.
  7. Stir the butter into the hot drippings in the baking dish until melted, then add any juices from the resting plate.
  8. Arrange the chops on a serving plate, spoon the buttery juices over them, and scatter the parsley on top.

Tips

  • Choose chops of similar thickness so they cook evenly.
  • Check each chop separately; smaller chops may reach 145°F before the others.
  • Use a thermometer rather than color to judge doneness.
  • Keep the chops spaced apart in the baking dish and do not flip them.
  • Use a baking dish rather than a wide sheet pan to make the drippings easier to collect.

Variations

  • Oregano Pork Chops: Replace the dried thyme with dried oregano and keep the paprika for its orange-gold color.

Notes

Refrigerate cooled leftovers with their juices in an airtight container for up to 3 days. Reheat covered in a 300°F (150°C) oven until warmed through. Nutrition estimates are per serving; per 100 g cooked, approximately 230 calories, 27 g protein, 14 g fat, and 1 g carbohydrates.

Nutrition

Calories: 320 kcal | Protein: 37 g | Fat: 19 g | Carbohydrates: 2 g

Garlic Parmesan Chicken Skewers

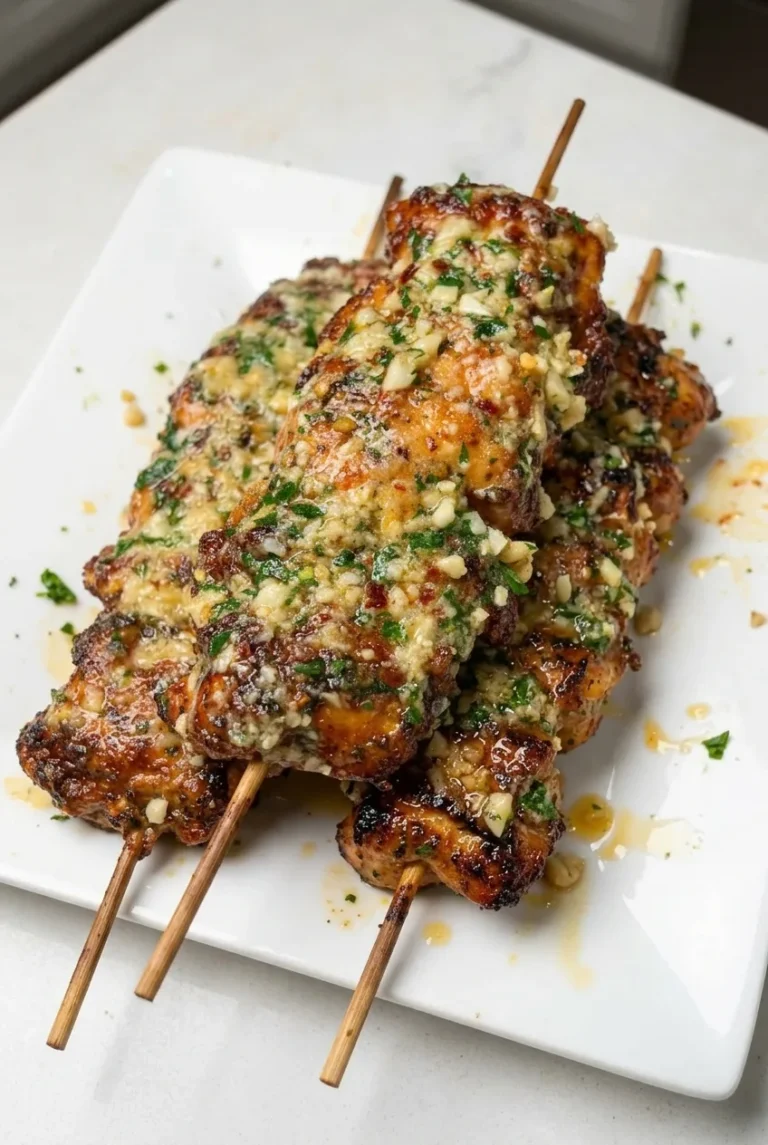
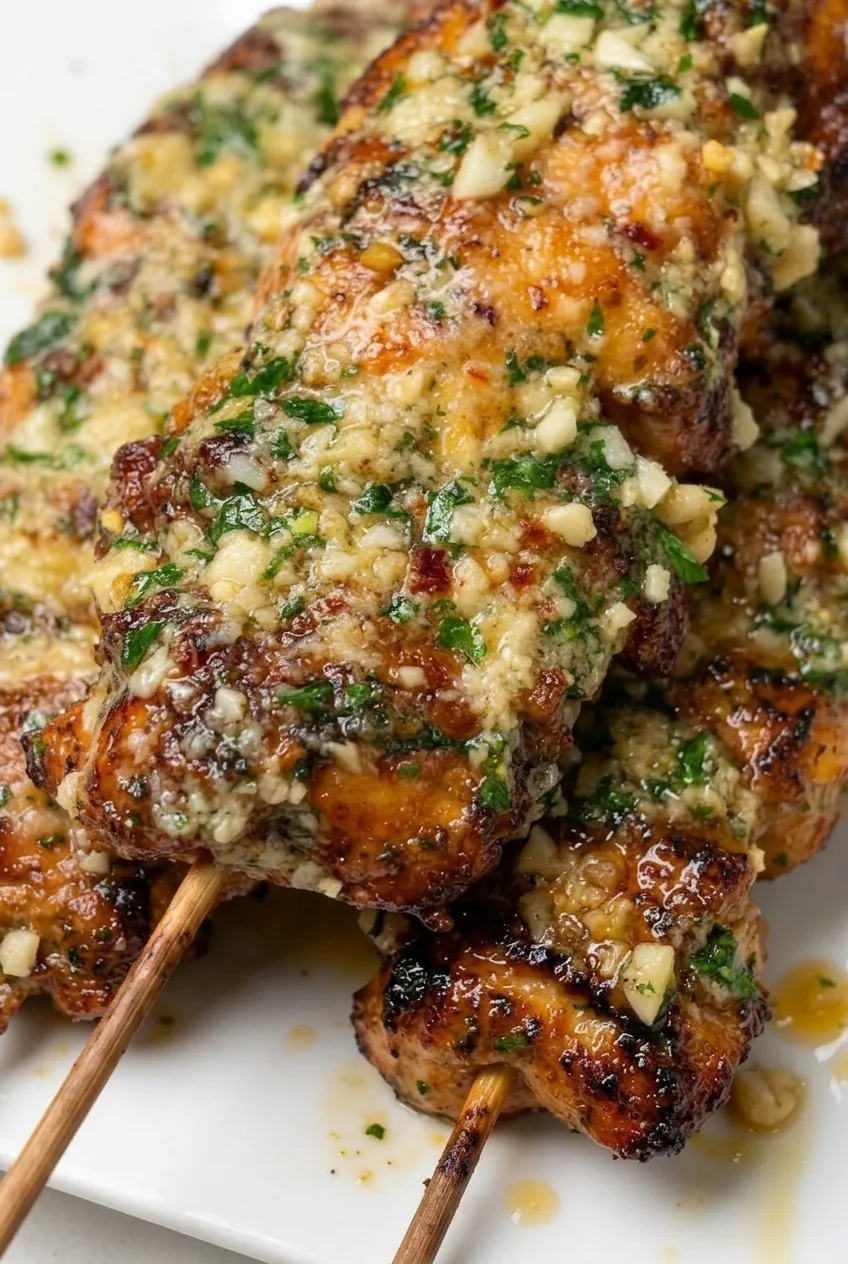
These air-fryer skewers have substantial pieces of chicken with browned edges beneath a glossy garlic-Parmesan butter. The chicken cooks before the butter goes on, so the chopped garlic stays tender and the Parmesan and parsley remain visible instead of scorching.

Thread the chicken closely for compact skewers, but leave space between skewers in the basket so the surfaces can brown. Cooking takes about 12 to 16 minutes per batch; check the thickest pieces with a thermometer rather than relying on time alone.

Ingredients for Garlic Parmesan Chicken Skewers

Close view of browned chicken on a skewer with visible garlic, Parmesan, and parsley in glossy butter

Yield: 4 servings, 1 skewer each. Time: About 30 minutes prep, including skewer soaking, plus 12 to 16 minutes per batch. Allow approximately 55 to 65 minutes total for two batches.

  • 4 short wooden skewers, sized to fit the air-fryer basket
  • 1 1/2 lb boneless skinless chicken thighs (680g)
  • 1 tablespoon olive oil
  • 1 teaspoon paprika
  • 1 teaspoon garlic powder
  • 3/4 teaspoon fine salt
  • 1/2 teaspoon ground black pepper
  • 4 tablespoons unsalted butter (57g)
  • 4 cloves garlic, finely chopped
  • 1/3 cup finely grated Parmesan (35g)
  • 2 tablespoons chopped fresh parsley

Optional: Add 1/4 teaspoon crushed red pepper flakes to the butter for mild heat, and serve with lemon wedges.

How to Make Garlic Parmesan Chicken Skewers in the Air Fryer

Four finished garlic Parmesan chicken skewers arranged together on a white plate
  1. Fit and soak the skewers: Check that a skewer fits with the air-fryer basket fully closed. Trim wooden skewers before soaking if needed, then soak them in water for 20 to 30 minutes while preparing the chicken.
  2. Season and thread: Pat the thighs dry and cut them into roughly 1 1/2- to 2-inch pieces of similar thickness. Toss with the olive oil, paprika, garlic powder, salt, and pepper. Thread onto four skewers with minimal gaps, folding thinner sections as needed. Keep the pieces close without compressing them into a tight mass.
  3. Air fry in batches: Preheat only if your air fryer’s instructions call for it. Arrange as many skewers as fit in a spaced, single layer, often about two per batch. Air fry at 400°F (205°C), turning after about 6 to 8 minutes. Begin checking at 10 minutes; expect approximately 12 to 16 minutes per batch. The chicken is done when it has browned edges and the thickest pieces reach 165°F (75°C). Insert the thermometer into the chicken without touching the skewer. Repeat with the remaining skewers.
  4. Make the garlic-Parmesan butter: While the chicken cooks, melt the butter in a small saucepan over low heat. Add the chopped garlic and warm briefly until fragrant, without letting it brown. Remove from the heat and stir in the Parmesan, parsley, and red pepper flakes, if using.
  5. Rest and finish: Let each cooked batch rest for about 3 minutes. Stir the warm butter, then spoon it over all sides of the skewers, distributing the garlic, Parmesan, and parsley along with the butter. Serve warm.

How to Get Browned, Evenly Cooked Skewers

Patting the chicken dry and leaving room around each skewer help the surfaces brown instead of steam. Piece thickness matters, too: fold thin sections when threading so they cook more like the larger pieces. If the basket holds only two skewers at a time, allow for two full cooking cycles.

Check more than one thick piece for 165°F. Browned edges are a useful surface cue, but they cannot confirm that every piece is cooked through. Boneless chicken breast or tenders can replace the thighs; portion them evenly and use the thermometer rather than the thigh timing to judge doneness.

Why the Garlic-Parmesan Butter Goes on Last

Fresh garlic and grated Parmesan can brown too far during the chicken’s full high-heat cooking time. Adding them afterward leaves the butter glossy and textured, with the browned chicken still visible underneath. Stir before spooning it on so the garlic, cheese, and parsley do not stay behind in the saucepan.

Grill Option

Cook the seasoned skewers on a preheated medium to medium-high grill, turning regularly and watching for flare-ups. Expect roughly 10 to 15 minutes, but check the thickest pieces for 165°F rather than using the time alone. Rest briefly, then add the garlic-Parmesan butter off the grill.

Serving Garlic Parmesan Chicken Skewers

Serve the skewers as an appetizer or with rice and vegetables or a salad for dinner. Offer lemon wedges at the table. For another chicken finger food, try hidden veggie chicken nuggets.

Storage and Reheating

Refrigerate cooked leftovers in an airtight container for up to 4 days. Warm gently in a skillet over medium heat or microwave in short intervals until heated through; prolonged reheating can dry out the chicken.

For longer storage, remove the cooked chicken from the skewers and freeze airtight for up to 2 months. Thaw overnight in the refrigerator before reheating.

Nutrition

Approximate nutrition per serving (1 skewer, including one-quarter of the butter): 390 calories, 37g protein, 27g fat, and 3g carbohydrates. Based on an estimated cooked yield of about 720g, that is approximately 215 calories, 21g protein, 15g fat, and 2g carbohydrates per 100g. Values vary with the chicken, cooked yield, and how much finishing butter is served.

Garlic Parmesan Chicken Skewers

Air-fried chicken thigh skewers are finished with a glossy butter sauce of garlic, Parmesan, and parsley.
Course: Main Course
Cuisine: American
Prep: 30 min
Cook: 32 min
Total: 62 min
Servings: 4 Calories: 390 kcal

Equipment

  • Air fryer
  • Wooden skewers
  • Small saucepan
  • Meat thermometer

Ingredients

For the Chicken

  • 4 short wooden skewers, sized to fit the air-fryer basket
  • 1 1/2 lb boneless skinless chicken thighs (680 g)
  • 1 tablespoon olive oil
  • 1 teaspoon paprika
  • 1 teaspoon garlic powder
  • 3/4 teaspoon fine salt
  • 1/2 teaspoon ground black pepper

For the Garlic-Parmesan Butter

  • 4 tablespoons unsalted butter (57 g)
  • 4 cloves garlic, finely chopped
  • 1/3 cup finely grated Parmesan (35 g)
  • 2 tablespoons chopped fresh parsley
  • Optional: 1/4 teaspoon crushed red pepper flakes
  • Optional: lemon wedges, for serving

Instructions

  1. Check that a skewer fits in the air fryer with the basket fully closed. Trim the skewers if needed, then soak them in water for 20 to 30 minutes.
  2. Pat the chicken thighs dry and cut them into roughly 1 1/2- to 2-inch pieces of similar thickness.
  3. Toss the chicken with the olive oil, paprika, garlic powder, salt, and pepper.
  4. Thread the chicken onto four skewers, keeping the pieces close without compressing them. Fold thinner sections as needed.
  5. Preheat the air fryer only if its instructions call for it. Arrange the skewers in a spaced, single layer, working in batches as needed.
  6. Air fry at 400°F (205°C), turning after about 6 to 8 minutes. Begin checking at 10 minutes and cook for approximately 12 to 16 minutes per batch, until browned and the thickest pieces reach 165°F (75°C). Check the chicken with a thermometer without touching the skewer.
  7. While the chicken cooks, melt the butter in a small saucepan over low heat. Add the garlic and warm briefly until fragrant without browning.
  8. Remove the butter from the heat and stir in the Parmesan, parsley, and red pepper flakes if using.
  9. Rest each cooked batch for about 3 minutes. Stir the warm butter, spoon it over all sides of the skewers, and serve warm.

Tips

  • Leave space between skewers in the air-fryer basket so the chicken browns instead of steaming.
  • Cut the chicken into pieces of similar thickness for more even cooking.
  • Check more than one thick piece for an internal temperature of 165°F (75°C).
  • Add the garlic-Parmesan butter after cooking to keep the garlic and cheese from scorching.
  • Stir the butter before spooning it over the skewers so the garlic, cheese, and parsley are evenly distributed.

Variations

  • Grilled Garlic Parmesan Chicken Skewers: Grill the seasoned skewers over medium to medium-high heat, turning regularly, for roughly 10 to 15 minutes or until the thickest pieces reach 165°F (75°C). Rest briefly and add the butter off the grill.
  • Mildly Spicy Chicken Skewers: Add 1/4 teaspoon crushed red pepper flakes to the garlic-Parmesan butter.

Notes

Refrigerate leftovers in an airtight container for up to 4 days. Reheat gently to avoid drying out the chicken. For longer storage, remove the chicken from the skewers and freeze airtight for up to 2 months; thaw overnight in the refrigerator before reheating.

Nutrition

Calories: 390 kcal | Protein: 37 g | Fat: 27 g | Carbohydrates: 3 g