Author

Julia

Browsing

Coffee Cake Banana Bread with Streusel

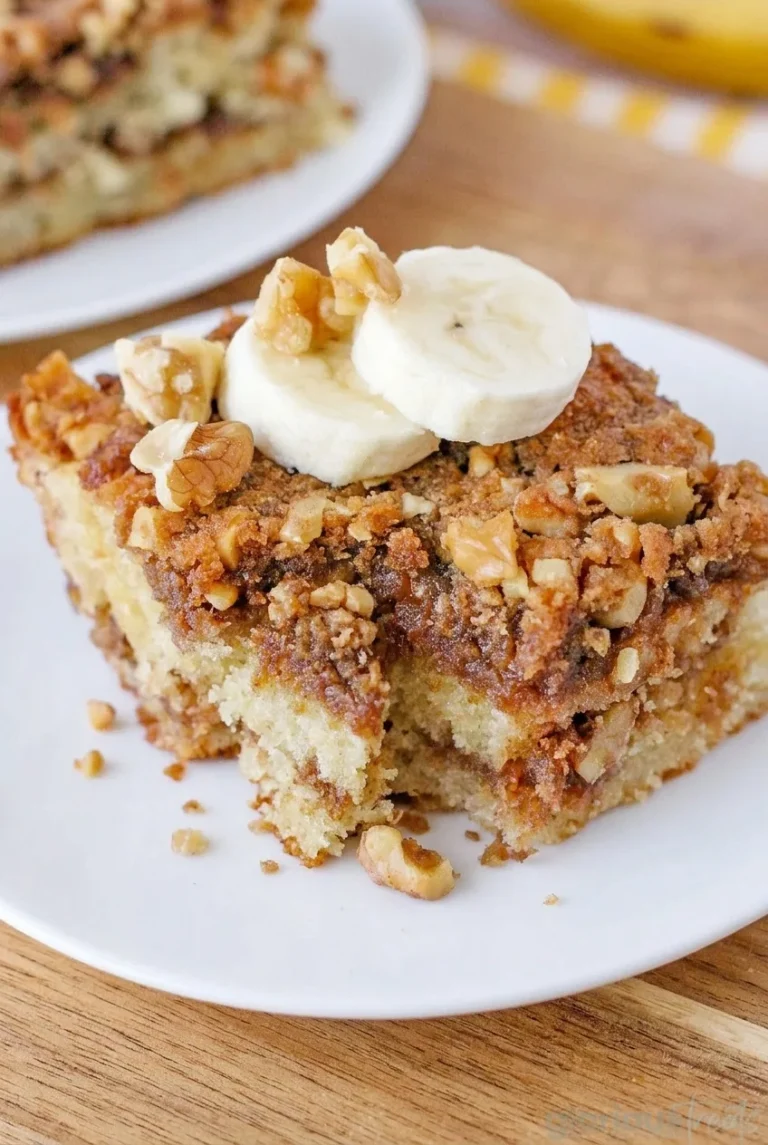
This square-pan banana coffee cake has tender banana crumb, a cinnamon-walnut layer through the middle, and coarse streusel on top. One batch of streusel makes both layers, while fresh banana rounds and walnuts finish each plated square.

Measure the mashed banana rather than relying on a banana count. The moist center may need longer than the topping takes to brown, so check the cake beneath the streusel before taking it out of the oven.

Ingredients for Coffee Cake Banana Bread
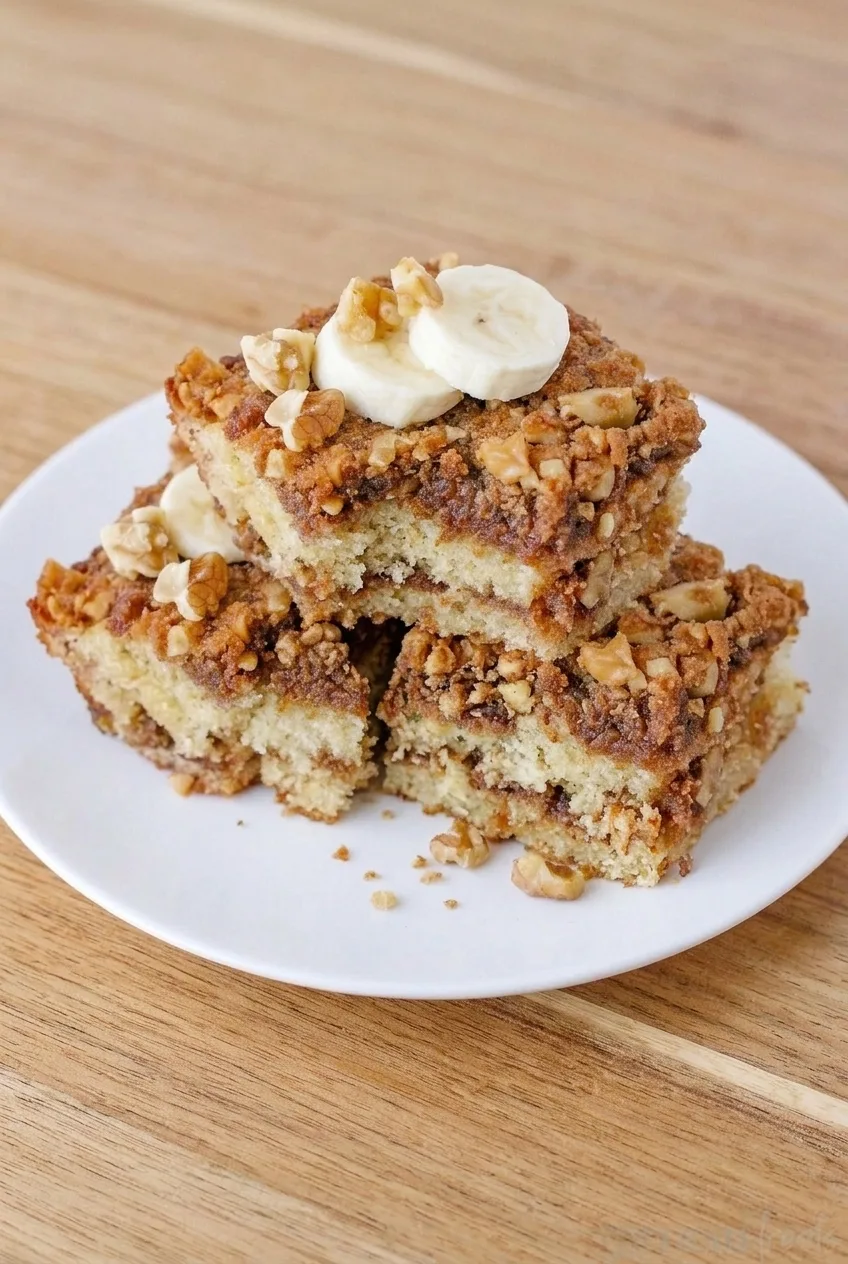
Several streusel-topped banana coffee cake squares on a white serving plate

Banana cake

  • 1 3/4 cups all-purpose flour (210g)
  • 1 teaspoon baking soda
  • 1/2 teaspoon baking powder
  • 1/2 teaspoon fine salt
  • 1/2 cup unsalted butter, softened (115g)
  • 2/3 cup granulated sugar (135g)
  • 2 large eggs
  • 1 teaspoon vanilla extract
  • 1 cup mashed very ripe banana, from about 2 to 3 medium bananas (225g)
  • 1/3 cup sour cream (80g)

Cinnamon-walnut streusel

  • 3/4 cup all-purpose flour (90g)
  • 1/2 cup packed light brown sugar (100g)
  • 1 1/2 teaspoons ground cinnamon
  • 1/2 cup chopped walnuts
  • 5 tablespoons cold unsalted butter, cubed (70g)

For serving

  • About 2 medium fresh bananas, sliced as needed
  • 2 tablespoons chopped walnuts

Full-fat plain Greek yogurt can replace the sour cream in the same amount. If using frozen bananas, thaw them and drain off any conspicuous excess liquid before mashing and measuring 1 cup.
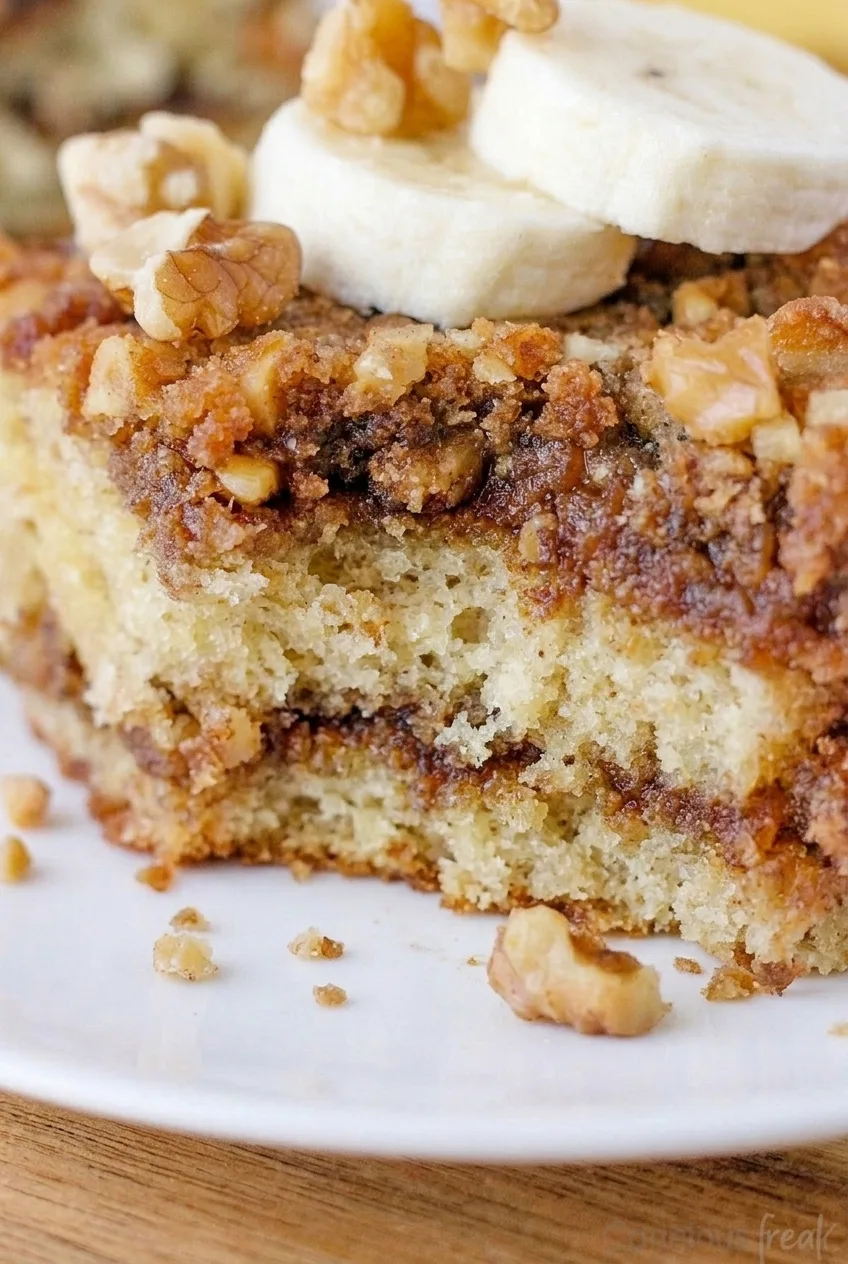
Close view of tender banana crumb, a cinnamon-walnut middle layer, and chunky streusel

How to Bake Coffee Cake Banana Bread

  1. Prepare the pan: Position a rack near the center of the oven and preheat to 350°F (175°C). Line a 9 x 9-inch square pan with parchment extending over two sides, and lightly grease the exposed sides.
  2. Make the streusel: Combine the streusel flour, brown sugar, cinnamon, and 1/2 cup walnuts. Cut in the cold butter with a fork or pastry blender until uneven crumbs form, ranging from pea-size pieces to larger clumps. Refrigerate while making the batter.
  3. Mix the batter: Whisk the cake flour, baking soda, baking powder, and salt in a bowl. In another bowl, beat the softened butter and granulated sugar together, then beat in the eggs and vanilla. Mix in the measured banana and sour cream. Fold in the dry ingredients just until no flour streaks remain; further mixing can make the cake dense.
  4. Build the layers: Spread half the batter in the pan. Scatter about one-third of the streusel over it, reaching nearly to the edges. Gently spread on the remaining batter without dragging the filling through it. Scatter the rest of the streusel on top in loose clumps; do not press it flat.
  5. Bake: Bake uncovered for approximately 45 to 55 minutes, beginning to check at 40 minutes. The center should feel set, and a tester inserted into a cake-crumb area near the center—not just the cinnamon filling—should come out with no wet batter. A few moist crumbs are fine. If the topping darkens before the center is done, tent the pan loosely with foil and continue baking. Rotate the pan if your oven browns noticeably unevenly.
  6. Cool and serve: Cool in the pan for about 20 minutes, then lift the cake out by the parchment and cool on a rack for about 25 minutes more, until the squares hold together when cut. Cut into 9 thick squares. Just before serving, top each square with two fresh banana rounds and a few of the serving walnuts.

Why Pan Size Affects the Bake

The 9 x 9-inch pan produces the intended thick, square-cut portions. An 8 x 8-inch pan makes a deeper cake that will need a doneness-based adjustment; a loaf pan changes both the shape and baking schedule. Dark metal and glass pans can also affect edge browning, while wetter banana mash can extend the bake. Rely on the center rather than the clock or the color of the streusel alone.

For a traditional loaf instead, see this classic moist banana bread.

Serving and Storing the Squares

Serve at room temperature or briefly warm an individual square in the microwave before adding the fresh banana and walnuts. Slice the serving bananas just before plating; they are not part of the baked topping.

Store fully cooled squares without the fresh banana garnish, covered at room temperature for about 3 to 4 days. The streusel will gradually soften. The cake can also be baked a day ahead, cooled, and covered.

To freeze, tightly wrap fully cooled, ungarnished squares for up to 2 months. Thaw before serving and add the fresh garnish afterward.

Nutrition

Approximate nutrition per serving, based on 9 squares with banana and walnut garnish: 500 calories, 7g protein, 25g fat, and 64g carbohydrates. Approximate values per 100g: 350 calories, 5g protein, 17g fat, and 45g carbohydrates. Values vary with banana size, ingredients, and moisture lost during baking.

Coffee Cake Banana Bread with Streusel

Tender banana cake is layered with cinnamon-walnut streusel and topped with fresh banana and walnuts.
Course: Dessert
Cuisine: American
Prep: 25 min
Cook: 50 min
Total: 120 min
Servings: 9 Calories: 500 kcal

Equipment

  • 9 x 9-inch square pan
  • Parchment paper
  • Mixing bowls
  • Whisk
  • Fork or pastry blender
  • Cooling rack
  • Cake tester

Ingredients

Banana Cake

  • 1 3/4 cups all-purpose flour (210g)
  • 1 teaspoon baking soda
  • 1/2 teaspoon baking powder
  • 1/2 teaspoon fine salt
  • 1/2 cup unsalted butter, softened (115g)
  • 2/3 cup granulated sugar (135g)
  • 2 large eggs
  • 1 teaspoon vanilla extract
  • 1 cup mashed very ripe banana (225g), about 2 to 3 medium bananas
  • 1/3 cup sour cream (80g)

Cinnamon-Walnut Streusel

  • 3/4 cup all-purpose flour (90g)
  • 1/2 cup packed light brown sugar (100g)
  • 1 1/2 teaspoons ground cinnamon
  • 1/2 cup chopped walnuts
  • 5 tablespoons cold unsalted butter, cubed (70g)

For Serving

  • About 2 medium fresh bananas, sliced as needed
  • 2 tablespoons chopped walnuts

Instructions

  1. Position a rack near the center of the oven and preheat to 350°F (175°C). Line a 9 x 9-inch pan with parchment, leaving overhang on two sides, and lightly grease the exposed sides.
  2. Combine the streusel flour, brown sugar, cinnamon, and walnuts. Cut in the cold butter with a fork or pastry blender until uneven crumbs form. Refrigerate while preparing the batter.
  3. Whisk the cake flour, baking soda, baking powder, and salt in a bowl.
  4. Beat the softened butter and granulated sugar together. Beat in the eggs and vanilla, then mix in the mashed banana and sour cream.
  5. Fold in the dry ingredients just until no flour streaks remain.
  6. Spread half the batter in the prepared pan. Scatter about one-third of the streusel over it, nearly to the edges.
  7. Gently spread the remaining batter over the filling. Scatter the rest of the streusel on top in loose clumps without pressing it down.
  8. Bake uncovered for approximately 45 to 55 minutes, beginning to check at 40 minutes. The center should feel set, and a tester inserted into cake crumb near the center should come out without wet batter.
  9. If the topping darkens before the center is done, tent the pan loosely with foil and continue baking. Rotate the pan if it browns unevenly.
  10. Cool in the pan for about 20 minutes. Lift the cake out using the parchment and cool on a rack for about 25 minutes more.
  11. Cut into 9 squares. Just before serving, top each square with two fresh banana rounds and a few serving walnuts.

Tips

  • Measure the mashed banana rather than relying on the number of bananas.
  • If using frozen bananas, thaw them and drain off conspicuous excess liquid before mashing and measuring.
  • Check a cake-crumb area near the center, not just the cinnamon filling, for doneness.
  • Tent the pan loosely with foil if the streusel browns before the center is baked.
  • Slice the garnish bananas just before serving.

Variations

  • Greek Yogurt Version: Replace the sour cream with the same amount of full-fat plain Greek yogurt.
Notes

Store fully cooled squares without the fresh banana garnish, covered at room temperature for 3 to 4 days. Freeze ungarnished squares, tightly wrapped, for up to 2 months; thaw before serving. The cake can be baked a day ahead.

Nutrition

Calories: 500 kcal | Protein: 7 g | Fat: 25 g | Carbohydrates: 64 g

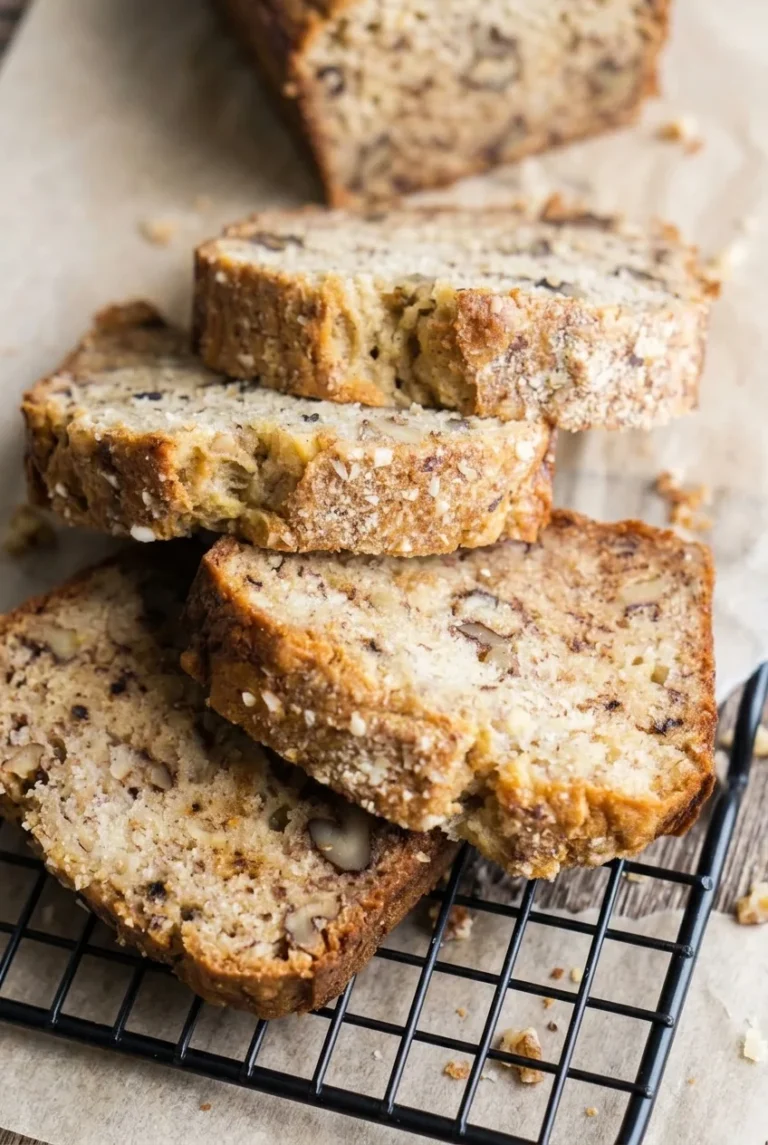
Banana Nut Bread with Walnuts

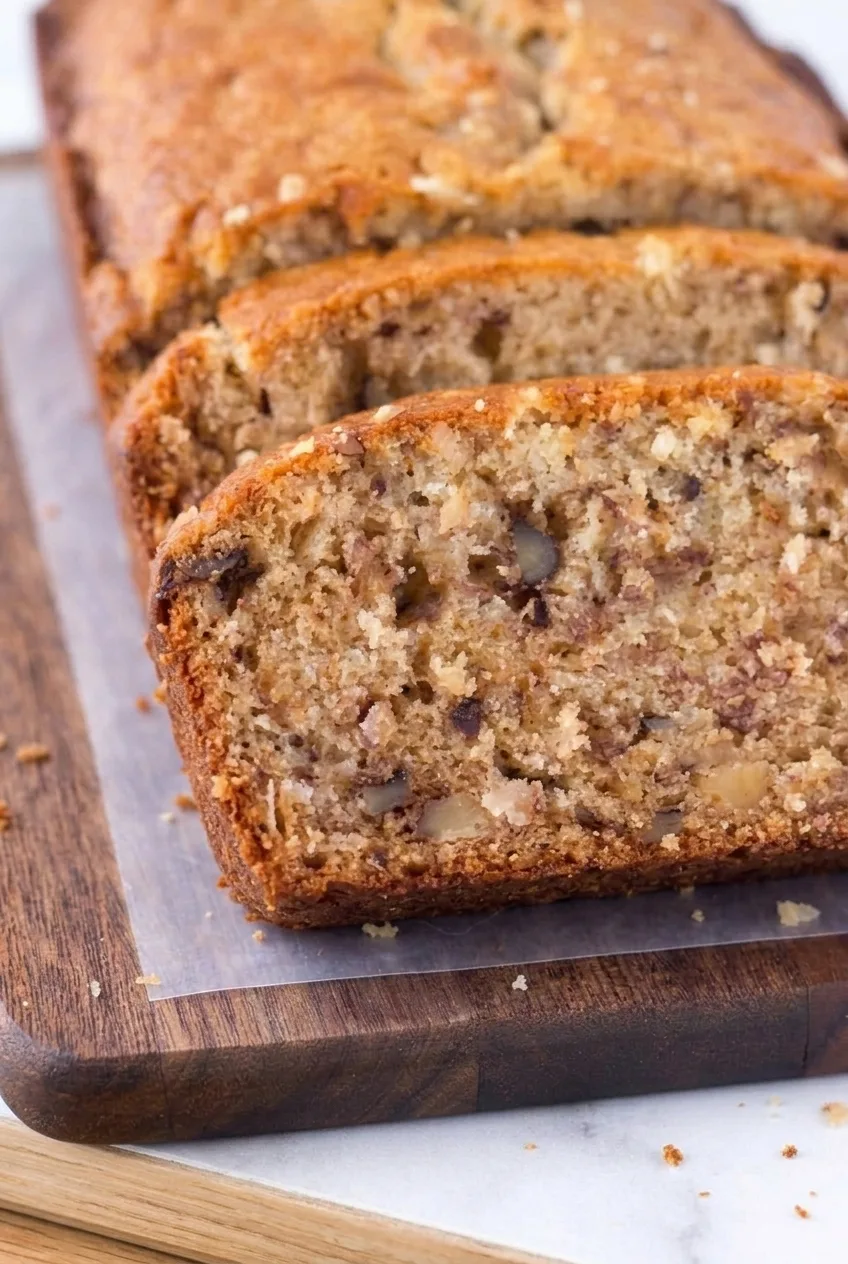
Very ripe bananas give this loaf a moist, tender crumb, with chopped walnuts in every thick slice. It bakes in a 9-by-5-inch pan with a golden, naturally split top. Because the crust can brown before the middle is baked, check the center with a toothpick rather than relying on color or time alone.

Ingredients for Banana Nut Bread

  • 1 1/2 cups mashed very ripe banana, from about 3 medium bananas (340g)
  • 1 3/4 cups all-purpose flour, spooned and leveled (210g)
  • 3/4 cup granulated sugar (150g)
  • 1/2 cup unsalted butter, melted and slightly cooled (115g), plus butter or cooking spray for the pan
  • 2 large eggs
  • 1 teaspoon baking soda
  • 1/2 teaspoon fine salt
  • 1 teaspoon vanilla extract
  • 3/4 cup chopped walnuts (85g)
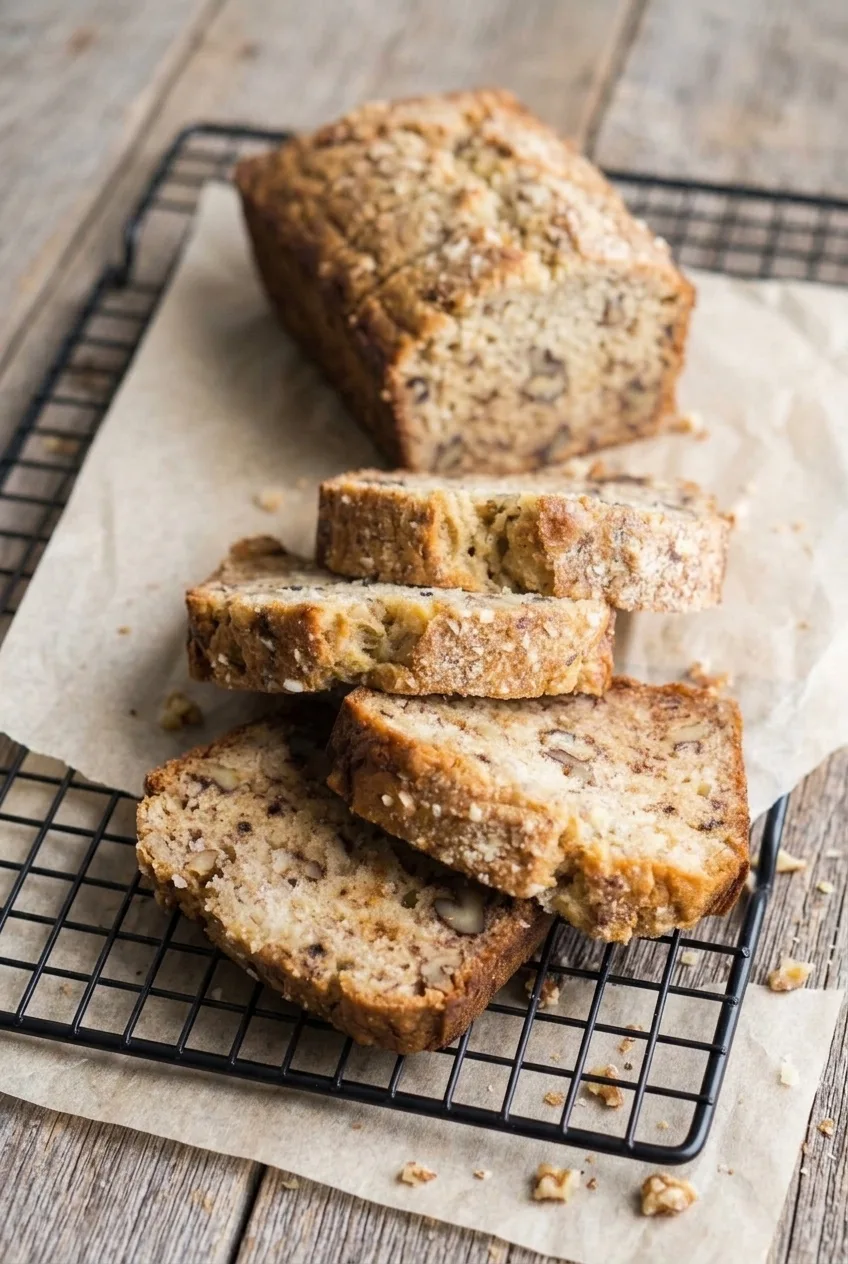
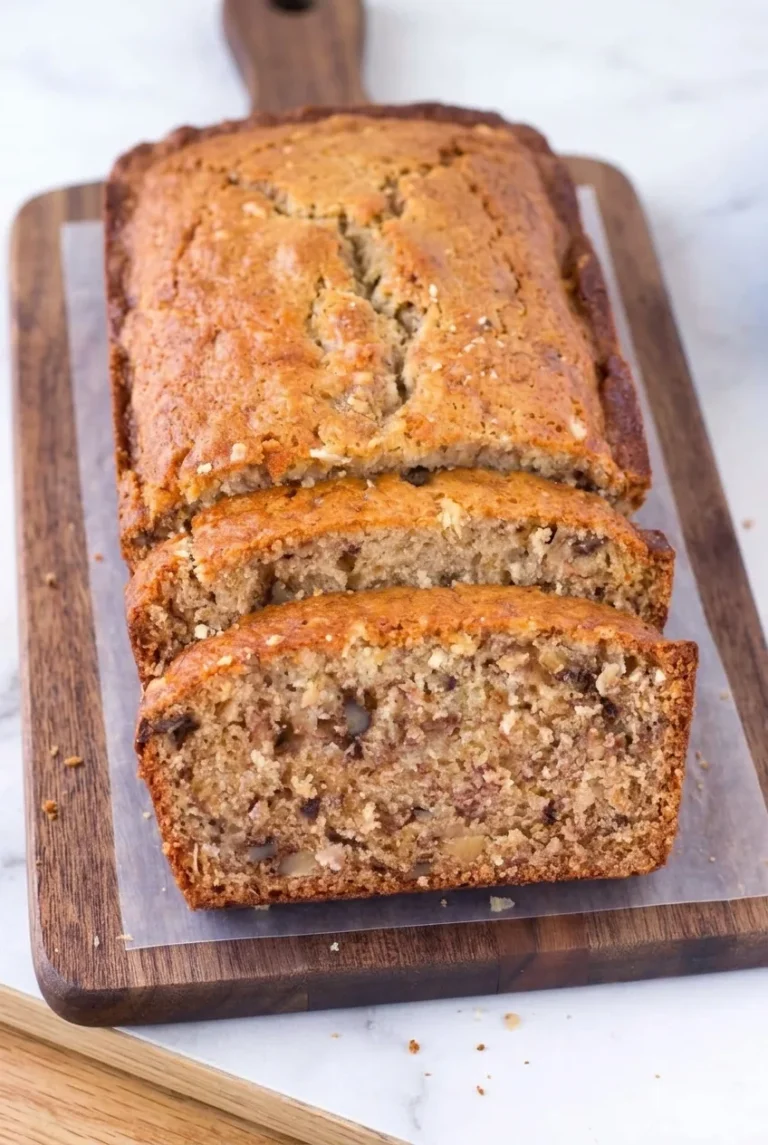
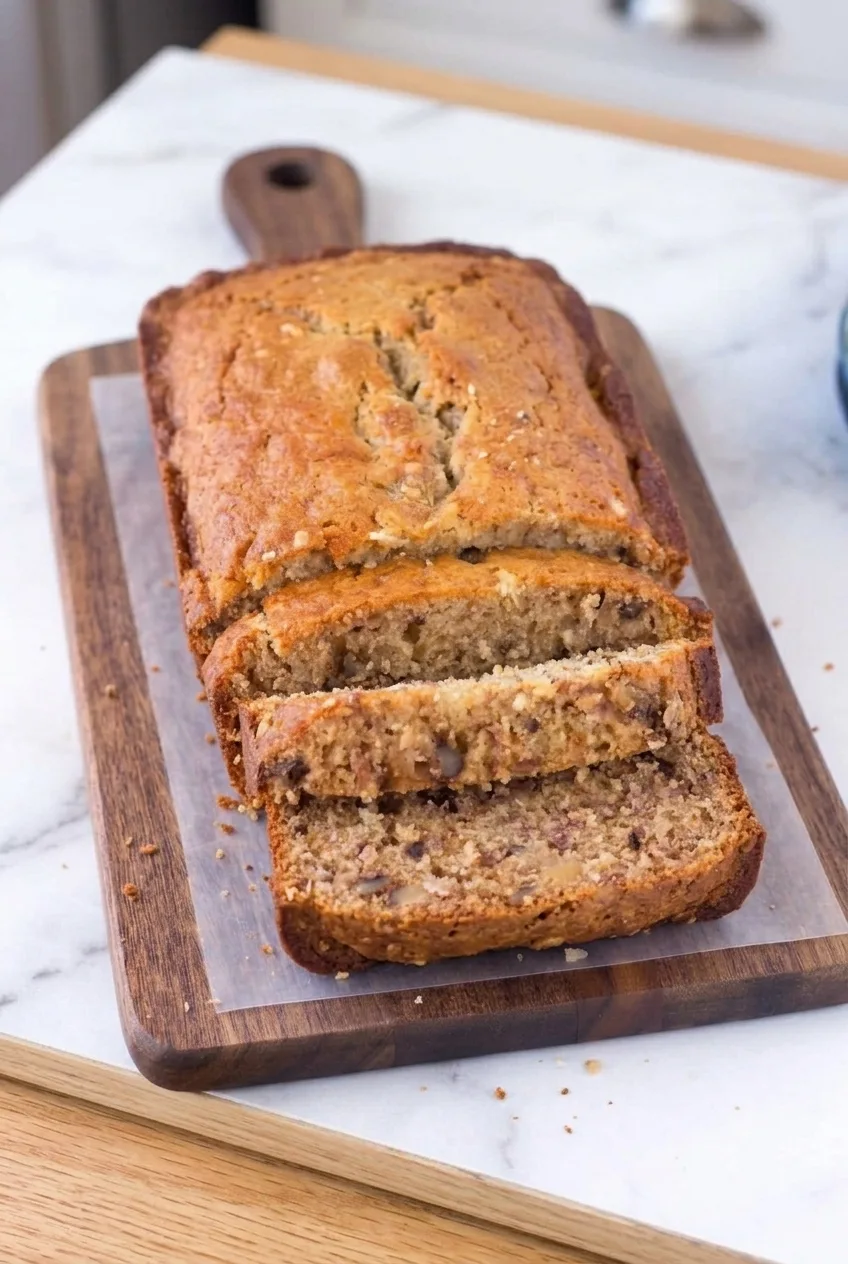
Whole banana walnut loaf with thick slices on a parchment-lined wooden board in a wider view

Optional: Add 1/2 teaspoon ground cinnamon to the dry ingredients for a lightly spiced loaf.

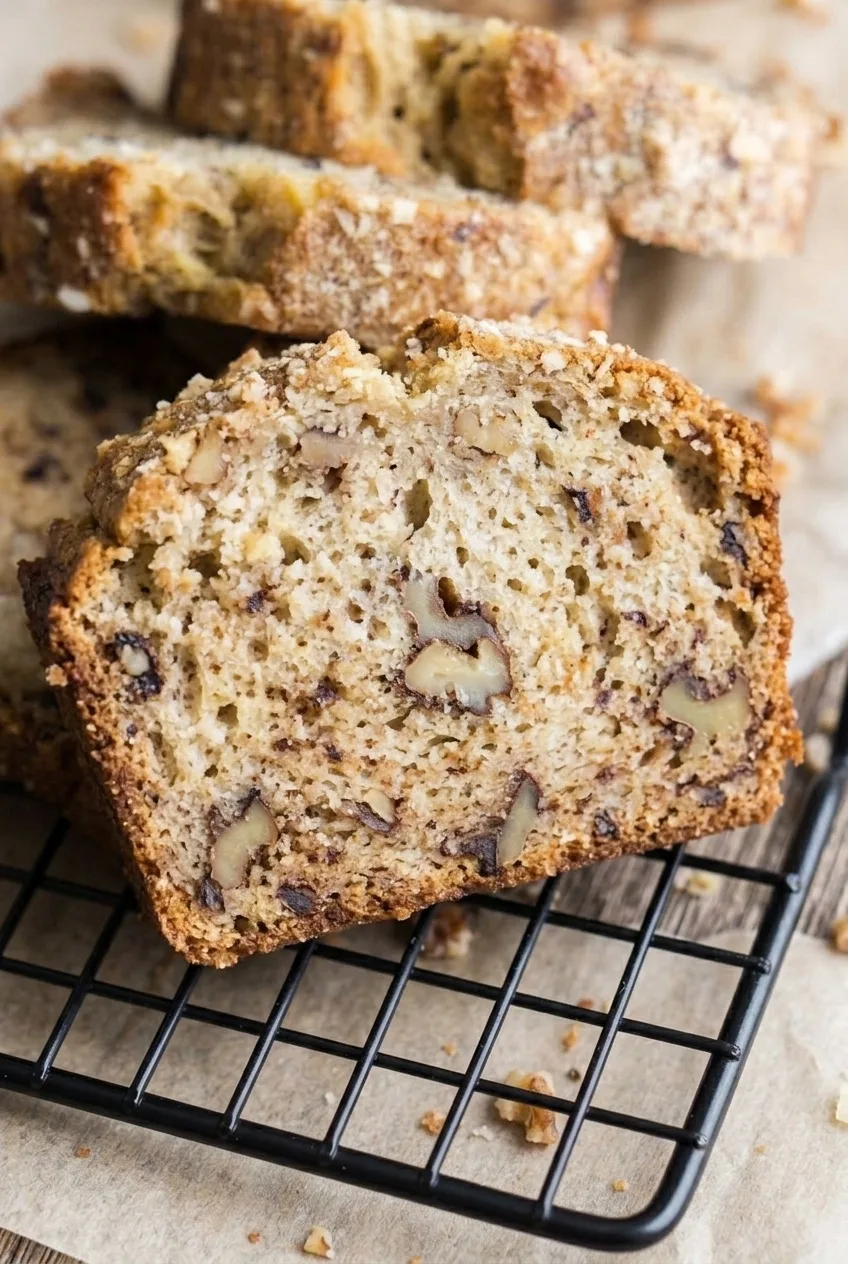
Close view of a banana nut bread slice showing its moist crumb and chopped walnuts

How to Bake Banana Nut Bread with Walnuts

Yield: One 9-by-5-inch loaf, about 10 slices. Prep: 15 minutes. Bake: About 55 to 65 minutes. Total: About 2 hours 10 minutes to 2 hours 20 minutes, including cooling.

  1. Prepare the pan: Preheat the oven to 350°F (175°C). Lightly grease a 9-by-5-inch loaf pan. Line the bottom and long sides with parchment, leaving overhang for lifting out the loaf.
  2. Combine the dry ingredients: Whisk the flour, baking soda, salt, and cinnamon, if using, in a bowl.
  3. Mix the banana base: Mash the bananas, then measure 1 1/2 cups. In a second bowl, whisk the mashed banana with the sugar, eggs, melted butter, and vanilla. The butter should be warm, not hot.
  4. Finish the batter: Fold the dry ingredients into the banana mixture just until no flour streaks remain. Gently fold in the walnuts. Avoid mixing extensively after adding the flour, which can make the loaf dense or tough.
  5. Bake: Spread the batter evenly in the pan and bake uncovered on the center rack. Start checking the center at 50 minutes, then recheck about every 5 minutes as needed. Expect roughly 55 to 65 minutes total. If the top becomes deeply browned while the center is still wet, tent it loosely with foil and continue baking. The loaf is done when the center is set and a toothpick inserted there comes out clean or with a few moist crumbs, not wet batter.
  6. Cool and slice: Cool in the pan for 10 to 15 minutes, then lift the loaf onto a wire rack. Let it cool until sliceable, ideally about 1 hour total, before cutting thick slices. Slicing it hot can compress the moist crumb.

How Ripe Should the Bananas Be?

Use soft bananas with heavily spotted peels. Three medium bananas are a guide, but sizes vary; measuring 1 1/2 cups after mashing gives the batter the intended amount of banana and moisture.

How to Tell When the Center Is Done

A golden, cracked top does not guarantee a baked center. If the toothpick carries wet batter, keep baking even if the crust looks finished; a wet middle may sink as the loaf cools. Loosely tent a darkening top with foil while the center finishes.

The bake window applies to a 9-by-5-inch pan. A narrower pan can make a taller loaf and change how long the center takes to bake, so use the toothpick test rather than the same timing alone.

Serving and Storing the Loaf

Serve thick slices plain or with butter alongside. Once completely cool, keep the bread airtight at room temperature for up to 2 days.

To keep it longer, wrap the cooled loaf tightly in plastic wrap and foil and freeze for up to 3 months. Or wrap slices individually and place them in a freezer bag. Thaw wrapped slices at room temperature, or thaw a whole loaf overnight in the refrigerator.

For another loaf, see classic moist banana bread with walnuts. For a different baked banana snack, try banana peanut butter oat bars.

Nutrition

Approximate nutrition per slice, based on 10 slices: 320 calories, 5g protein, 16g fat, and 40g carbohydrates. Per 100g of baked bread: approximately 360 calories, 6g protein, 18g fat, and 45g carbohydrates. Values vary with slice size and moisture lost during baking.

Banana Nut Bread with Walnuts

A moist banana loaf made with very ripe bananas and chopped walnuts.
Course: Breakfast
Cuisine: American
Prep: 15 min
Cook: 60 min
Total: 135 min
Servings: 10 Calories: 320 kcal

Equipment

  • 9-by-5-inch loaf pan
  • Parchment paper
  • Mixing bowls
  • Whisk
  • Wire rack
  • Toothpick

Ingredients

  • 1 1/2 cups mashed very ripe banana, from about 3 medium bananas (340 g)
  • 1 3/4 cups all-purpose flour, spooned and leveled (210 g)
  • 3/4 cup granulated sugar (150 g)
  • 1/2 cup unsalted butter, melted and slightly cooled (115 g), plus butter or cooking spray for the pan
  • 2 large eggs
  • 1 teaspoon baking soda
  • 1/2 teaspoon fine salt
  • 1 teaspoon vanilla extract
  • 3/4 cup chopped walnuts (85 g)
  • Optional: 1/2 teaspoon ground cinnamon

Instructions

  1. Preheat the oven to 350°F (175°C). Lightly grease a 9-by-5-inch loaf pan and line the bottom and long sides with parchment, leaving an overhang.
  2. Whisk the flour, baking soda, salt, and cinnamon, if using, in a bowl.
  3. Mash the bananas and measure 1 1/2 cups. In a second bowl, whisk the banana with the sugar, eggs, melted butter, and vanilla.
  4. Fold the dry ingredients into the banana mixture just until no flour streaks remain.
  5. Gently fold in the walnuts.
  6. Spread the batter evenly in the prepared pan and bake uncovered on the center rack. Start checking the center at 50 minutes, then check about every 5 minutes as needed.
  7. If the top becomes deeply browned before the center is done, tent it loosely with foil. Continue baking until a toothpick inserted in the center comes out clean or with a few moist crumbs, not wet batter.
  8. Cool in the pan for 10 to 15 minutes, then lift the loaf onto a wire rack. Cool until sliceable, ideally about 1 hour total, before slicing.

Tips

  • Use soft bananas with heavily spotted peels.
  • Measure 1 1/2 cups of mashed banana, since banana sizes vary.
  • Use melted butter that is warm, not hot.
  • Fold the flour in just until combined to help keep the loaf tender.
  • Check the center with a toothpick; a golden, cracked top does not guarantee the loaf is done.
  • Tent the loaf loosely with foil if the top browns before the center finishes baking.

Variations

  • Cinnamon Banana Nut Bread: Add 1/2 teaspoon ground cinnamon to the dry ingredients for a lightly spiced loaf.

Notes

Once completely cool, store airtight at room temperature for up to 2 days. Freeze tightly wrapped for up to 3 months.

Nutrition

Calories: 320 kcal | Protein: 5 g | Fat: 16 g | Carbohydrates: 40 g

Chocolate Chip Banana Bread

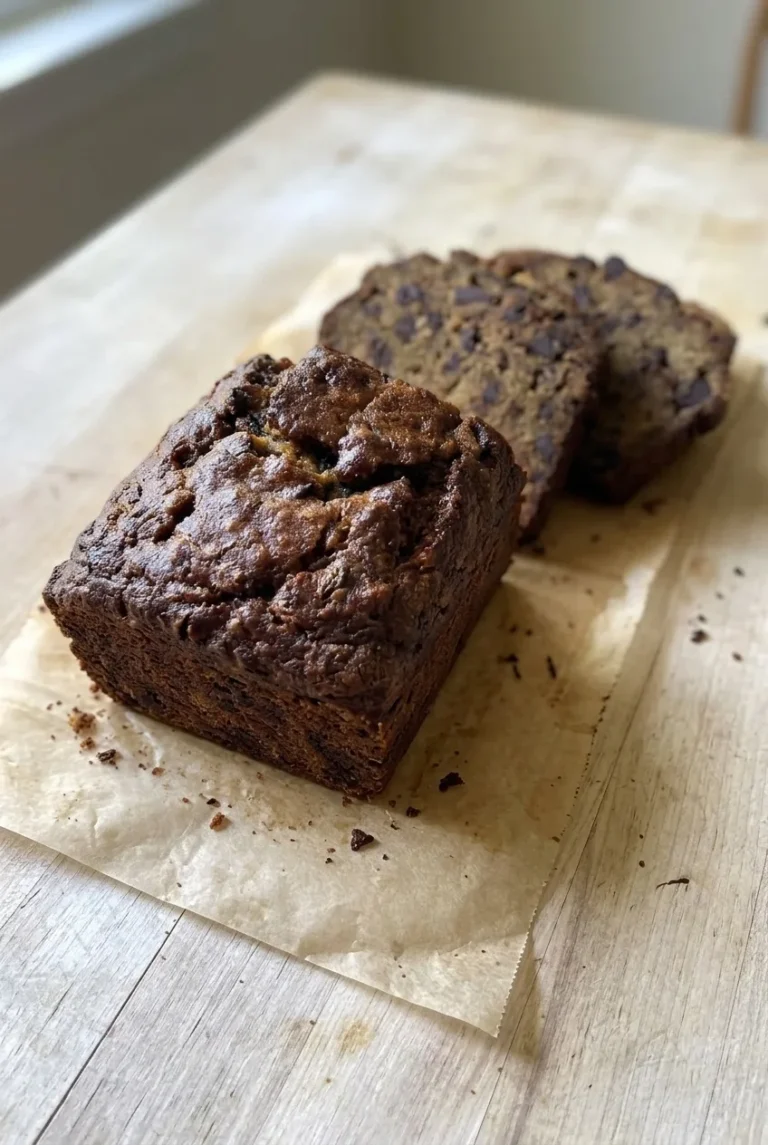
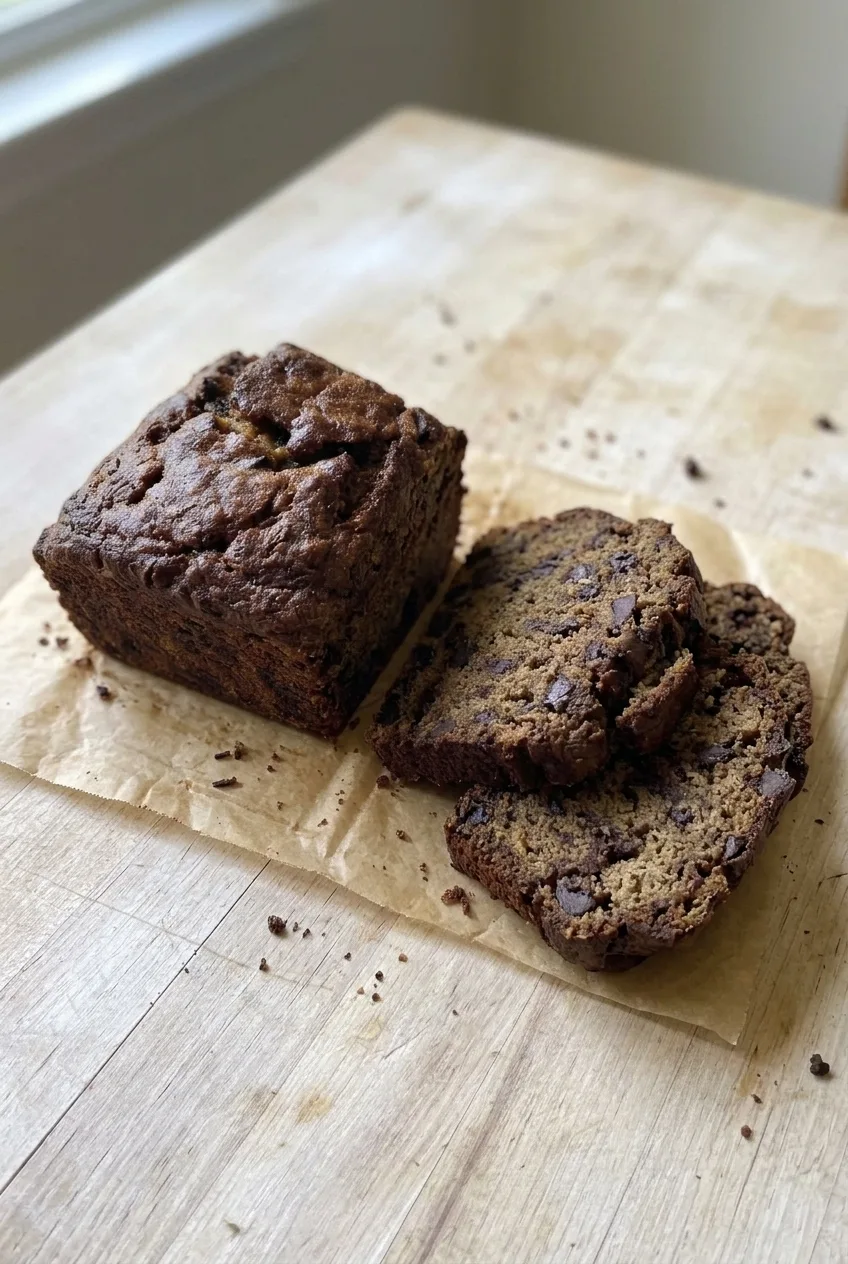
This full-size loaf has a browned, naturally cracked top and a tender crumb with chocolate throughout. Measuring the mashed banana keeps the batter from getting too wet, while a light-colored 9×5-inch metal pan helps the center bake before the crust gets too dark. Start checking early, but let the center—not the clock—tell you when the bread is done.

Yield: 1 loaf, about 10 thick slices. Prep: 15 minutes. Bake: about 55–70 minutes. Cooling: about 1 hour.

Ingredients for Chocolate Chip Banana Bread

Full chocolate chip banana bread loaf and overlapping slices on parchment over a pale wood table
  • 1 1/2 cups mashed very ripe banana, from about 3 medium bananas (340g)
  • 1 3/4 cups all-purpose flour (210g)
  • 1 teaspoon baking soda
  • 1/2 teaspoon fine salt
  • 1/2 cup unsalted butter, melted and cooled slightly (113g), plus a little for greasing the pan
  • 3/4 cup packed light brown sugar (150g)
  • 2 large eggs
  • 1 teaspoon vanilla extract
  • 1 cup semisweet chocolate chips or coarsely chopped semisweet chocolate (170g)
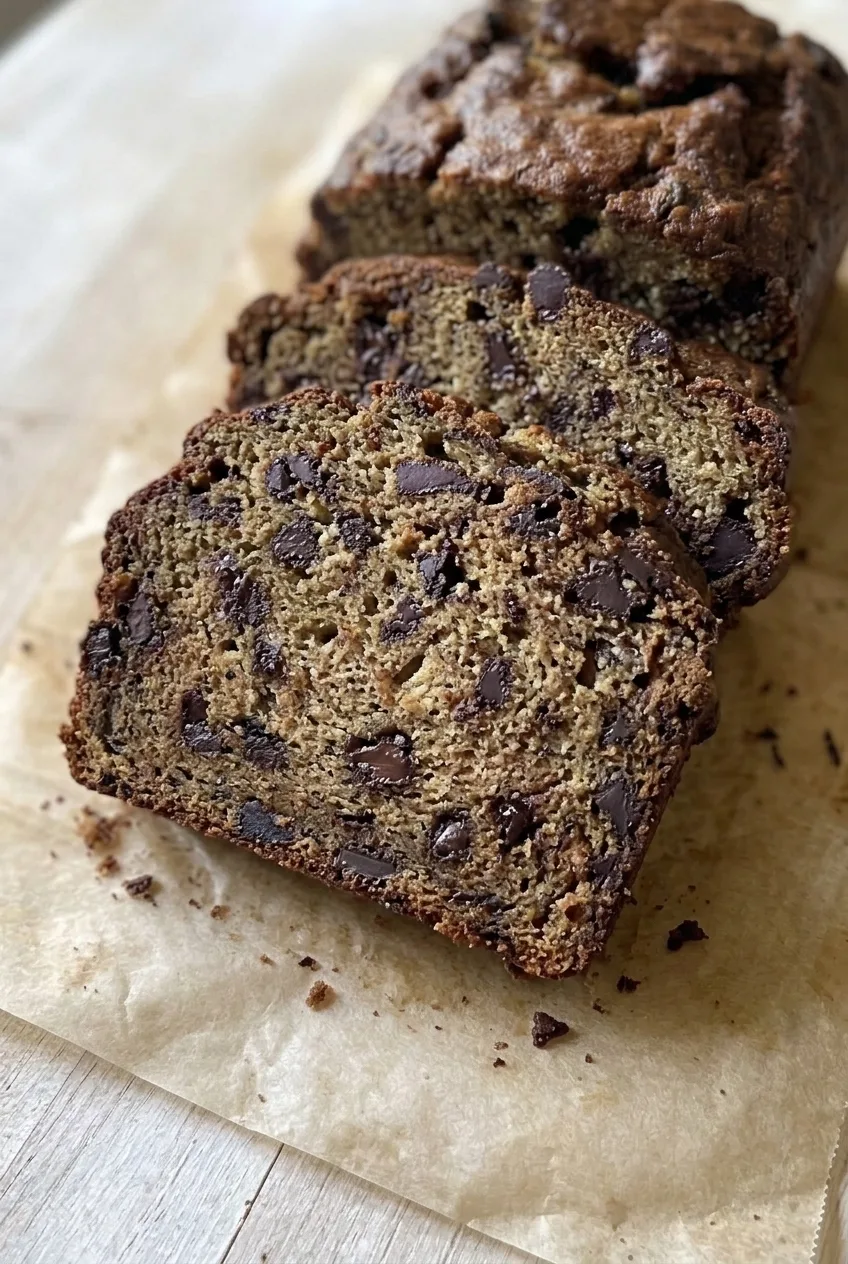
Close view of thick banana bread slices showing a set crumb filled with dark chocolate pieces

The Right Bananas and Loaf Pan

Use bananas with heavily spotted or browned skins, and measure them after mashing. Three bananas can yield different amounts; more than 1 1/2 cups can leave the center too wet.

The bake-time range is for a light-colored 9×5-inch metal loaf pan. A smaller pan makes a deeper loaf, while dark or glass pans change how quickly the crust browns. Leave parchment overhang on the pan’s long sides to make the cooled loaf easier to lift out.

How to Bake Chocolate Chip Banana Bread

  1. Prepare the pan: Preheat the oven to 350°F (175°C) with a rack near the center. Grease a light-colored 9×5-inch metal loaf pan and line it with parchment, leaving overhang on the long sides.
  2. Mix the dry ingredients: Mash and measure 1 1/2 cups banana. In a separate bowl, whisk together the flour, baking soda, and salt. If using large chocolate chunks, reserve a little of the measured flour to coat them before adding them to the batter.
  3. Mix the wet ingredients: In a second bowl, whisk the slightly cooled melted butter with the brown sugar, eggs, and vanilla. Stir in the banana; small pieces are fine.
  4. Fold the batter: Add the dry ingredients to the wet ingredients and fold just until no dry flour remains. Gently fold in the chocolate. The batter should be thick and spoonable; continued stirring can make the loaf dense.
  5. Bake: Spread the batter in the pan and bake uncovered. Begin checking at 50 minutes; expect about 55–70 minutes in the specified pan. The top should be browned and naturally cracked, and the center should look set rather than shiny. A tester inserted near the center should come out clean or with a few moist crumbs, not wet batter.
  6. Cool and slice: Leave the loaf in the pan for 15 minutes, then lift it onto a wire rack. Cool completely, about 45–60 minutes more, before cutting thick slices so the crumb holds together.

How to Tell When the Center Is Done

Melted chocolate can leave a dark smear on a tester. If the tester hits chocolate, check another spot near the center. Wet batter means the loaf needs more time, even if the crust is already brown. If the top becomes too dark before the center is done, tent it loosely with foil and continue baking.

Serving and Chocolate Variation

Serve thick slices plain, or warm an individual slice and add a little butter. For a less-sweet contrast, replace the semisweet chocolate with the same amount of dark chocolate; the method stays the same.

Storing and Freezing Chocolate Chip Banana Bread

Cool the loaf completely before wrapping it tightly or storing it in an airtight container. Keep it at room temperature for about 2–3 days, checking sooner in a warm or humid kitchen.

For longer storage, wrap the cooled loaf or individual slices tightly, seal, and freeze for about 2–3 months for best quality. Thaw slices at room temperature or warm them in a toaster oven. A room-temperature slice can also be microwaved for about 10–15 seconds.

Nutrition

Approximate nutrition per slice, based on 10 thick slices: 345 calories, 5g protein, 15g fat, and 50g carbohydrates. Per 100g of baked bread: approximately 360 calories, 5g protein, 16g fat, and 53g carbohydrates, assuming a baked loaf weighing about 950g. Values vary with the chocolate used and moisture lost during baking.

Chocolate Chip Banana Bread

A tender banana bread loaf with a browned, naturally cracked top and semisweet chocolate throughout.
Course: Breakfast
Cuisine: American
Prep: 15 min
Cook: 70 min
Total: 145 min
Servings: 10 Calories: 345 kcal

Equipment

  • Oven
  • 9×5-inch light-colored metal loaf pan
  • Parchment paper
  • Mixing bowls
  • Whisk
  • Wire rack
  • Cake tester

Ingredients

  • 1 1/2 cups mashed very ripe banana (340g), about 3 medium bananas
  • 1 3/4 cups all-purpose flour (210g)
  • 1 teaspoon baking soda
  • 1/2 teaspoon fine salt
  • 1/2 cup unsalted butter, melted and slightly cooled (113g), plus a little for greasing
  • 3/4 cup packed light brown sugar (150g)
  • 2 large eggs
  • 1 teaspoon vanilla extract
  • 1 cup semisweet chocolate chips or coarsely chopped semisweet chocolate (170g)

Instructions

  1. Preheat the oven to 350°F (175°C) with a rack near the center.
  2. Grease a light-colored 9×5-inch metal loaf pan and line it with parchment, leaving overhang on the long sides.
  3. Mash the bananas and measure 1 1/2 cups.
  4. Whisk the flour, baking soda, and salt together in a bowl. If using chocolate chunks, reserve a little of the measured flour to coat them.
  5. In a separate bowl, whisk the slightly cooled melted butter with the brown sugar, eggs, and vanilla. Stir in the mashed banana.
  6. Add the dry ingredients to the wet ingredients and fold just until no dry flour remains.
  7. Gently fold in the chocolate.
  8. Spread the batter in the prepared pan and bake uncovered. Begin checking at 50 minutes; baking usually takes about 55–70 minutes.
  9. Check that the top is browned and cracked and the center looks set, not shiny. Insert a tester near the center; it should come out clean or with a few moist crumbs, not wet batter.
  10. If the top gets too dark before the center is done, tent it loosely with foil and continue baking.
  11. Cool the loaf in the pan for 15 minutes, then lift it onto a wire rack and cool completely, about 45–60 minutes more, before slicing.

Tips

  • Use heavily spotted or browned bananas and measure them after mashing.
  • Keep the mashed banana to 1 1/2 cups to avoid an overly wet center.
  • Use a light-colored 9×5-inch metal pan for the stated baking time.
  • Avoid overmixing after adding the flour to help keep the loaf tender.
  • If a tester hits melted chocolate, check another spot near the center.

Variations

  • Dark Chocolate Banana Bread: Replace the semisweet chocolate with the same amount of dark chocolate.

Notes

Cool completely before wrapping. Store airtight at room temperature for about 2–3 days, or freeze tightly wrapped for about 2–3 months. Warm slices in a toaster oven or microwave for 10–15 seconds.

Nutrition

Calories: 345 kcal | Protein: 5 g | Fat: 15 g | Carbohydrates: 50 g

Classic Moist Banana Bread

Thick slices of banana bread should have a golden-brown crust and a moist, tender crumb with banana flecks and chopped walnuts. Heavily spotted bananas provide the flavor, while measuring them after mashing keeps extra fruit from making the center too wet.

This loaf uses a hand-mixed batter with melted butter and buttermilk. Fold gently once the flour goes in, then let the bread cool completely before slicing so the crumb holds together.

Yield: 1 loaf, about 10 thick slices. Prep: 15 minutes. Bake: About 55–65 minutes, plus 60–90 minutes to cool.

Cooled banana bread loaf cut into thick slices and arranged on a wire rack

Ingredients for Classic Moist Banana Bread

  • 1 1/2 cups mashed very ripe bananas, from approximately 3 medium-to-large bananas (340g)
  • 1 3/4 cups all-purpose flour, spooned and leveled (210g)
  • 3/4 cup granulated sugar (150g)
  • 1/2 cup unsalted butter, melted and slightly cooled (115g)
  • 2 large eggs
  • 1/4 cup buttermilk (60g)
  • 1 teaspoon baking soda
  • 1/2 teaspoon fine salt
  • 1 teaspoon vanilla extract
  • 1/2 cup chopped walnuts (55g)
Close view of banana-flecked bread crumb with chopped walnuts and a browned crust

How to Bake Banana Bread

  1. Preheat and prepare the pan: Preheat the oven fully to 350°F (175°C). Line a 9-by-5-inch metal loaf pan with a parchment sling extending above the long sides. Lightly grease the exposed pan surfaces.
  2. Mash and measure: Mash the bananas until mostly smooth, with a few small pieces remaining. Measure 1 1/2 cups; do not add extra banana.
  3. Mix the wet and dry ingredients: Whisk the flour, baking soda, and salt in one bowl. In another, whisk the mashed banana, sugar, melted butter, eggs, buttermilk, and vanilla until combined. The butter should be warm, not hot, when added to the eggs.
  4. Fold the batter: Fold the dry mixture into the wet mixture just until no dry flour remains. Briefly fold in the walnuts, then spread the thick, slightly lumpy batter in the pan. Further mixing can make the loaf dense or tough.
  5. Bake: Bake uncovered on the center rack for about 55–65 minutes, starting checks at 50 minutes. The top should be golden brown and the center set. A toothpick or thin skewer inserted into the center should come out clean or with a few moist crumbs, not raw batter. If the crust browns before the center is done, loosely tent the loaf with foil and continue baking.
  6. Cool and slice: Let the loaf cool in the pan for about 15 minutes, then lift it onto a wire rack. Cool completely before cutting into about 10 thick slices. Loosely overlap a few slices to show the banana-flecked, walnut-studded crumb.

How Ripe Should the Bananas Be?

Choose soft bananas with heavily spotted peels. The number of bananas is only an estimate; the measured mashed amount controls how much moisture goes into the batter. Thawed frozen bananas also work. Drain off excess free liquid before mashing and measuring them.

How to Tell When Banana Bread Is Done

Ovens, pan materials, and banana moisture can change the baking time, so check the center rather than relying on the clock. A toothpick that hits a moist banana pocket may look wetter than the surrounding crumb; test another central spot before baking the loaf longer.

An instant-read thermometer offers another check: the center should be around 200–205°F (about 95°C). A dark metal or glass pan may brown the crust at a different rate than the specified metal pan. If the outside darkens while the middle is still wet, tent it loosely with foil and keep baking.

Serving and Variations

Serve thick slices plain, or lightly toast cooled slices and add a little butter. For another baked banana snack, try these banana peanut butter oat bars.

This loaf contains walnuts. For a different version, replace them with an equal amount of chopped pecans, omit them, or use 1/2 cup chocolate chips instead. For mild spice, whisk 1/2 teaspoon ground cinnamon into the flour mixture.

Cooling, Storage, and Freezing

Cool the bread completely before slicing or wrapping it. Cutting a warm loaf can make even a baked-through crumb seem gummy, while wrapping it warm traps moisture. Once cool, wrap or seal the loaf and keep it at room temperature for about 3–4 days.

Refrigeration can be useful for longer holding or in humid conditions, but it may firm or dry the bread; briefly warm a slice before serving if desired. Freeze the fully cooled loaf or individually wrapped slices, tightly protected from freezer air, for up to 3 months. Thaw at room temperature before serving or warming.

Nutrition

Approximate nutrition per thick slice, based on 10 slices: 300 calories, 5g protein, 14g fat, and 40g carbohydrates. Per 100g of baked bread: approximately 335 calories, 5g protein, 16g fat, and 44g carbohydrates, assuming a cooled loaf weighing about 900g. Values will vary with ingredients and moisture lost during baking.

Classic Moist Banana Bread

A tender banana bread made with very ripe bananas, buttermilk, and chopped walnuts.
Course: Breakfast
Cuisine: American
Prep: 15 min
Cook: 65 min
Total: 170 min
Servings: 10 Calories: 300 kcal

Equipment

  • Oven
  • 9-by-5-inch loaf pan
  • Parchment paper
  • Mixing bowls
  • Whisk
  • Spatula
  • Wire rack
  • Toothpick or thin skewer

Ingredients

  • 1 1/2 cups mashed very ripe bananas (340 g; approximately 3 medium-to-large bananas)
  • 1 3/4 cups all-purpose flour, spooned and leveled (210 g)
  • 3/4 cup granulated sugar (150 g)
  • 1/2 cup unsalted butter, melted and slightly cooled (115 g)
  • 2 large eggs
  • 1/4 cup buttermilk (60 g)
  • 1 teaspoon baking soda
  • 1/2 teaspoon fine salt
  • 1 teaspoon vanilla extract
  • 1/2 cup chopped walnuts (55 g)

Instructions

  1. Preheat the oven to 350°F (175°C). Line a 9-by-5-inch metal loaf pan with a parchment sling and lightly grease the exposed surfaces.
  2. Mash the bananas until mostly smooth, then measure exactly 1 1/2 cups.
  3. Whisk the flour, baking soda, and salt together in a bowl.
  4. In a separate bowl, whisk the mashed bananas, sugar, melted butter, eggs, buttermilk, and vanilla until combined. Make sure the butter is warm, not hot.
  5. Fold the dry ingredients into the wet ingredients just until no dry flour remains. Briefly fold in the walnuts, then spread the batter in the prepared pan.
  6. Bake uncovered on the center rack for about 55–65 minutes, checking from 50 minutes. The top should be golden brown and a toothpick or thin skewer inserted in the center should come out clean or with a few moist crumbs. If the crust browns before the center is done, tent loosely with foil and continue baking.
  7. Cool in the pan for about 15 minutes, then transfer to a wire rack and cool completely before slicing.

Tips

  • Use heavily spotted, soft bananas for the best flavor.
  • Measure the mashed bananas; adding extra can make the center too wet.
  • Use melted butter that has cooled until warm, not hot, before mixing it with the eggs.
  • Fold gently once the flour is added to keep the loaf tender.
  • If the crust darkens before the center is done, tent the loaf loosely with foil.
  • If a toothpick hits a moist banana pocket, test another spot before baking the loaf longer.

Variations

  • Pecan Banana Bread: Replace the walnuts with an equal amount of chopped pecans.
  • Chocolate Chip Banana Bread: Replace the walnuts with 1/2 cup chocolate chips.
  • Cinnamon Banana Bread: Whisk 1/2 teaspoon ground cinnamon into the flour mixture.
  • Nut-Free Banana Bread: Omit the walnuts.

Notes

Cool completely before wrapping or slicing. Store sealed at room temperature for 3–4 days, or freeze tightly wrapped for up to 3 months. The center should reach about 200–205°F (about 95°C).

Nutrition

Calories: 300 kcal | Protein: 5 g | Fat: 14 g | Carbohydrates: 40 g

One-Skillet Salmon with Lemon Orzo

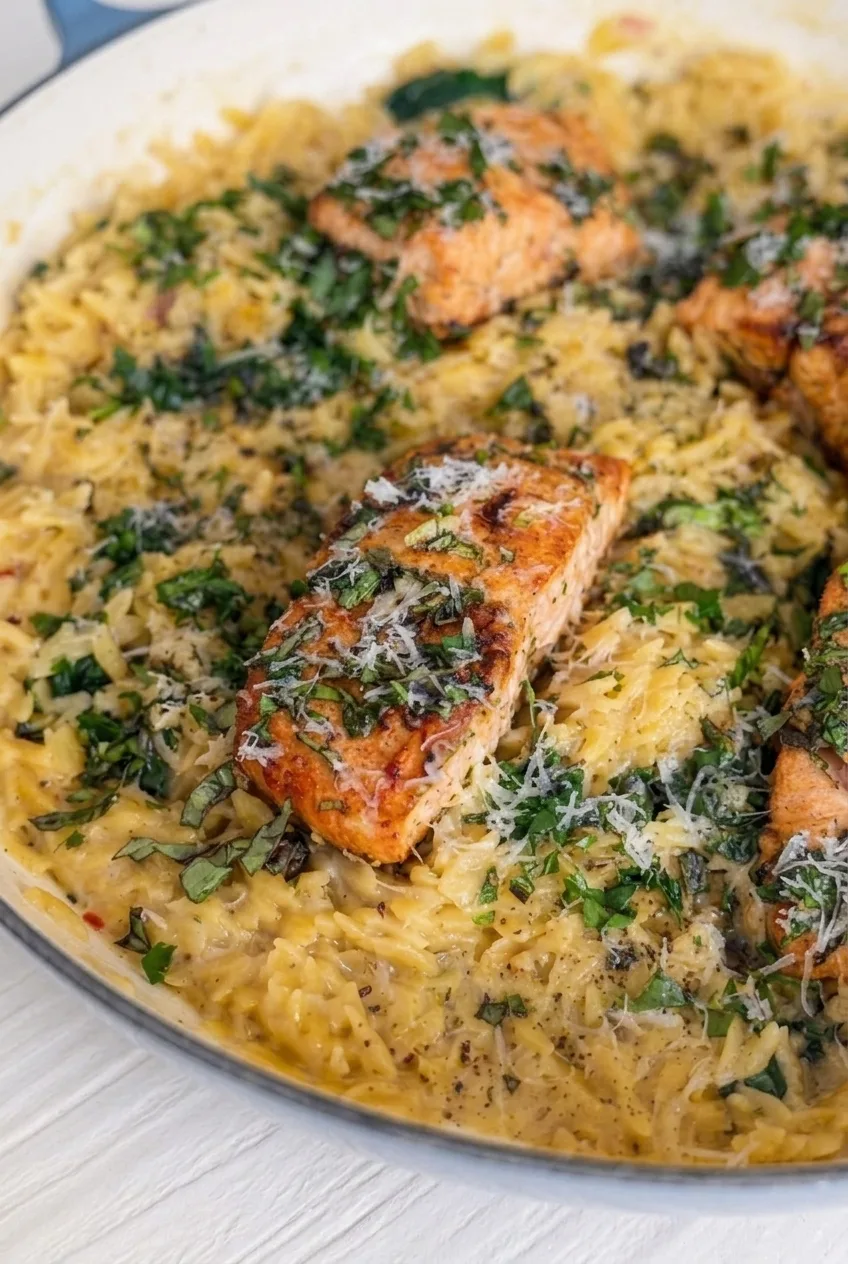
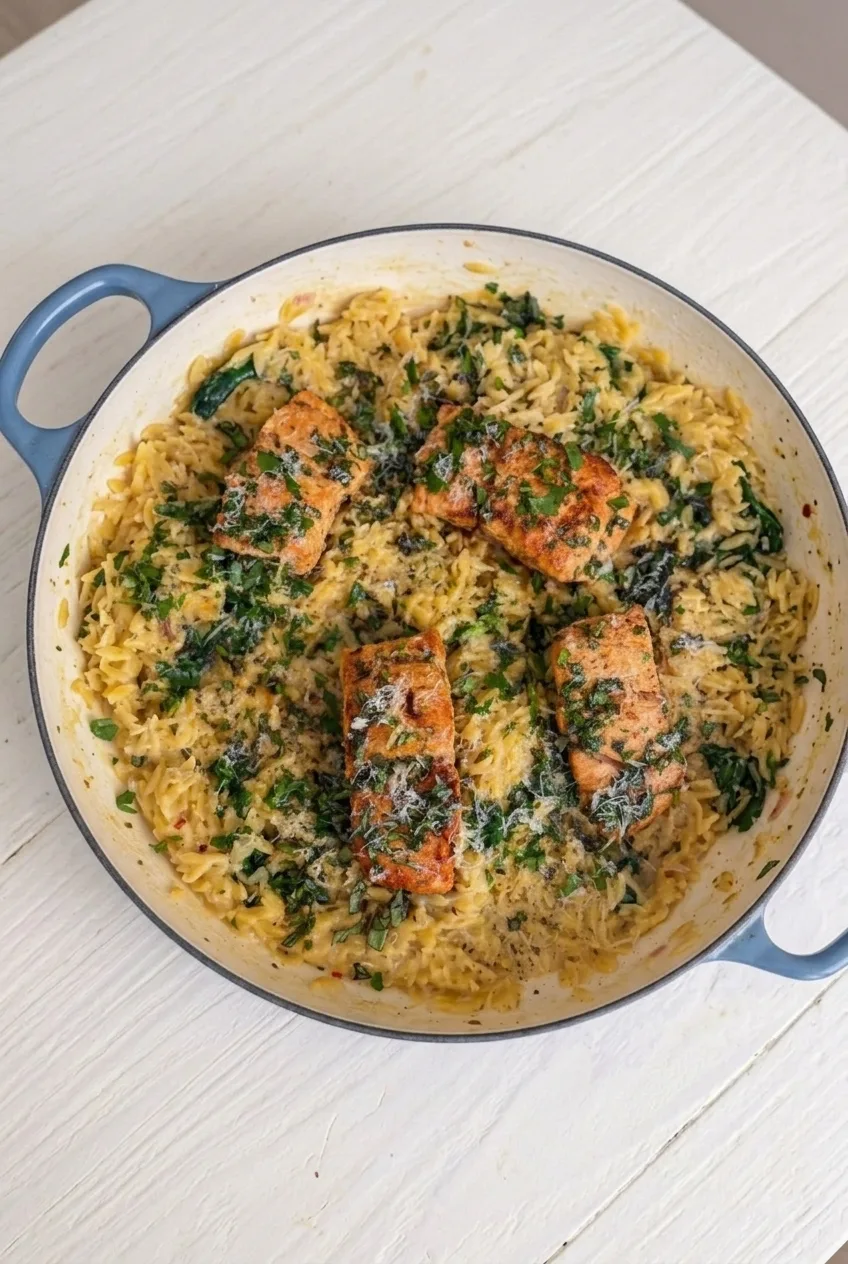
Four seared salmon portions sit over creamy lemon-Parmesan orzo with wilted spinach, parsley, and a little more grated cheese. The salmon browns first, then rests on a plate while dry orzo cooks in broth in the same skillet. Returning the fish only near the end gives the pasta time to become tender without leaving the salmon over the heat for the full simmer. Serve it while the orzo is loose and glossy.

Makes 4 servings. Prep time: 15 minutes. Cook time: 20–25 minutes.

Ingredients for Salmon with Lemon Orzo

Close view of moist, seared salmon beside glossy spinach orzo with parsley and fine Parmesan
  • 4 salmon fillets, about 5–6 oz each (about 625g total), preferably similar in thickness
  • 2 tablespoons olive oil, divided
  • About 1 teaspoon kosher salt, divided, plus more to taste
  • 1/2 teaspoon freshly ground black pepper, divided
  • 1 medium shallot, finely chopped (about 40g)
  • 3 garlic cloves, minced
  • 1 1/2 cups dry orzo (about 270g)
  • 3 cups low-sodium chicken or vegetable broth, plus up to 1/2 cup more for adjusting
  • 3 packed cups baby spinach (about 85g)
  • 1/3 cup heavy cream (about 80g)
  • 1 large lemon, zested and juiced; use 2 tablespoons juice, plus more to taste
  • 1/2 cup finely grated Parmesan, plus 2 tablespoons for finishing (about 65g total)
  • 1/4 cup chopped fresh flat-leaf parsley (about 15g)

Use a wide, deep 12-inch skillet with a lid. Keep the extra broth nearby: pan width and simmer strength affect how quickly the orzo absorbs liquid.

How to Make One-Skillet Salmon with Lemon Orzo

Wide view of the complete skillet of salmon and creamy lemon orzo on a pale tabletop
  1. Prepare the salmon and aromatics: Pat the salmon dry and season it with about half the salt and pepper. Chop the shallot and parsley, mince the garlic, and zest and juice the lemon.
  2. Sear the salmon: Heat 1 tablespoon olive oil in the skillet over medium-high heat. Add the salmon skin-side down if using skin-on fillets. Cook for about 3–4 minutes, until browned and reasonably easy to release from the pan. Flip once and cook for 1–2 minutes more, then transfer to a plate while the centers still need a brief finish. Sear in two batches in the same skillet if the fillets would otherwise be crowded.
  3. Toast the orzo: Reduce the heat to medium. Add the remaining tablespoon of oil and the shallot; cook until softened. Stir in the garlic briefly, just until fragrant. Add the dry orzo and stir for 1–2 minutes, until lightly glossy but not dark brown.
  4. Simmer the orzo: Pour in 3 cups broth, scraping up the browned bits from the skillet bottom. Add the remaining salt and pepper. Simmer uncovered at a gentle, steady bubble, stirring regularly across the bottom. Start checking at 9 minutes. If the pan looks dry before the orzo softens, add warm broth in small splashes. After about 9–12 minutes, the orzo should be nearly tender with some liquid still around it.
  5. Add the spinach and finish the salmon: Stir the spinach and lemon zest into the orzo. Add the cream and reduce the heat to low. Set all four salmon portions on top, cover, and cook gently for about 2–5 minutes, checking the thickest part early. The spinach should be wilted, the orzo tender, and the salmon should separate into moist flakes. For a thermometer-based food-safety check, cook the salmon to 145°F (65°C) in its thickest part; thicker fillets may need longer.
  6. Finish off heat: Turn off the heat. Gently stir 1/2 cup Parmesan and 2 tablespoons lemon juice into the exposed orzo without breaking up the salmon. If the pasta is stiff, add a little warm broth until it is glossy and spoonable. Taste and adjust the salt or lemon juice. Scatter the parsley and remaining 2 tablespoons Parmesan over the fish and pasta. Serve directly from the skillet.

How to Keep the Salmon Tender

The initial sear builds browned edges; it does not need to cook the fish through. Leaving salmon in the skillet during the entire orzo simmer can dry it out. Thin fillets may need less searing or almost no final cooking, while thick portions may need longer under the lid. Check the thickest part rather than relying on the clock.

How to Keep the Orzo Saucy

Stir across the skillet bottom while the orzo simmers so it cooks evenly without sticking. The finished pasta should hold distinct pieces in a sauce that flows around a spoonful—not form a dry mound or sit in a pool of broth. Orzo keeps absorbing liquid as it stands, so loosen it with warm broth if needed and serve promptly.

Keep the heat low after adding the cream. Stirring in Parmesan and lemon juice off heat helps the sauce stay smooth rather than boiling the cheese and dairy.

Serving and Storing Leftovers

Scoop the spinach orzo from beneath each salmon portion and serve from the skillet. For another skillet pasta dinner, try Creamy Tuscan Ravioli.

Refrigerate leftovers promptly in an airtight container and use within 2–3 days. Reheat gently with a splash of broth to loosen the orzo, warming the salmon only until heated through. The texture is best freshly made; freezing is not recommended for this creamy version because the sauce and fish may lose texture.

Nutrition

Approximate nutrition per serving, based on 4 servings: 810 calories, 47g protein, 41g fat, and 56g carbohydrates. Approximate nutrition per 100g of finished dish: 170 calories, 10g protein, 9g fat, and 12g carbohydrates. Values vary with the salmon, broth, and amount of liquid absorbed or evaporated.

One-Skillet Salmon with Lemon Orzo

Seared salmon rests over creamy lemon-Parmesan orzo with wilted spinach and parsley.
Course: Main Course
Cuisine: Mediterranean
Prep: 15 min
Cook: 25 min
Total: 40 min
Servings: 4 Calories: 810 kcal

Equipment

  • 12-inch deep skillet with lid
  • Instant-read thermometer

Ingredients

Salmon and Orzo

  • 4 salmon fillets, about 5–6 oz each (about 625 g total), preferably similar in thickness
  • 2 tablespoons olive oil, divided
  • About 1 teaspoon kosher salt, divided, plus more to taste
  • 1/2 teaspoon freshly ground black pepper, divided
  • 1 medium shallot, finely chopped (about 40 g)
  • 3 garlic cloves, minced
  • 1 1/2 cups dry orzo (about 270 g)
  • 3 cups low-sodium chicken or vegetable broth, plus up to 1/2 cup more for adjusting
  • 3 packed cups baby spinach (about 85 g)
  • 1/3 cup heavy cream (about 80 g)
  • 1 large lemon, zested and juiced; use 2 tablespoons juice, plus more to taste
  • 1/2 cup finely grated Parmesan, plus 2 tablespoons for finishing (about 65 g total)
  • 1/4 cup chopped fresh flat-leaf parsley (about 15 g)

Instructions

  1. Pat the salmon dry and season it with about half the salt and pepper. Chop the shallot and parsley, mince the garlic, and zest and juice the lemon.
  2. Heat 1 tablespoon olive oil in a wide, deep 12-inch skillet over medium-high heat. Add the salmon skin-side down if using skin-on fillets. Cook for 3–4 minutes, until browned and easy to release. Flip and cook for 1–2 minutes more, then transfer to a plate. Sear in two batches if needed to avoid crowding.
  3. Reduce the heat to medium. Add the remaining tablespoon of olive oil and the shallot; cook until softened. Stir in the garlic briefly, then add the orzo and toast for 1–2 minutes, stirring until lightly glossy.
  4. Pour in 3 cups broth and scrape up the browned bits from the skillet. Add the remaining salt and pepper. Simmer uncovered at a gentle, steady bubble, stirring regularly across the bottom. Start checking the orzo at 9 minutes; add warm broth in small splashes if the pan looks dry before the orzo softens. Cook for about 9–12 minutes, until nearly tender with some liquid remaining.
  5. Stir the spinach and lemon zest into the orzo. Add the cream and reduce the heat to low. Set the salmon on top, cover, and cook gently for about 2–5 minutes, checking the thickest part early. Cook until the spinach is wilted, the orzo is tender, and the salmon flakes moistly. For a thermometer-based food-safety check, cook the salmon to 145°F (65°C) in its thickest part.
  6. Turn off the heat. Gently stir 1/2 cup Parmesan and 2 tablespoons lemon juice into the exposed orzo without breaking up the salmon. Add a little warm broth if needed to make the orzo glossy and spoonable. Taste and adjust the salt or lemon juice, then top with parsley and the remaining 2 tablespoons Parmesan. Serve promptly.

Tips

  • Sear the salmon only until browned; it will finish cooking under the lid.
  • Check the thickest part of the salmon rather than relying only on the cooking time.
  • Stir across the bottom of the skillet while the orzo simmers to prevent sticking.
  • Keep extra warm broth nearby and add it in small splashes to keep the orzo loose and saucy.
  • Stir in the Parmesan and lemon juice off the heat to help keep the sauce smooth.

Notes

Refrigerate leftovers promptly in an airtight container and use within 2–3 days. Reheat gently with a splash of broth, warming the salmon only until heated through. Freezing is not recommended.

Nutrition

Calories: 810 kcal | Protein: 47 g | Fat: 41 g | Carbohydrates: 56 g | Calories Per 100g: 170 kcal | Protein Per 100g: 10 g | Fat Per 100g: 9 g | Carbohydrates Per 100g: 12 g

Baked Ziti with Five Cheeses

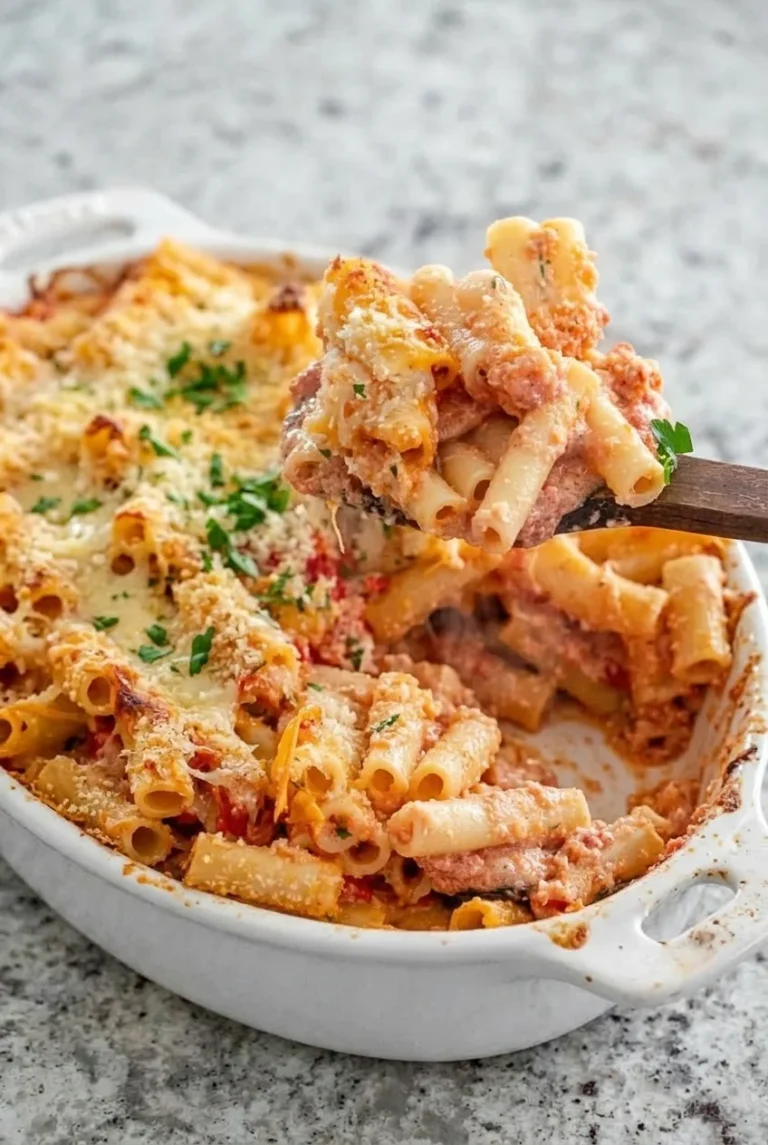
This baked ziti is meant to be scooped, not cut into squares: distinct pasta tubes stay coated in a creamy, rosy sauce beneath melted cheese and lightly golden crumbs. Marinara and prepared Alfredo keep the sauce simple, while ricotta, mozzarella, fontina, Parmesan, and Pecorino Romano make up the five-cheese blend.

Drain the ziti while it is still slightly firm so it can finish cooking in the oven. Bake the casserole covered to protect the saucy interior, then add the breadcrumbs for a short uncovered finish.

Ingredients for Five-Cheese Baked Ziti

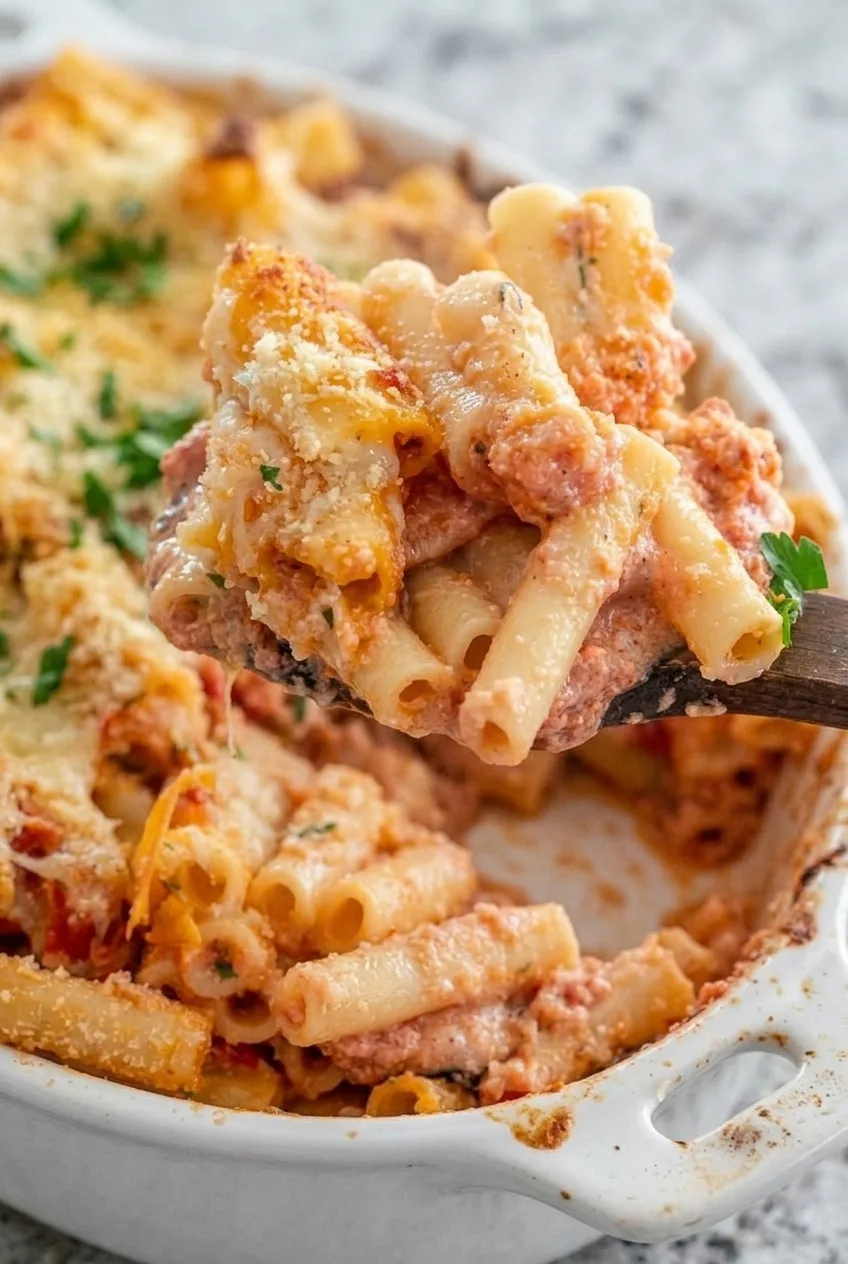
Close view of saucy ziti tubes, melted cheese, fine golden crumbs, and parsley
  • 1 pound dry ziti (about 450g)
  • 1 jar (24 ounces) marinara sauce (about 680g)
  • 1 jar (15 ounces) prepared Alfredo sauce (about 425g)
  • 1 cup whole-milk ricotta (about 225g)
  • 2 cups shredded low-moisture mozzarella, divided (about 225g)
  • 1 cup shredded fontina (about 115g)
  • 1/2 cup finely grated Parmesan (about 50g)
  • 1/4 cup finely grated Pecorino Romano (about 25g)
  • 1 teaspoon Italian seasoning
  • 1/2 teaspoon garlic powder
  • 1/2 cup plain or Italian-style breadcrumbs (about 55g)
  • 1 tablespoon olive oil
  • 2 tablespoons chopped fresh parsley

Yield: 8 generous servings. Time: About 25 minutes prep, 50–55 minutes cooking, and 10 minutes resting.

How to Make Baked Ziti with Five Cheeses

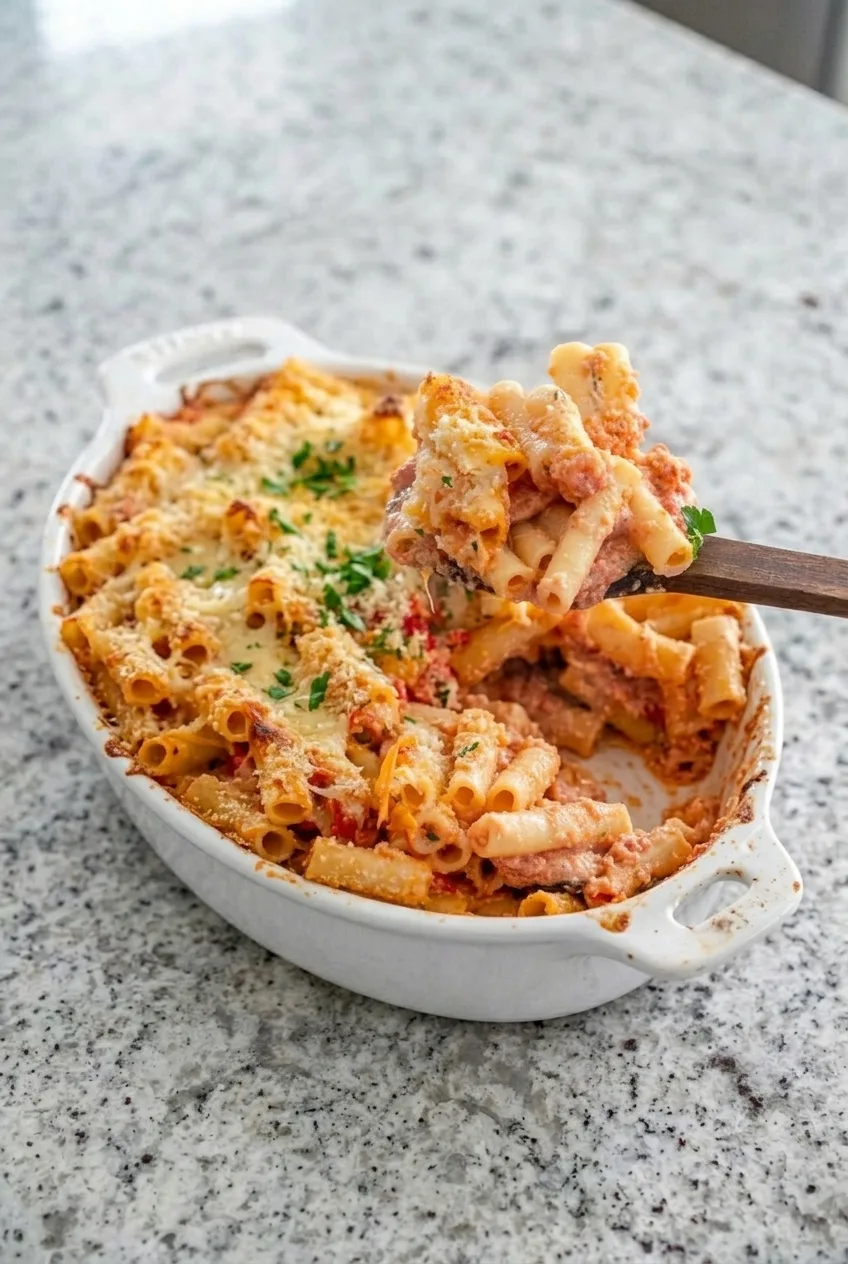
Nearly full white dish of five-cheese baked ziti with a moist portion lifted above it
  1. Prepare the dish: Preheat the oven to 375°F (190°C). Lightly grease a deep 9-by-13-inch baking dish with roughly 4-quart capacity. Set it on a rimmed sheet pan to catch any drips.
  2. Cook the ziti: Boil the pasta until 1–2 minutes short of the package’s al dente time. It should still be slightly firm. Drain; it will finish softening in the oven.
  3. Coat the pasta: In a large bowl, combine the marinara, Alfredo, Italian seasoning, and garlic powder. Fold in the ziti, ricotta, fontina, Parmesan, Pecorino Romano, and 1 cup of the mozzarella. Coat the pasta thoroughly, leaving a few small pockets of ricotta.
  4. Assemble: Spread the pasta evenly in the baking dish and top with the remaining 1 cup mozzarella. Cover loosely with foil. If the foil may touch the cheese, lightly oil the side facing down.
  5. Bake and add the crumbs: Bake covered for 20–25 minutes, until the cheese on top has melted. Toss the breadcrumbs with the olive oil, remove the foil, and scatter the crumbs over the cheese.
  6. Finish and rest: Bake uncovered for 12–18 minutes more. Start checking after 12 minutes; the sauce should bubble at the edges, the center should be hot, and the crumbs should be lightly golden. Rest for 10 minutes, then scatter with parsley and scoop into servings.

How to Keep the Ziti Creamy, Not Dry

Use both full jars of sauce, even if the pasta looks generously coated before baking. The ziti absorbs moisture in the oven, and the covered first stage limits evaporation. Adding the crumbs only after that stage lets them brown without leaving the pasta uncovered for too long.

A deeper dish or a casserole that starts cold may need longer to heat through. Look for bubbling edges and a hot center rather than relying only on the clock. Take the dish out once the crumbs are lightly golden; they can burn quickly under a broiler.

The Five-Cheese Blend

Ricotta leaves creamy pockets among the pasta. Mozzarella and fontina melt throughout the casserole, while Parmesan and Pecorino Romano add a sharper, savory note. Shred the mozzarella and fontina from blocks when practical for a smoother melt. Jarred Alfredo and the hard cheeses vary in saltiness, so taste before adding any salt.

Penne or rigatoni can replace the ziti in the same quantity. Serve with a green salad or garlic bread. For another creamy pasta dinner, try Creamy Tuscan Ravioli.

Make-Ahead, Storage, and Reheating

Make ahead: Assemble the casserole up to 24 hours ahead and refrigerate it without the breadcrumbs. Bake it covered first, then add the oiled crumbs for the uncovered finish. Starting from cold will require extra oven time; check for a hot center and bubbling edges.

Store and reheat: Cool leftovers, cover tightly, and refrigerate for up to 4 days. Microwave individual portions until hot, or cover larger portions with foil and reheat at 350°F (175°C) until heated through. Add a few spoonfuls of marinara if the pasta seems dry.

Freeze: An unbaked, tightly wrapped casserole can be frozen for up to 2 months, but the pasta and creamy sauce may lose some texture. Freshly baked or refrigerated ziti will have a creamier finish.

Nutrition

Approximate per serving (1/8 of the casserole): 610 calories, 28g protein, 29g fat, and 61g carbohydrates. Approximate per 100g of prepared casserole: 150 calories, 7g protein, 7g fat, and 15g carbohydrates. Values are estimates; sauce and cheese brands and the pasta’s cooked weight will affect the totals.

Baked Ziti with Five Cheeses

Ziti is baked in a creamy marinara and Alfredo sauce with five cheeses and a lightly golden breadcrumb topping.
Course: Main Course
Cuisine: Italian
Prep: 25 min
Cook: 55 min
Total: 90 min
Servings: 8 Calories: 610 kcal

Equipment

  • 9-by-13-inch baking dish
  • Rimmed sheet pan
  • Large pot
  • Colander
  • Large mixing bowl
  • Aluminum foil

Ingredients

For the ziti

  • 1 pound dry ziti (about 450 g)
  • 1 jar (24 ounces) marinara sauce (about 680 g)
  • 1 jar (15 ounces) prepared Alfredo sauce (about 425 g)
  • 1 cup whole-milk ricotta (about 225 g)
  • 2 cups shredded low-moisture mozzarella, divided (about 225 g)
  • 1 cup shredded fontina (about 115 g)
  • 1/2 cup finely grated Parmesan (about 50 g)
  • 1/4 cup finely grated Pecorino Romano (about 25 g)
  • 1 teaspoon Italian seasoning
  • 1/2 teaspoon garlic powder

For the topping

  • 1/2 cup plain or Italian-style breadcrumbs (about 55 g)
  • 1 tablespoon olive oil
  • 2 tablespoons chopped fresh parsley

Instructions

  1. Preheat the oven to 375°F (190°C). Lightly grease a deep 9-by-13-inch baking dish with roughly 4-quart capacity and set it on a rimmed sheet pan.
  2. Boil the ziti until 1–2 minutes short of the package’s al dente time. Drain while it is still slightly firm.
  3. In a large bowl, combine the marinara, Alfredo sauce, Italian seasoning, and garlic powder.
  4. Fold in the ziti, ricotta, fontina, Parmesan, Pecorino Romano, and 1 cup of the mozzarella. Coat the pasta thoroughly, leaving a few small pockets of ricotta.
  5. Spread the pasta in the baking dish and top with the remaining 1 cup mozzarella. Cover loosely with foil, oiling the underside if it may touch the cheese.
  6. Bake covered for 20–25 minutes, until the cheese on top has melted.
  7. Toss the breadcrumbs with the olive oil. Remove the foil and scatter the breadcrumbs over the cheese.
  8. Bake uncovered for 12–18 minutes, checking after 12 minutes, until the edges bubble, the center is hot, and the crumbs are lightly golden.
  9. Rest for 10 minutes, scatter with parsley, and scoop into servings.

Tips

  • Drain the ziti while it is still slightly firm so it can finish cooking in the oven.
  • Use both full jars of sauce; the pasta absorbs moisture as it bakes.
  • Bake covered at first to limit evaporation and keep the casserole saucy.
  • Add the breadcrumbs only for the uncovered finish so they brown without drying out the pasta.
  • Check for bubbling edges and a hot center, especially if baking in a deep dish or starting from cold.
  • Taste the sauce before adding salt because prepared Alfredo and hard cheeses vary in saltiness.

Variations

  • Penne or Rigatoni Baked Pasta: Replace the ziti with the same quantity of penne or rigatoni.

Notes

Assemble up to 24 hours ahead and refrigerate without the breadcrumbs; allow extra baking time if starting cold. Refrigerate leftovers for up to 4 days and reheat until hot, adding a few spoonfuls of marinara if dry. An unbaked, tightly wrapped casserole can be frozen for up to 2 months; texture may change.

Nutrition

Calories: 610 kcal | Protein: 28 g | Fat: 29 g | Carbohydrates: 61 g | Per 100g Calories: 150 kcal | Per 100g Protein: 7 g | Per 100g Fat: 7 g | Per 100g Carbohydrates: 15 g

Chicken Pot Pie Orzo

Chicken pot pie orzo has the familiar mix of shredded chicken, carrots, celery, and peas, but no pastry crust. The orzo cooks directly in broth with the vegetables, releasing starch that helps make the sauce creamy without a flour roux. Cooked chicken and peas go in near the end, so the chicken only needs to heat through and the peas stay bright. Serve it from the skillet while the orzo grains are distinct and the sauce is thick but spoonable.

Ingredients for Chicken Pot Pie Orzo

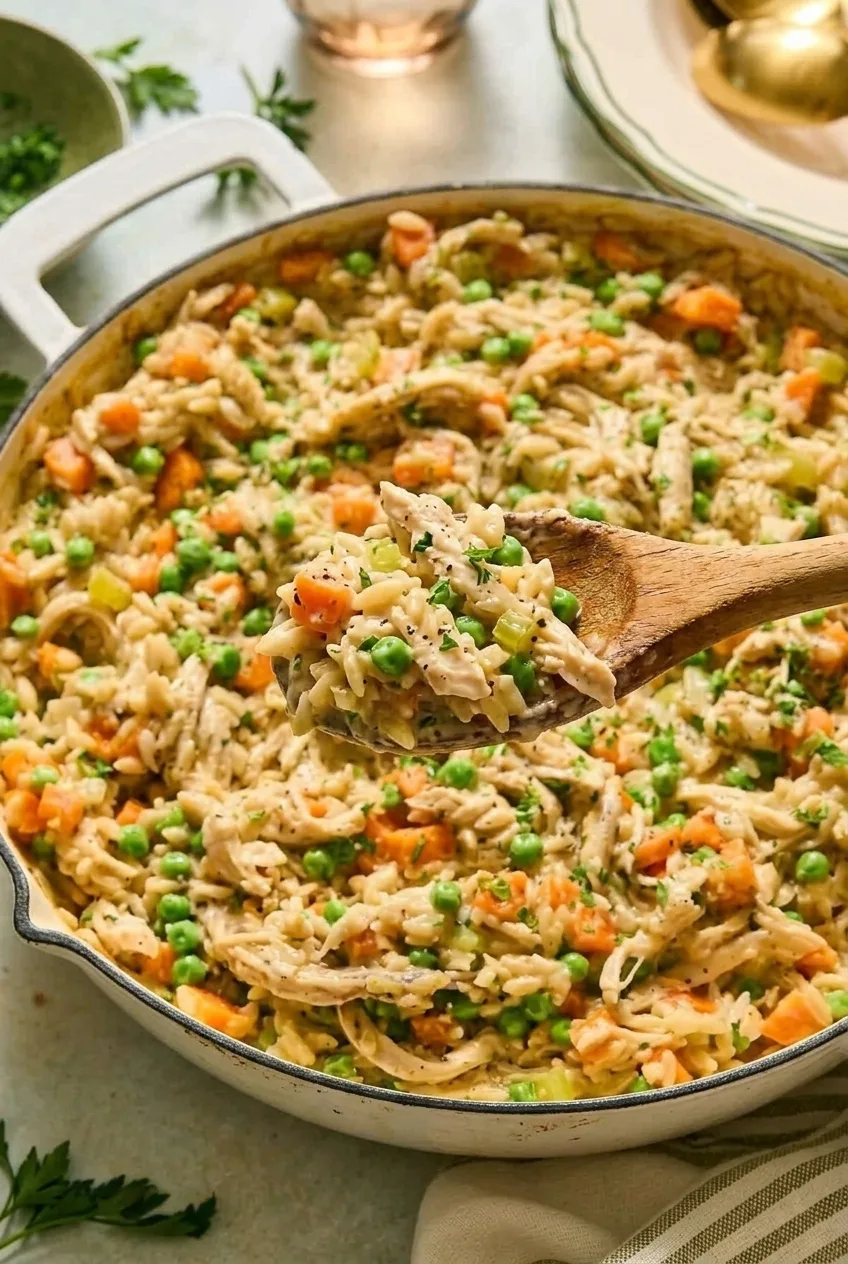
Close view of creamy orzo and shredded chicken with peas and diced vegetables coating a wooden spoon
  • 2 tablespoons unsalted butter (30g)
  • 1 medium yellow onion, finely diced, about 1 cup (150g)
  • 2 medium carrots, diced small, about 1 cup (120g)
  • 2 celery stalks, diced small, about 3/4 cup (100g)
  • 3 garlic cloves, minced
  • 1 teaspoon dried thyme
  • 1 1/2 cups regular dry orzo (270g)
  • 3 cups low-sodium chicken broth, plus up to 1 cup more as needed
  • About 3 cups loosely packed, fully cooked shredded chicken (420g)
  • 1 cup frozen peas (140g)
  • 1/2 cup heavy cream (120g)
  • About 1/2 teaspoon kosher salt, or to taste
  • 1/4 teaspoon freshly ground black pepper, or to taste
  • 2 tablespoons finely chopped fresh parsley

How to Make Chicken Pot Pie Orzo

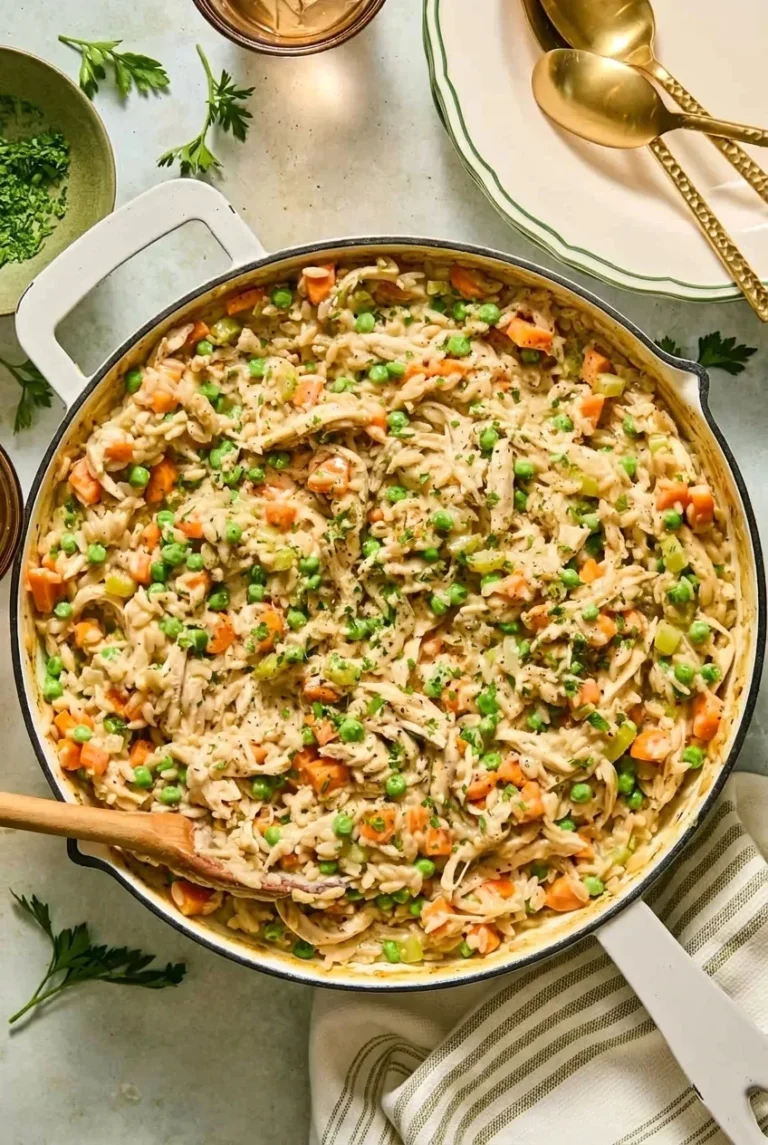
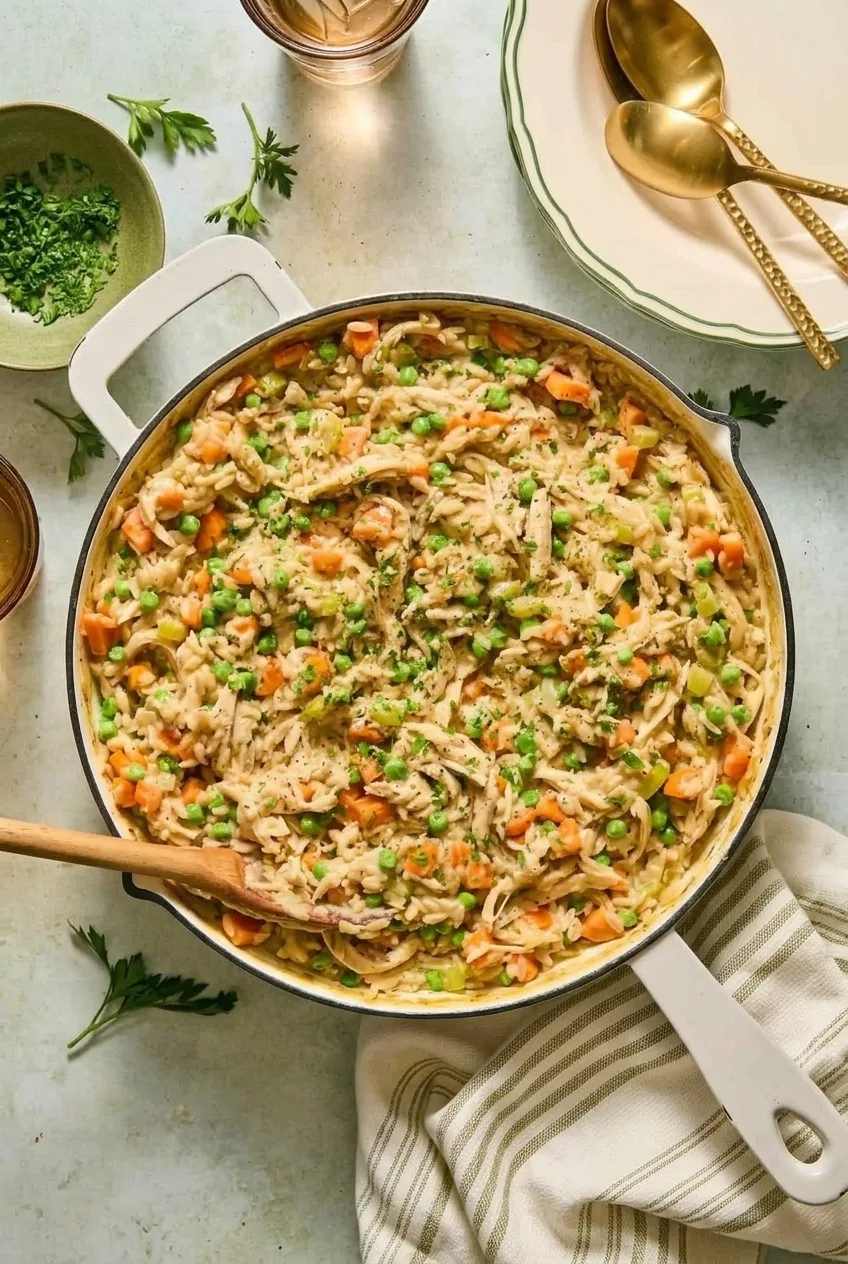
Complete skillet of chicken pot pie orzo on a pale tabletop, with the handles and parsley-topped surface visible
  1. Prepare the ingredients: Dice the onion, carrots, and celery small so they soften before the orzo finishes cooking. Shred the cooked chicken into visible strands and keep the broth within reach.
  2. Soften the vegetables: Warm a 12-inch deep-sided skillet over medium heat, then melt the butter. Add the onion, carrots, and celery. Cook, stirring occasionally, for 7 to 8 minutes, until the onion is translucent and the carrots and celery have begun to soften. Lower the heat if the butter starts to brown.
  3. Add the garlic, thyme, and orzo: Stir in the garlic and thyme for about 1 minute, until fragrant but not browned. Add the dry orzo and stir briefly to coat it.
  4. Simmer the orzo: Pour in 3 cups broth and scrape the skillet bottom. Bring to a gentle simmer, then reduce the heat to medium-low. Cook uncovered, stirring and scraping the bottom every 1 to 2 minutes. Start tasting after about 9 minutes; the orzo is typically tender with a slight bite after 10 to 12 minutes of simmering. If the pan becomes hard to stir before the orzo is tender, add reserved broth a splash at a time. If the orzo is tender but broth is pooling, simmer uncovered a little longer, stirring.
  5. Finish with chicken, peas, and cream: Reduce the heat to low or medium-low. Stir in the chicken, frozen peas, and cream. Cook gently for 2 to 3 minutes, until the chicken is heated through and the peas are bright green. Taste before adding salt, especially if the chicken is already seasoned, then add salt and pepper as needed.
  6. Rest and serve: Remove the skillet from the heat and let it stand for about 3 minutes. Stir and add a splash of reserved broth if the mixture has become stiff. The sauce should coat the chicken and distinct orzo grains, with no separate pool of broth, but move easily when spooned. Scatter the parsley over the skillet and serve.

How to Keep the Orzo Creamy

A wide skillet can reduce broth faster than a deeper pan, and orzo brands absorb liquid differently. During cooking, add broth if the grains are still firm and the pan is drying out. After the rest, add a little broth only if the finished mixture needs loosening.

Stop cooking when the orzo has a slight bite; it will soften further as it rests. Keep the rest brief rather than leaving the skillet covered, which can make the pasta too soft.

Chicken and Orzo Substitutions

Shredded rotisserie chicken or leftover fully cooked chicken both work. Half-and-half can replace the heavy cream for a less rich finish. Brown-rice gluten-free orzo is another option, but check its tenderness and liquid level as it cooks rather than relying on the regular-orzo timing.

For another creamy pasta dinner, try Marry Me Chicken Orzo.

Storing and Reheating Leftovers

Cool leftovers and refrigerate in an airtight container for 3 to 4 days. Orzo keeps absorbing sauce as it sits. Reheat gently on the stovetop or in short microwave intervals, stirring in splashes of broth or water until spoonable again.

For better make-ahead texture, prepare the vegetables and shred the chicken ahead, but cook the orzo near serving time. Freezing the completed dish is not recommended for best texture; the orzo may become mushy after thawing.

Nutrition

Approximate nutrition per serving, based on 6 servings: 435 calories, 31g protein, 16g fat, and 42g carbohydrates. Approximate values per 100g of finished dish: 135 calories, 10g protein, 5g fat, and 13g carbohydrates. Values vary with the chicken, broth, and amount of extra liquid used.

Chicken Pot Pie Orzo

Shredded chicken, vegetables, and orzo simmer in broth and cream for a skillet dinner inspired by chicken pot pie.
Course: Main Course
Cuisine: American
Prep: 15 min
Cook: 27 min
Total: 42 min
Servings: 6 Calories: 435 kcal per serving

Equipment

  • 12-inch deep-sided skillet
  • Cutting board
  • Knife
  • Wooden spoon

Ingredients

  • 2 tablespoons unsalted butter (30g)
  • 1 medium yellow onion, finely diced (about 1 cup; 150g)
  • 2 medium carrots, diced small (about 1 cup; 120g)
  • 2 celery stalks, diced small (about 3/4 cup; 100g)
  • 3 garlic cloves, minced
  • 1 teaspoon dried thyme
  • 1 1/2 cups regular dry orzo (270g)
  • 3 cups low-sodium chicken broth, plus up to 1 cup more as needed
  • About 3 cups loosely packed fully cooked shredded chicken (420g)
  • 1 cup frozen peas (140g)
  • 1/2 cup heavy cream (120g)
  • About 1/2 teaspoon kosher salt, or to taste
  • 1/4 teaspoon freshly ground black pepper, or to taste
  • 2 tablespoons finely chopped fresh parsley

Instructions

  1. Dice the onion, carrots, and celery. Shred the cooked chicken and keep the broth nearby.
  2. Melt the butter in a 12-inch deep-sided skillet over medium heat. Add the onion, carrots, and celery and cook, stirring occasionally, for 7 to 8 minutes, until the onion is translucent and the vegetables begin to soften.
  3. Stir in the garlic and thyme and cook for about 1 minute, until fragrant. Add the dry orzo and stir to coat.
  4. Pour in 3 cups broth and scrape the bottom of the skillet. Bring to a gentle simmer, then reduce the heat to medium-low.
  5. Cook uncovered for 10 to 12 minutes, stirring and scraping the bottom every 1 to 2 minutes, until the orzo is tender with a slight bite. Add reserved broth a splash at a time if the pan dries out before the orzo is tender.
  6. Reduce the heat to low or medium-low. Stir in the chicken, peas, and cream and cook gently for 2 to 3 minutes, until the chicken is heated through and the peas are bright green.
  7. Taste and add salt and pepper as needed. Remove the skillet from the heat and let it stand for about 3 minutes.
  8. Stir and add a splash of reserved broth if needed to loosen the mixture. Scatter the parsley over the top and serve.

Tips

  • Stir and scrape the skillet bottom every 1 to 2 minutes while the orzo simmers to prevent sticking.
  • Add broth gradually if the pan dries out while the orzo is still firm.
  • Stop cooking the orzo when it has a slight bite; it will soften more as it rests.
  • Keep the resting time brief so the orzo does not become too soft.
  • Taste before adding salt, especially if the cooked chicken is already seasoned.

Variations

  • Half-and-Half Finish: Replace the heavy cream with half-and-half for a less rich finish.
  • Gluten-Free Orzo: Use brown-rice gluten-free orzo and check its tenderness and liquid level as it cooks, rather than relying on the regular-orzo timing.
  • Rotisserie Chicken Orzo: Use shredded rotisserie chicken or leftover fully cooked chicken.

Notes

Refrigerate leftovers in an airtight container for 3 to 4 days. Reheat gently on the stovetop or in short microwave intervals, stirring in splashes of broth or water until spoonable. Freezing is not recommended for best texture. Approximate nutrition per 100g: 135 calories, 10g protein, 5g fat, and 13g carbohydrates.

Nutrition

Calories: 435 kcal per serving | Protein: 31 g per serving | Fat: 16 g per serving | Carbohydrates: 42 g per serving | Per 100g Calories: 135 kcal | Per 100g Protein: 10 g | Per 100g Fat: 5 g | Per 100g Carbohydrates: 13 g

Creamy Tuscan Ravioli

Refrigerated cheese ravioli cook directly in a garlic, sun-dried tomato, cream, and broth sauce—no separate pot of water needed. A lid helps the pasta become tender during a short, gentle simmer, while the ravioli release starch that gives the sauce body. Spinach goes in only after the pasta is tender, followed by Parmesan and lemon juice off the heat. The finished ravioli should stay intact, with sauce coating each piece and pooling lightly in the skillet.

Ingredients for Creamy Tuscan Ravioli

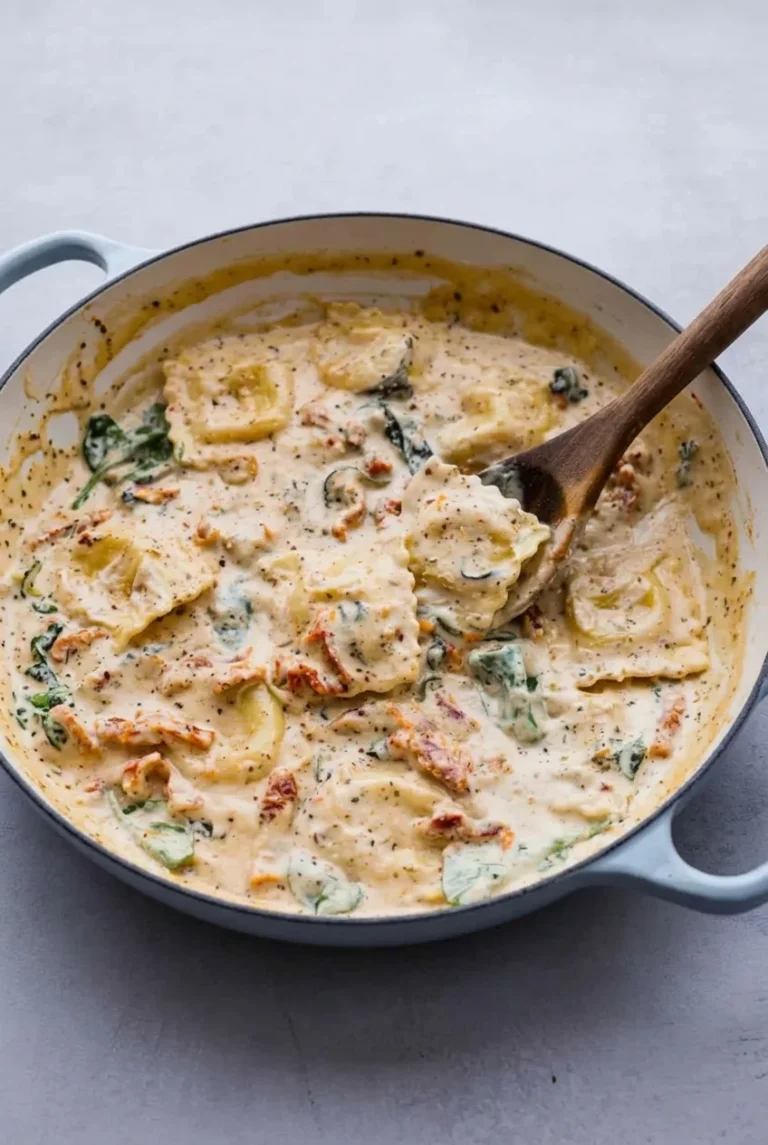
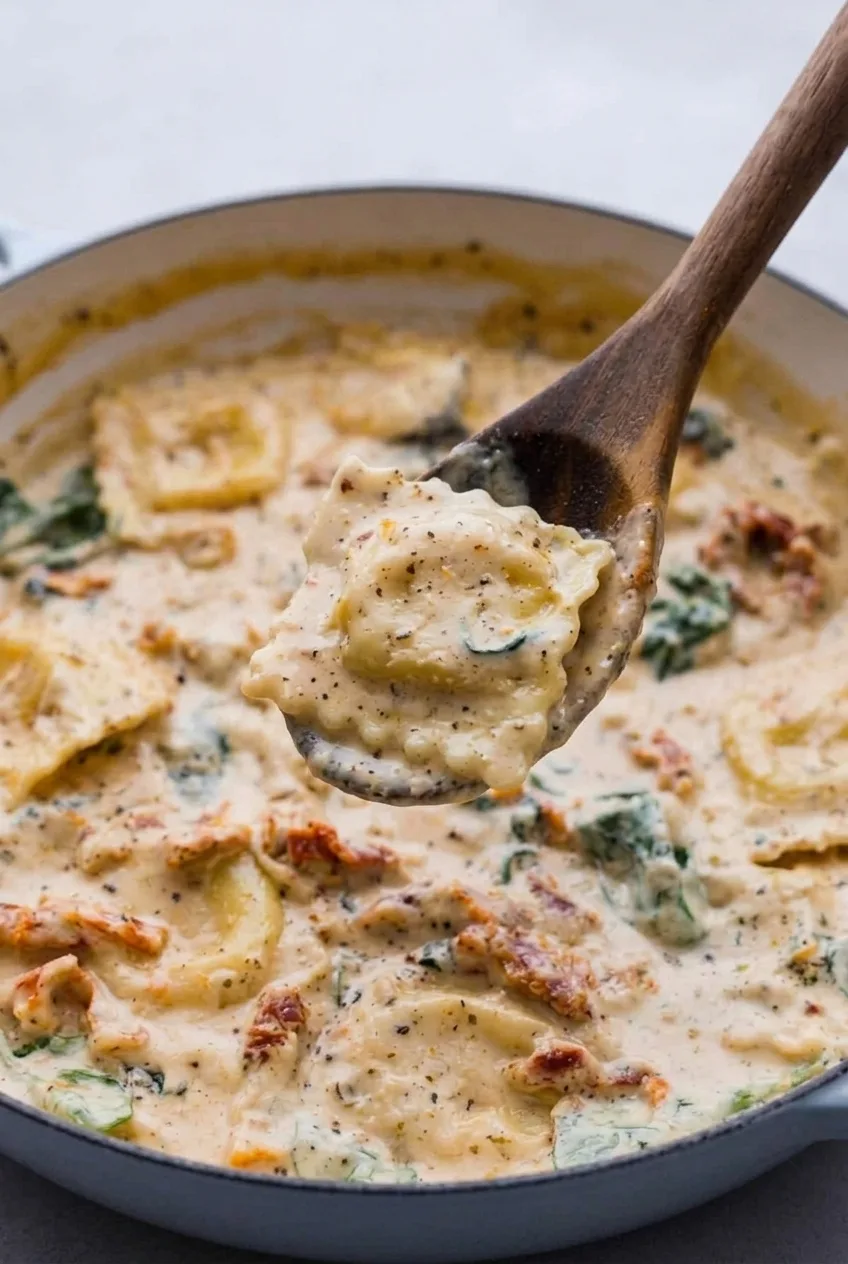
Close view of a ridged raviolo lifted from creamy sauce with spinach and sun-dried tomatoes
  • 20 ounces store-bought refrigerated cheese ravioli (about 570g)
  • 1/2 cup oil-packed sun-dried tomatoes, drained and chopped (about 70g)
  • 1 tablespoon oil from the sun-dried tomato jar, or olive oil if needed
  • 3 garlic cloves, minced
  • 1 cup low-sodium vegetable or chicken broth, plus more as needed
  • 1 cup heavy cream
  • 1 teaspoon Italian seasoning
  • 2 packed cups baby spinach (about 60g)
  • 1/3 cup finely grated Parmesan (about 30g)
  • 1 teaspoon fresh lemon juice
  • Kosher salt and freshly ground black pepper, to taste

Yield: 4 servings. Time: 10 minutes prep, 15 minutes cook; 25 minutes total.

How to Make Creamy Tuscan Ravioli

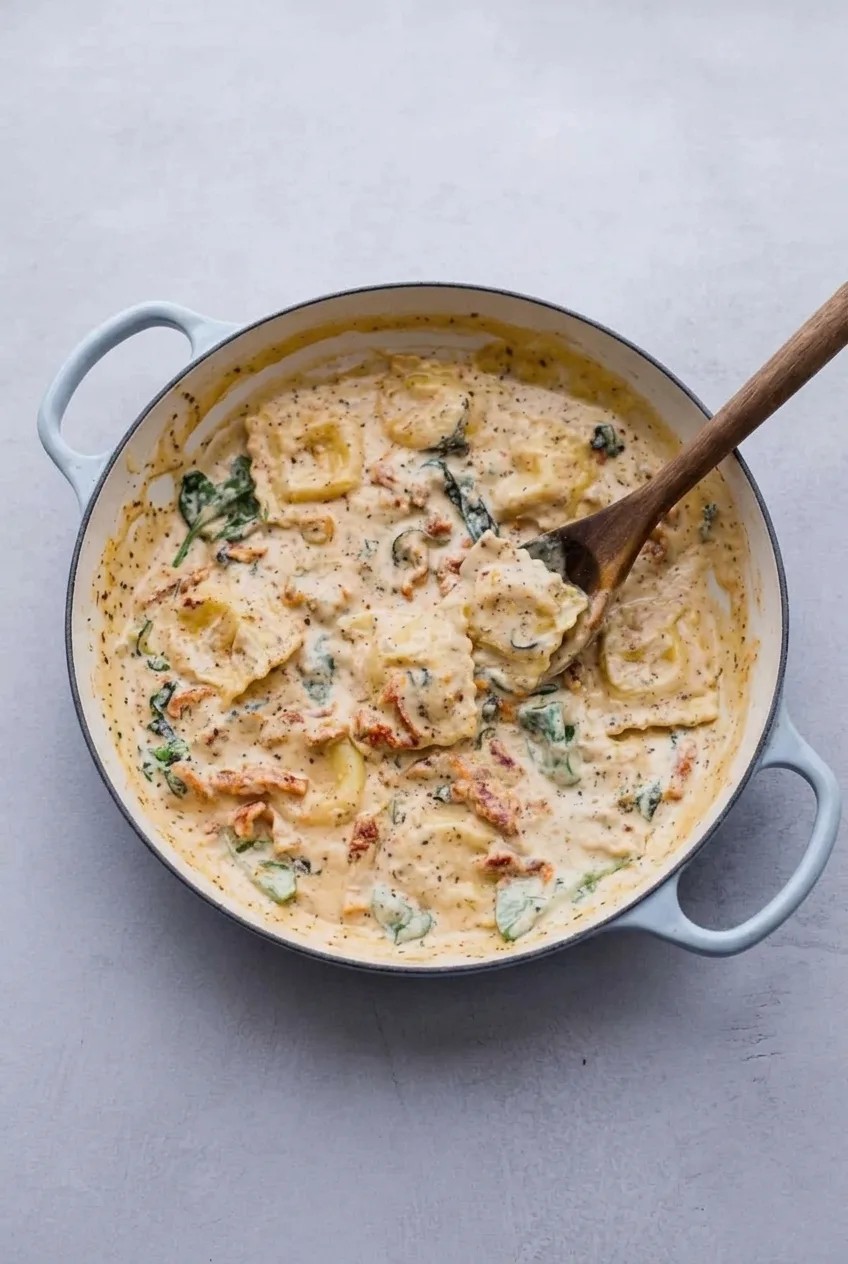
Complete skillet of creamy Tuscan ravioli on a pale gray surface
  1. Prepare the ingredients: Chop the tomatoes, mince the garlic, and measure the broth and cream. Wash the spinach and drain it well so it does not dilute the sauce. Keep the ravioli refrigerated until ready to add; do not preboil it.
  2. Start the sauce: Warm a 12-inch lidded skillet over medium heat. Add the tomato-jar oil and garlic. Cook briefly, until the garlic is fragrant but not browned, then stir in the sun-dried tomatoes and Italian seasoning. This step takes about 2 minutes total.
  3. Add the liquids: Pour in 1 cup broth and the cream, stirring to combine. Reduce the heat to medium-low as the sauce warms, about 2 minutes. Look for small bubbles around the edges, not a rolling boil.
  4. Simmer the ravioli: Nestle the refrigerated ravioli into the sauce, mostly in one layer with slight overlap. Cover and maintain a gentle simmer. Check one raviolo for tenderness after 5 minutes; cook briefly longer if needed, about 5 to 7 minutes total. Use the package guidance and tenderness as your guide. If the sauce thickens before the pasta is done, add a small splash of broth. Avoid vigorous stirring, which can split the ravioli.
  5. Wilt the spinach: Uncover, scatter the spinach over the ravioli, and gently fold it into the sauce. Cook for 1 to 2 minutes, just until the leaves soften but remain green.
  6. Finish off the heat: Turn off the heat. Gently fold in the Parmesan a little at a time, then add the lemon juice. Season with salt and black pepper. If the sauce is too thick, add broth 1 to 2 tablespoons at a time until it coats the ravioli but still pools lightly around them. Serve promptly from the skillet.

Why Use Refrigerated Ravioli?

The covered cooking time and amount of liquid are designed for store-bought refrigerated ravioli. Size and filling vary, so check a raviolo after 5 minutes: it should be tender throughout and still hold its shape. Other refrigerated fillings can work, but check their package directions. Do not apply this timing unchanged to frozen or homemade ravioli; those may need a different cooking approach.

How to Keep the Sauce Creamy

Ravioli starch and Parmesan both thicken the sauce. If it starts looking pasty, loosen it with broth a tablespoon or two at a time rather than adding a large pour. Keep the simmer gentle while the pasta cooks: hard boiling or prolonged heat can cause the cream sauce to separate.

Serving and Storing Leftovers

Serve with a simple green salad or garlic bread. For a spicier creamy pasta dinner, try Creamy Cajun Sausage Pasta with Chicken and Peppers.

Refrigerate leftovers in an airtight container for up to 3 days. The ravioli will soften and the sauce will thicken, so this dish is best served fresh. Reheat gently over low heat with a splash of broth or water, folding carefully as the sauce loosens. Freezing the finished dish is not recommended as a default because its texture may suffer.

Nutrition

Approximate nutrition per serving, based on 4 servings: 650 calories, 21g protein, 40g fat, and 55g carbohydrates. Approximate values per 100g of finished dish: 215 calories, 7g protein, 13g fat, and 18g carbohydrates. Values will vary with the ravioli brand, broth, and final sauce reduction.

Creamy Tuscan Ravioli

Refrigerated cheese ravioli simmer in a creamy garlic and sun-dried tomato sauce with spinach, Parmesan, and lemon.
Course: Main Course
Cuisine: Italian
Prep: 10 min
Cook: 15 min
Total: 25 min
Servings: 4

Equipment

  • 12-inch lidded skillet

Ingredients

  • 20 ounces store-bought refrigerated cheese ravioli (about 570 g)
  • 1/2 cup oil-packed sun-dried tomatoes, drained and chopped (about 70 g)
  • 1 tablespoon oil from the sun-dried tomato jar, or olive oil if needed
  • 3 garlic cloves, minced
  • 1 cup low-sodium vegetable or chicken broth, plus more as needed
  • 1 cup heavy cream
  • 1 teaspoon Italian seasoning
  • 2 packed cups baby spinach (about 60 g)
  • 1/3 cup finely grated Parmesan (about 30 g)
  • 1 teaspoon fresh lemon juice
  • Kosher salt and freshly ground black pepper, to taste

Instructions

  1. Chop the sun-dried tomatoes and mince the garlic. Measure the broth and cream, and wash and drain the spinach. Keep the ravioli refrigerated; do not preboil it.
  2. Warm a 12-inch lidded skillet over medium heat. Add the tomato-jar oil and garlic and cook briefly until fragrant but not browned.
  3. Stir in the sun-dried tomatoes and Italian seasoning.
  4. Pour in the broth and cream, stir to combine, and reduce the heat to medium-low. Warm for about 2 minutes, until small bubbles form around the edges.
  5. Nestle the ravioli into the sauce in mostly one layer. Cover and simmer gently. Check one raviolo after 5 minutes and cook briefly longer if needed, about 5 to 7 minutes total. Add a small splash of broth if the sauce thickens before the ravioli is tender.
  6. Uncover, scatter the spinach over the ravioli, and gently fold it into the sauce. Cook for 1 to 2 minutes, until the spinach softens but remains green.
  7. Turn off the heat. Gently fold in the Parmesan a little at a time, then add the lemon juice. Season with salt and black pepper. Add broth 1 to 2 tablespoons at a time if needed to loosen the sauce, then serve promptly.

Tips

  • Use refrigerated ravioli; frozen or homemade ravioli may need a different cooking approach.
  • Check a raviolo for tenderness after 5 minutes and follow the package guidance.
  • Keep the sauce at a gentle simmer to help prevent the cream from separating.
  • Stir gently to avoid splitting the ravioli.
  • Add broth a tablespoon or two at a time if the sauce becomes too thick.

Notes

Refrigerate leftovers in an airtight container for up to 3 days. Reheat gently over low heat with a splash of broth or water, folding carefully. Freezing is not recommended. Ravioli should be tender and hold its shape.

Nutrition

Per Serving Calories: 650 kcal | Per Serving Protein: 21 g | Per Serving Fat: 40 g | Per Serving Carbohydrates: 55 g | Per 100 G Calories: 215 kcal | Per 100 G Protein: 7 g | Per 100 G Fat: 13 g | Per 100 G Carbohydrates: 18 g

Southwestern Ground Beef Sweet Potato Skillet

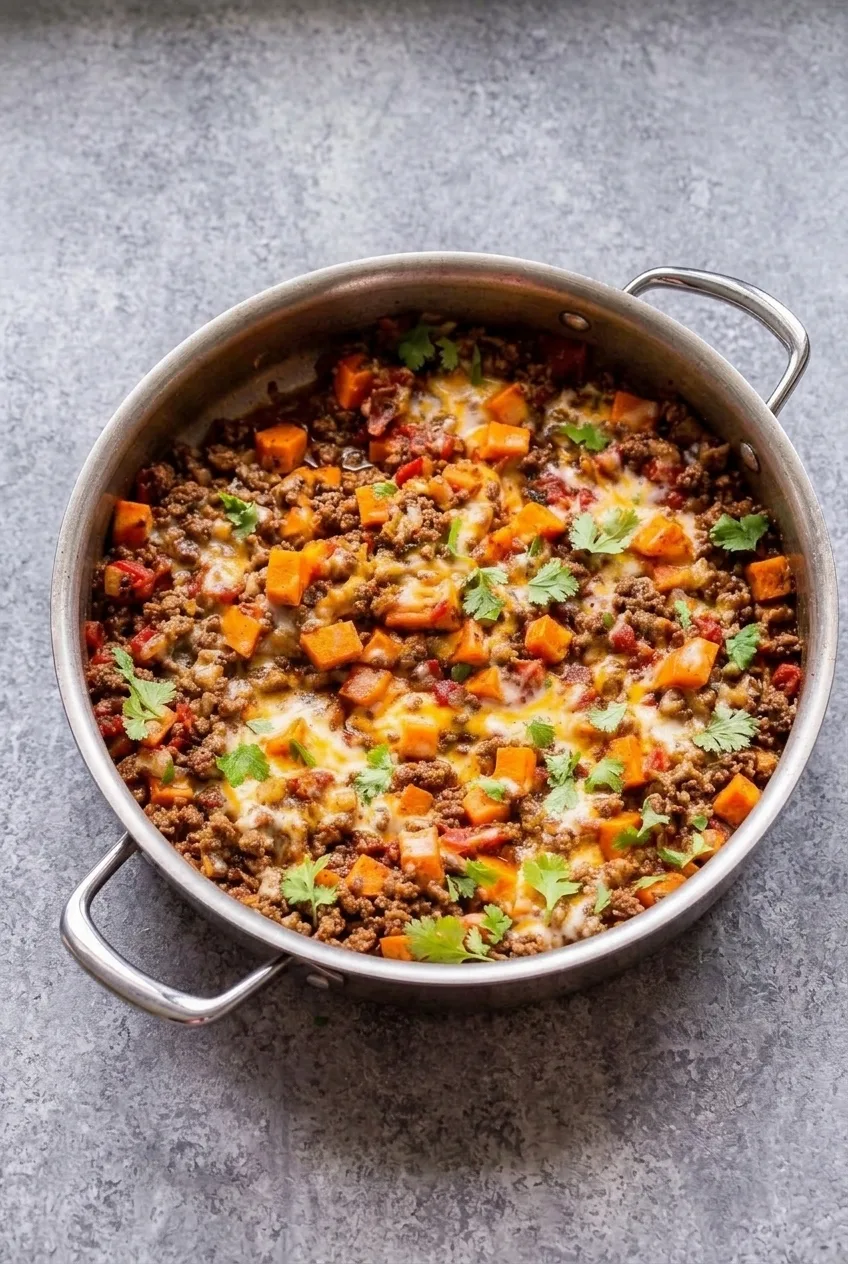
Browned ground beef, tender sweet potato cubes, and fire-roasted tomatoes cook together in a stovetop skillet with chili powder and cumin. Scattered cheddar-Jack melts over the top, leaving the beef and potatoes visible, and fresh cilantro finishes the dish.

Cut the sweet potatoes into roughly 1/2-inch cubes so they cook evenly under the lid. The finished skillet should be moist and lightly saucy, without a pool of liquid beneath the cheese.

Ingredients

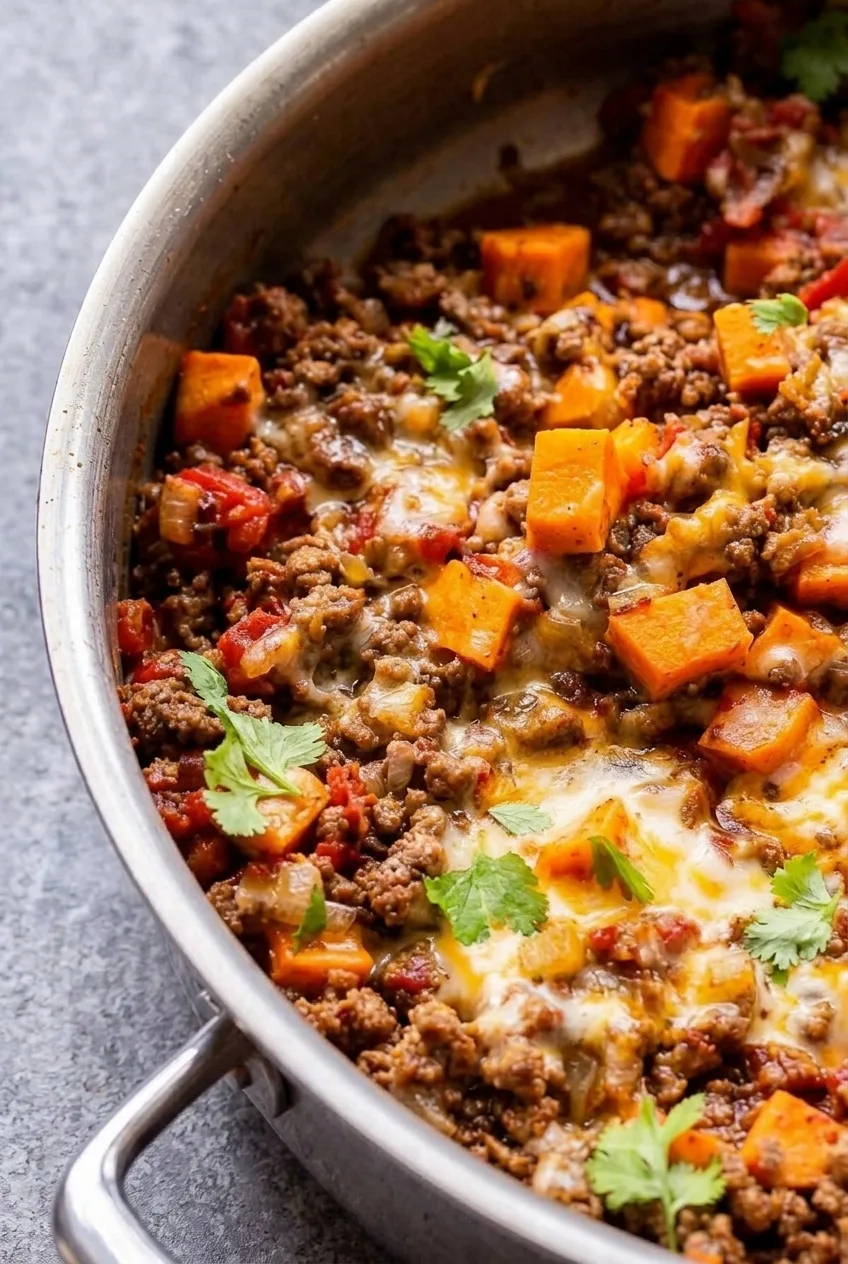
Close view of intact sweet potato cubes, browned beef, tomatoes, and melted cheese in the skillet
  • 1 tablespoon olive oil
  • 1 lb lean ground beef, preferably 90% lean (about 450g)
  • 1 1/2 lb sweet potatoes, about 2 medium, peeled and cut into roughly 1/2-inch cubes (about 680g)
  • 1 medium yellow onion, diced (about 150g)
  • 3 garlic cloves, minced
  • 2 teaspoons chili powder
  • 1 teaspoon ground cumin
  • 1/2 teaspoon smoked paprika
  • 3/4 teaspoon kosher salt, divided, plus more to taste
  • 1/4 teaspoon ground black pepper
  • 1 can (14.5 oz) fire-roasted diced tomatoes, with their juices
  • 1/4 cup water, plus more as needed
  • 1 cup shredded cheddar-Jack cheese (about 115g)
  • 1/4 cup loosely packed fresh cilantro leaves

Yield: 4 servings. Allow 15–20 minutes for preparation and about 25–32 minutes for cooking, plus any extra time the potatoes need to become tender.

How to Make the Skillet

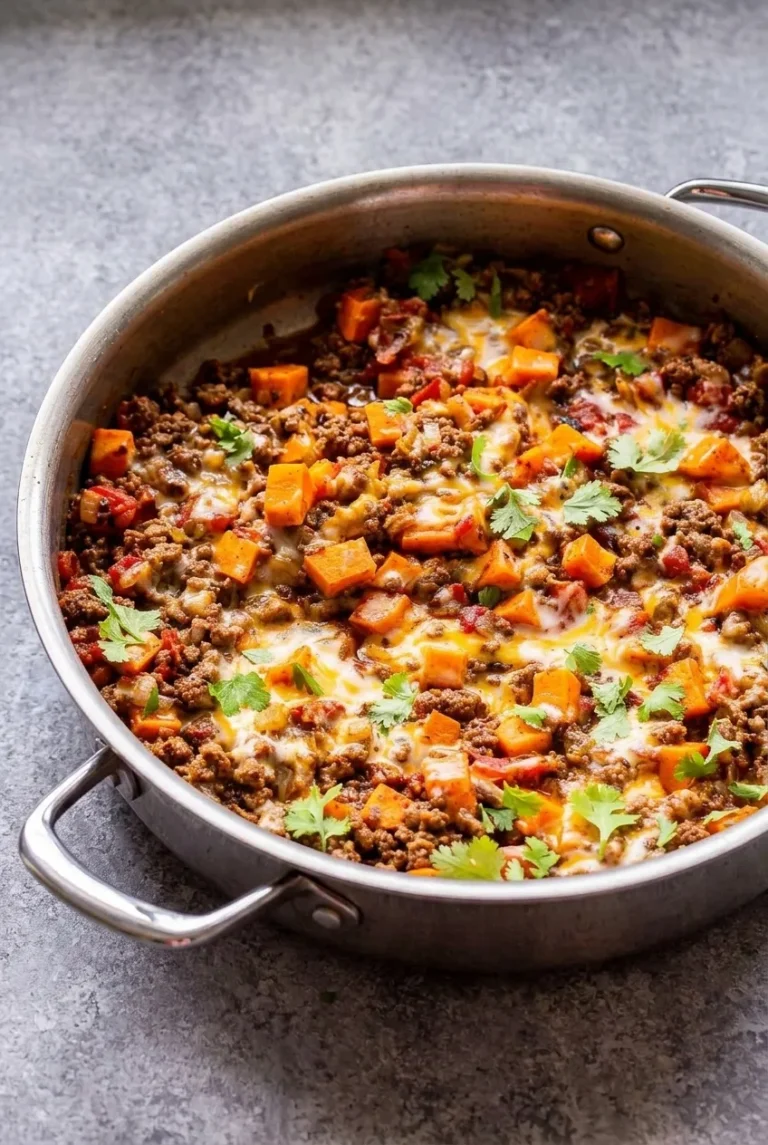
Complete beef and sweet potato skillet on a gray surface, topped with melted cheese and cilantro
  1. Prepare the vegetables: Cut the sweet potatoes into reasonably uniform 1/2-inch cubes. Dice the onion and mince the garlic.
  2. Brown the beef: Heat a roomy 12-inch skillet with a fitting lid briefly over medium-high heat. Add the oil and beef, season with about half the salt, and cook for 5–7 minutes. Break the meat into small, slightly chunky crumbles as it browns. Transfer the fully cooked beef to a plate, then drain excess fat, leaving the skillet lightly coated. If checking with a thermometer, ground beef should reach 160°F (70°C).
  3. Start the vegetables: Reduce the heat to medium. Add the onion and sweet potatoes and cook for 4–5 minutes, stirring occasionally, until the onion begins to soften. Add the garlic, chili powder, cumin, smoked paprika, pepper, and remaining salt. Stir for about 30 seconds, until fragrant.
  4. Simmer the potatoes: Add the tomatoes with their juices and the 1/4 cup water, scraping up the browned bits. Cover, reduce the heat to medium-low, and maintain a gentle simmer. Stir once or twice without crushing the potatoes. Begin checking after 12 minutes; they generally take 12–18 minutes, but continue cooking if needed. A fork should slip easily into a cube that still holds its shape. If the skillet dries out while the potatoes are firm, add water a few tablespoons at a time and cover again.
  5. Return the beef: Add the beef and any juices from the plate. Stir gently and cook over medium heat for 2–4 minutes, until heated through. If thin liquid pools in the skillet, simmer uncovered until the tomatoes lightly coat the beef and potatoes. Taste and adjust the salt.
  6. Melt the cheese: Scatter the cheddar-Jack unevenly over the skillet, leaving some beef, potatoes, and tomatoes exposed. Cover over low heat or with the burner turned off for 1–2 minutes, just until melted. Remove from the heat, scatter the cilantro on top, and serve from the skillet.

How to Tell When the Sweet Potatoes Are Done

Uniform 1/2-inch cubes should soften during the covered simmer while keeping their edges. Start testing after 12 minutes rather than treating the timer as the final cue. Larger cubes, a deeper pan, or a weaker simmer may need more time; keep the skillet covered until a fork slips through the center of a cube.

Adjust the Skillet’s Moisture

Firm potatoes need moisture to cook under the lid. If the mixture starts sticking before they soften, add a few tablespoons of water. Once the potatoes are tender, uncover the skillet to cook off excess liquid before adding cheese. The tomatoes should lightly coat the beef and potatoes, not leave them sitting in a pool.

Serving and Simple Swaps

Serve directly from the skillet, with lime wedges at the table if desired. Spoon leftovers over rice or into warm tortillas. For more chile flavor, add a drained 4-ounce can of mild green chiles with the tomatoes. Regular diced tomatoes can replace fire-roasted tomatoes, and Colby Jack or Monterey Jack can replace the cheddar-Jack.

Storage, Reheating, and Freezing

Cool leftovers promptly and refrigerate in airtight containers for up to 4 days. Reheat until hot throughout in a covered skillet over medium-low heat, adding a splash of water if needed, or microwave in intervals. Keep cilantro separate for later servings when practical.

For freezer portions, cool the beef-and-potato base and freeze it without cheese or cilantro in airtight freezer-safe containers for up to 3 months. Thaw in the refrigerator, reheat, then add cheese and fresh cilantro.

For a baked alternative with beef, potatoes, and cheese, see Cheesy Hamburger Potato Casserole with Potato Crust.

Nutrition

Approximate per serving (1/4 of the skillet): 530 calories, 35g protein, 24g fat, and 45g carbohydrates. Approximate per 100g of finished skillet: 140 calories, 9g protein, 6g fat, and 12g carbohydrates. Values vary with the beef and cheese used, the fat drained, and the final moisture level.

Southwestern Ground Beef Sweet Potato Skillet

Ground beef and tender sweet potatoes simmer with fire-roasted tomatoes and Southwestern spices, then are topped with melted cheddar-Jack and fresh cilantro.
Course: Main Course
Cuisine: Southwestern
Prep: 20 min
Cook: 32 min
Total: 52 min
Servings: 4 Calories: 530 kcal

Equipment

  • 12-inch skillet with lid
  • Cutting board
  • Knife

Ingredients

For the Skillet

  • 1 tablespoon olive oil
  • 1 lb lean ground beef, preferably 90% lean (about 450g)
  • 1 1/2 lb sweet potatoes, about 2 medium, peeled and cut into roughly 1/2-inch cubes (about 680g)
  • 1 medium yellow onion, diced (about 150g)
  • 3 garlic cloves, minced
  • 2 teaspoons chili powder
  • 1 teaspoon ground cumin
  • 1/2 teaspoon smoked paprika
  • 3/4 teaspoon kosher salt, divided, plus more to taste
  • 1/4 teaspoon ground black pepper
  • 1 can (14.5 oz) fire-roasted diced tomatoes, with their juices
  • 1/4 cup water, plus more as needed
  • 1 cup shredded cheddar-Jack cheese (about 115g)
  • 1/4 cup loosely packed fresh cilantro leaves

Instructions

  1. Peel and cut the sweet potatoes into uniform 1/2-inch cubes. Dice the onion and mince the garlic.
  2. Heat a 12-inch skillet with a lid over medium-high heat. Add the oil and ground beef, season with about half the salt, and cook for 5–7 minutes, breaking the meat into small crumbles.
  3. Transfer the cooked beef to a plate and drain excess fat, leaving the skillet lightly coated. Ground beef should reach 160°F (70°C).
  4. Reduce the heat to medium. Add the onion and sweet potatoes and cook for 4–5 minutes, stirring occasionally, until the onion begins to soften.
  5. Add the garlic, chili powder, cumin, smoked paprika, black pepper, and remaining salt. Stir for about 30 seconds, until fragrant.
  6. Add the tomatoes and their juices and 1/4 cup water. Scrape up the browned bits, cover, and reduce the heat to medium-low for a gentle simmer.
  7. Stir once or twice without crushing the potatoes. Begin checking after 12 minutes and continue cooking, usually 12–18 minutes total, until a fork slips easily into a cube that still holds its shape. Add water a few tablespoons at a time if the skillet dries out while the potatoes are firm.
  8. Return the beef and any plate juices to the skillet. Stir gently and cook over medium heat for 2–4 minutes, until heated through.
  9. If thin liquid pools in the skillet, simmer uncovered until the tomatoes lightly coat the beef and potatoes. Taste and adjust the salt.
  10. Scatter the cheddar-Jack over the skillet, leaving some of the mixture exposed. Cover over low heat or turn off the burner for 1–2 minutes, just until the cheese melts.
  11. Remove from the heat, top with cilantro, and serve.

Tips

  • Cut the sweet potatoes into uniform 1/2-inch cubes so they cook evenly.
  • Check the potatoes with a fork after 12 minutes; continue simmering until tender but still holding their shape.
  • If the skillet dries before the potatoes are tender, add water a few tablespoons at a time and cover again.
  • Once the potatoes are tender, simmer uncovered to cook off excess liquid before adding the cheese.

Variations

  • Green Chile Skillet: Add a drained 4-ounce can of mild green chiles with the tomatoes.
  • Alternative Tomatoes: Use regular diced tomatoes instead of fire-roasted tomatoes.
  • Alternative Cheese: Use Colby Jack or Monterey Jack in place of cheddar-Jack.

Notes

Refrigerate leftovers in an airtight container for up to 4 days and reheat until hot throughout. Freeze the beef-and-potato base without cheese or cilantro for up to 3 months; thaw in the refrigerator, reheat, then add cheese and fresh cilantro.

Nutrition

Calories: 530 kcal | Protein: 35 g | Fat: 24 g | Carbohydrates: 45 g

French Onion Beef Gnocchi

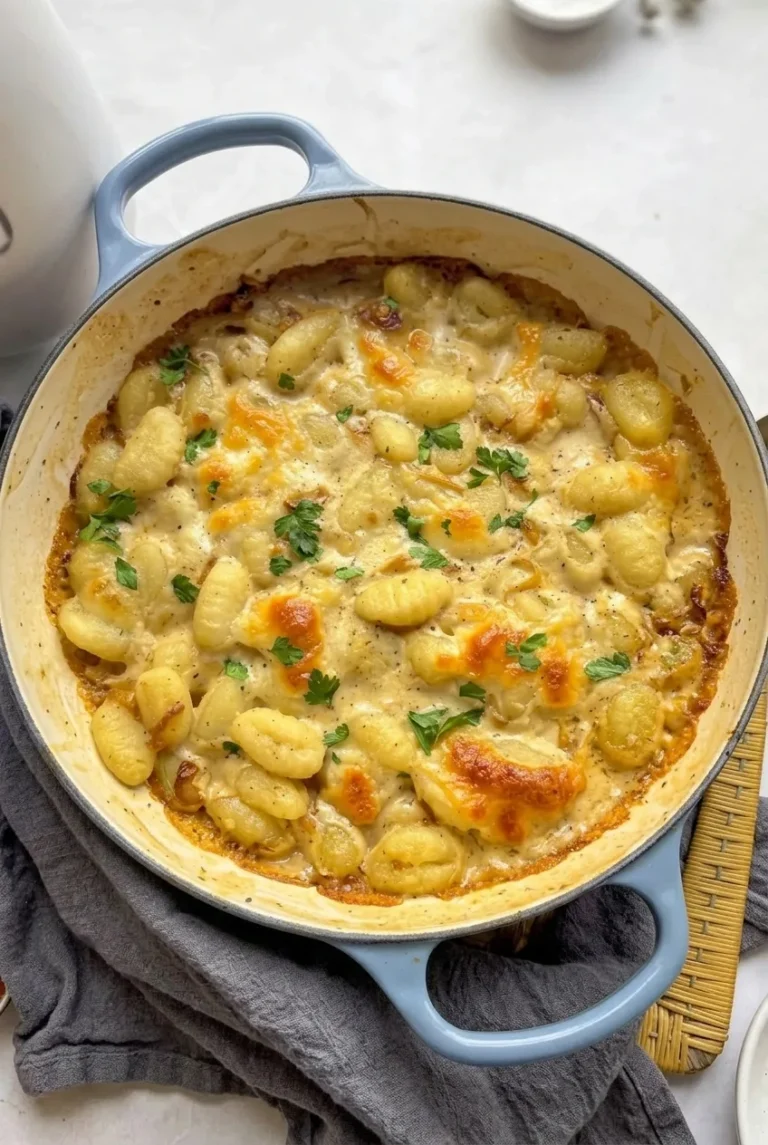
Slowly caramelized onions coat tender potato gnocchi in a creamy, beef-broth sauce. Gruyère browns in scattered patches on top, leaving the gnocchi visible. The “beef” refers to the broth; there is no ground beef or steak in this version.

This is a sauce-coated skillet dinner, not a brothy soup. The onions take about 30 to 40 minutes to soften and brown, making them the main time commitment. The finished dish serves 4 and takes about 1 hour to 1 hour 10 minutes, including 15 minutes of prep.

Ingredients for French Onion Beef Gnocchi

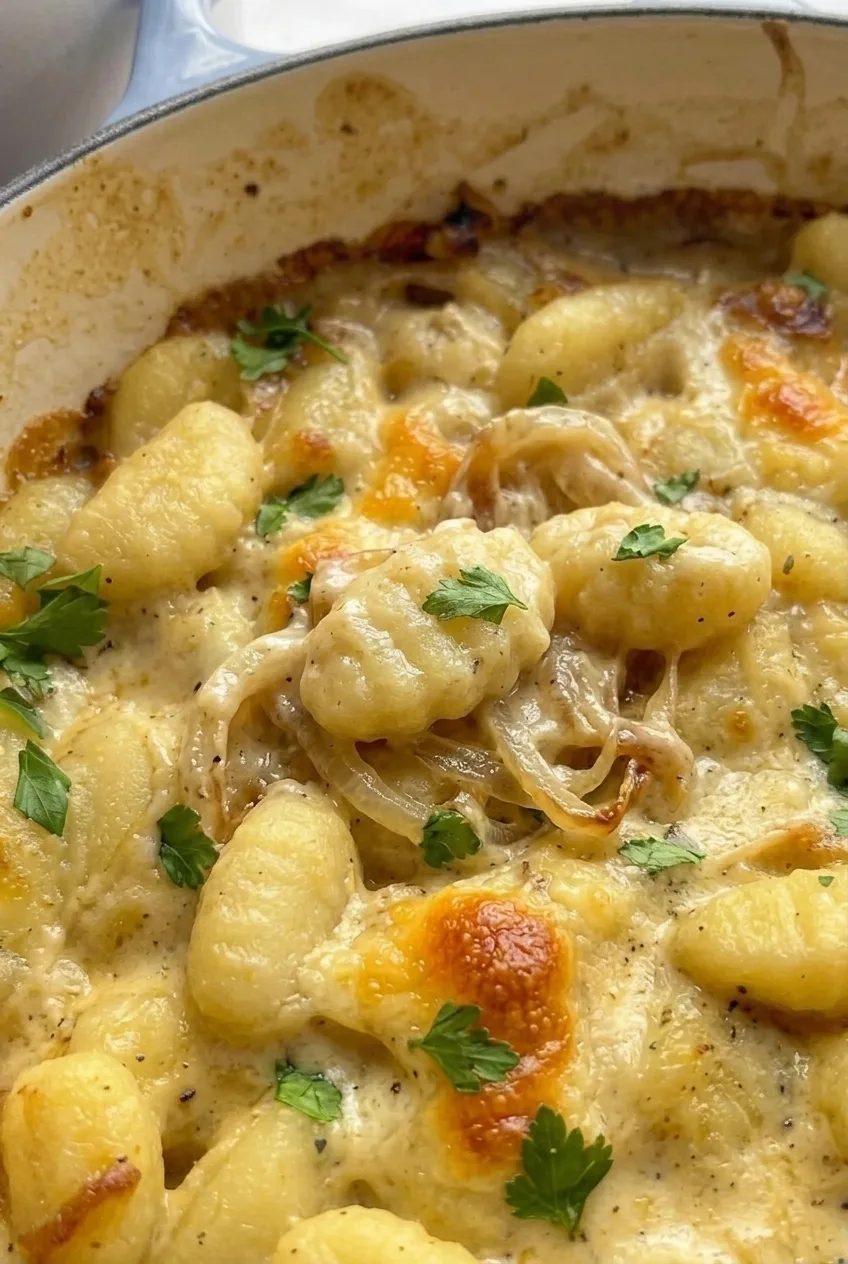
Close view of ridged gnocchi coated in creamy onion sauce beside a browned Gruyère patch
  • 2 large yellow onions, thinly sliced (about 1 lb or 450g total)
  • 3 tablespoons unsalted butter (about 40g)
  • 1 tablespoon olive oil
  • 2 garlic cloves, minced
  • 1 teaspoon fresh thyme leaves
  • 1 1/2 cups low-sodium beef broth, divided
  • 1 teaspoon Worcestershire sauce
  • 1/2 cup heavy cream (about 120g)
  • 1 package (16 oz) shelf-stable potato gnocchi (about 450g)
  • 1 cup loosely packed shredded Gruyère (about 110g)
  • Kosher salt and freshly ground black pepper, to taste
  • 2 tablespoons chopped flat-leaf parsley

Use a wide, shallow, heavy pot or braiser about 12 inches across. Check that the entire vessel, including its handles, is rated for broiler use. If it is not, transfer the cooked gnocchi to a broiler-safe baking dish before adding the cheese.

How to Make French Onion Beef Gnocchi

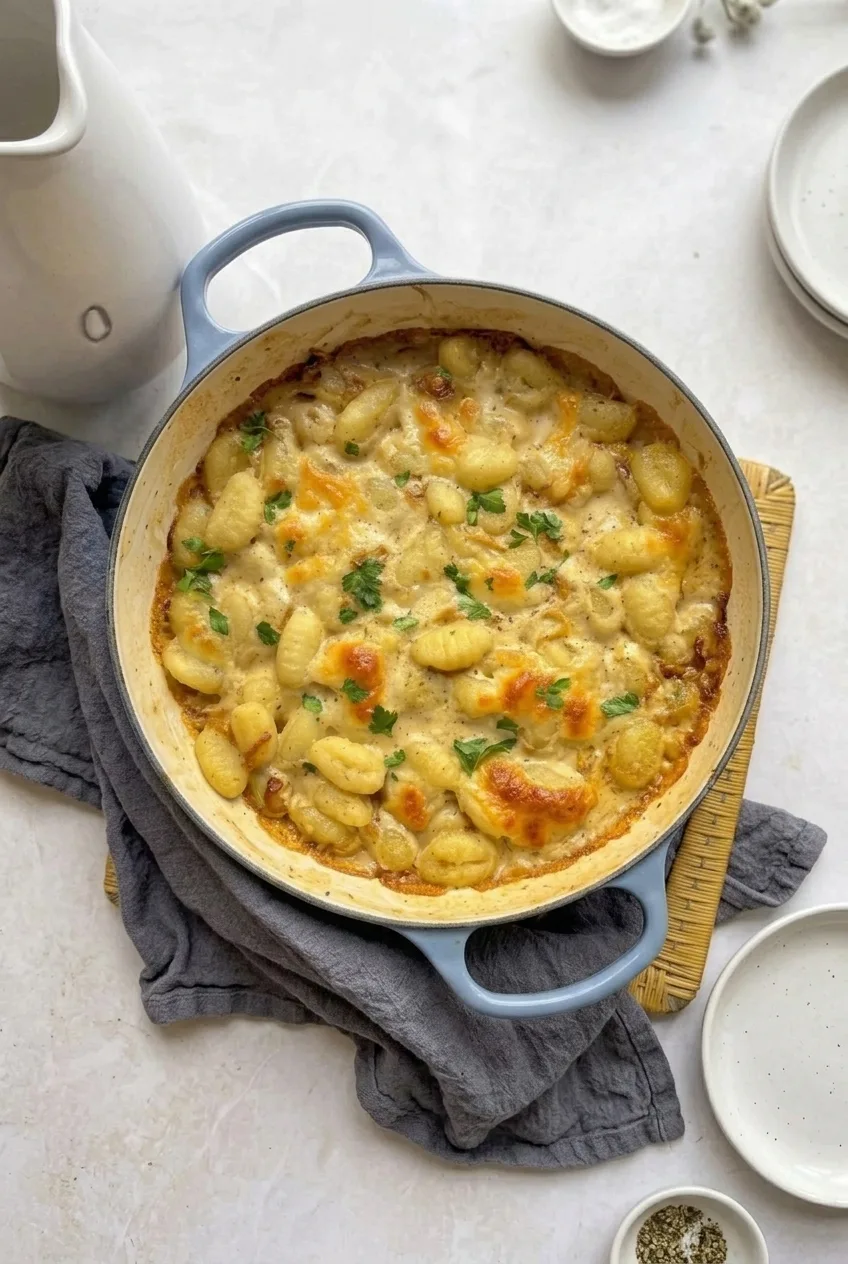
Complete pot of French onion beef gnocchi on a pale surface, with parsley and patchy browned cheese
  1. Prepare the ingredients: Thinly slice the onions, mince the garlic, and shred the Gruyère. Set aside 1/2 cup of the measured broth for adjusting the sauce.
  2. Caramelize the onions: Melt the butter with the olive oil in the wide pot over medium-low heat. Add the onions and cook uncovered for 30 to 40 minutes, stirring regularly and more often as they darken. They should shrink substantially and become very soft and deeply golden, without blackened edges. If they stick hard or brown while still firm, lower the heat and loosen the pan with a splash of water or broth.
  3. Build the sauce: Stir in the garlic and thyme briefly. Add 1 cup beef broth, raise the heat to medium, and scrape up the browned bits. Add the Worcestershire sauce and simmer for a few minutes. Stir in the cream, then lower the heat to low or medium-low so the sauce bubbles gently rather than boiling hard. This step takes about 4 to 5 minutes.
  4. Cook the gnocchi: Add the shelf-stable gnocchi and stir gently to coat. Simmer uncovered for about 4 to 7 minutes, testing one after 4 minutes; it should be tender through the center. If the sauce becomes thick or gluey before the gnocchi are done, add reserved broth a splash at a time. The sauce should cling to the gnocchi but still move when stirred, rather than pool like soup. Taste before adding salt and pepper. Preheat the broiler shortly before the gnocchi finish.
  5. Broil the cheese: Scatter the Gruyère in small, uneven patches, leaving plenty of gnocchi exposed. If needed, transfer the gnocchi to a broiler-safe dish first. Broil uncovered on high for about 2 to 4 minutes, watching continuously from the first minute. Remove when the cheese is bubbly with scattered golden-brown spots.
  6. Rest and serve: Set the hot vessel on a heat-safe surface and let the bubbling sauce settle for 3 to 5 minutes. Scatter the parsley over the top and serve.

How Dark Should the Onions Get?

Aim for onions that are very soft and deeply golden, not merely translucent. Cooking them uncovered in a wide pot lets moisture escape so they can brown. Stir more frequently toward the end, and add a splash of water or broth if browned bits begin sticking hard to the pot.

Which Gnocchi Can Cook in the Sauce?

The 4-to-7-minute simmer is for the shelf-stable potato gnocchi in the ingredient list. Check tenderness and the package directions rather than relying on time alone. If another type requires separate boiling, cook it according to its package, then fold it briefly into the reduced onion sauce before adding the cheese.

Getting the Sauce and Cheese Finish Right

Gnocchi absorb liquid and release starch as they cook, especially noticeable in a shallow pot. Add the reserved broth gradually if the sauce tightens; it should coat the gnocchi without clumping or turning soupy. Leave gaps between the patches of Gruyère so the cheese can brown without hiding the gnocchi.

Serve with a green salad, green vegetables, or crusty bread alongside the pot. For a cheesy potato dinner that contains beef meat, try this hamburger potato casserole. For a different creamy dinner, see this Cajun sausage pasta.

Make-Ahead and Leftovers

Caramelize the onions up to 5 days ahead and refrigerate them. Cool finished leftovers and store them in an airtight container in the refrigerator for up to 3 to 4 days.

Reheat portions gently on the stovetop with a splash of broth, or microwave until heated through. For a larger portion, cover an oven-safe dish with foil and warm at 350°F (175°C) for roughly 15 to 20 minutes, until heated through. The gnocchi may soften after reheating. Freezing the finished dish is not recommended if you want to preserve its texture.

Nutrition

Approximate nutrition per serving, based on 4 dinner servings: 575 calories, 16g protein, 32g fat, and 53g carbohydrates. Approximate nutrition per 100g of finished dish: 175 calories, 5g protein, 10g fat, and 16g carbohydrates. Values vary with the gnocchi, broth, cheese, and final amount of sauce.

French Onion Beef Gnocchi

Potato gnocchi simmer in a creamy caramelized onion and beef-broth sauce, then broil with Gruyère.
Course: Main Course
Cuisine: French-inspired
Prep: 15 min
Cook: 50 min
Total: 65 min
Servings: 4 Calories: 575 kcal per serving; 175 kcal per 100 g

Equipment

  • 12-inch broiler-safe heavy pot or braiser
  • Broiler-safe baking dish, if needed
  • Knife and cutting board
  • Grater

Ingredients

For the gnocchi

  • 2 large yellow onions, thinly sliced (about 1 lb or 450 g total)
  • 3 tablespoons unsalted butter (about 40 g)
  • 1 tablespoon olive oil
  • 2 garlic cloves, minced
  • 1 teaspoon fresh thyme leaves
  • 1 1/2 cups low-sodium beef broth, divided
  • 1 teaspoon Worcestershire sauce
  • 1/2 cup heavy cream (about 120 g)
  • 1 package (16 oz) shelf-stable potato gnocchi (about 450 g)
  • 1 cup loosely packed shredded Gruyère (about 110 g)
  • Kosher salt and freshly ground black pepper, to taste
  • 2 tablespoons chopped flat-leaf parsley

Instructions

  1. Thinly slice the onions, mince the garlic, and shred the Gruyère. Set aside 1/2 cup of the measured beef broth.
  2. Melt the butter and olive oil in a wide, heavy pot over medium-low heat. Add the onions and cook uncovered for 30 to 40 minutes, stirring regularly and more often as they darken, until very soft and deeply golden.
  3. If the onions stick hard or brown while still firm, lower the heat and loosen the pot with a splash of water or broth.
  4. Stir in the garlic and thyme briefly. Add 1 cup beef broth, raise the heat to medium, and scrape up the browned bits. Stir in the Worcestershire sauce and simmer for a few minutes.
  5. Stir in the cream. Lower the heat to low or medium-low and simmer gently for 4 to 5 minutes; do not let the sauce boil hard.
  6. Add the gnocchi and stir gently to coat. Simmer uncovered for about 4 to 7 minutes, testing one after 4 minutes for tenderness through the center.
  7. If the sauce thickens before the gnocchi are done, add reserved broth a splash at a time. Season with salt and pepper to taste, and preheat the broiler shortly before the gnocchi finish cooking.
  8. Scatter the Gruyère in small, uneven patches over the gnocchi, leaving plenty exposed. If the pot is not broiler-safe, transfer the gnocchi to a broiler-safe dish first.
  9. Broil uncovered on high for about 2 to 4 minutes, watching continuously from the first minute. Remove when the cheese is bubbly with scattered golden-brown spots.
  10. Set the hot vessel on a heat-safe surface and let the sauce settle for 3 to 5 minutes. Scatter the parsley over the top and serve.

Tips

  • Cook the onions uncovered so moisture can escape and they can brown.
  • Stir the onions more frequently as they darken, and lower the heat if they brown while still firm.
  • Check gnocchi for tenderness rather than relying on the cooking time alone.
  • Add reserved broth gradually; the sauce should cling to the gnocchi but still move when stirred.
  • Watch the dish continuously under the broiler, since the cheese can brown quickly.
  • Leave gaps between the Gruyère patches so the gnocchi remain visible.

Notes

Caramelized onions can be refrigerated for up to 5 days. Refrigerate finished leftovers in an airtight container for 3 to 4 days; reheat gently with a splash of broth. For a larger portion, cover and warm at 350°F (175°C) for 15 to 20 minutes. Freezing the finished dish is not recommended for best texture. Use a broiler-safe pot or transfer to a broiler-safe dish before broiling.

Nutrition

Calories: 575 kcal per serving; 175 kcal per 100 g | Protein: 16 g per serving; 5 g per 100 g | Fat: 32 g per serving; 10 g per 100 g | Carbohydrates: 53 g per serving; 16 g per 100 g