Author

Julia

Browsing

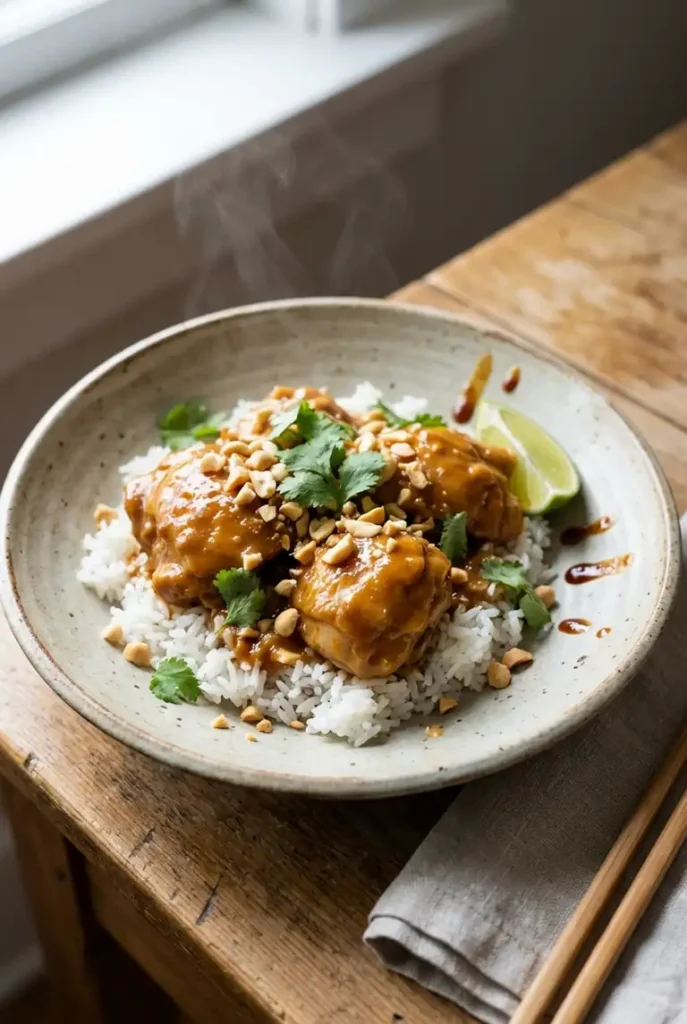
The first time I made this in a slow cooker, I mixed the peanut sauce the way I would for a stovetop pan sauce and started it too thick. By the time the chicken was done, the sauce had tightened into something closer to paste than spoonable sauce.

The fix was simple: start with a sauce that looks loose, glossy, and easy to pour, then finish with fresh lime at the end. That gives you peanut chicken that stays rich without turning heavy, with tender pieces of chicken and a sauce that tastes savory first, then nutty, with ginger and lime still coming through.

Why this version works

  • The sauce starts slightly loose, which matters in a slow cooker because peanut butter thickens as it heats.
  • Chicken thighs hold their texture better than breasts and stay moist instead of turning stringy.
  • Lime goes in at the end, which keeps the sauce tasting brighter and less flat.
  • Chopped peanuts and cilantro add contrast that the finished bowl actually needs.

Ingredients for Slow Cooker Peanut Chicken

  • 2 pounds boneless, skinless chicken thighs (900g)
  • 3/4 cup creamy peanut butter (190g)
  • 1/2 cup low-sodium chicken broth (120g)
  • 1/4 cup soy sauce (60g)
  • 2 tablespoons lime juice (30g)
  • 2 tablespoons brown sugar (25g)
  • 1 tablespoon rice vinegar (15g)
  • 1 tablespoon fresh ginger, grated (15g)
  • 3 cloves garlic, minced
  • 1 teaspoon sesame oil
  • 1/2 teaspoon red pepper flakes
  • 1/4 teaspoon black pepper

For serving:

  • 3 cups cooked rice (480g)
  • 1/4 cup chopped peanuts (35g)
  • 1/4 cup chopped cilantro
  • 1 lime, cut into wedges (70g)

Best peanut butter for a smooth crockpot sauce

Use regular creamy peanut butter if you want the smoothest, most reliable sauce.

Natural peanut butter can work, but if it is oily or stiff, it is more likely to look separated after cooking. If that is what you have, stir it very well in the jar before measuring.

Why chicken thighs work better than chicken breasts

Thighs are the better choice here. They stay soft in the slow cooker and can handle a rich sauce without drying out.

Chicken breasts can work, but they overcook more easily, especially in hot-running slow cookers.


How to Make Slow Cooker Peanut Chicken
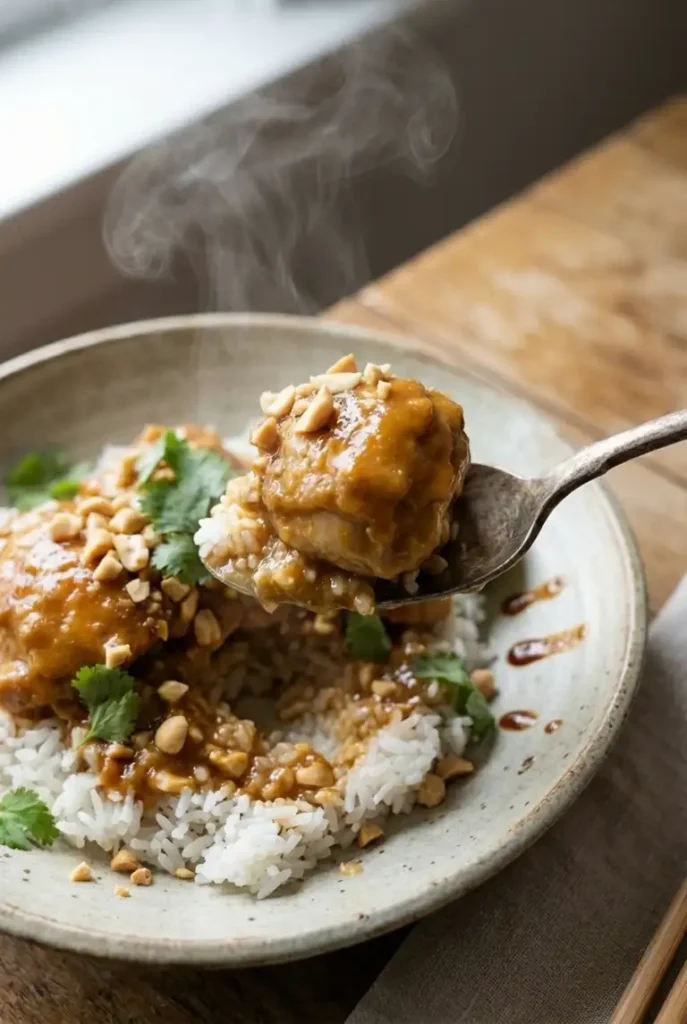
Close-up of a spoon lifting tender peanut chicken and rice, showing glossy peanut lime sauce, chopped peanuts, and steam.

Whisk the sauce until it’s smooth and pourable

  1. In a medium bowl, whisk together the peanut butter, chicken broth, soy sauce, lime juice, brown sugar, rice vinegar, ginger, garlic, sesame oil, red pepper flakes, and black pepper until smooth, glossy, and pourable. If it looks stiff or clumpy, whisk in 1 to 2 tablespoons more broth.
  2. Arrange the chicken thighs in the slow cooker in as even a layer as possible. Pour the sauce over the chicken and turn the pieces once so they are coated.

How long to cook peanut chicken in a crockpot

  1. Cover and cook on low for 3 1/2 to 4 1/2 hours or on high for 2 to 3 hours, until the chicken reaches 165°F and pulls apart with light pressure while still looking moist. If your slow cooker runs hot, start checking at 3 hours on low.
  2. Transfer the chicken to a plate or cutting board. Stir the sauce well in the slow cooker; peanut sauces often look slightly separated until stirred back together.
  3. Break the chicken into large bite-size chunks or lightly shred it. Avoid shredding too finely. Larger pieces hold moisture better and give the dish better texture. Return the chicken to the sauce and turn to coat.

How to finish the sauce so it tastes bright, not heavy

  1. Taste the sauce. If it feels too thick, loosen it with warm broth 1 tablespoon at a time. If it feels too thin, leave the lid off on warm for 10 to 15 minutes, stirring a few times. Add extra lime juice 1 teaspoon at a time if the sauce tastes heavy.
  2. Serve over warm rice and top with chopped peanuts, cilantro, and lime wedges.

If you love creamy, bold flavors with a little tang, you’d probably also enjoy this Thai Coconut Curry Soup.


Slow cooker peanut chicken variations

Slow cooker peanut chicken with coconut milk

For a richer, more Thai-leaning version, replace half of the broth with full-fat coconut milk.

Use:

  • 1/4 cup chicken broth (60g)
  • 1/4 cup full-fat coconut milk (60g)

Whisk thoroughly before adding it to the slow cooker. The sauce will look a little looser at first, but it thickens as it cooks. This version has a softer peanut flavor and a rounder, creamier sauce.

Slow cooker peanut chicken with broccoli

To turn this into more of a one-pot dinner, add broccoli near the end, not at the start.

Use:

  • 3 cups small broccoli florets (225g)

Stir the broccoli into the slow cooker during the last 20 to 30 minutes of cooking on low, just until bright green and tender. If you use frozen broccoli, add it closer to the last 15 to 20 minutes so it does not go soft.

If ginger-forward chicken dinners are your thing, these Sesame Ginger Chicken Meatballs are another fast weeknight favorite.


Tips for a Smooth Peanut Sauce

  • Start with a sauce that pours easily. If you have to scrape it from the bowl, it is too thick.
  • Stir the sauce after cooking before judging the texture. A little separation is normal.
  • Do not overcook the chicken while chasing a thicker sauce. Thin sauce can be adjusted later; dry chicken cannot.
  • Finish with lime at the end to keep the peanut butter from tasting dull.

What to Serve with Slow Cooker Peanut Chicken

Store leftovers in an airtight container in the refrigerator for up to 4 days.

Reheat gently on the stove or in the microwave with a splash of broth or water to loosen the sauce. Peanut sauce thickens as it chills, so that is normal.

Freeze for up to 2 months, though the sauce may need a thorough stir after thawing.


How to store and reheat leftovers

Store leftovers in an airtight container in the refrigerator for up to 4 days.

Reheat gently on the stove or in the microwave with a splash of broth or water to loosen the sauce. Peanut sauce thickens as it chills, so that is normal.

Freeze for up to 2 months, though the sauce may need a thorough stir after thawing.


Slow cooker peanut chicken FAQs

Why did my peanut sauce separate in the slow cooker?

Usually because the peanut butter was natural and oily, or the sauce cooked a little too long. In most cases, it comes back together once you stir it well. If needed, add a spoonful of warm broth and stir again.

Can I use natural peanut butter?

Yes, but regular creamy peanut butter gives a smoother, more stable sauce. If using natural peanut butter, stir it very well before measuring.

Can I add broccoli without it turning mushy?

Yes. Add small florets only during the last 20 to 30 minutes of cooking. Earlier than that, and it loses color and softens too much.

How do I thin or thicken the sauce after cooking?

To thin it, add warm broth 1 tablespoon at a time. To thicken it, leave the lid off on warm for 10 to 15 minutes and stir occasionally.

Can I use chicken breast instead of thighs?

Yes, but check it early. Breasts cook faster and dry out more easily. Pull them once they hit 165°F, then slice or chunk them rather than shredding.


Nutrition

  • Serving size: approximately 1/4 of the total recipe
  • Calories: 742 kcal
  • Protein: 47g
  • Fat: 41g
  • Carbohydrates: 45g
  • Per 100g: Calories: 180 kcal, Protein: 11g, Fat: 10g, Carbohydrates: 11g

These values are approximate and will vary with ingredient brands and exact serving size.

Easy Slow Cooker Peanut Chicken

Tender chicken thighs cooked slowly in a creamy, glossy peanut lime sauce that coats rice without heaviness. The sauce balances savory, nutty, lime, and ginger flavors for a bright, slightly tangy finish.
Course: Dinner
Cuisine: American
Prep: 20 min
Cook: 270 min
Total: 290 min
Servings: 4 Calories: 742 kcal Cost: —

Equipment

  • Slow cooker
  • Medium bowl
  • Whisk
  • Cutting board
  • Chef’s knife
  • Plate

Ingredients

  • 2 pounds Boneless, skinless chicken thighs
  • 190 g (3/4 cup) Creamy peanut butter
  • 120 g (1/2 cup) Low-sodium chicken broth
  • 60 g (1/4 cup) Soy sauce
  • 30 g (2 tablespoons) Lime juice
  • 25 g (2 tablespoons) Brown sugar
  • 15 g (1 tablespoon) Rice vinegar
  • 15 g (1 tablespoon) Fresh ginger grated
  • 3 cloves Garlic minced
  • 1 teaspoon Sesame oil
  • 1/2 teaspoon Red pepper flakes
  • 1/4 teaspoon Black pepper
  • 480 g (3 cups) Cooked rice
  • 35 g (1/4 cup) Chopped peanuts
  • 1/4 cup Chopped cilantro
  • 70 g (1 lime) Lime wedges

Instructions

  1. In a medium bowl, whisk peanut butter, chicken broth, soy sauce, lime juice, brown sugar, rice vinegar, ginger, garlic, sesame oil, red pepper flakes, and black pepper until smooth, glossy, and pourable. If too thick, add 1 to 2 tablespoons more broth and whisk again.
  2. Arrange chicken thighs evenly in the slow cooker. Pour sauce over chicken and turn pieces once to coat.
  3. Cover and cook on low for 3.5 to 4.5 hours or on high for 2 to 3 hours, until chicken reaches 165°F and is tender but moist. Start checking at 3 hours on low if cooker runs hot.
  4. Remove chicken to a plate; stir sauce well in slow cooker to recombine any separation.
  5. Break chicken into large chunks or gently shred, return to sauce, and coat pieces.
Notes

Taste sauce and adjust thickness by adding warm broth 1 tablespoon at a time to thin, or leave lid off on warm 10 to 15 minutes stirring occasionally to thicken. Add extra lime juice 1 teaspoon at a time if sauce tastes heavy. Serve over warm rice, topped with chopped peanuts, cilantro, and lime wedges. Leftovers store up to 4 days refrigerated; reheat gently with broth or water to loosen sauce. Freeze up to 2 months; stir after thawing.

Nutrition

Serving Size: 1/4 recipe | Calories: 742 kcal | Protein: 47g | Fat: 41g | Carbohydrates: 45g

Fresh tomato sauce gets disappointing fast when the tomatoes in the pot are giving off more water than the sauce can cook away. Roma and San Marzano-style tomatoes usually break down into a thicker sauce pretty quickly, while juicier garden tomatoes need more time before they stop looking loose.

The other step that changes this dish most is finishing the spaghetti in the sauce with a little pasta water. That last minute is what turns it from chopped tomatoes on noodles into a glossy sauce that actually clings.

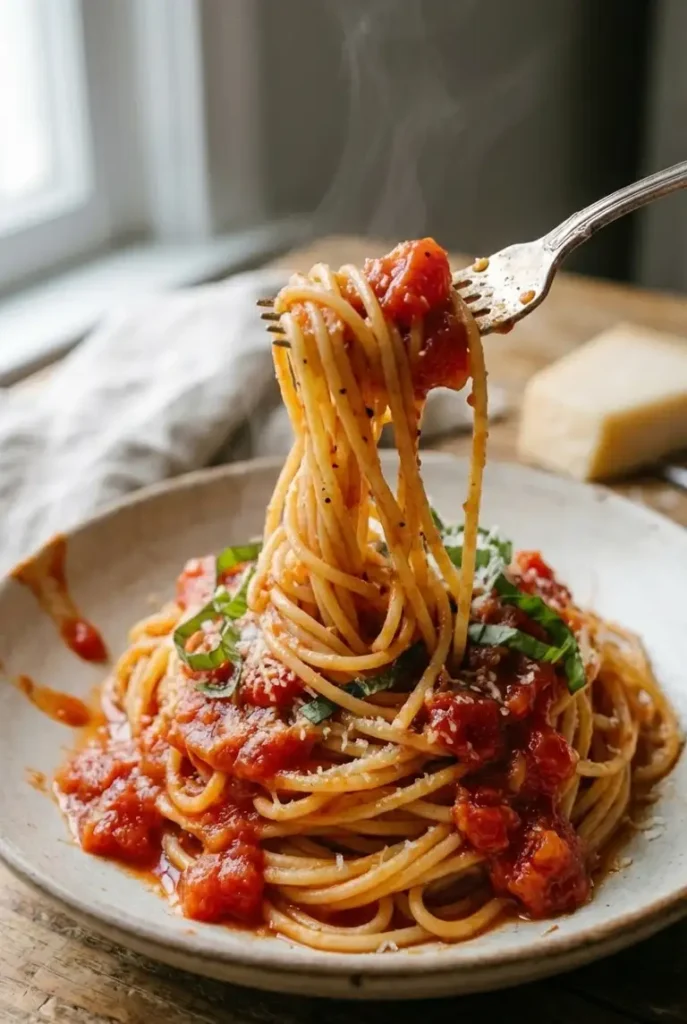
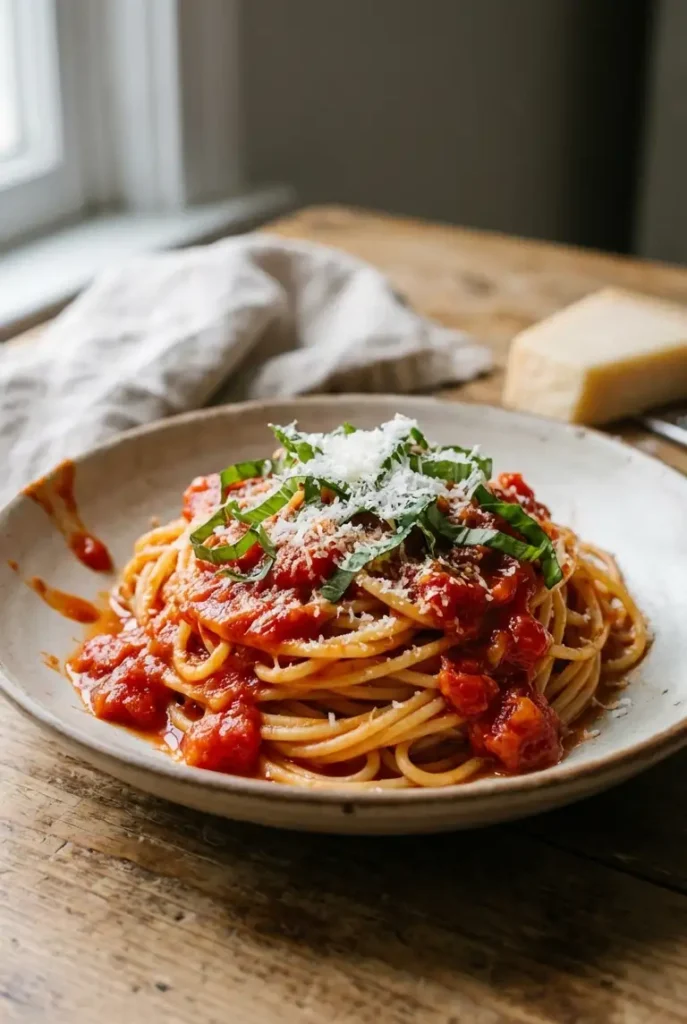
What you get here is a fresh tomato spaghetti sauce that stays bright, lightly chunky, and clean-tasting, with softened onion, garlic in the background, and basil added late so it still tastes fresh.

Why This Fresh Tomato Spaghetti Sauce Works

  • Blanching and peeling the tomatoes removes the papery skin, so the finished sauce feels smoother and doesn’t leave tough bits tangled in the pasta.
  • Onion is cooked until soft but not browned, which rounds out the acidity without pushing the sauce toward a sweeter, darker flavor.
  • A short simmer cooks off raw wateriness but stops before the tomatoes turn dull or jammy.
  • Tossing the pasta in the sauce with reserved pasta water helps the starch emulsify the sauce so it clings to the spaghetti instead of pooling underneath.

Best Tomatoes for Fresh Tomato Pasta Sauce

Roma vs. San Marzano vs. Juicier Garden Tomatoes

Roma and San Marzano-style tomatoes are the easiest choice because they have more flesh and less water, so they cook down into a thicker sauce faster.

Round slicing tomatoes and mixed garden tomatoes work too, but expect a looser sauce at first and plan on a little more simmer time. Very ripe tomatoes collapse quickly but can release a lot of liquid, while firmer ones usually need longer to soften.

Do You Need to Peel Tomatoes First?

Not absolutely, but peeling improves the texture. Tomato skins tend to separate as the sauce cooks and can leave thin curled pieces throughout the pot. For a cleaner sauce, peel them.

If you leave the skins on, chop the tomatoes more finely and expect a more rustic result.


Ingredients You Need for Homemade Spaghetti Sauce with Fresh Tomatoes

  • 2 pounds fresh Roma or plum tomatoes (900g)
  • 12 ounces spaghetti (340g)
  • 2 tablespoons olive oil
  • 1 medium yellow onion, finely chopped (150g)
  • 3 cloves garlic, minced
  • 1 teaspoon kosher salt, plus more for pasta water (I prefer 👉Atlantic sea salt)
  • 1/2 teaspoon black pepper
  • 1/4 teaspoon sugar, optional
  • 1/4 cup fresh basil, chopped
  • 1/4 cup grated Parmesan cheese (25g), plus more for serving

How to Make Spaghetti Sauce from Fresh Tomatoes

Close-up of a fork lifting glossy spaghetti strands coated in lightly chunky fresh tomato sauce with basil and Parmesan.

Blanch and Peel the Tomatoes

  1. Bring a large pot of water to a boil. Cut a shallow X on the bottom of each tomato.
  2. Lower the tomatoes into the boiling water for 30 to 60 seconds, just until the scored skin starts to curl back at the X. Transfer them to a bowl of cold water.
  3. Peel off the skins. If any resist, return those tomatoes to the boiling water for 10 to 15 more seconds. Core the tomatoes, then chop them roughly, keeping all the juices.

Cook the Onion and Garlic Without Browning

  1. Heat the olive oil in a large skillet or wide saucepan over medium heat. Add the onion and cook for 4 to 5 minutes, stirring now and then, until soft, glossy, and translucent. The edges should not brown.
  2. Add the garlic and cook for 30 to 60 seconds, just until fragrant. If the garlic starts to color, lower the heat right away.

Simmer Until the Sauce Coats a Spoon

  1. Add the chopped tomatoes and all their juices, along with the salt, pepper, and optional sugar. Bring the mixture to a lively simmer, then lower the heat so it cooks at a gentle bubble.
  2. Simmer for 20 to 30 minutes, stirring occasionally, until the tomatoes look softened and slightly broken down. The sauce should be lightly chunky, not watery. When you drag a spoon across the pan, it should leave a brief trail before the sauce settles back.
  3. Taste only after the sauce has reduced, then adjust the salt and pepper. Stir in the basil over low heat so it keeps its fresher flavor.

Finish the Pasta in the Sauce for Better Texture

  1. While the sauce simmers, cook the spaghetti in well-salted water until 1 minute shy of package directions. Before draining, reserve 1/2 to 1 cup of pasta water.
  2. Add the drained spaghetti to the sauce along with the Parmesan. Toss over low heat for 1 to 2 minutes, adding small splashes of pasta water as needed, until the noodles look glossy and evenly coated.
  3. Serve right away with more Parmesan on top.

If you want to turn this into a full Italian-style dinner, serve it with my Classic Crispy Air Fryer Chicken Parmesan on the side.


How to Keep Fresh Tomato Sauce from Getting Watery

  • Use plum-style tomatoes if you can. They contain less water and reduce faster.
  • Do not cover the pan while the sauce simmers. You want the steam to escape.
  • Use a wide pan when possible so the sauce reduces faster.
  • Do not judge the texture too early. Fresh tomatoes release a lot of liquid before they start to thicken.
  • Always finish the pasta in the sauce. Even a slightly loose sauce tightens once the pasta water is worked in.

Easy Variations for Fresh Tomato Spaghetti Sauce

Spicy Fresh Tomato Spaghetti Sauce

Add 1/4 to 1/2 teaspoon crushed red pepper flakes when you add the garlic. The heat should sit in the background, not cover the tomato flavor.

Fresh Tomato Sauce with Red Wine

After the onion softens, add 1/4 cup dry red wine and simmer until it is almost gone before adding the garlic and tomatoes. This gives the sauce a slightly deeper, darker edge without making it heavy.

If pasta night is on repeat at your house, you might also like this Easy Pasta Carbonara (No Egg) for a creamier change of pace.


Storage, Freezing, and Reheating Tips

Store leftover sauce in an airtight container in the refrigerator for up to 4 days.

For longer storage, freeze the sauce without the pasta for up to 3 months. Let it cool first, then portion it into containers or freezer bags.

Reheat the sauce gently on the stove over medium-low heat. If it has thickened too much in the fridge, loosen it with a splash of water.

If you already mixed the pasta into the sauce, the noodles will keep absorbing liquid as they sit. Add a little water when reheating to bring it back.


Fresh Tomato Sauce FAQ

Why is my spaghetti sauce with fresh tomatoes watery?

Usually the tomatoes were very juicy or the sauce needed more time. Keep simmering uncovered until the liquid reduces. A wide pan helps, and finishing the pasta in the sauce improves the texture even if the sauce starts a little loose.

Why did my tomato sauce taste too acidic or bitter?

Acidity usually softens as the sauce cooks and the onion breaks down. If it still tastes sharp at the end, a small pinch of sugar can help. Bitterness usually comes from browned garlic or over-reduced sauce.

Do I have to peel the tomatoes?

No, but peeling gives you a smoother sauce. If you skip it, expect a more rustic texture with some skin in the finished dish.

Can I use frozen or canned tomatoes instead of fresh?

Yes. Frozen tomatoes work well once thawed, though they release a lot of liquid and may need longer to reduce. Canned whole tomatoes are the easiest substitute when fresh tomatoes are out of season.


Nutrition

  • Serving size: approximately 1/4 of the total recipe
  • Calories: 403 kcal
  • Protein: 13g
  • Fat: 11g
  • Carbohydrates: 63g
  • Per 100g: Calories: 120 kcal, Protein: 4g, Fat: 3g, Carbohydrates: 19g

These nutritional values are approximate and can vary based on the specific ingredients and brands used.

Spaghetti Sauce with Fresh Tomatoes

Fresh tomato spaghetti sauce with peeled tomatoes, soft onion, and basil. Bright, lightly chunky, and ready in about 45 minutes.
Course: Dinner
Cuisine: Italian
Prep: 15 min
Cook: 30 min
Total: 45 min
Servings: 4 Calories: 403 kcal Cost: —

Equipment

  • Large pot
  • Bowl
  • Large skillet or wide saucepan
  • Wooden spoon
  • Colander
  • Cutting board
  • Chef’s knife

Ingredients

  • 2 pounds fresh Roma or plum tomatoes (900g)
  • 12 ounces spaghetti (340g)
  • 2 tablespoons olive oil
  • 1 medium yellow onion, finely chopped (150g)
  • 3 cloves garlic, minced
  • 1 teaspoon kosher salt, plus more for pasta water
  • 1/2 teaspoon black pepper
  • 1/4 teaspoon sugar, optional
  • 1/4 cup fresh basil, chopped
  • 1/4 cup grated Parmesan cheese (25g), plus more for serving

Instructions

  1. Bring a large pot of water to a boil. Cut a shallow X on the bottom of each tomato.
  2. Lower the tomatoes into boiling water for 30 to 60 seconds until the skin curls back at the X, then transfer to a bowl of cold water.
  3. Peel off the skins, return any resistant tomatoes to boiling water for 10 to 15 more seconds, core and chop roughly, keeping all juices.
  4. Heat olive oil in a large skillet or saucepan over medium heat. Add onion and cook for 4 to 5 minutes until soft and translucent without browning.
  5. Add garlic and cook for 30 to 60 seconds until fragrant; lower heat if garlic starts to color.
  6. Add chopped tomatoes with juices, salt, pepper, and optional sugar. Bring to a lively simmer, then lower heat to a gentle bubble.
  7. Simmer for 20 to 30 minutes, stirring occasionally, until tomato pieces are softened and sauce is lightly chunky and coats a spoon.
  8. Taste and adjust seasoning; stir in basil over low heat to keep fresh flavor.
  9. Cook spaghetti in well-salted water until 1 minute shy of package directions. Reserve 1/2 to 1 cup pasta water before draining.
  10. Add drained spaghetti to sauce with Parmesan. Toss over low heat 1 to 2 minutes, adding pasta water as needed until noodles are glossy and coated.
  11. Serve immediately with extra Parmesan on top.

Notes

Peeling tomatoes improves sauce texture. Finish pasta in sauce with pasta water for better cling. Use Roma or San Marzano tomatoes for thicker sauce. Store leftovers in airtight container in fridge for up to 4 days or freeze up to 3 months without pasta.

Nutrition

Serving Size: Approximately 1/4 of recipe | Calories: 403 kcal | Protein: 13g | Fat: 11g | Carbohydrates: 63g

The part that makes or breaks this casserole is the gravy. If it goes into the baking dish loose like regular sausage gravy, the biscuits underneath can turn pasty by the time the eggs finish setting. I make the gravy a little thicker here, then leave a few biscuit tops exposed so they brown on top instead of steaming completely under the sauce.

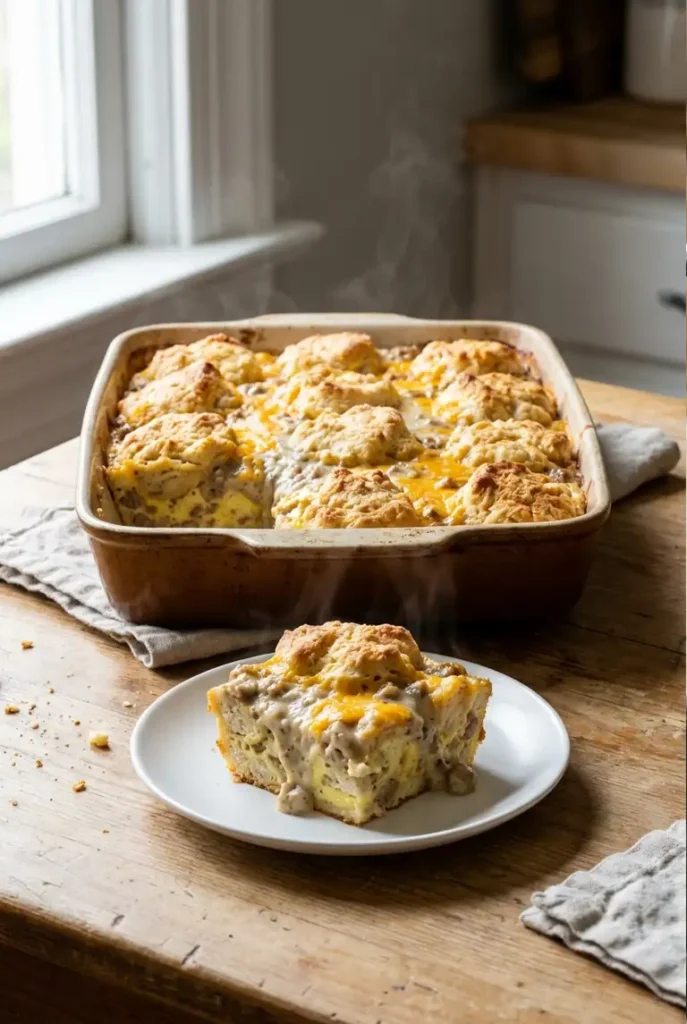
Done right, this cuts like a soft breakfast bake instead of collapsing when you scoop it. You get tender biscuit pieces underneath, browned edges on top, peppery sausage gravy that still has some body, and pockets of melted cheddar through the middle.

Why This Biscuits and Gravy Breakfast Casserole Works

  • The gravy is thick enough to stay creamy through baking instead of soaking the biscuit layer.
  • The eggs give the casserole structure, so it slices cleanly after a short rest.
  • It holds up better than most make-ahead breakfast bakes.
  • You still get contrast: browned biscuit peaks on top, a soft center, and melted cheddar throughout.

Ingredients for Biscuits and Gravy Casserole with Eggs

  • 1 can refrigerated biscuits (460g)
  • 1 pound breakfast sausage (455g)
  • 1/4 cup all-purpose flour (30g)
  • 2 1/2 cups whole milk (600g)
  • 6 large eggs (300g)
  • 1 cup shredded cheddar cheese (115g)
  • 1/2 teaspoon 👉garlic powder
  • 1/2 teaspoon 👉onion powder
  • 1/2 teaspoon black pepper
  • 1/4 teaspoon salt
  • nonstick cooking spray

Best sausage to use for the gravy

Regular breakfast sausage works best here because it usually renders enough fat to carry the flour and build the gravy. Mild or hot both work.

If your sausage is very lean and the skillet looks dry after browning, add 1 tablespoon butter before adding the flour.

Biscuit, cheese, and milk notes

Use standard refrigerated biscuits rather than flaky layered ones if possible. The regular style bakes more evenly once cut up.

Whole milk gives the gravy better body. Lower-fat milk works, but the sauce stays looser.

Sharp cheddar is the better choice here because the gravy and eggs mute milder cheese pretty quickly.


How to Make Biscuits and Gravy Breakfast Casserole

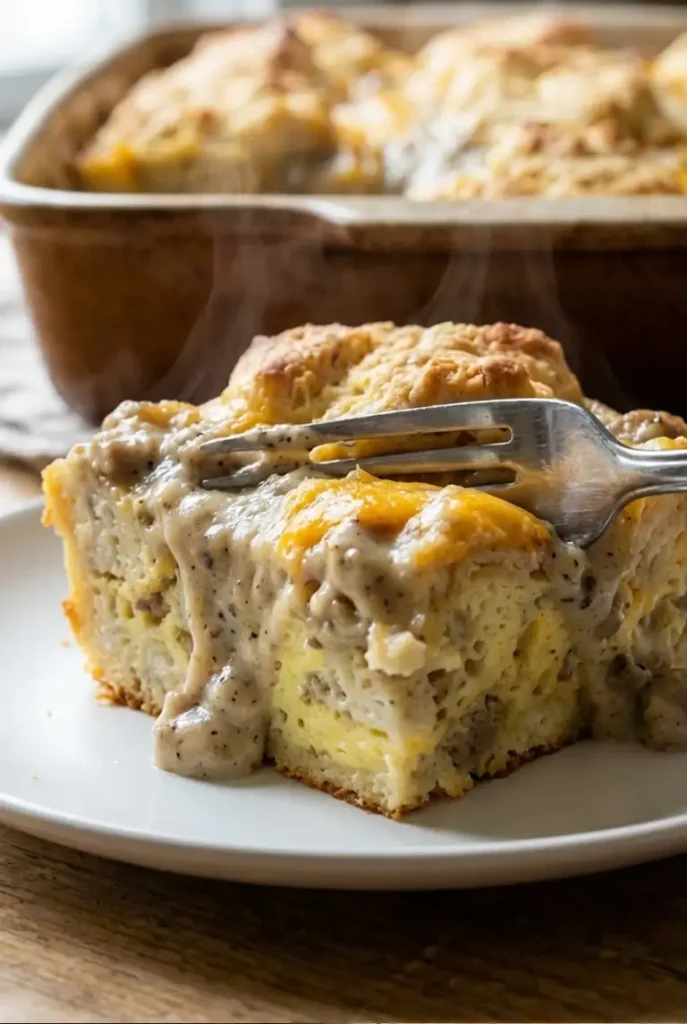
Close-up of a fork cutting into the casserole, revealing creamy sausage gravy, set eggs, tender biscuit pieces, and stretchy cheddar.

Brown the sausage and build flavor

  1. Preheat the oven to 350°F. Grease a 9×13-inch baking dish.
  2. Cut the biscuits into even quarters. Scatter them in the baking dish with a little space between pieces. Don’t press them into a tight layer or the bottom can stay heavy and underbaked.
  3. In a large skillet over medium heat, cook the sausage for 6 to 8 minutes, breaking it up as it browns, until there is no pink left and some pieces have deep brown edges, not just a gray surface. If there is excessive grease, spoon off a little, but leave enough to coat the pan. If the pan looks dry, add 1 tablespoon butter before moving on.

Make a thick sausage gravy for casserole

  1. Sprinkle the flour over the sausage and stir for 1 to 2 minutes until the flour looks fully absorbed and lightly foamy. You shouldn’t see dry white pockets.
  2. Pour in the milk gradually, whisking as you go. Bring the mixture to a gentle simmer and cook for 4 to 5 minutes, stirring often, until the gravy is noticeably thicker than standard breakfast gravy. It should leave a trail when stirred and mound lightly on a spoon. If it still looks loose, simmer it another minute or two.
  3. Stir in the garlic powder, onion powder, black pepper, and salt. Remove from the heat and let the gravy cool for 2 to 3 minutes so the eggs don’t start setting on contact.

Layer the biscuits so they bake through

  1. In a medium bowl, whisk the eggs until fully blended. Stir the eggs into the slightly cooled gravy until the mixture is even.
  2. Pour the gravy mixture over the biscuit pieces. Use a spoon to nudge a few biscuit corners and tops back up so some pieces stay exposed. That helps the top brown instead of steam.
  3. Sprinkle the cheddar evenly over the casserole.

Bake until the eggs are just set

  1. Bake for 30 to 35 minutes, until the top is golden, the exposed biscuit pieces feel set rather than doughy, and the center no longer looks glossy when the pan is gently shaken. A knife inserted near the middle should come out moist, but not with raw egg on it.
  2. If the top browns too quickly, tent it loosely with foil for the last few minutes.
  3. Rest the casserole for 10 minutes before slicing. That short rest helps the center firm up and the slices hold together better.

My Best Tips for the Perfect Biscuits and Gravy Casserole

Keep the gravy thicker than usual

It should drag slightly behind the spoon instead of flowing back right away. Once it bakes with the eggs, it loosens a little again.

Leave some biscuit tops exposed

That gives you contrast: soft pieces underneath and browned pieces on top.

Do not leave too much grease in the skillet

You need enough fat to make the gravy, but not so much that the finished casserole turns oily.

If you love easy recipes that start with canned biscuits, these Chicken Pot Pie Bites with Biscuits are another smart shortcut comfort-food option.


Biscuits and Gravy Breakfast Casserole Variations

Hash Brown Biscuits and Gravy Breakfast Casserole

Add about 2 cups thawed hash browns (240g), squeezed dry in a towel, to the baking dish before the biscuits, or mix them loosely with the biscuit pieces.

Keep the layer thin. If the potatoes go in wet, they release moisture and soften the whole casserole. This version bakes up a little sturdier and more filling.

No-Egg Option for Biscuits and Gravy Casserole

For a no-egg version, leave out the eggs and reduce the milk to 2 cups (480g). Make the gravy slightly thicker than usual, then pour it over the biscuit pieces and top with cheese. Bake until the biscuits are cooked through and the top is browned, about 25 to 30 minutes.

This version won’t slice as neatly. It eats more like a baked pan of biscuits and gravy than a custard-set casserole.


Make-Ahead, Storage, and Reheating

Can you assemble it the night before?

Yes, but for the best biscuit texture, I prefer a partial make-ahead approach: cook the sausage gravy, cool it, and refrigerate it separately.

In the morning, cut the biscuits, whisk in the eggs, assemble, and bake. If you fully assemble it the night before, the biscuits soften more and the bottom layer gets denser.

How to freeze and reheat without sogginess

Freeze it after baking, not before. Let the baked casserole cool completely, wrap tightly, and freeze for up to 2 months.

Reheat covered at 325°F until hot in the center, then uncover for the last few minutes to dry the surface slightly. Individual slices reheat fine in the microwave, but the biscuit edges stay better in the oven.


Biscuits and Gravy Breakfast Casserole FAQ

Why did my biscuits and gravy casserole turn out soggy?

Usually the gravy was too thin, the biscuits were packed too tightly, or the casserole came out before the center finished setting. It should not look liquid in the middle when you gently shake the pan.

How thick should the sausage gravy be before baking?

Thick enough to coat the sausage heavily and leave clear lines when you stir it. If it pours like regular table gravy, it is too thin for this casserole.

Can I use frozen hash browns?

Yes, but thaw them first and squeeze them dry. Wet potatoes release moisture and soften the biscuit layer.

Can I make this without eggs?

Yes. Use less milk and a thicker gravy, then expect a softer, scoopable bake instead of neat slices.


Nutrition

  • Serving size: approximately 1/8 of the total recipe
  • Calories: 457 kcal
  • Protein: 19g
  • Fat: 30g
  • Carbohydrates: 27g
  • Per 100g: Calories: 232 kcal, Protein: 10g, Fat: 15g, Carbohydrates: 14g.

These nutritional values are approximate and can vary based on the specific ingredients and brands used.

Biscuits and Gravy Breakfast Casserole with Eggs

A delicious make-ahead breakfast casserole featuring thick sausage gravy, tender biscuit pieces, melted cheddar, and eggs that give structure for clean slices. Perfect for family brunches with a rich, freshly cooked gravy and contrast between soft and browned biscuit pieces.
Course: Breakfast
Cuisine: American
Prep: 15 min
Cook: 35 min
Total: 50 min
Servings: 8 Calories: 457 kcal Cost: —

Equipment

  • 9×13-inch baking dish
  • Large skillet
  • Medium bowl
  • Whisk
  • Spoon
  • Knife
  • Measuring cups and spoons

Ingredients

  • 1 can Refrigerated biscuits (460g)
  • 1 pound Breakfast sausage (455g)
  • 1/4 cup All-purpose flour (30g)
  • 2 1/2 cups Whole milk (600g)
  • 6 large Eggs (300g)
  • 1 cup Shredded cheddar cheese (115g)
  • 1/2 teaspoon Garlic powder
  • 1/2 teaspoon Onion powder
  • 1/2 teaspoon Black pepper
  • 1/4 teaspoon Salt
  • — — Nonstick cooking spray

Instructions

  1. Preheat the oven to 350°F (177°C) and grease a 9×13-inch baking dish with nonstick spray.
  2. Cut refrigerated biscuits into even quarters and scatter them in the baking dish with space between pieces, avoiding packing tightly.
  3. In a large skillet over medium heat, cook breakfast sausage for 6 to 8 minutes, breaking up while browning until no pink remains and edges are deep brown; drain excess grease if needed, add 1 Tbsp butter if dry.
  4. Sprinkle flour over sausage and stir 1 to 2 minutes until fully absorbed and lightly foamy with no dry pockets.
  5. Gradually whisk in whole milk and bring mixture to a gentle simmer; cook for 4 to 5 minutes until gravy thickens noticeably, leaving a trail when stirred and slightly mounding on a spoon.
  6. Stir in garlic powder, onion powder, black pepper, and salt; remove from heat and cool 2 to 3 minutes to prevent eggs from setting prematurely.
  7. Whisk eggs in a medium bowl until blended; stir eggs into the slightly cooled gravy evenly.
  8. Pour gravy mixture over biscuit pieces and gently nudge some biscuit tops to remain exposed for browning.
  9. Sprinkle shredded cheddar cheese evenly over the casserole.
  10. Bake for 30 to 35 minutes until top is golden, biscuit edges are set (not doughy), and center is no longer glossy or liquid; tent with foil if browning too fast.
  11. Rest casserole 10 minutes before slicing to firm the center and improve slice stability.

Notes

Use sausage with enough fat for gravy; add butter if skillet looks dry. Maintain some biscuit tops exposed to avoid soggy texture. Freeze after baking for up to 2 months; reheat covered at 325°F. Variations include adding hash browns or omitting eggs with adjusted milk and gravy thickness.

Nutrition

Serving Size: 1/8 casserole | Calories: 457 kcal | Protein: 19g | Fat: 30g | Carbohydrates: 27g

The first time I tested this, I let the garlic go a little too far and added the Parmesan while the pan was still bubbling. The orzo was still edible, but the sauce lost that smooth, glossy look and turned heavier than it should have.

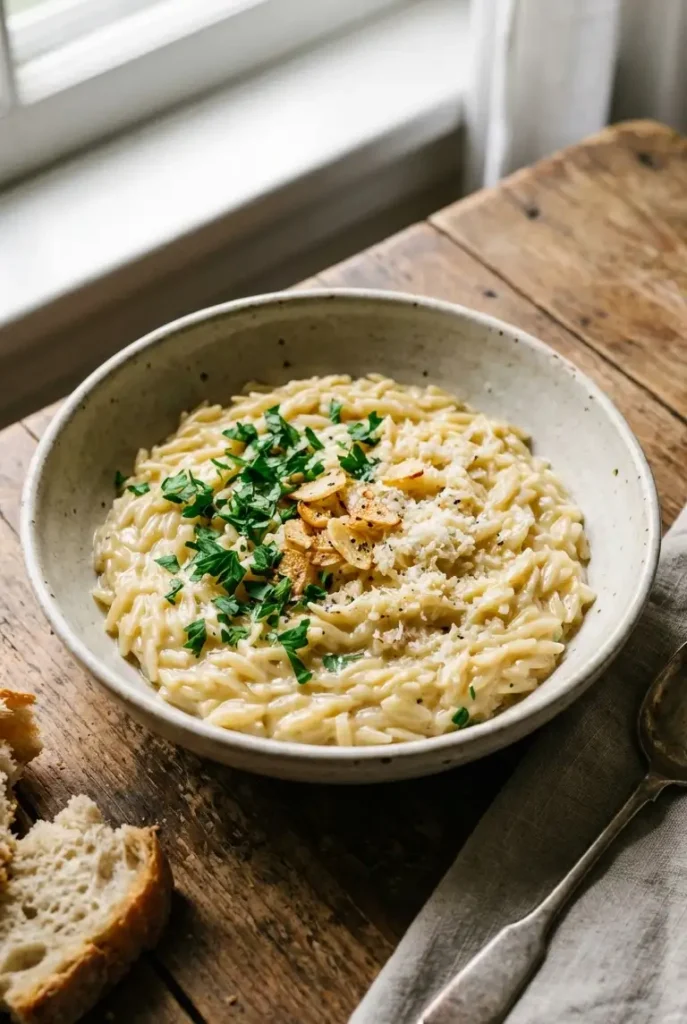
This version fixes both problems. The garlic stays pale and sweet, the cheese melts in off the heat, and the finished orzo stays creamy without turning stiff or pasty. What you get is a one-pan garlic butter orzo that feels rich but still loose enough to spoon, with tender grains and just enough lemon at the end to keep the cream and Parmesan from tasting flat.

Why This One-Pan Garlic Butter Orzo Works

  • Toasting the dry orzo in butter gives the dish a lightly nutty base and helps it taste fuller.
  • A gentle simmer cooks the orzo evenly without catching too fast on the bottom.
  • Parmesan goes in off the heat, so the sauce stays smooth instead of tightening or turning grainy.
  • A little lemon at the end keeps the butter, cream, and cheese from tasting too heavy.

Ingredients for One-Pan Garlic Butter Orzo

  • 2 tablespoons unsalted butter (30g)
  • 1 tablespoon olive oil (15g)
  • 4 cloves garlic, finely minced (15g)
  • 1 cup dry orzo (200g)
  • 2 1/2 cups low-sodium chicken broth (600g)
  • 1/2 teaspoon kosher salt
  • 1/4 teaspoon black pepper
  • 1/2 cup heavy cream (120g)
  • 3/4 cup finely grated Parmesan cheese (70g)
  • 1 tablespoon lemon juice
  • 2 tablespoons chopped parsley, optional

How to Make Creamy Garlic Butter Orzo

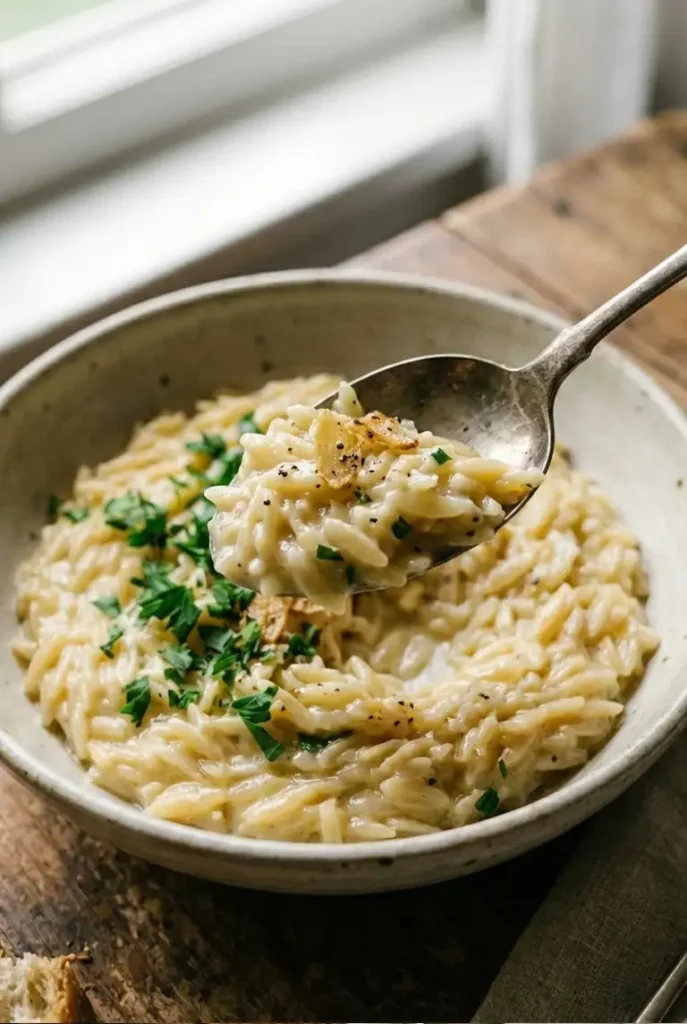
A close-up of a spoon lifting a scoop of creamy garlic butter orzo, showing the glossy sauce and tender pasta grains.

Toast the orzo for a nuttier base

  1. In a wide skillet or sauté pan, melt the butter with the olive oil over medium heat. The butter should be melted and foamy, not browned.
  2. Add the garlic and cook for 30 to 60 seconds, stirring constantly, until fragrant and just pale blond. If it starts turning brown, lower the heat immediately.
  3. Add the dry orzo and stir for 1 to 2 minutes, until the grains look glossy and lightly coated, with a few turning pale golden at the edges.

Simmer until the orzo is tender and glossy

  1. Pour in the chicken broth, then add the salt and pepper. Bring it to a gentle simmer, not a hard boil.
  2. Cook for 8 to 10 minutes, stirring around the edges and across the bottom once or twice as it cooks. Orzo settles quickly, so don’t skip this.
  3. When it’s ready, the orzo should be tender with a slight bite and the pan should still look a little loose. If the mixture looks tight while the pasta is still firm, add a splash of extra broth or water.

Stir in cream, Parmesan, and lemon off the heat

  1. Take the pan off the heat and stir in the heavy cream until evenly combined.
  2. Add the Parmesan a handful at a time, stirring until it melts before adding more. Finely grated cheese works best here, since larger shreds do not melt as smoothly.
  3. Stir in the lemon juice and parsley, if using. The sauce should coat the spoon and flow back into the pan slowly, not sit in stiff clumps.
  4. Let the orzo rest for 1 to 2 minutes before serving. It will thicken slightly as it stands.

Tips for the Best Texture

Do not wait for the pan to look perfect

Orzo keeps absorbing liquid after it comes off the heat. If it already looks thick in the skillet, it will usually be too tight by the time you serve it.

Add the Parmesan off the heat

If the liquid is still actively bubbling, the cheese can clump instead of melting smoothly into the sauce.

If you like creamy Parmesan dishes, this Garlic Parmesan Meatloaf is another cozy dinner to keep in rotation.


Easy variations for this creamy orzo recipe

Creamy garlic butter orzo with shrimp

Sear 1 pound peeled shrimp separately in a little butter or olive oil with salt and pepper for 1 to 2 minutes per side, until just pink and firm. Fold them into the finished orzo right before serving so they do not overcook in the residual heat.

Creamy garlic butter chicken orzo

Use 2 cups cooked diced chicken or shredded rotisserie chicken. Stir it in during the last 2 minutes so it warms through without drying out. If you want to start with raw chicken, sear bite-size pieces first, remove them, then return them at the end.


What to serve with creamy garlic butter orzo

This can work as either a side or a main, depending on what you add. If you are serving it as a main dish, a simple green salad or roasted broccoli is enough to balance the richness.

If you want to round this out with another simple stovetop comfort recipe, these One-Pot Tuscan White Beans fit right in.


How to store and reheat one-pan orzo

Store leftovers in an airtight container in the fridge for up to 3 days. The orzo will thicken noticeably as it sits.

To reheat, warm it gently on the stove or in the microwave with a splash of broth, milk, or water. Stir well before serving. Avoid reheating it hard or the sauce can tighten while the pasta goes soft.


Creamy Garlic Butter Orzo FAQ

Why did my Parmesan turn grainy or clump in the sauce?

Usually the pan was too hot or the cheese was too coarsely grated. Take the skillet off the heat first, then add finely grated Parmesan in small handfuls.

Why is my creamy garlic butter orzo too thick?

Usually it cooked a little too long or sat too long before serving. Orzo keeps absorbing liquid after it comes off the heat. Stir in a splash of warm broth, milk, or water until it loosens.

Can I use milk or half-and-half instead of heavy cream?

Yes. Half-and-half is the better substitute and keeps more body in the sauce. Milk works too, but the texture will be lighter and less velvety.

Can I add cooked chicken or shrimp?

Yes. Cooked chicken can go in during the last couple of minutes just to warm through. Shrimp is best cooked separately and added at the end so it stays firm and juicy.


Nutrition

  • Serving size: approximately 1/4 of the total recipe
  • Calories: 440 kcal
  • Protein: 13g
  • Fat: 23g
  • Carbohydrates: 43g
  • Per 100g: Calories: 164 kcal, Protein: 5g, Fat: 9g, Carbohydrates: 16g.

These nutritional values are approximate and can vary based on the specific ingredients and brands used.

Creamy Garlic Butter Orzo

A one-pan creamy garlic butter orzo cooked in 30 minutes with Parmesan, lemon, and a smooth, glossy sauce that stays loose and flavorful. This recipe balances garlic sweetness, cheese sharpness, and a tender but firm orzo texture.
Course: Dinner
Cuisine: American
Prep: 10 min
Cook: 20 min
Total: 30 min
Servings: 4 Calories: 440 kcal Cost: —

Equipment

  • Wide skillet or sauté pan
  • Spoon
  • Measuring cups and spoons

Ingredients

  • 2 tablespoons unsalted butter (30g)
  • 1 tablespoon olive oil (15g)
  • 4 cloves garlic, finely minced (15g)
  • 1 cup dry orzo (200g)
  • 2 1/2 cups low-sodium chicken broth (600g)
  • 1/2 teaspoon kosher salt
  • 1/4 teaspoon black pepper
  • 1/2 cup heavy cream (120g)
  • 3/4 cup finely grated Parmesan cheese (70g)
  • 1 tablespoon lemon juice
  • 2 tablespoons chopped parsley, optional

Instructions

  1. Melt butter with olive oil in a wide skillet over medium heat until foamy, not browned.
  2. Add garlic and cook 30 to 60 seconds until fragrant and pale blond, stirring constantly; lower heat if browning.
  3. Add dry orzo and stir for 1 to 2 minutes until grains look glossy and lightly coated, some edges pale golden.
  4. Pour in chicken broth, add salt and pepper, and bring to a gentle simmer, not a hard boil.
  5. Cook 8 to 10 minutes, stirring occasionally around edges and bottom to prevent sticking; orzo should be tender with a slight bite and pan look slightly loose.
  6. If mixture tightens before orzo is tender, add splash of extra broth or water.
  7. Remove pan from heat; stir in heavy cream until combined.
  8. Add Parmesan cheese gradually, stirring until melted before adding more; use finely grated cheese for smooth melting.
  9. Stir in lemon juice and parsley if using; sauce should coat spoon and flow slowly back to pan, not clump.
  10. Let orzo rest for 1 to 2 minutes before serving; sauce will thicken slightly.

Notes

Tips: Toast dry orzo in butter before adding broth to develop a nutty flavor. Keep broth simmering gently, not boiling hard, for even cooking. Add Parmesan off heat to keep sauce smooth and not grainy. Finish with lemon juice to balance richness without overwhelming lemon flavor. Variations: Add sautéed shrimp or cooked chicken at end for protein. Storage & Reheat: Store leftovers in airtight container in fridge up to 3 days; reheat gently with splash of broth or water to loosen sauce.

Nutrition

Serving Size: 1/4 recipe | Calories: 440 kcal | Carbohydrates: 43g | Protein: 13g | Fat: 23g | Saturated Fat: — | Cholesterol: — | Sodium: — | Fiber: — | Sugar: —

The first time I made this, I let the cream boil while the noodles finished cooking, and the whole pot went thicker than I wanted. The garlic lost its freshness, the broth turned heavier, and the noodles started heading soft before the bowls even hit the table.

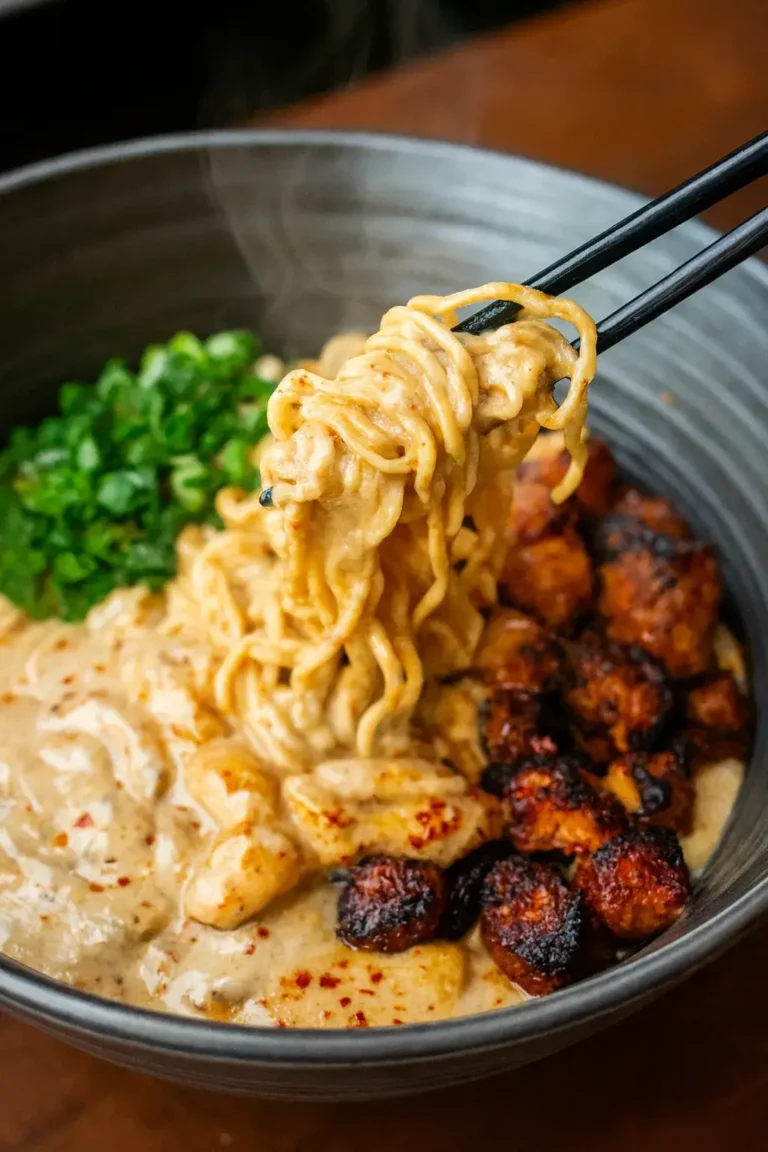
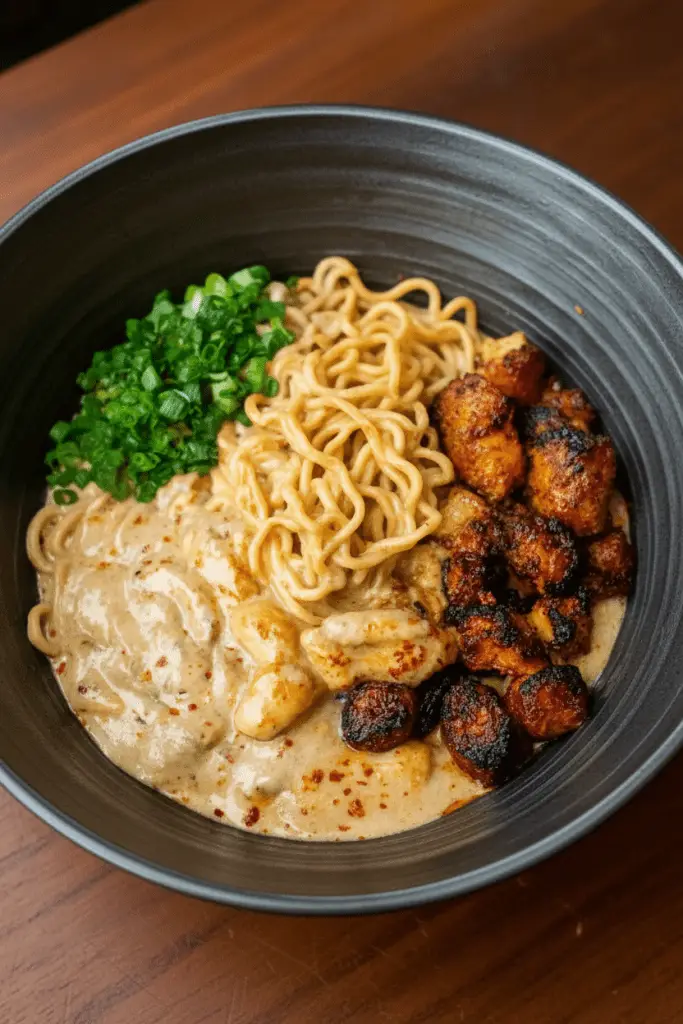
This version fixes that by keeping the garlic pale, adding the cream over lower heat, and cooking the noodles only until they still have some spring. The spicy chicken on top is what makes the bowl work especially well: you get creamy broth underneath, browned bites of chicken with a little char around the edges, and enough contrast that the whole thing eats like a real dinner instead of a bland creamy soup.

Why This Creamy Garlic Chicken Ramen Works

  • The chicken is browned first, then finished gently, which keeps it tender and gives the bowl better contrast.
  • The garlic is cooked only until pale and fragrant, so the broth stays savory instead of harsh.
  • The cream goes into hot broth over lower heat, which keeps the texture smooth instead of greasy or split.
  • The noodles are cooked only until tender, then served right away so they stay springy.
  • Using low-sodium broth helps keep the bowl flavorful without tipping too salty too fast.

Ingredients for Creamy Garlic Chicken Ramen

Serves 4

  • 1 lb boneless skinless chicken thighs or chicken breast, cut into bite-size pieces or thin strips (450g)
  • 2 packages instant ramen noodles, seasoning packets discarded (170g)
  • 1 tablespoon neutral oil
  • 1 tablespoon soy sauce
  • 1 teaspoon chili crisp or sriracha, plus more to taste
  • 1/2 teaspoon smoked paprika
  • 1/4 teaspoon red pepper flakes
  • 4 cloves garlic, finely minced (20g)
  • 4 cups low-sodium chicken broth (960g) (low-sodium works best here, since the soy sauce and noodles add salt too)
  • 1 cup heavy cream (240g)
  • 2 teaspoons soy sauce
  • 1 teaspoon toasted sesame oil
  • 3 green onions, finely chopped (45g)
  • Salt, to taste
  • Black pepper, to taste

Best ramen noodles to use

Standard instant ramen bricks work well here because they cook fast and release a little starch into the broth. That helps the creamy broth cling to the noodles without turning the whole pot heavy.

Fresh ramen also works, but cook it a little less since it softens faster.

Can you use chicken thighs instead of breast?

Chicken thighs are the better choice if you want deeper browning and juicier bites on top. They stay tender more easily and give you those dark golden edges with less effort.

Chicken breast works too, but slice it thin and pull it as soon as it is cooked through.

Heavy cream vs coconut milk

Heavy cream gives the broth its fullest body and the smoothest texture. Full-fat coconut milk works well for a dairy-free version and has already proven to be a good swap in this style of bowl, but the broth will be a little lighter and slightly sweeter.


How to Make Creamy Garlic Chicken Ramen

Cook the spicy chicken first

  1. Toss the chicken with 1 tablespoon soy sauce, chili crisp or sriracha, smoked paprika, and red pepper flakes.
  2. Heat a large pot or deep skillet over medium-high heat and add the oil. Once the oil is shimmering, add the chicken in a single layer.
  3. Cook for 4 to 5 minutes, stirring only occasionally, until most of the chicken is cooked through and some pieces are deep golden-brown in spots with slightly charred edges.
  4. Transfer about one-third of the chicken to a plate for topping the bowls later. Leave the rest in the pot so it finishes gently in the broth. That gives you both browned, crisp-edged bites on top and softer chicken in the creamy ramen.

Bloom the garlic without browning it too much

  1. Lower the heat to medium. If the pot looks dry, add a small splash of oil. Add the garlic and stir for 30 to 60 seconds, just until fragrant. Keep it moving. If it turns deep brown, it will taste harsh.

Build the broth and add the cream

  1. Pour in the chicken broth and scrape up any browned bits from the bottom of the pot. Add the remaining 2 teaspoons soy sauce and the sesame oil.
  2. Bring the broth to a gentle simmer, not a rolling boil, and cook for 2 to 3 minutes so the garlic and chicken flavor the liquid.
  3. Lower the heat before adding the cream. Stir it in and keep the broth at a low simmer for about 2 minutes. It should look slightly opaque, smooth, and lightly glossy.
  4. Taste the broth before adding any salt. Between the broth, soy sauce, and noodles, this bowl can turn salty faster than you expect.

Cook the ramen just until tender

  1. Add the ramen noodles. Break them once or twice if needed so they fit below the surface. Cook for 2 to 3 minutes, stirring gently, until the noodles are just tender with a little spring left.
  2. If the broth thickens more than you want, add a splash of broth or water. You want a creamy broth that still moves easily around the noodles, not something thick like pasta sauce.
  3. Taste and add black pepper, more chili crisp, or a few drops of soy sauce only if needed.
  4. Divide into bowls and top with the reserved caramelized chicken and a small mound of green onions. Serve immediately while the noodles still have bite.

How to Keep the Broth Smooth

  • Add the cream only after lowering the heat.
  • The broth should stay brothy-creamy, not thick like Alfredo.
  • If dinner is delayed, cook the noodles separately and add them at the end.

Easy variations

Dairy-free creamy chicken ramen

Use 1 cup full-fat coconut milk instead of heavy cream. Keep the heat low after adding it. The broth will be a little lighter and have a faint sweetness, but it still works well with the garlic and chili.

Spicy creamy garlic chicken ramen

Double the chili crisp, or add 1 to 2 teaspoons sriracha to the broth. You can also finish the bowls with extra red pepper flakes over the top chicken so the heat stays distinct from the creamy broth.

For a less brothy option, this 30-Minute Chicken Ramen Stir Fry has the same weeknight convenience in a drier noodle format.

Creamy chicken ramen with spinach or broccoli

Add a few handfuls of spinach at the end, or stir in steamed broccoli before serving. Both work well in this bowl and make it feel heartier without changing the broth too much.


What to serve with creamy chicken ramen

This bowl is rich enough to stand on its own, so keep any side simple. A quick cucumber salad, steamed greens, or extra green onions and chili crisp at the table all work well.

If creamy, cozy chicken dinners are your thing, you’ll probably love this Creamy Chicken Gnocchi Soup too.


How to store and reheat

Store leftovers in an airtight container in the refrigerator for up to 2 days. The noodles will soften and the broth will thicken as it sits.

To reheat, warm the ramen gently over low heat with a splash of broth or water until loosened. Do not boil it hard or the cream can turn grainy.

If you know you will have leftovers, store the noodles separately from the broth if possible. That gives you a much better texture the next day.


FAQ

Why did my creamy chicken ramen taste too salty?

Usually the broth was the main reason. Some chicken bases and bouillon products are much saltier than standard low-sodium broth, and the soy sauce adds more on top. Use low-sodium broth when possible, taste before adding extra salt, and add a splash of water or broth if the bowl tastes too concentrated.

Why did my creamy ramen broth separate?

Usually the heat was too high when the cream went in, or it boiled too long afterward. Lower the heat before adding the cream and keep the broth at only a gentle simmer.

Can I use coconut milk instead of heavy cream?

Yes. Full-fat coconut milk is the best dairy-free swap here. The broth will be a little lighter and have a faint coconut note, but it still works well with the garlic and chili.

Can I use chicken thighs instead of chicken breast?

Yes, and they are often the better option here. They brown more deeply, stay juicier, and hold up especially well as the topping for the bowls.

How do I keep ramen noodles from getting mushy?

Cook them only until just tender and serve the bowls right away. If you are not eating immediately, cook the noodles separately and combine them at the last minute.


Nutrition

  • Serving size: approximately 1/4 of the total recipe
  • Calories: 519 kcal
  • Protein: 28g
  • Fat: 29g
  • Carbohydrates: 36g
  • Per 100g: Calories: 110 kcal, Protein: 6g, Fat: 6g, Carbohydrates: 8g.

These nutritional values are approximate and can vary based on the specific ingredients and brands used.

Chicken Ramen with Creamy Garlic Sauce

Creamy chicken ramen with garlic, browned spicy chicken, and a loose, silky broth ready in 30 minutes. Features tender chicken cooked in two stages, fragrant pale garlic, and noodles coated in a smooth, lightly glossy broth with balanced spice.
4.5 (2 reviews)
Course: Dinner
Cuisine: Japanese Fusion
Prep: 10 min
Cook: 20 min
Total: 30 min
Servings: 4 Calories: 519 kcal

Equipment

  • Large pot or deep skillet
  • Tongs
  • Cutting board
  • Chef’s knife
  • Measuring spoons
  • Large spoon

Ingredients

  • 1 lb Boneless skinless chicken thighs or breast (cut into bite-size pieces or strips, 450g)
  • 2 packages Instant ramen noodles (seasoning packets discarded, 170g)
  • 1 tablespoon Neutral oil
  • 1 tablespoon Soy sauce
  • 1 teaspoon Chili crisp or sriracha plus more to taste
  • 1/2 teaspoon Smoked paprika
  • 1/4 teaspoon Red pepper flakes
  • 4 cloves Garlic (finely minced, 20g)
  • 4 cups Low-sodium chicken broth (960g)
  • 1 cup Heavy cream (240g)
  • 2 teaspoons Soy sauce
  • 1 teaspoon Toasted sesame oil
  • 3 pieces Green onions (finely chopped, 45g)
  • To taste Salt
  • To taste Black pepper

Instructions

  1. Toss chicken with 1 tablespoon soy sauce, chili crisp or sriracha, smoked paprika, and red pepper flakes.
  2. Heat oil in a large pot or deep skillet over medium-high until shimmering, then add chicken in a single layer.
  3. Cook 4-5 minutes, stirring occasionally, until chicken is deep golden brown with slightly charred edges. Remove about one-third chicken for topping later.
  4. Lower heat to medium. Add a small splash of oil if pot looks dry. Add garlic and stir for 30-60 seconds until fragrant and pale golden without browning.
  5. Pour in chicken broth, scraping browned bits from pot bottom. Add remaining 2 teaspoons soy sauce and sesame oil.
  6. Bring to a gentle simmer (not rolling boil). Cook 2-3 minutes to infuse flavors.
  7. Lower heat to low. Add heavy cream and stir until broth is slightly opaque, smooth, and lightly glossy. Keep simmering gently for 2 minutes; do not boil hard.
  8. Add ramen noodles, breaking to fit under broth if needed. Cook 2-3 minutes, stirring gently, until noodles are just tender with some spring left.
  9. Taste broth before adding salt. Add salt, black pepper, and more chili crisp or sriracha as desired for heat.
  10. If broth thickens too much, add splash of broth or water to keep it flowing easily around noodles, not like a heavy sauce.
  11. Divide ramen into bowls. Top with reserved caramelized chicken and green onions. Serve immediately while noodles have bite.

Notes

Keep cream from separating by adding it only after lowering heat to a gentle simmer. Broth should be brothy-creamy, not thick like Alfredo. Cook noodles just until tender and serve immediately to avoid mushiness. For dairy-free version, substitute heavy cream with full-fat coconut milk and keep heat low. Store leftover noodles and broth separately to maintain texture. Reheat gently with broth or water.

Nutrition

Serving Size: 1/4 recipe | Calories: 519 kcal | Protein: 28g | Fat: 29g | Carbohydrates: 36g

This bowl got better as soon as I stopped treating the noodles and dumplings like they cooked on the same schedule. They do not. Frozen dumplings need a few more minutes, while ramen can go from springy to limp fast, and if both go in together you usually end up sacrificing one for the other.

The fix is simple: build the broth first, cook the dumplings in it, and add the noodles at the end. That gives you a bowl with actual contrast instead of one soft texture all the way through—plump dumplings, springy noodles, shiitakes with a little chew, and bok choy that stays tender instead of collapsing.

The broth is light but still savory, with garlic, ginger, soy sauce, and just enough toasted sesame oil to make it feel rounded without turning heavy.

Why This Dumpling Ramen Bowl Works

  • Cooking the broth first gives the garlic and ginger time to mellow, so the soup tastes deeper instead of sharp or flat.
  • Frozen dumplings keep this bowl practical and still hold their shape well in the broth.
  • Bok choy and mushrooms cook directly in the soup, which adds flavor without making the bowl feel complicated.
  • The noodles go in last, so they stay springy instead of soaking up the broth too early.

Ingredients You Need for Dumpling Ramen Soup

Use frozen dumplings for the fastest version

  • 8 cups chicken broth (1,920g)
  • 1 tablespoon toasted sesame oil (15g)
  • 4 cloves garlic, minced
  • 1 tablespoon fresh ginger, sliced or grated (15g)
  • 2 tablespoons soy sauce (30g)
  • 1 teaspoon rice vinegar
  • 12 frozen dumplings or potstickers (480g)
  • 8 ounces shiitake mushrooms, stems removed and sliced (225g)
  • 4 baby bok choy, halved lengthwise (340g)
  • 2 packages ramen noodles, seasoning packets discarded (170g)

Optional toppings

  • 2 green onions, thinly sliced (30g)
  • 1 teaspoon sesame seeds
  • Chili oil, for serving

How to Make a Dumpling Ramen Bowl

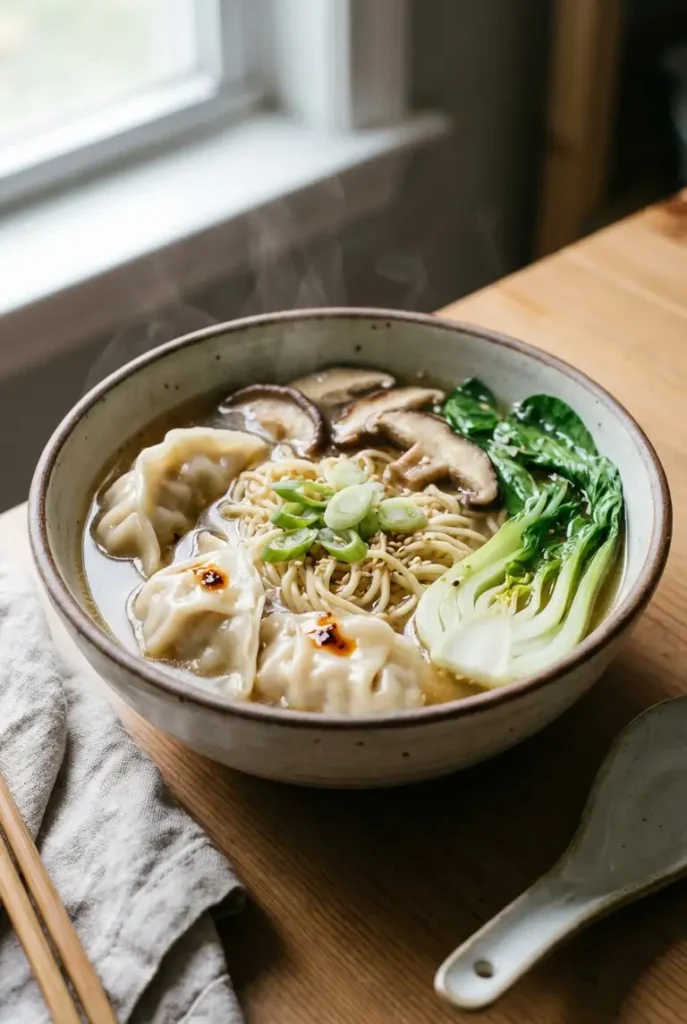
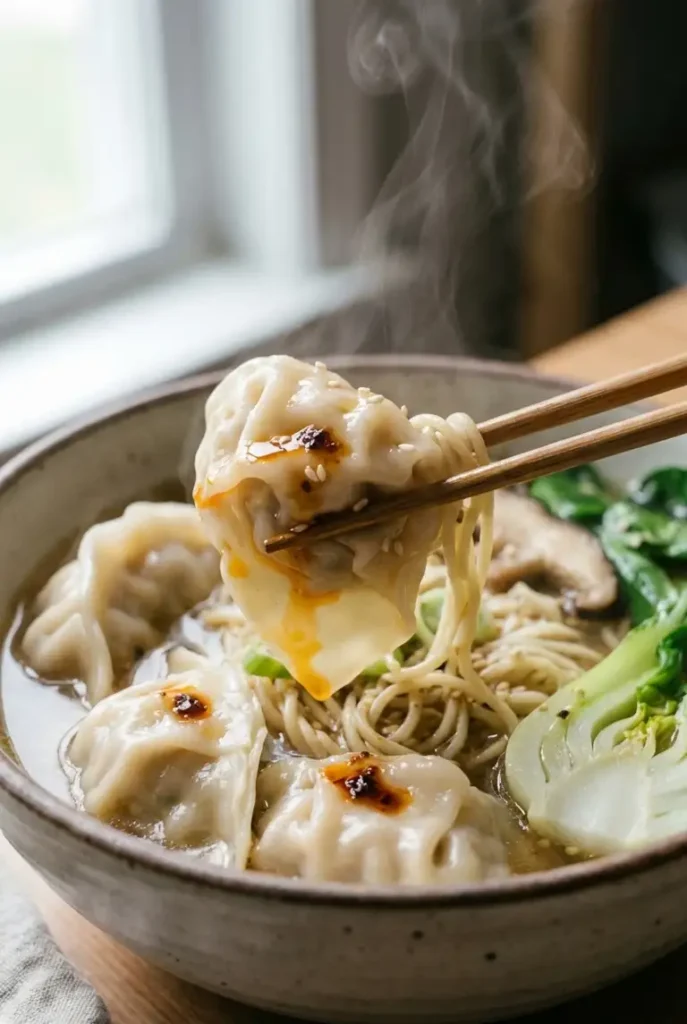
Close-up of chopsticks lifting a steamed dumpling from ramen broth, with springy noodles, sesame seeds, and bok choy in the background.

Build the broth first

  1. In a large pot or Dutch oven, heat the sesame oil over medium heat. Add the garlic and ginger and cook for 30 to 60 seconds, just until fragrant. Do not let the garlic brown.
  2. Pour in the chicken broth, soy sauce, and rice vinegar. Bring the pot to a gentle simmer. You want small bubbles around the edges, not a rolling boil. Simmer for 8 to 10 minutes, until the broth smells savory and the garlic no longer smells raw.

Cook the mushrooms and bok choy until just tender

  1. Add the shiitake mushrooms and simmer for 4 to 5 minutes, until they darken, shrink slightly, and look silky rather than spongy.
  2. Add the bok choy and cook for 2 to 3 minutes, until the white stems are crisp-tender and the greens are just wilted.

Add ramen noodles and dumplings at the right time

  1. Slide the frozen dumplings into the broth one at a time so they do not stick together. Keep the pot at a gentle simmer; a hard boil can tear the wrappers. Cook for 4 to 6 minutes, or according to package directions, until the dumplings look slightly puffed and the filling is hot throughout.
  2. Add the ramen noodles during the last 2 to 3 minutes of dumpling cooking. Loosen the noodles with tongs after 30 to 60 seconds instead of stirring hard. Cook until springy with a little bite. They will keep softening in the hot broth.

Serve immediately for the best texture

  1. Taste the broth before adding more soy sauce. Frozen dumplings can add a fair amount of salt on their own. If needed, add a few more drops of soy sauce or chili oil.
  2. Divide the broth, noodles, vegetables, and dumplings between bowls. Top with green onions, sesame seeds, and a fried egg if using. Serve right away.

If you love ramen-style dinners but want something richer and creamier next time, try this Chicken Ramen with Creamy Garlic Sauce.


Best Dumplings and Noodles for This Bowl

Frozen dumplings work best here
For a fast weeknight version, frozen dumplings or potstickers are the best choice. Look for ones with fairly sturdy wrappers, since very delicate dumplings are more likely to split in simmering broth.

The best noodles for the broth
Fresh ramen gives the best texture if you can find it, but dried ramen bricks work well too and are easy to keep on hand. Discard the seasoning packets. Once cooked, ramen absorbs broth quickly, so this bowl is best served as soon as the noodles are tender.

For a broth-free option with the same quick-cooking noodle appeal, this 30-Minute Chicken Ramen Stir Fry is another easy weeknight dinner.


How to Keep the Broth Balanced

Soy sauce should make the broth taste deeper, not sharply salty. Sesame oil should read as lightly toasty in the background, not slick on top. Ginger should taste warm and fresh without taking over the bowl.

If the soup tastes flat at the end, a small splash of rice vinegar or a spoonful of chili oil usually fixes it faster than more soy sauce.


Easy Variations

Kimchi dumpling ramen

Add 1/2 to 1 cup chopped kimchi (75g to 150g) when you add the mushrooms. Let it simmer in the broth so the acidity softens a bit. At the end, stir in 1 to 2 teaspoons kimchi brine to sharpen the broth. This version works especially well with pork dumplings.

Dumpling ramen bowl with fried egg

Top each bowl with a fried egg. A jammy yolk gives the broth more body, while a crispy-edge egg adds texture against the soft noodles and dumplings. Fry the eggs separately while the dumplings cook so everything lands hot at the same time.


How to Store and Reheat Without Soggy Noodles

This soup is best eaten right after cooking. If you expect leftovers, cook the noodles separately and store them apart from the broth, dumplings, and vegetables.

Refrigerate leftovers in airtight containers for up to 3 days.

Reheat the broth gently over medium-low heat until hot, then add the noodles only at the end, just long enough to warm through. If noodles sit in the broth overnight, they will absorb a surprising amount of liquid and turn soft quickly.


Dumpling Ramen Bowl FAQ

Why did my ramen noodles turn mushy?

They either cooked too long or sat too long in the hot broth. Add the noodles at the end and serve the soup right away.

How do I keep dumplings from breaking in the broth?

Keep the soup at a gentle simmer, not a boil. Add the dumplings one at a time and avoid stirring them aggressively.

Can I make this ahead of time?

You can make the broth and prep the vegetables ahead, but cook the dumplings and noodles right before serving for the best texture.

What can I use instead of bok choy?

Napa cabbage, spinach, or thinly sliced green cabbage all work. Spinach cooks especially fast, so add it at the very end.

Can I use frozen dumplings?

Yes. Add them straight from frozen. Do not thaw them first, or the wrappers can turn sticky and fragile.


Nutrition

  • Serving size: approximately 1/4 of the total recipe
  • Calories: 471 kcal
  • Protein: 22g
  • Fat: 19g
  • Carbohydrates: 52g
  • Per 100g: Calories 62 kcal, Protein 2.9g, Fat 2.5g, Carbohydrates 6.8g.

These values are approximate and will vary by brand, especially the dumplings and broth.

Dumpling Ramen Bowl

An easy 40-minute soup featuring frozen dumplings, bok choy, shiitake mushrooms, and ramen noodles in a savory broth with toasted sesame oil and soy sauce. Perfect for a weeknight meal with layers of flavor and contrasting textures.
Course: Dinner
Cuisine: Asian
Prep: 10 min
Cook: 30 min
Total: 40 min
Servings: 4 Calories: 471 kcal Cost: —

Equipment

  • Large pot or Dutch oven
  • Tongs

Ingredients

  • 8 cups Chicken broth (1920g)
  • 1 tablespoon Toasted sesame oil (15g)
  • 4 cloves Garlic minced (10g)
  • 1 tablespoon Fresh ginger sliced or grated (15g)
  • 2 tablespoons Soy sauce (30g)
  • 1 teaspoon Rice vinegar
  • 12 pieces Frozen dumplings or potstickers (480g)
  • 8 ounces Shiitake mushrooms stems removed and sliced (225g)
  • 4 pieces Baby bok choy halved lengthwise (340g)
  • 2 packages Ramen noodles seasoning packets discarded (170g)
  • 2 pieces Green onions thinly sliced (30g, optional)
  • 1 teaspoon Sesame seeds optional
  • Chili oil for serving, optional
  • 4 Fried eggs optional

Instructions

  1. Heat sesame oil over medium heat in a large pot or Dutch oven. Add minced garlic and ginger and cook for 30 to 60 seconds until fragrant, but do not brown the garlic.
  2. Pour in chicken broth, soy sauce, and rice vinegar. Bring to a gentle simmer with small bubbles around edges, not a rolling boil. Simmer for 8 to 10 minutes until savory and garlic aroma mellows.
  3. Add shiitake mushrooms and simmer 4 to 5 minutes until mushrooms darken, shrink slightly, and become silky.
  4. Add baby bok choy and cook 2 to 3 minutes until white stems are crisp-tender and greens are just wilted.
  5. Add frozen dumplings one at a time to the gently simmering broth to prevent sticking. Cook for 4 to 6 minutes or according to package instructions until dumplings puff slightly and filling is hot.
  6. Add ramen noodles during the last 2 to 3 minutes of dumpling cooking. After 30 to 60 seconds, loosen noodles with tongs instead of stirring hard. Cook until noodles are springy with a little bite.
  7. Taste the broth and adjust soy sauce or add chili oil if needed as dumplings can add saltiness.
  8. Divide broth, noodles, vegetables, and dumplings between bowls. Top with sliced green onions, sesame seeds, and fried eggs if using. Serve immediately for best texture.

Notes

Store noodles separately from broth, dumplings, and vegetables if leftovers are expected to prevent sogginess. Refrigerate leftovers in airtight containers up to 3 days. Reheat broth gently and add noodles last to warm through. A gentle simmer preserves broth clarity and dumpling integrity.

Nutrition

Serving Size: 1 bowl (1/4 recipe) | Calories: 471 kcal | Protein: 22g | Fat: 19g | Carbohydrates: 52g

The first time I made this, I put all the Parmesan on top before the loaf went into the oven. By the time the center was done, the cheese had browned too hard and the top had turned drier than I wanted. It looked good from a distance, but the texture was off.

This version fixes that by splitting the Parmesan. Most of it goes into the meat mixture, where it adds savory flavor and helps the loaf hold together, and the rest goes on near the end so you get golden spots on top instead of a thick, dry crust. The result is a meatloaf that slices neatly, stays tender in the middle, and tastes more savory than sweet.

Why This Meatloaf Stays Tender and Holds Together

  • The breadcrumbs and eggs bind the loaf without making it feel heavy or bready.
  • Finely chopped onion softens into the meat as it bakes, adding moisture without leaving noticeable chunks.
  • A freeform loaf on a sheet pan gives you better browning than a loaf pan.
  • The Parmesan topping goes on near the end, so it melts and browns without drying out.

Ingredients for Garlic Parmesan Meatloaf

The best ground beef for moist meatloaf

Use ground beef with enough fat to stay tender. An 85/15 blend works especially well here.

  • 2 pounds ground beef (905g)
  • 1 cup Italian breadcrumbs (110g)
  • 1 cup finely grated Parmesan cheese, divided (100g)
  • 1 medium onion, very finely chopped (150g)
  • 4 cloves garlic, minced
  • 2 large eggs (100g)
  • 2 tablespoons Worcestershire sauce
  • 2 tablespoons chopped fresh parsley
  • 1 teaspoon kosher salt (I like fine-grain 👉Atlantic sea salt here)
  • 1/2 teaspoon black pepper
  • 2 tablespoons olive oil (30g)

Why these ingredients matter

Breadcrumbs help the loaf hold its shape by absorbing some of the meat juices as it bakes. Finely grated Parmesan adds savory flavor and helps the slices cut a little more cleanly without making the meatloaf feel tight.


How to Make Garlic Parmesan Meatloaf

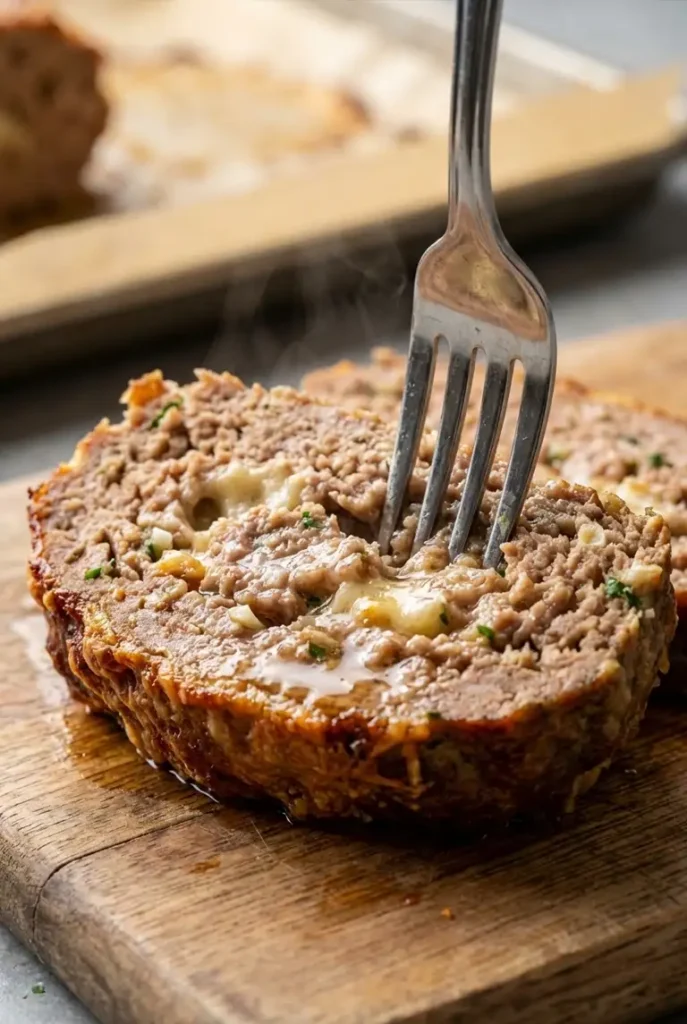
Close-up of a fork cutting into garlic Parmesan meatloaf, showing a steaming, juicy interior and browned Parmesan topping.

Mix the meat gently for a tender loaf

  1. Preheat the oven to 375°F. Line a sheet pan or baking sheet with parchment paper.
  2. In a large bowl, combine the breadcrumbs, 3/4 cup of the Parmesan, onion, garlic, eggs, Worcestershire sauce, parsley, salt, pepper, and olive oil.
  3. Add the ground beef and mix with your hands just until combined. Stop when the seasonings are evenly distributed and you no longer see streaks of egg. Do not keep working it until it feels sticky or paste-like.

If your onion seems especially wet, blot it with a paper towel first or sauté it briefly and cool it before adding. Very juicy onion can loosen the mixture.

Shape freeform or use a loaf pan

  1. Transfer the mixture to the prepared pan and shape it into a loaf about 1 1/2 to 2 inches tall. Keep the thickness even so the center cooks through before the outside dries out.
  2. Bake for 35 minutes. At this point, the loaf should look set around the edges, and you may see some juices collecting on the pan. The center can still feel slightly springy.

For better browning, use the sheet pan. If you want a softer, more compact loaf, you can bake it in a loaf pan instead.

When to add the Parmesan topping

  1. Sprinkle the remaining 1/4 cup Parmesan over the top. Return the loaf to the oven and bake for 15 to 20 minutes more, until the cheese has golden spots and the center reaches 160°F in the thickest part.
  2. Rest the meatloaf for 10 to 15 minutes before slicing. This gives the juices time to settle and the loaf time to firm up, so the slices hold together instead of crumbling.

A finished slice should cut cleanly, hold its shape, and still look moist inside rather than crumbly or greasy.


Garlic Parmesan Chicken Meatloaf

  1. For a lighter version, use 2 pounds ground chicken or a ground chicken thigh blend. Add 1 extra tablespoon olive oil to make up for the lower fat content, and start checking the loaf around 40 minutes total bake time.
  2. For the topping, mix 1/4 cup finely grated Parmesan, 1 tablespoon 👉chopped parsley, and 1/2 teaspoon dried oregano. Sprinkle that over the top during the last 10 minutes of baking.
  3. Chicken meatloaf is usually softer than beef, so let it rest the full 10 to 15 minutes before slicing.

How to Store and Reheat Meatloaf

  • Store cooled meatloaf in an airtight container in the refrigerator for up to 4 days.
  • To reheat slices, microwave them in short bursts until hot, or warm them in a 325°F oven covered with foil until heated through.
  • For freezing, wrap individual slices tightly and freeze for up to 2 months. Thaw overnight in the refrigerator before reheating.
  • For the best reheating, slice the meatloaf before chilling so individual portions warm through more evenly.

Garlic Parmesan Meatloaf FAQs

Why did my meatloaf turn out dry?

Usually the beef was too lean, the mixture was overmixed, or the loaf baked too long. Use beef with some fat, mix only until combined, and pull it at 160°F.

Can I sauté the onion first?

Yes. Sautéed onion gives a softer texture and works well here. Let it cool before mixing it into the meat.

Can I make this ahead of time?

Yes. You can shape the loaf and refrigerate it, tightly covered, for up to a day before baking. Let it sit at room temperature for a short time while the oven preheats.

Is it better on a sheet pan or in a loaf pan?

For this recipe, a sheet pan gives better browning and less steaming around the sides. A loaf pan gives a softer outer texture and a more compact shape.

Why is my meatloaf falling apart when I slice it?

Usually it just needs more time to rest. Let it sit for 10 to 15 minutes before slicing so the juices settle and the loaf firms up.


Nutrition

  • Serving size: approximately 1/8 of the total recipe
  • Calories: 468 kcal
  • Protein: 35g
  • Fat: 31g
  • Carbohydrates: 10g
  • Per 100g:
  • Calories: 218 kcal
  • Protein: 16g
  • Fat: 14g
  • Carbohydrates: 5g

These values are approximate and will vary with the exact ingredients used.

Juicy Garlic Parmesan Meatloaf

Savory garlic Parmesan meatloaf with a tender center, browned edges, and a late-added cheese topping that stays crisp, not tough. This recipe balances flavor and texture using ground beef, breadcrumbs, finely grated Parmesan, onion, garlic, eggs, Worcestershire sauce, parsley, salt, pepper, and olive oil.
Course: Dinner
Cuisine: American
Prep: 15 min
Cook: 60 min
Total: 90 min
Servings: 7 Calories: 468 kcal

Ingredients

  • 2 pounds ground beef (905g)
  • 1 cup Italian breadcrumbs (110g)
  • 1 cup finely grated Parmesan cheese, divided (100g)
  • 1 medium onion, very finely chopped (150g)
  • 4 cloves garlic, minced
  • 2 large eggs (100g)
  • 2 tablespoons Worcestershire sauce
  • 2 tablespoons chopped fresh parsley
  • 1 teaspoon kosher salt
  • 1/2 teaspoon black pepper
  • 2 tablespoons olive oil (30g)

Instructions

  1. Preheat the oven to 375°F. Line a sheet pan or baking sheet with parchment paper.
  2. In a large bowl, combine the breadcrumbs, 3/4 cup Parmesan, onion, garlic, eggs, Worcestershire sauce, parsley, salt, pepper, and olive oil.
  3. Add the ground beef and mix gently by hand just until combined, no sticky or paste-like texture.
  4. Transfer the mixture to the prepared pan and shape into a loaf about 1.5 to 2 inches tall, keeping thickness even.
  5. Bake for 35 minutes until the edges look set and the center feels slightly springy.
  6. Sprinkle the remaining 1/4 cup Parmesan over the top and bake 15 to 20 minutes more until cheese forms golden spots and center reaches 160°F.
  7. Rest meatloaf for 10 to 15 minutes before slicing to allow juices to settle and loaf to firm.

Notes

Tips: Chop onion very finely to avoid rough texture. Use finely grated Parmesan for better melt and browning. Do not overmix the meat. Keep loaf thickness under 2 inches. Let rest before slicing to prevent falling apart. Storage & Reheat: Store in airtight container in fridge up to 4 days. Reheat in microwave or covered oven at 325°F. Freeze tightly wrapped for up to 2 months and thaw refrigerated overnight.

Nutrition

Serving Size: approximately 1/8 of the loaf | Calories: 468 kcal | Protein: 35g | Fat: 31g | Carbohydrates: 10g | Per100g Calories: 218 kcal | Per100g Protein: 16g | Per100g Fat: 14g | Per100g Carbohydrates: 5g

The first time I made this, I treated it like every ingredient should somehow cooperate just because it was all going on one sheet pan. It doesn’t work that way. The sweet potatoes needed more time, the broccoli was already heading soft, and the salmon was getting dangerously close to overcooked.

The fix was simple: start the sweet potatoes first, then add the salmon and broccoli later. Once I did that, the whole dinner came together the way it should have from the start. The salmon stayed moist and flaky, the broccoli got browned edges instead of steaming, and the sweet potatoes turned soft in the middle with caramelized corners. A squeeze of lemon at the end pulls everything into focus.

Why This Sheet Pan Salmon Dinner Works

  • Everything cooks on one pan, but not on one timeline. That is what keeps the vegetables roasted instead of steamed.
  • The sweet potatoes go in first, so they have time to soften and brown before the salmon is added.
  • The salmon roasts skin-side down, which helps protect it from overcooking underneath.
  • The broccoli is added later, so it gets browned edges instead of turning soft too early.

Ingredients for Sheet Pan Salmon, Sweet Potatoes, and Broccoli

  • 4 salmon fillets, preferably skin-on and about 1 inch thick (680g total)
  • 2 medium sweet potatoes, peeled and cut into 1/2-inch cubes (680g)
  • 1 large head broccoli, cut into florets (340g), or thawed frozen broccoli, well dried
  • 2 tablespoons olive oil (30g)
  • 1 teaspoon kosher salt
  • 1/2 teaspoon black pepper
  • 1 teaspoon 👉garlic powder
  • 1 teaspoon👉 smoked paprika
  • 1 lemon, cut into wedges (120g)

Optional:


How to Make Sheet Pan Salmon and Sweet Potatoes

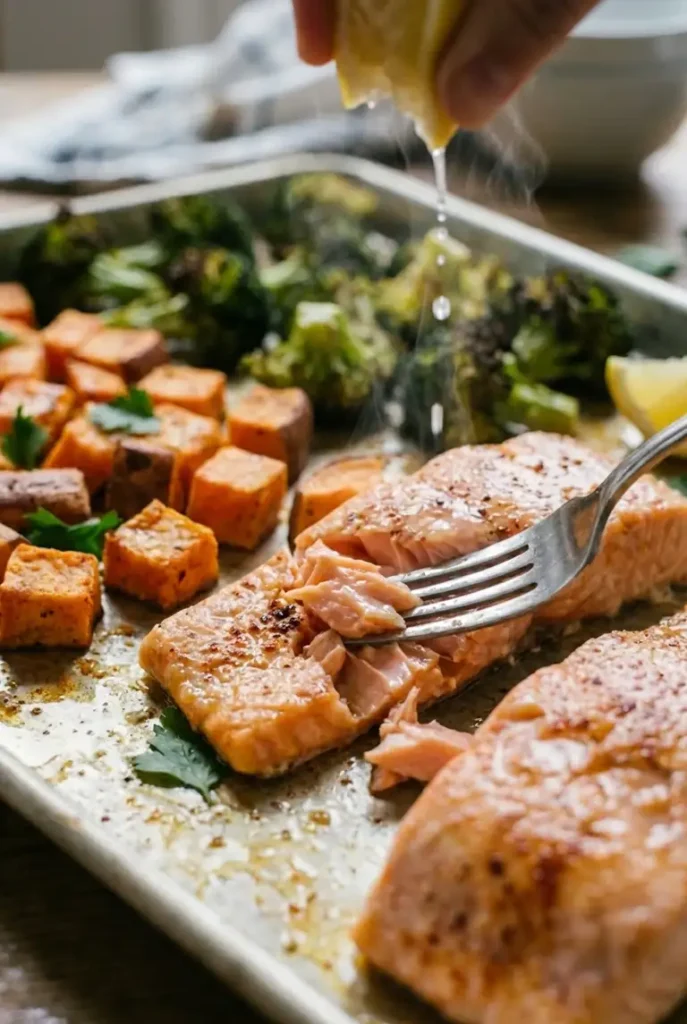
Close-up of a fork flaking moist roasted salmon beside browned sweet potatoes and charred broccoli on a sheet pan.

Give the sweet potatoes a head start

  1. Preheat the oven to 425°F. Use a large rimmed half-sheet pan. If everything will be packed tightly once the salmon and broccoli are added, use two pans. Crowding traps moisture and turns roasting into steaming.
  2. Toss the sweet potatoes with 1 tablespoon olive oil, 1/2 teaspoon salt, 1/4 teaspoon black pepper, 1/2 teaspoon garlic powder, and 1/2 teaspoon smoked paprika. Spread them into a single layer.
  3. Roast for 12 to 15 minutes, until the bottoms are starting to color and some of the edges look browned.

Add the salmon and broccoli

  1. While the sweet potatoes roast, toss the broccoli with the remaining 1 tablespoon olive oil, the remaining 1/2 teaspoon salt, 1/4 teaspoon black pepper, 1/2 teaspoon garlic powder, and 1/2 teaspoon smoked paprika.
  2. Pat the salmon dry, then season it lightly on top. Place it on the pan skin-side down with the broccoli around it. Leave a little visible space between the broccoli florets and potato cubes so the heat can circulate.
  3. Roast for 10 to 14 minutes, depending on the thickness of the salmon. If your oven runs unevenly, rotate the pan halfway through.

How to tell when salmon is perfectly cooked

  1. The salmon is ready when the flesh has turned mostly opaque and the center is still slightly glossy. If you use an instant-read thermometer, look for 125 to 130°F for medium or 130 to 135°F for fully cooked but still moist salmon.
  2. The broccoli should have darkened edges in spots and stems that are tender but not floppy. The sweet potatoes should be soft in the center when pierced.
  3. Let the salmon rest on the pan for 2 minutes. Finish with lemon juice right before serving, not before roasting. Added too early, the acid slows browning and makes the vegetables wetter.
  4. If sheet pan dinners are your weeknight safety net, this Easy Chicken Sausage and Veggies Sheet Pan is another low-effort option with the same minimal cleanup appeal.

How to Roast Everything Evenly

Best salmon fillet size

Fillets about 1 inch thick are the easiest to time with the vegetables. Thin tail pieces can finish before the sweet potatoes and broccoli are where you want them, so start checking thinner salmon around the 8-minute mark.

Fresh vs. frozen broccoli

Fresh broccoli gives the best texture and color. Frozen broccoli can work, but thaw it first and dry it very well. If it goes onto the pan wet, it will soften before it browns.


Tips for Better Texture

  • Cut the sweet potatoes into 1/2-inch cubes so they roast on time.
  • Pat the salmon dry before it goes on the pan.
  • Keep the broccoli florets fairly large if you want browned edges without dried-out stems.
  • Add the lemon at the end, not before roasting.

If you want another oven-baked dinner built around crisp edges and easy prep, try this Easy Parmesan Chicken Sheet Pan Recipe next.


Easy Variations for This Healthy Sheet Pan Salmon Dinner

Spicy sheet pan salmon

Add 1/4 to 1/2 teaspoon red pepper flakes to the seasoning mix, or brush the salmon lightly with chili crisp after roasting. If you use chili crisp before roasting, go lightly—too much oil can blunt browning.

Sheet pan salmon with butternut squash

Swap the sweet potatoes for peeled butternut squash cut into 1/2-inch cubes (680g). Roast it the same way, but start checking a little earlier. Butternut squash softens faster and usually browns less deeply than sweet potatoes.

For a meatless dinner with the same cozy, practical feel, these One-Pot Tuscan White Beans make a great next recipe to bookmark.


How to Store and Reheat Leftovers

Store leftovers in an airtight container in the refrigerator for up to 3 days.

To reheat, place everything on a small sheet pan or in a baking dish and warm at 300°F for 8 to 12 minutes, just until heated through. The microwave works, but the broccoli softens more and the salmon can go past tender quickly.

If you’re packing this for lunch, keep the lemon separate and add it after reheating.


Sheet Pan Salmon and Sweet Potatoes FAQ

Can I use thinner salmon fillets?

Yes, but start checking them earlier. Thin fillets, especially tail pieces, can cook through faster than the vegetables and may be ready in about 8 minutes after they go on the pan.

Can I use frozen broccoli?

Yes, but thaw it first and dry it very well. If it goes onto the sheet pan wet, it will soften before it browns.

How do I know when the salmon is done without overcooking it?

Look for flesh that has turned mostly opaque with a center that is still slightly glossy. If you are using a thermometer, aim for 125 to 130°F for medium or 130 to 135°F for fully cooked but still moist salmon.

Why did my vegetables steam instead of roast?

Usually the pan was too crowded, the broccoli was too wet, or the oven was not fully preheated. Any of those will trap moisture and slow browning.


Nutrition

  • Serving size: approximately 1/4 of the total recipe
  • Calories: 514 kcal
  • Protein: 39g
  • Fat: 24g
  • Carbohydrates: 35g
  • Per 100g: Calories: 126 kcal, Protein: 10g, Fat: 6g, Carbohydrates: 9g

These nutritional values are approximate and can vary based on the specific ingredients and brands used.

Sheet Pan Salmon and Sweet Potatoes with Broccoli

A practical 35-minute dinner featuring salmon, sweet potatoes, and broccoli roasted on one sheet pan with staggered timing for perfect textures and minimal cleanup.
Course: Dinner
Cuisine: American
Prep: 15 min
Cook: 35 min
Total: 50 min
Servings: 4 Calories: 514 kcal Cost: —

Equipment

  • Large rimmed half-sheet pan
  • Oven
  • Mixing bowls
  • Tongs
  • Knife
  • Cutting board

Ingredients

  • 4 pieces Salmon fillets (skin-on, about 1 inch thick, 680g total)
  • 2 medium Sweet potatoes peeled and cut into 1/2-inch cubes (680g)
  • 1 large head Broccoli cut into florets (340g) or thawed frozen broccoli, well dried
  • 2 Tbsp (30g) Olive oil
  • 1 tsp Kosher salt
  • 1/2 tsp Black pepper
  • 1 tsp Garlic powder
  • 1 tsp Smoked paprika
  • 1 whole Lemon cut into wedges (120g)
  • Optional: 1/4 tsp Red pepper flakes
  • Optional: Chopped parsley for finishing

Instructions

  1. Preheat oven to 425°F (218°C). Toss sweet potatoes with 1 tablespoon olive oil, 1/2 teaspoon salt, 1/4 teaspoon black pepper, 1/2 teaspoon garlic powder, and 1/2 teaspoon smoked paprika. Spread in single layer on sheet pan.
  2. Roast sweet potatoes for 12 to 15 minutes until bottoms brown and edges start to crisp.
  3. Meanwhile, toss broccoli with remaining 1 tablespoon olive oil, 1/2 teaspoon salt, 1/4 teaspoon black pepper, 1/2 teaspoon garlic powder, and 1/2 teaspoon smoked paprika.
  4. Pat salmon dry and season lightly on top. Arrange salmon skin-side down on the pan with broccoli around it, leaving space between pieces for heat circulation.
  5. Return pan to oven and roast salmon and broccoli for 10 to 14 minutes until salmon flesh is mostly opaque with slightly glossy center, broccoli has darkened edges, and sweet potatoes are tender.
  6. Let salmon rest on pan for 2 minutes. Squeeze lemon juice over everything before serving. Garnish with chopped parsley if desired.

Notes

Tips: Cut sweet potatoes into 1/2-inch cubes for best timing. Keep salmon skin on to prevent overcooking. Add lemon juice after cooking to preserve browning and texture. Use fresh broccoli if possible; if frozen, thaw and dry thoroughly. Avoid crowding the pan to prevent steaming. Storage & Reheat: Store leftovers in airtight container in fridge up to 3 days. Reheat in oven at 300°F for 8-12 minutes; add lemon after reheating.

Nutrition

Serving Size: 1/4 of recipe | Calories: 514 kcal | Protein: 39g | Fat: 24g | Carbohydrates: 35g | Calories Per100g: 126 kcal | Protein Per100g: 10g | Fat Per100g: 6g | Carbohydrates Per100g: 9g

The easiest way to ruin this kind of chicken pasta is to let the sauce get too thick before the pasta ever goes in. I’ve done it more than once: the skillet looks silky and perfect, then a minute later the pasta absorbs the extra moisture, the sauce tightens, and dinner lands on the table heavier than it should be.

This version fixes that. The sauce is stopped while it still looks slightly loose, then finished with a little pasta water so it stays smooth and glossy instead of pasty. The chicken is cooked first and set aside so it stays tender, and the sauce gets its body from broth, flour, and unsweetened oat milk rather than cream or cheese.

It’s the kind of weeknight pasta that feels comforting and creamy, but not overly rich. If you’ve ever made a dairy-free white sauce that turned bland or stiff, this is the version I’d use to avoid both problems.

Why This Dairy-Free Chicken Pasta Actually Stays Creamy

  • The sauce is built with onion, garlic, broth, and milk, so it still tastes savory and full without cream or cheese.
  • The chicken is browned first, then taken out of the pan, which keeps it tender instead of overcooked.
  • The sauce is finished with pasta water at the end, which keeps it glossy and loose instead of turning thick and heavy.

Ingredients for a Creamy Dairy-Free Chicken Pasta

  • 8 ounces penne or rigatoni (225g)
  • 1 pound boneless skinless chicken breast, cut into 1-inch pieces (450g)
  • 1 tablespoon olive oil
  • 1 tablespoon dairy-free butter
  • 1 small onion, finely diced (150g)
  • 3 cloves garlic, minced
  • 3 tablespoons all-purpose flour (25g)
  • 1 1/2 cups chicken broth (360g)
  • 1 1/4 cups unsweetened oat milk or unsweetened almond milk (300g)
  • 1 teaspoon kosher salt, plus more for the pasta water
  • 1/2 teaspoon black pepper
  • 1/2 teaspoon garlic powder
  • 1/2 teaspoon 👉dried parsley
  • 2 tablespoons chopped fresh parsley

How to Make Dairy-Free White Sauce Chicken Pasta

Close-up of a fork lifting creamy white sauce penne with a tender golden chicken piece, sauce dripping back into the bowl.

1. Cook the pasta

  1. Bring a large pot of well-salted water to a boil. Cook the pasta 1 minute shy of package time so it still has a little firmness in the center.
  2. Before draining, reserve about 1 cup of the pasta water.

2. Cook the chicken until lightly golden, not dry

  1. Heat the olive oil in a large skillet over medium-high heat. The pan should be hot enough that the chicken sizzles when it goes in, but the oil should not be smoking.
  2. Add the chicken in a single layer. Season with half the salt, the black pepper, and the garlic powder. Cook for 4 to 5 minutes, turning once or twice, until the outside is lightly golden and the thickest piece reaches 165°F.
  3. Transfer the chicken to a plate.

3. Soften the onion and garlic

  1. Lower the heat to medium. Add the dairy-free butter and onion to the same skillet. Cook for 3 to 4 minutes, stirring often, until the onion looks soft, glossy, and translucent, not browned.
  2. Add the garlic and cook for 30 to 60 seconds, just until fragrant. Don’t let it darken.

4. Build the roux

Sprinkle in the flour and stir well. Cook for 1 minute, scraping the pan so there are no dry patches left. The mixture should smell slightly toasted, not raw.

5. Whisk in the Broth Gradually

  1. Add a few splashes of chicken broth first, whisking each addition into a smooth paste. Once the mixture is smooth, slowly pour in the remaining broth, whisking constantly. Then whisk in the milk.
  2. Bring the sauce to a gentle simmer, not a hard boil.

6. Simmer until the sauce coats the back of a spoon

  1. Cook the sauce for 3 to 5 minutes, whisking often, until it coats the back of a spoon and a whisk dragged across the skillet leaves a trail for 1 to 2 seconds. Stir in the dried parsley and the remaining salt.
  2. This is where white sauce usually gets pushed too far. If it already looks very thick in the pan, it will be thicker once the pasta goes in.

7. Finish the pasta

  1. Return the chicken to the skillet. Add the drained pasta and toss to coat. Add 2 to 3 tablespoons of reserved pasta water and stir. Add more, a spoonful at a time, until the sauce looks glossy and fluid in the pan.
  2. Taste and adjust salt and pepper at the end. Stir in the fresh parsley and serve right away.

For another fast pantry-style pasta, try this Easy Pasta Carbonara (No Egg) for a simple weeknight dinner with a silky sauce.


The Best Non-Dairy Milk for This White Sauce

Unsweetened oat milk gives the best texture here. It makes a fuller sauce with a little more body, so the pasta feels creamy without needing cheese or cream.

Unsweetened almond milk works, but the sauce will be lighter and slightly thinner. It still works well—you just need to season it more carefully, and you’ll usually want a splash more pasta water at the end so the sauce stays smooth instead of stiff.

Soy milk is also fine if it’s plain and unsweetened. It gives more body than almond milk and a neutral enough flavor for pasta.

Use only unsweetened milk. Sweetened versions throw the sauce off immediately.

How to Keep the Sauce Smooth and Glossy

  • Add the broth gradually at first so the flour blends smoothly.
  • Keep the sauce at a gentle simmer, not a hard boil.
  • Stop cooking as soon as it coats the back of a spoon.
  • Loosen it with pasta water at the end and serve it right away.

If you love creamy chicken pasta dinners, this Marry Me Chicken Pasta is another reader favorite with a richer sauce.


Easy Variations

White sauce chicken pasta with spinach

Add 2 to 3 handfuls of fresh spinach (60g to 90g) during the last 1 to 2 minutes of cooking. Stir until wilted.

If using frozen spinach, thaw it first and squeeze it dry so it doesn’t water down the sauce.

Gluten-free white sauce chicken pasta

Use your favorite gluten-free short pasta and cook it just to al dente. For the sauce, replace the all-purpose flour with a gluten-free 1:1 flour blend.

Watch the texture closely, since some blends thicken faster than wheat flour.


How to Store and Reheat It

Store leftovers in an airtight container in the fridge for up to 3 days.

To reheat, add the pasta to a skillet or saucepan with a few tablespoons of water or extra milk. Warm it over low heat, stirring gently, until the sauce loosens and turns smooth again.

Microwave reheating works too, but use short bursts and stir between each one.

This is not my favorite make-ahead pasta for company. It’s best fresh, because the sauce is at its smoothest right after cooking.


White Sauce Chicken Pasta FAQ

Why did my sauce turn thick and sticky instead of creamy?

Usually because it was reduced too far before the pasta was added. This sauce should still look slightly loose in the skillet, since the pasta keeps absorbing liquid after it goes in. A splash of reserved pasta water at the end helps bring it back to a smooth consistency.

What is the best dairy-free milk for this recipe?

Unsweetened oat milk gives the fullest, creamiest texture. Unsweetened soy milk also works well. Almond milk is usable, but the sauce will be lighter and needs a little more attention with seasoning.

Can I make this ahead of time?

You can, but it’s best fresh. Flour-thickened sauces tighten as they sit, so leftovers usually need a splash of water or non-dairy milk when reheated.

Can I add spinach or mushrooms?

Yes. Spinach is the easiest add-in and can go in near the end. Mushrooms work too, but cook them separately first so they don’t release excess moisture into the sauce.


Nutrition

Estimated per serving (about 1/4 of the recipe): 460 calories, 34g protein, 12g fat, 51g carbohydrates.

These values are approximate and will vary depending on the brands and ingredients used.

White Sauce Chicken Pasta Without Cheese

Creamy white sauce chicken pasta without cheese, made with oat milk, broth, and garlic for a smooth 30-minute dinner. Sauce coats pasta perfectly, chicken lightly golden and tender.
Course: Dinner
Cuisine: American
Prep: 10 min
Cook: 20 min
Total: 30 min
Servings: 4 Calories: 460 kcal Cost: —

Equipment

  • Large pot
  • Large skillet
  • Tongs
  • Cutting board
  • Chef’s knife
  • Whisk
  • Measuring cups
  • Measuring spoons

Ingredients

  • 8 ounces penne or rigatoni (225g)
  • 1 pound boneless skinless chicken breast, cut into 1-inch pieces (450g)
  • 1 tablespoon olive oil
  • 1 tablespoon dairy-free butter
  • 1 small onion, finely diced (150g)
  • 3 cloves garlic, minced
  • 3 tablespoons all-purpose flour (25g)
  • 1 1/2 cups chicken broth (360g)
  • 1 1/4 cups unsweetened oat milk or unsweetened almond milk (300g)
  • 1 teaspoon kosher salt, plus more for pasta water
  • 1/2 teaspoon black pepper
  • 1/2 teaspoon garlic powder
  • 1/2 teaspoon dried parsley
  • 2 tablespoons chopped fresh parsley

Instructions

  1. Bring a large pot of well-salted water to a boil. Cook pasta 1 minute shy of package time for firmness. Reserve about 1 cup pasta water before draining.
  2. Heat olive oil in large skillet over medium-high heat until hot but not smoking. Add chicken in a single layer. Season with half the salt, black pepper, and garlic powder. Cook 4-5 minutes until lightly golden and thickest piece reaches 165°F. Transfer to plate.
  3. Lower heat to medium. Add dairy-free butter and onion to skillet. Cook 3-4 minutes, stirring often, until onion is soft, glossy, and translucent, not browned.
  4. Add garlic and cook 30-60 seconds until fragrant, not darkened.
  5. Sprinkle flour over onion and garlic. Stir well and cook 1 minute, scraping pan so no dry patches remain. Mixture should smell toasted, not raw.
  6. Add a few splashes of chicken broth first, whisking into smooth paste. Slowly whisk in remaining broth, then milk. Bring sauce to gentle simmer, not a hard boil.
  7. Simmer sauce 3-5 minutes, whisking often, until it coats back of a spoon and whisk dragged across skillet leaves trail for 1-2 seconds. Stir in dried parsley and remaining salt.
  8. Return chicken to skillet. Add drained pasta and toss to coat. Add 2-3 tablespoons reserved pasta water and stir. Add more pasta water as needed until sauce is glossy and fluid.
  9. Taste and adjust salt and pepper. Stir in fresh parsley and serve immediately.

Notes

Use unsweetened oat milk for fullest texture; almond milk works but sauce will be lighter. Stop sauce reduction when it just coats a spoon to avoid thick, pasty result. Store leftovers up to 3 days refrigerated; reheat gently with added water or milk to loosen sauce.

Nutrition

Serving Size: 1/4 recipe | Calories: 460 kcal | Protein: 34g | Fat: 12g | Carbohydrates: 51g

The first time I made stuffed shells like this, the filling looked fine in the bowl but turned loose in the oven. The shells softened too much, the sauce washed over everything, and the whole pan felt wetter than it should have. It turned out the problem was not the ricotta. It was the spinach.

Once I started squeezing the spinach until it was truly dry, the whole dish baked differently. The filling stayed creamy but thick, the shells held their shape, and the sauce bubbled around them instead of flattening everything. When it comes out right, you get tender pasta, a distinct ricotta filling, and just enough marinara to keep the shells soft without drowning them.

What Keeps These Stuffed Shells From Turning Watery

  • They can be assembled earlier in the day, covered, and baked when you need them.
  • The filling is built to stay thick, so the shells plate neatly instead of collapsing.
  • Frozen spinach works well here because it’s easy to drain thoroughly and folds evenly into the ricotta.
  • The red sauce, green spinach, and white cheese fit a holiday table without needing extra garnish.

Ingredients for Christmas Stuffed Shells with Ricotta and Spinach

  • 1 box jumbo pasta shells (340g)
  • 2 cups whole milk ricotta cheese (480g)
  • 1 package frozen chopped spinach, thawed and squeezed very dry (280g)
  • 1 1/2 cups shredded mozzarella cheese, divided (170g)
  • 3/4 cup grated Parmesan cheese, divided (75g)
  • 1 large egg (50g)
  • 3 1/2 cups marinara sauce (840g)
  • 2 cloves garlic, minced (12g)
  • 2 tablespoons chopped parsley
  • 1 teaspoon kosher salt
  • 1/2 teaspoon black pepper
  • 1/2 teaspoon 👉dried oregano
  • 1/4 teaspoon red pepper flakes, optional
  • 1 tablespoon olive oil (15g)
  • butter or oil for greasing the baking dish

The Best Ricotta for Stuffed Shells

Whole milk ricotta gives the filling enough body to hold inside the shells. If your ricotta looks loose or has liquid sitting in the tub, drain it in a sieve for 20 to 30 minutes before mixing.

Why Frozen Spinach Works Well Here

Frozen chopped spinach works well because it is already broken down and easy to distribute through the filling. The only part that really matters is drying it thoroughly. Squeeze until nothing drips out. A kitchen towel usually works better than your hands alone.

How to Improve Jarred Marinara

A thick jarred marinara works best. If your sauce tastes flat, warm it with the olive oil, garlic, oregano, and red pepper flakes for 3 to 4 minutes before assembling. That cooks off the raw garlic edge and gives the sauce a rounder, more finished flavor.


How to Make Easy Christmas Stuffed Shells

Close-up of a fork lifting one ricotta spinach stuffed shell, showing creamy filling and stretchy mozzarella with marinara sauce.

Cook the Shells Just to Al Dente

  1. Heat the oven to 375°F. Grease a 9×13-inch baking dish.
  2. Bring a large pot of water to a boil. Salt it so it tastes lightly seasoned, almost like broth.
  3. Cook the jumbo shells for 1 to 2 minutes less than the package directs. They should bend open but still feel slightly firm in the center.
  4. Drain and rinse briefly under cool water just until they’re easy to handle. Don’t leave them sitting in cold water long enough to turn gummy.
  5. Set the shells on a tray or sheet pan so they don’t stick together.

Mix a Thick, Well-Seasoned Ricotta Filling

  1. In a large bowl, combine the ricotta, squeezed spinach, 1 cup mozzarella (115g), 1/2 cup Parmesan (50g), egg, parsley, salt, pepper, and oregano.
  2. Mix until evenly combined. The filling should be thick enough to mound on a spoon, not run or slump.
  3. If it looks loose, let it sit for 5 minutes. The cheeses and spinach will absorb some of the moisture.

Stuff, Sauce, and Bake Until Bubbling at the Edges

  1. If needed, warm the marinara with the olive oil, garlic, and red pepper flakes in a saucepan over medium heat for 3 to 4 minutes, just until fragrant.
  2. Spread about 1 1/2 cups sauce (360g) across the bottom of the baking dish so the surface is fully coated.
  3. Fill each shell about 2/3 to 3/4 full with the ricotta mixture. That’s enough to make them full without splitting.
  4. Arrange the filled shells in the dish open side up.
  5. Spoon the remaining sauce lightly over the tops. Cover them enough to keep the pasta from drying out, but let some shell ridges still show.
  6. Sprinkle with the remaining 1/2 cup mozzarella (55g) and 1/4 cup Parmesan (25g).
  7. Cover with foil and bake for 25 minutes, until the center is hot and the sauce is actively bubbling at the edges.
  8. Uncover and bake for 10 to 12 minutes more, until the cheese is fully melted with light golden spots.
  9. Let the shells rest for 10 minutes before serving. This helps the filling firm up so each shell lifts out cleanly.

For a simple holiday side that keeps the meal vegetarian, serve these shells with One-Pot Tuscan White Beans.


My Best Tips for Stuffed Shells That Don’t Turn Watery or Tear

  • Drain wet ingredients before they go into the bowl. Loose ricotta and damp spinach are the main reasons stuffed shells get soupy.
  • Undercook the shells slightly. Fully soft shells tear while stuffing and keep softening in the oven.
  • Don’t overfill them. Once you push past 3/4 full, the sides tend to split.
  • Use enough sauce to coat, not smother. Too little dries the pasta; too much makes the filling slide around.

Make-Ahead, Storage, and Freezing Instructions

You can assemble the shells up to 24 hours ahead. Cover the dish tightly and refrigerate.

When ready to bake, let it sit at room temperature for 20 to 30 minutes first, then bake as directed. If it’s going into the oven cold, add 5 to 10 minutes to the covered baking time.

Leftovers keep well in the refrigerator for up to 4 days. Reheat covered in a 350°F oven until hot, or microwave individual portions with a spoonful of extra sauce to keep the pasta from drying out.

To freeze before baking, assemble the dish, wrap it tightly, and freeze for up to 2 months. Thaw overnight in the refrigerator before baking, or bake from frozen covered for about 50 to 60 minutes, then uncover and finish baking until hot in the center.


Variations: Ricotta Stuffed Shells and a Hearty Meat Option

Classic Stuffed Shells with Ricotta

Leave out the spinach and add an extra 1/4 cup Parmesan (25g). The filling will be a little richer and denser, so keep the sauce slightly generous.

Stuffed Shells with Ground Beef for a Heartier Version

Brown 1/2 pound ground beef (225g) or Italian sausage (225g), drain it well, and let it cool before mixing it into the ricotta. Keep the amount moderate so the filling stays soft instead of turning heavy.

If you’re building out a full Christmas menu, finish dinner with this Cranberry White Chocolate Tart Recipe.


FAQs About Christmas Stuffed Shells

Why are my stuffed shells watery?

Most of the time, the spinach still had too much moisture or the filling went in looser than it should have. I also see it happen when the shells are covered too heavily with sauce. Before you start stuffing, the filling should look thick enough to hold its shape in the spoon.

Can I use frozen spinach in ricotta stuffed shells?

Yes, and it’s a good choice here. Thaw it fully, then squeeze it hard in a towel or press it in a sieve until it’s dry enough that nothing drips out.

Can I make Christmas stuffed shells ahead of time?

Yes. Assemble them, cover, and refrigerate for up to 24 hours. They hold up well, and the flavor is often better once the filling has had a little time to settle.

How do I freeze stuffed shells before baking?

Assemble the dish, wrap it tightly, and freeze it before baking. That gives you a better final texture than freezing leftovers after they have already gone through the oven once.

Nutrition

  • Serving size: approximately 1/6 of the total recipe
  • Calories: 490 kcal
  • Protein: 27g
  • Fat: 21g
  • Carbohydrates: 46g
  • Fiber: 4g
  • Sugar: 8g
  • Sodium: 980mg
  • Per 100g: Calories: 150 kcal, Protein: 8g, Fat: 6g, Carbohydrates: 14g.

These nutritional values are approximate and can vary based on the specific ingredients and brands used.


Easy Christmas Stuffed Shells with Ricotta and Spinach

Soft jumbo pasta shells stuffed with a thick, creamy ricotta and spinach filling, baked in marinara sauce with mozzarella and Parmesan cheese topping. Make ahead and bake when needed for a festive holiday main dish.
Course: Dinner
Cuisine: Italian
Prep: 45 min
Cook: 45 min
Total: 105 min
Servings: 6 Calories: 490 kcal Cost: —

Equipment

  • 9×13-inch baking dish
  • Large pot
  • Tray or sheet pan
  • Large bowl
  • Saucepan
  • Kitchen towel or sieve
  • Oven
  • Foil

Ingredients

  • 1 box jumbo pasta shells (340g)
  • 2 cups whole milk ricotta cheese (480g), drained
  • 1 package frozen chopped spinach (280g), thawed and squeezed dry
  • 1 1/2 cups shredded mozzarella cheese divided (170g)
  • 3/4 cup grated Parmesan cheese divided (75g)
  • 1 large egg (50g)
  • 3 1/2 cups marinara sauce (840g)
  • 2 cloves garlic minced (12g)
  • 2 tablespoons chopped parsley
  • 1 teaspoon kosher salt
  • 1/2 teaspoon black pepper
  • 1/2 teaspoon dried oregano
  • 1/4 teaspoon red pepper flakes optional
  • 1 tablespoon olive oil (15g)
  • Butter or oil for greasing the baking dish

Instructions

  1. Preheat oven to 375°F (190°C) and grease a 9×13-inch baking dish with butter or oil.
  2. Bring a large pot of salted water to a boil. Cook jumbo shells for 1 to 2 minutes less than package directions until slightly firm but bendable.
  3. Drain shells and rinse briefly with cool water. Arrange shells on a tray or sheet pan to prevent sticking.
  4. In a large bowl, mix together ricotta, thoroughly squeezed spinach, 1 cup shredded mozzarella (115g), 1/2 cup grated Parmesan (50g), egg, chopped parsley, kosher salt, black pepper, and dried oregano until thick and well combined. Let sit 5 minutes if too loose.
  5. If desired, warm marinara sauce with olive oil, minced garlic, and red pepper flakes over medium heat for 3 to 4 minutes until fragrant.
  6. Spread 1 1/2 cups sauce (360g) evenly in the bottom of the prepared baking dish.
  7. Fill each shell about 2/3 to 3/4 full with the ricotta filling and arrange open side up in the baking dish.
  8. Spoon remaining sauce lightly over the shells without covering completely so shell ridges show.
  9. Sprinkle with remaining 1/2 cup mozzarella (55g) and 1/4 cup Parmesan (25g).
  10. Cover with foil and bake for 25 minutes until sauce is bubbling at the edges and filling is hot.
  11. Remove foil and bake an additional 10 to 12 minutes until cheese melts and develops light golden spots.
  12. Let shells rest for 10 minutes before serving to firm up the filling so shells lift cleanly.

Notes

Drain ricotta and squeeze spinach well to avoid watery filling. Undercook shells slightly so they hold their shape and don’t tear when stuffing. Do not overfill shells beyond 3/4 full to prevent splitting. Use enough marinara sauce to coat pasta but not so much that filling becomes loose. Make ahead by assembling up to 24 hours ahead and refrigerate covered. Thaw frozen stuffed shells before baking or bake from frozen covered for longer time.

Nutrition

Serving Size: 1/6 of recipe | Calories: 490 kcal | Protein: 27g | Fat: 21g | Carbohydrates: 46g | Fiber: 4g | Sugar: 8g | Sodium: 980mg