Author

Julia

Browsing

The first time I tested this, I rushed the simmer and ended up with beans sitting in thin broth that tasted fine but felt flat. The fix was simple: let the beans cook long enough to release some starch, then mash a small scoop against the side of the pot before adding the spinach. That gives you a broth that’s still loose enough for a spoon, but not watery.

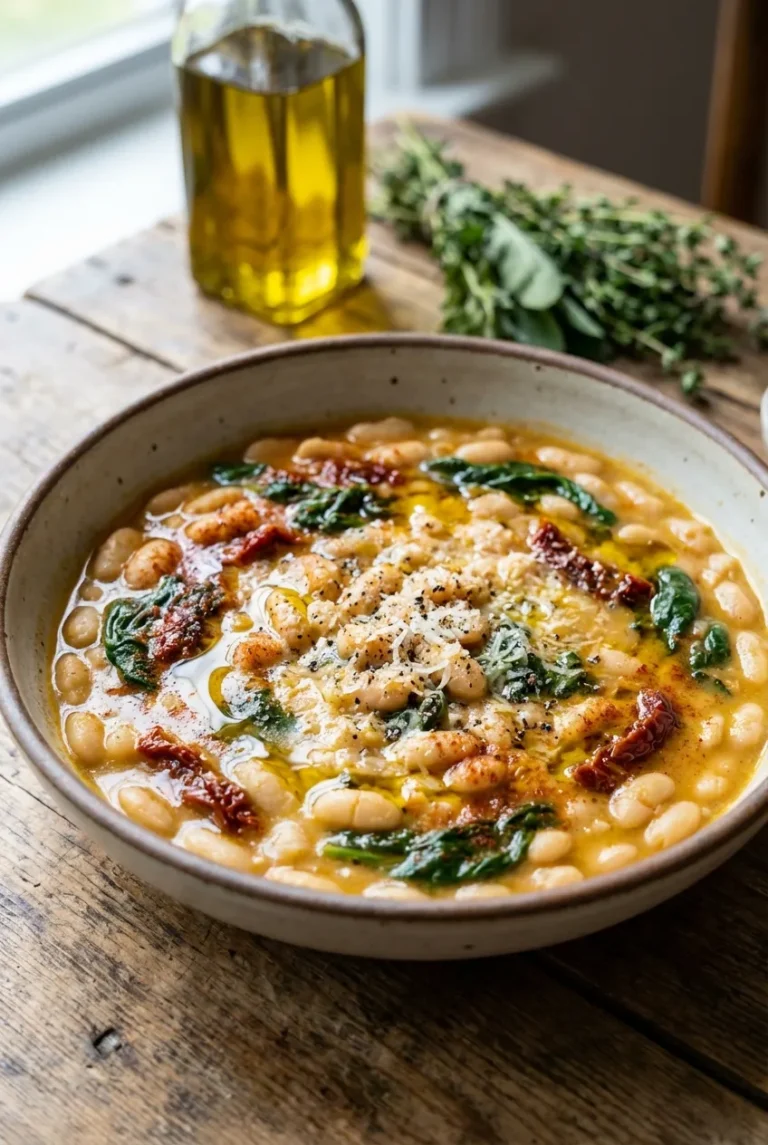
Done right, this lands somewhere between a soup and a light stew. The beans stay tender without falling apart, the spinach softens into the broth, and the sun-dried tomatoes give you small chewy, savory bites that keep the whole pot from tasting flat. Parmesan added off the heat melts in smoothly and gives the broth a salty, nutty edge without turning grainy.

Why These Tuscan White Beans Work

  • Mashing a portion of the beans thickens the broth naturally, so you get a lightly creamy texture without flour or cream.
  • Sun-dried tomatoes add concentrated savory flavor and a bit of chew, which keeps the texture from going soft all the way through.
  • Parmesan is stirred in off the heat, so it melts into the broth instead of clumping or turning gritty.
  • Spinach goes in at the end, which keeps it green and tender instead of dull and overcooked.

Ingredients for Tuscan white beans with spinach and sun-dried tomatoes

  • 2 tablespoons olive oil
  • 1 medium yellow onion (150g), diced
  • 4 garlic cloves (20g), minced
  • 1/3 cup oil-packed sun-dried tomatoes (55g), chopped
  • 2 cans cannellini beans (480g), drained and rinsed
  • 2 cups vegetable broth (480g)
  • 1/2 cup water (120g)
  • 5 ounces fresh spinach (140g)
  • 1/2 cup finely grated Parmesan cheese (45g)
  • 1 tablespoon lemon juice
  • 1 teaspoon Italian seasoning (I like a 👉softer Italian blend here)
  • 1/4 teaspoon red pepper flakes
  • Salt, to taste
  • Black pepper, to taste

Best white beans to use

Cannellini beans are the best fit here if you want a creamier pot with beans that still hold their shape. They’re larger and softer than great northern beans, so they break down just enough to give the broth body.

Great northern beans work too, but the finished dish stays a little lighter and less silky.

A note on sun-dried tomatoes, Parmesan, and broth

Use sun-dried tomatoes packed in oil if you can. They’re softer, richer, and bring some of that seasoned oil into the pot. They can also add extra salt, so hold back on final seasoning until the end.

For broth, start with a modest amount. This dish should be lightly brothy and spoonable, not soupy. You can always loosen it with another splash right before serving.


How to make one-pot Tuscan white beans
1. Soften the onion

  1. Heat the olive oil in a large pot or deep skillet over medium heat. Add the onion and cook for 4 to 5 minutes, stirring now and then, until soft and translucent with no deep browning.
  2. If the onion starts taking on much color, lower the heat. Browned onion will push the whole pot in a sweeter, darker direction.

2. Add the garlic and tomatoes

  1. Stir in the garlic, Italian seasoning, and red pepper flakes. Cook for 30 to 60 seconds, just until fragrant. If the garlic starts coloring, turn the heat down.
  2. Add the chopped sun-dried tomatoes and beans. Stir for 1 to 2 minutes so the beans warm through and get coated in the oil and aromatics before you add the broth.

3. Simmer until the broth tastes fuller

  1. Add the vegetable broth and water. Bring the pot to a gentle simmer, not a rolling boil, then cook for 12 to 15 minutes. The liquid should reduce slightly and look less watery.
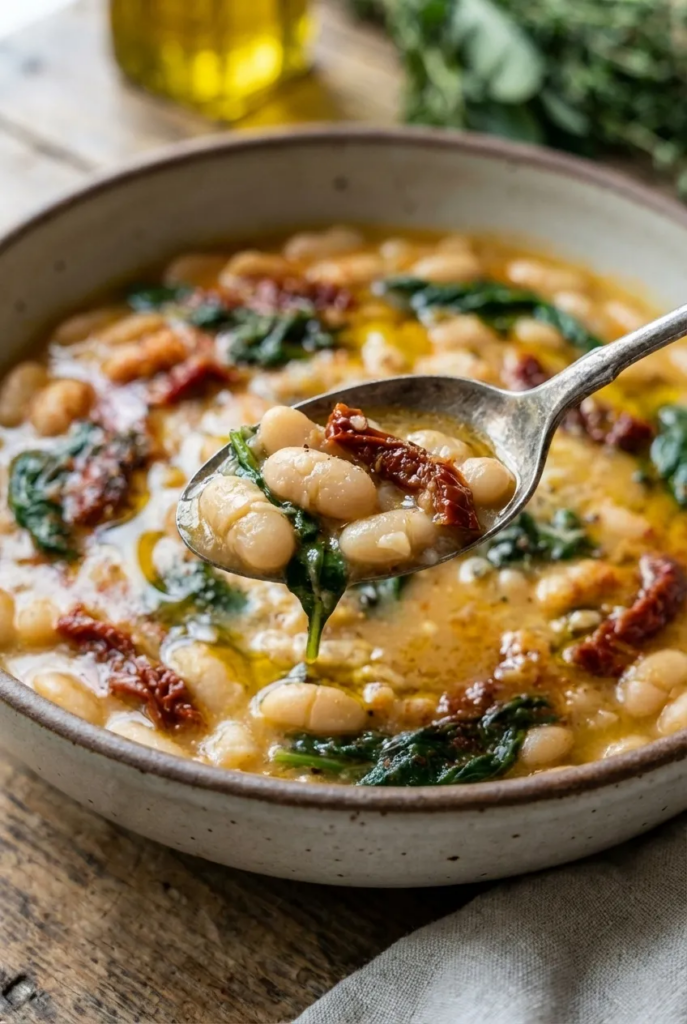
  2. For a thicker broth, mash about 1/4 to 1/2 cup of the beans against the side of the pot with a spoon, then stir them back in. The broth should lightly coat the spoon instead of running off like plain stock.

4. Wilt the spinach

  1. Add the spinach by handfuls and stir until just wilted, about 1 to 2 minutes. Stop once it turns soft and deep green.
  2. If you keep cooking past that point, it can lose color and turn stringy.

5. Add Parmesan off the heat

  1. Take the pot fully off the heat. Stir in the Parmesan a little at a time, stirring constantly so it melts into the broth instead of clumping.
  2. Add the lemon juice, then taste and adjust with salt and black pepper as needed. The finished Tuscan white beans should be spoonable and lightly brothy, not dry. If it tightens up too much, add a small splash of broth or water before serving.
Tips for the best Tuscan white beans

How to thicken the broth naturally

The easiest way is to simmer long enough for the beans to give off some starch, then mash a small portion of them. Don’t mash too much or you’ll lose the contrast between whole beans and broth.

You want a mix of intact beans and a slightly creamy base.

How to keep Parmesan from clumping

Don’t add it while the pot is still bubbling. High heat can make grated cheese seize and turn grainy.

Take the pot off the heat first, use finely grated Parmesan, and stir steadily while adding it in small amounts.


Tuscan white beans variations

Tuscan white beans with kale

Use chopped kale instead of spinach if you want a heartier texture, especially for leftovers. Add 4 ounces chopped kale (115g) about 5 to 7 minutes before the beans are done simmering so it has time to soften.

Kale keeps more bite than spinach and holds up better after reheating.

Tuscan white beans with rosemary

For a deeper, woodsy flavor, add 1 small sprig fresh rosemary when you pour in the broth, then remove it before serving. If using dried rosemary, use 1/4 teaspoon, crushed between your fingers before adding.

Rosemary works especially well here if you’re serving the beans with bread on a cold night.


What to serve with Tuscan white beans

Toasted rustic bread makes the most sense here, especially if you want something to drag through the thickened broth. A simple salad also works if you want to keep dinner lighter.

For another lighter one-pot option, try this One-Pot Lemon Chicken Soup on nights when you want something bright and brothy.


How to store, reheat, and freeze

Store leftovers in an airtight container in the fridge for up to 4 days. The beans will keep absorbing liquid as they sit, so expect the broth to thicken overnight.

Reheat gently on the stove over medium-low heat with a splash of broth or water to loosen it back up. The microwave works too, but stir halfway through so the center heats evenly.

You can freeze it, but the texture is better if you do so before adding the spinach and Parmesan. If freezing the finished dish, thaw in the fridge and reheat slowly with extra broth.


Tuscan white beans FAQ

Why are my Tuscan white beans too watery?

Usually it means they didn’t simmer long enough, or the beans weren’t mashed at all. Let the pot bubble gently a few minutes longer, then mash some of the beans into the broth.

That thickens it quickly without adding anything extra.

Why did the Parmesan clump or turn grainy?

It was likely added when the pot was too hot. Parmesan needs lower heat here. Take the pot off the burner first, then stir it in gradually.

Can I use kale instead of spinach?

Yes. Kale is sturdier and better for meal prep. Just add it earlier so it has time to soften.

Can I make this with dried beans instead of canned?

Yes, but cook the dried beans separately first, or go into the recipe knowing the timeline will be much longer. You want fully tender beans before they go into the final simmer with the tomatoes and broth, otherwise the seasoning balance gets harder to control.

If you’re in the mood for another creamy, Italian-inspired dinner, Marry Me Tortellini is a great next recipe to make.


Nutrition

  • Serving size: approximately 1/4 of the total recipe
  • Calories: 317 kcal
  • Protein: 16g
  • Fat: 12g
  • Carbohydrates: 38g
  • Per 100g: Calories: 90 kcal, Protein: 4.6g, Fat: 3.4g, Carbohydrates: 10.8g.

These nutritional values are approximate and can vary based on the specific ingredients and brands used.

One-Pot Tuscan White Beans with Spinach and Sun-Dried Tomatoes

A comforting one-pot dish featuring tender cannellini beans simmered to creamy perfection with spinach and sun-dried tomatoes in a lightly brothy Tuscan-style stew, finished with Parmesan cheese and lemon juice.
Course: Dinner
Cuisine: Italian
Prep: 10 min
Cook: 30 min
Total: 40 min
Servings: 4 Calories: 317 kcal Cost: —

Equipment

  • Large pot or deep skillet
  • Spoon
  • Knife
  • Cutting board
  • Measuring cups
  • Measuring spoons

Ingredients

  • 2 tablespoons olive oil
  • 1 medium yellow onion (150g), diced
  • 4 garlic cloves (20g), minced
  • 1/3 cup oil-packed sun-dried tomatoes (55g), chopped
  • 2 cans cannellini beans (480g), drained and rinsed
  • 2 cups vegetable broth (480g)
  • 1/2 cup water (120g)
  • 5 ounces fresh spinach (140g)
  • 1/2 cup finely grated Parmesan cheese (45g)
  • 1 tablespoon lemon juice
  • 1 teaspoon Italian seasoning
  • 1/4 teaspoon red pepper flakes
  • Salt, to taste
  • Black pepper, to taste

Instructions

  1. Heat olive oil in a large pot over medium heat. Add diced onion; cook 4-5 minutes until soft and translucent, stirring occasionally, avoiding browning.
  2. Add minced garlic, Italian seasoning, and red pepper flakes; cook 30 to 60 seconds until fragrant, lowering heat if garlic colors.
  3. Stir in chopped sun-dried tomatoes and cannellini beans; cook 1 to 2 minutes to warm through and coat with oil and aromatics.
  4. Add vegetable broth and water; bring to a gentle simmer (not a rolling boil), cook 12 to 15 minutes until liquid reduces slightly and thickens.
  5. Mash about 1/4 to 1/2 cup of beans against pot side, stir back in to thicken broth, coating a spoon lightly.
  6. Add spinach handfuls, stir for 1 to 2 minutes until just wilted, soft, and deep green, then remove from heat.
  7. Off the heat, slowly stir in Parmesan cheese until melted smoothly. Add lemon juice; season with salt and black pepper to taste.
  8. If broth thickens too much, add a splash of broth or water before serving.
Notes

For a thicker broth, mash some beans carefully, preserving some whole beans for texture contrast. Use oil-packed sun-dried tomatoes for richer flavor but adjust salt accordingly. Add Parmesan off the heat to avoid clumping. Spinach should be added last to keep vibrant and tender. Optional variations include kale instead of spinach (add earlier), or rosemary for deeper flavor (remove sprig before serving). Store leftovers airtight in fridge up to 4 days. Reheat gently with extra liquid.

Nutrition

Serving Size: 1/4 of recipe | Calories: 317 kcal | Protein: 16g | Fat: 12g | Carbohydrates: 38g

The first time I made these, I pulled the tots as soon as they looked “done,” piled everything on, and ended up with a soft, heavy pan that ate more like casserole than nachos. The fix is simple: bake the tots a little longer than you would for a side dish. You want them deeply golden and firm before the cheese goes on.

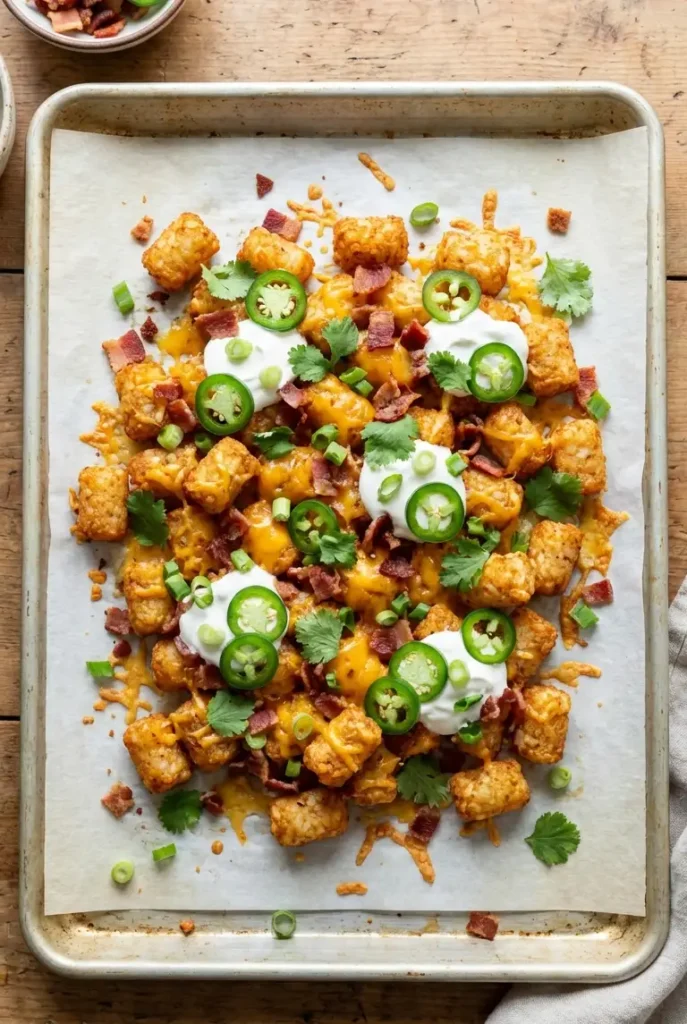
That extra browning gives you a crisp shell that can handle melted cheddar, bacon, and cold toppings without collapsing. Done right, these loaded tater tot nachos have crunchy edges, fluffy centers, sharp cheese, salty bacon, and cool pockets of sour cream. They beat the limp restaurant version for one reason: the potato base still has structure when you pick one up.

Why These Totchos Hold Up Better

  • Baking the tots until deep golden at the ridges gives them a sturdier crust, so they stay crisp under toppings.
  • Cheese goes on at the end for only 3 to 5 minutes, which melts it without steaming the potatoes.
  • Crisp, well-drained bacon adds salt and crunch without leaving greasy spots on the pan.
  • Cold toppings are scattered lightly instead of blanketing the whole tray, so some of the crisp tops stay exposed.

Ingredients for Tater Tot Nachos

  • 1 bag frozen tater tots (900g)
  • 2 cups shredded sharp cheddar cheese (225g)
  • 8 slices bacon, cooked crisp and crumbled (120g)
  • 1/2 cup sour cream (120g)
  • 1 jalapeño, thinly sliced (15g)
  • 3 scallions, thinly sliced (45g)
  • 2 tablespoons chopped cilantro

Best Cheese, Bacon, and Toppings for Totchos

Use sharp cheddar here, not mild. Mild cheddar melts well, but its flavor gets lost once it hits the potatoes and bacon. Sharp cheddar still reads clearly after baking.

For bacon, cook it until fully crisp and drain it well. If it’s still bendy, it won’t crumble cleanly, and it softens more in the oven.

Sour cream, jalapeños, scallions, and cilantro should all go on after baking. They bring contrast: cool against the hot potatoes, fresh against the cheese and bacon, and sharp enough to cut through the richness.


How to Make Loaded Tater Tot Nachos

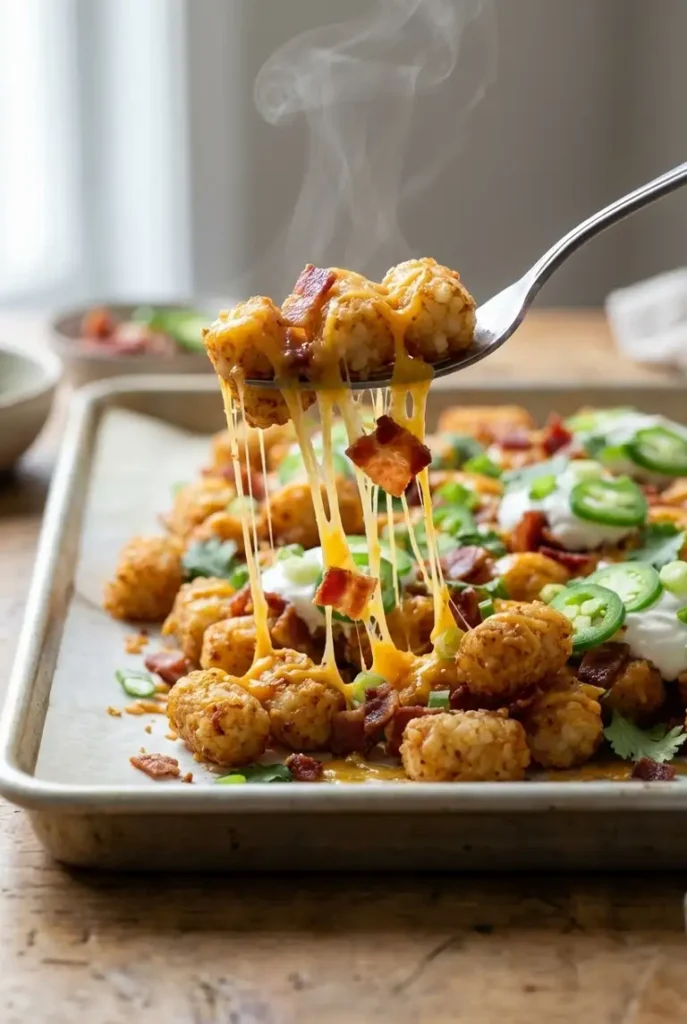
Close-up of a fork lifting totchos with stretchy melted cheddar, crispy bacon, and steam rising from deep golden tater tots.
  1. Preheat the oven to 425°F. If you want extra browning on the bottoms, set a large sheet pan in the oven while it heats.
  2. Spread the frozen tater tots in a single layer on the hot or room-temperature sheet pan. Do not crowd them. If they’re packed too tightly, they steam instead of crisping.
  3. Bake for 15 minutes, then rotate the pan and flip the tots once the undersides have started browning. Continue baking for 10 to 15 minutes, until the tots are deep golden, especially on the ridges, and feel firm when nudged with a spatula.

How to Bake Tater Tots So They Stay Crispy

The tots need to be fully crisp before you add anything else. If you stop at pale gold, they’ll soften fast under the cheese. A darker, well-browned crust gives you a better bite and keeps the center fluffy instead of gluey.

  1. Sprinkle the cheddar evenly over the hot tots, then scatter the bacon on top. Return the pan to the oven for 3 to 5 minutes, just until the cheese is fully melted and bubbling at the edges.

When to Add Cheese and Toppings

  1. Let the pan sit for 1 minute. If you add sour cream immediately, it melts into a thin layer instead of staying in cool spoonfuls.
  2. Add small dollops of sour cream, then scatter the jalapeños, scallions, and cilantro over the top. Keep the wet toppings light and uneven so some crisp tops stay uncovered.
  3. Serve right away. These are best in the first few minutes, when the cheese is still soft and the tots still crackle at the edges.

Tips for Crispy Tater Tot Nachos Every Time

  • Use a large sheet pan. A crowded pan is the fastest way to get soft tots.
  • Don’t line the pan with parchment if maximum crispness is the goal. A bare metal pan browns better.
  • Shred your own cheese if you can. Bagged cheese works, but freshly shredded cheddar melts more smoothly.
  • Keep the second bake short. The tots are already cooked; you’re only melting the cheese.
  • Add cold toppings at the end and don’t overload the tray.

Tater Tot Nachos Variations

Tater Tot Nachos with Queso

Use thick, warm queso as a finishing sauce instead of replacing all the shredded cheese. Bake the tots, melt a lighter layer of cheddar on top, then drizzle queso over just before serving. Too much queso too early will soften the crisp surface.

Tater Tot Nachos with Pulled Pork

Swap some or all of the bacon for warm pulled pork. Use about 1 to 1 1/2 cups pulled pork (170g to 255g), and keep it in a light layer so the tots still stay exposed. This version eats more like dinner than a snack.

If you love cheesy potato comfort food, this Crock Pot Crack Potato Soup hits the same rich, savory notes in cozy soup form.


Make-Ahead, Storage, and Reheating

You can cook the bacon, shred the cheese, and slice the toppings ahead of time. Keep everything separate and cold.

Do not fully assemble these ahead if you care about texture. Once topped, they soften quickly.

If you have leftovers, refrigerate them and reheat on a sheet pan in a 400°F oven until hot and re-crisped, about 8 to 10 minutes. Fresh toppings are best added again after reheating.


Loaded Tater Tot Nachos FAQ

Why did my tater tot nachos turn soggy?

Usually it comes down to one of three things: the pan was crowded, the tots weren’t browned enough before topping, or too many wet toppings went on at once. The base should be fully crisp first, then topped lightly.

Can I use frozen toppings like pre-cooked bacon or frozen jalapeños?

Pre-cooked bacon is fine if you crisp it up first. Frozen jalapeños are less ideal because they release water as they thaw. Fresh slices hold their texture better here.

Can I make tater tot nachos in the air fryer instead of the oven?

Yes, but you’ll need to work in batches unless your air fryer is large. Cook the tots until crisp first, then top and air fry briefly just to melt the cheese. It works, but the oven is easier for a full tray.

What’s the best cheese for loaded tater tot nachos?

Sharp cheddar is the most reliable choice. It melts well and still tastes like cheddar against the potatoes and bacon. Monterey Jack is a good partner if you want a softer melt.


Nutrition

  • Serving size: approximately 1/6 of the total recipe
  • Calories: 485 kcal
  • Protein: 15g
  • Fat: 29g
  • Carbohydrates: 41g

These nutritional values are approximate and can vary based on the specific ingredients and brands used.

Loaded Tater Tot Nachos

Crispy loaded tater tot nachos with sharp cheddar, bacon, sour cream, jalapeños, scallions, and cilantro. A sheet pan recipe ready in 30 minutes, featuring deeply golden, crisp tots that hold up under melted cheese and toppings.
Course: Appetizer
Cuisine: American
Prep: 10 min
Cook: 28 min
Total: 38 min
Servings: 6 Calories: 485 kcal Cost: —

Equipment

  • Oven
  • Large sheet pan
  • Spatula
  • Knife
  • Cutting board

Ingredients

  • 1 bag frozen tater tots (900g)
  • 2 cups shredded sharp cheddar cheese (225g)
  • 8 slices bacon, cooked crisp and crumbled (120g)
  • 1/2 cup sour cream (120g)
  • 1 whole jalapeño, thinly sliced (15g)
  • 3 whole scallions, thinly sliced (45g)
  • 2 tablespoons chopped cilantro

Instructions

  1. Preheat oven to 425°F (220°C). Optionally place a large sheet pan in oven while heating for extra browning.
  2. Spread frozen tater tots in a single layer on the hot or room-temperature sheet pan, avoiding crowding to prevent steaming.
  3. Bake tots for 15 minutes, then rotate pan and flip tots to brown undersides. Continue baking for another 10 to 15 minutes until tots are deep golden at the ridges and feel firm when nudged.
  4. Sprinkle shredded sharp cheddar evenly over hot tots, then scatter crumbled bacon on top.
  5. Return pan to oven and bake for 3 to 5 minutes until cheese is fully melted and bubbling at the edges.
  6. Let pan sit for 1 minute to allow cheese to set, preventing sour cream from melting into a thin layer.
  7. Add small dollops of sour cream on top, then scatter sliced jalapeños, scallions, and chopped cilantro lightly over the nachos to maintain some exposed crispy tots.
  8. Serve immediately for best texture and flavor; cheese should be soft and tots still crunchy at edges.

Notes

Use sharp cheddar cheese for strong flavor and good melting; avoid mild cheddar. Cook bacon until fully crisp for best texture and drainage. Add cold toppings after baking to contrast the hot tots and melted cheese. Avoid crowding tots while baking to keep them crispy. Store toppings separate if prepping ahead, and reheat leftovers on a sheet pan at 400°F for 8-10 minutes to re-crisp.

Nutrition

Serving Size: 1/6 recipe | Calories: 485 kcal | Protein: 15g | Fat: 29g | Carbohydrates: 41g

The sweet spot for this chili is adding the cream cheese only after the broth has reduced a little and the chicken shreds easily with a fork. If it goes in too early, while the slow cooker is still bubbling hard, the dairy can turn grainy and the broth never quite comes together.

I also like to mash a small scoop of beans before the cream cheese goes in. That one step gives the chili a thicker, spoon-coating body without flour or cornstarch. Done right, it is thick enough to mound slightly on the spoon but still loose enough to ladle, with tender chicken and beans that soften into the broth without disappearing.

Why This Crockpot White Chicken Chili Works

  • Letting the broth cook down before the cream cheese goes in gives the chili body before the dairy ever hits the pot.
  • Lightly shredded chicken blends into the broth better than cubes and gives the chili a more classic texture.
  • Mashing some of the beans thickens the pot naturally without starch.
  • Cream cheese adds thickness and mild tang, which helps the broth cling to the chicken and beans instead of pooling thinly around them.

Ingredients for Crockpot White Chicken Chili

  • 1 1/2 pounds boneless skinless chicken breasts (680g)
  • 1 medium yellow onion, diced (150g)
  • 3 cloves garlic, minced
  • 2 cans Great Northern beans, drained and rinsed (850g)
  • 1 can diced green chiles (120g)
  • 3 cups low-sodium chicken broth (720g)
  • 1 package cream cheese, softened and cubed (225g)
  • 1 cup frozen corn (140g)
  • 1 teaspoon ground cumin (I like a 👉warmer, softer cumin here)
  • 1 teaspoon chili powder
  • 1/2 teaspoon dried oregano
  • 1/2 teaspoon onion powder
  • 1/2 teaspoon garlic powder
  • 1/4 teaspoon black pepper
  • 1/2 to 1 teaspoon kosher salt, plus more to taste

Optional for serving:

  • lime wedges
  • chopped cilantro
  • sliced jalapeño
  • shredded Monterey Jack or cheddar
  • crushed tortilla chips
  • sour cream

Best beans for white chicken chili: Great Northern vs cannellini

Great Northern beans hold their shape a little better, so the finished chili has more visible bean texture. If you want a bowl with clearer definition between broth, chicken, and beans, use those.

Cannellini beans break down more easily and make the base a little smoother. If you want the chili to feel more velvety, especially after mashing some of the beans, cannellini are the better choice.

Either works. If I want a thicker, softer pot of chili, I use cannellini. If I want the beans to stay more intact, I use Great Northern.


How to Make Crockpot White Chicken Chili

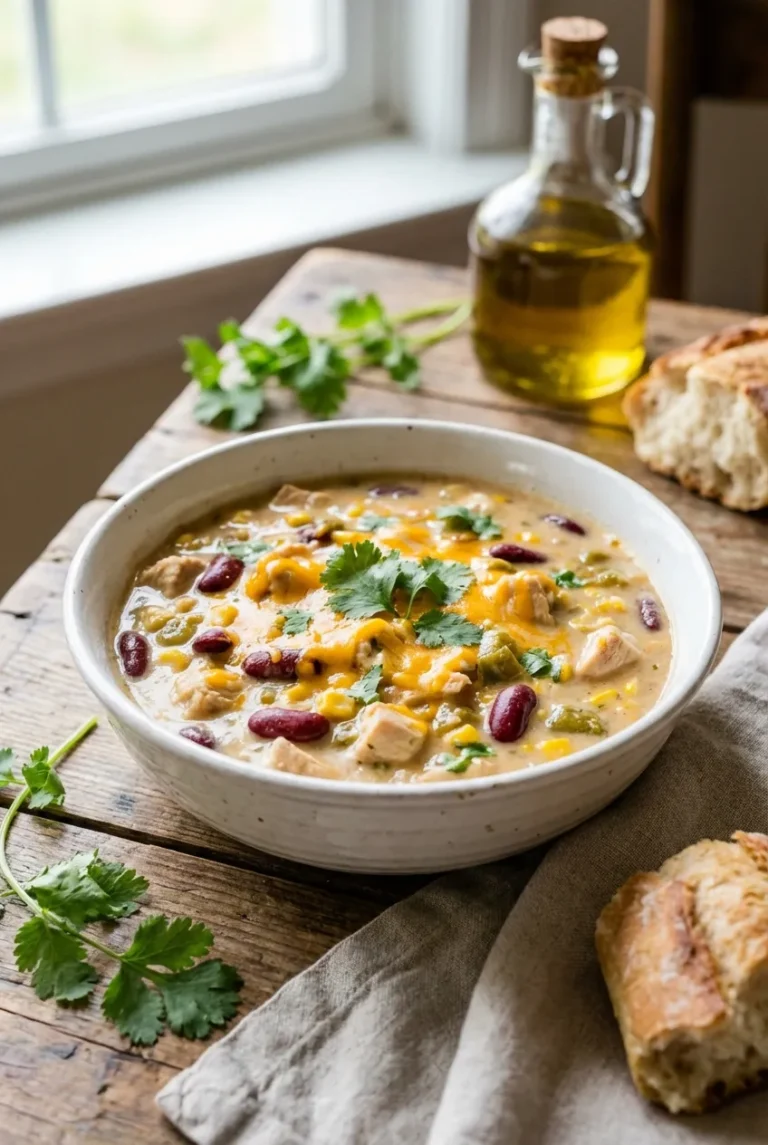
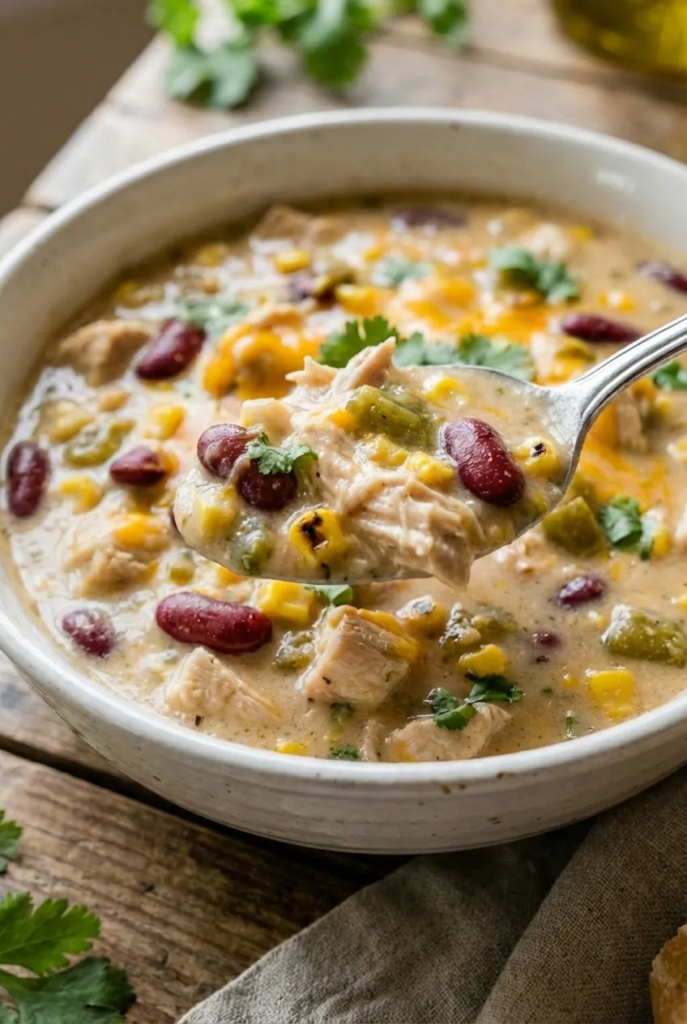
A close-up of a spoon lifting a scoop of thick, creamy white chicken chili, showing the texture of the shredded chicken, beans, and rich broth.
  1. Add the chicken breasts, onion, garlic, beans, green chiles, chicken broth, corn, cumin, chili powder, oregano, onion powder, garlic powder, pepper, and 1/2 teaspoon salt to the slow cooker. Stir gently so the seasonings are distributed.
  2. Cover and cook on low for 6 to 7 hours or on high for 3 to 4 hours, until the chicken reaches 165°F and pulls apart easily with a fork.

Should you cube or shred the chicken?

  1. Transfer the chicken to a cutting board or bowl. Lightly shred it with two forks rather than chopping it into cubes. Shredded chicken blends into the broth better and gives the chili a more classic texture. Return it to the slow cooker.

How to make it thicker without cornstarch

  1. Scoop out about 1/2 to 1 cup of beans and mash them with a fork, or press them against the side of the slow cooker with a spoon. Stir them back in. At this point, the broth should look slightly cloudy and lightly thickened, not like clear soup stock.

When to add cream cheese to white chicken chili

  1. Turn the slow cooker to low or warm. Add the softened cream cheese a few cubes at a time and stir until melted. Do not add it while the chili is at a hard boil. Keep stirring until no white streaks remain and the broth coats the back of a spoon.
  2. Cover and cook for another 15 to 20 minutes if needed to fully melt the cream cheese. Stir again, then taste. The dairy will mute the seasoning a bit, so add more salt or pepper only after the cream cheese is fully incorporated.
  3. Serve hot with lime wedges or your preferred toppings. Add lime at the end, just before eating, so it sharpens the bowl without taking over the creamy base.

How to keep white chicken chili creamy, not grainy

A few habits make the difference here:

  • Soften the cream cheese before adding it. Cold blocks take longer to melt and are more likely to leave little lumps.
  • Lower the heat to low or warm before adding the dairy.
  • Add the cream cheese in cubes, not one large block.
  • Stir until the broth looks smooth and uniform. If you still see pale streaks, it needs more time.
  • Don’t let the chili boil hard after the cream cheese goes in.

Crockpot white chicken chili variations

How to make crockpot white chicken chili with rotisserie chicken

Use about 3 to 4 cups shredded rotisserie chicken (450g to 560g). Add everything except the cooked chicken and cream cheese to the slow cooker first, then cook on low for 4 to 5 hours or until the onions and beans are fully softened and the broth has picked up flavor.

Stir in the rotisserie chicken during the last 30 to 45 minutes, then add the cream cheese once the chicken is hot. You usually won’t need extra broth unless the chili has reduced more than you want.

Crockpot white chicken chili with cannellini beans

Swap the Great Northern beans for the same amount of cannellini. This version ends up slightly smoother and thicker because cannellini break down more readily. If you like a softer, more blended texture, mash a full cup of the beans before adding the cream cheese.

How to add more heat without overpowering the chili

For more heat, add 1 chopped jalapeño at the beginning or stir in a pinch of cayenne near the end. Keep it restrained. This chili is built on a mild, creamy base, and too much sharp heat can flatten the flavor of the chicken and beans.


What to serve with white chicken chili

Keep the sides simple: cornbread, warm flour tortillas, tortilla chips, or a crisp salad with a sharp vinaigrette all work.

If you like chili nights on repeat, this High Protein Turkey Chili Recipe is a great tomato-based option for a leaner, heartier bowl.

If creamy comfort food is your thing, you may also love this Broccoli Cheddar Soup, which has the same cozy, spoon-coating texture.

For another easy slow cooker dinner, try this Crock Pot Crack Potato Soup when you want something extra rich and family-friendly.


How to store, reheat, and freeze white chicken chili

Store cooled chili in an airtight container in the refrigerator for up to 4 days.

Reheat gently on the stove over low heat or in the microwave in short intervals, stirring between each one. If it thickens too much in the fridge, add a small splash of broth or water to loosen it.

You can freeze it, but cream cheese-based soups sometimes separate a bit after thawing. It will usually come back together with slow reheating and steady stirring, but the texture may be a little less smooth than when first made.


White chicken chili FAQ

Why did my white chicken chili turn grainy after adding cream cheese?

Usually because the cream cheese went into a pot that was too hot, or it was added cold. Lower the heat first, use softened cream cheese, and stir it in gradually.

Can I use rotisserie chicken?

Yes. Add it near the end, during the last 30 to 45 minutes, so it heats through without drying out.

What are the best beans: cannellini or Great Northern?

Cannellini make the chili smoother and thicker. Great Northern beans stay more intact. Either works; it depends on whether you want a softer or more defined bean texture.

How do I thicken it if it looks too brothy?

Mash more of the beans and let the chili cook uncovered for a short stretch on high before adding the cream cheese, if needed. Mashed beans keep the texture more natural than flour or cornstarch.


Nutrition

  • Serving size: approximately 1/6 of the total recipe
  • Calories: 439 kcal
  • Protein: 33g
  • Fat: 18g
  • Carbohydrates: 35g
  • Per 100g: Calories: 94 kcal, Protein: 7g, Fat: 4g, Carbohydrates: 8g.

These nutritional values are approximate and can vary based on the specific ingredients and brands used.

Crockpot White Chicken Chili With Cream Cheese

Crockpot white chicken chili with cream cheese that stays thick and smooth, with practical tips to avoid grainy dairy. Easy, thick, and creamy with tender shredded chicken, white beans, and a mild tang from cream cheese.
Course: Dinner
Cuisine: American
Prep: 20 min
Cook: 420 min
Total: 440 min
Servings: 6 Calories: 439 kcal Cost: —

Equipment

  • Slow cooker
  • Cutting board
  • Forks
  • Spoon

Ingredients

  • 1 1/2 pounds Boneless skinless chicken breasts (about 680g)
  • 1 medium Yellow onion diced (150g)
  • 3 cloves Garlic minced
  • 2 cans Great Northern beans drained and rinsed (850g)
  • 1 can Diced green chiles (120g)
  • 3 cups Low-sodium chicken broth (720g)
  • 1 package Cream cheese softened and cubed (225g)
  • 1 cup Frozen corn (140g)
  • 1 teaspoon Ground cumin
  • 1 teaspoon Chili powder
  • 1/2 teaspoon Dried oregano
  • 1/2 teaspoon Onion powder
  • 1/2 teaspoon Garlic powder
  • 1/4 teaspoon Black pepper
  • 1/2 to 1 teaspoon Kosher salt plus more to taste

Instructions

  1. Add chicken breasts, diced onion, minced garlic, drained beans, diced green chiles, chicken broth, frozen corn, cumin, chili powder, oregano, onion powder, garlic powder, black pepper, and 1/2 teaspoon kosher salt to slow cooker. Stir gently to distribute seasonings.
  2. Cover and cook on low for 6 to 7 hours or on high for 3 to 4 hours until chicken reaches 165°F and shreds easily with a fork.
  3. Transfer chicken to a cutting board and lightly shred using two forks. Return shredded chicken to slow cooker.
  4. Scoop out about 1/2 to 1 cup of beans, mash them with a fork or spoon against the side of the slow cooker, then stir back in. Broth should look slightly cloudy and lightly thickened.
  5. Turn slow cooker to low or warm. Add softened cream cheese cubes a few at a time, stirring until melted and broth coats back of spoon with no white streaks.
  6. Cover and cook another 15 to 20 minutes if needed to fully melt cream cheese. Stir and then taste; add more salt or pepper after cream cheese is incorporated.
  7. Serve hot with optional lime wedges or other preferred toppings added just before eating.

Notes

Softening cream cheese before adding, lowering heat to low or warm, and stirring until smooth prevents grainy texture. Avoid boiling after adding cream cheese. Mash some beans for natural thickness without starch. Use Great Northern beans for more defined beans texture or cannellini for smoother, thicker chili. Store leftovers in airtight container in fridge up to 4 days. Reheat gently with occasional stirring. Freezing may cause separation but usually recombines with slow reheating.

Nutrition

Serving Size: 1/6 recipe | Calories: 439 kcal | Protein: 33g | Fat: 18g | Carbohydrates: 35g | Per100g Calories: 94 kcal | Per100g Protein: 7g | Per100g Fat: 4g | Per100g Carbohydrates: 8g

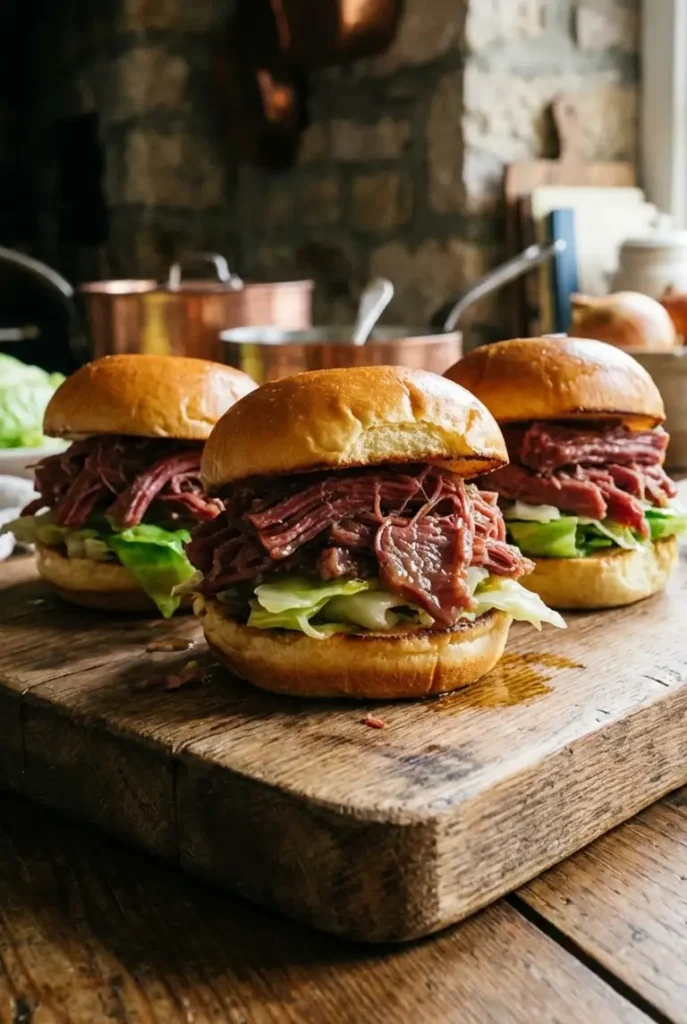
What makes these sliders work is the texture. Thick slices of corned beef may look better on a platter, but in a slider they usually pull out in one bite. Cooking the brisket until it loosens into short, moist shreds fixes that. The meat settles into the bun instead of fighting it.

Cabbage matters just as much. Whole leaves are fine if you blanch them just enough to bend and dry them well, but for easier bite-through and better crunch, a quick slaw often works better. Done right, the finished slider has warm shredded beef, a little sharp mustard, buttery toasted bun edges, and enough cabbage to keep the whole thing balanced.

Why These Corned Beef Sliders Work

  • The corned beef cooks with a little liquid in a tightly covered pan, so it braises gently instead of drying out around the edges.
  • Shredding or chopping the meat into short strands makes the sliders easier to eat.
  • Toasted buns create a dry barrier against the meat juices and mustard.
  • Cabbage adds contrast: softened leaves keep the classic feel, while slaw gives more crunch and easier bite-through.

Ingredients You Need for Corned Beef and Cabbage Sliders

  • 1 corned beef brisket with spice packet, about 1 1/2 pounds (680g)
  • 3/4 cup beef broth or water (180g)
  • 12 slider buns (480g)
  • 3 tablespoons unsalted butter, melted (45g)
  • 2 tablespoons Dijon mustard (30g)
  • 2 tablespoons mayonnaise (30g)
  • 2 cups green cabbage, thinly sliced or leaves separated (140g)
  • 1 tablespoon apple cider vinegar
  • 1 teaspoon sugar
  • Black pepper, to taste

Optional for serving

  • Swiss cheese, 6 slices halved (170g)
  • Extra mustard
  • Pickles (90g)

Best Cabbage for Sliders: Leaves vs Slaw

When to use blanched cabbage leaves

Use leaves if you want the most classic corned beef and cabbage feel. Pull off the thick center rib if it’s bulky, then blanch the leaves until bright green and flexible, about 30 to 60 seconds. Dry them very well before using. Wet leaves are one of the fastest ways to ruin the buns.

When a quick cabbage slaw is the better choice

For actual slider eating, slaw is often better. It’s easier to bite through, stays put, and gives more crunch. Toss thinly sliced cabbage with vinegar, sugar, pepper, and a small spoonful of mayo or mustard if you want. Let it sit 5 to 10 minutes, then drain off any liquid before assembling.


Step-by-Step: Tender Shredded Corned Beef for Sliders

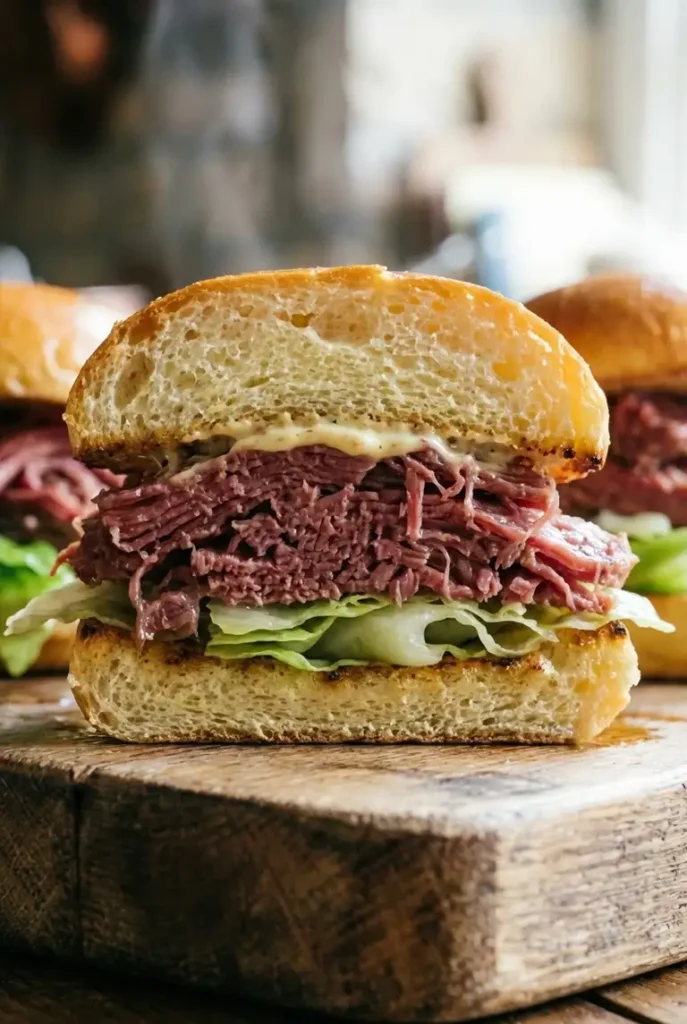
A detailed close-up of a corned beef slider cut in half, revealing layers of shredded meat, sauce, crisp cabbage, and a toasted bun.

How much liquid to add to the pan

  1. Heat the oven to 325°F.
  2. Place the corned beef fat-side up in a small roasting pan or baking dish. Sprinkle over the spice packet.
  3. Pour in 1/2 to 1 cup broth or water around the beef. Don’t wash the spices off the top.
  4. Cover the pan tightly with foil. Seal the pan tightly so steam can’t escape.

How to know corned beef is done without guessing

  1. Roast for 3 to 3 1/2 hours, depending on thickness. Start checking at 3 hours.
  2. The corned beef is ready when a fork or thin knife slides into the thickest part with very little resistance. If you’re checking temperature, it’s usually tender around 195 to 205°F, but go by feel first.
  3. Rest the meat, still loosely covered, for 15 to 20 minutes. If you shred it right away, you squeeze out more moisture than you need to.

How to shred for the best slider texture

  1. Transfer the corned beef to a board and shred or chop it into short strands. You want loose, bite-size pieces, not long strings.
  2. If it looks dry, toss it with 2 to 3 spoonfuls of the pan juices. Enough to make the meat lightly glossy, not wet.

If you love the tangy mustard-and-corned-beef flavor combo here, this Reuben Dip is another easy party favorite.


How to Assemble Sliders Without Soggy Buns

  1. While the beef rests, toast the buns. Brush the cut sides lightly with melted butter and toast in a skillet or under the broiler until golden at the edges but still soft in the center, about 1 to 2 minutes.
  2. If using cabbage leaves, blanch and dry them now. If using slaw, make it and let it sit 5 to 10 minutes, then drain.
  3. Stir together the Dijon and mayonnaise. Spread it on the buns in a thin layer, edge to edge. Too much makes the filling slide.
  4. Pile warm corned beef onto the bottom buns. The beef should be warm, not dripping. If needed, let excess juices run off for a few seconds before adding it.
  5. Add cabbage or slaw. If using Swiss cheese, lay it over the hot beef so it softens slightly.
  6. Close the sliders and serve right away. They’re best when the bun is still lightly crisp, the beef is warm, and the cabbage is cool or just barely softened.

Slow Cooker Corned Beef and Cabbage Sliders with Guinness Mustard

If you want the hands-off version, put the corned beef in a slow cooker with the spice packet and 1 cup water or broth. Cook on low for 8 to 9 hours or until a fork slides in easily.

For the Guinness mustard, stir together:

  • 2 tablespoons Dijon mustard (30g)
  • 1 tablespoon whole grain mustard (15g)
  • 1 tablespoon Guinness or other stout (15g)
  • 1 teaspoon honey

Use it in place of the Dijon-mayo spread. The stout adds a slight bitter edge that helps balance the salty beef.

Corned Beef Sliders with Cabbage Slaw

For a version with more crunch, use:

  • 2 cups shredded cabbage (140g)
  • 1 small carrot, shredded (50g)
  • 1 tablespoon apple cider vinegar
  • 1 tablespoon mayonnaise (15g)
  • 1 teaspoon Dijon mustard
  • 1 teaspoon sugar
  • Black pepper, to taste

Mix and let sit 5 to 10 minutes, then drain off any extra liquid. This is the better option if the sliders will sit on a serving tray for a few minutes. Slaw stays in place better than full cabbage leaves.

If you’re building a St. Patrick’s Day menu, pair these sliders with Guinness Glazed Meatballs for an easy holiday spread.


How to Store and Reheat Leftover Corned Beef Sliders

If possible, store the components separately. Keep the shredded beef with a little pan juice in a covered container and refrigerate it for up to 3 days. Keep the cabbage or slaw separate so it does not wet the buns.

Reheat the beef gently in a skillet or microwave until hot. Toast fresh buns before assembling. Already assembled sliders can be refrigerated, but the bread softens quickly and the cabbage loses its texture.


Corned Beef Slider FAQs

Why is my corned beef still tough after 3 hours?

It probably needs more time. Corned beef turns tender when the connective tissue breaks down, not on a strict timer. If the fork still meets resistance, cover it again and keep cooking in 20- to 30-minute stretches.

Do I need to add water or broth when roasting corned beef?

Yes. A little liquid helps create steam and keeps the surface from drying out. You do not need to submerge it. About 1/2 to 1 cup is enough for a tightly covered pan.

Can I use bagged coleslaw mix instead of cabbage leaves?

Yes, and for sliders it is often the easier option. Just dress it lightly, let it sit a few minutes, and drain off any extra liquid.

How do I keep sliders from getting soggy?

Toast the buns, dry the cabbage well, use condiments sparingly, and do not pile on meat that is dripping with pan juices. Assemble as close to serving time as you can.

Can I make them ahead for a party?

Make the beef ahead, yes. Assemble ahead, not really. The best compromise is to cook and shred the beef earlier, prep the cabbage, mix the spread, and toast the buns right before serving.


Nutrition

  • Serving size: approximately 1 slider
  • Calories: 280 kcal
  • Protein: 16g
  • Fat: 14g
  • Carbohydrates: 20g
  • Per 100g: Calories: 238 kcal, Protein: 14g, Fat: 12g, Carbohydrates: 17g.

These nutritional values are approximate and can vary based on the specific ingredients and brands used.

Corned Beef and Cabbage Sliders

Tender shredded corned beef sliders with toasted buttery buns and crisp cabbage that stays fresh instead of soggy. Perfect for parties and gatherings, these sliders combine juicy beef, sharp mustard, and cabbage for great texture contrast.
Course: Dinner
Cuisine: American
Prep: 20 min
Cook: 210 min
Total: 230 min
Servings: 12 Calories: 280 kcal Cost: —

Equipment

  • Roasting pan or baking dish
  • Aluminum foil
  • Skillet or broiler
  • Cutting board
  • Knife
  • Mixing bowl
  • Spatula

Ingredients

  • 1 1/2 pounds (680g) corned beef brisket with spice packet
  • 3/4 cup (180g) beef broth or water
  • 12 slider buns (480g)
  • 3 tablespoons (45g) unsalted butter, melted
  • 2 tablespoons (30g) Dijon mustard
  • 2 tablespoons (30g) mayonnaise
  • 2 cups (140g) green cabbage, thinly sliced or whole leaves
  • 1 tablespoon apple cider vinegar
  • 1 teaspoon sugar
  • Black pepper, to taste
  • Optional for serving: 6 slices Swiss cheese halved (170g), extra mustard, pickles (90g)

Instructions

  1. Preheat oven to 325°F.
  2. Place corned beef fat-side up in roasting pan; sprinkle spice packet over beef.
  3. Add 1/2 to 1 cup broth or water around beef without washing off spices.
  4. Cover pan tightly with foil to seal in steam.
  5. Roast for 3 to 3 1/2 hours until fork slides in with little resistance (about 195-205°F internal temp).
  6. Rest meat loosely covered for 15-20 minutes.
  7. Transfer beef to board and shred into short strands. Toss with 2-3 spoonfuls pan juices if dry.
  8. Toast buns brushed lightly with melted butter in skillet or broiler until golden at edges but soft inside (1-2 minutes).
  9. If using cabbage leaves, blanch 30-60 seconds until flexible and dry thoroughly; if slaw, toss sliced cabbage with vinegar, sugar, pepper, and a spoonful of mayo or mustard, let sit 5-10 minutes, then drain.
  10. Mix Dijon and mayonnaise and spread thinly on buns.
  11. Pile warm shredded beef on bottom buns; let excess juices run off if needed.
  12. Add cabbage or slaw; top with Swiss cheese if using, so it softens slightly.
  13. Close sliders and serve immediately for best texture.

Notes

For slow cooker version, cook brisket with spice packet and 1 cup broth on low for 8-9 hours until tender. For variation, add Guinness mustard made with Dijon, whole grain mustard, stout, and honey. Store shredded beef and cabbage separately for up to 3 days in fridge; reheat beef gently. Assemble sliders just before serving to avoid soggy buns.

Nutrition

Serving Size: 1 slider | Calories: 280 kcal | Carbohydrates: 20g | Protein: 16g | Fat: 14g

I got better results with these once I stopped being vague about softened butter. If the butter is too warm — shiny, greasy, or starting to slump — the dough spreads before the structure sets, and you get wide cookies with thin centers.

When the butter is soft enough to dent but still holds its shape, the dough stays thick, scoops cleanly, and bakes into cookies with rippled tops and a proper middle. I also prefer chopped dark chocolate here instead of using only chips. Chips help hold shape, but chopped chocolate gives you thinner streaks through the dough and larger melted pockets on top.


Why these cookies stay thick instead of spreading flat

  • The dough uses more flour than a thin, crisp cookie, so the centers keep their height.
  • Brown sugar adds moisture and chew, while a smaller amount of granulated sugar helps the edges set.
  • The dough is mixed just until combined, which keeps the cookies tender instead of overworked.
  • There is a built-in chill option for warm kitchens or very soft dough, and that often makes the difference between thick cookies and flat ones.

Ingredients for thick and chewy chocolate chip cookies

  • 1 cup unsalted butter, softened (225g)
  • 1 cup packed brown sugar (220g)
  • 1/2 cup granulated sugar (100g)
  • 2 large eggs (100g)
  • 2 teaspoons vanilla extract (I like a 👉softer vanilla here so it doesn’t overpower the butter and chocolate)
  • 3 cups all-purpose flour (360g)
  • 1 teaspoon baking soda
  • 1 teaspoon salt
  • 8 ounces dark chocolate, chopped (225g)
  • 1 cup semisweet chocolate chips (170g)

How to make thick soft chocolate chip cookies

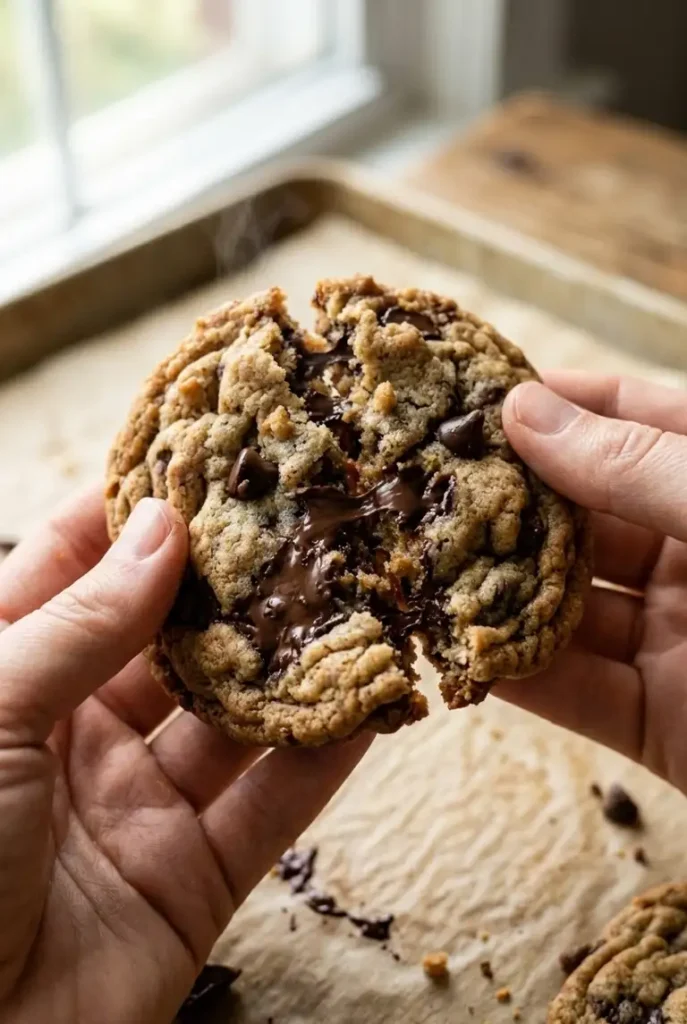
Close-up of a thick chocolate chip cookie being broken open, revealing a chewy center with gooey melted dark chocolate and crumbs.

Cream the butter and sugars until light and fluffy

  1. Heat the oven to 350°F. Line 2 baking sheets with parchment paper.
  2. In a large bowl, beat the softened butter, brown sugar, and granulated sugar for 3 to 4 minutes. The mixture should look paler, fluffier, and less grainy, not dense or greasy. If the butter already looks shiny before you start, it’s probably too warm.
  3. Add the eggs one at a time, beating well after each one. The mixture should look smooth and emulsified, not curdled. Stir in the vanilla.

Mix the dough just until combined

  1. In a separate bowl, whisk together the flour, baking soda, and salt.
  2. Add the dry ingredients to the butter mixture and mix on low just until a few faint flour streaks remain. Finish with a spatula so you don’t overwork the dough.
  3. Fold in the chopped chocolate and chocolate chips. The finished dough should be thick, soft, and scoopable, not loose or glossy.

Scoop, chill if needed, and bake

  1. Scoop the dough into large mounds, about 3 tablespoons each, and place them on the baking sheets with room to spread. Keep the mounds tall rather than flattening them; a taller scoop gives you a thicker finished cookie.
  2. If the dough feels very soft or sticky, or if your kitchen is warm, chill the scooped dough for 20 to 30 minutes before baking.
  3. Bake one sheet at a time for 11 to 14 minutes.

How to tell when the cookies are done

  1. The cookies are ready when the edges look set and lightly golden, but the centers still look slightly puffed and underdone. That slightly underbaked center is what keeps the middle chewy after cooling.
  2. Let the cookies sit on the pan for 10 minutes. They finish setting there, and moving them too early can cause them to fold or break.
  3. If you want a neater bakery-style shape, use a round cutter or drinking glass to gently swirl around the cookies while they’re still hot.
  4. Transfer to a wire rack to cool completely.

Tips to keep chocolate chip cookies thick, soft, and chewy

Why your cookies spread too much

The usual causes are butter that is too warm, not enough flour, or dough that went onto a hot baking sheet. If the dough looks shiny or slack, chill it before baking.

The best chocolate for gooey pockets

A mix of chopped chocolate and chips gives the best texture. Chopped chocolate melts into thin streaks and soft pockets, while chips keep some shape.

When to chill the dough

You do not always need to chill this dough. In a cool kitchen, with properly softened butter, it usually bakes well right away. Chill it when the dough feels too soft to hold a rounded scoop or when the first tray spreads more than you want.


Best variations for this chocolate chip cookie recipe

Chocolate Chip Cookie Without eggs

Replace the 2 eggs with 1/2 cup plain Greek yogurt (120g) or use 2 flax eggs. The texture will be a little softer and slightly less glossy in the center, but the cookies still bake up thick.

If the dough feels loose, add 1 to 2 tablespoons of flour before scooping.

Chocolate Chip Cookie Without butter

This is not a straight one-for-one swap if you want the same result. For a butter-free version, use 3/4 cup neutral oil (165g) and chill the dough for at least 1 hour before baking.

The cookies will be chewier and a little denser, with less of that buttery edge flavor. Oil-based dough spreads more easily, so don’t skip the chill.


How to store and freeze chocolate chip cookies

Store the cooled cookies in an airtight container at room temperature for up to 4 days. They stay softer if you let them cool fully before sealing the container.

To freeze baked cookies, layer them between sheets of parchment and freeze for up to 2 months.

To freeze the dough, scoop it first, then freeze the portions on a tray until firm. Transfer to a freezer bag and bake from frozen, adding 1 to 3 minutes to the baking time.

If you want something a little more playful and colorful, these Red Velvet Oreo Cookies are another fun bakery-style treat.


FAQ: thick chocolate chip cookie troubleshooting

Why did my chocolate chip cookies spread too much?

Most often, the butter was too warm or the dough needed a short chill. It can also happen if the baking sheet was still warm from the previous batch.

Start with cool dough and a cool pan.

Do I need to chill the dough before baking?

Not always. If your dough is thick and holds a rounded scoop, you can bake it right away.

If it feels sticky, slack, or soft, chill it for 20 to 30 minutes.

Can I use chocolate chips instead of chopped chocolate?

Yes. Use the same total amount by weight. The cookies will be a little more uniform, with fewer melted pools on top, but the structure will be the same.

How do I keep these cookies soft for several days?

Don’t overbake them, and don’t store them while still warm. Once fully cooled, keep them in an airtight container.

A cookie baked until the center looks fully done in the oven usually turns firmer by the next day.


Nutrition

  • Serving size: approximately 1 cookie (1/18 of the total recipe)
  • Calories: 322 kcal
  • Protein: 4g
  • Fat: 17g
  • Carbohydrates: 40g
  • Per 100g: Calories: 460 kcal, Protein: 5g, Fat: 24g, Carbohydrates: 57g

These nutritional values are approximate and will vary by ingredient brand and chocolate used.

Thick Soft Chocolate Chip Cookies

Thick, soft chocolate chip cookies with chewy centers, rippled tops, and practical tips to keep them from spreading. Made with chopped dark chocolate and chips for gooey pockets, a buttery vanilla base, and balanced saltiness. These cookies stay thick and chewy for days with a built-in chilling option for warm kitchens.
Course: Dessert
Cuisine: American
Prep: 20 min
Cook: 14 min
Total: 54 min
Servings: 18 Calories: 322 kcal Cost: —

Equipment

  • Oven
  • Baking sheets
  • Parchment paper
  • Large bowl
  • Mixer or hand beater
  • Spatula
  • Whisk
  • Measuring cups and spoons
  • Wire rack

Ingredients

  • 1 cup unsalted butter, softened (225g)
  • 1 cup packed brown sugar (220g)
  • 1/2 cup granulated sugar (100g)
  • 2 large eggs (100g)
  • 2 teaspoons vanilla extract
  • 3 cups all-purpose flour (360g)
  • 1 teaspoon baking soda
  • 1 teaspoon salt
  • 8 ounces dark chocolate, chopped (225g)
  • 1 cup semisweet chocolate chips (170g)

Instructions

  1. Preheat oven to 350°F. Line 2 baking sheets with parchment paper.
  2. In a large bowl, beat softened butter, brown sugar, and granulated sugar for 3 to 4 minutes until pale, fluffy, and less grainy.
  3. Add eggs one at a time, beating well after each until smooth and emulsified. Stir in vanilla extract.
  4. In a separate bowl, whisk together flour, baking soda, and salt.
  5. Add dry ingredients to butter mixture and mix on low speed just until a few faint flour streaks remain. Finish mixing with spatula to avoid overworking.
  6. Fold in chopped dark chocolate and chocolate chips until dough is thick, soft, and scoopable.
  7. Scoop dough into large mounds (about 3 tablespoons each) on prepared sheets, keeping mounds tall for thicker cookies.
  8. If dough is very soft or sticky, or kitchen is warm, chill dough for 20 to 30 minutes before baking.
  9. Bake one sheet at a time for 11 to 14 minutes until edges look set and lightly golden but centers still look slightly puffed.
  10. Let cookies sit on baking sheet for 10 minutes to finish setting. Optionally, use a round cutter to gently swirl edges while still warm for neat shape.
  11. Transfer cookies to a wire rack to cool completely.

Notes

Tips include careful flour measurement to prevent spreading, combining chopped chocolate and chips for gooey texture, chilling dough when too soft, and baking until centers are slightly underdone for chewiness. Variations include egg-free and butter-free options. Store cooled cookies in an airtight container up to 4 days or freeze dough and baked cookies for longer storage.

Nutrition

Serving Size: 1 cookie (1/18 of recipe) | Calories: 322 kcal | Protein: 4g | Fat: 17g | Carbohydrates: 40g | Per100g Calories: 460 kcal | Per100g Protein: 5g | Per100g Fat: 24g | Per100g Carbohydrates: 57g

The easiest way to lose the texture on brownies is to leave them in the oven until the center looks fully finished. I’ve done that, and it always gives the same result: clean squares, dry edges, and a middle that eats more like cake than brownie.

This batter should look thick and glossy before it goes into the pan, and the brownies should come out when the edges are set but the center still has a slight wobble. After they cool, that underdone-looking middle turns dense and compact, with a thin crackly top and softer chocolate pockets throughout.

Why These Fudgy Brownies Stay Dense, Not Cakey

  • The flour stays low, which keeps the crumb tight instead of airy.
  • Melted butter whisked with sugar gives the batter a thick, glossy base that bakes into a delicate papery top.
  • Brown sugar adds moisture, so the center stays soft after cooling.
  • Chocolate chips soften into the batter and give you softer pockets through the middle instead of one uniform texture.

Ingredients for Fudgy Chocolate Brownies with Cocoa Powder

  • 1/2 cup unsalted butter, melted (115g)
  • 1/2 cup granulated sugar (100g)
  • 1/2 cup packed brown sugar (110g)
  • 2 large eggs (100g)
  • 1 teaspoon vanilla extract (I like a 👉softer vanilla here so it doesn’t overpower the cocoa)
  • 1/2 cup unsweetened cocoa powder (50g)
  • 3/4 cup all-purpose flour (95g)
  • 1/4 teaspoon salt
  • 1/2 teaspoon baking powder
  • 1/2 cup semi-sweet chocolate chips (85g)

Best cocoa powder for brownies

Natural cocoa and Dutch-process both work here. Natural cocoa gives a slightly brighter chocolate flavor. Dutch-process tastes darker and smoother. Use whichever you already have.

Why chocolate chips help
The chips do more than add sweetness. They soften into the crumb and make the center feel more molten after baking.


How to Make Fudgy Chocolate Brownies

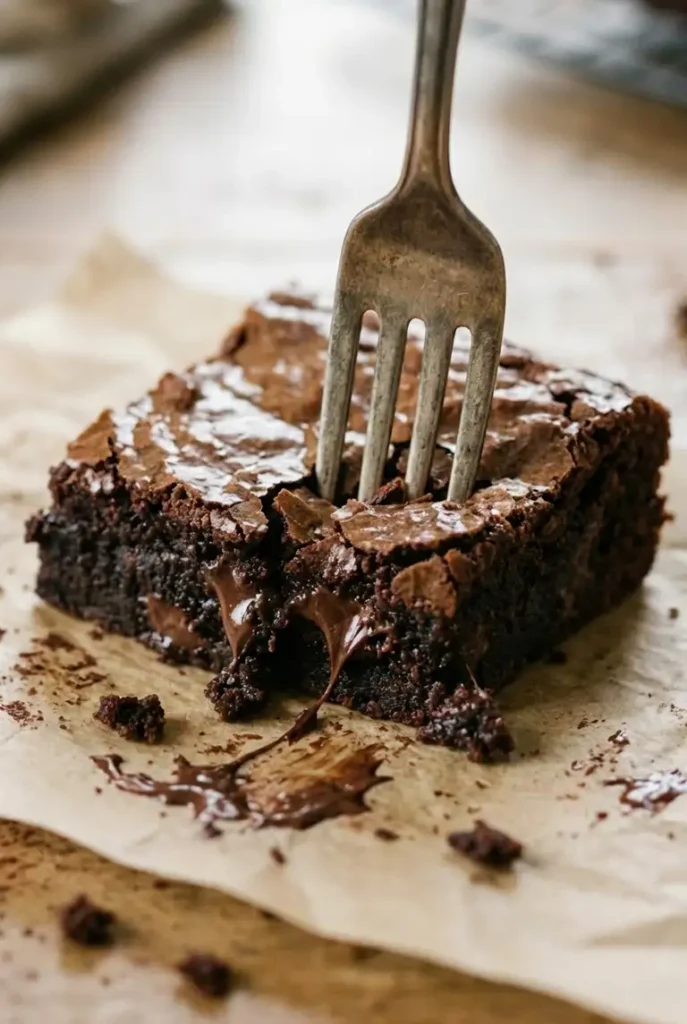
Close-up of a fork cutting into a brownie, showing a dense fudgy center with gooey chocolate chips and moist crumbs.
  1. Preheat the oven to 350°F. Line an 8×8-inch or 9×9-inch baking pan with parchment paper.
  2. In a medium bowl, whisk together the melted butter, granulated sugar, and brown sugar. The butter should be melted but not hot. The mixture should look thick, wet, and slightly grainy.
  3. Add the eggs and vanilla. Whisk until the batter looks smoother and glossier, about 1 minute.
  4. Add the cocoa powder, flour, salt, and baking powder. Fold with a spatula just until no dry flour streaks remain. Do not overmix.
  5. Fold in the chocolate chips. The final batter should be thick enough to spread, not pour like cake batter.
  6. Spread the batter into the prepared pan and push it into the corners. Tap the pan on the counter 1 to 2 times to level the batter and knock out any large air bubbles.
  7. Bake for 25 to 30 minutes in a 9×9-inch pan, or 30 to 35 minutes in an 8×8-inch pan. If you’re using a glass pan, expect the edges to darken faster and the timing to shift slightly.

How to Know When Fudgy Brownies Are Done

The brownies are ready when the edges are visibly set, the top has a shiny surface with fine cracks, and the center no longer looks raw but still has a slight wobble. A toothpick inserted in the middle should come out with moist crumbs, not liquid batter.

  1. Let the brownies cool in the pan for at least 1 hour before slicing. For cleaner cuts, cool them completely, then chill for 20 to 30 minutes and slice with a hot knife, wiping it clean between cuts.

For an even more over-the-top dessert, try these Chocolate Mousse Brownies with their layered finish.


Tips for Crackly Tops and Soft Centers

  • Do not mix hot butter with the eggs. Let it cool slightly first.
  • Whisk the sugar into the butter well so the batter starts glossy.
  • Stop baking when the middle still looks a little underdone.
  • A metal pan usually bakes more evenly than glass.

Fudgy Brownie Variations

Fudgy brownies with walnuts

Fold in 1/2 cup chopped walnuts at the end if you want more contrast in texture and a slightly toastier finish.

Fudgy Brownies with Cocoa Powder Only

If you don’t want to use chocolate chips, leave them out. The brownies will still be dense and fudgy, just a little less soft through the middle and more uniform in texture.

If you’re baking for a crowd, pair these brownies with my Thick Soft Chocolate Chip Cookies for an easy chocolate dessert tray.


How to Store and Freeze Brownies

Store cooled brownies in an airtight container at room temperature for up to 4 days. If your kitchen runs warm, refrigerate them so the center stays set.

To freeze, wrap individual squares tightly and freeze for up to 2 months. Thaw at room temperature. They’re also good eaten slightly chilled if you want a firmer, denser bite.


Fudgy Brownie FAQ

Why did my brownies turn out cakey instead of fudgy?

Usually it comes down to too much flour, too much mixing, or too much time in the oven. This batter should stay thick and compact. Once the flour goes in, fold only until combined.

How do I know when fudgy brownies are done?

Watch the edges and center more than the clock. The edges should be set, the top should show light cracking, and the center should still move slightly if you nudge the pan.

Can I use natural cocoa powder instead of Dutch-process?

Yes. Both work in this recipe. Natural cocoa tastes a bit brighter and more direct. Dutch-process gives a darker, rounder chocolate flavor.

Can I make these without chocolate chips?

Yes. Leave them out if needed. The brownies will still be fudgy, but you will lose the softer melted pockets in the crumb.


Nutrition

  • Serving size: approximately 1/9 of the total recipe
  • Calories: 282 kcal
  • Protein: 4g
  • Fat: 14g
  • Carbohydrates: 38g
  • Per 100g: Calories: 392 kcal, Protein: 5g, Fat: 20g, Carbohydrates: 53g.

These nutritional values are approximate and can vary based on the specific ingredients and brands used.

Fudgy Chocolate Brownies with Cocoa Powder

Dense, fudgy brownies with a crackly top, soft chocolate pockets, and a deep cocoa flavor. Made with cocoa powder and chocolate chips for richness without melted baking chocolate.
Course: Dessert
Cuisine: American
Prep: 15 min
Cook: 35 min
Total: 70 min
Servings: 9 Calories: 282 kcal Cost: —

Equipment

  • 8×8-inch or 9×9-inch baking pan
  • parchment paper
  • medium bowl
  • whisk
  • spatula

Ingredients

  • 1/2 cup unsalted butter, melted (115g)
  • 1/2 cup granulated sugar (100g)
  • 1/2 cup packed brown sugar (110g)
  • 2 large eggs (100g)
  • 1 teaspoon vanilla extract
  • 1/2 cup unsweetened cocoa powder (50g)
  • 3/4 cup all-purpose flour (95g)
  • 1/4 teaspoon salt
  • 1/2 teaspoon baking powder
  • 1/2 cup semi-sweet chocolate chips (85g)

Instructions

  1. Preheat oven to 350°F. Line an 8×8-inch or 9×9-inch baking pan with parchment paper.
  2. Whisk together melted butter, granulated sugar, and brown sugar until thick, wet, and slightly grainy.
  3. Add eggs and vanilla; whisk until smooth and glossy, about 1 minute.
  4. Fold in cocoa powder, flour, salt, and baking powder just until combined; do not overmix.
  5. Fold in chocolate chips; batter should be thick enough to spread.
  6. Spread batter evenly in pan, push into corners and tap pan 1-2 times to remove air bubbles.
  7. Bake 25-30 minutes for 9×9-inch pan or 30-35 minutes for 8×8-inch pan. Edges should be set, top cracked and shiny, center slightly wobbly.
  8. Let cool in pan 1 hour before slicing. Chill 20-30 minutes for cleaner cuts.

Notes

Don’t mix hot butter with eggs to prevent tightening. Stop baking when center is slightly underdone for fudgiest results. Use metal pan for even baking. Variations include increasing chocolate chips to 3/4 cup or omitting them entirely. Store brownies in airtight container up to 4 days at room temperature or freeze up to 2 months.

Nutrition

Serving Size: 1/9 of recipe | Calories: 282 kcal | Protein: 4g | Fat: 14g | Carbohydrates: 38g

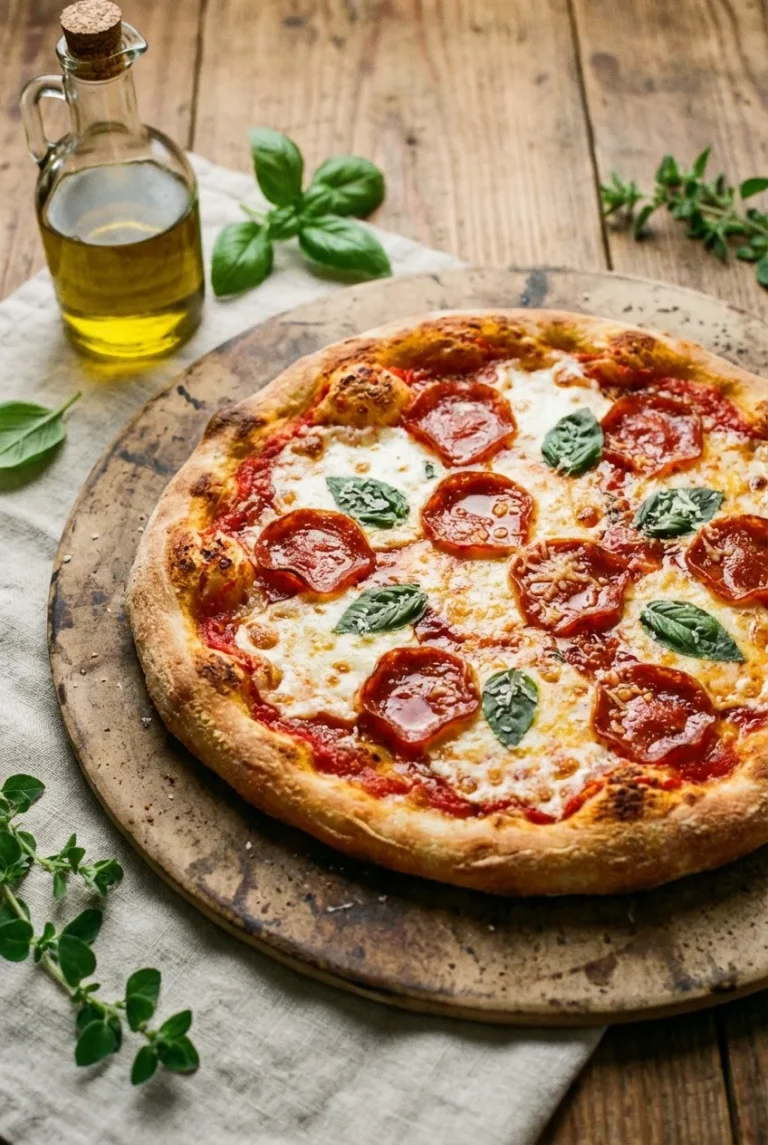
The biggest change I had to make with homemade pizza on a pizza stone was patience. If I rushed the preheat, the top browned before the bottom had any real color, and the crust stayed pale and soft under the sauce.

Once I started giving the stone a full heat-up and keeping the toppings lighter, the pizza baked the way it should: a dry, crisp underside, a chewy rim, and enough structure to hold a slice without the center collapsing. That comes down to heat management and restraint with the toppings, not luck.


How to Make Homemade Pizza on a Pizza Stone

1 medium pizza, about 10 to 12 inches

  • Prep: 20 minutes
  • Rise: 1 hour
  • Bake: 10 to 14 minutes

Ingredients

For the dough

  • 2 1/4 teaspoons active dry yeast
  • 3/4 cup warm water (180g)
  • 2 cups all-purpose flour (240g)
  • 1 teaspoon sugar
  • 1 teaspoon salt
  • 1 tablespoon olive oil (15g)

For the pizza

  • 1/3 to 1/2 cup pizza sauce (80g to 120g)
  • 6 to 8 ounces low-moisture mozzarella, shredded (170g to 225g)
  • 2 to 3 ounces pepperoni, if using (55g to 85g)
  • 2 tablespoons grated Parmesan (10g)
  • 4 to 6 fresh basil leaves, torn
  • 1/2 teaspoon dried oregano (I like a 👉softer oregano here, not one that tastes dusty or harsh)
  • Cornmeal or flour, for dusting the peel or parchment

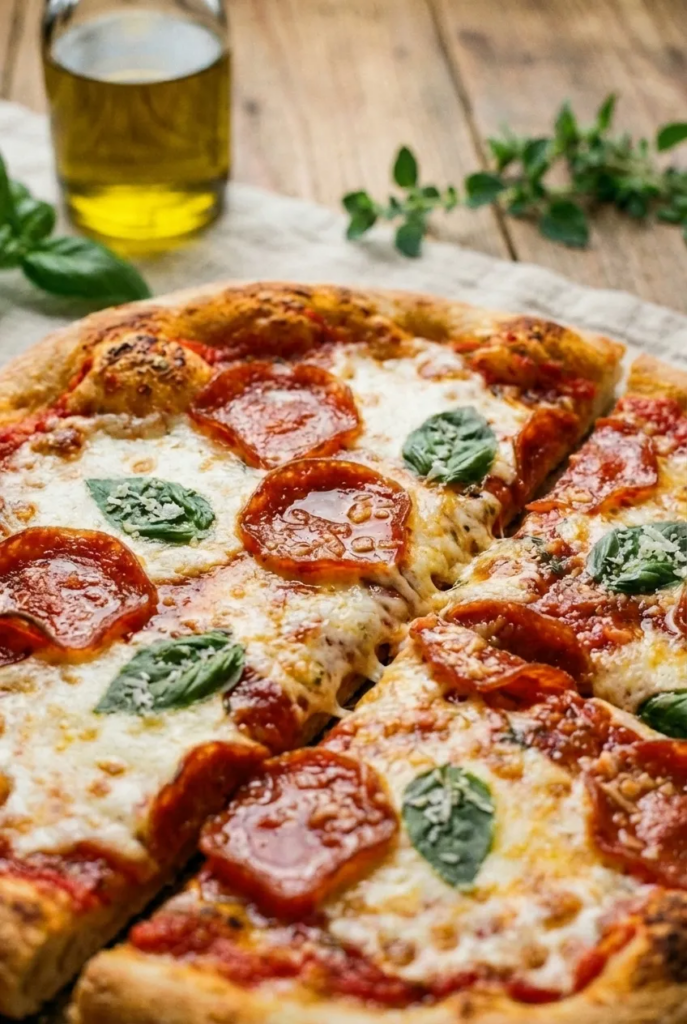
Homemade Pizza on a Pizza Stone Slices

Instructions

  1. In a large bowl, combine the warm water, yeast, and sugar. Let it sit for 5 to 10 minutes until the surface looks foamy. If nothing happens, the yeast is likely old, or the water was too hot or too cool.
  2. Add the flour, salt, and olive oil. Stir until the dough looks shaggy and rough, with no dry flour left at the bottom of the bowl.
  3. Turn the dough onto a lightly floured surface and knead for 6 to 8 minutes. At first it may look uneven, but it should become smooth, elastic, and slightly tacky rather than sticky. If it clings heavily to your fingers after the first minute or two, add flour 1 teaspoon at a time. When properly kneaded, the dough should spring back slowly when poked.
  4. Place the dough in a lightly oiled bowl, cover, and let rise in a warm spot for 1 hour, or until doubled and slightly domed. In a cool kitchen, this may take 75 to 90 minutes.
  5. While the dough rises, place your pizza stone in the oven and preheat to 500°F. Let the stone heat for at least 30 to 45 minutes, even if the oven reaches temperature sooner. That full preheat is what gives you a browned bottom instead of a pale, soft crust.
  6. Punch down the dough and turn it onto a lightly floured surface. Press and stretch it into a 10- to 12-inch round, keeping the center thinner and leaving a slightly thicker rim. If the dough keeps shrinking back, let it rest 5 to 10 minutes and try again.
  7. Transfer the dough to a pizza peel dusted with flour or cornmeal, or set it on a piece of parchment. Spread on 1/3 to 1/2 cup sauce, leaving a small border. Add the mozzarella in an even layer, then the pepperoni if using, Parmesan, and oregano. Keep the toppings moderate; too much sauce or cheese weighs down the center and traps steam.
  8. Before baking, give the peel a small shake. The dough should move freely. If it sticks, lift the edge and add a little more flour or cornmeal underneath. Slide the pizza onto the hot stone. If using parchment, bake with it underneath for the first 2 to 3 minutes, then pull it out once the crust has set.
  9. Bake for 10 to 14 minutes, rotating halfway if your oven has hot spots, until the cheese is fully melted and browned in spots, the rim is golden with a few blisters, and the bottom is deep golden-brown and crisp.
  10. Remove the pizza and let it rest for 2 to 3 minutes before slicing. That short rest helps the cheese settle so the center stays cleaner when cut. Finish with torn basil.

If you want an easy side for pizza night, these One-Pot Tuscan White Beans make a simple, hearty addition without much extra work.


Why a Pizza Stone Gives You a Crispier Crust

A pizza stone stores heat and transfers it directly into the dough the moment the crust hits the surface. That fast contact helps set and dry the bottom before the sauce can soak through.

A fully heated stone browns the underside faster than a standard sheet pan, helps the center stay less floppy under sauce and cheese, and gives you better contrast between the crisp bottom and chewy edge. The difference becomes obvious once the pizza is sliced.


Best Flour for Pizza Dough on a Pizza Stone

All-Purpose Flour vs Bread Flour vs 00 Flour

All three can work. The best one depends on the crust you want and how hot your oven runs.

  • All-purpose flour: The most practical option for most home cooks. It gives a crust that’s crisp on the bottom with a moderate chew. That’s what this recipe is built around.
  • Bread flour: Higher in protein, so the dough is a little stronger and chewier. It also browns well and stretches nicely once rested. If you like a more elastic rim, use it in the same amount.
  • 00 flour: Fine-textured and often used for very hot pizza ovens. In a standard home oven, it can still work, but it usually performs best at higher heat than most home kitchens can produce.

If you use bread flour, the dough may feel slightly firmer. If you use 00 flour, watch the hydration and avoid adding too much extra flour during kneading.

How to Tell When Pizza Dough Is Properly Kneaded

You’re looking for dough that feels smooth and flexible, not rough or stiff. It should hold together as one piece, stretch without tearing right away, and slowly bounce back when pressed. If it’s still lumpy and breaks easily, it needs more kneading.

For a tangier crust with more developed flavor, try this Sourdough Discard Pizza Dough the next time you make pizza night at home.


How to Shape and Top Pizza Without a Soggy Center

The center gets soggy for three common reasons: too much sauce, too much cheese, or wet toppings.

A better balance looks like this:

  • Keep sauce to 1/3 to 1/2 cup
  • Use 6 to 8 ounces low-moisture mozzarella (170g to 225g)
  • Blot fresh mozzarella, mushrooms, or other wet toppings before using
  • Leave the center thin and the rim slightly thicker
  • Don’t pile toppings into the middle

That lighter hand gives you a cleaner bake. The heavy, damp center you get from overloaded pizzas usually comes from trapped moisture, not from the dough recipe itself.


How to Bake Pizza on a Pizza Stone Without Sticking

How Hot Should a Pizza Stone Be Before Baking?

The oven should be at 500°F, and the stone should stay in there for 30 to 45 minutes before baking. A hot oven alone is not enough. The stone itself needs time to absorb heat.

Should You Use Parchment Paper or a Pizza Peel?

Both are useful.

  • Pizza peel: Best if you’re comfortable launching the pizza directly. Dust it lightly and make sure the dough still slides before it goes in.
  • Parchment paper: Easier and more forgiving, especially if you’re new to using a stone. Just remove it after 2 to 3 minutes once the crust firms up.

If your pizza sticks, it usually means one of three things: the dough sat too long after topping, the peel wasn’t dusted enough, or the dough was too wet on the bottom.


Storage, Reheating, and Make-Ahead Tips

Store leftover slices in the refrigerator for up to 3 days. Let them cool first so condensation doesn’t soften the crust.

To reheat, place slices in a 425°F oven directly on a sheet pan or stone for 5 to 8 minutes, until the cheese loosens and the bottom is crisp again. The microwave softens the crust and turns the cheese rubbery.

You can also make the dough ahead:

  • Refrigerate after kneading for up to 72 hours
  • Let it sit at room temperature for 30 to 45 minutes before shaping

A slower cold rise gives the dough fuller flavor and better browning.


Pizza Stone FAQs

Why did my pizza stick to the peel or stone?

Usually the dough sat too long after you added toppings, so moisture soaked through the flour underneath. Build the pizza quickly, dust the peel lightly, and test with a shake before you launch. If it doesn’t move, fix it before it goes near the oven.

Why is my pizza crust pale on the bottom but overdone on top?

The stone probably wasn’t heated long enough. This is the most common problem with pizza stone baking. Give the stone a full 30 to 45 minutes in the oven after preheating starts, and position it in the lower-middle part of the oven if your top browns too fast.

Can I use bread flour or 00 flour instead of all-purpose flour?

Yes. Bread flour gives you more chew and a slightly stronger dough. 00 flour gives a finer texture, but in a regular home oven it won’t always outperform all-purpose flour. For a reliable weeknight pizza, all-purpose flour is still a solid choice.

Can I bake frozen pizza on a pizza stone?

Yes, but preheat the stone first and follow the package temperature as a starting point. Bake the frozen pizza directly on the hot stone if the instructions allow it. Watch the bottom closely near the end, because the crust can brown faster on stone than on a standard rack or tray.


Nutrition

  • Serving size: approximately 1/4 of the total recipe
  • Calories: 483 kcal
  • Protein: 22g
  • Fat: 18g
  • Carbohydrates: 56g
  • Per 100g: Calories: 252 kcal, Protein: 11g, Fat: 9g, Carbohydrates: 29g

These nutritional values are approximate and can vary based on the specific ingredients and brands used.

Homemade Pizza on a Pizza Stone

Homemade pizza on a pizza stone with a crisp bottom, chewy rim, and clear timing for dough, shaping, and baking. A straightforward weeknight pizza with a thin center, puffed edge, bright tomato sauce, browned mozzarella, and pepperoni that curls at edges.
Course: Dinner
Cuisine: Italian
Prep: 20 min
Cook: 14 min
Total: 94 min
Servings: 3 Calories: 483 kcal Cost: —

Equipment

  • Pizza stone
  • Oven
  • Large bowl
  • Mixing spoon
  • Pizza peel
  • Parchment paper (optional)
  • Measuring cups and spoons
  • Floured surface

Ingredients

  • 2 1/4 teaspoons active dry yeast
  • 3/4 cup warm water (180g)
  • 2 cups all-purpose flour (240g)
  • 1 teaspoon sugar
  • 1 teaspoon salt
  • 1 tablespoon olive oil (15g)
  • 1/3 to 1/2 cup pizza sauce (80g to 120g)
  • 6 to 8 ounces low-moisture mozzarella, shredded (170g to 225g)
  • 2 to 3 ounces pepperoni, if using (55g to 85g)
  • 2 tablespoons grated Parmesan (10g)
  • 4 to 6 fresh basil leaves, torn
  • 1/2 teaspoon dried oregano
  • Cornmeal or flour for dusting

Instructions

  1. Combine warm water, yeast, and sugar in a large bowl and let sit for 5 to 10 minutes until foamy.
  2. Add flour, salt, and olive oil; stir until dough is shaggy and no dry flour remains.
  3. Turn dough onto a floured surface and knead for 6 to 8 minutes until smooth, elastic, and slightly tacky; add flour 1 teaspoon at a time if sticky.
  4. Place dough in an oiled bowl, cover, and let rise in a warm spot for 1 hour or until doubled and slightly domed.
  5. Place pizza stone in the oven and preheat to 500°F; heat stone for at least 30 to 45 minutes.
  6. Punch down dough and shape into a 10- to 12-inch round with a thinner center and slightly thicker rim; rest 5 to 10 minutes if it shrinks back.
  7. Transfer dough to a peel dusted with flour or cornmeal or parchment; spread 1/3 to 1/2 cup sauce leaving a border; add mozzarella, pepperoni if using, Parmesan, and oregano; keep toppings moderate.
  8. Shake peel to ensure dough moves freely; slide pizza onto the hot stone; bake with parchment for 2 to 3 minutes then remove parchment.
  9. Bake for 10 to 14 minutes until cheese is melted and browned in spots, rim golden with blisters, and bottom crisp and deep golden-brown.
  10. Remove pizza and rest for 2 to 3 minutes before slicing; finish with torn basil.

Notes

Patience is key for a crisp bottom and chewy rim. Use a full 30-45 minute preheated stone for best crust texture. Adjust flour type (all-purpose, bread, or 00) based on desired crust texture. Store leftovers in fridge up to 3 days and reheat in 425°F oven for 5 to 8 minutes. Dough can be refrigerated up to 72 hours before shaping for better flavor.

Nutrition

Serving Size: 1/4 pizza | Calories: 483 kcal | Protein: 22g | Fat: 18g | Carbohydrates: 56g | Per100g Calories: 252 kcal | Per100g Protein: 11g | Per100g Fat: 9g | Per100g Carbohydrates: 29g

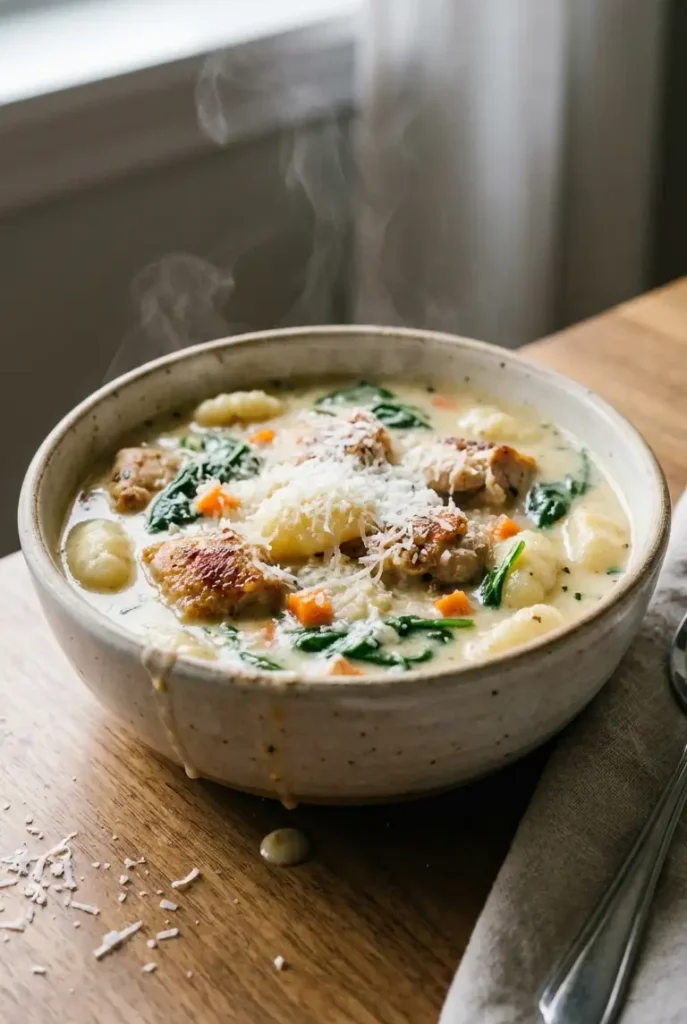
The difference between a flat chicken gnocchi soup and a good one usually comes down to two things: browned chicken and gentle heat. If the chicken goes into the pot wet and steams instead of searing, the broth tastes thin no matter how much cream you add. And if the soup boils once the gnocchi and dairy are in, the gnocchi swells too much and the broth can turn grainy.

This version keeps the broth silky, the gnocchi tender, and the chicken actually seasoned all the way through. The finished soup should be thick enough to lightly coat a spoon, with sweetness from onion and carrot, a clear garlic edge, Parmesan for depth, and spinach added late so it softens into the broth without going dull.

Why This Creamy Chicken Gnocchi Soup Works

  • Browning the chicken first leaves a layer of fond in the pot, which gives the broth a deeper savory base.
  • The gnocchi cooks at a gentle simmer, not a boil, so it stays tender instead of turning bloated.
  • Cream and Parmesan go in over low heat so the broth stays smooth instead of splitting or clumping.
  • Spinach is added at the end, which keeps it bright and soft rather than gray-green and overcooked.

Ingredients for Creamy Chicken Gnocchi Soup

  • 1 pound boneless skinless chicken breast, cut into bite-size pieces (450g)
  • 1 tablespoon olive oil
  • 1 tablespoon unsalted butter (15g)
  • 1 small yellow onion, diced (150g)
  • 2 medium carrots, diced (120g)
  • 2 celery stalks, diced (100g)
  • 3 cloves garlic, minced
  • 4 cups chicken broth (960g)
  • 1 teaspoon Italian seasoning (I like a 👉softer Italian blend here, not one that leans too rosemary-heavy)
  • 1/2 teaspoon kosher salt, plus more to taste
  • 1/2 teaspoon black pepper
  • 1 package potato gnocchi (500g)
  • 1 cup heavy cream (240g)
  • 1 cup freshly grated Parmesan cheese (100g)
  • 2 cups baby spinach (60g)

Best gnocchi to use: shelf-stable, refrigerated, or frozen

Refrigerated gnocchi usually gives the best texture here: soft but not mushy. Shelf-stable gnocchi works well too and is convenient for pantry cooking.

Frozen gnocchi is fine, but add it straight from frozen and give it an extra minute or two. Do not thaw it first or it can soften unevenly and start breaking down in the broth.

Chicken breast, thighs, or rotisserie chicken

Chicken breast keeps the soup a little lighter and cooks quickly. Thighs are better if you want a richer soup and slightly more forgiving texture.

Rotisserie chicken works too. If using it, skip the searing step and stir in about 3 cups shredded cooked chicken near the end, just long enough to heat through.


How to make creamy chicken gnocchi soup

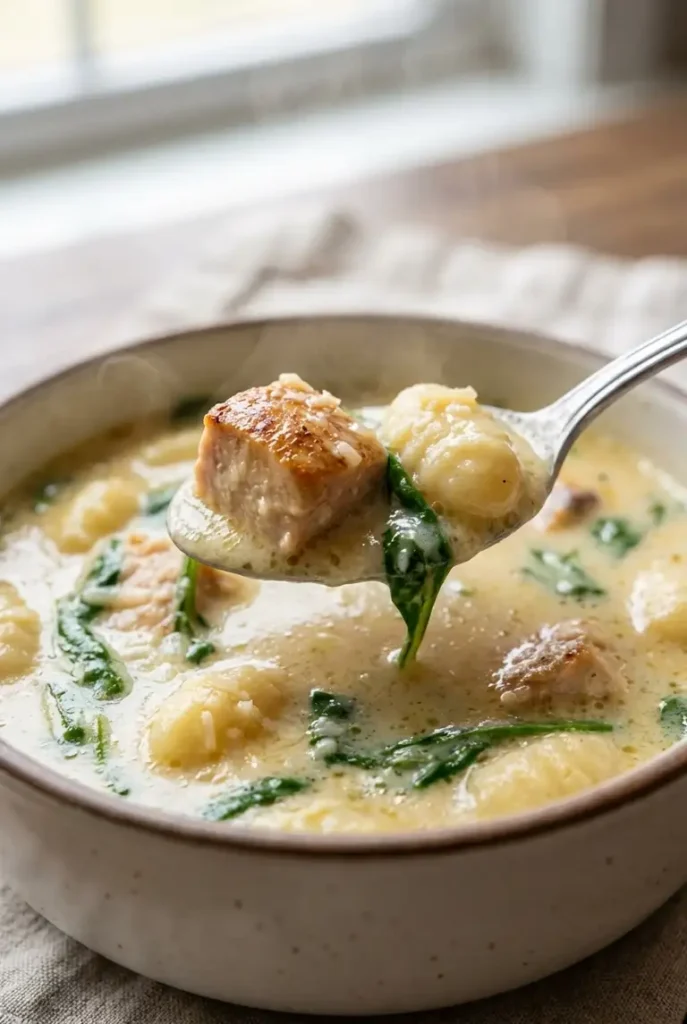
A spoonful of creamy chicken gnocchi soup lifted from the bowl, showing tender gnocchi, browned chicken, spinach, and Parmesan in thick broth.
  1. Pat the chicken dry and season it with the salt and pepper. Heat the olive oil in a large Dutch oven or soup pot over medium-high heat. Add the chicken in a single layer and leave it alone for the first 2 minutes so it can brown properly. Cook for 5 to 7 minutes, turning once or twice, until the pieces have golden brown edges and are nearly cooked through. They should release easily from the pot when a crust forms. Transfer to a plate.
  2. Reduce the heat to medium and add the butter, onion, carrots, and celery. Cook for 4 to 5 minutes, stirring often, until the onion looks glossy and translucent and the carrots have lost their raw edge but are still firm. If the browned bits on the bottom of the pot start turning very dark, lower the heat slightly.
  3. Add the garlic and Italian seasoning. Cook for 30 seconds, just until fragrant.
  4. Pour in the chicken broth and scrape the bottom of the pot well to loosen all the browned bits. Return the chicken and any juices to the pot. Bring the soup to a gentle simmer with small bubbles around the edge, not a rolling boil.

Sear the chicken for a richer broth

This is the step that gives the soup more depth. You’re not trying to cook the chicken all the way through at the start; you’re building color. That browned layer dissolves into the broth and tastes much better than a broth built from pale, crowded chicken.

  1. Add the gnocchi and keep the heat at a gentle simmer. Cook for 3 to 5 minutes, depending on the type of gnocchi, until the pieces float and feel tender when cut or bitten. Make sure the chicken reaches an internal temperature of 165°F.

Simmer the gnocchi gently so it stays pillowy

If the pot is boiling hard here, the gnocchi will absorb liquid too quickly and turn heavy. A quiet simmer keeps the centers tender and the broth from reducing too fast.

  1. Lower the heat to low. Stir in the heavy cream. The soup should be hot but not boiling.
  2. Add the Parmesan a little at a time, stirring between additions so it melts smoothly into the broth. Stir in the spinach and cook for 1 to 2 minutes, just until wilted and bright green.

Add cream and Parmesan without curdling

Parmesan clumps most often when it hits boiling liquid or when it’s added all at once. Freshly grated cheese melts more cleanly than pre-shredded because it doesn’t carry the same anti-caking powders.

  1. Taste and adjust seasoning. The finished soup should lightly coat the back of a spoon. If it’s too thick, add a splash of broth. If it’s thinner than you want, simmer for 2 to 3 minutes longer, or mash a few gnocchi into the broth to thicken it naturally.

If you’re in the mood for something a little brothy and classic, my Easy Chicken Noodle Soup From Scratch is another cozy chicken dinner that works well for weeknights.


Tips for thick, creamy chicken gnocchi soup that doesn’t turn mushy

  • Keep the soup at a simmer, never a full boil, once the gnocchi goes in.
  • Use heavy cream if you want the smoothest, most stable broth.
  • Add Parmesan over very low heat.
  • If making it ahead, cook the base first and add the gnocchi, cream, and spinach when reheating.
  • Do not let the spinach cook longer than necessary.

Easy variations

Instant Pot creamy chicken gnocchi soup

Use the sauté function to brown the chicken in the oil, then transfer it out. Sauté the onion, carrots, celery, and garlic. Add the broth and return the chicken. Pressure cook on high for 4 minutes, then quick release.

Turn the sauté function back on low, add the gnocchi, and simmer for 2 to 4 minutes until tender. Turn off the heat, then stir in the cream, Parmesan, and spinach.

Creamy chicken gnocchi soup with sun-dried tomatoes

Add 1/3 cup chopped oil-packed sun-dried tomatoes (55g) with the garlic. They bring a sharper, concentrated tomato flavor that cuts through the richness of the cream.

If you want another easy vegetable add-in, stir in 1 cup frozen peas (140g) during the last 2 minutes of cooking.

If creamy, spoon-coating soups are your thing, you’d also love this Broccoli Cheddar Soup for the same comfort-food payoff.


What to serve with chicken gnocchi soup

A simple green salad works well if you want to keep dinner from feeling too heavy. Bread is the obvious choice if you want something to drag through the broth. For a fuller comfort-food dinner, garlic breadsticks work especially well with a thick, creamy soup like this.


How to store and reheat leftovers

Store leftovers in an airtight container in the refrigerator for up to 3 days. The soup will thicken as it sits because the gnocchi keeps absorbing liquid.

Reheat gently on the stove over low heat or in short bursts in the microwave, stirring between each one. Add a splash of broth or milk to loosen the texture before serving.

I do not recommend freezing the fully finished soup. Cream-based broths can separate after thawing, and the gnocchi tends to go soft.


Creamy chicken gnocchi soup FAQ

Why did my chicken gnocchi soup separate?

Usually the soup got too hot after the cream went in, or the Parmesan was added too quickly. Keep the heat low and do not let the soup boil once the dairy is in.

Can I use frozen, refrigerated, or shelf-stable gnocchi?

Yes. Refrigerated gnocchi gives the most reliable texture. Frozen works too; add it straight from the freezer and cook it a little longer. Shelf-stable gnocchi is also fine and convenient.

How do I keep gnocchi from getting mushy?

Do not boil the soup hard, and do not let the gnocchi sit in the pot much longer than needed. If you know you will have leftovers, cook the gnocchi separately or add it only to the portion you plan to eat.

Can I make this ahead without the gnocchi turning soft?

Yes. Make the soup base with the chicken, vegetables, and broth, then cool and refrigerate it. Reheat the base and add the gnocchi, cream, Parmesan, and spinach fresh when serving.


Nutrition

  • Serving size: approximately 1/6 of the total recipe
  • Calories: 545 kcal
  • Protein: 31g
  • Fat: 26g
  • Carbohydrates: 45g
  • Per 100g: Calories: 86 kcal, Protein: 5g, Fat: 4g, Carbohydrates: 7g.

These nutritional values are approximate and can vary based on the specific ingredients and brands used.

Creamy Chicken Gnocchi Soup

Creamy chicken gnocchi soup with browned chicken, tender gnocchi, Parmesan, and spinach. One pot, ready in 40 minutes. The broth stays silky, the gnocchi tender, and chicken seasoned all the way through.
Course: Dinner
Cuisine: American
Prep: 15 min
Cook: 25 min
Total: 40 min
Servings: 6 Calories: 545 kcal

Ingredients

  • 1 pound boneless skinless chicken breast cut into bite-size pieces (450g)
  • 1 tbsp olive oil
  • 1 tbsp unsalted butter (15g)
  • 1 small yellow onion diced (150g)
  • 2 medium carrots diced (120g)
  • 2 stalks celery diced (100g)
  • 3 cloves garlic minced
  • 4 cups chicken broth (960g)
  • 1 tsp Italian seasoning
  • 1/2 tsp kosher salt plus more to taste
  • 1/2 tsp black pepper
  • 1 package potato gnocchi (500g)
  • 1 cup heavy cream (240g)
  • 1 cup freshly grated Parmesan cheese (100g)
  • 2 cups baby spinach (60g)

Instructions

  1. Pat the chicken dry and season with salt and pepper. Heat olive oil in a large pot over medium-high heat. Add chicken in a single layer and brown for 2 minutes without stirring. Cook for 5-7 minutes, turning to brown all sides until golden and nearly cooked through. Remove chicken to a plate.
  2. Reduce heat to medium; add butter, onion, carrots, and celery. Cook 4-5 minutes until onion is glossy and translucent and carrots are tender but firm. Lower heat if bottom darkens too much.
  3. Add garlic and Italian seasoning; cook 30 seconds until fragrant.
  4. Pour in chicken broth and scrape bottom to loosen browned bits. Return chicken and juices to pot. Bring to a gentle simmer with small bubbles around the edge, not a boil.
  5. Add gnocchi and simmer gently for 3-5 minutes until gnocchi float and are tender. Ensure chicken reaches 165°F internal temperature.
  6. Lower heat to low. Stir in heavy cream, hot but not boiling.
  7. Add Parmesan gradually, stirring to melt smoothly. Stir in spinach and cook 1-2 minutes until wilted and bright green.
  8. Taste and adjust seasonings. Soup should coat a spoon lightly. Add broth if too thick or simmer 2-3 minutes longer or mash some gnocchi to thicken.

Notes

Keep soup at a gentle simmer after adding gnocchi to prevent mushiness. Use refrigerated gnocchi for best texture; frozen can be added frozen and cooked longer. Add Parmesan off or low heat to prevent clumping. Store leftovers in the fridge up to 3 days; reheat gently and add broth if needed. Avoid freezing finished soup as cream and gnocchi texture degrade.

Nutrition

Serving Size: 1/6 recipe | Calories: 545 kcal | Protein: 31g | Fat: 26g | Carbohydrates: 45g | Per100g Calories: 86 kcal | Per100g Protein: 5g | Per100g Fat: 4g | Per100g Carbohydrates: 7g

The detail that fixes this dish is heat control. If the cream is bubbling hard when the Parmesan goes in, the sauce can turn grainy and thin out around the edges. Keep it at a gentle simmer instead, and you get a smooth sauce that stays on the chicken instead of sliding off it.

Done right, this is a skillet chicken dinner with real contrast: browned chicken, a thick cream sauce, sharp Parmesan, sweet-tart sun-dried tomatoes, and basil added at the end so it still tastes fresh.

Why This Marry Me Chicken Works

  • The chicken is seared first, so you get browned edges and a little crust before it finishes in the sauce.
  • The sauce is built in the same skillet, which pulls in the browned bits instead of tasting flat.
  • Parmesan is added off a hard boil, so the sauce stays smoother and less likely to split.
  • Finishing in the oven cooks the chicken through gently without reducing the sauce too far.

Ingredients for Marry Me Chicken

  • 4 boneless, skinless chicken breasts (680g)
  • 1 teaspoon kosher salt
  • 1/2 teaspoon black pepper
  • 1 teaspoon garlic powder
  • 2 tablespoons all-purpose flour (15g)
  • 2 tablespoons olive oil
  • 2 tablespoons unsalted butter (30g)
  • 3 cloves garlic, minced
  • 1 cup chicken broth (240g)
  • 1 cup heavy cream (240g)
  • 3/4 cup freshly grated Parmesan cheese (75g)
  • 1/2 cup oil-packed sun-dried tomatoes, drained and sliced (85g)
  • 1/2 teaspoon red pepper flakes
  • 1 teaspoon Italian seasoning (I like a 👉softer Italian blend here, not one that leans too rosemary-heavy)
  • 1/4 cup fresh basil (10g), sliced

Best chicken cut to use

Chicken breasts work well here if you pound or slice them to an even thickness, about 1/2 to 3/4 inch. That keeps the outside from drying out while the center catches up.

Chicken thighs also work and stay naturally juicier, but they make the dish a little richer.

Why oil-packed sun-dried tomatoes work better

Oil-packed sun-dried tomatoes are softer, less chewy, and easier to distribute through the sauce. Dry-packed tomatoes can work, but they need to be rehydrated first or they stay leathery in the finished dish.

Freshly grated Parmesan vs. pre-shredded

Freshly grated Parmesan melts more cleanly. Pre-shredded cheese often contains anti-caking starches that can leave the sauce slightly grainy.


How to make Marry Me Chicken

Close-up of a spoon lifting thick Parmesan cream sauce with sun-dried tomatoes over a golden seared chicken breast.
  1. Preheat the oven to 375°F.
  2. Pat the chicken dry. If the breasts are very thick, pound or slice them to an even 1/2- to 3/4-inch thickness. Season both sides with salt, pepper, and garlic powder, then lightly dust with flour.
  3. Heat a large oven-safe skillet over medium to medium-high heat. Add the olive oil. When the oil shimmers and moves easily across the pan, add the chicken.
  4. Sear the chicken for 4 to 5 minutes on the first side, then 3 to 4 minutes on the second side, until you have golden brown edges. The chicken should release easily once a crust forms; if it sticks hard, give it another 30 to 60 seconds. Transfer to a plate.

How to build a smooth Parmesan cream sauce

  1. Reduce the heat to medium. Add the butter, then the garlic. Cook for 20 to 30 seconds, just until fragrant. If the garlic starts browning, lower the heat right away.
  2. Pour in the chicken broth and scrape up any browned bits from the pan. Add the heavy cream, sun-dried tomatoes, red pepper flakes, and Italian seasoning. Bring to a gentle simmer, not a boil, and cook for 2 to 3 minutes.
  3. Lower the heat if needed so the sauce is not bubbling aggressively. Add the Parmesan in small handfuls, whisking between additions until melted. The sauce should lightly coat the back of a spoon before the chicken goes back in.
  4. Return the chicken and any juices to the skillet, turning the pieces once so the sauce coats them.

When the chicken is done

  1. Transfer the skillet to the oven and bake for 10 to 15 minutes, depending on thickness, until the chicken reaches 162 to 163°F in the thickest part. Carryover heat will bring it to 165°F.
  2. Let the skillet rest for 5 minutes. Stir in the basil off the heat. If the sauce has tightened too much, loosen it with 1 to 2 tablespoons warm broth or cream.

Tips for a better creamy Marry Me Chicken sauce

  • Keep the cream at a low simmer. A rolling boil is the fastest way to break the sauce.
  • Slice larger pieces of sun-dried tomato so they spread through the dish instead of landing in a few heavy bites.
  • Do not rush the sear. Pale chicken gives you less flavor in the pan.
  • Add the basil at the end so it stays fresher and brighter.

If you love this sauce, my Marry Me Chicken Pasta turns the same creamy sun-dried tomato flavor into a full pasta dinner.


Marry Me Chicken variations

Marry Me Chicken with orzo

To turn this into marry me chicken with orzo, cook 8 ounces orzo (225g) separately until just shy of done. Stir it into the finished sauce after the chicken comes out of the oven, adding a splash of warm broth if needed. The orzo absorbs sauce quickly, so serve it right away.

Marry Me Chicken with fresh tomatoes

For a fresher version, replace the sun-dried tomatoes with 1 1/2 cups chopped ripe tomatoes (225g). Cook them in the skillet for 4 to 5 minutes after the garlic, until they slump and release some liquid, then add the broth and cream. The sauce will taste lighter and less concentrated, with more acidity and less chew.

If you want to try the fresh-tomato variation, my Authentic Italian Spaghetti Sauce with Fresh Tomatoes is a helpful guide for picking and cooking ripe tomatoes.


What to serve with Marry Me Chicken

You want something that can handle a thick cream sauce. Pasta, mashed potatoes, orzo, rice, or crusty bread all work well. Roasted broccoli or green beans help balance the richness.


How to store and reheat Marry Me Chicken

Store leftovers in an airtight container in the refrigerator for up to 3 days.

Reheat in a skillet over low heat with a small splash of broth or cream. Stir the sauce gently and do not let it boil. The microwave works in short bursts if needed, but it is more likely to make the sauce separate and push the chicken too far.


Marry Me Chicken FAQ

Why did my Marry Me Chicken sauce separate?

Usually the heat was too high when the cream or Parmesan was added. Keep the sauce at a gentle simmer and add the cheese gradually. Pre-shredded Parmesan can also make the texture rougher.

Can I use chicken thighs instead of chicken breasts?

Yes. Use boneless, skinless thighs and sear them the same way. They may need a little more time in the oven, but they stay juicy and work well with the sauce.

Can I use dry-packed or frozen sun-dried tomatoes?

Dry-packed tomatoes need to be softened first in hot water, then drained and sliced. Frozen tomatoes are not the best fit here because they lose texture and dilute the sauce.

How do I know when the sauce is thick enough before baking?

Dip in a spoon and run a finger through the back. If the line holds for a moment and the sauce does not immediately flood back together, it is ready. It should still look fluid, not stiff, because it thickens more in the oven and while resting.


Nutrition

  • Serving size: approximately 1 chicken breast with 1/4 of the sauce
  • Calories: 562 kcal
  • Protein: 45g
  • Fat: 37g
  • Carbohydrates: 10g
  • Per 100g: Calories: 177 kcal, Protein: 14g, Fat: 12g, Carbohydrates: 3g

These nutritional values are approximate and vary based on the specific ingredients and brands used.

Marry Me Chicken

Creamy Marry Me Chicken with Parmesan, sun-dried tomatoes, and basil. A balanced skillet dinner ready in about 40 minutes, featuring lightly browned chicken breasts in a smooth, thick Parmesan cream sauce with sharp, sweet-tart flavors.
Course: Dinner
Cuisine: American
Prep: 15 min
Cook: 25 min
Total: 40 min
Servings: 4 Calories: 562 kcal Cost: —

Equipment

  • Oven-safe skillet
  • Tongs
  • Cutting board
  • Chef’s knife
  • Measuring spoons
  • Measuring cups
  • Whisk

Ingredients

  • 4 pieces Boneless, skinless chicken breasts (about 680g)
  • 1 tsp Kosher salt
  • 1/2 tsp Black pepper
  • 1 tsp Garlic powder
  • 2 Tbsp All-purpose flour (15g)
  • 2 Tbsp Olive oil
  • 2 Tbsp Unsalted butter (30g)
  • 3 cloves Garlic minced
  • 1 cup Chicken broth (240g)
  • 1 cup Heavy cream (240g)
  • 3/4 cup Freshly grated Parmesan cheese (75g)
  • 1/2 cup Oil-packed sun-dried tomatoes drained and sliced (85g)
  • 1/2 tsp Red pepper flakes
  • 1 tsp Italian seasoning
  • 1/4 cup Fresh basil sliced (10g)

Instructions

  1. Preheat the oven to 375°F (190°C).
  2. Pat the chicken breasts dry and pound or slice to an even 1/2- to 3/4-inch thickness if needed. Season both sides with salt, black pepper, and garlic powder. Lightly dust the chicken with flour.
  3. Heat an oven-safe skillet over medium to medium-high heat. Add olive oil and heat until it shimmers and moves easily across the pan.
  4. Add the chicken breasts to the skillet. Sear for 4 to 5 minutes on the first side, then 3 to 4 minutes on the second side, until golden brown edges form. If chicken sticks, cook another 30 to 60 seconds. Transfer chicken to a plate.
  5. Reduce heat to medium. Add butter and minced garlic to the skillet. Cook for 20 to 30 seconds until fragrant, lowering heat if garlic starts to brown.
  6. Pour in chicken broth and scrape up browned bits from the skillet. Add heavy cream, sun-dried tomatoes, red pepper flakes, and Italian seasoning. Bring mixture to a gentle simmer and cook for 2 to 3 minutes.
  7. Lower heat if sauce bubbles aggressively. Gradually whisk in Parmesan in small handfuls until melted and sauce lightly coats the back of a spoon.
  8. Return chicken and any juices to the skillet, turning pieces once to coat with sauce.
  9. Transfer skillet to preheated oven and bake for 10 to 15 minutes, depending on thickness, until chicken reaches 162 to 163°F internally. Carryover heat will bring it to 165°F.
  10. Remove skillet from oven. Let rest for 5 minutes. Stir in fresh basil off the heat. If sauce is too thick, loosen with 1 to 2 tablespoons warm broth or cream.

Notes

Tips: Keep cream at a low simmer to prevent sauce from breaking. Slice sun-dried tomatoes larger for even distribution. Do not rush searing chicken to develop flavor and crust. Add basil at the end to keep flavor fresh. Storage & Reheat: Store leftovers in airtight container in fridge for up to 3 days. Reheat gently in skillet over low heat with splash of broth or cream; avoid boiling sauce.

Nutrition

Serving Size: 1 chicken breast with 1/4 sauce | Calories: 562 kcal | Protein: 45g | Fat: 37g | Carbohydrates: 10g | Per100g Calories: 177 kcal | Per100g Protein: 14g | Per100g Fat: 12g | Per100g Carbohydrates: 3g

The first time I tried to make a creamy no-egg carbonara, I treated it too much like Alfredo with bacon and added the cheese while the pan was still too hot. It clumped almost immediately, then turned grainy and heavy instead of silky.

That batch made the key part clear: keep the cream at a bare simmer, then add the parmesan off the heat. If the sauce looks slightly loose in the skillet, that is usually right. It tightens as it hits the pasta and settles into the glossy, lightly thick texture you want.

This is not traditional Roman carbonara. It is a creamy, no-egg carbonara-style pasta for weeknights when you want the bacon, black pepper, cheese, and spaghetti combination without dealing with eggs.

Why This Creamy No-Egg Carbonara Works

  • It gives you the carbonara flavor profile in a more forgiving format.
  • The sauce stays smooth because the cheese is added off the heat.
  • Bacon fat, cream, pasta water, and finely grated parmesan build a sauce that coats the noodles instead of turning greasy.
  • It comes together quickly, but it still tastes deliberate.

What Makes This Carbonara Without Eggs So Creamy

The cream helps, but the texture mostly comes from how the sauce is built:

  • Rendered bacon fat gives the sauce depth and helps carry the cheese and pepper.
  • Pasta water loosens the sauce and helps it cling to the spaghetti in a thin layer.
  • Finely grated parmesan melts much more smoothly than coarse shreds.
  • Adding the cheese off the heat keeps the sauce from breaking or turning grainy.

The finished pasta should look glossy and fluid, not stiff or gluey. The noodles should stay coated, not buried in sauce.


Ingredients for Creamy No-Egg Carbonara Pasta

  • 12 ounces spaghetti (340g)
  • 8 ounces bacon, chopped (225g)
  • 1 tablespoon olive oil (15g)
  • 3 cloves garlic, minced
  • 1 cup heavy cream (240g)
  • 1 cup finely grated parmesan cheese (100g)
  • 1 teaspoon freshly ground black pepper (I like a 👉fragrant black pepper here, not a flat pre-ground one)
  • Salt, for the pasta water
  • 2 tablespoons chopped parsley, optional

Best pasta for no-egg carbonara

Spaghetti is the most straightforward choice here. It gives you the classic carbonara feel and holds a light coating of sauce well. Linguine also works. Short pasta is usable, but this sauce makes the most sense on long strands.

Bacon, pancetta, or guanciale

Bacon is the easiest option and brings smoke along with the salt. Pancetta gives a cleaner cured-pork flavor and lands a little closer to the usual carbonara direction. Guanciale works too, though at that point you may prefer a more traditional egg-based version.

Parmesan vs pecorino for a smoother sauce

Parmesan melts more gently and gives a nuttier, rounder flavor. Pecorino is sharper and saltier. For a smoother no-egg carbonara sauce, parmesan is the safer choice. If you want more bite, use half parmesan and half pecorino.


Close-up of a fork lifting creamy no-egg carbonara spaghetti, showing glossy parmesan cream sauce, pepper flecks, and crisp bacon pieces.

How to Make Carbonara Without Eggs

Cook the Pasta Just to Al Dente

  1. Bring a large pot of water to a boil and season it well. It should taste lightly salty, but don’t overdo it since the bacon and cheese add plenty later.
  2. Cook the spaghetti 1 minute shy of package time. Before draining, reserve at least 1 cup of pasta water.

Render the Bacon Until Crisp, Not Hard

  1. While the pasta cooks, set a large skillet over medium heat. Add the bacon and cook for 6 to 8 minutes, stirring now and then, until the edges are deep golden and crisp, but not dark brown or brittle.
  2. If the bacon is lean and the pan looks dry, add the olive oil. If it gives off a lot of fat, you can skip some or all of the oil.
  3. Transfer a spoonful of bacon to a plate if you want some pieces to stay extra crisp for serving, then leave the rest in the skillet.

Build a Silky Cream Sauce

  1. Lower the heat to medium-low. Add the garlic and cook for 30 to 60 seconds, just until fragrant. If it starts turning tan, lower the heat right away.
  2. Pour in the heavy cream and stir to combine with the bacon fat. Let it come to a gentle simmer for 2 to 3 minutes. You want small bubbles around the edge, not a rolling boil. The cream is ready when it lightly coats the back of a spoon.
  3. Stir in the black pepper.

Toss Until the Sauce Clings to Every Strand

  1. Add the drained spaghetti to the skillet along with 1/2 cup of the reserved pasta water. Toss well over low heat for 1 to 2 minutes so the pasta finishes cooking and starts absorbing the sauce.
  2. Take the skillet off the heat. Add the finely grated parmesan a handful at a time, tossing continuously until the sauce turns glossy and smooth. If it looks tight or sticky, add more pasta water in small splashes until the sauce loosens.
  3. The final texture should cling to the noodles in a thin, silky layer. If it sits in a thick mass, it needs more pasta water. If it looks watery, let it sit 30 seconds and toss again; the cheese will usually pull it together.
  4. Taste and add more pepper if needed. The pepper should be noticeable in each bite, not just scattered on top.
  5. Serve immediately, with parsley and extra parmesan if you like. Warm bowls help keep the sauce fluid for the first few minutes at the table.

Tips for the Best No-Egg Spaghetti Carbonara

  • Use finely grated parmesan, not thick shreds.
  • Keep the heat low once the cream goes in.
  • Save more pasta water than you think you need.
  • Do not salt the finished dish until you taste it.

Variations

Chicken Carbonara Pasta Recipe No Egg

For a higher-protein version, add 1 to 1 1/2 cups cooked sliced chicken breast or rotisserie chicken when you toss in the pasta. You can keep the bacon for flavor or cut it back to 4 ounces (115g) so the dish doesn’t get too salty.

For another silky stovetop pasta idea, take a look at White Sauce Chicken Pasta without Cheese.

Carbonara Pasta Bake No Egg

Make the pasta as directed, but keep the sauce slightly looser by adding an extra splash of cream or pasta water. Transfer to a baking dish, top with extra parmesan and a small handful of mozzarella, and bake at 400°F for 10 to 15 minutes, until bubbling at the edges and lightly browned on top.


Common Problems and How to Fix Them

Why did my no-egg carbonara turn grainy?

The pan was probably too hot when the cheese went in, or the parmesan was too coarse. Remove the skillet from the heat before adding cheese and use finely grated parmesan.

How do I keep it from getting too thick?

Hold back extra pasta water and add it a tablespoon or two at a time while tossing. The sauce should look slightly loose in the skillet because it firms up as it cools.

Can I use frozen peas or spinach?

Yes. Add frozen peas during the last 1 to 2 minutes of simmering. Add spinach right before serving and toss just until wilted. Do not add too much or the sauce gets diluted.

Can I use pancetta instead of bacon?

Yes. Pancetta gives a less smoky, more cured flavor. It can also be saltier, so taste the dish before adding any extra salt.


How to Store and Reheat Leftovers

Store leftovers in an airtight container in the fridge for up to 3 days.

To reheat, put the pasta in a skillet or saucepan with a small splash of cream, milk, or water. Warm over low heat, tossing gently until the sauce loosens. The microwave works, but use short bursts and stir in between so the cheese doesn’t tighten too much.

If you want to round out an Italian-style dinner night, serve this with my Authentic Italian Spaghetti Sauce with Fresh Tomatoes on another pasta night for a brighter, tomato-forward option.


Nutrition

  • Serving size: approximately 1/4 of the total recipe
  • Calories: 740 kcal
  • Protein: 27g
  • Fat: 44g
  • Carbohydrates: 57g
  • Per 100g: Calories: 258 kcal, Protein: 9g, Fat: 15g, Carbohydrates: 20g.

These nutritional values are approximate and can vary based on the specific ingredients and brands used.

Creamy No-Egg Carbonara Pasta

A creamy, no-egg carbonara-style pasta with bacon, parmesan, and black pepper. Fast and weeknight-friendly with a smooth, glossy sauce that clings to spaghetti.
Course: Dinner
Cuisine: Italian-inspired
Prep: 10 min
Cook: 20 min
Total: 30 min
Servings: 4 Calories: 740 kcal Cost: —

Equipment

  • Large pot
  • Large skillet
  • Tongs
  • Spoon
  • Measuring cups
  • Measuring spoons

Ingredients

  • 12 ounces Spaghetti (340g)
  • 8 ounces Bacon chopped (225g)
  • 1 tablespoon Olive oil (15g)
  • 3 cloves Garlic minced
  • 1 cup Heavy cream (240g)
  • 1 cup Finely grated parmesan cheese (100g)
  • 1 teaspoon Freshly ground black pepper
  • To taste Salt for pasta water
  • 2 tablespoons Parsley chopped, optional

Instructions

  1. Bring a large pot of salted water to a boil, cook spaghetti 1 minute shy of package instructions, reserving 1 cup pasta water before draining.
  2. In a large skillet over medium heat, cook bacon 6–8 minutes, stirring occasionally, until crisp but not burnt. Add olive oil if pan looks dry.
  3. Remove some bacon pieces to a plate for garnish, keep the rest in skillet. Lower heat to medium-low, add garlic and cook 30–60 seconds until fragrant, not browned.
  4. Pour in heavy cream, stirring to combine with bacon fat. Simmer gently 2–3 minutes until cream lightly coats the back of a spoon with small bubbles at edges.
  5. Stir in black pepper. Add drained spaghetti and 1/2 cup reserved pasta water, toss over low heat 1–2 minutes until pasta absorbs sauce.
  6. Remove skillet from heat, add parmesan gradually, tossing continuously until sauce is glossy and smooth. Add more pasta water if sauce is too tight or sticky.
  7. Taste and adjust pepper if needed. Serve immediately topped with reserved bacon, parsley, and extra parmesan if desired.

Notes

Use finely grated parmesan for smoother sauce. Keep cream at gentle simmer to prevent graininess. Save extra pasta water to adjust sauce consistency. Serve warm to keep sauce fluid. Optional variations include adding cooked chicken or baking with mozzarella.

Nutrition

Serving Size: 1/4 recipe | Calories: 740 kcal | Carbohydrates: 57g | Protein: 27g | Fat: 44g