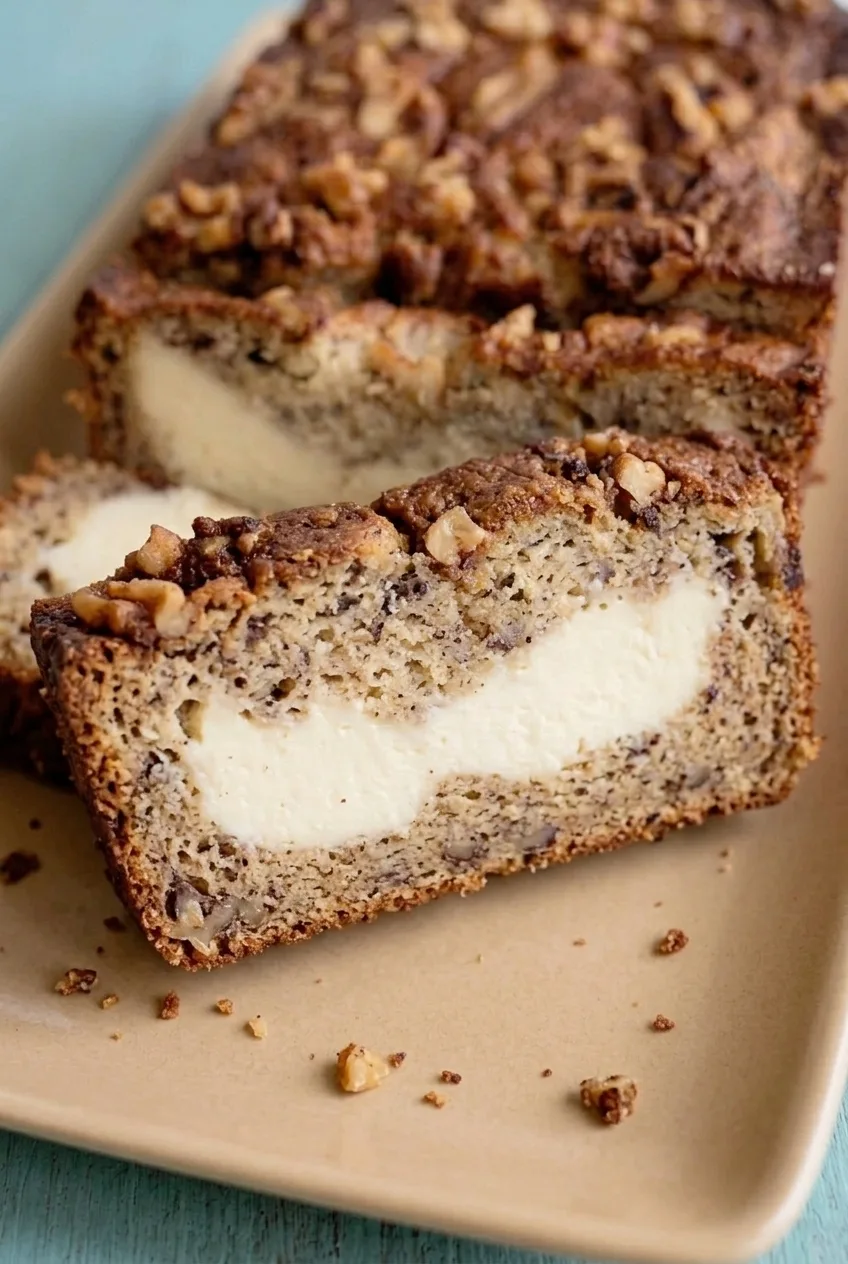
Author

Julia

Browsing

Strawberry Overnight Oats

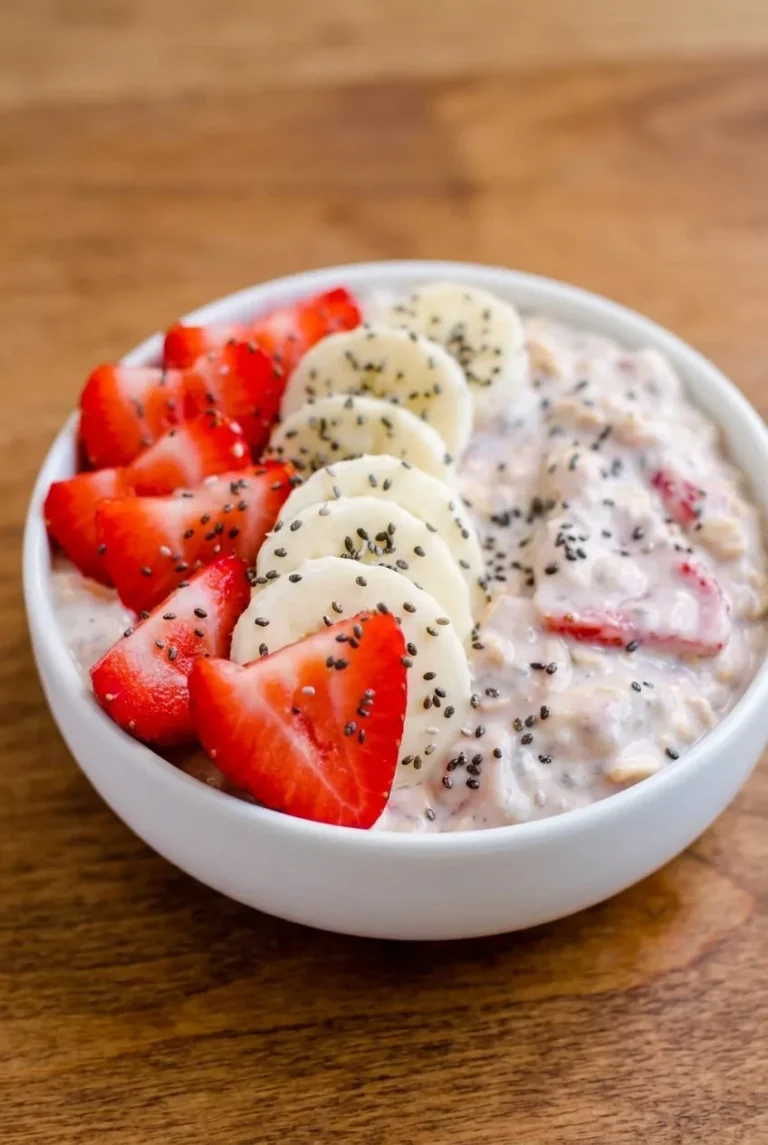
Old-fashioned rolled oats soften in milk and Greek yogurt to make a thick, creamy base with visible oat texture. Mashed strawberries flavor the oats as they chill; fresh strawberry wedges, banana slices, and a little chia finish each bowl. Refrigerate the covered mixture for at least 6 hours before judging its thickness, since juicy berries can make it looser.

Ingredients for Strawberry Overnight Oats
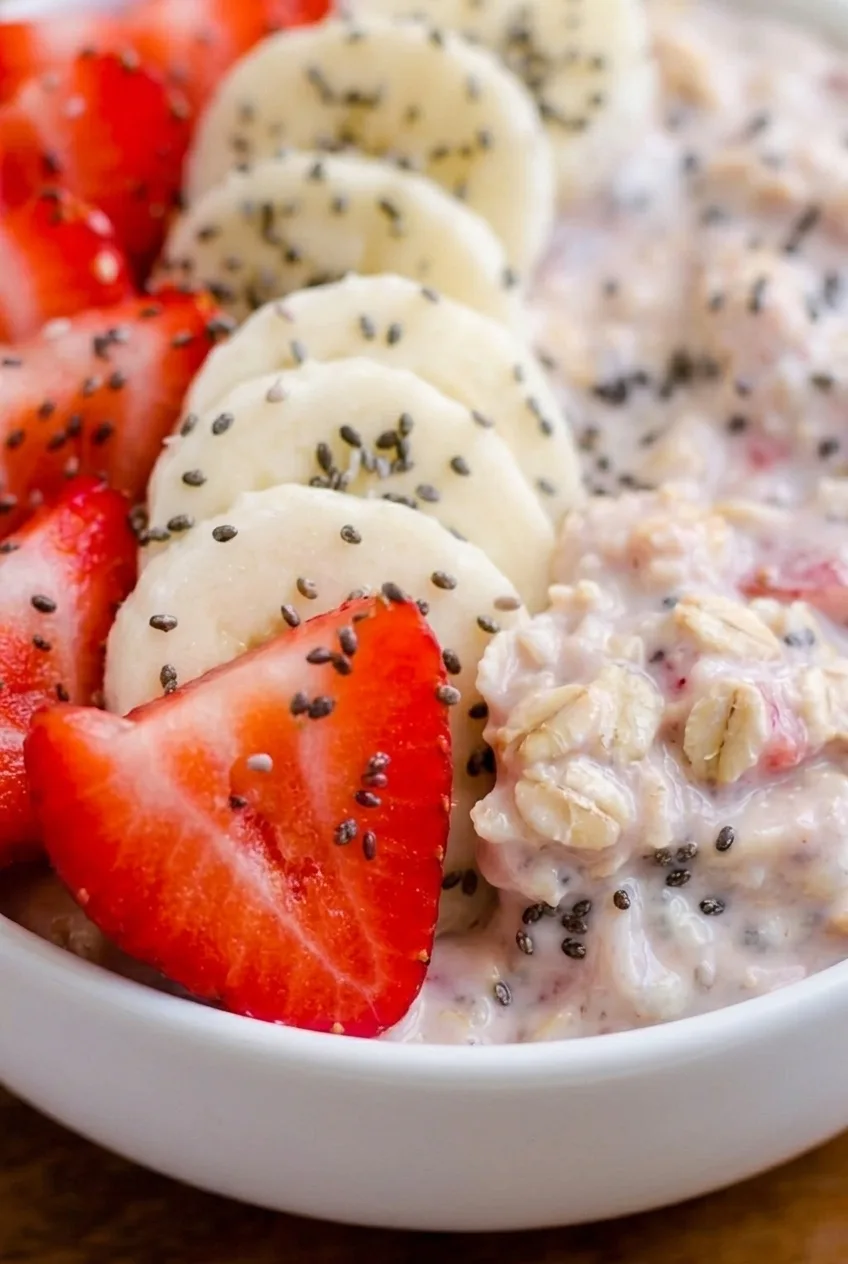
Close view of creamy oat flakes beside strawberry wedges, overlapping banana slices, and chia seeds
  • 1 cup old-fashioned rolled oats (80g)
  • 1 cup milk (240g), plus more if needed for serving
  • 1/2 cup plain Greek yogurt (120g)
  • 1 cup fresh strawberries, chopped or wedged (150g), divided
  • 1 tablespoon chia seeds (12g), divided
  • 2 teaspoons maple syrup, or to taste
  • 1/2 teaspoon vanilla extract
  • 1 medium ripe banana (about 120g), sliced just before serving

How to Make Strawberry Overnight Oats
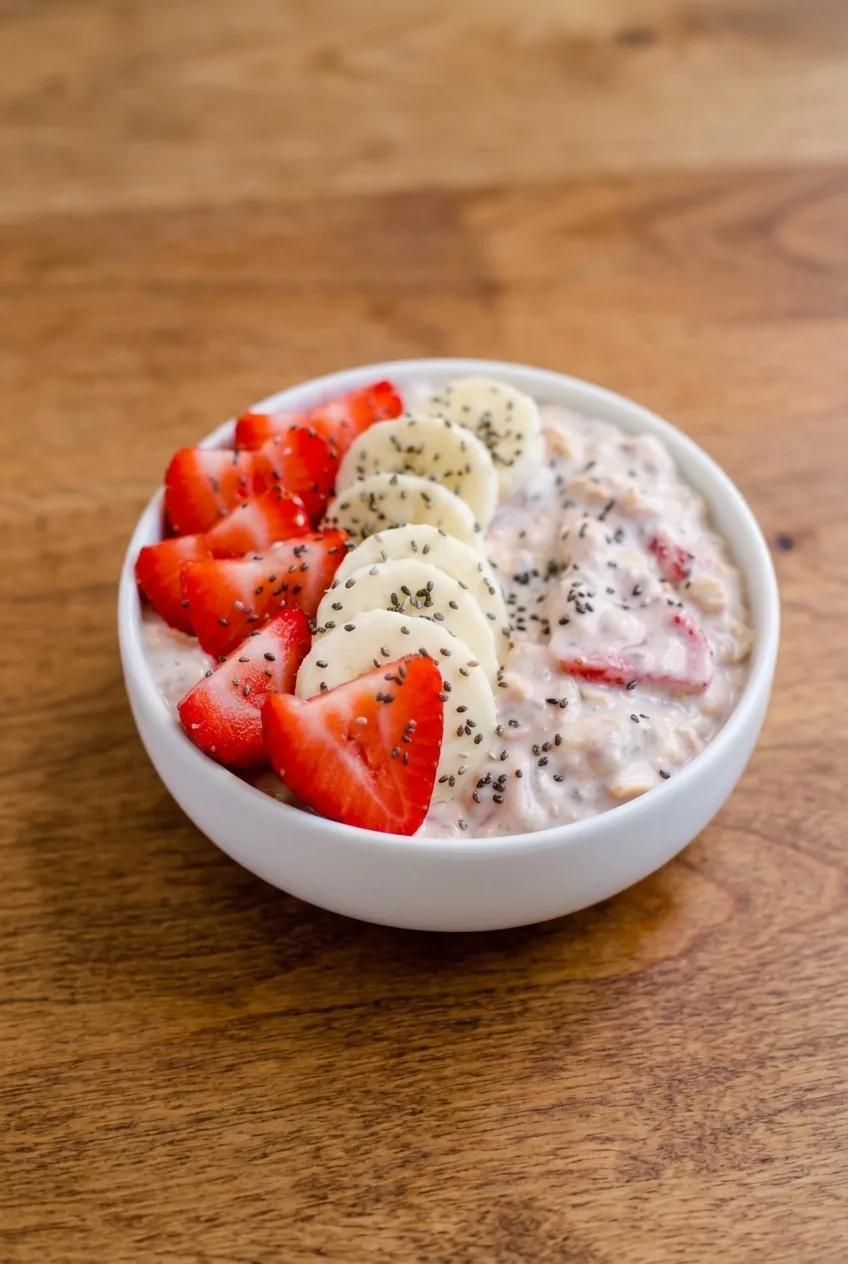
Complete bowl of strawberry overnight oats with banana and chia on a warm wooden table
  1. Prepare the strawberries: Set aside about half for topping. Mash or finely chop the rest with a fork until juicy, leaving a few small pieces.
  2. Mix the oat base: In a medium bowl or covered storage container, stir together the oats, milk, yogurt, mashed strawberries, 2 teaspoons of the chia seeds, maple syrup, and vanilla. Break up any dry pockets of oats or chia clumps. The mixture will look loose before chilling.
  3. Cover and refrigerate: Chill for at least 6 hours, preferably overnight. The oats should be softened but still visible, and the mixture should be thick and spoonable.
  4. Stir and portion: Stir the chilled oats and divide them between two shallow white bowls. They should mound softly rather than flow like milk. If too firm, stir in more milk a tablespoon at a time.
  5. Finish the bowls: Cut the reserved strawberries into wedges and slice the banana. Arrange the strawberry wedges along one side and the front of each bowl, then overlap the banana rounds across the center. Lightly scatter the remaining teaspoon of chia seeds over the fruit and exposed oats. Serve chilled.

Why Split the Strawberries?

Mashed berries release their juice into the oat base without hiding its texture. Keeping the topping berries out of the overnight mixture gives each bowl distinct, fresh wedges. Slice the banana at serving time so the rounds keep their shape and color.

Getting the Right Oat Texture

Use old-fashioned rolled oats for a soft but discernible texture. Instant oats can turn pasty, while steel-cut oats need a different liquid ratio and soaking method. Wait until after the full chill to assess thickness: strawberries can release extra juice as the oats rest. If the mixture is still thin, stir in a small amount of rolled oats or chia and refrigerate until thickened.

For a dairy-free version, use unsweetened plant milk and a thick plant-based yogurt; adjust the consistency after chilling. Thawed frozen strawberries can flavor the base, but they may make it looser. Use fresh berries for the topping. For a base with other topping options, try classic creamy overnight oats.

Make-Ahead and Storage

Keep the oat base covered in the refrigerator for up to 3 days. Stir before serving and add a little milk if it has thickened. Cut the topping strawberries and banana when you’re ready to assemble each bowl. Freezing is not recommended for this yogurt-and-fresh-fruit version.

Nutrition

Approximate nutrition per breakfast bowl (1 of 2): 380 calories, 16g protein, 9g fat, and 61g carbohydrates. Per 100g: about 105 calories, 4g protein, 2g fat, and 17g carbohydrates. Values vary with the milk and yogurt used.

Strawberry Overnight Oats

Rolled oats soak with milk, Greek yogurt, and mashed strawberries for a creamy breakfast topped with fresh berries, banana, and chia seeds.
Course: Breakfast
Cuisine: Global
Prep: 10 min
Total: 370 min
Servings: 2 Calories: 380 kcal per serving; about 105 kcal per 100 g

Equipment

  • Medium bowl or covered storage container
  • Fork
  • Knife

Ingredients

  • 1 cup old-fashioned rolled oats (80 g)
  • 1 cup milk (240 g), plus more if needed for serving
  • 1/2 cup plain Greek yogurt (120 g)
  • 1 cup fresh strawberries, chopped or wedged (150 g), divided
  • 1 tablespoon chia seeds (12 g), divided
  • 2 teaspoons maple syrup, or to taste
  • 1/2 teaspoon vanilla extract
  • 1 medium ripe banana (about 120 g), sliced just before serving

Instructions

  1. Set aside about half of the strawberries for topping. Mash or finely chop the rest with a fork until juicy, leaving a few small pieces.
  2. Stir the oats, milk, yogurt, mashed strawberries, 2 teaspoons of the chia seeds, maple syrup, and vanilla together in a medium bowl or covered storage container. Break up any dry pockets or chia clumps.
  3. Cover and refrigerate for at least 6 hours, preferably overnight, until the oats are softened and the mixture is thick and spoonable.
  4. Stir the chilled oats and divide between two bowls. If the mixture is too firm, add milk a tablespoon at a time.
  5. Cut the reserved strawberries into wedges and slice the banana. Arrange the fruit over the oats and scatter the remaining chia seeds on top. Serve chilled.

Tips

  • Use old-fashioned rolled oats for a soft but discernible texture.
  • Wait until after the full chilling time to judge the thickness, since strawberries can release extra juice.
  • If the oats are still thin after chilling, stir in a small amount of rolled oats or chia seeds and refrigerate until thickened.
  • Slice the banana just before serving to help it keep its shape and color.

Variations

  • Dairy-Free Strawberry Overnight Oats: Use unsweetened plant milk and a thick plant-based yogurt, then adjust the consistency after chilling.
  • Frozen Strawberry Oat Base: Use thawed frozen strawberries in the oat base; use fresh strawberries for the topping.
Notes

Keep the covered oat base refrigerated for up to 3 days. Stir before serving and add milk if needed. Freezing is not recommended.

Nutrition

Calories: 380 kcal per serving; about 105 kcal per 100 g | Protein: 16 g per serving; about 4 g per 100 g | Fat: 9 g per serving; about 2 g per 100 g | Carbohydrates: 61 g per serving; about 17 g per 100 g

Blueberry Overnight Oats

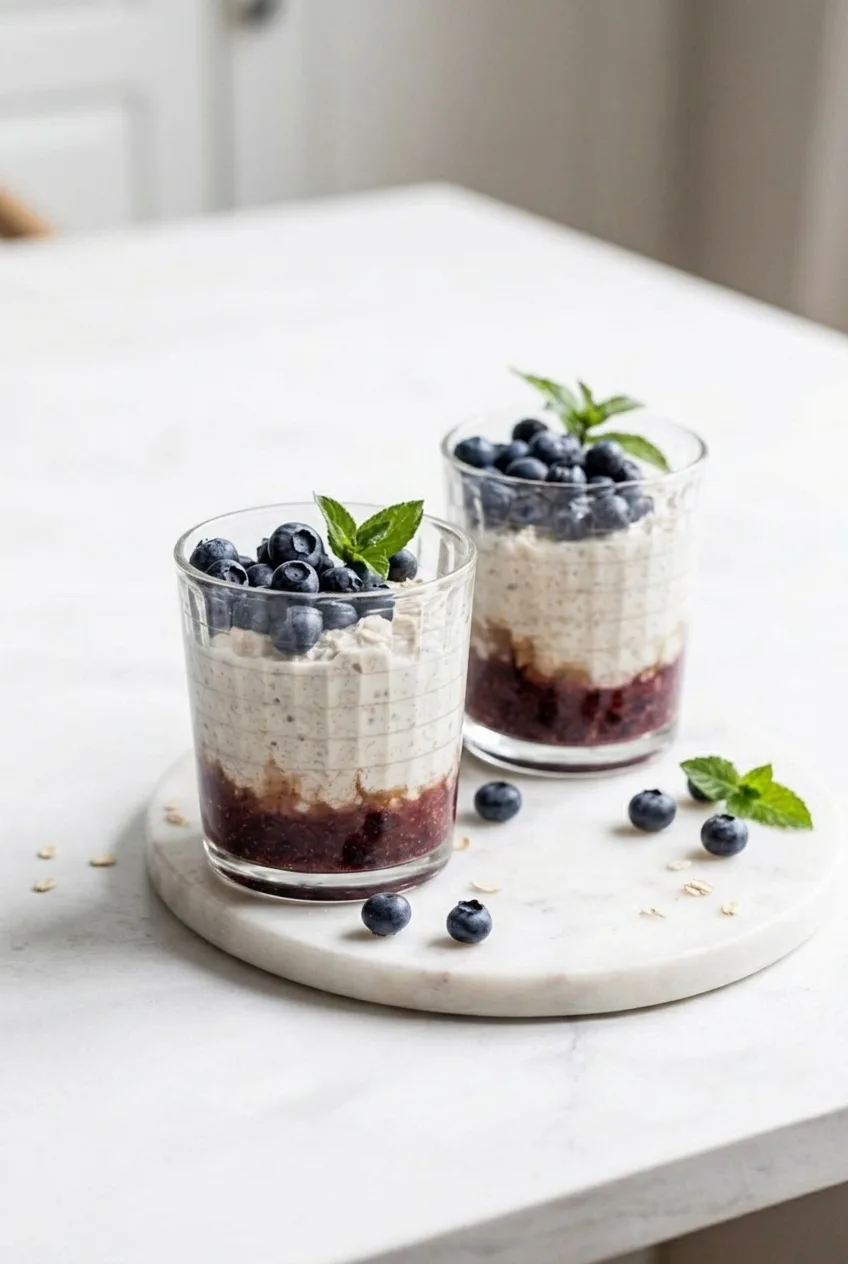
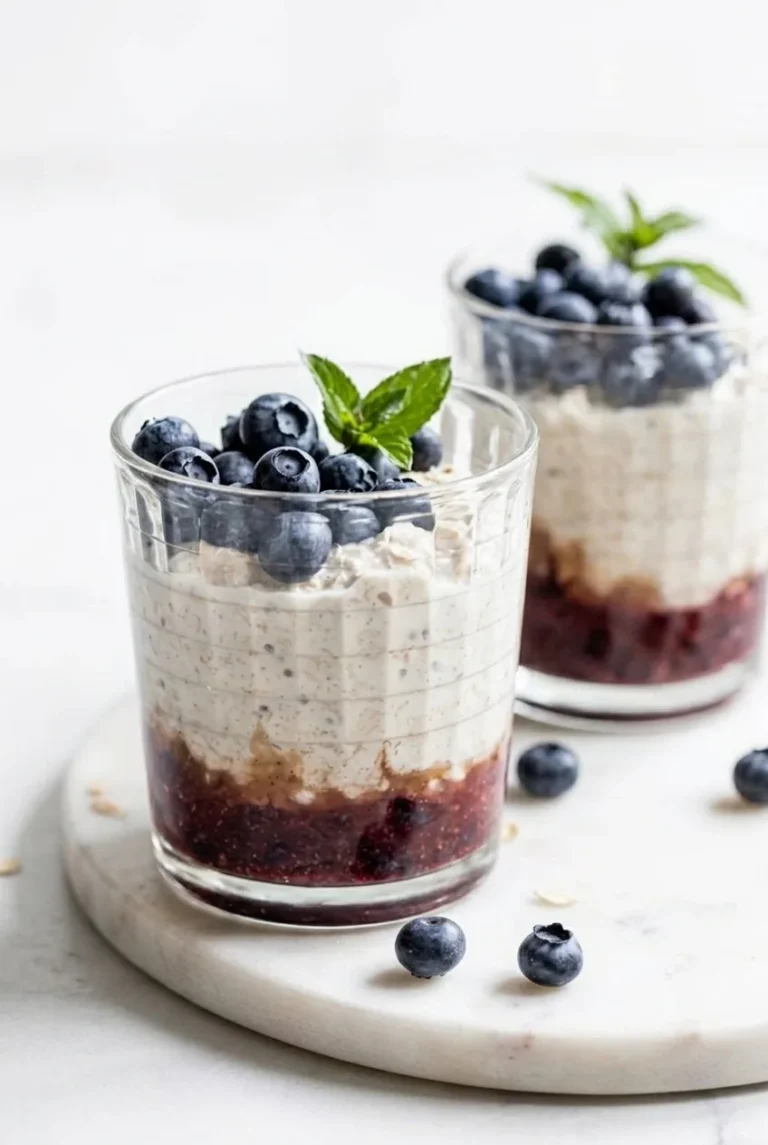
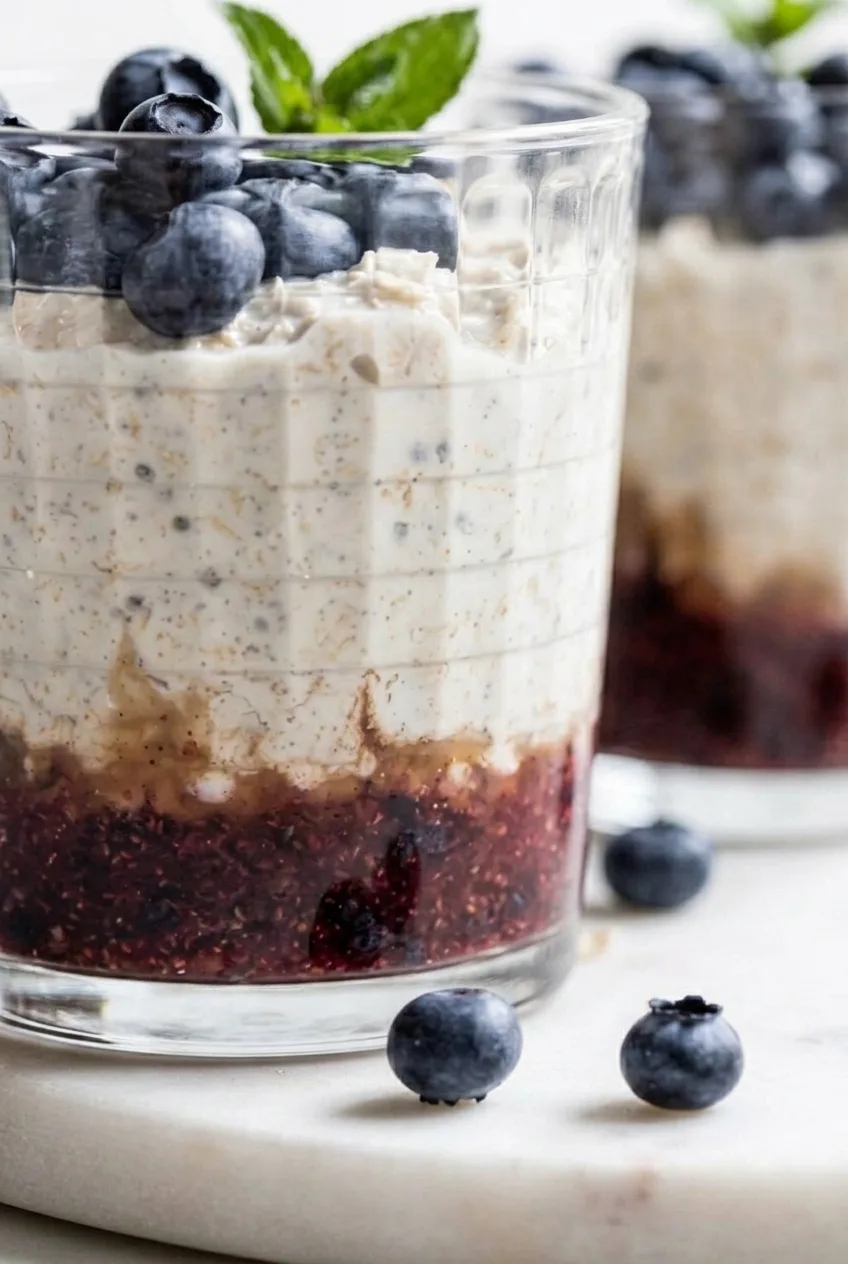
These overnight oats have a jammy blueberry layer beneath thick, pale oats, with whole berries and mint added just before serving. A brief simmer thickens the fruit so it stays at the bottom of each clear glass instead of coloring the oats throughout. The oat layer needs no cooking: rolled oats, milk, Greek yogurt, and a little chia soften in the refrigerator until creamy and spoonable.

The recipe makes two servings. Assemble them at least 6 hours ahead, or leave them covered overnight.

Ingredients for Blueberry Overnight Oats

Close view through a glass of jammy blueberries beneath creamy oats, topped with whole berries and mint
  • 1 cup fresh or frozen blueberries (about 150g), for the bottom layer
  • 1 tablespoon honey (about 20g)
  • 1 teaspoon lemon juice
  • 1 cup old-fashioned rolled oats (80g)
  • 3/4 cup milk (180g), plus more if needed to serve
  • 1/2 cup plain Greek yogurt (120g)
  • 1 tablespoon chia seeds (about 10g)
  • 1/2 cup fresh blueberries (about 75g), for topping
  • 2 small fresh mint sprigs, for topping

Frozen berries can go straight into the saucepan, though they may take a little longer to thicken. Use fresh berries on top so they stay whole and firm.

How to Make Blueberry Overnight Oats

Two complete glasses of layered blueberry overnight oats on a bright tabletop
  1. Thicken the blueberries: Combine the 1 cup blueberries, honey, and lemon juice in a small saucepan. Simmer uncovered over medium-low heat for 5 to 8 minutes, stirring and lightly mashing the berries. Start checking at 5 minutes. The berries should be burst and textured, with thick, spoonable juices rather than a pool of thin liquid.
  2. Cool and divide the fruit: Let the berries cool until no longer warm, about 10 to 15 minutes. Divide between two clear, approximately 12-ounce glasses or jars, spreading the fruit into even bottom layers.
  3. Mix the oats: Stir the rolled oats, milk, Greek yogurt, and chia together in a bowl until no dry oats remain. Let stand for 5 minutes, then stir again to break up any chia clumps.
  4. Layer and chill: Gently spoon half the oat mixture over the berries in each glass. Do not stir the layers together. Cover securely and refrigerate for at least 6 hours, preferably 8 to 12 hours, until the oats are soft with visible flakes and the mixture is thick but spoonable.
  5. Finish: If the oats are too stiff, stir 1 to 2 tablespoons additional milk into the top oat layer of each glass without mixing in the berries. Add the fresh blueberries and a mint sprig to each serving just before eating.

How to Keep the Layers Distinct

Let the cooked berries thicken and cool before adding the oats. Warm or runny fruit can seep upward, and stirring the filled glasses will turn the oat layer purple. Spoon the oats on gently and, if they need loosening after chilling, stir only the top layer.

Getting the Oat Texture Right

Old-fashioned rolled oats soften during the long soak while keeping their flakes visible. Quick oats soften faster and can become mushy in this mixture. The second stir before assembly distributes the chia; after chilling, adjust each serving with milk as needed rather than thinning the whole batch.

For a dairy-free version, use plant milk and plain dairy-free yogurt. Replace the honey with maple syrup for a vegan version. If omitting the chia, start with 1/2 cup milk instead of 3/4 cup; the finished texture will be different, so adjust it after chilling.

Make-Ahead and Storage

Keep the glasses covered in the refrigerator and aim to eat them within 3 days for the best fruit and oat texture. Store the fresh blueberries and mint separately until serving. Refrigeration is preferable to freezing when you want the layers to remain distinct.

For a warm serving, remove the lid and heat in a microwave-safe vessel in about 30-second intervals. Add the fresh toppings afterward. Stirring to heat the oats evenly will blur the layers.

For an oat base you can finish with other toppings, try classic creamy overnight oats.

Nutrition

Approximate nutrition per serving (1 glass; recipe makes 2): 370 calories, 17g protein, 8g fat, and 60g carbohydrates. Per 100g: approximately 125 calories, 6g protein, 3g fat, and 20g carbohydrates. Values vary with the milk and yogurt used.

Blueberry Overnight Oats

Creamy rolled oats and chia chill over a thick, lightly sweetened blueberry layer, then get topped with fresh berries and mint.
Course: Breakfast
Cuisine: American
Prep: 20 min
Cook: 8 min
Total: 388 min
Servings: 2 Calories: 370 kcal

Equipment

  • Small saucepan
  • Mixing bowl
  • Two 12-ounce glasses or jars

Ingredients

Blueberry Layer

  • 1 cup fresh or frozen blueberries (about 150 g)
  • 1 tablespoon honey (about 20 g)
  • 1 teaspoon lemon juice

Oat Layer

  • 1 cup old-fashioned rolled oats (80 g)
  • 3/4 cup milk (180 g), plus more if needed to serve
  • 1/2 cup plain Greek yogurt (120 g)
  • 1 tablespoon chia seeds (about 10 g)

Topping

  • 1/2 cup fresh blueberries (about 75 g)
  • 2 small fresh mint sprigs

Instructions

  1. Combine 1 cup blueberries, honey, and lemon juice in a small saucepan.
  2. Simmer uncovered over medium-low heat for 5 to 8 minutes, stirring and lightly mashing the berries, until burst and thick with spoonable juices.
  3. Cool the berries until no longer warm, about 10 to 15 minutes, then divide them between two glasses or jars.
  4. Stir the oats, milk, Greek yogurt, and chia seeds together in a bowl until no dry oats remain. Let stand for 5 minutes, then stir again to break up chia clumps.
  5. Gently spoon half the oat mixture over the berries in each glass without mixing the layers.
  6. Cover and refrigerate for at least 6 hours, preferably 8 to 12 hours, until thick and spoonable.
  7. If needed, stir 1 to 2 tablespoons additional milk into the oat layer of each glass without disturbing the berries.
  8. Top each serving with fresh blueberries and a mint sprig just before eating.

Tips

  • Let the cooked blueberries cool completely before adding the oats to help keep the layers distinct.
  • Use fresh berries for the topping so they stay whole and firm.
  • Choose old-fashioned rolled oats; quick oats can become mushy during the long soak.
  • Stir the chia mixture a second time before assembling to break up clumps.
  • If the oats are too stiff after chilling, loosen each serving with milk rather than thinning the whole batch.

Variations

  • Dairy-Free: Use plant milk and plain dairy-free yogurt.
  • Vegan: Use plant milk and plain dairy-free yogurt, and replace the honey with maple syrup.
  • Without Chia: Omit the chia seeds and start with 1/2 cup milk; adjust the texture after chilling.

Notes

Keep covered in the refrigerator and eat within 3 days for best texture. Store the fresh toppings separately. To serve warm, heat without the lid in a microwave-safe vessel in 30-second intervals; add toppings afterward.

Nutrition

Calories: 370 kcal | Protein: 17 g | Fat: 8 g | Carbohydrates: 60 g

Classic Creamy Overnight Oats

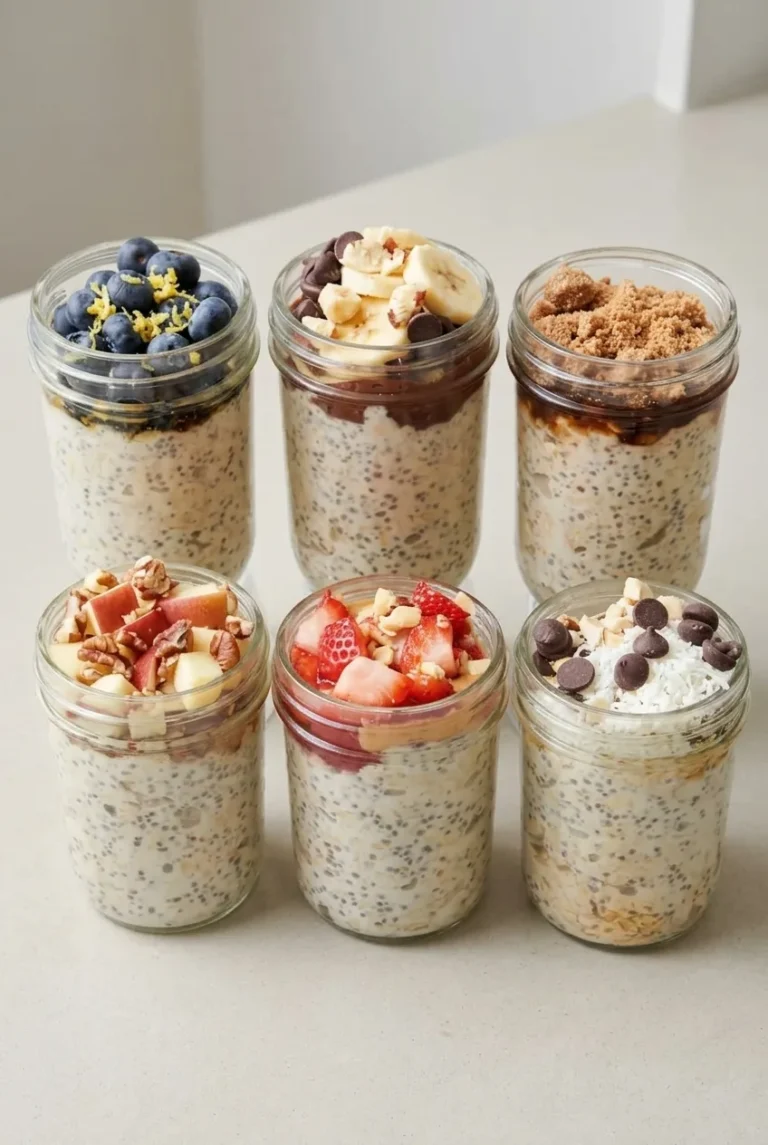
One no-cook oat base makes six jars, each with a different topping. Old-fashioned rolled oats soften in milk and yogurt, while chia thickens the mixture and leaves it visibly speckled. After at least 6 hours in the refrigerator, the oats should be creamy and spoonable, with a little chew.

Stir the base twice before chilling to keep the chia from clumping. Add the fruit, nuts, coconut, and crumbs just before serving so the six finishes stay distinct and the crunchy toppings keep their texture.

Ingredients for Six Overnight Oat Jars

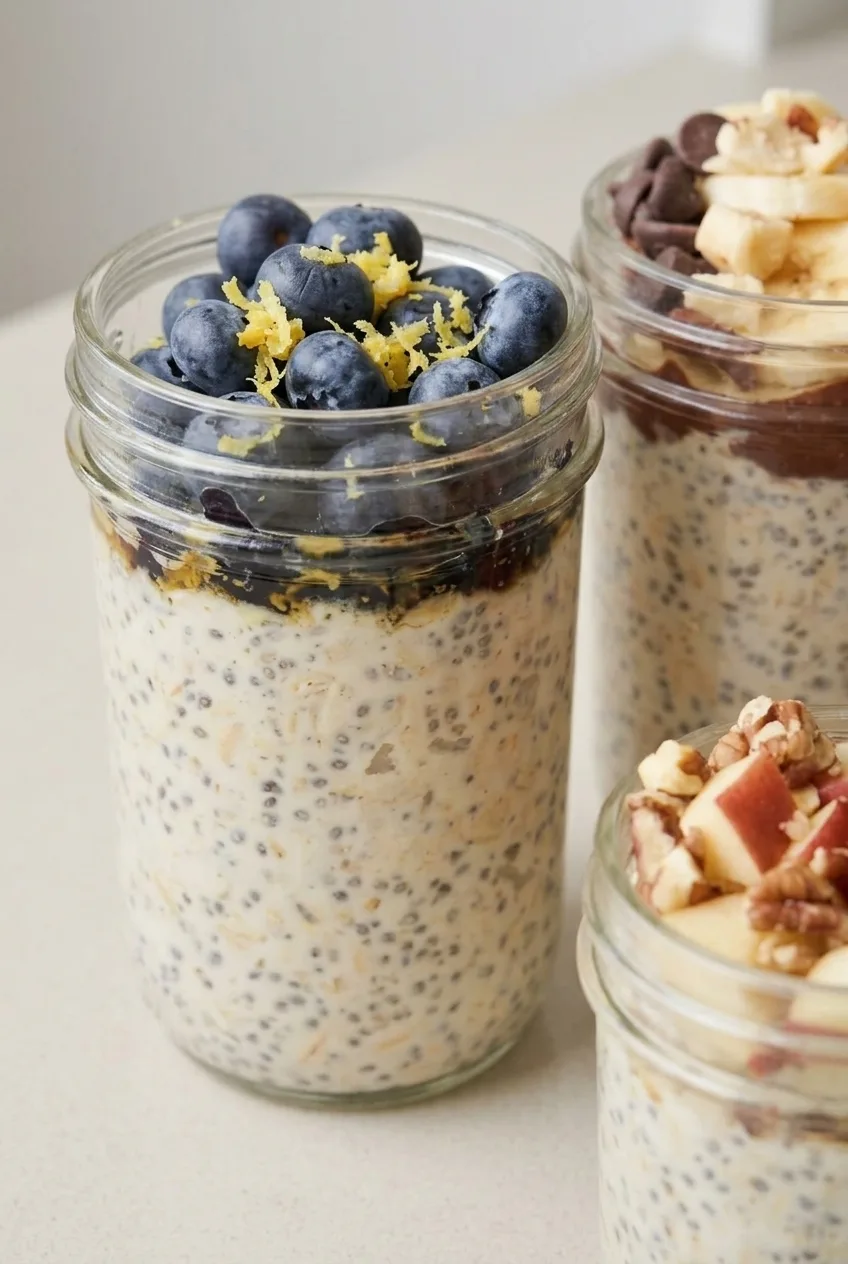
Close view of creamy oat and chia texture beneath blueberries and lemon zest

Creamy oat base

  • 3 cups old-fashioned rolled oats (240g)
  • 3 cups milk (about 720g), plus more to thin if needed
  • 1 1/2 cups plain Greek yogurt (about 360g)
  • 4 tablespoons chia seeds (48g)
  • 2 tablespoons maple syrup (about 40g)
  • 1 teaspoon vanilla extract
  • 1/8 teaspoon fine salt

One topping combination for each jar

  • Blueberry-lemon: 1 tablespoon blueberry jam, 1/3 cup fresh blueberries, and a little finely grated lemon zest
  • Banana-chocolate: 1 tablespoon chocolate spread, 1/2 sliced banana, and 1 tablespoon chocolate chips
  • Chocolate-crumb: 1 tablespoon chocolate spread and 2 tablespoons finely crushed graham crackers
  • Apple-pecan: 1/3 cup diced red-skinned apple and 2 tablespoons chopped pecans
  • Strawberry-peanut-butter: 1 tablespoon strawberry jam, 1 tablespoon peanut butter, and 1/3 cup diced strawberries
  • Coconut-chocolate: 2 tablespoons unsweetened shredded coconut and 1 tablespoon chocolate chips

How to Make Classic Creamy Overnight Oats

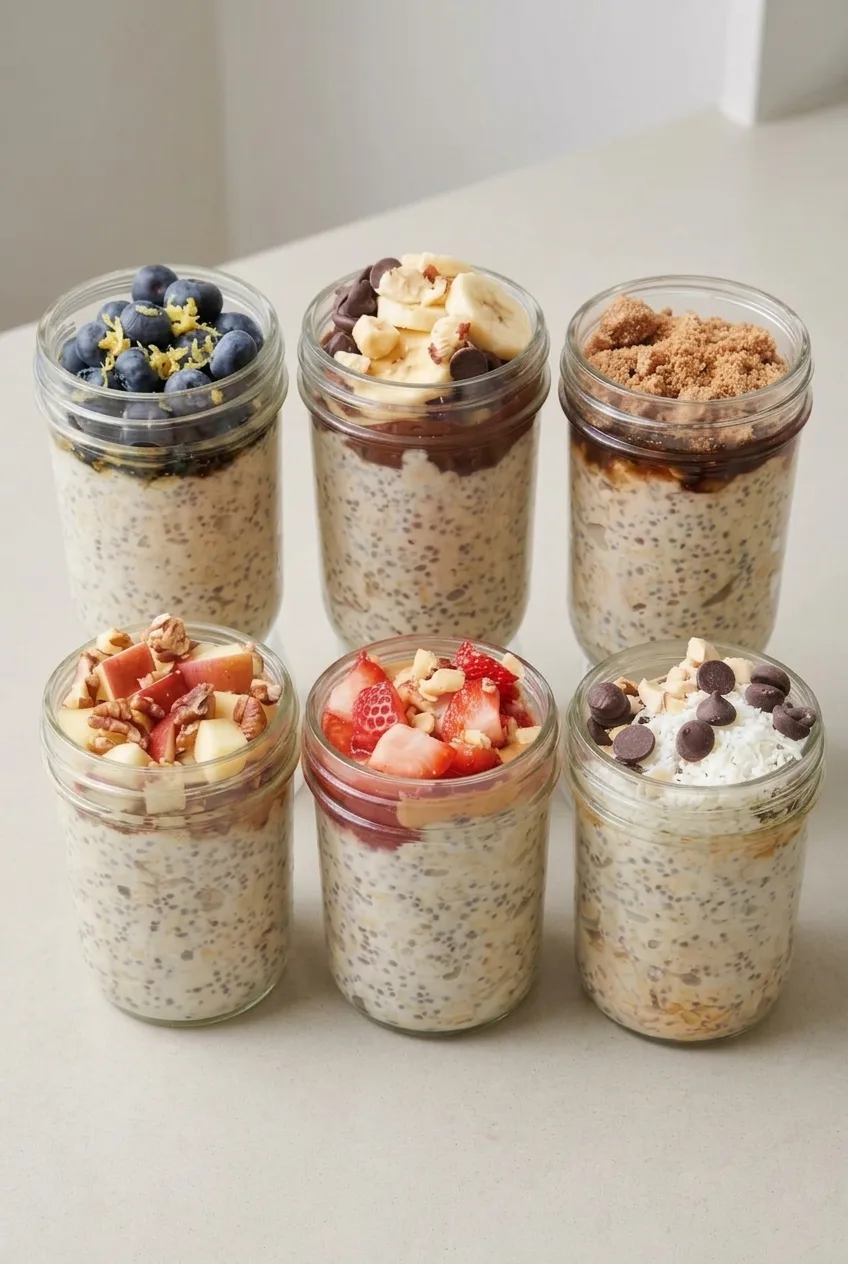
Six differently topped overnight oat jars together on a pale countertop
  1. Mix the base: In a large bowl, stir together the milk, yogurt, maple syrup, vanilla, and salt. Add the oats and chia seeds. Stir until the oats are fully moistened and the seeds are dispersed.
  2. Stir again: Let the mixture stand for about 5 minutes. Scrape the bottom of the bowl and stir thoroughly once more to prevent chia clumps.
  3. Portion and chill: Divide the mixture evenly among six lidded 12- to 16-ounce glass jars, leaving several inches of room for toppings. Cover and refrigerate for at least 6 hours, preferably overnight.
  4. Check the texture: Stir each jar. The oats should be soft with slight chew, without dry patches, and the base should be creamy and spoonable. If a jar is too thick, stir in a small splash of milk at a time.
  5. Finish three jars: Top one with blueberry jam, blueberries, and lemon zest. Add chocolate spread, banana, and chocolate chips to another. Top a third with chocolate spread and graham cracker crumbs.
  6. Finish the remaining jars: Add apple and pecans to one jar. Layer strawberry jam and peanut butter over another, then add strawberries. Finish the last jar with coconut and chocolate chips. Serve while the fresh and crunchy toppings are at their best.

Why Use Old-Fashioned Rolled Oats?

Rolled oats soften during the cold soak but retain a little texture. Quick oats can turn mushy, while steel-cut oats need a different soaking approach. Give this yogurt-and-chia base the full 6 hours before checking it; overnight is preferable.

Adjusting the Creamy Base

Both oats and chia absorb liquid as they chill, so the mixture will look looser before refrigeration. The second stir distributes the seeds before the base thickens. Adjust individual jars with milk after chilling rather than adding extra liquid to the whole batch.

For a dairy-free base, use plant-based milk and plain plant-based yogurt; thickness may differ, so check it after chilling. Choose dairy-free chocolate toppings if needed. For gluten-free jars, use certified gluten-free rolled oats and replace or omit the graham crumbs. The maple syrup can be omitted from the base, though the jam and chocolate toppings will still add sweetness.

Make-Ahead and Storage

Keep the covered, untopped jars refrigerated for up to 4 days. Pack cut fruit, nuts, coconut, and graham crumbs separately and add them shortly before serving. Fully topped jars may not keep the same texture for that long.

Serve the oats cold. For a warm serving, transfer a portion to a microwave-safe container, add a little milk, and warm gently before adding fresh toppings. Freezing is not recommended for this creamy version because the texture may change.

For another breakfast with rolled oats, try healthy oatmeal banana bread.

Nutrition

Approximate nutrition per jar, averaged across the six topping combinations: 455 calories, 20g protein, 15g fat, and 63g carbohydrates. Approximate values per 100g: 155 calories, 7g protein, 5g fat, and 21g carbohydrates. Actual values vary by jar and by the milk, yogurt, spreads, and toppings used.

Classic Creamy Overnight Oats

A creamy rolled-oat, yogurt, and chia base chills overnight and gets six different fruit and chocolate toppings.
Course: Breakfast
Cuisine: Global
Prep: 15 min
Total: 375 min
Servings: 6 Calories: 455 kcal per jar; 155 kcal per 100 g

Equipment

  • Large mixing bowl
  • Measuring cups and spoons
  • Six lidded 12- to 16-ounce jars
  • Fine grater
  • Knife and cutting board

Ingredients

Creamy Oat Base

  • 3 cups old-fashioned rolled oats (240 g)
  • 3 cups milk (about 720 g), plus more to thin if needed
  • 1 1/2 cups plain Greek yogurt (about 360 g)
  • 4 tablespoons chia seeds (48 g)
  • 2 tablespoons maple syrup (about 40 g)
  • 1 teaspoon vanilla extract
  • 1/8 teaspoon fine salt

Blueberry-Lemon Jar

  • 1 tablespoon blueberry jam
  • 1/3 cup fresh blueberries
  • A little finely grated lemon zest

Banana-Chocolate Jar

  • 1 tablespoon chocolate spread
  • 1/2 banana, sliced
  • 1 tablespoon chocolate chips

Chocolate-Crumb Jar

  • 1 tablespoon chocolate spread
  • 2 tablespoons finely crushed graham crackers

Apple-Pecan Jar

  • 1/3 cup diced red-skinned apple
  • 2 tablespoons chopped pecans

Strawberry-Peanut-Butter Jar

  • 1 tablespoon strawberry jam
  • 1 tablespoon peanut butter
  • 1/3 cup diced strawberries

Coconut-Chocolate Jar

  • 2 tablespoons unsweetened shredded coconut
  • 1 tablespoon chocolate chips

Instructions

  1. In a large bowl, stir together the milk, yogurt, maple syrup, vanilla, and salt.
  2. Add the oats and chia seeds. Stir until the oats are fully moistened and the seeds are evenly dispersed.
  3. Let the mixture stand for about 5 minutes, then scrape the bottom of the bowl and stir thoroughly again.
  4. Divide the mixture evenly among six lidded jars, leaving room for toppings. Cover and refrigerate for at least 6 hours, preferably overnight.
  5. Stir each jar. If the oats are too thick, mix in a small splash of milk at a time until creamy and spoonable.
  6. Top one jar with blueberry jam, blueberries, and lemon zest. Top another with chocolate spread, banana, and chocolate chips. Top a third with chocolate spread and graham cracker crumbs.
  7. Top one jar with apple and pecans. Layer strawberry jam and peanut butter over another jar, then add strawberries. Finish the last jar with coconut and chocolate chips.

Tips

  • Stir the base a second time after it rests for 5 minutes to prevent chia clumps.
  • Give the oats at least 6 hours to chill so they soften properly.
  • Thin individual jars with milk after chilling rather than adding extra liquid to the whole batch.
  • Add fruit and crunchy toppings shortly before serving to preserve their texture.

Variations

  • Dairy-Free: Use plant-based milk and plain plant-based yogurt, and choose dairy-free chocolate toppings if needed.
  • Gluten-Free: Use certified gluten-free rolled oats and replace the graham cracker crumbs with a gluten-free option or omit them.
  • No Added Maple Syrup: Omit the maple syrup from the base; the jam and chocolate toppings will still add sweetness.

Notes

Keep covered, untopped jars refrigerated for up to 4 days. Store cut fruit and crunchy toppings separately until serving. Serve cold; for a warm portion, transfer to a microwave-safe container, add a little milk, and warm gently. Freezing is not recommended.

Nutrition

Calories: 455 kcal per jar; 155 kcal per 100 g | Protein: 20 g per jar; 7 g per 100 g | Fat: 15 g per jar; 5 g per 100 g | Carbohydrates: 63 g per jar; 21 g per 100 g

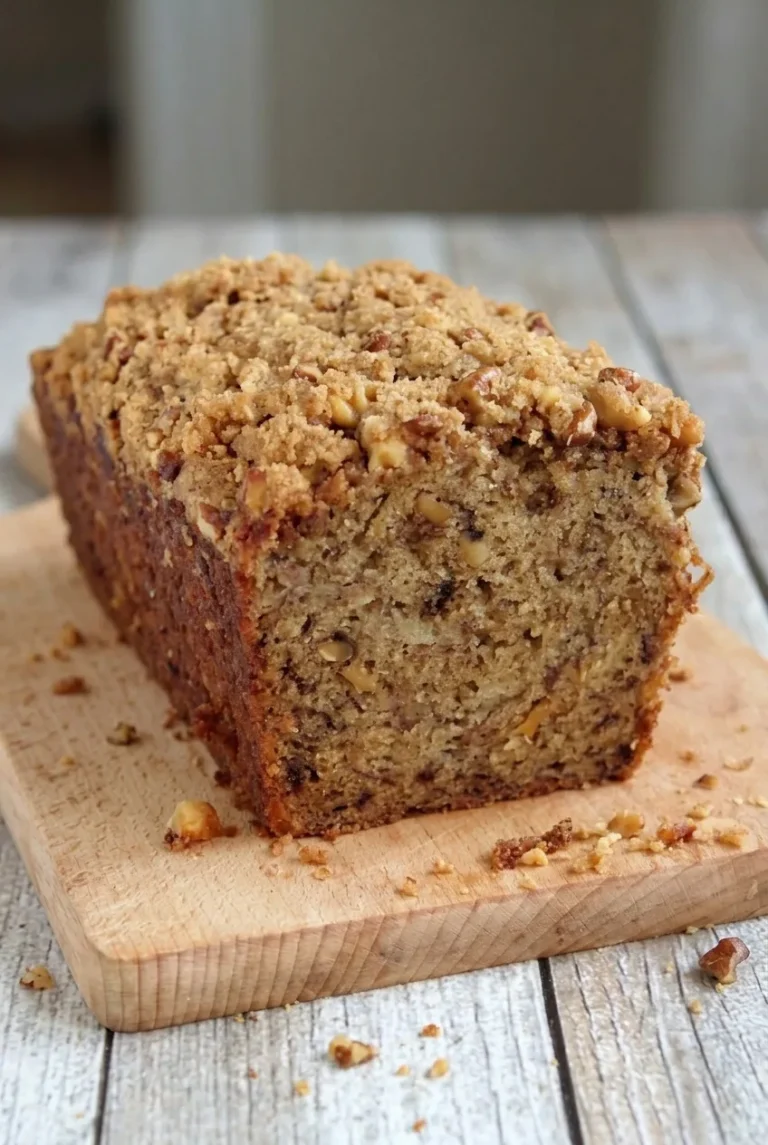
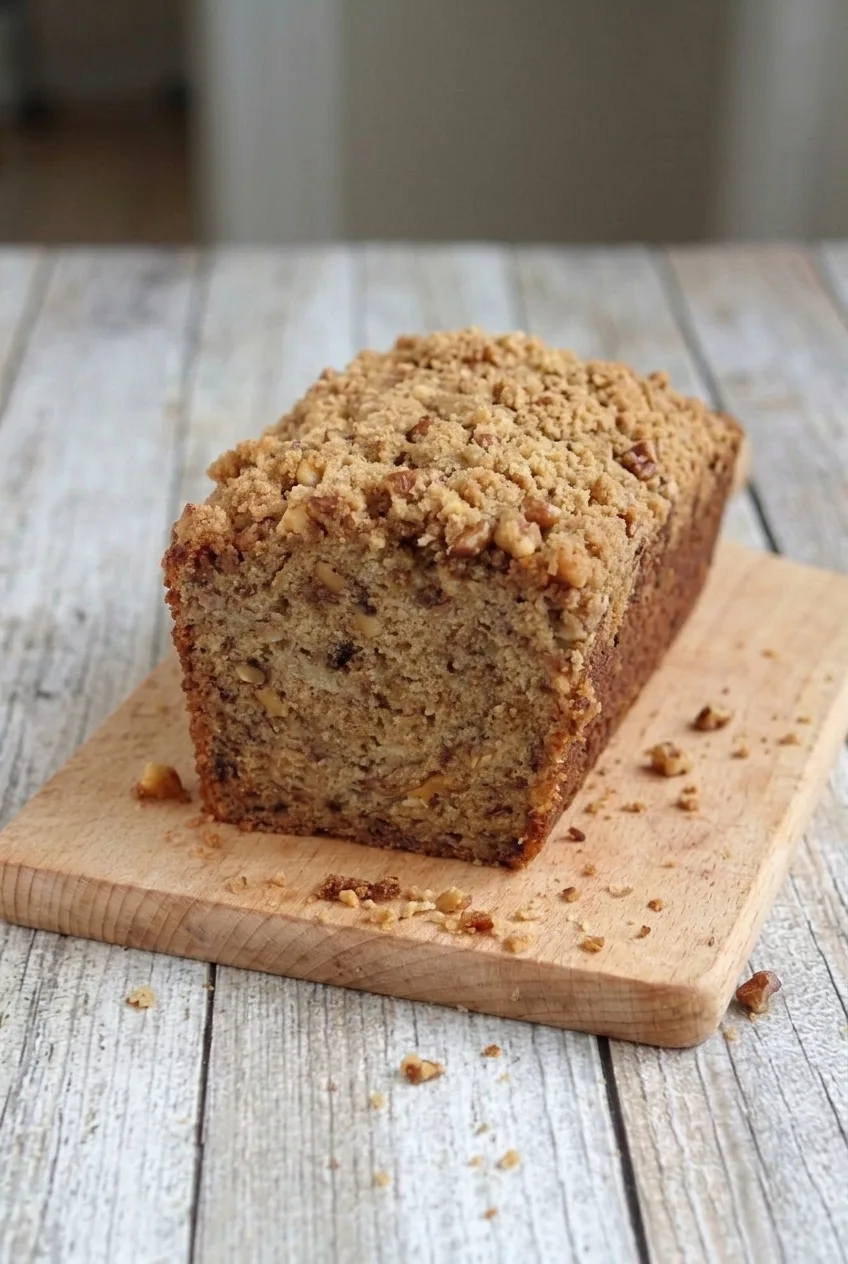
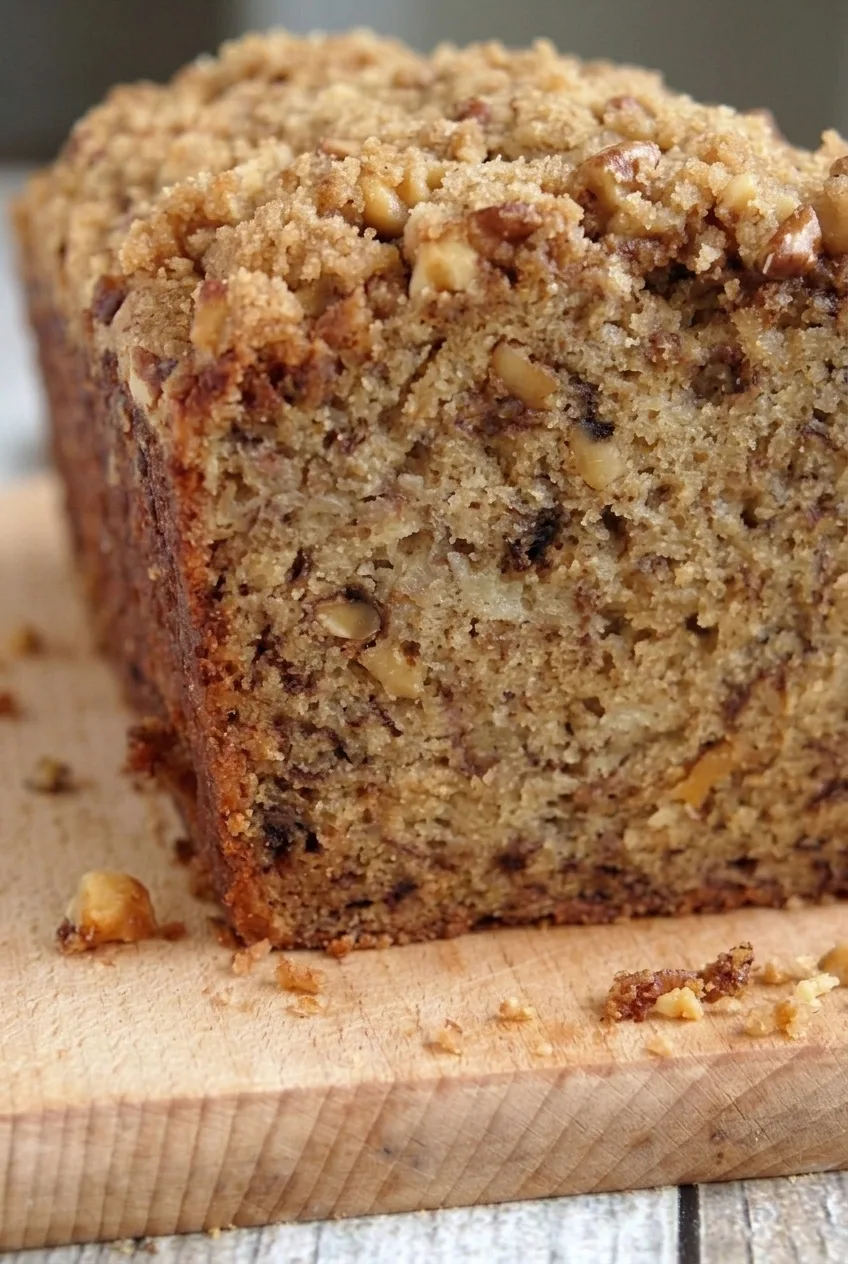
Banana Bread with Pecan Streusel

This full-size banana loaf has a moist crumb with chopped pecans throughout and a thick cinnamon-pecan streusel on top. Cold butter keeps the topping in coarse clumps, while a measured amount of mashed banana helps the center bake through without overfilling the pan.

Bake until a pick inserted into the center shows no wet batter, even if the streusel has browned first. The recipe makes one 9-by-5-inch loaf, about 10 slices. Allow about 20 minutes to prepare it, 55–70 minutes to bake it, and 1 hour to cool it before slicing.

Ingredients for Banana Bread with Pecan Streusel

Whole pecan-streusel banana bread loaf on a cutting board, with its cut end visible

Banana bread

  • 1 3/4 cups all-purpose flour, spooned and leveled (210g)
  • 1 teaspoon baking soda
  • 1/2 teaspoon fine salt
  • 1 1/4 cups mashed very ripe banana, about 3 medium bananas (285g)
  • 1/2 cup unsalted butter, melted and cooled slightly (115g)
  • 3/4 cup packed light brown sugar (150g)
  • 2 large eggs
  • 1/4 cup sour cream (60g)
  • 1 teaspoon vanilla extract
  • 1/3 cup chopped pecans (35g)

Pecan streusel

  • 1/3 cup all-purpose flour (40g)
  • 1/3 cup packed light brown sugar (65g)
  • 1 teaspoon ground cinnamon
  • 1/2 cup chopped pecans (55g)
  • 3 tablespoons cold unsalted butter, cubed (45g)
Close view of moist banana bread crumb with pecan pieces beneath coarse cinnamon streusel

How to Bake Banana Bread with Pecan Streusel

  1. Prepare the oven and pan: Position a rack near the center of the oven and preheat to 350°F (175°C). Lightly grease a 9-by-5-inch metal loaf pan and line it with parchment, leaving overhang on the long sides.
  2. Make the streusel: Mix the streusel flour, brown sugar, cinnamon, and pecans. Cut in the cold butter with a fork or pastry cutter until coarse, uneven clumps form. Refrigerate while you make the batter.
  3. Mix the batter: Whisk the banana-bread flour, baking soda, and salt in one bowl. In another, mix the measured banana, melted butter, brown sugar, eggs, sour cream, and vanilla. Fold in the dry ingredients just until no flour pockets remain, then fold in the 1/3 cup pecans. The batter should be thick and spoonable.
  4. Fill and top the pan: Spread the batter evenly in the pan. It should reach no higher than about three-quarters of the pan’s height. Scatter the chilled streusel over the batter, pressing lightly so the clumps stay distinct.
  5. Bake: Bake uncovered for about 55–70 minutes. Start checking at 50 minutes, then check every 5–10 minutes as needed. The center should be set, and a wooden pick inserted into it should come out without wet batter; a few moist crumbs are fine. If the streusel browns deeply before the center is done, tent the loaf loosely with foil without pressing on the crumbs, and continue baking.
  6. Cool and slice: Rest the loaf in the pan for 10–15 minutes. Lift it out by the parchment and transfer it to a wire rack. Let it cool until nearly or completely cool, about 1 hour of total cooling time, before cutting with a serrated knife.

How to Keep the Pecan Streusel Crumbly

Stop cutting in the cold butter while some crumbs are pea-size and others are larger. Working the mixture into a paste can leave a flatter topping. Keep it chilled until the batter is ready, then scatter it on without pressing it flat.

Bananas, Pan Size, and Doneness

Use heavily spotted bananas, but measure the mash: three bananas can yield different amounts. Extra banana or a smaller pan can leave the loaf overfilled or wet in the center. A glass or ceramic pan may also change the bake time; the timing here is for a 9-by-5-inch metal pan. Judge the loaf by the center pick test rather than the color of the topping alone.

Cooling, Serving, and Storage

Cooling helps the moist crumb set so it slices without tearing. Serve at room temperature or slightly warm; leave the cut end of the remaining loaf exposed when serving to show the pecans inside.

Once completely cool, wrap or cover the loaf and keep it at room temperature for up to 3 days. The streusel may soften under a tight cover. For longer storage, refrigerate it well wrapped and let slices approach room temperature before serving, or warm them briefly.

To freeze, cool the loaf fully, wrap it securely, and thaw before serving. The streusel’s texture may change after thawing.

For another topped loaf, try cream cheese banana bread with walnut topping.

Nutrition

Approximate nutrition per slice, based on 10 slices: 400 calories, 5g protein, 22g fat, and 49g carbohydrates. Per 100g of finished loaf: approximately 385 calories, 5g protein, 21g fat, and 46g carbohydrates. Values vary with ingredients, slice size, and moisture lost during baking.

Banana Bread with Pecan Streusel

A moist banana loaf with chopped pecans and a cinnamon-pecan streusel topping.
Course: Dessert
Cuisine: American
Prep: 20 min
Cook: 65 min
Total: 145 min
Servings: 10 Calories: 400 kcal

Equipment

  • 9-by-5-inch metal loaf pan
  • Parchment paper
  • Mixing bowls
  • Whisk
  • Fork or pastry cutter
  • Wire rack
  • Serrated knife

Ingredients

Banana Bread

  • 1 3/4 cups all-purpose flour, spooned and leveled (210g)
  • 1 teaspoon baking soda
  • 1/2 teaspoon fine salt
  • 1 1/4 cups mashed very ripe banana, about 3 medium bananas (285g)
  • 1/2 cup unsalted butter, melted and cooled slightly (115g)
  • 3/4 cup packed light brown sugar (150g)
  • 2 large eggs
  • 1/4 cup sour cream (60g)
  • 1 teaspoon vanilla extract
  • 1/3 cup chopped pecans (35g)

Pecan Streusel

  • 1/3 cup all-purpose flour (40g)
  • 1/3 cup packed light brown sugar (65g)
  • 1 teaspoon ground cinnamon
  • 1/2 cup chopped pecans (55g)
  • 3 tablespoons cold unsalted butter, cubed (45g)

Instructions

  1. Position a rack near the center of the oven and preheat to 350°F (175°C). Lightly grease a 9-by-5-inch metal loaf pan and line it with parchment, leaving overhang on the long sides.
  2. Mix the streusel flour, brown sugar, cinnamon, and pecans. Cut in the cold butter until coarse, uneven clumps form, then refrigerate while you make the batter.
  3. Whisk the banana-bread flour, baking soda, and salt in a bowl.
  4. In a separate bowl, mix the mashed banana, melted butter, brown sugar, eggs, sour cream, and vanilla.
  5. Fold the dry ingredients into the banana mixture just until no flour pockets remain, then fold in the 1/3 cup pecans.
  6. Spread the batter evenly in the prepared pan, keeping it no higher than about three-quarters of the pan’s height. Scatter the chilled streusel over the top and press lightly to keep the clumps distinct.
  7. Bake uncovered for 55–70 minutes, starting to check at 50 minutes and then every 5–10 minutes as needed. The center should be set, and a wooden pick inserted there should come out without wet batter; a few moist crumbs are fine.
  8. If the streusel browns deeply before the center is done, tent the loaf loosely with foil without pressing on the topping and continue baking.
  9. Rest the loaf in the pan for 10–15 minutes. Lift it out using the parchment and transfer it to a wire rack. Cool for about 1 hour total before slicing with a serrated knife.

Tips

  • Measure the mashed banana; three bananas can yield different amounts.
  • Stop cutting the cold butter into the streusel when some crumbs are pea-size and others are larger.
  • Keep the streusel chilled until the batter is ready, then scatter it on without pressing it flat.
  • Use a 9-by-5-inch metal pan and judge doneness with a pick in the center, not by the topping color.
  • Cool the loaf before slicing so the moist crumb can set.

Notes

Once completely cool, cover and keep at room temperature for up to 3 days, or wrap well and refrigerate or freeze for longer storage. The streusel may soften under a tight cover or after thawing.

Nutrition

Calories: 400 kcal | Protein: 5 g | Fat: 22 g | Carbohydrates: 49 g

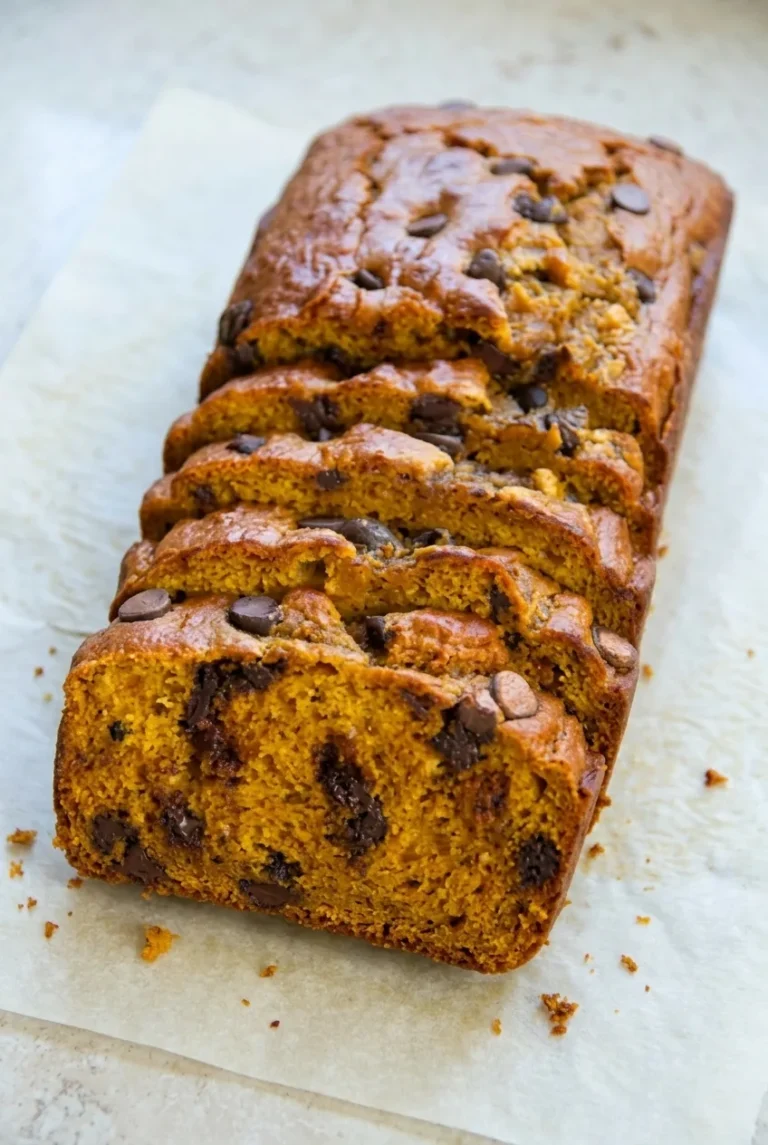
Pumpkin Banana Bread

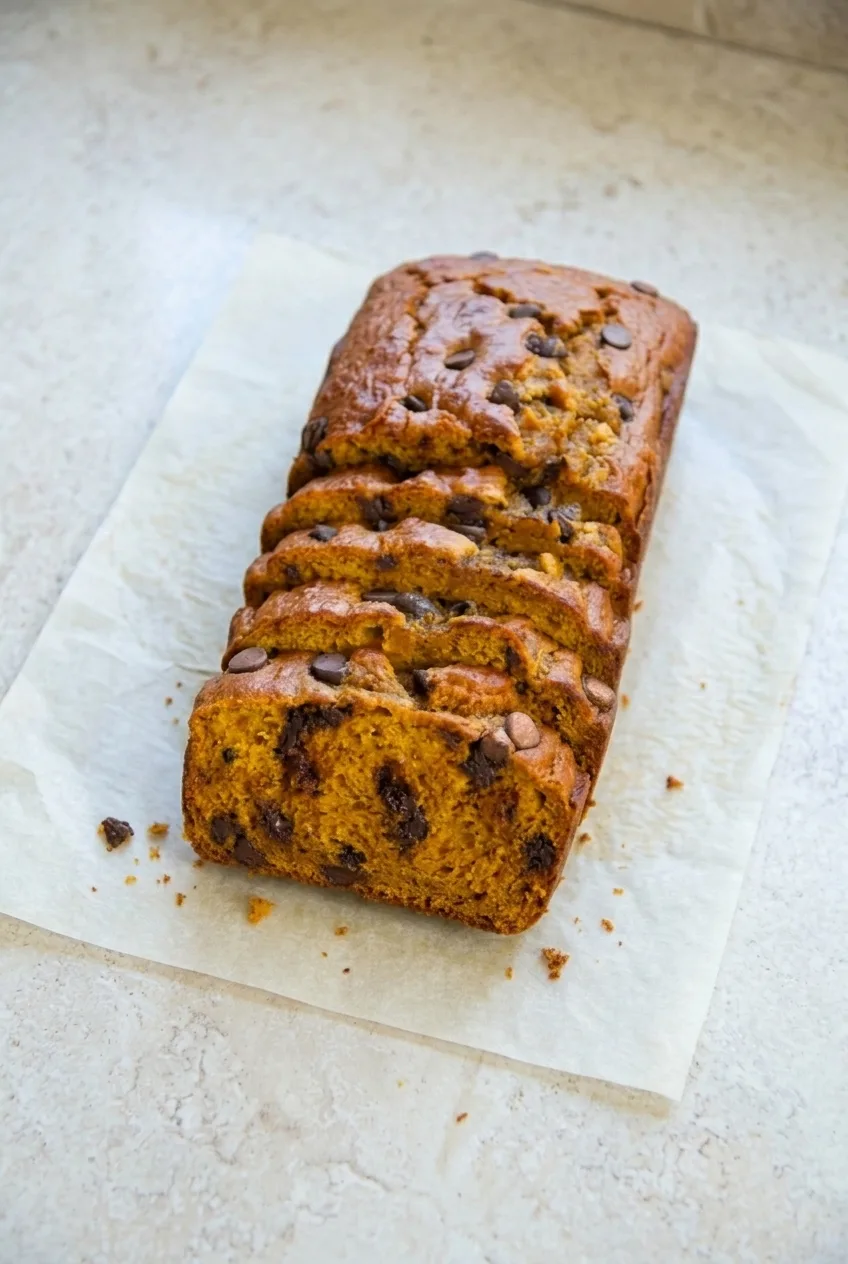
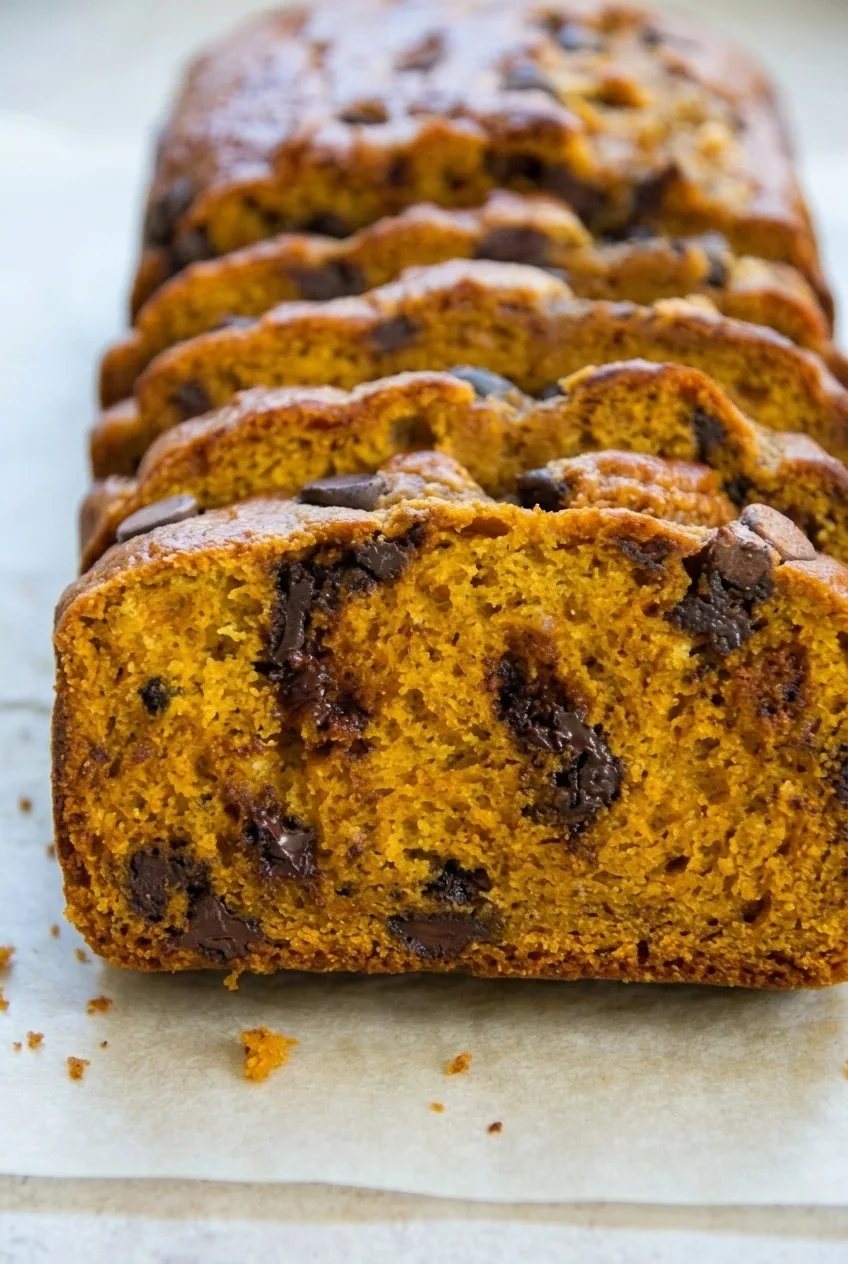
This pumpkin banana bread bakes into one chocolate-studded loaf with a tender orange-gold crumb and a browned, lightly cracked top. The batter is moist, so measure the mashed banana and pumpkin rather than adding any leftovers. Begin checking at 50 minutes, but let the center—not the clock—determine when the loaf is done.

Ingredients for Pumpkin Banana Bread

  • 2 cups all-purpose flour, spooned and leveled (240g)
  • 1 teaspoon baking soda
  • 1/2 teaspoon baking powder
  • 1 teaspoon pumpkin pie spice
  • 1/2 teaspoon fine salt
  • 3/4 cup mashed ripe banana, measured after mashing (170g)
  • 3/4 cup pure canned pumpkin puree (180g)
  • 3/4 cup packed light brown sugar (150g)
  • 2 large eggs
  • 1/3 cup neutral oil, such as canola or vegetable oil
  • 1 teaspoon vanilla extract
  • 3/4 cup semisweet chocolate chips (about 130g), divided
Wider view of a sliced pumpkin banana bread loaf with overlapping slices on a pale surface
Close view of a pumpkin banana bread slice showing its moist crumb and chocolate pockets

How to Bake Pumpkin Banana Bread

  1. Prepare the pan: Preheat the oven to 350°F (175°C) with a rack in the middle. Lightly grease a 9-by-5-inch metal loaf pan. Line the bottom and long sides with parchment, leaving enough overhang to lift out the loaf.
  2. Mix the dry ingredients: Whisk the flour, baking soda, baking powder, pumpkin pie spice, and salt in a bowl.
  3. Mix the wet ingredients: In a second bowl, whisk the measured mashed banana, pumpkin puree, brown sugar, eggs, oil, and vanilla until combined.
  4. Finish the batter: Fold the dry ingredients into the wet ingredients just until no dry flour remains. Fold in the chocolate chips, reserving about 2 tablespoons for the top. The batter will be thick; do not beat it smooth.
  5. Fill the pan: Spread the batter evenly in the prepared pan and scatter the reserved chips over the surface.
  6. Bake: Bake uncovered on the middle rack. Begin checking at 50 minutes; the loaf will likely need about 55 to 65 minutes, or longer if the center is still wet. The top should be deep golden brown and may crack. Insert a long tester into the center, preferably through the crack and away from a visible chip. A few moist crumbs are fine, but there should be no wet batter. If the top darkens before the center is done, tent it loosely with foil and continue baking.
  7. Cool and slice: Cool in the pan for about 15 minutes, then lift the loaf onto a rack using the parchment. Cool for at least 60 minutes more so the moist crumb can set. Cut into about 10 thick slices.

Measure the Banana and Use Pure Pumpkin

Use ripe, brown-spotted bananas, and measure 3/4 cup after mashing; banana size varies too much to rely on a count. Use 3/4 cup pure pumpkin puree, not pumpkin pie filling. Save any leftover banana or pumpkin rather than adding it to the batter, since extra moisture can leave the center wet or cause the loaf to sink.

How to Tell When the Center Is Baked

A browned crust can form before the middle finishes baking. If a tester has a dark streak, it may have passed through melted chocolate; retest a nearby spot in the center and look specifically for wet batter. A smaller pan makes a taller loaf that may take longer than the stated range. Pan material and oven behavior can also shift the timing.

Storage and Freezing

Cool the bread completely, then store it airtight at room temperature for up to 3 days. Freeze it sooner in a particularly warm or humid kitchen. If condensation dampens the surface, place a paper towel in the container.

Wrap the cooled loaf or individual slices tightly and freeze for up to 3 months. Separate stacked slices with parchment. Thaw a slice before serving, or warm it briefly in the microwave. Slices are also good at room temperature or lightly toasted with butter.

More Banana Bread Recipes

For a banana-only loaf, try classic moist banana bread with walnuts. For a dedicated gluten-free loaf, try gluten-free banana bread rather than making an unverified flour swap in this batter.

Nutrition

Approximate nutrition per slice, based on 10 slices: 310 calories, 5g protein, 12g fat, and 47g carbohydrates. Per 100g of baked bread: approximately 325 calories, 5g protein, 13g fat, and 49g carbohydrates. Values vary with ingredients, slice size, and moisture lost during baking.

Pumpkin Banana Bread

A moist pumpkin and banana loaf with semisweet chocolate chips and a browned, lightly cracked top.
Course: Dessert
Cuisine: American
Prep: 15 min
Cook: 60 min
Total: 150 min
Servings: 10 Calories: 310 kcal

Equipment

  • 9-by-5-inch metal loaf pan
  • Parchment paper
  • Mixing bowls
  • Whisk
  • Wire rack
  • Long tester

Ingredients

  • 2 cups all-purpose flour, spooned and leveled (240g)
  • 1 teaspoon baking soda
  • 1/2 teaspoon baking powder
  • 1 teaspoon pumpkin pie spice
  • 1/2 teaspoon fine salt
  • 3/4 cup mashed ripe banana, measured after mashing (170g)
  • 3/4 cup pure canned pumpkin puree (180g)
  • 3/4 cup packed light brown sugar (150g)
  • 2 large eggs
  • 1/3 cup neutral oil, such as canola or vegetable oil
  • 1 teaspoon vanilla extract
  • 3/4 cup semisweet chocolate chips (about 130g), divided

Instructions

  1. Preheat the oven to 350°F (175°C) with a rack in the middle. Lightly grease a 9-by-5-inch metal loaf pan and line the bottom and long sides with parchment, leaving overhang to lift out the loaf.
  2. Whisk the flour, baking soda, baking powder, pumpkin pie spice, and salt in a bowl.
  3. In a second bowl, whisk the measured mashed banana, pumpkin puree, brown sugar, eggs, oil, and vanilla until combined.
  4. Fold the dry ingredients into the wet ingredients just until no dry flour remains. Fold in the chocolate chips, reserving about 2 tablespoons for the top. Do not beat the batter smooth.
  5. Spread the batter evenly in the prepared pan and scatter the reserved chocolate chips over the surface.
  6. Bake uncovered on the middle rack. Begin checking at 50 minutes; bake for about 55 to 65 minutes or longer if needed. The loaf is done when a tester inserted into the center has no wet batter, though a few moist crumbs are fine. Tent loosely with foil if the top darkens before the center is baked.
  7. Cool in the pan for about 15 minutes, then lift the loaf onto a wire rack using the parchment. Cool for at least 60 minutes more before slicing into about 10 thick slices.

Tips

  • Measure the banana after mashing because banana size varies.
  • Use pure pumpkin puree, not pumpkin pie filling.
  • Do not add leftover banana or pumpkin; extra moisture can leave the center wet or make the loaf sink.
  • If a tester has a dark streak, retest a nearby spot because it may have passed through melted chocolate.
  • A smaller pan or different oven behavior may increase baking time.

Notes

Cool completely before storing airtight at room temperature for up to 3 days. Freeze the cooled loaf or slices for up to 3 months; thaw before serving or warm briefly in the microwave.

Nutrition

Calories: 310 kcal | Protein: 5 g | Fat: 12 g | Carbohydrates: 47 g

Snickerdoodle Banana Bread

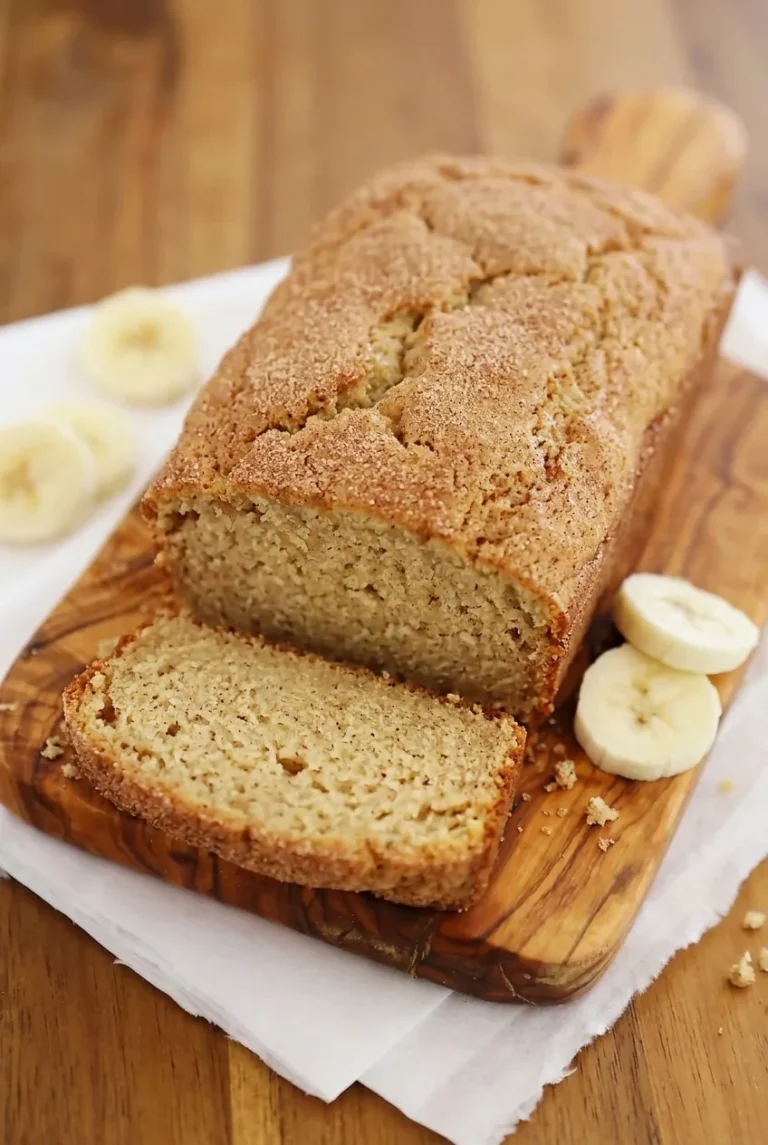
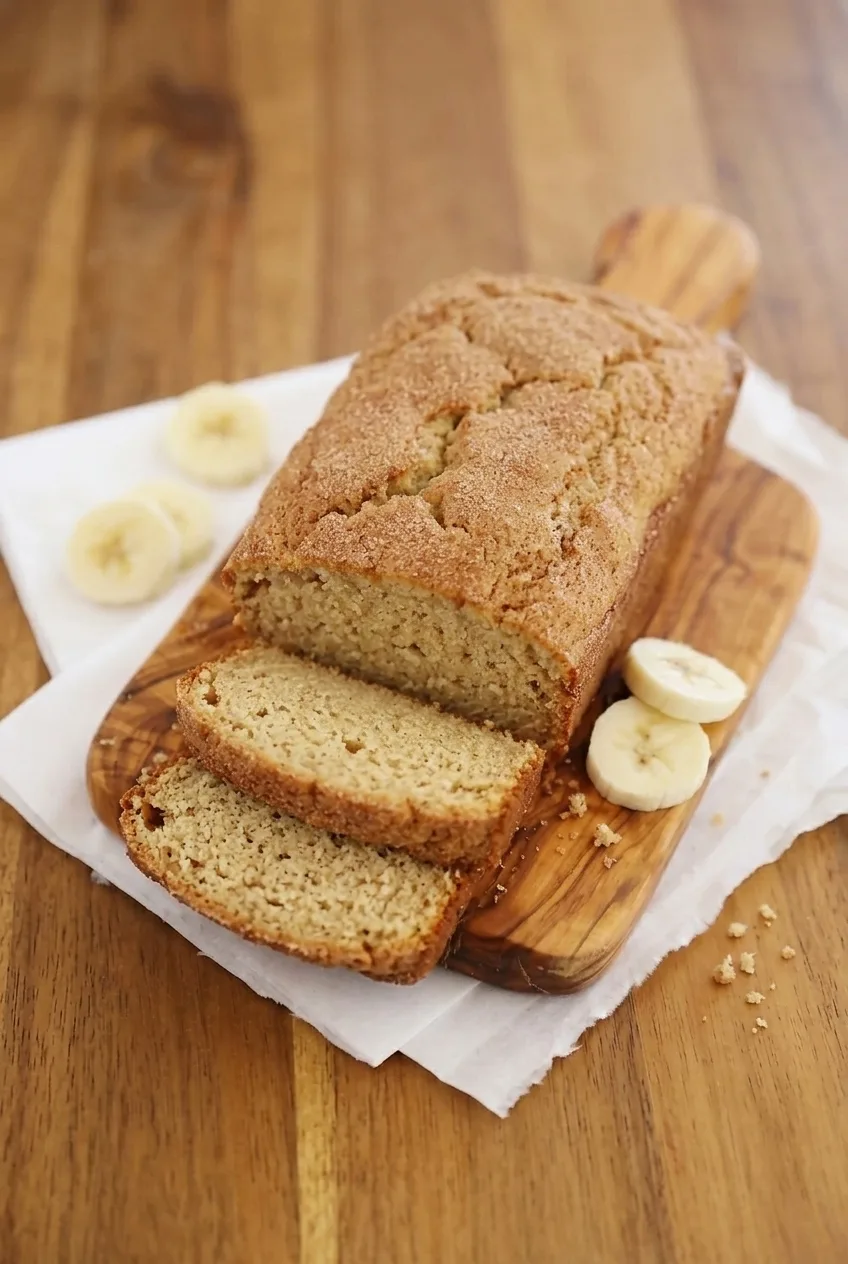
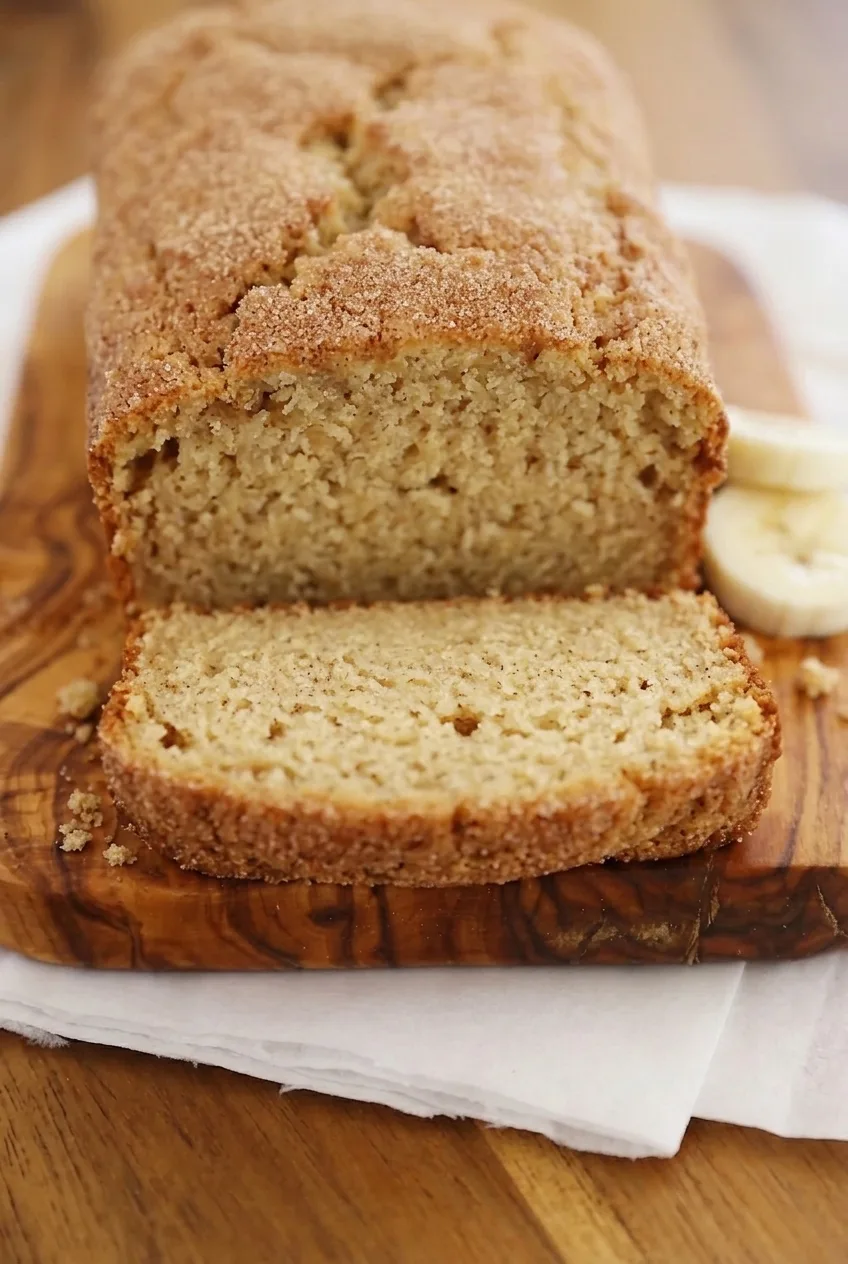
Cinnamon runs through the banana crumb of this sliceable loaf, while cinnamon sugar sprinkled over the batter before baking forms a golden, lightly crackled top. It has the finish of a snickerdoodle without a glaze or frosting.

Measure the banana after mashing it so extra fruit does not leave the center gummy. The sugared top can brown before the loaf is baked through, so check the center with a skewer rather than relying on crust color.

Ingredients for Snickerdoodle Banana Bread

Whole snickerdoodle banana bread loaf and cut slices on a wooden board in a wider view

For the bread

  • 1¼ cups very ripe mashed banana (280g), measured after mashing
  • 2 cups all-purpose flour (240g), spooned and leveled
  • 1 teaspoon baking soda
  • ½ teaspoon fine salt
  • 1 teaspoon ground cinnamon
  • ¼ cup unsalted butter (57g), softened
  • ¼ cup neutral vegetable or canola oil (55g)
  • ¾ cup granulated sugar (150g)
  • 1 large egg
  • ¼ cup milk (60g)

For the cinnamon-sugar top

  • 2 tablespoons granulated sugar (25g)
  • 1 teaspoon ground cinnamon

Yield: One 9×5-inch loaf, about 10 slices. Allow 15–20 minutes to prepare, 50–65 minutes to bake, and time for the loaf to cool completely.

Close view of a banana bread slice showing its soft crumb beneath a cinnamon-sugar crust

How to Bake Snickerdoodle Banana Bread

  1. Prepare the oven and pan: Preheat the oven to 350°F (175°C) with a rack near the center. Grease a 9×5-inch loaf pan. If using a parchment sling, grease any exposed sides of the pan.
  2. Measure the banana and mix the dry ingredients: Mash the bananas and measure 1¼ cups. In a separate bowl, whisk together the flour, baking soda, salt, and 1 teaspoon cinnamon.
  3. Mix the banana base: Beat the softened butter, oil, and ¾ cup sugar until combined and somewhat lighter. Beat in the egg, then mix in the banana. The mixture may look slightly uneven.
  4. Finish the batter: Add the dry ingredients and milk. Fold just until no dry flour remains. The batter should be thick and spoonable; continued mixing can make the crumb tough.
  5. Add the topping: Spread the batter evenly in the pan. Mix the 2 tablespoons sugar with the remaining teaspoon cinnamon, then sprinkle it over the unbaked batter, reaching the edges without piling it in the center.
  6. Bake: Bake uncovered for about 50–65 minutes, rotating the pan halfway through if your oven browns unevenly. Start checking at 50 minutes and recheck at roughly 5-minute intervals as needed. The top should be golden and naturally cracked, and a skewer inserted into the center should come out clean or with a few moist crumbs, not wet batter. If the top gets too dark while the center is still wet, tent it loosely with foil and continue baking.
  7. Cool before slicing: Leave the loaf in the pan for 10–15 minutes, then transfer it to a wire rack. Let it cool completely so the crumb firms up before cutting it into about 10 slices.

What to Expect from the Cinnamon-Sugar Top

The pre-bake topping gives the loaf a cinnamon-speckled surface with natural cracks. It may look done before the center is ready; wet batter on a center skewer means the loaf needs more time.

For cinnamon inside the loaf instead, try cinnamon swirl banana bread. For a crumbly topping rather than a sugar crust, see coffee cake banana bread with streusel.

Pan Size and Batter Texture

The baking window is for a 9×5-inch pan. An 8×4-inch pan makes a deeper loaf and may need longer, so use the center-skewer test rather than the stated timing alone. A light-colored metal pan can help keep the edges from browning too quickly.

Use soft, brown-spotted bananas, but do not add more than 1¼ cups after mashing. Too much banana, prolonged mixing after adding the flour, or an underbaked center can leave the crumb gummy. For crunch, fold up to ½ cup chopped walnuts or pecans into the finished batter before filling the pan; keep the topping as written.

How to Store and Warm Slices

Cool the bread completely before wrapping it. Store airtight at room temperature for 2–3 days, or well wrapped in the refrigerator for up to 1 week. The cinnamon-sugar top may soften in storage.

For longer storage, wrap the loaf or individual slices securely and freeze in a freezer-safe bag or container for up to 3 months. Thaw overnight in the refrigerator or for several hours at room temperature. Warm one slice in the microwave for about 10–15 seconds or briefly in a dry skillet.

Nutrition

Approximate nutrition per slice, based on 10 slices: 280 calories, 4g protein, 11g fat, and 43g carbohydrates. Estimated per 100g of baked bread: 340 calories, 4g protein, 13g fat, and 51g carbohydrates. Values depend on slice size and the loaf’s weight after baking. Optional nuts are not included.

Snickerdoodle Banana Bread

A cinnamon-scented banana loaf topped with a lightly crackled cinnamon-sugar crust.
Course: Breakfast
Cuisine: American
Prep: 20 min
Cook: 65 min
Total: 185 min
Servings: 10 Calories: 280 kcal

Equipment

  • 9×5-inch loaf pan
  • Mixing bowls
  • Whisk
  • Wire rack
  • Skewer

Ingredients

For the bread

  • 1¼ cups very ripe mashed banana (280 g), measured after mashing
  • 2 cups all-purpose flour (240 g), spooned and leveled
  • 1 teaspoon baking soda
  • ½ teaspoon fine salt
  • 1 teaspoon ground cinnamon
  • ¼ cup unsalted butter (57 g), softened
  • ¼ cup neutral vegetable or canola oil (55 g)
  • ¾ cup granulated sugar (150 g)
  • 1 large egg
  • ¼ cup milk (60 g)

For the cinnamon-sugar top

  • 2 tablespoons granulated sugar (25 g)
  • 1 teaspoon ground cinnamon

Instructions

  1. Preheat the oven to 350°F (175°C) with a rack near the center. Grease a 9×5-inch loaf pan; if using a parchment sling, grease any exposed sides.
  2. Mash the bananas and measure 1¼ cups. In a bowl, whisk together the flour, baking soda, salt, and 1 teaspoon cinnamon.
  3. Beat the softened butter, oil, and ¾ cup sugar until combined and somewhat lighter. Beat in the egg, then mix in the banana.
  4. Add the dry ingredients and milk. Fold just until no dry flour remains.
  5. Spread the batter evenly in the prepared pan. Mix the remaining 2 tablespoons sugar with 1 teaspoon cinnamon and sprinkle over the batter, reaching the edges without piling it in the center.
  6. Bake uncovered for 50–65 minutes, rotating the pan halfway through if needed. Start checking at 50 minutes; a skewer inserted into the center should come out clean or with a few moist crumbs, not wet batter. If the top darkens before the center is done, tent loosely with foil and continue baking.
  7. Cool in the pan for 10–15 minutes, then transfer to a wire rack and cool completely before slicing.

Tips

  • Measure the banana after mashing and use no more than 1¼ cups to help prevent a gummy center.
  • Fold the flour into the batter just until no dry flour remains to keep the crumb tender.
  • Use a center skewer to check doneness rather than relying on the color of the sugared top.
  • An 8×4-inch pan makes a deeper loaf and may need more baking time; use the skewer test.
  • A light-colored metal pan can help prevent the edges from browning too quickly.

Variations

  • Nutty Banana Bread: Fold up to ½ cup chopped walnuts or pecans into the finished batter before filling the pan.

Notes

Cool completely before wrapping. Store airtight at room temperature for 2–3 days or refrigerate for up to 1 week. Freeze securely wrapped for up to 3 months. Warm slices in the microwave for 10–15 seconds or briefly in a dry skillet.

Nutrition

Calories: 280 kcal | Protein: 4 g | Fat: 11 g | Carbohydrates: 43 g

Vegan Banana Bread

This plain vegan banana bread bakes into a browned, slightly craggy loaf with thick slices and a moist, fully set crumb. Ripe bananas give the batter structure without a flax egg or other dedicated egg replacer. Measure the banana after mashing, fold the flour in gently, and check the center before taking the loaf out of the oven. The crust can brown while the middle still needs time.

Yield: One 9-by-5-inch loaf, about 10 slices. Prep: 15 minutes. Bake: About 55 to 70 minutes. Cooling: About 1 hour.

Ingredients for Vegan Banana Bread

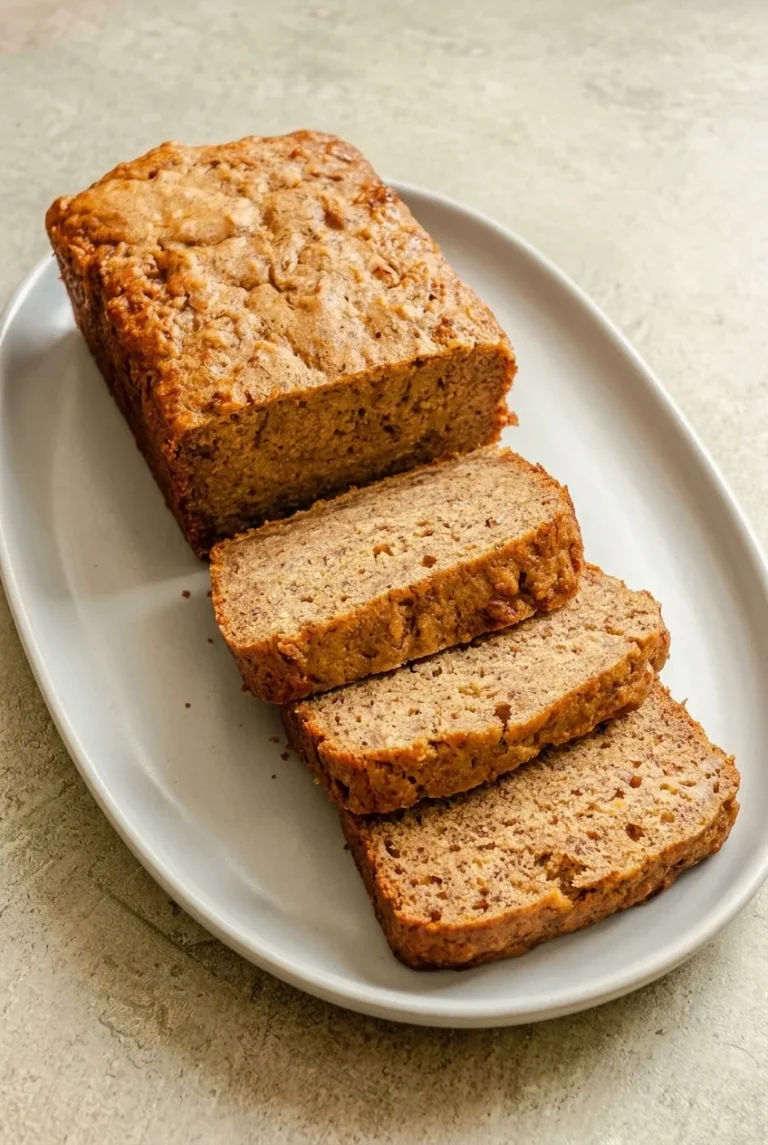
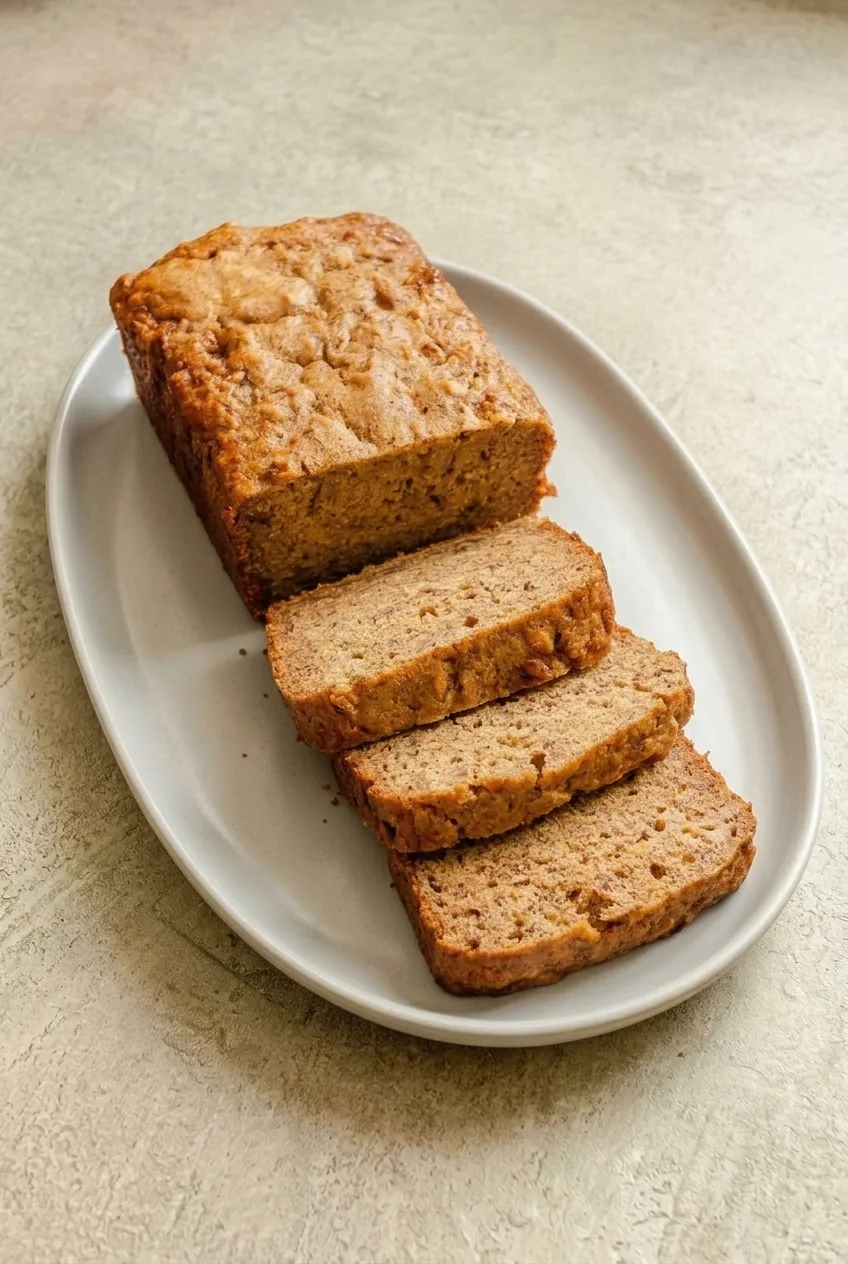
Full platter of partly sliced vegan banana bread on a neutral kitchen surface
  • 1 1/2 cups very ripe mashed banana, measured after mashing (about 3 medium bananas; 340g)
  • 3/4 cup packed light brown sugar (150g)
  • 1/3 cup neutral oil (75g), plus a little for the pan
  • 1/4 cup unsweetened plant milk, such as oat, soy, or almond milk (60g)
  • 1 teaspoon vanilla extract
  • 2 cups all-purpose flour, spooned and leveled (250g)
  • 1 teaspoon baking soda
  • 1 teaspoon baking powder
  • 1/2 teaspoon fine salt

Optional: 1/2 teaspoon ground cinnamon for a lightly spiced loaf.

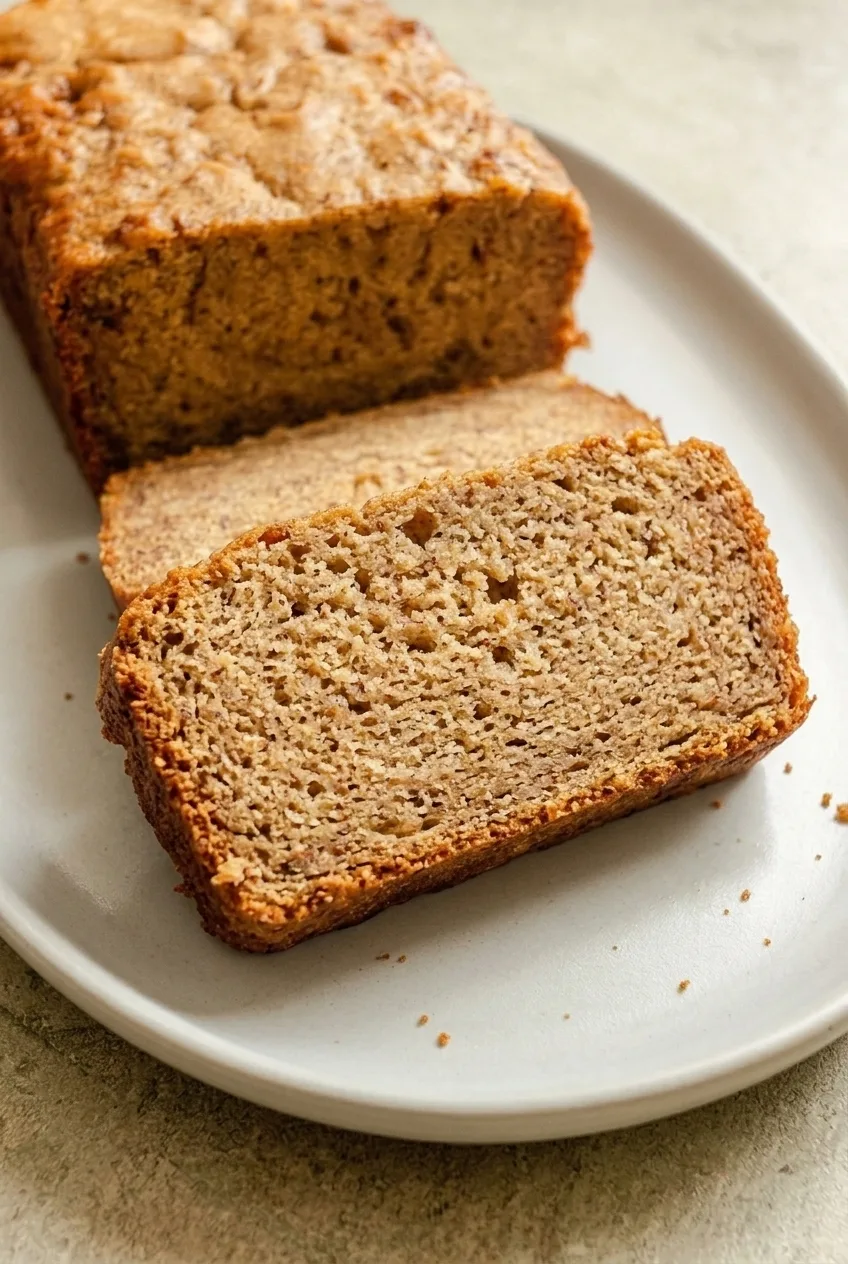
Close view of a thick vegan banana bread slice showing its set, banana-flecked crumb and browned crust

How to Bake Vegan Banana Bread

  1. Preheat and prepare the pan: Preheat the oven fully to 350°F (175°C) with a rack in the center. Line a 9-by-5-inch loaf pan with a parchment sling extending above the long sides. Lightly oil the exposed ends.
  2. Measure the banana: Mash the ripe bananas, then measure 1 1/2 cups. If using thawed frozen bananas, drain off excess released liquid before mashing and measuring.
  3. Mix wet and dry ingredients separately: Whisk the banana, brown sugar, oil, plant milk, and vanilla in one bowl. In another, whisk the flour, baking soda, baking powder, salt, and optional cinnamon.
  4. Fold and fill: Fold the dry ingredients into the banana mixture just until no dry flour remains. The batter will be thick. Transfer it to the pan and gently level the top without beating the batter smooth.
  5. Bake and check the center: Bake uncovered for about 55 to 70 minutes, starting toothpick checks at 50 minutes. The loaf is done when the top is browned, the center looks set, and a toothpick inserted into the center comes out without wet batter. A few moist crumbs are fine. If the top darkens before the center is done, tent it loosely with foil and continue baking, checking again at short intervals.
  6. Cool before slicing: Cool in the pan for about 15 minutes, then lift the loaf onto a wire rack. Let it cool completely, about 45 to 60 minutes more, before cutting thick slices.

Why Measure the Mashed Banana?

Use soft, brown-spotted bananas, but measure the mash rather than relying on a banana count. Banana sizes vary, and more than 1 1/2 cups—or extra liquid from thawed fruit—can leave the center gummy.

How to Tell When the Center Is Done

A browned crust does not mean the middle is baked through. Moist crumbs appear as small, soft bits on the toothpick; wet batter coats it like uncooked mixture. If you see wet batter, keep baking and use a loose foil tent if the top is getting dark.

An 8-by-4-inch pan makes a taller loaf that may need longer than the stated range. A gummy-looking slice can also result from overmixing or cutting while warm, so fold the batter gently and let the loaf cool completely.

Serving and Variations

Serve thick slices at room temperature or lightly warmed, with plant-based butter or nut butter alongside if desired. For a separate chocolate-studded loaf, try chocolate chip banana bread.

How to Store and Freeze Banana Bread

Once completely cool, keep the loaf airtight at room temperature for about two days. In a hot kitchen, choose a cooler storage spot or freeze it sooner.

For longer keeping, wrap cooled slices individually and seal them in a freezer-safe bag or container. Use within roughly two to three months for best quality. Thaw at room temperature or in the refrigerator; warm an individual slice briefly in the microwave if desired.

Nutrition

Approximate per slice, based on 10 slices: 245 calories, 3g protein, 8g fat, and 42g carbohydrates. Approximate per 100g of baked loaf: 310 calories, 4g protein, 10g fat, and 53g carbohydrates. Values vary with the plant milk, slice size, and moisture lost during baking.

Vegan Banana Bread

A moist, fully set banana bread loaf made with ripe bananas and no egg replacer.
Course: Breakfast
Cuisine: American
Prep: 15 min
Cook: 70 min
Total: 145 min
Servings: 10 Calories: 245 kcal per slice

Equipment

  • 9-by-5-inch loaf pan
  • Parchment paper
  • Mixing bowls
  • Whisk
  • Wire rack
  • Toothpick

Ingredients

  • 1 1/2 cups very ripe mashed banana, measured after mashing (about 3 medium bananas; 340g)
  • 3/4 cup packed light brown sugar (150g)
  • 1/3 cup neutral oil (75g), plus a little for the pan
  • 1/4 cup unsweetened plant milk, such as oat, soy, or almond milk (60g)
  • 1 teaspoon vanilla extract
  • 2 cups all-purpose flour, spooned and leveled (250g)
  • 1 teaspoon baking soda
  • 1 teaspoon baking powder
  • 1/2 teaspoon fine salt
  • Optional: 1/2 teaspoon ground cinnamon

Instructions

  1. Preheat the oven to 350°F (175°C) with a rack in the center.
  2. Line a 9-by-5-inch loaf pan with a parchment sling, then lightly oil the exposed ends.
  3. Mash the bananas and measure 1 1/2 cups. If using thawed frozen bananas, drain excess liquid before measuring.
  4. Whisk the banana, brown sugar, oil, plant milk, and vanilla in a bowl.
  5. In a separate bowl, whisk the flour, baking soda, baking powder, salt, and optional cinnamon.
  6. Fold the dry ingredients into the banana mixture just until no dry flour remains. Transfer the thick batter to the pan and gently level the top.
  7. Bake uncovered for about 55 to 70 minutes, beginning toothpick checks at 50 minutes. The loaf is done when the center looks set and a toothpick comes out without wet batter; a few moist crumbs are fine.
  8. If the top darkens before the center is done, tent loosely with foil and continue baking, checking again at short intervals.
  9. Cool in the pan for about 15 minutes, then transfer the loaf to a wire rack. Cool completely for about 45 to 60 minutes more before slicing.

Tips

  • Measure the banana after mashing; using too much can leave the center gummy.
  • Drain excess liquid from thawed frozen bananas before measuring.
  • Fold the flour in gently and stop as soon as no dry flour remains.
  • Use a toothpick to check the center; moist crumbs are fine, but wet batter means the loaf needs more time.
  • Tent the loaf loosely with foil if the top browns before the center is baked.

Variations

  • Cinnamon Banana Bread: Add 1/2 teaspoon ground cinnamon to the dry ingredients for a lightly spiced loaf.
  • Chocolate Chip Banana Bread: Make a separate chocolate-studded variation by adding chocolate chips to the loaf.

Notes

Store airtight at room temperature for about two days, or freeze wrapped slices for two to three months. Thaw at room temperature or in the refrigerator; warm individual slices briefly in the microwave if desired.

Nutrition

Calories: 245 kcal per slice | Protein: 3 g per slice | Fat: 8 g per slice | Carbohydrates: 42 g per slice | Per 100g Calories: 310 kcal | Per 100g Protein: 4 g | Per 100g Fat: 10 g | Per 100g Carbohydrates: 53 g

Gluten-Free Banana Bread

This plain gluten-free banana bread bakes into a loaf with browned edges and a moist, banana-flecked crumb that holds together in thick slices. Very ripe bananas provide moisture, while a binder-containing 1:1 gluten-free flour blend gives the loaf structure. Measure the mashed banana, and check the center before taking the loaf out of the oven: the top can brown while the middle is still wet.

Makes one 9×5-inch loaf, about 10 thick slices. Allow 15 minutes to prepare, about 50 to 60 minutes to bake, and at least 1 hour to cool before slicing.

Ingredients for Gluten-Free Banana Bread

Full white plate of overlapping gluten-free banana bread slices on a pale surface
  • 1 1/4 cups mashed very ripe bananas (about 3 medium bananas; 285g)
  • 1 1/2 cups 1:1 gluten-free baking flour blend containing a binder (about 210g; check the package weight)
  • 1/2 cup packed light brown sugar (100g)
  • 2 large eggs
  • 1/3 cup neutral oil (about 75g)
  • 1 teaspoon vanilla extract
  • 1 teaspoon baking soda
  • 1/2 teaspoon baking powder
  • 1/2 teaspoon fine salt
Close view of the moist, banana-flecked crumb and browned crust of a gluten-free banana bread slice

How to Bake Gluten-Free Banana Bread

  1. Prepare the oven and pan: Fully preheat the oven to 350°F (175°C) with a rack in the center. Lightly grease a 9×5-inch metal loaf pan, then line it with parchment extending above the long sides to form a sling.
  2. Measure the bananas: Mash the ripe bananas and measure out 1 1/4 cups. A few small pieces can remain. Measuring matters because three bananas can yield different amounts of fruit.
  3. Mix the wet and dry ingredients: Whisk the flour, baking soda, baking powder, and salt in one bowl. In another bowl, whisk the measured banana, brown sugar, eggs, oil, and vanilla until combined.
  4. Fill the pan: Stir the dry ingredients into the banana mixture just until no dry flour remains. Spread the batter evenly in the prepared pan; leave the top plain.
  5. Bake and check the center: Bake uncovered for approximately 50 to 60 minutes, beginning checks at 50 minutes. The top should be browned and set, and a tester inserted into the center should come out clean or with a few moist crumbs, not wet batter. If the top darkens before the center is done, tent the loaf loosely with foil and continue baking, checking again as needed.
  6. Cool before slicing: Cool in the pan for about 15 minutes. Lift the loaf out with the parchment and cool on a rack for at least 45 more minutes. Cut into thick slices and serve them overlapping, with the cut faces visible.

Choosing Gluten-Free Flour

Use a blend labeled for 1:1 baking that already contains a binder; this recipe does not call for separate xanthan gum. Blend weights and absorption can differ, so use the package’s weight for 1 1/2 cups if it differs from 210g. Choose gluten-free-certified ingredients where needed.

Coconut, almond, and oat flour cannot replace the blend cup-for-cup; they need different formulas. For a separate oat-focused loaf, try healthy oatmeal banana bread. Simply leaving out the eggs is not a reliable vegan conversion for this loaf.

How to Tell When the Center Is Done

A browned top can hide a wet center. A few moist crumbs on the tester are fine, but a streak of batter means the loaf needs more time. Keep baking under a loose foil tent if the crust is getting too dark. A narrower pan makes a taller loaf that may take longer; oven and flour-blend differences can also shift the baking time.

Cooling for Slices That Hold Together

The crumb is more delicate while warm. Wait at least an hour total—about 15 minutes in the pan and 45 minutes on a rack—before cutting thick slices. If the slices break apart, the loaf may need more cooling, or the flour blend may not have provided the intended structure.

Storage and Freezing

Cool the loaf completely before wrapping or covering it. Keep it in a cool, dry place at room temperature for about 3 to 4 days, or wrap it tightly and freeze for up to 3 months.

Nutrition

Approximate nutrition per thick slice, based on 10 slices: 220 calories, 2g protein, 9g fat, and 34g carbohydrates. Per 100g of baked bread: approximately 310 calories, 3g protein, 12g fat, and 49g carbohydrates. Values vary with the flour blend and the loaf’s final weight.

Gluten-Free Banana Bread

A moist banana bread made with ripe bananas and a 1:1 gluten-free flour blend.
Course: Breakfast
Cuisine: American
Prep: 15 min
Cook: 60 min
Total: 135 min
Servings: 10 Calories: 220 kcal

Equipment

  • 9×5-inch metal loaf pan
  • Parchment paper
  • Mixing bowls
  • Whisk
  • Cooling rack
  • Cake tester

Ingredients

  • 1 1/4 cups mashed very ripe bananas (about 3 medium bananas; 285 g)
  • 1 1/2 cups 1:1 gluten-free baking flour blend containing a binder (about 210 g; follow package weight if different)
  • 1/2 cup packed light brown sugar (100 g)
  • 2 large eggs
  • 1/3 cup neutral oil (about 75 g)
  • 1 teaspoon vanilla extract
  • 1 teaspoon baking soda
  • 1/2 teaspoon baking powder
  • 1/2 teaspoon fine salt

Instructions

  1. Preheat the oven to 350°F (175°C) with a rack in the center.
  2. Lightly grease a 9×5-inch metal loaf pan and line it with parchment, leaving excess paper over the long sides to form a sling.
  3. Mash the bananas and measure 1 1/4 cups.
  4. Whisk the flour, baking soda, baking powder, and salt in a bowl.
  5. In a separate bowl, whisk the measured banana, brown sugar, eggs, oil, and vanilla until combined.
  6. Stir the dry ingredients into the banana mixture just until no dry flour remains.
  7. Spread the batter evenly in the prepared pan.
  8. Bake uncovered for 50 to 60 minutes, beginning to check at 50 minutes. The top should be browned and set, and a tester inserted in the center should come out clean or with a few moist crumbs.
  9. If the top darkens before the center is done, tent the loaf loosely with foil and continue baking, checking as needed.
  10. Cool in the pan for about 15 minutes, then lift the loaf out using the parchment and cool on a rack for at least 45 minutes before slicing.

Tips

  • Measure the mashed banana rather than relying on a count of bananas.
  • Use a 1:1 gluten-free flour blend that already contains a binder; no extra xanthan gum is needed.
  • Use the flour package’s weight for 1 1/2 cups if it differs from 210 g.
  • A few moist crumbs on the tester are fine, but wet batter means the loaf needs more baking.
  • Tent the loaf loosely with foil if the top browns before the center is done.
  • Let the loaf cool for at least an hour total so the slices hold together.

Notes

Cool completely before wrapping. Store at room temperature for about 3 to 4 days, or wrap tightly and freeze for up to 3 months. Nutrition is approximate per slice, based on 10 slices.

Nutrition

Calories: 220 kcal | Protein: 2 g | Fat: 9 g | Carbohydrates: 34 g

Peanut Butter Banana Bread

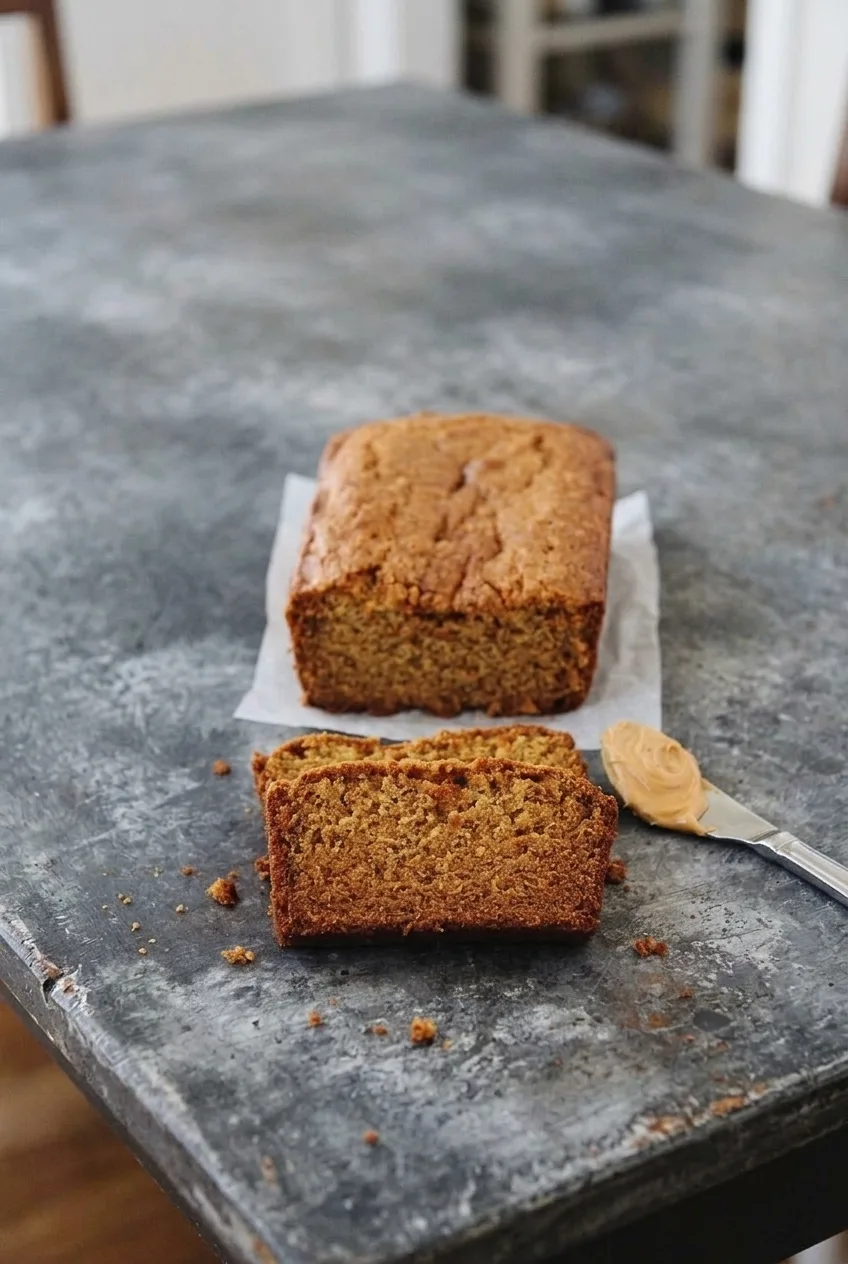
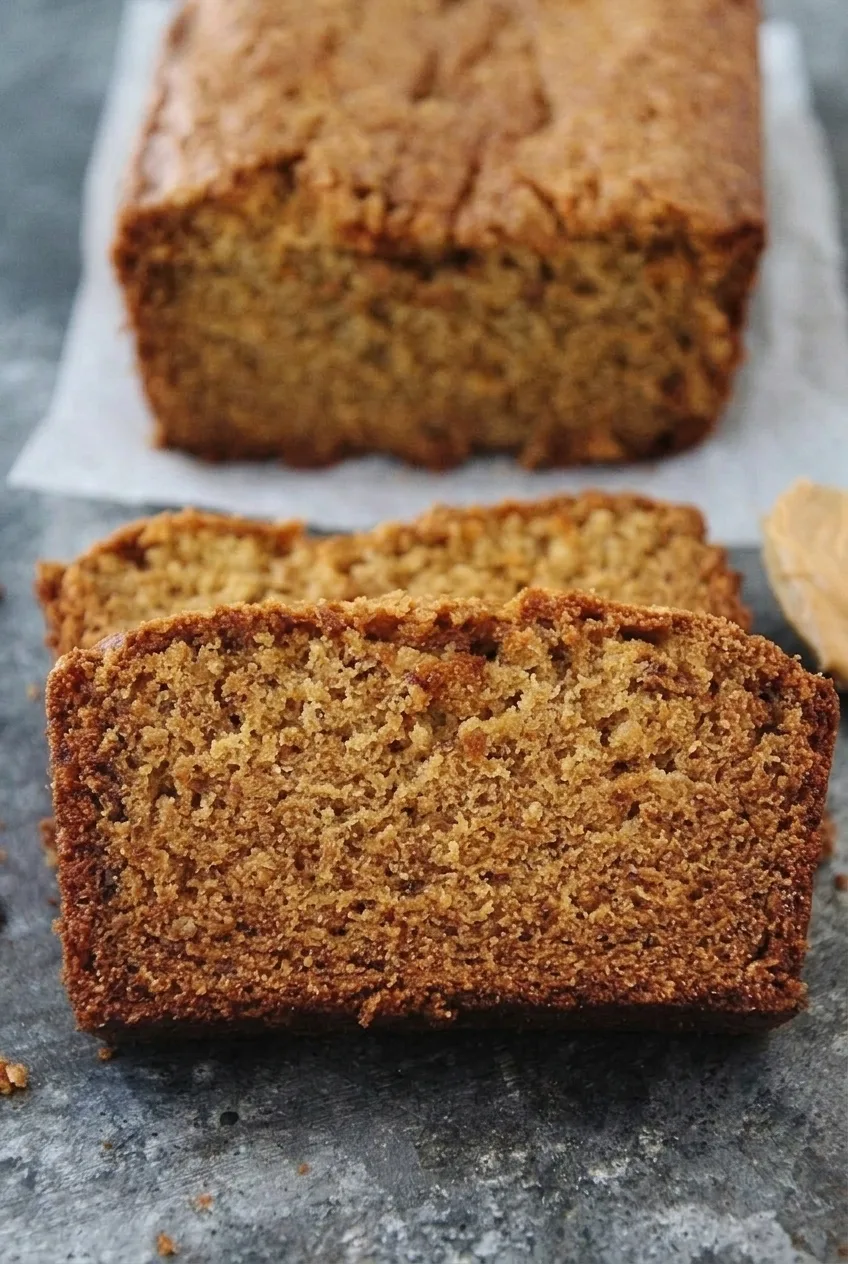
Peanut butter is mixed throughout this banana bread, giving the loaf an even flavor and a fine, tender crumb rather than a swirl. The top browns and splits naturally, while the inside stays moist enough to cut into thick slices once cool. Measure the mashed banana before mixing: too much can leave the center wet even after the crust has browned.

Yield: 1 loaf, about 10 slices. Prep: 15 minutes. Bake: 50–65 minutes. Total: about 2 hours 5 minutes to 2 hours 20 minutes, including approximately 1 hour of cooling.

Ingredients for Peanut Butter Banana Bread

Full peanut butter banana bread loaf on parchment with two thick slices on a gray surface
  • 1 cup mashed very ripe banana, measured after mashing (about 2 medium bananas; 225g)
  • 1/2 cup conventional creamy peanut butter (130g)
  • 1/4 cup unsalted butter, melted and cooled slightly (57g)
  • 2/3 cup packed light brown sugar (135g)
  • 1 large egg
  • 1/4 cup milk (60g)
  • 1 teaspoon vanilla extract
  • 1 1/2 cups all-purpose flour (190g)
  • 1 teaspoon baking powder
  • 1/2 teaspoon baking soda
  • 1/2 teaspoon fine salt

Use bananas with heavily spotted peels. Mash them before measuring 1 cup, and save any extra for another use rather than adding it to the batter.

Close view of a thick peanut butter banana bread slice showing its fine crumb and browned crust

How to Bake Peanut Butter Banana Bread

  1. Prepare the oven and pan: Position a rack near the center of the oven and preheat to 350°F (175°C). Grease a light-colored 9-by-5-inch loaf pan. If desired, line it with parchment overhangs along the long sides to help lift out the loaf.
  2. Mix the wet ingredients: In a large bowl, whisk the measured banana, peanut butter, melted butter, brown sugar, egg, milk, and vanilla until combined, with no large peanut butter streaks. The mixture will be thick but stirrable.
  3. Mix the dry ingredients: In a separate bowl, whisk together the flour, baking powder, baking soda, and salt.
  4. Finish the batter: Fold the dry ingredients into the wet mixture just until no dry flour remains. Do not beat the batter smooth; overmixing can make the loaf tough. Spread the batter in the pan and leave the top plain.
  5. Bake: Bake uncovered for about 50–65 minutes, beginning to check at 50 minutes. The top should be golden to medium brown with a natural split. A tester inserted into the center should come out clean or with a few moist crumbs, not wet batter. If the top darkens before the center is done, tent loosely with foil and continue baking.
  6. Cool and slice: Cool in the pan for about 15 minutes, then lift the loaf onto a wire rack. Let it cool completely before cutting thick slices so the crumb has time to set. Serve plain or with a little creamy peanut butter alongside.

How to Tell When the Center Is Baked

Test the middle of the loaf, not an edge that may finish sooner. A few soft crumbs on the tester are fine; shiny, wet batter means the bread needs more time, even if the crust is already brown. Slicing while hot can also make a baked loaf seem gummy, so wait until it has cooled.

Pan and Peanut Butter Choices

A light-colored 9-by-5-inch pan helps the center bake before the crust gets too dark. A smaller pan makes the batter deeper and changes the baking time. For a dark-coated pan, consider lowering the oven to 325°F (165°C) and allowing more time; use the center tester rather than the 350°F baking range to judge doneness.

Conventional creamy peanut butter blends smoothly into the wet ingredients. Oil-separated natural peanut butter may behave differently in this batter.

Chocolate-Chip Variation

For a chocolate-chip loaf, fold up to 1/2 cup chocolate chips into the finished batter. Check the center for doneness as usual. Leave the chips out for the plain loaf and a clearer peanut butter flavor.

For another banana-bread option, try classic moist banana bread with walnuts.

Storing and Freezing Slices

Cool the loaf completely before wrapping it tightly. Keep it at room temperature for about 3 days. To freeze, wrap the loaf or individual slices tightly, place in a freezer bag, and freeze for up to 3 months. Thaw while wrapped at room temperature. Leftover slices can also be lightly toasted in a buttered skillet.

Nutrition

Approximate nutrition per slice, based on 10 slices: 270 calories, 6g protein, 12g fat, and 36g carbohydrates. Approximate values per 100g of baked bread: 345 calories, 7g protein, 15g fat, and 46g carbohydrates. Values exclude optional peanut butter for serving and chocolate chips; actual amounts vary with ingredients, slice size, and moisture lost during baking.

Peanut Butter Banana Bread

A tender banana bread with creamy peanut butter mixed throughout and a naturally split, golden-brown top.
Course: Breakfast
Cuisine: American
Prep: 15 min
Cook: 65 min
Total: 140 min
Servings: 10 Calories: 270 kcal per slice; 345 kcal per 100 g

Equipment

  • 9-by-5-inch loaf pan
  • Mixing bowls
  • Whisk
  • Wire rack
  • Center tester

Ingredients

For the batter

  • 1 cup mashed very ripe banana, measured after mashing (about 2 medium bananas; 225 g)
  • 1/2 cup conventional creamy peanut butter (130 g)
  • 1/4 cup unsalted butter, melted and cooled slightly (57 g)
  • 2/3 cup packed light brown sugar (135 g)
  • 1 large egg
  • 1/4 cup milk (60 g)
  • 1 teaspoon vanilla extract
  • 1 1/2 cups all-purpose flour (190 g)
  • 1 teaspoon baking powder
  • 1/2 teaspoon baking soda
  • 1/2 teaspoon fine salt

Instructions

  1. Position a rack near the center of the oven and preheat to 350°F (175°C). Grease a light-colored 9-by-5-inch loaf pan; line with parchment overhangs if desired.
  2. Whisk the measured banana, peanut butter, melted butter, brown sugar, egg, milk, and vanilla in a large bowl until combined.
  3. Whisk the flour, baking powder, baking soda, and salt together in a separate bowl.
  4. Fold the dry ingredients into the wet mixture just until no dry flour remains. Spread the batter in the pan without beating it smooth.
  5. Bake uncovered for 50–65 minutes, beginning to check at 50 minutes. The top should be golden to medium brown, and a tester inserted in the center should come out clean or with a few moist crumbs.
  6. If the top darkens before the center is baked, tent it loosely with foil and continue baking.
  7. Cool in the pan for about 15 minutes, then transfer the loaf to a wire rack. Cool completely before slicing.

Tips

  • Mash the bananas before measuring, and use exactly 1 cup; extra banana can leave the center wet.
  • Use very ripe bananas with heavily spotted peels.
  • Fold the batter only until the dry flour disappears to help keep the loaf tender.
  • Test the center rather than an edge; wet, shiny batter means the loaf needs more time.
  • For a dark-coated pan, consider baking at 325°F (165°C) and rely on the center tester to judge doneness.

Variations

  • Chocolate-Chip Peanut Butter Banana Bread: Fold up to 1/2 cup chocolate chips into the finished batter before baking.

Notes

Cool completely before wrapping. Store at room temperature for about 3 days, or freeze tightly wrapped for up to 3 months; thaw while wrapped. Nutrition estimates exclude optional chocolate chips and peanut butter served alongside.

Nutrition

Calories: 270 kcal per slice; 345 kcal per 100 g | Protein: 6 g per slice; 7 g per 100 g | Fat: 12 g per slice; 15 g per 100 g | Carbohydrates: 36 g per slice; 46 g per 100 g

Cream Cheese Banana Bread

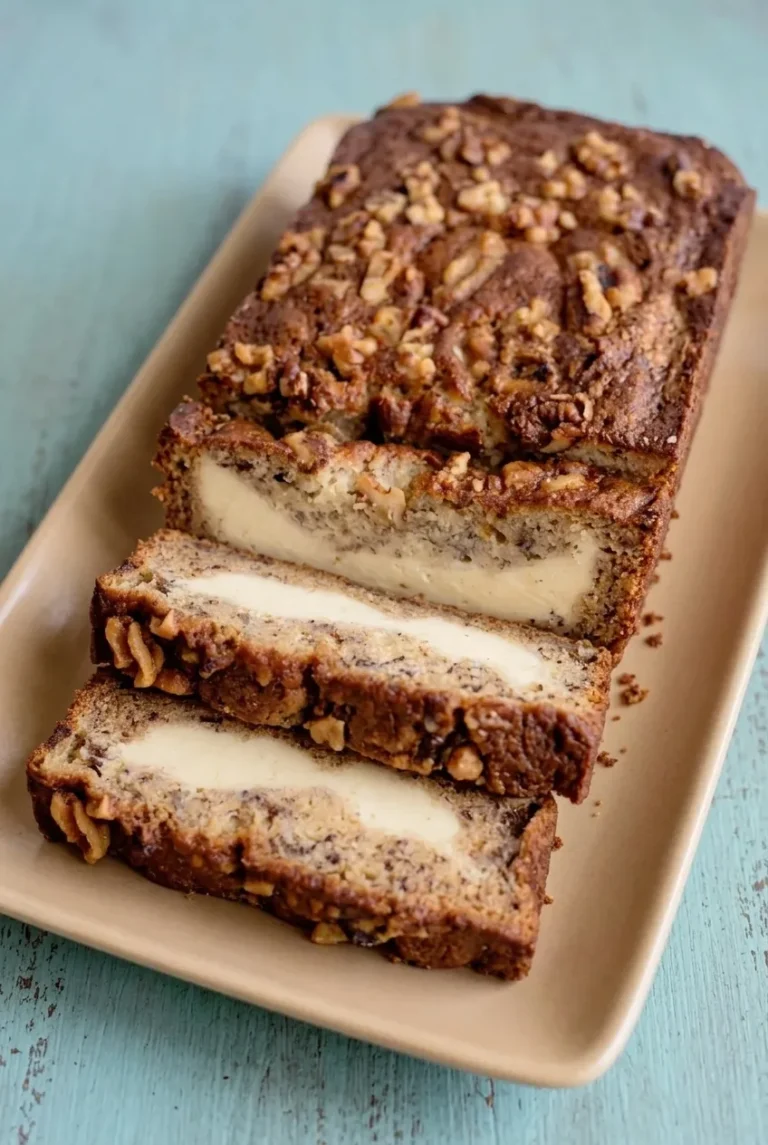
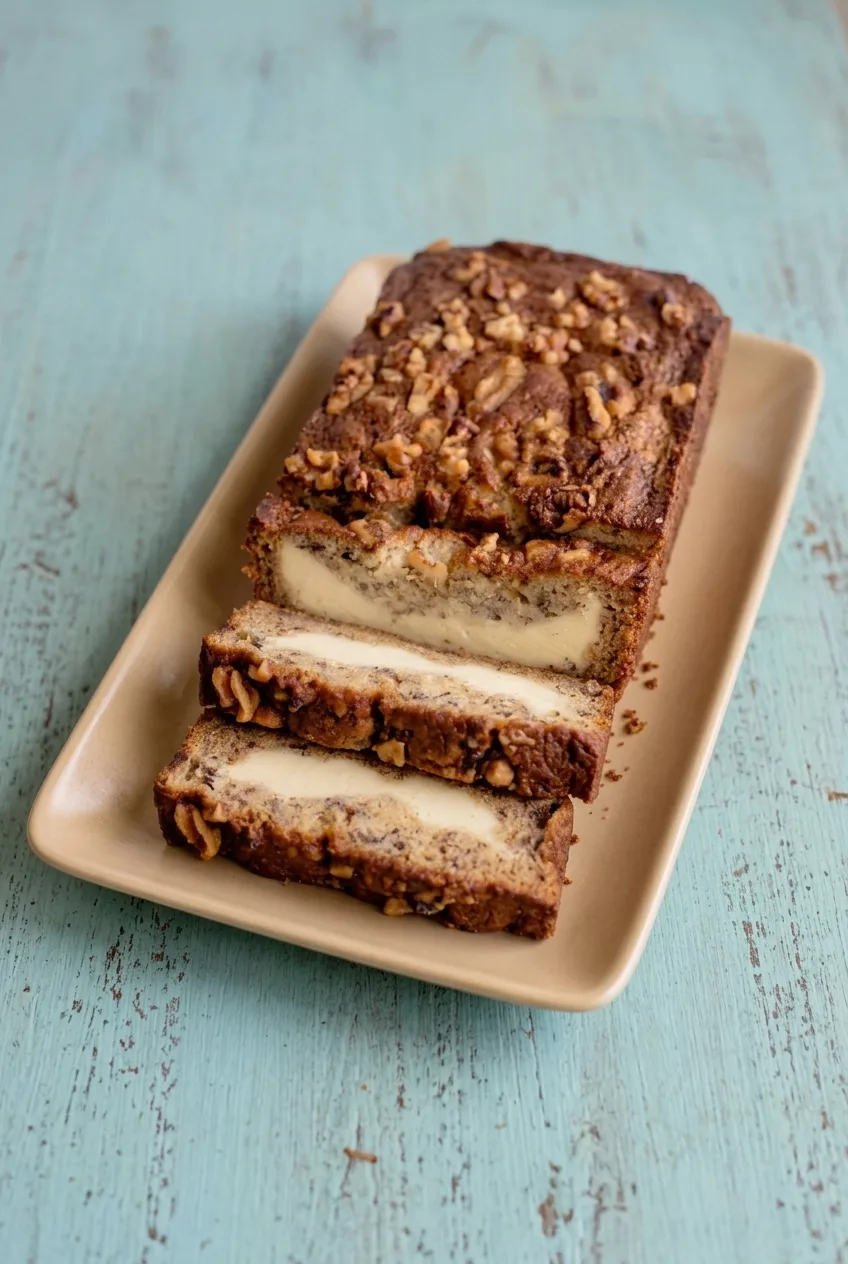
Thick slices of this walnut-topped banana bread reveal a broad cream cheese center, not a swirl. Very ripe bananas give the surrounding bread its moist, flecked crumb. Layer the filling between two portions of batter, then let the baked loaf cool completely before slicing. That cooling time helps the filling hold its shape and keeps the bread from crumbling.

Ingredients for Cream Cheese Banana Bread

Banana batter

Walnut-topped cream cheese banana bread and overlapping slices on a platter
  • 1 1/2 cups mashed very ripe bananas, about 3 medium bananas (340g)
  • 1/2 cup unsalted butter, melted and slightly cooled (115g)
  • 3/4 cup packed light brown sugar (150g)
  • 1 large egg
  • 1 teaspoon vanilla extract
  • 1 3/4 cups all-purpose flour (210g)
  • 1 teaspoon baking soda
  • 1/2 teaspoon fine salt

Cream cheese filling

  • 8 ounces full-fat block cream cheese, softened (225g)
  • 1/4 cup granulated sugar (50g)
  • 1 large egg
  • 1 tablespoon all-purpose flour
  • 1/2 teaspoon vanilla extract

Topping

  • 1/2 cup chopped walnuts (55g)

Use bananas with plenty of brown spots. Let the block cream cheese soften before mixing so the filling is smooth rather than lumpy.

Close view of a banana bread slice showing moist flecked crumb and a broad cream cheese center

How to Bake Cream Cheese Banana Bread

Yield: 1 loaf, about 10 thick slices. Prep: 20 minutes. Bake: about 55–70 minutes. Cooling: about 90 minutes.

  1. Prepare the pan: Preheat the oven to 350°F (175°C) with a rack near the center. Line a 9 x 5-inch loaf pan with parchment overhang on two sides. Lightly grease any exposed pan surfaces.
  2. Mix the filling: Beat the softened cream cheese and granulated sugar until smooth. Add the filling egg, 1 tablespoon flour, and 1/2 teaspoon vanilla; mix just until combined.
  3. Make the banana batter: In a separate bowl, whisk the mashed bananas, melted butter, brown sugar, batter egg, and 1 teaspoon vanilla. Add the 1 3/4 cups flour, baking soda, and salt. Fold just until no dry flour remains; the batter will be thick.
  4. Layer the loaf: Spread about half the banana batter evenly in the pan. Spoon the cream cheese filling over it, leaving a narrow border near the pan sides. Gently cover with the remaining banana batter without swirling, then scatter the walnuts over the top.
  5. Bake: Bake uncovered and begin checking at 55 minutes. Allow approximately 55–70 minutes, or longer if needed. The top should be browned, and a tester inserted into banana crumb near the middle, slightly beside the cream cheese, should come out without wet batter. If the top darkens before the bread is done, loosely tent it with foil and continue baking.
  6. Cool and slice: Cool in the pan for about 15 minutes. Lift the loaf out by the parchment and cool completely on a wire rack, about 75 minutes more, before cutting into thick slices.

How to Keep the Cream Cheese Center Defined

Keeping the filling just inside the edges lets the banana batter enclose it. Spread the top layer gently rather than dragging it through the cream cheese; swirling would break up the broad center band.

How to Tell When the Loaf Is Done

A tester pushed through the cream cheese can pick up creamy residue even when the bread is baked. Test the banana crumb beside the filling instead, looking for no wet banana batter. The filled center may need longer than the browned top suggests. A smaller or differently shaped pan changes the loaf’s depth, so do not assume it will follow the same bake time.

Cooling, Storage, and Freezing

Let the loaf cool completely before wrapping or slicing; cutting it warm can smear the filling. Wrap or seal the cooled loaf and refrigerate for up to 5 days. Serve slices cool or let them lose their chill briefly before eating.

To freeze, tightly wrap the cooled loaf or individual slices for up to 2 months. Thaw wrapped slices in the refrigerator and keep leftovers refrigerated.

For a different banana loaf, try this chocolate chip banana bread.

Nutrition

Approximate nutrition per thick slice, based on 10 slices: 400 calories, 6g protein, 22g fat, and 46g carbohydrates. Per 100g of baked loaf: approximately 350 calories, 5g protein, 19g fat, and 40g carbohydrates. Values vary with slice size, ingredient brands, and moisture lost during baking.

Cream Cheese Banana Bread

Moist banana bread surrounds a broad cream cheese center and is topped with chopped walnuts.
Course: Breakfast
Cuisine: American
Prep: 20 min
Cook: 70 min
Total: 180 min
Servings: 10 Calories: 400 kcal

Equipment

  • 9 x 5-inch loaf pan
  • Parchment paper
  • Mixing bowls
  • Whisk
  • Wire rack
  • Cake tester

Ingredients

Banana batter

  • 1 1/2 cups mashed very ripe bananas, about 3 medium (340 g)
  • 1/2 cup unsalted butter, melted and slightly cooled (115 g)
  • 3/4 cup packed light brown sugar (150 g)
  • 1 large egg
  • 1 teaspoon vanilla extract
  • 1 3/4 cups all-purpose flour (210 g)
  • 1 teaspoon baking soda
  • 1/2 teaspoon fine salt

Cream cheese filling

  • 8 ounces full-fat block cream cheese, softened (225 g)
  • 1/4 cup granulated sugar (50 g)
  • 1 large egg
  • 1 tablespoon all-purpose flour
  • 1/2 teaspoon vanilla extract

Topping

  • 1/2 cup chopped walnuts (55 g)

Instructions

  1. Preheat the oven to 350°F (175°C), with a rack near the center. Line a 9 x 5-inch loaf pan with parchment paper, leaving an overhang on two sides, and lightly grease any exposed pan surfaces.
  2. Beat the softened cream cheese and granulated sugar until smooth. Add the filling egg, 1 tablespoon flour, and 1/2 teaspoon vanilla; mix just until combined.
  3. In a separate bowl, whisk the mashed bananas, melted butter, brown sugar, batter egg, and 1 teaspoon vanilla.
  4. Add the 1 3/4 cups flour, baking soda, and salt to the banana mixture. Fold just until no dry flour remains.
  5. Spread about half the banana batter evenly in the prepared pan. Spoon the cream cheese filling over it, leaving a narrow border near the sides.
  6. Gently cover the filling with the remaining banana batter without swirling. Scatter the walnuts over the top.
  7. Bake uncovered for about 55–70 minutes, beginning to check at 55 minutes. If the top darkens before the bread is done, loosely tent it with foil and continue baking.
  8. Check the banana crumb near the middle, slightly beside the cream cheese, with a tester. Remove the loaf when there is no wet banana batter on the tester.
  9. Cool the loaf in the pan for about 15 minutes. Lift it out using the parchment and cool completely on a wire rack, about 75 minutes more, before slicing.

Tips

  • Use very ripe bananas with plenty of brown spots.
  • Soften the block cream cheese before mixing for a smooth filling.
  • Leave a narrow border around the filling so the banana batter can enclose it.
  • Spread the top batter gently; swirling breaks up the broad cream cheese center.
  • Test the banana crumb beside the filling, not through the cream cheese.
  • If the top browns too quickly, tent the loaf loosely with foil.

Notes

Cool completely before slicing or wrapping. Refrigerate the sealed loaf for up to 5 days. Freeze tightly wrapped for up to 2 months; thaw wrapped slices in the refrigerator.

Nutrition

Calories: 400 kcal | Protein: 6 g | Fat: 22 g | Carbohydrates: 46 g