Author

Julia

Browsing

Slow Cooker Chicken Legs

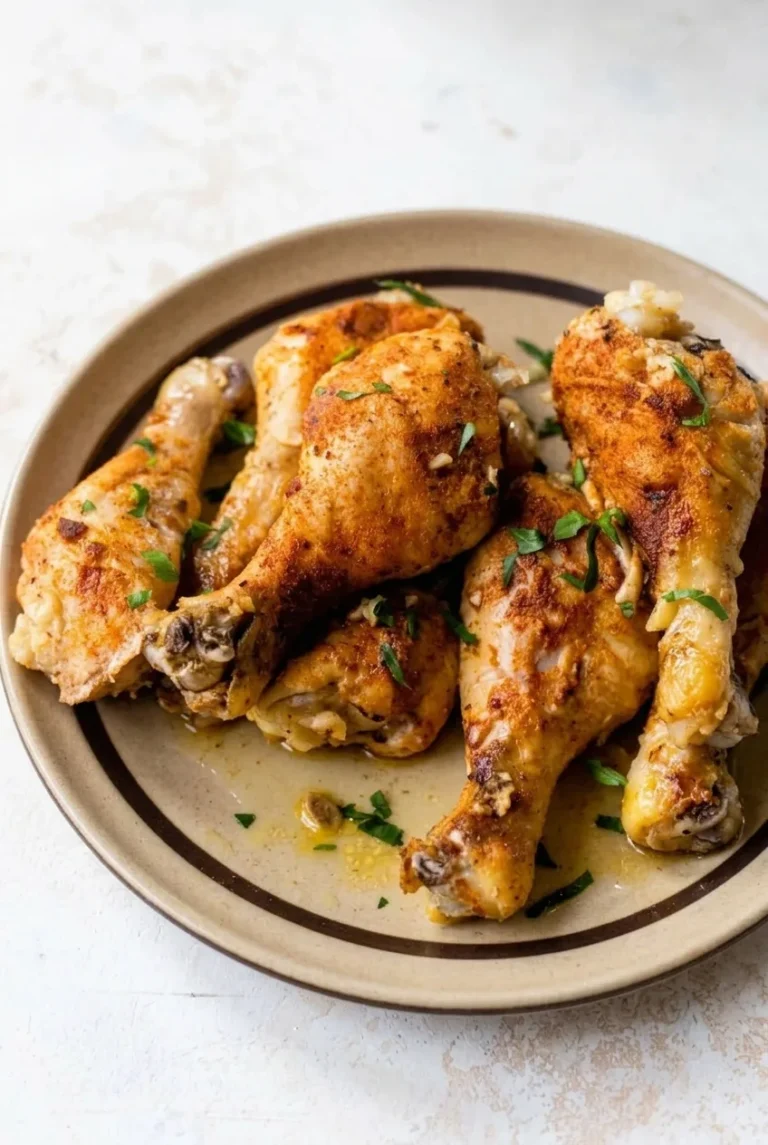
These paprika-seasoned drumsticks cook in a light garlic-butter broth until tender, then get a brief broil for scattered golden-brown patches. The slow cooker keeps the meat moist, but its covered heat leaves the skin soft rather than crisp. Spoon a little of the cooking liquid and softened garlic over the whole drumsticks, then finish with parsley.

Makes 4 servings, about 2 drumsticks each. Allow 15 minutes to prepare the chicken, 4 to 6 hours to cook it on Low, and 2 to 4 minutes to broil it if desired.

Ingredients for Slow Cooker Chicken Legs
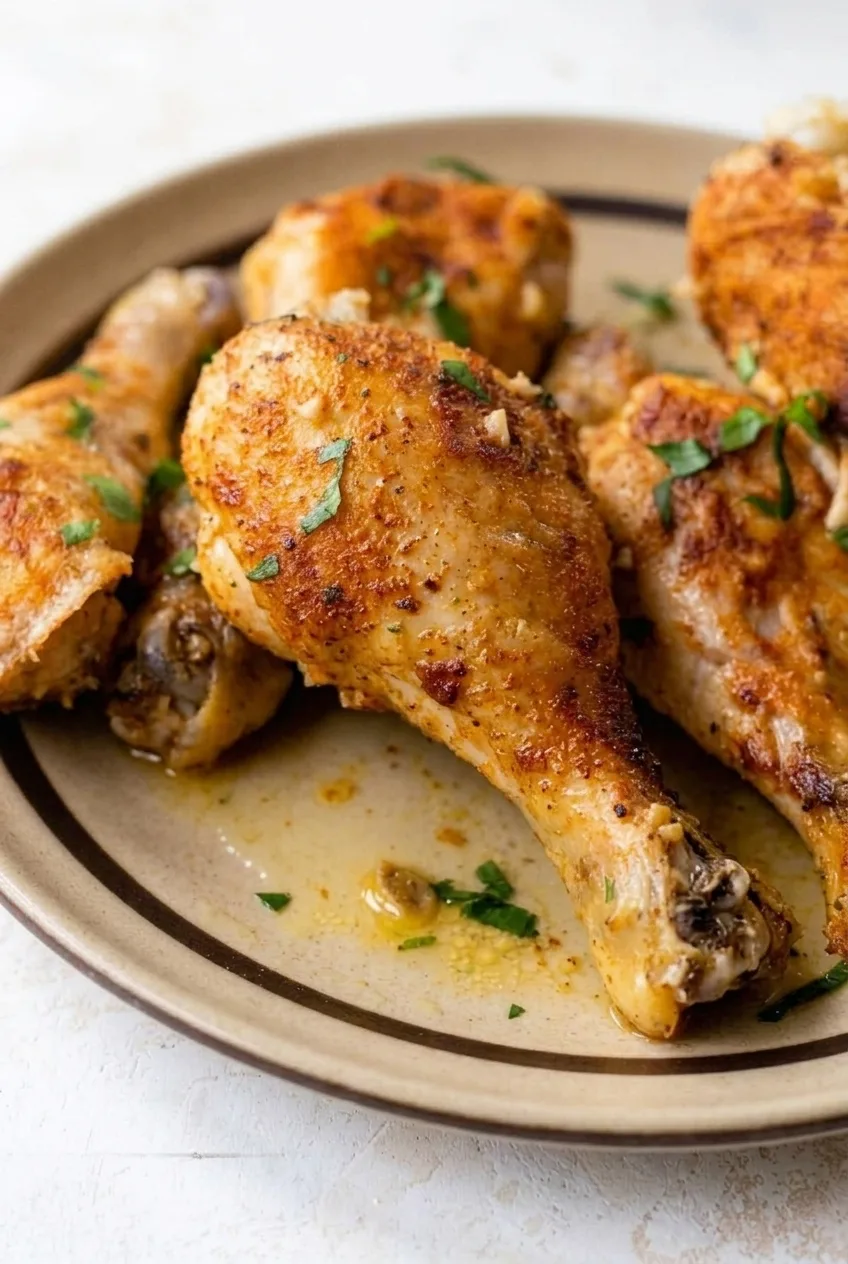
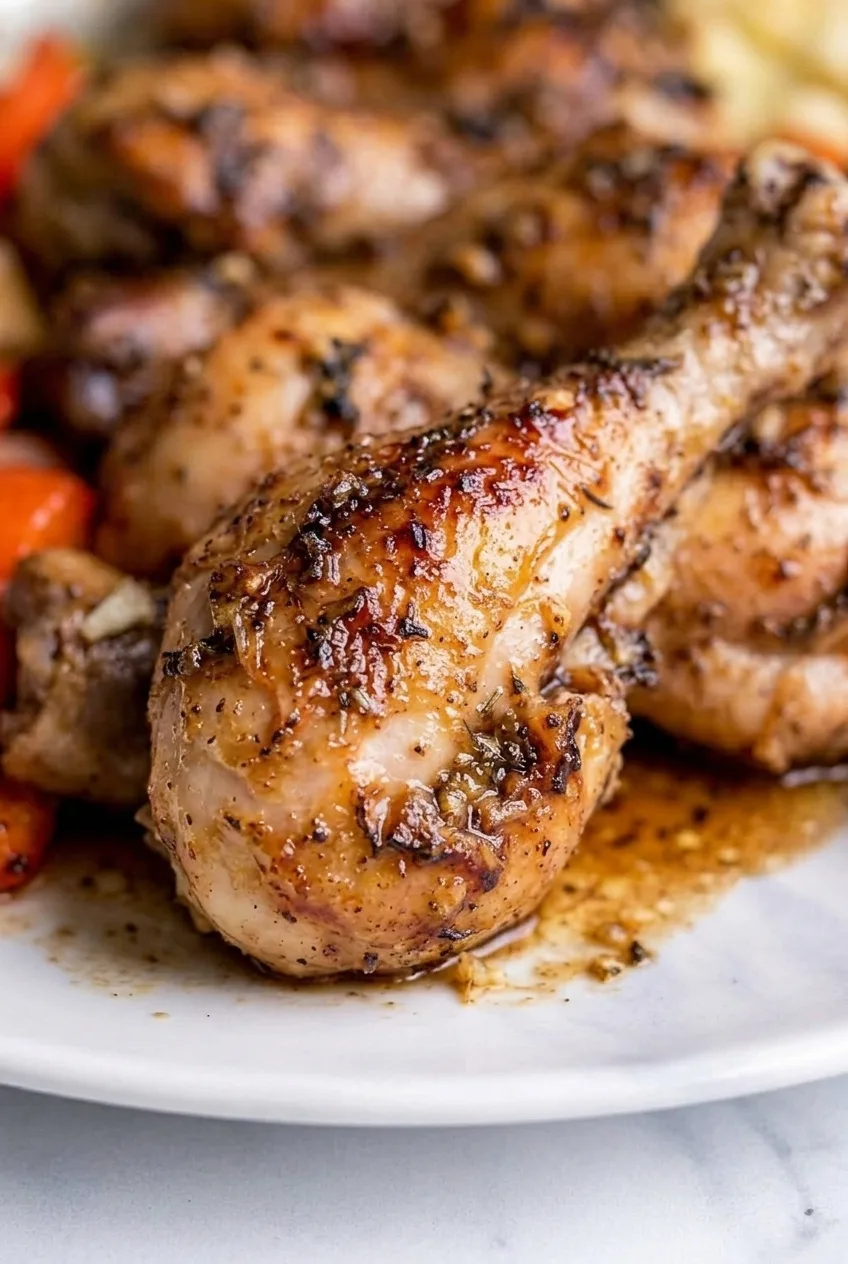
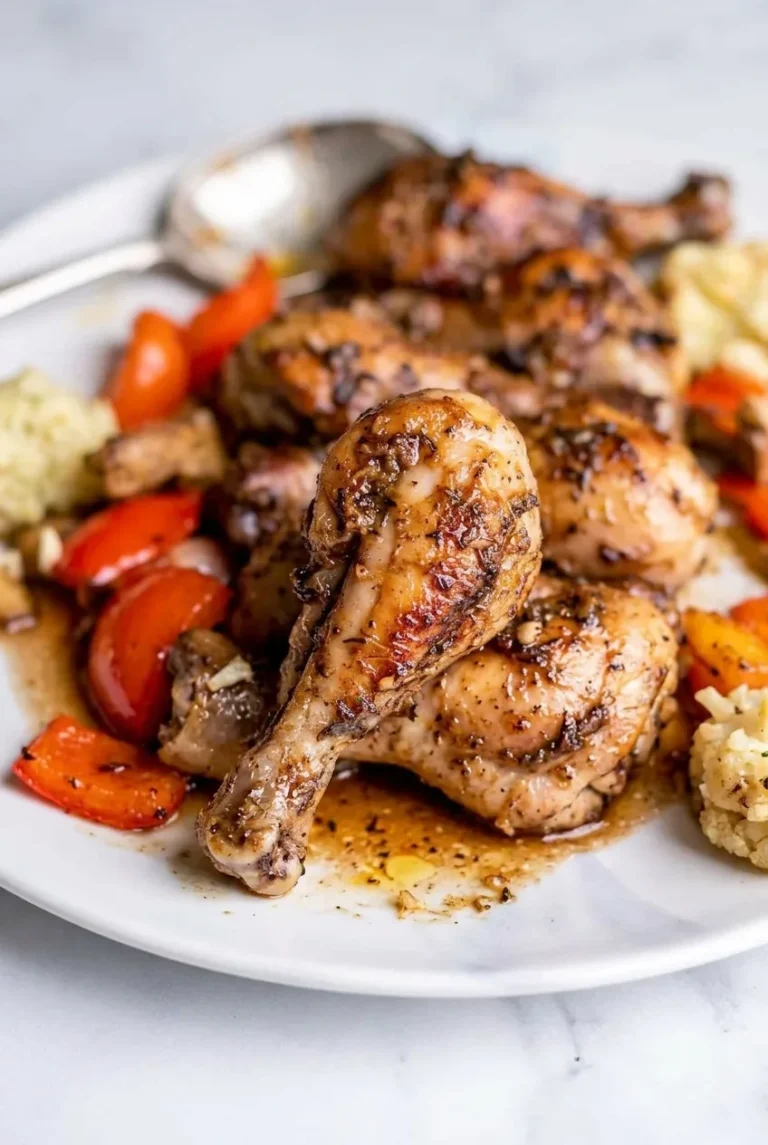
Close view of a moist, lightly browned chicken drumstick with cooked garlic and parsley
  • 8 bone-in, skin-on chicken drumsticks, fully thawed (about 2 1/2 to 3 pounds; 1,150 to 1,350g)
  • 2 teaspoons paprika
  • 1 teaspoon garlic powder
  • 1/2 teaspoon dried Italian seasoning
  • 1 teaspoon kosher salt, or to taste
  • 1/2 teaspoon black pepper
  • 1/2 cup low-sodium chicken broth
  • 2 tablespoons unsalted butter (about 30g)
  • 4 garlic cloves, minced
  • 2 tablespoons chopped fresh parsley

Use low-sodium broth to keep the salt level adjustable. The chicken releases liquid as it cooks, so there is no need to add more than 1/2 cup of broth.

How to Make Slow Cooker Chicken Legs
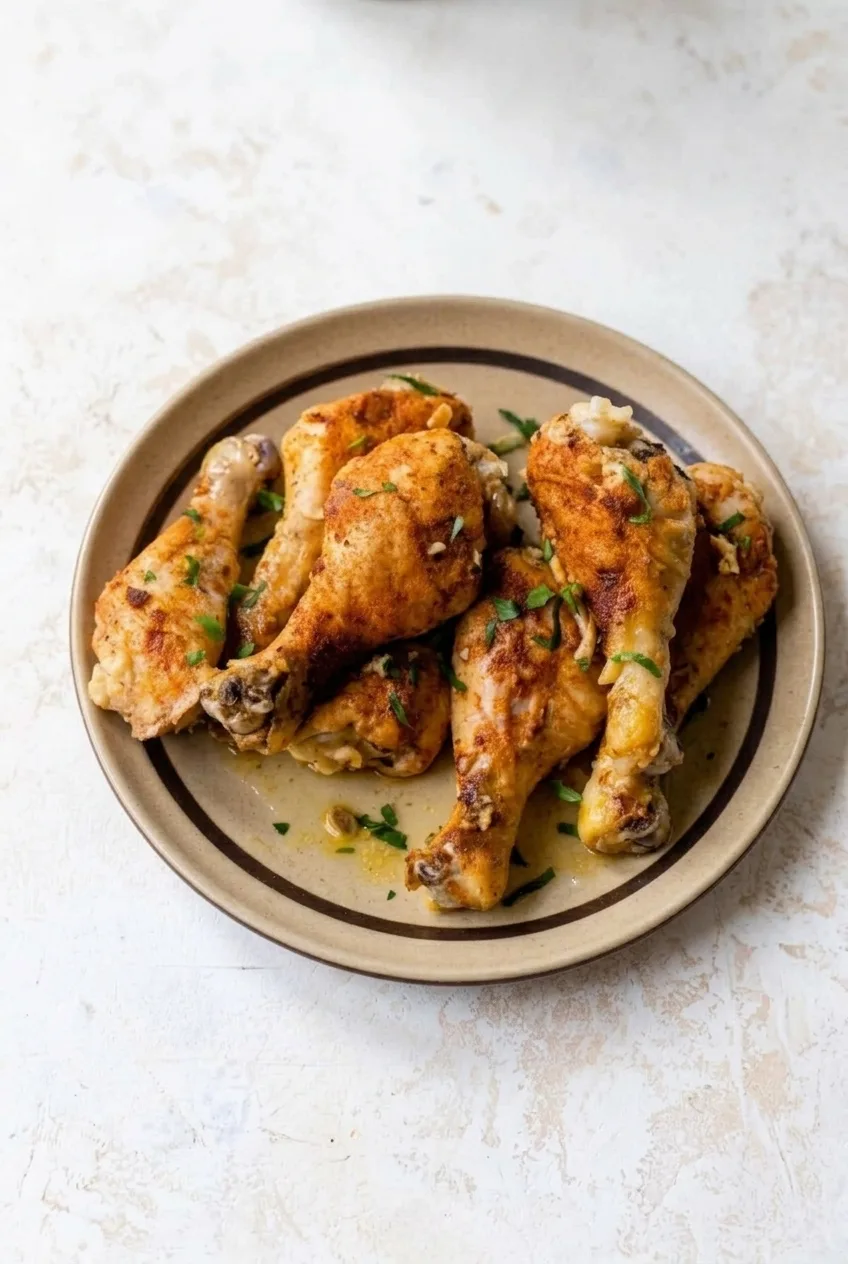
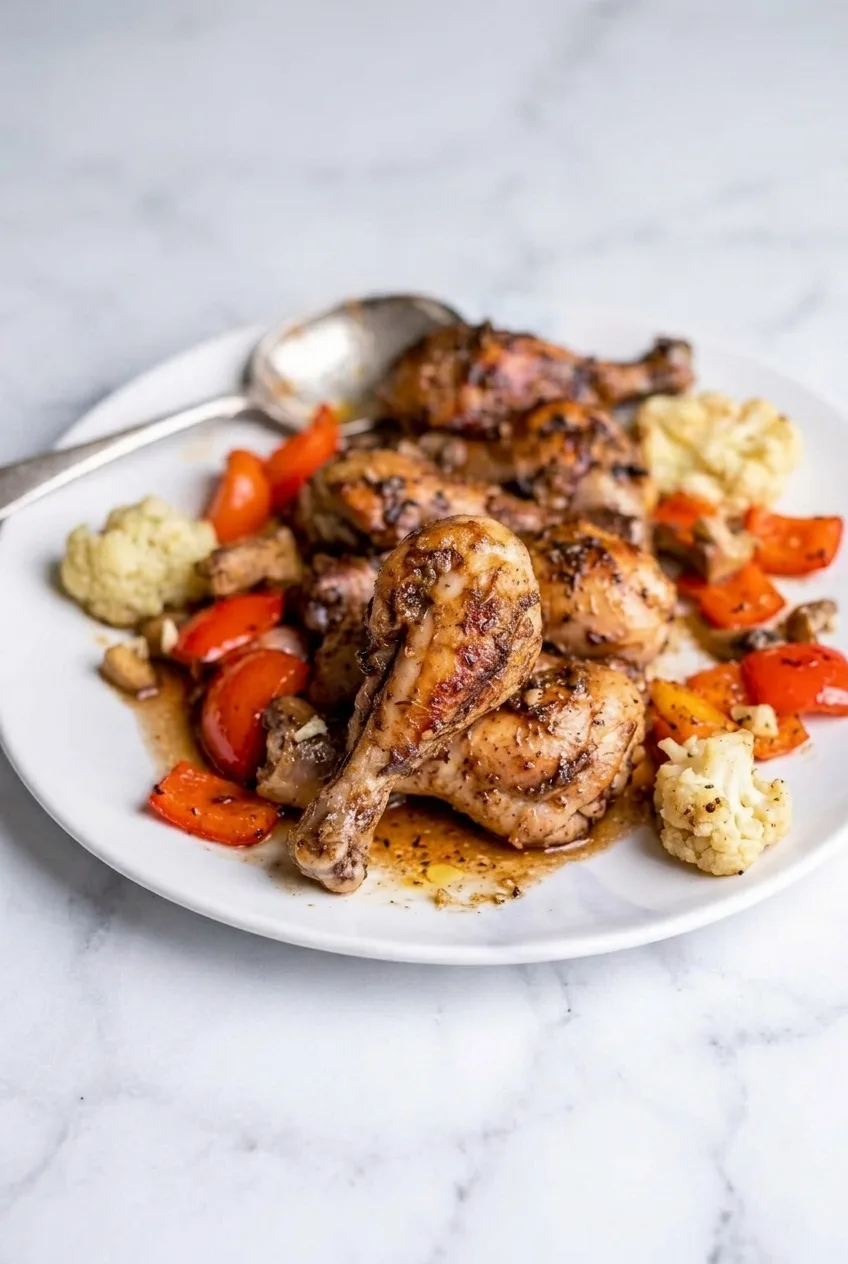
Full plate of slow cooker chicken legs with garlic-butter juices on a pale stone surface
  1. Season the drumsticks: Pat the thawed chicken dry so the seasoning clings to the skin. Mix the paprika, garlic powder, Italian seasoning, salt, and pepper, then sprinkle over all sides of the drumsticks.
  2. Fill the slow cooker: Pour the broth into a 5- to 6-quart slow cooker. Scatter the butter and minced garlic in the bottom, then arrange the drumsticks on top. A little overlap is fine, but do not pack them tightly.
  3. Cook until tender: Cover and cook on Low for 4 to 6 hours, starting to check at 4 hours. Alternatively, cook on High for about 3 to 4 hours, checking around 3 hours. Check earlier if the drumsticks are small or the cooker runs hot. Insert an instant-read thermometer into the thickest meaty part without touching bone. The chicken should be tender, cooked through, and at least 165°F (75°C).
  4. Broil for color: Preheat the broiler. Gently lift the drumsticks onto a foil-lined, broiler-safe rimmed pan; support very tender pieces underneath with a broad spatula. Leave the garlic and cooking liquid in the slow cooker. Broil uncovered for about 2 to 4 minutes, watching continuously, until the skin has scattered golden-brown patches. Rotate the pan if it browns unevenly.
  5. Finish and serve: Let the chicken stand for a few minutes. Arrange the whole drumsticks on a plate, spoon over a modest amount of warm cooking juices and softened garlic, and sprinkle with parsley.

How to Get Golden Chicken Legs

Covered slow cooking does not brown the skin. The brief broil adds color, though it will not create a uniformly crisp crust. Keep the small garlic pieces in the cooker until afterward so they do not scorch under the broiler.

You can skip the broiler and serve the fully cooked chicken directly from the slow cooker; its skin will be softer and paler. For a crunchy coating instead, try these crispy oven-baked chicken drumsticks.

Serving and Storing Leftovers

Serve with mashed potatoes or rice to catch the garlic-butter juices, plus broccoli, carrots, or green beans.

Refrigerate leftover chicken and reserved juices promptly in an airtight container for up to 3 days. Reheat gently with a spoonful of the juices or broth to help keep the meat moist. Cooked drumsticks can be frozen in a freezer-safe container or bag for up to 3 months; thaw overnight in the refrigerator before reheating.

Nutrition

Approximate per serving (2 drumsticks with a modest amount of juices): 390 calories, 38g protein, 26g fat, and 2g carbohydrates. Approximate per 100g of edible chicken and served juices: 205 calories, 20g protein, 14g fat, and 1g carbohydrates. Values vary with drumstick size and how much cooking liquid is served.

Slow Cooker Chicken Legs

Paprika-seasoned chicken drumsticks cook in a garlic-butter broth until tender, then are briefly broiled for golden-brown patches.
Course: Main Course
Cuisine: American
Prep: 15 min
Cook: 364 min
Total: 379 min
Servings: 4 Calories: 390 kcal

Equipment

  • 5- to 6-quart slow cooker
  • Instant-read thermometer
  • Broiler-safe rimmed pan
  • Aluminum foil
  • Broiler

Ingredients

For the Chicken

  • 8 bone-in, skin-on chicken drumsticks, fully thawed (about 2 1/2 to 3 pounds; 1,150 to 1,350g)
  • 2 teaspoons paprika
  • 1 teaspoon garlic powder
  • 1/2 teaspoon dried Italian seasoning
  • 1 teaspoon kosher salt, or to taste
  • 1/2 teaspoon black pepper

For the Cooking Liquid and Finish

  • 1/2 cup low-sodium chicken broth
  • 2 tablespoons unsalted butter (about 30g)
  • 4 garlic cloves, minced
  • 2 tablespoons chopped fresh parsley

Instructions

  1. Pat the thawed chicken drumsticks dry.
  2. Mix the paprika, garlic powder, Italian seasoning, salt, and pepper. Sprinkle the mixture over all sides of the drumsticks.
  3. Pour the broth into a 5- to 6-quart slow cooker. Add the butter and minced garlic, then arrange the drumsticks on top without packing them tightly.
  4. Cover and cook on Low for 4 to 6 hours, starting to check at 4 hours. Alternatively, cook on High for about 3 to 4 hours, checking around 3 hours.
  5. Check the thickest meaty part of a drumstick with an instant-read thermometer, avoiding the bone. Make sure the chicken is tender, cooked through, and at least 165°F (75°C).
  6. If desired, preheat the broiler. Transfer the drumsticks to a foil-lined, broiler-safe rimmed pan, supporting very tender pieces with a broad spatula. Leave the garlic and cooking liquid in the slow cooker.
  7. Broil uncovered for 2 to 4 minutes, watching continuously, until the skin has scattered golden-brown patches. Rotate the pan if it browns unevenly.
  8. Let the chicken stand for a few minutes. Arrange the drumsticks on a plate, spoon over a modest amount of warm cooking juices and softened garlic, and sprinkle with parsley.

Tips

  • Use low-sodium broth so you can adjust the salt to taste.
  • Start checking early if the drumsticks are small or your slow cooker runs hot.
  • Keep the minced garlic in the slow cooker while broiling to prevent it from scorching.
  • Broiling adds color but will not make the skin uniformly crisp.
  • Skip the broiler if you prefer softer, paler skin.

Variations

  • No-Broil Chicken Legs: Skip the broiler and serve the fully cooked drumsticks directly from the slow cooker.
Notes

Refrigerate leftovers and reserved juices promptly in an airtight container for up to 3 days. Reheat gently with a spoonful of juices or broth. Freeze for up to 3 months and thaw overnight in the refrigerator before reheating. Nutrition is approximate per serving.

Nutrition

Calories: 390 kcal | Protein: 38 g | Fat: 26 g | Carbohydrates: 2 g

Brown Sugar Garlic Chicken Drumsticks

These oven-baked drumsticks come out with a sticky brown sugar–garlic glaze and glossy skin browned in irregular golden-to-mahogany patches. Soy sauce balances the sweetness, and a little ketchup adds tang. Coat the chicken and bake it right away—no marinating or separate sauce pan needed.

The sugar can darken before the thickest part of a drumstick is cooked, so start checking early and use a thermometer rather than judging by color alone.

Ingredients for Brown Sugar Garlic Chicken Drumsticks

Full plate of glazed brown sugar garlic chicken drumsticks with cooked vegetables

Makes 4 servings, about 2 drumsticks each. Prep time: 10 minutes. Cook time: about 35 to 45 minutes, plus a 5-minute rest.

  • 8 medium bone-in, skin-on chicken drumsticks, about 2 1/2 pounds (1,150g)
  • 1/3 cup packed brown sugar (70g)
  • 1/4 cup low-sodium soy sauce (60g)
  • 2 tablespoons ketchup (30g)
  • 4 garlic cloves, finely minced (about 15g)
  • 1/2 teaspoon freshly ground black pepper

Use a shallow 9-by-13-inch baking dish and an instant-read thermometer. If the drumsticks will not fit with a little space between them, use a second shallow dish.

Close view of sticky brown sugar garlic glaze and caramelized patches on a whole chicken drumstick

How to Bake the Drumsticks

  1. Preheat and arrange: Heat the oven to 400°F (205°C). Pat the drumsticks dry and arrange them in a single layer in the dish, with a little space between pieces. Lightly grease the dish if it is prone to sticking.
  2. Coat with glaze: Whisk the brown sugar, soy sauce, ketchup, garlic, and pepper until no dry sugar clumps remain. Pour over the chicken and turn each piece to coat it, leaving the meaty sides facing up. Do not add water; the glaze and chicken will supply the pan juices.
  3. Bake and baste: Bake uncovered. At about 20 minutes, spoon the hot pan juices over the drumsticks without flipping them. Rotate the dish if your oven browns unevenly.
  4. Check for doneness: Start checking the glaze and chicken temperature at 30 minutes. Medium drumsticks usually take about 35 to 45 minutes total; larger pieces may take longer. Bake until the thickest meat reaches at least 165°F (75°C), with the thermometer tip away from the bone. For more tender dark meat, cook toward 175°F (80°C) to 185°F (85°C). If the glaze gets very dark before the chicken is done, tent the dish loosely with foil.
  5. Rest and serve: Rest for 5 minutes. Serve the drumsticks whole, with a little of the fully cooked pan glaze spooned over them if desired.

How to Tell When Drumsticks Are Done

Insert the thermometer into the thickest part of a drumstick without touching bone. The 165°F reading is the cooked-through minimum; the higher range is a texture choice for dark meat, not a different safety requirement. Browned, shiny skin and dark caramelized spots show that the glaze is ready, but not necessarily the meat underneath.

How to Keep the Glaze from Burning

Dry chicken and space between the pieces help the coating brown rather than stay pale and watery. Check the color from 30 minutes onward. If the sugar is darkening too quickly, keep the foil tent above the chicken so it does not stick to the glaze, and continue baking until the meat reaches temperature. Expect sticky, browned skin rather than a uniformly crisp surface.

Serving and Leftovers

Serve with rice or mashed potatoes to catch the glaze, plus roasted or steamed vegetables. For a crunchy coating instead of a sticky glaze, try crispy oven-baked chicken drumsticks.

Cool leftovers promptly and refrigerate in an airtight container for 3 to 4 days. Reheat gently in a skillet over medium-low heat, adding a splash of water or broth if the glaze has thickened.

Nutrition

Approximate per serving (2 drumsticks): 410 calories, 36g protein, 19g fat, and 21g carbohydrates. Approximate per 100g of edible chicken and glaze, excluding bones: 225 calories, 20g protein, 10g fat, and 12g carbohydrates. Values vary with drumstick size and how much pan glaze is served.

Brown Sugar Garlic Chicken Drumsticks

Oven-baked chicken drumsticks are coated in a sticky brown sugar, garlic, soy sauce, and ketchup glaze.
Course: Main Course
Cuisine: American
Prep: 10 min
Cook: 45 min
Total: 60 min
Servings: 4 Calories: 410 kcal

Equipment

  • Shallow 9-by-13-inch baking dish
  • Instant-read thermometer
  • Whisk

Ingredients

  • 8 medium bone-in, skin-on chicken drumsticks, about 2 1/2 pounds (1,150 g)
  • 1/3 cup packed brown sugar (70 g)
  • 1/4 cup low-sodium soy sauce (60 g)
  • 2 tablespoons ketchup (30 g)
  • 4 garlic cloves, finely minced (about 15 g)
  • 1/2 teaspoon freshly ground black pepper

Instructions

  1. Preheat the oven to 400°F (205°C).
  2. Pat the drumsticks dry and arrange them in a single layer in a shallow baking dish, leaving a little space between pieces. Lightly grease the dish if it tends to stick.
  3. Whisk the brown sugar, soy sauce, ketchup, garlic, and pepper until no dry sugar clumps remain.
  4. Pour the glaze over the chicken and turn each piece to coat. Leave the meaty sides facing up; do not add water.
  5. Bake uncovered. At about 20 minutes, spoon the hot pan juices over the drumsticks without flipping them. Rotate the dish if your oven browns unevenly.
  6. Start checking the glaze and chicken temperature at 30 minutes. Bake for about 35 to 45 minutes total, or longer for larger drumsticks, until the thickest meat reaches at least 165°F (75°C). Keep the thermometer tip away from the bone.
  7. If the glaze darkens too quickly before the chicken is done, loosely tent the dish with foil and continue baking.
  8. Rest the drumsticks for 5 minutes. Serve whole, with some fully cooked pan glaze spooned over them if desired.

Tips

  • Dry the drumsticks before coating so the glaze browns instead of becoming watery.
  • Leave space between the pieces; use a second shallow dish if needed.
  • Begin checking the glaze and temperature at 30 minutes because the sugar can darken before the chicken is cooked through.
  • For more tender dark meat, cook to 175°F (80°C) to 185°F (85°C).
  • Keep a foil tent above the chicken so it does not stick to the glaze.

Notes

Refrigerate cooled leftovers in an airtight container for 3 to 4 days. Reheat gently in a skillet over medium-low heat, adding a splash of water or broth if needed. The safe minimum internal temperature is 165°F (75°C).

Nutrition

Calories: 410 kcal | Protein: 36 g | Fat: 19 g | Carbohydrates: 21 g

Crispy Oven-Baked Chicken Drumsticks

These drumsticks have a thin, golden crumb crust rather than bare crisp skin. Finely crushed panko gives the coating its small granules, while a little oil helps the flour and crumbs brown instead of looking dusty. Baking the drumsticks uncovered on a greased rack lets air reach the undersides without flipping and loosening the crust. Start checking at 30 minutes; the color tells you how the coating is doing, and a thermometer tells you when the chicken is done.

Makes 4 servings, with 2 drumsticks each. Allow about 55–65 minutes, including a 5-minute rest; large drumsticks may take longer.

Ingredients for Crispy Oven-Baked Chicken Drumsticks

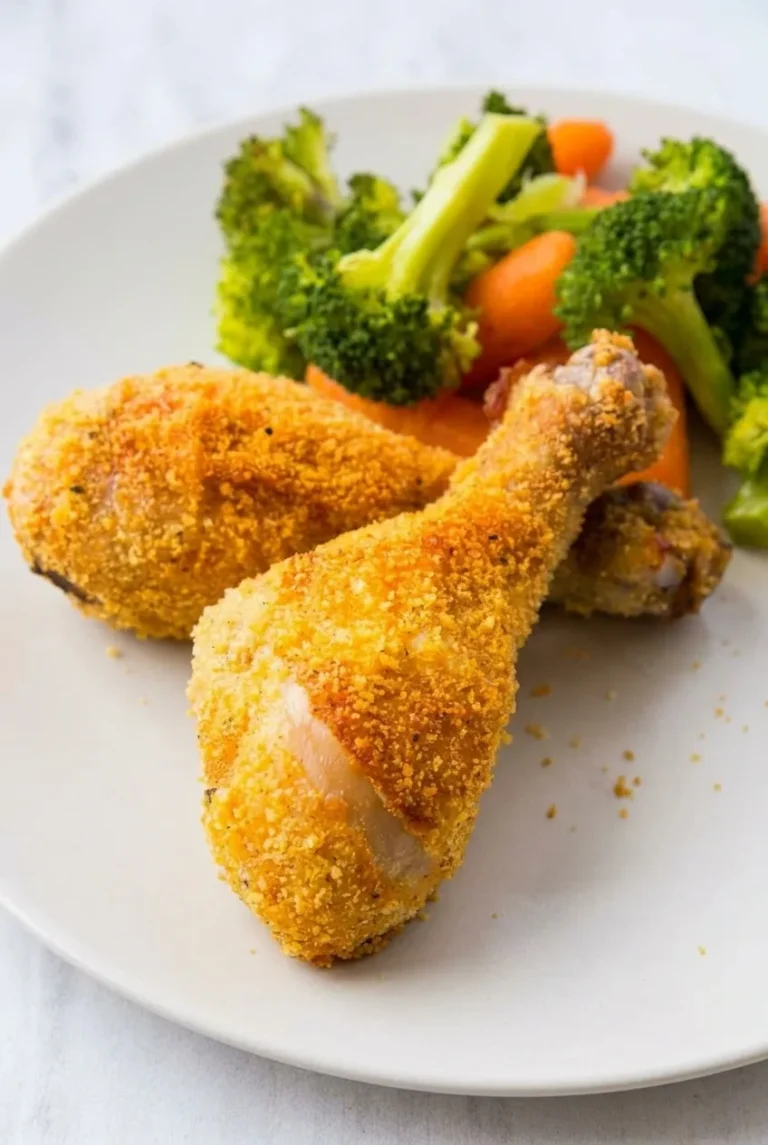
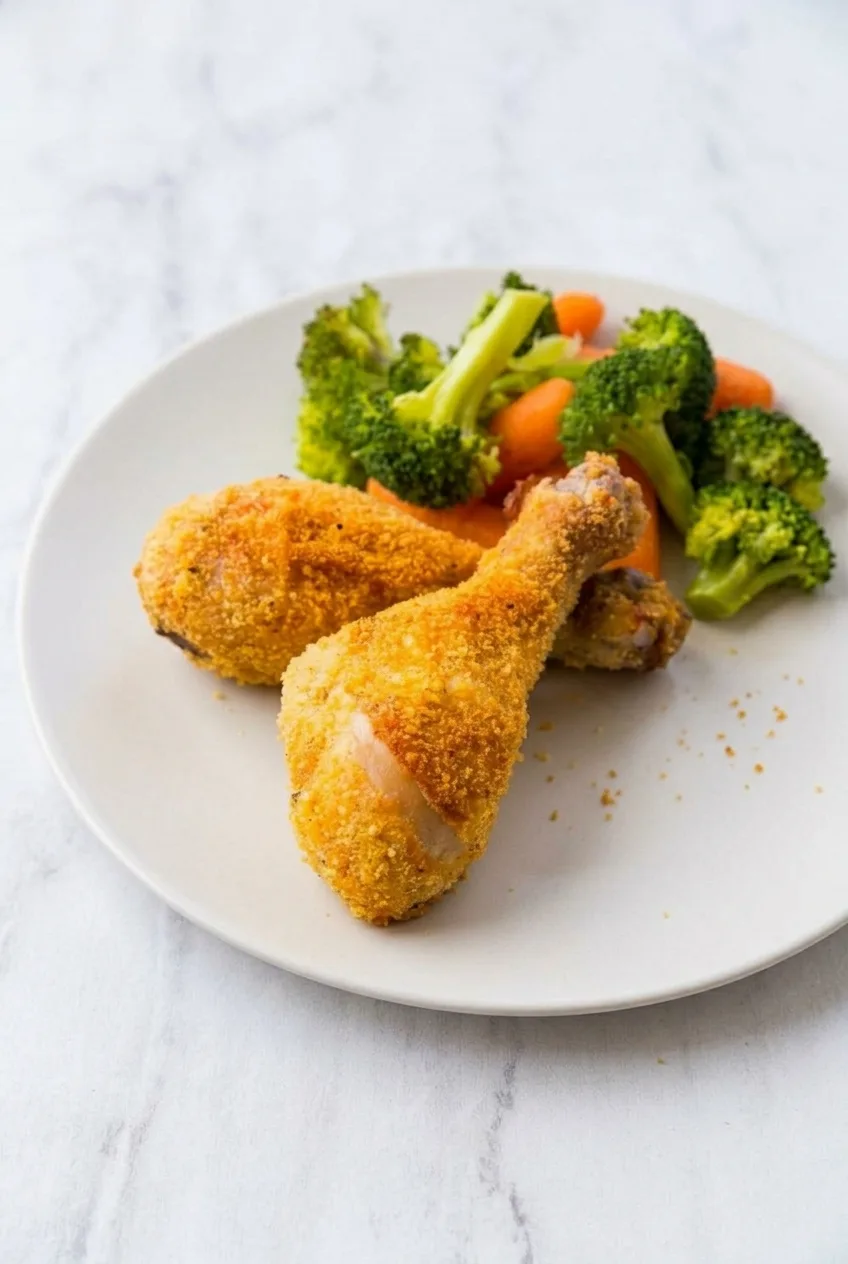
Full plate of crumb-coated chicken drumsticks with broccoli and carrots on a light table
  • 8 skin-on, bone-in chicken drumsticks, about 2½–3 lb (1,150–1,350g)
  • ¾ cup panko breadcrumbs, measured before crushing (about 45g)
  • ¼ cup all-purpose flour (about 30g)
  • 1 tablespoon cornstarch
  • 1½ teaspoons kosher salt, adjusted for the brand and your taste
  • 1 teaspoon paprika
  • 1 teaspoon garlic powder
  • ½ teaspoon onion powder
  • ½ teaspoon black pepper
  • 3 tablespoons neutral cooking oil, divided

Cooked broccoli and carrots are optional for serving; keep them alongside the finished chicken, not beneath the baking rack.

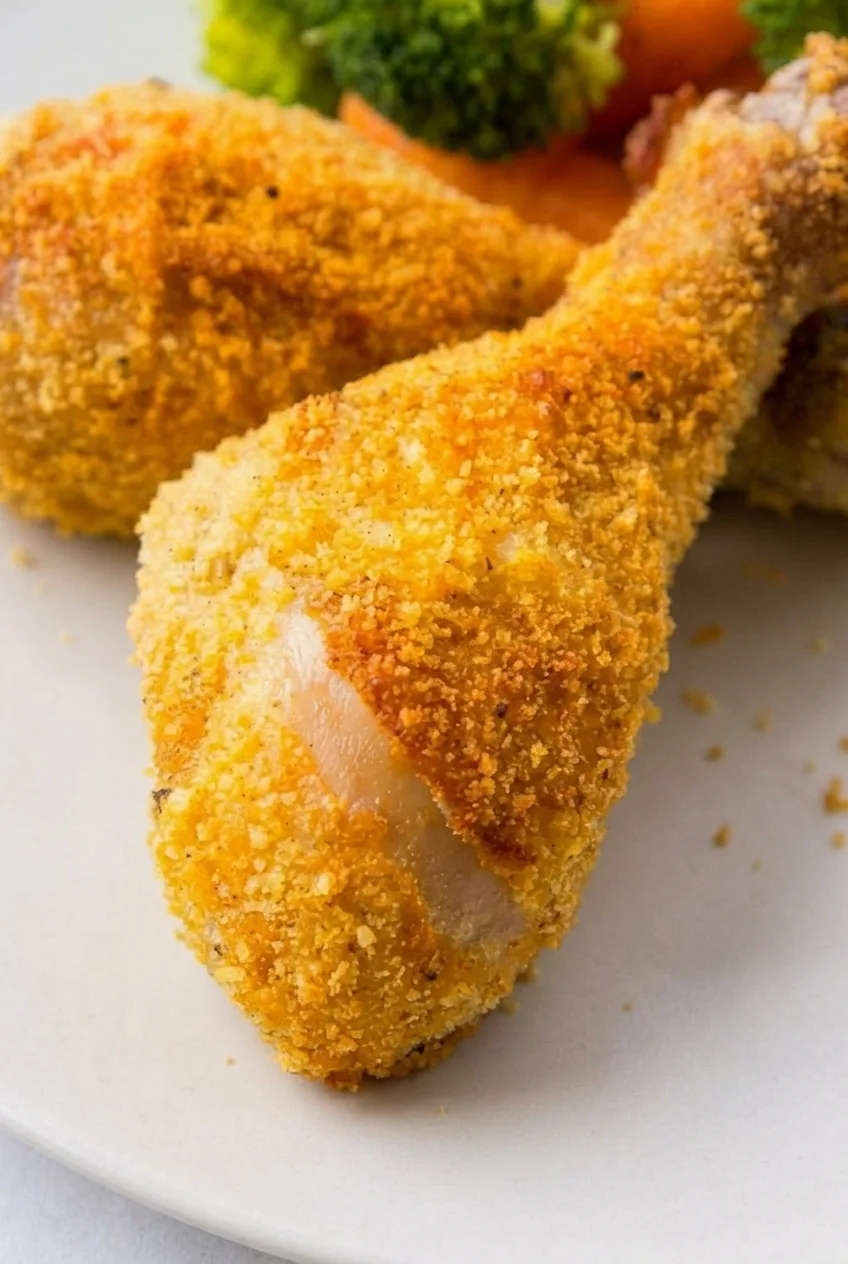
Close view of fine golden crumbs and toasted spots on a whole baked chicken drumstick

How to Bake Crumb-Coated Chicken Drumsticks

  1. Preheat the oven: Fully heat to 400°F (205°C). Set an oven-safe wire rack over a rimmed baking sheet and lightly grease the rack with some of the oil. Line the sheet beneath it if you like.
  2. Dry the chicken: Pat the whole drumsticks thoroughly dry with paper towels. Leave the skin on.
  3. Make the coating: Crush the panko into small, distinct crumbs, not powder. Mix with the flour, cornstarch, salt, paprika, garlic powder, onion powder, and pepper. Work in 1 tablespoon of oil; the mixture should stay loose rather than forming a paste.
  4. Coat the drumsticks: Rub the chicken with about 1 tablespoon of oil. Press on a thin layer of crumbs, leaving the natural shape and bone ends visible. Arrange the pieces on the rack with space between them; use a second pan if needed. Dab or spritz any dry, floury spots with the remaining oil.
  5. Bake uncovered: Bake for about 35–45 minutes, checking the crust and temperature beginning at 30 minutes. Do not flip the drumsticks on the rack; rotate the pan if one side browns faster. The crust should look golden and dry, with some darker toasted spots. Check each drumstick in its thickest meat without touching bone. Chicken is safe at 165°F (75°C); for more tender dark meat, aim for 175–185°F (80–85°C). Large pieces may need longer.
  6. Rest and serve: Let the drumsticks rest uncovered for 5 minutes. Serve them whole, without tightly covering the crust.

How to Keep the Coating Crisp

Surface moisture and crowding can leave the crumbs pale or damp. Pat the chicken dry before coating it, moisten powdery patches with a little oil, and leave room around each drumstick so moisture can escape. Greasing the rack helps prevent sticking; leaving the chicken undisturbed helps keep the thin coating in place.

No wire rack? Bake on a greased sheet pan and carefully turn the drumsticks about halfway through. The underside may be softer, and turning can loosen some crumbs.

When Are the Drumsticks Done?

Probe each drumstick away from the bone, especially if the pieces differ in size. The 165°F minimum is a safety target; continuing toward 175–185°F is a choice for more tender dark meat. Use the temperature rather than the stated baking window to decide when each piece is ready.

Serving the Drumsticks

Serve with broccoli and carrots or potatoes. If offering barbecue sauce, keep it on the side so the crumb crust stays dry. For a different crusted chicken dinner, try the Parmesan crusted chicken sheet pan dinner.

Storing and Reheating Leftovers

Cool leftovers, then refrigerate in an airtight container for 3–4 days. Reheat on a sheet or rack in a 350°F (175°C) oven until heated through. Leave the chicken uncovered if preserving the crust is a priority.

Cooked drumsticks can be frozen for about 2–3 months. Thaw in the refrigerator before reheating; the coating may be less crisp after freezing.

Nutrition

Approximate per serving (2 drumsticks, edible chicken and coating, without optional sides): 500 calories, 38g protein, 31g fat, and 16g carbohydrates. Approximate per 100g of edible cooked chicken and coating: 250 calories, 19g protein, 16g fat, and 8g carbohydrates. Values vary with drumstick size, how much coating adheres, and how much oil remains on the chicken.

Crispy Oven-Baked Chicken Drumsticks

Skin-on chicken drumsticks are coated in seasoned panko crumbs and baked on a rack until golden and crisp.
Course: Main Course
Cuisine: American
Prep: 15 min
Cook: 45 min
Total: 65 min
Servings: 4 Calories: 500 kcal

Equipment

  • Oven-safe wire rack
  • Rimmed baking sheet
  • Mixing bowl
  • Paper towels
  • Meat thermometer

Ingredients

For the Drumsticks

  • 8 skin-on, bone-in chicken drumsticks, about 2½–3 lb (1,150–1,350 g)
  • 3 tablespoons neutral cooking oil, divided

For the Coating

  • ¾ cup panko breadcrumbs, measured before crushing (about 45 g)
  • ¼ cup all-purpose flour (about 30 g)
  • 1 tablespoon cornstarch
  • 1½ teaspoons kosher salt, adjusted to taste
  • 1 teaspoon paprika
  • 1 teaspoon garlic powder
  • ½ teaspoon onion powder
  • ½ teaspoon black pepper

Optional for Serving

  • Cooked broccoli and carrots

Instructions

  1. Preheat the oven to 400°F (205°C). Set an oven-safe wire rack over a rimmed baking sheet and lightly grease the rack with some of the oil.
  2. Pat the drumsticks thoroughly dry with paper towels, leaving the skin on.
  3. Crush the panko into small, distinct crumbs. Mix it with the flour, cornstarch, salt, paprika, garlic powder, onion powder, and black pepper.
  4. Work 1 tablespoon of oil into the crumb mixture until loose, not pasty.
  5. Rub the drumsticks with about 1 tablespoon of oil. Press a thin layer of crumbs onto each piece, leaving the natural shape and bone ends visible.
  6. Arrange the drumsticks on the rack with space between them. Use a second pan if needed, and dab or spritz dry, floury spots with the remaining oil.
  7. Bake uncovered for about 35–45 minutes. Begin checking the crust and internal temperature at 30 minutes; rotate the pan if one side browns faster, but do not flip the drumsticks.
  8. Check each drumstick in its thickest part without touching the bone. Cook to at least 165°F (75°C), or to 175–185°F (80–85°C) for more tender dark meat. Large pieces may take longer.
  9. Rest uncovered for 5 minutes, then serve.

Tips

  • Dry the drumsticks thoroughly so the coating browns instead of turning damp.
  • Crush the panko into small crumbs, but do not grind it into powder.
  • Leave space between the drumsticks so moisture can escape.
  • Use the internal temperature, rather than the baking time alone, to check doneness.
  • Keep barbecue sauce on the side to help the crumb crust stay dry.

Notes

Makes 4 servings of 2 drumsticks each. Refrigerate leftovers in an airtight container for 3–4 days; reheat uncovered in a 350°F (175°C) oven until heated through. Freeze for about 2–3 months and thaw in the refrigerator before reheating.

Nutrition

Calories: 500 kcal | Protein: 38 g | Fat: 31 g | Carbohydrates: 16 g | Per 100g Calories: 250 kcal | Per 100g Protein: 19 g | Per 100g Fat: 16 g | Per 100g Carbohydrates: 8 g

Tropical Grilled Chicken Marinade

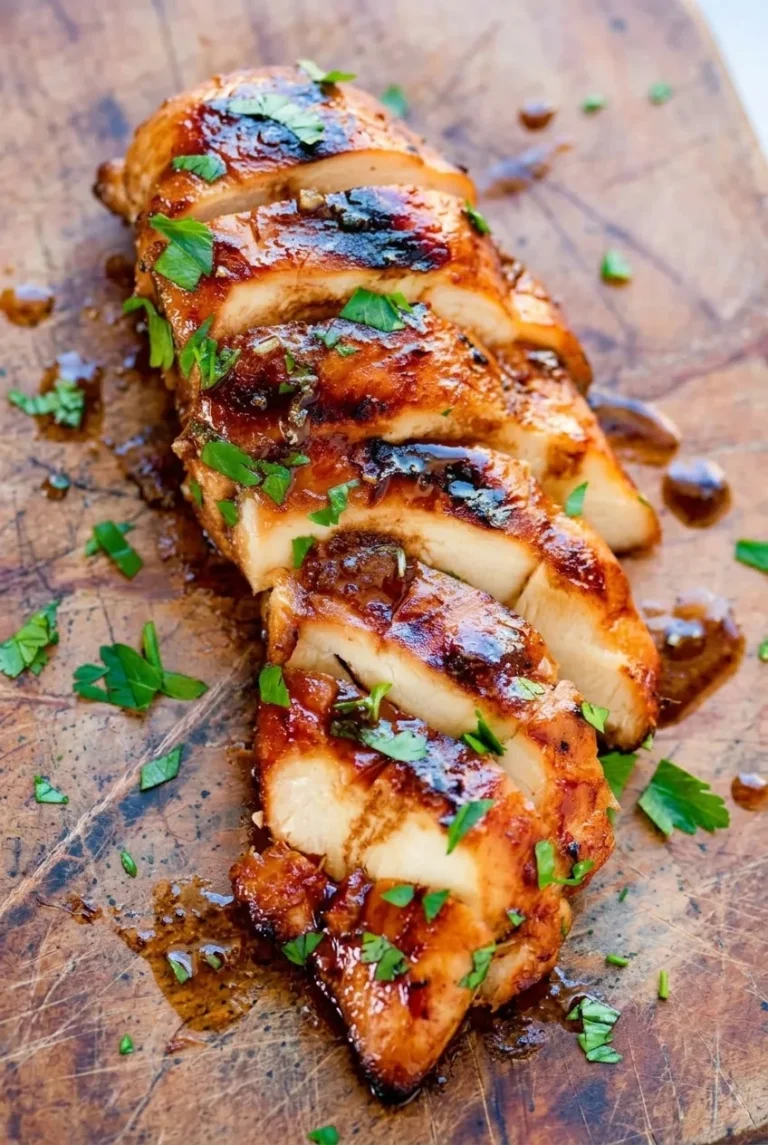
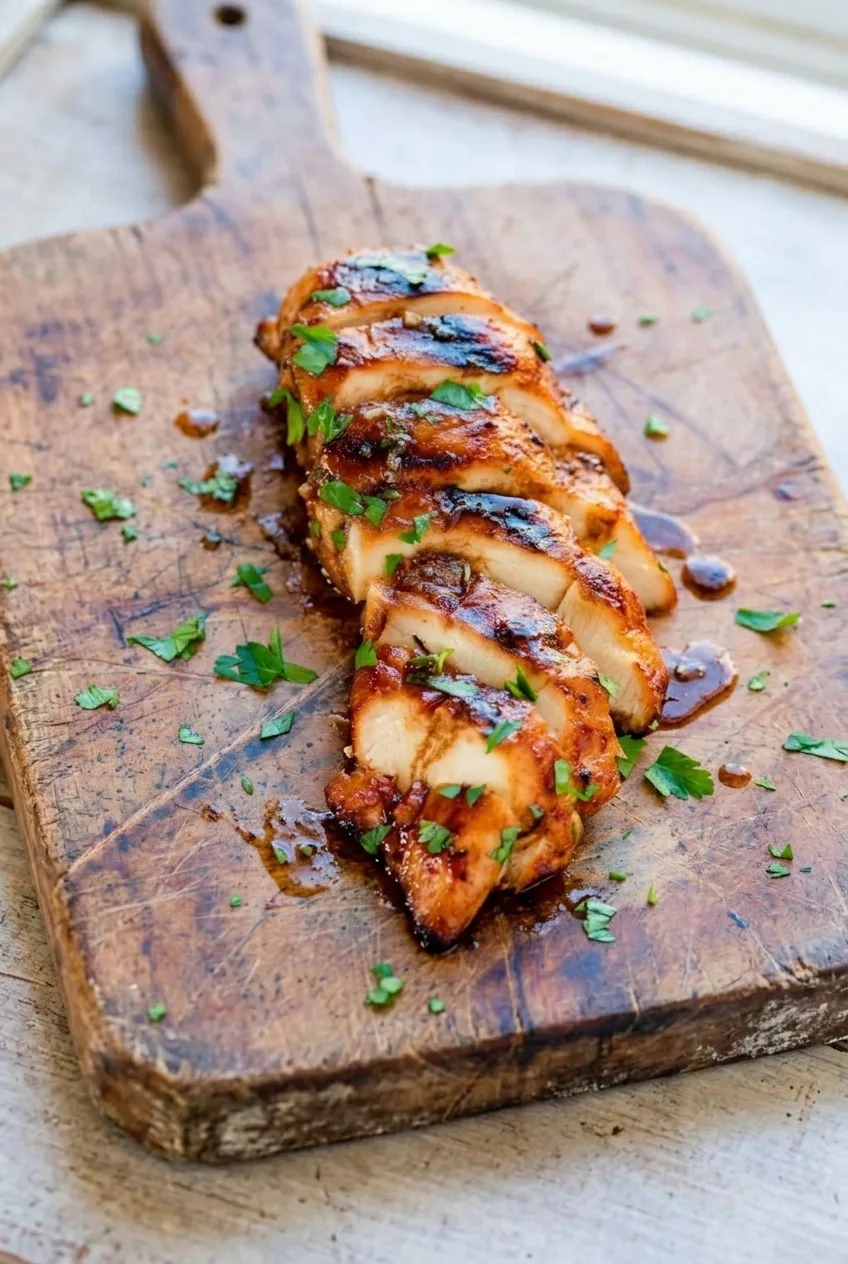
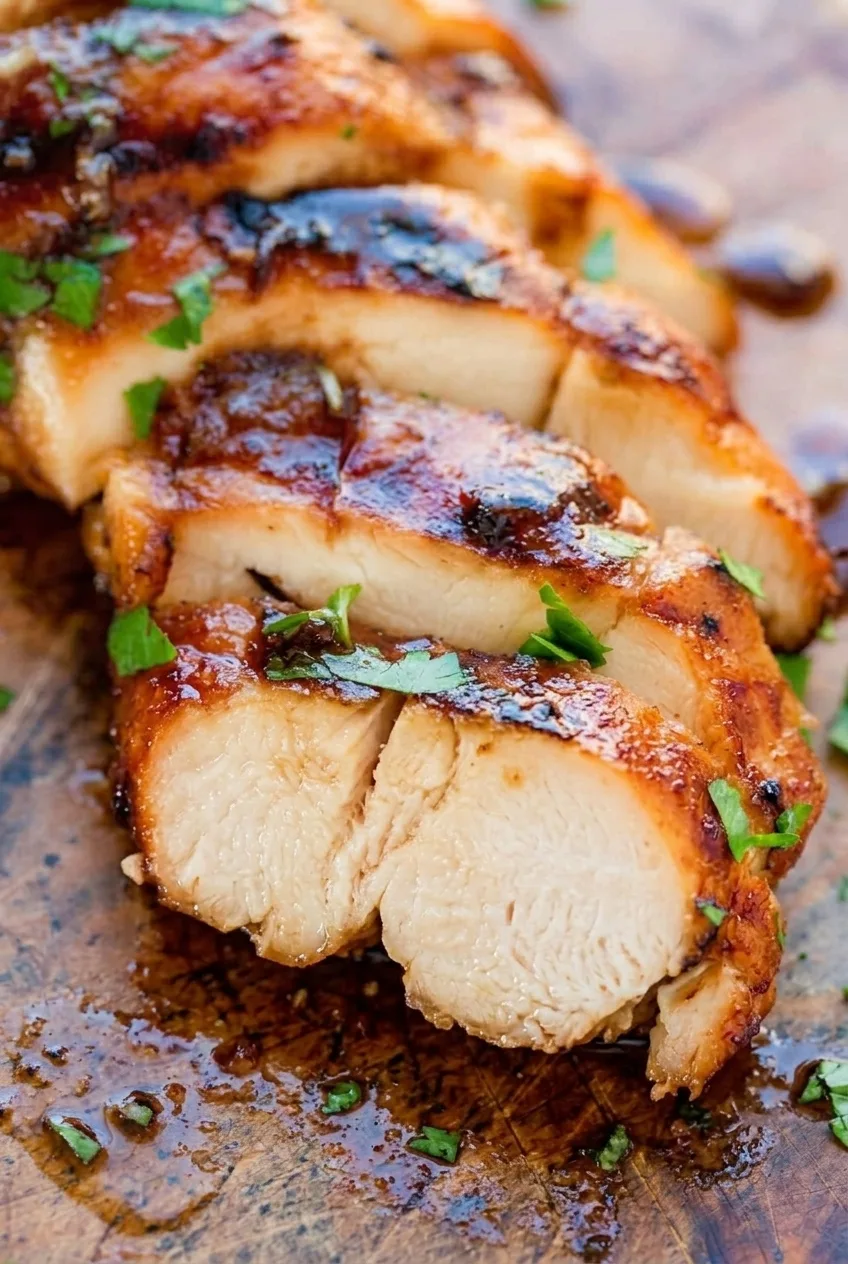
Pineapple, orange, and lime juice give grilled chicken breasts a sweet-tangy finish. The fruit juice and brown sugar also brown quickly, so medium grill heat and a light coating of marinade help the chicken cook through without scorching. A portion of the marinade is set aside before it touches the raw chicken, then reduced into a glaze. Serve the breasts in thick, overlapping slices with browned edges, visible cut faces, and a scattering of cilantro.

Ingredients for Tropical Grilled Chicken

  • 1 1/2 to 2 pounds boneless skinless chicken breasts, about 4 breasts
  • 1/2 cup unsweetened pineapple juice (120g)
  • 1/4 cup orange juice (60g)
  • 2 tablespoons fresh lime juice
  • 1 tablespoon light brown sugar (about 15g)
  • 3 garlic cloves, minced
  • 1 teaspoon finely grated fresh ginger
  • 1 teaspoon kosher salt, adjusted for the brand used
  • 2 tablespoons olive oil or neutral oil, plus a little for the grill grates
  • 2 tablespoons chopped fresh cilantro
Wider view of overlapping tropical grilled chicken slices with cilantro on a rustic brown serving surface

Optional for serving: 4 lime wedges.

Close view of moist grilled chicken breast slices with pale interiors, charred edges, and a light glaze

How to Grill the Chicken

  1. Even the breasts: If needed, gently pound the thick ends until each breast is about 3/4 inch thick. Keep the pieces intact for grilling and slicing.
  2. Mix and reserve the marinade: Whisk together the pineapple juice, orange juice, lime juice, brown sugar, garlic, ginger, and salt until the sugar dissolves. Transfer 1/3 cup to a clean, covered container for the glaze. Whisk the oil into the remaining marinade.
  3. Marinate: Coat the chicken with the oil-containing marinade in a shallow dish or sealable bag. Refrigerate for 2 to 4 hours, turning once if using a dish. Refrigerate the reserved glaze separately. Do not marinate the chicken for more than 8 hours.
  4. Prepare the grill: Preheat to medium direct heat, approximately 400°F (205°C). Clean and lightly oil the grates. Lift the chicken from the marinade, let the excess drip off, and discard the marinade that held the raw chicken.
  5. Grill: Space the breasts on the grate and close the lid between checks when possible. Grill for about 6 to 8 minutes per side, turning when the first side is browned and releases readily. Start checking the thickest part after about 10 minutes total; cook each breast to 165°F (75°C). Look for deep browning with small patches of char, not widespread scorching. Move the chicken to a cooler grill area if flare-ups darken it too quickly.
  6. Reduce the clean glaze: While the chicken grills or rests, bring the reserved marinade to a simmer in a small saucepan over medium heat. Simmer uncovered for about 4 to 6 minutes, until reduced to roughly 2 to 3 tablespoons and lightly syrupy. Remove it from the heat while it is still brushable; if it gets too thick, loosen it with a teaspoon of water.
  7. Rest and finish: Rest the chicken for 5 minutes. Cut crosswise on a slight diagonal into thick slices and arrange them in overlapping rows. Brush lightly with the warm glaze and scatter the cilantro over the top, leaving the cut faces visible.

How Long to Marinate the Chicken

Plan on 2 to 4 hours in the refrigerator. The pineapple-citrus mixture is acidic, and leaving chicken breasts in it too long can make their surfaces overly soft. For this marinade, stop at 8 hours.

How to Grill Without Burning the Marinade

Fruit juice and brown sugar can scorch before the center of a thick breast is cooked. Use medium heat and let excess marinade drip off before grilling. Clean, lightly oiled grates and waiting until the first side releases will also help prevent sticking. Breast thickness and grill heat affect the timing, so use the thermometer rather than the clock as the final doneness check.

Why Reserve Marinade for the Glaze?

Set aside the glaze portion before adding the raw chicken. Reducing that clean portion gives the sliced chicken a light sheen without brushing it with marinade that held raw meat. Stop simmering when the glaze lightly coats a spoon but still flows easily.

Variations

  • Orange-lime marinade: Replace the pineapple juice with additional orange juice for a citrus-forward version.
  • Boneless chicken thighs: Use the same marinade, but determine grilling time by the thighs’ thickness and check doneness with a thermometer. The breast timing above does not apply.

Serving and Leftovers

Serve the sliced chicken with lime wedges or pineapple salsa on the side, rather than covering the glaze and cut faces. For a different chicken dinner, try these garlic Parmesan chicken skewers.

Refrigerate cooked leftovers in an airtight container for up to 3 days. Reheat gently in a lightly oiled skillet or the microwave until hot; prolonged heating can dry out chicken breast.

Nutrition

Approximate per serving, based on 4 servings: 340 calories, 45g protein, 12g fat, and 10g carbohydrates. Approximate per 100g of cooked chicken: 200 calories, 26g protein, 7g fat, and 6g carbohydrates. Actual values vary because some marinade is discarded and the chicken loses moisture as it cooks.

Tropical Grilled Chicken Marinade

Chicken breasts are marinated in pineapple, orange, and lime juice, grilled, then brushed with a reduced citrus glaze.
Course: Main Course
Cuisine: American
Prep: 15 min
Cook: 22 min
Total: 217 min
Servings: 4 Calories: 340 kcal

Equipment

  • Outdoor grill
  • Instant-read thermometer
  • Mixing bowl
  • Whisk
  • Shallow dish or sealable bag
  • Small saucepan
  • Grill tongs
  • Pastry brush

Ingredients

For the Chicken and Marinade

  • 1 1/2 to 2 pounds boneless skinless chicken breasts, about 4 breasts
  • 1/2 cup unsweetened pineapple juice (120 g)
  • 1/4 cup orange juice (60 g)
  • 2 tablespoons fresh lime juice
  • 1 tablespoon light brown sugar (about 15 g)
  • 3 garlic cloves, minced
  • 1 teaspoon finely grated fresh ginger
  • 1 teaspoon kosher salt, adjusted for the brand used
  • 2 tablespoons olive oil or neutral oil, plus a little for the grill grates

For Serving

  • 2 tablespoons chopped fresh cilantro
  • 4 lime wedges (optional)

Instructions

  1. If needed, gently pound the thick ends of the chicken breasts until each is about 3/4 inch thick.
  2. Whisk the pineapple juice, orange juice, lime juice, brown sugar, garlic, ginger, and salt until the sugar dissolves.
  3. Transfer 1/3 cup of the juice mixture to a clean, covered container for the glaze.
  4. Whisk the oil into the remaining marinade.
  5. Coat the chicken in the oil-containing marinade in a shallow dish or sealable bag. Refrigerate for 2 to 4 hours, turning once if using a dish. Keep the reserved glaze refrigerated separately, and do not marinate the chicken for more than 8 hours.
  6. Preheat the grill to medium direct heat, approximately 400°F (205°C). Clean and lightly oil the grates.
  7. Lift the chicken from the marinade and let the excess drip off. Discard the marinade that held the raw chicken.
  8. Grill the breasts with the lid closed between checks when possible, about 6 to 8 minutes per side. Turn when the first side is browned and releases readily.
  9. Start checking the thickest part after about 10 minutes total. Cook each breast to 165°F (75°C). Move the chicken to a cooler grill area if flare-ups cause it to darken too quickly.
  10. While the chicken grills or rests, bring the reserved clean marinade to a simmer in a small saucepan over medium heat. Simmer uncovered for 4 to 6 minutes, until reduced to about 2 to 3 tablespoons and lightly syrupy. If it gets too thick, loosen it with 1 teaspoon of water.
  11. Rest the chicken for 5 minutes, then cut crosswise on a slight diagonal into thick slices.
  12. Arrange the slices in overlapping rows, brush lightly with warm glaze, and scatter the cilantro over the top. Serve with lime wedges if desired.

Tips

  • Marinate for 2 to 4 hours and stop at 8 hours to prevent the acidic mixture from softening the chicken too much.
  • Let excess marinade drip off before grilling to help prevent scorching.
  • Use medium heat and lightly oiled, clean grates to reduce sticking and burning.
  • Turn the chicken when it releases readily from the grate.
  • Use a thermometer to check for 165°F (75°C); breast thickness and grill heat affect cooking time.
  • Simmer the reserved glaze until lightly syrupy but still easy to brush.

Variations

  • Orange-Lime Marinade: Replace the pineapple juice with additional orange juice for a citrus-forward version.
  • Boneless Chicken Thighs: Use the same marinade with boneless chicken thighs, adjusting the grilling time for their thickness and checking doneness with a thermometer.

Notes

Refrigerate cooked leftovers in an airtight container for up to 3 days. Reheat gently in a lightly oiled skillet or microwave until hot.

Nutrition

Calories: 340 kcal | Protein: 45 g | Fat: 12 g | Carbohydrates: 10 g

Chia Overnight Oats

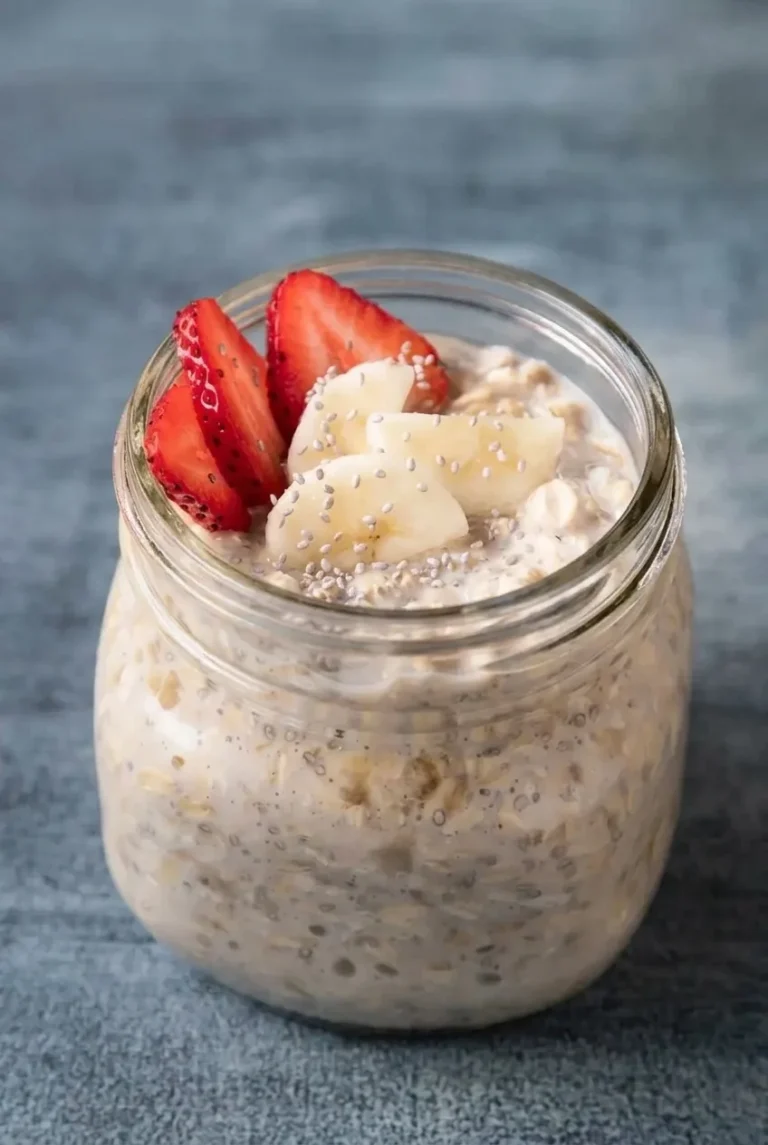
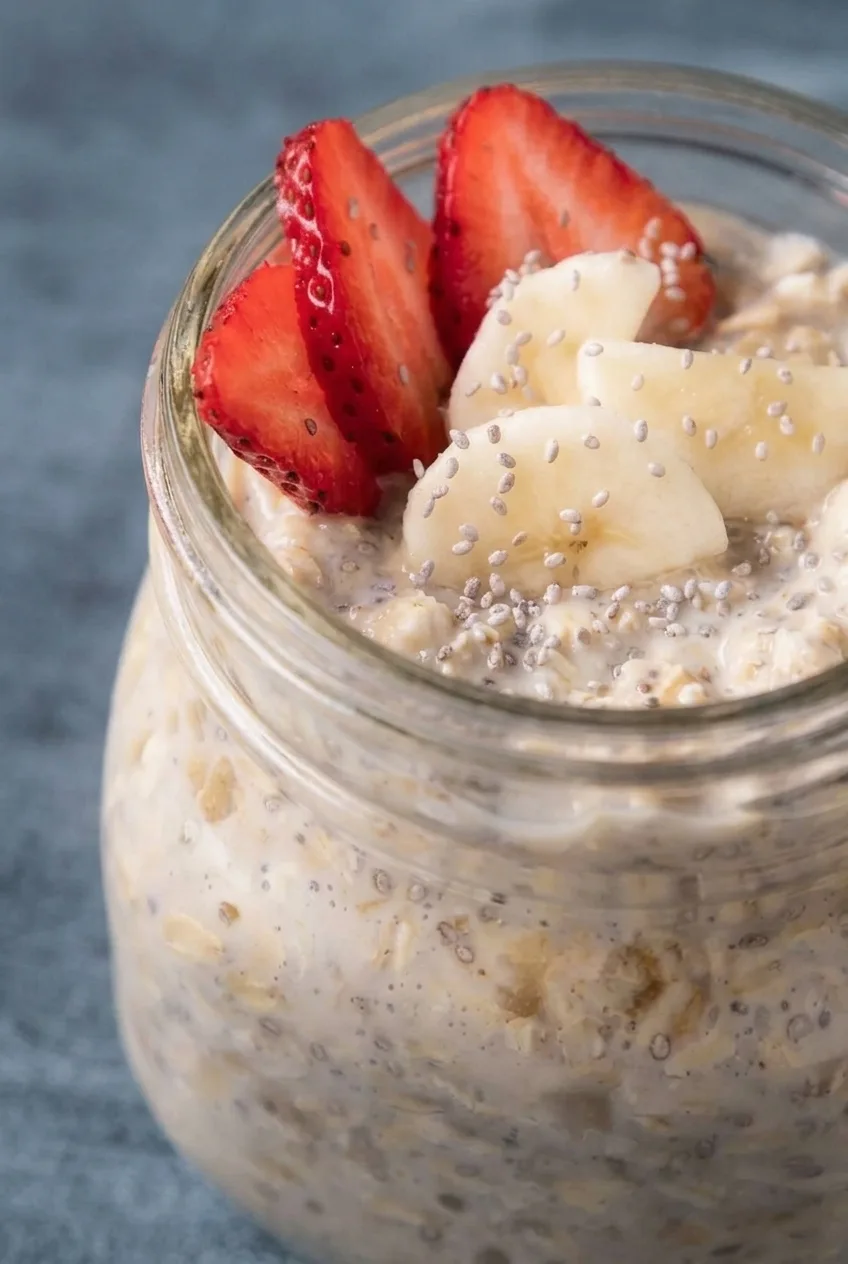
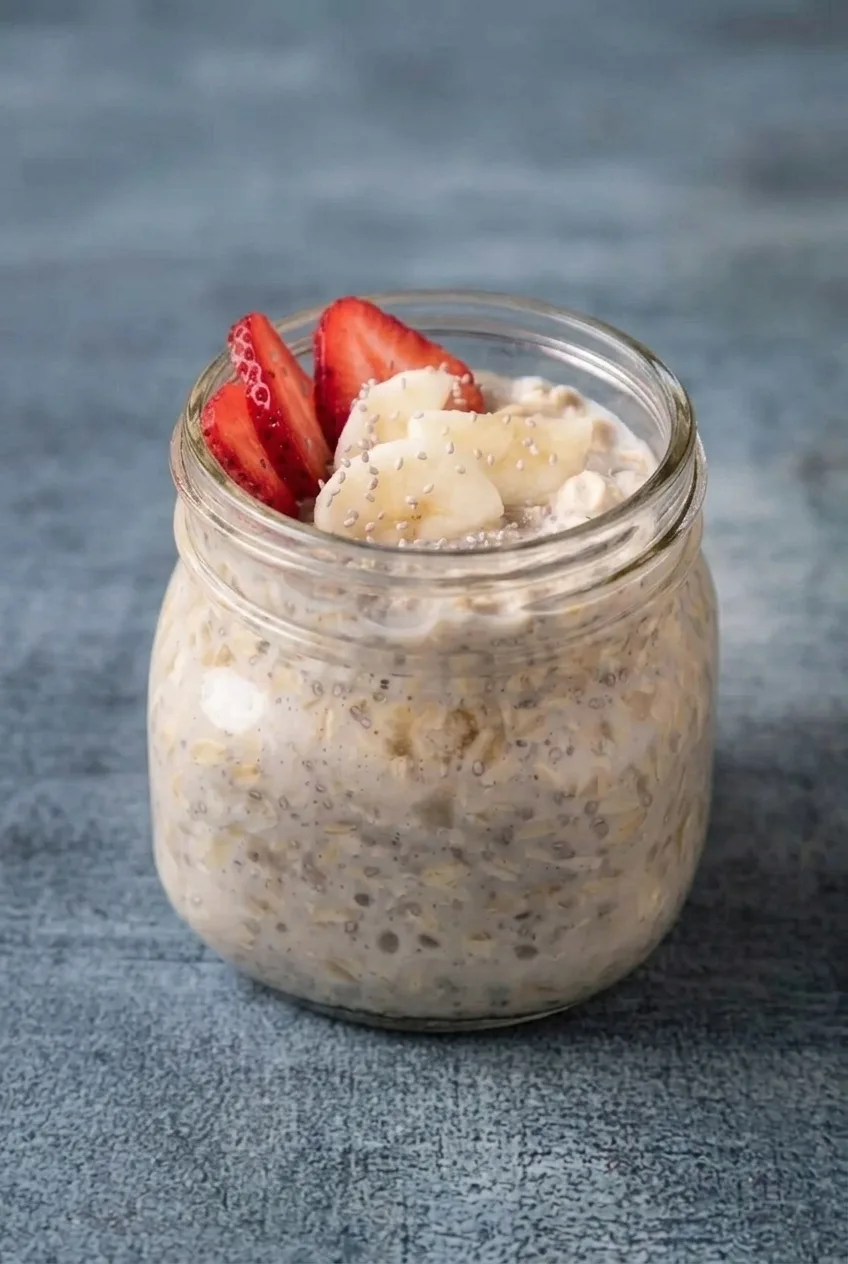
Chia overnight oats should be creamy and thick enough to scoop, with softened oat flakes and chia seeds still visible. Stir the oats, chia, and milk thoroughly before refrigerating so no dry pockets or seed clumps remain. After an overnight soak, top the jar with freshly sliced strawberries and banana and a light sprinkle of chia seeds.

Ingredients for One Jar

Close view of softened oat flakes and chia seeds beneath fresh strawberry and banana slices
  • 1/2 cup old-fashioned rolled oats (40g)
  • 1 tablespoon chia seeds (12g), plus a small pinch for topping
  • 2/3 cup milk or unsweetened plant-based milk (160g), plus more if needed
  • 2 medium fresh strawberries, sliced (about 35g)
  • About 1/3 medium banana, sliced (about 40g)

Optional: Add 1 to 2 teaspoons maple syrup, 1/4 teaspoon vanilla extract, or a tiny pinch of fine salt to the oat base.

How to Make Chia Overnight Oats

Complete jar of strawberry-banana chia overnight oats on a blue-gray tabletop
  1. Mix the base: Combine the oats, 1 tablespoon chia seeds, milk, and any optional additions in a 12- to 16-ounce wide-mouth glass jar. Stir thoroughly, scraping the bottom and sides until all the oats and seeds are wet and submerged. Leave room for stirring and the fruit topping.
  2. Refrigerate: Cover tightly and refrigerate for at least 8 hours, preferably overnight.
  3. Stir and adjust: Stir the oats. They should be soft but still visible in a creamy, spoonable mixture, with no dry spots or chia clumps. If the oats are too thick, stir in a splash of milk. If they are runny, stir in 1 teaspoon chia seeds and refrigerate for another 10 to 15 minutes.
  4. Add the topping: Arrange the sliced strawberries and banana on the oats. Scatter a small pinch of chia seeds over the fruit and serve chilled.

How Thick Should Chia Overnight Oats Be?

The mixture will thicken as the oats and chia absorb the milk. When ready, it should hold on a spoon but still be easy to stir. Milk choice can affect the final thickness, so make any adjustments after the overnight soak rather than adding extra chia at the start.

Rolled Oats and Milk Choices

Old-fashioned rolled oats soften while keeping their distinct flakes. Quick oats will be softer and may turn mushy; steel-cut oats are not a direct swap for this amount of milk and soak time. Dairy milk, almond milk, oat milk, and soy milk can all be used, though flavor and thickness may vary.

Yogurt is not needed to thicken this version. For a yogurt-based recipe, see these high protein Greek yogurt overnight oats.

Making Jars Ahead

Refrigerate the covered, untopped oat base for up to 3 days. Stir before serving and add a splash of milk if it has become too thick. Slice the strawberries and banana just before eating so the topping looks fresh.

For a warm serving, gently warm the soaked oat base, loosening it with milk as needed, then add the fresh fruit.

Nutrition

Approximate nutrition per jar, calculated with 2% dairy milk and without optional additions: 335 calories, 13g protein, 10g fat, and 52g carbohydrates. Per 100g: approximately 115 calories, 5g protein, 3g fat, and 18g carbohydrates. Values vary with the milk and fruit used.

Chia Overnight Oats

Rolled oats and chia seeds soak in milk overnight, then get topped with fresh strawberries and banana.
Course: Breakfast
Cuisine: Global
Prep: 5 min
Total: 485 min
Servings: 1 Calories: 335 kcal

Equipment

  • 12- to 16-ounce wide-mouth glass jar
  • Knife

Ingredients

Oat Base

  • 1/2 cup old-fashioned rolled oats (40 g)
  • 1 tablespoon chia seeds (12 g)
  • 2/3 cup milk or unsweetened plant-based milk (160 g), plus more if needed

Topping

  • 2 medium fresh strawberries, sliced (about 35 g)
  • About 1/3 medium banana, sliced (about 40 g)
  • Small pinch chia seeds

Optional Additions

  • 1 to 2 teaspoons maple syrup
  • 1/4 teaspoon vanilla extract
  • Tiny pinch fine salt

Instructions

  1. Combine the oats, 1 tablespoon chia seeds, milk, and any optional additions in a wide-mouth jar.
  2. Stir thoroughly, scraping the bottom and sides until all the oats and seeds are wet and submerged. Leave room for stirring and toppings.
  3. Cover the jar tightly and refrigerate for at least 8 hours, preferably overnight.
  4. Stir the oats until creamy and spoonable. If too thick, add a splash of milk. If runny, stir in 1 teaspoon chia seeds and refrigerate for another 10 to 15 minutes.
  5. Top with the sliced strawberries and banana, then scatter a small pinch of chia seeds over the fruit. Serve chilled.

Tips

  • Stir thoroughly before chilling to prevent dry pockets and chia clumps.
  • Adjust the thickness after the overnight soak, since different milks can change the consistency.
  • Use old-fashioned rolled oats for distinct softened flakes; quick oats may become mushy.
  • Slice the fruit just before serving to keep the topping fresh.

Variations

  • Maple Vanilla: Add 1 to 2 teaspoons maple syrup and 1/4 teaspoon vanilla extract to the oat base.
  • Warm Chia Overnight Oats: Gently warm the soaked oat base, loosening it with milk as needed, then add the fresh fruit.

Notes

Refrigerate the covered, untopped oat base for up to 3 days. Stir before serving and add milk if it has thickened.

Nutrition

Calories: 335 kcal | Protein: 13 g | Fat: 10 g | Carbohydrates: 52 g | Calories Per 100g: 115 kcal | Protein Per 100g: 5 g | Fat Per 100g: 3 g | Carbohydrates Per 100g: 18 g

High Protein Greek Yogurt Overnight Oats

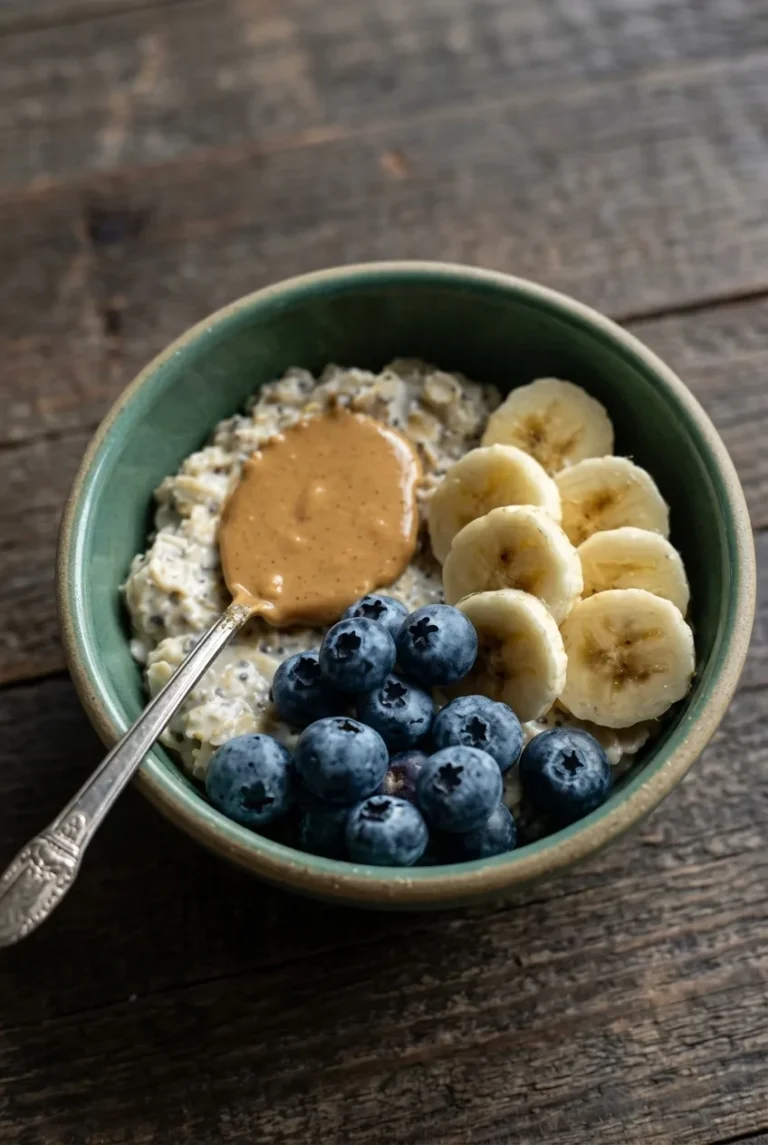
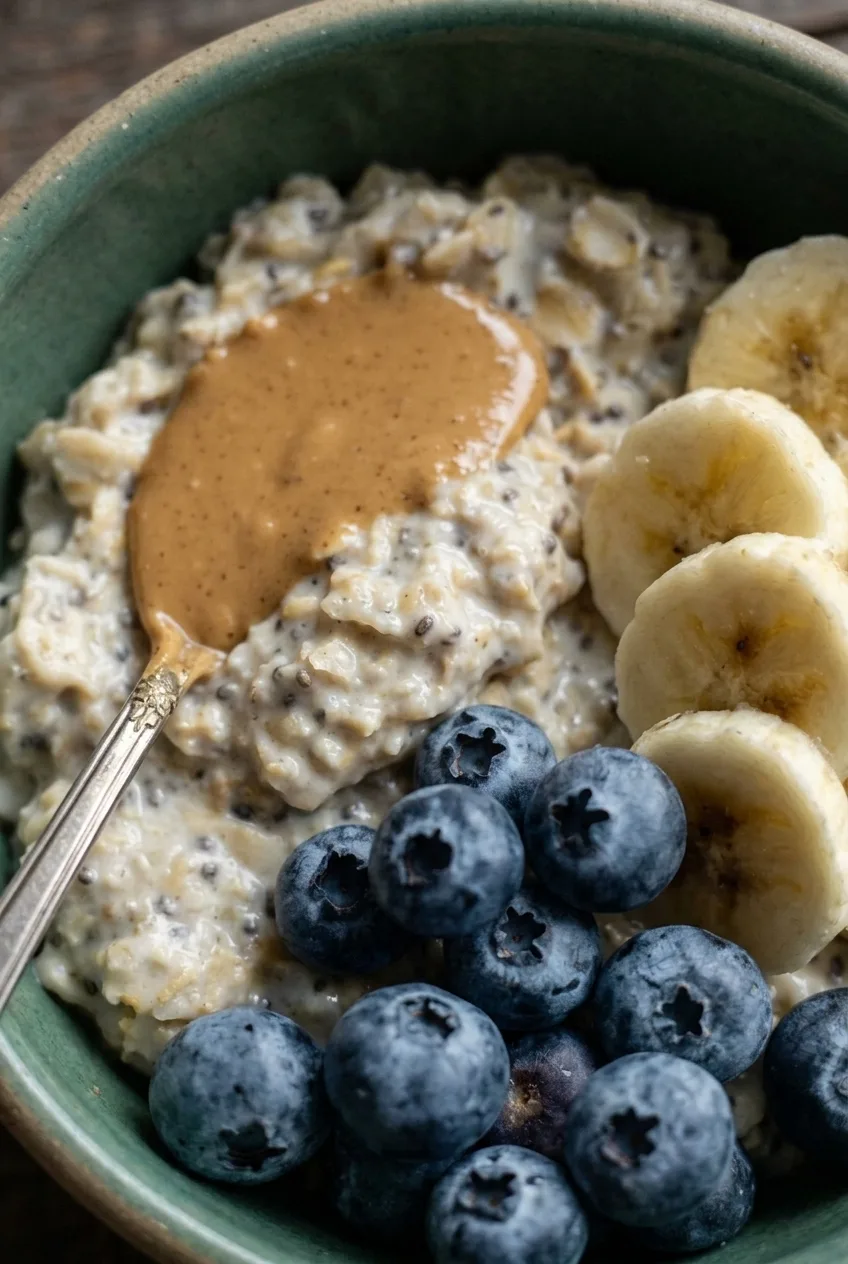
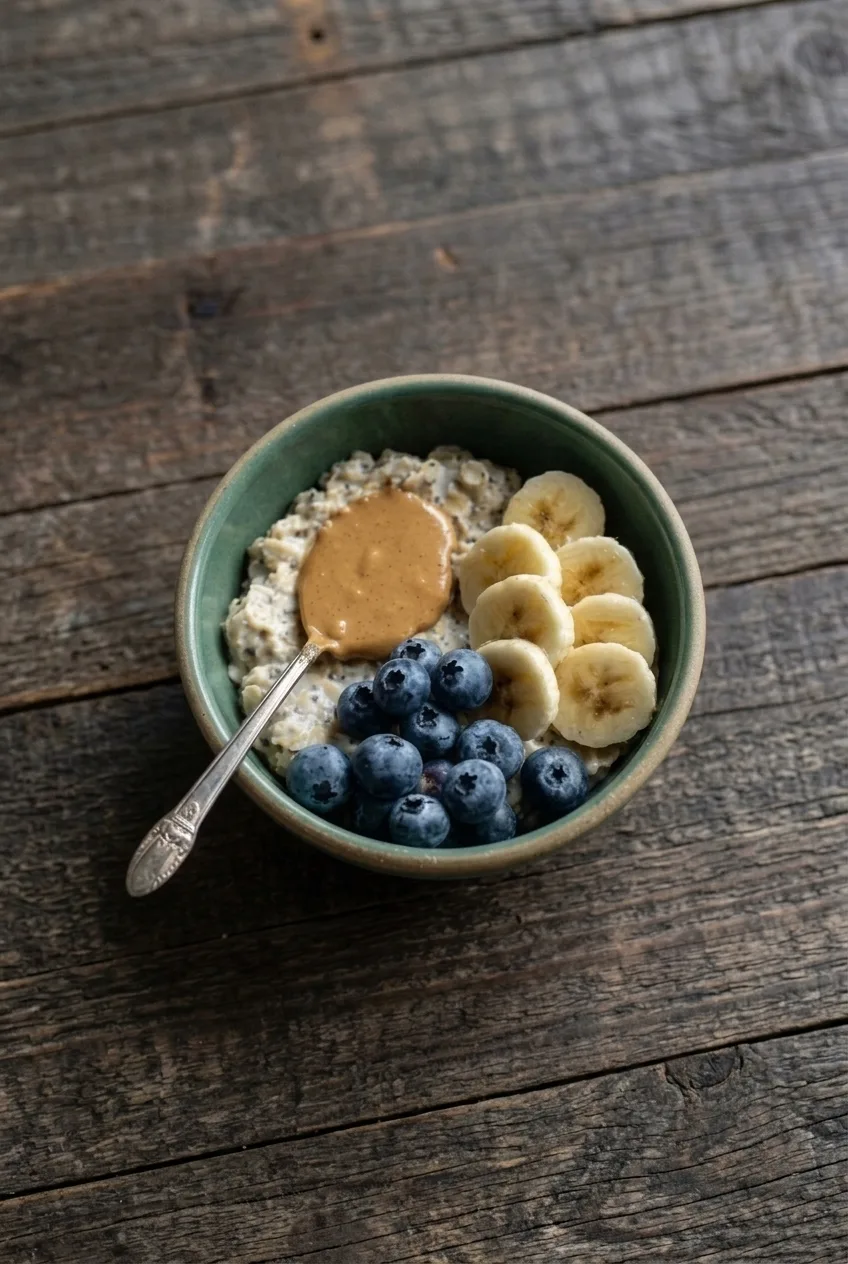
Greek yogurt and vanilla protein powder make the no-cook oat base creamy, while rolled oats keep their shape as they soften. Whisk the powder into the milk first to avoid dry clumps, then let the oats and chia thicken in the refrigerator. Serve the oats cold in a bowl with fresh banana slices, whole blueberries, and a separate dollop of peanut butter. Because protein powders absorb liquid differently, check the texture after chilling and loosen the oats with a little milk if needed.

Ingredients

Close view of creamy overnight oats with visible flakes beside blueberries, banana, and peanut butter

Makes 1 generous serving. Prep time: 10 minutes. Chill time: at least 4 hours, preferably overnight.

  • 1/2 cup milk (120g), plus 1–3 tablespoons more if needed
  • About 1/2 scoop vanilla protein powder (15g; scoop sizes vary)
  • 1/2 cup plain Greek yogurt (120g)
  • 1/2 cup old-fashioned rolled oats (40g)
  • 1 tablespoon chia seeds (12g)
  • 1/2 medium banana, sliced (about 60g)
  • 1/3 cup fresh blueberries (about 50g)
  • 1 tablespoon creamy peanut butter (16g)
  • Optional: 1–2 teaspoons maple syrup, to taste

How to Make Greek Yogurt Overnight Oats

Complete bowl of Greek yogurt overnight oats on a dark wood table with three distinct toppings
  1. Whisk the powder: In a pint-size jar or other container with room to stir, whisk the 1/2 cup milk and protein powder until evenly combined, with no dry pockets.
  2. Mix the base: Stir in the Greek yogurt, rolled oats, and chia seeds until no dry oats or chia clumps remain. Add maple syrup if needed for sweetness.
  3. Cover and chill: Refrigerate for at least 4 hours, preferably overnight. The oats are ready when the flakes have softened but remain visible and the mixture is creamy and spoonable.
  4. Adjust the texture: Stir well. If the oats are stiff, add milk 1 tablespoon at a time, up to about 3 tablespoons, until they mound softly on a spoon. Transfer to a serving bowl.
  5. Add the toppings: Slice the banana and group the rounds along one side of the bowl. Cluster the whole blueberries toward the front and add a separate dollop of peanut butter, leaving some oats visible between the toppings. Serve cold.

How Thick Should Overnight Oats Be?

The oats should be moist and thick enough to mound gently, not dry or runny. Stir before adding milk; the top can look firmer than the mixture underneath. If the oats are still loose after 4 hours, stir and continue chilling until the flakes soften and the base thickens.

Old-fashioned rolled oats retain visible flakes and some chew. Quick oats soften faster and can become mushy, especially during longer storage.

Protein Powder and Milk Choices

Protein powders differ in sweetness, texture, and how much liquid they absorb. Whisking the powder into milk reduces clumps, but it cannot remove grittiness inherent to a powder. Wait until after chilling to decide whether the oats need extra milk.

For a powder-free version, omit the protein powder, begin with slightly less milk, and adjust after soaking. It will have less protein than the main version. Soy milk is a plant-milk option for a protein-forward bowl, though protein amounts vary by product.

Make-Ahead and Storage

Keep the covered oat base in the refrigerator and aim to eat it within 3 days for the best texture. A 5-day storage window is sometimes used, but the oats will continue to soften and thicken. Store the fruit separately; slice the banana and add it with the blueberries and peanut butter just before serving.

For another blueberry-forward bowl, try lemon blueberry overnight oats. For more banana and peanut butter flavor, see peanut butter banana overnight oats.

Nutrition

Approximate per generous bowl: 580 calories, 40g protein, 19g fat, and 64g carbohydrates. Approximate per 100g: 135 calories, 9g protein, 4g fat, and 15g carbohydrates. Estimates include the listed toppings but not optional maple syrup or extra milk. Values, especially protein, vary with the milk, yogurt, peanut butter, and protein powder used.

High Protein Greek Yogurt Overnight Oats

Creamy overnight oats made with Greek yogurt, vanilla protein powder, chia seeds, and fresh fruit.
Course: Breakfast
Cuisine: American
Prep: 10 min
Total: 250 min
Servings: 1 Calories: 580 kcal

Equipment

  • Pint-size jar or mixing container
  • Whisk
  • Serving bowl

Ingredients

Oat Base

  • 1/2 cup milk (120 g), plus 1–3 tablespoons more if needed
  • About 1/2 scoop vanilla protein powder (15 g; scoop sizes vary)
  • 1/2 cup plain Greek yogurt (120 g)
  • 1/2 cup old-fashioned rolled oats (40 g)
  • 1 tablespoon chia seeds (12 g)
  • Optional: 1–2 teaspoons maple syrup, to taste

Toppings

  • 1/2 medium banana, sliced (about 60 g)
  • 1/3 cup fresh blueberries (about 50 g)
  • 1 tablespoon creamy peanut butter (16 g)

Instructions

  1. Whisk the milk and protein powder in a pint-size jar or container until evenly combined with no dry pockets.
  2. Stir in the Greek yogurt, rolled oats, and chia seeds until no dry clumps remain. Add maple syrup if desired.
  3. Cover and refrigerate for at least 4 hours, preferably overnight, until the oats are soft and the mixture is creamy.
  4. Stir the oats. If they are stiff, add milk 1 tablespoon at a time, up to about 3 tablespoons, until creamy and spoonable.
  5. Transfer the oats to a serving bowl. Add the banana, blueberries, and peanut butter, then serve cold.

Tips

  • Whisk the protein powder into the milk first to help prevent dry clumps.
  • Wait until after chilling to decide whether the oats need extra milk.
  • Use old-fashioned rolled oats for visible flakes and some chew; quick oats soften faster and may become mushy.
  • If the oats seem loose after 4 hours, stir them and continue chilling until thickened.

Variations

  • Protein-Powder-Free: Omit the protein powder, start with slightly less milk, and adjust the texture after soaking; the oats will contain less protein.
  • Soy Milk: Use soy milk as a plant-based option; protein amounts vary by product.

Notes

Refrigerate the covered oat base and aim to eat it within 3 days for the best texture. Store the fruit separately and add it just before serving.

Nutrition

Calories: 580 kcal | Protein: 40 g | Fat: 19 g | Carbohydrates: 64 g

Maple Brown Sugar Overnight Oats

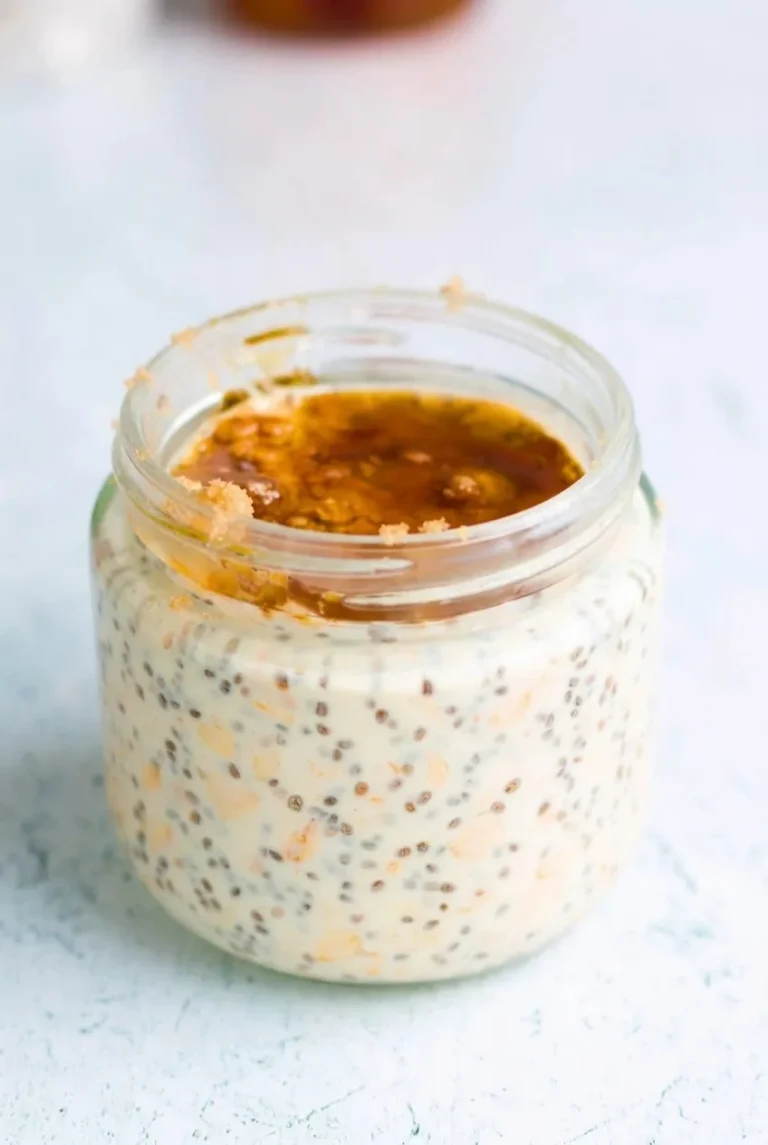
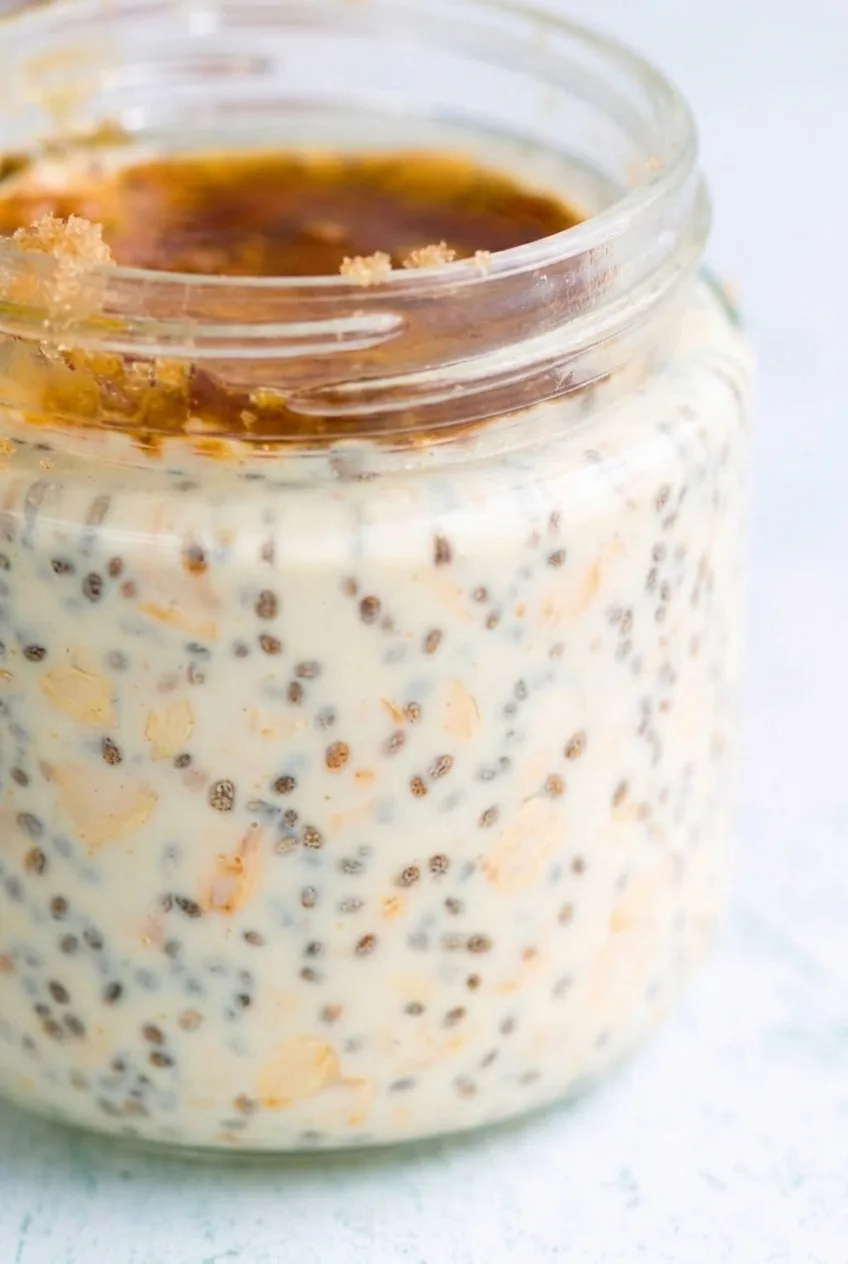
These no-cook oats soften in the refrigerator into a thick, creamy base with visible chia seeds and a little chew. Maple syrup and brown sugar flavor the oats, while a second spoonful of each becomes a glossy amber topping.

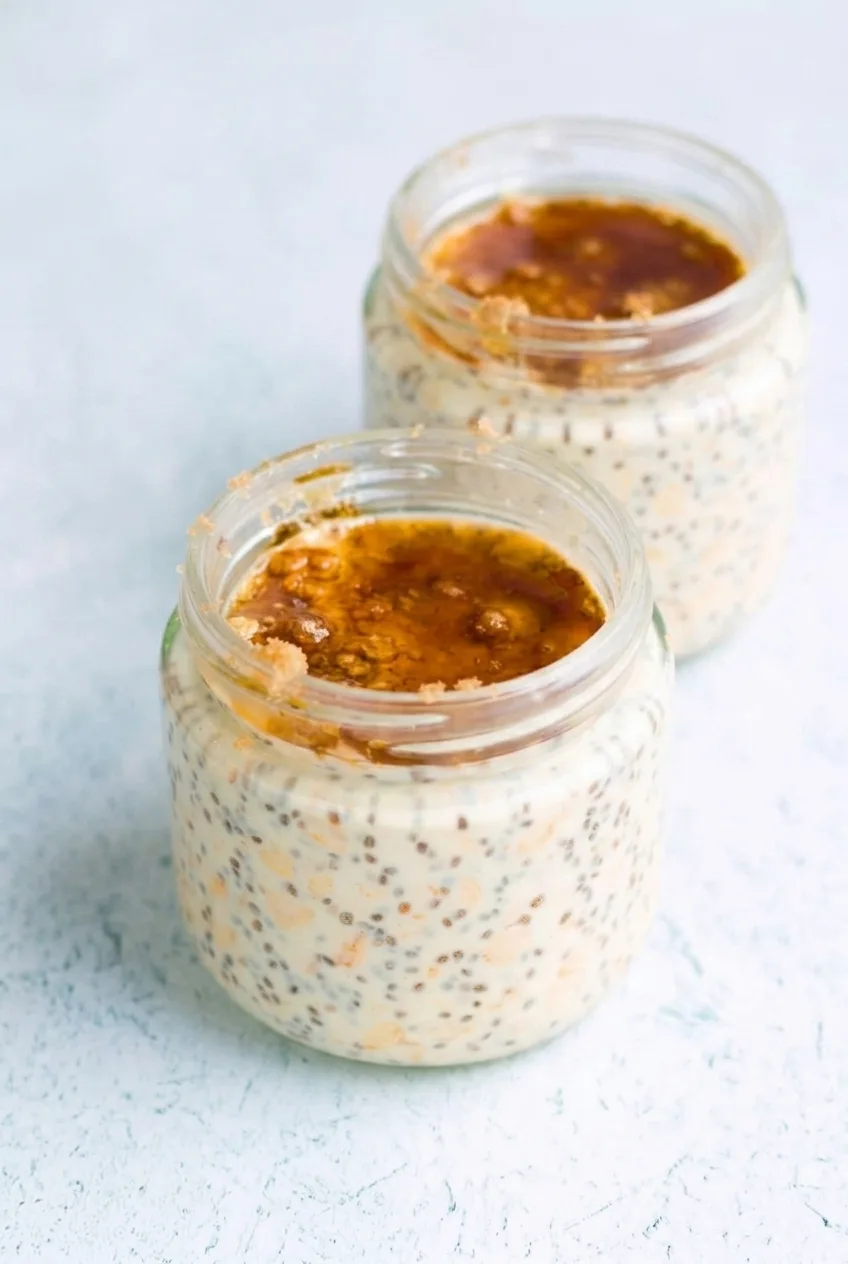
Make two jars in about 10 minutes, then chill them for at least 4 hours or overnight. Add the topping after any final stirring so it stays on the surface rather than disappearing into the oats.

Ingredients for Maple Brown Sugar Overnight Oats

Close view of creamy rolled oats and chia seeds beneath the maple-brown-sugar layer

Oat base

  • 1 cup old-fashioned rolled oats (80g)
  • 1 1/4 cups milk, dairy or unsweetened nondairy
  • 1/2 cup plain Greek yogurt (120g)
  • 2 tablespoons chia seeds (25g)
  • 1 tablespoon pure maple syrup
  • 2 teaspoons packed brown sugar
  • 1/2 teaspoon vanilla extract

Maple-brown-sugar topping

  • 2 tablespoons pure maple syrup
  • 2 teaspoons packed brown sugar

How to Make Maple Brown Sugar Overnight Oats

Two finished jars of maple brown sugar overnight oats on a pale surface
  1. Mix the base: Stir the oats, milk, yogurt, chia seeds, 1 tablespoon maple syrup, 2 teaspoons brown sugar, and vanilla together in a bowl. Scrape the bottom as you stir until all the oats are moistened and no dry chia pockets remain.
  2. Portion and chill: Divide between two sealable, wide-mouth clear glass jars, about 12 to 16 ounces each. Leave room for stirring and the topping. Cover tightly and refrigerate for at least 4 hours, preferably overnight.
  3. Check the texture: The oats should be tender with a little chew, and the mixture should be creamy and spoonable. If it is too stiff, stir a small splash of milk into each jar before adding the topping.
  4. Top the jars: Stir the remaining 2 tablespoons maple syrup and 2 teaspoons brown sugar together. Spoon half onto each jar and leave the topping on the surface.

Which Oats Work Best?

Old-fashioned rolled oats soften during the cold soak without losing all their texture. Quick oats soften faster and may turn mushy after several days in the refrigerator. Uncooked steel-cut oats stay too chewy for this method.

How to Keep the Maple Layer Distinct

Sweetening the oat base lightly gives it maple-brown-sugar flavor without turning it uniformly brown. Stir the topping thoroughly before spooning it over the chilled oats; a few brown sugar granules may remain. Once it is on, leave it unstirred to keep the amber layer visible.

Make-Ahead, Storage, and Serving

Keep the oat base sealed in the refrigerator for up to 4 days. For jars made several days ahead, store the topping separately and add it just before serving. Oats and chia continue to absorb liquid, so loosen a thickened base with a splash of milk before topping.

Serve cold from the jar. For warm oats, heat the base in a microwave-safe container in short intervals until warmed through, stir, then add the topping. To make the jars dairy-free, use nondairy milk and plain plant-based yogurt; adjust with a splash of milk if the chilled oats are too thick.

For another sweet breakfast jar, try Cinnamon Roll Overnight Oats. For a fruit-forward version, see Apple Cinnamon Overnight Oats.

Nutrition

Approximate nutrition per jar: 430 calories, 18g protein, 10g fat, and 70g carbohydrates. Per 100g: approximately 140 calories, 6g protein, 3g fat, and 23g carbohydrates. Estimates use 2% dairy milk and plain nonfat Greek yogurt; values vary by milk, yogurt, and brand.

Maple Brown Sugar Overnight Oats

Rolled oats, chia seeds, milk, and yogurt chill into a creamy breakfast topped with maple syrup and brown sugar.
Course: Breakfast
Cuisine: American
Prep: 10 min
Total: 250 min
Servings: 2 Calories: 430 kcal

Equipment

  • Mixing bowl
  • Spoon
  • Two sealable jars

Ingredients

Oat Base

  • 1 cup old-fashioned rolled oats (80g)
  • 1 1/4 cups milk, dairy or unsweetened nondairy
  • 1/2 cup plain Greek yogurt (120g)
  • 2 tablespoons chia seeds (25g)
  • 1 tablespoon pure maple syrup
  • 2 teaspoons packed brown sugar
  • 1/2 teaspoon vanilla extract

Maple-Brown-Sugar Topping

  • 2 tablespoons pure maple syrup
  • 2 teaspoons packed brown sugar

Instructions

  1. Stir the oats, milk, yogurt, chia seeds, 1 tablespoon maple syrup, 2 teaspoons brown sugar, and vanilla together in a bowl until the oats are moistened and no dry chia pockets remain.
  2. Divide the mixture between two sealable, wide-mouth jars, about 12 to 16 ounces each, leaving room to stir and add the topping. Cover and refrigerate for at least 4 hours, preferably overnight.
  3. Check that the oats are tender with a little chew and the mixture is creamy and spoonable. If it is too thick, stir a small splash of milk into each jar.
  4. Stir together the remaining 2 tablespoons maple syrup and 2 teaspoons brown sugar. Spoon half over each jar and leave the topping on the surface.

Tips

  • Use old-fashioned rolled oats for a tender texture with some chew.
  • Scrape the bottom of the bowl while mixing to moisten all the oats and chia seeds.
  • Stir the topping thoroughly before spooning it onto the oats.
  • Add the topping after any final stirring to keep the amber layer visible.
  • Loosen thickened oats with a splash of milk before adding the topping.

Variations

  • Dairy-Free Overnight Oats: Use nondairy milk and plain plant-based yogurt.
  • Warm Maple Brown Sugar Oats: Heat the oat base in a microwave-safe container in short intervals until warmed through, then stir and add the topping.

Notes

Store the oat base sealed in the refrigerator for up to 4 days. If making the jars several days ahead, store the topping separately and add it just before serving.

Nutrition

Calories: 430 kcal | Protein: 18 g | Fat: 10 g | Carbohydrates: 70 g

Tiramisu Overnight Oats

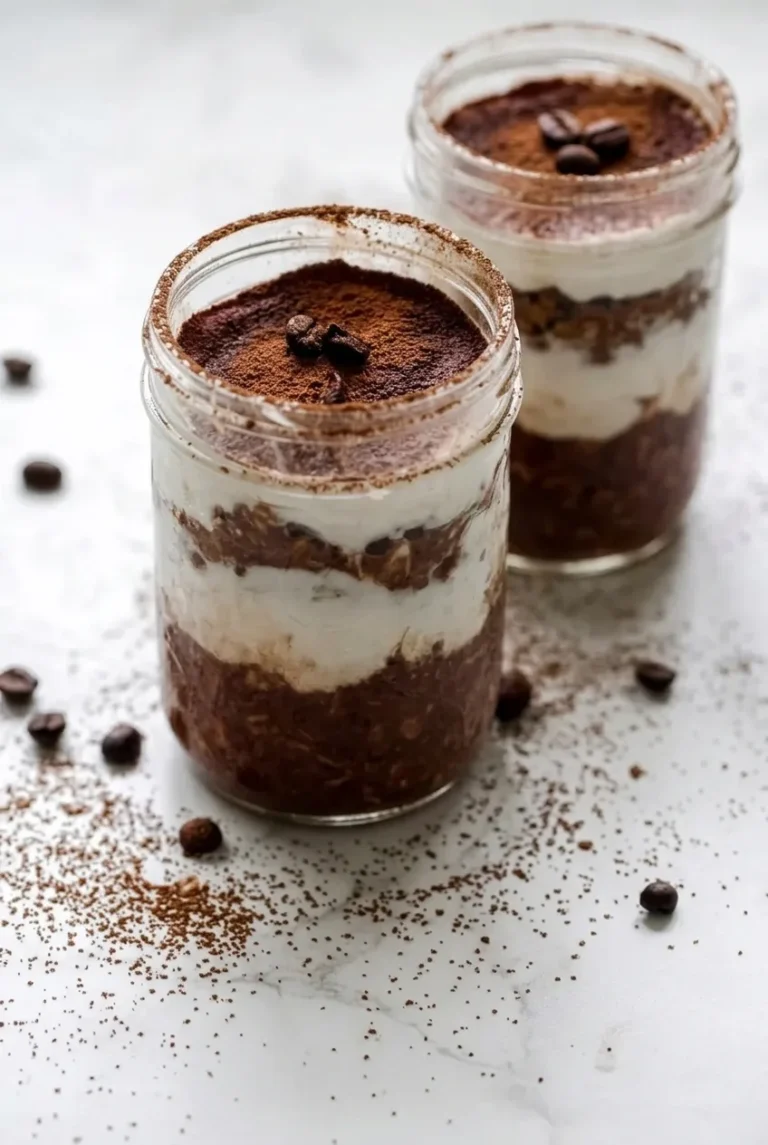
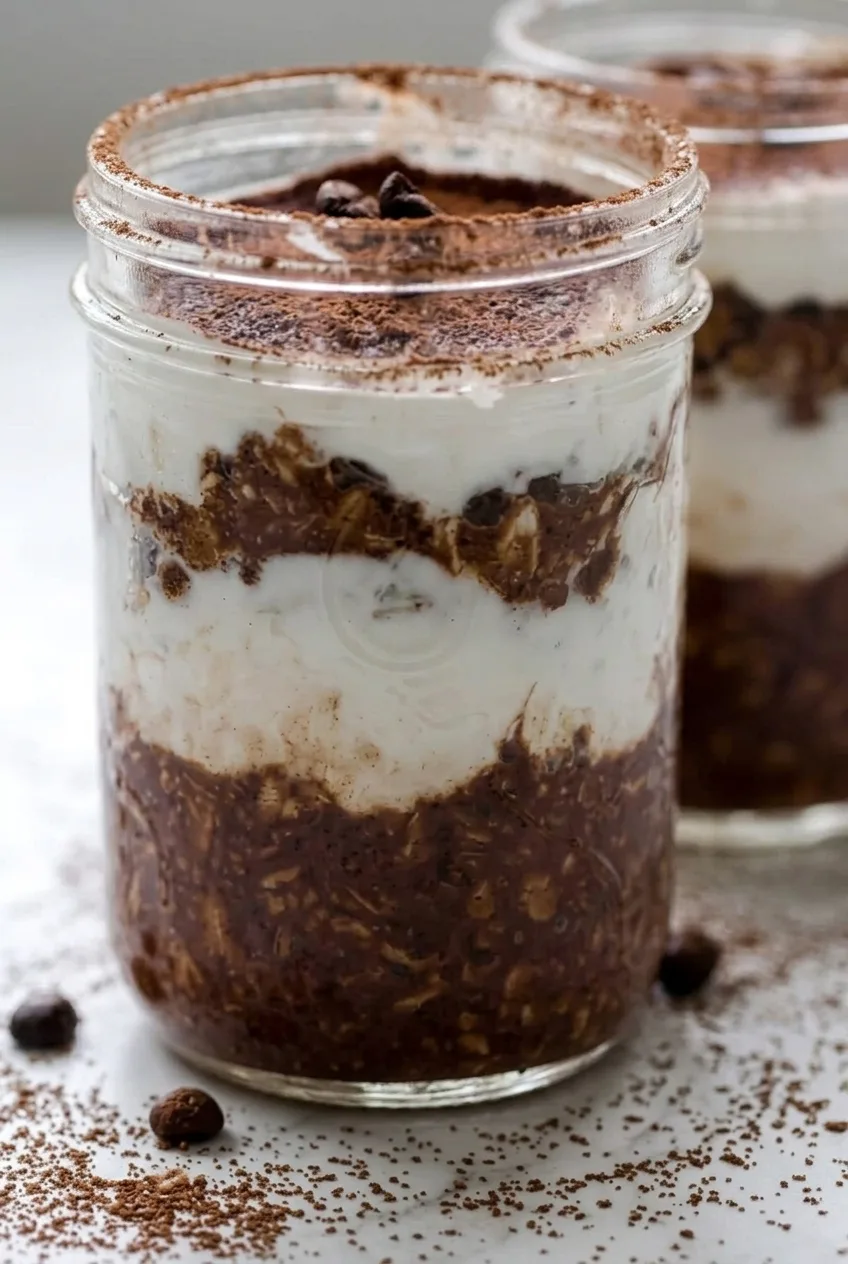
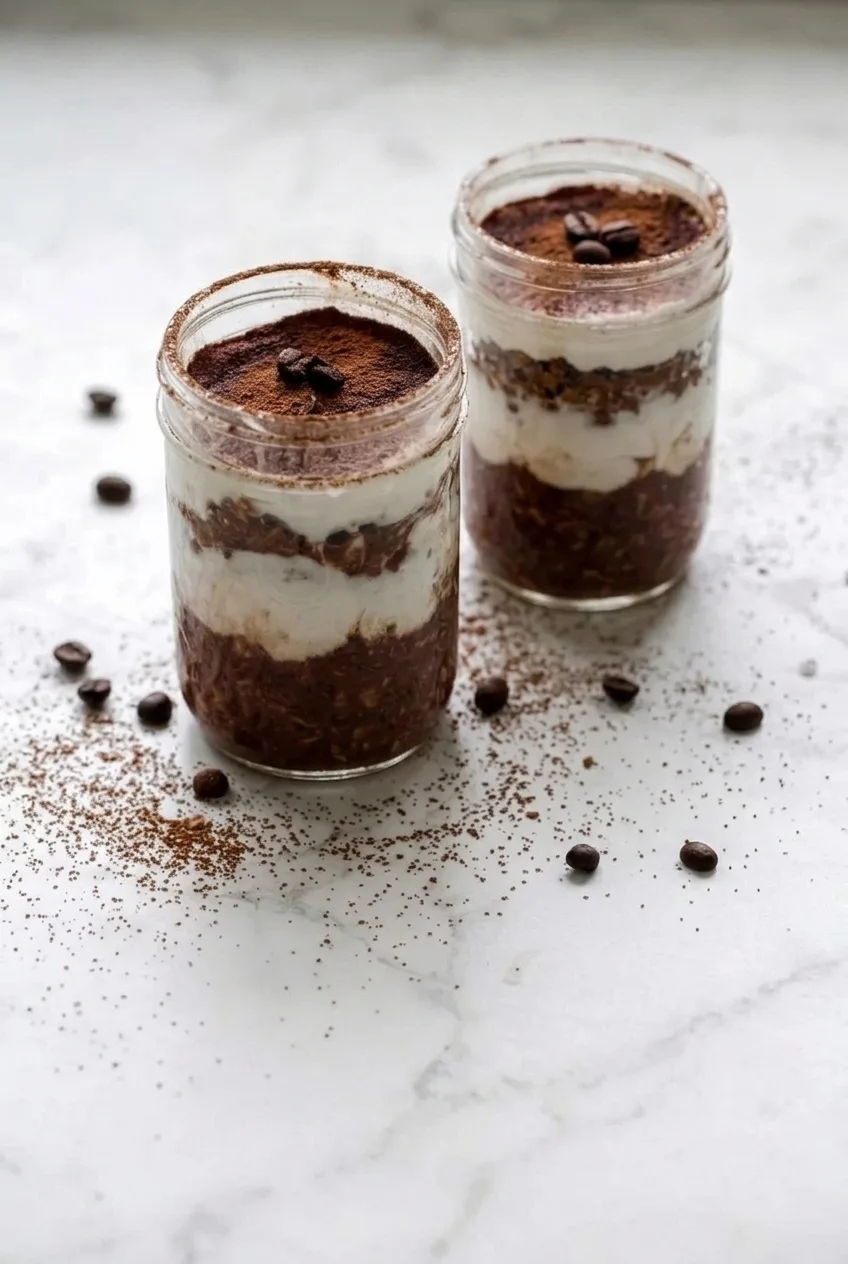
These tiramisu-inspired oats soak in milk and cooled coffee instead of cooking. Cocoa mixed into the oats makes dark, creamy bands that alternate with lightly sweetened Greek yogurt in two clear jars. A cocoa dusting finishes each white yogurt top.

Chill the oats until they are thick enough to support the yogurt—usually 4 to 6 hours, though overnight gives them a creamier texture. Assemble the layers after soaking so the dark and white bands stay distinct.

Ingredients for Tiramisu Overnight Oats

Close view of creamy cocoa-coffee oats against thick white yogurt layers in a glass jar
  • 1 cup old-fashioned rolled oats (80g)
  • 3/4 cup milk (180g), plus more if needed after chilling
  • 1/2 cup strong brewed coffee, cooled (120g)
  • 2 teaspoons chia seeds (8g)
  • 1 tablespoon unsweetened cocoa powder for the oats, plus 2 teaspoons for dusting (9g total)
  • 2 tablespoons maple syrup, divided (40g), plus more to taste if needed
  • 1/2 teaspoon vanilla extract, divided
  • 3/4 cup plain thick Greek yogurt (180g)
  • 4 to 6 whole roasted coffee beans, for garnish; remove before eating

How to Make Tiramisu Overnight Oats

Two complete jars of layered tiramisu overnight oats on a pale countertop
  1. Mix the oats: In a medium bowl or lidded container, stir together the oats, milk, cooled coffee, chia seeds, 1 tablespoon cocoa powder, 1 tablespoon maple syrup, and 1/4 teaspoon vanilla. Stir until no dry cocoa remains and the chia is evenly dispersed. Taste the mixture and add a little more maple syrup if the coffee and cocoa taste too bitter.
  2. Chill: Cover and refrigerate for 4 to 6 hours, preferably overnight. If convenient, stir again after 20 to 30 minutes to break up any chia clumps. Begin checking at 4 hours: the oats should be creamy and softened, with a little chew and no liquid pooling at the bottom.
  3. Prepare the yogurt: Stir the Greek yogurt with the remaining 1 tablespoon maple syrup and 1/4 teaspoon vanilla. If the chilled oats are too stiff to spoon into layers, stir in milk 1 tablespoon at a time until they are thick but spoonable.
  4. Layer the jars: Divide about half the oat mixture between two clear, wide-mouth 12- to 16-ounce jars. Spoon half the yogurt over the oats, then repeat with the remaining oats and yogurt. Each jar should have two dark oat bands and two white yogurt bands, with yogurt on top.
  5. Finish and serve: Just before serving, sift or sprinkle the remaining 2 teaspoons cocoa over the yogurt tops. Place 2 or 3 whole coffee beans in the center of each jar. Serve cold and remove the beans before eating.

How to Keep the Layers Distinct

Use thick yogurt and wait until the oats have absorbed their liquid before assembling the jars. Spoon each yogurt layer gently against the inside of the glass, then spread it without stirring into the oats. The edges need not be perfectly straight; the dark and white bands should simply remain visible.

For another layered breakfast, try Cinnamon Roll Overnight Oats.

Coffee and Oat Choices

Old-fashioned rolled oats soften while keeping a little chew. Quick oats will give a softer texture that is less suited to distinct layers, and untreated steel-cut oats are not a direct substitute.

Cool the brewed coffee before mixing it with the oats and chia. To use instant coffee, dissolve it in water to make 1/2 cup prepared coffee, then cool it; dry granules alone cannot replace the recipe’s coffee liquid. The same amount of cooled strong decaf coffee also works. For dairy-free jars, use plant milk and a thick plain dairy-free yogurt.

Make-Ahead and Storage

Keep the oat base covered in the refrigerator for up to 3 days. For the clearest layers, store the yogurt separately and assemble the jars near serving time. Assembled jars can also be covered and refrigerated, though the bands may soften.

Add the cocoa and coffee beans just before serving so the cocoa stays powdery. These oats are meant to be served cold. Freezing the layered jars is not recommended because thawing may change the texture of the oats and yogurt.

Nutrition

Approximate nutrition per jar: 335 calories, 19g protein, 7g fat, and 52g carbohydrates. Per 100g: about 110 calories, 6g protein, 2g fat, and 17g carbohydrates. Estimates are based on two jars made with 2% milk and plain nonfat Greek yogurt; brands and any extra milk or maple syrup will change the values.

Tiramisu Overnight Oats

Rolled oats soak in coffee, milk, and cocoa before being layered with lightly sweetened Greek yogurt.
Course: Breakfast
Cuisine: American
Prep: 15 min
Total: 375 min
Servings: 2 Calories: 335 kcal per jar (about 110 kcal per 100 g)

Equipment

  • Mixing bowl or lidded container
  • Two clear 12- to 16-ounce jars
  • Sieve

Ingredients

For the Oats

  • 1 cup old-fashioned rolled oats (80 g)
  • 3/4 cup milk (180 g), plus more if needed
  • 1/2 cup strong brewed coffee, cooled (120 g)
  • 2 teaspoons chia seeds (8 g)
  • 1 tablespoon unsweetened cocoa powder (part of 9 g total)
  • 1 tablespoon maple syrup (part of 40 g total)
  • 1/4 teaspoon vanilla extract

For the Yogurt Layers and Topping

  • 3/4 cup plain thick Greek yogurt (180 g)
  • 1 tablespoon maple syrup (part of 40 g total)
  • 1/4 teaspoon vanilla extract
  • 2 teaspoons unsweetened cocoa powder, for dusting (part of 9 g total)
  • 4 to 6 whole roasted coffee beans, for garnish

Instructions

  1. Stir the oats, milk, cooled coffee, chia seeds, 1 tablespoon cocoa powder, 1 tablespoon maple syrup, and 1/4 teaspoon vanilla together until no dry cocoa remains.
  2. Taste the oat mixture and add a little more maple syrup if needed.
  3. Cover and refrigerate for 4 to 6 hours, preferably overnight. If convenient, stir again after 20 to 30 minutes to break up chia clumps.
  4. Stir the Greek yogurt with the remaining 1 tablespoon maple syrup and 1/4 teaspoon vanilla.
  5. If the chilled oats are too stiff to layer, stir in milk 1 tablespoon at a time until thick but spoonable.
  6. Divide about half the oats between two clear jars. Spoon half the yogurt over the oats, then repeat with the remaining oats and yogurt, leaving yogurt on top.
  7. Just before serving, dust the yogurt with the remaining 2 teaspoons cocoa powder and place 2 or 3 coffee beans on each jar.
  8. Serve cold and remove the coffee beans before eating.

Tips

  • Use old-fashioned rolled oats; quick oats become softer and steel-cut oats are not a direct substitute.
  • Make sure the brewed coffee is cooled before mixing it with the oats and chia.
  • Wait until the oats have absorbed their liquid before assembling the layers.
  • Use thick yogurt and spoon it gently against the inside of the jar to keep the layers distinct.
  • If using instant coffee, dissolve it in water to make 1/2 cup prepared coffee, then cool it.

Variations

  • Decaf Coffee: Replace the brewed coffee with the same amount of cooled strong decaf coffee.
  • Dairy-Free: Use plant milk and a thick plain dairy-free yogurt.

Notes

Store the oat base covered in the refrigerator for up to 3 days. For the clearest layers, store the yogurt separately and assemble near serving time. Add cocoa and coffee beans just before serving; freezing is not recommended.

Nutrition

Calories: 335 kcal per jar (about 110 kcal per 100 g) | Protein: 19 g per jar (about 6 g per 100 g) | Fat: 7 g per jar (about 2 g per 100 g) | Carbohydrates: 52 g per jar (about 17 g per 100 g)

Lemon Blueberry Overnight Oats

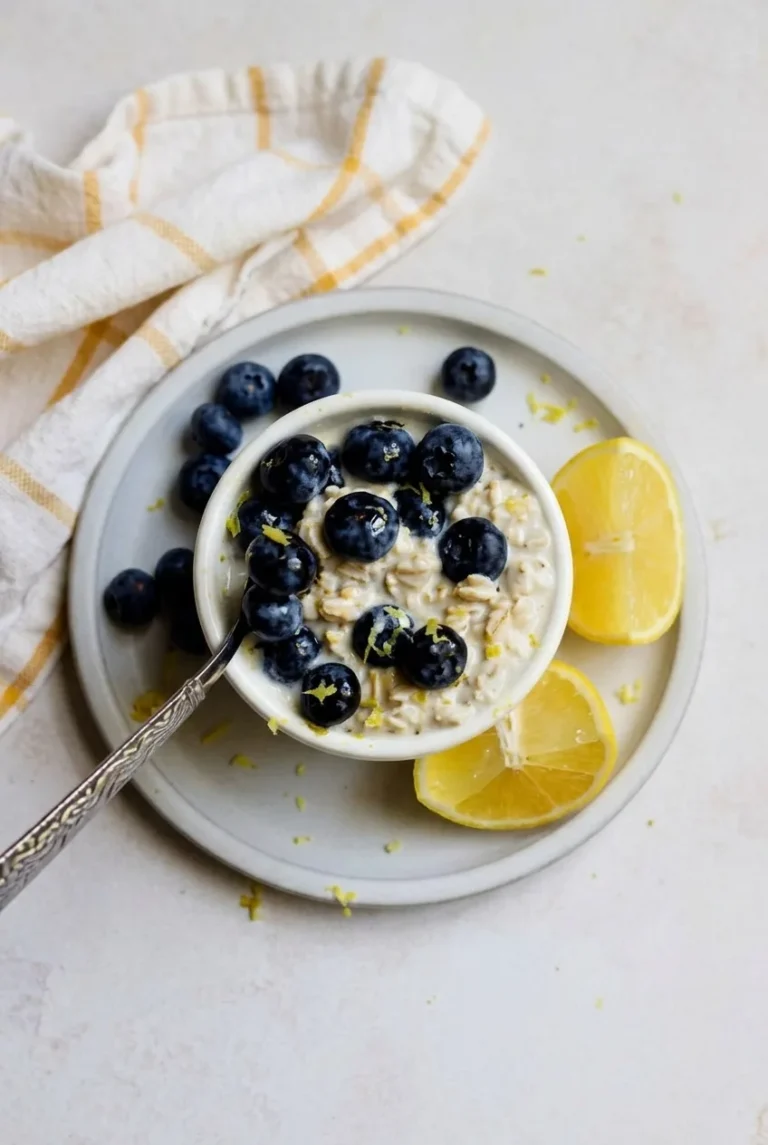
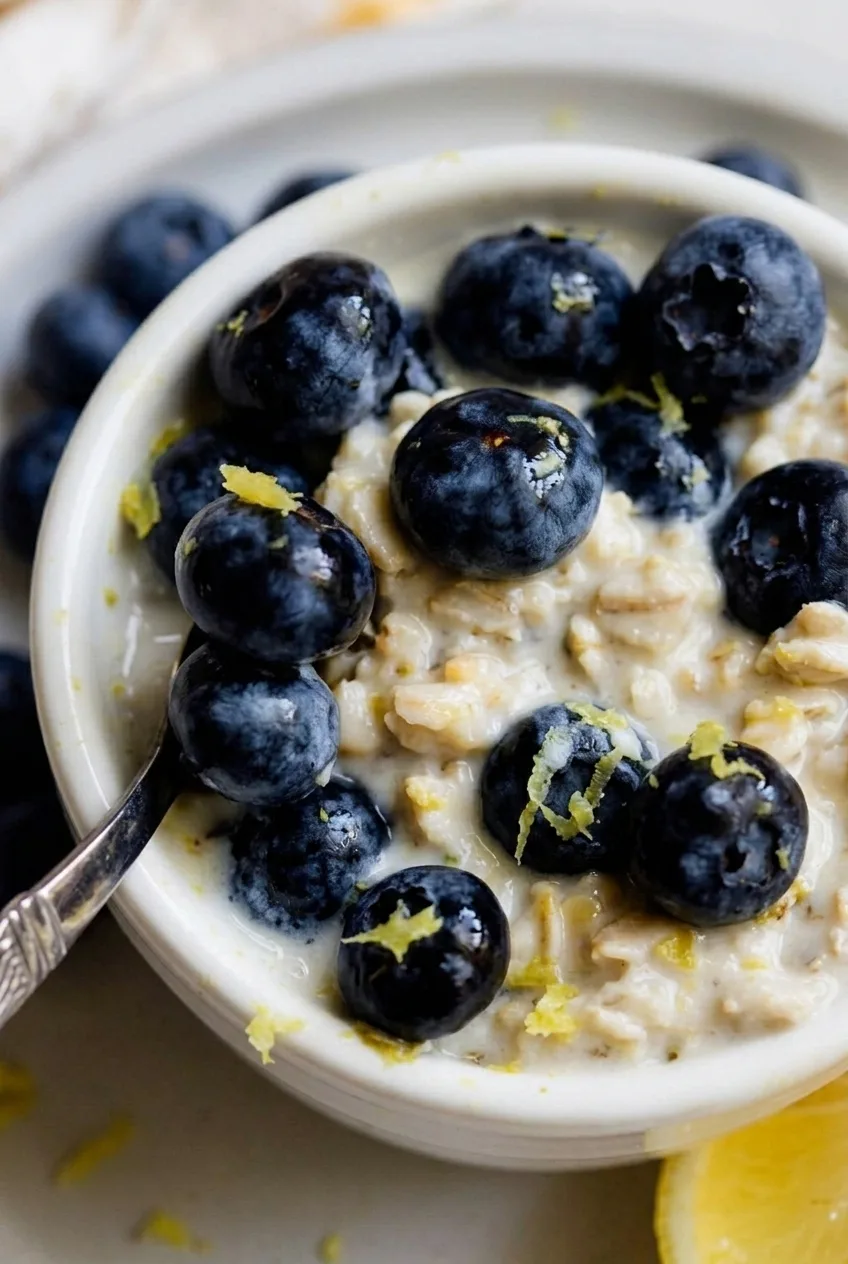
These overnight oats have a thick, creamy lemon base with whole blueberries on top and tucked into each bowl. Milk, yogurt, and chia soften the rolled oats in the refrigerator; no cooking is needed. Give them at least 4 hours to soak, though overnight produces a more dependable texture. Add the fresh berries after chilling to keep the oats pale and the fruit intact, then finish with reserved lemon zest.

Ingredients for Lemon Blueberry Overnight Oats

Close view of hydrated lemon overnight oats with whole blueberries and fine lemon zest
  • 1 cup old-fashioned rolled oats (90g)
  • 1 cup milk, dairy or unsweetened plant-based (240g), plus more if needed to serve
  • 1/2 cup plain Greek yogurt (120g)
  • 1 tablespoon chia seeds (12g)
  • 1 medium lemon, for about 1 teaspoon finely grated zest and 2 teaspoons juice
  • 1 tablespoon maple syrup (20g), or to taste
  • 1 cup fresh blueberries (150g)

Optional: Add 1/4 teaspoon vanilla extract to the oat base. Serve with lemon wedges if enough lemon remains.

How to Make Lemon Blueberry Overnight Oats

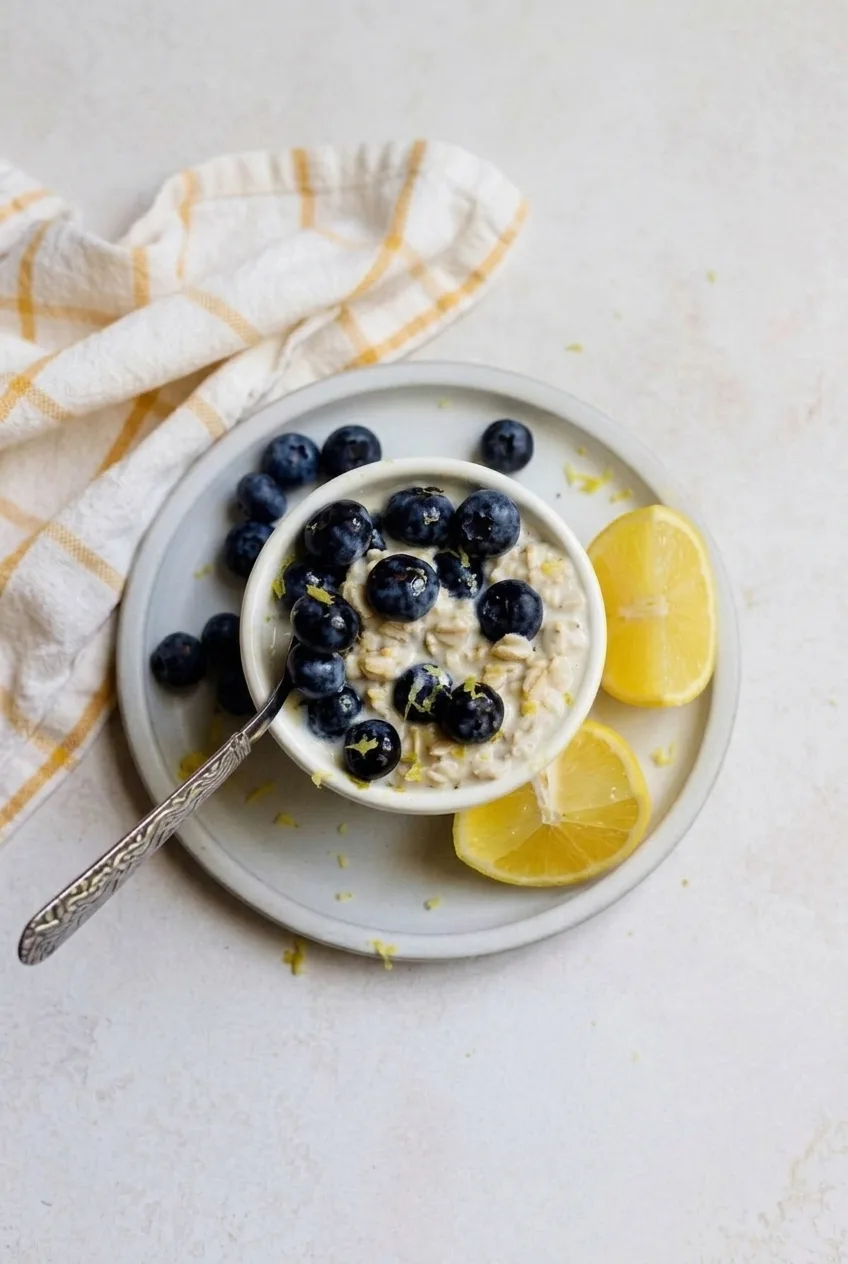
Complete bowl of lemon blueberry overnight oats on a saucer with lemon wedges beside it
  1. Zest and juice the lemon: Finely zest the whole lemon, avoiding the white pith. Reserve a little zest for serving, then cut the lemon and measure 2 teaspoons juice.
  2. Mix the oat base: Stir together the oats, milk, yogurt, chia seeds, maple syrup, lemon juice, and remaining zest. Add the vanilla, if using. Mix until all the oats are moistened and no chia clumps remain. Divide between two lidded containers with room to stir, then stir each portion once more.
  3. Cover and chill: Refrigerate for at least 4 hours, preferably overnight. The oats should be tender when tasted and thick enough to mound softly on a spoon.
  4. Adjust and add berries: Stir the chilled oats. If they are too thick to spoon comfortably, add a little milk at a time. Gently fold in about half the blueberries.
  5. Finish the bowls: Spoon the oats into two small bowls. Scatter the remaining whole blueberries and reserved lemon zest over the top. Serve cold, with lemon wedges if desired.

Getting the Right Overnight Oat Texture

Use old-fashioned rolled oats for this liquid ratio and soak time; steel-cut oats need a different formula. The oats and chia keep absorbing liquid as they chill, so wait until serving to adjust the thickness. Stir before adding milk—a mixture that looks firm at first may loosen enough on its own.

Fresh or Frozen Blueberries

Adding fresh blueberries after the soak keeps the berries whole and the lemon-oat base pale. Frozen blueberries also work as a topping, but thaw them separately and drain excess liquid first. Thawing them in the oats can make the base watery and purple-streaked.

For a different fruit presentation, try blueberry overnight oats with jammy berry layers.

Easy Substitutions

For dairy-free oats, use plant milk and dairy-free yogurt; check the thickness after chilling, as it may differ from the Greek yogurt version. An equal amount of ground flax can replace the chia, though the texture may change. If you need to avoid gluten, use certified gluten-free rolled oats.

Make-Ahead and Storage

Keep the oat base covered in the refrigerator for up to 3 to 4 days. Add the blueberries and finishing zest when serving for the freshest appearance. Stir each portion and loosen it with a little milk if it has thickened further.

Nutrition

Approximate nutrition per serving (1 of 2): 370 calories, 19g protein, 8g fat, and 58g carbohydrates. Approximate values per 100g: 115 calories, 6g protein, 2g fat, and 18g carbohydrates. Estimates use 2% milk and plain nonfat Greek yogurt; values vary with substitutions and added milk.

Lemon Blueberry Overnight Oats

Rolled oats soak with milk, Greek yogurt, chia, and lemon, then get topped with fresh blueberries.
Course: Breakfast
Cuisine: American
Prep: 10 min
Total: 250 min
Servings: 2 Calories: 370 kcal

Equipment

  • Fine grater
  • Mixing bowl
  • Lidded containers
  • Small bowls

Ingredients

  • 1 cup old-fashioned rolled oats (90 g)
  • 1 cup milk, dairy or unsweetened plant-based (240 g), plus more if needed to serve
  • 1/2 cup plain Greek yogurt (120 g)
  • 1 tablespoon chia seeds (12 g)
  • 1 medium lemon, for about 1 teaspoon finely grated zest and 2 teaspoons juice
  • 1 tablespoon maple syrup (20 g), or to taste
  • 1 cup fresh blueberries (150 g)
  • Optional: 1/4 teaspoon vanilla extract
  • Optional: lemon wedges for serving

Instructions

  1. Finely grate the lemon, avoiding the white pith. Reserve a little zest for serving, then cut the lemon and measure 2 teaspoons of juice.
  2. Stir together the oats, milk, yogurt, chia seeds, maple syrup, lemon juice, and remaining zest. Add the vanilla if using. Mix until the oats are moistened and no chia clumps remain.
  3. Divide the mixture between two lidded containers, leaving room to stir. Stir each portion once more, cover, and refrigerate for at least 4 hours, preferably overnight.
  4. Stir the chilled oats. If they are too thick to spoon comfortably, add a little milk at a time. Gently fold in about half of the blueberries.
  5. Spoon the oats into two bowls. Top with the remaining blueberries and reserved lemon zest. Serve cold, with lemon wedges if desired.

Tips

  • Use old-fashioned rolled oats; steel-cut oats need a different liquid ratio and soak time.
  • Let the oats chill before adjusting the thickness, since the oats and chia continue absorbing liquid.
  • Stir the oats before adding extra milk; they may loosen as you mix.
  • Add fresh blueberries after chilling to keep the oats pale and the berries intact.
  • Thaw frozen blueberries separately and drain them before using as a topping.

Variations

  • Dairy-Free Lemon Blueberry Oats: Use plant-based milk and dairy-free yogurt, then check and adjust the thickness after chilling.
  • Flax Overnight Oats: Replace the chia seeds with an equal amount of ground flax; the texture may differ.
  • Frozen Blueberry Topping: Use frozen blueberries after thawing them separately and draining excess liquid.

Notes

Keep the covered oat base refrigerated for 3 to 4 days. Add berries and finishing zest when serving. Nutrition estimates are per serving and use 2% milk and plain nonfat Greek yogurt.

Nutrition

Calories: 370 kcal | Protein: 19 g | Fat: 8 g | Carbohydrates: 58 g

Carrot Cake Overnight Oats

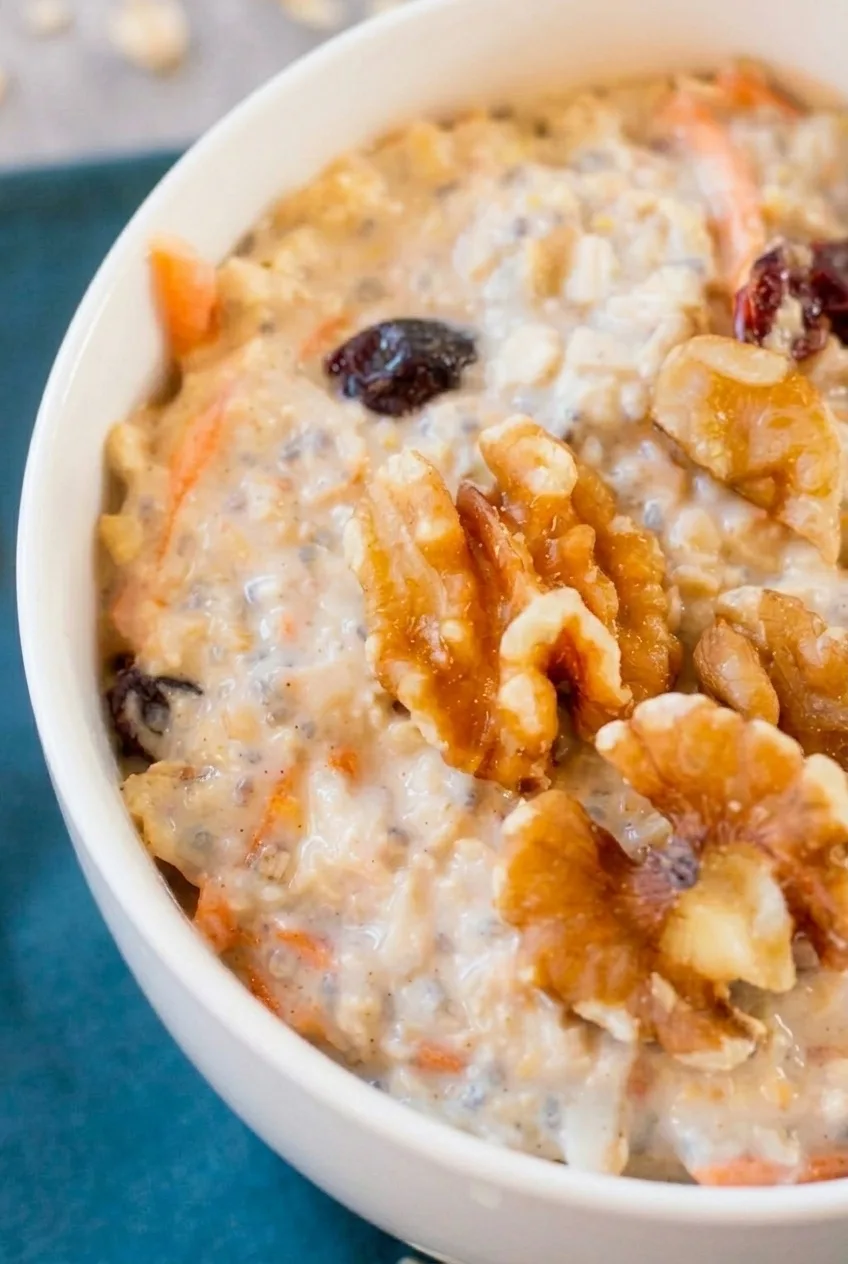
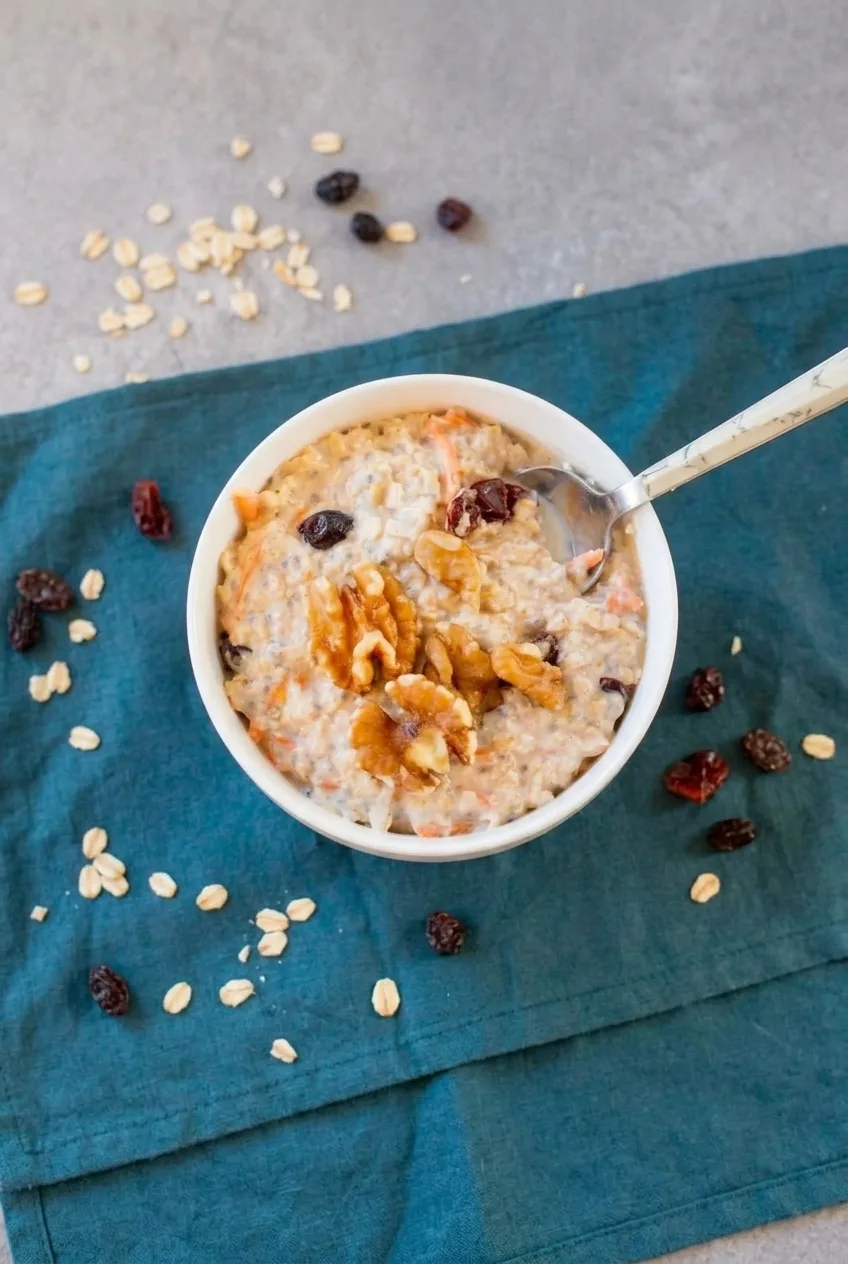
Carrot cake overnight oats are a no-cook breakfast with soft, distinct oat flakes, fine carrot shreds, raisins, and warm spices in a creamy milk-and-yogurt base. Finely grating the carrot helps it soften alongside the oats. After at least 6 hours in the refrigerator, stir the mixture and add milk if it needs loosening. Spoon it into two bowls and add the walnuts just before serving so they stay crunchy.

Ingredients for Carrot Cake Overnight Oats

Close detail of softened oats, fine carrot shreds, raisins, and a walnut piece in a creamy bowl
  • 1 cup old-fashioned rolled oats (90g)
  • 1 cup milk, dairy or unsweetened plant-based (240g), plus more as needed
  • 1/3 cup plain Greek yogurt (80g)
  • 1/2 cup lightly packed finely grated fresh carrot (55g)
  • 1 tablespoon maple syrup (20g)
  • 2 tablespoons raisins (20g)
  • 1 teaspoon ground cinnamon
  • 1/8 teaspoon ground nutmeg
  • 1/2 teaspoon vanilla extract
  • 1 small pinch fine salt
  • 1/4 cup walnuts in large pieces (30g), for serving

How to Make Carrot Cake Overnight Oats

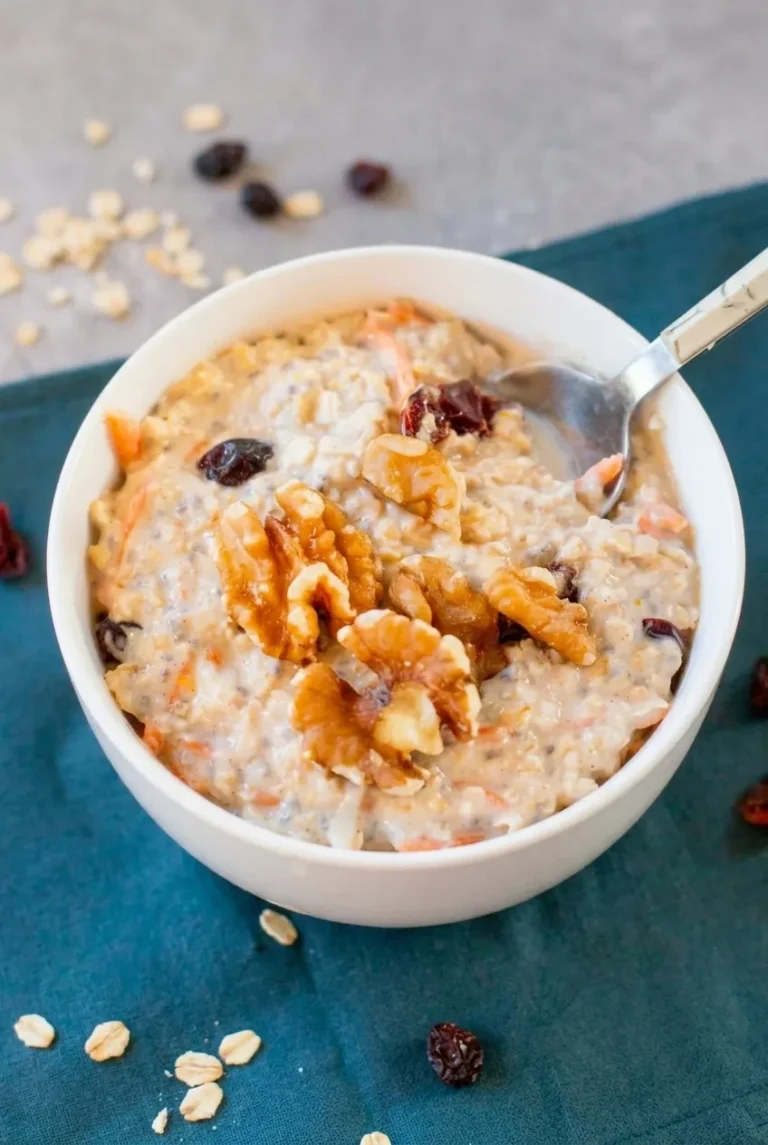
Complete bowl of carrot cake overnight oats with walnuts and raisins on a dark teal cloth
  1. Grate the carrot: Use the fine side of a box grater to make thin, short shreds. Measure 1/2 cup lightly packed.
  2. Mix the oats: In a bowl, stir together the milk, yogurt, maple syrup, cinnamon, nutmeg, vanilla, and salt. Add the oats, carrot, and raisins. Stir until all the oats are coated and the carrot and raisins are distributed throughout.
  3. Cover and chill: Cover the bowl, or divide the mixture between two lidded containers. Refrigerate for at least 6 hours, preferably overnight. Keep the walnuts separate.
  4. Check the texture: Stir the chilled oats. The flakes should be soft but still recognizable, and the mixture should be thick, moist, and spoonable. If it is too thick or looks dry, stir in milk 1 tablespoon at a time.
  5. Serve: Spoon into two bowls and top with the walnut pieces. Leave some carrot shreds and raisins visible among the oats.

Choosing Oats and Grating the Carrot

Old-fashioned rolled oats hold their shape during a long soak. Quick oats can turn mushy overnight, while steel-cut oats do not soften enough on this schedule. Finely grate fresh carrot rather than using thick packaged shreds, which can remain firm after the oats are ready.

Adjusting the Texture and Ingredients

Oat brands and yogurt thickness affect how much liquid the mixture absorbs. Stir before judging the texture, then add milk by the tablespoon if the oats are too thick. They should mound softly on a spoon, not form dry clumps or pour like a drink.

For a dairy-free version, use plant milk and a thick, plain plant-based yogurt; check the consistency after chilling because plant yogurts vary. Certified gluten-free rolled oats can be used if needed. Pecans can replace the walnuts, though they change the walnut-topped finish of the main recipe.

Make-Ahead and Storage

Keep the oat mixture covered in the refrigerator for up to 3 days, with the walnuts stored separately until serving. It can soak in one container or two jars; spoon it into bowls to serve. Freezing is not recommended for the best texture.

To serve a portion warm, transfer it to a microwave-safe bowl, warm briefly, and stir. Add a little milk if needed, then top with walnuts.

For a simpler base, try these classic creamy overnight oats. For a fresh-fruit version, try apple cinnamon overnight oats.

Nutrition

Approximate per serving, based on 2 servings: 430 calories, 18g protein, 16g fat, and 57g carbohydrates. Approximate per 100g: 160 calories, 7g protein, 6g fat, and 21g carbohydrates. Estimates use 2% dairy milk and plain nonfat Greek yogurt; values vary with substitutions and any extra milk added.

Carrot Cake Overnight Oats

Rolled oats, finely grated carrot, raisins, and warm spices soak in a creamy milk-and-yogurt mixture overnight.
Course: Breakfast
Cuisine: Global
Prep: 10 min
Total: 370 min
Servings: 2 Calories: 430 kcal per serving; 160 kcal per 100 g

Equipment

  • Box grater
  • Mixing bowl
  • Measuring cups and spoons
  • Covered container or lidded jars

Ingredients

For the oats

  • 1 cup old-fashioned rolled oats (90 g)
  • 1 cup milk, dairy or unsweetened plant-based (240 g), plus more as needed
  • 1/3 cup plain Greek yogurt (80 g)
  • 1/2 cup lightly packed finely grated fresh carrot (55 g)
  • 1 tablespoon maple syrup (20 g)
  • 2 tablespoons raisins (20 g)
  • 1 teaspoon ground cinnamon
  • 1/8 teaspoon ground nutmeg
  • 1/2 teaspoon vanilla extract
  • 1 small pinch fine salt

For serving

  • 1/4 cup walnuts in large pieces (30 g)

Instructions

  1. Finely grate the carrot with the fine side of a box grater and measure 1/2 cup lightly packed.
  2. In a bowl, stir together the milk, yogurt, maple syrup, cinnamon, nutmeg, vanilla, and salt.
  3. Add the oats, grated carrot, and raisins. Stir until evenly combined and all the oats are coated.
  4. Cover the bowl or divide the mixture between two lidded containers. Refrigerate for at least 6 hours, preferably overnight, keeping the walnuts separate.
  5. Stir the chilled oats. If they are too thick or look dry, add milk 1 tablespoon at a time until moist and spoonable.
  6. Spoon into two bowls and top with the walnut pieces.

Tips

  • Use old-fashioned rolled oats; quick oats can become mushy, and steel-cut oats will not soften enough.
  • Finely grate fresh carrot so it softens during the overnight soak.
  • Stir the oats before checking their consistency, then add milk gradually if needed.
  • Add walnuts just before serving to keep them crunchy.

Variations

  • Dairy-free: Use plant milk and a thick, plain plant-based yogurt, then check the consistency after chilling.
  • Gluten-free: Use certified gluten-free rolled oats.
  • Pecan topping: Replace the walnuts with pecans.

Notes

Store covered in the refrigerator for up to 3 days, with walnuts kept separate. Freezing is not recommended. To serve warm, microwave briefly in a microwave-safe bowl, stir, and add milk if needed.

Nutrition

Calories: 430 kcal per serving; 160 kcal per 100 g | Protein: 18 g per serving; 7 g per 100 g | Fat: 16 g per serving; 6 g per 100 g | Carbohydrates: 57 g per serving; 21 g per 100 g