Author

Julia

Browsing

Creamy Garlic Mashed Potatoes

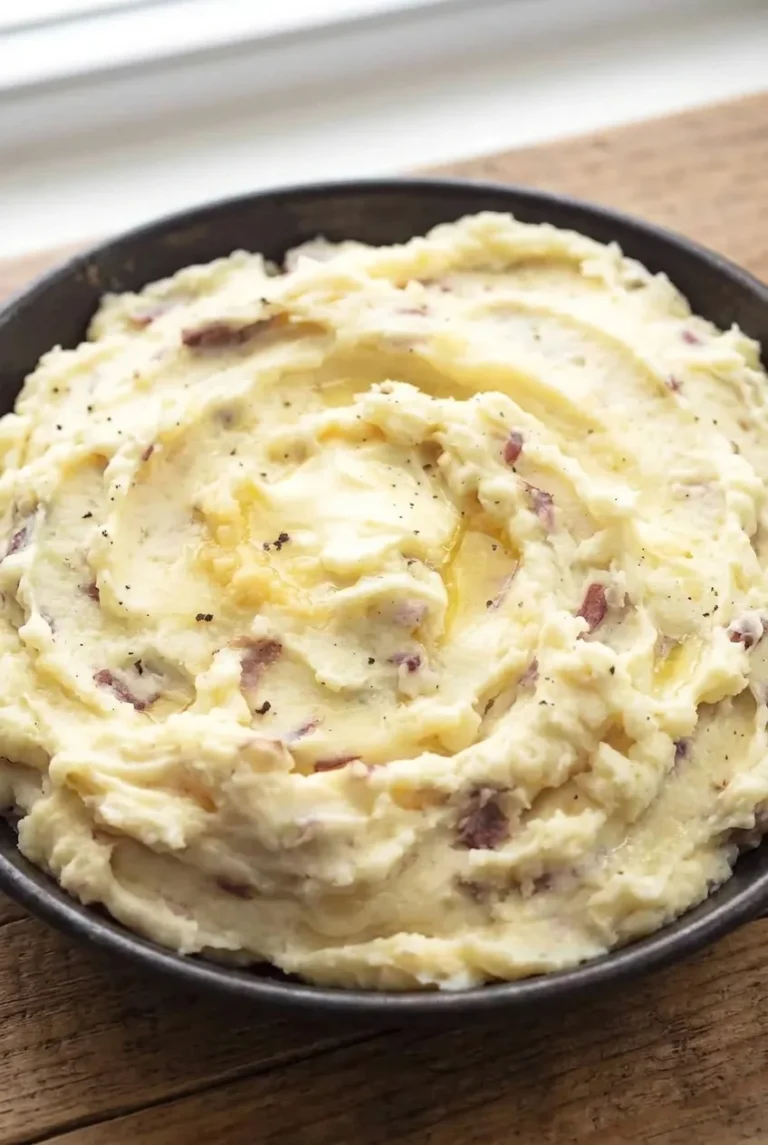
These garlic mashed potatoes are thick and creamy, with red skin flecks and a few small potato pieces rather than a whipped-smooth finish. The garlic cooks briefly in butter for a mellow flavor, and a pat of butter melts into a hollow at the center of the serving bowl.

The key is to cook the potatoes until fully tender, dry them after draining, and add warm milk gradually. That keeps the mash soft enough to swirl with a spoon without letting it turn loose or gummy.

Prep: 15 minutes | Cook: About 25 minutes | Total: About 40 minutes; allow longer if the pot takes longer to heat | Servings: 6 side-dish servings

Ingredients for Creamy Garlic Mashed Potatoes
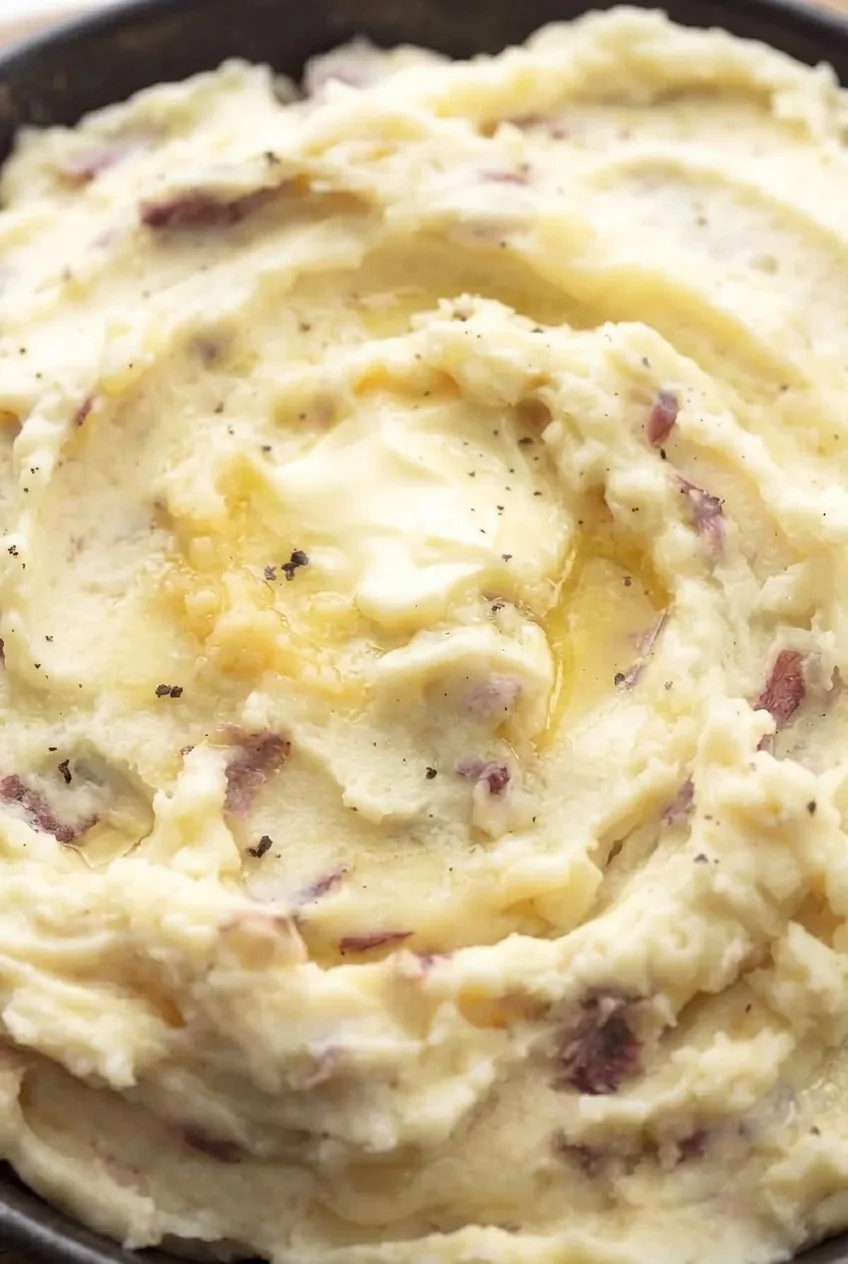
Close view of melted butter among creamy mashed potato ridges, red skin pieces, and black pepper
  • 2 lb red potatoes, scrubbed and left unpeeled (900g)
  • About 2 teaspoons kosher salt for the cooking water, plus 1/2 teaspoon to start in the mash and more to taste
  • 5 tablespoons unsalted butter, divided (70g)
  • 4 garlic cloves, finely minced (about 12g)
  • 1/2 cup whole milk, added as needed (120g)
  • 1/4 cup sour cream (60g)
  • 1/4 teaspoon freshly ground black pepper, plus a little for serving

How to Make Garlic Mashed Potatoes
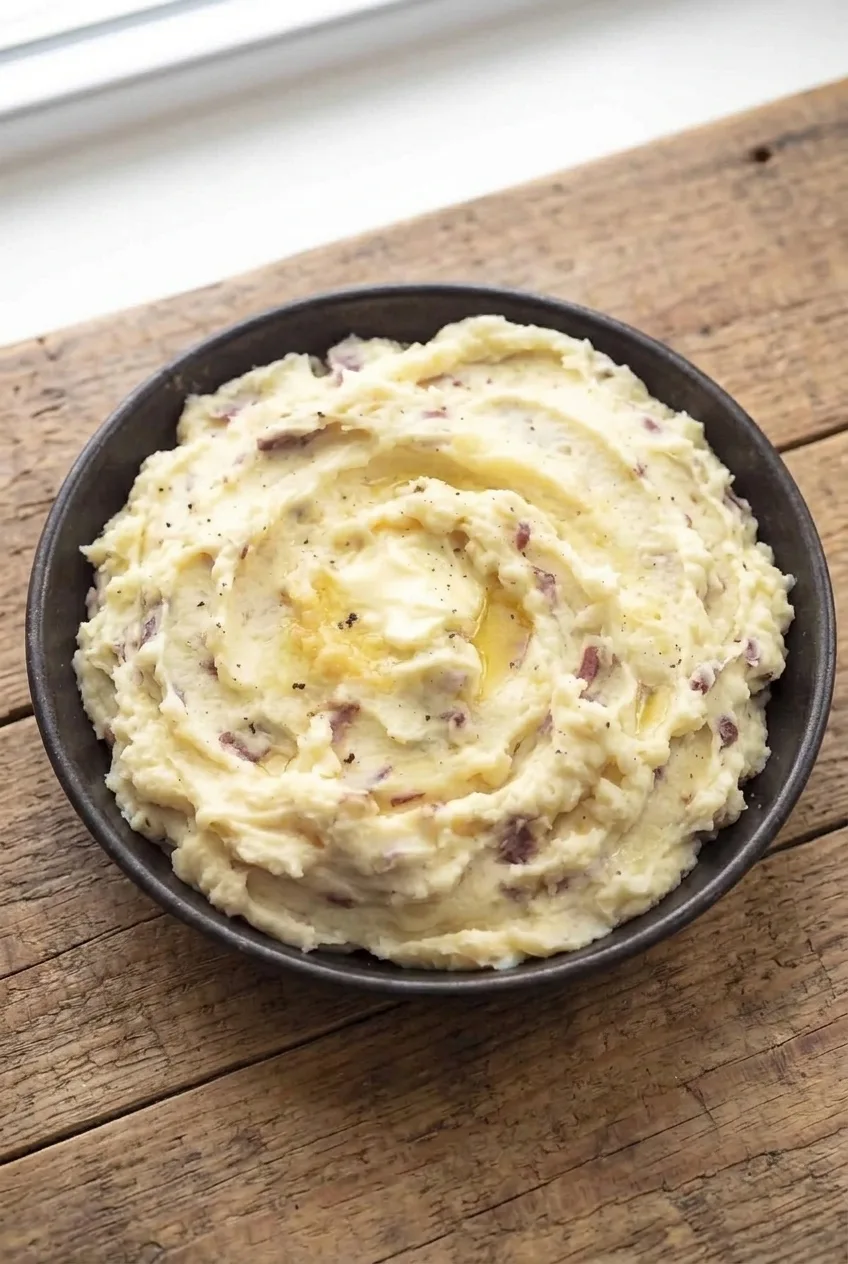
Full serving bowl of red-skin garlic mashed potatoes on a neutral surface, finished with butter and pepper
  1. Start the potatoes: Cut the unpeeled potatoes into similar-sized, 1- to 1 1/2-inch pieces. Place them in a large pot, cover with cold water by about 1 inch, and add about 2 teaspoons kosher salt. Bring to a boil over high heat.
  2. Simmer until tender: Reduce the heat to a gentle simmer and cook uncovered or partially covered for about 15 to 20 minutes. Start checking after 15 minutes. A fork should slide through the center of a piece with little resistance.
  3. Warm the garlic butter and milk: Near the end of the simmer, melt 4 tablespoons butter in a small saucepan over low heat. Add the garlic and cook for about 1 minute, until fragrant but not browned. Add the milk and warm it gently without boiling.
  4. Drain and dry: Drain the potatoes thoroughly. Return them to the pot over low heat and shake or stir gently for about 1 minute, until no water pools in the pot and the potatoes look less wet. Turn off the heat.
  5. Mash and season: Mash by hand until no firm centers remain. Add the warm garlic-butter milk in portions, stopping when the mash is creamy but still holds soft spoon ridges; you may not need it all. Gently fold in the sour cream, 1/2 teaspoon kosher salt, and 1/4 teaspoon pepper. Taste and add more salt if needed.
  6. Finish with butter: Spoon the potatoes into a serving bowl. Make loose swirls and a shallow hollow in the center, leaving the red skin flecks visible. Add the remaining tablespoon of butter to the hollow, scatter a little pepper over the top, and serve hot as the butter melts.

How to Keep Red-Skin Mashed Potatoes Creamy

Leave the thin red skins on for the lightly rustic texture, but make sure the potato centers are fully tender before draining. Drying the potatoes briefly in the warm pot removes surface water that would thin the mash. Use a handheld masher and stop once the potatoes are creamy with a few small pieces remaining; beating or processing them further can make them gummy.

The full 1/2 cup of milk may not be needed. Add the warmed mixture gradually and use the spoon ridges as your guide: the potatoes should hold their shape rather than flow flat. Keeping the garlic pale as it cooks gives it a mellower flavor without a browned taste.

For a different texture, the same weight of Yukon Gold potatoes makes a smoother mash. Peeled russets make a fluffier mash and may need more milk. Neither will have this version’s red skin flecks.

Serving Garlic Mashed Potatoes

Serve hot alongside roast chicken, meatloaf, or a holiday roast. If offering gravy, serve it at the table rather than covering the butter-filled hollow. For a crisp potato side instead, try Garlic Parmesan smashed potatoes.

How to Store and Reheat

Refrigerate leftovers promptly in an airtight container for up to 4 days. Reheat in a covered saucepan over low heat with a splash of milk, stirring only as much as needed to warm them through. A food thermometer can confirm leftovers have reached 165°F (75°C).

Nutrition

Approximate per serving (1/6 of the recipe): 235 calories, 4g protein, 12g fat, and 29g carbohydrates. Approximate per 100g: 125 calories, 2g protein, 6g fat, and 15g carbohydrates. Values are estimates; the amount of milk used and the finished yield will affect them.

Creamy Garlic Mashed Potatoes

Red potatoes are mashed with mellow garlic butter, warm milk, and sour cream for a creamy, lightly rustic side dish.
Course: Side Dish
Cuisine: American
Prep: 15 min
Cook: 25 min
Total: 40 min
Servings: 6

Equipment

  • Large pot
  • Small saucepan
  • Handheld potato masher
  • Serving bowl

Ingredients

  • 2 lb red potatoes, scrubbed and left unpeeled (900 g)
  • About 2 teaspoons kosher salt for the cooking water, plus 1/2 teaspoon for the mash and more to taste
  • 5 tablespoons unsalted butter, divided (70 g)
  • 4 garlic cloves, finely minced (about 12 g)
  • 1/2 cup whole milk, added as needed (120 g)
  • 1/4 cup sour cream (60 g)
  • 1/4 teaspoon freshly ground black pepper, plus a little for serving

Instructions

  1. Cut the potatoes into similar-sized 1- to 1 1/2-inch pieces. Place them in a large pot, cover with cold water by about 1 inch, and add about 2 teaspoons kosher salt.
  2. Bring the water to a boil over high heat, then reduce to a gentle simmer. Cook uncovered or partially covered for 15 to 20 minutes, checking after 15 minutes, until a fork slides through the potato centers with little resistance.
  3. Near the end of cooking, melt 4 tablespoons butter in a small saucepan over low heat. Add the garlic and cook for about 1 minute, until fragrant but not browned.
  4. Add the milk to the garlic butter and warm gently without boiling.
  5. Drain the potatoes thoroughly. Return them to the pot over low heat and shake or stir gently for about 1 minute, until no water pools in the pot. Turn off the heat.
  6. Mash by hand until no firm centers remain. Gradually add the warm garlic-butter milk, stopping when the potatoes are creamy and hold soft spoon ridges.
  7. Gently fold in the sour cream, 1/2 teaspoon kosher salt, and 1/4 teaspoon pepper. Taste and add more salt if needed.
  8. Spoon the potatoes into a serving bowl and make a shallow hollow in the center. Add the remaining tablespoon of butter and a little pepper, then serve hot.

Tips

  • Cut the potatoes into similar-sized pieces so they cook evenly.
  • Cook the potatoes until fully tender before draining.
  • Dry the drained potatoes briefly in the warm pot to remove surface water.
  • Add the warm milk gradually; you may not need the full amount.
  • Use a handheld masher and stop when the potatoes are creamy with a few small pieces remaining.
  • Keep the garlic pale as it cooks to maintain a mellow flavor.

Variations

  • Yukon Gold Mashed Potatoes: Use the same weight of Yukon Gold potatoes for a smoother mash.
  • Russet Mashed Potatoes: Use peeled russet potatoes for a fluffier mash; they may need more milk.
Notes

Refrigerate leftovers in an airtight container for up to 4 days. Reheat covered in a saucepan over low heat with a splash of milk; heat leftovers to 165°F (75°C).

Nutrition

Per Serving Calories: 235 kcal | Per Serving Protein: 4 g | Per Serving Fat: 12 g | Per Serving Carbohydrates: 29 g | Per 100g Calories: 125 kcal | Per 100g Protein: 2 g | Per 100g Fat: 6 g | Per 100g Carbohydrates: 15 g

Garlic Parmesan Smashed Potatoes

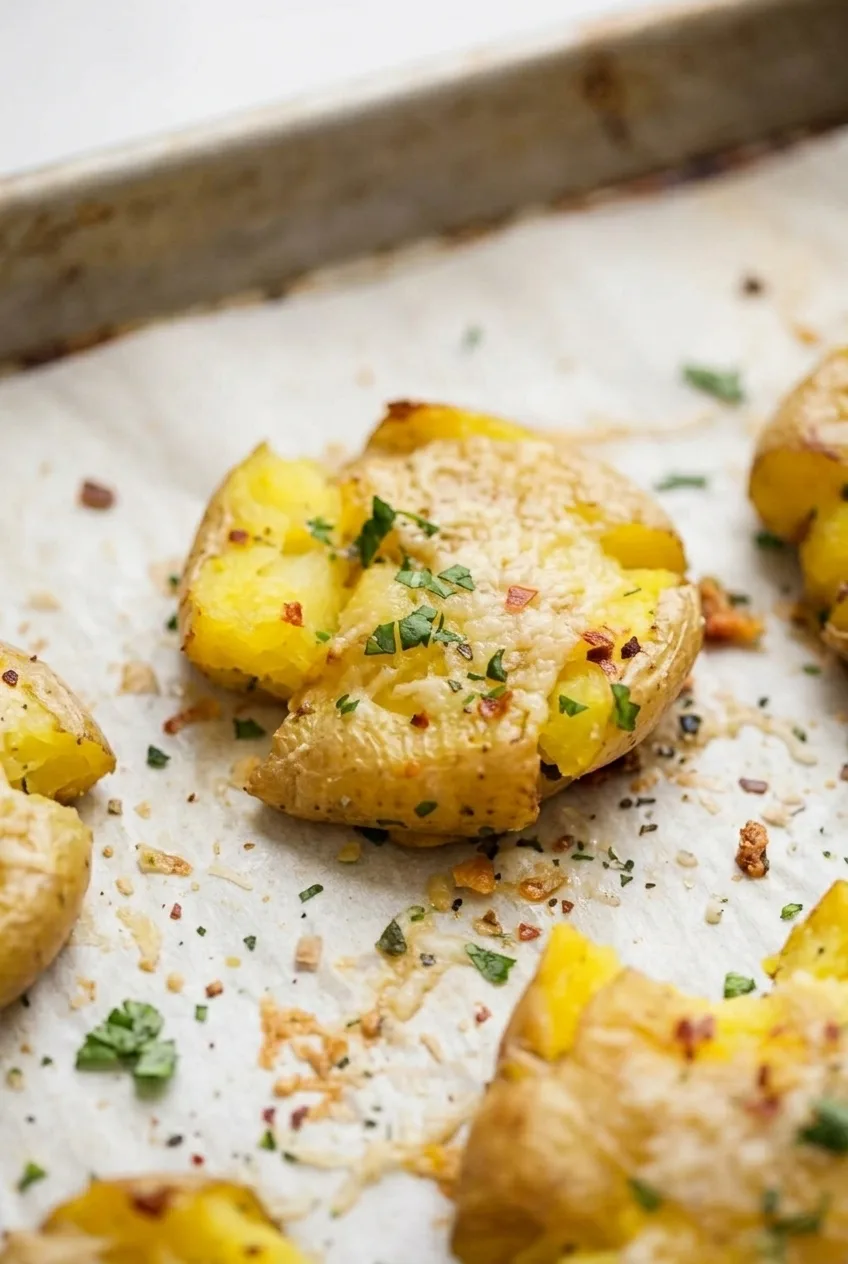
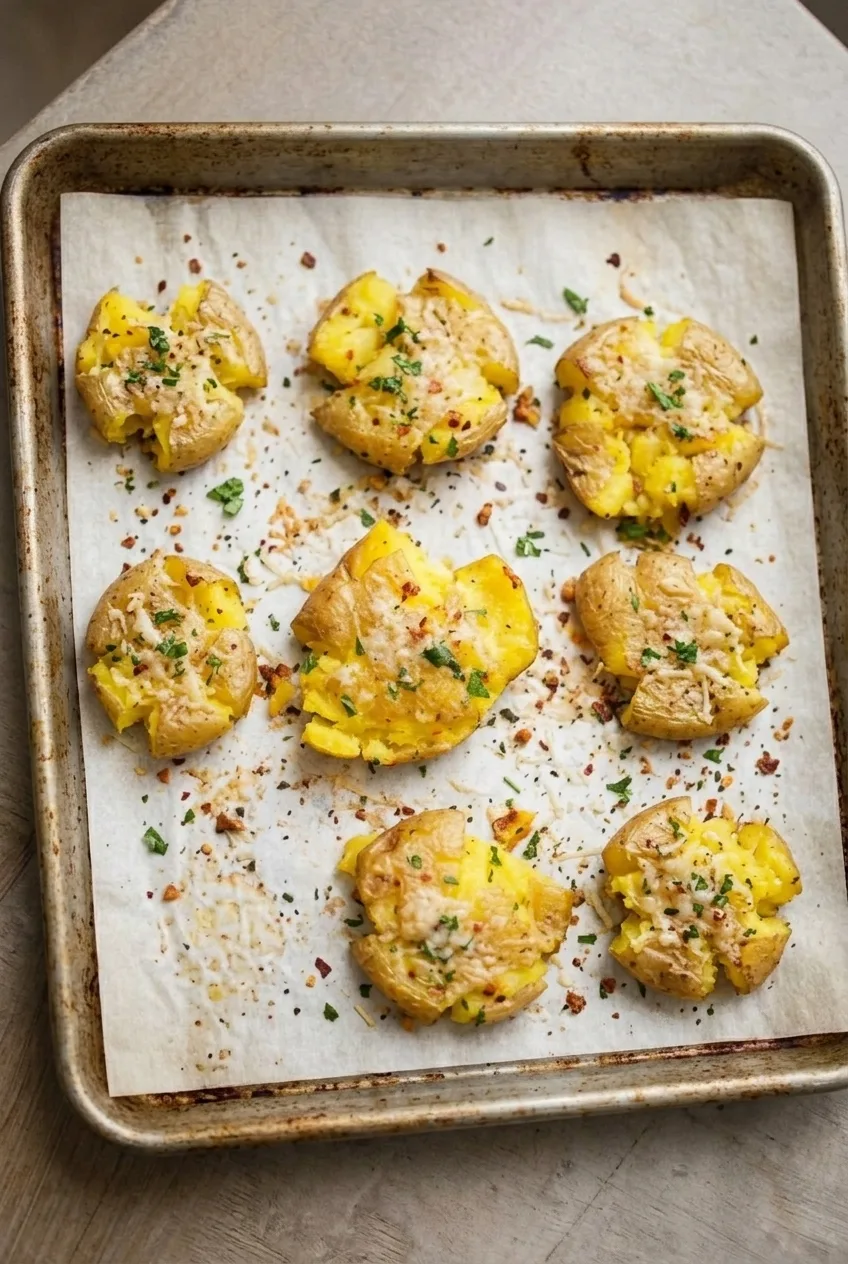
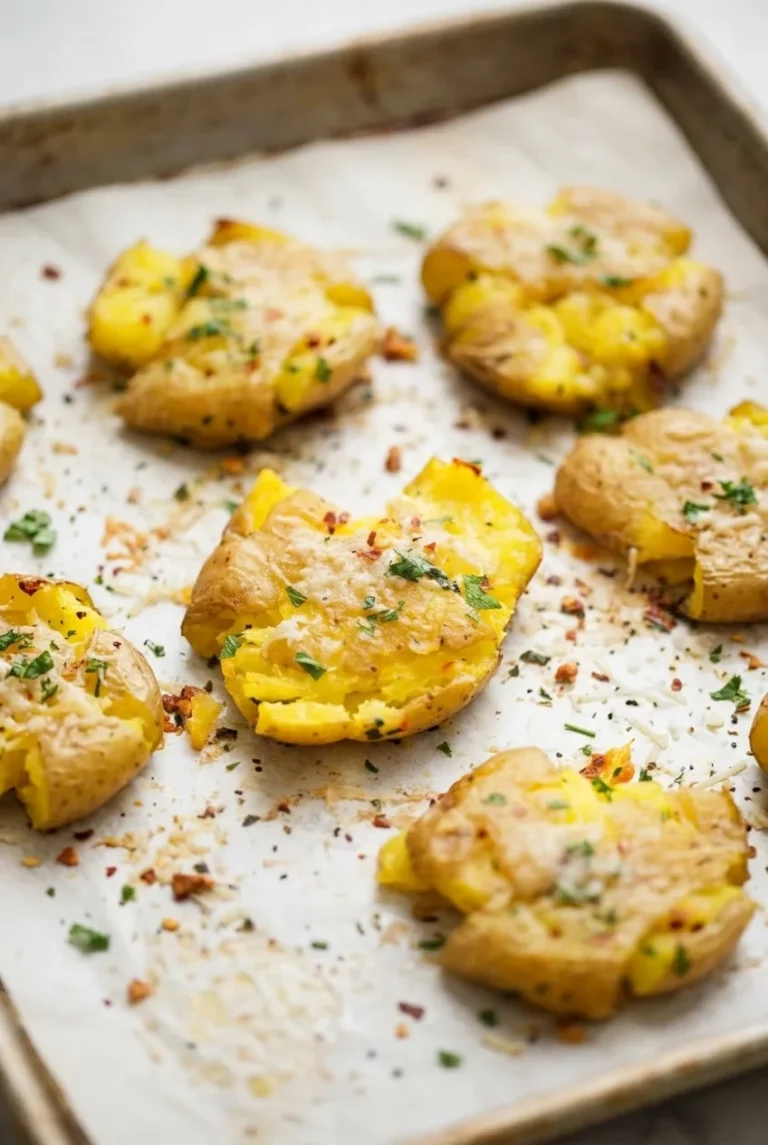
These skin-on baby potatoes roast into irregular pieces with golden, crisp edges and soft yellow centers. Simmer them until tender, let their surfaces dry, then press just enough to split the sides—not into thin chips. Give them room on the pan to brown, and add the fresh garlic and Parmesan near the end so neither spends too long in the hot oven.

Servings: 4 side-dish servings | Prep: 10–15 minutes | Cook: 40–52 minutes | Total: About 55–70 minutes

Ingredients for Garlic Parmesan Smashed Potatoes

Close view of a smashed potato’s fluffy yellow center, browned edge, Parmesan, and parsley
  • 1 1/2 pounds similarly sized baby yellow or baby Yukon Gold potatoes (680g), scrubbed
  • 1 tablespoon kosher salt, for the cooking water
  • 2 tablespoons olive oil, divided
  • 1/2 teaspoon kosher salt, plus more to taste
  • 1/4 teaspoon freshly ground black pepper
  • 2 tablespoons unsalted butter (28g), melted
  • 3 garlic cloves, finely minced or grated
  • 1/3 cup finely grated Parmesan (30g)
  • 1 tablespoon chopped fresh parsley
  • Optional: a small pinch of crushed red pepper flakes, for serving

How to Make Garlic Parmesan Smashed Potatoes

Wider view of garlic Parmesan smashed potatoes spaced across a parchment-lined sheet pan
  1. Simmer the potatoes: Put the potatoes in a medium saucepan, cover with water, and add the tablespoon of kosher salt. Bring to a steady simmer and cook, uncovered or partially covered, for about 15–20 minutes. Start checking at 15 minutes: a fork or small knife should slide easily into the center, but the potatoes should still hold together.
  2. Preheat and steam-dry: While the potatoes cook, preheat the oven to 425°F (220°C). Drain the potatoes thoroughly and leave them in a colander for about 5 minutes, until the skins no longer look wet. Line a rimmed sheet pan with parchment rated for 425°F, keeping the parchment within the pan, and lightly oil it.
  3. Smash and season: Arrange the potatoes with space between them; use a second pan if needed. Lightly oil the bottom of a flat-bottomed glass or measuring cup, then gently press each potato to about 1/2 inch thick at its thickest point. The sides should split to expose yellow flesh, while each potato remains mostly in one piece. Drizzle with the remaining olive oil and season with the 1/2 teaspoon salt and the pepper.
  4. Roast until golden: Roast uncovered, without flipping, for about 20–25 minutes. Check at 20 minutes. The broken edges should be visibly golden and beginning to crisp before the toppings go on; if they are still pale, keep roasting. Rotate the pan if browning is uneven. If using two pans, switch their positions during this first roast.
  5. Add garlic and Parmesan: Stir the garlic into the melted butter and distribute it over the potatoes. Sprinkle lightly with Parmesan. Roast for about 5–7 minutes more, checking after 4 minutes. The cheese should be melted or lightly golden, and the garlic fragrant rather than dark brown.
  6. Finish: Scatter parsley over the hot potatoes. Add the optional red pepper flakes, if using, taste for salt, and serve promptly.

How to Get Crisp Edges and Tender Centers

Steam-drying removes surface moisture that slows browning. Pressing until the sides split creates craggy edges, while the thicker centers stay soft. Space matters, too: crowded potatoes trap moisture instead of roasting evenly.

Potato size and smash thickness affect the timing. Let the edges turn golden during the first roast rather than adding the garlic and Parmesan as soon as the timer ends.

Serving, Storing, and Reheating

Serve hot alongside chicken, steak, fish, or pork chops. For a potato side without the boil-and-smash step, try crispy oven roasted potatoes.

To prepare ahead, boil and drain the potatoes, then refrigerate them. Smash and roast closer to serving; cold potatoes may need extra time to develop golden edges.

Refrigerate cooled leftovers in an airtight container for up to 4 days. Reheat on a sheet pan at 400°F (205°C) for about 10 minutes, until hot and the edges have crisped again. A microwave will warm them but will not restore the edges as well. Freezing is not recommended if crisp texture is the priority.

Nutrition

Approximate per serving, based on 4 servings: 280 calories, 6g protein, 15g fat, and 31g carbohydrates. Approximate per 100g: 145 calories, 3g protein, 8g fat, and 16g carbohydrates. Values are estimates; per-100g figures vary with moisture lost during roasting and how much oil remains on the pan.

Garlic Parmesan Smashed Potatoes

Baby potatoes are boiled until tender, smashed, and roasted until crisp before being finished with garlic butter, Parmesan, and parsley.
Course: Side Dish
Cuisine: American
Prep: 15 min
Cook: 46 min
Total: 63 min
Servings: 4 Calories: 280 kcal

Equipment

  • Medium saucepan
  • Colander
  • Rimmed sheet pan
  • Parchment paper
  • Flat-bottomed glass or measuring cup

Ingredients

Potatoes

  • 1 1/2 pounds similarly sized baby yellow or baby Yukon Gold potatoes (680g), scrubbed
  • 1 tablespoon kosher salt, for the cooking water
  • 2 tablespoons olive oil, divided
  • 1/2 teaspoon kosher salt, plus more to taste
  • 1/4 teaspoon freshly ground black pepper

Toppings

  • 2 tablespoons unsalted butter (28g), melted
  • 3 garlic cloves, finely minced or grated
  • 1/3 cup finely grated Parmesan (30g)
  • 1 tablespoon chopped fresh parsley
  • Optional: a small pinch of crushed red pepper flakes, for serving

Instructions

  1. Place the potatoes in a medium saucepan, cover with water, and add 1 tablespoon kosher salt. Bring to a steady simmer and cook for 15–20 minutes, until a fork or small knife slides easily into the center while the potatoes still hold together.
  2. While the potatoes cook, preheat the oven to 425°F (220°C). Drain the potatoes and leave them in a colander for about 5 minutes, until the skins no longer look wet.
  3. Line a rimmed sheet pan with parchment rated for 425°F and lightly oil it. Arrange the potatoes with space between them, using a second pan if needed.
  4. Lightly oil the bottom of a flat-bottomed glass or measuring cup. Gently press each potato until about 1/2 inch thick at its thickest point, splitting the sides while keeping each potato mostly in one piece.
  5. Drizzle the potatoes with the remaining olive oil and season with 1/2 teaspoon salt and the pepper.
  6. Roast uncovered without flipping for 20–25 minutes, checking at 20 minutes. Rotate the pan if needed; if using two pans, switch their positions. Continue until the broken edges are golden and beginning to crisp.
  7. Stir the garlic into the melted butter and distribute it over the potatoes. Sprinkle lightly with Parmesan and roast for 5–7 minutes, checking after 4 minutes, until the cheese is melted or lightly golden and the garlic is fragrant.
  8. Scatter parsley over the potatoes. Add red pepper flakes if desired, taste for salt, and serve promptly.

Tips

  • Let the potatoes steam-dry for about 5 minutes after draining so surface moisture does not slow browning.
  • Press gently; split sides create crisp edges while thicker centers stay tender.
  • Leave space between the potatoes or use a second pan to prevent them from steaming.
  • Wait until the edges are golden before adding the garlic and Parmesan to help prevent burning.

Notes

Refrigerate cooled leftovers in an airtight container for up to 4 days. Reheat on a sheet pan at 400°F (205°C) for about 10 minutes; freezing is not recommended for best crispness.

Nutrition

Calories: 280 kcal | Protein: 6 g | Fat: 15 g | Carbohydrates: 31 g

Crispy Oven Roasted Potatoes

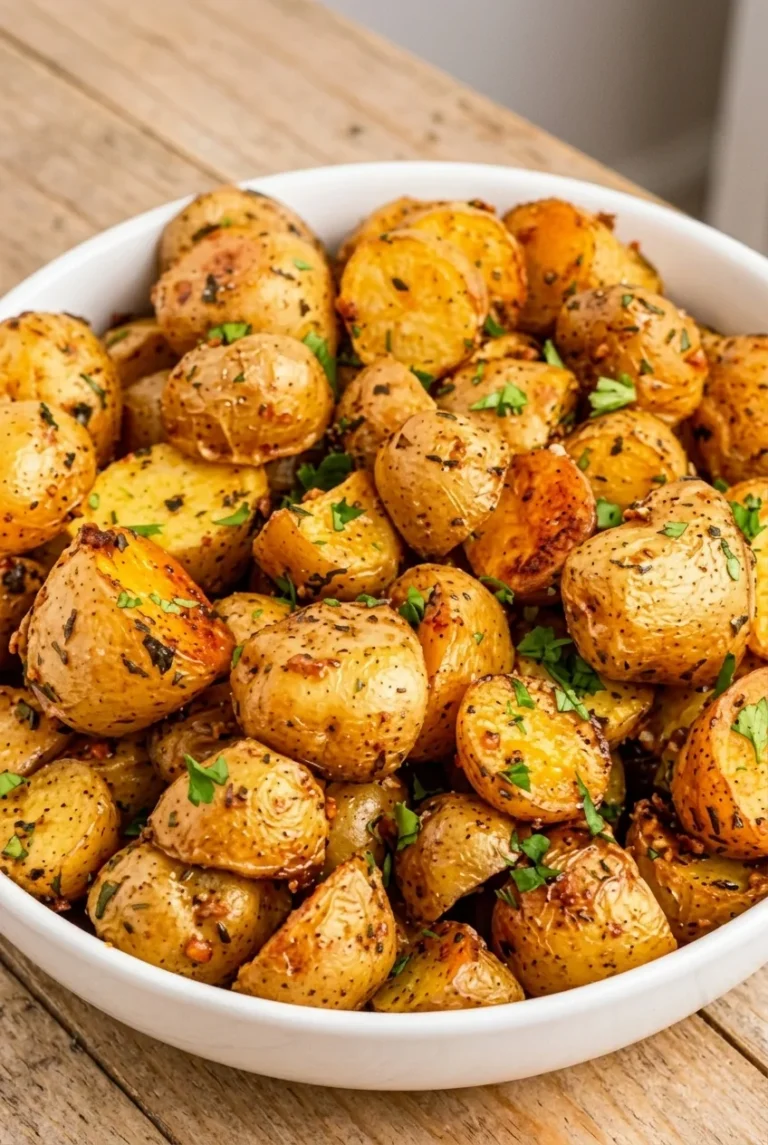
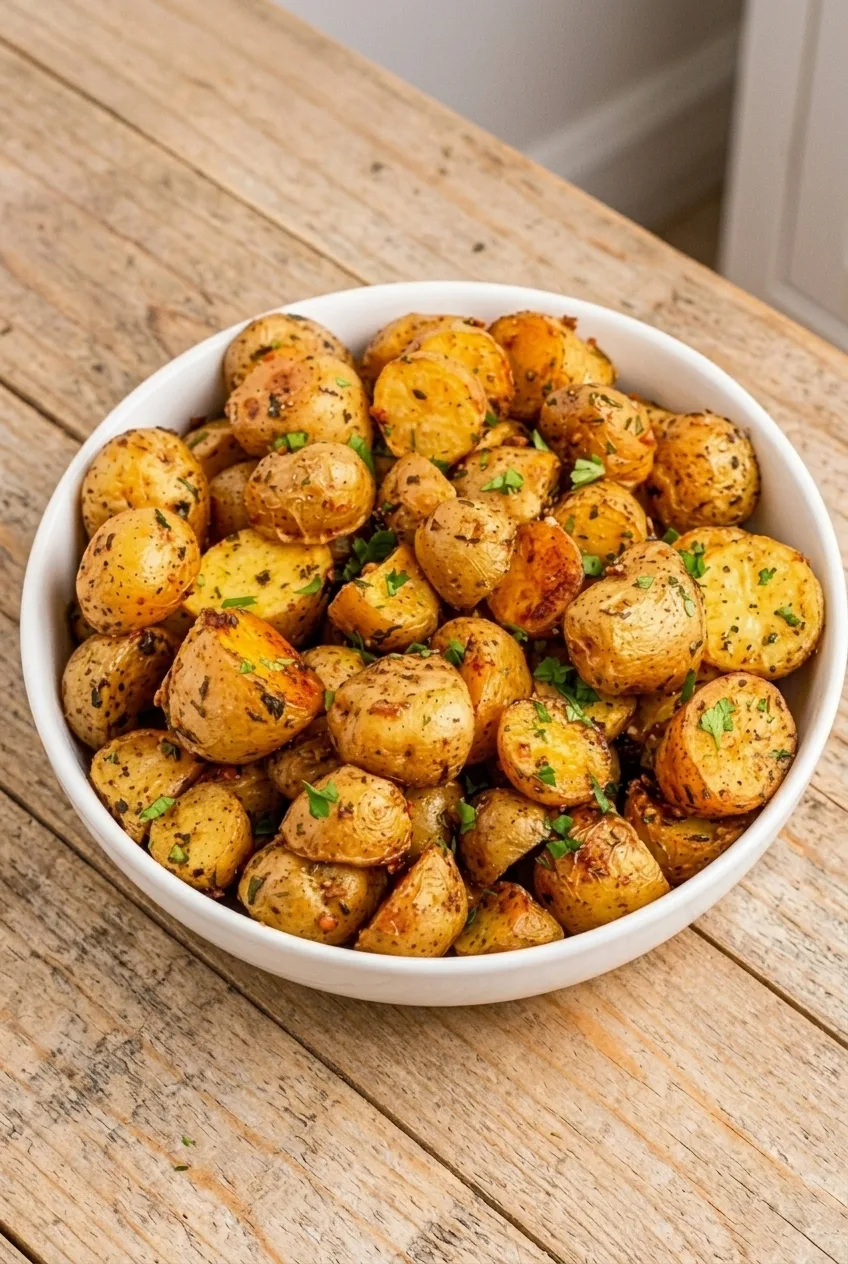
Small, skin-on potato halves and quarters roast with browned cut faces, crisp edges, and tender centers. Garlic powder, paprika, and black pepper season them lightly; fresh parsley goes on after roasting.

There’s no parboiling or starch coating in this version. Dry the potatoes well, place their cut faces against the pan, and leave space between the pieces so they brown instead of steam. Allow about 15 minutes to prepare them and 35 to 40 minutes to roast, but use color and tenderness—not the clock alone—to judge when they’re done.

Ingredients for Crispy Oven Roasted Potatoes

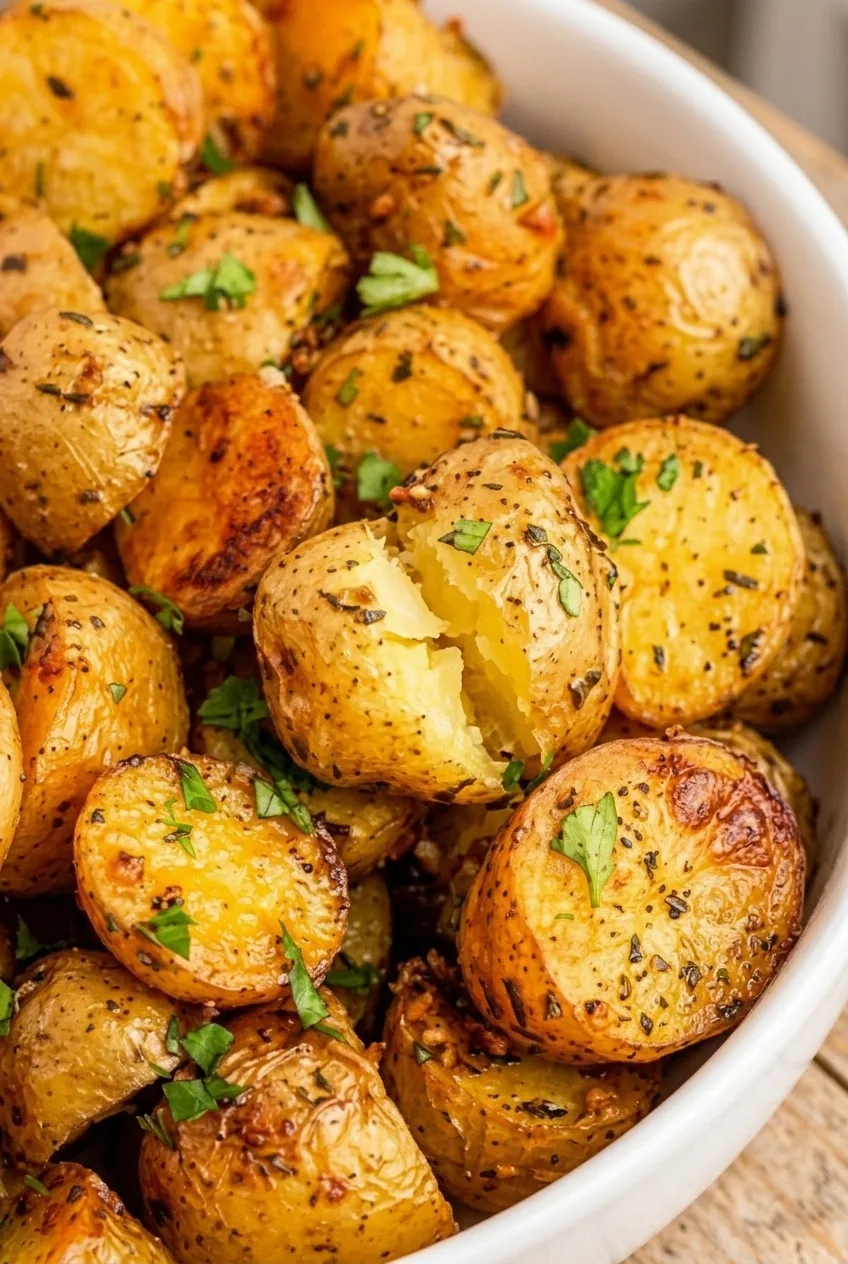
Full white bowl of parsley-finished roasted potatoes on a neutral tabletop
  • 2 pounds baby yellow potatoes (about 900g)
  • 3 tablespoons olive oil
  • 1 teaspoon kosher salt, or to taste
  • 1 teaspoon garlic powder
  • 1/2 teaspoon paprika
  • 1/2 teaspoon freshly ground black pepper
  • 2 tablespoons chopped fresh parsley
Close view of browned roasted potato cut faces and a split piece showing its tender center

How to Roast the Potatoes

  1. Preheat and cut: Fully preheat the oven to 425°F (220°C). Wash the potatoes and leave the skins on. Halve small potatoes lengthwise and quarter larger ones so the pieces are roughly 1 to 1 1/2 inches across.
  2. Dry and season: Dry the cut potatoes thoroughly. Toss them in a bowl with the olive oil, salt, garlic powder, paprika, and black pepper until evenly coated.
  3. Arrange and roast: Spread the potatoes on a large, unlined rimmed metal baking sheet in a single layer, with broad cut faces against the pan. Leave visible space between most pieces; use a second pan if needed. Roast uncovered for about 20 minutes.
  4. Flip and finish: Turn the potatoes with a spatula and roast for about 15 to 20 minutes more. Start checking at 30 minutes total, especially if the pieces are small. They’re done when the cut faces and edges are golden to deep golden brown and a fork slides easily through the centers. If they’re tender but pale, continue roasting uncovered until they brown.
  5. Serve: Transfer the potatoes to a white serving bowl, scatter the parsley over them, and serve hot.

How to Get Browned, Crisp Edges

Wet surfaces and a crowded pan trap moisture, leaving potatoes soft and pale. Dry the pieces before seasoning, coat them evenly with oil, and spread them out so moisture can escape. Let the cut faces brown against the metal before the first flip; turning too early can leave the browned surface stuck to the pan.

The potatoes need space while roasting, but they can be piled in the bowl once they’re done.

Do You Need to Boil the Potatoes First?

No. Roasting the raw baby potatoes keeps the halves and quarters intact, with smooth skins and broad browned cut faces. Parboiling and roughing up potatoes is a different method that produces a more craggy crust and requires different timing.

Storing and Reheating

Cool leftovers and refrigerate them promptly in an airtight container. Use within 3 to 4 days; the crisp edges will soften in storage. To reheat, spread the potatoes on a sheet pan and warm uncovered in a 400°F (205°C) oven until hot and the edges re-crisp, checking after about 10 minutes.

Nutrition

Approximate per serving, based on 6 side-dish servings: 175 calories, 3g protein, 7g fat, and 27g carbohydrates. Approximate per 100g of roasted potatoes: 125 calories, 2g protein, 5g fat, and 19g carbohydrates. Values are estimates; the per-100g figures vary with moisture lost during roasting.

Crispy Oven Roasted Potatoes

Baby yellow potatoes roast with golden, crisp edges and tender centers, then get finished with fresh parsley.
Course: Side Dish
Cuisine: American
Prep: 15 min
Cook: 40 min
Total: 55 min
Servings: 6 Calories: 175 kcal

Equipment

  • Oven
  • Rimmed metal baking sheet
  • Mixing bowl
  • Spatula

Ingredients

  • 2 pounds baby yellow potatoes (about 900g)
  • 3 tablespoons olive oil
  • 1 teaspoon kosher salt, or to taste
  • 1 teaspoon garlic powder
  • 1/2 teaspoon paprika
  • 1/2 teaspoon freshly ground black pepper
  • 2 tablespoons chopped fresh parsley

Instructions

  1. Preheat the oven to 425°F (220°C).
  2. Wash the potatoes and leave the skins on. Halve small potatoes lengthwise and quarter larger ones so the pieces are about 1 to 1 1/2 inches across.
  3. Dry the potatoes thoroughly.
  4. Toss the potatoes with the olive oil, salt, garlic powder, paprika, and black pepper until evenly coated.
  5. Arrange the potatoes in a single layer on a large, unlined rimmed metal baking sheet, with broad cut faces against the pan. Leave space between most pieces; use a second pan if needed.
  6. Roast uncovered for about 20 minutes.
  7. Turn the potatoes with a spatula and roast for about 15 to 20 minutes more. Start checking at 30 minutes total.
  8. Check that the cut faces and edges are golden to deep golden brown and a fork slides easily through the centers. If the potatoes are tender but pale, continue roasting uncovered until browned.
  9. Transfer to a serving bowl, scatter the parsley over the potatoes, and serve hot.

Tips

  • Dry the potatoes thoroughly before seasoning to help them brown.
  • Leave space between the pieces so moisture can escape instead of steaming the potatoes.
  • Place the cut faces against the metal pan and let them brown before the first flip.
  • Use a second baking sheet if needed to avoid crowding.
  • Judge doneness by the color and tenderness of the potatoes, not the clock alone.

Notes

Refrigerate leftovers promptly in an airtight container and use within 3 to 4 days. Reheat uncovered on a sheet pan in a 400°F (205°C) oven until hot and re-crisped, checking after about 10 minutes. Nutrition estimates per side-dish serving: 175 calories, 3g protein, 7g fat, and 27g carbohydrates.

Nutrition

Calories: 175 kcal | Protein: 3 g | Fat: 7 g | Carbohydrates: 27 g

Italian Dressing Chicken Legs

Zesty Italian dressing coats these whole drumsticks and seasons the juices that collect in the baking dish. A low oven cooks the chicken before a hotter finish browns the skin and a fine layer of Parmesan. Turn the pieces during baking and leave the juices in the pan for serving.

The Parmesan can darken before larger drumsticks are done, so use a thermometer as well as the color of the skin. Plan on about two hours of baking, with a little extra time if needed.

Ingredients for Italian Dressing Chicken Legs

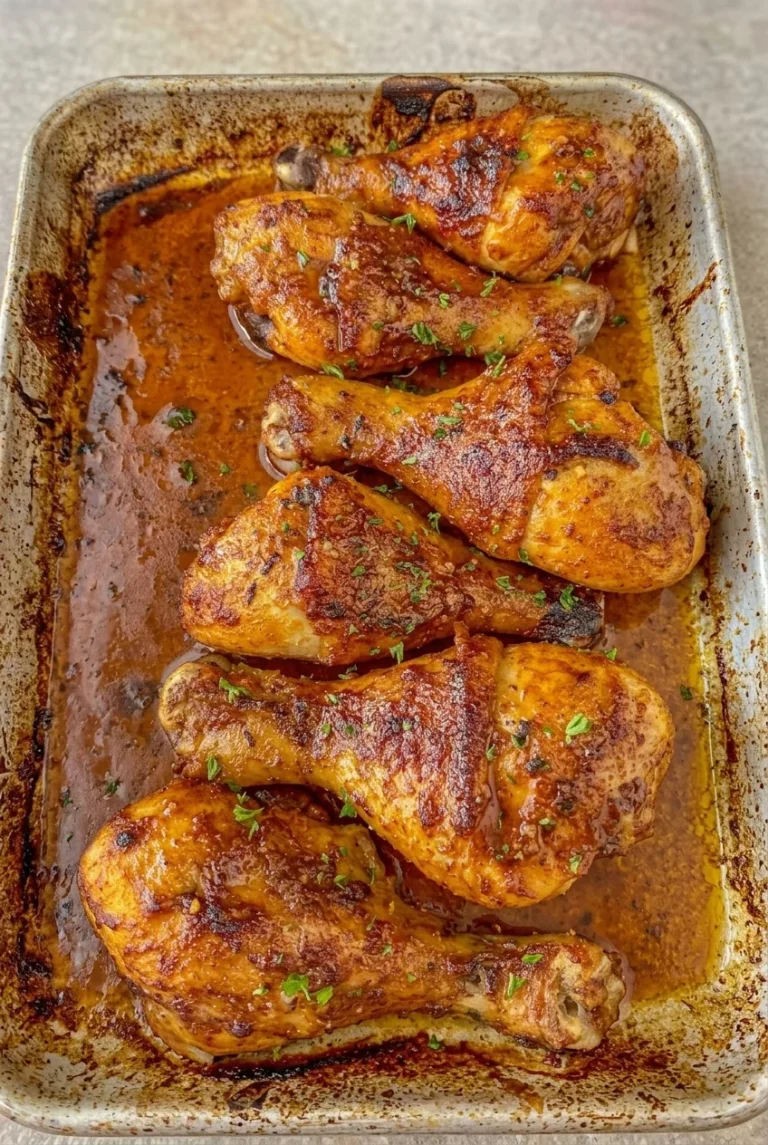
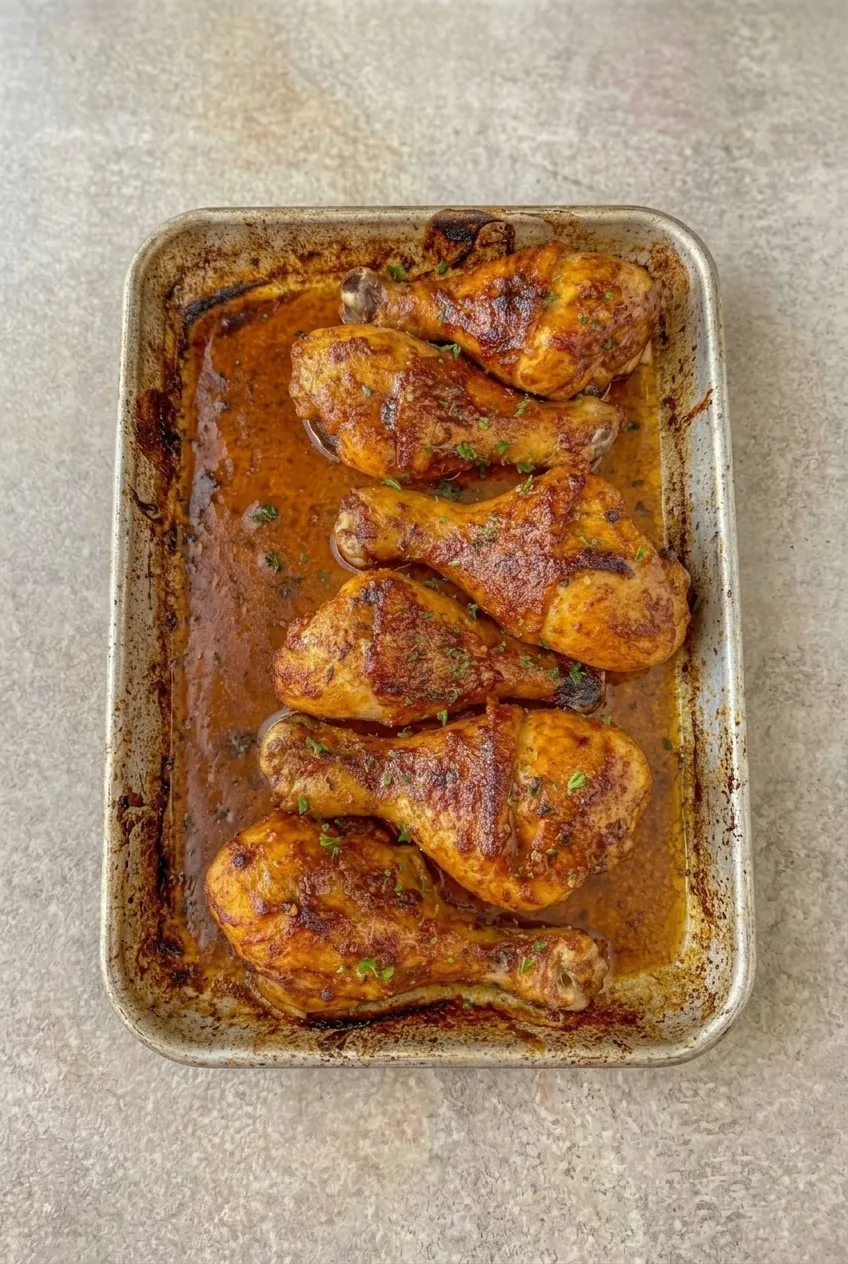
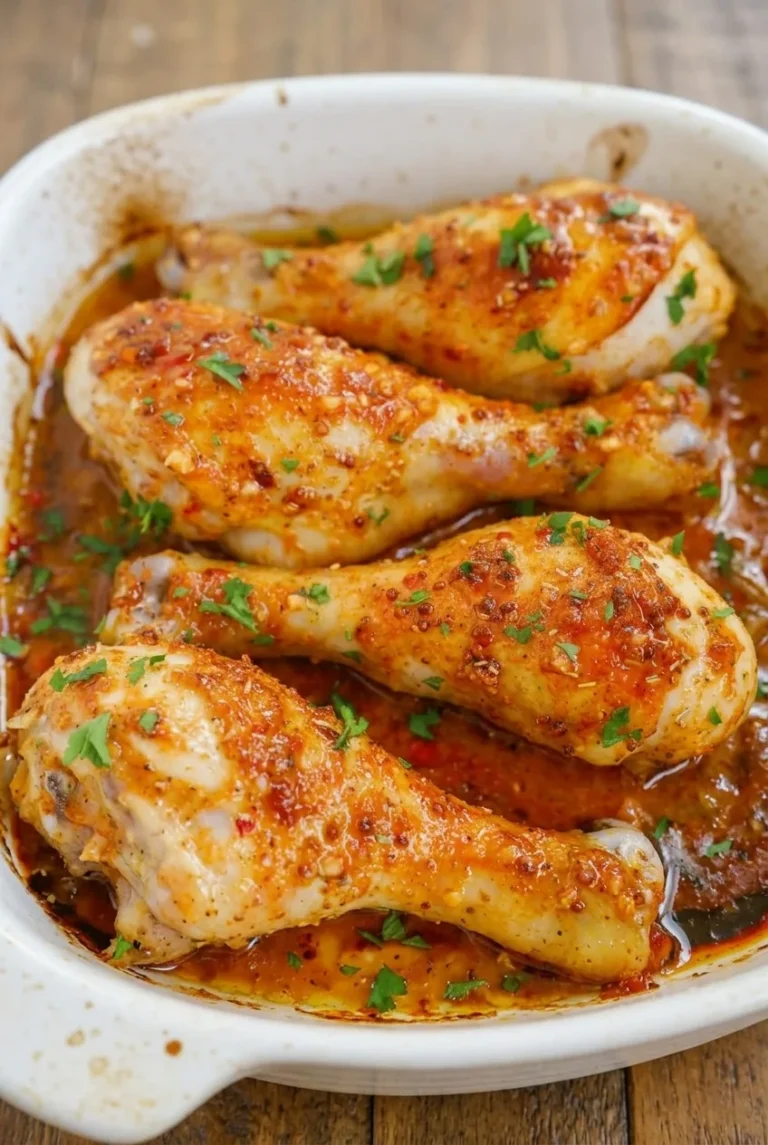
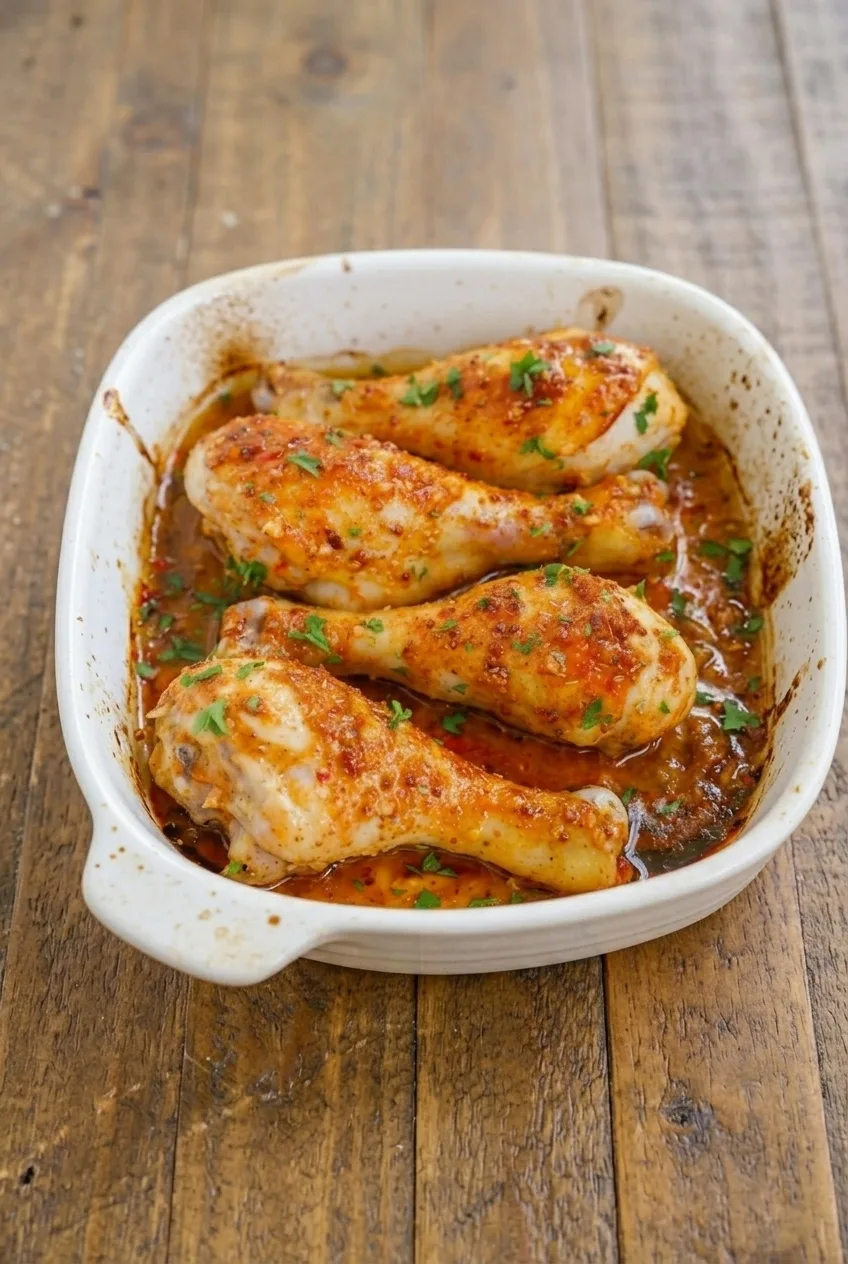
Full baking dish of six Italian dressing chicken legs on a plain countertop
  • 6 bone-in, skin-on chicken drumsticks, about 2½–3 lb (1.1–1.4 kg)
  • ¾ cup regular zesty Italian salad dressing (about 180g)
  • ½ cup finely grated Parmesan cheese (about 45g)
  • 1 tablespoon finely chopped fresh parsley

Use regular, oil-containing dressing rather than fat-free dressing; its oil helps coat the chicken and contributes to the glossy finish. You’ll also need tongs, an instant-read thermometer, and a baking dish large enough to hold the drumsticks in one layer.

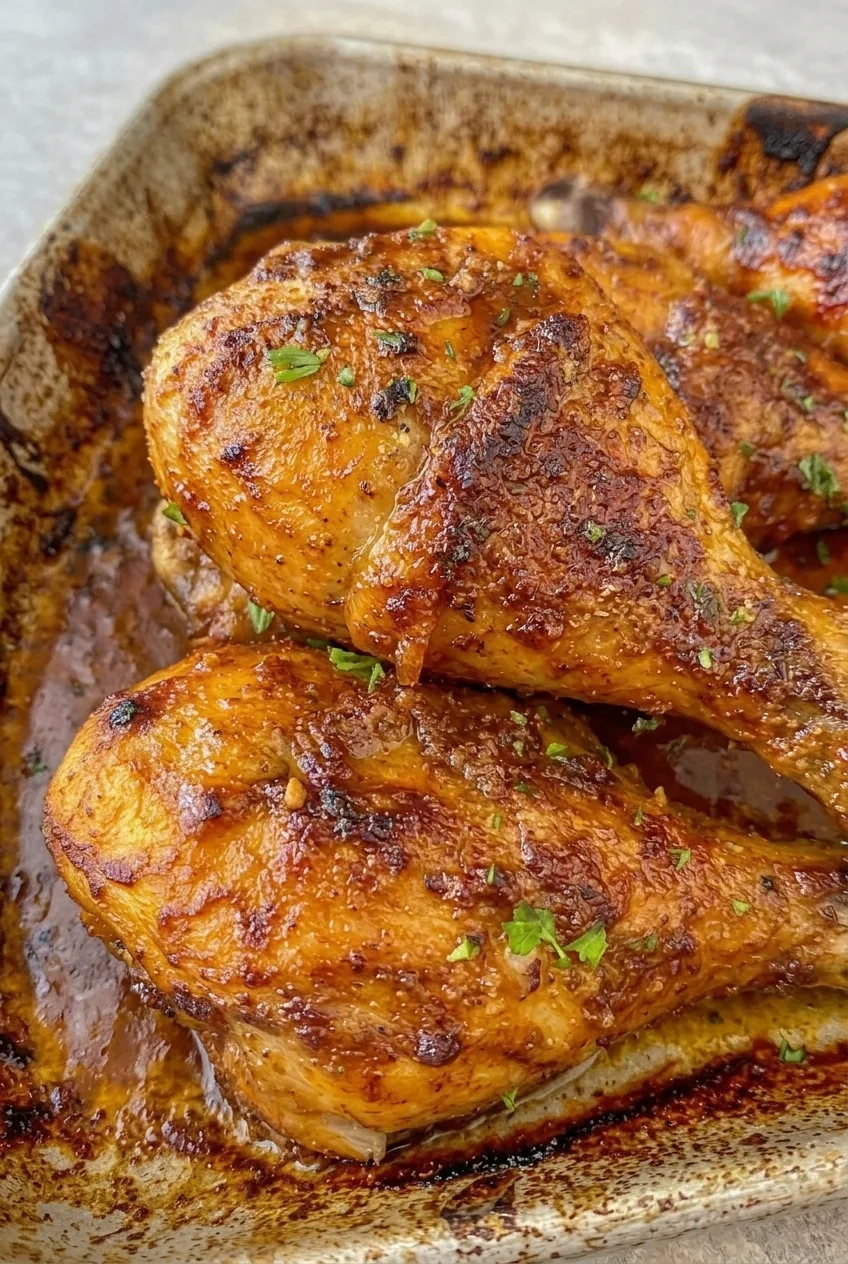
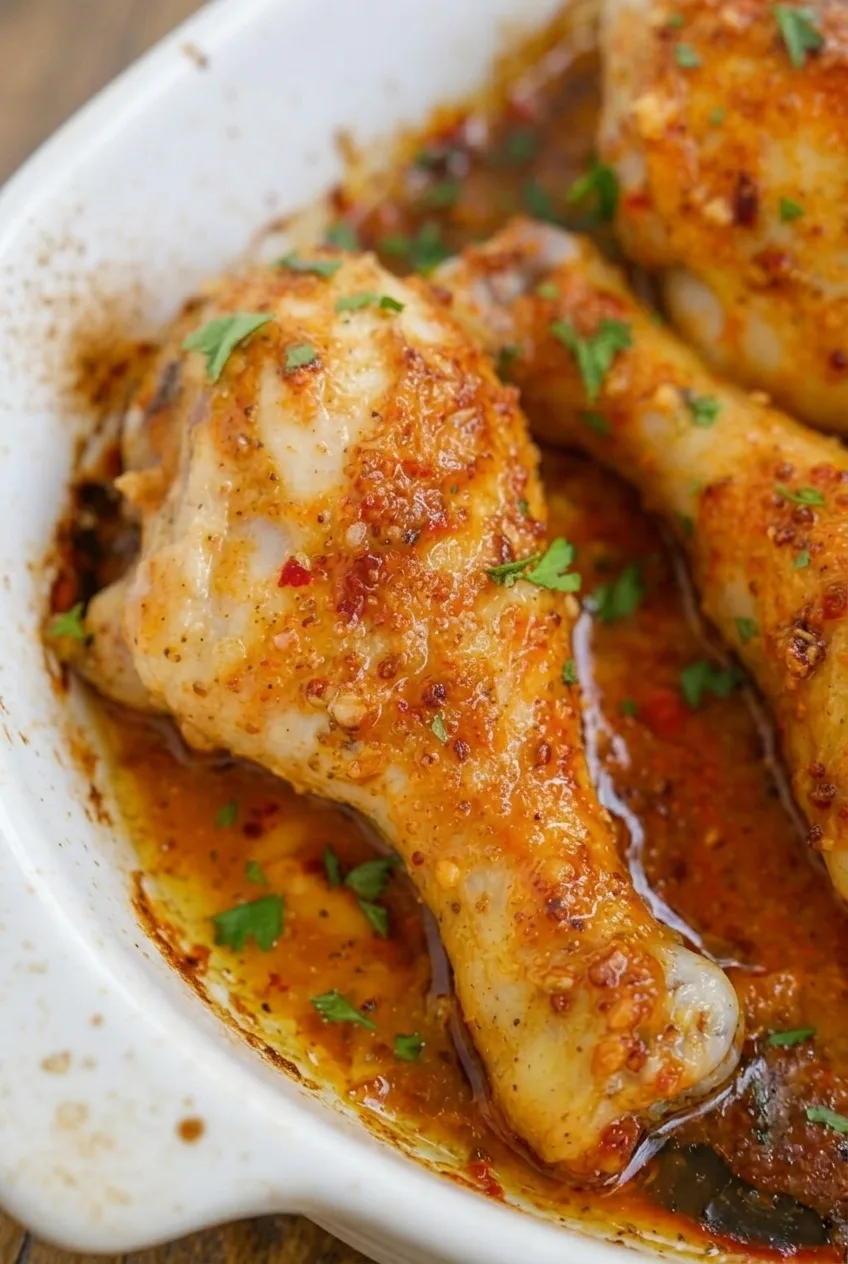
Close view of glossy browned drumstick skin, fine Parmesan, parsley flecks, and cooked juices

How to Bake Italian Dressing Chicken Legs

  1. Coat the chicken: Preheat the oven to 275°F (135°C). Arrange the drumsticks in a roughly 9-by-13-inch baking dish; use a larger pan if they would be substantially stacked. Pour the dressing over them and turn to coat. Do not add oil, water, or broth.
  2. Bake and turn: Bake uncovered for 45 minutes. Turn the drumsticks, bake for another 45 minutes, then turn them again. Leave the cooking juices in the dish.
  3. Add the Parmesan: Increase the oven temperature to 325°F (165°C). Sprinkle half the Parmesan over the exposed sides of the drumsticks. Bake for about 15 minutes, then check the browning and temperature. Gently turn the pieces, sprinkle on the remaining Parmesan, and bake for about 15 minutes more.
  4. Check for doneness: Insert an instant-read thermometer into the thickest part of each drumstick without touching bone. The chicken must reach at least 165°F (75°C); look for glossy skin with golden to deep-brown patches. If needed, continue baking at 325°F in short increments, checking the temperature and cheese. This may take another 10–20 minutes. If the cheese gets very dark before the chicken is done, loosely protect those spots with foil.
  5. Rest and serve: Let the chicken rest for about 5 minutes. Scatter the parsley lightly over the drumsticks and serve from the dish with some of the fully cooked pan juices.

Timing: Allow about 10 minutes to prepare and about 2 hours to bake, plus up to 20 minutes if needed. Rest for 5 minutes before serving.

Why Add the Parmesan Near the End?

Parmesan browns readily, so it goes on during the hotter finish rather than spending the full slow bake in the oven. Sprinkle it lightly: the goal is browned patches integrated into the skin, not a thick cheese layer.

How to Tell When the Drumsticks Are Done

Size, crowding, and oven performance all affect the final browning time. Check the thickest pieces away from the bone; color alone cannot confirm they are cooked through. If the chicken has reached 165°F but looks pale, bake it briefly at 325°F while watching the Parmesan. There’s no need to add another full 30-minute cycle just for color.

Some liquid around the chicken is expected. Serve it with a simple salad or cooked vegetables. For a different dinner with vegetables in the pan, try oven-roasted chicken drumsticks with potatoes and carrots. For another oven-baked flavor, see these honey mustard chicken drumsticks.

How to Store and Reheat Leftovers

As general food-safety guidance, refrigerate leftover chicken in a covered container within 2 hours and use it within 3–4 days. Reheat in an oven-safe dish with some of its juices until the chicken reaches 165°F.

Cooked leftovers can also be frozen in a well-sealed container. Thaw them in the refrigerator before reheating.

Nutrition

Approximate per drumstick: 350 calories, 34g protein, 26g fat, and 3g carbohydrates. Approximate per 100g of edible prepared chicken and coating: 240 calories, 23g protein, 18g fat, and 2g carbohydrates. The recipe makes 6 drumsticks, or about 3–6 servings. Values vary with drumstick size, dressing brand, and how much pan juice is served.

Italian Dressing Chicken Legs

Whole drumsticks bake in zesty Italian dressing and finish with browned Parmesan.
Course: Main Course
Cuisine: Italian
Prep: 10 min
Cook: 140 min
Total: 155 min
Servings: 6 Calories: 350 kcal

Equipment

  • 9-by-13-inch baking dish
  • Tongs
  • Instant-read thermometer
  • Aluminum foil

Ingredients

For the Chicken

  • 6 bone-in, skin-on chicken drumsticks, about 2½–3 lb (1.1–1.4 kg)
  • ¾ cup regular zesty Italian salad dressing (about 180 g)
  • ½ cup finely grated Parmesan cheese (about 45 g)
  • 1 tablespoon finely chopped fresh parsley

Instructions

  1. Preheat the oven to 275°F (135°C).
  2. Arrange the drumsticks in a single layer in a roughly 9-by-13-inch baking dish, using a larger dish if needed.
  3. Pour the Italian dressing over the drumsticks and turn to coat. Do not add oil, water, or broth.
  4. Bake uncovered for 45 minutes. Turn the drumsticks and bake for another 45 minutes, then turn them again. Leave the cooking juices in the dish.
  5. Increase the oven temperature to 325°F (165°C). Sprinkle half the Parmesan over the exposed sides of the drumsticks and bake for about 15 minutes.
  6. Check the browning and temperature. Gently turn the drumsticks, sprinkle with the remaining Parmesan, and bake for about 15 minutes more.
  7. Check the thickest part of each drumstick with an instant-read thermometer, avoiding the bone. Continue baking at 325°F in short increments if needed, until the chicken reaches at least 165°F (75°C).
  8. If the Parmesan gets very dark before the chicken is done, loosely cover those spots with foil.
  9. Rest the chicken for about 5 minutes. Scatter the parsley over the drumsticks and serve with some of the cooked pan juices.

Tips

  • Use regular, oil-containing Italian dressing rather than fat-free dressing.
  • Arrange the drumsticks in one layer so they cook evenly.
  • Check temperature as well as color; browning alone does not confirm doneness.
  • If the chicken is cooked but pale, bake briefly at 325°F while watching the Parmesan.
  • Lightly sprinkle the Parmesan to create browned patches rather than a thick cheese layer.

Notes

Refrigerate leftovers in a covered container within 2 hours and use within 3–4 days. Reheat with some pan juices until the chicken reaches 165°F. Freeze leftovers in a well-sealed container and thaw in the refrigerator before reheating.

Nutrition

Calories: 350 kcal | Protein: 34 g | Fat: 26 g | Carbohydrates: 3 g

Chicken Lollipop Drumsticks

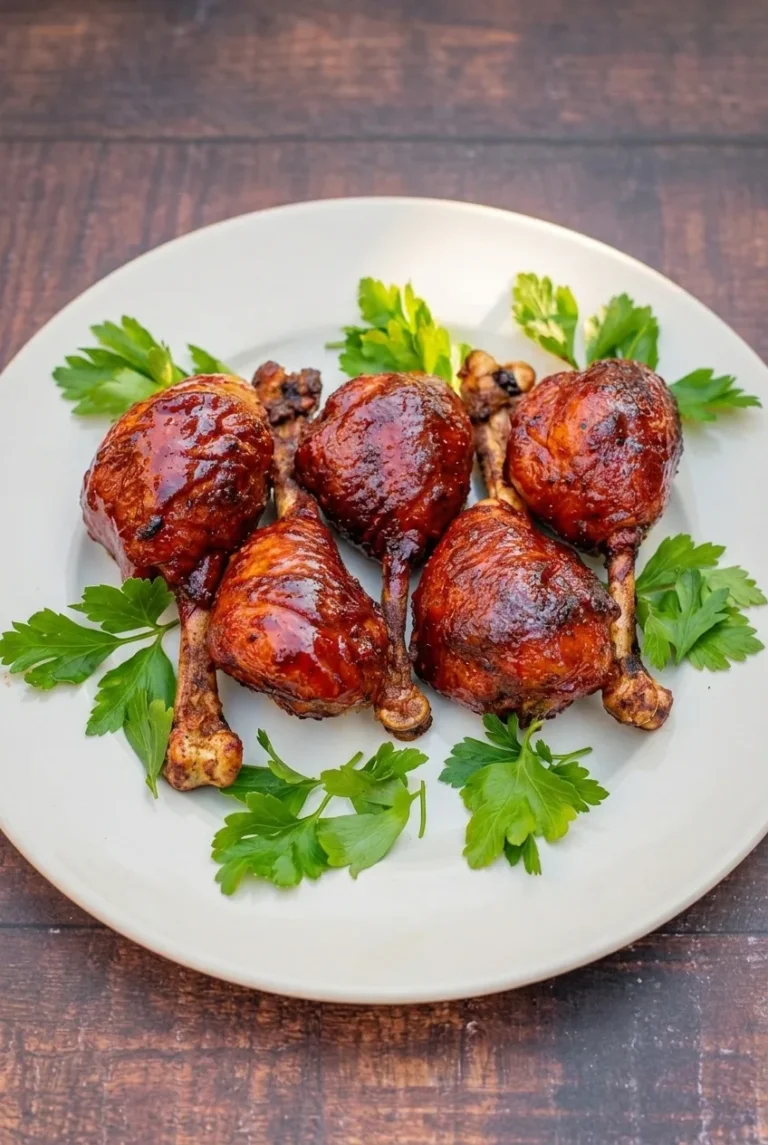
Chicken lollipop drumsticks are whole, skin-on legs trimmed to leave an exposed bone handle and a rounded meaty end. They bake with a paprika-garlic seasoning, then get a late coat of barbecue sauce that turns glossy without spending the entire cook time in the oven. Frenching the drumsticks takes the most hands-on work; once they are baking, a thermometer is more reliable than the clock for judging doneness.

Yield: 8 drumsticks; 4 main-course servings or about 8 appetizer portions. Prep: 25–30 minutes. Cook: about 35–45 minutes, depending on size. Total: about 1 hour 10 minutes to 1 hour 25 minutes, including resting.

Ingredients for Chicken Lollipop Drumsticks

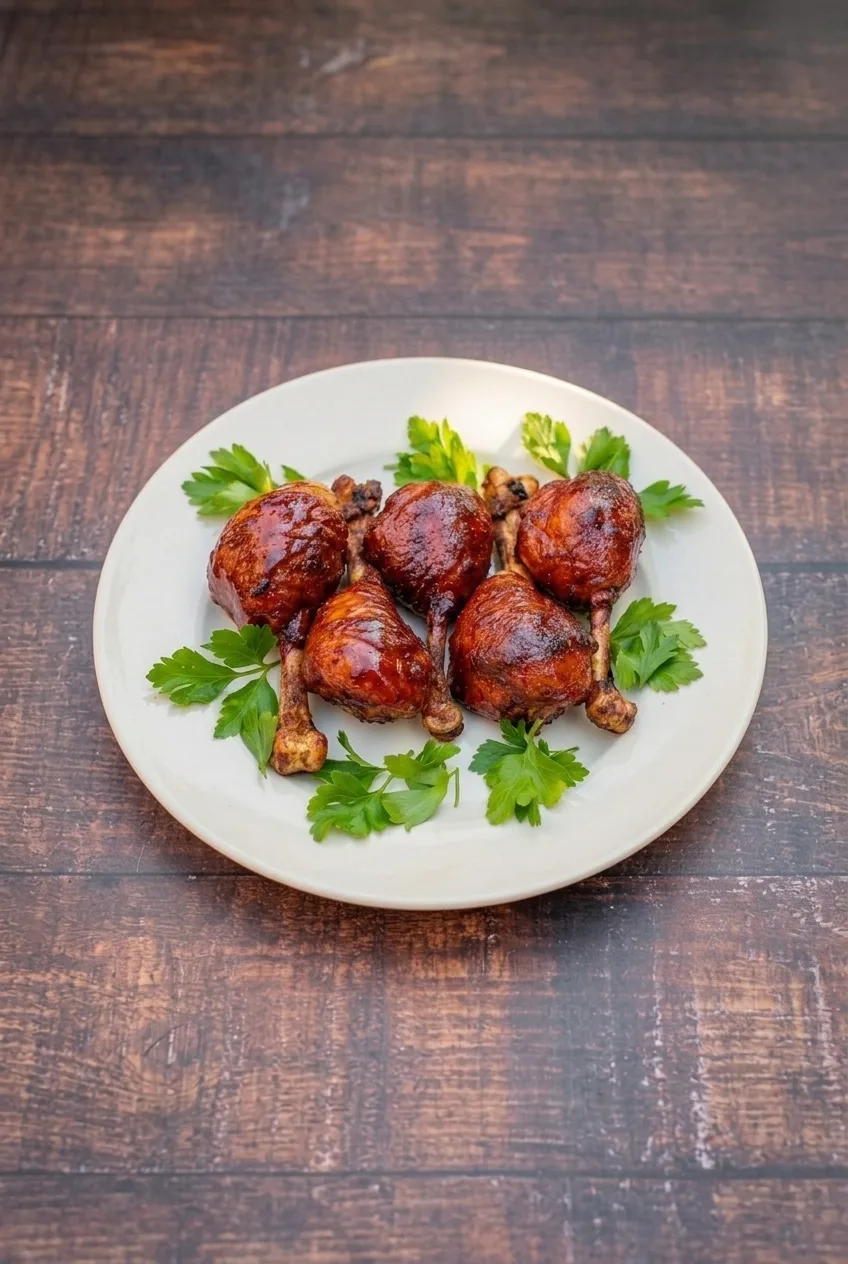
Full plate of glazed chicken lollipop drumsticks and parsley on a dark wood table
  • 8 medium skin-on chicken drumsticks, about 2 1/2–3 pounds total (about 1,250g)
  • 1 tablespoon olive oil or neutral cooking oil, plus a little for the rack
  • 1 teaspoon smoked paprika
  • 1 teaspoon garlic powder
  • 1/2 teaspoon onion powder
  • 1 teaspoon fine salt
  • 1/2 teaspoon freshly ground black pepper
  • 3/4 cup reddish-brown barbecue sauce (about 180g)
  • A small handful of fresh flat-leaf parsley sprigs, about 1/4 cup loosely packed
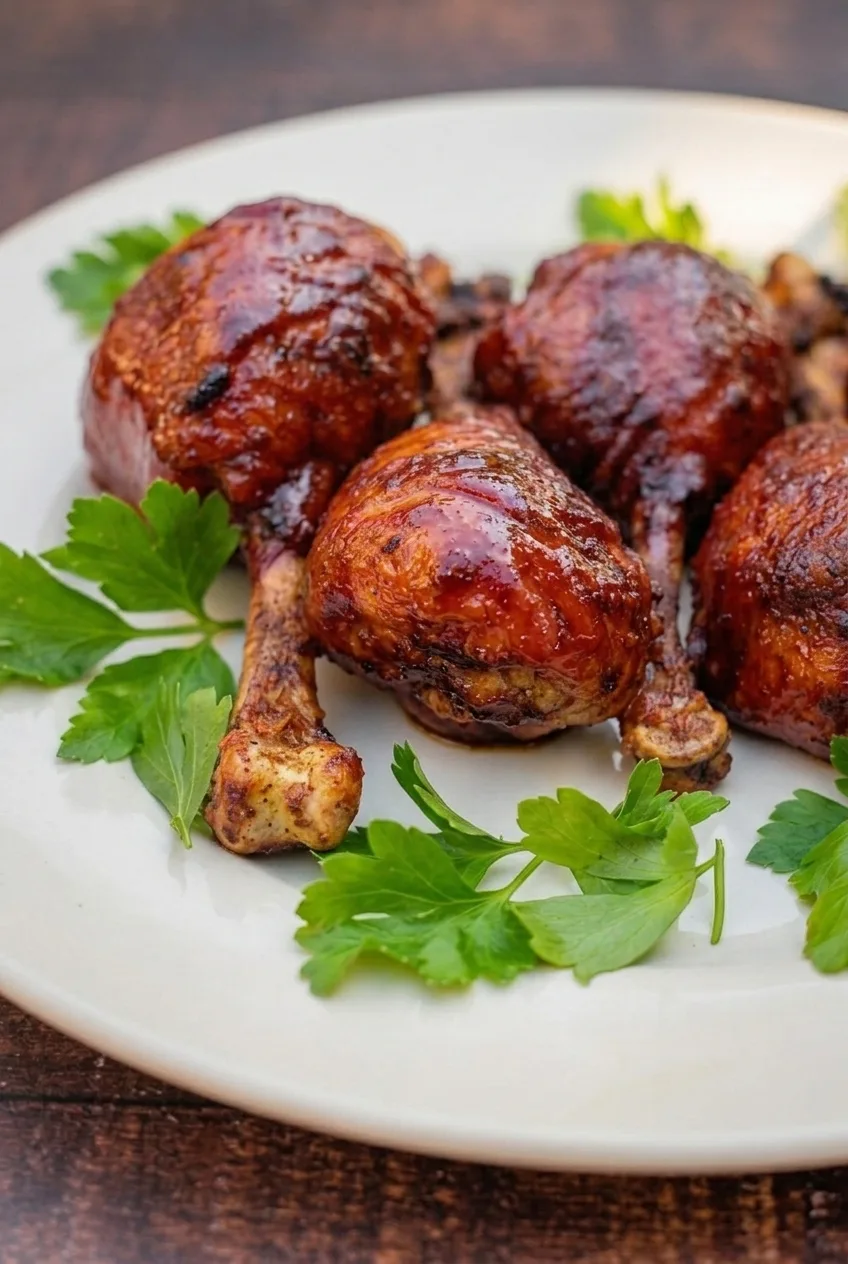
Close view of glossy barbecue glaze on a chicken lollipop drumstick beside its exposed bone handle

How to Bake Chicken Lollipop Drumsticks

  1. Preheat and prepare the pan: Set an oven rack in the middle position and preheat to 400°F (205°C). Line a rimmed baking sheet with foil and set a lightly oiled oven-safe wire rack on top.
  2. French the drumsticks: Pat the chicken dry. Just below the meaty portion of each drumstick, cut all the way around the narrow shaft through the skin and tendons, but not the bone. Grip the tissue at the narrow end with a paper towel and pull it away. Push the remaining meat toward the thick end, then snip away any dangling tendons, cartilage, or loose skin from the exposed handle.
  3. Season: Rub the meaty ends with the tablespoon of oil. Mix the paprika, garlic powder, onion powder, salt, and pepper, then coat the chicken evenly. Arrange the drumsticks on the rack with space between the meaty ends. Leave the barbecue sauce off for now.
  4. Bake until browned: Bake uncovered for about 25–35 minutes, turning once halfway through. Start checking the thickest part of the gathered meat at about 25 minutes, without touching bone with the thermometer tip. Glaze when the skin is browned and the chicken is nearing doneness, roughly 155°F (70°C) to 165°F (75°C).
  5. Glaze and finish: Brush the meaty ends generously with barbecue sauce. Bake another 8–12 minutes, watching for a glossy, set coating rather than wet or blackened sauce. The thickest meat must reach at least 165°F; for more tender dark meat, aim for about 175°F (80°C). Continue baking as needed, particularly for large drumsticks.
  6. Rest and serve: Rest for 5–10 minutes so the hot glaze can settle. Remove any foil used to protect the bones, then cluster the drumsticks on a plate with their handles visible and arrange the parsley sprigs around them.

How to French Chicken Drumsticks

Sharp kitchen shears make it easier to cut through the ring of skin and tendons around the narrow shaft. If the tissue will not pull free, look for strands still attached to the bone and snip them individually. A paper towel helps grip slippery skin and cartilage. The finished handle should have no dangling tissue, but the bone does not need to be uniformly white.

When to Add the Barbecue Glaze

Baking with the dry seasoning first gives the skin time to brown before the sugary sauce goes on. During the final bake, the glaze should deepen to a reddish-brown shine and cling to the chicken rather than pool on it. Sauces vary in sweetness, so check frequently if yours darkens quickly.

Browned bone handles are fine. If the tips become excessively dark, loosely cover just those tips with small pieces of foil during cooking and remove the foil before serving.

Serving and Make-Ahead Notes

Serve the drumsticks as handheld appetizers with extra barbecue sauce in a separate bowl, or plan on two per person with rice and vegetables for dinner. Do not serve sauce that has contacted raw chicken.

You can French the raw drumsticks ahead of time and keep them refrigerated until ready to season and bake. For a different oven-roasted glaze, see these honey mustard chicken drumsticks.

Storing and Reheating Leftovers

Refrigerate cooked leftovers promptly in an airtight container and use within 3–4 days. Reheat in an oven or air fryer until hot throughout, watching the glaze so it does not burn. The coating will remain sticky rather than turn crisp.

Nutrition

Approximate nutrition per main-course serving of 2 drumsticks, excluding bones: 440 calories, 40g protein, 21g fat, and 20g carbohydrates. Per 100g of edible cooked chicken and glaze: approximately 225 calories, 20g protein, 11g fat, and 10g carbohydrates. Values vary with drumstick size, edible yield, and barbecue sauce.

Chicken Lollipop Drumsticks

Skin-on chicken drumsticks are frenched, seasoned with paprika and garlic, baked until browned, and finished with a glossy barbecue glaze.
Course: Main Course
Cuisine: American
Prep: 30 min
Cook: 40 min
Total: 80 min
Servings: 4 Calories: 440 kcal

Equipment

  • Oven
  • Rimmed baking sheet
  • Oven-safe wire rack
  • Kitchen shears
  • Instant-read thermometer
  • Pastry brush

Ingredients

For the Chicken

  • 8 medium skin-on chicken drumsticks, about 2 1/2–3 pounds total (about 1,250 g)
  • 1 tablespoon olive oil or neutral cooking oil, plus a little for the rack
  • 1 teaspoon smoked paprika
  • 1 teaspoon garlic powder
  • 1/2 teaspoon onion powder
  • 1 teaspoon fine salt
  • 1/2 teaspoon freshly ground black pepper
  • 3/4 cup reddish-brown barbecue sauce (about 180 g)

For Serving

  • A small handful of fresh flat-leaf parsley sprigs, about 1/4 cup loosely packed

Instructions

  1. Position an oven rack in the middle and preheat the oven to 400°F (205°C). Line a rimmed baking sheet with foil and set a lightly oiled oven-safe wire rack on top.
  2. Pat the chicken dry. Just below the meaty portion of each drumstick, cut around the narrow shaft through the skin and tendons without cutting the bone.
  3. Grip the tissue at the narrow end with a paper towel and pull it away. Push the remaining meat toward the thick end, then snip away dangling tendons, cartilage, or loose skin.
  4. Rub the meaty ends with the tablespoon of oil. Mix the paprika, garlic powder, onion powder, salt, and pepper, then coat the chicken evenly.
  5. Arrange the drumsticks on the rack with space between the meaty ends. Bake uncovered for about 25–35 minutes, turning once halfway through.
  6. Starting at about 25 minutes, check the thickest part of the gathered meat with a thermometer, avoiding the bone. When browned and nearing doneness, roughly 155°F (70°C) to 165°F (75°C), brush the meaty ends generously with barbecue sauce.
  7. Bake for another 8–12 minutes, until the glaze is glossy and set and the thickest meat reaches at least 165°F (75°C). For more tender dark meat, aim for about 175°F (80°C). Continue baking as needed for large drumsticks.
  8. Rest for 5–10 minutes. Remove any foil used to protect the bone tips, then arrange the drumsticks with the handles visible and parsley around them.

Tips

  • Use sharp kitchen shears to cut through the skin and tendons around the narrow shaft.
  • If tissue will not pull free, use a paper towel for grip and snip any remaining strands individually.
  • Add the barbecue sauce near the end of baking so it has time to glaze without burning.
  • Check the thickest gathered meat with a thermometer, keeping the tip away from the bone.
  • Loosely cover bone tips with small pieces of foil if they become excessively dark.

Notes

Refrigerate leftovers promptly in an airtight container and use within 3–4 days. Reheat in an oven or air fryer until hot throughout, watching the glaze to prevent burning. Do not serve sauce that has contacted raw chicken.

Nutrition

Calories: 440 kcal | Protein: 40 g | Fat: 21 g | Carbohydrates: 20 g

Turkish Spiced Chicken Legs

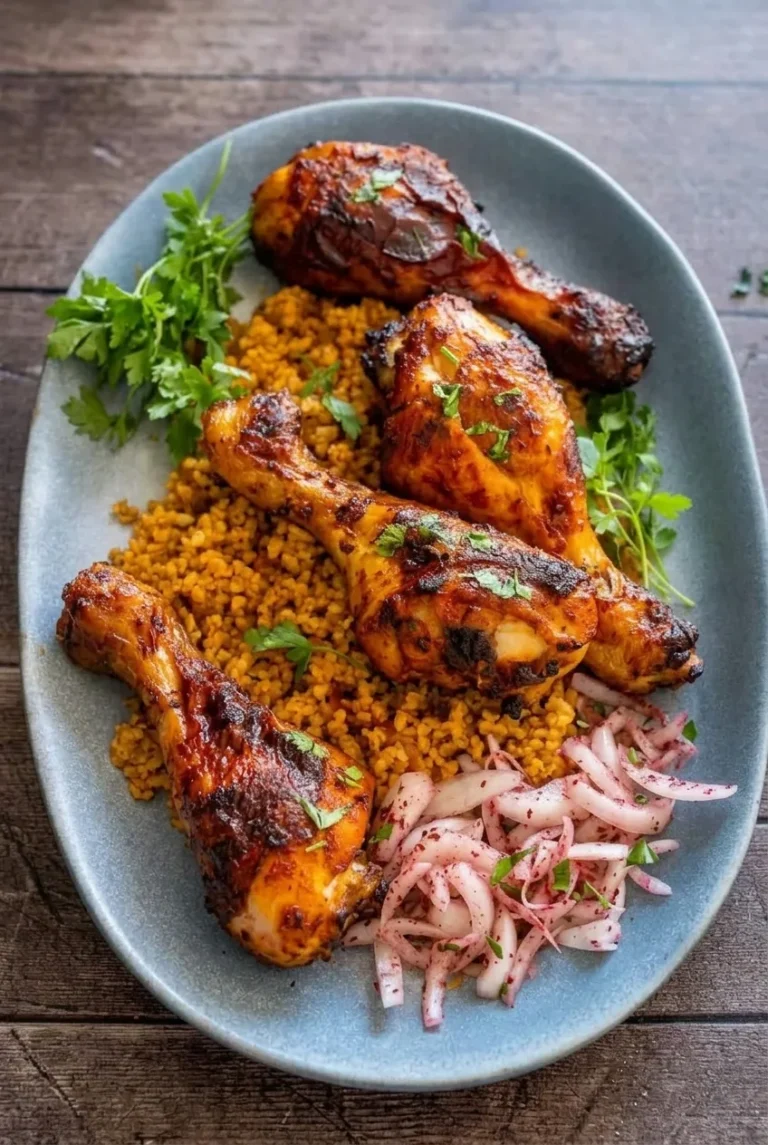
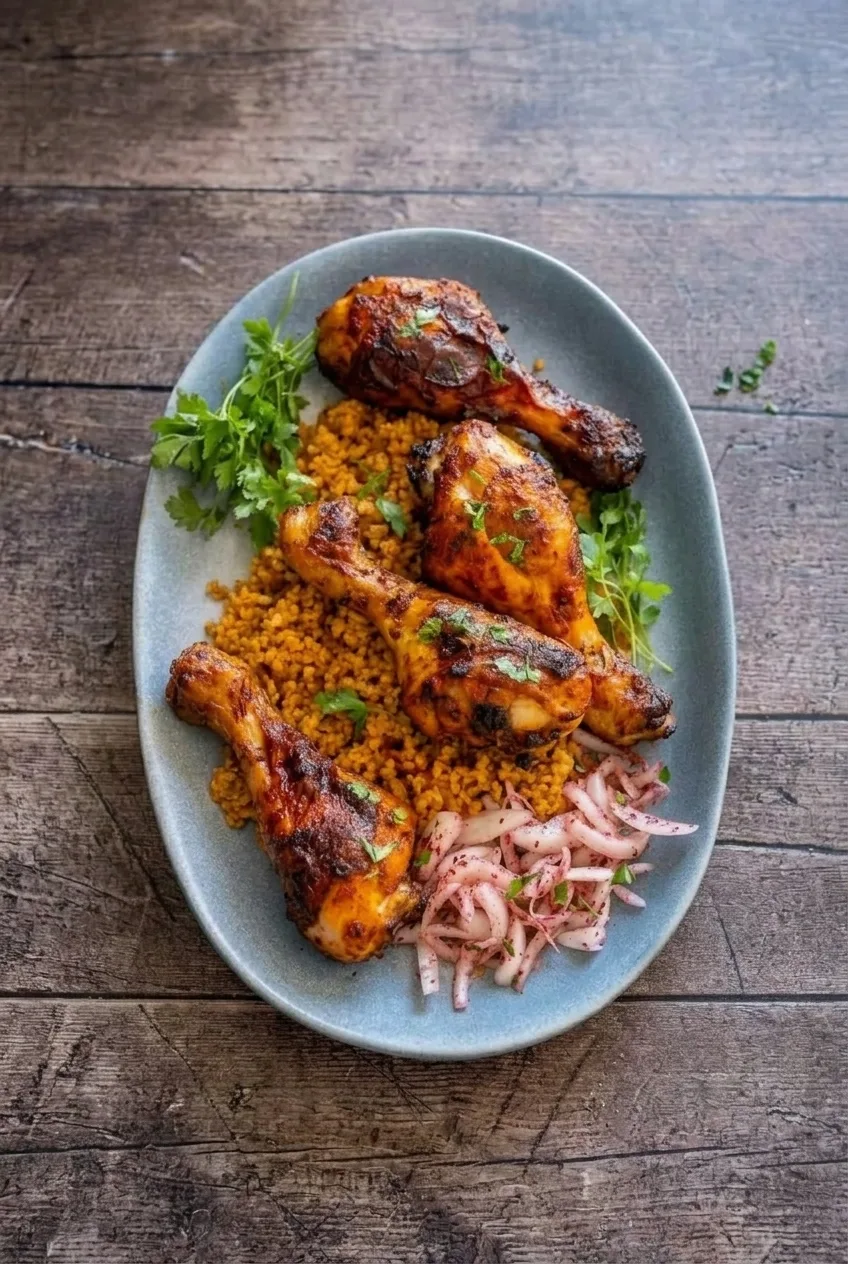
Whole drumsticks roast with a yogurt, tomato, garlic, and spice coating that browns in uneven amber-red patches. Serve them over golden bulgur with a separate pile of tart sumac onions and a scattering of parsley.

Give the chicken at least an hour to marinate, then leave space between the pieces on the baking sheet. The coating can darken before larger drumsticks cook through, so use a thermometer—not color alone—to decide when they’re done.

Ingredients for Turkish Spiced Chicken Legs

Full platter of Turkish spiced chicken legs, bulgur, sumac onions, and parsley on a wooden table

Chicken

  • 8 bone-in, skin-on chicken drumsticks, about 2 1/2 to 3 lb (1.15 to 1.35kg)
  • 1/2 cup plain yogurt (120g)
  • 2 tablespoons tomato paste
  • 2 tablespoons olive oil
  • 3 garlic cloves, finely grated
  • 1 1/2 teaspoons paprika
  • 1 teaspoon ground cumin
  • 1 teaspoon dried oregano
  • 1/2 teaspoon crushed red pepper flakes
  • 1 teaspoon kosher salt
  • 1/2 teaspoon ground black pepper

Bulgur and toppings

  • 1 tablespoon olive oil
  • 1 tablespoon tomato paste
  • 1 cup dry coarse bulgur (about 180g)
  • About 1 3/4 cups water or low-sodium chicken broth, or the amount directed on the bulgur package
  • 1/4 teaspoon kosher salt, adjusted for the broth and salt brand
  • 1 small red onion, thinly sliced
  • 1 teaspoon sumac
  • 1 teaspoon lemon juice
  • About 1/4 cup fresh flat-leaf parsley leaves and a few small sprigs

Plain Greek-style yogurt can replace the yogurt, and dried thyme can replace the oregano. If using fine bulgur instead of coarse, follow its package directions for the liquid and cooking time.

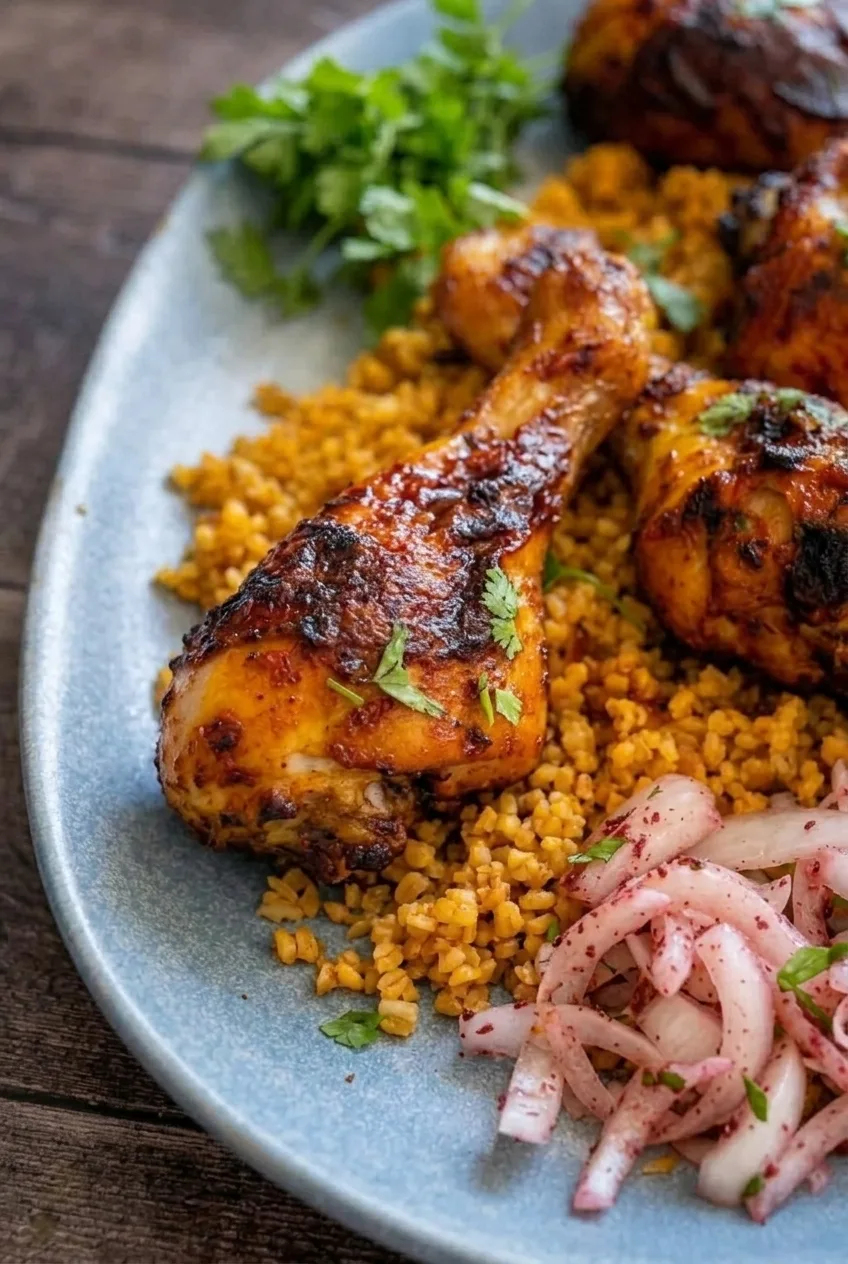
Close view of browned chicken drumstick skin and individual golden bulgur grains

How to Roast the Chicken and Make the Bulgur

  1. Mix the marinade: In a large bowl, stir together the yogurt, 2 tablespoons tomato paste, 2 tablespoons olive oil, garlic, paprika, cumin, oregano, red pepper flakes, 1 teaspoon salt, and black pepper.
  2. Marinate the chicken: Coat the drumsticks on all sides. Cover and refrigerate for at least 1 hour, or for 4 to 5 hours or overnight if preparing ahead.
  3. Prepare the baking sheet: Fully preheat the oven to 400°F (205°C). Line a rimmed baking sheet with parchment paper or foil. Arrange the drumsticks skin-side down in a single layer with gaps between them; use a second sheet if needed. Leave the coating on the chicken, but discard excess raw marinade in the bowl. Roast uncovered.
  4. Roast and flip: Roast for 25 minutes, then flip the drumsticks skin-side up. Roast for about 15 to 20 minutes more, moving the sheet to a lower rack if the coating darkens too quickly. Begin checking the thickest pieces around 40 minutes; larger drumsticks may need longer.
  5. Cook the bulgur while the chicken roasts: Warm the remaining tablespoon of olive oil in a medium saucepan over medium heat. Stir in the remaining tablespoon of tomato paste, then add the bulgur, water or broth, and 1/4 teaspoon salt. Bring to a simmer, cover, and cook over low heat for about 12 to 15 minutes, or according to the package, until the grains are tender and the liquid is absorbed. Let stand, covered, for 5 minutes, then fluff.
  6. Dress the onions: Toss the sliced onion with the sumac and lemon juice. Let stand for about 10 minutes while the chicken finishes.
  7. Check and serve: The chicken should have browned patches. An instant-read thermometer inserted into the thickest meat without touching bone must read at least 165°F (75°C). Rest the drumsticks for about 5 minutes. Spread the bulgur on a large shallow platter, arrange the whole drumsticks over it, add the onions in a separate pile, and scatter the parsley over the top.

How to Keep the Coating from Burning

The yogurt-tomato coating browns quickly, especially near the top of the oven. Gaps between drumsticks help moisture escape so they roast instead of steam; leaving excess marinade off the sheet prevents a wet layer from collecting around them. After the flip, move the sheet lower if the coating is getting very dark. A few darker spots are fine, but the thermometer determines when the chicken is done.

Marinating and Serving Timing

Marinate the chicken in the refrigerator for at least 1 hour; 4 to 5 hours or overnight gives you a longer make-ahead window. Cook the bulgur and dress the onions during the roast so they’re ready when the chicken has rested.

Fluff the bulgur before spreading it on the platter, and leave some grains visible beneath the drumsticks. Keep the sumac onions together at one end rather than mixing them into the bulgur. A shepherd’s salad makes a fresh side if you want one.

For another oven-roasted drumstick dinner, try chicken drumsticks with potatoes and carrots. For a different spiced crust, see these blackened chicken drumsticks.

Storing and Reheating Leftovers

Refrigerate cooked chicken in an airtight container for up to 3 days. Store leftover bulgur and onions separately when practical. Reheat the chicken in a 350°F (175°C) oven until hot throughout, about 10 minutes for the chicken alone; thicker or colder pieces may take longer. Reheat the bulgur separately with a splash of water, and serve the onions cold or cool.

Nutrition

Yield: 4 servings, about 2 drumsticks per serving with bulgur and toppings. Approximate nutrition per serving: 620 calories, 44g protein, 30g fat, and 43g carbohydrates. Approximate per 100g of edible food: 180 calories, 13g protein, 9g fat, and 12g carbohydrates. Values are estimates; drumstick size, edible meat yield, and how much marinade remains on the chicken will affect them.

Turkish Spiced Chicken Legs

Yogurt- and tomato-coated drumsticks roast with warm spices and are served over bulgur with sumac onions and parsley.
Course: Main Course
Cuisine: Turkish
Prep: 75 min
Cook: 50 min
Total: 125 min
Servings: 4 Calories: 620 kcal

Equipment

  • Large mixing bowl
  • Rimmed baking sheet
  • Parchment paper or foil
  • Medium saucepan
  • Instant-read thermometer

Ingredients

For the Chicken

  • 8 bone-in, skin-on chicken drumsticks, about 2 1/2 to 3 lb (1.15 to 1.35 kg)
  • 1/2 cup plain yogurt (120 g)
  • 2 tablespoons tomato paste
  • 2 tablespoons olive oil
  • 3 garlic cloves, finely grated
  • 1 1/2 teaspoons paprika
  • 1 teaspoon ground cumin
  • 1 teaspoon dried oregano
  • 1/2 teaspoon crushed red pepper flakes
  • 1 teaspoon kosher salt
  • 1/2 teaspoon ground black pepper

For the Bulgur

  • 1 tablespoon olive oil
  • 1 tablespoon tomato paste
  • 1 cup dry coarse bulgur (about 180 g)
  • About 1 3/4 cups water or low-sodium chicken broth, or the amount directed on the bulgur package
  • 1/4 teaspoon kosher salt, adjusted for the broth and salt brand

For the Toppings

  • 1 small red onion, thinly sliced
  • 1 teaspoon sumac
  • 1 teaspoon lemon juice
  • About 1/4 cup fresh flat-leaf parsley leaves and a few small sprigs

Instructions

  1. Stir together the yogurt, 2 tablespoons tomato paste, 2 tablespoons olive oil, garlic, paprika, cumin, oregano, red pepper flakes, 1 teaspoon salt, and black pepper in a large bowl.
  2. Coat the drumsticks on all sides. Cover and refrigerate for at least 1 hour, or for 4 to 5 hours or overnight.
  3. Preheat the oven to 400°F (205°C). Line a rimmed baking sheet with parchment paper or foil.
  4. Arrange the drumsticks skin-side down in a single layer with gaps between them, using a second sheet if needed. Leave the coating on the chicken and discard excess raw marinade. Roast uncovered.
  5. Roast for 25 minutes, then flip the drumsticks skin-side up. Roast for about 15 to 20 minutes more, moving the sheet to a lower rack if the coating darkens too quickly.
  6. While the chicken roasts, warm 1 tablespoon olive oil in a medium saucepan over medium heat. Stir in 1 tablespoon tomato paste, then add the bulgur, water or broth, and 1/4 teaspoon salt.
  7. Bring the bulgur to a simmer, cover, and cook over low heat for about 12 to 15 minutes, or according to the package, until tender and the liquid is absorbed. Let stand covered for 5 minutes, then fluff.
  8. Toss the sliced onion with the sumac and lemon juice. Let stand for about 10 minutes.
  9. Check the thickest drumsticks with an instant-read thermometer, avoiding the bone. Cook until they reach at least 165°F (75°C), allowing more time if needed.
  10. Rest the chicken for about 5 minutes. Spread the bulgur on a large shallow platter, arrange the drumsticks over it, add the onions in a separate pile, and scatter the parsley over the top.

Tips

  • Leave gaps between the drumsticks so they roast rather than steam.
  • Discard excess raw marinade instead of letting it collect on the baking sheet.
  • Move the baking sheet to a lower rack if the coating darkens too quickly.
  • Use a thermometer to check doneness; the coating can brown before larger drumsticks cook through.
  • Cook the bulgur and dress the onions while the chicken roasts.

Variations

  • Greek-Style Yogurt: Use plain Greek-style yogurt in place of plain yogurt.
  • Thyme Chicken: Use dried thyme in place of dried oregano.
  • Fine Bulgur: Use fine bulgur and follow its package directions for liquid and cooking time.

Notes

Refrigerate cooked chicken in an airtight container for up to 3 days. Reheat in a 350°F (175°C) oven until hot throughout; reheat bulgur separately with a splash of water and serve the onions cold or cool.

Nutrition

Calories: 620 kcal | Protein: 44 g | Fat: 30 g | Carbohydrates: 43 g

Blackened Chicken Drumsticks

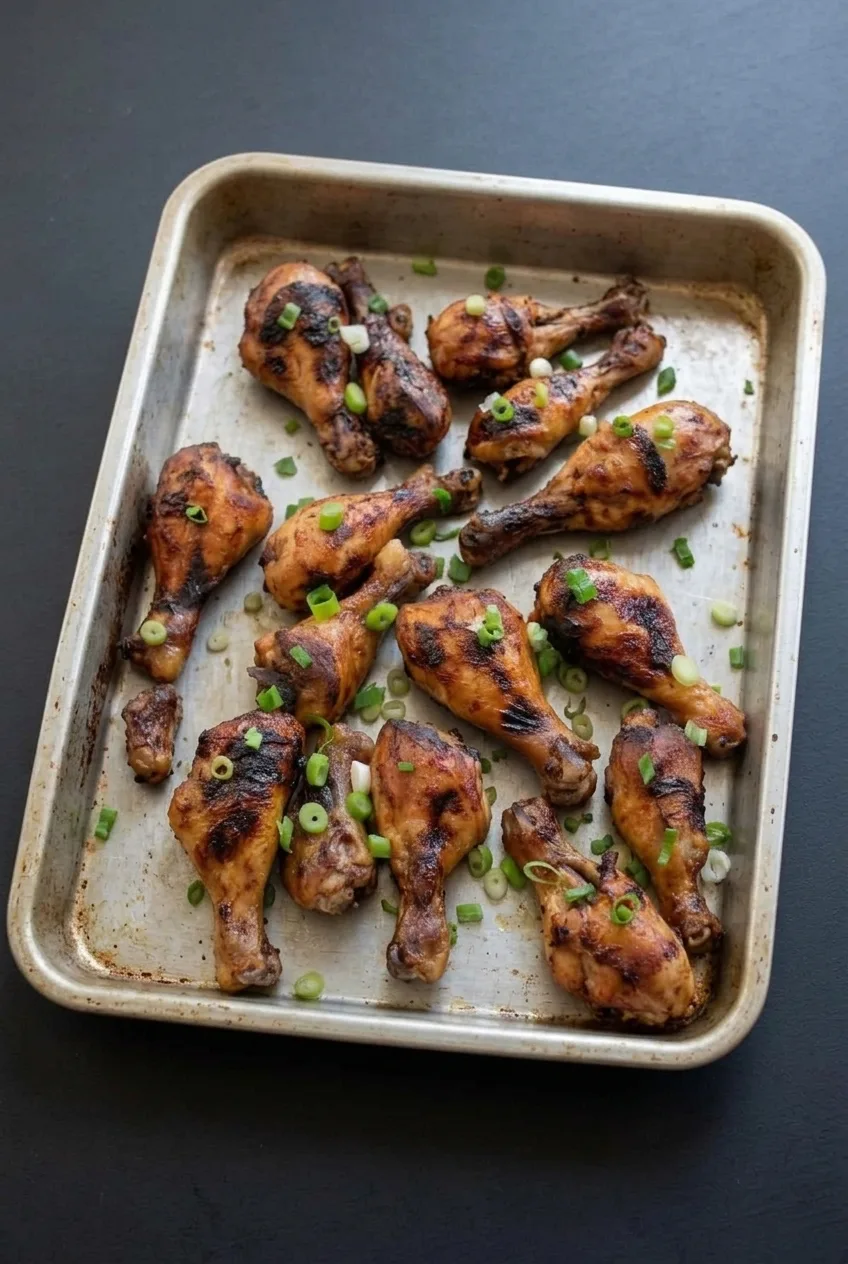
Blackened chicken drumsticks get their color from a dry, paprika-led spice coating: the skin should be browned with irregular near-black patches, not covered in a uniformly burned crust. A short skillet sear builds that color, then an uncovered oven finish cooks the bone-in meat without keeping the spices over intense heat. Check doneness with a thermometer—the dark crust can form well before the meat beside the bone is cooked.

Ingredients for Blackened Chicken Drumsticks

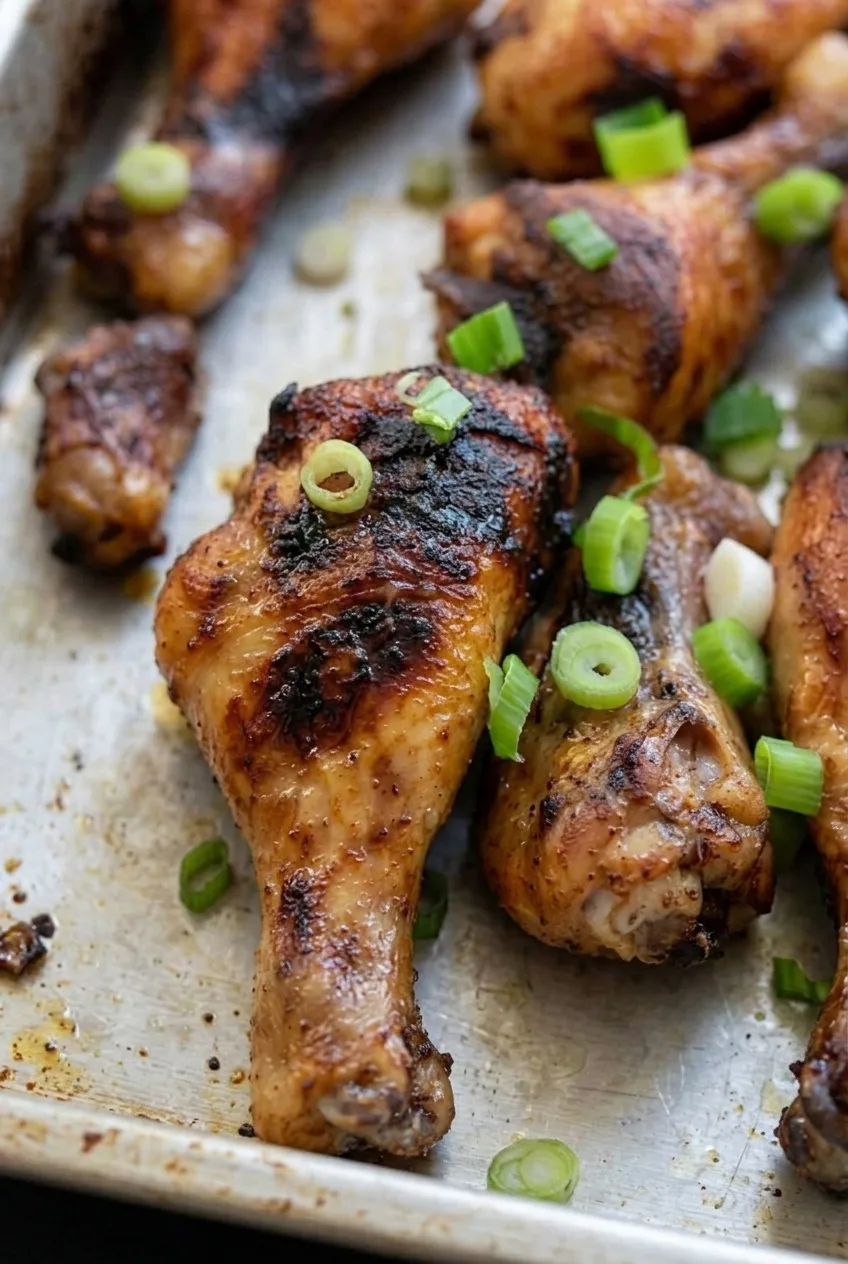
Close view of a drumstick’s browned skin, uneven blackened spice crust, and sliced scallions
  • 6 bone-in, skin-on chicken drumsticks, about 2–2½ lb (900–1,125g)
  • 2 teaspoons smoked paprika
  • 1 teaspoon garlic powder
  • 1 teaspoon onion powder
  • ½ teaspoon dried thyme
  • ½ teaspoon dried oregano
  • ¼ teaspoon cayenne pepper
  • 1 teaspoon Diamond Crystal kosher salt
  • ½ teaspoon freshly ground black pepper
  • 1 tablespoon avocado or canola oil
  • 2 scallions, thinly sliced

For less heat, reduce the cayenne to a pinch. If using Morton kosher salt, use less than the listed volume; it measures differently from Diamond Crystal.

How to Make Blackened Chicken Drumsticks

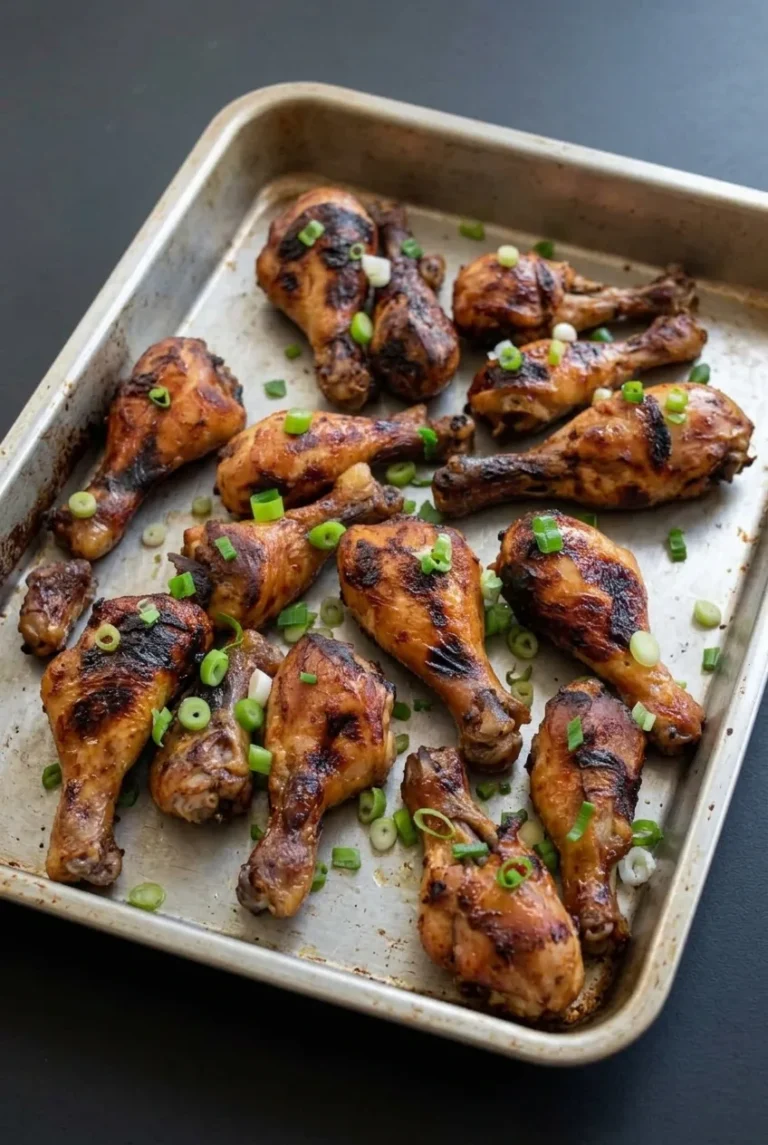
Six blackened chicken drumsticks with scallions in a shallow dish on a dark table
  1. Preheat and mix the spices: Heat the oven to 400°F (205°C). Combine the paprika, garlic powder, onion powder, thyme, oregano, cayenne, salt, and black pepper in a small bowl.
  2. Season the chicken: Pat the drumsticks thoroughly dry and coat all sides with the spice mixture. Let them stand briefly while the skillet heats.
  3. Brown several sides: Preheat a 12-inch oven-safe heavy skillet over medium-high heat for about 3 minutes. Add the oil and drumsticks, leaving small gaps between them. Brown for about 7–10 minutes total, turning roughly every 2–3 minutes as each surface releases from the pan. Look for deep-brown skin with scattered near-black patches. Lower the heat if the spices smell acrid or produce harsh, continuous smoke. If the drumsticks overlap, brown them in batches.
  4. Finish in the oven: Transfer the skillet to the oven. If you browned the chicken in batches, arrange all the pieces with space between them on a rimmed baking sheet instead. Roast uncovered for approximately 15–25 minutes, turning once midway if convenient. Start checking after 15 minutes: insert an instant-read thermometer into the thickest meat without touching bone. It must reach at least 165°F (75°C); for more tender dark meat, aim for 175–185°F (80–85°C).
  5. Rest and garnish: Rest for 5 minutes uncovered or under a very loose foil tent. Arrange the drumsticks in a shallow serving dish and scatter the scallions over them. Leave excess pan juices behind so they do not soften the crust.

How to Blacken Drumsticks Without Burning the Spices

The skillet builds the crust; it does not need to cook the drumsticks through. Give each browned surface time to release before turning so the skin and seasoning stay in place. Uneven dark patches are desirable, but bitter-smelling spices signal too much heat. The oven finishes the meat near the bone without prolonged contact with the hot skillet.

For a different spice-forward method, try these oven-roasted Cajun chicken drumsticks.

When Are Chicken Drumsticks Done?

Probe the thickest meaty part of a drumstick from the side, keeping the thermometer tip away from the bone. The 165°F mark is the safety minimum; 175–185°F is a texture preference for dark meat. Larger drumsticks may need more than the estimated oven time, so use the thermometer rather than the crust color or the clock for the final decision.

Serving Ideas

Serve with rice or roasted vegetables, or pair with buttered pasta and a green salad. For a different dry-seasoned flavor another time, try oven-roasted lemon pepper chicken drumsticks.

How to Store and Reheat

Refrigerate cooled leftovers in an airtight container for up to 3 days. Reheat in a lightly oiled skillet over medium heat, turning as needed until thoroughly hot. Add fresh scallions afterward if available, and avoid pouring sauce over the crust.

Cooked drumsticks can also be frozen airtight for up to 3 months. Thaw overnight in the refrigerator before reheating.

Nutrition

Approximate per drumstick, based on 6 drumsticks: 230 calories, 26g protein, 12g fat, and 2g carbohydrates. Approximate per 100g of cooked edible portion: 230 calories, 26g protein, 12g fat, and 2g carbohydrates. Values vary with drumstick size, the amount of skin eaten, and how much oil remains in the pan.

Blackened Chicken Drumsticks

Bone-in chicken drumsticks are coated in a paprika-led spice blend, seared until patchily browned, then roasted until tender.
Course: Main Course
Cuisine: American
Prep: 10 min
Cook: 35 min
Total: 45 min
Servings: 6 Calories: 230 kcal per drumstick

Equipment

  • Small bowl
  • 12-inch oven-safe skillet
  • Rimmed baking sheet
  • Instant-read thermometer

Ingredients

For the Chicken

  • 6 bone-in, skin-on chicken drumsticks, about 2–2½ lb (900–1,125g)
  • 1 tablespoon avocado or canola oil
  • 2 scallions, thinly sliced

For the Spice Coating

  • 2 teaspoons smoked paprika
  • 1 teaspoon garlic powder
  • 1 teaspoon onion powder
  • ½ teaspoon dried thyme
  • ½ teaspoon dried oregano
  • ¼ teaspoon cayenne pepper
  • 1 teaspoon Diamond Crystal kosher salt
  • ½ teaspoon freshly ground black pepper

Instructions

  1. Preheat the oven to 400°F (205°C). Combine the paprika, garlic powder, onion powder, thyme, oregano, cayenne, salt, and black pepper in a small bowl.
  2. Pat the drumsticks thoroughly dry and coat all sides with the spice mixture. Let them stand briefly while the skillet heats.
  3. Preheat a 12-inch oven-safe heavy skillet over medium-high heat for about 3 minutes. Add the oil and drumsticks, leaving small gaps between them.
  4. Brown the drumsticks for about 7–10 minutes total, turning every 2–3 minutes as each surface releases from the pan. Lower the heat if the spices smell acrid or produce harsh, continuous smoke. Brown in batches if needed.
  5. Transfer the skillet to the oven. If cooking in batches, arrange all the drumsticks with space between them on a rimmed baking sheet instead.
  6. Roast uncovered for approximately 15–25 minutes, turning once midway if convenient. Start checking after 15 minutes; insert an instant-read thermometer into the thickest meat without touching bone. Cook to at least 165°F (75°C), or 175–185°F (80–85°C) for more tender dark meat.
  7. Rest uncovered or under a very loose foil tent for 5 minutes. Arrange the drumsticks in a shallow serving dish, scatter the scallions over them, and leave excess pan juices behind.

Tips

  • Pat the drumsticks thoroughly dry so the skin browns well.
  • Let each browned surface release from the pan before turning to help keep the skin and seasoning in place.
  • Look for deep-brown skin with scattered near-black patches; lower the heat if the spices smell acrid or smoke harshly.
  • Check temperature beside the bone without letting the thermometer touch it; larger drumsticks may need extra oven time.
  • Use less than the listed volume if substituting Morton kosher salt for Diamond Crystal.

Variations

  • Milder Blackened Drumsticks: Reduce the cayenne pepper to a pinch for less heat.

Notes

Refrigerate cooled leftovers in an airtight container for up to 3 days, or freeze airtight for up to 3 months. Thaw frozen drumsticks overnight in the refrigerator and reheat in a lightly oiled skillet until thoroughly hot. Nutrition values vary with drumstick size, skin eaten, and oil remaining in the pan.

Nutrition

Calories: 230 kcal per drumstick | Protein: 26 g per drumstick | Fat: 12 g per drumstick | Carbohydrates: 2 g per drumstick | Per 100g Cooked Edible Portion Calories: 230 kcal | Per 100g Cooked Edible Portion Protein: 26 g | Per 100g Cooked Edible Portion Fat: 12 g | Per 100g Cooked Edible Portion Carbohydrates: 2 g

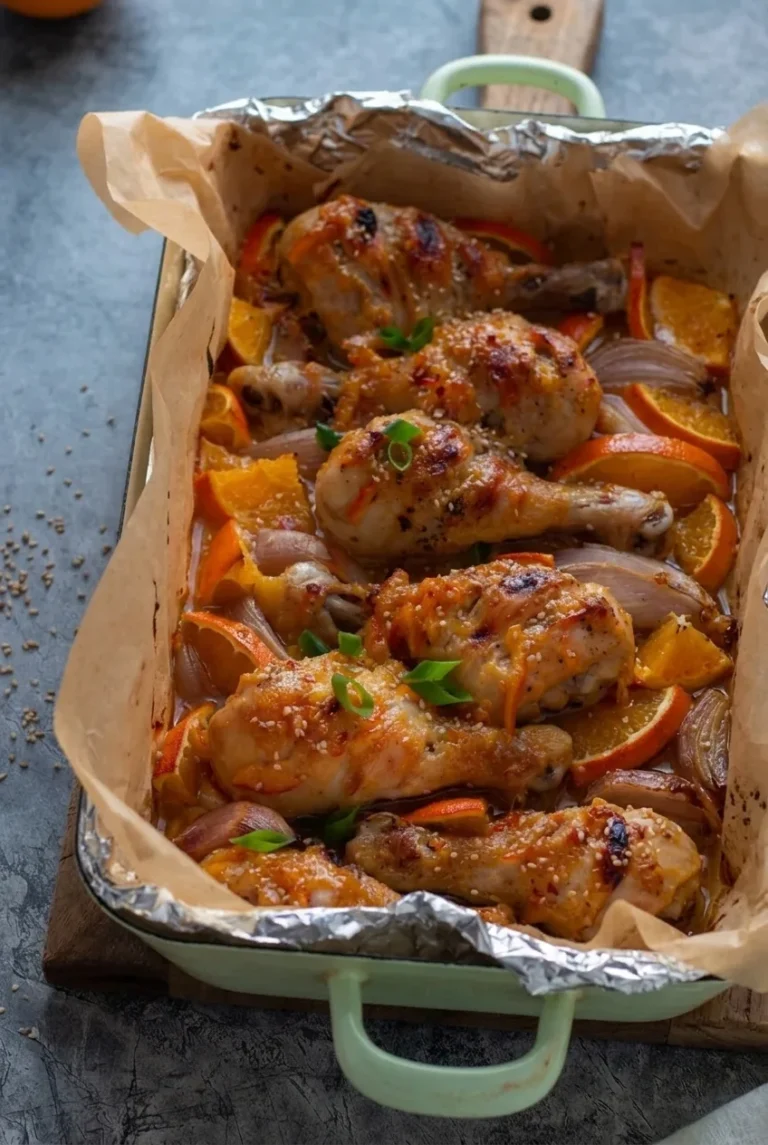
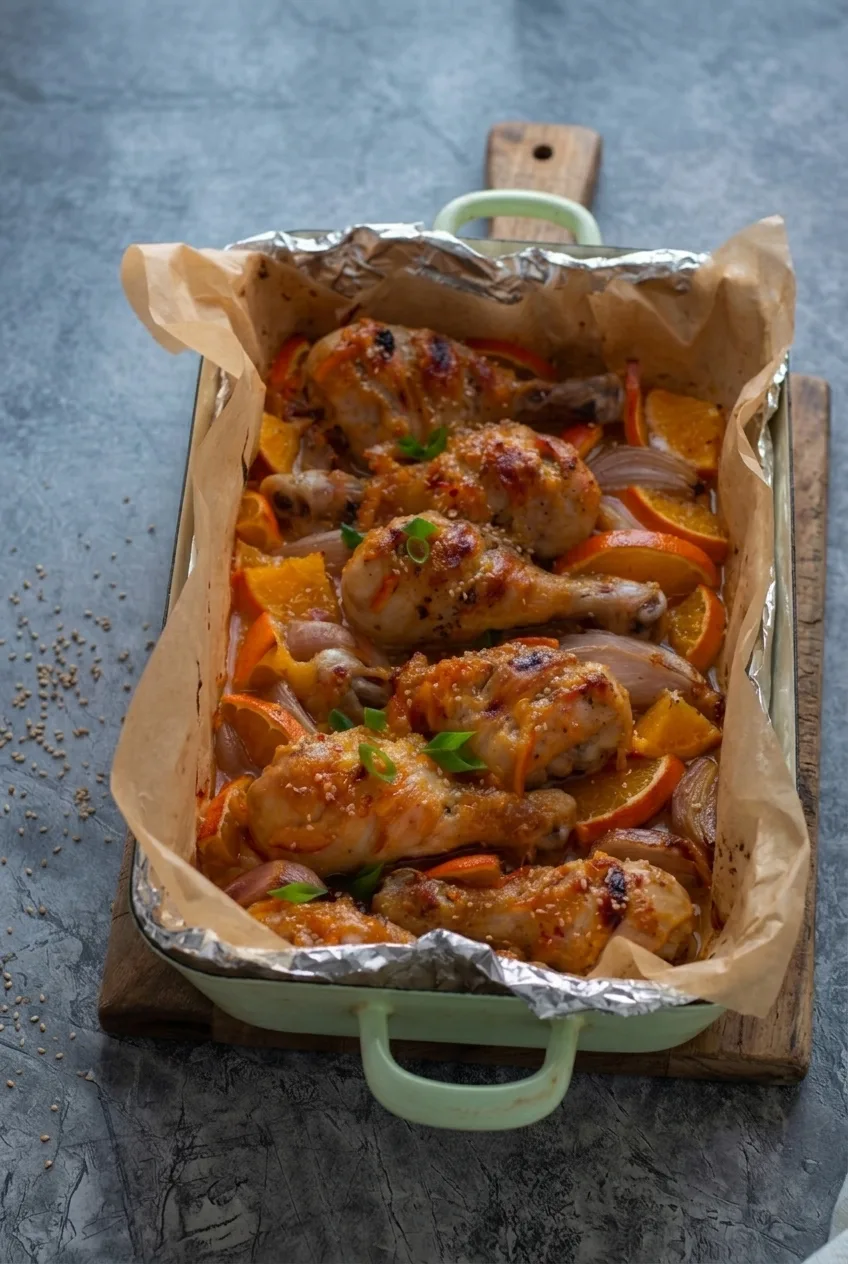
Orange Ginger Glazed Chicken Drumsticks

These whole drumsticks roast with shallots until the skin begins to brown, then finish with orange wedges and a glossy orange-ginger glaze. Simmering the marmalade glaze separately makes it thick enough to brush on; adding it late keeps the sugar from darkening too much. Sesame seeds and sliced green onions finish the pan.

Serves 4, about 2 drumsticks each. Prep time: 15 minutes. Cook time: about 40 to 50 minutes, depending on drumstick size.

Ingredients for Orange Ginger Glazed Chicken Drumsticks

Full pan of orange ginger glazed drumsticks with roasted orange wedges and shallots
  • 8 bone-in, skin-on chicken drumsticks, about 2 1/2 to 3 pounds (about 1,200g)
  • 1 tablespoon neutral oil
  • 1/2 teaspoon kosher salt, adjusted for the brand
  • 1/4 teaspoon black pepper
  • 2 medium shallots, peeled and quartered
  • 1 medium orange, cut into wedges
  • 1/2 cup orange marmalade (about 160g)
  • 1/4 cup orange juice
  • 1 tablespoon low-sodium soy sauce
  • 1 tablespoon rice vinegar
  • 1 tablespoon freshly grated ginger
  • 2 garlic cloves, finely minced
  • 2 teaspoons sesame seeds
  • 2 green onions, thinly sliced
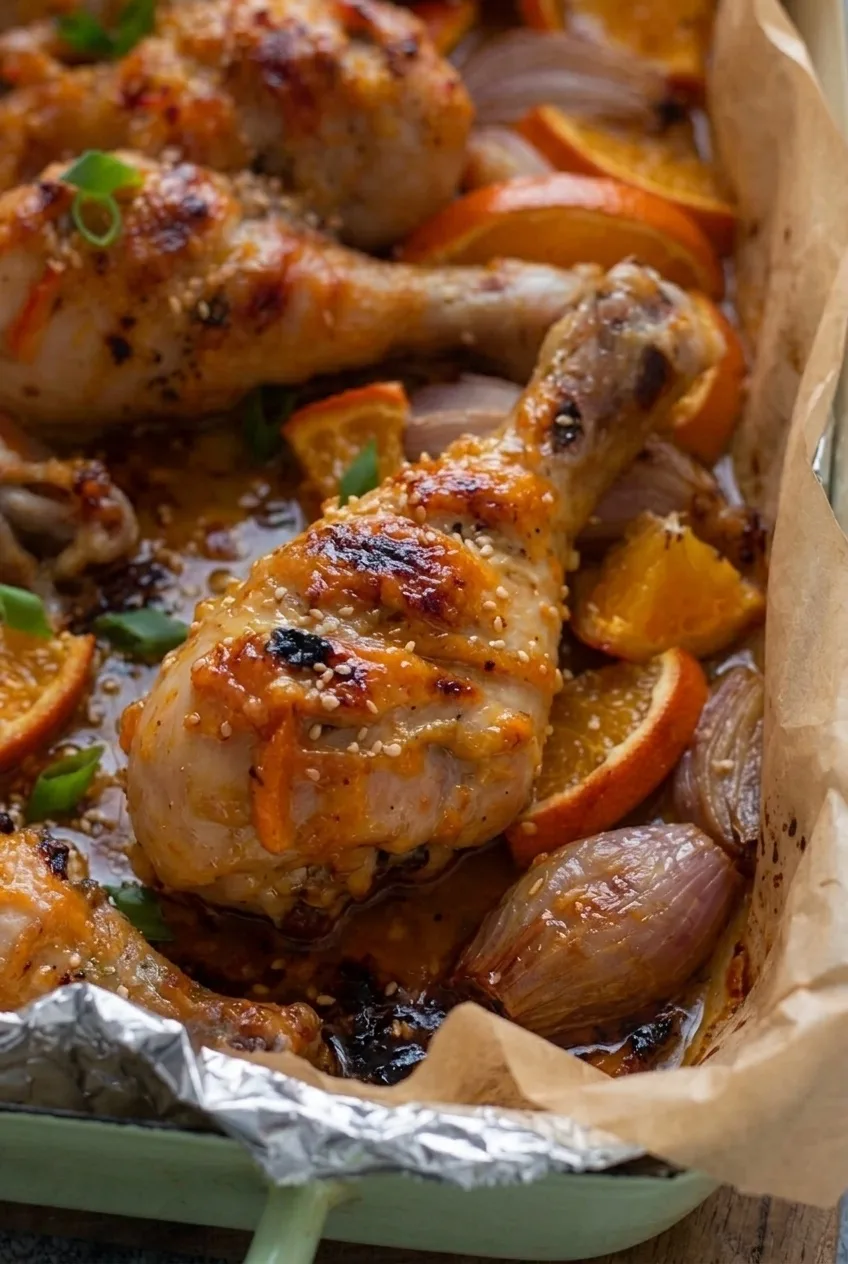
Close view of glossy glazed drumstick skin with sesame seeds, green onion, orange and shallot

How to Roast the Drumsticks

  1. Prepare the oven and pan: Preheat the oven fully to 400°F (205°C). Line a roomy rimmed roasting pan or approximately 10-by-15-inch baking pan with parchment rated for 400°F. You can place foil beneath the parchment for easier cleanup. Keep the lining within the pan rim and away from the oven’s heating elements.
  2. Season the chicken: Pat the drumsticks dry. Toss them and the shallots with the oil, salt, and pepper. Arrange in a single layer without stacking. Use two pans if needed so the chicken has room to brown rather than steam.
  3. Roast before glazing: Roast uncovered for 25 minutes, until the chicken begins to turn golden and the shallots soften.
  4. Simmer the glaze: While the chicken roasts, combine the marmalade, orange juice, soy sauce, vinegar, ginger, and garlic in a small saucepan. Simmer over medium-low heat, stirring, for about 4 to 6 minutes. The glaze should look glossy and lightly coat a spoon while remaining easy to brush. If it is watery, simmer it a little longer.
  5. Turn and glaze: Set aside a portion of glaze in a separate container for the final brush. After the initial 25 minutes, turn the drumsticks and tuck the orange wedges and shallots between them. Brush the chicken with some of the remaining glaze. Do not dip a brush that has touched the chicken into the reserved glaze.
  6. Finish roasting: Return the pan to the 400°F oven for approximately 15 to 25 minutes more. Start checking the thickest drumsticks after about 40 minutes of total roasting, and watch the glaze and orange edges during the final 10 minutes. Brush with the reserved clean glaze near the end. The chicken should be golden-orange with a glossy coating and a few darker spots, not scorched. Insert a thermometer into the thickest meat without touching bone; each drumstick checked must reach at least 165°F (75°C). Larger pieces may need more time.
  7. Rest and garnish: Let the chicken rest for about 5 minutes. Scatter the sesame seeds and green onions over the drumsticks. Serve in the pan with the roasted orange wedges and shallots.

Why the Glaze Goes on Later

Marmalade can darken too much if it spends the full roasting time in the oven. Roasting the chicken first gives the skin a chance to brown; adding the orange wedges with the glaze keeps their exposed edges from roasting for too long. Do not broil this parchment-lined pan.

Reducing the glaze in a saucepan makes it cling to the chicken without depending on how much juice collects in the roasting pan. A little juice underneath the drumsticks is normal, but brush on the glaze rather than pouring it all into the pan.

Serving and Leftovers

Serve with white rice to catch any extra glaze, plus green beans or steamed broccoli. For a different glazed drumstick dinner, see these oven-roasted honey mustard chicken drumsticks.

Refrigerate leftovers promptly in a covered container. Reheat the cooked drumsticks covered to limit drying, until heated through. The glaze can also be made ahead, refrigerated promptly, and warmed gently until brushable before cooking the chicken.

Nutrition

Approximate per serving (2 drumsticks, with glaze, orange, and shallots): 520 calories, 38g protein, 24g fat, and 38g carbohydrates. Approximate per 100g of edible prepared food: 200 calories, 15g protein, 9g fat, and 15g carbohydrates. Drumstick size, edible meat yield, and how much glaze remains in the pan will affect these estimates.

Orange Ginger Glazed Chicken Drumsticks

Roasted chicken drumsticks are brushed with a reduced orange marmalade and ginger glaze, then finished with sesame seeds and green onions.
Course: Main Course
Cuisine: American
Prep: 15 min
Cook: 50 min
Total: 70 min
Servings: 4 Calories: 520 kcal

Equipment

  • Rimmed roasting pan
  • Parchment paper
  • Small saucepan
  • Pastry brush
  • Meat thermometer

Ingredients

For the Chicken

  • 8 bone-in, skin-on chicken drumsticks, about 2 1/2 to 3 pounds (about 1,200 g)
  • 1 tablespoon neutral oil
  • 1/2 teaspoon kosher salt, adjusted for the brand
  • 1/4 teaspoon black pepper
  • 2 medium shallots, peeled and quartered
  • 1 medium orange, cut into wedges

For the Glaze and Garnish

  • 1/2 cup orange marmalade (about 160 g)
  • 1/4 cup orange juice
  • 1 tablespoon low-sodium soy sauce
  • 1 tablespoon rice vinegar
  • 1 tablespoon freshly grated ginger
  • 2 garlic cloves, finely minced
  • 2 teaspoons sesame seeds
  • 2 green onions, thinly sliced

Instructions

  1. Preheat the oven to 400°F (205°C). Line a roomy rimmed roasting pan or approximately 10-by-15-inch baking pan with parchment rated for 400°F. Keep the parchment within the pan rim and away from the heating elements.
  2. Pat the drumsticks dry. Toss them and the shallots with the oil, salt, and pepper.
  3. Arrange the chicken in a single layer in the pan. Use two pans if needed to leave room for browning.
  4. Roast uncovered for 25 minutes, until the chicken begins to turn golden and the shallots soften.
  5. While the chicken roasts, combine the marmalade, orange juice, soy sauce, rice vinegar, ginger, and garlic in a small saucepan. Simmer over medium-low heat, stirring, for 4 to 6 minutes, until glossy and thick enough to lightly coat a spoon.
  6. Set aside some glaze in a clean container for brushing near the end. After the first 25 minutes, turn the drumsticks and tuck the orange wedges and shallots between them.
  7. Brush the chicken with some of the remaining glaze. Do not dip a brush that has touched the chicken into the reserved glaze.
  8. Return the pan to the oven for 15 to 25 minutes. Begin checking the thickest drumsticks after about 40 minutes of total roasting, and watch the glaze and orange edges during the final 10 minutes.
  9. Brush the chicken with the reserved clean glaze near the end of cooking. Check each drumstick with a thermometer inserted into the thickest meat without touching bone; it must reach at least 165°F (75°C). Cook larger pieces longer if needed.
  10. Rest the chicken for about 5 minutes. Sprinkle with sesame seeds and green onions, and serve with the roasted orange wedges and shallots.

Tips

  • Dry the drumsticks before roasting to help the skin brown.
  • Arrange the chicken in a single layer; use two pans if needed to prevent steaming.
  • Simmer the glaze until it lightly coats a spoon so it clings to the chicken.
  • Add the glaze and orange wedges after the initial roast to keep them from darkening too much.
  • Keep a portion of glaze separate for the final brush, and do not reuse a brush that has touched raw chicken.

Notes

Do not broil the parchment-lined pan. Refrigerate leftovers promptly in a covered container and reheat covered until heated through. The glaze can be made ahead, refrigerated, and gently warmed until brushable.

Nutrition

Calories: 520 kcal | Protein: 38 g | Fat: 24 g | Carbohydrates: 38 g

Chicken Drumsticks with Potatoes and Carrots

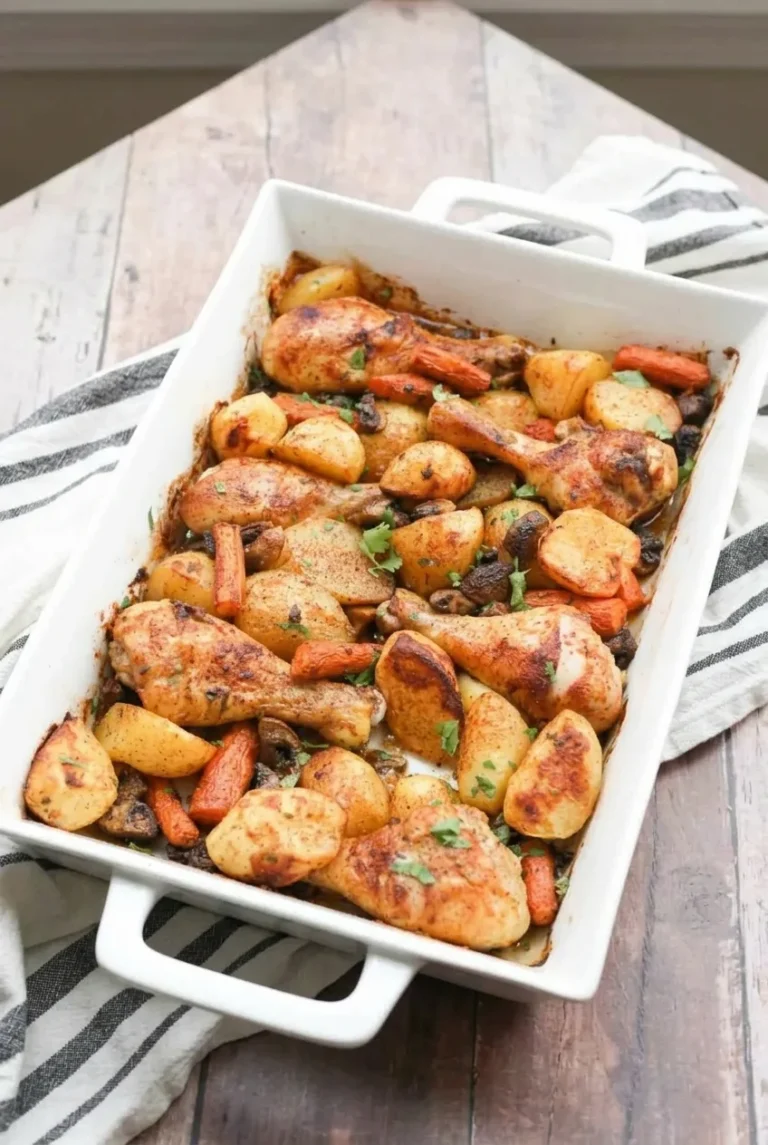
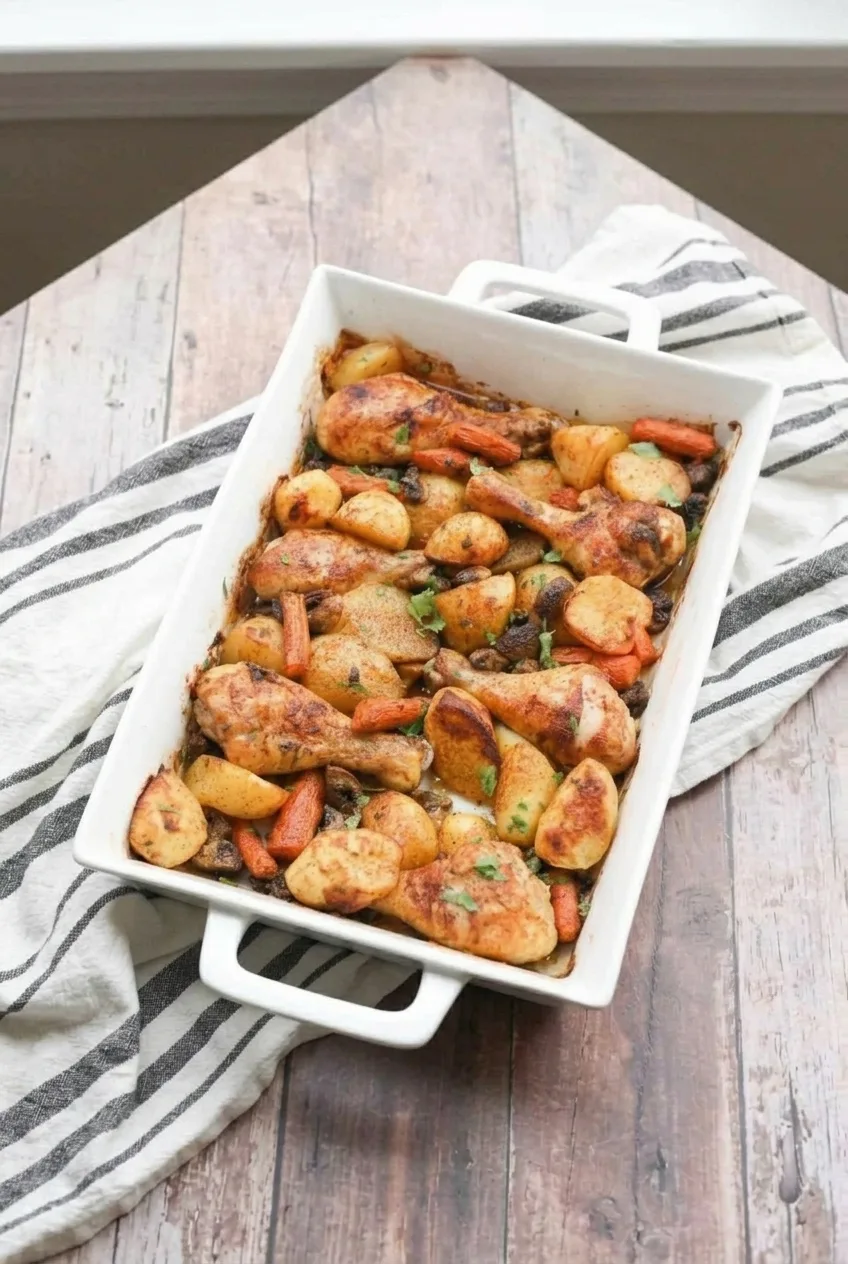
Whole chicken drumsticks roast skin-side up in a baking dish with chunky potatoes, thick carrots, and a few mushrooms. Paprika, garlic, and thyme season the dish; parsley adds a fresh finish. The vegetables cook in shallow roasting juices, with no broth or water added.

Cutting the vegetables to the right size helps them become tender while the chicken cooks. Keep the drumstick skin exposed for browning, and use a thermometer and a fork—not the clock alone—to decide when everything is done.

Ingredients for Chicken Drumsticks with Potatoes and Carrots

Full baking dish of roasted chicken drumsticks and vegetables on a pale surface
  • 6 medium bone-in, skin-on chicken drumsticks, about 2½ pounds (1,150g)
  • 1¼ pounds small yellow potatoes (570g), halved or cut into roughly 1-inch pieces
  • 12 ounces carrots (340g), cut into 1- to 1½-inch segments
  • 6 ounces cremini mushrooms (170g), halved or quartered if large
  • 3 tablespoons olive oil, divided
  • 1½ teaspoons kosher salt, divided, or to taste depending on brand
  • 1½ teaspoons paprika, divided
  • 1 teaspoon garlic powder, divided
  • 1 teaspoon dried thyme, divided
  • ½ teaspoon black pepper, divided
  • 2 tablespoons chopped fresh parsley

Yield: 4–6 servings. Prep: 20 minutes. Cook: About 50–60 minutes, or longer if needed.

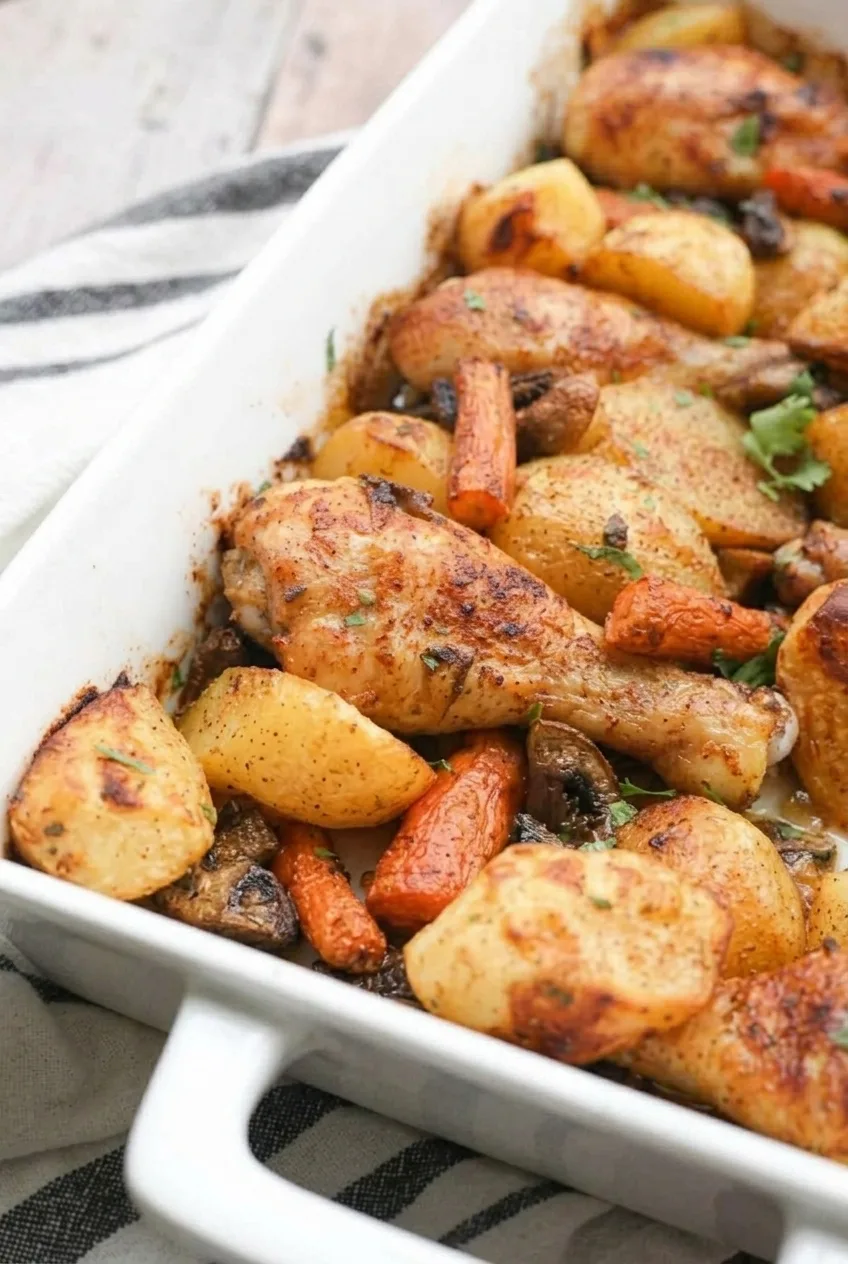
Close view of browned drumstick skin, golden potatoes, carrots, mushrooms, and shallow pan juices

How to Roast Chicken Drumsticks with Potatoes and Carrots

  1. Preheat and cut: Preheat the oven to 400°F (205°C). Cut the potatoes into roughly 1-inch pieces and the carrots into 1- to 1½-inch segments. Split especially wide carrot pieces lengthwise.
  2. Season the vegetables: In a mixing bowl, toss the potatoes, carrots, and mushrooms with 2 tablespoons olive oil and half each of the salt, paprika, garlic powder, thyme, and pepper. Spread them across the bottom of a 9-by-13-inch oven-safe baking dish.
  3. Add the chicken: Pat the drumsticks dry. Rub them with the remaining tablespoon of oil and remaining seasonings. Nestle them among and partly over the vegetables in a single layer, skin-side up. Leave the skin exposed; do not add broth or water.
  4. Roast uncovered: After 25–30 minutes, stir the vegetables you can reach around the chicken. Rotate the dish if one side is browning faster, but leave the drumsticks skin-side up.
  5. Check for doneness: Begin checking at 45 minutes. Insert an instant-read thermometer into the thickest meaty part of a drumstick without touching bone. The chicken must reach at least 165°F (75°C), and the potatoes and carrots should be fork-tender. Look for browned patches on the chicken and some browned potato edges. Roasting usually takes about 50–60 minutes total; large drumsticks or a crowded dish may take longer.
  6. Rest and serve: Let the dish stand for about 5 minutes. Scatter parsley over the top and serve from the baking dish with a little of the natural pan juice.

Cut the Vegetables to Finish With the Chicken

Even-sized potato pieces cook more reliably than oversized halves or quarters. Keep the carrot segments thick, but split those from the widest part of the carrot so their centers can soften during the same roast. Test both vegetables with a fork before serving.

Keep the Chicken Skin Exposed

A generously filled baking dish will develop some roasting juice, but the drumsticks should not be buried under the vegetables. Dry skin, an uncovered dish, and no added liquid give the upper surfaces a better chance to brown. If making a larger batch, divide it between two dishes rather than stacking the ingredients; extra mushrooms can also make the dish wetter.

If the Chicken and Vegetables Finish at Different Times

If the chicken reaches 165°F before the potatoes and carrots are tender, transfer it to a plate, keep it warm, and return the vegetables to the oven. If the vegetables finish first, remove them and continue roasting the chicken until it reaches temperature.

Storing and Reheating Leftovers

Refrigerate leftovers in an airtight container for up to 4 days. Reheat in a 350°F (175°C) oven until thoroughly hot; about 20 minutes is a starting point. The vegetables may be softer after refrigeration.

Nutrition

Approximate nutrition per serving, based on 6 servings: 400 calories, 25g protein, 22g fat, and 24g carbohydrates. Approximate values per 100g of edible prepared food: 155 calories, 10g protein, 9g fat, and 9g carbohydrates. Values vary with drumstick size, edible meat yield, and how much pan juice is served.

Chicken Drumsticks with Potatoes and Carrots

Oven-roasted chicken drumsticks cook with potatoes, carrots, and mushrooms seasoned with paprika, garlic, and thyme.
Course: Main Course
Cuisine: American
Prep: 20 min
Cook: 60 min
Total: 85 min
Servings: 6 Calories: 400 kcal

Equipment

  • 9-by-13-inch baking dish
  • Mixing bowl
  • Instant-read thermometer
  • Fork

Ingredients

Chicken and Vegetables

  • 6 medium bone-in, skin-on chicken drumsticks, about 2½ pounds (1,150 g)
  • 1¼ pounds small yellow potatoes (570 g), halved or cut into roughly 1-inch pieces
  • 12 ounces carrots (340 g), cut into 1- to 1½-inch segments
  • 6 ounces cremini mushrooms (170 g), halved or quartered if large

Seasoning and Garnish

  • 3 tablespoons olive oil, divided
  • 1½ teaspoons kosher salt, divided, or to taste
  • 1½ teaspoons paprika, divided
  • 1 teaspoon garlic powder, divided
  • 1 teaspoon dried thyme, divided
  • ½ teaspoon black pepper, divided
  • 2 tablespoons chopped fresh parsley

Instructions

  1. Preheat the oven to 400°F (205°C). Cut the potatoes into roughly 1-inch pieces and the carrots into 1- to 1½-inch segments. Split especially wide carrot pieces lengthwise.
  2. Toss the potatoes, carrots, and mushrooms in a mixing bowl with 2 tablespoons of olive oil and half of the salt, paprika, garlic powder, thyme, and pepper.
  3. Spread the vegetables across the bottom of a 9-by-13-inch oven-safe baking dish.
  4. Pat the drumsticks dry. Rub them with the remaining tablespoon of olive oil and the remaining seasonings. Nestle them among and partly over the vegetables in a single layer, skin-side up, leaving the skin exposed. Do not add broth or water.
  5. Roast uncovered. After 25–30 minutes, stir the vegetables you can reach around the chicken. Rotate the dish if one side is browning faster, keeping the drumsticks skin-side up.
  6. Begin checking for doneness at 45 minutes. Insert an instant-read thermometer into the thickest meaty part of a drumstick without touching bone; the chicken must reach at least 165°F (75°C). Check that the potatoes and carrots are fork-tender. Continue roasting as needed; cooking usually takes about 50–60 minutes.
  7. Let the dish rest for about 5 minutes. Scatter the parsley over the top and serve with some of the natural pan juice.

Tips

  • Cut potatoes into roughly 1-inch pieces so they cook through with the chicken.
  • Split the widest carrot segments lengthwise to help their centers become tender.
  • Keep the drumstick skin exposed and roast uncovered for better browning.
  • Divide a larger batch between two baking dishes instead of crowding or stacking the ingredients.
  • Use a thermometer for the chicken and a fork to check the vegetables.

Notes

Refrigerate leftovers in an airtight container for up to 4 days. Reheat in a 350°F (175°C) oven until thoroughly hot; about 20 minutes is a starting point.

Nutrition

Calories: 400 kcal | Protein: 25 g | Fat: 22 g | Carbohydrates: 24 g

Honey Mustard Chicken Drumsticks

These oven-roasted, bone-in drumsticks get a glossy, golden-amber coating from honey, Dijon mustard, and flecks of whole-grain mustard. Brushing on some of the glaze partway through roasting builds a sticky finish without broiling. Honey can darken before larger drumsticks cook through, so use a thermometer rather than the color of the glaze to judge doneness.

The recipe makes 4 servings. Allow about 15 minutes to prepare it, 35 to 45 minutes to roast, and 5 minutes for the chicken to rest.

Ingredients for Honey Mustard Chicken Drumsticks

Full dish of honey mustard chicken drumsticks with parsley and amber pan sauce
  • 8 bone-in, skin-on chicken drumsticks, about 2½ pounds (1,150g)
  • ¼ cup honey (85g)
  • 3 tablespoons Dijon mustard (45g)
  • 1 tablespoon whole-grain mustard (15g)
  • 1 tablespoon apple cider vinegar
  • 1 tablespoon olive oil, plus a little more for greasing the foil
  • 2 garlic cloves, finely minced
  • 1 teaspoon paprika
  • 1 teaspoon kosher salt, or to taste
  • ½ teaspoon black pepper
  • 2 tablespoons chopped fresh parsley
Close view of a honey mustard drumstick showing speckled glaze and unevenly browned skin

How to Roast Honey Mustard Chicken Drumsticks

  1. Prepare the oven and pan: Fully preheat the oven to 400°F (205°C). Line a 13-by-18-inch rimmed sheet pan with foil and lightly grease it so the sticky glaze is less likely to cling.
  2. Mix and divide the glaze: Whisk together the honey, both mustards, vinegar, olive oil, garlic, and paprika. Transfer about one-third to a separate clean bowl for later brushing, before any glaze touches the raw chicken.
  3. Coat the drumsticks: Pat the chicken dry and season with the salt and pepper. Brush with the glaze left in the original bowl. Arrange the drumsticks in one layer with gaps between them so they brown rather than steam.
  4. Roast and brush again: Roast uncovered for about 20 minutes. Gently loosen and turn the drumsticks with tongs, then brush with the clean reserved glaze. Use a clean brush, or wash the first brush if it touched raw chicken. Roast for another 15 to 25 minutes, rotating the pan if browning is uneven. Begin checking the chicken around 30 minutes total; small drumsticks may finish early.
  5. Check, rest, and serve: The glaze should be glossy with golden-brown patches, not blackened. Check the thickest meat of each drumstick without touching bone; it must reach at least 165°F (75°C). Rest for 5 minutes. Arrange the drumsticks close together in a shallow dish, spoon a little fully cooked pan glaze and juices beneath or over them, and scatter with parsley.

Why Brush the Glaze on Twice?

Honey browns quickly, so saving some glaze for the second half of roasting helps build a shiny coating without exposing all of it to the full cooking time. Set that portion aside before coating the chicken. Do not serve leftover glaze from a bowl or brush that touched raw poultry; use only the glaze and juices cooked in the roasting pan.

How to Tell When the Drumsticks Are Done

Drumstick size affects roasting time, and browned glaze is not proof that the meat is cooked. Check each piece with an instant-read thermometer in the thickest meat, away from the bone. While 165°F is the minimum, dark meat cooked closer to 175°F (80°C) may be more tender. Expect browned, sticky skin rather than uniformly crisp skin.

Keep the Honey Glaze from Burning

If the coating becomes very dark before the chicken reaches temperature, loosely shield those areas with foil and continue roasting. When turning the drumsticks, loosen them gently: caramelized honey can stick even to greased foil.

Serving and Storage

Serve with rice or roasted potatoes to catch the sauce, plus a green vegetable or salad if you like. For a different sweet glaze, try these honey garlic chicken drumsticks.

Refrigerate leftovers in an airtight container for up to 3 days and reheat until warmed through. The glaze may be less glossy afterward. If coating the chicken ahead, keep it refrigerated and store the clean finishing glaze separately. Freezing is possible, though the texture may be less pleasant after thawing.

Nutrition

Approximate nutrition per serving (2 drumsticks, including a share of the glaze): 430 calories, 36g protein, 23g fat, and 21g carbohydrates. Per 100g of edible chicken and glaze: approximately 215 calories, 18g protein, 12g fat, and 10g carbohydrates. Values vary with drumstick size, edible meat yield, and how much pan sauce is served.

Honey Mustard Chicken Drumsticks

Oven-roasted chicken drumsticks are brushed with honey, Dijon, and whole-grain mustard for a glossy, sticky glaze.
Course: Main Course
Cuisine: American
Prep: 15 min
Cook: 40 min
Total: 60 min
Servings: 4 Calories: 430 kcal

Equipment

  • Oven
  • Rimmed sheet pan
  • Foil
  • Mixing bowl
  • Whisk
  • Pastry brush
  • Tongs
  • Instant-read thermometer

Ingredients

For the Chicken

  • 8 bone-in, skin-on chicken drumsticks, about 2½ pounds (1,150 g)
  • 1 teaspoon kosher salt, or to taste
  • ½ teaspoon black pepper
  • A little olive oil for greasing the foil

For the Glaze

  • ¼ cup honey (85 g)
  • 3 tablespoons Dijon mustard (45 g)
  • 1 tablespoon whole-grain mustard (15 g)
  • 1 tablespoon apple cider vinegar
  • 1 tablespoon olive oil
  • 2 garlic cloves, finely minced
  • 1 teaspoon paprika

For Serving

  • 2 tablespoons chopped fresh parsley

Instructions

  1. Preheat the oven to 400°F (205°C). Line a 13-by-18-inch rimmed sheet pan with foil and lightly grease the foil.
  2. Whisk together the honey, Dijon mustard, whole-grain mustard, vinegar, olive oil, garlic, and paprika.
  3. Transfer about one-third of the glaze to a separate clean bowl for brushing later.
  4. Pat the drumsticks dry and season with salt and pepper. Brush them with the remaining glaze.
  5. Arrange the drumsticks in a single layer on the pan, leaving space between them.
  6. Roast uncovered for about 20 minutes. Gently loosen and turn the drumsticks with tongs.
  7. Brush the drumsticks with the reserved clean glaze. Roast for another 15 to 25 minutes, rotating the pan if they brown unevenly.
  8. Begin checking for doneness at about 30 minutes total. Insert an instant-read thermometer into the thickest meat of each drumstick without touching the bone; it must reach at least 165°F (75°C).
  9. Rest the chicken for 5 minutes. Arrange the drumsticks in a shallow dish, spoon cooked pan glaze and juices beneath or over them, and sprinkle with parsley.

Tips

  • Set aside the finishing glaze before it touches raw chicken.
  • Use a clean brush for the reserved glaze, or wash the first brush before using it.
  • Check each drumstick with a thermometer; browned glaze does not confirm the chicken is cooked.
  • Dark meat may be more tender when cooked closer to 175°F (80°C).
  • If the glaze darkens too quickly, loosely cover those areas with foil and continue roasting.
  • Loosen the drumsticks gently when turning because caramelized honey can stick to the foil.

Notes

Refrigerate leftovers in an airtight container for up to 3 days and reheat until warmed through. Discard any glaze that touched raw chicken; serve only cooked pan glaze and juices.

Nutrition

Calories: 430 kcal | Protein: 36 g | Fat: 23 g | Carbohydrates: 21 g