Author

Julia

Browsing

Caramelized Onion Cheese Ball

Fresh onions cook down until deep golden and sweet, then cool before being folded into a cream cheese and sharp white cheddar base. Chilling turns the mixture into one large, spreadable cheese ball; a thick coating of chopped walnuts adds a crunchy exterior. Cook away the onions’ moisture and let them cool completely so the ball holds its shape.

Makes 12 appetizer servings. Allow about 20 minutes of active prep, 30–40 minutes to cook the onions, about 20 minutes to cool them, and at least 2 hours to chill the ball.

Ingredients for Caramelized Onion Cheese Ball
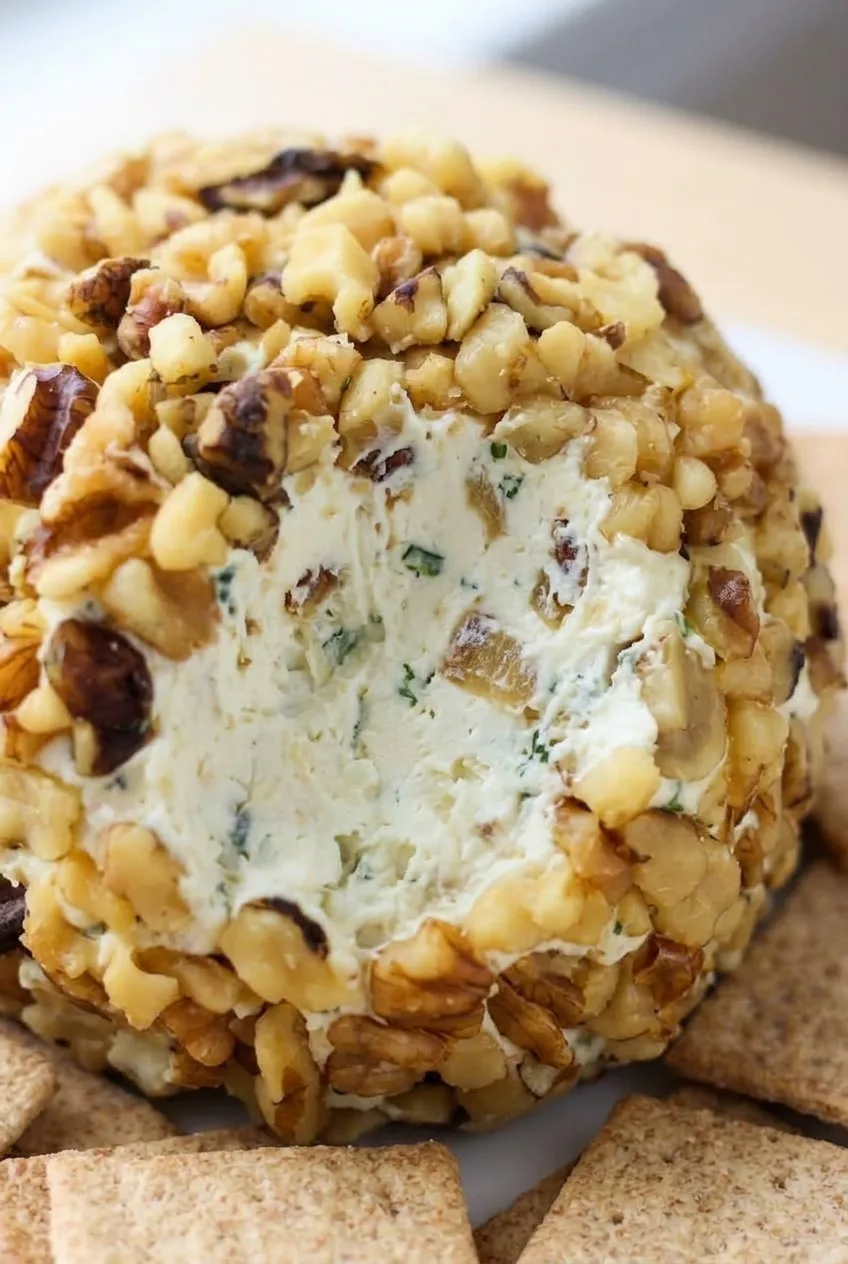
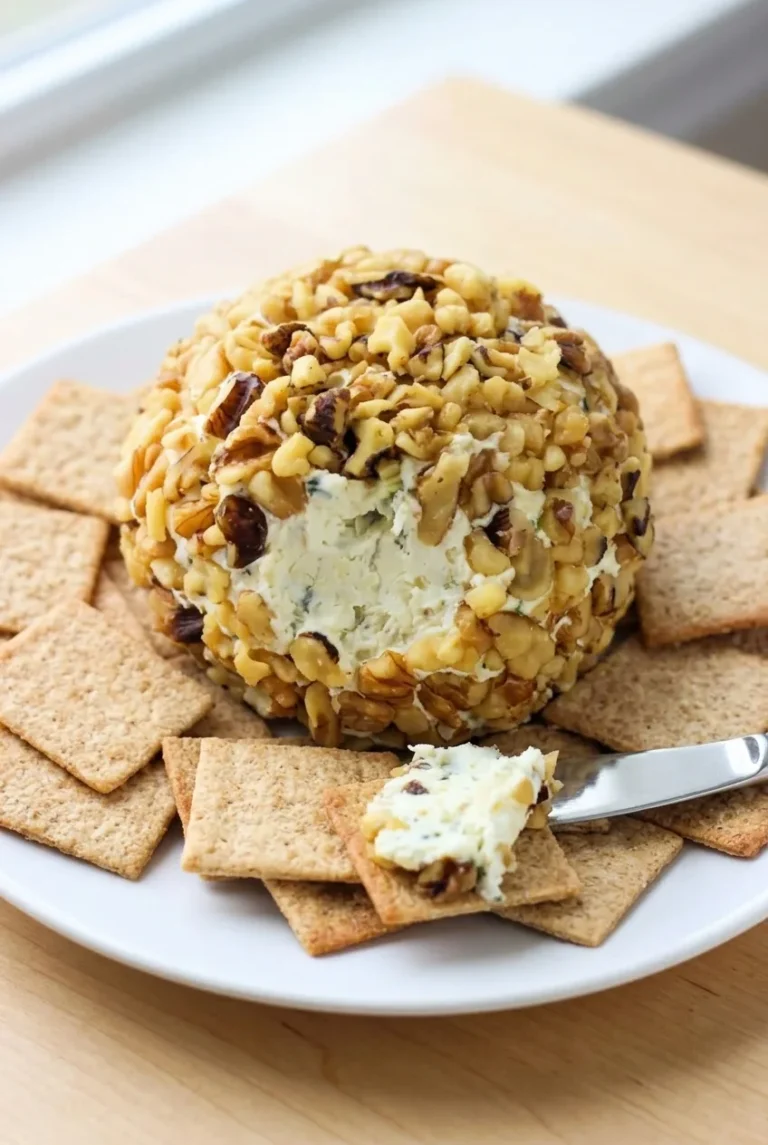
Close view of chunky walnuts and the pale, onion-flecked interior of a caramelized onion cheese ball
  • 2 medium yellow onions, thinly sliced (about 300g)
  • 1 tablespoon unsalted butter (15g)
  • 2 packages full-fat cream cheese (8 ounces each), softened (450g total)
  • 1 cup freshly grated sharp white cheddar (about 115g)
  • 1 teaspoon Worcestershire sauce
  • 1 teaspoon dried parsley
  • 1/4 teaspoon kosher salt, plus more to taste
  • 1/4 teaspoon freshly ground black pepper
  • 1 cup chopped walnuts (about 110g)

For serving: sturdy square crackers and a spreading knife.

How to Make Caramelized Onion Cheese Ball
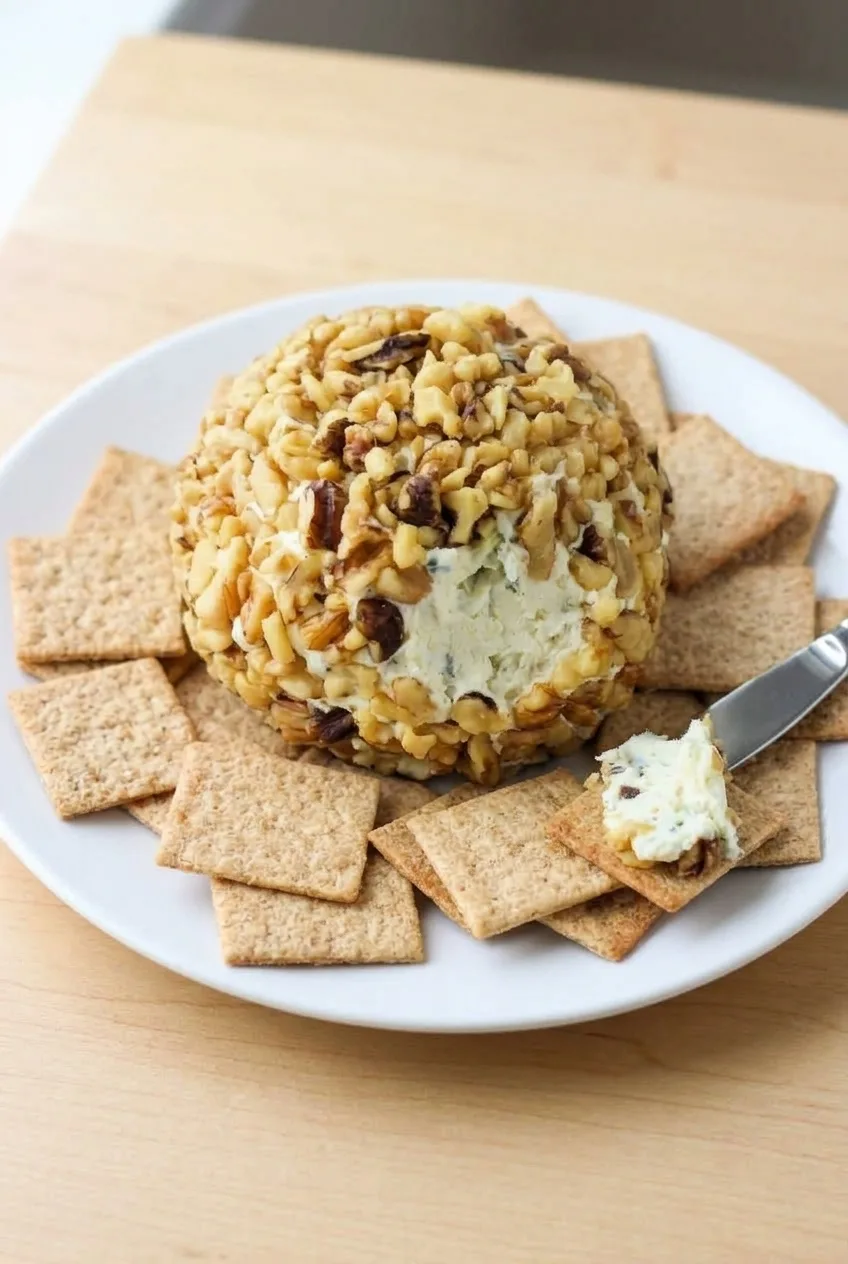
Full plate of caramelized onion cheese ball, square crackers, and a spreading knife
  1. Brown the onions: Melt the butter in a 10- to 12-inch skillet over medium-low heat. Add the onions and cook uncovered for about 30–40 minutes, stirring every few minutes and more often as they darken. Start checking for sticking after about 20 minutes. If browned bits threaten to scorch, add 1–2 tablespoons of water and scrape them up. Continue until the onions are soft, substantially reduced, deep golden brown, and free of pooled liquid.
  2. Cool and chop: Spread the onions out and let them cool completely, about 20 minutes. Chop any long strands into small pieces so they distribute through the cheese.
  3. Mix the cheese: Stir the softened cream cheese, cheddar, Worcestershire sauce, parsley, salt, and pepper until evenly combined. Fold in the cooled onions. Taste and add more salt if needed; the mixture should be thick enough to mound.
  4. Shape and chill: Transfer the mixture to plastic wrap and gather it into one large, rounded ball. Wrap tightly and refrigerate for at least 2 hours, or until firm enough to unwrap without slumping. If it is still soft, keep it wrapped and chill it longer.
  5. Coat and serve: Spread the walnuts on a shallow plate. Unwrap the ball and press the nuts over its entire surface, leaving little cheese exposed. Set it on a serving plate with square crackers and a spreading knife. Let it stand for 15–20 minutes before serving so the center is easier to spread.

How Brown Should the Onions Be?

Soft or translucent onions still hold too much moisture for this cheese ball. Cook them until they are deep golden, much smaller in volume, and no longer wet. A wide skillet helps moisture escape; a crowded pan may take longer. Let the onions cool until no warmth remains before adding them to the cheese, since warm or damp onions can loosen the mixture.

When to Add the Walnuts

If making the cheese ball ahead, refrigerate it wrapped and uncoated. Press on the walnuts shortly before serving to keep the coating distinct and chunky. For another walnut-coated option, see this blue cheese and walnut cheese ball.

Serving and Storage

Serve with sturdy square crackers and a spreading knife. The brief stand after refrigeration makes the cheese easier to spread without breaking the crackers.

Keep leftovers covered in the refrigerator and plan to use them within 3–4 days. For the best walnut texture, store any cheese ball made ahead without its coating and add the nuts near serving time. Do not reheat. Freezing is not recommended because the texture of this fresh-onion version after thawing is uncertain.

For a different savory flavor, try the everything ranch cheese ball.

Nutrition

Approximate nutrition per serving (1/12 of the cheese ball, without crackers): 245 calories, 6g protein, 23g fat, and 5g carbohydrates. Per 100g of finished cheese ball: approximately 360 calories, 9g protein, 34g fat, and 8g carbohydrates. Values are estimates; the finished weight depends on how much moisture cooks out of the onions.

Caramelized Onion Cheese Ball

Sweet caramelized onions are folded into a cream cheese and sharp cheddar mixture, chilled, and coated with chopped walnuts.
Course: Appetizer
Cuisine: American
Prep: 40 min
Cook: 40 min
Total: 220 min
Servings: 12 Calories: 245 kcal

Equipment

  • 10- to 12-inch skillet
  • Plastic wrap
  • Shallow plate

Ingredients

For the Cheese Ball

  • 2 medium yellow onions, thinly sliced (about 300 g)
  • 1 tablespoon unsalted butter (15 g)
  • 2 packages full-fat cream cheese (8 ounces each), softened (450 g total)
  • 1 cup freshly grated sharp white cheddar (about 115 g)
  • 1 teaspoon Worcestershire sauce
  • 1 teaspoon dried parsley
  • 1/4 teaspoon kosher salt, plus more to taste
  • 1/4 teaspoon freshly ground black pepper

For the Coating and Serving

  • 1 cup chopped walnuts (about 110 g)
  • Sturdy square crackers, for serving

Instructions

  1. Melt the butter in a 10- to 12-inch skillet over medium-low heat. Add the onions and cook uncovered for 30–40 minutes, stirring every few minutes and more often as they darken.
  2. Start checking for sticking after about 20 minutes. If browned bits threaten to scorch, add 1–2 tablespoons of water and scrape them up. Cook until the onions are soft, substantially reduced, deep golden brown, and no liquid remains.
  3. Spread the onions out and cool completely, about 20 minutes. Chop any long strands into small pieces.
  4. Stir together the cream cheese, cheddar, Worcestershire sauce, parsley, salt, and pepper. Fold in the cooled onions, taste, and add more salt if needed.
  5. Transfer the mixture to plastic wrap and shape it into one large rounded ball. Wrap tightly and refrigerate for at least 2 hours, or until firm.
  6. Spread the walnuts on a shallow plate. Unwrap the ball and press the walnuts over the entire surface.
  7. Set the cheese ball on a serving plate with crackers and a spreading knife. Let it stand for 15–20 minutes before serving.

Tips

  • Cook the onions until deep golden and no longer wet so the cheese ball holds its shape.
  • Use a wide skillet to help moisture escape; a crowded pan may take longer.
  • Add a little water and scrape the pan if browned bits begin to scorch.
  • Cool the onions completely before mixing them into the cheese.
  • If the wrapped cheese ball is still soft, chill it longer before coating.
Notes

Refrigerate leftovers covered and use within 3–4 days. For make-ahead storage, chill the cheese ball uncoated and add the walnuts shortly before serving. Do not reheat; freezing is not recommended.

Nutrition

Calories: 245 kcal | Protein: 6 g | Fat: 23 g | Carbohydrates: 5 g

Spinach Artichoke Cheese Ball

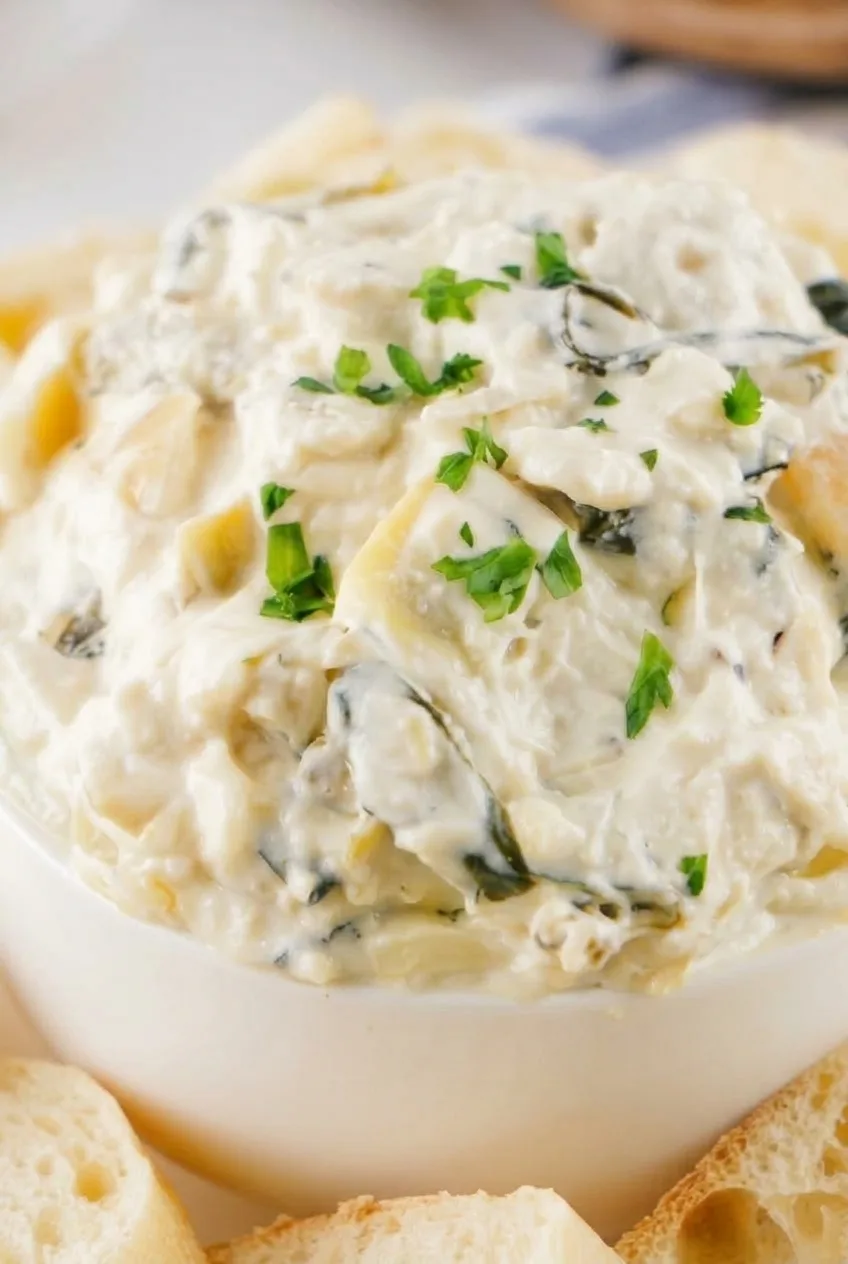
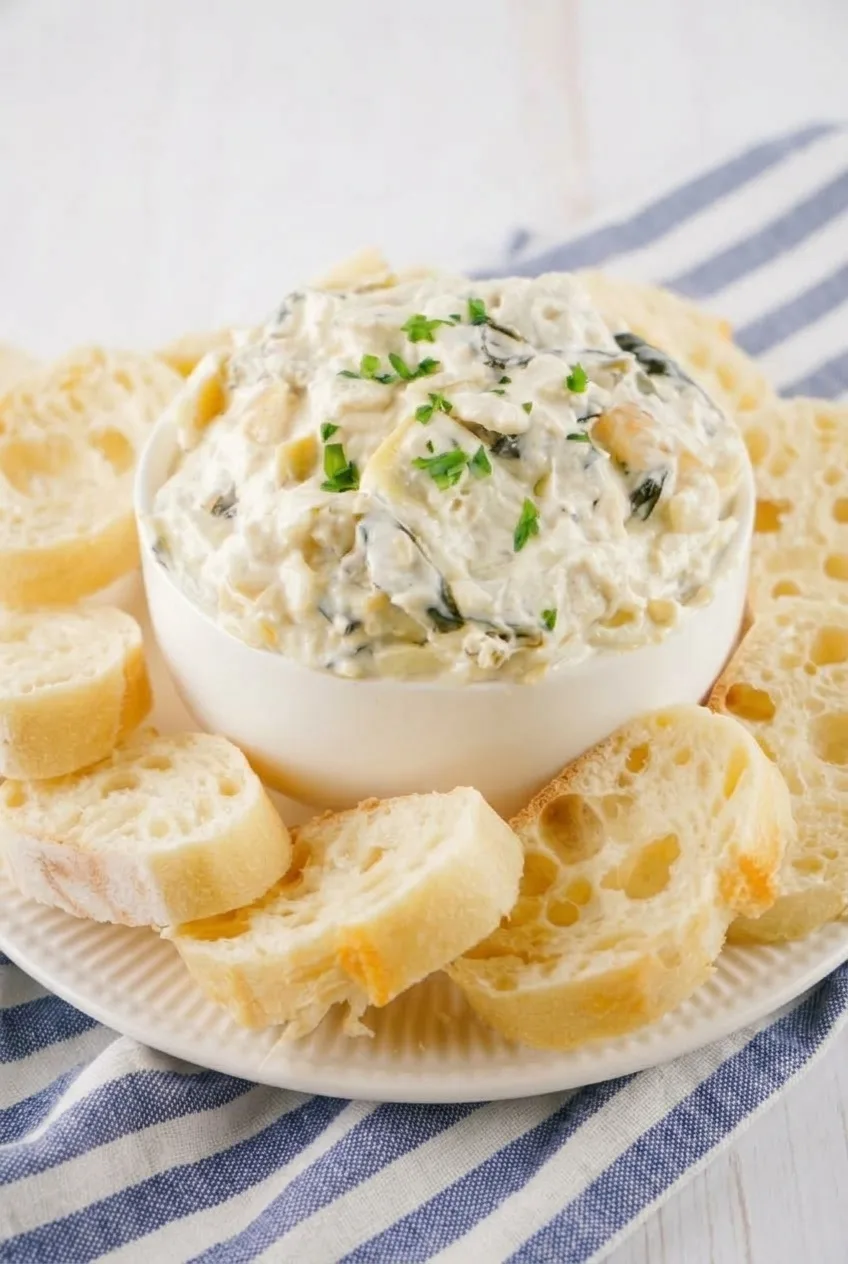
This spinach artichoke cheese ball is a cold, chunky spread shaped into a generous mound in its serving bowl, rather than a freestanding ball. Cream cheese holds it together, Brie adds richness, and folded-in spinach and artichokes remain visible in every scoop. Squeezing the vegetables dry and chilling the filled bowl for at least 8 hours help the mound hold above the rim. Serve it with sliced baguette.

Ingredients for Spinach Artichoke Cheese Ball

Close view of creamy spinach artichoke cheese with visible artichoke chunks and spinach
  • 2 packages (8 ounces each) cream cheese, softened (450g total)
  • 4 ounces Brie, weighed after trimming most of the rind, then softened (115g)
  • 5 ounces frozen chopped spinach, thawed and squeezed very dry (about half a 10-ounce package; 140g before squeezing)
  • 1 can (14 ounces) artichoke hearts packed in water or brine, rinsed and drained (400g before draining)
  • 2 green onions, finely chopped
  • 1 small garlic clove, minced
  • 1 teaspoon lemon zest
  • 1 teaspoon lemon juice
  • 2 tablespoons chopped fresh parsley, divided
  • 1/4 teaspoon kosher salt, plus more to taste
  • 1/4 teaspoon black pepper
  • 1 medium baguette, sliced, for serving (about 300g)

Yield: 12 to 16 appetizer servings. Prep: 25 minutes, plus time to soften the cheeses. Chill: At least 8 hours. Total: About 8 hours 25 minutes, plus any cheese-softening time.

How to Make Spinach Artichoke Cheese Ball

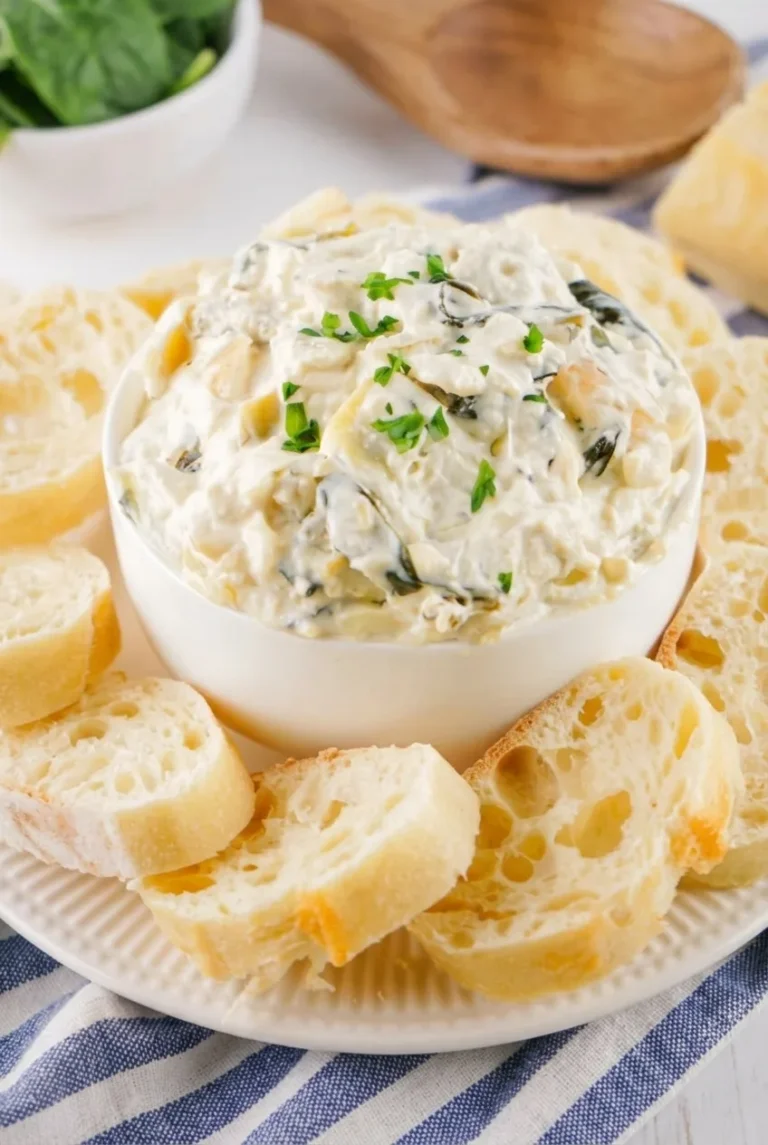
White bowl of spinach artichoke cheese surrounded by baguette slices on a serving plate
  1. Dry the vegetables: Wrap the thawed spinach in a clean kitchen towel or sturdy paper towels and squeeze until it no longer drips. Rinse and drain the artichokes well, then chop them into small but recognizable pieces.
  2. Mix the cheese base: Trim most of the Brie rind while the cheese is cold, then let the Brie soften. In a food processor, pulse it with the cream cheese, green onions, garlic, lemon zest, lemon juice, 1 tablespoon parsley, salt, and pepper until evenly combined.
  3. Fold in the vegetables: Transfer the cheese mixture to a mixing bowl. Fold in the spinach and artichokes until distributed throughout. Do not purée them; the spread should retain visible pieces. Taste and adjust the salt if needed.
  4. Mound and chill: Press the mixture into a small serving bowl, filling any large gaps. Heap the top into an irregular rounded mound above the rim. Cover and refrigerate for at least 8 hours. Once chilled, the mound should hold its shape without liquid pooling around it, yet remain easy to scoop.
  5. Garnish and serve: Scatter the remaining tablespoon of parsley lightly over the mound. Set the bowl on a larger plate, arrange the baguette slices around it, and serve chilled.

How to Keep the Cheese Mound Firm

Spinach that has only been drained in a colander can still hold enough water to make the spread slump or weep. Squeeze it until it feels nearly dry, and drain the artichokes thoroughly. Water- or brine-packed hearts suit this version better than marinated ones, which bring extra oil and seasoning.

Choose a bowl small enough for the mixture to rise above its rim. The bowl supports the mound while it chills and doubles as the serving vessel—there is no need to grease a mold or turn the spread out.

Make-Ahead and Serving

Cover the filled bowl and refrigerate it for 8 hours to 2 days before serving. Add the parsley and slice the bread just before serving. Crackers can be offered alongside the baguette. Keep the spread chilled until serving time and refrigerate it promptly afterward; it is not meant to be heated.

For a different cold cheese appetizer, try this herb goat cheese ball.

Nutrition

Approximate nutrition per serving, based on 12 servings and including the baguette: 245 calories, 8g protein, 16g fat, and 20g carbohydrates. Per 100g: approximately 240 calories, 8g protein, 16g fat, and 19g carbohydrates. Values vary with the cheeses, drained vegetable weight, bread, and portion size.

Spinach Artichoke Cheese Ball

A chilled, scoopable mound of cream cheese and Brie folded with spinach, artichokes, and fresh herbs.
Course: Appetizer
Cuisine: American
Prep: 25 min
Total: 505 min
Servings: 12 Calories: 245 kcal

Equipment

  • Food processor
  • Mixing bowl
  • Kitchen towel
  • Small serving bowl

Ingredients

  • 2 packages (8 ounces each) cream cheese, softened (450 g total)
  • 4 ounces Brie, most of the rind trimmed, softened (115 g)
  • 5 ounces frozen chopped spinach, thawed (140 g before squeezing)
  • 1 can (14 ounces) artichoke hearts packed in water or brine, rinsed and drained (400 g before draining)
  • 2 green onions, finely chopped
  • 1 small garlic clove, minced
  • 1 teaspoon lemon zest
  • 1 teaspoon lemon juice
  • 2 tablespoons chopped fresh parsley, divided
  • 1/4 teaspoon kosher salt, plus more to taste
  • 1/4 teaspoon black pepper
  • 1 medium baguette, sliced, for serving (about 300 g)

Instructions

  1. Wrap the thawed spinach in a clean kitchen towel or sturdy paper towels and squeeze until it no longer drips.
  2. Drain the artichokes well and chop them into small, recognizable pieces.
  3. Pulse the Brie, cream cheese, green onions, garlic, lemon zest, lemon juice, 1 tablespoon parsley, salt, and pepper in a food processor until evenly combined.
  4. Transfer the cheese mixture to a mixing bowl. Fold in the spinach and artichokes without puréeing them. Taste and adjust the salt if needed.
  5. Press the mixture into a small serving bowl, fill any large gaps, and heap it into a rounded mound above the rim.
  6. Cover and refrigerate for at least 8 hours, until the mound holds its shape and remains easy to scoop.
  7. Sprinkle with the remaining parsley. Set the bowl on a larger plate, arrange baguette slices around it, and serve chilled.

Tips

  • Squeeze the spinach until it feels nearly dry to help prevent the spread from slumping or weeping.
  • Drain the artichokes thoroughly; water- or brine-packed hearts work better here than oil-packed marinated ones.
  • Use a small bowl so the mixture rises above the rim and the bowl supports the mound as it chills.
  • Chill for at least 8 hours before serving so the mound can hold its shape.

Notes

Cover and refrigerate for up to 2 days before serving. Add the parsley and slice the baguette just before serving. Keep chilled, refrigerate promptly after serving, and do not heat.

Nutrition

Calories: 245 kcal | Protein: 8 g | Fat: 16 g | Carbohydrates: 20 g

Everything Ranch Cheese Ball

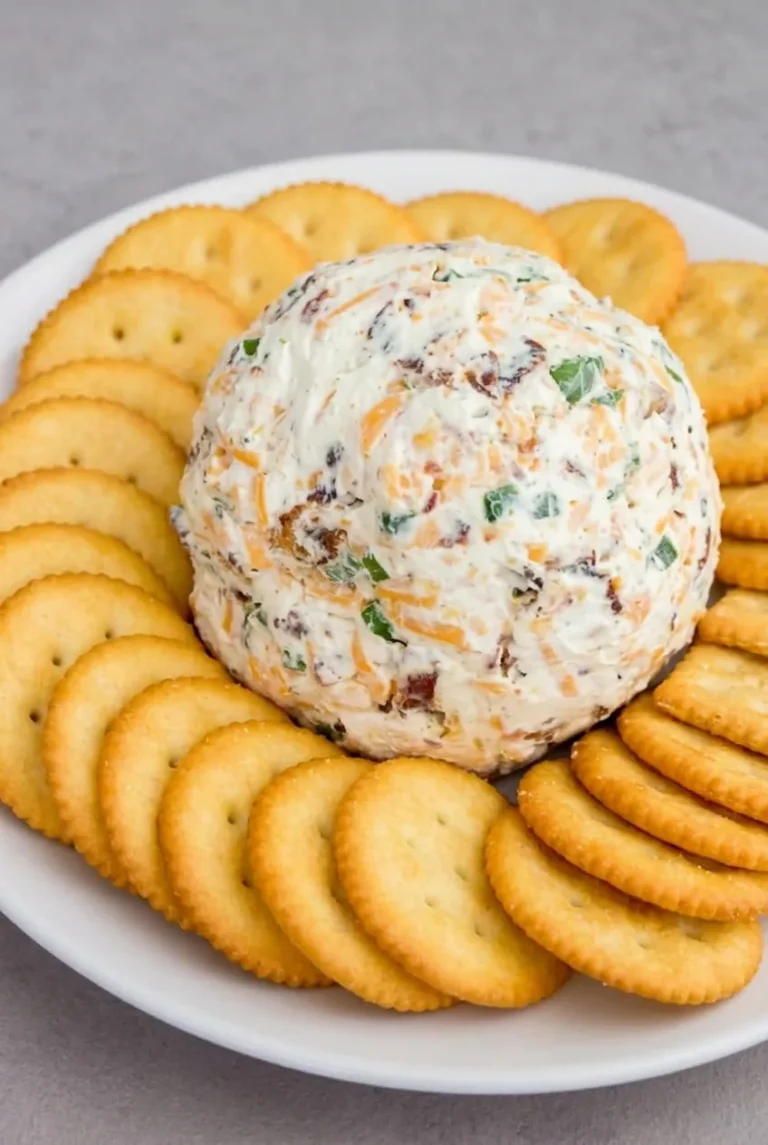
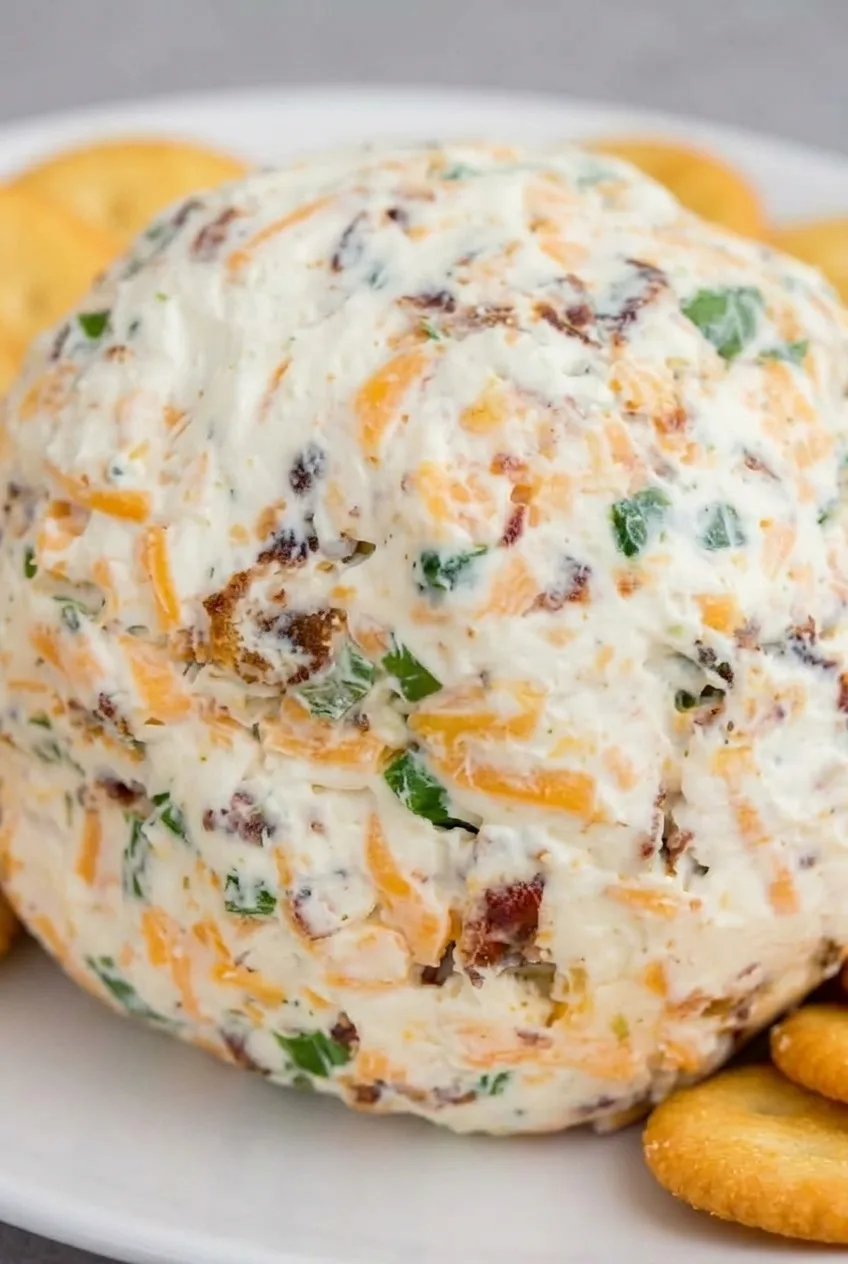
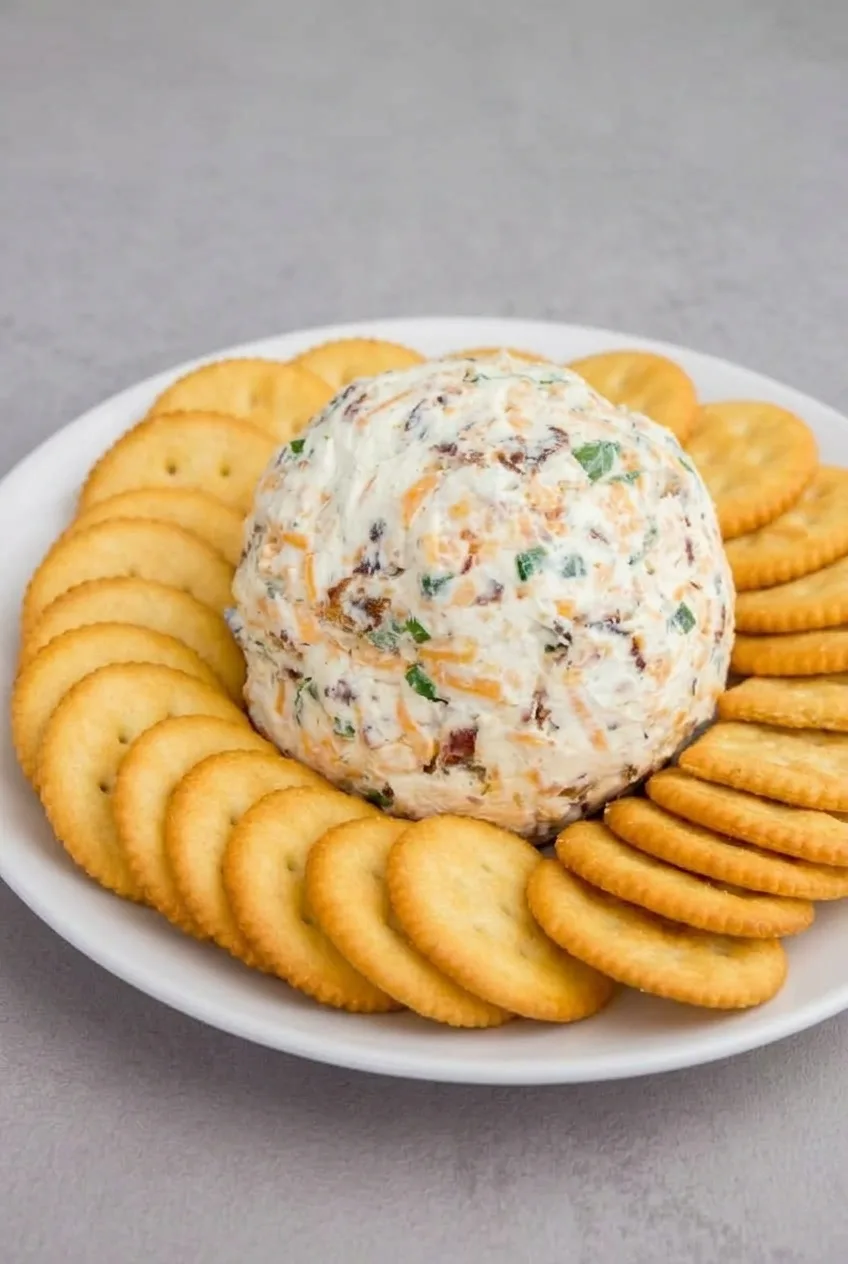
Sharp cheddar, bacon, and green onion run through this creamy ranch cheese ball, leaving the mix-ins visible on its uncoated surface. Here, “everything” refers to those additions, not everything bagel seasoning.

Softened cream cheese makes the ingredients easy to combine. Once shaped in plastic wrap, the ball needs at least 2 hours in the refrigerator to hold its rounded shape while staying spreadable. The cheese mixture requires no cooking and can be made a day ahead.

Ingredients for Everything Ranch Cheese Ball

Close view of cheddar strands, bacon pieces, and green onion in the creamy ranch cheese ball
  • 2 blocks (8 ounces each) full-fat cream cheese, softened (450g)
  • 1 packet dry ranch seasoning mix, about 1 ounce (30g)
  • 1 1/2 cups shredded sharp cheddar (170g)
  • About 1/2 cup cooked, cooled, finely chopped bacon, from approximately 6 slices (60g)
  • 3 green onions, finely chopped (about 30g)
  • Round buttery crackers, for serving (optional)

Use full-fat cream cheese to help the ball hold its shape. Ranch mix and bacon can both be salty, so taste the mixture before considering any extra salt.

How to Make Everything Ranch Cheese Ball

Complete platter of Everything Ranch Cheese Ball with crackers on a neutral tabletop

Yield: About 12 appetizer servings. Prep time: 20 minutes with cooked bacon. Chill time: At least 2 hours. Total time: About 2 hours 20 minutes, plus any time needed to cook and cool the bacon.

  1. Prepare the ingredients: Let the cream cheese soften until it yields easily to a spatula. If cooking the bacon now, cook it separately, drain it, and let it cool completely before chopping. Finely chop the green onions.
  2. Mix: Stir or beat the cream cheese and ranch seasoning in a mixing bowl until smooth, with no pockets of dry mix. Fold in the cheddar, bacon, and green onions until evenly distributed.
  3. Shape: Transfer the mixture to a sheet of plastic wrap. Gather the wrap around it and gently compact it into one rounded, slightly irregular ball. Wrap tightly, leaving the visible mix-ins uncovered by any coating.
  4. Chill: Refrigerate for at least 2 hours, or overnight. Start checking after 2 hours: the unwrapped ball should hold a rounded mound without slumping but still spread easily on a cracker. If it is too soft, rewrap and chill longer.
  5. Serve: Unwrap the cheese ball, set it on a platter, and arrange crackers alongside it.

If the Cheese Ball Is Too Soft to Shape

Chill the mixture briefly in the mixing bowl, then shape it with plastic wrap. If the wrapped ball needs support, set it in a small bowl while it refrigerates. Keep it tightly wrapped until serving so the surface does not dry out or absorb refrigerator odors.

Make-Ahead, Serving, and Storage

Shape and wrap the cheese ball a day ahead, then refrigerate it overnight. Add crackers just before serving. Pretzels or crisp vegetable sticks can be offered alongside them.

Store the cheese ball tightly wrapped in an airtight container in the refrigerator, and plan to use it within 3 to 4 days. Refrigerate leftovers promptly; do not leave the appetizer at room temperature for more than 2 hours. Serve it chilled rather than reheating it.

For a separate option with heat and a crunchy coating, try this bacon jalapeño cheese ball.

Nutrition

Approximate nutrition per serving, based on 12 servings and excluding crackers: 225 calories, 8g protein, 20g fat, and 4g carbohydrates. Per 100g: approximately 360 calories, 13g protein, 32g fat, and 6g carbohydrates. Values will vary with the ranch mix, bacon, and cheese used.

Everything Ranch Cheese Ball

A creamy ranch cheese ball mixed with sharp cheddar, bacon, and green onion, served with crackers.
Course: Appetizer
Cuisine: American
Prep: 20 min
Total: 140 min
Servings: 12 Calories: 225 kcal

Equipment

  • Mixing bowl
  • Spatula or electric mixer
  • Plastic wrap
  • Small bowl
  • Serving platter

Ingredients

For the Cheese Ball

  • 2 blocks (8 ounces each) full-fat cream cheese, softened (450 g)
  • 1 packet dry ranch seasoning mix, about 1 ounce (30 g)
  • 1 1/2 cups shredded sharp cheddar (170 g)
  • About 1/2 cup cooked, cooled, finely chopped bacon, from approximately 6 slices (60 g)
  • 3 green onions, finely chopped (about 30 g)

For Serving

  • Round buttery crackers, optional

Instructions

  1. Let the cream cheese soften until it yields easily to a spatula.
  2. If needed, cook the bacon separately, drain it, and let it cool completely before chopping. Finely chop the green onions.
  3. Stir or beat the cream cheese and ranch seasoning in a mixing bowl until smooth, with no pockets of dry mix.
  4. Fold in the cheddar, bacon, and green onions until evenly distributed.
  5. Transfer the mixture to a sheet of plastic wrap. Gather the wrap around it and gently shape the mixture into a rounded, slightly irregular ball.
  6. Wrap tightly and refrigerate for at least 2 hours or overnight. If the ball is too soft, rewrap it and chill longer.
  7. Unwrap the cheese ball, place it on a platter, and arrange crackers alongside it.

Tips

  • Use full-fat cream cheese to help the cheese ball hold its shape.
  • Make sure cooked bacon is completely cooled before mixing it in.
  • Taste the mixture before adding any extra salt; ranch seasoning and bacon can both be salty.
  • If the mixture is too soft to shape, chill it briefly in the bowl first.
  • Keep the cheese ball tightly wrapped while chilling to prevent it from drying out or absorbing refrigerator odors.

Notes

Shape the cheese ball up to a day ahead and refrigerate it overnight. Store leftovers tightly wrapped in an airtight container in the refrigerator and use within 3 to 4 days. Refrigerate promptly, and do not leave at room temperature for more than 2 hours. Serve chilled; do not reheat.

Nutrition

Calories: 225 kcal | Protein: 8 g | Fat: 20 g | Carbohydrates: 4 g

Buffalo Chicken Cheese Ball

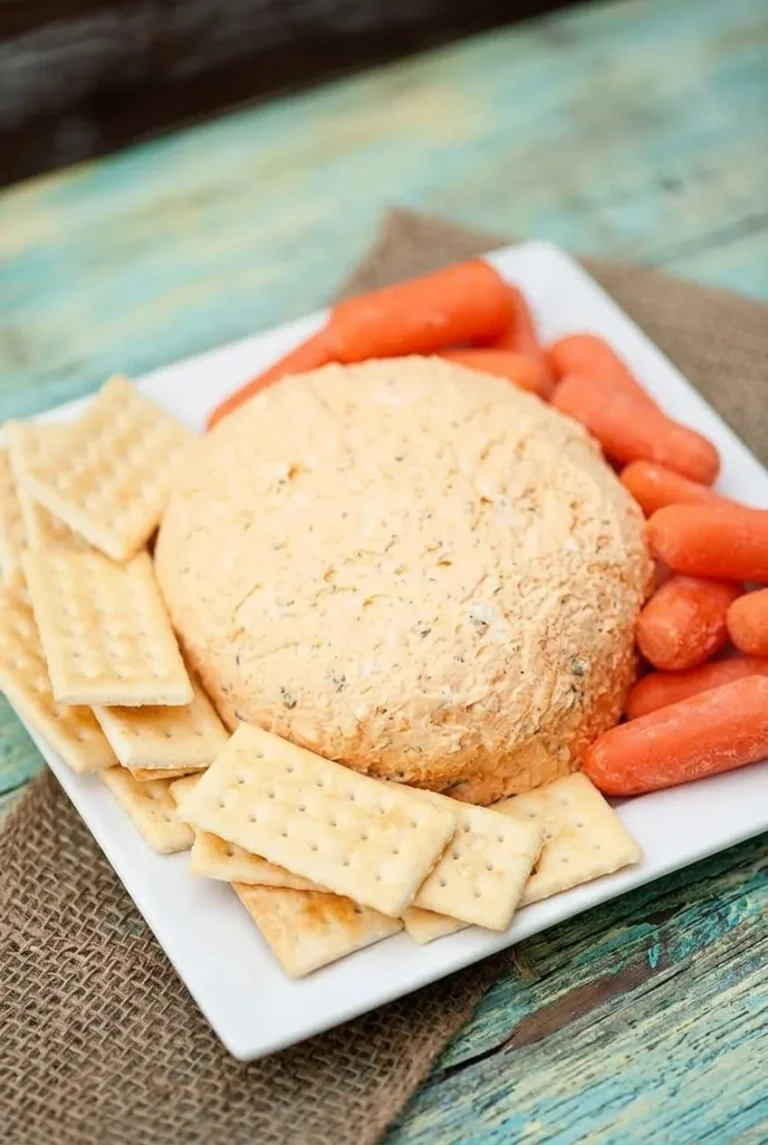
Fully cooked chicken, cheddar, and Buffalo hot sauce turn a cream-cheese base into a chilled, spreadable appetizer. Shape it into one broad, low dome and leave the pale orange, flecked surface uncoated. Finely chopped, fairly dry chicken and measured liquids help it hold its shape without making it hard to spread on crackers.

Makes about 10 appetizer servings. Allow 20 minutes to prepare, plus time to soften the cream cheese and about 2 hours to chill. No cooking is needed if the chicken is already cooked.

Ingredients for Buffalo Chicken Cheese Ball

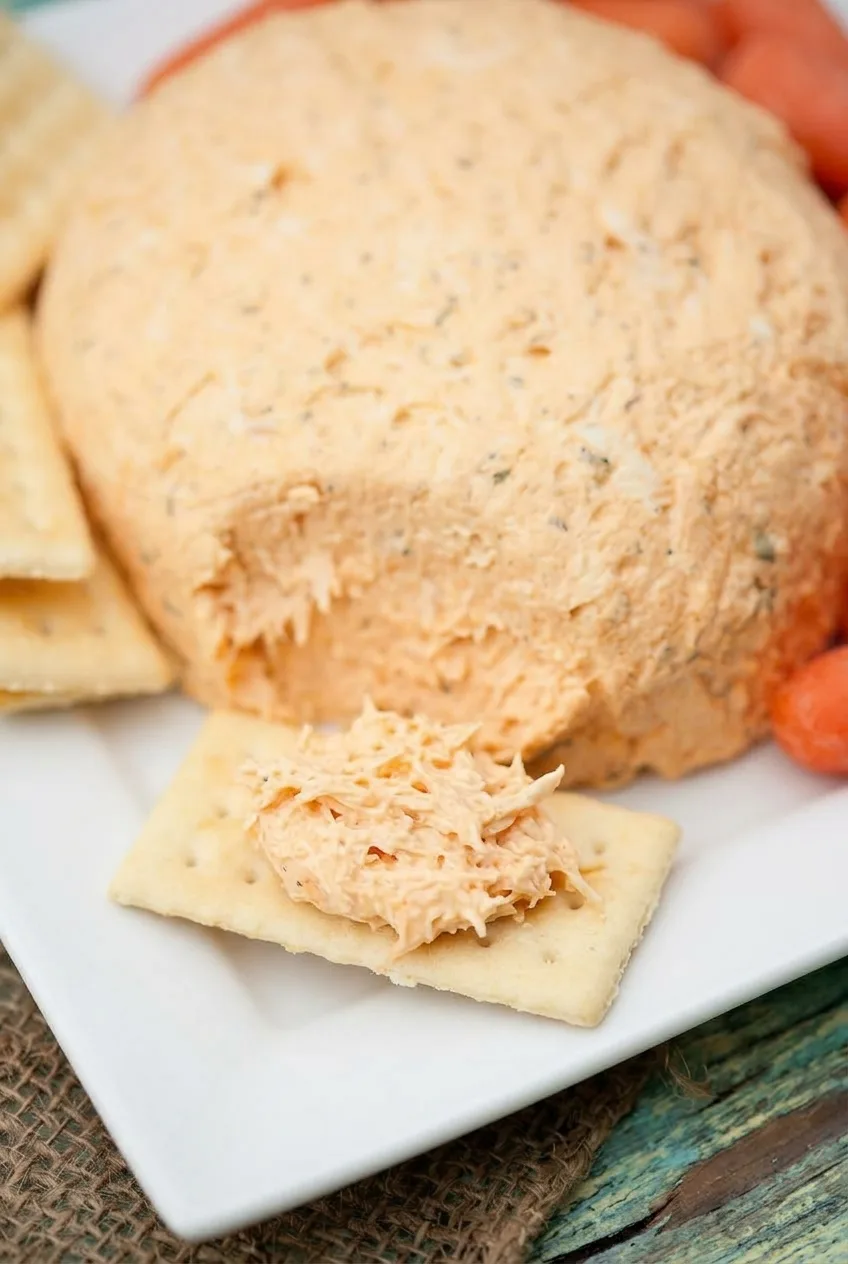
Creamy chicken-flecked Buffalo cheese ball with a small portion spread on a cracker
  • 8 ounces cream cheese, softened (225g)
  • 1 packed cup fully cooked chicken, cooled and finely shredded or chopped (140g)
  • 3/4 cup shredded sharp cheddar cheese (85g)
  • 2 tablespoons Buffalo-style hot sauce (30g)
  • 1 tablespoon blue cheese dressing (15g)
  • 1/4 teaspoon garlic powder
  • 1/4 teaspoon onion powder

Have rectangular crackers and baby carrots ready for serving. Rotisserie chicken works if it is fully cooked and still within its safe refrigerated storage window; avoid pieces sitting in excess liquid.

How to Make Buffalo Chicken Cheese Ball

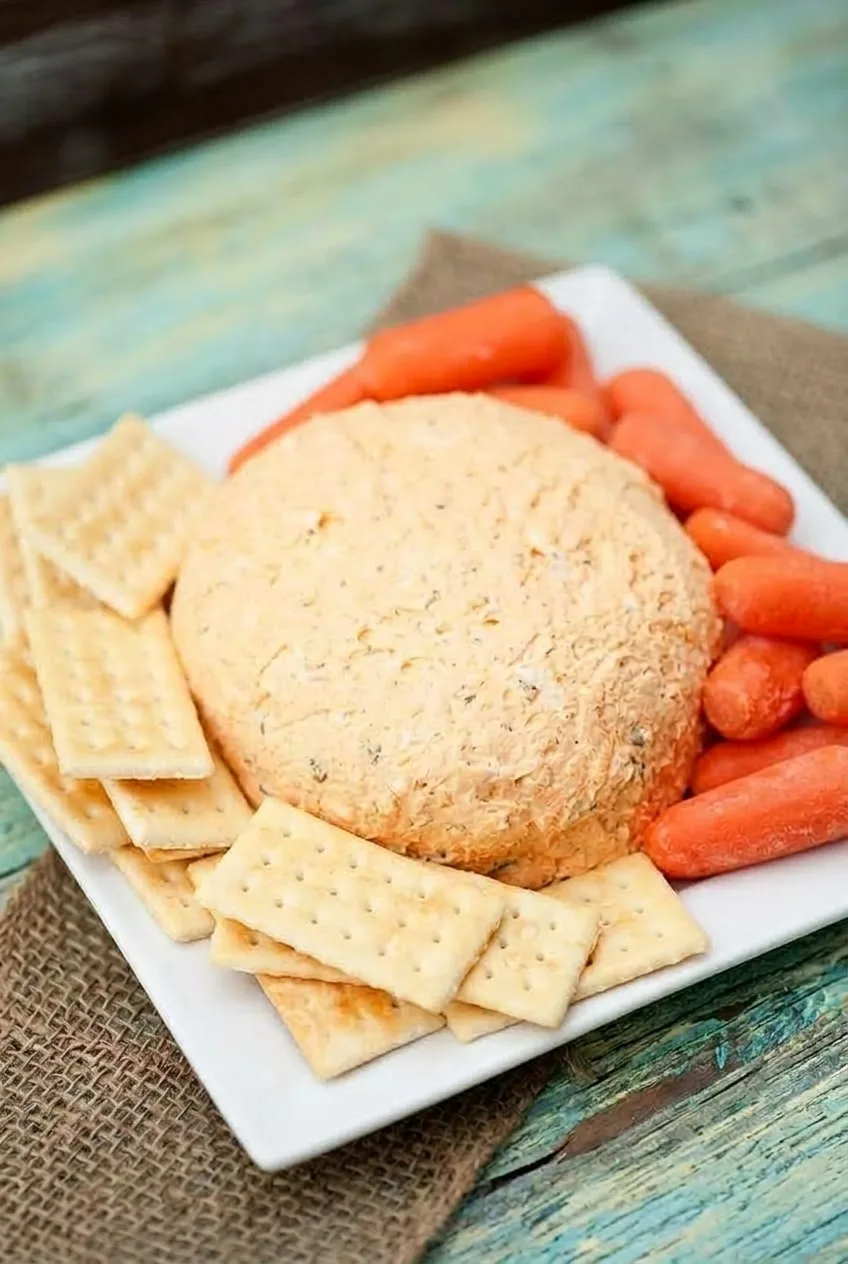
Complete plate of Buffalo chicken cheese ball, crackers, and baby carrots on a rustic tabletop
  1. Prepare the ingredients: Soften the cream cheese until it yields easily to a spatula. Finely shred or chop the cooled, cooked chicken and drain away any visible liquid. Short, fine pieces spread more neatly than long strands.
  2. Mix the base: In a bowl, stir the cream cheese, hot sauce, blue cheese dressing, garlic powder, and onion powder until evenly pale orange, with no large cream-cheese lumps. Stir in the cheddar, then fold in the chicken.
  3. Shape the dome: Spoon the mixture onto plastic wrap. Gather the wrap around it and gently press it into one broad mound about 5 inches across, with a flattened base and rounded top. Leave the outside uncoated.
  4. Chill: Wrap closely and refrigerate. Start checking after about 1 hour and allow roughly 2 hours, or longer if needed. When gently unwrapped, the mound should hold its outline but still be soft enough to spread.
  5. Serve: Unwrap and transfer the cheese ball to a plate. Arrange crackers and baby carrots around it, leaving the flecked surface visible. Serve chilled.

If cooking chicken specifically for this recipe, cook it to 165°F (75°C), then cool it before mixing. Do not use raw chicken.

How to Keep the Cheese Ball Firm and Spreadable

Chicken and dressing add moisture to the cream-cheese base. Drain the chicken and measure the hot sauce and dressing rather than adding extra. If the dome spreads when unwrapped, gather it back into the plastic wrap and chill it longer. Use its shape and spreadability—not the clock alone—as the final cue.

Serving and Variations

Crackers and baby carrots suit the uncoated cheese ball; celery sticks or pita chips also work. For a different hand-held chicken snack, see these chicken avocado roll-ups.

  • Ranch version: Replace the tablespoon of blue cheese dressing with 1 tablespoon ranch dressing. Keep the amount the same so the mixture does not become wetter.
  • Nut-coated version: Press about 1/2 cup finely chopped pecans or walnuts onto the chilled mound for a crunchy finish. This changes the uncoated appearance of the main version.

Make-Ahead and Cold Storage

Shape the cheese ball ahead, keep it wrapped and refrigerated, and unwrap it just before serving. Refrigerate at 40°F (5°C) or below and use it within 3 to 4 days of cooking the chicken; assembling the cheese ball does not restart that clock.

Do not leave it at room temperature for more than 2 hours, or more than 1 hour above 90°F (30°C). Serve chilled without reheating. Freezing is not recommended as a planned method because the thawed texture is uncertain.

For another make-ahead chicken option, try these chicken bacon ranch pinwheels.

Nutrition

Approximate nutrition per appetizer serving, based on 10 servings and excluding crackers and carrots: 145 calories, 8g protein, 12g fat, and 2g carbohydrates. Per 100g of cheese ball: approximately 290 calories, 16g protein, 24g fat, and 4g carbohydrates. Values vary with the brands and chicken used.

Buffalo Chicken Cheese Ball

A chilled cream-cheese appetizer mixed with shredded chicken, cheddar, and Buffalo hot sauce.
Course: Appetizer
Cuisine: American
Prep: 20 min
Total: 140 min
Servings: 10 Calories: 145 kcal

Equipment

  • Mixing bowl
  • Spatula
  • Plastic wrap
  • Serving plate

Ingredients

  • 8 ounces cream cheese, softened (225g)
  • 1 packed cup fully cooked chicken, cooled and finely shredded or chopped (140g)
  • 3/4 cup shredded sharp cheddar cheese (85g)
  • 2 tablespoons Buffalo-style hot sauce (30g)
  • 1 tablespoon blue cheese dressing (15g)
  • 1/4 teaspoon garlic powder
  • 1/4 teaspoon onion powder
  • Rectangular crackers, for serving
  • Baby carrots, for serving

Instructions

  1. Soften the cream cheese until it yields easily to a spatula.
  2. Finely shred or chop the cooled, cooked chicken and drain away any visible liquid.
  3. Stir the cream cheese, hot sauce, blue cheese dressing, garlic powder, and onion powder until evenly pale orange and smooth.
  4. Stir in the cheddar, then fold in the chicken.
  5. Spoon the mixture onto plastic wrap. Gather the wrap around it and shape it into a broad mound about 5 inches across, with a flattened base and rounded top.
  6. Wrap closely and refrigerate for about 2 hours, checking after 1 hour. Chill longer if needed, until the mound holds its shape but remains spreadable.
  7. Unwrap the cheese ball and transfer it to a plate. Arrange crackers and baby carrots around it and serve chilled.

Tips

  • Use finely chopped or shredded chicken for a neater texture.
  • Drain visible liquid from the chicken to help the cheese ball hold its shape.
  • Measure the hot sauce and dressing; adding extra liquid can make the mixture too soft.
  • If the mound spreads when unwrapped, reshape it in the plastic wrap and chill it longer.

Variations

  • Ranch Version: Replace the blue cheese dressing with 1 tablespoon ranch dressing.
  • Nut-Coated Version: Press about 1/2 cup finely chopped pecans or walnuts onto the chilled mound.

Notes

If cooking chicken for this recipe, cook it to 165°F (75°C) and cool it before mixing. Refrigerate at 40°F (5°C) or below and use within 3 to 4 days of cooking the chicken. Do not leave at room temperature for more than 2 hours, or more than 1 hour above 90°F (30°C). Freezing is not recommended.

Nutrition

Calories: 145 kcal | Protein: 8 g | Fat: 12 g | Carbohydrates: 2 g

Smoked Salmon Cheese Ball

One large smoked salmon cheese ball makes a creamy, spreadable appetizer with lemon, dill, and green onion in the center. Larger salmon flakes cover the outside, giving it a textured finish instead of a smooth pink surface. Divide the salmon before mixing, then chill the wrapped ball until it holds its shape; a firm surface makes the flakes easier to press on without flattening it.

Ingredients for Smoked Salmon Cheese Ball

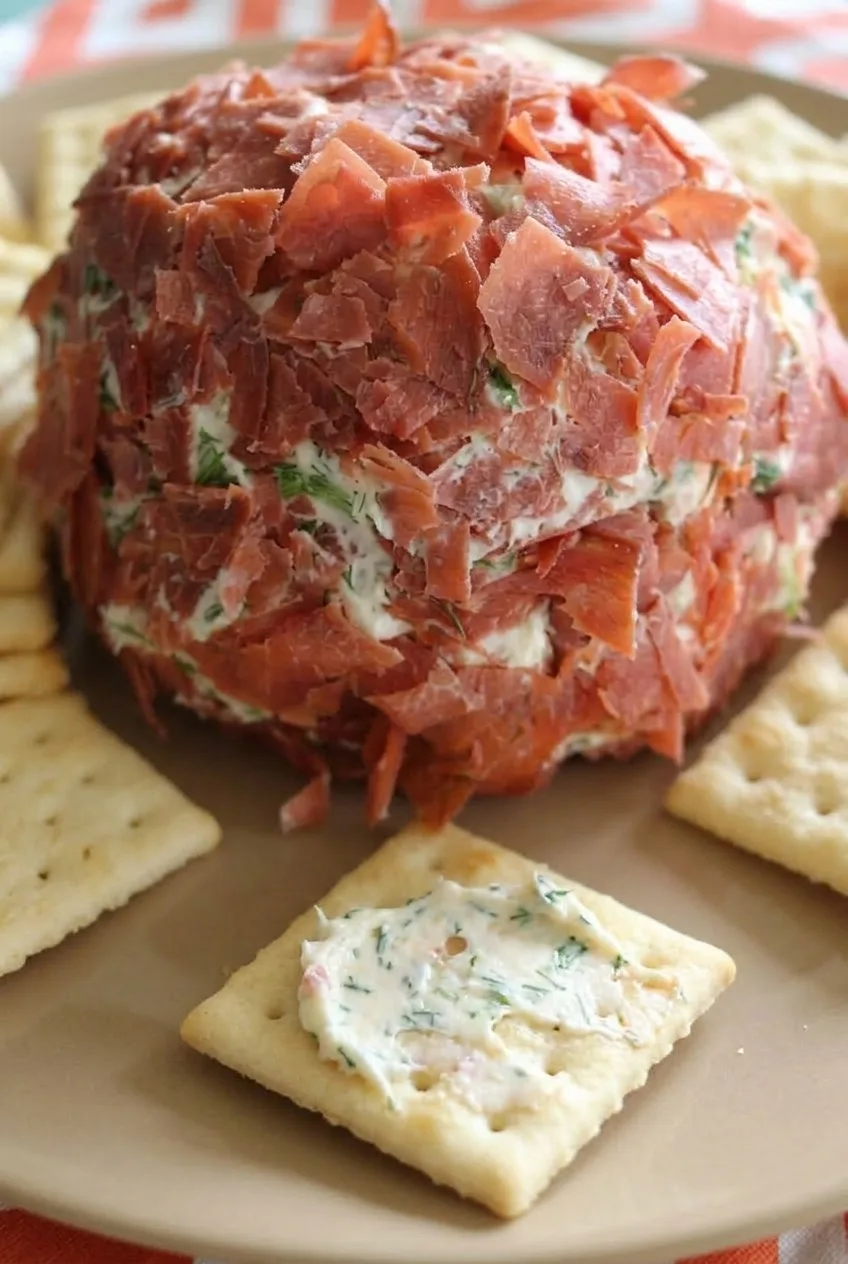
Close view of salmon flakes on the cheese ball and herbed filling spread on a cracker
  • 12 ounces full-fat cream cheese, softened (1 1/2 standard blocks; 340g)
  • 8 ounces ready-to-eat hot-smoked salmon (about 225g), divided: 5 ounces finely flaked for the filling and 3 ounces reserved in larger flakes for coating
  • 1 tablespoon mayonnaise
  • 2 tablespoons finely chopped green onion
  • 1 tablespoon finely chopped fresh dill
  • 1 teaspoon finely grated lemon zest
  • 1 teaspoon fresh lemon juice
  • 6 to 8 ounces plain square crackers, for serving (about 200g)
  • Optional: a pinch of freshly ground black pepper

Smoked salmon varies in saltiness. Taste the filling before deciding whether it needs any additional salt.

How to Make a Smoked Salmon Cheese Ball

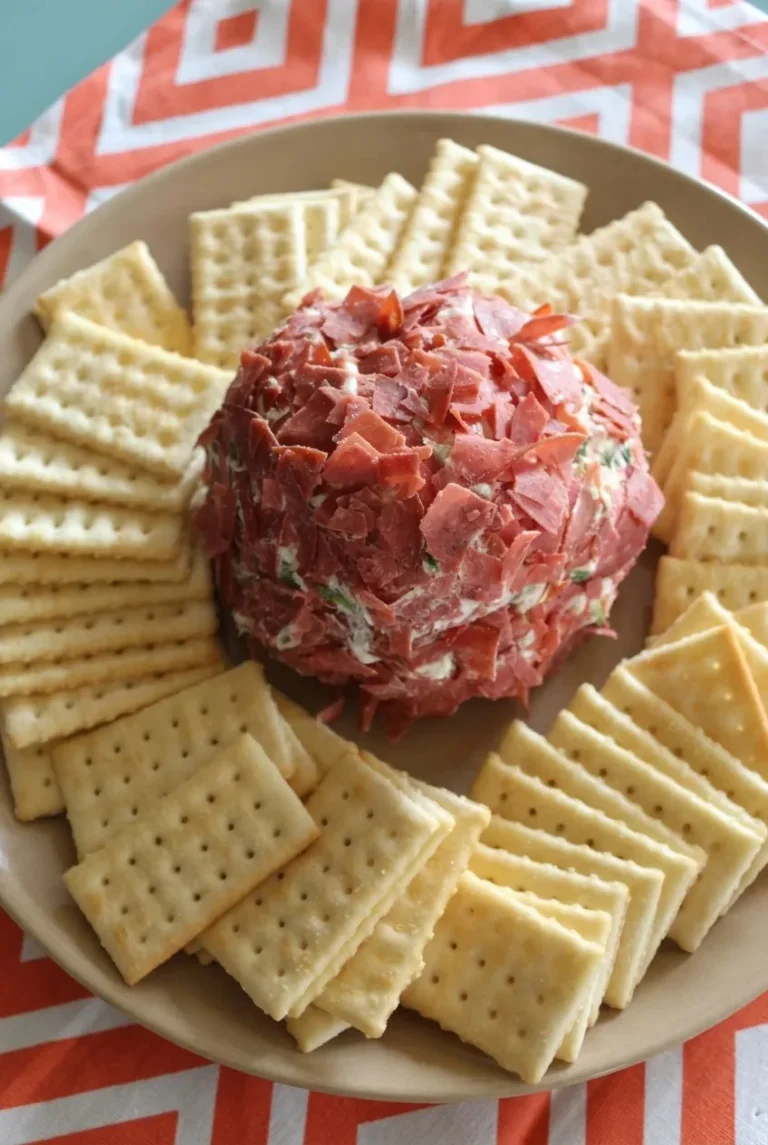
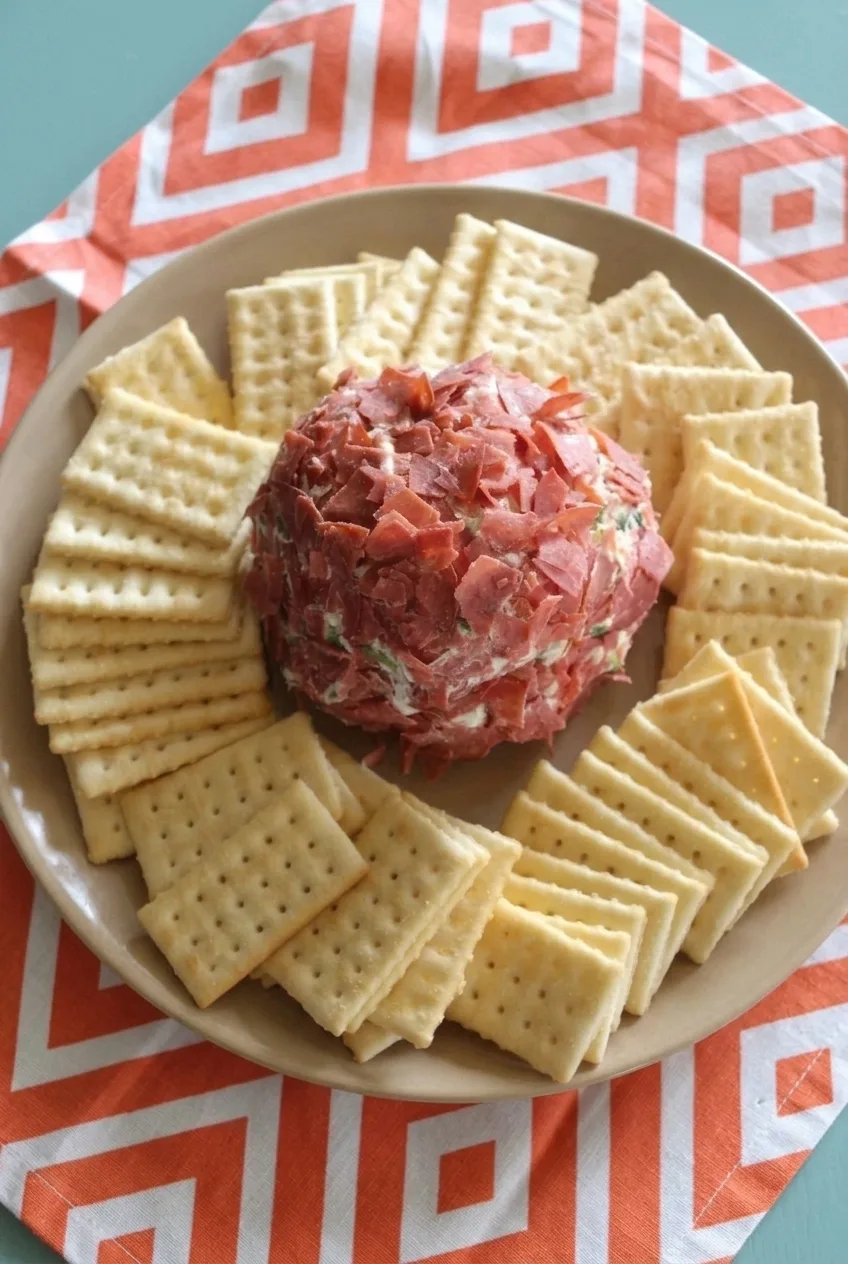
Full plate of smoked salmon cheese ball and square crackers on a patterned tablecloth

Serves: 8 to 10 as an appetizer. Prep: 20 minutes. Cook: 0 minutes. Chill: About 2 hours, or until firm.

  1. Divide the salmon: Check for skin or bones. Finely flake 5 ounces for the filling, keeping the remaining 3 ounces in larger, irregular flakes for the outside.
  2. Mix the filling: Stir the cream cheese and mayonnaise together in a medium bowl. Fold in the finely flaked salmon, green onion, dill, lemon zest, and lemon juice by hand, leaving small salmon and herb pieces visible. Taste and add pepper if desired.
  3. Shape and chill: Spoon the mixture onto plastic wrap. Bring the wrap around it and gently form one ball. Set it on a small plate or in a bowl and refrigerate, tightly wrapped, for about 2 hours. Start checking after 1 hour: it is ready to coat when it stays rounded as the wrap is loosened. If it slumps, rewrap and chill longer.
  4. Coat: Unwrap the ball and gently reshape it if needed. Press the reserved salmon flakes onto the chilled surface so they adhere without being mashed smooth. Leave a few small glimpses of the pale, herb-flecked filling.
  5. Serve: Center the ball on a plate and arrange the square crackers around it. Let it stand for about 15 minutes for easier spreading, then serve with a spreading knife.

How to Keep the Salmon Coating Distinct

Reserve the larger flakes before mixing the filling, and press them onto the ball only after it has firmed up. Hot-smoked salmon separates into opaque, irregular pieces that remain visible on the surface. Cold-smoked salmon also works: chop the portion for the filling and tear the reserved portion into pieces, but expect a softer, less chunky exterior.

Make-Ahead and Storage

Keep the uncoated ball tightly wrapped in the refrigerator for up to 2 days. Press on the salmon flakes and arrange the crackers close to serving, keeping the crackers separate until then. Refrigerate leftovers promptly in an airtight container. Do not reheat; freezing is not recommended as a planned step because the texture after thawing is uncertain.

For another savory option, try this dried beef and green onion cheese ball.

Nutrition

Approximate nutrition per serving, based on 10 appetizer servings with crackers: 255 calories, 9g protein, 17g fat, and 17g carbohydrates. Per 100g: approximately 315 calories, 11g protein, 21g fat, and 21g carbohydrates. Values vary with the salmon, cream cheese, crackers, and serving size.

Smoked Salmon Cheese Ball

A creamy smoked salmon cheese ball with lemon, dill, and green onion, finished with larger flakes of salmon.
Course: Appetizer
Cuisine: American
Prep: 20 min
Total: 155 min
Servings: 8 Calories: 255 kcal

Equipment

  • Medium bowl
  • Plastic wrap
  • Small plate or bowl
  • Serving plate
  • Spreading knife

Ingredients

For the Cheese Ball

  • 12 ounces full-fat cream cheese, softened (340 g)
  • 8 ounces ready-to-eat hot-smoked salmon (about 225 g), divided into 5 ounces finely flaked and 3 ounces in larger flakes
  • 1 tablespoon mayonnaise
  • 2 tablespoons finely chopped green onion
  • 1 tablespoon finely chopped fresh dill
  • 1 teaspoon finely grated lemon zest
  • 1 teaspoon fresh lemon juice
  • Optional: pinch of freshly ground black pepper

For Serving

  • 6 to 8 ounces plain square crackers (about 200 g)

Instructions

  1. Check the salmon for skin or bones. Finely flake 5 ounces for the filling and reserve the remaining 3 ounces in larger flakes for coating.
  2. Stir the softened cream cheese and mayonnaise together in a medium bowl.
  3. Fold in the finely flaked salmon, green onion, dill, lemon zest, and lemon juice by hand. Taste and add pepper if desired.
  4. Spoon the mixture onto plastic wrap. Wrap it and gently shape it into one ball.
  5. Place the wrapped ball on a small plate or in a bowl and refrigerate for about 2 hours. Start checking after 1 hour; chill longer if it slumps when the wrap is loosened.
  6. Unwrap the chilled ball and gently reshape it if needed. Press the reserved salmon flakes onto the surface without mashing them smooth.
  7. Center the ball on a plate and arrange the crackers around it. Let it stand for about 15 minutes, then serve with a spreading knife.

Tips

  • Reserve the larger salmon flakes before mixing the filling so they stay distinct for the coating.
  • Chill the wrapped ball until it holds its rounded shape before adding the salmon coating.
  • Taste the filling before adding salt because smoked salmon varies in saltiness.
  • Press the salmon flakes onto the surface gently to keep their texture.

Variations

  • Cold-Smoked Salmon Cheese Ball: Use cold-smoked salmon; chop the portion for the filling and tear the reserved portion into pieces for the coating. The exterior will be softer and less chunky.

Notes

Keep the uncoated ball tightly wrapped in the refrigerator for up to 2 days. Add the salmon coating and crackers close to serving. Refrigerate leftovers promptly in an airtight container. Do not reheat; freezing is not recommended.

Nutrition

Calories: 255 kcal | Protein: 9 g | Fat: 17 g | Carbohydrates: 17 g | Per 100g Calories: 315 kcal | Per 100g Protein: 11 g | Per 100g Fat: 21 g | Per 100g Carbohydrates: 21 g

Dried Beef and Green Onion Cheese Ball

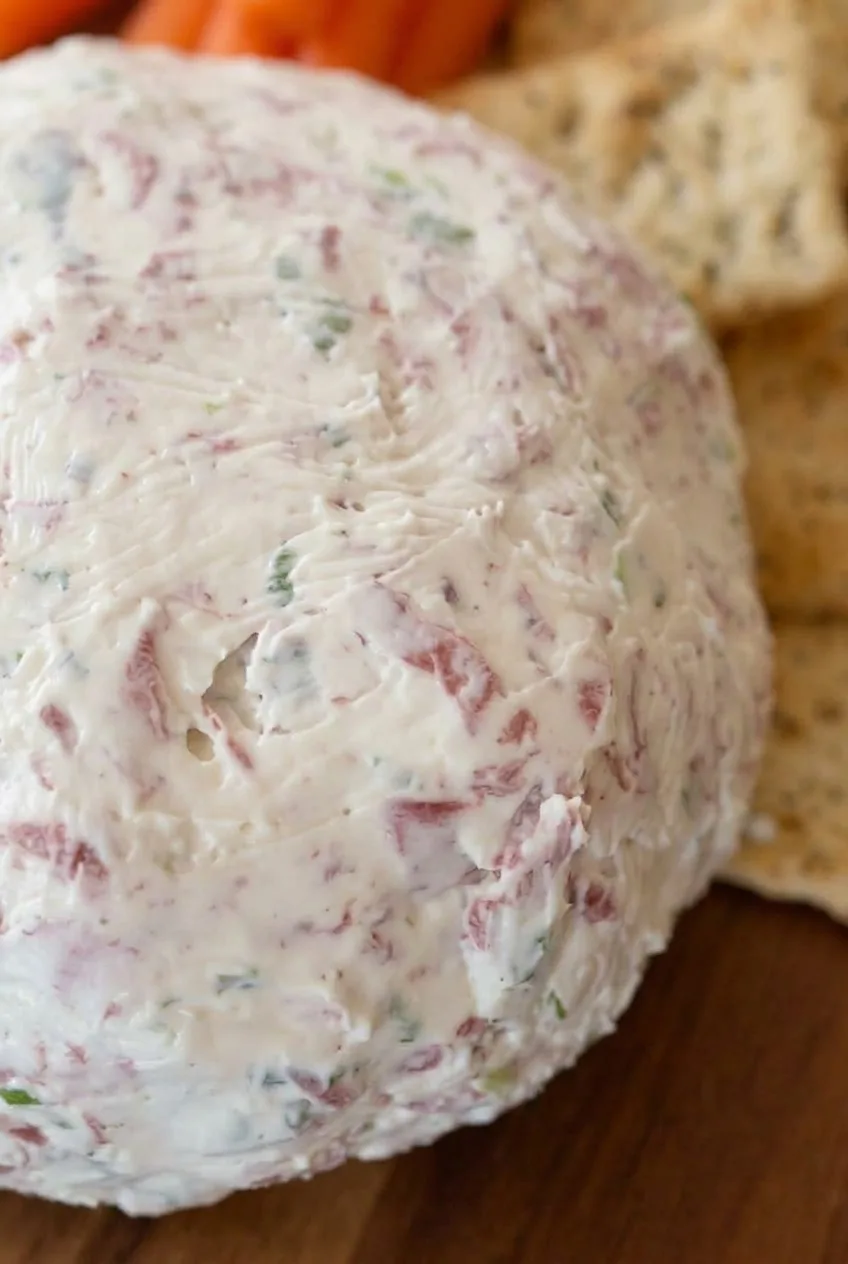
Finely chopped dried beef and green onions run through this large, creamy cheese ball, while Worcestershire sauce seasons the four-ingredient mixture. All the beef goes into the cheese rather than onto the outside, leaving a pale, uncoated surface with visible flecks.

Soften the cream cheese so it mixes smoothly, then shape the mixture in plastic wrap and chill it until it holds its form. Plan on at least 4 hours of refrigeration before serving with crackers.

Makes one cheese ball, or about 12 appetizer servings. Allow about 15 minutes for preparation, plus cream-cheese softening time and at least 4 hours of chilling.

Ingredients for Dried Beef and Green Onion Cheese Ball

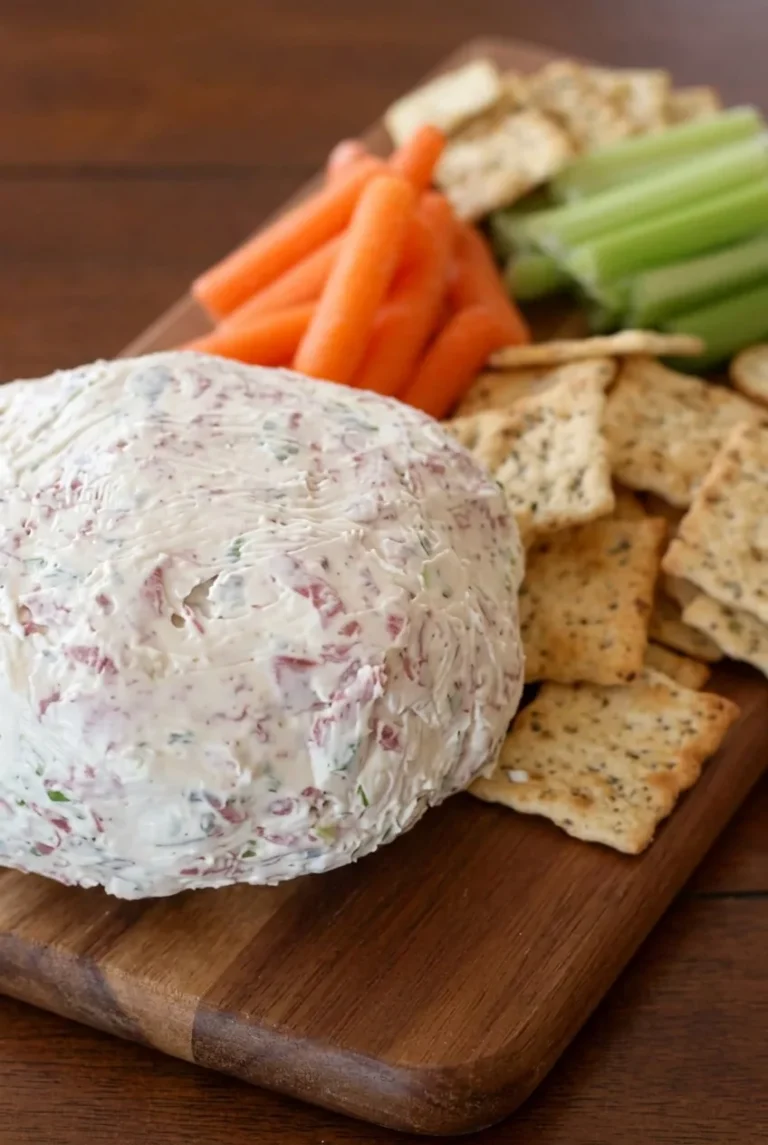
Close view of creamy cheese ball surface flecked with dried beef and green onion
  • 2 (8-ounce) packages full-fat cream cheese, softened (about 450g total)
  • 4 ounces dried or chipped beef, finely chopped (about 115g)
  • 3 medium green onions, finely chopped (about 45g)
  • 2 teaspoons Worcestershire sauce

For serving: Savory crackers and, if desired, carrot and celery sticks.

How to Make the Cheese Ball

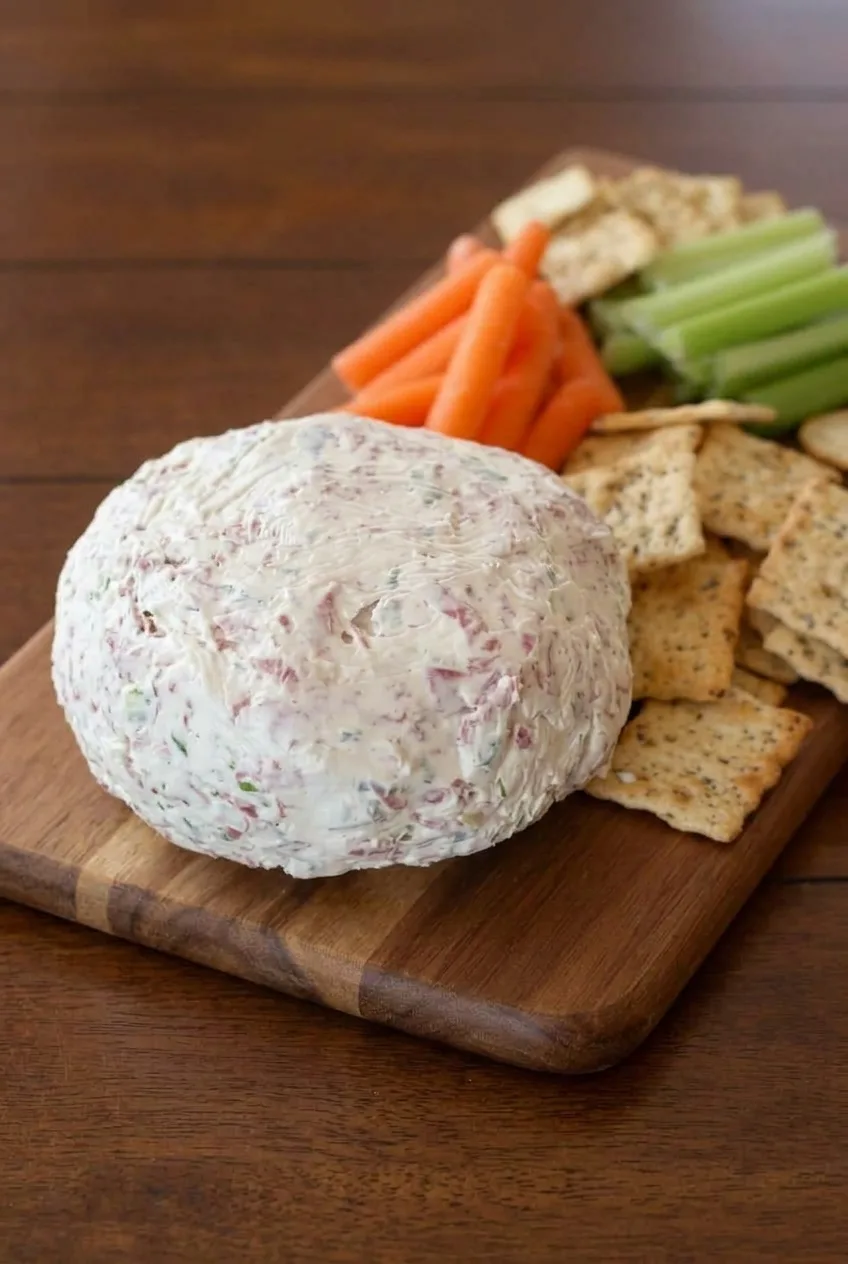
Wide view of a dried beef and green onion cheese ball with crackers and vegetable sticks on a board
  1. Soften and chop: Let the cream cheese soften until it yields easily to a spoon. Finely chop the dried beef and green onions so they distribute evenly.
  2. Mix: Stir the cream cheese and Worcestershire sauce together until smooth. Fold in all the beef and green onions, leaving fine flecks throughout. Taste before considering any added salt; the beef and Worcestershire may provide enough.
  3. Shape: Spoon the mixture onto a sheet of plastic wrap. Gather the wrap around it and gently form one large, roughly round ball with a broad base.
  4. Chill: Place the wrapped ball on a plate and refrigerate for at least 4 hours. It should hold its shape when unwrapped. If it slumps, rewrap it and chill longer.
  5. Serve: Unwrap the ball and place it on a serving board without adding a coating. Arrange crackers alongside it, with carrot and celery sticks if desired. If the cheese is too firm to spread, let it stand briefly before serving.

Shaping and Chilling a Large Cheese Ball

Plastic wrap contains the soft mixture as you shape it, so there is no need to mold a smooth sphere by hand. The cream cheese should be soft for mixing but firm for serving. Use the ball’s ability to hold its shape—not the clock alone—to decide when it is ready.

Serving and Variations

Keep the cheese ball refrigerated until serving, then offer crackers alongside it. For a separate onion-forward version, see this green onion cheese ball.

For a richer variation, mix shredded cheddar into the base; it will change this version’s pale, four-ingredient finish. This ham and cheddar cheese ball is another meat-and-onion option.

Make-Ahead and Storage

Shape the cheese ball ahead of time and keep it tightly wrapped or in an airtight container in the refrigerator. For best quality, make it up to 3–5 days ahead using fresh cream cheese and beef. No reheating is needed.

Refrigerator make-ahead is preferable to freezing. An uncoated cheese ball can be frozen, but thawing may change the cream cheese’s texture.

Nutrition

Approximate per serving: 155 calories, 6g protein, 14g fat, and 3g carbohydrates, based on 12 appetizer servings. Approximate per 100g: 300 calories, 11g protein, 27g fat, and 6g carbohydrates. Values exclude optional crackers and vegetables and will vary by brand.

Dried Beef and Green Onion Cheese Ball

A creamy cheese ball mixed with finely chopped dried beef, green onions, and Worcestershire sauce.
Course: Appetizer
Cuisine: American
Prep: 15 min
Total: 255 min
Servings: 12 Calories: 155 kcal per serving

Equipment

  • Mixing bowl
  • Knife
  • Cutting board
  • Plastic wrap
  • Plate

Ingredients

For the Cheese Ball

  • 2 (8-ounce) packages full-fat cream cheese, softened (about 450 g total)
  • 4 ounces dried or chipped beef, finely chopped (about 115 g)
  • 3 medium green onions, finely chopped (about 45 g)
  • 2 teaspoons Worcestershire sauce

For Serving

  • Savory crackers
  • Carrot and celery sticks, optional

Instructions

  1. Soften the cream cheese until it yields easily to a spoon.
  2. Finely chop the dried beef and green onions.
  3. Stir the cream cheese and Worcestershire sauce together until smooth.
  4. Fold in all the dried beef and green onions.
  5. Spoon the mixture onto plastic wrap, gather the wrap around it, and shape it into one large, roughly round ball with a broad base.
  6. Place the wrapped cheese ball on a plate and refrigerate for at least 4 hours, or until it holds its shape when unwrapped.
  7. Unwrap the cheese ball and serve with crackers and, if desired, carrot and celery sticks.

Tips

  • Soften the cream cheese before mixing for a smoother texture.
  • Chop the beef and green onions finely so they distribute evenly.
  • Taste before adding salt; the beef and Worcestershire sauce may provide enough.
  • If the cheese ball slumps when unwrapped, rewrap it and chill it longer.
  • Let the cheese ball stand briefly before serving if it is too firm to spread.

Variations

  • Cheddar Dried Beef Cheese Ball: Mix shredded cheddar into the cream cheese base for a richer version.

Notes

Keep refrigerated until serving. Make up to 3–5 days ahead and store tightly wrapped or in an airtight container. Freezing is not recommended because it may change the cream cheese texture.

Nutrition

Calories: 155 kcal per serving | Protein: 6 g per serving | Fat: 14 g per serving | Carbohydrates: 3 g per serving | Per 100g Calories: 300 kcal | Per 100g Protein: 11 g | Per 100g Fat: 27 g | Per 100g Carbohydrates: 6 g

Ham and Cheddar Cheese Ball

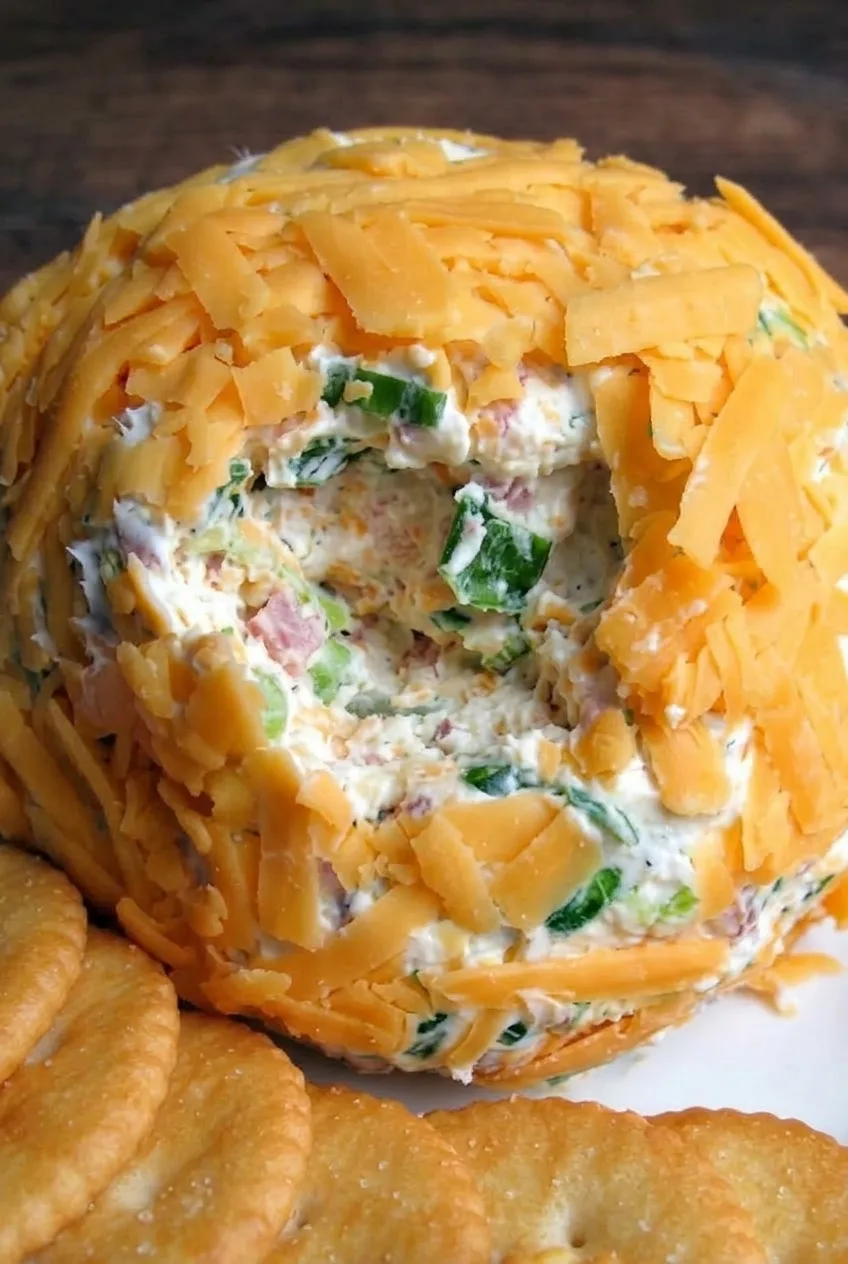
Finely diced ham and green onion run through the creamy center of this chilled cheese ball, while a thick layer of orange cheddar shreds covers the outside. It’s one shareable appetizer served with crackers, not a dip or individual bites. Shape the soft mixture in plastic wrap, then chill it until it holds its rounded shape before pressing on the cheddar. Take a scoop from the front just before serving to show the filling.

Prep: 15 minutes | Chill: At least 1 hour | Total: About 1 hour 15 minutes | Yield: 10 to 12 appetizer servings

Ingredients for Ham and Cheddar Cheese Ball

Close view of the cheese ball's creamy ham and green onion center beneath orange cheddar shreds
  • 2 (8-ounce) blocks full-fat cream cheese, softened (about 450g total)
  • 2 cups shredded sharp orange cheddar, divided (about 225g)
  • 3/4 cup fully cooked, ready-to-eat ham, finely diced and patted dry (about 115g)
  • 2 green onions, thinly sliced (about 30g)
  • 1/4 teaspoon garlic powder
  • About 1 box round buttery crackers, for serving

The ham will not be heated, so use ham that is ready to eat. Mild orange cheddar can replace sharp cheddar for a gentler flavor; keep the same amount for the filling and coating.

How to Make a Ham and Cheddar Cheese Ball

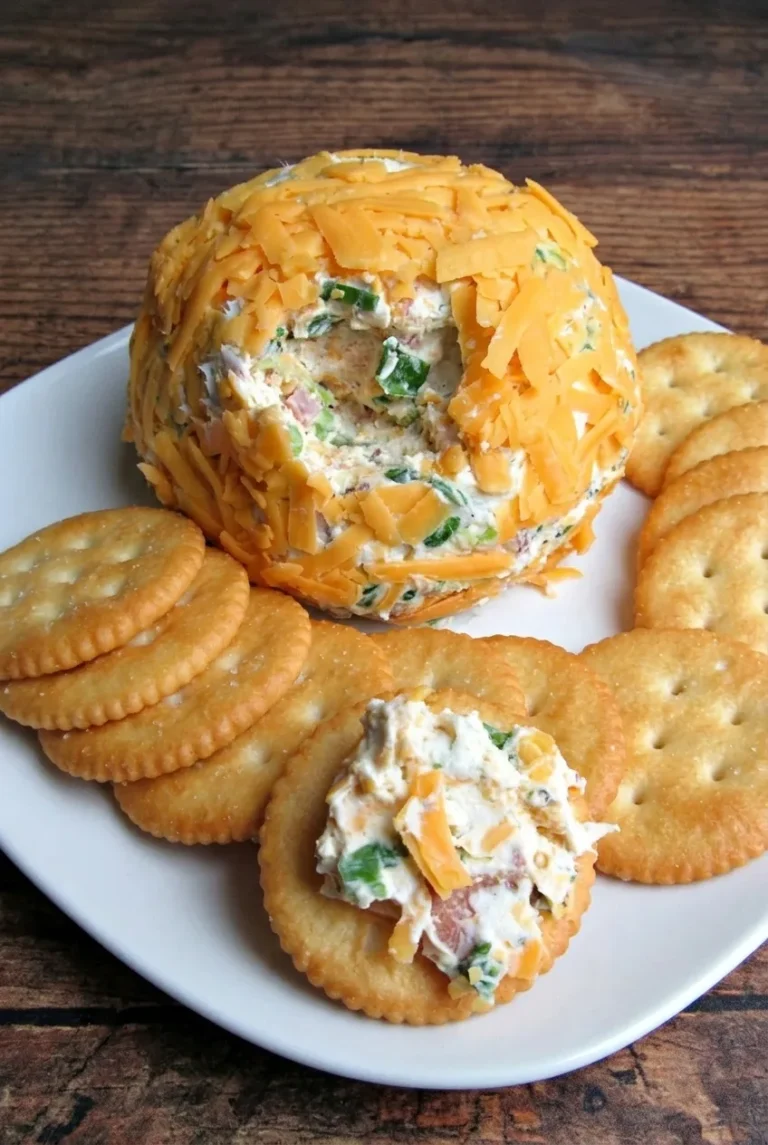
Full plate of ham and cheddar cheese ball with round crackers on a dark wood table
  1. Prepare the mix-ins: Finely dice the ham and pat it dry. Slice the green onions and shred the cheddar if needed. Set aside 1 cup of cheddar for the coating.
  2. Mix the filling: Stir the softened cream cheese in a bowl until smooth. Fold in the remaining 1 cup cheddar, the ham, green onions, and garlic powder until evenly distributed.
  3. Shape and chill: Spoon the mixture onto plastic wrap. Gather and twist the wrap to form one large, rounded ball. Set it on a small plate or tray and refrigerate for at least 1 hour. When unwrapped, the ball should hold its shape without slumping; if it does not, wrap it again and chill longer.
  4. Coat with cheddar: Unwrap the chilled ball and gently press the reserved cheddar over its top and sides. Cover most of the visible surface with distinct shreds without flattening the ball. If the shreds will not stick, let the surface stand for a few minutes, then press them on again.
  5. Serve: Place the ball on a white plate and arrange round crackers around it. Just before serving, remove a scoop from the front to reveal the ham and green onion inside. Set the scoop on a cracker if desired.

How to Keep the Cheese Ball Firm

Use block cream cheese and keep excess moisture out of the filling. Small, dry ham pieces distribute evenly and make the cheese ball easier to shape and scoop onto crackers. There’s no need for added salt: the ham and cheddar already supply it. If the ball is still soft after an hour in the refrigerator, chill it longer before adding the coating.

Make-Ahead and Storage

For a conservative best-quality make-ahead plan, shape the ball up to 2 days ahead and keep it wrapped in the refrigerator. Add the cheddar coating close to serving time. Keep the crackers separate until serving so they stay crisp, and remove the display scoop only when you’re ready to serve.

Cover and refrigerate leftovers promptly. Do not leave this dairy-and-ham appetizer at room temperature for more than 2 hours. Serve it cold; do not reheat it.

For a different cheddar-based appetizer, try the cheddar ranch cheese ball.

Nutrition

Approximate nutrition per serving, based on 12 servings of the cheese ball: 220 calories, 9g protein, 20g fat, and 2g carbohydrates. Per 100g of cheese ball: approximately 315 calories, 13g protein, 28g fat, and 3g carbohydrates. Crackers are not included because the number served per person varies. Values are estimates.

Ham and Cheddar Cheese Ball

A chilled cheese ball filled with diced ham and green onion, coated in shredded cheddar and served with crackers.
Course: Appetizer
Cuisine: American
Prep: 15 min
Total: 75 min
Servings: 10 Calories: 220 kcal

Equipment

  • Mixing bowl
  • Plastic wrap
  • Small plate or tray

Ingredients

For the Cheese Ball

  • 2 (8-ounce) blocks full-fat cream cheese, softened (about 450 g total)
  • 2 cups shredded sharp orange cheddar, divided (about 225 g)
  • 3/4 cup fully cooked, ready-to-eat ham, finely diced and patted dry (about 115 g)
  • 2 green onions, thinly sliced (about 30 g)
  • 1/4 teaspoon garlic powder

For Serving

  • About 1 box round buttery crackers

Instructions

  1. Finely dice the ham and pat it dry. Slice the green onions and shred the cheddar if needed.
  2. Set aside 1 cup of cheddar for the coating.
  3. Stir the softened cream cheese in a bowl until smooth.
  4. Fold in the remaining 1 cup of cheddar, the ham, green onions, and garlic powder until evenly distributed.
  5. Spoon the mixture onto plastic wrap. Gather and twist the wrap to form one large ball.
  6. Set the wrapped ball on a small plate or tray and refrigerate for at least 1 hour, or until it holds its shape without slumping. Chill longer if needed.
  7. Unwrap the ball and gently press the reserved cheddar over the top and sides without flattening it.
  8. Place the cheese ball on a plate and arrange crackers around it. Just before serving, remove a scoop from the front to show the filling.

Tips

  • Use block cream cheese and let it soften before mixing.
  • Pat the diced ham dry to keep excess moisture out of the filling.
  • Chill the ball longer if it does not hold its shape after an hour.
  • If the cheddar shreds do not stick, let the surface stand for a few minutes and press them on again.
  • Keep crackers separate until serving so they stay crisp.

Variations

  • Mild Cheddar Cheese Ball: Replace the sharp cheddar with mild orange cheddar, keeping the same amount for the filling and coating.

Notes

Shape up to 2 days ahead and keep wrapped in the refrigerator; add the cheddar coating close to serving. Refrigerate leftovers promptly, keep the appetizer out of room temperature for no more than 2 hours, and serve cold without reheating.

Nutrition

Calories: 220 kcal | Protein: 9 g | Fat: 20 g | Carbohydrates: 2 g

Bacon Jalapeño Cheese Ball

This bacon jalapeño cheese ball has a creamy cheddar center flecked with bacon, green onion, and fresh pepper. Toasted pecans and more bacon give it a chunky coating, with patches of pale cheese still showing through.

Shape the sticky mixture in plastic wrap and chill it until firm before adding the coating. The ball is easier to handle that way, and the bacon and pecans keep more of their texture when pressed on near serving time.

Ingredients for Bacon Jalapeño Cheese Ball

Close view of a bacon jalapeño cheese ball with its creamy, flecked center exposed
  • 2 packages (8 ounces each) full-fat cream cheese, softened (about 450g)
  • 1 cup shredded sharp cheddar (about 115g)
  • 8 regular slices bacon (about 225g before cooking)
  • 2 medium fresh jalapeños, ribs and seeds removed, finely chopped and patted dry (about 35g)
  • 3/4 cup toasted, coarsely chopped pecans (about 85g)
  • 2 tablespoons finely chopped green onions
  • 1 teaspoon Worcestershire sauce
  • 1/2 teaspoon garlic powder
  • Optional: a small pinch of mild chile powder for the top

How to Make a Bacon Jalapeño Cheese Ball

Complete bacon jalapeño cheese ball on a platter with crackers and a cheese spreader
  1. Cook the bacon: Place it in a large, cool skillet without added oil. Cook over medium-low heat, turning as needed, until browned and crisp. Start checking around 8 minutes; it will take about 8–12 minutes, depending on thickness. Cook in batches if the skillet is crowded. Drain, cool completely, and chop. Set aside about half for the coating.
  2. Prepare the jalapeños and pecans: Pat the chopped jalapeños dry and reserve about 1 tablespoon for the coating. If the pecans are not already toasted, toast them in a dry skillet over medium-low heat. Let them cool, then chop coarsely so the pieces remain distinct.
  3. Mix the filling: Stir together the softened cream cheese, cheddar, green onions, Worcestershire sauce, and garlic powder until evenly combined. Fold in the bacon not reserved for coating and the remaining jalapeño. The cheese should have visible orange and green flecks.
  4. Shape and chill: Spoon the mixture onto plastic wrap. Gather the wrap around it and shape it into one rounded, slightly squat ball. Wrap tightly and refrigerate for at least 2 hours, until it holds its shape when unwrapped. If it slumps, rewrap and chill it longer.
  5. Add the coating: Combine the pecans, reserved bacon, and reserved jalapeño on a shallow plate. Unwrap the chilled ball and gently press the coating onto its top and sides, leaving a little cheese visible. If the surface is too firm for the pieces to adhere, let it stand briefly, then press again. Sprinkle with chile powder, if using.
  6. Serve: Transfer to a platter and let stand for 10–15 minutes so the cheese is easier to spread. Serve with sturdy crackers and a cheese spreader.

Adjusting the Heat and Serving

Removing the jalapeño ribs and seeds moderates the heat, but peppers vary. For a milder cheese ball, replace some or all of the jalapeño with finely chopped, patted-dry bell pepper. The flavor will be milder, too.

Sturdy crackers hold up to the dense cheese; celery sticks, bell pepper strips, and cucumber slices also work alongside them. For a different cheddar-and-bacon flavor, see this cheddar ranch cheese ball. For individual portions, try these mini pimento cheese balls with pecans and bacon.

Make-Ahead and Storage

Shape and wrap the cheese mixture up to a day ahead. Refrigerate the prepared coating separately, then press it on near serving time; a long chill can soften the bacon-and-pecan exterior.

Refrigerate leftovers promptly in an airtight container for up to 3 days. The coating will soften somewhat during storage. Do not reheat the cheese ball. Freezing is not recommended because its texture after thawing is uncertain.

Nutrition

Approximate nutrition per appetizer serving, based on 12 servings and excluding crackers: 245 calories, 7g protein, 23g fat, and 3g carbohydrates. Approximate values per 100g: 380 calories, 11g protein, 36g fat, and 5g carbohydrates. Values will vary with the bacon and cheese used.

Bacon Jalapeño Cheese Ball

A cheddar and cream cheese ball mixed with bacon, jalapeño, and green onion, then coated with toasted pecans and more bacon.
Course: Appetizer
Cuisine: American
Prep: 20 min
Cook: 12 min
Total: 167 min
Servings: 12 Calories: 245 kcal

Equipment

  • Large skillet
  • Mixing bowl
  • Plastic wrap
  • Shallow plate

Ingredients

For the Cheese Ball

  • 2 packages (8 ounces each) full-fat cream cheese, softened (about 450 g)
  • 1 cup shredded sharp cheddar (about 115 g)
  • 8 regular slices bacon (about 225 g before cooking), cooked, cooled, and chopped
  • 2 medium fresh jalapeños, ribs and seeds removed, finely chopped and patted dry (about 35 g)
  • 2 tablespoons finely chopped green onions
  • 1 teaspoon Worcestershire sauce
  • 1/2 teaspoon garlic powder

For the Coating

  • 3/4 cup toasted, coarsely chopped pecans (about 85 g)
  • Reserved cooked bacon
  • Reserved chopped jalapeño
  • Optional: a small pinch of mild chile powder

Instructions

  1. Place the bacon in a large, cool skillet without oil. Cook over medium-low heat, turning as needed, until browned and crisp, about 8–12 minutes. Cook in batches if needed.
  2. Drain the bacon, let it cool completely, and chop it. Set aside about half for the coating.
  3. Pat the chopped jalapeños dry and reserve about 1 tablespoon for the coating.
  4. If the pecans are not already toasted, toast them in a dry skillet over medium-low heat. Cool and chop them coarsely.
  5. Stir the softened cream cheese, cheddar, green onions, Worcestershire sauce, and garlic powder together until evenly combined.
  6. Fold in the unreserved bacon and jalapeño.
  7. Spoon the mixture onto plastic wrap. Gather the wrap around it and shape the mixture into a rounded, slightly squat ball. Wrap tightly and refrigerate for at least 2 hours, until firm.
  8. Combine the pecans, reserved bacon, and reserved jalapeño on a shallow plate.
  9. Unwrap the chilled cheese ball and gently press the coating onto the top and sides, leaving a little cheese visible. If the coating does not adhere, let the ball stand briefly and press again.
  10. Sprinkle with chile powder, if using. Transfer to a platter and let stand for 10–15 minutes before serving.

Tips

  • Pat the chopped jalapeño dry to help keep the cheese mixture from becoming wet.
  • Chill the wrapped cheese ball for at least 2 hours so it holds its shape.
  • Let the pecans cool before chopping and adding them to the coating.
  • Apply the bacon and pecan coating near serving time to help it keep its texture.
  • For less heat, remove the jalapeño ribs and seeds.

Variations

  • Milder Bell Pepper Cheese Ball: Replace some or all of the jalapeño with finely chopped, patted-dry bell pepper for a milder flavor.

Notes

Refrigerate leftovers promptly in an airtight container for up to 3 days. Do not reheat; freezing is not recommended. Nutrition is approximate and excludes crackers.

Nutrition

Calories: 245 kcal | Protein: 7 g | Fat: 23 g | Carbohydrates: 3 g | Per 100g Calories: 380 kcal | Per 100g Protein: 11 g | Per 100g Fat: 36 g | Per 100g Carbohydrates: 5 g

Goat Cheese Balls with Herbs and Nuts

Despite the plural name, this recipe makes one large goat cheese ball for sharing. Chives and parsley fleck the creamy center, while chopped pistachios form a chunky coating. Serve it with two kinds of round crackers for spreading.

Plastic wrap makes the soft cheese easy to shape without a mold. Chill the ball until it holds its shape when unwrapped, then press on the pistachios shortly before serving to keep their chopped texture distinct.

Ingredients for the Goat Cheese Ball

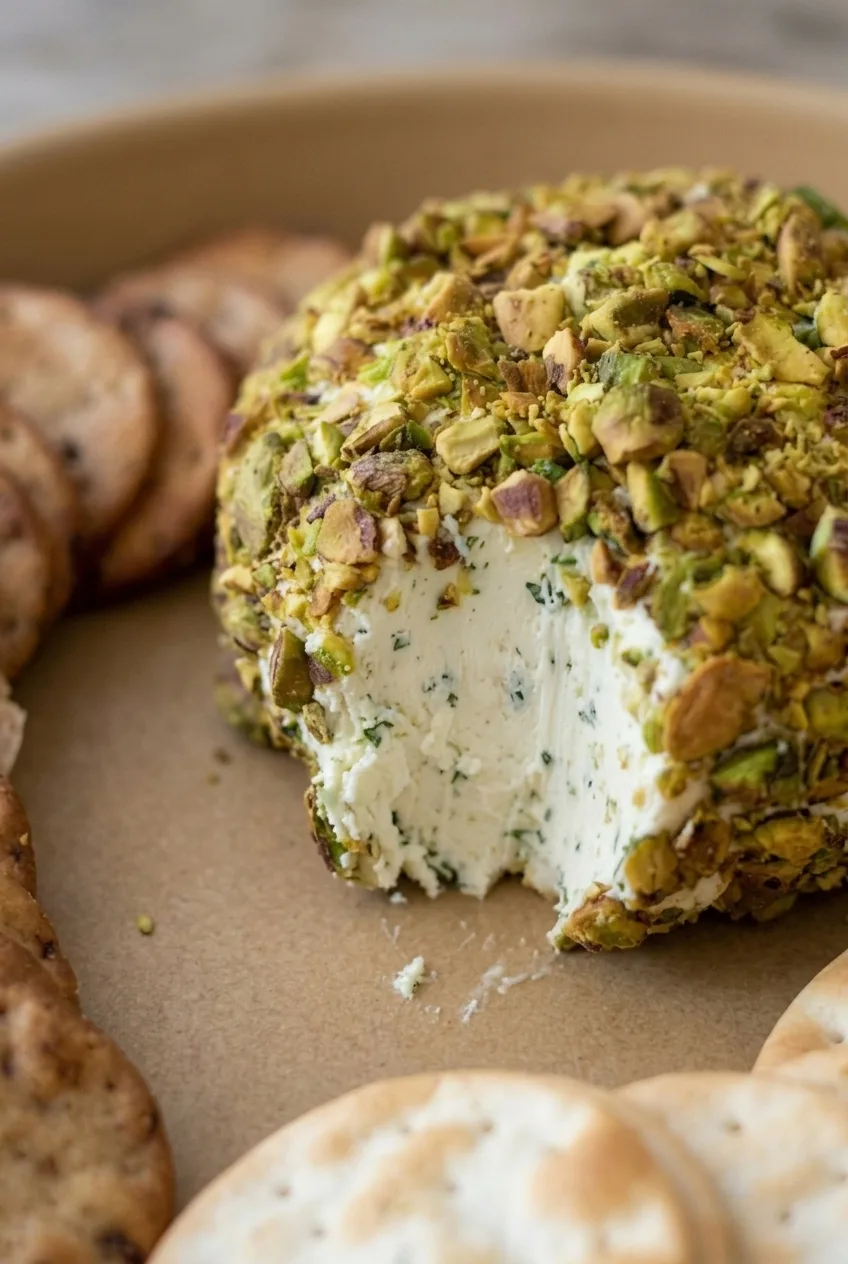
Close view of chopped pistachios and the pale, herb-flecked center of a goat cheese ball
  • 8 ounces plain goat cheese, softened (225g)
  • 4 ounces full-fat cream cheese, softened (115g)
  • 2 tablespoons finely chopped fresh chives
  • 2 tablespoons finely chopped fresh flat-leaf parsley
  • 1 teaspoon finely grated lemon zest
  • 1/4 teaspoon freshly ground black pepper
  • 3/4 cup shelled pistachios, chopped into small, recognizable pieces (90g)
  • About 8 ounces round crackers, one plain variety and one darker or seeded variety, for serving (225g)

Optional: A small pinch of fine salt, if needed after tasting.

How to Make the Goat Cheese Ball

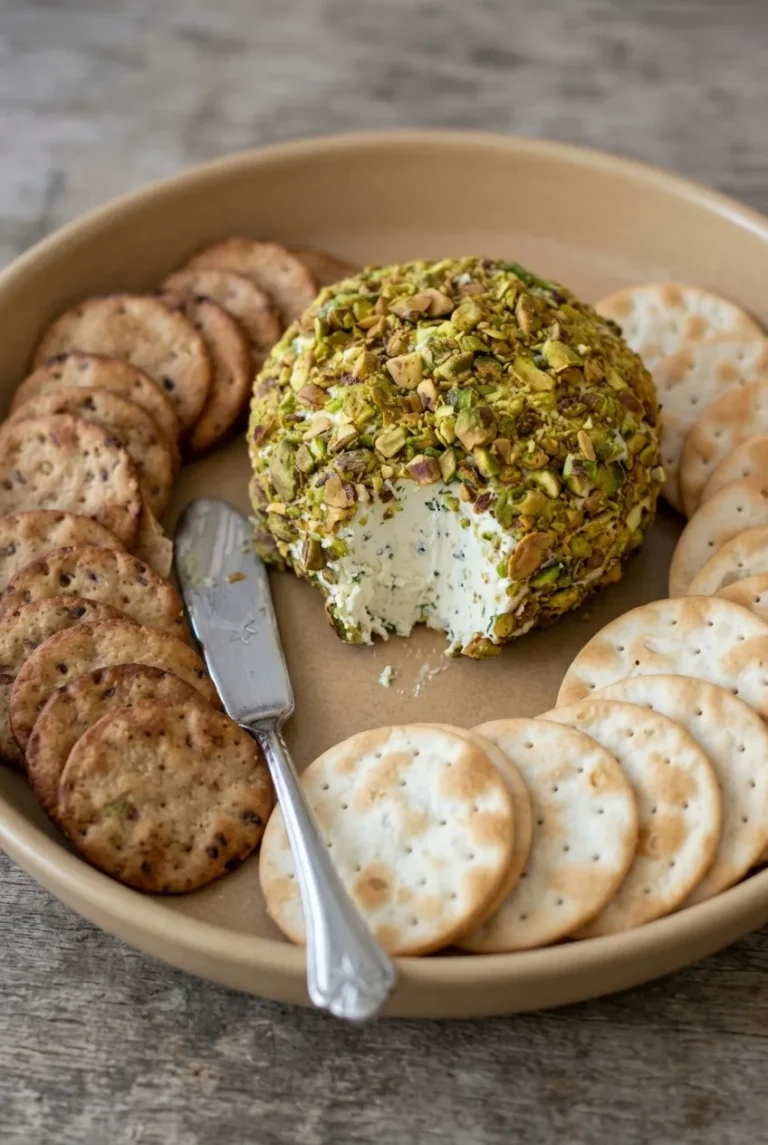
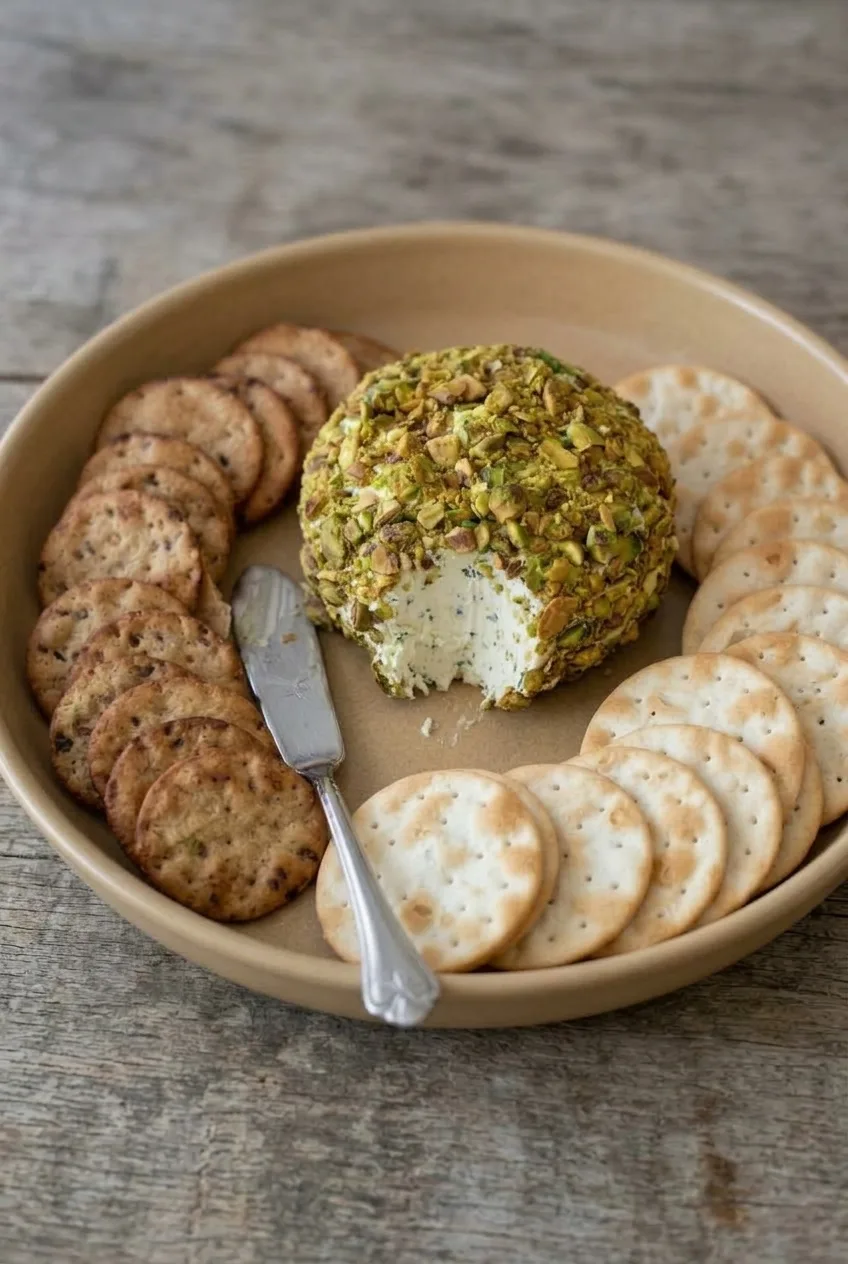
Full platter of pistachio-coated goat cheese ball and contrasting round crackers on a wooden table
  1. Chop the herbs and pistachios: Finely chop the chives and parsley. Chop the pistachios separately, leaving visible pieces rather than grinding them into powder.
  2. Mix the cheese: In a medium bowl, mix the softened goat cheese and cream cheese until smooth. Fold in the herbs, lemon zest, and pepper, leaving small green flecks visible. Taste and add a pinch of salt only if needed, especially if the pistachios or crackers are salted.
  3. Shape and chill: Spoon the mixture onto a large sheet of plastic wrap. Gather the wrap around it to form one round ball. Set it seam-side down in a small bowl or on a plate and refrigerate, covered in the wrap, for about 3 hours. Start checking after about 2 hours: the ball is ready when it holds its shape as the wrap is loosened. If it slumps, rewrap it and chill longer.
  4. Coat with pistachios: Spread the chopped nuts in a shallow dish. Unwrap the firm cheese ball and gently round any flattened spots. Roll it in the nuts, then press more onto bare areas until the exterior is covered.
  5. Arrange and serve: Set the ball near the center of a platter. Fan the two kinds of crackers in separate, overlapping groups around it and add a spreader. Let the ball stand for about 20 minutes before serving, until the center spreads easily but the ball still holds its shape.

Make-Ahead and Storage

For advance preparation, keep the uncoated cheese mixture covered in an airtight container in the refrigerator for up to 3 days. Shape it in plastic wrap and chill until firm before adding the pistachios. If the ball is already shaped, keep it wrapped and refrigerated until you are ready to coat and serve it.

Coating shortly before serving keeps the pistachio pieces distinct, though the coated ball can also be refrigerated. Return leftovers to the refrigerator promptly; a specific storage duration for the finished, coated ball is not established.

For Individual Portions

For bite-size appetizers instead, chill the mixture until workable, form small balls, and coat each with pistachios. The main recipe makes one shared ball; for another individually portioned option, see these mini cheese ball bites.

Nutrition

Approximate nutrition per appetizer portion, based on 12 portions and including the crackers: 210 calories, 7g protein, 13g fat, and 16g carbohydrates. Per 100g: approximately 370 calories, 13g protein, 23g fat, and 29g carbohydrates. Values will vary with the cheeses, pistachios, and crackers used.

Goat Cheese Balls with Herbs and Nuts

A creamy goat cheese ball flecked with fresh herbs and lemon zest, coated in chopped pistachios and served with crackers.
Course: Appetizer
Cuisine: Global
Prep: 20 min
Total: 220 min
Servings: 12 Calories: 210 kcal

Equipment

  • Mixing bowl
  • Plastic wrap
  • Shallow dish
  • Serving platter

Ingredients

For the Cheese Ball

  • 8 ounces plain goat cheese, softened (225g)
  • 4 ounces full-fat cream cheese, softened (115g)
  • 2 tablespoons finely chopped fresh chives
  • 2 tablespoons finely chopped fresh flat-leaf parsley
  • 1 teaspoon finely grated lemon zest
  • 1/4 teaspoon freshly ground black pepper
  • Optional: small pinch of fine salt

For Coating and Serving

  • 3/4 cup shelled pistachios, chopped (90g)
  • About 8 ounces round crackers, one plain variety and one darker or seeded variety (225g)

Instructions

  1. Finely chop the chives and parsley. Chop the pistachios separately, leaving small recognizable pieces.
  2. Mix the softened goat cheese and cream cheese in a medium bowl until smooth.
  3. Fold in the chives, parsley, lemon zest, and black pepper. Taste and add a pinch of salt if needed.
  4. Spoon the mixture onto a large sheet of plastic wrap. Gather the wrap around the cheese and shape it into one round ball.
  5. Set the ball seam-side down in a small bowl or on a plate. Cover and refrigerate for about 3 hours, checking after 2 hours. It is ready when it holds its shape as the wrap is loosened.
  6. Spread the chopped pistachios in a shallow dish. Unwrap the firm cheese ball, round any flattened spots, and roll it in the pistachios. Press nuts onto any bare areas.
  7. Place the ball near the center of a platter and arrange the two kinds of crackers in separate groups around it. Let stand for about 20 minutes before serving.

Tips

  • Keep the pistachios chopped into visible pieces rather than grinding them into powder.
  • Chill the wrapped ball until it holds its shape when unwrapped; return it to the refrigerator if it slumps.
  • Add salt only after tasting, since the pistachios or crackers may already be salted.
  • Coat the ball shortly before serving to keep the pistachio pieces distinct.

Variations

  • Bite-Size Pistachio Cheese Balls: Chill the mixture until workable, form small balls, and coat each with chopped pistachios.

Notes

The uncoated mixture can be stored covered in an airtight container in the refrigerator for up to 3 days. Refrigerate leftovers promptly; a specific storage duration for the finished coated ball is not established.

Nutrition

Calories: 210 kcal | Protein: 7 g | Fat: 13 g | Carbohydrates: 16 g

Pimento Cheese Ball

These mini pimento cheese balls have a creamy center of sharp cheddar, cream cheese, and red pimentos, with toasted pecans, crisp bacon, and chives pressed onto the outside. Chilling the cheese mixture before shaping keeps the individual portions round; blotting the pimentos helps prevent them from becoming too soft.

The recipe makes 12 to 14 balls in about 1 hour 25 minutes, including chilling. The 25-minute prep time assumes the bacon is already cooked and the pecans are toasted and cooled.

Ingredients for Mini Pimento Cheese Balls

Close view of an opened pimento cheese ball with cheddar, red pimentos, and a pecan-bacon coating
  • 8 oz cream cheese, softened (225g)
  • 8 oz sharp cheddar, freshly shredded, about 2 cups (225g)
  • 1 (4 oz) jar diced pimentos, drained and blotted dry
  • ¼ teaspoon garlic powder
  • ¾ cup toasted pecans, cooled and finely chopped (85g)
  • 4 slices bacon, cooked crisp, cooled, and finely crumbled
  • 1 tablespoon finely chopped fresh chives

The 4 oz measurement refers to the jar size; use the drained peppers, not the packing liquid.

How to Make Pimento Cheese Balls

Wider view of mini pimento cheese balls clustered on a board over a teal tabletop
  1. Prepare the ingredients: Shred the cheddar. Drain the pimentos and blot them dry. Have the toasted pecans and crisp bacon cooled and finely chopped before making the coating.
  2. Mix the cheese: In a bowl, blend the softened cream cheese with the garlic powder. Fold in the cheddar and pimentos until evenly distributed, leaving the cheese shreds and pepper pieces visible.
  3. Chill until shapeable: Cover and refrigerate the mixture. Start checking after about 45 minutes; it may take around 1 hour or longer. It is ready when a scoop holds its shape without spreading.
  4. Shape and coat: Combine the pecans, bacon, and chives in a shallow dish. Scoop 12 to 14 portions and roll into roughly 1½-inch balls. Turn each ball in the coating, pressing gently so it covers most of the surface.
  5. Serve chilled: Keep the balls covered and refrigerated until serving. Arrange them on a board and cut one open to show the cheddar and pimentos. Offer crackers or cut vegetables alongside.

How to Keep Mini Cheese Balls Firm

Moisture from the pimento jar can make the cheese mixture sticky, so drain and blot the peppers before adding them. If the mixture smears heavily onto your hands or the balls flatten as you roll them, refrigerate it longer. Freshly shredded cheddar leaves more distinct shreds in the finished balls, though pre-shredded cheddar can be used.

When to Add the Pecan-Bacon Coating

Finely chopped pecans and bacon adhere more easily than large pieces. Press the coating gently onto the chilled balls rather than relying on rolling alone. If making the balls ahead, keep the coating separate and apply it closer to serving to help it retain its texture. For a different bite-size version, see mini cheese ball bites with three coatings.

Variations

Bacon-free: Replace the bacon with additional toasted, chopped pecans.

A little heat: Mix a pinch of cayenne into the cheese base. For a separate, spicier appetizer, see the jalapeño popper cheese ball.

For a single centerpiece instead of individual portions, see this classic cheddar and pecan cheese ball.

Make-Ahead and Storage

Make the cheese mixture ahead and keep it covered in the refrigerator until ready to shape. You can shape and coat the balls up to a day ahead, though the coating may soften. Keep finished balls covered and refrigerated, and store leftovers in a sealed container for up to 3 days. Serve chilled; do not reheat.

Nutrition

Approximate nutrition per ball, based on 13 balls and excluding crackers or vegetables: 190 calories, 7g protein, 17g fat, and 3g carbohydrates. Approximate values per 100g: 380 calories, 14g protein, 35g fat, and 6g carbohydrates. Values vary with the bacon, cheese, and amount of pimentos drained from the jar.

Pimento Cheese Ball

Mini cheese balls combine sharp cheddar, cream cheese, and pimentos with a crisp pecan, bacon, and chive coating.
Course: Appetizer
Cuisine: American
Prep: 25 min
Total: 85 min
Servings: 13 Calories: 190 kcal

Equipment

  • Mixing bowl
  • Shallow dish
  • Cookie scoop

Ingredients

For the Cheese Balls

  • 8 oz cream cheese, softened (225g)
  • 8 oz sharp cheddar, freshly shredded, about 2 cups (225g)
  • 1 (4 oz) jar diced pimentos, drained and blotted dry
  • 1/4 teaspoon garlic powder

For the Coating

  • 3/4 cup toasted pecans, cooled and finely chopped (85g)
  • 4 slices bacon, cooked crisp, cooled, and finely crumbled
  • 1 tablespoon finely chopped fresh chives

Instructions

  1. Shred the cheddar. Drain the pimentos and blot them dry. Make sure the toasted pecans and cooked bacon are cooled and finely chopped.
  2. Blend the softened cream cheese with the garlic powder in a bowl.
  3. Fold in the cheddar and pimentos until evenly distributed.
  4. Cover and refrigerate the mixture for at least 45 minutes, checking until it is firm enough to hold its shape when scooped. This may take about 1 hour or longer.
  5. Combine the pecans, bacon, and chives in a shallow dish.
  6. Scoop 12 to 14 portions and roll them into roughly 1 1/2-inch balls.
  7. Turn each ball in the coating, pressing gently so it covers most of the surface.
  8. Keep the cheese balls covered and refrigerated until serving. Serve chilled with crackers or cut vegetables.

Tips

  • Drain and blot the pimentos well to keep the cheese mixture from becoming sticky.
  • Chill the mixture longer if it smears onto your hands or the balls flatten while rolling.
  • Freshly shredded cheddar gives the finished balls more distinct cheese shreds.
  • Finely chop the pecans and bacon so the coating adheres easily.
  • For make-ahead preparation, keep the coating separate and apply it closer to serving.

Variations

  • Bacon-Free: Replace the bacon with additional toasted, chopped pecans.
  • A Little Heat: Mix a pinch of cayenne into the cheese base.

Notes

Keep covered and refrigerated. Finished balls can be made up to a day ahead, though the coating may soften. Store leftovers in a sealed container for up to 3 days. Serve chilled; do not reheat.

Nutrition

Calories: 190 kcal | Protein: 7 g | Fat: 17 g | Carbohydrates: 3 g | Per 100g Calories: 380 kcal | Per 100g Protein: 14 g | Per 100g Fat: 35 g | Per 100g Carbohydrates: 6 g