Author

Julia

Browsing

Strawberry Cheesecake Cookies

These thick, golden cookies have small pieces of fresh strawberry in the dough and a sweetened cream-cheese center inside—not frosting on top. Each one is shaped around a portion of filling before baking. Firm the filling first so it is easier to wrap, and blot the strawberries so their juice does not make the dough too sticky. Let the cookies cool before breaking one open; the white center will hold its shape better once it has set.

Ingredients for Strawberry Cheesecake Cookies

Makes 12 large cookies. Allow about 25 minutes of active prep, 35–45 minutes to firm the filling, 15–18 minutes per baking sheet, and time to cool. Total time is about 1 hour 35 minutes to 2 hours.
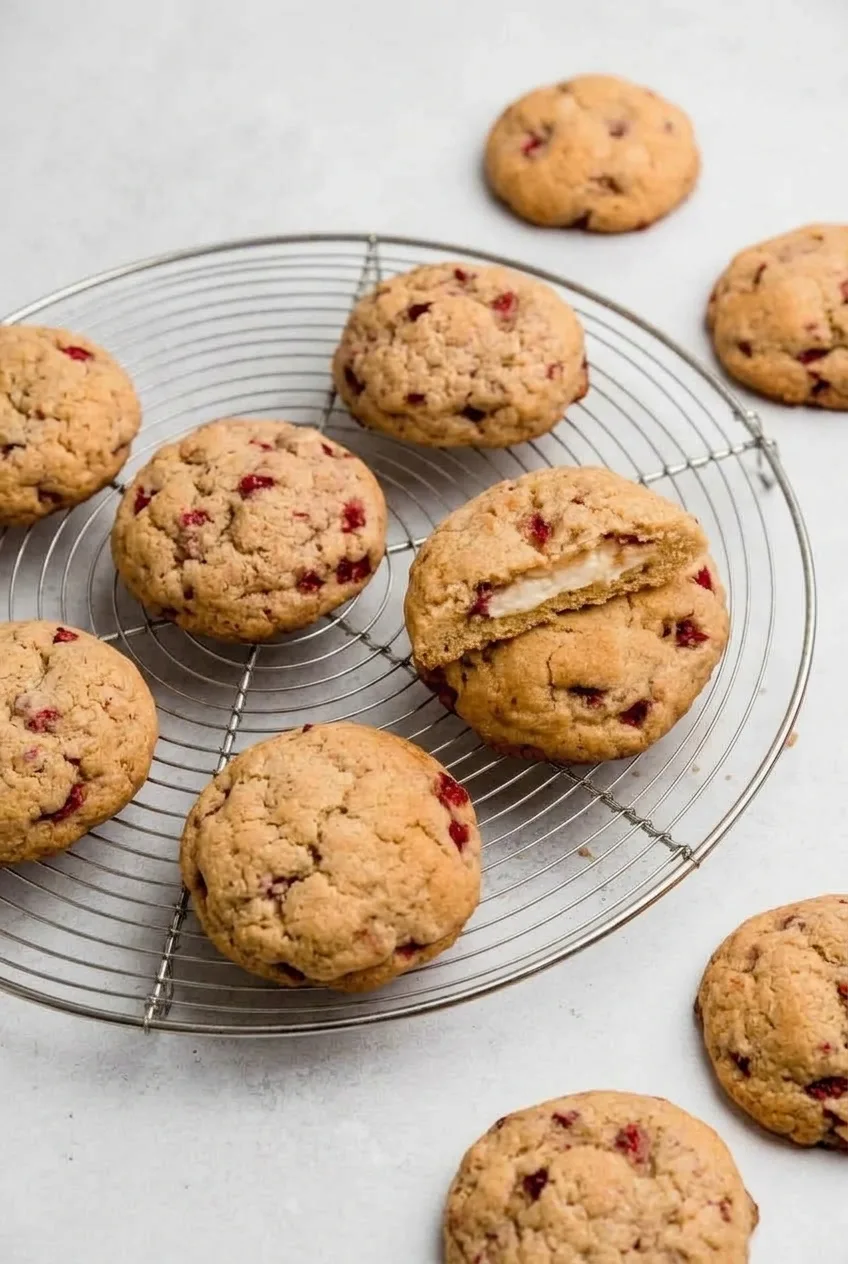
Several golden strawberry cheesecake cookies on a round cooling rack, with one broken cookie near the center

Cheesecake filling

  • 6 ounces full-fat brick cream cheese, softened (170g)
  • 1/4 cup powdered sugar (30g)
  • 1/2 teaspoon vanilla extract

Strawberry cookie dough

  • 1/2 cup unsalted butter, softened (113g)
  • 1/2 cup packed light brown sugar (100g)
  • 1/4 cup granulated sugar (50g)
  • 1 large egg
  • 1/2 teaspoon vanilla extract
  • 2 cups all-purpose flour, spooned and leveled (240g)
  • 1/2 teaspoon baking soda
  • 1/2 teaspoon fine salt
  • 2/3 cup fresh strawberries, finely diced and blotted dry (about 100g)
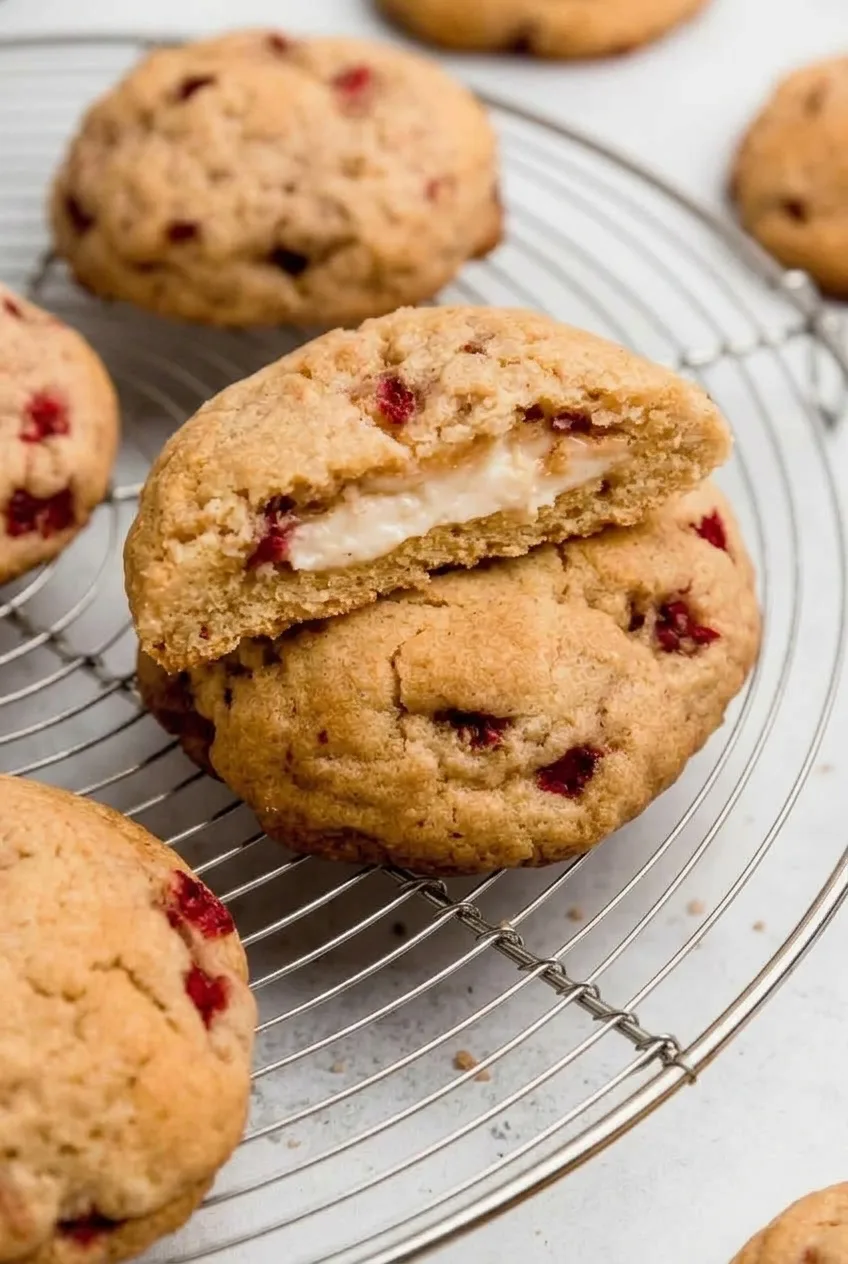
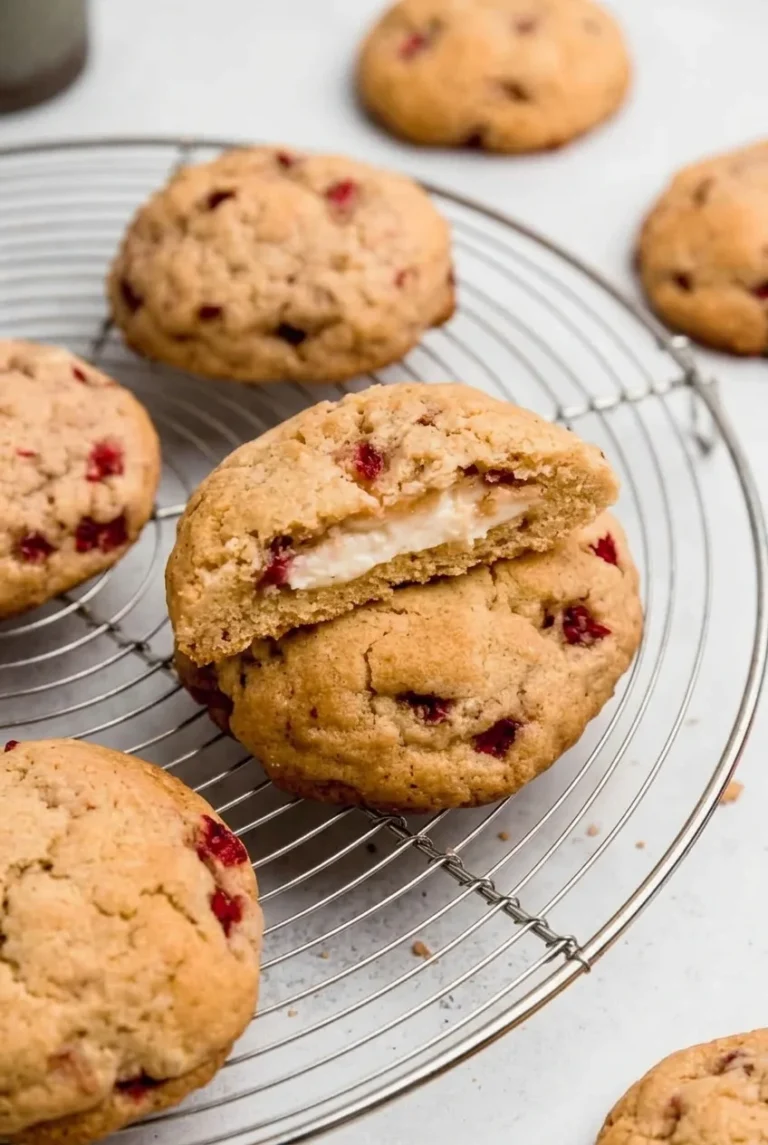
Close view of a broken strawberry cheesecake cookie showing red fruit pieces and an enclosed white filling

How to Bake Strawberry Cheesecake Cookies

  1. Firm the filling: Beat the cream cheese, powdered sugar, and 1/2 teaspoon vanilla until smooth. Spoon 12 roughly tablespoon-size mounds onto a parchment-lined plate or small tray. Freeze for 35–45 minutes, until they hold their shape when lifted.
  2. Prepare the strawberries: Finely dice them and gently blot away surface juice with paper towels. The pieces should remain intact, with no puddled liquid.
  3. Make the dough: Beat the butter and both sugars until creamy. Mix in the egg and remaining 1/2 teaspoon vanilla. In a separate bowl, combine the flour, baking soda, and salt. Mix the dry ingredients into the butter mixture just until no dry flour remains, then gently fold in the strawberries.
  4. Enclose the filling: Divide the dough into 12 equal portions. Flatten each into a thick disk, place one firm filling mound in the center, and bring the dough up and over it. Pinch every seam and crack closed so no filling shows, keeping a substantial layer of dough above and below the center. Keep the remaining filling cold as you work. If the dough becomes too sticky to shape, chill it briefly.
  5. Bake: Preheat the oven to 350°F (175°C) with a rack near the center. Line two baking sheets with parchment. Place 6 cookies on each sheet, at least 3 inches apart; do not flatten them. Bake one sheet at a time, uncovered. Start checking at 14 minutes; the cookies will typically take 15–18 minutes per sheet. Rotate a sheet near the end only if your oven browns unevenly. The edges should be set and lightly golden, and the tops should look matte rather than wet. The centers may still feel slightly soft.
  6. Cool: Leave the cookies on their baking sheets for 10 minutes so they firm up, then transfer them to a wire rack. Let the filling set before breaking a cookie open.

How to Keep the Cheesecake Center Inside

The filling should be firm enough to lift without smearing into the dough. If any white filling shows after shaping, cover it with dough and pinch the spot closed. An exposed spot or open seam can leak during baking; keeping the cookies thick also leaves enough dough around each center.

Working With Fresh Strawberries

Small, blotted pieces give the golden dough visible red flecks without adding too much surface moisture. Fold them in at the end so they do not heavily streak the dough. Frozen strawberries are not a direct substitute: thawing releases liquid that can make this dough difficult to shape. Jam also changes the dough’s moisture and the finished appearance.

When Are the Cookies Done?

Use the edges and tops rather than the clock alone, since cookie size and ovens can affect baking time. Look for lightly golden, set edges and matte tops; a slightly soft center will firm as the cookies cool on the baking sheet.

Storage and Serving

Cool the cookies before covering them, then refrigerate in an airtight container and eat within 3–4 days. Because they contain cream cheese and fresh fruit, limit room-temperature serving to about 2 hours. For a softer cookie, let a refrigerated one stand briefly at room temperature before serving. Reheating is unnecessary and can soften the filling.

For another fruit-forward bake, try these lemon raspberry cookies.

Nutrition

Approximate nutrition per cookie, based on 12 large cookies: 255 calories, 4g protein, 13g fat, and 32g carbohydrates. Per 100g of baked cookies: approximately 385 calories, 5g protein, 20g fat, and 47g carbohydrates. The per-100g values will vary with moisture lost during baking.

Strawberry Cheesecake Cookies

Thick strawberry cookies are wrapped around a sweetened cream-cheese filling and baked until lightly golden.
Course: Dessert
Cuisine: American
Prep: 25 min
Cook: 36 min
Total: 108 min
Servings: 12 Calories: 255 kcal

Equipment

  • electric mixer
  • mixing bowls
  • parchment paper
  • small tray or plate
  • baking sheets
  • paper towels
  • wire rack

Ingredients

Cheesecake filling

  • 6 ounces full-fat brick cream cheese, softened (170 g)
  • 1/4 cup powdered sugar (30 g)
  • 1/2 teaspoon vanilla extract

Strawberry cookie dough

  • 1/2 cup unsalted butter, softened (113 g)
  • 1/2 cup packed light brown sugar (100 g)
  • 1/4 cup granulated sugar (50 g)
  • 1 large egg
  • 1/2 teaspoon vanilla extract
  • 2 cups all-purpose flour, spooned and leveled (240 g)
  • 1/2 teaspoon baking soda
  • 1/2 teaspoon fine salt
  • 2/3 cup fresh strawberries, finely diced and blotted dry (about 100 g)

Instructions

  1. Beat the cream cheese, powdered sugar, and 1/2 teaspoon vanilla until smooth.
  2. Spoon 12 roughly tablespoon-size mounds of filling onto a parchment-lined plate or small tray. Freeze for 35–45 minutes, until firm enough to lift without losing their shape.
  3. Finely dice the strawberries and gently blot away surface juice with paper towels.
  4. Beat the butter and both sugars until creamy. Mix in the egg and remaining 1/2 teaspoon vanilla.
  5. Combine the flour, baking soda, and salt in a separate bowl. Mix the dry ingredients into the butter mixture just until no dry flour remains, then gently fold in the strawberries.
  6. Divide the dough into 12 equal portions. Flatten each into a thick disk, place a filling mound in the center, and wrap the dough around it. Pinch all seams and cracks closed, keeping a substantial layer of dough above and below the filling. Keep the remaining filling cold as you work, and briefly chill the dough if it becomes too sticky to shape.
  7. Preheat the oven to 350°F (175°C) with a rack near the center. Line two baking sheets with parchment.
  8. Place 6 cookies on each sheet, at least 3 inches apart, without flattening them. Bake one sheet at a time for 15–18 minutes, starting to check at 14 minutes. Rotate near the end only if your oven browns unevenly.
  9. Remove the cookies when the edges are set and lightly golden and the tops look matte. Leave them on the baking sheets for 10 minutes, then transfer to a wire rack and let the filling set before serving.

Tips

  • Blot the diced strawberries well to keep excess juice from making the dough sticky.
  • Fold the strawberries in gently at the end to avoid heavily streaking the dough.
  • Make sure the filling is firm before wrapping it in the dough.
  • Pinch every seam closed and cover any spots where filling shows.
  • Bake one sheet at a time and judge doneness by the set, lightly golden edges and matte tops.
Notes

Cool completely before storing in an airtight container in the refrigerator; eat within 3–4 days. Limit room-temperature serving to about 2 hours. Reheating is unnecessary and can soften the filling.

Nutrition

Calories: 255 kcal | Protein: 4 g | Fat: 13 g | Carbohydrates: 32 g

Lemon Raspberry Cookies

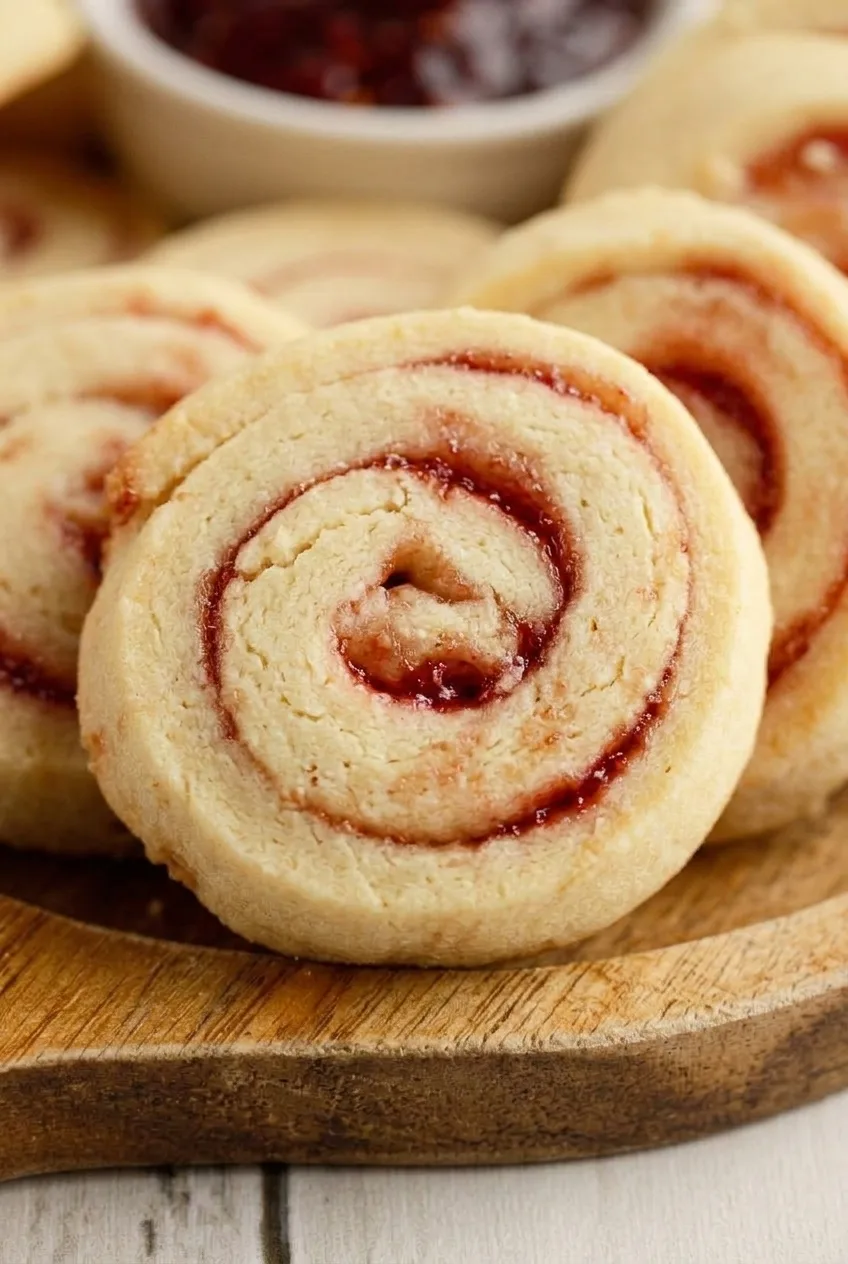
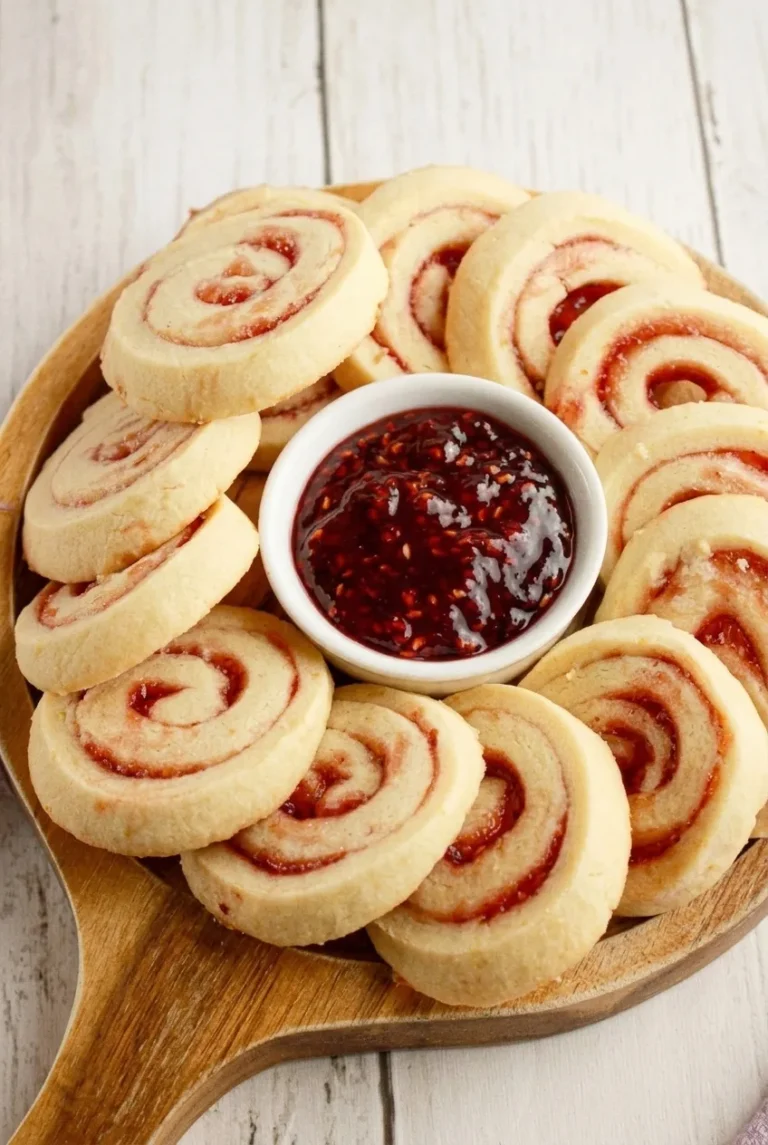
These lemon raspberry cookies are sliced pinwheels with a thin raspberry-jam spiral baked into a buttery lemon dough. The cookies stay mostly pale, with lightly golden edges and a tender, slightly crumbly texture.

The filled dough needs at least an hour in the refrigerator before slicing. A firm log cuts into round cookies without flattening the spirals, while a thin layer of jam keeps the filling from squeezing out.

Ingredients for Lemon Raspberry Cookies

Close view of pale lemon raspberry cookies showing thin jam spirals and lightly golden edges
  • 1 cup unsalted butter, softened (225g)
  • 1/2 cup powdered sugar (60g)
  • 1 tablespoon finely grated lemon zest, from about 2 lemons (6g)
  • 1 teaspoon vanilla extract
  • 2 cups all-purpose flour (240g)
  • 1/4 teaspoon fine salt
  • 1/3 cup raspberry jam or preserves (105g)

Yield: About 24 cookies. Time: About 25 minutes of prep, at least 1 hour of chilling, 10–12 minutes of baking per batch, and cooling time; about 2 hours 5–15 minutes total for two batches.

Smooth or seeded raspberry jam works. Use jam that spreads easily but is not runny.

How to Make Lemon Raspberry Pinwheel Cookies

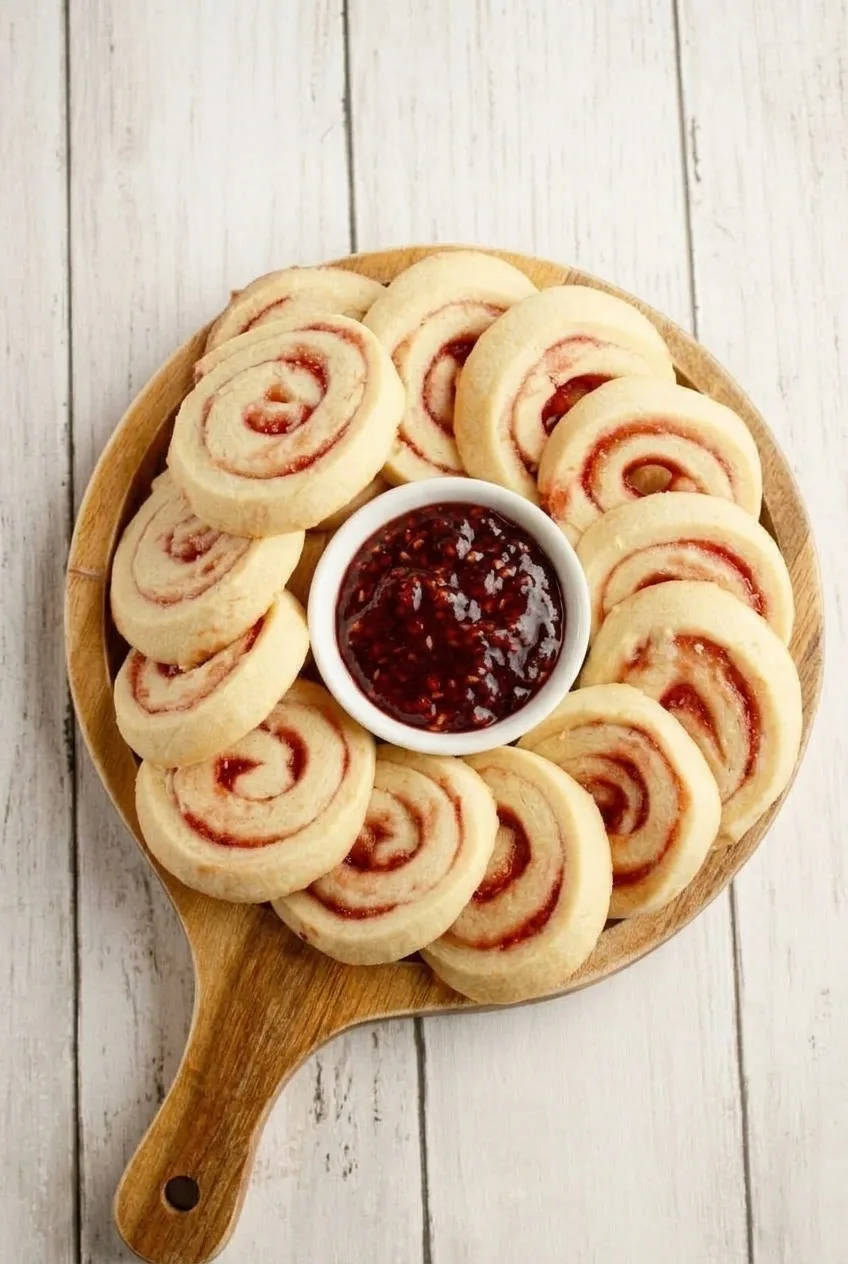
Full wooden board of lemon raspberry pinwheel cookies with a bowl of jam on a light tabletop
  1. Mix the dough: Beat the butter and powdered sugar with a hand mixer until combined. Mix in the lemon zest and vanilla. Add the flour and salt, mixing just until no dry flour remains and the dough holds together when pressed.
  2. Roll and fill: Roll the dough on parchment into an approximately 10-by-12-inch rectangle. If it is too soft to handle, refrigerate it briefly; if it sticks, roll it between sheets of parchment. Spread the jam in a thin, even layer, leaving about a 1/2-inch clean border along one long edge.
  3. Form and chill the log: Starting at the opposite long edge, roll the dough snugly toward the clean border to make an approximately 12-inch log. Seal the seam, wrap the log, and refrigerate for at least 1 hour, until firm enough to slice without flattening.
  4. Preheat and slice: As the log finishes chilling, preheat the oven to 350°F (175°C) with a rack in the center. Line baking sheets with parchment. Cut the log into approximately 1/2-inch rounds with a sharp knife, wiping jam from the blade as needed. Place the slices about 2 inches apart and keep any waiting slices chilled.
  5. Bake: Bake one sheet at a time, uncovered, for 10–12 minutes. Start checking at 10 minutes and remove the cookies when their surfaces look set and the edges are just lightly golden. Do not wait for the whole cookie to brown.
  6. Cool: Let the cookies firm on the sheet for about 2 minutes, then carefully transfer them to a wire rack. Cool completely before storing.

How to Keep the Raspberry Spirals Defined

Too much jam can squeeze out as the dough rolls and stick to the baking sheet. Keep the layer thin and leave the clean border so the seam can seal. Roll snugly without pressing hard enough to force out the filling.

If the log squashes under the knife, refrigerate it until firm again. A sharp blade wiped between cuts helps keep the red spiral visible in each slice. For another rolled cookie design, see these cinnamon roll cookies.

Serving Lemon Raspberry Cookies

Serve the cookies with tea or coffee. A small bowl of extra raspberry jam is optional for serving; the cookies already have jam baked inside.

Storing and Freezing

Store completely cooled cookies in an airtight container at room temperature for up to 5 days, with parchment between layers to limit sticking. Freeze baked, cooled cookies airtight for up to 3 months, separating layers with parchment. Thaw before serving.

Nutrition

Approximate nutrition per cookie, based on 24 cookies: 125 calories, 1g protein, 8g fat, and 13g carbohydrates. Estimated per 100g of ingredients: 470 calories, 4g protein, 29g fat, and 48g carbohydrates. Values are estimates; cookie size, jam brand, and moisture lost during baking will affect the results.

Lemon Raspberry Cookies

Buttery lemon pinwheel cookies are rolled with a thin layer of raspberry jam and baked until their edges are lightly golden.
Course: Dessert
Cuisine: American
Prep: 25 min
Cook: 24 min
Total: 130 min
Servings: 24 Calories: 125 kcal

Equipment

  • Hand mixer
  • Mixing bowl
  • Rolling pin
  • Parchment paper
  • Baking sheets
  • Sharp knife
  • Wire rack

Ingredients

  • 1 cup unsalted butter, softened (225g)
  • 1/2 cup powdered sugar (60g)
  • 1 tablespoon finely grated lemon zest, from about 2 lemons (6g)
  • 1 teaspoon vanilla extract
  • 2 cups all-purpose flour (240g)
  • 1/4 teaspoon fine salt
  • 1/3 cup raspberry jam or preserves (105g)

Instructions

  1. Beat the butter and powdered sugar until combined.
  2. Mix in the lemon zest and vanilla.
  3. Add the flour and salt, mixing just until no dry flour remains and the dough holds together when pressed.
  4. Roll the dough on parchment into an approximately 10-by-12-inch rectangle. If it is too soft, refrigerate it briefly; if it sticks, roll it between sheets of parchment.
  5. Spread the jam in a thin, even layer, leaving about a 1/2-inch clean border along one long edge.
  6. Starting at the opposite long edge, roll the dough snugly toward the clean border to form an approximately 12-inch log. Seal the seam, wrap the log, and refrigerate for at least 1 hour, until firm.
  7. Preheat the oven to 350°F (175°C) with a rack in the center. Line baking sheets with parchment.
  8. Cut the log into approximately 1/2-inch rounds with a sharp knife, wiping jam from the blade as needed.
  9. Place the slices about 2 inches apart and keep any waiting slices chilled.
  10. Bake one sheet at a time for 10–12 minutes, checking at 10 minutes. Remove the cookies when the surfaces look set and the edges are just lightly golden.
  11. Let the cookies firm on the baking sheet for about 2 minutes, then transfer them to a wire rack to cool completely.

Tips

  • Use jam that spreads easily but is not runny.
  • Keep the jam layer thin and leave a clean border to help seal the seam.
  • Roll snugly without pressing hard enough to force out the filling.
  • If the log squashes while slicing, refrigerate it until firm again.
  • Use a sharp knife and wipe it between cuts to keep the spirals defined.

Notes

Store completely cooled cookies in an airtight container at room temperature for up to 5 days, with parchment between layers. Freeze airtight for up to 3 months and thaw before serving.

Nutrition

Calories: 125 kcal | Protein: 1 g | Fat: 8 g | Carbohydrates: 13 g | Per 100g Calories: 470 kcal | Per 100g Protein: 4 g | Per 100g Fat: 29 g | Per 100g Carbohydrates: 48 g

Lemon Cookies

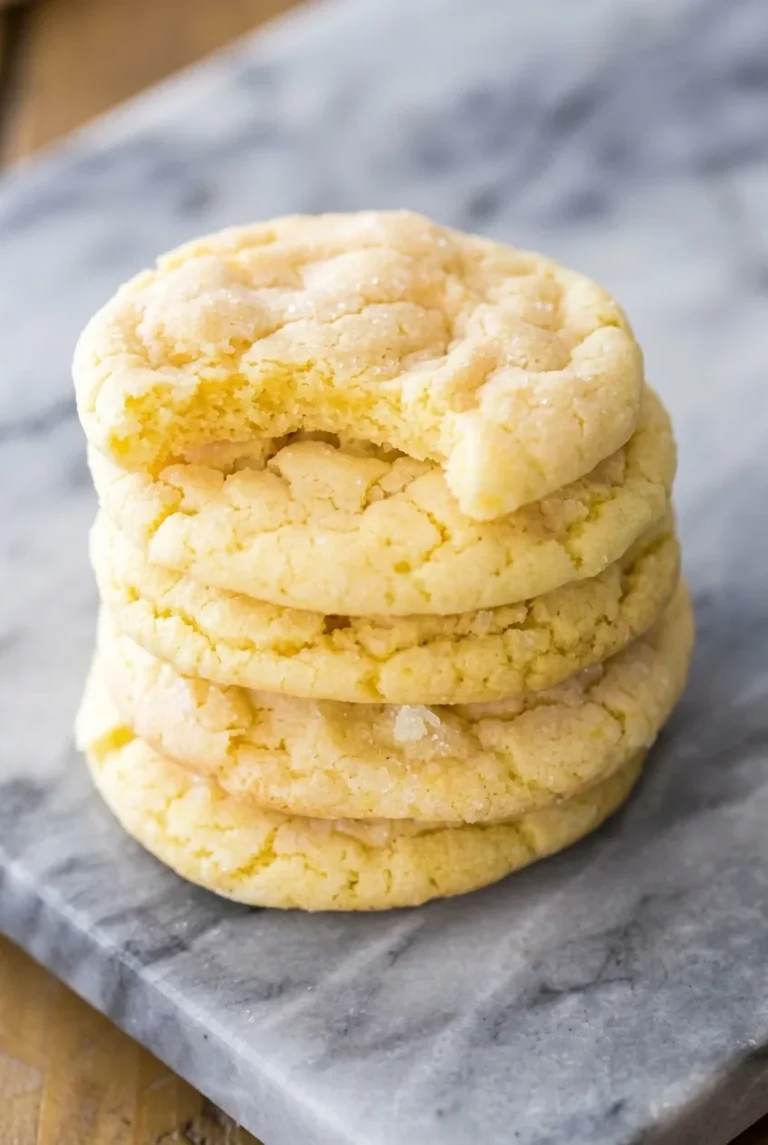
These thick lemon cookies have lightly cracked, sugared tops and soft centers. Fresh zest supplies most of their lemon aroma, while a measured tablespoon of juice brightens the dough without making it too wet. Gently press the portions into thick disks, then take the cookies out while their tops are still pale; they firm up as they cool.

Preparation takes about 20 minutes and makes about 18 medium cookies. Allow 10 to 12 minutes of baking per sheet and about 40 to 50 minutes total. If the dough needs chilling, add 15 to 20 minutes.

Ingredients for Lemon Cookies

Wider view of a stack of pale lemon cookies on a gray stone slab
  • 2 cups all-purpose flour, spooned and leveled (240g)
  • 1 teaspoon baking powder
  • ½ teaspoon fine salt
  • ½ cup unsalted butter, softened (113g)
  • ¾ cup granulated sugar, for the dough (150g)
  • 1 large egg
  • 2 tablespoons finely grated fresh lemon zest, from about 2 lemons
  • 1 tablespoon fresh lemon juice
  • 2 tablespoons granulated sugar, for coating (25g)
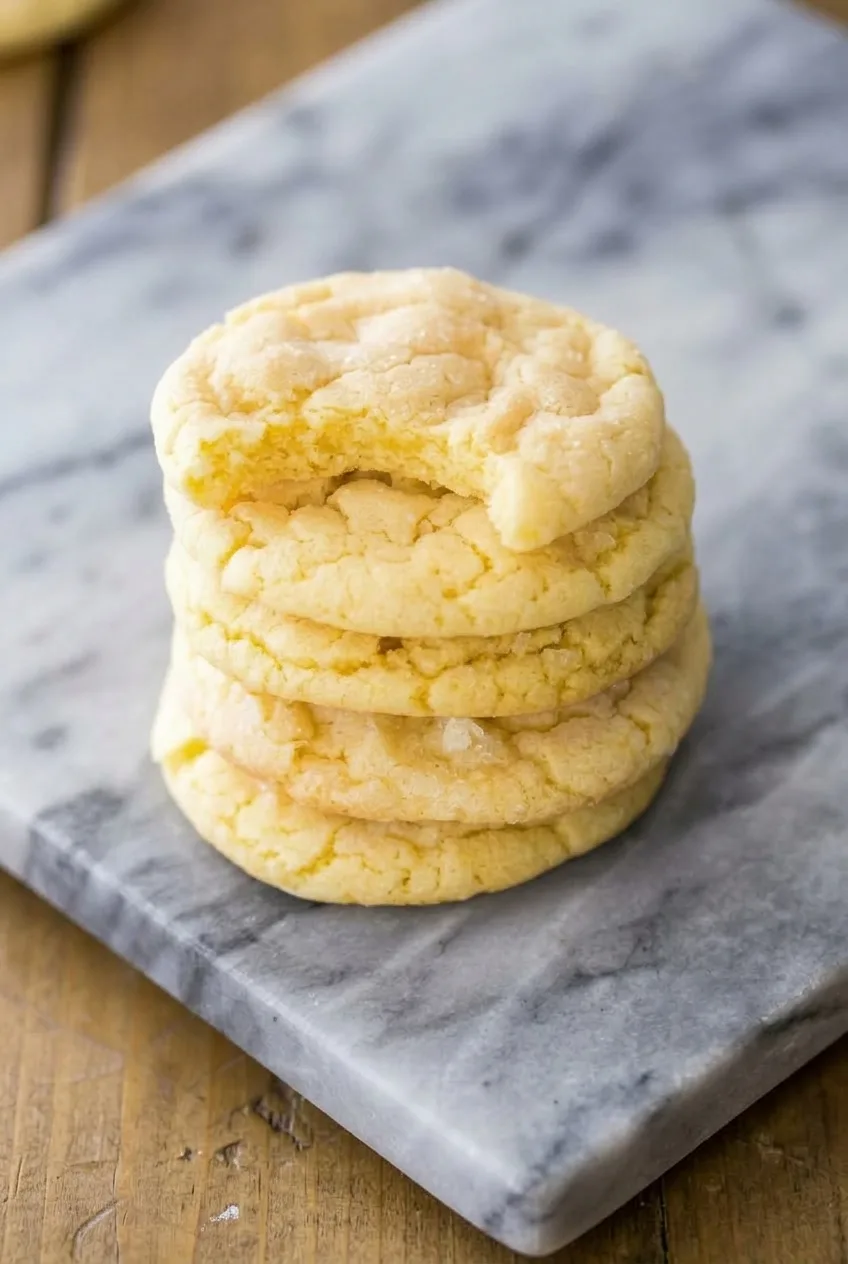
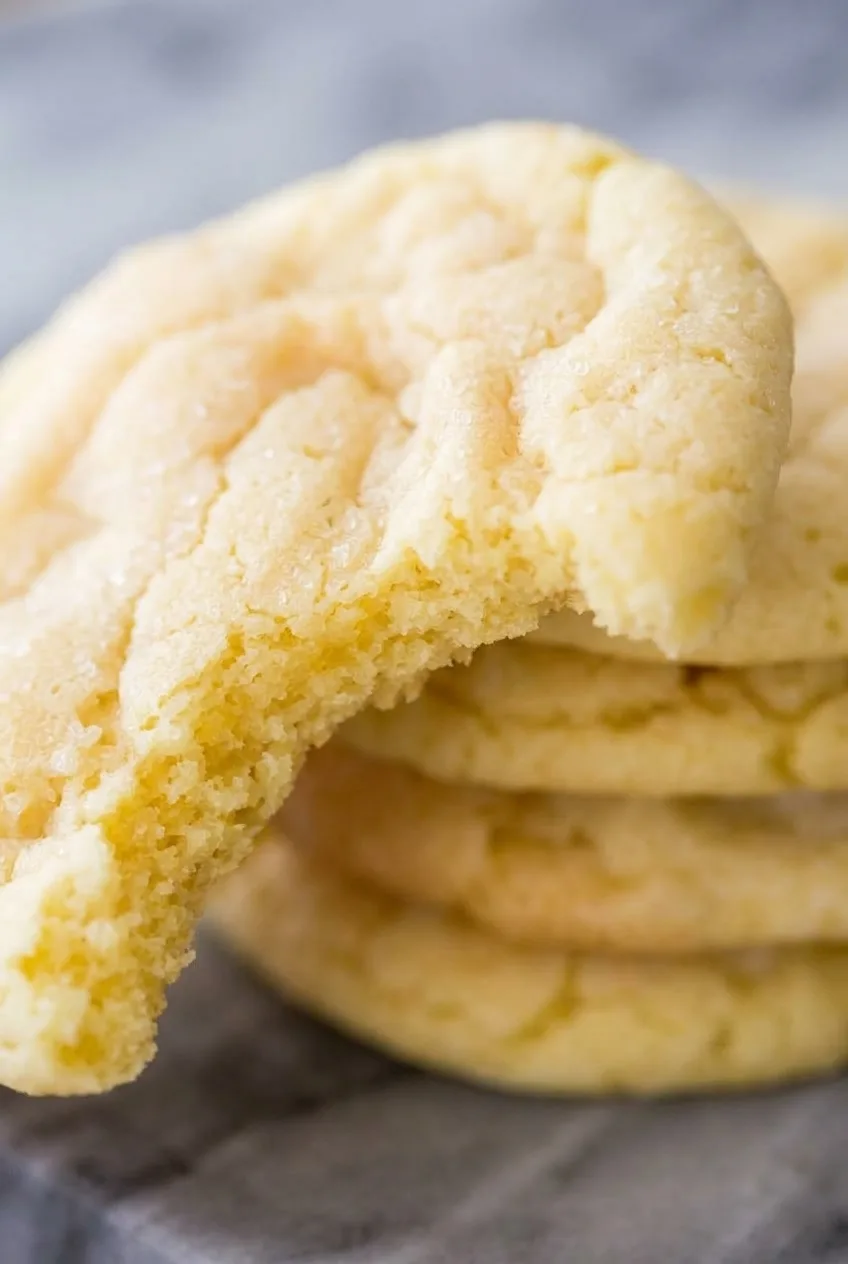
Close view of a broken lemon cookie showing its tender crumb and lightly sugared, cracked surface

How to Bake Lemon Cookies

  1. Prepare the oven and lemons: Fully preheat the oven to 350°F (175°C). Line two baking sheets with parchment paper. Grate only the yellow lemon peel, avoiding the bitter white pith, then squeeze and measure the juice.
  2. Mix the dry ingredients: Whisk together the flour, baking powder, and salt.
  3. Cream the butter and sugar: Beat the softened butter with the ¾ cup sugar until lighter and fluffy, about 2 minutes. Mix in the egg, lemon zest, and 1 tablespoon lemon juice, scraping the bowl as needed.
  4. Finish the dough: Add the dry ingredients and mix just until no flour streaks remain. The dough should hold a scoop without flowing. If it is too sticky to portion, refrigerate it for 15 to 20 minutes; otherwise, no chilling is needed.
  5. Shape and sugar: Scoop about 1½ tablespoons of dough per cookie. Roll each portion lightly in the remaining sugar and place them 2 inches apart on the lined sheets. Gently press each into a thick disk about ½ inch tall. The sugar should form a light scattering, not a heavy crust.
  6. Bake: Bake one sheet at a time, uncovered, for about 10 to 12 minutes. Start checking at 9 minutes. Remove the cookies when the edges look set, the pale tops show delicate cracks, and the centers look just set but still soft. Rotate the sheet only if your oven browns unevenly, and use a cool sheet for subsequent batches.
  7. Cool: Leave the cookies on the baking sheet for 5 minutes so they firm up enough to move. Transfer to a rack to cool completely.

How to Tell When Lemon Cookies Are Done

Look at the edges and centers rather than waiting for the tops to brown. The edges may be faintly golden, but the centers should still look soft. The cookies continue to set during their five-minute rest on the sheet; baking until the tops are golden all over can leave them dry.

Getting the Lemon Flavor Right

Zest provides most of the fresh lemon aroma, so grate only the outer yellow peel and leave the bitter white pith behind. Measure the juice rather than adding extra: more liquid can change how the dough spreads.

Serving Lemon Cookies

Serve the cookies fully cooled, stacked on a platter with one broken open to show the soft crumb. They pair well with Earl Grey tea. For a different flavored bake, try maple brown sugar cookies.

How to Store Lemon Cookies

Cool the cookies completely before storing them airtight at room temperature for 3 to 4 days. For longer storage, freeze the cooled cookies airtight for up to 2 months and thaw them covered at room temperature. Reheating is not necessary.

Nutrition

Approximate nutrition per cookie, based on 18 cookies: 140 calories, 2g protein, 6g fat, and 20g carbohydrates. Per 100g of baked cookies: approximately 430 calories, 6g protein, 17g fat, and 64g carbohydrates. Values vary with cookie size and moisture lost during baking.

Lemon Cookies

Soft-centered lemon cookies with lightly cracked, sugar-coated tops and fresh lemon zest.
Course: Dessert
Cuisine: American
Prep: 20 min
Cook: 22 min
Total: 45 min
Servings: 18 Calories: 140 kcal

Equipment

  • Baking sheets
  • Parchment paper
  • Mixing bowl
  • Whisk
  • Electric mixer
  • Microplane or zester
  • Cookie scoop
  • Cooling rack

Ingredients

For the Dough

  • 2 cups all-purpose flour, spooned and leveled (240g)
  • 1 teaspoon baking powder
  • 1/2 teaspoon fine salt
  • 1/2 cup unsalted butter, softened (113g)
  • 3/4 cup granulated sugar (150g)
  • 1 large egg
  • 2 tablespoons finely grated fresh lemon zest, from about 2 lemons
  • 1 tablespoon fresh lemon juice

For Coating

  • 2 tablespoons granulated sugar (25g)

Instructions

  1. Preheat the oven to 350°F (175°C). Line two baking sheets with parchment paper.
  2. Grate the yellow peel from the lemons, avoiding the white pith, then squeeze and measure the juice.
  3. Whisk together the flour, baking powder, and salt.
  4. Beat the softened butter with the 3/4 cup sugar until light and fluffy, about 2 minutes.
  5. Mix in the egg, lemon zest, and lemon juice, scraping the bowl as needed.
  6. Add the dry ingredients and mix just until no flour streaks remain. If the dough is too sticky to portion, refrigerate it for 15 to 20 minutes.
  7. Scoop about 1 1/2 tablespoons of dough per cookie. Roll each portion lightly in the coating sugar and place 2 inches apart on the prepared sheets.
  8. Gently press each portion into a thick disk about 1/2 inch tall.
  9. Bake one sheet at a time for about 10 to 12 minutes, checking from 9 minutes. Remove the cookies when the edges are set, the pale tops show delicate cracks, and the centers look just set but still soft.
  10. Leave the cookies on the baking sheet for 5 minutes, then transfer them to a rack to cool completely.

Tips

  • Grate only the yellow lemon peel; the white pith can taste bitter.
  • Measure the lemon juice rather than adding extra, which can affect how the dough spreads.
  • Chill the dough for 15 to 20 minutes only if it is too sticky to portion.
  • Bake on a cool sheet for subsequent batches and rotate the sheet only if your oven browns unevenly.
  • Take the cookies out while the tops are pale; they will firm up as they cool.

Notes

Store completely cooled cookies airtight at room temperature for 3 to 4 days, or freeze for up to 2 months. Reheating is not necessary.

Nutrition

Calories: 140 kcal | Protein: 2 g | Fat: 6 g | Carbohydrates: 20 g

Maple Brown Sugar Cookies

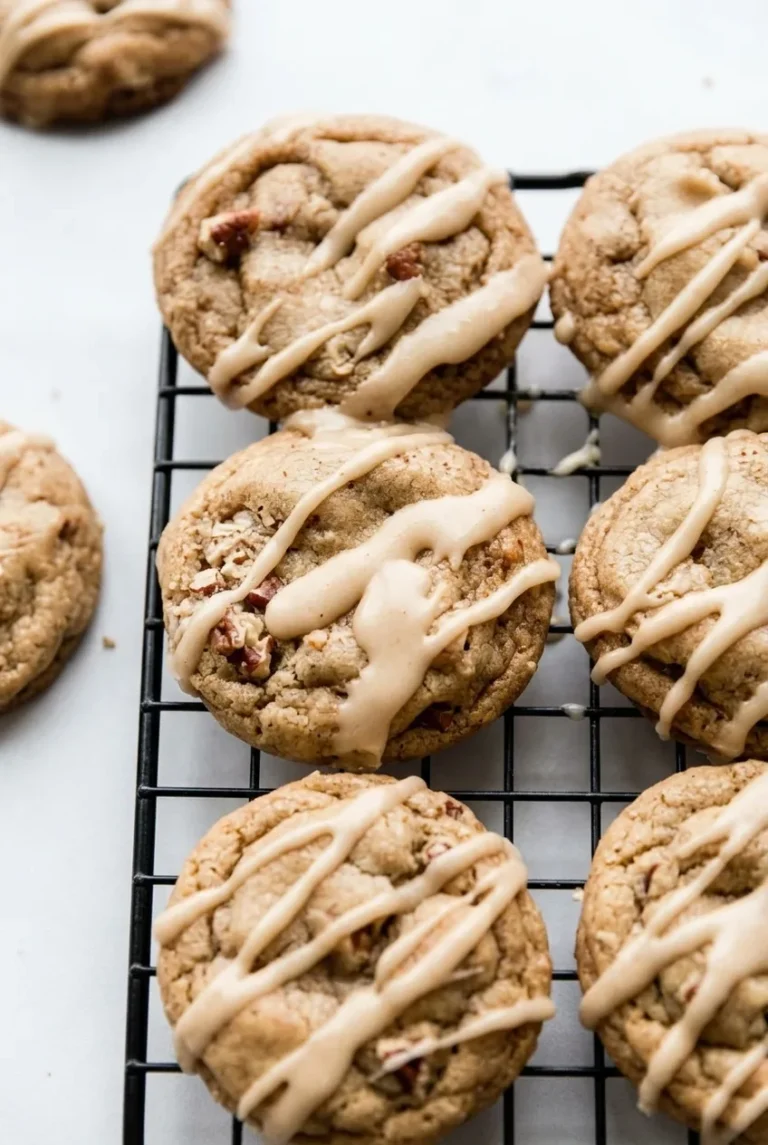
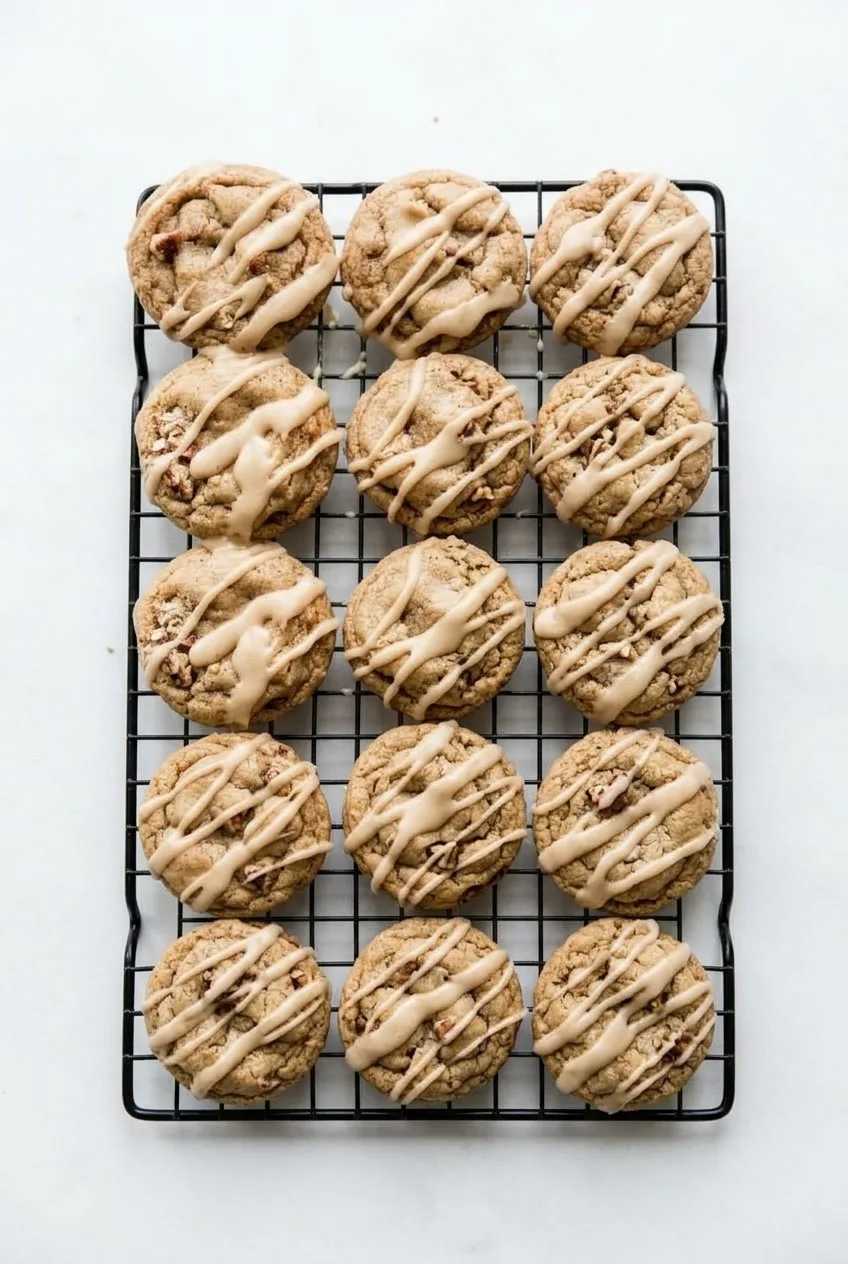
These maple brown sugar cookies have lightly golden edges, soft centers, visible pecans, and broad ribbons of pale maple icing. Pure maple syrup flavors the dough, while maple extract helps that flavor come through after baking.

The syrup also makes the dough soft, so give it at least 2 hours in the refrigerator before scooping. Keep the portions rounded and bake them on cool sheets to help the cookies hold their moderately thick shape.

Ingredients for Maple Brown Sugar Cookies

Wider view of pecan-studded maple brown sugar cookies with pale icing on a cooling rack

Cookies

  • 2 1/3 cups all-purpose flour, spooned and leveled (290g)
  • 1 teaspoon baking soda
  • 1/2 teaspoon fine salt
  • 1/2 cup unsalted butter, softened (115g)
  • 1 cup packed dark brown sugar (200g)
  • 1 large egg, preferably at room temperature
  • 1/3 cup pure maple syrup (105g)
  • 1 teaspoon vanilla extract
  • 1 teaspoon maple extract
  • 3/4 cup chopped pecans (80g)

Maple icing

  • 1 cup confectioners’ sugar, sifted (120g)
  • 2 tablespoons pure maple syrup (40g)
  • 1 tablespoon unsalted butter, melted (15g)

Light brown sugar can replace dark brown sugar for a milder flavor, though the cookies may be slightly lighter in color. Chopped walnuts can replace the pecans. Without maple extract, the baked maple flavor may be less pronounced.

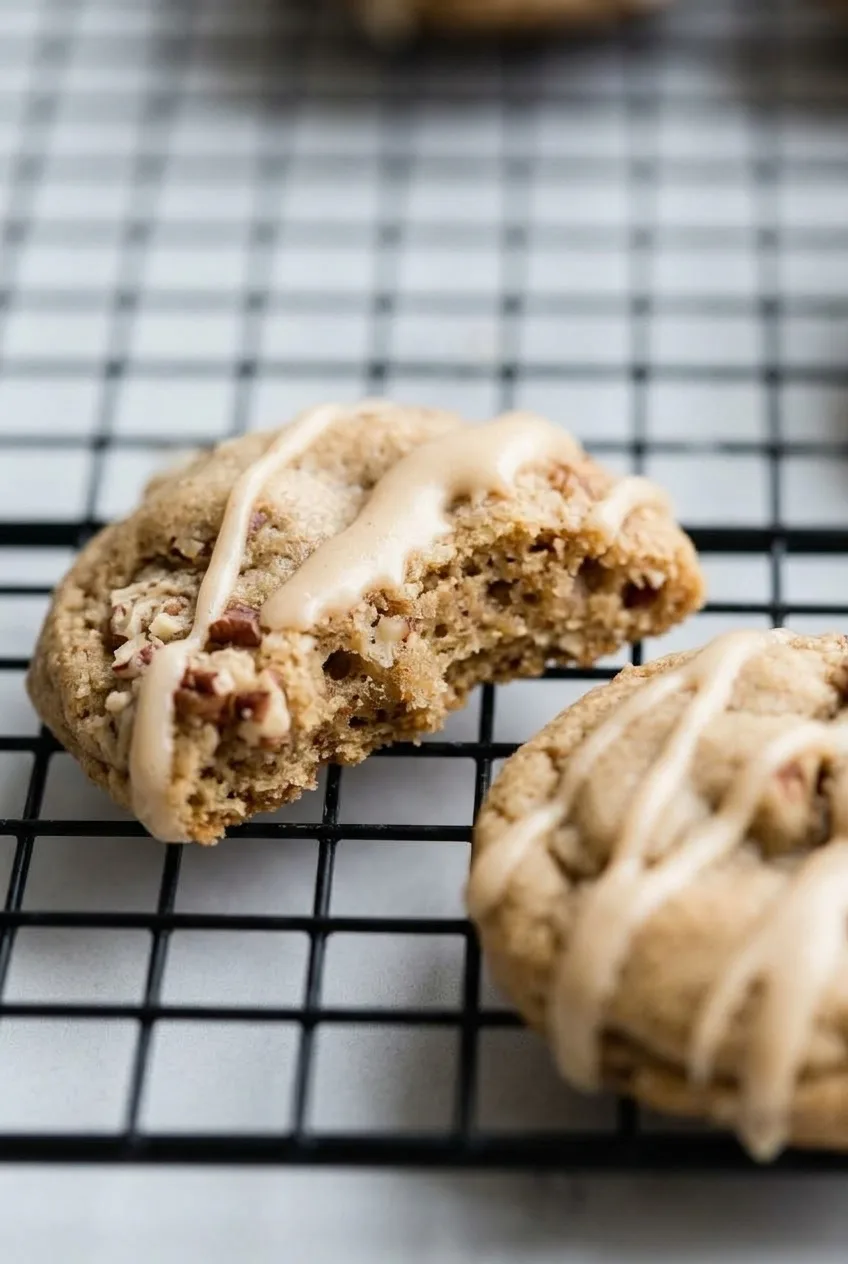
Broken-open maple brown sugar cookie showing its soft center, pecans, and thick icing ribbons

How to Bake Maple Brown Sugar Cookies

  1. Mix the dry ingredients: Whisk the flour, baking soda, and salt together in a bowl.
  2. Cream the butter and sugar: Beat the softened butter and brown sugar with an electric mixer until well blended and somewhat lighter. Beat in the egg, then the maple syrup, vanilla, and maple extract.
  3. Finish and chill the dough: Mix in the dry ingredients just until no dry flour remains, then fold in the pecans. Cover and refrigerate for at least 2 hours, until the dough feels firmer and holds a rounded scoop.
  4. Portion: Preheat the oven to 350°F (175°C). Line cool baking sheets with parchment. Scoop rounded portions of about 2 tablespoons each, or 38–40g, and space them about 3 inches apart. Do not flatten them. Keep dough for later batches refrigerated.
  5. Bake and cool: Bake one sheet at a time on the center rack, uncovered, for about 11–13 minutes. Start checking at 11 minutes: the edges should be set and lightly golden, the tops no longer wet-looking, and the centers still soft. Let the cookies set on the sheet for 5–10 minutes, then transfer them to a wire rack to cool completely. Use a cool sheet for each batch.
  6. Ice: Whisk the sifted confectioners’ sugar, maple syrup, and melted butter until smooth. Drizzle broad diagonal ribbons over the completely cooled cookies. Let the icing set before stacking, about 20–30 minutes depending on its thickness and room conditions.

Why the Dough Needs to Chill

Maple syrup softens the dough, making warm portions more likely to spread. If a test cookie spreads too thin, chill the remaining dough longer and make sure each new batch goes onto a cool sheet. Flour that was scooped directly from the bag may also measure differently; for these amounts, spoon it into the cup and level it, or use a scale.

How to Tell When the Cookies Are Done

Take the cookies out when the edges are set and lightly golden, even though the centers still look soft. They continue setting during the 5–10 minutes on the hot sheet. Waiting for firm-looking centers can leave them dry; portion size, dough temperature, pans, and oven behavior can all shift the baking time.

Getting Thick Maple Icing Ribbons

The icing should fall from a spoon in thick, opaque ribbons rather than run like a thin glaze. If it spreads too quickly, whisk in a little more sifted confectioners’ sugar. If it is too stiff to drizzle, add water a few drops at a time. Ice only completely cooled cookies so the ribbons stay distinct.

Make-Ahead and Storage

Covered dough can chill overnight; portion it while cold and refrigerate it between batches. Once the icing has set, store the cookies in an airtight container at room temperature for up to 2 days, with parchment between layers if stacked. They can also be refrigerated airtight for up to 1 week; bring them to room temperature before serving.

Freeze fully cooled baked cookies, iced or uniced, airtight for up to 3 months, then thaw them covered. Portioned dough can also be frozen, but its baking time may differ; use the set-edge and soft-center cues rather than the clock alone. No reheating is needed.

For another brown sugar bake, try these cinnamon roll cookies.

Nutrition

Approximate nutrition per cookie, based on about 24 cookies: 175 calories, 2g protein, 7g fat, and 27g carbohydrates. Per 100g of finished cookies: approximately 445 calories, 4g protein, 18g fat, and 68g carbohydrates. Values vary with portion size and the finished weight of the cookies.

Maple Brown Sugar Cookies

Soft-centered brown sugar cookies with maple syrup, pecans, and thick maple icing ribbons.
Course: Dessert
Cuisine: American
Prep: 25 min
Cook: 13 min
Total: 198 min
Servings: 24 Calories: 175 kcal

Equipment

  • Electric mixer
  • Mixing bowls
  • Whisk
  • Baking sheets
  • Parchment paper
  • Cookie scoop
  • Wire rack

Ingredients

Cookies

  • 2 1/3 cups all-purpose flour, spooned and leveled (290g)
  • 1 teaspoon baking soda
  • 1/2 teaspoon fine salt
  • 1/2 cup unsalted butter, softened (115g)
  • 1 cup packed dark brown sugar (200g)
  • 1 large egg, preferably at room temperature
  • 1/3 cup pure maple syrup (105g)
  • 1 teaspoon vanilla extract
  • 1 teaspoon maple extract
  • 3/4 cup chopped pecans (80g)

Maple Icing

  • 1 cup confectioners’ sugar, sifted (120g)
  • 2 tablespoons pure maple syrup (40g)
  • 1 tablespoon unsalted butter, melted (15g)

Instructions

  1. Whisk the flour, baking soda, and salt together in a bowl.
  2. Beat the softened butter and brown sugar with an electric mixer until well blended and somewhat lighter.
  3. Beat in the egg, then the maple syrup, vanilla, and maple extract.
  4. Mix in the dry ingredients just until no dry flour remains, then fold in the pecans.
  5. Cover and refrigerate the dough for at least 2 hours, until firmer and able to hold a rounded scoop.
  6. Preheat the oven to 350°F (175°C). Line cool baking sheets with parchment paper.
  7. Scoop rounded portions of about 2 tablespoons each (38–40g) and space them about 3 inches apart. Do not flatten. Keep dough for later batches refrigerated.
  8. Bake one sheet at a time on the center rack for 11–13 minutes, starting to check at 11 minutes. Remove when the edges are set and lightly golden, the tops no longer look wet, and the centers are still soft.
  9. Let the cookies set on the baking sheet for 5–10 minutes, then transfer them to a wire rack to cool completely. Use a cool baking sheet for each batch.
  10. Whisk the sifted confectioners’ sugar, maple syrup, and melted butter until smooth.
  11. Drizzle thick diagonal ribbons of icing over the completely cooled cookies. Let the icing set for about 20–30 minutes before stacking.

Tips

  • Chill the dough for at least 2 hours; maple syrup makes it soft and more likely to spread.
  • Spoon flour into the measuring cup and level it, or weigh it, rather than scooping directly from the bag.
  • Keep dough refrigerated between batches and place each batch on a cool baking sheet.
  • Remove cookies while the centers are still soft; they continue setting on the hot baking sheet.
  • For thick icing ribbons, add a little sifted confectioners’ sugar if the icing spreads too quickly, or a few drops of water if it is too stiff.

Variations

  • Light Brown Sugar Cookies: Use light brown sugar instead of dark brown sugar for a milder flavor and slightly lighter color.
  • Maple Walnut Cookies: Replace the chopped pecans with chopped walnuts.
  • Cookies Without Maple Extract: Omit the maple extract; the baked maple flavor will be less pronounced.

Notes

Store iced cookies airtight at room temperature for up to 2 days or refrigerated for up to 1 week. Freeze baked cookies airtight for up to 3 months and thaw covered. No reheating is needed.

Nutrition

Calories: 175 kcal | Protein: 2 g | Fat: 7 g | Carbohydrates: 27 g

Cinnamon Roll Cookies

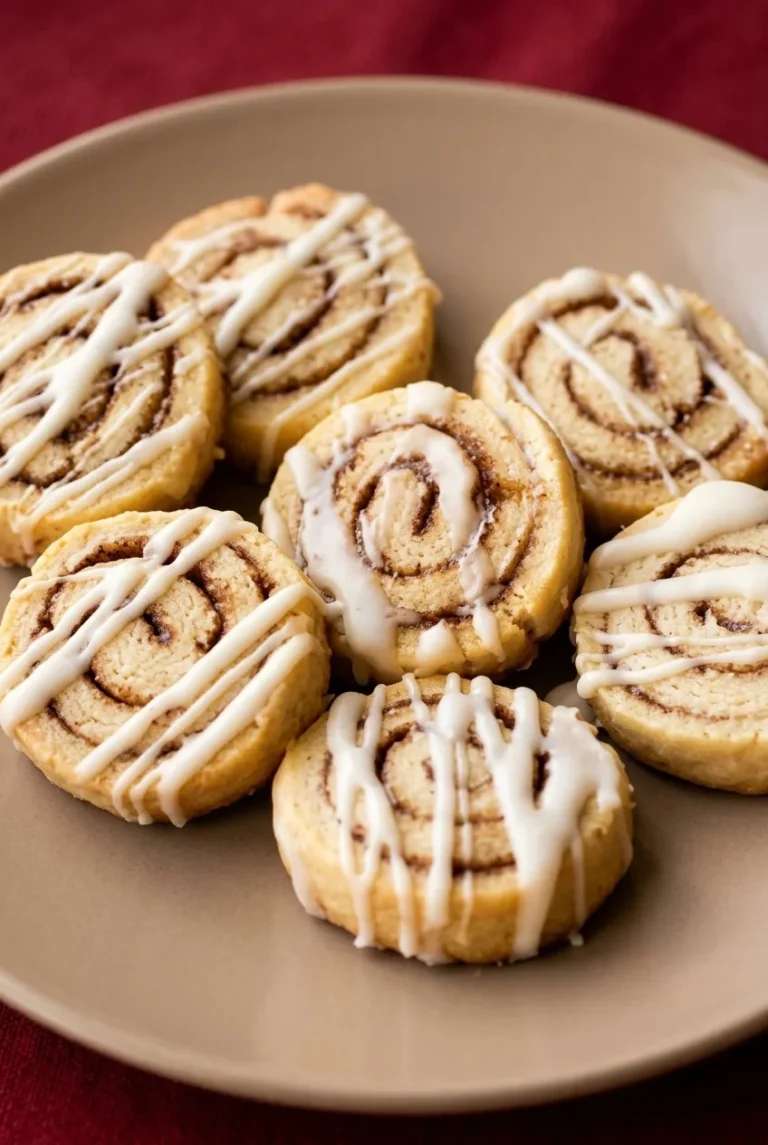
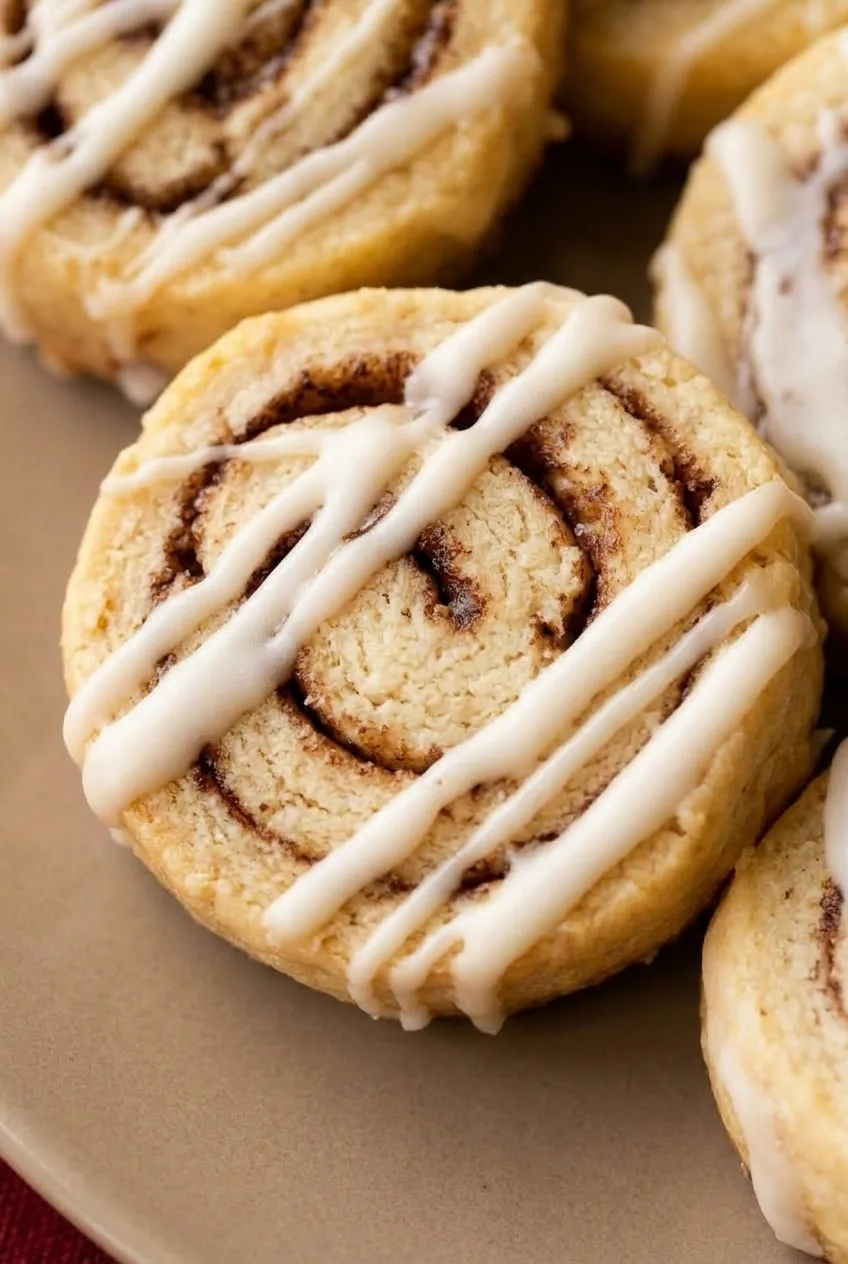
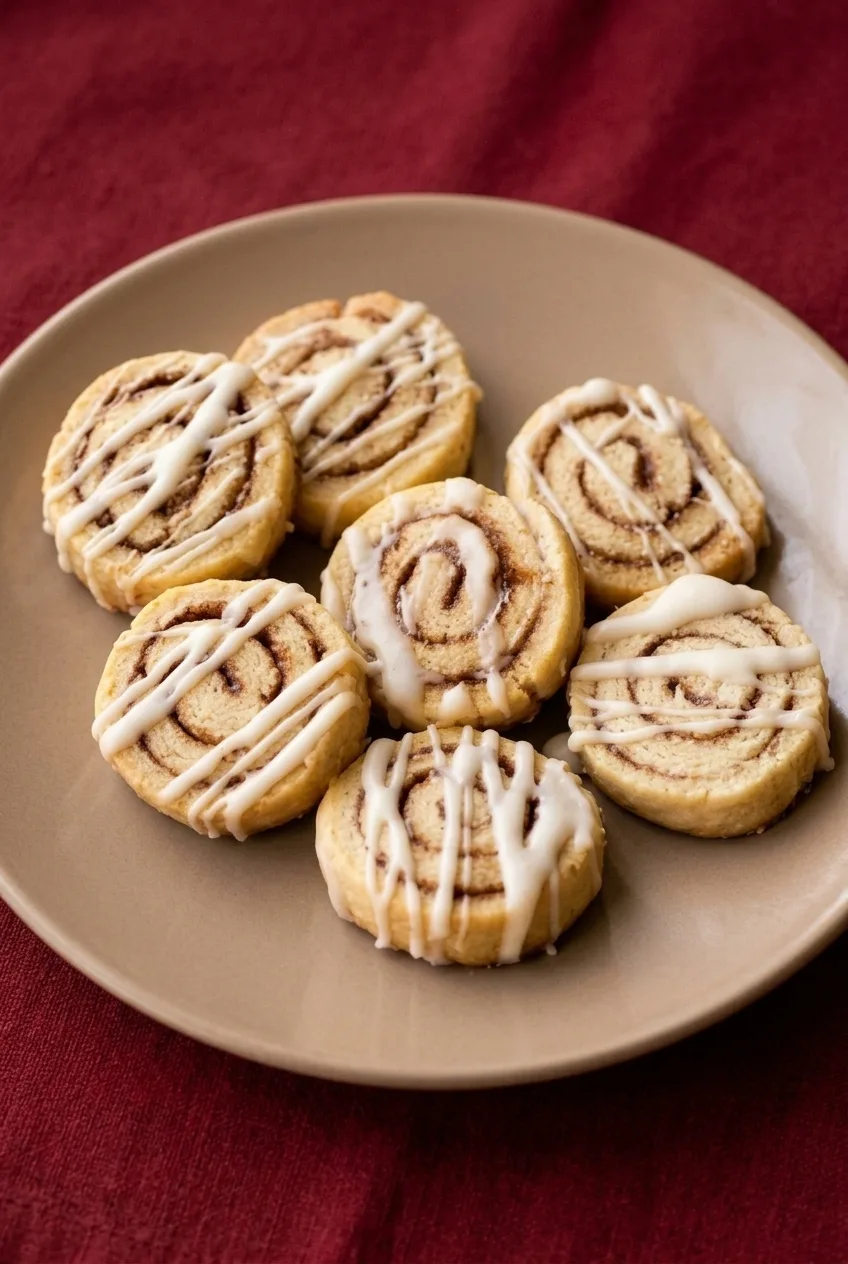
These cinnamon roll cookies are sliced pinwheels with brown-sugar-cinnamon spirals, lightly golden edges, and thin white icing. The filled dough is rolled into two logs, then chilled until firm enough to cut without flattening. That chill helps the spirals stay visible as the cookies bake.

Plan on about 35 minutes of preparation, 2 hours of chilling, and 10 to 12 minutes of baking per sheet. Including cooling and glazing, the total time is about 3 hours 15 minutes to 3 hours 45 minutes.

Ingredients for Cinnamon Roll Cookies

Close view of a cinnamon roll cookie showing its brown spiral and thin white icing

Cookie dough

  • 3/4 cup unsalted butter, softened (170g)
  • 3/4 cup granulated sugar (150g)
  • 1 large egg
  • 1 teaspoon vanilla extract
  • 2 1/4 cups all-purpose flour (270g)
  • 1/2 teaspoon baking powder
  • 1/2 teaspoon fine salt

Cinnamon filling

  • 2 tablespoons unsalted butter, softened (about 30g)
  • 1/3 cup packed light brown sugar (about 65g)
  • 1 tablespoon ground cinnamon

White icing

  • 3/4 cup powdered sugar (90g)
  • 1 to 2 tablespoons milk

How to Make Cinnamon Roll Cookies

Full plate of glazed cinnamon roll cookies surrounded by a dark red surface
  1. Mix the dough: Beat the 3/4 cup softened butter and granulated sugar until creamy. Mix in the egg and vanilla. Add the flour, baking powder, and salt, mixing just until no dry flour remains and the dough holds together.
  2. Make the filling: Mix the 2 tablespoons softened butter, brown sugar, and cinnamon until spreadable.
  3. Roll and fill: Divide the dough in half. On parchment, roll each portion into an approximately 8-by-12-inch rectangle, about 1/4 inch thick. If the dough sticks, refrigerate it briefly before continuing. Spread half the filling thinly over each rectangle, leaving a clean 1/2-inch border along one long edge.
  4. Form and chill the logs: Starting at the opposite long edge, roll each rectangle snugly toward the clean border without squeezing out the filling. Press the clean edge against the log to seal it. Wrap the logs and refrigerate for about 2 hours, until firm throughout. A test slice should hold its round shape rather than flatten.
  5. Slice and bake: As the logs finish chilling, position a rack near the center of the oven and preheat to 350°F (175°C). Line baking sheets with parchment. Cut the logs into approximately 1/2-inch slices with a sharp knife, using gentle strokes. Place the slices about 2 inches apart; refrigerate any that soften or squash as you work. Bake uncovered, one sheet at a time, for 10 to 12 minutes. Start checking at 10 minutes and remove the cookies when the edges are set and lightly golden and the centers look set but still tender.
  6. Cool and ice: Leave the cookies on the baking sheet for 5 minutes, then transfer them to a rack to cool completely. Stir the powdered sugar with 1 tablespoon milk, adding more a little at a time until the icing falls in thin, opaque ribbons. Drizzle over the cooled cookies and let the icing set before stacking.

How to Keep the Cinnamon Spirals Defined

A thin filling layer and clean sealing border help keep the cinnamon sugar inside the logs. Slice only when the logs are firm enough that the knife does not press them oval. If a log is too hard to cut, let it soften slightly, then slice it before it becomes floppy. A few less-complete spirals, particularly near the ends, are normal.

How to Tell When the Cookies Are Done

Look for lightly golden, set edges and centers that no longer look raw. The cookies firm up as they cool, so do not wait for deep browning across the tops. Wider or thicker slices may need more than 12 minutes; use their appearance rather than the clock alone.

Make-Ahead and Storage

Wrapped, filled logs can be refrigerated until ready to slice. For longer storage, wrap them well and freeze for up to 3 months. Let frozen logs soften just enough to cut cleanly.

Once the icing has set, store the cookies airtight at room temperature for up to 4 days, with parchment between stacked layers. Baked cookies can also be frozen for up to 3 months; for the clearest white drizzle, glaze them after thawing. Serve with coffee, tea, or hot chocolate.

For another warmly spiced cookie, try these soft and chewy oatmeal raisin cookies. For a chocolate option, try these chocolate chunk cookies.

Nutrition

Estimated per 1/24 of the recipe: 155 calories, 2g protein, 7g fat, and 22g carbohydrates. Estimated per 100g of finished cookies: 455 calories, 4g protein, 20g fat, and 64g carbohydrates. These are approximations; the number and weight of cookies will vary with the size of the logs and slices.

Cinnamon Roll Cookies

These slice-and-bake cookies have brown sugar and cinnamon spirals with a thin white icing drizzle.
Course: Dessert
Cuisine: American
Prep: 35 min
Cook: 12 min
Total: 210 min
Servings: 24 Calories: 155 kcal

Equipment

  • Mixing bowl
  • Electric mixer
  • Rolling pin
  • Parchment paper
  • Baking sheets
  • Sharp knife
  • Wire rack

Ingredients

Cookie dough

  • 3/4 cup unsalted butter, softened (170g)
  • 3/4 cup granulated sugar (150g)
  • 1 large egg
  • 1 teaspoon vanilla extract
  • 2 1/4 cups all-purpose flour (270g)
  • 1/2 teaspoon baking powder
  • 1/2 teaspoon fine salt

Cinnamon filling

  • 2 tablespoons unsalted butter, softened (about 30g)
  • 1/3 cup packed light brown sugar (about 65g)
  • 1 tablespoon ground cinnamon

White icing

  • 3/4 cup powdered sugar (90g)
  • 1 to 2 tablespoons milk

Instructions

  1. Beat the softened butter and granulated sugar until creamy.
  2. Mix in the egg and vanilla.
  3. Add the flour, baking powder, and salt. Mix just until no dry flour remains and the dough holds together.
  4. Mix the softened filling butter with the brown sugar and cinnamon until spreadable.
  5. Divide the dough in half. On parchment, roll each portion into an approximately 8-by-12-inch rectangle about 1/4 inch thick. If the dough sticks, refrigerate it briefly.
  6. Spread half the filling over each rectangle, leaving a clean 1/2-inch border along one long edge.
  7. Starting at the opposite long edge, roll each rectangle snugly toward the clean border. Press the border against the log to seal.
  8. Wrap the logs and refrigerate for about 2 hours, until firm throughout.
  9. Position a rack near the center of the oven and preheat to 350°F (175°C). Line baking sheets with parchment.
  10. Cut the logs into approximately 1/2-inch slices with a sharp knife. Place the slices about 2 inches apart, refrigerating any that soften as you work.
  11. Bake one sheet at a time for 10 to 12 minutes, until the edges are set and lightly golden and the centers look set but tender.
  12. Cool the cookies on the baking sheet for 5 minutes, then transfer them to a wire rack to cool completely.
  13. Stir the powdered sugar with 1 tablespoon milk. Add more milk a little at a time until the icing falls in thin, opaque ribbons.
  14. Drizzle the icing over the cooled cookies and let it set before stacking.

Tips

  • Spread the filling in a thin layer and keep the sealing border clean to help the spirals hold.
  • Chill the logs until firm so the slices stay round when cut.
  • If a log is too hard to slice, let it soften slightly before cutting.
  • Start checking the cookies at 10 minutes; remove them when the edges are lightly golden and the centers look set.
  • Use gentle knife strokes, and chill any slices that soften or squash while you work.

Notes

Store iced cookies airtight at room temperature for up to 4 days, with parchment between layers. Filled logs and baked cookies can be frozen for up to 3 months. Glaze baked cookies after thawing for the clearest drizzle.

Nutrition

Calories: 155 kcal | Protein: 2 g | Fat: 7 g | Carbohydrates: 22 g | Per 100g Calories: 455 kcal | Per 100g Protein: 4 g | Per 100g Fat: 20 g | Per 100g Carbohydrates: 64 g

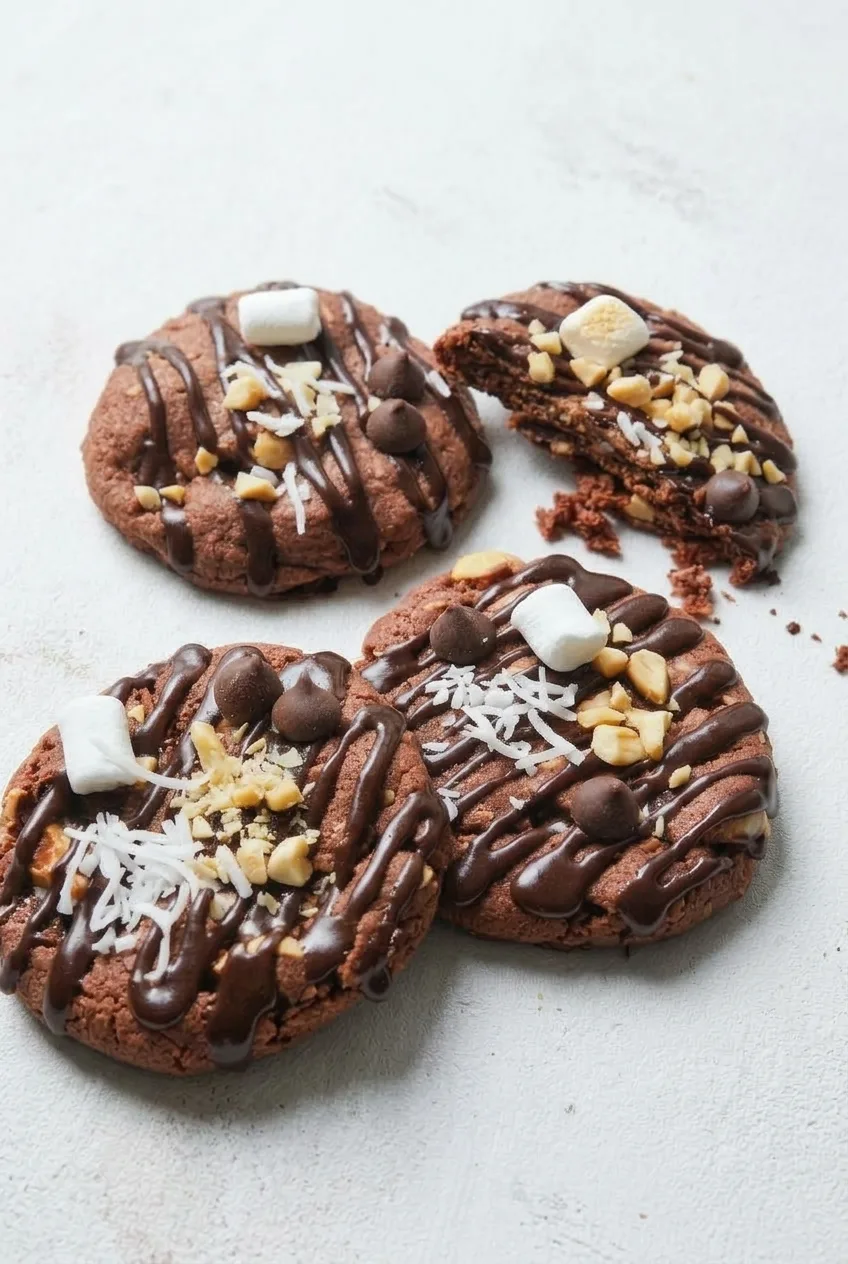
Rocky Road Cookies

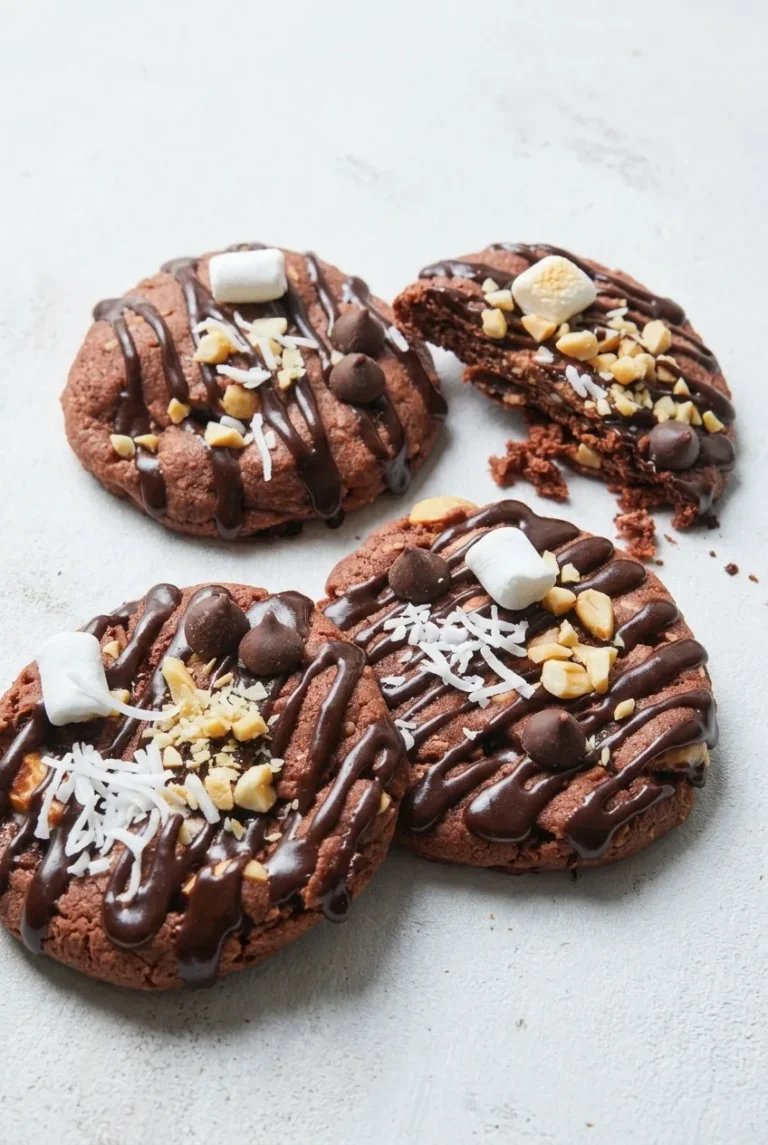
These flourless chocolate cookies have set edges, soft centers, and a topping of almonds, coconut, chocolate chips, and mini marshmallows. The cocoa-and-egg-white batter is thick and sticky, not a rollable dough; freezing the scooped mounds briefly helps limit spreading.

A few marshmallows bake on each cookie, while fresh white ones go on after cooling. Broad stripes of melted chocolate hold the finishing toppings in place.

Ingredients for Rocky Road Cookies

A loose group of finished Rocky Road Cookies on a pale surface, with one cookie broken
  • 2 cups powdered sugar (240g)
  • 1/2 cup unsweetened cocoa powder (45g)
  • 1/4 teaspoon fine salt
  • 3 large egg whites, about 6 tablespoons (90g)
  • 1 teaspoon vanilla extract
  • 1 cup semisweet chocolate chips, divided (170g)
  • 3/4 cup toasted chopped almonds, divided (90g)
  • About 1/2 cup mini marshmallows, divided (25g)
  • 1/3 cup shredded coconut (25g)
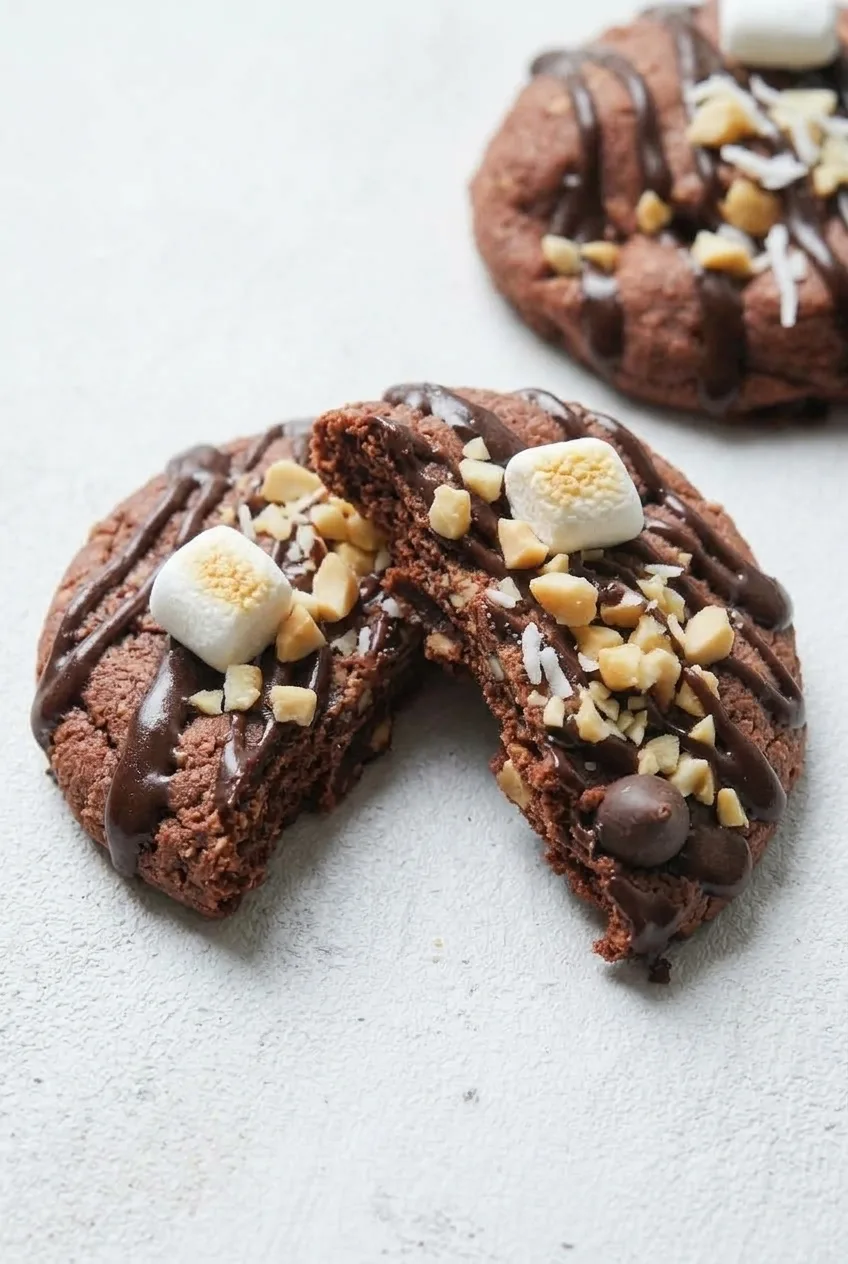
Broken Rocky Road Cookie showing its soft chocolate center beneath the drizzle and toppings

How to Bake Rocky Road Cookies

  1. Prepare the pans: Preheat the oven to 350°F (175°C) with a rack near the middle. Line two baking sheets with parchment paper.
  2. Mix the batter: Whisk the powdered sugar, cocoa powder, and salt together, breaking up any lumps. Whisk in the egg whites and vanilla until no dry pockets remain. Stir in 1/2 cup of the chocolate chips and 1/2 cup of the almonds. The batter will be thick and sticky; do not add water or milk.
  3. Scoop and freeze: Scoop about 12 mounds, using roughly 2 tablespoons of batter each and leaving about 3 inches between them. Gently place about two mini marshmallows on top of each mound, keeping them exposed. Freeze the portioned batter for 15 minutes. If the sheets do not fit in the freezer, slide the parchment onto freezer-safe trays.
  4. Bake: Bake one sheet at a time for 12 to 13 minutes, checking at 12 minutes. Keep the second sheet in the freezer while the first bakes. The edges should look set and slightly crisp, and the baked marshmallows may have light golden spots. The centers can still look soft. Rotate the sheet only if your oven browns unevenly.
  5. Cool: Leave the cookies on their parchment for at least 10 minutes so they can set without breaking. Move them gently, then let them cool completely before decorating.
  6. Drizzle and finish: Melt 1/3 cup of the remaining chocolate chips in a microwave-safe bowl in short bursts, stirring until smooth. Drizzle broad stripes over the cooled cookies. While the chocolate is tacky, add the remaining 1/4 cup almonds, the remaining chocolate chips, the coconut, and one fresh white mini marshmallow per cookie. Let the chocolate firm up before serving or stacking.

Why Add Marshmallows Twice?

Marshmallows folded into this batter can melt out of sight. Placing a few on each mound leaves gooey spots on the baked cookies, though those pieces may turn golden. The marshmallow added after cooling stays white and visible. For another marshmallow-topped bake, try these S’mores Cookies.

How to Tell When the Cookies Are Done

Look for set edges rather than waiting for firm centers. Baking until the centers look dry can make these cookies hard. They are fragile when hot and continue to set as they cool on the parchment.

Dark Chocolate Option

Replace the semisweet chips with an equal amount of dark chocolate chips or chopped dark chocolate. Keep the portions for the batter, drizzle, and topping; chopped chocolate will look less uniform than whole chips on top.

How to Store Rocky Road Cookies

Once the drizzle has set, store the cookies in an airtight container at room temperature for up to 4 days. In humid conditions, they may soften within 1 to 2 days.

Nutrition

Approximate per cookie, based on 12 cookies: 225 calories, 4g protein, 9g fat, and 35g carbohydrates. Approximate per 100g: 405 calories, 7g protein, 17g fat, and 63g carbohydrates. Values will vary with ingredient brands, cookie size, and moisture lost during baking.

Rocky Road Cookies

Flourless chocolate cookies with soft centers, toasted almonds, coconut, chocolate chips, and marshmallows.
Course: Dessert
Cuisine: American
Prep: 20 min
Cook: 26 min
Total: 81 min
Servings: 12 Calories: 225 kcal per cookie; 405 kcal per 100 g

Equipment

  • Mixing bowl
  • Whisk
  • Baking sheets
  • Parchment paper
  • Cookie scoop
  • Freezer
  • Microwave-safe bowl
  • Microwave

Ingredients

Cookie Batter

  • 2 cups powdered sugar (240 g)
  • 1/2 cup unsweetened cocoa powder (45 g)
  • 1/4 teaspoon fine salt
  • 3 large egg whites, about 6 tablespoons (90 g)
  • 1 teaspoon vanilla extract
  • 1/2 cup semisweet chocolate chips
  • 1/2 cup toasted chopped almonds
  • About 1/4 cup mini marshmallows

For Topping

  • 1/3 cup semisweet chocolate chips, for melting
  • Remaining semisweet chocolate chips
  • 1/4 cup toasted chopped almonds
  • About 1/4 cup mini marshmallows, including 1 fresh marshmallow per cookie
  • 1/3 cup shredded coconut (25 g)

Instructions

  1. Preheat the oven to 350°F (175°C) with a rack near the middle. Line two baking sheets with parchment paper.
  2. Whisk the powdered sugar, cocoa powder, and salt in a bowl, breaking up any lumps.
  3. Whisk in the egg whites and vanilla until no dry pockets remain. Stir in 1/2 cup chocolate chips and 1/2 cup almonds. The batter will be thick and sticky; do not add water or milk.
  4. Scoop about 12 mounds, using roughly 2 tablespoons of batter per mound, and space them about 3 inches apart.
  5. Gently place about two mini marshmallows on top of each mound, keeping them exposed. Freeze the portioned batter for 15 minutes. If needed, transfer the parchment to freezer-safe trays.
  6. Bake one sheet at a time for 12 to 13 minutes, checking at 12 minutes. Keep the second sheet in the freezer while the first bakes. Bake until the edges look set and slightly crisp; the centers may still look soft.
  7. Let the cookies set on the parchment for at least 10 minutes, then move them gently and cool completely.
  8. Melt 1/3 cup of the remaining chocolate chips in a microwave-safe bowl in short bursts, stirring until smooth. Drizzle broad stripes over the cooled cookies.
  9. While the chocolate is tacky, add the remaining almonds, chocolate chips, coconut, and one fresh white mini marshmallow per cookie. Let the chocolate firm before serving or stacking.

Tips

  • Keep the batter thick and sticky; do not add water or milk.
  • Freeze the scooped batter briefly to help limit spreading.
  • Keep the second sheet in the freezer while the first bakes.
  • Remove the cookies when the edges are set, even if the centers still look soft.
  • Let the cookies cool on the parchment before moving them because they are fragile when hot.

Variations

  • Dark Chocolate Rocky Road Cookies: Replace the semisweet chips with an equal amount of dark chocolate chips or chopped dark chocolate.

Notes

Store in an airtight container at room temperature for up to 4 days; humidity may soften the cookies within 1 to 2 days.

Nutrition

Calories: 225 kcal per cookie; 405 kcal per 100 g | Protein: 4 g per cookie; 7 g per 100 g | Fat: 9 g per cookie; 17 g per 100 g | Carbohydrates: 35 g per cookie; 63 g per 100 g

Brookie Cookies

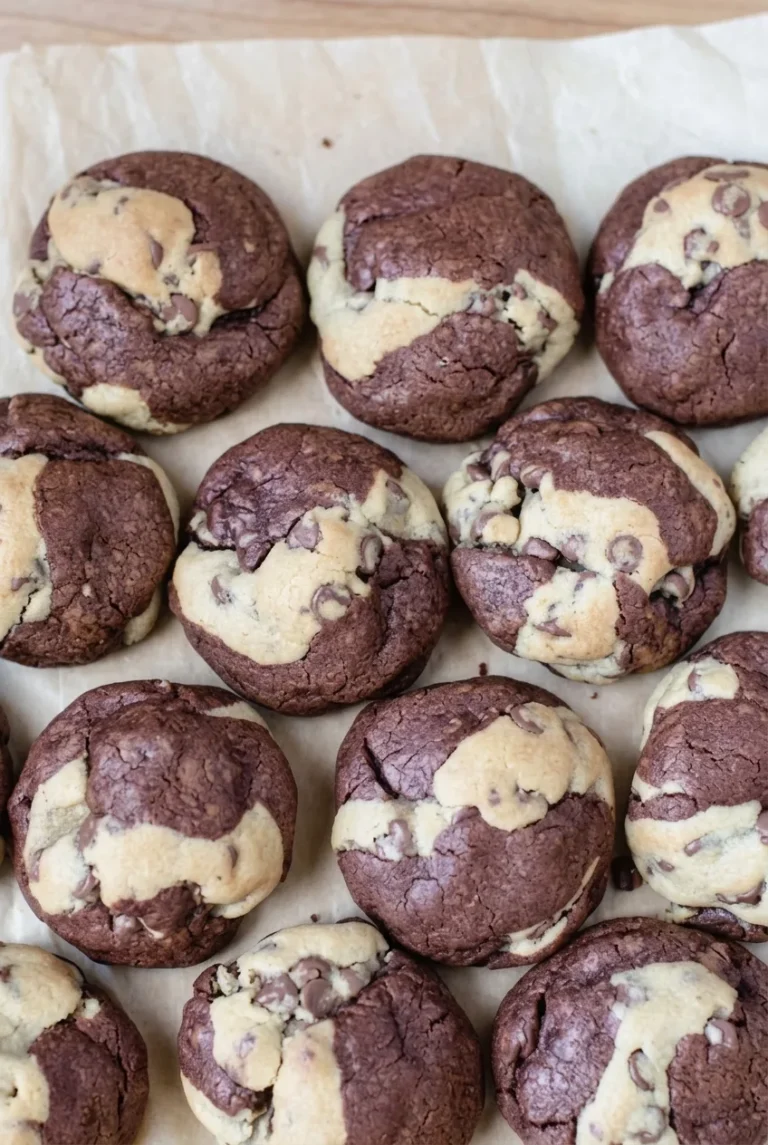
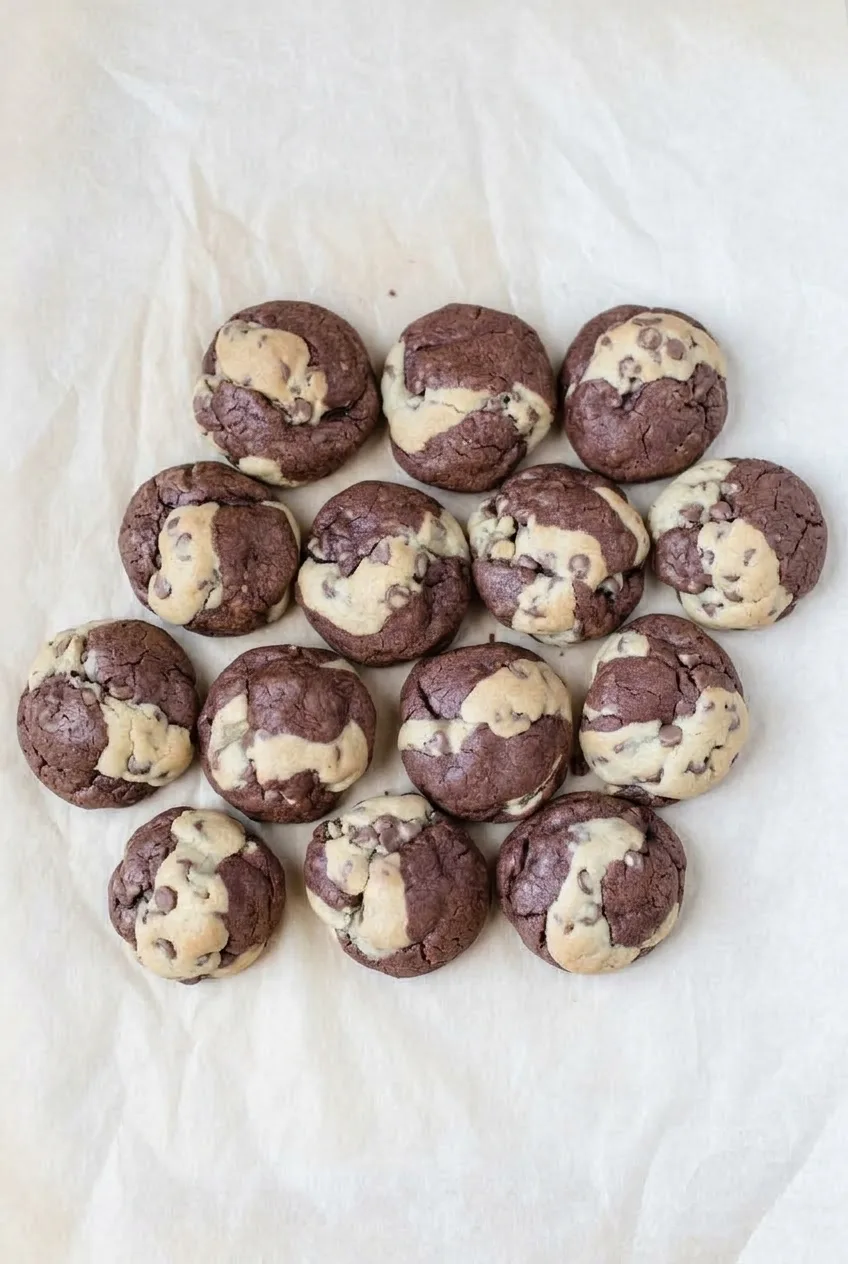
Brookie cookies bring brownie dough and chocolate chip cookie dough together in thick, soft-centered rounds. Each cookie should have broad patches of dark cocoa dough beside pale, chip-studded dough, with lightly golden edges and set brownie tops.

Make and chill the doughs separately, then join equal-size portions with only a brief roll. Keeping both colors exposed is what makes these cookies look and eat like brookies rather than blended chocolate cookies. This recipe makes about 20 cookies.

Ingredients for Brookie Cookies

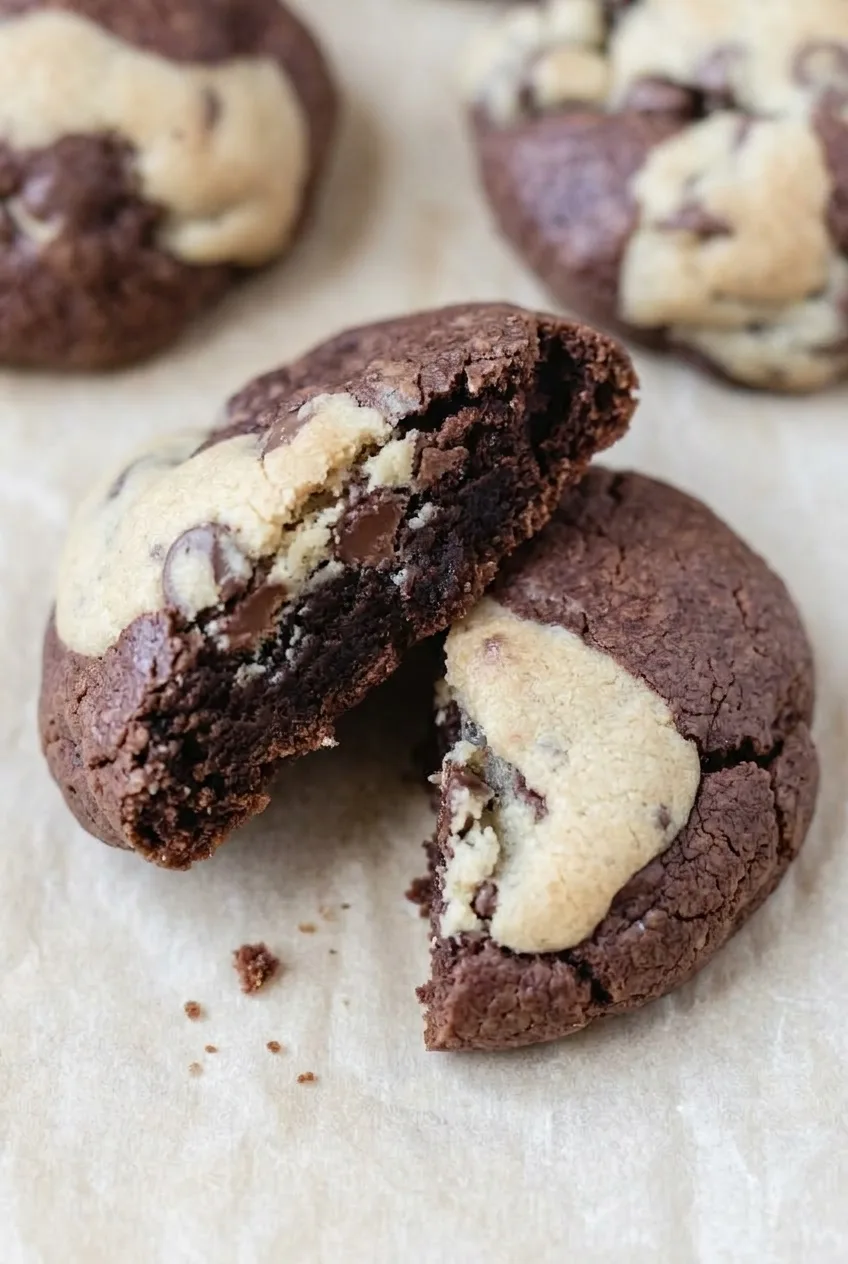
Broken brookie cookie showing soft brownie and chocolate chip cookie interiors beside their irregular seam
  • 1 cup unsalted butter (225g), divided: 1/2 cup melted for the brownie dough and 1/2 cup softened for the cookie dough
  • 1 cup granulated sugar (200g), divided: 3/4 cup for the brownie dough and 1/4 cup for the cookie dough
  • 1/2 cup packed light brown sugar (100g), for the cookie dough
  • 2 large eggs, one for each dough
  • 2 teaspoons vanilla extract, divided: 1 teaspoon for each dough
  • 1/3 cup unsweetened cocoa powder (30g), for the brownie dough
  • 2 1/4 cups all-purpose flour (280g), divided: 1 cup for the brownie dough and 1 1/4 cups for the cookie dough
  • 1/2 teaspoon baking soda, for the cookie dough
  • 1/2 teaspoon fine salt, divided: 1/4 teaspoon for each dough
  • 1 cup semisweet chocolate chips (170g), divided: 1/2 cup for each dough

How to Make Brookie Cookies

Wider view of a group of two-tone brookie cookies arranged on light parchment
  1. Mix the brownie dough: Let the melted butter cool until warm, not hot. Stir it with 3/4 cup granulated sugar, then mix in one egg and 1 teaspoon vanilla. Add the cocoa powder, 1 cup flour, and 1/4 teaspoon salt. Mix just until no dry flour remains, then fold in 1/2 cup chocolate chips.
  2. Mix the chocolate chip cookie dough: In a second bowl, beat the softened butter with the brown sugar and remaining 1/4 cup granulated sugar. Mix in the remaining egg and 1 teaspoon vanilla. Add the remaining 1 1/4 cups flour, the baking soda, and remaining 1/4 teaspoon salt. Mix until combined, then fold in the remaining 1/2 cup chocolate chips.
  3. Chill: Cover both bowls and refrigerate for at least 1 hour, until the doughs are firm enough to scoop and handle without smearing. Near the end of chilling, preheat the oven to 350°F (175°C) with a rack in the center. Line large baking sheets with parchment.
  4. Shape the cookies: Divide each dough into about 20 similar-size portions, roughly a heaping tablespoon each. Press one brownie portion and one cookie-dough portion side by side. Roll briefly into a thick ball, leaving large areas of both doughs visible on top.
  5. Bake in batches: Arrange about 10 cookies on a lined baking sheet, roughly 2 inches apart. Bake one sheet at a time for about 15 to 18 minutes, starting to check at 13 minutes. Rotate the sheet near halfway if your oven browns unevenly, and keep the waiting batch chilled. The pale edges should be lightly golden and the brownie surfaces set, without a wet sheen; the centers may still feel slightly soft.
  6. Cool before moving: Leave the cookies on the baking sheet for 5 minutes so they firm up enough to lift without breaking. Transfer to a wire rack.

How to Keep Both Doughs Visible

Join the chilled portions side by side rather than wrapping one around the other. A quick roll holds them together while leaving an irregular seam. If the dough starts to smear during shaping, return it to the refrigerator until firm.

Leave space between cookies while they bake so they do not spread into one another. Once cool, they can be arranged closely for serving. For a one-dough bake, try these chocolate chunk cookies.

When Are Brookie Cookies Done?

Look at both doughs rather than relying only on the clock. The pale edges should be lightly golden, and the brownie sections should look set, sometimes with small cracks. A slightly soft center will firm during the 5-minute rest on the sheet; a wet-looking brownie surface needs more time. Smaller portions may finish sooner, so begin checking early to avoid dry centers.

Storage and Freezing

Once completely cool, store the cookies in an airtight container at room temperature for up to about one week. Their texture is best in the first few days. Freeze fully cooled baked cookies in a freezer-safe container for up to six months, then thaw at room temperature.

Nutrition

Approximate nutrition per cookie, based on 20 cookies: 245 calories, 3g protein, 12g fat, and 29g carbohydrates. Approximate values per 100g of baked cookies: 460 calories, 5g protein, 23g fat, and 55g carbohydrates. Values are estimates and will vary with cookie size, ingredients, and moisture lost during baking.

Brookie Cookies

Brownie and chocolate chip cookie dough are joined together in soft-centered cookies with lightly golden edges.
Course: Dessert
Cuisine: American
Prep: 25 min
Cook: 36 min
Total: 126 min
Servings: 20 Calories: 245 kcal

Equipment

  • Mixing bowls
  • Baking sheets
  • Parchment paper
  • Wire rack
  • Oven

Ingredients

Brownie Dough

  • 1/2 cup unsalted butter, melted
  • 3/4 cup granulated sugar
  • 1 large egg
  • 1 teaspoon vanilla extract
  • 1/3 cup unsweetened cocoa powder (30g)
  • 1 cup all-purpose flour
  • 1/4 teaspoon fine salt
  • 1/2 cup semisweet chocolate chips

Chocolate Chip Cookie Dough

  • 1/2 cup unsalted butter, softened
  • 1/4 cup granulated sugar
  • 1/2 cup packed light brown sugar (100g)
  • 1 large egg
  • 1 teaspoon vanilla extract
  • 1 1/4 cups all-purpose flour
  • 1/2 teaspoon baking soda
  • 1/4 teaspoon fine salt
  • 1/2 cup semisweet chocolate chips

Instructions

  1. Let the melted butter cool until warm, not hot.
  2. Mix the melted butter with the brownie dough’s granulated sugar. Stir in one egg and 1 teaspoon vanilla, then add the cocoa powder, 1 cup flour, and 1/4 teaspoon salt. Mix just until no dry flour remains and fold in 1/2 cup chocolate chips.
  3. In a second bowl, beat the softened butter with the brown sugar and remaining 1/4 cup granulated sugar. Mix in the remaining egg and 1 teaspoon vanilla, then add the remaining 1 1/4 cups flour, baking soda, and 1/4 teaspoon salt. Mix until combined and fold in the remaining 1/2 cup chocolate chips.
  4. Cover both bowls and refrigerate for at least 1 hour, until the doughs are firm enough to scoop and handle.
  5. Near the end of chilling, preheat the oven to 350°F (175°C) with a rack in the center. Line large baking sheets with parchment paper.
  6. Divide each dough into about 20 similar-size portions, roughly a heaping tablespoon each. Press one portion of each dough side by side, then roll briefly into a thick ball, leaving large areas of both doughs visible.
  7. Arrange about 10 cookies on a baking sheet, roughly 2 inches apart. Keep the remaining dough chilled.
  8. Bake one sheet at a time for 15 to 18 minutes, starting to check at 13 minutes. Rotate the sheet near halfway if your oven browns unevenly. Bake until the pale edges are lightly golden and the brownie surfaces look set, without a wet sheen.
  9. Let the cookies rest on the baking sheet for 5 minutes, then transfer them to a wire rack.

Tips

  • Keep the brownie and cookie doughs separate while mixing and chilling.
  • Join the portions side by side and roll only briefly to keep both doughs visible.
  • If the dough smears while shaping, return it to the refrigerator until firm.
  • Leave about 2 inches between cookies and bake one sheet at a time.
  • Start checking for doneness at 13 minutes; the centers may still feel slightly soft.

Notes

Store completely cooled cookies in an airtight container at room temperature for up to about one week, or freeze for up to six months. A wet-looking brownie surface needs more baking time. Nutrition estimates are per cookie.

Nutrition

Calories: 245 kcal | Protein: 3 g | Fat: 12 g | Carbohydrates: 29 g

Cowboy Cookies

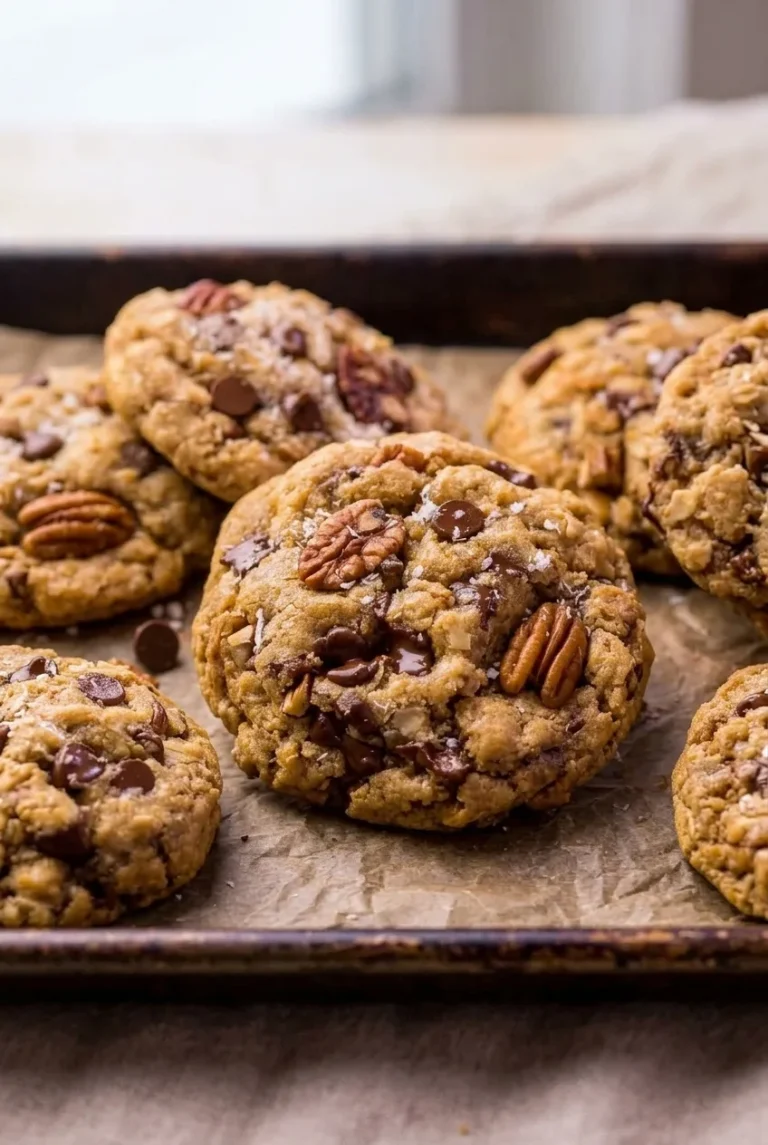
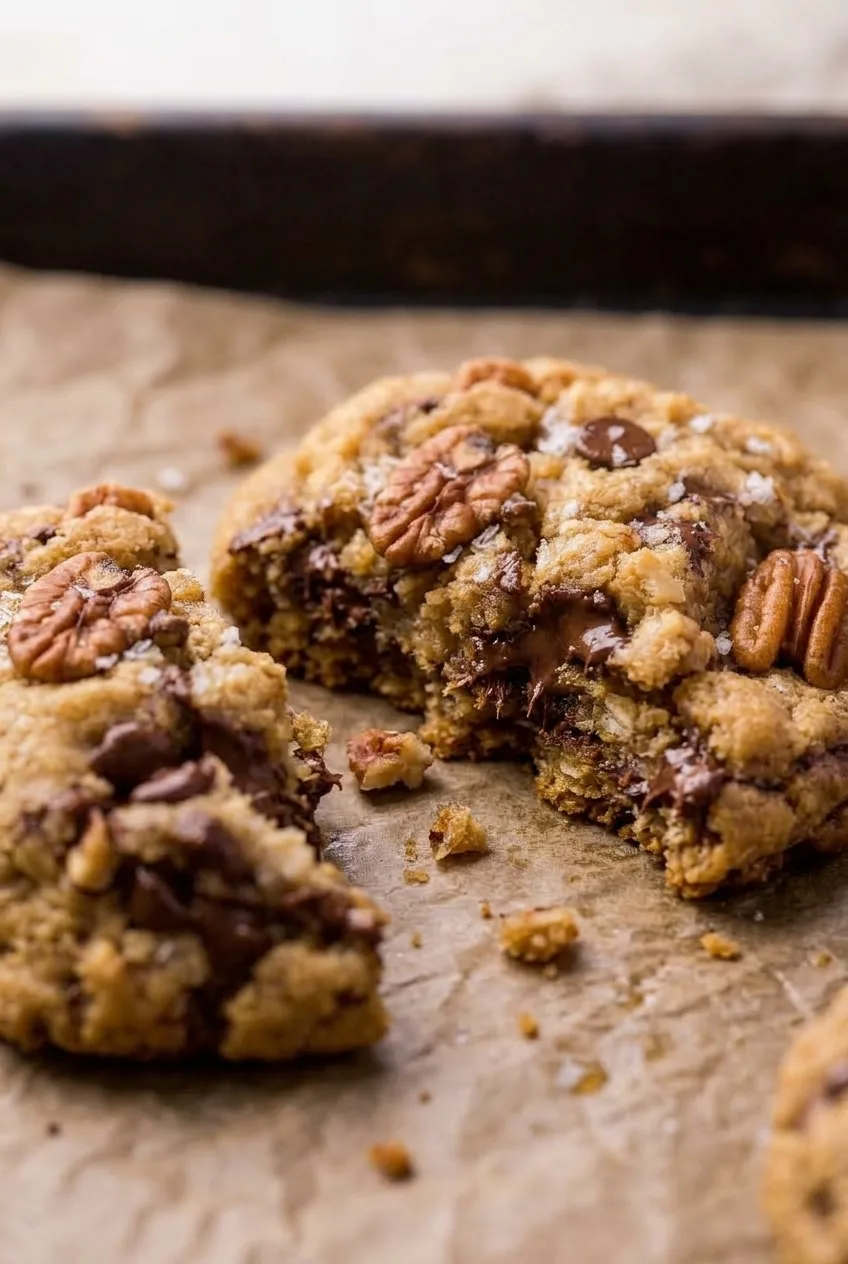
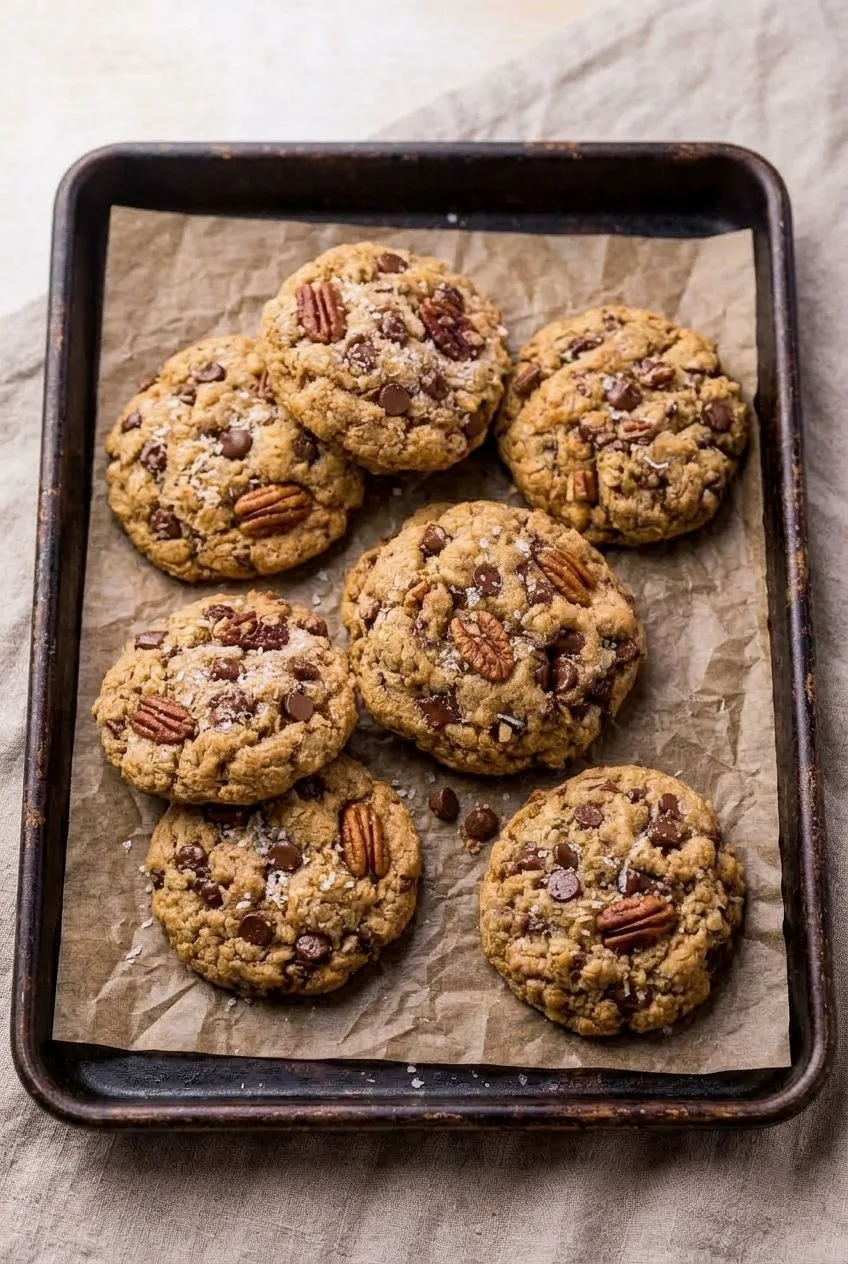
Cowboy cookies are thick oatmeal cookies filled with chocolate chips, pecans, and coconut. They bake with craggy tops, golden edges, and centers that still look soft when they leave the oven. This version uses generous 3-tablespoon scoops; keeping the mounds tall and chilling them before baking helps them hold their shape. A few of the measured mix-ins are pressed on top so they remain visible.

Ingredients for Cowboy Cookies

Broken-open cowboy cookie showing a soft oat interior and chocolate beneath its pecan-studded top
  • 1 cup unsalted butter, softened (225g)
  • 3/4 cup packed light brown sugar (150g)
  • 1/2 cup granulated sugar (100g)
  • 2 large eggs
  • 2 teaspoons vanilla extract
  • 1 3/4 cups all-purpose flour, spooned and leveled (210g)
  • 1 teaspoon baking soda
  • 3/4 teaspoon fine salt
  • 1 teaspoon ground cinnamon
  • 2 cups old-fashioned rolled oats (180g)
  • 1 1/4 cups semisweet chocolate chips (215g), reserving about 2 tablespoons for the tops
  • 3/4 cup sweetened shredded coconut (65g), reserving about 1 tablespoon for the tops
  • 1 cup pecans (110g), reserving about 24 halves or large pieces for the tops and chopping the rest

Old-fashioned oats give the cookies their hearty, visible oat texture; instant oats will change it. Use sweetened coconut for the texture intended here. The toppings come from the amounts listed above, not from extra ingredients.

How to Make Cowboy Cookies

Wider view of thick cowboy cookies arranged on parchment in a dark baking sheet
  1. Mix the dry ingredients: Whisk the flour, baking soda, salt, and cinnamon together in a bowl.
  2. Cream the butter and sugars: Beat the softened butter, brown sugar, and granulated sugar until blended and somewhat lighter. Beat in the eggs one at a time, then add the vanilla. The butter should be soft, not melted.
  3. Finish the dough: Mix in the flour mixture just until no dry streaks remain. Fold in the oats, the unreserved chocolate chips and coconut, and the chopped pecans. The dough will be thick; stop mixing once the additions are distributed.
  4. Scoop and top: Portion the dough into approximately 3-tablespoon mounds. Leave them tall rather than flattening them. Gently press the reserved chocolate chips, coconut, and one pecan half or large piece onto each mound.
  5. Chill and preheat: Refrigerate the portioned dough for 45 minutes, until noticeably firmer. Near the end of chilling, place a rack in the center of the oven and preheat to 350°F (175°C). Line cool baking sheets with parchment.
  6. Bake in batches: Arrange the mounds at least 2½ to 3 inches apart on a cool sheet. Bake one sheet at a time, uncovered, for about 13 to 16 minutes, starting to check at 12 minutes. Rotate the sheet halfway through only if your oven browns unevenly. The edges should be set and lightly golden, and the tops should no longer look wet overall, though the centers will still look soft. Keep unbaked portions chilled between batches.
  7. Let the cookies set: Leave the cookies on the baking sheet for about 10 minutes before transferring them to a wire rack. Let a reused sheet cool completely before adding more chilled dough.

Makes about 24 cookies, depending on how firmly the scoop is filled. The baking time is for approximately 3-tablespoon portions; larger cookies need more time.

How to Keep Cowboy Cookies Thick

Do not flatten the scooped dough, and give it the full 45-minute chill. If the first batch spreads too much, keep the remaining portions chilled and check that the next baking sheet is completely cool. A hot sheet can soften the dough before it reaches the oven. The cookies can sit close together for serving, but they need space while baking.

When Are Cowboy Cookies Done?

Take the cookies out when the edges are set and lightly golden, even if the centers still look somewhat soft. They finish setting during the 10-minute rest on the sheet and may break if moved sooner. To avoid dry cookies, spoon and level the flour and use the edge and center cues rather than waiting for the cookies to feel firm in the oven.

Cowboy Cookie Variations

Walnuts can replace the pecans. For larger, irregular chocolate pockets, use chopped chocolate instead of chips. For a different oat-based cookie, try these soft and chewy oatmeal raisin cookies.

Storage and Freezing

Cool the cookies completely, then store them in an airtight container at room temperature for up to 5 days. Covered, portioned dough can stay in the refrigerator for up to 5 days; bake it while cold, checking for set, lightly golden edges.

Freeze baked cookies airtight for up to 3 months and thaw at room temperature. Firm, portioned dough can also be frozen in an airtight container for up to 3 months. Bake from frozen, allowing approximately 1 to 3 extra minutes and checking the edges for doneness.

Nutrition

Approximate nutrition per cookie, based on 24 cookies: 265 calories, 4g protein, 15g fat, and 29g carbohydrates. Approximate values per 100g of baked cookies: 505 calories, 7g protein, 29g fat, and 56g carbohydrates. Values will vary with cookie size, ingredients, and moisture lost during baking.

Cowboy Cookies

Thick oatmeal cookies with chocolate chips, pecans, and sweetened coconut, baked with golden edges and soft centers.
Course: Dessert
Cuisine: American
Prep: 25 min
Cook: 45 min
Total: 115 min
Servings: 24 Calories: 265 kcal per cookie

Equipment

  • Mixing bowls
  • Whisk
  • Electric mixer
  • Cookie scoop
  • Baking sheets
  • Parchment paper
  • Wire rack

Ingredients

Cookie Dough

  • 1 cup unsalted butter, softened (225g)
  • 3/4 cup packed light brown sugar (150g)
  • 1/2 cup granulated sugar (100g)
  • 2 large eggs
  • 2 teaspoons vanilla extract
  • 1 3/4 cups all-purpose flour, spooned and leveled (210g)
  • 1 teaspoon baking soda
  • 3/4 teaspoon fine salt
  • 1 teaspoon ground cinnamon
  • 2 cups old-fashioned rolled oats (180g)
  • 1 1/4 cups semisweet chocolate chips (215g), reserving about 2 tablespoons for topping
  • 3/4 cup sweetened shredded coconut (65g), reserving about 1 tablespoon for topping
  • 1 cup pecans (110g), reserving about 24 halves or large pieces for topping and chopping the rest

Instructions

  1. Whisk the flour, baking soda, salt, and cinnamon together in a bowl.
  2. Beat the softened butter and both sugars until blended and somewhat lighter.
  3. Beat in the eggs one at a time, then mix in the vanilla.
  4. Mix in the flour mixture just until no dry streaks remain.
  5. Fold in the oats, unreserved chocolate chips and coconut, and chopped pecans until evenly distributed.
  6. Scoop the dough into approximately 3-tablespoon mounds. Keep the mounds tall rather than flattening them.
  7. Press some reserved chocolate chips and coconut, plus one pecan half or large piece, onto each mound.
  8. Refrigerate the portioned dough for 45 minutes, until noticeably firmer.
  9. Near the end of chilling, place a rack in the center of the oven and preheat to 350°F (175°C). Line cool baking sheets with parchment.
  10. Arrange the dough mounds at least 2½ to 3 inches apart on a cool baking sheet.
  11. Bake one sheet at a time for about 13 to 16 minutes, starting to check at 12 minutes. Rotate the sheet halfway through only if the oven browns unevenly.
  12. Remove the cookies when the edges are set and lightly golden and the tops no longer look wet overall; the centers will still look soft.
  13. Leave the cookies on the baking sheet for about 10 minutes, then transfer them to a wire rack. Cool each reused sheet completely before adding more dough.

Tips

  • Use old-fashioned rolled oats for the intended hearty texture; instant oats will change it.
  • Keep the scooped dough mounds tall and chill them for the full 45 minutes to help the cookies stay thick.
  • Use a completely cool baking sheet for each batch, and keep unbaked portions chilled between batches.
  • Spoon and level the flour to avoid dry cookies.
  • Use the edge and center cues for doneness; the cookies will finish setting as they rest on the baking sheet.

Variations

  • Walnut Cowboy Cookies: Replace the pecans with walnuts.
  • Chopped Chocolate Cowboy Cookies: Use chopped chocolate instead of chocolate chips for larger, irregular chocolate pockets.

Notes

Cool completely and store airtight at room temperature for up to 5 days. Baked cookies or firm portioned dough can be frozen airtight for up to 3 months; bake frozen dough for about 1 to 3 minutes longer. Approximate nutrition per 100g: 505 calories, 7g protein, 29g fat, and 56g carbohydrates.

Nutrition

Calories: 265 kcal per cookie | Protein: 4 g per cookie | Fat: 15 g per cookie | Carbohydrates: 29 g per cookie

S’mores Cookies

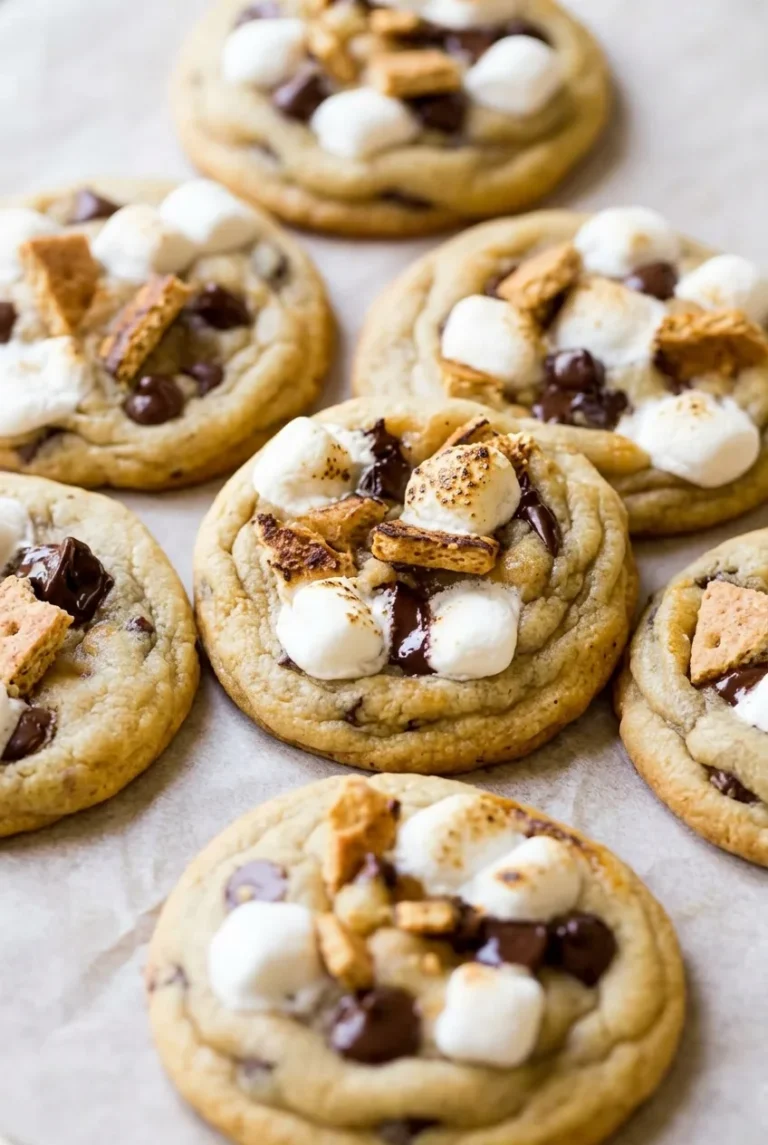
These thick, round cookies have golden edges, soft centers, and graham cracker crumbs mixed into the dough. Chocolate chips run through each cookie, while milk chocolate, mini marshmallows, and small graham pieces stay visible on top.

The toppings go on partway through baking, after the cookies have spread and begun to set. This helps the marshmallows stay puffy and keeps them from melting onto the baking sheet. The recipe makes about 16 generous cookies.

Ingredients for S’mores Cookies

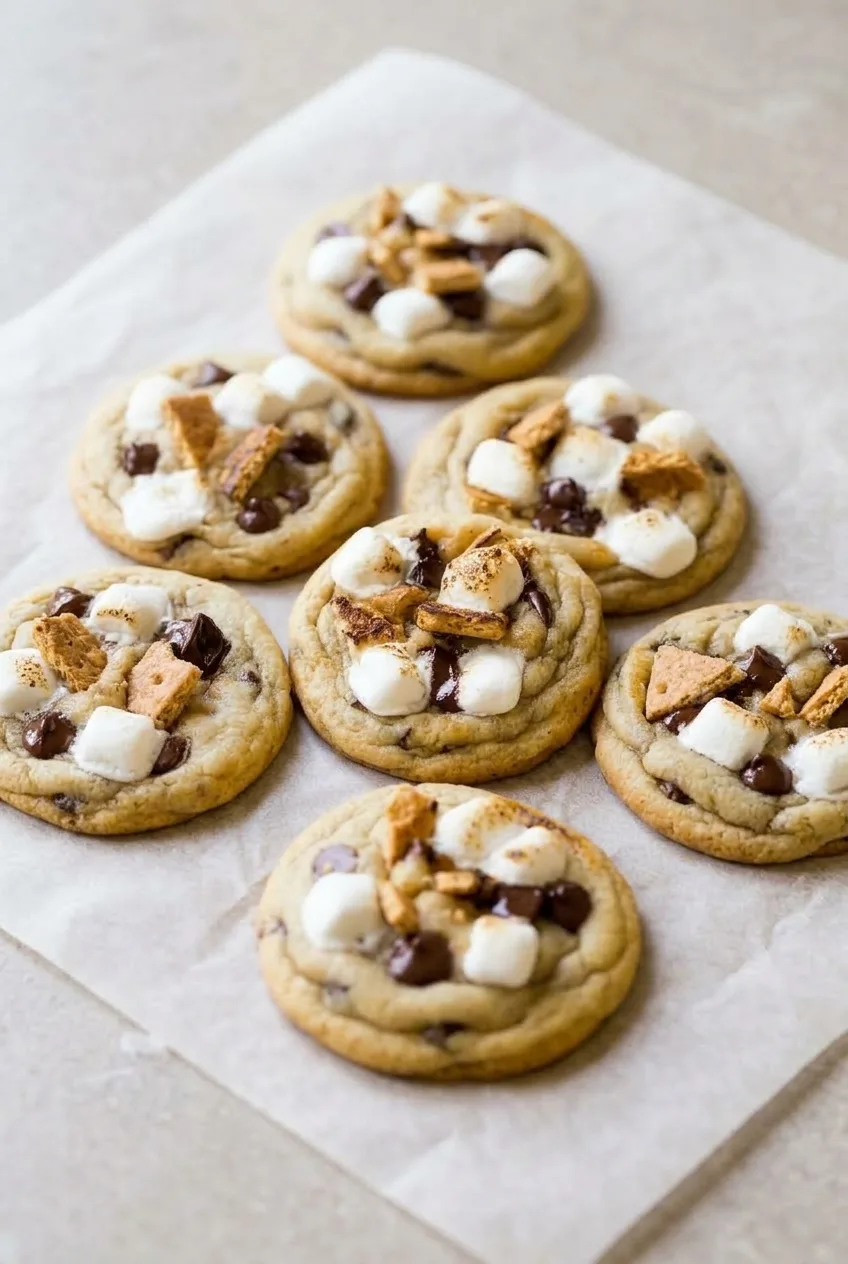
Wider view of a group of finished s’mores cookies on a light neutral surface
  • 3/4 cup unsalted butter, softened (170g)
  • 3/4 cup packed light brown sugar (150g)
  • 1/3 cup granulated sugar (about 65g)
  • 1 large egg
  • 2 teaspoons vanilla extract
  • 2 cups all-purpose flour (250g), spooned and leveled or weighed
  • 1/2 cup finely crushed graham cracker crumbs (55g)
  • 3/4 teaspoon baking soda
  • 1/2 teaspoon fine salt
  • 3/4 cup semisweet chocolate chips (130g)
  • 2 ounces milk chocolate bar, broken into small pieces (about 55g)
  • About 3/4 cup mini marshmallows (40g), or 4 to 5 per cookie
  • 2 full graham cracker sheets, broken into small topping pieces (about 30g)

Measure the fine crumbs separately from the broken cracker pieces. The crumbs go into the dough; the pieces stay on top. Replacing the pieces with extra crumbs can make the dough dry.

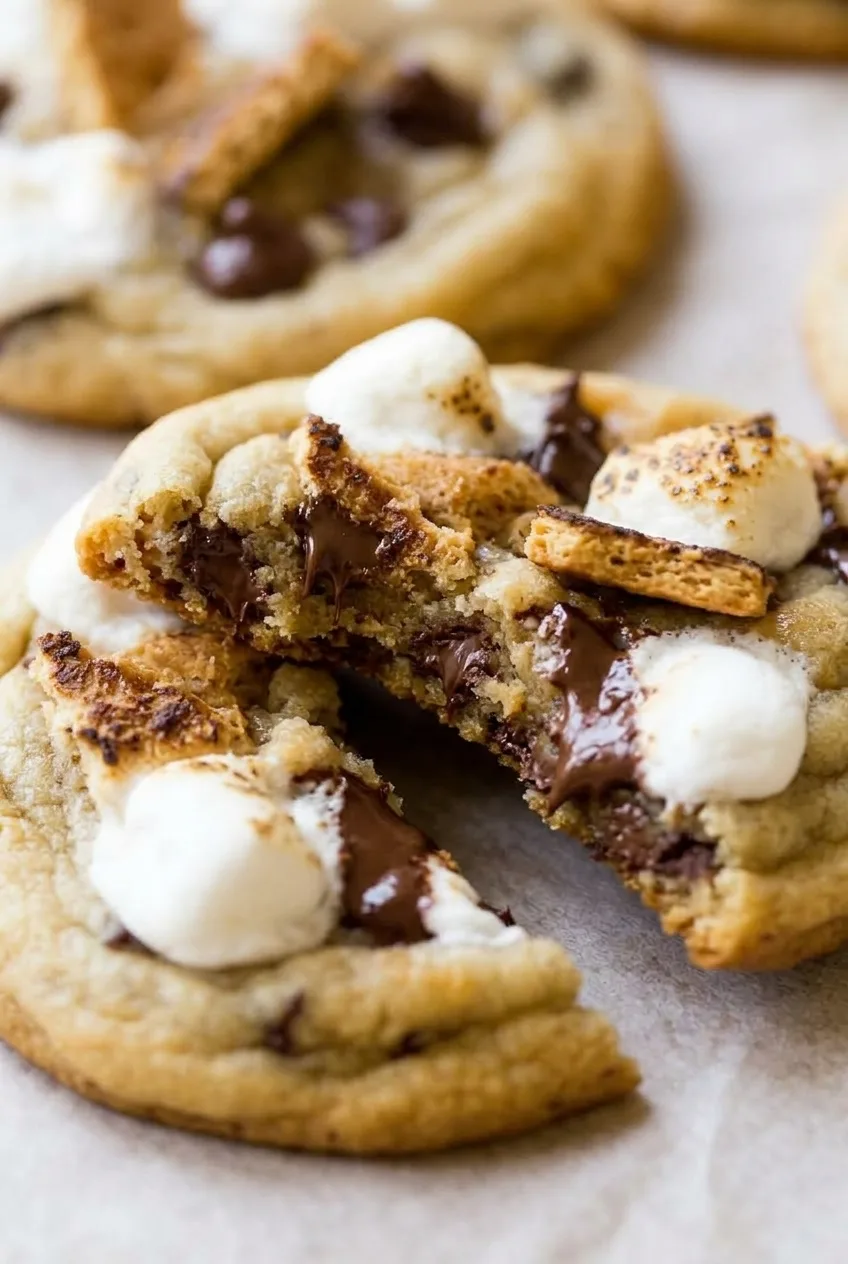
Close view of a soft s’mores cookie center with melted chocolate, puffy marshmallows, and graham pieces

How to Bake S’mores Cookies

  1. Prepare the oven and toppings: Preheat the oven to 350°F (175°C). Line baking sheets with parchment. Have the milk chocolate, mini marshmallows, and small graham pieces ready for the mid-bake topping step.
  2. Mix the dough: Beat the butter with both sugars until creamy. Mix in the egg and vanilla. Add the flour, graham crumbs, baking soda, and salt; mix just until no dry flour remains. Fold in the chocolate chips.
  3. Scoop and chill: Portion the dough into approximately 3-tablespoon mounds. Refrigerate for 20 to 30 minutes, until slightly firm but not frozen. Place about six mounds on a standard half-sheet pan, at least 2 inches apart. Keep the remaining dough chilled while each batch bakes.
  4. Partially bake: Bake one sheet at a time on the middle rack for about 9 to 10 minutes. Start checking around 8 minutes; the cookies should have spread, with edges beginning to set. Rotate the sheet only if your oven browns unevenly.
  5. Add the toppings: Briefly remove the sheet from the oven. Gently press 4 to 5 mini marshmallows, a few milk chocolate pieces, and several small graham pieces into the top of each cookie. Keep the marshmallows away from the outer edges so they do not melt onto the parchment.
  6. Finish baking and cool: Return the sheet to the oven for about 3 to 4 minutes, checking after 2 minutes. Remove the cookies when the edges are set and lightly golden, the centers still look slightly soft, the marshmallows are puffed, and the chocolate has softened. Cool on the sheet for 5 to 10 minutes before transferring to a rack. Repeat with the remaining dough.

Why Add the Marshmallows Partway Through?

Mini marshmallows can melt away or stick to the sheet if they bake for the full cookie time. Once the dough has spread and begun to set, the marshmallows have a surface to rest on. They should puff during the final minutes but may stay mostly white.

For more noticeable toasted spots, briefly brown the marshmallow tops with a kitchen torch after the cookies are firm enough to move off the parchment onto a heat-safe surface. A torch is optional; do not put a parchment-lined sheet under the broiler.

How to Keep the Centers Soft

The bake times are for approximately 3-tablespoon portions, so judge smaller or larger cookies by appearance. Take them out when the centers look slightly soft, not wet and glossy or fully firm. They will continue to set during their 5 to 10 minutes on the hot baking sheet.

For another soft-centered bake without s’mores toppings, try these chocolate chunk cookies.

Serving and Storing S’mores Cookies

Serve slightly warm once the cookies are firm enough to lift, or let them cool to room temperature for neater handling. Before stacking, cool them completely and let the chocolate set. Store in an airtight container at room temperature for 3 to 4 days, with parchment between layers to reduce sticking.

To warm a cookie, microwave it briefly, just until softened; extended heating can make the marshmallows run. Baked cookies can be frozen after cooling and firming on a lined tray. Pack with parchment between layers for up to 3 months, then thaw at room temperature. The toppings may look less tidy after thawing.

Nutrition

Approximate nutrition per cookie, based on 16 cookies: 280 calories, 3g protein, 13g fat, and 38g carbohydrates. Approximate values per 100g of baked cookies: 480 calories, 6g protein, 22g fat, and 66g carbohydrates. Values vary with ingredient brands, cookie size, and moisture lost during baking.

S’mores Cookies

Thick cookies with graham cracker crumbs and chocolate chips, topped with milk chocolate, mini marshmallows, and graham cracker pieces.
Course: Dessert
Cuisine: American
Prep: 20 min
Cook: 42 min
Total: 102 min
Servings: 16 Calories: 280 kcal

Equipment

  • Oven
  • Baking sheets
  • Parchment paper
  • Mixing bowl
  • Electric mixer
  • Cookie scoop
  • Cooling rack

Ingredients

For the dough

  • 3/4 cup unsalted butter, softened (170g)
  • 3/4 cup packed light brown sugar (150g)
  • 1/3 cup granulated sugar (about 65g)
  • 1 large egg
  • 2 teaspoons vanilla extract
  • 2 cups all-purpose flour (250g), spooned and leveled or weighed
  • 1/2 cup finely crushed graham cracker crumbs (55g)
  • 3/4 teaspoon baking soda
  • 1/2 teaspoon fine salt
  • 3/4 cup semisweet chocolate chips (130g)

For topping

  • 2 ounces milk chocolate bar, broken into small pieces (about 55g)
  • About 3/4 cup mini marshmallows (40g), or 4 to 5 per cookie
  • 2 full graham cracker sheets, broken into small pieces (about 30g)

Instructions

  1. Preheat the oven to 350°F (175°C). Line baking sheets with parchment paper.
  2. Beat the butter and both sugars until creamy. Mix in the egg and vanilla.
  3. Add the flour, graham cracker crumbs, baking soda, and salt. Mix just until no dry flour remains, then fold in the chocolate chips.
  4. Scoop the dough into approximately 3-tablespoon mounds. Refrigerate for 20 to 30 minutes, until slightly firm.
  5. Arrange about six dough mounds at least 2 inches apart on a baking sheet. Keep the remaining dough chilled.
  6. Bake one sheet at a time on the middle rack for 9 to 10 minutes, starting to check at 8 minutes, until the cookies have spread and the edges are beginning to set.
  7. Briefly remove the sheet from the oven. Press 4 to 5 mini marshmallows, a few milk chocolate pieces, and several graham cracker pieces into each cookie, keeping the marshmallows away from the edges.
  8. Return the sheet to the oven for 3 to 4 minutes, checking after 2 minutes. Remove the cookies when the edges are set and lightly golden, the centers still look slightly soft, the marshmallows are puffed, and the chocolate has softened.
  9. Cool the cookies on the baking sheet for 5 to 10 minutes, then transfer them to a rack. Repeat with the remaining dough.

Tips

  • Measure the fine graham cracker crumbs separately from the larger topping pieces; replacing the pieces with extra crumbs can dry out the dough.
  • Keep the remaining dough chilled while each batch bakes.
  • Keep marshmallows away from cookie edges so they do not melt onto the parchment.
  • Judge doneness by appearance, especially if making cookies smaller or larger than 3 tablespoons.
  • Let cookies firm on the baking sheet before moving them; they continue to set as they cool.

Variations

  • Toasted marshmallow tops: After the cookies are firm enough to move to a heat-safe surface, briefly brown the marshmallow tops with a kitchen torch.

Notes

Cool completely before stacking and store airtight at room temperature for 3 to 4 days, with parchment between layers. Reheat briefly to avoid making the marshmallows run. Freeze cooled cookies for up to 3 months; thaw at room temperature.

Nutrition

Calories: 280 kcal | Protein: 3 g | Fat: 13 g | Carbohydrates: 38 g

Oatmeal Raisin Cookies

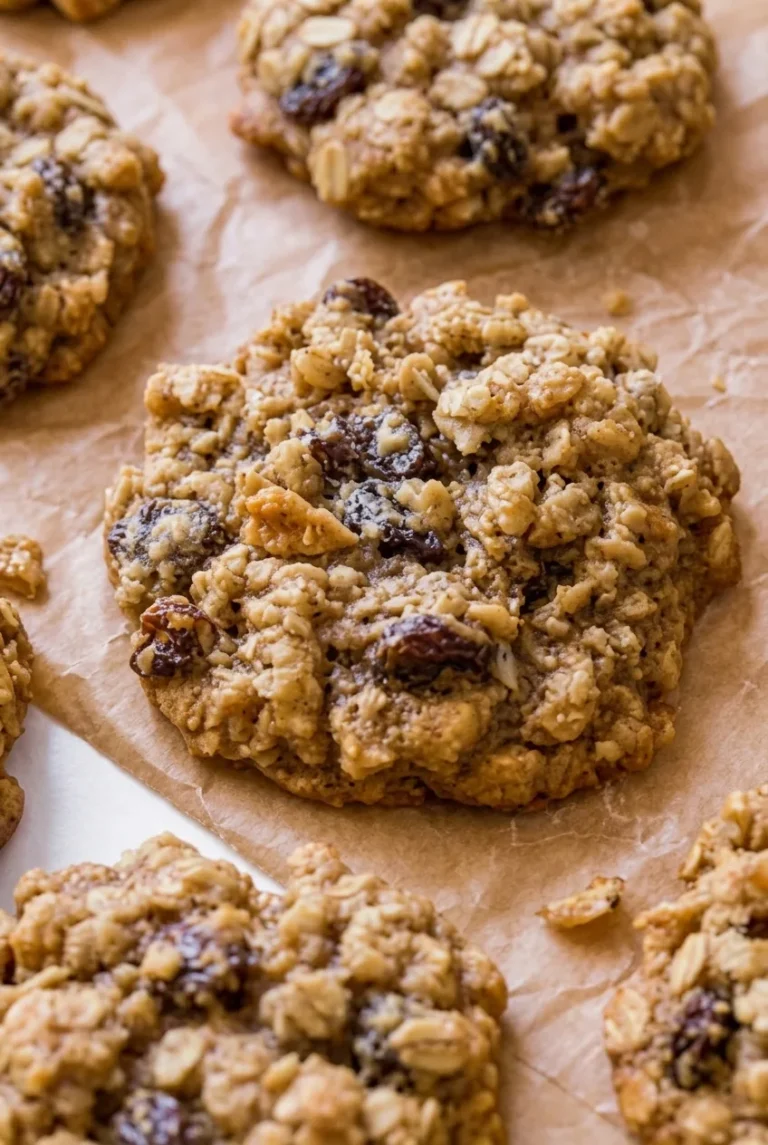
These oatmeal raisin cookies are rustic drop cookies with craggy oat surfaces, visible raisins, lightly golden edges, and soft centers. Old-fashioned rolled oats give them their hearty texture, while cinnamon adds a warm spice note.

A 20- to 30-minute chill makes the dough easier to scoop. Pressing each portion slightly afterward helps the cookies spread without turning thin. The recipe makes about 28 to 32 cookies using roughly 2 tablespoons of dough each.

Ingredients for Oatmeal Raisin Cookies

Wider view of oatmeal raisin cookies arranged on warm-toned parchment
  • 1 cup unsalted butter, softened (225g)
  • 3/4 cup packed light brown sugar (150g)
  • 1/2 cup granulated sugar (100g)
  • 2 large eggs
  • 2 teaspoons vanilla extract
  • 1 1/2 cups all-purpose flour, spooned and leveled (180g)
  • 1 teaspoon baking soda
  • 1 1/2 teaspoons ground cinnamon
  • 1/2 teaspoon fine salt
  • 3 cups old-fashioned rolled oats (270g)
  • 1 cup raisins (150g)
Broken oatmeal raisin cookie showing its soft center, rolled oats, and dark raisins

How to Bake Oatmeal Raisin Cookies

  1. Cream the butter and sugars: Beat the softened, not melted, butter with both sugars until combined and somewhat fluffy, about 4 to 5 minutes. Beat in the eggs one at a time, then mix in the vanilla.
  2. Add the dry ingredients: Whisk the flour, baking soda, cinnamon, and salt in a separate bowl. Add to the butter mixture and mix just until no dry flour remains.
  3. Fold in the oats and raisins: Mix until evenly distributed. The thick dough should hold its shape when scooped.
  4. Chill and preheat: Cover the dough and refrigerate for 20 to 30 minutes, until less sticky but still scoopable. Meanwhile, preheat the oven to 350°F (175°C) with a rack in the center. Line baking sheets with parchment.
  5. Scoop and press: Place roughly 2-tablespoon mounds on a cool prepared sheet, at least 2 inches apart. Gently press each to about 3/4 inch thick, leaving the edges rough rather than flattening the dough into discs. Turn a few raisins already in each mound toward the top.
  6. Bake: Bake one sheet at a time for about 10 to 13 minutes, starting to check at 10 minutes. Rotate the sheet if your oven browns unevenly. The edges should be lightly golden and the tops set rather than wet; the centers should still look soft.
  7. Cool: Leave the cookies on the sheet for about 5 minutes to firm up, then transfer them to a wire rack. Let the sheet cool before filling it with another batch.

How to Keep the Cookies Chewy

Take the cookies out when the edges are golden but the centers still look soft. Baking until the centers look firm all the way through can leave them dry. They finish setting during the brief rest on the baking sheet.

Getting the Right Amount of Spread

If the cookies stay in tall mounds, check that the flour was spooned and leveled or weighed. Dough chilled much longer than 30 minutes may also be too firm to spread; gently pressing each scoop helps it bake into a moderately thick cookie.

If the cookies spread too much, the butter may have been too warm or the dough may have gone onto a hot sheet. Start with softened butter, complete the short chill, and use a cool sheet for each batch.

Rolled Oats, Quick Oats, and Raisins

Old-fashioned rolled oats give these cookies their distinct flakes. Quick oats can replace them in equal volume, but the cookies will have a finer texture and fewer visible oat flakes. Avoid instant oats.

Raisins can go straight into the dough. For softer raisins, soak them in warm water first, then drain and blot them thoroughly so they do not add excess moisture. For a separate oat-cookie recipe with a different mix-in, try these oatmeal chocolate chip cookies.

Storing and Freezing Oatmeal Raisin Cookies

Cool the cookies completely, then store them in an airtight container at room temperature for up to 1 week. Freeze cooled baked cookies airtight for up to 3 months.

Portioned dough can also be frozen for up to 3 months. Bake from frozen at 350°F, allowing approximately 1 to 2 extra minutes. Check for lightly golden edges, set tops, and soft centers rather than relying only on the time.

Nutrition

Approximate per cookie, based on a batch of 30: 165 calories, 3g protein, 7g fat, and 23g carbohydrates. Approximate per 100g of baked cookies: 445 calories, 7g protein, 19g fat, and 62g carbohydrates. Values are estimates; cookie size and moisture lost during baking will affect them.

Oatmeal Raisin Cookies

Rustic oatmeal raisin cookies with cinnamon, lightly golden edges, and soft centers.
Course: Dessert
Cuisine: American
Prep: 20 min
Cook: 39 min
Total: 90 min
Servings: 30 Calories: 165 kcal

Equipment

  • Electric mixer
  • Mixing bowls
  • Whisk
  • Baking sheets
  • Parchment paper
  • Wire rack

Ingredients

  • 1 cup unsalted butter, softened (225g)
  • 3/4 cup packed light brown sugar (150g)
  • 1/2 cup granulated sugar (100g)
  • 2 large eggs
  • 2 teaspoons vanilla extract
  • 1 1/2 cups all-purpose flour, spooned and leveled (180g)
  • 1 teaspoon baking soda
  • 1 1/2 teaspoons ground cinnamon
  • 1/2 teaspoon fine salt
  • 3 cups old-fashioned rolled oats (270g)
  • 1 cup raisins (150g)

Instructions

  1. Beat the softened butter and both sugars for 4 to 5 minutes, until combined and somewhat fluffy.
  2. Beat in the eggs one at a time, then mix in the vanilla.
  3. Whisk the flour, baking soda, cinnamon, and salt in a separate bowl. Add the dry ingredients to the butter mixture and mix just until no dry flour remains.
  4. Fold in the oats and raisins until evenly distributed.
  5. Cover the dough and refrigerate for 20 to 30 minutes, until less sticky but still scoopable.
  6. Meanwhile, preheat the oven to 350°F (175°C) with a rack in the center. Line baking sheets with parchment.
  7. Scoop roughly 2-tablespoon portions onto a cool prepared sheet, spacing them at least 2 inches apart.
  8. Gently press each mound to about 3/4 inch thick, keeping the edges rough. Turn a few raisins in each mound toward the top.
  9. Bake one sheet at a time for 10 to 13 minutes, checking at 10 minutes. Rotate the sheet if your oven browns unevenly. Remove the cookies when the edges are lightly golden, the tops are set, and the centers still look soft.
  10. Let the cookies rest on the baking sheet for about 5 minutes, then transfer them to a wire rack. Cool the sheet before using it for another batch.

Tips

  • Use softened butter, not melted butter.
  • Spoon and level the flour or weigh it to help prevent cookies from staying in tall mounds.
  • Press the chilled dough portions gently so the cookies spread without becoming thin.
  • Use a cool baking sheet for each batch to help prevent excess spreading.
  • Take the cookies out while the centers still look soft; they finish setting as they rest.

Variations

  • Quick Oat Cookies: Replace the rolled oats with an equal volume of quick oats for a finer texture and fewer visible oat flakes.

Notes

Store completely cooled cookies in an airtight container at room temperature for up to 1 week, or freeze baked cookies for up to 3 months. Freeze portioned dough for up to 3 months and bake from frozen at 350°F, adding about 1 to 2 minutes.

Nutrition

Calories: 165 kcal | Protein: 3 g | Fat: 7 g | Carbohydrates: 23 g