Author

Julia

Browsing

Chia Pudding Cups

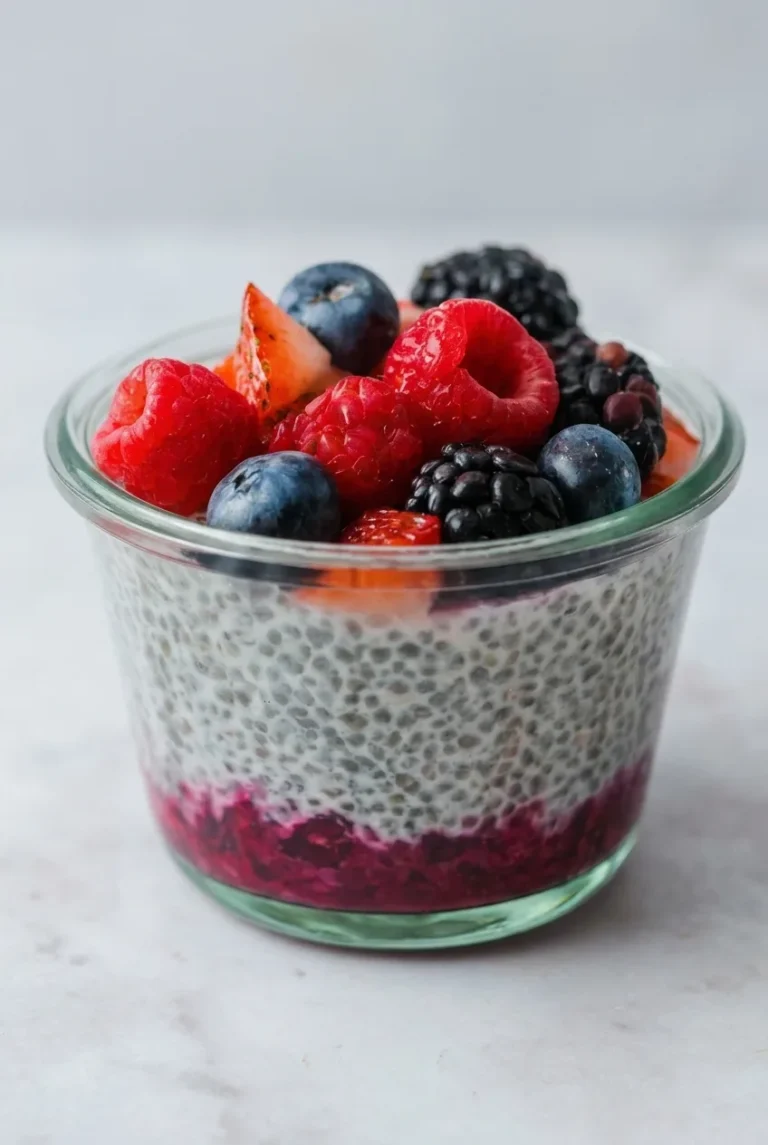
These chia pudding cups have a narrow layer of crushed raspberries and blackberries beneath thick, pale chia pudding, with fresh mixed berries on top. Clear cups show off the layers, but the pudding needs to set before assembly: if it still pours freely, it will run into the fruit.

Whisk the chia with milk, stir it once more after 10 minutes, then refrigerate for at least 4 hours or overnight. Once the pudding is spoonable, the four cups take just a few minutes to assemble.

Ingredients for Chia Pudding Cups
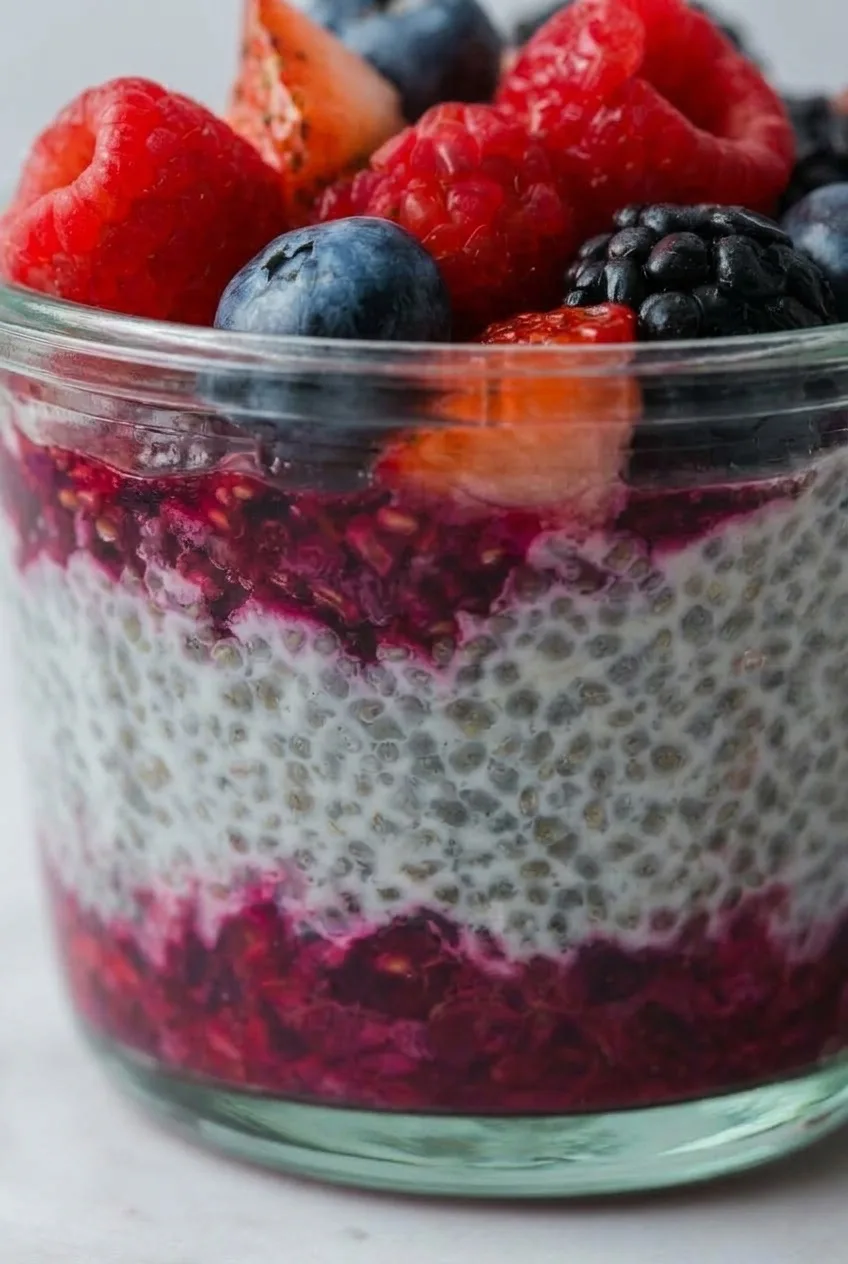
Close view of hydrated chia seeds above the crushed-berry layer in a clear cup
  • 2 cups dairy milk or unsweetened plant milk (480g)
  • 2 tablespoons maple syrup, plus up to 1 teaspoon for the crushed berries if needed
  • 1/2 cup chia seeds (80g)
  • 1 cup raspberries and blackberries, for the bottom layer (140g)
  • 1 1/2 cups fresh raspberries, blueberries, blackberries, and strawberries, for topping (210g); halve or chop large strawberries
  • 1 teaspoon vanilla extract, optional

How to Make Chia Pudding Cups
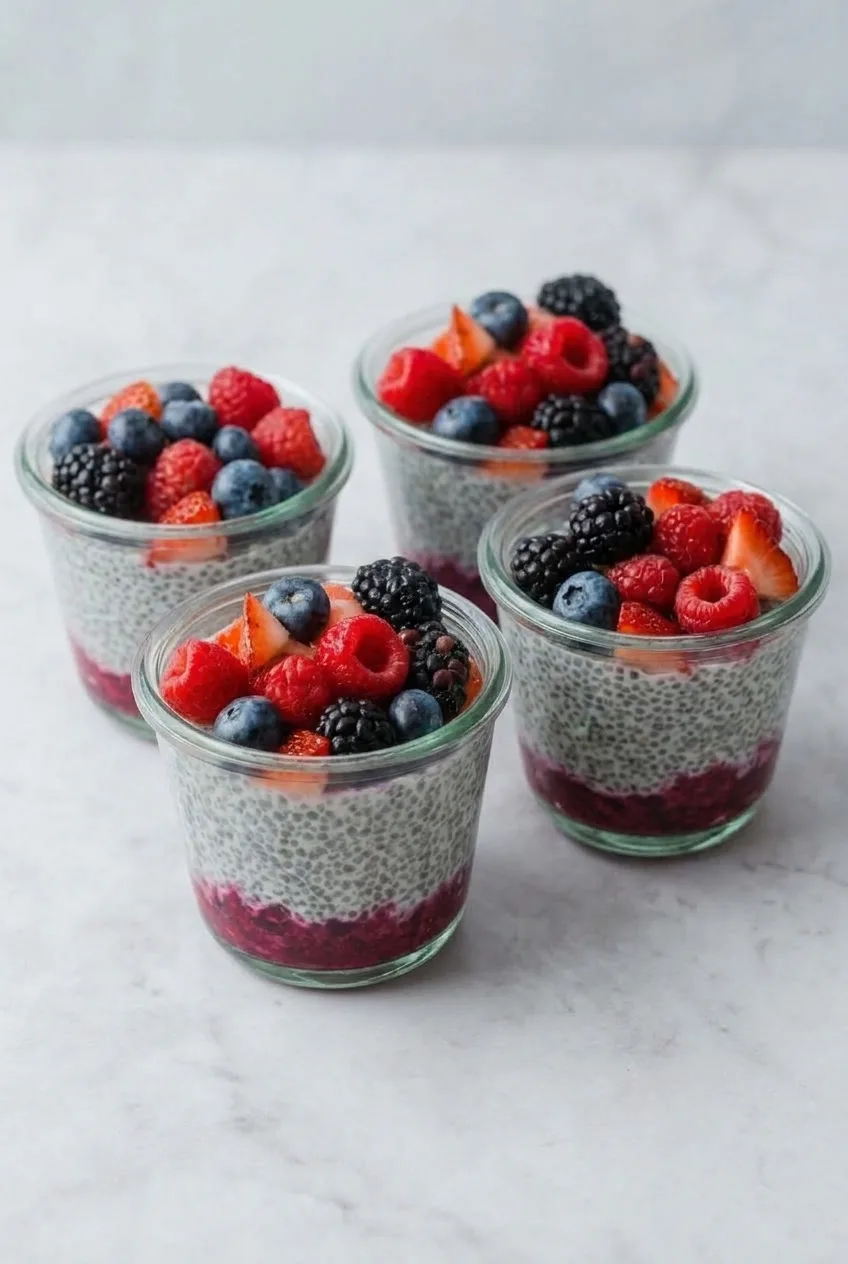
Four berry-layered chia pudding cups on a pale tabletop
  1. Mix the pudding: In a bowl or lidded container, whisk the milk with 2 tablespoons maple syrup and the vanilla, if using. Whisk in the chia seeds until evenly dispersed, with no dry patches or obvious clumps.
  2. Stir and chill: After about 10 minutes, stir again to break up any seed clusters. Cover and refrigerate for at least 4 hours or overnight. Start checking after 4 hours; the pudding should be thick and spoonable, not freely pourable.
  3. Mash the bottom berries: Mash the raspberries and blackberries for the bottom layer with a fork until soft and chunky. Taste and add up to 1 teaspoon maple syrup if they are too tart.
  4. Build the layers: Divide the mashed berries among four clear 6- to 8-ounce cups. Gently stir the set pudding, then spoon it over the fruit without mixing the layers. The pudding layer should be substantially thicker than the berry layer.
  5. Add the topping: Shortly before serving, divide the fresh raspberries, blueberries, blackberries, and strawberry pieces among the cups. Serve chilled.

When Is the Chia Pudding Ready?

The seeds should look evenly hydrated, and the pudding should hold on a spoon. If it still pours freely after 4 hours, keep it covered in the refrigerator and check again later. The time needed to set can differ with the milk used. If the finished pudding is too stiff to spoon into the cups, stir in a small splash of the same milk.

How to Keep the Berry Layers Distinct

Mash the bottom berries rather than blending them into the milk. If they release a lot of juice, leave the excess liquid behind when filling the cups. Spoon fully set pudding gently over the fruit so the magenta base stays visible beneath the pale chia layer.

Milk and Berry Options

Dairy milk or unsweetened plant milk works here; check the set before layering because the finished thickness can differ. Thawed frozen raspberries or blackberries can be used for the crushed bottom layer if you leave behind excess thawing liquid. Use fresh berries for the topping.

Make-Ahead and Storage

The pudding can set covered in the refrigerator overnight before assembly. Keep assembled cups refrigerated, and add the fresh berries near serving time so they stay intact above the pudding.

For a fuller breakfast, serve the cups with zucchini muffins.

Nutrition

Approximate nutrition per cup, based on 4 servings and calculated with 2% dairy milk, without the optional vanilla or extra maple syrup: 230 calories, 8g protein, 9g fat, and 31g carbohydrates. Approximate values per 100g: 95 calories, 3g protein, 4g fat, and 13g carbohydrates. Values vary with the milk and berries used.

Chia Pudding Cups

Layer spoonable chia pudding over crushed berries and top with fresh mixed berries for a make-ahead breakfast.
Course: Breakfast
Cuisine: Global
Prep: 15 min
Total: 255 min
Servings: 4 Calories: 230 kcal

Equipment

  • Mixing bowl or lidded container
  • Whisk
  • Fork
  • Four clear 6- to 8-ounce cups

Ingredients

For the Chia Pudding

  • 2 cups dairy milk or unsweetened plant milk (480 g)
  • 2 tablespoons maple syrup
  • 1/2 cup chia seeds (80 g)
  • 1 teaspoon vanilla extract (optional)

For the Berry Layers

  • 1 cup raspberries and blackberries (140 g)
  • Up to 1 teaspoon maple syrup for the crushed berries, if needed
  • 1 1/2 cups fresh raspberries, blueberries, blackberries, and strawberries (210 g); halve or chop large strawberries

Instructions

  1. Whisk the milk, 2 tablespoons maple syrup, and vanilla, if using, in a bowl or lidded container.
  2. Whisk in the chia seeds until evenly dispersed, with no dry patches or obvious clumps.
  3. After about 10 minutes, stir again to break up any seed clusters.
  4. Cover and refrigerate for at least 4 hours or overnight, until thick and spoonable.
  5. Mash the raspberries and blackberries for the bottom layer with a fork until soft and chunky. Taste and add up to 1 teaspoon maple syrup if they are too tart.
  6. Divide the mashed berries among four clear cups. Leave behind excess juice if the berries release a lot of liquid.
  7. Gently stir the set pudding, then spoon it over the berries without mixing the layers.
  8. Shortly before serving, divide the fresh berries among the cups and serve chilled.

Tips

  • Stir the pudding again after 10 minutes to break up seed clusters.
  • Check the pudding after 4 hours; it should hold on a spoon rather than pour freely.
  • If the pudding is too stiff to spoon, stir in a small splash of the same milk.
  • Spoon fully set pudding gently over the crushed berries to keep the layers distinct.
  • Add the fresh berry topping near serving time to keep the berries intact.
Notes

The pudding can be refrigerated, covered, overnight before assembly. Keep assembled cups refrigerated.

Nutrition

Calories: 230 kcal | Protein: 8 g | Fat: 9 g | Carbohydrates: 31 g | Per 100 G Calories: 95 kcal | Per 100 G Protein: 3 g | Per 100 G Fat: 4 g | Per 100 G Carbohydrates: 13 g

Avocado Egg Toast Bites

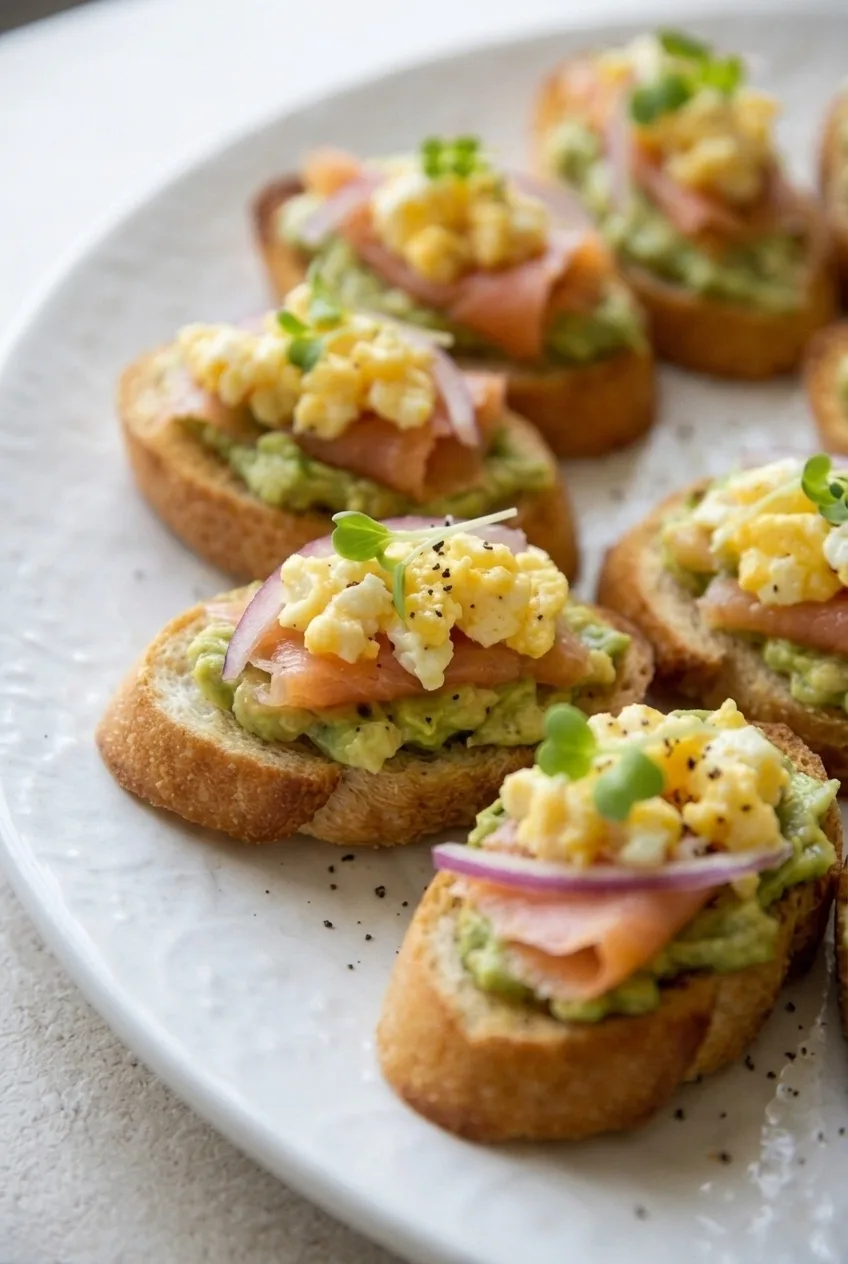
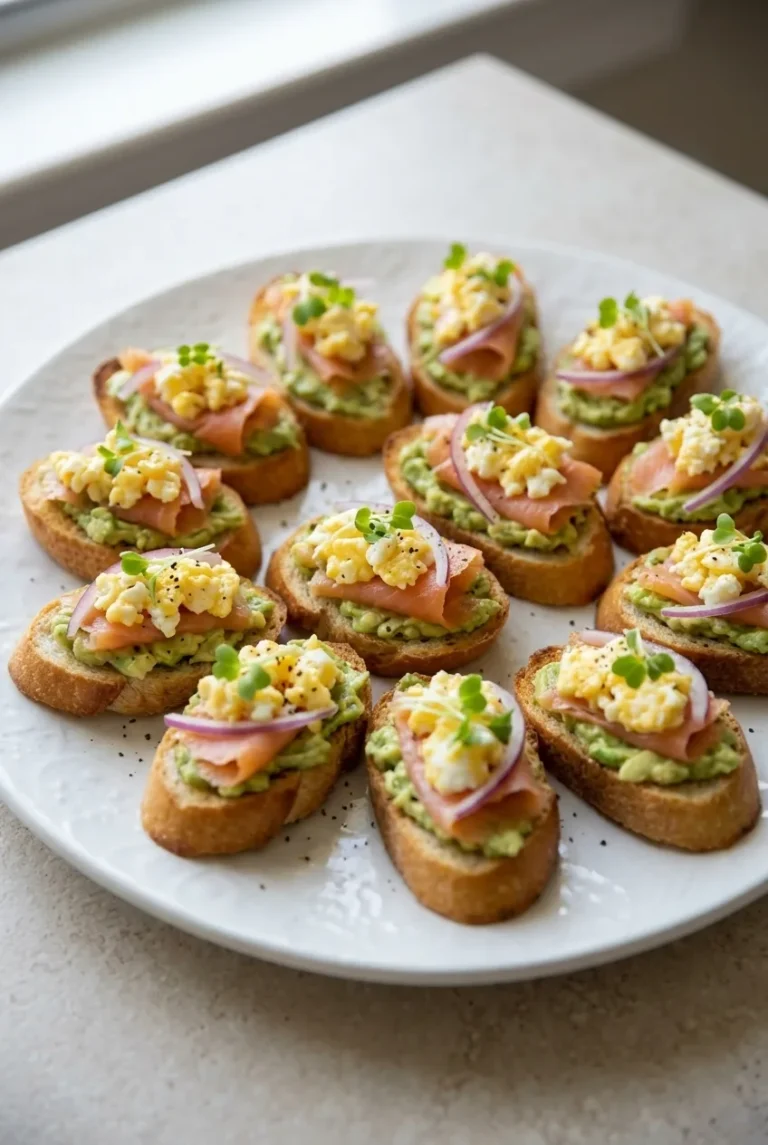
These two- or three-bite crostini layer creamy avocado, tender scrambled eggs, smoked salmon, red onion, and microgreens on crisp baguette slices. Small egg curds are easier to portion on narrow toasts than a whole poached egg, and modest toppings keep each bite easy to pick up.

Toast the bread and cook the eggs separately, then add the avocado and other toppings just before serving. That keeps the browned edges crisp against the soft layers.

Ingredients for Avocado Egg Toast Bites

Close view of crisp baguette, chunky avocado, scrambled egg, and smoked salmon on toast bites
  • 1 small baguette (about 250g), cut into about 16 diagonal slices
  • 1 tablespoon olive oil
  • 2 medium ripe avocados (about 300g flesh)
  • 2 teaspoons lemon juice
  • 4 large eggs
  • 1 tablespoon unsalted butter
  • 4 ounces smoked salmon (about 115g)
  • 2 tablespoons very thinly sliced red onion
  • 1 loosely packed cup microgreens
  • 1/4 teaspoon kosher salt, divided, or to taste
  • 1/8 teaspoon freshly ground black pepper, or to taste

Optional: Whisk 1 tablespoon water or milk into the eggs before cooking for a slightly looser mixture.

How to Make Avocado Egg Toast Bites

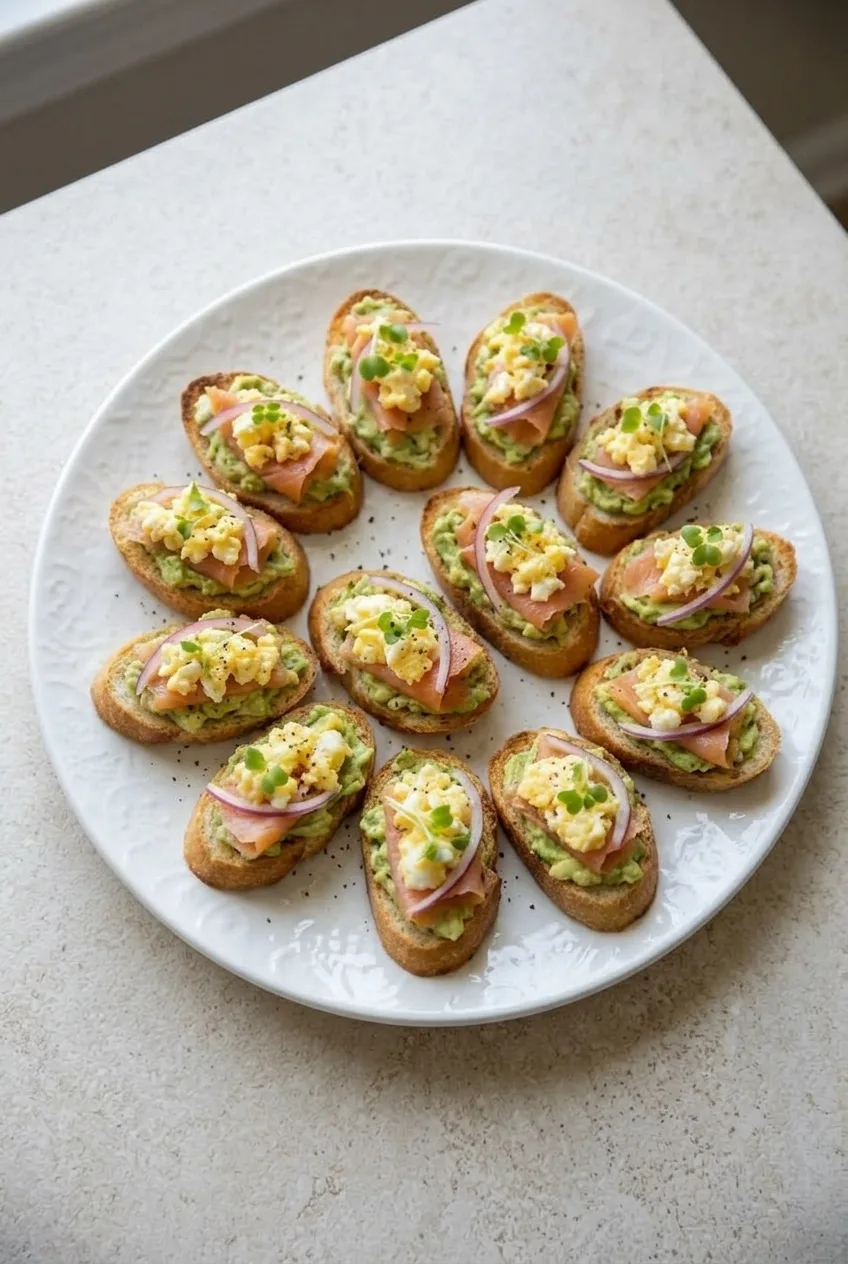
Full plate of avocado egg toast bites on a light tabletop
  1. Prepare the bread: Preheat the oven to 350°F (175°C). Arrange the baguette slices in a single layer on a baking sheet, without overlapping.
  2. Toast the slices: Lightly brush the tops with olive oil. Bake uncovered for 5 to 8 minutes, checking at 5 minutes. Remove when the edges are lightly browned and the surfaces feel dry and toasted. Let cool just enough to handle.
  3. Mash the avocado: Mash the avocado with the lemon juice and a small pinch of salt. Leave it slightly chunky but spreadable.
  4. Scramble the eggs: Beat the eggs with the remaining salt and the optional water or milk, if using. Melt the butter in a 10-inch nonstick skillet over medium-low heat. Add the eggs and gently push and fold for about 3 to 5 minutes, until they form small, tender curds with no liquid egg remaining.
  5. Assemble and serve: Spread about 1 tablespoon avocado on each toast. Add a small fold of smoked salmon, about 1 tablespoon scrambled egg, a few strands of red onion, and a pinch of microgreens. Finish with black pepper and serve promptly.

Yield: About 16 bites, or 4 appetizer servings of 4 bites each. Allow about 15 minutes to prep and about 10 minutes to cook; the eggs can cook while the bread toasts.

How to Keep the Bites Crisp

Use light browning and a dry surface—not the baking time alone—to judge the baguette. Moist avocado softens the toast as it stands, so keep the toppings separate until close to serving. Thin salmon folds, a few onion strands, and small egg curds leave the layers visible without overloading each slice.

Make-Ahead and Serving

You can slice the baguette and prepare the onion and microgreens in advance. Toast the bread, scramble the eggs, and assemble close to serving; there is no established crisp holding time for the finished bites. Do not reheat or freeze them fully assembled.

Serve on a brunch platter with fresh fruit. For a sweet contrast, add cranberry orange muffins.

Nutrition

Approximate nutrition per serving of 4 bites: 450 calories, 19g protein, 24g fat, and 43g carbohydrates. Per 100g: approximately 200 calories, 8g protein, 11g fat, and 19g carbohydrates. Values are estimates; baguette size and smoked-salmon brands will affect the totals.

Avocado Egg Toast Bites

Crisp baguette slices are topped with mashed avocado, tender scrambled eggs, smoked salmon, red onion, and microgreens.
Course: Appetizer
Cuisine: American
Prep: 15 min
Cook: 10 min
Total: 25 min
Servings: 4 Calories: 450 kcal

Equipment

  • Baking sheet
  • Pastry brush
  • 10-inch nonstick skillet

Ingredients

For the Toasts

  • 1 small baguette (about 250 g), cut into about 16 diagonal slices
  • 1 tablespoon olive oil

For the Toppings

  • 2 medium ripe avocados (about 300 g flesh)
  • 2 teaspoons lemon juice
  • 4 large eggs
  • 1 tablespoon unsalted butter
  • 4 ounces smoked salmon (about 115 g)
  • 2 tablespoons very thinly sliced red onion
  • 1 loosely packed cup microgreens
  • 1/4 teaspoon kosher salt, divided, or to taste
  • 1/8 teaspoon freshly ground black pepper, or to taste
  • Optional: 1 tablespoon water or milk, whisked into the eggs

Instructions

  1. Preheat the oven to 350°F (175°C). Arrange the baguette slices in a single layer on a baking sheet.
  2. Lightly brush the tops of the slices with olive oil. Bake uncovered for 5 to 8 minutes, checking at 5 minutes, until the edges are lightly browned and the surfaces are dry and toasted. Let cool just enough to handle.
  3. Mash the avocados with the lemon juice and a small pinch of salt, leaving the mixture slightly chunky but spreadable.
  4. Beat the eggs with the remaining salt and the optional water or milk, if using.
  5. Melt the butter in a 10-inch nonstick skillet over medium-low heat. Add the eggs and gently push and fold for 3 to 5 minutes, until small, tender curds form and no liquid egg remains.
  6. Spread about 1 tablespoon of avocado on each toast. Top each with a small fold of smoked salmon, about 1 tablespoon of scrambled egg, a few strands of red onion, and a pinch of microgreens.
  7. Finish with black pepper and serve promptly.

Tips

  • Judge the toast by its light browning and dry surface, not baking time alone.
  • Keep the toppings separate until close to serving to help the toast stay crisp.
  • Use thin salmon folds, a few onion strands, and small egg curds so each bite is easy to pick up.
  • Cook the eggs while the bread toasts to save time.

Notes

Assemble close to serving; there is no established crisp holding time for finished bites. Do not reheat or freeze them fully assembled.

Nutrition

Calories: 450 kcal | Protein: 19 g | Fat: 24 g | Carbohydrates: 43 g

Peanut Butter Oat Energy Balls

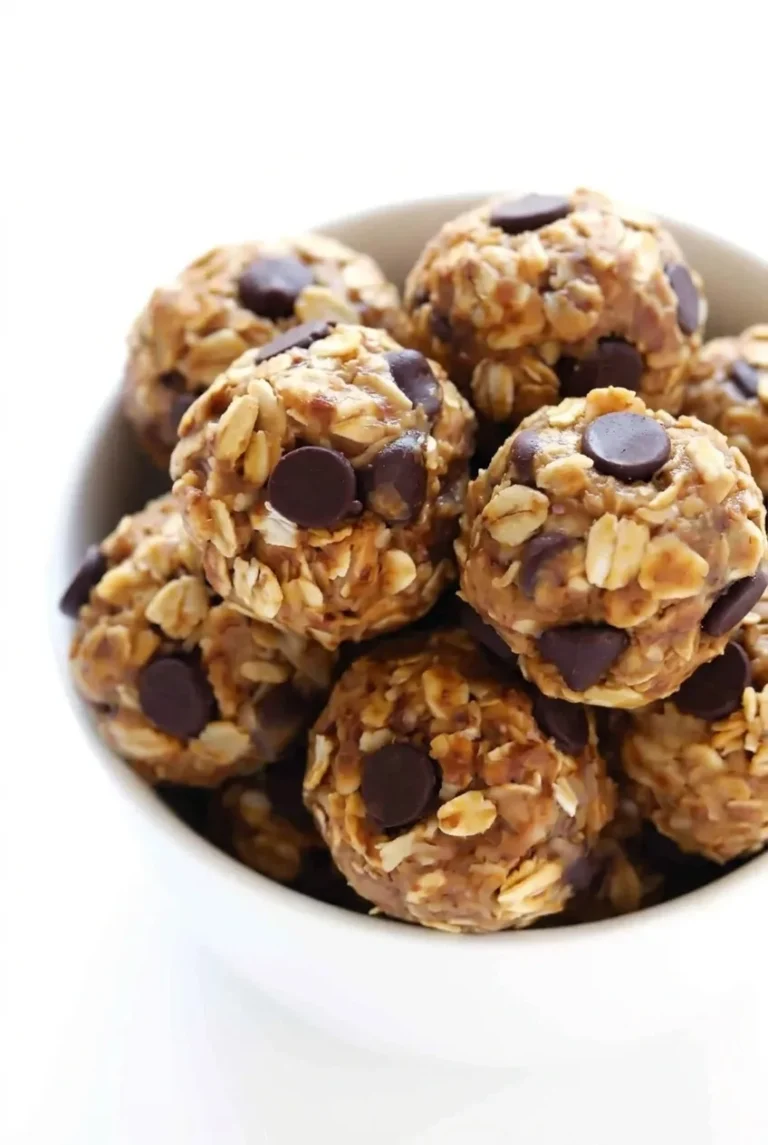
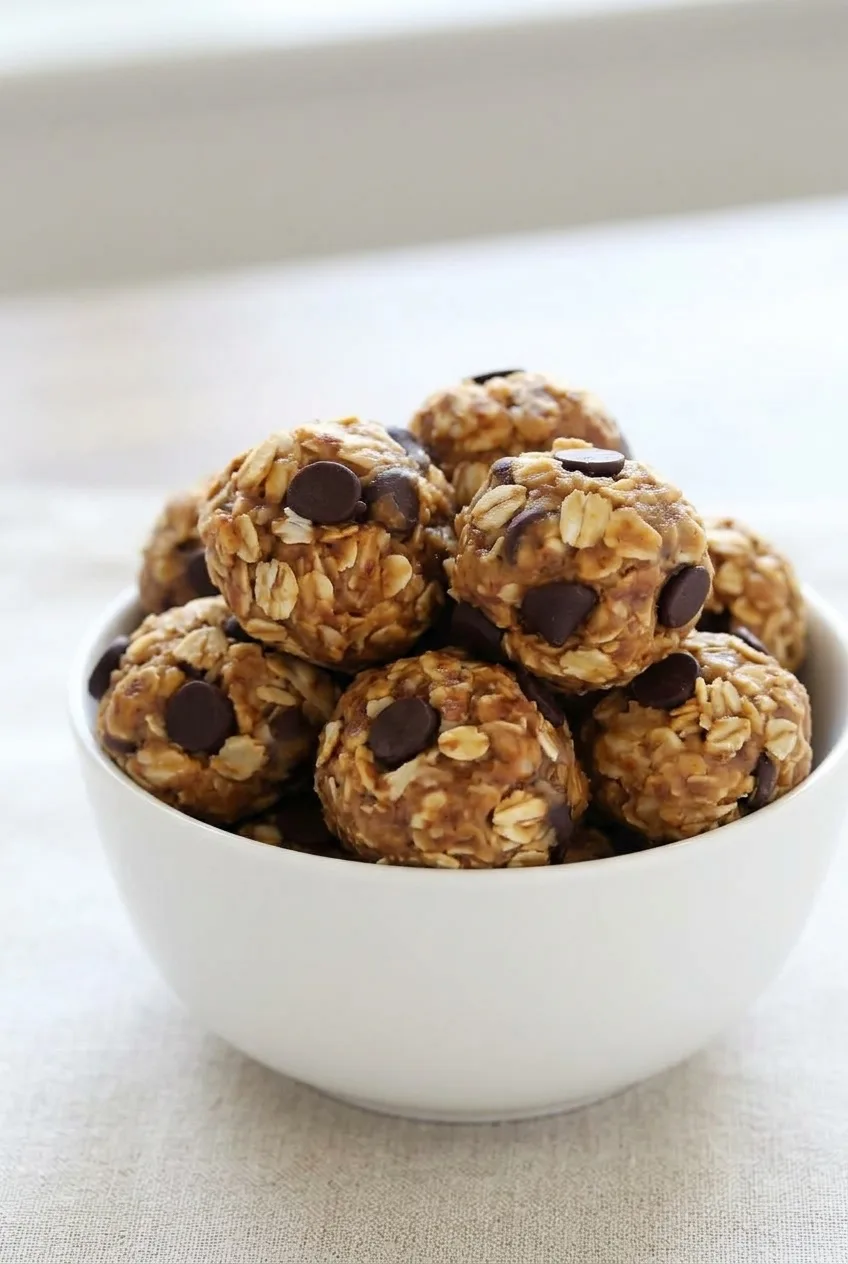
These no-bake energy balls are chewy and oat-studded, with chocolate chips throughout and on the surface. Mixing by hand keeps the rolled oats intact; all you need is a bowl and a spoon.

Peanut butter varies in thickness, so check the mixture before rolling. A squeezed spoonful should hold together. If it does, shape the balls and refrigerate them for about 30 minutes to firm up.

Ingredients for Peanut Butter Oat Energy Balls

Close view of intact oat flakes and dark chocolate chips embedded in peanut butter oat energy balls
  • 1/2 cup thick, creamy no-stir peanut butter (130g)
  • 1/3 cup honey (115g)
  • 1 teaspoon vanilla extract
  • 1 1/2 cups old-fashioned rolled oats (120g)
  • 1/3 cup semisweet chocolate chips (55g)

If the peanut butter is unsalted, add an optional pinch of fine salt with the vanilla.

How to Make Peanut Butter Oat Energy Balls

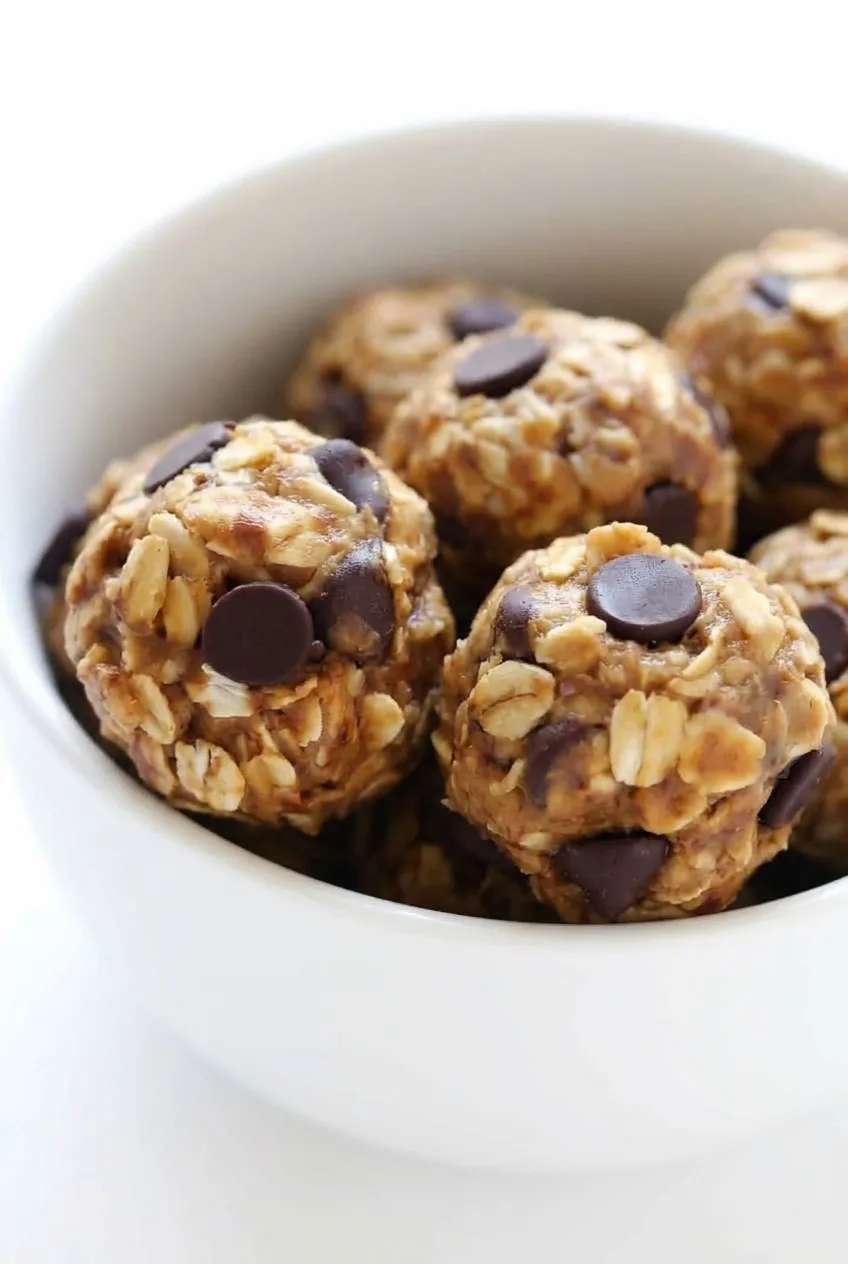
Full white bowl of peanut butter oat energy balls on a plain light surface
  1. Mix the binders: Stir the peanut butter, honey, and vanilla in a medium bowl until evenly combined, with no separate streaks of honey.
  2. Add the oats and chocolate: Reserve a few chocolate chips from the measured amount. Stir the oats and remaining chips into the peanut butter mixture until the flakes are coated. Mix by hand rather than processing so the oats stay intact.
  3. Check the mixture: Squeeze a spoonful. It should stay together instead of scattering into loose oats. If it crumbles, stir in more peanut butter 1 teaspoon at a time, repeating the squeeze test. If it is too soft or sticky to shape, refrigerate the bowl for 10 to 15 minutes.
  4. Shape: Scoop heaping-tablespoon portions and press or roll into about 18 roughly rounded balls, 1 to 1 1/2 inches across. Press the reserved chips onto the surfaces so they remain visible alongside the oat flakes.
  5. Chill: Arrange the balls on a plate or small tray, cover, and refrigerate for about 30 minutes, until they hold their shape when lifted and feel firm and chewy. Serve chilled or transfer to an airtight container.

Which Oats and Peanut Butter to Use

Old-fashioned rolled oats give the balls their distinct flakes and chewy texture. Steel-cut oats are not a substitute, and instant oats will not give the same chunky result.

Thick no-stir peanut butter makes the mixture easier to shape. Natural peanut butter can work if it is thoroughly stirred and thick, but a runny or oil-separated jar may leave the mixture too soft to roll.

Simple Variations

For a seed variation, stir 1 to 2 tablespoons ground flaxseed in with the oats, then check whether the mixture needs a little more peanut butter. Maple syrup can replace the honey, but it may produce a softer mixture; use the squeeze test before rolling. Thick sunflower seed butter can replace the peanut butter, though the flavor and binding will differ.

Dates are not a direct swap for honey. A date-based version requires processing and will not have the same intact-oat texture.

Storage and Freezing

Store the balls in an airtight container in the refrigerator for up to one week. For longer storage, freeze them on a tray until firm, then transfer to a freezer-safe airtight container for up to three months. Thaw in the refrigerator or let stand at room temperature for about 30 minutes before eating.

For a bar-shaped snack with similar flavors, try these homemade peanut butter and chocolate granola bars.

Nutrition

Approximate nutrition per ball, based on 18 balls: 105 calories, 3g protein, 5g fat, and 13g carbohydrates. Per 100g: approximately 440 calories, 12g protein, 21g fat, and 56g carbohydrates. Values will vary with ingredient brands and any extra peanut butter used for binding.

Peanut Butter Oat Energy Balls

No-bake energy balls made with rolled oats, peanut butter, honey, and chocolate chips.
Course: Snack
Cuisine: American
Prep: 15 min
Total: 45 min
Servings: 18 Calories: 105 kcal

Equipment

  • Mixing bowl
  • Spoon
  • Cookie scoop
  • Plate or small tray

Ingredients

  • 1/2 cup thick, creamy no-stir peanut butter (130 g)
  • 1/3 cup honey (115 g)
  • 1 teaspoon vanilla extract
  • 1 1/2 cups old-fashioned rolled oats (120 g)
  • 1/3 cup semisweet chocolate chips (55 g), divided
  • Optional: pinch of fine salt if the peanut butter is unsalted

Instructions

  1. Stir the peanut butter, honey, and vanilla in a medium bowl until evenly combined.
  2. Reserve a few chocolate chips. Stir the oats and remaining chocolate chips into the peanut butter mixture until the oats are coated.
  3. Squeeze a spoonful of the mixture to check that it holds together. If it crumbles, stir in additional peanut butter 1 teaspoon at a time. If it is too soft or sticky to shape, refrigerate the bowl for 10 to 15 minutes.
  4. Scoop heaping-tablespoon portions and press or roll into about 18 balls, roughly 1 to 1 1/2 inches across.
  5. Press the reserved chocolate chips onto the surfaces of the balls.
  6. Arrange the balls on a plate or small tray, cover, and refrigerate for about 30 minutes, until firm. Serve chilled or transfer to an airtight container.

Tips

  • Mix by hand to keep the rolled oats intact.
  • Use thick, creamy no-stir peanut butter for easier shaping.
  • Check that a squeezed spoonful holds together before rolling.
  • If the mixture crumbles, add peanut butter 1 teaspoon at a time and test again.
  • Reserve a few chocolate chips to press onto the outside of the balls.

Variations

  • Ground Flaxseed: Stir 1 to 2 tablespoons of ground flaxseed in with the oats, then add a little more peanut butter if needed.
  • Maple Syrup: Replace the honey with maple syrup; the mixture may be softer, so check that it holds together before rolling.
  • Sunflower Seed Butter: Use thick sunflower seed butter instead of peanut butter; the flavor and binding may differ.

Notes

Store in an airtight container in the refrigerator for up to one week. Freeze in an airtight freezer-safe container for up to three months; thaw in the refrigerator or at room temperature for about 30 minutes.

Nutrition

Calories: 105 kcal | Protein: 3 g | Fat: 5 g | Carbohydrates: 13 g

Healthy Zucchini Muffins

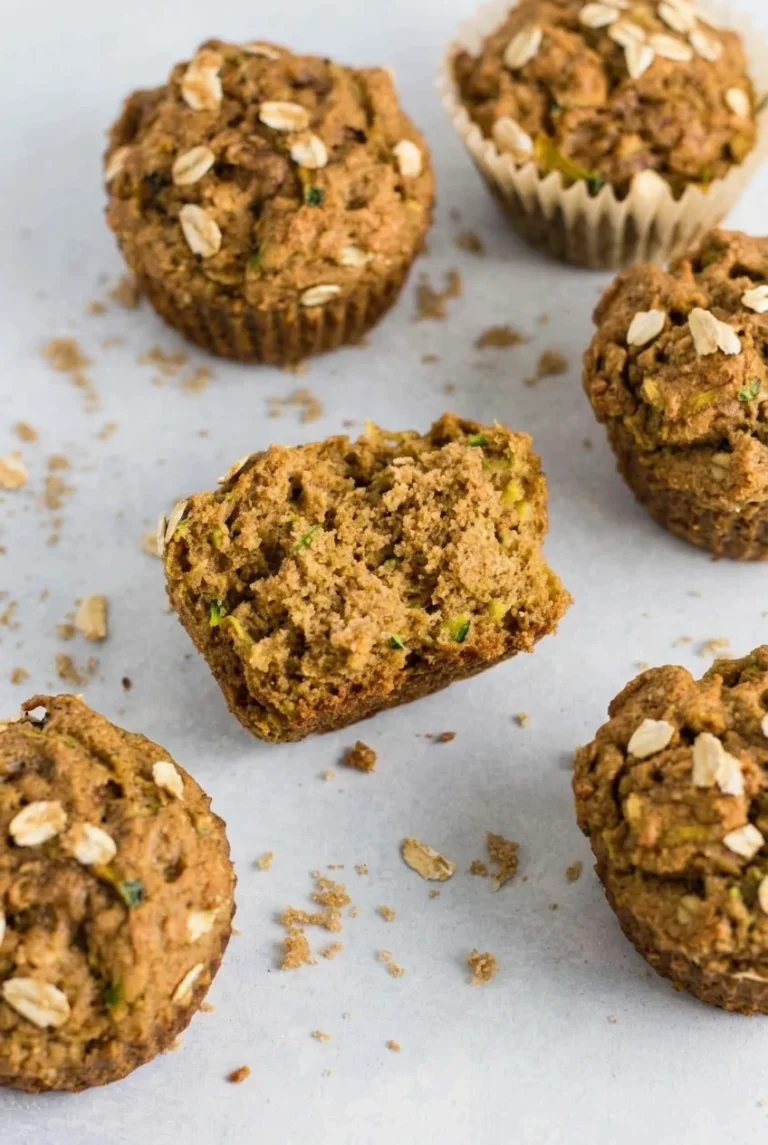
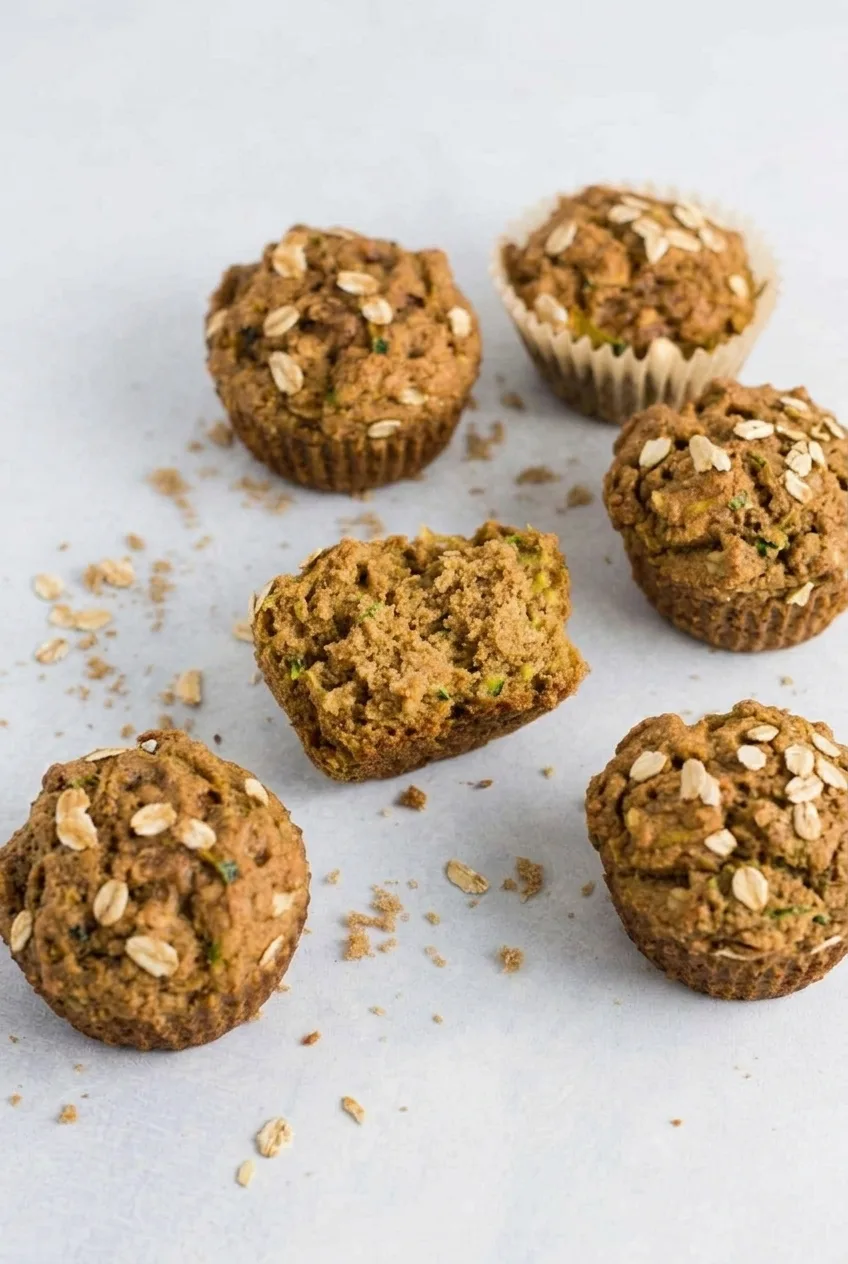
These standard-size zucchini muffins have irregular browned tops, visible green shreds, and a scattering of rolled oats. White whole wheat flour gives them structure, while maple syrup, applesauce, and a little oil keep the crumb tender and lightly sweet. They make an easy breakfast or snack and freeze well.

This batter has plenty of moisture, so gently squeeze the grated zucchini and measure it afterward. The shreds should still feel moist, but they should not drip into the batter.

Ingredients for Healthy Zucchini Muffins

Wider view of oat-topped zucchini muffins on a pale surface, including one broken-open muffin
  • 1 1/2 cups white whole wheat flour (180g)
  • 1/2 cup old-fashioned rolled oats, plus 2 tablespoons for topping (55g total)
  • 1 1/2 teaspoons baking powder
  • 1/2 teaspoon baking soda
  • 1 1/2 teaspoons ground cinnamon
  • 1/2 teaspoon fine salt
  • 2 large eggs
  • 1/2 cup pure maple syrup (160g)
  • 1/2 cup unsweetened applesauce (120g)
  • 1/4 cup neutral oil (55g)
  • 1 teaspoon vanilla extract
  • 1 packed cup grated zucchini, measured after gently squeezing (about 135g; start with approximately 1 medium-to-large zucchini)
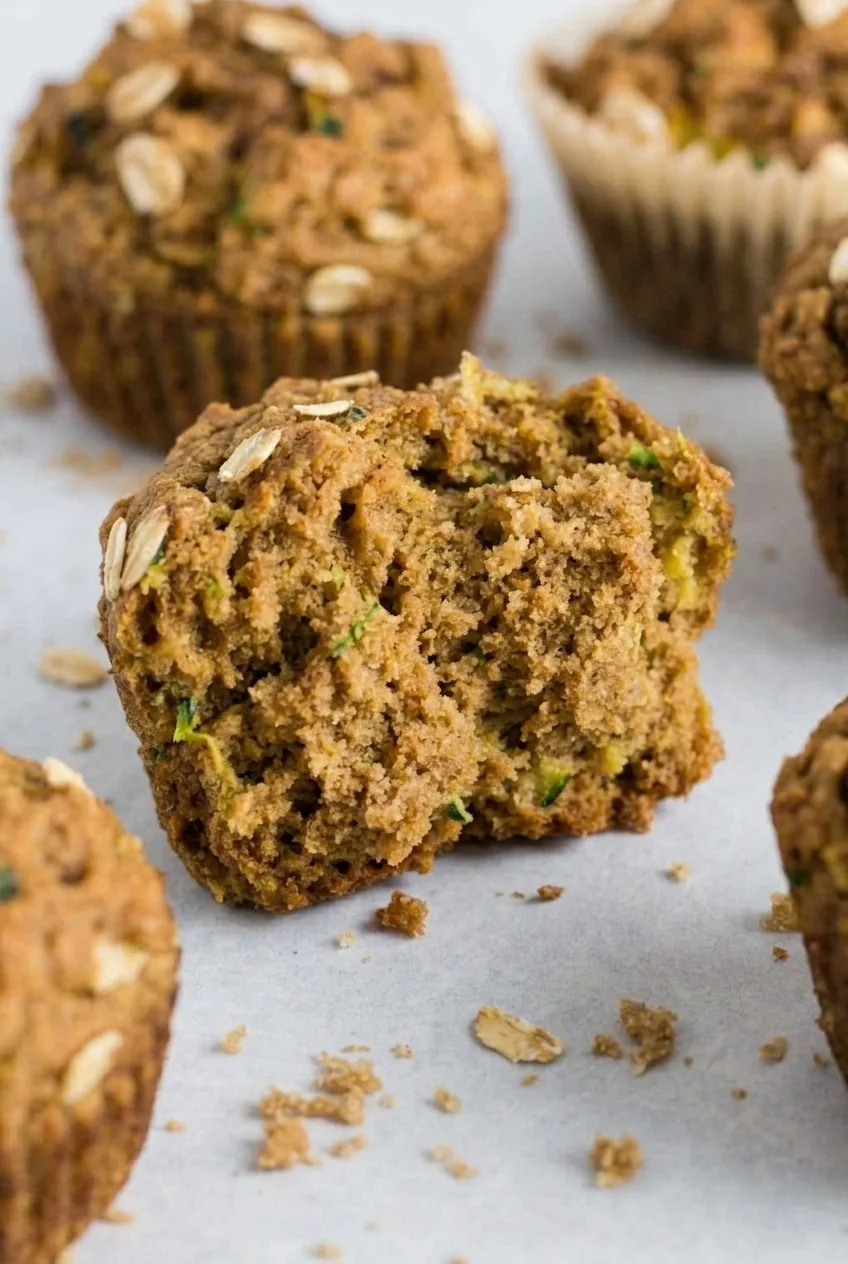
Close view of a broken-open zucchini muffin with a moist, fully baked crumb and visible green shreds

How to Bake Zucchini Muffins

  1. Prepare the oven and pan: Position a rack near the center of the oven and preheat to 350°F (175°C). Line all 12 cups of a standard muffin pan with paper liners.
  2. Grate and measure the zucchini: Grate it on the large holes of a box grater. Wrap the shreds in a clean kitchen towel or sturdy paper towels and squeeze gently until moist but not dripping. Measure 1 packed cup after squeezing and discard the liquid.
  3. Mix the dry ingredients: Whisk together the flour, 1/2 cup oats, baking powder, baking soda, cinnamon, and salt. Reserve the remaining 2 tablespoons oats for topping.
  4. Mix the wet ingredients: In a second bowl, whisk the eggs, maple syrup, applesauce, oil, and vanilla until combined.
  5. Finish the batter: Fold the dry ingredients into the wet ingredients just until no dry flour remains, then gently fold in the zucchini. The batter should be thick and scoopable. Do not beat it smooth; overmixing can make the muffins tough.
  6. Fill the pan: Divide the batter evenly among the lined cups, filling each about three-quarters full. Scatter the reserved oats over the tops.
  7. Bake: Bake uncovered for 18–22 minutes, beginning to check at 18 minutes. The tops should be set and browned along their ridges. A toothpick inserted into a muffin near the center of the pan should come out without wet batter; a few moist crumbs are fine.
  8. Cool: Leave the muffins in the pan for about 5 minutes, then transfer them to a wire rack. Cool completely before packing or freezing. Serve plain or break one open and add a little butter, if desired.

Why Measure the Zucchini After Squeezing?

Applesauce, maple syrup, and oil already supply moisture to this batter. Measuring 1 packed cup after squeezing helps prevent excess zucchini water from leaving the centers wet or sunken. Squeeze gently rather than wringing the shreds dry, and do not add the liquid back. Other zucchini muffin batters may be designed for unsqueezed zucchini; this one uses the drained measurement.

How to Tell When the Muffins Are Done

Treat 18 minutes as a checking point, not a fixed finish time. Zucchini moisture and ovens can shift the bake slightly. Test a muffin near the center of the pan: its dome should look set, and a toothpick should show no wet batter. The crumb can be moist when broken open, but it should not look raw.

Simple Variations

For a variation, fold in up to 1/2 cup chopped walnuts or chocolate chips with the zucchini. Keep the rolled oats on top. For a separate breakfast bake, try these healthy chocolate chip muffins.

Storage and Freezing

Cool the muffins completely before sealing them. Store covered at room temperature for up to 2 days, or refrigerate in an airtight container for up to 4 days. To freeze, arrange the cooled muffins in a single layer until firm, then transfer them to a freezer-safe bag for up to 3 months.

Thaw before serving, or microwave an individual muffin briefly, checking after 15–20 seconds and heating only until warm. For another make-ahead snack, see these homemade granola bars.

Nutrition

Approximate nutrition per muffin, based on 12 standard muffins and excluding optional butter or mix-ins: 165 calories, 4g protein, 6g fat, and 24g carbohydrates. Approximate values per 100g of baked muffin: 260 calories, 6g protein, 10g fat, and 39g carbohydrates. Values are estimates and will vary with the ingredients and finished weight.

Healthy Zucchini Muffins

Tender whole wheat zucchini muffins are lightly sweetened with maple syrup and topped with rolled oats.
Course: Breakfast
Cuisine: American
Prep: 15 min
Cook: 20 min
Total: 60 min
Servings: 12 Calories: 165 kcal

Equipment

  • Standard 12-cup muffin pan
  • Paper liners
  • Box grater
  • Kitchen towel or sturdy paper towels
  • Mixing bowls
  • Whisk
  • Wire rack

Ingredients

  • 1 1/2 cups white whole wheat flour (180 g)
  • 1/2 cup old-fashioned rolled oats, plus 2 tablespoons for topping (55 g total)
  • 1 1/2 teaspoons baking powder
  • 1/2 teaspoon baking soda
  • 1 1/2 teaspoons ground cinnamon
  • 1/2 teaspoon fine salt
  • 2 large eggs
  • 1/2 cup pure maple syrup (160 g)
  • 1/2 cup unsweetened applesauce (120 g)
  • 1/4 cup neutral oil (55 g)
  • 1 teaspoon vanilla extract
  • 1 packed cup grated zucchini, measured after gently squeezing (about 135 g; start with approximately 1 medium-to-large zucchini)

Instructions

  1. Position a rack near the center of the oven and preheat to 350°F (175°C). Line all 12 cups of a standard muffin pan with paper liners.
  2. Grate the zucchini using the large holes of a box grater. Wrap the shreds in a clean towel or sturdy paper towels and gently squeeze until moist but not dripping.
  3. Measure 1 packed cup of zucchini after squeezing and discard the liquid.
  4. Whisk together the flour, 1/2 cup oats, baking powder, baking soda, cinnamon, and salt. Set aside the remaining 2 tablespoons of oats for topping.
  5. In a separate bowl, whisk the eggs, maple syrup, applesauce, oil, and vanilla until combined.
  6. Fold the dry ingredients into the wet ingredients just until no dry flour remains, then gently fold in the zucchini. Do not overmix.
  7. Divide the batter evenly among the muffin cups, filling each about three-quarters full. Scatter the reserved oats over the tops.
  8. Bake uncovered for 18–22 minutes, beginning to check at 18 minutes. The tops should be set and browned along their ridges, and a toothpick inserted into a center muffin should come out without wet batter.
  9. Cool the muffins in the pan for about 5 minutes, then transfer them to a wire rack to cool completely.

Tips

  • Measure the zucchini after gently squeezing it.
  • Keep the zucchini moist but not dripping; do not wring it completely dry.
  • Fold the batter only until the dry flour disappears to help keep the muffins tender.
  • Begin checking for doneness at 18 minutes; a few moist crumbs on the toothpick are fine.
  • Cool completely before packing or freezing.

Variations

  • Walnut Zucchini Muffins: Fold up to 1/2 cup chopped walnuts into the batter with the zucchini.
  • Chocolate Chip Zucchini Muffins: Fold up to 1/2 cup chocolate chips into the batter with the zucchini.

Notes

Store covered at room temperature for up to 2 days or refrigerate in an airtight container for up to 4 days. Freeze cooled muffins for up to 3 months. Thaw before serving or microwave an individual muffin, checking after 15–20 seconds.

Nutrition

Calories: 165 kcal | Protein: 4 g | Fat: 6 g | Carbohydrates: 24 g | Per 100g Calories: 260 kcal | Per 100g Protein: 6 g | Per 100g Fat: 10 g | Per 100g Carbohydrates: 39 g

Hummus & Veggie Snack Cups

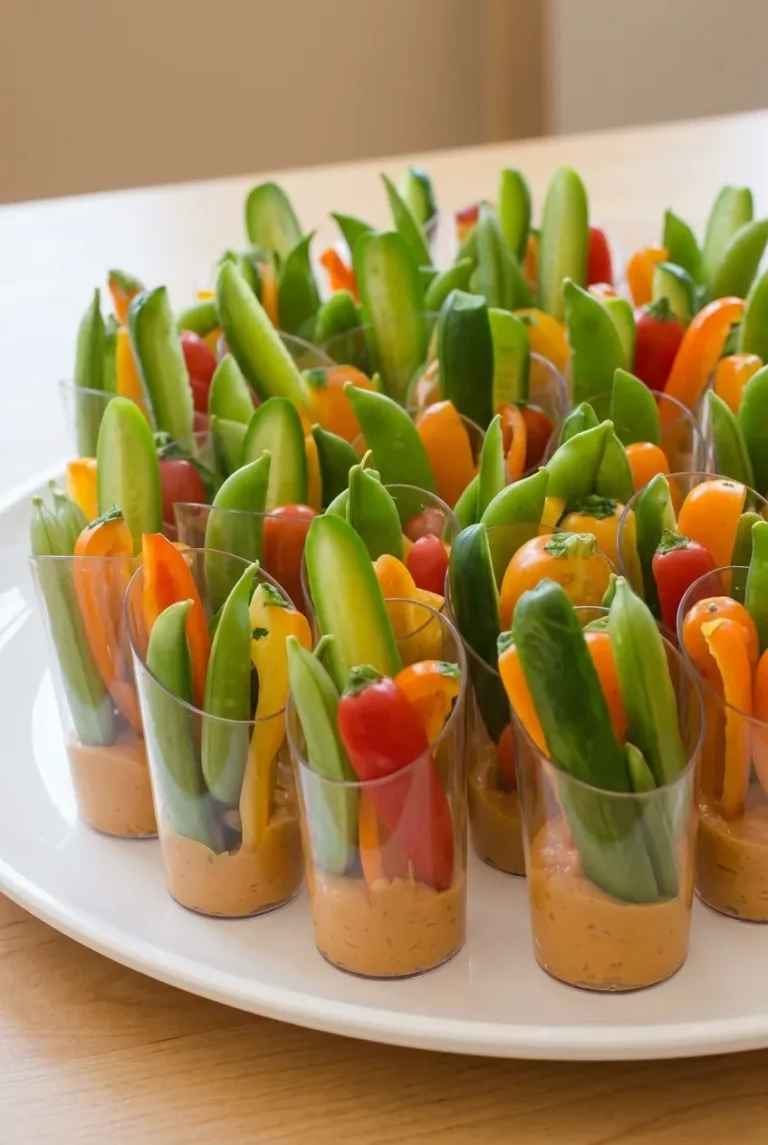
Roasted red pepper hummus forms a peach-orange layer beneath cucumber spears, snap peas, bell pepper strips, and small tomatoes in individual clear cups. The vegetables rise above the rims, making each cup easy to pick up and eat without a shared dip bowl.

These no-cook cups take about 20 minutes to prepare. Thick purchased hummus helps hold the vegetables upright; drying the vegetables and assembling close to serving keeps them crisp and the hummus layer tidy.

Ingredients for Hummus & Veggie Snack Cups

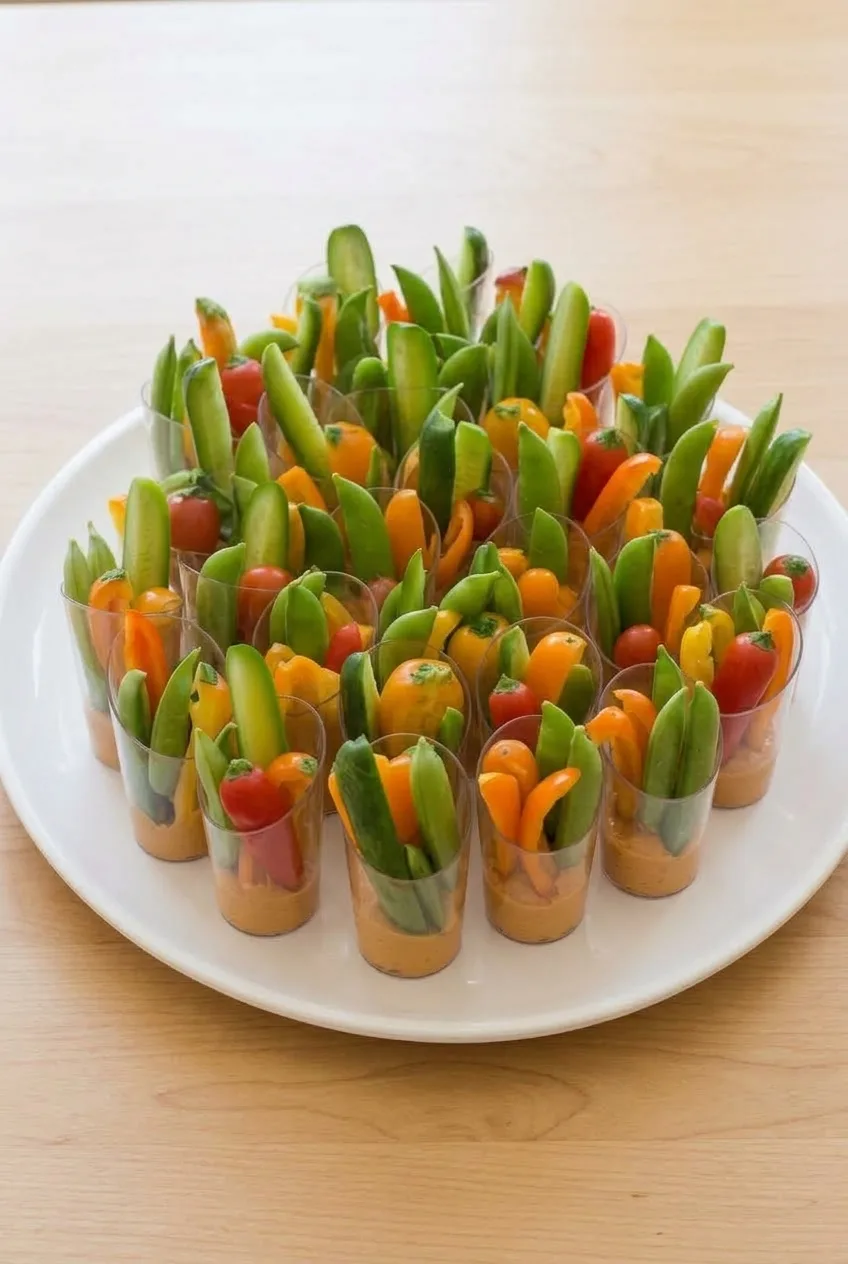
Full platter of clear hummus and veggie snack cups on a neutral table
  • 2 1/4 cups thick prepared roasted red pepper hummus (about 510g)
  • 1 medium English cucumber (about 300g)
  • About 6 ounces sugar snap peas (170g)
  • 1 medium red bell pepper (about 150g)
  • 1 medium orange bell pepper (about 150g)
  • 12 to 24 mixed red and orange cherry or grape tomatoes (about 180g)

Equipment: Twelve sturdy, clear 5-ounce cups, a knife, a cutting board, and a spoon.

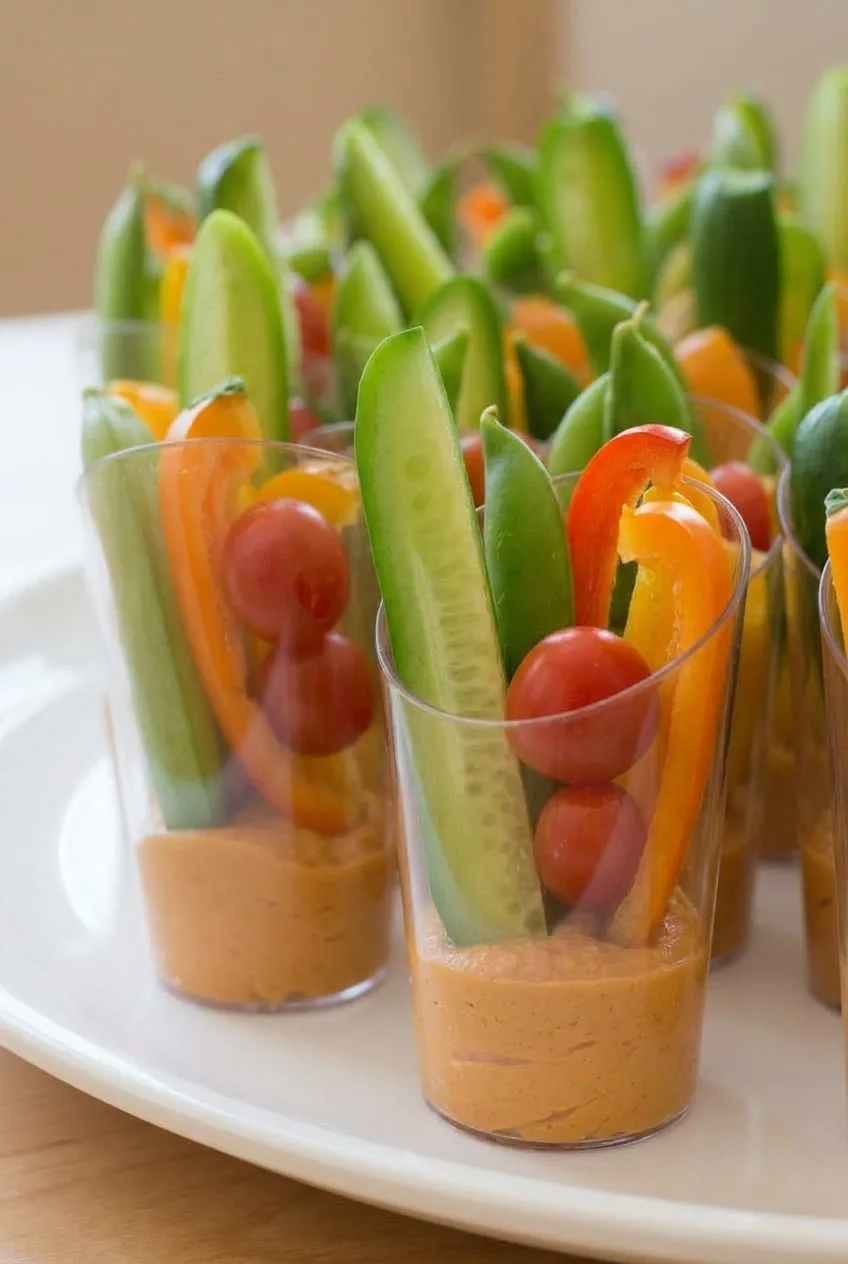
Close view of orange hummus beneath cucumber, snap peas, peppers, and tomatoes in clear snack cups

How to Assemble Hummus & Veggie Snack Cups

  1. Wash and dry: Rinse the vegetables, dry them thoroughly, and trim the snap peas as needed. Water left on the vegetables can collect in the hummus.
  2. Cut the dippers: Cut the cucumber into spears and the peppers into long strips. Check their length against a cup; they should extend above the rim and be easy to grasp. Leave the snap peas whole and the tomatoes intact.
  3. Portion the hummus: Spoon about 3 tablespoons into the bottom of each cup. Keep the upper walls mostly clear so the hummus forms a distinct visible layer.
  4. Fill and chill: Gently stand cucumber, snap peas, and both colors of pepper in the hummus. Tuck one or two tomatoes between the taller pieces near each rim so they stay visible instead of sinking. Leave enough room to pull out one vegetable at a time. Serve cold, or loosely cover and refrigerate until serving.

Choose Cups and Cut Vegetables That Fit

Clear, high-sided cups show the hummus layer and support the upright vegetables. Assemble one cup before cutting all the cucumber and peppers: cup heights vary, and pieces cut too short can disappear into the dip. If the first cup feels crowded, use fewer pieces rather than forcing them in and smearing hummus up the sides. Adjust the hummus slightly if your cups differ in capacity, leaving room for the vegetables.

Make Ahead and Keep the Vegetables Crisp

Keep cut vegetables in covered containers in the refrigerator, then assemble the cups close to serving for the freshest appearance. Loosely cover finished cups and keep them chilled. Arrange them on a platter to serve; in warm weather, set the platter over ice to help keep the cups cold. Do not freeze assembled cups, since the raw vegetables will lose their crisp texture.

For another individually portioned vegetable appetizer, try cucumber ranch bites.

Hummus and Vegetable Swaps

Another thick purchased hummus will hold the vegetables upright, though it will change the orange appearance of these cups. A few carrot sticks can replace some pepper strips; cut them to a similar length and avoid overpacking.

Nutrition

Yield: 12 snack cups. Approximate nutrition per cup: 100 calories, 3g protein, 4g fat, and 11g carbohydrates. Approximate nutrition per 100g: 80 calories, 3g protein, 4g fat, and 9g carbohydrates. Values vary with the hummus brand and the amount of vegetables in each cup.

Hummus & Veggie Snack Cups

Roasted red pepper hummus and crisp vegetables are portioned into individual clear cups for easy snacking.
Course: Snack
Cuisine: Mediterranean
Prep: 20 min
Total: 20 min
Servings: 12 Calories: 100 kcal per cup

Equipment

  • Twelve sturdy clear 5-ounce cups
  • Knife
  • Cutting board
  • Spoon

Ingredients

  • 2 1/4 cups thick prepared roasted red pepper hummus (about 510 g)
  • 1 medium English cucumber (about 300 g)
  • About 6 ounces sugar snap peas (170 g)
  • 1 medium red bell pepper (about 150 g)
  • 1 medium orange bell pepper (about 150 g)
  • 12 to 24 mixed red and orange cherry or grape tomatoes (about 180 g)

Instructions

  1. Rinse the vegetables, dry them thoroughly, and trim the snap peas as needed.
  2. Cut the cucumber into spears and the peppers into long strips that extend above the cup rims. Leave the snap peas whole and the tomatoes intact.
  3. Spoon about 3 tablespoons of hummus into the bottom of each cup, keeping the upper sides mostly clear.
  4. Stand the cucumber, snap peas, and pepper strips upright in the hummus.
  5. Tuck one or two tomatoes between the taller vegetables near the rim, leaving room to remove the vegetables easily.
  6. Serve cold, or loosely cover and refrigerate until serving.

Tips

  • Dry the vegetables thoroughly so water does not collect in the hummus.
  • Assemble one cup before cutting all the cucumber and peppers to check the right length.
  • If a cup feels crowded, use fewer vegetables rather than forcing them in.
  • Assemble close to serving time for the freshest appearance.

Variations

  • Carrot Sticks: Replace some of the pepper strips with carrot sticks cut to a similar length.
  • Other Hummus: Use another thick prepared hummus; the color of the cups will vary.

Notes

Keep cut vegetables covered in the refrigerator and loosely cover finished cups while chilling. Do not freeze assembled cups. In warm weather, serve the platter over ice.

Nutrition

Calories: 100 kcal per cup | Protein: 3 g per cup | Fat: 4 g per cup | Carbohydrates: 11 g per cup | Per 100g Calories: 80 kcal | Per 100g Protein: 3 g | Per 100g Fat: 4 g | Per 100g Carbohydrates: 9 g

Homemade Granola Bars

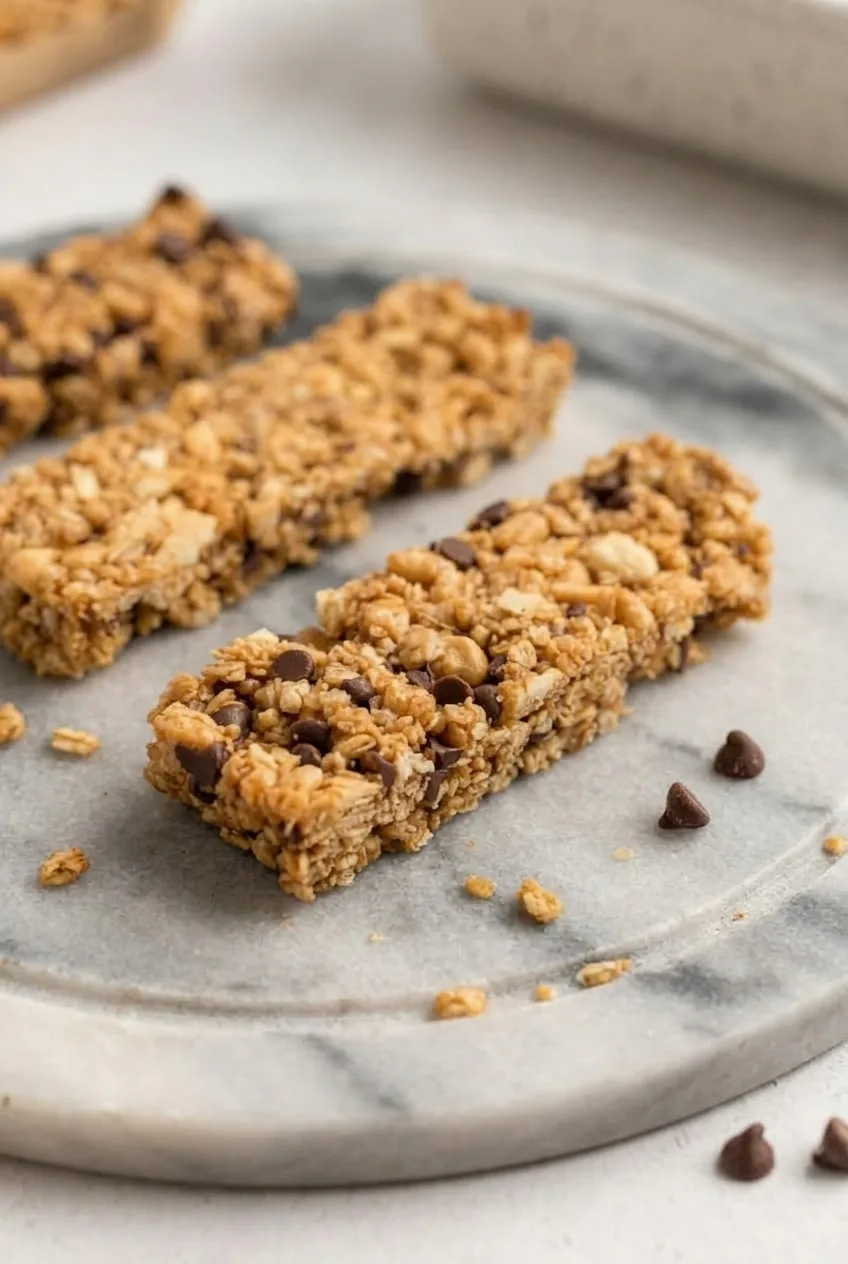
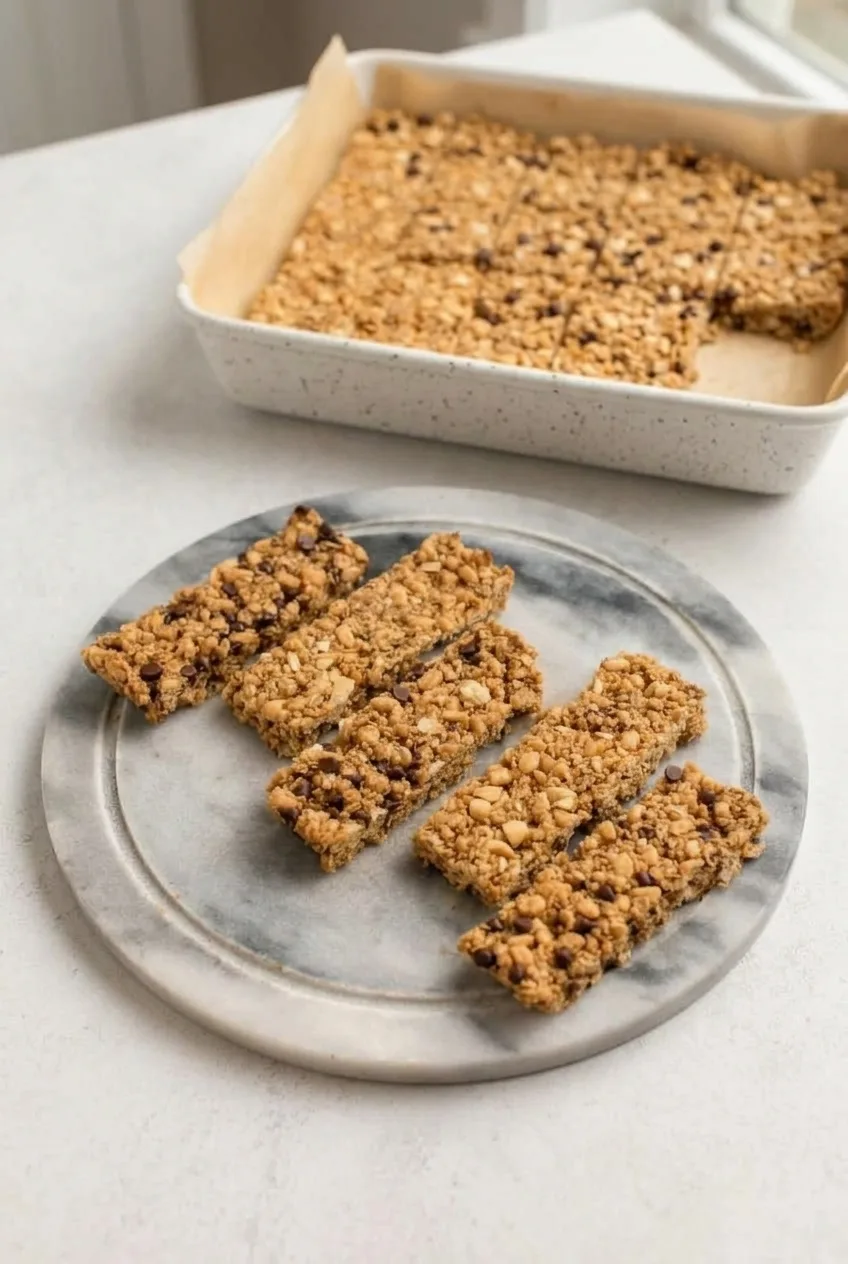
These slim granola bars have a golden-tan surface with visible oats, crisp rice, chopped peanuts, and mini chocolate chips. Peanut butter and honey bind the mixture, while a short bake lightly browns the edges. The bars will still feel soft when they leave the oven. Pressing the mixture firmly, then cooling and chilling the slab, is what makes it possible to cut clean rectangles.

Ingredients for Homemade Granola Bars

Close view of a granola bar’s cut edge, showing compact oats, crisp rice, peanuts, and chocolate chips
  • 2 cups quick oats (180g)
  • 1 cup crisp rice cereal (30g)
  • 1/2 cup chopped roasted peanuts (70g)
  • 1/2 cup creamy peanut butter (130g)
  • 1/3 cup honey (115g)
  • 2 tablespoons packed light brown sugar (25g)
  • 1/2 teaspoon vanilla extract
  • 1/4 teaspoon fine salt
  • 1/3 cup mini chocolate chips (60g), divided
  • Optional: 1/4 teaspoon ground cinnamon

How to Make Homemade Granola Bars

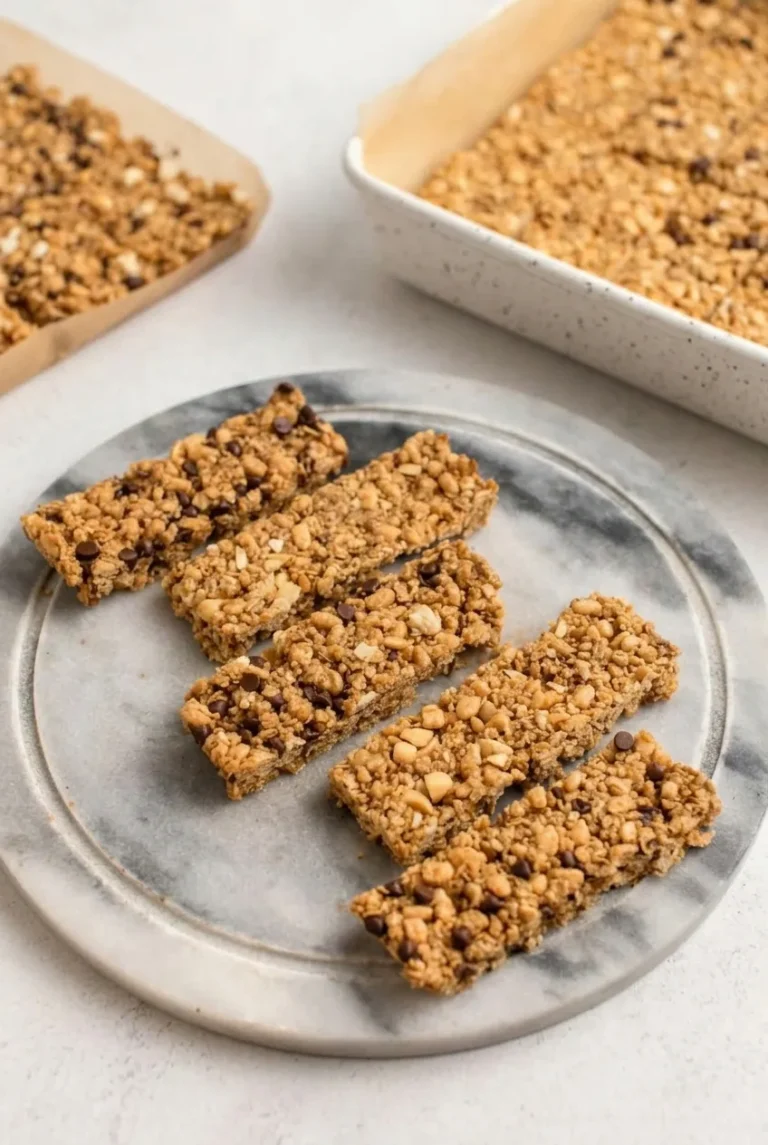
Gray plate of slim granola bars with more cut bars in a parchment-lined pan behind it

Yield: 12 slim bars. Prep: 15 minutes. Bake: 8–10 minutes. Total: About 1 hour 45 minutes, including cooling and chilling.

  1. Prepare the pan: Preheat the oven to 350°F (175°C). Line an 8-by-8-inch metal baking pan with parchment, leaving overhang on two sides. Combine the oats, crisp rice, and peanuts in a large bowl. Stir in the cinnamon, if using. Chop any large peanut pieces small enough to slice through.
  2. Warm the binder: Stir the peanut butter, honey, and brown sugar in a small saucepan over low heat for 3–4 minutes, until smooth and fluid and the sugar is mostly dissolved. Do not let it boil. Remove from the heat and stir in the vanilla and salt.
  3. Coat the oats: Pour the warm binder over the oat mixture and stir until no dry pockets remain. Let the mixture cool for several minutes, until warm rather than hot. Fold in the chocolate chips, reserving about 1 tablespoon for the top. Cooling briefly keeps the chips from smearing into the binder.
  4. Press into the pan: Transfer the mixture to the lined pan. Cover it with another piece of parchment and press firmly and evenly with a flat-bottomed measuring cup, making a compact layer about 1/2 to 3/4 inch thick. Pay particular attention to the edges, but do not crush all the visible cereal pieces. Remove the top parchment and press the reserved chips lightly into the surface.
  5. Bake briefly: Bake uncovered for 8–10 minutes, checking at 8 minutes. The edges should be lightly golden and the surface should look set. The slab may still feel soft while hot; baking it longer just to make it firm can dry out these thin bars.
  6. Cool and cut: Cool completely in the pan, about 45–60 minutes, then refrigerate for about 30 minutes. Lift out the slab using the parchment. For 12 narrow bars, cut it into six strips across the pan, then halve each strip with a sharp knife.

How to Keep the Bars from Crumbling

Coat every oat and cereal piece with the warm binder, then press the mixture firmly across the pan. Loose patches, especially around the edges, are more likely to break when cut. Leave the slab in the pan until it has cooled and chilled; slicing while warm can pull it apart.

Mix-In and Allergy Options

For a peanut-free variation, replace the peanut butter with sunflower seed butter and the peanuts with chopped pumpkin or sunflower seeds. Flavor, color, and firmness may differ. Check all ingredient labels when avoiding an allergen.

For gluten-free bars, use oats and crisp rice cereal specifically labeled gluten-free. Avoid fresh fruit or other wet mix-ins, which can interfere with the bars setting.

How to Store and Pack Granola Bars

Once fully cooled, store the bars airtight at cool room temperature for up to 1 week. For a firmer texture, refrigerate them in an airtight container with parchment between layers. Wrap individual bars after chilling to protect the slim pieces when packing them.

For longer storage, wrap the bars individually and freeze in a sealed container for up to 2 months. Thaw at room temperature; no reheating is needed.

Nutrition

Approximate nutrition per bar, based on 12 bars: 225 calories, 7g protein, 11g fat, and 28g carbohydrates. Per 100g: approximately 450 calories, 13g protein, 21g fat, and 55g carbohydrates. Values vary by ingredient brand and finished bar weight.

Homemade Granola Bars

Slim baked granola bars made with oats, crisp rice, peanuts, peanut butter, honey, and mini chocolate chips.
Course: Snack
Cuisine: American
Prep: 15 min
Cook: 10 min
Total: 105 min
Servings: 12 Calories: 225 kcal

Equipment

  • Oven
  • 8-by-8-inch metal baking pan
  • Parchment paper
  • Large bowl
  • Small saucepan
  • Measuring cup
  • Sharp knife

Ingredients

For the bars

  • 2 cups quick oats (180g)
  • 1 cup crisp rice cereal (30g)
  • 1/2 cup chopped roasted peanuts (70g)
  • 1/2 cup creamy peanut butter (130g)
  • 1/3 cup honey (115g)
  • 2 tablespoons packed light brown sugar (25g)
  • 1/2 teaspoon vanilla extract
  • 1/4 teaspoon fine salt
  • 1/3 cup mini chocolate chips (60g), divided
  • Optional: 1/4 teaspoon ground cinnamon

Instructions

  1. Preheat the oven to 350°F (175°C). Line an 8-by-8-inch metal baking pan with parchment, leaving overhang on two sides.
  2. Combine the oats, crisp rice cereal, and peanuts in a large bowl. Stir in the cinnamon, if using, and make sure any large peanut pieces are small enough to slice through.
  3. Warm the peanut butter, honey, and brown sugar in a small saucepan over low heat for 3–4 minutes, stirring until smooth and fluid. Do not let the mixture boil. Remove from the heat and stir in the vanilla and salt.
  4. Pour the warm binder over the oat mixture and stir until evenly coated with no dry pockets. Let cool for several minutes, until warm rather than hot. Fold in the chocolate chips, reserving about 1 tablespoon for the top.
  5. Transfer the mixture to the prepared pan. Cover with another piece of parchment and press firmly and evenly into a compact layer about 1/2 to 3/4 inch thick. Remove the top parchment and press the reserved chips lightly into the surface.
  6. Bake uncovered for 8–10 minutes, checking at 8 minutes, until the edges are lightly golden and the surface looks set.
  7. Cool completely in the pan for about 45–60 minutes, then refrigerate for about 30 minutes. Lift out the slab using the parchment. Cut into six strips across the pan, then halve each strip to make 12 bars.

Tips

  • Coat all the oat and cereal pieces with the warm binder so there are no dry patches.
  • Press the mixture firmly and evenly, paying particular attention to the edges.
  • Let the mixture cool briefly before folding in the chocolate chips to keep them from smearing.
  • Do not bake longer just to make the hot slab feel firm; it will set as it cools and chills.
  • Cool and chill the slab before slicing to help prevent crumbling.

Variations

  • Peanut-Free Bars: Replace the peanut butter with sunflower seed butter and the peanuts with chopped pumpkin or sunflower seeds.
  • Gluten-Free Bars: Use oats and crisp rice cereal specifically labeled gluten-free.

Notes

Store airtight at cool room temperature for up to 1 week, or refrigerate for a firmer texture. Individually wrapped bars can be frozen in a sealed container for up to 2 months; thaw at room temperature.

Nutrition

Calories: 225 kcal | Protein: 7 g | Fat: 11 g | Carbohydrates: 28 g

Frozen Yogurt Fruit Bites

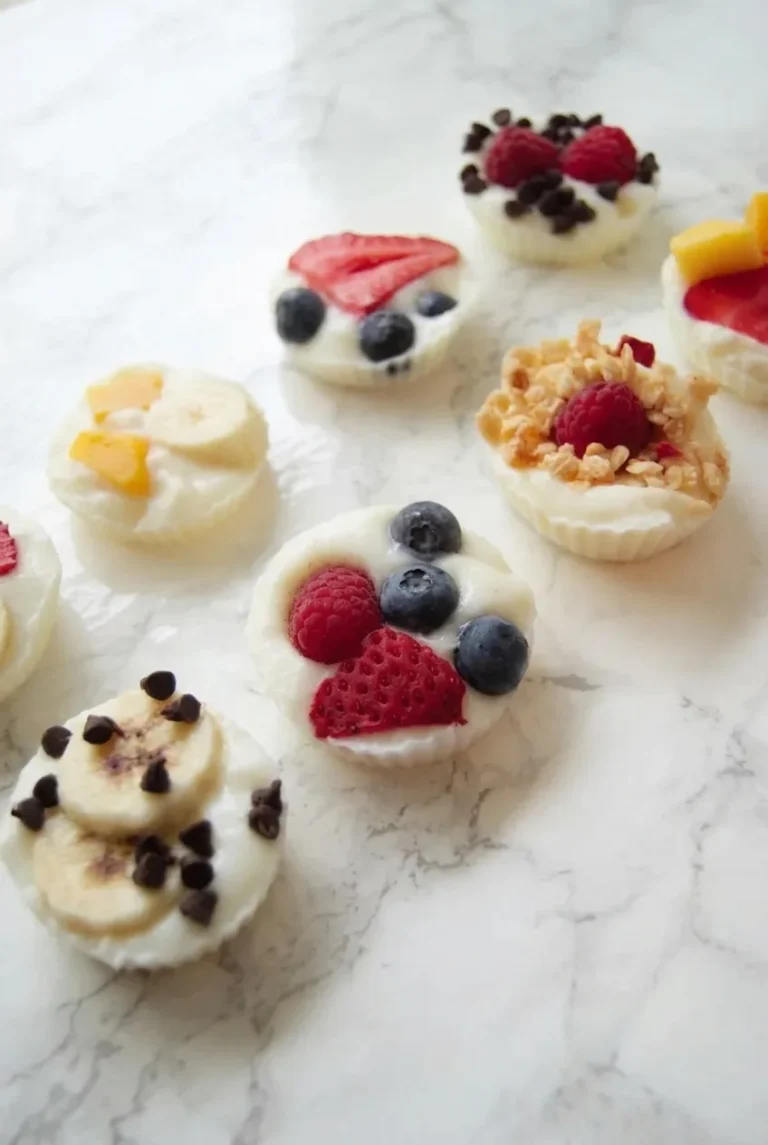
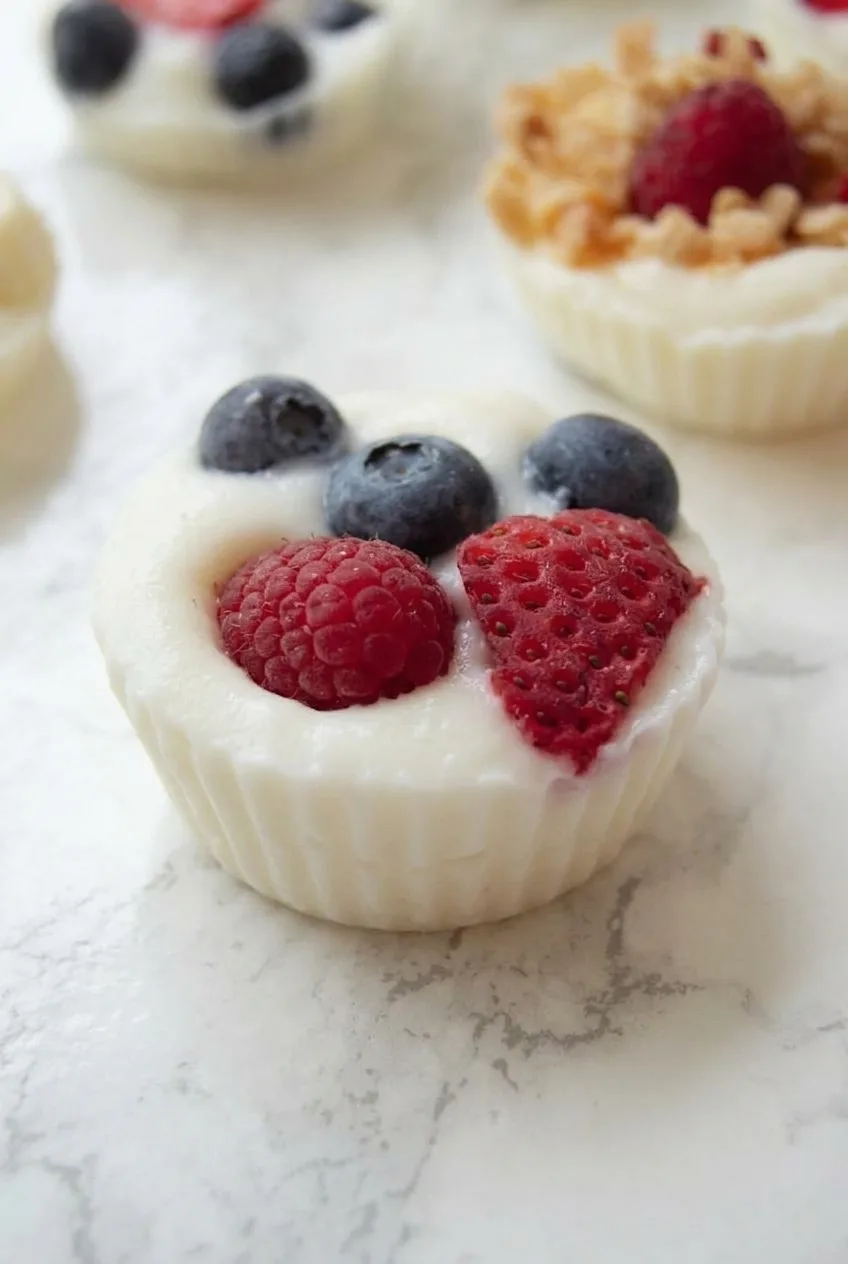
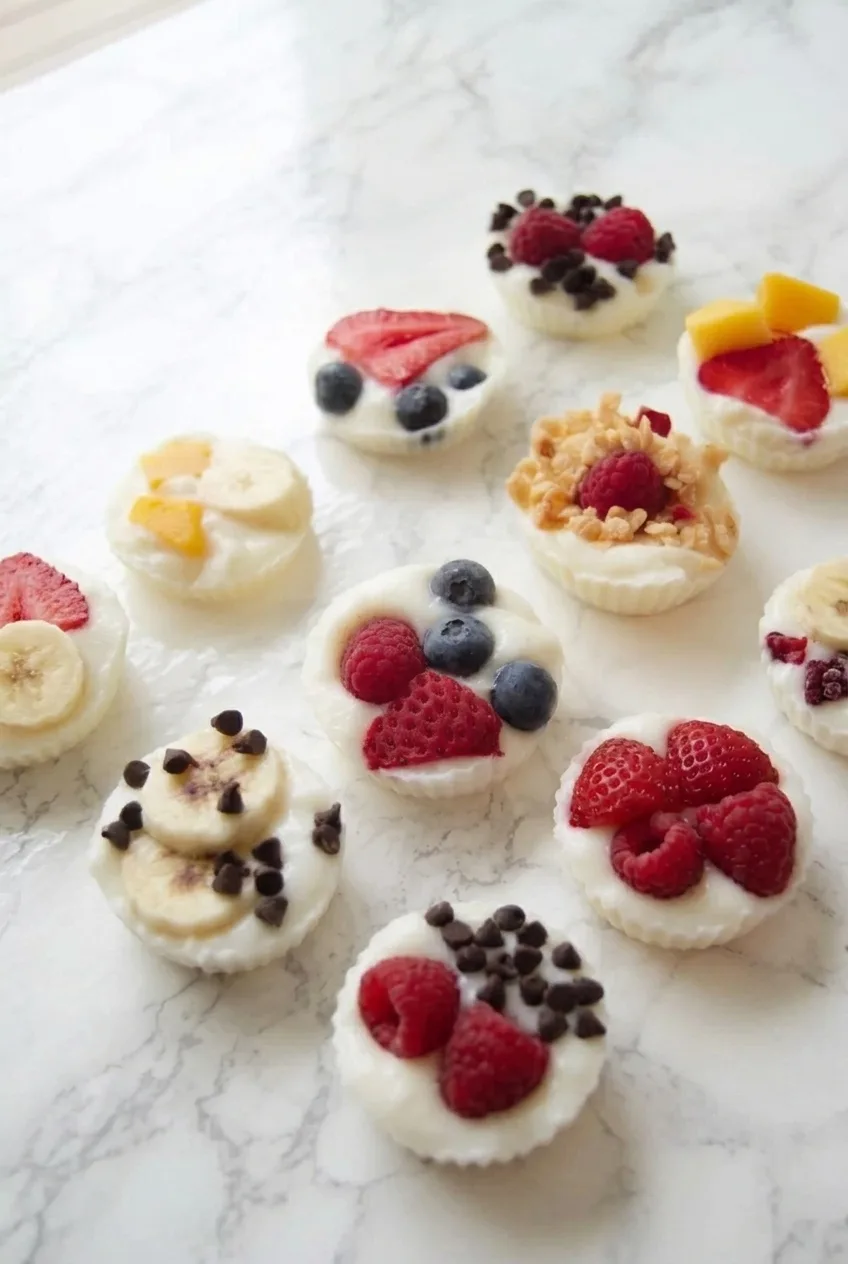
These frozen yogurt fruit bites are individual mini cups, not bark or yogurt-dipped fruit. A thick Greek yogurt base holds its shape, with berries, banana, mango, granola, and mini chocolate chips pressed into the open tops. Keep the fruit dry and the toppings partly exposed, then freeze the cups until their centers are solid enough to unmold.

Yield: About 20 mini bites, depending on mold size. Prep time: 20 minutes. Freezing time: About 3 to 4 hours.

Ingredients for Frozen Yogurt Fruit Bites

Close view of berries pressed into the top of a thick frozen yogurt mini cup
  • 2 cups plain Greek yogurt (480g)
  • 2 tablespoons maple syrup (40g)
  • 1/2 cup fresh strawberries, thinly sliced or diced (75g)
  • 1/2 cup fresh blueberries (75g)
  • 1/2 cup fresh raspberries (60g)
  • 1 small banana, thinly sliced just before assembly (about 100g)
  • 1/3 cup ripe mango, cut into small pieces (55g)
  • 1/4 cup granola (25g)
  • 2 tablespoons mini chocolate chips (20g)

You’ll also need a flexible silicone mini-muffin mold or about 20 mini silicone liners, plus a rigid tray to support them.

How to Make Frozen Yogurt Fruit Bites

Wider view of assorted frozen yogurt fruit bites on a light surface
  1. Prepare the mold and fruit: Set the silicone mold or liners on a rigid tray so they stay level. Wash and thoroughly dry the berries. Cut the strawberries and mango into small pieces, and slice the banana just before assembly.
  2. Mix the yogurt: Stir the Greek yogurt and maple syrup until evenly combined. The mixture should remain thick enough to mound softly on a spoon; do not thin it with water or fruit juice.
  3. Fill the cups: Spoon roughly 1 1/2 tablespoons of yogurt into each mini well. Adjust for your mold’s capacity and leave room for the toppings.
  4. Add the toppings: Make an assortment: berries on some cups, banana and mini chocolate chips on others, a raspberry with granola on a few, and mango on selected cups. Press each topping gently into the soft yogurt so it stays anchored but remains visible. Leave some white yogurt showing on each cup.
  5. Freeze until solid: Transfer the level tray to a standard freezer, about 0°F (-20°C), and freeze uncovered for approximately 3 to 4 hours. Start checking after 3 hours. The centers should feel solid, and the cups should not slump when you gently flex the mold.
  6. Unmold and serve: Flex the silicone to release the cups. Serve promptly, or let them stand for about 2 to 5 minutes if they are too hard to bite comfortably. Keep any remaining cups frozen.

How to Keep the Mini Cups Intact

Flexible silicone helps the frozen cups release without breaking. If using a metal mini-muffin pan, add silicone liners rather than filling the unlined wells. A cup that bends or collapses during unmolding needs more time in the freezer. Larger or more heavily filled wells may take longer than the suggested range.

Fruit and Topping Notes

Dry fruit limits extra ice on the yogurt, and small pieces fit more securely on the mini cups. Granola may soften where it touches the yogurt, so it adds variety rather than lasting crunch. Another ripe yellow fruit, cut small, can replace the mango.

For thick, already-sweetened yogurt, reduce or omit the maple syrup after tasting the mixture. Thinner yogurt may spread in the mold and freeze icier. If you have extra bananas, these peanut butter banana bites are another snack option.

Freezing and Storage

Once the bites are fully frozen, transfer them to an airtight freezer container. Separate layers if needed to avoid crushing the toppings. For best quality, aim to use them within about 2 weeks.

Take out only the portions you plan to serve. Let very hard bites soften briefly, but return them to the freezer before the yogurt starts to slump. For a different make-ahead snack, see these no-bake protein bites.

Nutrition

Approximate nutrition per mini bite, based on 20 bites: 45 calories, 3g protein, 1g fat, and 7g carbohydrates. Approximate nutrition per 100g: 95 calories, 6g protein, 2g fat, and 14g carbohydrates. Values vary with the yogurt, toppings, and size of each bite.

Frozen Yogurt Fruit Bites

Mini cups of sweetened Greek yogurt topped with fresh fruit, granola, and mini chocolate chips, then frozen until firm.
Course: Snack
Cuisine: American
Prep: 20 min
Cook: 240 min
Total: 260 min
Servings: 20 Calories: 45 kcal

Equipment

  • Silicone mini-muffin mold or mini silicone liners
  • Rigid tray

Ingredients

Yogurt Base

  • 2 cups plain Greek yogurt (480 g)
  • 2 tablespoons maple syrup (40 g)

Toppings

  • 1/2 cup fresh strawberries, thinly sliced or diced (75 g)
  • 1/2 cup fresh blueberries (75 g)
  • 1/2 cup fresh raspberries (60 g)
  • 1 small banana, thinly sliced (about 100 g)
  • 1/3 cup ripe mango, cut into small pieces (55 g)
  • 1/4 cup granola (25 g)
  • 2 tablespoons mini chocolate chips (20 g)

Instructions

  1. Set the silicone mold or liners on a rigid tray so they stay level.
  2. Wash and thoroughly dry the berries. Cut the strawberries and mango into small pieces, and slice the banana just before assembling.
  3. Stir the Greek yogurt and maple syrup until evenly combined. Keep the mixture thick; do not thin it with water or fruit juice.
  4. Spoon about 1 1/2 tablespoons of yogurt into each mini well, adjusting for the mold size and leaving room for toppings.
  5. Add an assortment of berries, banana, mango, granola, and mini chocolate chips. Press the toppings gently into the yogurt while leaving some yogurt visible.
  6. Freeze the tray uncovered at about 0°F (-20°C) for 3 to 4 hours. Start checking after 3 hours; the centers should be solid and the cups should not slump when the mold is gently flexed.
  7. Flex the silicone to release the bites. Serve promptly, or let them stand for 2 to 5 minutes if they are too hard to bite.

Tips

  • Dry the fruit thoroughly to limit extra ice on the yogurt.
  • Cut fruit into small pieces so it fits securely on the mini cups.
  • Use silicone liners if filling a metal mini-muffin pan.
  • Freeze larger or more heavily topped cups longer if they are not solid.
  • Granola may soften where it touches the yogurt.

Variations

  • Alternative Fruit: Replace the mango with another ripe yellow fruit cut into small pieces.
  • Less-Sweet Yogurt Base: Reduce or omit the maple syrup when using thick, already-sweetened yogurt.

Notes

Transfer fully frozen bites to an airtight freezer container, separating layers if needed to protect the toppings. For best quality, use within about 2 weeks. Keep frozen and return any remaining bites to the freezer before the yogurt starts to slump.

Nutrition

Calories: 45 kcal | Protein: 3 g | Fat: 1 g | Carbohydrates: 7 g | Per 100g Calories: 95 kcal | Per 100g Protein: 6 g | Per 100g Fat: 2 g | Per 100g Carbohydrates: 14 g

Apple Slices with Peanut Butter & Chocolate

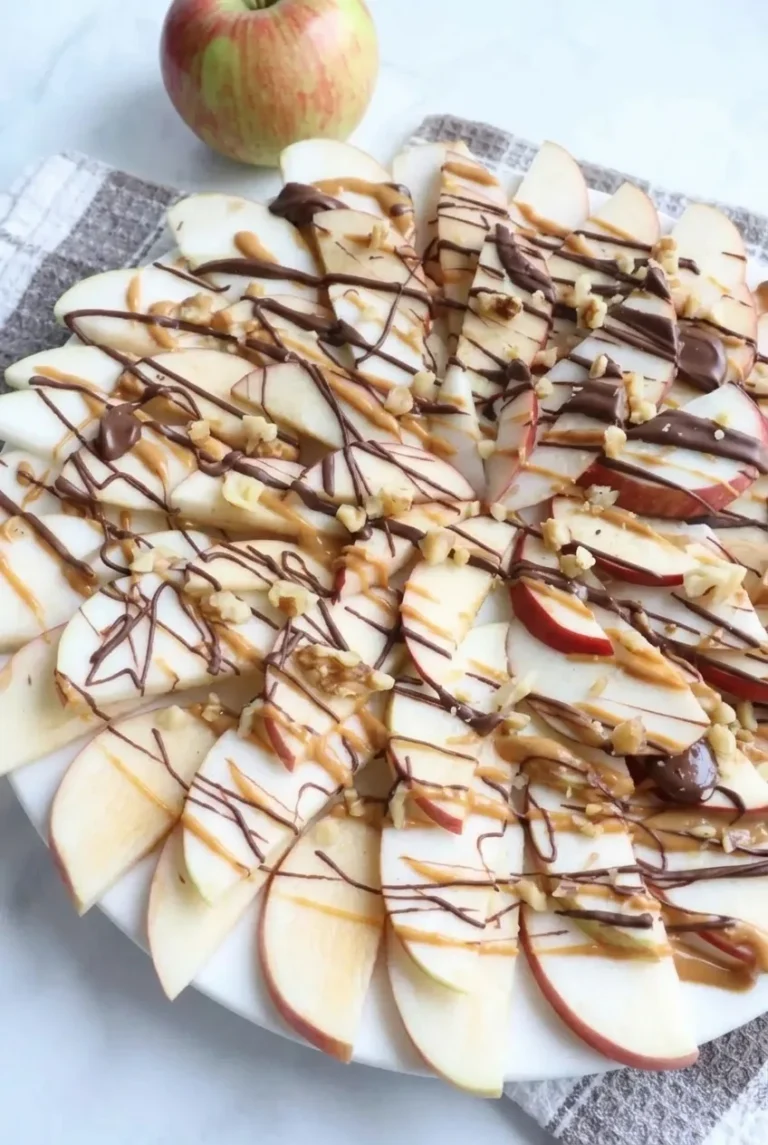
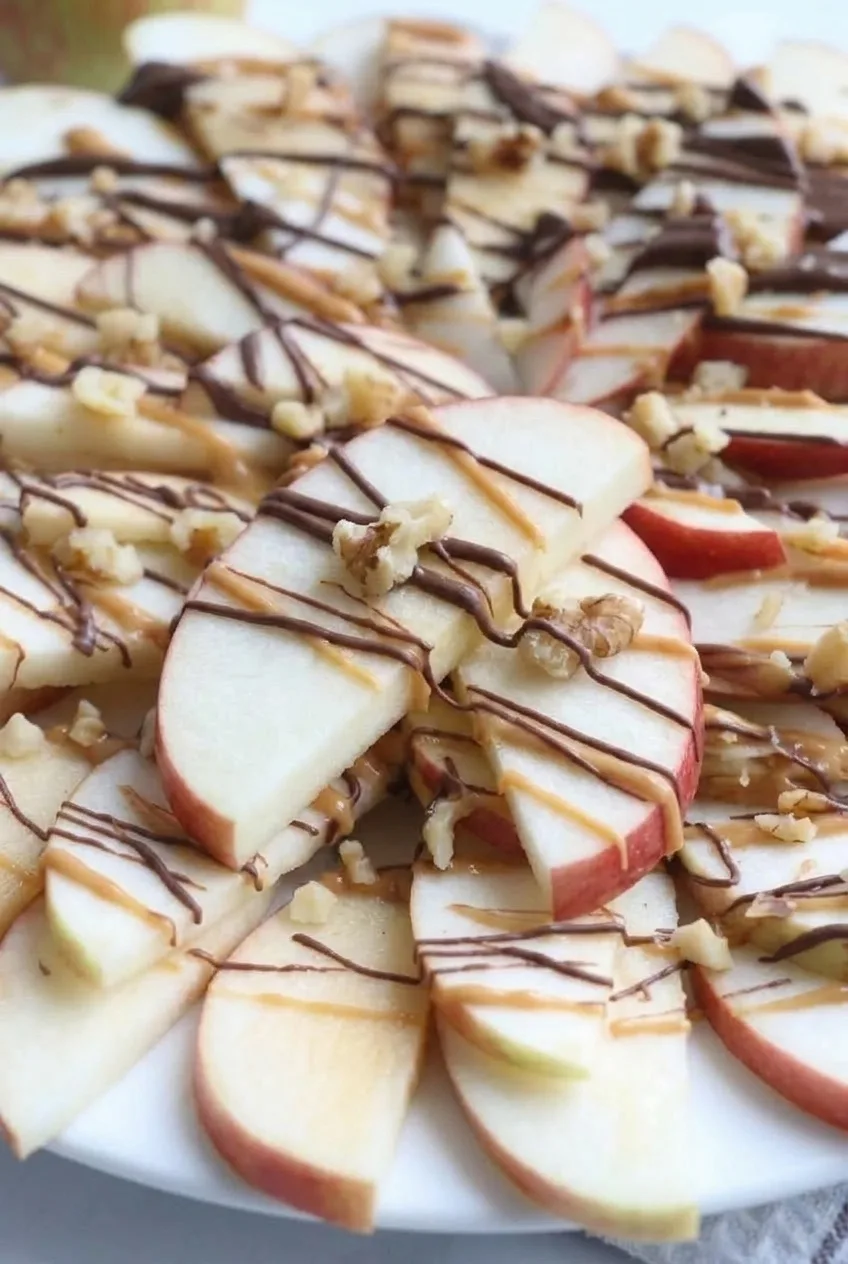
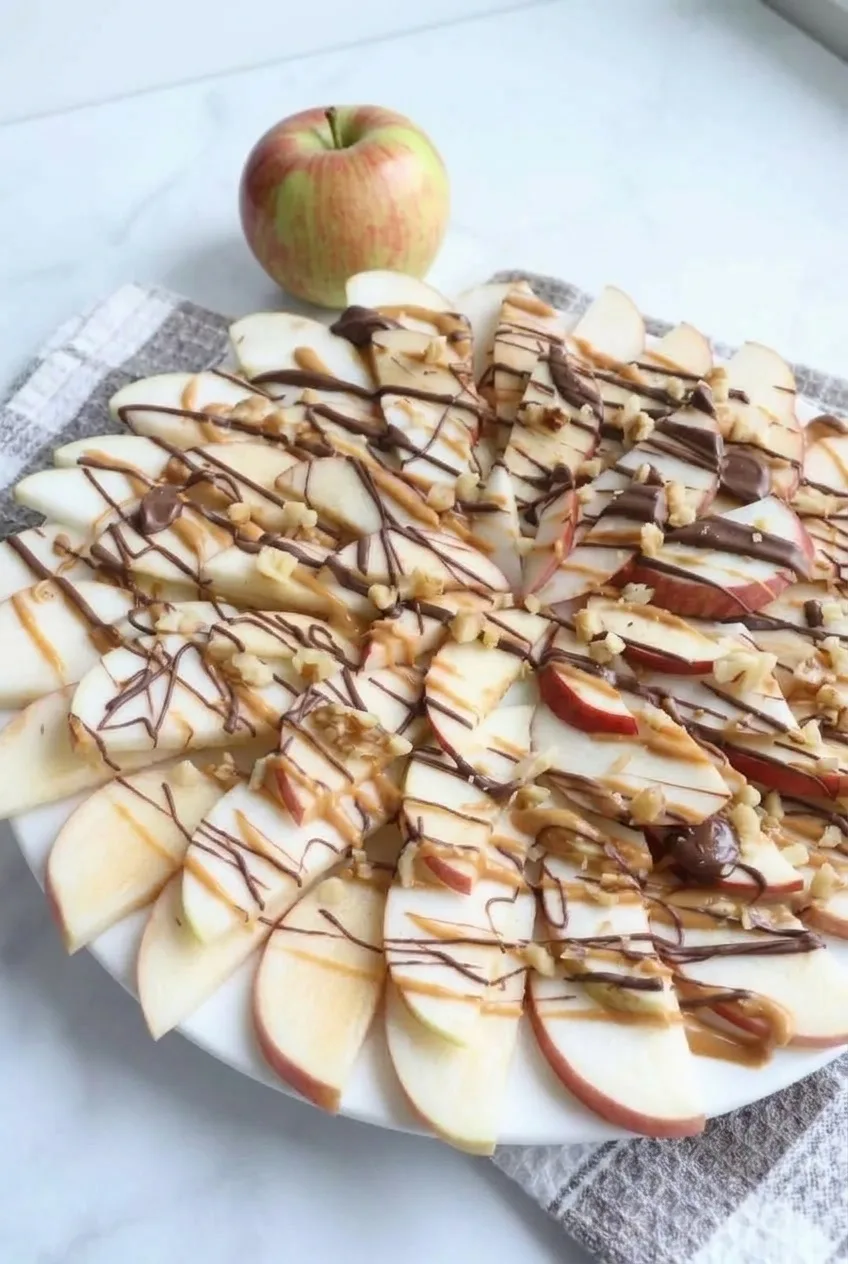
Thin, unpeeled apple wedges make a crisp base for separate peanut butter and chocolate drizzles. Loosely overlap them on a platter, leaving some pale apple flesh and red peel visible beneath the toppings, then finish with a light scattering of walnuts.

Have the toppings ready before cutting the apples. You can then assemble the platter quickly and serve it while the wedges still look fresh.

Ingredients

Close view of crisp apple wedges with separate peanut butter and chocolate lines and walnut pieces
  • 3 medium crisp red-skinned apples (about 540g total)
  • 1/4 cup creamy peanut butter (about 65g)
  • 1/4 cup dark or semisweet chocolate chips (about 45g)
  • 2 tablespoons chopped walnuts (about 15g)

Yield: 4 snack servings. Time: About 10–12 minutes, including optional microwave warming.

How to Make Apple Slices with Peanut Butter & Chocolate

Full platter of apple slices with peanut butter, chocolate, and walnuts on a light surface
  1. Ready the toppings: Chop the walnuts into small pieces. Put the peanut butter and chocolate chips in separate small microwave-safe bowls.
  2. Make the drizzles: Stir the peanut butter. If it drops from a spoon in clumps, microwave it briefly and stir until it falls in thin ribbons. Microwave the chocolate in 15–20-second intervals, stirring after each, and stop as soon as it is smooth. Let either topping cool briefly if hot.
  3. Slice and arrange the apples: Core the unpeeled apples and cut them into thin, fairly even wedges. Loosely overlap them across a large white plate or platter, leaving red peel edges visible.
  4. Drizzle and finish: Sweep the peanut butter in thin lines across the apples, then drizzle the chocolate separately over multiple wedges. Leave plenty of apple visible. Scatter the walnuts lightly over the top and serve promptly.

How to Keep the Apples Fresh-Looking

If you need to cut the apples before assembly, soak the wedges for about 5 minutes in a bowl of water mixed with 1 tablespoon lemon juice. Drain and pat them thoroughly dry before arranging and drizzling; wet surfaces can make the toppings slide off or pool beneath the apples.

Make-Ahead and Serving

You can measure the toppings and chop the walnuts ahead, but slice and assemble the apples close to serving time. Divide the finished platter among four small plates, or serve it as a shared snack.

For another peanut-butter snack, try Peanut Butter Banana Bites. For a baked apple dessert, see Classic Apple Crumb Pie.

Nutrition

Approximate per serving (one-quarter of the platter): 240 calories, 6g protein, 14g fat, and 29g carbohydrates. Approximate per 100g: 145 calories, 3g protein, 8g fat, and 18g carbohydrates. Values vary with the apples, peanut butter, and chocolate used.

Apple Slices with Peanut Butter & Chocolate

Thin apple wedges are drizzled with peanut butter and chocolate, then finished with chopped walnuts.
Course: Snack
Cuisine: American
Prep: 10 min
Cook: 2 min
Total: 12 min
Servings: 4 Calories: 240 kcal

Equipment

  • Microwave-safe bowls
  • Microwave
  • Knife
  • Apple corer
  • Large platter

Ingredients

  • 3 medium crisp red-skinned apples (about 540 g total)
  • 1/4 cup creamy peanut butter (about 65 g)
  • 1/4 cup dark or semisweet chocolate chips (about 45 g)
  • 2 tablespoons chopped walnuts (about 15 g)

Instructions

  1. Chop the walnuts into small pieces.
  2. Put the peanut butter and chocolate chips in separate microwave-safe bowls.
  3. Stir the peanut butter. If it falls from a spoon in clumps, microwave it briefly and stir until it falls in thin ribbons.
  4. Microwave the chocolate in 15–20-second intervals, stirring after each, until smooth. Let either topping cool briefly if hot.
  5. Core the unpeeled apples and cut them into thin, fairly even wedges.
  6. Arrange the wedges in a loose overlap on a large plate or platter, leaving some red peel visible.
  7. Drizzle the peanut butter in thin lines over the apples, then drizzle the chocolate separately across multiple wedges.
  8. Scatter the walnuts lightly over the top and serve promptly.

Tips

  • Prepare the toppings and chop the walnuts before cutting the apples.
  • Microwave the chocolate in short intervals and stop as soon as it is smooth.
  • Leave plenty of apple visible when drizzling the toppings.
  • If cutting apples ahead, soak the wedges for about 5 minutes in water mixed with 1 tablespoon lemon juice, then drain and pat thoroughly dry.

Notes

Slice and assemble the apples close to serving time. The finished platter can be divided among four small plates or served as a shared snack.

Nutrition

Calories: 240 kcal | Protein: 6 g | Fat: 14 g | Carbohydrates: 29 g

Cucumber Ranch Bites

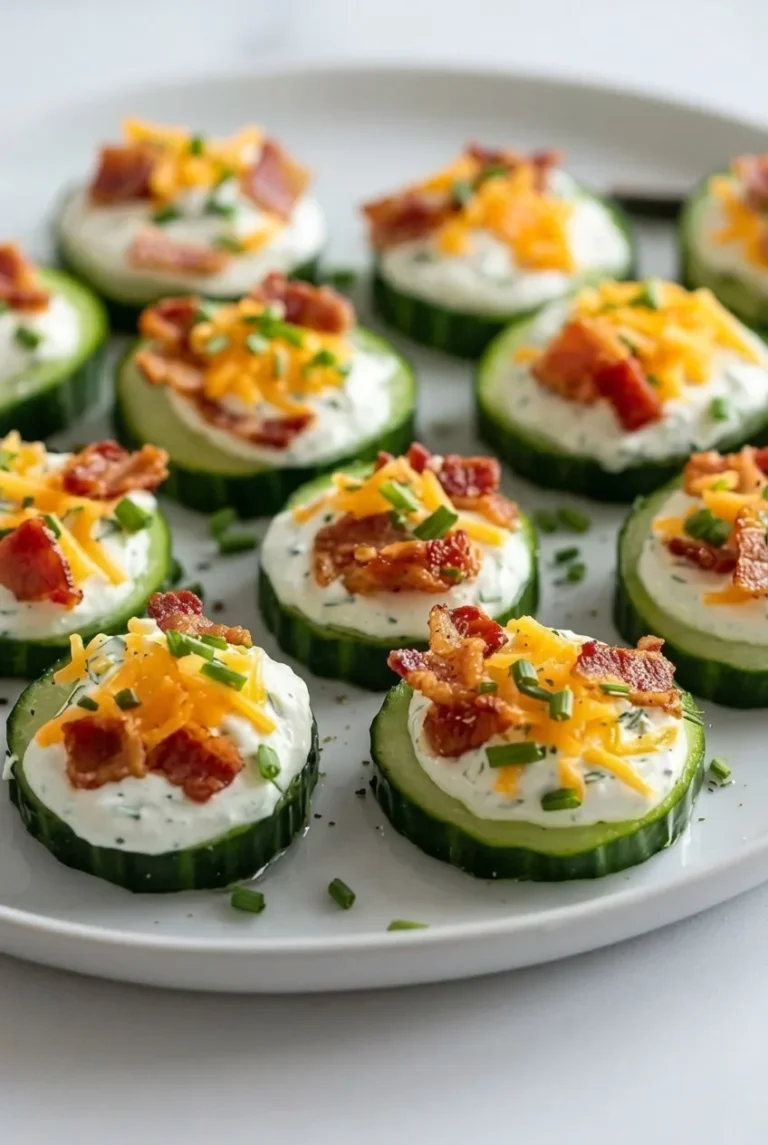
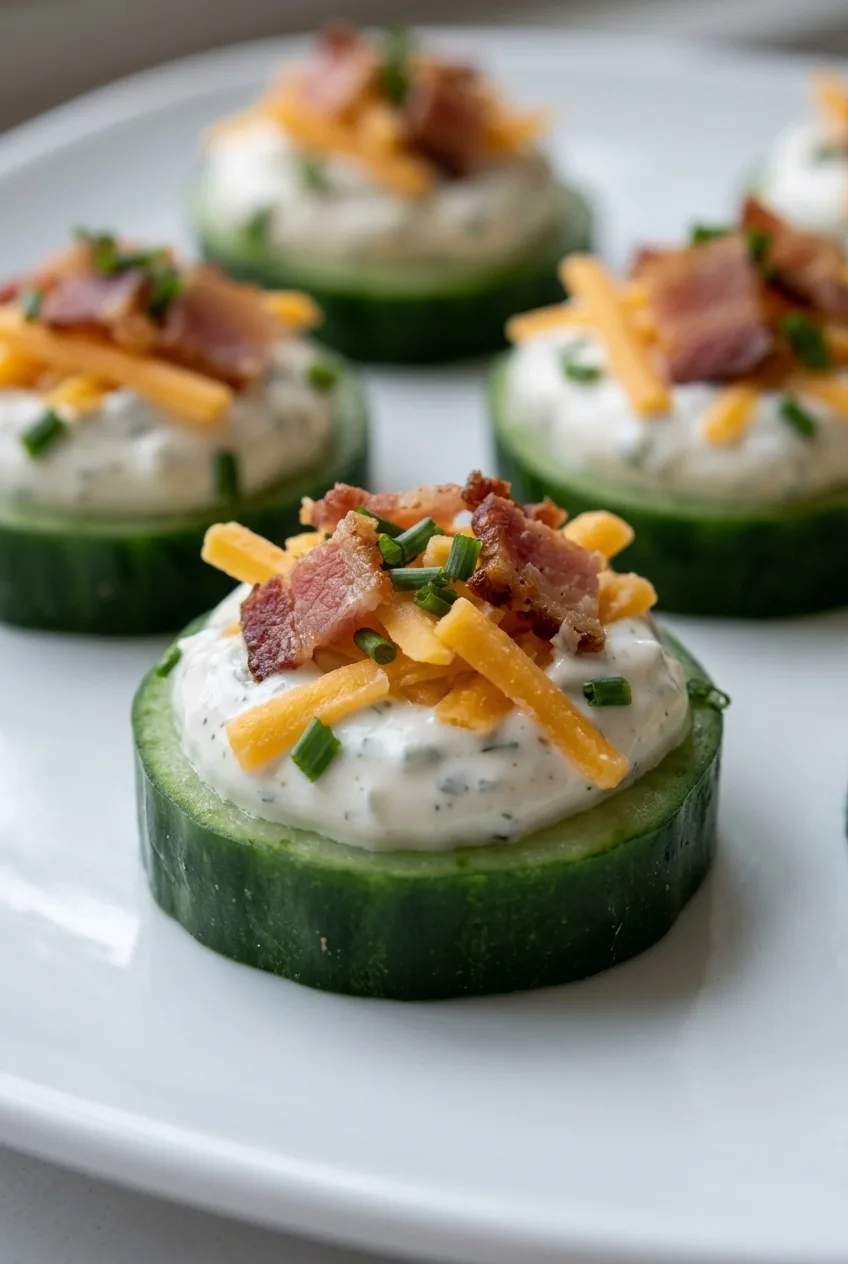
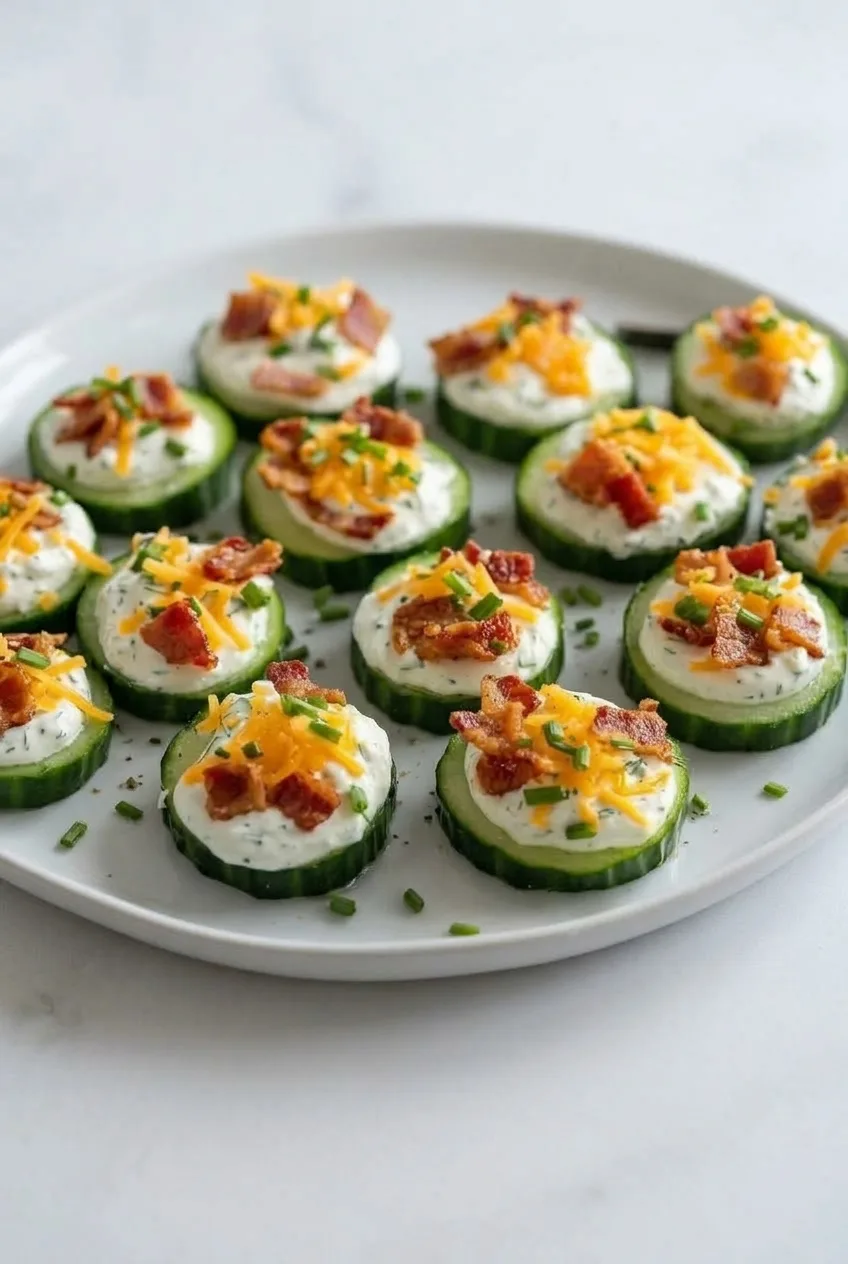
Thick, peel-on cucumber rounds hold dollops of creamy ranch filling, with shredded cheddar, bacon, and chives on top. These cold appetizers take about 20 minutes to assemble when the bacon is already cooked. Pat the cucumber dry and keep the filling thick enough to mound; those two steps help the topping stay put instead of sliding onto a watery platter.

Ingredients for Cucumber Ranch Bites

Close view of thick cucumber rounds topped with mounded ranch filling, cheddar, bacon and chives
  • 1 large English cucumber (about 350g), cut into roughly 1/2-inch rounds
  • 4 ounces cream cheese (about 115g), softened
  • 2 tablespoons sour cream (30g)
  • 1 tablespoon dry ranch seasoning mix, or to taste
  • 1/3 cup shredded cheddar cheese (about 40g)
  • 4 slices fully cooked, cooled bacon (about 30g), crumbled or chopped
  • 1 tablespoon finely chopped fresh chives

One large cucumber makes about 20 to 24 bites, depending on its size. Ranch seasoning, cheddar, and bacon all add salt, so taste the filling before adding more seasoning or any salt.

How to Make Cucumber Ranch Bites

Full platter of cucumber ranch bites on a light surface, with cheddar, bacon and chives visible
  1. Prepare the toppings: Chop the fully cooked, cooled bacon into small pieces. Shred the cheddar if needed and finely chop the chives.
  2. Mix the filling: Stir the softened cream cheese, sour cream, and ranch seasoning in a small bowl until smooth. Taste and adjust the ranch seasoning if needed. The filling should be spreadable but thick enough to hold a mound on a spoon.
  3. Slice and dry the cucumber: Cut it into roughly 1/2-inch rounds, leaving the peel on. Pat both cut sides dry with paper towels, then arrange the rounds in a single layer on a platter.
  4. Assemble the bites: Spoon or pipe a generous dollop of filling onto each round. Add cheddar and bacon, then finish with chives so each topping remains visible.
  5. Serve cool: Serve soon after assembly, or refrigerate the platter until serving time.

How to Keep Cucumber Bites from Getting Watery

Thick rounds provide a sturdy base, while dry cut surfaces help the filling stay in place. Keep the ranch mixture thick rather than thinning it to dressing consistency; bottled ranch dressing is too pourable to form these dollops. Assemble close to serving, and add the bacon at the end so it spends less time against the moist filling.

Serving Cucumber Ranch Bites

Serve the bites cool as a finger-food appetizer. For a larger option on the same appetizer table, add an everything ranch cheese ball.

Make-Ahead and Storage

Keep the ranch filling and fully cooked bacon separately covered in the refrigerator. Slice and dry the cucumber near serving time, then assemble the bites. If starting with raw bacon, cook it separately until fully cooked and let it cool; this adds time beyond the 20-minute prep.

Refrigerate assembled leftovers promptly in a covered container and prioritize eating them the day they are made. The cucumber can release water as it sits. Do not reheat or freeze the bites; thawed cucumber loses its crispness. Do not leave the platter at room temperature for more than 2 hours, or more than 1 hour above 90°F (30°C).

Nutrition

Approximate nutrition per serving, based on 8 appetizer servings of about 2 to 3 bites each: 105 calories, 4g protein, 9g fat, and 3g carbohydrates. Per 100g: about 150 calories, 5g protein, 12g fat, and 5g carbohydrates. Values vary with ingredient brands, cucumber size, and the number of bites made.

Cucumber Ranch Bites

Cucumber rounds topped with thick ranch cream cheese filling, cheddar, bacon, and chives make a cool, easy appetizer.
Course: Appetizer
Cuisine: American
Prep: 20 min
Total: 20 min
Servings: 8 Calories: 105 kcal

Equipment

  • Cutting board
  • Knife
  • Small bowl
  • Paper towels
  • Serving platter

Ingredients

For the Bites

  • 1 large English cucumber (about 350 g), cut into roughly 1/2-inch rounds
  • 4 ounces cream cheese (about 115 g), softened
  • 2 tablespoons sour cream (30 g)
  • 1 tablespoon dry ranch seasoning mix, or to taste
  • 1/3 cup shredded cheddar cheese (about 40 g)
  • 4 slices fully cooked, cooled bacon (about 30 g), crumbled or chopped
  • 1 tablespoon finely chopped fresh chives

Instructions

  1. Chop the fully cooked, cooled bacon into small pieces. Shred the cheddar if needed and finely chop the chives.
  2. Stir the cream cheese, sour cream, and ranch seasoning in a small bowl until smooth. Taste and adjust the ranch seasoning as needed.
  3. Cut the cucumber into roughly 1/2-inch rounds, leaving the peel on. Pat both cut sides dry with paper towels and arrange the rounds on a platter.
  4. Spoon or pipe a generous dollop of filling onto each cucumber round.
  5. Top with cheddar and bacon, then finish with chives.
  6. Serve soon after assembling, or refrigerate the platter until serving.

Tips

  • Pat the cucumber rounds dry so the filling stays in place.
  • Keep the filling thick enough to mound; bottled ranch dressing is too thin.
  • Taste the filling before adding extra seasoning or salt, since the ranch mix, cheddar, and bacon are already salty.
  • Add the bacon near serving time to limit how long it sits against the moist filling.
  • Assemble close to serving time to help keep the cucumber crisp.

Notes

Store filling and cooked bacon separately, covered in the refrigerator, and slice the cucumber near serving time. Refrigerate leftovers promptly and eat them the day they are made. Do not reheat or freeze. Do not leave out for more than 2 hours, or 1 hour above 90°F (30°C).

Nutrition

Calories: 105 kcal | Protein: 4 g | Fat: 9 g | Carbohydrates: 3 g

Healthy Chocolate Chip Muffins

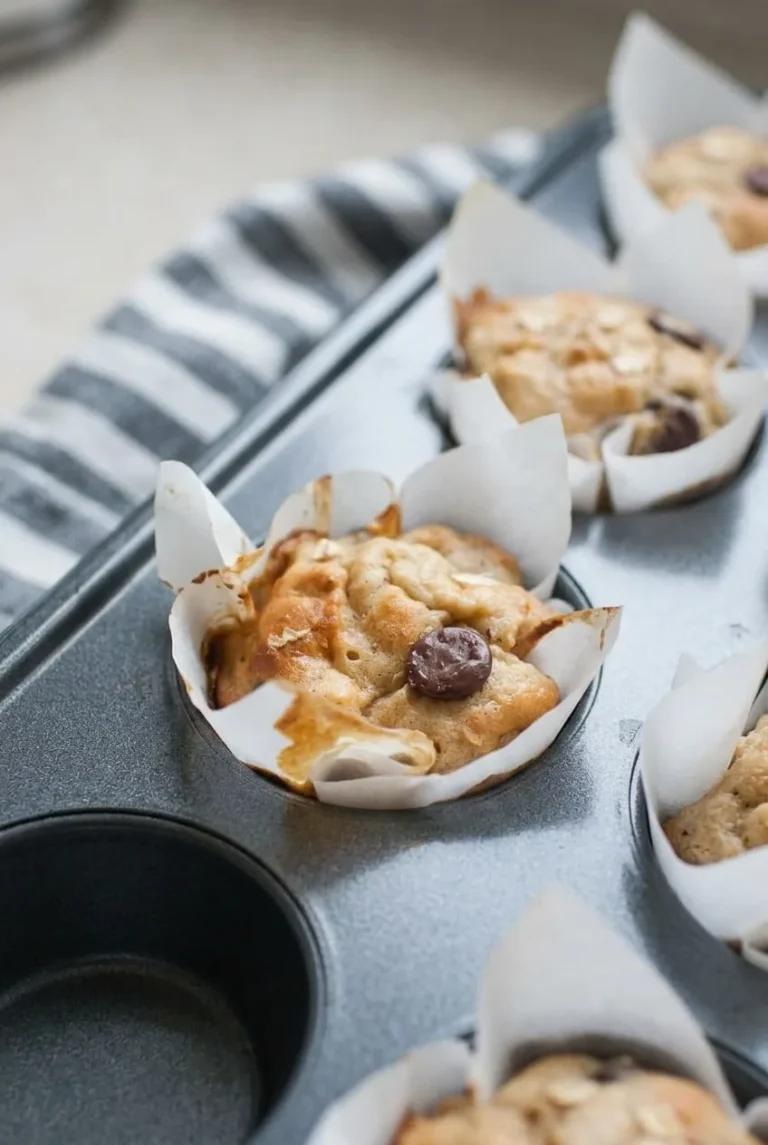
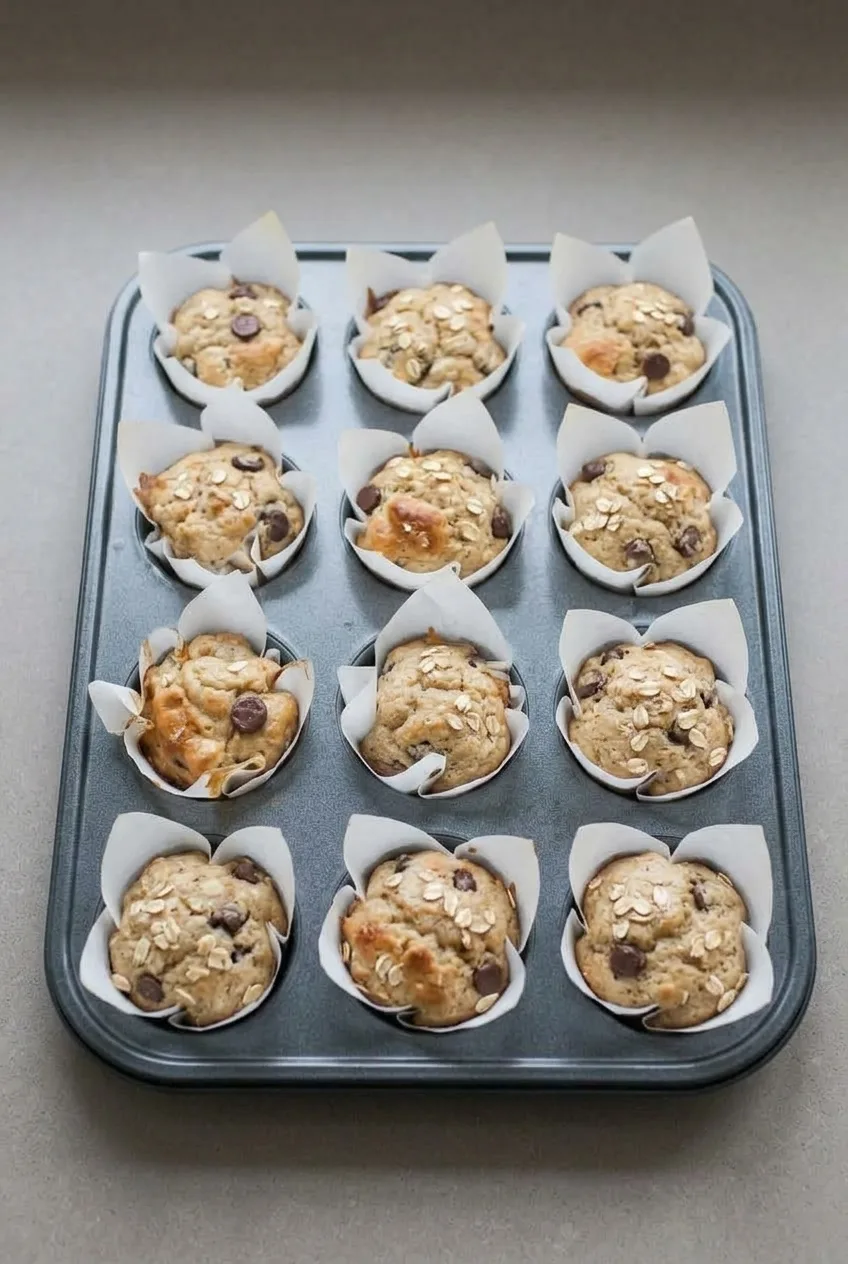
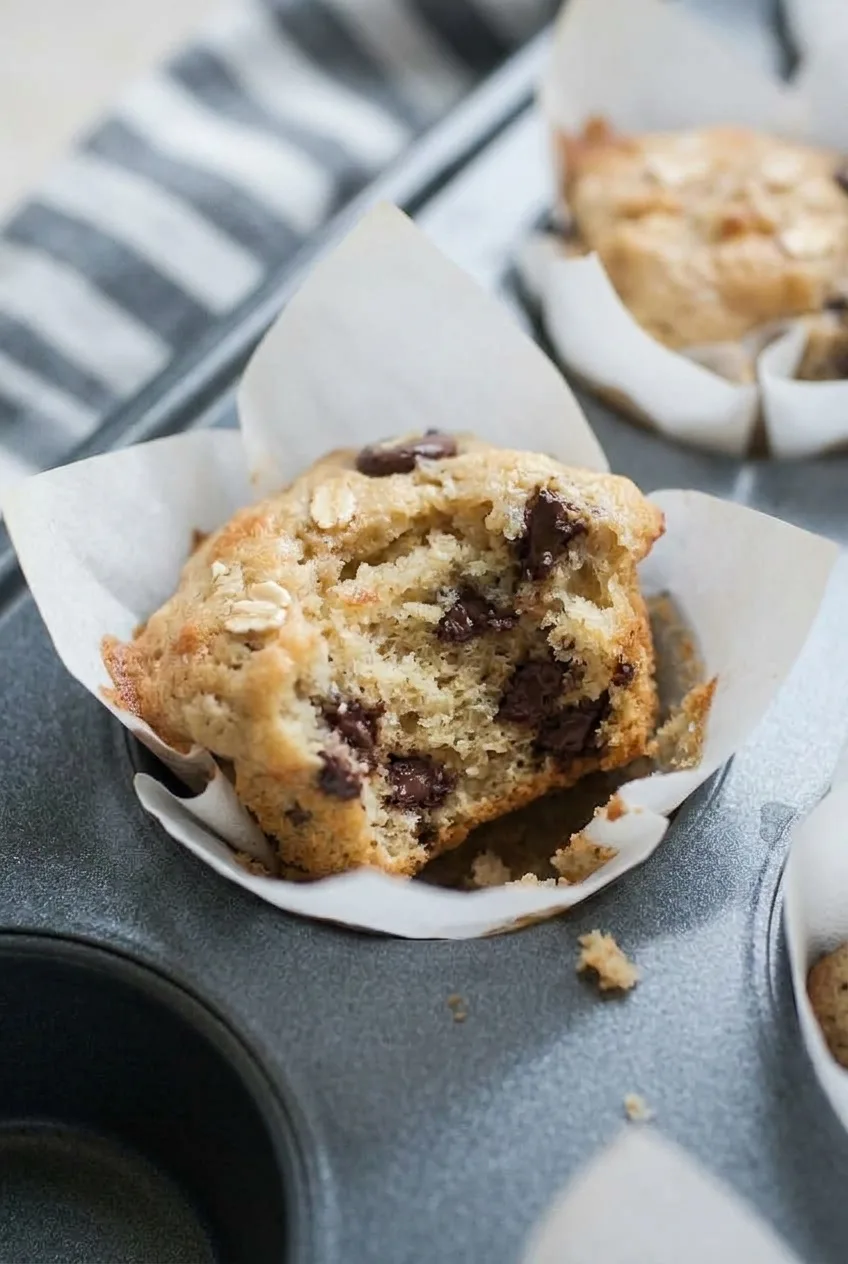
These standard-size chocolate chip muffins have tender, lightly golden tops with visible chips and a few oat flakes. Greek yogurt, white whole wheat flour, and rolled oats give the batter its character, while a little oil helps keep the crumb soft. They’re plain chocolate chip muffins—not banana or double chocolate.

The batter should be thick enough to scoop into parchment tulip liners. Fold it gently and start checking for doneness at 19 minutes: a springy top and a toothpick without wet batter are more reliable than the clock alone. The recipe makes 12 muffins and takes about 45 minutes, including an initial cooling period.

Ingredients for Healthy Chocolate Chip Muffins

Wider view of a pan of golden chocolate chip muffins in white parchment tulip liners
  • 3/4 cup white whole wheat flour (90g)
  • 3/4 cup all-purpose flour (90g)
  • 1/2 cup old-fashioned rolled oats, plus 1 tablespoon for the tops (about 50g total)
  • 2 teaspoons baking powder (8g)
  • 1/2 teaspoon baking soda
  • 1/4 teaspoon fine salt
  • 2 large eggs
  • 3/4 cup plain Greek yogurt (170g)
  • 1/3 cup milk (80g)
  • 1/3 cup pure maple syrup (105g)
  • 2 tablespoons packed light brown sugar (25g)
  • 1/4 cup neutral oil (55g)
  • 1 teaspoon vanilla extract
  • 1/2 cup semisweet chocolate chips (85g), with about 2 tablespoons reserved for the tops
  • Nonstick cooking spray, for the parchment liners
Broken-open chocolate chip muffin showing a tender golden crumb and chocolate chips inside its parchment liner

How to Bake Chocolate Chip Muffins

  1. Preheat and line the pan: Heat the oven to 350°F (175°C) with a rack in the center. Fit a 12-cup standard muffin pan with white parchment tulip liners. To make your own, press approximately 5-inch parchment squares into the wells with a small drinking glass, leaving pointed folds above the pan. Lightly spray the inside of each liner.
  2. Mix the dry ingredients: Whisk both flours, the 1/2 cup oats, baking powder, baking soda, and salt in a bowl.
  3. Mix the wet ingredients: In a separate bowl, whisk the eggs, yogurt, milk, maple syrup, brown sugar, oil, and vanilla until no large streaks of yogurt remain.
  4. Fold the batter: Add the wet mixture to the dry mixture and fold just until no dry flour remains. Fold in the chocolate chips, except for the reserved 2 tablespoons. Small lumps are fine; the batter should be thick and scoopable, not pourable.
  5. Fill and top: Divide the batter among the 12 liners, filling each about three-quarters to four-fifths full and keeping the batter below the upper parchment folds. Scatter the reserved chips and 1 tablespoon oats sparingly over the tops.
  6. Bake: Bake uncovered for 19 to 23 minutes, starting checks at 19 minutes. The tops should be set, lightly golden in patches, and spring back gently. A toothpick inserted away from a chocolate chip should come out without wet batter; a few moist crumbs are fine.
  7. Cool: Let the muffins rest in the pan for about 5 minutes, then transfer them to a wire rack. Let them cool before peeling away the parchment and cool completely before storing.

How to Keep the Muffins Tender

Mixing the wet and dry ingredients separately helps limit stirring once the flour is added. Stop folding when the dry flour disappears. Continuing to mix can make the muffins dense, and there’s no need to smooth out small lumps in the thick batter.

Parchment Liners and Easy Release

Tall parchment folds leave room for the muffins to rise above the pan. Lightly spray the liner interiors before filling them: this yogurt-containing batter may cling to uncoated paper. Wait until the muffins have cooled before peeling the liners so less crumb comes away.

How to Tell When the Muffins Are Done

A brown streak on a toothpick may be melted chocolate rather than unbaked batter. If the tester passes through a chip, check another spot. Look for set, springy tops and no wet batter on the second test.

Storage and Freezing

Cool the muffins completely before sealing them; packing them warm traps condensation and can make the tops soggy. Store airtight at room temperature for up to 3 days. A paper towel in the container can help absorb excess moisture.

For longer storage, wrap fully cooled muffins individually or place them in a freezer-safe container and freeze for up to 2 months. Thaw at room temperature. If desired, warm an individual muffin in the microwave for about 15 to 20 seconds.

For another muffin option, try these Protein Blueberry Muffins. For a fruit-forward batch, see these Cranberry Orange Muffins.

Nutrition

Approximate nutrition per muffin, based on 12 muffins: 205 calories, 7g protein, 8g fat, and 28g carbohydrates. Per 100g of baked muffin: approximately 305 calories, 11g protein, 13g fat, and 41g carbohydrates. Values are estimates and will vary with ingredients and the muffins’ weight after baking.

Healthy Chocolate Chip Muffins

Tender chocolate chip muffins made with Greek yogurt, white whole wheat flour, and rolled oats.
Course: Breakfast
Cuisine: American
Prep: 17 min
Cook: 23 min
Total: 45 min
Servings: 12 Calories: 205 kcal

Equipment

  • 12-cup standard muffin pan
  • Parchment tulip liners
  • Mixing bowls
  • Whisk
  • Wire rack

Ingredients

For the batter

  • 3/4 cup white whole wheat flour (90 g)
  • 3/4 cup all-purpose flour (90 g)
  • 1/2 cup old-fashioned rolled oats (about 50 g total, including topping oats)
  • 2 teaspoons baking powder (8 g)
  • 1/2 teaspoon baking soda
  • 1/4 teaspoon fine salt
  • 2 large eggs
  • 3/4 cup plain Greek yogurt (170 g)
  • 1/3 cup milk (80 g)
  • 1/3 cup pure maple syrup (105 g)
  • 2 tablespoons packed light brown sugar (25 g)
  • 1/4 cup neutral oil (55 g)
  • 1 teaspoon vanilla extract
  • 1/2 cup semisweet chocolate chips (85 g)

For topping and the pan

  • About 2 tablespoons chocolate chips, reserved for the tops
  • 1 tablespoon rolled oats, reserved for the tops
  • Nonstick cooking spray, for the parchment liners

Instructions

  1. Preheat the oven to 350°F (175°C) with a rack in the center. Fit a 12-cup muffin pan with parchment tulip liners and lightly spray the inside of each liner.
  2. Whisk both flours, 1/2 cup rolled oats, baking powder, baking soda, and salt in a bowl.
  3. In a separate bowl, whisk the eggs, yogurt, milk, maple syrup, brown sugar, oil, and vanilla until no large streaks of yogurt remain.
  4. Add the wet mixture to the dry ingredients and fold just until no dry flour remains.
  5. Fold in the chocolate chips, leaving about 2 tablespoons aside for topping. The batter should be thick and scoopable; small lumps are fine.
  6. Divide the batter among the liners, filling each about three-quarters to four-fifths full and keeping the batter below the upper parchment folds.
  7. Scatter the reserved chocolate chips and 1 tablespoon of oats over the muffin tops.
  8. Bake for 19 to 23 minutes, checking from 19 minutes. The tops should be set and spring back gently, and a toothpick inserted away from a chocolate chip should come out without wet batter.
  9. Rest the muffins in the pan for about 5 minutes, then transfer them to a wire rack. Cool before peeling away the parchment, and cool completely before storing.

Tips

  • Fold the batter just until the dry flour disappears to help keep the muffins tender.
  • Leave small lumps in the thick batter rather than mixing it smooth.
  • Check doneness from 19 minutes; a toothpick that hits a chocolate chip may show melted chocolate.
  • Lightly spray the parchment liners to help prevent the yogurt-containing batter from sticking.
  • Let muffins cool before peeling off the parchment to keep crumbs from coming away.

Notes

Cool completely before storing airtight at room temperature for up to 3 days, or freeze for up to 2 months. Thaw at room temperature; warm an individual muffin in the microwave for 15 to 20 seconds if desired.

Nutrition

Calories: 205 kcal | Protein: 7 g | Fat: 8 g | Carbohydrates: 28 g | Per 100g Calories: 305 kcal | Per 100g Protein: 11 g | Per 100g Fat: 13 g | Per 100g Carbohydrates: 41 g