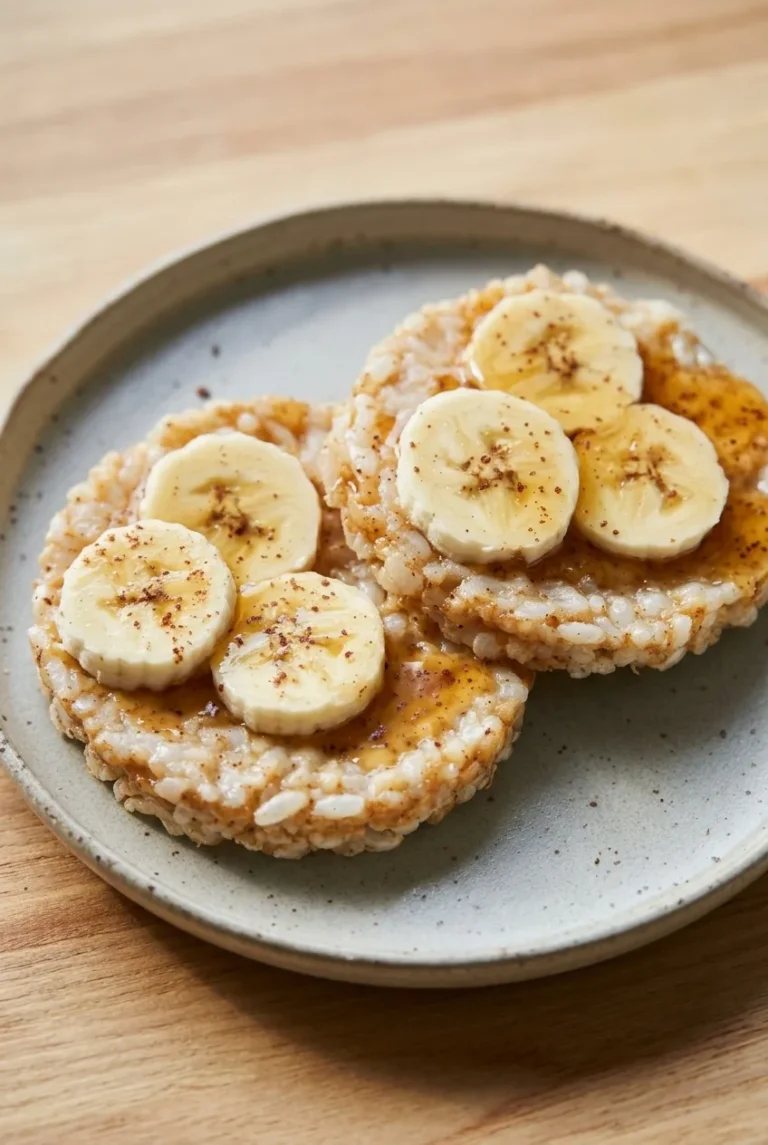
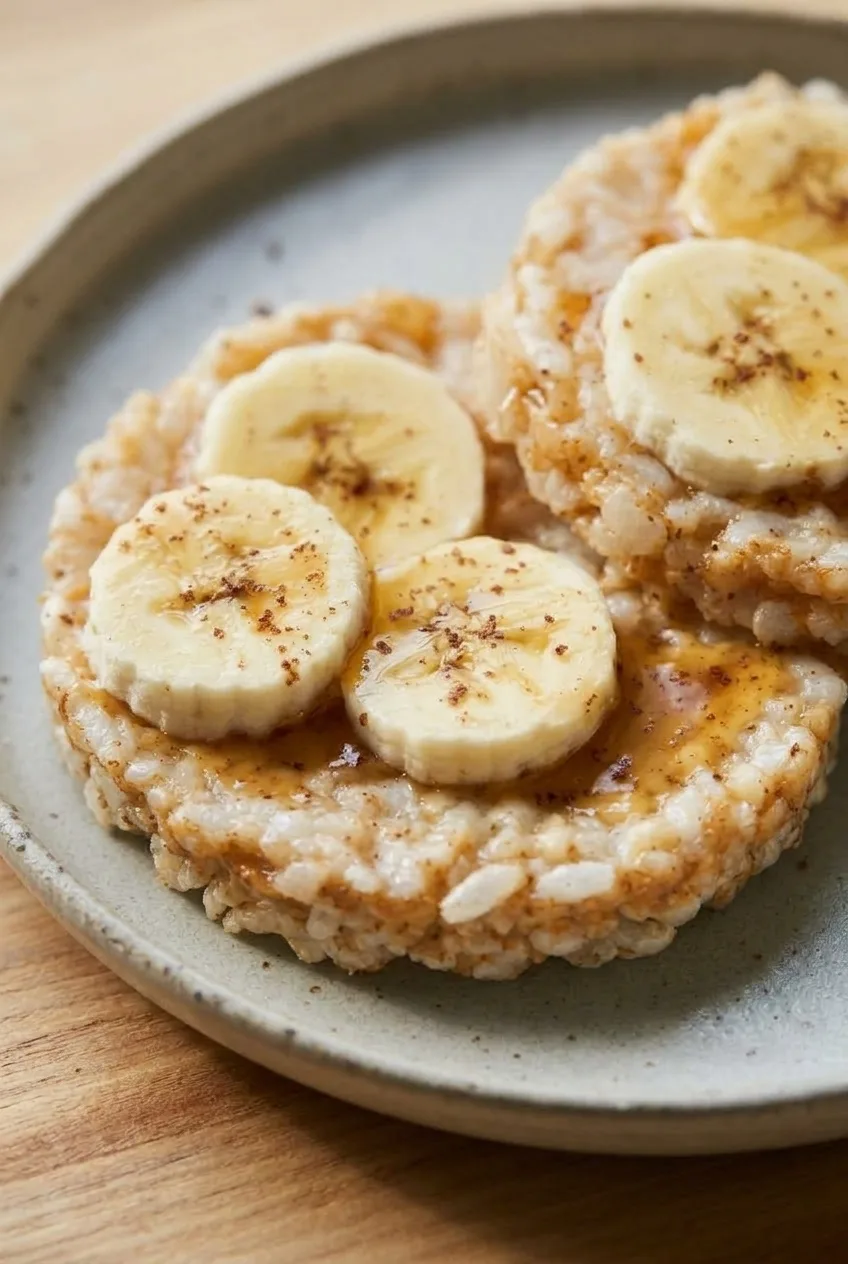
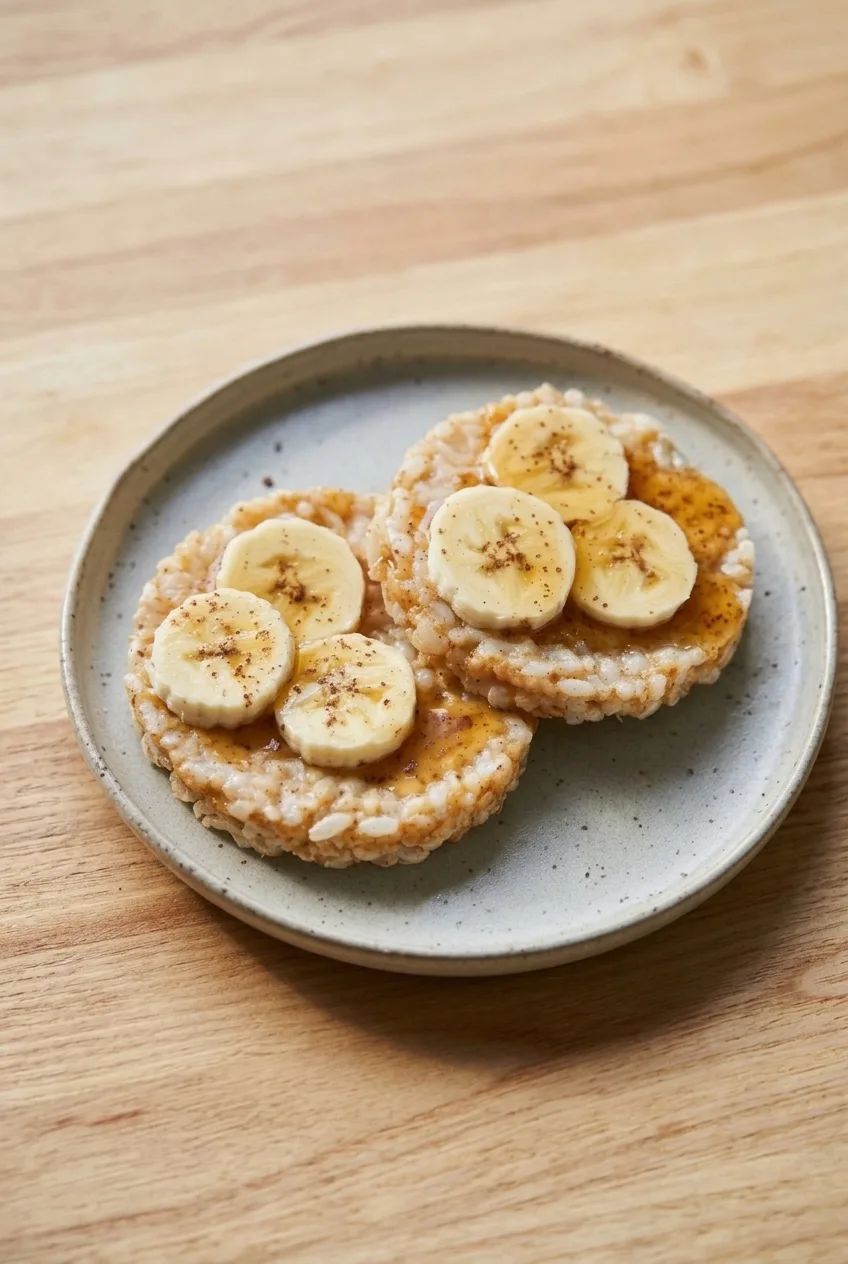
Crisp rice cakes, creamy peanut butter, and soft banana make a quick no-cook snack. Honey and a light sprinkle of cinnamon finish the two cakes without hiding their puffed-rice edges. Spread the peanut butter beneath the banana to help the slices stay in place, and assemble the cakes just before eating so they stay crisp.
Ingredients for Rice Cakes with Peanut Butter & Banana
2 plain round rice cakes (about 20g)
2 tablespoons creamy peanut butter (about 30g)
1 medium ripe banana, cut into at least 6 thick rounds
2 teaspoons honey (about 15g)
1/8 teaspoon ground cinnamon
How to Make Peanut Butter and Banana Rice Cakes
Spread the peanut butter: Place the two whole rice cakes on a plate. Spread 1 tablespoon peanut butter evenly over each, leaving a little puffed-rice rim exposed.
Add the banana: Arrange three fresh banana rounds on each cake. Press them gently into the peanut butter so they stay in place.
Finish and serve: Drizzle 1 teaspoon honey over each cake, distributing it across the banana rather than pouring it in one spot. Sprinkle both cakes lightly with cinnamon and serve promptly.
How to Keep the Rice Cakes Crisp
Fresh banana and honey will soften the rice cakes as they sit. Keep the ingredients separate until serving, then spread, top, and drizzle. You can measure the peanut butter and honey ahead, but slice the banana shortly before assembly. Freezing the assembled cakes is not a reliable way to preserve their crispness.
Simple Ingredient Swaps
Almond, cashew, or hazelnut butter can replace the peanut butter, though the flavor and appearance will change. If using powdered peanut butter, mix it with water until spreadable; do not sprinkle it on dry. Banana chips add crunch but will not give the cakes the soft fresh-banana topping used here.
1 medium ripe banana, cut into at least 6 thick rounds
2 teaspoons honey (about 15 g)
1/8 teaspoon ground cinnamon
Instructions
Place the rice cakes on a plate.
Spread 1 tablespoon of peanut butter over each rice cake, leaving a little rim exposed.
Arrange three banana rounds on each cake and press them gently into the peanut butter.
Drizzle 1 teaspoon of honey over each cake.
Sprinkle both cakes lightly with cinnamon and serve promptly.
Tips
Assemble the cakes just before eating to keep them crisp.
Spread the peanut butter beneath the banana to help the slices stay in place.
Drizzle the honey across the banana instead of pouring it in one spot.
Slice the banana shortly before assembly.
Variations
Alternative Nut Butter: Replace the peanut butter with almond, cashew, or hazelnut butter.
Powdered Peanut Butter: Mix powdered peanut butter with water until spreadable before adding it to the rice cakes.
Banana Chips: Use banana chips for a crunchy topping instead of fresh banana.
Notes
Fresh banana and honey soften rice cakes as they sit. Keep ingredients separate until serving; freezing assembled cakes will not reliably preserve their crispness.
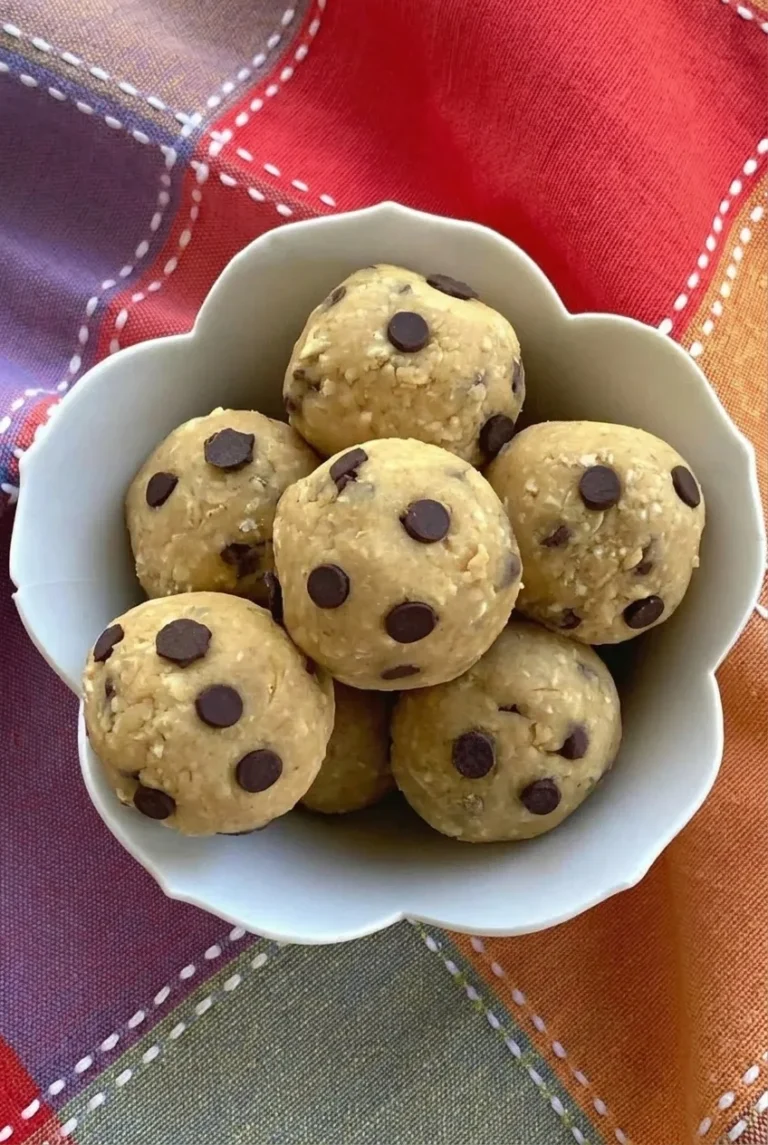
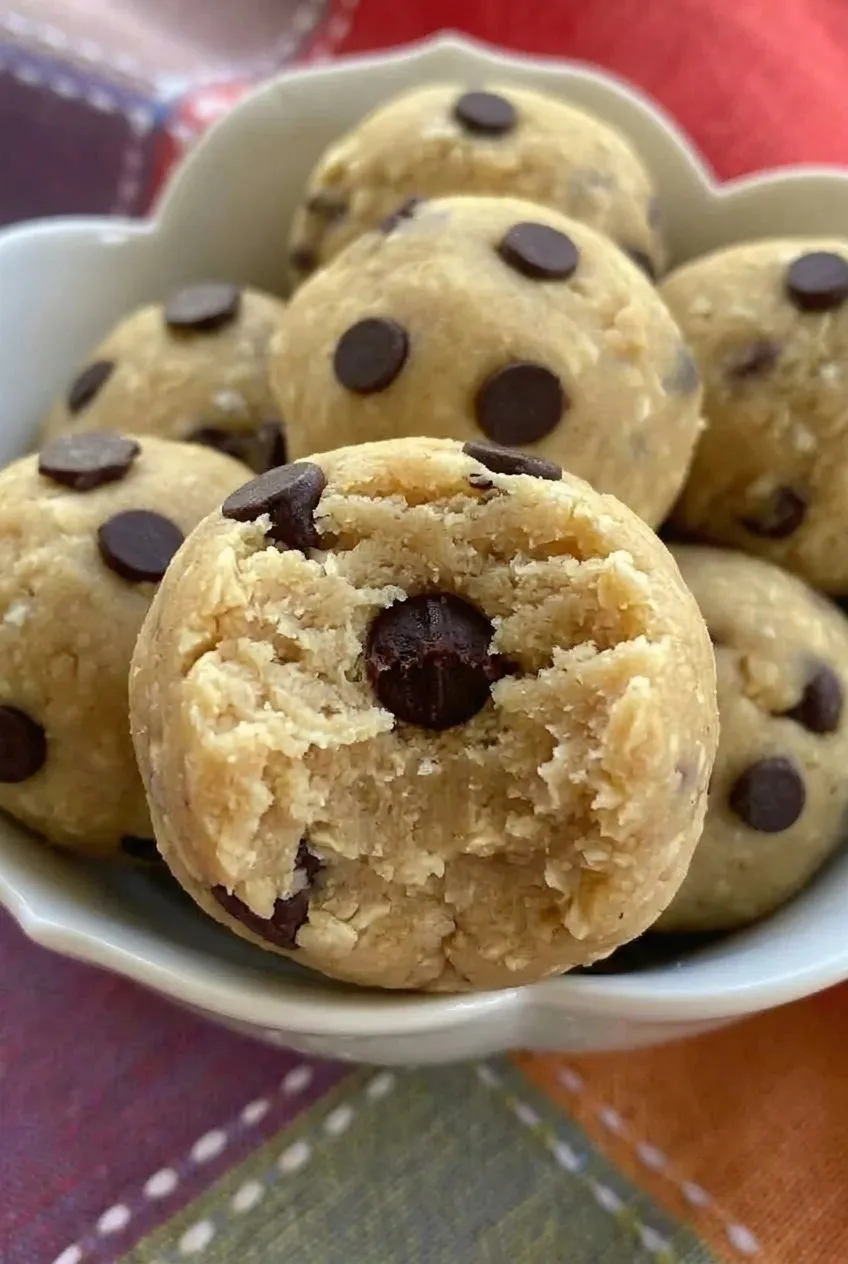
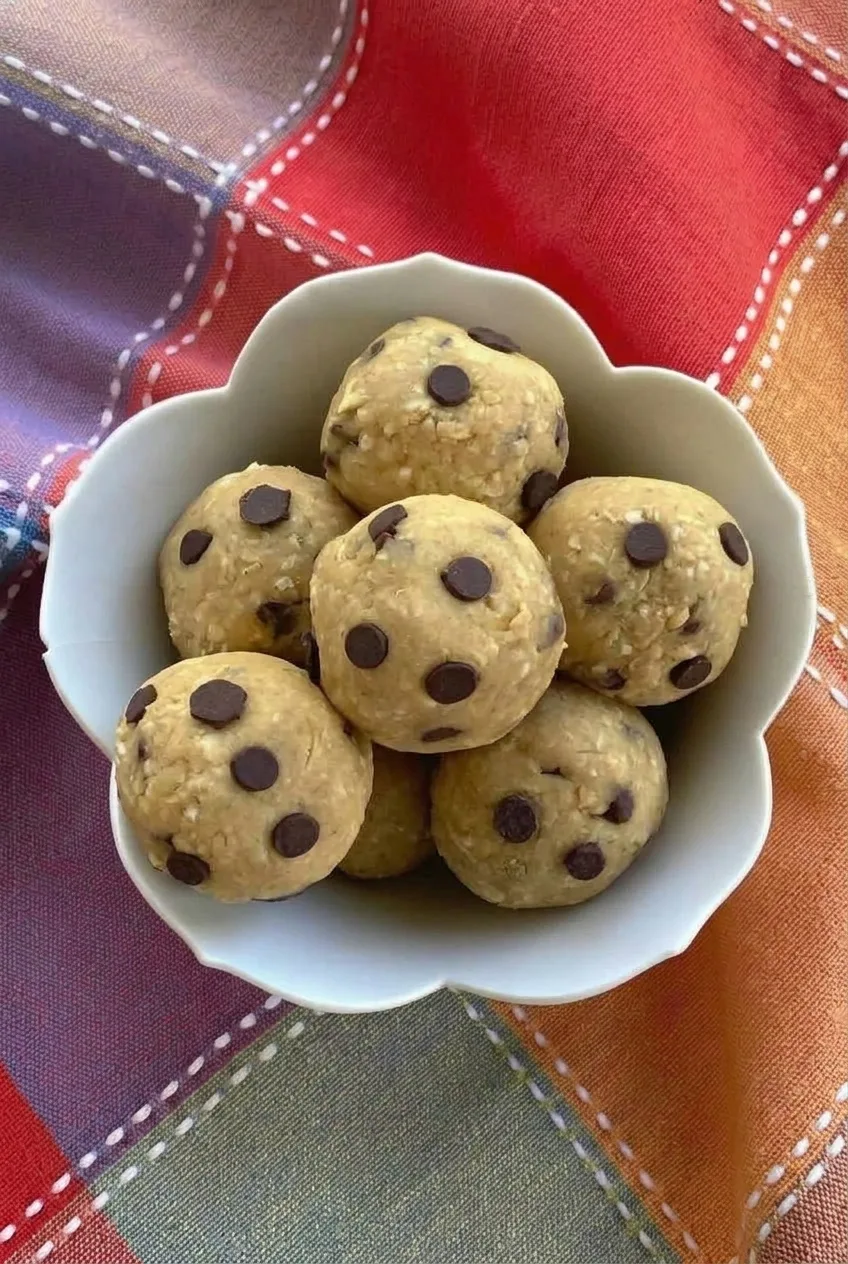
These no-bake bites are pale, hand-rolled balls with soft centers and whole chocolate chips throughout. A food processor blends chickpeas with peanut butter, maple syrup, and oat flour until the base is mostly smooth; the chips go in afterward so they stay intact.
The dough should hold together when pinched before you roll it. If it’s sticky but cohesive, a short chill will make shaping easier. If it smears and won’t hold a ball, it needs a little more oat flour.
Ingredients for Chickpea Cookie Dough Bites
1 (15-ounce) can chickpeas, drained, rinsed, and patted dry (about 1 1/2 cups or 250g drained; weight varies by can)
1/2 cup creamy peanut butter, well stirred (about 130g)
1/4 cup pure maple syrup (about 80g)
3/4 cup oat flour (about 75g), plus more only if needed
1 teaspoon vanilla extract
1/4 teaspoon fine salt, or less if the peanut butter is salted
1/3 cup semisweet chocolate chips (about 60g)
Yield: About 16 bites. Time: 15 minutes of prep, plus about 30 minutes to chill. No cooking required.
How to Make Chickpea Cookie Dough Bites
Dry the chickpeas: Drain and rinse them, then pat dry with a clean towel. Remove loose skins if convenient; there’s no need to peel every chickpea.
Process the dough: Add the chickpeas, peanut butter, maple syrup, oat flour, vanilla, and salt to a food processor. Process until thick, cohesive, and mostly smooth, scraping down the bowl as needed. Keep processing if large chickpea pieces remain.
Check the texture: Pinch some dough together. If it smears and won’t hold a ball, process in more oat flour 1 tablespoon at a time. If it holds together but sticks to your hands, refrigerate it for 10 to 15 minutes before rolling.
Fold in the chips: Set aside a small handful of the measured chocolate chips. Fold the rest into the dough with a spatula rather than processing them.
Roll the bites: Divide the dough into about 16 portions and hand-roll into roughly 1 1/2-inch balls. Press the reserved chips onto the outsides, then place the bites in a single layer on a parchment-lined plate or small tray.
Chill: Refrigerate for about 30 minutes, checking after 20 minutes. The bites are ready when they hold their round shape and lift cleanly from the tray but remain soft in the center.
How the Dough Should Feel
Chickpea moisture and peanut-butter thickness can affect how much oat flour the dough needs. Slight tackiness is fine if the dough holds together; chill it before adding more flour. Add extra flour only when the dough is too wet to keep its shape, since too much can make the bites less soft.
A food processor handles this thick mixture more easily than most blenders. Scrape down the bowl thoroughly for a smoother base; peeling the chickpeas is optional.
Ingredient Swaps
To make oat flour, grind rolled oats into a reasonably fine meal, then measure 3/4 cup of the ground flour. For a nut-free adaptation, use creamy seed butter instead of peanut butter and adjust with a little more oat flour or chilling if needed. Check the oat and chocolate-chip labels if you need gluten-free or vegan bites.
Store the bites in an airtight container in the refrigerator for up to five days. To freeze, arrange them on a lined tray until firm, then transfer to a freezer-safe container. Let a frozen bite soften briefly if it’s too firm to eat straight away.
Nutrition
Approximate nutrition per bite, based on 16 bites: 125 calories, 4g protein, 6g fat, and 15g carbohydrates. Per 100g: approximately 330 calories, 11g protein, 15g fat, and 39g carbohydrates. Values vary with ingredient brands and any extra oat flour used.
Chickpea Cookie Dough Bites
No-bake chickpea bites blended with peanut butter, maple syrup, and oat flour, then folded with chocolate chips.
Servings: 16Calories: 125 kcal per bite; approximately 330 kcal per 100 g
Equipment
Food processor
Spatula
Parchment paper
Plate or small tray
Ingredients
1 (15-ounce) can chickpeas, drained, rinsed, and patted dry (about 1 1/2 cups or 250 g drained)
1/2 cup creamy peanut butter, well stirred (about 130 g)
1/4 cup pure maple syrup (about 80 g)
3/4 cup oat flour (about 75 g), plus more if needed
1 teaspoon vanilla extract
1/4 teaspoon fine salt, or less if the peanut butter is salted
1/3 cup semisweet chocolate chips (about 60 g)
Instructions
Drain and rinse the chickpeas, then pat them dry with a clean towel. Remove any loose skins if convenient.
Add the chickpeas, peanut butter, maple syrup, oat flour, vanilla, and salt to a food processor.
Process until thick, cohesive, and mostly smooth, scraping down the bowl as needed.
Pinch some dough together. If it will not hold a ball, process in more oat flour 1 tablespoon at a time. If it holds together but sticks to your hands, chill it for 10 to 15 minutes before rolling.
Set aside a small handful of chocolate chips. Fold the remaining chips into the dough with a spatula.
Divide the dough into about 16 portions and roll them into roughly 1 1/2-inch balls.
Press the reserved chocolate chips onto the outside of the bites and arrange them in a single layer on a parchment-lined plate or small tray.
Refrigerate for about 30 minutes, checking after 20 minutes. The bites are ready when they hold their shape and lift cleanly from the tray while remaining soft in the center.
Tips
Pat the chickpeas dry to help prevent excess moisture in the dough.
Peeling every chickpea is not necessary.
A food processor handles the thick mixture better than most blenders.
Add extra oat flour only if the dough cannot hold its shape; slight tackiness is fine.
Chill sticky but cohesive dough before adding more flour.
Variations
Nut-Free Bites: Replace the peanut butter with creamy seed butter and adjust with a little more oat flour or chilling if needed.
Notes
Store in an airtight container in the refrigerator for up to five days. To freeze, firm the bites on a lined tray, then transfer them to a freezer-safe container. Frozen bites can be left to soften briefly before eating.
Nutrition
Calories: 125 kcal per bite; approximately 330 kcal per 100 g|Protein: 4 g per bite; approximately 11 g per 100 g|Fat: 6 g per bite; approximately 15 g per 100 g|Carbohydrates: 15 g per bite; approximately 39 g per 100 g
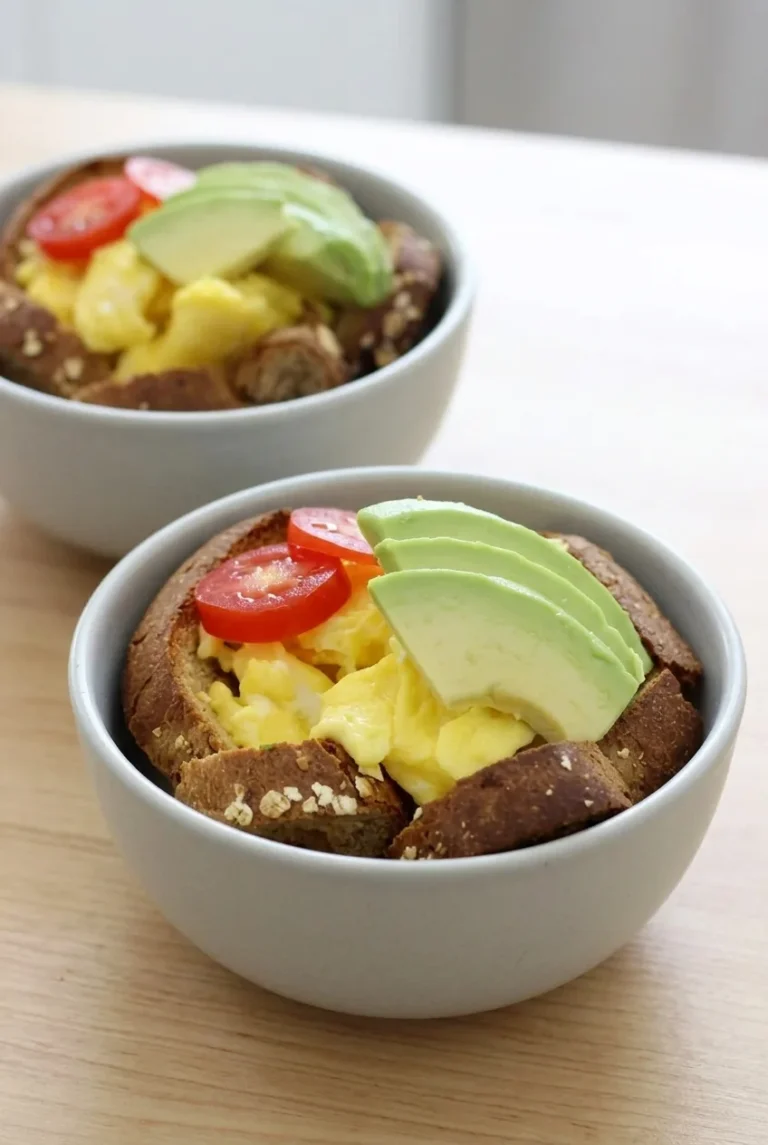
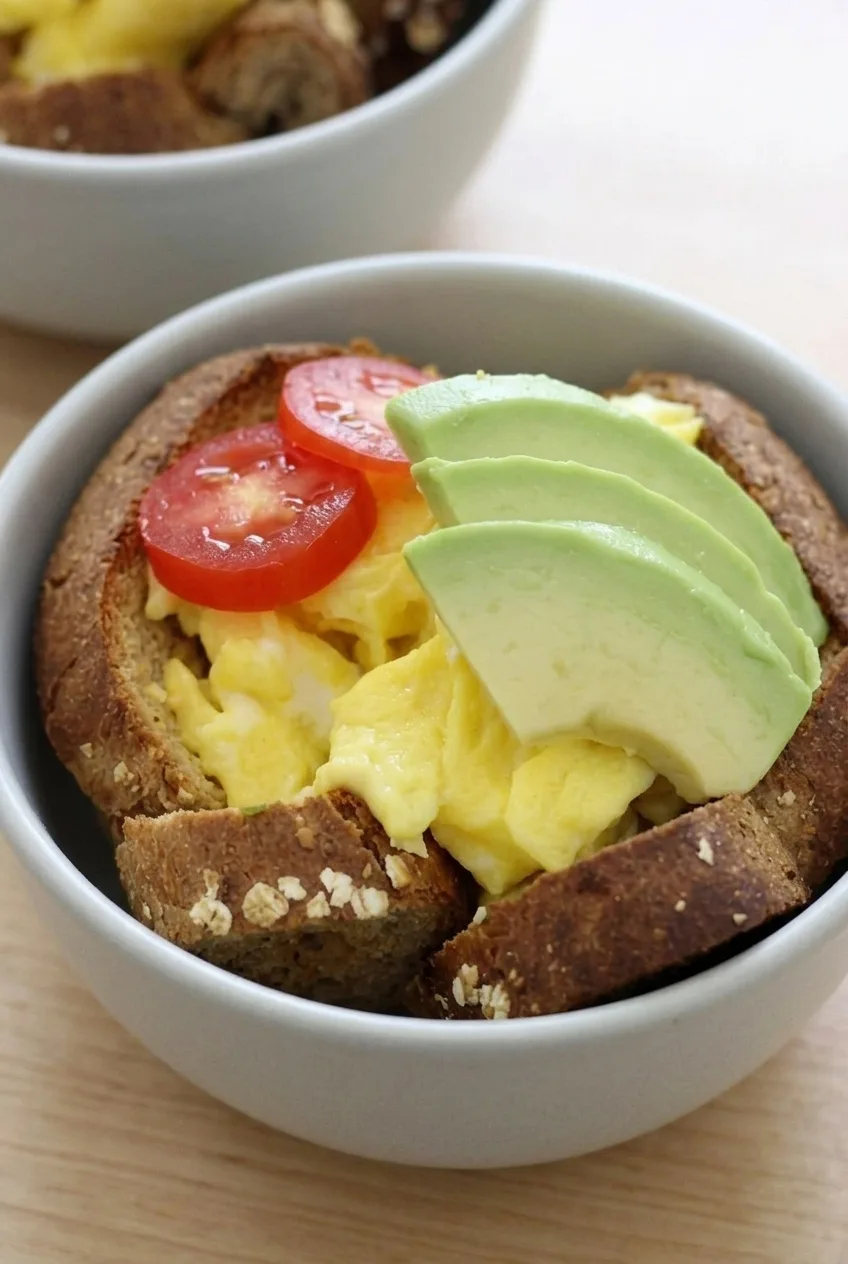
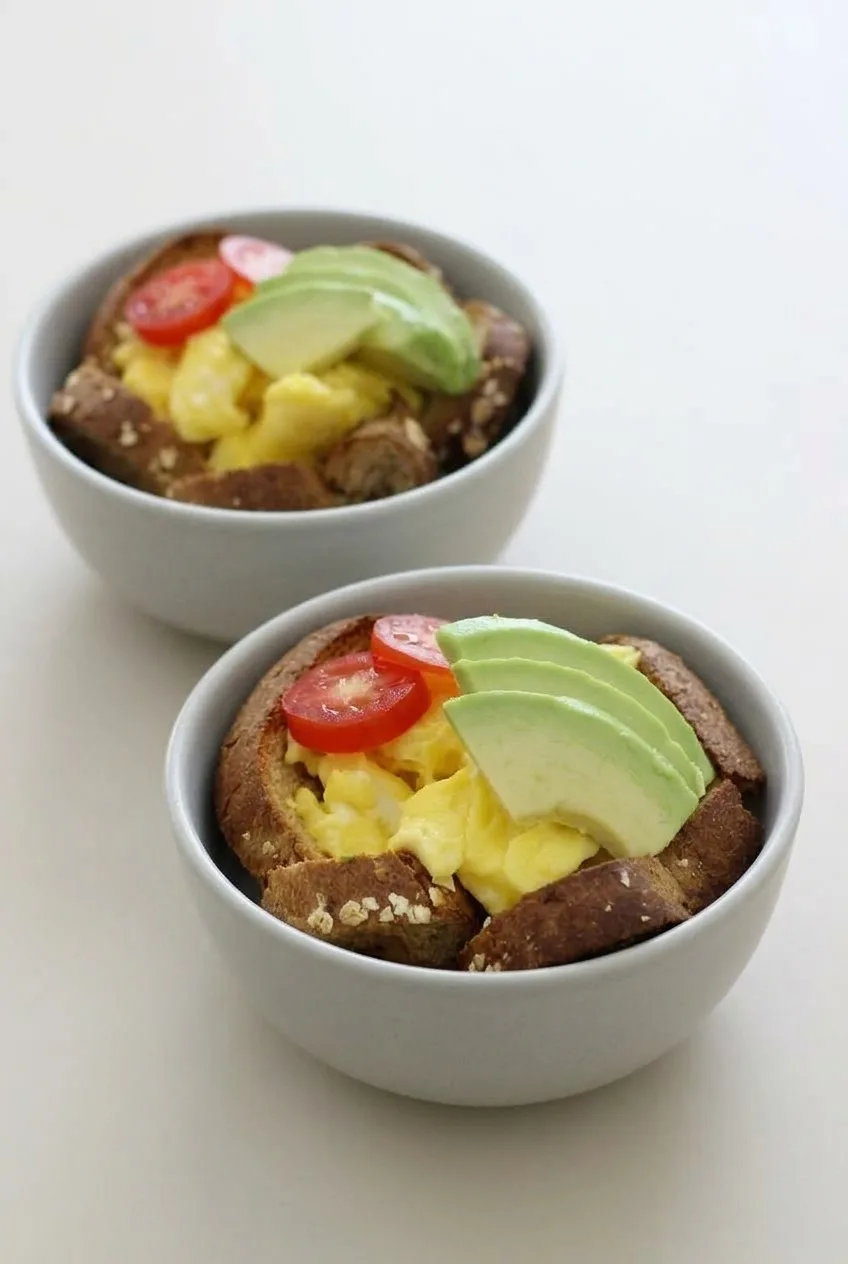
Whole-wheat bread bakes into individual cups with browned, irregular rims and room for soft scrambled eggs. The eggs cook separately in a skillet, so the bread can crisp without drying out the filling. Add sliced avocado and tomato after cooking, then serve the cups right away before the moist filling softens the toast.
Yield: 4 snack cups Prep: 10 minutes Cook: 12 to 15 minutes Total: About 25 minutes
Preheat and grease: Heat the oven to 375°F (190°C). Lightly spray four wells of a standard muffin tin.
Shape the bread: Gently press one slice into each well, easing the corners upward to leave a deep, open center and an exposed rim. Press slowly if the bread feels stiff, and avoid packing the bottom into a tight wad.
Bake the cups: Bake uncovered, checking at 10 minutes. At about 12 minutes, the exposed rims should be browned and the cups firm enough to hold their shape. Let them stand briefly, then gently loosen and lift them from the tin.
Scramble the eggs: While the bread bakes, whisk the eggs with the salt and about 1 teaspoon of the softened butter. Melt the remaining butter in an 8- to 10-inch nonstick skillet over low heat. Add the eggs and stir gently and frequently for about 3 to 5 minutes, until they form soft folds with no visible liquid egg. Remove from the heat while still soft; add pepper, if using.
Fill and serve: Divide the warm eggs among the bread cups. Fan avocado slices over part of the eggs in each cup, leaving some egg visible, and add the tomato alongside. Serve immediately, with each cup in a small bowl if desired.
How to Keep the Bread Cups Crisp
Flexible bread is less likely to crack as you shape it, and greased muffin wells help the baked cups release. Bread thickness and muffin-well shape affect cup depth and browning, so look for a firm cup with browned edges rather than relying on the bake time alone.
Keep the eggs and toppings out of the cups until serving. Moist eggs and juicy tomato will soften the toast as the filled cups sit.
Making the Cups Ahead
For the crispest result, bake the bread cups and cook the eggs near serving time. If preparing components in advance, keep them separate and slice the avocado shortly before serving. There is no established reheating method for the assembled cups; freezing them is not recommended.
Approximate per snack cup: 235 calories, 11g protein, 14g fat, and 17g carbohydrates. Approximate per 100g: 170 calories, 8g protein, 10g fat, and 13g carbohydrates. Values vary with the bread, avocado, and portion sizes.
Egg & Avocado Snack Cups
Crisp whole-wheat bread cups are filled with soft scrambled eggs, sliced avocado, and tomato.
Preheat the oven to 375°F (190°C). Lightly coat four wells of a standard muffin tin with cooking spray.
Press one bread slice into each well, easing the corners upward to create an open center and exposed rim. Press gently if the bread feels stiff.
Bake uncovered, checking at 10 minutes. Bake until the rims are browned and the cups are firm enough to hold their shape, about 12 to 15 minutes.
Let the bread cups stand briefly, then gently loosen and lift them from the tin.
While the cups bake, whisk the eggs with the salt and about 1 teaspoon of the softened butter.
Melt the remaining butter in an 8- to 10-inch nonstick skillet over low heat. Add the eggs and stir gently and frequently for 3 to 5 minutes, until soft folds form and no liquid egg is visible.
Remove the eggs from the heat while they are still soft. Add pepper, if using.
Divide the warm eggs among the bread cups. Fan avocado slices over part of the eggs in each cup, then add the tomato alongside. Serve immediately.
Tips
Use flexible bread to reduce cracking as you shape the cups.
Press the bread gently and avoid packing the bottom into a tight wad.
Judge doneness by browned edges and firm cups, since bread thickness and muffin-well shape affect baking.
Keep the eggs and toppings separate from the bread cups until serving to help the toast stay crisp.
Notes
For best texture, prepare the cups and eggs near serving time. If making components ahead, store them separately and slice the avocado shortly before serving. Assembled cups have no established reheating method; freezing is not recommended.
Nutrition
Calories: 235 kcal|Protein: 11 g|Fat: 14 g|Carbohydrates: 17 g
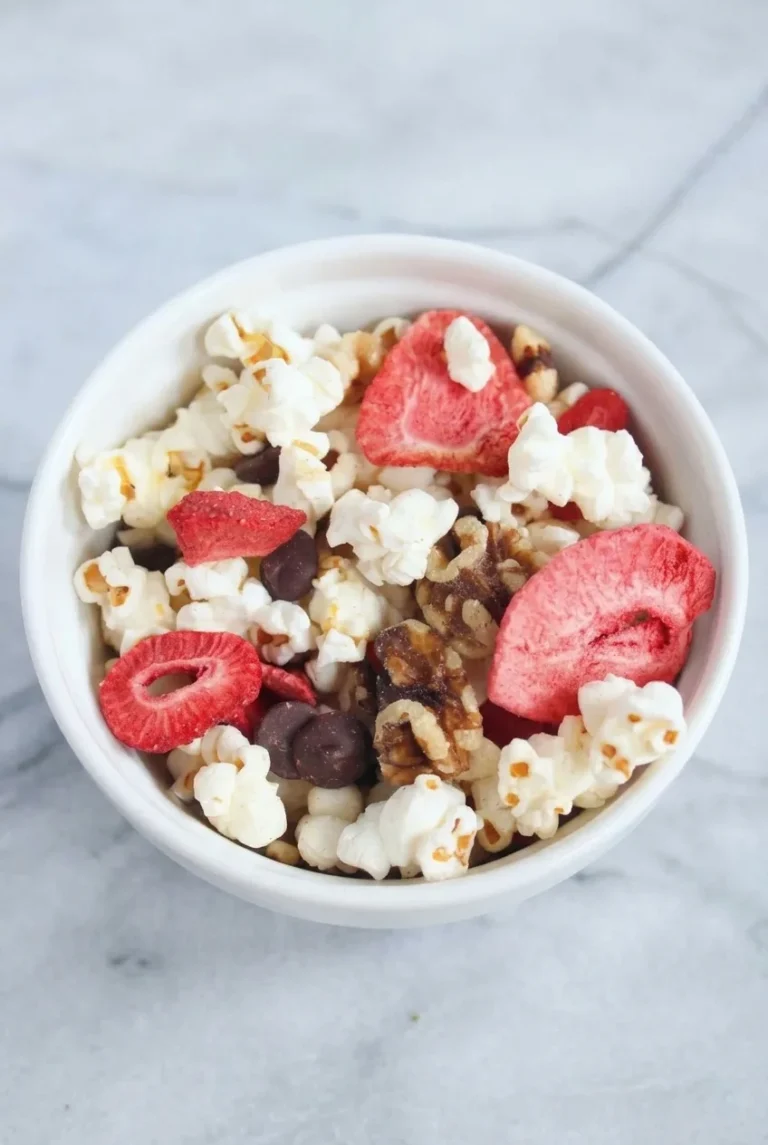
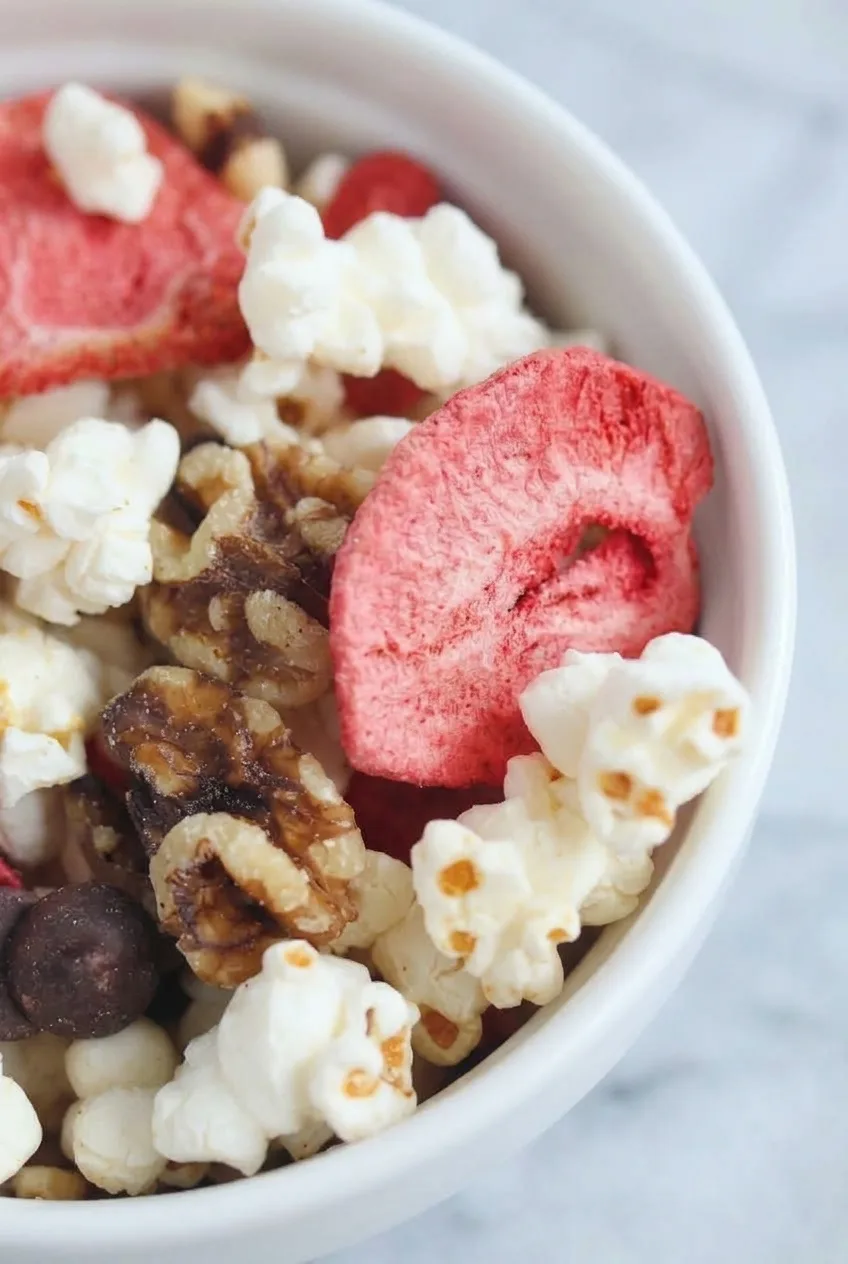
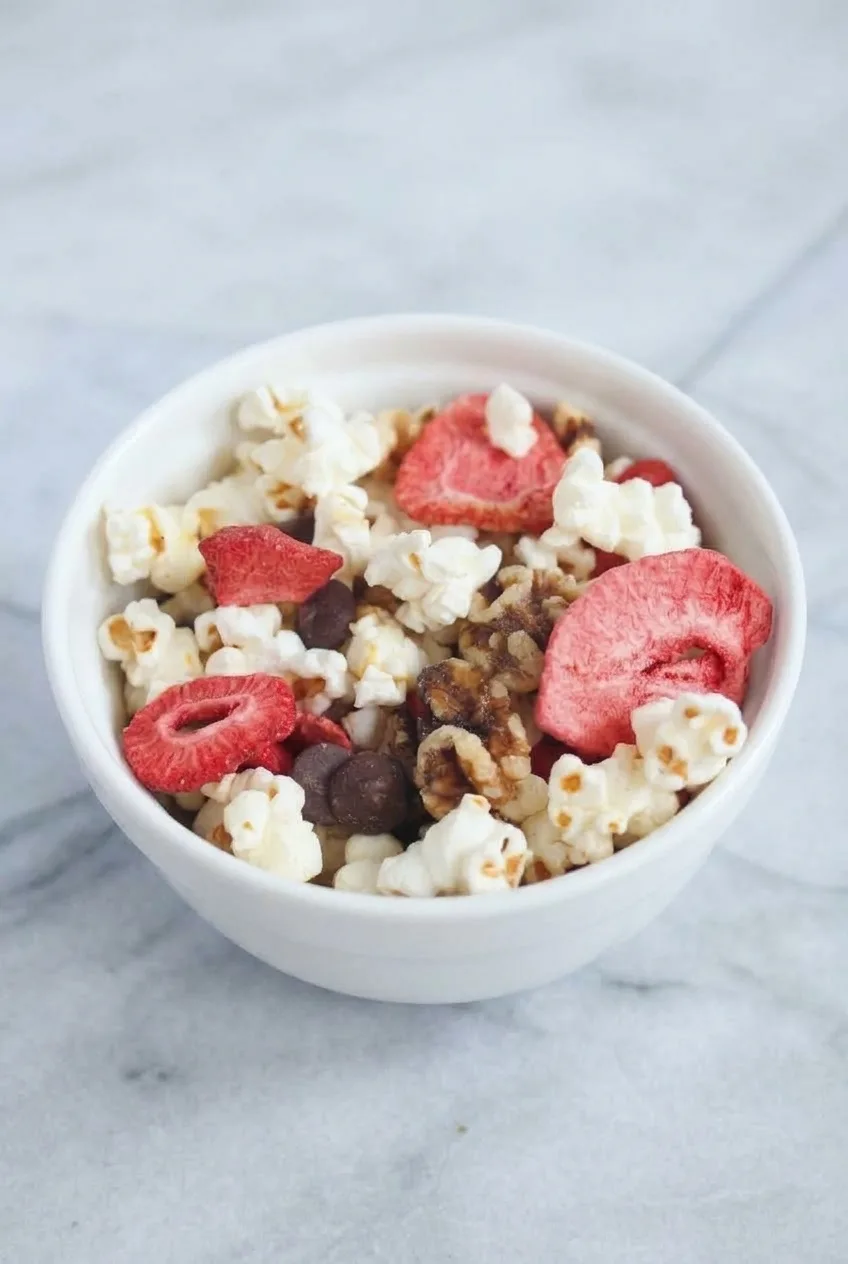
Stovetop popcorn becomes a loose snack mix with red freeze-dried strawberry slices, walnut pieces, and dark chocolate chips. The popcorn stays pale and fluffy, with no added salt or butter. Pop the kernels in a little oil, then let them cool before adding the mix-ins so the chocolate stays in distinct chips and the strawberries stay dry and crisp.
Ingredients for Healthy Popcorn
1/3 cup popcorn kernels (about 55g)
1 tablespoon sunflower oil
1/2 cup freeze-dried strawberry slices (about 10g)
1/3 cup walnut pieces (about 35g)
2 tablespoons dark chocolate chips (about 30g)
Groundnut oil can replace the sunflower oil, but avoid it if peanut allergies are a concern.
How to Make Healthy Popcorn
Coat the kernels: Add the kernels and oil to a cold 5-quart heavy-bottomed pot. Cover with a tight-fitting lid and swirl gently to coat the kernels.
Pop the corn: Set the covered pot over medium heat. Give it an occasional gentle shake if needed, but keep the lid on during active popping. After about 4 to 6 minutes, remove the pot from the heat when popping slows to roughly one pop every 2 to 3 seconds.
Cool the popcorn: Wait a few seconds for the last pops to subside, then open the lid away from your face. Transfer the popcorn to a wide bowl or tray, leaving hard unpopped kernels behind. Let it cool for about 3 to 5 minutes, until no longer hot.
Add the mix-ins: Gently fold in the freeze-dried strawberries, walnuts, and chocolate chips. Divide among 4 bowls, making sure each serving gets some of every mix-in.
When to Take the Pot Off the Heat
The 4-to-6-minute cooking time can shift with the pot and burner, so listen rather than waiting for a timer. Take the pot off the heat when rapid popping slows to one pop every 2 to 3 seconds. Waiting for complete silence can scorch the popcorn.
How to Keep the Mix Crisp
Use freeze-dried strawberry slices rather than fresh berries, which would add moisture to the popcorn. Fold the mix gently so the slices stay recognizable instead of breaking into crumbs.
To make the mix ahead, pop the corn and let it cool completely, then add the strawberries, walnuts, and chocolate near serving time. If needed, keep the fully cooled mix in an airtight container in a cool, dry place and aim to eat it within a day; it may lose some crispness. No reheating is needed. Freezing is not recommended.
Nutrition
Approximate nutrition per snack serving (1/4 of the recipe): 185 calories, 4g protein, 12g fat, and 17g carbohydrates. Estimated per 100g: 530 calories, 10g protein, 35g fat, and 50g carbohydrates. Values vary with the ingredients used and the amount of oil retained after popping.
Healthy Popcorn
Stovetop popcorn tossed with freeze-dried strawberries, walnuts, and dark chocolate chips.
1/2 cup freeze-dried strawberry slices (about 10g)
1/3 cup walnut pieces (about 35g)
2 tablespoons dark chocolate chips (about 30g)
Instructions
Add the kernels and oil to a cold 5-quart heavy-bottomed pot. Cover with a tight-fitting lid and gently swirl to coat the kernels.
Set the covered pot over medium heat. Shake gently occasionally if needed, keeping the lid on while the corn is popping.
Remove the pot from the heat when popping slows to about one pop every 2 to 3 seconds, usually after 4 to 6 minutes.
Wait a few seconds for the last pops to subside, then open the lid away from your face.
Transfer the popcorn to a wide bowl or tray, leaving any hard unpopped kernels behind. Cool for 3 to 5 minutes, until no longer hot.
Gently fold in the strawberries, walnuts, and chocolate chips.
Divide among 4 bowls, making sure each serving gets some of every mix-in.
Tips
Listen to the popping rather than relying only on the cooking time.
Take the pot off the heat before the popping stops completely to avoid scorching the popcorn.
Let the popcorn cool before adding the chocolate so the chips remain distinct.
Use freeze-dried strawberries to keep the mix dry and crisp.
Fold the mix-ins gently to keep the strawberry slices intact.
Variations
Groundnut Oil: Replace the sunflower oil with groundnut oil; avoid it if peanut allergies are a concern.
Notes
Serve soon after mixing for the crispest texture. For make-ahead preparation, cool the popcorn completely and add the mix-ins near serving time. Store any fully cooled mix in an airtight container in a cool, dry place and eat within a day. Reheating is not needed; freezing is not recommended.
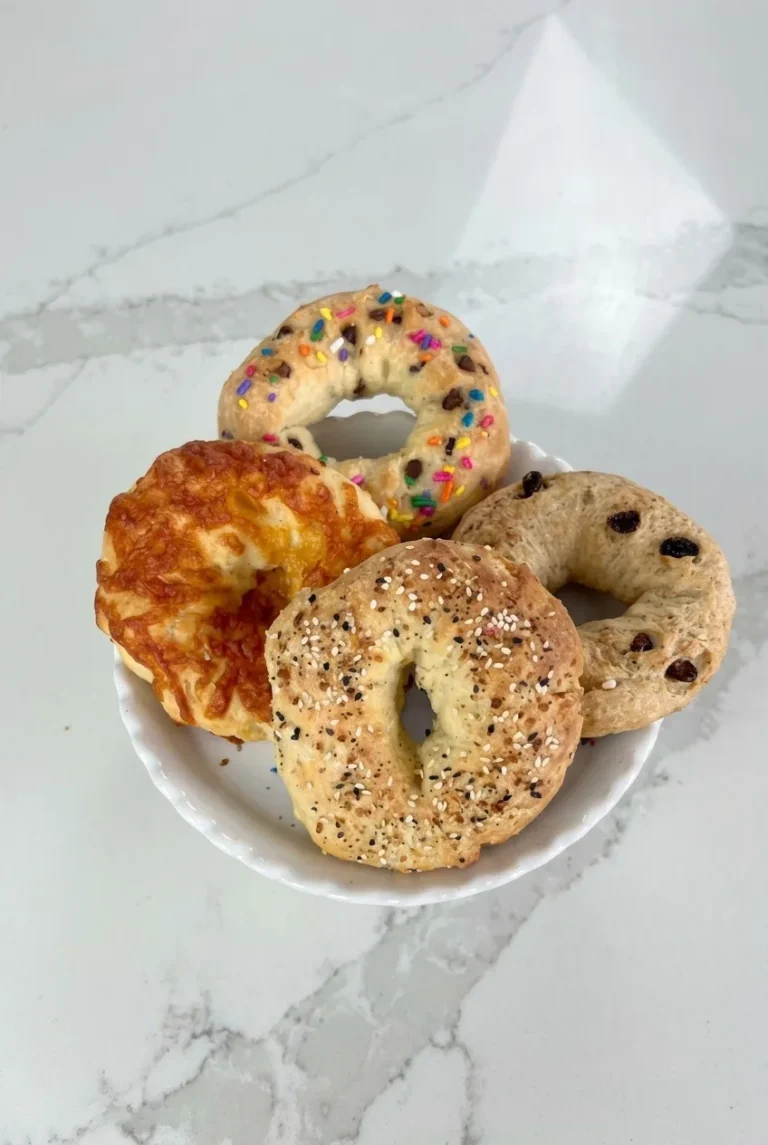
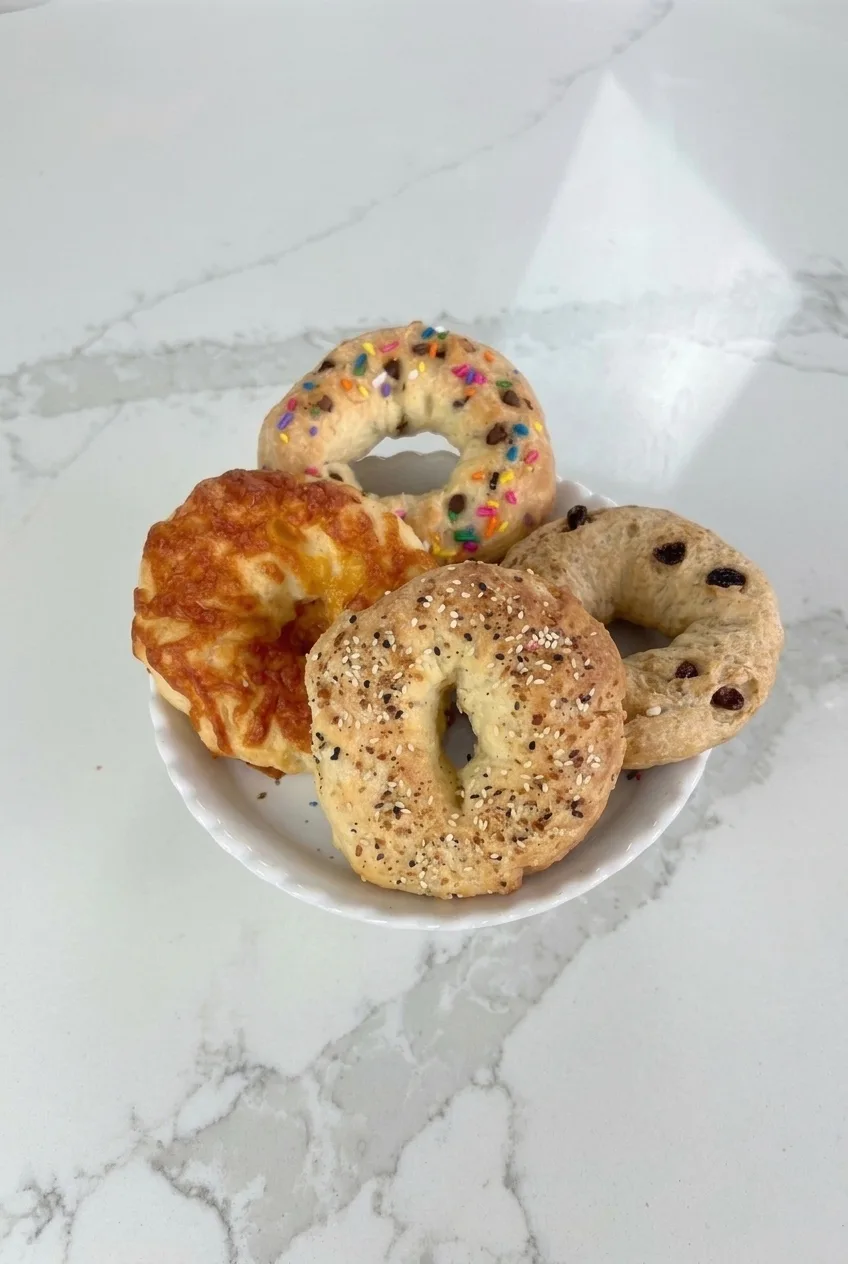
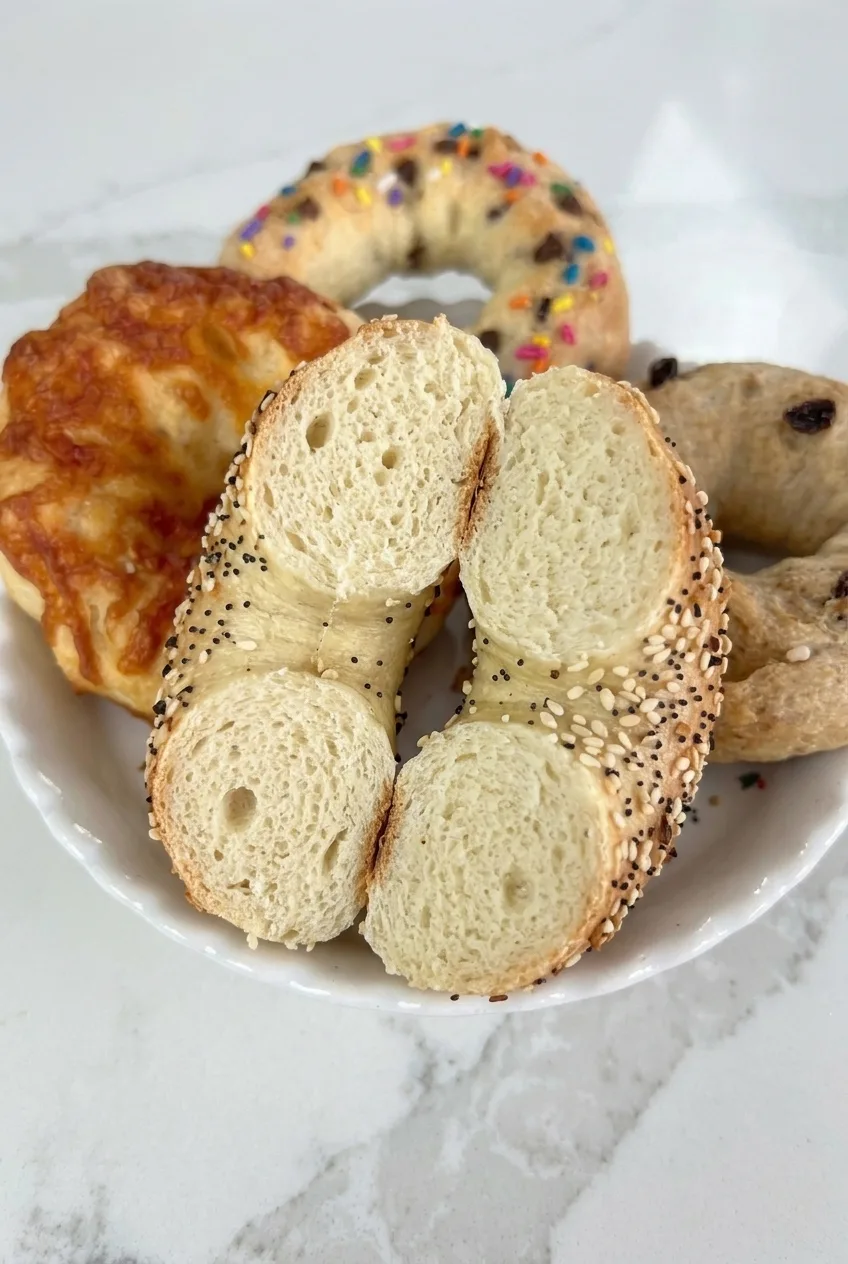
One Greek-yogurt dough makes eight mini bagels in four flavors: everything-seasoned, cheddar, rainbow-sprinkle, and cinnamon-raisin. There’s no yeast, rising, or boiling. The baked rings are tender and lightly golden, not chewy like traditional bagels.
Use thick yogurt and keep the dough slightly tacky so the rings are easy to shape without becoming dry. Leave the center holes wide enough to stay open as the bagels puff. The batch takes about 40–45 minutes, including a brief cooling time.
Ingredients for Mini Protein Bagels
1 1/2 cups all-purpose flour (180g), plus 1–3 tablespoons only if needed for shaping
2 1/4 teaspoons baking powder (9g)
3/8 teaspoon fine salt
1 cup thick plain Greek yogurt (225g)
1 tablespoon milk, or just enough to brush the tops
2 teaspoons everything bagel seasoning
2 tablespoons shredded cheddar cheese (15g)
1 teaspoon rainbow sprinkles
1 tablespoon raisins (10g)
1/8 teaspoon ground cinnamon
Optional: Add 1 teaspoon mini chocolate chips to the sprinkle pair, or serve the finished bagels with cream cheese.
How to Bake Mini Protein Bagels
Prepare the oven and pan: Preheat the oven to 350°F (175°C). Line a baking sheet with parchment paper. Lightly oil the parchment if sticking is a concern.
Mix the dough: Whisk the flour, baking powder, and salt in a bowl. Stir in the yogurt, then briefly work the mixture until no dry flour remains. The dough should be soft and tacky but not cling heavily to your fingers. If it is too sticky to shape, add the extra flour 1 tablespoon at a time.
Divide the flavors: Divide the dough into 8 roughly equal pieces, about 50g each, and assign two pieces to each flavor. Briefly work the raisins and cinnamon into one pair. If using mini chocolate chips, work them into the sprinkle pair.
Shape the rings: Roll each piece into a short rope and join the ends firmly, or gently open a hole through its center. Make thick rings about 2 1/2–3 inches across, with center holes about 1 inch wide. Place them about 2 inches apart on the baking sheet.
Add the toppings: Lightly brush the tops with milk. Gently press everything seasoning onto one pair, cheddar onto another, and rainbow sprinkles onto the sprinkle pair. Leave the raisins visible in the fourth pair, and keep the center holes open.
Bake and cool: Bake uncovered, starting to check at 12 minutes. Allow about 12–20 minutes total, depending on ring thickness and the oven; rotate the sheet once if the bagels brown unevenly. The exposed bread should look set and lightly golden, the undersides should be lightly browned, and the centers should feel springy rather than paste-like. The cheddar should be melted and browned in spots. Cool on the pan for about 5 minutes before moving or slicing.
How to Keep the Dough Easy to Shape
Greek yogurt varies in thickness. Mix until all the flour is incorporated before adding any extra; a thinner yogurt may need more flour to make the dough workable. Add only enough to shape the rings. Dough that remains slightly tacky bakes up more tender than dough made stiff with extra flour.
How to Tell When the Bagels Are Done
Check the bread rather than relying on the toppings: cheddar can brown before the dough beneath it is ready. If the exposed surface still looks wet or the underside is pale, bake a little longer and check again. Rings of slightly different thickness may finish at different times.
Serving and Variations
Arrange one of each flavor together and offer cream cheese alongside if desired. The savory bagels also go well with eggs. For another small savory breakfast, try these avocado egg toast bites.
For a single-flavor batch, use one chosen finish on all 8 bagels. If using self-rising flour in place of all-purpose flour, omit the separate baking powder and salt; the dough may still need a small flour adjustment for shaping.
Storage and Toaster Reheating
Let the bagels cool completely, then store them airtight for up to 3 days. Slice and toast them to refresh the texture. To freeze, slice the cooled bagels, wrap them individually, and place them in a freezer bag; toast from frozen as needed.
Nutrition
Approximate nutrition per mini bagel, based on 8 bagels: 115 calories, 6g protein, 1g fat, and 20g carbohydrates. Approximate values per 100g of baked bagels: 220 calories, 11g protein, 2g fat, and 38g carbohydrates. Estimates assume plain nonfat Greek yogurt and exclude optional additions, serving spreads, and any extra shaping flour. Yogurt brands and finished bagel weights will affect the values.
Mini Protein Bagels
Tender Greek-yogurt dough makes eight mini bagels in everything, cheddar, sprinkle, and cinnamon-raisin flavors.
1 1/2 cups all-purpose flour (180 g), plus 1–3 tablespoons only if needed for shaping
2 1/4 teaspoons baking powder (9 g)
3/8 teaspoon fine salt
1 cup thick plain Greek yogurt (225 g)
Toppings
1 tablespoon milk, or just enough to brush the tops
2 teaspoons everything bagel seasoning
2 tablespoons shredded cheddar cheese (15 g)
1 teaspoon rainbow sprinkles
1 tablespoon raisins (10 g)
1/8 teaspoon ground cinnamon
Optional
1 teaspoon mini chocolate chips
Cream cheese, for serving
Instructions
Preheat the oven to 350°F (175°C). Line a baking sheet with parchment paper and lightly oil it if sticking is a concern.
Whisk the flour, baking powder, and salt in a bowl. Stir in the yogurt and briefly work the mixture until no dry flour remains. If the dough is too sticky to shape, add extra flour 1 tablespoon at a time.
Divide the dough into 8 roughly equal pieces, about 50 g each, and assign two pieces to each flavor. Work the raisins and cinnamon into one pair. If using chocolate chips, work them into the sprinkle pair.
Roll each piece into a short rope and join the ends firmly, or gently open a hole through its center. Shape thick rings about 2 1/2–3 inches across with center holes about 1 inch wide. Arrange them about 2 inches apart on the baking sheet.
Lightly brush the tops with milk. Press everything seasoning onto one pair, cheddar onto another, and sprinkles onto the sprinkle pair. Leave the raisins visible and keep all center holes open.
Bake uncovered for 12–20 minutes, starting to check at 12 minutes. Rotate the pan once if the bagels brown unevenly. Bake until the exposed bread is set and lightly golden, the undersides are lightly browned, and the centers feel springy. The cheddar should be melted and browned in spots.
Cool on the pan for about 5 minutes before moving or slicing.
Tips
Use thick Greek yogurt and mix until all the flour is incorporated before adding extra flour.
Keep the dough slightly tacky; add only enough flour to make shaping manageable.
Make the center holes about 1 inch wide so they stay open as the bagels puff.
Check the exposed bread and undersides for doneness rather than relying on the cheddar color.
Bagels of different thicknesses may finish at different times.
Variations
Single-Flavor Batch: Use one chosen topping or flavoring on all 8 bagels.
Chocolate Chip Sprinkles: Add 1 teaspoon mini chocolate chips to the sprinkle pair.
Self-Rising Flour: Replace the all-purpose flour with self-rising flour and omit the baking powder and salt; add a little flour if needed for shaping.
Notes
Cool completely and store airtight for up to 3 days. Slice and toast to refresh, or freeze individually sliced bagels and toast from frozen. Approximate nutrition per 100 g: 220 calories, 11 g protein, 2 g fat, and 38 g carbohydrates.
Nutrition
Calories: 115 kcal|Protein: 6 g|Fat: 1 g|Carbohydrates: 20 g
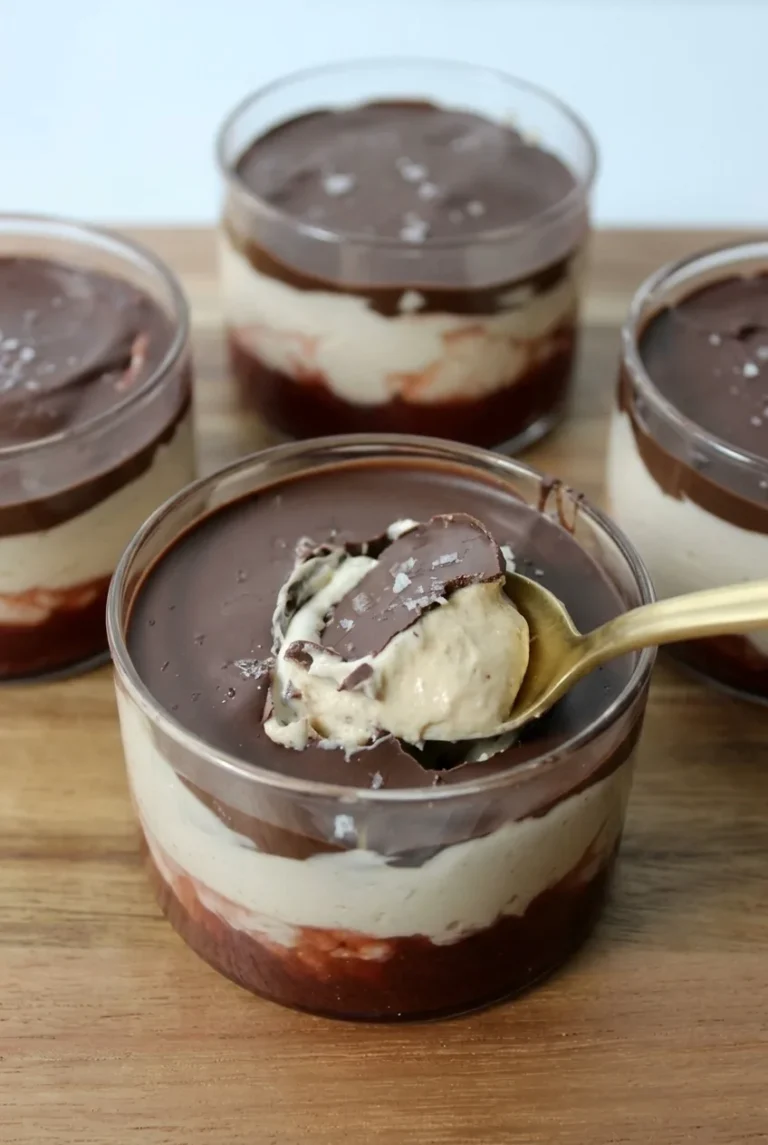
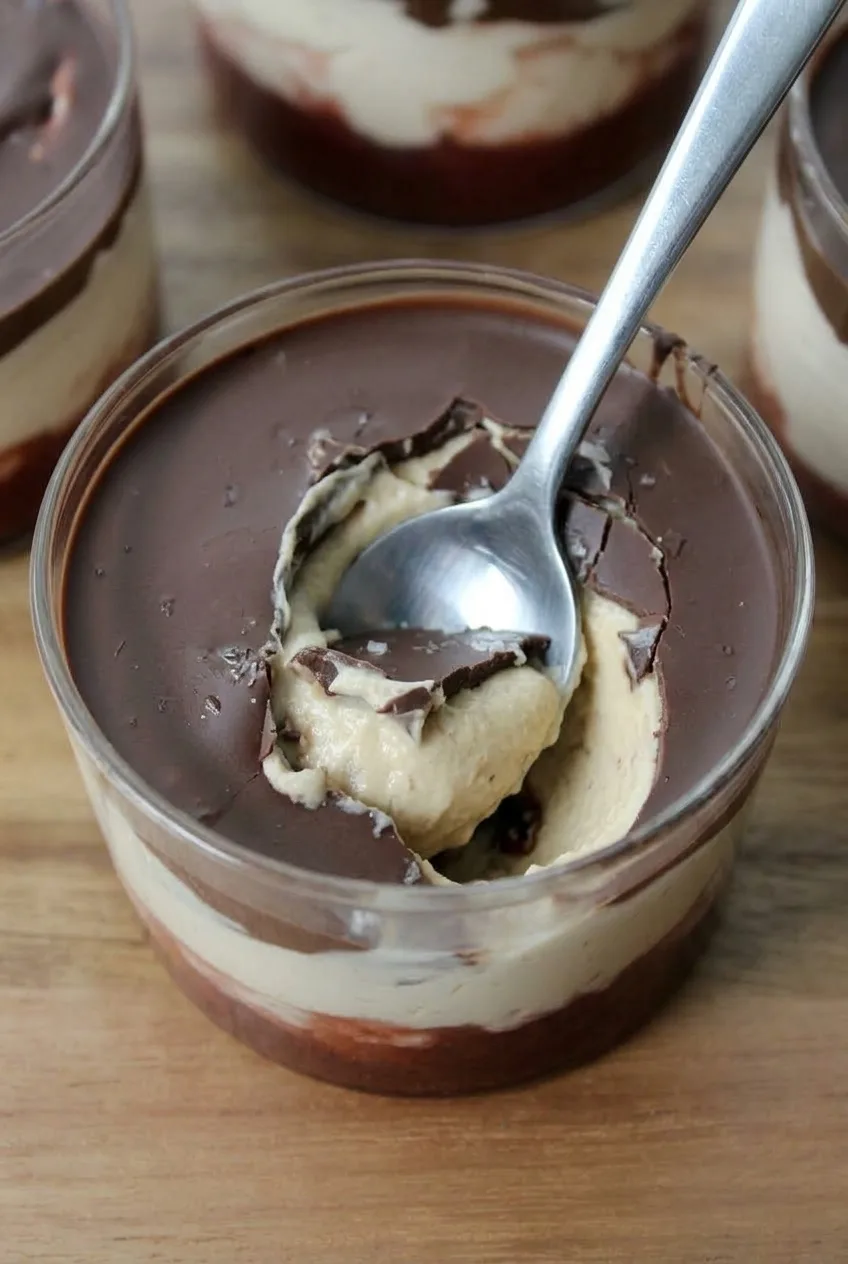
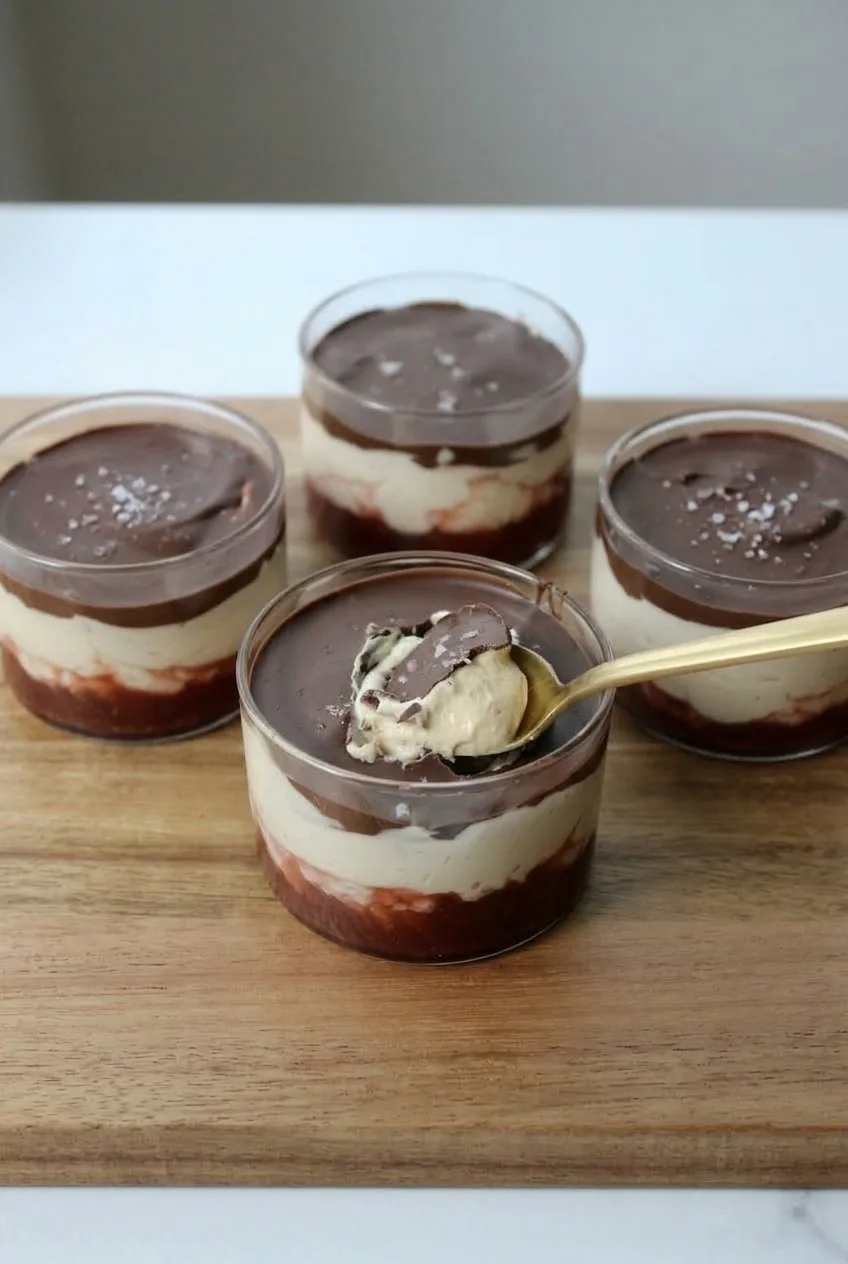
These four refrigerated cups have a chocolate base, a thick peanut butter Greek yogurt center, and a smooth chocolate top that breaks under a spoon. They need no baking or freezing. Let the base set before adding the yogurt, then cool the topping chocolate until just warm before spreading it over the filling. Those two pauses keep the dark and pale layers distinct while the center stays creamy.
Ingredients for Chocolate Peanut Butter Yogurt Cups
3/4 cup semisweet chocolate chips (about 130g)
1 1/2 teaspoons refined coconut oil
1 1/2 cups plain, thick Greek yogurt (360g)
1/3 cup creamy peanut butter (85g)
2 tablespoons maple syrup (30g)
Optional: a scant pinch of flaky sea salt for all four cups
Use yogurt that holds softly on a spoon; thin yogurt can blur the layers. Do not add milk or water to the filling. If using sweetened yogurt, reduce or omit the maple syrup to taste.
How to Make Chocolate Peanut Butter Yogurt Cups
Yield: 4 cups Prep: 15 minutes Chill: about 50 minutes Total: about 1 hour 5 minutes
Melt the chocolate: Place four clear, straight-sided 6- to 8-ounce cups on a tray. Microwave the chocolate chips and coconut oil in a microwave-safe bowl in 15- to 20-second intervals, stirring after each, until smooth. Reserve roughly half for the tops.
Set the bases: Divide the other half among the cups and spread it over the bottoms. Refrigerate uncovered for 15 to 20 minutes, until the chocolate holds its shape when a cup is gently tilted.
Mix the filling: Stir the yogurt, peanut butter, and maple syrup together until thick and evenly pale beige, with no large peanut butter streaks.
Fill the cups: Gently spoon the filling over the set bases, dividing it evenly at roughly 1/2 cup per cup. Smooth the surfaces and refrigerate for 5 to 10 minutes. Let the reserved chocolate cool until just warm. If it has become too thick to spread, briefly rewarm it, then let it cool again.
Add the chocolate tops: Spoon the just-warm chocolate gently onto the centers of the chilled filling and spread it in a thin layer to the edges. Add a few flakes of salt, if using. Refrigerate uncovered for 25 to 30 minutes, until the tops no longer look wet or flow when gently tilted.
How to Keep the Layers Distinct
A firm chocolate base keeps the yogurt from swirling into it. The topping needs the opposite balance: fluid enough to spread, but not hot enough to streak through the filling. Spoon it on gently rather than pouring it from a height. Layer thickness and refrigerator temperature can change the setting time, so check how the chocolate looks and moves instead of relying only on the clock.
What Texture to Expect
The chocolate should form a distinct, spoon-breakable top while the yogurt beneath stays thick and creamy. If a cup is difficult to spoon straight from the refrigerator, let it stand for about 5 minutes before serving. These cups are chilled, not frozen.
Make-Ahead and Storage
Once the tops have set, cover the cups and keep them refrigerated. Aim to eat them within 3 days. Freezing is not recommended if you want the yogurt center to remain smooth and creamy.
Approximate nutrition per cup, based on four cups and plain 2% Greek yogurt: 385 calories, 16g protein, 23g fat, and 33g carbohydrates. Per 100g: approximately 255 calories, 10g protein, 15g fat, and 21g carbohydrates. Values vary by ingredient brand and yogurt fat content; optional salt is not included.
Chocolate Peanut Butter Yogurt Cups
Chilled cups layered with a firm chocolate base, creamy peanut butter Greek yogurt, and a spoon-breakable chocolate top.
Optional: a scant pinch of flaky sea salt for all four cups
Instructions
Place four clear, straight-sided 6- to 8-ounce cups on a tray.
Microwave the chocolate chips and coconut oil in a microwave-safe bowl in 15- to 20-second intervals, stirring after each interval, until smooth. Reserve roughly half of the melted chocolate for the tops.
Divide the remaining chocolate among the cups and spread it over the bottoms. Refrigerate uncovered for 15 to 20 minutes, until the chocolate holds its shape when a cup is gently tilted.
Stir the yogurt, peanut butter, and maple syrup together until thick and evenly pale beige, with no large peanut butter streaks.
Spoon the filling evenly over the set chocolate bases, about 1/2 cup per cup. Smooth the surfaces and refrigerate for 5 to 10 minutes.
Let the reserved chocolate cool until just warm. If it becomes too thick to spread, briefly rewarm it, then let it cool again.
Spoon the chocolate gently onto the centers of the chilled filling and spread it in a thin layer to the edges. Add a few flakes of salt, if using.
Refrigerate uncovered for 25 to 30 minutes, until the tops no longer look wet or flow when gently tilted.
Tips
Use thick Greek yogurt that holds softly on a spoon; thin yogurt can blur the layers.
Do not add milk or water to the filling.
Let the chocolate bases set before adding the yogurt filling.
Cool the topping chocolate until just warm before spreading, and spoon it on gently.
Check that the chocolate looks set and does not flow when tilted; setting time can vary with layer thickness and refrigerator temperature.
If using sweetened yogurt, reduce or omit the maple syrup to taste.
Notes
Cover and refrigerate once set; eat within 3 days. Freezing is not recommended. Let a cup stand for about 5 minutes before serving if it is difficult to spoon straight from the refrigerator. Nutrition is approximate per cup and based on plain 2% Greek yogurt.
Nutrition
Calories: 385 kcal|Protein: 16 g|Fat: 23 g|Carbohydrates: 33 g
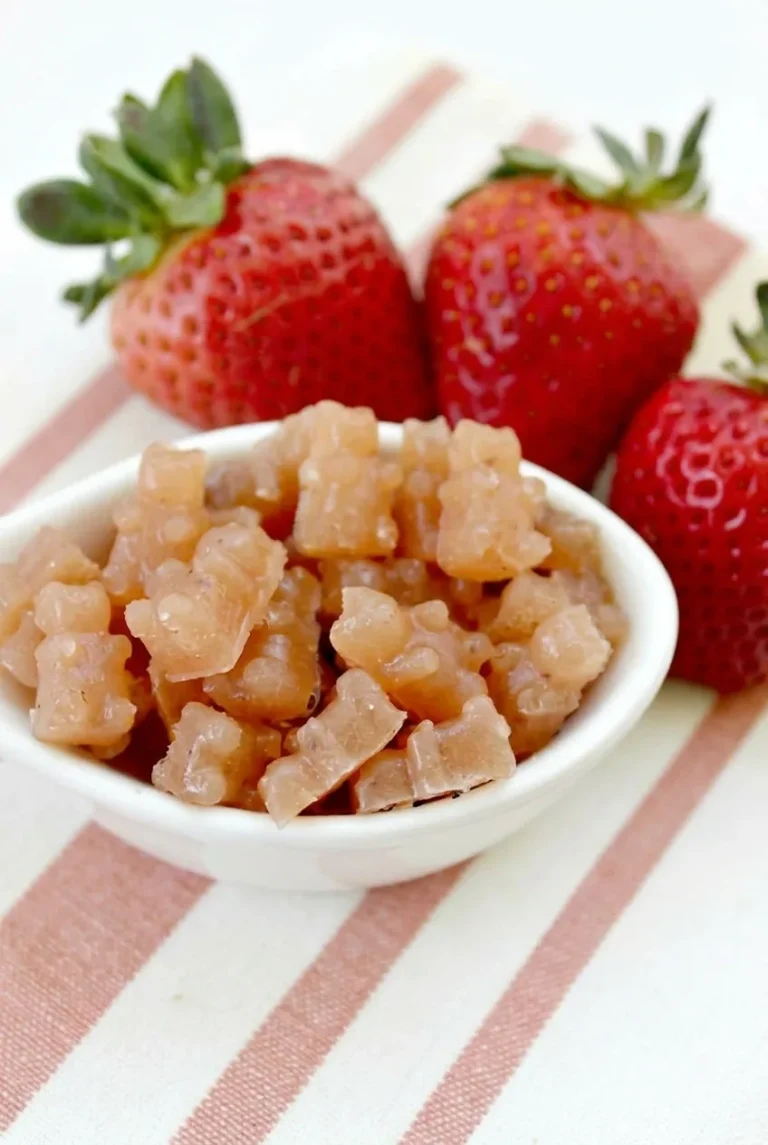
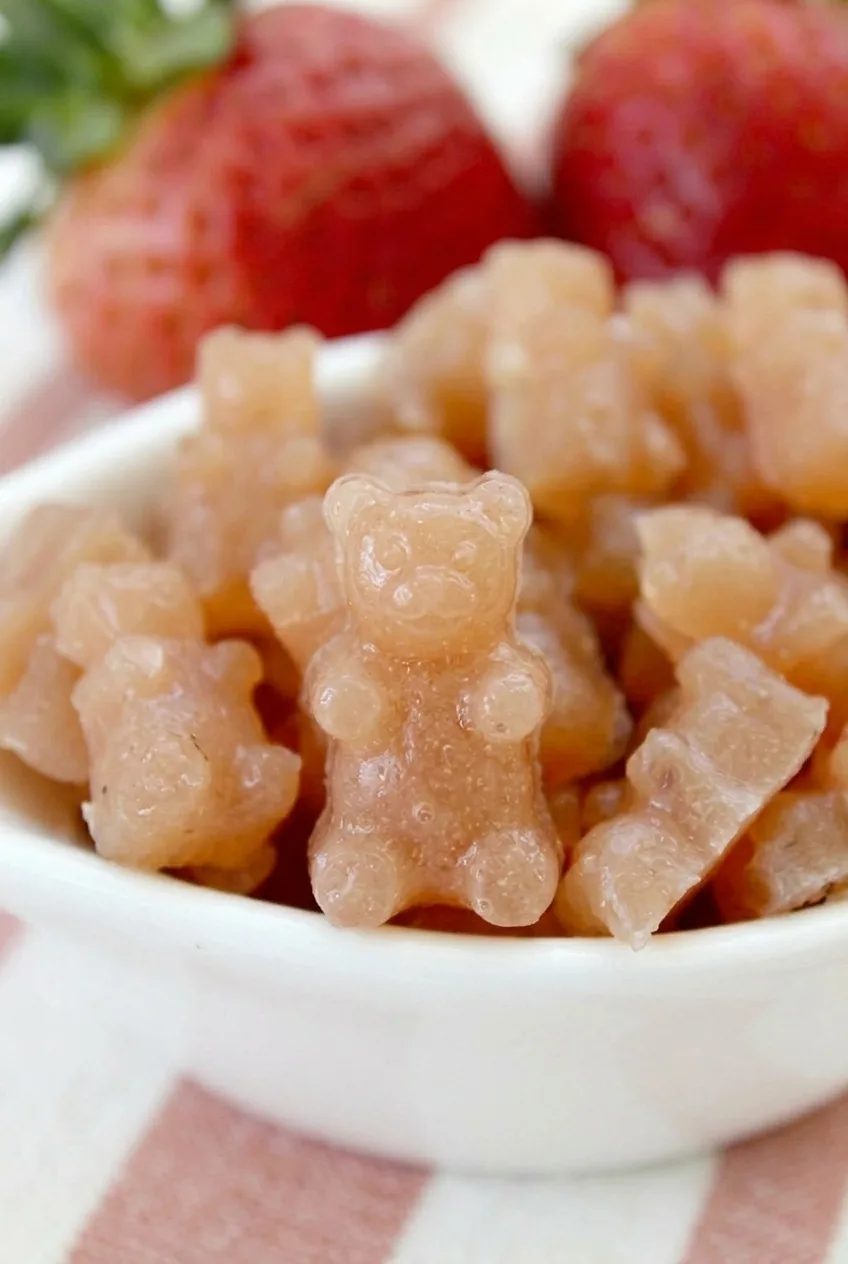
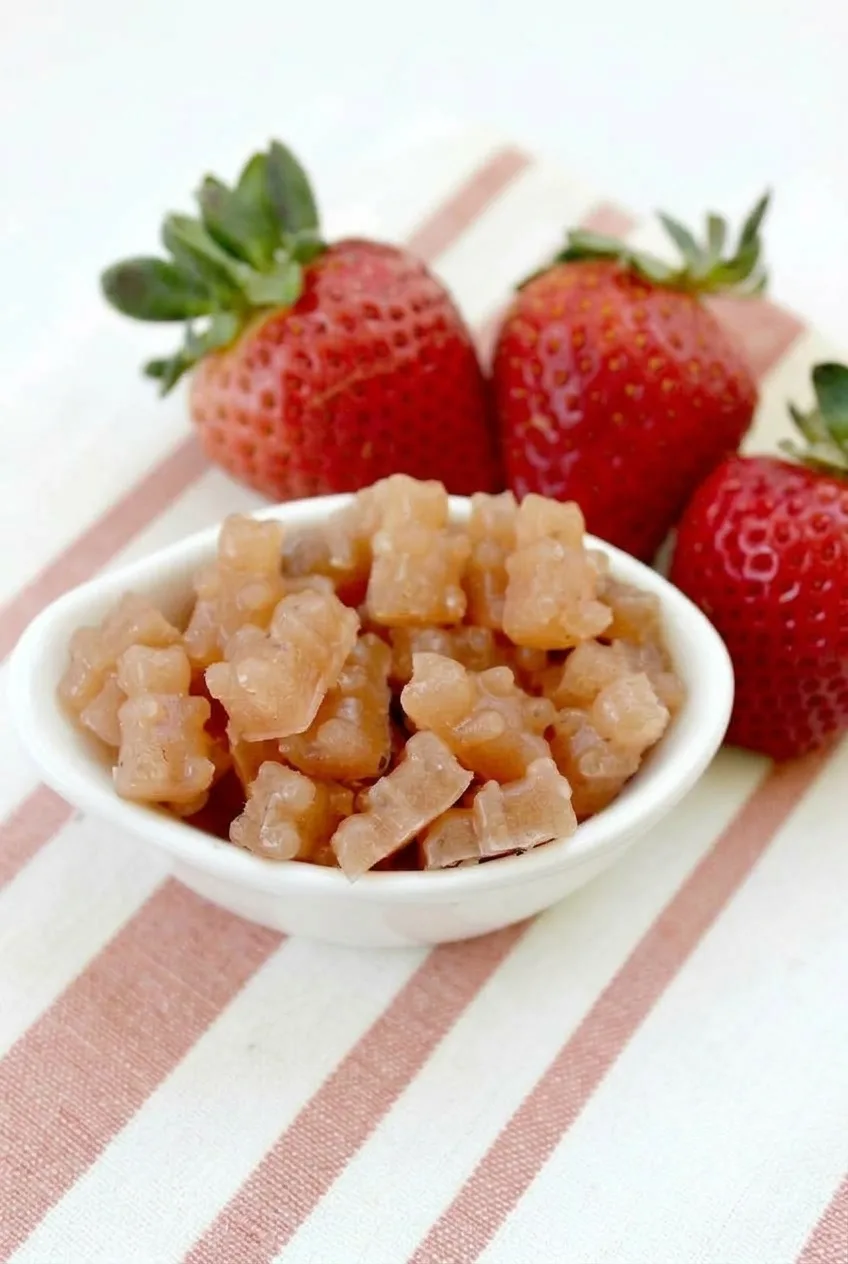
Orange juice and strained strawberry puree make these miniature fruit snacks softly peach-pink, while unflavored gelatin helps them hold their bear shapes. Straining the puree and dissolving the gelatin completely are especially important for smooth details in the tiny molds.
After chilling, the bears should be firm but tender. They are refrigerated fruit snacks, not shelf-stable candy, and they will not have exactly the same chew as packaged gummy bears.
Ingredients for Strawberry-Orange Fruit Snacks
3/4 cup 100% orange juice (180g), without pineapple or other enzyme-rich fruit blends, divided
1/4 cup seedless strawberry puree (60g), measured after straining; start with about 1/2 to 3/4 cup chopped ripe strawberries
1 to 2 teaspoons honey, optional, if the fruit mixture tastes tart
Yield: About 60 to 90 mini bears, depending on mold size, or roughly 8 small snack portions. Allow 15 minutes to prepare, about 5 minutes to warm, and approximately 2 hours to chill.
Use silicone mini-gummy-bear molds with about 1 cup of total capacity. You may need several trays. Set them on a rigid sheet pan before filling.
How to Make Strawberry-Orange Fruit Snack Bears
Prepare the puree and molds: Blend the strawberries and press them through a fine-mesh strainer. Measure 1/4 cup of puree after straining; removing seeds keeps the small bear details smooth, and measuring afterward maintains the intended fruit-base ratio. Set the molds on a sheet pan.
Bloom the gelatin: Pour 1/4 cup cold orange juice into a small saucepan. Sprinkle the gelatin evenly over it and let stand for about 5 minutes, until no dry mounds remain.
Dissolve over low heat: Add the remaining 1/2 cup orange juice and the strawberry puree. Warm uncovered for about 5 minutes, whisking gently until the mixture is fluid and no gelatin grains remain. Do not boil. Stir in the optional honey while warm if the fruit mixture needs sweetness.
Fill the molds: If the mixture is hot, let it cool briefly, but fill the molds before it thickens. Use a small measuring spoon or dropper to fill the cavities without overflowing. Pop large surface bubbles and transfer the supported trays to the refrigerator.
Chill and unmold: Refrigerate for about 2 hours, or until the bears feel firm and hold their outlines. Gently flex the silicone to release them. If they tear or slump, chill them longer before trying again.
How to Get Clean Mini-Bear Shapes
Whisk gently to avoid adding air to the mixture. A small spoon may be easier to control than a dropper in tiny cavities; whichever you use, pop visible bubbles before chilling. Keep the flexible trays on their sheet pan when moving them so the filled bears do not spill.
What Texture Should the Bears Have?
The finished bears should release cleanly, with smooth, slightly glossy surfaces and a firm, tender bite. Larger cavities or a warmer refrigerator may require more than 2 hours, so check firmness rather than relying only on the clock.
For a somewhat chewier bite, leave fully set, unmolded bears uncovered in the refrigerator overnight. This optional drying step does not make them shelf-stable or guarantee a packaged-candy chew. Without bear molds, you can set the mixture in a small shallow dish and cut it into squares, but the pieces will not have the featured bear shape.
Serving and Storage
Serve a small handful of bears in a white bowl. Fresh strawberries can sit beside the bowl, but they are not a topping for the fruit snacks.
Keep the bears covered in the refrigerator and use a cool pack for transport. Do not pack them in an unrefrigerated lunch box. A precise refrigerated keeping time and long-term freezing results have not been established for this recipe.
Approximate nutrition per small snack portion, based on 8 portions and excluding optional honey: 25 calories, 3g protein, 0g fat, and 3g carbohydrates. Per 100g: approximately 70 calories, 9g protein, 0g fat, and 9g carbohydrates. Values vary with the fruit and portion size.
Healthy Homemade Fruit Snacks
Strained strawberry puree and orange juice set with gelatin into tender, refrigerator-stored mini bear snacks.
1 to 2 teaspoons honey, optional, if the fruit mixture tastes tart
Instructions
Blend the strawberries and press the puree through a fine-mesh strainer. Measure 1/4 cup after straining.
Set the silicone molds on a rigid sheet pan.
Pour 1/4 cup cold orange juice into a small saucepan. Sprinkle the gelatin evenly over the juice and let it stand for about 5 minutes, until no dry mounds remain.
Add the remaining 1/2 cup orange juice and the strawberry puree. Warm uncovered over low heat for about 5 minutes, whisking gently until fluid and no gelatin grains remain. Do not boil.
Stir in optional honey while the mixture is warm, if needed.
If the mixture is hot, let it cool briefly. Fill the mold cavities before it thickens, using a small spoon or dropper. Avoid overflowing and pop any large surface bubbles.
Transfer the supported molds to the refrigerator and chill for about 2 hours, or until the bears are firm and hold their outlines.
Gently flex the silicone molds to release the bears. If they tear or slump, chill them longer before trying again.
Tips
Strain the strawberry puree to remove seeds and keep the small bear details smooth.
Measure the puree after straining to maintain the intended fruit-base ratio.
Whisk gently to avoid adding air, and pop visible bubbles before chilling.
Keep the flexible molds on a sheet pan while filling and moving them.
Fill the molds before the mixture thickens, and check firmness rather than relying only on the clock.
Notes
Keep covered in the refrigerator and use a cool pack for transport. These are not shelf-stable; do not pack them in an unrefrigerated lunch box. Refrigerated keeping time and long-term freezing results have not been established.
Nutrition
Calories: 25 kcal per small snack portion|Protein: 3 g per small snack portion|Fat: 0 g per small snack portion|Carbohydrates: 3 g per small snack portion|Calories Per 100g: 70 kcal|Protein Per 100g: 9 g|Fat Per 100g: 0 g|Carbohydrates Per 100g: 9 g
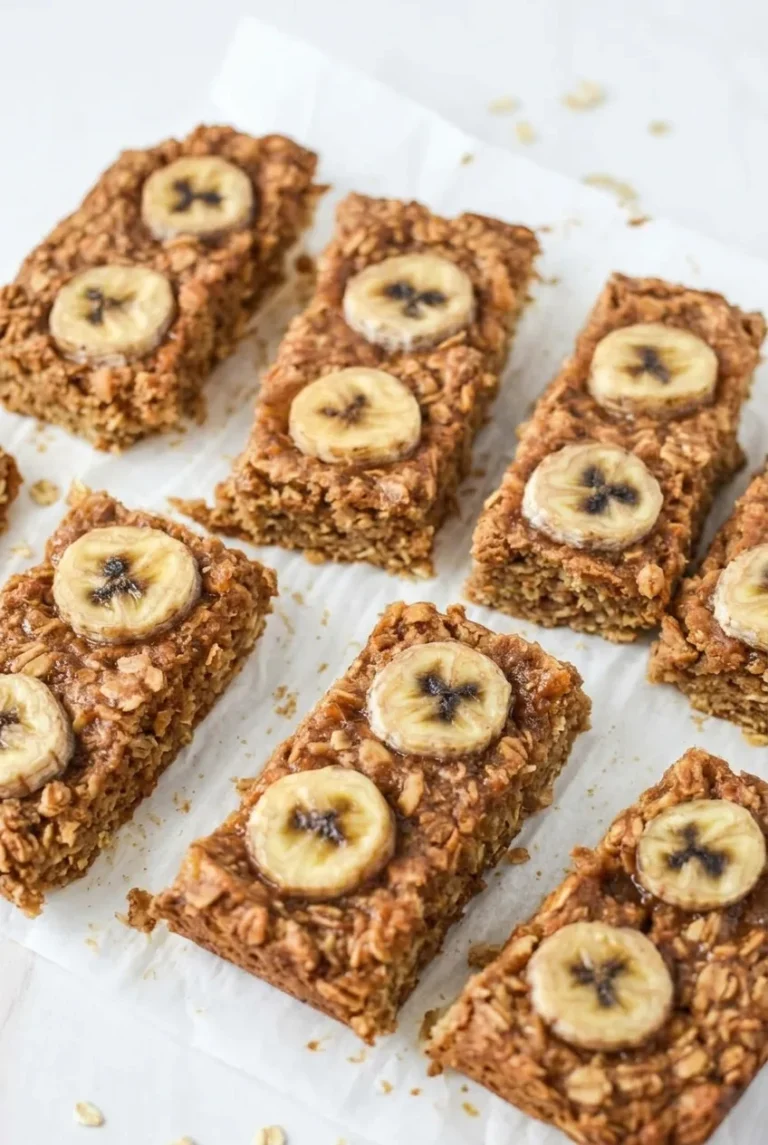
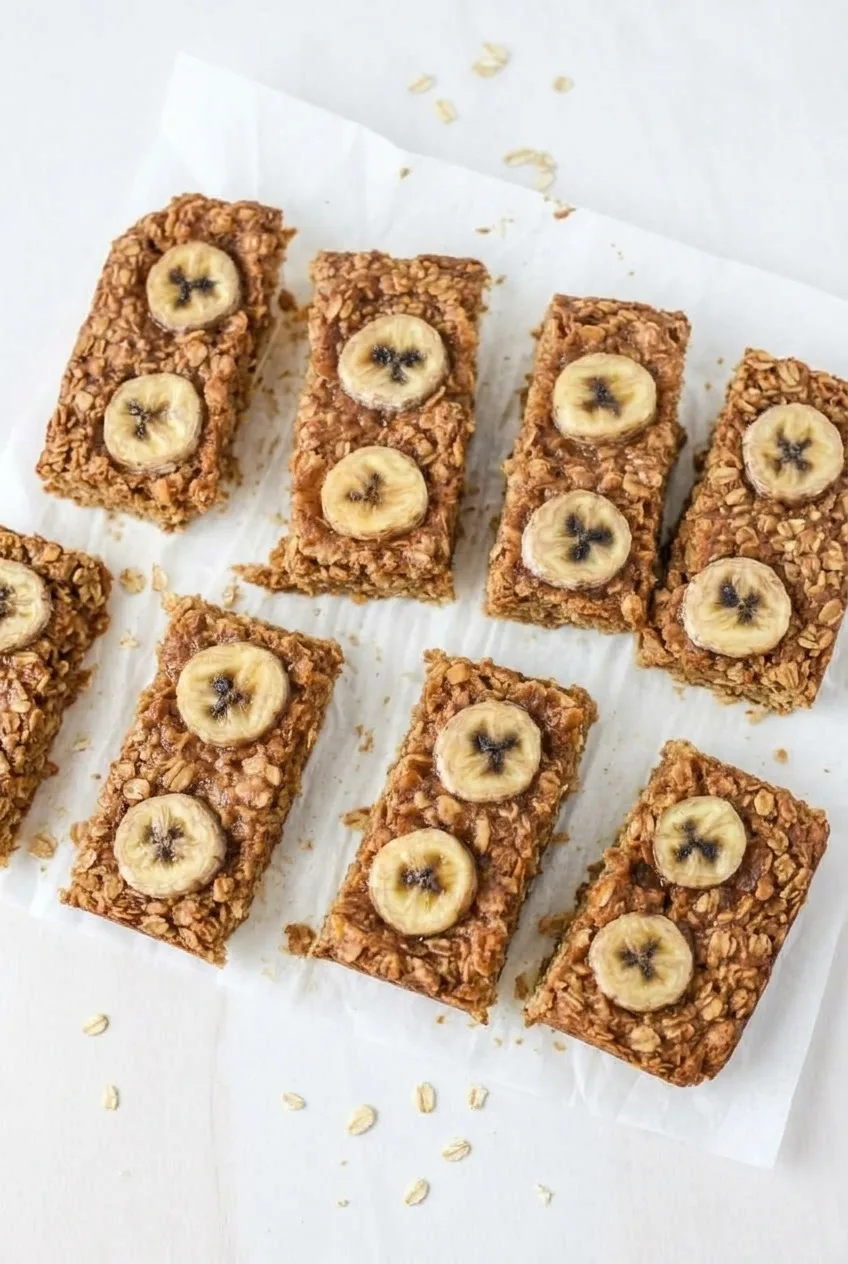
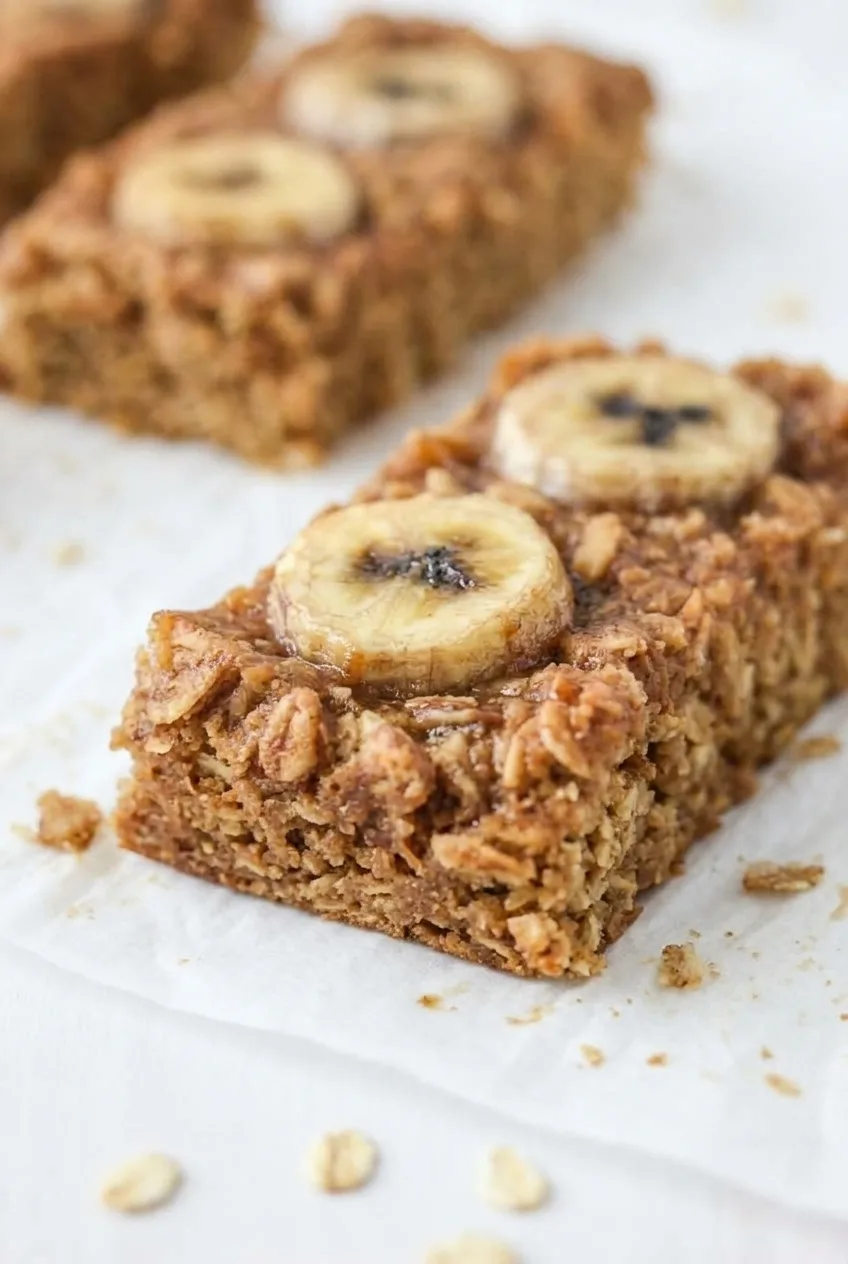
These baked bars are mildly sweet and moist, with visible oat flakes and two banana rounds on every piece. They’re cut from an 8-inch square pan into 12 hand-held portions.
Grinding half the oats helps the banana and peanut butter batter hold together; leaving the rest whole gives the bars their rustic texture. Let the slab cool before cutting so the edges stay intact.
Ingredients for Banana Peanut Butter Oat Bars
2 medium very ripe bananas, mashed (about 1 cup or 225g)
1 medium banana, for topping (about 110g)
1/2 cup creamy peanut butter, well stirred (about 130g), divided
2 cups old-fashioned rolled oats (180g), divided
1 large egg
2 tablespoons maple syrup (40g)
1 teaspoon vanilla extract
1/2 teaspoon baking powder
1/4 teaspoon fine salt
Yield: 12 bars. Prep: About 15 minutes. Bake: About 25–32 minutes. Total: About 80–90 minutes, including cooling.
How to Bake Banana Peanut Butter Oat Bars
Preheat and line the pan: Heat the oven to 350°F (175°C). Line an 8-inch square baking pan with parchment, leaving an overhang on two sides.
Prepare the oats: Grind 1 cup of the rolled oats in a food processor or blender until they resemble coarse flour. Mix with the remaining 1 cup whole oats, baking powder, and salt.
Mix the batter: In a second bowl, mash the 2 batter bananas. Stir in 6 tablespoons of the peanut butter, the egg, maple syrup, and vanilla. Fold in the oat mixture until no dry pockets remain. The batter should be thick and spreadable, not pourable. If unusually large bananas or runny peanut butter make it pourable, fold in a small spoonful of additional ground oats.
Add the topping: Spread the batter evenly in the pan. Stir the reserved 2 tablespoons peanut butter until smooth, then dot and lightly swirl it over the surface. Cut the topping banana into about 24 rounds. Arrange them in pairs within an imagined 3-by-4 grid, with two rounds inside each future bar. Press lightly so they adhere without sinking into the batter.
Bake: Bake uncovered for about 25–32 minutes, checking the center at 25 minutes. The edges should be lightly browned and the center set, not shiny with raw batter. A toothpick inserted into batter away from the banana rounds should come out without wet batter; a few moist crumbs are fine. If the top browns before the center sets, loosely tent it with foil while it finishes baking.
Cool and cut: Cool in the pan for about 20 minutes. Lift out by the parchment and cool another 20–30 minutes, until firm enough to cut cleanly. Cut into a 3-by-4 grid between the banana pairs.
Why Grind Only Half the Oats?
The ground oats help bind the moist batter, while whole rolled oats remain visible on the tops and cut edges. Old-fashioned oats work best for that distinct flake texture; quick oats will make the bars less rustic.
How to Tell When the Bars Are Done
Check the batter between the banana rounds rather than judging by the fruit’s glossy surface. The center should be set, and the edges should begin to pull from the parchment. Banana size, peanut butter consistency, and oven behavior can shift the bake time, so use those cues rather than the clock alone.
Serving and Variations
Serve the cooled bars by hand for breakfast or a snack, with fruit or yogurt alongside if desired. For a cinnamon variation, add 1/2 teaspoon ground cinnamon to the dry ingredients. For a sweeter version, fold up to 1/4 cup mini chocolate chips into the batter, keeping the banana rounds visible.
Cool completely, then refrigerate in a covered container. Separate layers with parchment to keep the banana topping from sticking. The bars can be made ahead and served cool or allowed to come closer to room temperature.
Nutrition
Approximate per bar (1 of 12): 160 calories, 6g protein, 7g fat, and 21g carbohydrates. Approximate per 100g of baked bars: 285 calories, 11g protein, 12g fat, and 37g carbohydrates. Values are estimates; banana size, peanut butter, and moisture lost during baking will affect them.
Banana Peanut Butter Oat Bars
Moist baked oat bars made with ripe bananas and peanut butter, topped with banana rounds.
2 medium very ripe bananas, mashed (about 1 cup or 225 g)
1/2 cup creamy peanut butter, well stirred (about 130 g), divided
2 cups old-fashioned rolled oats (180 g), divided
1 large egg
2 tablespoons maple syrup (40 g)
1 teaspoon vanilla extract
1/2 teaspoon baking powder
1/4 teaspoon fine salt
For the topping
1 medium banana (about 110 g)
Instructions
Preheat the oven to 350°F (175°C). Line an 8-inch square baking pan with parchment, leaving an overhang on two sides.
Grind 1 cup of the oats in a food processor or blender until they resemble coarse flour. Combine with the remaining 1 cup whole oats, baking powder, and salt.
Mash the 2 batter bananas in a bowl. Stir in 6 tablespoons of the peanut butter, the egg, maple syrup, and vanilla.
Fold the oat mixture into the banana mixture until no dry pockets remain. The batter should be thick and spreadable. If it is pourable, fold in a small spoonful of additional ground oats.
Spread the batter evenly in the prepared pan. Stir the remaining 2 tablespoons peanut butter until smooth, then dot and lightly swirl it over the surface.
Cut the topping banana into about 24 rounds. Arrange them in pairs in a 3-by-4 grid, with two rounds inside each future bar. Press lightly so they adhere.
Bake uncovered for 25–32 minutes, checking the center at 25 minutes. The edges should be lightly browned and the center set. A toothpick inserted into the batter away from the banana rounds should come out without wet batter; a few moist crumbs are fine. Tent loosely with foil if the top browns before the center sets.
Cool in the pan for about 20 minutes. Lift out using the parchment and cool another 20–30 minutes, until firm enough to cut. Cut into a 3-by-4 grid between the banana pairs.
Tips
Grind half the oats to help bind the moist batter, and leave the rest whole for a rustic texture.
Use old-fashioned rolled oats for visible flakes; quick oats make the bars less rustic.
Check doneness in the batter between banana rounds, not by the fruit’s glossy surface.
Cool the bars fully before cutting to help the edges stay intact.
Variations
Cinnamon: Add 1/2 teaspoon ground cinnamon to the dry ingredients.
Mini Chocolate Chip: Fold up to 1/4 cup mini chocolate chips into the batter, keeping the banana rounds visible.
Notes
Cool completely and refrigerate in a covered container. Separate layers with parchment to keep the banana topping from sticking. Approximate nutrition per 100 g: 285 calories, 11 g protein, 12 g fat, and 37 g carbohydrates.
Nutrition
Calories: 160 kcal per bar|Protein: 6 g per bar|Fat: 7 g per bar|Carbohydrates: 21 g per bar
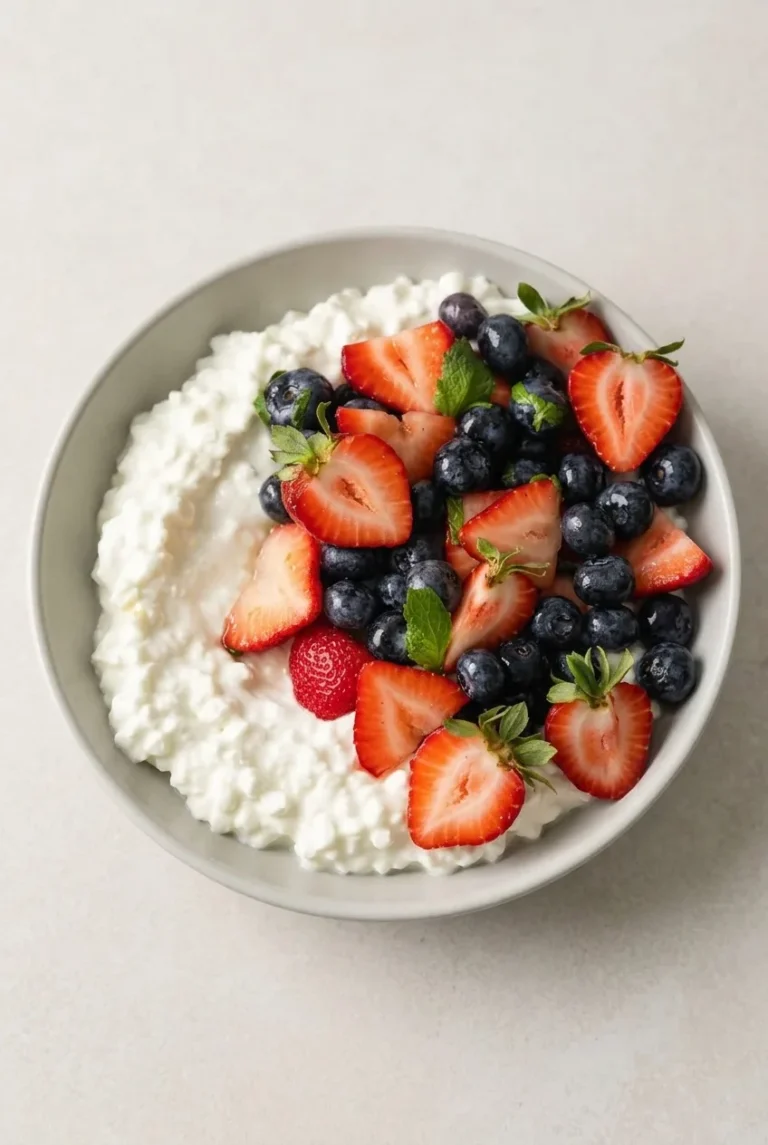
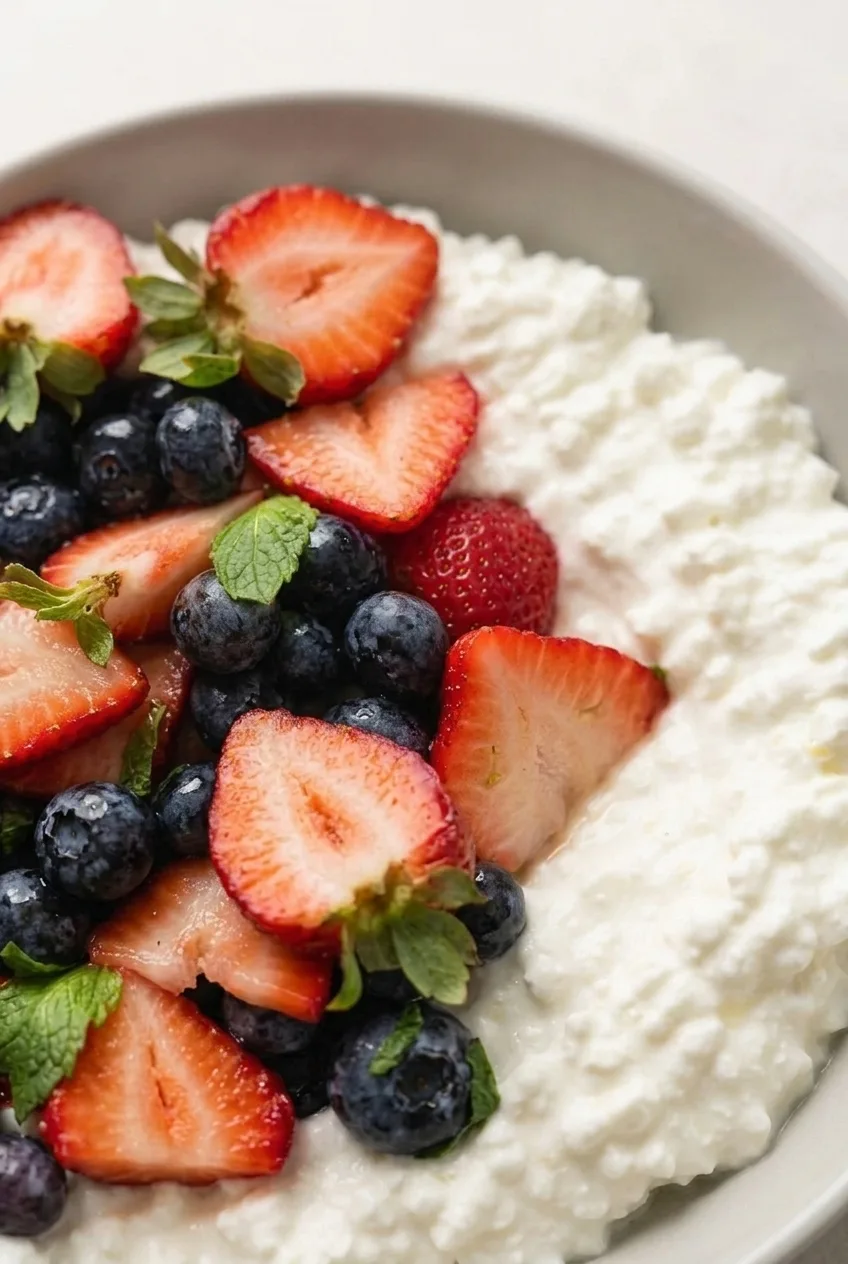
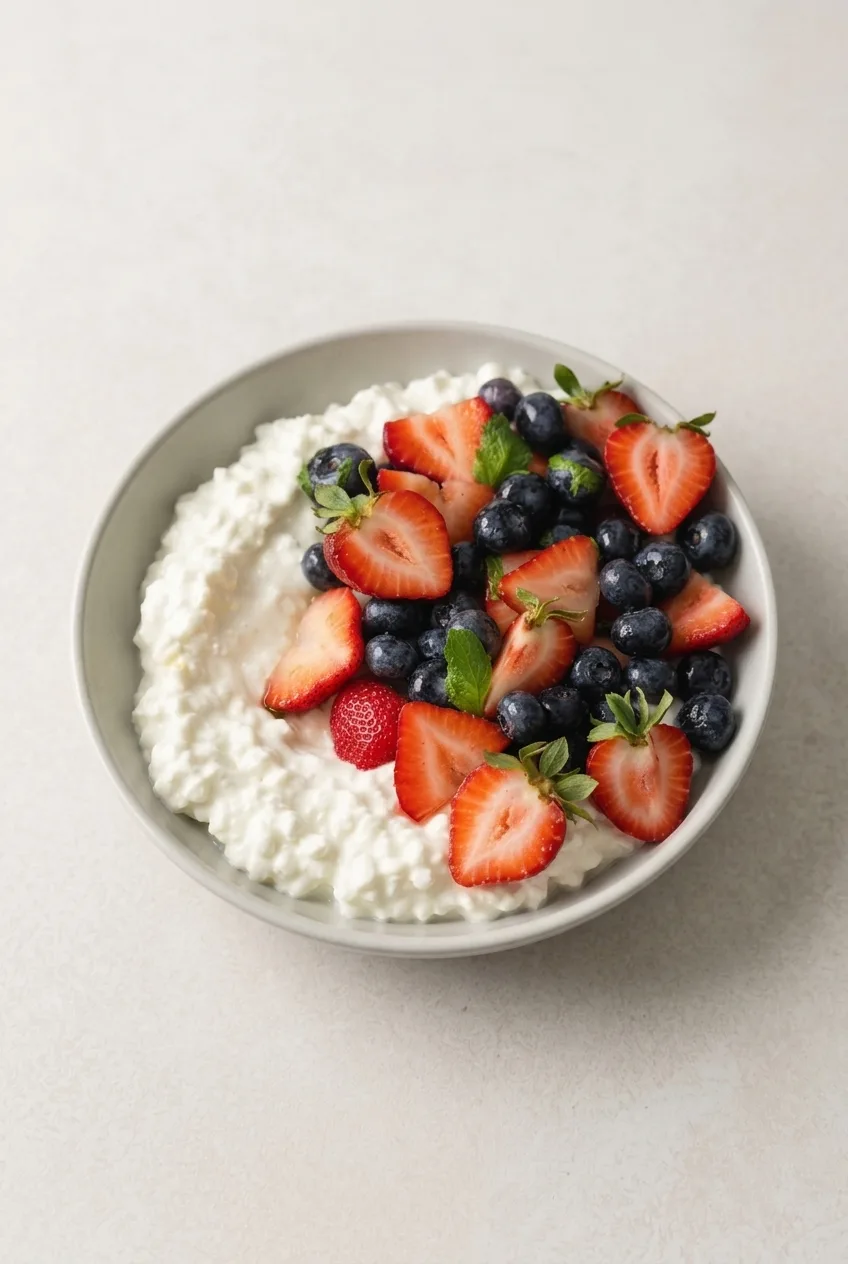
Visible cottage cheese curds make the base of these no-cook breakfast bowls. Strawberries and blueberries get a light coating of honey and lime, then sit over one side of each bowl with a few mint leaves. Dry the berries well and add them just before serving: the fruit stays distinct, and its juices are less likely to collect around the cheese. The recipe makes two bowls in about 10 minutes.
Ingredients for Cottage Cheese & Fruit Bowls
2 cups cottage cheese (about 450g)
1 cup fresh strawberries, hulled and halved or quartered (about 150g)
1 cup fresh blueberries (about 150g)
2 teaspoons honey (about 15g)
1 teaspoon fresh lime juice
4 to 6 small fresh mint leaves
Choose a cottage cheese with a texture you enjoy; no particular fat percentage is needed. For more lime aroma without extra liquid, add an optional small pinch of finely grated lime zest to the dressing.
How to Make Cottage Cheese & Fruit Bowls
Prepare the berries: Wash and thoroughly dry the strawberries and blueberries. Hull and halve or quarter the strawberries; leave the blueberries whole.
Dress the fruit: Stir the honey and lime juice together in a small bowl. Just before serving, gently toss with the berries. They should have a light sheen, not sit in a pool of dressing.
Fill the bowls: Spoon 1 cup of unblended cottage cheese into each of two shallow bowls. Divide the berries over roughly half of each bowl, leaving a broad area of white curds visible. Do not stir the fruit into the cheese.
Finish: Tuck 2 to 3 small mint leaves among the berries in each bowl and serve promptly.
Textured or Whipped Cottage Cheese?
For the curded bowl shown here, spoon the cottage cheese straight into the bowls. If you prefer a smooth base, briefly whip it before adding the berries. The topping stays the same, but the finished bowl will have a different texture and appearance.
How to Keep the Berry Topping Fresh
Water left on washed berries, extra lime juice, or dressing the fruit too early can leave liquid around the topping. Measure the lime juice, dry the berries well, and toss them with the dressing only when you are ready to assemble.
Make-Ahead and Serving
For next-morning assembly, keep the cottage cheese covered in the refrigerator and store the washed, dried berries separately. Dress the fruit and add the mint when ready to serve. Fully assembled bowls are best eaten promptly because the berries can release liquid as they sit.
Approximate nutrition per bowl (1 of 2): 275 calories, 25g protein, 5g fat, and 33g carbohydrates. Per 100g: about 70 calories, 6g protein, 1g fat, and 9g carbohydrates. Values vary with the cottage cheese brand and fruit size.
Cottage Cheese & Fruit Bowl
Unblended cottage cheese is topped with strawberries and blueberries tossed in honey and lime, then finished with fresh mint.
1 cup fresh strawberries, hulled and halved or quartered (about 150 g)
1 cup fresh blueberries (about 150 g)
2 teaspoons honey (about 15 g)
1 teaspoon fresh lime juice
4 to 6 small fresh mint leaves
Optional: small pinch of finely grated lime zest
Instructions
Wash and thoroughly dry the strawberries and blueberries.
Hull and halve or quarter the strawberries; leave the blueberries whole.
Stir the honey and lime juice together in a small bowl.
Just before serving, gently toss the berries with the honey-lime mixture until lightly coated.
Spoon 1 cup of cottage cheese into each of two shallow bowls.
Divide the berries over roughly half of each bowl, leaving some cottage cheese visible. Do not stir the fruit into the cheese.
Add 2 to 3 mint leaves to each bowl and serve promptly.
Tips
Dry the berries thoroughly to help prevent liquid from collecting around the topping.
Measure the lime juice so the dressing does not make the fruit too wet.
Toss the berries with the dressing just before assembling the bowls.
Keep the fruit on one side and avoid stirring it into the cottage cheese.
Variations
Whipped Cottage Cheese Bowl: Briefly whip the cottage cheese before adding the berries for a smooth base.
Notes
For next-morning assembly, refrigerate the cottage cheese covered and store the washed, dried berries separately. Dress the fruit and add the mint just before serving; assembled bowls are best eaten promptly.
Nutrition
Calories: 275 kcal|Protein: 25 g|Fat: 5 g|Carbohydrates: 33 g
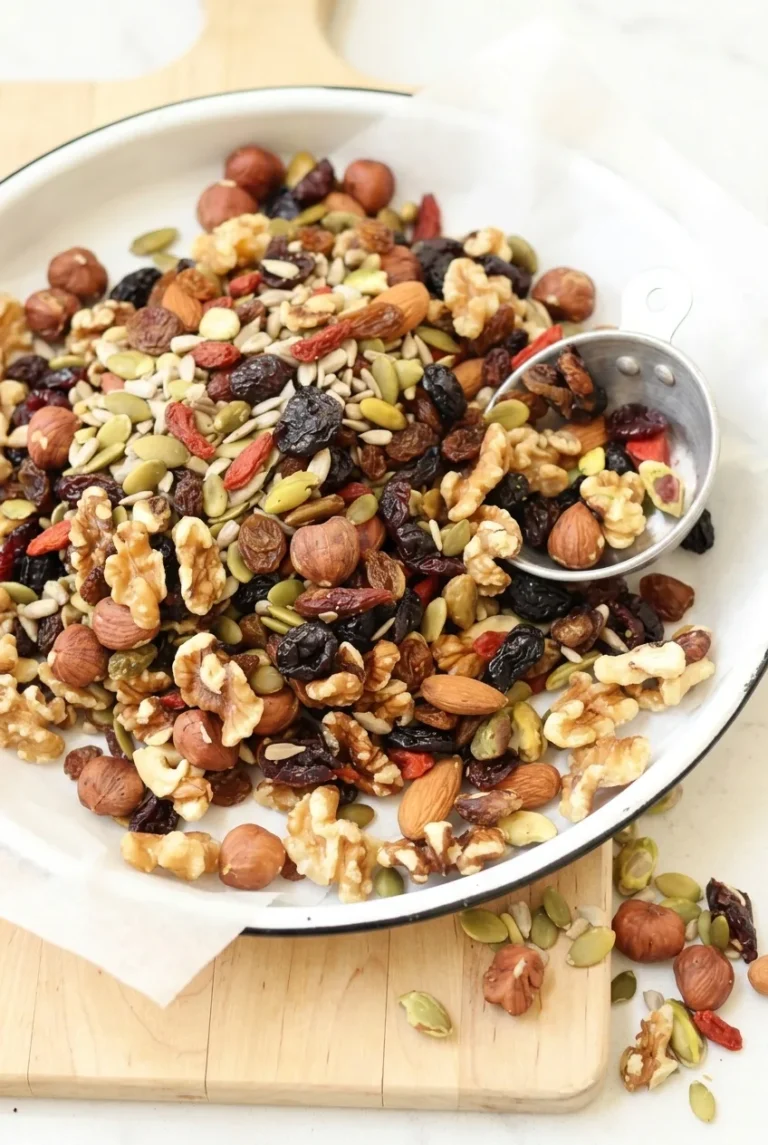
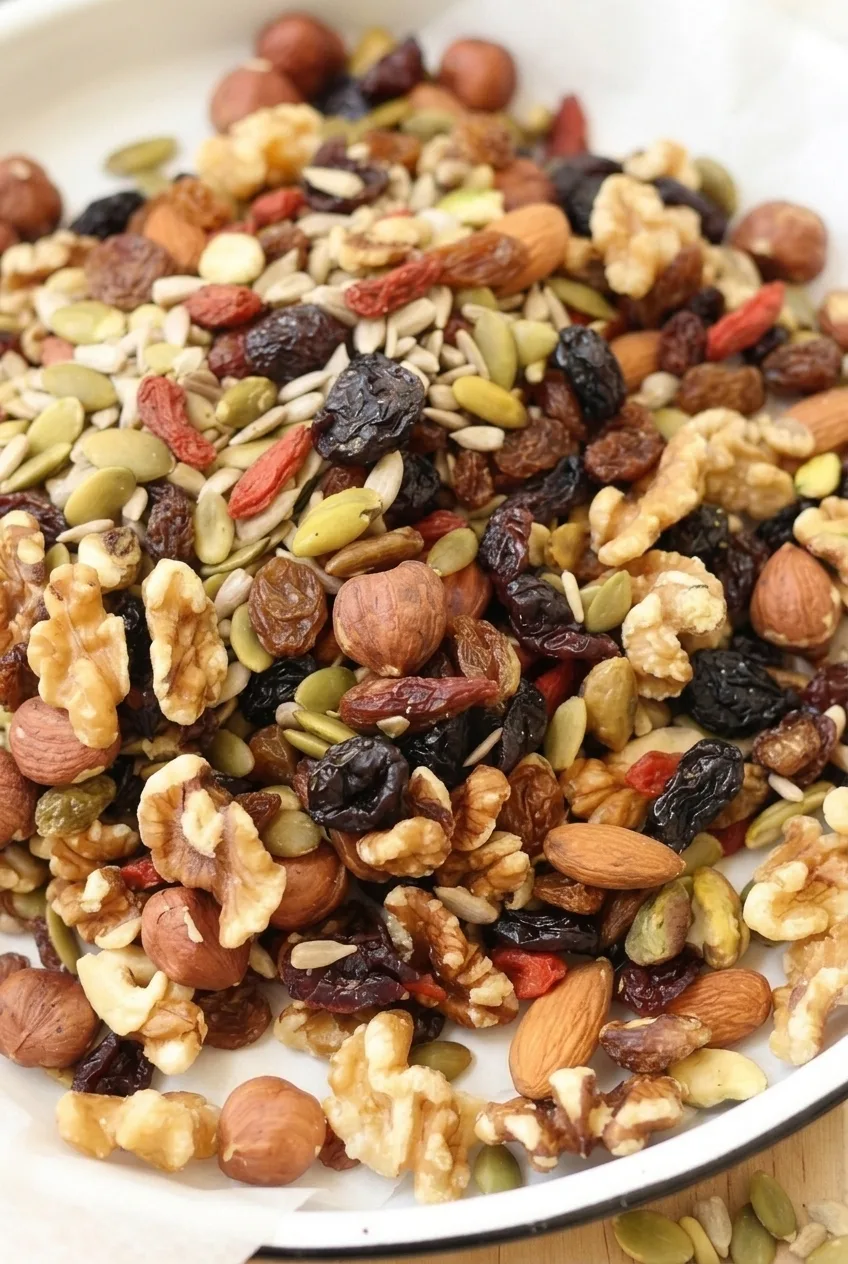
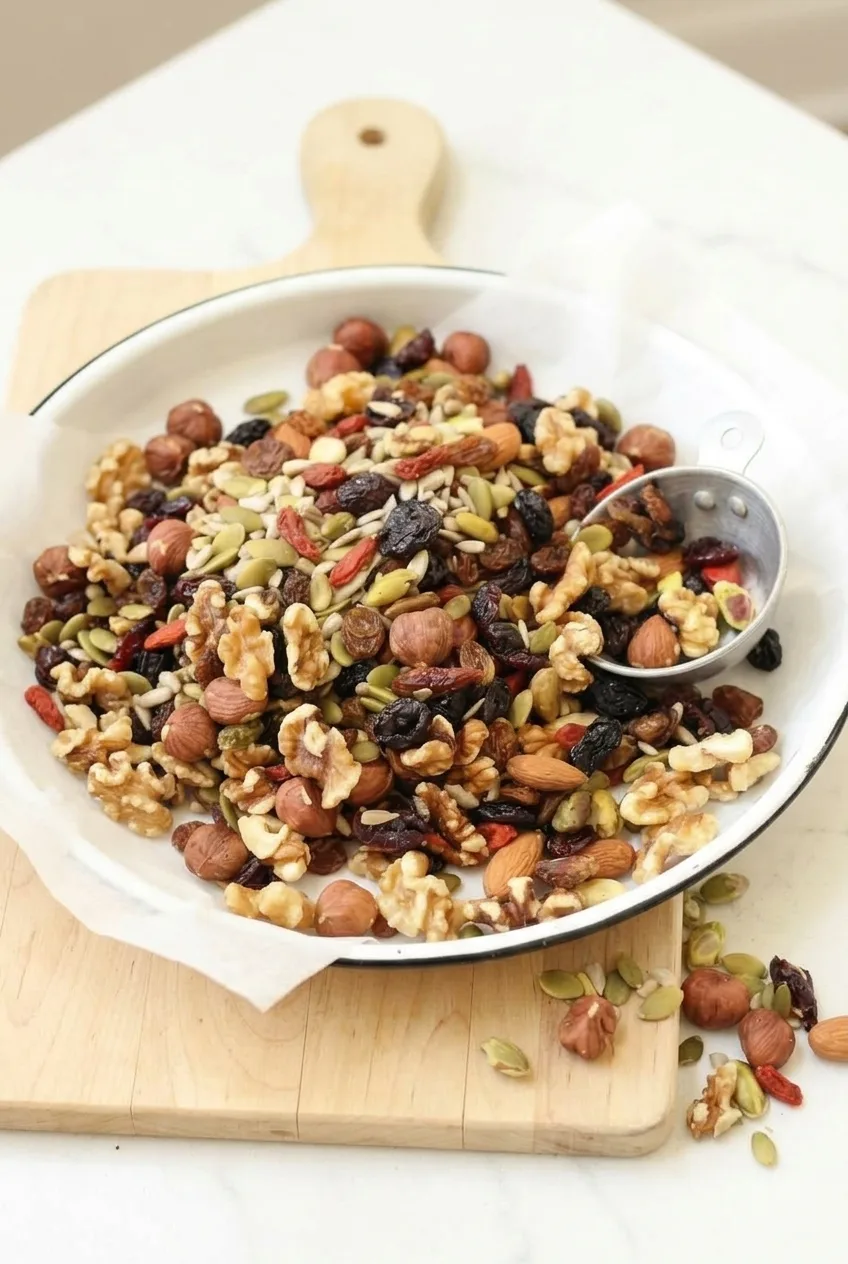
Large walnut pieces, whole almonds, and hazelnuts make this trail mix nut-forward, while pumpkin and sunflower seeds add smaller bites of crunch. Raisins and dried cranberries bring chewy contrast. The mix stays loose and uncoated, ready to scoop into a dish or divide into portions.
All seven ingredients are ready to eat, so there’s no cooking or cereal base to prepare. Toss them together in a roomy bowl, then stir again before portioning if the small seeds have settled.
Ingredients for Healthy Trail Mix
1 cup ready-to-eat walnut halves and pieces (about 100g)
1/2 cup ready-to-eat whole almonds (about 70g)
1/2 cup ready-to-eat hazelnuts (about 65g)
1/3 cup ready-to-eat pumpkin seeds (about 45g)
1/4 cup ready-to-eat sunflower seeds (about 35g)
1/2 cup raisins (about 75g)
1/3 cup dried cranberries (about 45g)
Use dry nuts and seeds that are ready to eat as purchased. Keep the almonds and hazelnuts whole and the walnut pieces fairly large rather than chopping everything to the size of the seeds.
How to Make Healthy Trail Mix
Combine: Measure the nuts, seeds, raisins, and dried cranberries into a large mixing bowl with enough room to toss without spilling.
Toss: Stir until the green and pale seeds and both dried fruits are distributed throughout the nuts. The mix should remain dry and loose.
Serve or portion: Spoon into a shallow serving dish or divide among airtight containers. Stir again first if the seeds have collected at the bottom, so each portion gets some.
Prep: 5 minutes | Cook: 0 minutes | Total: 5 minutes | Yield: About 7 servings, approximately 1/2 cup each
Trail Mix Variations
For a sweeter mix, toss in 2 to 3 tablespoons of dark chocolate chips. You can replace one nut variety with cashews, peanuts, or pecans, or swap the cranberries for dried cherries or chopped dried apricots.
For a cereal-containing version, replace some of the nuts with ready-to-eat whole-grain cereal and add popcorn if desired. This makes a less nut-forward mix than the main recipe.
Serving and Storing Trail Mix
Serve from a shallow dish or divide the mix into small containers for portable snacks. For another portable no-cook option, try these hummus and veggie snack cups.
Keep the trail mix in an airtight container to protect its crunch from moisture. Refrigeration is an option; follow the storage guidance on the ingredient packages. Stir before serving if the seeds settle.
Nutrition
Approximate per 1/2-cup serving, based on 7 servings: 330 calories, 9g protein, 26g fat, and 21g carbohydrates. Approximate per 100g: 525 calories, 14g protein, 42g fat, and 34g carbohydrates. Values are estimates for the seven-ingredient main recipe and vary by product and portion size.
Healthy Trail Mix
A no-cook mix of walnuts, almonds, hazelnuts, seeds, raisins, and dried cranberries.
Servings: 7Calories: 330 kcal per 1/2-cup serving; 525 kcal per 100 g
Equipment
Large mixing bowl
Ingredients
1 cup ready-to-eat walnut halves and pieces (about 100 g)
1/2 cup ready-to-eat whole almonds (about 70 g)
1/2 cup ready-to-eat hazelnuts (about 65 g)
1/3 cup ready-to-eat pumpkin seeds (about 45 g)
1/4 cup ready-to-eat sunflower seeds (about 35 g)
1/2 cup raisins (about 75 g)
1/3 cup dried cranberries (about 45 g)
Instructions
Measure the walnuts, almonds, hazelnuts, pumpkin seeds, sunflower seeds, raisins, and cranberries into a large mixing bowl.
Stir until the seeds and dried fruits are evenly distributed throughout the nuts.
Serve in a shallow dish or divide among airtight containers. Stir again before portioning if the seeds have settled.
Tips
Use dry nuts and seeds that are ready to eat as purchased.
Keep the almonds and hazelnuts whole and the walnut pieces fairly large.
Stir before serving or portioning if the small seeds have settled.
Variations
Chocolate Trail Mix: Add 2 to 3 tablespoons of dark chocolate chips.
Alternative Nut or Fruit Mix: Replace one nut variety with cashews, peanuts, or pecans, or swap the cranberries for dried cherries or chopped dried apricots.
Cereal Trail Mix: Replace some of the nuts with ready-to-eat whole-grain cereal and add popcorn if desired.
Notes
Store in an airtight container to protect the mix from moisture. Refrigeration is optional; follow the storage guidance on the ingredient packages.
Nutrition
Calories: 330 kcal per 1/2-cup serving; 525 kcal per 100 g|Protein: 9 g per 1/2-cup serving; 14 g per 100 g|Fat: 26 g per 1/2-cup serving; 42 g per 100 g|Carbohydrates: 21 g per 1/2-cup serving; 34 g per 100 g