Author

Julia

Browsing

Healthy Banana Oatmeal Cookies

Very ripe bananas hold these oatmeal cookies together and sweeten the dough, while chocolate chips add sweetness and stay visible on top. The cookies bake up thick, soft, and chewy, with distinct oat flakes and lightly golden edges—not thin or crisp. Because banana-oat dough barely spreads, give each portion a cookie shape before it goes into the oven.

Makes about 12 cookies. Allow 15 minutes of active prep, 10 minutes for the dough to rest, 15 to 18 minutes to bake, and about 10 minutes to cool on the sheet.

Ingredients for Banana Oatmeal Cookies
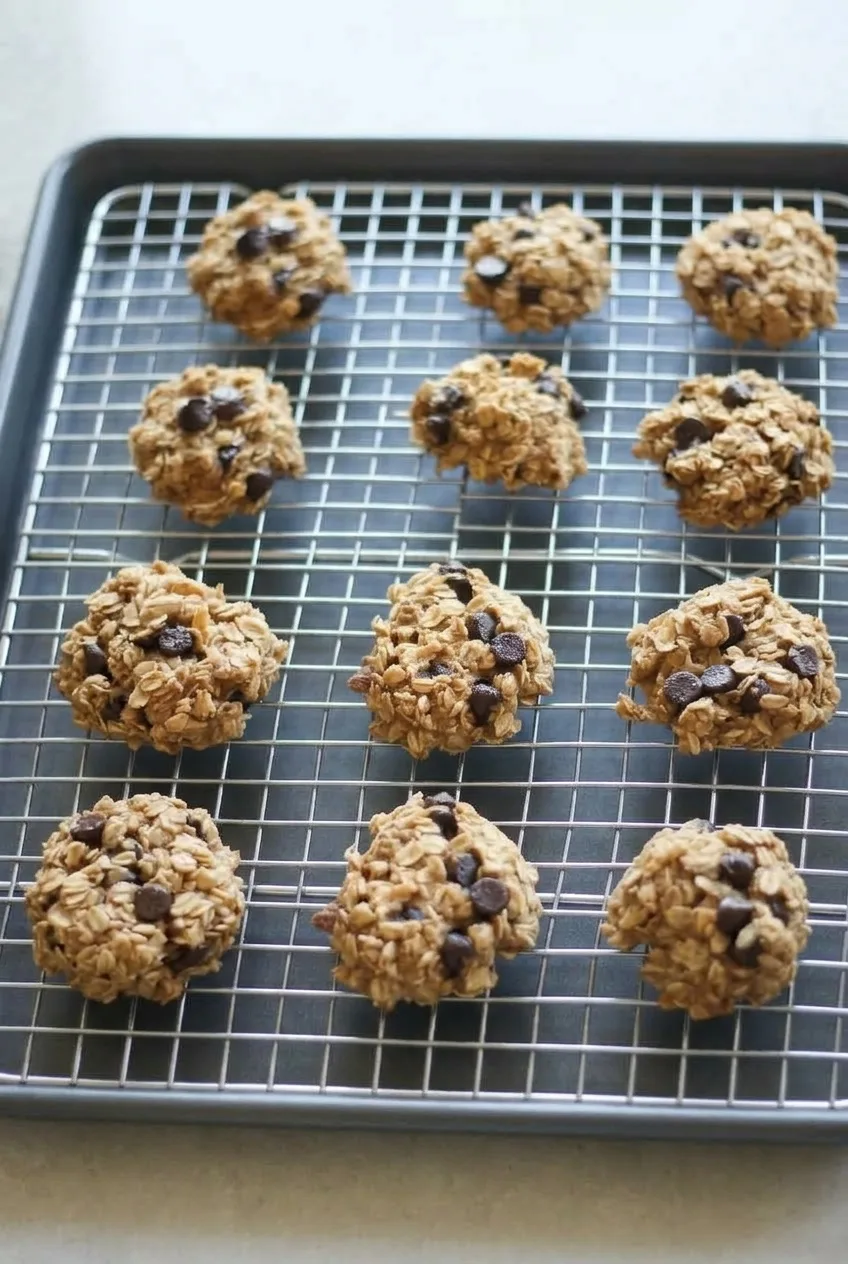
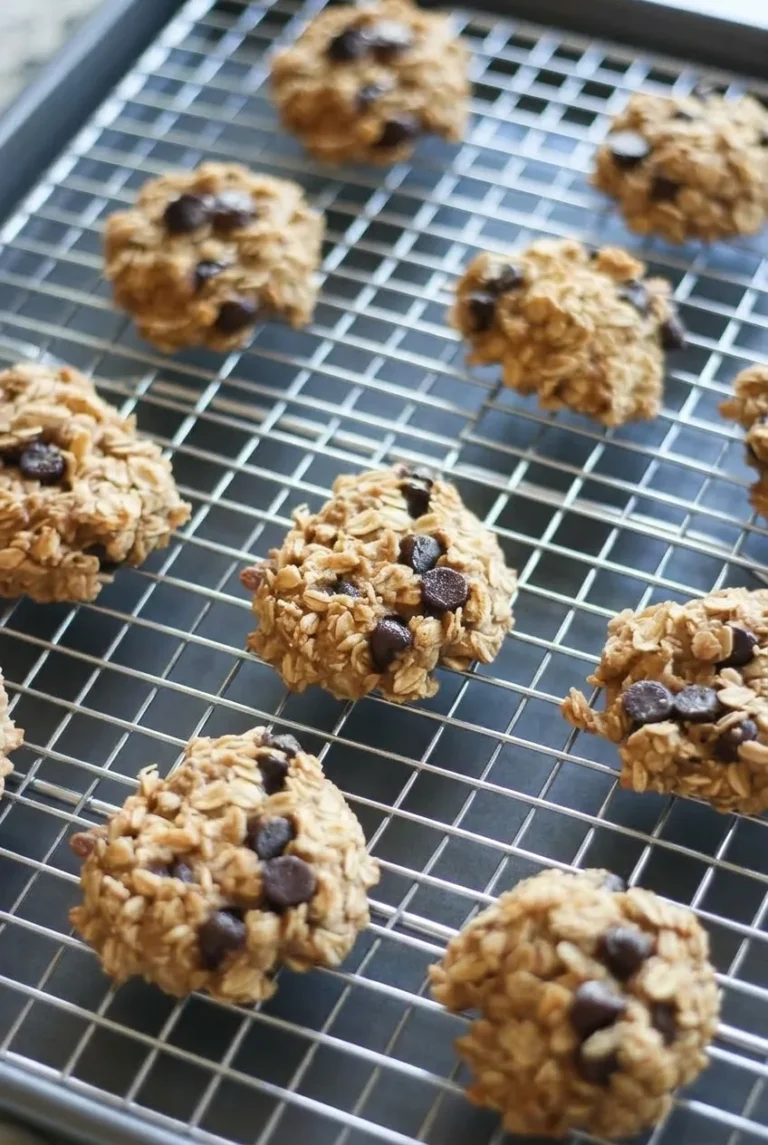
A full rack of chunky banana oatmeal cookies cooling over a dark baking sheet
  • 2 medium very ripe bananas, mashed to about 1 cup (225g)
  • 2 cups old-fashioned rolled oats (180g), plus more if needed
  • 1/2 teaspoon ground cinnamon
  • 1/3 cup chocolate chips (about 55g)

Optional: Add 1/2 teaspoon vanilla extract to the mashed bananas. Reserve a few of the measured chocolate chips for the cookie tops.
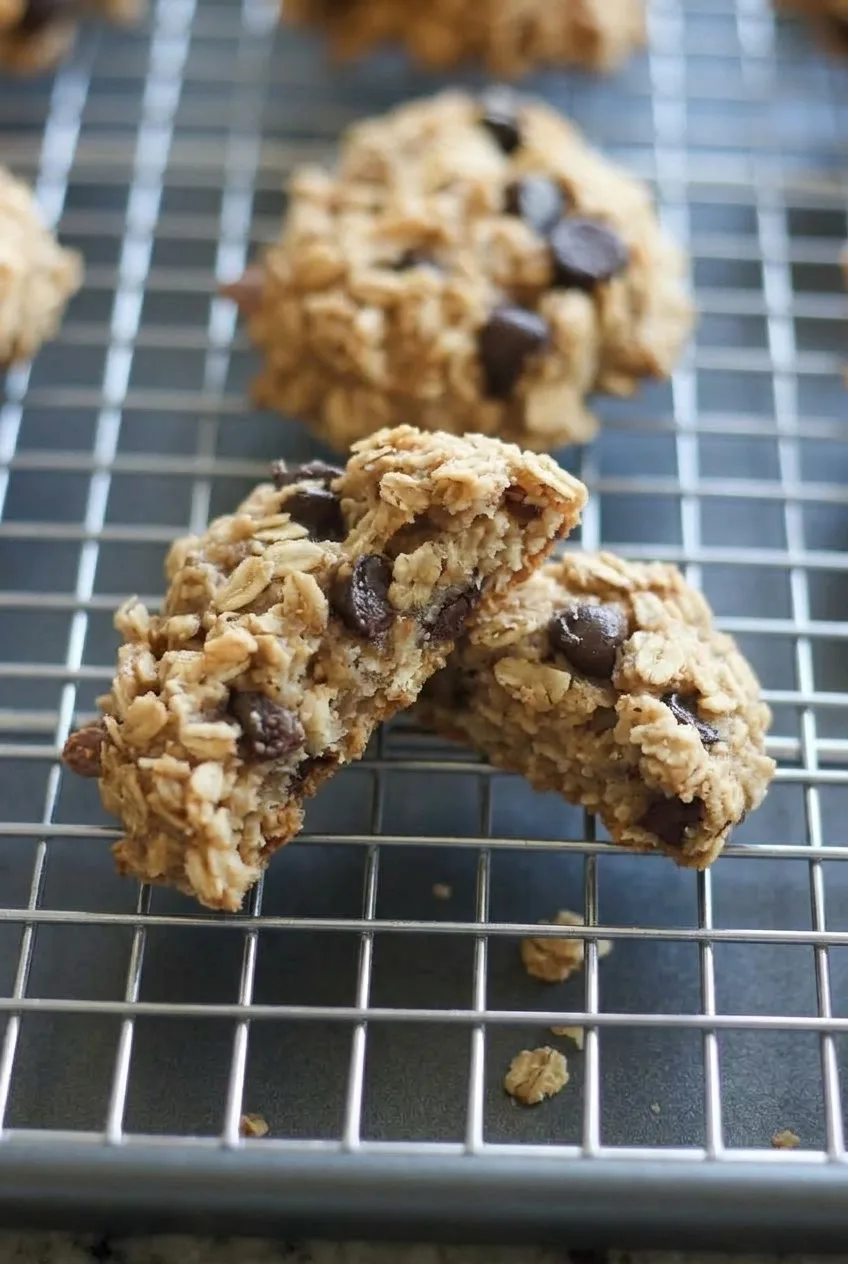
Broken banana oatmeal cookie showing its soft oat-filled interior and chocolate chips

How to Bake Banana Oatmeal Cookies

  1. Preheat the oven: Set a rack in the center of the oven and heat to 350°F (175°C). Line a baking sheet with parchment paper.
  2. Mash the bananas: Mash the bananas in a mixing bowl until mostly smooth. Stir in the cinnamon and optional vanilla.
  3. Mix and rest: Stir in the rolled oats and most of the chocolate chips. Let the mixture stand for 10 minutes so the oats absorb moisture. The rested dough should be moist and cohesive but scoopable, not pourable. If it is still runny, stir in more rolled oats 1 tablespoon at a time until it holds a scoop.
  4. Shape the cookies: Divide the dough into 12 portions on the lined sheet, leaving about 2 inches between them. Gently press each into a roughly round, irregular cookie about 3/4 inch thick. Press the reserved chocolate chips onto the tops.
  5. Bake until set: Bake uncovered for about 15 to 18 minutes, checking at 14 minutes. The tops should look set rather than wet, and the edges should be lightly golden; the centers will remain soft. Rotate the sheet once if your oven browns unevenly.
  6. Cool before moving: Leave the cookies on the sheet for about 10 minutes, then carefully transfer them to a wire rack. They firm up enough to hold together as they cool.

Banana Ripeness and Dough Consistency

Choose heavily spotted bananas and measure about 1 cup after mashing. Less-ripe bananas give the cookies less sweetness, while larger bananas can make the dough wetter. Wait until after the 10-minute rest before adding extra oats; the mixture often becomes easier to scoop as it sits.

Quick oats can replace rolled oats by volume, but the cookies will have a finer texture without the prominent oat flakes. Steel-cut oats are not a direct substitute.

Why Shape the Cookies Before Baking?

Banana-oat dough spreads very little. Pressing each portion to about 3/4 inch thick prevents tall, shapeless mounds while keeping the cookies substantial. Leave the edges uneven, and avoid baking until deeply browned, which can dry out their soft centers.

Storage and Freezing

Cool the cookies completely before packing them. Refrigerate in an airtight container for about 4 days, or freeze for up to 2 months. Thaw frozen cookies before serving; reheating is not necessary.

For another banana snack, try these Peanut Butter Banana Bites. For a richer dessert cookie, see these Pecan Pie Cookies.

Nutrition

Approximate per cookie, based on 12 cookies: 100 calories, 3g protein, 2g fat, and 17g carbohydrates. Approximate per 100g of the unbaked ingredient mixture: 255 calories, 8g protein, 6g fat, and 45g carbohydrates. Values vary with the bananas and chocolate chips used. Baking changes the cookies’ weight, so per-100g values for finished cookies will differ.

Healthy Banana Oatmeal Cookies

Soft, chewy cookies made with ripe bananas, rolled oats, cinnamon, and chocolate chips.
Course: Snack
Cuisine: American
Prep: 25 min
Cook: 18 min
Total: 53 min
Servings: 12

Equipment

  • Mixing bowl
  • Baking sheet
  • Parchment paper
  • Wire rack

Ingredients

  • 2 medium very ripe bananas, mashed to about 1 cup (225 g)
  • 2 cups old-fashioned rolled oats (180 g), plus more if needed
  • 1/2 teaspoon ground cinnamon
  • 1/3 cup chocolate chips (about 55 g), with a few reserved for the tops
  • 1/2 teaspoon vanilla extract (optional)

Instructions

  1. Preheat the oven to 350°F (175°C) with a rack in the center. Line a baking sheet with parchment paper.
  2. Mash the bananas in a mixing bowl until mostly smooth. Stir in the cinnamon and optional vanilla.
  3. Stir in the rolled oats and most of the chocolate chips. Let the mixture rest for 10 minutes.
  4. Check that the dough is moist and cohesive but scoopable. If it is runny, stir in more oats 1 tablespoon at a time.
  5. Divide the dough into 12 portions on the baking sheet, leaving about 2 inches between them. Press each portion into an irregular round about 3/4 inch thick, then press the reserved chocolate chips onto the tops.
  6. Bake for 15 to 18 minutes, checking at 14 minutes, until the tops look set and the edges are lightly golden. Rotate the sheet once if your oven browns unevenly.
  7. Cool the cookies on the baking sheet for about 10 minutes, then carefully transfer them to a wire rack.

Tips

  • Use heavily spotted, very ripe bananas for the best sweetness.
  • Measure about 1 cup of banana after mashing; larger bananas can make the dough wetter.
  • Wait until after the 10-minute rest before adding extra oats.
  • Shape the portions before baking because the dough spreads very little.
  • Avoid baking until deeply browned to keep the centers soft.

Variations

  • Quick-Oat Cookies: Replace the rolled oats with quick oats by volume for a finer texture.
  • Vanilla Banana Oat Cookies: Stir 1/2 teaspoon vanilla extract into the mashed bananas.
Notes

Cool completely before storing. Refrigerate in an airtight container for about 4 days or freeze for up to 2 months; thaw before serving. Approximate nutrition per 100 g of unbaked mixture is 255 calories, 8 g protein, 6 g fat, and 45 g carbohydrates.

Nutrition

Per Cookie Calories: 100 kcal | Per Cookie Protein: 3 g | Per Cookie Fat: 2 g | Per Cookie Carbohydrates: 17 g | Per 100g Unbaked Calories: 255 kcal | Per 100g Unbaked Protein: 8 g | Per 100g Unbaked Fat: 6 g | Per 100g Unbaked Carbohydrates: 45 g

Peanut Butter Banana Bites

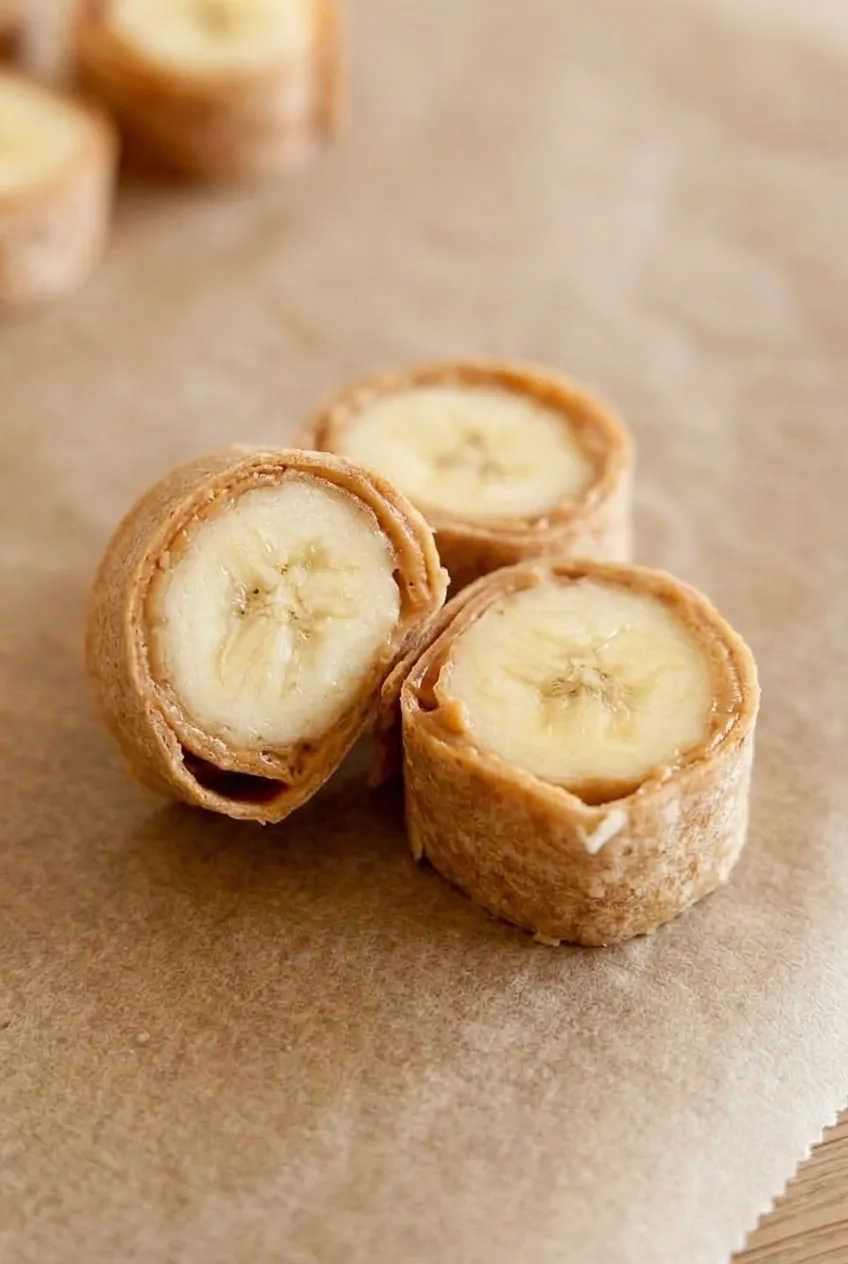
Roll a whole banana inside a thin wrap spread with peanut butter, then slice it into thick pinwheels. Each bite has a soft banana center, a narrow peanut-butter layer, and a visible wrap edge. These are fresh, no-cook bites rather than frozen or chocolate-coated ones. Ripe but firm bananas and a snug roll help the slices hold their shape.

Prep: 10 minutes | Cook: 0 minutes | Total: 10 minutes | Yield: About 18 to 22 bites, or 4 snack servings

Ingredients for Peanut Butter Banana Bites

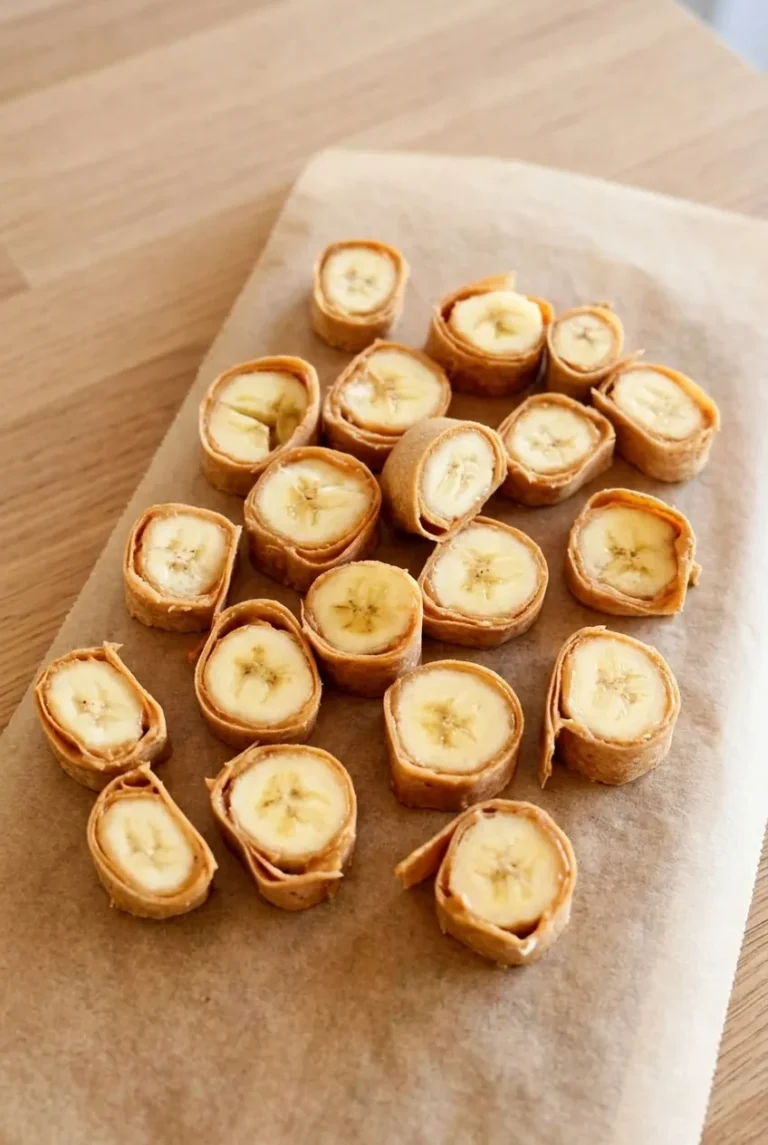
Close view of banana-centered pinwheels with a thin peanut butter layer and overlapping tan wrap edges.
  • 2 medium ripe but firm bananas (about 235g peeled)
  • 4 tablespoons creamy peanut butter (about 65g)
  • 2 thin, flexible coconut wraps, each large enough to roll around a medium banana

Choose wraps that bend without cracking and overlap slightly around the bananas. If coconut wraps aren’t available, use similarly thin, flexible wraps; a thick flour tortilla will make a different-looking pinwheel. Stir separated natural peanut butter before spreading.

How to Make Peanut Butter Banana Bites

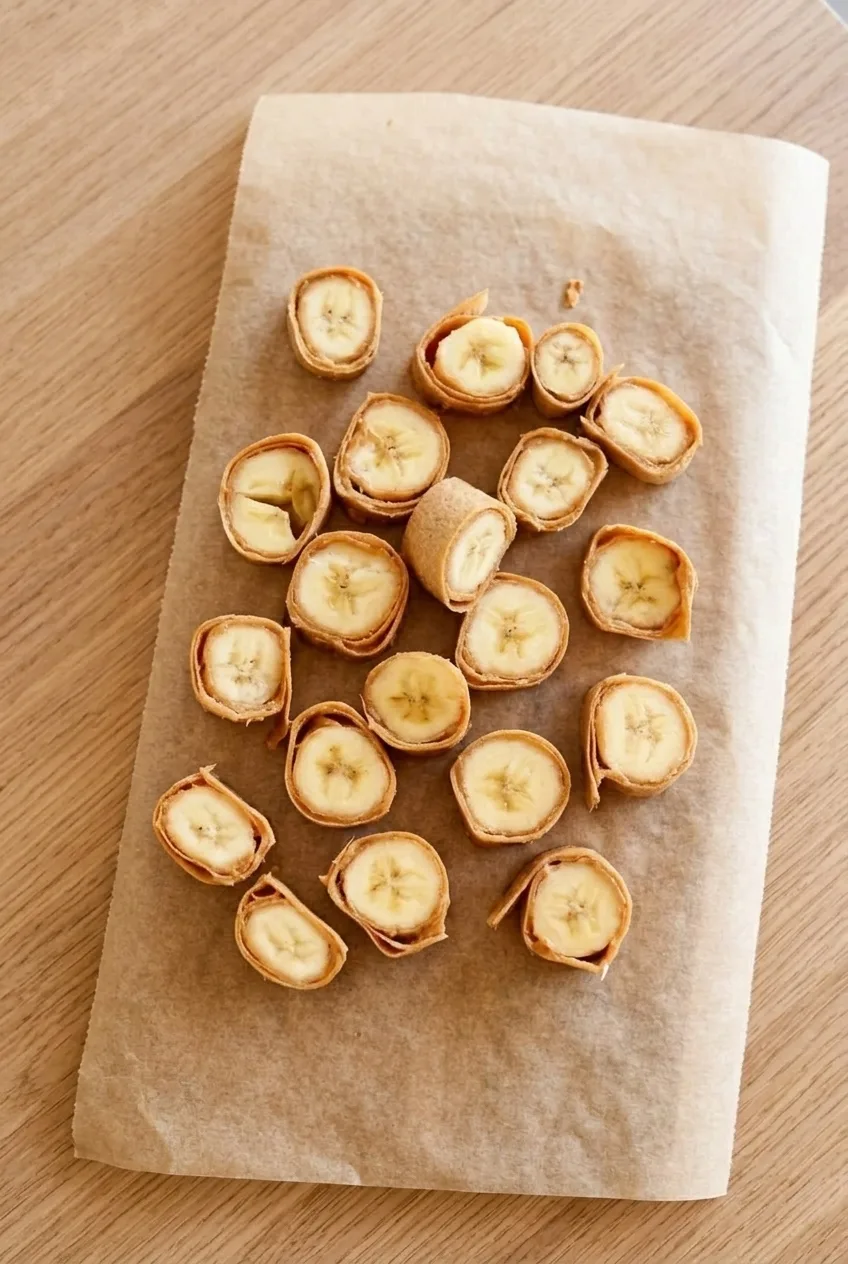
Wider view of the full serving of peanut butter banana pinwheels on parchment.
  1. Check the fit: Peel the bananas and lay the wraps flat. Place a whole banana along one edge of each wrap to check that the wrap can enclose it with a small overlap.
  2. Spread the peanut butter: Spread 2 tablespoons over each wrap in a thin, even layer, reaching the edge that will close the roll.
  3. Roll the bananas: Place a whole banana along one edge of each wrap and roll snugly, leaving as little empty space as possible. Set the rolls seam-side down and check that they stay closed before cutting. Keeping the bananas whole gives each slice a distinct fruit center.
  4. Slice and serve: Using a sharp knife and gentle sawing motions, cut each roll crosswise into pieces about 3/4 inch thick. Arrange cut-side up and serve promptly. The number of bites depends on the length of the bananas and wraps.

How to Keep the Pinwheels Together

If a wrap cracks, try a more flexible one and follow any handling directions on its package. If the banana squashes or slides out during cutting, it may be too soft; use firmer fruit and saw gently rather than pressing the knife straight down.

Serving and Storing Fresh Bites

Serve soon after slicing for the freshest appearance. To prepare ahead, cover and refrigerate the assembled rolls, then slice them close to serving time. The banana may darken and the wrap may soften as they sit. These pinwheels do not need freezing or reheating.

Nutrition

Approximate nutrition per snack serving (1/4 of the recipe): 180 calories, 5g protein, 11g fat, and 21g carbohydrates. Per 100g: approximately 215 calories, 6g protein, 13g fat, and 25g carbohydrates. Values are estimates and will vary with the size and nutrition of the wraps and bananas.

Peanut Butter Banana Bites

Whole bananas are rolled in peanut-butter-spread coconut wraps and sliced into fresh, no-cook pinwheels.
Course: Snack
Cuisine: American
Prep: 10 min
Total: 10 min
Servings: 4 Calories: 180 kcal

Equipment

  • Sharp knife
  • Cutting board
  • Spreading knife

Ingredients

  • 2 medium ripe but firm bananas (about 235 g peeled)
  • 4 tablespoons creamy peanut butter (about 65 g)
  • 2 thin, flexible coconut wraps, each large enough to roll around a medium banana

Instructions

  1. Peel the bananas and lay the wraps flat.
  2. Place a whole banana along one edge of each wrap to check that the wrap can enclose it with a small overlap.
  3. Spread 2 tablespoons of peanut butter in a thin, even layer over each wrap, reaching the edge that will close the roll.
  4. Place a banana along one edge of each wrap and roll snugly, leaving as little empty space as possible.
  5. Set the rolls seam-side down and check that they stay closed.
  6. Using a sharp knife and gentle sawing motions, cut each roll crosswise into pieces about 3/4 inch thick.
  7. Arrange the bites cut-side up and serve promptly.

Tips

  • Choose wraps that bend without cracking and overlap slightly around the bananas.
  • Stir separated natural peanut butter before spreading.
  • Use ripe but firm bananas so they hold their shape.
  • If a wrap cracks, try a more flexible wrap and follow its package handling directions.
  • Saw gently when cutting; pressing straight down can squash the banana or push it out.

Notes

Serve soon after slicing. To prepare ahead, cover and refrigerate the assembled rolls, then slice close to serving time; the banana may darken and the wrap may soften. No freezing or reheating is needed.

Nutrition

Calories: 180 kcal | Protein: 5 g | Fat: 11 g | Carbohydrates: 21 g

Cheesecake Cookies

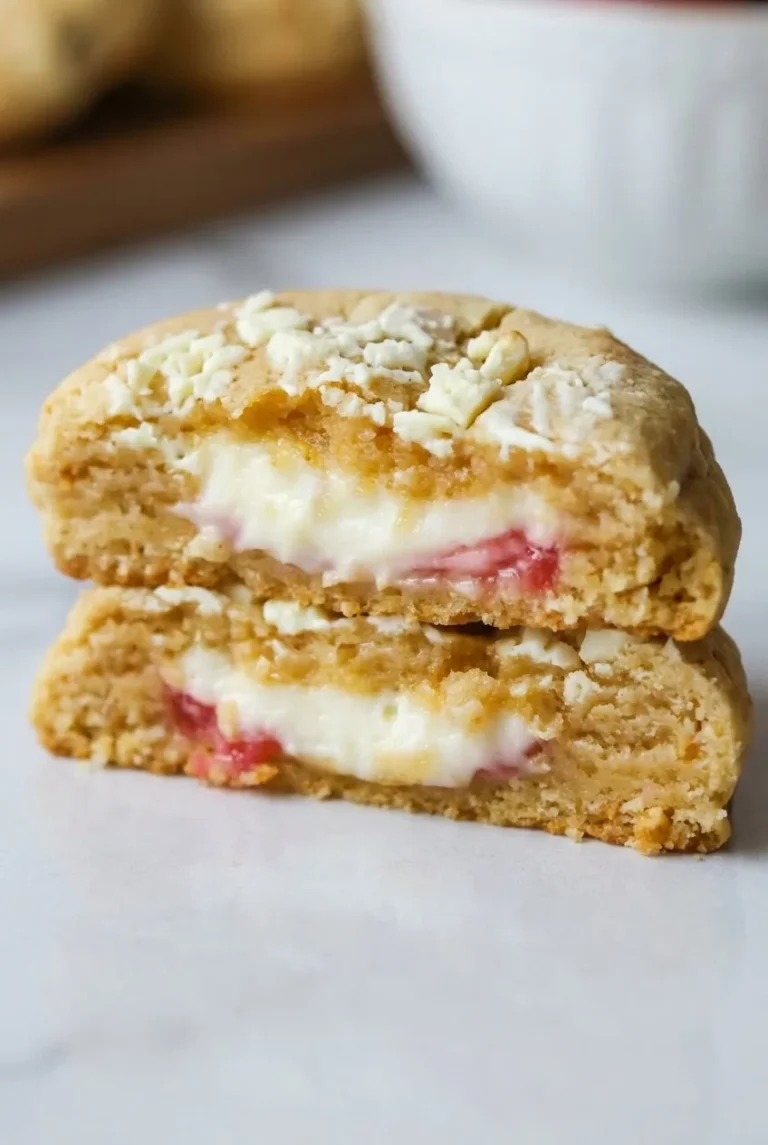
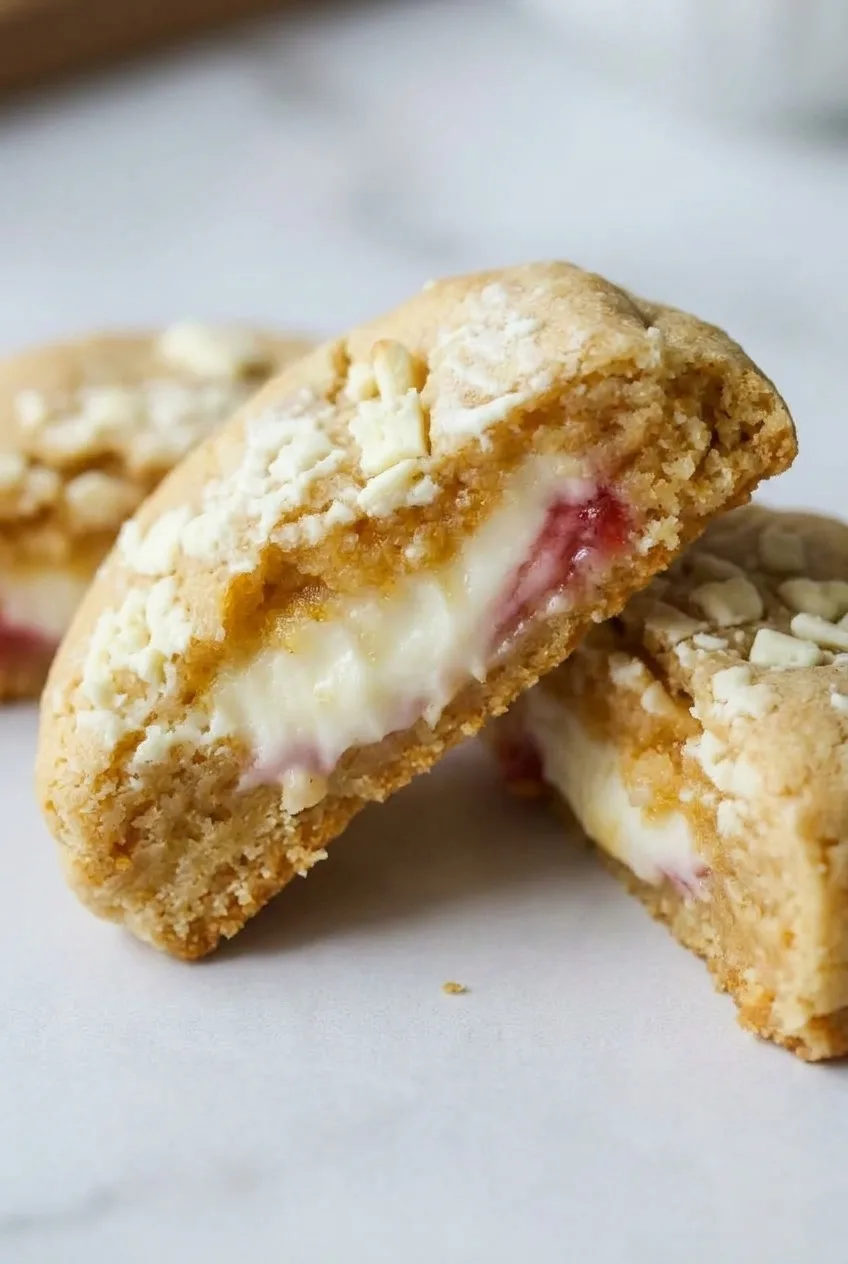
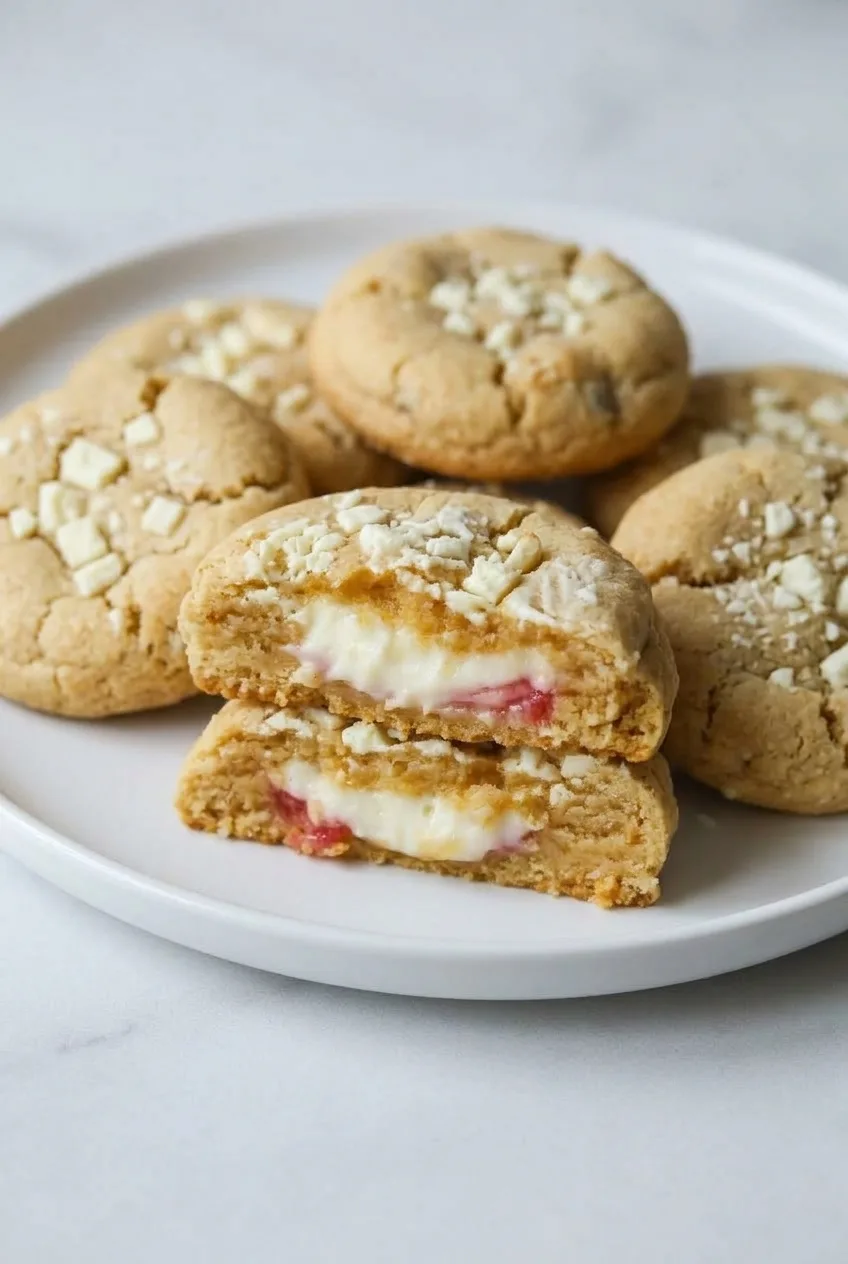
These large cheesecake cookies have a thick, golden graham cracker shell around a creamy center and a smaller layer of strawberry jam. Cut one open after it cools to see both fillings sealed inside, rather than spread on top.

Stuffing the dough takes a little care. Freeze the cheesecake filling so it is easy to handle, keep the jam away from the seam, and chill the assembled cookies before baking. Those steps help the cookies hold their thick shape and keep the filling enclosed.

Ingredients for Cheesecake Cookies

Close view of a cheesecake cookie cross-section with creamy filling, strawberry jam, and tender golden crumb

Cheesecake filling

  • 8 ounces full-fat block cream cheese, softened (225g)
  • 1/3 cup powdered sugar (40g)
  • 1/2 teaspoon vanilla extract

Cookie dough and strawberry layer

  • 3/4 cup unsalted butter, softened (170g)
  • 1/2 cup granulated sugar (100g)
  • 1/2 cup packed light brown sugar (100g)
  • 1 large egg
  • 1 teaspoon vanilla extract
  • 2 1/4 cups all-purpose flour, spooned and leveled (270g)
  • 3/4 cup finely crushed graham cracker crumbs (75g)
  • 1 teaspoon baking powder
  • 1/2 teaspoon fine salt
  • 1/4 cup thick strawberry jam (about 80g)
  • 2 ounces chopped white chocolate (about 55g)

Yield: 12 large cookies. Allow about 35–40 minutes of active preparation, 14–16 minutes of baking per batch, and about 2 hours 15 minutes total, including chilling and cooling.

How to Make Cheesecake Cookies

Several thick cheesecake cookies with stacked cut halves showing their strawberry and cream cheese centers
  1. Freeze the filling: Beat the cream cheese, powdered sugar, and 1/2 teaspoon vanilla until smooth. Spoon 12 separate mounds onto a small parchment-lined tray or plate. Freeze for 45–60 minutes, until firm enough to lift without slumping.
  2. Make the dough: Beat the butter and both sugars until fluffy. Beat in the egg and remaining 1 teaspoon vanilla. In another bowl, whisk the flour, graham cracker crumbs, baking powder, and salt. Mix the dry ingredients into the butter mixture just until no flour streaks remain; mixing longer can make the cookie shells tough.
  3. Fill and seal: Divide the dough into 12 equal portions, about 3–4 tablespoons each. Flatten one portion into a thick disk. Put about 1 teaspoon of jam in the center, then place one frozen cheesecake portion on the jam. Bring the dough up around both fillings and pinch it completely closed. Keep unused cheesecake portions in the freezer as you work. If the dough becomes sticky, chill it briefly rather than adding flour.
  4. Chill the cookies: Place the dough balls seam-side down on parchment-lined baking sheets, at least 3 inches apart, about six per sheet. Keep them thick rather than pressing them flat. Press a few small white chocolate pieces into each top. Refrigerate for 20–30 minutes, until the dough feels cool and firm. Meanwhile, fully preheat the oven to 375°F (190°C).
  5. Bake: Bake one sheet at a time, uncovered, on a cool baking sheet. Start checking at 13 minutes; allow about 14–16 minutes per batch. The edges should be set and lightly golden, and the tops should look set, possibly with small cracks. The centers may still look soft. Do not wait for dark-brown tops.
  6. Cool: Leave the cookies on the baking sheet for about 10 minutes, then transfer them to a wire rack. Cool completely before cutting one open so the cheesecake and strawberry layers have time to settle.

How to Keep the Filling Inside

Use thick jam, not a loose strawberry sauce. Keep the jam and frozen cheesecake portion in the middle of each dough disk; jam at the seam can prevent the dough from sealing. Check each shaped ball for gaps without flattening it, and keep the assembled cookies chilled until they go into the oven.

Use a cool baking sheet for the second batch so the dough does not soften before baking. For a different fruit flavor, a similarly thick raspberry or cherry jam can replace the strawberry jam.

When Are the Cookies Done?

For these large stuffed cookies, set, lightly golden edges are a better guide than a deeply browned top. If the tops look set but the centers still appear soft, let the cookies finish firming up on the baking sheet. Moving them immediately can cause them to break; cutting them while warm can make the filling look runny.

Storing Filled Cheesecake Cookies

Cool the cookies completely, then store them in an airtight container in the refrigerator for up to 5 days. Place parchment between layers if needed to prevent sticking. For a less chilled filling, let the cookies stand at room temperature for about 10–20 minutes before serving. The cheesecake filling portions can be frozen ahead of assembly.

For another take on the flavor pairing, see these strawberry cheesecake cookies.

Nutrition

Approximate nutrition per large cookie, based on 12 cookies: 400 calories, 5g protein, 21g fat, and 50g carbohydrates. Approximate values per 100g of baked cookies: 445 calories, 5g protein, 23g fat, and 55g carbohydrates. Values will vary with ingredient brands and the cookies’ finished weight.

Cheesecake Cookies

Thick graham cracker cookies are filled with frozen cheesecake and strawberry jam, then baked until lightly golden.
Course: Dessert
Cuisine: American
Prep: 40 min
Cook: 30 min
Total: 135 min
Servings: 12 Calories: 400 kcal

Equipment

  • Electric mixer
  • Mixing bowls
  • Small tray
  • Baking sheets
  • Parchment paper
  • Wire rack

Ingredients

Cheesecake filling

  • 8 ounces full-fat block cream cheese, softened (225 g)
  • 1/3 cup powdered sugar (40 g)
  • 1/2 teaspoon vanilla extract

Cookie dough and strawberry layer

  • 3/4 cup unsalted butter, softened (170 g)
  • 1/2 cup granulated sugar (100 g)
  • 1/2 cup packed light brown sugar (100 g)
  • 1 large egg
  • 1 teaspoon vanilla extract
  • 2 1/4 cups all-purpose flour, spooned and leveled (270 g)
  • 3/4 cup finely crushed graham cracker crumbs (75 g)
  • 1 teaspoon baking powder
  • 1/2 teaspoon fine salt
  • 1/4 cup thick strawberry jam (about 80 g)
  • 2 ounces chopped white chocolate (about 55 g)

Instructions

  1. Beat the cream cheese, powdered sugar, and 1/2 teaspoon vanilla until smooth.
  2. Spoon the cheesecake mixture into 12 separate mounds on a small parchment-lined tray. Freeze for 45–60 minutes, until firm.
  3. Beat the butter and both sugars until fluffy. Beat in the egg and the remaining 1 teaspoon vanilla.
  4. Whisk the flour, graham cracker crumbs, baking powder, and salt in a separate bowl. Mix into the butter mixture just until no flour streaks remain.
  5. Divide the dough into 12 equal portions, about 3–4 tablespoons each. Flatten each into a thick disk.
  6. Place about 1 teaspoon of jam in the center of each disk, then add one frozen cheesecake portion. Bring the dough around the fillings and pinch completely closed. Keep unused cheesecake portions frozen while working.
  7. Set the dough balls seam-side down on parchment-lined baking sheets, at least 3 inches apart. Keep them thick and press a few pieces of white chocolate onto each top.
  8. Refrigerate the shaped cookies for 20–30 minutes, until cool and firm. Meanwhile, fully preheat the oven to 375°F (190°C).
  9. Bake one sheet at a time on a cool baking sheet for about 14–16 minutes. The edges should be set and lightly golden, and the tops should look set; the centers may still look soft.
  10. Cool the cookies on the baking sheet for about 10 minutes, then transfer to a wire rack. Cool completely before cutting.

Tips

  • Use thick jam rather than loose strawberry sauce.
  • Keep the jam in the center of each dough disk and away from the seam so the dough can seal.
  • Keep unused cheesecake portions in the freezer while assembling the cookies.
  • If the dough becomes sticky, chill it briefly instead of adding flour.
  • Use a cool baking sheet for each batch and keep the assembled cookies chilled until baking.

Variations

  • Raspberry Cheesecake Cookies: Replace the strawberry jam with similarly thick raspberry jam.
  • Cherry Cheesecake Cookies: Replace the strawberry jam with similarly thick cherry jam.

Notes

Store completely cooled cookies in an airtight container in the refrigerator for up to 5 days, with parchment between layers if needed. Let stand at room temperature for 10–20 minutes before serving. The cheesecake filling portions can be frozen ahead.

Nutrition

Calories: 400 kcal | Protein: 5 g | Fat: 21 g | Carbohydrates: 50 g

Pecan Chocolate Chip Cookies

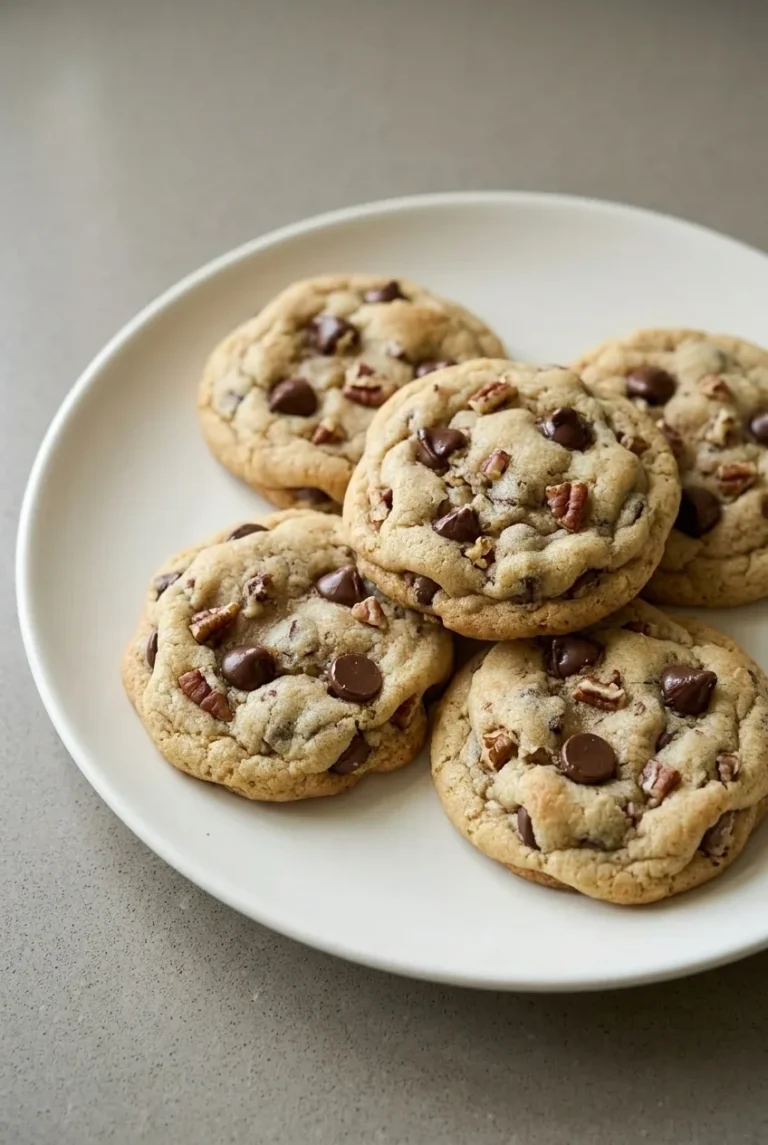
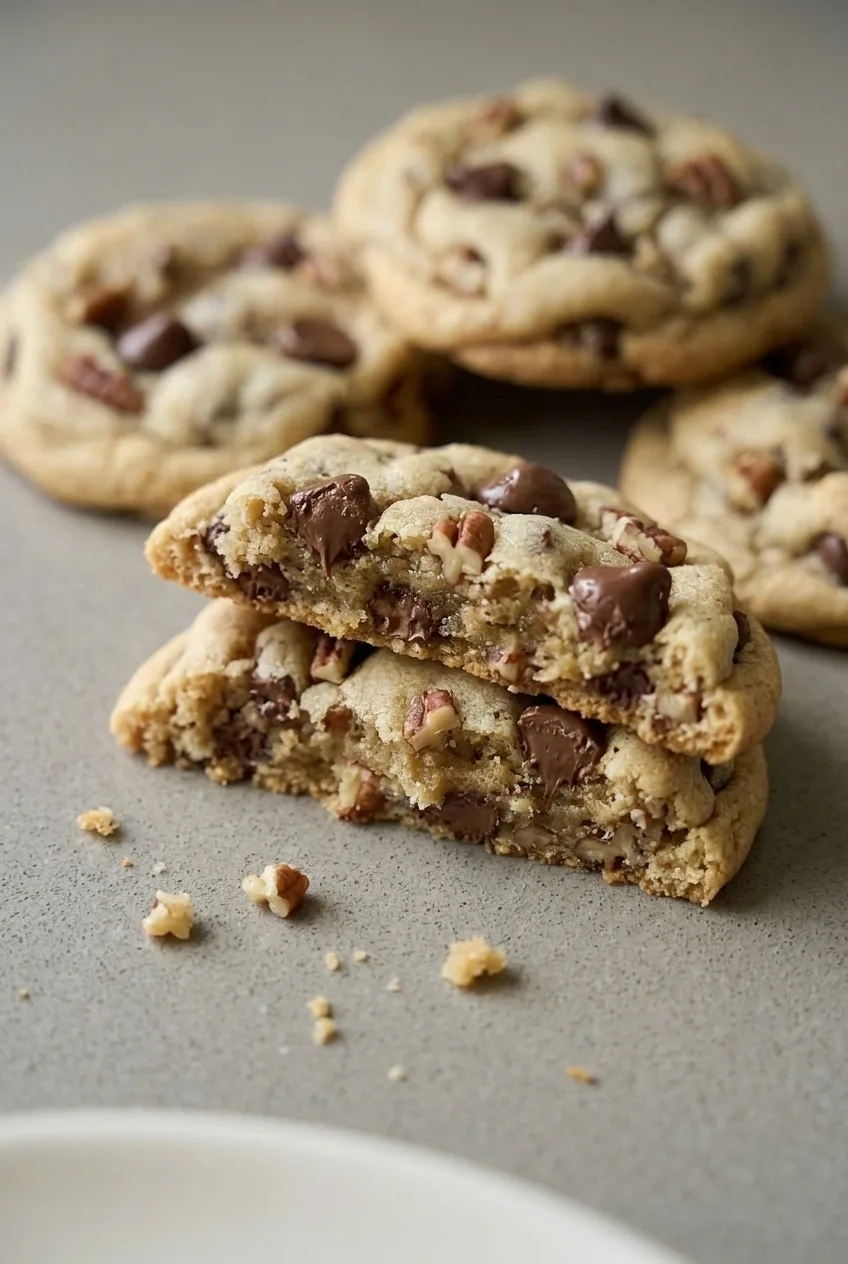
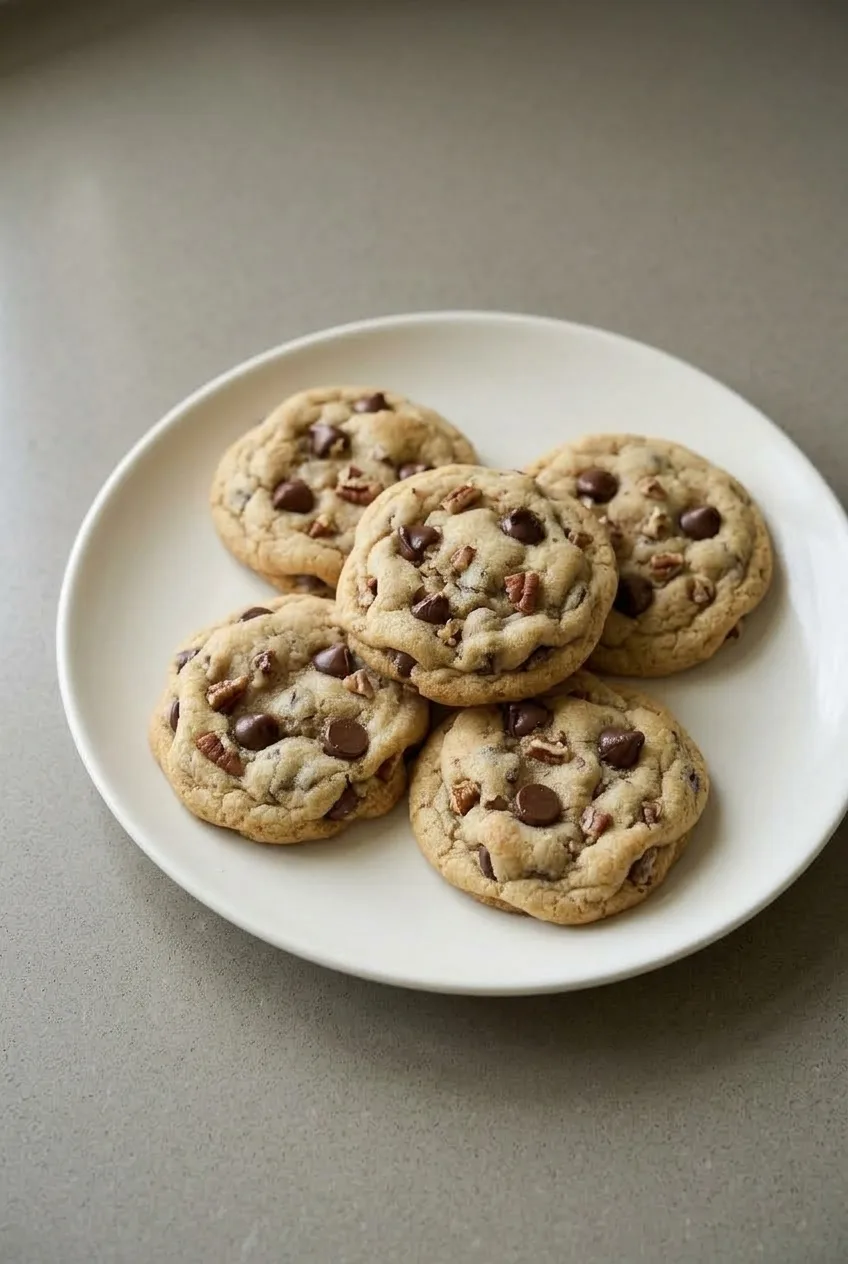
These pecan chocolate chip cookies have lightly golden edges, soft centers, and plenty of chopped pecans and chocolate chips. There’s no required dough chill: scoop the dough after mixing and bake the cookies one sheet at a time.

The 10-to-12-minute bake time is for roughly 2-tablespoon portions. Keep the scoops similar in size, leave room for them to spread, and use the color of the edges—not just the clock—to decide when they’re done.

Ingredients for Pecan Chocolate Chip Cookies

Broken pecan chocolate chip cookie showing its soft center, chocolate chips, and chopped pecans
  • 2 1/4 cups all-purpose flour (270g)
  • 1 teaspoon baking soda
  • 3/4 teaspoon fine salt
  • 1 cup (2 sticks) unsalted butter, softened (225g)
  • 3/4 cup packed light brown sugar (150g)
  • 1/2 cup granulated sugar (100g)
  • 2 large eggs
  • 2 teaspoons vanilla extract
  • 1 1/2 cups semisweet chocolate chips (255g)
  • 1 cup chopped pecans (110g)

Weigh the flour or spoon it into the measuring cup and level it off; too much flour can make the cookies dry. Toasting the pecans deepens their flavor, but untoasted pecans work, too. Dark or milk chocolate chips can replace the semisweet chips in the same amount.

How to Make Pecan Chocolate Chip Cookies

Full plate of pecan chocolate chip cookies on a neutral tabletop
  1. Prepare the oven and pans: Preheat the oven to 350°F (175°C) and line baking sheets with parchment. If toasting the pecans, spread them on a small baking sheet and toast for 6 to 8 minutes, until fragrant. Let them cool before adding them to the dough.
  2. Mix the dry ingredients: Whisk the flour, baking soda, and salt together in a bowl.
  3. Cream the butter and sugars: Beat the softened, not melted, butter with both sugars until combined and somewhat lighter. Beat in the eggs and vanilla until incorporated.
  4. Finish the dough: Mix in the dry ingredients just until no dry flour remains. Fold in the chocolate chips and pecans. For more visible mix-ins, reserve a few chips and pecan pieces from the measured amounts for the tops.
  5. Scoop: Portion about 2 tablespoons of dough per cookie, leaving 2 to 3 inches between portions so they do not spread into each other. Press on any reserved chips and pecans.
  6. Bake: Bake one sheet at a time, checking at 10 minutes. The cookies typically take 10 to 12 minutes per batch. Remove them when the edges are lightly golden and set and the centers look slightly soft, but not visibly wet.
  7. Cool: Leave the cookies on the baking sheet for about 5 minutes so they firm up enough to move without breaking. Transfer to a wire rack and repeat with the remaining dough.

Makes approximately 32 cookies. Allow 15 to 20 minutes for preparation and about 40 to 60 minutes total, depending on the number of batches. Toasting the pecans adds time.

How to Tell When the Cookies Are Done

Do not wait for the centers to look fully firm. Once the edges are lightly golden, the centers should look soft but not liquid or like visibly raw dough. They will continue to set during the 5-minute rest on the baking sheet. If the cookies turn out dry, check the flour measurement and remove the next batch a little sooner.

Cookie Size and Optional Chilling

The bake time applies to approximately 2-tablespoon scoops; larger cookies need a different timing window. For potentially thicker cookies, chill the portioned dough for at least 1 hour before baking. Chilled dough may take a little longer, so watch the edges and centers rather than relying on the same bake time.

For a salty finish, add a light pinch of flaky sea salt to each cookie immediately after baking. For another pecan dessert, try these turtle cookies with caramel centers.

Storage and Freezing

Cool the cookies completely, then store them in an airtight container at room temperature for 3 to 5 days. Baked cookies or portioned unbaked dough can be frozen for up to 1 month. Bake frozen dough portions directly from frozen, allowing a few additional minutes and checking the edges and centers for doneness.

Nutrition

Approximate nutrition per cookie, based on 32 cookies: 180 calories, 2g protein, 11g fat, and 19g carbohydrates. Per 100g of finished cookies: approximately 500 calories, 6g protein, 30g fat, and 54g carbohydrates. Values are estimates and will vary with cookie size, ingredients, and moisture lost during baking.

Pecan Chocolate Chip Cookies

Soft-centered chocolate chip cookies with lightly golden edges, chopped pecans, and no required dough chill.
Course: Dessert
Cuisine: American
Prep: 20 min
Cook: 40 min
Total: 60 min
Servings: 32 Calories: 180 kcal

Equipment

  • Oven
  • Baking sheets
  • Parchment paper
  • Mixing bowl
  • Whisk
  • Electric mixer
  • Wire rack

Ingredients

  • 2 1/4 cups all-purpose flour (270g)
  • 1 teaspoon baking soda
  • 3/4 teaspoon fine salt
  • 1 cup (2 sticks) unsalted butter, softened (225g)
  • 3/4 cup packed light brown sugar (150g)
  • 1/2 cup granulated sugar (100g)
  • 2 large eggs
  • 2 teaspoons vanilla extract
  • 1 1/2 cups semisweet chocolate chips (255g)
  • 1 cup chopped pecans (110g)
  • Flaky sea salt, optional

Instructions

  1. Preheat the oven to 350°F (175°C) and line baking sheets with parchment paper.
  2. If toasting the pecans, spread them on a small baking sheet and toast for 6 to 8 minutes, until fragrant. Let them cool.
  3. Whisk the flour, baking soda, and fine salt together in a bowl.
  4. Beat the softened butter with the brown sugar and granulated sugar until combined and somewhat lighter.
  5. Beat in the eggs and vanilla until incorporated.
  6. Mix in the dry ingredients just until no dry flour remains.
  7. Fold in the chocolate chips and pecans. Reserve a few pieces for the tops if desired.
  8. Scoop about 2 tablespoons of dough per cookie onto the prepared sheets, leaving 2 to 3 inches between portions. Press on any reserved chocolate chips and pecans.
  9. Bake one sheet at a time for 10 to 12 minutes, checking at 10 minutes. Remove the cookies when the edges are lightly golden and set and the centers look slightly soft, but not visibly wet.
  10. Add a light pinch of flaky sea salt to each cookie immediately after baking, if desired.
  11. Let the cookies rest on the baking sheet for about 5 minutes, then transfer them to a wire rack to cool. Repeat with the remaining dough.

Tips

  • Weigh the flour or spoon it into the measuring cup and level it to avoid dry cookies.
  • Use softened, not melted, butter.
  • Keep dough portions similar in size and leave 2 to 3 inches between them.
  • Use the color and set of the edges to judge doneness; the centers will continue to set as the cookies rest.
  • For potentially thicker cookies, chill the portioned dough for at least 1 hour and allow extra baking time as needed.

Variations

  • Dark or Milk Chocolate Cookies: Replace the semisweet chocolate chips with the same amount of dark or milk chocolate chips.
  • Salted Pecan Chocolate Chip Cookies: Add a light pinch of flaky sea salt to each cookie immediately after baking.

Notes

Store completely cooled cookies in an airtight container at room temperature for 3 to 5 days. Freeze baked cookies or portioned unbaked dough for up to 1 month; bake frozen dough directly from frozen, adding a few minutes as needed.

Nutrition

Calories: 180 kcal | Protein: 2 g | Fat: 11 g | Carbohydrates: 19 g

Oatmeal Cream Pie Cookies

Quick oats and a little molasses give these rustic oatmeal cookies their texture and warm flavor. A thick marshmallow buttercream forms the white layer between each pair. Take the cookies out when the edges are lightly golden and the centers still look soft; they will finish setting on the baking sheet. Cool them completely before filling, then chill the sandwiches briefly so the cream holds an even band.

Ingredients for Oatmeal Cream Pie Cookies

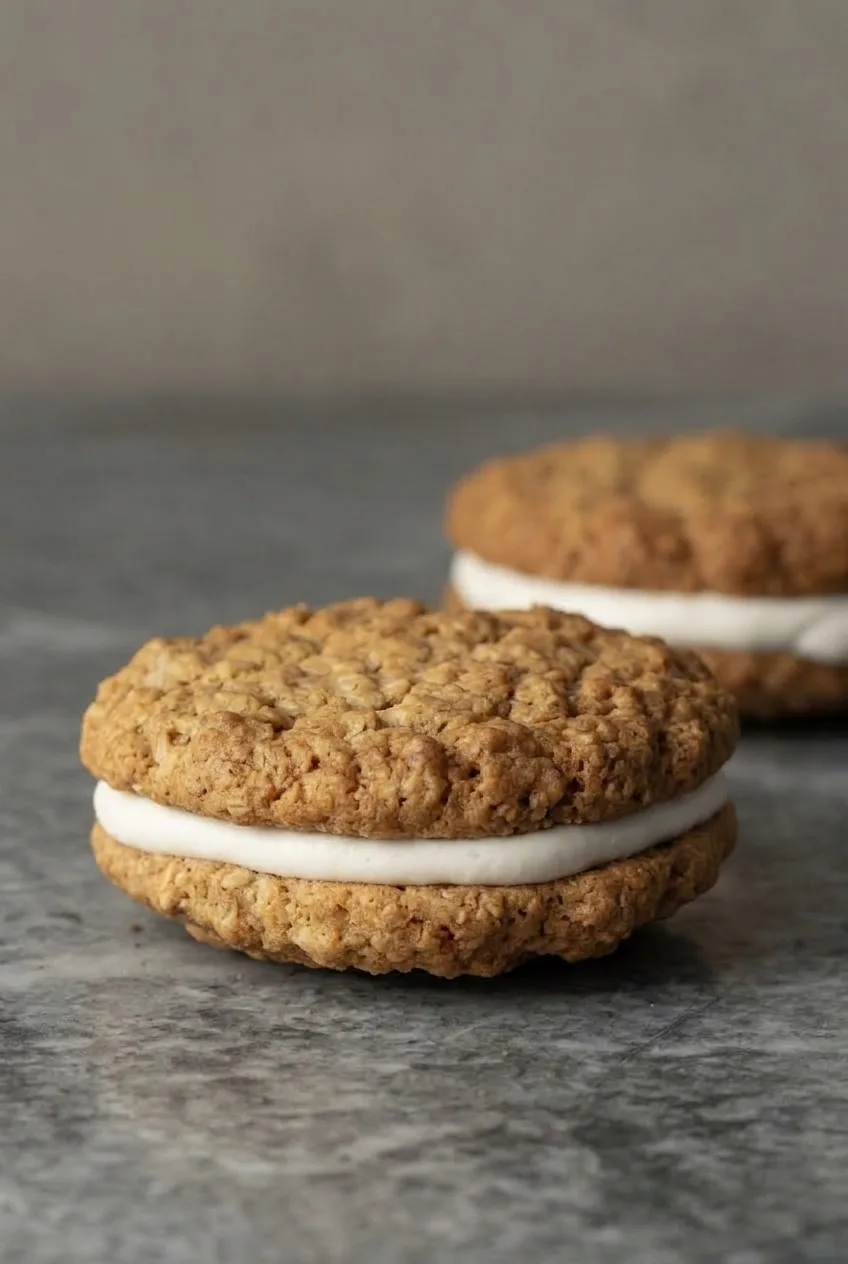
Close view of oat-textured cookie halves and the thick white filling between them

For the cookies

  • 1 cup unsalted butter, softened (225g)
  • 1 cup packed light brown sugar (200g)
  • 1/4 cup granulated sugar (50g)
  • 1 large egg
  • 1 large egg yolk
  • 1 tablespoon molasses (20g)
  • 1 teaspoon vanilla extract
  • 1 3/4 cups all-purpose flour, spooned and leveled (210g)
  • 2 cups quick oats (180g)
  • 1 teaspoon baking soda
  • 1 teaspoon ground cinnamon
  • 1/2 teaspoon fine salt
  • Optional: 1/8 teaspoon ground nutmeg

For the marshmallow filling

  • 1/2 cup unsalted butter, softened (115g)
  • 1 standard 7-ounce jar marshmallow fluff or marshmallow creme (200g)
  • 1 cup powdered sugar (120g)
  • 1/2 teaspoon vanilla extract
  • Pinch of fine salt

Use quick oats for this thick dough. Old-fashioned oats have not been established as an equal swap in this formula.

Yield: About 15–16 sandwich cookies. Prep: 25 minutes. Bake: 10–12 minutes per batch, about 24–36 minutes for all batches. Total: About 1 hour 45 minutes to 2 hours, including cooling and chilling.

How to Make Oatmeal Cream Pie Cookies

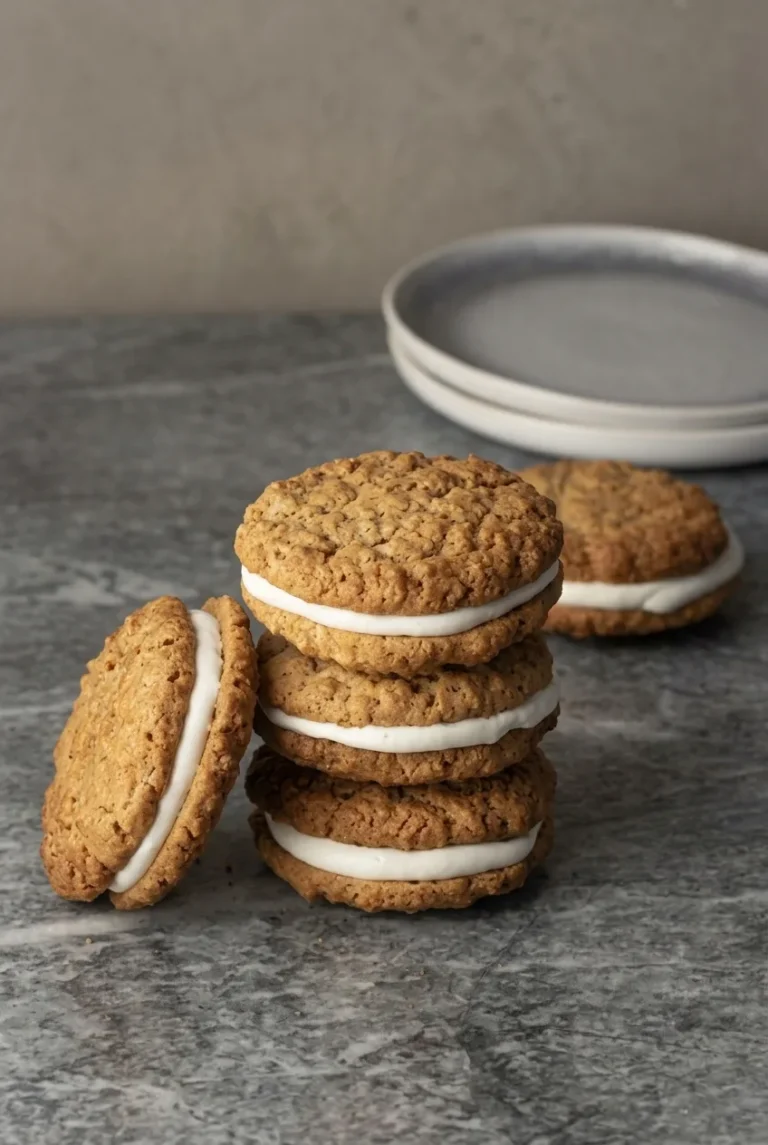
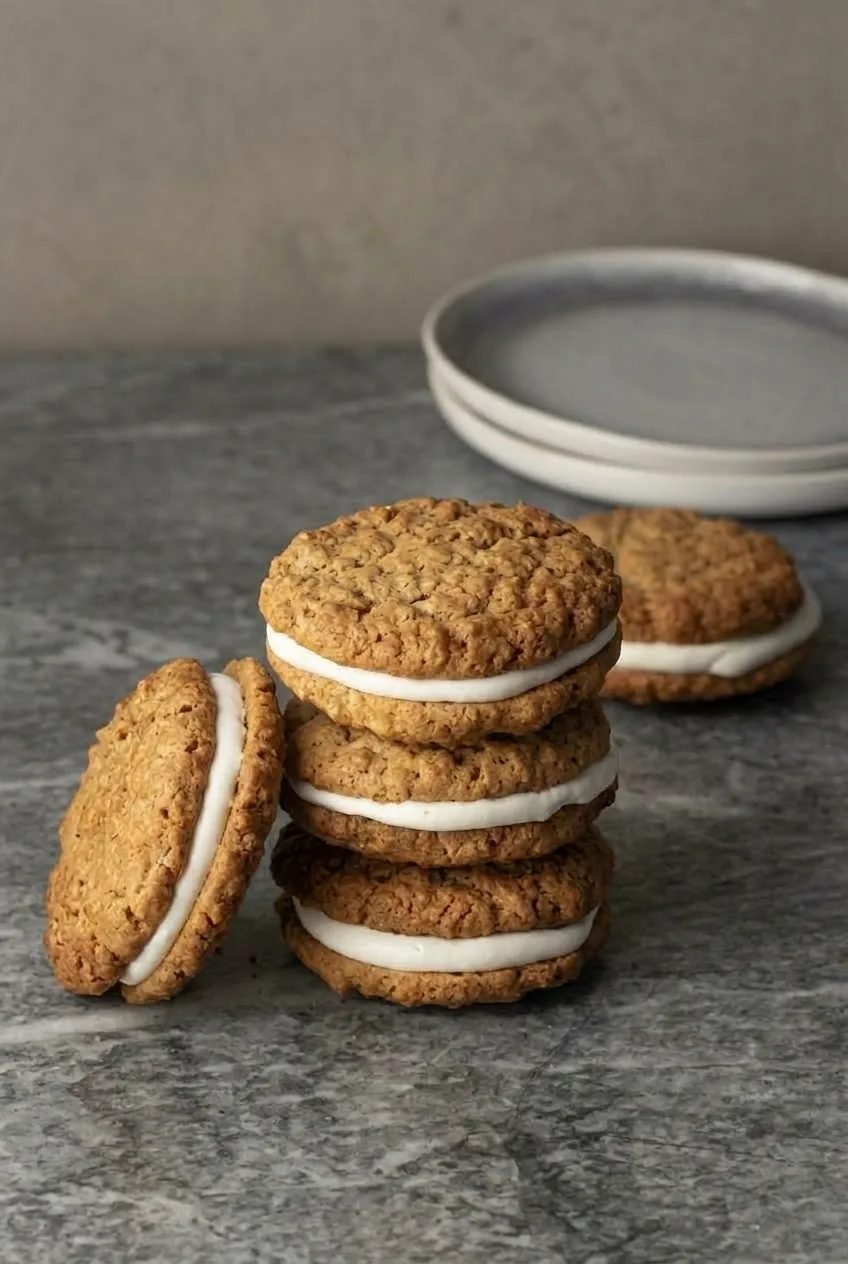
Wider tabletop view of stacked oatmeal cream pie cookies with one leaning beside them
  1. Prepare the oven and pans: Fully preheat the oven to 350°F (175°C). Line baking sheets with parchment paper.
  2. Combine the dry ingredients: Whisk together the flour, quick oats, baking soda, cinnamon, 1/2 teaspoon salt, and optional nutmeg.
  3. Make the dough: With an electric hand mixer or stand mixer, beat the 1 cup of butter with both sugars until lighter and fluffy. Beat in the egg, yolk, molasses, and 1 teaspoon vanilla. Add the dry ingredients and mix just until no flour streaks remain. The dough will be very thick.
  4. Scoop and bake: Portion about 2 tablespoons of dough per cookie, gently roll into balls, and place about 3 inches apart on the prepared sheets. Bake uncovered for 10–12 minutes per batch, checking at 10 minutes. Remove the cookies when the edges are lightly golden but the centers still look soft. Rotate a sheet only if your oven browns noticeably unevenly.
  5. Cool and pair: Leave the cookies on their sheets for about 5 minutes, then transfer to a wire rack. Let them cool completely, about 25–35 minutes total, before pairing cookies of similar size.
  6. Beat the filling: Beat the 1/2 cup of filling butter until smooth. Add the marshmallow fluff, powdered sugar, remaining 1/2 teaspoon vanilla, and a pinch of salt. Beat until thick and fluffy, with no butter lumps and soft ridges that hold when piped.
  7. Assemble: Pipe a generous tablespoon of filling onto the flat side of one cookie in each pair, stopping just inside the edge. Divide any remaining filling among the pairs. Add the second cookies flat-side down and press gently until an even white band is visible.
  8. Chill: Refrigerate the sandwiches for 15–20 minutes, until the filling is slightly firmer but still soft.

How to Keep the Cookies Soft

Do not wait for the tops to brown all over. The soft-looking centers will firm up during the 5-minute rest on the hot baking sheet. Scoop size and oven behavior can shift the bake time, so use the golden edges as your cue rather than the clock alone.

How to Keep the Filling in Place

Warm cookie halves can soften the butter-based filling and make it slide. Once the cookies are completely cool, match similar-sized halves and pipe the cream just inside their edges. Press only until the filling forms a visible band; pressing harder can force it down the sides.

Storing the Sandwich Cookies

Serve after the short chill. Keep filled cookies covered, and avoid tightly stacking them before the filling firms. Do not reheat the sandwiches; warmth will soften the cream.

For another warm-flavored bake, try these maple brown sugar cookies.

Nutrition

Approximate nutrition per sandwich cookie, based on 16 sandwiches: 385 calories, 4g protein, 19g fat, and 51g carbohydrates. Approximate values per 100g of finished cookies: 475 calories, 5g protein, 23g fat, and 63g carbohydrates. Values vary with cookie size, filling portions, and moisture lost during baking.

Oatmeal Cream Pie Cookies

Soft oatmeal cookies with molasses and cinnamon are sandwiched around thick marshmallow buttercream.
Course: Dessert
Cuisine: American
Prep: 25 min
Cook: 36 min
Total: 120 min
Servings: 16 Calories: 385 kcal

Equipment

  • Electric hand mixer or stand mixer
  • Baking sheets
  • Parchment paper
  • Wire rack
  • Cookie scoop or tablespoon
  • Piping bag

Ingredients

For the cookies

  • 1 cup unsalted butter, softened (225 g)
  • 1 cup packed light brown sugar (200 g)
  • 1/4 cup granulated sugar (50 g)
  • 1 large egg
  • 1 large egg yolk
  • 1 tablespoon molasses (20 g)
  • 1 teaspoon vanilla extract
  • 1 3/4 cups all-purpose flour, spooned and leveled (210 g)
  • 2 cups quick oats (180 g)
  • 1 teaspoon baking soda
  • 1 teaspoon ground cinnamon
  • 1/2 teaspoon fine salt
  • Optional: 1/8 teaspoon ground nutmeg

For the marshmallow filling

  • 1/2 cup unsalted butter, softened (115 g)
  • 1 standard 7-ounce jar marshmallow fluff or marshmallow creme (200 g)
  • 1 cup powdered sugar (120 g)
  • 1/2 teaspoon vanilla extract
  • Pinch of fine salt

Instructions

  1. Preheat the oven to 350°F (175°C). Line baking sheets with parchment paper.
  2. Whisk together the flour, quick oats, baking soda, cinnamon, salt, and optional nutmeg.
  3. Beat 1 cup butter with both sugars until lighter and fluffy. Beat in the egg, egg yolk, molasses, and 1 teaspoon vanilla.
  4. Add the dry ingredients and mix just until no flour streaks remain. The dough will be very thick.
  5. Scoop about 2 tablespoons of dough per cookie, roll gently into balls, and arrange about 3 inches apart on the prepared sheets.
  6. Bake for 10–12 minutes per batch, checking at 10 minutes. Remove when the edges are lightly golden and the centers still look soft. Rotate the sheet only if your oven browns unevenly.
  7. Let the cookies rest on the baking sheets for about 5 minutes, then transfer them to a wire rack. Cool completely, about 25–35 minutes total, and pair cookies of similar size.
  8. Beat the filling butter until smooth. Add the marshmallow fluff, powdered sugar, 1/2 teaspoon vanilla, and a pinch of salt. Beat until thick and fluffy, with soft ridges that hold.
  9. Pipe a generous tablespoon of filling onto the flat side of one cookie in each pair, stopping just inside the edge. Divide any remaining filling among the pairs.
  10. Top with the second cookie, flat-side down, and press gently until an even band of filling is visible.
  11. Refrigerate the sandwiches for 15–20 minutes, until the filling is slightly firmer but still soft.

Tips

  • Use quick oats; old-fashioned oats have not been established as an equal swap for this recipe.
  • Use lightly golden edges as the doneness cue rather than waiting for the cookie tops to brown.
  • Let the cookies cool completely before filling so the buttercream does not soften and slide.
  • Match cookies of similar size and press the tops gently to keep the filling from squeezing out.
  • Chill the assembled cookies briefly to help the filling hold its shape.

Notes

Keep filled cookies covered and avoid tightly stacking them before the filling firms. Do not reheat. Nutrition is approximate per sandwich cookie based on 16 sandwiches; per 100 g, the recipe lists about 475 calories, 5 g protein, 23 g fat, and 63 g carbohydrates.

Nutrition

Calories: 385 kcal | Protein: 4 g | Fat: 19 g | Carbohydrates: 51 g

Crème Brûlée Cookies

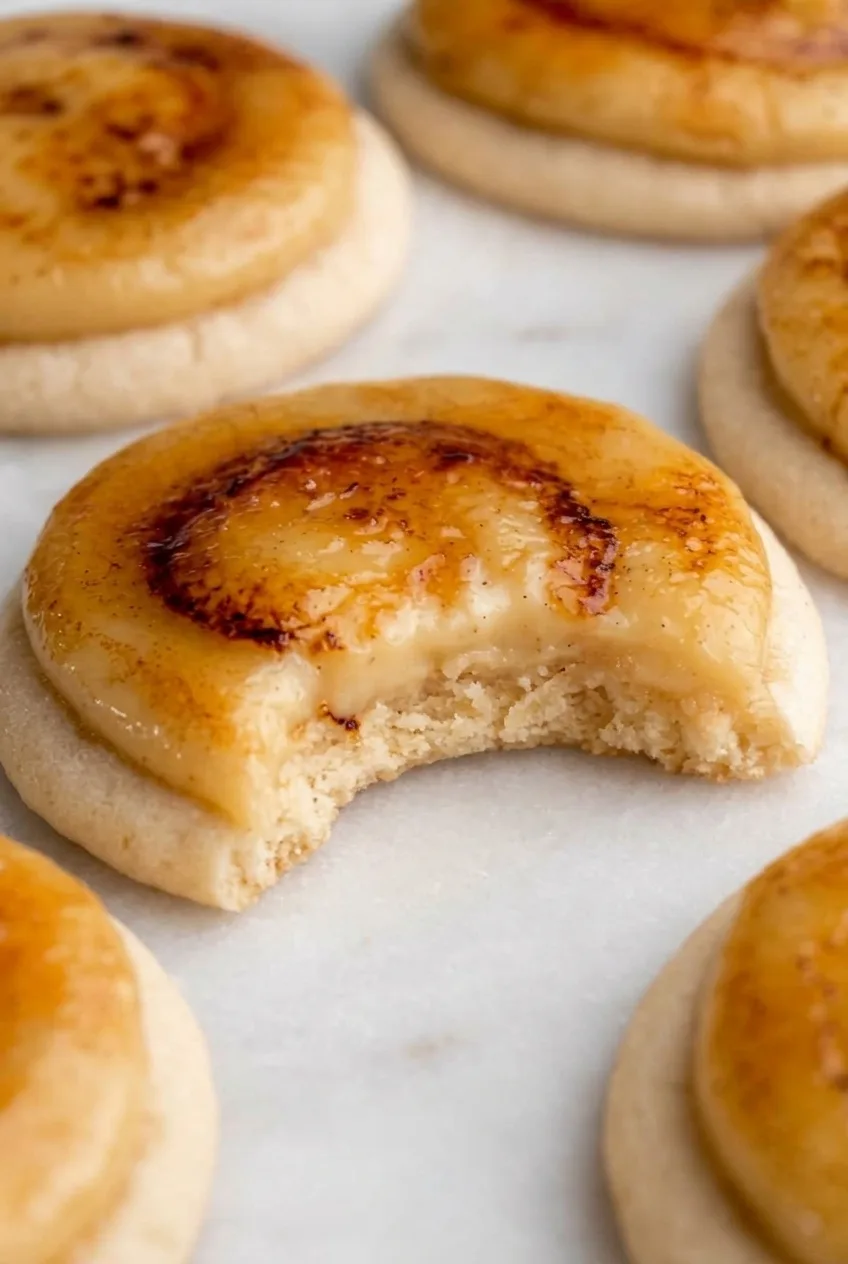
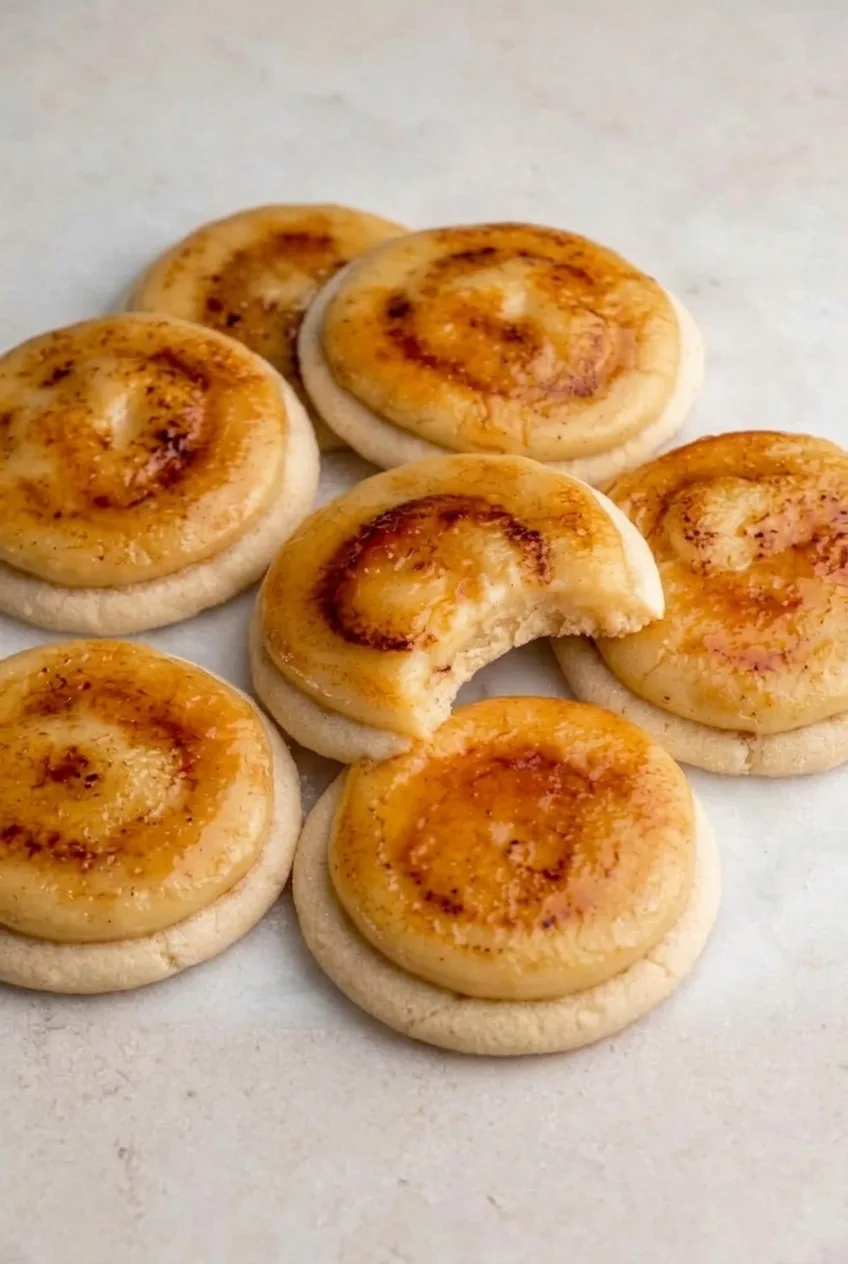
These cookies layer a soft, pale sugar cookie with a thick dome of vanilla pastry cream and a thin caramelized crust that cracks when tapped. This version uses cooked pastry cream for a custard-like topping, while a kitchen torch browns the sugar without heating the cream as broadly as a broiler would.

Make the cookies and cream ahead, then bring them together shortly before serving. Sugar absorbs moisture from the cream, so the tops are at their crispest soon after torching. The recipe makes about 16 cookies and takes about 3 hours, including chilling and cooling.

Ingredients for Crème Brûlée Cookies

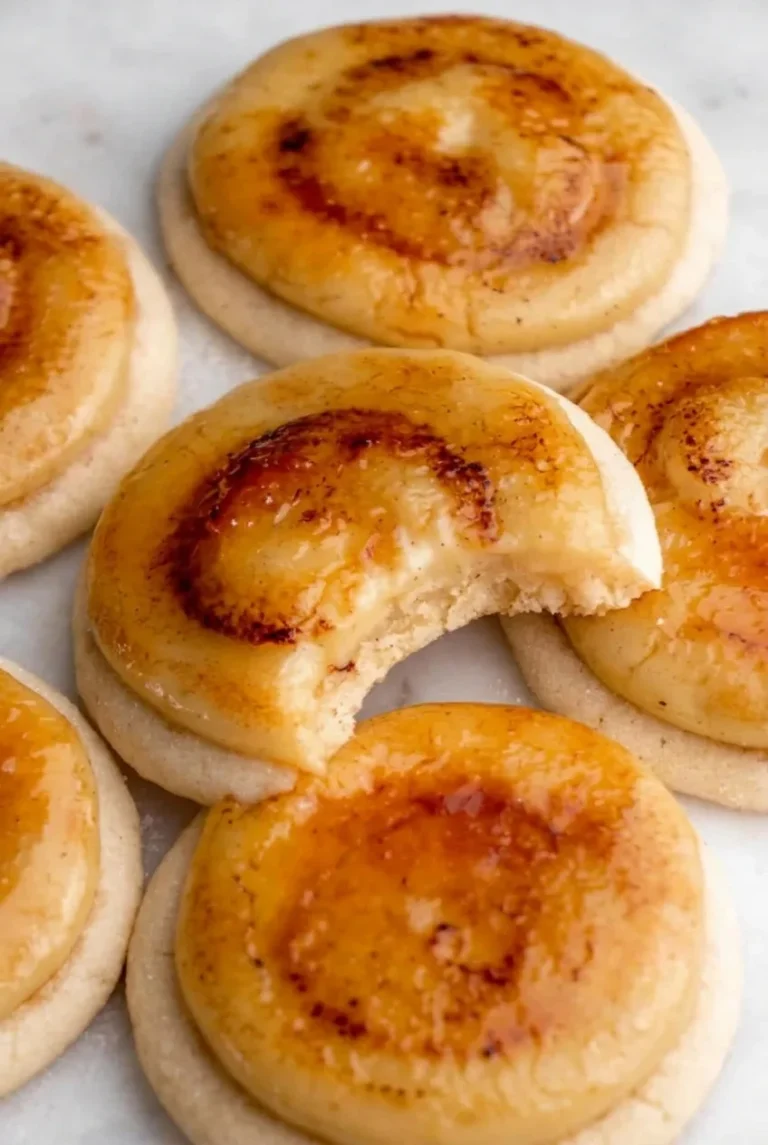
Close view of a bitten crème brûlée cookie showing crisp caramel, thick vanilla cream, and soft cookie crumb

For the cookies

  • 2 1/4 cups all-purpose flour (270g)
  • 3/4 cup unsalted butter, softened (170g)
  • 3/4 cup granulated sugar (150g)
  • 1/4 cup packed light brown sugar (50g)
  • 1 large egg
  • 2 teaspoons vanilla extract
  • 1/2 teaspoon baking soda
  • 1/2 teaspoon fine salt

For the vanilla pastry cream

  • 2 cups whole milk (480g)
  • 4 large egg yolks
  • 1/2 cup granulated sugar (100g)
  • 1/4 cup cornstarch (30g)
  • 2 tablespoons unsalted butter (30g)
  • 1 teaspoon vanilla extract

For the brûléed tops

  • 1/3 cup granulated sugar (65g), about 1 teaspoon per cookie

How to Make Crème Brûlée Cookies

A cluster of finished crème brûlée cookies on a light stone surface, with their pale bases and torched tops visible
  1. Cook the pastry cream: Whisk the egg yolks, pastry cream sugar, and cornstarch until smooth. Warm the milk in a medium saucepan over medium heat. Gradually whisk some warm milk into the yolk mixture, then pour everything back into the saucepan. Whisk continuously over medium heat until thick and bubbling; cook briefly while whisking. Remove from the heat and stir in the pastry cream butter and vanilla. The cream should mound on a spoon rather than run off it.
  2. Chill the cream: Spread it in a shallow container and press wrap directly against its surface. Refrigerate until cold throughout, about 2 hours. Stir briefly before using to smooth it, but do not thin it.
  3. Mix the dough: Preheat the oven to 350°F (175°C) with a rack near the center. Line baking sheets with parchment. Cream the cookie butter with both cookie sugars. Mix in the egg and cookie vanilla, then add the flour, baking soda, and salt. Mix just until no dry flour remains.
  4. Bake the cookies: Scoop about 2 tablespoons of dough per cookie, spacing portions 2 inches apart. If the dough is too soft to hold its shape, refrigerate it for 15 to 20 minutes. Bake uncovered in batches for 9 to 11 minutes per sheet, checking at 9 minutes. Remove the cookies when the edges are set and barely golden but the centers are still pale and soft. Cool completely, about 30 minutes.
  5. Add the cream: Shortly before serving, spoon or pipe about 2 tablespoons of cold pastry cream onto each cooled cookie. Form a thick, rounded layer that leaves a narrow rim of cookie visible.
  6. Torch and serve: Work with a few cookies at a time on a heatproof sheet pan, away from parchment overhang and other flammable items. Sprinkle about 1 teaspoon granulated sugar evenly over each cream dome and torch immediately, keeping the flame moving. Stop when the sugar bubbles and turns glossy amber with scattered darker spots. Let the crust harden briefly before serving.

Getting a Thick, Smooth Pastry Cream Layer

Whisk continuously as the cream thickens to prevent lumps. It needs to be fully thickened on the stove, then chilled until it holds a mound; stirring should smooth it, not make it runny. If a topped cookie slumps, check that the cream is cold and the cookie has no residual warmth. Lingering with the torch in one spot can loosen the cream, too.

How to Keep the Brûléed Tops Crackly

Keep the sugar off the cream until the torch is ready. Sugar left on the moist topping can dissolve before it browns. Sprinkle and torch a few cookies at a time, let the crust set, and serve soon afterward. Do not use a broiler for these cream-topped cookies; its broad heat can melt the cream before the sugar caramelizes.

Make-Ahead and Storage

Store plain, cooled cookies airtight at room temperature for a few days. Keep the pastry cream covered in the refrigerator and use it within 3 days. Assemble and torch near serving rather than storing the finished cookies for their crisp texture.

Plain baked cookies can be frozen, tightly wrapped, for up to 3 months; thaw them before topping. Refrigerate leftover assembled cookies promptly in an airtight container, but expect the crust to soften. Do not reheat cream-topped cookies.

For another caramel-topped treat, try these caramel apple cookies.

Nutrition

Approximate per cookie, based on 16 cookies: 290 calories, 4g protein, 13g fat, and 39g carbohydrates. Approximate per 100g of finished cookies: 330 calories, 4g protein, 15g fat, and 45g carbohydrates. Values vary with portion size and the amount of pastry cream used.

Crème Brûlée Cookies

Soft sugar cookies are topped with vanilla pastry cream and a thin, crackly caramelized sugar crust.
Course: Dessert
Cuisine: American
Prep: 35 min
Cook: 25 min
Total: 180 min
Servings: 16 Calories: 290 kcal

Equipment

  • Medium saucepan
  • Whisk
  • Shallow container
  • Baking sheets
  • Parchment paper
  • Cookie scoop
  • Kitchen torch
  • Heatproof sheet pan

Ingredients

For the cookies

  • 2 1/4 cups all-purpose flour (270 g)
  • 3/4 cup unsalted butter, softened (170 g)
  • 3/4 cup granulated sugar (150 g)
  • 1/4 cup packed light brown sugar (50 g)
  • 1 large egg
  • 2 teaspoons vanilla extract
  • 1/2 teaspoon baking soda
  • 1/2 teaspoon fine salt

For the vanilla pastry cream

  • 2 cups whole milk (480 g)
  • 4 large egg yolks
  • 1/2 cup granulated sugar (100 g)
  • 1/4 cup cornstarch (30 g)
  • 2 tablespoons unsalted butter (30 g)
  • 1 teaspoon vanilla extract

For the brûléed tops

  • 1/3 cup granulated sugar (65 g), about 1 teaspoon per cookie

Instructions

  1. Whisk the egg yolks, pastry cream sugar, and cornstarch until smooth.
  2. Warm the milk in a medium saucepan over medium heat.
  3. Gradually whisk some warm milk into the yolk mixture, then pour the mixture back into the saucepan.
  4. Whisk continuously over medium heat until thick and bubbling; cook briefly while whisking.
  5. Remove the pan from the heat and stir in the pastry cream butter and vanilla.
  6. Spread the pastry cream in a shallow container and press plastic wrap directly onto its surface. Refrigerate until cold throughout, about 2 hours.
  7. Preheat the oven to 350°F (175°C) with a rack near the center. Line baking sheets with parchment.
  8. Cream the cookie butter with both cookie sugars. Mix in the egg and cookie vanilla.
  9. Add the flour, baking soda, and salt, and mix just until no dry flour remains.
  10. Scoop about 2 tablespoons of dough per cookie and space portions 2 inches apart. If the dough is too soft to hold its shape, refrigerate it for 15 to 20 minutes.
  11. Bake in batches for 9 to 11 minutes per sheet, checking at 9 minutes. Remove when the edges are set and barely golden and the centers are pale and soft.
  12. Cool the cookies completely, about 30 minutes.
  13. Briefly stir the cold pastry cream to smooth it. Spoon or pipe about 2 tablespoons onto each cookie, making a thick rounded layer with a narrow rim of cookie visible.
  14. Place a few cookies at a time on a heatproof sheet pan, away from parchment overhang and other flammable items.
  15. Sprinkle about 1 teaspoon of sugar evenly over each cream dome and torch immediately, keeping the flame moving, until the sugar bubbles and turns glossy amber with scattered darker spots.
  16. Let the sugar crust harden briefly before serving.

Tips

  • Whisk the pastry cream continuously as it thickens to prevent lumps.
  • Cook the pastry cream until it holds a mound, then chill it until cold before topping the cookies.
  • Keep sugar off the pastry cream until the torch is ready so it does not dissolve.
  • Torch only a few cookies at a time and keep the flame moving to avoid loosening the cream.
  • Use a kitchen torch rather than a broiler, which can heat the cream too broadly.

Notes

Store plain cookies airtight at room temperature and pastry cream covered in the refrigerator for up to 3 days. Assemble and torch shortly before serving. Freeze plain cookies for up to 3 months; refrigerate assembled leftovers promptly, expect the crust to soften, and do not reheat them.

Nutrition

Calories: 290 kcal | Protein: 4 g | Fat: 13 g | Carbohydrates: 39 g

Turtle Cookies

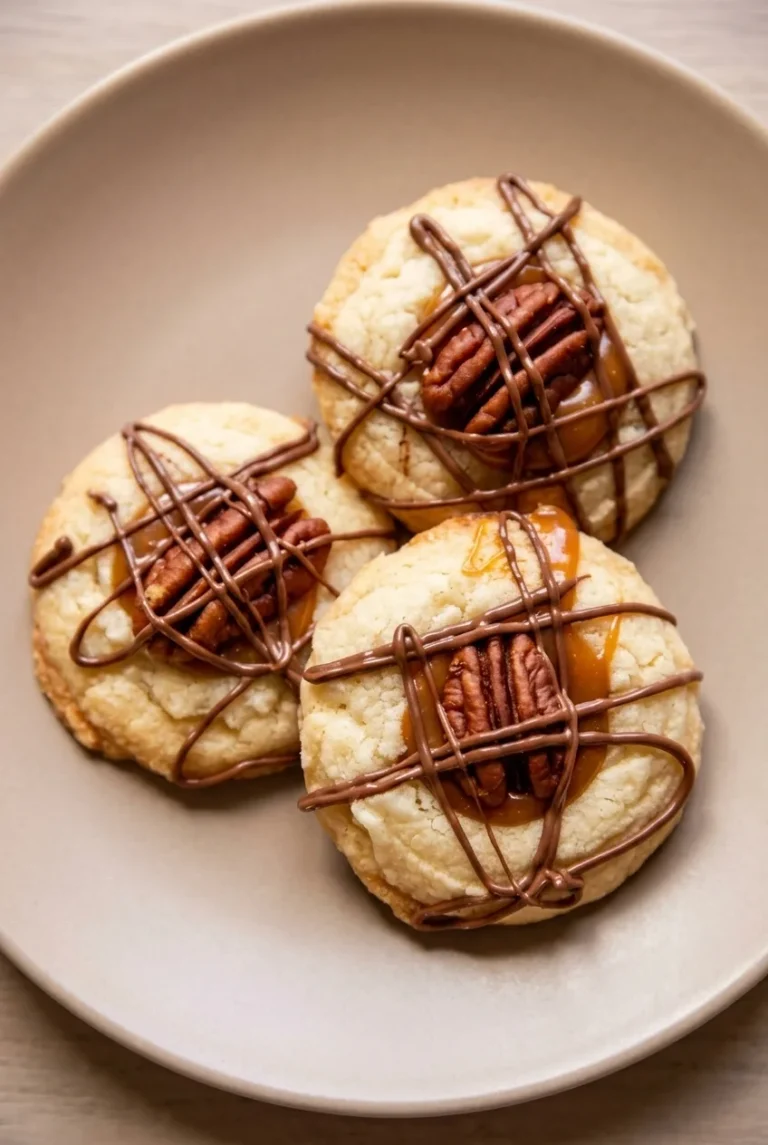
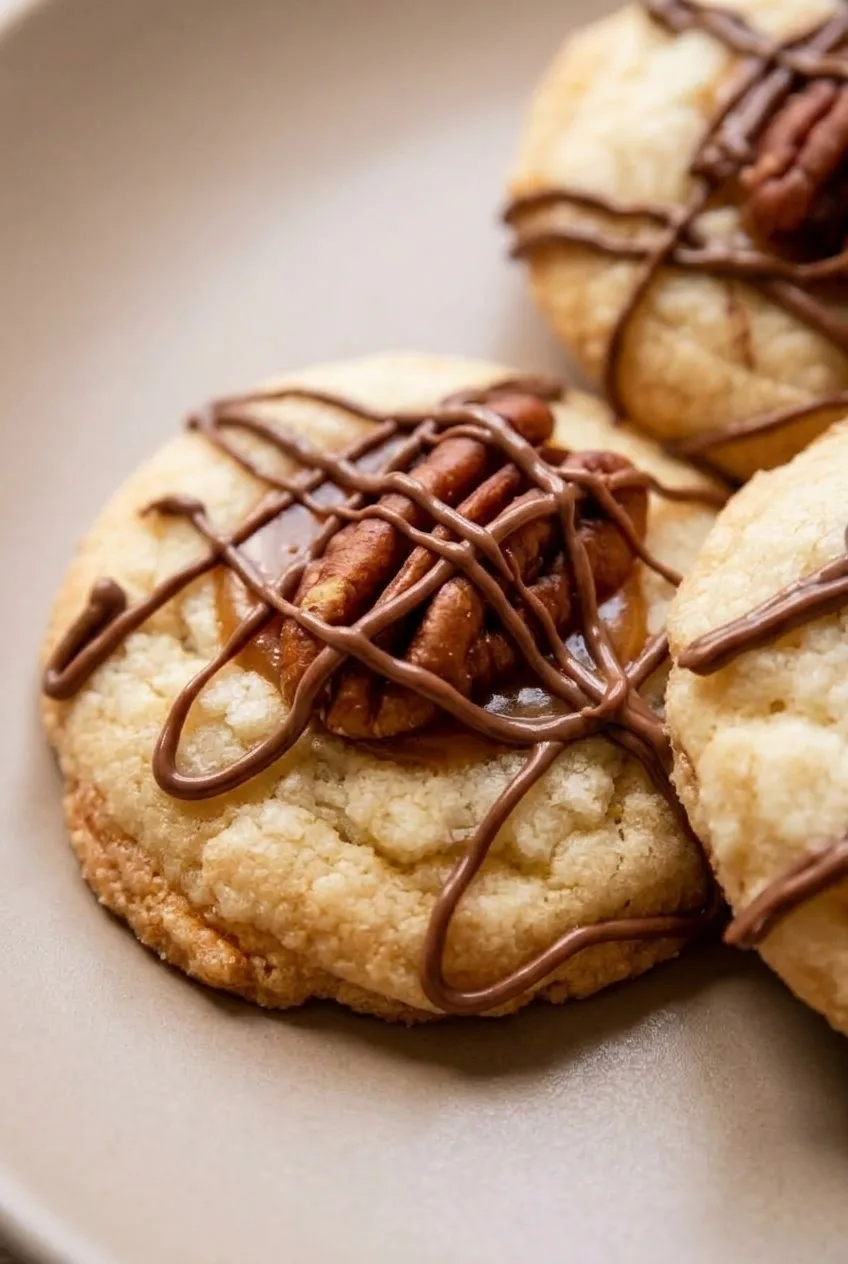
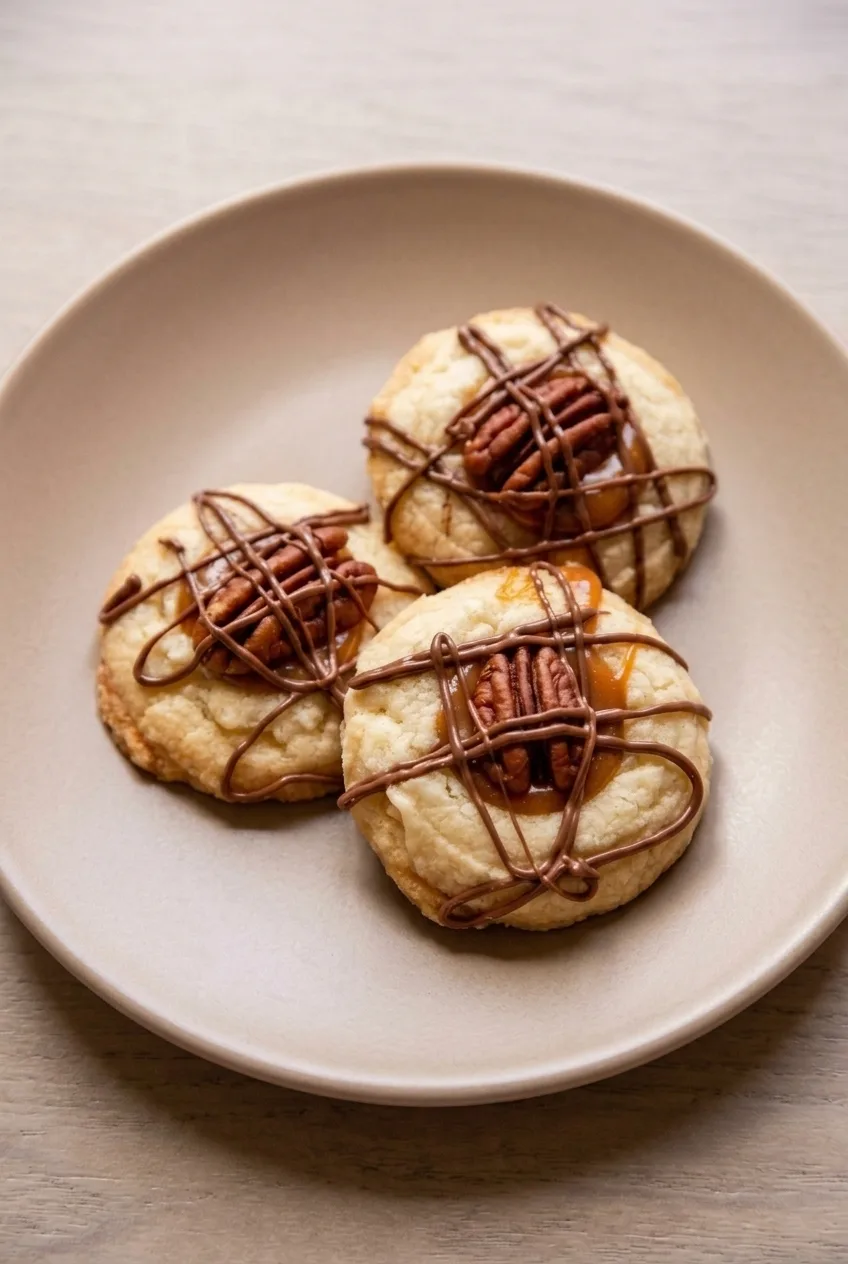
These turtle cookies have thick, pale vanilla shortbread-style bases instead of chocolate dough. A shallow well in each cookie holds caramel and a pecan half, while thin chocolate lines cross the top. The caramel, pecans, and chocolate give them their turtle-candy flavor.

The wells are pressed into the cookies immediately after baking, while they are still warm enough to shape. Let the cookies cool before filling them so the caramel stays inside the borders.

Ingredients for Turtle Cookies

Close view of a turtle cookie's glossy caramel well, ridged pecan half, and thin chocolate drizzle.
  • 1 cup (2 sticks) unsalted butter, softened (225g)
  • 1/2 cup powdered sugar (60g)
  • 1 teaspoon vanilla extract
  • 2 cups all-purpose flour, spooned and leveled (240g)
  • 1/4 teaspoon fine salt
  • About 5 ounces soft caramel candies, unwrapped (140g)
  • 2 tablespoons heavy cream (30g)
  • 18 pecan halves, plus a few spare
  • 1/3 cup semisweet chocolate chips (55g)

Yield: About 18 cookies. Time: About 25 minutes active preparation, 30 minutes chilling, and 20–23 minutes baking per batch. Allow about 1 hour 45 minutes including cooling and setting, or longer if baking multiple batches.

How to Make Turtle Cookies

Full plate of three caramel-pecan turtle cookies on a neutral tabletop.
  1. Mix the dough: Beat the butter and powdered sugar until smooth. Mix in the vanilla. Add the flour and salt, mixing just until no dry flour remains and the dough holds together when pressed.
  2. Portion and chill: Scoop about 1 1/2 tablespoons of dough per cookie. Roll gently and flatten slightly into thick rounds. Place on a parchment-lined sheet and refrigerate for about 30 minutes, until firm but not frozen.
  3. Bake: Fully preheat the oven to 325°F (165°C). Arrange the chilled rounds about 2 inches apart on parchment-lined baking sheets. Bake uncovered, one sheet at a time, checking at 18 minutes and expecting about 20–23 minutes per batch. Rotate the sheet if your oven browns unevenly. The tops should look set and remain mostly pale, with edges and bottoms just beginning to turn light gold.
  4. Press the wells: Immediately after removing the cookies from the oven, gently press the rounded back of a teaspoon into each center. Make a shallow well with room for about 1–2 teaspoons of caramel, leaving a thick border and an intact bottom. Cool on the pan for 8–10 minutes, then transfer carefully to a rack and cool completely.
  5. Add caramel and pecans: Heat the caramels and cream in a microwave-safe bowl in brief intervals, stirring until smooth and spoonable. Add caramel gradually to each cooled well, stopping below the rim. Immediately seat one pecan half in each center.
  6. Drizzle: Microwave the chocolate chips in short intervals, stirring between each and letting residual heat finish melting them. Use a spoon or small piping bag to drizzle thin lines across the cookies, including the pecans and caramel. Let the toppings set before moving or stacking the cookies.

How to Shape the Caramel Wells

The lower-temperature bake keeps these shortbread-style cookies pale while their edges become lightly golden. Press the wells as soon as the cookies leave the oven; once they cool, they are more likely to crack. A lightly greased, rounded measuring-spoon back can help. Press straight down with gentle, even pressure, and ease up if a border begins to split.

Keeping the Caramel and Chocolate Neat

Leave a visible cookie border when filling each well so the caramel does not run over the sides and the pecan half stays prominent. If the caramel thickens while you work, warm it briefly and stir until spoonable again.

Melt the chocolate gently, stopping once stirring makes it smooth. Overheated chocolate can scorch or become difficult to drizzle. Let the finished cookies set fully so the chocolate lines do not smear when stacked.

Serving Turtle Cookies

Serve once the caramel and chocolate have set. For a pecan-forward cookie platter, add maple brown sugar cookies.

Storage and Make-Ahead Notes

Store fully set cookies in an airtight container in a cool room, with parchment between layers. For the neatest appearance, plan to serve them within about 3 days. The dough can be portioned and chilled ahead of baking.

Avoid reheating finished cookies if you want to preserve the caramel centers and chocolate lines. How these assembled cookies look after freezing and thawing is uncertain.

Nutrition

Approximate per cookie, based on 18 cookies: 215 calories, 2g protein, 14g fat, and 22g carbohydrates. Approximate per 100g of finished cookies: 510 calories, 5g protein, 33g fat, and 53g carbohydrates. Values vary with candy brands, portion size, and moisture lost during baking.

Turtle Cookies

Pale vanilla shortbread-style cookies are filled with caramel and pecans, then finished with a chocolate drizzle.
Course: Dessert
Cuisine: American
Prep: 55 min
Cook: 23 min
Total: 105 min
Servings: 18

Equipment

  • Electric mixer
  • Mixing bowls
  • Cookie scoop
  • Baking sheets
  • Parchment paper
  • Teaspoon
  • Wire rack
  • Microwave-safe bowl

Ingredients

For the cookies

  • 1 cup (2 sticks) unsalted butter, softened (225 g)
  • 1/2 cup powdered sugar (60 g)
  • 1 teaspoon vanilla extract
  • 2 cups all-purpose flour, spooned and leveled (240 g)
  • 1/4 teaspoon fine salt

For the filling and topping

  • About 5 ounces soft caramel candies, unwrapped (140 g)
  • 2 tablespoons heavy cream (30 g)
  • 18 pecan halves, plus a few spare
  • 1/3 cup semisweet chocolate chips (55 g)

Instructions

  1. Beat the butter and powdered sugar until smooth.
  2. Mix in the vanilla. Add the flour and salt, mixing just until no dry flour remains and the dough holds together when pressed.
  3. Scoop about 1 1/2 tablespoons of dough per cookie. Roll gently and flatten each portion slightly into a thick round.
  4. Arrange the rounds on a parchment-lined sheet and refrigerate for about 30 minutes, until firm but not frozen.
  5. Fully preheat the oven to 325°F (165°C). Arrange the chilled rounds about 2 inches apart on parchment-lined baking sheets.
  6. Bake uncovered, one sheet at a time. Check at 18 minutes and expect about 20–23 minutes per batch. Rotate the sheet if the oven browns unevenly. The tops should look set and remain mostly pale, with edges and bottoms just beginning to turn light gold.
  7. Immediately after baking, gently press the rounded back of a teaspoon into the center of each cookie to make a shallow well. Leave a thick border and an intact bottom.
  8. Cool the cookies on the pan for 8–10 minutes, then carefully transfer them to a wire rack and cool completely.
  9. Heat the caramels and cream in a microwave-safe bowl in brief intervals, stirring until smooth and spoonable.
  10. Add caramel gradually to each cooled well, stopping below the rim. Immediately place one pecan half in each center.
  11. Microwave the chocolate chips in short intervals, stirring between each and letting residual heat finish melting them.
  12. Drizzle thin lines of chocolate across the cookies, including the pecans and caramel. Let the toppings set before moving or stacking the cookies.

Tips

  • Press the wells into the cookies immediately after baking, while they are still warm enough to shape.
  • Use gentle, even pressure when pressing the wells; ease up if a cookie border begins to split.
  • Leave a visible cookie border when adding caramel so it does not spill over the sides.
  • If the caramel thickens while you work, warm it briefly and stir until spoonable.
  • Melt the chocolate gently and stop heating once stirring makes it smooth.

Notes

Store fully set cookies in an airtight container in a cool room, with parchment between layers. For the neatest appearance, serve within about 3 days. Avoid reheating assembled cookies; their appearance after freezing and thawing is uncertain.

Nutrition

Per Cookie Calories: 215 kcal | Per Cookie Protein: 2 g | Per Cookie Fat: 14 g | Per Cookie Carbohydrates: 22 g | Per 100g Calories: 510 kcal | Per 100g Protein: 5 g | Per 100g Fat: 33 g | Per 100g Carbohydrates: 53 g

Pumpkin Cheesecake Cookies

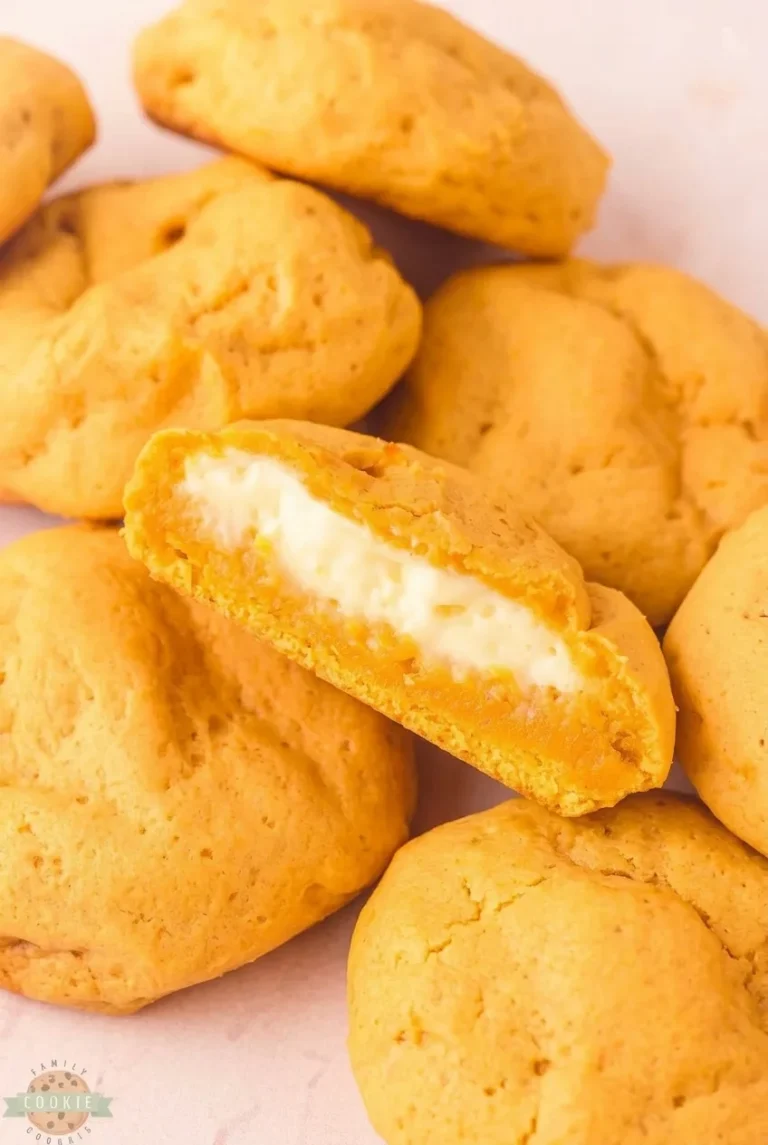
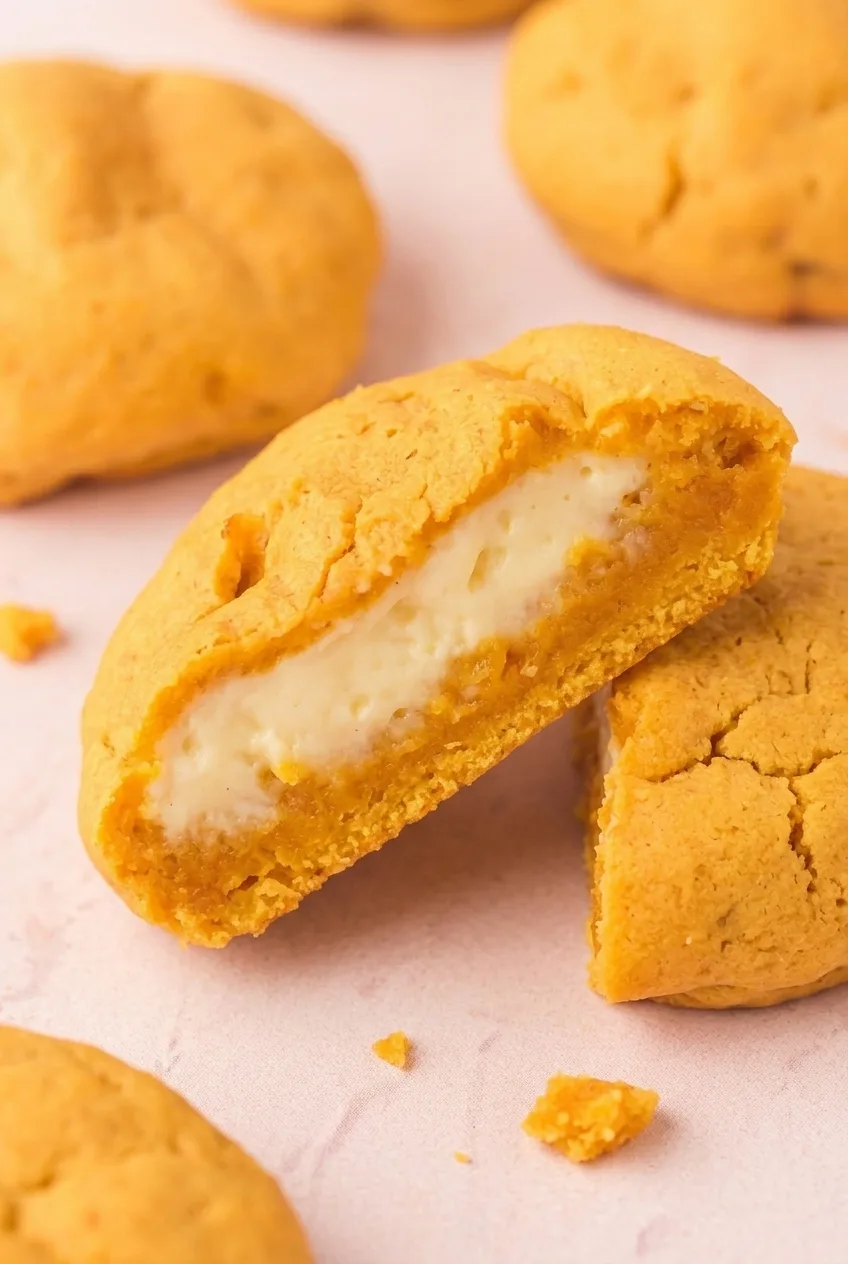
These thick pumpkin-spice cookies have soft, orange-gold shells and creamy cheesecake centers that stay hidden until you break one open. Freezing the filling in portions makes it easier to wrap without smearing, while blotting the pumpkin helps the dough hold its shape. Seal each cookie completely to keep the white center inside as it bakes.

Makes 12 large cookies. Plan on about 30 minutes of active preparation and 1 hour 45 minutes to 2 hours total, including time to firm the filling, bake in batches, and cool.

Ingredients for Pumpkin Cheesecake Cookies

Close view of a broken pumpkin cookie showing creamy cheesecake filling surrounded by soft orange dough

Cheesecake filling

  • 6 ounces full-fat brick cream cheese, softened (170g)
  • 1/3 cup powdered sugar (40g)
  • 1/2 teaspoon vanilla extract

Pumpkin cookie dough

  • 1/2 cup unsalted butter, softened (115g)
  • 1/2 cup packed light brown sugar (100g)
  • 1/3 cup granulated sugar (65g)
  • 1/2 cup plain pumpkin puree, measured before blotting (120g)
  • 1 large egg yolk
  • 1 teaspoon vanilla extract
  • 2 cups all-purpose flour (250g)
  • 1 1/2 teaspoons pumpkin pie spice
  • 1/2 teaspoon baking soda
  • 1/2 teaspoon fine salt

Use plain pumpkin puree, not sweetened pumpkin pie filling. Its weight will decrease after blotting.

How to Make Pumpkin Cheesecake Cookies

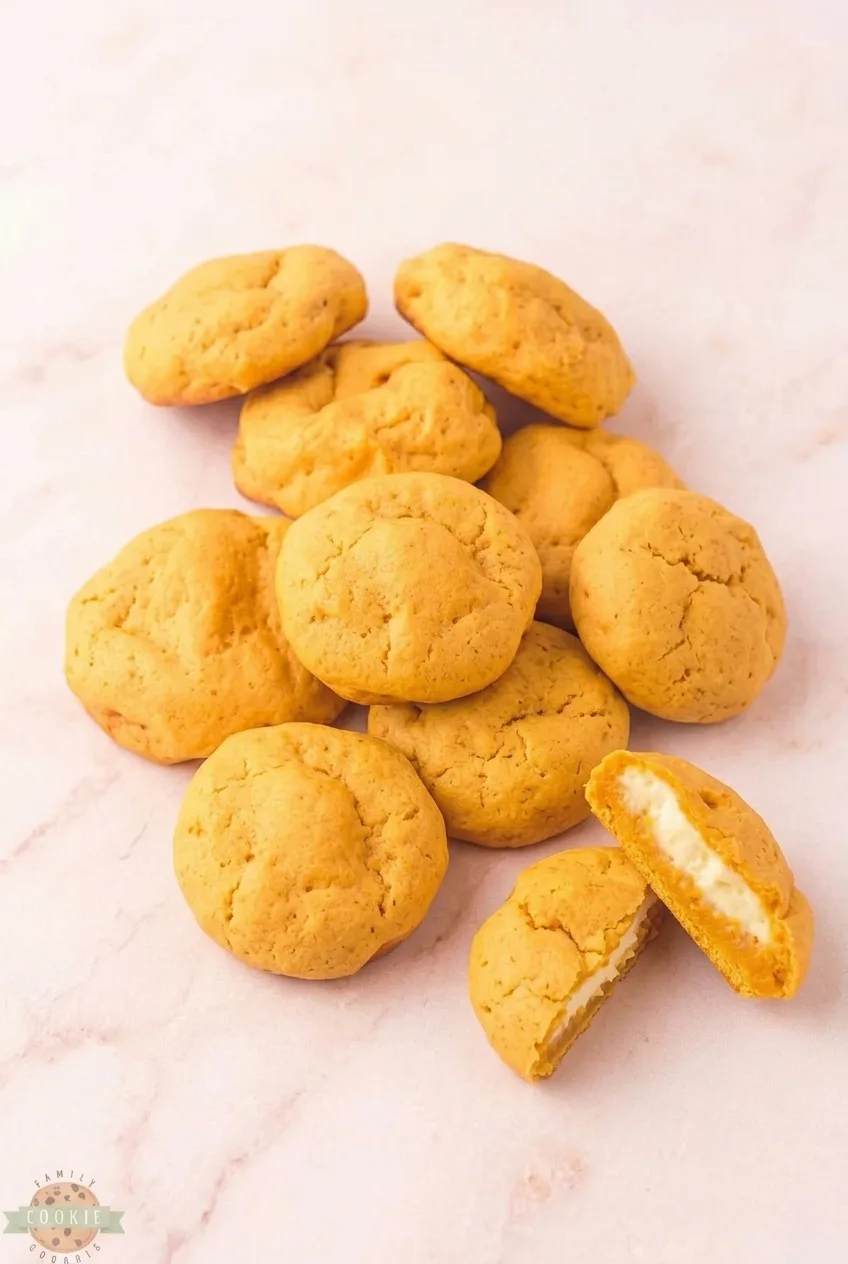
Wider view of rounded pumpkin cheesecake cookies, including one broken open to show the filling
  1. Firm the filling: Beat the cream cheese, powdered sugar, and 1/2 teaspoon vanilla until smooth. Scoop 12 roughly tablespoon-sized portions onto a small parchment-lined tray or plate. Freeze for about 45 to 60 minutes, until they hold their shape and lift from the parchment without collapsing.
  2. Blot the pumpkin: Measure the puree, then press it between layers of paper towel to absorb visible moisture. It should remain soft, not dry like a paste.
  3. Mix the dough: Beat the butter and both sugars until creamy. Mix in the blotted pumpkin, egg yolk, and remaining 1 teaspoon vanilla. Add the flour, pumpkin pie spice, baking soda, and salt; mix just until no dry flour remains. The dough should hold together when pressed.
  4. Chill if needed and preheat: If the dough sticks heavily to your hands or is too soft to lift after flattening, refrigerate it for about 20 minutes while the filling finishes firming. Position a rack near the center of the oven, preheat to 350°F (175°C), and line baking sheets with parchment.
  5. Wrap and seal: Divide the dough into 12 portions. Flatten each into a roughly 3-inch round, place one firm filling portion in the center, and draw the dough over it. Pinch every seam closed so no filling shows, and check that the dough is not paper-thin over the center. Place seam-side down on the sheets, about 2 inches apart. Keep the cookies thick rather than pressing them flat. Return unused filling portions to the freezer if they soften.
  6. Bake: Bake one sheet at a time, uncovered. Start checking at 12 minutes; the cookies will generally take about 13 to 15 minutes per batch. The edges and tops should look set rather than wet, and the bottoms should be lightly golden. The cookies will still be soft, so do not wait for deep browning. If your oven browns unevenly, rotate the sheet once late in baking.
  7. Cool: Leave the cookies on the baking sheet for about 10 minutes so they are less likely to break when moved. Transfer to a rack. Once cool enough to handle, break or cut one open to reveal the cheesecake center. Cool the remaining cookies completely before storing.

How to Keep the Cheesecake Filling Inside

The filling should be firm enough to lift without slumping. If it smears during assembly, return the remaining portions to the freezer briefly. A thick, even layer of dough and a fully pinched seam help prevent leaks.

Pumpkin Moisture and Dough Texture

Measure the pumpkin before blotting it. Removing excess moisture helps the stuffed cookies keep their thick shape. If the mixed dough is too sticky to flatten and lift, chill it briefly rather than adding more flour.

Storing and Freezing Pumpkin Cheesecake Cookies

Because the cookies have a cream cheese filling, refrigerate them rather than storing them at room temperature. Once completely cool, keep them in an airtight container in the refrigerator for up to 5 days. Let a refrigerated cookie warm briefly before serving if you prefer a softer texture.

To freeze, place cooled baked cookies in a single layer until firm, then pack them airtight with parchment between layers. Freeze for up to 2 months and thaw before serving.

For another pumpkin-cookie option, try Brown Butter Pumpkin Chocolate Chip Cookies.

Nutrition

Approximate nutrition per large cookie, based on 12 cookies: 270 calories, 3g protein, 13g fat, and 35g carbohydrates. Per 100g: approximately 400 calories, 5g protein, 20g fat, and 52g carbohydrates. Values are estimates; the finished weight varies with blotting and baking.

Pumpkin Cheesecake Cookies

Thick pumpkin-spice cookies are wrapped around a creamy cheesecake filling and baked until set.
Course: Dessert
Cuisine: American
Prep: 90 min
Cook: 30 min
Total: 120 min
Servings: 12 Calories: 270 kcal

Equipment

  • Electric mixer
  • Small parchment-lined tray
  • Baking sheets
  • Parchment paper
  • Paper towels
  • Wire rack

Ingredients

Cheesecake filling

  • 6 ounces full-fat brick cream cheese, softened (170 g)
  • 1/3 cup powdered sugar (40 g)
  • 1/2 teaspoon vanilla extract

Pumpkin cookie dough

  • 1/2 cup unsalted butter, softened (115 g)
  • 1/2 cup packed light brown sugar (100 g)
  • 1/3 cup granulated sugar (65 g)
  • 1/2 cup plain pumpkin puree, measured before blotting (120 g)
  • 1 large egg yolk
  • 1 teaspoon vanilla extract
  • 2 cups all-purpose flour (250 g)
  • 1 1/2 teaspoons pumpkin pie spice
  • 1/2 teaspoon baking soda
  • 1/2 teaspoon fine salt

Instructions

  1. Beat the cream cheese, powdered sugar, and 1/2 teaspoon vanilla until smooth.
  2. Scoop the filling into 12 roughly tablespoon-sized portions on a parchment-lined tray. Freeze for 45 to 60 minutes, until firm enough to lift without collapsing.
  3. Measure the pumpkin puree, then press it between paper towels to absorb visible moisture. Keep it soft rather than drying it into a paste.
  4. Beat the butter and both sugars until creamy. Mix in the blotted pumpkin, egg yolk, and remaining 1 teaspoon vanilla.
  5. Add the flour, pumpkin pie spice, baking soda, and salt. Mix just until no dry flour remains.
  6. If the dough is too sticky to flatten and lift, refrigerate it for about 20 minutes. Preheat the oven to 350°F (175°C), position a rack near the center, and line baking sheets with parchment.
  7. Divide the dough into 12 portions. Flatten each into a roughly 3-inch round, place a firm filling portion in the center, and wrap the dough around it. Pinch the seam completely closed and keep the dough thick and even.
  8. Place the cookies seam-side down about 2 inches apart. Keep unused filling portions in the freezer if they begin to soften.
  9. Bake one sheet at a time for about 13 to 15 minutes, checking at 12 minutes. Bake until the tops and edges look set and the bottoms are lightly golden; rotate the sheet late in baking if your oven browns unevenly.
  10. Cool the cookies on the baking sheet for about 10 minutes, then transfer them to a wire rack. Cool completely before storing.

Tips

  • Use plain pumpkin puree, not sweetened pumpkin pie filling.
  • Measure the pumpkin before blotting it so the ingredient amount stays consistent.
  • Chill sticky dough briefly instead of adding extra flour.
  • Make sure the filling is firm and pinch every seam closed to help prevent leaks.

Notes

Refrigerate completely cooled cookies in an airtight container for up to 5 days. Freeze baked cookies airtight for up to 2 months and thaw before serving.

Nutrition

Calories: 270 kcal | Protein: 3 g | Fat: 13 g | Carbohydrates: 35 g | Per 100 G Calories: 400 kcal | Per 100 G Protein: 5 g | Per 100 G Fat: 20 g | Per 100 G Carbohydrates: 52 g

Caramel Apple Cookies

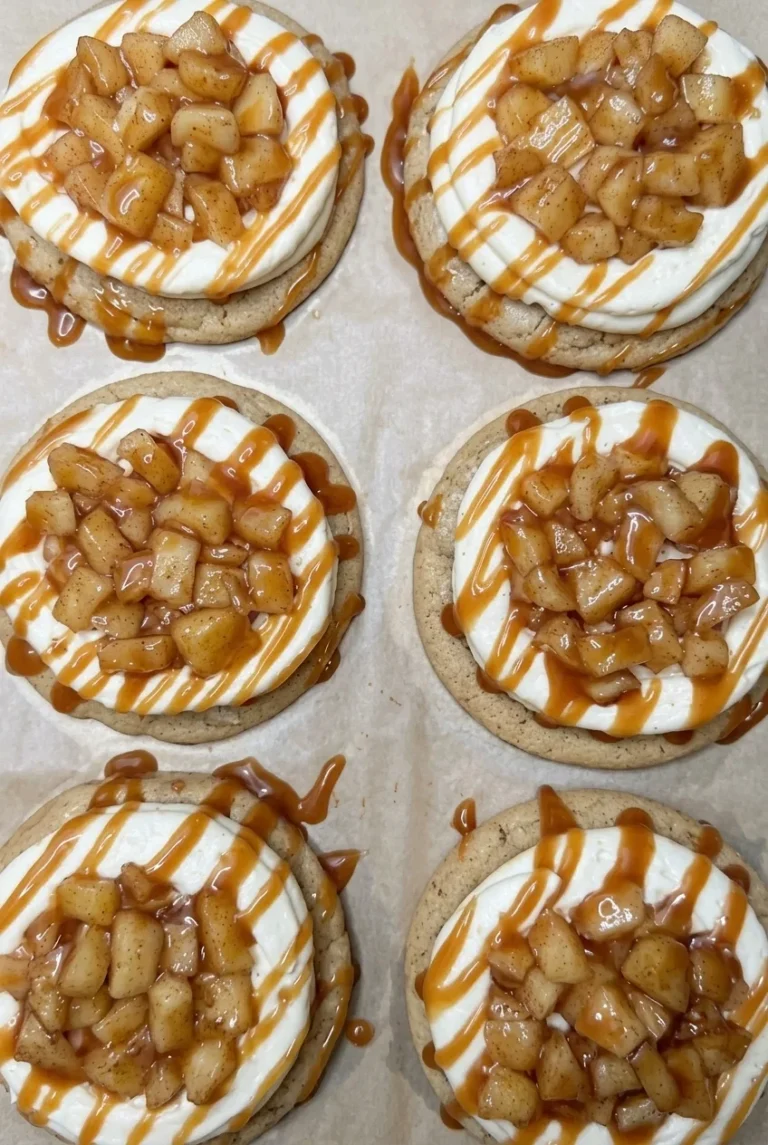
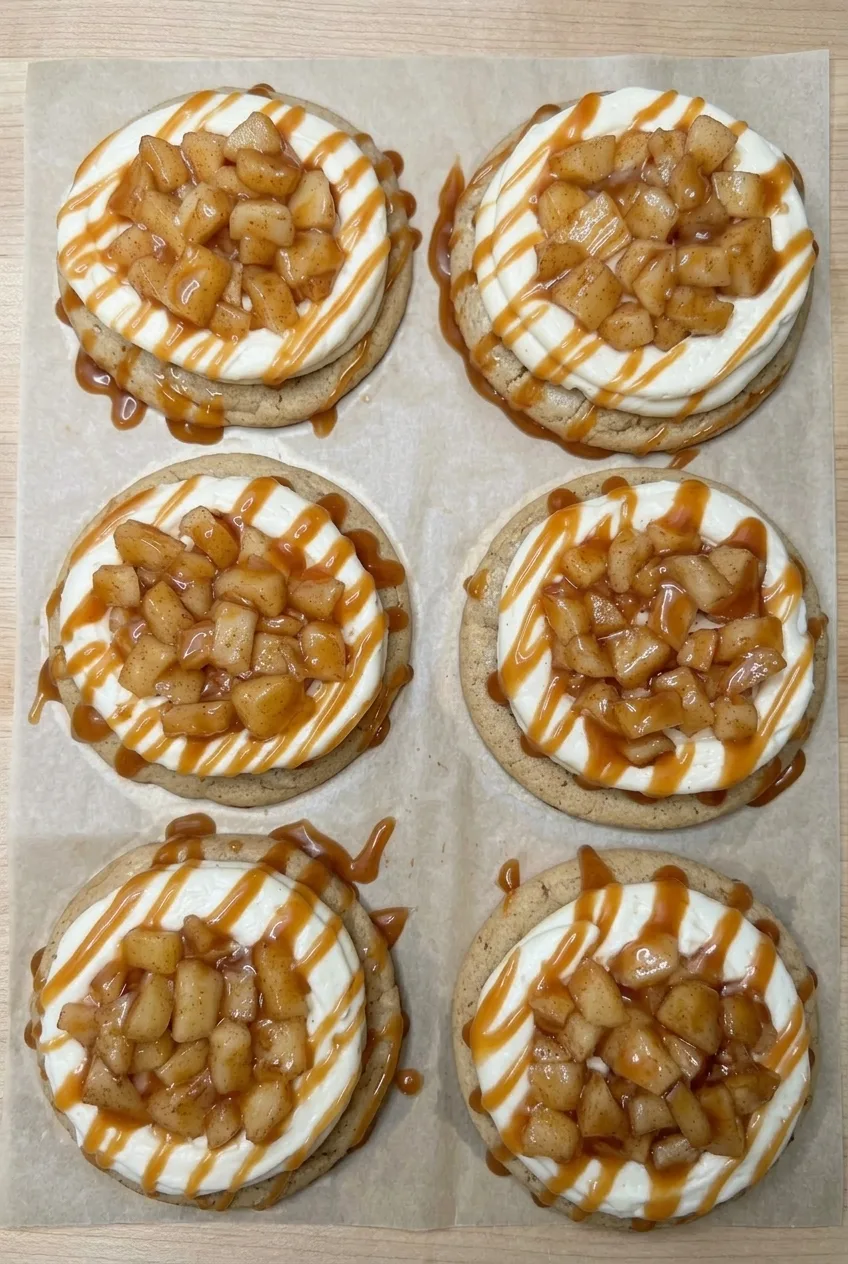
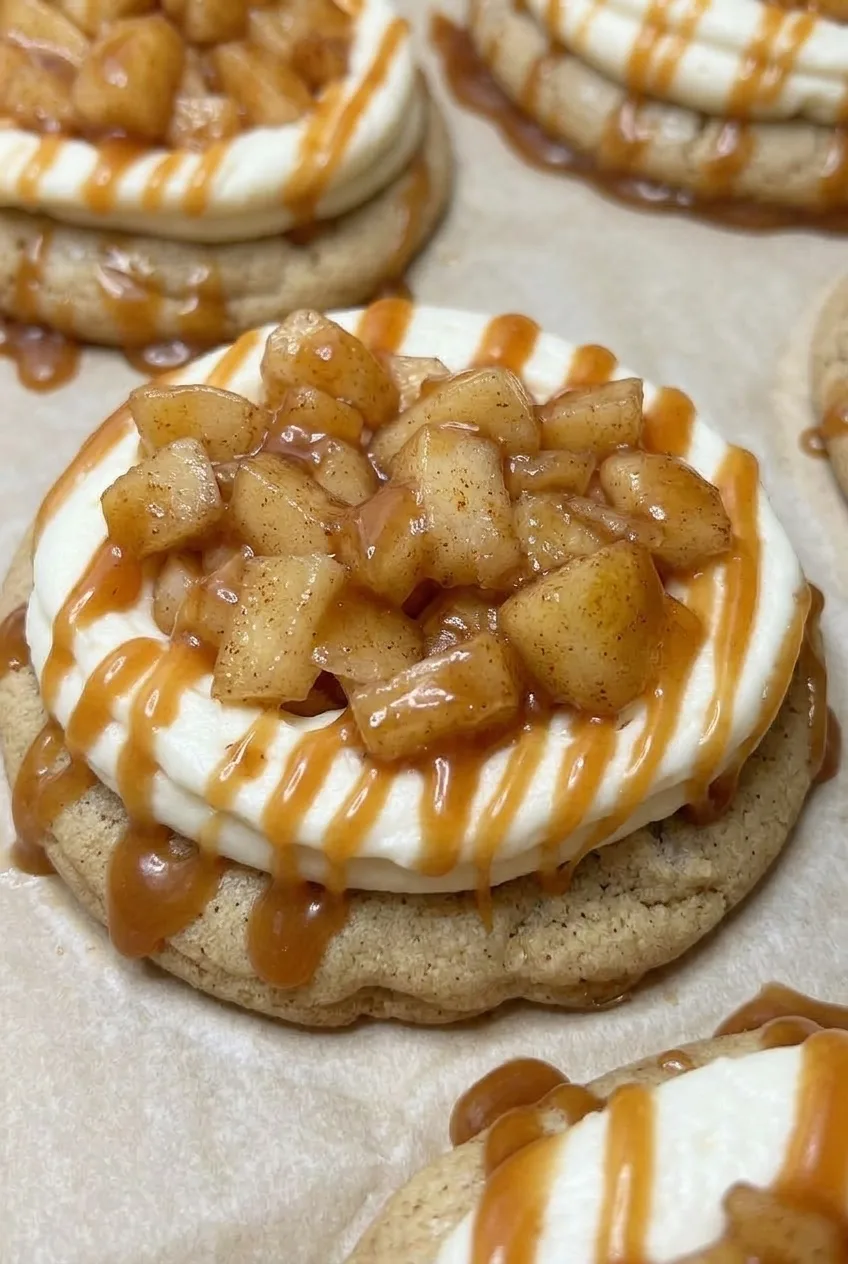
These large cinnamon-spiced cookies are topped with a thick vanilla frosting swirl, a mound of glossy diced apples, and thin lines of caramel. The apples sit on top rather than baking into the dough, so each layer stays distinct.

Cook the apples until their juices lightly coat the pieces, then cool both the apples and cookies completely before assembling. This keeps the frosting in place and prevents the topping from making it watery. Makes 12 large cookies in about 1 hour 35 minutes, including cooling and assembly.

Ingredients for Caramel Apple Cookies

Wider view of six finished caramel apple cookies arranged on parchment

Spiced cookies

  • 1 3/4 cups all-purpose flour (210g)
  • 1/2 teaspoon baking powder
  • 1/4 teaspoon baking soda
  • 1/2 teaspoon fine salt
  • 1 teaspoon ground cinnamon
  • 1/2 cup unsalted butter, softened (115g)
  • 1/2 cup packed light brown sugar (100g)
  • 1/4 cup granulated sugar (50g)
  • 1 large egg
  • 1 teaspoon vanilla extract

Apple topping

  • About 2 1/2 cups firm apples, peeled and cut into roughly 1/4-inch cubes (325g; from 2 to 3 apples)
  • 1 tablespoon unsalted butter
  • 2 tablespoons packed light brown sugar (25g)
  • 1/2 teaspoon ground cinnamon
  • 1 teaspoon cornstarch
  • 1 tablespoon water

Frosting and caramel

  • 7 tablespoons unsalted butter, softened (about 100g)
  • 2 cups powdered sugar (240g)
  • 1/2 teaspoon vanilla extract
  • 1 to 2 tablespoons milk, as needed
  • About 1/3 cup thick caramel sauce (105g)

Granny Smith or another firm tart apple balances the sweet frosting; a firm sweeter apple also works. Use a thick caramel sauce that will form narrow lines rather than run off the cookies.

Close view of glossy diced apples and caramel lines over a thick white frosting swirl on a cookie

How to Bake and Assemble Caramel Apple Cookies

  1. Prepare the oven and pans: Heat the oven to 350°F (175°C) with a rack near the center. Line two baking sheets with parchment. Whisk together the flour, baking powder, baking soda, salt, and 1 teaspoon cinnamon.
  2. Mix the dough: Beat the 1/2 cup butter, 1/2 cup brown sugar, and granulated sugar until creamy. Beat in the egg and 1 teaspoon vanilla. Add the flour mixture and mix just until the dough comes together.
  3. Portion and bake: Scoop 12 roughly 3-tablespoon portions onto the baking sheets, at least 2 inches apart. Gently flatten into thick rounds. Bake one sheet at a time for about 12 to 15 minutes, checking at 12 minutes. Remove when the edges are set and lightly golden and the tops no longer look shiny; the centers can still be soft. Let the cookies rest briefly on the sheets, then transfer to a rack to cool completely.
  4. Cook the apples: In a medium skillet over medium heat, cook the diced apples with 1 tablespoon butter, 2 tablespoons brown sugar, and 1/2 teaspoon cinnamon, stirring, for about 5 to 8 minutes. When the pieces are tender but still hold their shape, stir the cornstarch and water together and add to the skillet. Cook briefly, stirring, until the juices form a light, glossy coating with no pool of thin liquid. Spread the apples in a shallow dish to cool completely.
  5. Make the frosting: Beat the remaining 7 tablespoons butter with the powdered sugar and 1/2 teaspoon vanilla. Add milk a little at a time until the frosting is smooth and spreadable but thick enough to hold a swirl.
  6. Assemble: Pipe or spread a generous frosting swirl on each cooled cookie, leaving a narrow edge visible. Mound the cooled apple pieces in the center, leaving any excess liquid in the dish. Just before serving, drizzle cool, thick caramel sauce in thin lines across the apples and frosting.

How to Keep the Apple Topping from Soaking the Frosting

Cut the apples into small, even cubes so they become tender without losing their shape. Their juices should cling to the pieces, not form a loose syrup. If liquid collects as the topping cools, leave it behind when spooning the apples onto the cookies. Warm apples or cookie bases can soften the frosting, so let both cool completely.

How to Tell When the Cookies Are Done

Equal, roughly 3-tablespoon portions bake more evenly and make a substantial base for the toppings. Start checking at 12 minutes: the edges should be set and lightly golden, while the tops should look set rather than shiny. Don’t wait for the centers to feel firm, which can leave the cooled cookies dry. Smaller portions need an earlier check.

Make Ahead and Storage

For the neatest finish, bake the cookies and cook the apples ahead, then refrigerate the cooled apples separately. Frost and assemble closer to serving. Plain baked cookies can be frozen well wrapped; thaw them fully before adding the frosting, apples, and caramel.

Keep assembled cookies covered in the refrigerator, preferably in a single layer. Serving them within about 2 days is a quality guideline: the moist apples will gradually soften the frosting and cookies. Do not reheat assembled cookies.

For a different apple-filled cookie, try these soft apple pie cookies. For another topped cookie, see these maple brown sugar cookies.

Nutrition

Approximate per large cookie, based on 12 cookies: 380 calories, 3g protein, 17g fat, and 58g carbohydrates. Approximate per 100g of finished cookies: 360 calories, 3g protein, 16g fat, and 55g carbohydrates. Values vary with the caramel sauce, amount of milk used, and moisture lost during baking.

Caramel Apple Cookies

Cinnamon-spiced cookies are topped with vanilla frosting, glossy cooked apples, and a drizzle of caramel.
Course: Dessert
Cuisine: American
Prep: 35 min
Cook: 60 min
Total: 95 min
Servings: 12 Calories: 380 kcal

Equipment

  • Oven
  • Two baking sheets
  • Parchment paper
  • Whisk
  • Electric mixer
  • Cookie scoop
  • Skillet
  • Shallow dish
  • Cooling rack

Ingredients

Spiced cookies

  • 1 3/4 cups all-purpose flour (210g)
  • 1/2 teaspoon baking powder
  • 1/4 teaspoon baking soda
  • 1/2 teaspoon fine salt
  • 1 teaspoon ground cinnamon
  • 1/2 cup unsalted butter, softened (115g)
  • 1/2 cup packed light brown sugar (100g)
  • 1/4 cup granulated sugar (50g)
  • 1 large egg
  • 1 teaspoon vanilla extract

Apple topping

  • About 2 1/2 cups firm apples, peeled and cut into roughly 1/4-inch cubes (325g; from 2 to 3 apples)
  • 1 tablespoon unsalted butter
  • 2 tablespoons packed light brown sugar (25g)
  • 1/2 teaspoon ground cinnamon
  • 1 teaspoon cornstarch
  • 1 tablespoon water

Frosting and caramel

  • 7 tablespoons unsalted butter, softened (about 100g)
  • 2 cups powdered sugar (240g)
  • 1/2 teaspoon vanilla extract
  • 1 to 2 tablespoons milk, as needed
  • About 1/3 cup thick caramel sauce (105g)

Instructions

  1. Preheat the oven to 350°F (175°C) with a rack near the center. Line two baking sheets with parchment.
  2. Whisk together the flour, baking powder, baking soda, salt, and cinnamon.
  3. Beat 1/2 cup butter with 1/2 cup brown sugar and the granulated sugar until creamy. Beat in the egg and vanilla, then mix in the flour mixture just until the dough comes together.
  4. Scoop the dough into 12 portions of roughly 3 tablespoons each and place them at least 2 inches apart on the baking sheets. Gently flatten each portion into a thick round.
  5. Bake one sheet at a time for 12 to 15 minutes, checking at 12 minutes. Remove when the edges are set and lightly golden and the tops no longer look shiny. Cool briefly on the sheets, then transfer to a rack to cool completely.
  6. Cook the diced apples in a skillet over medium heat with 1 tablespoon butter, 2 tablespoons brown sugar, and 1/2 teaspoon cinnamon for 5 to 8 minutes, stirring, until tender but still holding their shape.
  7. Stir the cornstarch and water together, then add to the skillet. Cook briefly, stirring, until the juices lightly coat the apples without pooling. Spread the apples in a shallow dish and cool completely.
  8. Beat the remaining 7 tablespoons butter with the powdered sugar and 1/2 teaspoon vanilla. Add milk a little at a time until the frosting is smooth, spreadable, and thick enough to hold a swirl.
  9. Pipe or spread frosting onto each cooled cookie, leaving a narrow edge visible. Mound the cooled apples in the center, leaving excess liquid behind.
  10. Just before serving, drizzle cool, thick caramel sauce in thin lines over the apples and frosting.

Tips

  • Use firm apples so the pieces soften without losing their shape; Granny Smith or another tart apple balances the sweet frosting.
  • Cut the apples into small, even cubes so they cook evenly.
  • Cook the apple juices until they lightly coat the pieces, and leave any excess liquid behind when topping the cookies.
  • Cool the cookies and apples completely before assembling to keep the frosting from softening.
  • Use thick caramel sauce so it forms thin lines instead of running off the cookies.
  • Start checking the cookies at 12 minutes; the centers can still be soft when they come out of the oven.

Variations

  • Sweeter Apple Topping: Use a firm, sweeter apple instead of a tart variety.

Notes

Store assembled cookies covered in the refrigerator, preferably in a single layer, and serve within about 2 days. Do not reheat assembled cookies. Plain baked cookies can be frozen well wrapped; thaw fully before assembling. Total time includes cooling and assembly.

Nutrition

Calories: 380 kcal | Protein: 3 g | Fat: 17 g | Carbohydrates: 58 g

Apple Pie Cookies

These apple pie cookies are thick, soft thumbprints with golden butter-cookie rims and open centers filled with diced cinnamon apples. The apples are cooked until the juices cling to the pieces, then cooled before they go into the dough. That keeps the filling visible and helps prevent soggy centers. There’s no pastry lid or glaze—just a broad well that holds the apples inside each cookie.

Ingredients for Apple Pie Cookies

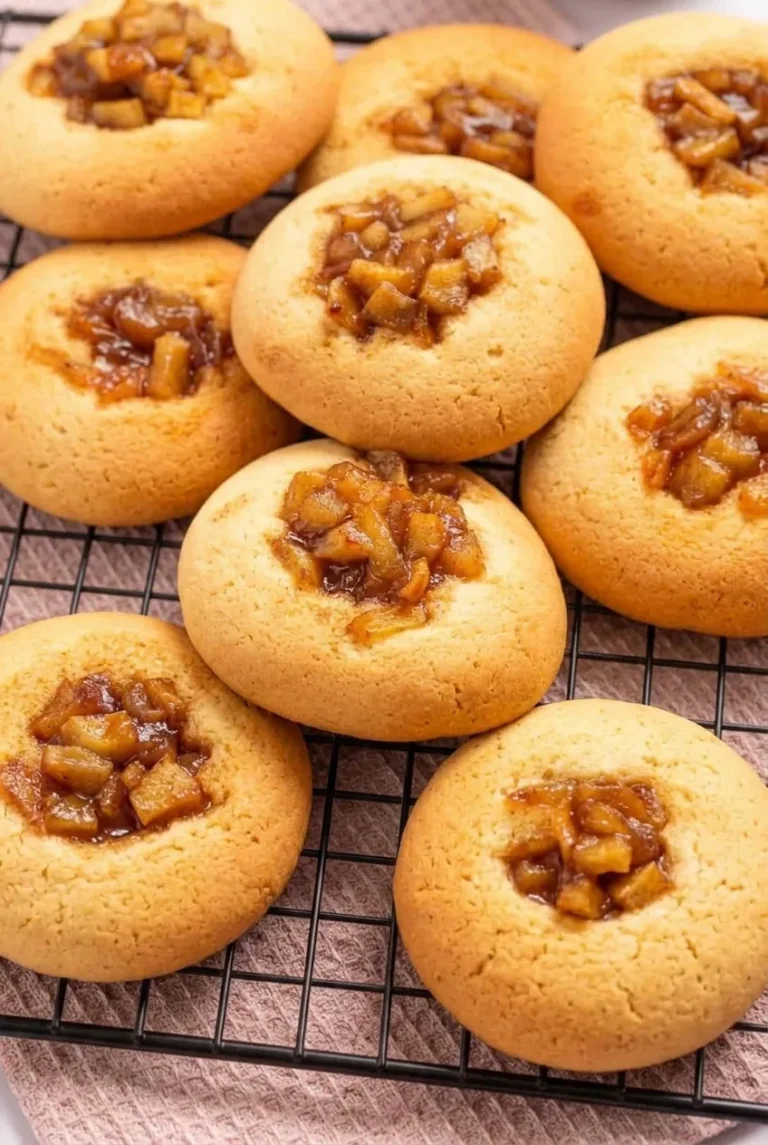
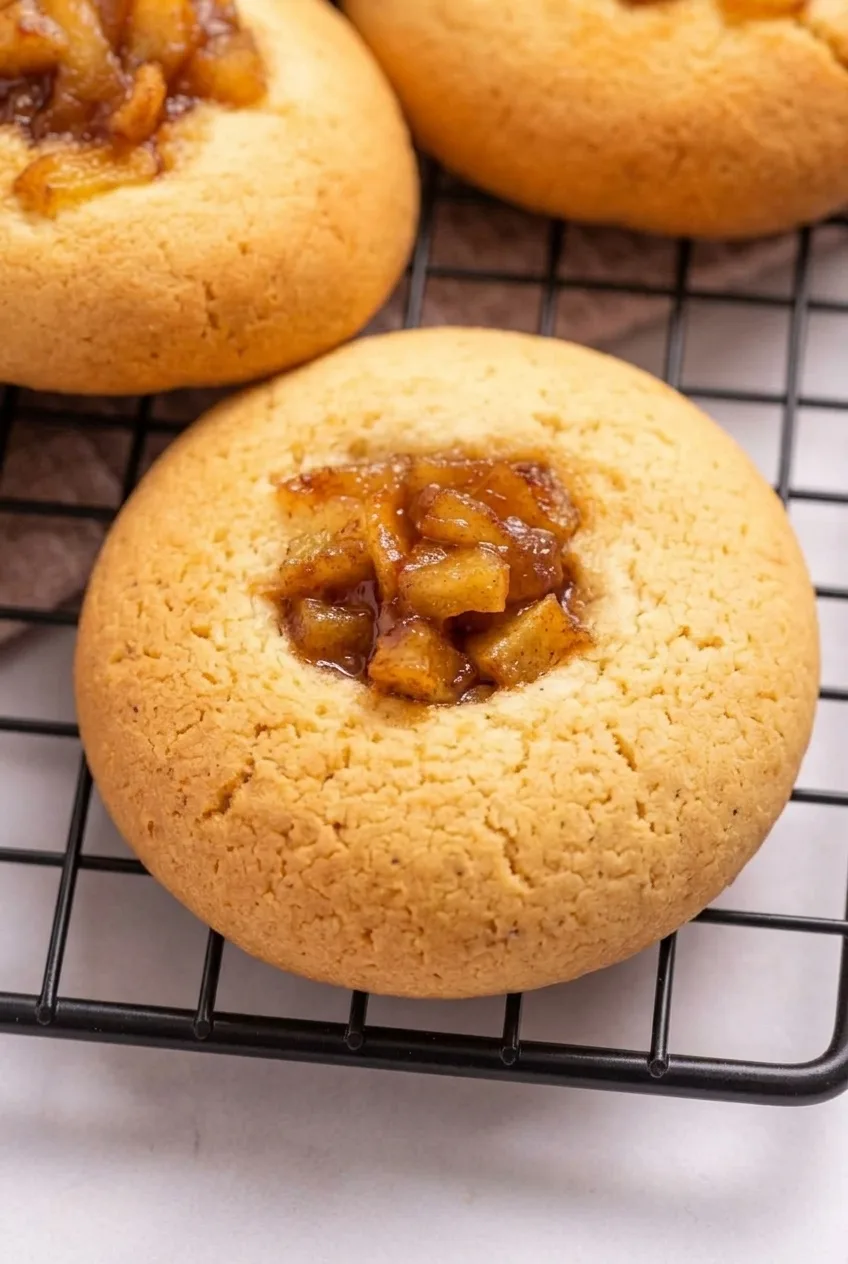
Close view of glossy diced apples nestled inside the soft golden rim of an apple pie cookie

Apple filling

  • 2 medium firm baking apples, peeled and finely diced (about 2 cups or 300g)
  • 1 tablespoon unsalted butter (15g)
  • 1/4 cup packed light brown sugar (50g)
  • 1 teaspoon ground cinnamon
  • 2 teaspoons cornstarch
  • 1 tablespoon water

Cookie dough

  • 3/4 cup unsalted butter, softened (170g)
  • 1/2 cup granulated sugar (100g)
  • 1/3 cup packed light brown sugar (about 65g)
  • 1 large egg
  • 1 teaspoon vanilla extract
  • 2 1/4 cups all-purpose flour, spooned and leveled (270g)
  • 1 teaspoon baking powder
  • 1/2 teaspoon fine salt

Granny Smith apples give the filling a tarter flavor; Honeycrisp or Gala make it sweeter. Choose apples that hold their shape when cooked. For a little more spice, add a small pinch of nutmeg with the cinnamon.

How to Make Apple Pie Cookies

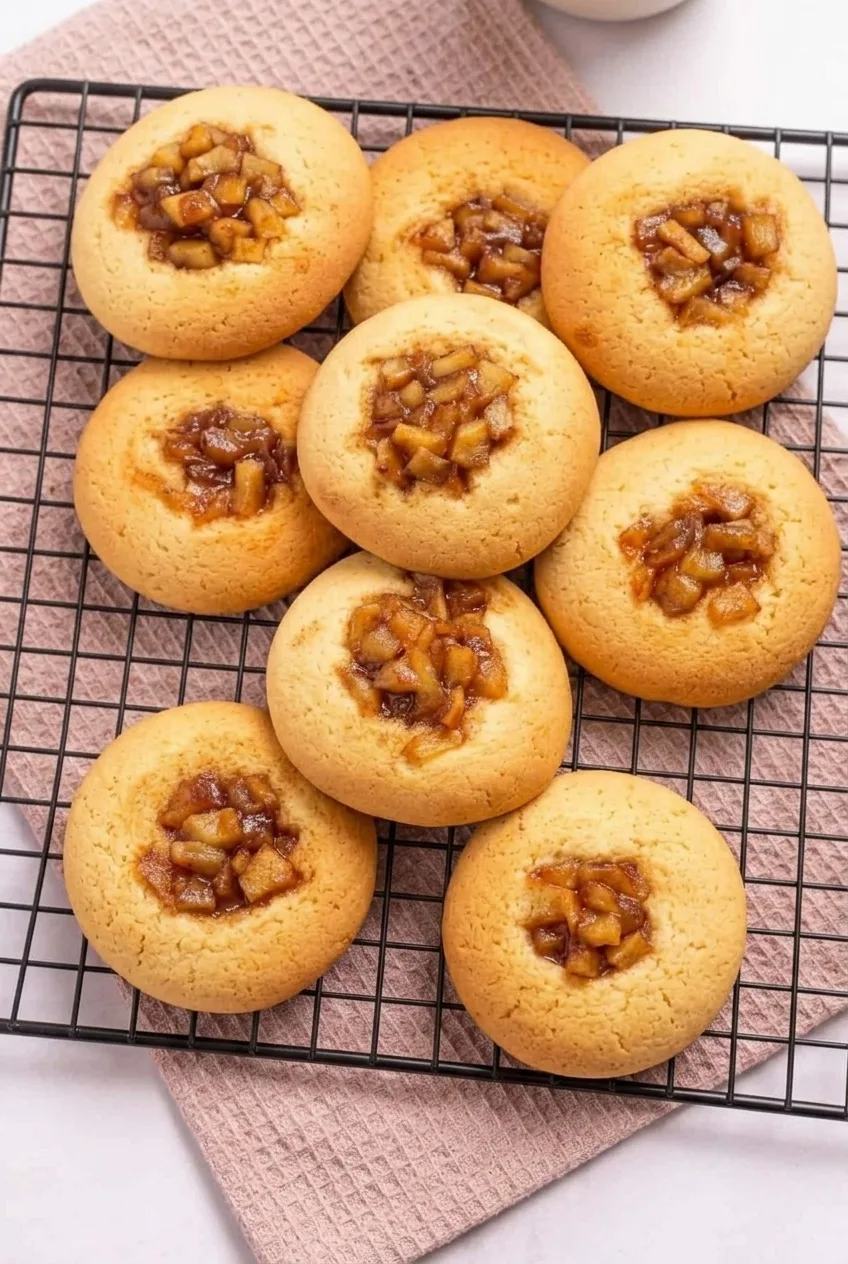
Several apple pie thumbprint cookies arranged on a cooling rack with the surrounding surface visible
  1. Cook the filling: Combine the apples, filling butter, 1/4 cup brown sugar, and cinnamon in a medium saucepan. Cook uncovered over medium heat, stirring regularly, until the apples are slightly tender but still hold their shape. Stir the cornstarch and water together, then add to the pan. Continue cooking until the juices are thick and glossy and cling to the apple pieces, about 7 to 9 minutes total.
  2. Cool and preheat: Spread the filling in a shallow bowl and let it cool until no longer warm, about 15 to 20 minutes. While it cools, preheat the oven to 350°F (175°C) and line baking sheets with parchment.
  3. Make the dough: Cream the softened dough butter with the granulated sugar and 1/3 cup brown sugar. Beat in the egg and vanilla. Add the flour, baking powder, and salt; mix just until no dry flour remains. The dough should be soft but able to hold an indentation.
  4. Shape the cookies: Roll about 2 tablespoons of dough per cookie into balls and place them 2 inches apart on the baking sheets. With a fingertip or small rounded spoon, press a broad, deep well about 1 to 1 1/4 inches wide into each ball. Leave the base intact and a thick rim around the well.
  5. Fill and bake: Spoon about 2 teaspoons to 1 tablespoon of cooled filling into each well, keeping it inside the rim. Bake for approximately 12 to 15 minutes per batch, checking the first batch at 12 minutes. The edges and bottoms should be lightly golden; the tops will remain mostly pale gold.
  6. Let the cookies set: Leave them on the baking sheet for about 5 minutes so the bases firm up, then carefully transfer to a wire rack to cool.

Makes about 20 cookies. Allow extra time if baking in batches.

How Thick Should the Apple Filling Be?

The filling should be spoonable, with glossy sauce coating recognizable apple pieces and no liquid pooling around them. Juicy apples may need a little longer in the pan. Let the filling cool before adding it to the dough; warm or runny filling can soften the wells and spill over their rims.

How to Keep the Thumbprints Open

Press each well wide enough to show the diced apples, but not so deep that you break through the bottom. Keep the filling below the raised rim. If the cookies turn out dry, weigh the flour when possible and check the first batch promptly; waiting for the entire top to brown can overbake them.

Storing and Freezing

Cool the cookies completely, then refrigerate in an airtight container for up to 3 to 4 days. Let them come closer to room temperature before serving if preferred. Fully cooled baked cookies can be frozen airtight for up to 3 months; thaw before serving.

For another cinnamon-forward bake, try these cinnamon roll cookies. For a different brown-sugar cookie, try these maple brown sugar cookies.

Nutrition

Approximate per cookie, based on 20 cookies: 170 calories, 2g protein, 8g fat, and 24g carbohydrates. Approximate per 100g of baked cookies: 380 calories, 4g protein, 17g fat, and 52g carbohydrates. Values vary with cookie size, apple size, and moisture lost during baking.

Apple Pie Cookies

Soft thumbprint cookies with golden edges and centers filled with diced cinnamon apples.
Course: Dessert
Cuisine: American
Prep: 35 min
Cook: 40 min
Total: 75 min
Servings: 20 Calories: 170 kcal

Equipment

  • Medium saucepan
  • Shallow bowl
  • Mixing bowl
  • Baking sheets
  • Parchment paper
  • Wire rack

Ingredients

Apple filling

  • 2 medium firm baking apples, peeled and finely diced (about 2 cups or 300 g)
  • 1 tablespoon unsalted butter (15 g)
  • 1/4 cup packed light brown sugar (50 g)
  • 1 teaspoon ground cinnamon
  • 2 teaspoons cornstarch
  • 1 tablespoon water

Cookie dough

  • 3/4 cup unsalted butter, softened (170 g)
  • 1/2 cup granulated sugar (100 g)
  • 1/3 cup packed light brown sugar (about 65 g)
  • 1 large egg
  • 1 teaspoon vanilla extract
  • 2 1/4 cups all-purpose flour, spooned and leveled (270 g)
  • 1 teaspoon baking powder
  • 1/2 teaspoon fine salt

Instructions

  1. Combine the diced apples, filling butter, 1/4 cup brown sugar, and cinnamon in a medium saucepan.
  2. Cook uncovered over medium heat, stirring regularly, until the apples are slightly tender but still hold their shape.
  3. Stir the cornstarch and water together, then add the mixture to the pan. Cook until the juices are thick, glossy, and cling to the apples, about 7 to 9 minutes total.
  4. Spread the filling in a shallow bowl and cool until no longer warm, about 15 to 20 minutes.
  5. Preheat the oven to 350°F (175°C) and line baking sheets with parchment paper.
  6. Cream the softened dough butter with the granulated sugar and 1/3 cup brown sugar. Beat in the egg and vanilla.
  7. Add the flour, baking powder, and salt. Mix just until no dry flour remains.
  8. Roll about 2 tablespoons of dough into a ball for each cookie and place the balls 2 inches apart on the baking sheets.
  9. Press a broad, deep well about 1 to 1 1/4 inches wide into each ball, leaving the base intact and a thick rim.
  10. Spoon about 2 teaspoons to 1 tablespoon of cooled filling into each well, keeping it inside the rim.
  11. Bake each batch for about 12 to 15 minutes, checking the first batch at 12 minutes. Bake until the edges and bottoms are lightly golden.
  12. Let the cookies set on the baking sheet for about 5 minutes, then carefully transfer them to a wire rack to cool.

Tips

  • Choose firm apples that hold their shape when cooked.
  • Cook the filling until the glossy sauce clings to the apple pieces, with no liquid pooling around them.
  • Cool the filling completely before adding it to the cookie dough.
  • Make each well broad enough for the diced apples, but keep its base intact and its rim raised.
  • Weigh the flour when possible and check the first batch promptly to avoid dry, overbaked cookies.

Variations

  • Tart Apple Filling: Use Granny Smith apples for a tarter filling.
  • Sweeter Apple Filling: Use Honeycrisp or Gala apples for a sweeter filling.
  • Extra-Spiced Filling: Add a small pinch of nutmeg with the cinnamon.

Notes

Refrigerate fully cooled cookies in an airtight container for 3 to 4 days. Freeze baked cookies airtight for up to 3 months and thaw before serving.

Nutrition

Calories: 170 kcal | Protein: 2 g | Fat: 8 g | Carbohydrates: 24 g