Author

Julia

Browsing

White Chocolate Chip Cookies

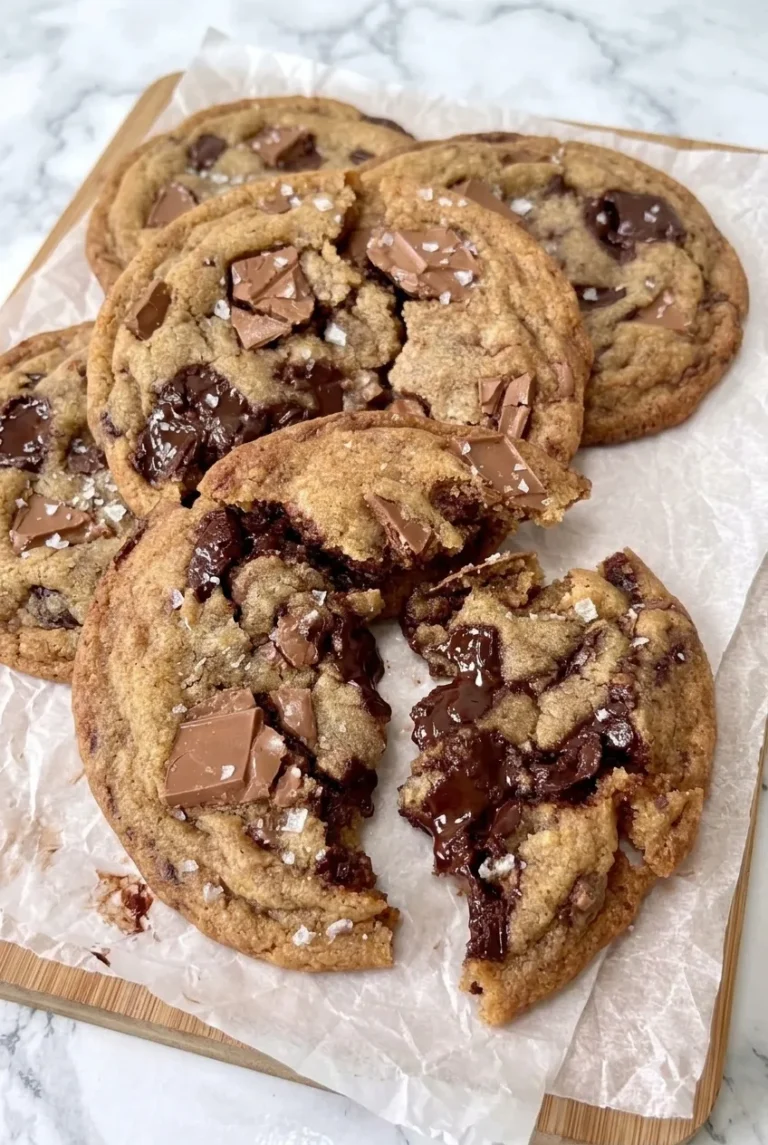
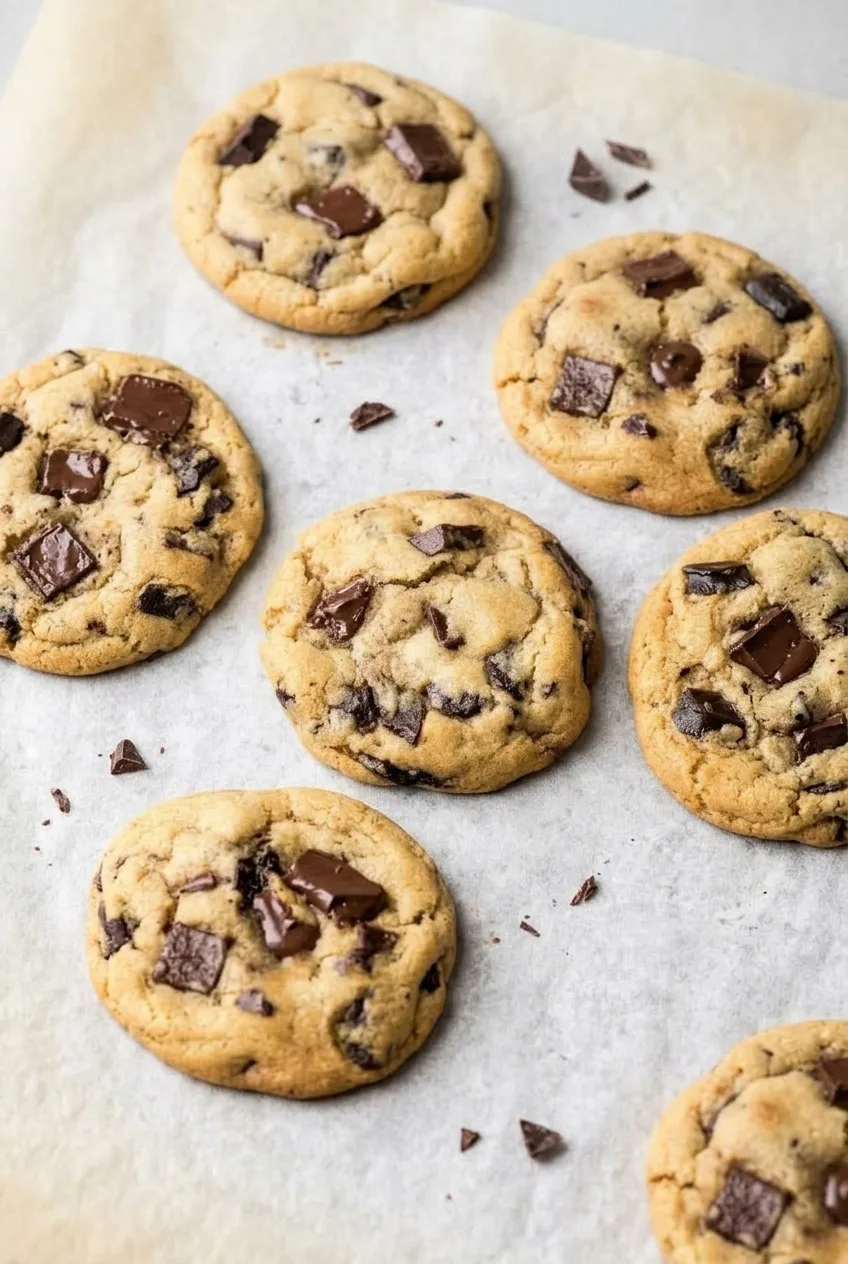
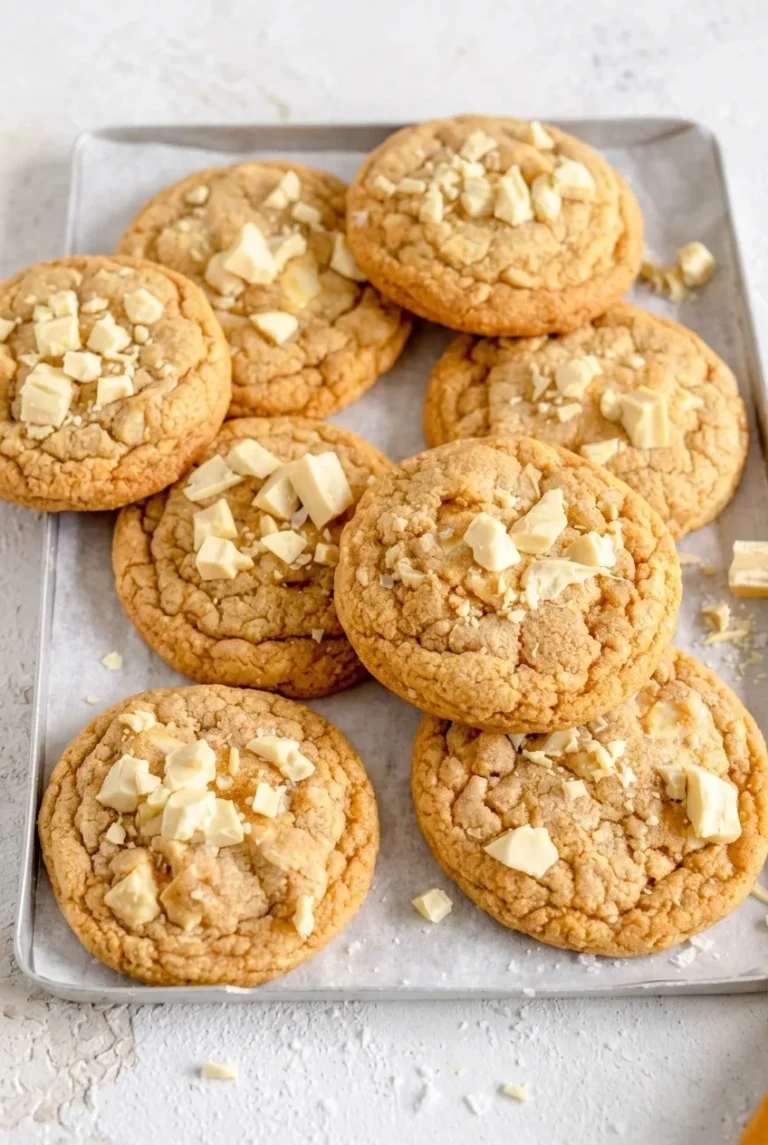
These pale vanilla cookies bake into broad rounds with lightly golden edges, soft centers, and irregular pieces of white chocolate across their wrinkled tops. Most of the chopped chocolate goes into the dough; the rest is pressed onto the cookies just after baking so it stays visible.

This creamed-butter dough gets a 30-minute chill to limit excess spread. Take the cookies out when their edges are set but their centers still look soft—they finish setting on the baking sheet.

Yield: About 24 to 26 cookies. Prep: 20 minutes. Chill: 30 minutes. Bake: About 10 to 12 minutes per sheet. Total: About 1 hour 20 minutes to 1 hour 35 minutes, including batch baking.
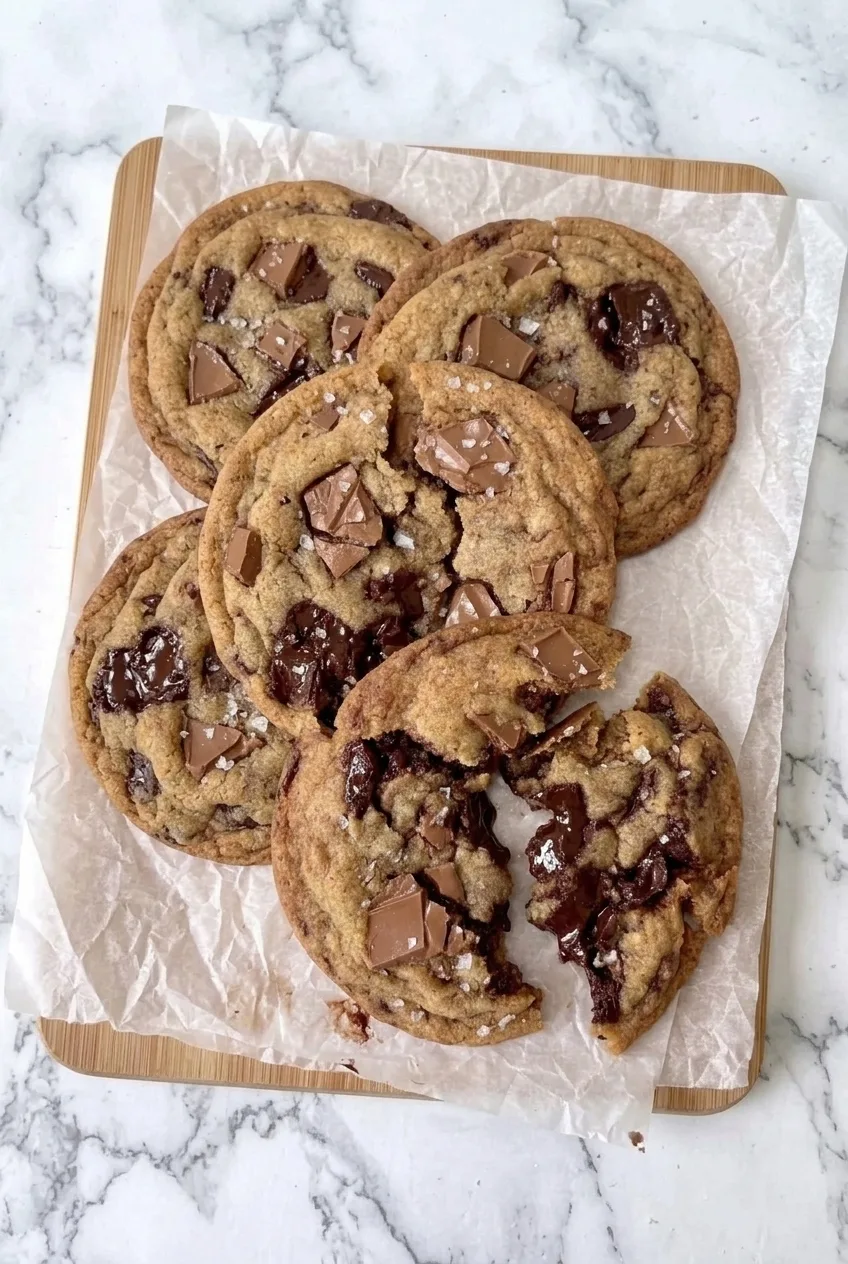
Full baking sheet of pale golden white chocolate chip cookies on a neutral countertop

Ingredients for White Chocolate Chip Cookies

  • 2 1/4 cups all-purpose flour, spooned and leveled (270g)
  • 1 teaspoon baking soda
  • 3/4 teaspoon fine salt
  • 1 cup unsalted butter, softened but not melted (225g)
  • 3/4 cup packed light brown sugar (150g)
  • 1/2 cup granulated sugar (100g)
  • 1 large egg
  • 1 large egg yolk
  • 2 teaspoons vanilla extract
  • 8 ounces chopped white chocolate or white chocolate chunks (225g), divided

Chopped white chocolate gives the cookies irregular pieces on top. White chocolate chips also work, but will look more uniform.
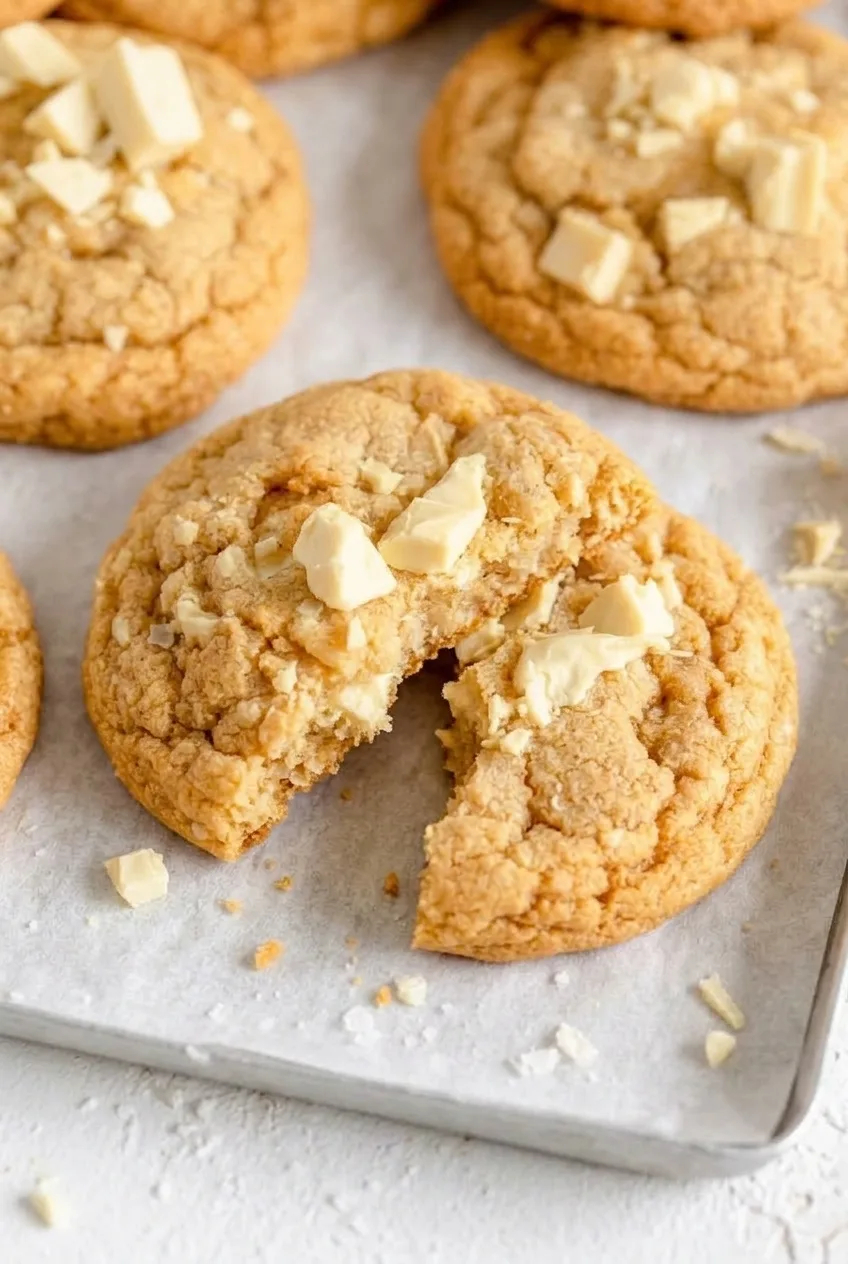
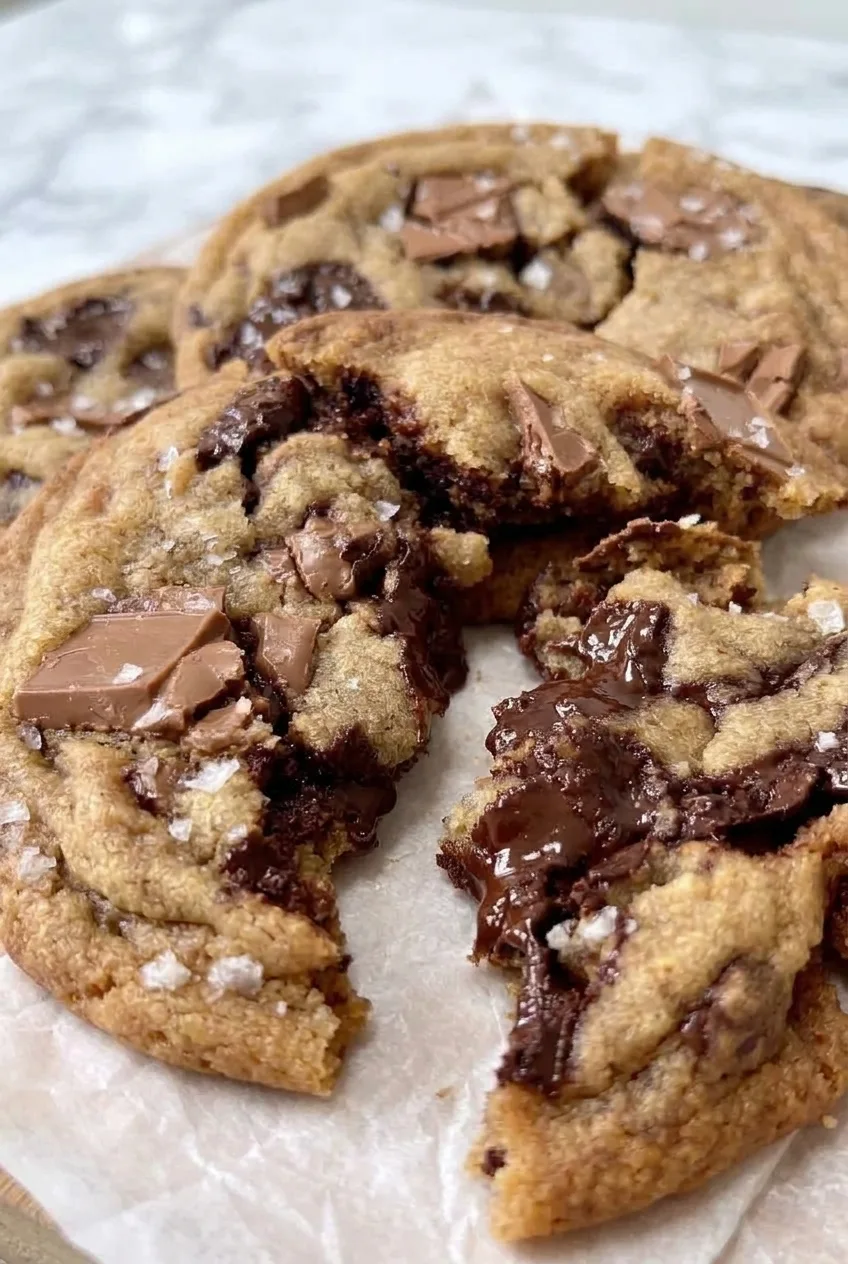
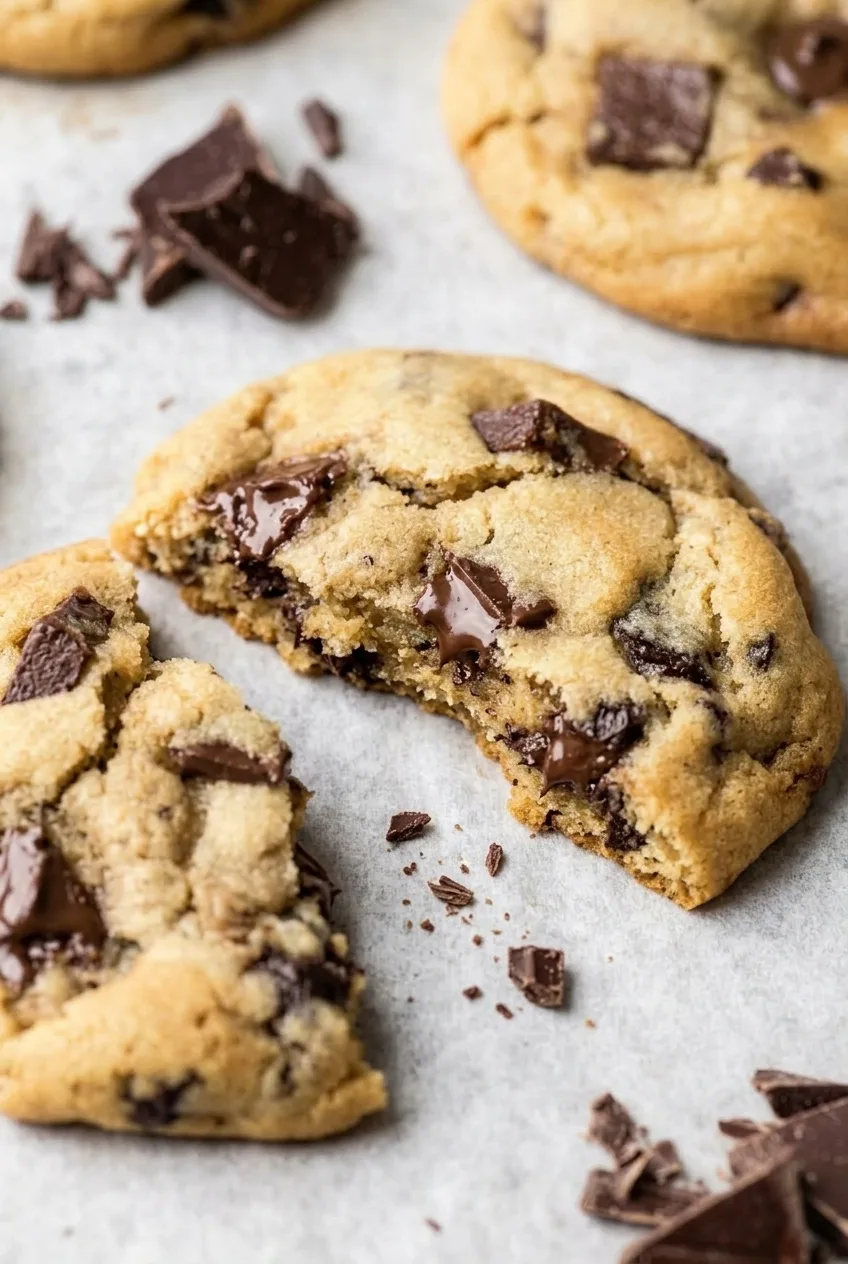
Broken white chocolate chip cookie showing a soft center and chopped white chocolate

How to Bake White Chocolate Chip Cookies

  1. Mix the dry ingredients: Whisk the flour, baking soda, and salt together in a bowl.
  2. Cream the butter and sugars: Beat the softened butter, brown sugar, and granulated sugar with an electric mixer until creamy and a little lighter. Beat in the egg, egg yolk, and vanilla.
  3. Finish the dough: Add the dry ingredients and mix just until no dry flour remains. Fold in about 6 ounces of the white chocolate, reserving the remaining 2 ounces for the tops. Avoid beating the dough once the flour is incorporated.
  4. Portion and chill: Scoop roughly 2-tablespoon portions of dough and refrigerate for 30 minutes, until firmer. Near the end of the chill, preheat the oven to 350°F (175°C) with a rack in the center. Line baking sheets with parchment.
  5. Bake in batches: Arrange the chilled portions about 2 inches apart on a parchment-lined sheet. Bake uncovered, one sheet at a time. Start checking at 9 minutes; expect about 10 to 12 minutes per sheet. Remove the cookies when the edges are set and lightly golden but the centers still look slightly puffy and soft. Keep dough for later batches chilled, and place it on a cool sheet.
  6. Add the chocolate and cool: Immediately press pieces of the reserved white chocolate gently onto the hot tops without flattening the cookies. Leave them on the sheet for about 5 minutes to set, then transfer to a wire rack.

How to Tell When the Cookies Are Done

Look at the edges rather than waiting for the whole cookie to look firm. The edges should be set and lightly browned, while the centers remain pale and soft-looking. The centers firm during the five-minute rest on the hot sheet; baking until they look completely firm can leave the cookies dry or hard.

Why Chill This Dough?

Chilling the scooped, creamed-butter dough helps it spread into broad rounds without becoming too thin. Butter that is too warm or a hot baking sheet can encourage excess spread. Leave about 2 inches between portions during baking, even if you arrange the finished cookies close together for serving.

White Chocolate Chip Cookie Variations

For a separate variation, fold up to 1/2 cup chopped macadamia nuts or up to 1/2 cup dried sweetened cranberries into the dough with the white chocolate. Leave them out of the plain white chocolate cookies described here.

For a cocoa-based cookie, see these double chocolate cookies with white chips rather than adding cocoa to this dough. For a pale dough with darker chocolate, try these classic chocolate chip cookies with soft centers.

Storing and Freezing

Cool the cookies completely, then store them airtight at room temperature for the best texture within 3 days. Baked cookies can be frozen airtight for up to 3 months; thaw at room temperature for approximately 30 minutes.

You can portion and chill the dough ahead of baking or freeze the portions for later. For frozen dough, use the set-edge and soft-center cues rather than assuming the chilled-dough bake time will be exact.

Nutrition

Approximate nutrition per cookie, based on 25 cookies: 200 calories, 2g protein, 11g fat, and 24g carbohydrates. Per 100g: approximately 495 calories, 5g protein, 27g fat, and 59g carbohydrates. Values are estimates and vary with the white chocolate used and the size of each cookie.

White Chocolate Chip Cookies

Soft-centered vanilla cookies are baked with chopped white chocolate and topped with extra pieces while still warm.
Course: Dessert
Cuisine: American
Prep: 20 min
Cook: 45 min
Total: 95 min
Servings: 25 Calories: 200 kcal per cookie; 495 kcal per 100 g

Equipment

  • Mixing bowls
  • Whisk
  • Electric mixer
  • Cookie scoop
  • Baking sheets
  • Parchment paper
  • Wire rack

Ingredients

Cookie Dough

  • 2 1/4 cups all-purpose flour, spooned and leveled (270g)
  • 1 teaspoon baking soda
  • 3/4 teaspoon fine salt
  • 1 cup unsalted butter, softened but not melted (225g)
  • 3/4 cup packed light brown sugar (150g)
  • 1/2 cup granulated sugar (100g)
  • 1 large egg
  • 1 large egg yolk
  • 2 teaspoons vanilla extract
  • 8 ounces chopped white chocolate or white chocolate chunks (225g), divided

Instructions

  1. Whisk the flour, baking soda, and salt together in a bowl.
  2. Beat the softened butter, brown sugar, and granulated sugar with an electric mixer until creamy and slightly lighter.
  3. Beat in the egg, egg yolk, and vanilla.
  4. Add the dry ingredients and mix just until no dry flour remains.
  5. Fold in about 6 ounces of the white chocolate, reserving the remaining 2 ounces for topping.
  6. Scoop the dough into roughly 2-tablespoon portions and refrigerate for 30 minutes, until firmer.
  7. Near the end of chilling, preheat the oven to 350°F (175°C) with a rack in the center. Line baking sheets with parchment.
  8. Arrange the chilled dough portions about 2 inches apart on a parchment-lined sheet. Keep dough for later batches chilled and use a cool baking sheet.
  9. Bake one sheet at a time, uncovered. Start checking at 9 minutes; bake for about 10 to 12 minutes, until the edges are set and lightly golden while the centers remain slightly puffy and soft.
  10. Immediately press pieces of the reserved white chocolate gently onto the hot cookie tops without flattening them.
  11. Let the cookies rest on the baking sheet for about 5 minutes, then transfer them to a wire rack.

Tips

  • Chill the scooped dough for 30 minutes to help limit spreading.
  • Avoid beating the dough after adding the flour; mix only until no dry flour remains.
  • Bake on a cool sheet and leave about 2 inches between dough portions.
  • Remove the cookies while their centers still look soft; they will finish setting on the hot baking sheet.
  • Press the reserved chocolate onto the cookies just after baking so the pieces stay visible.

Variations

  • White Chocolate Macadamia Cookies: Fold up to 1/2 cup chopped macadamia nuts into the dough with the white chocolate.
  • White Chocolate Cranberry Cookies: Fold up to 1/2 cup dried sweetened cranberries into the dough with the white chocolate.
Notes

Cool completely and store airtight at room temperature for up to 3 days. Freeze baked cookies airtight for up to 3 months and thaw at room temperature for about 30 minutes. Dough portions can also be frozen; use the doneness cues rather than relying on the chilled-dough bake time.

Nutrition

Calories: 200 kcal per cookie; 495 kcal per 100 g | Protein: 2 g per cookie; 5 g per 100 g | Fat: 11 g per cookie; 27 g per 100 g | Carbohydrates: 24 g per cookie; 59 g per 100 g

M&M Cookies

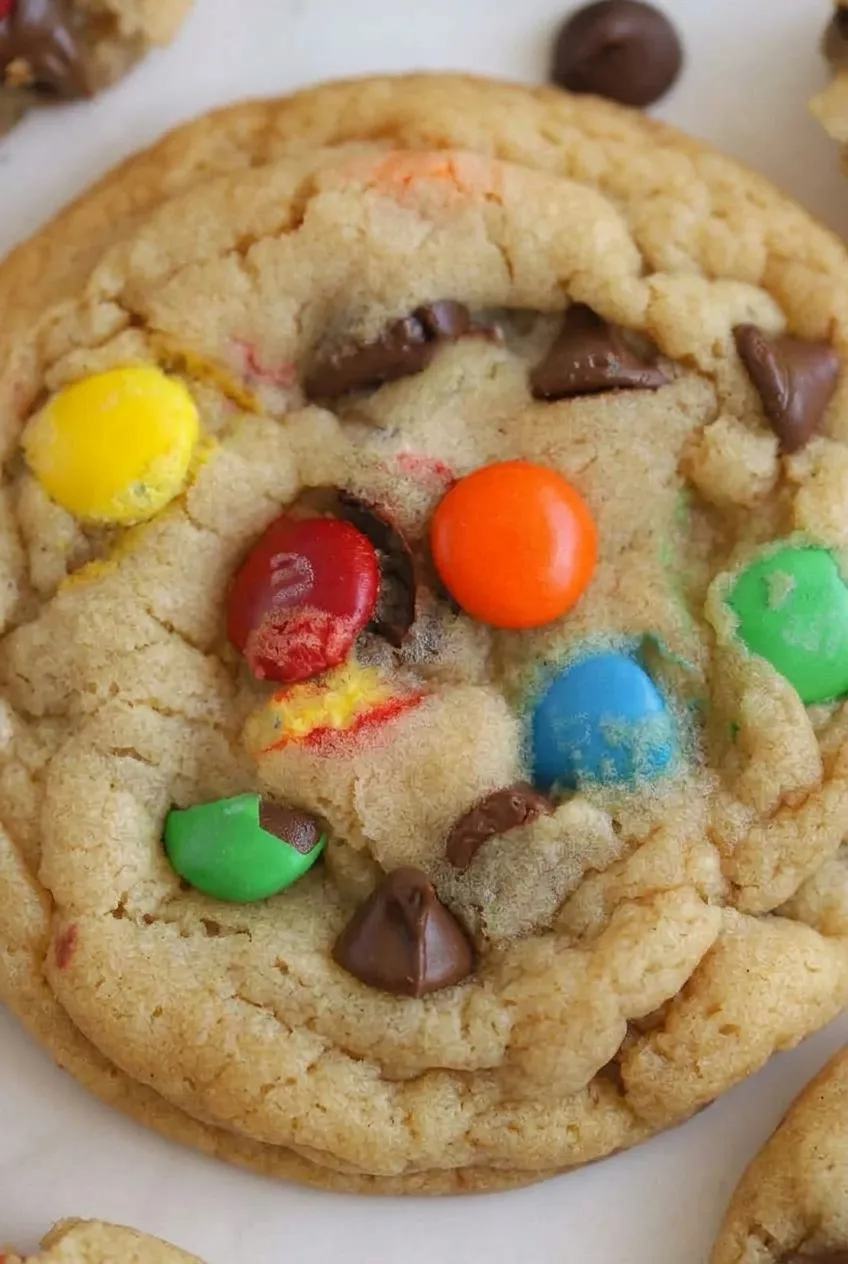
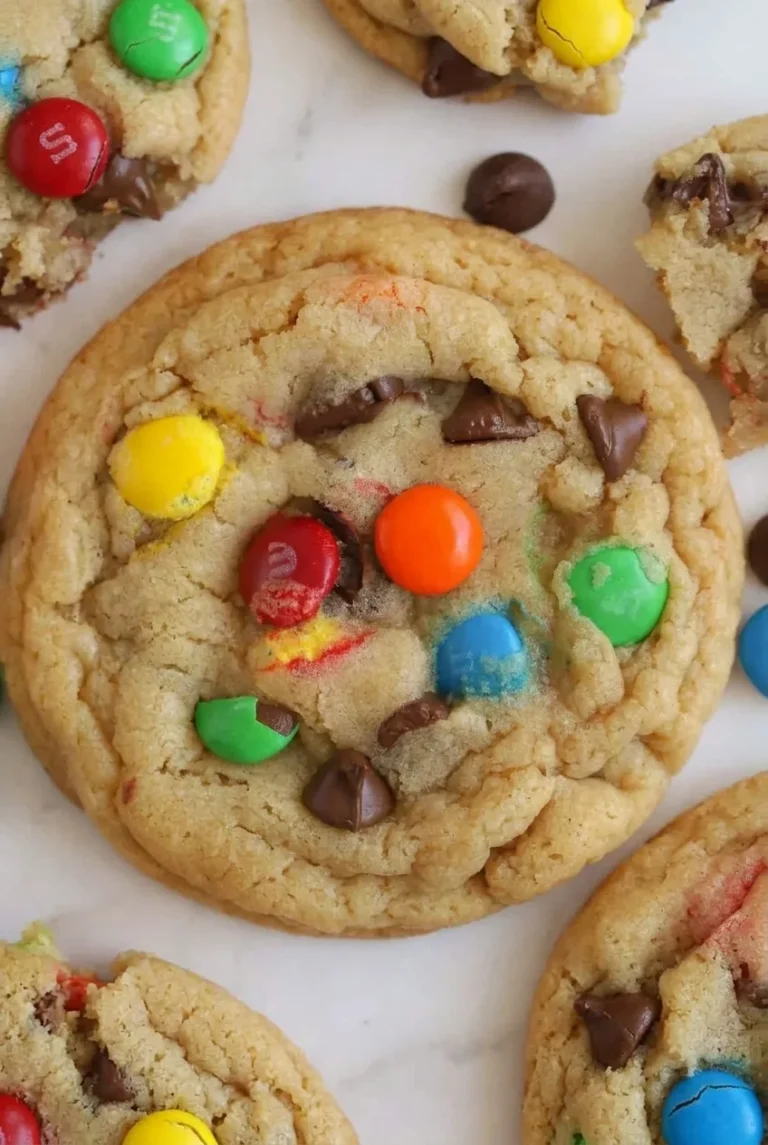
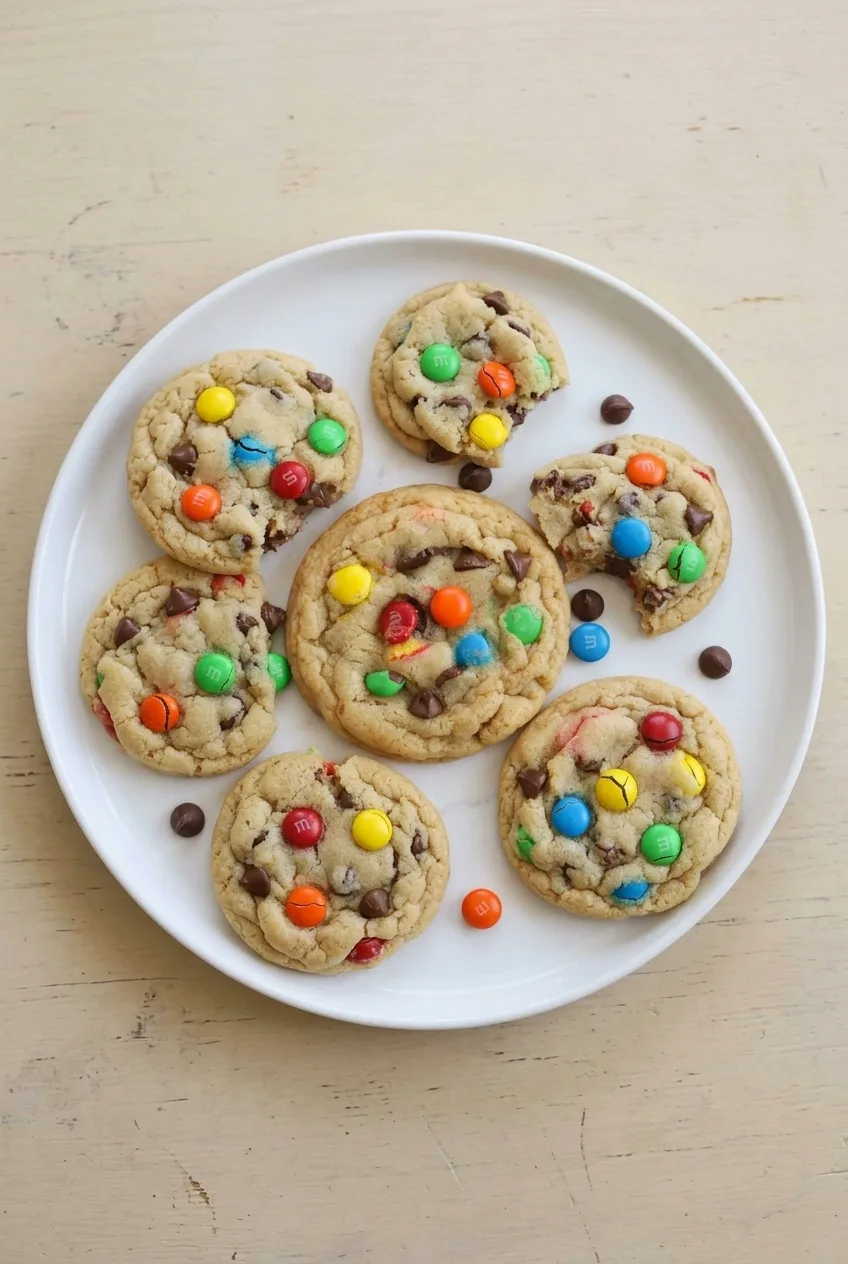
These large M&M cookies have lightly golden edges, soft centers, and plenty of colorful candies and chocolate chips on top. Scoop the dough into 3-tablespoon portions, then press some of the mix-ins onto the exposed surfaces so they stay visible after baking.

For this thicker cookie, chill the portioned dough for 45 minutes to help control spreading. Take the cookies out when the edges are set but the centers still look pale and soft; they will firm up as they rest on the baking sheet.

Ingredients for M&M Cookies

Several large M&M cookies with colorful candies and chocolate chips arranged on a white plate
  • 3/4 cup unsalted butter (170g), softened but still cool
  • 3/4 cup packed light brown sugar (150g)
  • 1/2 cup granulated sugar (100g)
  • 1 large egg
  • 2 teaspoons vanilla extract
  • 2 cups all-purpose flour (240g), spooned and leveled
  • 3/4 teaspoon baking soda
  • 3/4 teaspoon fine salt
  • 3/4 cup regular milk chocolate M&Ms (150g), divided
  • 1/2 cup semisweet chocolate chips (85g), divided

Yield: 17–18 large cookies. Prep: 20 minutes. Chill: 45 minutes. Bake: about 11–13 minutes per batch. Allow about 1 hour 30 minutes total, depending on batches and cooling time.

Close view of the soft, folded center of an M&M cookie with embedded candies and chocolate chips

How to Bake M&M Cookies

  1. Mix the dry ingredients: Whisk the flour, baking soda, and salt together in a bowl.
  2. Cream the butter and sugars: Beat the butter with both sugars until creamy and lighter in appearance. The butter should be pliable, not melted or greasy. Beat in the egg and vanilla.
  3. Finish the dough: Mix in the dry ingredients just until no flour pockets remain. Fold in 1/2 cup M&Ms and 6 tablespoons chocolate chips. Reserve the remaining 1/4 cup M&Ms and 2 tablespoons chips for the tops; these come from the listed amounts, not from extra add-ins.
  4. Scoop and chill: Scoop roughly 3-tablespoon mounds onto a parchment-lined tray. Press the reserved candies and chips onto the exposed tops. Refrigerate for 45 minutes, until the dough feels firmer.
  5. Bake in batches: Fully preheat the oven to 350°F (175°C). Place chilled portions at least 3 inches apart on parchment-lined baking sheets. Bake one sheet at a time on the center rack, keeping the remaining dough refrigerated. Start checking at 10 minutes; each batch will generally take about 11–13 minutes. Rotate the sheet only if your oven browns unevenly.
  6. Let the cookies set: Remove them when the edges are set and lightly golden but the centers still look pale and soft. Leave them on the baking sheet for 8–10 minutes, until they hold together when lifted, then transfer to a wire rack.

How to Keep M&M Cookies Soft and Thick

Overly warm butter or dough can make these cookies spread too far. Use butter that is soft enough to cream but still cool, complete the chill, and place each new batch on a cool baking sheet rather than a hot one.

Do not wait for the centers to look dry. The large portions continue to set on the sheet after baking. Scoop size, dough temperature, and oven differences can shift the timing, so judge doneness by the set edges and soft centers as well as the clock. For another soft-centered bake without candy shells, try these classic chocolate chip cookies.

Make-Ahead and Storage

Cool baked cookies completely, then store them airtight at room temperature for up to 3 days for best quality.

To make the dough ahead, portion and top the cookies, then refrigerate them covered for up to 2 days before baking. Fully cooled baked cookies can be frozen in an airtight freezer-safe container for up to 2 months.

To freeze dough, freeze the topped portions until solid, then store airtight for up to 2 months. Bake from frozen at 350°F, allowing extra time. Look for set, lightly golden edges and soft centers rather than relying on a fixed number of added minutes.

Nutrition

Approximate per cookie, based on 18 large cookies: 240 calories, 3g protein, 11g fat, and 33g carbohydrates. Approximate per 100g of baked cookies: 480 calories, 5g protein, 22g fat, and 66g carbohydrates. Values are estimates; cookie size, ingredient brands, and moisture lost during baking will affect them.

M&M Cookies

Large cookies with lightly golden edges, soft centers, M&Ms, and semisweet chocolate chips.
Course: Dessert
Cuisine: American
Prep: 20 min
Cook: 13 min
Total: 90 min
Servings: 18 Calories: 240 kcal

Equipment

  • Mixing bowls
  • Whisk
  • Electric mixer
  • Cookie scoop
  • Baking sheets
  • Parchment paper
  • Wire rack

Ingredients

For the cookies

  • 3/4 cup unsalted butter (170 g), softened but still cool
  • 3/4 cup packed light brown sugar (150 g)
  • 1/2 cup granulated sugar (100 g)
  • 1 large egg
  • 2 teaspoons vanilla extract
  • 2 cups all-purpose flour (240 g), spooned and leveled
  • 3/4 teaspoon baking soda
  • 3/4 teaspoon fine salt
  • 3/4 cup regular milk chocolate M&Ms (150 g), divided
  • 1/2 cup semisweet chocolate chips (85 g), divided

Instructions

  1. Whisk the flour, baking soda, and salt together in a bowl.
  2. Beat the butter and both sugars until creamy and lighter in appearance.
  3. Beat in the egg and vanilla.
  4. Mix in the dry ingredients just until no flour pockets remain.
  5. Fold in 1/2 cup M&Ms and 6 tablespoons chocolate chips.
  6. Scoop the dough into roughly 3-tablespoon mounds onto a parchment-lined tray.
  7. Press the remaining 1/4 cup M&Ms and 2 tablespoons chocolate chips onto the tops.
  8. Refrigerate the portioned dough for 45 minutes, until firmer.
  9. Preheat the oven to 350°F (175°C).
  10. Arrange chilled portions at least 3 inches apart on parchment-lined baking sheets. Keep remaining dough refrigerated.
  11. Bake one sheet at a time on the center rack, starting to check at 10 minutes. Bake for about 11–13 minutes per batch, rotating the sheet only if the oven browns unevenly.
  12. Remove the cookies when the edges are set and lightly golden and the centers still look pale and soft.
  13. Let the cookies rest on the baking sheet for 8–10 minutes, then transfer them to a wire rack.

Tips

  • Use butter that is pliable but still cool, not melted or greasy.
  • Chill the portioned dough for the full 45 minutes to help limit spreading.
  • Bake each batch on a cool baking sheet rather than a hot one.
  • Take the cookies out while the centers still look pale and soft; they will set as they rest.
  • Use the set edges and soft centers to judge doneness, since scoop size and oven conditions can affect timing.

Notes

Store completely cooled cookies airtight at room temperature for up to 3 days. Freeze baked cookies or topped dough portions airtight for up to 2 months; bake dough from frozen at 350°F, checking for set edges and soft centers.

Nutrition

Calories: 240 kcal | Protein: 3 g | Fat: 11 g | Carbohydrates: 33 g | Per 100g Calories: 480 kcal | Per 100g Protein: 5 g | Per 100g Fat: 22 g | Per 100g Carbohydrates: 66 g

Sugar Cookies

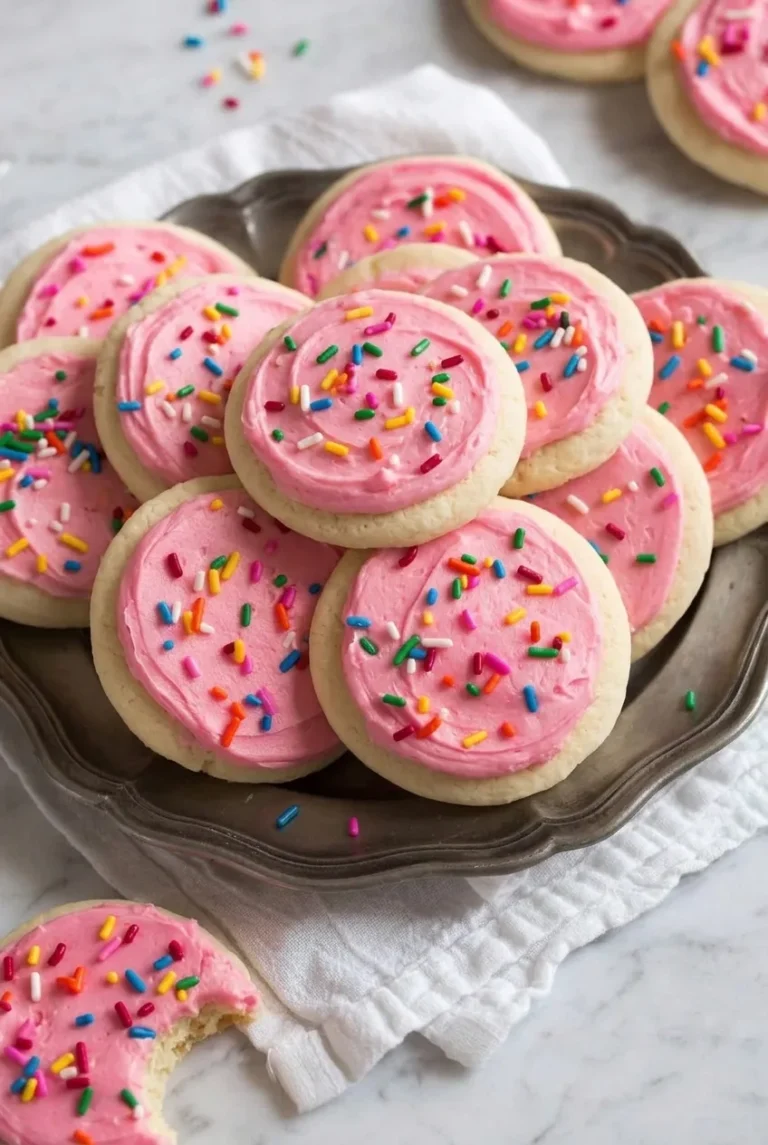
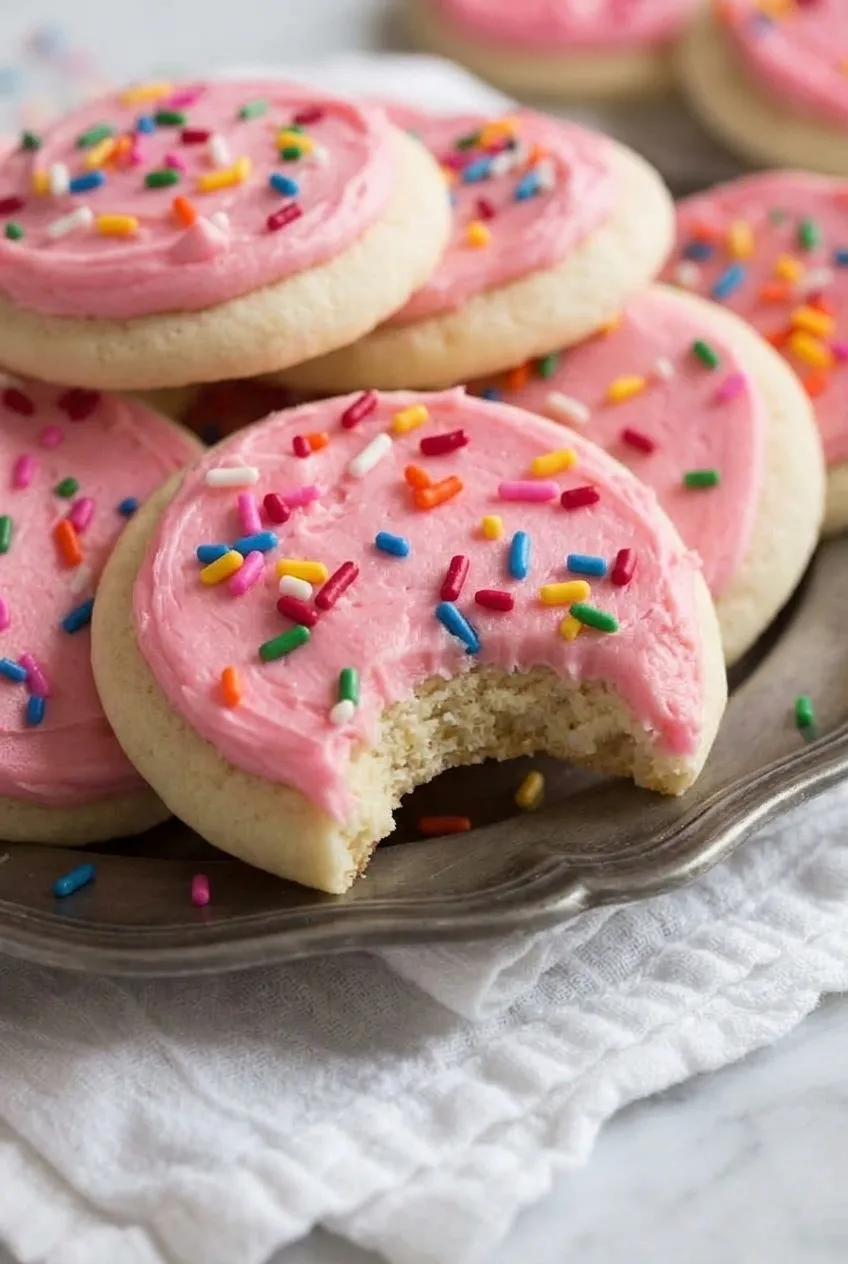
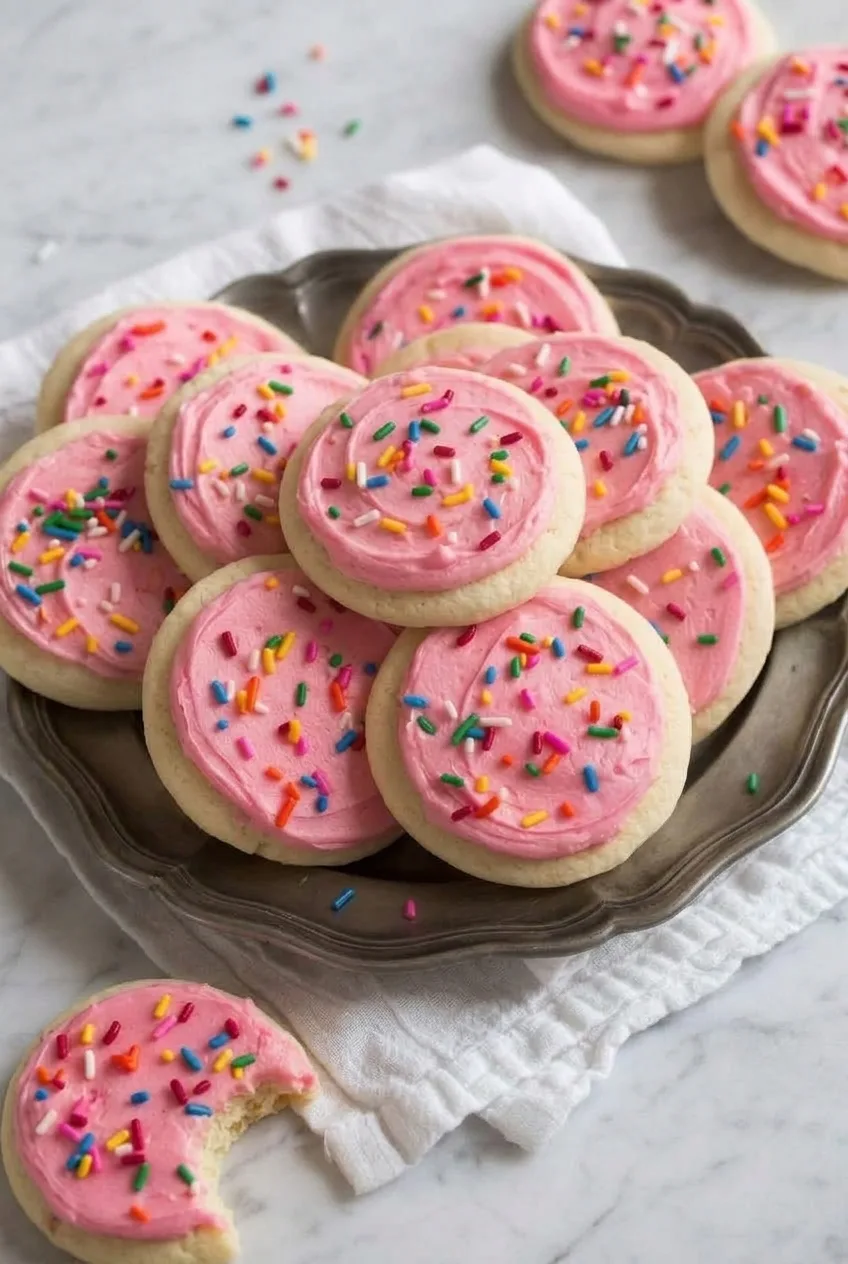
These round sugar cookies bake up pale and tender, with thick pink vanilla frosting spread inside each cookie’s edge and rainbow jimmies on top. A short chill makes the dough easier to cut and transfer. Roll it about 1/4 inch thick, then take the cookies out when their tops are set rather than waiting for them to brown. Cool them completely before adding the frosting so the hand-spread swirls stay in place.

Makes about 24 cookies, depending on the cutter and how the scraps are rerolled. Allow about 2 hours 15 minutes, including chilling, baking in batches, and cooling.

Ingredients for Sugar Cookies

Close view of a bitten pink-frosted sugar cookie showing its tender interior and rainbow sprinkles

Cookies

  • 1 cup unsalted butter, softened (225g)
  • 1 cup granulated sugar (200g)
  • 1 large egg
  • 2 teaspoons vanilla extract
  • 2 3/4 cups all-purpose flour (330g), plus a little more for rolling if needed
  • 1 1/2 teaspoons baking powder
  • 1/2 teaspoon fine salt

Pink Vanilla Frosting

  • 1/2 cup unsalted butter, softened (115g)
  • 2 cups confectioners’ sugar (240g)
  • 1–2 tablespoons milk
  • 1 teaspoon vanilla extract
  • 1–2 small drops pink gel food coloring, or as needed
  • About 1/4 cup rainbow jimmies (40g)

How to Make Frosted Sugar Cookies

Full plate of pink-frosted sugar cookies with rainbow sprinkles on a light stone surface
  1. Mix the dry ingredients: Whisk the flour, baking powder, and salt together.
  2. Make the dough: With an electric mixer, beat the 1 cup butter and granulated sugar until creamy. Mix in the egg and 2 teaspoons vanilla. Add the dry ingredients and mix just until no loose flour remains and the dough holds together.
  3. Chill and preheat: Divide the dough into two disks, wrap, and refrigerate for about 45 minutes, until cool and workable. Near the end of chilling, fully preheat the oven to 375°F (190°C). Line light-colored baking sheets with parchment; do not grease the parchment.
  4. Roll and cut: Working with one disk at a time, roll the dough about 1/4 inch thick, using only a light dusting of flour if needed. Cut with an approximately 3-inch round cutter and place the rounds about 1 1/2 inches apart on the sheets. Gently reroll the scraps. If the dough sticks or stretches during transfer, briefly rechill it.
  5. Bake and cool: Bake uncovered, one sheet at a time on the center rack. Start checking at 8 minutes; each batch will usually take 8–10 minutes. Remove the cookies when the tops look set rather than wet and the edges are pale or only faintly golden. Leave them on the sheet for about 5 minutes, then transfer to a rack to cool completely.
  6. Make the frosting: Beat the 1/2 cup butter, confectioners’ sugar, and 1 teaspoon vanilla together. Add milk gradually, starting with 1 tablespoon, until the frosting spreads smoothly but holds shallow swirls. Beat in the pink coloring. If the frosting is runny, mix in a little more confectioners’ sugar.
  7. Frost and decorate: Use a small spatula or butter knife to spread frosting over each cool cookie, leaving a narrow border of cookie visible. Add rainbow jimmies immediately, while the frosting is soft. Let the frosting firm before arranging or storing the cookies.

How to Keep the Cookies Soft

Thickness and doneness matter more than a deeply golden color. Rounds rolled thinner than 1/4 inch or baked longer will be crisper. Check the first batch at 8 minutes, especially if your cutter is smaller or your baking sheets are dark, and use set tops and pale edges as the cue to remove the cookies.

Why Chill the Dough?

The 45-minute chill helps this dough hold tidy rounds as you cut and move them. Keep the second disk refrigerated while you work with the first. If the dough warms and becomes sticky, rechill it instead of working in a lot of extra flour; handle rerolled scraps gently so the later cookies stay tender.

Getting the Pink Frosting Finish

Use thick, spreadable frosting rather than thin cookie icing. Completely cooled cookies keep it from melting or sliding, and a small spatula leaves visible swirls. Leave a pale rim around each cookie and add the jimmies before the frosting surface firms.

Storing Frosted Sugar Cookies

Once the frosting has firmed, refrigerate the cookies in an airtight container for up to about 5 days. Separate layers with parchment to help protect the frosting and sprinkles. Bring the cookies toward room temperature before serving for softer frosting; do not reheat them.

For another soft cookie, try these thick snickerdoodle cookies. For a different classic, make these peanut butter cookies.

Nutrition

Approximate nutrition per cookie, based on 24 frosted cookies: 235 calories, 2g protein, 12g fat, and 30g carbohydrates. Per 100g: approximately 470 calories, 4g protein, 24g fat, and 61g carbohydrates. Values will vary with cookie size and the amount of frosting used.

Frosted Sugar Cookies

Tender round sugar cookies are topped with pink vanilla frosting and rainbow jimmies.
Course: Dessert
Cuisine: American
Prep: 105 min
Cook: 30 min
Total: 135 min
Servings: 24 Calories: 235 kcal

Equipment

  • Electric mixer
  • Mixing bowls
  • Whisk
  • Rolling pin
  • Round cookie cutter
  • Baking sheets
  • Parchment paper
  • Wire rack
  • Small spatula

Ingredients

Cookies

  • 1 cup unsalted butter, softened (225g)
  • 1 cup granulated sugar (200g)
  • 1 large egg
  • 2 teaspoons vanilla extract
  • 2 3/4 cups all-purpose flour (330g), plus a little more for rolling if needed
  • 1 1/2 teaspoons baking powder
  • 1/2 teaspoon fine salt

Pink Vanilla Frosting

  • 1/2 cup unsalted butter, softened (115g)
  • 2 cups confectioners’ sugar (240g)
  • 1–2 tablespoons milk
  • 1 teaspoon vanilla extract
  • 1–2 small drops pink gel food coloring, or as needed
  • About 1/4 cup rainbow jimmies (40g)

Instructions

  1. Whisk the flour, baking powder, and salt together.
  2. Beat the butter and granulated sugar with an electric mixer until creamy. Mix in the egg and vanilla.
  3. Add the dry ingredients and mix just until no loose flour remains and the dough holds together.
  4. Divide the dough into two disks, wrap, and refrigerate for about 45 minutes, until cool and workable.
  5. Near the end of chilling, preheat the oven to 375°F (190°C). Line light-colored baking sheets with parchment; do not grease them.
  6. Roll out one disk at a time to about 1/4 inch thick, using a light dusting of flour if needed. Cut into rounds with an approximately 3-inch cutter and place them about 1 1/2 inches apart on the sheets.
  7. Gently reroll the scraps. Briefly rechill the dough if it sticks or stretches during transfer.
  8. Bake one sheet at a time on the center rack for 8–10 minutes. Remove the cookies when the tops look set and the edges are pale or only faintly golden.
  9. Let the cookies rest on the baking sheet for about 5 minutes, then transfer them to a wire rack to cool completely.
  10. Beat the butter, confectioners’ sugar, and vanilla together. Gradually add milk, starting with 1 tablespoon, until the frosting spreads smoothly and holds shallow swirls. Beat in the pink food coloring.
  11. Spread frosting over each cool cookie, leaving a narrow border visible. Add rainbow jimmies while the frosting is soft, then let the frosting firm before storing.

Tips

  • Keep the second dough disk refrigerated while you roll and cut the first.
  • Use only a light dusting of flour, and rechill sticky dough rather than working in lots of extra flour.
  • Check the first batch at 8 minutes; use set tops and pale edges as the doneness cue.
  • Cool cookies completely before frosting so the frosting does not melt or slide.
  • Add the jimmies immediately after frosting, before the surface firms.

Notes

Once the frosting has firmed, refrigerate in an airtight container for up to about 5 days, separating layers with parchment. Bring to room temperature before serving; do not reheat.

Nutrition

Calories: 235 kcal | Protein: 2 g | Fat: 12 g | Carbohydrates: 30 g

Double Chocolate Cookies

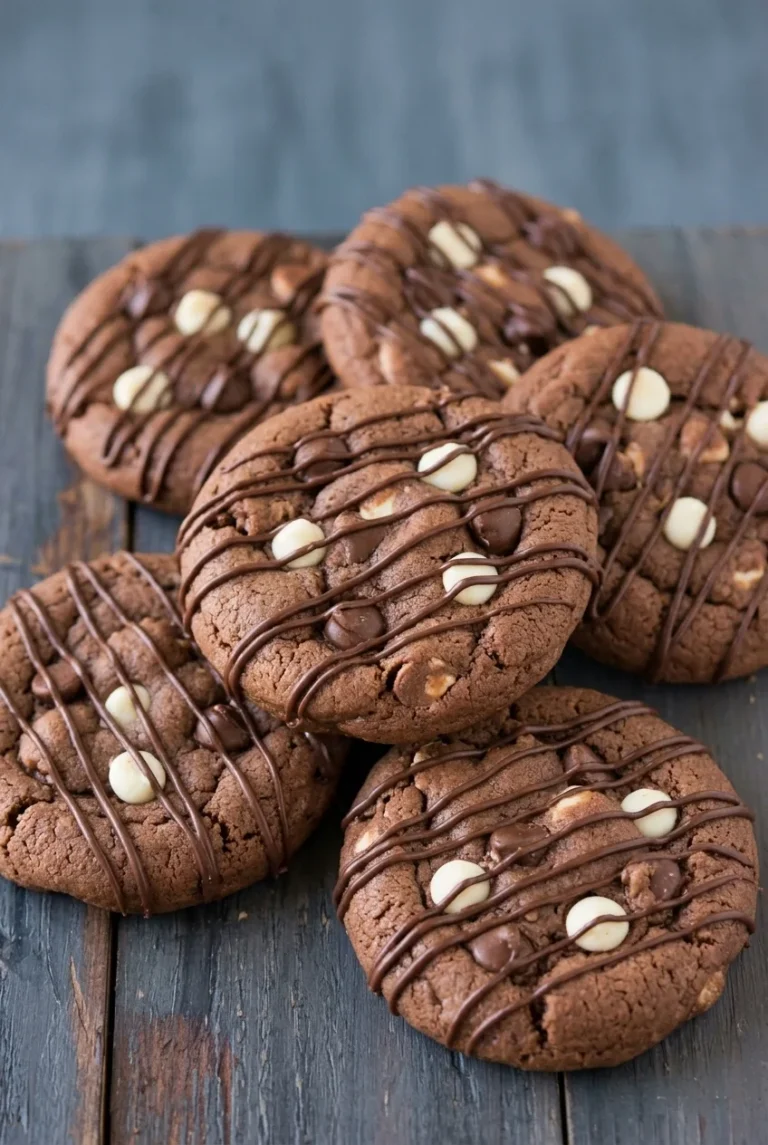
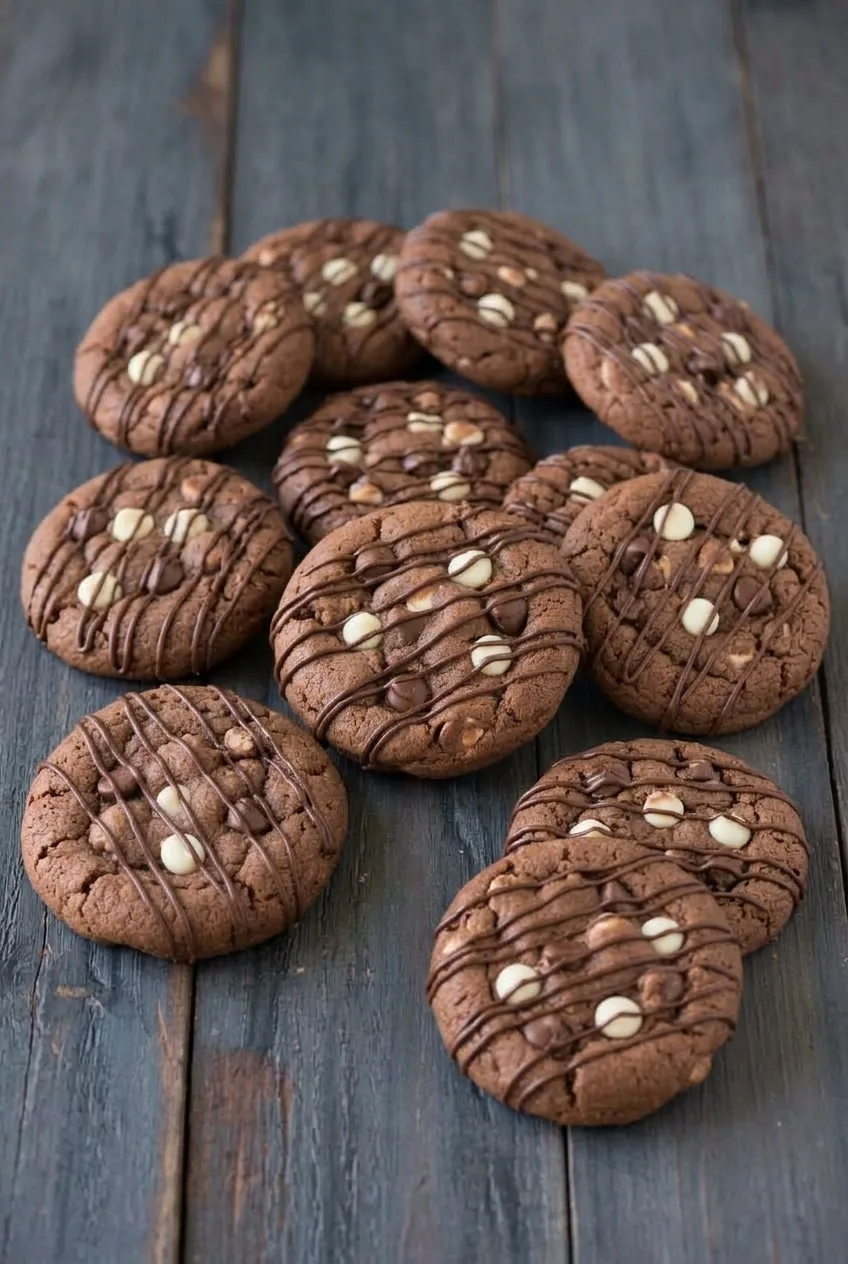
These individual cocoa cookies have slightly soft centers, dark and white chocolate chips, and a thin semisweet drizzle. A few chips pressed onto the dough keep both colors visible after baking.

Dark dough gives little browning feedback, so begin checking the cookies at 9 minutes. Take them out when the edges are set and the centers are still slightly soft; they will firm up as they rest on the baking sheet.

Ingredients for Double Chocolate Cookies

Wider view of a serving of round double chocolate cookies with mixed chips and chocolate drizzle
  • 1 1/2 cups all-purpose flour (180g)
  • 1/2 cup unsweetened cocoa powder (45g)
  • 1/2 teaspoon baking soda
  • 1/2 teaspoon fine salt
  • 1/2 cup (1 stick) unsalted butter, softened but not melted (113g)
  • 3/4 cup packed light brown sugar (150g)
  • 1/4 cup granulated sugar (50g)
  • 1 large egg
  • 1 teaspoon vanilla extract
  • 3/4 cup semisweet chocolate chips (130g), divided
  • 1/2 cup white chocolate chips (85g)
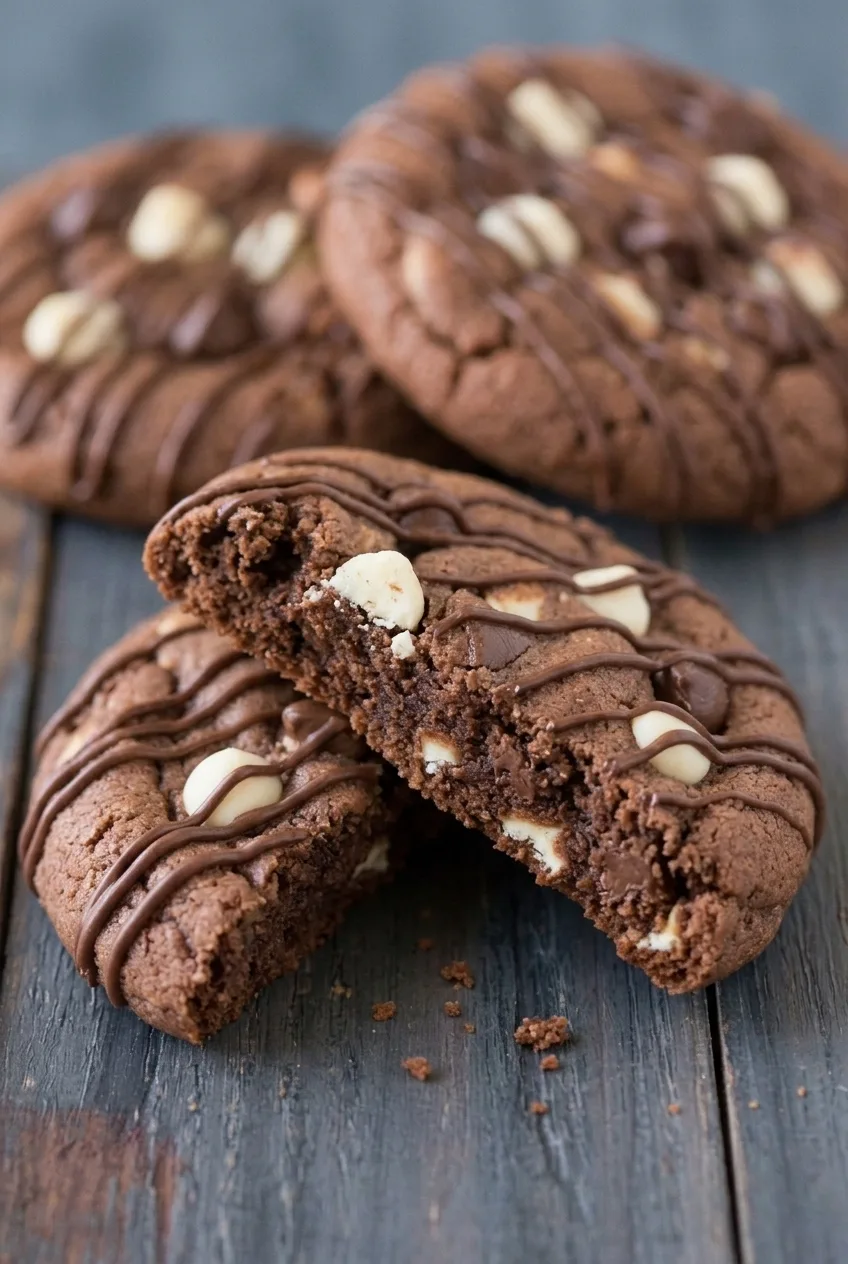
Broken double chocolate cookie showing its soft cocoa center, chocolate chips, and thin drizzle

How to Bake Double Chocolate Cookies

  1. Preheat the oven: Heat to 350°F (175°C) with a rack in the center. Line baking sheets with parchment paper.
  2. Combine the dry ingredients: Whisk the flour, cocoa powder, baking soda, and salt until the mixture is evenly colored.
  3. Mix the dough: Cream the softened butter with both sugars. Mix in the egg and vanilla, then add the dry ingredients and mix just until no flour streaks remain. Set aside 1/4 cup of the semisweet chips for the drizzle. Reserve a few of the remaining semisweet chips and a few white chips for the tops, then fold the rest into the dough.
  4. Portion and top: Scoop approximately 2-tablespoon mounds onto a cool, parchment-lined sheet, spacing them about 2 inches apart. Lightly press the reserved chips onto the tops. If the dough has become very soft, chill it briefly before portioning; warm dough or a hot baking sheet can encourage spreading.
  5. Bake and cool: Bake uncovered for 9–12 minutes per batch, checking at 9 minutes. The edges should look set and the centers slightly soft, not wet or liquid. Leave the cookies on the sheet for 10 minutes to firm up, then transfer them to a rack to cool completely.
  6. Add the drizzle: Melt the reserved 1/4 cup semisweet chips in a microwave-safe bowl in short bursts, stirring between each until smooth. Use a spoon or small piping bag to drizzle thin lines over the cooled cookies. Let the chocolate set before stacking.

How to Tell When Chocolate Cookies Are Done

The 9–12 minute window applies to approximately 2-tablespoon portions. Look for set edges and centers that are still slightly soft rather than waiting for the dark dough to brown. Larger or flatter cookies may need a different baking time, so use those cues to decide when to take them out.

Storing the Cookies

Once the drizzle has set, keep the cookies in an airtight container at room temperature for up to 3 days. Serve them as they are or with a hot drink or glass of milk.

For a lighter dough without cocoa, try these classic chocolate chip cookies.

Nutrition

Approximate nutrition per cookie, based on 16 cookies: 220 calories, 3g protein, 11g fat, and 31g carbohydrates. Per 100g of finished cookies: approximately 460 calories, 6g protein, 22g fat, and 64g carbohydrates. Values vary with ingredient brands, cookie size, and moisture lost during baking.

Double Chocolate Cookies

Cocoa cookies with soft centers, semisweet and white chocolate chips, and a thin chocolate drizzle.
Course: Dessert
Cuisine: American
Prep: 25 min
Cook: 24 min
Total: 60 min
Servings: 16 Calories: 220 kcal per cookie; approximately 460 kcal per 100 g

Equipment

  • Mixing bowls
  • Whisk
  • Electric mixer
  • Baking sheets
  • Parchment paper
  • Cookie scoop
  • Cooling rack
  • Microwave-safe bowl

Ingredients

Cookie Dough

  • 1 1/2 cups all-purpose flour (180g)
  • 1/2 cup unsweetened cocoa powder (45g)
  • 1/2 teaspoon baking soda
  • 1/2 teaspoon fine salt
  • 1/2 cup (1 stick) unsalted butter, softened but not melted (113g)
  • 3/4 cup packed light brown sugar (150g)
  • 1/4 cup granulated sugar (50g)
  • 1 large egg
  • 1 teaspoon vanilla extract
  • 3/4 cup semisweet chocolate chips (130g), divided
  • 1/2 cup white chocolate chips (85g)

Instructions

  1. Preheat the oven to 350°F (175°C) with a rack in the center. Line baking sheets with parchment paper.
  2. Whisk the flour, cocoa powder, baking soda, and salt until evenly combined.
  3. Cream the softened butter with the brown and granulated sugars. Mix in the egg and vanilla.
  4. Add the dry ingredients and mix just until no flour streaks remain.
  5. Set aside 1/4 cup semisweet chocolate chips for the drizzle. Reserve a few of the remaining semisweet chips and white chocolate chips for the tops, then fold the rest into the dough.
  6. Scoop approximately 2-tablespoon portions onto a cool, parchment-lined baking sheet, spacing them about 2 inches apart. Press the reserved chips onto the tops.
  7. Bake for 9–12 minutes per batch, checking at 9 minutes. Remove when the edges are set and the centers are slightly soft, not wet or liquid.
  8. Leave the cookies on the baking sheet for 10 minutes, then transfer them to a rack to cool completely.
  9. Melt the reserved semisweet chips in a microwave-safe bowl in short bursts, stirring between each until smooth. Drizzle over the cooled cookies and let the chocolate set before stacking.

Tips

  • Start checking the cookies at 9 minutes because the dark dough makes browning difficult to see.
  • Use approximately 2-tablespoon portions for the stated baking time.
  • If the dough becomes very soft, chill it briefly before portioning.
  • Use a cool baking sheet to help prevent the cookies from spreading.

Notes

Store cookies in an airtight container at room temperature for up to 3 days. Nutrition is approximate and varies with ingredients and cookie size.

Nutrition

Calories: 220 kcal per cookie; approximately 460 kcal per 100 g | Protein: 3 g per cookie; approximately 6 g per 100 g | Fat: 11 g per cookie; approximately 22 g per 100 g | Carbohydrates: 31 g per cookie; approximately 64 g per 100 g

Snickerdoodle Cookies

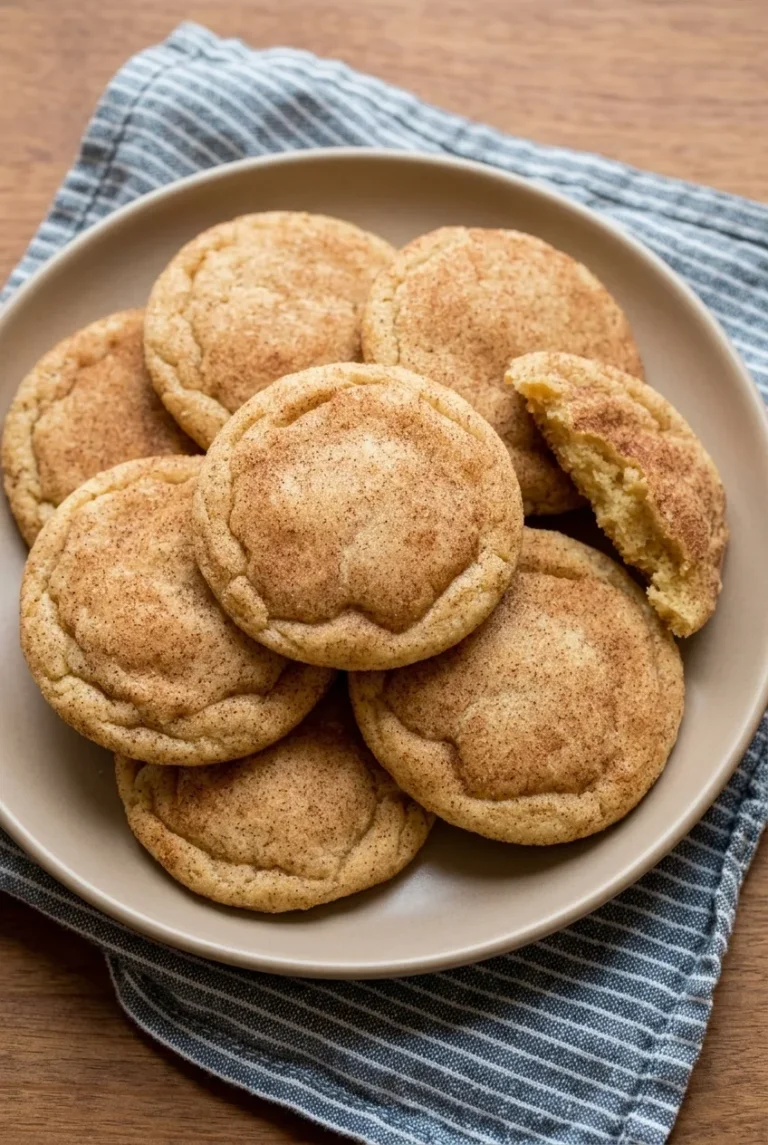
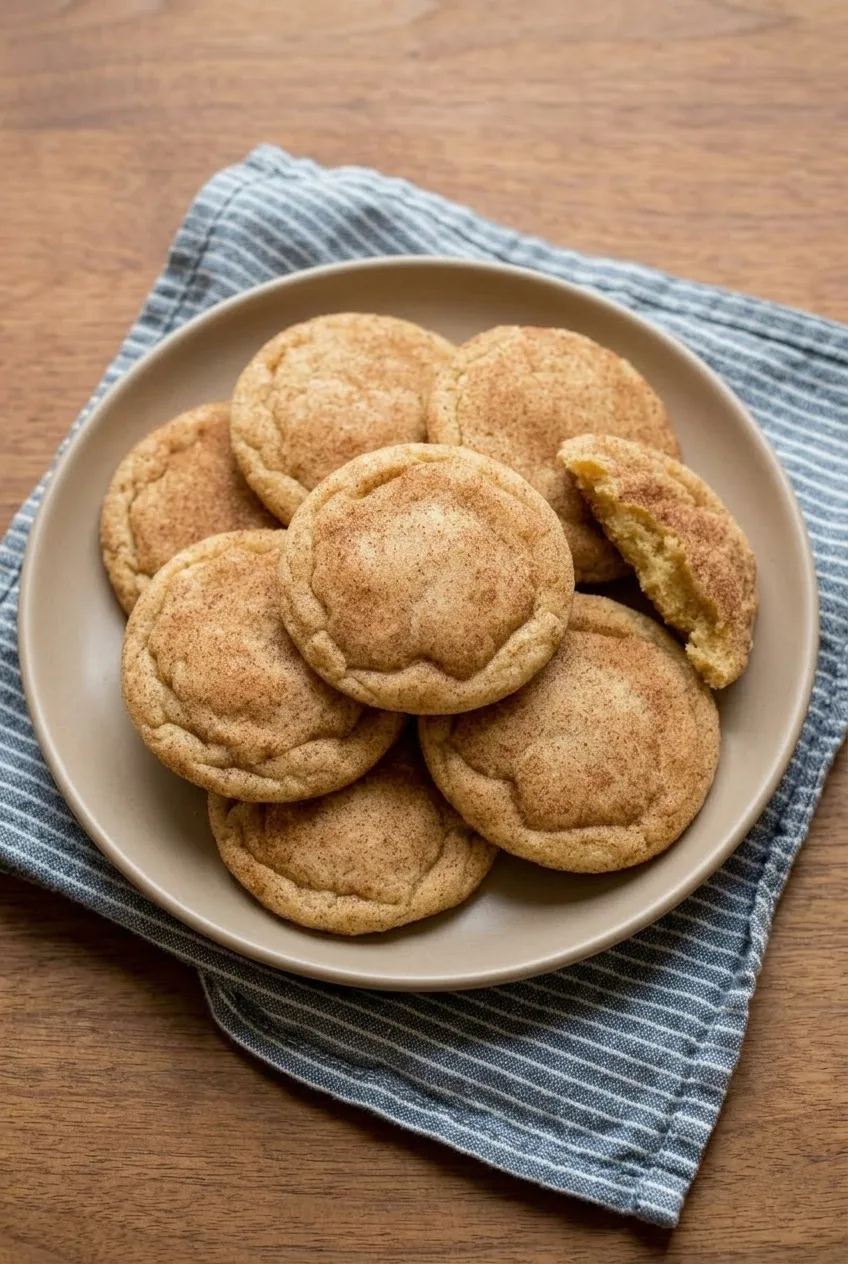
These snickerdoodles have a fine cinnamon-sugar coating, lightly crinkled edges, and soft centers. Cream of tartar gives the dough its mild tang. A short chill makes the butter dough easier to roll and helps the cookies stay fairly thick; leave the coated balls rounded rather than pressing them flat. Take the cookies out when the edges are set but the centers still look slightly soft. They finish setting on the baking sheet.

Yield: About 28 cookies. Total time: About 1 hour 25 minutes to 1 hour 40 minutes, including a 30-minute chill and baking in batches.

Ingredients for Snickerdoodle Cookies

Wider view of a full plate of pale-golden snickerdoodle cookies on a striped cloth and wooden table

For the dough

  • 2 3/4 cups all-purpose flour (330g)
  • 2 teaspoons cream of tartar
  • 1 teaspoon baking soda
  • 1/2 teaspoon fine salt
  • 1 cup (2 sticks) unsalted butter, softened but not melted (225g)
  • 1 1/2 cups granulated sugar (300g)
  • 2 large eggs
  • 1 teaspoon vanilla extract

For the cinnamon-sugar coating

  • 1/4 cup granulated sugar (50g)
  • 1 tablespoon ground cinnamon

Keep the coating sugar separate from the sugar for the dough. Cream of tartar works with the baking soda in this formula; baking powder alone is not a direct substitute.

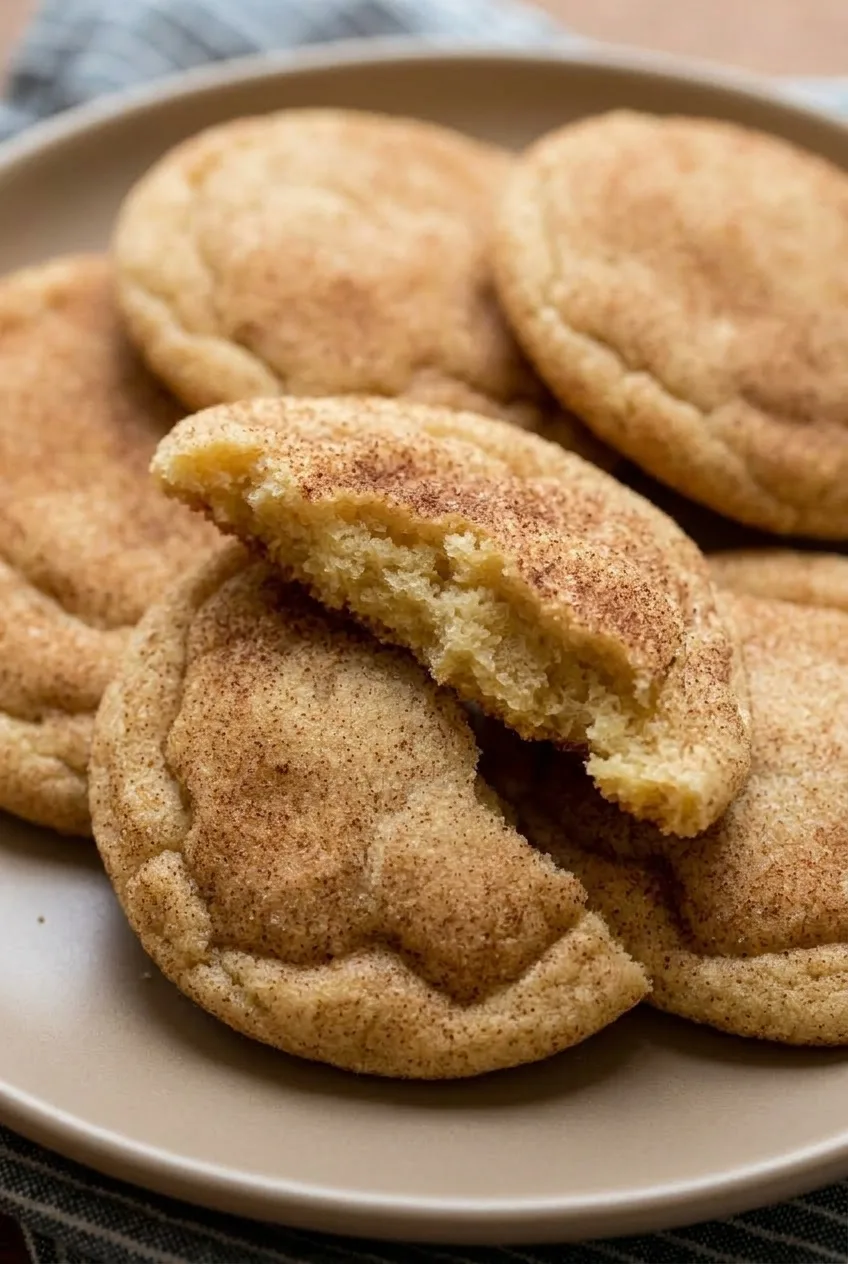
Close view of a broken snickerdoodle showing its soft crumb and cinnamon-sugar-coated surface

How to Bake Snickerdoodle Cookies

  1. Mix the dry ingredients: Whisk the flour, cream of tartar, baking soda, and salt together in a bowl.
  2. Cream the butter and sugar: Beat the softened butter and 1 1/2 cups sugar for about 2 minutes, until combined and slightly lightened. Beat in the eggs one at a time, then the vanilla.
  3. Finish and chill the dough: Mix in the dry ingredients just until no flour streaks remain. Cover and refrigerate for about 30 minutes, until the dough holds a ball shape without sticking heavily to your hands. If it is still too sticky, chill it a little longer rather than adding extra flour.
  4. Prepare the oven and coating: While the dough chills, preheat the oven to 350°F (175°C) with a rack in the center. Line baking sheets with parchment. Stir the remaining 1/4 cup sugar and the cinnamon together in a shallow bowl.
  5. Shape the cookies: Scoop about 2 tablespoons of dough per cookie. Roll into balls, coat the entire surface in cinnamon sugar, and place at least 2 inches apart on cool baking sheets. Do not flatten. Keep portions for later batches chilled.
  6. Bake: Bake one sheet at a time on the center rack. Start checking at 9 minutes; the cookies will typically take 10 to 12 minutes. Remove them when the edges are set and faintly golden, the tops are lightly crinkled, and the centers look slightly soft but not wet. Rotate the sheet near the end only if your oven browns unevenly.
  7. Let them set: Leave the cookies on the baking sheet for 5 minutes so they firm enough to lift, then transfer to a wire rack. Let the sheet cool before using it for another batch.

How to Tell When Snickerdoodles Are Done

Look at the edges rather than waiting for the whole cookie to feel firm. The centers should still look soft when the set, pale-golden edges and shallow crinkles tell you it is time to take the sheet out. Baking until the centers are fully firm can leave the cookies dry.

If using a convection oven, lower the setting to about 325°F (165°C) and begin checking early; the cookies may bake faster.

How to Keep Snickerdoodles Thick

Start with softened, not melted, butter, and leave the coated dough balls rounded. Warm dough or a hot baking sheet can make them spread too much. If later portions become difficult to roll, return them to the refrigerator until they hold their shape. Weigh the flour if possible, and stop mixing as soon as it disappears into the dough to help keep the centers tender.

Storing and Freezing Snickerdoodles

Cool the cookies completely, then store them airtight at room temperature for about 3 to 5 days. To warm one, microwave it for about 10 to 15 seconds.

For make-ahead dough, refrigerate it covered, then roll and coat the portions before baking. You can also freeze uncoated dough balls airtight for up to 2 to 3 months. Thaw until they can be coated evenly, roll them in cinnamon sugar, and use the visual doneness cues rather than assuming the bake time will be identical. Freeze fully cooled baked cookies airtight for up to 3 months; thaw before serving.

Serve the cookies just warm or fully cooled. Breaking one open shows the soft center. For another soft-centered bake, try these classic chocolate chip cookies, or see these peanut butter cookies.

Nutrition

Approximate per cookie, based on 28 cookies: 155 calories, 2g protein, 7g fat, and 22g carbohydrates. Approximate per 100g of baked cookies: 470 calories, 5g protein, 21g fat, and 66g carbohydrates. Values are estimates; cookie size and moisture lost during baking will affect them.

Snickerdoodle Cookies

Soft-centered snickerdoodles are rolled in cinnamon sugar and baked until their edges are set and lightly golden.
Course: Dessert
Cuisine: American
Prep: 55 min
Cook: 40 min
Total: 95 min
Servings: 28 Calories: 155 kcal

Equipment

  • Mixing bowls
  • Whisk
  • Electric mixer
  • Baking sheets
  • Parchment paper
  • Shallow bowl
  • Wire rack

Ingredients

For the dough

  • 2 3/4 cups all-purpose flour (330 g)
  • 2 teaspoons cream of tartar
  • 1 teaspoon baking soda
  • 1/2 teaspoon fine salt
  • 1 cup (2 sticks) unsalted butter, softened but not melted (225 g)
  • 1 1/2 cups granulated sugar (300 g)
  • 2 large eggs
  • 1 teaspoon vanilla extract

For the cinnamon-sugar coating

  • 1/4 cup granulated sugar (50 g)
  • 1 tablespoon ground cinnamon

Instructions

  1. Whisk the flour, cream of tartar, baking soda, and salt together in a bowl.
  2. Beat the softened butter with 1 1/2 cups sugar for about 2 minutes, until combined and slightly lightened.
  3. Beat in the eggs one at a time, then mix in the vanilla.
  4. Mix in the dry ingredients just until no flour streaks remain. Cover and refrigerate for about 30 minutes, until the dough holds a ball shape without sticking heavily to your hands.
  5. While the dough chills, preheat the oven to 350°F (175°C) with a rack in the center. Line baking sheets with parchment.
  6. Stir the remaining 1/4 cup sugar and the cinnamon together in a shallow bowl.
  7. Scoop about 2 tablespoons of dough per cookie and roll into balls. Coat each ball in cinnamon sugar and place at least 2 inches apart on a cool baking sheet. Do not flatten; keep dough for later batches chilled.
  8. Bake one sheet at a time on the center rack. Start checking at 9 minutes; baking typically takes 10 to 12 minutes. Remove the cookies when the edges are set and faintly golden, the tops are lightly crinkled, and the centers look slightly soft but not wet.
  9. Leave the cookies on the baking sheet for 5 minutes, then transfer them to a wire rack. Cool the baking sheet before using it for another batch.

Tips

  • Use softened butter, not melted butter, to help the cookies stay thick.
  • Keep the dough balls rounded rather than flattening them before baking.
  • If the dough is still sticky after chilling, refrigerate it longer instead of adding flour.
  • Keep dough for later batches chilled and use cool baking sheets.
  • Take the cookies out while the centers still look slightly soft; they will finish setting on the baking sheet.

Notes

Store completely cooled cookies airtight at room temperature for 3 to 5 days; microwave briefly for 10 to 15 seconds to warm. Freeze baked cookies airtight for up to 3 months. For convection ovens, use about 325°F (165°C) and check early.

Nutrition

Calories: 155 kcal | Protein: 2 g | Fat: 7 g | Carbohydrates: 22 g

Oatmeal Chocolate Chip Cookies

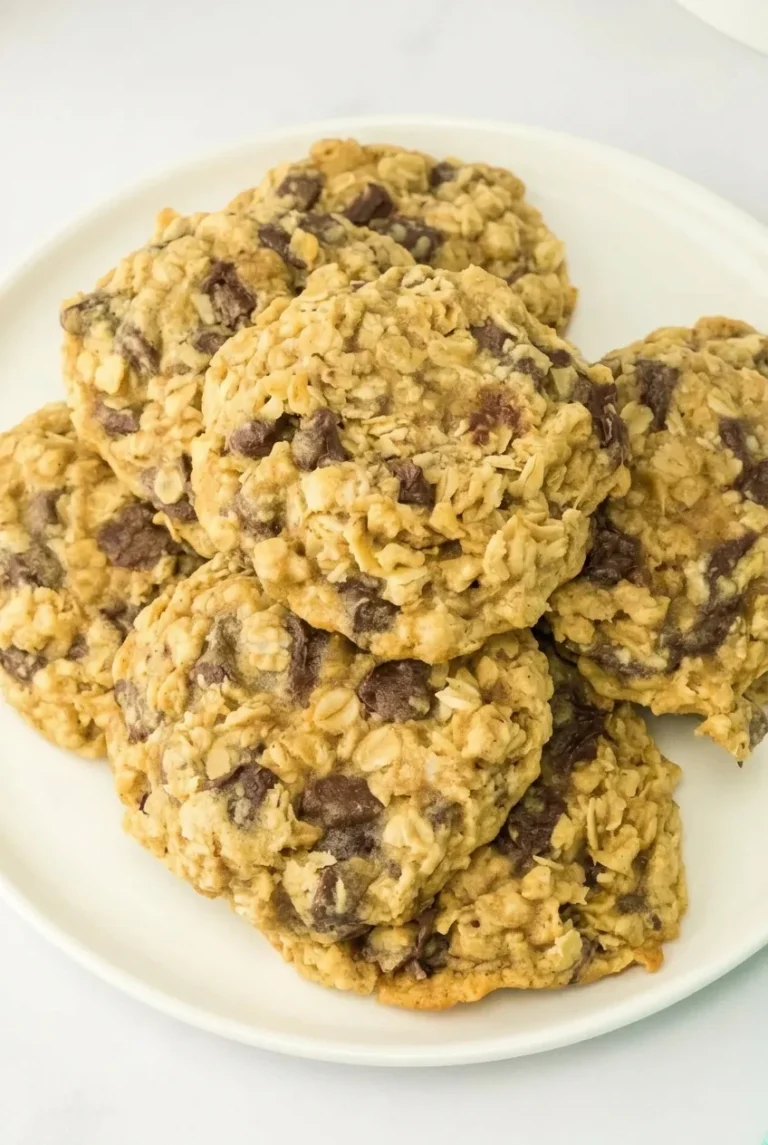
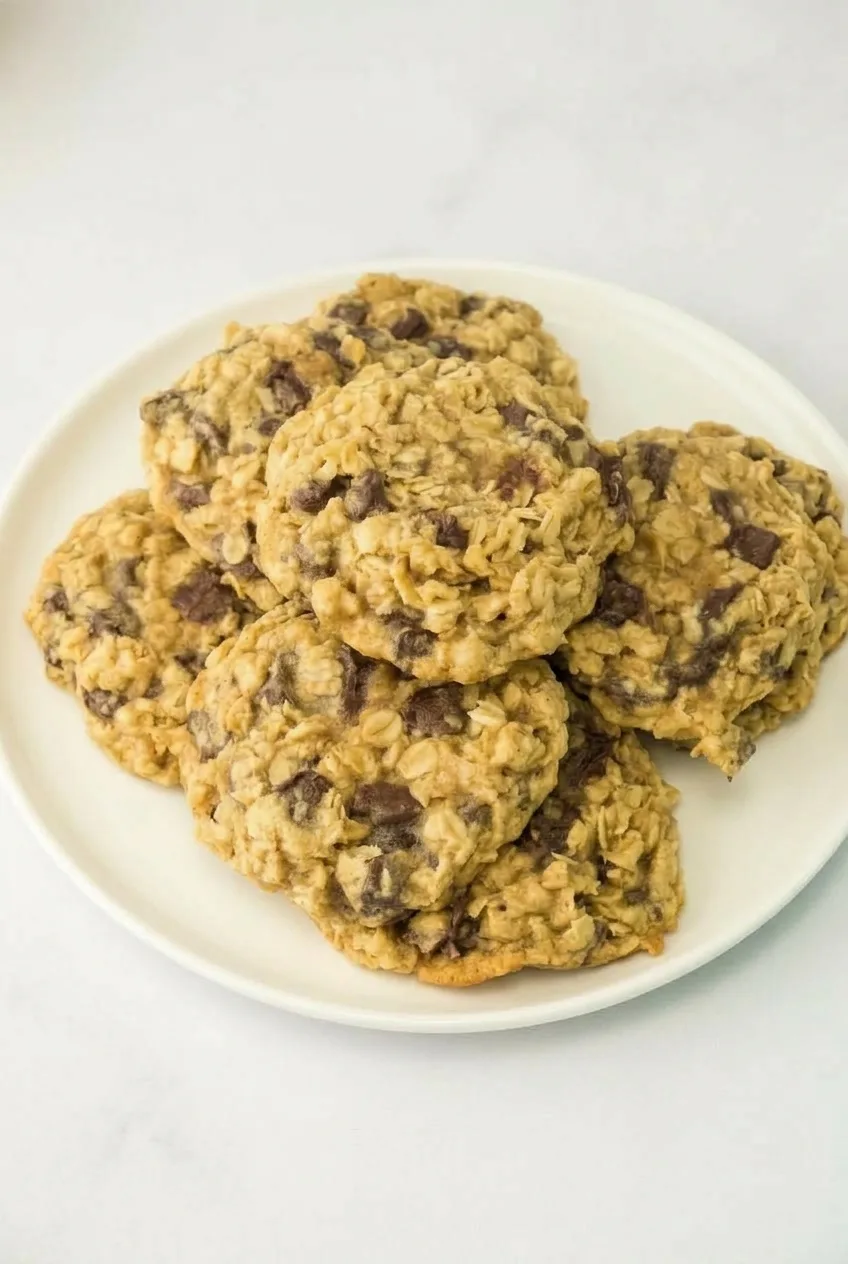
These thick drop cookies have visible rolled oats, plenty of chocolate, lightly golden edges, and soft centers. Scoop the dough into irregular mounds before chilling it for about an hour; the firm portions hold their shape better in the oven. Bake until the edges are set, even if the centers still look soft. The cookies finish setting during a short rest on the baking sheet.

Yield: About 18 cookies. Total time: About 1 hour 45 minutes, including chilling, baking in batches, and brief cooling.

Ingredients for Oatmeal Chocolate Chip Cookies

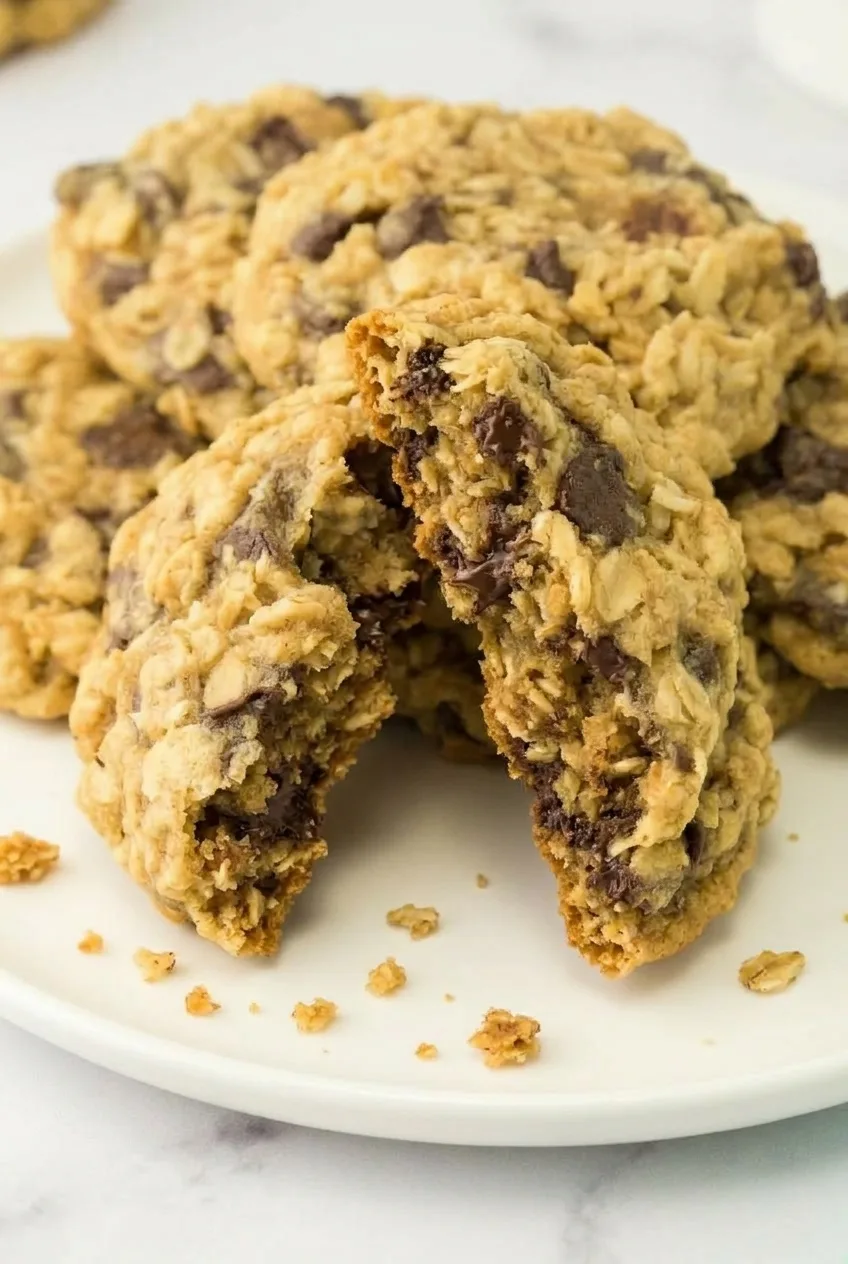
Full white plate of thick oatmeal chocolate chip cookies on a pale tabletop
  • 1/2 cup (1 stick) unsalted butter, softened (113g)
  • 1/2 cup packed light brown sugar (100g)
  • 1/4 cup granulated sugar (50g)
  • 1 large egg
  • 1 teaspoon vanilla extract
  • 1 cup all-purpose flour, spooned and leveled (120g)
  • 1/2 teaspoon baking soda
  • 1/2 teaspoon fine salt
  • 1 1/2 cups old-fashioned rolled oats (120g)
  • 3/4 cup semisweet chocolate chips (about 130g)

Optional: Add 1/4 teaspoon ground cinnamon to the dry ingredients for a lightly spiced version.

Broken oatmeal chocolate chip cookie showing a soft, oat-studded center and chocolate chips

How to Bake Oatmeal Chocolate Chip Cookies

  1. Combine the dry ingredients: Whisk the flour, baking soda, and salt in a bowl. Add the cinnamon here if using.
  2. Cream the butter and sugars: Beat the softened butter with both sugars until combined and slightly fluffy, about 3 to 4 minutes. Beat in the egg and vanilla until the mixture looks cohesive.
  3. Finish the dough: Mix in the flour mixture just until no dry flour remains. Fold in the rolled oats and chocolate chips. The dough should be thick and scoopable.
  4. Scoop and chill: Portion the dough into roughly 2-tablespoon mounds. Leave them thick and slightly irregular rather than pressing them flat. Refrigerate for about 1 hour, until the portions hold their shape.
  5. Preheat and arrange: Near the end of chilling, preheat the oven to 350°F (175°C). Place the chilled portions about 2 inches apart on a cool, parchment-lined baking sheet. Keep any remaining portions chilled while the first batch bakes.
  6. Bake: Bake one sheet at a time on the center rack for 10 to 12 minutes, starting to check at 9 minutes. Remove the cookies when the edges are set and lightly golden but the centers still look soft. Let a reused baking sheet cool before adding the next batch of dough.
  7. Let the cookies set: Leave them on the baking sheet for about 5 minutes, then transfer to a wire rack.

Which Oats Work Best?

Old-fashioned rolled oats give the cookies their chewy texture and visible flakes. Quick oats can be used, but they produce a finer texture and a less visibly oat-studded surface. Instant oatmeal and steel-cut oats are not direct substitutes here.

How to Keep the Cookies Thick and Chewy

Chilling the dough after scooping helps the mounds retain their thickness. Use a cool baking sheet: dough placed on a warm, reused sheet may spread before it starts to bake.

The 10-to-12-minute bake time applies to roughly 2-tablespoon portions; check smaller cookies earlier. Pull the cookies when the edges are lightly golden rather than waiting for firm centers. A longer bake produces a firmer, crisper cookie.

Storing and Freezing

Cool the cookies completely, then store them airtight at room temperature for 3 to 4 days. To warm one, microwave it for about 15 to 20 seconds and check before serving.

Freeze cooled baked cookies in a freezer-safe container or bag for up to 3 months. To make the dough ahead, freeze the scooped portions on a sheet until solid, then transfer them to a freezer-safe container. Bake from frozen, allowing a few extra minutes and judging doneness by the lightly golden edges and soft centers.

For an oat-free option, try these classic chocolate chip cookies.

Nutrition

Approximate nutrition per cookie (1 of 18): 170 calories, 3g protein, 8g fat, and 22g carbohydrates. Approximate per 100g: 470 calories, 7g protein, 22g fat, and 62g carbohydrates. Values vary with cookie size, ingredients, and moisture lost during baking.

Oatmeal Chocolate Chip Cookies

Thick, chewy cookies made with rolled oats and semisweet chocolate chips, with lightly golden edges and soft centers.
Course: Dessert
Cuisine: American
Prep: 75 min
Cook: 30 min
Total: 105 min
Servings: 18 Calories: 170 kcal

Equipment

  • Mixing bowls
  • Whisk
  • Electric mixer
  • Cookie scoop
  • Baking sheet
  • Parchment paper
  • Wire rack
  • Oven

Ingredients

Cookie Dough

  • 1/2 cup (1 stick) unsalted butter, softened (113g)
  • 1/2 cup packed light brown sugar (100g)
  • 1/4 cup granulated sugar (50g)
  • 1 large egg
  • 1 teaspoon vanilla extract
  • 1 cup all-purpose flour, spooned and leveled (120g)
  • 1/2 teaspoon baking soda
  • 1/2 teaspoon fine salt
  • 1 1/2 cups old-fashioned rolled oats (120g)
  • 3/4 cup semisweet chocolate chips (about 130g)

Optional

  • 1/4 teaspoon ground cinnamon

Instructions

  1. Whisk the flour, baking soda, and salt in a bowl. Whisk in the cinnamon if using.
  2. Beat the softened butter with both sugars until combined and slightly fluffy, about 3 to 4 minutes.
  3. Beat in the egg and vanilla until the mixture looks cohesive.
  4. Mix in the flour mixture just until no dry flour remains. Fold in the oats and chocolate chips.
  5. Scoop the dough into roughly 2-tablespoon mounds, keeping them thick and slightly irregular.
  6. Refrigerate the dough portions for about 1 hour, until they hold their shape.
  7. Near the end of chilling, preheat the oven to 350°F (175°C).
  8. Place the chilled portions about 2 inches apart on a cool, parchment-lined baking sheet. Keep remaining dough chilled.
  9. Bake one sheet at a time on the center rack for 10 to 12 minutes, starting to check at 9 minutes. Remove when the edges are set and lightly golden while the centers still look soft.
  10. Let the cookies rest on the baking sheet for about 5 minutes, then transfer them to a wire rack. Cool a reused baking sheet before adding another batch.

Tips

  • Use old-fashioned rolled oats for chewy texture and visible oat flakes.
  • Keep the dough portions thick and do not press them flat.
  • Use a cool baking sheet for each batch to help prevent the dough from spreading too quickly.
  • Check smaller cookies earlier; the stated bake time is for roughly 2-tablespoon portions.
  • Remove the cookies while the centers still look soft; they will finish setting on the baking sheet.

Variations

  • Cinnamon Oatmeal Chocolate Chip Cookies: Add 1/4 teaspoon ground cinnamon to the dry ingredients for a lightly spiced version.

Notes

Cool completely and store airtight at room temperature for 3 to 4 days. Rewarm a cookie for about 15 to 20 seconds in the microwave. Freeze baked cookies for up to 3 months, or bake frozen dough portions with a few extra minutes. Approximate nutrition per 100 g: 470 calories, 7 g protein, 22 g fat, and 62 g carbohydrates.

Nutrition

Calories: 170 kcal | Protein: 3 g | Fat: 8 g | Carbohydrates: 22 g

Peanut Butter Cookies

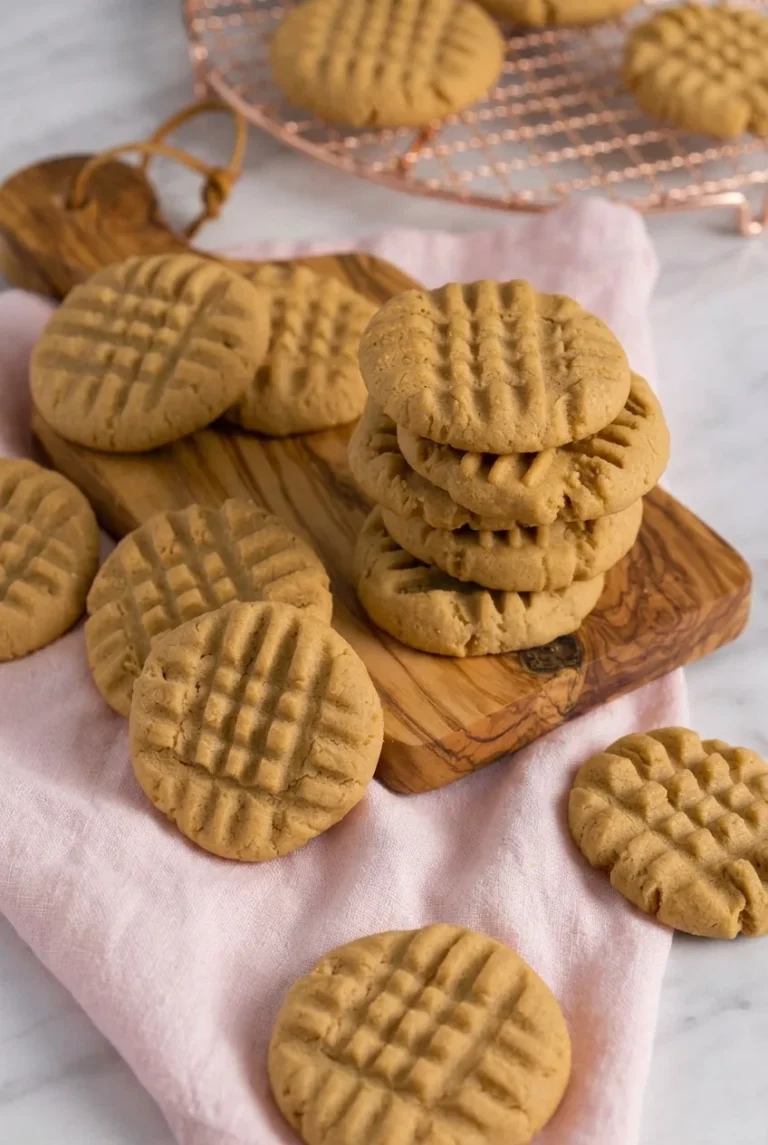
These peanut butter cookies bake into substantial golden-tan rounds with deep criss-cross tops, set edges, and tender centers. Pressing the dough to about ½ inch thick helps it bake evenly without turning the cookies into thin disks. This butter-and-flour dough does not need routine chilling; chill the portions briefly only if they slump or lose their fork marks.

Ingredients for Peanut Butter Cookies

  • ½ cup unsalted butter, softened (115g)
  • ½ cup creamy shelf-stable peanut butter (130g)
  • ½ cup packed light brown sugar (100g)
  • ½ cup granulated sugar (100g)
  • 1 large egg
  • 1 teaspoon vanilla extract
  • 1½ cups all-purpose flour, spooned and leveled (190g)
  • ½ teaspoon baking soda
  • ¼ teaspoon fine salt
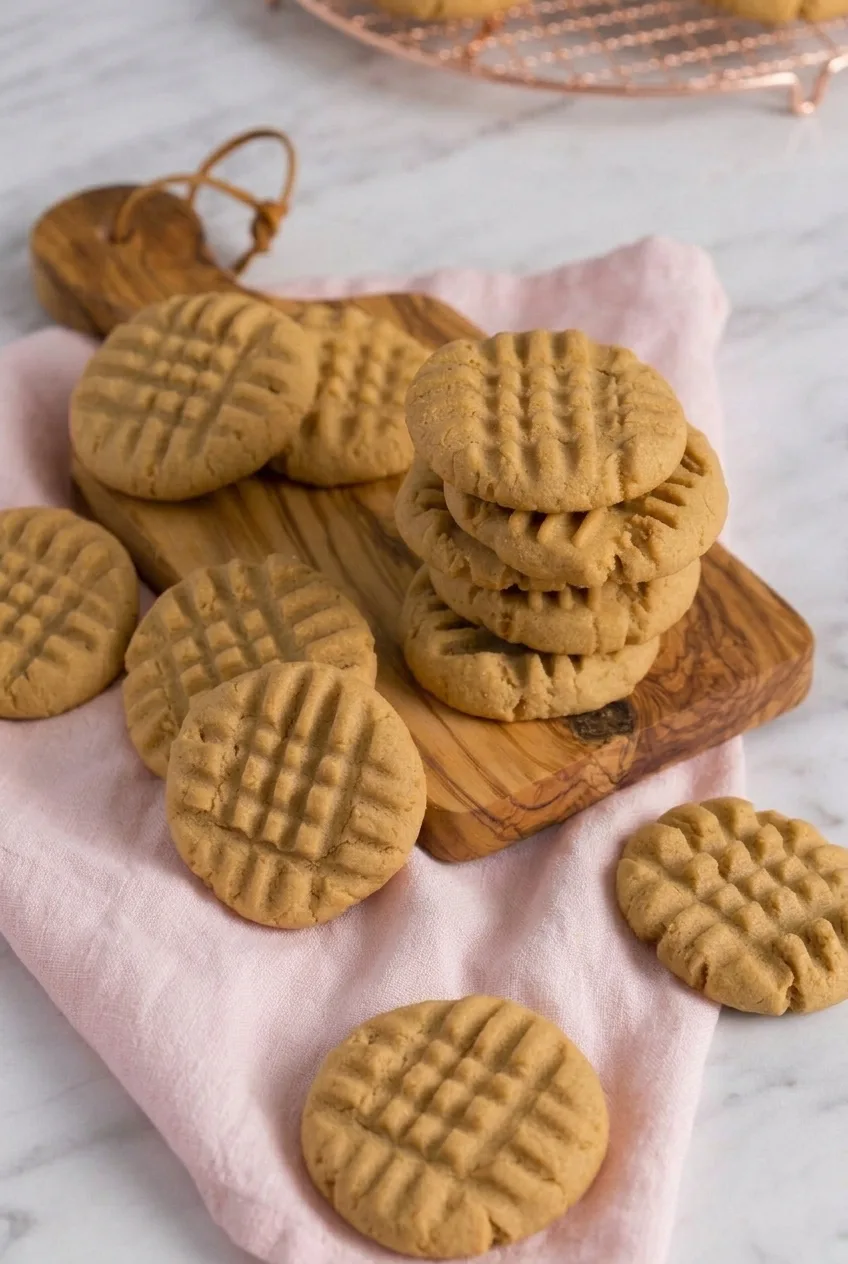
Wider view of stacked and loose peanut butter cookies on a wooden board and soft cloth

Yield: About 24 cookies. Prep: 15 minutes. Bake: 9–11 minutes per sheet, or about 20–25 minutes for two sheets baked separately. Total: About 40–45 minutes, including the initial pan cooling; add 20–30 minutes if the dough needs chilling.

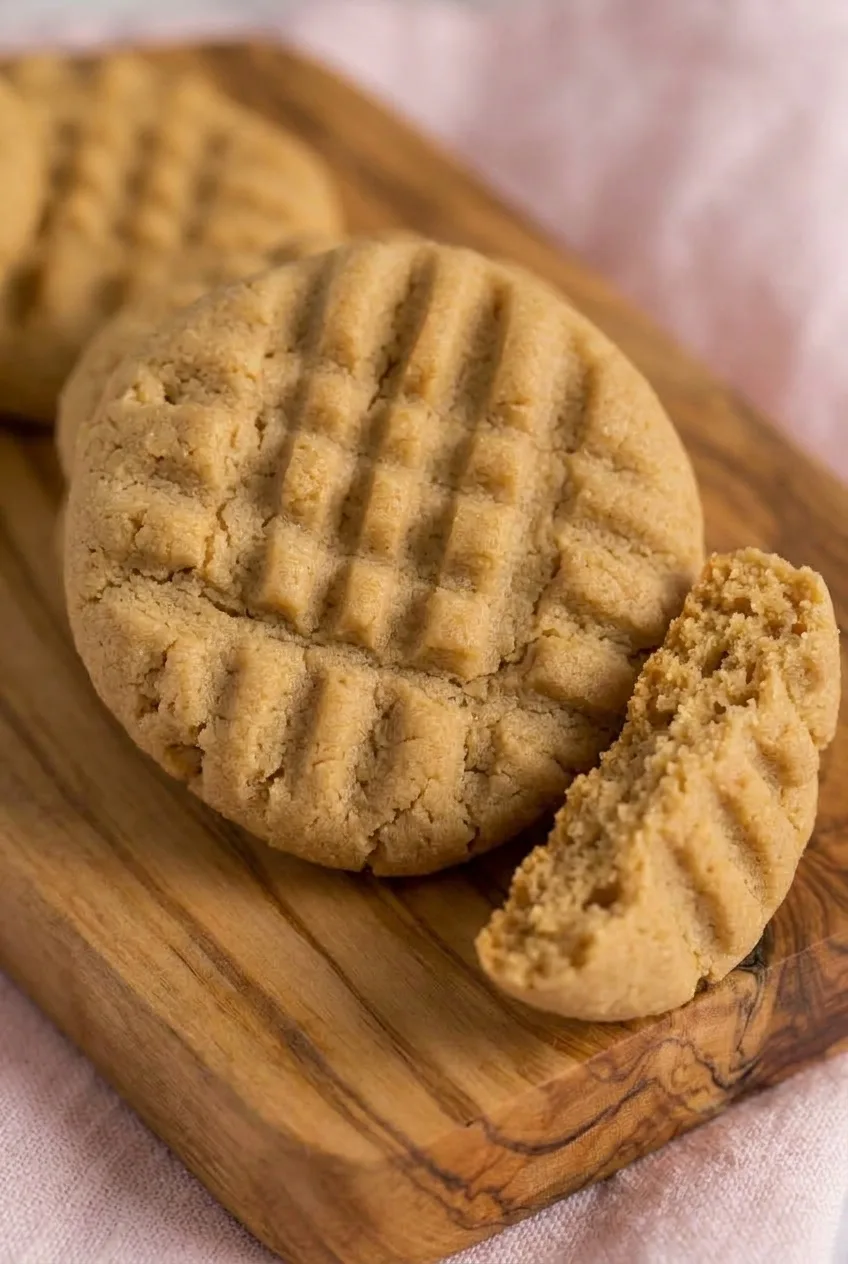
Close view of a fork-marked peanut butter cookie beside a broken piece showing its tender crumb

How to Bake Peanut Butter Cookies

  1. Preheat the oven: Place a rack in the center and fully preheat to 350°F (175°C). Line two standard baking sheets with parchment paper.
  2. Mix the fats and sugars: Beat the softened butter, peanut butter, brown sugar, and granulated sugar until creamy and evenly combined. Beat in the egg and vanilla.
  3. Add the dry ingredients: Whisk the flour, baking soda, and salt in a separate bowl. Mix into the peanut butter mixture just until no dry flour remains. Weigh the flour or spoon and level it; too much can make the cookies dry.
  4. Portion and press: Divide the dough into about 24 rounded, 1½-tablespoon portions. Arrange about 12 per sheet, at least 2 inches apart. Press each ball with a fork, then press across the first marks at a right angle, leaving the cookies about ½ inch thick. If the portions slump or the marks collapse, chill the portioned dough for 20–30 minutes, then press it.
  5. Bake one sheet at a time: Bake uncovered for 9–11 minutes, starting to check at 9 minutes. Remove the cookies when the edges look set and only faintly golden and the tops look mostly set; the centers may still appear slightly soft. Do not wait for deep browning. Rotate the sheet only if your oven browns unevenly.
  6. Let the cookies set: Leave them on the baking sheet for 5 minutes before transferring to a wire rack to cool completely. They can break if moved straight from the oven.

How to Keep the Fork Marks Distinct

The two fork presses flatten the dense dough for more even baking and make its familiar crosshatch. Press firmly enough to leave deep lines without flattening the cookies below about ½ inch. If dough sticks to the fork, clean the tines or dip them lightly in flour.

Choosing Peanut Butter

Creamy, shelf-stable peanut butter gives the dough a cohesive texture and a smooth surface for clear fork marks. Crunchy peanut butter can make the tops less even and the cookies more crumbly. If using natural peanut butter, stir it thoroughly first; differences in oil content may change how much the cookies spread.

For flourless peanut butter cookies, use a separate recipe. Simply omitting the flour from this dough will not produce the same result.

Storage and Freezing

Cool the cookies completely, then store them airtight at room temperature for up to 1 week; their texture may be best sooner. Fully cooled baked cookies can be frozen airtight for 1–2 months.

For another familiar bake, try these classic chocolate chip cookies.

Nutrition

Approximate nutrition per cookie, based on 24 cookies: 130 calories, 2g protein, 7g fat, and 15g carbohydrates. Per 100g of baked cookies: approximately 500 calories, 9g protein, 26g fat, and 59g carbohydrates. Values are estimates; cookie size and moisture lost during baking will affect them.

Peanut Butter Cookies

These peanut butter cookies have golden edges, tender centers, and deep fork-pressed crosshatch tops.
Course: Dessert
Cuisine: American
Prep: 15 min
Cook: 22 min
Total: 43 min
Servings: 24 Calories: 130 kcal

Equipment

  • Mixing bowls
  • Electric mixer
  • Whisk
  • Baking sheets
  • Parchment paper
  • Fork
  • Wire rack

Ingredients

  • 1/2 cup unsalted butter, softened (115 g)
  • 1/2 cup creamy shelf-stable peanut butter (130 g)
  • 1/2 cup packed light brown sugar (100 g)
  • 1/2 cup granulated sugar (100 g)
  • 1 large egg
  • 1 teaspoon vanilla extract
  • 1 1/2 cups all-purpose flour, spooned and leveled (190 g)
  • 1/2 teaspoon baking soda
  • 1/4 teaspoon fine salt

Instructions

  1. Preheat the oven to 350°F (175°C) with a rack in the center. Line two baking sheets with parchment paper.
  2. Beat the butter, peanut butter, brown sugar, and granulated sugar until creamy and evenly combined.
  3. Beat in the egg and vanilla.
  4. Whisk the flour, baking soda, and salt in a separate bowl. Mix the dry ingredients into the peanut butter mixture just until no dry flour remains.
  5. Divide the dough into about 24 rounded 1 1/2-tablespoon portions. Arrange about 12 portions per baking sheet, at least 2 inches apart.
  6. Press each dough ball with a fork, then press across the first marks at a right angle, leaving the cookies about 1/2 inch thick. If the portions slump or the marks collapse, chill them for 20–30 minutes before pressing.
  7. Bake one sheet at a time for 9–11 minutes, checking at 9 minutes. Remove the cookies when the edges are set and faintly golden and the tops are mostly set; the centers may still look slightly soft.
  8. Leave the cookies on the baking sheet for 5 minutes, then transfer them to a wire rack to cool completely.

Tips

  • Spoon and level the flour or weigh it to help prevent dry cookies.
  • Press the dough firmly enough to leave deep fork marks while keeping the cookies about 1/2 inch thick.
  • If dough sticks to the fork, clean the tines or dip them lightly in flour.
  • Chill the portioned dough for 20–30 minutes only if it slumps or loses its fork marks.
  • Use creamy, shelf-stable peanut butter for cohesive dough and distinct fork marks.

Notes

Store fully cooled cookies airtight at room temperature for up to 1 week, or freeze them airtight for 1–2 months. Nutrition is approximate and based on 24 cookies; per 100 g, the cookies provide about 500 calories, 9 g protein, 26 g fat, and 59 g carbohydrates.

Nutrition

Calories: 130 kcal | Protein: 2 g | Fat: 7 g | Carbohydrates: 15 g | Per 100g Calories: 500 kcal | Per 100g Protein: 9 g | Per 100g Fat: 26 g | Per 100g Carbohydrates: 59 g

Brown Butter Chocolate Chip Cookies

These large cookies have lightly golden edges, soft centers, and generous pools of melted semisweet chocolate alongside lighter milk-chocolate pieces. Brown the butter until its milk solids turn golden and smell nutty, then let it cool before mixing the dough. Scoop and chill the portions before baking to help control spread. A little flaky salt goes on while the cookies are warm.

Yield: About 18 large cookies. Total time: About 2 hours 45 minutes to 3 hours, including a 90-minute chill and baking in batches.

Ingredients for Brown Butter Chocolate Chip Cookies

Broken brown butter cookie showing a tender center and melted chocolate
  • 1 cup (2 sticks) unsalted butter (225g)
  • 1 cup packed light brown sugar (200g)
  • 1/2 cup granulated sugar (100g)
  • 1 large egg
  • 1 large egg yolk
  • 2 teaspoons vanilla extract
  • 2 1/4 cups all-purpose flour, spooned and leveled (280g)
  • 1 teaspoon baking soda
  • 1/2 teaspoon fine sea salt
  • 6 ounces semisweet chocolate bar, roughly chopped (170g)
  • 4 ounces milk chocolate bar, roughly chopped (115g)
  • About 1/2 teaspoon flaky sea salt, for finishing

Reserve a few larger pieces of each chocolate for the tops. Chopped chocolate creates broader melted pools than chips.

How to Make Brown Butter Chocolate Chip Cookies

Overlapping brown butter chocolate chip cookies on parchment over a wooden board
  1. Brown the butter: Melt the butter in a light-colored saucepan over medium heat. Cook for about 8 to 12 minutes, stirring or swirling frequently, especially once it foams. When the milk solids beneath the foam turn golden brown and smell nutty, immediately pour the butter and all its browned bits into a heat-safe mixing bowl.
  2. Cool and mix: Let the butter cool for about 15 to 20 minutes, until warm rather than hot. Whisk in both sugars, then the egg, yolk, and vanilla until combined.
  3. Make the dough: In a separate bowl, whisk the flour, baking soda, and fine sea salt. Fold into the butter mixture just until no dry flour remains. Fold in most of both chopped chocolates. The dough should be soft but scoopable.
  4. Scoop and chill: Scoop about 18 portions, roughly 3 tablespoons or 60 to 65g each. Press the reserved semisweet and milk chocolate onto the tops. Cover and refrigerate for about 90 minutes, until the portions feel firm when gently pressed.
  5. Bake: During the latter part of the chill, preheat the oven to 350°F (175°C) with a rack in the center. Arrange the chilled portions about 3 inches apart on parchment-lined, cool baking sheets. Bake uncovered in batches, checking at 11 minutes; each sheet should take about 11 to 14 minutes. Rotate the sheet if your oven browns unevenly. The edges should be set and lightly golden, and the centers should look soft and slightly puffed, not wet or liquid.
  6. Salt and cool: Scatter a little flaky sea salt over the warm cookies. Let them set on the baking sheets for 5 to 10 minutes, then transfer to a rack. Once a cookie holds together but its chocolate is still soft, break it open to serve.

How to Brown Butter Without Burning It

Watch the milk solids beneath the foam rather than relying only on the clock. A light-colored pan makes their color easier to judge. Transfer the butter as soon as the solids are golden brown and smell nutty; they can burn if left in the hot pan. Keep the toasted bits in the dough for their flavor.

Why Chill the Scooped Dough?

Browned butter enters the dough melted, so baking the portions while they are still warm can make the cookies spread too thin. Scooping before chilling is easier than digging into firm refrigerated dough. Chill the covered portions until firm, and start each batch on a cool baking sheet.

How to Tell When the Cookies Are Done

Look for set, lightly golden edges and centers that still appear tender but not liquid. The cookies finish setting during their rest on the hot sheet. If they bake until the centers look fully firm, they may turn dry; weighing the flour, or spooning and leveling it, also helps prevent dry, puffy cookies.

Chocolate Variations

For a less-sweet chocolate profile, replace the milk chocolate with the same weight of semisweet chocolate. The cookies will lose their lighter chocolate contrast. Chocolate chips can replace the chopped bars by weight, but they will leave smaller, more defined pieces instead of broad melted pools.

For a version without browned butter, try these classic chocolate chip cookies.

Storing and Freezing the Cookies

Keep fully cooled cookies airtight at room temperature for about 3 days for the best texture. Covered, portioned dough can be refrigerated for up to 48 hours before baking.

To freeze unbaked cookies, freeze the portions until solid, then transfer them to a freezer-safe container for up to 3 months. Bake from frozen at 350°F, allowing a few additional minutes and using the golden-edge, soft-center cues to judge doneness. Baked cookies can also be frozen airtight for up to 2 months.

Nutrition

Approximate nutrition per cookie, based on 18 large cookies: 300 calories, 3g protein, 16g fat, and 38g carbohydrates. Per 100g of baked cookies: approximately 510 calories, 5g protein, 27g fat, and 64g carbohydrates. Values are estimates and will vary with chocolate brands, portion size, and moisture lost during baking.

Brown Butter Chocolate Chip Cookies

Large cookies with nutty brown butter, soft centers, semisweet and milk chocolate, and a finish of flaky salt.
Course: Dessert
Cuisine: American
Prep: 138 min
Cook: 42 min
Total: 180 min
Servings: 18 Calories: 300 kcal

Equipment

  • Light-colored saucepan
  • Heat-safe mixing bowl
  • Mixing bowl
  • Whisk
  • Spatula
  • Cookie scoop
  • Baking sheets
  • Parchment paper
  • Wire rack
  • Oven

Ingredients

  • 1 cup (2 sticks) unsalted butter (225g)
  • 1 cup packed light brown sugar (200g)
  • 1/2 cup granulated sugar (100g)
  • 1 large egg
  • 1 large egg yolk
  • 2 teaspoons vanilla extract
  • 2 1/4 cups all-purpose flour, spooned and leveled (280g)
  • 1 teaspoon baking soda
  • 1/2 teaspoon fine sea salt
  • 6 ounces semisweet chocolate bar, roughly chopped (170g)
  • 4 ounces milk chocolate bar, roughly chopped (115g)
  • About 1/2 teaspoon flaky sea salt, for finishing

Instructions

  1. Melt the butter in a light-colored saucepan over medium heat. Cook for 8 to 12 minutes, stirring or swirling frequently, until the milk solids turn golden brown and smell nutty.
  2. Immediately pour the butter and browned bits into a heat-safe mixing bowl. Cool for 15 to 20 minutes, until warm but not hot.
  3. Whisk both sugars into the butter, then whisk in the egg, egg yolk, and vanilla until combined.
  4. In a separate bowl, whisk together the flour, baking soda, and fine sea salt.
  5. Fold the dry ingredients into the butter mixture just until no dry flour remains. Fold in most of both chopped chocolates.
  6. Scoop about 18 portions, roughly 3 tablespoons or 60 to 65g each. Press the reserved chocolate pieces onto the tops.
  7. Cover and refrigerate the portions for about 90 minutes, until firm when gently pressed.
  8. Toward the end of the chilling time, preheat the oven to 350°F (175°C) with a rack in the center.
  9. Arrange the chilled portions about 3 inches apart on parchment-lined, cool baking sheets.
  10. Bake in batches for about 11 to 14 minutes, checking at 11 minutes. Rotate the sheet if needed; the edges should be set and lightly golden while the centers remain soft and slightly puffed.
  11. Sprinkle the warm cookies with flaky sea salt. Let them rest on the baking sheets for 5 to 10 minutes, then transfer to a wire rack.

Tips

  • Use a light-colored saucepan to see when the butter solids turn golden.
  • Transfer the browned butter from the pan as soon as it smells nutty to prevent burning.
  • Reserve a few larger chocolate pieces to press onto the cookie tops before chilling.
  • Bake each batch on a cool baking sheet to help control spreading.
  • Weigh the flour or spoon and level it to help prevent dry, puffy cookies.

Variations

  • All Semisweet Chocolate: Replace the milk chocolate with the same weight of semisweet chocolate for a less-sweet chocolate profile.
  • Chocolate Chip Version: Replace the chopped chocolate bars with chocolate chips by weight; the cookies will have smaller, more defined chocolate pieces.

Notes

Store fully cooled cookies airtight at room temperature for about 3 days. Refrigerate covered portioned dough for up to 48 hours, or freeze unbaked portions for up to 3 months. Baked cookies can be frozen airtight for up to 2 months. Nutrition is approximate per cookie.

Nutrition

Calories: 300 kcal | Protein: 3 g | Fat: 16 g | Carbohydrates: 38 g

Classic Chocolate Chip Cookies

These chocolate chip cookies bake with lightly golden edges, soft centers, and uneven tops dotted with melted chocolate. Chips go throughout the dough, while some of the measured chopped chocolate is pressed onto the tops before baking.

The softened-butter dough needs no required chill. For the best guide to doneness, make roughly 48–50 g portions and take the cookies out when the edges are set but the centers still look soft. They finish setting during a short rest on the baking sheet.

Ingredients for Classic Chocolate Chip Cookies

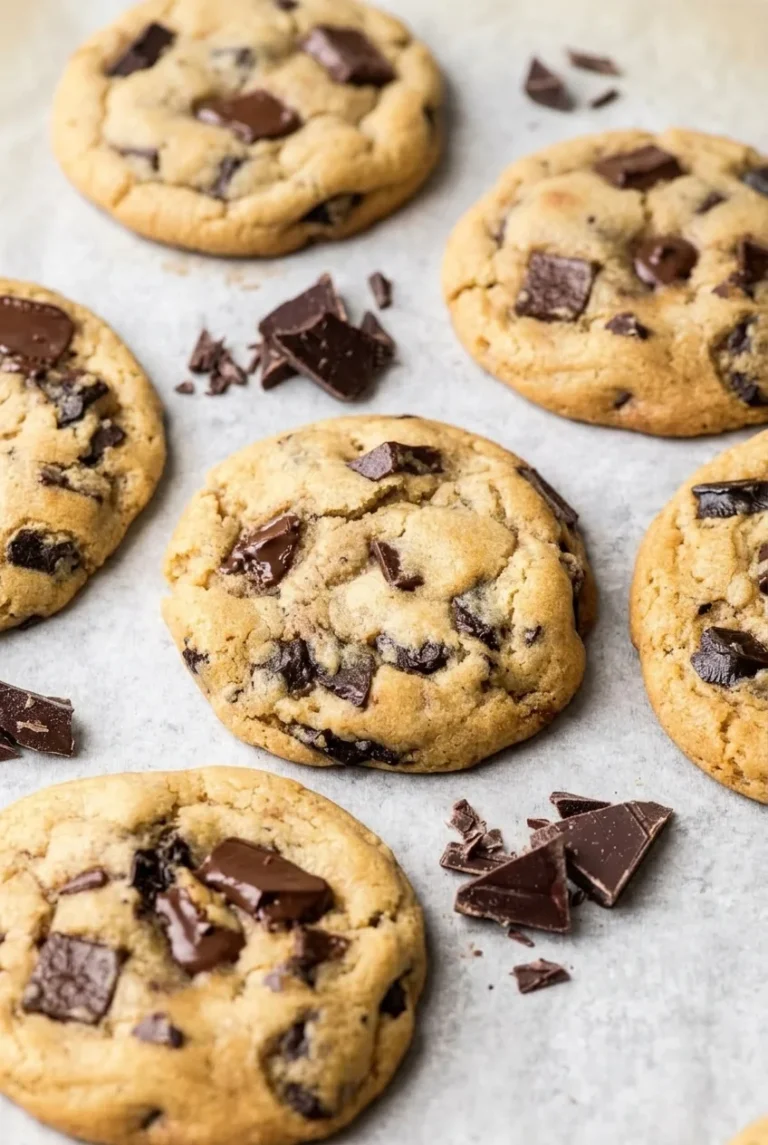
Several golden chocolate chip cookies loosely arranged on pale parchment
  • 2 1/4 cups all-purpose flour, spooned and leveled (270g)
  • 1 teaspoon baking soda
  • 3/4 teaspoon fine salt
  • 1 cup (2 sticks) unsalted butter, softened but not melted (225g)
  • 3/4 cup packed light brown sugar (150g)
  • 1/2 cup granulated sugar (100g)
  • 2 large eggs
  • 2 teaspoons vanilla extract
  • 8 ounces semisweet chocolate, roughly chopped (225g); reserve about one-quarter for the tops
  • 1/2 cup semisweet chocolate chips (85g)

Yield: About 24 cookies. Prep: 20 minutes. Bake: 9–11 minutes per batch, or about 30–35 minutes for three batches. Total: About 55–65 minutes, including brief sheet cooling.

Broken chocolate chip cookie showing its soft center, golden edge, and melted chocolate

How to Bake Chocolate Chip Cookies

  1. Prepare the oven and sheets: Fully preheat the oven to 375°F (190°C) with a rack in the center. Line two large baking sheets with parchment paper; do not grease the parchment.
  2. Mix the dry ingredients: Whisk the flour, baking soda, and salt together.
  3. Cream the butter and sugars: Beat the butter with both sugars until creamy and lighter in color. The butter should yield to pressure but not look liquid or greasy. Beat in the eggs one at a time, then the vanilla.
  4. Finish the dough: Mix in the dry ingredients just until no flour streaks remain. Fold in the chocolate chips and about three-quarters of the chopped chocolate.
  5. Portion and top: Divide the dough into about 24 portions of 48–50 g each. Place about eight on a cool, prepared sheet, at least 2 inches apart. Gently press the reserved chopped chocolate into the tops without flattening the dough.
  6. Bake one sheet at a time: Bake on the center rack, starting to check at 8 minutes. For these unfrozen portions, expect about 9–11 minutes. Remove the cookies when the edges are set and lightly golden but the uneven centers still look soft. Turn the sheet only if your oven browns noticeably unevenly.
  7. Cool and repeat: Leave the cookies on the sheet for 5 minutes, then transfer them to a rack. Bake the remaining dough on cool sheets. If the waiting portions become very soft, refrigerate them briefly before baking.

How to Tell When the Cookies Are Done

Look at the edges rather than waiting for the entire cookie to feel firm. The centers should still be lighter and soft-looking when the edges are lightly golden. The 5-minute rest on the sheet lets the cookies firm up enough to lift without drying out the centers.

The 9–11-minute range is for roughly 48–50 g portions of unfrozen dough in a conventional oven; smaller or larger portions may bake differently. If using convection, lowering the setting by 25°F is a starting adjustment, but check the browning early.

How to Keep Cookies from Spreading Too Much

Use softened butter, not melted butter, and place each batch on a cool sheet. Greasy butter, very warm dough, or a hot sheet can make the cookies spread too quickly. A brief chill helps if the portioned dough becomes overly soft, but it is not a required step.

Weigh the flour when possible, or spoon it into the measuring cup and level it off. Too little flour can contribute to excess spread; too much can leave the cookies unusually tall or dry. Let the oven fully preheat before baking.

Make-Ahead and Storage

Serve the cookies after their brief sheet rest while the chocolate is still soft, or let them cool completely. Store cooled cookies in an airtight container at room temperature for up to 5 days.

To make the dough ahead, freeze the portions on a parchment-lined sheet, then transfer them to an airtight container or bag for up to 2 months. Thaw before following the baking directions above; the stated bake time does not apply to dough baked straight from frozen.

For a different cookie, try these white chocolate cranberry cookies or these filled pecan pie cookies.

Nutrition

Approximate nutrition per cookie, based on 24 cookies: 220 calories, 2g protein, 12g fat, and 27g carbohydrates. Approximate values per 100g of baked cookies: 500 calories, 5g protein, 28g fat, and 60g carbohydrates. Values will vary with the chocolate used and moisture lost during baking.

Classic Chocolate Chip Cookies

Soft-centered chocolate chip cookies with lightly golden edges and chopped chocolate pressed onto the tops.
Course: Dessert
Cuisine: American
Prep: 20 min
Cook: 33 min
Total: 60 min
Servings: 24 Calories: 220 kcal

Equipment

  • Oven
  • Two large baking sheets
  • Parchment paper
  • Mixing bowls
  • Whisk
  • Electric mixer
  • Cooling rack

Ingredients

For the dough

  • 2 1/4 cups all-purpose flour, spooned and leveled (270 g)
  • 1 teaspoon baking soda
  • 3/4 teaspoon fine salt
  • 1 cup (2 sticks) unsalted butter, softened but not melted (225 g)
  • 3/4 cup packed light brown sugar (150 g)
  • 1/2 cup granulated sugar (100 g)
  • 2 large eggs
  • 2 teaspoons vanilla extract
  • 8 ounces semisweet chocolate, roughly chopped (225 g), divided
  • 1/2 cup semisweet chocolate chips (85 g)

Instructions

  1. Preheat the oven to 375°F (190°C) with a rack in the center. Line two large baking sheets with parchment paper; do not grease.
  2. Whisk together the flour, baking soda, and salt.
  3. Beat the softened butter with the brown sugar and granulated sugar until creamy and lighter in color.
  4. Beat in the eggs one at a time, then mix in the vanilla.
  5. Add the dry ingredients and mix just until no flour streaks remain.
  6. Fold in the chocolate chips and about three-quarters of the chopped chocolate.
  7. Divide the dough into about 24 portions of 48–50 g each. Arrange about eight portions at least 2 inches apart on a cool, prepared baking sheet.
  8. Press the reserved chopped chocolate gently into the tops without flattening the dough.
  9. Bake one sheet at a time on the center rack, checking at 8 minutes. Bake unfrozen portions for about 9–11 minutes, until the edges are set and lightly golden while the centers still look soft.
  10. Leave the cookies on the baking sheet for 5 minutes, then transfer them to a rack to cool.
  11. Repeat with the remaining dough on cool baking sheets. Briefly refrigerate waiting portions if they become very soft.

Tips

  • Use softened butter that yields to pressure but is not liquid or greasy.
  • Weigh the flour when possible, or spoon it into the measuring cup and level it off.
  • Use cool baking sheets for each batch to help prevent excessive spreading.
  • Judge doneness by the edges; the centers should still look soft when the cookies come out.
  • For convection ovens, lowering the setting by 25°F is a starting adjustment; check browning early.

Notes

Store cooled cookies in an airtight container at room temperature for up to 5 days. Freeze portioned dough for up to 2 months; thaw before baking, as the stated bake time does not apply to frozen dough.

Nutrition

Calories: 220 kcal | Protein: 2 g | Fat: 12 g | Carbohydrates: 27 g

Hawaiian Cheese Ball

Sweet pineapple, sharp cheddar, and small pieces of pepper and green onion run through this creamy, pecan-coated cheese ball. It makes one large appetizer to share with crackers, and you can shape it a day ahead. Press the pineapple dry before measuring it so the filling stays thick, then chill the ball until it holds its shape. A wedge cut just before serving reveals the colorful center.

Ingredients for Hawaiian Cheese Ball

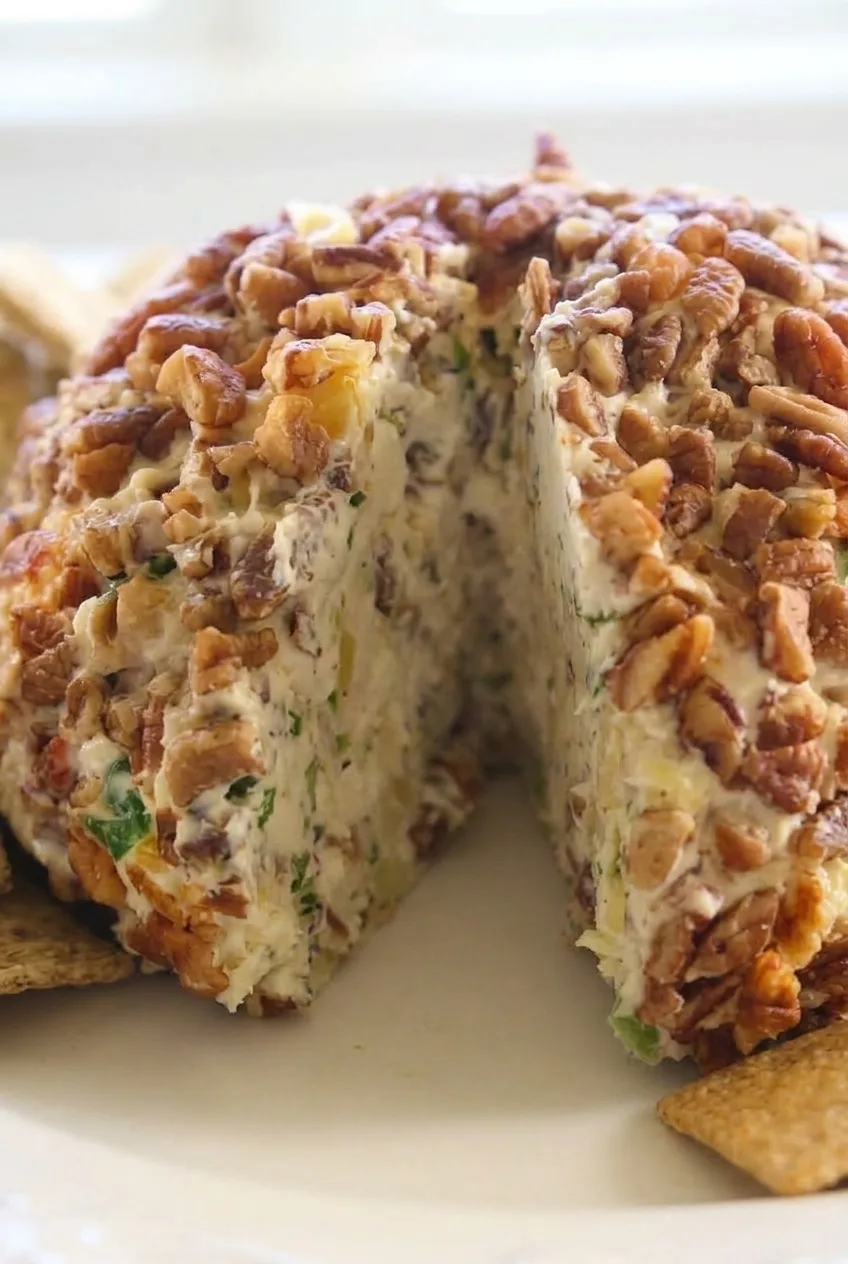
Close view of the pecan coating and creamy, colorful interior of a Hawaiian cheese ball
  • 2 packages (8 ounces each) full-fat cream cheese, softened (450g)
  • 1/2 cup crushed pineapple, measured after draining and pressing (110g)
  • 1 cup shredded sharp cheddar cheese (115g)
  • 1/4 cup finely diced red bell pepper, patted dry (40g)
  • 2 tablespoons finely chopped green onions (10g)
  • 1 cup chopped pecans, divided: 1/4 cup for the filling and 3/4 cup for coating (110g total)
  • About 8 ounces sturdy crackers, for serving (225g)

Optional: A small pinch of fine salt, if needed after tasting the filling.

How to Make Hawaiian Cheese Ball

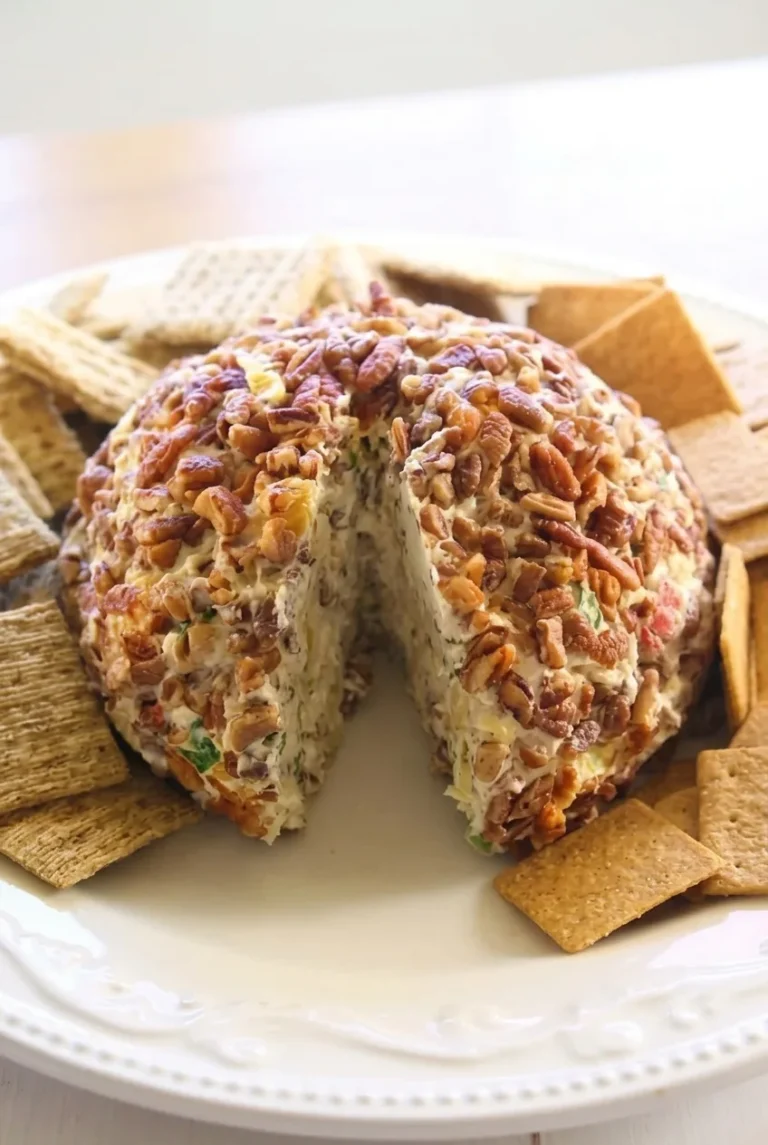
Full platter of Hawaiian cheese ball with an exposed wedge and crackers on a light table

Makes about 12 appetizer servings. Allow 20 minutes to prepare and at least 2 hours to chill, or about 2 hours 20 minutes total.

  1. Drain the pineapple: Drain it in a fine-mesh strainer, then press it with paper towels or a clean kitchen towel. Measure 1/2 cup after pressing; no juice should pool beneath it. Pat the diced pepper dry.
  2. Mix the filling: Stir the softened cream cheese in a bowl until workable. Fold in the pineapple, cheddar, pepper, green onions, and 1/4 cup pecans. Mix until the pieces are evenly distributed and no moisture is pooling. Taste and add a pinch of salt only if needed.
  3. Shape and chill: Spoon the mixture onto plastic wrap. Gather the wrap around it and shape one large, slightly flattened ball. Set it on a plate and refrigerate at 40°F (5°C) or below for at least 2 hours. Check whether it stays rounded when the wrap is loosened; if it slumps, wrap it again and chill longer.
  4. Coat with pecans: Spread the remaining 3/4 cup pecans on a plate. Unwrap the firm cheese ball and gently press the nuts onto its top and sides, filling bare spots by hand.
  5. Plate and serve: Place the cheese ball on a platter with crackers around it. Just before serving, cut and remove a front wedge to show the creamy filling. Serve chilled, or let it stand for about 10 minutes if it is too firm to spread easily.

How to Keep the Cheese Ball Firm

Measure the pineapple after pressing, not straight from the can. Extra juice can loosen the filling enough to make the ball slump, and a wet pepper adds more moisture. Keep the pieces small so they distribute evenly and the ball takes a neat cut. Chill until the ball holds its shape before adding the pecans or removing the serving wedge.

Coating and Serving

Press the pecans onto the cheese ball rather than sprinkling them over it; gentle pressure helps them adhere to the sides. Add the coating close to serving for the best crunch. Set out a cheese spreader with the crackers so guests can take a portion.

For a savory alternative, try the caramelized onion cheese ball with walnuts.

Make-Ahead and Storage

Shape and wrap the cheese ball up to a day ahead. Keep it refrigerated, then add the pecans close to serving. Cover leftovers promptly and refrigerate at 40°F or below; as a conservative guideline, use within 3 to 4 days. Do not leave the cheese ball at room temperature for more than 2 hours, or more than 1 hour if the temperature is above 90°F (30°C).

Freezing is not recommended for this version. Thawing may change the creamy texture and release moisture from the pineapple and pepper.

Nutrition

Approximate nutrition per appetizer serving, based on 12 servings and including crackers: 320 calories, 7g protein, 25g fat, and 18g carbohydrates. Per 100g: approximately 360 calories, 8g protein, 28g fat, and 20g carbohydrates. Values will vary with the cream cheese and crackers used.

Hawaiian Cheese Ball

A creamy cheese ball with pineapple, sharp cheddar, red pepper, and green onions, coated in chopped pecans.
Course: Appetizer
Cuisine: American
Prep: 20 min
Total: 140 min
Servings: 12 Calories: 320 kcal per serving

Equipment

  • Fine-mesh strainer
  • Mixing bowl
  • Paper towels or clean kitchen towel
  • Plastic wrap
  • Plate
  • Serving platter

Ingredients

For the Cheese Ball

  • 2 packages (8 ounces each) full-fat cream cheese, softened (450 g)
  • 1/2 cup crushed pineapple, drained and pressed (110 g)
  • 1 cup shredded sharp cheddar cheese (115 g)
  • 1/4 cup finely diced red bell pepper, patted dry (40 g)
  • 2 tablespoons finely chopped green onions (10 g)
  • 1/4 cup chopped pecans, for the filling
  • Small pinch of fine salt, optional

For Coating and Serving

  • 3/4 cup chopped pecans, for coating
  • About 8 ounces sturdy crackers (225 g)

Instructions

  1. Drain the pineapple in a fine-mesh strainer, then press it with paper towels or a clean kitchen towel. Measure 1/2 cup after pressing, and pat the diced pepper dry.
  2. Stir the softened cream cheese in a bowl until workable. Fold in the pineapple, cheddar, pepper, green onions, and 1/4 cup pecans until evenly combined. Taste and add a pinch of salt if needed.
  3. Spoon the mixture onto plastic wrap, gather the wrap around it, and shape it into one large, slightly flattened ball. Set it on a plate and refrigerate at 40°F (5°C) or below for at least 2 hours.
  4. Check that the cheese ball holds its shape when the wrap is loosened. If it slumps, wrap it again and chill longer.
  5. Spread the remaining 3/4 cup pecans on a plate. Unwrap the firm cheese ball and gently press the pecans onto the top and sides.
  6. Place the cheese ball on a platter with crackers. Just before serving, cut and remove a front wedge to show the filling. Serve chilled, or let it stand for about 10 minutes if it is too firm to spread.

Tips

  • Measure the pineapple after draining and pressing it to keep excess juice from loosening the filling.
  • Pat the diced pepper dry before mixing it in.
  • Keep the pepper and green onion pieces small so they distribute evenly and the cheese ball cuts neatly.
  • Chill until the cheese ball holds its shape before coating it or cutting the serving wedge.
  • Press the pecans gently onto the sides, and add the coating close to serving for the best crunch.

Notes

Shape and wrap up to a day ahead; add the pecans close to serving. Refrigerate leftovers at 40°F or below and use within 3 to 4 days. Do not leave at room temperature for more than 2 hours, or more than 1 hour above 90°F (30°C). Freezing is not recommended.

Nutrition

Calories: 320 kcal per serving | Protein: 7 g per serving | Fat: 25 g per serving | Carbohydrates: 18 g per serving | Per 100 G Calories: 360 kcal | Per 100 G Protein: 8 g | Per 100 G Fat: 28 g | Per 100 G Carbohydrates: 20 g