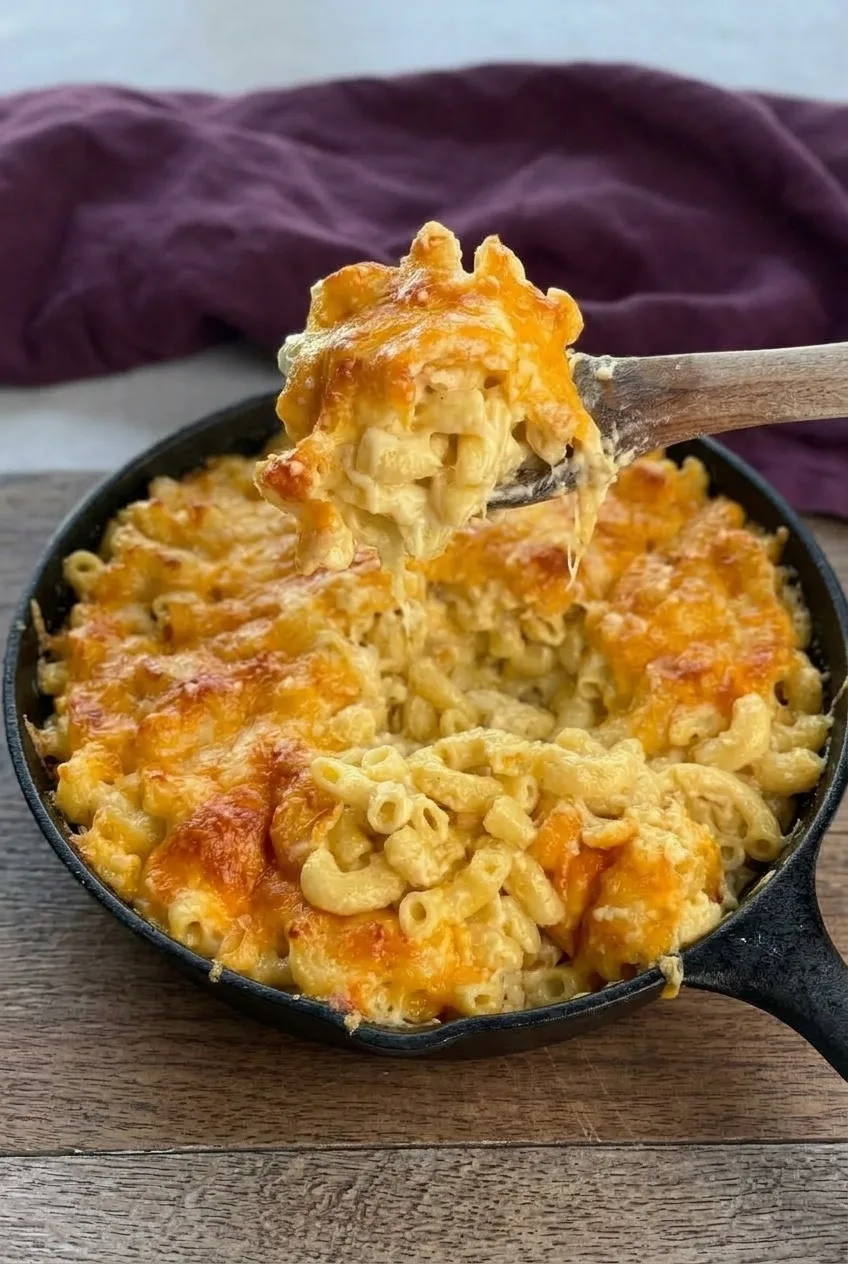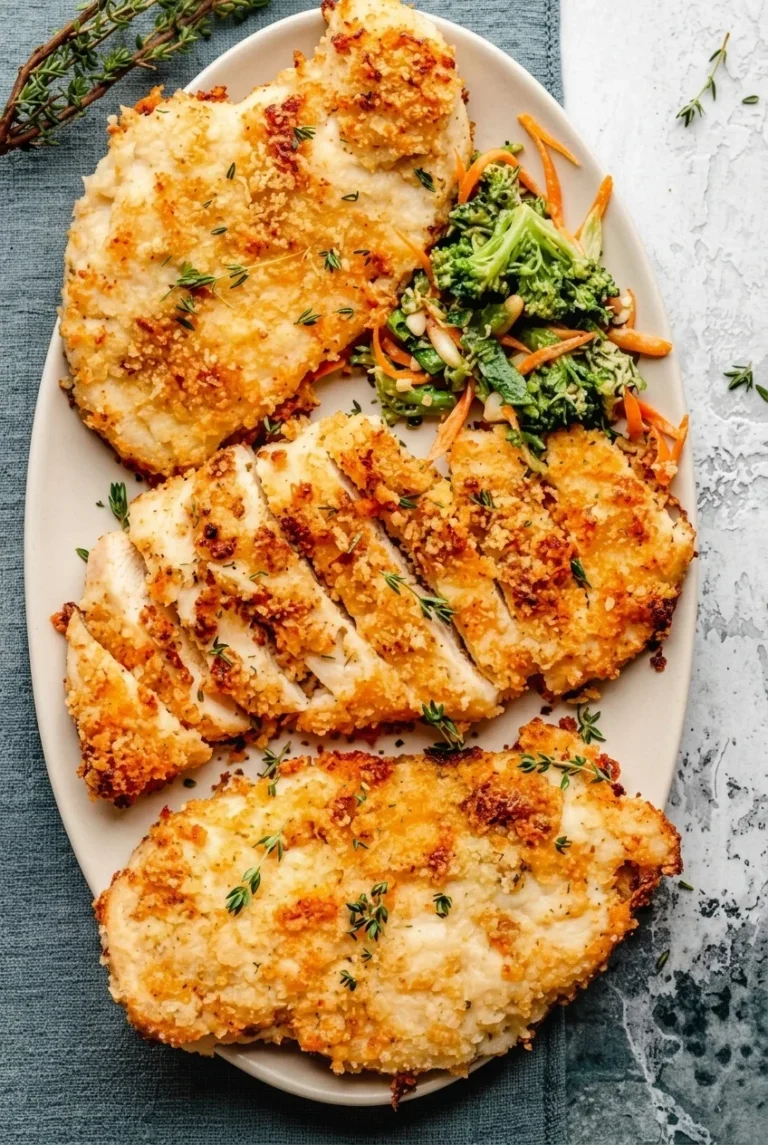
Author

Julia

Browsing

Ranch Chicken

These oven-baked ranch chicken cutlets have a coarse, golden coating made with panko, Parmesan, and dry ranch seasoning. Toasting the crumbs before coating the chicken gives them a head start on browning, so the cutlets don’t need to stay in the oven just to develop color.

Cut the chicken into four broad pieces of even thickness and leave space between them as they bake. Serve the cutlets whole, with one sliced into thick pieces to show the cooked white center.

Ingredients for Ranch Chicken
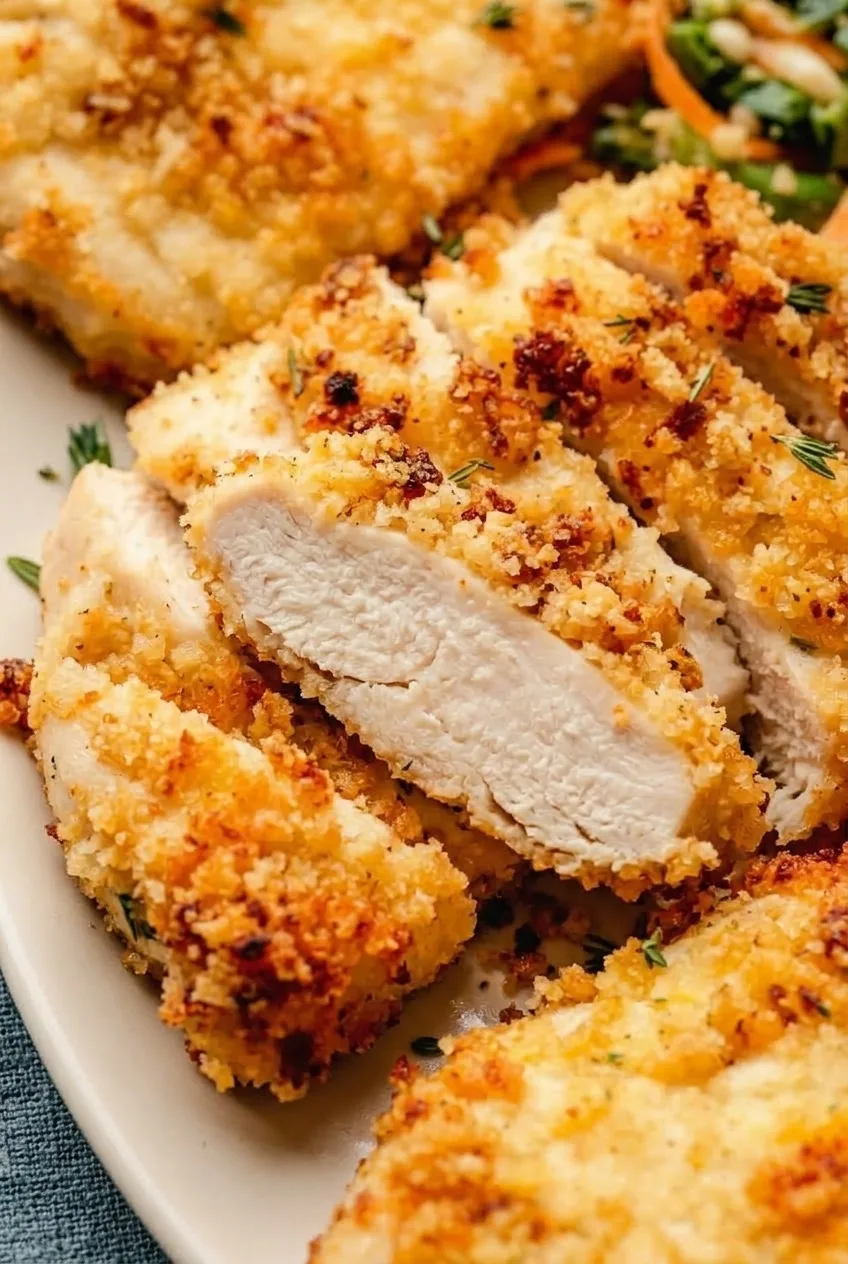
Close view of sliced ranch chicken showing coarse golden crumbs and a moist white interior
  • 1½ pounds boneless, skinless chicken breasts (680g), cut or pounded into 4 cutlets about ½–¾ inch thick
  • ¾ cup panko breadcrumbs (45g)
  • 1 tablespoon olive oil
  • 2 tablespoons dry ranch seasoning mix (about 15g, or half a standard 1-ounce packet)
  • ⅓ cup finely grated Parmesan (30g)
  • ¼ cup mayonnaise (about 60g)
  • 1 teaspoon fresh thyme leaves, plus a few more for serving
  • Ranch dressing for dipping, optional

Ranch seasoning and Parmesan both contribute salt, so don’t add extra automatically. Bottled ranch dressing will wet the crumbs; serve it as a dip rather than using it in the coating.

How to Bake Ranch Chicken
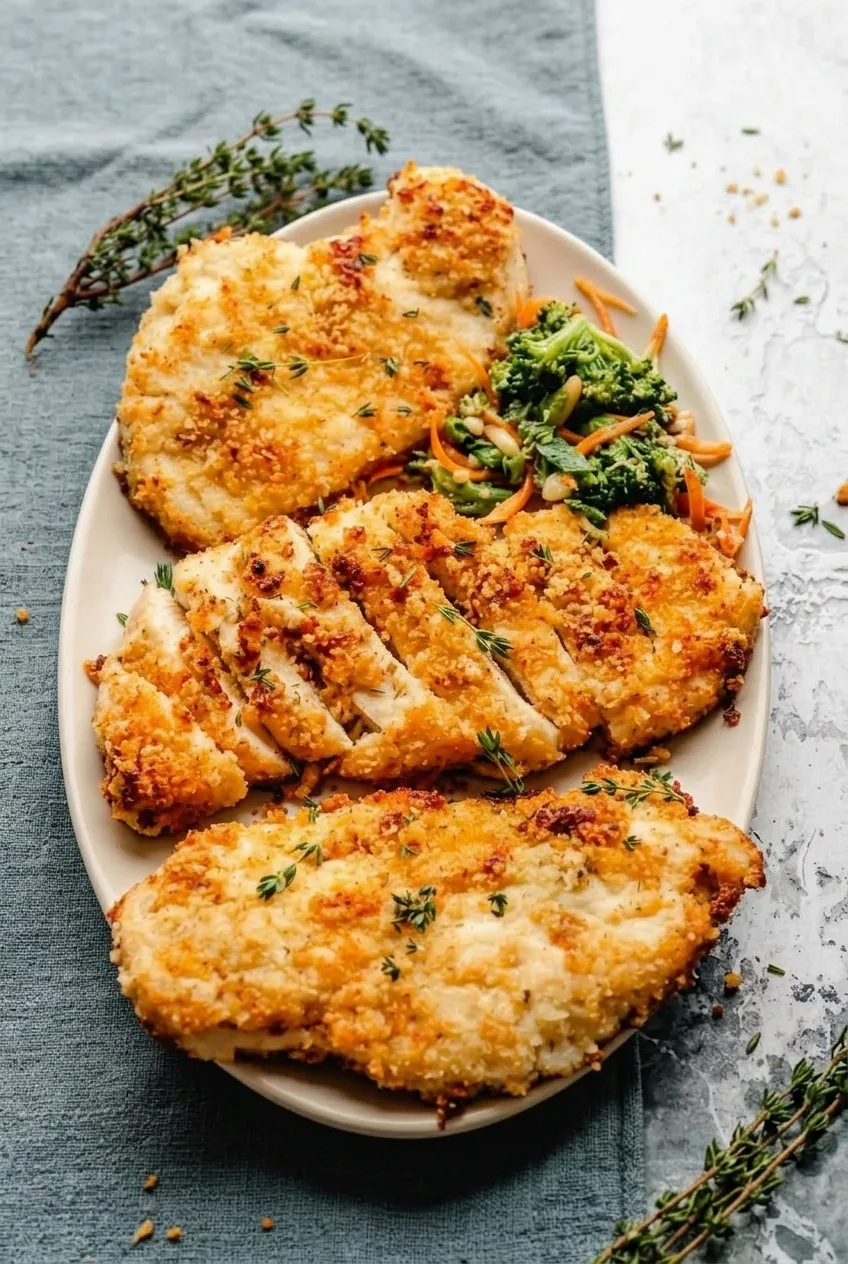
Wide view of an oval platter of golden ranch chicken cutlets, including one sliced cutlet
  1. Prepare the chicken: Preheat the oven to 425°F (220°C). Cut or pound the chicken into four broad cutlets of roughly even thickness. Pat them dry.
  2. Toast the panko: Stir the panko and olive oil frequently in a skillet over medium heat for 3–4 minutes, until light gold. Transfer to a bowl and let cool briefly. Stir in the ranch seasoning, Parmesan, and most of the thyme.
  3. Coat the cutlets: Spread a thin layer of mayonnaise over both sides of each cutlet. Press the chicken firmly into the crumb mixture so the crumbs attach without thick patches of mayonnaise underneath.
  4. Bake: Space the cutlets apart on an oven-safe wire rack set over a rimmed baking sheet. Bake uncovered for about 17–22 minutes, starting to check at 17 minutes. The coating should be golden, and an instant-read thermometer inserted into the thickest part of the chicken should read 165°F (75°C).
  5. Rest and serve: Rest the chicken for 5 minutes. Arrange the cutlets on a platter, slicing one into thick pieces if desired. Scatter the remaining thyme leaves over the top.

No oven-safe rack? Use a lightly oiled, parchment-lined baking sheet instead. Leave space between the cutlets and turn them carefully halfway through baking.

How to Keep the Coating Golden

Toast the panko only until light gold; it will brown further in the oven. Starting with colored crumbs helps the crust finish without baking the chicken longer just to darken it. Pat the chicken dry, use mayonnaise sparingly, and press the crumbs onto both sides so they stay attached.

Leave room around each cutlet so moisture doesn’t soften the coating. If serving ranch dressing, keep it on the side rather than pouring it over the crust.

Cutlet Thickness and Doneness

Aim for cutlets about ½–¾ inch thick. Thinner pieces may finish before 17 minutes, while thicker ones may need longer than 22 minutes. Check the thickest part with a thermometer rather than relying on the color of the already-toasted crumbs.

For another baked chicken dinner without a crumb coating, try these baked chicken breasts with paprika and garlic.

What to Serve With Ranch Chicken

Broccoli and carrots make a simple side; prepare them separately from the chicken. Serve optional ranch dressing alongside for dipping.

Storing and Reheating

Refrigerate cooked chicken promptly in an airtight container for up to 3–4 days. Reheat uncovered in a 350°F (175°C) oven until hot throughout. The coating will be less crisp than when freshly baked.

For the best texture, coat and bake the chicken shortly before serving rather than holding it raw after coating. Cooked cutlets can be frozen in an airtight container for up to 2–3 months, though thawing softens the crust. Thaw in the refrigerator before reheating.

Nutrition

Approximate nutrition per cutlet, based on 4 servings: 420 calories, 42g protein, 21g fat, and 11g carbohydrates. Per 100g of cooked chicken: approximately 240 calories, 24g protein, 12g fat, and 6g carbohydrates. Values vary with the ranch seasoning, mayonnaise, and moisture lost during cooking. Optional dressing is not included.

Ranch Chicken

Oven-baked chicken cutlets are coated in toasted panko, Parmesan, and dry ranch seasoning.
Course: Main Course
Cuisine: American
Prep: 15 min
Cook: 26 min
Total: 46 min
Servings: 4 Calories: 420 kcal

Equipment

  • Oven
  • Skillet
  • Mixing bowl
  • Wire rack
  • Rimmed baking sheet
  • Instant-read thermometer

Ingredients

For the Chicken

  • 1.5 lb boneless, skinless chicken breasts (680 g), cut or pounded into 4 cutlets about 1/2–3/4 inch thick
  • 1/4 cup mayonnaise (about 60 g)

For the Coating

  • 3/4 cup panko breadcrumbs (45 g)
  • 1 tablespoon olive oil
  • 2 tablespoons dry ranch seasoning mix (about 15 g, or half a standard 1-ounce packet)
  • 1/3 cup finely grated Parmesan (30 g)
  • 1 teaspoon fresh thyme leaves, plus a few more for serving

For Serving

  • Ranch dressing, optional

Instructions

  1. Preheat the oven to 425°F (220°C). Cut or pound the chicken into four broad cutlets of even thickness, then pat them dry.
  2. Stir the panko and olive oil in a skillet over medium heat for 3–4 minutes, until the crumbs are light gold.
  3. Transfer the panko to a bowl and let it cool briefly. Stir in the ranch seasoning, Parmesan, and most of the thyme.
  4. Spread a thin layer of mayonnaise over both sides of each cutlet.
  5. Press each cutlet firmly into the crumb mixture to coat both sides evenly.
  6. Place the cutlets with space between them on an oven-safe wire rack set over a rimmed baking sheet.
  7. Bake uncovered for about 17–22 minutes, checking from 17 minutes. The coating should be golden and the thickest part of the chicken should reach 165°F (75°C).
  8. Rest the chicken for 5 minutes. Serve with the remaining thyme scattered over the top and ranch dressing on the side, if desired.

Tips

  • Toast the panko only until light gold; it will brown further in the oven.
  • Pat the chicken dry and use a thin layer of mayonnaise to help the crumbs adhere without forming thick patches.
  • Leave space between the cutlets so moisture does not soften the coating.
  • Check doneness with a thermometer, especially if the cutlets are thinner or thicker than recommended.
  • If you do not have an oven-safe rack, use a lightly oiled, parchment-lined baking sheet and carefully turn the cutlets halfway through baking.
Notes

Refrigerate cooked chicken in an airtight container for 3–4 days. Reheat uncovered at 350°F (175°C) until hot throughout; the coating will be less crisp. Cooked cutlets can be frozen for 2–3 months and thawed in the refrigerator before reheating.

Nutrition

Calories: 420 kcal | Protein: 42 g | Fat: 21 g | Carbohydrates: 11 g

Chicken Burrito Casserole

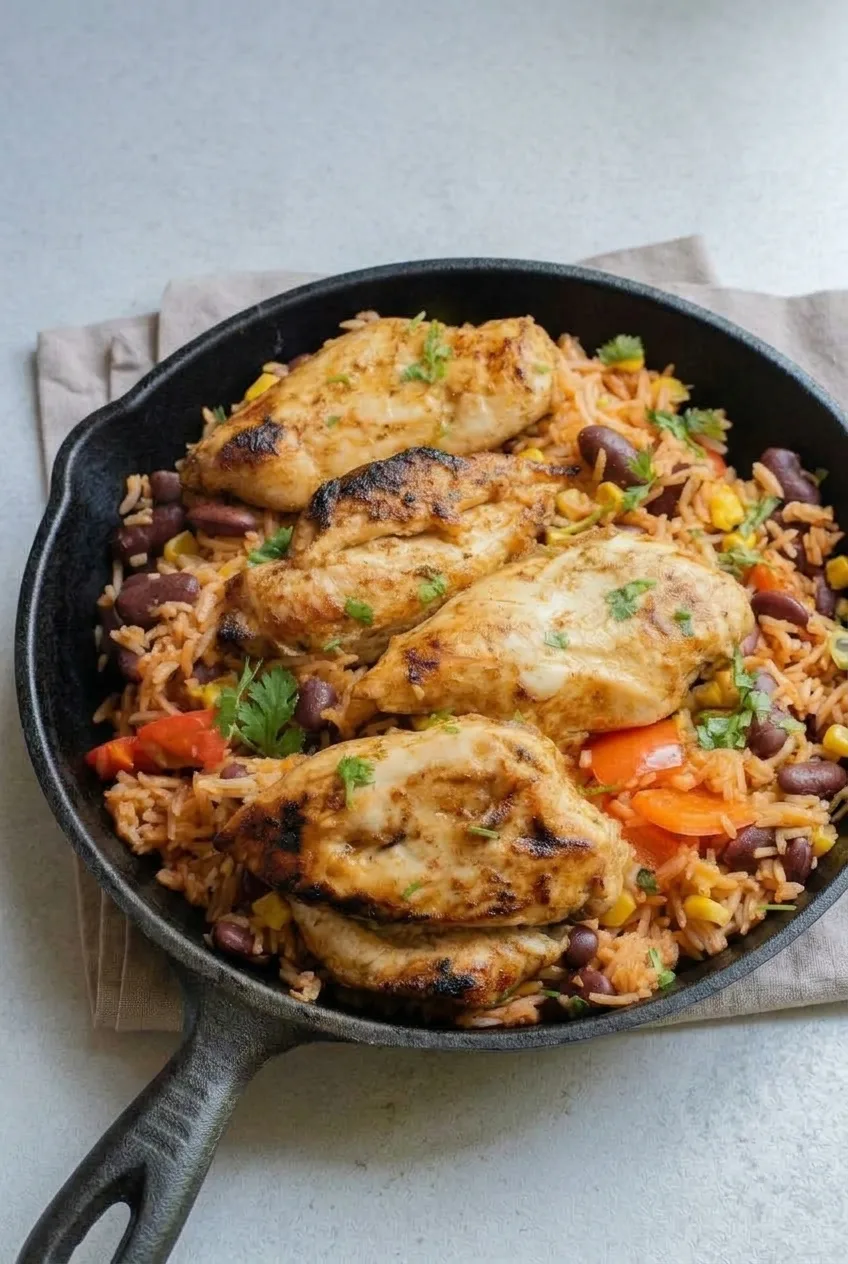
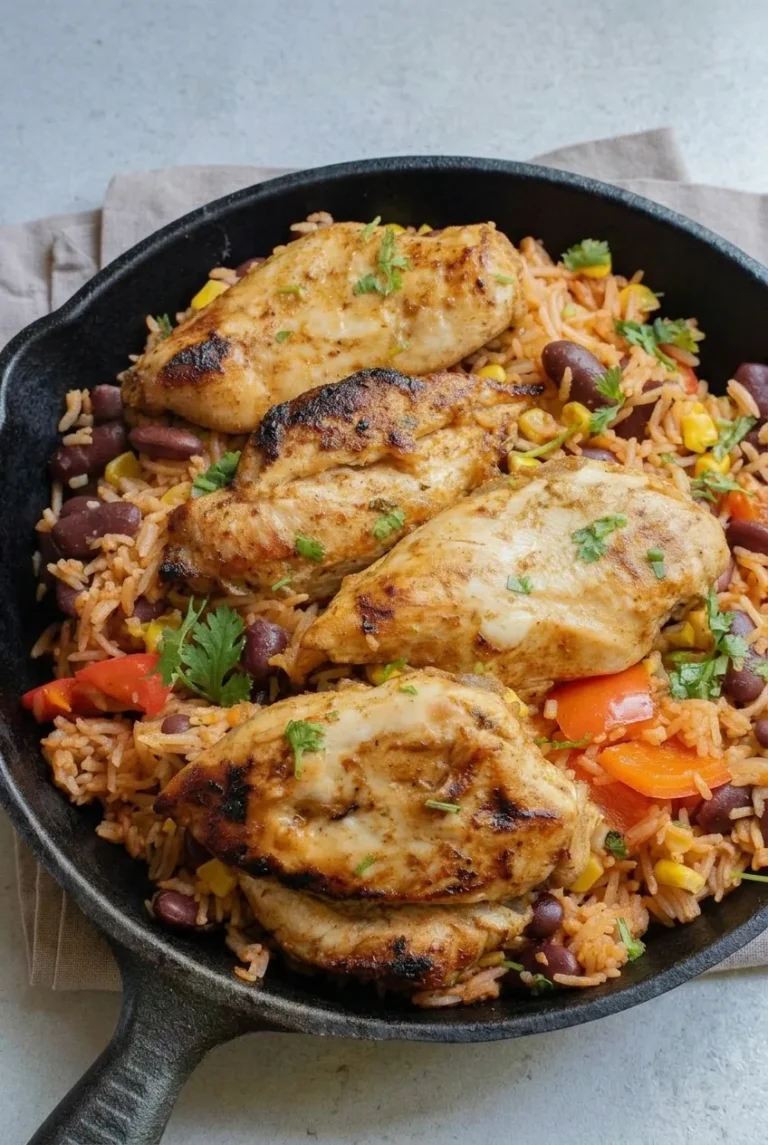
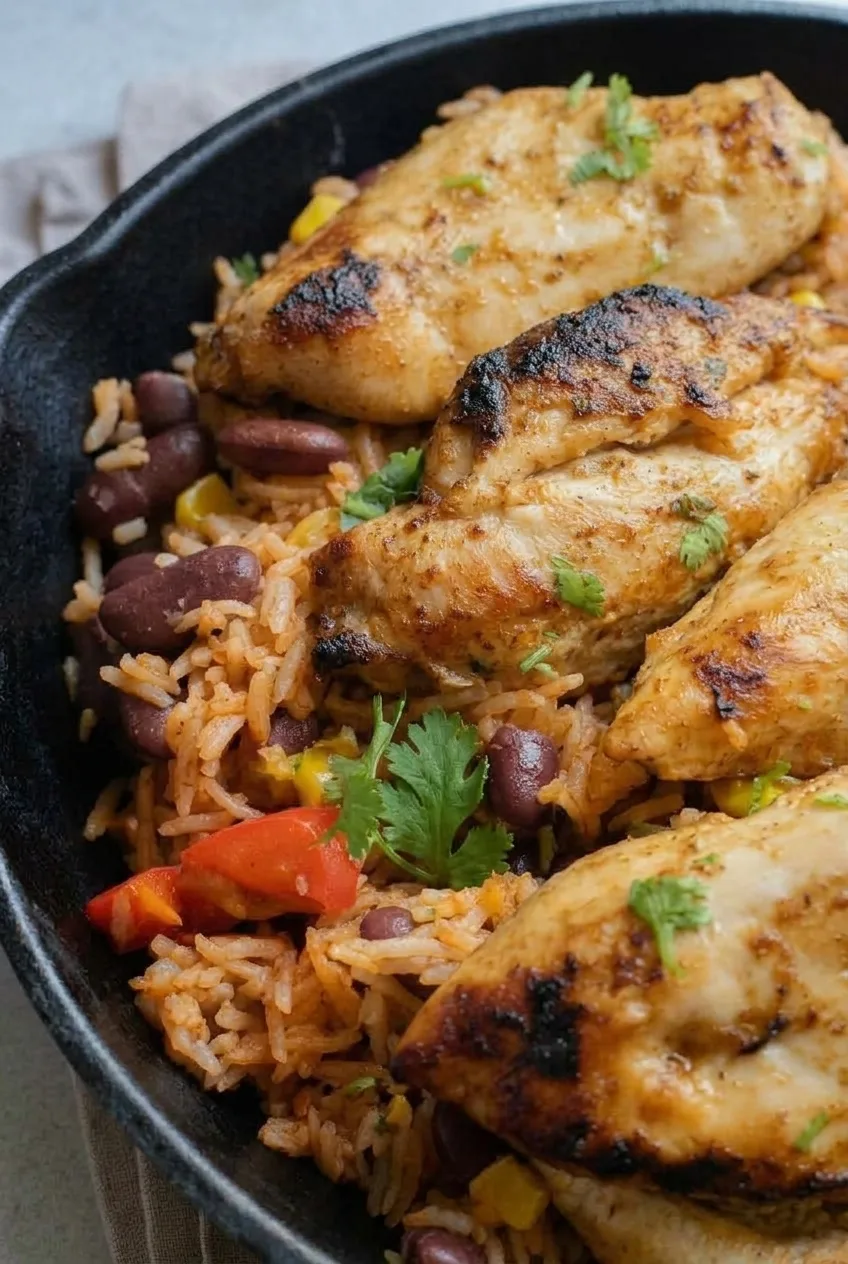
This chicken burrito casserole is spooned from a skillet, not cut into squares. Four browned chicken breasts sit over tomato-tinted rice with kidney beans, corn, and red pepper. Fresh cilantro finishes the dish; there’s no tortilla layer or cheese topping.

The rice bakes covered until it is nearly tender before the chicken goes on top. That gives the rice time to soften without keeping the chicken in the oven for the entire bake. Check the rice and chicken for doneness rather than relying on the clock alone.

Ingredients for Chicken Burrito Casserole

Close view of seared chicken over distinct orange-red rice grains, kidney beans, corn, and red pepper

Makes 4 servings. Prep time: about 15 minutes. Cook time: about 45–55 minutes, depending on the rice and chicken. Total time: about 1 hour to 1 hour 10 minutes.

  • 4 small boneless, skinless chicken breasts, about 1 1/2 pounds total (680g), evened to about 3/4–1 inch thick
  • 2 tablespoons olive oil, divided
  • 1 small yellow or white onion, diced (about 140g)
  • 1 medium red bell pepper, cut into roughly 1/2-inch pieces (about 150g)
  • 1 1/2 cups dry long-grain white rice, rinsed and well drained (about 280g)
  • 2 1/4 cups low-sodium chicken broth, plus a little extra only if needed
  • 1/2 cup plain canned tomato sauce (about 120g)
  • 1 can (15 ounces) kidney beans, drained and rinsed
  • 1 cup corn kernels, thawed if frozen (about 160g)
  • 1 1/2 teaspoons chili powder
  • 1 teaspoon ground cumin
  • 1 teaspoon garlic powder
  • 3/4 teaspoon fine salt, divided, plus more to taste
  • 1/4 cup chopped fresh cilantro, plus a few leaves for garnish

Use a deep 12-inch oven-safe skillet with at least a 3-quart capacity and a tight-fitting oven-safe lid. A shallow skillet may crowd the rice or spill over. If needed, tightly crimp heavy-duty foil over the rim instead of using a lid.

How to Make Chicken Burrito Casserole

Full skillet of chicken burrito casserole on a pale surface, with four chicken breasts and cilantro visible
  1. Preheat and season: Heat the oven to 400°F (205°C). Even out any especially thick parts of the chicken. Season the breasts with half of each of the chili powder, cumin, garlic powder, and salt.
  2. Brown the chicken: Heat 1 tablespoon olive oil in the skillet over medium-high heat. Sear the chicken for about 3 minutes per side, turning once, until browned in patches. Transfer to a clean plate. It will finish cooking later.
  3. Start the rice: Reduce the heat to medium. Add the remaining tablespoon of oil, the onion, and the bell pepper. Cook until they begin to soften. Stir in the remaining spices and salt, then add the drained rice, broth, tomato sauce, beans, and corn. Scrape up the browned bits, spread the rice evenly, and bring the liquid to a steady simmer. Allow about 7–9 minutes for this stage.
  4. Bake the rice: Cover tightly and carefully transfer the hot skillet to the oven. Start checking after 25 minutes; the rice will typically need 25–35 minutes. Taste grains from different parts of the skillet. They should be nearly tender, with a little moisture remaining but no large pool of thin liquid. If the rice is still firm and the skillet looks dry, stir in 1/4 cup hot broth or water, cover, and bake a few minutes longer.
  5. Finish with the chicken: Set the four breasts on top of the rice without burying their browned surfaces. Pour in any juices from the plate. Cover and bake, starting to check after 8 minutes, until the rice is tender and the thickest part of each breast reaches 165°F (75°C). This typically takes 8–15 minutes. If the rice is tender but still wet once the chicken is cooked, uncover briefly to let excess moisture evaporate.
  6. Rest and serve: Let the skillet rest loosely covered for 5 minutes. Taste the rice and adjust the salt if needed. Scatter cilantro over the chicken and rice, then serve one breast with a scoop of rice per person.

When Is the Rice Ready for the Chicken?

At the 25-minute check, the grains should be almost tender, not hard in the middle. Firm rice in a dry skillet needs a small amount of hot liquid and more covered baking before the chicken goes on top. If the rice is already tender but wet, do not add broth; let excess moisture evaporate briefly after the chicken finishes cooking. Skillet depth, lid fit, and rice can all change the bake time.

Why Add the Chicken Near the End?

Searing gives the chicken its browned surface, but browning does not mean the center is cooked. Adding the breasts after the rice is nearly tender limits their time in the oven while keeping them visible on top. Check every piece with an instant-read thermometer before serving.

Variations and Serving

Black beans can replace the kidney beans, though they change the look of the finished skillet. For a cheesy variation, scatter a modest amount of Monterey Jack over the finished rice around the chicken and melt it briefly, leaving the browned chicken exposed. Offer lime wedges at the table if desired.

For a bowl-style dinner with related flavors, try these chicken taco rice bowls.

How to Store and Reheat Leftovers

Cool leftovers promptly and refrigerate in airtight containers for up to 3 days. Reheat individual portions in the microwave until thoroughly hot, adding a small splash of water if the rice has dried out. You can season the chicken and chop the vegetables ahead, but do not hold partially cooked chicken overnight.

Nutrition

Approximate nutrition per serving, based on 4 servings: 670 calories, 52g protein, 13g fat, and 86g carbohydrates. Per 100g of finished casserole, that is roughly 125 calories, 10g protein, 2g fat, and 16g carbohydrates. Values vary with the chicken, broth, beans, and amount of liquid retained after cooking.

Chicken Burrito Casserole

Browned chicken breasts bake over tomato-seasoned rice with kidney beans, corn, red pepper, and cilantro.
Course: Main Course
Cuisine: Mexican
Prep: 15 min
Cook: 50 min
Total: 65 min
Servings: 4 Calories: 670 kcal

Equipment

  • Deep 12-inch oven-safe skillet with lid
  • Instant-read thermometer

Ingredients

Chicken

  • 4 small boneless, skinless chicken breasts, about 1 1/2 pounds (680 g) total, evened to 3/4–1 inch thick
  • 2 tablespoons olive oil, divided
  • 1 1/2 teaspoons chili powder, divided
  • 1 teaspoon ground cumin, divided
  • 1 teaspoon garlic powder, divided
  • 3/4 teaspoon fine salt, divided, plus more to taste

Rice and Vegetables

  • 1 small yellow or white onion, diced (about 140 g)
  • 1 medium red bell pepper, cut into roughly 1/2-inch pieces (about 150 g)
  • 1 1/2 cups dry long-grain white rice, rinsed and well drained (about 280 g)
  • 2 1/4 cups low-sodium chicken broth, plus a little extra only if needed
  • 1/2 cup plain canned tomato sauce (about 120 g)
  • 1 can (15 ounces) kidney beans, drained and rinsed
  • 1 cup corn kernels, thawed if frozen (about 160 g)

To Finish

  • 1/4 cup chopped fresh cilantro, plus a few leaves for garnish

Instructions

  1. Preheat the oven to 400°F (205°C). Even out any especially thick parts of the chicken.
  2. Season the chicken with half of the chili powder, cumin, garlic powder, and salt.
  3. Heat 1 tablespoon of olive oil in a deep oven-safe skillet over medium-high heat. Sear the chicken for about 3 minutes per side, until browned in patches. Transfer to a clean plate; the chicken will finish cooking later.
  4. Reduce the heat to medium. Add the remaining tablespoon of oil, onion, and bell pepper. Cook until they begin to soften.
  5. Stir in the remaining spices and salt. Add the rice, broth, tomato sauce, beans, and corn. Scrape up the browned bits, spread the rice evenly, and bring the liquid to a steady simmer, about 7–9 minutes.
  6. Cover the skillet tightly and carefully transfer it to the oven. Bake the rice for 25–35 minutes, checking after 25 minutes. It should be nearly tender, with a little moisture remaining but no large pool of thin liquid.
  7. If the rice is still firm and the skillet looks dry, stir in 1/4 cup hot broth or water, cover, and bake for a few more minutes.
  8. Place the chicken breasts on top of the rice without burying their browned surfaces. Pour in any juices from the plate. Cover and bake for 8–15 minutes, checking after 8 minutes, until the rice is tender and the thickest part of each breast reaches 165°F (75°C).
  9. If the rice is tender but still wet once the chicken is cooked, uncover the skillet briefly to let excess moisture evaporate.
  10. Rest the skillet loosely covered for 5 minutes. Taste the rice and adjust the salt if needed. Scatter cilantro over the chicken and rice, then serve.

Tips

  • Use a deep skillet with at least a 3-quart capacity to avoid crowding or spills.
  • If your skillet has no oven-safe lid, tightly crimp heavy-duty foil over the rim.
  • Check rice from different parts of the skillet; skillet depth, lid fit, and rice can affect cooking time.
  • Add hot broth or water only if the rice is firm and the skillet looks dry.
  • Check the thickest part of every chicken breast with an instant-read thermometer.

Variations

  • Black Bean Variation: Replace the kidney beans with black beans.
  • Cheesy Variation: Scatter a modest amount of Monterey Jack over the finished rice around the chicken and melt briefly, leaving the browned chicken exposed.

Notes

Cool leftovers promptly and refrigerate in airtight containers for up to 3 days. Reheat individual portions in the microwave until thoroughly hot; add a splash of water if the rice has dried out. Do not hold partially cooked chicken overnight.

Nutrition

Calories: 670 kcal | Protein: 52 g | Fat: 13 g | Carbohydrates: 86 g

Alice Springs Chicken

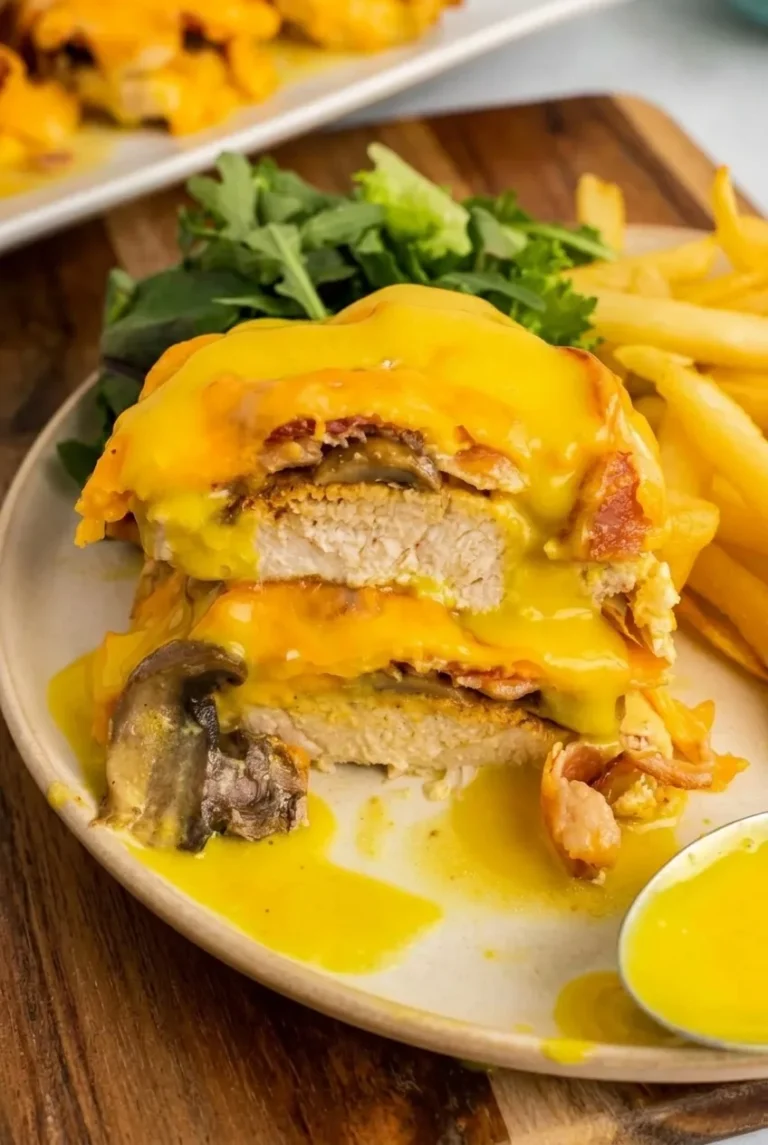
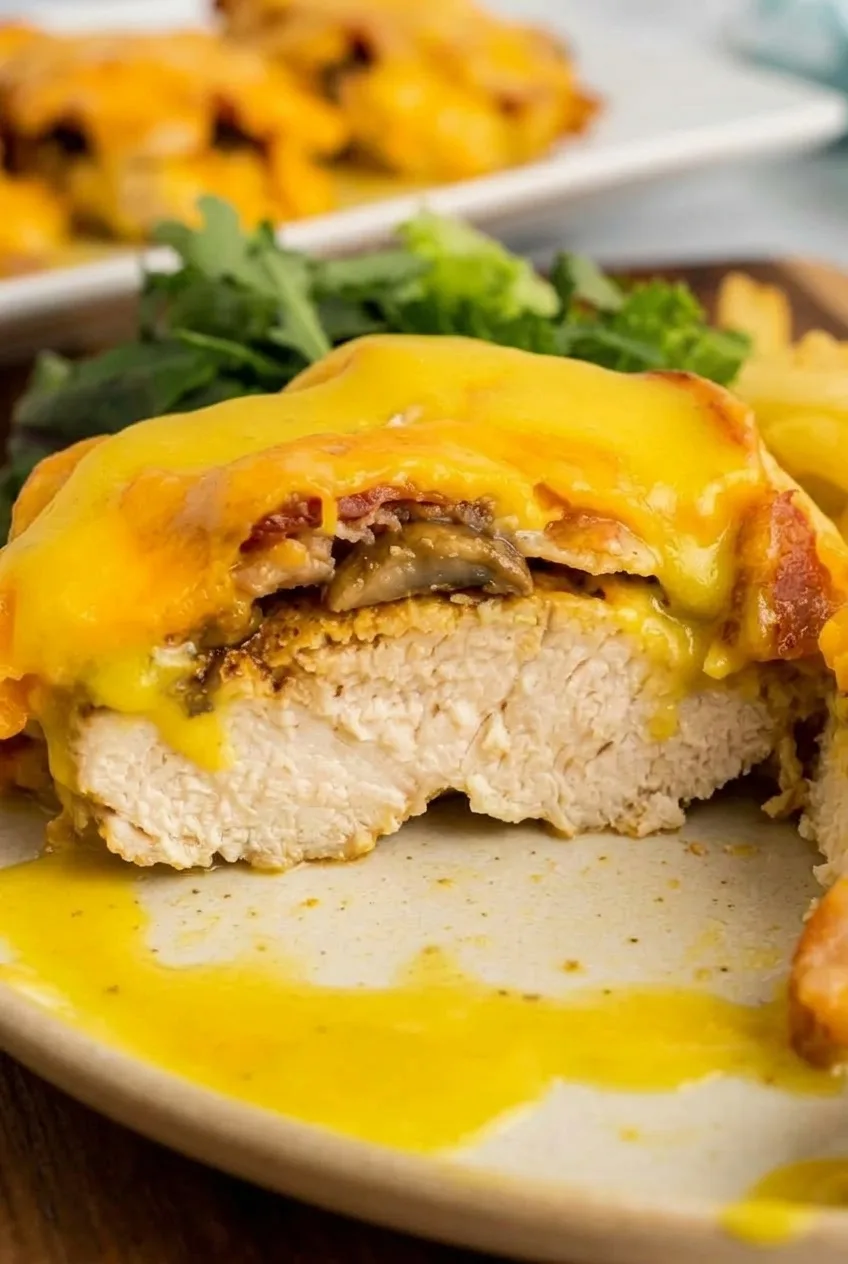
Alice Springs Chicken is made with individual chicken breasts topped with honey mustard, browned mushrooms, bacon, and melted Colby Jack. Browning the chicken in a skillet gives it color; finishing it in the oven melts the cheese while the center cooks through.

This version divides the honey mustard before assembly. Most goes under the toppings, while a clean portion stays aside for drizzling over the finished chicken. Keep the breasts an even thickness and check their temperature beneath the cheese—melted cheese alone doesn’t mean the chicken is done.

Ingredients for Alice Springs Chicken

Close view of cooked chicken beneath melted cheese, bacon, mushrooms, and yellow honey mustard
  • 4 boneless, skinless chicken breasts, about 1 3/4 to 2 pounds total (850g)
  • 1 teaspoon seasoning salt
  • 1/4 cup yellow mustard (60g)
  • 3 tablespoons honey (65g)
  • 1/3 cup mayonnaise (75g)
  • 8 slices bacon (about 225g)
  • 8 ounces sliced fresh mushrooms (225g)
  • 1 1/2 cups shredded Colby Jack cheese (170g)
  • 1 to 2 teaspoons neutral cooking oil, if needed

How to Make Alice Springs Chicken

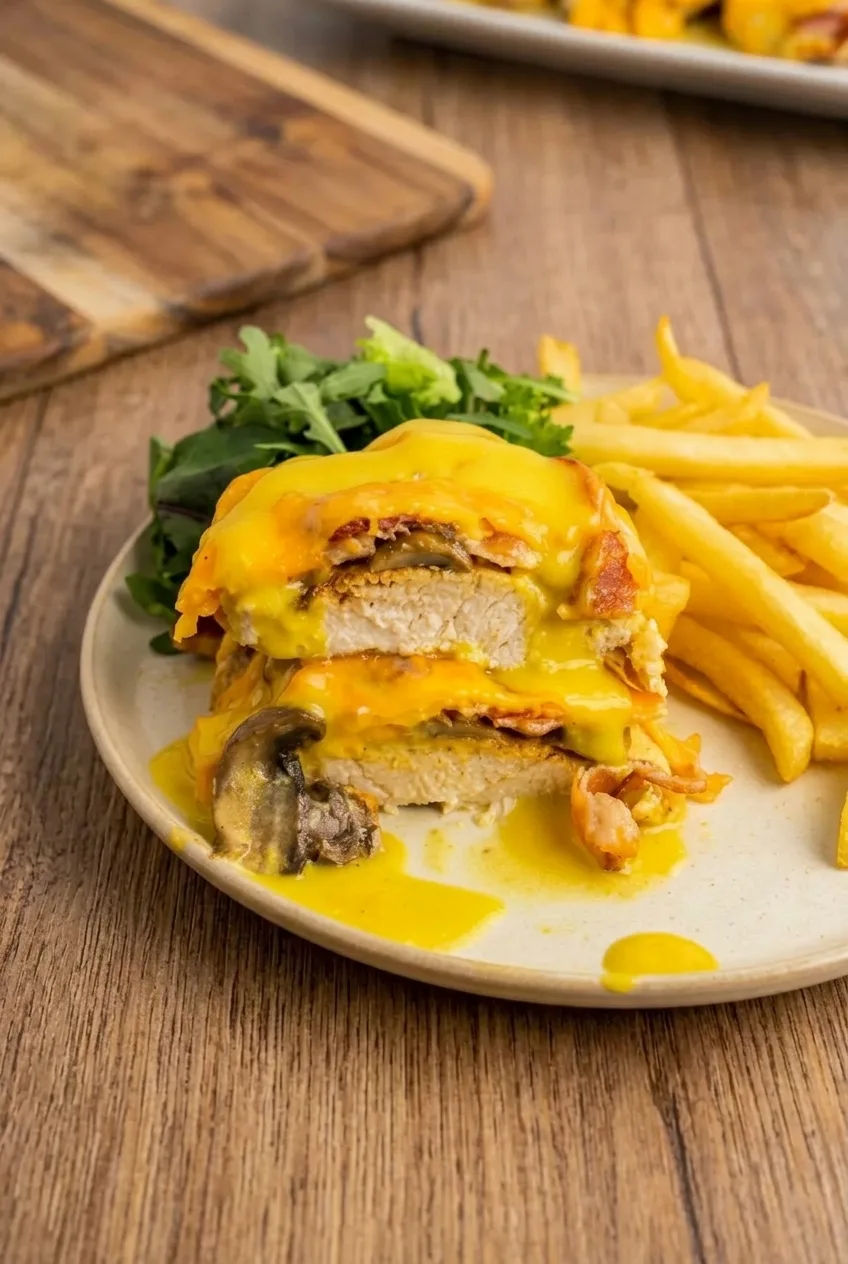
Full plate of Alice Springs Chicken with honey mustard, fries, and greens
  1. Prepare the chicken: Preheat the oven to 350°F (175°C). Bring the breasts to an even thickness of about 3/4 inch, using a meat mallet or rolling pin if needed. Season both sides with seasoning salt.
  2. Divide the sauce: Whisk the mustard, honey, and mayonnaise until smooth. Transfer about 1/4 cup to a separate clean bowl for serving, before any sauce touches the chicken.
  3. Cook the bacon: In a 12-inch skillet over medium heat, cook the bacon for 8 to 10 minutes, turning as needed, until browned and crisp. Transfer to a paper towel and break into substantial pieces. Leave about 1 tablespoon of rendered fat in the skillet; discard the excess.
  4. Brown the mushrooms: Cook the mushrooms in the skillet over medium heat for 5 to 7 minutes, stirring occasionally, until tender and browned and most of their released moisture has evaporated. Add a little of the optional oil if the pan is dry. Remove the mushrooms from the skillet.
  5. Sear the chicken: Increase the heat to medium-high. Brown the breasts for about 3 minutes per side, flipping once and working in batches if the skillet is crowded. Add a little oil if needed. The chicken should be lightly golden but will not be cooked through. Transfer it to a lightly greased 9-by-13-inch baking dish, leaving space between the pieces.
  6. Add the toppings: Spoon the honey mustard that was not reserved for serving over the chicken. Divide the mushrooms and bacon among the breasts, then top with the cheese. Leave some mushroom and bacon pieces visible at the edges.
  7. Bake and check: Bake uncovered, starting to check after 18 minutes. At the specified thickness, the chicken will generally take 20 to 25 minutes. Insert an instant-read thermometer into the thickest part of each breast beneath the cheese, without touching the dish. The chicken is done at 165°F (75°C). If the cheese darkens before the chicken is done, tent the dish loosely with foil and continue baking.
  8. Rest and serve: Let the chicken rest for about 5 minutes, then drizzle with the reserved honey mustard or serve it alongside. If cutting a portion to show the layers, make thick cuts and stack the pieces slightly askew, keeping the toppings on top.

How to Keep the Chicken Juicy

Even thickness makes the oven finish more predictable. Sear only long enough to color the outside, then use the thermometer rather than the cheese or the clock to judge doneness. Breasts thicker than 3/4 inch may need more than 25 minutes in the oven.

Why Cook the Mushrooms First?

Cooking the mushrooms before assembly gives them browned edges and lets their released moisture evaporate. They should be tender, with little liquid left in the skillet, before they go beneath the cheese.

Serving and Variations

Serve with the extra honey mustard for dipping or drizzling. Fries and a small green salad work alongside the chicken; broccoli or asparagus are other options.

For a sharper sauce, replace the yellow mustard with Dijon, though the color will be less bright. An equal amount of a cheddar–Monterey Jack blend can replace the Colby Jack. To accommodate someone who dislikes mushrooms, leave them off that individual breast during assembly.

For another restaurant-inspired dinner, try Applebee’s Honey Pepper Chicken Mac and Cheese Copycat. For chicken without these toppings, see Baked Chicken Breasts with Paprika and Garlic.

Storing and Reheating

Refrigerate cooled leftovers in an airtight container for up to 3 days. Warm in the oven until hot throughout, avoiding prolonged heating that can dry out the chicken. For more even microwave reheating, slice the chicken first.

Bacon softens during storage. If preparing components ahead, keep the cooked bacon separate until assembly when practical.

Nutrition

Approximate per serving, based on 4 servings: 740 calories, 65g protein, 46g fat, and 17g carbohydrates. Approximate per 100g: 230 calories, 20g protein, 14g fat, and 5g carbohydrates. Values vary with chicken breast size, bacon yield, and how much rendered fat remains in the pan.

Alice Springs Chicken

Seared chicken breasts are topped with honey mustard, browned mushrooms, bacon, and melted Colby Jack cheese.
Course: Main Course
Cuisine: American
Prep: 15 min
Cook: 45 min
Total: 60 min
Servings: 4 Calories: 740 kcal per serving

Equipment

  • 12-inch skillet
  • 9-by-13-inch baking dish
  • Instant-read thermometer
  • Meat mallet or rolling pin
  • Mixing bowl
  • Whisk

Ingredients

For the Chicken

  • 4 boneless, skinless chicken breasts, about 1 3/4 to 2 pounds total (850 g)
  • 1 teaspoon seasoning salt
  • 1 to 2 teaspoons neutral cooking oil, if needed

For the Toppings and Sauce

  • 1/4 cup yellow mustard (60 g)
  • 3 tablespoons honey (65 g)
  • 1/3 cup mayonnaise (75 g)
  • 8 slices bacon (about 225 g)
  • 8 ounces sliced fresh mushrooms (225 g)
  • 1 1/2 cups shredded Colby Jack cheese (170 g)

Instructions

  1. Preheat the oven to 350°F (175°C).
  2. Pound the chicken breasts to an even thickness of about 3/4 inch, if needed. Season both sides with seasoning salt.
  3. Whisk the mustard, honey, and mayonnaise until smooth. Set aside about 1/4 cup in a clean bowl for serving.
  4. Cook the bacon in a 12-inch skillet over medium heat for 8 to 10 minutes, turning as needed, until browned and crisp. Transfer to paper towels and break into substantial pieces.
  5. Leave about 1 tablespoon of bacon fat in the skillet and discard the excess. Cook the mushrooms over medium heat for 5 to 7 minutes, stirring occasionally, until tender, browned, and most of their moisture has evaporated. Add a little oil if the pan is dry, then remove the mushrooms.
  6. Increase the heat to medium-high. Brown the chicken for about 3 minutes per side, working in batches if needed and adding oil if the pan is dry. Transfer the chicken to a lightly greased 9-by-13-inch baking dish.
  7. Spoon the unreserved honey mustard over the chicken. Divide the mushrooms and bacon among the breasts, then top with cheese.
  8. Bake uncovered, checking after 18 minutes. Chicken at the specified thickness generally takes 20 to 25 minutes. Check each breast with an instant-read thermometer inserted into the thickest part beneath the cheese, without touching the dish. Cook to 165°F (75°C). If the cheese darkens before the chicken is done, loosely tent the dish with foil and continue baking.
  9. Rest the chicken for about 5 minutes. Drizzle with the reserved honey mustard or serve it alongside.

Tips

  • Pound the breasts to an even thickness so they cook predictably.
  • Sear the chicken only until lightly golden; it will finish cooking in the oven.
  • Cook the mushrooms until most of their released moisture has evaporated before assembling.
  • Check the temperature beneath the cheese; melted cheese does not indicate that the chicken is fully cooked.
  • Use the thermometer rather than the clock alone, especially for breasts thicker than 3/4 inch.

Variations

  • Dijon Honey Mustard: Replace the yellow mustard with an equal amount of Dijon mustard for a sharper sauce.
  • Cheddar-Monterey Jack Topping: Replace the Colby Jack with an equal amount of a cheddar–Monterey Jack blend.
  • No-Mushroom Chicken: Leave the mushrooms off an individual breast during assembly.

Notes

Refrigerate cooled leftovers in an airtight container for up to 3 days. Reheat in the oven until hot throughout, or slice before microwaving for more even reheating. Nutrition is approximate and varies with ingredient amounts and bacon fat retained.

Nutrition

Calories: 740 kcal per serving | Protein: 65 g per serving | Fat: 46 g per serving | Carbohydrates: 17 g per serving | Per 100g Calories: 230 kcal | Per 100g Protein: 20 g | Per 100g Fat: 14 g | Per 100g Carbohydrates: 5 g

Baked Chicken Breasts

Whole chicken breasts bake on a sheet pan with a thin coating of olive oil, paprika, garlic, and oregano. The tops turn golden and spice-speckled, while a little parsley adds a fresh finish. Because breast meat can dry out quickly, start checking before the estimated bake time is up. The chicken is done when the thickest part of each breast reaches 165°F, not when the surface looks browned.

Ingredients for Baked Chicken Breasts

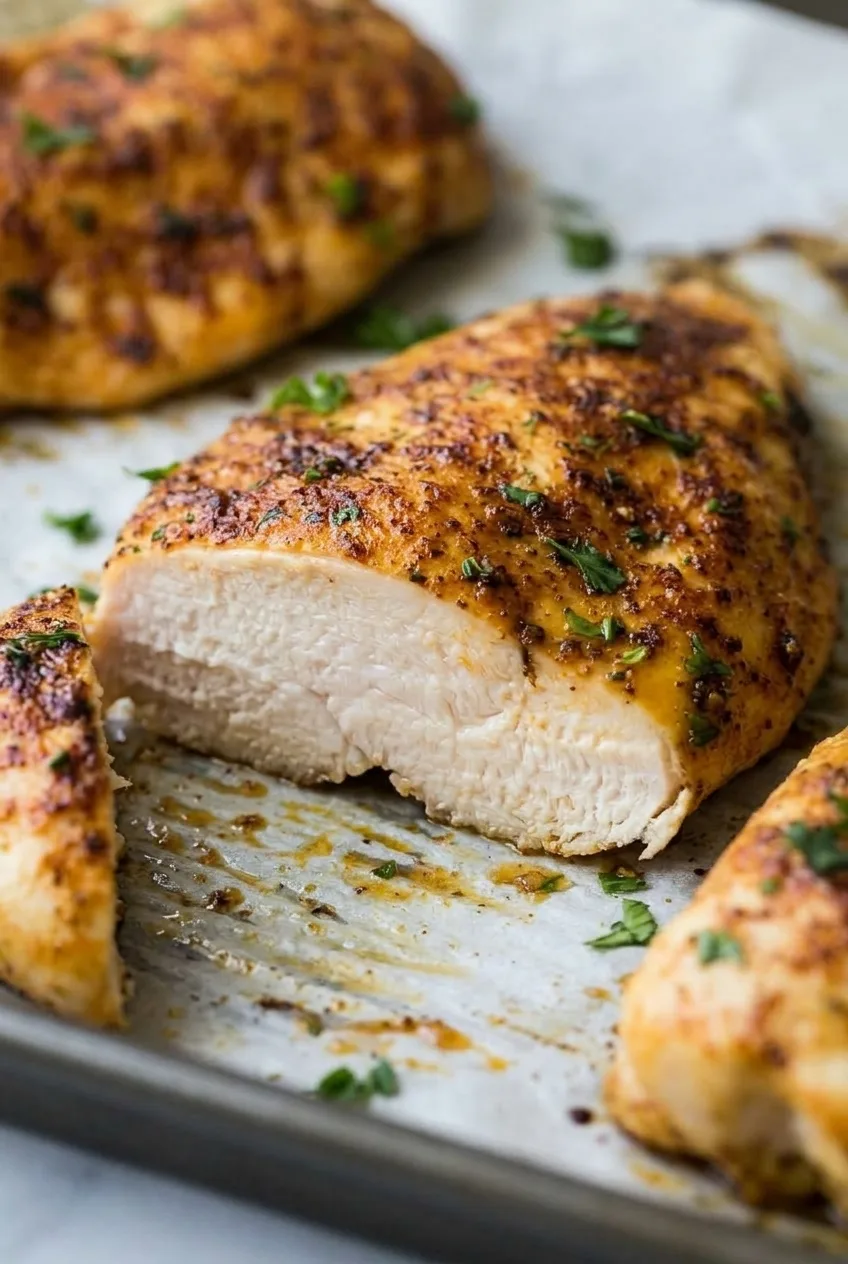
Cut baked chicken breast showing its moist white interior and browned paprika-seasoned top
  • 3 boneless, skinless chicken breasts, about 8 ounces each (1½ pounds/680g total)
  • 1½ tablespoons olive oil
  • 1 teaspoon paprika
  • 1 teaspoon garlic powder
  • ¾ teaspoon fine salt
  • ½ teaspoon freshly ground black pepper
  • ½ teaspoon dried oregano
  • 1 tablespoon chopped fresh parsley

Choose breasts of similar size when possible. If substituting kosher salt for fine salt, adjust the amount according to the brand rather than using the same teaspoon measure.

How to Bake Chicken Breasts

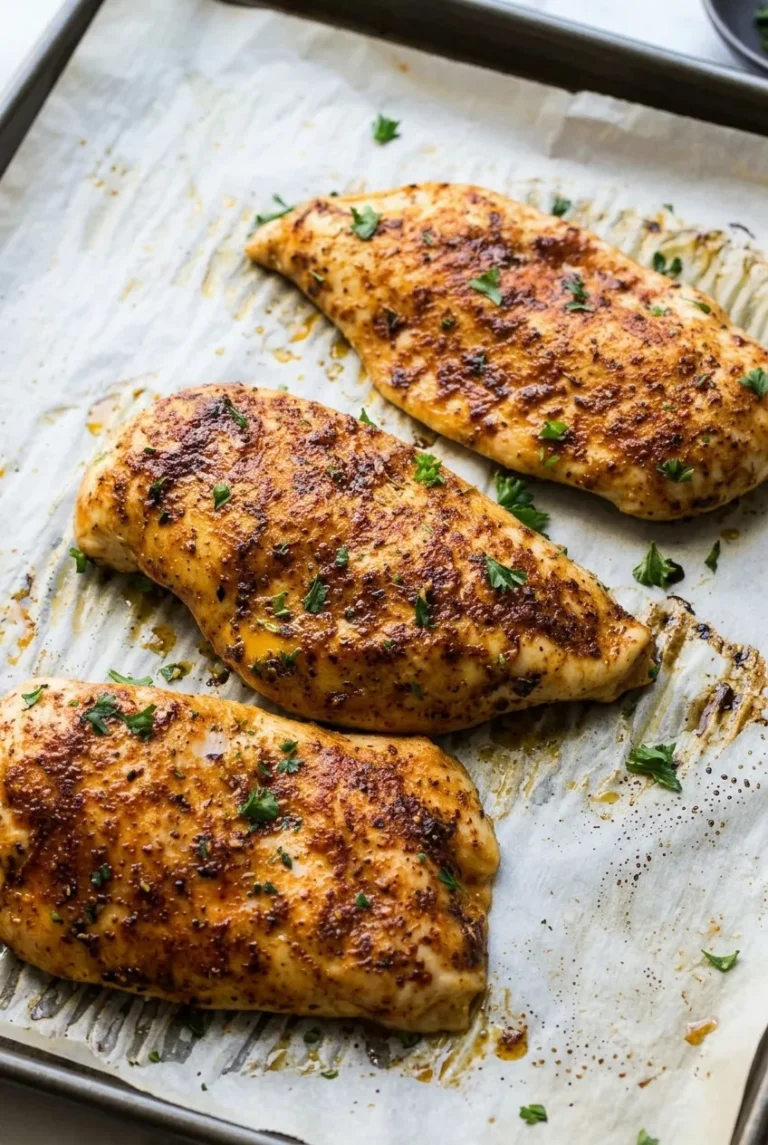
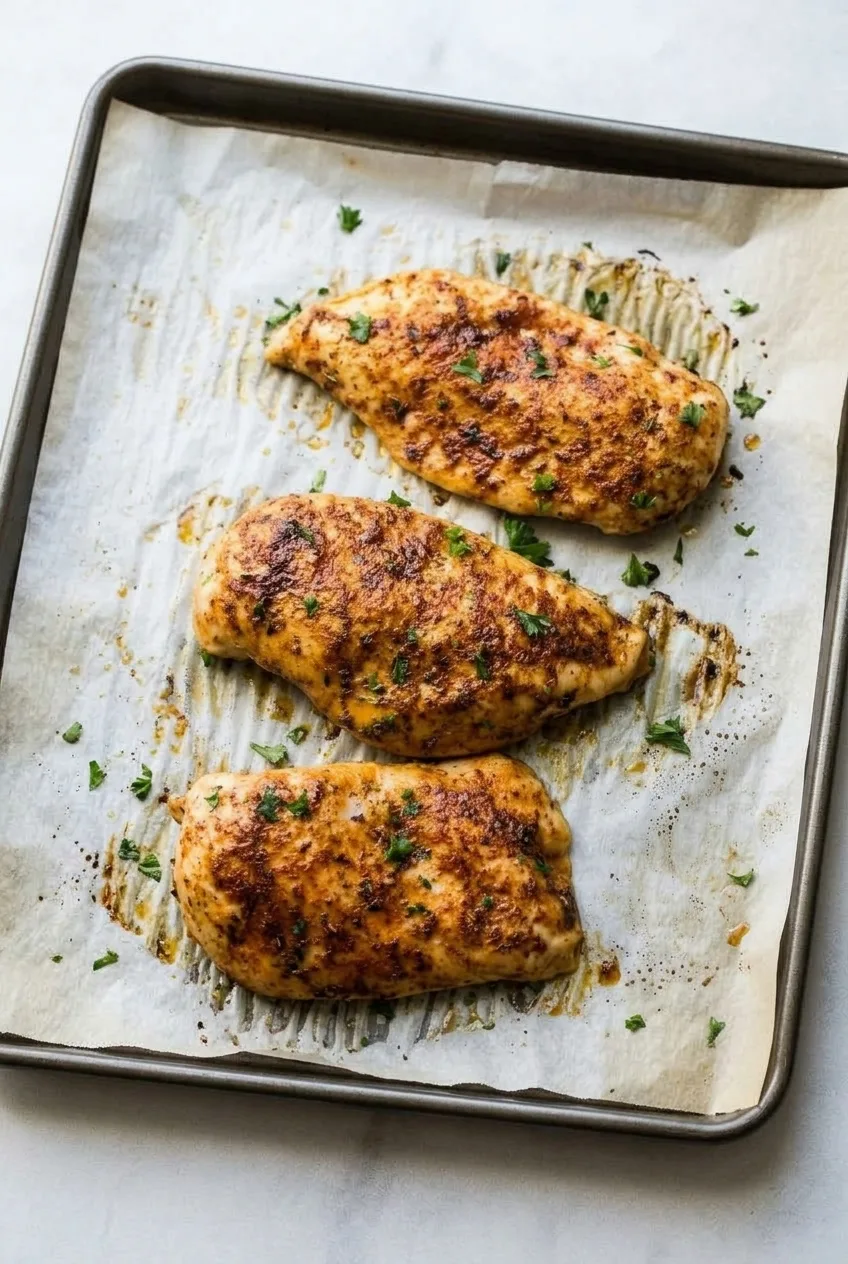
Three whole baked chicken breasts on a parchment-lined baking sheet in a wider view
  1. Preheat the oven: Place a rack near the center and heat to 425°F (220°C). Line a rimmed baking sheet with parchment rated for that temperature, or lightly oil the bare sheet. Do not broil parchment.
  2. Prepare the chicken: Pat the breasts dry. If one has an unusually thick portion, gently press that area with a meat mallet to even it out. Keep each breast intact and plump rather than flattening it into a cutlet.
  3. Season and arrange: Lightly coat the chicken with olive oil. Mix the paprika, garlic powder, salt, pepper, and oregano, then rub the mixture over all sides. Arrange the breasts smooth sides up, with space between them.
  4. Bake and check: Bake uncovered, without flipping or basting. Begin checking the thickest part of each breast at 18–20 minutes, or sooner for smaller or noticeably thin pieces. Continue baking until each reaches 165°F (75°C). Breasts around 8 ounces typically take 20–28 minutes, but thickness can change that range. Remove any breast that finishes ahead of the others.
  5. Rest and serve: Let the chicken rest for 5 minutes. Scatter parsley over the tops and serve the breasts whole with any pan juices. If slicing, wait until after the rest.

How to Tell When the Chicken Is Done

Insert an instant-read thermometer into the thickest part of each breast without touching the baking sheet. If a piece is below 165°F, return it to the oven and check again after a few minutes. Golden tops and dark paprika speckles show browning, not whether the center is cooked.

Why Baking Time Varies

The 20–28-minute estimate is for boneless, skinless breasts weighing about 8 ounces each; it does not apply to thin cutlets or bone-in pieces. A thick center can take longer to cook even when two breasts weigh the same. Gently evening out an unusually thick portion helps the pieces finish more consistently while preserving their whole-breast shape.

Serving and Storing Leftovers

Serve with roasted vegetables and rice, or mashed potatoes and a vegetable side. For a different chicken dinner, try this garlic butter chicken and zucchini.

Refrigerate leftover chicken promptly in an airtight container for up to 3 days. Reheat gently, covered, until hot throughout; prolonged reheating can dry out the meat.

For longer storage, freeze cooled chicken airtight for up to 3 months. Thaw overnight in the refrigerator before reheating. It may be less juicy after freezing.

Nutrition

Approximate nutrition per serving (one breast): 335 calories, 51g protein, 13g fat, and 2g carbohydrates. Approximate nutrition per 100g of cooked chicken: 185 calories, 28g protein, 7g fat, and 1g carbohydrates. Values vary with breast size, moisture lost during baking, and how much oil remains on the pan.

Baked Chicken Breasts

Whole chicken breasts are seasoned with olive oil, paprika, garlic, and oregano, then baked until they reach 165°F.
Course: Main Course
Cuisine: American
Prep: 10 min
Cook: 28 min
Total: 43 min
Servings: 3 Calories: 335 kcal

Equipment

  • Oven
  • Rimmed baking sheet
  • Parchment paper
  • Instant-read thermometer
  • Meat mallet

Ingredients

For the Chicken

  • 3 boneless, skinless chicken breasts, about 8 ounces each (1½ pounds/680 g total)
  • 1½ tablespoons olive oil
  • 1 teaspoon paprika
  • 1 teaspoon garlic powder
  • ¾ teaspoon fine salt
  • ½ teaspoon freshly ground black pepper
  • ½ teaspoon dried oregano
  • 1 tablespoon chopped fresh parsley

Instructions

  1. Preheat the oven to 425°F (220°C) with a rack near the center. Line a rimmed baking sheet with parchment rated for that temperature, or lightly oil the bare sheet. Do not broil parchment.
  2. Pat the chicken breasts dry. If a breast has an unusually thick portion, gently press it with a meat mallet to even it out while keeping the breast whole.
  3. Lightly coat the chicken with olive oil.
  4. Mix the paprika, garlic powder, salt, pepper, and oregano, then rub the seasoning over all sides of the chicken.
  5. Arrange the breasts smooth sides up on the baking sheet, leaving space between them.
  6. Bake uncovered without flipping or basting. Begin checking the thickest part of each breast at 18–20 minutes, or sooner for smaller or thinner pieces.
  7. Continue baking until each breast reaches 165°F (75°C). Remove any breast that finishes before the others. Breasts around 8 ounces typically take 20–28 minutes.
  8. Rest the chicken for 5 minutes. Sprinkle with parsley and serve whole with any pan juices; slice after resting if desired.

Tips

  • Choose breasts of similar size so they cook more evenly.
  • Check each breast separately with an instant-read thermometer inserted into its thickest part without touching the baking sheet.
  • Start checking early, especially for smaller or thinner breasts.
  • If substituting kosher salt for fine salt, adjust the amount for the brand rather than using the same teaspoon measure.

Notes

Refrigerate leftovers promptly in an airtight container for up to 3 days. Reheat gently, covered, until hot throughout. Freeze cooled chicken airtight for up to 3 months and thaw overnight in the refrigerator before reheating.

Nutrition

Calories: 335 kcal | Protein: 51 g | Fat: 13 g | Carbohydrates: 2 g

Honey Butter Cornbread

Honey in the batter gives this cornbread a sweet, moist golden crumb. A honey-butter mixture brushed over the warm top adds a glossy finish, while small butter pats soften on the squares just before serving.

An 8-inch square pan makes nine thick pieces with browned tops and tender centers. Because the batter is deeper than it would be in a wider pan, check the center before the expected end of the bake rather than judging doneness by the edges alone.

Ingredients for Honey Butter Cornbread

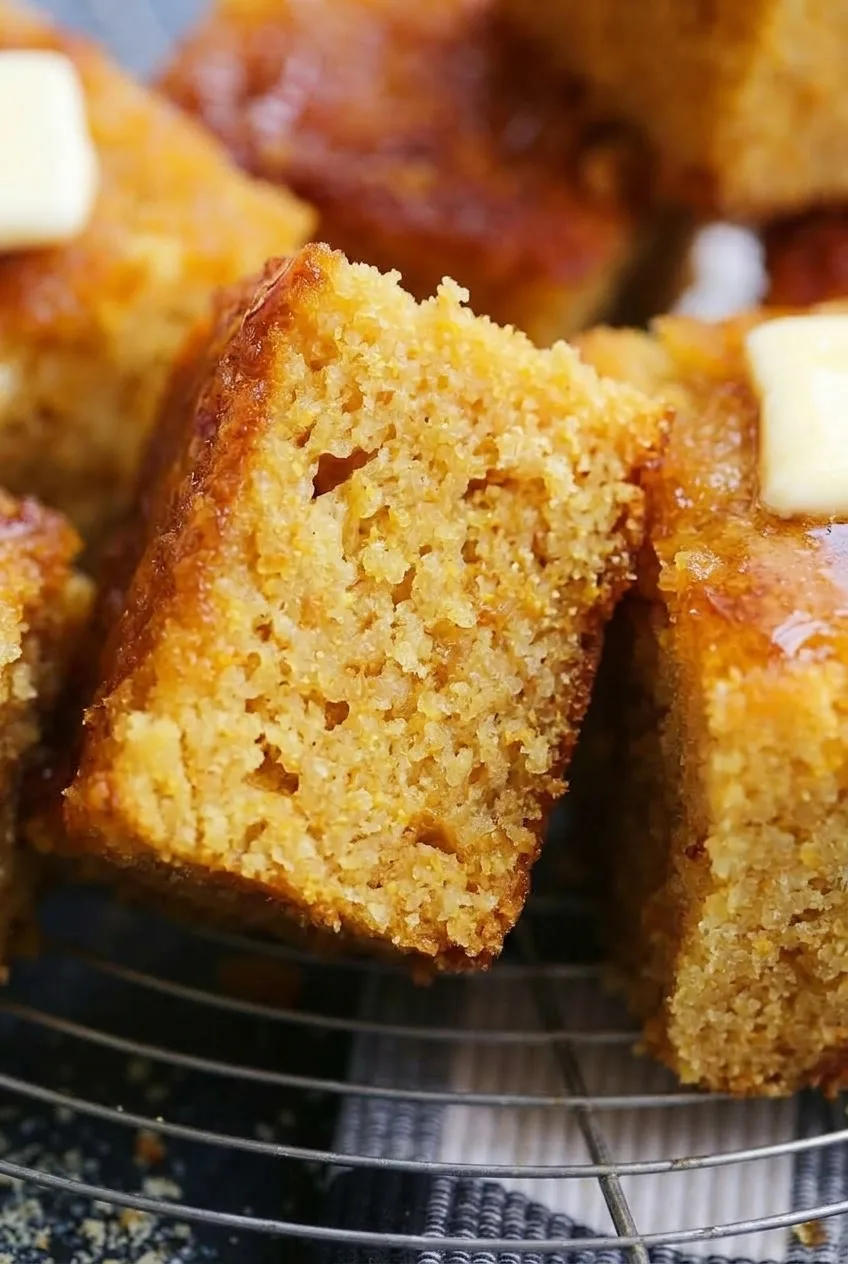
Close view of a honey butter cornbread square showing its moist, grainy crumb and browned, glossy top

For the cornbread

  • 1 cup fine- or medium-grind yellow cornmeal (150g)
  • 1 cup all-purpose flour (120g)
  • 1/4 cup granulated sugar (50g)
  • 2 teaspoons baking powder (8g)
  • 1/4 teaspoon baking soda
  • 3/4 teaspoon fine salt
  • 1 cup buttermilk (240g)
  • 2 large eggs
  • 6 tablespoons unsalted butter, melted and cooled slightly (85g), plus a little for greasing the pan
  • 1/4 cup honey (85g)

For finishing and serving

  • 2 tablespoons unsalted butter, melted (28g)
  • 2 tablespoons honey (42g)
  • 2 tablespoons unsalted butter, cut into small pats (28g)
  • 1 tablespoon extra honey for serving, optional

How to Bake Honey Butter Cornbread

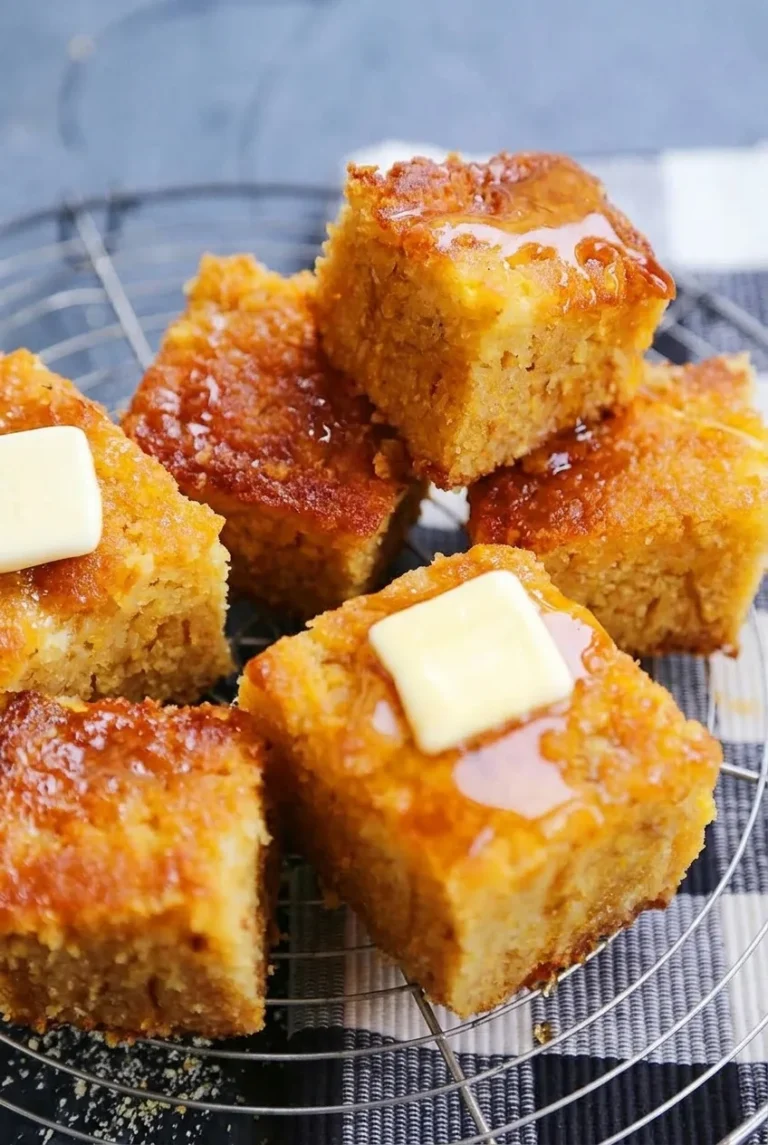
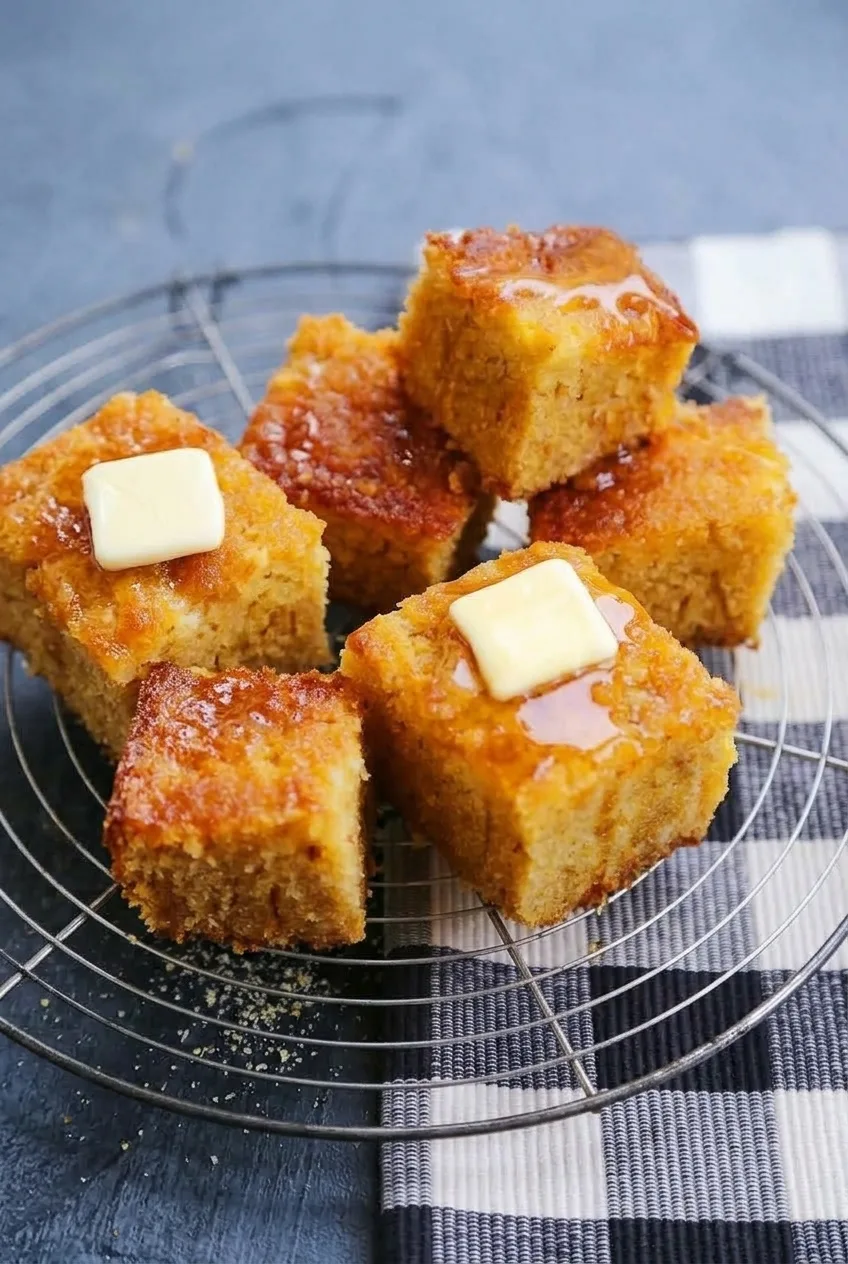
Wider view of honey butter cornbread squares with butter pats arranged on a wire cooling rack
  1. Prepare the oven and pan: Fully preheat the oven to 350°F (175°C) with a rack in the center. Grease an 8-inch square baking pan and line it with parchment paper, leaving overhang on two sides.
  2. Combine the dry ingredients: Whisk the cornmeal, flour, sugar, baking powder, baking soda, and salt in a large bowl.
  3. Combine the wet ingredients: In a second bowl, whisk the buttermilk, eggs, 6 tablespoons melted butter, and 1/4 cup honey. The melted butter should be warm, not hot, when added to the eggs.
  4. Mix the batter: Fold the wet ingredients into the dry ingredients just until no dry streaks remain. Small lumps are fine. Spread the thick, pourable batter evenly in the pan.
  5. Bake: Bake uncovered for about 40–50 minutes, starting to check at 38 minutes. The top should be golden brown and the center set. A toothpick inserted into the center should come out without wet batter; a few moist crumbs are fine. If the edges are brown but the center is wet, continue baking and recheck in short intervals.
  6. Brush the top: Stir together the 2 tablespoons melted finishing butter and 2 tablespoons honey. Brush evenly over the warm cornbread to give it a glossy surface without flooding it.
  7. Rest and serve: Let the cornbread rest in the pan for about 10 minutes. Lift it out using the parchment overhang and let it cool until sturdy enough to cut into nine thick squares. Add the butter pats to the warm serving pieces.

How to Tell When Thick Cornbread Is Done

Check the middle, not just the browned edges. Wet batter on the toothpick means the center needs more time; a few moist crumbs mean it is ready. Waiting for a completely dry toothpick can leave the squares crumbly.

The 40–50 minute range is for the deeper batter in an 8-inch square pan. A wider pan makes thinner cornbread that may bake faster, and different pan materials can shift the timing. Use the center test to decide when to take it out.

Keeping the Squares Tender

Once the wet ingredients meet the flour, fold only until the dry streaks disappear. More mixing can toughen the crumb. Brush the honey butter onto the baked top rather than soaking the bread, and give the slab time to rest before lifting and cutting it.

Serving Honey Butter Cornbread

Serve the squares warm with their butter pats and, if desired, a light drizzle of extra honey. They pair well with chili, beans, or stew. For a comfort-food spread, serve them with old-fashioned soul food mac and cheese.

How to Store and Reheat

Cool leftover cornbread completely before wrapping it tightly or storing it airtight. Keep it at room temperature for about 2–3 days, refrigerate it for up to about 5 days, or freeze well-wrapped squares for up to 3 months.

Thaw frozen squares before warming. Heat slices loosely wrapped in foil in a 350°F oven for about 5–10 minutes, or microwave an individual slice for roughly 20–30 seconds. Add fresh butter pats after warming.

Nutrition

Approximate nutrition per square, based on nine squares: 320 calories, 5g protein, 15g fat, and 42g carbohydrates. Approximate values per 100g of baked cornbread: 340 calories, 5g protein, 16g fat, and 45g carbohydrates. Values include the honey-butter finish and serving butter, but not optional extra honey; they vary with ingredients and the finished weight of the bread.

Honey Butter Cornbread

Moist, golden cornbread is brushed with honey butter and served warm with butter pats.
Course: Side Dish
Cuisine: American
Prep: 15 min
Cook: 50 min
Total: 75 min
Servings: 9

Equipment

  • 8-inch square baking pan
  • Parchment paper
  • Mixing bowls
  • Whisk
  • Spatula
  • Pastry brush
  • Toothpick

Ingredients

For the cornbread

  • 1 cup fine- or medium-grind yellow cornmeal (150 g)
  • 1 cup all-purpose flour (120 g)
  • 1/4 cup granulated sugar (50 g)
  • 2 teaspoons baking powder (8 g)
  • 1/4 teaspoon baking soda
  • 3/4 teaspoon fine salt
  • 1 cup buttermilk (240 g)
  • 2 large eggs
  • 6 tablespoons unsalted butter, melted and slightly cooled (85 g), plus a little for greasing the pan
  • 1/4 cup honey (85 g)

For finishing and serving

  • 2 tablespoons unsalted butter, melted (28 g)
  • 2 tablespoons honey (42 g)
  • 2 tablespoons unsalted butter, cut into small pats (28 g)
  • 1 tablespoon extra honey for serving, optional

Instructions

  1. Preheat the oven to 350°F (175°C) with a rack in the center. Grease an 8-inch square pan and line it with parchment, leaving overhang on two sides.
  2. Whisk the cornmeal, flour, sugar, baking powder, baking soda, and salt in a large bowl.
  3. In a second bowl, whisk the buttermilk, eggs, 6 tablespoons melted butter, and 1/4 cup honey. Make sure the butter is warm, not hot.
  4. Fold the wet ingredients into the dry ingredients just until no dry streaks remain. Spread the batter evenly in the pan.
  5. Bake uncovered for 40–50 minutes, starting to check at 38 minutes. The top should be golden and the center set. A toothpick inserted in the center should come out without wet batter; a few moist crumbs are fine.
  6. Stir together 2 tablespoons melted butter and 2 tablespoons honey. Brush the mixture evenly over the warm cornbread.
  7. Rest the cornbread in the pan for about 10 minutes. Lift it out using the parchment overhang and let it cool until sturdy enough to cut into nine squares.
  8. Serve the warm squares with butter pats and, if desired, a light drizzle of extra honey.

Tips

  • Check the center for doneness rather than relying on browned edges.
  • A few moist crumbs on the toothpick are fine; wet batter means the center needs more time.
  • Fold the batter only until the dry streaks disappear to help keep the crumb tender.
  • If the edges brown before the center is done, continue baking and recheck at short intervals.
  • Let the cornbread rest before lifting and cutting it.

Notes

Cool leftovers completely before storing airtight. Keep at room temperature for 2–3 days, refrigerate for up to 5 days, or freeze for up to 3 months. Reheat loosely wrapped in foil at 350°F for 5–10 minutes or microwave an individual slice for 20–30 seconds.

Nutrition

Per Serving Calories: 320 kcal | Per Serving Protein: 5 g | Per Serving Fat: 15 g | Per Serving Carbohydrates: 42 g | Per 100 G Calories: 340 kcal | Per 100 G Protein: 5 g | Per 100 G Fat: 16 g | Per 100 G Carbohydrates: 45 g

Pumpkin Whipped Feta Dip

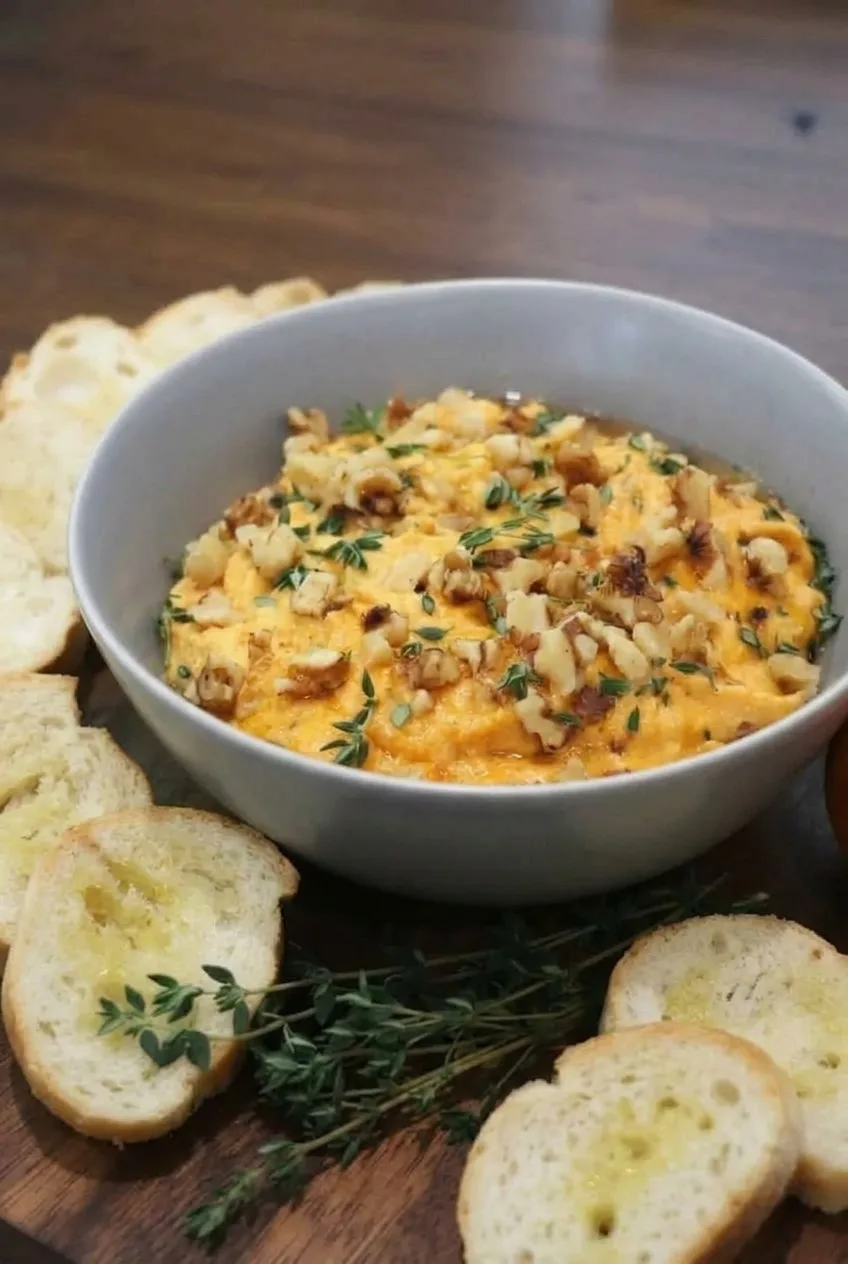
Pumpkin puree and feta whip into a thick, tangy orange dip with soft swirls that hold their shape. Greek yogurt helps the feta blend smoothly, while a little honey balances its saltiness. Spoon the dip into a wide bowl and finish it with chopped walnuts, fresh thyme, and a light honey drizzle. Add the toppings just before serving with sliced bread so the walnuts stay crisp.

Ingredients for Pumpkin Whipped Feta Dip

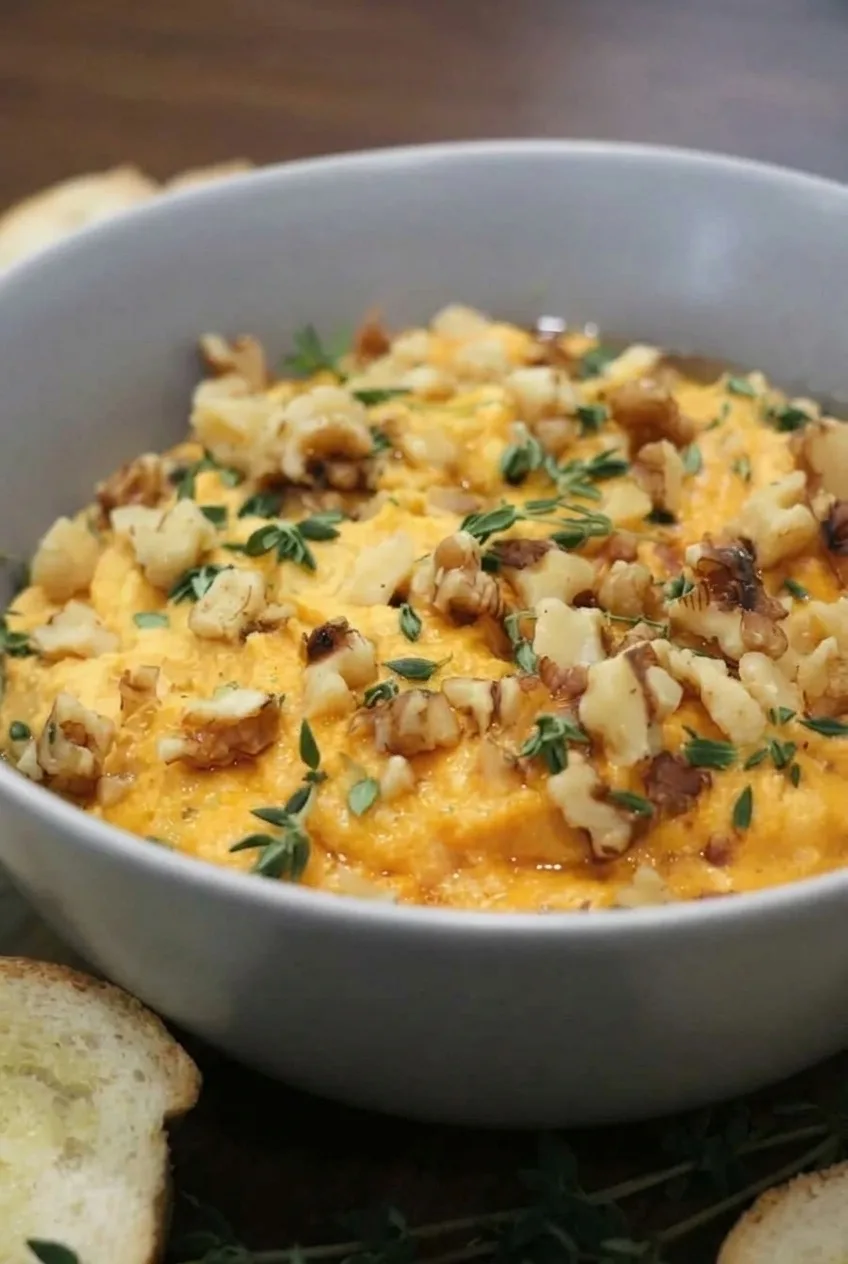
Close view of thick pumpkin whipped feta swirls with chopped walnuts, thyme leaves, and a light honey drizzle
  • 8 ounces feta cheese, preferably a block, broken into pieces (about 225g)
  • 1/2 cup pure pumpkin puree (about 120g)
  • 1/4 cup plain Greek yogurt (60g)
  • 1 tablespoon honey, divided
  • 1/8 teaspoon freshly ground black pepper, or to taste
  • 1/4 cup chopped walnuts (about 30g)
  • 1 teaspoon fresh thyme leaves
  • 1/2 small baguette, sliced, for serving (about 120g)

How to Make Pumpkin Whipped Feta Dip

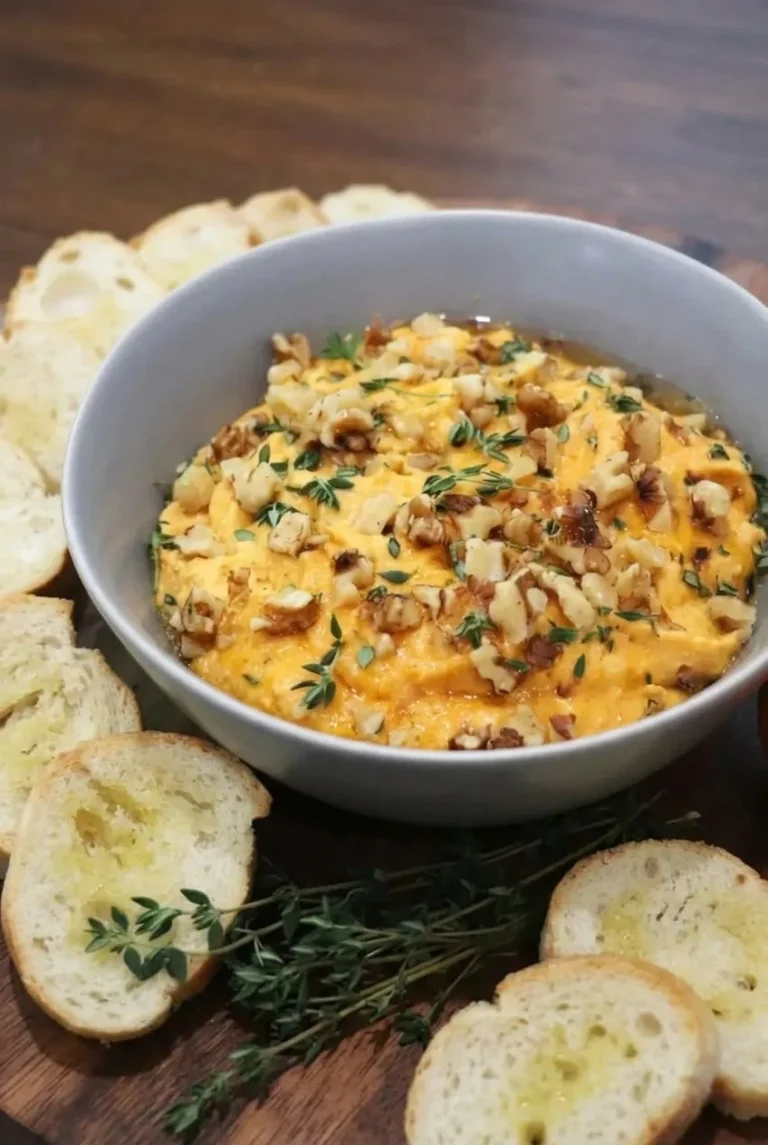
Wide tabletop view of a bowl of pumpkin whipped feta dip with walnuts, thyme, and sliced baguette
  1. Prepare the ingredients: Break up the feta, chop the walnuts into visible pieces, strip the thyme leaves, and slice the baguette. Reserve 1 teaspoon of the honey for finishing.
  2. Whip the dip: Add the feta, pumpkin puree, Greek yogurt, remaining 2 teaspoons honey, and pepper to a food processor. Process for about 1 to 2 minutes, checking after the first minute. Scrape down the sides and process again until the dip is creamy with no obvious feta pieces. A high-speed blender also works, though it may need more frequent scraping.
  3. Check the thickness: Taste and adjust the pepper if needed. A spoon should leave soft ridges that hold their shape. If the dip runs flat, cover and refrigerate it for 15 to 20 minutes; otherwise, serve it right away.
  4. Garnish and serve: Spoon the dip into a wide bowl, leaving uneven swirls on top. Scatter over the walnuts and thyme, then drizzle lightly with the reserved honey. Serve with the sliced baguette alongside.

Time: 10 minutes prep, 0 minutes cook, 10 minutes total, plus an optional 15 to 20-minute chill. Yield: 6 to 8 appetizer servings.

How to Keep Pumpkin Whipped Feta Thick

Use thick Greek yogurt and the measured amount of pumpkin puree; do not add water. Moisture in feta and pumpkin can vary, so judge the dip by its shape rather than processing time alone. It should mound on a spoon instead of flowing off it. Chill it only if it runs flat.

Pumpkin Puree and Feta Notes

Use pure pumpkin puree, not pumpkin pie filling, which is sweetened and spiced. Feta varies in saltiness, so taste the blended dip before considering any added salt.

Crackers, pita, or vegetable sticks can replace the bread. For a nut-free variation, use pumpkin seeds instead of walnuts if they suit your needs. For another whipped feta appetizer, try cranberry whipped feta dip with pistachios.

Make Ahead and Storage

Refrigerate the ungarnished dip in an airtight container for up to 3 days. Keep the walnuts and thyme separate and add them just before serving so the walnuts stay crisp. Stir the dip if needed; if it is too firm to spread, let it stand briefly before spooning it into the bowl. No reheating is needed. Freezing is not recommended because the whipped dairy texture may change after thawing.

Nutrition

Approximate nutrition per serving, based on 8 servings and including the bread: 160 calories, 7g protein, 9g fat, and 14g carbohydrates. Per 100g: approximately 220 calories, 10g protein, 12g fat, and 19g carbohydrates. Values will vary with the feta, yogurt, and bread used.

Pumpkin Whipped Feta Dip

Pumpkin puree, feta, and Greek yogurt make a thick, tangy dip finished with walnuts, thyme, and honey.
Course: Appetizer
Cuisine: Mediterranean
Prep: 10 min
Total: 30 min
Servings: 8 Calories: 160 kcal

Equipment

  • Food processor
  • Serving bowl

Ingredients

For the Dip

  • 8 ounces feta cheese, preferably a block, broken into pieces (about 225 g)
  • 1/2 cup pure pumpkin puree (about 120 g)
  • 1/4 cup plain Greek yogurt (60 g)
  • 1 tablespoon honey, divided
  • 1/8 teaspoon freshly ground black pepper, or to taste

For Serving

  • 1/4 cup chopped walnuts (about 30 g)
  • 1 teaspoon fresh thyme leaves
  • 1/2 small baguette, sliced (about 120 g)

Instructions

  1. Break the feta into pieces. Chop the walnuts, strip the thyme leaves, and slice the baguette. Reserve 1 teaspoon of honey for finishing.
  2. Add the feta, pumpkin puree, Greek yogurt, remaining 2 teaspoons honey, and pepper to a food processor.
  3. Process for 1 to 2 minutes, scraping down the sides as needed, until creamy with no obvious feta pieces.
  4. Taste and adjust the pepper. The dip should hold soft ridges on a spoon. If it runs flat, cover and chill for 15 to 20 minutes.
  5. Spoon the dip into a wide bowl and leave soft swirls on top. Scatter over the walnuts and thyme, drizzle with the reserved honey, and serve with sliced baguette.

Tips

  • Use thick Greek yogurt and measure the pumpkin puree; avoid adding water.
  • Judge the dip by its texture: it should mound on a spoon rather than flow off.
  • Chill the dip for 15 to 20 minutes only if it runs flat.
  • Add the walnuts and thyme just before serving to keep the walnuts crisp.
  • Taste before adding salt, since feta varies in saltiness.

Variations

  • Nut-Free Version: Replace the walnuts with pumpkin seeds if they suit your needs.
  • Alternative Dippers: Serve with crackers, pita, or vegetable sticks instead of baguette.

Notes

Refrigerate ungarnished dip in an airtight container for up to 3 days. Keep the walnuts and thyme separate until serving. Freezing is not recommended; no reheating is needed.

Nutrition

Calories: 160 kcal | Protein: 7 g | Fat: 9 g | Carbohydrates: 14 g

Cheesy Scalloped Potatoes

Thin potato rounds bake in a creamy garlic-cheddar sauce, with their edges still visible beneath a lightly browned cheese topping. This version starts with raw potatoes and a whole-milk sauce thickened on the stovetop. Baking the dish under foil first gives the potatoes time to soften; uncovering it later adds color. Check the center with a knife before serving—a golden top alone does not mean the potatoes are tender.

Makes 8 side-dish servings. Allow 25–30 minutes to prepare, 70–85 minutes to bake, and 15 minutes to rest. A cold or deeper casserole may need longer.

Ingredients for Cheesy Scalloped Potatoes

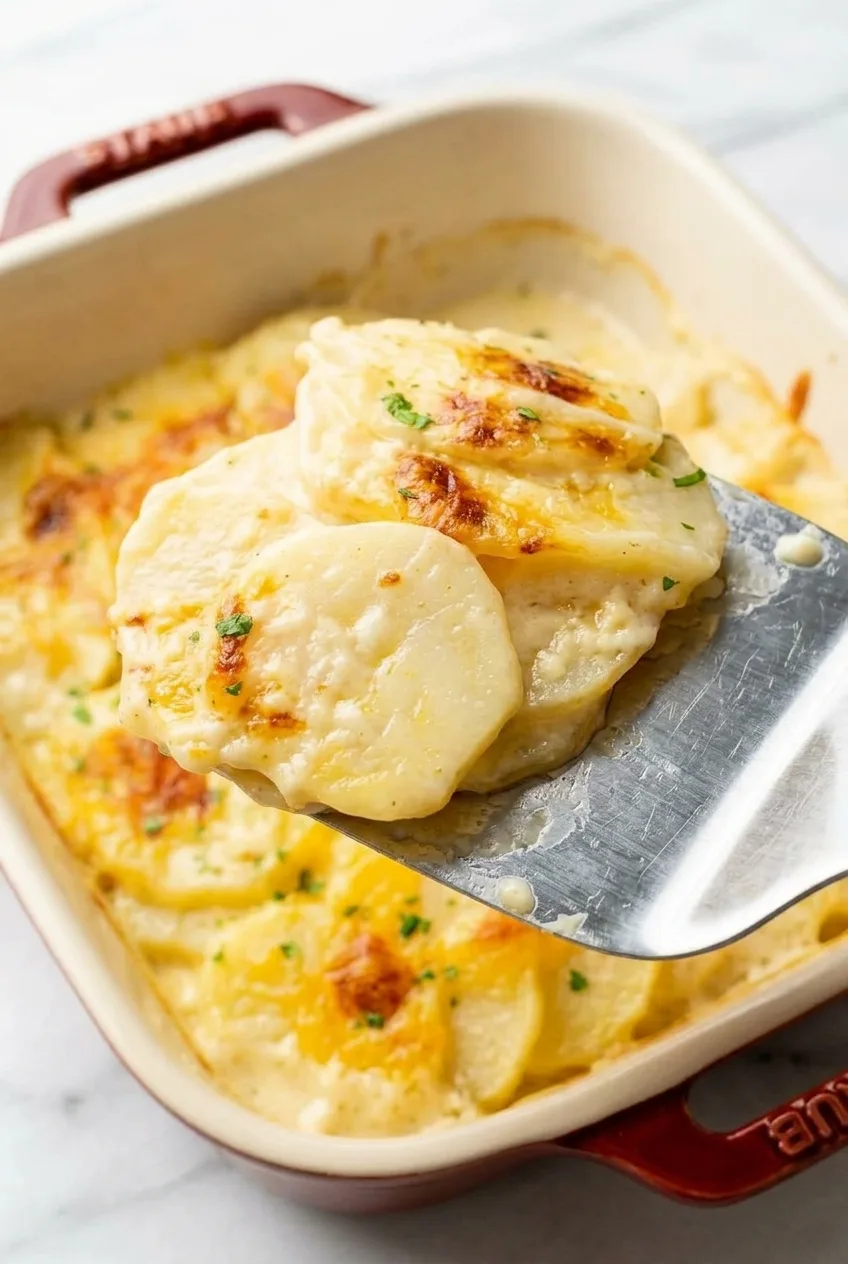
Close view of tender potato rounds with creamy cheddar sauce between the layers and browned cheese on top
  • 3 pounds russet potatoes, peeled (about 1,350g)
  • 3 tablespoons unsalted butter (about 40g), plus a little more for the dish
  • 2 cloves garlic, minced
  • 3 tablespoons all-purpose flour (about 25g)
  • 2 1/2 cups whole milk (about 610g)
  • 2 cups freshly grated sharp cheddar cheese (about 225g), divided
  • 1 teaspoon fine salt, or to taste
  • 1/4 teaspoon freshly ground black pepper
  • 1 tablespoon finely chopped fresh parsley

How to Make Cheesy Scalloped Potatoes

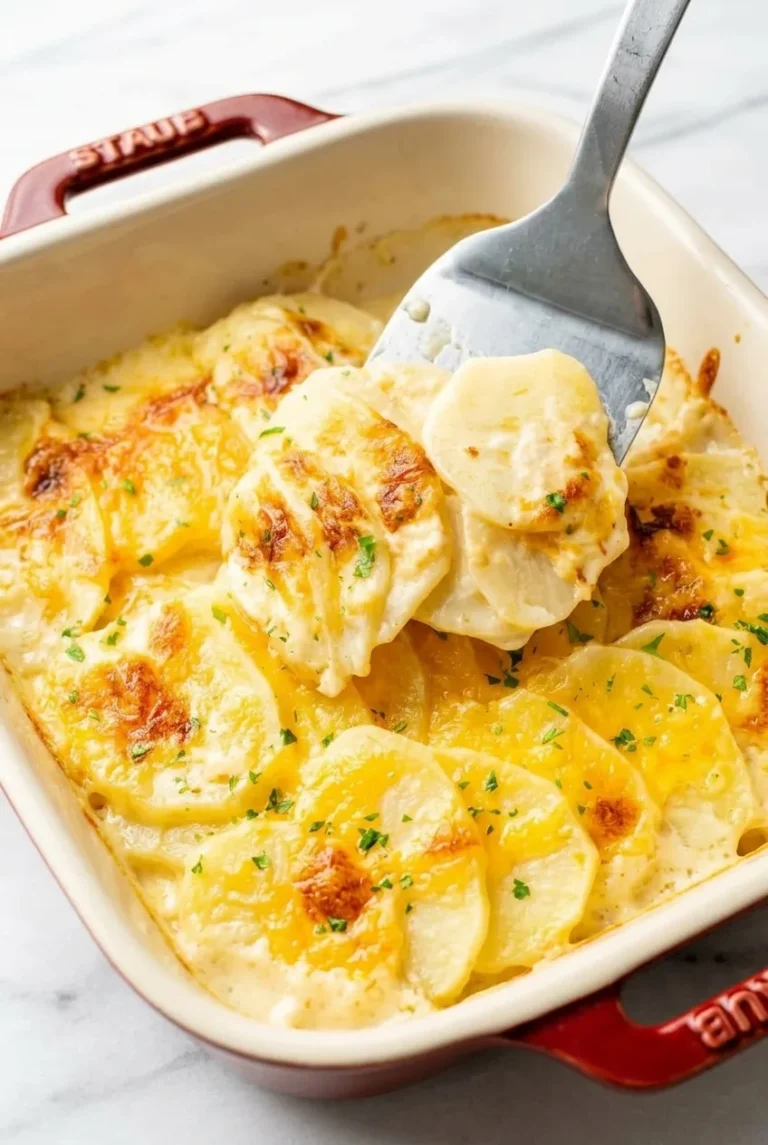
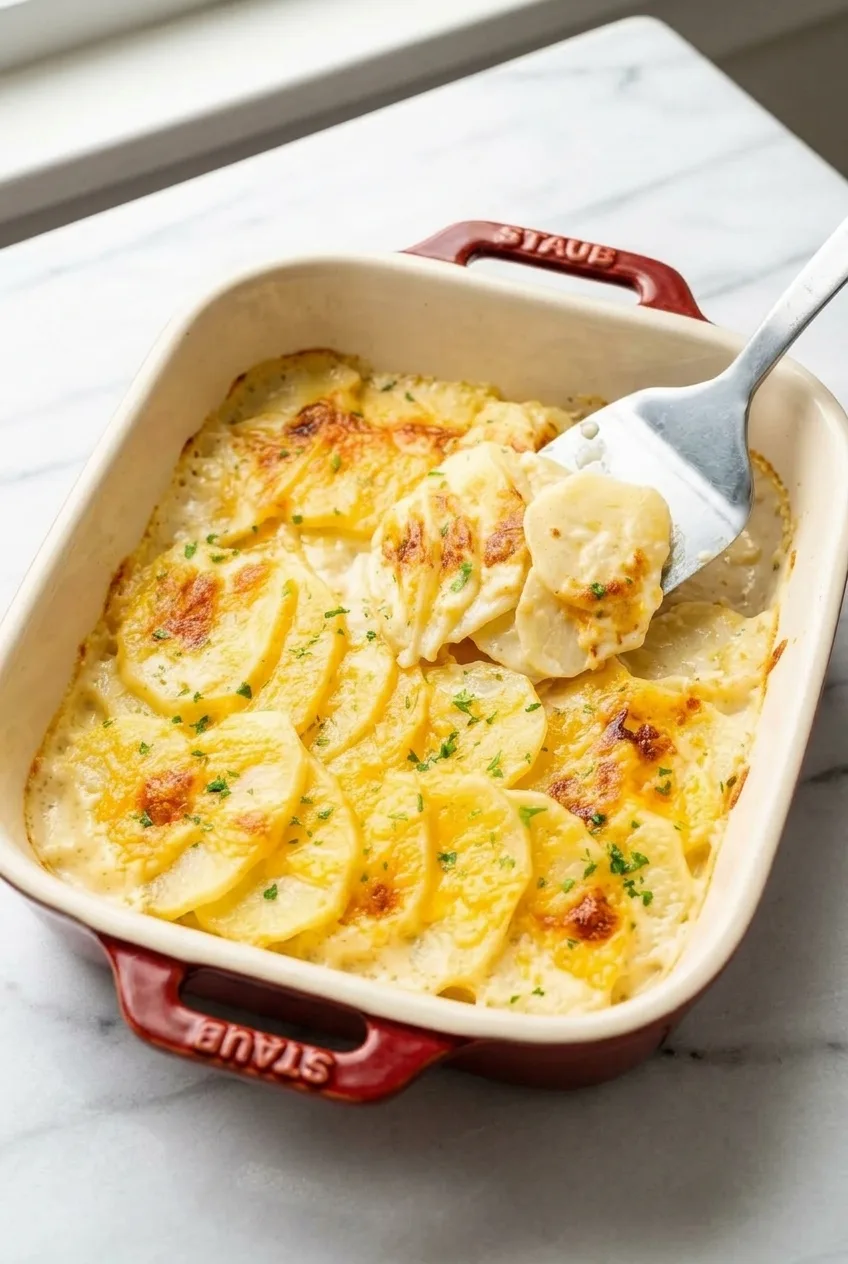
Full baking dish of cheesy scalloped potatoes with parsley and a soft serving lifted on a spatula
  1. Preheat and slice: Heat the oven to 350°F (175°C). Butter a 9-by-13-inch baking dish with room below the rim for bubbling sauce. Cut the potatoes into even rounds about 1/8 inch thick. If using a mandoline, use its hand guard.
  2. Make the sauce: Melt the 3 tablespoons butter in a medium saucepan over medium heat. Add the garlic and cook briefly, then whisk in the flour. Cook for about 1 minute, until no dry flour remains. Gradually whisk in the milk and cook, whisking, until the sauce coats a spoon but still pours easily. If it is too thick to flow between the potatoes, whisk in extra milk a tablespoon or two at a time. Remove from the heat and stir in 1 1/2 cups cheddar, the salt, and the pepper until the cheese melts.
  3. Layer the potatoes: Arrange one-third of the rounds in shallow overlaps in the dish and spoon over one-third of the sauce. Repeat twice, finishing with sauce. Scatter the remaining 1/2 cup cheddar over the top; some potato outlines should remain visible.
  4. Bake covered: Loosely tent the dish with foil, keeping it off the cheese. Bake for 45–50 minutes.
  5. Uncover and check: Remove the foil and bake for about 25–35 minutes more. Start checking after 25 minutes uncovered. The sauce should bubble at the edges, the cheese should have scattered golden-brown patches, and a thin knife should slide through the center layers with little resistance. Test more than one spot. If the top browns while the center is firm, loosely cover the dish again and continue baking until tender.
  6. Rest and serve: Let the casserole rest for 15 minutes so the sauce settles around the slices. Scatter the parsley over the top and lift the soft, overlapping rounds with a broad spatula.

How Thin Should You Slice the Potatoes?

Aim for rounds about 1/8 inch thick and keep them as even as possible. Thicker or crowded areas can remain firm after the top has browned, so check those spots when testing for doneness. A sharp knife works; a mandoline makes uniform slices easier.

Why Bake Covered First?

The foil holds in steam while the raw potatoes soften. Uncovering the dish afterward lets the cheddar brown without leaving it exposed for the entire bake. Slice thickness, dish depth, and a cooler-running oven can lengthen the cooking time, so use center tenderness rather than the clock or surface color as the final test.

Serving and Potato Variation

Serve directly from the dish alongside roast chicken, turkey, ham, or pork chops. For a larger dinner spread, add soft garlic butter rolls. For a different creamy side, try stovetop white cheddar mac and cheese.

Yukon Gold potatoes can replace the russets at the same weight. Slice them evenly and check the center for tenderness; their texture and baking time may differ.

Make-Ahead and Leftovers

Assemble the casserole up to one day ahead, cover, and refrigerate. If it goes into the oven cold, allow extra baking time and check that the center is tender before serving.

Cool leftovers, cover, and refrigerate for up to 4 days. Reheat covered in a 350°F oven until hot, uncovering briefly if the top needs refreshing. Cooked leftovers can be frozen, but the sauce may change texture. Thaw in the refrigerator before reheating gently.

Nutrition

Approximate nutrition per serving, based on 8 side-dish servings: 340 calories, 13g protein, 16g fat, and 36g carbohydrates. Per 100g of finished casserole: approximately 130 calories, 5g protein, 6g fat, and 14g carbohydrates. Values are estimates; per-100g figures vary with moisture lost during baking.

Cheesy Scalloped Potatoes

Thin russet potato rounds bake in a creamy garlic-cheddar sauce until tender beneath a lightly browned cheese topping.
Course: Side Dish
Cuisine: American
Prep: 30 min
Cook: 85 min
Total: 130 min
Servings: 8 Calories: 340 kcal

Equipment

  • 9-by-13-inch baking dish
  • Medium saucepan
  • Whisk
  • Mandoline or sharp knife
  • Aluminum foil

Ingredients

Potatoes and Topping

  • 3 pounds russet potatoes, peeled (about 1,350g)
  • 2 cups freshly grated sharp cheddar cheese (about 225g), divided
  • 1 tablespoon finely chopped fresh parsley

Cheese Sauce

  • 3 tablespoons unsalted butter (about 40g), plus a little more for the dish
  • 2 cloves garlic, minced
  • 3 tablespoons all-purpose flour (about 25g)
  • 2 1/2 cups whole milk (about 610g), plus more if needed
  • 1 teaspoon fine salt, or to taste
  • 1/4 teaspoon freshly ground black pepper

Instructions

  1. Preheat the oven to 350°F (175°C). Butter a 9-by-13-inch baking dish with room below the rim for bubbling sauce.
  2. Cut the peeled potatoes into even rounds about 1/8 inch thick. Use a hand guard if slicing with a mandoline.
  3. Melt the 3 tablespoons butter in a medium saucepan over medium heat. Add the garlic and cook briefly.
  4. Whisk in the flour and cook for about 1 minute, until no dry flour remains.
  5. Gradually whisk in the milk. Cook, whisking, until the sauce coats a spoon but still pours easily. Add extra milk a tablespoon or two at a time if needed.
  6. Remove the sauce from the heat. Stir in 1 1/2 cups cheddar, the salt, and pepper until the cheese melts.
  7. Arrange one-third of the potato rounds in shallow overlaps in the baking dish and spoon over one-third of the sauce. Repeat twice, finishing with sauce.
  8. Scatter the remaining 1/2 cup cheddar over the top, leaving some potato outlines visible.
  9. Loosely tent the dish with foil, keeping the foil off the cheese. Bake for 45–50 minutes.
  10. Remove the foil and bake for about 25–35 minutes more, starting to check after 25 minutes. The sauce should bubble at the edges, the cheese should have golden-brown patches, and a thin knife should slide through the center layers with little resistance.
  11. If the top browns while the center is still firm, loosely cover the dish again and continue baking until tender.
  12. Rest the casserole for 15 minutes. Scatter the parsley over the top and serve.

Tips

  • Slice the potatoes evenly, about 1/8 inch thick, so they cook at the same rate.
  • Use a mandoline hand guard when slicing potatoes.
  • Keep the sauce pourable so it can flow between the potato layers; thin it with extra milk if needed.
  • Check the center in more than one spot; a golden top does not necessarily mean the potatoes are tender.
  • A cold or deeper casserole may need extra baking time.

Variations

  • Yukon Gold Scalloped Potatoes: Replace the russet potatoes with Yukon Gold potatoes at the same weight, slicing evenly and checking the center for tenderness.

Notes

Assemble up to one day ahead and refrigerate; allow extra baking time if baking cold. Refrigerate leftovers for up to 4 days and reheat covered at 350°F until hot. Cooked leftovers can be frozen, though the sauce may change texture.

Nutrition

Calories: 340 kcal | Protein: 13 g | Fat: 16 g | Carbohydrates: 36 g

Garlic Butter Rolls

These soft dinner rolls start as squares cut from mashed-potato dough. They rise into separate pillows with rounded corners, lightly golden tops, and fluffy centers. Brush them with garlic-parsley butter as soon as they leave the oven: the hot rolls take on a glossy finish, while the parsley stays visible. Use thick, cooled mashed potato so the dough remains soft but holds its shape when cut.

Ingredients for Garlic Butter Rolls

For the dough

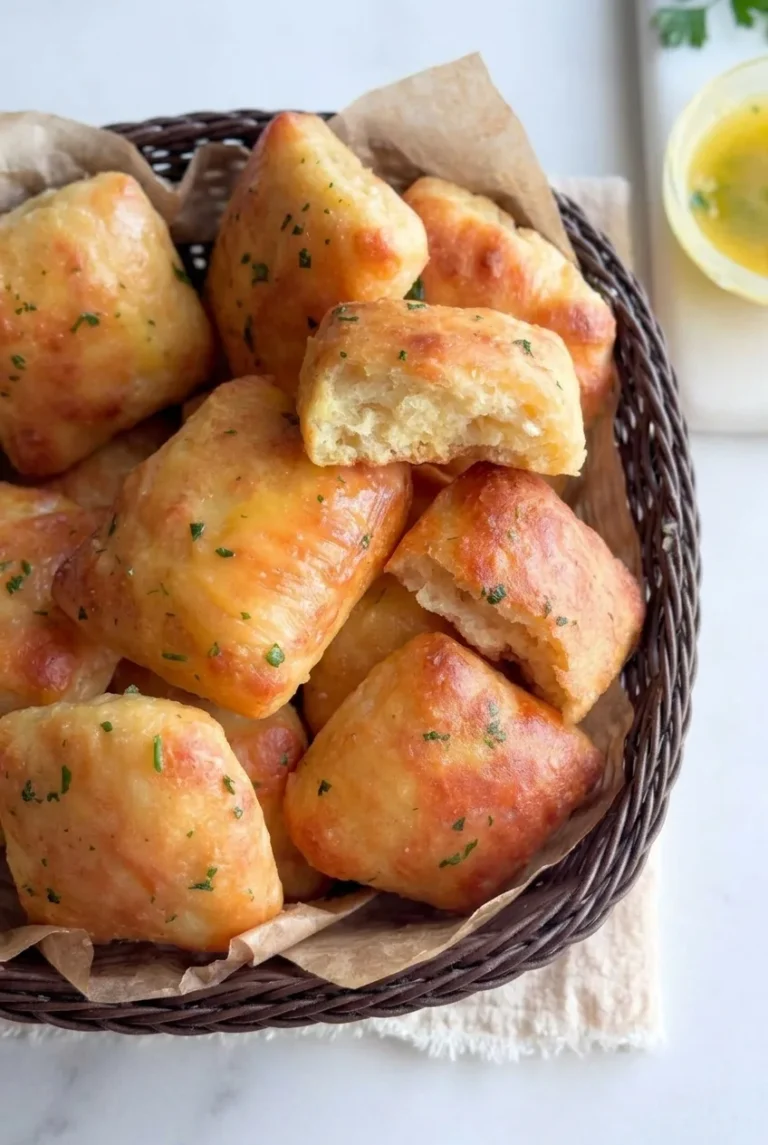
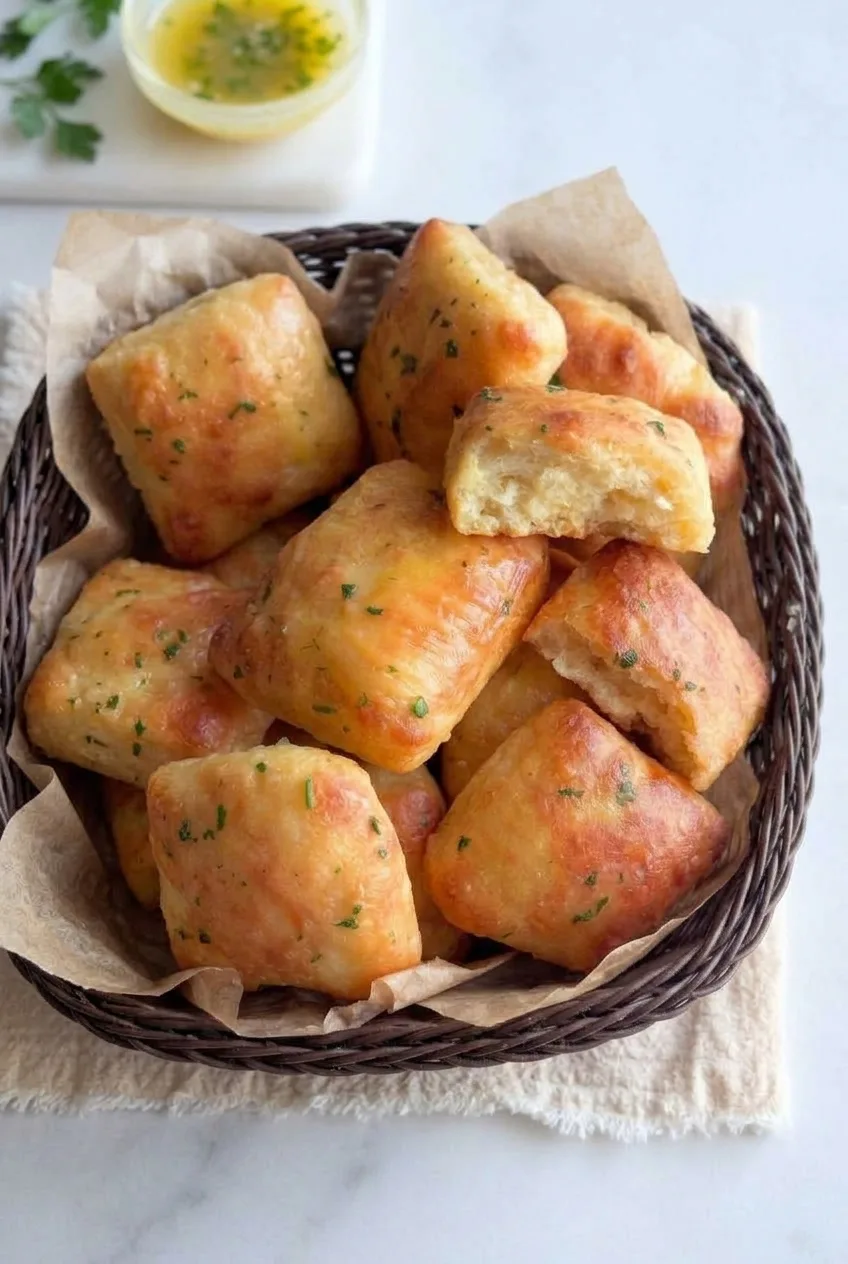
Wider view of a basket of golden garlic butter rolls, including an opened roll, on a light surface
  • 3¼ cups all-purpose flour (390g), plus a little for handling
  • ¾ cup plain, thick mashed potato, cooled (150g)
  • ¾ cup warm milk (180g)
  • 2¼ teaspoons instant yeast (7g)
  • 2 tablespoons granulated sugar (25g)
  • 1¼ teaspoons fine salt
  • 3 tablespoons unsalted butter, melted (40g)

For the garlic butter

  • 4 tablespoons unsalted butter (55g)
  • 1 teaspoon garlic powder
  • 1 tablespoon finely chopped fresh parsley
  • Pinch of fine salt, optional
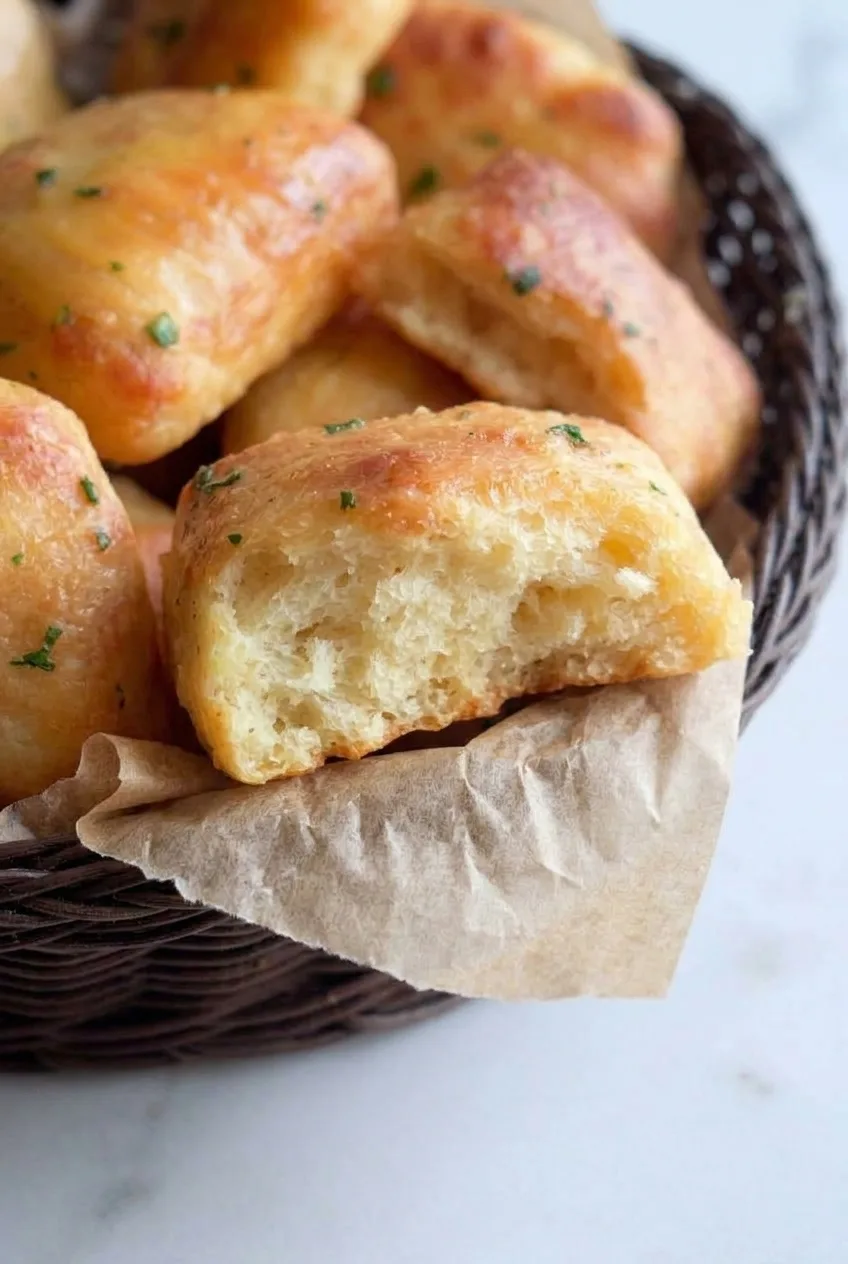
Close view of an opened garlic butter roll showing its fluffy crumb beside glossy, parsley-flecked rolls

How to Bake Garlic Butter Rolls

  1. Mix the dough: Combine the flour, yeast, sugar, and salt in a large bowl. Add the warm milk, cooled mashed potato, and 3 tablespoons melted butter. Mix thoroughly for 8 to 10 minutes, until no dry flour remains and the dough is cohesive, soft, and slightly tacky. It should hold together rather than pour or spread.
  2. Let it rise: Cover the bowl and leave it in a comfortably warm spot for about 60 to 90 minutes, until the dough looks roughly doubled and airy.
  3. Cut the rolls: Line a large rimmed baking sheet with parchment. Turn the dough onto a lightly floured surface and gently pat it into an approximately 9-by-12-inch rectangle. Cut into 12 squares and place them on the sheet about 1 inch apart. Handle them gently to retain some of the air from the first rise.
  4. Proof and preheat: Loosely cover the squares and let them rise for about 30 to 45 minutes, until noticeably puffy. Their corners should soften and round, but the rolls should remain distinct. Near the end of the rise, preheat the oven to 350°F (175°C).
  5. Bake: Uncover and bake for 18 to 22 minutes, starting to check at 17 minutes. Rotate the sheet halfway through if your oven browns unevenly. The tops should be lightly golden with a few deeper patches; an opened roll should have a set, fluffy center, not a gummy one.
  6. Brush and serve: Melt the remaining 4 tablespoons butter and stir in the garlic powder and parsley. Taste and add a pinch of salt if desired. Brush over the rolls as soon as they leave the oven, then let them stand for about 5 minutes before serving warm. For dipping, set aside a little garlic butter before brushing the rolls.

What the Dough Should Feel Like

Use thick mashed potato, not loose, creamy mash that pours from a spoon. The mixed dough should feel tacky but hold together. If it sticks while you cut it, lightly flour the work surface and your hands; working in too much flour can make the rolls dense.

Thick leftover mashed potato can work. Account for any salt already in it when seasoning the dough. If the mash is very wet, the dough may spread instead of holding cut squares.

Proofing and Baking Cues

Room temperature affects both rises, so look for expansion rather than relying only on the clock. Wait until the dough is airy after its first rise and the cut squares are visibly puffy before baking. Under-proofed rolls can bake up dense.

Check early if your squares are small, and remove the rolls once the tops are lightly golden rather than waiting for a dark crust. Brushing garlic butter on while they are hot gives them their glossy finish without baking the parsley into the tops.

For a fresh-garlic finish, replace the garlic powder with one small finely grated garlic clove. Let it stand briefly in warm, not scorching, melted butter before brushing.

Serving and Storing Garlic Butter Rolls

Serve warm as dinner rolls, or alongside old-fashioned soul food mac and cheese.

The rolls are best on the day they are baked. Cool leftovers fully and store them airtight at room temperature for up to 2 days. Warm an individual roll briefly in the microwave, or warm a batch for a few minutes in a low oven, checking so they do not dry out. For longer storage, wrap cooled baked rolls airtight and freeze; thaw before gently reheating.

Nutrition

Approximate nutrition per roll, based on 12 rolls: 210 calories, 4g protein, 8g fat, and 31g carbohydrates. Approximate values per 100g of baked rolls: 320 calories, 7g protein, 12g fat, and 47g carbohydrates. Values vary with the milk, mashed potato, and amount of garlic butter used.

Garlic Butter Rolls

Soft mashed-potato dinner rolls are cut into squares, baked until lightly golden, and brushed with garlic-parsley butter.
Course: Side Dish
Cuisine: American
Prep: 145 min
Cook: 22 min
Total: 172 min
Servings: 12 Calories: 210 kcal per roll; 320 kcal per 100 g

Equipment

  • Large mixing bowl
  • Rimmed baking sheet
  • Parchment paper
  • Rolling pin or hands
  • Pastry brush
  • Oven

Ingredients

For the dough

  • 3¼ cups all-purpose flour (390 g), plus a little for handling
  • ¾ cup plain, thick mashed potato, cooled (150 g)
  • ¾ cup warm milk (180 g)
  • 2¼ teaspoons instant yeast (7 g)
  • 2 tablespoons granulated sugar (25 g)
  • 1¼ teaspoons fine salt
  • 3 tablespoons unsalted butter, melted (40 g)

For the garlic butter

  • 4 tablespoons unsalted butter (55 g)
  • 1 teaspoon garlic powder
  • 1 tablespoon finely chopped fresh parsley
  • Pinch of fine salt, optional

Instructions

  1. Combine the flour, yeast, sugar, and salt in a large bowl.
  2. Add the warm milk, cooled mashed potato, and 3 tablespoons melted butter. Mix for 8 to 10 minutes, until no dry flour remains and the dough is cohesive, soft, and slightly tacky.
  3. Cover the bowl and let the dough rise in a comfortably warm spot for 60 to 90 minutes, until roughly doubled and airy.
  4. Line a large rimmed baking sheet with parchment. Turn the dough onto a lightly floured surface and gently pat it into an approximately 9-by-12-inch rectangle.
  5. Cut the dough into 12 squares and place them about 1 inch apart on the baking sheet.
  6. Loosely cover the squares and let them rise for 30 to 45 minutes, until noticeably puffy. Near the end of the rise, preheat the oven to 350°F (175°C).
  7. Uncover and bake for 18 to 22 minutes, starting to check at 17 minutes. Rotate the sheet halfway through if needed. Bake until the tops are lightly golden and the centers are set and fluffy.
  8. Melt the remaining 4 tablespoons butter and stir in the garlic powder and parsley. Add a pinch of salt if desired.
  9. Brush the garlic butter over the rolls as soon as they leave the oven. Let stand for about 5 minutes before serving warm.

Tips

  • Use thick, cooled mashed potato; loose or very wet mash can make the dough spread.
  • The dough should feel tacky but hold together. Use only a light dusting of flour when shaping.
  • Judge both rises by how airy and puffy the dough looks, since room temperature affects rising time.
  • Check the rolls early and remove them when lightly golden to avoid a dark crust.
  • Set aside a little garlic butter before brushing if you want some for dipping.

Variations

  • Fresh Garlic Butter: Replace the garlic powder with one small finely grated garlic clove. Let it stand briefly in warm, not scorching, melted butter before brushing.

Notes

Best served the day they are baked. Cool leftovers fully and store airtight at room temperature for up to 2 days, or freeze them wrapped airtight. Thaw frozen rolls before gently reheating.

Nutrition

Calories: 210 kcal per roll; 320 kcal per 100 g | Protein: 4 g per roll; 7 g per 100 g | Fat: 8 g per roll; 12 g per 100 g | Carbohydrates: 31 g per roll; 47 g per 100 g

Creamy Mac and Cheese Casserole

A browned cheese top should not mean dry macaroni underneath. This baked casserole has tender elbows in a creamy cheddar and Monterey Jack sauce, with scattered golden spots on a cheese-only surface. Cook the pasta slightly short of al dente, keep the sauce pourable, and take the dish out of the oven while the center is still moist. After a short rest, it should be soft enough to serve by spoon, not cut into squares.

Makes 8 generous side servings or 6 main-course servings. Allow about 20 minutes to prep, 35–40 minutes to cook, and 10 minutes to rest.

Ingredients for Creamy Mac and Cheese Casserole

Close view of elbow macaroni and creamy sauce beneath browned cheddar and Monterey Jack
  • 1 pound elbow macaroni (about 450g)
  • 4 tablespoons unsalted butter (about 55g), plus a little for the baking dish
  • 1/4 cup all-purpose flour (30g)
  • 4 cups whole milk
  • 12 ounces sharp orange cheddar, freshly shredded (about 340g or 3 packed cups); reserve about 3/4 cup for the top
  • 8 ounces Monterey Jack, freshly shredded (about 225g or 2 packed cups); reserve about 1/2 cup for the top
  • 1 teaspoon dry mustard
  • 1/2 teaspoon kosher salt, plus more for the pasta water and to taste
  • 1/4 teaspoon freshly ground black pepper

Shred the cheeses from blocks for smoother melting. The packed-cup amounts are approximate; use the weights when possible.

How to Make Creamy Mac and Cheese Casserole

Nearly full baking dish of creamy mac and cheese casserole with a spoonful lifted
  1. Prepare the oven and cheese: Preheat the oven to 375°F (190°C) with a rack near the center. Lightly butter a 9-by-13-inch baking dish. Shred both cheeses, setting aside the amounts reserved for the top.
  2. Cook the macaroni: Boil the elbows in a large pot of salted water until 1–2 minutes short of the package’s al dente time, usually about 7–9 minutes. They should be slightly firmer than you would serve on their own. Drain well; they will continue softening in the oven.
  3. Make the milk sauce: Melt the 4 tablespoons butter in a heavy medium-to-large saucepan over medium heat. Whisk in the flour and cook for about 1 minute without browning it. Gradually whisk in the milk. Cook, whisking, for about 7–9 minutes, until the sauce lightly coats a spoon but still pours easily.
  4. Add the cheese off heat: Remove the saucepan from the heat. Stir in the unreserved cheddar and Monterey Jack a handful at a time until melted. Stir in the dry mustard, 1/2 teaspoon salt, and pepper, then taste and adjust the salt. The sauce should flow easily around the pasta rather than sit in a stiff mound.
  5. Assemble: Fold the drained macaroni into the sauce and spread it in the prepared dish. Scatter the reserved cheddar and Monterey Jack unevenly over the top so both colors remain visible.
  6. Bake: Bake uncovered for about 20–25 minutes, checking at 18 minutes. Remove the casserole when the edges are gently bubbling and the cheese has melted with scattered golden-brown spots. The interior should still look moist. If the edges bubble before the top browns, broil for up to 1–2 minutes only if the dish is broiler-safe; watch it continuously.
  7. Rest and serve: Let stand for about 10 minutes, then lift soft servings from the dish with a wooden spoon.

How to Keep Baked Mac and Cheese Creamy

The sauce will look a little loose before baking. That is intentional: the macaroni absorbs some of it in the oven and during the rest. Reducing the sauce until stiff or waiting for a deeply browned crust can leave the casserole dry. Once the edges bubble, a lifted spoonful should still show sauce between the noodles.

The bake time assumes a freshly assembled casserole in a shallow 9-by-13-inch dish. A deeper dish or a refrigerated casserole will heat differently, so judge it by bubbling edges and a hot, moist center rather than the clock alone.

How to Brown the Cheese Without Drying the Pasta

The reserved cheddar and Monterey Jack create the orange-and-pale top without breadcrumbs. Scattered browned spots are enough; the surface does not need to become a dark crust. If the casserole is already bubbling, a brief, closely watched broil can add color without extending the bake.

Make-Ahead, Storage, and Reheating

For advance prep, keep the cooked pasta and sauce separate when practical. An assembled casserole absorbs sauce as it sits in the refrigerator, so it may be less creamy and will take longer to heat than a freshly assembled one.

Refrigerate cooled leftovers in a covered container for up to 4 days. Reheat individual portions gently in the microwave, stirring in a splash of milk if the sauce has thickened. For a larger amount, cover and warm in a 350°F (175°C) oven until hot, without heating longer than necessary.

An unbaked assembled casserole can be frozen tightly covered and thawed in the refrigerator before baking, but it may be less creamy than one baked fresh.

Nutrition

Approximate nutrition per serving, based on 8 side servings: 625 calories, 29g protein, 33g fat, and 52g carbohydrates. Per 100g of finished casserole: approximately 200 calories, 9g protein, 11g fat, and 17g carbohydrates. Values are estimates; cheese brands and moisture lost during baking will affect them.

Creamy Mac and Cheese Casserole

Tender elbow macaroni is baked in a creamy cheddar and Monterey Jack sauce with a cheese-only golden top.
Course: Side Dish
Cuisine: American
Prep: 20 min
Cook: 40 min
Total: 70 min
Servings: 8 Calories: 625 kcal

Equipment

  • 9-by-13-inch baking dish
  • Large pot
  • Colander
  • Medium-to-large saucepan
  • Whisk

Ingredients

Pasta

  • 1 pound elbow macaroni (about 450 g)
  • Kosher salt, for the pasta water

Cheese Sauce and Topping

  • 4 tablespoons unsalted butter (about 55 g), plus a little for the baking dish
  • 1/4 cup all-purpose flour (30 g)
  • 4 cups whole milk
  • 12 ounces sharp orange cheddar, freshly shredded (about 340 g or 3 packed cups), divided; reserve about 3/4 cup for the top
  • 8 ounces Monterey Jack, freshly shredded (about 225 g or 2 packed cups), divided; reserve about 1/2 cup for the top
  • 1 teaspoon dry mustard
  • 1/2 teaspoon kosher salt, plus more to taste
  • 1/4 teaspoon freshly ground black pepper

Instructions

  1. Preheat the oven to 375°F (190°C) with a rack near the center. Lightly butter a 9-by-13-inch baking dish.
  2. Shred both cheeses and set aside about 3/4 cup cheddar and 1/2 cup Monterey Jack for the topping.
  3. Boil the macaroni in salted water until 1–2 minutes short of the package’s al dente time, usually 7–9 minutes. Drain well.
  4. Melt the butter in a heavy medium-to-large saucepan over medium heat. Whisk in the flour and cook for about 1 minute without browning.
  5. Gradually whisk in the milk. Cook, whisking, for 7–9 minutes, until the sauce lightly coats a spoon but still pours easily.
  6. Remove the saucepan from the heat. Stir in the remaining cheddar and Monterey Jack a handful at a time until melted. Stir in the dry mustard, 1/2 teaspoon salt, and pepper; taste and adjust the salt.
  7. Fold the drained macaroni into the sauce and spread it in the prepared baking dish. Scatter the reserved cheeses over the top.
  8. Bake uncovered for about 20–25 minutes, checking at 18 minutes, until the edges are gently bubbling and the cheese has melted with scattered golden-brown spots. Keep the center moist.
  9. If the edges bubble before the top browns, broil for up to 1–2 minutes only if the dish is broiler-safe, watching continuously.
  10. Rest for about 10 minutes, then serve soft portions with a wooden spoon.

Tips

  • Shred cheese from blocks for smoother melting.
  • Cook the macaroni 1–2 minutes short of al dente so it does not overcook in the oven.
  • Keep the sauce pourable before baking; the pasta will absorb some as it cooks and rests.
  • Remove the casserole when the edges bubble and the center still looks moist rather than waiting for a deeply browned crust.

Notes

Refrigerate cooled leftovers in a covered container for up to 4 days. Reheat portions gently with a splash of milk, or cover and warm a larger amount in a 350°F (175°C) oven until hot. An assembled unbaked casserole can be frozen tightly covered and thawed in the refrigerator before baking; it may be less creamy.

Nutrition

Serving: Per serving, based on 8 side servings | Calories: 625 kcal | Protein: 29 g | Fat: 33 g | Carbohydrates: 52 g | Per100g Calories: 200 kcal | Per100g Protein: 9 g | Per100g Fat: 11 g | Per100g Carbohydrates: 17 g

Old-Fashioned Soul Food Mac and Cheese

Golden, blistered cheese covers creamy elbow macaroni in this Southern-inspired skillet bake. It is meant to be served in generous scoops, with distinct elbows beneath the crust, rather than cut into firm squares.

This version uses eggs, evaporated milk, and whole milk to make a gently set custard instead of a flour-thickened cheese sauce. Sharp cheddar gives it a bold cheese flavor, while Colby Jack melts into the filling. Bake until the center is set but still creamy, then rest the skillet before serving.

Ingredients for Skillet Mac and Cheese

Close view of moist elbow macaroni beneath the browned cheese crust of skillet mac and cheese
  • 1 pound dry elbow macaroni (about 450g)
  • 4 tablespoons unsalted butter (about 55g), plus a little for the skillet
  • 12 ounces sharp cheddar cheese, freshly grated and divided (about 340g)
  • 8 ounces Colby Jack cheese, freshly grated and divided (about 225g)
  • 1 can (12 fluid ounces) evaporated milk
  • 1 cup whole milk
  • 2 large eggs
  • 1/2 cup sour cream (about 120g)
  • 1/2 teaspoon garlic powder
  • 1/2 teaspoon onion powder
  • 1/2 teaspoon ground mustard
  • About 1 teaspoon kosher salt for the custard, plus salt for the pasta water
  • 1/4 teaspoon ground black pepper

Yield: 8–10 side-dish servings. Time: About 25 minutes prep, 45–50 minutes cooking, and a 15-minute rest; about 1 hour 25 minutes total.

How to Make Old-Fashioned Soul Food Mac and Cheese

Full black skillet of golden baked mac and cheese with a generous scoop lifted for serving
  1. Prepare the oven and skillet: Heat the oven to 350°F (175°C) with a rack in the center. Lightly butter a room-temperature 12-inch oven-safe cast-iron skillet; do not preheat the empty skillet. Set aside 4 ounces of the cheddar and 2 ounces of the Colby Jack for the top.
  2. Cook the macaroni: Boil the elbows in salted water until about 1 minute shy of package-tender. Drain well, then toss the warm pasta with the 4 tablespoons of butter.
  3. Whisk the custard: In a large bowl, whisk the eggs and sour cream until mostly smooth. Whisk in the evaporated milk, whole milk, garlic powder, onion powder, mustard, salt, and pepper. The mixture should be pourable, with no visible streaks of egg.
  4. Fill the skillet: Gently combine the macaroni, custard, and all the cheese not reserved for topping. Transfer to the skillet, making sure the mixture sits comfortably below the rim. Spread it evenly without packing it down; the pasta should look thoroughly moistened. Scatter the reserved cheese over the top.
  5. Bake uncovered: Start checking at 30 minutes; a 12-inch skillet will take approximately 35–40 minutes. The edges should bubble, the cheese should be golden with a few deeper amber patches, and the center should move only slightly when the skillet is gently nudged. It should not slosh. If the top browns before the center sets, loosely shield it with foil and continue baking.
  6. Rest and serve: Let the skillet stand for 15 minutes. Lift generous scoops directly from the skillet with a wooden serving spoon or spatula. The filling should hold together loosely while showing moist, distinct elbows.

What Custard-Style Mac and Cheese Should Look Like

The eggs set the dairy around the macaroni as it bakes; there is no separate roux-based sauce. A slight jiggle in the center is fine, but freely moving liquid means the custard needs more time. The 15-minute rest lets it settle enough to scoop while keeping the interior creamy.

A broad skillet exposes more surface than a deeper casserole. If using a baking dish of comparable capacity, expect the center to take longer and use the same bubbling-edge and slight-jiggle cues to judge doneness.

How to Keep the Center Creamy and the Top Golden

Do not keep baking just to darken every patch of cheese: once the center is set, extra oven time can dry the macaroni. If the center is ready but the top is pale, broil briefly, watching continuously, then rest the skillet.

Grate block cheese when practical for a smoother melt. Cooking the elbows just shy of tender gives them room to finish in the oven, and the butter coating helps limit how much custard they absorb. Monterey Jack can replace the Colby Jack, though the finished melt may differ.

Make-Ahead, Leftovers, and Reheating

To make ahead, assemble the mac and cheese, cover, and refrigerate overnight. Bake until the edges bubble and the center is set; a chilled skillet may need extra time.

Cool leftovers promptly and refrigerate in an airtight container for 3–4 days. Reheat portions covered in a 300°F (150°C) oven until hot, adding a small splash of milk if they seem dry. Freezing is not the preferred make-ahead option because the custard’s texture may change.

Serve warm from the skillet with fried chicken and collard greens, or alongside cornbread or candied yams. For another baked version, try Patti LaBelle Mac and Cheese.

Nutrition

Approximate nutrition per serving, based on 9 side-dish servings: 580 calories, 27g protein, 34g fat, and 45g carbohydrates. Estimated per 100g of finished mac and cheese: 195 calories, 9g protein, 11g fat, and 15g carbohydrates. Values will vary with the cheeses, serving size, and final cooked weight.

Old-Fashioned Soul Food Mac and Cheese

Elbow macaroni bakes in a creamy egg-and-milk custard beneath a golden cheddar and Colby Jack topping.
Course: Side Dish
Cuisine: Southern American
Prep: 25 min
Cook: 50 min
Total: 85 min
Servings: 9 Calories: 580 kcal

Equipment

  • 12-inch oven-safe cast-iron skillet
  • Large pot
  • Colander
  • Large mixing bowl
  • Whisk
  • Grater

Ingredients

For the macaroni

  • 1 pound dry elbow macaroni (about 450 g)
  • 4 tablespoons unsalted butter (about 55 g), plus a little for the skillet
  • Salt for the pasta water

For the custard and cheese

  • 12 ounces sharp cheddar cheese, freshly grated and divided (about 340 g)
  • 8 ounces Colby Jack cheese, freshly grated and divided (about 225 g)
  • 1 can (12 fluid ounces) evaporated milk
  • 1 cup whole milk
  • 2 large eggs
  • 1/2 cup sour cream (about 120 g)
  • 1/2 teaspoon garlic powder
  • 1/2 teaspoon onion powder
  • 1/2 teaspoon ground mustard
  • About 1 teaspoon kosher salt
  • 1/4 teaspoon ground black pepper

Instructions

  1. Preheat the oven to 350°F (175°C) with a rack in the center. Lightly butter a room-temperature 12-inch oven-safe cast-iron skillet; do not preheat the empty skillet.
  2. Set aside 4 ounces of cheddar and 2 ounces of Colby Jack for the topping.
  3. Boil the macaroni in salted water until about 1 minute shy of package-tender. Drain well and toss the warm pasta with the butter.
  4. Whisk the eggs and sour cream in a large bowl until mostly smooth. Whisk in the evaporated milk, whole milk, garlic powder, onion powder, ground mustard, kosher salt, and black pepper until no streaks of egg remain.
  5. Gently combine the macaroni, custard, and cheese that was not reserved for the topping.
  6. Transfer the mixture to the skillet, spreading it evenly without packing it down. Scatter the reserved cheese over the top.
  7. Bake uncovered, checking at 30 minutes. Bake for approximately 35–40 minutes, until the edges bubble, the top is golden with a few deeper amber patches, and the center moves only slightly when nudged. If the top browns before the center sets, loosely cover it with foil and continue baking.
  8. Rest the skillet for 15 minutes. Serve generous scoops directly from the skillet.

Tips

  • Cook the macaroni about 1 minute shy of tender so it can finish cooking in the oven.
  • Grate block cheese for a smoother melt.
  • Do not pack the pasta mixture into the skillet; spread it evenly so the custard can set.
  • A slight center jiggle is fine, but the custard should not slosh.
  • If the center is set but the top is pale, broil briefly while watching continuously.

Variations

  • Monterey Jack Mac and Cheese: Replace the Colby Jack with Monterey Jack; the finished melt may differ.

Notes

Assemble ahead, cover, and refrigerate overnight; a chilled skillet may need extra baking time. Refrigerate leftovers in an airtight container for 3–4 days. Reheat covered at 300°F (150°C) until hot, adding a splash of milk if dry. Freezing may change the custard texture.

Nutrition

Calories: 580 kcal | Protein: 27 g | Fat: 34 g | Carbohydrates: 45 g