Author

Julia

Browsing

Rotisserie Chicken Salad

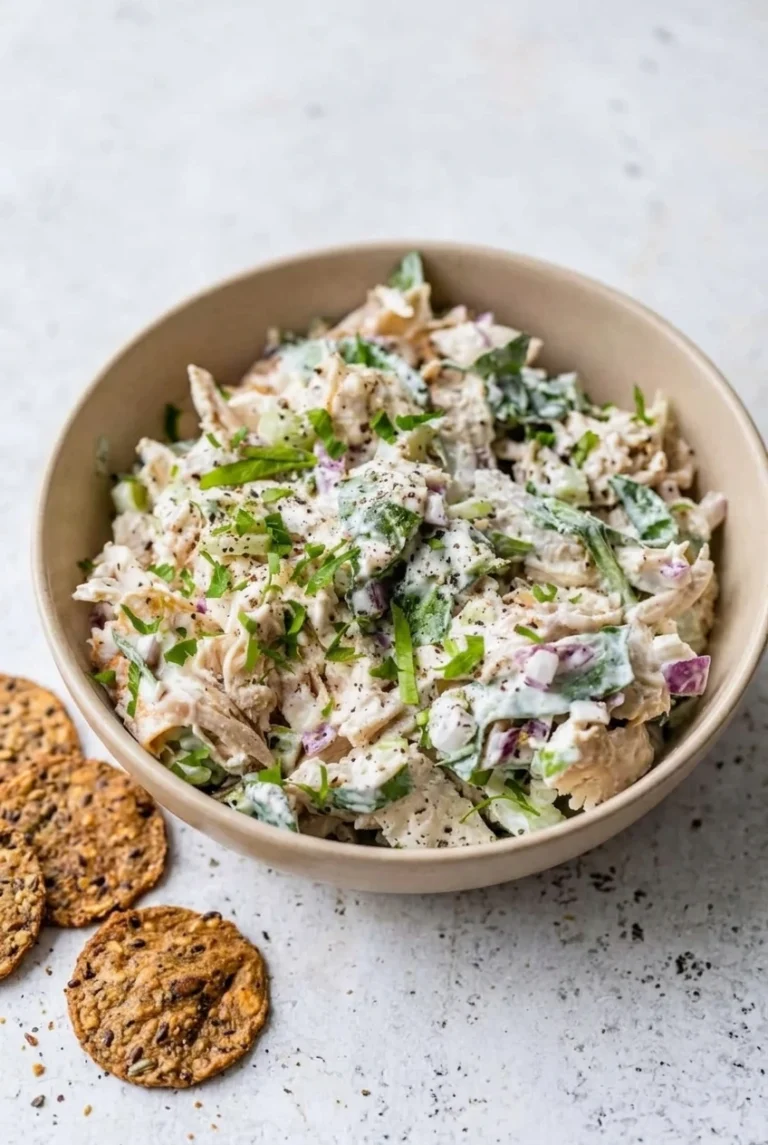
Rotisserie chicken makes this creamy salad a no-cook meal. A mix of shreds and bite-size pieces gives it substance, while diced celery, red onion, and chopped baby spinach keep each bite crisp and fresh. A mayonnaise-forward dressing with a little Greek yogurt, Dijon, and lemon should coat the chicken without pooling in the bowl.

It takes about 15 minutes to assemble and makes 4 servings. Taste after mixing before adding more salt: rotisserie chicken is often well seasoned already. Serve the salad right away or chill it briefly, with seeded crackers alongside.

Ingredients for Rotisserie Chicken Salad
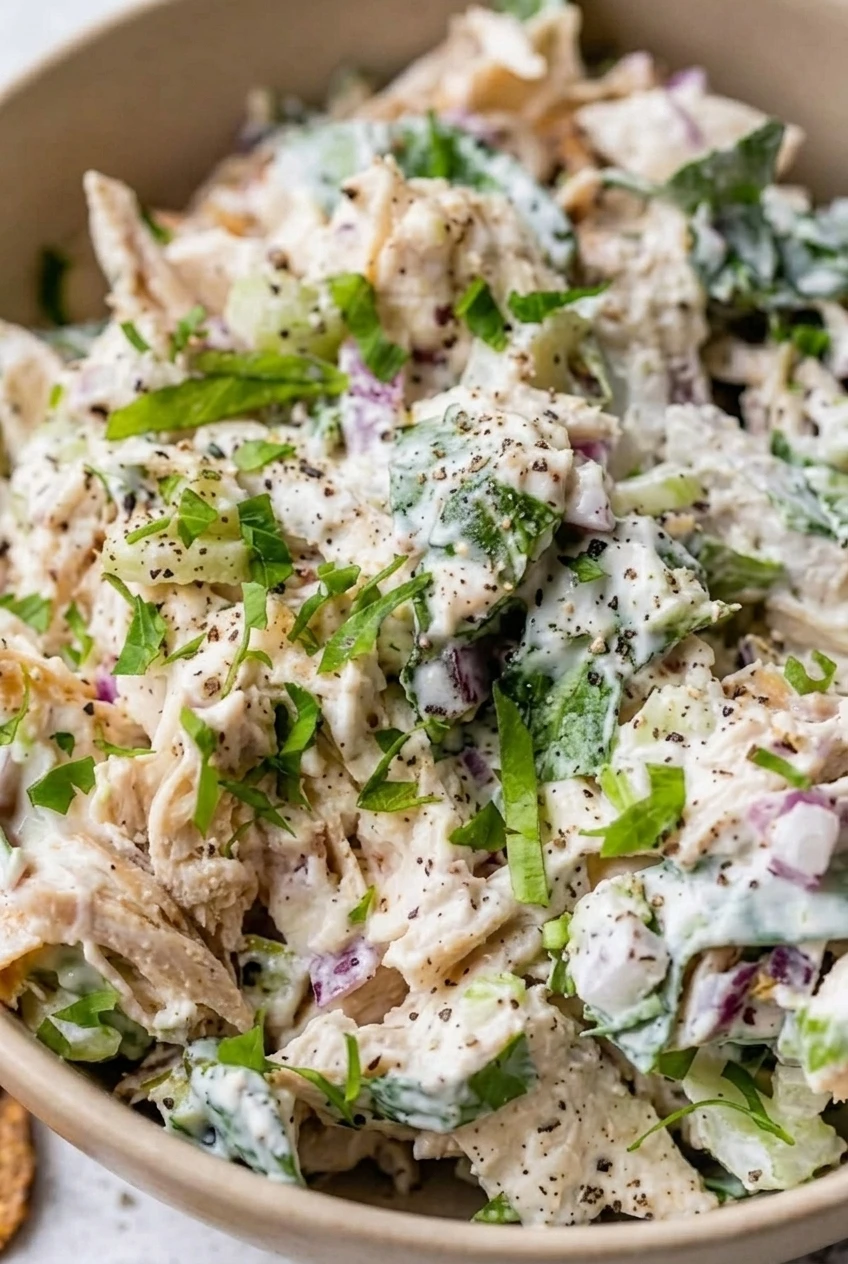
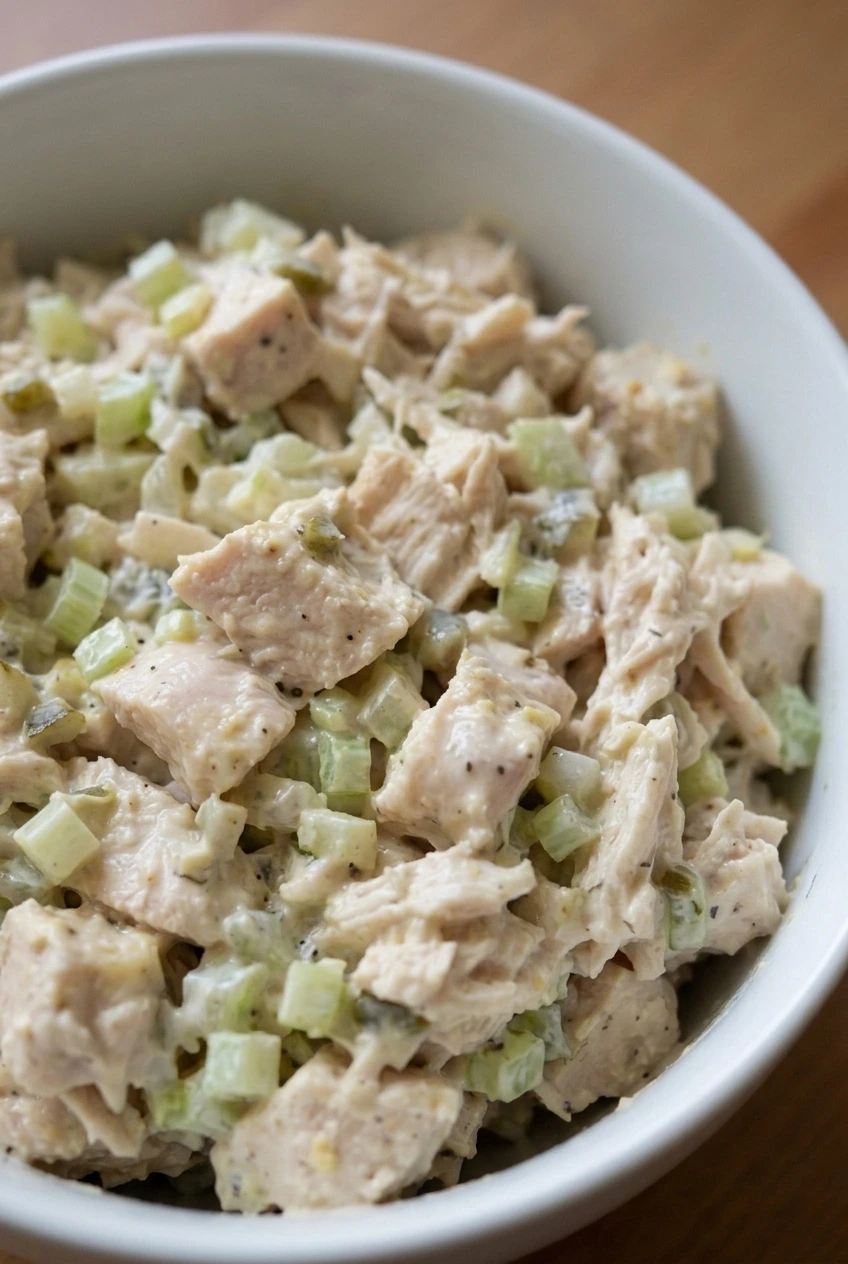
Close detail of creamy rotisserie chicken salad showing chicken shreds, spinach, celery, red onion, and pepper
  • About 4 cups picked rotisserie chicken, skin and bones removed, shredded with some bite-size pieces (450g)
  • 1/3 cup mayonnaise (75g)
  • 2 tablespoons plain Greek yogurt (30g)
  • 2 celery ribs, finely diced, about 1/2 cup (60g)
  • 1/4 cup finely diced red onion (40g)
  • 1 packed cup roughly chopped baby spinach (30g)
  • 1 teaspoon Dijon mustard
  • 1 tablespoon fresh lemon juice
  • 1 tablespoon finely chopped flat-leaf parsley, plus a little for finishing
  • 1/8 teaspoon kosher salt, plus more to taste
  • 1/4 teaspoon freshly ground black pepper, plus a little for finishing

Optional: 1–2 tablespoons additional mayonnaise if the salad needs more moisture, and seeded crackers for serving alongside.

How to Make Rotisserie Chicken Salad
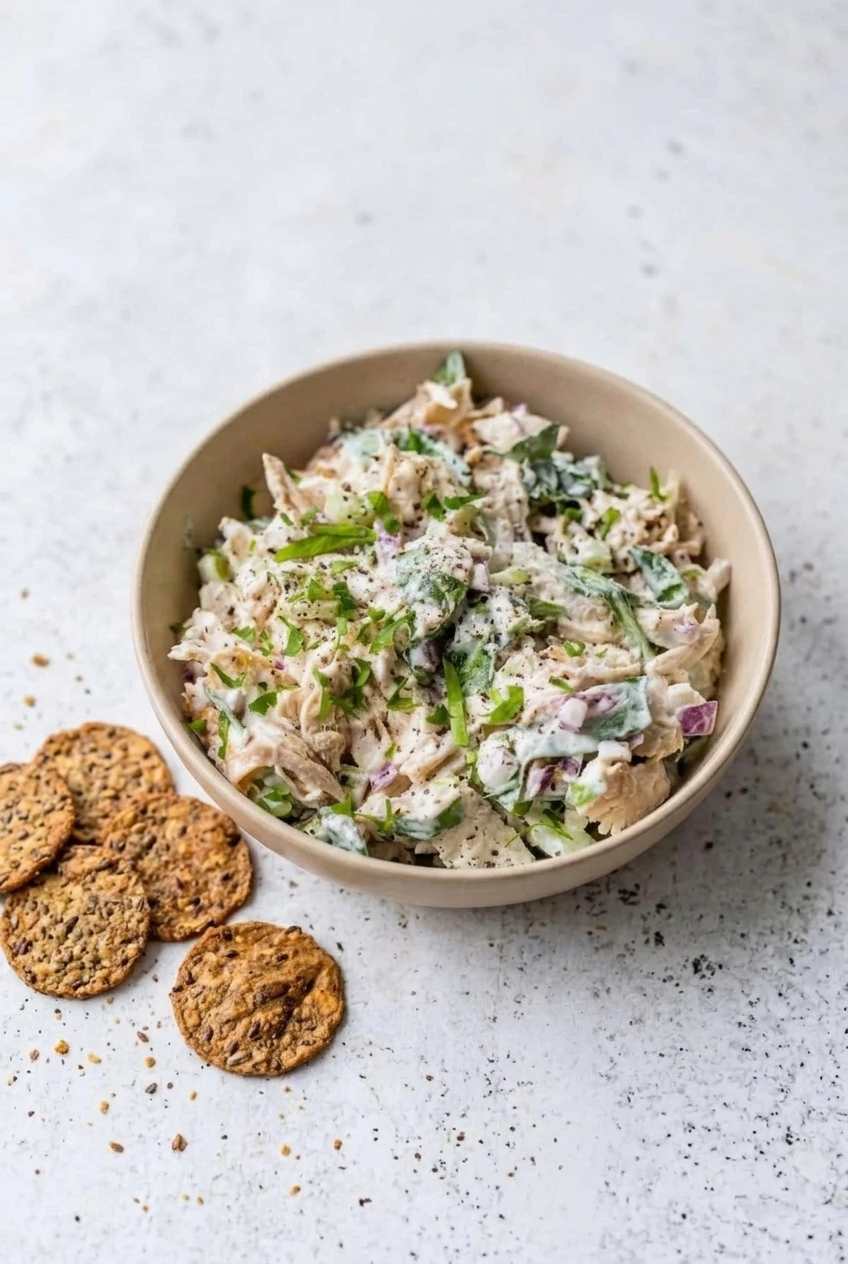
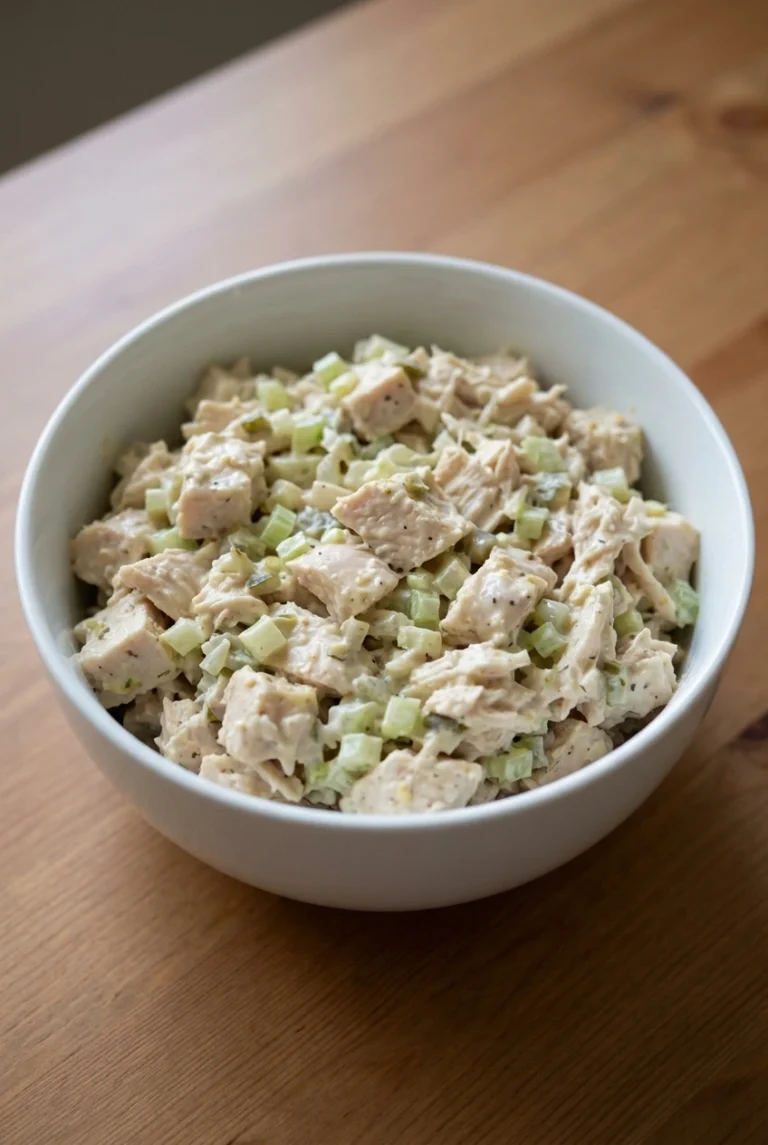
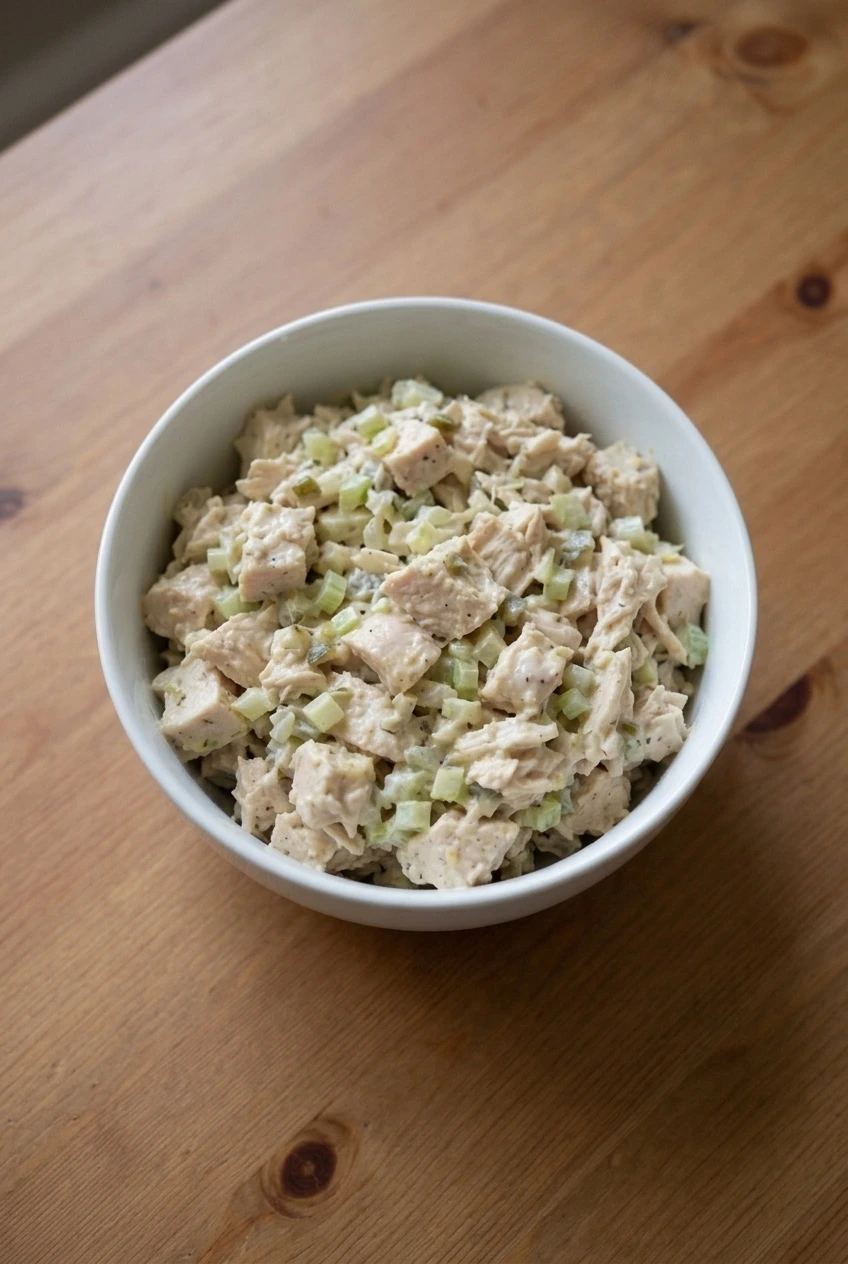
A full bowl of rotisserie chicken salad with seeded crackers on a pale surface
  1. Prepare the chicken: Remove the skin and bones, checking for small bones or cartilage. Shred most of the meat and cut the rest into bite-size pieces.
  2. Whisk the dressing: In a small bowl, whisk the mayonnaise, Greek yogurt, Dijon, lemon juice, 1/8 teaspoon salt, and 1/4 teaspoon pepper until smooth.
  3. Chop the vegetables: Finely dice the celery and red onion. Roughly chop the spinach and parsley, reserving a little parsley for the top.
  4. Fold together: In a medium mixing bowl, combine the chicken, celery, red onion, spinach, and most of the parsley. Add the dressing and fold gently until it clings to the ingredients and the chicken pieces remain distinct. If the salad seems dry, fold in additional mayonnaise a spoonful at a time.
  5. Taste and serve: Taste before adding more salt; adjust the pepper if needed. Spoon into a shallow bowl and finish with the reserved parsley and a little black pepper. Serve immediately or cover and refrigerate for 20–30 minutes. Keep the crackers beside the salad, not mixed in.

How to Keep the Salad Creamy, Not Runny

The amount of dressing needed depends on how moist the chicken is and how finely it is shredded. Keep some larger pieces and fold gently rather than stirring the salad into a paste. Add extra mayonnaise only after mixing; the dressing should coat the chicken and vegetables without collecting at the bottom of the bowl.

Choosing the Rotisserie Chicken

Breast meat, dark meat, or a mixture all work. Chicken that is still warm may be easier to shred, but there is no need to heat it for this salad. For a richer dressing without yogurt, replace the 2 tablespoons of Greek yogurt with the same amount of mayonnaise.
Serving and Storing

Serve the salad in a bowl with seeded crackers, or spoon it onto bread, over greens, or into lettuce leaves. If making it ahead, fold in the spinach closer to serving to keep the leaves fresher.

Keep the salad cold when serving. Refrigerate leftovers promptly in an airtight container and use within 3–4 days. The mixed salad is not recommended for freezing because the creamy dressing may lose its texture; picked chicken can be frozen separately.

Nutrition

Approximate nutrition per serving, based on 1/4 of the recipe (about 175g; crackers not included): 350 calories, 32g protein, 23g fat, and 3g carbohydrates. Per 100g: about 200 calories, 18g protein, 13g fat, and 2g carbohydrates. Values vary with the rotisserie chicken and mayonnaise used.

Rotisserie Chicken Salad

A creamy no-cook chicken salad with celery, red onion, baby spinach, and a lemon-Dijon dressing.
Course: Salad
Cuisine: American
Prep: 15 min
Total: 45 min
Servings: 4 Calories: 350 kcal

Equipment

  • Cutting board
  • Chef's knife
  • Small bowl
  • Whisk
  • Mixing bowl

Ingredients

For the Salad

  • About 4 cups picked rotisserie chicken, skin and bones removed, shredded with some bite-size pieces (450 g)
  • 2 celery ribs, finely diced (about 1/2 cup; 60 g)
  • 1/4 cup finely diced red onion (40 g)
  • 1 packed cup roughly chopped baby spinach (30 g)
  • 1 tablespoon finely chopped flat-leaf parsley, plus a little for finishing

For the Dressing

  • 1/3 cup mayonnaise (75 g)
  • 2 tablespoons plain Greek yogurt (30 g)
  • 1 teaspoon Dijon mustard
  • 1 tablespoon fresh lemon juice
  • 1/8 teaspoon kosher salt, plus more to taste
  • 1/4 teaspoon freshly ground black pepper, plus a little for finishing

Optional

  • 1–2 tablespoons additional mayonnaise, as needed
  • Seeded crackers, for serving

Instructions

  1. Remove the skin and bones from the chicken, checking for small bones or cartilage. Shred most of the meat and cut the rest into bite-size pieces.
  2. Whisk the mayonnaise, Greek yogurt, Dijon, lemon juice, 1/8 teaspoon salt, and 1/4 teaspoon pepper in a small bowl until smooth.
  3. Finely dice the celery and red onion. Roughly chop the spinach and parsley, reserving a little parsley for finishing.
  4. Combine the chicken, celery, red onion, spinach, and most of the parsley in a medium mixing bowl.
  5. Add the dressing and fold gently until it coats the ingredients. If the salad seems dry, fold in additional mayonnaise a spoonful at a time.
  6. Taste and adjust the salt and pepper as needed. Spoon into a shallow bowl and finish with the reserved parsley and a little black pepper.
  7. Serve immediately or cover and refrigerate for 20–30 minutes. Serve crackers alongside rather than mixing them into the salad.

Tips

  • Taste the salad before adding more salt because rotisserie chicken may already be well seasoned.
  • Keep some larger chicken pieces and fold gently to preserve the salad’s texture.
  • Add extra mayonnaise only after mixing, a spoonful at a time.
  • For fresher leaves when making ahead, fold in the spinach closer to serving.
  • Keep crackers beside the salad so they stay crisp.

Variations

  • Richer Dressing: Replace the 2 tablespoons of Greek yogurt with the same amount of mayonnaise.
Notes

Keep the salad cold. Refrigerate leftovers promptly in an airtight container and use within 3–4 days. Freezing the mixed salad is not recommended.

Nutrition

Calories: 350 kcal | Protein: 32 g | Fat: 23 g | Carbohydrates: 3 g | Per 100 G Calories: 200 kcal | Per 100 G Protein: 18 g | Per 100 G Fat: 13 g | Per 100 G Carbohydrates: 2 g

Dill Pickle Chicken Salad

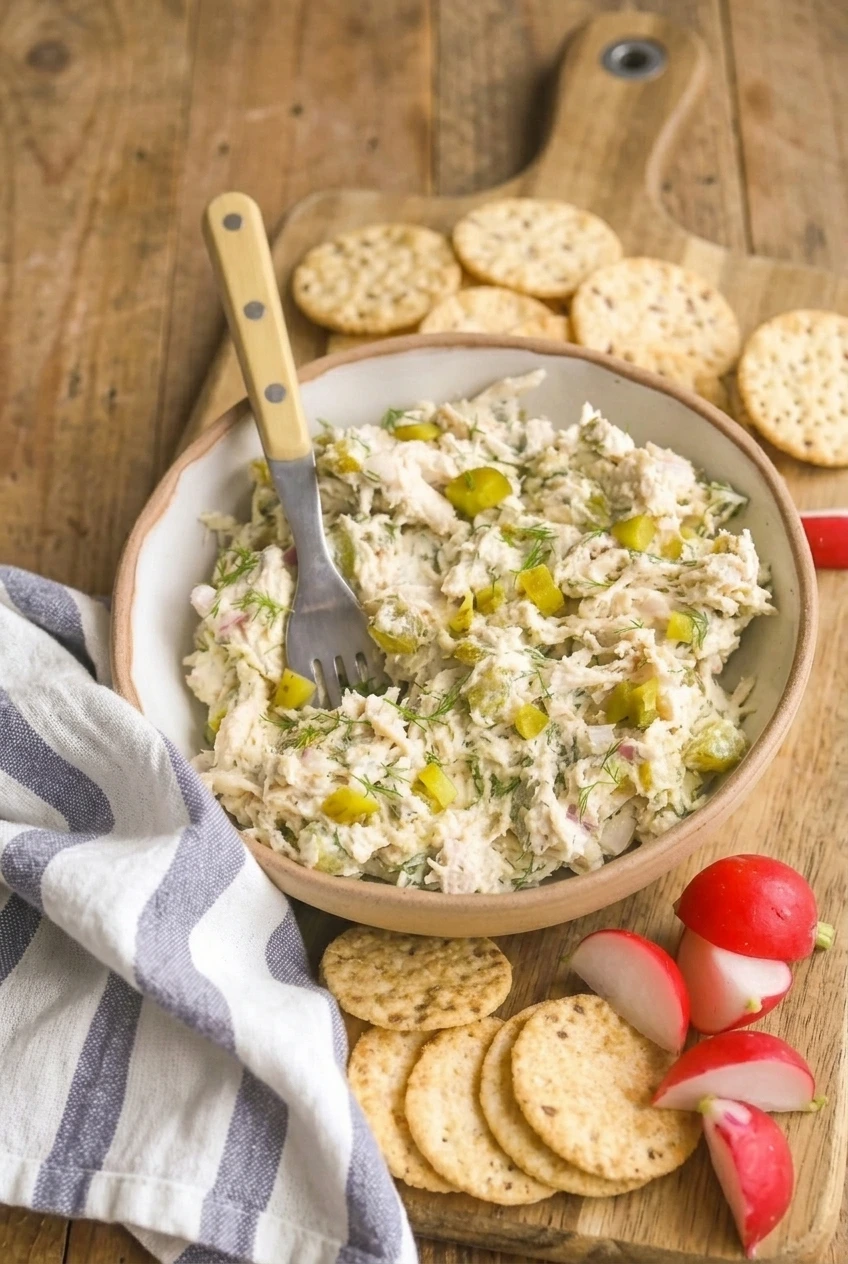
Dill pickles and fresh dill give this creamy chicken salad its tang, while hand-shredded chicken and chopped pickles keep every scoop substantial and crisp. Using rotisserie or leftover chicken makes assembly no-cook: stir together a mayonnaise-and-Greek-yogurt dressing, then fold in the chicken by hand.

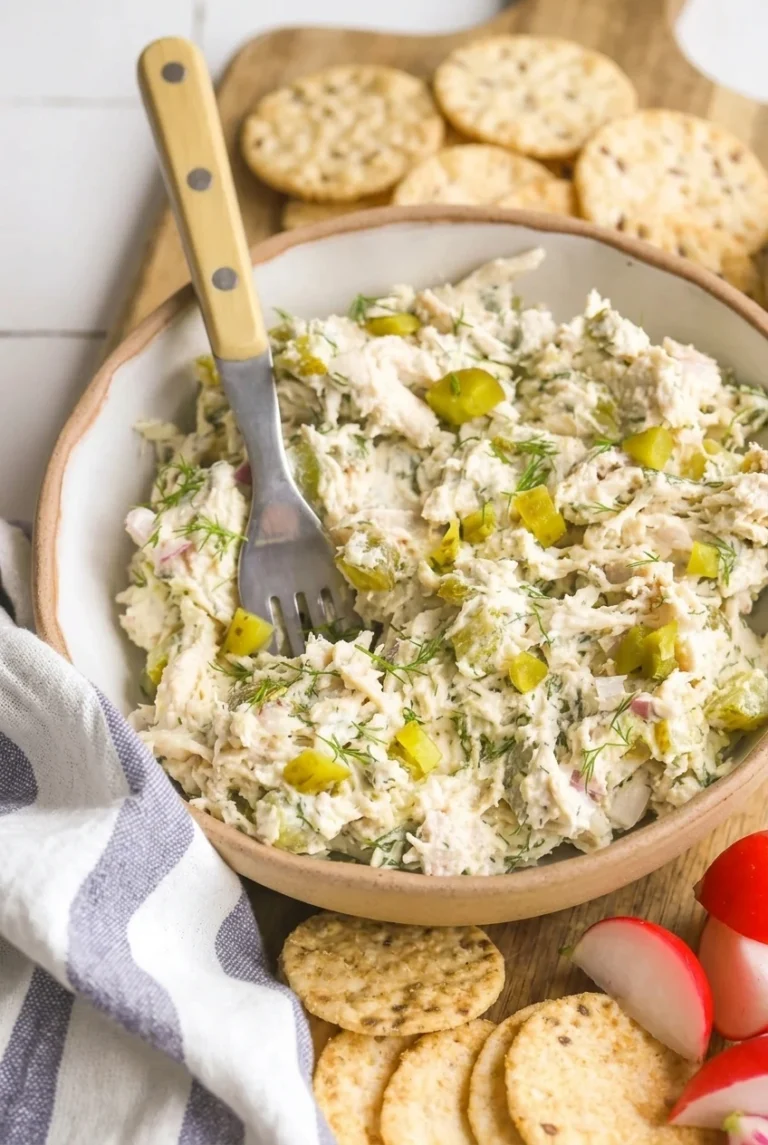
Serve the salad in a bowl with crackers and sliced radishes alongside. Pickle brine sharpens the dressing, but add any extra sparingly so it stays thick enough to cling to the chicken.

Ingredients for Dill Pickle Chicken Salad

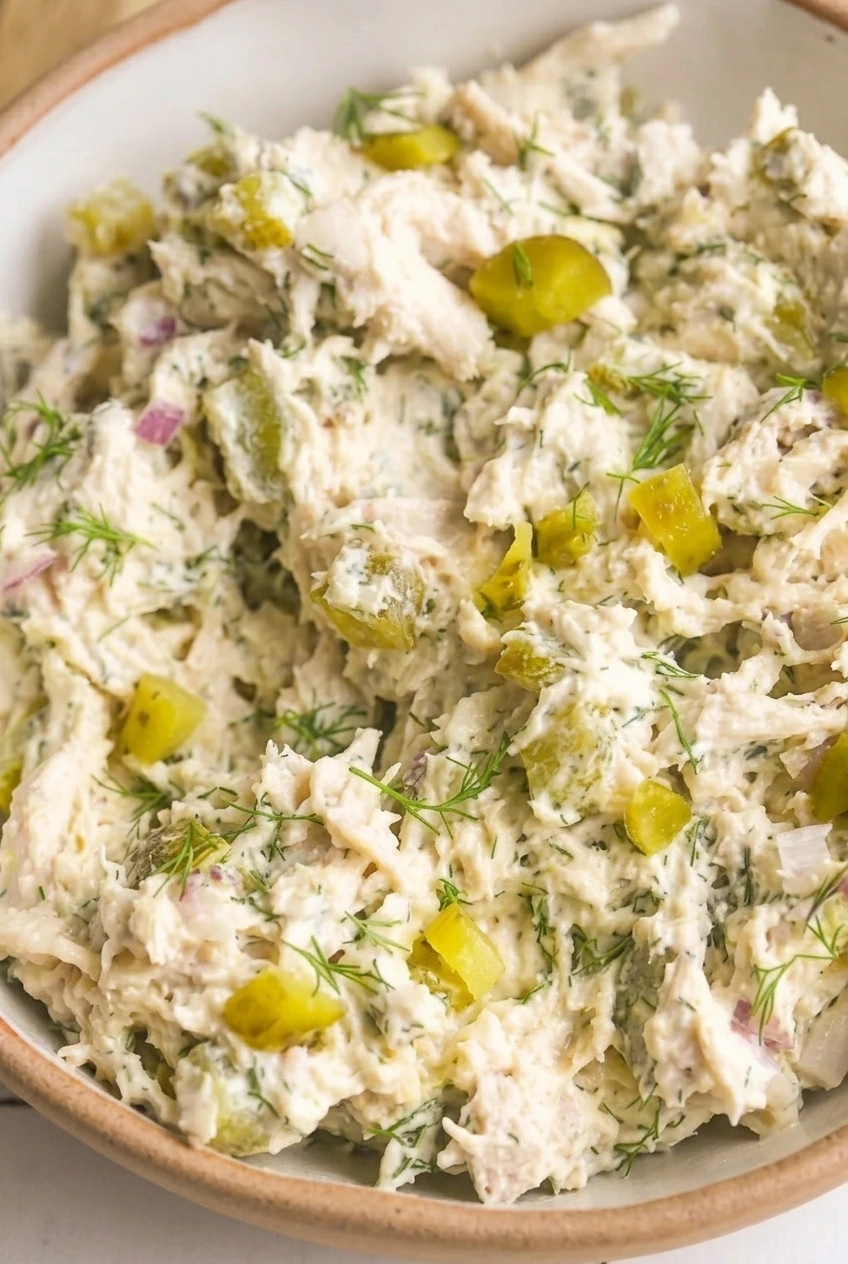
Close detail of dill pickle chicken salad showing creamy dressing, distinct chicken shreds, pickle pieces, and fresh dill
  • 3 cups cooked, cooled chicken, hand-shredded (420g)
  • 1/2 cup drained, chopped dill pickles, plus 1 tablespoon for topping (75g total)
  • 1/3 cup mayonnaise (75g)
  • 1/4 cup plain Greek yogurt (60g)
  • 1 tablespoon dill pickle brine, plus more only if needed
  • 1 tablespoon finely chopped fresh dill, plus a few small fronds for garnish
  • 2 tablespoons finely diced red onion (20g)
  • 1 teaspoon Dijon mustard
  • 1/8 teaspoon kosher salt, plus more to taste
  • 1/8 teaspoon black pepper
  • Crackers and sliced radishes, for serving (optional)

Rotisserie or leftover chicken works well; remove any skin and bones before shredding. Use dill pickles rather than sweet pickles for the intended tangy flavor.

How to Make Dill Pickle Chicken Salad

A full bowl of dill pickle chicken salad served with crackers and sliced radishes on a wooden surface
  1. Prepare the chicken and pickles: Shred the chicken by hand into loose, bite-size strands. Drain and lightly pat dry the chopped pickles, reserving 1 tablespoon for the top.
  2. Mix the dressing: In a medium bowl, stir together the mayonnaise, Greek yogurt, 1 tablespoon pickle brine, Dijon, chopped dill, salt, and pepper. Taste before adding more brine; the dressing should be thick, not pourable.
  3. Fold in the salad: Add the chicken, remaining pickles, and red onion. Fold gently with a fork or spatula until the chicken is coated and the shreds and pickle pieces remain distinct. Taste and adjust the seasoning. If the salad seems dry, add mayonnaise or Greek yogurt 1 tablespoon at a time.
  4. Chill and serve: Serve right away, or cover and refrigerate for about 30 minutes to let the flavors meld. Spoon into a shallow bowl and top with the reserved pickles and dill fronds. Serve crackers and sliced radishes alongside, if desired.

How to Keep the Salad Thick and Scoopable

Wet pickles and excess brine can make the dressing runny. If it needs more tang after mixing, add brine 1 teaspoon at a time, stopping while the dressing still clings to the chicken. If the salad becomes too loose, fold in a little more shredded chicken.

Chicken Texture and Pickle Crunch

A food processor can turn the chicken fine and pasty; hand-shredding and gentle folding keep the salad’s texture loose. Save the topping pickles until just before serving for a fresher crunch, especially when making the salad ahead.

Serving and Storage

Keep the salad covered and refrigerated when not serving. As cautious storage guidance, use it within 3 days. It can also be spooned into a sandwich, wrap, or lettuce cup, though the bowl is the primary serving option.

Serve chilled; reheating is not needed. Freezing is not recommended because the pickles may become watery and the creamy dressing may separate after thawing.

Nutrition Information

Approximate nutrition per serving, based on 4 servings: 315 calories, 34g protein, 18g fat, and 2g carbohydrates. Approximate nutrition per 100g: 185 calories, 20g protein, 11g fat, and 1g carbohydrates. Values vary with the chicken, mayonnaise, and Greek yogurt used.

Dill Pickle Chicken Salad

Hand-shredded chicken is folded with chopped dill pickles and a creamy mayonnaise-yogurt dressing.
Course: Salad
Cuisine: American
Prep: 15 min
Total: 45 min
Servings: 4 Calories: 315 kcal per serving; 185 kcal per 100 g

Equipment

  • Medium mixing bowl
  • Cutting board
  • Knife
  • Fork or spatula

Ingredients

For the Salad

  • 3 cups cooked, cooled chicken, hand-shredded (420 g)
  • 1/2 cup drained, chopped dill pickles, plus 1 tablespoon for topping (75 g total)
  • 1/3 cup mayonnaise (75 g)
  • 1/4 cup plain Greek yogurt (60 g)
  • 1 tablespoon dill pickle brine, plus more only if needed
  • 1 tablespoon finely chopped fresh dill, plus a few small fronds for garnish
  • 2 tablespoons finely diced red onion (20 g)
  • 1 teaspoon Dijon mustard
  • 1/8 teaspoon kosher salt, plus more to taste
  • 1/8 teaspoon black pepper

For Serving

  • Crackers and sliced radishes, optional

Instructions

  1. Shred the cooked chicken by hand into loose, bite-size strands.
  2. Drain and lightly pat dry the chopped pickles, reserving 1 tablespoon for topping.
  3. In a medium bowl, stir together the mayonnaise, Greek yogurt, pickle brine, Dijon mustard, chopped dill, salt, and pepper. Taste before adding more brine; keep the dressing thick.
  4. Add the chicken, remaining pickles, and red onion. Fold gently with a fork or spatula until coated, keeping the chicken shreds and pickle pieces distinct.
  5. Taste and adjust the seasoning. If the salad seems dry, fold in mayonnaise or Greek yogurt 1 tablespoon at a time.
  6. Serve immediately, or cover and refrigerate for about 30 minutes to let the flavors meld.
  7. Spoon into a shallow bowl and top with the reserved pickles and dill fronds. Serve crackers and sliced radishes alongside, if desired.

Tips

  • Use rotisserie or leftover chicken, removing the skin and bones before shredding.
  • Choose dill pickles rather than sweet pickles for a tangy flavor.
  • Pat the chopped pickles dry to help keep the dressing thick.
  • Add extra pickle brine 1 teaspoon at a time, stopping while the dressing still clings to the chicken.
  • Hand-shred the chicken and fold gently to avoid a fine, pasty texture.
  • Add the topping pickles just before serving for the freshest crunch.

Notes

Keep covered and refrigerated when not serving; use within 3 days. Serve chilled; reheating is not needed. Freezing is not recommended because the pickles may become watery and the dressing may separate.

Nutrition

Calories: 315 kcal per serving; 185 kcal per 100 g | Protein: 34 g per serving; 20 g per 100 g | Fat: 18 g per serving; 11 g per 100 g | Carbohydrates: 2 g per serving; 1 g per 100 g

Southern Chicken Salad

Southern-style chicken salad is a chilled, scoopable mixture of tender chicken, finely diced celery and dill pickle, and a creamy mayonnaise dressing with mustard and lemon. Small, distinct pieces of chicken give it texture without making it difficult to spread on a sandwich.

Poach the chicken for this version, or use cooked rotisserie chicken as a shortcut. Chop or lightly shred the chicken while it is warm, then cool it completely before adding the dressing. Chill the finished salad for at least 2 hours so the flavors can meld.

Ingredients for Southern Chicken Salad

Close-up of creamy Southern chicken salad showing distinct chicken pieces, diced celery, and dill pickle
  • 1 1/2 pounds boneless, skinless chicken breasts (680g)
  • About 4 cups low-sodium chicken stock, or enough to cover the chicken
  • 1/2 cup mayonnaise (115g)
  • 2 celery ribs, finely diced (about 1/2 cup; 60g)
  • 1/4 cup finely diced dill pickle, drained (35g)
  • 1 teaspoon yellow mustard
  • 1 tablespoon fresh lemon juice
  • 1/2 teaspoon kosher salt, plus more to taste
  • 1/4 teaspoon black pepper, plus more to taste

How to Make Southern Chicken Salad

A full bowl of chilled Southern chicken salad centered on a wooden table with space around it
  1. Poach the chicken: Place the chicken breasts in a medium saucepan in a single layer. Add enough cool stock to cover them, using water if needed. Bring to a gentle simmer over medium heat, then reduce the heat to maintain a low simmer. Leave the pot uncovered or partially covered, and turn the chicken once if needed to keep it submerged. Begin checking around 18 minutes; the chicken usually takes 20–25 minutes, depending on thickness. It should be opaque throughout and reach 165°F (75°C) in the thickest part.
  2. Chop and cool: Transfer the chicken to a clean cutting board. While it is warm, roughly chop or lightly shred it into small, distinct pieces. Let it cool completely before adding the dressing; warm chicken can make mayonnaise dressing loose.
  3. Mix the dressing: In a mixing bowl, stir together the mayonnaise, mustard, lemon juice, salt, and pepper. Fold in the finely diced celery and drained pickle. Taste and adjust the lemon, salt, or pepper as needed.
  4. Fold in the chicken: Add the cooled chicken and fold just until coated. Avoid vigorous stirring, which can break down the pieces and make the salad pasty.
  5. Chill: Cover and refrigerate for at least 2 hours. Stir gently and taste again before serving.

Southern Chicken Salad Variations

  • Rotisserie chicken: Use about 3 cups of cooked rotisserie or leftover chicken in place of the raw chicken and stock. Remove the skin and bones, chop or lightly shred the meat, and skip the poaching step.
  • Fruit or nuts: For a sweeter variation, add 1/2 cup halved grapes or diced apple. For extra crunch, add 1/4 cup chopped toasted pecans or walnuts. Neither is needed for the savory version.
  • Greek yogurt: Replace some or all of the mayonnaise with plain Greek yogurt for a tangier dressing. Adjust to taste and texture.

Serving Southern Chicken Salad

Serve chilled on toasted bread, sandwich rolls, or croissants. It also works on crackers, in lettuce cups, or over greens; keep the chicken salad mixed together rather than arranging its ingredients as separate toppings.

Make-Ahead and Storage

Make the salad up to 24 hours ahead. Store it covered in an airtight container in the refrigerator at 40°F (5°C) or below, and use within 3–4 days. Stir gently before serving if the dressing has settled.

Freezing is not recommended because the mayonnaise-based dressing may separate and become watery after thawing. Serve the salad chilled; it does not need reheating.

Nutrition

Approximate nutrition per serving, based on 4 servings: 375 calories, 39g protein, 24g fat, and 1g carbohydrates. Per 100g: about 200 calories, 21g protein, 13g fat, and 1g carbohydrates. Values vary with the chicken and mayonnaise used. The drained poaching stock is not included.

Southern Chicken Salad

Tender chicken, celery, and dill pickle are folded into a creamy mayonnaise dressing with mustard and lemon.
Course: Salad
Cuisine: American
Prep: 15 min
Cook: 25 min
Total: 190 min
Servings: 4 Calories: 375 kcal

Equipment

  • Medium saucepan
  • Cutting board
  • Knife
  • Mixing bowl
  • Meat thermometer

Ingredients

For the Chicken

  • 1 1/2 pounds boneless, skinless chicken breasts (680 g)
  • About 4 cups low-sodium chicken stock, or enough to cover the chicken

For the Dressing

  • 1/2 cup mayonnaise (115 g)
  • 2 celery ribs, finely diced (about 1/2 cup; 60 g)
  • 1/4 cup finely diced dill pickle, drained (35 g)
  • 1 teaspoon yellow mustard
  • 1 tablespoon fresh lemon juice
  • 1/2 teaspoon kosher salt, plus more to taste
  • 1/4 teaspoon black pepper, plus more to taste

Instructions

  1. Place the chicken breasts in a single layer in a medium saucepan. Add enough cool stock to cover, using water if needed.
  2. Bring the stock to a gentle simmer over medium heat, then reduce the heat to maintain a low simmer. Cook uncovered or partially covered for 20–25 minutes, turning the chicken if needed, until opaque throughout and 165°F (75°C) in the thickest part.
  3. Transfer the chicken to a cutting board. While warm, roughly chop or lightly shred it into small, distinct pieces, then cool completely.
  4. Stir the mayonnaise, mustard, lemon juice, salt, and pepper together in a mixing bowl.
  5. Fold in the diced celery and drained pickle. Taste and adjust the lemon, salt, or pepper as needed.
  6. Add the cooled chicken and fold just until coated.
  7. Cover and refrigerate for at least 2 hours. Stir gently and taste again before serving.

Tips

  • Use water if needed to keep the chicken covered while poaching.
  • Begin checking the chicken around 18 minutes; thicker pieces may take longer.
  • Cool the chicken completely before adding it to the mayonnaise dressing.
  • Fold gently to keep the chicken pieces distinct and prevent a pasty texture.

Variations

  • Rotisserie Chicken: Use about 3 cups of cooked rotisserie or leftover chicken, with the skin and bones removed, and skip the poaching step.
  • Fruit or Nuts: Add 1/2 cup halved grapes or diced apple for sweetness, or 1/4 cup chopped toasted pecans or walnuts for crunch.
  • Greek Yogurt: Replace some or all of the mayonnaise with plain Greek yogurt, adjusting to taste and texture.

Notes

Store covered in an airtight container at 40°F (5°C) or below and use within 3–4 days. Freezing is not recommended; serve chilled without reheating.

Nutrition

Calories: 375 kcal | Protein: 39 g | Fat: 24 g | Carbohydrates: 1 g

Classic Creamy Chicken Salad

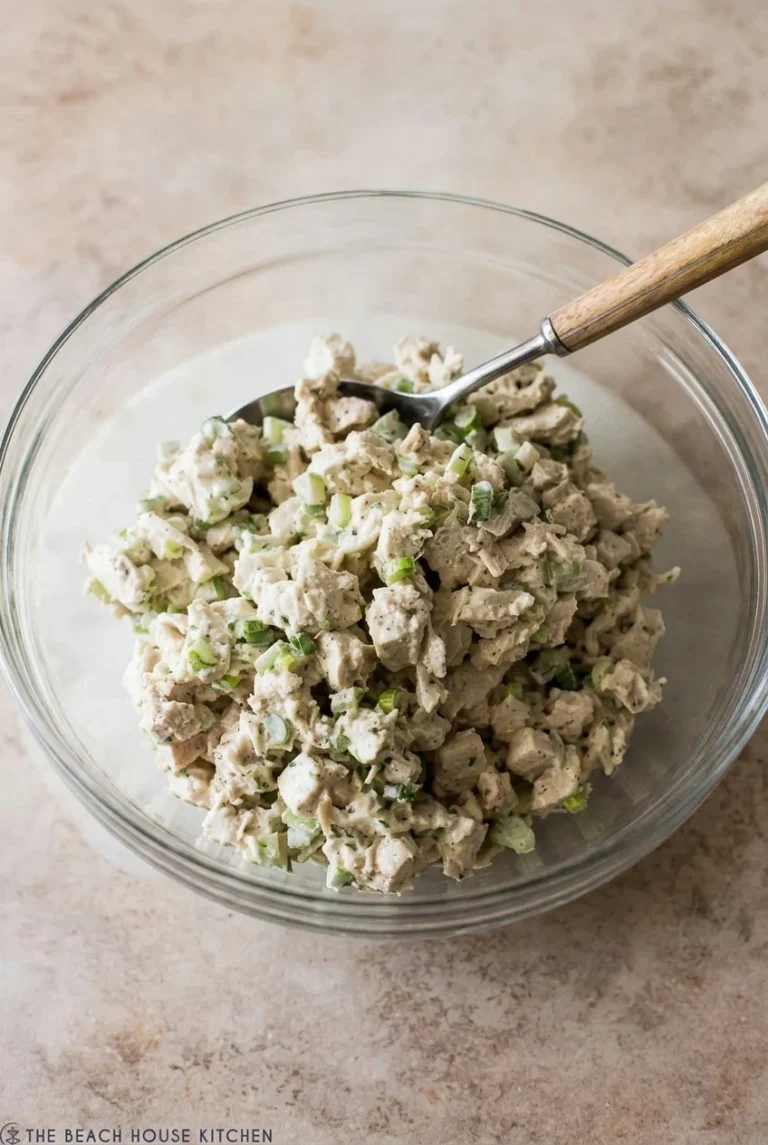
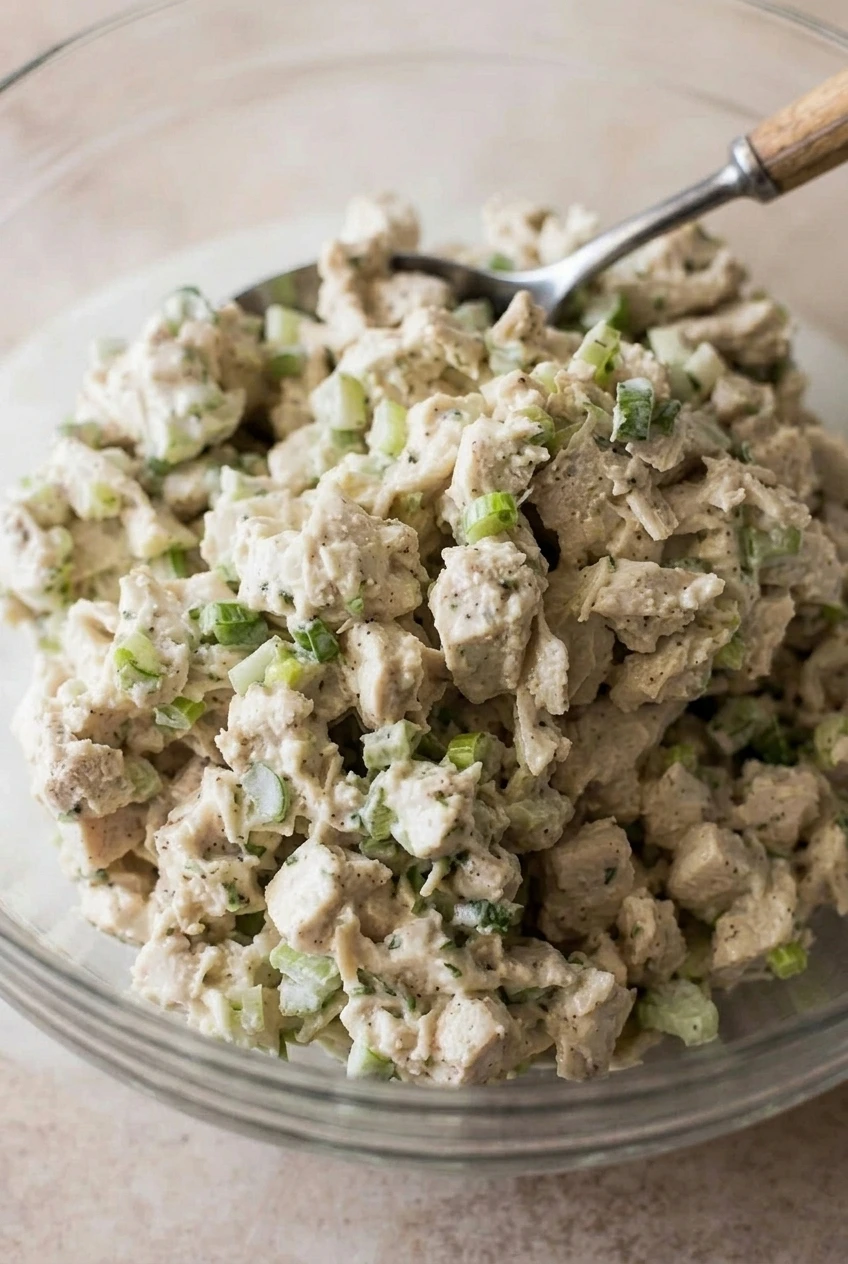
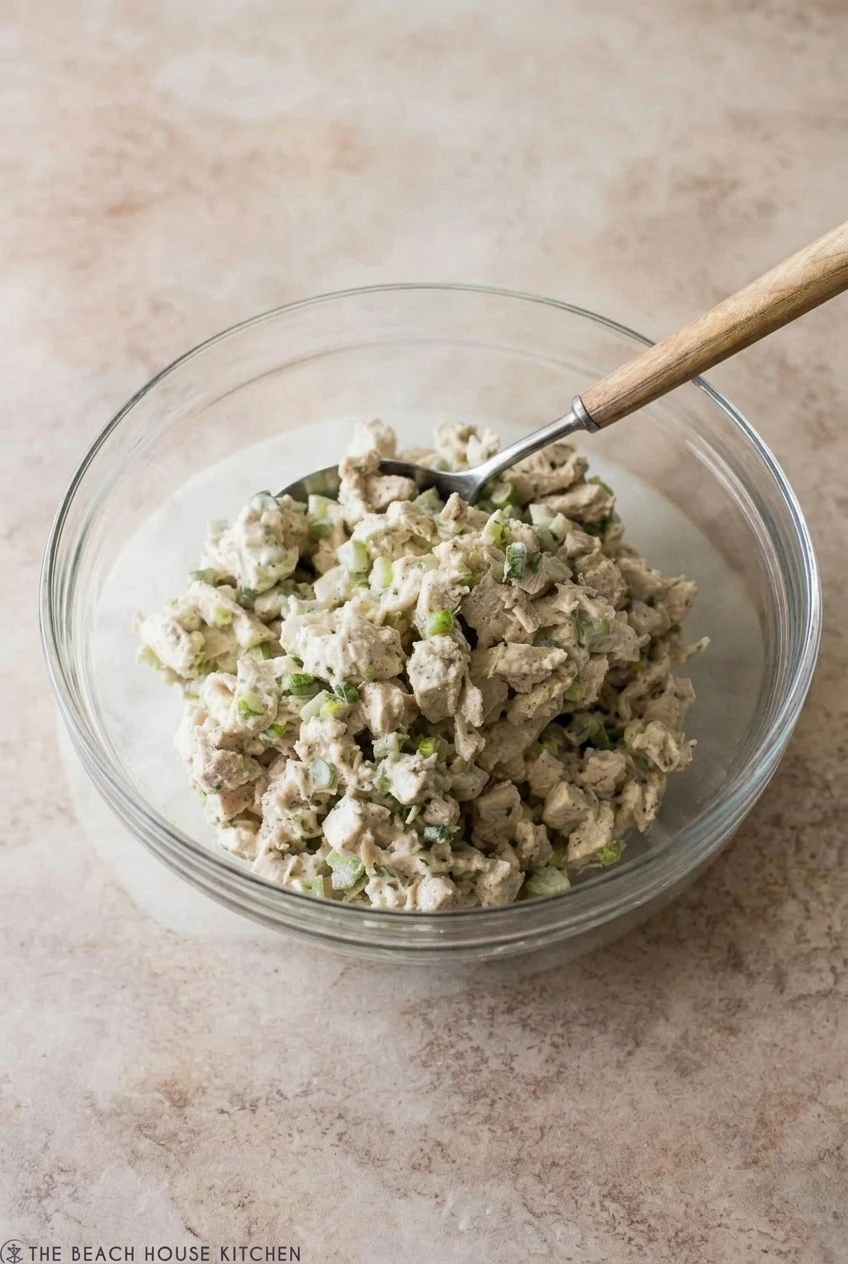
Distinct pieces of chicken, crisp celery, and scallions give this cold chicken salad its chunky texture. A mayonnaise dressing with a little sour cream and Dijon coats the ingredients without pooling in the bowl. Use cooked chicken or rotisserie chicken to assemble it in about 15 minutes. Add the dressing gradually: chicken varies in moisture, and a lighter coating is easier to adjust than an overly wet salad. Serve it right away or chill it briefly.

Ingredients

Close-up of chunky chicken salad showing the creamy coating, celery, scallions, and pepper
  • 1 1/2 pounds cooked chicken, cooled and chopped into bite-size pieces (about 4 cups; 680g)
  • 1/2 cup mayonnaise (110g)
  • 2 tablespoons sour cream (30g)
  • 3/4 cup finely diced celery (about 2 ribs; 75g)
  • 1/4 cup thinly sliced scallions (about 2 scallions; 25g)
  • 1 teaspoon Dijon mustard
  • 1/4 teaspoon kosher salt, plus more to taste
  • 1/4 teaspoon freshly ground black pepper, or to taste

How to Make Classic Creamy Chicken Salad

A full bowl of classic creamy chicken salad centered on a light stone surface
  1. Prepare the chicken: Use fully cooked, cooled chicken. Remove the skin and bones if using rotisserie chicken, then chop the meat into irregular bite-size pieces, leaving a few natural shreds.
  2. Mix the dressing: In a small bowl, stir together the mayonnaise, sour cream, Dijon, salt, and pepper until smooth. If the chicken is well seasoned, start with less salt.
  3. Combine: Put the chicken, celery, and scallions in a large bowl. Fold in most of the dressing gently, then add the rest a spoonful at a time only if needed. The dressing should cling to the pieces without pooling in the bowl.
  4. Taste and adjust: Add salt or pepper as needed. If the salad seems dry, fold in a little more mayonnaise without mashing the chicken.
  5. Serve or chill: Spoon into a shared bowl and serve immediately, or cover and refrigerate for about 30 minutes to let the flavors meld. Stir gently before serving.

Choosing and Cutting the Chicken

Cooked chicken breast, rotisserie chicken, and other cooked leftovers all work. Let warm chicken cool before mixing it with the dressing. Keep the pieces bite-size rather than finely chopping or processing them; the chicken should remain distinct from the diced celery and scallions.

If starting with raw chicken, cook it to 165°F (75°C) in the thickest part, then cool it before making the salad.

Serving and Storage

Serve the chicken salad in a bowl with crackers, spoon it into bread or a croissant, or serve it on lettuce.

Store the assembled salad covered in an airtight container in the refrigerator at 40°F (5°C) or below and use it within 3–4 days. Chicken may absorb some dressing as it sits; stir gently and add mayonnaise a spoonful at a time if the salad seems dry. Do not reheat it.

Discard chicken salad left at room temperature for more than 2 hours, or after 1 hour if the temperature is above 90°F (30°C). Freezing is not recommended because the mayonnaise-based dressing can change texture after thawing.

Nutrition

Approximate nutrition per serving, based on 1 of 6 servings (about 155g): 330 calories, 36g protein, 18g fat, and 1g carbohydrates. Per 100g: 210 calories, 23g protein, 11g fat, and 1g carbohydrates. Values vary with the chicken and mayonnaise used.

Classic Creamy Chicken Salad

Chunky chicken, crisp celery, and scallions are coated in a creamy mayonnaise, sour cream, and Dijon dressing.
Course: Salad
Cuisine: American
Prep: 15 min
Total: 45 min
Servings: 6 Calories: 330 kcal per serving; 210 kcal per 100 g

Equipment

  • Cutting board
  • Knife
  • Small bowl
  • Large bowl

Ingredients

For the Chicken Salad

  • 1 1/2 pounds cooked chicken, cooled and chopped into bite-size pieces (about 4 cups; 680 g)
  • 3/4 cup finely diced celery (about 2 ribs; 75 g)
  • 1/4 cup thinly sliced scallions (about 2 scallions; 25 g)

For the Dressing

  • 1/2 cup mayonnaise (110 g)
  • 2 tablespoons sour cream (30 g)
  • 1 teaspoon Dijon mustard
  • 1/4 teaspoon kosher salt, plus more to taste
  • 1/4 teaspoon freshly ground black pepper, or to taste

Instructions

  1. If using rotisserie chicken, remove the skin and bones. Chop the cooled chicken into irregular bite-size pieces, leaving a few natural shreds.
  2. Stir the mayonnaise, sour cream, Dijon, salt, and pepper together in a small bowl until smooth.
  3. Place the chicken, celery, and scallions in a large bowl.
  4. Fold in most of the dressing gently. Add more a spoonful at a time as needed, stopping when it clings to the chicken without pooling.
  5. Taste and adjust the salt and pepper. If the salad seems dry, fold in a little more mayonnaise without mashing the chicken.
  6. Serve immediately, or cover and refrigerate for about 30 minutes. Stir gently before serving.

Tips

  • Let warm cooked chicken cool before mixing it with the dressing.
  • Keep the chicken in bite-size pieces rather than finely chopping or processing it.
  • Add the dressing gradually because chicken can vary in moisture.
  • Start with less salt if the chicken is already well seasoned.
  • If the salad dries out after chilling, stir in mayonnaise a spoonful at a time.

Notes

Refrigerate covered at 40°F (5°C) or below and use within 3–4 days. Discard if left at room temperature for over 2 hours, or over 1 hour above 90°F (30°C). Do not reheat; freezing is not recommended. If cooking raw chicken, cook to 165°F (75°C) in the thickest part and cool before mixing.

Nutrition

Calories: 330 kcal per serving; 210 kcal per 100 g | Protein: 36 g per serving; 23 g per 100 g | Fat: 18 g per serving; 11 g per 100 g | Carbohydrates: 1 g per serving; 1 g per 100 g

Pork Chops and Rice Casserole

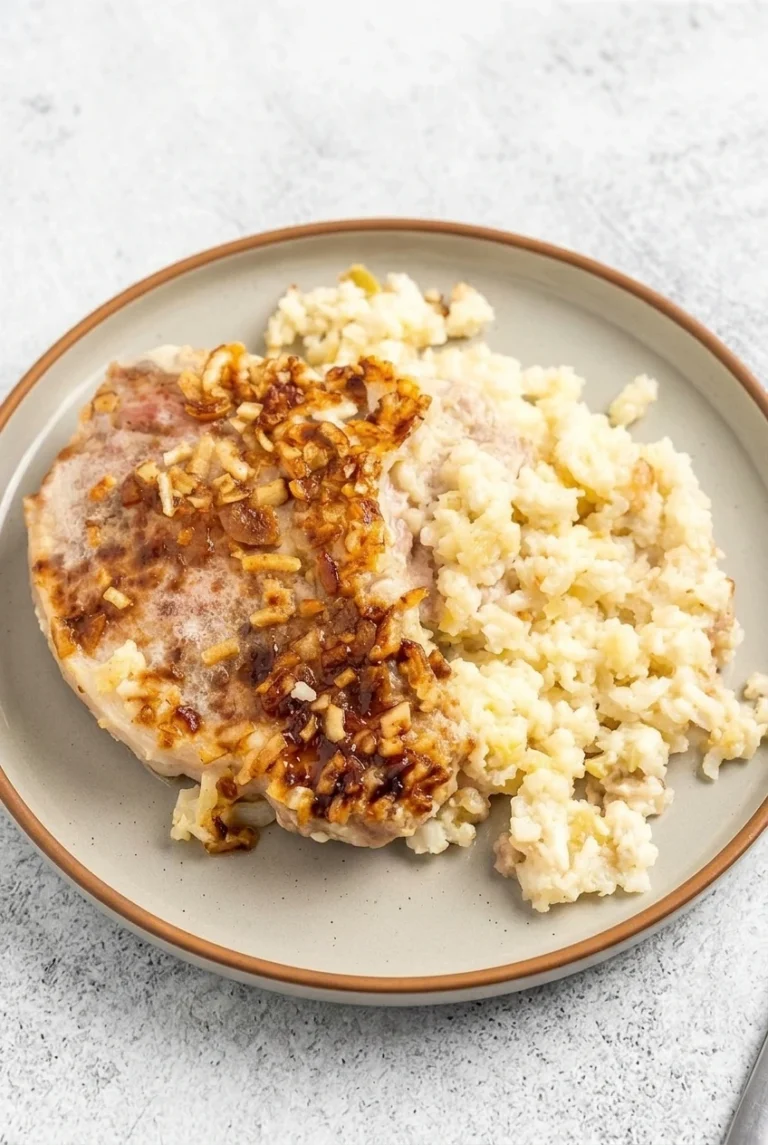
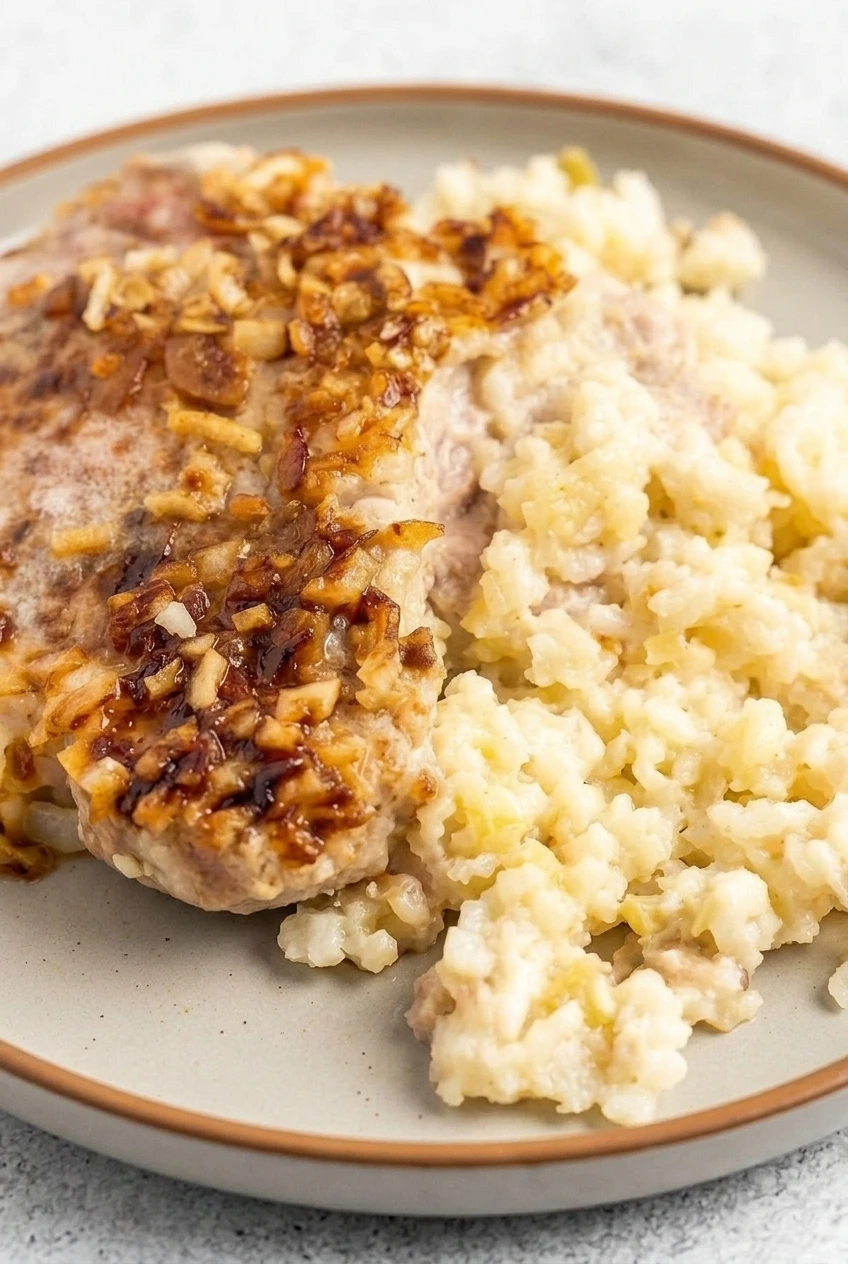
Thin pork chops bake on top of instant white rice mixed with condensed cream soups, milk, and onion soup mix. The rice turns soft and creamy, while onion pieces give the chops a few golden-brown patches. There’s no need to sear the pork first.

The chops and rice may not finish at the same time. Start checking the pork before the rice is expected to be tender, and remove any chops that are done so they don’t dry out while the rice finishes.

Ingredients for Pork Chops and Rice Casserole

Close detail of golden onion bits on a pork chop beside soft, creamy rice grains.
  • 1 tablespoon unsalted butter, or enough cooking spray to grease the dish
  • 2 cups instant white rice (360g)
  • 1 can (10.5 ounces) condensed cream of mushroom soup (about 300g)
  • 1 can (10.5 ounces) condensed cream of celery soup (about 300g)
  • 1 cup milk (240g)
  • 1 envelope dry onion soup mix (28g), divided
  • 1/4 teaspoon black pepper, or to taste
  • 4 bone-in pork chops, about 1/2 inch thick and 1 1/2 pounds total (680g)

Boneless chops also work, but they may finish sooner. If preferred, replace the cream of mushroom soup with one 10.5-ounce can of condensed cream of chicken soup; keep the cream of celery soup and milk as written.

How to Make Pork Chops and Rice Casserole

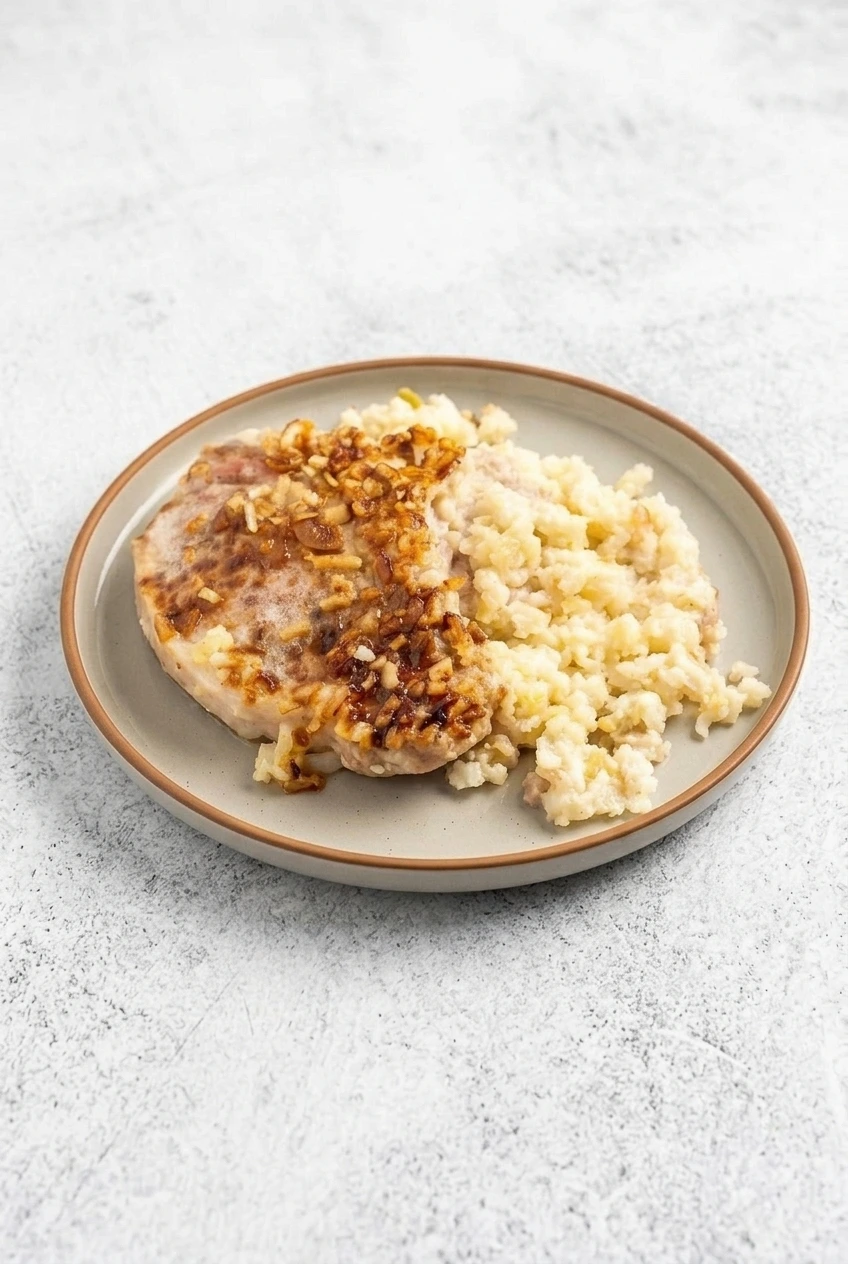
A full plate of pork chop and creamy rice casserole photographed with more of the light tabletop visible.
  1. Prepare the oven and dish: Preheat the oven to 350°F (175°C) with a rack in the center. Lightly grease a 9-by-13-inch casserole dish. Pat the pork chops dry and divide the onion soup mix roughly in half.
  2. Mix the rice: In the dish, stir together the instant rice, both condensed soups, milk, pepper, and half of the onion soup mix. Spread the thick mixture evenly.
  3. Add the chops: Arrange them on top of the rice in a single layer, without overlapping or burying them. Sprinkle the remaining onion soup mix over the chops, leaving some onion pieces on their surfaces.
  4. Bake covered: Cover the dish tightly with foil and bake for about 40 minutes. Begin checking the chops at this point, especially if they are thin or boneless. Check the rice for tenderness around 45 minutes.
  5. Check each chop and the rice: Insert an instant-read thermometer into the thickest part of each chop, avoiding the bone. Transfer any chop that reaches 145°F (65°C) to a plate and let it rest for at least 3 minutes. If the rice is still firm in the center, cover the dish again and continue baking until the grains are tender and the mixture is moist and creamy.
  6. Finish and serve: If the rice is tender but the chops still need time or a little surface color, uncover the dish for 5 to 10 minutes, checking the pork as it bakes. The onion pieces should be golden-brown, not scorched. Do not leave chops that have reached 145°F in the oven just to brown them. Return any removed chops to the finished rice, let the casserole stand for about 5 minutes, and serve.

Allow approximately 45 to 55 minutes of baking, though chop thickness, the baking dish, and the oven can affect the timing. Serve one chop with a generous scoop of creamy rice; a green salad or cooked vegetable can go alongside.

Why This Casserole Uses Instant Rice

Instant white rice suits the amount of soup and milk in this casserole. Regular long-grain rice needs a different amount of liquid and a different baking schedule, so it is not a direct substitute. Keep the foil cover tight during the main bake to retain the moisture the rice needs.

Make-Ahead, Storage, and Reheating

To prepare the casserole ahead, bake it first, then cool and refrigerate it. Avoid refrigerating the assembled casserole unbaked: the rice can absorb the liquid while it sits.

Store cooled leftovers in a covered airtight container in the refrigerator for up to 3 to 4 days. Reheat portions in the microwave or covered in the oven, adding a small splash of water if the rice has firmed up. Reheat leftovers to 165°F (75°C).

Nutrition

Approximate nutrition per serving, based on 4 servings of one pork chop with one-quarter of the rice casserole: 710 calories, 39g protein, 21g fat, and 89g carbohydrates. Per 100g: approximately 160 calories, 9g protein, 5g fat, and 20g carbohydrates. Values vary with the soups, pork cut, and amount of edible meat on each chop.

Pork Chops and Rice Casserole

Thin pork chops bake over creamy instant rice with condensed soups and onion soup mix.
Course: Main Course
Cuisine: American
Prep: 10 min
Cook: 55 min
Total: 70 min
Servings: 4 Calories: 710 kcal

Equipment

  • 9-by-13-inch casserole dish
  • Aluminum foil
  • Instant-read thermometer

Ingredients

For the casserole

  • 1 tablespoon unsalted butter, or cooking spray, for greasing the dish
  • 2 cups instant white rice (360 g)
  • 1 can (10.5 ounces; about 300 g) condensed cream of mushroom soup
  • 1 can (10.5 ounces; about 300 g) condensed cream of celery soup
  • 1 cup milk (240 g)
  • 1 envelope dry onion soup mix (28 g), divided
  • 1/4 teaspoon black pepper, or to taste
  • 4 bone-in pork chops, about 1/2 inch thick and 1 1/2 pounds total (680 g)

Instructions

  1. Preheat the oven to 350°F (175°C) with a rack in the center. Lightly grease a 9-by-13-inch casserole dish.
  2. Pat the pork chops dry and divide the onion soup mix roughly in half.
  3. Stir the instant rice, both condensed soups, milk, pepper, and half of the onion soup mix together in the casserole dish. Spread the mixture evenly.
  4. Arrange the pork chops in a single layer on top of the rice, without overlapping or burying them. Sprinkle the remaining onion soup mix over the chops.
  5. Cover the dish tightly with foil and bake for about 40 minutes. Begin checking the pork at this point and check the rice for tenderness around 45 minutes.
  6. Check each chop in its thickest part, avoiding the bone. Remove any chop that reaches 145°F (65°C) and let it rest for at least 3 minutes.
  7. If the rice is still firm, cover the dish again and continue baking until the grains are tender and the mixture is moist and creamy.
  8. If the rice is tender but the chops need more time or color, uncover the dish and bake for 5 to 10 minutes, checking the pork often. Remove any chop once it reaches 145°F (65°C).
  9. Return removed chops to the finished rice, let the casserole stand for about 5 minutes, and serve.

Tips

  • Keep the foil cover tight during the main bake so the rice retains the moisture it needs.
  • Check thin or boneless chops early; they may finish before the rice.
  • Remove each chop as soon as it reaches 145°F (65°C) to help prevent it from drying out.
  • Use instant white rice; regular long-grain rice needs different liquid amounts and baking times.

Variations

  • Cream of Chicken Version: Replace the cream of mushroom soup with one 10.5-ounce can of condensed cream of chicken soup; keep the cream of celery soup and milk as written.
  • Boneless Pork Chops: Use boneless chops in place of bone-in chops, and check them early because they may finish sooner.

Notes

Refrigerate cooled leftovers in a covered airtight container for 3 to 4 days. Reheat covered in the oven or in the microwave, adding a splash of water if needed, until leftovers reach 165°F (75°C).

Nutrition

Calories: 710 kcal | Protein: 39 g | Fat: 21 g | Carbohydrates: 89 g

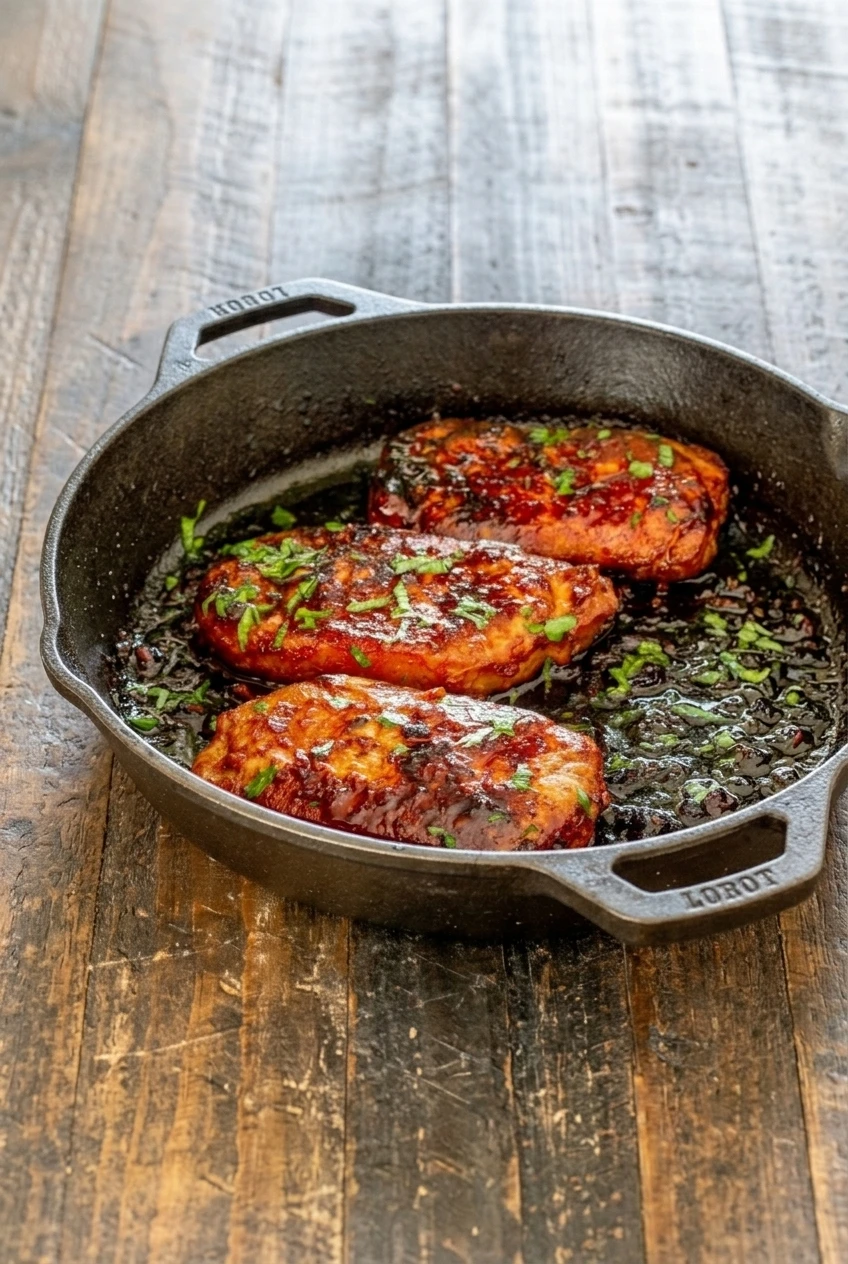
Korean Glazed Pork Chops

These Korean-inspired pork chops are seared in a skillet for browned edges, finished briefly in the oven, and coated with a glossy gochujang, soy, and honey glaze. Garlic, ginger, and sesame oil round out the sauce; sliced green onion adds a fresh finish.

Reserve some sauce before marinating the pork. That clean portion can be warmed and brushed on at the end, giving the chops a generous coating without leaving the honey-based glaze over high heat long enough to scorch. Use a thermometer rather than the clock to judge when each chop is done.

Ingredients for Korean Glazed Pork Chops

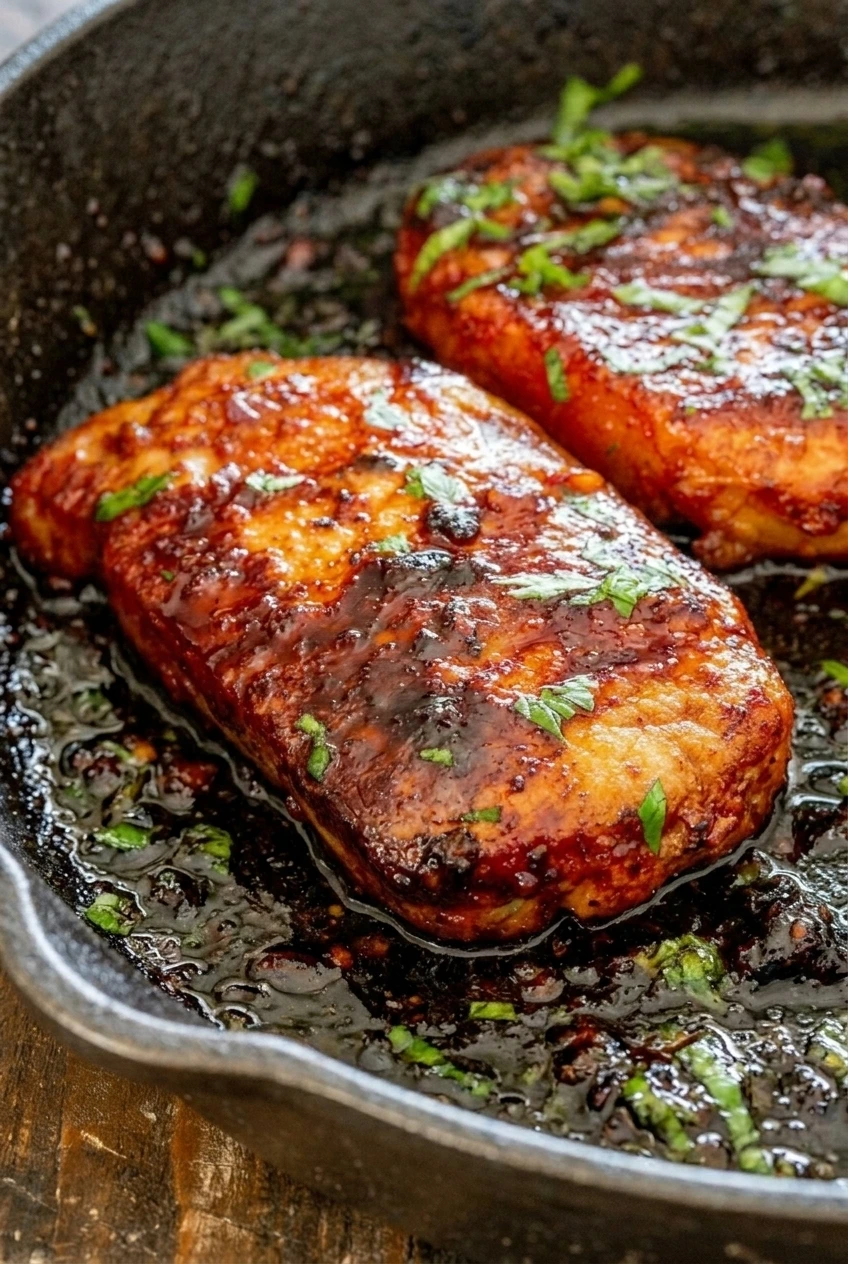
Close detail of glossy gochujang glaze, browned searing, and green onion on a whole pork chop
  • 4 boneless pork chops, about 1 inch thick and 6–8 ounces each (about 800g total)
  • 3 tablespoons gochujang (about 50g)
  • 2 tablespoons soy sauce (30g)
  • 2 tablespoons honey (about 40g)
  • 1 teaspoon toasted sesame oil
  • 2 garlic cloves, finely minced
  • 1 teaspoon finely grated fresh ginger
  • 1 tablespoon water, plus more as needed
  • About 1/4 teaspoon kosher salt, adjusted for the saltiness of the soy sauce
  • 1 tablespoon neutral high-heat oil
  • 2 green onions, thinly sliced

Gochujang varies in heat and saltiness by brand. Season the pork lightly at first, since the sauce also contains soy sauce.

How to Make Korean Glazed Pork Chops

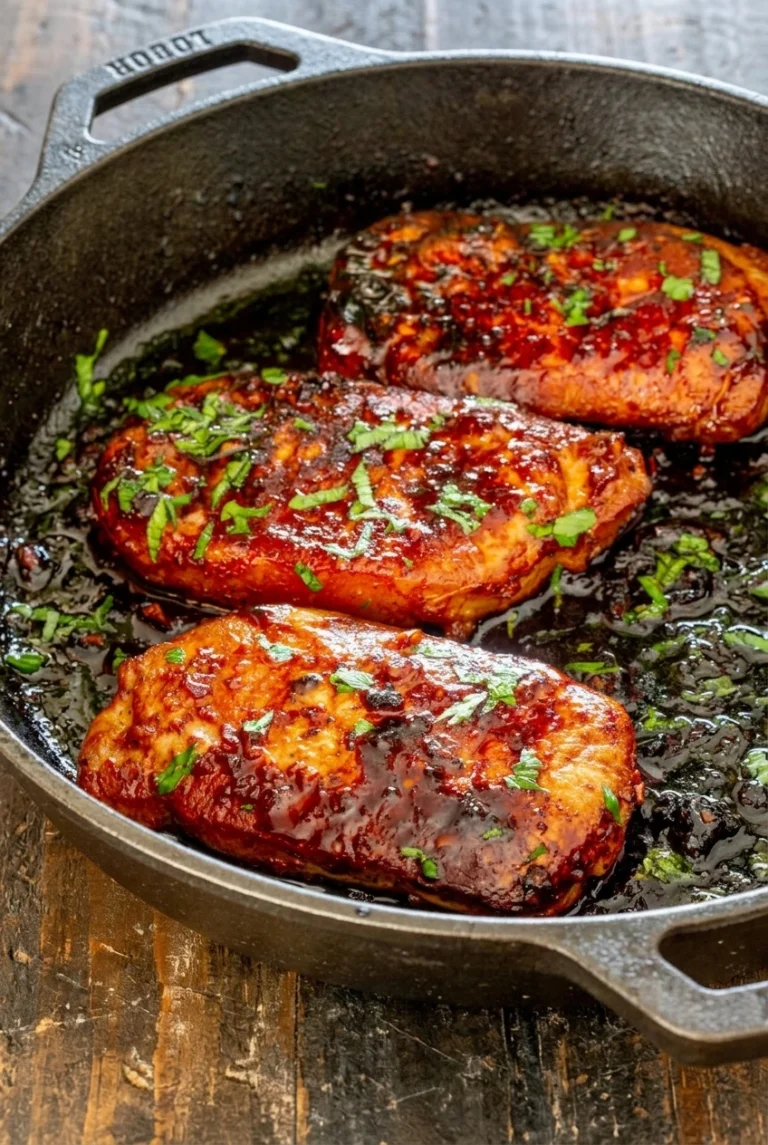
A wider view of whole Korean glazed pork chops arranged in a dark skillet
  1. Mix and reserve the sauce: Stir together the gochujang, soy sauce, honey, sesame oil, garlic, ginger, and water until smooth. Transfer about one-third to a clean bowl for finishing. Keep it separate from the pork.
  2. Marinate and preheat: Lightly season the chops with salt and coat them with the remaining sauce. Let stand for about 15 minutes while the oven preheats to 400°F (205°C). Let any thick excess sauce drip off before searing to limit scorching.
  3. Sear the chops: Heat the neutral oil in a 12-inch oven-safe skillet over medium-high heat. Add the chops in one uncrowded layer and sear uncovered for about 2–3 minutes per side, turning once, until browned. If they do not fit, sear in batches; crowding will make them steam instead of brown. Do not add the reserved glaze yet.
  4. Finish in the oven: Arrange the chops in the skillet and transfer it to the oven, uncovered. Start checking after about 4 minutes. Insert an instant-read thermometer into the thickest part of each chop without touching the pan. Remove chops individually when they reach 145°F (65°C). About 4–8 minutes in the oven is a starting range; check in short intervals if they need longer.
  5. Warm the clean glaze: Move the chops to a plate and begin their 3-minute rest. Carefully return the skillet to low heat. Add the reserved glaze and stir for 1–2 minutes, until warm and glossy. If it is too thick to spoon over the pork, stir in a teaspoon or two of water. Do not add marinade that touched raw pork.
  6. Finish and serve: Spoon or brush the warm glaze generously over the chops during their rest. Once they have rested for 3 minutes, scatter the green onion over the tops and serve the chops whole.

Choosing and Checking the Chops

Boneless chops of similar thickness are easiest to cook evenly with this method. Thinner chops may finish before the suggested oven window, while thicker or bone-in chops may need longer. Check each one separately; for bone-in chops, place the thermometer in the thickest part without touching the bone.

The chops should have browned surfaces, and the finished glaze should cling in a shiny layer. Temperature is the reliable doneness check: remove each chop at 145°F and give it the full 3-minute rest before serving.

Serving and Leftovers

Serve with white or brown rice to catch the extra glaze and a simple green vegetable such as steamed green beans or bok choy. For another pork chop dinner with a glossy skillet sauce, see Honey Garlic Pork Chops.

Refrigerate leftovers promptly in an airtight container and use within 3 days. Reheat gently in a covered skillet over low heat or in short microwave intervals, adding a splash of water if the glaze has thickened. Avoid prolonged reheating, which can dry out the pork.

The sauce can be mixed and divided ahead of time; keep the finishing portion separate from the raw-pork marinade. If freezing leftovers, wrap them airtight and use within about 2 months for best quality. Thaw in the refrigerator before reheating.

Nutrition

Approximate nutrition per serving (1 glazed pork chop; 1/4 of the recipe): 405 calories, 46g protein, 16g fat, and 15g carbohydrates. Approximate nutrition per 100g: 200 calories, 23g protein, 8g fat, and 7g carbohydrates. Values vary with chop size, how much marinade remains behind, and the brands used.

Korean Glazed Pork Chops

Skillet-seared pork chops are finished in the oven and brushed with a glossy gochujang, soy, and honey glaze.
Course: Main Course
Cuisine: Korean
Prep: 20 min
Cook: 17 min
Total: 37 min
Servings: 4 Calories: 405 kcal

Equipment

  • Mixing bowl
  • 12-inch oven-safe skillet
  • Instant-read thermometer

Ingredients

For the Pork and Sauce

  • 4 boneless pork chops, about 1 inch thick and 6–8 ounces each (about 800g total)
  • 3 tablespoons gochujang (about 50g)
  • 2 tablespoons soy sauce (30g)
  • 2 tablespoons honey (about 40g)
  • 1 teaspoon toasted sesame oil
  • 2 garlic cloves, finely minced
  • 1 teaspoon finely grated fresh ginger
  • 1 tablespoon water, plus more as needed
  • About 1/4 teaspoon kosher salt, adjusted for the saltiness of the soy sauce
  • 1 tablespoon neutral high-heat oil
  • 2 green onions, thinly sliced

Instructions

  1. Stir together the gochujang, soy sauce, honey, sesame oil, garlic, ginger, and water until smooth.
  2. Transfer about one-third of the sauce to a clean bowl for finishing; keep it separate from the pork.
  3. Lightly season the chops with salt and coat them with the remaining sauce. Let stand for about 15 minutes while the oven preheats to 400°F (205°C).
  4. Let thick excess sauce drip off the chops before searing.
  5. Heat the neutral oil in a 12-inch oven-safe skillet over medium-high heat. Sear the chops uncovered in one uncrowded layer for about 2–3 minutes per side, turning once, until browned. Sear in batches if needed.
  6. Transfer the skillet to the oven and cook the chops uncovered. Start checking after about 4 minutes, then remove each chop individually when its thickest part reaches 145°F (65°C). About 4–8 minutes is a starting range.
  7. Move the chops to a plate to rest for 3 minutes. Carefully return the skillet to low heat, add the reserved glaze, and stir for 1–2 minutes until warm and glossy. Add a teaspoon or two of water if needed to thin it.
  8. Spoon or brush the warm glaze over the chops during their rest. Scatter the green onion over the chops and serve.

Tips

  • Reserve a clean portion of glaze before it touches the raw pork.
  • Season lightly at first because gochujang and soy sauce both contribute salt.
  • Avoid crowding the skillet so the chops brown instead of steam.
  • Check each chop with a thermometer and remove it at 145°F (65°C).
  • For bone-in chops, place the thermometer in the thickest part without touching the bone.

Notes

Refrigerate leftovers in an airtight container for up to 3 days. Reheat gently in a covered skillet over low heat or in short microwave intervals, adding water if needed. Freeze airtight for up to about 2 months and thaw in the refrigerator before reheating. Do not use marinade that touched raw pork as finishing glaze.

Nutrition

Calories: 405 kcal | Protein: 46 g | Fat: 16 g | Carbohydrates: 15 g

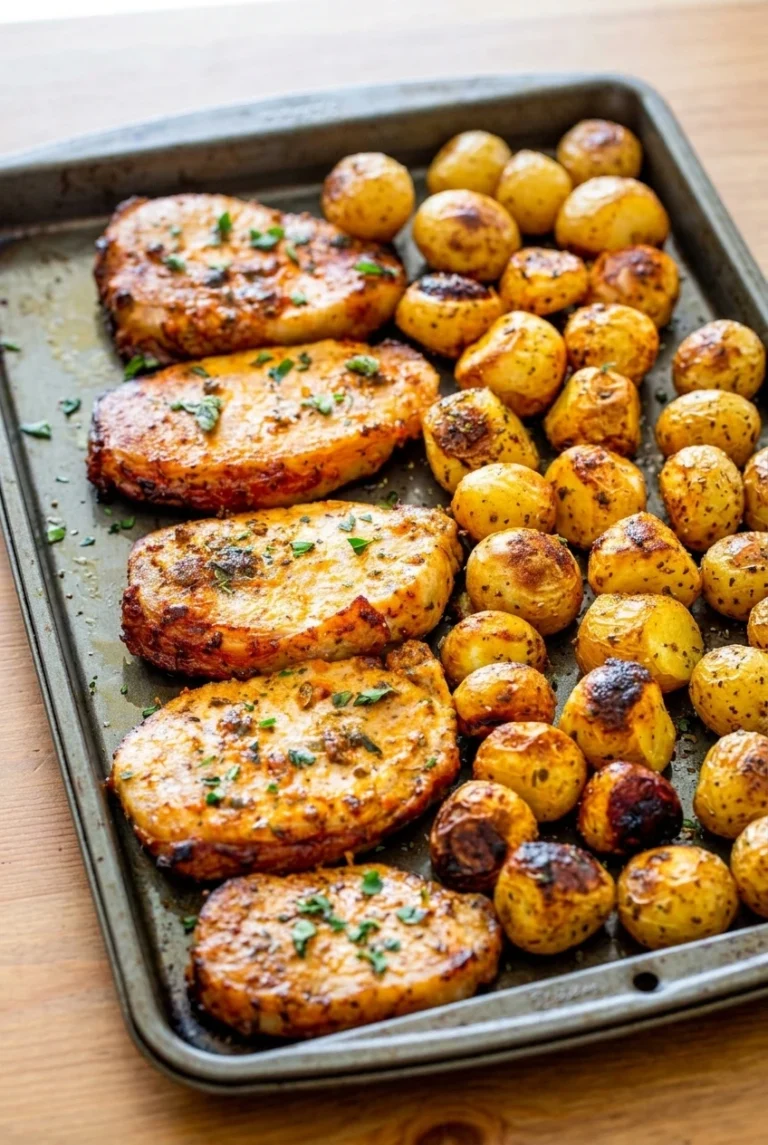
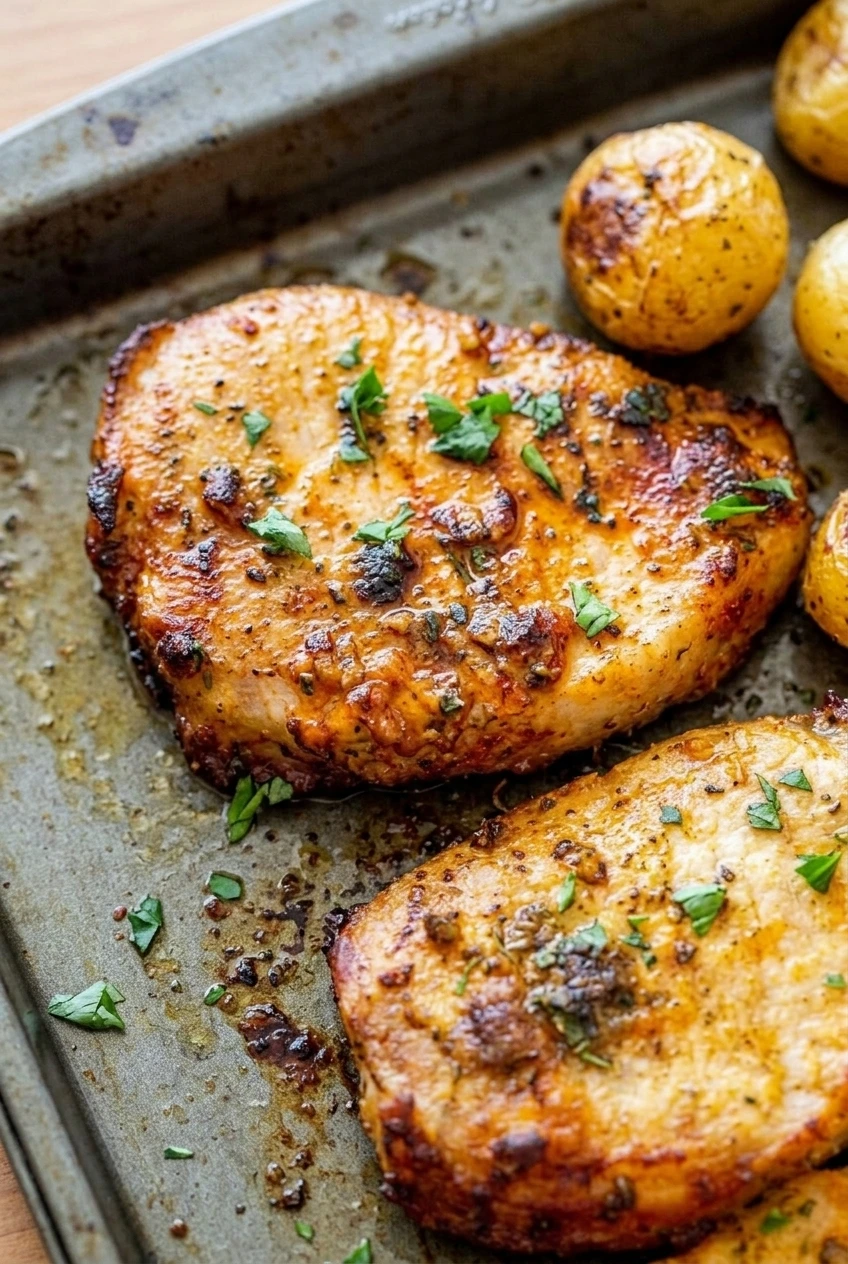
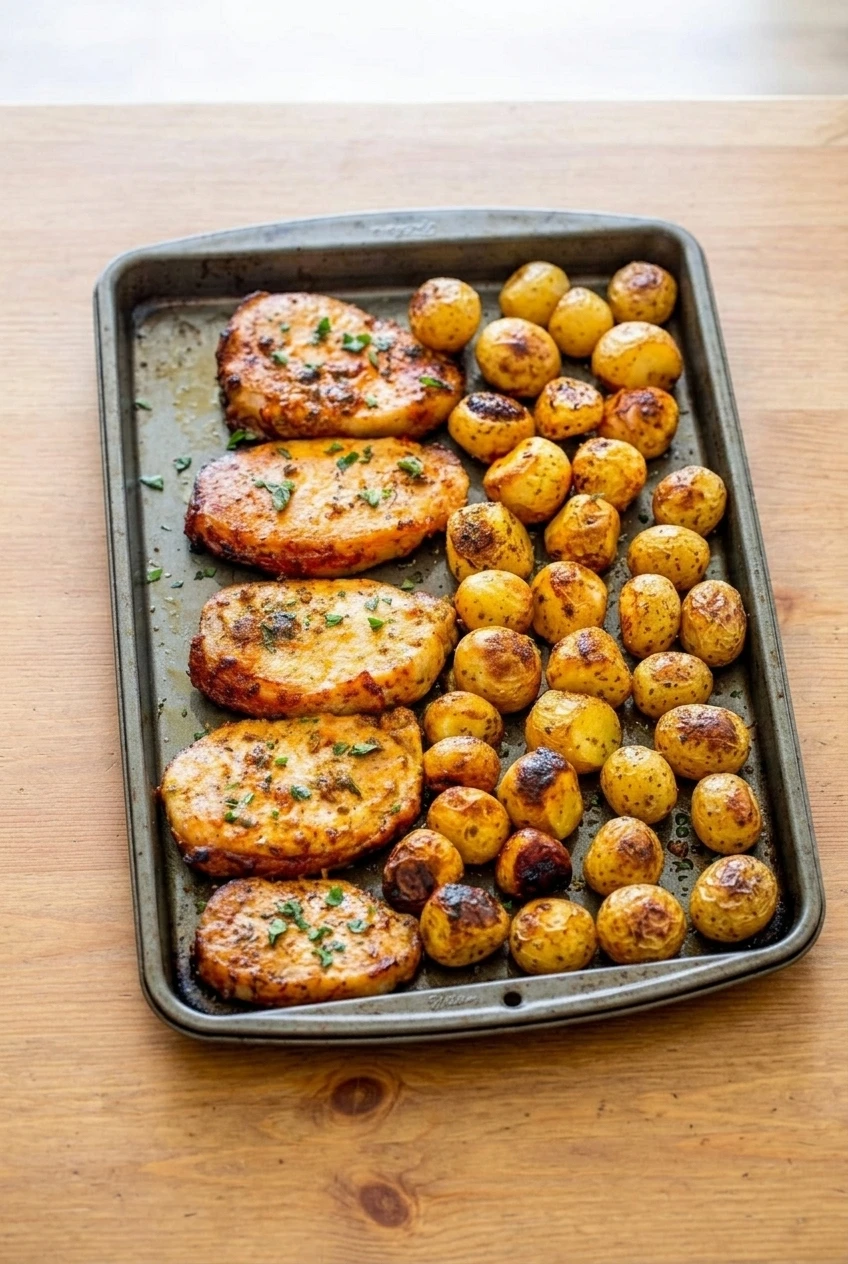
Ranch Pork Chops and Potatoes

Ranch-seasoned pork chops roast alongside small baby potatoes on a sheet pan, with smoked paprika and oregano adding color and herb flecks to the dry coating. Leave very small potatoes whole for browned skins, and halve larger ones so they cook more evenly.

The potatoes get a short head start, but the two ingredients may still finish at different times. Remove each chop when it reaches 145°F (65°C), and keep roasting the potatoes until a fork slides in easily. Ranch seasoning already contains salt, so taste before adding any extra.

Ingredients

Close detail of golden ranch seasoning and browned edges on pork chops beside roasted baby potatoes
  • 4 pork chops, about 1 inch thick, bone-in or boneless (6–8 ounces each)
  • 1 1/2 pounds small baby potatoes (680g), very small ones left whole and larger ones halved
  • 2 tablespoons olive oil, divided
  • 1-ounce packet dry ranch seasoning (28g; about 2 tablespoons, depending on the brand)
  • 1 teaspoon smoked paprika
  • 1 teaspoon dried oregano
  • 1/2 teaspoon black pepper
  • 1 tablespoon finely chopped fresh parsley, for finishing

How to Make Ranch Pork Chops and Potatoes

A wider view of the complete sheet-pan meal of ranch pork chops and roasted baby potatoes
  1. Heat the oven: Preheat to 400°F (205°C) with a rack in the center. Set out a large rimmed sheet pan; line it with parchment if desired.
  2. Season the potatoes: Pat them dry. Leave very small potatoes whole and halve larger ones into similar-sized pieces. Toss with 1 tablespoon olive oil and half each of the ranch seasoning, paprika, oregano, and pepper.
  3. Start roasting the potatoes: Spread them on the pan in one layer, with space between pieces. Place any halved potatoes cut-side down. Roast for 8–10 minutes; they do not need to be tender yet.
  4. Season the pork: Pat the chops dry and coat with the remaining tablespoon of oil. Season both sides with the remaining ranch seasoning, paprika, oregano, and pepper. Do not add salt yet.
  5. Roast together: Carefully remove the pan from the oven and arrange the chops among the potatoes in one layer. Roast uncovered for about 18–25 minutes more. Begin checking thinner chops after about 15 minutes; no routine flipping is needed.
  6. Check doneness: Insert an instant-read thermometer into the thickest part of each chop without touching bone. Transfer each chop to a plate as it reaches 145°F, and let it rest for 3 minutes. The potatoes are done when they are fork-tender and browned in spots. If they are still firm, return them to the oven without the pork.
  7. Finish: Scatter the parsley over the chops and potatoes. Taste before adding any extra salt.

Allow about 28–35 minutes of total oven time, though potato size, chop thickness, and oven performance can change the timing. Bone-in and boneless chops both work; check each one rather than assuming they will finish together.

Potato Size and Pan Space

Choose very small potatoes if you want to leave most of them whole. Halve larger ones so they have a better chance of becoming tender near the time the pork is done. Pat the potatoes dry and give them room on the pan: crowded or wet potatoes tend to steam instead of brown. If everything will not fit in one layer, use two pans.

Serving and Storage

Serve the chops and potatoes with a simple green salad. Green beans or asparagus also work as a separate side.

Refrigerate leftovers promptly in an airtight container for 3–4 days. Reheat only the portion needed in a 325°F (165°C) oven until hot, covering loosely if the pork appears to be drying out.

Freezing cooked portions is optional. They can be frozen for 2–3 months and thawed in the refrigerator before reheating, though the potatoes may soften.

Nutrition

Approximate nutrition per serving, based on 4 servings: 510 calories, 46g protein, 20g fat, and 40g carbohydrates. Approximate nutrition per 100g: 160 calories, 14g protein, 6g fat, and 13g carbohydrates. Values vary with the pork cut and ranch seasoning brand.

Ranch Pork Chops and Potatoes

Ranch-seasoned pork chops roast on a sheet pan with baby potatoes, smoked paprika, and oregano.
Course: Main Course
Cuisine: American
Prep: 15 min
Cook: 38 min
Total: 53 min
Servings: 4 Calories: 510 kcal

Equipment

  • Oven
  • Large rimmed sheet pan
  • Instant-read thermometer

Ingredients

  • 4 pork chops, about 1 inch thick, bone-in or boneless (6–8 ounces each)
  • 1 1/2 pounds small baby potatoes (680 g), very small ones left whole and larger ones halved
  • 2 tablespoons olive oil, divided
  • 1-ounce packet dry ranch seasoning (28 g; about 2 tablespoons, depending on the brand)
  • 1 teaspoon smoked paprika
  • 1 teaspoon dried oregano
  • 1/2 teaspoon black pepper
  • 1 tablespoon finely chopped fresh parsley, for finishing

Instructions

  1. Preheat the oven to 400°F (205°C) with a rack in the center. Set out a large rimmed sheet pan; line it with parchment if desired.
  2. Pat the potatoes dry. Leave very small potatoes whole and halve larger ones into similar-sized pieces.
  3. Toss the potatoes with 1 tablespoon olive oil and half each of the ranch seasoning, paprika, oregano, and pepper.
  4. Spread the potatoes on the pan in one layer with space between pieces, placing halved potatoes cut-side down. Roast for 8–10 minutes.
  5. Pat the pork chops dry and coat them with the remaining tablespoon of oil. Season both sides with the remaining ranch seasoning, paprika, oregano, and pepper.
  6. Carefully remove the pan from the oven and arrange the chops among the potatoes in one layer. Roast uncovered for about 18–25 minutes more. Begin checking thinner chops after about 15 minutes; flipping is not needed.
  7. Check each chop in its thickest part without touching bone. Transfer each chop to a plate when it reaches 145°F (65°C), and let it rest for 3 minutes.
  8. Check that the potatoes are fork-tender and browned in spots. If they are still firm, return them to the oven without the pork.
  9. Scatter parsley over the chops and potatoes. Taste before adding any extra salt.

Tips

  • Pat the potatoes dry and leave space between them on the pan so they brown instead of steam.
  • Use two pans if the ingredients will not fit in a single layer.
  • Check each chop individually, since bone-in and boneless chops may finish at different times.
  • Ranch seasoning contains salt, so taste before adding more.

Notes

Refrigerate leftovers promptly in an airtight container for 3–4 days. Reheat only the portion needed in a 325°F (165°C) oven until hot, covering loosely if the pork seems dry. Cooked portions can be frozen for 2–3 months; potatoes may soften after thawing.

Nutrition

Calories: 510 kcal | Protein: 46 g | Fat: 20 g | Carbohydrates: 40 g

Creamy Garlic Parmesan Pork Chops

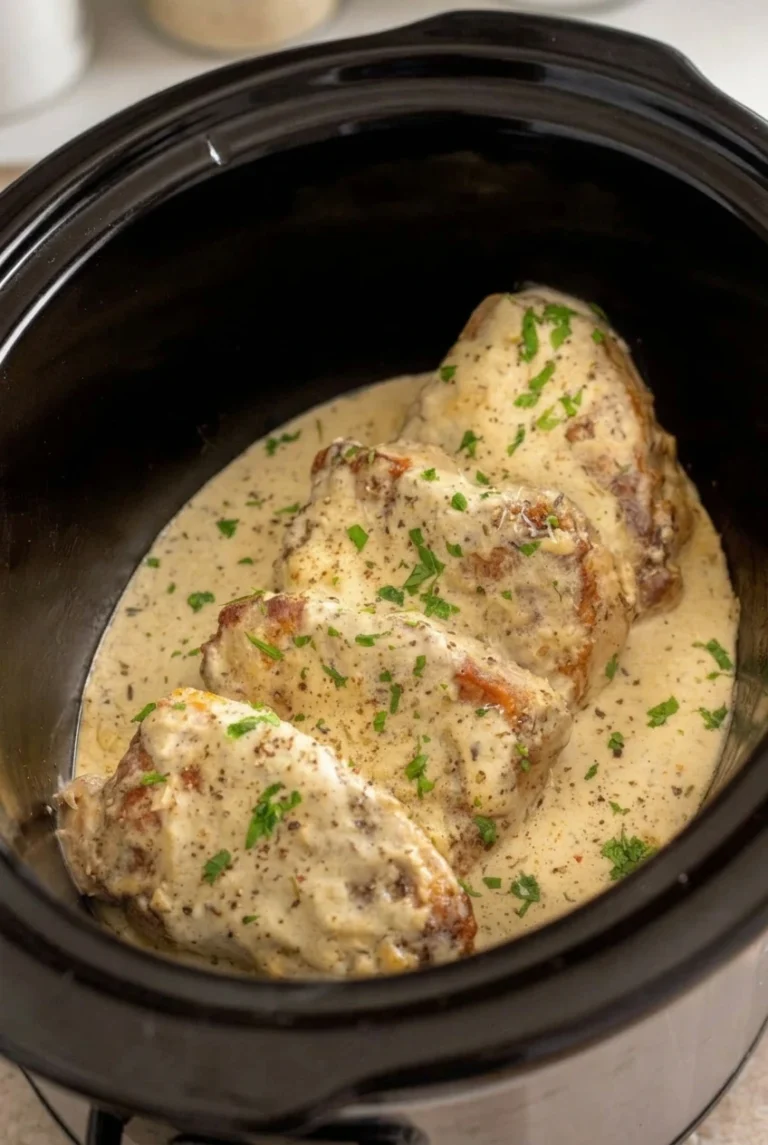
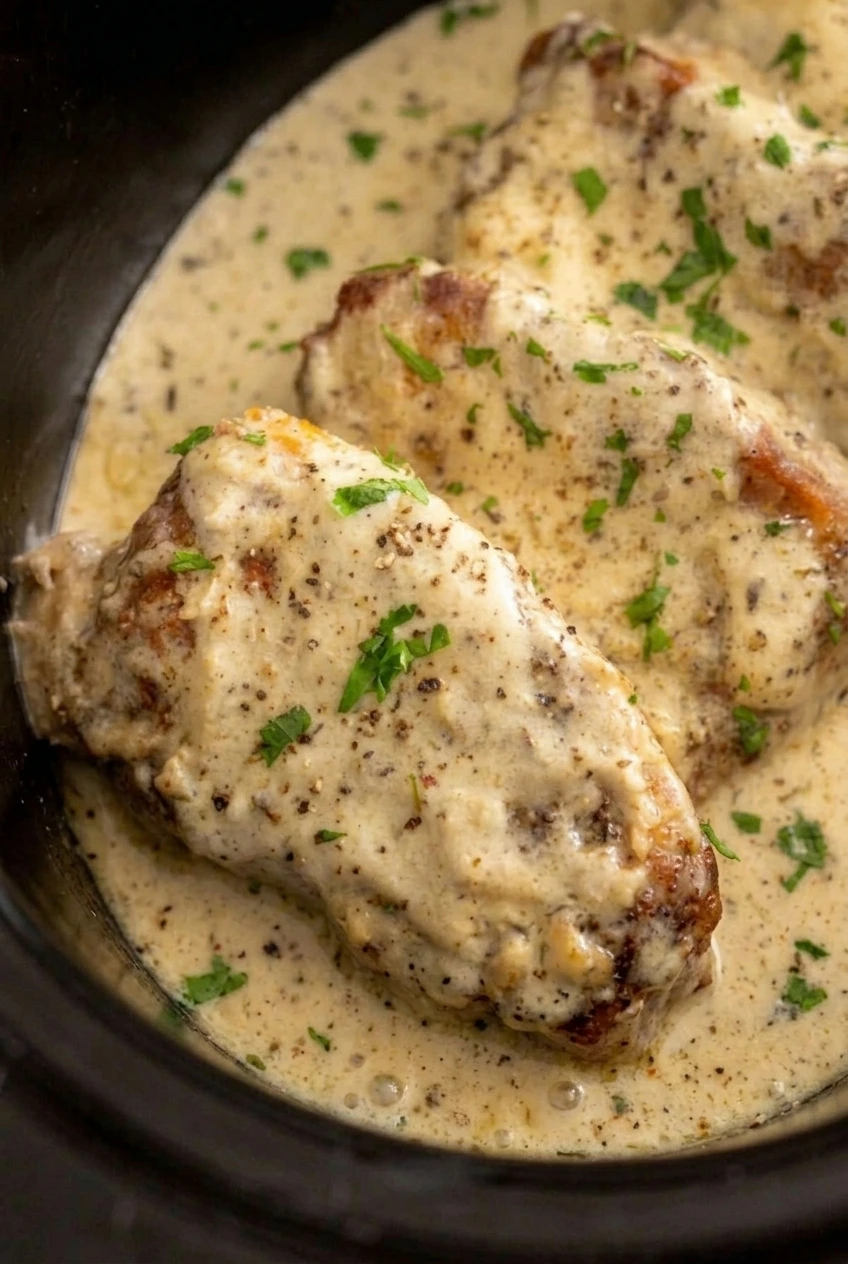
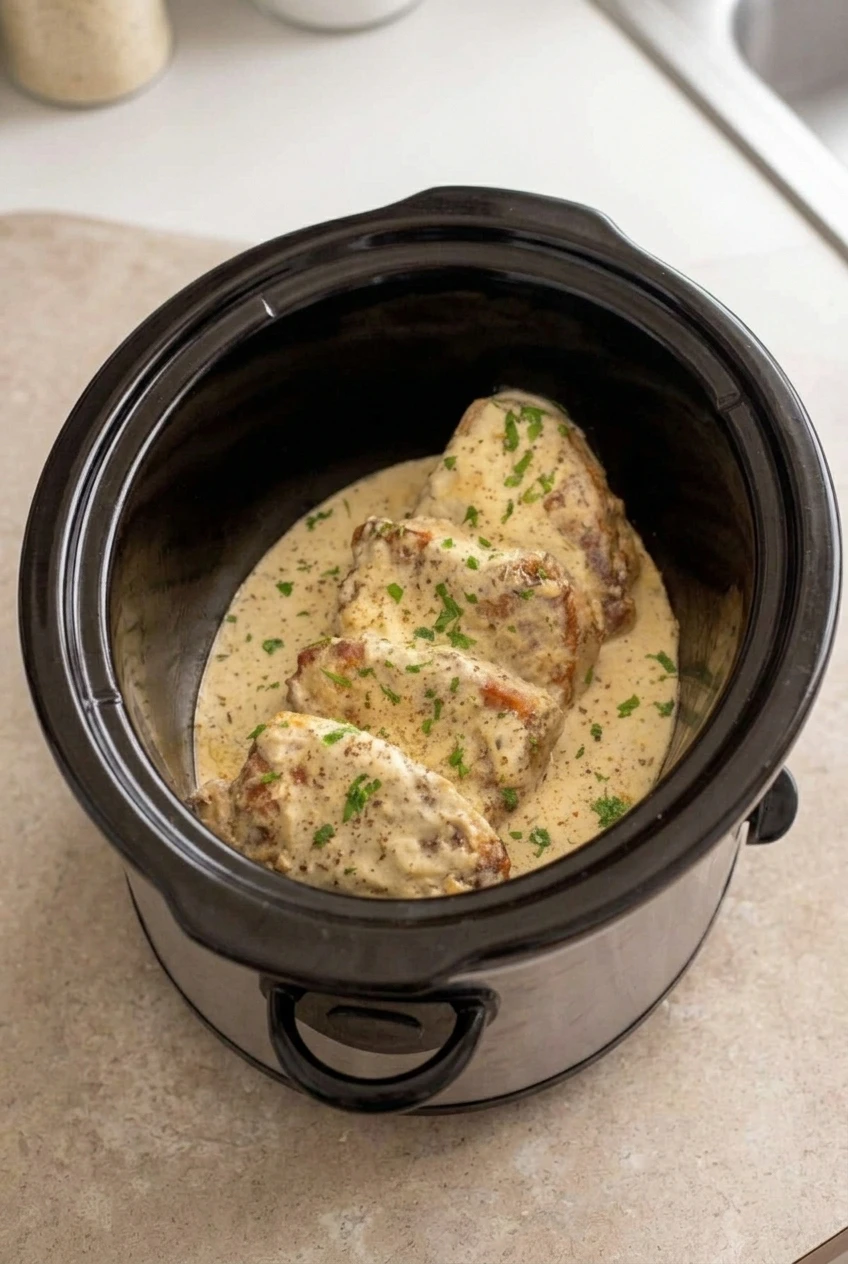
These thick pork chops get a quick skillet sear for browned edges, then cook in a slow cooker with garlic and broth. Heavy cream and Parmesan go in after the pork is done, making a pale sauce that coats the whole chops and pools around them. Start checking early: chop thickness and slow-cooker performance matter more than the estimated cooking time.

Ingredients

Close detail of browned pork chop edges under creamy Parmesan sauce with pepper and parsley.
  • 4 boneless pork chops, about 1½ inches thick (2 to 2½ pounds total; about 1kg)
  • 1 teaspoon kosher salt, or to taste
  • ½ teaspoon black pepper, plus more to finish
  • 1 tablespoon neutral oil
  • 2 tablespoons unsalted butter (30g)
  • 4 garlic cloves, minced
  • 2 tablespoons all-purpose flour (15g)
  • ½ cup low-sodium chicken broth (120g)
  • ½ teaspoon Italian seasoning
  • 1 cup heavy cream (240g)
  • ¾ cup finely grated Parmesan, loosely packed (75g)
  • 2 tablespoons chopped fresh parsley

Thick chops are less likely to dry out during slow cooking. Grate the Parmesan finely so it melts more readily into the sauce.

How to Make Creamy Garlic Parmesan Pork Chops

A full black slow-cooker insert filled with whole creamy garlic Parmesan pork chops and parsley.
  1. Season and sear: Pat the chops dry and season both sides with salt and pepper. Heat the oil in a large skillet over medium-high heat. Sear the chops for 2 to 3 minutes per side, in batches if needed, until browned but not cooked through. Transfer to a 4- to 6-quart slow cooker and arrange mostly in one layer, with only loose overlap.
  2. Make the garlic broth base: Reduce the skillet heat to medium-low. Discard any especially dark, scorched bits if you want a paler sauce, then melt the butter. Cook the garlic briefly until fragrant, without letting it brown. Whisk in the flour, then gradually whisk in the broth and Italian seasoning until smooth. Pour over the chops.
  3. Slow-cook the pork: Cover and cook on LOW for about 4 to 5 hours. Begin checking around 3½ hours. Insert an instant-read thermometer into the thickest part of each chop; remove each one when it reaches 145°F (65°C). Let the chops rest for 3 minutes. Do not leave a smaller chop in the cooker just to match the estimated time.
  4. Finish the sauce: Stir the cream into the cooking liquid, then add the Parmesan gradually, stirring gently until melted. Keep the cooker on LOW or WARM only as needed to smooth the sauce; do not let it boil. It should lightly coat a spoon while still flowing around the chops. If it is too thick, stir in a small splash of cream or milk.
  5. Serve: Return the rested chops briefly to coat them. Arrange them whole in the slow-cooker insert or a dark, deep serving dish, leaving some browned edges visible. Spoon sauce over and around them, then scatter with parsley and a little more black pepper.

Timing and Chop Thickness

The 4- to 5-hour window is a guide, not a doneness test. Thinner chops can finish sooner, and loosely overlapping chops may not all reach temperature at once. For bone-in chops, check the thickest part of the meat without touching the bone. Remove each chop at 145°F and give it the full 3-minute rest.

Why Add the Cream and Parmesan Last?

The pork cooks in the garlic-broth base so the dairy does not spend hours in the slow cooker. Stirring in the cream and cheese at the end, without boiling, helps keep the sauce smooth rather than grainy or separated.

What to Serve With the Pork Chops

Mashed potatoes, rice, or pasta will catch the extra sauce. Add green beans, broccoli, or asparagus alongside. For another saucy option, try Cream of Mushroom Pork Chops. If you prefer a crisp coating, see Crispy Parmesan-Crusted Pork Chops.

Storing and Reheating Leftovers

Refrigerate leftovers promptly in an airtight container for 3 to 4 days. Reheat gently in a covered skillet or saucepan over low heat, or microwave in short 30-second increments. The sauce thickens when chilled; stir in a splash of cream or milk to loosen it, and avoid boiling.

Freezing the chops in the cream sauce may change its texture. For better quality, freeze the cooked pork separately and make fresh sauce after thawing.

Nutrition

Approximate nutrition per serving, based on 1 pork chop with one-fourth of the sauce: 740 calories, 62g protein, 50g fat, and 6g carbohydrates. Per 100g of finished dish: approximately 220 calories, 18g protein, 15g fat, and 2g carbohydrates. Values vary with chop size, fat content, and the amount of sauce served.

Creamy Garlic Parmesan Pork Chops

Thick pork chops are seared, slow-cooked in a garlic broth, and finished with a creamy Parmesan sauce.
Course: Main Course
Cuisine: American
Prep: 20 min
Cook: 270 min
Total: 293 min
Servings: 4 Calories: 740 kcal

Equipment

  • Large skillet
  • 4- to 6-quart slow cooker
  • Instant-read thermometer
  • Whisk

Ingredients

For the Pork

  • 4 boneless pork chops, about 1½ inches thick (2 to 2½ pounds total; about 1 kg)
  • 1 teaspoon kosher salt, or to taste
  • ½ teaspoon black pepper, plus more to finish
  • 1 tablespoon neutral oil

For the Sauce

  • 2 tablespoons unsalted butter (30 g)
  • 4 garlic cloves, minced
  • 2 tablespoons all-purpose flour (15 g)
  • ½ cup low-sodium chicken broth (120 g)
  • ½ teaspoon Italian seasoning
  • 1 cup heavy cream (240 g)
  • ¾ cup finely grated Parmesan, loosely packed (75 g)

For Serving

  • 2 tablespoons chopped fresh parsley

Instructions

  1. Pat the pork chops dry and season both sides with salt and pepper.
  2. Heat the oil in a large skillet over medium-high heat. Sear the chops for 2 to 3 minutes per side, working in batches if needed, until browned but not cooked through.
  3. Transfer the chops to a 4- to 6-quart slow cooker and arrange mostly in one layer, with only loose overlap.
  4. Reduce the skillet heat to medium-low. Discard any especially dark, scorched bits if you want a paler sauce, then melt the butter.
  5. Cook the garlic briefly until fragrant without letting it brown. Whisk in the flour, then gradually whisk in the broth and Italian seasoning until smooth.
  6. Pour the garlic broth mixture over the chops. Cover and cook on LOW for about 4 to 5 hours, beginning to check around 3½ hours.
  7. Check the thickest part of each chop with an instant-read thermometer. Remove each chop when it reaches 145°F (65°C), then let it rest for 3 minutes.
  8. Stir the cream into the cooking liquid, then gradually add the Parmesan, stirring gently until melted. Keep the slow cooker on LOW or WARM only as needed to smooth the sauce; do not let it boil.
  9. Return the rested chops briefly to the slow cooker and coat with sauce. Serve whole, spoon sauce over and around them, and finish with parsley and more black pepper.

Tips

  • Use thick chops, which are less likely to dry out during slow cooking.
  • Start checking the chops around 3½ hours; thickness and slow-cooker performance affect cooking time.
  • Remove each chop as soon as it reaches 145°F (65°C), rather than leaving smaller chops in to match the estimated cooking time.
  • Grate the Parmesan finely so it melts more readily into the sauce.
  • Add the cream and Parmesan at the end and avoid boiling to help keep the sauce smooth.

Notes

Refrigerate leftovers in an airtight container for 3 to 4 days. Reheat gently over low heat or in short microwave intervals; loosen the thickened sauce with a splash of cream or milk and do not boil. Freezing the pork in the cream sauce may affect its texture.

Nutrition

Calories: 740 kcal | Protein: 62 g | Fat: 50 g | Carbohydrates: 6 g | Per 100g Calories: 220 kcal | Per 100g Protein: 18 g | Per 100g Fat: 15 g | Per 100g Carbohydrates: 2 g

Sheet Pan Pork Chops and Potatoes

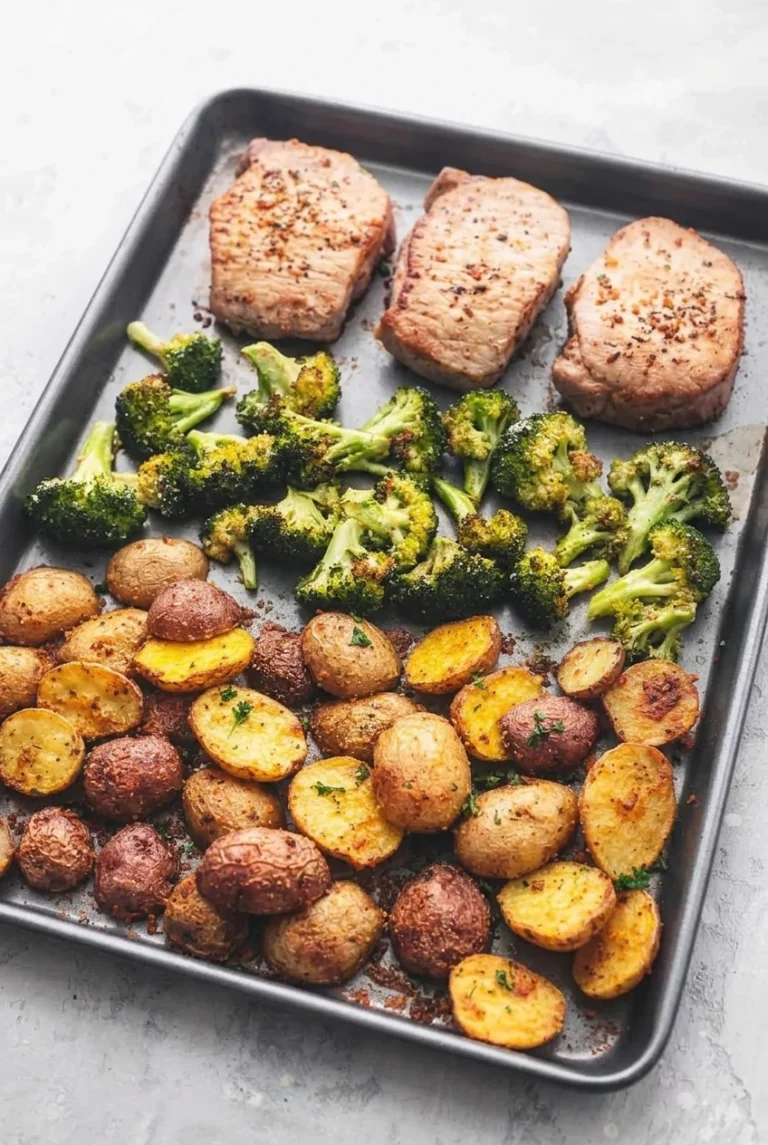
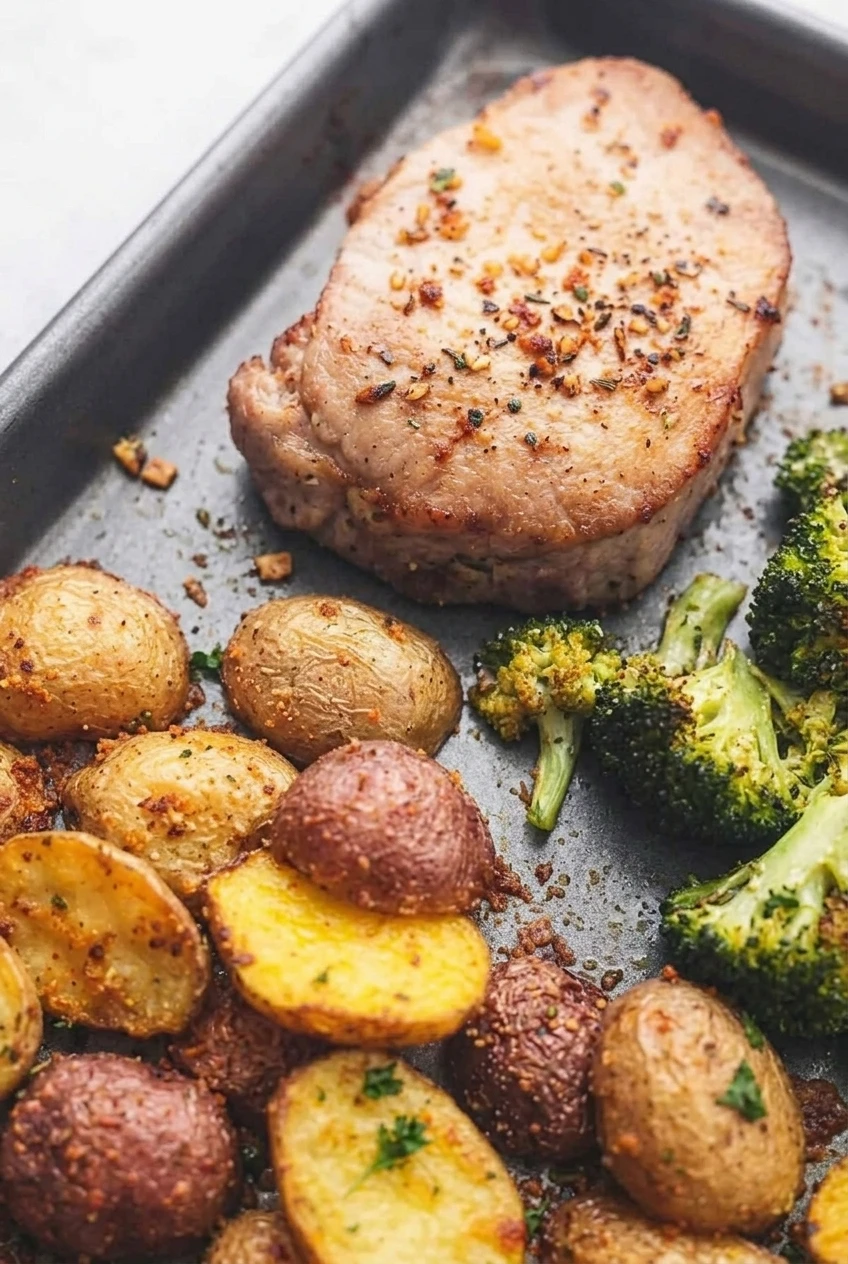
Baby potatoes need longer in the oven than boneless pork chops. Giving the potatoes a 15-minute head start lets their cut sides brown before the chops and broccoli join them on the sheet pan. Garlic, paprika, and dried herbs season all three components without a sauce or coating.

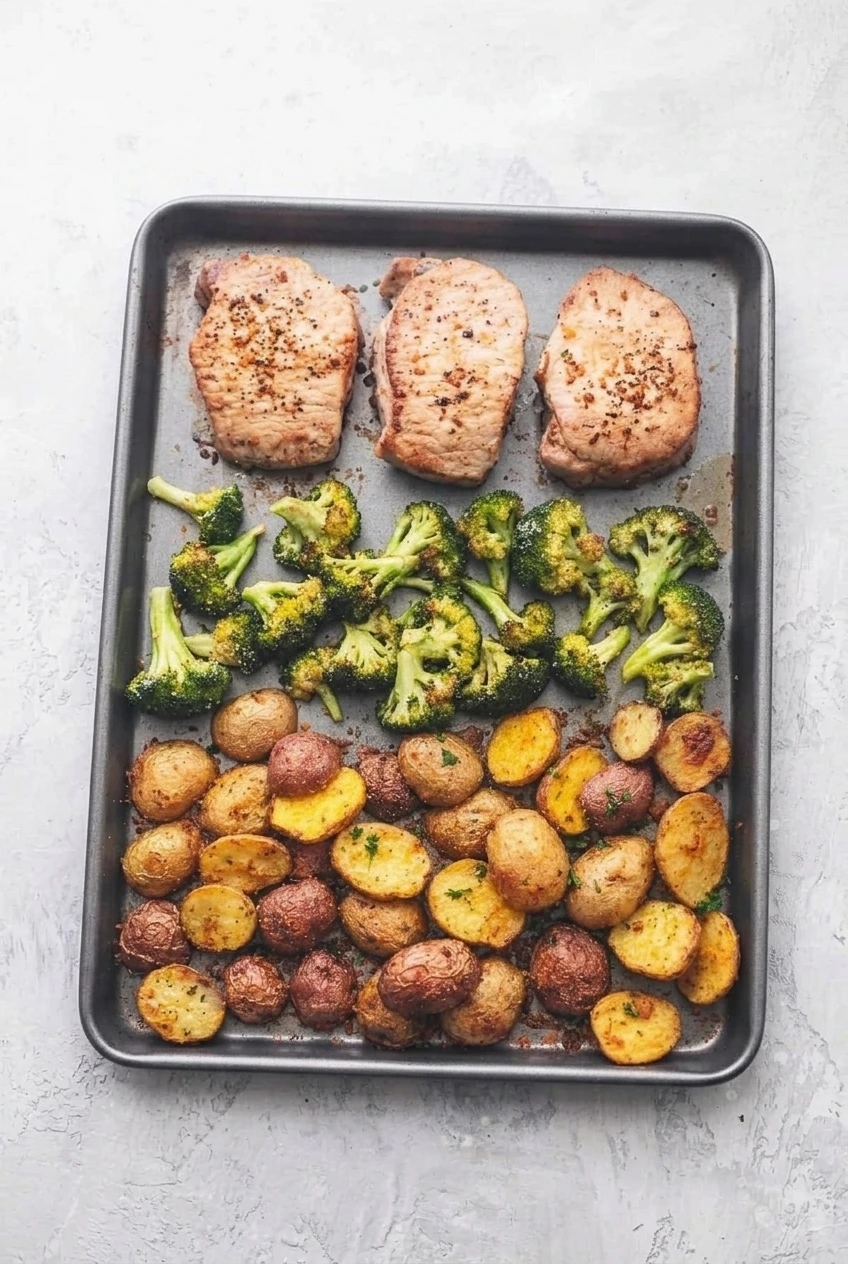
This version makes three servings with approximately 1-inch-thick chops. Roast the pork, broccoli, and potatoes in separate areas of the pan, and check each for doneness rather than expecting them to finish at exactly the same time.

Ingredients for Sheet Pan Pork Chops and Potatoes

Close detail of seasoned pork chops, browned potato halves, and roasted broccoli
  • 1½ pounds small red- and yellow-skinned baby potatoes, halved evenly (about 675g)
  • 3 tablespoons olive oil, divided
  • 1 teaspoon kosher salt, divided
  • ½ teaspoon black pepper, divided
  • 1 teaspoon garlic powder, divided
  • ½ teaspoon paprika, divided
  • 1 teaspoon dried Italian seasoning, divided
  • 3 boneless pork chops, about 1 inch thick and 1½ pounds total (about 675g)
  • 1 pound broccoli florets, cut to similar sizes and patted dry (about 450g)
  • Optional: 1 tablespoon chopped fresh parsley, for serving

How to Make Sheet Pan Pork Chops and Potatoes

A wider view of the full sheet pan of pork chops, baby potatoes, and broccoli on a pale surface
  1. Preheat the oven: Place a rack in the center and heat the oven to 425°F (220°C).
  2. Start the potatoes: Toss the potato halves with 1 tablespoon olive oil, ½ teaspoon salt, ¼ teaspoon pepper, and about half each of the garlic powder, paprika, and Italian seasoning. Spread them cut-side down in a single layer across the lower part of a large rimmed sheet pan, about 13 by 18 inches. Roast uncovered for 15 minutes.
  3. Add the pork and broccoli: While the potatoes roast, rub the chops with 1 tablespoon oil, the remaining garlic powder, paprika, and Italian seasoning, and some of the reserved salt and pepper. Toss the dry broccoli with the last tablespoon of oil and the remaining salt and pepper. Remove the pan from the oven. Arrange the chops across the upper part and the broccoli in a loose band between the chops and potatoes, leaving space between the ingredients.
  4. Roast and check: Return the pan to the oven for about 12–18 minutes. Begin checking the chops after about 10 minutes; remove each one when its thickest part reaches 145°F (65°C) on an instant-read thermometer. The potatoes should be fork-tender with browned cut faces, and the broccoli should have tender stems and browned edges. Rotate the pan once if your oven browns unevenly.
  5. Rest and serve: Transfer the chops to a clean plate and rest for 3 minutes. If the vegetables need longer, keep roasting them while the pork rests. Serve with the potatoes and broccoli, adding parsley if desired.

Why the Potatoes Go in First

The 15-minute head start gives evenly halved baby potatoes time to soften and brown without keeping the pork in the oven for the full potato cooking time. Total roasting time is roughly 27–33 minutes, but larger potato pieces, chop thickness, and oven performance can shift the finish. If the pork reaches 145°F while the potatoes are still firm, remove the chops and let the potatoes continue roasting.

How to Tell When Everything Is Done

Check each chop separately; three chops may not finish together. Use the thermometer for the pork, then give it a 3-minute rest. Test the potatoes with a fork and look for browned cut sides. Broccoli is ready when its stems are tender and the florets have a few toasted edges.

Bone-in or thinner chops may need different timing from the boneless chops used here. Start checking early rather than using the roasting time as the sole doneness test.

How to Avoid a Crowded Pan

Keep the vegetables in a single layer and leave some open pan surface so moisture can escape and the edges can brown. Pat washed broccoli dry before oiling it. If the ingredients will not fit without piling up, use a second pan.

Storage and Reheating

Refrigerate leftovers promptly in an airtight container for up to 3–4 days. Reheat only until warmed through to limit drying the pork: cover and warm in a 400°F (205°C) oven for about 5–10 minutes, checking as it heats, or use a brief, monitored microwave reheat.

The potatoes, broccoli, and chops can be prepped ahead, but roast them shortly before serving for better browning and pork texture. Leftovers can be frozen for up to about 3 months and thawed in the refrigerator before reheating; the vegetables may soften after thawing.

More Pork Chop Dinner Ideas

For a sweeter oven-baked option, try Brown Sugar Baked Pork Chops. For a separate crisp-coated preparation, see Crispy Parmesan-Crusted Pork Chops. For a stovetop dinner, try Garlic Butter Skillet Pork Chops with Zucchini.

Nutrition

Approximate nutrition per serving, based on one-third of the recipe: 680 calories, 57g protein, 27g fat, and 51g carbohydrates. Per 100g of finished dish: about 130 calories, 11g protein, 5g fat, and 10g carbohydrates. Values vary with the pork cut, ingredient sizes, and how much oil remains on the pan.

Sheet Pan Pork Chops and Potatoes

Boneless pork chops roast with baby potatoes and broccoli seasoned with garlic, paprika, and dried Italian herbs.
Course: Main Course
Cuisine: American
Prep: 15 min
Cook: 33 min
Total: 51 min
Servings: 3 Calories: 680 kcal

Equipment

  • Large rimmed sheet pan
  • Instant-read thermometer
  • Oven

Ingredients

Potatoes

  • 1½ pounds (about 675 g) small red- and yellow-skinned baby potatoes, halved evenly
  • 1 tablespoon olive oil
  • ½ teaspoon kosher salt
  • ¼ teaspoon black pepper
  • ½ teaspoon garlic powder
  • ¼ teaspoon paprika
  • ½ teaspoon dried Italian seasoning

Pork and Broccoli

  • 3 boneless pork chops, about 1 inch thick and 1½ pounds total (about 675 g)
  • 1 pound (about 450 g) broccoli florets, cut to similar sizes and patted dry
  • 2 tablespoons olive oil, divided
  • ½ teaspoon kosher salt, remaining
  • ¼ teaspoon black pepper, remaining
  • ½ teaspoon garlic powder, remaining
  • ¼ teaspoon paprika, remaining
  • ½ teaspoon dried Italian seasoning, remaining

For Serving

  • 1 tablespoon chopped fresh parsley (optional)

Instructions

  1. Place a rack in the center of the oven and preheat to 425°F (220°C).
  2. Toss the potatoes with 1 tablespoon olive oil, ½ teaspoon salt, ¼ teaspoon pepper, and half of the garlic powder, paprika, and Italian seasoning.
  3. Spread the potatoes cut-side down in a single layer across the lower part of a large rimmed sheet pan. Roast uncovered for 15 minutes.
  4. While the potatoes roast, rub the pork chops with 1 tablespoon olive oil and the remaining garlic powder, paprika, and Italian seasoning. Season with some of the remaining salt and pepper.
  5. Toss the dry broccoli with the remaining 1 tablespoon olive oil and the rest of the salt and pepper.
  6. Remove the pan from the oven. Arrange the pork chops across the upper part of the pan and the broccoli in a loose band between the chops and potatoes, leaving space between the ingredients.
  7. Return the pan to the oven and roast for about 12–18 minutes. Begin checking the chops after about 10 minutes, removing each one when its thickest part reaches 145°F (65°C) on an instant-read thermometer.
  8. Check that the potatoes are fork-tender with browned cut faces and the broccoli has tender stems and browned edges. Rotate the pan once if your oven browns unevenly.
  9. Transfer the chops to a clean plate and rest for 3 minutes. If needed, continue roasting the vegetables while the pork rests.
  10. Serve the pork with the potatoes and broccoli, adding parsley if desired.

Tips

  • Halve the potatoes evenly so they cook at a similar rate.
  • Pat the broccoli dry before tossing it with oil to help it brown.
  • Leave open space between ingredients so moisture can escape and the edges can brown.
  • Check each pork chop separately and remove it as soon as it reaches 145°F (65°C).
  • If the pork is done before the potatoes, remove the chops and let the potatoes continue roasting.

Notes

Refrigerate leftovers in an airtight container for 3–4 days. Reheat covered in a 400°F (205°C) oven for about 5–10 minutes, or microwave briefly until warmed through. Leftovers can be frozen for up to about 3 months; thaw in the refrigerator before reheating.

Nutrition

Calories: 680 kcal | Protein: 57 g | Fat: 27 g | Carbohydrates: 51 g

Honey Mustard Pork Chops

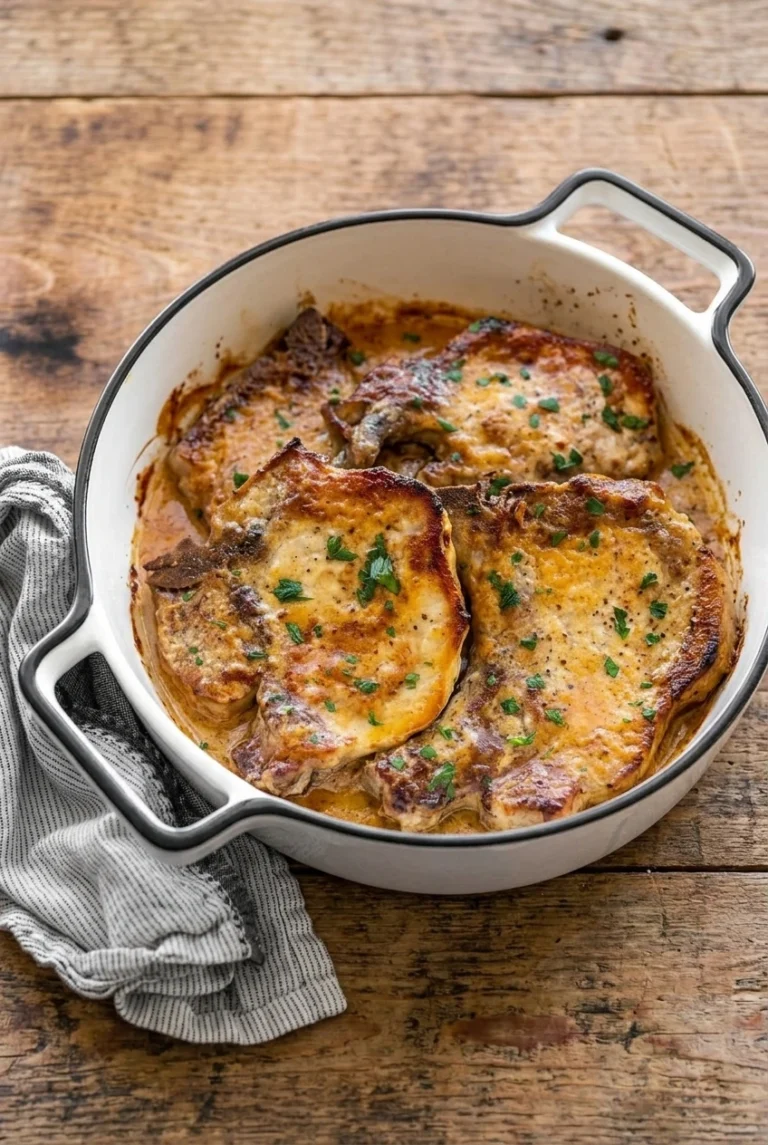
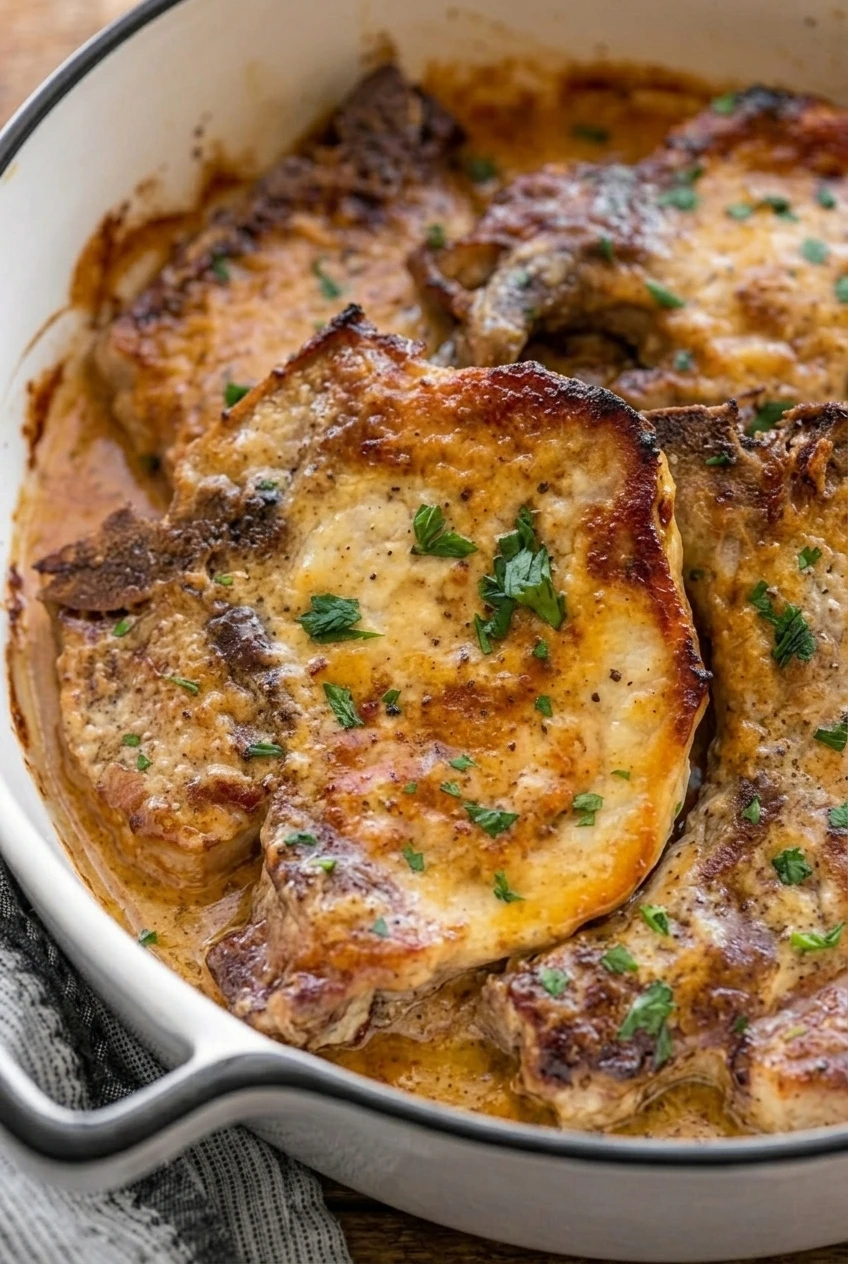
Whole pork chops get a golden sear before finishing in a shallow baking dish with creamy honey-Dijon sauce. The sauce coats the chops and pools around them, with honey balancing the mustard’s tang. Mayonnaise gives this version its spoonable texture rather than a thin glaze.

Because thickness and searing time affect how quickly the pork cooks, start checking early and use an instant-read thermometer to judge doneness.

Ingredients for Honey Mustard Pork Chops

Close view of browned honey mustard pork chop, creamy sauce, and fresh parsley
  • 4 bone-in pork chops, about ¾–1 inch thick (6–8 ounces each; about 850g total)
  • 1 tablespoon neutral oil
  • ¾ teaspoon kosher salt, or to taste
  • ¼ teaspoon black pepper
  • 2 tablespoons Dijon mustard (30g)
  • 2 tablespoons honey (40g)
  • ⅓ cup mayonnaise (75g)
  • ¼ cup low-sodium chicken broth
  • 1 garlic clove, finely minced
  • 1 tablespoon chopped fresh parsley

How to Make Honey Mustard Pork Chops

Wider view of the complete dish of creamy honey mustard pork chops on a wooden surface
  1. Prepare the chops: Preheat the oven to 350°F (175°C). Pat the chops dry and season both sides with salt and pepper.
  2. Mix the sauce: Whisk the Dijon, honey, mayonnaise, and garlic in a small bowl. Gradually whisk in the broth until the sauce is smooth and thick enough to coat a spoon but loose enough to flow around the chops.
  3. Sear the chops: Heat a large skillet over medium-high heat, then add the oil. Sear the chops for about 2–3 minutes per side, turning once, until browned. Work in batches if they do not fit without crowding; packed-together chops steam rather than brown.
  4. Add the sauce: Arrange the whole chops in one layer in a shallow oven-safe baking dish. An oven-safe skillet large enough to hold them in one layer also works. Spoon the sauce over the chops and into the spaces around them without submerging them.
  5. Bake uncovered: Begin checking after about 10 minutes; the oven finish usually takes 10–20 minutes. Insert an instant-read thermometer into the thickest part of each chop, away from the bone. Remove the chops when they reach 145°F (65°C). The sauce should be hot, creamy, and spoonable.
  6. Rest and serve: Let the chops rest for 3–5 minutes. Scatter the parsley over the chops and sauce, then spoon sauce over each serving.

How to Keep the Chops from Overcooking

The skillet sear starts cooking the pork, so chops that brown more slowly may need less time in the oven. Thin or boneless chops can finish sooner than the stated range; check their temperature earlier. Thicker bone-in chops may take longer. Use the temperature of each chop, not its color or the clock, as the final doneness test.

Choosing the Mustard

Dijon makes a smooth sauce with balanced tang. Whole-grain or stone-ground mustard adds visible texture, while yellow mustard changes the flavor and sharpness. These swaps will not make exactly the same sauce.

What to Serve with Honey Mustard Pork Chops

Mashed potatoes, rice, or buttered noodles give the sauce somewhere to go. Green beans or broccoli work alongside. For a different sauce, try honey garlic pork chops or cream of mushroom pork chops.

How to Store and Reheat Leftovers

Refrigerate the chops with their sauce in an airtight container for 3–4 days. Reheat gently in a covered skillet over medium-low heat, adding a small splash of broth or water if the sauce has thickened. Prolonged high heat can dry out the pork.

Cooked chops can be frozen for up to 3 months, though their texture may be less appealing after thawing. Thaw overnight in the refrigerator.

Nutrition

Approximate nutrition per serving, based on 4 servings: 610 calories, 45g protein, 44g fat, and 10g carbohydrates. Approximate nutrition per 100g: 225 calories, 17g protein, 16g fat, and 4g carbohydrates. Values vary with chop size, edible meat yield, and the mayonnaise and broth used.

Honey Mustard Pork Chops

Bone-in pork chops are seared, then baked in a creamy honey-Dijon sauce.
Course: Main Course
Cuisine: American
Prep: 15 min
Cook: 30 min
Total: 45 min
Servings: 4 Calories: 610 kcal

Equipment

  • Large skillet
  • Shallow oven-safe baking dish
  • Small bowl
  • Whisk
  • Instant-read thermometer

Ingredients

For the Pork Chops

  • 4 bone-in pork chops, about ¾–1 inch thick (6–8 ounces each; about 850g total)
  • 1 tablespoon neutral oil
  • ¾ teaspoon kosher salt, or to taste
  • ¼ teaspoon black pepper

For the Sauce

  • 2 tablespoons Dijon mustard (30g)
  • 2 tablespoons honey (40g)
  • ⅓ cup mayonnaise (75g)
  • ¼ cup low-sodium chicken broth
  • 1 garlic clove, finely minced

To Finish

  • 1 tablespoon chopped fresh parsley

Instructions

  1. Preheat the oven to 350°F (175°C). Pat the pork chops dry and season both sides with salt and pepper.
  2. Whisk the Dijon mustard, honey, mayonnaise, and garlic in a small bowl. Gradually whisk in the broth until the sauce is smooth and pourable.
  3. Heat a large skillet over medium-high heat and add the oil. Sear the chops for about 2–3 minutes per side, turning once, until browned. Work in batches if needed.
  4. Arrange the chops in one layer in a shallow oven-safe baking dish or a large oven-safe skillet. Spoon the sauce over the chops and into the spaces around them without submerging them.
  5. Bake uncovered, beginning to check after about 10 minutes. The oven finish usually takes 10–20 minutes. Check each chop in its thickest part, away from the bone, and remove it when it reaches 145°F (65°C).
  6. Rest the chops for 3–5 minutes. Sprinkle with parsley and spoon the sauce over each serving.

Tips

  • Pat the chops dry before seasoning to help them brown.
  • Sear in batches if the skillet is crowded; crowded chops steam instead of browning.
  • Check each chop separately with an instant-read thermometer, since thickness and searing time affect how quickly it cooks.
  • Start checking thin or boneless chops earlier; thicker bone-in chops may need more oven time.
  • Keep the chops in a single layer and spoon the sauce around them rather than submerging them.

Variations

  • Whole-Grain Mustard Pork Chops: Replace the Dijon with whole-grain or stone-ground mustard for a sauce with visible texture and a different tang.
  • Yellow Mustard Pork Chops: Use yellow mustard instead of Dijon for a change in flavor and sharpness.

Notes

Refrigerate chops with sauce in an airtight container for 3–4 days. Reheat gently in a covered skillet over medium-low heat, adding a splash of broth or water if needed. Freeze for up to 3 months and thaw overnight in the refrigerator. Approximate nutrition per 100g: 225 calories, 17g protein, 16g fat, and 4g carbohydrates.

Nutrition

Calories: 610 kcal | Protein: 45 g | Fat: 44 g | Carbohydrates: 10 g