Author

Julia

Browsing

Southern Fried Pork Chops

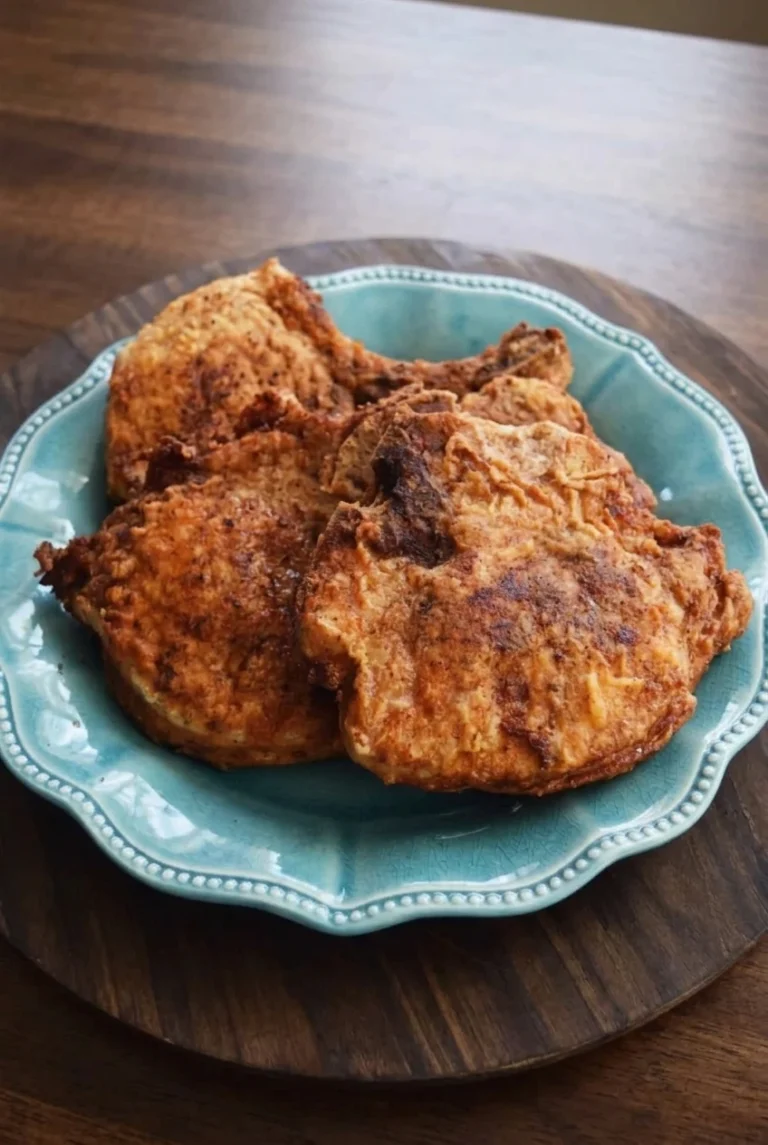
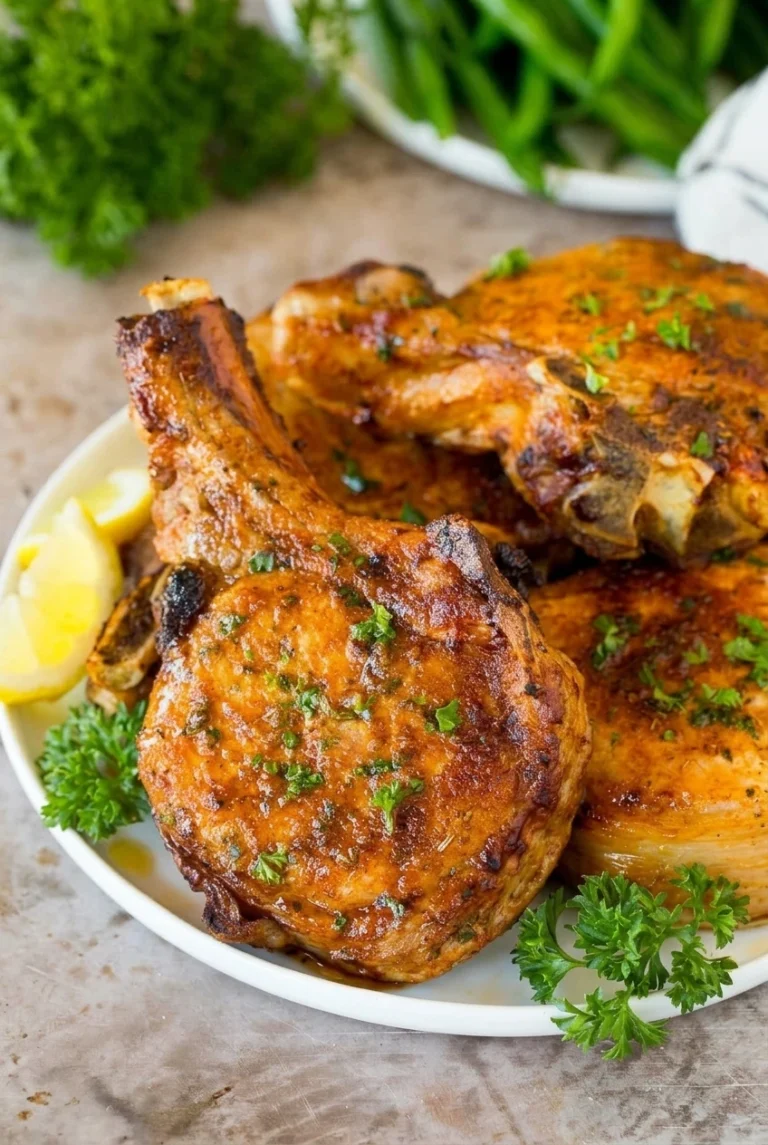
These whole, bone-in pork chops have a craggy, seasoned flour crust that fries to a deep golden brown. An egg wash helps build the substantial coating; pressing on the flour and resting the chops before frying helps it stay attached.

Fry the chops in uncrowded batches and drain them on a wire rack to keep the crust crisp. The frying time is a guide for chops about 3/4 inch thick, so check the pork with a thermometer rather than relying on crust color alone.

Ingredients for Southern Fried Pork Chops
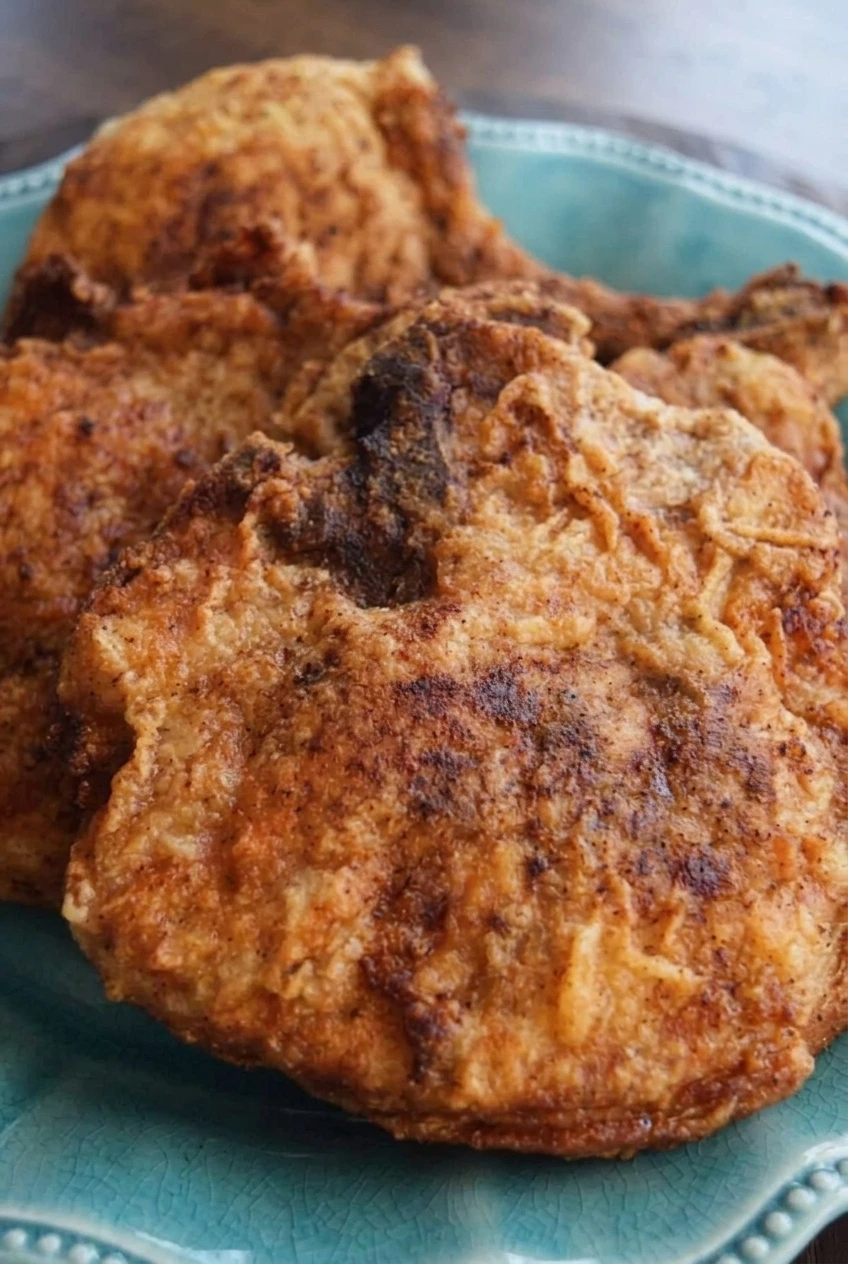
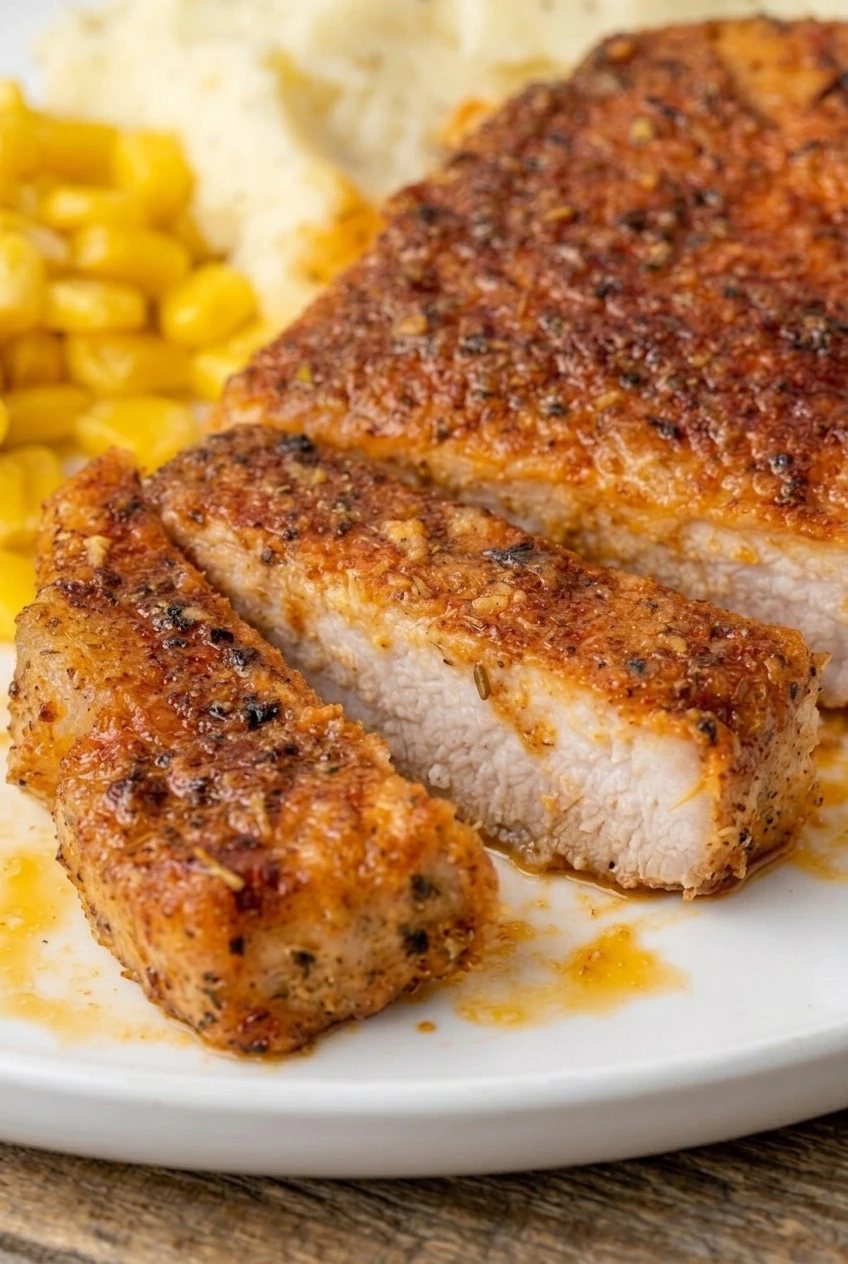
Close view of the crisp, uneven golden-brown flour crust on Southern fried pork chops
  • 4 bone-in pork chops, about 3/4 inch thick and 6–8 ounces each (about 800g total)
  • 1 teaspoon kosher salt, divided
  • 3/4 teaspoon black pepper, divided
  • 1 1/2 cups all-purpose flour (180g)
  • 1 teaspoon paprika
  • 1/2 teaspoon garlic powder
  • 2 large eggs
  • About 1/2 cup neutral vegetable or canola oil, or enough for a shallow 1/4-inch layer

For a little heat, add a pinch of cayenne, up to 1/4 teaspoon, to the flour.

How to Make Southern Fried Pork Chops
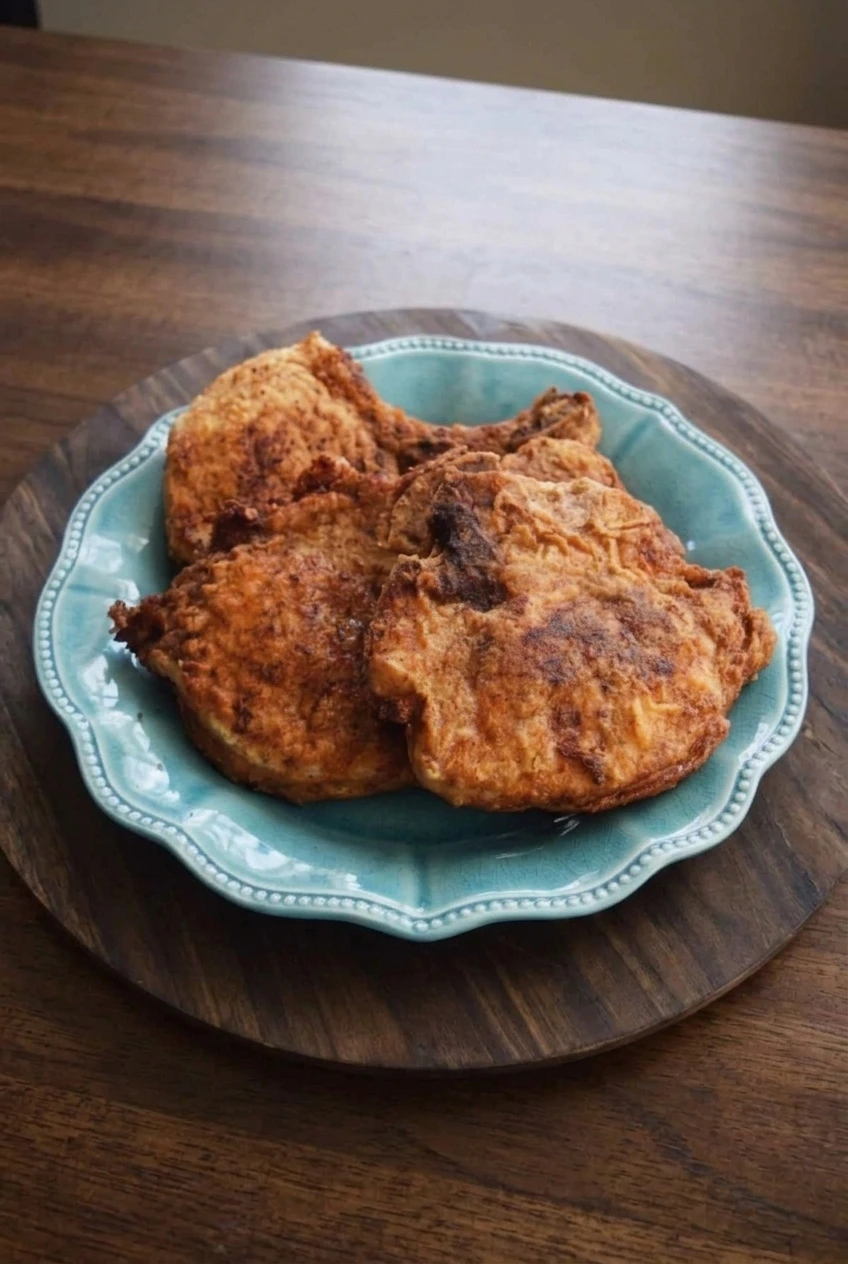
A full platter of overlapping Southern fried pork chops on a dark wooden table
  1. Season the chops: Pat the pork chops dry with paper towels. Season both sides with about half the salt and pepper.
  2. Set up the coating: Beat the eggs in one shallow dish. In another, mix the flour, paprika, garlic powder, and remaining salt and pepper.
  3. Coat and rest: Dip each chop in the egg, letting the excess drip off. Press it into the flour on both sides and along the edges, covering any bare patches. Set the chops on a tray for about 10 minutes, until the coating clings to the meat.
  4. Heat the oil: Add oil to a 12-inch heavy skillet, such as cast iron or stainless steel, to a depth of about 1/4 inch. Heat over medium to medium-high until the oil reaches about 350°F (175°C). It should shimmer but not smoke.
  5. Fry in batches: Carefully add the chops, leaving space around each one. Fry uncovered and without moving them until the first side is golden brown, about 4–5 minutes for 3/4-inch chops. Turn once gently with tongs and fry the second side for about 3–5 minutes. Lower the heat if the crust darkens too quickly, and let the oil return to about 350°F before adding another batch.
  6. Check and rest: Begin checking the thickest chop after about 7 minutes total. Insert an instant-read thermometer into the thickest part, away from the bone. When the pork reaches 145°F (65°C), transfer it to a wire rack set over a rimmed sheet pan. Rest for at least 3 minutes before serving. Check and transfer the remaining chops as they reach temperature.

How to Keep the Coating Attached and Crisp

Moisture on the pork and rough handling can loosen the flour coating. Pat the chops dry, press the flour onto the egg-coated surface, and give the coating its 10-minute rest before frying. Once a chop is in the skillet, leave it alone until the first side has browned.

A crowded pan cools the oil and can leave the crust soft or greasy. Fry in batches, then drain the chops without stacking them so steam does not collect beneath the coating.

How Long to Fry Pork Chops

The 4–5 minutes on the first side and 3–5 minutes on the second are starting estimates for bone-in chops about 3/4 inch thick. Thinner chops may finish sooner; thicker ones may need longer. If the crust is browning quickly, check the pork early and adjust the burner. The thickest part should reach 145°F before the 3-minute rest.

The egg wash makes a substantial coating, but it is not essential to flour-fried pork chops. For a simpler version, skip the egg and dredge the seasoned chops directly in the flour; the crust may be lighter. A buttermilk dip can also replace the egg wash. If using boneless chops, begin checking early because they may cook and dry out more quickly.

Serving Southern Fried Pork Chops

Serve the whole chops hot, overlapping on a platter without sauce or garnish. Mashed potatoes, collard greens, Southern-style green beans, or macaroni and cheese work well alongside them. For a gravy-based alternative, try Southern Smothered Pork Chops with Onion Gravy. For a different coating, see Crispy Parmesan-Crusted Pork Chops.

How to Store and Reheat

Refrigerate leftovers in an airtight container for 3–4 days. Reheat on a foil-lined baking sheet in a 350°F oven for about 5–8 minutes per side, adjusting for thickness, until hot in the center. The coating may not be as crisp as it was when freshly fried.

Nutrition

Approximate nutrition per serving, based on 1 chop (1/4 of the recipe): 480 calories, 36g protein, 30g fat, and 14g carbohydrates. Per 100g: about 240 calories, 18g protein, 15g fat, and 7g carbohydrates. Values vary with chop size, coating retained, and oil absorbed during frying.

Southern Fried Pork Chops

Bone-in pork chops are coated in seasoned flour and egg, then fried until golden and crisp.
Course: Main Course
Cuisine: American
Prep: 20 min
Cook: 20 min
Total: 43 min
Servings: 4 Calories: 480 kcal

Equipment

  • 12-inch heavy skillet
  • Shallow dishes
  • Instant-read thermometer
  • Tongs
  • Wire rack
  • Rimmed sheet pan

Ingredients

For the Pork Chops

  • 4 bone-in pork chops, about 3/4 inch thick and 6–8 ounces each (about 800g total)
  • 1 teaspoon kosher salt, divided
  • 3/4 teaspoon black pepper, divided
  • 2 large eggs

For the Coating and Frying

  • 1 1/2 cups all-purpose flour (180g)
  • 1 teaspoon paprika
  • 1/2 teaspoon garlic powder
  • About 1/2 cup neutral vegetable or canola oil, or enough for a shallow 1/4-inch layer

Instructions

  1. Pat the pork chops dry with paper towels and season both sides with about half the salt and pepper.
  2. Beat the eggs in one shallow dish.
  3. Mix the flour, paprika, garlic powder, and remaining salt and pepper in another shallow dish.
  4. Dip each chop in the egg, letting the excess drip off. Press it into the flour on both sides and along the edges, covering any bare patches.
  5. Set the coated chops on a tray and rest for about 10 minutes.
  6. Add oil to a 12-inch heavy skillet to a depth of about 1/4 inch. Heat over medium to medium-high until it reaches about 350°F (175°C); the oil should shimmer but not smoke.
  7. Fry the chops in uncrowded batches, uncovered and without moving them, for about 4–5 minutes on the first side.
  8. Turn each chop gently with tongs and fry the second side for about 3–5 minutes. Lower the heat if the crust darkens too quickly, and let the oil return to about 350°F (175°C) before frying another batch.
  9. Begin checking the thickest chop after about 7 minutes total. Insert an instant-read thermometer into the thickest part, away from the bone.
  10. Transfer each chop to a wire rack set over a rimmed sheet pan when it reaches 145°F (65°C). Rest for at least 3 minutes before serving.

Tips

  • Pat the chops dry and press the flour firmly onto the egg-coated surface so the coating stays attached.
  • Let the coated chops rest for about 10 minutes before frying.
  • Do not crowd the skillet; fry in batches to help keep the crust crisp.
  • Leave the chops undisturbed until the first side has browned.
  • Use a thermometer to check doneness rather than relying on crust color.

Variations

  • Cayenne-Spiced Pork Chops: Add a pinch of cayenne, up to 1/4 teaspoon, to the flour.
  • Egg-Free Coating: Skip the egg and dredge the seasoned chops directly in the flour for a lighter crust.
  • Buttermilk-Dipped Pork Chops: Use a buttermilk dip in place of the egg wash.
Notes

Refrigerate leftovers in an airtight container for 3–4 days. Reheat on a foil-lined baking sheet in a 350°F oven for about 5–8 minutes per side, adjusting for thickness, until hot in the center.

Nutrition

Calories: 480 kcal | Protein: 36 g | Fat: 30 g | Carbohydrates: 14 g

Air Fryer Pork Chops

Bone-in pork chops get a paprika-garlic rub that browns in the air fryer without breading. Cook them at 400°F (205°C), turning once, then finish with chopped parsley and lemon wedges.

The browned crust tells you little about the center. Because chop thickness and air fryer performance vary, check each chop with an instant-read thermometer. Remove it when the thickest part reaches 145°F (65°C), measuring away from the bone.

Ingredients for Air Fryer Pork Chops

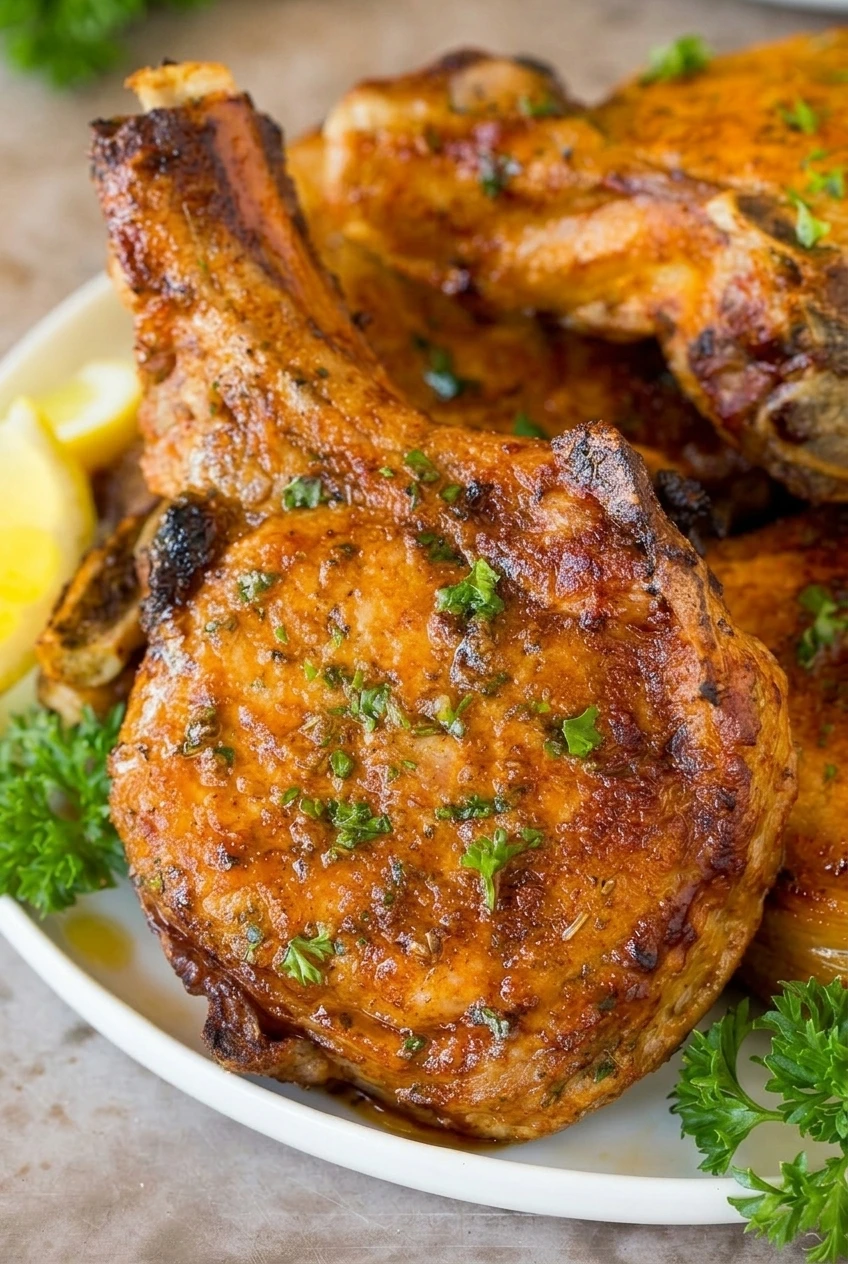
Close view of the browned paprika crust, parsley, and visible bone on an air fryer pork chop
  • 4 bone-in pork chops, about 1 inch thick and 2 pounds total (900g)
  • 1 tablespoon olive oil
  • 1 teaspoon paprika
  • 1 teaspoon garlic powder
  • 1/2 teaspoon onion powder
  • 1/2 teaspoon dried thyme
  • 3/4 teaspoon kosher salt, or to taste
  • 1/4 teaspoon black pepper
  • 1 tablespoon finely chopped fresh parsley, plus a small sprig for serving
  • 1 lemon, cut into wedges

How to Make Air Fryer Pork Chops

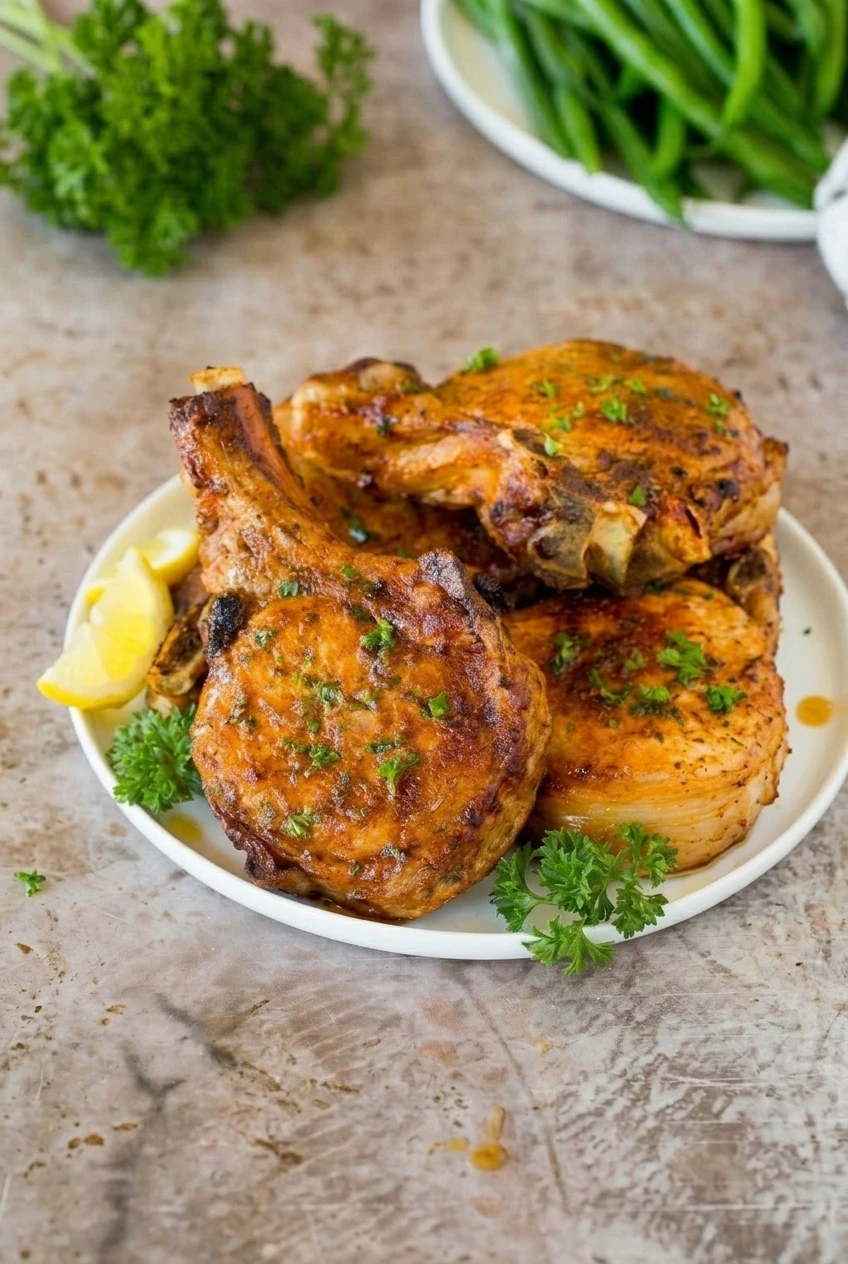
Whole plate of browned bone-in air fryer pork chops with parsley and lemon wedges, viewed from farther back
  1. Prepare the rub: Set the air fryer to 400°F and preheat if the appliance instructions recommend it. Mix the paprika, garlic powder, onion powder, thyme, salt, and pepper in a small bowl.
  2. Season the chops: Pat the pork chops dry with paper towels. Coat them lightly with the olive oil, then rub the seasoning over all sides.
  3. Arrange in one layer: Place the chops in the basket with space around each one. Do not stack or overlap them; cook in batches if necessary.
  4. Air fry: Cook at 400°F, turning once halfway through. For roughly 1-inch bone-in chops, allow about 10–14 minutes total as a checking window. Begin checking at 9–10 minutes total.
  5. Check and rest: Insert an instant-read thermometer into the thickest part of each chop without touching the bone. Remove each chop when it reaches 145°F. If one needs longer, continue cooking in short increments and check again. Rest on a plate for 3–5 minutes.
  6. Serve: Arrange the whole chops together on a plate. Scatter the chopped parsley over them and add the lemon wedges and parsley sprig alongside.

How Thickness Affects Cook Time

Choose chops of similar thickness when possible, but check each one separately even if they cook in the same batch. Thicker chops may need more than the suggested window; thinner or boneless chops may finish sooner. Air fryer models also cook differently, so use the thermometer rather than the clock or the color of the rub to decide when a chop is done.

How to Get Even Browning

Patting the chops dry helps the oil and rub form a browned coating instead of staying wet. Space in the basket lets hot air reach their surfaces; crowding can leave patches pale and cause the chops to cook unevenly.

Serving, Make-Ahead, and Storage

Serve with mashed or baked potatoes, rice pilaf, broccoli, green beans, or a green salad. To prep ahead, season the chops, cover, and refrigerate for up to 24 hours before cooking.

Refrigerate leftover cooked chops in a covered container for up to 3 days. They can also be frozen after cooling completely for up to 2 months; thaw overnight in the refrigerator before reheating.

Nutrition

Approximate nutrition per serving, based on 1 of 4 bone-in chops and an estimated edible portion: 340 calories, 33g protein, 22g fat, and 1g carbohydrates. Approximate nutrition per 100g of edible cooked pork: 270 calories, 26g protein, 18g fat, and 1g carbohydrates. Values vary with chop size, fat content, and the amount of meat left on the bone.

Air Fryer Pork Chops

Bone-in pork chops are coated with a paprika-garlic rub and air-fried until they reach 145°F.
Course: Main Course
Cuisine: American
Prep: 10 min
Cook: 14 min
Total: 29 min
Servings: 4

Equipment

  • Air fryer
  • Small bowl
  • Instant-read thermometer

Ingredients

  • 4 bone-in pork chops, about 1 inch thick and 2 pounds total (900g)
  • 1 tablespoon olive oil
  • 1 teaspoon paprika
  • 1 teaspoon garlic powder
  • 1/2 teaspoon onion powder
  • 1/2 teaspoon dried thyme
  • 3/4 teaspoon kosher salt, or to taste
  • 1/4 teaspoon black pepper
  • 1 tablespoon finely chopped fresh parsley, plus a small sprig for serving
  • 1 lemon, cut into wedges

Instructions

  1. Set the air fryer to 400°F (205°C) and preheat if recommended by the appliance instructions.
  2. Mix the paprika, garlic powder, onion powder, thyme, salt, and pepper in a small bowl.
  3. Pat the pork chops dry with paper towels, coat lightly with olive oil, and rub the seasoning over all sides.
  4. Arrange the chops in a single layer in the air fryer basket with space around each one. Cook in batches if needed.
  5. Air fry at 400°F (205°C), turning once halfway through. For roughly 1-inch bone-in chops, allow about 10–14 minutes total and begin checking at 9–10 minutes.
  6. Check each chop with an instant-read thermometer inserted into the thickest part, away from the bone. Remove each chop when it reaches 145°F (65°C); cook in short increments if needed.
  7. Rest the chops on a plate for 3–5 minutes.
  8. Arrange the chops together on a plate, scatter with chopped parsley, and serve with lemon wedges and the parsley sprig.

Tips

  • Choose chops of similar thickness, but check each one separately for doneness.
  • Pat the chops dry to help the oil and rub brown on the surface.
  • Leave space around each chop so hot air can circulate and brown them evenly.
  • Use an instant-read thermometer rather than color or the clock to determine doneness.
  • Thinner or boneless chops may finish sooner; thicker chops may need more time.

Notes

Seasoned chops can be covered and refrigerated for up to 24 hours before cooking. Refrigerate leftovers in a covered container for up to 3 days or freeze for up to 2 months; thaw overnight in the refrigerator before reheating. Nutrition is approximate and varies with the edible portion and chop size.

Nutrition

Per Serving Calories: 340 kcal | Per Serving Protein: 33 g | Per Serving Fat: 22 g | Per Serving Carbohydrates: 1 g | Per 100g Edible Cooked Pork Calories: 270 kcal | Per 100g Edible Cooked Pork Protein: 26 g | Per 100g Edible Cooked Pork Fat: 18 g | Per 100g Edible Cooked Pork Carbohydrates: 1 g

Brown Sugar Baked Pork Chops

Brown sugar, paprika, garlic, herbs, and black pepper form a sweet-savory coating on these thick baked pork chops. A little oil helps the dry rub cling, while uncovered baking gives the surface a glossy, browned finish without a poured sauce.

Start checking the chops before the estimated bake time is up. Thickness and cut affect how quickly they cook, and a thermometer is the best way to catch them before they dry out.

Prep: 10 minutes. Cook: 18–25 minutes. Total: About 35 minutes, including rest. Serves: 4.

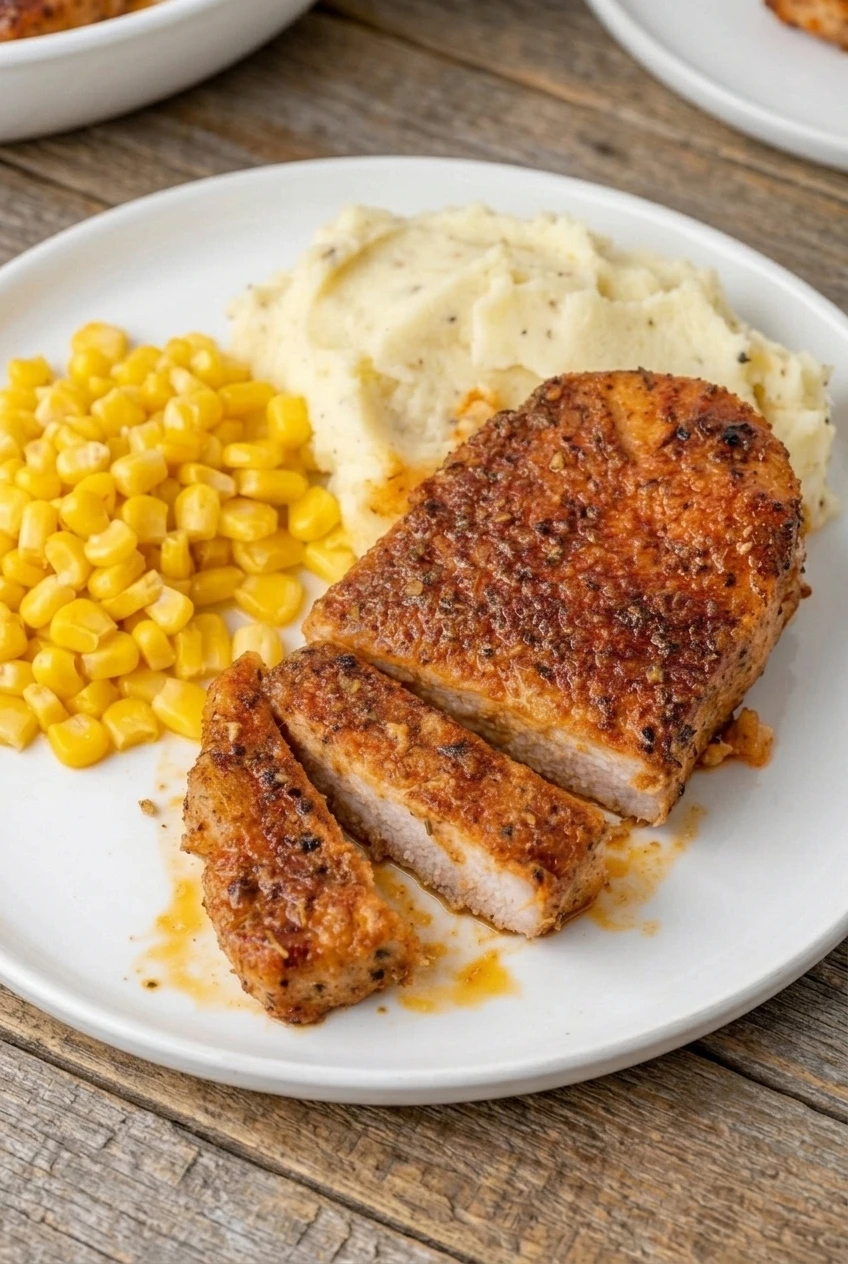
Full plate of brown sugar baked pork chops with mashed potatoes and corn, viewed with more table surface around it

Ingredients for Brown Sugar Baked Pork Chops

  • 4 boneless pork chops, about 1 inch thick and 6–8 ounces each (about 800g total)
  • 1 tablespoon olive oil or neutral oil
  • 2 tablespoons packed light brown sugar (25g)
  • 1 teaspoon paprika
  • 1 teaspoon garlic powder
  • 1/2 teaspoon onion powder
  • 1 teaspoon dried Italian seasoning
  • 3/4 teaspoon kosher salt, or to taste depending on the salt’s crystal size
  • 1/2 teaspoon black pepper

For gentle heat, add an optional pinch of cayenne to the rub. Dark brown sugar can replace light brown sugar for a deeper, sweeter flavor.

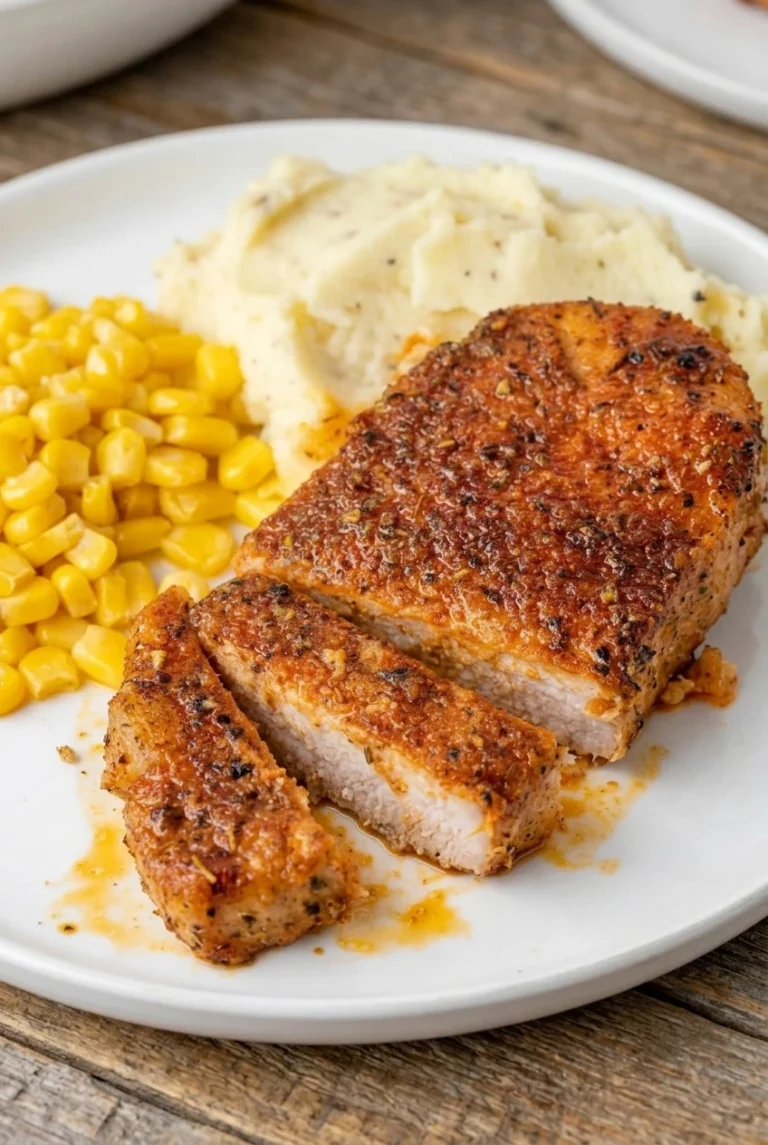
Close view of glossy brown sugar baked pork chops showing herb-flecked seasoning and a moist, pale cut interior

How to Bake Brown Sugar Pork Chops

  1. Heat the oven: Preheat to 400°F (205°C) with a rack in the center. Line a rimmed baking sheet with parchment paper or foil.
  2. Mix the rub: Stir together the brown sugar, paprika, garlic powder, onion powder, Italian seasoning, salt, and black pepper in a small bowl. Break up any large sugar clumps.
  3. Coat the chops: Pat the pork dry, then lightly coat both sides with oil. Press the rub onto both sides and the edges so it stays in place.
  4. Bake uncovered: Arrange the chops in one layer with space between them. Do not add liquid or flip the chops. Bake for an estimated 18–25 minutes for 1-inch chops, but start checking around 15 minutes. The coating should be browned and glossy, not scorched.
  5. Check and rest: Insert an instant-read thermometer into the thickest part of each chop, avoiding any bone. Remove each chop when it reaches 145°F (65°C), then rest for 3–5 minutes before serving. Spoon over a little collected pan juice, if available.

Choosing Chops and Checking Doneness

The bake-time estimate is for boneless chops about 1 inch thick. Thin chops may finish earlier; thicker or bone-in chops may take longer. Check each chop with a thermometer rather than relying on its color or leaving it in the oven for the full estimated time.

Brown sugar can darken quickly. If the coating is already well browned, do not bake longer just to deepen its color. The pork needs to reach 145°F and rest for at least 3 minutes; broiling is not necessary.

Serving and Storing

For a plate of whole and sliced chops, leave one chop intact and cut another into thick slices. Mashed potatoes and corn make fitting sides, but neither is part of the pork chop recipe.

Promptly refrigerate leftovers in an airtight container. Properly chilled pork can be kept for 3–4 days; a more conservative window is 2 days. Reheat in a covered oven-safe dish at 350°F (175°C) until thoroughly heated. A small splash of broth can help limit drying.

For longer storage, pack the chops in a freezer-safe bag with the air removed and freeze for 2–3 months. Thaw overnight in the refrigerator before reheating.

Nutrition

Approximate nutrition per serving, based on 1 pork chop and excluding sides: 350 calories, 43g protein, 15g fat, and 8g carbohydrates. Per 100g of finished pork chops: approximately 215 calories, 27g protein, 9g fat, and 5g carbohydrates. Values vary with chop size, cut, and how much seasoning remains on the pan.

Brown Sugar Baked Pork Chops

Thick pork chops are coated in a sweet-savory brown sugar and herb rub, then baked uncovered until browned and tender.
Course: Main Course
Cuisine: American
Prep: 10 min
Cook: 25 min
Total: 35 min
Servings: 4 Calories: 350 kcal

Equipment

  • Oven
  • Rimmed baking sheet
  • Parchment paper or foil
  • Small bowl
  • Instant-read thermometer

Ingredients

  • 4 boneless pork chops, about 1 inch thick and 6–8 ounces each (about 800g total)
  • 1 tablespoon olive oil or neutral oil
  • 2 tablespoons packed light brown sugar (25g)
  • 1 teaspoon paprika
  • 1 teaspoon garlic powder
  • 1/2 teaspoon onion powder
  • 1 teaspoon dried Italian seasoning
  • 3/4 teaspoon kosher salt, or to taste
  • 1/2 teaspoon black pepper
  • Pinch of cayenne, optional

Instructions

  1. Preheat the oven to 400°F (205°C) with a rack in the center. Line a rimmed baking sheet with parchment paper or foil.
  2. Mix the brown sugar, paprika, garlic powder, onion powder, Italian seasoning, salt, and black pepper in a small bowl, breaking up any sugar clumps.
  3. Pat the pork chops dry and lightly coat both sides with oil.
  4. Press the rub onto both sides and the edges of each chop.
  5. Arrange the chops in a single layer with space between them. Bake uncovered without adding liquid or flipping.
  6. Start checking around 15 minutes. Bake for an estimated 18–25 minutes, checking each chop with an instant-read thermometer inserted into its thickest part.
  7. Remove each chop when it reaches 145°F (65°C). Rest for 3–5 minutes before serving, and spoon over a little pan juice if available.

Tips

  • Start checking before the estimated bake time is up; chop thickness and cut affect cooking time.
  • Use a thermometer rather than color to check doneness.
  • Avoid baking longer just to darken the coating; brown sugar can scorch.
  • Rest the chops for at least 3 minutes after they reach 145°F (65°C).

Variations

  • Dark Brown Sugar Pork Chops: Replace the light brown sugar with dark brown sugar for a deeper, sweeter flavor.
  • Spicy Brown Sugar Pork Chops: Add a pinch of cayenne to the rub for gentle heat.

Notes

Refrigerate leftovers promptly in an airtight container for 2–4 days. Reheat covered at 350°F (175°C) until thoroughly heated; a splash of broth can help prevent drying. Freeze for 2–3 months and thaw overnight in the refrigerator. Approximate nutrition per 100g: 215 calories, 27g protein, 9g fat, and 5g carbohydrates.

Nutrition

Calories: 350 kcal | Protein: 43 g | Fat: 15 g | Carbohydrates: 8 g

Crispy Parmesan Crusted Pork Chops

A fine coating of Parmesan, breadcrumbs, garlic, and herbs gives these boneless pork chops a golden crust. A short skillet sear browns the coating; the oven finishes the pork without leaving the cheese over the heat too long. The timing is based on chops about 1 inch thick. Start checking early with a thermometer, since thickness and cookware affect how quickly they cook.

Ingredients for Parmesan Crusted Pork Chops

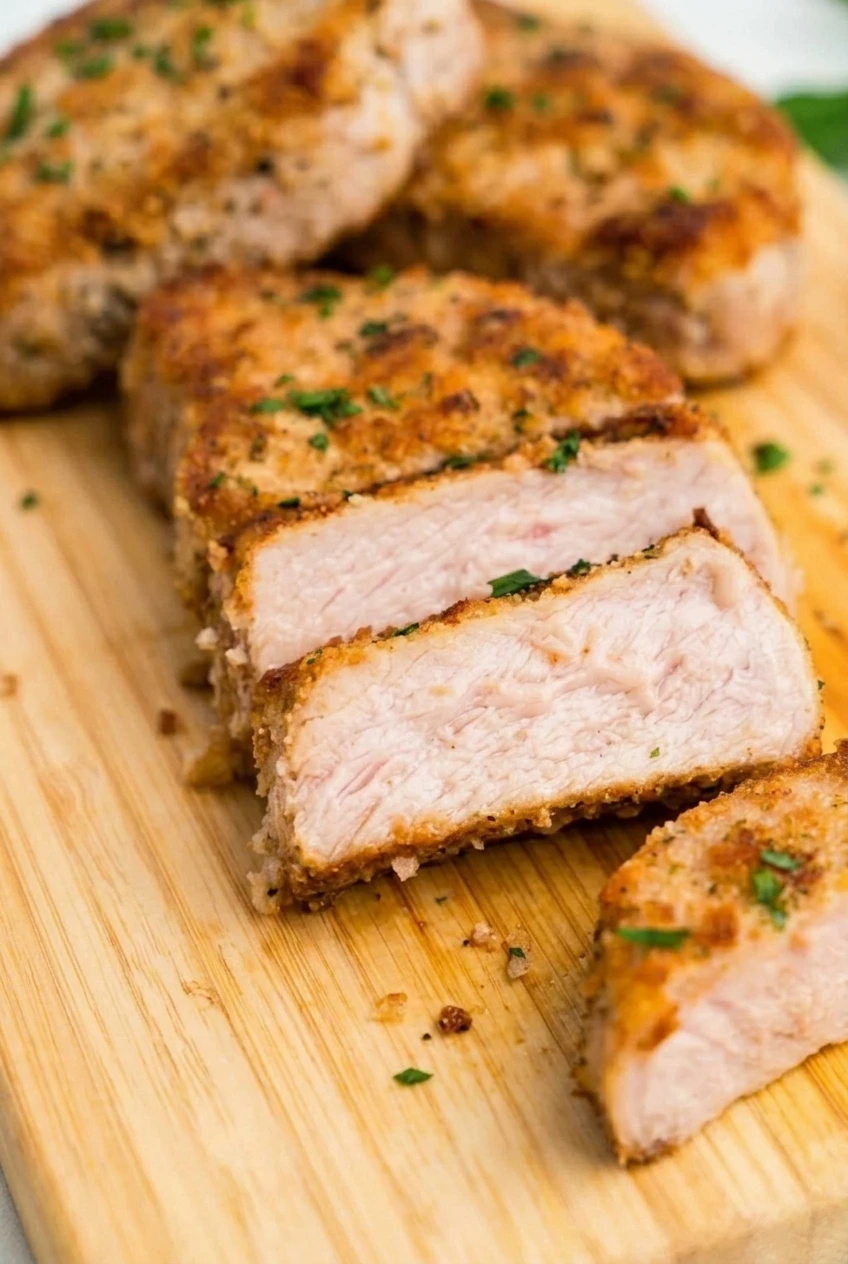
Close view of a sliced Parmesan-crusted pork chop showing its fine golden coating and moist interior.
  • 4 boneless pork chops, about 1 inch thick (about 1½ pounds/680g total)
  • 1 cup fine plain or Italian-style breadcrumbs (110g)
  • ½ cup finely grated Parmesan (50g)
  • 1 large egg
  • 1 tablespoon water
  • ½ teaspoon garlic powder
  • ½ teaspoon Italian seasoning
  • ½ teaspoon fine salt, divided
  • ¼ teaspoon black pepper
  • 2 tablespoons olive oil
  • 1 tablespoon finely chopped fresh parsley, plus a little for finishing

Finely grated Parmesan blends evenly with the crumbs and is less likely to scorch than large shreds. Panko can replace the fine breadcrumbs, but it will make a coarser crust.

How to Make Crispy Parmesan Crusted Pork Chops

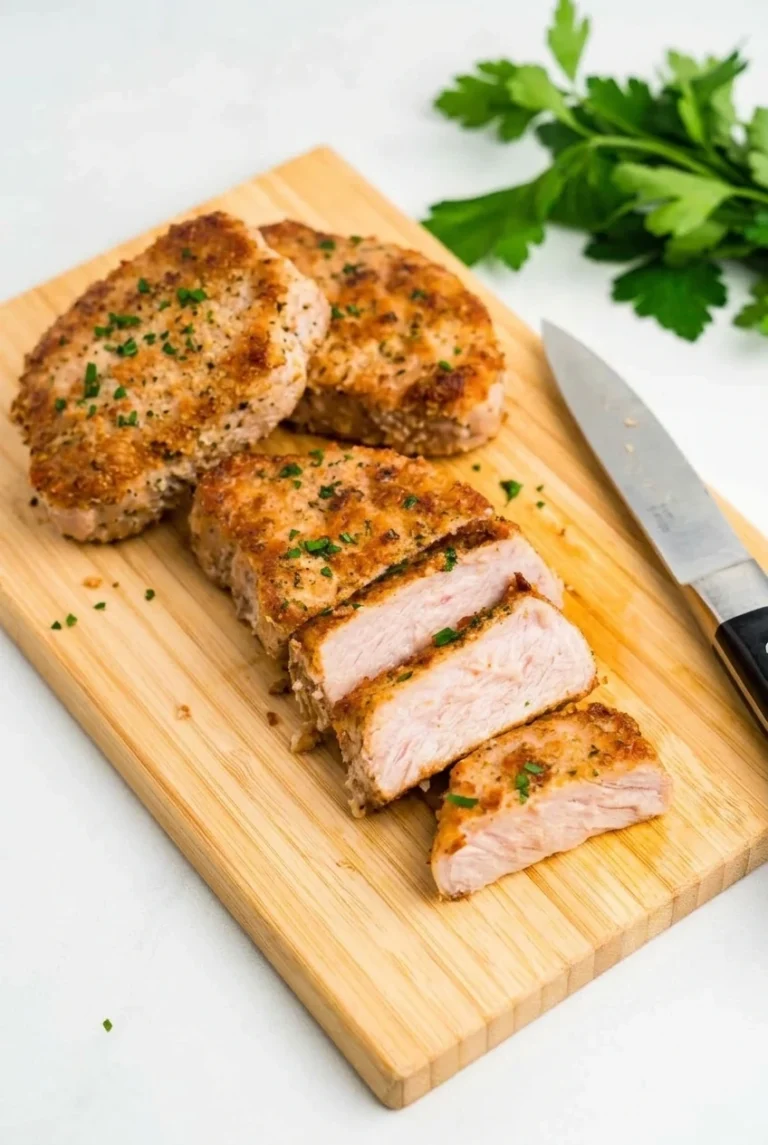
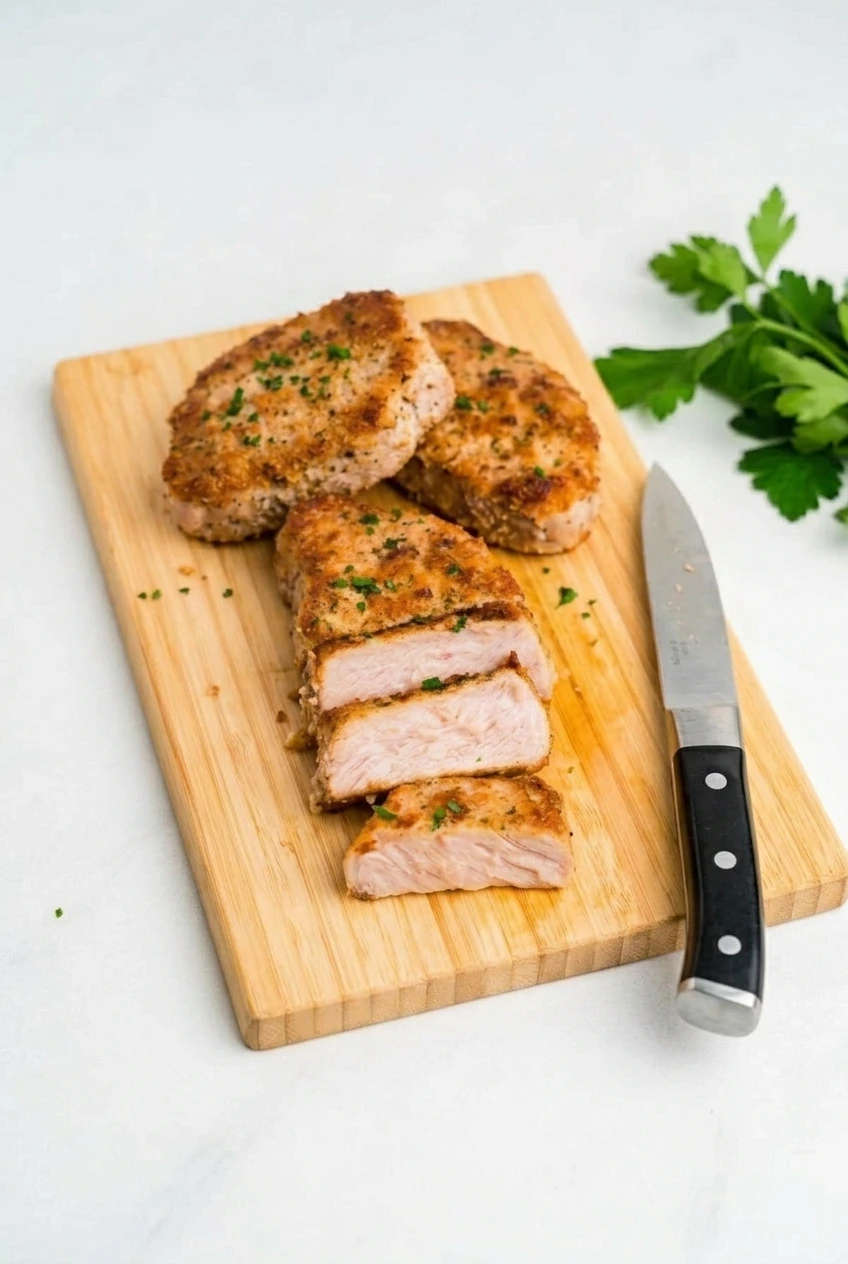
A wider view of whole and thickly sliced Parmesan-crusted pork chops arranged on a wooden board.
  1. Prepare the oven and coating: Heat the oven to 375°F (190°C). If you may need a baking sheet instead of an oven-safe skillet, place a rimmed sheet in the oven to preheat. In a shallow dish, mix the breadcrumbs, Parmesan, garlic powder, Italian seasoning, pepper, and ¼ teaspoon of the salt. Beat the egg with the water in a separate bowl.
  2. Coat the chops: Pat the pork dry and season it with the remaining ¼ teaspoon salt. Dip each chop in the egg, let the excess drip off, then press the crumb mixture onto both sides and around the edges.
  3. Sear: Heat the oil in a large oven-safe skillet, preferably about 12 inches wide, over medium heat. When the oil shimmers but does not smoke, add the chops with space between them. Sear for about 2 minutes per side, turning once, until lightly golden. Work in batches if needed, and lower the heat if the coating darkens quickly.
  4. Finish in the oven: Transfer the skillet to the oven. If it is not oven-safe, or the chops will not fit without touching, carefully move them to the preheated rimmed baking sheet. Cook uncovered and start checking the thickest chop after about 6 minutes. Oven time is often 6–12 minutes, but continue checking in short intervals until the center reaches 145°F (65°C).
  5. Rest and serve: Transfer the chops to a cutting board and rest for about 5 minutes. Scatter a little parsley over the crust. Leave most chops whole and cut one into a few thick slices to show the moist interior.

How to Keep the Parmesan Coating on the Chops

The egg dip helps the crumbs cling in this version, though not every Parmesan-crusted chop needs one. Drying the pork and pressing on the coating matter, too. Once the chops are coated, handle them gently and turn them only once during searing.

Leave room between the chops so the coating browns instead of softening in a crowded pan. Keep the heat at medium: the Parmesan can darken before the pork is done if the skillet gets too hot.

How to Tell When Pork Chops Are Done

Insert an instant-read thermometer into the thickest part of a chop without touching the pan. Check early if your chops are closer to ¾ inch thick; thicker chops may need longer. Remove them at 145°F, then rest before cutting. The sliced center should look moist, not dry.

Storing and Reheating Leftovers

Refrigerate cooked chops promptly in an airtight container for 3–4 days. Reheat in a 350°F (175°C) oven until hot throughout; the time depends on the thickness of the chops. The oven can help the coating regain some crispness, though it may remain softer than when freshly cooked.

Nutrition

Approximate nutrition per serving, based on 1 pork chop (one-quarter of the recipe): 470 calories, 45g protein, 22g fat, and 21g carbohydrates. Approximate nutrition per 100g: 235 calories, 23g protein, 11g fat, and 10g carbohydrates. Values vary with the chops and how much coating and oil are used.

Crispy Parmesan Crusted Pork Chops

Boneless pork chops are coated in Parmesan, breadcrumbs, garlic, and herbs, seared until golden, then finished in the oven.
Course: Main Course
Cuisine: American
Prep: 15 min
Cook: 16 min
Total: 36 min
Servings: 4

Equipment

  • Oven
  • Shallow dishes
  • Oven-safe skillet
  • Rimmed baking sheet
  • Instant-read thermometer

Ingredients

  • 4 boneless pork chops, about 1 inch thick (about 1½ pounds/680 g total)
  • 1 cup fine plain or Italian-style breadcrumbs (110 g)
  • ½ cup finely grated Parmesan (50 g)
  • 1 large egg
  • 1 tablespoon water
  • ½ teaspoon garlic powder
  • ½ teaspoon Italian seasoning
  • ½ teaspoon fine salt, divided
  • ¼ teaspoon black pepper
  • 2 tablespoons olive oil
  • 1 tablespoon finely chopped fresh parsley, plus extra for finishing

Instructions

  1. Preheat the oven to 375°F (190°C). If using a baking sheet instead of an oven-safe skillet, place a rimmed baking sheet in the oven to preheat.
  2. In a shallow dish, combine the breadcrumbs, Parmesan, garlic powder, Italian seasoning, pepper, and ¼ teaspoon of the salt. In a separate bowl, beat the egg with the water.
  3. Pat the pork chops dry and season with the remaining ¼ teaspoon salt. Dip each chop in the egg, let the excess drip off, then press the crumb mixture onto both sides and around the edges.
  4. Heat the olive oil in a large oven-safe skillet over medium heat until shimmering but not smoking. Add the chops with space between them and sear for about 2 minutes per side, turning once, until lightly golden. Work in batches if needed.
  5. Transfer the skillet to the oven. If the skillet is not oven-safe or the chops do not fit without touching, carefully move them to the preheated baking sheet. Bake uncovered, checking the thickest chop after about 6 minutes, until it reaches 145°F (65°C); oven time is often 6–12 minutes.
  6. Transfer the chops to a cutting board and rest for about 5 minutes. Finish with parsley before serving.

Tips

  • Use finely grated Parmesan so it blends evenly with the breadcrumbs and is less likely to scorch.
  • Pat the chops dry and press the coating firmly onto them to help it adhere.
  • Leave space between chops while searing so the coating browns instead of softening.
  • Keep the skillet at medium heat and lower it if the coating darkens quickly.
  • Check the thickest chop early with an instant-read thermometer; thickness and cookware affect cooking time.

Variations

  • Panko Parmesan Pork Chops: Replace the fine breadcrumbs with panko for a coarser crust.

Notes

Refrigerate leftovers promptly in an airtight container for 3–4 days. Reheat in a 350°F (175°C) oven until hot throughout. Remove the chops from the oven at 145°F (65°C) and rest before cutting.

Nutrition

Per Serving Calories: 470 kcal | Per Serving Protein: 45 g | Per Serving Fat: 22 g | Per Serving Carbohydrates: 21 g | Per 100 G Calories: 235 kcal | Per 100 G Protein: 23 g | Per 100 G Fat: 11 g | Per 100 G Carbohydrates: 10 g

Cream of Mushroom Pork Chops

Whole pork chops get a golden sear before finishing in a pale, creamy sauce made with condensed cream of mushroom soup and chicken broth. Finely diced onion softens into the sauce, keeping it mostly smooth, while parsley adds a fresh finish.

The skillet finish is brief, but chop thickness matters more than the clock. Start checking early with an instant-read thermometer so the pork reaches 145°F (65°C) without cooking far beyond it. The recipe serves four and takes about 30 minutes.

Ingredients for Cream of Mushroom Pork Chops

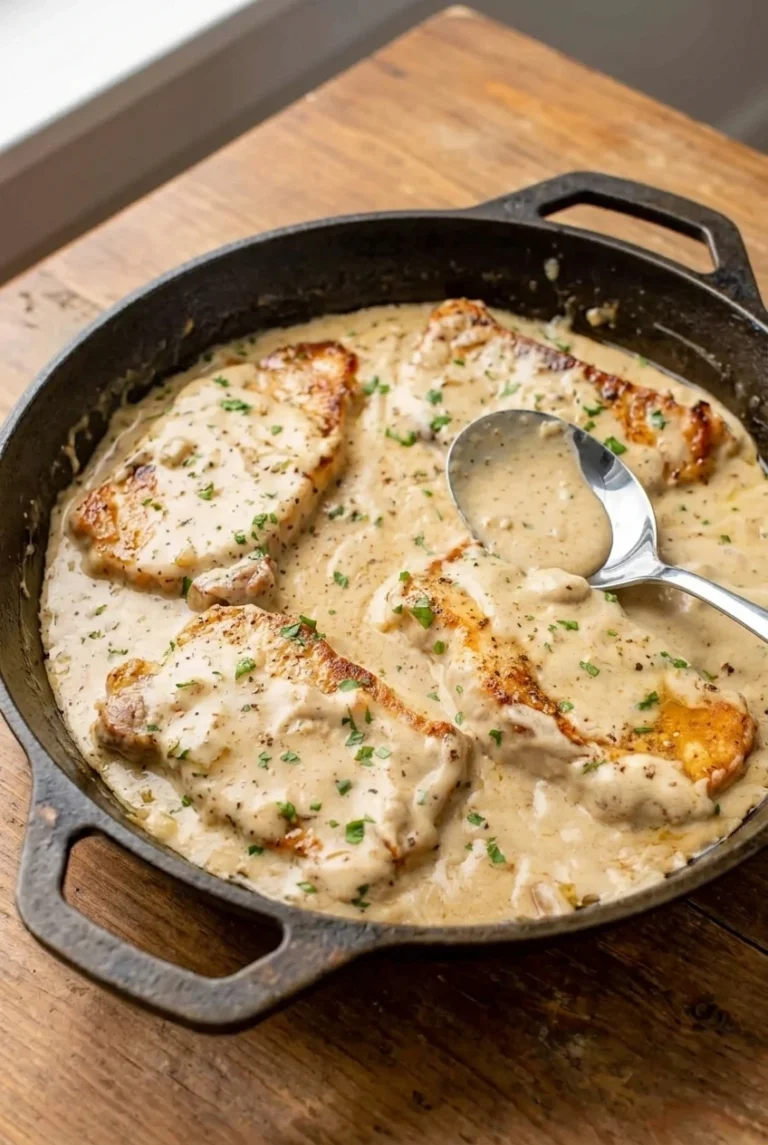
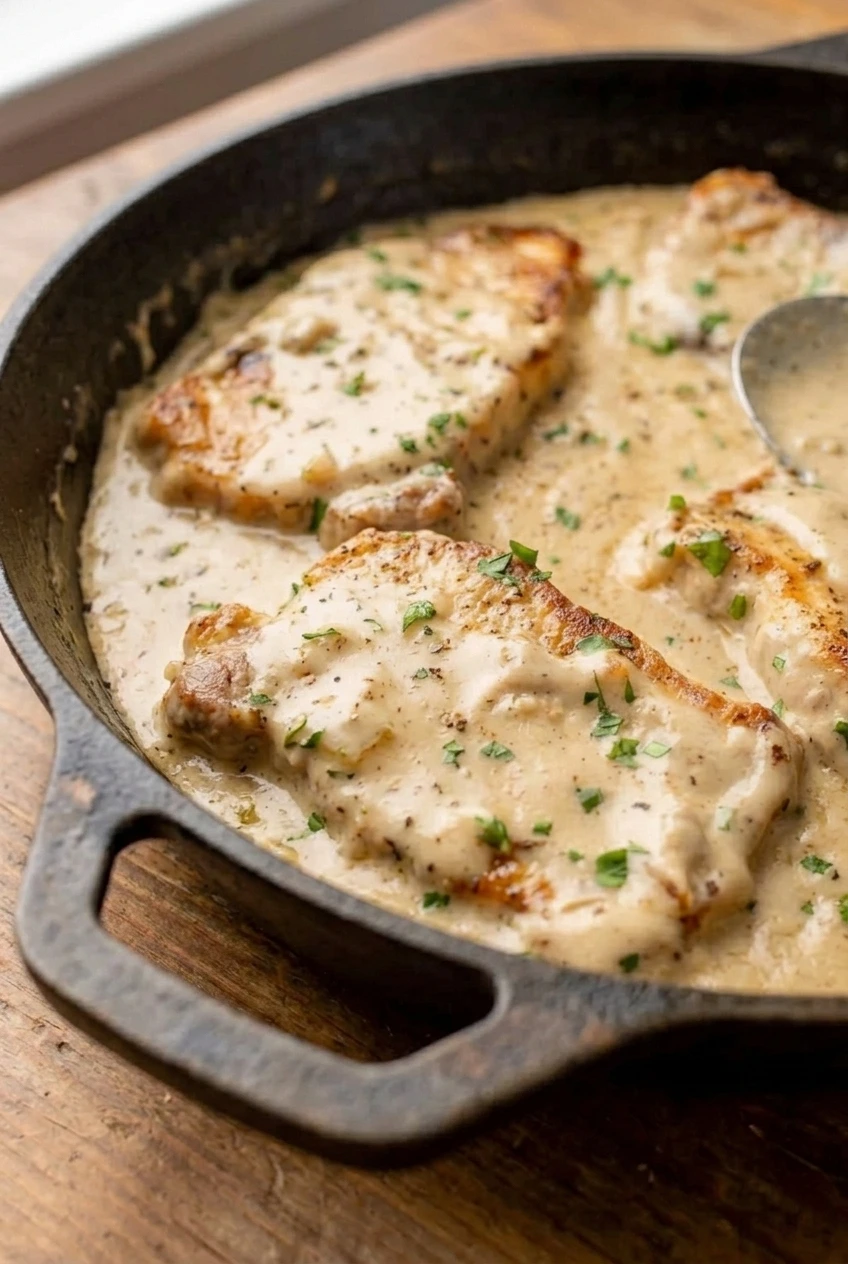
Close detail of a browned pork chop coated in creamy mushroom sauce with parsley and pepper flecks.
  • 4 boneless pork chops, about 3/4 to 1 inch thick (1 1/4 to 1 1/2 pounds total; about 620g)
  • 3/4 teaspoon kosher salt, or to taste
  • 1/2 teaspoon black pepper, plus more to taste
  • 1 tablespoon neutral oil
  • 1/3 cup finely diced yellow onion (about 55g)
  • 1 can condensed cream of mushroom soup (10.5 ounces; about 300g)
  • 1/2 cup chicken broth (120g), plus more as needed
  • 1 tablespoon chopped fresh parsley

Optional: Season the chops with 1/4 teaspoon garlic powder. For a chunkier sauce, cook 4 ounces of sliced fresh mushrooms with the onion until softened before adding the soup mixture.

How to Make Cream of Mushroom Pork Chops

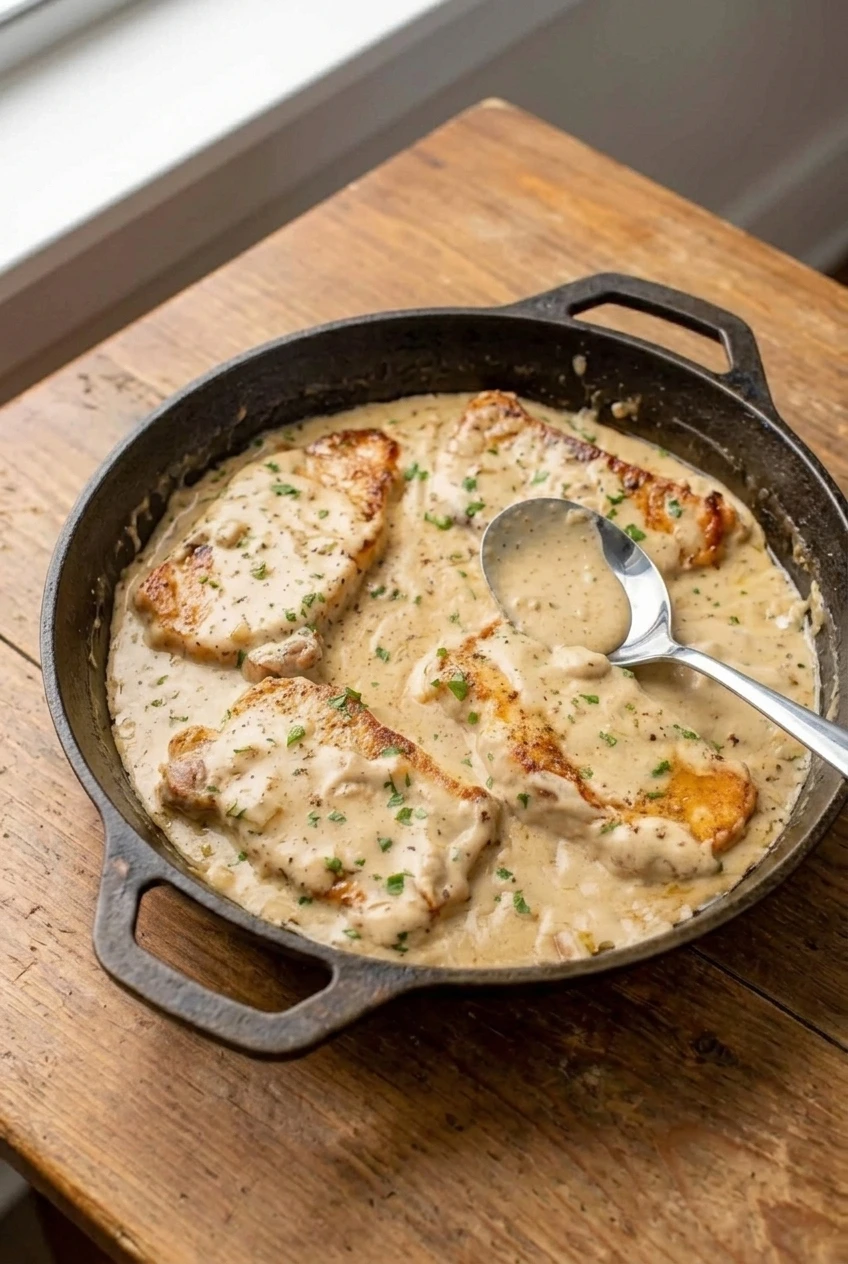
A full skillet of cream of mushroom pork chops with parsley, shown with more tabletop around the dish.
  1. Season the chops: Pat the pork dry and season both sides with the salt and pepper. Add the garlic powder now if using it. Dry surfaces help the chops brown rather than steam.
  2. Sear the pork: Heat a 12-inch skillet over medium-high heat, then add the oil. When it shimmers, add the chops in a single layer, leaving space between them. Sear for about 3–4 minutes per side, without moving them until they release easily and develop golden-brown patches. Work in batches if needed, adding a little more oil only if the pan is dry. Transfer the chops to a plate.
  3. Soften the onion: Reduce the heat to medium. Add the onion and cook, stirring, for 2–3 minutes, until softened. If the pan is dry, add a spoonful of broth to loosen the browned bits.
  4. Make the sauce: Whisk the condensed soup with 1/2 cup broth in a bowl or measuring cup. Stir it into the skillet and reduce the heat to medium-low. Cook, stirring, until the sauce is smooth and gently bubbling, not boiling rapidly.
  5. Finish the chops: Return the chops and any plate juices to the skillet, nestling the chops in the sauce. Cover loosely and simmer gently for about 5–10 minutes, turning the chops once if needed. Start checking their temperature after about 5 minutes, especially if they are under 1 inch thick.
  6. Rest and serve: Check each chop in its thickest part and remove it when it reaches 145°F. Rest for about 3 minutes. If the sauce is too thick to spoon easily, stir in more broth a tablespoon at a time. Return the chops to the sauce, scatter with parsley, and serve from the skillet.

How to Keep the Chops Tender

Choose chops of similar thickness so they finish at about the same time. A thin chop may be ready before the full simmer time is up; check each one rather than relying on color or the clock. Bone-in chops also work, but their timing may differ. Insert the thermometer into the thickest part of the meat, away from the bone.

Adjusting the Mushroom Sauce

Condensed soup thickens as it simmers. Keep the heat low enough for gentle bubbles and stir the sauce before serving. Add broth gradually if needed so it stays creamy and spoonable rather than becoming watery.

What to Serve with Mushroom Pork Chops

Serve the chops with rice, egg noodles, or mashed potatoes to catch the sauce. Green beans or another simple vegetable work well alongside.

Storing and Reheating Leftovers

Refrigerate leftovers promptly in a covered container for 3–4 days. Reheat gently in a skillet over low heat until hot, adding a splash of broth if the sauce has thickened. Prolonged high heat can dry out the pork.

Leftovers can be frozen, but the creamy sauce may change texture after thawing. Cool and seal them promptly, thaw in the refrigerator, and reheat gently.

Nutrition

Approximate nutrition per serving, based on 1 of 4 servings (one pork chop with about one-quarter of the sauce): 320 calories, 36g protein, 16g fat, and 7g carbohydrates. Per 100g: about 130 calories, 14g protein, 6g fat, and 3g carbohydrates. Values vary with the pork, soup brand, and amount of sauce served.

Cream of Mushroom Pork Chops

Golden-seared pork chops simmer in a creamy mushroom soup sauce with onion and parsley.
Course: Main Course
Cuisine: American
Prep: 10 min
Cook: 20 min
Total: 30 min
Servings: 4

Equipment

  • 12-inch skillet
  • Mixing bowl or measuring cup
  • Whisk
  • Instant-read thermometer

Ingredients

Pork Chops

  • 4 boneless pork chops, 3/4 to 1 inch thick (1 1/4 to 1 1/2 pounds total; about 620g)
  • 3/4 teaspoon kosher salt, or to taste
  • 1/2 teaspoon black pepper, plus more to taste
  • 1 tablespoon neutral oil

Sauce and Garnish

  • 1/3 cup finely diced yellow onion (about 55g)
  • 1 can condensed cream of mushroom soup (10.5 ounces; about 300g)
  • 1/2 cup chicken broth (120g), plus more as needed
  • 1 tablespoon chopped fresh parsley

Optional

  • 1/4 teaspoon garlic powder
  • 4 ounces sliced fresh mushrooms

Instructions

  1. Pat the pork chops dry and season both sides with salt and pepper. Add garlic powder if using.
  2. Heat a 12-inch skillet over medium-high heat and add the oil. When it shimmers, add the chops in a single layer, working in batches if needed.
  3. Sear the chops for 3–4 minutes per side without moving them until they release easily and develop golden-brown patches. Transfer to a plate.
  4. Reduce the heat to medium. Add the onion and cook, stirring, for 2–3 minutes until softened. If the pan is dry, add a spoonful of broth to loosen the browned bits.
  5. Whisk the condensed soup with 1/2 cup broth. Stir the mixture into the skillet and reduce the heat to medium-low. Cook, stirring, until smooth and gently bubbling.
  6. Return the chops and any plate juices to the skillet, nestling them in the sauce. Cover loosely and simmer gently for about 5–10 minutes, turning the chops once if needed.
  7. Start checking the temperature after about 5 minutes. Remove each chop when its thickest part reaches 145°F (65°C), checking away from the bone if using bone-in chops.
  8. Rest the chops for about 3 minutes. If needed, stir extra broth into the sauce a tablespoon at a time. Return the chops to the sauce, scatter with parsley, and serve.

Tips

  • Choose chops of similar thickness so they finish cooking at about the same time.
  • Check each chop individually; thinner chops may be ready before the simmer time is up.
  • Keep the sauce at a gentle simmer rather than letting it boil rapidly.
  • Add broth gradually if the sauce becomes too thick.

Variations

  • Garlic Mushroom Pork Chops: Season the chops with 1/4 teaspoon garlic powder.
  • Chunky Mushroom Sauce: Cook 4 ounces of sliced fresh mushrooms with the onion until softened before adding the soup mixture.

Notes

Refrigerate leftovers promptly in a covered container for 3–4 days. Reheat gently in a skillet over low heat with a splash of broth if needed. Leftovers can be frozen, though the sauce may change texture after thawing.

Nutrition

Per Serving Calories: 320 kcal | Per Serving Protein: 36 g | Per Serving Fat: 16 g | Per Serving Carbohydrates: 7 g | Per 100g Calories: 130 kcal | Per 100g Protein: 14 g | Per 100g Fat: 6 g | Per 100g Carbohydrates: 3 g

Honey Garlic Pork Chops

Whole pork chops get a golden-brown sear before they’re coated in a glossy honey-garlic glaze. Soy sauce adds a savory note, vinegar balances the honey, and parsley and red pepper flakes finish the dish.

The timing is based on boneless chops about 1 inch thick. Check each chop with a thermometer after searing and as it finishes in the sauce. If the pork is ready before the glaze thickens, let it rest while the sauce reduces on its own.

Ingredients for Honey Garlic Pork Chops

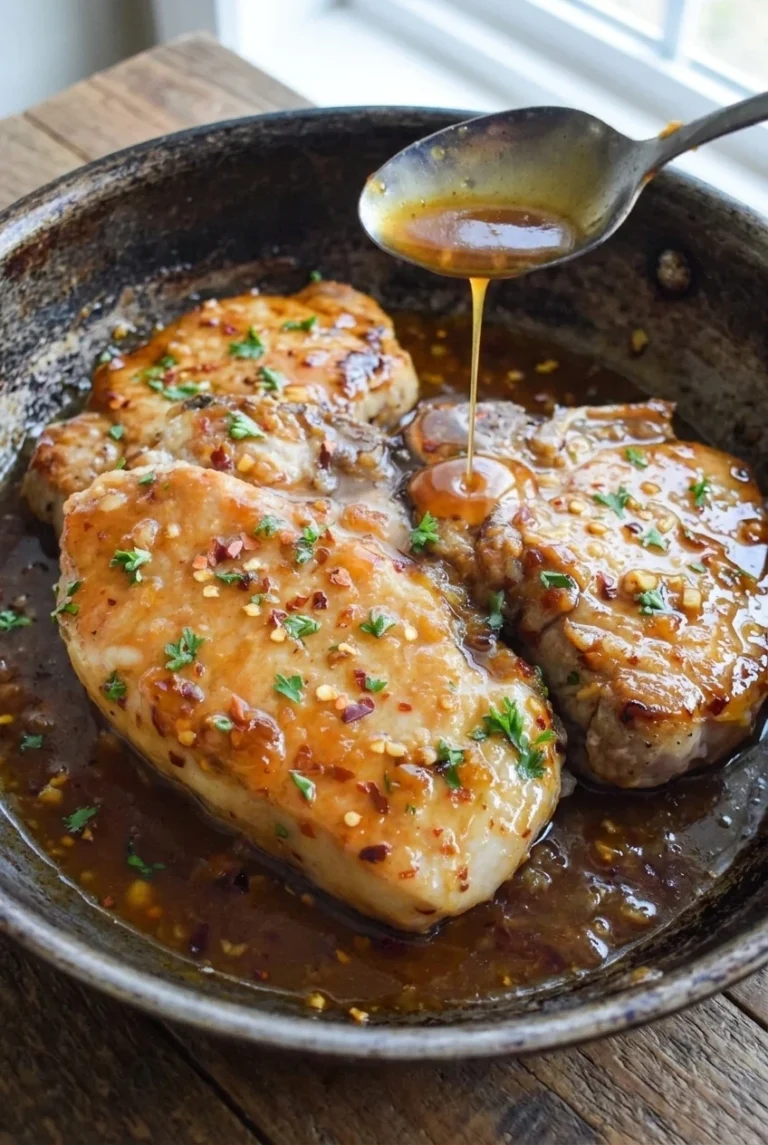
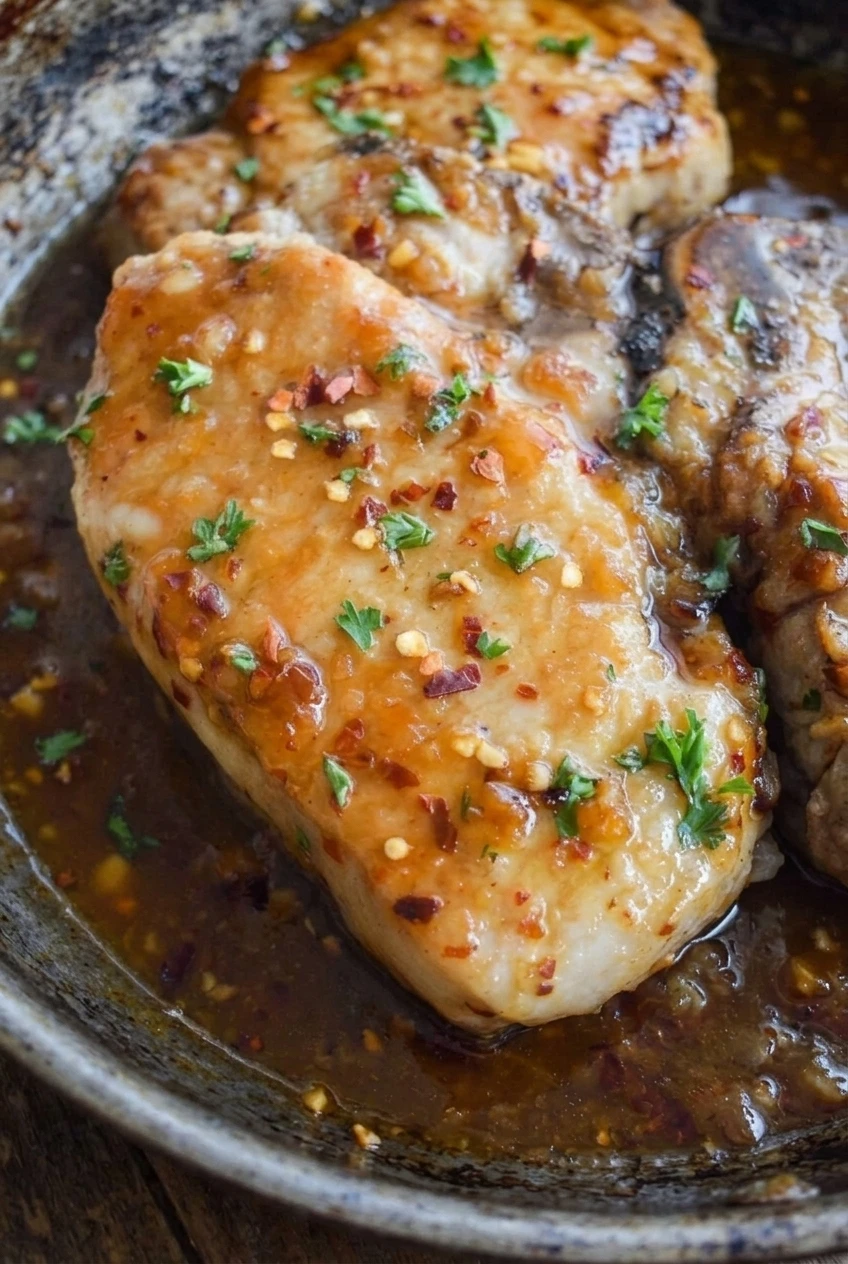
Close detail of honey garlic pork chops showing glossy glaze, garlic pieces, parsley, and red pepper flakes
  • 4 boneless pork chops, about 1 inch thick and 6–8 ounces each (about 850g total)
  • 3/4 teaspoon kosher salt, or to taste
  • 1/4 teaspoon black pepper
  • 1 tablespoon neutral oil
  • 4 garlic cloves, finely minced
  • 1/3 cup honey (115g)
  • 2 tablespoons low-sodium soy sauce
  • 1/3 cup chicken broth
  • 1 tablespoon apple cider vinegar
  • 1/4 teaspoon crushed red pepper flakes, plus a pinch for finishing
  • 1 tablespoon finely chopped fresh parsley, plus a little for finishing

Optional: Stir 1 tablespoon unsalted butter into the reduced sauce for a richer finish.

How to Make Honey Garlic Pork Chops

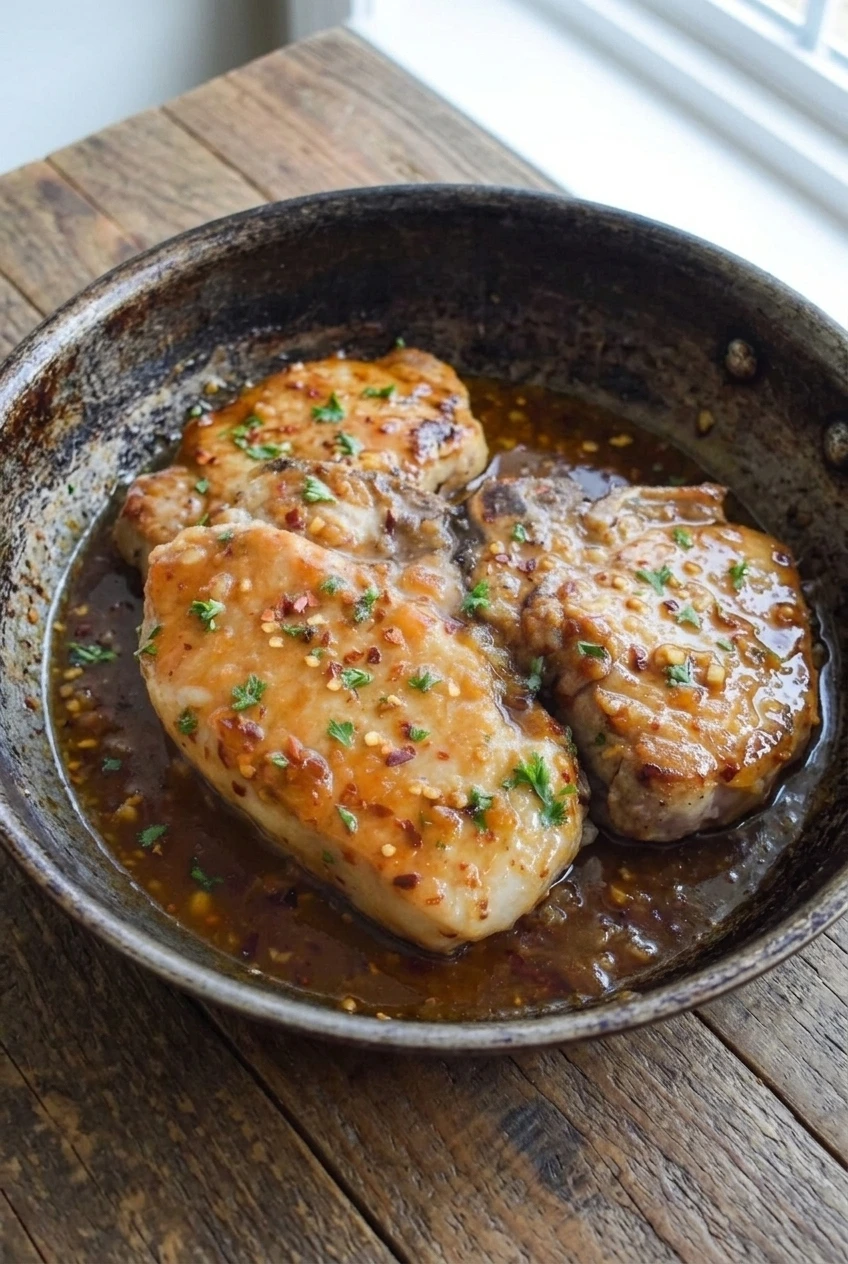
A wider view of whole honey garlic pork chops in a shallow serving pan, finished with parsley and pepper flakes
  1. Season and mix the sauce: Pat the chops dry and season both sides with salt and black pepper. In a small bowl, stir together the honey, soy sauce, broth, vinegar, and 1/4 teaspoon red pepper flakes.
  2. Sear the chops: Heat a 12-inch heavy-bottomed skillet over medium-high heat, then add the oil. When it shimmers but does not smoke, add the chops in one uncrowded layer; sear in batches if needed. Cook undisturbed for about 3–4 minutes on the first side, then turn once and cook for 2–4 minutes more, until browned. Transfer to a plate and check the thickest part of each chop with an instant-read thermometer. They may not be fully cooked yet.
  3. Cook the garlic: Reduce the heat to medium-low. Add the garlic and stir for about 30 seconds, scraping up the browned bits, until fragrant but still pale.
  4. Reduce the glaze: Pour in the honey mixture. Simmer uncovered, stirring, for about 2–4 minutes, until glossy and lightly thickened. It should coat the back of a spoon but still flow easily.
  5. Finish the pork: If the chops are not yet done, return them and any plate juices to the skillet. Turn and spoon sauce over them as they cook at a gentle simmer. Check each chop in its thickest part and remove it when it reaches 145°F (65°C). If a chop reached 145°F after searing, leave it on the plate and spoon the finished glaze over it later. If the pork finishes before the glaze, remove it and reduce the sauce separately.
  6. Rest and serve: Let the chops rest for 3 minutes. Keep them whole, spoon the glaze over and around them, and finish with parsley and a visible pinch of red pepper flakes.

How to Keep the Pork Chops Juicy

Start checking early if the chops are thinner than 1 inch; they may reach 145°F during the sear. Thicker or bone-in chops need more time, so check the thickest part rather than extending the listed time by a fixed amount. Don’t leave cooked chops in the skillet just to thicken the sauce.

Getting a Glossy Honey Garlic Sauce

Keep the sauce at a gentle simmer, not a hard boil. Honey can darken quickly over high heat, and browned garlic can taste bitter. Brief reduction gives the sauce a coating consistency without a cornstarch slurry; it should remain fluid enough to spoon over the chops.

Ingredient Swaps and Serving Ideas

  • Tamari or coconut aminos can replace the soy sauce, though the sauce may taste more or less salty or sweet.
  • White vinegar or rice vinegar can replace the apple cider vinegar.
  • Vegetable broth can replace the chicken broth.
  • Bone-in chops can replace boneless chops, but use a thermometer rather than the boneless cooking time.

For more heat, add extra red pepper flakes to the sauce or at the finish. Serve with rice or mashed potatoes to catch the glaze, and green beans or broccoli alongside.

How to Store and Reheat

Refrigerate leftover chops and sauce in an airtight container for 3–4 days. Reheat gently in a covered skillet with a splash of broth or water to loosen the sauce. For more even microwave reheating, slice leftover pork and heat just until warmed through.

Cooked chops and sauce can be frozen in an airtight freezer-safe container for about 3 months. Thaw overnight in the refrigerator before reheating; the pork may be less tender after freezing.

Nutrition

Approximate nutrition per serving, based on 1 of 4 servings with sauce: 435 calories, 47g protein, 16g fat, and 25g carbohydrates. Approximate nutrition per 100g: 195 calories, 21g protein, 7g fat, and 11g carbohydrates. Values vary with chop size, leanness, and how much sauce is served.

Honey Garlic Pork Chops

Boneless pork chops are seared and finished in a glossy honey-garlic sauce with soy sauce, vinegar, parsley, and red pepper flakes.
Course: Main Course
Cuisine: American
Prep: 10 min
Cook: 20 min
Total: 30 min
Servings: 4 Calories: 435 kcal

Equipment

  • 12-inch heavy-bottomed skillet
  • Small bowl
  • Instant-read thermometer

Ingredients

For the pork

  • 4 boneless pork chops, about 1 inch thick and 6–8 ounces each (about 850g total)
  • 3/4 teaspoon kosher salt, or to taste
  • 1/4 teaspoon black pepper
  • 1 tablespoon neutral oil

For the honey garlic glaze

  • 4 garlic cloves, finely minced
  • 1/3 cup honey (115g)
  • 2 tablespoons low-sodium soy sauce
  • 1/3 cup chicken broth
  • 1 tablespoon apple cider vinegar
  • 1/4 teaspoon crushed red pepper flakes, plus a pinch for finishing
  • 1 tablespoon finely chopped fresh parsley, plus a little for finishing

Optional

  • 1 tablespoon unsalted butter

Instructions

  1. Pat the pork chops dry and season both sides with salt and black pepper.
  2. In a small bowl, stir together the honey, soy sauce, broth, vinegar, and 1/4 teaspoon red pepper flakes.
  3. Heat a 12-inch heavy-bottomed skillet over medium-high heat. Add the oil when the skillet is hot.
  4. Sear the chops in one uncrowded layer, working in batches if needed. Cook undisturbed for 3–4 minutes, turn once, and cook for 2–4 minutes more, until browned.
  5. Transfer the chops to a plate and check the thickest part of each with an instant-read thermometer.
  6. Reduce the heat to medium-low. Add the garlic and stir for about 30 seconds, scraping up browned bits, until fragrant but still pale.
  7. Pour in the honey mixture and simmer uncovered, stirring, for 2–4 minutes, until glossy and lightly thickened.
  8. If the chops are not yet done, return them and any plate juices to the skillet. Turn the chops and spoon sauce over them as they cook at a gentle simmer.
  9. Remove each chop when its thickest part reaches 145°F (65°C). If a chop reached 145°F during searing, leave it on the plate and spoon the finished glaze over it later.
  10. If the pork is ready before the glaze thickens, remove the chops and reduce the sauce separately. Stir in the optional butter if desired.
  11. Rest the chops for 3 minutes. Serve whole with glaze spooned over and around them, and finish with parsley and a pinch of red pepper flakes.

Tips

  • Start checking thinner chops early; they may reach 145°F during searing.
  • Use a thermometer on the thickest part of each chop, especially for thicker or bone-in chops.
  • Keep the sauce at a gentle simmer to prevent the honey from darkening and the garlic from browning too much.
  • Remove cooked chops from the skillet if the sauce needs more time to reduce.

Variations

  • Tamari or Coconut Aminos: Replace the soy sauce with tamari or coconut aminos; the sauce may taste more or less salty or sweet.
  • Vinegar Swap: Use white vinegar or rice vinegar in place of apple cider vinegar.
  • Vegetable Broth: Replace the chicken broth with vegetable broth.
  • Bone-In Pork Chops: Use bone-in chops and check for doneness with a thermometer rather than relying on the listed boneless cooking time.

Notes

Refrigerate leftover chops and sauce in an airtight container for 3–4 days. Reheat gently in a covered skillet with a splash of broth or water. Freeze for about 3 months and thaw overnight in the refrigerator before reheating.

Nutrition

Calories: 435 kcal | Protein: 47 g | Fat: 16 g | Carbohydrates: 25 g

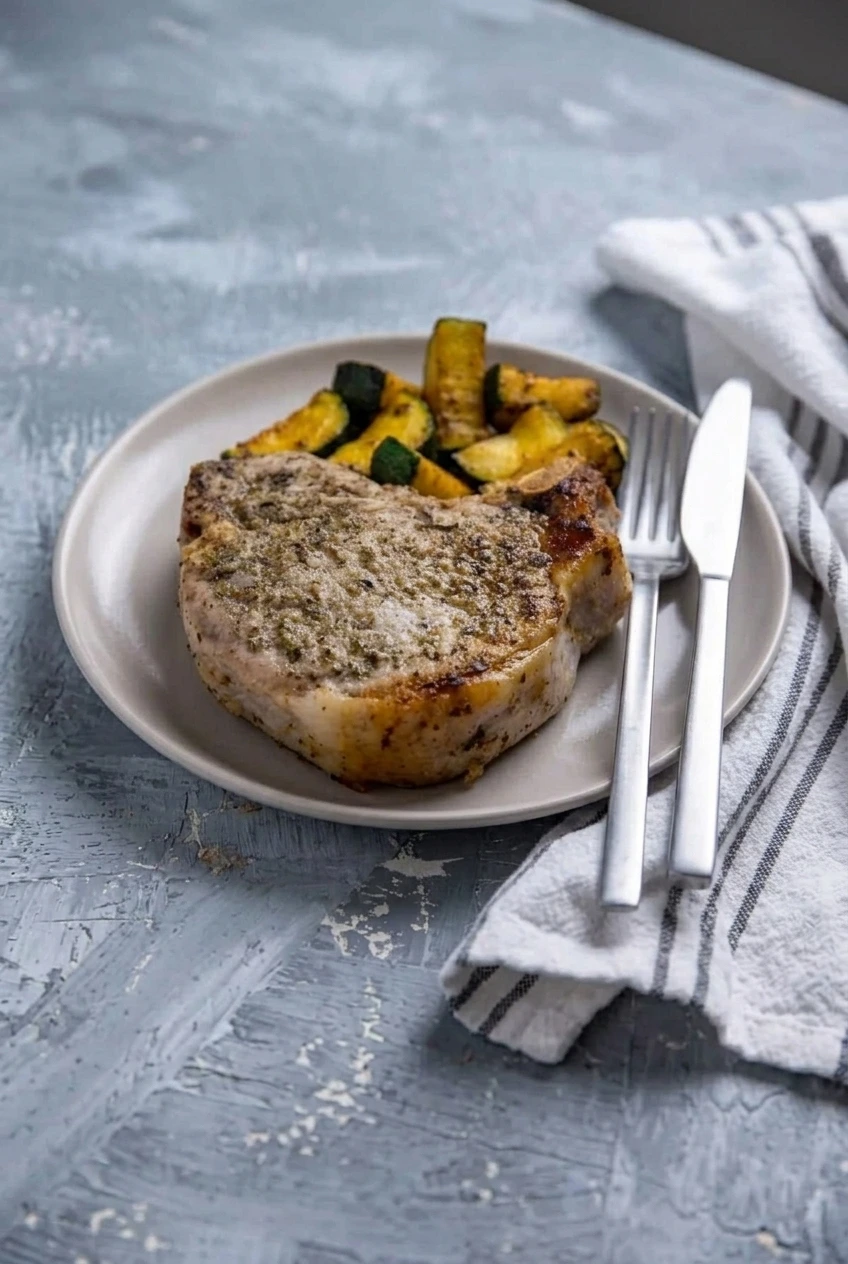
Garlic Butter Skillet Pork Chops

Thick pork chops get a golden sear in oil before a short garlic-butter baste. Once the chops come out to rest, chunky zucchini wedges brown in the same skillet, picking up the seasoned butter and pan drippings. Keep the garlic-butter finish gentle so the garlic stays fragrant, and use a thermometer to judge the pork: chop thickness and skillet heat matter more than a fixed cooking time.

Serves 4. Allow about 10 minutes to prep and 20–25 minutes to cook, or 30–35 minutes total; cooking in batches may take longer.

Ingredients

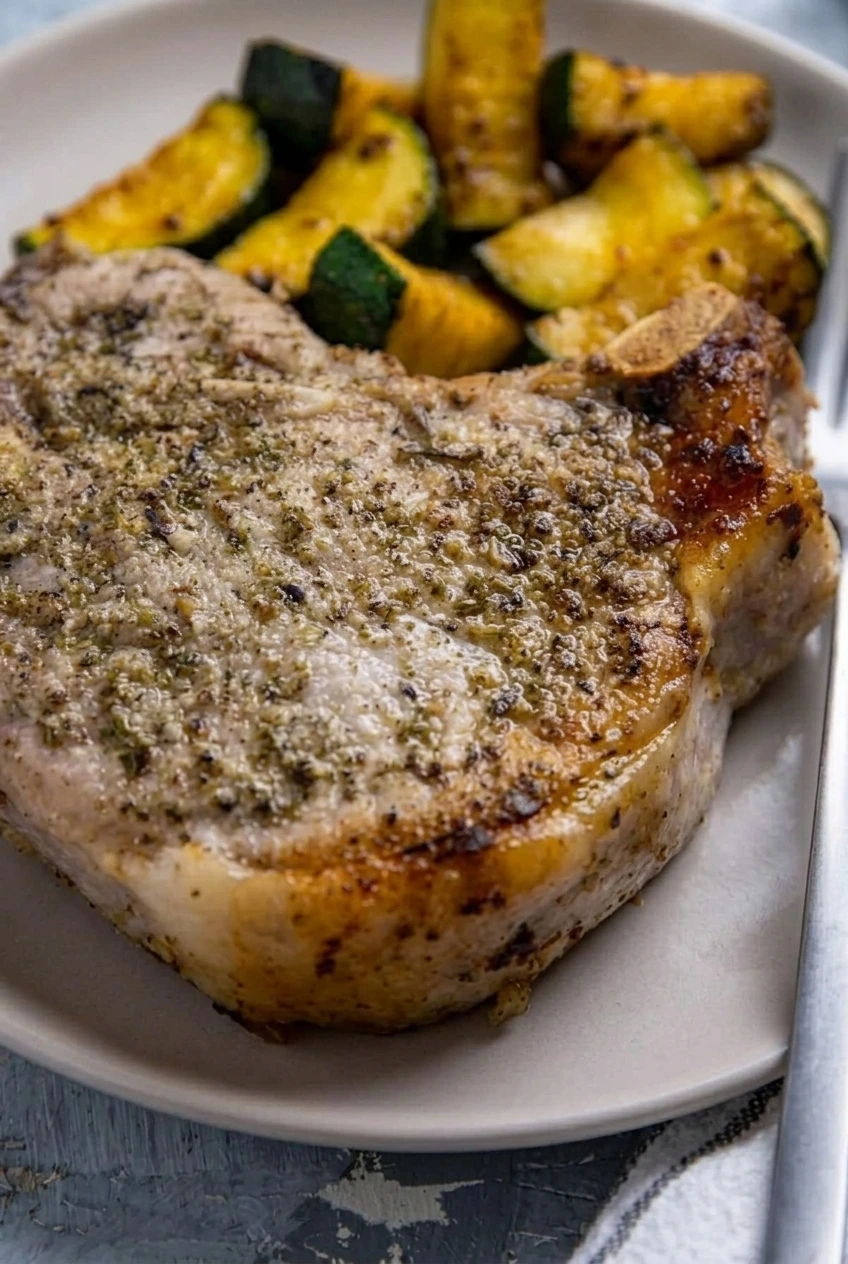
Close detail of the pork chop’s seasoned sear and golden zucchini edges
  • 4 thick bone-in pork chops, about 1 to 1¼ inches thick (about 2 pounds/900g total)
  • ¾ teaspoon kosher salt, plus a pinch for the zucchini if needed
  • ½ teaspoon black pepper
  • 1 teaspoon dried Italian seasoning
  • 1 tablespoon olive oil or neutral cooking oil
  • 3 tablespoons unsalted butter (42g)
  • 3 garlic cloves, finely minced
  • 2 medium zucchini, about 1 pound total (450g), cut into chunky wedges

Optional: Add ½ teaspoon fresh thyme leaves or a few small sprigs with the butter and garlic. Sprinkle up to 1 tablespoon chopped fresh parsley over the finished dish, if desired.

How to Make Garlic Butter Skillet Pork Chops

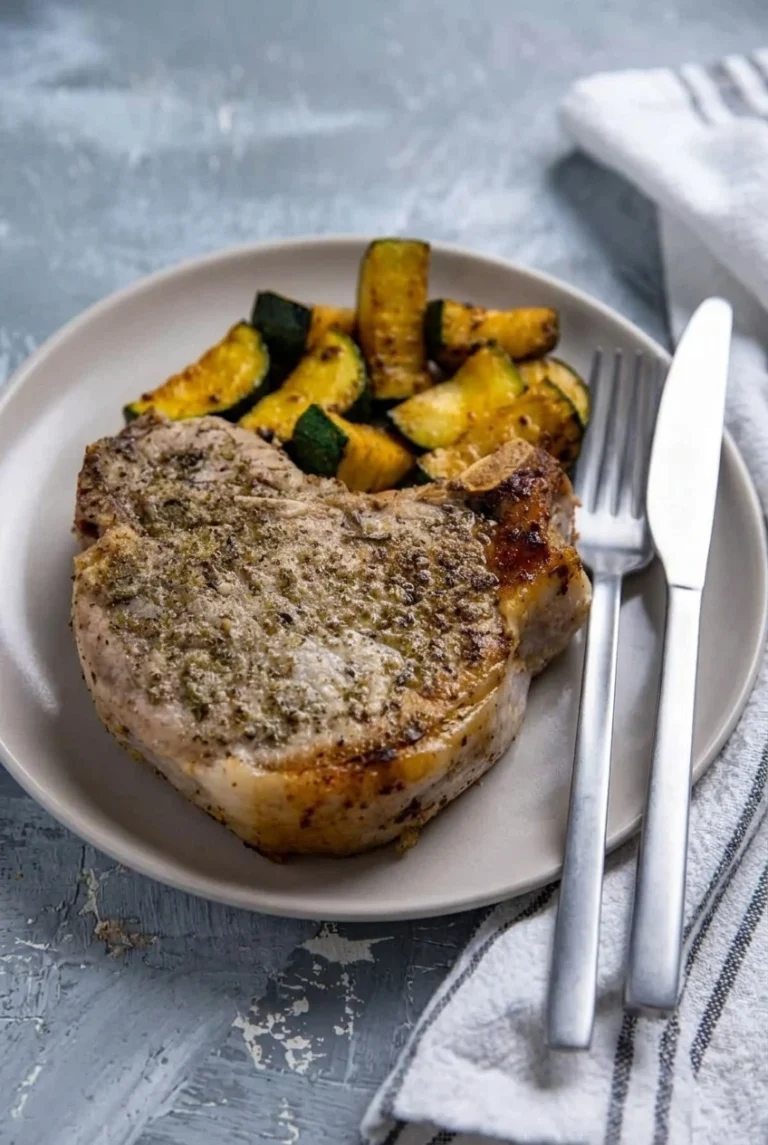
A full plate of garlic butter skillet pork chop and zucchini on a gray tabletop
  1. Prepare the pork and zucchini: Pat the chops dry and season both sides with the salt, pepper, and Italian seasoning. Cut the zucchini into similarly sized wedges; pat the cut surfaces dry if they are wet.
  2. Sear the first side: Heat a 12-inch heavy skillet over medium-high heat. Add the oil. When it shimmers without smoking, add the chops in a single layer with space between them. Cook uncovered and undisturbed for about 3–4 minutes, until golden brown underneath. Cook in batches if they do not fit comfortably.
  3. Brown the second side: Turn the chops and cook for about 2–4 minutes more. Lower the heat if the pan smokes or the pork darkens too quickly. Begin checking the thickest chop after about 8 minutes of total cooking, inserting an instant-read thermometer into its center without touching the bone.
  4. Baste with garlic butter: Reduce the heat to medium or medium-low. Add the butter and garlic, then spoon the gently foaming butter over the chops. Turn or reposition them as needed and continue cooking until each reaches 145°F (65°C) in the thickest part. The garlic should smell fragrant, not turn dark brown. If working in batches, lower the heat for each garlic-butter finish and watch the garlic closely.
  5. Rest the chops: Transfer them to a plate and rest for at least 3 minutes. Leave them uncovered or loosely tented so the browned surfaces do not soften under a tight cover.
  6. Brown the zucchini: Add the wedges to the skillet and cook uncovered over medium heat for about 6–8 minutes, turning occasionally, until their cut faces are golden and their centers are tender. Keep them in a roomy single layer or work in batches so they brown rather than steam. Add a pinch of salt if needed. Serve one chop with zucchini alongside it and a little of the pan butter spooned over the top.

How to Tell When the Pork Chops Are Done

Check each chop in its thickest part, keeping the thermometer tip away from the bone. Remove it from the skillet when it reaches 145°F, then rest it for at least 3 minutes. Boneless or thinner chops may reach that temperature sooner than the thick bone-in chops used here, so start checking them earlier rather than following the searing times rigidly.

How to Keep the Garlic Butter from Scorching

Use oil for the initial medium-high sear, then lower the heat before adding butter and minced garlic. Baste briefly while the butter foams gently. If it starts to smoke or the garlic darkens quickly, take the skillet off the heat.

Ingredient Swaps

Boneless chops can replace bone-in chops, but they may be leaner and cook faster. If using salted butter, reduce the added salt slightly.

How to Store Leftovers

Store leftover pork and zucchini covered in the refrigerator for up to 3 days.

Nutrition

Approximate nutrition per serving, based on 4 servings: 400 calories, 37g protein, 26g fat, and 4g carbohydrates. Estimated per 100g of prepared food: 160 calories, 15g protein, 10g fat, and 2g carbohydrates. Values vary with chop size, leanness, and how much pan butter is served.

Garlic Butter Skillet Pork Chops

Thick pork chops are seared in a skillet, finished with garlic butter, and served with golden zucchini wedges.
Course: Main Course
Cuisine: American
Prep: 10 min
Cook: 25 min
Total: 35 min
Servings: 4 Calories: 400 kcal

Equipment

  • 12-inch heavy skillet
  • Instant-read thermometer

Ingredients

Pork and Zucchini

  • 4 thick bone-in pork chops, about 1 to 1¼ inches thick (about 2 pounds/900g total)
  • ¾ teaspoon kosher salt, plus a pinch for the zucchini if needed
  • ½ teaspoon black pepper
  • 1 teaspoon dried Italian seasoning
  • 1 tablespoon olive oil or neutral cooking oil
  • 2 medium zucchini, about 1 pound total (450g), cut into chunky wedges

Garlic Butter

  • 3 tablespoons unsalted butter (42g)
  • 3 garlic cloves, finely minced

Optional Garnishes

  • ½ teaspoon fresh thyme leaves or a few small sprigs
  • Up to 1 tablespoon chopped fresh parsley

Instructions

  1. Pat the pork chops dry and season both sides with the salt, pepper, and Italian seasoning.
  2. Cut the zucchini into chunky wedges and pat the cut surfaces dry if wet.
  3. Heat a 12-inch heavy skillet over medium-high heat. Add the oil and wait until it shimmers without smoking.
  4. Add the pork chops in a single layer with space between them. Cook uncovered and undisturbed for 3–4 minutes, until golden underneath. Work in batches if needed.
  5. Turn the chops and cook for 2–4 minutes more. Lower the heat if the pan smokes or the pork darkens too quickly.
  6. Reduce the heat to medium or medium-low. Add the butter and garlic, then spoon the gently foaming butter over the chops.
  7. Check the thickest part of each chop with an instant-read thermometer, keeping the tip away from the bone. Continue cooking until each reaches 145°F (65°C). Keep the garlic fragrant and prevent it from browning too much.
  8. Transfer the chops to a plate and rest for at least 3 minutes, uncovered or loosely tented.
  9. Add the zucchini to the skillet and cook uncovered over medium heat for 6–8 minutes, turning occasionally, until golden on the cut faces and tender. Cook in batches if needed, and add a pinch of salt if desired.
  10. Serve the zucchini alongside the pork chops with some of the pan butter spooned over the top. Add parsley if desired.

Tips

  • Use a thermometer rather than relying on cooking time, since chop thickness and skillet heat vary.
  • Start checking thinner or boneless chops earlier; they may reach 145°F sooner.
  • Use oil for the initial sear, then lower the heat before adding butter and garlic.
  • If the butter smokes or the garlic darkens quickly, take the skillet off the heat.
  • Cook the zucchini in a roomy single layer or in batches so it browns instead of steaming.

Variations

  • Boneless Pork Chops: Use boneless chops in place of bone-in chops and begin checking for doneness earlier.
  • Thyme Garlic Butter: Add fresh thyme leaves or a few small sprigs with the butter and garlic.

Notes

Refrigerate leftover pork and zucchini covered for up to 3 days. Cook pork to 145°F (65°C) and rest for at least 3 minutes.

Nutrition

Calories: 400 kcal | Protein: 37 g | Fat: 26 g | Carbohydrates: 4 g

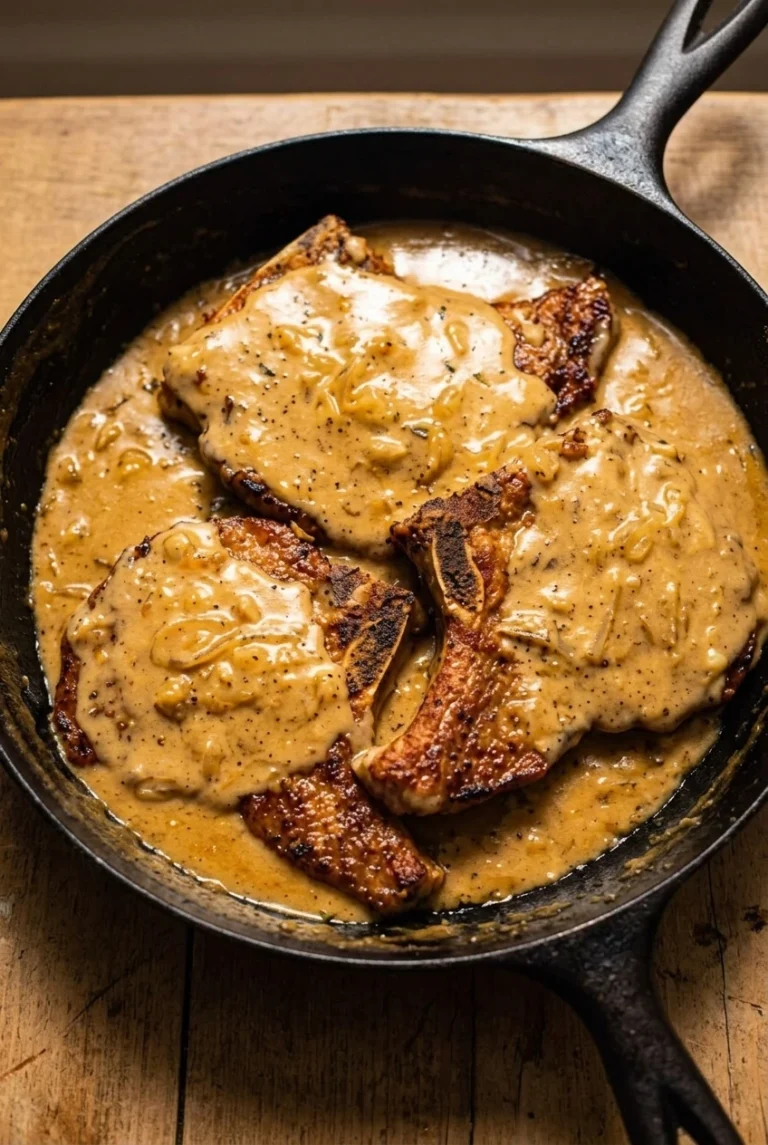
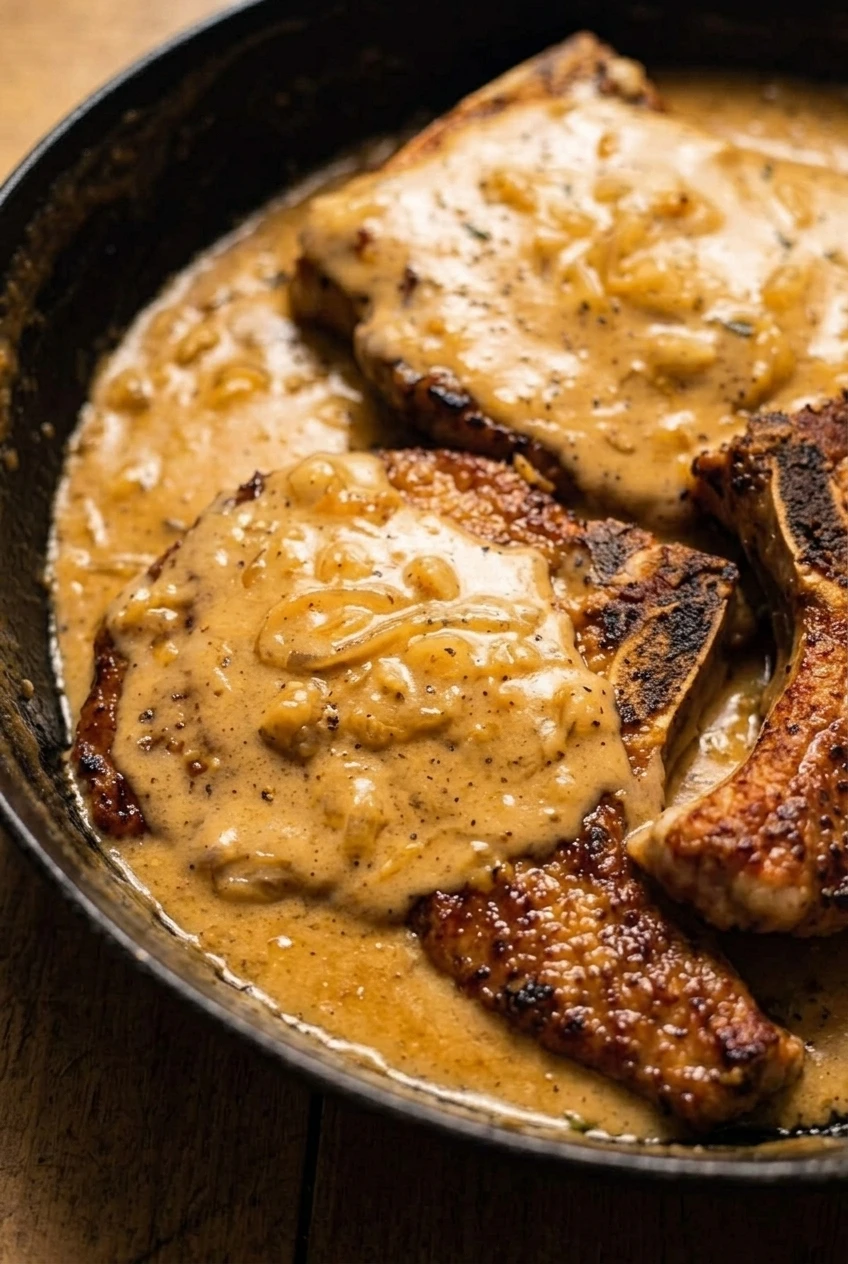
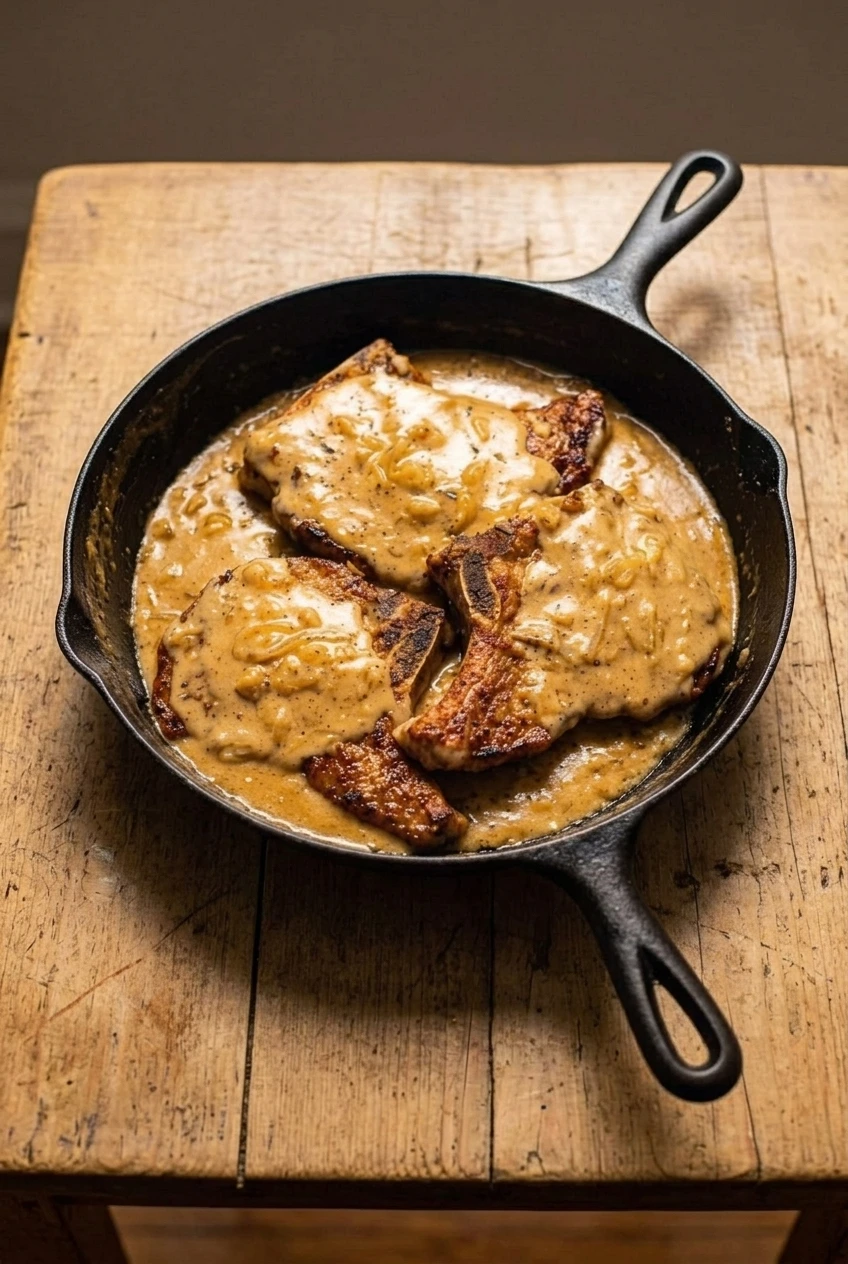
Southern Smothered Pork Chops with Onion Gravy

Browned pork chops finish in a skillet of soft onions and thick, spoonable gravy. This version uses a light flour coating on the chops and a little cream in the broth-based gravy; neither is required for every style of smothered pork chops. For juicy pork, keep the gravy at a gentle simmer and use a thermometer rather than a fixed cooking time. The recipe makes 4 servings in about 40 to 45 minutes.

Ingredients

Close detail of browned pork chop edges, soft onions, and thick creamy onion gravy.
  • 4 bone-in pork chops, about 1 inch thick and 2 to 2 1/2 pounds total (about 1 kg)
  • 1 teaspoon kosher salt, divided
  • 1/2 teaspoon black pepper
  • 1/2 teaspoon garlic powder
  • 1/2 teaspoon paprika
  • 1/3 cup all-purpose flour (40g)
  • 2 tablespoons neutral oil
  • 2 tablespoons unsalted butter
  • 2 medium yellow onions, thinly sliced (about 300g)
  • 1 1/2 cups low-sodium chicken broth (360ml), plus more as needed
  • 1/2 cup heavy cream (120ml)
  • 1/2 teaspoon dried thyme

How to Make Smothered Pork Chops

A full dark skillet of Southern smothered pork chops with onion gravy, shown with more surrounding surface.
  1. Season and dredge: Pat the chops dry and season both sides with 1/2 teaspoon of the salt. Mix the remaining salt, pepper, garlic powder, and paprika into the flour. Set aside 2 tablespoons of the seasoned flour before dredging the raw pork. Lightly coat the chops with the remaining flour and shake off the excess.
  2. Brown the chops: Heat the oil in a 12-inch heavy skillet over medium-high heat until it shimmers. Sear the chops in a single layer for about 3 to 4 minutes per side, until well browned. Work in batches if they do not fit without crowding; crowded chops will steam instead of brown. Transfer to a plate. Lower the heat if the flour coating darkens too quickly.
  3. Soften the onions: Reduce the heat to medium. Add the butter and onions and cook uncovered for 8 to 10 minutes, stirring occasionally, until soft and lightly golden. If the browned bits in the skillet start to scorch, lower the heat and add a small splash of broth.
  4. Make the gravy: Stir the reserved flour and thyme into the onions and butter for about 1 minute. Gradually whisk in the broth, scraping up the browned bits. Stir in the cream and bring the gravy to a gentle simmer. It should coat a spoon but still pour easily.
  5. Finish the pork: Reduce the heat to low. Nestle the chops into the gravy and spoon some over their tops. Simmer gently, turning or basting once. Start checking the thickest chop after about 4 minutes; finishing may take roughly 4 to 8 minutes, depending on thickness. Check away from the bone and remove each chop when it reaches 145°F (65°C).
  6. Rest and serve: Take the skillet off the heat and rest the chops in the gravy for 3 minutes. If some chops finish earlier than others, hold them on a plate, then return them to the gravy once the skillet is off the heat. Loosen gravy that has become too thick with a splash of broth or water. Serve with the onions and gravy spooned over the pork.

How to Keep the Pork Chops Juicy

The timing is based on roughly 1-inch bone-in chops. A hard boil or a longer-than-needed simmer can dry them out, so keep the gravy bubbling gently and rely on the thermometer. Thinner or boneless chops may finish sooner; begin checking them earlier and give each chop its 3-minute rest after it reaches 145°F.

Getting Smooth Onion Gravy

Stirring the reserved flour into the butter and onions before adding broth helps prevent lumps. Add the broth gradually while whisking, and keep the browned skillet bits in the gravy for flavor. The gravy will thicken as it stands; add a little broth or water until it flows easily from a spoon.

Serving and Variations

Serve the chops from the skillet with mashed potatoes or rice to catch the gravy. Green beans, another simple vegetable, or cornbread can go alongside.

For a dairy-free gravy, omit the cream and use additional broth. It will be less creamy than the main version. Boneless chops also work, but check their temperature earlier rather than following the bone-in timing exactly.

How to Store and Reheat

Refrigerate the chops and gravy together in an airtight container for 3 to 4 days. Reheat gently in a saucepan over medium-low heat until hot throughout, stirring the gravy and adding a few tablespoons of broth or water if it has thickened.

Cooked chops and gravy can be frozen in a freezer-safe container for up to 3 months. Remove as much air as possible before freezing.

Nutrition

Approximate nutrition per serving, based on 4 servings of one pork chop with gravy: 740 calories, 42g protein, 55g fat, and 16g carbohydrates. Per 100g of finished dish: approximately 200 calories, 11g protein, 15g fat, and 4g carbohydrates. Values vary with chop size, fat content, and the amount of gravy served.

Southern Smothered Pork Chops with Onion Gravy

Bone-in pork chops are browned, then gently simmered with soft onions in a creamy chicken-broth gravy.
Course: Main Course
Cuisine: American
Prep: 15 min
Cook: 30 min
Total: 45 min
Servings: 4 Calories: 740 kcal

Equipment

  • 12-inch heavy skillet
  • Instant-read thermometer
  • Whisk

Ingredients

For the Pork Chops

  • 4 bone-in pork chops, about 1 inch thick and 2 to 2 1/2 pounds total (about 1 kg)
  • 1 teaspoon kosher salt, divided
  • 1/2 teaspoon black pepper
  • 1/2 teaspoon garlic powder
  • 1/2 teaspoon paprika
  • 1/3 cup all-purpose flour (40g)
  • 2 tablespoons neutral oil

For the Onion Gravy

  • 2 tablespoons unsalted butter
  • 2 medium yellow onions, thinly sliced (about 300g)
  • 1 1/2 cups low-sodium chicken broth (360ml), plus more as needed
  • 1/2 cup heavy cream (120ml)
  • 1/2 teaspoon dried thyme

Instructions

  1. Pat the pork chops dry and season both sides with 1/2 teaspoon of the salt.
  2. Mix the remaining salt, pepper, garlic powder, and paprika into the flour. Set aside 2 tablespoons of the seasoned flour before dredging the pork.
  3. Lightly coat the chops with the remaining flour and shake off the excess.
  4. Heat the oil in a 12-inch heavy skillet over medium-high heat until shimmering. Sear the chops in a single layer for 3 to 4 minutes per side, working in batches if needed. Transfer to a plate.
  5. Reduce the heat to medium. Add the butter and onions and cook uncovered for 8 to 10 minutes, stirring occasionally, until soft and lightly golden. Add a small splash of broth if the browned bits begin to scorch.
  6. Stir the reserved flour and thyme into the onions and butter for about 1 minute.
  7. Gradually whisk in the broth, scraping up the browned bits. Stir in the cream and bring the gravy to a gentle simmer.
  8. Reduce the heat to low. Nestle the chops into the gravy and spoon some gravy over them. Simmer gently, turning or basting once, until each chop reaches 145°F (65°C) when checked away from the bone.
  9. Remove the skillet from the heat and rest the chops in the gravy for 3 minutes. Loosen the gravy with a splash of broth or water if needed, then serve with the onions and gravy.

Tips

  • Cook the chops in batches if needed so they brown instead of steam.
  • Lower the heat if the flour coating darkens too quickly or the onions begin to scorch.
  • Add broth gradually while whisking to help keep the gravy smooth.
  • Keep the gravy at a gentle simmer and use a thermometer; thinner or boneless chops may finish sooner.
  • Check the thickest part of each chop away from the bone.

Variations

  • Dairy-Free Onion Gravy: Omit the cream and use additional chicken broth for a less creamy gravy.
  • Boneless Pork Chops: Use boneless chops and check their temperature earlier, since they may finish sooner.

Notes

Refrigerate chops and gravy together in an airtight container for 3 to 4 days. Reheat gently over medium-low heat, adding broth or water if needed. Freeze for up to 3 months.

Nutrition

Calories: 740 kcal | Protein: 42 g | Fat: 55 g | Carbohydrates: 16 g

Skillet Lasagna

Broken lasagna noodles simmer directly in a ground-beef and marinara sauce, so there’s no separate pot of pasta to boil. The finished skillet is saucy and unlayered, with broad noodle pieces, creamy ricotta dollops, melted mozzarella, and fresh basil.

Keep the noodles mostly submerged as they cook. They usually soften in 18 to 25 minutes, but the skillet, heat, and noodle brand can change the timing. Check for tenderness and add a little warm liquid if the sauce thickens before the pasta is done.

Ingredients for Skillet Lasagna

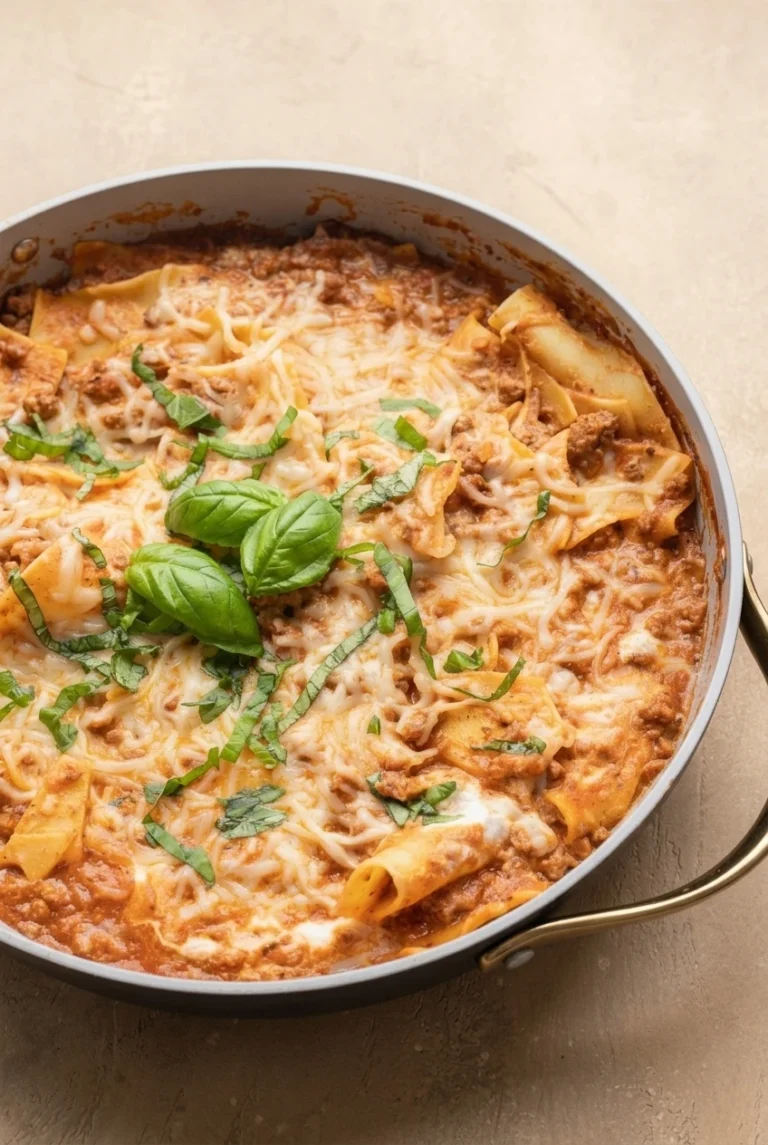
Close view of tender lasagna noodles coated in beef sauce with melted mozzarella, ricotta, and basil
  • 1 tablespoon olive oil
  • 1 lb ground beef (450g)
  • 1 small yellow onion, finely chopped (110g)
  • 3 garlic cloves, minced
  • 1 teaspoon Italian seasoning
  • 1 jar marinara sauce (24 oz; 680g)
  • 2 cups low-sodium chicken broth or water, plus more as needed
  • 8 oz regular dried lasagna noodles, broken into broad, irregular 2- to 3-inch pieces (225g)
  • 1 cup ricotta cheese (245g)
  • 1 1/2 cups shredded low-moisture mozzarella (170g)
  • 1/2 cup loosely packed fresh basil leaves, some left whole and some thinly sliced
  • Kosher salt and black pepper, to taste; start with about 1/2 teaspoon salt and 1/4 teaspoon pepper

Optional: Add a pinch of red pepper flakes with the garlic, or finish with 2 to 3 tablespoons finely grated Parmesan.

How to Make Skillet Lasagna

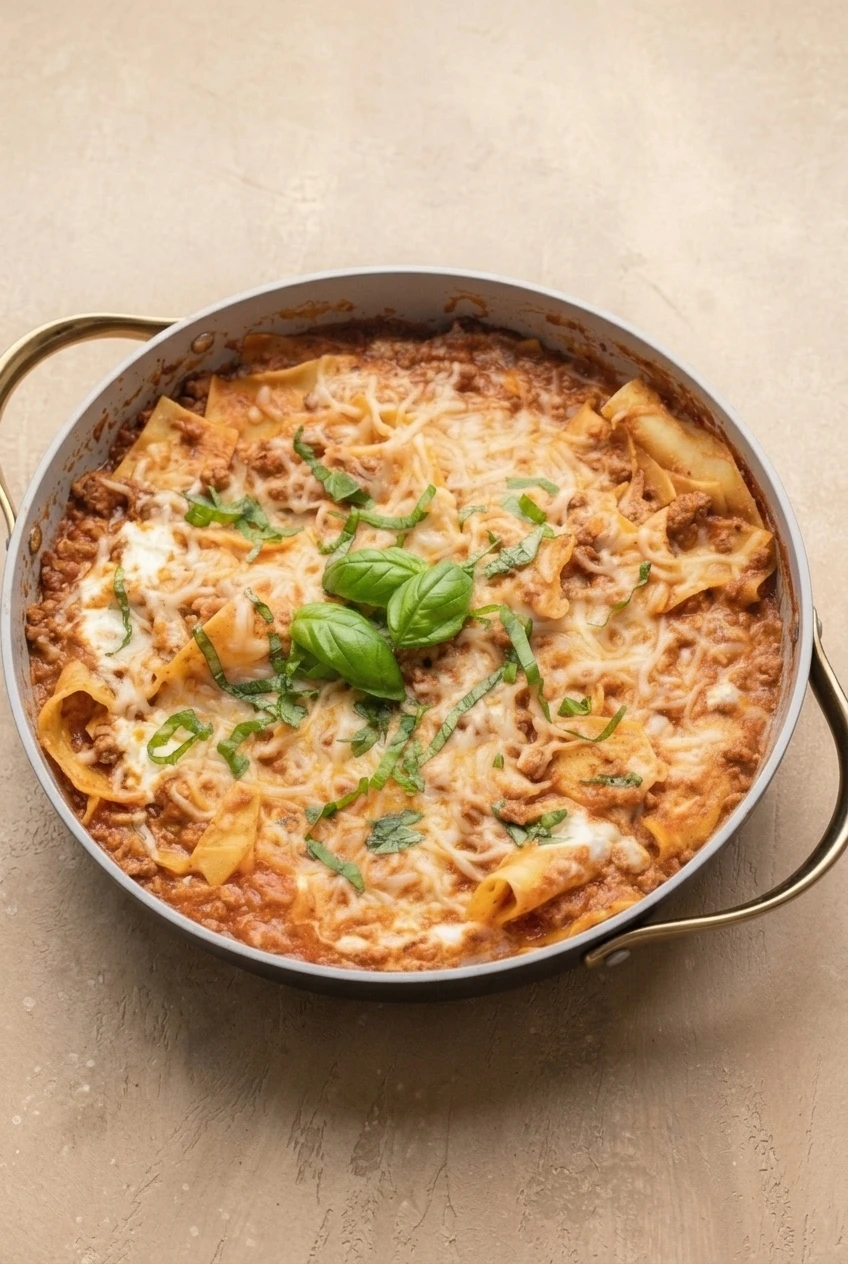
Whole skillet of beef lasagna noodles with ricotta, mozzarella, and basil on a neutral tabletop
  1. Brown the beef: Heat a 12-inch deep skillet with a lid over medium-high heat. Add the olive oil, beef, and onion. Season with about 1/2 teaspoon salt and 1/4 teaspoon pepper. Cook for 6 to 8 minutes, breaking up the beef, until it is browned through and the onion is soft. Drain excess fat if needed. Reduce the heat to medium, add the garlic and Italian seasoning, and stir briefly until fragrant.
  2. Add the sauce and noodles: Stir in the marinara and 2 cups broth or water. Add the broken noodles, pressing and turning them gently until most pieces are covered by the sauce. Taste the sauce and adjust the seasoning, allowing for the salt already in the marinara and broth.
  3. Simmer until tender: Bring to a gentle simmer, cover, and reduce the heat to medium-low. Every 3 to 4 minutes, uncover to stir, gently scrape the bottom, and tuck exposed noodles back under the sauce. Start checking at 15 minutes; the noodles usually take 18 to 25 minutes. If the sauce thickens while they are still firm, add warm broth or water about 1/4 cup at a time. Cook until the noodles have no hard, dry center and the sauce is thick and spoonable. A little loose liquid is fine.
  4. Add the cheeses: Reduce the heat to low. Spoon the ricotta over the pasta in distinct dollops, then scatter the mozzarella across the top. Leave some ricotta and meat sauce visible rather than stirring the cheeses in.
  5. Melt and garnish: Cover for 2 to 3 minutes, just until the mozzarella melts without browning. Remove from the heat and add the whole basil leaves and thin ribbons. Rest for about 5 minutes before serving from the skillet; the sauce will thicken slightly.

Choosing the Skillet and Noodles

Use a wide, deep skillet so there is room to stir and keep the noodle pieces mostly under the sauce. If your skillet is too shallow or crowded, use a wide pot with a lid instead.

Regular dried lasagna noodles are the choice for the liquid amount and timing above. No-boil sheets may need different adjustments, so don’t assume they will cook the same way.

Why the Ricotta Goes on Top

Dolloping ricotta over the cooked pasta leaves soft, creamy patches distinct from the tomato sauce. The lid melts the mozzarella gently on the stovetop, without a broiler or a browned crust.

Skillet Lasagna Variations

  • Italian sausage: Replace the beef with ground Italian sausage. It may add more fat, salt, and spice, so taste before adding more salt.
  • Vegetarian: Omit the beef, use vegetable broth or water, and add sautéed mushrooms or another vegetable. Cook off excess moisture from the vegetables before adding the sauce and noodles.
  • Cottage cheese: Use it in place of ricotta for creamy patches with a less smooth texture.

Serve with a simple green salad or garlic bread. For another lasagna-inspired skillet dinner, try Bowtie Pasta Lasagna. For a different one-pot ground-beef pasta, see One Pot Taco Pasta.

Storage and Reheating

Refrigerate leftovers in an airtight container for up to 4 days. Reheat gently in the microwave or a covered skillet until hot, adding a splash of water if the pasta has absorbed the sauce.

Portions can be frozen for up to 3 months, though the pasta may soften after thawing.

Nutrition

Approximate nutrition per serving, based on 1/6 of the skillet: 600 calories, 35g protein, 30g fat, and 45g carbohydrates. Approximate nutrition per 100g: 165 calories, 10g protein, 8g fat, and 12g carbohydrates. Values vary with the ground beef, marinara, and cheese used.

Skillet Lasagna

Broken lasagna noodles simmer in beef marinara and are finished with ricotta, mozzarella, and fresh basil.
Course: Main Course
Cuisine: Italian
Prep: 15 min
Cook: 40 min
Total: 60 min
Servings: 6 Calories: 600 kcal per serving; 165 kcal per 100 g

Equipment

  • 12-inch deep skillet with lid

Ingredients

  • 1 tablespoon olive oil
  • 1 lb ground beef (450g)
  • 1 small yellow onion, finely chopped (110g)
  • 3 garlic cloves, minced
  • 1 teaspoon Italian seasoning
  • 1 jar marinara sauce (24 oz; 680g)
  • 2 cups low-sodium chicken broth or water, plus more as needed
  • 8 oz regular dried lasagna noodles, broken into broad, irregular 2- to 3-inch pieces (225g)
  • 1 cup ricotta cheese (245g)
  • 1 1/2 cups shredded low-moisture mozzarella (170g)
  • 1/2 cup loosely packed fresh basil leaves, some whole and some thinly sliced
  • Kosher salt and black pepper, to taste; start with about 1/2 teaspoon salt and 1/4 teaspoon pepper
  • Optional: pinch of red pepper flakes
  • Optional: 2 to 3 tablespoons finely grated Parmesan

Instructions

  1. Heat the olive oil in a 12-inch deep skillet with a lid over medium-high heat.
  2. Add the ground beef and onion. Season with about 1/2 teaspoon salt and 1/4 teaspoon pepper.
  3. Cook for 6 to 8 minutes, breaking up the beef, until browned through and the onion is soft. Drain excess fat if needed.
  4. Reduce the heat to medium. Add the garlic and Italian seasoning and stir briefly until fragrant.
  5. Stir in the marinara and 2 cups broth or water.
  6. Add the broken noodles and gently press and turn them until most pieces are covered by the sauce.
  7. Taste the sauce and adjust the seasoning, accounting for the salt in the marinara and broth.
  8. Bring the mixture to a gentle simmer, cover, and reduce the heat to medium-low.
  9. Every 3 to 4 minutes, uncover and stir, gently scrape the bottom, and tuck exposed noodles under the sauce.
  10. Start checking the noodles at 15 minutes; they usually take 18 to 25 minutes to soften. If the sauce thickens while the noodles are still firm, add warm broth or water about 1/4 cup at a time.
  11. Cook until the noodles have no hard, dry center and the sauce is thick and spoonable. A little loose liquid is fine.
  12. Reduce the heat to low. Spoon the ricotta over the pasta in distinct dollops, then scatter the mozzarella on top.
  13. Cover for 2 to 3 minutes, just until the mozzarella melts.
  14. Remove the skillet from the heat and add the basil leaves and ribbons.
  15. Rest for about 5 minutes before serving.

Tips

  • Use a wide, deep skillet so there is room to stir and keep the noodles mostly submerged.
  • If your skillet is too shallow or crowded, use a wide pot with a lid.
  • Check the noodles for tenderness rather than relying only on the cooking time; skillet and noodle brands can affect timing.
  • Use regular dried lasagna noodles for the stated liquid amount and timing; no-boil sheets may need adjustments.
  • Taste before adding extra salt, since the marinara and broth may already be salty.

Variations

  • Italian Sausage: Replace the ground beef with ground Italian sausage and taste before adding extra salt.
  • Vegetarian: Omit the beef, use vegetable broth or water, and add sautéed mushrooms or another vegetable. Cook off excess moisture before adding the sauce and noodles.
  • Cottage Cheese: Use cottage cheese in place of ricotta for creamy patches with a less smooth texture.

Notes

Refrigerate leftovers in an airtight container for up to 4 days. Reheat gently in the microwave or a covered skillet, adding a splash of water if needed. Freeze portions for up to 3 months; the pasta may soften after thawing. Nutrition is approximate and based on 1/6 of the skillet.

Nutrition

Calories: 600 kcal per serving; 165 kcal per 100 g | Protein: 35 g per serving; 10 g per 100 g | Fat: 30 g per serving; 8 g per 100 g | Carbohydrates: 45 g per serving; 12 g per 100 g

Lazy Lasagna Casserole

Farfalle takes the place of lasagna sheets in this scoopable casserole. The pasta is coated in beef marinara, with small pockets of ricotta inside and melted mozzarella, Parmesan, and fresh basil on top.

Cook the pasta just shy of tender before assembling the dish. It will soften further during the covered bake, while a short uncovered finish melts the cheese and gives it a few golden spots. Serves 6–8; allow about 1 hour.

Ingredients

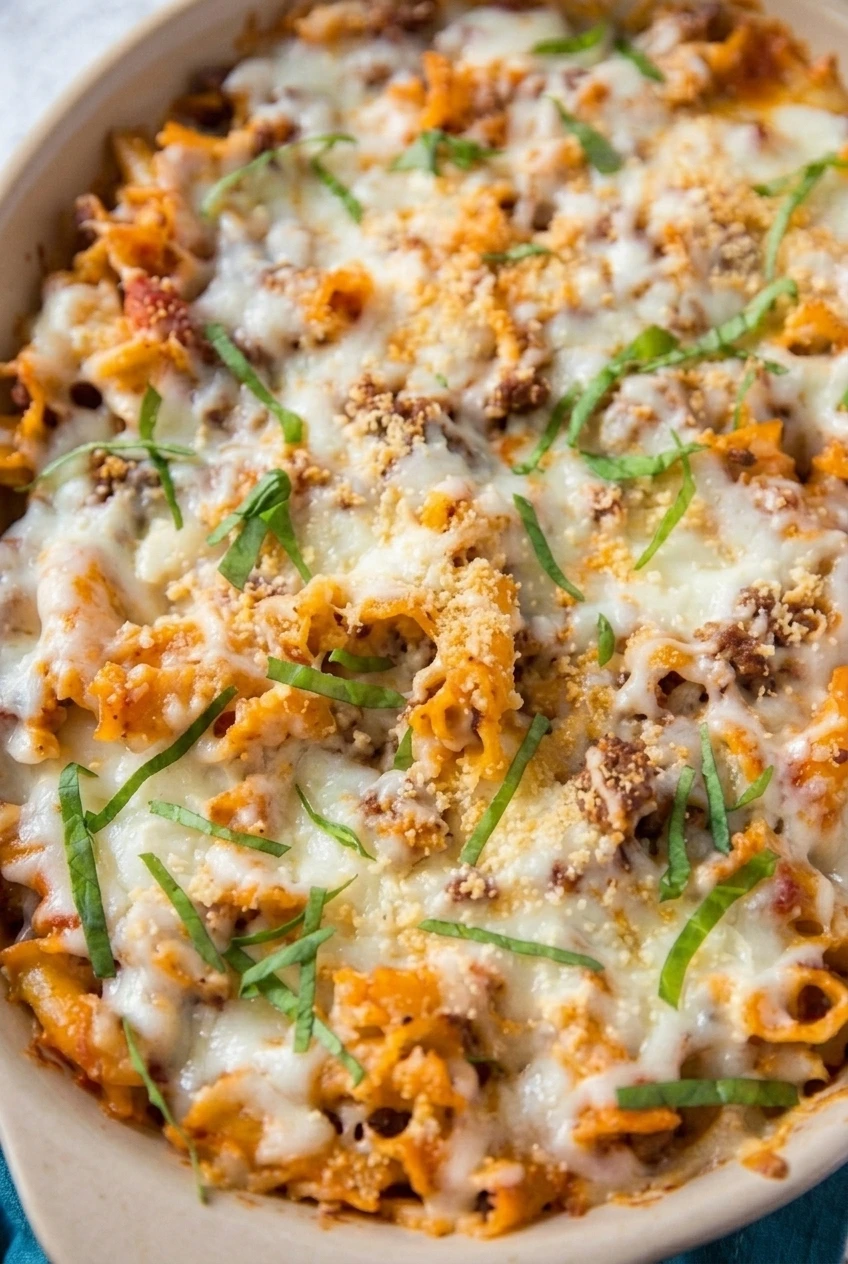
Close detail of saucy farfalle, browned beef, melted mozzarella, Parmesan, and basil in lazy lasagna casserole
  • 12 ounces farfalle pasta (340 g)
  • 1 pound ground beef (450 g)
  • 1 small yellow onion, finely diced (about 100 g)
  • 2 cloves garlic, minced
  • 1 teaspoon Italian seasoning
  • 1 jar marinara sauce, about 24 ounces (680 g)
  • 1 cup ricotta cheese (about 250 g)
  • 1/2 cup grated Parmesan, divided (about 50 g)
  • 2 cups shredded mozzarella (about 200 g)
  • 2 tablespoons loosely packed fresh basil leaves, cut into thin ribbons
  • Kosher salt and black pepper, to taste; start with about 1/2 teaspoon salt and 1/4 teaspoon pepper for the beef

Salt the pasta water before cooking. For optional additions, use a pinch of red pepper flakes or up to 1 cup of sautéed mushrooms or spinach. Cook off excess moisture from the vegetables before adding them to the sauce.

How to Make Lazy Lasagna Casserole

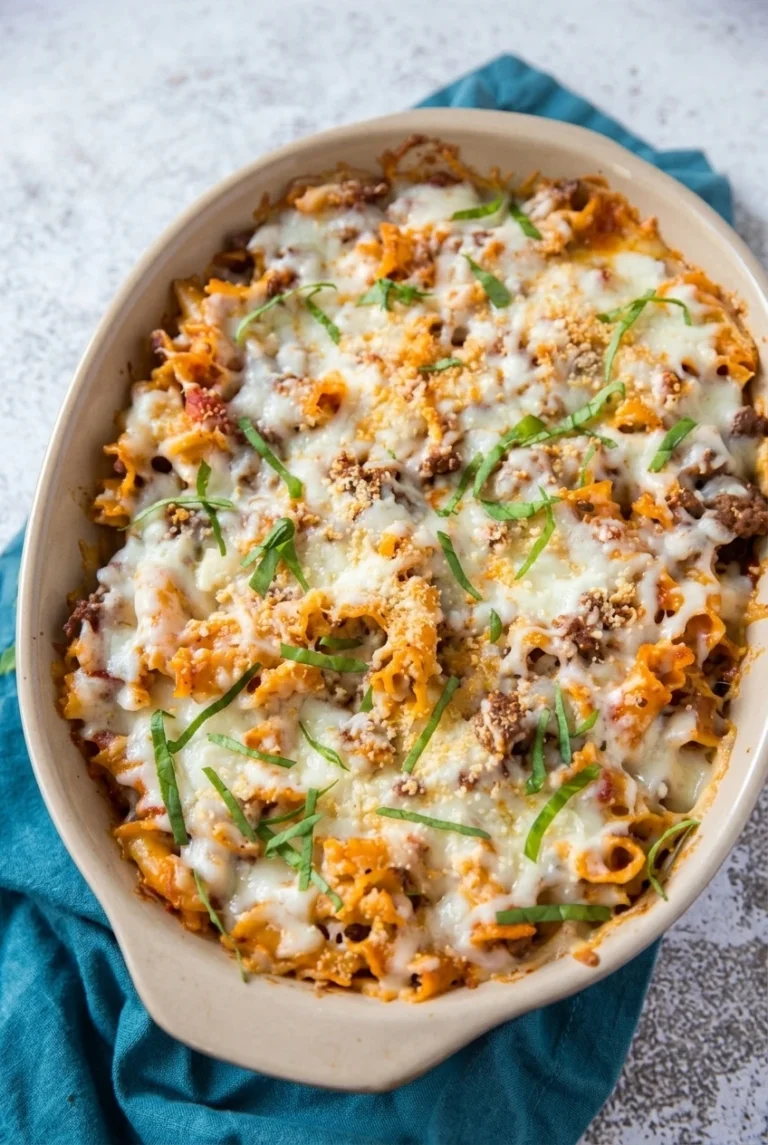
A full oval dish of lazy lasagna casserole with beef, farfalle, melted cheese, and basil on a pale counter
  1. Preheat and prepare the dish: Heat the oven to 350°F (175°C). Lightly grease a 9-by-13-inch baking dish or a similar-capacity oval casserole dish.
  2. Cook the pasta: Boil the farfalle in salted water, starting to check it 1–2 minutes before the package’s full cooking time. Drain thoroughly without rinsing when the pasta is flexible but still has a slight firm bite.
  3. Make the beef sauce: While the pasta cooks, brown the beef and onion in a large skillet over medium heat, breaking the meat into small crumbles. Season with salt and pepper. Drain excess fat, then stir in the garlic and Italian seasoning briefly. Add the marinara and bring to a gentle simmer.
  4. Combine: Stir the drained pasta into the beef sauce. In a small bowl, mix the ricotta with half of the Parmesan. Gently fold spoonfuls through the pasta, leaving small pockets of ricotta rather than blending it completely into the sauce.
  5. Fill and top: Spread the pasta mixture evenly in the prepared dish without packing it down. Scatter the mozzarella and remaining Parmesan over the top, leaving some pasta visible.
  6. Bake: Cover with foil and bake for about 25 minutes. Check that the casserole is hot and beginning to bubble at the edges, then uncover and bake for another 5–10 minutes, until the mozzarella is melted with a few golden spots. A deep dish or one starting cold may need more covered time; keep it covered if the cheese browns before the center is hot.
  7. Rest and serve: Let the casserole rest for 5–10 minutes so it settles slightly. Scatter the basil ribbons over the top and scoop portions directly from the dish.

How to Keep the Pasta from Getting Mushy

Do not boil the farfalle until fully tender: it continues to cook as the casserole bakes. Drain it well, too. Water left on the pasta can thin the sauce, while excess fat left in the skillet can make the finished dish greasy. Once the center is hot, the edges are bubbling, and the cheese has melted, take the casserole out rather than baking it longer for a darker crust.

Why the Bake Time Depends on the Pasta

The 30–35-minute bake is for short pasta that has already been boiled. Oven-ready lasagna noodles and refrigerated or frozen ravioli need different amounts of liquid and different baking instructions; they are not direct swaps in this casserole.

Substitutions and Serving

Penne, shells, rotini, or ziti can replace the farfalle; cook the chosen shape just shy of tender according to its package timing. Ground turkey or Italian sausage can replace the beef. Cottage cheese can replace ricotta, though it has a different texture; drain it if especially wet.

Serve with a green salad, garlic bread, or a simple side of broccoli or green beans. For a version made in a skillet rather than baked, try bowtie pasta lasagna.

Make-Ahead, Storage, and Reheating

To make the casserole ahead, assemble and cover it, then refrigerate for about 24–36 hours before baking. Allow extra covered baking time if it goes into the oven cold, and uncover only after the center is hot and the edges begin to bubble.

Refrigerate leftovers in an airtight container for 3–4 days. Microwave individual portions until hot, or cover a larger amount and reheat it in a 350°F oven until heated through.

The assembled, unbaked casserole can be frozen tightly covered. Thaw it overnight in the refrigerator before baking, and allow extra covered time if it is still cold.

Nutrition

Approximate nutrition per serving, based on 1 of 8 portions: 480 calories, 30 g protein, 22 g fat, and 40 g carbohydrates. Approximate nutrition per 100 g: 155 calories, 10 g protein, 7 g fat, and 13 g carbohydrates. Values will vary with the beef, cheese, marinara, and portion size.

Lazy Lasagna Casserole

Farfalle, beef marinara, and pockets of ricotta bake under a melted mozzarella and Parmesan topping.
Course: Main Course
Cuisine: Italian
Prep: 20 min
Cook: 40 min
Total: 60 min
Servings: 8 Calories: 480 kcal

Equipment

  • 9-by-13-inch baking dish
  • Large skillet
  • Large pot
  • Colander
  • Small mixing bowl
  • Aluminum foil

Ingredients

For the casserole

  • 12 ounces farfalle pasta (340 g)
  • 1 pound ground beef (450 g)
  • 1 small yellow onion, finely diced (about 100 g)
  • 2 cloves garlic, minced
  • 1 teaspoon Italian seasoning
  • 1 jar marinara sauce, about 24 ounces (680 g)
  • 1 cup ricotta cheese (about 250 g)
  • 1/2 cup grated Parmesan, divided (about 50 g)
  • 2 cups shredded mozzarella (about 200 g)
  • 2 tablespoons loosely packed fresh basil leaves, cut into thin ribbons
  • Kosher salt and black pepper, to taste
  • Salt, for the pasta water

Optional additions

  • Pinch of red pepper flakes
  • Up to 1 cup sautéed mushrooms or spinach

Instructions

  1. Heat the oven to 350°F (175°C). Lightly grease a 9-by-13-inch baking dish or a similar-capacity casserole dish.
  2. Boil the farfalle in salted water, checking it 1–2 minutes before the package’s full cooking time. Drain thoroughly without rinsing when it is flexible but still slightly firm.
  3. While the pasta cooks, brown the beef and onion in a large skillet over medium heat, breaking the beef into small crumbles. Season with salt and pepper; start with about 1/2 teaspoon salt and 1/4 teaspoon pepper.
  4. Drain excess fat from the skillet. Stir in the garlic and Italian seasoning briefly, then add the marinara and bring to a gentle simmer.
  5. Stir the drained pasta into the beef sauce.
  6. Mix the ricotta with half of the Parmesan in a small bowl. Gently fold spoonfuls of the mixture through the pasta, leaving small pockets of ricotta.
  7. Spread the pasta mixture evenly in the prepared dish without packing it down. Scatter the mozzarella and remaining Parmesan over the top, leaving some pasta visible.
  8. Cover the dish with foil and bake for about 25 minutes, until hot and beginning to bubble at the edges.
  9. Uncover and bake for another 5–10 minutes, until the mozzarella is melted with a few golden spots. If the center is not hot yet, cover and continue baking.
  10. Rest the casserole for 5–10 minutes. Scatter the basil over the top and serve.

Tips

  • Cook the pasta just shy of tender because it will continue cooking in the oven.
  • Drain the pasta thoroughly so extra water does not thin the sauce.
  • Drain excess fat from the beef to help keep the casserole from becoming greasy.
  • If adding mushrooms or spinach, cook off excess moisture before stirring them into the sauce.
  • For a cold or deep casserole, allow extra covered baking time and uncover only when the center is hot and the edges bubble.

Variations

  • Alternative pasta shapes: Replace the farfalle with penne, shells, rotini, or ziti, and cook the pasta just shy of tender.
  • Ground turkey or sausage: Use ground turkey or Italian sausage in place of the ground beef.
  • Cottage cheese: Replace the ricotta with cottage cheese; drain it first if it is especially wet.
  • Vegetable or spicy addition: Add up to 1 cup of sautéed mushrooms or spinach, or a pinch of red pepper flakes.

Notes

Refrigerate leftovers in an airtight container for 3–4 days. Reheat individual portions in the microwave or a larger amount covered in a 350°F oven until hot. The assembled unbaked casserole can be frozen tightly covered; thaw overnight in the refrigerator before baking. Approximate nutrition per 100 g: 155 calories, 10 g protein, 7 g fat, and 13 g carbohydrates.

Nutrition

Calories: 480 kcal | Protein: 30 g | Fat: 22 g | Carbohydrates: 40 g