Author

Julia

Browsing

Creamy Chicken Alfredo Lasagna

Layers of chicken, spinach-ricotta filling, and Parmesan cream sauce make this a soft, creamy lasagna with a golden mozzarella top. Rotisserie chicken saves preparation time, while traditional noodles are boiled separately so they cook evenly in the casserole.

The two details that matter most are squeezing the thawed spinach dry and keeping the sauce thick enough to coat a spoon. Bake the lasagna covered to heat the layers, then uncover it to brown the cheese. A short rest makes the portions easier to lift while the filling stays creamy.

Ingredients for Creamy Chicken Alfredo Lasagna
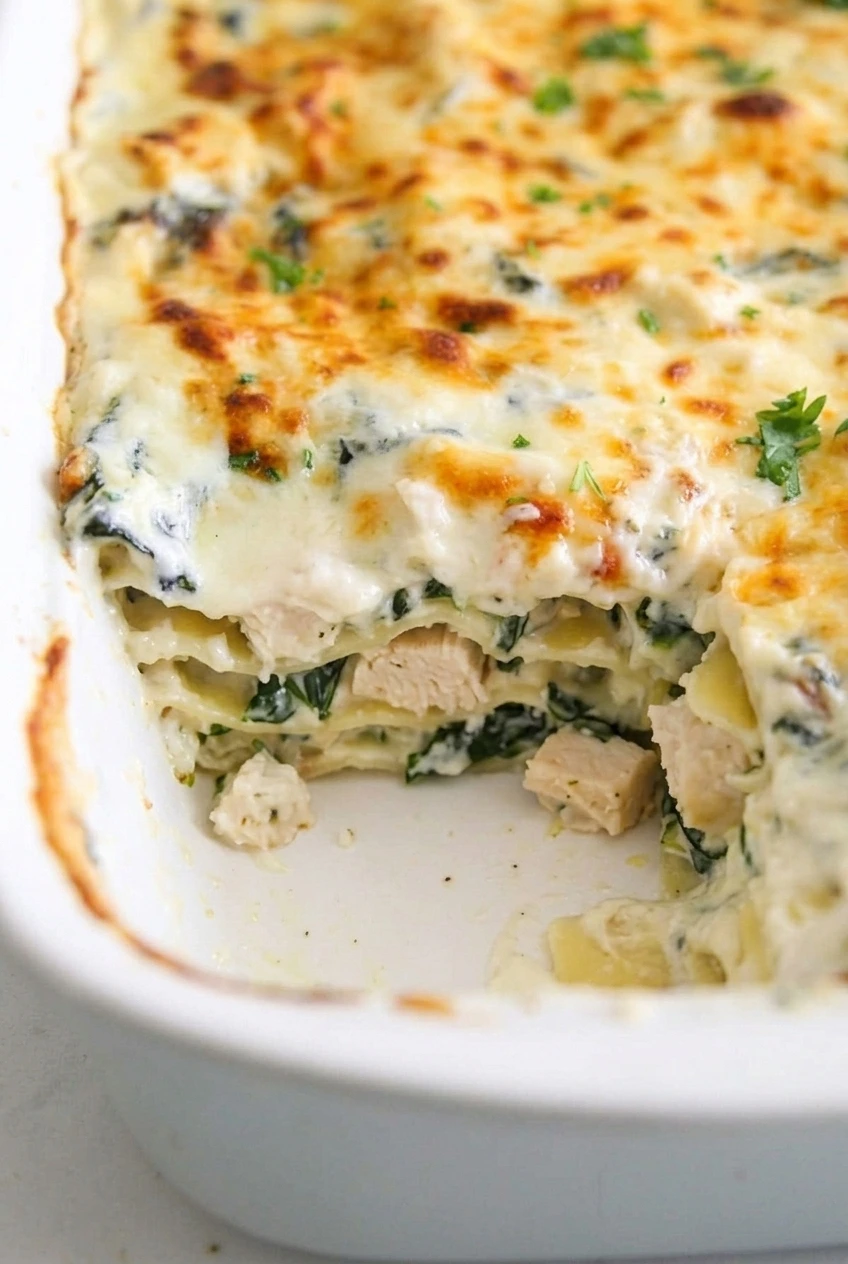
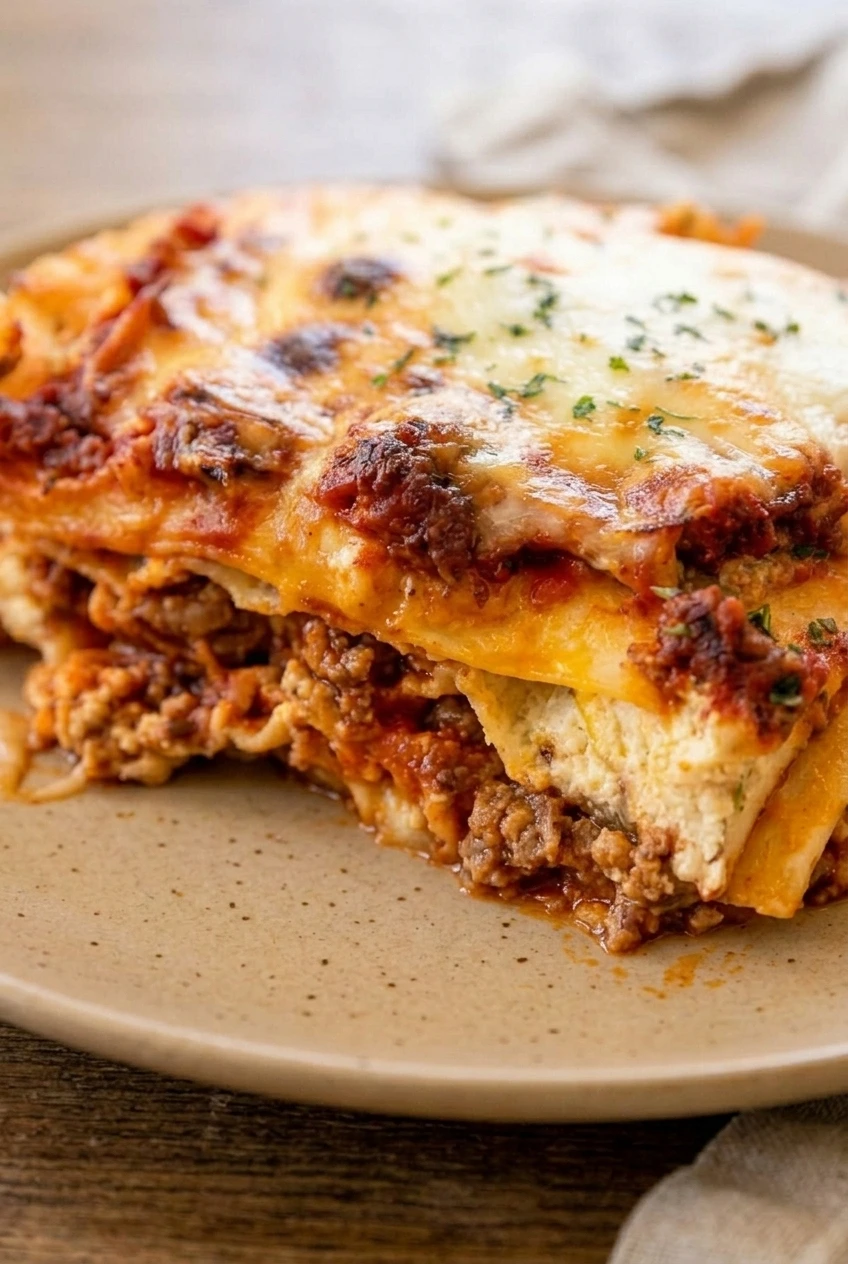
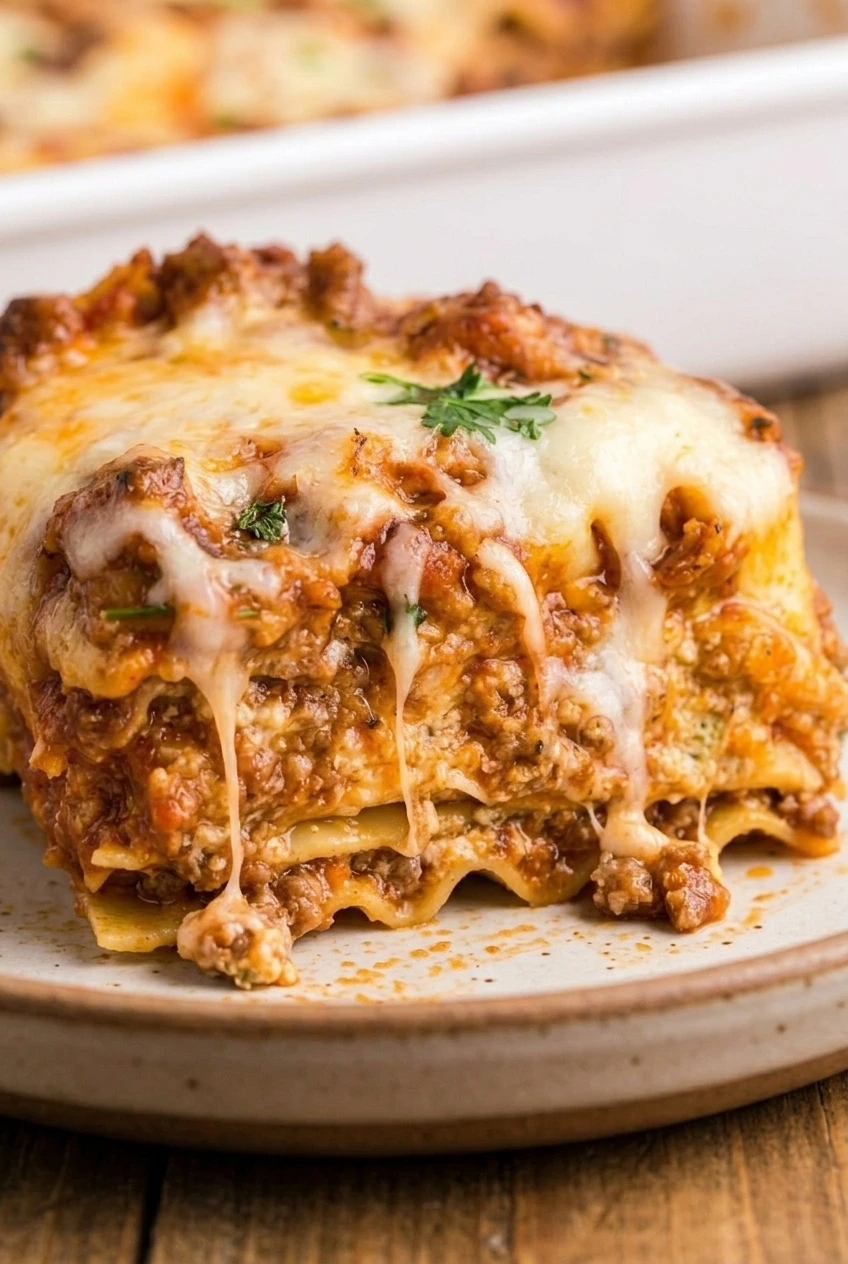
Close view of chicken Alfredo lasagna layers showing tender noodles, creamy spinach ricotta, chicken, and browned cheese.
  • 12 traditional dried lasagna noodles (300g)
  • 3 cups cooked shredded chicken (420g), such as rotisserie chicken
  • 10 ounces frozen chopped spinach (280g), thawed and squeezed very dry
  • 15 ounces whole-milk ricotta (425g)
  • 3 cups shredded mozzarella (340g), divided
  • 1 cup finely grated Parmesan (100g), divided
  • 4 tablespoons unsalted butter (55g), plus a little for the dish
  • 1/4 cup all-purpose flour (30g)
  • 3 garlic cloves, finely minced
  • 2 cups whole milk (490g)
  • 1 cup heavy cream (240g)
  • About 1 teaspoon kosher salt, divided or to taste
  • 1/2 teaspoon black pepper
  • 1 tablespoon chopped fresh parsley

Optional: Add a small pinch of freshly grated nutmeg to the sauce, or a pinch of red pepper flakes to the sauce or filling.

How to Make Creamy Chicken Alfredo Lasagna
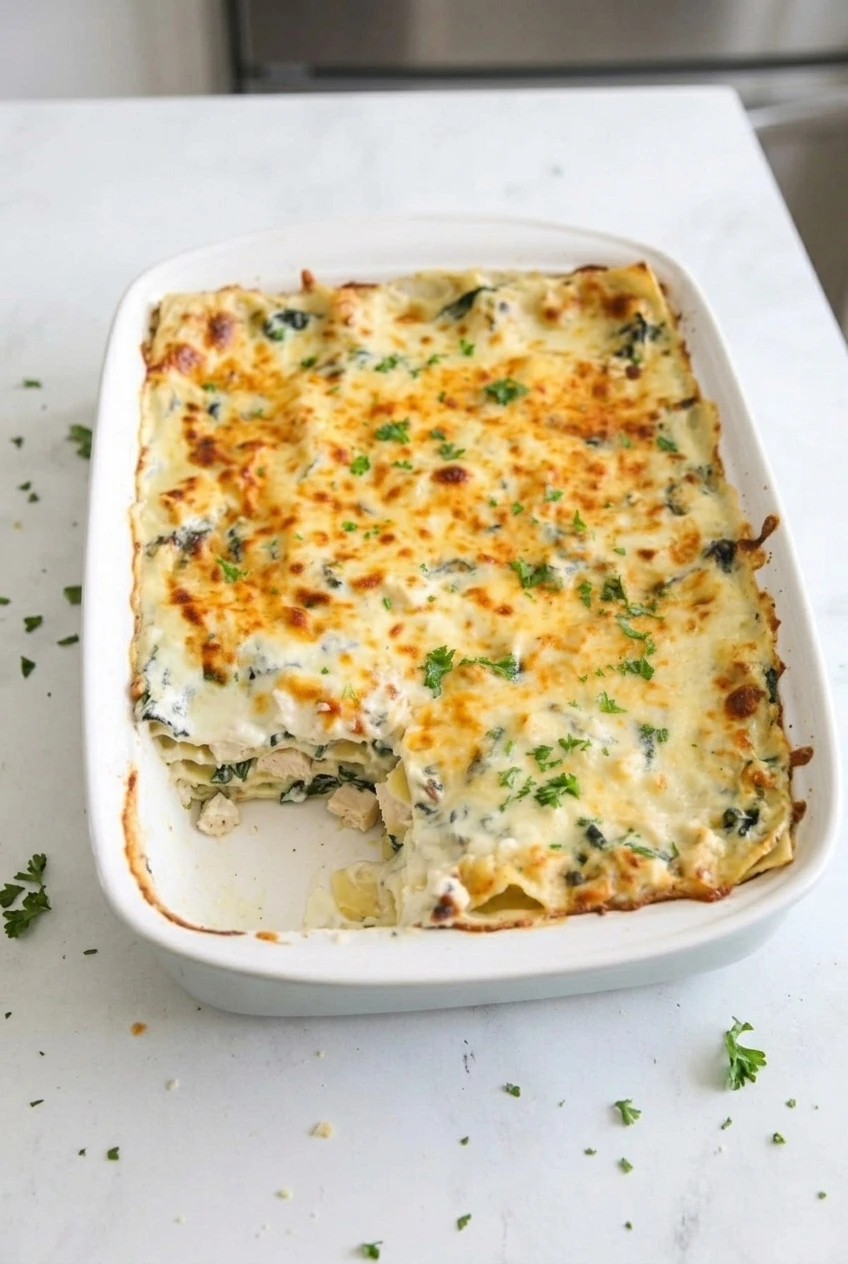
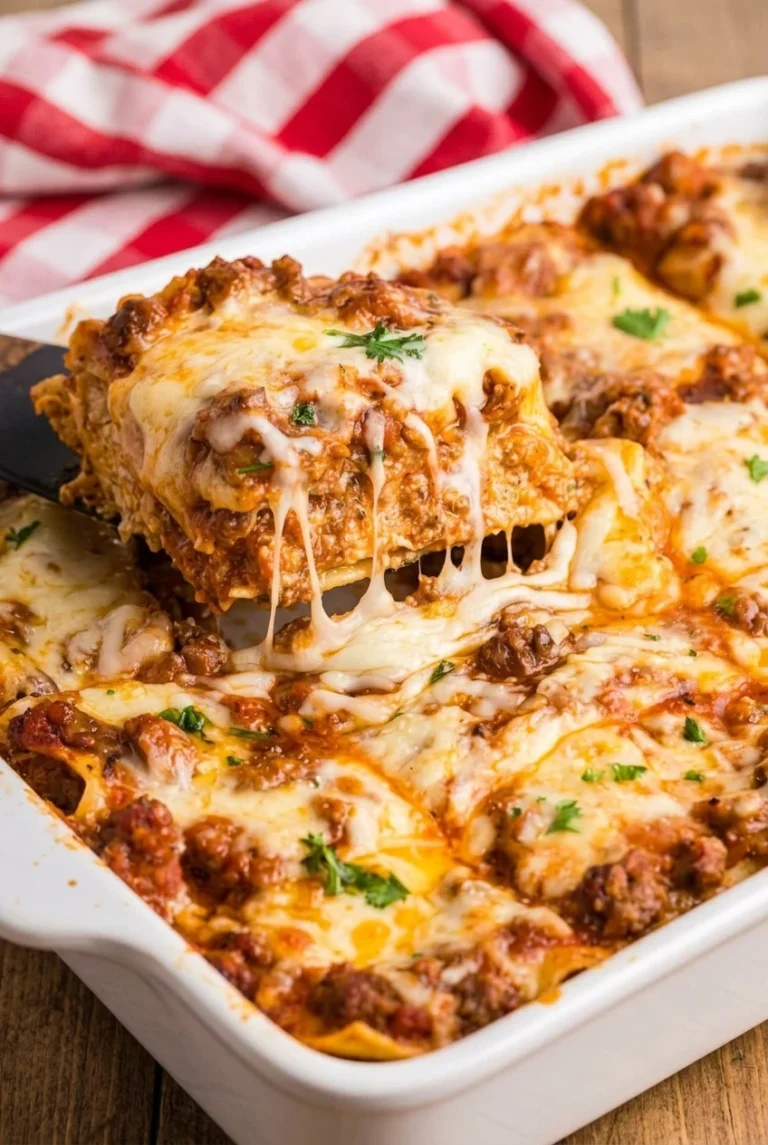
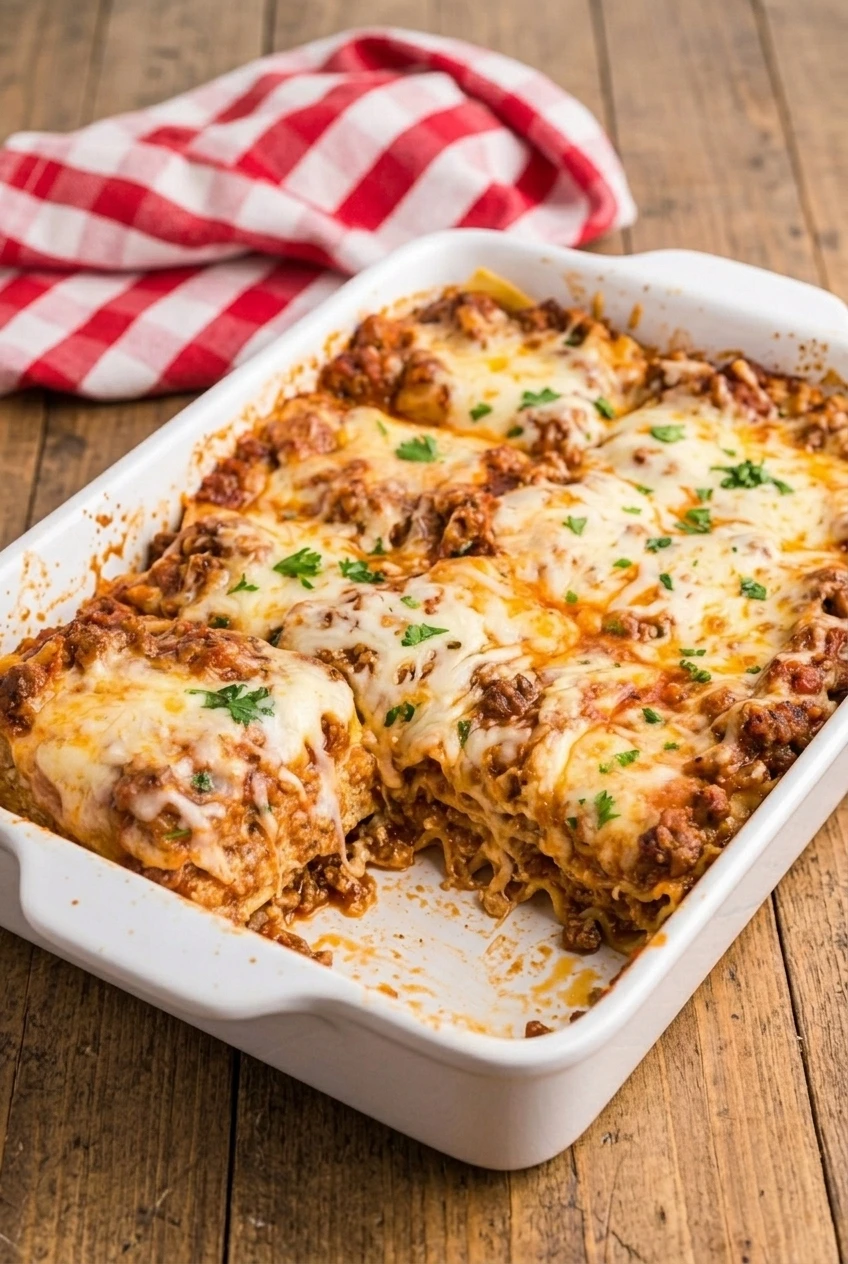
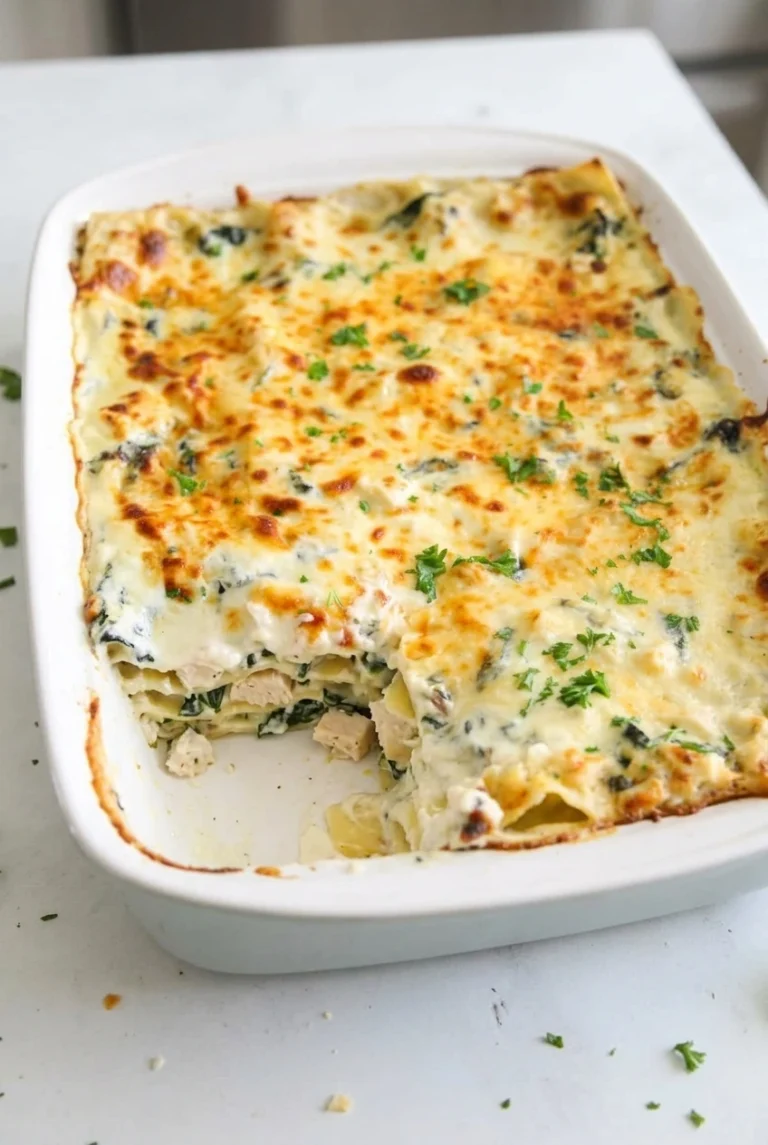
Full white casserole of spinach chicken Alfredo lasagna with golden cheese and a serving cut from one corner.
  1. Prepare the oven and noodles: Preheat the oven to 350°F (175°C) with a rack in the center. Lightly butter a 9-by-13-inch baking dish. Boil the noodles according to the package directions until al dente; they will continue cooking in the oven. Drain and separate them so they do not stick together.
  2. Mix the filling: Squeeze the thawed spinach firmly until it no longer releases water. Stir it into the ricotta with 1/4 cup of the Parmesan, about half the salt, and the black pepper. The filling should be thick enough to hold together. Keep the chicken separate for layering.
  3. Make the sauce: Melt the butter in a medium saucepan over medium heat. Add the garlic and cook briefly, then whisk in the flour until no dry pockets remain. Gradually whisk in the milk and cream. Bring to a gentle simmer and cook, whisking, until the sauce is smooth and coats a spoon but still pours easily. Stir in 1/2 cup of the Parmesan and season with the remaining salt to taste. Add the optional nutmeg or red pepper flakes, if using.
  4. Layer the lasagna: Spread a thin layer of sauce in the dish. Add four noodles, half the ricotta mixture, half the chicken, 1 cup of mozzarella, and some sauce. Repeat with four more noodles and the remaining filling and chicken, another cup of mozzarella, and more sauce. Finish with the last four noodles, the remaining sauce, the remaining 1 cup mozzarella, and the remaining 1/4 cup Parmesan. Spread the sauce to the edges so exposed noodles do not dry out.
  5. Bake covered: Tent the dish with foil, keeping it clear of the cheese. Bake for about 30 minutes, then check for bubbling around the edges. Set the dish on a rimmed baking sheet if it is very full.
  6. Brown the top: Remove the foil and bake for another 15–20 minutes. Start checking at about 15 minutes: the cheese should have golden-brown spots, and sauce should bubble at the edges and in a few places near the center. Carefully insert a knife into the center; it should come out hot, and the noodles should be tender, not firm or chalky. If the top browns before the center is hot, loosely cover the dish again and continue baking.
  7. Rest and serve: Let the lasagna rest for about 20 minutes so the layers settle. Scatter the parsley over the top, then cut into portions and lift them with a broad spatula.

How to Keep the Lasagna from Getting Watery

Thawed frozen spinach can release enough water to loosen the ricotta filling. Squeeze it by hand or in a clean towel until it feels damp but no longer drips. Extra cheese or a longer bake will not correct a filling made with wet spinach.

The cream sauce should coat a spoon while still flowing between the layers. If it looks thin, let it thicken at a gentle simmer before assembling the lasagna. Resting the baked casserole also helps the soft layers settle before cutting.

Noodle and Spinach Choices

This version uses traditional dried noodles boiled to al dente. Oven-ready noodles absorb liquid differently and are not a direct swap without changing the sauce and baking directions.

Fresh spinach needs to be wilted and drained before it goes into the ricotta. Do not replace the frozen spinach with the same volume of raw leaves.

Make-Ahead, Storage, and Reheating

The assembled lasagna can be covered and refrigerated before baking. A cold casserole may need longer in the oven; check for a hot center, tender noodles, and bubbling sauce rather than relying only on the stated bake time.

Cool leftovers, then cover the dish or transfer portions to an airtight container. Refrigerate for 3–4 days. Reheat portions in a 350°F oven until hot through, loosely covering them if the cheese starts to brown too much. Individual portions can also be microwaved, though the layers may soften.

Baked or unbaked lasagna can be frozen. Wrap it tightly and thaw it overnight in the refrigerator before baking or reheating. Allow extra time if it is still cold when it goes into the oven.

Serving Ideas

Serve the lasagna warm from the baking dish with a green salad or simple vegetables. Garlic bread also works well alongside it.

For another creamy chicken dinner, try Creamy Tuscan Chicken Pasta. For a different creamy spinach pasta, make Creamy Sausage and Spinach Pasta with Farfalle. Bowtie Pasta Lasagna is a separate skillet-style option.

Nutrition

Approximate nutrition per serving, based on 1/9 of the casserole: 630 calories, 41g protein, 36g fat, and 36g carbohydrates. Approximate nutrition per 100g: 185 calories, 12g protein, 10g fat, and 10g carbohydrates. Values will vary with the noodles, chicken, dairy, and cheeses used.

Creamy Chicken Alfredo Lasagna

Traditional lasagna noodles are layered with chicken, spinach-ricotta filling, and Parmesan cream sauce, then baked with mozzarella until golden.
Course: Main Course
Cuisine: Italian
Prep: 35 min
Cook: 50 min
Total: 105 min
Servings: 9 Calories: 630 kcal

Equipment

  • 9-by-13-inch baking dish
  • Large pot
  • Medium saucepan
  • Whisk
  • Rimmed baking sheet
  • Aluminum foil

Ingredients

For the Lasagna

  • 12 traditional dried lasagna noodles (300g)
  • 3 cups cooked shredded chicken (420g), such as rotisserie chicken
  • 10 ounces frozen chopped spinach (280g), thawed and squeezed very dry
  • 15 ounces whole-milk ricotta (425g)
  • 3 cups shredded mozzarella (340g), divided
  • 1 cup finely grated Parmesan (100g), divided
  • About 1 teaspoon kosher salt, divided or to taste
  • 1/2 teaspoon black pepper
  • 1 tablespoon chopped fresh parsley
  • A little butter for the baking dish

For the Sauce

  • 4 tablespoons unsalted butter (55g)
  • 1/4 cup all-purpose flour (30g)
  • 3 garlic cloves, finely minced
  • 2 cups whole milk (490g)
  • 1 cup heavy cream (240g)
  • Optional: a small pinch of freshly grated nutmeg or red pepper flakes

Instructions

  1. Preheat the oven to 350°F (175°C) with a rack in the center. Lightly butter a 9-by-13-inch baking dish.
  2. Boil the noodles according to package directions until al dente. Drain and separate them so they do not stick together.
  3. Squeeze the thawed spinach until it no longer releases water. Mix it with the ricotta, 1/4 cup of the Parmesan, about half the salt, and the black pepper.
  4. Melt the butter in a medium saucepan over medium heat. Add the garlic and cook briefly.
  5. Whisk in the flour until no dry pockets remain. Gradually whisk in the milk and cream.
  6. Bring the sauce to a gentle simmer, whisking until smooth and thick enough to coat a spoon while still pouring easily.
  7. Stir in 1/2 cup of the Parmesan and season with the remaining salt to taste. Add nutmeg or red pepper flakes, if using.
  8. Spread a thin layer of sauce in the baking dish. Add four noodles, half the ricotta mixture, half the chicken, 1 cup of mozzarella, and some sauce.
  9. Layer four more noodles with the remaining ricotta mixture and chicken, another cup of mozzarella, and more sauce.
  10. Top with the last four noodles, the remaining sauce, the remaining mozzarella, and the remaining 1/4 cup Parmesan. Spread the sauce to the edges.
  11. Tent the dish with foil, keeping it clear of the cheese. Bake for about 30 minutes, until bubbling around the edges. Set the dish on a rimmed baking sheet if it is very full.
  12. Remove the foil and bake for another 15–20 minutes, until the cheese has golden-brown spots and the sauce bubbles. Check that the center is hot and the noodles are tender.
  13. If the top browns before the center is hot, loosely cover the dish and continue baking.
  14. Rest the lasagna for about 20 minutes. Scatter parsley over the top, cut into portions, and serve.

Tips

  • Squeeze the thawed spinach very dry to keep the ricotta filling from becoming watery.
  • Simmer the sauce until it coats a spoon before assembling the lasagna.
  • Boil traditional noodles to al dente; they will continue cooking in the oven.
  • Spread sauce to the edges to keep exposed noodles from drying out.
  • Let the baked lasagna rest for 20 minutes so the layers settle and portions lift more easily.

Variations

  • Spiced Alfredo Lasagna: Add a small pinch of freshly grated nutmeg or red pepper flakes to the sauce or filling.
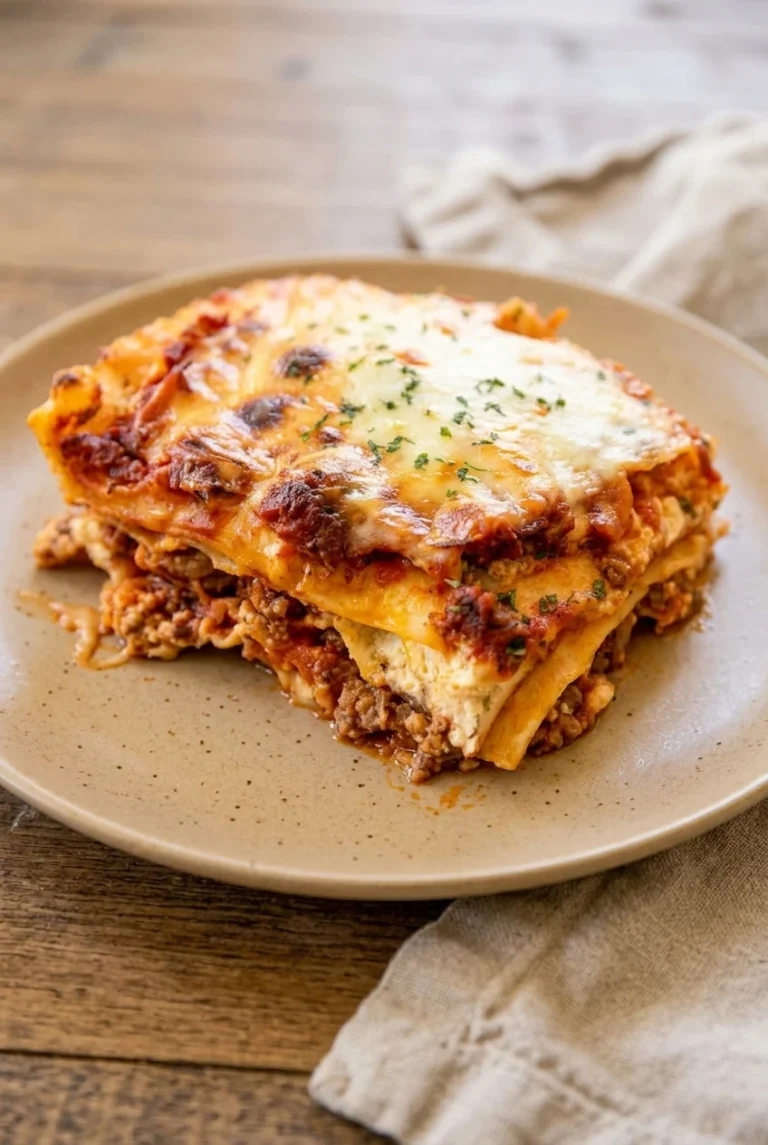
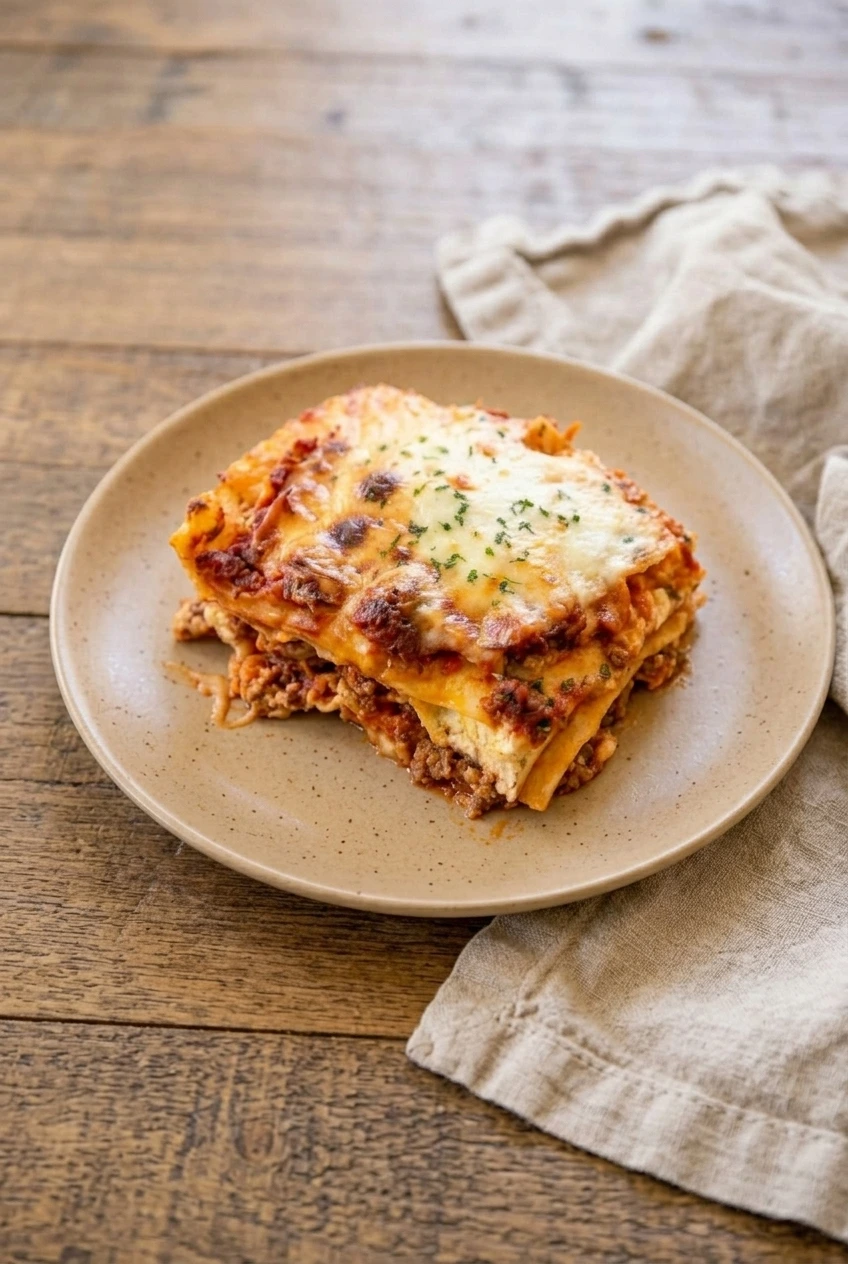
Notes

Refrigerate leftovers for 3–4 days and reheat portions in a 350°F oven until hot through. Baked or unbaked lasagna can be frozen; thaw overnight in the refrigerator before baking or reheating.

Nutrition

Calories: 630 kcal | Protein: 41 g | Fat: 36 g | Carbohydrates: 36 g

Million Dollar Lasagna

Million Dollar Lasagna has distinct layers of sausage-tomato sauce, pasta, and a rich cheese filling beneath a browned mozzarella top. This version makes the creamy layer with cream cheese, cottage cheese, and sour cream; other versions use different fillings.

Oven-ready sheets keep assembly straightforward, but they need good sauce coverage to soften evenly. Bake the lasagna covered first, then add the mozzarella for an uncovered finish. A 20-minute rest helps the generous square slices hold together.

Makes 8 generous servings. Allow about 30 minutes to prepare, 60–65 minutes to bake, and 20 minutes to rest.

A full square serving of Million Dollar Lasagna on a plate, with its browned cheese top and layered interior visible.

Ingredients for Million Dollar Lasagna

  • 12 oven-ready lasagna sheets, or enough for 3 layers in a 9-by-13-inch dish (about 300g)
  • 1 lb Italian sausage, casings removed (450g)
  • 1 jar marinara or tomato pasta sauce, 24 oz (680g)
  • 8 oz cream cheese, softened (225g)
  • 1 cup cottage cheese (225g)
  • 1 cup sour cream (230g)
  • 3 cups shredded mozzarella, divided (335g)
  • 1/2 cup grated Parmesan (50g)
  • 1 teaspoon garlic powder
  • 1 teaspoon dried Italian seasoning
  • 1 tablespoon chopped fresh parsley, for serving

Optional: Add 1/4 teaspoon red pepper flakes to the sauce for mild heat.

Close view of browned mozzarella and the creamy cheese, sausage sauce, and pasta layers in Million Dollar Lasagna.

How to Bake Million Dollar Lasagna

  1. Preheat the oven: Heat to 350°F (175°C). Set out a 9-by-13-inch baking dish. Check the oven-ready noodle package for any specific sauce or liquid requirements; do not boil the sheets unless directed.
  2. Make the meat sauce: In a large skillet or saucepan over medium heat, cook the sausage, breaking it into small pieces, until browned with no raw-looking spots. If the sausage sticks, add a small amount of oil. Stir in the marinara and optional red pepper flakes. Reduce to a gentle simmer and cook for 5–10 minutes, stirring occasionally, until the sauce thickens slightly and clings to the meat.
  3. Mix the filling: Stir together the cream cheese, cottage cheese, sour cream, Parmesan, garlic powder, Italian seasoning, and 1 cup of the mozzarella. The mixture should be thick and spreadable.
  4. Assemble three pasta layers: Spread a thin layer of meat sauce in the dish. Add a layer of lasagna sheets, then spread on about one-third of the cheese filling and some meat sauce. Repeat with two more layers of sheets, filling, and sauce, finishing with sauce. Keep the layers moderate, cover the sheets with sauce, and leave small gaps between sheets if needed for expansion. Reserve the remaining mozzarella.
  5. Bake covered: Cover the dish tightly with foil and bake for about 45 minutes. Check near the end for bubbling around the edges. If the center pasta is still firm, continue baking covered until it begins to soften.
  6. Brown the topping: Remove the foil, scatter the reserved mozzarella over the lasagna, and bake uncovered for 15–20 minutes. The sauce should be bubbling, the pasta tender when checked near the center with a knife, and the cheese melted with golden-brown spots. A deep dish, a different noodle brand, or a cold assembled lasagna may need more time.
  7. Rest and serve: Let the lasagna rest for about 20 minutes. Sprinkle with parsley, cut into generous squares, and lift each piece out with a wide spatula.

How to Avoid Watery or Sliding Layers

Simmer the sausage sauce until it is slightly thickened before assembly. A thin sauce can leave excess liquid in the finished dish, though the pasta still needs enough sauce contact to cook. Follow the noodle package if it calls for additional liquid.

Spread the sauce and filling evenly rather than piling either into one layer. Once baked, give the lasagna its full rest before cutting so the creamy filling and sauce can settle around the pasta.

Using Different Noodles or Fillings

Regular lasagna noodles need to be boiled and drained according to their package directions; do not assume they will bake exactly like oven-ready sheets. Ravioli requires a different assembly and bake schedule and is not a direct substitute here.

Ground beef can replace the Italian sausage for a milder meat sauce. A ricotta-and-egg filling is another style of Million Dollar Lasagna, but it should replace—not be added to—the creamy filling in this version.

Make-Ahead and Freezing Notes

You can assemble the lasagna and refrigerate it overnight before baking. If it goes into the oven cold, allow extra baking time and check for tender center pasta and bubbling sauce rather than relying on the clock alone.

The assembled lasagna or individual portions can be frozen. Wrap slices separately before placing them in a freezer bag. Thawing and reheating times depend on portion size and whether the lasagna is frozen; heat it until the center is hot rather than following the fresh-bake timing.

Serving and Related Recipes

Serve a square slice with a green salad or garlic bread. For a different lasagna-style dinner, try Bowtie Pasta Lasagna. Creamy Sausage and Spinach Pasta is another sausage dinner without the layered bake.

Nutrition

Approximate nutrition per serving (1/8 of the lasagna): 660 calories, 32g protein, 45g fat, and 39g carbohydrates. Per 100g: about 210 calories, 10g protein, 14g fat, and 13g carbohydrates. Values vary with the sausage, sauce, and cheeses used.

Million Dollar Lasagna

Oven-ready lasagna sheets are layered with sausage marinara and a creamy filling of cream cheese, cottage cheese, sour cream, Parmesan, and mozzarella.
Course: Main Course
Cuisine: Italian
Prep: 30 min
Cook: 65 min
Total: 115 min
Servings: 8 Calories: 660 kcal

Equipment

  • 9-by-13-inch baking dish
  • Large skillet or saucepan
  • Aluminum foil
  • Wide spatula

Ingredients

For the Lasagna

  • 12 oven-ready lasagna sheets, or enough for 3 layers in a 9-by-13-inch dish (about 300 g)
  • 1 lb Italian sausage, casings removed (450 g)
  • 1 jar marinara or tomato pasta sauce, 24 oz (680 g)
  • 1 tablespoon chopped fresh parsley, for serving

For the Cheese Filling and Topping

  • 8 oz cream cheese, softened (225 g)
  • 1 cup cottage cheese (225 g)
  • 1 cup sour cream (230 g)
  • 3 cups shredded mozzarella, divided (335 g)
  • 1/2 cup grated Parmesan (50 g)
  • 1 teaspoon garlic powder
  • 1 teaspoon dried Italian seasoning

Optional

  • 1/4 teaspoon red pepper flakes

Instructions

  1. Preheat the oven to 350°F (175°C). Set out a 9-by-13-inch baking dish. Check the noodle package for any sauce or liquid requirements; do not boil oven-ready sheets unless directed.
  2. Cook the sausage in a large skillet or saucepan over medium heat, breaking it into small pieces, until browned with no raw-looking spots. Add a little oil if it sticks.
  3. Stir in the marinara and optional red pepper flakes. Simmer gently for 5–10 minutes, stirring occasionally, until the sauce thickens slightly and clings to the meat.
  4. Mix the cream cheese, cottage cheese, sour cream, Parmesan, garlic powder, Italian seasoning, and 1 cup of the mozzarella until thick and spreadable.
  5. Spread a thin layer of meat sauce in the baking dish. Add a layer of lasagna sheets, about one-third of the cheese filling, and some meat sauce.
  6. Repeat to make two more layers of sheets, filling, and sauce, finishing with sauce. Keep layers moderate, cover the sheets with sauce, and leave small gaps between sheets if needed. Reserve the remaining mozzarella.
  7. Cover the dish tightly with foil and bake for about 45 minutes. If the center pasta is still firm, continue baking covered until it begins to soften.
  8. Remove the foil and scatter the reserved mozzarella over the lasagna. Bake uncovered for 15–20 minutes, until the sauce bubbles, the pasta is tender when checked near the center with a knife, and the cheese is melted with golden-brown spots.
  9. Rest the lasagna for about 20 minutes. Sprinkle with parsley, cut into generous squares, and serve with a wide spatula.

Tips

  • Simmer the sauce until slightly thickened to help prevent excess liquid in the finished lasagna.
  • Make sure the sauce covers the oven-ready sheets so they soften evenly.
  • Follow the noodle package directions if additional liquid is required.
  • Let the lasagna rest for the full 20 minutes before cutting so the layers can settle.
  • A cold assembled lasagna, deep dish, or different noodle brand may need more baking time; check the center for tenderness.

Variations

  • Ground Beef Lasagna: Replace the Italian sausage with ground beef for a milder meat sauce.
  • Ricotta and Egg Filling: Use a ricotta-and-egg filling instead of the creamy filling in this version.
  • Mildly Spicy Lasagna: Add 1/4 teaspoon red pepper flakes to the sauce.

Notes

Assemble and refrigerate overnight if desired; allow extra baking time when baking cold. Freeze the assembled lasagna or individual portions. Reheat until the center is hot.

Nutrition

Calories: 660 kcal | Protein: 32 g | Fat: 45 g | Carbohydrates: 39 g

Easy No-Boil Lasagna

Oven-ready lasagna sheets go straight into this meat-and-cheese casserole—no separate pot of water needed. Beef marinara runs between the pasta layers, ricotta adds a creamy filling, and mozzarella melts into a lightly browned top.

The key to tender sheets is sauce beneath and between them, followed by a covered bake that holds in moisture. Check the center before uncovering: the pasta should be tender and the sauce bubbling. A short rest helps the lasagna hold its layers when cut into thick squares.

Makes 8 servings. Allow about 25 minutes to prepare, 60–70 minutes to bake, and 15 minutes to rest.

Ingredients

Close detail of tender lasagna layers with chunky beef sauce, creamy cheese, and melted mozzarella.
  • 1 lb lean ground beef (450g)
  • Two 24-oz jars marinara or tomato pasta sauce (48 oz total; about 1,350g)
  • About 12 oven-ready lasagna sheets (250g), enough for three layers in a 9-by-13-inch dish
  • 15 oz whole-milk ricotta (425g)
  • 1 large egg
  • 3 cups shredded mozzarella (340g), divided
  • 1/2 cup grated Parmesan (50g), divided
  • 1 teaspoon Italian seasoning
  • Up to 1/2 cup water, only if the sauce is unusually thick

Optional: Salt and black pepper to taste; 1–2 tablespoons chopped fresh parsley for serving. Taste the marinara before adding salt, since the sauce and Parmesan may already be salty.

How to Make No-Boil Lasagna

A wide view of easy no-boil lasagna in a white baking dish, with one square serving removed.
  1. Preheat the oven: Heat to 375°F (190°C). Use a deep 9-by-13-inch baking dish with room for the sauce to bubble. Set it on a rimmed baking sheet if overflow is a concern.
  2. Make the meat sauce: In a large skillet over medium heat, cook the beef, breaking it into small pieces, until browned throughout, about 10–12 minutes. Drain excess fat. Stir in the marinara and Italian seasoning. If the sauce is unusually thick and difficult to spread, stir in up to 1/2 cup water; otherwise, leave it out.
  3. Mix the ricotta: Stir together the ricotta, egg, and half the Parmesan. Season lightly with salt and pepper if needed.
  4. Build the layers: Spread a thin layer of meat sauce across the bottom of the dish. Add the first layer of uncooked sheets, then half the ricotta mixture, more meat sauce, and some mozzarella. Repeat with a second layer of sheets, the remaining ricotta, more sauce, and some mozzarella. Add a third layer of sheets and cover them completely with the remaining sauce. Top with the remaining mozzarella and Parmesan. Do not force extra layers into the dish.
  5. Bake covered: Cover tightly with foil. Tent it above the cheese or lightly coat its inward-facing side with cooking spray to prevent sticking. Bake for 50–55 minutes; the covered bake helps the sheets soften in the sauce.
  6. Check and finish: Begin checking at about 50 minutes. A knife inserted into the center should meet tender pasta, and the sauce should bubble near the center as well as at the edges. If the sheets are firm or the center is not bubbling, cover and bake longer before checking again. Once the pasta is tender, uncover and bake for 10–15 minutes, until the mozzarella is melted with a few lightly browned spots.
  7. Rest and slice: Let the lasagna rest for about 15 minutes before cutting it into thick squares. Sprinkle lightly with parsley, if using. If the first slice is loose, give the casserole a little more time to rest.

How to Keep No-Boil Noodles Tender

Oven-ready sheets soften by absorbing moisture from the sauce, so cover the bottom of the dish and leave no top sheet dry. Keep the foil on for the main bake rather than uncovering early. Add water only when the sauce is notably thick; a loose, plentiful sauce does not need it.

Noodle brand, sauce thickness, oven, and dish depth can change the baking time. If the center sheets still resist a knife, continue baking covered before browning the cheese. Use oven-ready sheets for this method; regular dry noodles may need different liquid guidance.

Lasagna Variations

Sausage Lasagna

Replace the beef with Italian sausage. Brown it and drain excess fat before stirring in the sauce; keep the layering and baking method the same.

Meatless Cheese Lasagna

Omit the beef and layer the marinara, ricotta mixture, mozzarella, Parmesan, and oven-ready sheets. Keep sauce beneath and between the pasta layers.

For a different take on beef-and-pasta flavors, try Bowtie Pasta Lasagna. For a sausage pasta dinner with a creamy sauce, try Creamy Sausage and Spinach Pasta.

Serving, Make-Ahead, and Storage

Serve thick squares with a simple Italian or Caesar salad, or with garlic bread. To assemble ahead, cover and refrigerate the unbaked lasagna. A chilled casserole may need more baking time; check for tender pasta and bubbling sauce in the center.

Cool leftovers and refrigerate them in a covered container within two hours. Keep for 3–5 days. Reheat a larger portion covered in a 325°F (165°C) to 350°F (175°C) oven until hot throughout; cover individual portions when microwaving. A little marinara can help prevent oven-reheated portions from drying out.

Lasagna can be frozen before or after baking, tightly wrapped, for up to 2–3 months. Thaw an assembled, unbaked casserole in the refrigerator before baking for more even cooking. Baking time will vary if the dish is still cold.

Nutrition

Approximate nutrition per serving, based on 1/8 of the casserole (about 350g): 560 calories, 37g protein, 26g fat, and 38g carbohydrates. Per 100g: about 160 calories, 11g protein, 7g fat, and 11g carbohydrates. Values vary with the beef, sauce, noodles, and cheese used.

Easy No-Boil Lasagna

Oven-ready lasagna sheets bake with beef marinara, ricotta, mozzarella, and Parmesan until tender and bubbling.
Course: Main Course
Cuisine: Italian
Prep: 25 min
Cook: 70 min
Total: 110 min
Servings: 8 Calories: 560 kcal

Equipment

  • Large skillet
  • 9-by-13-inch baking dish
  • Aluminum foil
  • Rimmed baking sheet

Ingredients

For the Lasagna

  • 1 lb lean ground beef (450 g)
  • Two 24-oz jars marinara or tomato pasta sauce (48 oz total; about 1,350 g)
  • About 12 oven-ready lasagna sheets (250 g), enough for three layers
  • 15 oz whole-milk ricotta (425 g)
  • 1 large egg
  • 3 cups shredded mozzarella (340 g), divided
  • 1/2 cup grated Parmesan (50 g), divided
  • 1 teaspoon Italian seasoning
  • Up to 1/2 cup water, only if the sauce is unusually thick

Optional

  • Salt and black pepper, to taste
  • 1–2 tablespoons chopped fresh parsley, for serving

Instructions

  1. Preheat the oven to 375°F (190°C). Use a deep 9-by-13-inch baking dish; set it on a rimmed baking sheet if overflow is a concern.
  2. In a large skillet over medium heat, cook the beef, breaking it into small pieces, until browned throughout, about 10–12 minutes. Drain excess fat.
  3. Stir the marinara and Italian seasoning into the beef. If the sauce is unusually thick and difficult to spread, add up to 1/2 cup water.
  4. Stir together the ricotta, egg, and half the Parmesan. Season lightly with salt and pepper if needed.
  5. Spread a thin layer of meat sauce across the bottom of the baking dish. Add a layer of uncooked lasagna sheets, half the ricotta mixture, more meat sauce, and some mozzarella.
  6. Add a second layer of sheets, the remaining ricotta mixture, more sauce, and some mozzarella.
  7. Add a third layer of sheets and cover them completely with the remaining sauce. Top with the remaining mozzarella and Parmesan. Do not force extra layers into the dish.
  8. Cover tightly with foil, tenting it above the cheese or lightly coating its inward-facing side with cooking spray.
  9. Bake covered for 50–55 minutes. Begin checking at about 50 minutes: a knife inserted into the center should meet tender pasta, and the sauce should bubble near the center as well as at the edges.
  10. If the pasta is still firm or the center is not bubbling, cover and bake longer before checking again. Once tender, uncover and bake for 10–15 minutes, until the mozzarella is melted with a few lightly browned spots.
  11. Rest for about 15 minutes before cutting into thick squares. Sprinkle with parsley, if using.

Tips

  • Use oven-ready sheets; regular dry noodles may need different liquid guidance.
  • Spread sauce beneath and between the pasta layers, and cover the top layer completely.
  • Keep the lasagna covered during the main bake so the sheets can soften in the sauce.
  • Add water only if the sauce is notably thick.
  • Check for tender pasta and bubbling sauce in the center before uncovering.

Variations

  • Sausage Lasagna: Replace the beef with Italian sausage. Brown it and drain excess fat before adding the sauce.
  • Meatless Cheese Lasagna: Omit the beef and layer the marinara, ricotta mixture, mozzarella, Parmesan, and oven-ready sheets.

Notes

Refrigerate leftovers in a covered container within two hours and keep for 3–5 days. Reheat covered in a 325°F (165°C) to 350°F (175°C) oven until hot throughout. Freeze tightly wrapped before or after baking for up to 2–3 months; thaw an unbaked casserole in the refrigerator before baking.

Nutrition

Calories: 560 kcal | Protein: 37 g | Fat: 26 g | Carbohydrates: 38 g | Per 100 G Calories: 160 kcal | Per 100 G Protein: 11 g | Per 100 G Fat: 7 g | Per 100 G Carbohydrates: 11 g

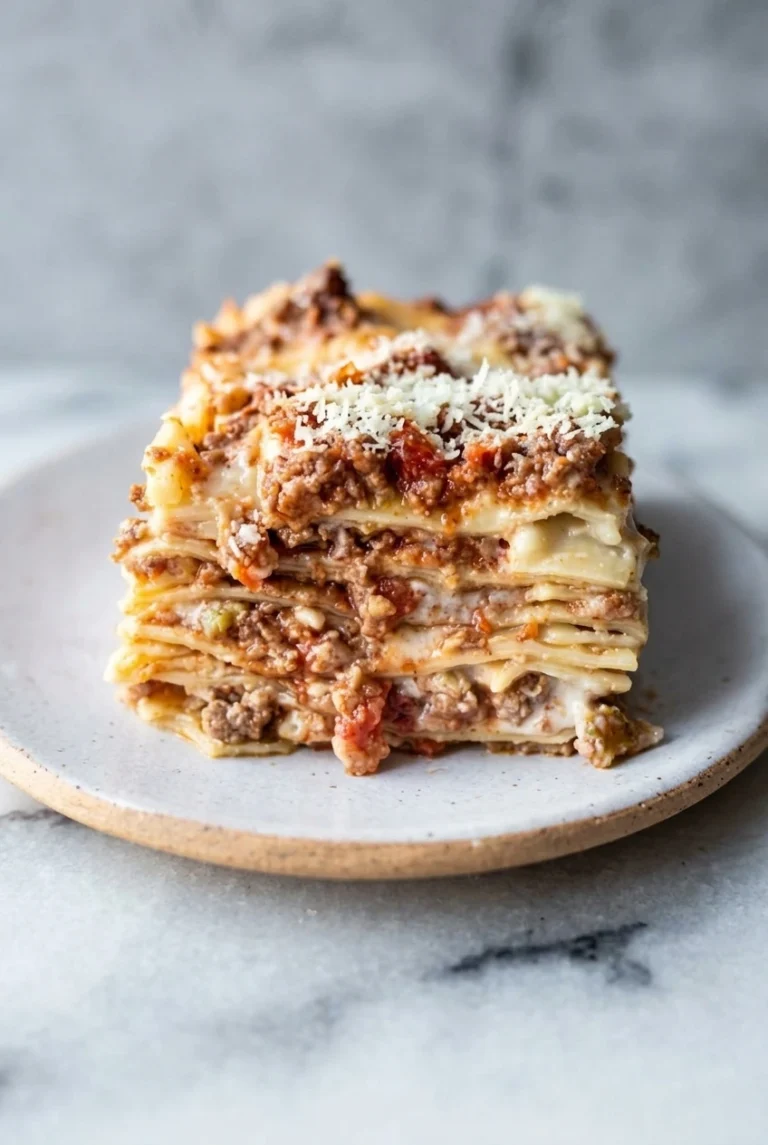
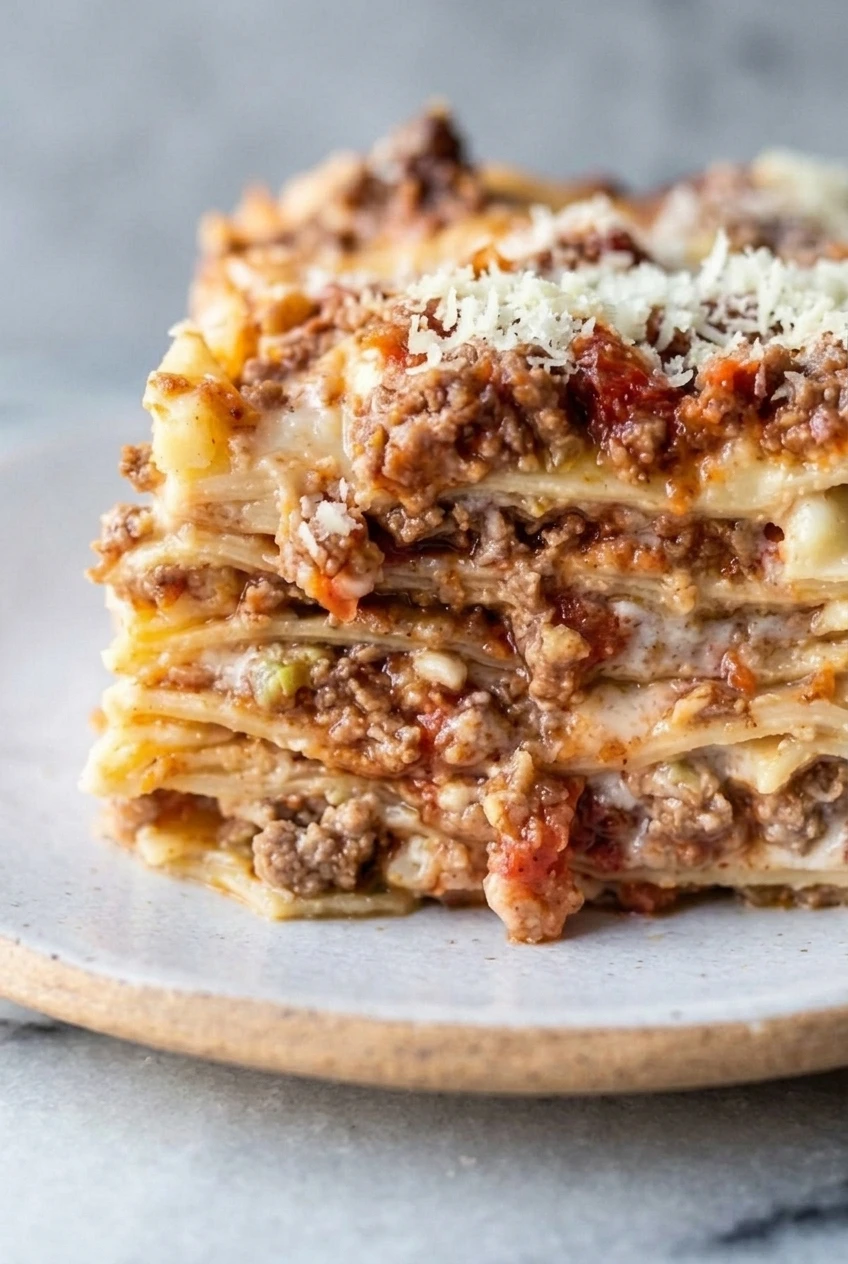
Lasagna Bolognese with Béchamel Sauce

Thin sheets of fresh pasta separate beef-and-pork ragù from creamy béchamel in this Parmesan-topped lasagna. There’s no ricotta or mozzarella: the sauces stay in distinct layers, and the top browns in the oven. For slices that hold together, simmer the ragù until it’s thick but moist, spread the sauces thinly, and let the baked lasagna rest before cutting. The ragù and béchamel can be made ahead to make assembly easier.

Ingredients

Close detail of the tender pasta, meat ragù, creamy béchamel, and browned Parmesan layers in Lasagna Bolognese

Makes 8 to 10 servings.

  • 4 ounces pancetta, finely diced (115g)
  • 1 tablespoon olive oil
  • 1 medium yellow onion, finely diced (150g)
  • 1 medium carrot, finely diced (75g)
  • 1 rib celery, finely diced (50g)
  • 1 pound ground beef (450g)
  • 8 ounces ground pork (225g)
  • 2 tablespoons tomato paste (30g)
  • 1 cup dry white wine
  • 1 can (28 ounces) crushed tomatoes (about 800g)
  • 1 cup whole milk, for the ragù
  • 6 tablespoons unsalted butter (85g)
  • ½ cup all-purpose flour (60g)
  • 5 cups whole milk, warmed, for the béchamel
  • ⅛ teaspoon freshly grated nutmeg
  • 2 cups finely grated Parmesan or Parmigiano-Reggiano, divided (200g)
  • About 1 pound fresh egg lasagna sheets (450g)
  • Fine salt, for the ragù, béchamel, and pasta water
  • Black pepper, to taste

Red wine can replace the white wine in the ragù. An extra light sprinkle of Parmesan is optional at serving.

How to Make Lasagna Bolognese

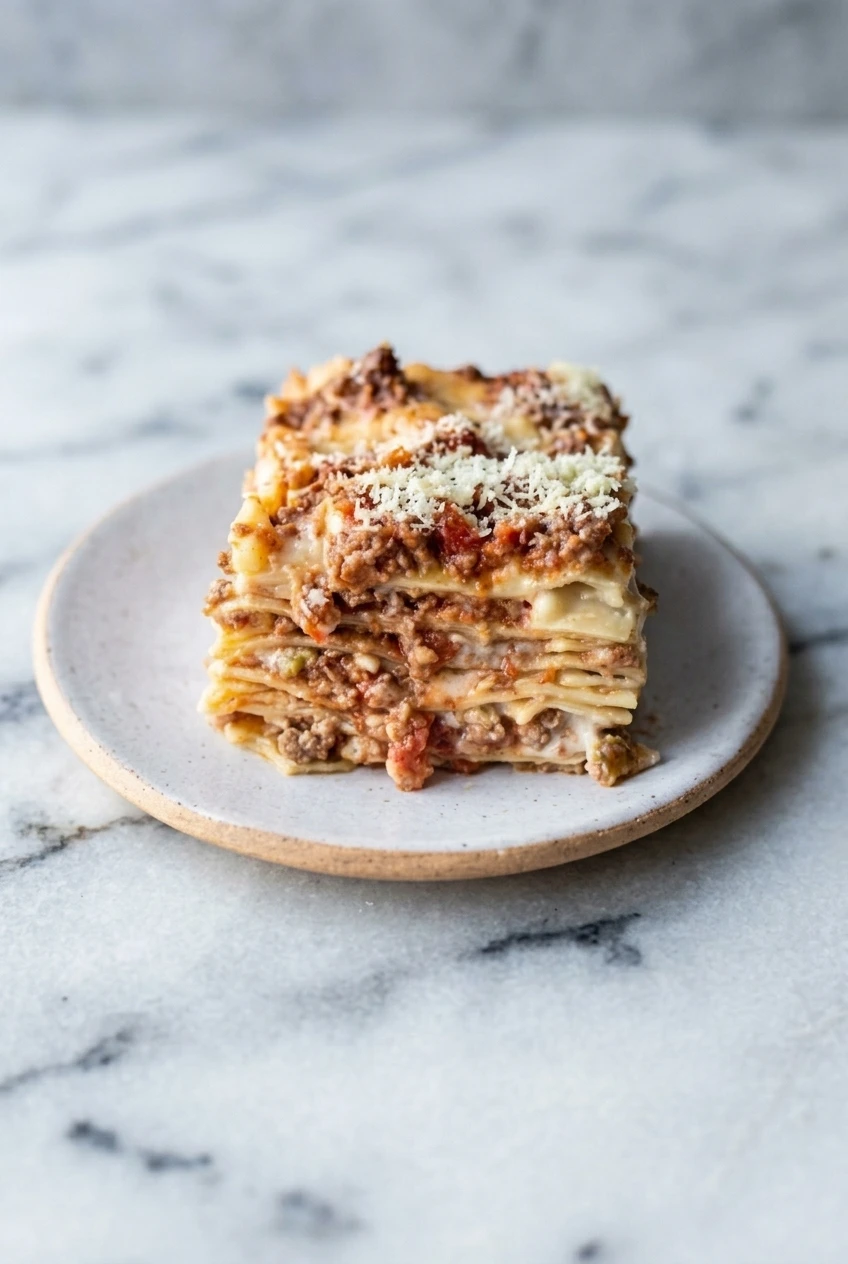
A square slice of layered Lasagna Bolognese centered on a plate with more neutral surface visible around it
  1. Brown the meat and vegetables: In a heavy Dutch oven or large saucepan, cook the pancetta and olive oil over medium heat until the pancetta releases some fat and begins to brown. Add the onion, carrot, and celery; cook until softened. Add the beef and pork and cook, breaking them into small pieces, until no pink remains and some meat has browned, about 15 to 20 minutes total.
  2. Simmer the ragù: Stir in the tomato paste, then add the wine and let it reduce before adding the crushed tomatoes and 1 cup milk. Season with salt and pepper. Simmer gently over low heat, stirring occasionally, for about 1½ to 2 hours. The sauce should mound softly on a spoon rather than run like soup, but remain moist enough to spread.
  3. Make the béchamel: Melt the butter in a medium saucepan over medium-low to medium heat. Whisk in the flour and cook briefly, then gradually whisk in the warm milk. Whisk as the sauce thickens, about 12 to 15 minutes, until smooth and pourable. It should lightly coat a spoon and flow from a ladle. Season with salt, pepper, and nutmeg.
  4. Prepare the pasta: Bring a large pot of salted water to a boil. Cook the fresh sheets in batches for about 30 to 60 seconds, or according to the package directions, just until flexible. Transfer to cool water, then drain, blot, and lay them separately on clean towels or parchment. Do not stack wet sheets.
  5. Assemble: Preheat the oven to 350°F (175°C). Lightly grease a deep 9-by-13-inch baking dish if needed. Spread a thin layer of béchamel on the bottom. Add pasta, then thin, separate layers of ragù and béchamel, followed by Parmesan. Repeat to make about four filling layers. Finish with pasta, béchamel, and the remaining Parmesan.
  6. Bake: Cover loosely with foil, keeping it off the topping, and bake for 20 to 25 minutes. Uncover and bake for about 15 to 20 minutes more. Start checking at 35 minutes: the edges should bubble, the center should be hot, a knife should pass through the pasta with little resistance, and the top should be golden with deeper browned spots. If the top browns before the center is hot, keep it covered longer.
  7. Rest and serve: Let the lasagna rest in the dish for at least 25 minutes so the layers settle. Cut square portions with a sharp knife and lift them with a spatula. Serve each slice upright to show the pasta, ragù, and béchamel layers.

Choosing and Preparing the Pasta Sheets

This method uses fresh egg lasagna sheets, briefly cooked until flexible rather than fully soft. Thickness varies by product, so follow the package directions if they differ. Cooling, blotting, and separating the sheets keeps them from sticking or tearing during assembly.

Dried and no-boil noodles need different preparation and may need a different bake schedule. Do not use the fresh-pasta timing unchanged.

Getting the Sauce Consistency Right

Ragù that runs across the dish will make the layers slippery. If yours is loose, simmer it longer so excess moisture evaporates, but stop while it is still moist and easy to spread. The béchamel should flow from a ladle while lightly coating a spoon; a stiff sauce is hard to spread in thin layers.

Make-Ahead, Storage, and Reheating

The ragù and béchamel can be made ahead and refrigerated separately for about 2 to 3 days. Press parchment or plastic wrap directly against the béchamel as it cools to limit skin formation. You can also assemble the lasagna ahead and refrigerate it; a chilled dish may need extra baking time. Check the center and pasta for doneness rather than relying only on the clock.

Cool leftover lasagna promptly and refrigerate it covered in an airtight container for up to 3 days. Reheat portions in a 325°F (165°C) to 350°F oven until hot through, covering them if the surface starts to dry. Individual portions can also be reheated in the microwave.

Assembled, unbaked lasagna and well-wrapped baked portions can be frozen, though recommended freezer storage times vary. Thaw an unbaked lasagna overnight in the refrigerator when practical, then bake until its center is hot and the edges are bubbling, allowing extra time for a cold dish.

Serving and More Pasta Dinners

Serve a square slice with a simple green salad or roasted asparagus. For a quicker skillet-style take on similar flavors, try Bowtie Pasta Lasagna. For other pasta dinners, see Creamy Sausage and Spinach Pasta or the meatless Caramelized Onion Pasta.

Nutrition

Approximate nutrition per serving, based on 1 of 9 servings: 750 calories, 39g protein, 49g fat, and 43g carbohydrates. Approximate values per 100g: 160 calories, 8g protein, 10g fat, and 9g carbohydrates. Values vary with the pasta, meat, and cheese used.

Lasagna Bolognese with Béchamel Sauce

Fresh pasta layers beef-and-pork ragù, creamy béchamel, and Parmesan in this classic baked lasagna.
Course: Main Course
Cuisine: Italian
Prep: 45 min
Cook: 190 min
Total: 260 min
Servings: 9 Calories: 750 kcal

Equipment

  • Dutch oven or large saucepan
  • Medium saucepan
  • Whisk
  • Large pot
  • Deep 9-by-13-inch baking dish
  • Aluminum foil

Ingredients

For the Ragù

  • 4 ounces pancetta, finely diced (115g)
  • 1 tablespoon olive oil
  • 1 medium yellow onion, finely diced (150g)
  • 1 medium carrot, finely diced (75g)
  • 1 rib celery, finely diced (50g)
  • 1 pound ground beef (450g)
  • 8 ounces ground pork (225g)
  • 2 tablespoons tomato paste (30g)
  • 1 cup dry white wine
  • 1 can (28 ounces) crushed tomatoes (about 800g)
  • 1 cup whole milk
  • Fine salt, to taste
  • Black pepper, to taste

For the Béchamel

  • 6 tablespoons unsalted butter (85g)
  • ½ cup all-purpose flour (60g)
  • 5 cups whole milk, warmed
  • ⅛ teaspoon freshly grated nutmeg
  • Fine salt, to taste
  • Black pepper, to taste

For Assembly

  • About 1 pound fresh egg lasagna sheets (450g)
  • 2 cups finely grated Parmesan or Parmigiano-Reggiano, divided (200g)
  • Fine salt, for the pasta water

Instructions

  1. Cook the pancetta and olive oil in a heavy Dutch oven or large saucepan over medium heat until the pancetta releases fat and begins to brown.
  2. Add the onion, carrot, and celery and cook until softened. Add the beef and pork; break the meat into small pieces and cook until no pink remains and some pieces are browned, about 15 to 20 minutes total.
  3. Stir in the tomato paste. Add the wine and let it reduce, then stir in the crushed tomatoes and 1 cup milk. Season with salt and pepper.
  4. Simmer the ragù gently over low heat, stirring occasionally, for 1½ to 2 hours, until thick but still moist and spreadable.
  5. Melt the butter in a medium saucepan over medium-low to medium heat. Whisk in the flour and cook briefly.
  6. Gradually whisk in the warm milk. Cook, whisking, for 12 to 15 minutes, until smooth, pourable, and lightly coating a spoon. Season with salt, pepper, and nutmeg.
  7. Bring a large pot of salted water to a boil. Cook the fresh pasta sheets in batches for 30 to 60 seconds, or according to package directions, just until flexible.
  8. Transfer the pasta sheets to cool water, then drain and blot them. Lay them separately on clean towels or parchment.
  9. Preheat the oven to 350°F (175°C). Lightly grease a deep 9-by-13-inch baking dish if needed.
  10. Spread a thin layer of béchamel in the dish. Add pasta, then thin, separate layers of ragù and béchamel, followed by Parmesan. Repeat to make about four filling layers, then finish with pasta, béchamel, and the remaining Parmesan.
  11. Cover loosely with foil, keeping it off the topping. Bake for 20 to 25 minutes, then uncover and bake for about 15 to 20 minutes more, until the edges bubble, the center is hot, and the top is golden with browned spots.
  12. Let the lasagna rest in the dish for at least 25 minutes. Cut into portions with a sharp knife and lift with a spatula.

Tips

  • Simmer the ragù until it mounds softly on a spoon but remains moist enough to spread.
  • Keep the ragù and béchamel in thin, separate layers so the lasagna slices hold together.
  • Cool, blot, and separate the pasta sheets to help prevent sticking and tearing.
  • If the top browns before the center is hot, keep the lasagna covered longer.
  • Let the lasagna rest for at least 25 minutes before cutting.

Variations

  • Red Wine Ragù: Replace the dry white wine with red wine in the ragù.

Notes

Ragù and béchamel can be refrigerated separately for 2 to 3 days. Refrigerate leftover lasagna in an airtight container for up to 3 days and reheat at 325°F (165°C) to 350°F until hot. Assembled unbaked lasagna and wrapped baked portions can be frozen; thaw unbaked lasagna in the refrigerator when practical and allow extra baking time.

Nutrition

Calories: 750 kcal | Protein: 39 g | Fat: 49 g | Carbohydrates: 43 g | Per 100g Calories: 160 kcal | Per 100g Protein: 8 g | Per 100g Fat: 10 g | Per 100g Carbohydrates: 9 g

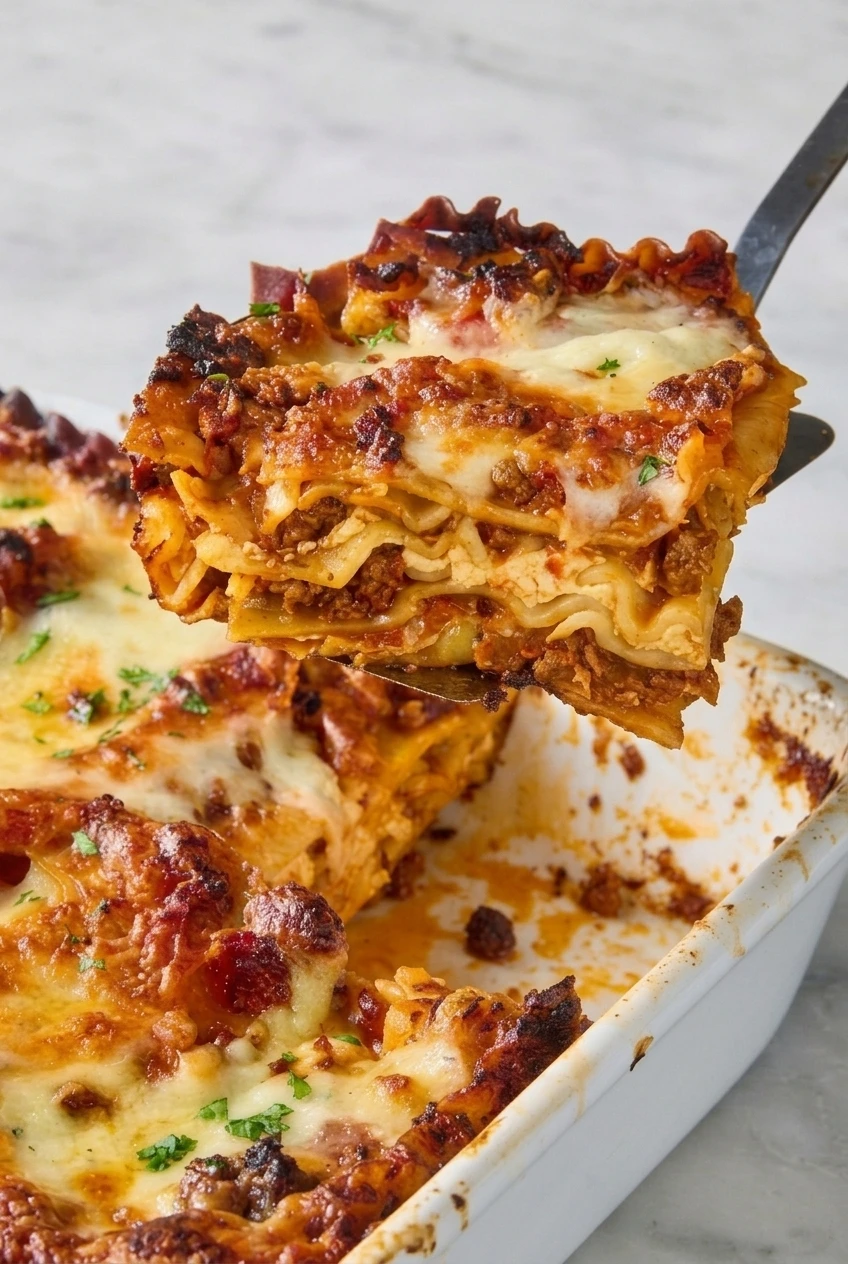
Classic Homemade Beef Lasagna

Thick beef-tomato sauce, ricotta filling, and ruffled pasta sheets give this lasagna distinct layers beneath a browned mozzarella-Parmesan top. Simmer the sauce until it coats a spoon, then bake the casserole covered before uncovering it to brown the cheese. A 20-minute rest makes it easier to lift thick rectangular slices without the layers sliding apart.

This recipe makes 10 to 12 servings and uses regular dried lasagna noodles, boiled before assembly.

Ingredients

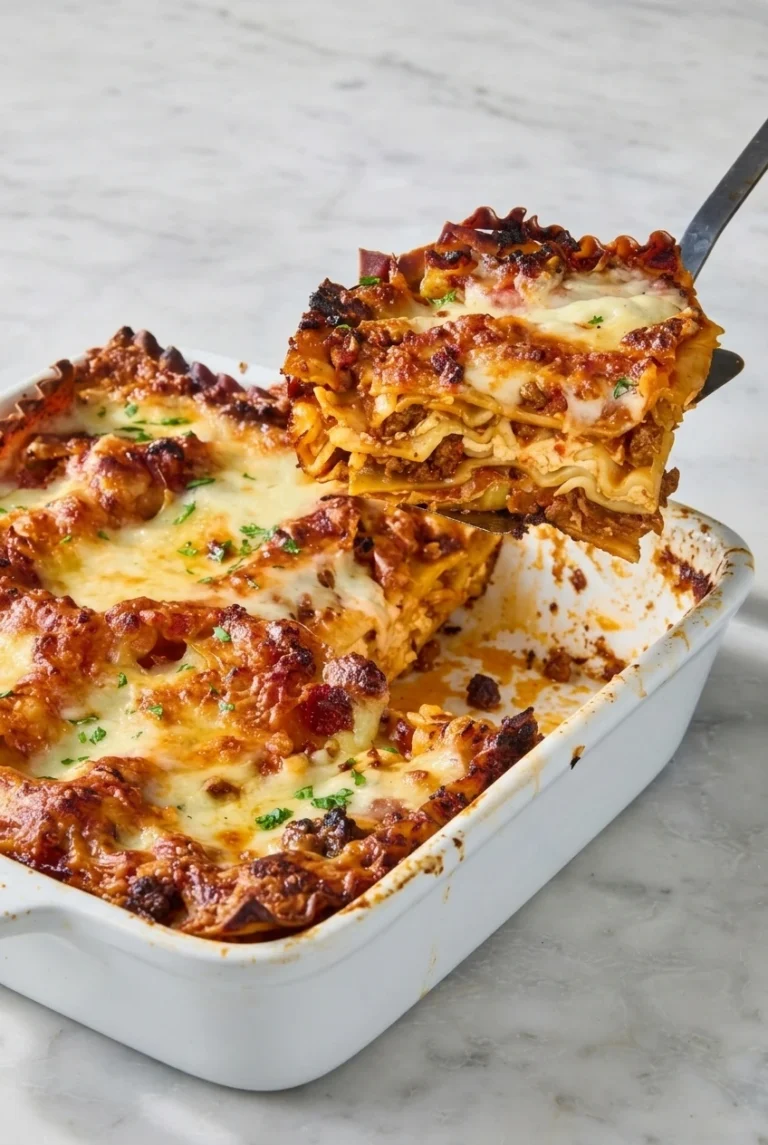
Close view of a lifted beef lasagna slice showing ruffled pasta, beef-tomato sauce, creamy cheese layers, and browned mozzarella.
  • 12 dried lasagna noodles, or enough for 3 layers (about 300g)
  • 1 tablespoon olive oil, as needed
  • 1 medium yellow onion, finely diced (about 150g)
  • 1 1/4 pounds ground beef (about 570g)
  • 3 garlic cloves, minced
  • 1 can (28 ounces) crushed tomatoes (about 800g)
  • 1 can (15 ounces) tomato sauce (about 425g)
  • 2 teaspoons dried Italian seasoning
  • About 1 1/2 teaspoons kosher salt, divided, plus more for the pasta water
  • 1/2 teaspoon black pepper, divided
  • 1 container (15 ounces) ricotta cheese (about 425g)
  • 1 large egg
  • 1 cup grated Parmesan (about 100g), divided
  • 4 cups shredded low-moisture mozzarella (16 ounces; about 455g), divided
  • 1 tablespoon chopped fresh parsley or basil, optional

How to Make Beef Lasagna

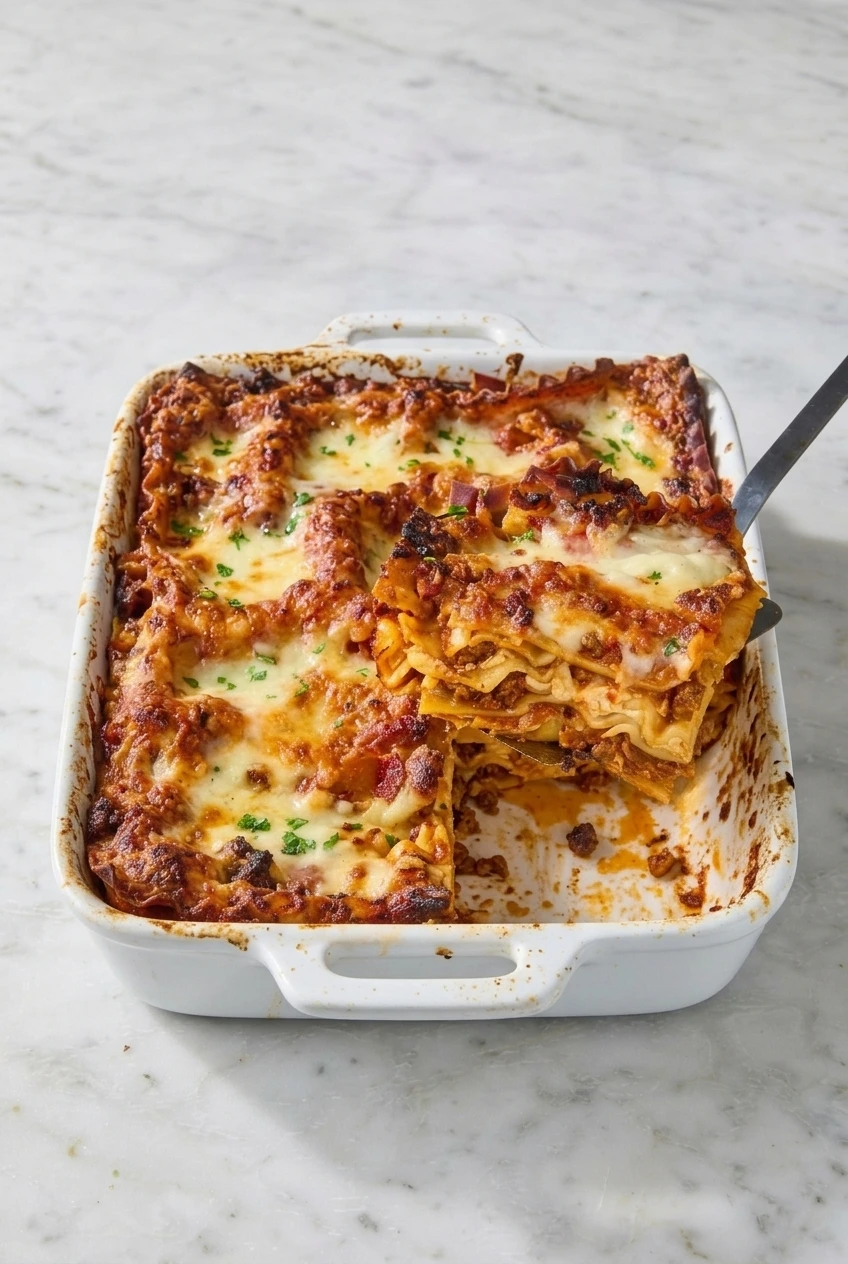
A wider view of beef lasagna in a rectangular casserole dish, with a layered slice lifted on a spatula.
  1. Heat the oven and cook the noodles: Heat the oven to 375°F (190°C). Boil the noodles in salted water according to the package directions until just al dente: flexible, but still slightly firm. Drain and lay them flat so they do not stick together.
  2. Make the beef sauce: In a large skillet or saucepan, warm the olive oil over medium heat if the beef is lean. Add the onion and cook until softened. Add the beef and cook, breaking it into small crumbles, until browned and fully cooked. Drain excess fat. If checking with a thermometer, the ground beef should reach 160°F (70°C) before layering. Stir in the garlic, crushed tomatoes, tomato sauce, Italian seasoning, and about half the salt and pepper. Reduce to medium-low and simmer for about 25 minutes, stirring occasionally, until the sauce is thick enough to coat a spoon but still easy to spread. Lower the heat if it begins to catch on the bottom.
  3. Mix the ricotta filling: Stir together the ricotta, egg, half the Parmesan, and the remaining salt and pepper until evenly combined.
  4. Layer the lasagna: Spread a thin layer of beef sauce in a deep 9-by-13-inch baking dish. Add a single layer of noodles, then half the ricotta filling, some beef sauce, and some mozzarella. Repeat with a second layer of noodles and the remaining ricotta, followed by sauce and mozzarella. Add the third noodle layer, cover it completely with the remaining sauce, and finish with the remaining mozzarella and Parmesan. Make sure sauce reaches the noodle edges so they do not dry out.
  5. Bake: Cover loosely with foil, keeping it off the cheese or lightly oiling the side that faces it. Bake for about 30 minutes. Uncover and bake for another 20 to 25 minutes, beginning to check after 20 minutes. The sauce should bubble at the edges, the center should be hot, a knife should pass through tender pasta, and the cheese should have golden-brown spots. Tent with foil again if the top darkens before the center is hot. A chilled casserole or a different baking dish may need more time.
  6. Rest and serve: Let the lasagna rest for about 20 minutes. Add parsley or basil, if using, then cut into thick rectangles and lift each portion with a broad spatula.

How to Keep the Layers from Sliding

The sauce should be thick, not watery, before it goes into the dish. Drain excess fat from the beef and spread the fillings evenly so no one section is overloaded. Resting the baked lasagna lets the bubbling sauce and cheese settle; slices cut straight from the oven will be softer and harder to lift.

This method is written for conventional dried noodles cooked separately. No-boil noodles need different sauce moisture and baking instructions, so they are not a direct swap.

Make-Ahead, Storage, and Reheating

The assembled lasagna can be covered and refrigerated before baking. If it goes into the oven cold, allow extra time and check the center and pasta for doneness rather than relying only on the usual bake time.

Refrigerate leftovers promptly in a covered, preferably shallow container and use within 3 to 4 days. Reheat individual portions covered in an oven-safe dish at 350°F (175°C) until steaming hot throughout. Uncover briefly at the end for a less-soft cheese top, or microwave covered portions in short intervals, checking the center.

For longer storage, freeze fully cooled portions in airtight, freezer-safe packaging for best quality and use within about 2 to 3 months. Thaw overnight in the refrigerator when possible, then reheat covered until hot throughout.

Serve with a green salad or garlic bread. For a quicker, skillet-style take on similar flavors, try Bowtie Pasta Lasagna.

Nutrition

Approximate nutrition per serving, based on 12 servings: 470 calories, 29g protein, 26g fat, and 29g carbohydrates. Approximate nutrition per 100g: 155 calories, 9g protein, 9g fat, and 10g carbohydrates. Values vary with ingredient brands, beef fat content, and portion size.

Classic Homemade Beef Lasagna

Dried lasagna noodles are layered with thick beef-tomato sauce, ricotta filling, mozzarella, and Parmesan, then baked until bubbly and golden.
Course: Main Course
Cuisine: Italian
Prep: 35 min
Cook: 80 min
Total: 135 min
Servings: 10 Calories: 470 kcal

Equipment

  • Large pot
  • Colander
  • Large skillet or saucepan
  • 9-by-13-inch baking dish
  • Aluminum foil
  • Broad spatula

Ingredients

For the Lasagna

  • 12 dried lasagna noodles, or enough for 3 layers (about 300 g)
  • 1 tablespoon olive oil, as needed
  • 1 medium yellow onion, finely diced (about 150 g)
  • 1 1/4 pounds ground beef (about 570 g)
  • 3 garlic cloves, minced
  • 1 can (28 ounces) crushed tomatoes (about 800 g)
  • 1 can (15 ounces) tomato sauce (about 425 g)
  • 2 teaspoons dried Italian seasoning
  • About 1 1/2 teaspoons kosher salt, divided, plus more for the pasta water
  • 1/2 teaspoon black pepper, divided
  • 4 cups shredded low-moisture mozzarella (16 ounces; about 455 g), divided

For the Ricotta Filling

  • 1 container (15 ounces) ricotta cheese (about 425 g)
  • 1 large egg
  • 1 cup grated Parmesan (about 100 g), divided

For Serving

  • 1 tablespoon chopped fresh parsley or basil, optional

Instructions

  1. Preheat the oven to 375°F (190°C).
  2. Boil the noodles in salted water according to package directions until just al dente. Drain and lay them flat so they do not stick together.
  3. Warm the olive oil in a large skillet or saucepan over medium heat if the beef is lean. Add the onion and cook until softened.
  4. Add the ground beef and cook, breaking it into small crumbles, until browned and fully cooked. Drain excess fat. If checking with a thermometer, make sure the beef reaches 160°F (70°C).
  5. Stir in the garlic, crushed tomatoes, tomato sauce, Italian seasoning, and about half the salt and pepper. Reduce the heat to medium-low and simmer for about 25 minutes, stirring occasionally, until thick enough to coat a spoon but still easy to spread.
  6. Stir together the ricotta, egg, half the Parmesan, and the remaining salt and pepper.
  7. Spread a thin layer of beef sauce in a deep 9-by-13-inch baking dish. Add a layer of noodles, half the ricotta mixture, some beef sauce, and some mozzarella. Repeat with a second layer of noodles and the remaining ricotta, sauce, and mozzarella. Add the final noodle layer, cover it completely with the remaining sauce, and top with the remaining mozzarella and Parmesan. Make sure sauce reaches the noodle edges.
  8. Cover loosely with foil, keeping it off the cheese or lightly oiling the side that faces the cheese. Bake for about 30 minutes.
  9. Uncover and bake for another 20 to 25 minutes, beginning to check after 20 minutes. Bake until the sauce bubbles at the edges, the center is hot, the pasta is tender, and the cheese has golden-brown spots. Tent with foil if the top darkens before the center is hot.
  10. Rest the lasagna for about 20 minutes. Add parsley or basil, if using, then cut into thick rectangles and serve.

Tips

  • Simmer the sauce until it is thick enough to coat a spoon so the finished layers hold together.
  • Drain excess fat from the beef before adding the tomatoes.
  • Spread the fillings evenly and make sure sauce reaches the edges of the noodles.
  • Rest the baked lasagna for 20 minutes before cutting for neater slices.
  • If the casserole is chilled before baking, allow extra time and check the center and pasta for doneness.

Notes

Refrigerate leftovers promptly in a covered container and use within 3 to 4 days. Reheat covered at 350°F (175°C) until steaming hot throughout. Freeze cooled portions for best quality for about 2 to 3 months. Nutrition estimates are per serving based on 12 servings.

Nutrition

Calories: 470 kcal | Protein: 29 g | Fat: 26 g | Carbohydrates: 29 g

Black Bean and Rice Bowls with Cilantro Lime Sauce

Long-grain rice, whole black beans, and fresh cilantro are mixed together for these bowls, then finished with a light cilantro-lime vinaigrette. The rice should be tender and separate, with just enough dressing to give the mixture a gentle sheen—not make it wet.

Cook the rice covered and let it rest before fluffing. Warm the beans gently, then add the cilantro and dressing off the heat to keep the beans intact and the herbs fresh. Spoon the mixture into bowls or serve it family-style from a pan, with any extra toppings on the side.

Ingredients for Black Bean and Rice Bowls

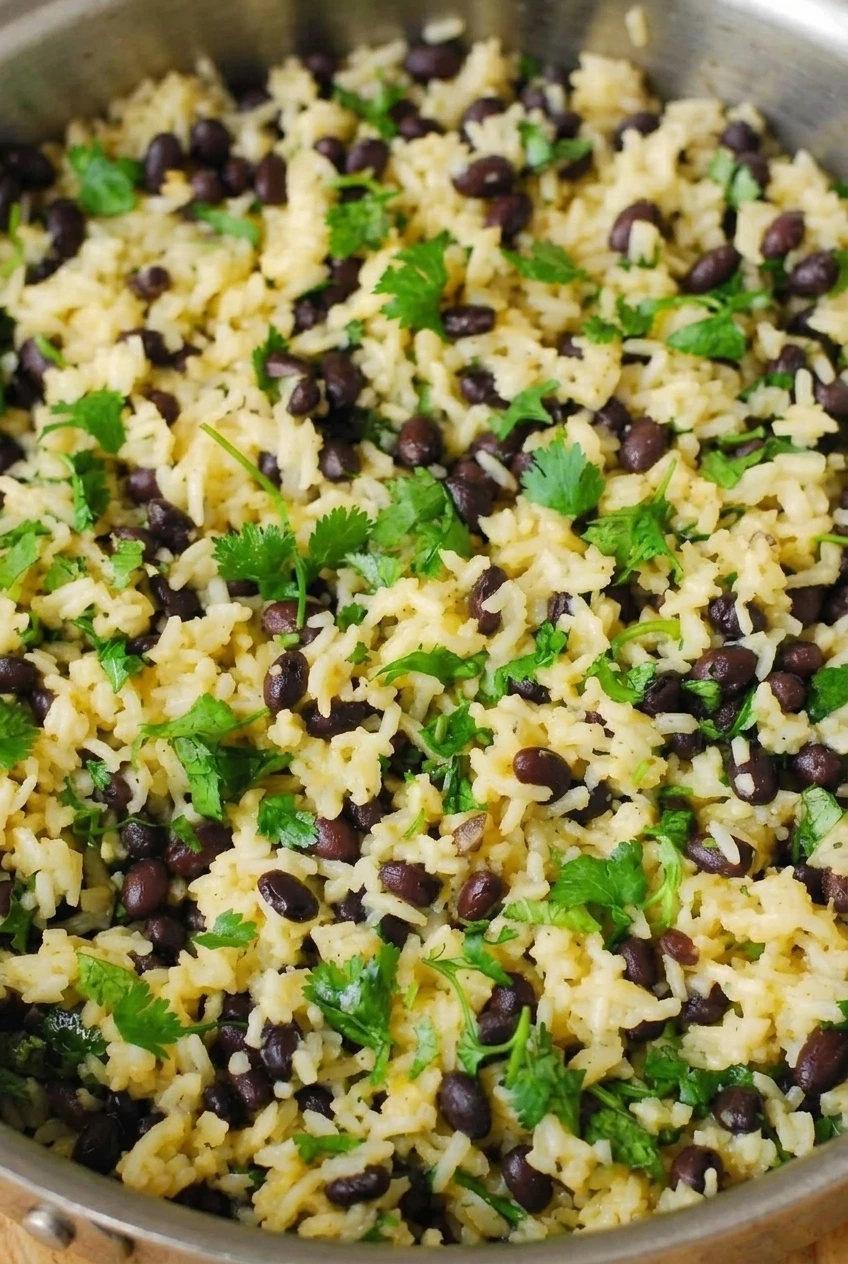
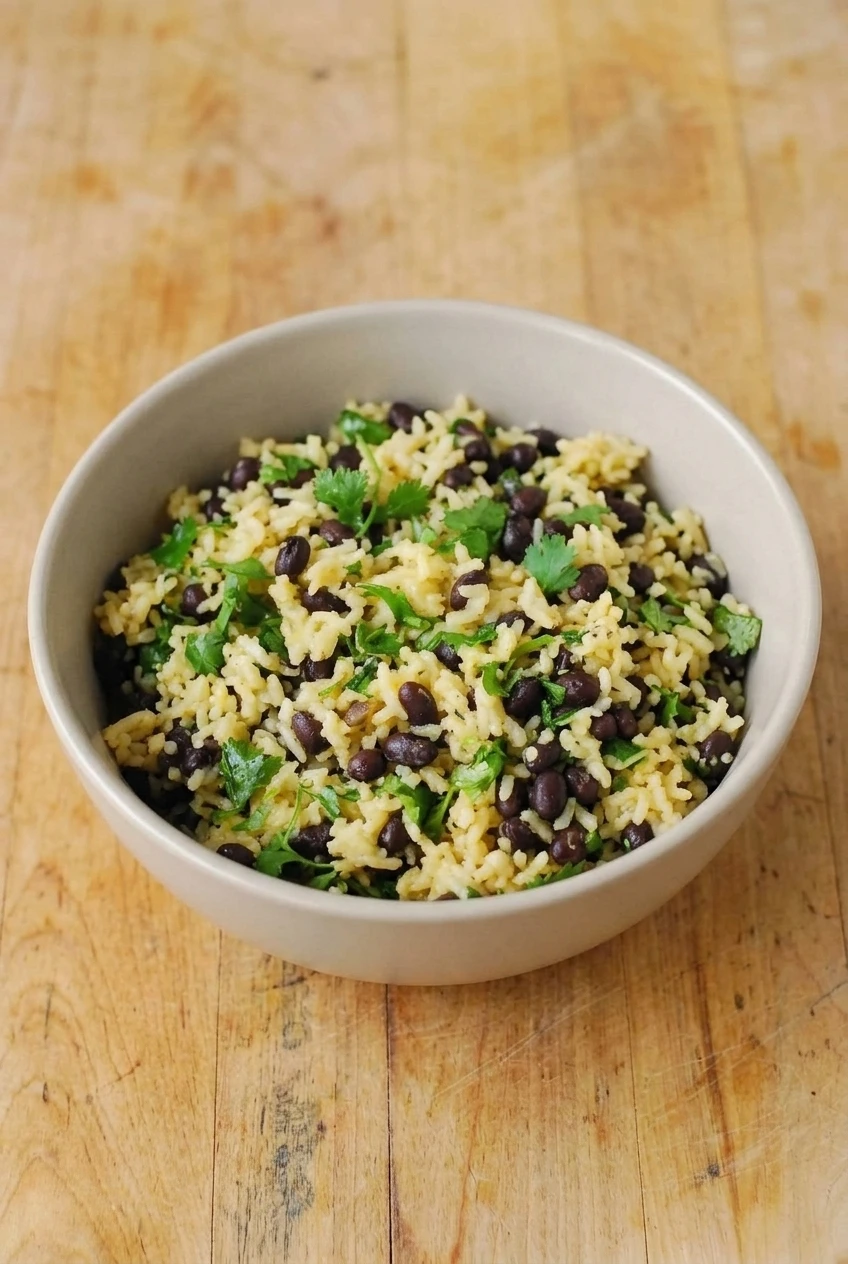
Close detail of distinct rice grains, whole black beans, and cilantro
  • 1 cup long-grain white rice (185g)
  • About 1 1/2 cups water, or the amount specified on the rice package
  • 3/4 teaspoon kosher salt, divided, or to taste
  • 1 can (15 ounces) black beans, drained and rinsed (about 255g drained)
  • 1/2 cup loosely packed chopped fresh cilantro, divided (20g)
  • 2 tablespoons fresh lime juice
  • 2 tablespoons extra-virgin olive oil

Optional for serving: diced avocado, shredded lettuce or tender greens, diced tomato, thinly sliced red onion, crumbled cotija or shredded cheese, and lime wedges.

How to Make Black Bean and Rice Bowls

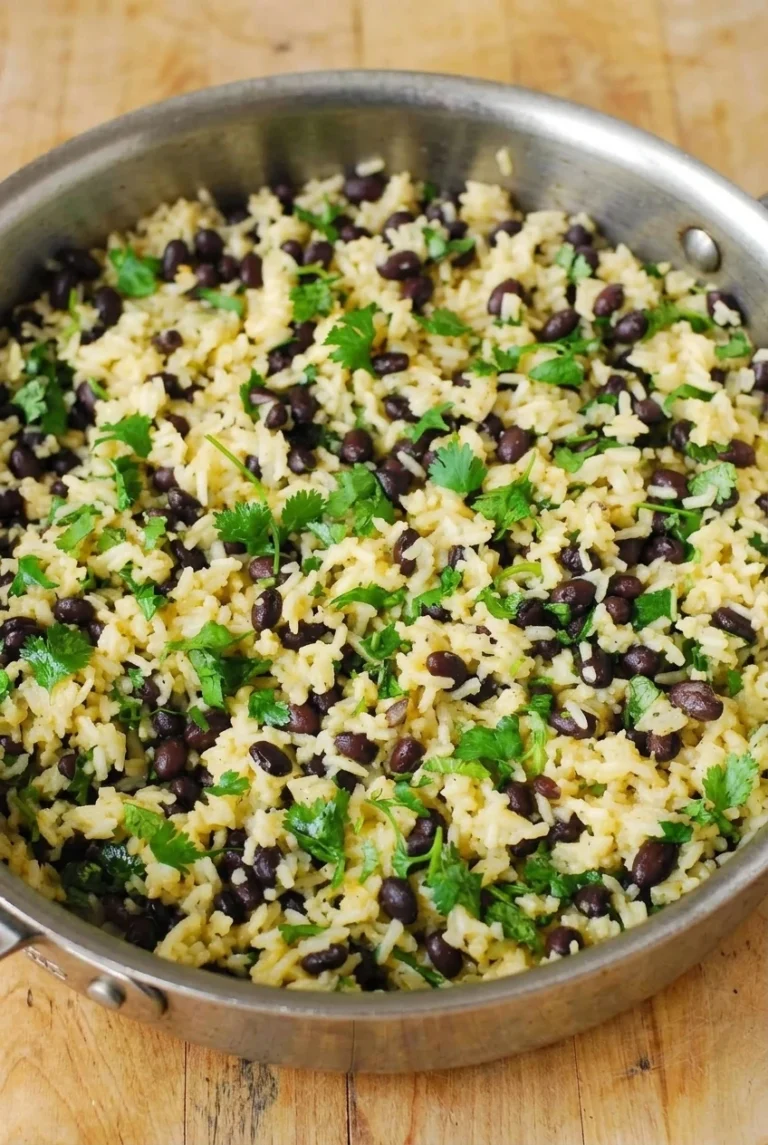
A bowl of cilantro-studded rice and black beans, shown with the full serving visible
  1. Rinse the rice: Rinse it in a fine-mesh strainer under cool water until the water runs less cloudy. Drain well.
  2. Cook and rest the rice: Combine the rice, water, and 1/2 teaspoon of the salt in a medium saucepan with a tight-fitting lid. Bring to a boil over medium-high heat, cover, and reduce the heat to low. Simmer without stirring for about 15 to 18 minutes, or follow the package directions. Start checking at the package’s lower timing range; the rice should be tender with no standing water. Remove from the heat and let rest, covered, for 5 minutes.
  3. Make the vinaigrette: Whisk the lime juice, olive oil, a small portion of the cilantro, and a pinch of the remaining salt in a small bowl or jar.
  4. Warm the beans: Warm the drained beans in a small saucepan or skillet over medium-low heat with 1 to 2 tablespoons of water for 3 to 5 minutes. Stir gently until heated through, then drain any excess liquid.
  5. Combine the base: Fluff the rice with a fork. Off the heat, add the warm beans and most of the remaining cilantro. Fold gently so the beans stay whole and the cilantro is distributed throughout.
  6. Dress and serve: Add the vinaigrette a little at a time, folding gently and tasting before adding more. Stop when the rice is lightly coated, not wet. Divide among four bowls or serve family-style from a pan. Add the reserved cilantro and offer optional toppings separately.

How to Keep the Rice Fluffy

Rinsing removes excess surface starch, while a covered simmer and rest help the grains cook without frequent stirring. If your rice package calls for a different water amount or cooking time, follow it rather than the estimates above. Brown rice needs different liquid and longer cooking; use its package directions instead of the white-rice timing.

Make-Ahead, Storage, and Reheating

For make-ahead bowls, keep the cooked rice and beans, vinaigrette, and fresh toppings separate. Refrigerate leftovers promptly in covered containers and use within 3 to 4 days.

Reheat the rice and beans in the microwave or in a saucepan with a small splash of water, stirring as needed. Add the cilantro, vinaigrette, and toppings after reheating. Rice stored with dressing already mixed in will absorb some of it and taste less fresh.

If freezing, freeze only the plain rice-and-bean base. Make the vinaigrette and prepare fresh toppings separately when ready to serve.

Nutrition

Approximate nutrition per bowl, based on 4 servings and excluding optional toppings: 315 calories, 9g protein, 8g fat, and 54g carbohydrates. Per 100g: about 145 calories, 4g protein, 4g fat, and 24g carbohydrates. Values vary with the rice, beans, and amount of dressing used.

Black Bean and Rice Bowls with Cilantro Lime Sauce

Tender rice and warm black beans are gently tossed with cilantro and a fresh lime vinaigrette.
Course: Main Course
Cuisine: Mexican
Prep: 10 min
Cook: 25 min
Total: 35 min
Servings: 4 Calories: 315 kcal

Equipment

  • Fine-mesh strainer
  • Medium saucepan with lid
  • Small saucepan or skillet
  • Small bowl or jar
  • Whisk

Ingredients

Rice and Beans

  • 1 cup long-grain white rice (185 g)
  • About 1 1/2 cups water, or the amount specified on the rice package
  • 3/4 teaspoon kosher salt, divided, or to taste
  • 1 can (15 ounces) black beans, drained and rinsed (about 255 g drained)

Cilantro Lime Vinaigrette

  • 1/2 cup loosely packed chopped fresh cilantro, divided (20 g)
  • 2 tablespoons fresh lime juice
  • 2 tablespoons extra-virgin olive oil

Optional Toppings

  • Diced avocado
  • Shredded lettuce or tender greens
  • Diced tomato
  • Thinly sliced red onion
  • Crumbled cotija or shredded cheese
  • Lime wedges

Instructions

  1. Rinse the rice in a fine-mesh strainer under cool water until the water runs less cloudy. Drain well.
  2. Combine the rice, water, and 1/2 teaspoon salt in a medium saucepan with a tight-fitting lid. Bring to a boil over medium-high heat, cover, and reduce the heat to low.
  3. Simmer without stirring for 15 to 18 minutes, or according to the package directions, until the rice is tender and no water remains. Remove from the heat and let rest, covered, for 5 minutes.
  4. Whisk the lime juice, olive oil, a small portion of the cilantro, and a pinch of the remaining salt in a small bowl or jar.
  5. Warm the drained beans in a small saucepan or skillet over medium-low heat with 1 to 2 tablespoons water for 3 to 5 minutes. Stir gently until heated through, then drain any excess liquid.
  6. Fluff the rice with a fork. Off the heat, add the warm beans and most of the remaining cilantro. Fold gently to keep the beans whole.
  7. Add the vinaigrette a little at a time, folding gently and tasting as you go. Stop when the rice is lightly coated, not wet.
  8. Divide among four bowls or serve family-style. Add the reserved cilantro and offer optional toppings separately.

Tips

  • Rinse the rice to remove excess surface starch and help keep the grains separate.
  • Follow the rice package directions if its water amount or cooking time differs.
  • Let the rice rest, covered, before fluffing.
  • Add the vinaigrette gradually and stop once the rice has a light sheen.
  • Fold the beans in gently and add cilantro off the heat to keep the beans intact and herbs fresh.

Notes

Refrigerate the rice and beans, vinaigrette, and toppings separately; use leftovers within 3 to 4 days. Reheat the rice and beans with a splash of water, then add the vinaigrette and fresh toppings. Freeze only the plain rice-and-bean base.

Nutrition

Calories: 315 kcal | Protein: 9 g | Fat: 8 g | Carbohydrates: 54 g

Ground Turkey Teriyaki Rice Bowls

Crumbled ground turkey, broccoli, carrot, red bell pepper, and pineapple cook in one skillet before a teriyaki-style sauce brings them together. A brief simmer thickens the sauce just enough to coat the mixture without pooling in the bowl.

Serve the turkey and vegetables beside fluffy white rice, then finish with cilantro and green onion. Pineapple adds sweet-tart flavor to this version, but it is not essential to every teriyaki turkey bowl. Plan on about 35 minutes, depending on the rice and how quickly the ingredients are prepped.

Ingredients for Ground Turkey Teriyaki Rice Bowls

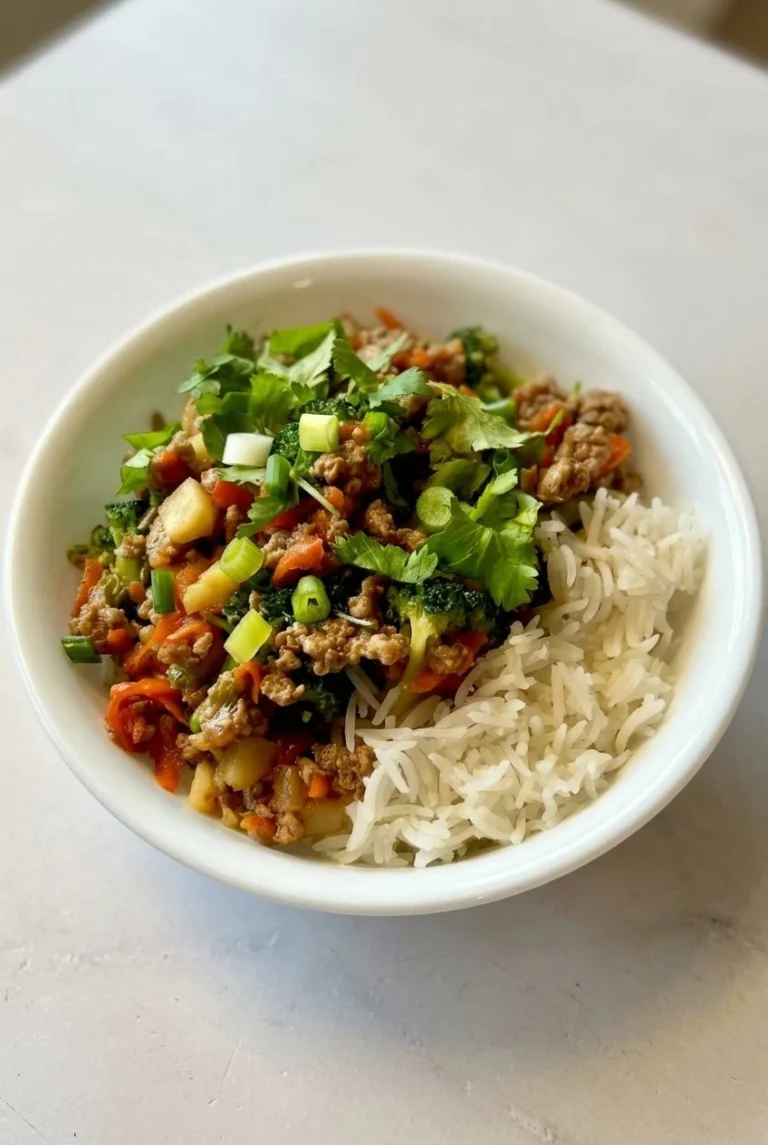
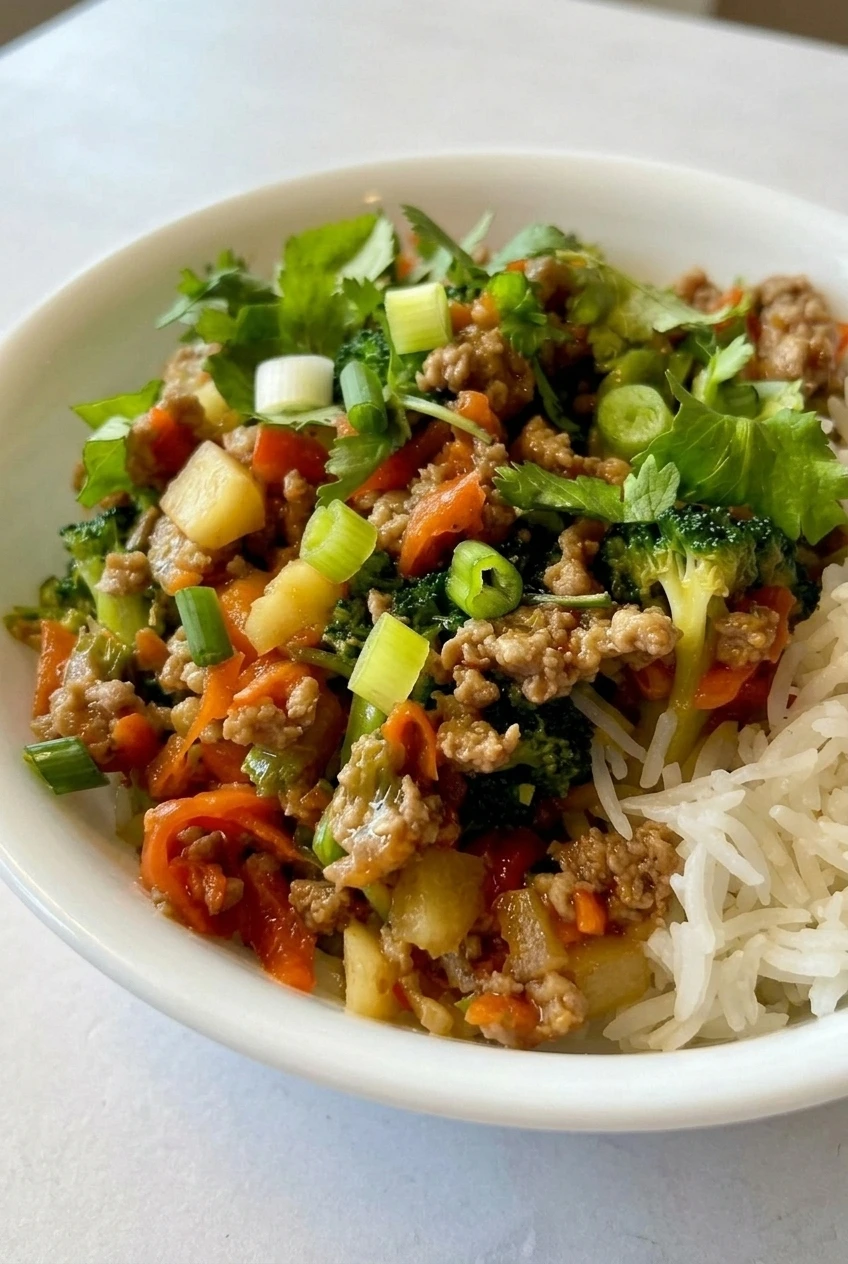
Close view of glossy teriyaki turkey crumbles, broccoli, pineapple, and fresh garnish beside white rice
  • 1 1/2 cups dry long-grain white rice (280g)
  • 1 tablespoon neutral cooking oil
  • 1 lb ground turkey (450g)
  • 2 cups bite-size broccoli florets (180g)
  • 1 medium carrot, thinly sliced or cut into small pieces (100g)
  • 1 medium red bell pepper, chopped (150g)
  • 1 cup pineapple chunks, drained if canned (165g)
  • 1/4 cup low-sodium soy sauce
  • 2 tablespoons hoisin sauce
  • 1 tablespoon brown sugar
  • 1 tablespoon rice vinegar
  • 1 tablespoon cornstarch
  • 1/3 cup cold water, for the sauce
  • 2 garlic cloves, minced
  • 1 tablespoon finely grated fresh ginger
  • 2 green onions, thinly sliced
  • 1/4 cup loosely packed cilantro leaves

How to Make Ground Turkey Teriyaki Rice Bowls

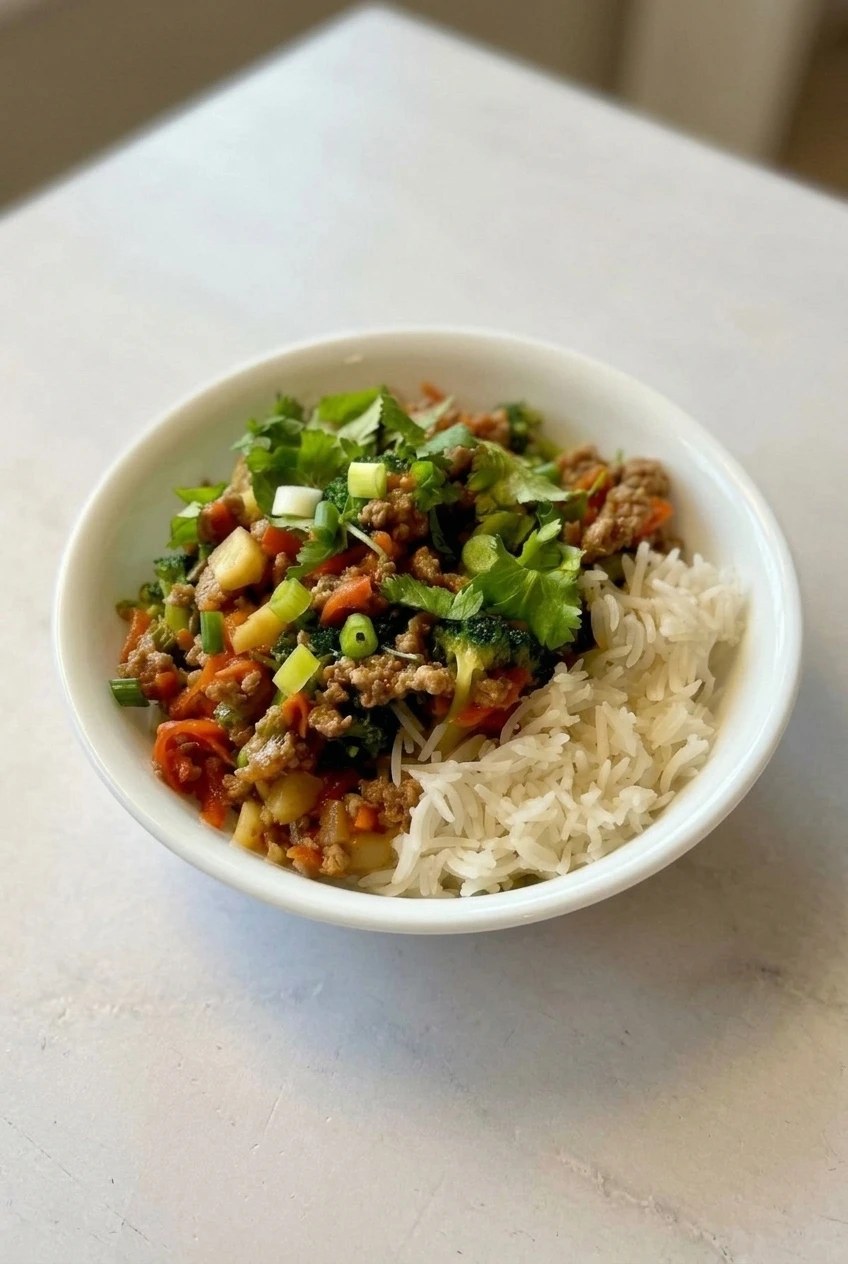
A complete ground turkey teriyaki rice bowl centered on a light tabletop, with rice and turkey mixture kept separate
  1. Start the rice: Cook it in a covered saucepan with the water amount and timing directed on the package. Start checking at the earliest suggested time. Once the rice is tender and the liquid is absorbed, let it stand covered for about 5 minutes, then fluff with a fork.
  2. Mix the sauce: In a small bowl, whisk the cornstarch into the cold water until smooth. Whisk in the soy sauce, hoisin, brown sugar, rice vinegar, garlic, and ginger. Taste the sauce and adjust the sweet-savory balance if needed.
  3. Brown the turkey: Warm a 12-inch skillet over medium-high heat, then add the oil and turkey. Cook uncovered, breaking the meat into small crumbles, for about 7 to 9 minutes. It should be browned with no pink remaining and reach 165°F (75°C) on a food thermometer. A crowded skillet can cause the turkey to steam rather than brown; use a larger pan or cook in batches if needed.
  4. Cook the vegetables: Reduce the heat to medium. Add the broccoli, carrot, and bell pepper to the skillet. Cook uncovered, stirring occasionally, for about 4 to 6 minutes. The broccoli should be bright green, and the vegetables should be beginning to soften while still holding their shape. Add a small splash of water if the pan looks dry.
  5. Coat with sauce: Stir the sauce again, then add it to the skillet with the pineapple. Cook over medium heat, stirring frequently, for about 2 to 3 minutes. Remove from the heat once the sauce simmers, turns glossy, and lightly coats the turkey and vegetables.
  6. Assemble the bowls: Divide the rice among four shallow bowls. Spoon the turkey mixture beside the rice rather than mixing them together, and scatter cilantro and green onion over the turkey side.

How to Keep the Sauce Balanced

Cornstarch disperses more evenly in cold water than in a hot skillet. Stir the prepared sauce again just before pouring it in, since the cornstarch can settle. Once it simmers and clings to the turkey, stop cooking; a long simmer can make the coating too thick and soften the vegetables.

Hoisin and pineapple both add sweetness, while soy sauce adds saltiness. Taste the sauce before it goes into the skillet. If it tastes too sweet, a little more rice vinegar or soy sauce can shift the balance. For a less sweet bowl, omit the pineapple; the turkey, vegetables, and sauce stay the same.

Timing the Rice and Skillet

Start dry rice first, then mix the sauce and cut the vegetables while it cooks. Once those are ready, brown the turkey and finish the skillet mixture. Rice cooking time varies by package, so the 35-minute total is an estimate. To shorten the process, use cooked rice and reheat it according to its package directions while making the turkey mixture.

How to Store and Reheat the Bowls

Cool leftovers and refrigerate them promptly in covered containers. Keep the rice and turkey mixture separate when practical, and use refrigerated leftovers within 3 to 4 days. Reheat until steaming hot, adding a small splash of water if either component seems dry. The rice may soften after refrigeration.

The cooled turkey and vegetable mixture can also be frozen, though the vegetables may be softer after thawing.

Nutrition

Approximate nutrition per serving, based on one-fourth of the recipe: 560 calories, 32g protein, 13g fat, and 79g carbohydrates. Per 100g: approximately 110 calories, 6g protein, 3g fat, and 15g carbohydrates. Values vary with the ground turkey, sauce ingredients, and cooked yield.

Ground Turkey Teriyaki Rice Bowls

Ground turkey, vegetables, and pineapple are coated in a glossy teriyaki-style sauce and served beside fluffy white rice.
Course: Main Course
Cuisine: Asian
Prep: 10 min
Cook: 25 min
Total: 35 min
Servings: 4 Calories: 560 kcal

Equipment

  • Saucepan with lid
  • 12-inch skillet
  • Small bowl
  • Whisk
  • Food thermometer

Ingredients

For the Rice

  • 1 1/2 cups dry long-grain white rice (280 g)

For the Turkey and Vegetables

  • 1 tablespoon neutral cooking oil
  • 1 lb ground turkey (450 g)
  • 2 cups bite-size broccoli florets (180 g)
  • 1 medium carrot, thinly sliced or cut into small pieces (100 g)
  • 1 medium red bell pepper, chopped (150 g)
  • 1 cup pineapple chunks, drained if canned (165 g)

For the Sauce

  • 1/4 cup low-sodium soy sauce
  • 2 tablespoons hoisin sauce
  • 1 tablespoon brown sugar
  • 1 tablespoon rice vinegar
  • 1 tablespoon cornstarch
  • 1/3 cup cold water
  • 2 garlic cloves, minced
  • 1 tablespoon finely grated fresh ginger

For Serving

  • 2 green onions, thinly sliced
  • 1/4 cup loosely packed cilantro leaves

Instructions

  1. Cook the rice in a covered saucepan according to the package directions. When tender and the liquid is absorbed, let it stand covered for about 5 minutes, then fluff with a fork.
  2. In a small bowl, whisk the cornstarch into the cold water until smooth. Whisk in the soy sauce, hoisin sauce, brown sugar, rice vinegar, garlic, and ginger.
  3. Heat a 12-inch skillet over medium-high heat. Add the oil and ground turkey, then cook uncovered for 7 to 9 minutes, breaking it into small crumbles, until browned with no pink remaining and it reaches 165°F (75°C).
  4. Reduce the heat to medium. Add the broccoli, carrot, and bell pepper. Cook uncovered, stirring occasionally, for 4 to 6 minutes, until bright green and beginning to soften. Add a small splash of water if the pan looks dry.
  5. Stir the sauce again, then add it to the skillet with the pineapple. Cook over medium heat, stirring frequently, for 2 to 3 minutes, until simmering, glossy, and lightly coating the turkey and vegetables.
  6. Divide the rice among four shallow bowls. Spoon the turkey mixture beside the rice and top with cilantro and green onion.

Tips

  • Whisk the cornstarch with cold water so it disperses smoothly.
  • Stir the sauce again just before adding it, since the cornstarch can settle.
  • Use a larger skillet or cook the turkey in batches if the pan is crowded.
  • Stop cooking once the sauce simmers and coats the mixture to keep it from getting too thick.
  • Start the rice first and prep the sauce and vegetables while it cooks.

Variations

  • Less-Sweet Pineapple-Free Bowls: Omit the pineapple for a less-sweet bowl while keeping the turkey, vegetables, and sauce.

Notes

Refrigerate leftovers promptly in covered containers and use within 3 to 4 days. Reheat until steaming hot, adding a splash of water if dry. The turkey and vegetable mixture can be frozen; vegetables may soften after thawing.

Nutrition

Calories: 560 kcal | Protein: 32 g | Fat: 13 g | Carbohydrates: 79 g | Per 100g Calories: 110 kcal | Per 100g Protein: 6 g | Per 100g Fat: 3 g | Per 100g Carbohydrates: 15 g

Korean BBQ Steak Rice Bowls

Thin slices of pear-soy marinated steak sear quickly for these Korean-inspired rice bowls. A wide, hot skillet and small batches give the beef room to brown; a clean portion of the marinade becomes a light glaze after a brief simmer.

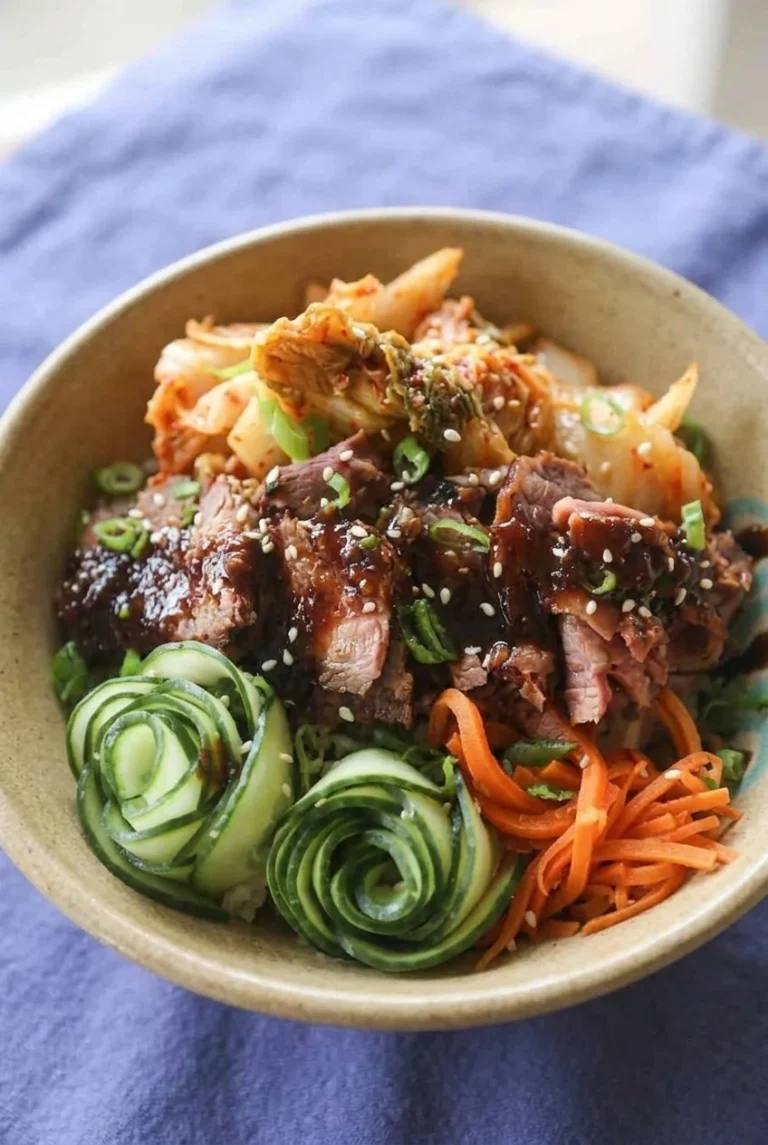
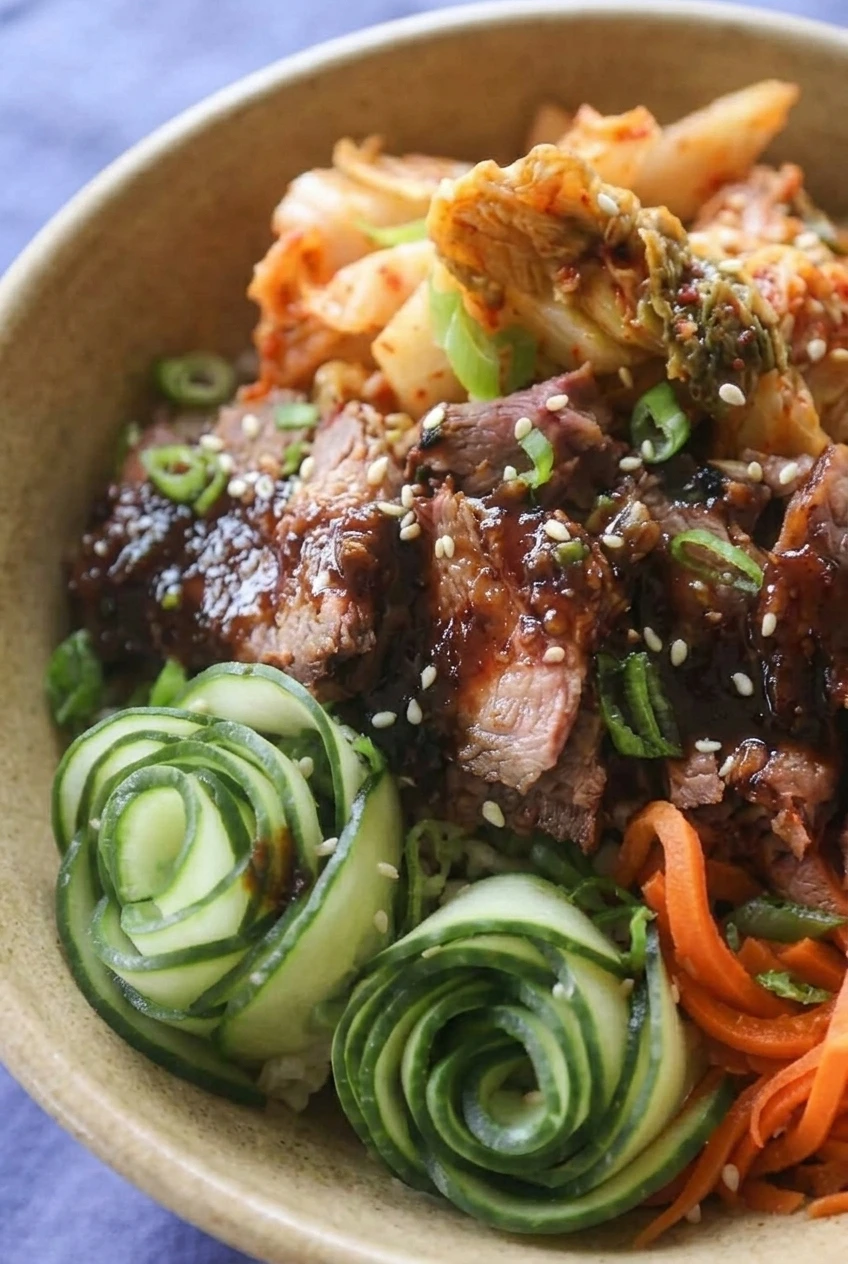
Serve the steak over white rice with kimchi, fine carrot strands, and cucumber ribbons rolled into coils. Keep the toppings in separate sections so the warm beef and rice do not soften the fresh vegetables before serving.

Ingredients for Korean BBQ Steak Rice Bowls

Close detail of glossy Korean BBQ steak with sesame and scallions beside cucumber coils and fine carrot strands
  • 1 1/2 cups uncooked white rice (280g)
  • 1 1/4 pounds flank or sirloin steak (about 575g)
  • 1/2 medium Asian pear or ripe Bartlett pear, finely grated or blended, about 1/2 cup (90g)
  • 1/3 cup low-sodium soy sauce (80g)
  • 1 1/2 tablespoons brown sugar (20g)
  • 1 tablespoon toasted sesame oil
  • 3 garlic cloves, minced
  • 1 tablespoon grated fresh ginger
  • 1 tablespoon neutral high-heat oil, as needed across batches
  • 1 large cucumber (300g)
  • 1 medium carrot (60g)
  • 1 cup napa cabbage kimchi (150g)
  • 2 scallions, thinly sliced
  • 2 teaspoons sesame seeds

Makes 4 bowls. Allow about 25 minutes of prep and 20 minutes of cooking, plus a 30-minute refrigerated marinade.

How to Make Korean BBQ Steak Rice Bowls

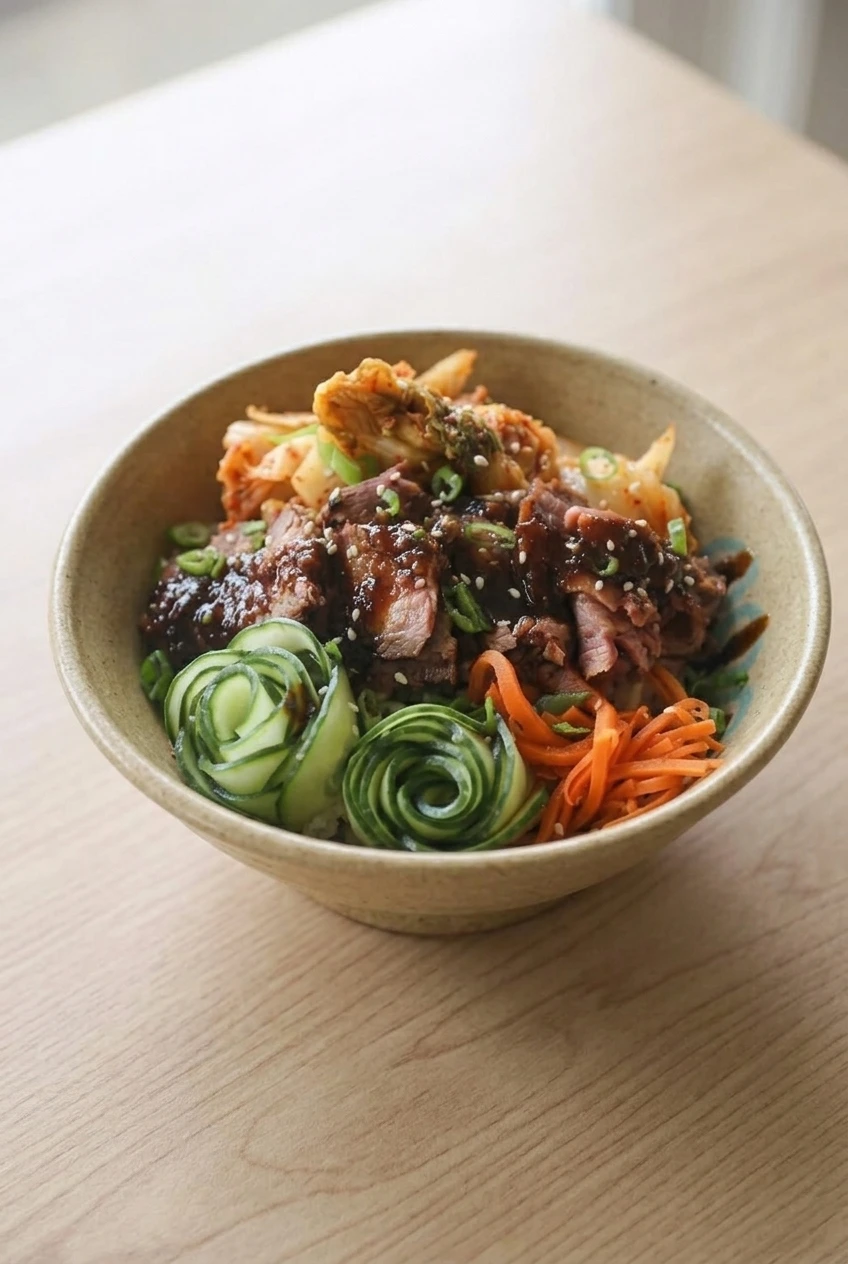
Full Korean BBQ steak rice bowl centered on a tabletop, with kimchi, cucumber coils, julienned carrots, and glossy beef
  1. Cook the rice: Rinse the rice if desired, then cook it in a medium saucepan according to the package directions. Keep it covered and warm.
  2. Mix and reserve the marinade: Stir together the pear, soy sauce, brown sugar, sesame oil, garlic, and ginger until the sugar is mostly dissolved. Pour about 1/4 cup into a clean small saucepan before the marinade touches the beef.
  3. Slice and marinate the steak: If the steak is difficult to slice, firm it in the freezer for 15–20 minutes. Cut it across the grain into thin, even strips. Toss with the remaining marinade, cover, and refrigerate for about 30 minutes.
  4. Prepare the toppings: Shave the cucumber into long, thin ribbons with a vegetable peeler or mandoline and blot away excess moisture. Cut the carrot into fine matchsticks. Portion the kimchi, scallions, and sesame seeds; roll the cucumber ribbons into loose coils close to serving.
  5. Simmer the glaze: Bring the clean, reserved marinade to a gentle simmer over medium heat. Cook for 2–3 minutes, until hot and slightly thickened but still pourable. Set aside.
  6. Sear the steak: Heat a wide 12-inch skillet or wok over high heat until very hot. Let excess marinade drip off the beef. Add a little neutral oil, then arrange one batch of strips in a loose single layer. Sear uncovered for about 1–2 minutes per batch, turning once or twice, until browned and cooked to the desired doneness. Start checking after about 1 minute. Transfer each batch out of the pan and let the skillet reheat before adding more beef and oil as needed. Discard the marinade that held the raw beef.
  7. Glaze and assemble: Toss the cooked steak with just enough simmered glaze to give it a light shine. Divide the rice among four bowls. Place the steak across the center, kimchi toward the back, cucumber coils at the front-left, and carrot at the front-right. Sprinkle with scallions and sesame seeds.

For whole-muscle beef, USDA guidance is 145°F (65°C) followed by a 3-minute rest. Thin strips are difficult to probe individually; if checking temperature, use a representative thicker piece.

How to Get Thin, Browned Steak Strips

Briefly chilling the steak makes it easier to cut evenly. Slice across the visible muscle fibers so the cooked pieces are easier to chew. Thick pieces will take longer than the thin strips used here, so use browning and doneness cues rather than the clock alone.

If liquid pools in the skillet and the beef turns gray, the batch is too crowded or carrying too much marinade. Give the strips space and let the pan heat back up between batches. The pear and sugar can darken quickly, so remove each batch once the beef is browned and cooked to the doneness you want.

How to Keep the Cucumber Coils Crisp

Thin, flexible ribbons roll more easily than thick ones. Blot them dry, roll them loosely, and keep them away from the wet kimchi until the bowls are assembled.

Variations

For a grilled version, marinate a larger steak, grill it using timing appropriate to its thickness and desired doneness, then rest and slice it across the grain. Do not use the thin-strip skillet timing for a whole steak. A fried or soft-cooked egg or extra heat from gochujang or sriracha can be added at the table; white rice and the listed toppings make the bowl described above.

Make-Ahead and Storage

For packed lunches, refrigerate the rice, beef, cucumber, carrot, kimchi, and glaze promptly in separate covered containers. Assemble shortly before eating to keep the vegetables crisp. No specific storage duration is established for the cooked beef or assembled bowls.

Reheat the rice and beef separately until hot, then add the chilled toppings and as much glaze as desired. Keep the cucumber and carrot out of the hot components until serving.

Nutrition

Approximate nutrition per bowl, based on 4 servings: 675 calories, 38g protein, 25g fat, and 72g carbohydrates. Approximate nutrition per 100g: 145 calories, 8g protein, 5g fat, and 15g carbohydrates. Values vary with the steak cut, cooked rice yield, and amount of marinade and glaze used.

Korean BBQ Steak Rice Bowls

Pear-soy marinated steak is seared and served over rice with kimchi, cucumber ribbons, and carrot.
Course: Main Course
Cuisine: Korean
Prep: 25 min
Cook: 20 min
Total: 75 min
Servings: 4 Calories: 675 kcal per bowl

Equipment

  • Medium saucepan
  • Small saucepan
  • 12-inch skillet or wok
  • Vegetable peeler or mandoline
  • Knife
  • Cutting board

Ingredients

For the rice and steak

  • 1 1/2 cups uncooked white rice (280 g)
  • 1 1/4 pounds flank or sirloin steak (about 575 g)
  • 1 tablespoon neutral high-heat oil, as needed across batches

For the marinade and glaze

  • 1/2 medium Asian pear or ripe Bartlett pear, finely grated or blended, about 1/2 cup (90 g)
  • 1/3 cup low-sodium soy sauce (80 g)
  • 1 1/2 tablespoons brown sugar (20 g)
  • 1 tablespoon toasted sesame oil
  • 3 garlic cloves, minced
  • 1 tablespoon grated fresh ginger

For the toppings

  • 1 large cucumber (300 g)
  • 1 medium carrot (60 g)
  • 1 cup napa cabbage kimchi (150 g)
  • 2 scallions, thinly sliced
  • 2 teaspoons sesame seeds

Instructions

  1. Cook the rice in a medium saucepan according to the package directions. Keep it covered and warm.
  2. Stir together the pear, soy sauce, brown sugar, sesame oil, garlic, and ginger until the sugar is mostly dissolved.
  3. Pour about 1/4 cup of the marinade into a clean small saucepan before the marinade touches the beef.
  4. If needed, firm the steak in the freezer for 15–20 minutes. Slice it across the grain into thin, even strips.
  5. Toss the steak with the remaining marinade, cover, and refrigerate for about 30 minutes.
  6. Shave the cucumber into long, thin ribbons and blot away excess moisture. Cut the carrot into fine matchsticks. Portion the kimchi, scallions, and sesame seeds, then roll the cucumber ribbons into loose coils close to serving.
  7. Bring the reserved marinade to a gentle simmer over medium heat. Cook for 2–3 minutes, until hot and slightly thickened but still pourable, then set aside.
  8. Heat a wide 12-inch skillet or wok over high heat until very hot. Let excess marinade drip off the beef.
  9. Add a little neutral oil to the skillet and arrange one batch of steak in a loose single layer. Sear uncovered for about 1–2 minutes, turning once or twice, until browned and cooked to your desired doneness. Start checking after about 1 minute.
  10. Transfer each batch out of the pan and let the skillet reheat before cooking the next batch. Add more oil as needed. Discard the marinade that held the raw beef.
  11. Toss the cooked steak with just enough simmered glaze to give it a light shine.
  12. Divide the rice among four bowls. Arrange the steak, kimchi, cucumber coils, and carrot in separate sections. Sprinkle with scallions and sesame seeds.

Tips

  • Chill the steak briefly if it is difficult to slice evenly.
  • Slice across the visible muscle fibers for more tender bites.
  • Cook the steak in uncrowded batches and let the skillet reheat between batches.
  • If liquid pools in the pan or the beef turns gray, reduce crowding and let excess marinade drip off.
  • Blot cucumber ribbons dry and keep them separate from the kimchi until serving.

Variations

  • Grilled Korean BBQ Steak: Marinate a larger steak, grill it according to its thickness and desired doneness, rest it, then slice across the grain.
  • Egg or Spicy Topping: Add a fried or soft-cooked egg, or serve with gochujang or sriracha for extra heat.

Notes

For whole-muscle beef, USDA guidance is 145°F (65°C) followed by a 3-minute rest. Refrigerate cooked components promptly in separate covered containers and reheat the rice and beef separately until hot.

Nutrition

Calories: 675 kcal per bowl | Protein: 38 g per bowl | Fat: 25 g per bowl | Carbohydrates: 72 g per bowl | Per 100g Calories: 145 kcal | Per 100g Protein: 8 g | Per 100g Fat: 5 g | Per 100g Carbohydrates: 15 g

Beef Teriyaki Rice Bowls

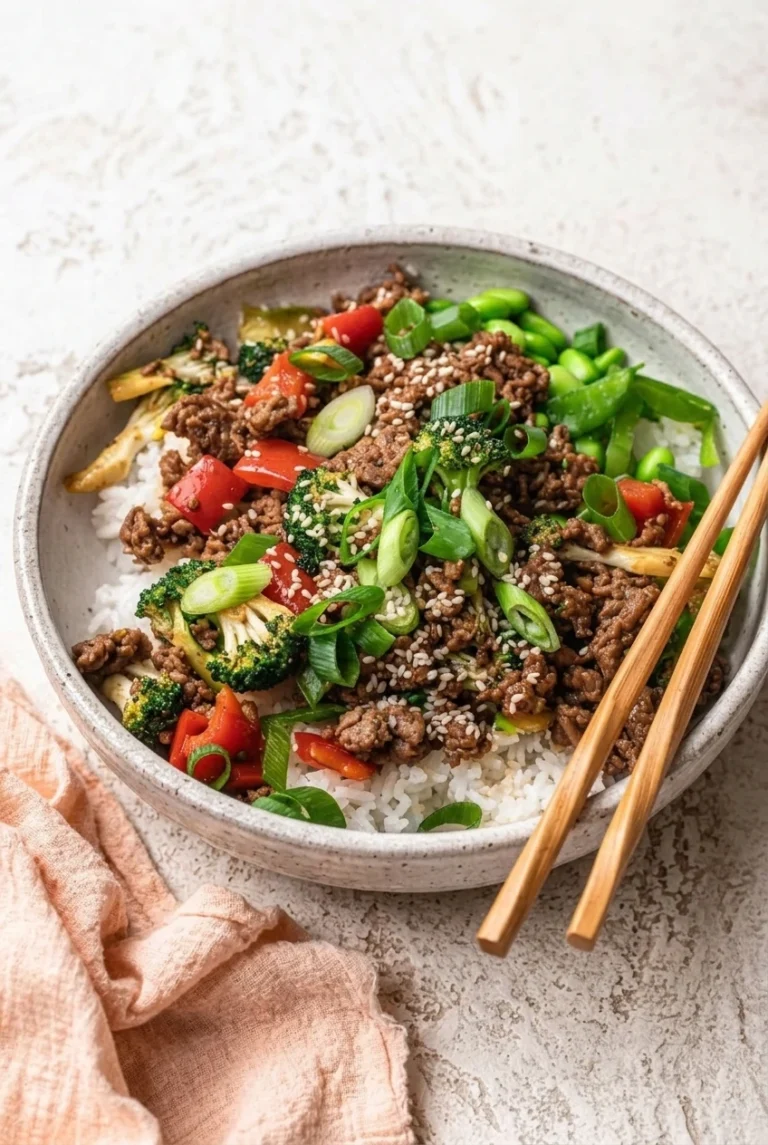
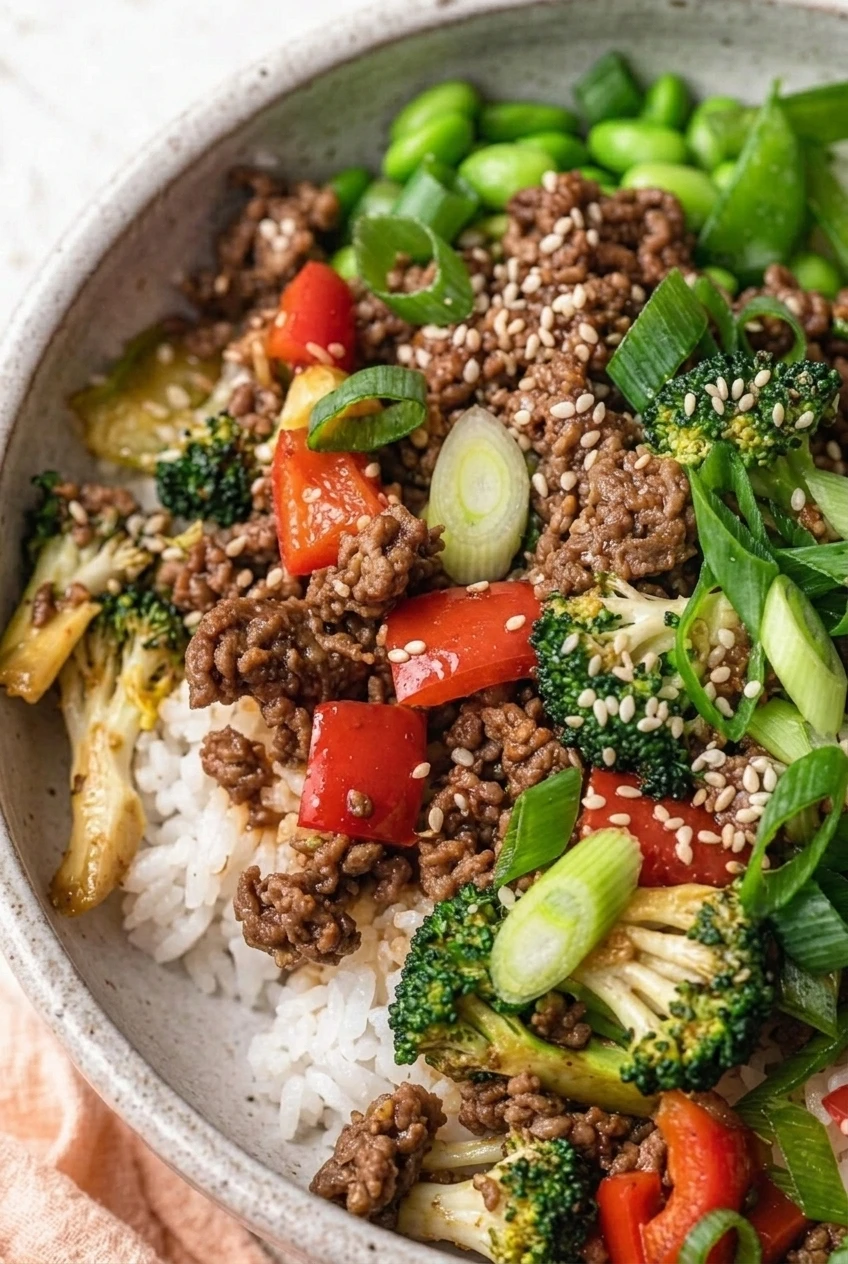
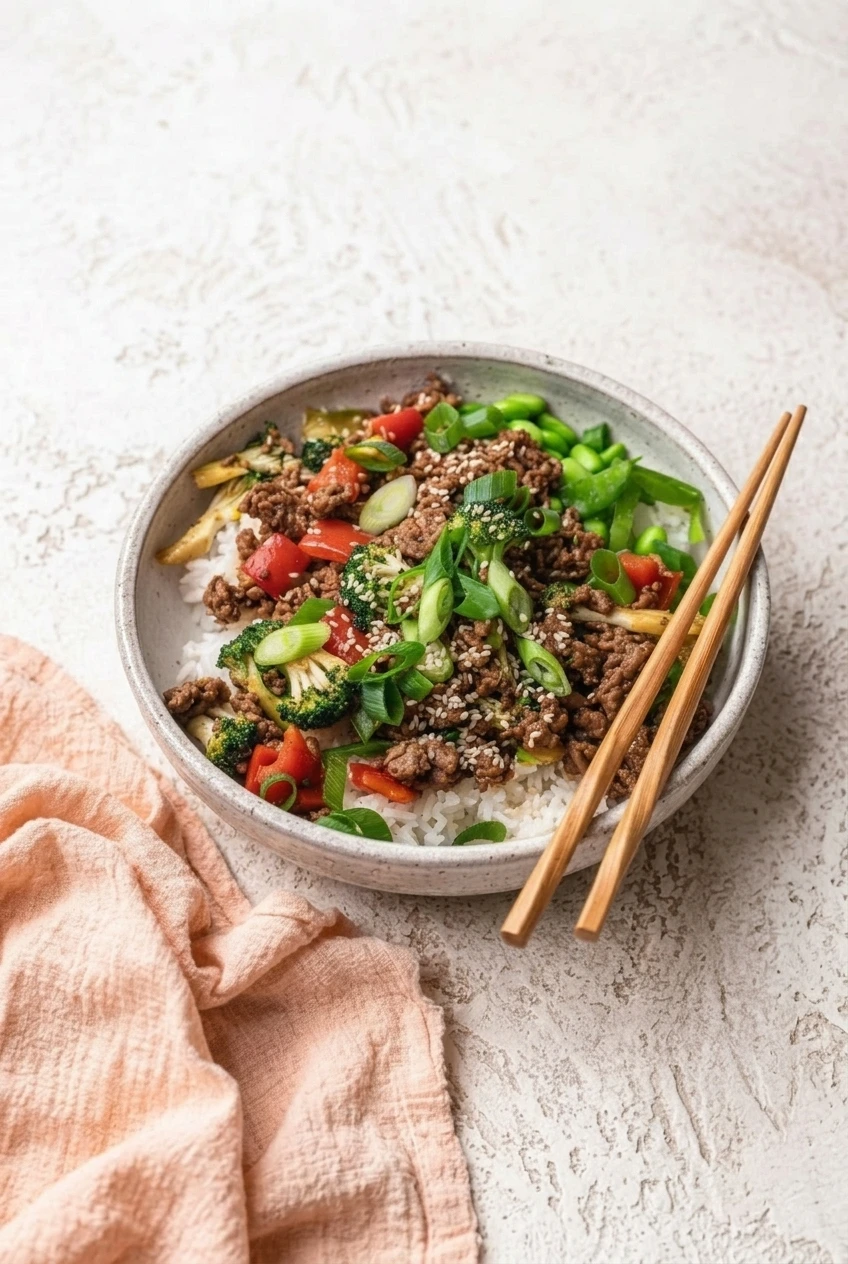
White rice forms the base of these bowls, with glossy ground-beef crumbles, broccoli, red bell pepper, edamame, and snap peas layered on top. Green onions and sesame seeds finish each bowl. Unlike steak-strip versions, the beef cooks in small crumbles, so a short simmer in teriyaki-style sauce is enough to coat it.

Cook the vegetables in stages to keep them crisp-tender, and stir the cornstarch sauce just before it goes into the skillet for an even glaze. Makes 4 bowls in about 35 minutes.

Ingredients for Beef Teriyaki Rice Bowls

Close view of glossy ground beef, crisp vegetables, sesame seeds, and green onions over rice in a beef teriyaki bowl
  • 1 1/2 cups uncooked jasmine or other white rice (280g)
  • 1 lb ground beef, 85–90% lean (450g)
  • 1 teaspoon neutral oil or sesame oil
  • 2 cups bite-size broccoli florets (180g)
  • 1 medium red bell pepper, cut into bite-size pieces (150g)
  • 1 cup shelled edamame, thawed if frozen (155g)
  • 1 cup snap peas, strings removed if needed (100g)
  • 1/3 cup low-sodium soy sauce
  • 1/4 cup water
  • 2 tablespoons honey (40g)
  • 1 tablespoon rice vinegar
  • 1 tablespoon cornstarch
  • 2 garlic cloves, minced
  • 1 teaspoon finely grated fresh ginger
  • 3 green onions, thinly sliced
  • 1 tablespoon sesame seeds

For a gluten-free option, use tamari instead of soy sauce and check the labels on other packaged ingredients.

How to Make Beef Teriyaki Rice Bowls

Full beef teriyaki rice bowl with colorful vegetables and garnishes, centered on a light tabletop
  1. Cook the rice: Rinse the rice if desired, then cook according to the package directions. Keep it covered while you prepare the toppings.
  2. Whisk the sauce: In a small bowl, whisk the soy sauce, water, honey, rice vinegar, cornstarch, garlic, and ginger until no dry cornstarch remains. Set aside.
  3. Brown the beef: Heat a 12-inch skillet or wok over medium-high heat. Add the oil and ground beef, breaking the meat into small crumbles. Start checking after about 5 minutes; cook for 5–7 minutes total, until browned, no longer pink, and at 160°F (70°C) when checked with an instant-read thermometer. Drain excess fat if it pools in the skillet.
  4. Cook the vegetables: Reduce the heat to medium or medium-high. Add the broccoli and bell pepper and cook, stirring occasionally. Add the edamame and snap peas for the final few minutes. After about 4–6 minutes total, the broccoli should be bright green with a little bite, the pepper should hold its shape, and the edamame and peas should be hot. If the skillet is crowded, cook the vegetables separately and return the beef to the pan before adding the sauce.
  5. Glaze the toppings: Stir the sauce again, then pour it into the skillet. Cook uncovered over medium heat, stirring continuously for 1–2 minutes, until it bubbles and clings to the beef and vegetables. Remove from the heat as soon as the glaze is glossy.
  6. Assemble the bowls: Divide the rice among four bowls. Spoon the beef and vegetables on top, leaving some rice visible, and finish with green onions and sesame seeds.

How to Keep the Sauce Glossy

Cornstarch settles as the sauce waits, so stir it immediately before pouring. If the cooked beef leaves a greasy pool, drain it before adding the sauce; excess fat can keep the glaze from clinging. The sauce needs only a brief simmer. Once it coats the crumbles, take the skillet off the heat rather than cooking the beef and vegetables longer.

How to Keep the Vegetables Crisp-Tender

A wide skillet gives the broccoli and pepper room to cook instead of steam. Add the edamame and snap peas later so they heat through without losing their bright green color. If everything will not fit comfortably, cook the vegetables separately before glazing the toppings together.

Beef Teriyaki Rice Bowl Variations

Bottled Teriyaki Sauce

Replace the homemade sauce with bottled teriyaki sauce. Sweetness and thickness vary, so add just enough to coat the cooked beef and vegetables, then simmer briefly.

Thinly Sliced Steak

For steak-strip bowls, sear thinly sliced flank steak or sirloin quickly in a hot skillet, working in batches if needed. Toss it briefly with the sauce; do not use the ground-beef cooking time.

How to Store and Reheat the Bowls

Cool leftovers promptly and refrigerate the rice and beef mixture in airtight containers for up to 3 days. Store sliced green onions separately and add them after reheating.

Reheat the rice and beef gently in a skillet over medium-low heat with a splash of water, broth, or sauce. Alternatively, microwave in short intervals, stirring as needed, until hot. If freezing, store the beef mixture in an airtight container for up to 2 months. Thaw it overnight in the refrigerator and reheat with a splash of liquid; keep the rice and fresh garnishes separate when possible.

Nutrition

Approximate nutrition per bowl, based on 4 servings: 660 calories, 38g protein, 21g fat, and 79g carbohydrates. Per 100g: about 125 calories, 7g protein, 4g fat, and 15g carbohydrates. Values will vary with the beef’s fat percentage and the final cooked yield.

Beef Teriyaki Rice Bowls

Ground beef and crisp-tender vegetables are coated in a quick teriyaki-style glaze and served over white rice.
Course: Main Course
Cuisine: Japanese-inspired
Prep: 15 min
Cook: 20 min
Total: 35 min
Servings: 4 Calories: 660 kcal

Equipment

  • Saucepan
  • 12-inch skillet or wok
  • Small bowl
  • Whisk
  • Instant-read thermometer

Ingredients

For the Rice and Toppings

  • 1 1/2 cups uncooked jasmine or other white rice (280 g)
  • 1 lb ground beef, 85–90% lean (450 g)
  • 1 teaspoon neutral oil or sesame oil
  • 2 cups bite-size broccoli florets (180 g)
  • 1 medium red bell pepper, cut into bite-size pieces (150 g)
  • 1 cup shelled edamame, thawed if frozen (155 g)
  • 1 cup snap peas, strings removed if needed (100 g)
  • 3 green onions, thinly sliced
  • 1 tablespoon sesame seeds

For the Sauce

  • 1/3 cup low-sodium soy sauce
  • 1/4 cup water
  • 2 tablespoons honey (40 g)
  • 1 tablespoon rice vinegar
  • 1 tablespoon cornstarch
  • 2 garlic cloves, minced
  • 1 teaspoon finely grated fresh ginger

Instructions

  1. Cook the rice according to the package directions. Keep it covered while you prepare the toppings.
  2. Whisk the soy sauce, water, honey, rice vinegar, cornstarch, garlic, and ginger in a small bowl until no dry cornstarch remains.
  3. Heat a 12-inch skillet or wok over medium-high heat. Add the oil and ground beef, breaking the meat into small crumbles.
  4. Cook the beef for 5–7 minutes, until browned and no longer pink. Check that it reaches 160°F (70°C) with an instant-read thermometer. Drain excess fat if it pools in the skillet.
  5. Reduce the heat to medium or medium-high. Add the broccoli and bell pepper and cook, stirring occasionally.
  6. Add the edamame and snap peas for the final few minutes. Cook the vegetables for about 4–6 minutes total, until crisp-tender and heated through. If the skillet is crowded, cook the vegetables separately.
  7. Stir the sauce again, then pour it into the skillet. Cook uncovered over medium heat, stirring continuously for 1–2 minutes, until the sauce bubbles and clings to the beef and vegetables. Remove the skillet from the heat once the glaze is glossy.
  8. Divide the rice among four bowls. Spoon the beef and vegetables on top, then finish with green onions and sesame seeds.

Tips

  • Stir the sauce just before adding it because the cornstarch settles as it sits.
  • Drain pooled beef fat before adding the sauce so the glaze can cling to the toppings.
  • Use a wide skillet and cook vegetables separately if the pan is crowded.
  • Add the edamame and snap peas later to help them stay bright and crisp-tender.
  • Simmer the sauce only until glossy, then take the skillet off the heat.

Variations

  • Bottled Teriyaki Sauce: Replace the homemade sauce with bottled teriyaki sauce, adding just enough to coat the beef and vegetables and simmering briefly.
  • Thinly Sliced Steak: Sear thinly sliced flank steak or sirloin quickly in a hot skillet, working in batches if needed, then toss briefly with the sauce.

Notes

For a gluten-free option, use tamari and check other packaged ingredients. Refrigerate rice and beef mixture in airtight containers for up to 3 days; store green onions separately. Reheat gently with a splash of liquid. Freeze the beef mixture for up to 2 months and thaw overnight in the refrigerator.

Nutrition

Calories: 660 kcal | Protein: 38 g | Fat: 21 g | Carbohydrates: 79 g

Beef Bulgogi Rice Bowls

These Korean-inspired bowls combine glossy, sweet-savory ground beef with white rice, roasted broccoli, crisp carrot batons, and lightly dressed cucumber. The beef browns in a skillet before the sauce goes in—no steak-style marinade needed. Giving it time against the hot pan helps the crumbles brown instead of steam.

Keep the rice, beef, and vegetables in separate sections, then finish with a creamy orange gochujang-mayo drizzle. It’s a finishing sauce, not the sauce used to cook the beef.

Makes 4 bowls. Prep: 20 minutes. Cook: 25 minutes. Total: 45 minutes.

Ingredients for Beef Bulgogi Rice Bowls

Close view of glossy beef crumbles, fluffy rice, browned broccoli, cucumber, and creamy orange sauce
  • 1 1/2 cups uncooked white rice (285g)
  • 1 lb ground beef, preferably 85–90% lean (450g)
  • 1/4 cup soy sauce
  • 2 tablespoons honey
  • 3 garlic cloves, minced
  • 1 tablespoon grated fresh ginger
  • 1 teaspoon toasted sesame oil
  • 1 lb broccoli florets (450g)
  • 1 tablespoon neutral oil, divided between the broccoli and skillet as needed
  • 2 medium carrots, cut into thin batons (120g)
  • 1 medium cucumber, cut into chunky pieces (300g)
  • 1 tablespoon rice vinegar
  • 1/3 cup mayonnaise (75g)
  • 1 tablespoon gochujang, or to taste

Optional toppings: Sesame seeds, sliced scallions, chili flakes, or a little chili crisp.

Ingredient swaps: Coconut aminos can replace the soy sauce; adjust the honey to taste, since sweetness varies by brand. Brown sugar can replace the honey. Use less gochujang for a milder drizzle.

How to Make Beef Bulgogi Rice Bowls

A complete beef bulgogi rice bowl with distinct vegetable sections on a dark tabletop
  1. Cook the rice: Rinse the rice and cook it according to the package or rice-cooker directions. Keep it covered while you prepare the toppings, then fluff before serving.
  2. Roast the broccoli: Heat the oven to 425°F (220°C). Dry the florets, toss them with some of the neutral oil, and spread them in one layer on a rimmed baking sheet, leaving space between them. Roast uncovered for 18 to 22 minutes, turning once. Start checking at 16 minutes; the tips should be browned and the stems just tender.
  3. Mix the sauces: Stir the soy sauce, honey, garlic, ginger, and sesame oil together for the beef. In a separate bowl, stir the mayonnaise and gochujang until smooth. Set the creamy sauce aside for serving.
  4. Dress the cucumber: Toss the cucumber with the rice vinegar. Keep it crisp and lightly coated, and drain off excess liquid before adding it to the bowls. Add a little chili, if desired.
  5. Brown the beef: Heat a wide skillet over medium-high heat. Add a little of the remaining neutral oil if needed, then add the beef. Let it brown briefly before breaking it into small crumbles. Cook for about 5 to 7 minutes, stirring as needed, until browned and no longer pink. If the skillet is crowded, cook in batches so the beef browns instead of steaming.
  6. Glaze the beef: Reduce the heat to medium or medium-low and add the soy mixture. Simmer uncovered for 2 to 4 minutes, stirring, until the sauce is glossy and clings to the crumbles rather than pooling in the pan. The ground beef should reach 160°F (70°C). Remove from the heat and let stand for 2 to 3 minutes.
  7. Assemble the bowls: Divide the warm rice among four shallow bowls. Arrange the beef, carrots, broccoli, and drained cucumber in separate sections. Drizzle the creamy orange sauce over the beef and rice just before serving.

How to Tell When the Beef Sauce Is Ready

The sauce should leave the beef glossy, with little thin liquid left in the skillet. If it still runs off the crumbles, simmer uncovered for another minute or two, stirring so the honey does not scorch. If the beef looks gray and watery before the sauce is added, give it more room in the skillet on the next batch.

Make-Ahead and Storage

Refrigerate cooked beef and rice in airtight containers for up to 4 days. Rice, beef, and roasted broccoli can be prepared ahead; keep the cucumber and creamy sauce separate from the hot components. Cut or dress the cucumber close to serving so it stays crisp.

Reheat the beef and rice until hot, then add the cucumber and creamy sauce. Cooked beef may be frozen in an airtight, freezer-safe container. Do not freeze the fresh cucumber, creamy sauce, or assembled bowls.

Nutrition

Approximate nutrition per serving, based on 1 of 4 bowls (about 550g): 740 calories, 33g protein, 30g fat, and 83g carbohydrates. Per 100g: about 135 calories, 6g protein, 5g fat, and 15g carbohydrates. Values vary with the beef’s fat content and the brands used.

Beef Bulgogi Rice Bowls

Sweet-savory ground beef, rice, roasted broccoli, crisp vegetables, and creamy gochujang mayo come together in these Korean-inspired bowls.
Course: Main Course
Cuisine: Korean
Prep: 20 min
Cook: 25 min
Total: 45 min
Servings: 4 Calories: 740 kcal

Equipment

  • Rice cooker or saucepan
  • Rimmed baking sheet
  • Wide skillet
  • Mixing bowls

Ingredients

For the bowls

  • 1 1/2 cups uncooked white rice (285g)
  • 1 lb ground beef, preferably 85–90% lean (450g)
  • 1 lb broccoli florets (450g)
  • 1 tablespoon neutral oil, divided between the broccoli and skillet as needed
  • 2 medium carrots, cut into thin batons (120g)
  • 1 medium cucumber, cut into chunky pieces (300g)
  • 1 tablespoon rice vinegar

For the beef sauce

  • 1/4 cup soy sauce
  • 2 tablespoons honey
  • 3 garlic cloves, minced
  • 1 tablespoon grated fresh ginger
  • 1 teaspoon toasted sesame oil

For the creamy sauce

  • 1/3 cup mayonnaise (75g)
  • 1 tablespoon gochujang, or to taste

Optional toppings

  • Sesame seeds
  • Sliced scallions
  • Chili flakes
  • Chili crisp

Instructions

  1. Rinse the rice and cook it according to the package or rice-cooker directions. Keep covered, then fluff before serving.
  2. Preheat the oven to 425°F (220°C). Dry the broccoli, toss with some of the neutral oil, and spread in one layer on a rimmed baking sheet.
  3. Roast the broccoli uncovered for 18 to 22 minutes, turning once. Start checking at 16 minutes; the tips should be browned and the stems just tender.
  4. Stir together the soy sauce, honey, garlic, ginger, and sesame oil in a bowl. In a separate bowl, stir the mayonnaise and gochujang until smooth; set aside for serving.
  5. Toss the cucumber with the rice vinegar. Drain off excess liquid before serving.
  6. Heat a wide skillet over medium-high heat. Add a little of the remaining neutral oil if needed, then add the beef. Let it brown briefly before breaking it into small crumbles.
  7. Cook the beef for 5 to 7 minutes, stirring as needed, until browned and no longer pink. Cook in batches if the skillet is crowded.
  8. Reduce the heat to medium or medium-low and add the soy sauce mixture. Simmer uncovered for 2 to 4 minutes, stirring, until glossy and clinging to the beef. Confirm the beef reaches 160°F (70°C), then remove from the heat and let stand for 2 to 3 minutes.
  9. Divide the rice among four shallow bowls. Arrange the beef, carrots, broccoli, and drained cucumber in separate sections. Drizzle with the creamy sauce and add optional toppings.

Tips

  • Dry the broccoli before roasting and leave space between the florets so they brown.
  • Give the beef time against the hot pan before breaking it up to help it brown rather than steam.
  • Cook the beef in batches if the skillet is crowded.
  • Simmer the beef sauce uncovered until glossy, stirring so the honey does not scorch.
  • Keep the cucumber crisp by cutting or dressing it close to serving.

Variations

  • Coconut Aminos Beef Bowls: Replace the soy sauce with coconut aminos and adjust the honey to taste.
  • Brown Sugar Beef Bowls: Replace the honey with brown sugar.
  • Milder Gochujang Mayo: Use less gochujang in the creamy sauce.

Notes

Refrigerate cooked beef and rice in airtight containers for up to 4 days. Reheat until hot and add the cucumber and creamy sauce afterward. Cooked beef can be frozen; do not freeze the cucumber, creamy sauce, or assembled bowls.

Nutrition

Calories: 740 kcal | Protein: 33 g | Fat: 30 g | Carbohydrates: 83 g