Author

Julia

Browsing

Buffalo Chicken Rice Bowls

Fluffy white rice, glossy buffalo chicken, and sautéed red pepper and onion make up the warm base of these bowls. Fresh tomatoes and avocado go on just before serving, with blue cheese crumbled over the top.

Cutting the chicken into even pieces helps it cook through without drying out. Toss it with buffalo sauce only after it reaches 165°F (75°C), then arrange the components in sections so the rice and fresh toppings stay distinct.

Ingredients
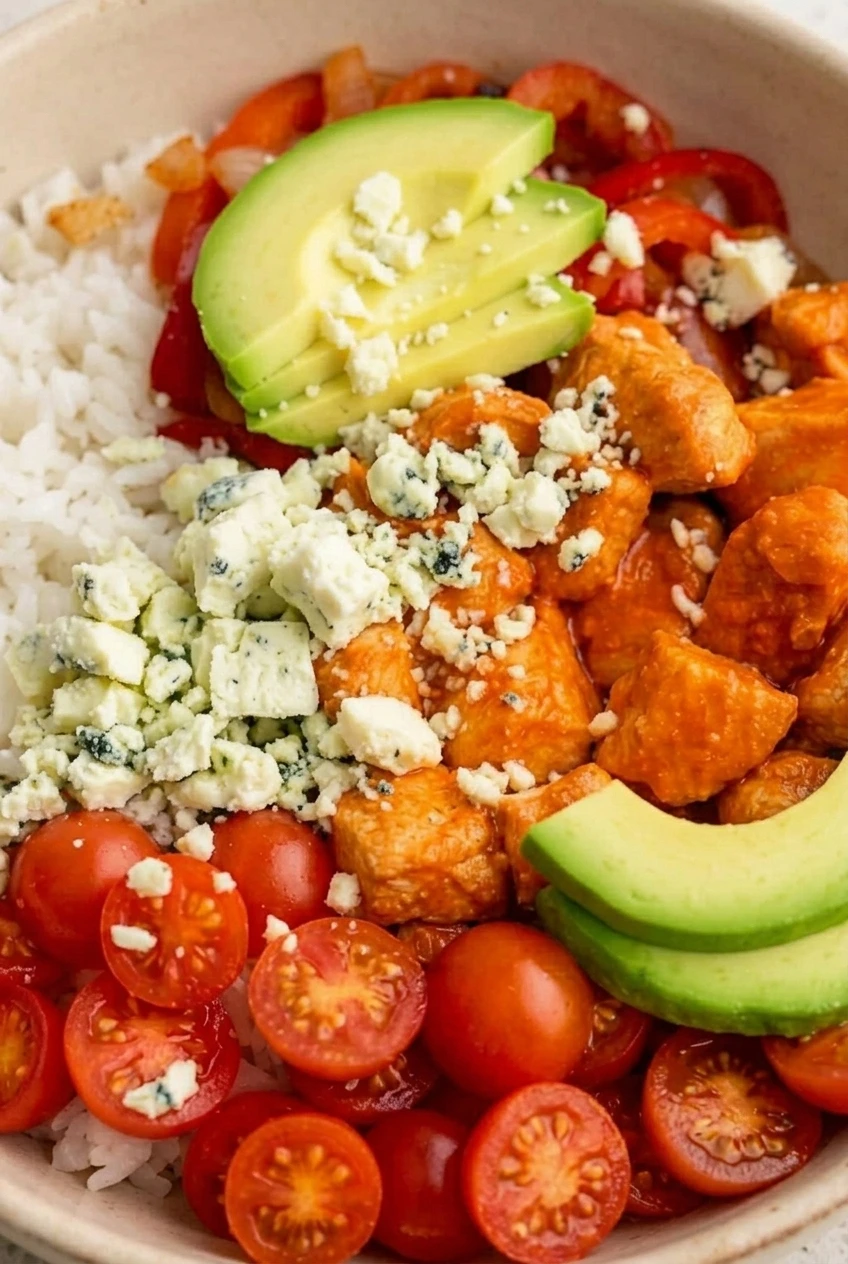
Close detail of glossy buffalo chicken with fluffy rice, sautéed peppers, fresh avocado, tomatoes, and blue cheese.
  • 1 cup uncooked white rice (185g)
  • Water, as directed on the rice package
  • 1 1/2 pounds boneless, skinless chicken breast, cut into roughly 1-inch pieces (675g)
  • 1 tablespoon neutral oil, plus more if needed
  • 1 medium red bell pepper, thinly sliced (150g)
  • 1/2 medium yellow onion, thinly sliced (75g)
  • 1/2 teaspoon kosher salt, divided, or to taste
  • 1/4 teaspoon black pepper
  • 1/2 cup buffalo sauce (120g), plus more for serving if desired
  • 1 pint cherry or grape tomatoes, halved (300g)
  • 1 ripe but firm avocado, sliced (200g)
  • 1/3 cup crumbled blue cheese (45g)

Makes 4 bowls. Allow about 15 minutes to prepare the ingredients and about 20 minutes to cook, depending on the rice and whether the chicken needs to cook in batches.

How to Make Buffalo Chicken Rice Bowls
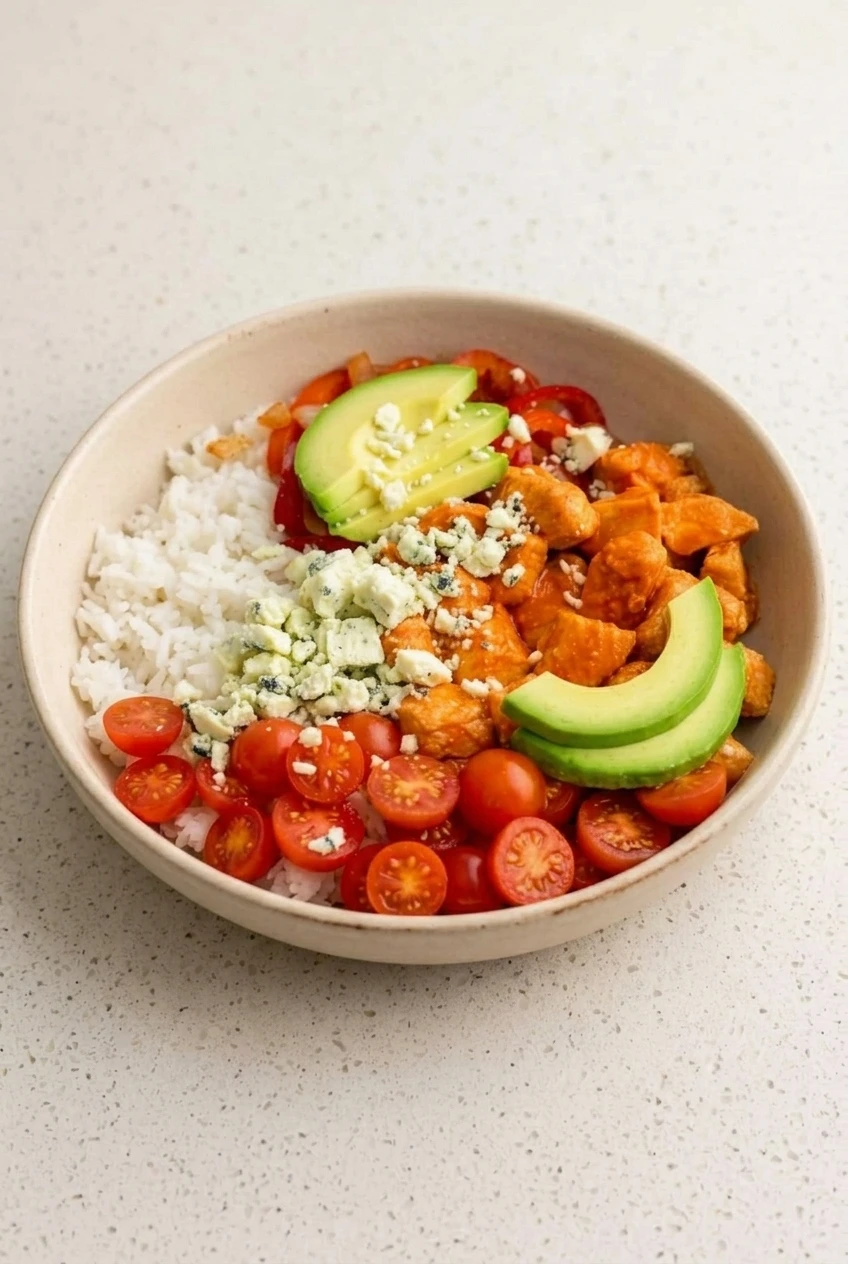
A complete Buffalo Chicken Rice Bowl centered on a light countertop, with rice, saucy chicken, vegetables, avocado, tomatoes, and blue cheese.
  1. Cook the rice: Cook the rice with the amount of water specified on its package, keeping the saucepan covered as directed. When the rice is tender and the water is absorbed, fluff it with a fork.
  2. Prepare the ingredients: Slice the pepper and onion and halve the tomatoes. Cut the chicken into even, roughly 1-inch pieces; season it with half the salt and the black pepper. Wait to slice the avocado until the bowls are ready to assemble.
  3. Sauté the vegetables: Heat some of the oil in a wide 12-inch skillet over medium-high heat. Add the pepper, onion, and remaining salt. Cook uncovered, stirring occasionally, for 4 to 6 minutes, until softened but still holding their shape. Transfer to a plate.
  4. Cook the chicken: Add the remaining oil to the skillet, plus a little more if the pan is dry. Arrange the chicken in a single layer, cooking in batches if needed. Leave the pieces briefly undisturbed to brown, then turn as needed. Cook for about 8 to 10 minutes per batch, starting to check after 8 minutes. The chicken should be opaque throughout, lightly browned in spots, and reach 165°F in the thickest pieces.
  5. Coat with sauce: Reduce the heat to low. Add the buffalo sauce to the fully cooked chicken and toss for 1 to 2 minutes, until the sauce is warm and clings to the pieces. For a lighter coating, start with less sauce and serve the rest on the side.
  6. Build the bowls: Divide the rice among four shallow bowls. Arrange the chicken and sautéed vegetables alongside it, then add the tomatoes and fanned avocado slices in separate sections. Scatter the blue cheese over the chicken and avocado. Serve warm.

Keeping the Chicken Browned and Saucy

A crowded skillet traps moisture, causing the chicken to steam rather than brown. Use a wide pan and cook in batches when the pieces cannot sit in a single layer. The 8-to-10-minute estimate applies to roughly 1-inch pieces; use the thermometer reading, not the clock alone, to determine doneness.

Adding buffalo sauce after the chicken cooks makes the coating easier to control without keeping the chicken over heat longer than necessary. Sauce brands vary in heat and saltiness, so taste before adding extra at the table. Ranch dressing can be offered separately if a cooling topping is wanted.

Make-Ahead, Storage, and Reheating

Refrigerate the cooked chicken, rice, and sautéed vegetables in airtight containers for up to 3 to 4 days. Keep the tomatoes separate, and slice the avocado close to serving time.

Reheat the chicken, rice, and vegetables in the microwave, stirring as needed, or warm them in a skillet until hot. Add the tomatoes, avocado, and blue cheese afterward. Chicken and rice can be frozen separately for about one month; thaw and reheat before assembling the bowls. Do not freeze the fresh toppings.

Nutrition

Approximate nutrition per serving, based on 1 of 4 bowls: 580 calories, 46g protein, 19g fat, and 49g carbohydrates. Approximate nutrition per 100g of prepared bowl: 110 calories, 9g protein, 4g fat, and 10g carbohydrates. Values vary with the buffalo sauce, blue cheese, and amount of water absorbed by the rice.

Buffalo Chicken Rice Bowls

Buffalo-sauced chicken and sautéed peppers and onions are served over rice with fresh tomatoes, avocado, and blue cheese.
Course: Main Course
Cuisine: American
Prep: 15 min
Cook: 20 min
Total: 35 min
Servings: 4 Calories: 580 kcal

Equipment

  • Saucepan with lid
  • 12-inch skillet
  • Meat thermometer

Ingredients

Rice

  • 1 cup uncooked white rice (185 g)
  • Water, as directed on the rice package

Chicken and Vegetables

  • 1 1/2 pounds boneless, skinless chicken breast, cut into roughly 1-inch pieces (675 g)
  • 1 tablespoon neutral oil, plus more if needed
  • 1 medium red bell pepper, thinly sliced (150 g)
  • 1/2 medium yellow onion, thinly sliced (75 g)
  • 1/2 teaspoon kosher salt, divided, or to taste
  • 1/4 teaspoon black pepper
  • 1/2 cup buffalo sauce (120 g), plus more for serving if desired

Toppings

  • 1 pint cherry or grape tomatoes, halved (300 g)
  • 1 ripe but firm avocado, sliced (200 g)
  • 1/3 cup crumbled blue cheese (45 g)

Instructions

  1. Cook the rice with the amount of water specified on the package, keeping the saucepan covered as directed. When tender and the water is absorbed, fluff with a fork.
  2. Cut the chicken into roughly 1-inch pieces. Season with half the salt and the black pepper.
  3. Heat some of the oil in a wide skillet over medium-high heat. Add the pepper, onion, and remaining salt. Cook uncovered, stirring occasionally, for 4 to 6 minutes, until softened but still holding their shape. Transfer to a plate.
  4. Add the remaining oil to the skillet, adding a little more if the pan is dry. Arrange the chicken in a single layer, working in batches if needed. Let the pieces brown briefly before turning as needed. Cook for about 8 to 10 minutes per batch, checking after 8 minutes, until opaque throughout and 165°F (75°C) in the thickest pieces.
  5. Reduce the heat to low. Add the buffalo sauce to the cooked chicken and toss for 1 to 2 minutes, until warm and coating the pieces.
  6. Divide the rice among four shallow bowls. Arrange the chicken and sautéed vegetables alongside it, then add the tomatoes and avocado in separate sections. Scatter the blue cheese over the chicken and avocado. Serve warm.

Tips

  • Cut the chicken into even pieces so it cooks through without drying out.
  • Cook the chicken in batches if needed to keep it in a single layer and help it brown.
  • Use a thermometer to check that the thickest chicken pieces reach 165°F (75°C).
  • Add buffalo sauce after the chicken is cooked so you can control the coating and avoid prolonging cooking.
  • Slice the avocado just before assembling the bowls.
Notes

Refrigerate cooked chicken, rice, and vegetables in airtight containers for 3 to 4 days. Keep tomatoes separate and add fresh toppings after reheating. Chicken and rice can be frozen separately for about one month; do not freeze fresh toppings.

Nutrition

Calories: 580 kcal | Protein: 46 g | Fat: 19 g | Carbohydrates: 49 g

Bang Bang Chicken Rice Bowls

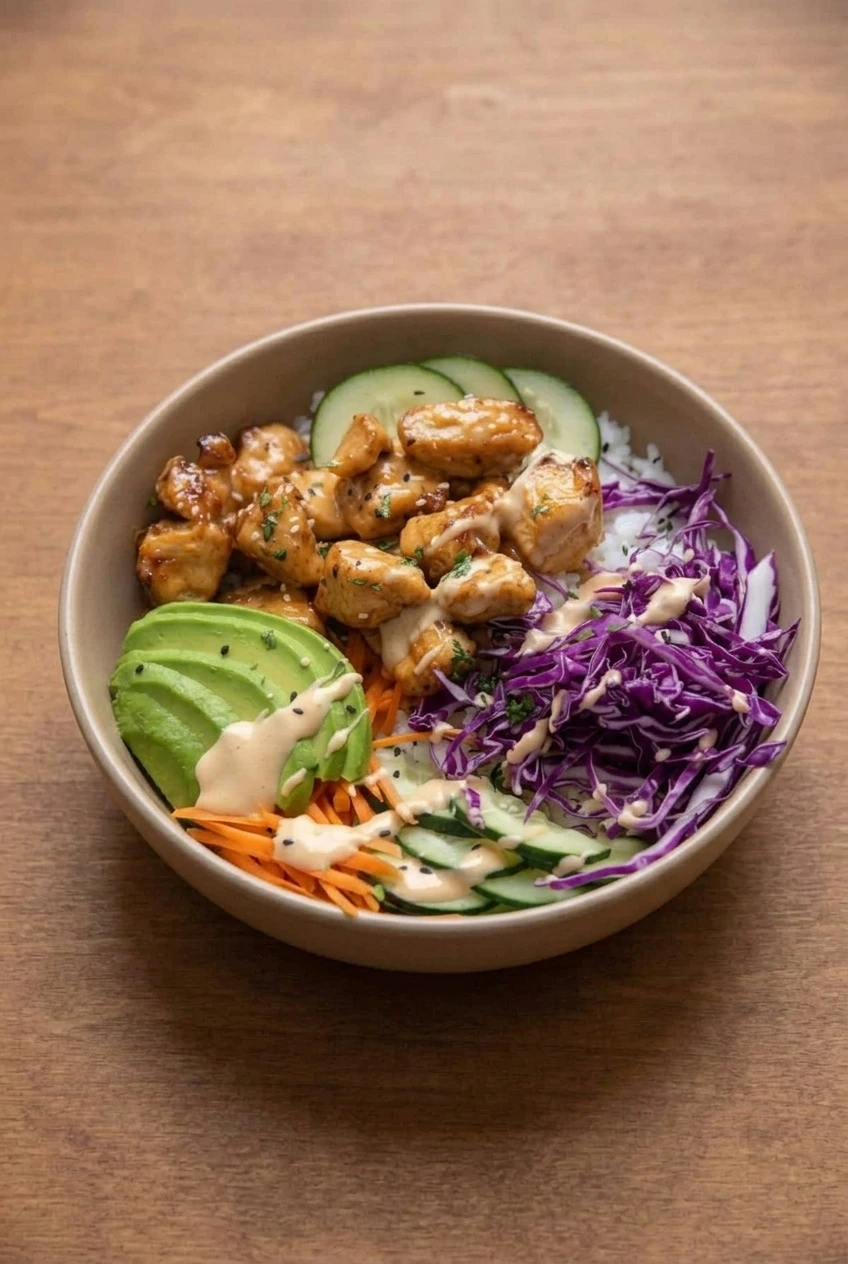
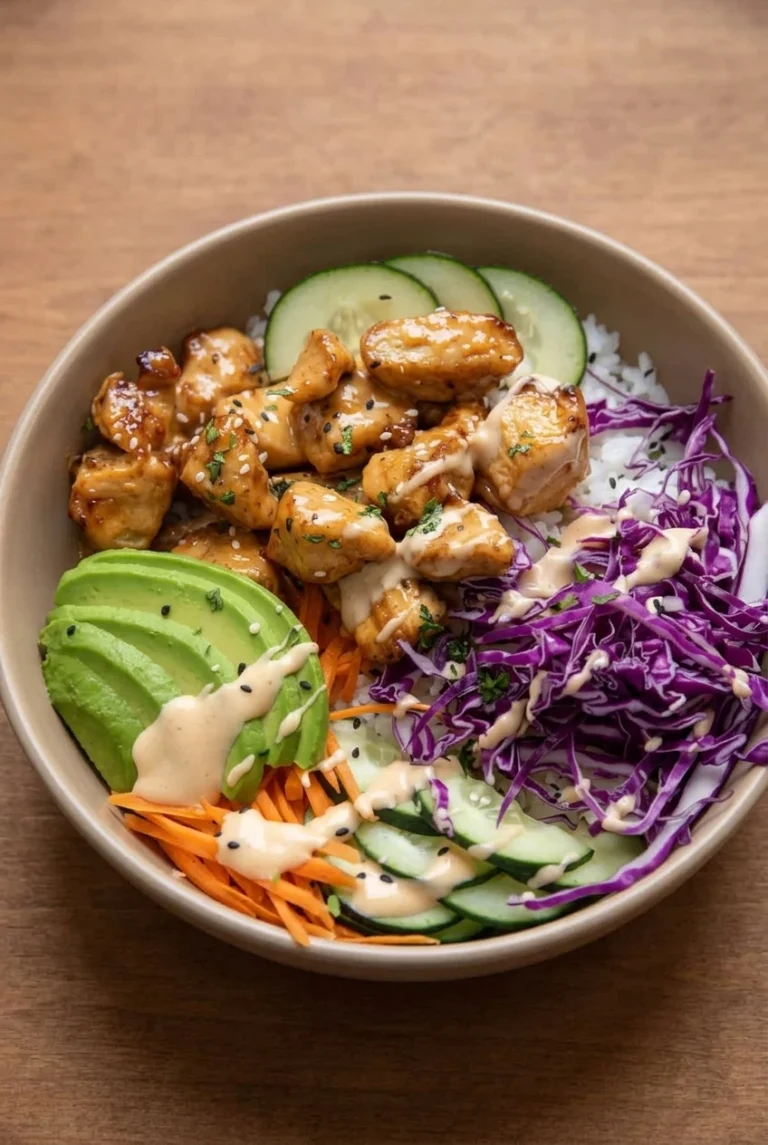
These rice bowls combine browned, bite-size chicken with a creamy sauce made from mayonnaise, sweet chili sauce, and adjustable sriracha. Shredded purple cabbage, matchstick carrots, cucumber rounds, and avocado add a fresh crunch alongside the warm chicken and rice.

A light cornstarch coating helps the chicken brown in the skillet without making it thickly breaded. Cook the pieces with room between them, then add the sauce off the heat and save some for a drizzle over each bowl.

Prep time: 20 minutes | Cook time: 20 minutes | Total time: 40 minutes | Serves: 4

Ingredients for Bang Bang Chicken Rice Bowls

Close-up of browned bang bang chicken with creamy sauce, sesame seeds, rice, and fresh vegetable toppings
  • 1½ pounds boneless, skinless chicken breast, cut into roughly 1-inch pieces (680g)
  • 2 tablespoons cornstarch (15g)
  • 1 teaspoon garlic powder
  • ½ teaspoon paprika
  • ¾ teaspoon kosher salt, or to taste
  • ¼ teaspoon black pepper
  • 2 tablespoons neutral or avocado oil, divided as needed
  • 1½ cups dry long-grain white rice (280g)
  • ½ cup mayonnaise (110g)
  • ⅓ cup sweet chili sauce (85g)
  • 1 tablespoon sriracha, plus more to taste
  • 2 cups thinly shredded red cabbage (140g)
  • 1 cup julienned or matchstick-cut carrot (110g)
  • 1 medium cucumber, thinly sliced into rounds (200g)
  • 1 medium avocado, sliced (150g)
  • 1 tablespoon black and white sesame seeds
  • Optional: 1 tablespoon chopped cilantro, for serving

How to Make Bang Bang Chicken Rice Bowls

A complete Bang Bang Chicken Rice Bowl centered on a wooden surface, with its colorful toppings arranged over rice
  1. Cook the rice: Prepare the rice according to the package directions. Keep it covered and warm while you make the chicken and toppings.
  2. Mix the sauce: Whisk the mayonnaise, sweet chili sauce, and sriracha until smooth. Taste and adjust the sriracha. Set aside about half the sauce for drizzling over the finished bowls.
  3. Prepare the toppings: Shred the cabbage, cut the carrot into matchsticks, and slice the cucumber. Keep the vegetables separate. Slice the avocado close to serving.
  4. Coat the chicken: Pat the chicken dry. Toss it with the cornstarch, garlic powder, paprika, salt, and pepper until lightly and evenly coated.
  5. Brown the chicken: Heat a 12-inch skillet over medium-high heat for a few minutes. Add about 1 tablespoon oil, then arrange the chicken in a single layer with space between the pieces. Cook uncovered, letting the first side brown before turning the pieces a few times. Cook in batches if needed, adding more oil if the pan looks dry. Allow about 6–8 minutes per batch, but start checking the thickest pieces around 5 minutes. Reduce the heat slightly if the coating darkens too quickly. The chicken should be browned on several sides, opaque in the center, and reach 165°F (75°C).
  6. Sauce the chicken: Remove the skillet from the heat. Toss the cooked chicken with enough of the unreserved sauce to make it glossy, leaving some browned edges visible.
  7. Assemble the bowls: Divide the rice among four wide bowls. Add the chicken, then arrange the cabbage, carrot, cucumber rounds, and fanned avocado in separate sections, leaving some rice visible. Drizzle the reserved sauce over the chicken and vegetables. Finish with sesame seeds and optional cilantro.

How to Keep the Chicken Browned

Wet chicken or a crowded skillet will steam the pieces instead of browning them. Pat the chicken dry before coating it, leave room between pieces, and let the first side develop color before turning. A smaller skillet may require more batches and a longer total cook time.

The sauce softens the light coating as it sits. For more browned texture, lightly sauce the chicken just before serving or drizzle the sauce over individual bowls instead of tossing it all with the chicken.

Adjusting the Sauce and Chicken

For a milder sauce, reduce or omit the sriracha and offer extra at the table. You can also use boneless, skinless chicken thighs in place of breast; the cook time may differ, so check the thickest pieces for 165°F rather than relying on the suggested batch time.

For a simpler version, omit the cornstarch and cook the seasoned chicken in batches. It will still brown, but it will not have the same lightly coated finish.

Meal Prep and Reheating

Cool and refrigerate the cooked rice and chicken separately from the fresh vegetables and sauce in airtight containers for 3–4 days. Refrigerate the sauce separately and use it within about 5 days. When possible, keep the avocado whole and slice it just before serving.

Reheat the rice and chicken separately until hot, then add the cold toppings and sauce. Cover rice when microwaving it, with a small splash of water if it seems dry. Reheating chicken in a skillet over medium heat helps retain more of its browned texture; microwaving is quicker but softens the coating. Freezing may also soften the coating, so do not expect thawed chicken to have the same finish.

Nutrition

Approximate nutrition per bowl, based on 4 servings of about 565g each: 880 calories, 46g protein, 40g fat, and 83g carbohydrates. Approximate nutrition per 100g: 155 calories, 8g protein, 7g fat, and 15g carbohydrates. Values vary with ingredient brands, the amount of oil used, and the final cooked yield.

Bang Bang Chicken Rice Bowls

Browned chicken tossed in a creamy sweet chili sauce is served with rice, crunchy vegetables, and avocado.
Course: Main Course
Cuisine: Global
Prep: 20 min
Cook: 20 min
Total: 40 min
Servings: 4 Calories: 880 kcal

Equipment

  • 12-inch skillet
  • rice saucepan
  • mixing bowl
  • whisk
  • knife
  • cutting board
  • meat thermometer

Ingredients

For the Chicken

  • 1.5 lb boneless, skinless chicken breast, cut into roughly 1-inch pieces (680 g)
  • 2 tablespoons cornstarch (15 g)
  • 1 teaspoon garlic powder
  • 1/2 teaspoon paprika
  • 3/4 teaspoon kosher salt, or to taste
  • 1/4 teaspoon black pepper
  • 2 tablespoons neutral or avocado oil, divided as needed

For the Bowls

  • 1.5 cups dry long-grain white rice (280 g)
  • 2 cups thinly shredded red cabbage (140 g)
  • 1 cup julienned or matchstick-cut carrot (110 g)
  • 1 medium cucumber, thinly sliced into rounds (200 g)
  • 1 medium avocado, sliced (150 g)
  • 1 tablespoon black and white sesame seeds
  • 1 tablespoon chopped cilantro, optional

For the Sauce

  • 1/2 cup mayonnaise (110 g)
  • 1/3 cup sweet chili sauce (85 g)
  • 1 tablespoon sriracha, plus more to taste

Instructions

  1. Prepare the rice according to the package directions. Keep it covered and warm.
  2. Whisk the mayonnaise, sweet chili sauce, and sriracha until smooth. Taste and adjust the sriracha, then set aside about half the sauce for serving.
  3. Shred the cabbage, cut the carrot into matchsticks, and slice the cucumber. Keep the vegetables separate and slice the avocado close to serving.
  4. Pat the chicken dry. Toss it with the cornstarch, garlic powder, paprika, salt, and pepper until evenly coated.
  5. Heat a 12-inch skillet over medium-high heat for a few minutes. Add about 1 tablespoon oil and arrange the chicken in a single layer with space between the pieces.
  6. Cook uncovered, letting the first side brown before turning the pieces a few times. Cook in batches if needed, adding more oil if the pan looks dry. Allow 6–8 minutes per batch, checking the thickest pieces around 5 minutes. Reduce the heat slightly if the coating darkens too quickly. Cook until browned on several sides, opaque in the center, and 165°F (75°C).
  7. Remove the skillet from the heat. Toss the cooked chicken with enough of the unreserved sauce to coat it lightly and leave some browned edges visible.
  8. Divide the rice among four wide bowls. Add the chicken, cabbage, carrot, cucumber, and avocado in separate sections.
  9. Drizzle the reserved sauce over the bowls and finish with sesame seeds and optional cilantro.

Tips

  • Pat the chicken dry before coating so it browns rather than steams.
  • Leave space between chicken pieces and cook in batches if necessary.
  • Let the first side brown before turning the chicken.
  • Add the sauce off the heat and use only enough to lightly coat the chicken for a more browned texture.
  • Check the thickest chicken pieces for 165°F (75°C) rather than relying only on cooking time.

Variations

  • Milder Sauce: Reduce or omit the sriracha and offer extra at the table.
  • Chicken Thighs: Use boneless, skinless chicken thighs instead of chicken breast and cook until the thickest pieces reach 165°F (75°C).
  • Without Cornstarch: Omit the cornstarch and cook the seasoned chicken in batches; it will brown without the lightly coated finish.

Notes

Refrigerate cooked rice and chicken separately from the vegetables and sauce for 3–4 days; refrigerate sauce separately for about 5 days. Reheat rice and chicken until hot. Slice avocado just before serving.

Nutrition

Calories: 880 kcal | Protein: 46 g | Fat: 40 g | Carbohydrates: 83 g

Thai Peanut Chicken Rice Bowls

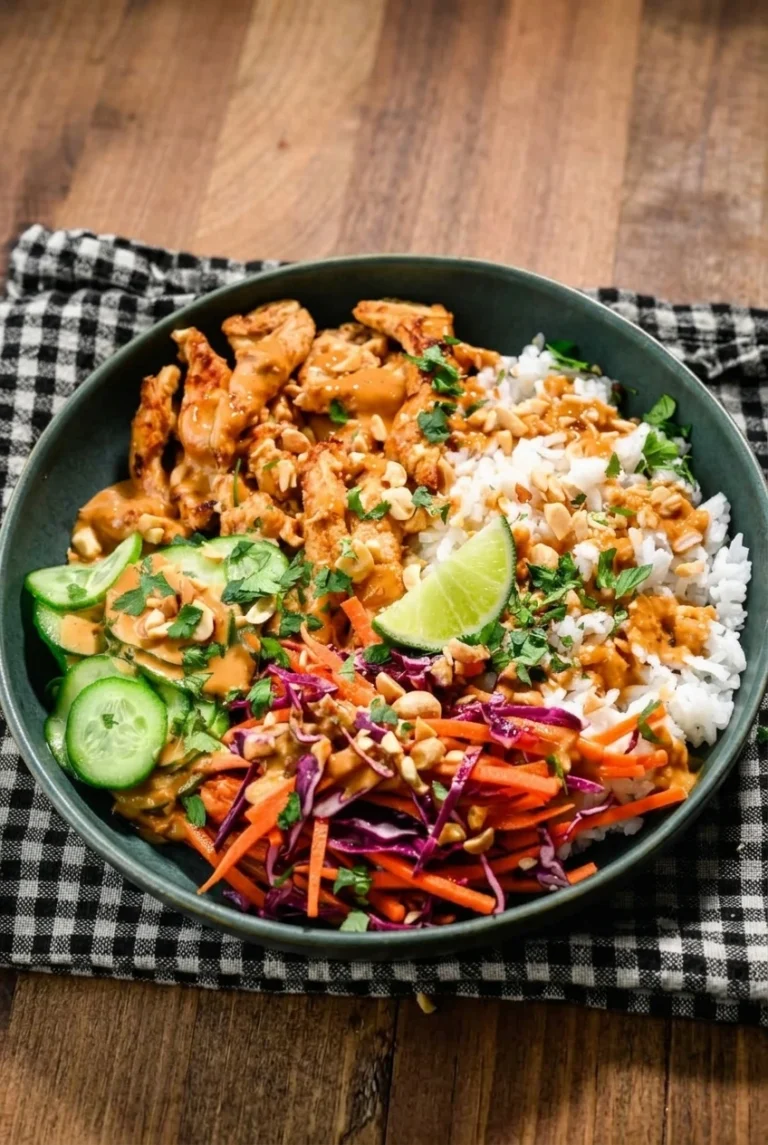
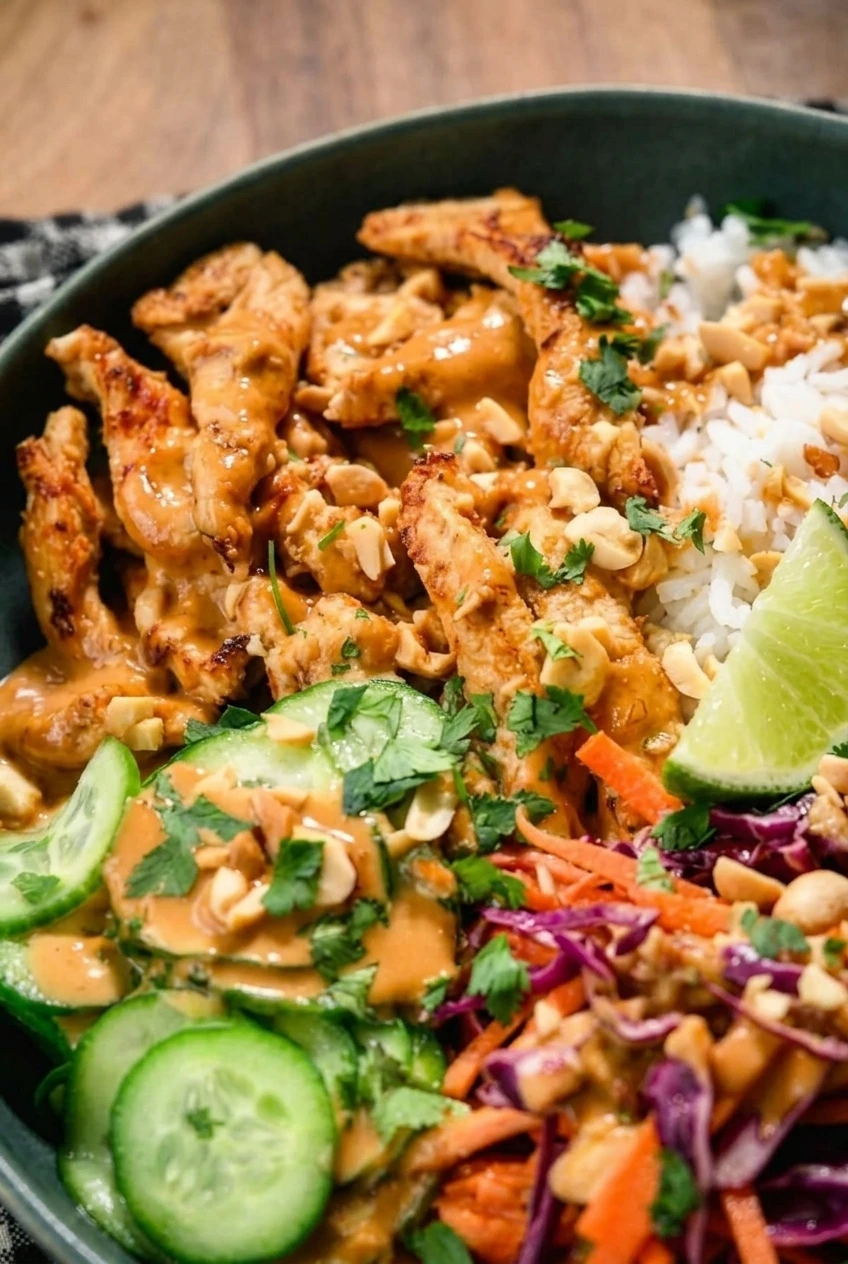
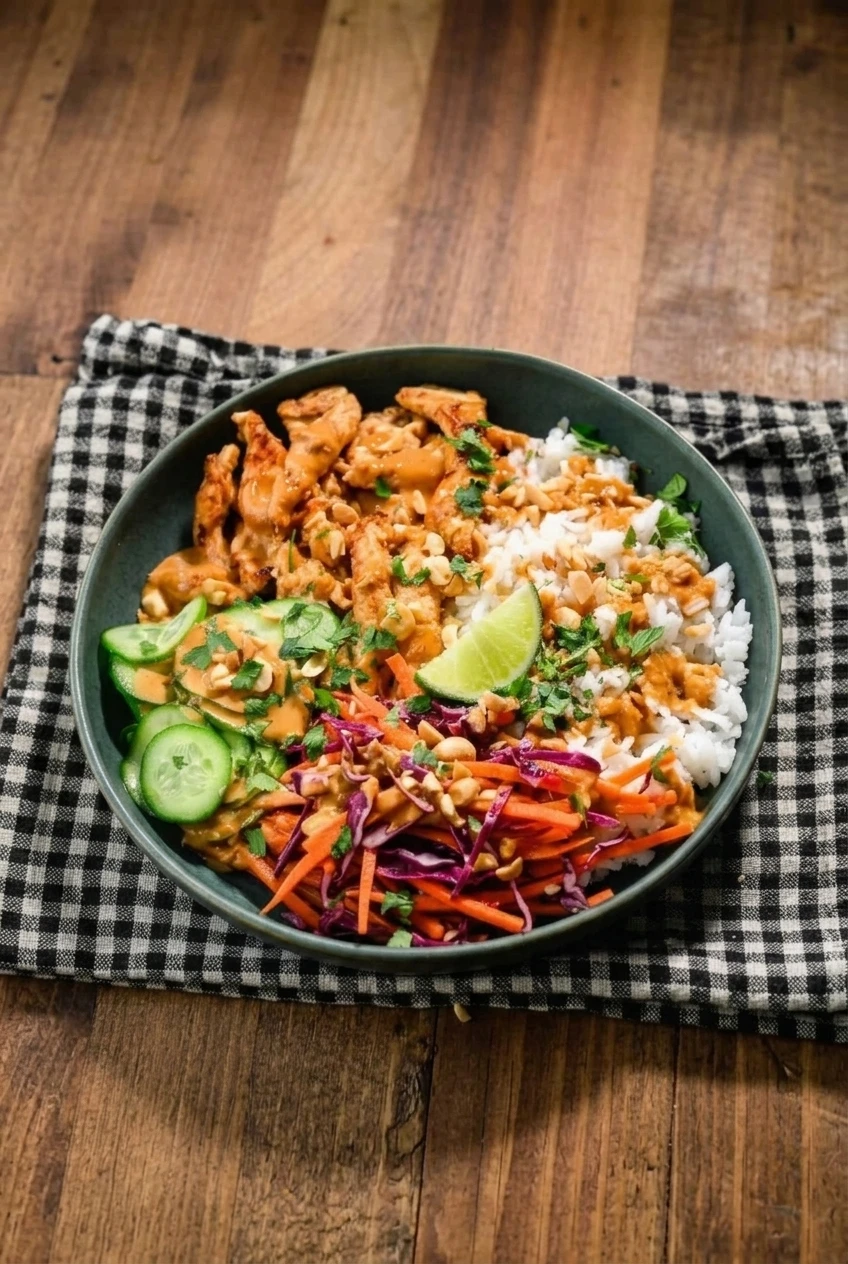
Warm white rice and skillet-seared chicken sit alongside cool cucumber rounds and a crisp purple cabbage-and-carrot slaw in these Thai-inspired bowls. A creamy peanut sauce coats the chicken and drizzles over the vegetables, while chopped peanuts, cilantro, and lime finish each bowl.

The chicken is cut into thin, even pieces so it cooks quickly. Make the peanut sauce separately from the raw-chicken marinade, then add it after cooking so it stays ready to serve and does not scorch in the skillet.

Ingredients for Thai Peanut Chicken Rice Bowls

Close detail of peanut sauce on browned chicken beside rice, cucumber, and crunchy cabbage-carrot slaw
  • 1½ cups dry long-grain white rice (280g), plus water and salt according to package directions
  • 1½ pounds boneless, skinless chicken breast, cut into evenly sized ½-inch-thick strips or bite-size pieces (680g)
  • 6 tablespoons low-sodium soy sauce, divided
  • 3 tablespoons fresh lime juice, divided, plus 1 lime cut into wedges
  • 2 tablespoons neutral oil, divided
  • 3 garlic cloves, finely minced, divided
  • 2 teaspoons finely grated fresh ginger, divided
  • ½ cup creamy peanut butter (130g)
  • 2 tablespoons honey (40g)
  • 3 to 6 tablespoons warm water, as needed
  • 1 teaspoon toasted sesame oil
  • 1 medium cucumber, thinly sliced into rounds (200g)
  • 2 cups finely shredded purple cabbage (140g)
  • 2 medium carrots, peeled and cut into thin matchsticks or grated (120g)
  • ⅓ cup roasted peanuts, roughly chopped (45g)
  • ⅓ cup loosely packed fresh cilantro leaves, roughly chopped (15g)
  • Optional: 1 to 2 teaspoons sriracha or another chile sauce

How to Make Thai Peanut Chicken Rice Bowls

A complete Thai peanut chicken rice bowl centered on a wood table, with distinct sections of rice and fresh vegetables
  1. Cook the rice: Rinse the rice if desired, then cook it with water and salt according to the package directions. Once tender, keep it covered and warm.
  2. Marinate the chicken: Whisk together 2 tablespoons soy sauce, 1 tablespoon lime juice, 1 tablespoon neutral oil, 2 minced garlic cloves, and 1 teaspoon grated ginger. Toss with the chicken, cover, and refrigerate for about 20 minutes.
  3. Make the peanut sauce: In a separate bowl, whisk the peanut butter, remaining ¼ cup soy sauce, remaining 2 tablespoons lime juice, honey, sesame oil, remaining garlic and ginger, and 3 tablespoons warm water. Add more warm water 1 tablespoon at a time until the sauce falls from a spoon in a thick, pourable ribbon. Stir in the optional chile sauce to taste.
  4. Prepare the vegetables: Slice the cucumber and shred the cabbage and carrots. Keep them raw, undressed, and separate from the warm components until assembly.
  5. Sear the chicken: Heat a dry 12-inch skillet over medium-high heat until hot, then add a thin film of the remaining neutral oil. Arrange the chicken in one layer with room between the pieces; cook in batches if needed so it browns rather than steams. Cook uncovered over medium to medium-high heat, turning as the pieces brown. Start checking after about 6 minutes. Thin pieces generally take 7 to 10 minutes per batch, but thickness and skillet heat will affect the timing. The chicken should be opaque with lightly browned edges and reach 165°F (75°C) in the thickest piece.
  6. Rest and assemble: Transfer the chicken to a plate and let it rest for about 5 minutes. Toss it with a few spoonfuls of clean peanut sauce. Divide the rice among four bowls, then arrange the chicken, cucumber rounds, and cabbage-carrot slaw in distinct sections. Drizzle with more sauce and finish with chopped peanuts, cilantro, and a lime wedge. Serve extra sauce on the side.

How to Keep the Peanut Sauce Pourable

Peanut sauce can thicken as it stands, especially after refrigeration. Whisk in warm water a tablespoon at a time until it drizzles easily without becoming watery. Keep it separate from the raw-chicken marinade; only the clean peanut sauce should be used to finish the bowls.

How to Store and Reheat the Bowls

Refrigerate leftovers promptly in airtight containers, keeping the rice, cooked chicken, fresh vegetables, and sauce separate. Use within about 3 days. Reheat the rice and chicken until hot; if the rice seems dry, add a splash of water and cover it while microwaving. Add the chilled vegetables and sauce after reheating.

For another composed chicken dinner bowl, try High-Protein Chicken Enchilada Bowls. For another make-ahead chicken lunch, see Greek Yogurt Chicken Salad (No Mayo).

Nutrition

Approximate nutrition per bowl, based on 4 servings: 805 calories, 56g protein, 35g fat, and 83g carbohydrates. Approximate nutrition per 100g: 145 calories, 10g protein, 6g fat, and 15g carbohydrates. Values will vary with ingredients and portion sizes.

Thai Peanut Chicken Rice Bowls

Rice bowls with seared chicken, crisp vegetables, creamy peanut sauce, peanuts, cilantro, and lime.
Course: Main Course
Cuisine: Thai
Prep: 35 min
Cook: 30 min
Total: 65 min
Servings: 4 Calories: 805 kcal

Equipment

  • 12-inch skillet
  • mixing bowls
  • whisk
  • knife and cutting board

Ingredients

For the Rice

  • 1½ cups dry long-grain white rice (280 g)
  • Water and salt, according to package directions

For the Chicken and Marinade

  • 1½ lb boneless, skinless chicken breast, cut into ½-inch-thick strips or bite-size pieces (680 g)
  • 2 tablespoons low-sodium soy sauce
  • 1 tablespoon fresh lime juice
  • 1 tablespoon neutral oil
  • 2 garlic cloves, finely minced
  • 1 teaspoon finely grated fresh ginger

For the Peanut Sauce

  • ½ cup creamy peanut butter (130 g)
  • ¼ cup low-sodium soy sauce
  • 2 tablespoons fresh lime juice
  • 2 tablespoons honey (40 g)
  • 1 teaspoon toasted sesame oil
  • 1 garlic clove, finely minced
  • 1 teaspoon finely grated fresh ginger
  • 3 to 6 tablespoons warm water, as needed
  • Optional: 1 to 2 teaspoons sriracha or another chile sauce

For the Bowls

  • 1 tablespoon neutral oil
  • 1 medium cucumber, thinly sliced into rounds (200 g)
  • 2 cups finely shredded purple cabbage (140 g)
  • 2 medium carrots, peeled and cut into thin matchsticks or grated (120 g)
  • ⅓ cup roasted peanuts, roughly chopped (45 g)
  • ⅓ cup loosely packed fresh cilantro leaves, roughly chopped (15 g)
  • 1 lime, cut into wedges

Instructions

  1. Rinse the rice if desired, then cook it with water and salt according to the package directions. Keep it covered and warm once tender.
  2. Whisk together 2 tablespoons soy sauce, 1 tablespoon lime juice, 1 tablespoon neutral oil, 2 minced garlic cloves, and 1 teaspoon grated ginger.
  3. Toss the chicken with the marinade, cover, and refrigerate for about 20 minutes.
  4. In a separate bowl, whisk the peanut butter, remaining ¼ cup soy sauce, remaining 2 tablespoons lime juice, honey, sesame oil, remaining garlic and ginger, and 3 tablespoons warm water. Add more warm water 1 tablespoon at a time until thick but pourable. Stir in chile sauce, if using.
  5. Slice the cucumber and prepare the cabbage and carrots. Keep the vegetables raw, undressed, and separate until assembly.
  6. Heat a dry 12-inch skillet over medium-high heat until hot, then add a thin film of the remaining neutral oil.
  7. Arrange the chicken in a single layer with space between pieces, working in batches if needed. Cook uncovered over medium to medium-high heat, turning as the pieces brown. Start checking after about 6 minutes; thin pieces generally take 7 to 10 minutes per batch.
  8. Check that the thickest piece of chicken is opaque, lightly browned, and reaches 165°F (75°C).
  9. Transfer the chicken to a plate and rest for about 5 minutes. Toss it with a few spoonfuls of clean peanut sauce.
  10. Divide the rice among four bowls. Arrange the chicken, cucumber, and cabbage-carrot slaw in separate sections.
  11. Drizzle with more peanut sauce and finish with chopped peanuts, cilantro, and a lime wedge. Serve extra sauce on the side.

Tips

  • Cut the chicken into evenly sized pieces so it cooks at a similar rate.
  • Cook the chicken in batches if needed to give the pieces room to brown instead of steam.
  • Keep the peanut sauce separate from the raw-chicken marinade; use only clean sauce to finish the bowls.
  • Thin thickened peanut sauce with warm water, one tablespoon at a time.

Variations

  • Spicy Peanut Chicken Bowls: Stir 1 to 2 teaspoons sriracha or another chile sauce into the peanut sauce to taste.

Notes

Refrigerate leftovers promptly in airtight containers, keeping rice, chicken, vegetables, and sauce separate; use within about 3 days. Reheat rice and chicken until hot, adding a splash of water to the rice if dry, then add the chilled vegetables and sauce.

Nutrition

Calories: 805 kcal | Protein: 56 g | Fat: 35 g | Carbohydrates: 83 g

Chicken Shawarma Rice Bowls

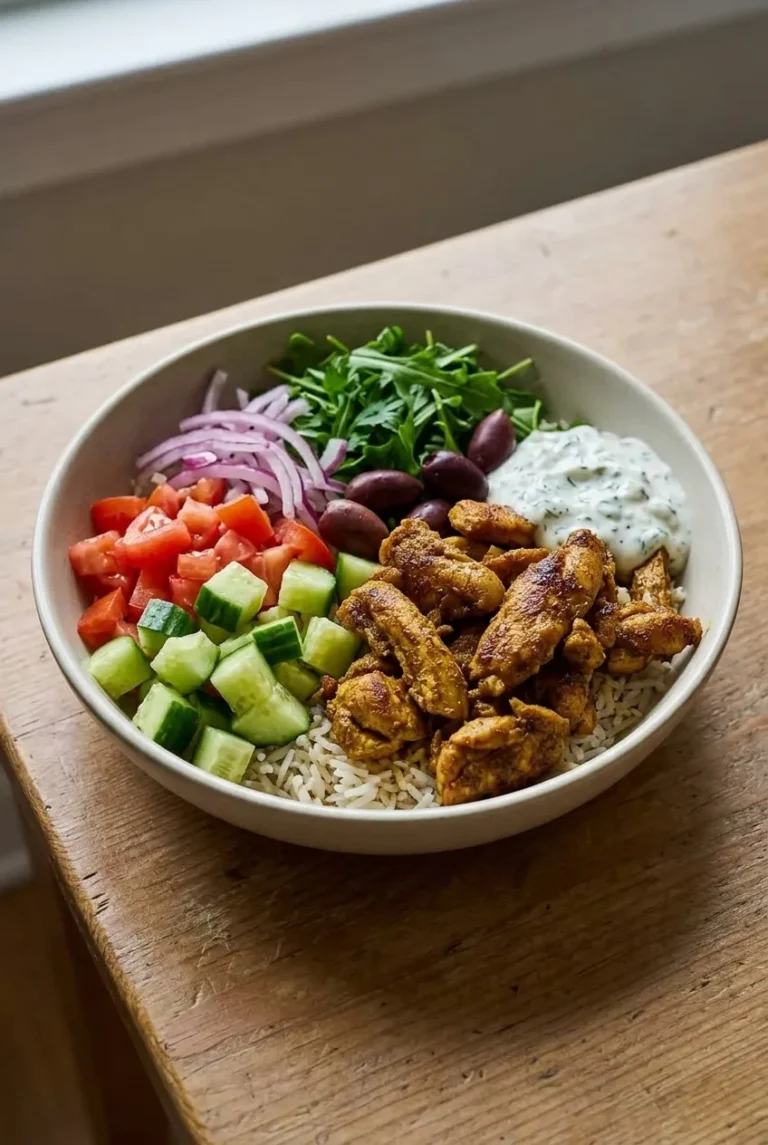
Browned, shawarma-spiced chicken thighs sit over basmati rice in these four individual bowls. Lemon, garlic, cumin, coriander, paprika, turmeric, and a little cinnamon season the chicken; cucumber, tomato, greens, and a cool yogurt-herb sauce can be added at serving time.

Roast the chicken in a single layer so the pieces brown instead of steam. A short seasoning rest is enough to cook it today, though you can refrigerate it in the marinade for longer if you’re preparing ahead.

Ingredients

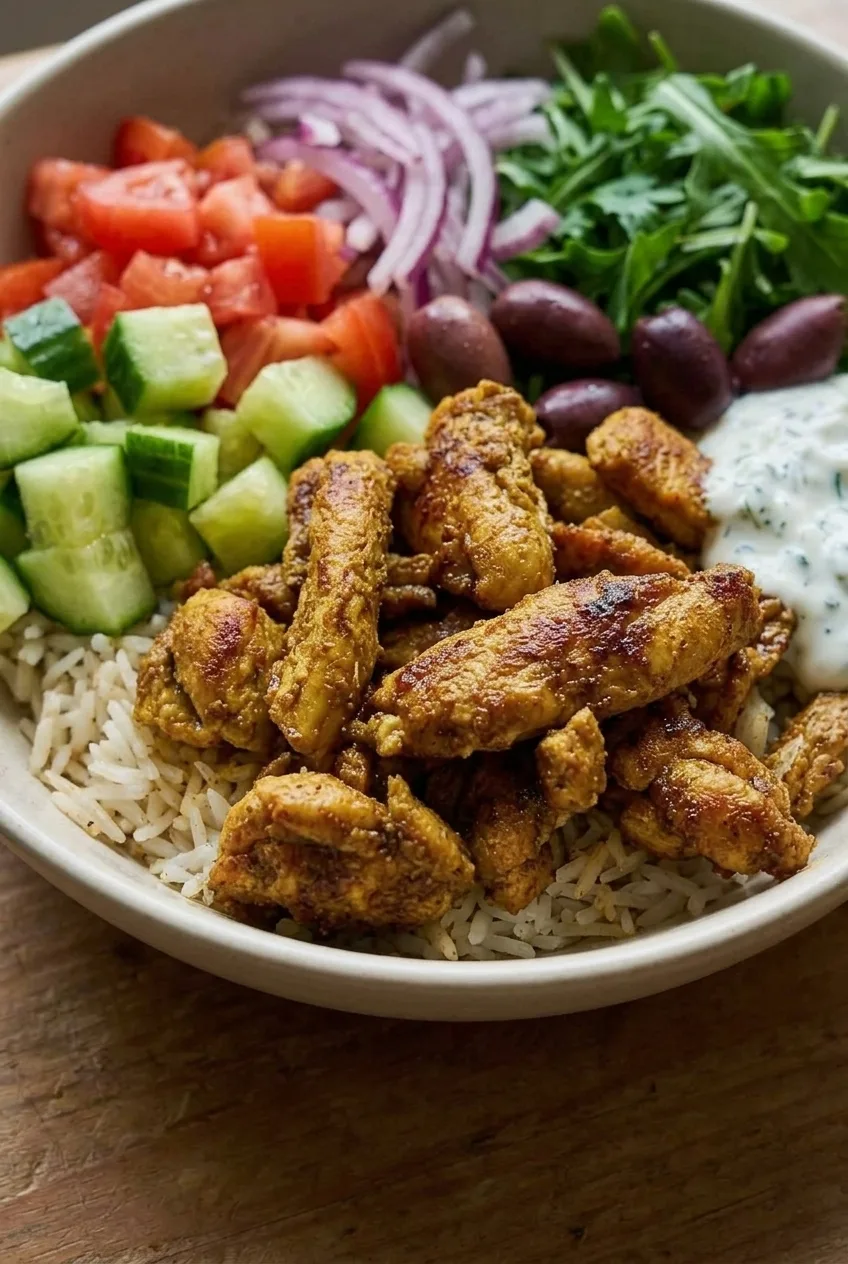
Close detail of browned shawarma chicken over basmati rice with cucumber, tomato, greens, and yogurt-herb sauce
  • 1 1/2 pounds boneless, skinless chicken thighs (about 680g), cut into even 1-inch strips or chunks
  • 1 cup uncooked basmati rice (about 185g)
  • 1 1/2 cups water, or the amount directed on the rice package
  • 2 tablespoons olive oil
  • 2 tablespoons lemon juice
  • 2 cloves garlic, finely grated or minced
  • 1 1/2 teaspoons ground cumin
  • 1 teaspoon ground coriander
  • 1 teaspoon paprika
  • 1/2 teaspoon ground turmeric
  • 1/4 teaspoon ground cinnamon
  • 1 teaspoon kosher salt, divided between the chicken and rice
  • 1/4 teaspoon black pepper

Optional toppings

  • 1 cup diced cucumber
  • 1 cup diced tomato
  • 1/4 small red onion, thinly sliced
  • 2 cups baby greens or arugula
  • 1/4 cup pitted, halved Kalamata olives
  • 1/2 cup tzatziki or yogurt-herb sauce

How to Make Chicken Shawarma Rice Bowls

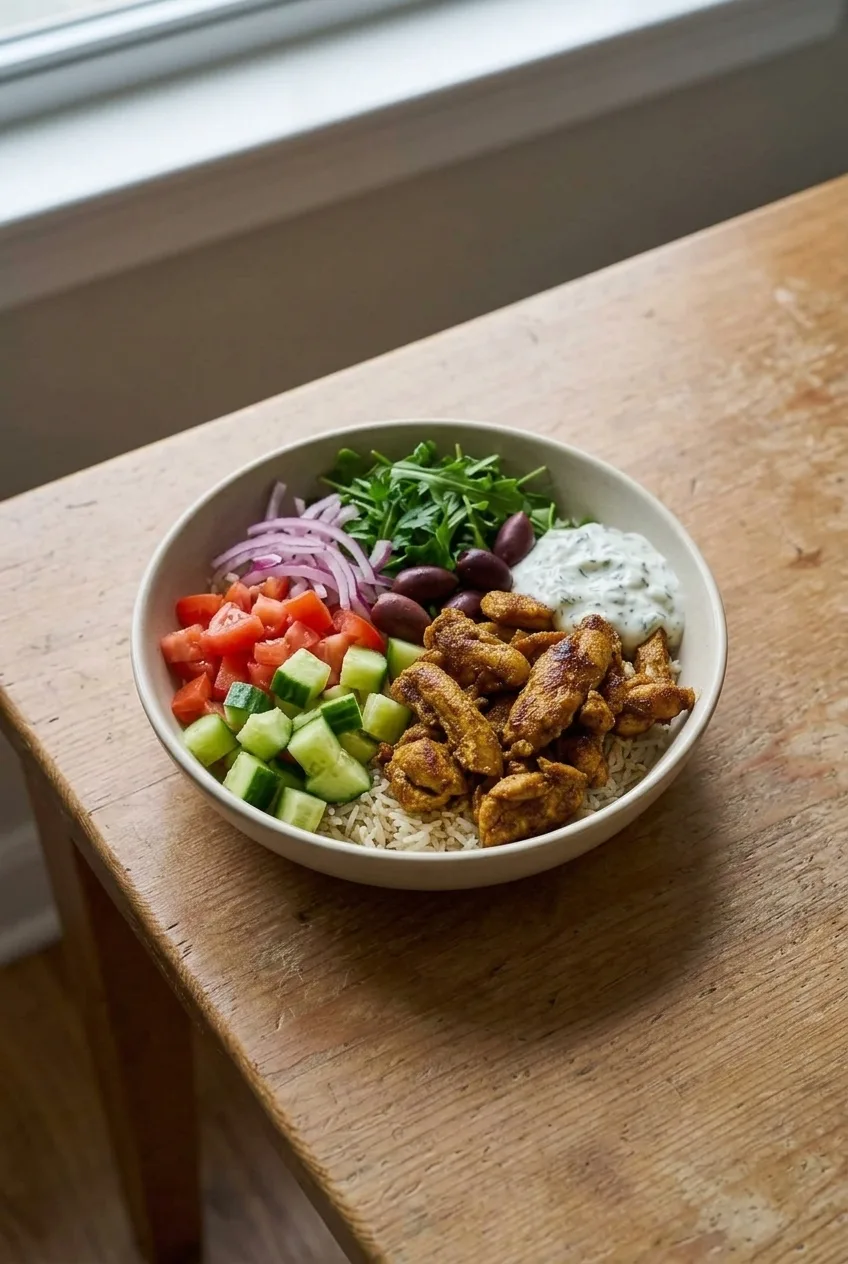
Complete chicken shawarma rice bowl centered on a simple surface, with rice, chicken, fresh toppings, and sauce
  1. Heat the oven and start the rice: Preheat the oven to 425°F (220°C) with a rack in the center. Rinse the rice if desired. Cook it with the water and a pinch of the salt according to the package directions, bringing it to a simmer over medium heat before reducing the heat as directed. Keep it covered while it cooks and during its rest off the heat.
  2. Season the chicken: Toss the chicken with the olive oil, lemon juice, garlic, spices, pepper, and remaining salt. Let it stand while the oven heats or the rice cooks. If marinating for longer, cover and refrigerate it.
  3. Roast the chicken: Spread the pieces in a single layer on a large rimmed sheet pan, leaving space between them. Use two pans if needed rather than piling the chicken up. Roast uncovered, turning once about halfway through if needed for even browning. Begin checking at about 20 minutes; the chicken may take 20 to 30 minutes, depending on piece size and oven.
  4. Check doneness: Insert an instant-read thermometer into the thickest pieces. Remove the chicken when it reaches 165°F (75°C); take smaller pieces out sooner if they finish first. Let the chicken rest for about 5 minutes.
  5. Prepare the toppings: Dice the cucumber and tomato, slice the onion, and set out any greens, olives, and sauce you’re using. Drain excess juice from especially ripe tomatoes.
  6. Assemble the bowls: Fluff the rice and divide it among four bowls. Arrange the chicken and chosen toppings over the rice, leaving some rice visible. Add a modest dollop or drizzle of sauce, or serve it on the side.

How to Get Browned Chicken

Space between the pieces lets moisture escape from the pan; crowded chicken releases liquid and steams instead of browning. Cut the pieces to a similar size so they finish more evenly, but use the thermometer rather than color or time alone to judge doneness.

If the chicken is cooked through but needs more color, broil it very briefly. Stay beside the oven and stop as soon as the edges brown—small pieces can burn quickly.

Marinating and Make-Ahead

An overnight marinade is optional. Roast the chicken after a short seasoning rest, or cover and refrigerate it for several hours or overnight for deeper flavor. Keep raw chicken refrigerated during a longer marinade.

For a different version, boneless, skinless chicken breast can replace the thighs, but it may dry out more readily; cut it evenly and check early for 165°F. Another long-grain rice also works if you follow its package directions. Tahini sauce can replace the yogurt-herb sauce.

How to Store and Reheat

Refrigerate cooked chicken and rice promptly in separate covered containers. Keep fresh vegetables, greens, and sauce apart from the warm components, and add them when serving so they do not soften the rice. Refrigerate the cooked chicken for up to two nights.

Reheat the chicken gently in a skillet over medium heat with a small splash of water or broth to limit drying. Reheat leftovers to 165°F, then assemble the bowls with the fresh toppings and sauce. Freezing a fully assembled bowl with fresh vegetables and sauce is not recommended.

Nutrition

Approximate nutrition per bowl, based on one-quarter of the chicken and rice and excluding optional toppings and sauce: 485 calories, 36g protein, 20g fat, and 39g carbohydrates. Approximate nutrition per 100g of the chicken-and-rice base: 195 calories, 14g protein, 8g fat, and 16g carbohydrates. Values vary with the chicken and the amount of oil retained during cooking.

Chicken Shawarma Rice Bowls

Shawarma-spiced roasted chicken thighs are served over basmati rice with fresh vegetables and yogurt-herb sauce.
Course: Main Course
Cuisine: Middle Eastern
Prep: 15 min
Cook: 30 min
Total: 45 min
Servings: 4 Calories: 485 kcal per bowl

Equipment

  • Oven
  • Rimmed sheet pan
  • Saucepan with lid
  • Instant-read thermometer
  • Knife and cutting board

Ingredients

Chicken and Rice

  • 1 1/2 pounds boneless, skinless chicken thighs (about 680 g), cut into even 1-inch strips or chunks
  • 1 cup uncooked basmati rice (about 185 g)
  • 1 1/2 cups water, or the amount directed on the rice package
  • 2 tablespoons olive oil
  • 2 tablespoons lemon juice
  • 2 cloves garlic, finely grated or minced
  • 1 1/2 teaspoons ground cumin
  • 1 teaspoon ground coriander
  • 1 teaspoon paprika
  • 1/2 teaspoon ground turmeric
  • 1/4 teaspoon ground cinnamon
  • 1 teaspoon kosher salt, divided between the chicken and rice
  • 1/4 teaspoon black pepper

Optional Toppings

  • 1 cup diced cucumber
  • 1 cup diced tomato
  • 1/4 small red onion, thinly sliced
  • 2 cups baby greens or arugula
  • 1/4 cup pitted Kalamata olives, halved
  • 1/2 cup tzatziki or yogurt-herb sauce

Instructions

  1. Preheat the oven to 425°F (220°C) with a rack in the center.
  2. Rinse the rice if desired. Add it to a saucepan with the water and a pinch of the salt. Bring to a simmer over medium heat, then cook covered according to the package directions. Let it rest, covered, off the heat.
  3. Toss the chicken with the olive oil, lemon juice, garlic, cumin, coriander, paprika, turmeric, cinnamon, pepper, and remaining salt. Let it stand while the oven heats or the rice cooks. Cover and refrigerate if marinating longer.
  4. Spread the chicken in a single layer on a large rimmed sheet pan, leaving space between the pieces. Use two pans if needed.
  5. Roast uncovered for 20 to 30 minutes, turning the pieces once halfway through if needed for even browning. Begin checking at about 20 minutes.
  6. Check the thickest pieces with an instant-read thermometer. Remove the chicken when it reaches 165°F (75°C), taking smaller pieces out sooner if they finish first. Rest for about 5 minutes.
  7. Prepare the toppings by dicing the cucumber and tomato and slicing the onion. Drain excess juice from especially ripe tomatoes.
  8. Fluff the rice and divide it among four bowls. Add the chicken and desired toppings, then serve with sauce on top or on the side.

Tips

  • Space the chicken pieces apart so moisture can escape and the chicken browns instead of steams.
  • Cut the chicken into similarly sized pieces so they cook more evenly.
  • Use an instant-read thermometer to check doneness rather than relying on color or time alone.
  • If cooked chicken needs more color, broil it briefly and watch closely to prevent burning.

Variations

  • Chicken Breast Shawarma Bowls: Replace the thighs with boneless, skinless chicken breast, cut evenly, and check early to avoid drying it out.
  • Long-Grain Rice Bowls: Use another long-grain rice and follow its package directions.
  • Tahini Sauce Bowls: Replace the yogurt-herb sauce with tahini sauce.

Notes

Refrigerate cooked chicken and rice promptly in separate covered containers; keep fresh toppings and sauce separate. Cooked chicken keeps refrigerated for up to two nights. Reheat leftovers to 165°F. Approximate nutrition per 100 g of the chicken-and-rice base: 195 calories, 14 g protein, 8 g fat, and 16 g carbohydrates.

Nutrition

Calories: 485 kcal per bowl | Protein: 36 g per bowl | Fat: 20 g per bowl | Carbohydrates: 39 g per bowl

Street Corn Chicken Rice Bowls

Browned chili-seasoned chicken and creamy lime-cotija corn sit over fluffy rice in these composed bowls. Avocado, pico de gallo, lettuce, and red onion stay in separate sections, so the warm ingredients and fresh toppings keep their distinct textures. Browning the thawed corn before adding its dressing gives it golden spots without making the topping watery.

Makes 4 bowls. Prep time: about 15 minutes. Cook time: about 20 minutes.

Ingredients

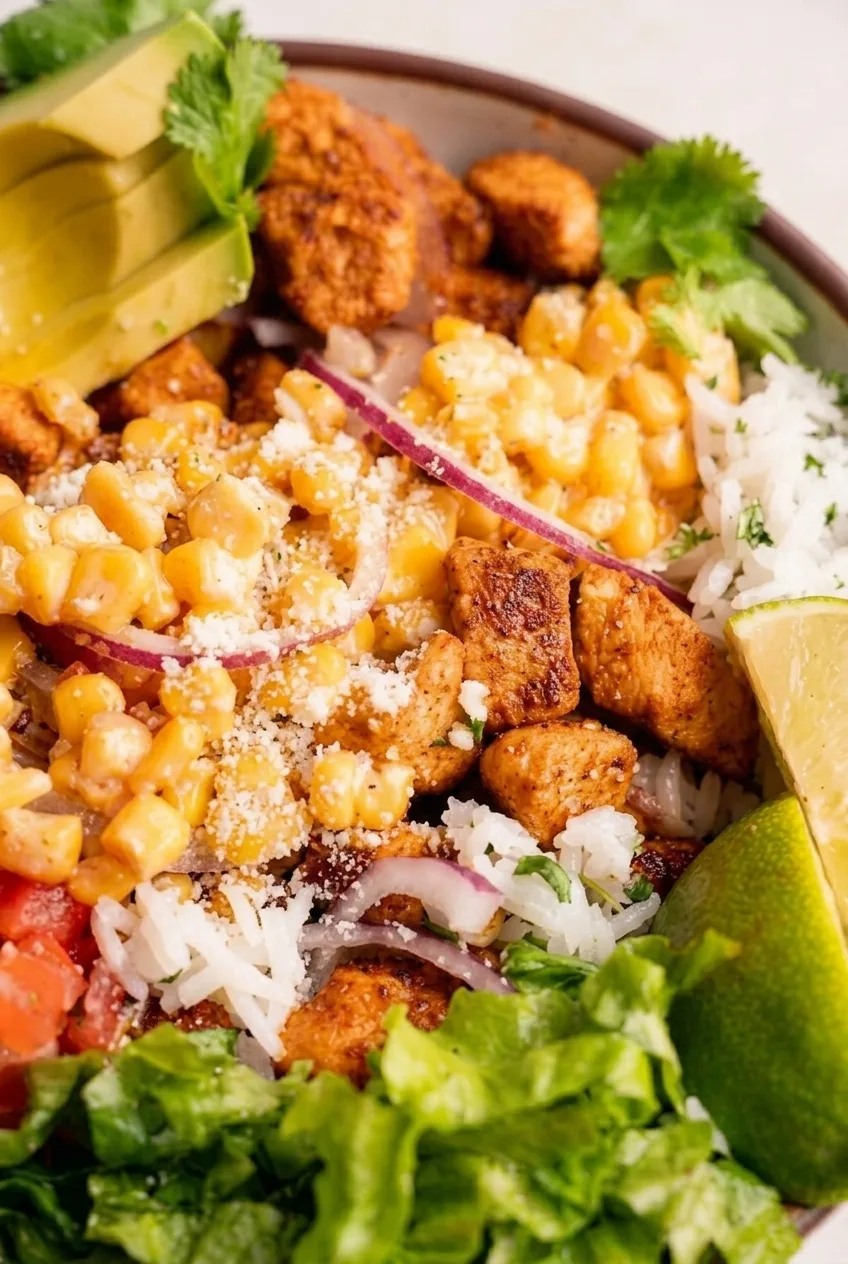
Close view of browned chicken, creamy cotija corn kernels, and fluffy rice in a street corn chicken rice bowl
  • 1 1/2 cups dry long-grain white or jasmine rice (280g)
  • Water for cooking the rice, about 2 1/4 cups or the amount directed on the package
  • 1 1/2 lb boneless, skinless chicken breast, cut into even 1-inch pieces (680g)
  • 1 tablespoon olive or neutral oil, plus 1 teaspoon for the corn if needed
  • 1 teaspoon chili powder, plus a pinch for the corn
  • 1/2 teaspoon ground cumin
  • 1 teaspoon smoked paprika
  • 1/2 teaspoon garlic powder
  • 3/4 teaspoon kosher salt, plus more to taste
  • 2 cups frozen corn, thawed and patted dry (300g)
  • 2 tablespoons mayonnaise
  • 2 tablespoons sour cream
  • 1/3 cup crumbled cotija cheese, divided (45g)
  • 2 limes, divided between the rice, corn, and serving wedges
  • 1/3 cup chopped fresh cilantro or cilantro leaves, divided (15g)
  • 2 cups chopped romaine or green-leaf lettuce (90g)
  • 3/4 cup pico de gallo (120g)
  • 1 avocado, sliced
  • 1/4 small red onion, thinly sliced

How to Make Street Corn Chicken Rice Bowls

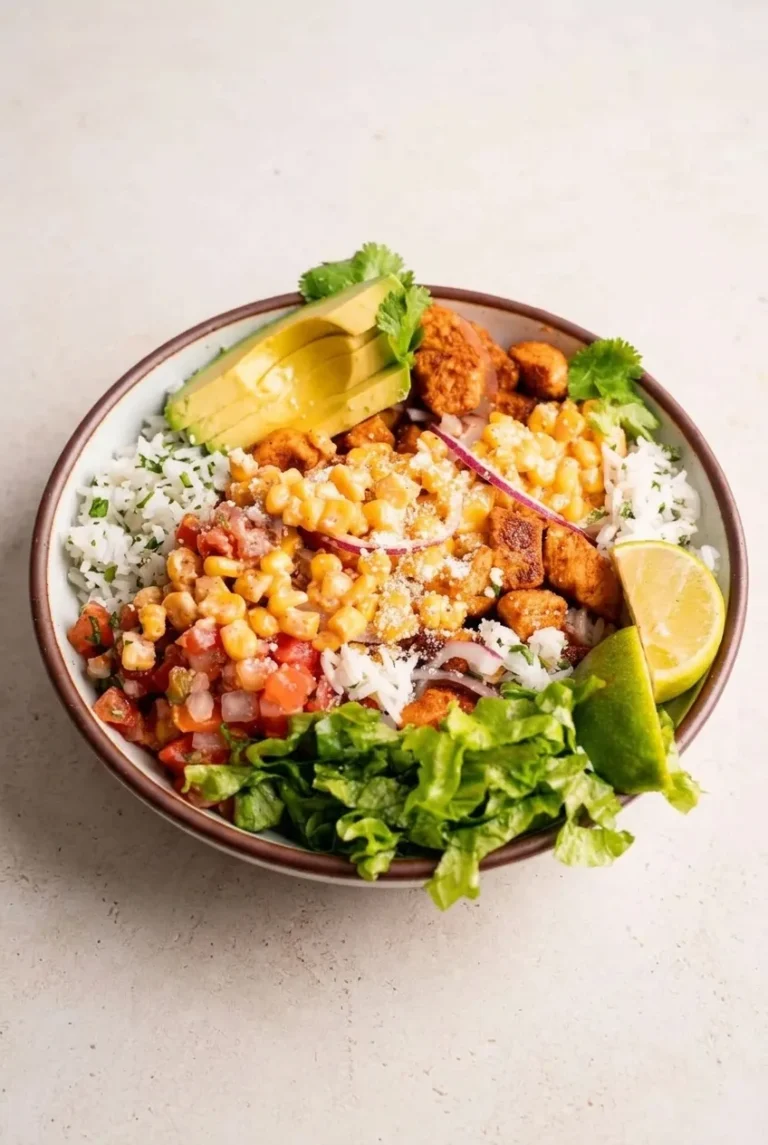
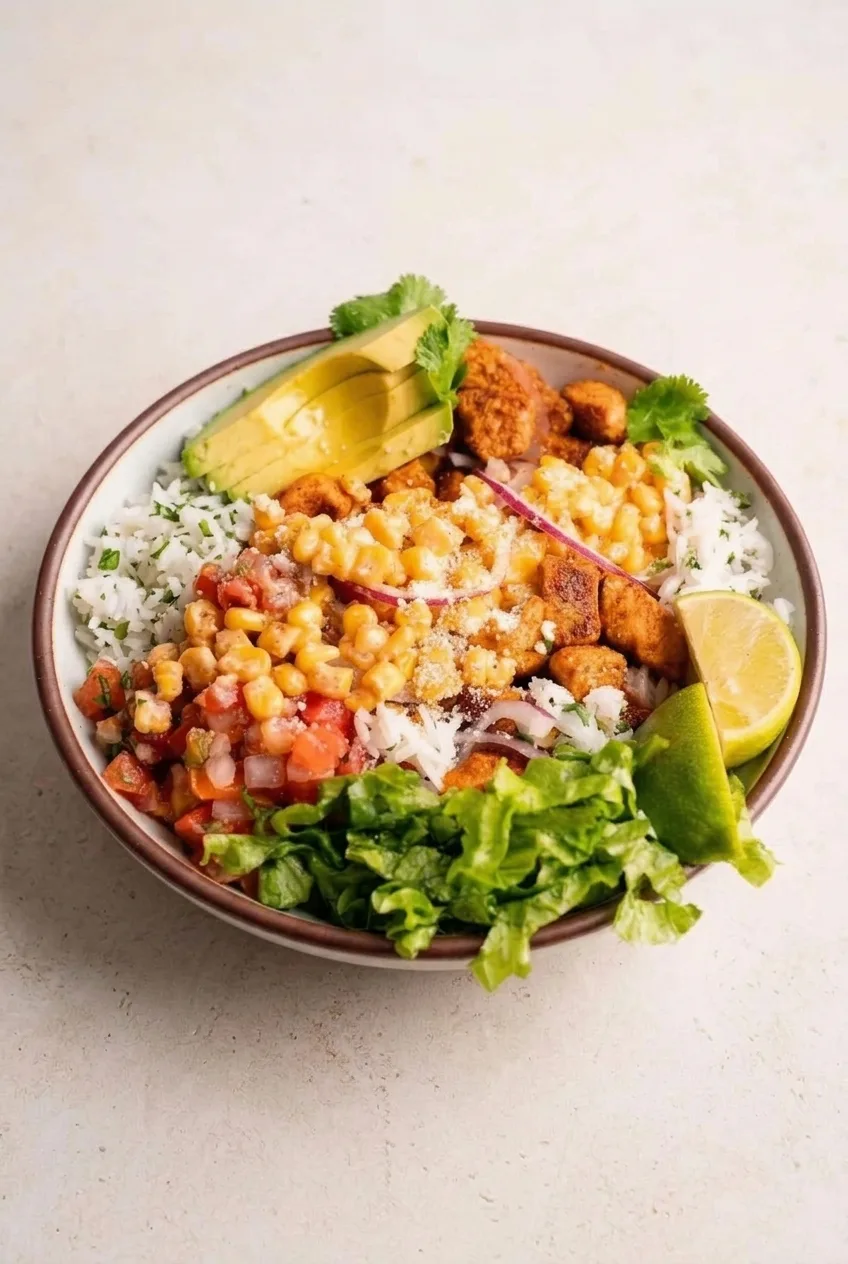
Full street corn chicken rice bowl centered on a pale surface, with chicken, creamy corn, rice, and fresh toppings
  1. Cook the rice: Rinse the rice if desired. Cook it with the package-directed amount of water in a covered saucepan, following the package directions. When the liquid is absorbed and the rice is tender, let it rest covered for 5 minutes. Fluff with a fork, then fold in the juice of 1/2 lime, some cilantro, and salt to taste.
  2. Season the chicken: Pat the chicken dry. Toss the evenly cut pieces with 1 tablespoon oil, 1 teaspoon chili powder, the cumin, smoked paprika, garlic powder, and 3/4 teaspoon salt.
  3. Brown the chicken: Preheat a large skillet over medium-high heat. Add the chicken in a single, uncrowded layer, working in batches if needed. Turn the pieces as they brown and start checking after about 5 minutes. Evenly cut 1-inch pieces usually take about 6–8 minutes total, but pan load and piece size affect the timing. The chicken should have browned edges, and the thickest piece must reach 165°F (75°C) on an instant-read thermometer. Transfer to a plate and rest for 3–5 minutes.
  4. Brown the corn: Wipe the skillet dry if it is wet, and add the remaining teaspoon of oil if the pan looks dry. Add the thawed, dried corn and cook uncovered over medium-high heat for about 4–6 minutes. Let the kernels sit briefly between stirs. They should be hot and tender with scattered golden-brown spots and no puddle of liquid.
  5. Dress the corn: Stir the mayonnaise, sour cream, juice of 1 lime, a pinch of chili powder, and about half the cotija together in a small bowl. Take the corn off the heat and fold in the dressing and some cilantro. It should coat the kernels lightly rather than pool around them.
  6. Assemble: Divide the rice among four shallow bowls. Arrange the chicken and creamy corn in separate clusters, then add the lettuce, pico de gallo, avocado, and red onion in their own sections. Finish with the remaining cotija and cilantro. Cut the remaining 1/2 lime into wedges and serve alongside.

How to Keep the Chicken and Corn from Steaming

Give the chicken room in the hot skillet so released moisture can evaporate and the pieces can brown. If the pan is crowded, cook another batch rather than piling in the remaining chicken. Reduce the heat slightly if the spices start to scorch.

Frozen corn needs to be thawed and dried before it goes into the skillet. Letting it sit between stirs develops browned spots; adding the creamy dressing only after the corn leaves the heat keeps the topping from turning thin.

Serving and Making Ahead

Keep the cooked ingredients and fresh toppings separate until it is time to assemble the bowls. Cut the avocado close to serving, and add the lettuce after reheating any prepared portions. Jalapeño or hot sauce can be offered at the table for extra heat.

Fresh corn cut from the cob can replace frozen corn. Canned corn also works if it is drained and patted dry before browning. Boneless, skinless chicken thighs can replace the breast, but their cooking time will differ; check the thickest pieces for 165°F.

How to Store and Reheat

Refrigerate the rice, chicken, and creamy corn in airtight containers for 3–4 days. Keep the lettuce, pico, avocado, and lime separate; cut the avocado close to serving.

Reheat the chicken and rice until hot before adding the fresh toppings. When microwaving the rice, add a small splash of water and cover it to help prevent drying. Serve the corn cool or at room temperature, or warm it gently if preferred.

For longer storage, freeze the chicken and rice separately for up to 2 months. Do not freeze assembled bowls or the creamy corn, avocado, lettuce, or pico; their textures can change.

Nutrition

Approximate nutrition per bowl, based on 4 servings: 770 calories, 50g protein, 28g fat, and 81g carbohydrates. Approximate nutrition per 100g: 140 calories, 9g protein, 5g fat, and 15g carbohydrates. Values vary with ingredient brands, portion sizes, and the amount of dressing used.

Street Corn Chicken Rice Bowls

Chili-seasoned chicken and creamy lime-cotija corn are served over rice with fresh, separate toppings.
Course: Main Course
Cuisine: Mexican
Prep: 15 min
Cook: 20 min
Total: 35 min
Servings: 4 Calories: 770 kcal

Equipment

  • Covered saucepan
  • Large skillet
  • Small bowl
  • Instant-read thermometer

Ingredients

For the Rice

  • 1 1/2 cups dry long-grain white or jasmine rice (280 g)
  • About 2 1/4 cups water, or the amount directed on the package
  • Juice of 1/2 lime
  • Some of the chopped cilantro
  • Salt, to taste

For the Chicken

  • 1 1/2 lb boneless, skinless chicken breast, cut into even 1-inch pieces (680 g)
  • 1 tablespoon olive or neutral oil
  • 1 teaspoon chili powder
  • 1/2 teaspoon ground cumin
  • 1 teaspoon smoked paprika
  • 1/2 teaspoon garlic powder
  • 3/4 teaspoon kosher salt

For the Corn

  • 2 cups frozen corn, thawed and patted dry (300 g)
  • 1 teaspoon olive or neutral oil, if needed
  • 2 tablespoons mayonnaise
  • 2 tablespoons sour cream
  • Juice of 1 lime
  • A pinch of chili powder
  • About half of the crumbled cotija cheese

For Serving

  • 1/3 cup crumbled cotija cheese, divided (45 g)
  • 1/3 cup chopped fresh cilantro or cilantro leaves, divided (15 g)
  • 2 cups chopped romaine or green-leaf lettuce (90 g)
  • 3/4 cup pico de gallo (120 g)
  • 1 avocado, sliced
  • 1/4 small red onion, thinly sliced
  • Remaining 1/2 lime, cut into wedges

Instructions

  1. Rinse the rice if desired. Cook it with the package-directed amount of water in a covered saucepan, following the package directions.
  2. When the rice is tender and the liquid is absorbed, let it rest covered for 5 minutes. Fluff with a fork and fold in the juice of 1/2 lime, some cilantro, and salt to taste.
  3. Pat the chicken dry. Toss it with 1 tablespoon oil, 1 teaspoon chili powder, the cumin, smoked paprika, garlic powder, and 3/4 teaspoon salt.
  4. Heat a large skillet over medium-high heat. Add the chicken in a single, uncrowded layer, working in batches if needed.
  5. Turn the chicken as it browns, checking after about 5 minutes. Cook evenly cut 1-inch pieces for about 6–8 minutes total, until browned and the thickest piece reaches 165°F (75°C). Transfer to a plate and rest for 3–5 minutes.
  6. Wipe the skillet dry if needed and add the remaining teaspoon of oil if the pan looks dry. Add the thawed, dried corn and cook uncovered over medium-high heat for about 4–6 minutes, letting the kernels sit briefly between stirs, until hot and tender with scattered golden-brown spots.
  7. Stir the mayonnaise, sour cream, juice of 1 lime, a pinch of chili powder, and about half the cotija together in a small bowl.
  8. Remove the corn from the heat. Fold in the dressing and some cilantro, coating the kernels lightly without letting the dressing pool.
  9. Divide the rice among four shallow bowls. Arrange the chicken and corn in separate clusters, then add the lettuce, pico de gallo, avocado, and red onion in their own sections.
  10. Finish with the remaining cotija and cilantro. Serve with the remaining lime wedges.

Tips

  • Cook the chicken in batches if needed so the skillet is not crowded and the pieces brown rather than steam.
  • Reduce the heat slightly if the chicken spices begin to scorch.
  • Thaw and pat the corn dry before browning to prevent excess liquid in the skillet.
  • Let the corn sit briefly between stirs to develop golden-brown spots.
  • Add the creamy dressing only after removing the corn from the heat.

Variations

  • Fresh Corn: Replace the frozen corn with fresh corn cut from the cob.
  • Canned Corn: Use drained, patted-dry canned corn in place of frozen corn.
  • Chicken Thighs: Replace the chicken breast with boneless, skinless chicken thighs and check the thickest pieces for 165°F (75°C).

Notes

Refrigerate rice, chicken, and corn in airtight containers for 3–4 days; keep fresh toppings separate. Reheat chicken and rice until hot, adding a splash of water and covering the rice when microwaving. Freeze chicken and rice separately for up to 2 months; do not freeze assembled bowls or the creamy corn.

Nutrition

Calories: 770 kcal | Protein: 50 g | Fat: 28 g | Carbohydrates: 81 g

Korean BBQ Chicken Rice Bowls

These Korean-inspired bowls bring together glossy gochujang chicken, white rice, roasted sweet potato, wilted kale, and cool kimchi. Keep the components in separate sections so the rice stays fluffy and the kimchi contrasts with the warm toppings.

Boneless skinless thighs stay juicy as they roast. A light coating of sauce seasons the chicken on the sheet pan; sauce reserved before it touches raw chicken adds the finishing glaze without exposing the sweet sauce to high heat for too long. Makes 4 bowls in about 50 minutes.

Ingredients for Korean BBQ Chicken Rice Bowls

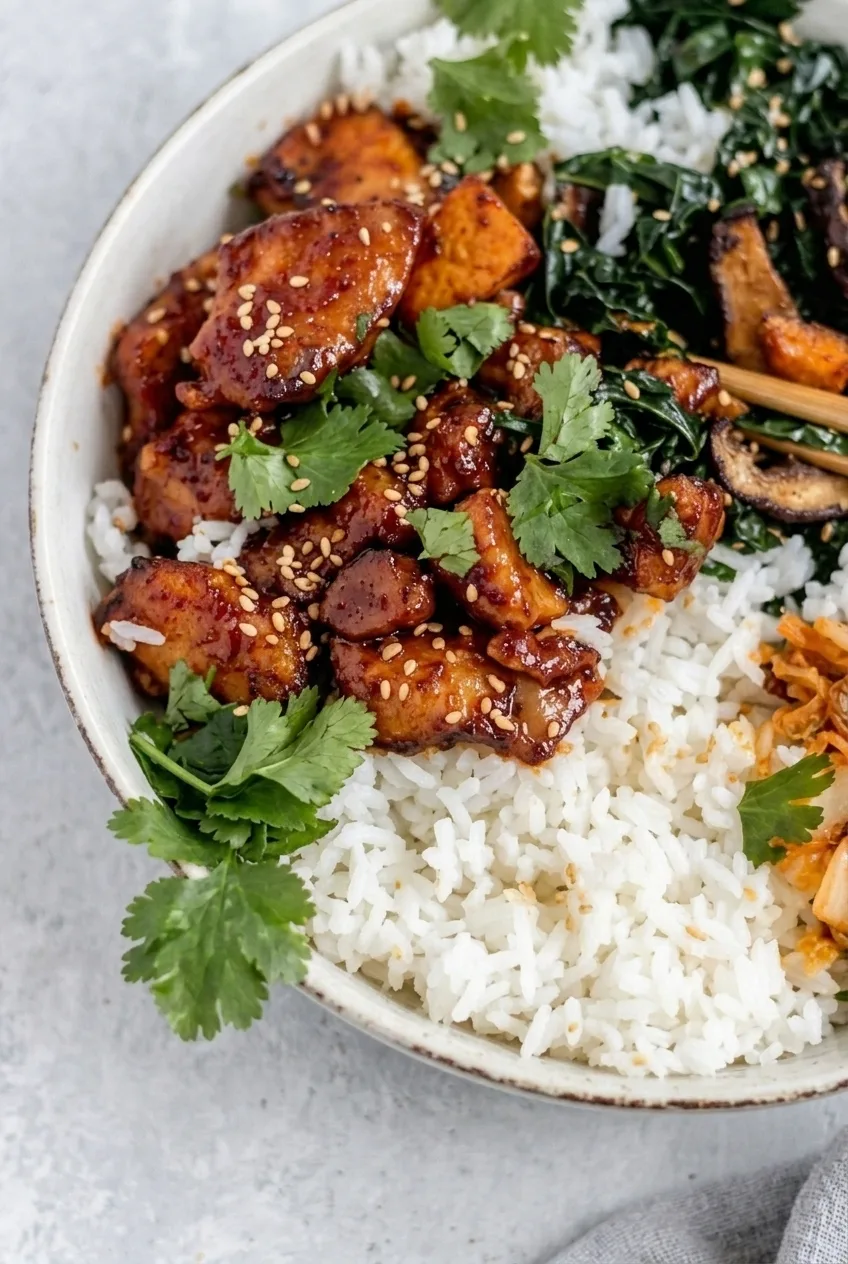
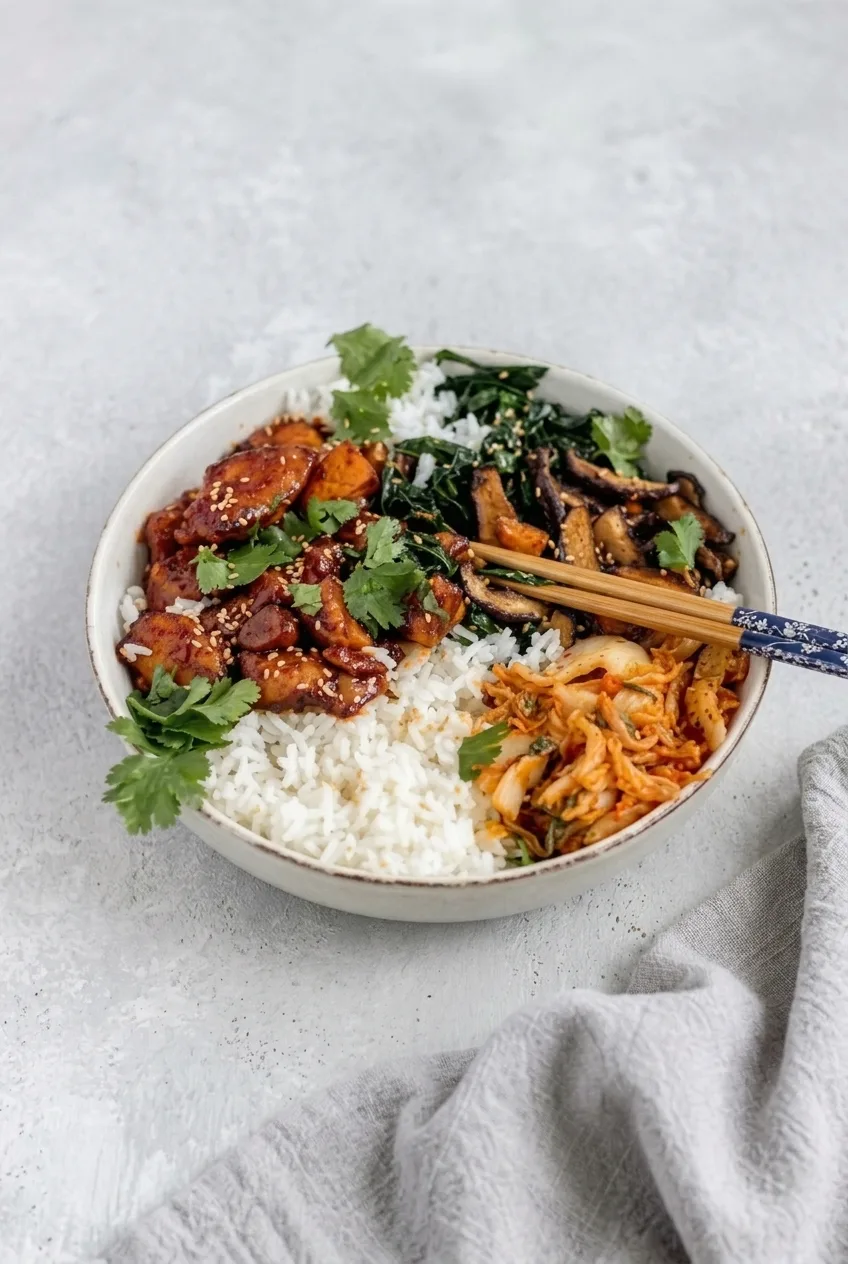
Close detail of glossy gochujang chicken beside fluffy rice, roasted sweet potato, kale, and kimchi
  • 1 1/2 cups uncooked jasmine rice (285g)
  • 1 lb sweet potato, cut into short, thin wedges or strips (450g)
  • 1 1/2 lb boneless skinless chicken thighs, cut into roughly 1-inch pieces (680g)
  • 4 packed cups chopped kale (140g)
  • 1 cup kimchi, drained slightly if very wet (150g)
  • 3 tablespoons gochujang
  • 3 tablespoons low-sodium soy sauce
  • 1 tablespoon honey
  • 1 tablespoon rice vinegar
  • 2 teaspoons toasted sesame oil
  • 2 garlic cloves, finely grated or minced
  • 1 tablespoon finely grated fresh ginger
  • 1 tablespoon neutral oil, plus more as needed for the vegetables
  • 2 tablespoons water, plus a splash as needed to thin the sauce
  • Kosher salt, used lightly to taste
  • 1 tablespoon sesame seeds
  • 1/4 cup loosely packed cilantro leaves

Optional: 2 sliced green onions for garnish.

How to Make Korean BBQ Chicken Rice Bowls

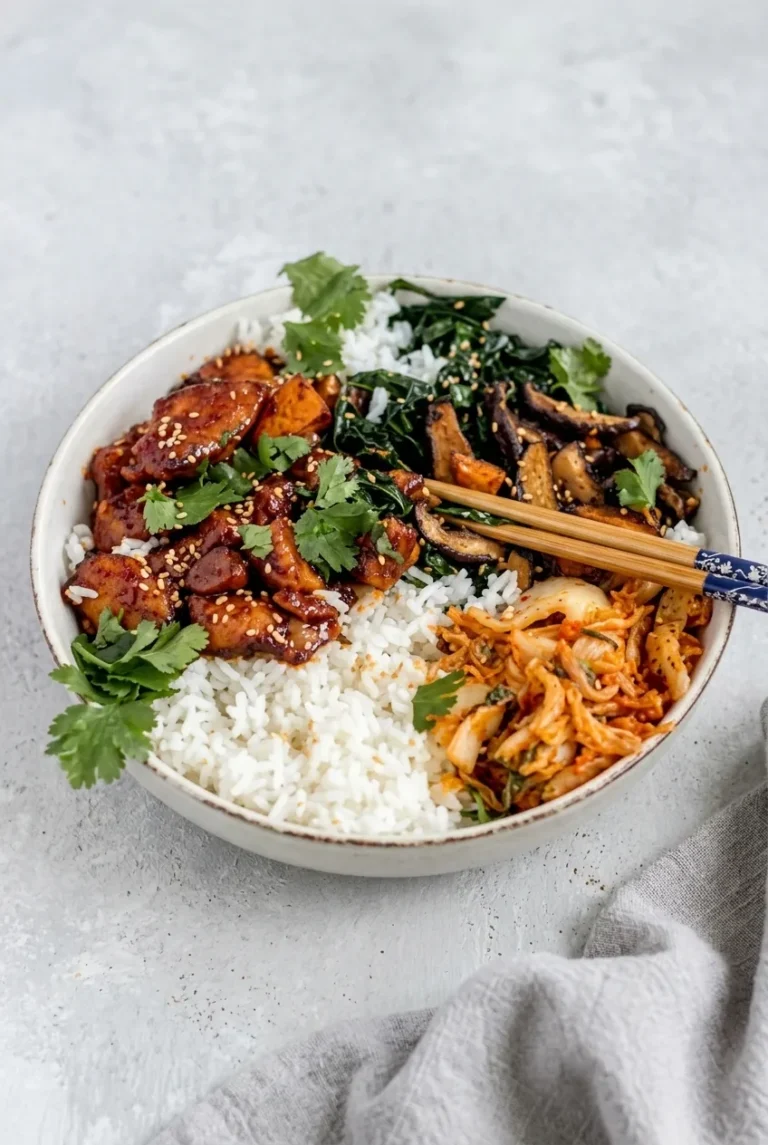
Full Korean BBQ chicken rice bowl centered on a light tabletop, with its toppings arranged in separate sections
  1. Cook the rice: Prepare the jasmine rice according to the package directions. When tender, keep it covered off the heat until assembly.
  2. Start the sweet potato: Heat the oven to 425°F (220°C) with a rack in the center. Toss the sweet potato with some of the neutral oil and a light pinch of salt. Spread it in a single layer on a large rimmed sheet pan. Roast uncovered for about 15 minutes, until the edges begin to brown.
  3. Mix and reserve the sauce: Whisk together the gochujang, soy sauce, honey, rice vinegar, sesame oil, garlic, ginger, and 2 tablespoons water. Set aside a clean portion for glazing and serving before any sauce touches the raw chicken.
  4. Roast the chicken: Toss the chicken with enough of the remaining sauce to coat it lightly. Turn the sweet potato, then add the chicken to the open space on the pan. Leave room between the pieces so they brown rather than steam; use a second sheet pan if needed. Roast for about 12 to 18 minutes, turning the chicken once if it browns unevenly. Start checking after 12 minutes. The thickest piece must reach 165°F (75°C); the sweet potato should be tender when pierced and browned at the edges.
  5. Glaze and rest: Lightly brush or toss the cooked chicken with some of the reserved clean sauce. For more browned edges, broil for 1 to 2 minutes, watching continuously. Rest the chicken for about 5 minutes.
  6. Wilt the kale: Warm a little neutral oil in a small skillet over medium heat. Add the kale and a small splash of water. Stir for 3 to 5 minutes, until tender but still green, then season lightly with salt.
  7. Build the bowls: Divide the rice among four wide, shallow bowls. Arrange the chicken, kale, sweet potato, and cool kimchi in distinct sections. Scatter with cilantro and sesame seeds. Serve any remaining reserved sauce on the side, and add green onion if desired.

How to Keep the Chicken Glazed, Not Burnt

Gochujang and honey can scorch, especially under the broiler. The sauce on the raw chicken should be a light coating, not a pool on the pan. Use only sauce reserved before it touched raw chicken for the finishing glaze or a table drizzle. Discard any uncooked sauce left over from coating the chicken.

Make-Ahead, Storage, and Reheating

The sauce and rice can be prepared ahead. Refrigerate cooked chicken and rice in airtight containers for 3 to 4 days. Cooked kale and sweet potato can be stored with the warm components, though they may soften. Keep the kimchi, cilantro, and reserved sauce separate.

Reheat the chicken and rice in a microwave or skillet until hot, then add the cool kimchi and fresh herbs. Loosen thickened sauce with a splash of water. Cooked chicken and rice may be frozen separately for up to about 3 months; thaw in the refrigerator before reheating. Do not freeze assembled bowls with kimchi or fresh garnishes.

Korean BBQ Chicken Rice Bowl Variations

  • Chicken breast: Use evenly cut boneless skinless breast pieces instead of thighs. Breast meat is leaner and may cook faster, so check early and remove it when the thickest piece reaches 165°F.
  • Different rice base: Use brown rice or cauliflower rice in place of jasmine rice. Prepare it according to its own package directions or recipe.

Nutrition

Approximate nutrition per bowl, based on 1/4 of the recipe: 855 calories, 45g protein, 32g fat, and 96g carbohydrates. Per 100g: approximately 145 calories, 8g protein, 6g fat, and 16g carbohydrates. Values vary with ingredient brands, the amount of sauce used, and cooked yield.

Korean BBQ Chicken Rice Bowls

Gochujang-glazed chicken is served with jasmine rice, roasted sweet potato, wilted kale, and cool kimchi.
Course: Main Course
Cuisine: Korean
Prep: 15 min
Cook: 35 min
Total: 50 min
Servings: 4 Calories: 855 kcal

Equipment

  • Oven
  • Rimmed sheet pan
  • Rice pot
  • Mixing bowl
  • Whisk
  • Skillet
  • Instant-read thermometer

Ingredients

For the Bowls

  • 1 1/2 cups uncooked jasmine rice (285g)
  • 1 lb sweet potato, cut into short, thin wedges or strips (450g)
  • 1 1/2 lb boneless skinless chicken thighs, cut into roughly 1-inch pieces (680g)
  • 4 packed cups chopped kale (140g)
  • 1 cup kimchi, drained slightly if very wet (150g)
  • 1 tablespoon neutral oil, plus more as needed for the vegetables
  • Kosher salt, used lightly to taste

For the Sauce

  • 3 tablespoons gochujang
  • 3 tablespoons low-sodium soy sauce
  • 1 tablespoon honey
  • 1 tablespoon rice vinegar
  • 2 teaspoons toasted sesame oil
  • 2 garlic cloves, finely grated or minced
  • 1 tablespoon finely grated fresh ginger
  • 2 tablespoons water, plus a splash as needed to thin the sauce

For Serving

  • 1 tablespoon sesame seeds
  • 1/4 cup loosely packed cilantro leaves
  • 2 sliced green onions (optional)

Instructions

  1. Prepare the jasmine rice according to the package directions. When tender, keep it covered off the heat.
  2. Heat the oven to 425°F (220°C) with a rack in the center.
  3. Toss the sweet potato with some of the neutral oil and a light pinch of salt. Spread it in a single layer on a large rimmed sheet pan.
  4. Roast the sweet potato uncovered for about 15 minutes, until the edges begin to brown.
  5. Whisk together the gochujang, soy sauce, honey, rice vinegar, sesame oil, garlic, ginger, and 2 tablespoons water.
  6. Set aside a clean portion of the sauce for glazing and serving before any sauce touches the raw chicken.
  7. Toss the chicken with enough of the remaining sauce to coat it lightly. Turn the sweet potato and add the chicken to the open space on the pan, leaving room between pieces. Use a second sheet pan if needed.
  8. Roast for about 12 to 18 minutes, turning the chicken once if it browns unevenly. Start checking after 12 minutes; the thickest piece must reach 165°F (75°C), and the sweet potato should be tender and browned at the edges.
  9. Brush or toss the cooked chicken with some of the reserved clean sauce. For more browned edges, broil for 1 to 2 minutes, watching continuously.
  10. Rest the chicken for about 5 minutes.
  11. Warm a little neutral oil in a small skillet over medium heat. Add the kale and a small splash of water; stir for 3 to 5 minutes, until tender but still green. Season lightly with salt.
  12. Divide the rice among four wide, shallow bowls. Arrange the chicken, kale, sweet potato, and kimchi in separate sections.
  13. Scatter with cilantro and sesame seeds. Serve any remaining reserved sauce on the side and add green onion if desired.

Tips

  • Reserve clean sauce before it touches raw chicken for glazing and serving.
  • Coat the chicken lightly; excess sauce on the pan can scorch.
  • Leave space between chicken pieces so they brown instead of steam.
  • Check the chicken early and cook until the thickest piece reaches 165°F (75°C).
  • Watch the chicken continuously if broiling, since gochujang and honey can scorch.

Variations

  • Chicken Breast: Use evenly cut boneless skinless chicken breast pieces instead of thighs; check early and remove when the thickest piece reaches 165°F.
  • Brown Rice or Cauliflower Rice: Replace the jasmine rice with brown rice or cauliflower rice, prepared according to its package directions or recipe.

Notes

Refrigerate cooked chicken and rice in airtight containers for 3 to 4 days; keep kimchi, cilantro, and reserved sauce separate. Reheat chicken and rice until hot, then add the cool toppings. Freeze chicken and rice separately for up to about 3 months; thaw in the refrigerator. Discard uncooked sauce left over from coating the chicken.

Nutrition

Calories: 855 kcal | Protein: 45 g | Fat: 32 g | Carbohydrates: 96 g

Sticky Honey Ginger Chicken Rice Bowls

Grilled honey-ginger chicken sits across warm white rice and crisp chopped cabbage in these composed bowls. The chicken gets browned edges and a light, glossy finish rather than a thick sauce. Set aside some of the honey-soy mixture before adding the raw chicken; that clean portion dresses the finished bowls. Rest the grilled chicken before slicing it diagonally, then add sesame seeds, cilantro, and a lime wedge.

Prep time: 20 minutes, plus 2 to 8 hours to marinate; cook time: about 25 minutes; total time: about 2 hours 45 minutes with the minimum marinating time; serves: 4.

Ingredients for Sticky Honey Ginger Chicken Rice Bowls

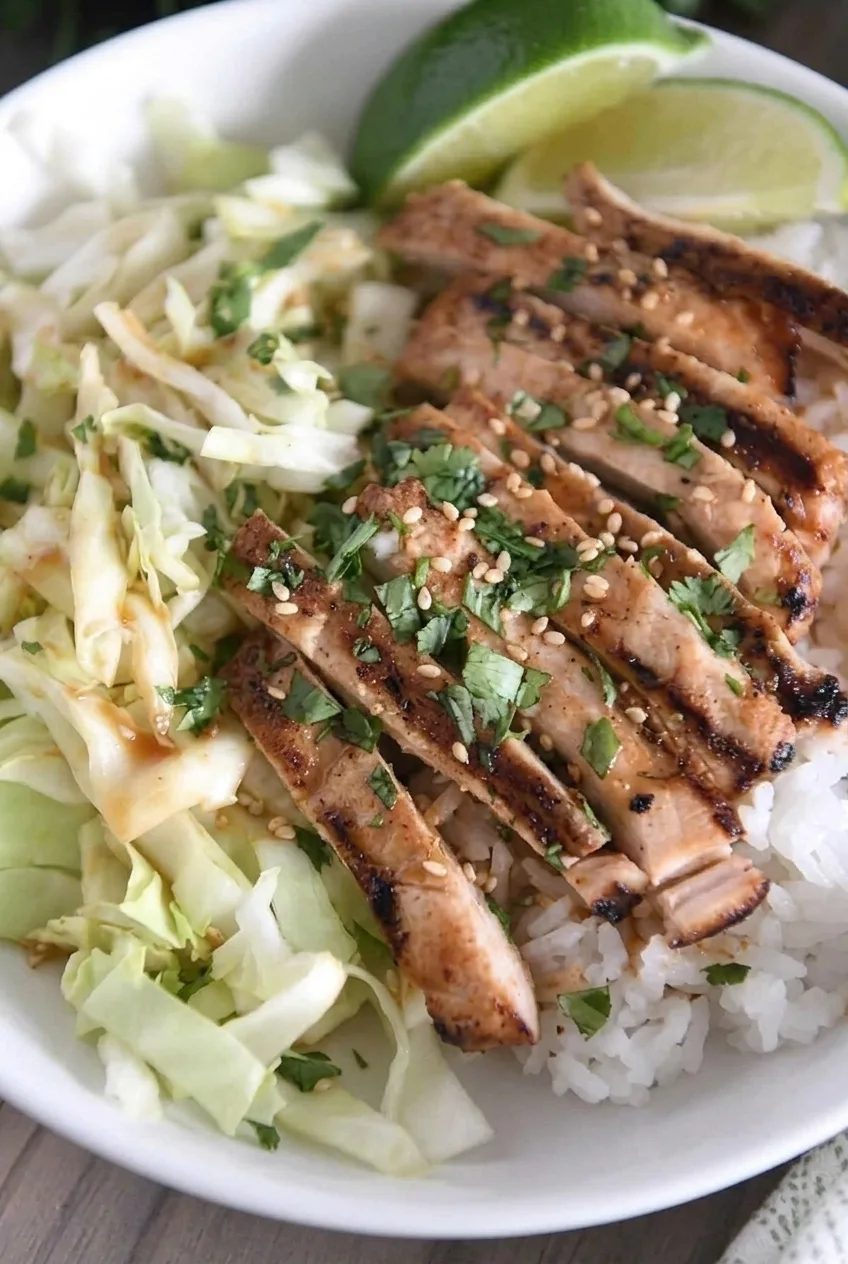
Close view of glossy grilled chicken slices with sesame, rice grains, and crisp cabbage in a honey ginger chicken bowl
  • 1 1/2 pounds boneless, skinless chicken breasts (about 680g)
  • 1 1/2 cups uncooked jasmine or other white rice (about 285g)
  • Water for the rice, according to package directions; about 2 1/4 cups for many jasmine rice brands
  • About 4 cups chopped green cabbage (about 10 ounces or 280g)
  • 1/3 cup low-sodium soy sauce
  • 1/4 cup honey (about 85g)
  • 2 tablespoons rice vinegar
  • 1 tablespoon olive oil
  • 1 tablespoon toasted sesame oil
  • 1 tablespoon finely grated fresh ginger
  • 2 cloves garlic, finely grated or minced
  • 1 tablespoon sesame seeds
  • 2 tablespoons chopped fresh cilantro
  • 1 lime, cut into wedges

How to Make Sticky Honey Ginger Chicken Rice Bowls

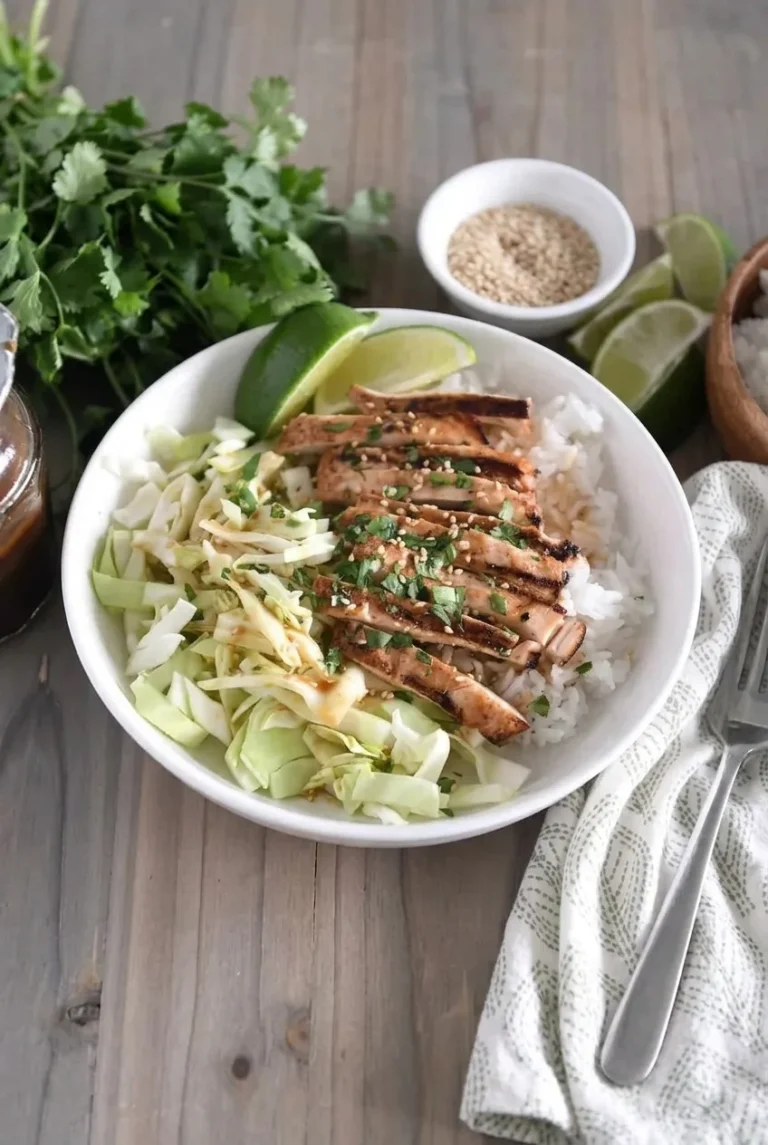
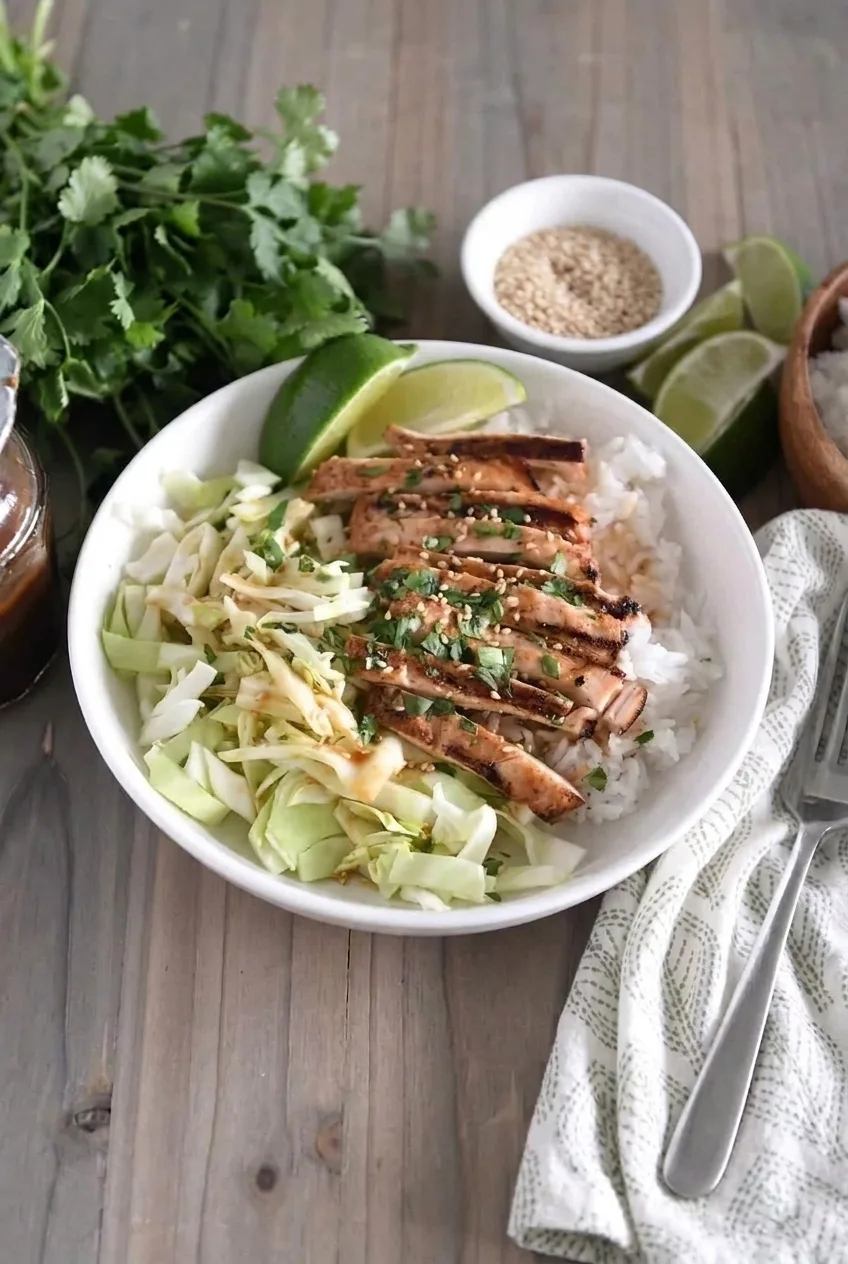
Wide view of a complete honey ginger chicken rice bowl with separate rice and cabbage sections and lime
  1. Mix and divide the dressing. Whisk the soy sauce, honey, rice vinegar, olive oil, sesame oil, ginger, and garlic until combined. Before handling the chicken, transfer about 1/4 cup to a clean, covered container and refrigerate it for serving.
  2. Marinate the chicken. Pound very uneven breasts to a fairly even thickness. Add the chicken to the remaining marinade, turn to coat, cover, and refrigerate for 2 to 8 hours.
  3. Cook the rice and chop the cabbage. Cook the rice covered according to its package directions. Let it stand covered briefly, then fluff it. Chop the cabbage into short, bite-size pieces and keep it separate from the rice. If you want to lightly dress the cabbage, use a little of the clean reserved dressing.
  4. Preheat the grill. Heat an outdoor grill to medium-high. Clean and lightly oil the grates. Lift the chicken from the marinade and let the excess drip off so the honey does not scorch in a thick coating. Discard the marinade that touched the raw chicken.
  5. Grill the chicken. Place the breasts over direct heat with space between them. Grill uncovered, turning once, for about 3 to 5 minutes per side, depending on thickness. Begin checking the thickest part after about 3 minutes on the second side. The chicken should have browned edges and grill marks and reach 165°F (75°C) on an instant-read thermometer. If the honey darkens too quickly, move the chicken away from flare-ups and continue cooking until done.
  6. Rest and slice. Transfer the chicken to a clean cutting board and rest for 5 to 10 minutes. Slice thinly and diagonally across the grain.
  7. Assemble the bowls. Divide the rice and cabbage among four bowls, keeping them in separate sections. Overlap the chicken slices across the center. Drizzle lightly with the clean reserved dressing, then add sesame seeds, cilantro, and a lime wedge to each bowl.

Getting the Grill Timing Right

The 3-to-5-minute estimate works as a starting point for evenly thick breasts, not a fixed finish time. Thicker pieces and different grills may need longer. Use the thermometer at the thickest point, and let the chicken rest before slicing. A light drizzle of dressing at assembly gives the chicken a sheen without pooling around the rice or softening the cabbage.

Make-Ahead and Ingredient Swaps

Marinate the chicken in the refrigerator for 2 to 8 hours, never at room temperature. Rice and chicken can be cooked ahead; keep the cabbage and clean dressing separate, then add them with the garnishes near serving time to preserve the cabbage’s crunch.

  • Chicken: Boneless, skinless thighs or tenderloins can replace breasts. Their size and thickness change the grilling time, so cook them to 165°F rather than using the breast timing.
  • Soy sauce: Tamari can replace soy sauce. Check the label if gluten-free preparation is needed.
  • Acidity: Fresh lime juice can replace some or all of the rice vinegar.
  • Optional heat: Add a few drops of sriracha or a pinch of red pepper flakes to the sauce before dividing it, or offer chile at the table.

How to Store the Bowls

Refrigerate cooked chicken and rice promptly in covered containers and use within 3 to 4 days. Store cabbage separately from the warm rice and dressing so it stays crisp. Add the cabbage, clean dressing, cilantro, sesame seeds, and lime when assembling. Freezing the assembled bowls has not been established for this recipe.

Nutrition

Approximate nutrition per serving, based on 1 of 4 bowls: 600 calories, 50g protein, 13g fat, and 75g carbohydrates. Approximate nutrition per 100g: 150 calories, 12g protein, 3g fat, and 19g carbohydrates. Values vary with ingredient brands, portions, and how much marinade remains on the chicken.

Sticky Honey Ginger Chicken Rice Bowls

Grilled honey-ginger chicken is served with warm white rice, crisp cabbage, and a light drizzle of reserved dressing.
Course: Main Course
Cuisine: Global
Prep: 20 min
Cook: 25 min
Total: 165 min
Servings: 4 Calories: 600 kcal

Equipment

  • Outdoor grill
  • Instant-read thermometer
  • Mixing bowl
  • Whisk
  • Covered container
  • Saucepan with lid
  • Cutting board
  • Knife

Ingredients

For the Chicken and Marinade

  • 1 1/2 lb boneless, skinless chicken breasts (about 680 g)
  • 1/3 cup low-sodium soy sauce
  • 1/4 cup honey (about 85 g)
  • 2 tablespoons rice vinegar
  • 1 tablespoon olive oil
  • 1 tablespoon toasted sesame oil
  • 1 tablespoon finely grated fresh ginger
  • 2 cloves garlic, finely grated or minced

For the Bowls

  • 1 1/2 cups uncooked jasmine or other white rice (about 285 g)
  • Water for the rice, according to package directions (about 2 1/4 cups for many jasmine rice brands)
  • About 4 cups chopped green cabbage (about 10 oz or 280 g)

For Serving

  • 1 tablespoon sesame seeds
  • 2 tablespoons chopped fresh cilantro
  • 1 lime, cut into wedges

Instructions

  1. Whisk together the soy sauce, honey, rice vinegar, olive oil, sesame oil, ginger, and garlic.
  2. Before adding the chicken, transfer about 1/4 cup of the mixture to a clean, covered container and refrigerate for serving.
  3. If needed, pound uneven chicken breasts to an even thickness. Add them to the remaining marinade, turn to coat, cover, and refrigerate for 2 to 8 hours.
  4. Cook the rice covered according to package directions. Let it stand covered briefly, then fluff with a fork.
  5. Chop the cabbage into short, bite-size pieces and keep it separate from the rice.
  6. Preheat an outdoor grill to medium-high. Clean and lightly oil the grates.
  7. Lift the chicken from the marinade and let excess marinade drip off. Discard the marinade that touched the raw chicken.
  8. Grill the chicken uncovered over direct heat, leaving space between pieces, for about 3 to 5 minutes per side, turning once. Check the thickest part and cook to 165°F (75°C). Move the chicken away from flare-ups if the honey darkens too quickly.
  9. Transfer the chicken to a clean cutting board and rest for 5 to 10 minutes. Slice thinly and diagonally across the grain.
  10. Divide the rice and cabbage among four bowls, keeping them in separate sections. Arrange the chicken slices across the center.
  11. Drizzle lightly with the reserved clean dressing. Top with sesame seeds and cilantro, and serve with a lime wedge.

Tips

  • Marinate the chicken in the refrigerator for 2 to 8 hours, never at room temperature.
  • Let excess marinade drip from the chicken before grilling to help prevent the honey from scorching.
  • Use an instant-read thermometer at the thickest point; grilling time varies with chicken thickness and grill heat.
  • Rest the chicken before slicing to help keep it juicy.
  • Use only the reserved clean dressing for serving; discard any marinade that contacted raw chicken.

Variations

  • Chicken Thighs or Tenderloins: Replace the chicken breasts with boneless, skinless thighs or tenderloins and cook to 165°F, adjusting the grilling time for their size and thickness.
  • Tamari: Use tamari in place of soy sauce; check the label if gluten-free preparation is needed.
  • Lime Dressing: Replace some or all of the rice vinegar with fresh lime juice.
  • Spicy Version: Add a few drops of sriracha or a pinch of red pepper flakes to the sauce before dividing it, or serve chile on the side.

Notes

Refrigerate cooked chicken and rice promptly in covered containers and use within 3 to 4 days. Store cabbage and reserved dressing separately; add them and the garnishes when assembling. Freezing assembled bowls has not been established for this recipe.

Nutrition

Calories: 600 kcal | Protein: 50 g | Fat: 13 g | Carbohydrates: 75 g

California Roll Sushi Bowls

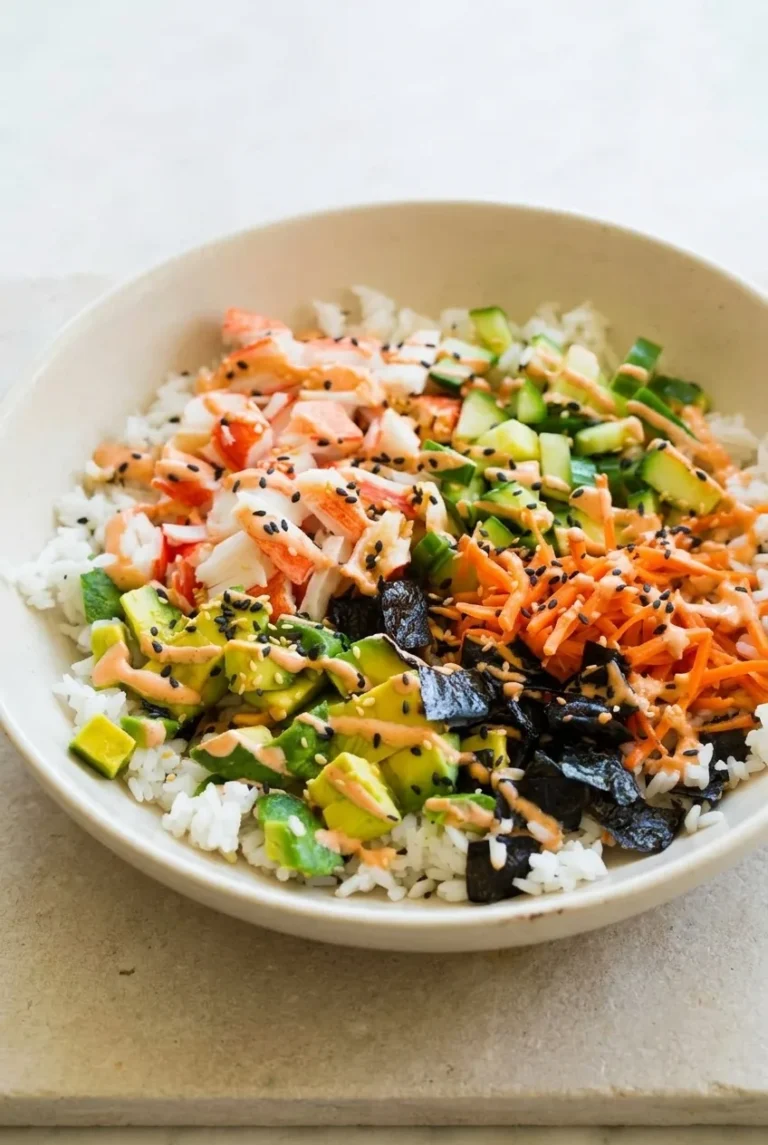
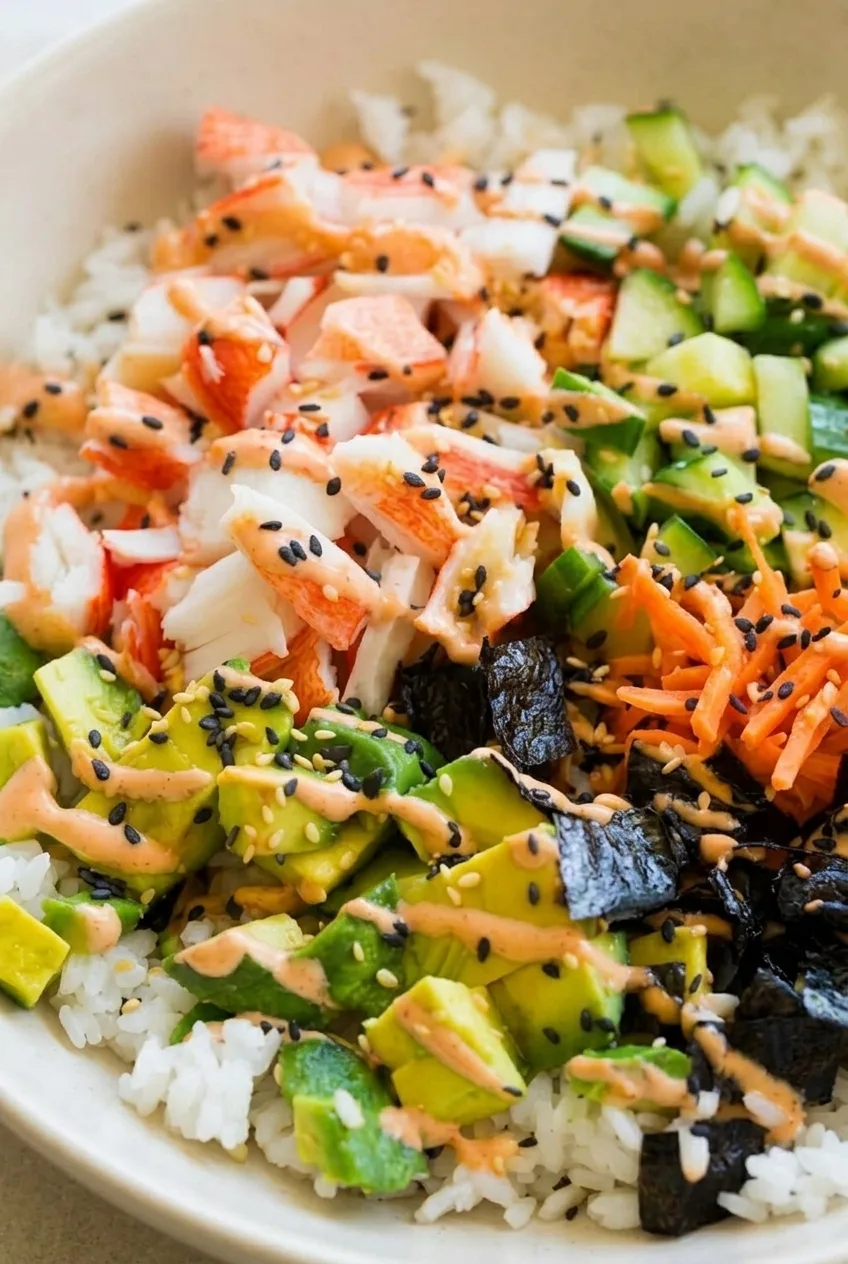
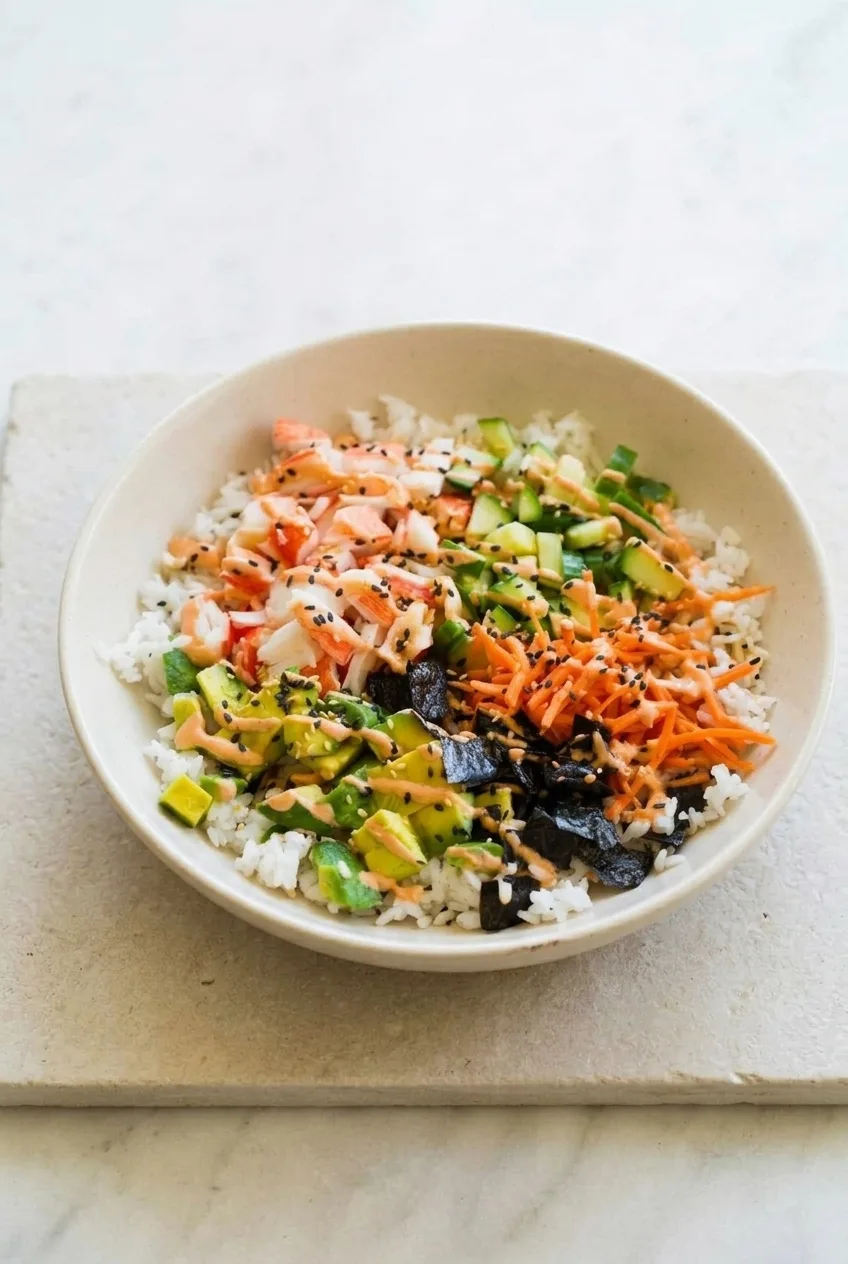
California roll sushi bowls layer vinegar-seasoned rice with imitation crab, avocado, cucumber, shredded carrot, and nori—no rolling required. Keep the toppings in separate sections so each bite can have a different mix of creamy and crisp textures. A thin sriracha-mayo drizzle and black and white sesame seeds finish the bowls.

For tender rice, rinse away excess surface starch and fold in the seasoning gently. Let the rice cool until warm or near room temperature, then assemble the bowls close to serving so the avocado stays fresh.

Makes 4 bowls. Prep time: 20 minutes. Cook time: about 25 minutes, including the rice rest. Total time: about 40 minutes.

Ingredients for California Roll Sushi Bowls

Close-up of California roll sushi bowl toppings, spicy mayo, sesame seeds, and tender rice grains
  • 1 1/2 cups short- or medium-grain sushi rice (285g)
  • 1 3/4 cups water, or the amount specified on the rice package
  • 2 tablespoons unseasoned rice vinegar
  • 2 teaspoons granulated sugar
  • 1/2 teaspoon kosher salt
  • 8 ounces imitation crab, cut or pulled into bite-size pieces (225g)
  • 1 large avocado, diced (about 200g)
  • 1 small English cucumber, diced (about 200g)
  • 1 medium carrot, finely shredded (about 60g)
  • 2 roasted nori sheets, torn or cut into small pieces
  • 1/3 cup mayonnaise (75g)
  • 1 to 2 tablespoons sriracha, to taste
  • 1 tablespoon black and white sesame seeds combined
  • 2 tablespoons soy sauce, for serving

If using seasoned rice vinegar, reduce or omit the sugar and salt to taste. Cooked real crab can replace the imitation crab, though its flavor and texture will differ.

How to Make California Roll Sushi Bowls

A complete California roll sushi bowl centered on a light tabletop, with rice and toppings in separate sections
  1. Rinse the rice: Rinse under cold water, gently agitating the grains, until the water runs nearly clear. Drain well.
  2. Cook and rest: Put the rice and water in a medium saucepan with a tight-fitting lid. Use the rice package’s water amount if it differs from the one listed here. Bring to a boil over medium-high heat, cover, and reduce the heat to low. Simmer for about 15 minutes, or according to package directions. Turn off the heat and leave the pan covered for 10 minutes. The water should be absorbed and the grains tender, with no hard centers.
  3. Season the rice: Stir the vinegar, sugar, and salt together until dissolved. Transfer the rice to a broad bowl, drizzle the seasoning over it, and gently fold with a rice paddle or fork. Let cool until warm or near room temperature before adding the toppings.
  4. Prepare the toppings and sauce: Cut or pull the crab into bite-size pieces. Dice the cucumber, shred the carrot, and tear the nori. Stir the mayonnaise with 1 tablespoon of sriracha, adding more to taste. Dice the avocado close to serving time.
  5. Assemble: Divide the rice among four shallow bowls. Arrange the crab, cucumber, carrot, avocado, and nori in distinct sections, leaving some rice visible. Drizzle lightly with spicy mayo, scatter the sesame seeds over the top, and serve promptly with soy sauce on the side.

How to Keep the Rice Tender

Rinsing and draining remove excess surface starch that can make the rice gummy. Rice brands need different amounts of water, so follow the package if its directions differ. After cooking, fold in the vinegar mixture rather than stirring vigorously; the grains should be moist and lightly sticky, not wet or mashed.

A rice cooker also works: cook the rice according to the appliance and rice-package directions, then season and cool it as described above. The rice does not need to be refrigerated before assembly.

Make-Ahead and Storage

For the freshest texture, keep cooked rice, crab, and prepared vegetables in separate covered containers in the refrigerator, and assemble the bowls near serving time. Refrigerate perishable components promptly. Cut the avocado just before assembly to limit browning, and add the spicy mayo when serving.

Chilled sushi-style rice becomes firmer than freshly cooked rice. If you want it warm, warm the rice separately and keep the crab and vegetables cool; do not heat an assembled bowl with avocado and spicy mayo. Freezing assembled bowls is not recommended because the rice and fresh toppings lose quality.

Nutrition

Approximate nutrition per bowl, based on 1 of 4 servings (about 420g): 560 calories, 12g protein, 25g fat, and 84g carbohydrates. Per 100g: about 135 calories, 3g protein, 6g fat, and 20g carbohydrates. Values vary with the rice, imitation crab, mayonnaise, and portions used.

California Roll Sushi Bowls

Vinegar-seasoned sushi rice is topped with imitation crab, avocado, cucumber, carrot, nori, spicy mayo, and sesame seeds.
Course: Main Course
Cuisine: Japanese
Prep: 20 min
Cook: 25 min
Total: 40 min
Servings: 4 Calories: 560 kcal

Equipment

  • Medium saucepan with lid
  • Rice paddle or fork
  • Broad bowl
  • Knife and cutting board

Ingredients

For the Rice

  • 1 1/2 cups short- or medium-grain sushi rice (285 g)
  • 1 3/4 cups water, or the amount specified on the rice package
  • 2 tablespoons unseasoned rice vinegar
  • 2 teaspoons granulated sugar
  • 1/2 teaspoon kosher salt

For the Toppings

  • 8 ounces imitation crab, cut or pulled into bite-size pieces (225 g)
  • 1 large avocado, diced (about 200 g)
  • 1 small English cucumber, diced (about 200 g)
  • 1 medium carrot, finely shredded (about 60 g)
  • 2 roasted nori sheets, torn or cut into small pieces
  • 1 tablespoon black and white sesame seeds combined

For the Spicy Mayo and Serving

  • 1/3 cup mayonnaise (75 g)
  • 1 to 2 tablespoons sriracha, to taste
  • 2 tablespoons soy sauce, for serving

Instructions

  1. Rinse the rice under cold water, gently agitating the grains, until the water runs nearly clear. Drain well.
  2. Combine the rice and water in a medium saucepan with a tight-fitting lid. Bring to a boil over medium-high heat, cover, and reduce the heat to low.
  3. Simmer for about 15 minutes, or according to package directions. Turn off the heat and leave covered for 10 minutes, until the water is absorbed and the grains are tender.
  4. Stir the rice vinegar, sugar, and salt together until dissolved.
  5. Transfer the rice to a broad bowl. Drizzle with the vinegar mixture and gently fold it in with a rice paddle or fork. Cool until warm or near room temperature.
  6. Cut or pull the crab into bite-size pieces. Dice the cucumber, shred the carrot, and tear the nori into small pieces.
  7. Stir the mayonnaise with 1 tablespoon of sriracha. Add more sriracha to taste.
  8. Dice the avocado close to serving time.
  9. Divide the rice among four shallow bowls. Arrange the crab, cucumber, carrot, avocado, and nori in separate sections.
  10. Drizzle with spicy mayo, scatter the sesame seeds over the bowls, and serve promptly with soy sauce on the side.

Tips

  • Use the water amount specified on the rice package if it differs from the recipe.
  • Rinse and drain the rice well to remove excess surface starch.
  • Fold the seasoning into the rice gently to keep the grains intact.
  • Let the rice cool until warm or near room temperature before adding toppings.
  • Cut the avocado close to serving time to limit browning.

Variations

  • Real Crab Sushi Bowls: Replace the imitation crab with cooked real crab; the flavor and texture will differ.

Notes

Refrigerate cooked rice, crab, and prepared vegetables promptly in separate covered containers. Assemble near serving time; avoid freezing assembled bowls.

Nutrition

Calories: 560 kcal | Protein: 12 g | Fat: 25 g | Carbohydrates: 84 g

Shrimp Sushi Bowls with Avocado

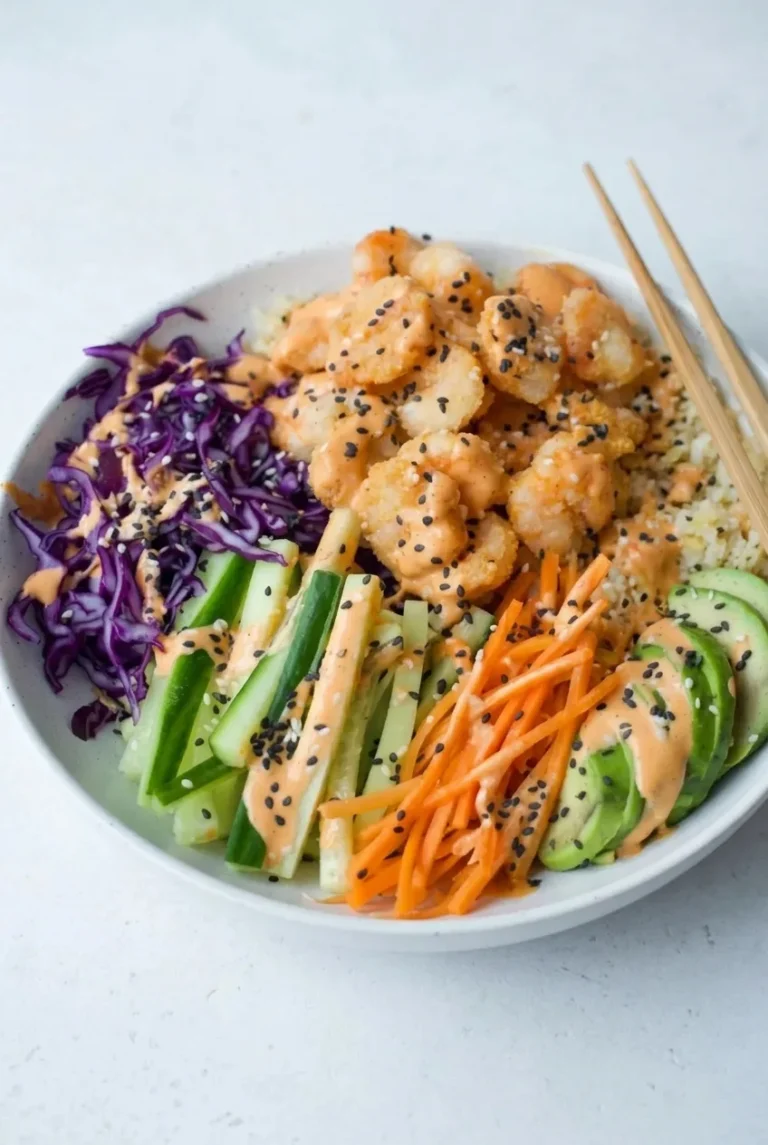
Seasoned white rice forms the base for these sushi-inspired bowls, with lightly crisp shrimp, cucumber, carrot, purple cabbage, and avocado arranged in separate sections on top. A sriracha-mayo drizzle adds a creamy finish without coating the shrimp while they cook.

This version starts with raw shrimp. Patting them dry helps the egg-white and cornstarch coating cling, while frying in uncrowded batches gives it room to turn golden. Add the sauce and slice the avocado just before serving.

Makes 4 bowls. Prep time: 20 minutes. Cook time: about 25 minutes. Total time: about 45 minutes.

Ingredients for Shrimp Sushi Bowls

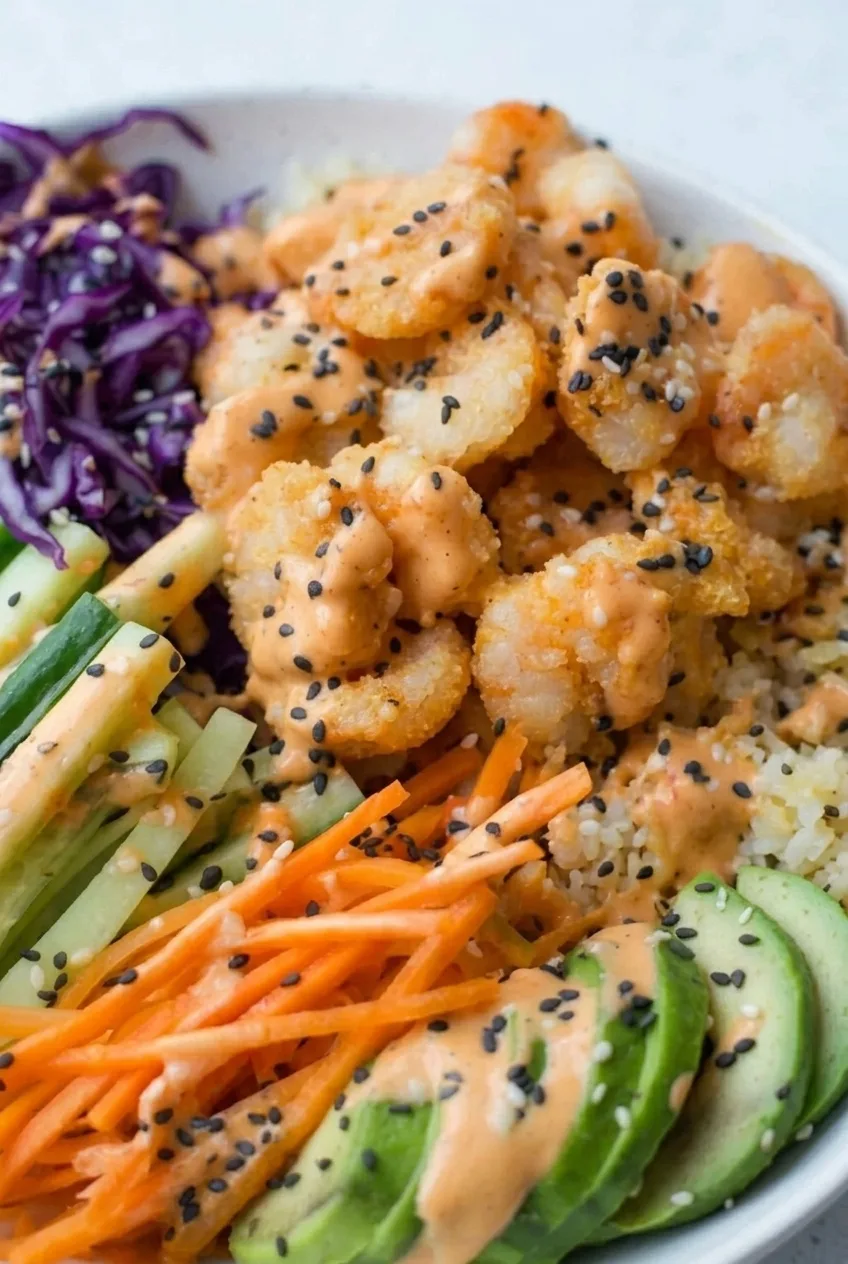
Close view of crispy shrimp with orange spicy mayo and sesame seeds beside fresh vegetables over rice
  • 1 1/2 cups dry short-grain sushi rice (285g)
  • 2 tablespoons rice vinegar
  • 2 teaspoons granulated sugar
  • 1/2 teaspoon kosher salt, divided
  • 1 lb raw medium or large shrimp, peeled and deveined (450g)
  • 1 large egg white
  • 1/3 cup cornstarch (40g)
  • About 1/3 cup neutral oil, as needed for shallow-frying
  • 1/2 cup mayonnaise (110g)
  • 1 to 2 tablespoons sriracha, to taste
  • 1 medium cucumber, cut into long spears (200g)
  • 1 medium carrot, cut into fine matchsticks (70g)
  • 1 cup finely shredded purple cabbage (70g)
  • 1 large avocado, sliced (200g)
  • 1 tablespoon black and white sesame seeds

Optional: Serve with pickled ginger or scatter thin strips of nori over the finished bowls.

How to Make Shrimp Sushi Bowls

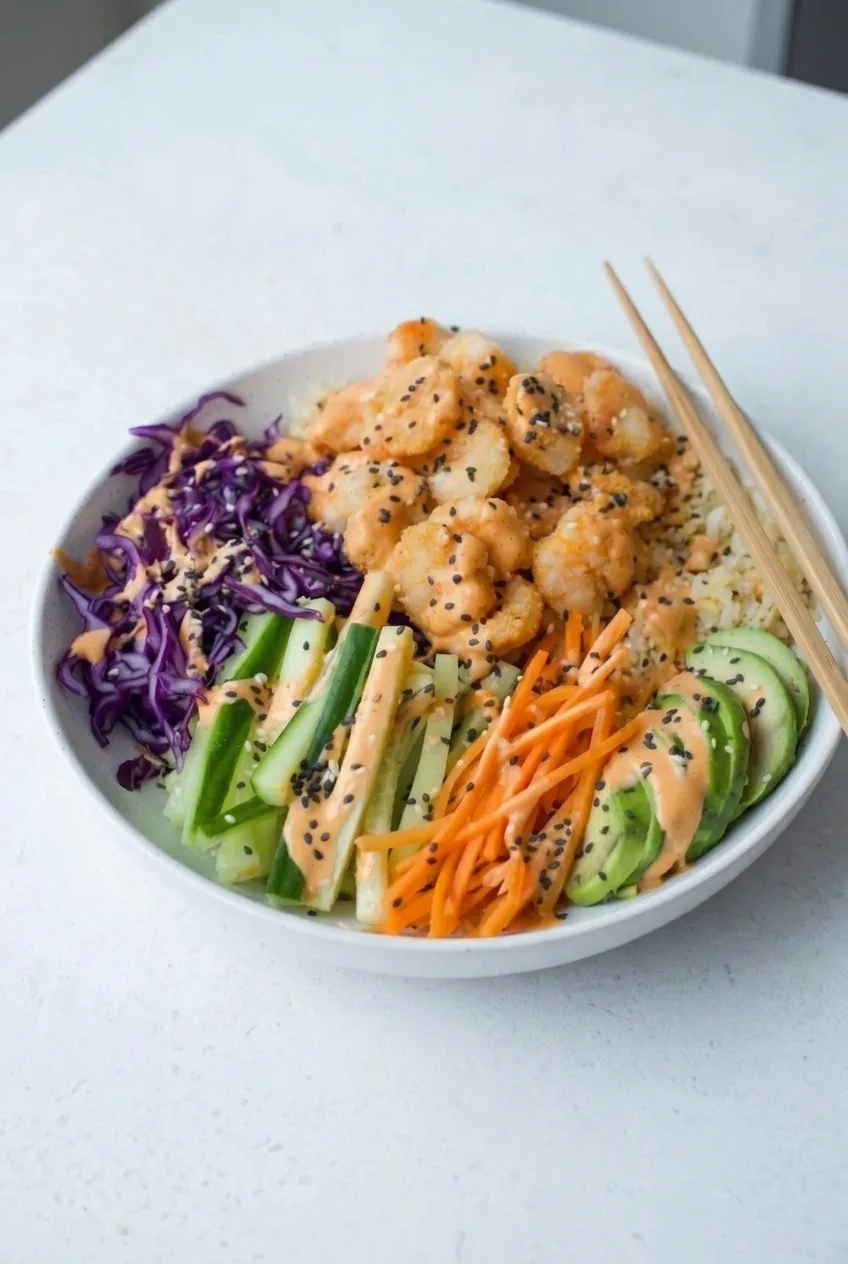
Complete shrimp sushi bowl with separate colorful toppings, shown on a pale countertop
  1. Cook and season the rice: Rinse the rice, then cook it covered in a saucepan or rice cooker using the package’s water ratio and directions. Stir the rice vinegar, sugar, and 1/4 teaspoon salt together until the sugar dissolves. Gently fold the seasoning into the cooked rice. Let it cool until comfortably warm or room temperature.
  2. Prepare the sauce and vegetables: Mix the mayonnaise with 1 tablespoon sriracha, adding more to taste. If needed, stir in a little water until the sauce is easy to drizzle. Cut the cucumber, carrot, and cabbage, keeping them separate. Wait to slice the avocado until assembly.
  3. Coat the shrimp: Pat the raw shrimp thoroughly dry; cut larger pieces into bite-size pieces if needed. Toss them with the egg white. Mix the cornstarch with the remaining 1/4 teaspoon salt, then coat the shrimp lightly, shaking off excess. Fry soon after coating.
  4. Shallow-fry in batches: Heat enough neutral oil to generously coat the bottom of a wide skillet over medium to medium-high heat. Add the shrimp in an uncrowded single layer; the oil should sizzle steadily without darkening the coating too quickly. Start checking after about 2 minutes on the first side. Turn once the coating is golden in spots, then cook until the shrimp are opaque throughout, about 3 to 5 minutes per batch. For a food-safety check, cook to 145°F (65°C). Remove each batch promptly and drain briefly on a wire rack or paper towel. Add more oil between batches if needed.
  5. Assemble the bowls: Divide the rice among four broad bowls, leaving some visible around the edges. Arrange the shrimp, cucumber spears, carrot, cabbage, and freshly sliced avocado in distinct sections.
  6. Finish and serve: Drizzle the spicy mayo over the shrimp and lightly across the vegetables. Sprinkle with black and white sesame seeds and serve promptly.

How to Keep the Shrimp Crispy

Moisture can make the light coating slip or turn soft. Dry the shrimp before coating them, and leave space between pieces in the skillet so they brown instead of steaming. Keep the spicy mayo separate until the bowls are ready to serve; the coating will soften once it sits in sauce.

Choosing Shrimp for This Method

Use raw, peeled, and deveined shrimp for the coating and frying directions above. Pre-cooked shrimp need only brief warming and will not develop the same crisp coating, so the raw-shrimp frying time does not apply to them. Arrowroot powder or potato starch can replace the cornstarch if needed.

Make-Ahead, Storage, and Reheating

Cook the rice, mix the sauce, and cut the cucumber, carrot, and cabbage ahead of time. Refrigerate them separately in covered containers. Keep the avocado whole and fry the shrimp close to serving for the freshest-looking toppings and crispest coating.

Store leftover rice, cooked shrimp, sauce, and vegetables separately in covered containers in the refrigerator. Use within about 2 days for best quality. Reheat the rice and shrimp separately and briefly; the shrimp may lose some crispness. Add fresh avocado, sauce, and sesame seeds afterward. Freezing fully assembled bowls is not recommended because the fresh toppings and sauce will lose their intended textures.

Nutrition

Approximate nutrition per serving, based on 1 of 4 bowls: 890 calories, 31g protein, 49g fat, and 79g carbohydrates. Approximate nutrition per 100g: 165 calories, 6g protein, 9g fat, and 15g carbohydrates. Values vary with ingredient brands and how much frying oil the shrimp absorb.

Shrimp Sushi Bowls with Avocado

Seasoned sushi rice is topped with crisp shrimp, fresh vegetables, avocado, sesame seeds, and a drizzle of sriracha mayo.
Course: Main Course
Cuisine: Japanese-inspired
Prep: 20 min
Cook: 25 min
Total: 45 min
Servings: 4 Calories: 890 kcal

Equipment

  • Saucepan or rice cooker
  • Wide skillet
  • Mixing bowls
  • Knife and cutting board
  • Wire rack or paper towels

Ingredients

For the Rice

  • 1 1/2 cups dry short-grain sushi rice (285 g)
  • 2 tablespoons rice vinegar
  • 2 teaspoons granulated sugar
  • 1/2 teaspoon kosher salt, divided

For the Shrimp

  • 1 lb raw medium or large shrimp, peeled and deveined (450 g)
  • 1 large egg white
  • 1/3 cup cornstarch (40 g)
  • About 1/3 cup neutral oil, as needed for shallow-frying

For the Sauce and Toppings

  • 1/2 cup mayonnaise (110 g)
  • 1 to 2 tablespoons sriracha, to taste
  • 1 medium cucumber, cut into long spears (200 g)
  • 1 medium carrot, cut into fine matchsticks (70 g)
  • 1 cup finely shredded purple cabbage (70 g)
  • 1 large avocado, sliced (200 g)
  • 1 tablespoon black and white sesame seeds
  • Optional: pickled ginger or thin strips of nori, for serving

Instructions

  1. Rinse the rice and cook it covered in a saucepan or rice cooker according to the package directions.
  2. Stir the rice vinegar, sugar, and 1/4 teaspoon salt together until the sugar dissolves. Gently fold the seasoning into the cooked rice and let it cool until comfortably warm or room temperature.
  3. Mix the mayonnaise with 1 tablespoon sriracha, adding more to taste. Stir in a little water if needed to make it easy to drizzle.
  4. Cut the cucumber, carrot, and cabbage, keeping them separate. Wait to slice the avocado until assembly.
  5. Pat the shrimp thoroughly dry and cut larger pieces into bite-size pieces if needed. Toss with the egg white.
  6. Mix the cornstarch with the remaining 1/4 teaspoon salt. Lightly coat the shrimp and shake off the excess.
  7. Heat enough neutral oil to generously coat the bottom of a wide skillet over medium to medium-high heat. Fry the shrimp in uncrowded batches in a single layer, turning once the coating is golden in spots. Cook until opaque throughout, about 3 to 5 minutes per batch, and to 145°F (65°C).
  8. Remove each batch promptly and drain briefly on a wire rack or paper towel. Add more oil between batches if needed.
  9. Divide the rice among four broad bowls. Arrange the shrimp, cucumber, carrot, cabbage, and freshly sliced avocado in separate sections.
  10. Drizzle with the spicy mayo, sprinkle with sesame seeds, and serve promptly.

Tips

  • Pat the shrimp thoroughly dry so the coating clings.
  • Fry in uncrowded batches to help the shrimp brown instead of steam.
  • Fry the shrimp soon after coating them.
  • Keep the spicy mayo separate until serving to help the shrimp stay crisp.
  • Slice the avocado just before assembling the bowls.
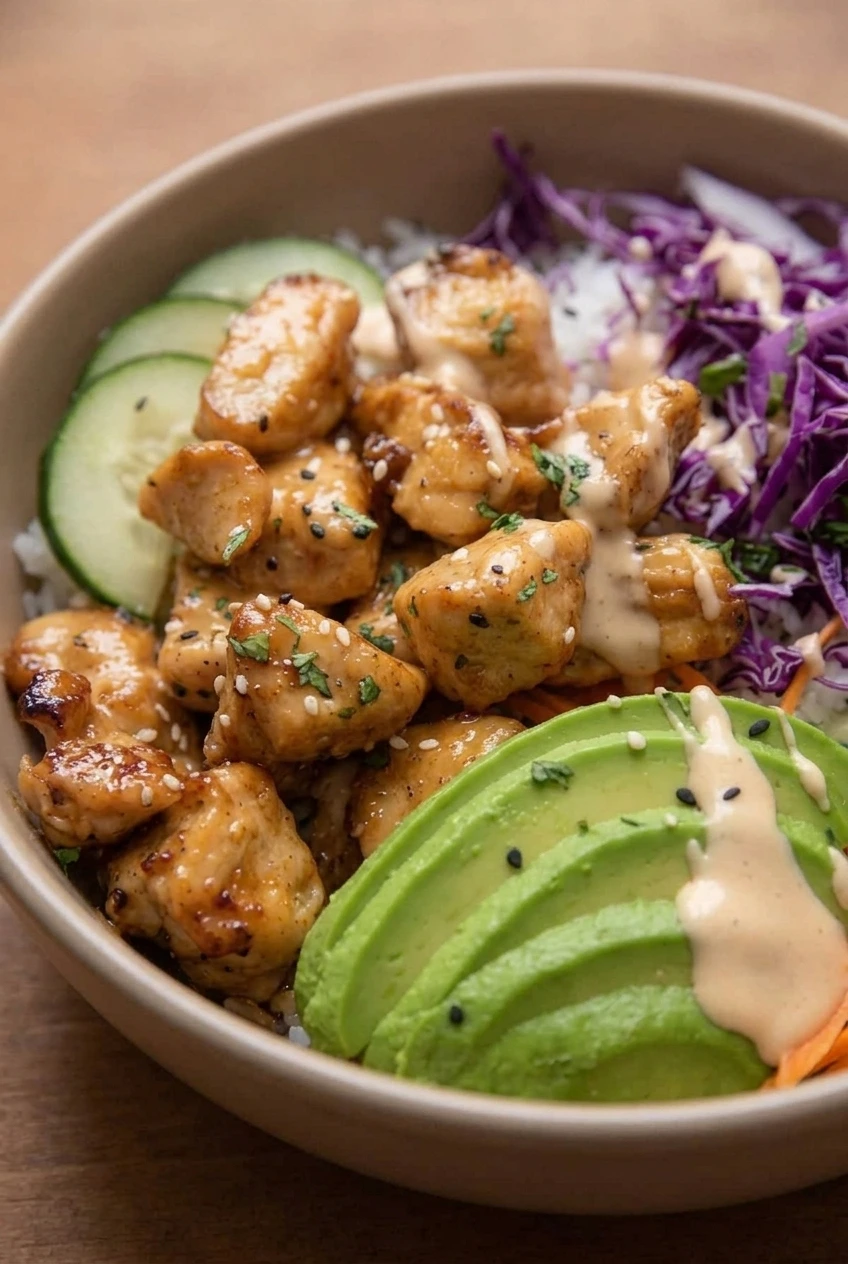
Variations

  • Alternative starch coating: Replace the cornstarch with arrowroot powder or potato starch.

Notes

Refrigerate leftover rice, shrimp, sauce, and vegetables separately and use within about 2 days. Reheat the rice and shrimp briefly and separately; the shrimp may lose some crispness. Cook shrimp to 145°F (65°C).

Nutrition

Calories: 890 kcal | Protein: 31 g | Fat: 49 g | Carbohydrates: 79 g

Teriyaki Salmon Rice Bowls

Glossy teriyaki salmon cubes sit over brown rice with chunky cucumber, edamame, nori, scallions, and sesame. A creamy sriracha mayo and a separate red sriracha drizzle finish the bowls without hiding the toppings.

Start the rice first: it takes much longer than the salmon. The salmon cooks quickly in the air fryer, so leave space between the cubes and begin checking them at 5 minutes. Set aside clean teriyaki sauce before coating the raw fish so there is sauce ready to drizzle over the finished bowls.

Ingredients for Teriyaki Salmon Rice Bowls

Close-up of glossy teriyaki salmon cubes, brown rice grains, cucumber, edamame, and sauce drizzles
  • 1 1/2 cups uncooked brown rice (285g)
  • 1 1/2 lb skinless salmon, cut into 1- to 1 1/2-inch cubes (680g)
  • 1/2 cup teriyaki sauce, divided (120g)
  • 1 1/2 cups shelled edamame, thawed and cooked (225g)
  • 1 medium cucumber, cut into chunky pieces (250g)
  • 1/4 cup mayonnaise (55g)
  • 2 to 3 teaspoons sriracha, divided
  • 1 to 2 teaspoons water or lime juice, as needed
  • 3 scallions, thinly sliced (30g)
  • 2 sheets nori, torn into small pieces (5g)
  • 2 teaspoons sesame seeds, preferably mixed black and white (6g)

How to Make Teriyaki Salmon Rice Bowls

A complete teriyaki salmon rice bowl centered on a pale stone surface, with all toppings and sauces visible
  1. Cook the rice: Rinse the brown rice and cook it with the amount of water specified on the package. When tender and the liquid is absorbed, let it stand covered briefly, then fluff with a fork.
  2. Prepare the toppings and drizzles: Cook or thaw the edamame as needed. Cut the cucumber, slice the scallions, and tear the nori. Stir the mayonnaise with some of the sriracha and 1 teaspoon water or lime juice. Add a little more liquid if needed; the sauce should fall from a spoon in a thin ribbon. Keep the remaining sriracha separate for the red drizzle.
  3. Coat the salmon: Pat the salmon dry if needed and check that the cubes are similar in size. Pour some teriyaki sauce into a separate dish for serving before the sauce touches the raw fish. Lightly coat the salmon with the remaining sauce; it should not be swimming in it.
  4. Air-fry the salmon: Preheat the air fryer to 400°F (205°C) according to its instructions. Lightly oil the basket if needed. Arrange the cubes in a single layer with space between them, working in batches rather than stacking them. Cook for about 5 to 7 minutes per batch, turning gently around halfway through. Start checking at 5 minutes: the cubes should be opaque through the sides and flake readily when gently pressed.
  5. Assemble the bowls: Divide the rice among four bowls. Arrange the salmon, cucumber, and edamame in loose sections, leaving some rice visible. Drizzle with the clean reserved teriyaki sauce, sriracha mayo, and remaining sriracha. Add the nori, scallions, and sesame seeds just before serving.

How to Keep the Salmon Tender

Cube size and air-fryer model affect the cooking time, so use the 5- to 7-minute range as a guide rather than a fixed endpoint. Stop cooking when the salmon is opaque and tender enough to flake; smaller cubes may be done sooner. If you need an exact endpoint, use a food thermometer and follow current food-safety guidance.

Space matters, too. Crowded cubes can steam and cook unevenly instead of developing browned edges. Teriyaki sauce is sweet and can darken quickly, so keep the cooking coat light and watch the salmon closely near the end.

Keep the Finishing Sauce Separate

Only teriyaki sauce set aside before it touches raw salmon should go onto the finished bowls. Discard any sauce left in the bowl with the raw fish. The clean reserved sauce adds gloss and flavor without exposing it to the air fryer’s heat.

Oven Method and Rice Swaps

  • Oven method: Spread the salmon cubes on a parchment-lined sheet pan and bake at 400°F. Check early for opaque, tender pieces that flake readily; oven timing will differ from air-fryer timing.
  • White or jasmine rice: Use the same uncooked volume in place of brown rice and follow its package directions. Brown rice gives the closest match to these bowls.
  • Gluten-free option: Choose a teriyaki sauce made with tamari and check the labels on other packaged ingredients.

Make-Ahead and Storage

Refrigerate cooked rice and salmon promptly in separate airtight containers and use within 3 days. Keep the cucumber, sauces, nori, scallions, and sesame separate; add them when assembling so the cucumber stays crisp and the rice does not get wet.

Reheat the rice and salmon until hot, warming the salmon gently so it does not dry out. Add the cool toppings and drizzles afterward. The components can also be served cool or at room temperature if they have been handled and refrigerated safely. Freezing assembled bowls is not recommended because the cucumber and creamy sauce lose quality.

Nutrition

Approximate nutrition per bowl, based on 4 servings: 840 calories, 48g protein, 38g fat, and 72g carbohydrates. Approximate nutrition per 100g: 145 calories, 8g protein, 7g fat, and 13g carbohydrates. Values vary with the teriyaki sauce, mayonnaise, rice, and salmon used.

Teriyaki Salmon Rice Bowls

Air-fried teriyaki salmon is served over brown rice with cucumber, edamame, nori, scallions, sesame, and two sriracha drizzles.
Course: Main Course
Cuisine: Japanese-inspired
Prep: 20 min
Cook: 45 min
Total: 65 min
Servings: 4 Calories: 840 kcal

Equipment

  • Saucepan or rice cooker
  • Air fryer
  • Mixing bowl
  • Instant-read thermometer

Ingredients

For the Bowls

  • 1 1/2 cups uncooked brown rice (285 g)
  • 1 1/2 lb skinless salmon, cut into 1- to 1 1/2-inch cubes (680 g)
  • 1/2 cup teriyaki sauce, divided (120 g)
  • 1 1/2 cups shelled edamame, thawed and cooked (225 g)
  • 1 medium cucumber, cut into chunky pieces (250 g)
  • 3 scallions, thinly sliced (30 g)
  • 2 sheets nori, torn into small pieces (5 g)
  • 2 teaspoons sesame seeds, preferably mixed black and white (6 g)

For the Drizzles

  • 1/4 cup mayonnaise (55 g)
  • 2 to 3 teaspoons sriracha, divided
  • 1 to 2 teaspoons water or lime juice, as needed

Instructions

  1. Rinse the brown rice and cook it with the amount of water specified on the package. When tender and the liquid is absorbed, let it stand covered briefly, then fluff with a fork.
  2. Cook or thaw the edamame as needed. Cut the cucumber, slice the scallions, and tear the nori.
  3. Stir the mayonnaise with some of the sriracha and 1 teaspoon water or lime juice. Add more liquid as needed until it falls from a spoon in a thin ribbon. Set the remaining sriracha aside for drizzling.
  4. Pour some teriyaki sauce into a clean dish to reserve for serving before it touches the raw salmon. Lightly coat the salmon cubes with the remaining sauce.
  5. Preheat the air fryer to 400°F (205°C) according to its instructions. Lightly oil the basket if needed.
  6. Arrange the salmon cubes in a single layer with space between them, working in batches if needed. Air-fry for about 5 to 7 minutes per batch, turning gently halfway through. Start checking at 5 minutes; the salmon should be opaque through the sides and flake readily when gently pressed.
  7. Divide the rice among four bowls. Arrange the salmon, cucumber, and edamame over the rice.
  8. Drizzle with the clean reserved teriyaki sauce, sriracha mayo, and remaining sriracha. Add the nori, scallions, and sesame seeds just before serving.

Tips

  • Start the rice first because it takes much longer to cook than the salmon.
  • Reserve clean teriyaki sauce before it touches the raw fish; discard any sauce left with the raw salmon.
  • Leave space between salmon cubes so they cook evenly instead of steaming.
  • Begin checking the salmon at 5 minutes; smaller cubes may cook sooner.
  • Keep the coating of teriyaki sauce light, since its sugar can darken quickly.

Variations

  • Oven-Baked Salmon Bowls: Bake the salmon cubes on a parchment-lined sheet pan at 400°F, checking early for tender, flaky pieces.
  • White or Jasmine Rice Bowls: Replace the brown rice with the same uncooked volume of white or jasmine rice and follow its package directions.
  • Gluten-Free Bowls: Use teriyaki sauce made with tamari and check the labels on other packaged ingredients.

Notes

Refrigerate cooked rice and salmon promptly in separate airtight containers and use within 3 days. Reheat until hot, warming the salmon gently; add cool toppings and sauces afterward. Approximate nutrition per 100 g: 145 calories, 8 g protein, 7 g fat, and 13 g carbohydrates.

Nutrition

Calories: 840 kcal | Protein: 48 g | Fat: 38 g | Carbohydrates: 72 g