Author

Julia

Browsing

Honey Sriracha Salmon Rice Bowls

Bite-size salmon pieces get lightly browned in the air fryer, then tossed with a glossy honey-sriracha glaze. Cooking the glaze separately keeps the wet, sweet sauce from interfering with browning. Serve the salmon over warm rice with cool cucumber, avocado, and edamame, then add a thin sriracha-mayo drizzle. Start checking the salmon early: 1-inch pieces cook quickly, and air fryers vary.

Ingredients for Honey Sriracha Salmon Rice Bowls
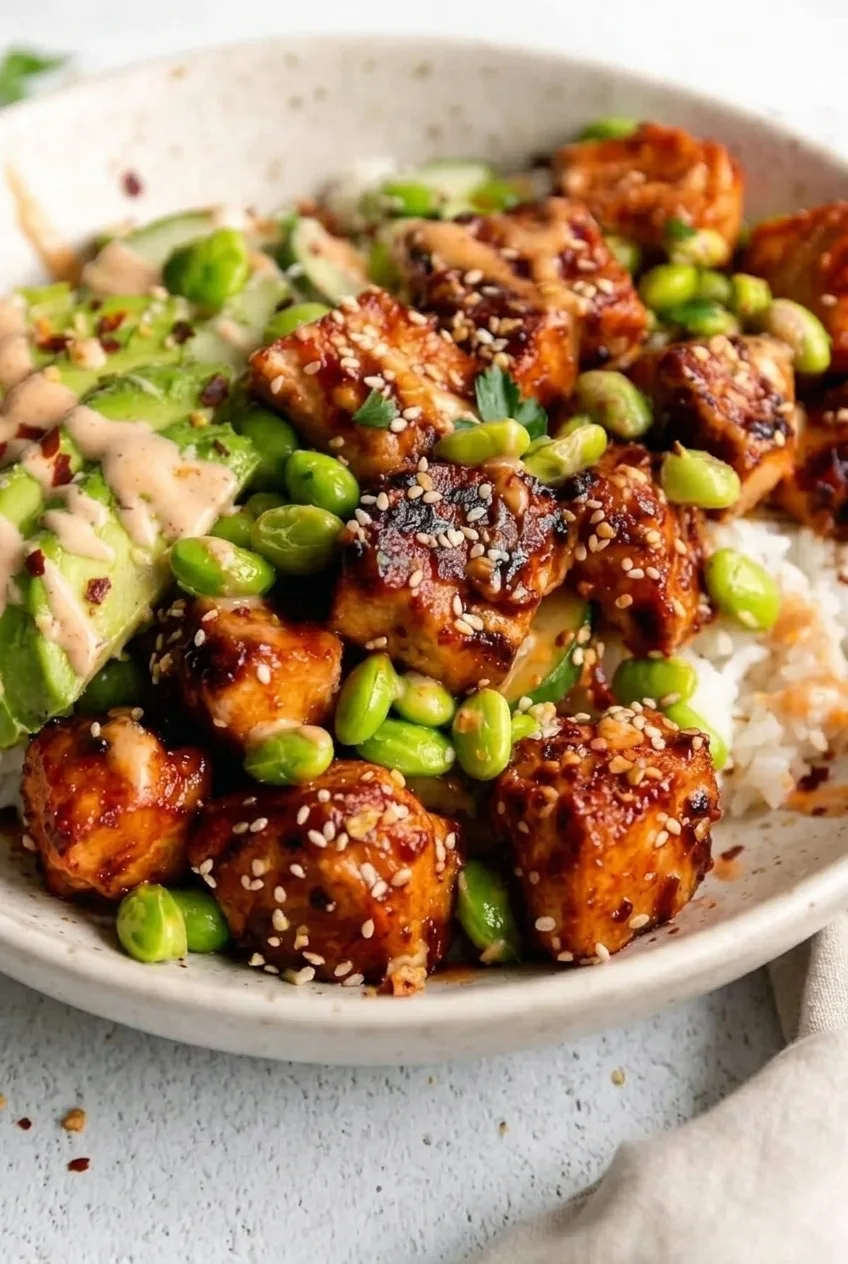
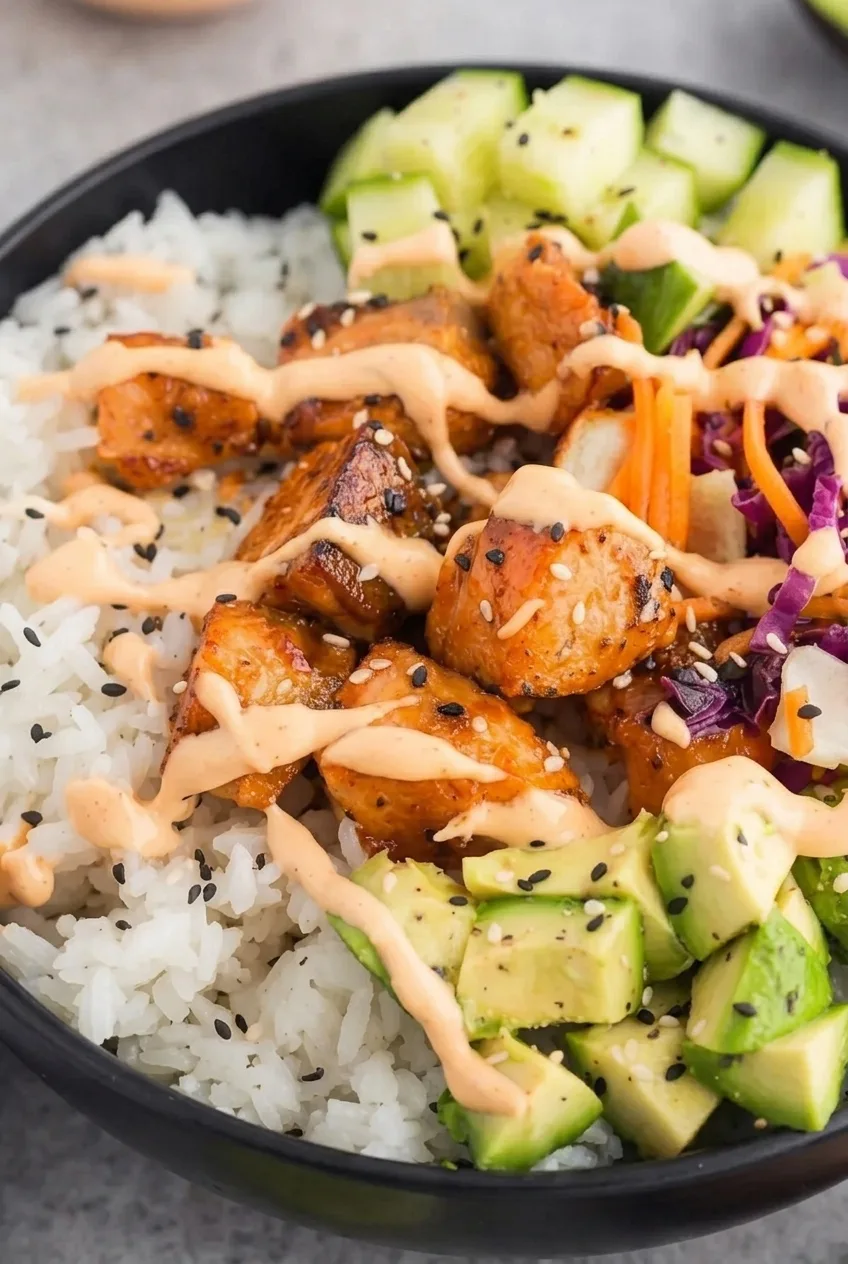
Close view of glossy honey sriracha salmon bites with sesame seeds, chili flakes, and fresh bowl toppings
  • 1¼ pounds skinless salmon fillets, cut into roughly 1-inch cubes (570g)
  • 2 teaspoons neutral oil
  • 4 cups cooked white or jasmine rice (600g), from about 1½ cups dry rice
  • 1 cup cooked, shelled edamame (155g)
  • 1 medium English cucumber, thinly sliced (200g)
  • 1 ripe avocado, thinly sliced (150g)
  • 3 tablespoons honey (65g)
  • 2 tablespoons sriracha for the glaze, plus 1 teaspoon for the drizzle
  • 1½ tablespoons low-sodium soy sauce
  • 1 tablespoon rice vinegar
  • 1 small garlic clove, finely grated or minced
  • 1 teaspoon cornstarch
  • 1 tablespoon water for the cornstarch slurry, plus more as needed
  • ¼ cup mayonnaise (60g)
  • 1 teaspoon lime juice, plus more as needed
  • 1 tablespoon sesame seeds
  • ¼ teaspoon red pepper flakes, or to taste

Optional: 1–2 tablespoons chopped cilantro or sliced green onion; extra sriracha for serving.

How to Make Honey Sriracha Salmon Rice Bowls
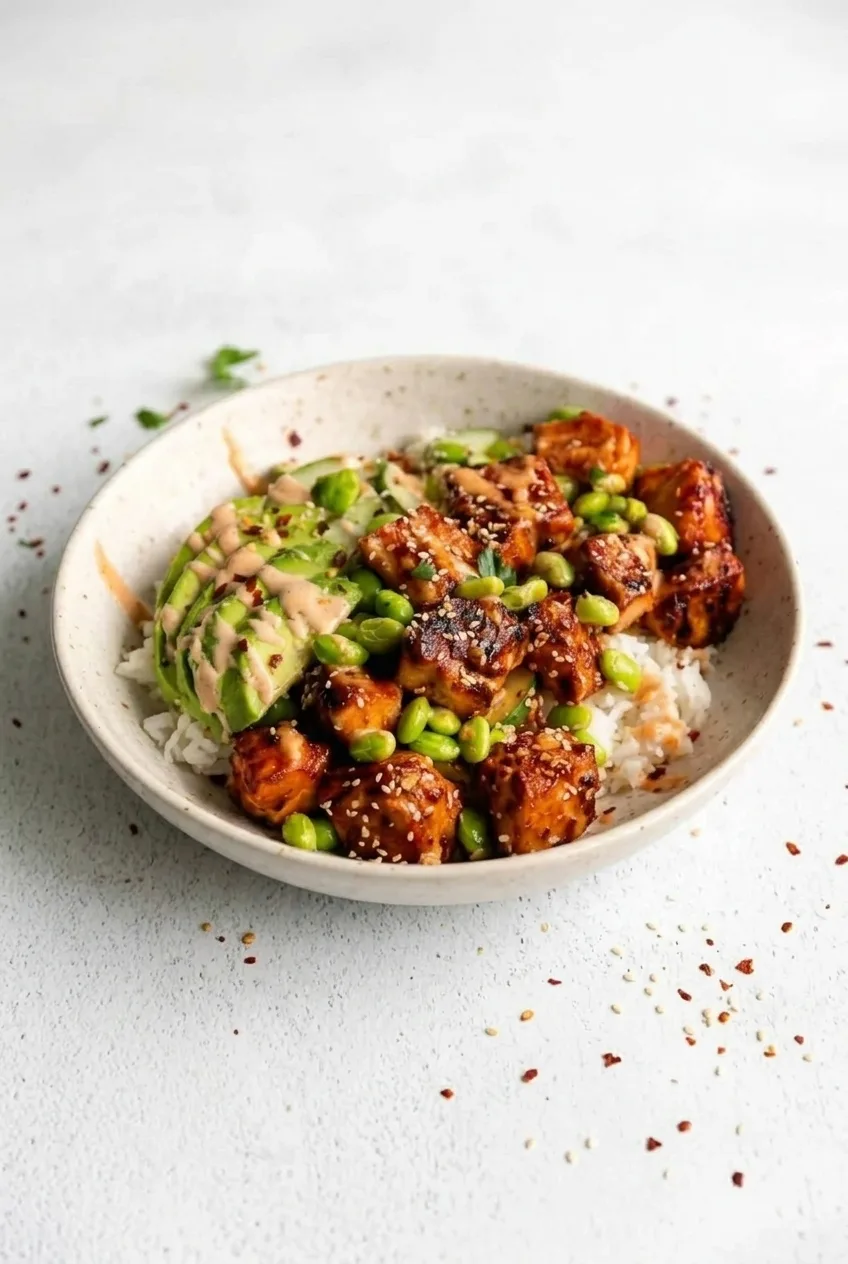
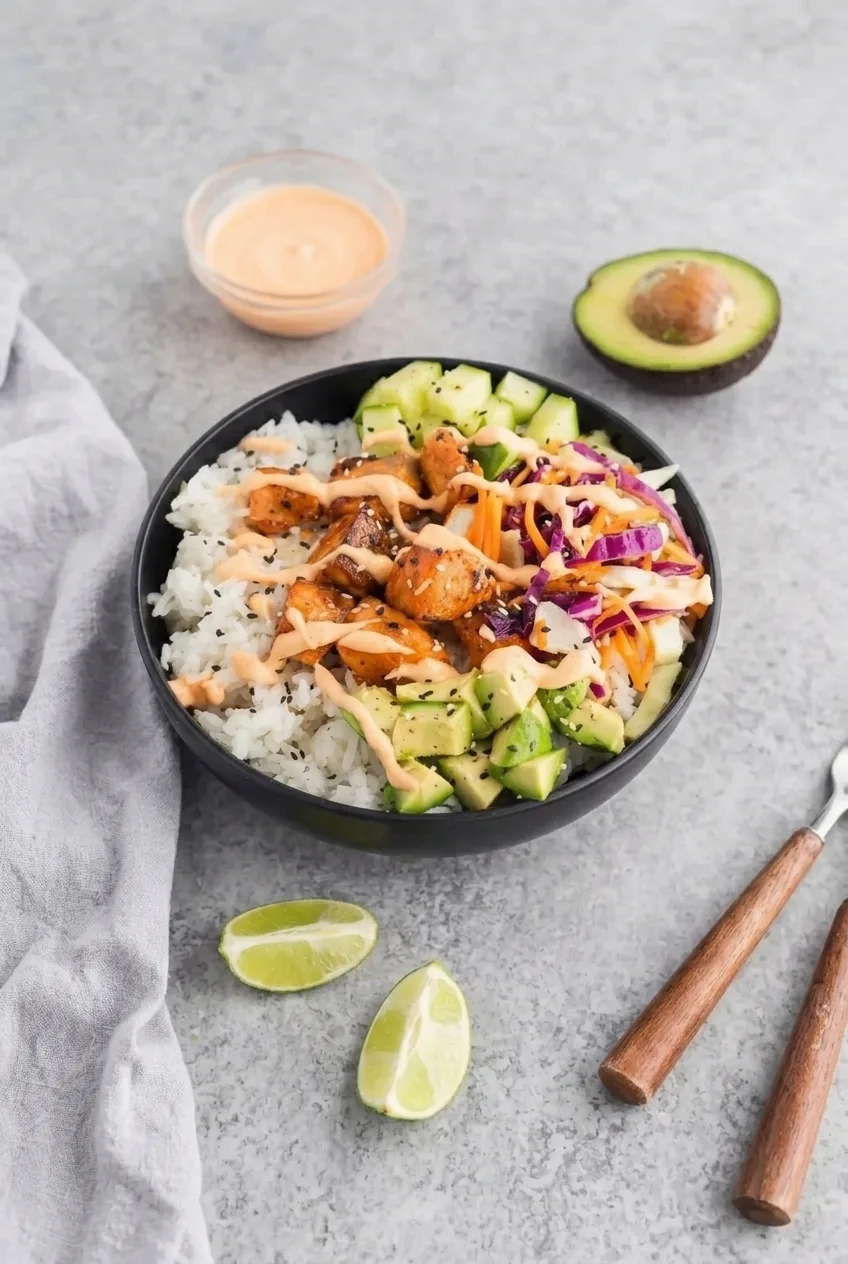
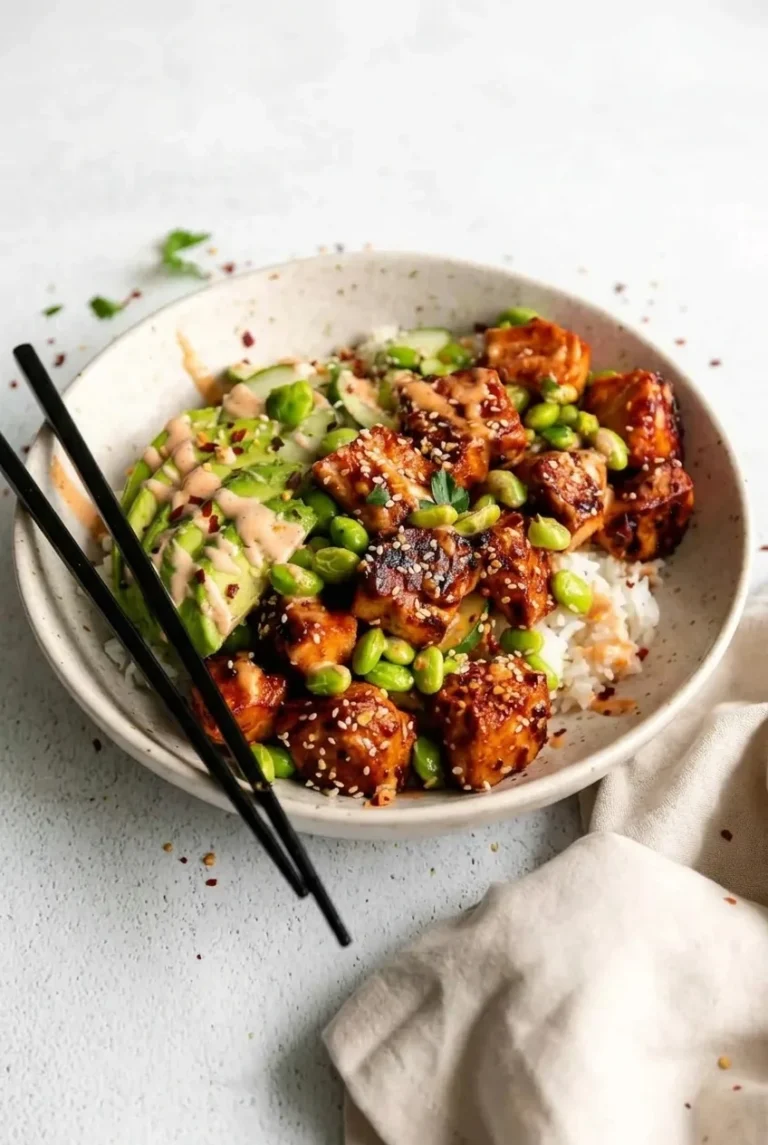
Complete honey sriracha salmon rice bowl centered on a light surface, with its toppings arranged in distinct sections
  1. Cook the rice: Prepare the rice according to the package directions. Keep it warm while you make the salmon and toppings.
  2. Prepare the toppings: Cook and drain the edamame if needed, and slice the cucumber. Leave the avocado uncut until you are ready to assemble the bowls.
  3. Mix the sauces: In a small saucepan, whisk together the honey, 2 tablespoons sriracha, soy sauce, rice vinegar, and garlic. In a small bowl, whisk the mayonnaise with 1 teaspoon sriracha and the lime juice. Add a little water until the mayo falls from a spoon in a thin ribbon. In another small bowl, stir the cornstarch into 1 tablespoon water until smooth.
  4. Air-fry the salmon: Preheat the air fryer to 400°F (205°C) if your appliance recommends or allows it. Pat the salmon dry and toss it with the oil. Arrange the pieces in a single layer with space between them; cook in batches if needed. Air-fry for about 6–8 minutes, beginning to check at 5 minutes. The thickest piece should be opaque and cooked through, with an internal temperature of 145°F (65°C). If your air fryer browns unevenly, gently turn the pieces once partway through.
  5. Thicken the glaze: While the salmon cooks, bring the glaze mixture to a gentle simmer over medium-low to medium heat. Whisk in the cornstarch slurry and cook briefly, until glossy and lightly thickened. If it becomes too thick to toss with the salmon, whisk in water a teaspoon at a time. Keep the glaze separate from the raw fish.
  6. Assemble the bowls: Gently toss the cooked salmon with enough glaze to coat it. Divide the warm rice among four shallow bowls. Slice the avocado, then arrange it with the cucumber and salmon in distinct sections over the rice. Scatter the edamame across the bowls. Drizzle lightly with sriracha mayo and finish with sesame seeds, red pepper flakes, and optional cilantro or green onion.

How to Get Browned Salmon Bites

Dry surfaces and an uncrowded basket give the salmon room to brown rather than steam. If the pieces barely fit in one layer, cook them in batches. Add the honey-sriracha glaze only after air frying: its moisture can limit browning, and its honey can darken quickly under direct heat.

Adjusting the Heat

For a milder bowl, use less sriracha in the glaze and mayo drizzle, but keep some in the glaze for its sweet-spicy flavor. For more heat, serve extra sriracha at the table. Thin the mayo with a little water rather than using a heavy coating that hides the salmon and fresh toppings.

Make-Ahead and Storage

The rice, salmon, edamame, and sauces can be prepared ahead and kept separate. Refrigerate cooked rice and salmon in separate airtight containers for up to 3 days. Store the cucumber separately and slice the avocado just before serving.

Reheat the rice and salmon gently in the microwave or a skillet until warm. Avoid prolonged heating, which can dry out the salmon. Leftover salmon can also be served cold. Freezing cooked salmon is not recommended because its texture may suffer after thawing.

Nutrition

Approximate nutrition per serving, based on 1 of 4 bowls: 800 calories, 39g protein, 41g fat, and 67g carbohydrates. Approximate nutrition per 100g: 165 calories, 8g protein, 9g fat, and 14g carbohydrates. Values vary with the salmon, mayonnaise, rice, and amount of glaze used.

Honey Sriracha Salmon Rice Bowls

Air-fried salmon bites are coated in a honey-sriracha glaze and served over rice with cucumber, avocado, edamame, and sriracha mayo.
Course: Main Course
Cuisine: Global
Prep: 15 min
Cook: 20 min
Total: 35 min
Servings: 4 Calories: 800 kcal

Equipment

  • Air fryer
  • Small saucepan
  • Mixing bowls
  • Whisk

Ingredients

For the Bowls

  • 4 cups cooked white or jasmine rice (600 g), from about 1½ cups dry rice
  • 1 cup cooked, shelled edamame (155 g)
  • 1 medium English cucumber, thinly sliced (200 g)
  • 1 ripe avocado, thinly sliced (150 g)
  • 1 tablespoon sesame seeds
  • ¼ teaspoon red pepper flakes, or to taste
  • Optional: 1–2 tablespoons chopped cilantro or sliced green onion
  • Optional: extra sriracha for serving

For the Salmon

  • 1¼ pounds skinless salmon fillets, cut into roughly 1-inch cubes (570 g)
  • 2 teaspoons neutral oil

For the Honey-Sriracha Glaze

  • 3 tablespoons honey (65 g)
  • 2 tablespoons sriracha
  • 1½ tablespoons low-sodium soy sauce
  • 1 tablespoon rice vinegar
  • 1 small garlic clove, finely grated or minced
  • 1 teaspoon cornstarch
  • 1 tablespoon water, plus more as needed

For the Sriracha Mayo

  • ¼ cup mayonnaise (60 g)
  • 1 teaspoon sriracha
  • 1 teaspoon lime juice, plus more as needed
  • Water, as needed to thin

Instructions

  1. Prepare the rice according to the package directions and keep it warm.
  2. Cook and drain the edamame if needed. Slice the cucumber, and wait to cut the avocado until assembly.
  3. In a small saucepan, whisk together the honey, 2 tablespoons sriracha, soy sauce, rice vinegar, and garlic.
  4. In a small bowl, whisk the mayonnaise with 1 teaspoon sriracha and the lime juice. Add a little water until it falls from a spoon in a thin ribbon.
  5. In another small bowl, stir the cornstarch into 1 tablespoon water until smooth.
  6. Preheat the air fryer to 400°F (205°C) if your appliance recommends or allows it.
  7. Pat the salmon dry and toss it with the oil. Arrange the pieces in a single layer with space between them, working in batches if needed.
  8. Air-fry the salmon for about 6–8 minutes, beginning to check at 5 minutes. Cook until the thickest piece is opaque and reaches an internal temperature of 145°F (65°C). Turn the pieces partway through if your air fryer browns unevenly.
  9. While the salmon cooks, bring the glaze to a gentle simmer over medium-low to medium heat. Whisk in the cornstarch slurry and cook briefly until glossy and lightly thickened. Add water a teaspoon at a time if needed to thin it.
  10. Gently toss the cooked salmon with enough glaze to coat it.
  11. Divide the warm rice among four shallow bowls. Slice the avocado and arrange it with the cucumber and salmon over the rice. Scatter the edamame across the bowls.
  12. Drizzle with sriracha mayo and finish with sesame seeds, red pepper flakes, and optional cilantro or green onion.

Tips

  • Pat the salmon dry and leave space between pieces so they brown instead of steam.
  • Cook the salmon in batches if the pieces do not fit in a single layer.
  • Start checking 1-inch salmon pieces at 5 minutes because air fryers vary.
  • Add the honey-sriracha glaze after air frying to help the salmon brown and prevent the honey from darkening too quickly.

Variations

  • Milder Bowls: Use less sriracha in the glaze and mayo drizzle.
  • Spicier Bowls: Serve extra sriracha at the table.
Notes

Refrigerate cooked rice and salmon separately in airtight containers for up to 3 days. Reheat gently until warm to help prevent the salmon from drying out; leftover salmon can also be served cold. Cook salmon to 145°F (65°C).

Nutrition

Calories: 800 kcal | Protein: 39 g | Fat: 41 g | Carbohydrates: 67 g | Per 100 G Calories: 165 kcal | Per 100 G Protein: 8 g | Per 100 G Fat: 9 g | Per 100 G Carbohydrates: 14 g

High-Protein Chocolate Cheesecake Cups

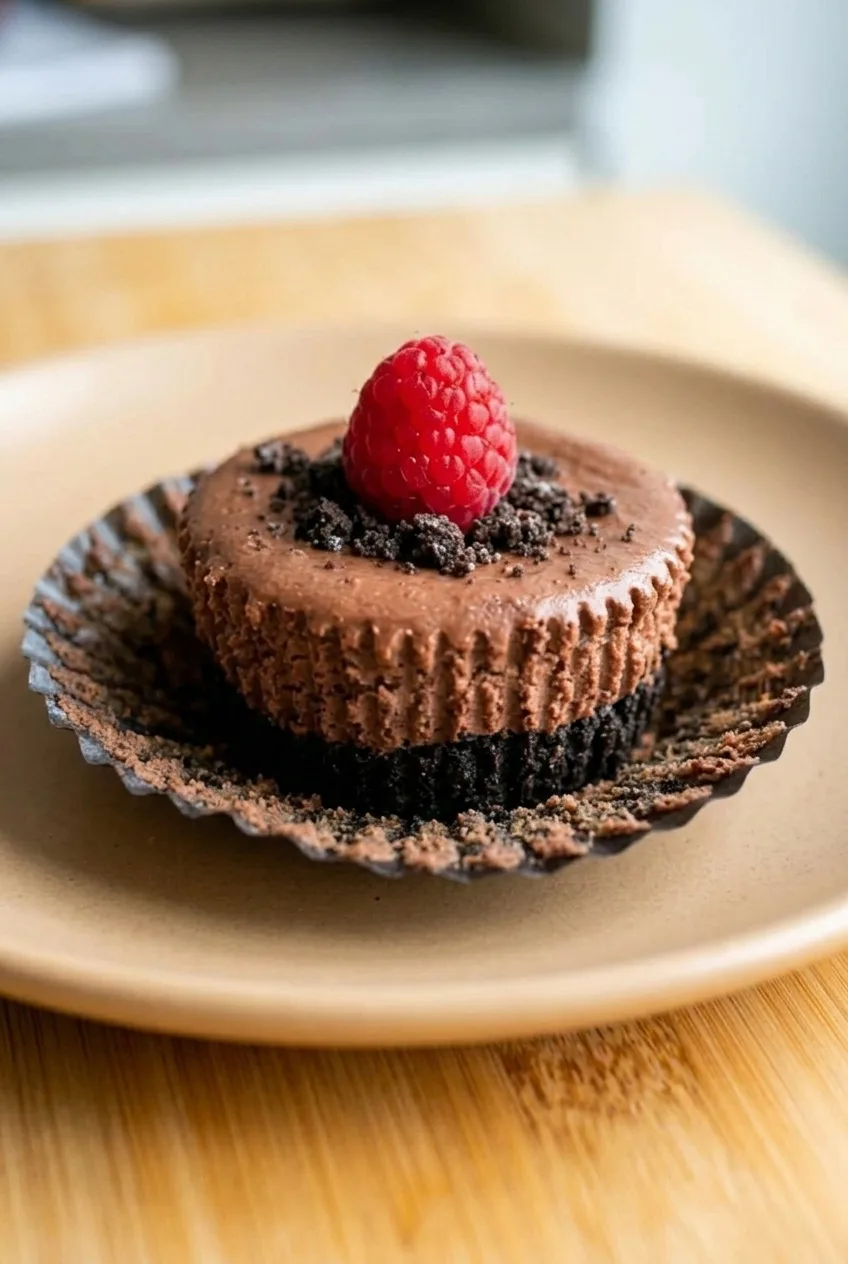
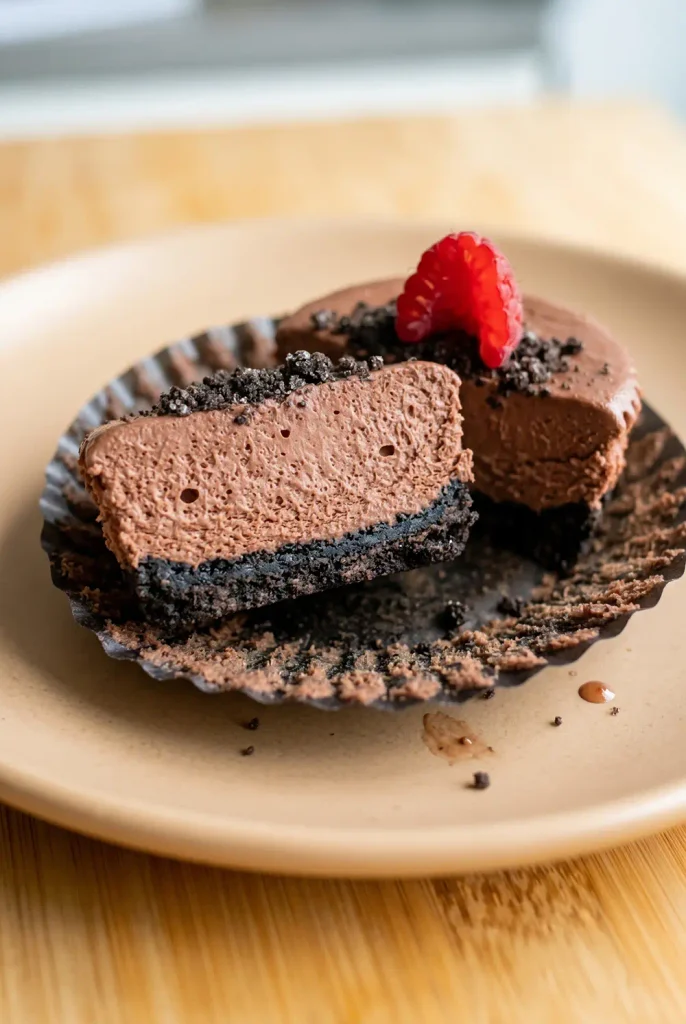
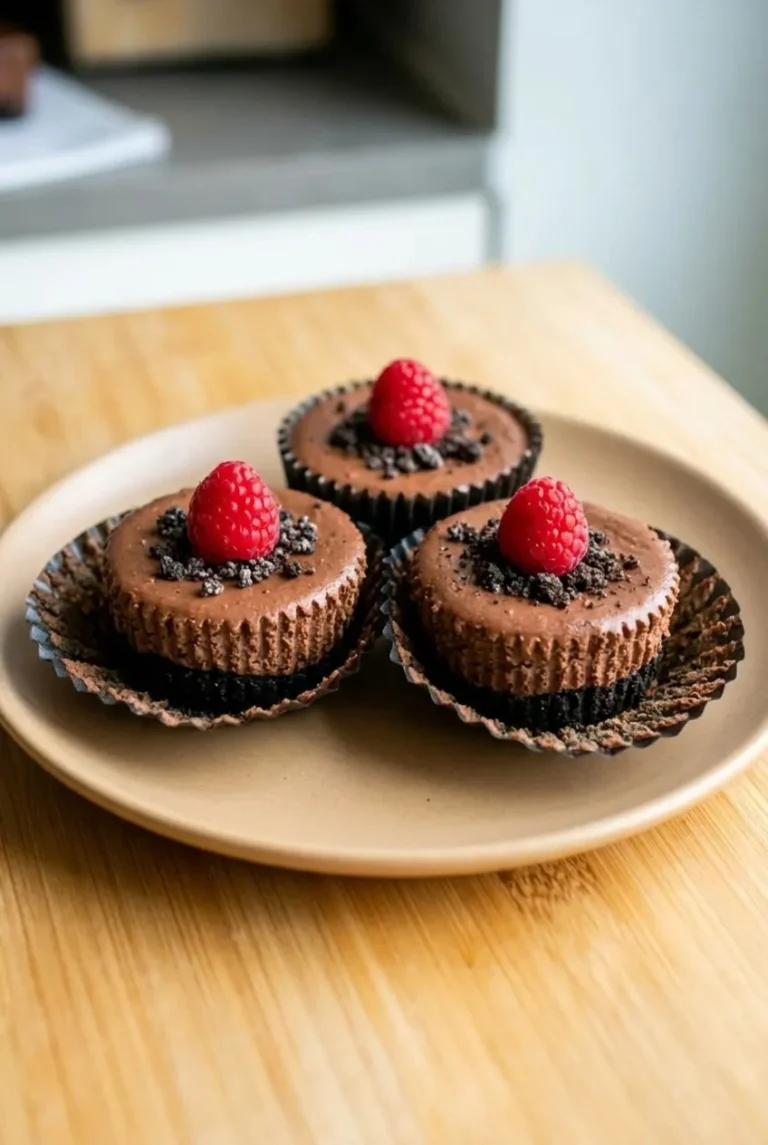
These no-bake cups have a compact chocolate-cookie crust beneath a thick filling made with cream cheese, Greek yogurt, chocolate protein powder, and cocoa. Cookie crumbs and a fresh raspberry finish each one. The filling needs to be smooth and spoonable before it goes into the liners; because protein powders vary, add milk only if it is too stiff. Freezing firms the crusts and filled cups, while a long refrigerator chill helps them hold their shape for serving.

Prep time: 25 minutes | Cook time: 0 minutes | Total time: About 9 to 9 1/2 hours, mostly chilling | Makes: 8 cups

Ingredients for High-Protein Chocolate Cheesecake Cups

Close detail of a chocolate cheesecake cup showing its dark cookie crust, smooth filling, crumbs, and raspberry
  • 1 1/2 cups finely crushed chocolate sandwich cookies (about 18 cookies; 165g), divided
  • 3 tablespoons unsalted butter, melted (about 40g)
  • 8 ounces cream cheese, softened (about 225g)
  • 1/2 cup plain Greek yogurt (120g)
  • 1 scoop chocolate protein powder, about 1/3 cup (30g)
  • 2 tablespoons unsweetened cocoa powder (10g)
  • 1/4 cup powdered sugar, or to taste (30g)
  • 1/2 teaspoon vanilla extract
  • 8 fresh raspberries, gently dried
  • Optional: 1–2 tablespoons milk, only if needed

How to Make Chocolate Cheesecake Cups

  1. Line the tin: Place 8 paper liners in a standard muffin tin. Reserve a small handful of the cookie crumbs for topping.
  2. Press the crusts: Stir the remaining crumbs with the melted butter until evenly coated and resembling damp sand. Divide among the liners and press firmly into level bases.
  3. Firm the crusts: Freeze the tin for about 1 hour, until the crumb bases feel compact rather than loose.
  4. Mix the filling: Beat the softened cream cheese until smooth. Add the Greek yogurt, protein powder, cocoa, powdered sugar, and vanilla. Mix until evenly combined, scraping the bowl as needed. The filling should be thick and spoonable, not runny. If it is too stiff to spoon, mix in milk 1 teaspoon at a time.
  5. Fill the cups: Divide the filling among the liners, smooth the tops, and leave a little space at the top of each. Scatter the reserved cookie crumbs over the filling.
  6. Set and chill: Freeze for 1 1/2–2 hours, until the surfaces feel set. Cover the tin without letting the cover touch the topping, then refrigerate for at least 6 hours or overnight.
  7. Garnish and serve: Shortly before serving, place one dry raspberry in the center of each cup. Serve cold, peeling away the liners if desired.

How to Keep the Filling Smooth

Beat the cream cheese smooth before adding the other ingredients; cold cream cheese can leave lumps. Protein powder and Greek yogurt vary in thickness, so start without milk. Add it only if the filling cannot be spooned easily. If the mixture already looks loose, add no liquid and allow the full chilling time.

When Are the Cups Ready to Serve?

After the refrigerator chill, the filling should feel firm to a light touch, and a cup should hold its shape when the liner is peeled back. Keep the cups cold until serving; this no-bake filling is softer than baked cheesecake. They can be made the day before and chilled overnight.

For another chilled chocolate dessert, try High-Protein Chocolate Greek Yogurt Pudding. For another individual no-bake dessert, see No-Bake Cookie Butter Cheesecake Cups.

Storage

Cover and refrigerate the cups for up to 1 week. When possible, store them without the raspberries and add the berries shortly before serving. The freezer is part of the setting method; longer-term freezer storage for these cups is not established.

Nutrition

Approximate nutrition per cup, based on 8 cups (about 80g each): 280 calories, 8g protein, 19g fat, and 21g carbohydrates. Approximate nutrition per 100g: 350 calories, 10g protein, 24g fat, and 26g carbohydrates. Values vary with the cookies, protein powder, cream cheese, and yogurt used.

High-Protein Chocolate Cheesecake Cups

No-bake chocolate cheesecake cups have a cookie crumb crust and a thick filling made with cream cheese, Greek yogurt, and chocolate protein powder.
Course: Dessert
Cuisine: American
Prep: 25 min
Total: 570 min
Servings: 8 Calories: 280 kcal

Equipment

  • Muffin tin
  • Paper liners
  • Mixing bowl
  • Hand mixer

Ingredients

For the crust

  • 1 1/2 cups finely crushed chocolate sandwich cookies (about 18 cookies; 165 g), divided
  • 3 tablespoons unsalted butter, melted (about 40 g)

For the filling

  • 8 ounces cream cheese, softened (about 225 g)
  • 1/2 cup plain Greek yogurt (120 g)
  • 1 scoop chocolate protein powder, about 1/3 cup (30 g)
  • 2 tablespoons unsweetened cocoa powder (10 g)
  • 1/4 cup powdered sugar (30 g), or to taste
  • 1/2 teaspoon vanilla extract
  • 1–2 tablespoons milk, optional, only if needed

For topping

  • 8 fresh raspberries, gently dried

Instructions

  1. Line a standard muffin tin with 8 paper liners. Reserve a small handful of the cookie crumbs for topping.
  2. Stir the remaining cookie crumbs with the melted butter until evenly coated and the mixture resembles damp sand.
  3. Divide the crumb mixture among the liners and press firmly into level bases.
  4. Freeze the tin for about 1 hour, until the crusts feel compact.
  5. Beat the softened cream cheese until smooth.
  6. Add the Greek yogurt, protein powder, cocoa, powdered sugar, and vanilla. Mix until combined, scraping down the bowl as needed.
  7. Check that the filling is thick and spoonable. If it is too stiff, mix in milk 1 teaspoon at a time.
  8. Divide the filling among the liners, smooth the tops, and leave a little space at the top of each cup.
  9. Scatter the reserved cookie crumbs over the filling.
  10. Freeze for 1 1/2–2 hours, until the surfaces feel set.
  11. Cover the tin without letting the cover touch the topping, then refrigerate for at least 6 hours or overnight.
  12. Shortly before serving, place one dry raspberry in the center of each cup. Serve cold, peeling away the liners if desired.

Tips

  • Beat the cream cheese smooth before adding the other ingredients to prevent lumps.
  • Start without milk because protein powders and Greek yogurt vary in thickness.
  • Add milk only if the filling is too stiff to spoon, 1 teaspoon at a time.
  • If the filling already looks loose, do not add milk and allow the cups the full chilling time.
  • Add the raspberries shortly before serving and keep the cups cold.

Notes

Cover and refrigerate for up to 1 week. The filling is softer than baked cheesecake, so keep the cups cold until serving. Longer-term freezer storage is not established.

Nutrition

Calories: 280 kcal | Protein: 8 g | Fat: 19 g | Carbohydrates: 21 g

High-Protein Breakfast Burrito Bowls

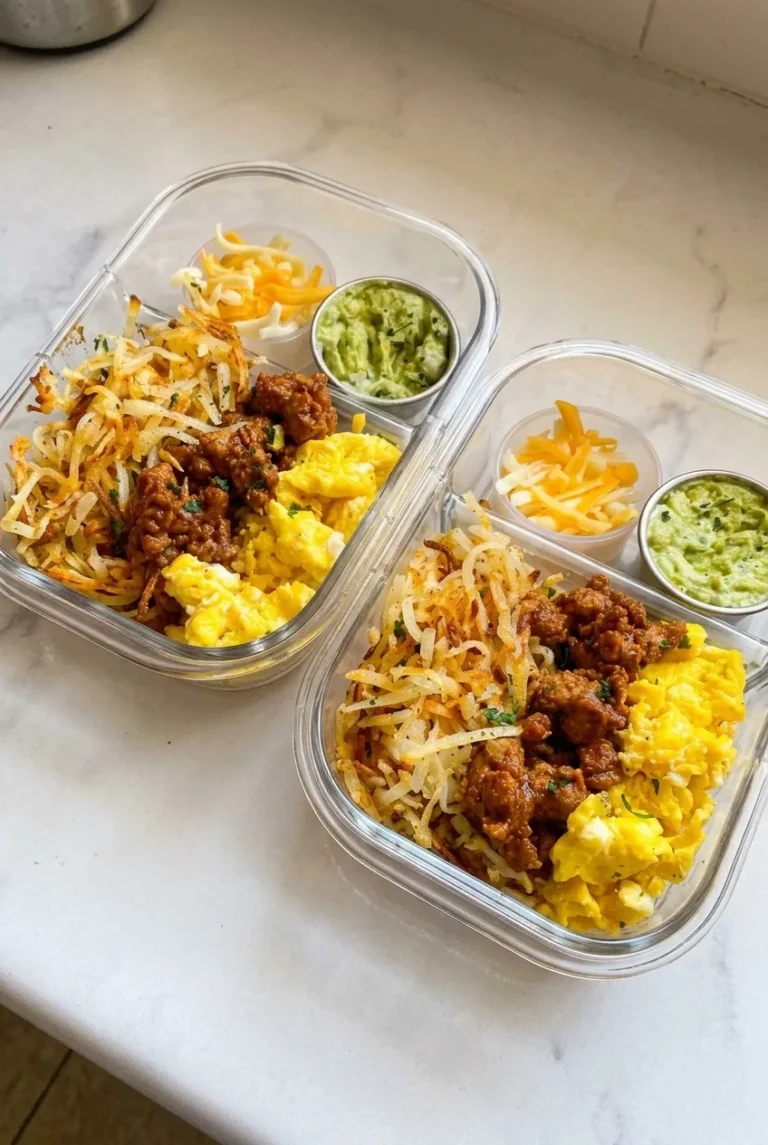
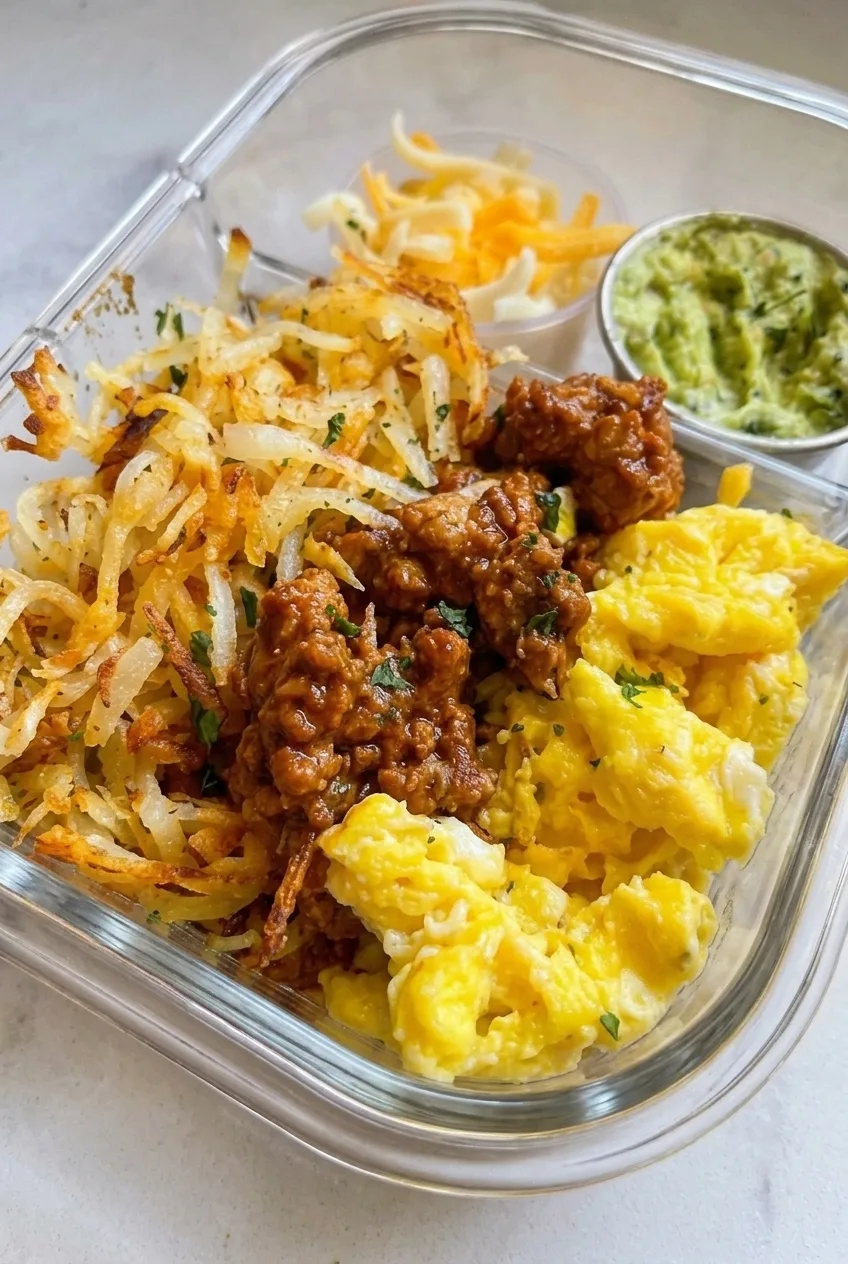
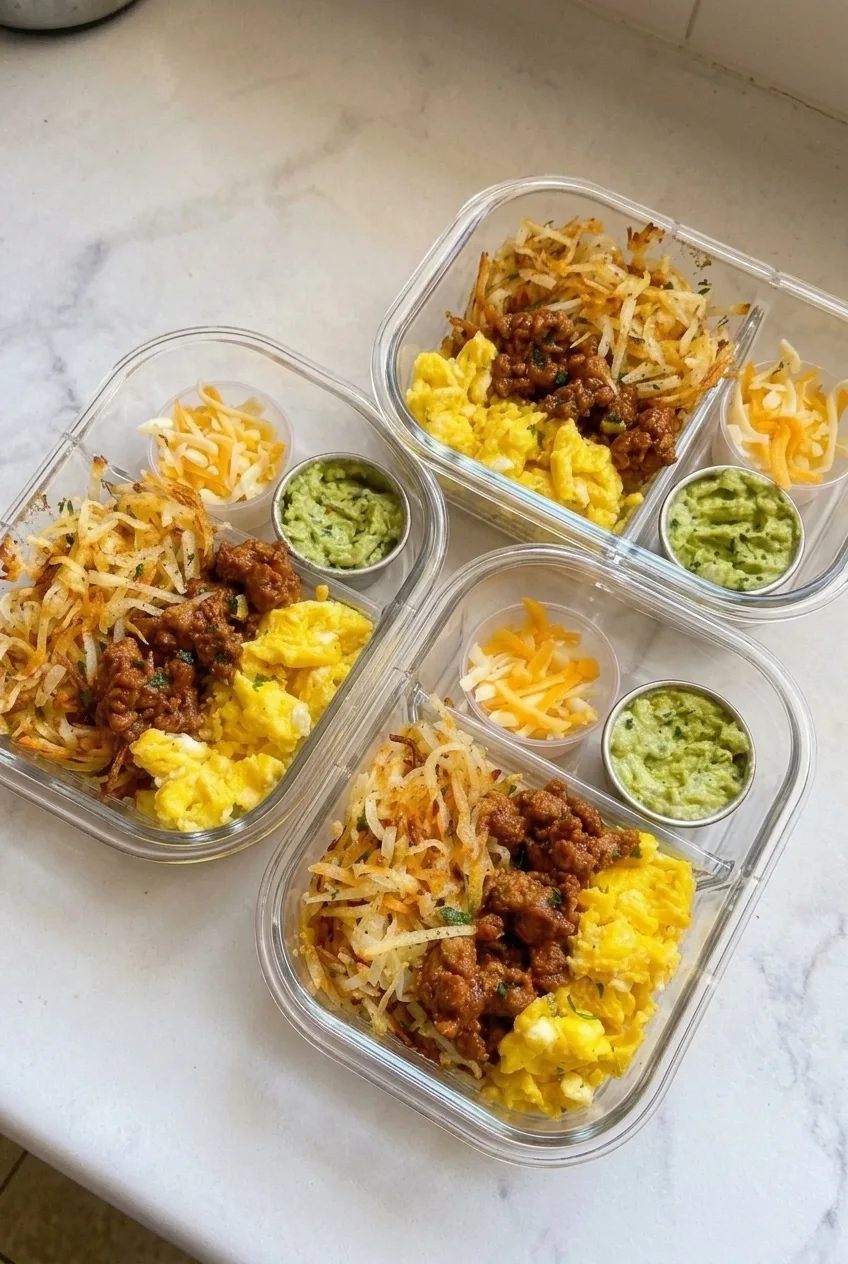
Golden shredded hash browns, soft scrambled eggs, and saucy taco-seasoned turkey make up these four meal-prep bowls. Each component cooks separately: the potatoes bake while the turkey and eggs cook on the stovetop. Thawing and drying the hash browns helps them brown, and a brief simmer with tomato sauce keeps the turkey spoonable. Portion the cheese and guacamole into separate cups so they stay out of the bowl until serving.

Ingredients for High-Protein Breakfast Burrito Bowls

Close view of crisp-edged shredded hash browns, soft eggs, and saucy turkey in a breakfast burrito bowl
  • 1 lb frozen shredded hash browns (about 450g), thawed and patted dry
  • 1 tablespoon olive oil or avocado oil
  • 2 tablespoons taco seasoning (about 18g), divided
  • 1/4 teaspoon kosher salt, or to taste, depending on the taco seasoning
  • 1 lb lean ground turkey (about 450g)
  • 1/2 cup tomato sauce
  • 1/4 cup water
  • 8 large eggs
  • 1 teaspoon butter or neutral oil, for the egg pan
  • 1 cup shredded Mexican-style cheese blend (about 4 oz or 110g)
  • 1 cup guacamole (about 240g)

Optional for serving: chopped cilantro, salsa, pico de gallo, lime, or hot sauce.

How to Make Breakfast Burrito Bowls

Several complete breakfast burrito meal-prep bowls with separate portions of potatoes, eggs, turkey, cheese, and guacamole
  1. Prepare the hash browns: Preheat the oven to 400°F (205°C). Pat the thawed potatoes thoroughly dry; the strands should feel damp at most, not wet. Toss with the oil, 1 tablespoon of the taco seasoning, and salt to taste.
  2. Bake the potatoes: Spread them in one even layer on a large rimmed sheet pan. Use a second pan if needed to avoid crowding. Bake uncovered for about 26 to 28 minutes, turning the potatoes and rotating the pan halfway through. Start checking around 22 minutes; they are ready when tender, golden, and crisp-edged, with some deeper toasted strands. Add a few minutes if they are still pale or soft.
  3. Cook the turkey: While the potatoes bake, cook the turkey in a large skillet over medium to medium-high heat, breaking it into small crumbles as it browns. Stir in the remaining tablespoon of taco seasoning, the tomato sauce, and the water. Reduce the heat to medium-low and simmer uncovered until the sauce coats the crumbles rather than pooling, about 10 to 12 minutes total cooking time. The turkey should reach 165°F (75°C).
  4. Scramble the eggs: Close to assembly time, beat the eggs. Melt the butter or warm the oil in a nonstick skillet over medium-low heat. Add the eggs and stir gently for about 4 to 6 minutes, until soft curds form and no liquid egg remains. Remove them from the heat while they are still moist, before they brown.
  5. Portion four bowls: Arrange the hash browns, eggs, and turkey in separate sections of divided meal-prep containers. Put the cheese and guacamole in separate small cups. Let the hot components stop steaming before sealing the containers.

How to Get the Hash Browns Golden

Moisture left in frozen shredded potatoes can make them steam instead of brown. Pat them dry after thawing and give the strands room on the pan. Use their golden, crisp-edged appearance as the final cue: a crowded pan or wetter potatoes may need a few extra minutes. Diced-potato baking times do not apply to shredded hash browns.

Keeping the Turkey Saucy and the Eggs Soft

The tomato sauce and water should reduce just enough to coat the turkey. If the sauce disappears, the meat can turn dry; if it pools, simmer briefly until it thickens. Cook the eggs over medium-low heat and remove them as soon as they are set so the warm pan does not continue to firm them up.

Meal Prep, Storage, and Reheating

Refrigerate the cooked components in airtight containers for up to 3 days. Keep the cheese and guacamole separate and refrigerate them promptly. Guacamole may discolor, so portioning it close to serving works best when practical.

Microwave the hash browns, eggs, and turkey in short intervals, stirring or rearranging them between intervals until hot. Add the cheese and guacamole afterward. Microwave reheating will soften the potatoes; for better texture, re-crisp them in a dry skillet over high heat for about 4 to 5 minutes and serve with the warmed turkey and eggs.

Freezing the cooled cooked components without the cheese or guacamole is an option. Use freezer-safe containers, aim to use them within 3 months, and thaw safely before reheating until hot. Expect the eggs and potatoes to be softer than when freshly cooked.

More Breakfast Ideas

For a skillet breakfast with potatoes and eggs, try Breakfast Skillet with Potatoes, Eggs, Bacon and Cheddar. For a handheld option, see Breakfast Tacos with Eggs, Potatoes, and Chorizo.

Nutrition

Approximate nutrition per bowl, including cheese and guacamole: 690 calories, 45g protein, 42g fat, and 29g carbohydrates. Approximate nutrition per 100g: 150 calories, 10g protein, 9g fat, and 6g carbohydrates. Values vary with ingredient brands, turkey fat content, and portion size.

High-Protein Breakfast Burrito Bowls

Meal-prep bowls of crisp hash browns, soft scrambled eggs, taco-seasoned turkey, cheese, and guacamole.
Course: Breakfast
Cuisine: Mexican
Prep: 15 min
Cook: 28 min
Total: 43 min
Servings: 4 Calories: 690 kcal

Equipment

  • Oven
  • Rimmed sheet pan
  • Large skillet
  • Nonstick skillet
  • Meal-prep containers

Ingredients

For the Bowls

  • 1 lb frozen shredded hash browns (about 450g), thawed and patted dry
  • 1 tablespoon olive oil or avocado oil
  • 2 tablespoons taco seasoning (about 18g), divided
  • 1/4 teaspoon kosher salt, or to taste
  • 1 lb lean ground turkey (about 450g)
  • 1/2 cup tomato sauce
  • 1/4 cup water
  • 8 large eggs
  • 1 teaspoon butter or neutral oil, for the egg pan
  • 1 cup shredded Mexican-style cheese blend (about 4 oz or 110g)
  • 1 cup guacamole (about 240g)

Optional for Serving

  • Chopped cilantro
  • Salsa
  • Pico de gallo
  • Lime
  • Hot sauce

Instructions

  1. Preheat the oven to 400°F (205°C). Pat the thawed hash browns thoroughly dry.
  2. Toss the hash browns with the oil, 1 tablespoon of taco seasoning, and salt to taste.
  3. Spread the potatoes in one even layer on a large rimmed sheet pan, using a second pan if needed. Bake uncovered for 26 to 28 minutes, turning the potatoes and rotating the pan halfway through, until tender, golden, and crisp-edged.
  4. While the potatoes bake, cook the turkey in a large skillet over medium to medium-high heat, breaking it into small crumbles as it browns.
  5. Stir the remaining tablespoon of taco seasoning, tomato sauce, and water into the turkey. Reduce the heat to medium-low and simmer uncovered until the sauce coats the crumbles, about 10 to 12 minutes total cooking time. Cook the turkey to 165°F (75°C).
  6. Close to assembly time, beat the eggs. Melt the butter or warm the oil in a nonstick skillet over medium-low heat.
  7. Add the eggs and stir gently for 4 to 6 minutes, until soft curds form and no liquid egg remains. Remove from the heat while still moist, before they brown.
  8. Divide the hash browns, eggs, and turkey among four meal-prep containers. Place the cheese and guacamole in separate small cups, and let the hot components stop steaming before sealing.

Tips

  • Thaw and thoroughly dry the hash browns so they brown instead of steam.
  • Spread the potatoes in a single layer and use a second pan if needed to avoid crowding.
  • Use golden, crisp-edged potatoes as the doneness cue; add a few minutes if they are still pale or soft.
  • Simmer the turkey until the sauce coats the crumbles, but do not let it reduce until the meat is dry.
  • Remove the eggs from the heat as soon as they are set; the warm pan will continue to cook them.

Notes

Refrigerate cooked components in airtight containers for up to 3 days, keeping the cheese and guacamole separate. Reheat the hash browns, eggs, and turkey until hot; re-crisp potatoes in a dry skillet for 4 to 5 minutes for better texture. Cooked components can be frozen without cheese or guacamole for up to 3 months; thaw safely before reheating.

Nutrition

Calories: 690 kcal | Protein: 45 g | Fat: 42 g | Carbohydrates: 29 g

High-Protein Buffalo Chicken Dip

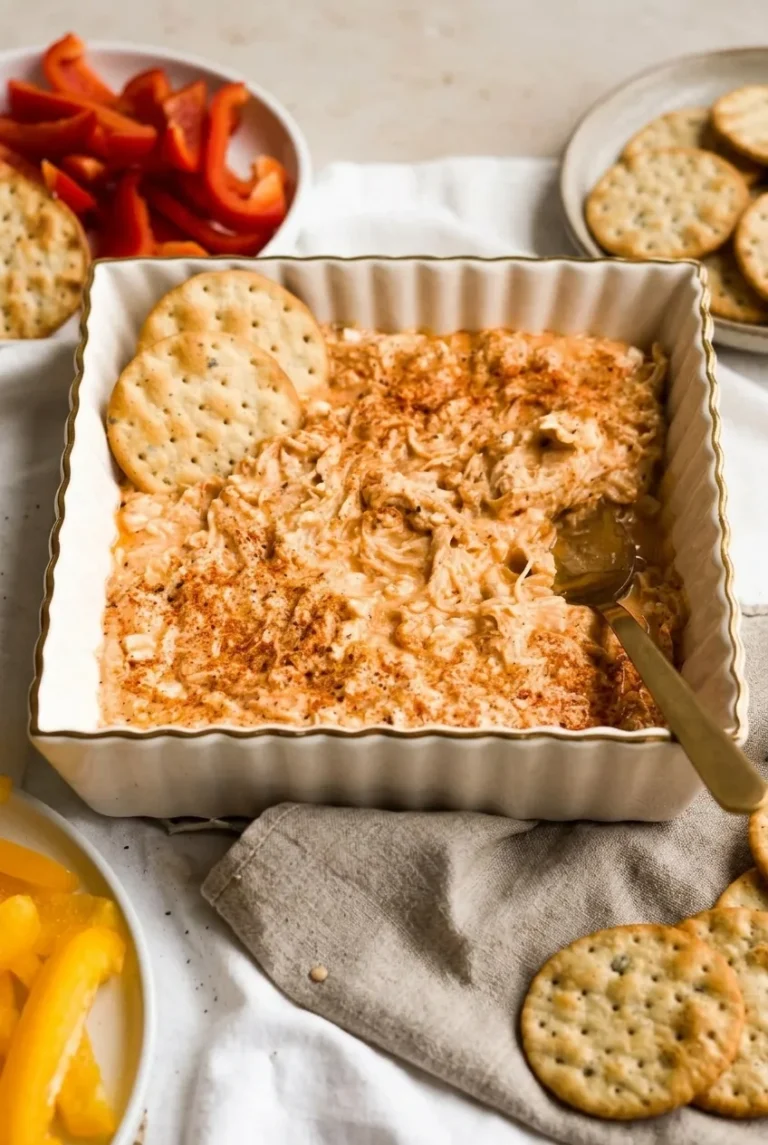
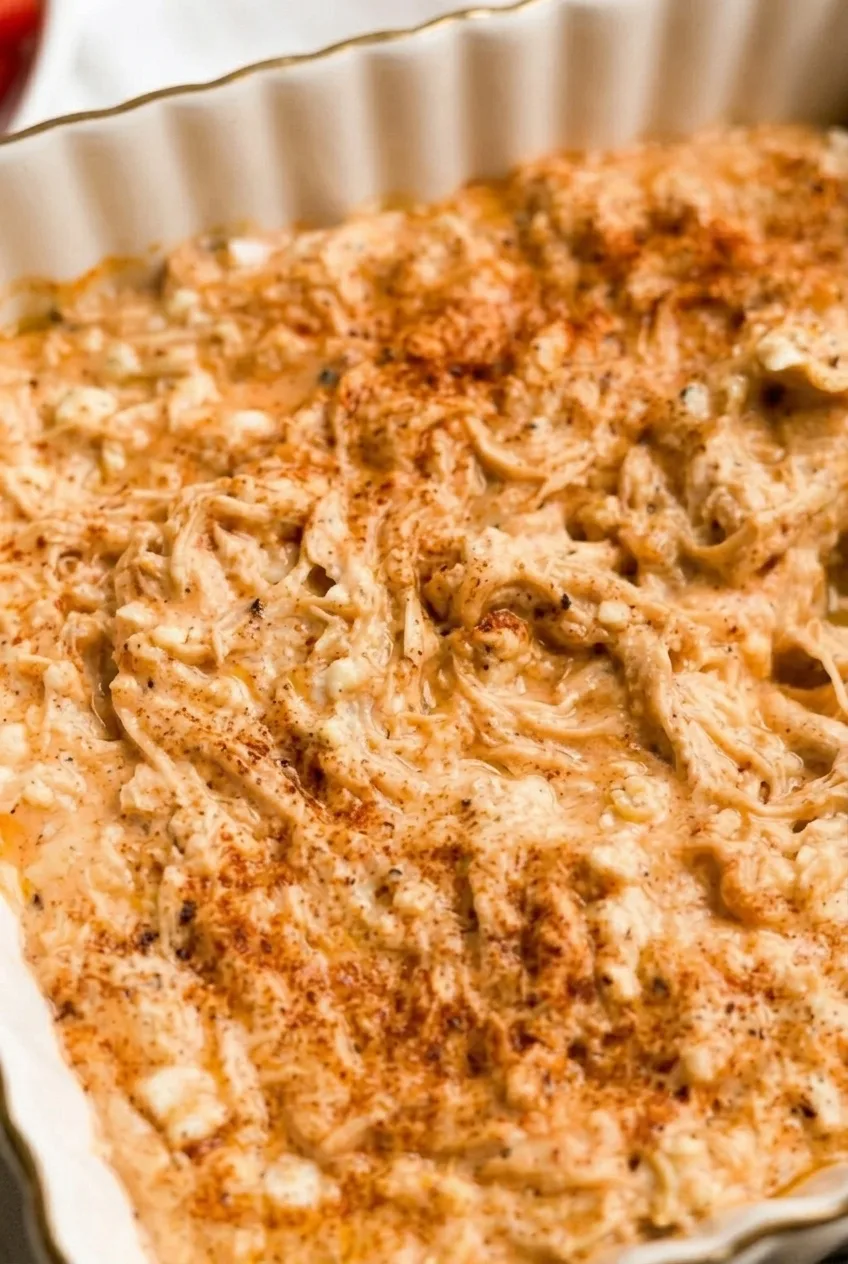
Blended cottage cheese and Greek yogurt make a creamy buffalo sauce that coats the chicken without hiding its shreds. The dip stays pale orange and scoopable, with a light paprika finish instead of a melted-cheese crust.

Start with fully cooked chicken: the short oven bake warms the dip; it does not cook raw poultry. Use a shallow dish and take it out when the center is hot and the edges just begin to bubble.

Ingredients

Close detail of creamy buffalo chicken dip showing shredded chicken, paprika, and a scoopable texture.
  • 2 cups cooked shredded chicken (about 8 ounces/225g), drained of excess liquid
  • 1 cup small-curd cottage cheese (225g)
  • ½ cup plain Greek yogurt (120g)
  • ⅓ cup buffalo-style hot sauce (80g), or to taste
  • ½ teaspoon garlic powder
  • ½ teaspoon onion powder
  • ⅛ teaspoon black pepper
  • ¼ teaspoon paprika, for finishing
  • Crackers and sliced bell peppers, for serving

Rotisserie or leftover chicken works well; remove any skin and bones before shredding. Drain canned chicken thoroughly if using it. Hot sauces vary in heat and salt, so taste the base before adding more sauce. For another way to use cooked chicken, try this Greek yogurt chicken salad.

How to Make Buffalo Chicken Dip

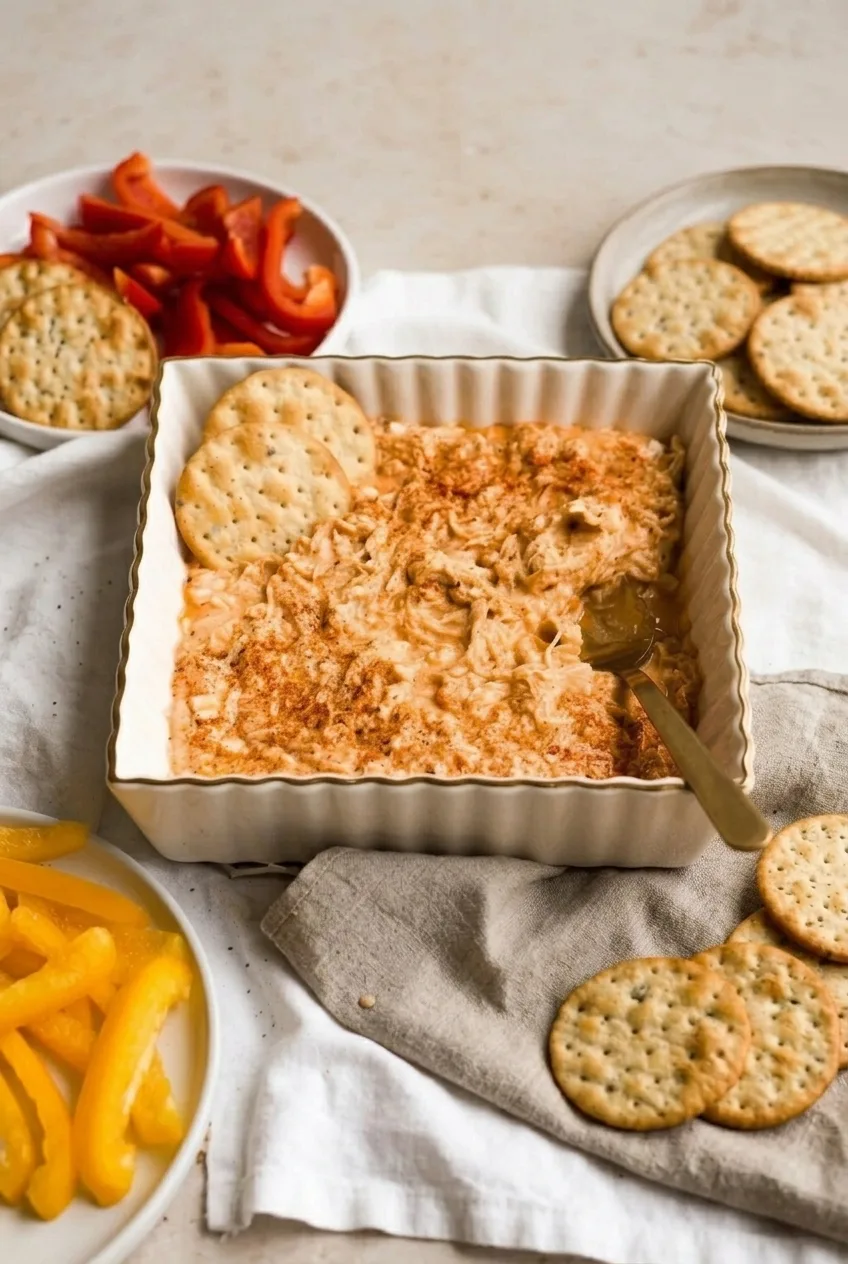
A wider view of the full dish of buffalo chicken dip with crackers and colorful bell pepper strips nearby.
  1. Heat the oven: Preheat to 350°F (175°C). Lightly grease a shallow 1- to 1½-quart oven-safe baking dish if sticking is a concern.
  2. Blend the cottage cheese: Blend for 30–60 seconds, until the curds are broken down and the cheese is mostly smooth. Do not add the chicken to the blender.
  3. Mix the base: In a bowl, stir together the blended cottage cheese, Greek yogurt, hot sauce, garlic powder, onion powder, and black pepper. Taste and adjust the hot sauce if desired. The mixture should be pale orange and thick enough to spoon.
  4. Fold in the chicken: Stir in the cooked shredded chicken until coated. Transfer to the baking dish and spread loosely, leaving some natural texture on the surface.
  5. Bake uncovered: Start checking at 12 minutes. Bake for about 15–20 minutes total, until the center is hot throughout and the edges are just beginning to bubble. A chilled dip or deeper dish may take longer. Remove it before the edges brown or liquid separates.
  6. Finish and serve: Dust lightly with paprika and let stand for about 5 minutes so the dip settles for scooping. Serve warm with crackers and bell pepper strips.

How to Keep the Dip Creamy and Scoopable

Blend only the cottage cheese, then fold in the chicken by hand. This smooths the sauce while keeping the chicken shreds distinct. Skipping the blender is possible, but the base will have more noticeable curds.

Drain the chicken and measure the hot sauce before mixing. Extra moisture can make the dip loose, while baking past the just-bubbling stage can dry the chicken or cause the dairy to separate. The brief rest after baking also helps the dip settle.

What to Serve with Buffalo Chicken Dip

Set crackers and bell pepper strips beside the baking dish for scooping. Celery sticks, carrot sticks, tortilla chips, or pita chips also work; keep the dippers out of the dip so they stay crisp.

Make-Ahead, Storage, and Reheating

To make the dip ahead, mix it, cover, and refrigerate until ready to bake. A chilled mixture may need longer than 20 minutes; check that the center is hot and the edges are just beginning to bubble.

Refrigerate leftovers promptly in an airtight container for 3–4 days. Reheat portions in the microwave in 30-second intervals, stirring between intervals, or warm the dip in a 350°F oven for about 10–15 minutes, until hot in the center. Heat gently to help preserve the creamy texture.

Freezing for up to 2 months is possible, but the dairy may change texture after thawing. Thaw overnight in the refrigerator, reheat gently, and stir if the dip looks uneven.

Nutrition

Approximate nutrition per serving, based on 8 appetizer servings: 80 calories, 13g protein, 2g fat, and 2g carbohydrates. Per 100g: about 100 calories, 16g protein, 2g fat, and 2g carbohydrates. Values vary with the chicken, dairy, and hot sauce used.

High-Protein Buffalo Chicken Dip

A creamy buffalo chicken dip made with blended cottage cheese and Greek yogurt, baked until hot and scoopable.
Course: Appetizer
Cuisine: American
Prep: 10 min
Cook: 20 min
Total: 35 min
Servings: 8 Calories: 80 kcal

Equipment

  • Blender
  • Mixing bowl
  • Shallow baking dish

Ingredients

  • 2 cups cooked shredded chicken (about 8 ounces/225 g), drained of excess liquid
  • 1 cup small-curd cottage cheese (225 g)
  • 1/2 cup plain Greek yogurt (120 g)
  • 1/3 cup buffalo-style hot sauce (80 g), or to taste
  • 1/2 teaspoon garlic powder
  • 1/2 teaspoon onion powder
  • 1/8 teaspoon black pepper
  • 1/4 teaspoon paprika, for finishing
  • Crackers and sliced bell peppers, for serving

Instructions

  1. Preheat the oven to 350°F (175°C). Lightly grease a shallow 1- to 1 1/2-quart oven-safe baking dish if needed.
  2. Blend the cottage cheese for 30–60 seconds, until mostly smooth. Do not add the chicken to the blender.
  3. In a bowl, stir together the blended cottage cheese, Greek yogurt, hot sauce, garlic powder, onion powder, and black pepper. Taste and adjust the hot sauce if desired.
  4. Fold in the cooked shredded chicken until coated.
  5. Transfer the mixture to the baking dish and spread it loosely.
  6. Bake uncovered for about 15–20 minutes, checking at 12 minutes, until the center is hot and the edges just begin to bubble. Remove before the edges brown or liquid separates.
  7. Dust with paprika and let stand for about 5 minutes. Serve warm with crackers and bell pepper strips.

Tips

  • Use fully cooked chicken; the oven bake only warms the dip.
  • Drain the chicken well to keep the dip from becoming loose.
  • Blend only the cottage cheese, then fold in the chicken by hand to keep the shreds distinct.
  • Hot sauces vary in heat and salt, so taste the base before adding more.
  • A chilled mixture or deeper baking dish may need more baking time; check that the center is hot.

Notes

Refrigerate leftovers promptly in an airtight container for 3–4 days. Reheat gently in the microwave or in a 350°F oven until hot in the center. Freezing for up to 2 months is possible, though the dairy texture may change. Nutrition is approximate per serving.

Nutrition

Calories: 80 kcal | Protein: 13 g | Fat: 2 g | Carbohydrates: 2 g

Cottage Cheese Pizza Bowl

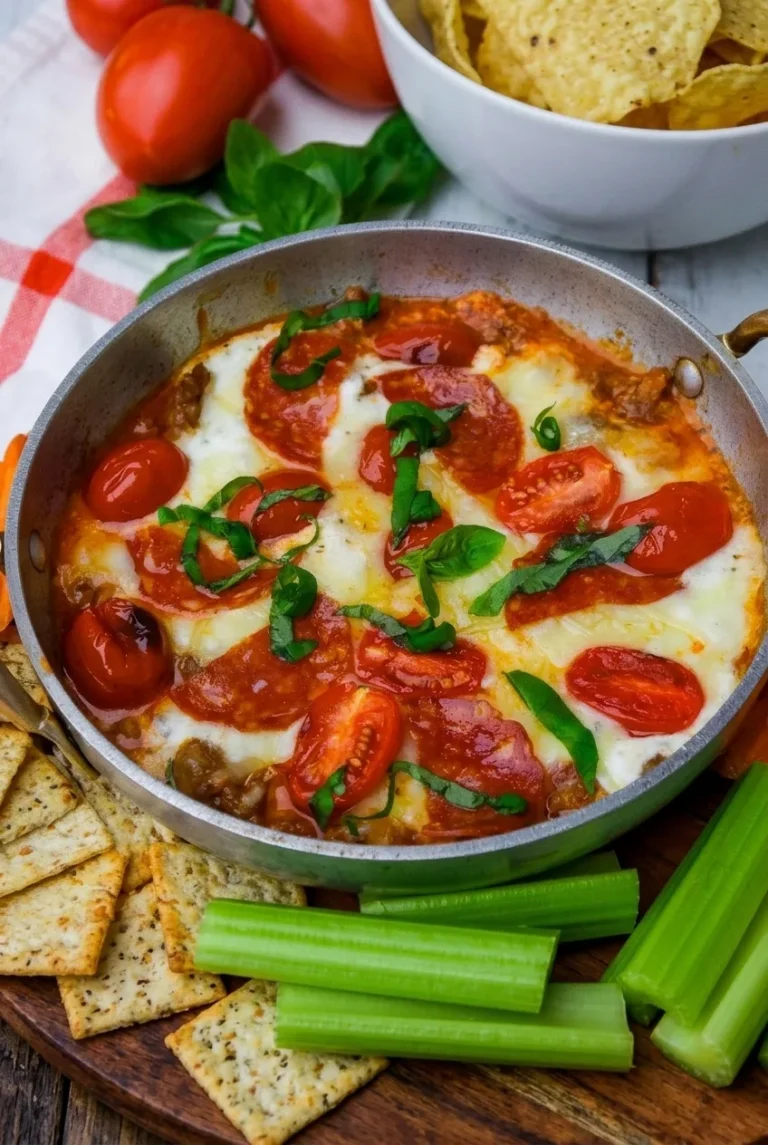
A shallow skillet turns cottage cheese, thick marinara, and mozzarella into a warm, crustless pizza dip. Cooked Italian sausage, pepperoni, and halved tomatoes stay visible beneath a finish of fresh basil. Serve it from the skillet with crackers and celery, or eat it with a fork.

The key is to keep the base from getting watery: use thick sauce and drain the cottage cheese if liquid has pooled in its container. Bake just until the filling is hot and the cheese bubbles; the time depends on the depth of the skillet.

Makes 2 meal servings or 3–4 dip servings. Allow about 15 minutes to prepare and 10–15 minutes to bake.

Ingredients for Cottage Cheese Pizza Bowl

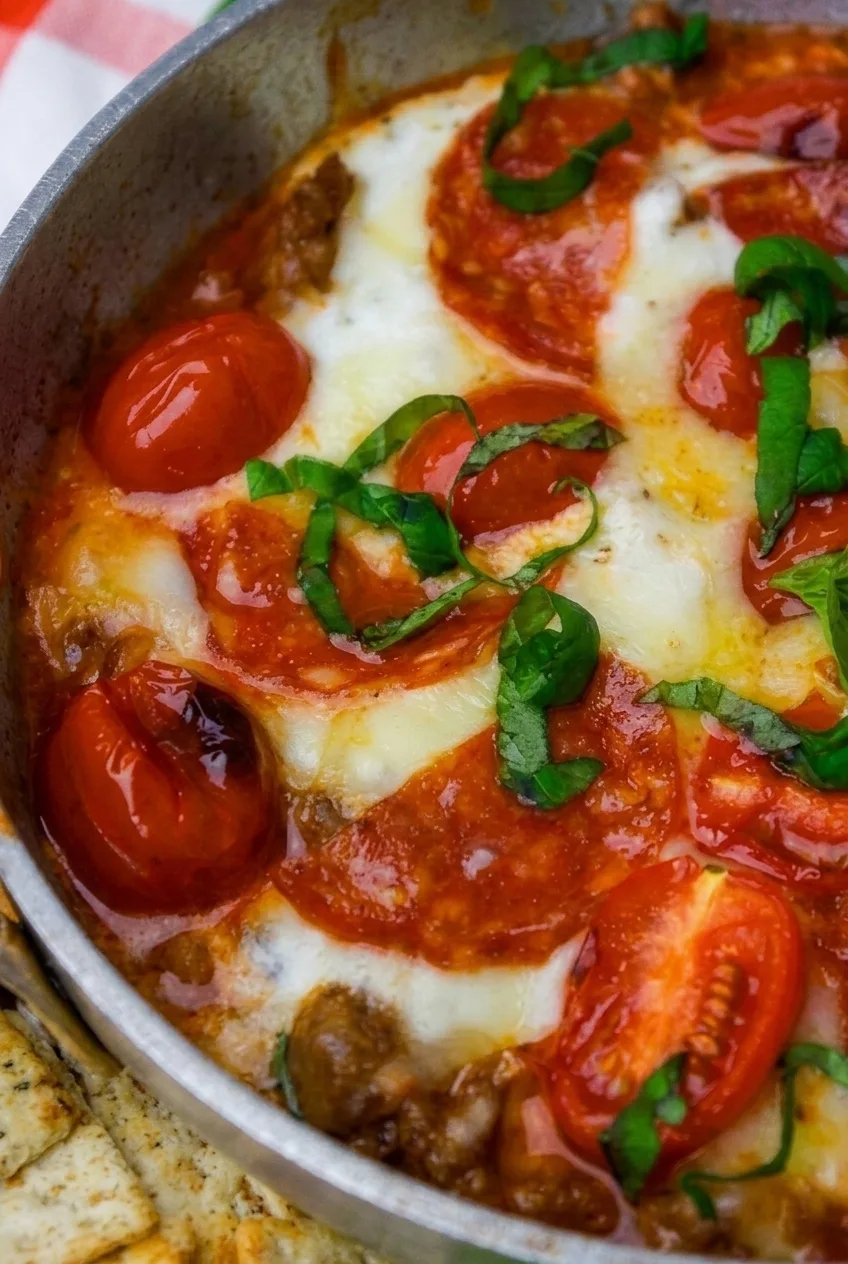
Close view of the pizza bowl’s melted mozzarella, pepperoni, tomato halves, sausage crumbles, and fresh basil
  • 1 cup small-curd cottage cheese (225g)
  • 1/3 cup thick marinara or pizza sauce (80g)
  • 1/2 teaspoon Italian seasoning
  • 1/4 teaspoon garlic powder
  • 1/3 cup cooked, crumbled Italian sausage (50g)
  • 3/4 cup shredded mozzarella (85g)
  • 1 tablespoon grated Parmesan (5g)
  • 8–10 pepperoni slices (20g)
  • 6–8 cherry or grape tomatoes, halved (about 90g)
  • 4–6 fresh basil leaves, torn or thinly sliced

Optional for serving: crackers, celery sticks, and a pinch of red pepper flakes.

How to Make Cottage Cheese Pizza Bowl

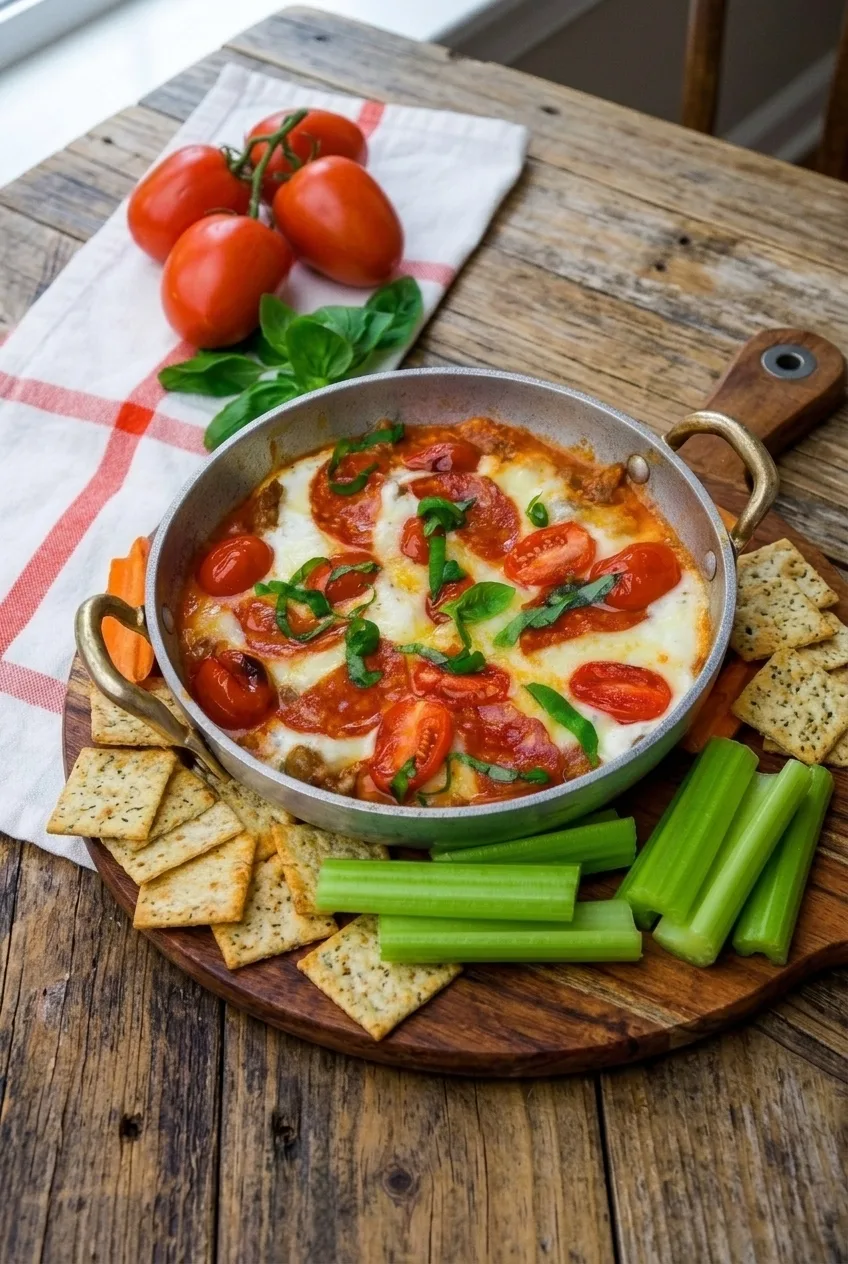
Whole skillet of cottage cheese pizza dip centered on a wooden surface with crackers and celery alongside
  1. Preheat and cook the sausage: Heat the oven to 350°F (175°C). If the sausage is not already cooked, crumble it into a small skillet and cook over medium heat for about 5–8 minutes, until browned and cooked through. Drain off excess fat.
  2. Prepare the base: If liquid has pooled around the cottage cheese, drain it briefly. For a smooth dip, blend the cottage cheese; otherwise, leave the curds intact. Stir in the Italian seasoning and garlic powder.
  3. Layer the skillet: Spread the cottage cheese in a shallow, 8-inch oven-safe skillet. Spoon the marinara over it, add the cooked sausage, and cover with the mozzarella and Parmesan. Leave a little room below the rim. If the skillet is nearly full, set it on a rimmed baking sheet to catch any overflow.
  4. Add the toppings: Arrange the pepperoni and halved tomatoes in an even layer over the cheese.
  5. Bake uncovered: Start checking at 10 minutes. Bake for about 10–15 minutes total, until the filling is hot, the mozzarella is fully melted, and the edges bubble gently. A few lightly golden spots are fine; remove the skillet before the top becomes dry or deeply browned.
  6. Rest and serve: Let the skillet rest for 3–5 minutes. Scatter the basil over the top and serve warm. The skillet and filling will still be very hot.

How to Avoid a Watery Pizza Bowl

Choose thick marinara or pizza sauce, and drain the cottage cheese only if it looks unusually wet. Stick to the listed amount of tomatoes; extra juicy toppings can thin the dip. If adding moisture-prone vegetables such as mushrooms or peppers, cook them first to release some of their liquid.

Curdy or Smooth Cottage Cheese?

Unblended cottage cheese gives the base visible curds. Blend it before seasoning if you prefer a smoother, more uniform dip. Either texture works in the skillet.

Serving and Leftovers

Serve the pizza bowl directly from the skillet with crackers and celery, or portion it out as a forkable meal. Add red pepper flakes at the table if desired.

Refrigerate leftovers in an airtight container for up to 3 days. Reheat in the microwave in short increments until hot and the cheese melts again, or warm in a shallow oven-safe dish at 350°F until heated through. You can also assemble the skillet ahead and refrigerate it unbaked; bake until the filling is hot and the cheese is bubbly before serving. Freezing is not the preferred option because the cottage cheese texture may change after thawing.

Nutrition

Approximate nutrition per serving, based on 1/4 of the skillet; crackers and celery are not included: 200 calories, 16g protein, 13g fat, and 6g carbohydrates. Per 100g: approximately 140 calories, 11g protein, 9g fat, and 5g carbohydrates. Values vary with the cottage cheese, sausage, sauce, and cheese used.

Cottage Cheese Pizza Bowl

Cottage cheese, marinara, sausage, pepperoni, tomatoes, and mozzarella bake together into a warm crustless pizza dip or meal.
Course: Main Course
Cuisine: Italian-American
Prep: 15 min
Cook: 15 min
Total: 35 min
Servings: 2 Calories: 200 kcal

Equipment

  • Oven
  • 8-inch oven-safe skillet
  • Small skillet
  • Rimmed baking sheet
  • Blender

Ingredients

For the Pizza Bowl

  • 1 cup small-curd cottage cheese (225 g)
  • 1/3 cup thick marinara or pizza sauce (80 g)
  • 1/2 teaspoon Italian seasoning
  • 1/4 teaspoon garlic powder
  • 1/3 cup cooked, crumbled Italian sausage (50 g)
  • 3/4 cup shredded mozzarella (85 g)
  • 1 tablespoon grated Parmesan (5 g)
  • 8–10 pepperoni slices (20 g)
  • 6–8 cherry or grape tomatoes, halved (about 90 g)
  • 4–6 fresh basil leaves, torn or thinly sliced

Optional for Serving

  • Crackers
  • Celery sticks
  • Pinch of red pepper flakes

Instructions

  1. Preheat the oven to 350°F (175°C).
  2. If the sausage is not already cooked, crumble it into a small skillet and cook over medium heat for 5–8 minutes, until browned and cooked through. Drain off excess fat.
  3. Drain the cottage cheese briefly if liquid has pooled around it. Blend it for a smooth base, if desired.
  4. Stir the Italian seasoning and garlic powder into the cottage cheese.
  5. Spread the cottage cheese in a shallow 8-inch oven-safe skillet. Spoon the marinara over it, add the cooked sausage, then top with the mozzarella and Parmesan.
  6. Arrange the pepperoni and halved tomatoes evenly over the cheese. If the skillet is nearly full, place it on a rimmed baking sheet to catch any overflow.
  7. Bake uncovered, checking at 10 minutes. Continue baking for about 10–15 minutes total, until hot, bubbly at the edges, and the mozzarella is melted. Remove it before the top becomes dry or deeply browned.
  8. Rest for 3–5 minutes, scatter the basil over the top, and serve warm.

Tips

  • Use thick marinara or pizza sauce to help keep the base from getting watery.
  • Drain the cottage cheese only if liquid has pooled in the container.
  • Stick to the listed amount of tomatoes; extra juicy toppings can thin the dip.
  • Cook moisture-prone vegetables such as mushrooms or peppers before adding them.
  • Check the bake early because cooking time depends on the depth of the skillet.

Variations

  • Smooth Cottage Cheese Base: Blend the cottage cheese before seasoning for a smoother, more uniform dip.

Notes

The skillet and filling will be very hot when served. Refrigerate leftovers in an airtight container for up to 3 days and reheat until hot. Freezing is not recommended because the cottage cheese texture may change.

Nutrition

Calories: 200 kcal | Protein: 16 g | Fat: 13 g | Carbohydrates: 6 g | Basis: Per 1/4 of the skillet; crackers and celery not included

High-Protein Salmon Rice Bowls

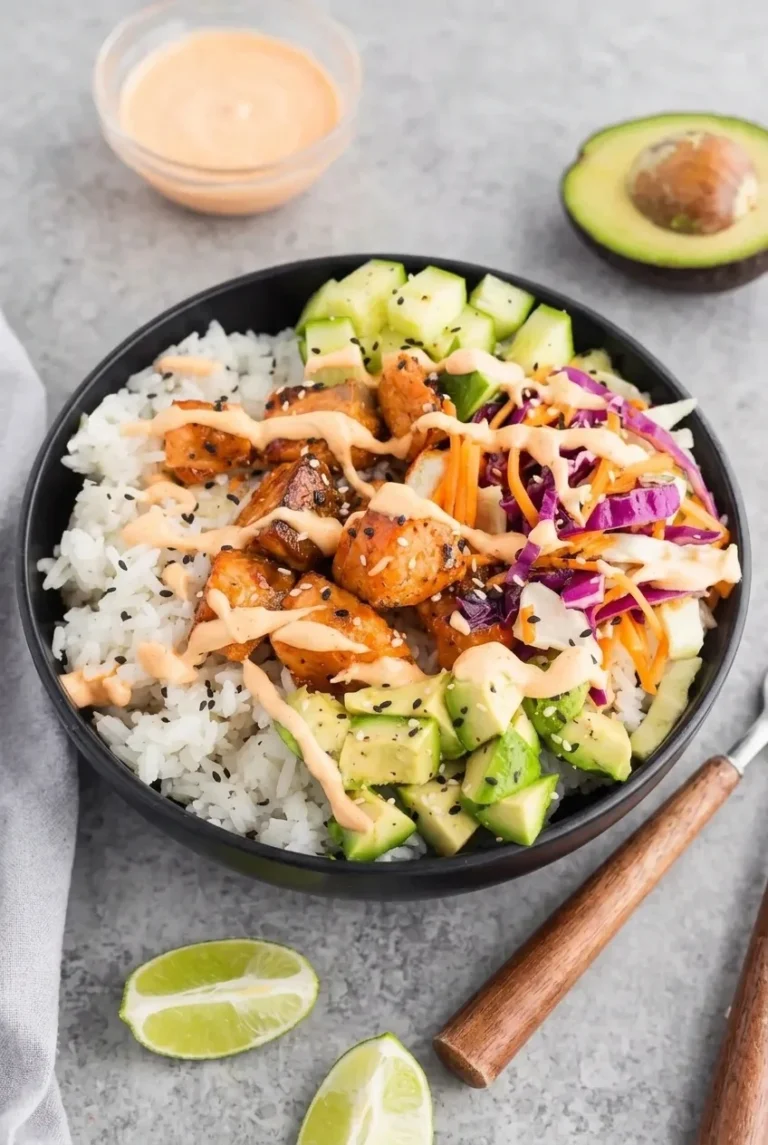
Browned salmon cubes, fluffy white rice, and fresh toppings make up these composed bowls. The salmon gets a brief soy-ginger-honey glaze in the skillet, while cucumber, avocado, and a purple cabbage-carrot slaw stay crisp until serving. A separate sriracha mayonnaise drizzle and mixed sesame seeds finish each bowl.

Start the rice first, then prepare the sauces and vegetables while it cooks. The salmon takes only a few minutes in the skillet, so have the glaze ready before the fish goes in. Makes 4 bowls; allow about 20 minutes to prep and 20 minutes to cook.

Ingredients

Close detail of glossy glazed salmon cubes, sesame seeds, creamy sriracha mayo, and fresh toppings in a salmon rice bowl
  • 1 1/2 cups dry long-grain white rice (280g)
  • Water, as directed for the rice; about 2 1/4 cups for many long-grain varieties
  • 1 1/2 lb boneless, skinless salmon, cut into roughly 1-inch cubes (680g)
  • 1 tablespoon neutral high-heat oil
  • 1/4 cup low-sodium soy sauce
  • 2 tablespoons honey
  • 1 tablespoon rice vinegar
  • 1 teaspoon finely grated fresh ginger
  • 1 small garlic clove, finely grated or minced
  • 1/3 cup mayonnaise
  • 1 to 2 teaspoons sriracha, plus more to taste
  • 2 cups thinly shredded purple cabbage (140g)
  • 1 medium carrot, shredded or cut into thin matchsticks (60g)
  • 1 medium cucumber, cut into chunky pieces (200g)
  • 1 ripe medium avocado, cut into chunks (150g)
  • 1 tablespoon mixed black and white sesame seeds

Optional for serving: Lime wedges and extra sriracha. For a gluten-free version, use tamari instead of soy sauce and check product labels.

How to Make Salmon Rice Bowls

Full salmon rice bowl with rice, glazed salmon, cucumber, avocado, cabbage-carrot slaw, and spicy mayo on a gray surface
  1. Cook the rice: Rinse it if desired, then cook in a saucepan or rice cooker according to the package or appliance directions. Keep it covered until assembly.
  2. Prepare the sauces and toppings: Whisk the soy sauce, honey, rice vinegar, ginger, and garlic in a small bowl. In a separate bowl, stir the mayonnaise and sriracha until smooth. Shred the cabbage and carrot, cut the cucumber, and keep the toppings separate. Cut the avocado close to serving.
  3. Sear the salmon: Pat the cubes dry. Preheat a large, about 12-inch nonstick or well-seasoned skillet over medium-high heat, then add the oil. When it shimmers but does not smoke, add the salmon in one uncrowded layer. Cook uncovered, turning to brown several sides. Begin checking after about 4 minutes; skillet cooking usually takes 6 to 8 minutes, depending on cube size and the pan. If necessary, sear in batches and return all the salmon to the skillet for glazing.
  4. Glaze briefly: When the salmon is nearly cooked, reduce the heat to medium-low. Add the soy-honey mixture and toss gently for 30 to 60 seconds, until it looks glossy and clings to the cubes. Check the thickest piece: it should be opaque and flake when gently pressed. For a conservative food-safety endpoint, cook it to 145°F (65°C), using an instant-read thermometer where practical. If it needs more time, continue cooking gently rather than simmering it in the glaze over high heat.
  5. Assemble the bowls: Divide the rice among four bowls. Group the salmon near the center, then arrange the cucumber, avocado, and cabbage-carrot slaw in separate sections, leaving some rice visible.
  6. Finish: Drizzle the sriracha mayonnaise over the bowls and scatter with sesame seeds. Serve promptly, with lime wedges or extra sriracha if desired.

How to Keep the Salmon Browned and Tender

Dry fish and space in the skillet matter more than a rigid cooking time. Wet or crowded cubes release moisture and steam instead of developing browned patches. If they will not fit in one layer, sear them in batches.

The honey glaze goes in only when the salmon is nearly done. Lowering the heat and tossing briefly lets it coat the fish without scorching. Because smaller cubes cook faster, check the thickest piece early rather than relying on the clock alone.

Make-Ahead and Leftovers

For make-ahead bowls, refrigerate the cooked rice and salmon promptly in separate airtight containers. Keep the slaw, cucumber, and creamy sauce apart from the warm components; cut the avocado close to serving.

Reheat the rice with a small splash of water. Warm the salmon separately and briefly to limit drying, or serve it cold if preferred. Add the fresh toppings, sauce, and sesame seeds afterward. Freezing fully assembled bowls is not recommended because the vegetables and creamy sauce lose quality.

More Bowl and Seafood Dinners

For another rice-based dinner, try Ground Beef Philly Cheesesteak Bowls. For another seafood option, see High-Protein Honey Garlic Shrimp.

Nutrition

Approximate nutrition per serving, based on 1 of 4 bowls: 910 calories, 43g protein, 48g fat, and 76g carbohydrates. Approximate values per 100g: 160 calories, 8g protein, 8g fat, and 13g carbohydrates. Values vary with ingredient brands, cooked rice yield, and portion size.

High-Protein Salmon Rice Bowls

Browned salmon glazed with soy, ginger, and honey is served over rice with crisp vegetables and sriracha mayonnaise.
Course: Main Course
Cuisine: Asian
Prep: 20 min
Cook: 20 min
Total: 40 min
Servings: 4 Calories: 910 kcal

Equipment

  • Saucepan or rice cooker
  • 12-inch skillet
  • Mixing bowls
  • Instant-read thermometer

Ingredients

Rice and Salmon

  • 1 1/2 cups dry long-grain white rice (280 g)
  • Water, as directed for the rice (about 2 1/4 cups for many long-grain varieties)
  • 1 1/2 lb boneless, skinless salmon, cut into roughly 1-inch cubes (680 g)
  • 1 tablespoon neutral high-heat oil

Soy-Ginger Glaze

  • 1/4 cup low-sodium soy sauce
  • 2 tablespoons honey
  • 1 tablespoon rice vinegar
  • 1 teaspoon finely grated fresh ginger
  • 1 small garlic clove, finely grated or minced

Sriracha Mayonnaise

  • 1/3 cup mayonnaise
  • 1 to 2 teaspoons sriracha, plus more to taste

Toppings

  • 2 cups thinly shredded purple cabbage (140 g)
  • 1 medium carrot, shredded or cut into thin matchsticks (60 g)
  • 1 medium cucumber, cut into chunky pieces (200 g)
  • 1 ripe medium avocado, cut into chunks (150 g)
  • 1 tablespoon mixed black and white sesame seeds
  • Optional: lime wedges and extra sriracha

Instructions

  1. Cook the rice in a saucepan or rice cooker according to the package or appliance directions. Keep covered until ready to serve.
  2. Whisk the soy sauce, honey, rice vinegar, ginger, and garlic together in a small bowl.
  3. Stir the mayonnaise and sriracha together in a separate bowl until smooth.
  4. Shred the cabbage and carrot, cut the cucumber, and keep the toppings separate. Cut the avocado close to serving.
  5. Pat the salmon cubes dry. Heat a large nonstick or well-seasoned skillet over medium-high heat, then add the oil.
  6. When the oil shimmers but does not smoke, add the salmon in one uncrowded layer. Cook uncovered, turning to brown several sides. Begin checking after about 4 minutes; cook for about 6 to 8 minutes total, depending on cube size and pan. Sear in batches if needed.
  7. When the salmon is nearly cooked, reduce the heat to medium-low. Add the soy-honey mixture and toss gently for 30 to 60 seconds, until glossy and coating the salmon.
  8. Check the thickest piece for doneness. It should be opaque and flake when gently pressed; for a conservative food-safety endpoint, cook to 145°F (65°C).
  9. Divide the rice among four bowls. Arrange the salmon, cucumber, avocado, and cabbage-carrot slaw in separate sections.
  10. Drizzle with the sriracha mayonnaise and sprinkle with sesame seeds. Serve promptly with lime wedges or extra sriracha if desired.

Tips

  • Pat the salmon dry and leave space between the cubes so they brown instead of steam.
  • Sear the salmon in batches if it will not fit in the skillet in one layer.
  • Add the honey glaze only when the salmon is nearly cooked, and toss it briefly over lower heat to prevent scorching.
  • Check the thickest salmon piece early because smaller cubes cook faster.

Variations

  • Gluten-Free Salmon Rice Bowls: Use tamari instead of soy sauce and check product labels.

Notes

Refrigerate cooked rice and salmon promptly in separate airtight containers, with fresh toppings and sauce stored apart. Reheat rice with a splash of water and warm salmon briefly, or serve it cold. Cut avocado close to serving. Fully assembled bowls are not recommended for freezing.

Nutrition

Calories: 910 kcal | Protein: 43 g | Fat: 48 g | Carbohydrates: 76 g | Per 100 G Calories: 160 kcal | Per 100 G Protein: 8 g | Per 100 G Fat: 8 g | Per 100 G Carbohydrates: 13 g

Greek Yogurt Chicken Salad

Thick Greek yogurt coats substantial pieces of chicken in this savory salad, while diced celery and red onion add crunch. Dijon, lemon, and dill season the dressing without overpowering it. The main recipe uses yogurt alone; mayonnaise is optional if you prefer a richer dressing.

Start with fully cooked, cooled chicken—rotisserie or leftovers work well—and the salad takes about 15 minutes to assemble. Serve it right away, or chill it for about 30 minutes to let the flavors meld.

Ingredients for Greek Yogurt Chicken Salad

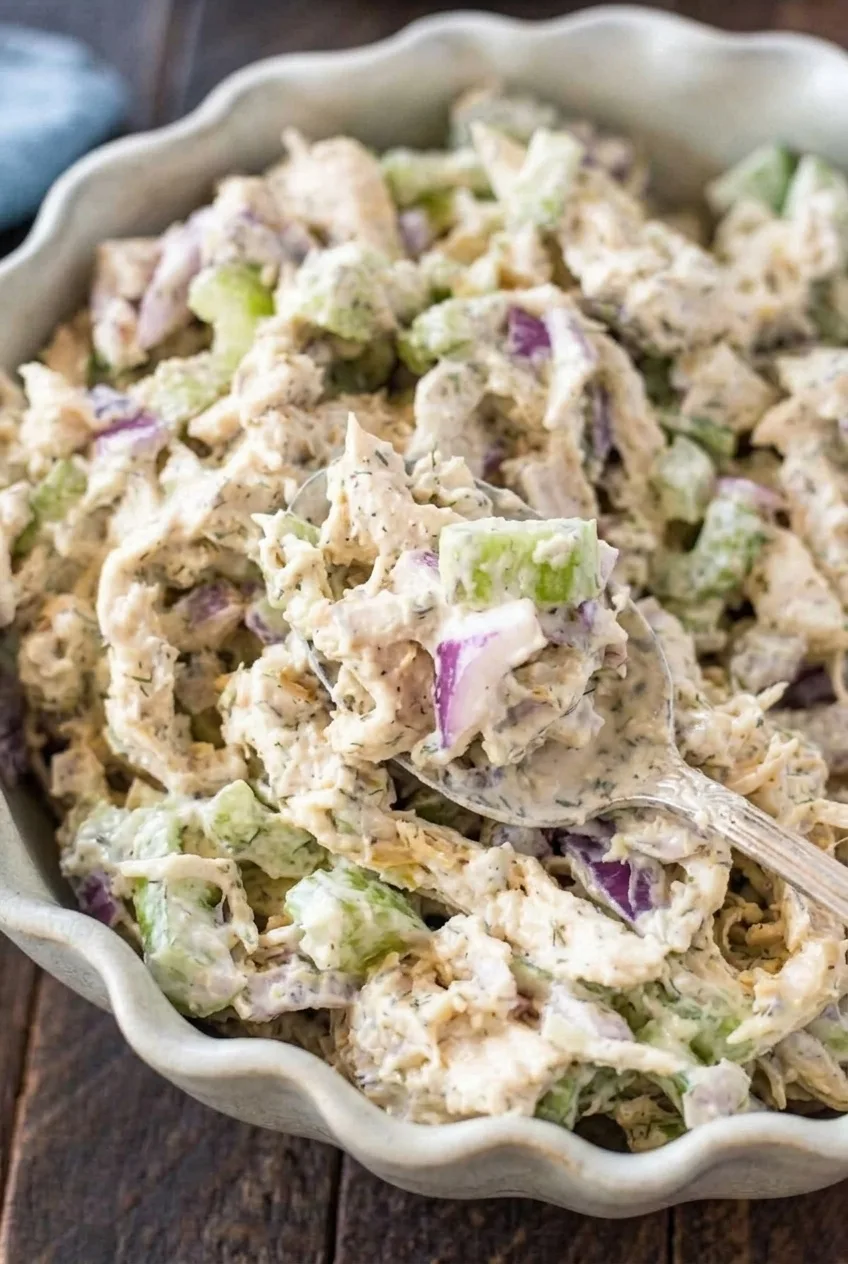
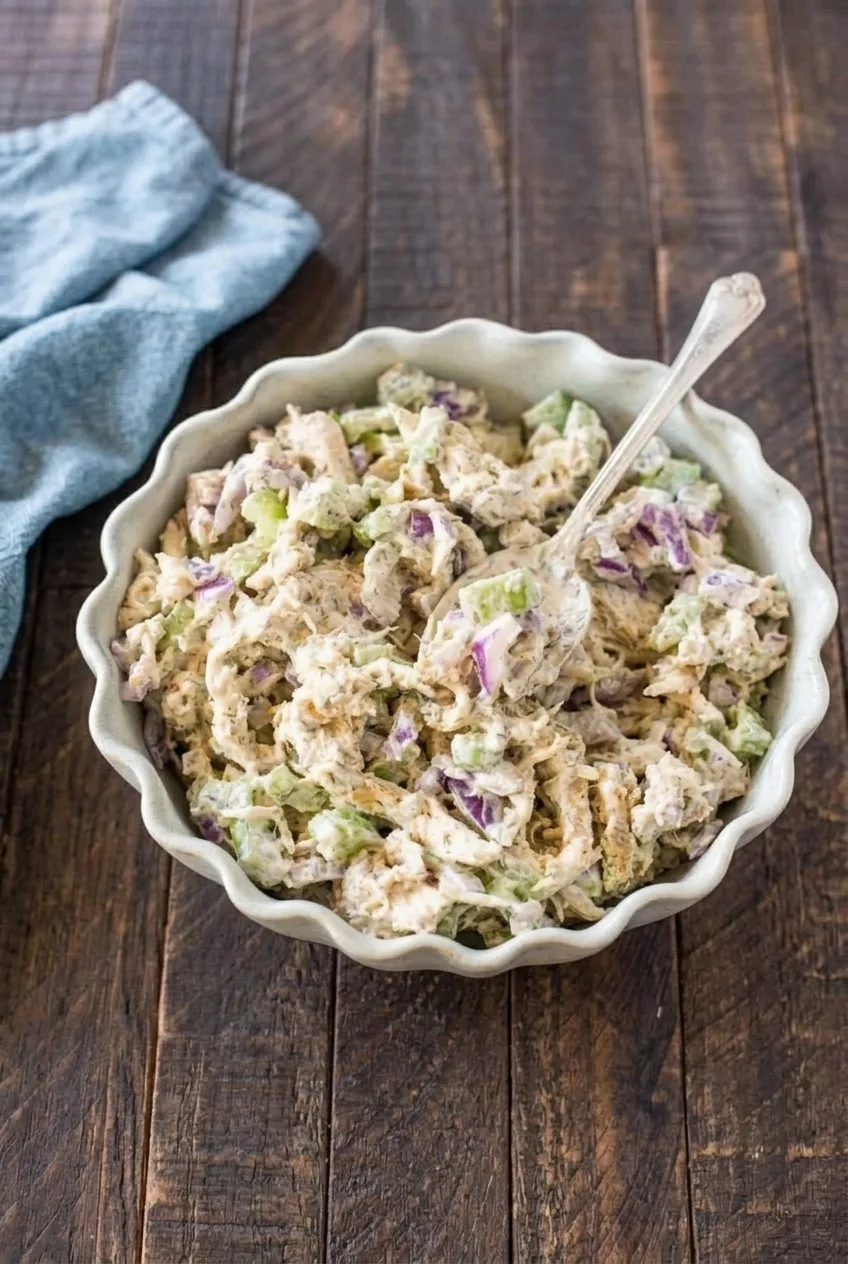
Close-up of thick Greek yogurt chicken salad coating chicken, celery, and red onion
  • 3 cups cooked chicken, cooled and shredded or chopped into substantial pieces (420g)
  • 3/4 cup plain Greek yogurt (180g)
  • 2 celery ribs, finely diced, about 1/2 cup (50g)
  • 1/4 cup finely diced red onion (40g)
  • 1 teaspoon Dijon mustard
  • 1 tablespoon fresh lemon juice
  • 1 tablespoon chopped fresh dill
  • 1/4 teaspoon kosher salt to start, then more to taste
  • 1/8 teaspoon black pepper, or to taste

Optional: Add 1 to 2 tablespoons mayonnaise to the dressing for a richer, less tangy salad.

How to Make Greek Yogurt Chicken Salad

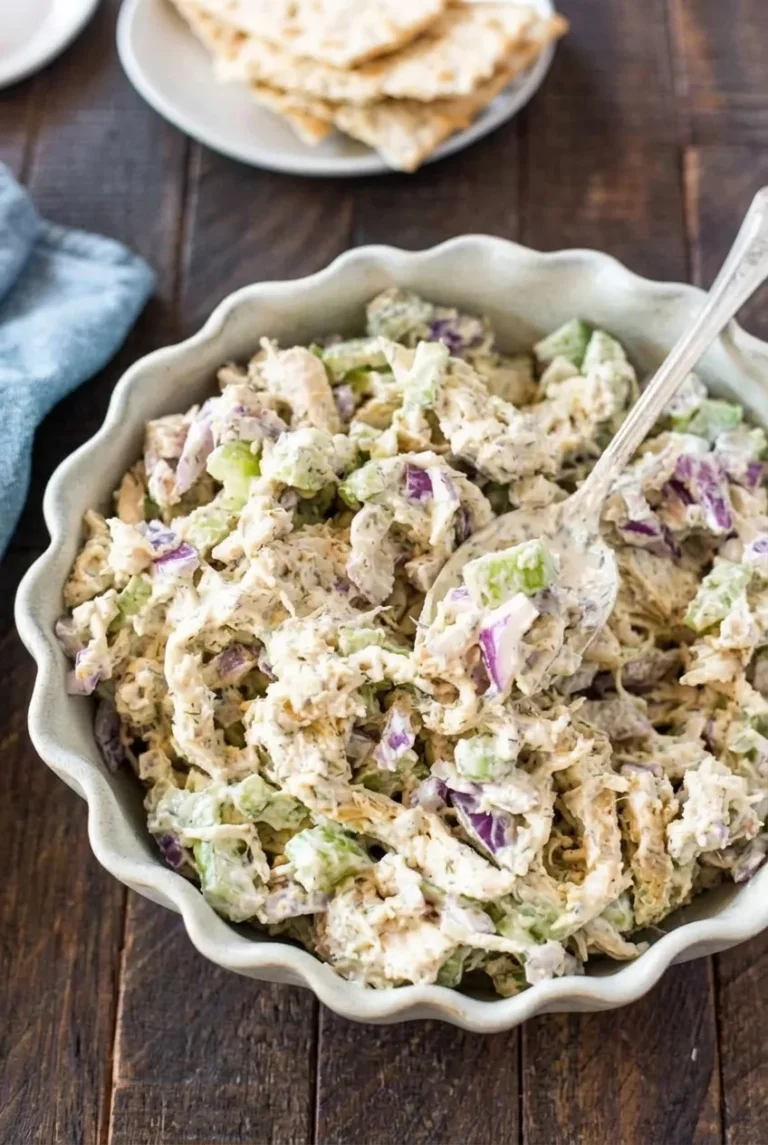
A full bowl of Greek yogurt chicken salad on a dark wood table, viewed from above at an angle
  1. Prepare the chicken and vegetables: Make sure the cooked chicken is cool, then shred or chop it into substantial bite-size pieces. Finely dice the celery and red onion.
  2. Mix the dressing: In a small bowl, stir together the yogurt, Dijon, lemon juice, dill, salt, and pepper until thick and smooth. If using seasoned rotisserie chicken, start with less salt and lemon; you can add more after mixing.
  3. Fold together: Put the chicken, celery, and red onion in a large bowl. Add the dressing and fold gently until the chicken is coated and the vegetables are distributed throughout. The dressing should cling to the chicken, not pool at the bottom of the bowl.
  4. Taste and adjust: Add salt, pepper, or lemon a little at a time as needed. If the salad needs more dressing, fold in a small spoonful of yogurt rather than thinning it with liquid.
  5. Serve or chill: Serve in a shallow bowl right away, or cover and refrigerate for about 30 minutes for the flavors to meld. Stir before serving if the salad has rested.

How to Keep the Dressing Thick

Use thick plain Greek yogurt and cool the chicken completely before mixing; warm chicken can loosen the dressing. Skip milk or other thinning liquids. If a little liquid separates while the salad is stored, stir it before serving and fold in a small spoonful of yogurt if needed.

Using Rotisserie Chicken

Shred or chop cooled rotisserie chicken into substantial pieces, removing the skin or excess fatty pieces if desired. Because it may already be salty, taste the finished salad before adding more salt.

Serving and Variations

Serve the salad with crackers, pita, or cut vegetables, or spoon it into a sandwich, wrap, or lettuce cup. For a different, more strongly flavored chicken salad, try Jalapeño Popper Chicken Salad with Bacon and Cheddar.

For a milder herb flavor, replace the dill with chopped parsley. To make the dressing richer, stir in the optional mayonnaise before adding it to the chicken.

Make-Ahead and Storage

Refrigerate the salad promptly in an airtight container for 3 to 4 days. Celery may soften as it sits; for more crunch, reserve some of the diced celery and fold it in shortly before serving. Stir the salad if any liquid separates.

Do not freeze the assembled salad. The yogurt dressing may separate and become watery after thawing.

Nutrition

Approximate nutrition per serving, based on 4 servings: 210 calories, 38g protein, 4g fat, and 5g carbohydrates. Per 100g: approximately 115 calories, 21g protein, 2g fat, and 3g carbohydrates. Values vary with the chicken and Greek yogurt used.

Greek Yogurt Chicken Salad

Cooked chicken, celery, and red onion are tossed in a thick Greek yogurt dressing with Dijon, lemon, and dill.
Course: Salad
Cuisine: American
Prep: 15 min
Total: 45 min
Servings: 4 Calories: 210 kcal

Equipment

  • Cutting board
  • Chef's knife
  • Small bowl
  • Large bowl

Ingredients

For the Salad

  • 3 cups cooked chicken, cooled and shredded or chopped into substantial pieces (420g)
  • 2 celery ribs, finely diced, about 1/2 cup (50g)
  • 1/4 cup finely diced red onion (40g)

For the Dressing

  • 3/4 cup plain Greek yogurt (180g)
  • 1 teaspoon Dijon mustard
  • 1 tablespoon fresh lemon juice
  • 1 tablespoon chopped fresh dill
  • 1/4 teaspoon kosher salt, plus more to taste
  • 1/8 teaspoon black pepper, or to taste
  • Optional: 1 to 2 tablespoons mayonnaise

Instructions

  1. Make sure the cooked chicken is cool, then shred or chop it into substantial bite-size pieces.
  2. Finely dice the celery and red onion.
  3. In a small bowl, stir together the Greek yogurt, Dijon, lemon juice, dill, salt, and pepper until smooth. Stir in the optional mayonnaise if using.
  4. Put the chicken, celery, and red onion in a large bowl.
  5. Add the dressing and fold gently until the chicken is coated and the vegetables are evenly distributed.
  6. Taste and adjust the salt, pepper, or lemon juice a little at a time. If needed, fold in a small spoonful of yogurt for more dressing.
  7. Serve right away, or cover and refrigerate for about 30 minutes. Stir before serving if the salad has rested.

Tips

  • Use thick plain Greek yogurt and cool the chicken completely to keep the dressing thick.
  • If using seasoned rotisserie chicken, start with less salt and taste before adding more.
  • Avoid adding milk or other thinning liquids to the dressing.
  • If liquid separates during storage, stir the salad and fold in a small spoonful of yogurt if needed.
  • Reserve some diced celery and fold it in shortly before serving for extra crunch.

Variations

  • Parsley Chicken Salad: Replace the dill with chopped parsley for a milder herb flavor.
  • Richer Chicken Salad: Stir 1 to 2 tablespoons of mayonnaise into the dressing for a richer, less tangy salad.

Notes

Refrigerate promptly in an airtight container for 3 to 4 days. Do not freeze; the yogurt dressing may separate and become watery after thawing.

Nutrition

Calories: 210 kcal | Protein: 38 g | Fat: 4 g | Carbohydrates: 5 g

High-Protein Egg and Cottage Cheese Breakfast Bake

Eggs and cottage cheese bake into a tender, slightly curdy casserole with spinach, red pepper, and bacon throughout. Cheddar browns on top, and fresh scallions finish each thick square. Cooking the vegetables before they go into the dish helps keep the center from turning watery. There’s no need to blend the cottage cheese: whisk the base, bake it in an 8-inch square dish, and let it rest before cutting.

Ingredients

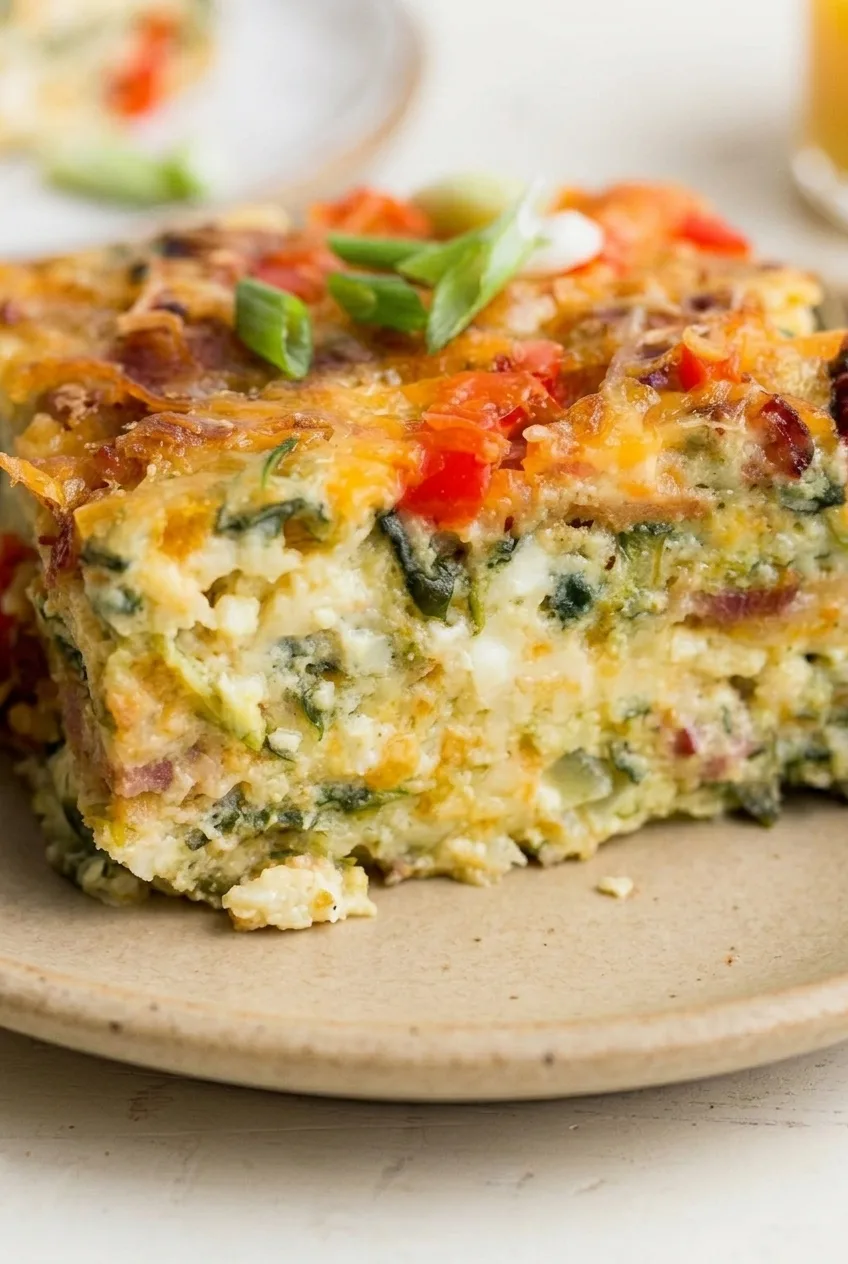
Close view of the tender spinach, red pepper, and bacon-filled interior beneath browned cheddar
  • 8 large eggs
  • 1 cup cottage cheese (225g); low-fat cottage cheese also works
  • 1 cup shredded cheddar cheese (115g), divided
  • 4 slices bacon, cooked, drained, and crumbled (45g)
  • 2 packed cups fresh spinach, roughly chopped (60g)
  • 1/2 cup finely diced red bell pepper (75g)
  • 2 scallions, thinly sliced (30g), dark green tops reserved for garnish
  • 1 teaspoon olive oil
  • 1/2 teaspoon kosher salt, or to taste
  • 1/4 teaspoon black pepper

Optional: Add a pinch of red pepper flakes to the egg mixture for a little heat.

How to Make the Egg and Cottage Cheese Breakfast Bake

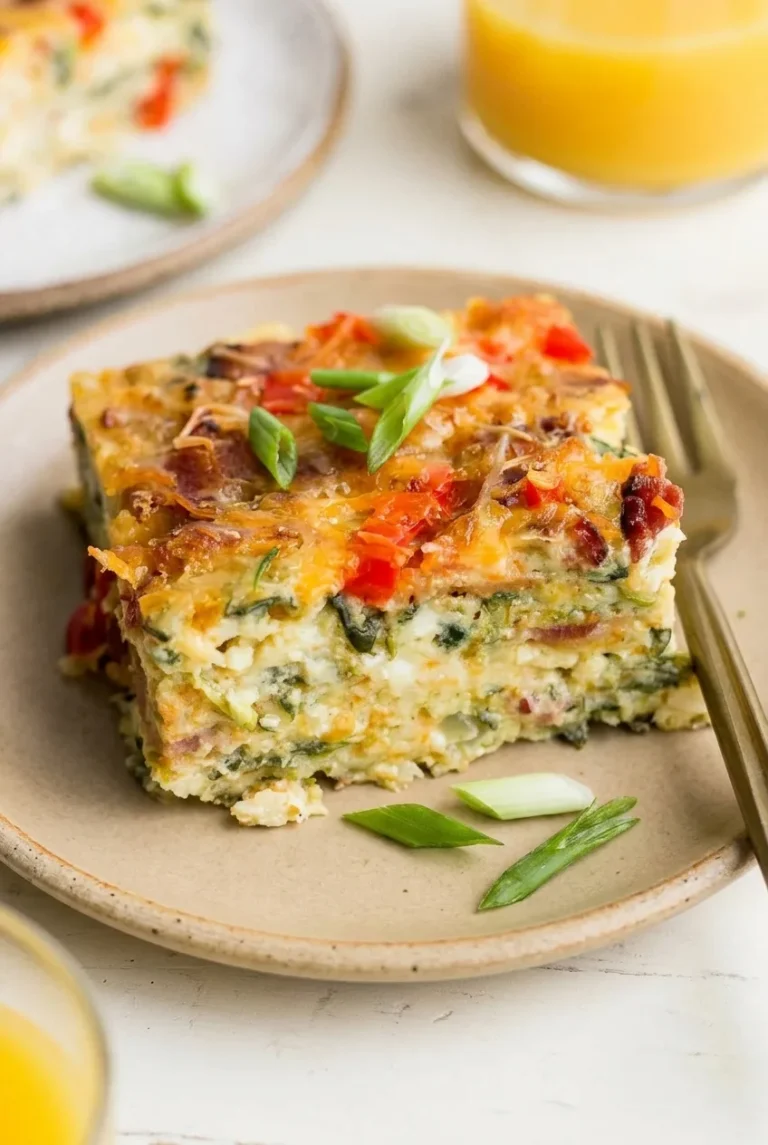
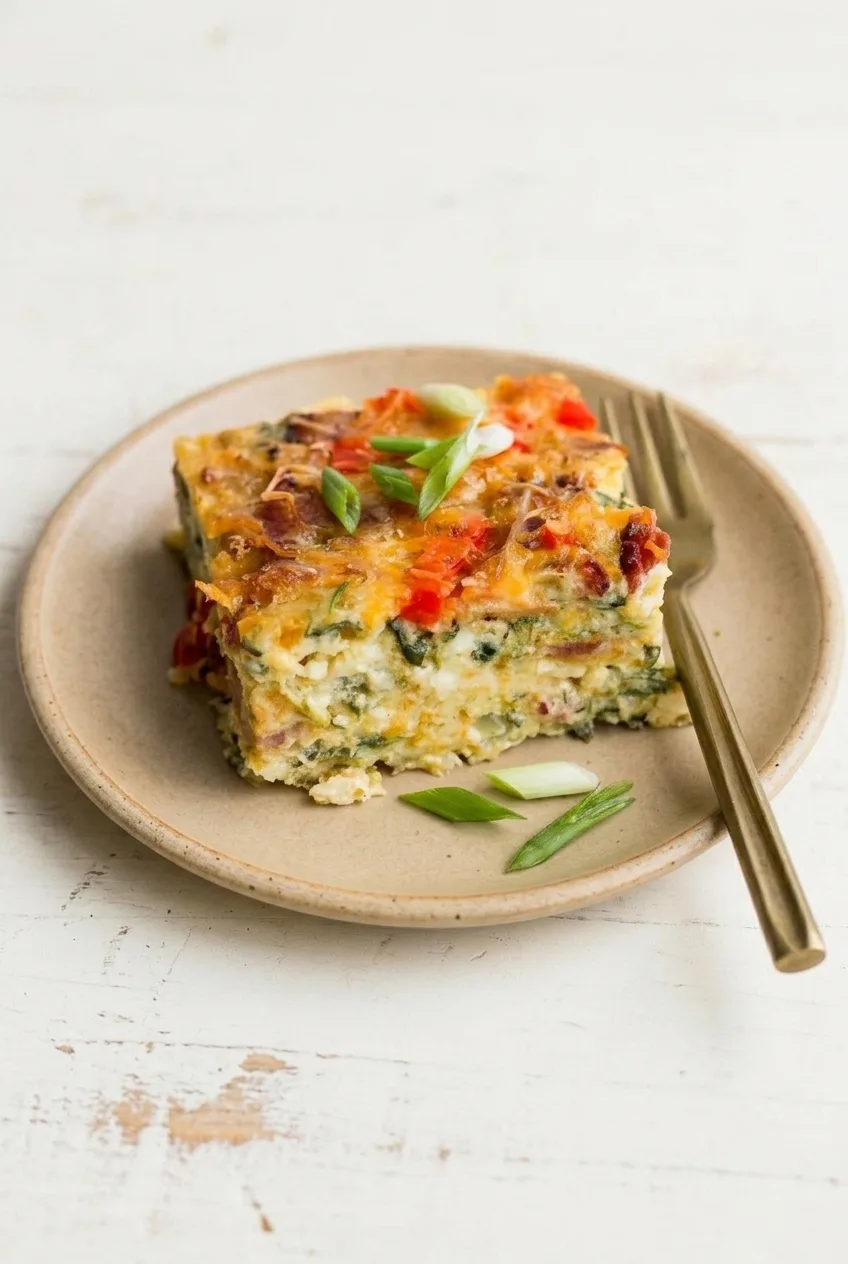
A full plate with a square egg and cottage cheese breakfast bake topped with browned cheddar and scallions
  1. Prepare the dish: Preheat the oven to 350°F (175°C). Generously grease the bottom and sides of an 8-inch square baking dish.
  2. Cook the vegetables: Heat the olive oil in a skillet over medium heat. Add the red pepper and cook until softened. Add the spinach and cook until wilted and any excess liquid has evaporated; there should be no pool of liquid in the skillet. If the bacon is not already cooked, cook it fully, then drain and crumble it.
  3. Whisk the eggs: In a mixing bowl, whisk the eggs, cottage cheese, salt, and black pepper until combined. Small cottage cheese curds can remain. Whisk in the red pepper flakes, if using.
  4. Assemble: Fold in the cooked vegetables, bacon, scallion whites and light-green pieces, and half the cheddar. Pour into the prepared dish and scatter the remaining cheddar evenly over the top.
  5. Bake: Bake uncovered for about 35 to 40 minutes, beginning to check at 30 minutes. The cheese should be browned in spots and the center set, with no wet or liquid movement when the dish is gently moved. A slight jiggle is fine. If the top browns before the center sets, loosely tent the dish with foil and continue baking.
  6. Rest and serve: Let the bake rest in the dish for about 10 minutes so it holds together when cut. Divide into 6 thick squares and finish with the reserved scallion greens.

How to Keep the Bake from Turning Watery

Spinach and pepper release moisture as they cook. Let that liquid evaporate in the skillet before adding the vegetables to the eggs, and drain the cooked bacon well. If using frozen spinach, thaw it completely and squeeze it very dry before adding it. Do not add milk; the eggs and cottage cheese provide the moisture this bake needs.

How to Tell When the Center Is Set

A browned cheese top does not necessarily mean the middle is done. Check the center for wet or liquid movement, rather than relying on the timer alone. If using an instant-read thermometer, the center should reach 160°F (70°C).

Filling moisture and the depth of the mixture can change the bake time. A dish larger or smaller than 8 inches square will also change the depth, so keep baking until the center sets, covering the top loosely with foil if needed.

Breakfast Bake Variations

  • Sausage and spinach: Replace the bacon with fully cooked, browned breakfast or Italian sausage. Drain it before adding it to the eggs.
  • Smoother texture: Blend the eggs and cottage cheese before folding in the fillings. The main method leaves some cottage cheese curds visible.
  • Vegetarian spinach and feta: Omit the bacon and replace some or all of the cheddar with feta. Cook the vegetables first as directed.

Serving and Make-Ahead Storage

Serve a warm square with fresh fruit, or add potatoes or a simple salad for brunch. For another cottage-cheese breakfast, try these high-protein cottage cheese pancakes.

Cooked bacon and vegetables can be prepared ahead and refrigerated separately. For leftovers, cool the baked casserole, then cover it or transfer individual squares to an airtight container. Refrigerate for 4 to 5 days and reheat a portion in the microwave until hot throughout.

Individual cooled portions can be wrapped and frozen, but the egg texture may change after thawing. Thaw overnight in the refrigerator and reheat until hot. Refrigeration is the better choice when texture matters most.

Nutrition

Approximate nutrition per serving, based on 1 of 6 squares: 265 calories, 21g protein, 18g fat, and 4g carbohydrates. Approximate nutrition per 100g: 180 calories, 14g protein, 12g fat, and 2g carbohydrates. Values vary with the cottage cheese, bacon, and cheddar used.

High-Protein Egg and Cottage Cheese Breakfast Bake

A tender egg and cottage cheese bake with spinach, red pepper, bacon, and cheddar.
Course: Breakfast
Cuisine: American
Prep: 15 min
Cook: 40 min
Total: 65 min
Servings: 6 Calories: 265 kcal

Equipment

  • 8-inch square baking dish
  • Skillet
  • Mixing bowl
  • Whisk

Ingredients

  • 8 large eggs
  • 1 cup cottage cheese (225g); low-fat cottage cheese also works
  • 1 cup shredded cheddar cheese (115g), divided
  • 4 slices bacon, cooked, drained, and crumbled (45g)
  • 2 packed cups fresh spinach, roughly chopped (60g)
  • 1/2 cup finely diced red bell pepper (75g)
  • 2 scallions, thinly sliced (30g), dark green tops reserved for garnish
  • 1 teaspoon olive oil
  • 1/2 teaspoon kosher salt, or to taste
  • 1/4 teaspoon black pepper
  • Optional: pinch of red pepper flakes

Instructions

  1. Preheat the oven to 350°F (175°C). Generously grease the bottom and sides of an 8-inch square baking dish.
  2. Heat the olive oil in a skillet over medium heat. Cook the red pepper until softened.
  3. Add the spinach and cook until wilted and any excess liquid has evaporated. Drain and crumble the bacon if it is not already prepared.
  4. Whisk the eggs, cottage cheese, salt, and black pepper in a mixing bowl until combined. Stir in red pepper flakes, if using.
  5. Fold in the cooked vegetables, bacon, scallion whites and light-green pieces, and half the cheddar.
  6. Pour the mixture into the prepared dish and scatter the remaining cheddar evenly over the top.
  7. Bake uncovered for 35 to 40 minutes, beginning to check at 30 minutes, until the center is set with no wet or liquid movement. If the top browns before the center sets, loosely tent with foil and continue baking.
  8. Rest in the dish for about 10 minutes. Cut into 6 squares and garnish with the reserved scallion greens.

Tips

  • Cook the vegetables until excess moisture has evaporated before adding them to the eggs.
  • Drain the cooked bacon well to help prevent a watery bake.
  • Small cottage cheese curds can remain; blending is not necessary.
  • Check the center for wet movement instead of relying on the timer alone; it should reach 160°F (70°C) if checked with an instant-read thermometer.
  • Loosely cover with foil if the cheese browns before the center is set.

Variations

  • Sausage and Spinach: Replace the bacon with fully cooked, browned breakfast or Italian sausage, and drain it before adding.
  • Smoother Texture: Blend the eggs and cottage cheese before folding in the fillings.
  • Vegetarian Spinach and Feta: Omit the bacon and replace some or all of the cheddar with feta. Cook the vegetables first.

Notes

Refrigerate cooled leftovers in a covered container for 4 to 5 days and microwave portions until hot throughout. Cooled portions can be frozen, though the egg texture may change; thaw overnight in the refrigerator and reheat until hot.

Nutrition

Calories: 265 kcal | Protein: 21 g | Fat: 18 g | Carbohydrates: 4 g | Per 100g Calories: 180 kcal | Per 100g Protein: 14 g | Per 100g Fat: 12 g | Per 100g Carbohydrates: 2 g

High-Protein Cottage Cheese Pancakes

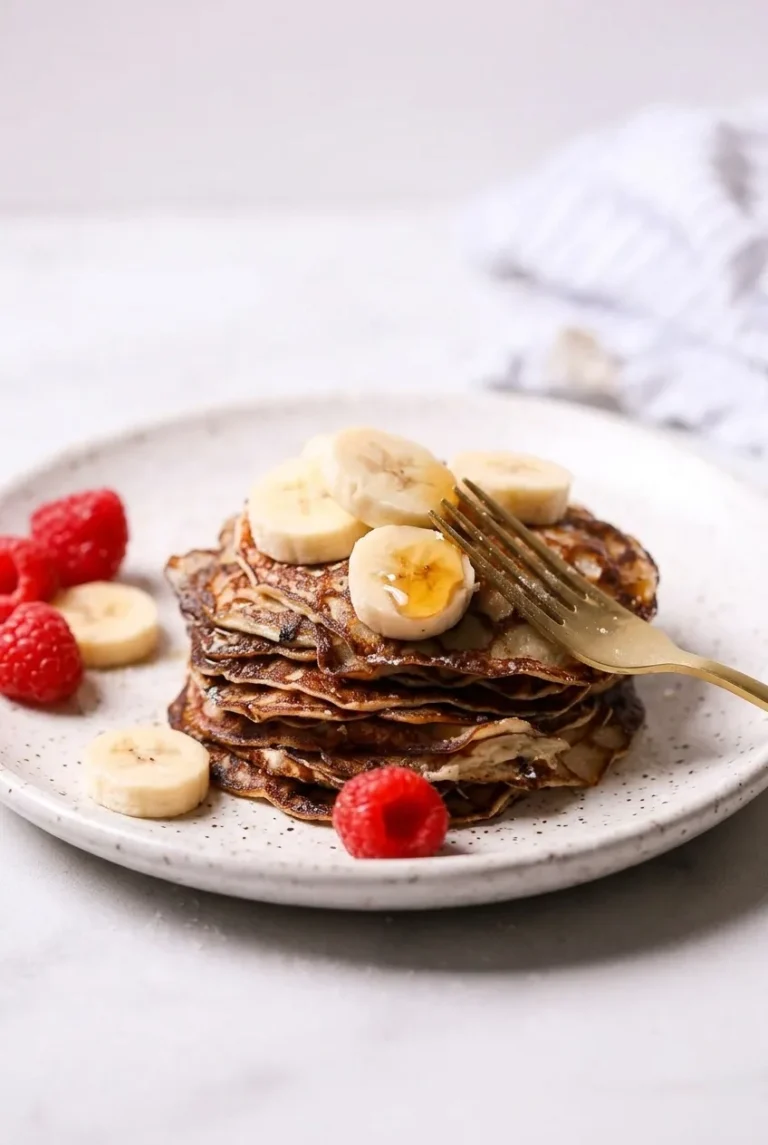
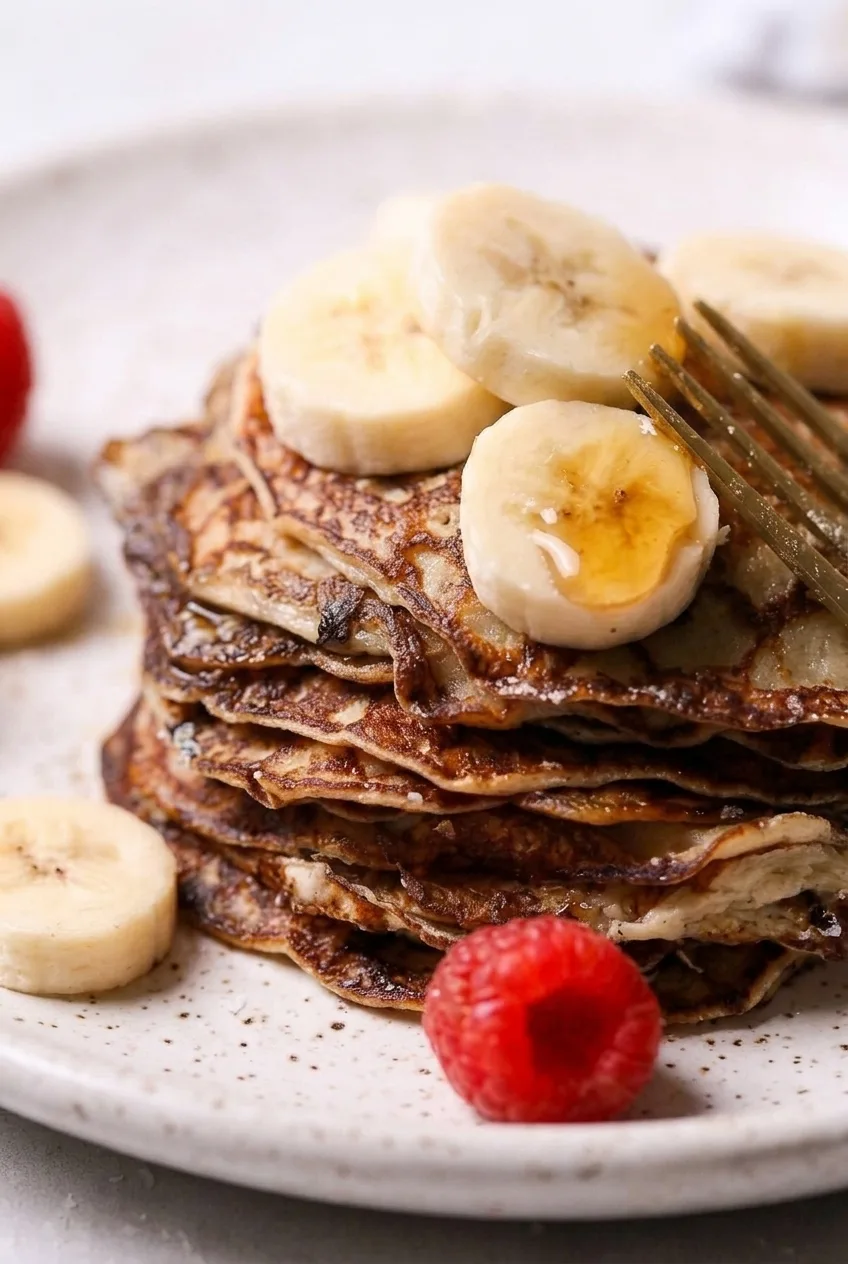
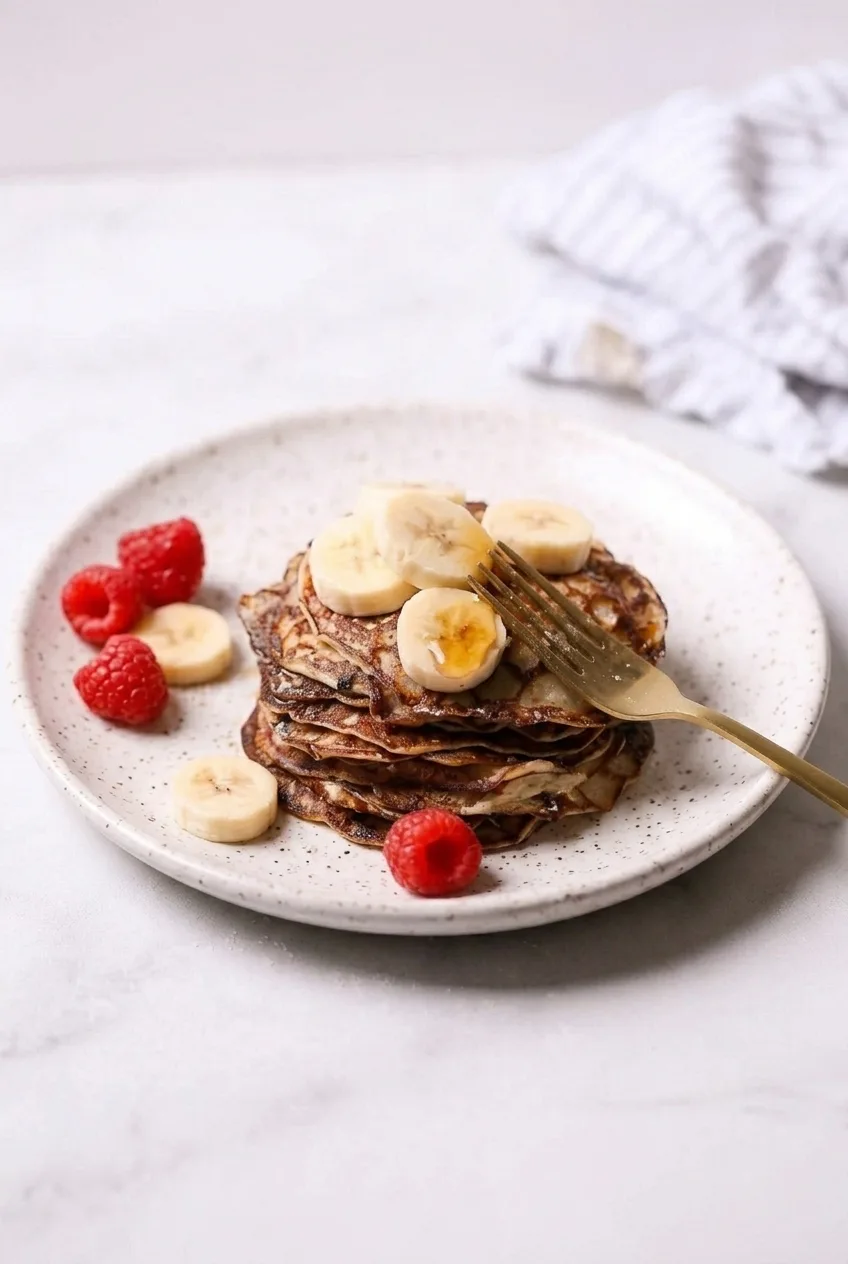
These flourless cottage cheese pancakes are thin and tender, not thick and fluffy. Blending the cottage cheese with eggs, egg whites, and banana makes a smooth batter that cooks into small rounds with golden-brown skillet marks. Because the pancakes are delicate, keep the portions small and wait for the edges to set before flipping. Serve them in a loose stack with fresh banana slices, raspberries, and a light drizzle of maple syrup.

Ingredients for Cottage Cheese Pancakes

Close view of the thin browned layers and banana-topped stack of cottage cheese pancakes with syrup

Makes 2–3 servings. Prep time: 10 minutes; cook time: 15–20 minutes, working in batches.

  • 1 cup cottage cheese (225g)
  • 2 large eggs
  • 2 large egg whites
  • 1 medium ripe banana, peeled (about 120g), for the batter
  • 1/2 teaspoon baking powder
  • 1 teaspoon vanilla extract
  • 1/4 teaspoon ground cinnamon
  • 1/8 teaspoon fine salt
  • Butter or neutral oil, for the skillet (about 1 teaspoon total)
  • 1 medium banana, sliced, for serving
  • 1/2 cup fresh raspberries (60g)
  • 2–3 tablespoons maple syrup, or to taste

The banana in the batter adds sweetness and helps give the flourless pancakes body; the second banana is for topping. Cottage cheese varies in moisture, so the batter may spread a little differently from batch to batch.

How to Make High-Protein Cottage Cheese Pancakes

A full plate of thin cottage cheese pancakes stacked with banana, raspberries, and maple syrup
  1. Blend the batter: Add the cottage cheese, eggs, egg whites, peeled batter banana, vanilla, cinnamon, and salt to a blender. Blend until smooth and pourable, with no prominent cottage cheese curds. Add the baking powder and pulse briefly to combine.
  2. Preheat the skillet: Warm a large nonstick skillet or well-seasoned griddle over medium heat. Wipe a thin film of butter or neutral oil over the surface; the fat should not pool or smoke.
  3. Cook the first side: Pour about 2 tablespoons of batter per pancake, leaving space between portions. Cook uncovered and begin checking after about 1 minute. The first side will usually take 1–2 minutes; look for matte edges, a surface beginning to set, and a golden to deep golden-brown underside.
  4. Flip and finish: Once a pancake releases easily, slide a thin, wide spatula underneath and turn it gently. Cook for about 1–2 minutes more, until the second side is browned and the center looks set rather than wet. If the outside darkens before the center sets, lower the heat toward medium-low.
  5. Stack and serve: Cook the remaining batter in batches, lightly greasing the skillet as needed. Stack the pancakes loosely, arrange the fresh banana slices on top, drizzle lightly with maple syrup, and scatter the raspberries around the plate.

How to Flip Thin Cottage Cheese Pancakes

This batter is more delicate than a flour-based pancake batter. Small portions leave room to get a spatula underneath without catching a neighboring pancake. If one resists lifting, let it cook a little longer rather than forcing it; easy release is a better cue than the clock alone.

How to Store and Reheat

Cool leftover pancakes, then refrigerate them in an airtight container for up to 3 days. Reheat briefly in the microwave until warm or warm them in a skillet. Add fresh banana slices, raspberries, and syrup after reheating.

For another cottage cheese breakfast, try these Cottage Cheese Breakfast Biscuits with Bacon and Cheddar. For a different sweet breakfast, try this Berry French Toast Casserole.

Nutrition

Approximate nutrition per serving, based on 3 servings and including the toppings: 260 calories, 17g protein, 7g fat, and 33g carbohydrates. Per 100g: approximately 110 calories, 7g protein, 3g fat, and 14g carbohydrates. Values vary with the cottage cheese and amount of maple syrup used.

High-Protein Cottage Cheese Pancakes

Flourless cottage cheese pancakes blend eggs and banana into a tender batter, served with fresh fruit and maple syrup.
Course: Breakfast
Cuisine: American
Prep: 10 min
Cook: 20 min
Total: 30 min
Servings: 3 Calories: 260 kcal

Equipment

  • Blender
  • Nonstick skillet or griddle
  • Wide spatula

Ingredients

For the pancakes

  • 1 cup cottage cheese (225g)
  • 2 large eggs
  • 2 large egg whites
  • 1 medium ripe banana, peeled (about 120g)
  • 1/2 teaspoon baking powder
  • 1 teaspoon vanilla extract
  • 1/4 teaspoon ground cinnamon
  • 1/8 teaspoon fine salt
  • About 1 teaspoon butter or neutral oil, for the skillet

For serving

  • 1 medium banana, sliced
  • 1/2 cup fresh raspberries (60g)
  • 2–3 tablespoons maple syrup, or to taste

Instructions

  1. Add the cottage cheese, eggs, egg whites, peeled batter banana, vanilla, cinnamon, and salt to a blender. Blend until smooth and pourable.
  2. Add the baking powder and pulse briefly to combine.
  3. Warm a large nonstick skillet or well-seasoned griddle over medium heat. Wipe the surface with a thin film of butter or oil.
  4. Pour about 2 tablespoons of batter per pancake into the skillet, leaving space between portions.
  5. Cook uncovered for 1–2 minutes, until the edges look matte, the surface begins to set, and the underside is golden to deep golden brown.
  6. When a pancake releases easily, slide a thin, wide spatula underneath and flip gently.
  7. Cook the second side for about 1–2 minutes, until browned and the center looks set. Lower the heat toward medium-low if the outside darkens before the center sets.
  8. Cook the remaining batter in batches, lightly greasing the skillet as needed.
  9. Stack the pancakes loosely and serve with banana slices, raspberries, and maple syrup.

Tips

  • Keep pancake portions small so they are easier to flip.
  • Wait for the edges to set and the pancake to release easily before flipping.
  • If a pancake resists lifting, let it cook a little longer rather than forcing it.
  • Keep the skillet lightly greased; the fat should not pool or smoke.
  • Lower the heat toward medium-low if the pancakes brown before the centers set.

Notes

Refrigerate cooled leftovers in an airtight container for up to 3 days. Reheat briefly in the microwave or in a skillet, then add fresh toppings. Nutrition is approximate per serving, based on 3 servings and including toppings; per 100g: about 110 calories, 7g protein, 3g fat, and 14g carbohydrates.

Nutrition

Calories: 260 kcal | Protein: 17 g | Fat: 7 g | Carbohydrates: 33 g

Crispy Smashed Chicken Caesar Tacos

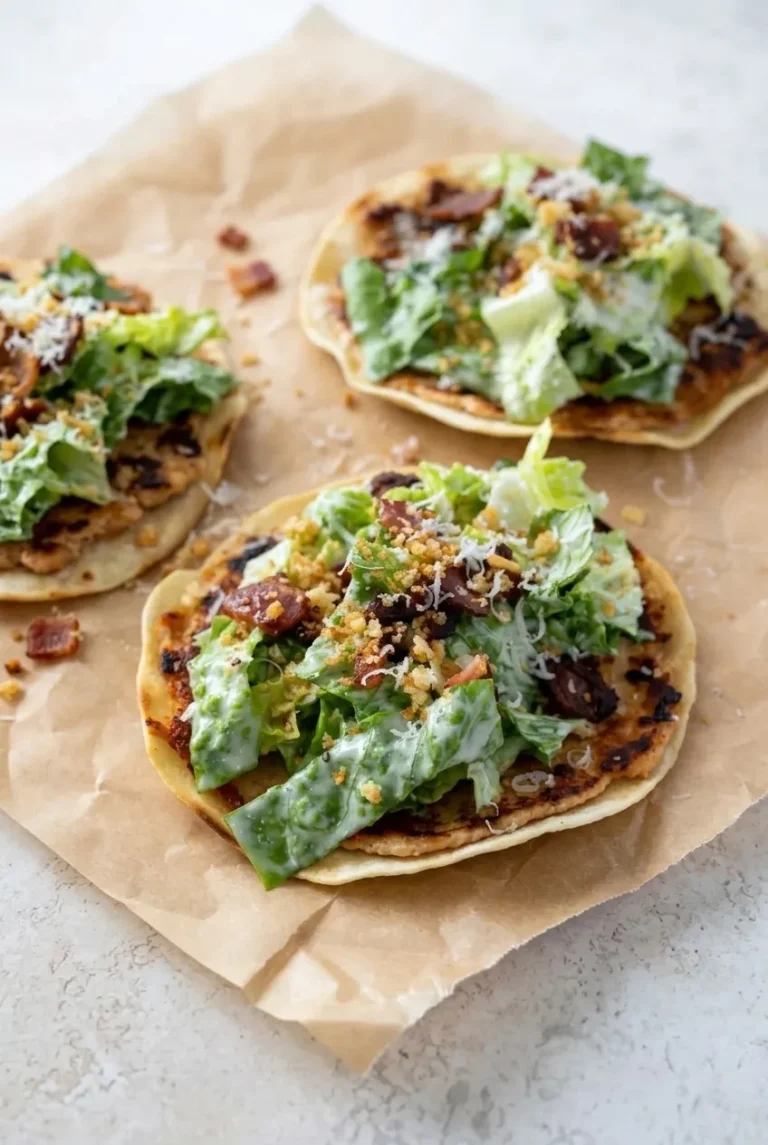
Ground chicken cooks directly against the skillet in a thin layer pressed onto small flour tortillas. A quick flip lightly toasts the tortillas, while the chicken develops browned, crisp-looking edges. Serve the tacos flat and open-faced with cool Caesar-dressed romaine, bacon, golden panko, and Parmesan.

The thin chicken layer is key: it needs to cook through before the tortilla gets too dark. Give each taco room in the pan so the chicken browns instead of steaming.

Makes 8 tacos; serves 4, with 2 tacos per serving. Prep time: 20 minutes. Cook time: about 20 minutes. Total time: about 40 minutes.

Ingredients for Crispy Smashed Chicken Caesar Tacos

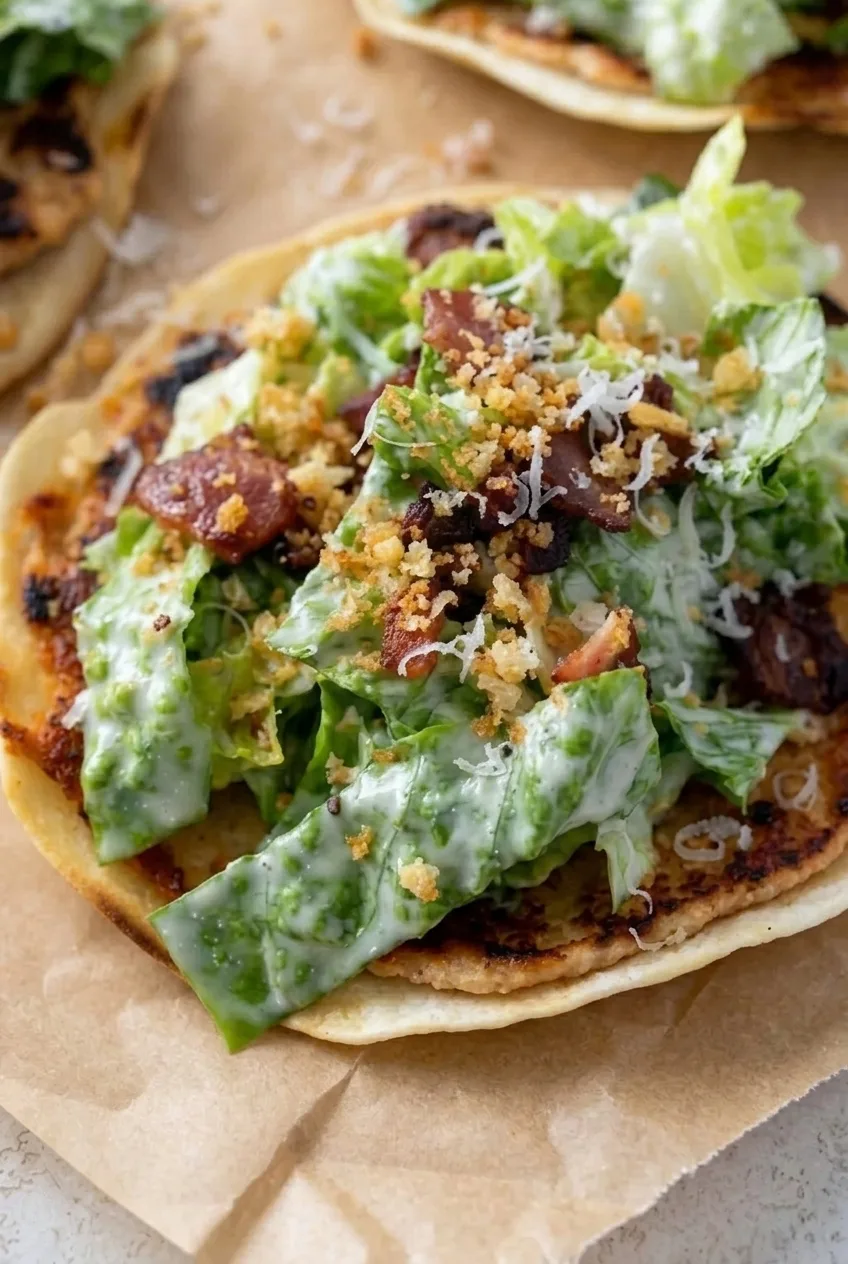
Close detail of browned chicken edges beneath Caesar romaine, bacon, toasted crumbs, and Parmesan on a taco
  • 1 lb ground chicken (450g)
  • 8 small flour tortillas, about 5 to 6 inches across
  • 1 teaspoon garlic powder
  • 1 teaspoon Italian seasoning
  • 3/4 teaspoon kosher salt, or to taste
  • 1/2 teaspoon black pepper
  • About 1 tablespoon neutral oil or olive oil, as needed
  • 4 slices bacon
  • 1/2 cup panko breadcrumbs
  • About 6 cups chopped romaine, washed and dried
  • 1/3 cup Caesar dressing, plus more to taste
  • 1/2 cup finely grated Parmesan, divided

How to Make Crispy Smashed Chicken Caesar Tacos

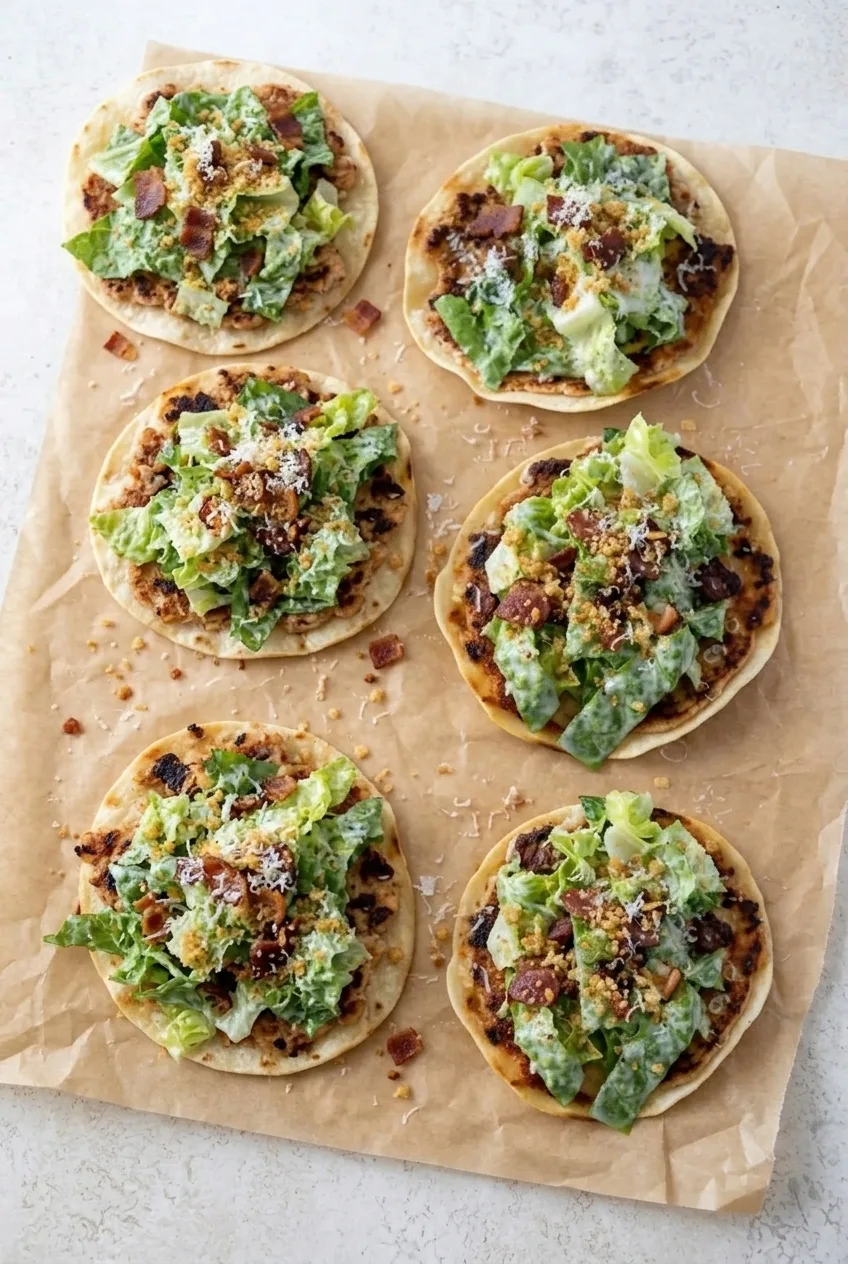
A wider view of eight open-faced chicken Caesar tacos arranged on parchment with their toppings visible
  1. Prepare the toppings: Toast the panko in a dry skillet over medium heat, stirring often, until evenly golden. Transfer to a plate. Cook the bacon over medium to medium-high heat until crisp, then drain and crumble it. Discard the excess fat and wipe the skillet clean.
  2. Season the chicken: Mix the ground chicken with the garlic powder, Italian seasoning, salt, and pepper. Divide into 8 portions.
  3. Cover the tortillas: Press one portion of chicken onto each tortilla in an even layer, about 1/8 to 1/4 inch thick and reaching nearly to the edges. Flatten any thick patches so the chicken cooks evenly.
  4. Brown the chicken side: Preheat a 12-inch nonstick or well-seasoned skillet over medium-high heat. Add just enough oil to lightly coat the surface. Place 1 or 2 tortillas chicken-side down, leaving space between them. Press briefly with a spatula, then cook undisturbed. Start checking at about 3 minutes; the chicken side typically takes 3 to 4 minutes to brown and adhere to the tortilla. Reduce the heat to medium if the tortilla edges darken too quickly.
  5. Toast the tortilla side: Carefully flip each taco and cook tortilla-side down for 30 to 60 seconds, until lightly toasted. Check the thickest part of the chicken layer with an instant-read thermometer; it must reach 165°F (75°C). If needed, return the taco chicken-side down and continue cooking. Repeat with the remaining tortillas, adding a little oil only if the pan is dry.
  6. Dress and assemble: Toss the romaine with enough Caesar dressing to coat it lightly, then fold in some of the Parmesan. Let each cooked base rest for about 1 minute. Keep the tacos flat and top with the romaine, bacon, toasted panko, and remaining Parmesan. Serve promptly.

How to Keep the Chicken Layer Crisp

Spread the chicken evenly rather than leaving a mound in the center. Thick spots may still be undercooked when the tortilla starts to over-brown. A preheated, uncrowded skillet helps moisture escape so the chicken sears; a light film of oil is enough for pan contact without making the bases greasy.

Keep the Caesar Topping Crisp

Dry the romaine well and dress it shortly before serving. Add the salad, bacon, and panko only after the bases are cooked so the lettuce stays cool and the tortillas do not soften while they sit.

Storage and Reheating

Refrigerate cooked taco bases in an airtight container for up to 3 days. Keep the romaine undressed, and store the dressing, bacon, panko, and Parmesan separately where possible. Bacon and panko can be prepared ahead.

Reheat the bases in a lightly oiled skillet over medium heat until hot and crisp again. Add freshly dressed romaine and the toppings afterward; do not reheat assembled tacos with lettuce. Freezing assembled tacos or dressed romaine is not recommended.

Nutrition

Approximate nutrition per serving of 2 tacos: 610 calories, 39g protein, 33g fat, and 40g carbohydrates. Approximate nutrition per 100g: 225 calories, 14g protein, 12g fat, and 15g carbohydrates. Values vary with the chicken, tortillas, bacon, dressing, and Parmesan used.

Crispy Smashed Chicken Caesar Tacos

Small flour tortillas are topped with seasoned ground chicken, cooked until crisp, then finished with Caesar-dressed romaine, bacon, toasted panko, and Parmesan.
Course: Main Course
Cuisine: American
Prep: 20 min
Cook: 20 min
Total: 40 min
Servings: 4

Equipment

  • 12-inch skillet
  • Spatula
  • Instant-read thermometer
  • Mixing bowl

Ingredients

For the Chicken Tacos

  • 1 lb ground chicken (450g)
  • 8 small flour tortillas, about 5 to 6 inches across
  • 1 teaspoon garlic powder
  • 1 teaspoon Italian seasoning
  • 3/4 teaspoon kosher salt, or to taste
  • 1/2 teaspoon black pepper
  • About 1 tablespoon neutral oil or olive oil, as needed

For the Toppings

  • 4 slices bacon
  • 1/2 cup panko breadcrumbs
  • About 6 cups chopped romaine, washed and dried
  • 1/3 cup Caesar dressing, plus more to taste
  • 1/2 cup finely grated Parmesan, divided

Instructions

  1. Toast the panko in a dry skillet over medium heat, stirring often, until evenly golden. Transfer to a plate.
  2. Cook the bacon over medium to medium-high heat until crisp. Drain and crumble it, then discard the excess fat and wipe the skillet clean.
  3. Mix the ground chicken with the garlic powder, Italian seasoning, salt, and pepper. Divide into 8 portions.
  4. Press one portion of chicken evenly onto each tortilla, making a layer about 1/8 to 1/4 inch thick that reaches nearly to the edges. Flatten any thick patches.
  5. Preheat a 12-inch nonstick or well-seasoned skillet over medium-high heat. Add just enough oil to lightly coat the surface.
  6. Cook 1 or 2 tortillas at a time, chicken-side down, leaving space between them. Press briefly with a spatula, then cook undisturbed for about 3 to 4 minutes, until the chicken is browned and adheres to the tortilla. Reduce the heat to medium if the tortilla edges darken too quickly.
  7. Carefully flip each taco and cook tortilla-side down for 30 to 60 seconds, until lightly toasted. Check the thickest part of the chicken with an instant-read thermometer; it must reach 165°F (75°C). If needed, return the taco chicken-side down and continue cooking.
  8. Repeat with the remaining tortillas, adding a little oil only if the pan is dry.
  9. Toss the romaine with enough Caesar dressing to coat it lightly, then fold in some of the Parmesan.
  10. Let each cooked taco base rest for about 1 minute. Keep the tacos flat and top with the romaine, bacon, toasted panko, and remaining Parmesan. Serve promptly.

Tips

  • Spread the chicken in an even, thin layer so it cooks through before the tortilla gets too dark.
  • Leave space between tacos in the skillet so the chicken browns instead of steaming.
  • Use only a light film of oil to help the chicken sear without making the taco bases greasy.
  • Dry the romaine well and dress it shortly before serving.
  • Add the toppings only after the taco bases are cooked to keep the lettuce cool and the tortillas crisp.

Notes

Refrigerate cooked taco bases in an airtight container for up to 3 days. Store the romaine undressed and keep toppings separate where possible. Reheat the bases in a lightly oiled skillet over medium heat until hot and crisp; add fresh toppings afterward. Do not reheat assembled tacos with lettuce. Chicken must reach 165°F (75°C).

Nutrition

Per Serving Calories: 610 kcal | Per Serving Protein: 39 g | Per Serving Fat: 33 g | Per Serving Carbohydrates: 40 g | Per 100g Calories: 225 kcal | Per 100g Protein: 14 g | Per 100g Fat: 12 g | Per 100g Carbohydrates: 15 g