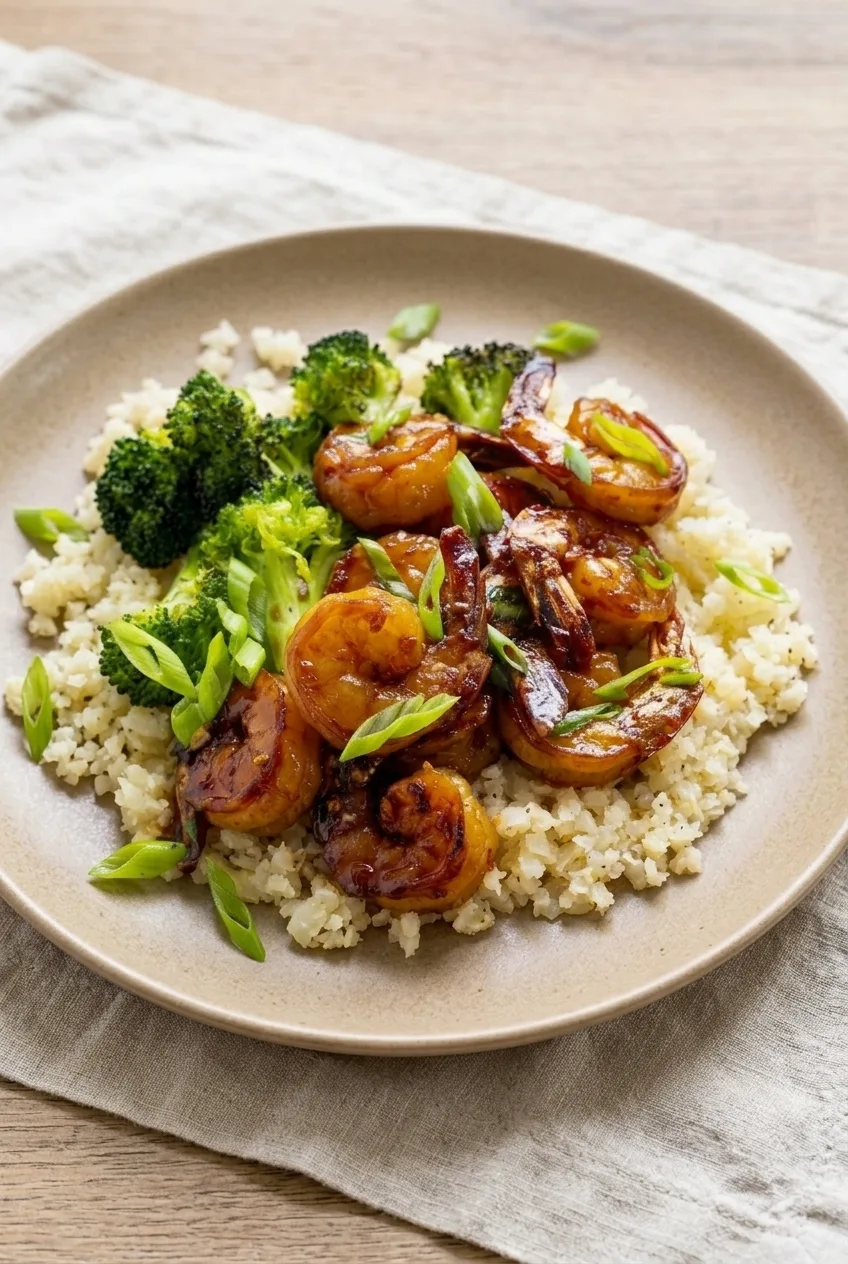
Author

Julia

Browsing

High-Protein White Bean Soup

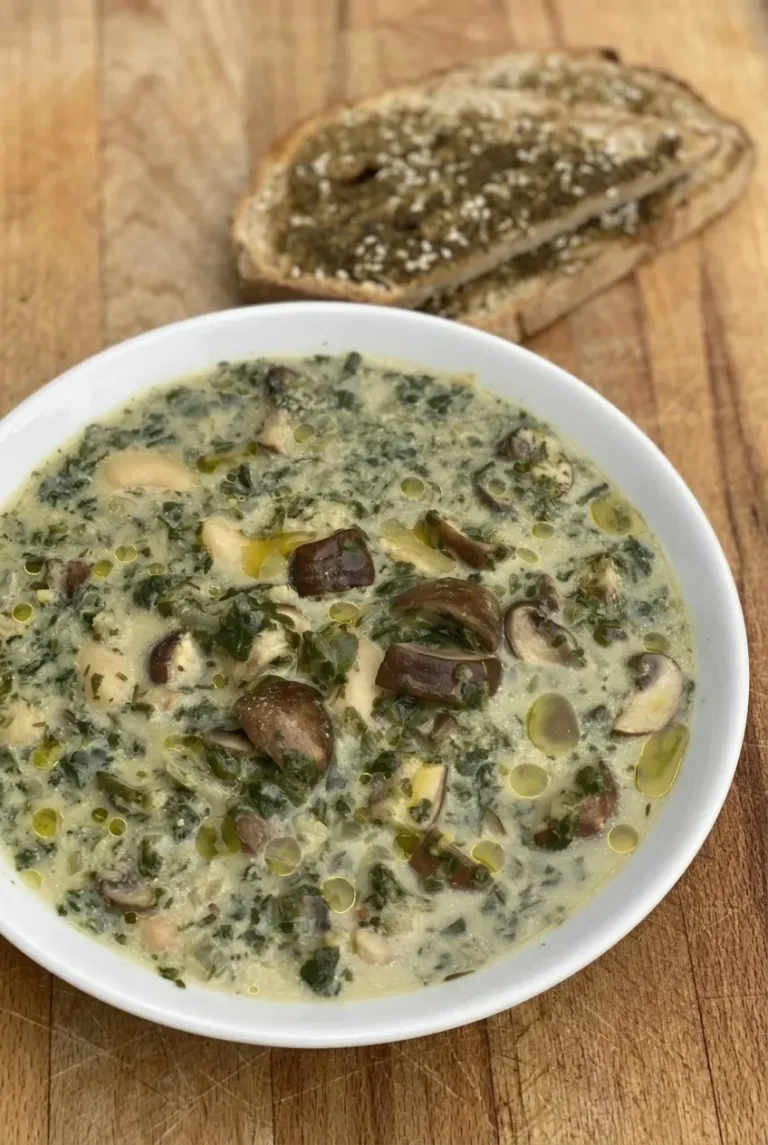
This stovetop soup has a pale, creamy broth with whole cannellini beans, browned mushrooms, and chopped spinach. Blending one can of beans with broth gives the soup body without cream; the other three cans stay whole for texture.

Brown the mushrooms before adding liquid so they develop savory edges instead of steaming in the broth. Finish with lemon and a few drops of olive oil, and serve with za’atar-topped sourdough toast.

Ingredients for High-Protein White Bean Soup
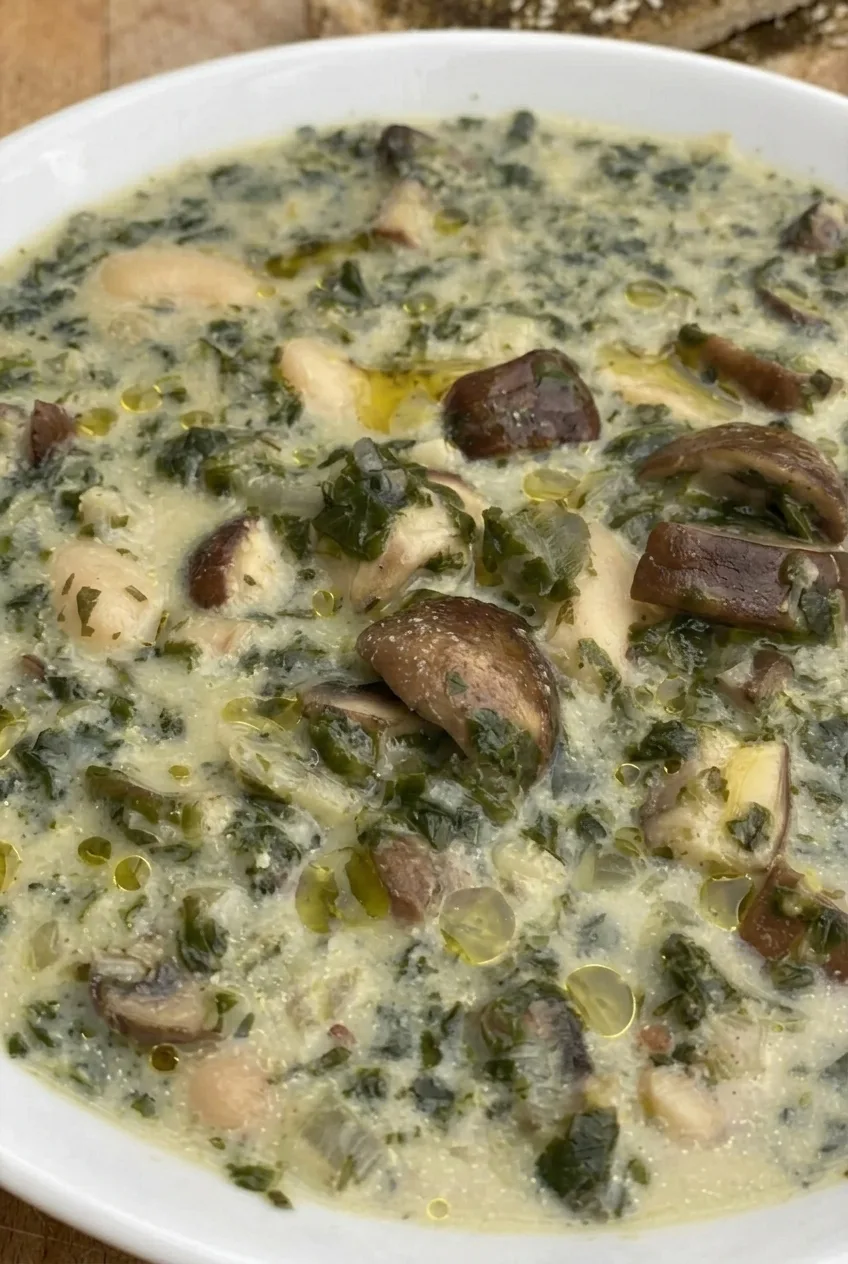
Close detail of creamy white bean soup with whole beans, browned mushrooms, spinach, and olive-oil droplets
  • 4 (15-ounce) cans cannellini beans, drained and rinsed
  • 6 cups vegetable broth, divided, plus more as needed
  • 2 tablespoons olive oil, plus more for the toast and serving
  • 8 ounces cremini or baby bella mushrooms, sliced (225g)
  • 1 medium yellow onion, finely chopped
  • 3 garlic cloves, minced
  • 1 teaspoon dried thyme or 1 tablespoon fresh thyme leaves
  • 1 teaspoon Dijon mustard
  • 1 teaspoon kosher salt, plus more to taste
  • 1/4 teaspoon black pepper, or to taste
  • 5 ounces baby spinach, roughly chopped (140g)
  • 1 tablespoon lemon juice, or to taste

For the optional za’atar toast: 4 slices sourdough bread, about 1 teaspoon olive oil per slice, and 1 to 2 teaspoons za’atar per slice.

How to Make High-Protein White Bean Soup
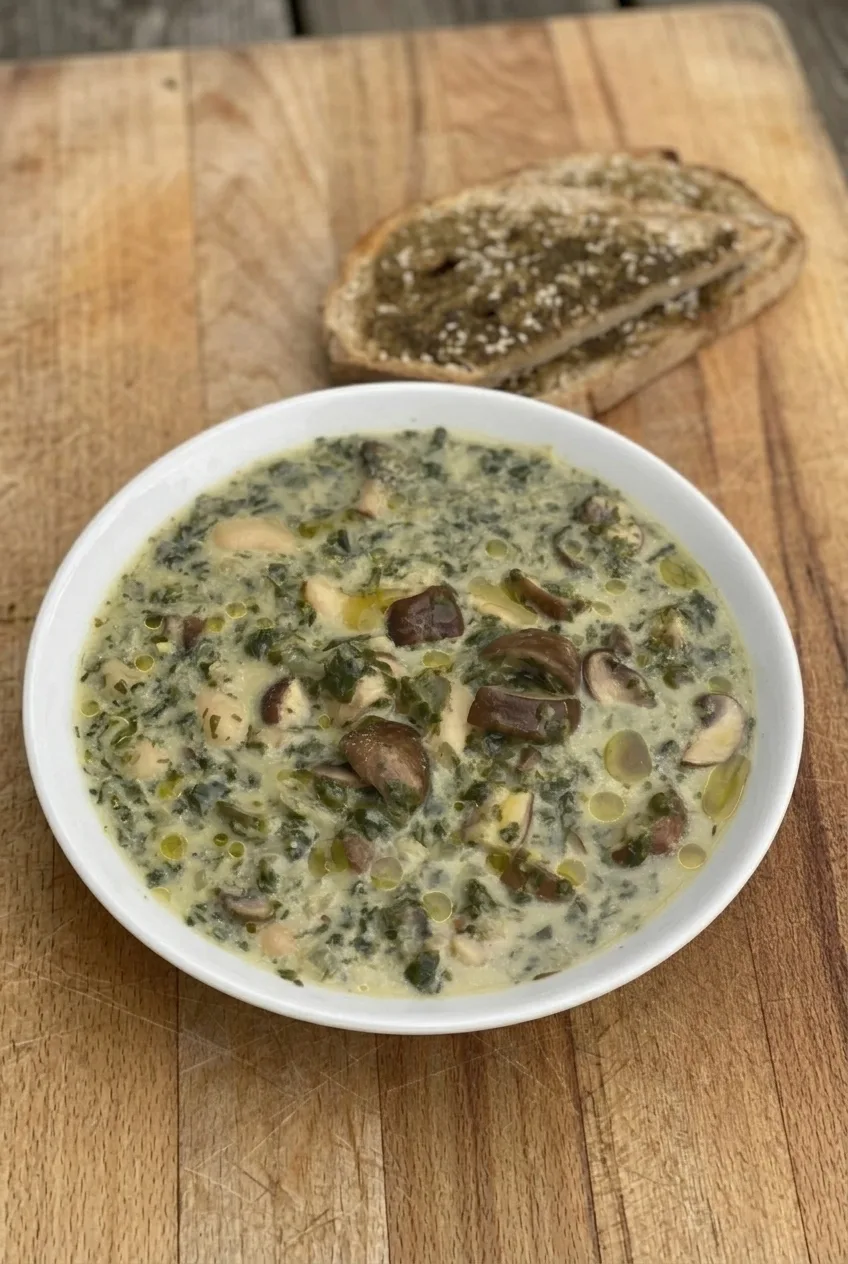
A full bowl of mushroom and spinach white bean soup with za’atar toast on a wooden surface
  1. Blend one can of beans: Blend 1 can of the drained beans with 1 cup of broth until mostly smooth, with no large bean pieces. Set aside the puree and the remaining 3 cans of whole beans.
  2. Brown the mushrooms: Warm a wide 5- to 6-quart soup pot or Dutch oven over medium heat, then add the 2 tablespoons olive oil and the mushrooms. Cook for 6 to 8 minutes, stirring occasionally, until their released moisture has mostly evaporated and some edges are golden brown.
  3. Soften the aromatics: Add the onion and cook for 4 to 5 minutes, until softened. Stir in the garlic, thyme, and Dijon; cook briefly, just until fragrant. Reduce the heat to medium-low if the garlic starts to brown.
  4. Simmer the soup: Add the bean puree, the 3 cans of whole beans, the remaining 5 cups broth, salt, and pepper. Bring to a gentle simmer, then reduce the heat to low. Cook uncovered for 10 to 15 minutes, stirring occasionally. Start checking after about 10 minutes: the beans should be hot throughout, with whole beans and mushroom pieces still distinct in the creamy broth. Avoid a rolling boil, which can break down the beans.
  5. Add the spinach and lemon: Stir in the spinach and cook over low heat for 2 to 3 minutes, just until wilted and still green. Remove the pot from the heat and stir in the lemon juice. Taste for seasoning. Let the soup stand for 2 to 3 minutes, then stir in more broth if it needs loosening.
  6. Make the toast and serve: While the soup simmers, toast the sourdough until crisp at the edges. Brush each slice lightly with olive oil and sprinkle with za’atar. Ladle the soup into bowls, finish each with a few drops of olive oil, and serve the toast alongside.

How to Adjust the Soup’s Texture

Blending one can of beans thickens the broth while leaving plenty of whole beans in the soup. It also avoids blending a pot of hot liquid. The soup will thicken as it stands and chills; stir in broth a little at a time until it is creamy but easy to spoon.

Ingredient Swaps

Great Northern or navy beans can replace cannellini beans, though their size and texture differ. Chopped kale can replace spinach; add it a little earlier in the final simmer so it has time to soften. The soup is dairy-free as written. If serving it as a vegan meal, check that the broth, bread, and za’atar are vegan.

Storage and Reheating

Cool leftovers promptly and refrigerate in an airtight container for up to 4 days. Reheat gently on the stovetop over low to medium-low heat, stirring often. For individual portions, microwave in short intervals and stir between them. Add broth as needed to loosen the soup.

To freeze, cool the soup completely and store in a freezer-safe airtight container for up to 3 months. Thaw overnight in the refrigerator, then reheat gently with extra broth if needed.

For another creamy vegetable soup, try Creamy Roasted Cauliflower Soup. For a different stovetop bowl, see Apple Cheddar Sweet Potato Soup.

Nutrition

Approximate nutrition per generous serving, based on 4 servings of soup and excluding the toast: 415 calories, 22g protein, 9g fat, and 62g carbohydrates. Per 100g: approximately 55 calories, 3g protein, 1g fat, and 8g carbohydrates. These are estimates; actual values depend on the bean and broth brands, drained bean quantity, and portion size.

High-Protein White Bean Soup

Cannellini beans, browned mushrooms, and spinach simmer in a creamy broth finished with lemon.
Course: Soup
Cuisine: Mediterranean
Prep: 15 min
Cook: 35 min
Total: 50 min
Servings: 4 Calories: 415 kcal

Equipment

  • Blender
  • 5- to 6-quart soup pot or Dutch oven
  • Toaster

Ingredients

For the soup

  • 4 (15-ounce) cans cannellini beans, drained and rinsed
  • 6 cups vegetable broth, divided, plus more as needed
  • 2 tablespoons olive oil, plus more for serving
  • 8 ounces cremini or baby bella mushrooms, sliced (225g)
  • 1 medium yellow onion, finely chopped
  • 3 garlic cloves, minced
  • 1 teaspoon dried thyme or 1 tablespoon fresh thyme leaves
  • 1 teaspoon Dijon mustard
  • 1 teaspoon kosher salt, plus more to taste
  • 1/4 teaspoon black pepper, or to taste
  • 5 ounces baby spinach, roughly chopped (140g)
  • 1 tablespoon lemon juice, or to taste

For the optional za’atar toast

  • 4 slices sourdough bread
  • About 1 teaspoon olive oil per slice
  • 1 to 2 teaspoons za’atar per slice

Instructions

  1. Blend 1 can of drained beans with 1 cup of broth until mostly smooth. Set aside the puree and the remaining 3 cans of whole beans.
  2. Warm a 5- to 6-quart soup pot or Dutch oven over medium heat. Add 2 tablespoons olive oil and the mushrooms. Cook for 6 to 8 minutes, stirring occasionally, until most of their moisture has evaporated and some edges are golden brown.
  3. Add the onion and cook for 4 to 5 minutes, until softened.
  4. Stir in the garlic, thyme, and Dijon mustard. Cook briefly until fragrant, reducing the heat to medium-low if the garlic starts to brown.
  5. Add the bean puree, whole beans, remaining 5 cups broth, salt, and pepper. Bring to a gentle simmer, then reduce the heat to low.
  6. Simmer uncovered for 10 to 15 minutes, stirring occasionally, until the beans are hot throughout. Avoid a rolling boil.
  7. Stir in the spinach and cook over low heat for 2 to 3 minutes, until wilted but still green.
  8. Remove the pot from the heat and stir in the lemon juice. Taste and adjust the seasoning. Let stand for 2 to 3 minutes, then add more broth if needed.
  9. While the soup simmers, toast the sourdough until crisp at the edges. Brush each slice lightly with olive oil and sprinkle with za’atar.
  10. Ladle the soup into bowls, finish with a few drops of olive oil, and serve with the toast alongside.

Tips

  • Brown the mushrooms before adding liquid so they develop savory edges.
  • Blend only one can of beans to thicken the broth while keeping whole beans for texture.
  • Keep the soup at a gentle simmer to prevent the beans from breaking down.
  • Add broth a little at a time if the soup thickens as it stands.

Variations

  • Great Northern or Navy Bean Soup: Replace the cannellini beans with Great Northern or navy beans.
  • White Bean and Kale Soup: Replace the spinach with chopped kale and add it earlier in the final simmer so it has time to soften.
Notes

The soup is dairy-free as written. Refrigerate leftovers in an airtight container for up to 4 days or freeze for up to 3 months. Reheat gently, adding broth as needed. Check that the broth, bread, and za’atar are vegan if serving as a vegan meal.

Nutrition

Calories: 415 kcal | Protein: 22 g | Fat: 9 g | Carbohydrates: 62 g

High-Protein Chicken Parmesan Casserole

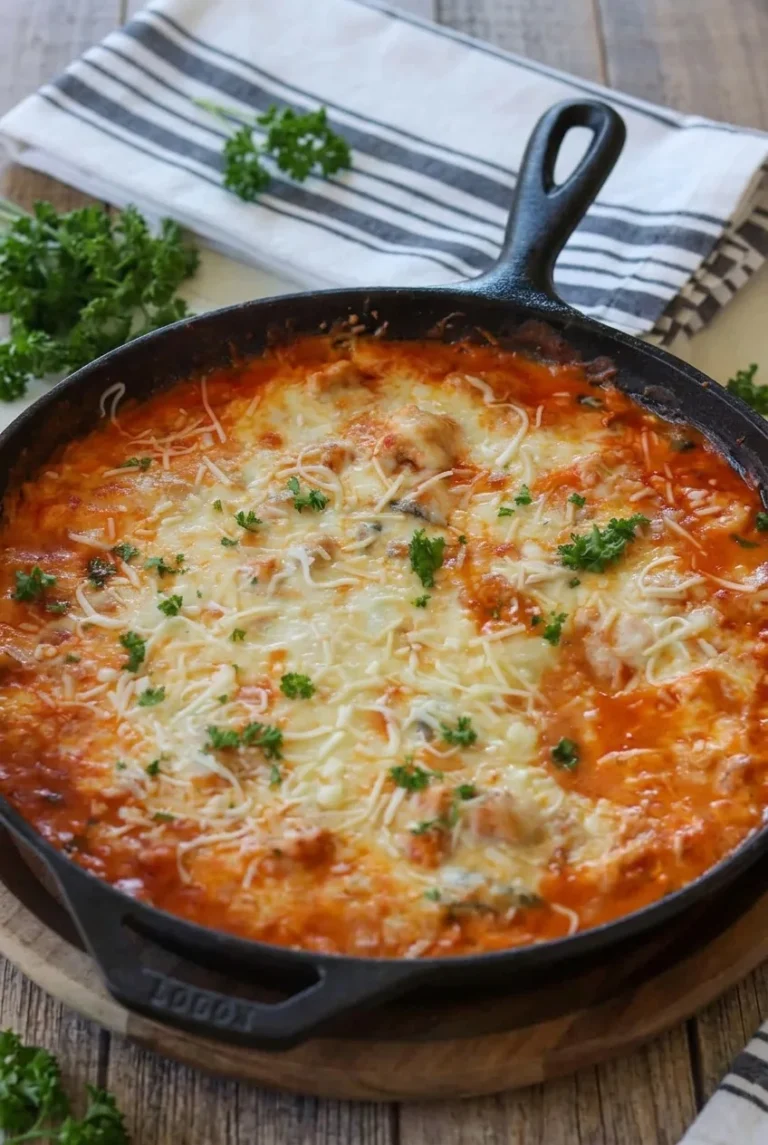
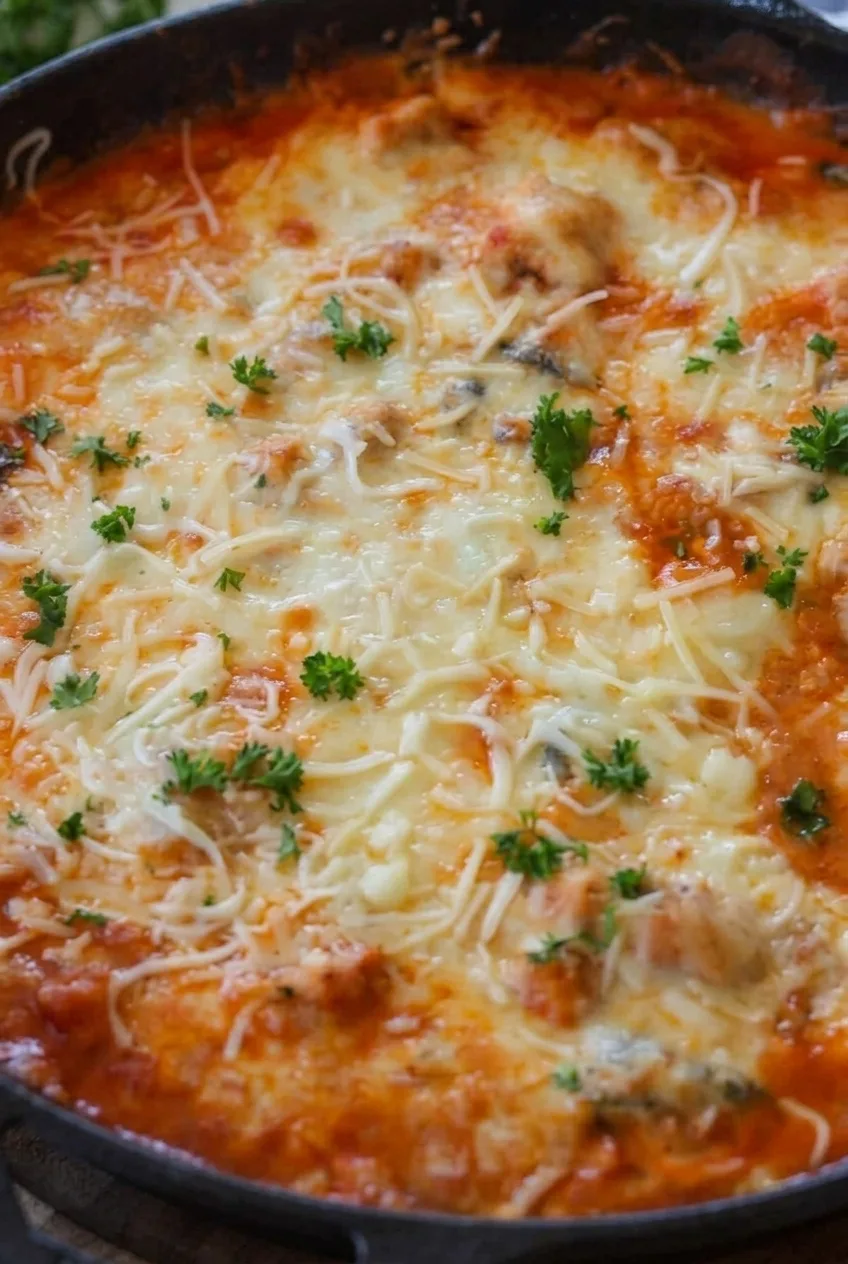
Seared chicken pieces simmer briefly in marinara, then bake under mozzarella and Parmesan until the sauce bubbles around the skillet and the cheese melts. This Chicken Parmesan casserole has no breading, pasta, or vegetable base; it stays saucy and is served directly from the pan.

Browning the chicken and warming the sauce before baking give the casserole a short oven finish. Cut the chicken into even pieces and check its temperature rather than relying on bake time alone, especially if you use a smaller skillet or sear in batches.

Ingredients

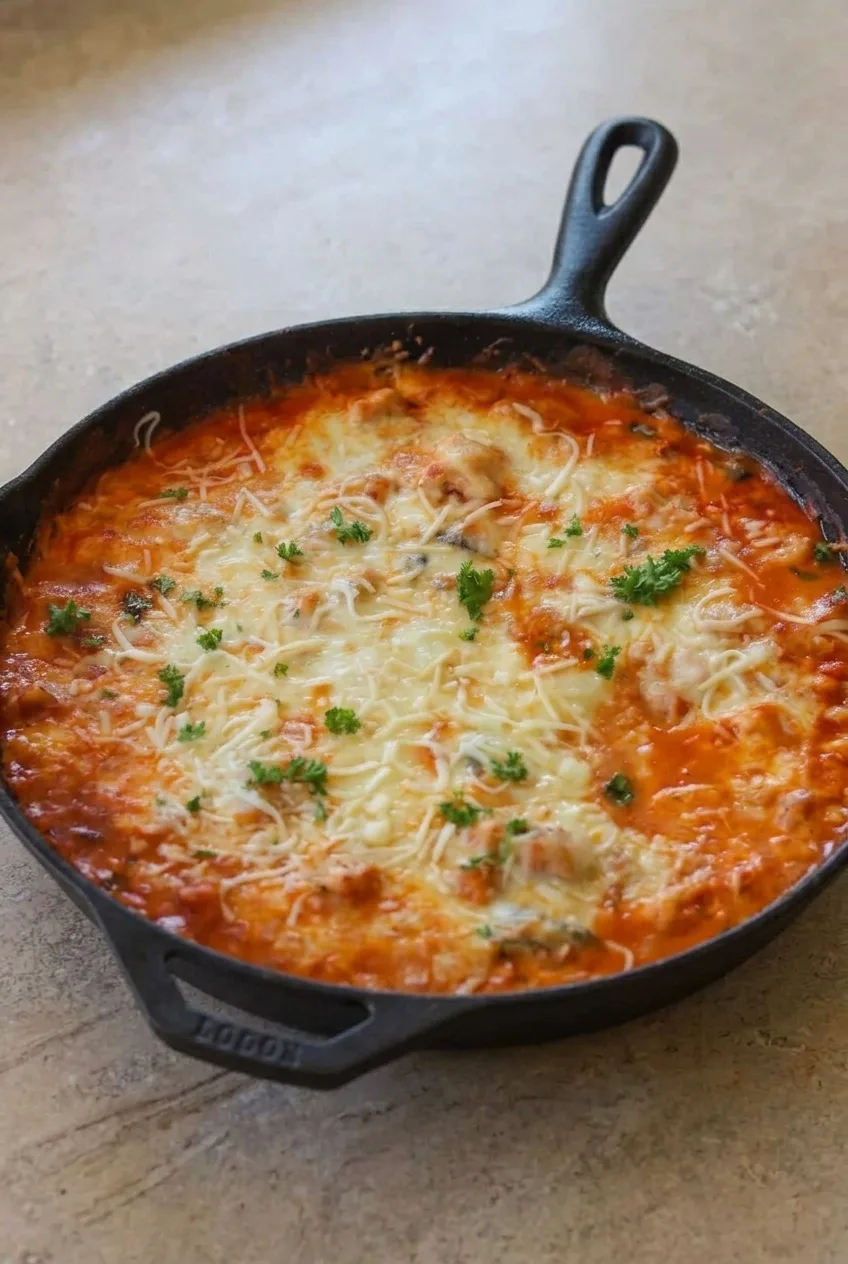
Close view of melted mozzarella, Parmesan, parsley, marinara, and chicken in the casserole
  • 1 1/2 pounds boneless, skinless chicken breasts, cut into uniform bite-size pieces (680g)
  • 1 tablespoon olive oil
  • 1 teaspoon fine salt, or to taste
  • 1/2 teaspoon black pepper
  • 1 teaspoon Italian seasoning
  • 3 garlic cloves, minced
  • 24 ounces marinara sauce, about 3 cups (680g)
  • 1 1/2 cups shredded low-moisture mozzarella, preferably freshly shredded (170g)
  • 1/3 cup finely grated Parmesan, plus more for serving if desired (30g)
  • 2 tablespoons chopped fresh parsley

For mild heat, add 1/4 teaspoon red pepper flakes with the garlic. A thick marinara helps the sauce stay glossy rather than soupy.

How to Make Chicken Parmesan Casserole

Whole skillet of chicken Parmesan casserole on a neutral surface, with more of the pan and setting visible
  1. Preheat and season: Heat the oven to 375°F (190°C). Season the chicken evenly with the salt, pepper, and Italian seasoning.
  2. Brown the chicken: Heat the olive oil in a 10- to 12-inch oven-safe skillet over medium-high heat. Add the chicken in a mostly single layer and turn it as it browns, about 6–8 minutes total. Work in batches if needed so moisture can escape and the pieces brown instead of steam. The chicken does not need to be fully cooked yet.
  3. Warm the sauce: Reduce the heat to medium. Add the garlic and stir briefly until fragrant, without letting it brown. Stir in the marinara and cook for 2–3 minutes, until the sauce is steaming around the edges.
  4. Add the cheese: Turn off the heat. Scatter the mozzarella over the chicken, leaving some sauce visible around the edge, then sprinkle the Parmesan on top.
  5. Bake: Transfer the uncovered skillet to the oven. Begin checking after 10 minutes; baking usually takes about 10–15 minutes. The sauce should bubble at the edges, and the cheese should be fully melted with a few light golden spots. Check several of the largest chicken pieces with an instant-read thermometer; they must reach 165°F (75°C).
  6. Rest and serve: Scatter the parsley over the cheese. Let the casserole rest for 5 minutes so the bubbling sauce settles, then serve from the skillet.

Check that both the skillet and its handle are oven-safe before baking. Skillet size and how hot the sauce is when it goes into the oven can change the bake time; remove the casserole once the chicken is cooked through rather than leaving it in for extra browning.

How to Keep the Sauce from Turning Watery

Use the listed amount of marinara without adding water. If you add vegetables, cook them first until their released liquid evaporates, or drain them before adding them to the skillet. Without a pasta or vegetable base to absorb sauce, this casserole should be spoonable and saucy, not soupy.

Using Cooked Chicken Instead

For a shortcut, replace the raw chicken with about 4 cups cooked, chopped or shredded chicken. Warm it in the marinara on the stovetop, add the cheeses, and bake just until the topping melts and the casserole is hot throughout. The oven finish will be shorter, and the chicken will be softer without the freshly seared flavor.

Serving and Storage

Serve with a green salad or roasted vegetables. Pasta, rice, or garlic bread can go alongside the skillet for anyone who wants a starch.

Cool leftovers promptly and refrigerate in an airtight container for 3–4 days. Reheat individual portions in short microwave intervals until hot. For a larger portion, cover and warm in a 350°F (175°C) oven until heated through; prolonged reheating can dry out the chicken.

Leftovers can be frozen in an airtight, freezer-safe container, though the sauce and cheese may change texture after thawing.

For another baked chicken dinner, try Chicken Alfredo Bake with Broccoli. For a different chicken dinner, see these High-Protein Chicken Enchilada Bowls.

Nutrition

Approximate nutrition per serving, based on 1/6 of the casserole: 330 calories, 36g protein, 15g fat, and 12g carbohydrates. Approximate nutrition per 100g: 130 calories, 14g protein, 6g fat, and 5g carbohydrates. Values vary with the marinara and cheese used.

High-Protein Chicken Parmesan Casserole

Seared chicken simmers in marinara and bakes under mozzarella and Parmesan until bubbly.
Course: Main Course
Cuisine: Italian-American
Prep: 15 min
Cook: 25 min
Total: 45 min
Servings: 6 Calories: 330 kcal per serving; 130 kcal per 100 g

Equipment

  • 10- to 12-inch oven-safe skillet
  • Instant-read thermometer

Ingredients

For the Casserole

  • 1 1/2 pounds boneless, skinless chicken breasts, cut into uniform bite-size pieces (680 g)
  • 1 tablespoon olive oil
  • 1 teaspoon fine salt, or to taste
  • 1/2 teaspoon black pepper
  • 1 teaspoon Italian seasoning
  • 3 garlic cloves, minced
  • 24 ounces marinara sauce, about 3 cups (680 g)
  • 1 1/2 cups shredded low-moisture mozzarella, preferably freshly shredded (170 g)
  • 1/3 cup finely grated Parmesan, plus more for serving if desired (30 g)
  • 2 tablespoons chopped fresh parsley

Instructions

  1. Preheat the oven to 375°F (190°C). Season the chicken with the salt, pepper, and Italian seasoning.
  2. Heat the olive oil in a 10- to 12-inch oven-safe skillet over medium-high heat. Add the chicken in a mostly single layer and brown, turning the pieces, for about 6–8 minutes total. Work in batches if needed; the chicken does not need to be fully cooked.
  3. Reduce the heat to medium. Add the garlic and stir briefly until fragrant, without browning it.
  4. Stir in the marinara and cook for 2–3 minutes, until steaming around the edges.
  5. Turn off the heat. Scatter the mozzarella over the chicken, leaving some sauce visible around the edge, then sprinkle with Parmesan.
  6. Bake the uncovered skillet for about 10–15 minutes, beginning to check after 10 minutes. Remove it when the sauce bubbles, the cheese has melted, and the largest chicken pieces reach 165°F (75°C) on an instant-read thermometer.
  7. Scatter the parsley over the cheese. Rest for 5 minutes before serving.

Tips

  • Cut the chicken into evenly sized pieces so they cook at the same rate.
  • Sear the chicken in batches if needed to help it brown instead of steam.
  • Use a thick marinara and avoid adding water to keep the casserole saucy rather than soupy.
  • Check the temperature of several of the largest chicken pieces; do not rely on baking time alone.
  • Confirm that both the skillet and its handle are oven-safe before baking.

Variations

  • Mild Heat: Add 1/4 teaspoon red pepper flakes with the garlic.
  • Cooked Chicken Shortcut: Use about 4 cups cooked, chopped or shredded chicken. Warm it in the marinara, add the cheeses, and bake just until hot throughout and the topping melts.

Notes

Refrigerate leftovers in an airtight container for 3–4 days. Reheat individual portions in short microwave intervals or cover and warm larger portions in a 350°F (175°C) oven until hot. Leftovers can be frozen, though the sauce and cheese may change texture. Approximate nutrition per 100 g: 130 calories, 14 g protein, 6 g fat, and 5 g carbohydrates.

Nutrition

Calories: 330 kcal per serving; 130 kcal per 100 g | Protein: 36 g per serving; 14 g per 100 g | Fat: 15 g per serving; 6 g per 100 g | Carbohydrates: 12 g per serving; 5 g per 100 g

Ground Beef Philly Cheesesteak Bowls

Browned ground beef, softened peppers, onion, and mushrooms get a splash of Worcestershire and beef broth before melted provolone goes on top. Serve the filling over fluffy white rice, with the beef and vegetables in a loose layer so both remain visible. These are cheesesteak-inspired rice bowls, not steak sandwiches.

Cook the rice separately while you make the filling in a wide skillet. Draining the beef and reducing the broth keep the topping moist and glossy without soaking the rice. The recipe makes 4 bowls and takes about 35–40 minutes.

Ingredients

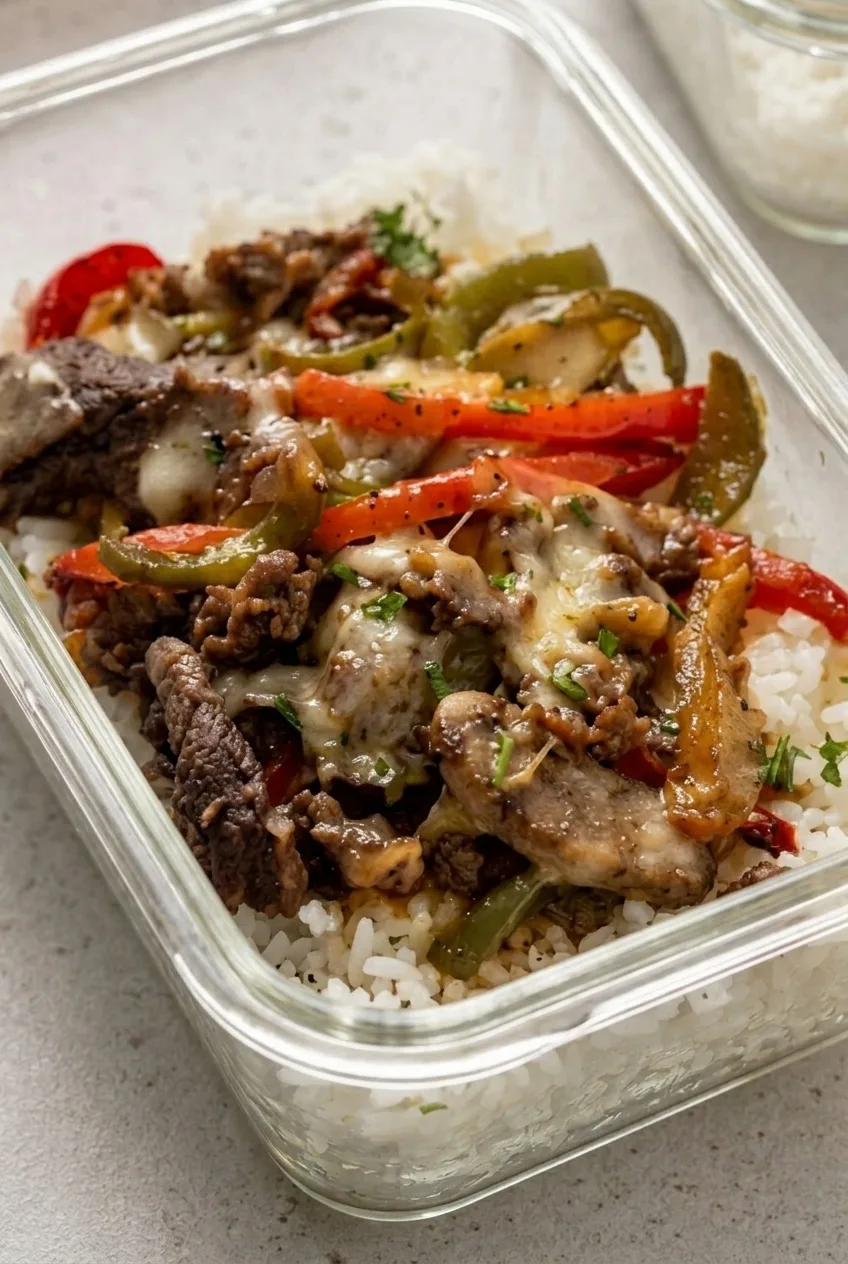
Close view of melted provolone, browned beef, peppers, mushrooms, and distinct rice grains in a cheesesteak bowl
  • 1 cup dry long-grain white rice (185g)
  • 1 lb ground beef, preferably 90/10 (450g)
  • 1 medium yellow onion, thinly sliced (150g)
  • 1 medium green bell pepper, thinly sliced (120g)
  • 1/2 medium red bell pepper, thinly sliced (60g)
  • 8 oz cremini or button mushrooms, sliced (225g)
  • 1 tablespoon olive oil
  • 2 tablespoons Worcestershire sauce
  • 1/3 cup beef broth
  • 4 oz shredded provolone (115g)
  • 3/4 teaspoon kosher salt, divided or to taste
  • 1/4 teaspoon black pepper, or to taste

How to Make Ground Beef Philly Cheesesteak Bowls

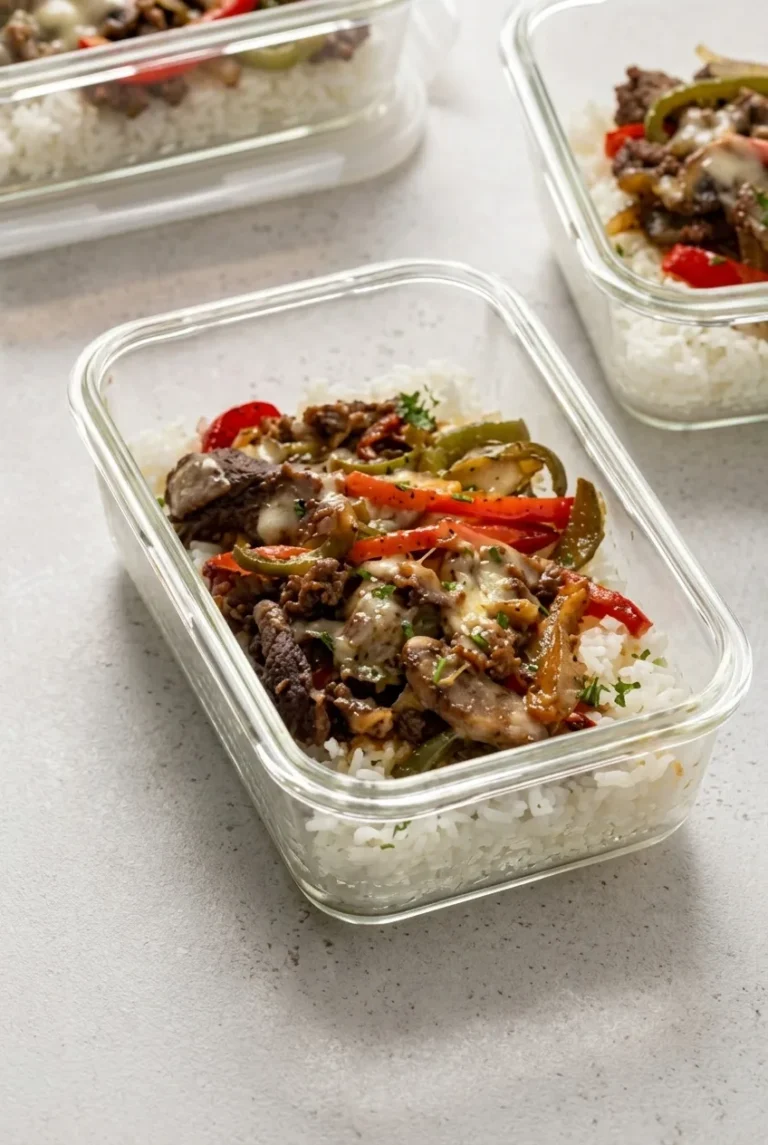
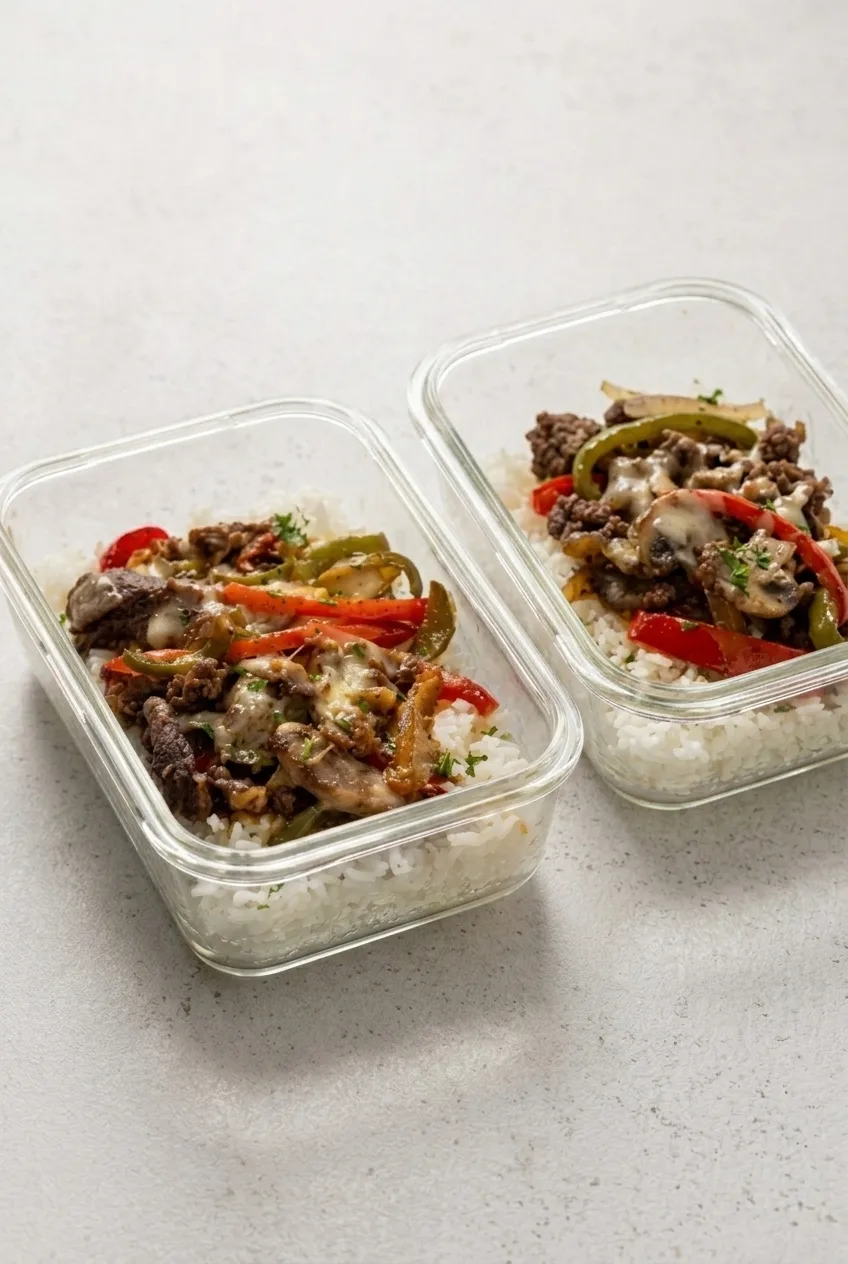
Two rectangular meal-prep containers of Ground Beef Philly Cheesesteak Bowls with visible rice and vegetable topping
  1. Cook the rice: Prepare the rice in a medium saucepan according to the package directions, seasoning with a little of the measured salt if desired. Keep it covered off the heat, then fluff before serving.
  2. Brown the beef: Warm a dry 12-inch skillet over medium-high heat. Add the beef and break it into small crumbles as it cooks, about 6–8 minutes. Start checking after 5 minutes; cook until browned, with no pink remaining, and the beef reaches 160°F (70°C). Drain excess rendered fat, then transfer the beef to a plate.
  3. Cook the vegetables: Reduce the heat to medium and add the olive oil, onion, both peppers, and mushrooms. Cook uncovered, stirring occasionally, for about 6–8 minutes. Start checking after 5 minutes; the peppers and onion should be soft but still hold their shape, and the mushrooms should be tender with most of their released moisture cooked away.
  4. Season and reduce: Return the beef to the skillet. Add the Worcestershire, broth, remaining salt, and black pepper, scraping up any browned bits. Simmer uncovered over medium heat for about 2–5 minutes, stirring occasionally, until the filling is moist and glossy with no pool of broth beneath it. A smaller skillet or lower heat may require more time.
  5. Melt the cheese: Reduce the heat to low and scatter the provolone over the filling. Cover for 1–2 minutes, just until the cheese melts. Let the filling settle for 2–3 minutes.
  6. Build the bowls: Divide the rice among four rectangular meal-prep containers or serving bowls. Spoon the beef and vegetables over it, leaving some rice visible around the edges.

How to Avoid a Watery or Greasy Filling

Drain the beef before adding the broth, especially if it releases more fat than lean 90/10 beef. Give the vegetables room in the skillet and stir occasionally rather than constantly so their moisture can cook away. After adding the broth, rely on the no-pooling cue instead of the clock: the liquid should coat the filling, not collect under it.

Cheese and Base Options

White cheddar or mozzarella can replace the provolone. For a different, lower-carbohydrate bowl, omit the rice or use cauliflower rice; neither option gives the same rice-based presentation as the main recipe.

For a baked beef-and-rice dinner, try Ground Beef and Rice Casserole with Cheddar. Stuffed Pepper Casserole with Rice and Mozzarella is another way to serve beef, rice, and peppers.

Meal Prep, Storage, and Reheating

Cool the cooked rice and filling promptly, then refrigerate in airtight containers for up to 4 days. Store them separately if convenient. For a fresher cheese melt, portion the filling without the provolone and add it just before reheating, covering the portion briefly to melt the cheese.

Reheat in the microwave until hot throughout; timing depends on the portion and appliance. Add a small splash of water if the rice seems dry.

If freezing, freeze the cooled beef-and-vegetable filling separately for up to 3 months. Thaw overnight in the refrigerator and reheat thoroughly. Freshly cooked rice gives a better texture than freezing complete rice-and-cheese bowls.

Nutrition

Approximate nutrition per serving, based on 1 of 4 bowls with rice and provolone: 550 calories, 37g protein, 24g fat, and 47g carbohydrates. Approximate nutrition per 100g: 140 calories, 9g protein, 6g fat, and 12g carbohydrates. Values vary with the ingredients used.

Ground Beef Philly Cheesesteak Bowls

Seasoned ground beef, peppers, onions, and mushrooms are topped with melted provolone and served over white rice.
Course: Main Course
Cuisine: American
Prep: 10 min
Cook: 30 min
Total: 40 min
Servings: 4 Calories: 550 kcal

Equipment

  • Medium saucepan
  • 12-inch skillet
  • Skillet lid

Ingredients

For the bowls

  • 1 cup dry long-grain white rice (185g)
  • 1 lb ground beef, preferably 90/10 (450g)
  • 1 medium yellow onion, thinly sliced (150g)
  • 1 medium green bell pepper, thinly sliced (120g)
  • 1/2 medium red bell pepper, thinly sliced (60g)
  • 8 oz cremini or button mushrooms, sliced (225g)
  • 1 tablespoon olive oil
  • 2 tablespoons Worcestershire sauce
  • 1/3 cup beef broth
  • 4 oz shredded provolone (115g)
  • 3/4 teaspoon kosher salt, divided or to taste
  • 1/4 teaspoon black pepper, or to taste

Instructions

  1. Prepare the rice in a medium saucepan according to the package directions, seasoning with a little of the measured salt if desired. Cover off the heat, then fluff before serving.
  2. Heat a dry 12-inch skillet over medium-high heat. Add the beef and cook for 6–8 minutes, breaking it into small crumbles, until browned with no pink remaining and it reaches 160°F (70°C). Drain excess fat and transfer the beef to a plate.
  3. Reduce the heat to medium. Add the olive oil, onion, green and red peppers, and mushrooms. Cook uncovered for 6–8 minutes, stirring occasionally, until the vegetables are soft but hold their shape and most mushroom moisture has cooked away.
  4. Return the beef to the skillet. Add the Worcestershire sauce, broth, remaining salt, and black pepper, scraping up browned bits. Simmer uncovered for 2–5 minutes, stirring occasionally, until the filling is glossy and no broth pools beneath it.
  5. Reduce the heat to low and scatter the provolone over the filling. Cover for 1–2 minutes, until the cheese melts, then let the filling settle for 2–3 minutes.
  6. Divide the rice among four bowls or meal-prep containers. Spoon the beef and vegetables over the rice, leaving some rice visible around the edges.

Tips

  • Drain excess fat from the beef before adding the broth, especially if using fattier beef.
  • Cook the vegetables uncovered and avoid stirring constantly so their moisture can evaporate.
  • Reduce the broth until it coats the filling without pooling underneath; use the visual cue rather than relying only on the timing.
  • Melt the provolone over low heat with the skillet covered.

Variations

  • White Cheddar or Mozzarella: Replace the provolone with white cheddar or mozzarella.
  • Lower-Carbohydrate Bowls: Omit the rice or serve the filling over cauliflower rice.

Notes

Refrigerate the cooled rice and filling in airtight containers for up to 4 days; reheat until hot throughout and add a splash of water if the rice is dry. Freeze the cooled filling separately for up to 3 months and thaw overnight in the refrigerator. The beef should reach 160°F (70°C).

Nutrition

Calories: 550 kcal | Protein: 37 g | Fat: 24 g | Carbohydrates: 47 g | Per 100 G Calories: 140 kcal | Per 100 G Protein: 9 g | Per 100 G Fat: 6 g | Per 100 G Carbohydrates: 12 g

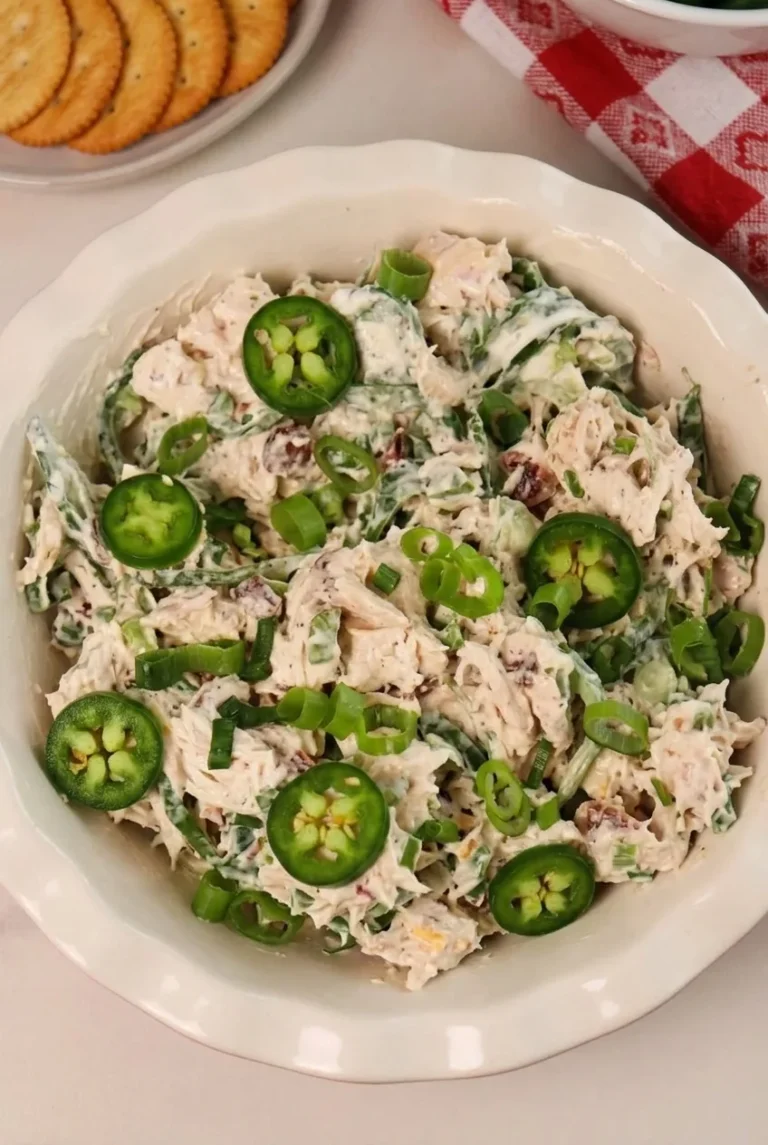
Jalapeño Popper Chicken Salad

Finely shredded chicken gets a thick, creamy coating of cream cheese and mayonnaise, with cheddar, bacon, fresh jalapeño, and scallions throughout. It’s a cold salad that starts with fully cooked chicken, so there’s no need to cook the finished dish.

Soften the cream cheese before mixing the dressing, then fold in the chicken without mashing the shreds. Start with one seeded jalapeño and taste before adding more—fresh peppers vary in heat. The salad makes 6 servings and takes about 40 minutes, including an optional 20-minute chill.

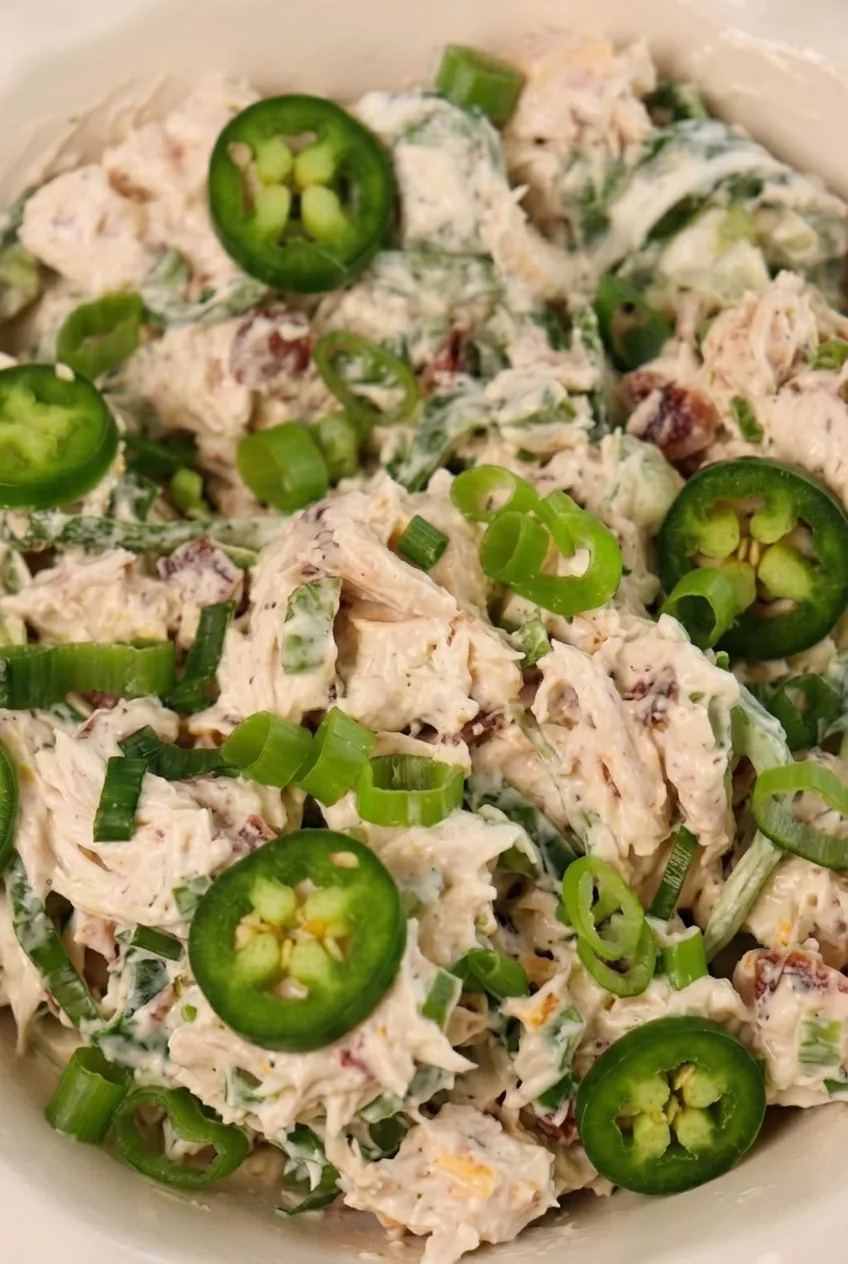
Ingredients for Jalapeño Popper Chicken Salad

Close detail of creamy jalapeño popper chicken salad showing chicken shreds, bacon, scallions, and pepper
  • 4 cups fully cooked, cooled chicken, finely shredded (about 550g)
  • 4 ounces cream cheese (½ cup; about 115g), softened
  • ⅓ cup mayonnaise (75g), plus more as needed
  • ¾ cup finely shredded sharp cheddar cheese (85g)
  • 4 slices cooked bacon (about 30g), crumbled
  • 1 medium fresh jalapeño, seeded and finely chopped, plus 1 small jalapeño or part of one for garnish
  • 3 green onions, thinly sliced (45g)
  • ¼ teaspoon garlic powder
  • ¼ teaspoon kosher salt, plus more to taste
  • ⅛ teaspoon black pepper

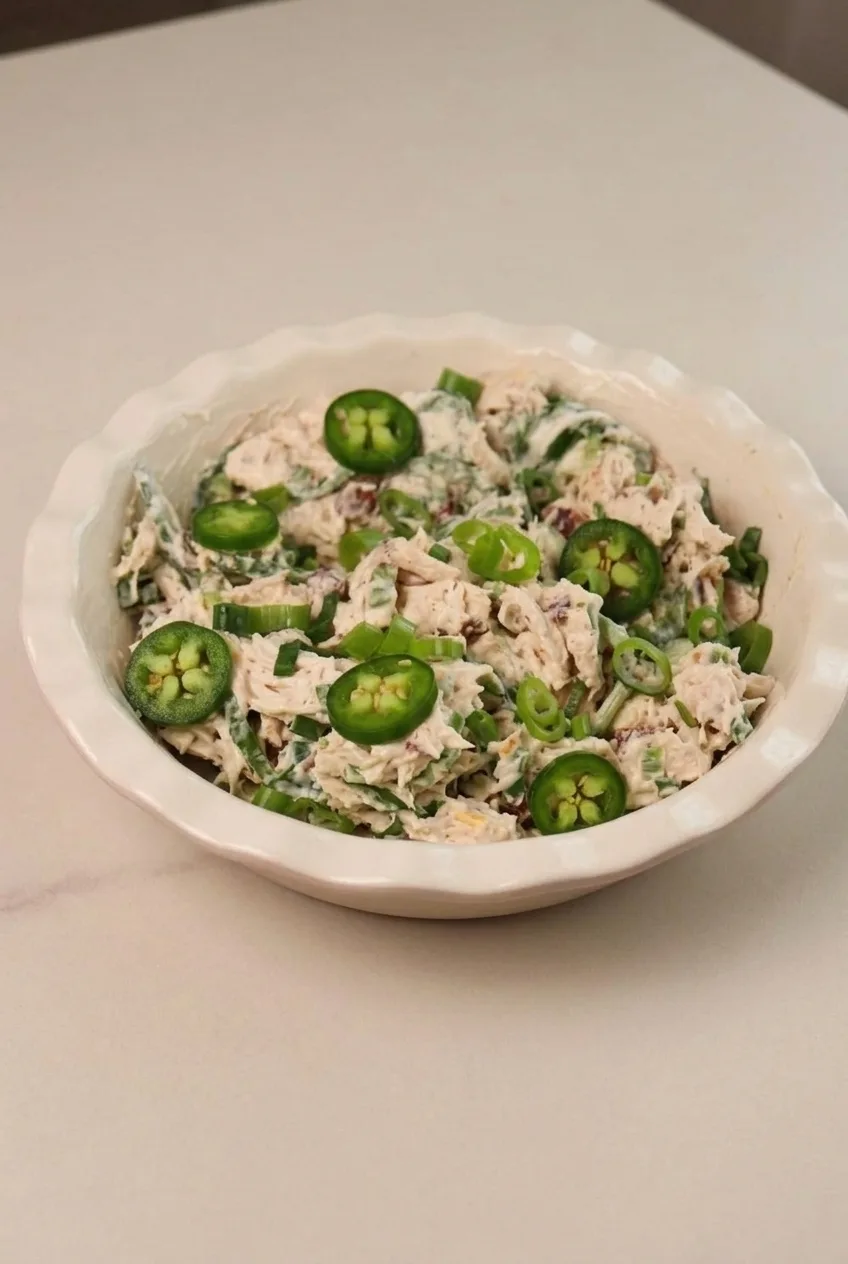
How to Make Jalapeño Popper Chicken Salad

A full bowl of jalapeño popper chicken salad centered on a neutral tabletop
  1. Prepare the mix-ins: Finely shred the cooled chicken. If the bacon needs cooking, cook it separately until browned and crisp; drain and cool it before crumbling. Chop the seeded jalapeño and slice the green onions. Cut a few rounds from the extra jalapeño, and reserve them with some scallions and bacon for the top.
  2. Make the dressing: In a mixing bowl large enough to fold the chicken, stir the softened cream cheese until smooth. Mix in the mayonnaise, garlic powder, salt, and black pepper until no large cream-cheese lumps remain.
  3. Fold in the salad: Add the chicken, cheddar, chopped jalapeño, scallions, and most of the bacon. Fold gently until the chicken is coated but the shreds remain distinct. The salad should be thick, with no dressing pooling at the bottom. Taste before adding more jalapeño or salt; bacon and cheddar contribute saltiness.
  4. Chill and check: Cover and refrigerate for at least 20 minutes if time allows, or serve sooner. Stir before serving. If the salad has firmed up or seems dry, fold in more mayonnaise a tablespoon at a time.
  5. Garnish and serve: Spoon the salad into a shallow bowl without pressing it down. Top with the reserved jalapeño rounds, scallions, and bacon. Serve cold.

How to Adjust the Jalapeño Heat

For a milder salad, remove the seeds and inner membranes from the chopped jalapeño. Taste the salad after mixing, then add more finely chopped pepper a little at a time if you want more heat. Jalapeños vary, so one pepper will not always give the same result. Wear gloves when handling them if your skin is sensitive.

How to Keep the Salad Creamy

Cold cream cheese can leave lumps that are difficult to smooth out once the chicken is added. Stir it smooth first, then fold the salad gently so the dressing coats visible shreds rather than turning the mixture into a paste. Chicken moisture varies, so adjust with a little extra mayonnaise only if needed, especially after chilling.

Serving and Storing

Serve in sandwiches, wraps, or lettuce cups, with crackers for scooping, or over greens. Bacon mixed into the dressing softens as it sits; add the reserved bacon just before serving for a more distinct topping.

Refrigerate leftovers promptly in an airtight container and use within three days. Keep the salad cold and stir it before serving. Freezing is not recommended because the creamy texture may deteriorate after thawing.

For a warm chicken-and-bacon dinner, try Chicken Bacon Ranch Casserole with Creamy Penne. For a different chicken meal, see High-Protein Chicken Enchilada Bowls.

Nutrition

Approximate nutrition per serving, based on 6 servings: 395 calories, 36g protein, 26g fat, and 2g carbohydrates. Per 100g: about 250 calories, 23g protein, 16g fat, and 1g carbohydrates. Values vary with the chicken, mayonnaise, bacon, and cheese used.

Jalapeño Popper Chicken Salad

Shredded chicken is folded with a creamy cream cheese and mayonnaise dressing, cheddar, bacon, jalapeño, and scallions.
Course: Salad
Cuisine: American
Prep: 20 min
Total: 40 min
Servings: 6 Calories: 395 kcal

Equipment

  • Mixing bowl
  • Knife
  • Cutting board

Ingredients

For the Salad

  • 4 cups fully cooked, cooled chicken, finely shredded (about 550 g)
  • 4 ounces cream cheese (½ cup; about 115 g), softened
  • ⅓ cup mayonnaise (75 g), plus more as needed
  • ¾ cup finely shredded sharp cheddar cheese (85 g)
  • 4 slices cooked bacon (about 30 g), crumbled
  • 1 medium fresh jalapeño, seeded and finely chopped
  • 3 green onions, thinly sliced (45 g)
  • ¼ teaspoon garlic powder
  • ¼ teaspoon kosher salt, plus more to taste
  • ⅛ teaspoon black pepper

For Garnish

  • 1 small jalapeño or part of one, sliced into rounds
  • Reserved sliced scallions and crumbled bacon

Instructions

  1. Finely shred the cooled chicken. If needed, cook the bacon separately until browned and crisp, then drain, cool, and crumble it.
  2. Seed and finely chop the medium jalapeño, and thinly slice the green onions. Reserve a few jalapeño rounds, scallions, and bacon for garnish.
  3. In a large mixing bowl, stir the softened cream cheese until smooth. Mix in the mayonnaise, garlic powder, salt, and black pepper until no large lumps remain.
  4. Add the chicken, cheddar, chopped jalapeño, scallions, and most of the bacon. Fold gently until the chicken is coated and the shreds remain distinct.
  5. Taste and add more jalapeño or salt if desired. Cover and chill for at least 20 minutes if time allows, then stir before serving. If the salad seems dry, fold in additional mayonnaise a tablespoon at a time.
  6. Spoon into a shallow bowl and top with the reserved jalapeño, scallions, and bacon. Serve cold.

Tips

  • Soften the cream cheese and stir it smooth before adding the chicken to prevent lumps.
  • Start with one seeded jalapeño, then taste the salad before adding more; pepper heat varies.
  • Fold gently to keep the chicken shreds distinct rather than turning the salad into a paste.
  • Add extra mayonnaise a tablespoon at a time if the salad seems dry, especially after chilling.
  • Reserve some bacon for topping just before serving so it stays distinct and crisp.

Notes

Refrigerate leftovers promptly in an airtight container and use within three days. Keep cold; freezing is not recommended.

Nutrition

Calories: 395 kcal | Protein: 36 g | Fat: 26 g | Carbohydrates: 2 g

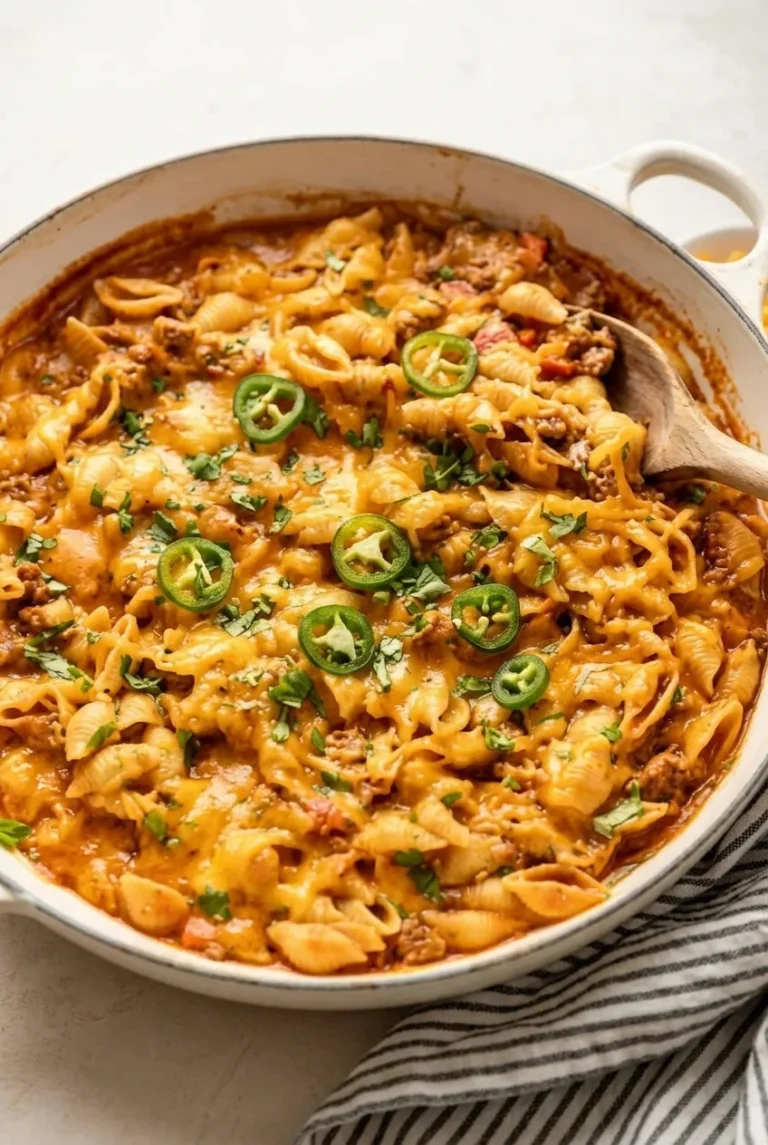
High-Protein Taco Pasta

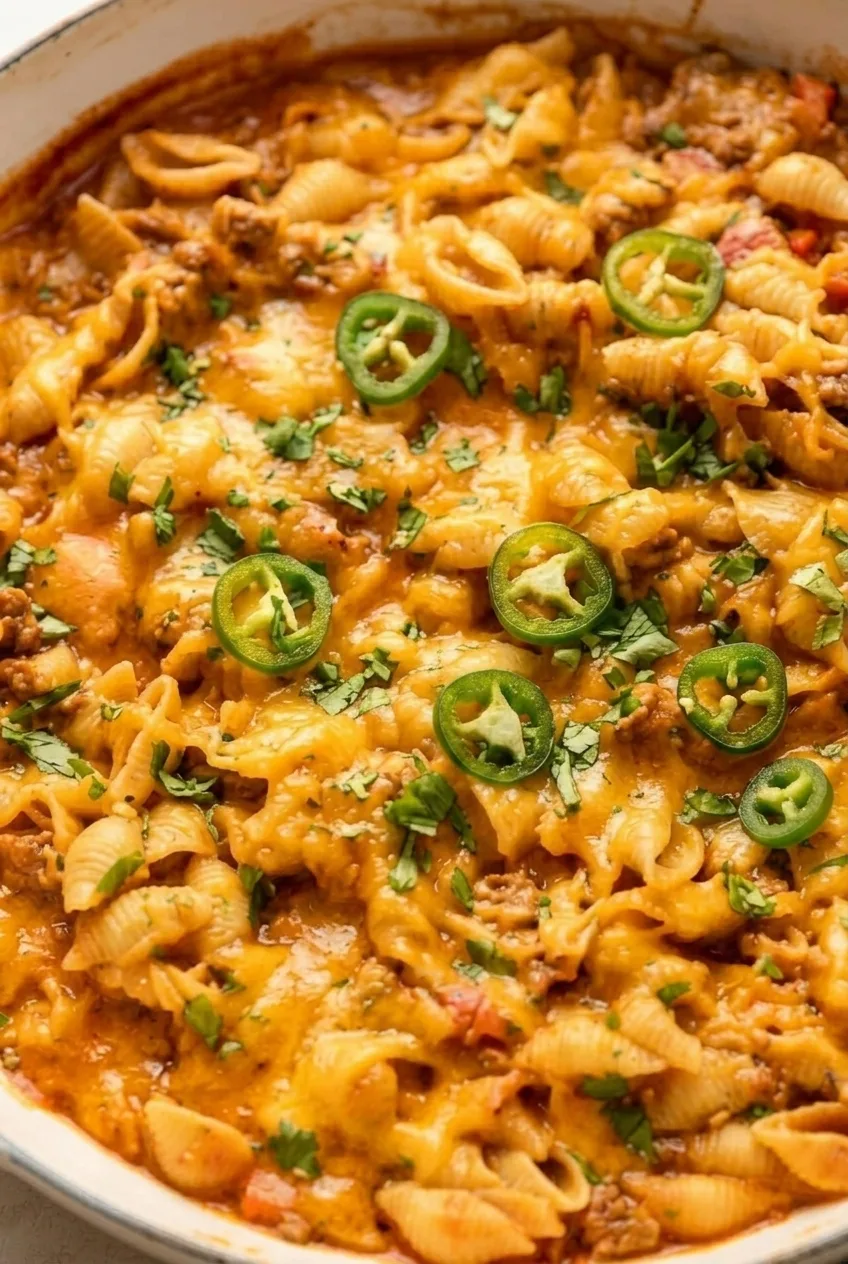
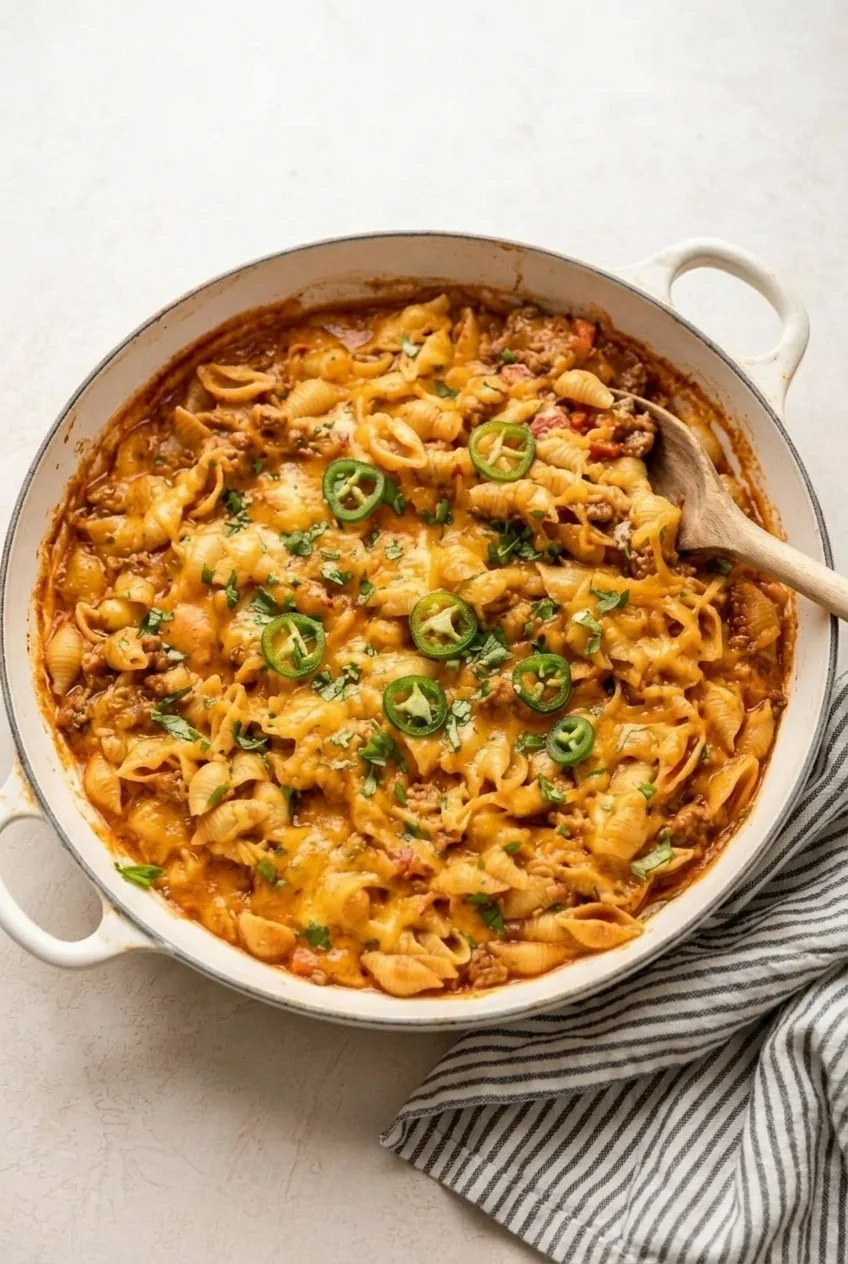
Short pasta shells and crumbled beef are coated in a glossy, orange-red taco sauce, then finished with melted cheddar, fresh jalapeño, and cilantro. Blended cottage cheese makes the tomato sauce creamy without a separate thickening step.

Cook the pasta separately and drain it while it still has a slight bite; it will soften a little more in the sauce. Stir in the cottage cheese off heat to keep the sauce even, and serve the jalapeño at the table if diners prefer different heat levels.

Makes 6 servings. Prep time: 15 minutes. Cook time: about 25 minutes. Total time: about 40 minutes.

Ingredients for High-Protein Taco Pasta

Close detail of High-Protein Taco Pasta showing saucy shells, crumbled beef, melted cheddar, jalapeño, and cilantro
  • 12 ounces short pasta shells (340g)
  • 1 tablespoon olive oil
  • 1 pound lean ground beef (450g)
  • 1 small yellow onion, finely chopped (about 100g)
  • 2 garlic cloves, minced
  • 1-ounce packet mild taco seasoning, or about 2 tablespoons
  • 2 tablespoons tomato paste
  • 1 can (14.5 ounces) diced tomatoes, preferably no-salt-added, with juices
  • 1/2 cup low-sodium beef broth, plus more as needed
  • 1 cup cottage cheese (225g)
  • 1 1/2 cups shredded cheddar or cheddar-Monterey Jack blend, divided (170g)
  • 1 small fresh jalapeño, thinly sliced, or to taste
  • 2 tablespoons chopped fresh cilantro
  • Kosher salt, for the pasta water and final seasoning

How to Make High-Protein Taco Pasta

A full shallow dish of High-Protein Taco Pasta centered on a light neutral surface
  1. Cook the pasta: Bring a large pot of well-salted water to a boil. Cook the shells until just al dente, checking 1–2 minutes before the shortest time on the package. Drain, reserving a little pasta water if desired.
  2. Brown the beef: While the pasta cooks, heat a 12-inch skillet over medium-high heat. Add the oil and beef, breaking the meat into small crumbles. Cook for 5–7 minutes, until browned and no longer pink. Drain excess fat if more than a small amount collects in the pan.
  3. Cook the aromatics: Reduce the heat to medium. Add the onion and cook for 3–4 minutes, until softened. Stir in the garlic, taco seasoning, and tomato paste; cook briefly, until fragrant.
  4. Simmer the sauce: Add the diced tomatoes and 1/2 cup broth, scraping up the browned bits. Simmer uncovered over medium-low to medium heat for 5–7 minutes, stirring occasionally. The sauce should thicken slightly but remain loose enough to coat the pasta.
  5. Add the cottage cheese: Blend the cottage cheese until smooth. Remove the skillet from the heat, then stir it into the beef and tomato sauce until evenly combined.
  6. Fold in the pasta: Add the drained shells and 1 cup of the shredded cheese. Fold gently until coated. If the sauce seems stiff, add a splash of broth or reserved pasta water; the pasta should look glossy and remain spoonable.
  7. Melt the cheese and serve: Scatter the remaining cheese over the pasta. Cover and warm over low heat for 2–3 minutes, just until the cheese melts in soft patches. Top with jalapeño slices and cilantro. Let stand for about 2 minutes, then serve from the skillet or transfer to a shallow serving dish.

Why Cook the Pasta Separately?

Cooking the shells in their own pot makes it easier to stop at al dente. Pasta continues to absorb liquid after it joins the warm sauce, so shells that are already soft can become too tender. Check gluten-free pasta early if using it; it may soften quickly after mixing.

How to Keep the Sauce Creamy

Blend the cottage cheese until no curds remain, and stir it into the sauce only after taking the skillet off active heat. Boiling the sauce after adding it can make the texture uneven. If the finished pasta needs more warming, use low heat briefly.

Adjusting the Heat and Meat

Plain diced tomatoes and mild taco seasoning keep the base gentler. Add jalapeño rounds to individual portions, or offer them alongside hot sauce at the table. Add the cilantro just before serving.

Lean ground turkey or chicken can replace the beef in the same amount; cook it until browned and no longer pink.

Storing and Reheating Leftovers

Cool leftovers and refrigerate in an airtight container for up to 4 days. The pasta absorbs sauce as it sits, so add a small splash of broth when reheating. Microwave individual portions in short intervals, stirring between them, or warm a larger batch gently on the stovetop.

For another taco-seasoned beef dinner, try Ground Beef Taco Casserole with Tortilla Chips. For a baked beef-and-pasta dinner, see Million Dollar Spaghetti Casserole with Beef.

Nutrition (Approximate)

Per serving (1/6 of the recipe): about 560 calories, 33g protein, 21g fat, and 50g carbohydrates. Per 100g: about 180 calories, 11g protein, 7g fat, and 16g carbohydrates. Values vary with the beef, cottage cheese, shredded cheese, taco seasoning, and finished portion size.

High-Protein Taco Pasta

Short pasta shells and ground beef are tossed in a creamy tomato-taco sauce with cottage cheese, cheddar, jalapeño, and cilantro.
Course: Main Course
Cuisine: Mexican
Prep: 15 min
Cook: 25 min
Total: 40 min
Servings: 6 Calories: about 560 kcal

Equipment

  • Large pot
  • 12-inch skillet
  • Colander
  • Blender

Ingredients

Pasta and Sauce

  • 12 ounces short pasta shells (340g)
  • Kosher salt, for the pasta water and final seasoning
  • 1 tablespoon olive oil
  • 1 pound lean ground beef (450g)
  • 1 small yellow onion, finely chopped (about 100g)
  • 2 garlic cloves, minced
  • 1-ounce packet mild taco seasoning, or about 2 tablespoons
  • 2 tablespoons tomato paste
  • 1 can (14.5 ounces) diced tomatoes, preferably no-salt-added, with juices
  • 1/2 cup low-sodium beef broth, plus more as needed
  • 1 cup cottage cheese (225g)

Toppings

  • 1 1/2 cups shredded cheddar or cheddar-Monterey Jack blend, divided (170g)
  • 1 small fresh jalapeño, thinly sliced, or to taste
  • 2 tablespoons chopped fresh cilantro

Instructions

  1. Bring a large pot of well-salted water to a boil. Cook the shells until just al dente, checking 1–2 minutes before the shortest package cooking time. Drain, reserving a little pasta water if desired.
  2. While the pasta cooks, heat a 12-inch skillet over medium-high heat. Add the oil and beef, breaking the meat into small crumbles. Cook for 5–7 minutes, until browned and no longer pink. Drain excess fat if more than a small amount collects.
  3. Reduce the heat to medium. Add the onion and cook for 3–4 minutes, until softened.
  4. Stir in the garlic, taco seasoning, and tomato paste. Cook briefly, until fragrant.
  5. Add the diced tomatoes and 1/2 cup broth, scraping up the browned bits. Simmer uncovered over medium-low to medium heat for 5–7 minutes, stirring occasionally, until slightly thickened but still loose enough to coat the pasta.
  6. Blend the cottage cheese until smooth. Remove the skillet from the heat and stir in the cottage cheese until evenly combined.
  7. Add the drained shells and 1 cup of the shredded cheese. Fold gently until coated. If the sauce seems stiff, add a splash of broth or reserved pasta water.
  8. Scatter the remaining cheese over the pasta. Cover and warm over low heat for 2–3 minutes, just until the cheese melts in soft patches.
  9. Top with jalapeño and cilantro. Let stand for about 2 minutes before serving.

Tips

  • Cook the shells just to al dente; they soften further in the warm sauce.
  • Blend the cottage cheese smooth and stir it in after removing the skillet from the heat.
  • Add broth or reserved pasta water a splash at a time if the sauce becomes too thick.
  • Serve jalapeño on the side so everyone can adjust the heat.

Variations

  • Turkey or Chicken Taco Pasta: Replace the ground beef with the same amount of lean ground turkey or chicken and cook until browned and no longer pink.
  • Gluten-Free Taco Pasta: Use gluten-free pasta shells and check them early, as they may soften quickly after being mixed into the sauce.

Notes

Refrigerate leftovers in an airtight container for up to 4 days. Add a splash of broth when reheating, and warm gently on the stovetop or microwave individual portions in short intervals, stirring between them.

Nutrition

Calories: about 560 kcal | Protein: 33 g | Fat: 21 g | Carbohydrates: 50 g

Cottage Cheese and Chickpea Salad

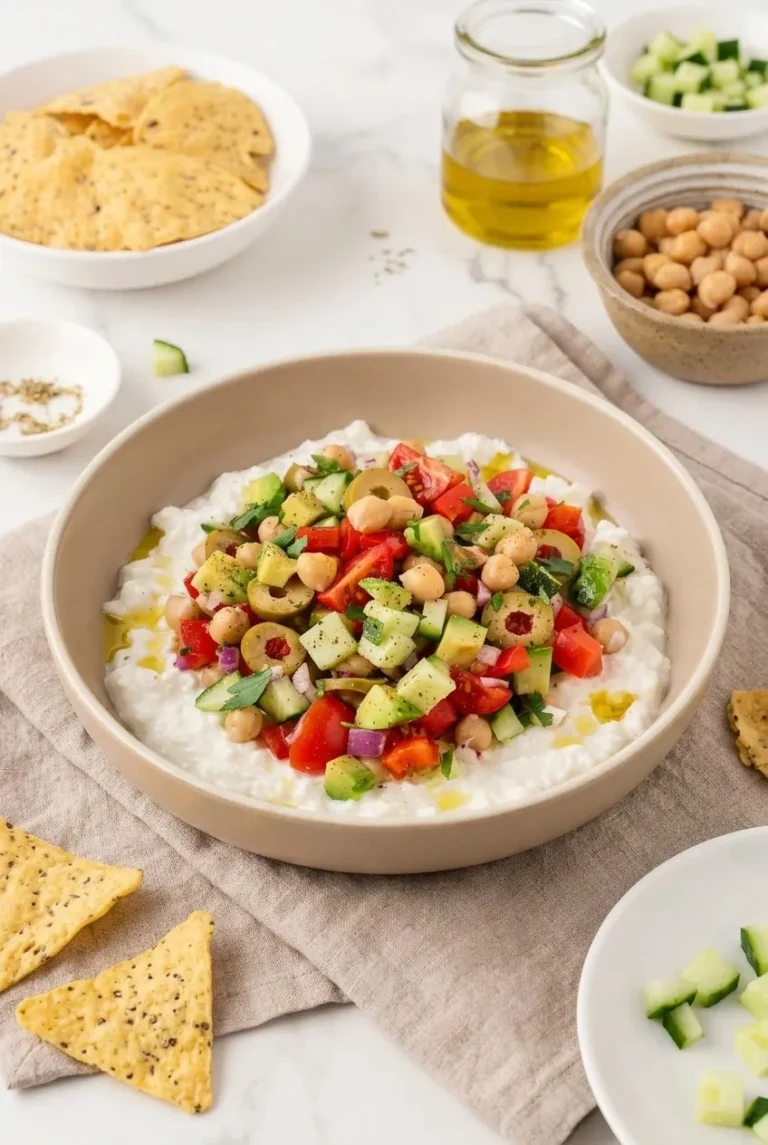
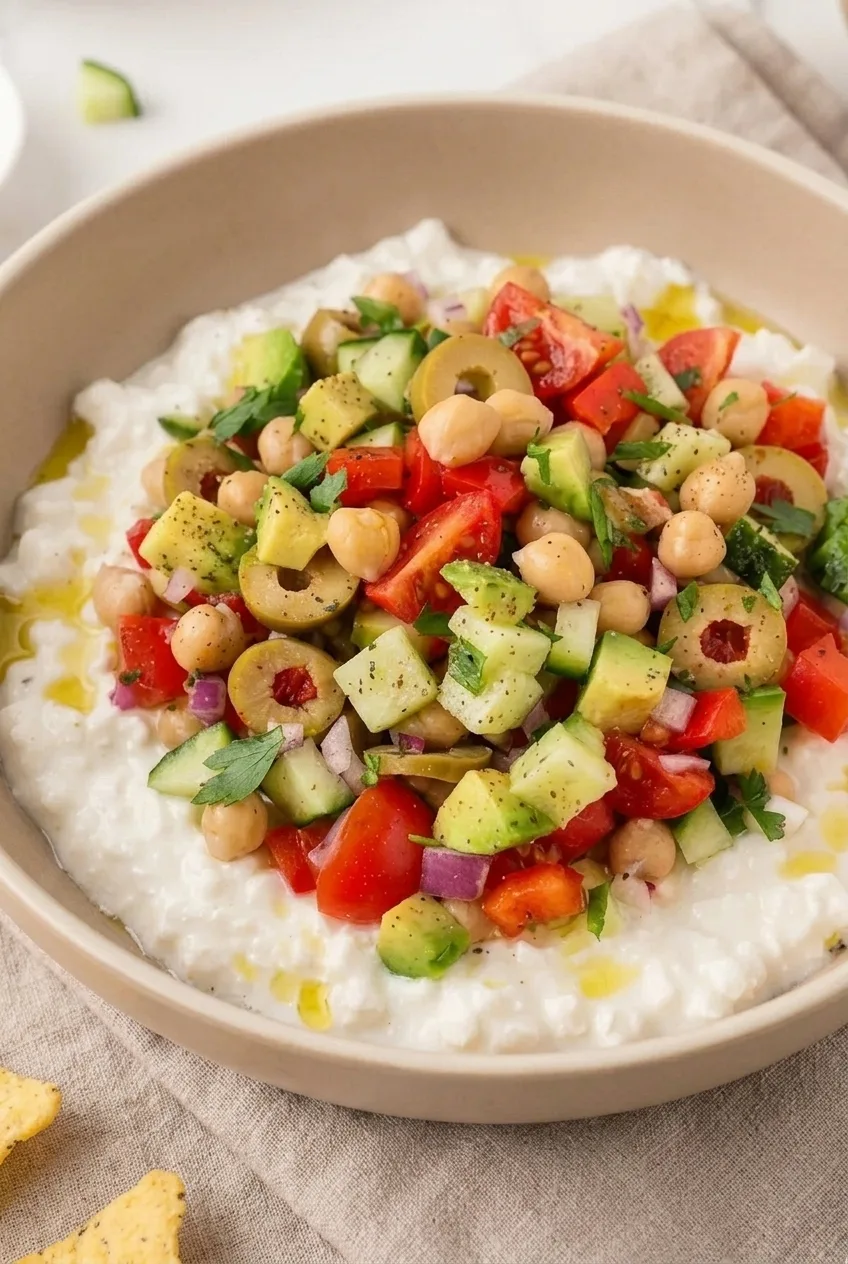
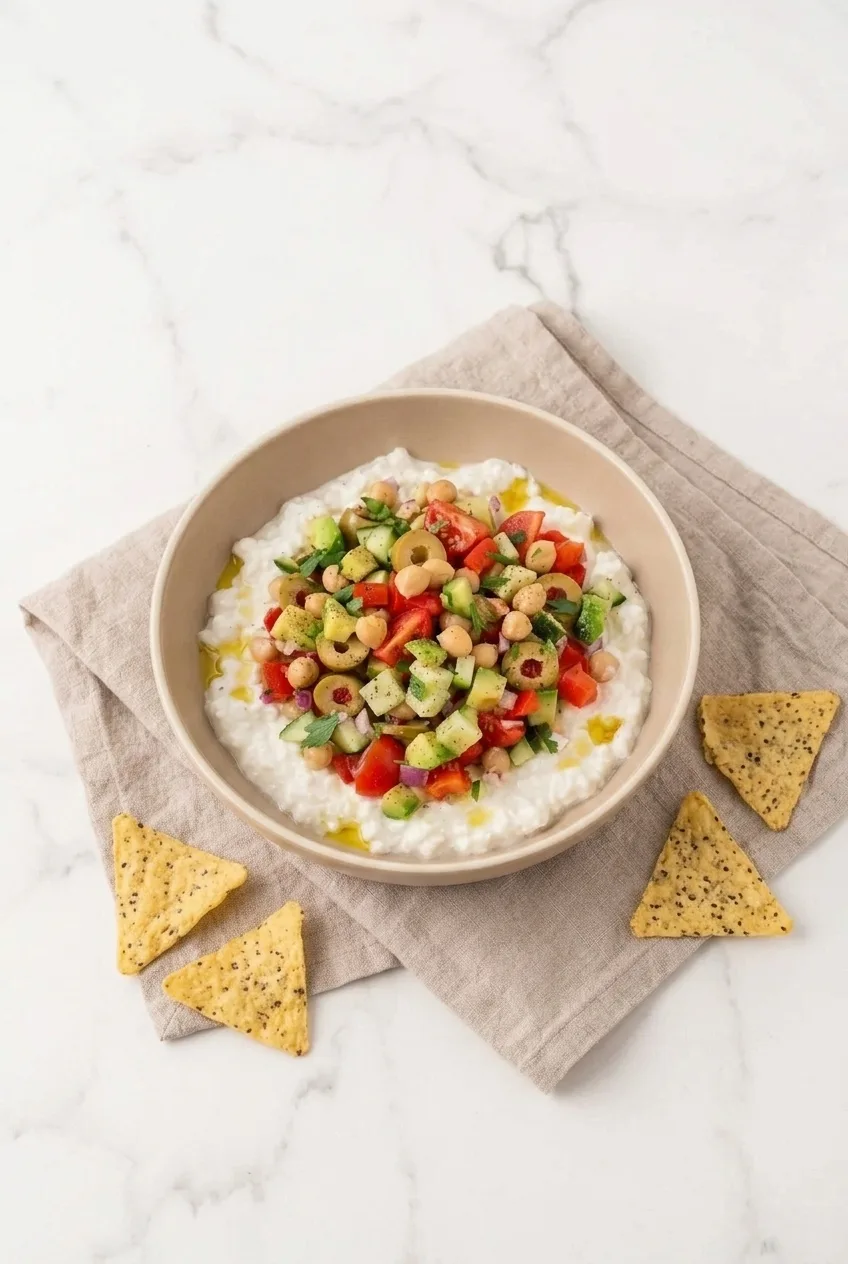
Curdy cottage cheese makes the base for a mound of chickpeas, crisp vegetables, avocado, and green olives. A little red wine vinegar and olive brine brighten the topping without soaking the cottage cheese. This cold, no-cook salad takes about 15 minutes to assemble and makes two generous meal portions or four smaller sides. Serve crackers or pita chips alongside for scooping.

Ingredients

Close view of chickpeas, cucumber, tomatoes, avocado, and olives over curdy cottage cheese.
  • 1 1/2 cups 2% or whole-milk cottage cheese (340g)
  • 1 cup canned chickpeas, drained and rinsed (165g)
  • 1 cup English cucumber, diced small (135g)
  • 1 cup cherry tomatoes, quartered (150g)
  • 1/2 cup red bell pepper, diced small (75g)
  • 1/4 cup red onion, finely diced (35g)
  • 1/2 medium ripe avocado, diced (75g)
  • 1/3 cup green olives, sliced (50g)
  • 1 tablespoon extra-virgin olive oil, plus a little for finishing
  • 2 teaspoons red wine vinegar
  • 1 teaspoon olive brine
  • 2 tablespoons chopped fresh parsley
  • 1/4 teaspoon dried oregano
  • 1/4 teaspoon kosher salt, or to taste
  • 1/8 teaspoon black pepper, plus more to finish
  • Seeded crackers or pita chips, for serving (optional)

How to Make Cottage Cheese and Chickpea Salad

A full bowl of cottage cheese and chickpea salad with seeded crackers beside it on a light surface.
  1. Drain and chop: Let the rinsed chickpeas drain until they are no longer dripping. Cut the vegetables and avocado into small, recognizable pieces, slice the olives, and chop the parsley.
  2. Mix the dressing: Stir together the tablespoon of olive oil, red wine vinegar, olive brine, oregano, salt, and pepper in a small bowl.
  3. Dress the topping: Combine the chickpeas, cucumber, tomatoes, bell pepper, red onion, avocado, olives, and parsley. Add the dressing and toss gently, keeping the avocado pieces intact. The topping should be lightly coated, with no dressing pooling in the bowl. Taste and adjust the vinegar, salt, or pepper if needed; the olives and brine are already salty.
  4. Build the bowl: Spread the cottage cheese across the bottom of a shallow serving bowl. Spoon the topping into a mound in the center, leaving cottage cheese visible around it. Do not stir the topping into the cottage cheese.
  5. Finish and serve: Add a light drizzle of olive oil and a little more black pepper. Serve cool, with crackers or pita chips on the side.

Ingredient and Texture Notes

Two-percent or whole-milk cottage cheese usually makes a richer, thicker base. Nonfat cottage cheese works, but it may spread more loosely. The chickpeas stay soft in this no-cook salad; they do not need to be roasted.

For a milder bowl, omit the red onion. Fresh pita or bread also works in place of crackers. For a pasta-based salad with chickpeas and a different herb profile, try Lemon Basil Parmesan Pasta Salad.

Make-Ahead and Storage

For advance prep, refrigerate the cottage cheese, chopped vegetables and chickpeas, and dressing in separate covered containers. Cut the avocado close to serving time, then dress the topping and assemble the bowl. Once combined, the cucumber and tomatoes release moisture, so the assembled salad is best served promptly. Keep crackers separate so they stay crisp.

Nutrition

Approximate nutrition per generous meal portion, based on 2 portions and excluding crackers: 475 calories, 29g protein, 22g fat, and 42g carbohydrates. Per 100g: about 90 calories, 6g protein, 4g fat, and 8g carbohydrates. Values vary with the cottage cheese, olives, and amount of finishing oil used.

Cottage Cheese and Chickpea Salad

A cold salad of cottage cheese topped with chickpeas, crisp vegetables, avocado, and olives dressed with red wine vinegar and olive brine.
Course: Salad
Cuisine: Mediterranean
Prep: 15 min
Total: 15 min
Servings: 2 Calories: 475 kcal

Equipment

  • Cutting board
  • Chef's knife
  • Small bowl
  • Shallow serving bowl

Ingredients

For the Salad

  • 1 1/2 cups 2% or whole-milk cottage cheese (340g)
  • 1 cup canned chickpeas, drained and rinsed (165g)
  • 1 cup English cucumber, diced small (135g)
  • 1 cup cherry tomatoes, quartered (150g)
  • 1/2 cup red bell pepper, diced small (75g)
  • 1/4 cup red onion, finely diced (35g)
  • 1/2 medium ripe avocado, diced (75g)
  • 1/3 cup green olives, sliced (50g)
  • 2 tablespoons chopped fresh parsley

For the Dressing and Finish

  • 1 tablespoon extra-virgin olive oil, plus a little for finishing
  • 2 teaspoons red wine vinegar
  • 1 teaspoon olive brine
  • 1/4 teaspoon dried oregano
  • 1/4 teaspoon kosher salt, or to taste
  • 1/8 teaspoon black pepper, plus more to finish

For Serving

  • Seeded crackers or pita chips, optional

Instructions

  1. Let the rinsed chickpeas drain until they are no longer dripping.
  2. Dice the vegetables and avocado, slice the olives, and chop the parsley.
  3. In a small bowl, stir together the olive oil, red wine vinegar, olive brine, oregano, salt, and pepper.
  4. Combine the chickpeas, cucumber, tomatoes, bell pepper, red onion, avocado, olives, and parsley. Add the dressing and toss gently to keep the avocado intact.
  5. Taste the topping and adjust the vinegar, salt, or pepper if needed.
  6. Spread the cottage cheese across the bottom of a shallow serving bowl. Spoon the topping into a mound in the center without stirring it into the cottage cheese.
  7. Finish with a light drizzle of olive oil and more black pepper. Serve cool with crackers or pita chips, if desired.

Tips

  • Drain the chickpeas until they are no longer dripping so the topping stays lightly dressed.
  • Toss gently after adding the avocado to keep the pieces intact.
  • Taste before adding more salt; the olives and olive brine are already salty.
  • Use 2% or whole-milk cottage cheese for a richer, thicker base.

Variations

  • Milder Salad: Omit the red onion for a milder bowl.
  • Bread or Pita Serving: Serve with fresh pita or bread instead of crackers.

Notes

For advance prep, refrigerate the cottage cheese, chopped vegetables and chickpeas, and dressing separately. Cut the avocado close to serving time and assemble just before eating; the combined salad is best served promptly. Keep crackers separate to maintain their crispness.

Nutrition

Calories: 475 kcal | Protein: 29 g | Fat: 22 g | Carbohydrates: 42 g | Per 100g: About 90 calories, 6 g protein, 4 g fat, and 8 g carbohydrates

High-Protein Chicken Enchilada Bowls

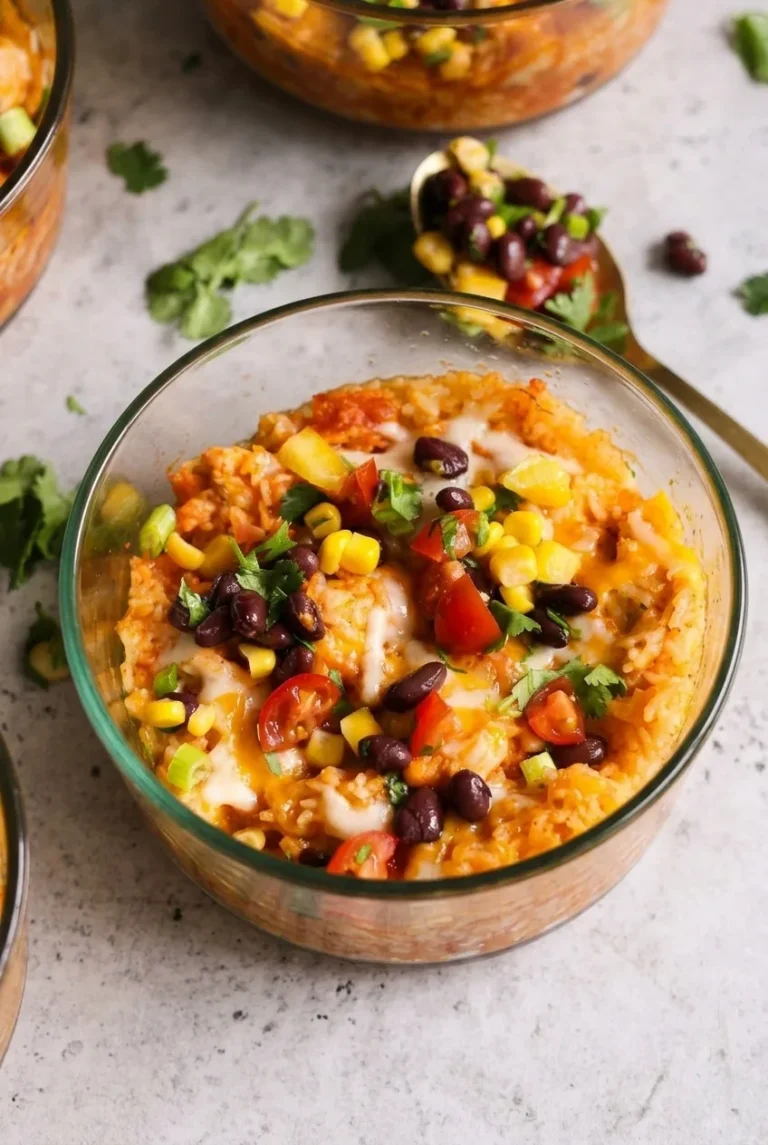
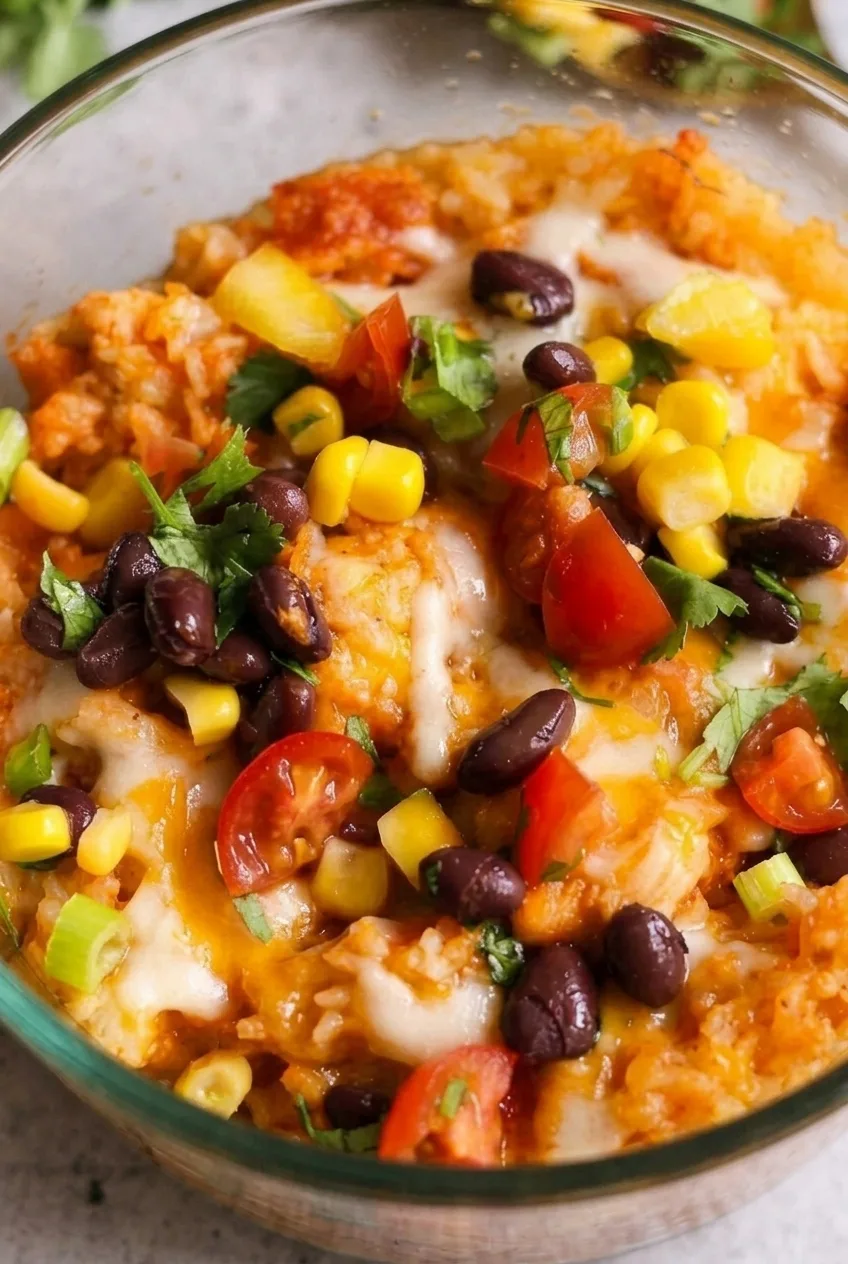
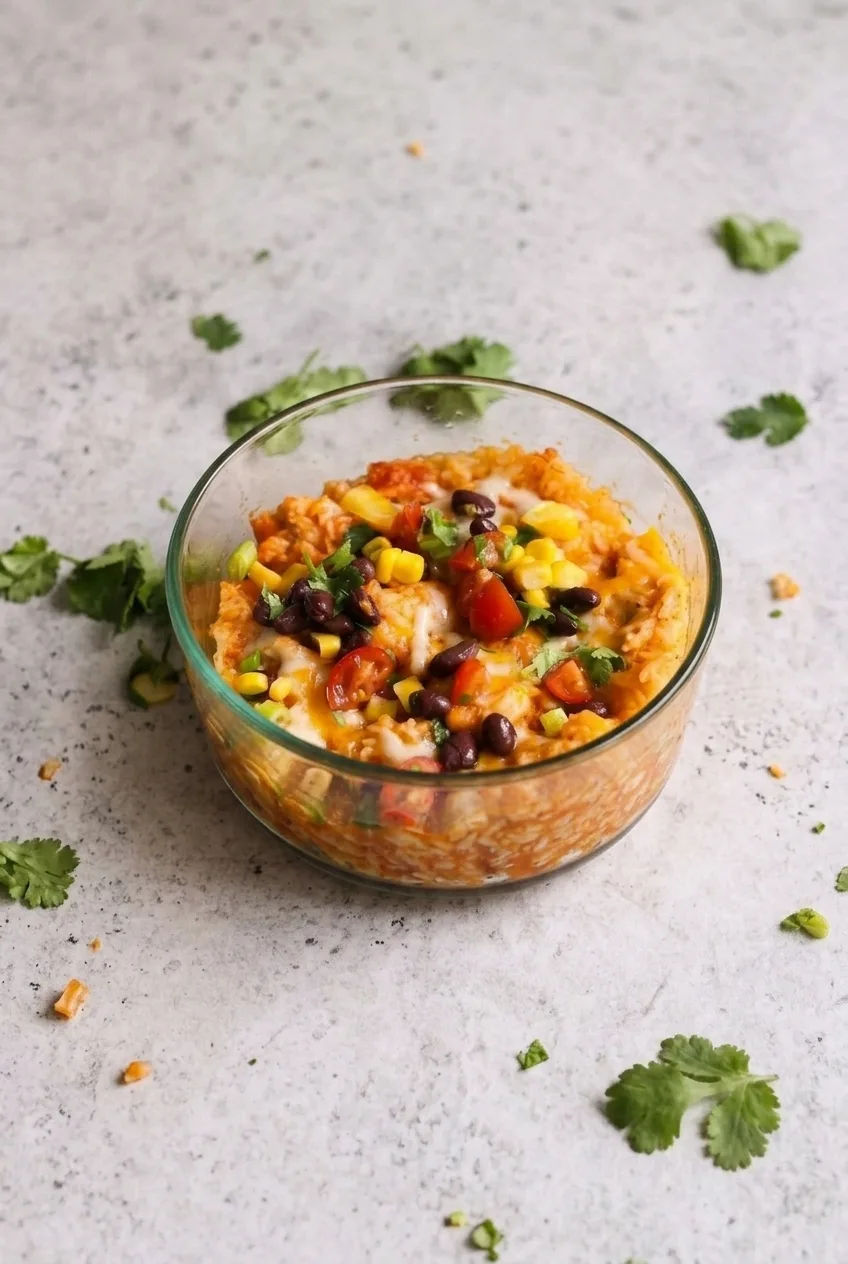
These bowls start with orange-red enchilada rice and sauce-coated chicken, then get patches of melted Monterey Jack and a generous layer of black beans, corn, tomatoes, scallions, and cilantro. Cook the rice separately so the grains stay tender and distinct. The chicken cooks in a skillet before a brief simmer in red enchilada sauce; the fresh toppings go on last so they stay crisp and visible.

Ingredients for Chicken Enchilada Bowls

Close-up of chicken enchilada bowl showing saucy rice, tender chicken, melted cheese, black beans, corn, and fresh toppings
  • 1 cup dry long-grain white rice (about 185g)
  • 1 1/2 pounds boneless, skinless chicken breasts (about 680g)
  • 1/2 teaspoon kosher salt, adjusted to the saltiness of the sauce
  • 1 teaspoon ground cumin
  • 1 tablespoon olive oil
  • 1 cup red enchilada sauce (about 240g), plus a little more if needed
  • 1 can black beans (15 ounces; about 425g), drained and rinsed
  • 1 cup corn kernels (about 165g), drained if canned
  • 1 cup shredded Monterey Jack cheese (about 110g)
  • 1 cup quartered cherry tomatoes (about 150g)
  • 2 scallions, thinly sliced
  • 1/4 cup loosely packed chopped fresh cilantro

Optional for serving: lime wedges, plain Greek yogurt or sour cream, and jalapeño or hot sauce.

How to Make Chicken Enchilada Bowls

A complete chicken enchilada bowl centered on a light stone surface, topped with beans, corn, tomatoes, scallions, and cilantro
  1. Cook the rice: Cook the rice in a medium saucepan according to the package directions. Let it stand covered briefly, then fluff with a fork. It should be tender, with separate grains and no standing water.
  2. Sear the chicken: Pat the chicken dry and season with the salt and cumin. Heat a large skillet over medium-high heat, then add the oil. Cook the chicken without crowding the pan, working in batches if needed, for about 5 to 7 minutes per side, turning once. Begin checking after about 10 minutes; the thickest part should reach 165°F (75°C).
  3. Coat with sauce: Reserve a little of the measured enchilada sauce for the rice. Reduce the skillet heat to medium-low and add the remaining sauce, turning the chicken to coat. Simmer gently for about 5 minutes, covering if needed to retain moisture. Avoid a hard boil; the sauce should cling to the chicken rather than pool thinly in the pan. Rest the chicken for 3 to 5 minutes, then shred or cut it into bite-sized pieces and return it to the sauce.
  4. Prepare the toppings: While the rice and chicken cook, drain and rinse the beans, drain the corn if needed, quarter the tomatoes, slice the scallions, and chop the cilantro.
  5. Assemble the warm base: Toss the cooked rice with the reserved sauce, adding a little more if needed to lightly coat the grains orange-red without making them wet. Divide among four bowls and add the saucy chicken. Sprinkle with Monterey Jack. Cover the hot bowls briefly or microwave in short intervals, just until the cheese melts in soft patches.
  6. Finish the bowls: Scatter the black beans, corn, tomatoes, scallions, and cilantro over the surface rather than burying them under the sauce. Serve with optional toppings on the side.

Why Cook the Rice Separately?

Rice cooked according to its package directions has a more predictable texture than rice cooked in an unmeasured amount of enchilada sauce. Coat the cooked grains lightly for color and flavor, but keep most of the sauce with the chicken. Well-drained beans and corn also help keep the finished bowls from turning watery.

Easy Swaps

  • Rotisserie chicken: Skip the raw-chicken searing step. Shred or cut the cooked chicken and warm it in enchilada sauce before assembling the bowls.
  • Beans and cheese: Pinto beans can replace black beans, though black beans give the pictured bowls their dark contrast. Cheddar or a Mexican-style melting blend can replace Monterey Jack.
  • Rice or corn: Brown rice can replace white rice; follow its package directions for liquid and cooking time. Thaw and drain frozen corn, or cook fresh corn before adding it.

For the same red-sauce flavor in a baked dish, try Chicken Enchilada Casserole with Red Sauce. Another cheesy chicken dinner is King Ranch Chicken Casserole.

Meal Prep, Storage, and Reheating

Refrigerate the cooked rice and sauce-coated chicken in airtight containers for 3 to 4 days. Keep the tomatoes, scallions, and cilantro separate, and add them only after reheating so they stay fresh.

Microwave the rice and chicken until hot. Add the cheese and heat briefly until melted, then finish with the beans, corn, and fresh toppings. Chicken and sauce can be frozen separately for up to about 3 months; thaw overnight in the refrigerator. Freezing fully assembled bowls is less certain, so prepare fresh rice and toppings for better texture.

Nutrition

Approximate nutrition per bowl, based on 4 servings and an estimated serving weight of about 550g: 680 calories, 57g protein, 19g fat, and 70g carbohydrates. Approximate nutrition per 100g: 125 calories, 10g protein, 3g fat, and 13g carbohydrates. Values vary with the sauce, canned ingredients, cheese, and optional toppings used.

High-Protein Chicken Enchilada Bowls

Separate rice and sauce-coated chicken are served with melted Monterey Jack, black beans, corn, and fresh toppings.
Course: Main Course
Cuisine: Mexican
Prep: 15 min
Cook: 30 min
Total: 45 min
Servings: 4 Calories: 680 kcal per serving; 125 kcal per 100 g

Equipment

  • Medium saucepan
  • Large skillet
  • Cutting board
  • Chef's knife
  • Meat thermometer

Ingredients

Rice and Chicken

  • 1 cup dry long-grain white rice (about 185 g)
  • 1 1/2 pounds boneless, skinless chicken breasts (about 680 g)
  • 1/2 teaspoon kosher salt, adjusted to the saltiness of the sauce
  • 1 teaspoon ground cumin
  • 1 tablespoon olive oil
  • 1 cup red enchilada sauce (about 240 g), plus a little more if needed

Toppings

  • 1 can black beans (15 ounces; about 425 g), drained and rinsed
  • 1 cup corn kernels (about 165 g), drained if canned
  • 1 cup shredded Monterey Jack cheese (about 110 g)
  • 1 cup quartered cherry tomatoes (about 150 g)
  • 2 scallions, thinly sliced
  • 1/4 cup loosely packed chopped fresh cilantro

Optional for Serving

  • Lime wedges
  • Plain Greek yogurt or sour cream
  • Jalapeño or hot sauce

Instructions

  1. Cook the rice in a medium saucepan according to the package directions. Let it stand covered briefly, then fluff with a fork.
  2. Pat the chicken dry and season it with the salt and cumin.
  3. Heat a large skillet over medium-high heat and add the olive oil. Cook the chicken without crowding the pan, working in batches if needed, for about 5 to 7 minutes per side, turning once. Begin checking after about 10 minutes; the thickest part should reach 165°F (75°C).
  4. Reserve a little of the measured enchilada sauce for the rice. Reduce the skillet heat to medium-low and add the remaining sauce, turning the chicken to coat.
  5. Simmer gently for about 5 minutes, covering the skillet if needed to retain moisture. Avoid a hard boil. Rest the chicken for 3 to 5 minutes, then shred or cut it into bite-sized pieces and return it to the sauce.
  6. While the rice and chicken cook, drain and rinse the beans, drain the corn if needed, quarter the tomatoes, slice the scallions, and chop the cilantro.
  7. Toss the cooked rice with the reserved sauce, adding a little more if needed to lightly coat the grains without making them wet.
  8. Divide the rice among four bowls and add the saucy chicken. Sprinkle with Monterey Jack, then cover briefly or microwave in short intervals until the cheese melts.
  9. Top with the black beans, corn, tomatoes, scallions, and cilantro. Serve with optional toppings on the side.

Tips

  • Cook the rice according to its package directions so the grains stay tender and distinct.
  • Keep most of the enchilada sauce with the chicken and lightly coat the rice with the reserved sauce.
  • Avoid boiling the sauce hard; simmer gently so it clings to the chicken.
  • Drain the beans and corn well to help prevent watery bowls.
  • Add fresh toppings after heating to keep them crisp and fresh.

Variations

  • Rotisserie Chicken: Skip searing raw chicken; shred or cut cooked chicken and warm it in enchilada sauce.
  • Pinto Bean or Cheddar Bowls: Replace the black beans with pinto beans, or use cheddar or a Mexican-style melting blend instead of Monterey Jack.
  • Brown Rice or Alternative Corn: Use brown rice according to its package directions, or add thawed and drained frozen corn or cooked fresh corn.

Notes

Refrigerate rice and sauce-coated chicken in airtight containers for 3 to 4 days; store fresh toppings separately. Reheat the rice and chicken until hot, then add cheese and fresh toppings. Chicken and sauce can be frozen separately for up to about 3 months. Chicken should reach 165°F (75°C).

Nutrition

Calories: 680 kcal per serving; 125 kcal per 100 g | Protein: 57 g per serving; 10 g per 100 g | Fat: 19 g per serving; 3 g per 100 g | Carbohydrates: 70 g per serving; 13 g per 100 g

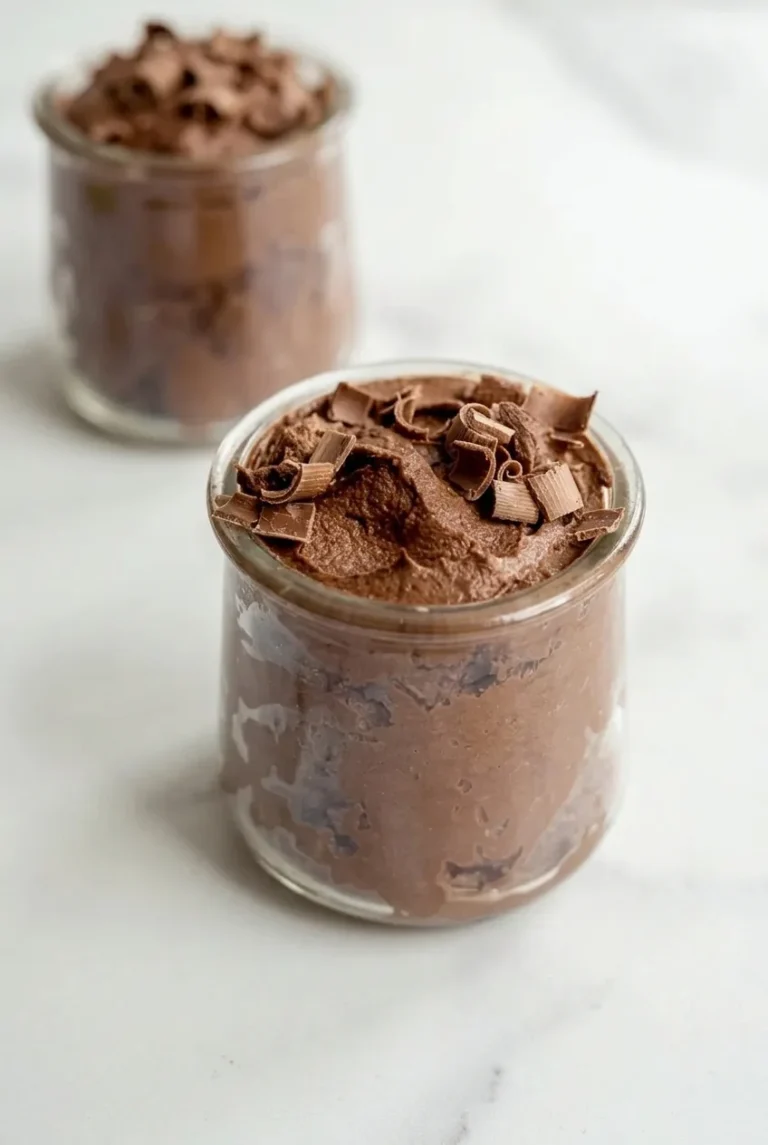
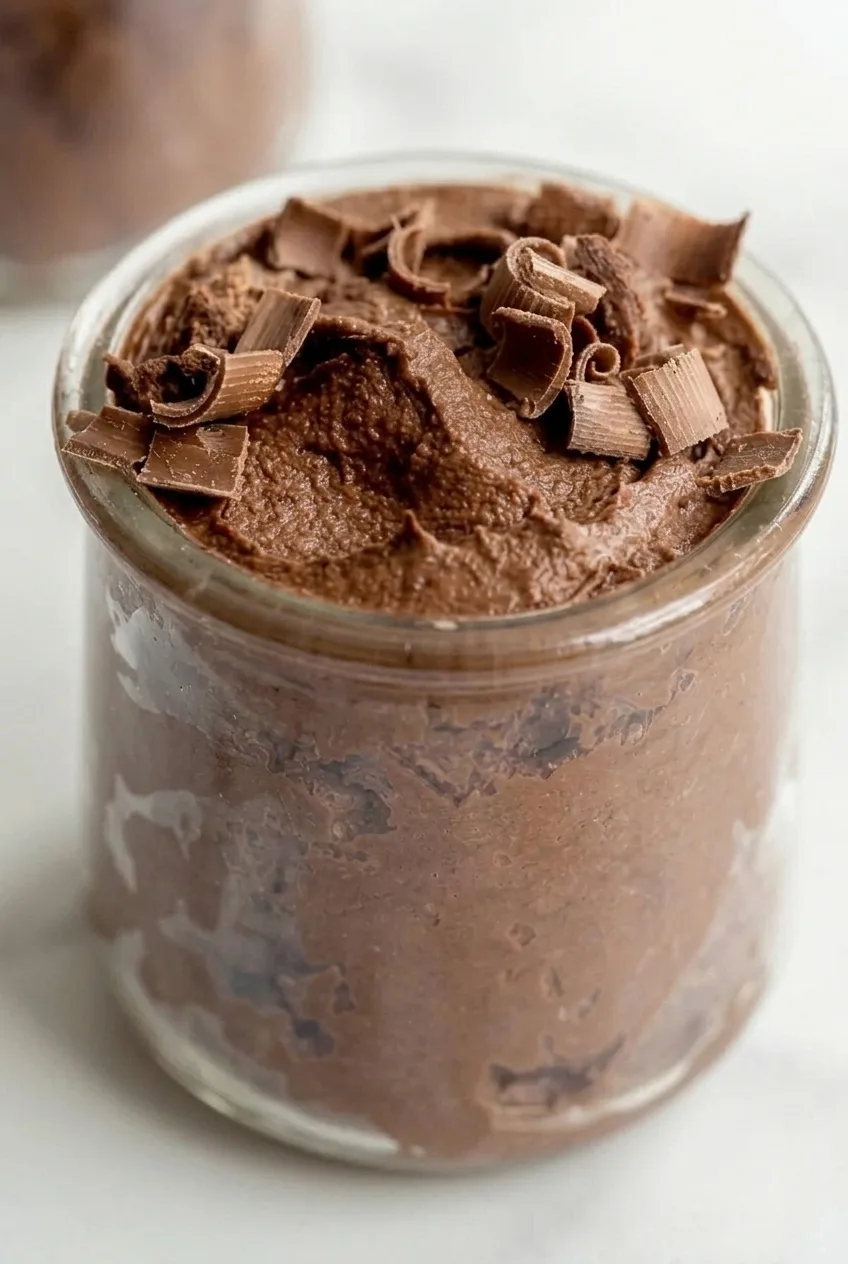
High-Protein Chocolate Pudding with Greek Yogurt

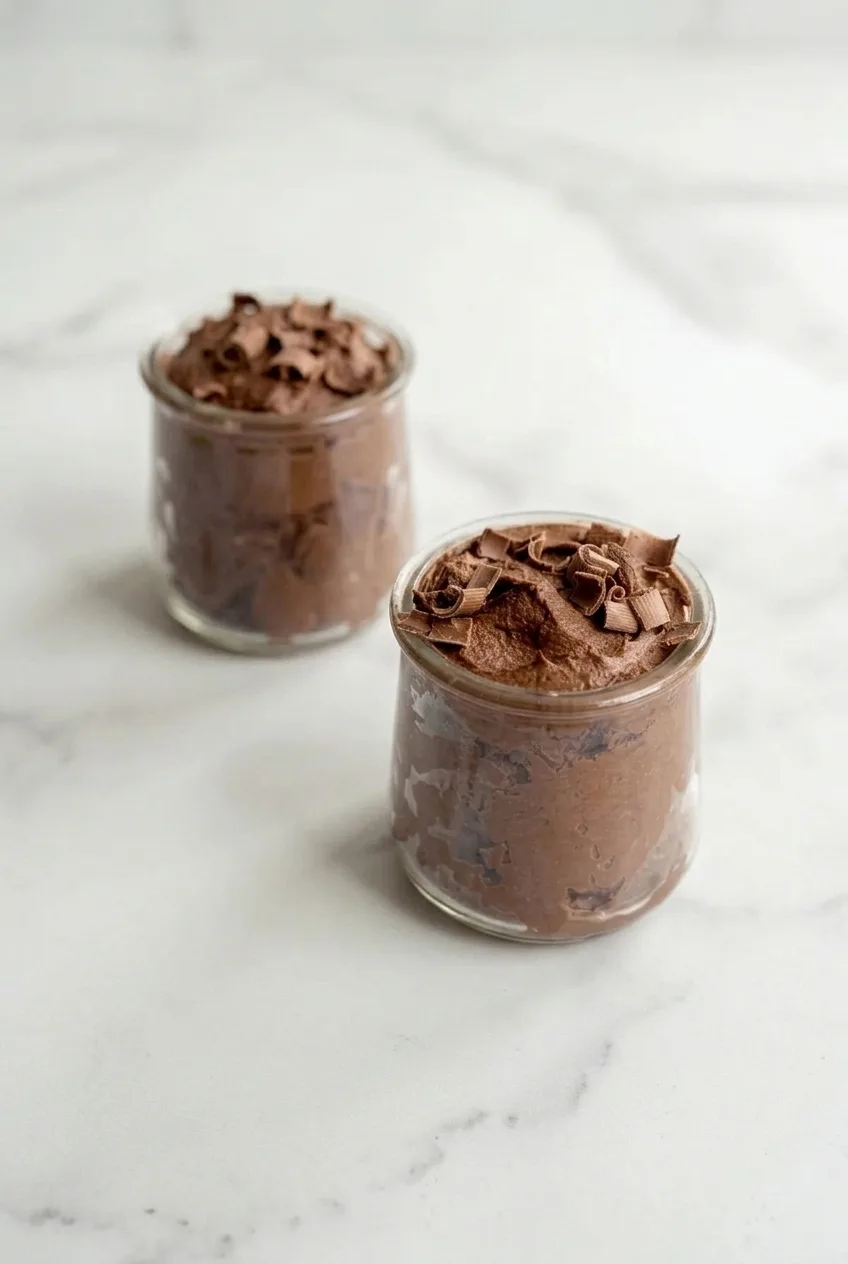
Greek yogurt, cocoa, and chocolate protein powder make a thick, no-cook pudding that holds a soft mound in a serving glass. The key is to whisk out the powder pockets before adding any milk: different yogurts and protein powders can produce very different thicknesses. Make two individual portions, serve them right away for a softer texture, or chill them briefly before finishing each glass with chocolate curls.

Ingredients for Chocolate Greek Yogurt Pudding

Close view of spoonable chocolate Greek yogurt pudding and curled chocolate shavings on its softly textured surface.
  • 1 cup plain Greek yogurt, preferably thick (225g)
  • 1 scoop chocolate protein powder, about 1 ounce (30g)
  • 2 tablespoons unsweetened cocoa powder (10g)
  • 1 tablespoon maple syrup (20g), plus more to taste
  • 1/2 teaspoon vanilla extract
  • Small pinch of fine salt
  • 1 tablespoon milk, plus up to 2 tablespoons more if needed
  • Chocolate bar, for about 2 tablespoons curls or shavings (15g)

Have two small, clear jars or straight-sided glasses ready for serving. The milk is only for adjusting the texture; you may not need any.

How to Make Chocolate Protein Pudding

Two clear glasses of thick chocolate Greek yogurt pudding with chocolate curls, shown together on a pale countertop.
  1. Combine the dry ingredients: In a medium bowl, whisk the protein powder, cocoa powder, and salt until no large cocoa clumps remain.
  2. Whisk the pudding: Add the Greek yogurt, vanilla, and some of the maple syrup. Whisk for 1 to 2 minutes, scraping the bowl, until the pudding is evenly chocolate-colored with no dry pockets.
  3. Check the texture and taste: If the pudding is too stiff to whisk or spoon smoothly, add milk a teaspoon at a time, using only as much as needed. It should be thick enough to mound on a spoon, not pour like sauce. Taste and add the remaining maple syrup or a little more if needed.
  4. Portion and optionally chill: Spoon into the two clear glasses, filling them nearly to the rim with softly mounded tops. Serve immediately for a softer pudding, or cover and refrigerate for 20 to 30 minutes for a thicker finish.
  5. Finish with chocolate: Just before serving, use a vegetable peeler or small knife to shave curls from the chocolate bar. Scatter them over each glass.

How to Keep the Pudding Thick and Spoonable

Whisk the pudding thoroughly before deciding it needs milk. Add liquid only if it is too stiff, and add it by the teaspoon; a large pour can make the pudding runny. If it seems loose, chill it for 20 to 30 minutes and check the texture again.

Protein powders vary in sweetness, chocolate flavor, and how much liquid they absorb. Use one whose flavor you enjoy, and taste the mixed pudding before adding more maple syrup. Vanilla or unflavored protein powder can work, but the chocolate flavor will be milder; adjust the cocoa and sweetener to taste.

Make Ahead and Store

Cover and refrigerate the pudding for up to three days. If making it ahead, stir gently if it settles, then add the chocolate curls just before serving so they remain distinct on top.

For another chilled dessert, try these Oreo Pudding Cups. For a different no-bake chocolate dessert, see this No-Bake Chocolate Tart.

Nutrition

Approximate nutrition per serving, based on half the recipe with 1 tablespoon of milk and the chocolate topping, using plain nonfat Greek yogurt and a typical chocolate protein powder: 210 calories, 25g protein, 5g fat, and 20g carbohydrates. Approximate nutrition per 100g: 130 calories, 16g protein, 3g fat, and 13g carbohydrates. Values vary with the yogurt, protein powder, milk, and chocolate used.

High-Protein Chocolate Pudding with Greek Yogurt

A thick, no-cook chocolate pudding made with Greek yogurt, cocoa, and chocolate protein powder.
Course: Dessert
Cuisine: Global
Prep: 10 min
Total: 40 min
Servings: 2 Calories: 210 kcal

Equipment

  • Medium bowl
  • Whisk
  • Two small glasses or jars
  • Vegetable peeler or small knife

Ingredients

  • 1 cup plain Greek yogurt, preferably thick (225 g)
  • 1 scoop chocolate protein powder, about 1 ounce (30 g)
  • 2 tablespoons unsweetened cocoa powder (10 g)
  • 1 tablespoon maple syrup (20 g), plus more to taste
  • 1/2 teaspoon vanilla extract
  • Small pinch fine salt
  • 1 tablespoon milk, plus up to 2 tablespoons more if needed
  • Chocolate bar, for about 2 tablespoons curls or shavings (15 g)

Instructions

  1. In a medium bowl, whisk the protein powder, cocoa powder, and salt until no large cocoa clumps remain.
  2. Add the Greek yogurt, vanilla, and some of the maple syrup. Whisk for 1 to 2 minutes, scraping the bowl, until evenly chocolate-colored with no dry pockets.
  3. If the pudding is too stiff to whisk or spoon smoothly, add milk a teaspoon at a time until it is thick enough to mound on a spoon.
  4. Taste the pudding and add the remaining maple syrup or a little more if needed.
  5. Spoon the pudding into two glasses, making softly mounded tops. Serve right away, or cover and refrigerate for 20 to 30 minutes for a thicker finish.
  6. Just before serving, shave curls from the chocolate bar and scatter them over the pudding.

Tips

  • Whisk thoroughly before deciding to add milk.
  • Add milk by the teaspoon to avoid making the pudding runny.
  • Taste before adding more maple syrup, since protein powders vary in sweetness.
  • If the pudding seems loose, chill it for 20 to 30 minutes and check the texture again.

Variations

  • Vanilla or Unflavored Protein Pudding: Use vanilla or unflavored protein powder for a milder chocolate flavor, adjusting the cocoa and sweetener to taste.

Notes

Cover and refrigerate for up to three days. Stir gently if the pudding settles, and add the chocolate curls just before serving.

Nutrition

Calories: 210 kcal | Protein: 25 g | Fat: 5 g | Carbohydrates: 20 g

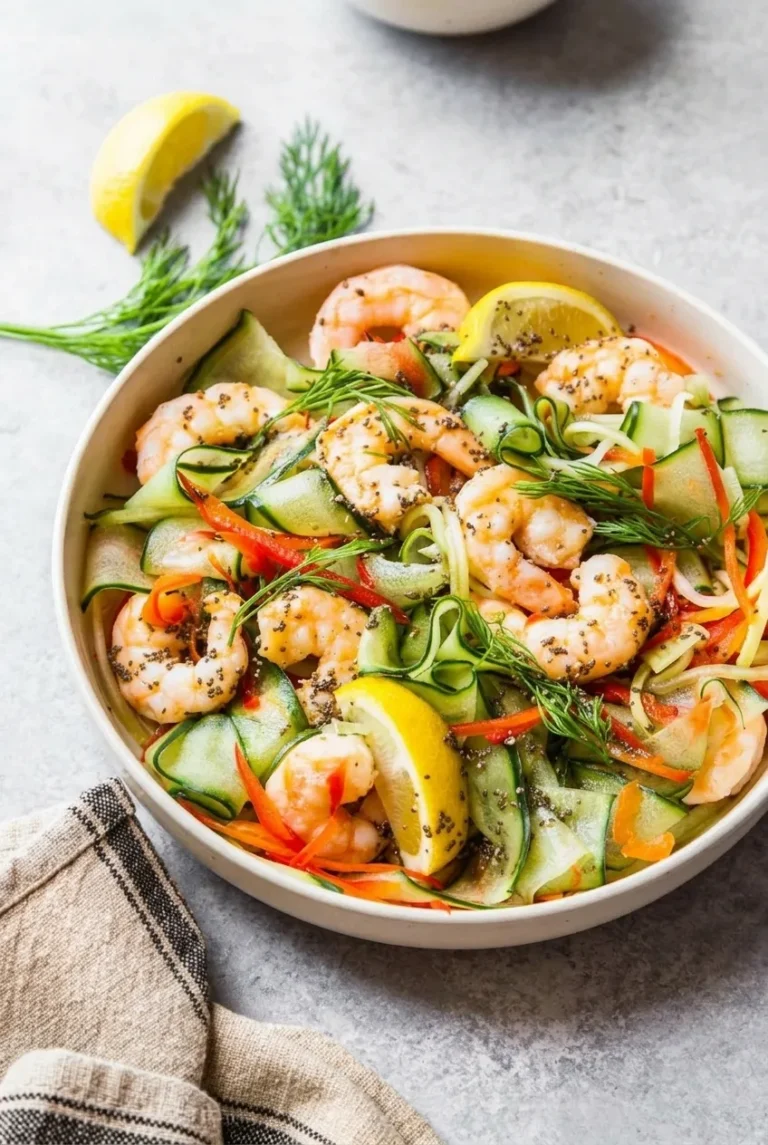
Cucumber Shrimp Salad

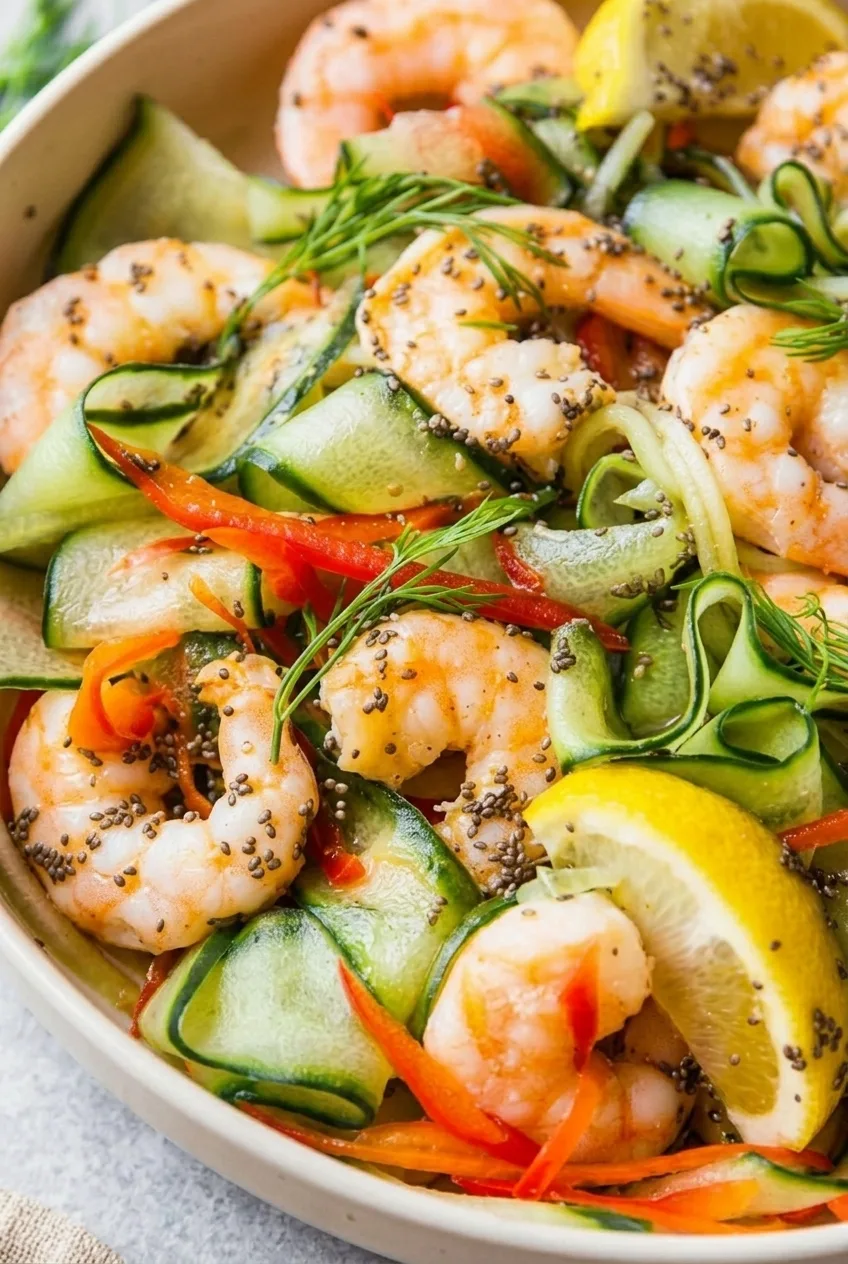
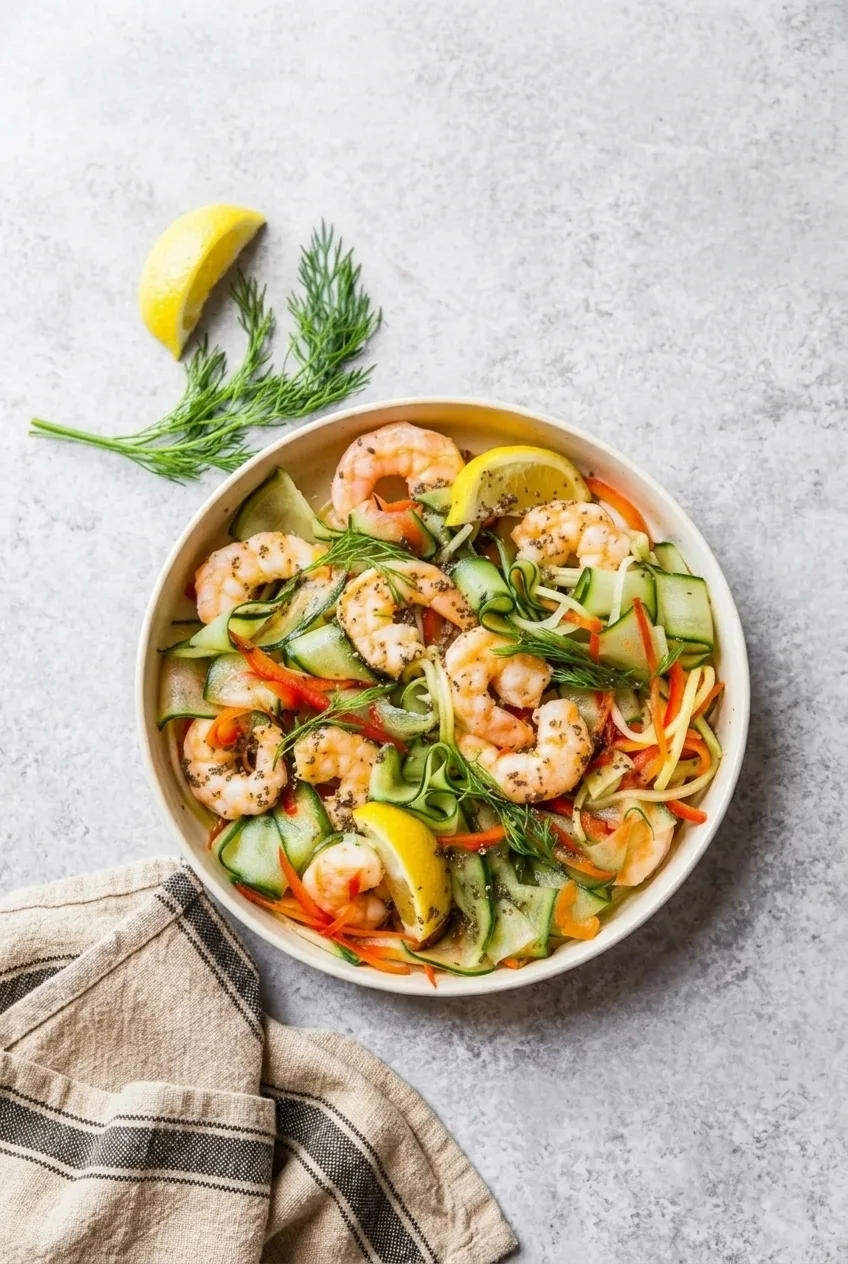
Wide cucumber ribbons curl around whole chilled shrimp, with thin red pepper and carrot strips tucked between them. A light lemon-sesame dressing carries chia seeds across the salad, while dill and lemon slices finish the bowl.

The key to keeping the ribbons distinct is to salt and dry them briefly, then fold them with cooled shrimp and dressing just before serving. Shrimp size affects simmering time, so check for doneness rather than relying on the clock alone.

Prep time: 20 minutes | Cook time: 3–4 minutes | Total time: About 35 minutes, including draining and cooling

Serves: 4 as a light main or 6 as a side

Ingredients for Cucumber Shrimp Salad

Close detail of cucumber shrimp salad showing chia-speckled dressing on whole shrimp and curled cucumber ribbons
  • 1 lb raw medium or large shrimp, peeled and deveined (450g)
  • Kosher salt, for the cooking water, plus 1/2 teaspoon for the cucumber
  • 1 large English cucumber, about 12 oz (340g)
  • 1/2 medium red bell pepper, thinly sliced (75g)
  • 1 small carrot, shaved or cut into thin strips (60g)
  • 2 tablespoons rice vinegar
  • 1 tablespoon fresh lemon juice
  • 1 tablespoon low-sodium soy sauce
  • 1 teaspoon honey
  • 1 teaspoon toasted sesame oil
  • 1 tablespoon chia seeds
  • 1/8 teaspoon black pepper, or to taste
  • 2 tablespoons chopped fresh dill, plus small fronds for garnish
  • 1 lemon, cut into thin slices, for serving

How to Make Cucumber Shrimp Salad

A full shallow bowl of cucumber shrimp salad with cucumber ribbons, whole shrimp, colorful strips, dill, and lemon
  1. Drain the cucumber: Use a vegetable peeler to shave the cucumber lengthwise into long, wide ribbons, stopping at the seedy center. Toss with 1/2 teaspoon kosher salt and drain in a colander for about 10 minutes. Gently pat dry with paper towels or a clean kitchen towel; do not squeeze the ribbons.
  2. Simmer and cool the shrimp: Bring enough lightly salted water to cover the shrimp to a boil in a medium saucepan. Reduce to a gentle simmer, add the shrimp in a loose layer, and cook uncovered, stirring once gently. Work in batches if needed. Start checking at 2 minutes; depending on size, they should take about 2–4 minutes. Drain when they are pink, opaque throughout, firm, and gently curled. Cool promptly under cold running water or in an ice bath, then drain and pat dry.
  3. Make the dressing: Whisk the rice vinegar, lemon juice, soy sauce, honey, sesame oil, chia seeds, and black pepper in a small bowl. Let stand for about 5 minutes, then whisk again to disperse the seeds. The dressing should still be pourable.
  4. Prepare the vegetables: Thinly slice the red pepper and shave or cut the carrot into narrow strips. Chop the dill, reserving a few small fronds.
  5. Assemble: Add the dried cucumber ribbons, cooled shrimp, pepper, carrot, and chopped dill to a large bowl. Pour in enough dressing to coat lightly and fold gently, keeping the ribbons loose and the shrimp whole. Transfer to a shallow serving bowl and finish with dill fronds and lemon slices. Serve chilled or cool.

How to Keep the Cucumber Ribbons from Getting Watery

Brief salting draws moisture from the cucumber; patting the ribbons dry keeps that liquid from diluting the dressing. English cucumber has a smaller seed cavity, but a regular cucumber also works if you leave behind its watery center. Dress the salad close to serving, since the ribbons will release more liquid as they sit.

Make-Ahead and Storage

Cook and chill the shrimp, prepare the dressing, and cut the vegetables ahead if needed, but refrigerate them separately. If using fully cooked shrimp, thaw and chill them, then skip the simmering step.

Refrigerate leftovers promptly in an airtight container and plan to eat them within about 1 day. Drain any liquid that collects before serving again. Serve cold or cool; reheating and freezing are not recommended for this cucumber-ribbon salad.

Serving

Serve in a shallow bowl with the shrimp and ribbons visible on top. Offer extra lemon at the table.

Nutrition

Approximate nutrition per serving, based on 4 servings: 165 calories, 27g protein, 4g fat, and 12g carbohydrates. Approximate nutrition per 100g: 65 calories, 10g protein, 2g fat, and 5g carbohydrates. Values may vary with ingredient brands, shrimp size, and the amount of dressing used.

Cucumber Shrimp Salad

Chilled shrimp and cucumber ribbons are tossed with red pepper, carrot, dill, and a light lemon-sesame dressing.
Course: Salad
Cuisine: Asian-inspired
Prep: 20 min
Cook: 4 min
Total: 35 min
Servings: 4 Calories: 165 kcal

Equipment

  • Vegetable peeler
  • Colander
  • Medium saucepan
  • Small bowl
  • Whisk
  • Large bowl

Ingredients

Salad

  • 1 lb raw medium or large shrimp, peeled and deveined (450 g)
  • Kosher salt, for the cooking water
  • 1 large English cucumber, about 12 oz (340 g)
  • 1/2 teaspoon kosher salt, for the cucumber
  • 1/2 medium red bell pepper, thinly sliced (75 g)
  • 1 small carrot, shaved or cut into thin strips (60 g)
  • 2 tablespoons chopped fresh dill, plus small fronds for garnish
  • 1 lemon, cut into thin slices, for serving

Dressing

  • 2 tablespoons rice vinegar
  • 1 tablespoon fresh lemon juice
  • 1 tablespoon low-sodium soy sauce
  • 1 teaspoon honey
  • 1 teaspoon toasted sesame oil
  • 1 tablespoon chia seeds
  • 1/8 teaspoon black pepper, or to taste

Instructions

  1. Shave the cucumber lengthwise into long, wide ribbons with a vegetable peeler, stopping at the seedy center.
  2. Toss the cucumber ribbons with 1/2 teaspoon kosher salt and drain in a colander for about 10 minutes. Pat dry gently without squeezing.
  3. Bring enough lightly salted water to cover the shrimp to a boil in a medium saucepan, then reduce to a gentle simmer.
  4. Add the shrimp in a loose layer and cook uncovered, stirring gently once. Start checking at 2 minutes; cook about 2–4 minutes, until pink, opaque throughout, firm, and gently curled. Work in batches if needed.
  5. Cool the shrimp promptly under cold running water or in an ice bath. Drain and pat dry.
  6. Whisk the rice vinegar, lemon juice, soy sauce, honey, sesame oil, chia seeds, and black pepper in a small bowl. Let stand for about 5 minutes, then whisk again.
  7. Add the cucumber, shrimp, red pepper, carrot, and chopped dill to a large bowl. Pour in enough dressing to coat lightly and fold gently.
  8. Transfer to a serving bowl and garnish with dill fronds and lemon slices. Serve chilled or cool.

Tips

  • Stop shaving the cucumber when you reach the watery seedy center.
  • Pat the salted cucumber ribbons dry gently; squeezing can damage them.
  • Check shrimp for doneness rather than relying only on the cooking time, since size affects how quickly they cook.
  • Let the chia dressing stand for about 5 minutes, then whisk again so the seeds disperse.
  • Dress the salad close to serving to help keep the cucumber ribbons from releasing excess liquid.

Variations

  • Fully Cooked Shrimp: Use thawed, chilled fully cooked shrimp and skip the simmering step.
  • Regular Cucumber: Use a regular cucumber, leaving behind its watery seedy center.

Notes

Refrigerate leftovers promptly in an airtight container and eat within about 1 day. Drain any collected liquid before serving again. Reheating and freezing are not recommended.

Nutrition

Calories: 165 kcal | Protein: 27 g | Fat: 4 g | Carbohydrates: 12 g

High-Protein Honey Garlic Shrimp

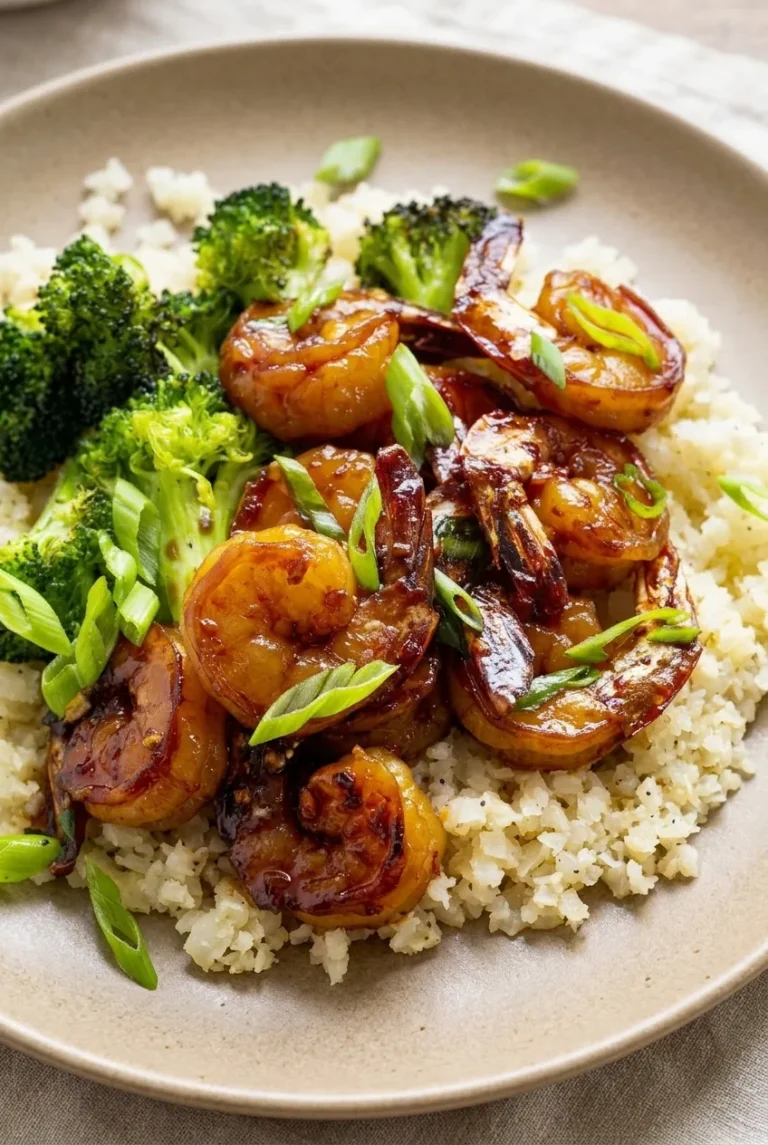
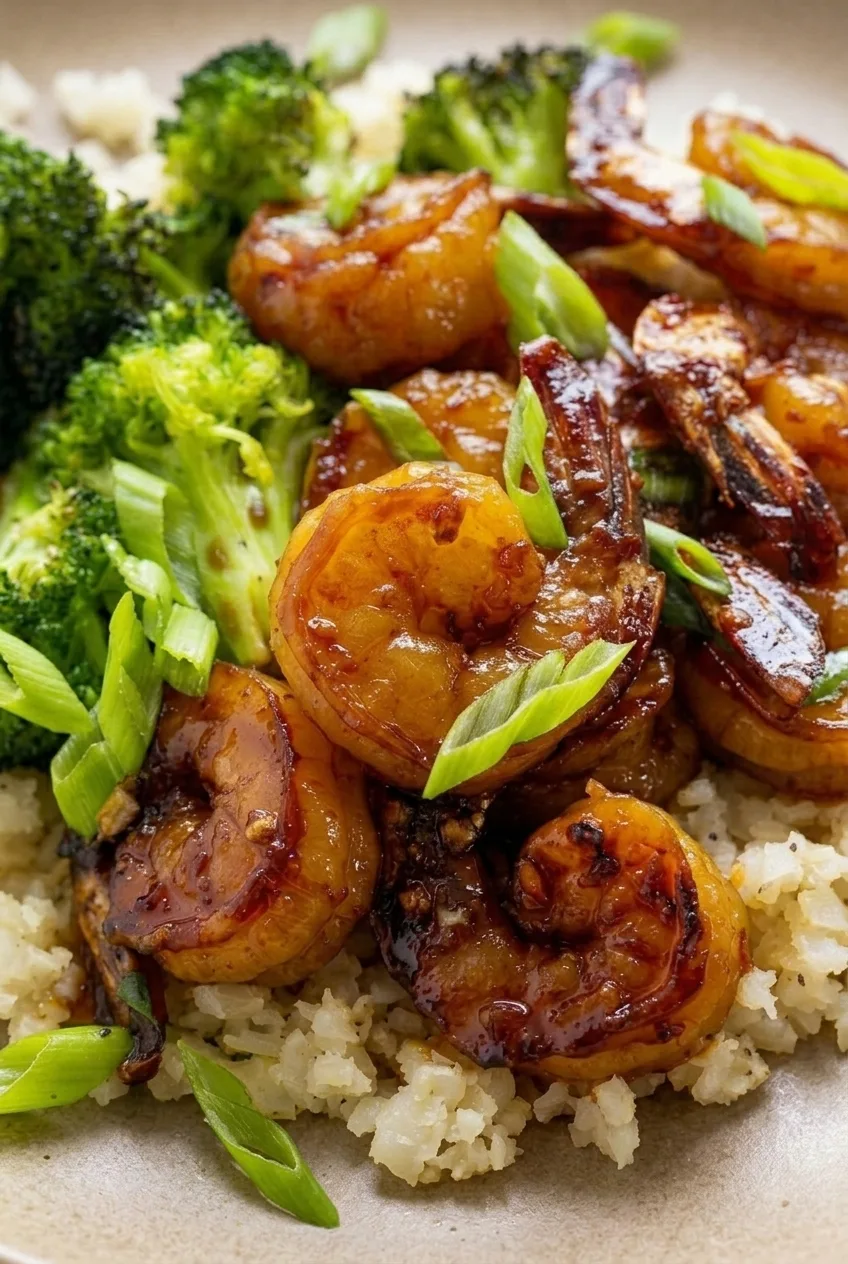
Large, tail-on shrimp get a quick skillet sear before being coated in a glossy honey-garlic glaze. The shrimp come out of the pan while the sauce thickens, then go back in just long enough to finish cooking. That short finish helps keep them tender rather than leaving them to simmer in the sauce.

Serve the shrimp over cauliflower rice with crisp-tender broccoli alongside and fresh green onions on top. Have the sauce and sides ready before searing: once the shrimp hit the skillet, the final steps move quickly.

Prep: 10 minutes | Cook: 12–15 minutes | Total: 22–25 minutes | Serves: 4

Ingredients for Honey Garlic Shrimp

Close detail of glazed honey garlic shrimp with seared spots, tails, scallions, broccoli, and cauliflower rice.
  • 1 lb raw large shrimp, peeled and deveined, tails left on (about 21–25 shrimp; 450g)
  • 3 cups broccoli florets, cut into small, even pieces (270g)
  • 4 cups cauliflower rice (400g)
  • 3 tablespoons honey (65g)
  • 2 tablespoons low-sodium soy sauce (30g)
  • 3 garlic cloves, minced
  • 1 teaspoon finely grated fresh ginger
  • 1 teaspoon cornstarch
  • 1 tablespoon water, plus a splash as needed
  • 1 tablespoon neutral cooking oil, divided
  • 2 green onions, thinly sliced on the diagonal
  • Kosher salt and black pepper, to taste

Optional: Add a pinch of red pepper flakes to the sauce for heat, or stir in 1/2 teaspoon toasted sesame oil for a toasted aroma. Tamari or coconut aminos can replace the soy sauce; coconut aminos may make the glaze sweeter and less salty.

How to Make Honey Garlic Shrimp

A full serving of honey garlic shrimp with broccoli and cauliflower rice, topped with sliced green onions.
  1. Prepare the shrimp and sauce: Thaw the shrimp completely if frozen, then pat them thoroughly dry. Season lightly with pepper and a little salt. Whisk the honey, soy sauce, garlic, ginger, cornstarch, and 1 tablespoon water in a small bowl until smooth. Cut the broccoli and slice the green onions before heating the skillet.
  2. Cook the cauliflower rice: Microwave it in a covered microwave-safe bowl until hot and tender, about 4–6 minutes, checking early. Or cook it briefly in a separate skillet over medium heat. Uncover promptly, fluff, and season lightly. Keep warm without leaving it covered to steam.
  3. Cook the broccoli: Heat a 12-inch skillet over medium-high heat. Add about half the oil and the broccoli. Cook uncovered for 4–5 minutes, stirring occasionally, until vivid green and crisp-tender with a few browned edges. If needed, add a small splash of water and cover briefly to help the stems cook through. Season lightly, transfer to a plate, and let any remaining water evaporate from the skillet.
  4. Sear the shrimp: Add the remaining oil to the hot skillet. Arrange the shrimp in a single layer, working in batches if they do not fit. Cook without moving for about 1–2 minutes, checking at 1 minute. Once the undersides are lightly browned and the edges turn pink, flip and cook for another 30–60 seconds. Transfer to a plate; the shrimp will finish in the glaze.
  5. Thicken the glaze: Reduce the heat to medium-low or medium. Whisk the sauce again to redistribute the cornstarch, then pour it into the skillet. Stir for 1–2 minutes, until it bubbles gently, turns glossy, and coats a spoon. Lower the heat if it thickens too quickly, or add a splash of water if it becomes too thick.
  6. Coat and serve: Return the shrimp to the skillet and toss briefly, just until coated and opaque through the thickest part. Spread the cauliflower rice across four plates, arrange the broccoli alongside, and pile the shrimp over the rice. Spoon on the glaze, scatter the green onions over the top, and serve promptly.

How to Keep the Shrimp Juicy

Wet or crowded shrimp release moisture and steam instead of browning. Pat them dry just before cooking and leave room between them in the skillet. There is no need to marinate them; the sauce goes on after searing.

Check doneness rather than relying only on the clock. Smaller shrimp cook faster, and a crowded pan can change the timing. The shrimp are ready when pink-orange and opaque through the thickest part, with a gentle C shape rather than a tight curl.

Getting a Glossy Glaze

Cornstarch can settle while the sauce waits, so whisk it again before adding it to the skillet. Keep the heat at medium-low to medium and stir while the sauce gently bubbles. It should cling to the shrimp but still flow easily; sustained high heat can scorch the honey and garlic.

Serving, Storing, and Reheating

Uncover the cauliflower rice as soon as it is tender so trapped steam does not make it watery. For a different serving, cooked jasmine or brown rice can replace it, though cauliflower rice is the base for this version.

Refrigerate leftovers promptly in an airtight container and use within 3–4 days; the shrimp have their best texture sooner. Store the cauliflower rice separately when practical. Reheat the shrimp and vegetables gently in a skillet over medium-low heat, adding a splash of water if the glaze is too thick. In the microwave, use short intervals and stop as soon as the shrimp are warm.

The sauce can be mixed and the broccoli cut ahead. Thaw the shrimp ahead if needed, but pat them dry just before cooking. Freezing cooked shrimp is not preferred because their texture may suffer. If necessary, freeze promptly in an airtight container, thaw overnight in the refrigerator, and reheat gently.

Nutrition

Approximate nutrition per serving, based on one-fourth of the recipe: 240 calories, 27g protein, 5g fat, and 26g carbohydrates. Per 100g: approximately 75 calories, 9g protein, 2g fat, and 8g carbohydrates. Values vary with ingredient brands, shrimp size, and how much sauce remains in the pan.

High-Protein Honey Garlic Shrimp

Skillet-seared shrimp are coated in a glossy honey-garlic glaze and served with cauliflower rice and broccoli.
Course: Main Course
Cuisine: Global
Prep: 10 min
Cook: 15 min
Total: 25 min
Servings: 4 Calories: 240 kcal

Equipment

  • 12-inch skillet
  • Small bowl
  • Whisk
  • Microwave-safe bowl

Ingredients

For the Shrimp and Sides

  • 1 lb raw large shrimp, peeled and deveined, tails left on (about 21–25 shrimp; 450g)
  • 3 cups broccoli florets, cut into small, even pieces (270g)
  • 4 cups cauliflower rice (400g)
  • 1 tablespoon neutral cooking oil, divided
  • 2 green onions, thinly sliced on the diagonal
  • Kosher salt and black pepper, to taste

For the Honey Garlic Glaze

  • 3 tablespoons honey (65g)
  • 2 tablespoons low-sodium soy sauce (30g)
  • 3 garlic cloves, minced
  • 1 teaspoon finely grated fresh ginger
  • 1 teaspoon cornstarch
  • 1 tablespoon water, plus a splash as needed

Instructions

  1. If frozen, thaw the shrimp completely. Pat them thoroughly dry and season lightly with pepper and a little salt.
  2. Whisk the honey, soy sauce, garlic, ginger, cornstarch, and 1 tablespoon water in a small bowl until smooth. Cut the broccoli and slice the green onions.
  3. Microwave the cauliflower rice in a covered microwave-safe bowl for 4–6 minutes, checking early, or cook it briefly in a separate skillet over medium heat. Uncover promptly, fluff, season lightly, and keep warm.
  4. Heat a 12-inch skillet over medium-high heat. Add about half the oil and the broccoli. Cook uncovered for 4–5 minutes, stirring occasionally, until vivid green and crisp-tender with a few browned edges. Add a small splash of water and cover briefly if needed to cook the stems through. Season lightly, transfer to a plate, and let any remaining water evaporate from the skillet.
  5. Add the remaining oil to the hot skillet. Arrange the shrimp in a single layer, working in batches if needed. Cook without moving for about 1–2 minutes, checking at 1 minute, until the undersides are lightly browned and the edges turn pink. Flip and cook for another 30–60 seconds, then transfer to a plate.
  6. Reduce the heat to medium-low or medium. Whisk the sauce again, pour it into the skillet, and stir for 1–2 minutes until it bubbles gently, turns glossy, and coats a spoon. Lower the heat if it thickens too quickly, or add a splash of water if needed.
  7. Return the shrimp to the skillet and toss briefly until coated and opaque through the thickest part.
  8. Divide the cauliflower rice among four plates, arrange the broccoli alongside, and serve the shrimp over the rice. Spoon on the glaze and top with green onions.

Tips

  • Pat the shrimp thoroughly dry just before cooking so they brown instead of steam.
  • Avoid crowding the skillet; cook the shrimp in batches if needed.
  • Whisk the sauce again just before adding it so the cornstarch is evenly distributed.
  • Keep the glaze at a gentle bubble to prevent the honey and garlic from scorching.
  • Check the shrimp for opacity through the thickest part; avoid cooking them until they curl tightly.

Variations

  • Spicy Honey Garlic Shrimp: Add a pinch of red pepper flakes to the sauce.
  • Toasted Sesame Honey Garlic Shrimp: Stir 1/2 teaspoon toasted sesame oil into the sauce.
  • Soy-Free Style: Replace the soy sauce with tamari or coconut aminos; coconut aminos may make the glaze sweeter and less salty.
  • Rice Serving: Serve with cooked jasmine or brown rice instead of cauliflower rice.

Notes

Refrigerate leftovers promptly in an airtight container and use within 3–4 days. Reheat gently over medium-low heat or in short microwave intervals; add a splash of water if the glaze is too thick. Approximate nutrition per 100g: 75 calories, 9g protein, 2g fat, and 8g carbohydrates.

Nutrition

Calories: 240 kcal | Protein: 27 g | Fat: 5 g | Carbohydrates: 26 g