Author

Julia

Browsing

Beef Lombardi Casserole

Beef Lombardi Casserole has three layers: egg noodles coated with sour cream and cream cheese, a mild tomato-beef sauce, and a melted cheddar-mozzarella topping. It comes out of the oven in hearty, scoopable portions rather than neat slices.

Drain the diced tomatoes and simmer the beef sauce until thick before assembling the dish. That keeps excess liquid out of the noodle layer, while cooking the noodles just to al dente helps them stay tender through baking.

Ingredients for Beef Lombardi Casserole
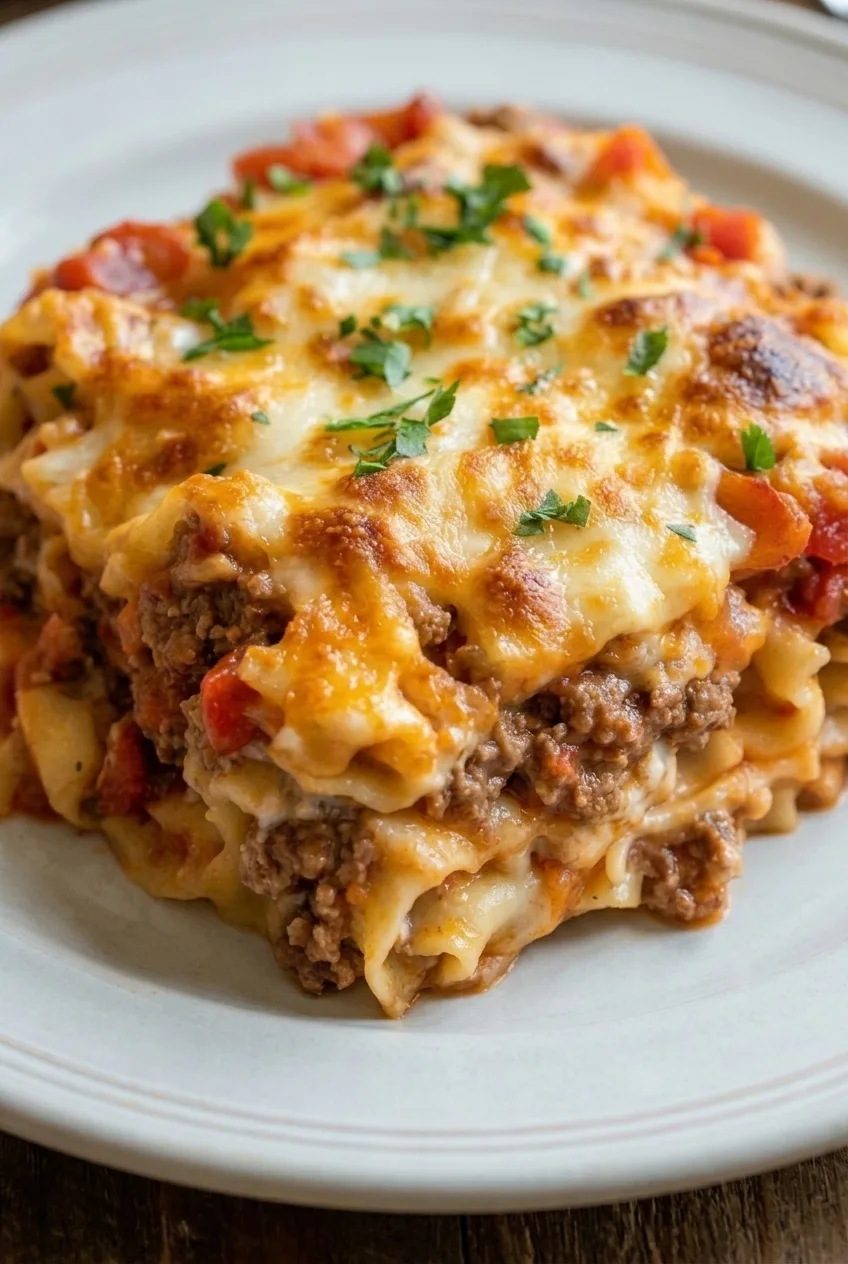
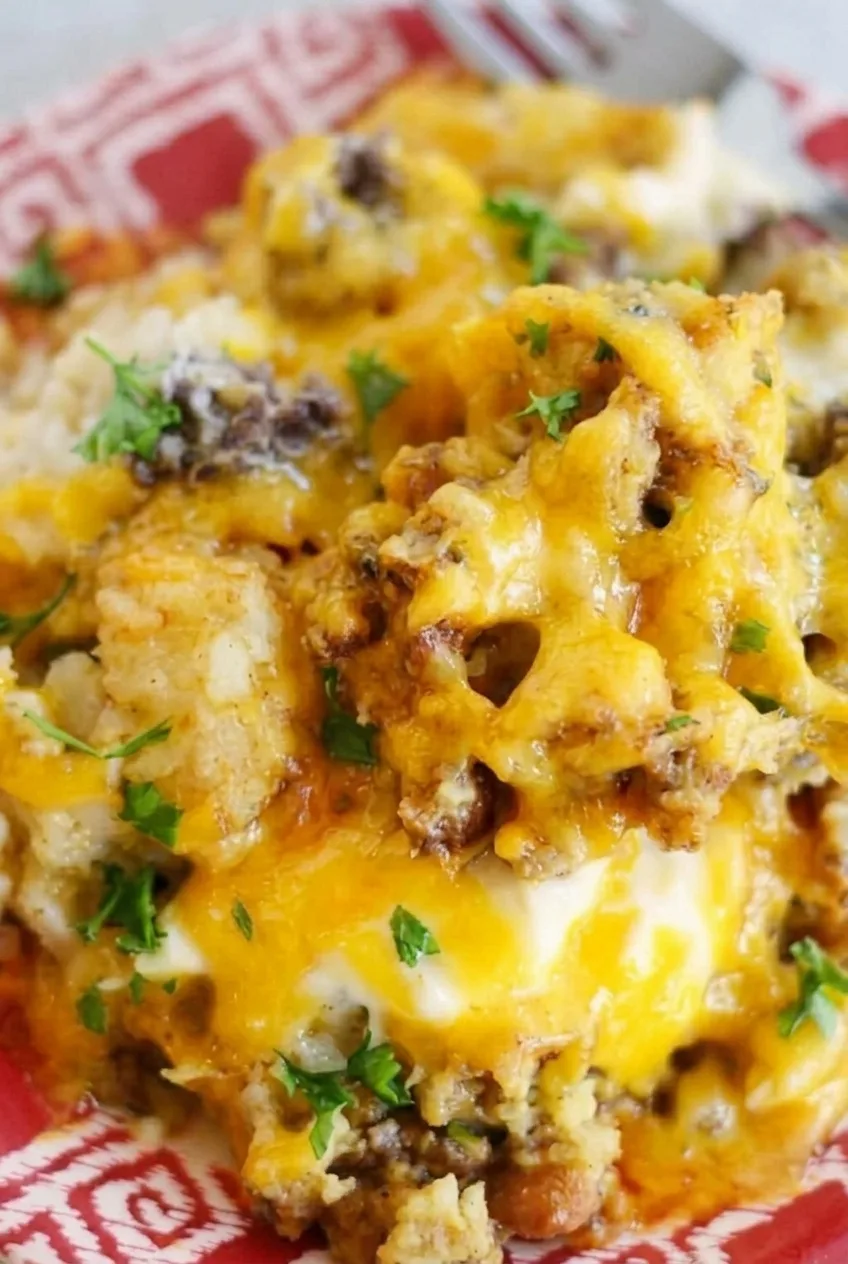
Close detail of Beef Lombardi Casserole showing melted cheese, tomato pieces, beef, and creamy egg noodles.

Makes 8 servings.

  • 12 ounces wide egg noodles (340g)
  • 1 1/2 pounds lean ground beef (680g)
  • 1 medium yellow onion, finely diced (150g)
  • 3 garlic cloves, minced
  • 1 tablespoon olive oil, as needed
  • 2 tablespoons tomato paste (30g)
  • 1 can (15 ounces) tomato sauce (425g)
  • 1 can (14 to 15 ounces) plain diced tomatoes, drained
  • 1 teaspoon Italian seasoning
  • 1 teaspoon kosher salt, divided, plus more for the noodle water
  • 1/2 teaspoon black pepper
  • 4 ounces cream cheese, softened (115g)
  • 1 cup sour cream (230g)
  • 2 cups shredded sharp cheddar (225g)
  • 1 cup shredded mozzarella (110g)

Optional: 1 to 2 tablespoons chopped fresh parsley for serving. For a spicier version, replace the plain diced tomatoes with a drained 14- to 15-ounce can of diced tomatoes with green chiles.

How to Make Beef Lombardi Casserole
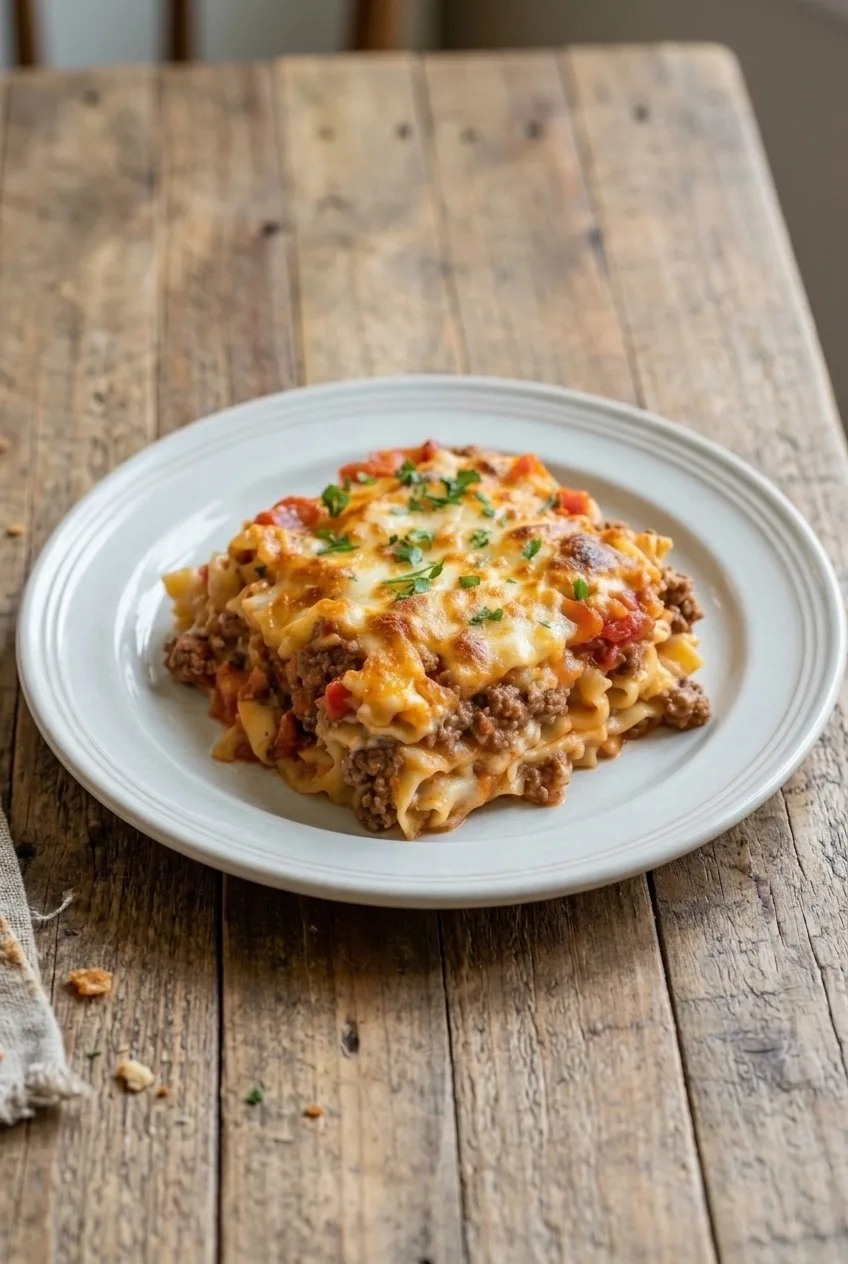
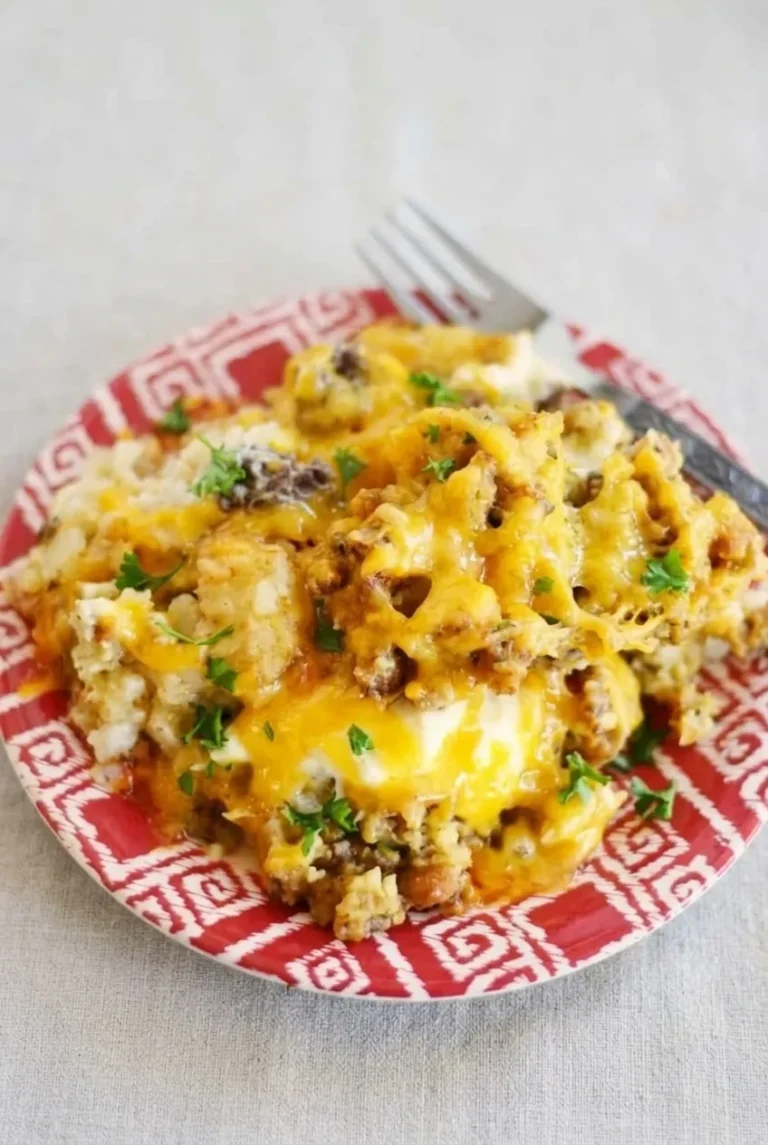
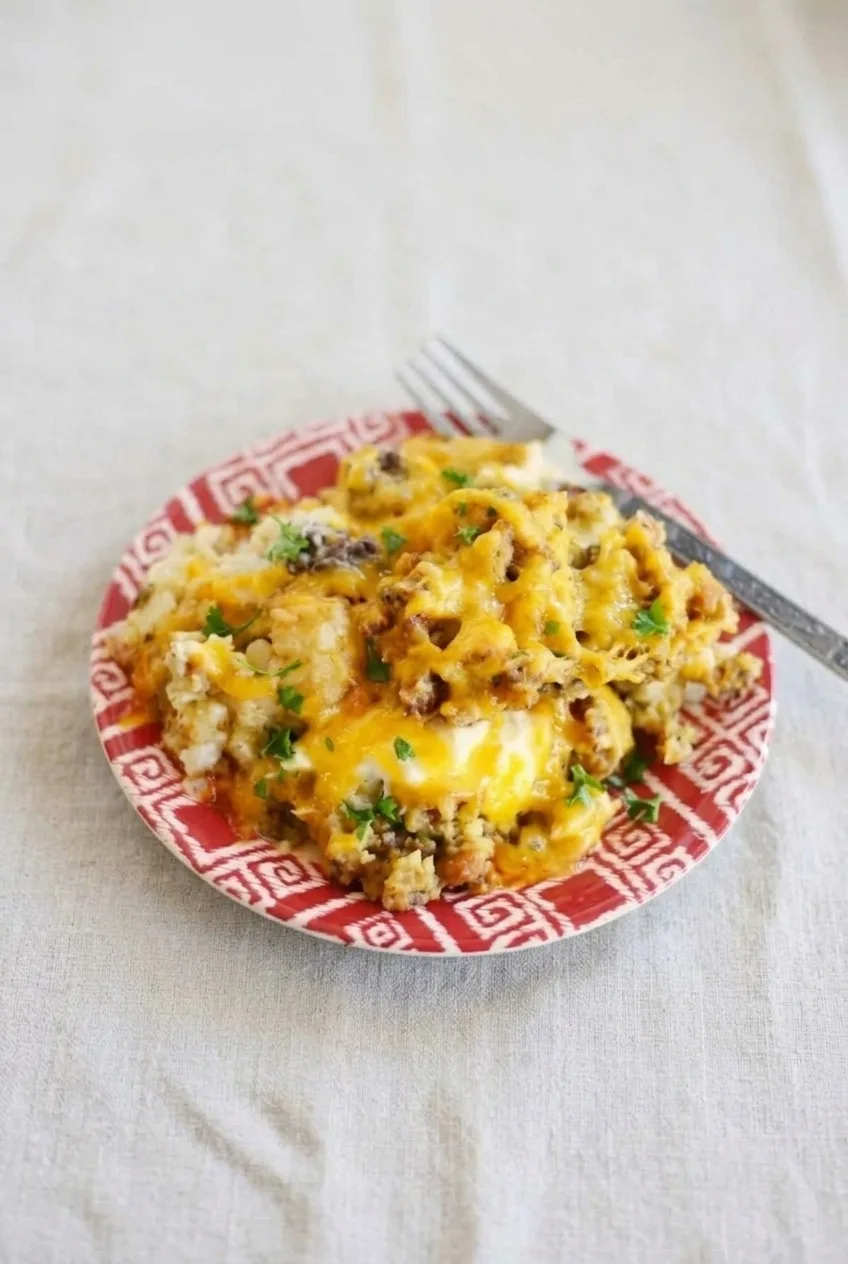
A full plate of Beef Lombardi Casserole with a generous scoop of noodles, tomato beef, and browned cheese.
  1. Prepare the dish. Preheat the oven to 350°F (175°C) and lightly grease a 9-by-13-inch baking dish.
  2. Cook the noodles. Boil the egg noodles in salted water according to the package directions, stopping when they are al dente and still have a slight bite. Drain well; they will cook further in the oven.
  3. Brown the beef. Meanwhile, cook the ground beef and onion in a large skillet over medium heat for 8 to 10 minutes, breaking up the beef, until it is browned and the onion is soft. Add the garlic near the end and cook briefly. Drain any fat that pools in the skillet. If the beef is very lean and the onion sticks, add the olive oil as needed.
  4. Simmer the sauce. Stir in the tomato paste, tomato sauce, drained diced tomatoes, Italian seasoning, 1/2 teaspoon of the salt, and the pepper. Simmer over medium-low heat for 8 to 10 minutes, stirring occasionally, until the sauce is thick and spoonable, with no watery liquid pooling in the skillet.
  5. Coat the noodles. Stir the softened cream cheese, sour cream, and remaining 1/2 teaspoon salt together until smooth. Fold in the drained noodles until evenly coated.
  6. Layer the casserole. Spread the creamy noodles in the prepared dish. Spoon the tomato-beef sauce evenly over them, then scatter the cheddar and mozzarella across the top.
  7. Bake uncovered. Bake for 25 to 30 minutes, starting to check around 25 minutes. The cheese should be melted and bubbling at the edges, with a few golden-brown spots, and the center should be hot. If the cheese browns before the center is hot, loosely cover the dish and continue baking.
  8. Rest and serve. Let the casserole rest for 5 minutes so the layers settle slightly. Serve in generous scoops, with the noodles, beef, tomatoes, and cheese visible together. Sprinkle with parsley, if using.

How to Keep the Casserole from Getting Watery

Drain the diced tomatoes before adding them to the beef, and simmer the sauce until it holds together on a spoon rather than running like soup. A wide skillet gives excess moisture room to evaporate. Drain the noodles well, too; this method does not use reserved noodle water.

Make-Ahead Instructions

Assemble the casserole, cover it, and refrigerate for up to 24 hours before baking. A chilled casserole will need longer than the 25- to 30-minute fresh-bake window. Check that the center is hot, not just the edges, and loosely cover the dish if the cheese browns too quickly.

Serving, Storage, and Reheating

Serve warm with a green salad or a simple vegetable side. For a stovetop pasta dinner with a similar tomato-beef combination, try Creamy Beef and Shells. For another baked option, see Ground Beef and Rice Casserole.

Refrigerate leftovers promptly in an airtight container for up to 4 days. Do not leave the casserole at room temperature for more than 2 hours. Reheat individual portions in the microwave or a larger amount in the oven until they reach 165°F (75°C).

Cooked or uncooked portions can be wrapped well and frozen for up to 3 months. An assembled casserole baked from frozen will take substantially longer: bake at 375°F (190°C) for about 60 to 75 minutes, until hot in the center. Cover loosely if the cheese browns too quickly.

Nutrition

Approximate nutrition per serving, based on 8 servings: 580 calories, 37g protein, 34g fat, and 43g carbohydrates. Approximate nutrition per 100g: 150 calories, 10g protein, 9g fat, and 11g carbohydrates. Values will vary with the ingredients used and the size of each serving.

Beef Lombardi Casserole

Egg noodles coated in sour cream and cream cheese are layered with tomato-beef sauce and melted cheddar and mozzarella.
Course: Main Course
Cuisine: American
Prep: 20 min
Cook: 45 min
Total: 65 min
Servings: 8 Calories: 580 kcal

Equipment

  • 9-by-13-inch baking dish
  • Large skillet
  • Large pot
  • Colander
  • Mixing bowl

Ingredients

Noodles and Beef Sauce

  • 12 ounces wide egg noodles (340 g)
  • 1 1/2 pounds lean ground beef (680 g)
  • 1 medium yellow onion, finely diced (150 g)
  • 3 garlic cloves, minced
  • 1 tablespoon olive oil, as needed
  • 2 tablespoons tomato paste (30 g)
  • 1 can (15 ounces) tomato sauce (425 g)
  • 1 can (14 to 15 ounces) plain diced tomatoes, drained
  • 1 teaspoon Italian seasoning
  • 1 teaspoon kosher salt, divided, plus more for the noodle water
  • 1/2 teaspoon black pepper

Creamy Noodle Layer

  • 4 ounces cream cheese, softened (115 g)
  • 1 cup sour cream (230 g)

Topping

  • 2 cups shredded sharp cheddar (225 g)
  • 1 cup shredded mozzarella (110 g)
  • 1 to 2 tablespoons chopped fresh parsley, optional

Instructions

  1. Preheat the oven to 350°F (175°C) and lightly grease a 9-by-13-inch baking dish.
  2. Boil the egg noodles in salted water according to package directions until al dente. Drain well.
  3. Meanwhile, cook the ground beef and onion in a large skillet over medium heat for 8 to 10 minutes, breaking up the beef, until browned and the onion is soft. Add the garlic near the end and cook briefly. Drain excess fat. Add olive oil if the beef is very lean and the onion sticks.
  4. Stir in the tomato paste, tomato sauce, drained diced tomatoes, Italian seasoning, 1/2 teaspoon of the salt, and the pepper. Simmer over medium-low heat for 8 to 10 minutes, stirring occasionally, until thick and spoonable.
  5. Stir the softened cream cheese, sour cream, and remaining 1/2 teaspoon salt together until smooth. Fold in the drained noodles until evenly coated.
  6. Spread the creamy noodles in the prepared baking dish. Spoon the beef sauce evenly over them, then top with the cheddar and mozzarella.
  7. Bake uncovered for 25 to 30 minutes, until the cheese is melted and bubbling at the edges and the center is hot. If the cheese browns before the center is hot, loosely cover the dish and continue baking.
  8. Rest for 5 minutes before serving. Sprinkle with parsley, if using.

Tips

  • Drain the diced tomatoes before adding them to the sauce.
  • Simmer the sauce until thick and spoonable so excess liquid does not make the casserole watery.
  • Cook the noodles just to al dente; they will continue cooking in the oven.
  • Drain the noodles well before mixing them with the creamy coating.
  • Check that the center is hot, especially when baking the casserole straight from the refrigerator.

Variations

  • Spicy Beef Lombardi Casserole: Replace the plain diced tomatoes with a drained 14- to 15-ounce can of diced tomatoes with green chiles.
Notes

Assemble, cover, and refrigerate for up to 24 hours before baking; a chilled casserole will need extra time. Refrigerate leftovers promptly in an airtight container for up to 4 days and reheat to 165°F (75°C). Wrapped cooked or uncooked portions can be frozen for up to 3 months. Bake an assembled frozen casserole at 375°F (190°C) for about 60 to 75 minutes, until hot in the center. Do not leave at room temperature for more than 2 hours.

Nutrition

Calories: 580 kcal | Protein: 37 g | Fat: 34 g | Carbohydrates: 43 g

Chicken Spaghetti Casserole

Chicken spaghetti casserole bakes cooked chicken and spaghetti in a mild, creamy sauce under a layer of melted cheddar. Condensed soups keep the sauce simple, while a covered first bake heats the casserole without letting the cheese brown too much.

Cook the spaghetti just to al dente before assembling it. The noodles soften further in the oven, so a little firmness at the start helps them stay distinct in each scoop. For a stovetop chicken pasta dinner, try creamy chicken tetrazzini.

Ingredients for Chicken Spaghetti Casserole

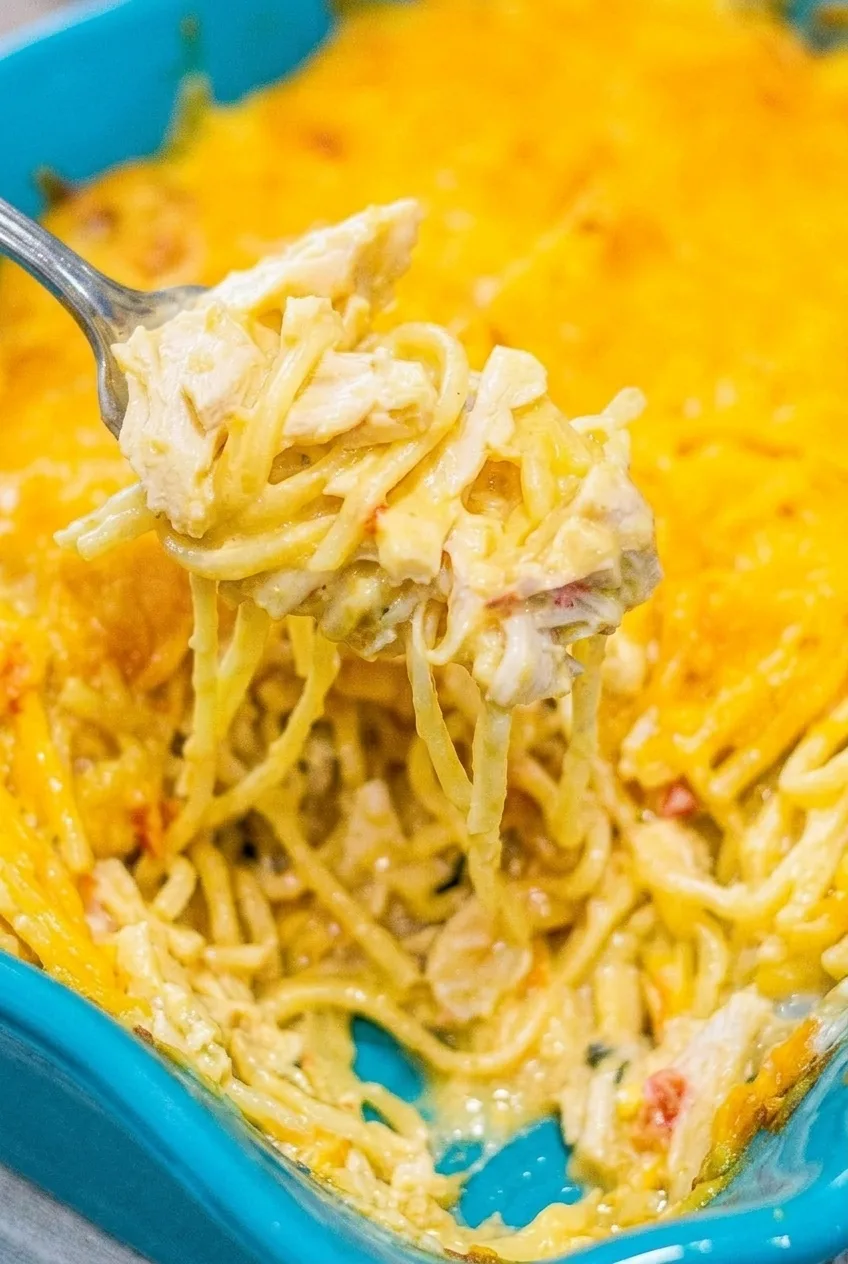
Close-up of creamy chicken spaghetti casserole showing distinct coated noodles, pale chicken pieces, and melted cheddar.
  • 12 ounces spaghetti (340g)
  • 3 cups chopped or shredded cooked chicken (420g)
  • 1 can (10.5 ounces) condensed cream of chicken soup (about 300g)
  • 1 can (10.5 ounces) condensed cream of mushroom soup (about 300g)
  • 3/4 cup milk (180g)
  • 2 1/2 cups shredded sharp cheddar cheese (280g), divided
  • 1 teaspoon onion powder
  • 1/2 teaspoon garlic powder
  • 1/4 teaspoon black pepper, or to taste
  • Up to 1/2 cup reserved pasta water, as needed
  • Cooking spray or a little neutral oil, for the dish

Rotisserie or leftover chicken works well. If cooking chicken for the casserole, cook it fully to 165°F (75°C) before chopping or shredding it. For a sauce without mushroom flavor, replace the cream of mushroom soup with a second can of cream of chicken soup.

How to Make Chicken Spaghetti Casserole

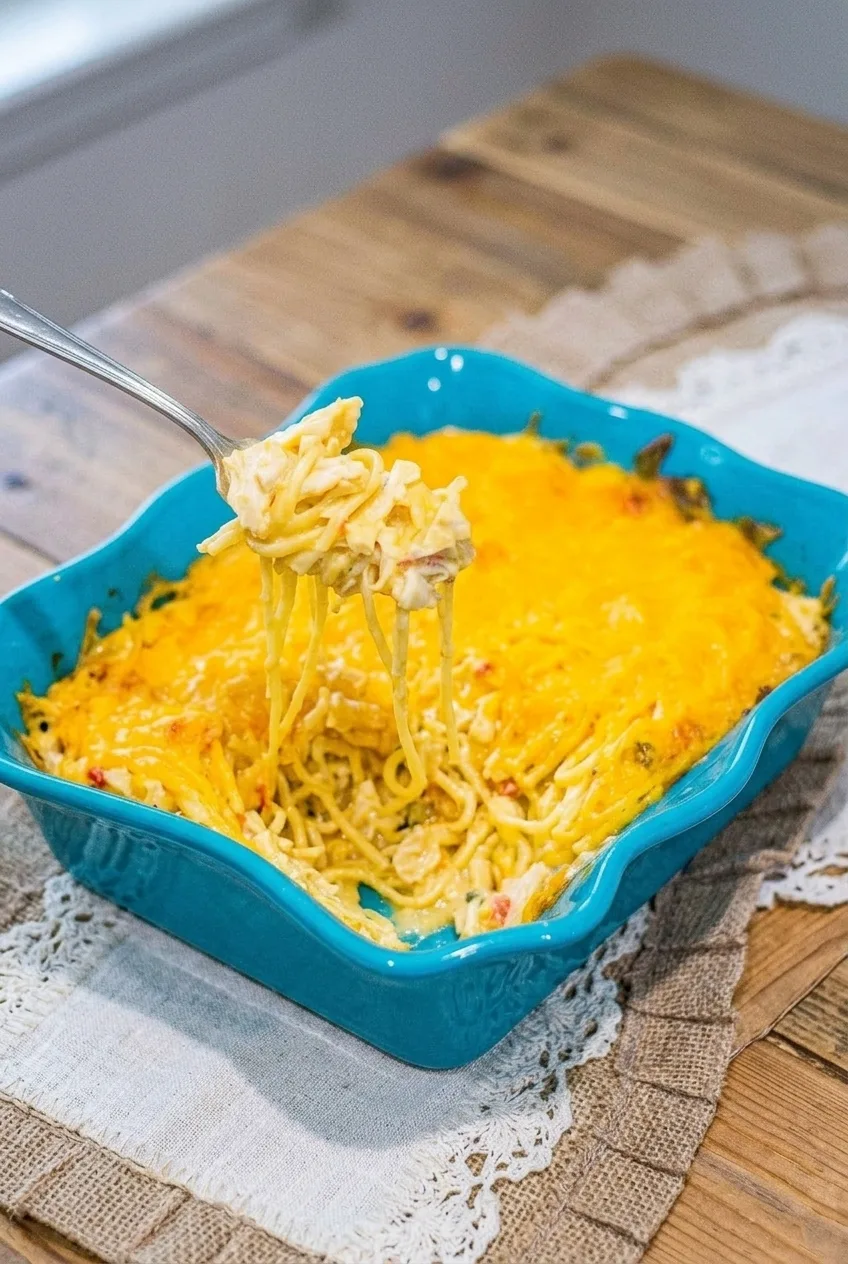
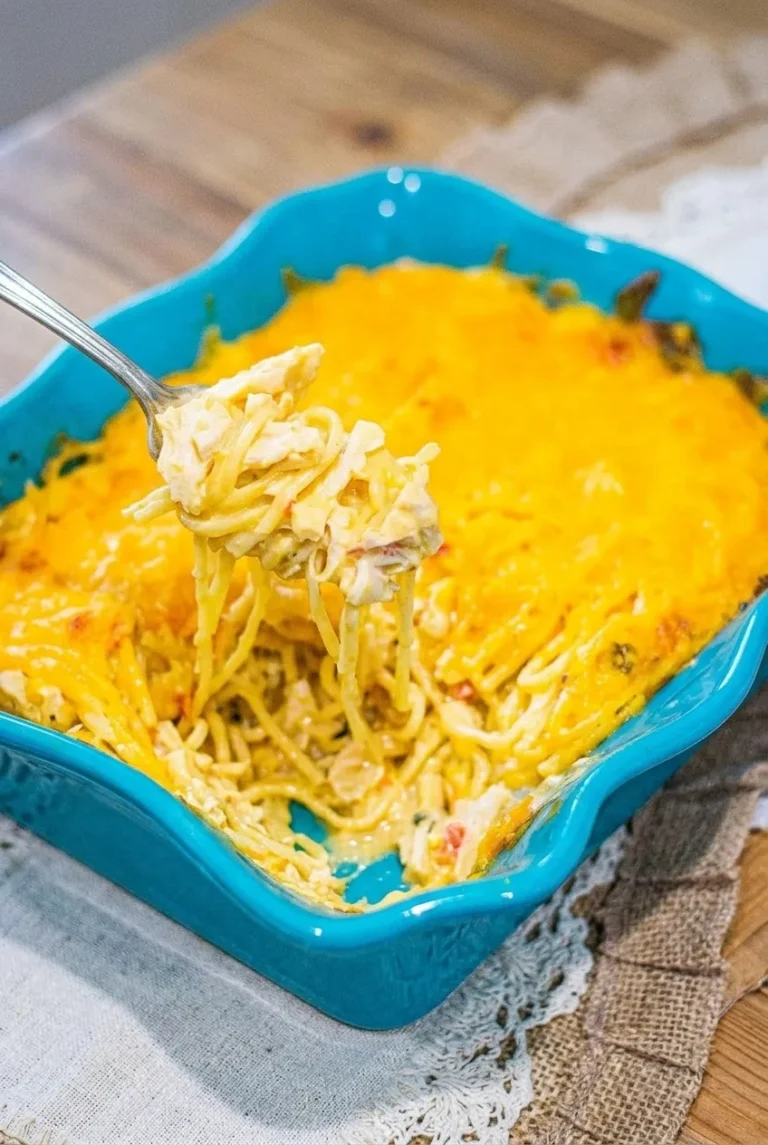
A full turquoise dish of chicken spaghetti casserole with a serving lifted, photographed with more of the tabletop visible.
  1. Prepare the oven and dish: Preheat the oven to 350°F (175°C). Lightly grease a 9-by-13-inch oven-safe casserole dish.
  2. Cook the spaghetti: Boil it in salted water until just al dente, checking near the lower end of the package timing. Reserve up to 1/2 cup pasta water, then drain the spaghetti thoroughly.
  3. Mix the sauce: In a large bowl or saucepan, stir the condensed soups, milk, onion powder, garlic powder, and black pepper until smooth. Stir in 1 cup of the cheddar. Taste before adding any salt; the soups and cheese may provide enough.
  4. Combine: Gently fold the spaghetti and cooked chicken into the sauce until evenly coated. If the sauce is too thick to cling to the noodles, add reserved pasta water 1 or 2 tablespoons at a time. It should coat the spaghetti without pooling heavily.
  5. Fill the dish: Spread the mixture evenly in the prepared dish. Sprinkle the remaining 1 1/2 cups cheddar over the top.
  6. Bake: Cover with foil and bake for about 20 minutes. Uncover and bake for another 5 to 10 minutes, starting to check at about 25 minutes total. The casserole is ready when the center is hot, the edges are bubbling, and the cheese is melted and only lightly golden. Tent loosely with foil if the top browns before the center is hot.
  7. Rest: Let the casserole stand for about 10 minutes before scooping so the sauce settles around the spaghetti and chicken.

How to Keep the Spaghetti from Getting Mushy

The noodles should be flexible but still slightly firm when drained. They continue softening during the bake, so avoid cooking them until fully tender in the pot. Once the casserole is hot and bubbling and the cheese has melted, take it out rather than extending the bake for a darker top.

How to Avoid a Watery Casserole

Drain the spaghetti well and stir the condensed soups and milk smooth before adding the pasta. Reserved pasta water is only a texture adjustment: add a little if the sauce is too thick, but stop as soon as it coats the noodles.

Chicken Spaghetti Casserole Variation

For a mildly spicy, tomato-flecked version, fold in one drained 10-ounce can of mild diced tomatoes with green chiles when combining the chicken and spaghetti. This changes the flavor and appearance of the creamy base casserole.

Make-Ahead, Storage, and Reheating

To make ahead, assemble the casserole, cover it, and refrigerate it before baking. A chilled casserole may need more time than the standard bake. Keep it covered while it heats, then uncover near the end; use a hot center, bubbling edges, and melted cheese as the finish cues.

Cool leftovers and refrigerate them in an airtight container for 3 to 4 days. Reheat portions in the microwave or oven until thoroughly warmed. Add a splash of milk if the sauce has thickened.

Cooled casserole can be frozen in a freezer-safe container for up to 3 months. An assembled, unbaked casserole can be wrapped tightly and frozen for up to 2 months. Thaw it overnight in the refrigerator and allow extra baking time.

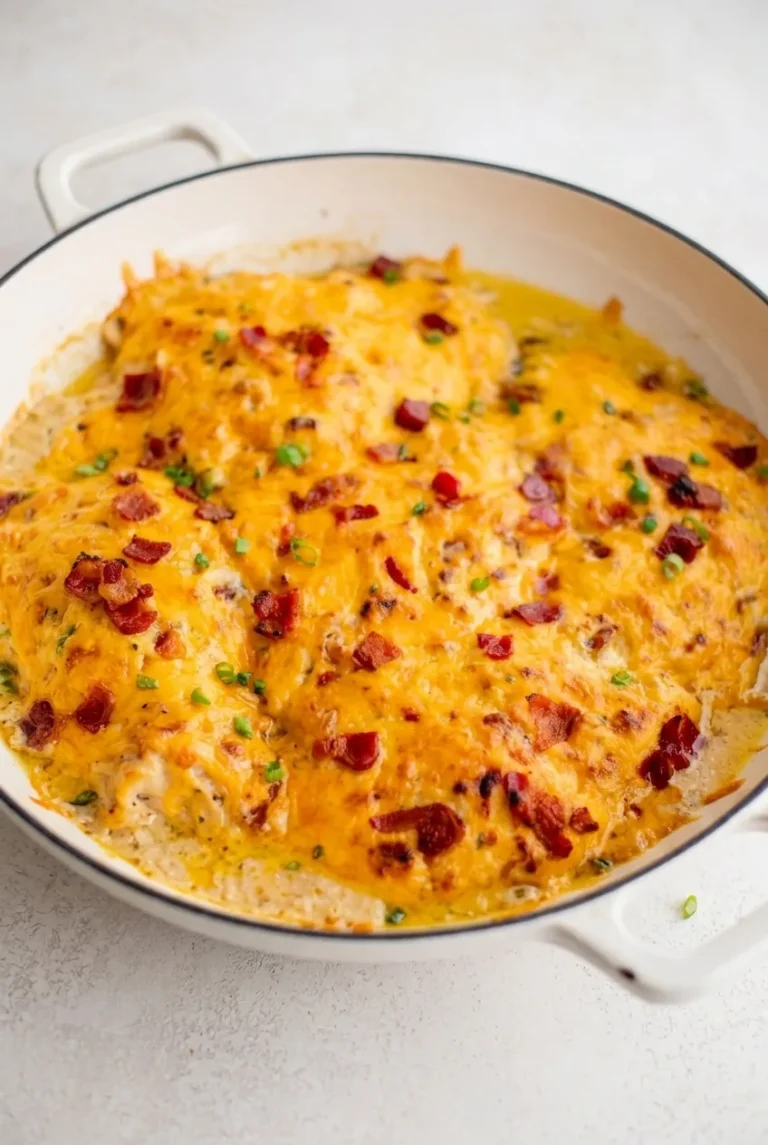
Serve with a green salad, cucumber salad, or garlic bread. For a baked chicken dinner with a different flavor profile, see crack chicken casserole with bacon and ranch.

Nutrition

Approximate nutrition per serving, based on 8 servings: 460 calories, 34g protein, 19g fat, and 38g carbohydrates. Approximate nutrition per 100g: 160 calories, 12g protein, 7g fat, and 13g carbohydrates. Values vary with the brands of soup and cheese used.

Chicken Spaghetti Casserole

Cooked chicken and al dente spaghetti are baked in a creamy soup sauce with cheddar cheese.
Course: Main Course
Cuisine: American
Prep: 15 min
Cook: 40 min
Total: 65 min
Servings: 8 Calories: 460 kcal

Equipment

  • Large pot
  • Colander
  • Large bowl or saucepan
  • 9-by-13-inch casserole dish
  • Aluminum foil

Ingredients

For the casserole

  • 12 ounces spaghetti (340g)
  • 3 cups chopped or shredded cooked chicken (420g)
  • 1 can (10.5 ounces) condensed cream of chicken soup (about 300g)
  • 1 can (10.5 ounces) condensed cream of mushroom soup (about 300g)
  • 3/4 cup milk (180g)
  • 2 1/2 cups shredded sharp cheddar cheese (280g), divided
  • 1 teaspoon onion powder
  • 1/2 teaspoon garlic powder
  • 1/4 teaspoon black pepper, or to taste
  • Up to 1/2 cup reserved pasta water, as needed
  • Cooking spray or a little neutral oil, for the dish

Instructions

  1. Preheat the oven to 350°F (175°C). Lightly grease a 9-by-13-inch casserole dish.
  2. Boil the spaghetti in salted water until just al dente. Reserve up to 1/2 cup pasta water, then drain the spaghetti well.
  3. Stir the condensed soups, milk, onion powder, garlic powder, and black pepper in a large bowl or saucepan until smooth.
  4. Stir 1 cup of the cheddar into the sauce. Taste before adding salt.
  5. Fold the spaghetti and cooked chicken into the sauce until evenly coated. Add reserved pasta water 1 or 2 tablespoons at a time if needed, stopping when the sauce coats the noodles.
  6. Spread the mixture evenly in the prepared dish and sprinkle the remaining 1 1/2 cups cheddar over the top.
  7. Cover with foil and bake for about 20 minutes. Uncover and bake for another 5 to 10 minutes, checking from about 25 minutes total.
  8. Remove the casserole when the center is hot, the edges are bubbling, and the cheese is melted and lightly golden. Tent loosely with foil if the top browns before the center is hot.
  9. Let the casserole rest for about 10 minutes before serving.

Tips

  • Cook the spaghetti just to al dente; it will soften more in the oven.
  • Drain the spaghetti thoroughly to help prevent a watery casserole.
  • Add pasta water gradually and stop as soon as the sauce coats the noodles.
  • Check the casserole from about 25 minutes total and avoid baking longer just to brown the cheese.
  • If cooking chicken for the casserole, cook it to 165°F (75°C) before chopping or shredding.

Variations

  • Mild Tomato-Chile Chicken Spaghetti: Fold in one drained 10-ounce can of mild diced tomatoes with green chiles when combining the chicken and spaghetti.
  • No-Mushroom Version: Replace the cream of mushroom soup with a second can of cream of chicken soup.

Notes

Refrigerate leftovers in an airtight container for 3 to 4 days and reheat until thoroughly warmed; add a splash of milk if needed. Freeze cooled casserole for up to 3 months, or freeze an assembled unbaked casserole for up to 2 months. Thaw overnight in the refrigerator and allow extra baking time.

Nutrition

Calories: 460 kcal | Protein: 34 g | Fat: 19 g | Carbohydrates: 38 g

Classic Taco Casserole with Ground Beef

Ground beef, taco seasoning, and salsa make the filling for this chip-based casserole. Simmer the filling until thick before spooning it over tortilla chips, then bake it with cheese until hot and bubbling. The result is loose and spoonable, not a casserole that cuts into tidy squares.

Chips beneath the beef will soften as they bake. Save some to add at serving, and finish each portion with fresh diced tomato and black olives.

Ingredients

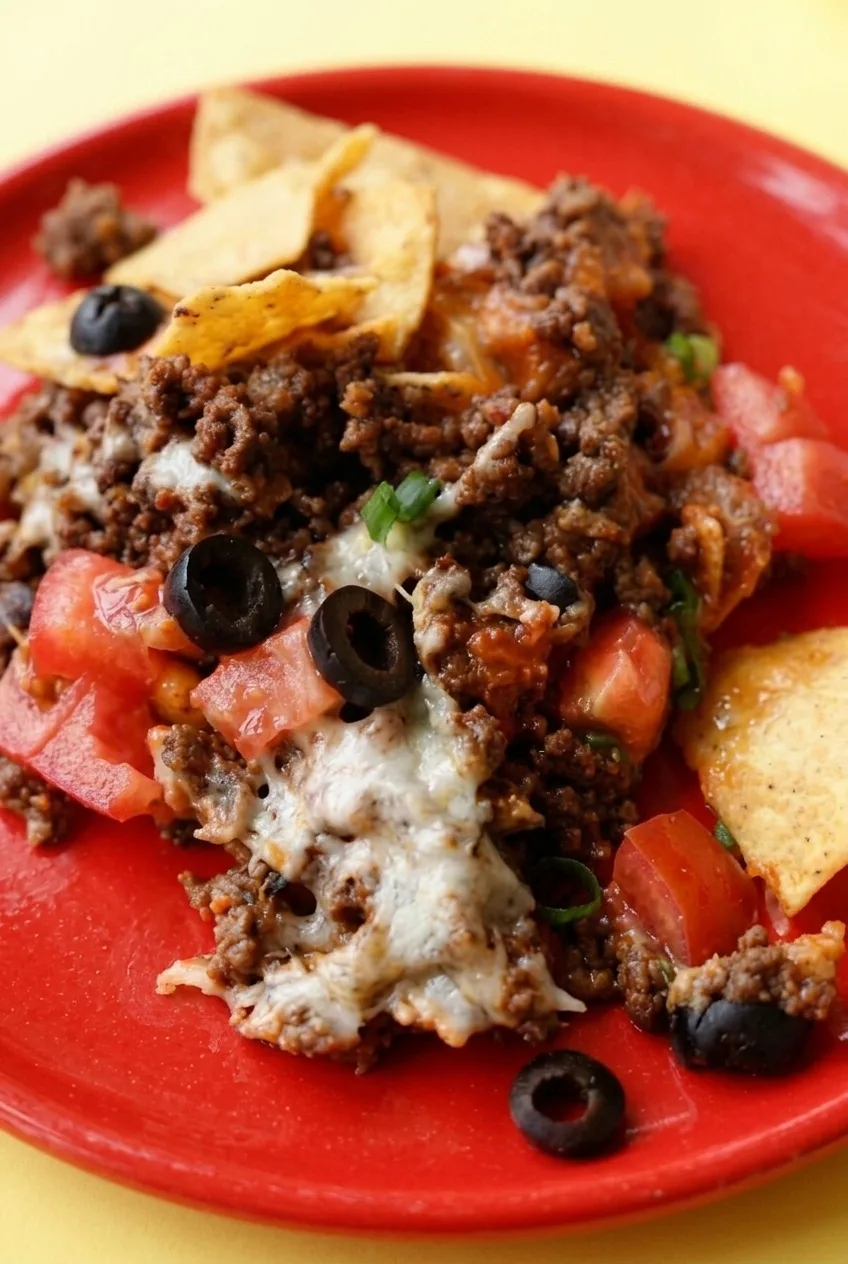
Close-up of taco casserole showing browned beef, melted cheese, softened tortilla chips, tomato, and black olives
  • 1 1/2 pounds lean ground beef (680g)
  • 1 small yellow onion, finely diced (110g)
  • 2 tablespoons taco seasoning, or one 28g packet
  • 1 1/2 cups chunky salsa (360g)
  • 4 cups corn tortilla chips, roughly crushed (120g), divided
  • 2 cups shredded Monterey Jack and cheddar blend (225g)
  • 1 medium fresh tomato, diced (150g)
  • 1/3 cup sliced black olives, drained (50g)

Optional for serving: 2 thinly sliced green onions, sour cream, extra salsa, and about 1 cup warm refried beans.

How to Make Taco Casserole

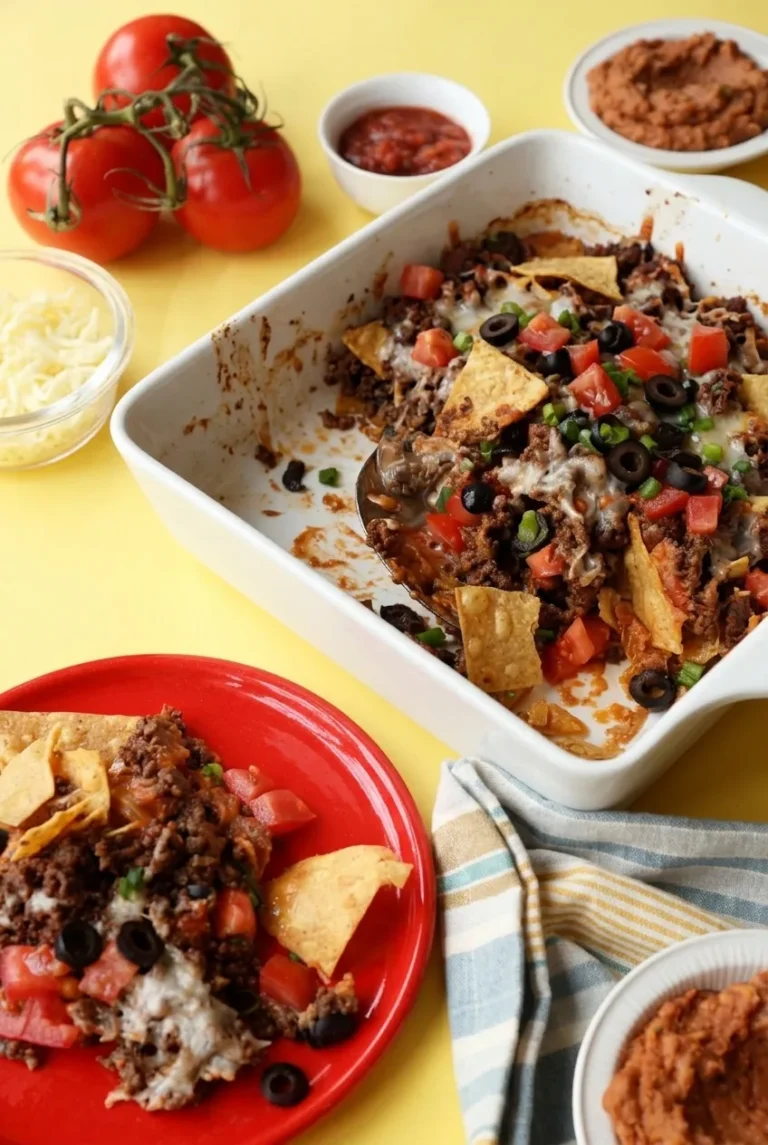
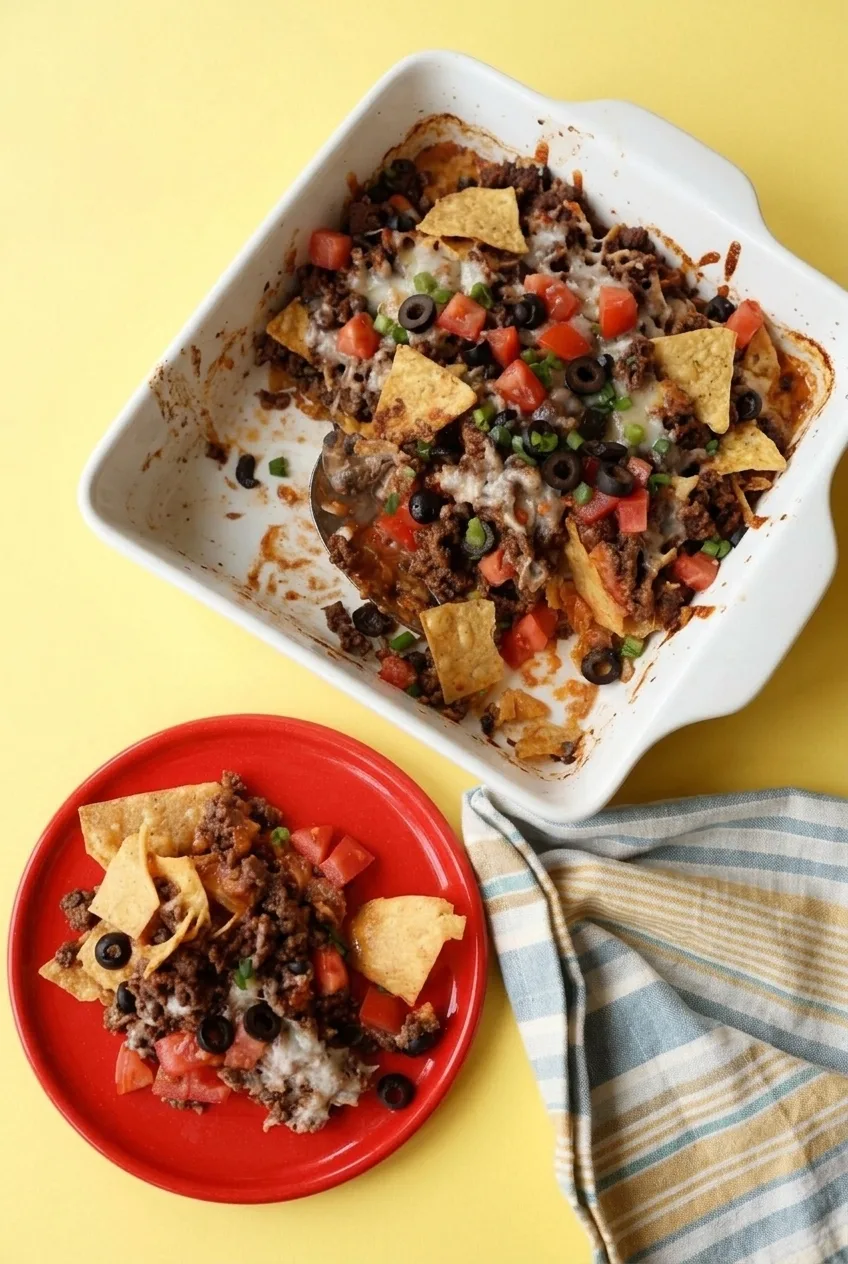
Wide view of the complete taco casserole in a rectangular dish beside a plated serving topped with tomato and olives
  1. Preheat the oven: Heat to 350°F (175°C). Lightly grease a 9-by-13-inch baking dish if needed. If scaling down the recipe, use a smaller dish so the filling does not spread too thin.
  2. Brown and drain the beef: Cook the beef and onion in a large skillet over medium-high heat for 7 to 9 minutes, breaking up the beef as it browns. Once no pink remains, drain off excess fat.
  3. Thicken the filling: Stir in the taco seasoning and salsa. Reduce the heat to medium and simmer for 4 to 6 minutes, stirring occasionally. The mixture should be thick enough to mound on a spoon rather than run like a thin sauce.
  4. Assemble: Spread about 3 cups of the tortilla chips in the baking dish, keeping some pieces irregular rather than crushing them into fine crumbs. Spoon the beef filling over the chips and scatter the cheese evenly on top. Set the remaining chips aside for serving.
  5. Bake uncovered: Bake for 15 to 20 minutes, starting to check at 15 minutes. The casserole is ready when the filling is hot throughout and the cheese is melted and bubbling at the edges.
  6. Rest and serve: Let stand for about 5 minutes. Spoon into portions and top with the diced tomato, black olives, and optional green onion. Add the reserved chips just before eating.

How to Keep the Chips from Getting Too Soft

Drain the beef before adding salsa, then simmer the filling until it is thick and cohesive. Excess fat or liquid will soak into the chips. Assemble the casserole shortly before baking rather than leaving the chips against the filling ahead of time.

The baked-in chips will still soften where they touch the beef. The reserved chips provide a firmer contrast without promising that the whole casserole stays crisp. If the filling has been refrigerated before assembly, it may need more than 20 minutes in the oven; check that it is hot throughout and the cheese is bubbling.

Serving Ideas

Keep the tomato and olives fresh by adding them after baking. Offer sour cream, extra salsa, or warm refried beans on the side; the beans are not a layer in this casserole.

For a version with beans and corn, try Walking Taco Casserole with Beef, Beans and Corn. For a rice-based beef dinner, see Ground Beef and Rice Casserole with Cheddar.

Make-Ahead, Storage, and Reheating

To make the casserole ahead, cook the beef filling and refrigerate it separately. Add the chips and cheese shortly before baking.

Refrigerate leftovers in a covered container for up to 3 days. The baked-in chips will soften further during storage. Reheat individual portions in the microwave until hot throughout, or warm them in a 350°F oven until heated through. Add fresh chips and toppings after reheating.

Freezing the assembled casserole is not recommended if chip texture matters. The cooked beef filling can be frozen separately in an airtight container, thawed in the refrigerator, and assembled with fresh chips.

Nutrition

Approximate nutrition per serving, based on 6 servings: 515 calories, 34g protein, 29g fat, and 23g carbohydrates. Per 100g: about 190 calories, 13g protein, 11g fat, and 9g carbohydrates. Values vary with the beef, chips, cheese, salsa, seasoning, and finished casserole weight.

Classic Taco Casserole with Ground Beef

Ground beef simmered with taco seasoning and salsa is layered over tortilla chips, topped with cheese, and baked until bubbling.
Course: Main Course
Cuisine: Mexican
Prep: 15 min
Cook: 35 min
Total: 55 min
Servings: 6 Calories: 515 kcal

Equipment

  • 9-by-13-inch baking dish
  • Large skillet

Ingredients

For the casserole

  • 1 1/2 pounds lean ground beef (680g)
  • 1 small yellow onion, finely diced (110g)
  • 2 tablespoons taco seasoning, or one 28g packet
  • 1 1/2 cups chunky salsa (360g)
  • 4 cups corn tortilla chips, roughly crushed (120g), divided
  • 2 cups shredded Monterey Jack and cheddar blend (225g)

For serving

  • 1 medium fresh tomato, diced (150g)
  • 1/3 cup sliced black olives, drained (50g)
  • 2 thinly sliced green onions (optional)
  • Sour cream (optional)
  • Extra salsa (optional)
  • About 1 cup warm refried beans (optional)

Instructions

  1. Preheat the oven to 350°F (175°C). Lightly grease a 9-by-13-inch baking dish if needed.
  2. Cook the ground beef and onion in a large skillet over medium-high heat for 7 to 9 minutes, breaking up the beef as it browns. Drain off excess fat once no pink remains.
  3. Stir in the taco seasoning and salsa. Reduce the heat to medium and simmer for 4 to 6 minutes, stirring occasionally, until the filling is thick enough to mound on a spoon.
  4. Spread about 3 cups of the tortilla chips in the baking dish, keeping some pieces irregular. Set the remaining chips aside for serving.
  5. Spoon the beef filling over the chips and scatter the cheese evenly on top.
  6. Bake uncovered for 15 to 20 minutes, starting to check at 15 minutes. Bake until the filling is hot throughout and the cheese is melted and bubbling at the edges.
  7. Let the casserole stand for about 5 minutes. Spoon into portions and top with diced tomato, black olives, and optional green onion. Add the reserved chips just before eating.

Tips

  • Drain excess fat from the beef before adding salsa so the chips absorb less liquid.
  • Simmer the filling until thick and cohesive before assembling.
  • Assemble shortly before baking rather than leaving the chips against the filling ahead of time.
  • Keep some chips reserved to add just before serving for a firmer contrast.
  • Add the tomato and olives after baking to keep them fresh.

Notes

Refrigerate leftovers in a covered container for up to 3 days; the chips will soften further. Reheat until hot throughout and add fresh chips and toppings afterward. For make-ahead preparation, refrigerate the cooked filling separately and assemble shortly before baking.

Nutrition

Calories: 515 kcal | Protein: 34 g | Fat: 29 g | Carbohydrates: 23 g

Crack Chicken Casserole with Bacon and Ranch

Chicken pieces bake under a thick ranch-seasoned mixture of cream cheese and sour cream, then get a melted cheddar and bacon topping. This is a chicken-only casserole—no pasta, rice, or canned soup in the dish. Add the cooked bacon near the end so it stays visible on top, and finish with green onion after baking.

Cutting the chicken into similar-sized pieces helps it cook evenly. Baking time is only a guide; check the thickest pieces with a thermometer before serving.

Ingredients

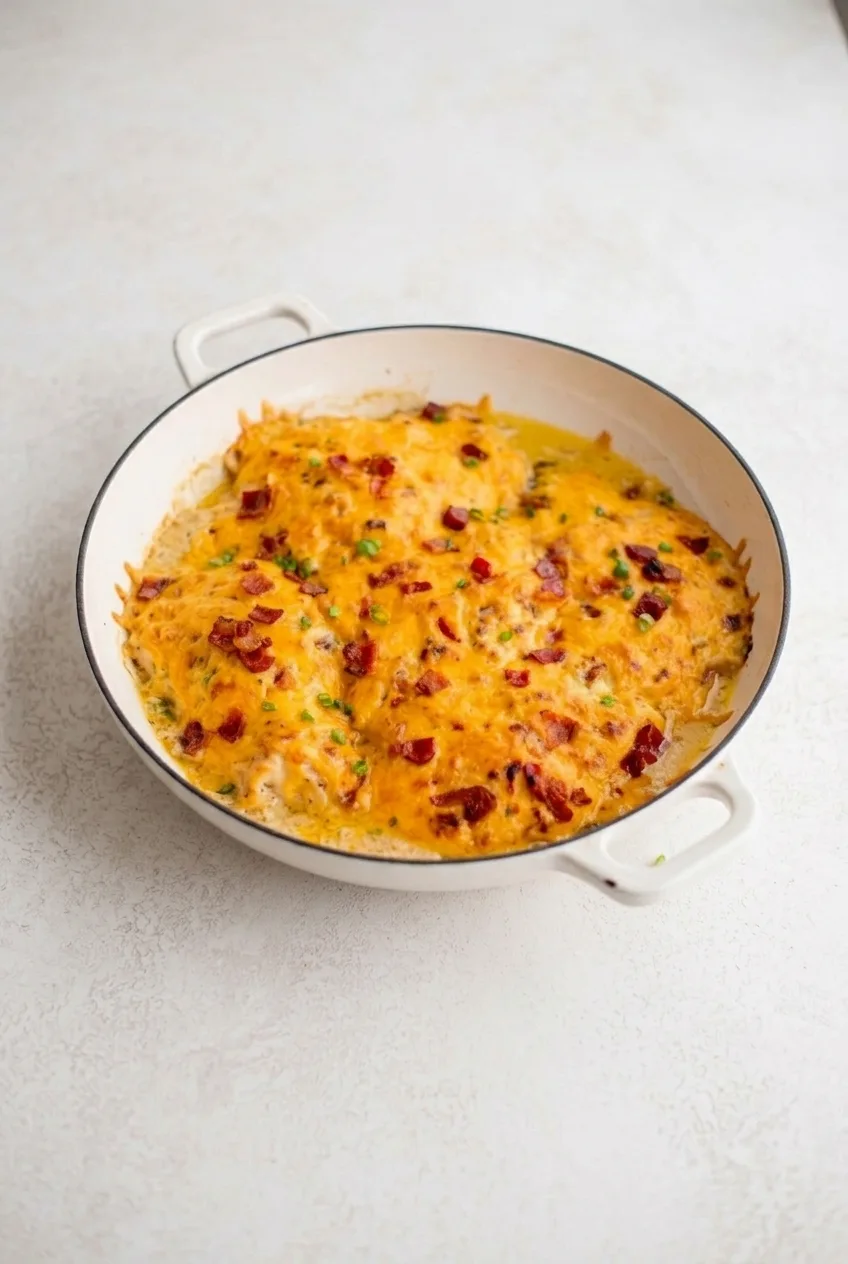
A whole oval dish of crack chicken casserole with cheddar, bacon, and green onion on a light surface
  • Cooking spray or a little neutral oil, for the baking dish
  • 6 slices bacon (about 170g), cooked crisp, drained, and chopped
  • 1½ pounds boneless, skinless chicken breasts, cut into roughly 1½-inch pieces (680g)
  • 8 ounces cream cheese, softened (225g)
  • ½ cup sour cream (120g)
  • 1-ounce packet dry ranch seasoning mix (28g)
  • 2 cups freshly shredded sharp cheddar, divided (225g)
  • ¼ teaspoon black pepper
  • 2 green onions, thinly sliced

Ranch seasoning, bacon, and cheddar all add salt, so skip additional salt at first. If needed, taste the cream cheese mixture and adjust it before spreading it over the raw chicken.

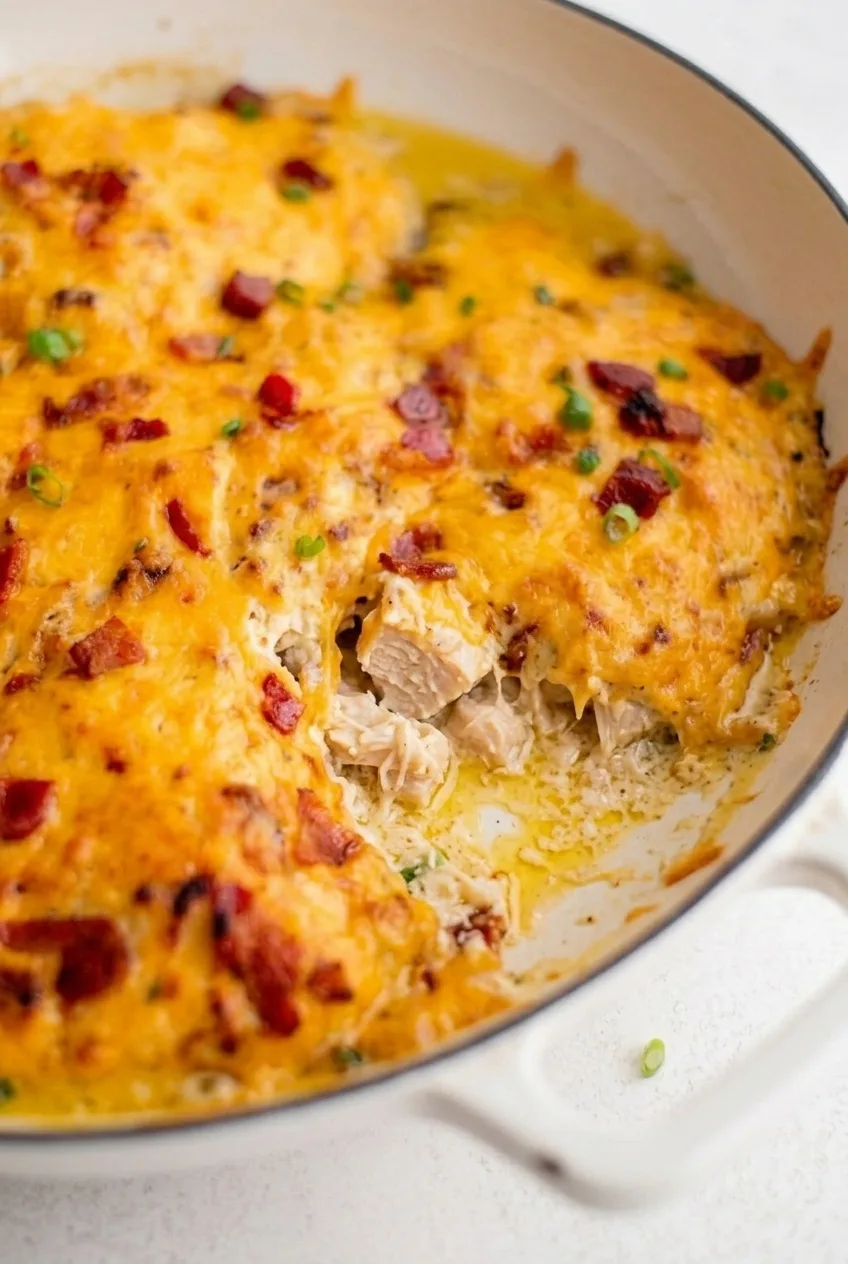
Close detail of creamy chicken, melted cheddar, bacon pieces, and green onion in crack chicken casserole

How to Bake Crack Chicken Casserole

  1. Prepare the oven and bacon: Preheat the oven to 375°F (190°C). Lightly grease a shallow 9-by-13-inch casserole dish. Cook the bacon in a skillet over medium heat until crisp, then drain it on paper towels and chop it. Do not add the rendered fat to the casserole.
  2. Arrange the chicken: Spread the chicken pieces in one even layer in the dish. Avoid piling them into a deep mound.
  3. Make the ranch topping: Stir the softened cream cheese, sour cream, ranch seasoning, black pepper, and 1 cup of the cheddar until combined. The mixture should be thick but spreadable. Spread it over the chicken; no broth or other liquid is needed.
  4. Bake covered: Cover loosely with foil and bake for about 20 minutes without stirring.
  5. Add the cheese and bacon: Remove the foil. Scatter the remaining 1 cup cheddar and the cooked bacon over the top, then return the dish to the oven uncovered.
  6. Check for doneness: Begin checking the thickest chicken pieces around 25 minutes of total baking time. Continue baking as needed, generally 30–40 minutes total, until the thickest pieces reach 165°F (75°C). Check more than one piece if their sizes vary. The cheese should be melted and bubbly with a few light golden spots. If it browns before the chicken is done, tent the dish loosely with foil.
  7. Rest and finish: Let the casserole rest for 5 minutes, then scatter the green onions over the top and serve from the dish.

Why Chicken Size Matters

Pieces cut to roughly 1½ inches are more likely to finish together in a shallow dish. An oversized piece may still be undercooked when the others are ready, so use the thickest piece reaching 165°F—not the clock—as the endpoint. Whole breasts and thin cutlets need different timing from the pieces used here.

How to Keep the Topping Creamy and Lightly Browned

Soften the cream cheese before mixing so the ranch topping spreads without large lumps. Cook and drain the bacon separately, then add it with the final cheddar rather than burying it in the sauce. The uncovered bake should melt the cheese, not turn it into a dry crust; add the green onion afterward to keep it fresh and green.

Soup-Free Sauce and Ingredient Swaps

Cream cheese, sour cream, and ranch seasoning make the thick sauce in this version. Some casseroles use cream of chicken soup instead, but it is not needed here.

Greek yogurt can replace the sour cream, though the flavor and texture may differ. Low-fat cream cheese is another option; fat-free cheese products may not melt as smoothly. Boneless, skinless chicken thighs can replace the breasts, but cut them evenly and check the thickest pieces for doneness rather than assuming the same bake time.

Serving and Storing Leftovers

Serve with broccoli, green beans, roasted vegetables, or a salad. Rice or mashed potatoes can catch the creamy sauce. For a rice-based dish instead, try Classic Chicken and Rice Casserole with Browned Thighs.

Cool leftovers and refrigerate them in an airtight container for up to 4 days. Reheat portions until hot throughout. Cooked leftovers can be frozen, but the creamy sauce may separate or change texture; thaw them in the refrigerator before reheating.

Nutrition

Approximate nutrition per serving, based on 1 of 6 servings: 510 calories, 42g protein, 35g fat, and 6g carbohydrates. Approximate nutrition per 100g: 240 calories, 20g protein, 16g fat, and 3g carbohydrates. Values vary with ingredient brands and portion size.

Crack Chicken Casserole with Bacon and Ranch

Chicken pieces bake beneath a creamy ranch, cheddar, and bacon topping, with no pasta, rice, or canned soup.
Course: Main Course
Cuisine: American
Prep: 20 min
Cook: 40 min
Total: 65 min
Servings: 6 Calories: 510 kcal

Equipment

  • 9-by-13-inch casserole dish
  • Skillet
  • Mixing bowl
  • Aluminum foil
  • Meat thermometer

Ingredients

For the Casserole

  • Cooking spray or a little neutral oil, for the baking dish
  • 1.5 lb boneless, skinless chicken breasts, cut into roughly 1.5-inch pieces (680 g)
  • 8 oz cream cheese, softened (225 g)
  • 1/2 cup sour cream (120 g)
  • 1 oz packet dry ranch seasoning mix (28 g)
  • 1/4 teaspoon black pepper
  • 2 cups freshly shredded sharp cheddar, divided (225 g)
  • 6 slices bacon (about 170 g), cooked crisp, drained, and chopped
  • 2 green onions, thinly sliced

Instructions

  1. Preheat the oven to 375°F (190°C). Lightly grease a shallow 9-by-13-inch casserole dish.
  2. Cook the bacon in a skillet over medium heat until crisp. Drain on paper towels and chop; do not add the rendered fat to the casserole.
  3. Arrange the chicken pieces in one even layer in the prepared dish.
  4. Stir the cream cheese, sour cream, ranch seasoning, black pepper, and 1 cup of cheddar until combined and spreadable.
  5. Spread the ranch mixture over the chicken. Cover loosely with foil and bake for about 20 minutes without stirring.
  6. Remove the foil. Scatter the remaining 1 cup of cheddar and the bacon over the top.
  7. Return the dish to the oven uncovered. Begin checking the thickest chicken pieces around 25 minutes of total baking time, and continue baking as needed, generally 30–40 minutes total, until they reach 165°F (75°C). Check more than one piece if sizes vary.
  8. If the cheese browns before the chicken is done, tent the dish loosely with foil. Remove from the oven when the cheese is melted and bubbly with a few light golden spots.
  9. Rest the casserole for 5 minutes, scatter the green onions over the top, and serve.

Tips

  • Cut the chicken into similarly sized pieces so it cooks evenly.
  • Use the thickest chicken piece reaching 165°F (75°C) as the doneness endpoint, rather than relying on the clock.
  • Soften the cream cheese before mixing so the topping spreads smoothly.
  • Add the cooked bacon with the final cheddar to keep it visible on top.
  • Taste the ranch mixture before spreading and add salt only if needed.

Variations

  • Greek Yogurt Version: Replace the sour cream with Greek yogurt; the flavor and texture may differ.
  • Chicken Thigh Version: Replace the chicken breasts with boneless, skinless chicken thighs, cut evenly and checked for doneness.
  • Low-Fat Cream Cheese Version: Use low-fat cream cheese in place of regular cream cheese; fat-free cheese products may not melt as smoothly.

Notes

Refrigerate cooled leftovers in an airtight container for up to 4 days and reheat until hot throughout. Cooked leftovers may be frozen, though the sauce can change texture; thaw in the refrigerator before reheating.

Nutrition

Calories: 510 kcal | Protein: 42 g | Fat: 35 g | Carbohydrates: 6 g | Per 100g Calories: 240 kcal | Per 100g Protein: 20 g | Per 100g Fat: 16 g | Per 100g Carbohydrates: 3 g

Mini Meatloaf Muffins

These mini meatloaves bake in a standard muffin tin, giving each portion lightly browned sides and a smooth ketchup glaze. Panko, milk, and egg help the beef hold together; gentle mixing keeps the meatloaves from becoming dense.

The 20–25-minute bake is a guide, not a fixed finish time. Check the center with a thermometer, then let the meatloaves rest in the tin so they hold together when lifted out. For a full-size version, try classic homemade meatloaf with glossy ketchup glaze.

Ingredients for Mini Meatloaf Muffins

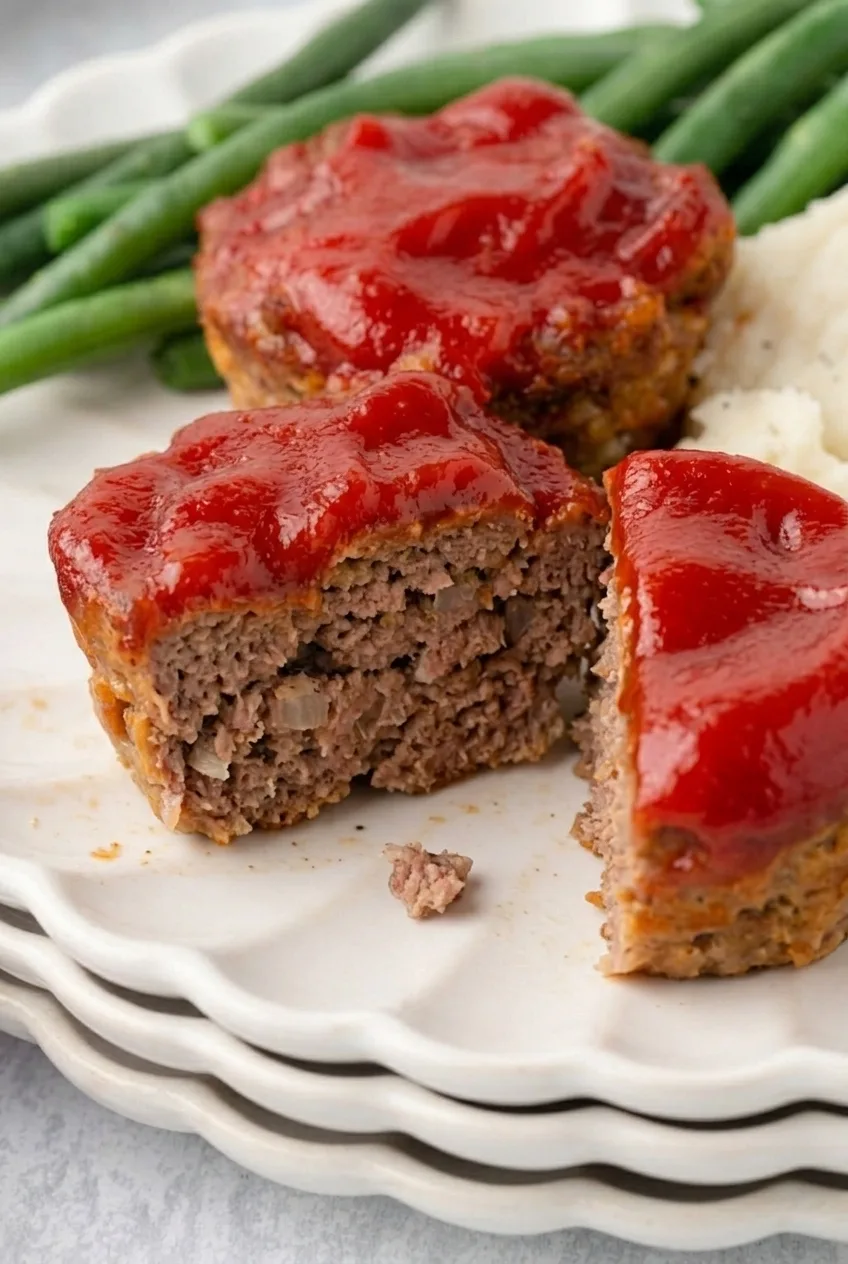
Close-up of a ketchup-glazed mini meatloaf muffin cut open to show its moist interior
  • 1 1/2 pounds ground beef, preferably 85% lean (680g)
  • 1/2 cup panko breadcrumbs (30g)
  • 1/3 cup milk (80g)
  • 1 large egg
  • 1/3 cup finely minced yellow onion (55g)
  • 1 tablespoon Worcestershire sauce (15g)
  • 1/2 teaspoon garlic powder
  • 3/4 teaspoon fine salt
  • 1/4 teaspoon black pepper
  • Neutral oil or nonstick spray, as needed for the muffin tin

For the glaze:

  • 1/2 cup ketchup (120g)
  • 1 tablespoon brown sugar (15g)
  • 1 teaspoon yellow mustard

Regular breadcrumbs can replace the panko in the same volume. Quick oats also work as a binder, though the texture will differ. For a turkey version, use ground turkey in place of the beef; it may be less juicy and must reach 165°F (75°C) in the center.

How to Make Mini Meatloaf Muffins

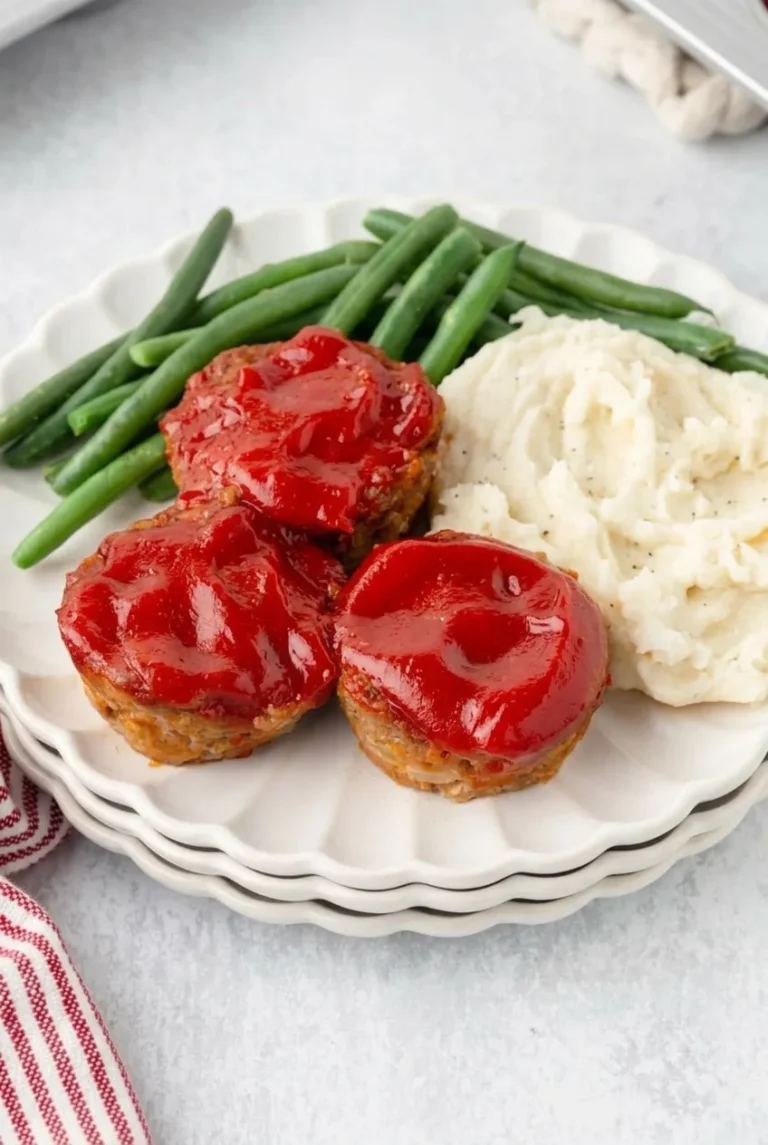
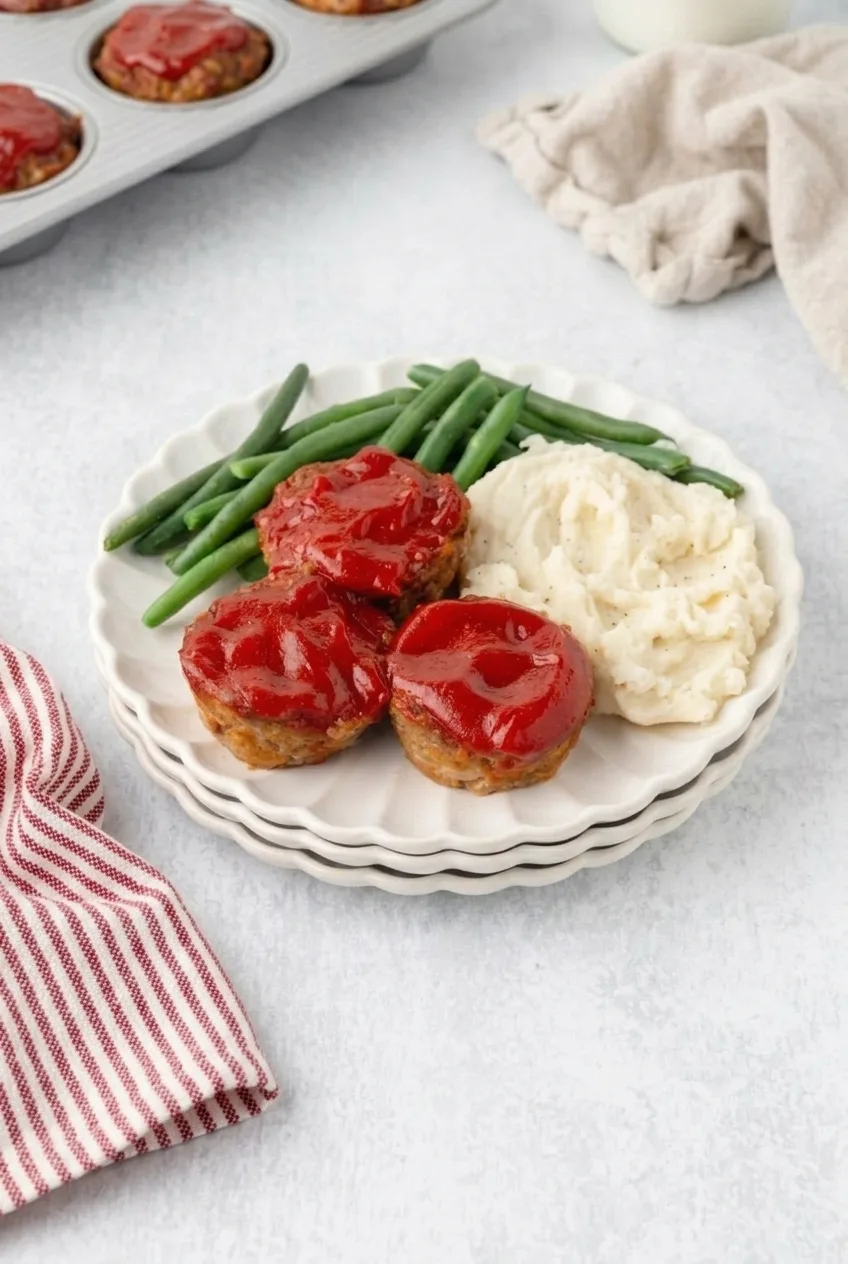
Full plate of ketchup-glazed mini meatloaf muffins with mashed potatoes and green beans on a light countertop
  1. Prepare the oven and tin: Preheat the oven to 375°F (190°C). Grease the bottoms and sides of all 12 cups of a standard muffin tin.
  2. Mix the binder: Stir the panko and milk together in a large bowl. Add the egg, onion, Worcestershire sauce, garlic powder, salt, and pepper, and mix to combine.
  3. Add the beef: Mix gently with your hands or a fork just until the ingredients are distributed and no dry panko remains. Overmixing can make the meatloaves dense.
  4. Fill the cups: Divide the mixture evenly among the 12 cups. Press each portion lightly into place without packing it tightly, and leave the tops gently rounded.
  5. Glaze: Stir together the ketchup, brown sugar, and mustard. Spoon a generous layer over each portion, spreading it across the top without letting much run down the sides.
  6. Bake: Bake uncovered for about 20–25 minutes. Begin checking at 20 minutes with an instant-read thermometer inserted into the center of a meatloaf. The sides should be set and lightly browned, the glaze glossy and set, and the beef should reach 160°F (70°C). Continue baking and checking as needed.
  7. Rest and remove: Let the meatloaves rest in the tin for about 5 minutes. Gently loosen the edges with a thin utensil, then lift them out.

Keeping the Meatloaves Tender and Intact

Evenly filled cups help the portions cook at a similar rate. Mix and press the beef lightly: working it firmly can leave the finished meatloaves dense. Grease the entire cup for easier release, then give the baked portions their 5-minute rest before loosening them so they are less likely to break.

Portion size and oven behavior can shift the bake time, so use the thermometer reading rather than browned sides alone to judge doneness. If grease pools around the portions, carefully dab it away without disturbing the meatloaves while they are setting.

Serving and Storing Mini Meatloaf Muffins

Serve with mashed potatoes and green beans, or with roasted vegetables or a simple salad. For another ground-beef dinner, try ground beef stuffed bell peppers with rice.

To make ahead, portion the uncooked mixture into a greased muffin tin, cover, and refrigerate for up to 24 hours before baking. Refrigerate cooled, cooked leftovers in an airtight container for 3–4 days.

Reheat leftovers covered in a 350°F (175°C) oven until hot throughout, or microwave individual portions until warmed through. To freeze, cool the baked meatloaves completely, freeze in a single layer or wrap individually, then transfer to a freezer-safe container. Use within about 2 months for best quality.

Nutrition

Approximate nutrition per mini meatloaf, based on 1 of 12 portions: 180 calories, 11g protein, 12g fat, and 7g carbohydrates. Per 100g: about 225 calories, 14g protein, 15g fat, and 9g carbohydrates. Values vary with the beef blend and specific ingredients used.

Mini Meatloaf Muffins

Individual beef meatloaves bake in a muffin tin with a glossy ketchup glaze.
Course: Main Course
Cuisine: American
Prep: 15 min
Cook: 25 min
Total: 45 min
Servings: 12 Calories: 180 kcal

Equipment

  • 12-cup muffin tin
  • Mixing bowl
  • Instant-read thermometer

Ingredients

For the Meatloaves

  • 1 1/2 pounds ground beef, preferably 85% lean (680g)
  • 1/2 cup panko breadcrumbs (30g)
  • 1/3 cup milk (80g)
  • 1 large egg
  • 1/3 cup finely minced yellow onion (55g)
  • 1 tablespoon Worcestershire sauce (15g)
  • 1/2 teaspoon garlic powder
  • 3/4 teaspoon fine salt
  • 1/4 teaspoon black pepper
  • Neutral oil or nonstick spray, as needed for the muffin tin

For the Glaze

  • 1/2 cup ketchup (120g)
  • 1 tablespoon brown sugar (15g)
  • 1 teaspoon yellow mustard

Instructions

  1. Preheat the oven to 375°F (190°C). Grease the bottoms and sides of all 12 cups of a standard muffin tin.
  2. Stir the panko and milk together in a large bowl.
  3. Add the egg, onion, Worcestershire sauce, garlic powder, salt, and pepper; mix to combine.
  4. Add the beef and mix gently just until the ingredients are evenly distributed and no dry panko remains.
  5. Divide the mixture among the 12 cups. Press each portion lightly into place without packing it, leaving the tops gently rounded.
  6. Stir together the ketchup, brown sugar, and mustard. Spoon a generous layer over each portion, spreading it across the top.
  7. Bake uncovered for about 20–25 minutes. Begin checking at 20 minutes with an instant-read thermometer inserted into the center; bake until the beef reaches 160°F (70°C).
  8. Rest the meatloaves in the tin for about 5 minutes. Loosen the edges with a thin utensil, then lift them out.

Tips

  • Mix the beef gently to keep the meatloaves tender rather than dense.
  • Fill the cups evenly so the portions cook at a similar rate.
  • Grease the entire cup to make the meatloaves easier to remove.
  • Use a thermometer to check doneness; browned sides alone are not a reliable indicator.
  • Let the meatloaves rest in the tin before loosening and removing them.

Variations

  • Breadcrumb or Oat Binder: Replace the panko with regular breadcrumbs in the same volume, or use quick oats for a different texture.
  • Turkey Meatloaf Muffins: Replace the beef with ground turkey and cook until the center reaches 165°F (75°C).

Notes

Refrigerate cooked leftovers in an airtight container for 3–4 days. Reheat covered in a 350°F (175°C) oven or microwave until hot throughout. Freeze cooled meatloaves for up to about 2 months. Nutrition is approximate per mini meatloaf; per 100g, about 225 calories, 14g protein, 15g fat, and 9g carbohydrates.

Nutrition

Calories: 180 kcal | Protein: 11 g | Fat: 12 g | Carbohydrates: 7 g

Ground Beef and Rice Casserole

Browned ground beef, cooked long-grain rice, mixed vegetables, and cheddar come together in a lightly creamy tomato sauce. The finished casserole is moist enough to scoop, with distinct rice grains and a few golden cheese patches rather than a solid cheese crust.

The rice must be cooked before assembly. That keeps the oven time short: the casserole only needs to heat through and melt the cheese, not cook rice from raw.

Ingredients for Ground Beef and Rice Casserole

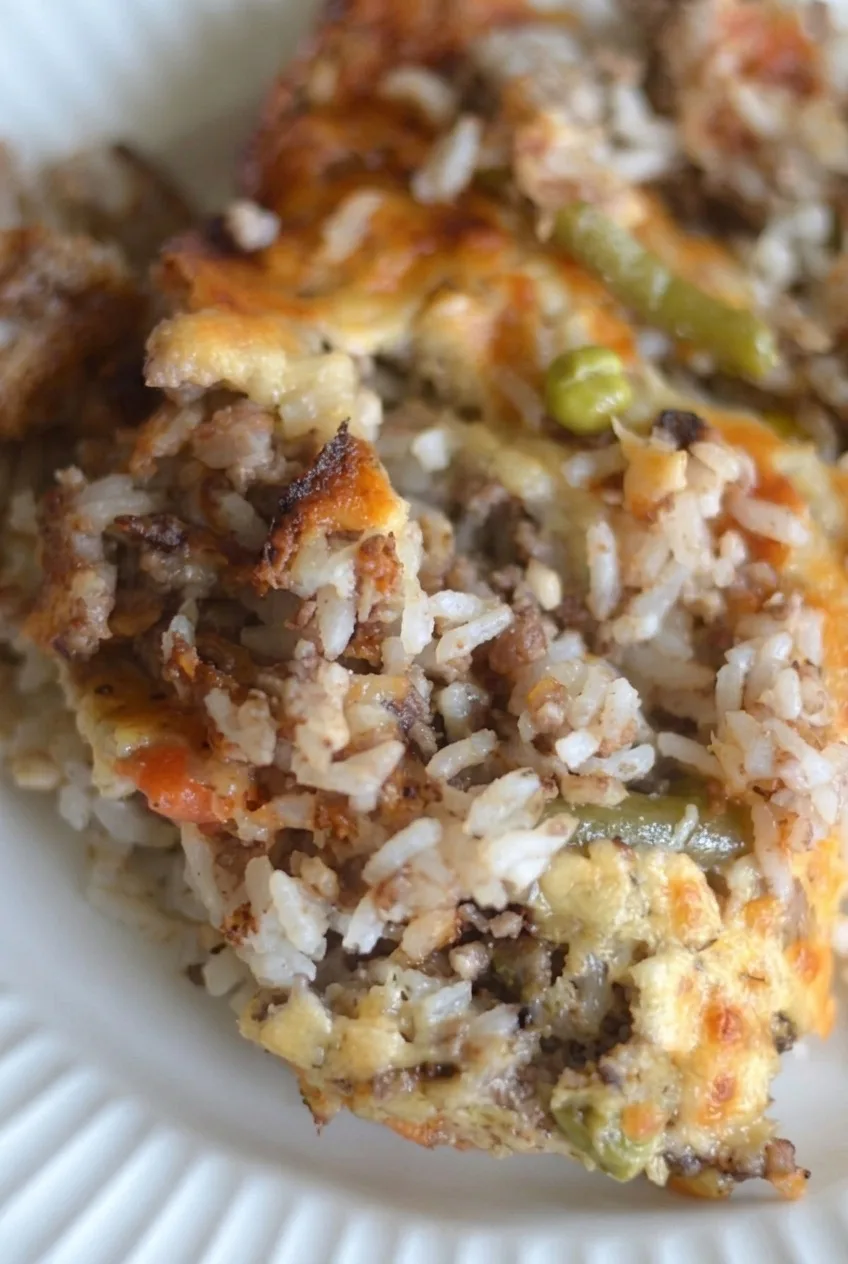
Close detail of ground beef and rice casserole showing distinct grains, beef crumbles, vegetables, and melted cheddar
  • 1 lb lean ground beef (450g)
  • 4 cups cooked long-grain white rice (640g)
  • 1 medium yellow onion, diced (150g)
  • 2 garlic cloves, minced
  • 1 cup tomato sauce (245g)
  • 1/2 cup beef or chicken broth (120g)
  • 1/2 cup sour cream (115g)
  • 1 cup frozen mixed vegetables (140g), preferably a blend with green and orange pieces
  • 1 1/2 cups shredded cheddar cheese, divided (170g)
  • 1 teaspoon Worcestershire sauce
  • 3/4 teaspoon kosher salt, or to taste
  • 1/4 teaspoon black pepper
  • 1 teaspoon neutral oil, only if needed

Optional: Add a pinch of red pepper flakes to the sauce for mild heat, or finish with 1 tablespoon chopped parsley. Plain, unflavored Greek yogurt can replace the sour cream, though the tang and texture may differ slightly.

How to Make Ground Beef and Rice Casserole

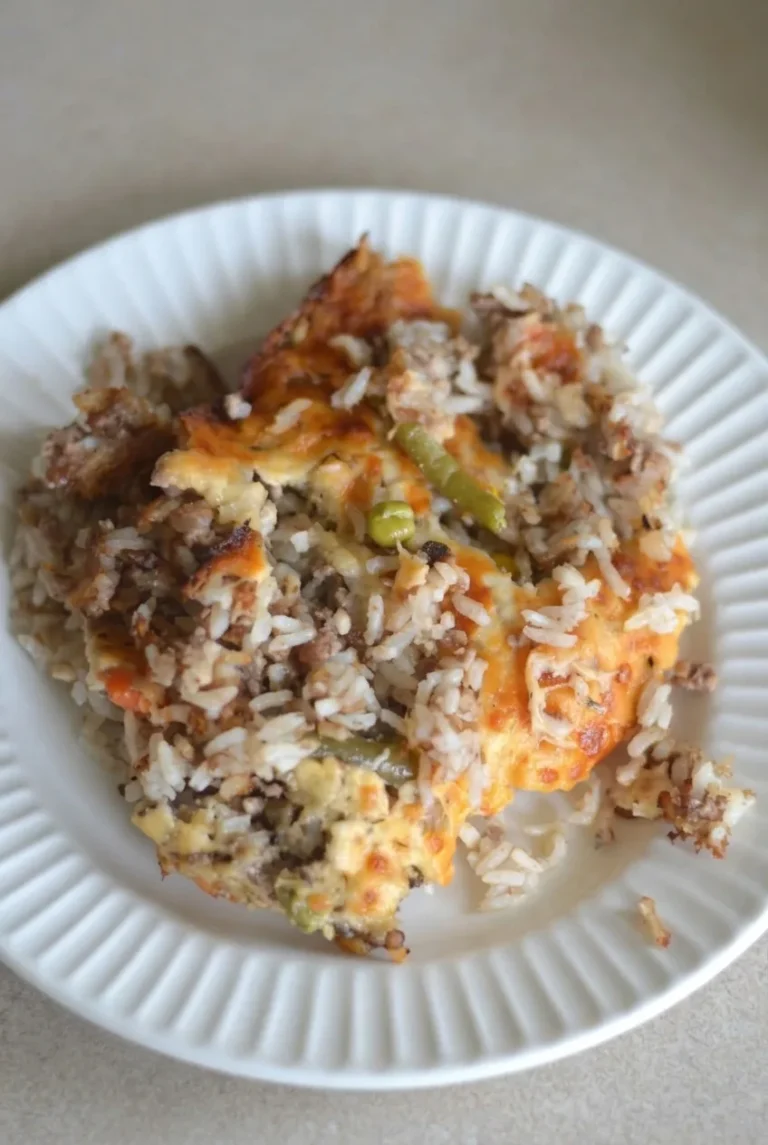
A full plate with a rustic scoop of ground beef and rice casserole, shown with extra neutral surface around it
  1. Prepare the dish: Heat the oven to 350°F (175°C). Lightly grease a 9-by-13-inch baking dish. Have the rice fully cooked before assembling the casserole.
  2. Brown the beef: In a large skillet over medium to medium-high heat, cook the beef, breaking it into small crumbles. Add the onion and continue cooking until the beef is browned and the onion is soft, about 8–10 minutes total. If the skillet is dry, add the oil. Stir in the garlic briefly, just until fragrant, then drain excess beef fat if needed.
  3. Make the sauce: Reduce the heat to medium-low. Stir in the tomato sauce, broth, Worcestershire sauce, salt, and pepper. Once combined and warm, remove the skillet from the heat and stir in the sour cream.
  4. Assemble: Gently fold in the cooked rice and frozen vegetables, followed by about half the cheddar. Spread the mixture evenly in the baking dish. It should be moist, with visible rice grains and no pool of loose liquid.
  5. Bake until hot: Bake uncovered for 15–20 minutes. Check around 20 minutes: the center should be steaming hot and the edges beginning to bubble. If needed, bake a little longer before adding the cheese. Rotate the dish if it heats unevenly.
  6. Finish with cheese: Scatter the remaining cheddar over the top, leaving some rice and vegetables visible. Bake for another 8–10 minutes, until the cheese has melted with a few golden spots.
  7. Rest and serve: Let the casserole rest for 5–10 minutes. Spoon it into loose portions rather than cutting it into squares.

Why Cooked Rice Matters

Raw rice cannot be substituted using this recipe’s liquid amounts or short bake time. It needs more liquid and a longer, covered bake to cook evenly. For this version, use fully cooked rice and avoid adding extra broth meant to hydrate uncooked grains.

How to Keep It Moist but Scoopable

Stick to the measured sauce, broth, and vegetables. Extra liquid can leave the filling watery, while baking it longer to compensate can dry out the rice. Take the casserole out once it is hot throughout and the cheese has melted, then let it settle before serving.

Serving Ideas

Serve generous spoonfuls with a crisp green salad. If using parsley, scatter it on lightly so the rice, beef, and vegetables remain visible.

For another beef-and-rice dinner in a different form, try Ground Beef Stuffed Bell Peppers with Rice.

Storage and Reheating

Cool leftovers and refrigerate them in an airtight container for up to four days. Reheat individual portions in the microwave until steaming hot. If the rice seems dry, stir in a small splash of milk.

To make the casserole ahead, assemble it with cooked rice and refrigerate it, reserving the topping cheese. A cold casserole will need extra time in the oven to heat through before the cheese goes on.

Freezing is possible, but the casserole may be drier or less creamy after thawing and reheating. Cool it first, store it airtight, and use within about three months.

Nutrition

Approximate nutrition per serving, based on 1/8 of the casserole: 355 calories, 19g protein, 15g fat, and 30g carbohydrates. Approximate nutrition per 100g: 140 calories, 8g protein, 6g fat, and 12g carbohydrates. Values vary with ingredient brands, beef leanness, and portion size.

Ground Beef and Rice Casserole

Cooked rice, browned ground beef, mixed vegetables, and cheddar bake in a lightly creamy tomato sauce.
Course: Main Course
Cuisine: American
Prep: 15 min
Cook: 40 min
Total: 60 min
Servings: 8 Calories: 355 kcal

Equipment

  • 9-by-13-inch baking dish
  • Large skillet

Ingredients

Casserole

  • 1 lb lean ground beef (450g)
  • 4 cups cooked long-grain white rice (640g)
  • 1 medium yellow onion, diced (150g)
  • 2 garlic cloves, minced
  • 1 cup tomato sauce (245g)
  • 1/2 cup beef or chicken broth (120g)
  • 1/2 cup sour cream (115g)
  • 1 cup frozen mixed vegetables (140g)
  • 1 1/2 cups shredded cheddar cheese, divided (170g)
  • 1 teaspoon Worcestershire sauce
  • 3/4 teaspoon kosher salt, or to taste
  • 1/4 teaspoon black pepper
  • 1 teaspoon neutral oil, only if needed

Optional

  • Pinch of red pepper flakes
  • 1 tablespoon chopped parsley
  • Plain, unflavored Greek yogurt as a substitute for sour cream

Instructions

  1. Preheat the oven to 350°F (175°C). Lightly grease a 9-by-13-inch baking dish and make sure the rice is fully cooked.
  2. Cook the ground beef in a large skillet over medium to medium-high heat, breaking it into small crumbles. Add the onion and cook until the beef is browned and the onion is soft, about 8–10 minutes total. Add oil if the skillet is dry.
  3. Stir in the garlic and cook briefly until fragrant. Drain excess beef fat if needed.
  4. Reduce the heat to medium-low. Stir in the tomato sauce, broth, Worcestershire sauce, salt, and pepper until combined and warm.
  5. Remove the skillet from the heat and stir in the sour cream.
  6. Gently fold in the cooked rice and frozen vegetables, then about half of the cheddar. Spread the mixture evenly in the baking dish.
  7. Bake uncovered for 15–20 minutes, until the center is steaming hot and the edges are beginning to bubble. Bake a little longer if needed, rotating the dish if it heats unevenly.
  8. Scatter the remaining cheddar over the casserole, leaving some rice and vegetables visible. Bake for another 8–10 minutes, until the cheese melts and has a few golden spots.
  9. Rest for 5–10 minutes before serving in loose spoonfuls.

Tips

  • Use fully cooked rice; raw rice will not cook properly with this amount of liquid and baking time.
  • Stick to the measured sauce, broth, and vegetables to avoid a watery casserole.
  • Remove the casserole once it is hot throughout and the cheese has melted to help keep the rice moist.
  • Add a splash of milk when reheating if the rice seems dry.

Variations

  • Mildly Spicy Casserole: Add a pinch of red pepper flakes to the sauce.
  • Greek Yogurt Substitute: Replace the sour cream with plain, unflavored Greek yogurt; the tang and texture may differ slightly.
  • Parsley Finish: Scatter 1 tablespoon of chopped parsley over the casserole before serving.

Notes

Refrigerate leftovers in an airtight container for up to four days and reheat portions until steaming hot. The casserole can be assembled ahead with cooked rice; reserve the topping cheese and allow extra oven time if baking it cold. It can be frozen for up to about three months, though it may be drier after reheating. Nutrition is approximate per serving.

Nutrition

Calories: 355 kcal | Protein: 19 g | Fat: 15 g | Carbohydrates: 30 g | Per 100g Calories: 140 kcal | Per 100g Protein: 8 g | Per 100g Fat: 6 g | Per 100g Carbohydrates: 12 g

Tater Tot Casserole with Ground Beef

Ground beef, onion, and a creamy mushroom sauce sit beneath a layer of golden tater tots in this cheesy casserole. Browning and draining the beef keeps the filling from turning greasy. The tots go on straight from the freezer, while the last of the cheddar goes on near the end of baking so some potato edges can brown.

After a short rest, serve the casserole in generous, loose scoops with beef, potato pieces, and melted cheese in each portion. Finish with a little chopped parsley.

Ingredients

Close detail of melted cheddar, browned beef, potato pieces, creamy sauce, and parsley in tater tot casserole.
  • 1 1/2 pounds lean ground beef (680g)
  • 1 small yellow onion, finely diced (about 100g)
  • 2 cloves garlic, minced
  • 3/4 teaspoon kosher salt, or to taste
  • 1/4 teaspoon black pepper
  • 1 tablespoon Worcestershire sauce
  • 1 can (10.5 ounces) condensed cream of mushroom soup (about 300g)
  • 1/2 cup milk
  • 2 cups shredded sharp cheddar cheese, divided (225g)
  • 1 bag frozen tater tots (28 to 32 ounces; about 850g)
  • 2 tablespoons chopped fresh parsley

How to Make Tater Tot Casserole with Ground Beef

A full red-and-white plate of ground beef tater tot casserole centered on a light surface, with the cheesy scoop and parsley visible.
  1. Prepare the oven and dish: Preheat the oven to 425°F (220°C). Lightly grease a 9-by-13-inch baking dish.
  2. Brown the beef: Cook the ground beef and onion in a large skillet over medium to medium-high heat for 8 to 10 minutes, breaking up the beef as it cooks. When the beef is browned with no pink remaining, drain off excess fat. Ground beef should reach 160°F (70°C) if checked with an instant-read thermometer. Stir in the garlic, salt, and pepper and cook for about 30 seconds.
  3. Make the filling: Reduce the heat to low or medium-low. Stir in the Worcestershire sauce, condensed soup, milk, and 1 cup of the cheddar. Cook for 2 to 3 minutes, stirring until combined. The filling should be creamy and easy to spread, not watery.
  4. Assemble: Spread the beef filling evenly in the prepared dish. Arrange the tots straight from the freezer in a reasonably even layer on top. Do not stir them into the filling.
  5. Bake and add the cheese: Bake uncovered for 20 to 22 minutes. Scatter the remaining cheddar across the top, leaving some tot edges exposed. Bake for another 5 to 8 minutes, until the filling bubbles around the edges, the exposed tots are golden, and the cheese has melted. If the tots need more color, continue baking in short increments.
  6. Rest and serve: Let the casserole stand for about 5 minutes so the filling settles slightly. Scoop onto plates and sprinkle with parsley.

How to Keep the Filling Creamy and the Tots Golden

Drain the browned beef before adding the soup and milk; excess skillet fat can leave the sauce oily or loose. The casserole will still be creamy and scoopable rather than firm enough to cut into neat squares.

Keep the tots in a single, reasonably even layer and bake uncovered. Adding the topping cheese late leaves some potato exposed to the oven heat. Use bubbling filling and golden tots as the final cues: a deeper dish or an oven that runs cool may need more than the suggested bake time.

Make-Ahead, Storage, and Reheating

To make the casserole ahead, assemble it, cover, and refrigerate for up to one day. Bake it cold, allowing roughly 5 to 10 extra minutes, and check for bubbling filling and golden tots rather than relying on the clock alone.

Refrigerate leftovers in an airtight container for 3 to 4 days. Reheat portions until hot. The tots will be softer than when freshly baked; for oven reheating, cover loosely with foil to limit drying, then uncover briefly to help the top re-crisp.

Freeze baked portions in freezer-safe containers for up to about 3 months. For an unbaked freezer casserole, cool the beef filling before assembling and use freezer-safe packaging. The tots may soften after thawing and reheating. Do not put a frozen glass dish directly into a preheated oven; follow the bakeware maker’s guidance. Baking time from frozen can vary considerably.

Serving Ideas

Serve generous scoops with a green salad or a simple vegetable side. For another ground beef casserole, try Walking Taco Casserole with Beef, Beans and Corn. For a beef-and-potato dinner with a mashed-potato topping instead, see Classic Ground Beef Shepherd’s Pie in a Skillet.

Nutrition

Approximate nutrition per serving, based on 6 servings: 685 calories, 38g protein, 40g fat, and 41g carbohydrates. Approximate nutrition per 100g: 180 calories, 10g protein, 10g fat, and 11g carbohydrates. Values vary with the brands and exact ingredients used.

Tater Tot Casserole with Ground Beef

Ground beef and onion in a creamy mushroom sauce are topped with frozen tater tots and cheddar, then baked until bubbling and golden.
Course: Main Course
Cuisine: American
Prep: 15 min
Cook: 45 min
Total: 60 min
Servings: 6 Calories: 685 kcal

Equipment

  • 9-by-13-inch baking dish
  • Large skillet
  • Instant-read thermometer

Ingredients

  • 1 1/2 pounds lean ground beef (680g)
  • 1 small yellow onion, finely diced (about 100g)
  • 2 cloves garlic, minced
  • 3/4 teaspoon kosher salt, or to taste
  • 1/4 teaspoon black pepper
  • 1 tablespoon Worcestershire sauce
  • 1 can (10.5 ounces) condensed cream of mushroom soup (about 300g)
  • 1/2 cup milk
  • 2 cups shredded sharp cheddar cheese, divided (225g)
  • 1 bag frozen tater tots (28 to 32 ounces; about 850g)
  • 2 tablespoons chopped fresh parsley

Instructions

  1. Preheat the oven to 425°F (220°C). Lightly grease a 9-by-13-inch baking dish.
  2. Cook the ground beef and onion in a large skillet over medium to medium-high heat for 8 to 10 minutes, breaking up the beef as it cooks.
  3. Drain off excess fat once the beef is browned and no pink remains. If using a thermometer, check that the beef reaches 160°F (70°C).
  4. Stir in the garlic, salt, and pepper, and cook for about 30 seconds.
  5. Reduce the heat to low or medium-low. Stir in the Worcestershire sauce, condensed soup, milk, and 1 cup of the cheddar. Cook for 2 to 3 minutes, stirring until creamy and combined.
  6. Spread the beef filling evenly in the prepared dish. Arrange the frozen tater tots in an even layer on top without stirring them into the filling.
  7. Bake uncovered for 20 to 22 minutes.
  8. Scatter the remaining cheddar over the casserole, leaving some tot edges exposed. Bake for another 5 to 8 minutes, until the filling bubbles around the edges, the exposed tots are golden, and the cheese has melted. Continue baking in short increments if the tots need more color.
  9. Let the casserole rest for about 5 minutes. Serve in scoops and sprinkle with parsley.

Tips

  • Drain the browned beef before adding the soup and milk to help prevent an oily or loose filling.
  • Keep the tater tots in a single, reasonably even layer and bake uncovered so they can brown.
  • Add the remaining cheddar near the end of baking to leave some tot edges exposed.
  • Use bubbling filling and golden tots as doneness cues; a deeper dish or a cool-running oven may need extra time.

Notes

Assemble and refrigerate covered for up to one day; bake cold, allowing about 5 to 10 extra minutes. Refrigerate leftovers for 3 to 4 days or freeze baked portions for up to about 3 months. Reheat portions until hot. Do not place a frozen glass dish directly into a preheated oven.

Nutrition

Calories: 685 kcal | Protein: 38 g | Fat: 40 g | Carbohydrates: 41 g

Ground Beef Bolognese Sauce

Ground beef Bolognese should be thick enough to cling to broad pappardelle ribbons, with tender beef crumbles and finely softened vegetables throughout. This version starts with onion, carrot, and celery, then reduces milk and white wine into the beef before adding tomatoes. Keep the long simmer gentle: the sauce needs time to concentrate, but a little hot water will keep it from sticking if the pot dries out too soon.

Serves: 6 | Prep: 25 minutes | Cook: about 2½ to 3 hours, or longer if needed

Ingredients

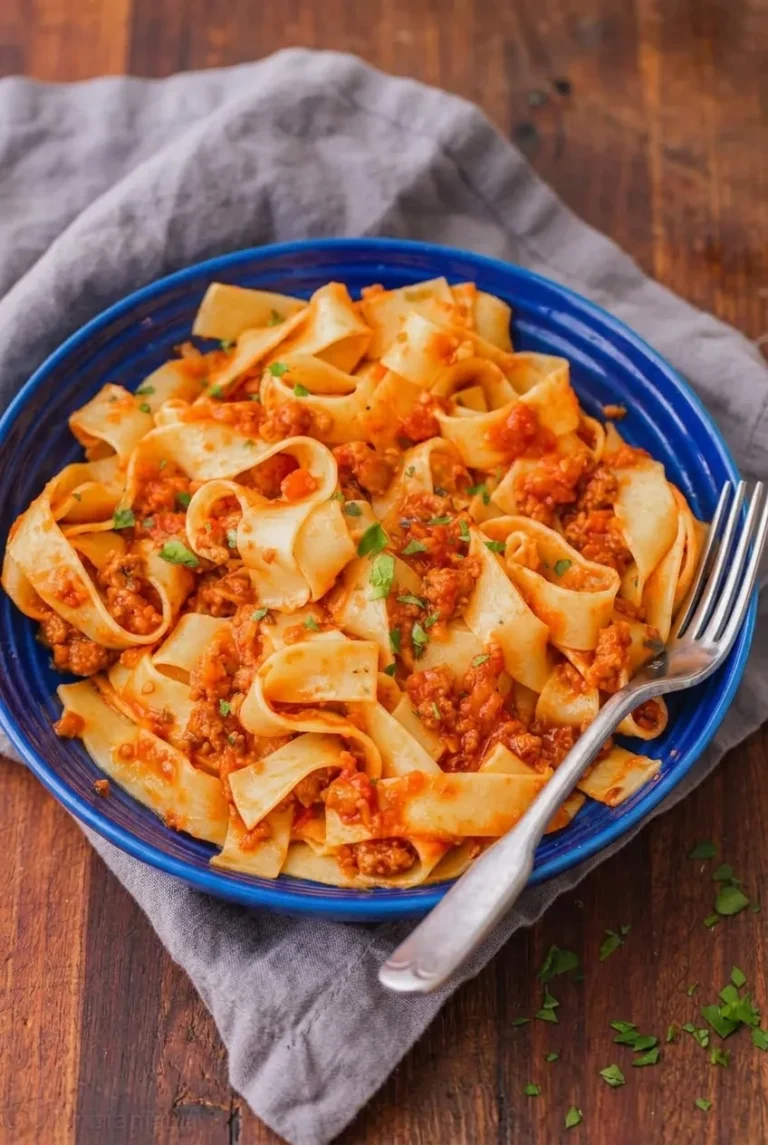
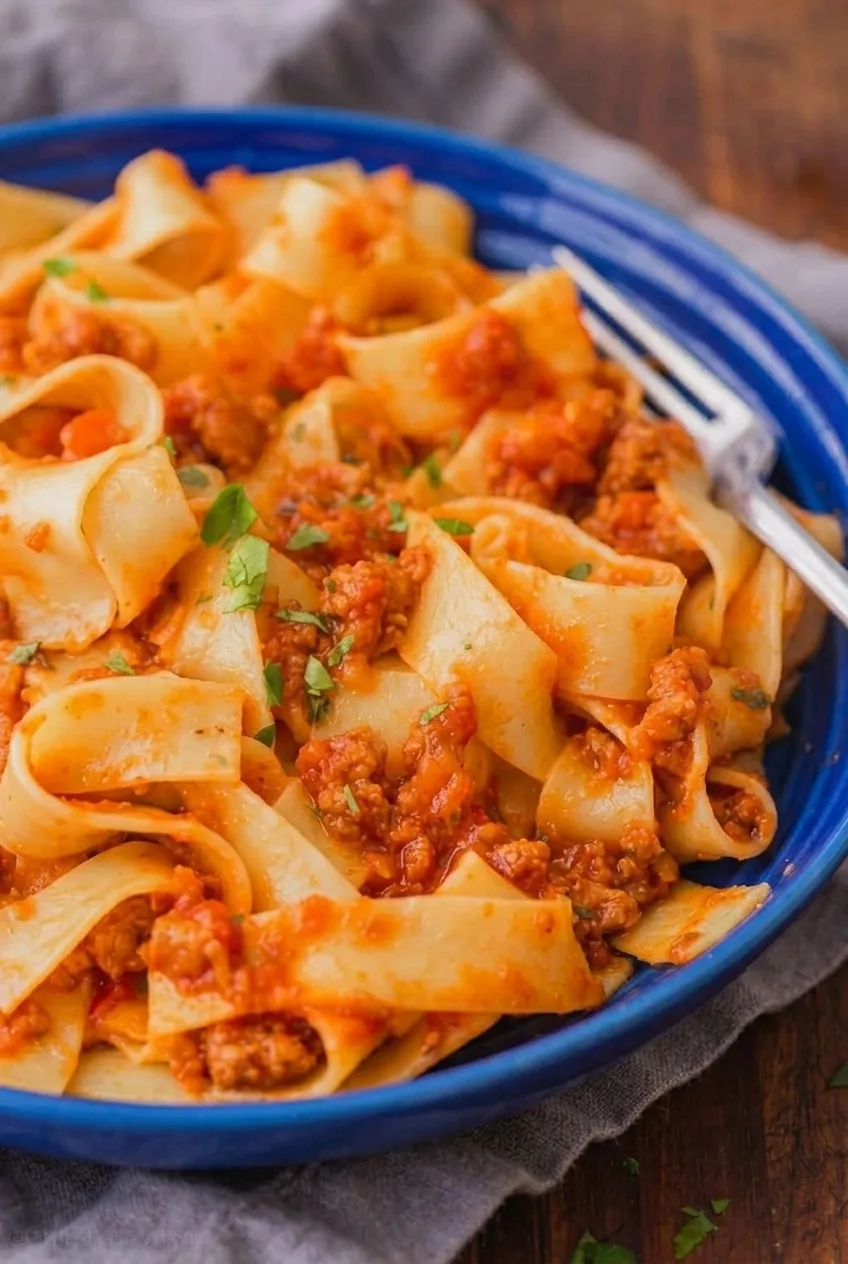
Close detail of thick ground beef Bolognese clinging to broad pappardelle ribbons with parsley flecks.
  • 1 tablespoon olive oil
  • 2 tablespoons unsalted butter
  • 1 medium yellow onion, finely diced (150g)
  • 1 medium carrot, finely diced (75g)
  • 1 celery rib, finely diced (50g)
  • 1 teaspoon kosher salt, plus more to taste
  • 1/2 teaspoon ground black pepper
  • 1 1/2 pounds ground beef, preferably 80/20 (680g)
  • 1 cup whole milk
  • 1 cup dry white wine
  • 2 tablespoons tomato paste (30g)
  • 1 can crushed tomatoes (28 ounces/about 795g)
  • 1/2 cup water, plus more as needed
  • 1 pound pappardelle (450g)
  • 2 tablespoons finely chopped fresh parsley, for serving

Optional: Add a small pinch of nutmeg with the milk, or cook 1 minced garlic clove briefly after the vegetables soften. Offer finely grated Parmesan at the table, if desired.

How to Make Ground Beef Bolognese

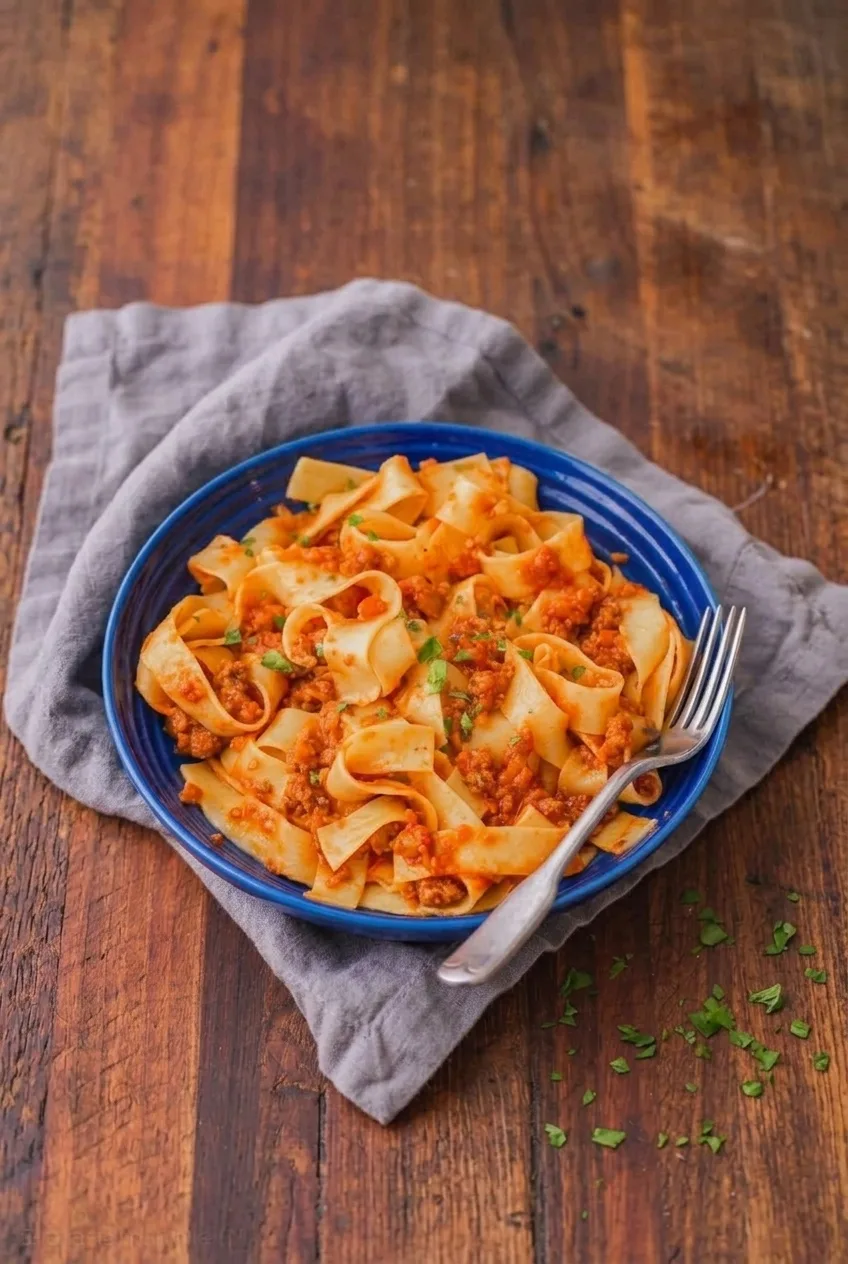
A full bowl of pappardelle with ground beef Bolognese on a dark wood table, photographed from a wider angle.
  1. Chop the vegetables: Finely dice the onion, carrot, and celery so they soften into the sauce. If using a food processor, pulse them finely without turning them into a purée.
  2. Soften the vegetables: Warm the olive oil and butter in a 5- to 6-quart Dutch oven or heavy-bottomed pot over medium heat. Add the onion, carrot, celery, salt, and pepper. Cook, stirring often, for 8 to 10 minutes, until glossy and very soft but not browned.
  3. Cook the beef: Add the ground beef and break it into small crumbles. Cook over medium heat for 8 to 10 minutes, until no longer raw-looking. Spoon off excess rendered fat only if the pot looks greasy.
  4. Reduce the milk: Add the milk and simmer gently over medium-low heat for 10 to 15 minutes, stirring occasionally, until most of the liquid has evaporated. The beef should look moist and creamy, not soupy. Add the nutmeg here if using.
  5. Reduce the wine: Add the wine and simmer over medium-low heat for 10 to 15 minutes, until little free liquid remains and its sharp alcohol smell has mostly cooked off. Stir in the tomato paste and cook briefly to coat the beef and vegetables.
  6. Simmer the sauce: Stir in the crushed tomatoes and 1/2 cup water. Bring to a gentle simmer, then reduce the heat to low. Cook mostly uncovered for 2 to 2½ hours, with only small, occasional bubbles breaking the surface. Stir every 20 to 30 minutes. Begin checking after 1½ hours for tenderness, sticking, and liquid level. If the sauce dries out before the beef is tender, lower the heat and add hot water in small splashes. If it evaporates unusually quickly, set the lid ajar.
  7. Finish and season: When the beef is tender and the vegetables have softened into the sauce, uncover fully and simmer for another 10 to 20 minutes if needed. Stir more often as it thickens. The sauce should cling to a spoon rather than run off it. Taste and adjust the salt and pepper; add a small splash of hot water if it becomes too thick.
  8. Cook the pasta: Near the end of the sauce’s cooking time, cook the pappardelle in salted water according to the package directions until just tender. Drain, reserving a little pasta water.
  9. Toss and serve: Toss the pappardelle with enough sauce to coat the broad ribbons, adding a splash of reserved pasta water only if needed. Serve in shallow bowls with a light scattering of parsley. Pass Parmesan separately if using.

How to Judge the Simmer and Finished Sauce

A heavy pot helps limit scorching, but a wide pot or a stronger burner may evaporate liquid faster. Keep the heat low and check the bottom of the pot when you stir. Add hot water a little at a time if the sauce is drying before the beef becomes tender; once the beef is tender, let excess moisture reduce uncovered.

The finished sauce should have distinct, tender beef crumbles and vegetables that are very soft. It should coat a pappardelle ribbon without leaving a watery pool beneath the pasta. Use those cues rather than an exact simmer time. A quick wide-skillet version can shorten the cook, but it will not develop the same tenderness and depth as this long simmer.

Wine and Pasta Options

Dry red wine can replace the white wine, though it changes the sauce’s flavor. For a wine-free version, use chicken or beef stock instead and taste before adding more salt. Reduce either substitute at the same stage as the white wine.

Pappardelle’s broad ribbons hold the substantial sauce; tagliatelle is a close alternative. This recipe reduces milk before adding wine and tomatoes, but milk timing varies among Bolognese methods.

Make-Ahead, Storage, and Reheating

The sauce can be made ahead. Let it cool, then refrigerate it in an airtight container for up to 3 days. Store it separately from the pasta when possible, and cook the pasta close to serving time.

Reheat the sauce gently in a saucepan, stirring until hot and adding a splash of water if it has thickened too much. For longer storage, freeze the cooled sauce in airtight, freezer-safe containers for up to 3 months for best quality. Thaw overnight in the refrigerator before reheating.

Nutrition

Approximate nutrition per serving, based on 6 servings of pasta with sauce: 730 calories, 33g protein, 31g fat, and 71g carbohydrates. Per 100g: about 160 calories, 7g protein, 7g fat, and 16g carbohydrates. Values vary with ingredients, portions, and how much liquid evaporates.

Ground Beef Bolognese Sauce

A slow-simmered beef and vegetable sauce served with broad pappardelle ribbons.
Course: Main Course
Cuisine: Italian
Prep: 25 min
Cook: 180 min
Total: 205 min
Servings: 6 Calories: 730 kcal

Equipment

  • 5- to 6-quart Dutch oven or heavy-bottomed pot
  • Large pot
  • Colander

Ingredients

For the Sauce

  • 1 tablespoon olive oil
  • 2 tablespoons unsalted butter
  • 1 medium yellow onion, finely diced (150 g)
  • 1 medium carrot, finely diced (75 g)
  • 1 celery rib, finely diced (50 g)
  • 1 teaspoon kosher salt, plus more to taste
  • 1/2 teaspoon ground black pepper
  • 1 1/2 pounds ground beef, preferably 80/20 (680 g)
  • 1 cup whole milk
  • 1 cup dry white wine
  • 2 tablespoons tomato paste (30 g)
  • 1 can crushed tomatoes (28 ounces/about 795 g)
  • 1/2 cup water, plus more as needed

For Serving

  • 1 pound pappardelle (450 g)
  • 2 tablespoons finely chopped fresh parsley
  • Finely grated Parmesan, optional

Instructions

  1. Finely dice the onion, carrot, and celery. If using a food processor, pulse until finely chopped but not puréed.
  2. Warm the olive oil and butter in a Dutch oven over medium heat. Add the onion, carrot, celery, salt, and pepper. Cook, stirring often, for 8 to 10 minutes, until very soft but not browned.
  3. Add the ground beef and break it into small crumbles. Cook over medium heat for 8 to 10 minutes, until no longer raw-looking. Spoon off excess fat only if the pot looks greasy.
  4. Add the milk and simmer gently over medium-low heat for 10 to 15 minutes, stirring occasionally, until most of the liquid has evaporated and the beef looks moist and creamy.
  5. Add the wine and simmer over medium-low heat for 10 to 15 minutes, until little free liquid remains and the sharp alcohol smell has mostly cooked off.
  6. Stir in the tomato paste and cook briefly to coat the beef and vegetables.
  7. Stir in the crushed tomatoes and 1/2 cup water. Bring to a gentle simmer, then reduce the heat to low.
  8. Cook mostly uncovered for 2 to 2 1/2 hours, keeping the simmer gentle. Stir every 20 to 30 minutes and begin checking after 1 1/2 hours. Add hot water in small splashes if the sauce dries before the beef is tender; set the lid ajar if it evaporates unusually quickly.
  9. When the beef is tender and the vegetables are very soft, simmer uncovered for another 10 to 20 minutes if needed, stirring more often as the sauce thickens. Season with salt and pepper, and add a splash of hot water if it becomes too thick.
  10. Near the end of the sauce’s cooking time, cook the pappardelle in salted water according to the package directions until just tender. Drain, reserving a little pasta water.
  11. Toss the pappardelle with enough sauce to coat, adding a splash of reserved pasta water if needed. Serve with parsley and Parmesan, if desired.

Tips

  • Dice the vegetables finely so they soften into the sauce.
  • Keep the simmer low, with only small, occasional bubbles.
  • Check the bottom of the pot when stirring and add hot water a little at a time if the sauce is drying out.
  • Judge doneness by tender beef and a sauce that clings to a spoon, rather than by time alone.
  • Store the sauce separately from the pasta when possible.

Variations

  • Red Wine Bolognese: Replace the white wine with dry red wine.
  • Wine-Free Bolognese: Replace the wine with chicken or beef stock and taste before adding more salt.
  • Garlic or Nutmeg Bolognese: Add 1 minced garlic clove after the vegetables soften, or stir a small pinch of nutmeg into the milk.
  • Tagliatelle Bolognese: Use tagliatelle instead of pappardelle.

Notes

Refrigerate cooled sauce in an airtight container for up to 3 days, or freeze for up to 3 months for best quality. Reheat gently, adding a splash of water if needed; thaw frozen sauce overnight in the refrigerator.

Nutrition

Calories: 730 kcal | Protein: 33 g | Fat: 31 g | Carbohydrates: 71 g | Per 100g Calories: 160 kcal | Per 100g Protein: 7 g | Per 100g Fat: 7 g | Per 100g Carbohydrates: 16 g

Ground Beef Stuffed Bell Peppers

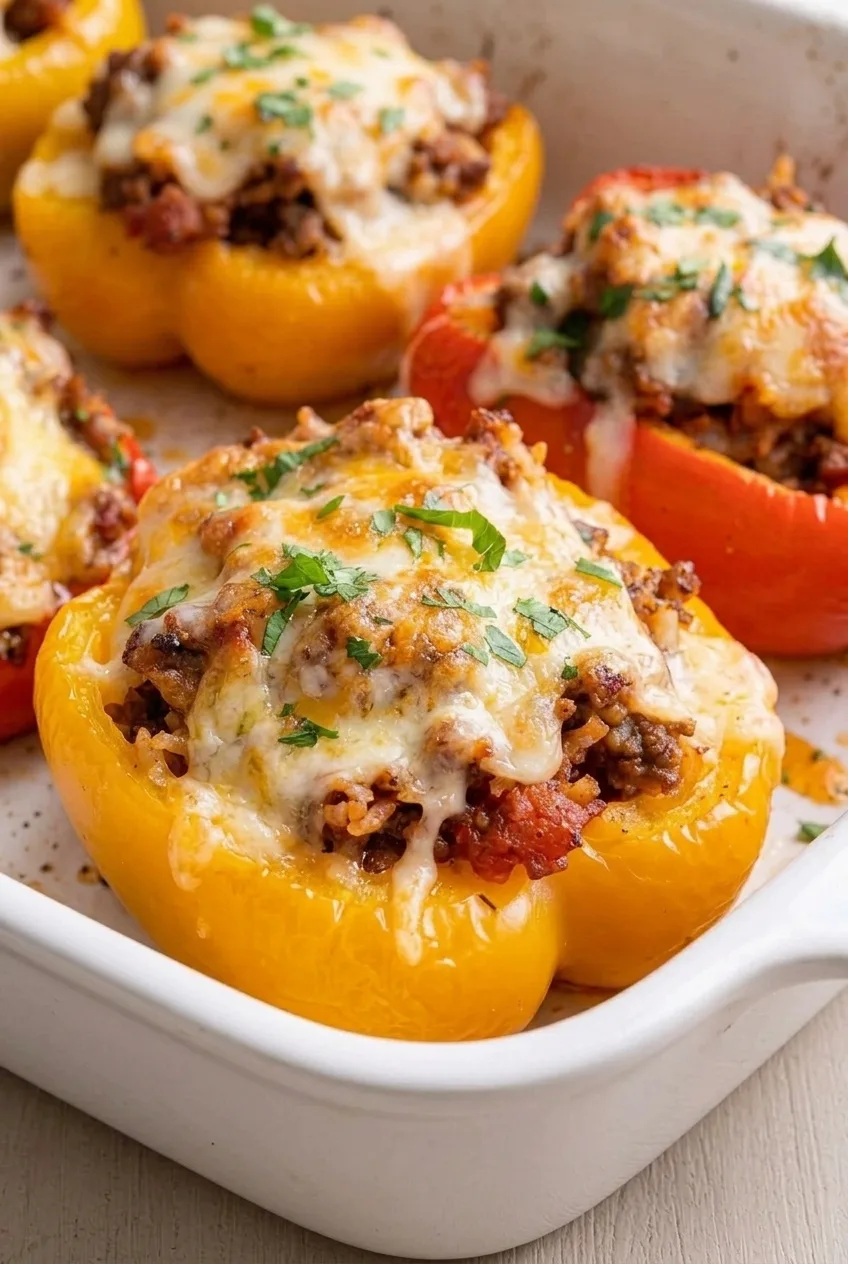
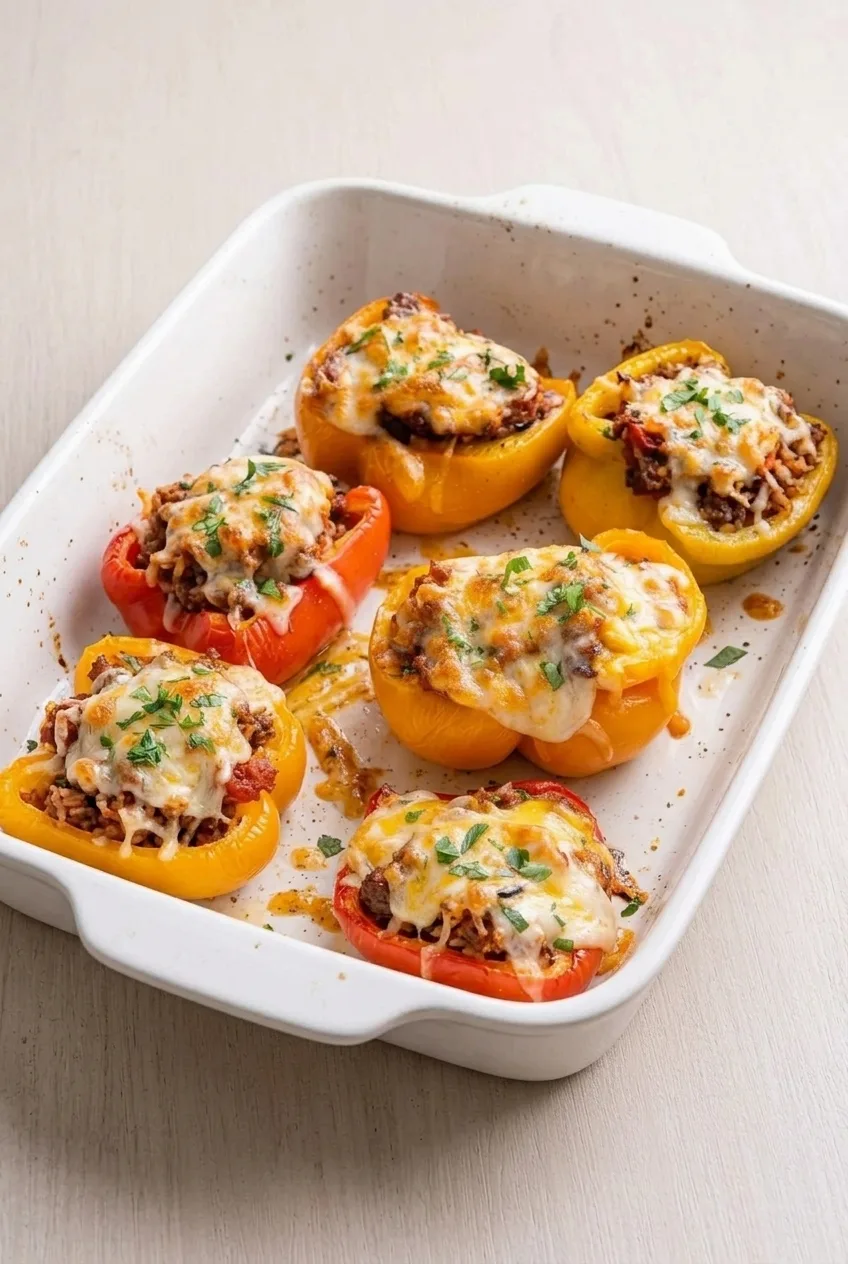
Colorful bell peppers are cut lengthwise into boats and filled with a tomato-herb mixture of ground beef and rice. Pre-baking the empty halves softens the peppers while the filling cooks in a skillet. Because the rice is already cooked, the stuffed peppers need only a short final bake to heat through and melt the cheese. A brief broil gives the topping a few golden spots; chopped parsley finishes each half.

Ingredients for Ground Beef Stuffed Bell Peppers

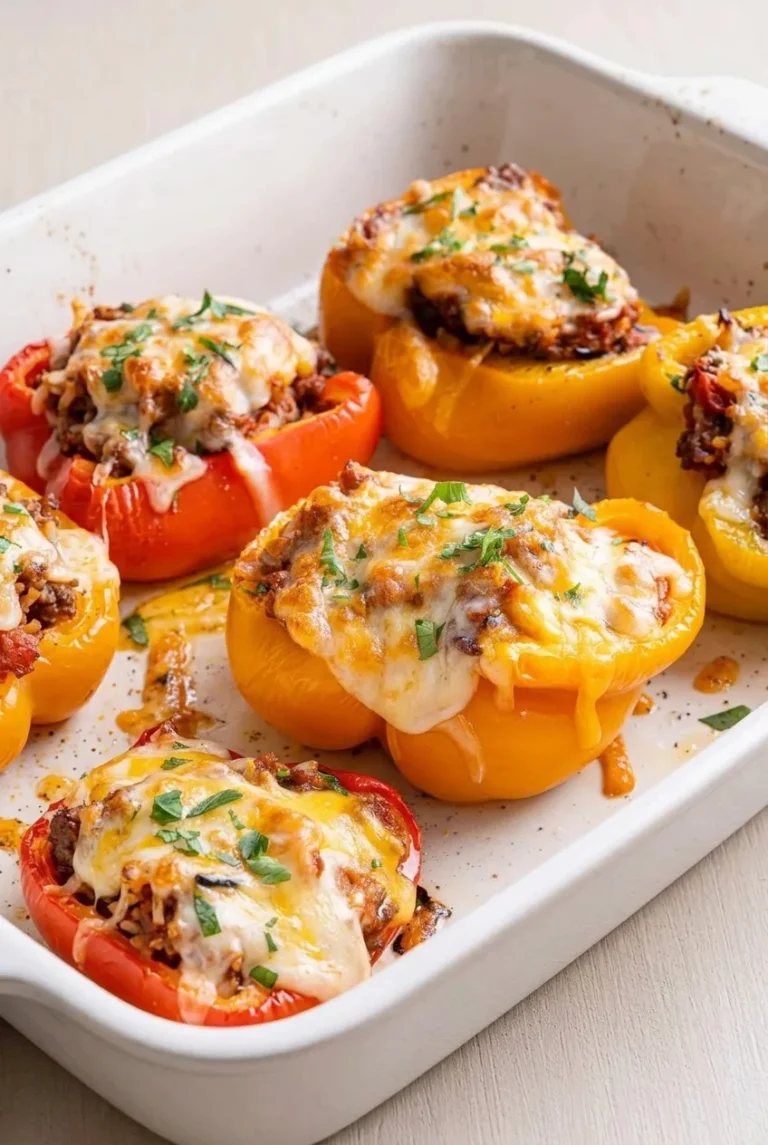
Close view of ground beef and rice filling beneath browned melted cheese on a parsley-topped pepper half
  • 4 medium bell peppers, preferably a mix of red, orange, and yellow (about 700g)
  • 1 tablespoon olive oil
  • 1 small yellow onion, finely diced (about 100g)
  • 1 lb lean ground beef (450g)
  • 2 cloves garlic, minced
  • 1 1/2 cups fully cooked rice (240g)
  • 1/2 cup drained petite diced tomatoes (120g)
  • 1/2 cup tomato sauce (120g)
  • 1 teaspoon Italian seasoning
  • 1/2 teaspoon paprika
  • 3/4 teaspoon kosher salt, or to taste
  • 1/4 teaspoon black pepper
  • 1 cup shredded mozzarella or Italian-blend cheese (110g)
  • 2 tablespoons chopped fresh parsley

How to Make Ground Beef Stuffed Bell Peppers

Full serving of colorful ground beef stuffed bell pepper halves on a white plate with space around the dish
  1. Prepare the peppers: Heat the oven to 425°F (220°C) with a rack in the center. Halve the peppers lengthwise and remove the seeds and ribs. Arrange the halves cut-side up in a rimmed baking dish that holds them securely.
  2. Pre-bake: Bake uncovered for 15–20 minutes, checking at 15 minutes. The edges should begin to soften while the halves still hold their shape. Give thick-walled peppers a few more minutes if needed. Carefully pour off liquid collected inside the peppers or in the dish.
  3. Cook the beef and onion: While the peppers bake, heat the olive oil in a large skillet over medium heat. Cook the onion until softened, then add the beef. Break it into small crumbles and cook for 7–9 minutes, until browned with no raw-looking pieces. Cook the beef to 160°F (70°C). Drain excess grease if needed.
  4. Finish the filling: Stir in the garlic, cooked rice, drained tomatoes, tomato sauce, Italian seasoning, paprika, salt, and pepper. Cook for 3–4 minutes, stirring, until hot and combined. The filling should be moist and easy to spoon, not watery. Taste and adjust the seasoning, then remove from the heat.
  5. Fill and top: Spoon the filling into the pepper halves, mounding it slightly. Sprinkle the cheese evenly over the tops.
  6. Bake and broil: Return the dish to the oven for about 5 minutes. Switch to broil for 1–3 minutes, watching continuously. Remove the peppers when the cheese is bubbling with a few golden spots.
  7. Rest and serve: Let the peppers stand for 5 minutes so the filling settles. Scatter the parsley over the cheese and serve cut-side up.

Why Pre-Bake the Peppers?

The filled bake is too short to soften raw pepper halves. Pre-baking gives the walls a head start without letting the boats collapse. Peppers vary in size and thickness, so use the softened edges as your cue rather than relying only on the clock. Pouring off the liquid they release keeps it from thinning the filling.

Use Cooked Rice for the Filling

The short final bake will not cook raw rice. Use fully cooked white or brown rice, and drain canned diced tomatoes before measuring them. Together with draining excess beef grease, this keeps the filling moist without leaving liquid pooled in the peppers.

Make-Ahead and Leftovers

The cooked filling can be refrigerated separately and spooned into pre-baked pepper halves when you’re ready to finish the dish. If the peppers are assembled and chilled, allow extra oven time to heat the filling through before broiling the cheese.

Refrigerate cooked peppers in an airtight container for up to 3 days. Reheat in an oven-safe dish until hot throughout, or microwave individual portions; the cheese will lose some of its browned texture. Cooked filling or stuffed peppers can also be frozen airtight. Thaw before reheating when possible, and expect the peppers to be softer after freezing.

Serve with a simple green salad. For another tomato-and-cheese ground beef dinner, try creamy beef and shells. For a different baked beef dish, see walking taco casserole.

Nutrition

Approximate nutrition per serving, based on 4 servings of about 2 pepper halves each: 465 calories, 34g protein, 21g fat, and 35g carbohydrates. Approximate nutrition per 100g: 105 calories, 8g protein, 5g fat, and 8g carbohydrates. Values vary with ingredients and portion sizes.

Ground Beef Stuffed Bell Peppers

Bell pepper halves are pre-baked, filled with seasoned ground beef and cooked rice, then topped with cheese and broiled until bubbling.
Course: Main Course
Cuisine: American
Prep: 15 min
Cook: 35 min
Total: 50 min
Servings: 4 Calories: 465 kcal

Equipment

  • Rimmed baking dish
  • Large skillet
  • Oven
  • Meat thermometer

Ingredients

For the Peppers and Filling

  • 4 medium bell peppers, preferably a mix of red, orange, and yellow (about 700g)
  • 1 tablespoon olive oil
  • 1 small yellow onion, finely diced (about 100g)
  • 1 lb lean ground beef (450g)
  • 2 cloves garlic, minced
  • 1 1/2 cups fully cooked rice (240g)
  • 1/2 cup drained petite diced tomatoes (120g)
  • 1/2 cup tomato sauce (120g)
  • 1 teaspoon Italian seasoning
  • 1/2 teaspoon paprika
  • 3/4 teaspoon kosher salt, or to taste
  • 1/4 teaspoon black pepper
  • 1 cup shredded mozzarella or Italian-blend cheese (110g)
  • 2 tablespoons chopped fresh parsley

Instructions

  1. Heat the oven to 425°F (220°C) with a rack in the center.
  2. Halve the peppers lengthwise, remove the seeds and ribs, and arrange them cut-side up in a rimmed baking dish.
  3. Bake the peppers uncovered for 15–20 minutes, checking at 15 minutes, until the edges begin to soften but the halves still hold their shape. Carefully pour off any liquid.
  4. While the peppers bake, heat the olive oil in a large skillet over medium heat. Cook the onion until softened.
  5. Add the ground beef, break it into small crumbles, and cook for 7–9 minutes until browned with no raw-looking pieces. Cook to 160°F (70°C), then drain excess grease if needed.
  6. Stir in the garlic, cooked rice, drained tomatoes, tomato sauce, Italian seasoning, paprika, salt, and pepper. Cook for 3–4 minutes, stirring, until hot and combined. Taste and adjust the seasoning, then remove from the heat.
  7. Spoon the filling into the pepper halves, mounding it slightly, and sprinkle the cheese evenly over the tops.
  8. Bake for about 5 minutes, then broil for 1–3 minutes, watching continuously, until the cheese bubbles and has a few golden spots.
  9. Let the peppers stand for 5 minutes. Scatter the parsley over the cheese and serve.

Tips

  • Use the peppers’ softened edges as a guide; thicker peppers may need a few extra minutes of pre-baking.
  • Pour off liquid released by the peppers so it does not thin the filling.
  • Use fully cooked rice; the short final bake is not long enough to cook raw rice.
  • Drain the diced tomatoes and excess beef grease to keep the filling moist without making it watery.
  • Watch the peppers continuously while broiling because the cheese can brown quickly.

Variations

  • Brown Rice Stuffed Peppers: Use fully cooked brown rice in place of white rice.
  • Italian-Blend Cheese Peppers: Use shredded Italian-blend cheese instead of mozzarella.

Notes

Refrigerate leftovers in an airtight container for up to 3 days. Reheat in an oven-safe dish until hot throughout or microwave individual portions. Cooked filling or stuffed peppers can be frozen airtight; thaw before reheating when possible. Cook ground beef to 160°F (70°C).

Nutrition

Calories: 465 kcal | Protein: 34 g | Fat: 21 g | Carbohydrates: 35 g

Ground Beef Dirty Rice

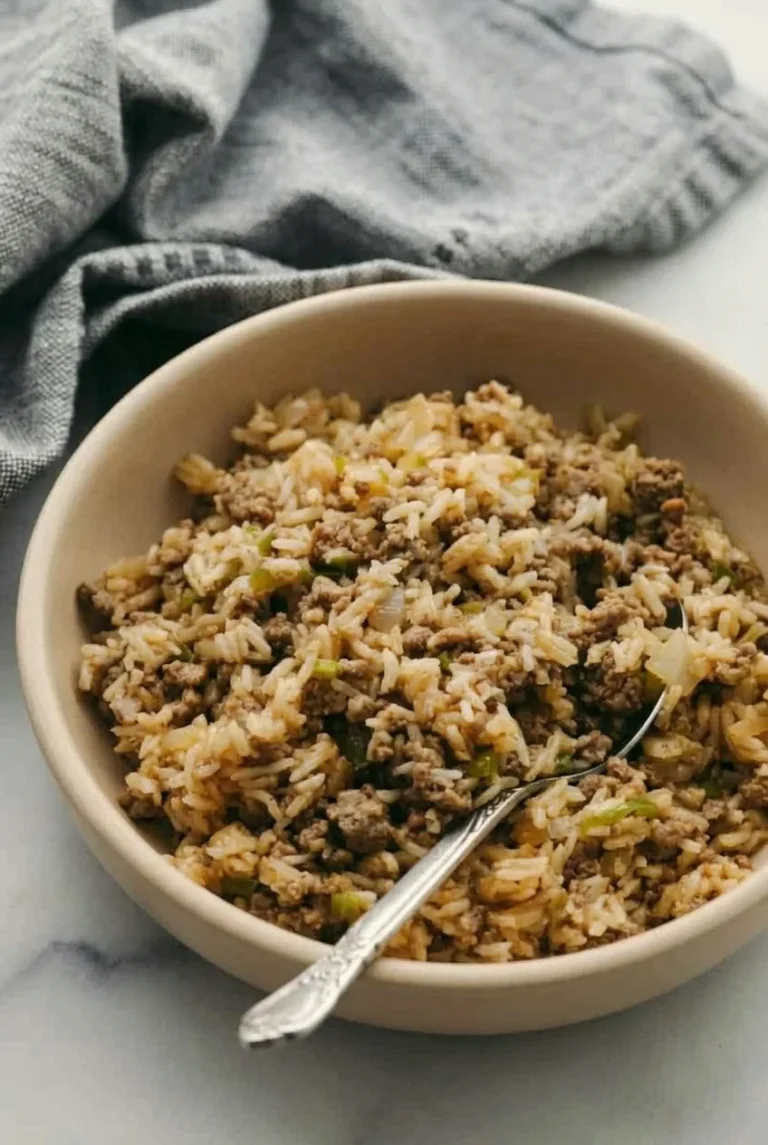
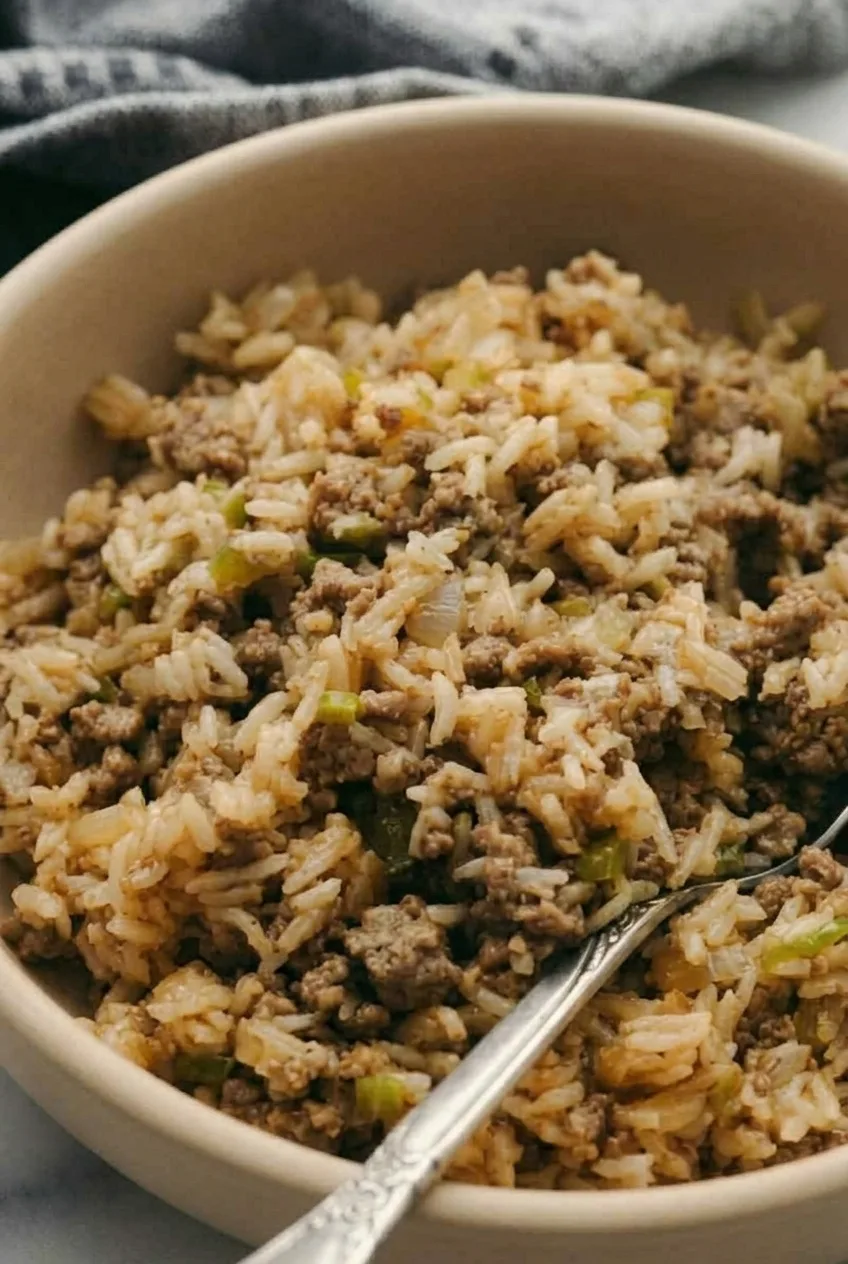
Uncooked long-grain rice simmers with browned ground beef, onion, green bell pepper, celery, Cajun seasoning, and beef broth in one pot. Break the beef into small crumbles so it mixes throughout the rice. A gentle covered simmer and short rest leave the grains tender and distinct, with a moist, spoonable finish rather than a soupy one. Serve generous bowls as a main dish or smaller portions as a side.

Ingredients for Ground Beef Dirty Rice

Close detail of ground beef dirty rice showing distinct rice grains, browned beef, and softened vegetables
  • 1 tablespoon neutral oil
  • 1 lb ground beef (450g)
  • 1 medium yellow onion, finely diced (150g)
  • 1 small green bell pepper, finely diced (120g)
  • 2 ribs celery, finely diced (80g)
  • 2 cloves garlic, minced
  • 1 to 1 1/2 teaspoons Cajun seasoning
  • 1/2 teaspoon dried thyme
  • 1/4 teaspoon kosher salt to start, plus more to taste
  • 1/4 teaspoon black pepper
  • 1 cup uncooked long-grain white rice (185g)
  • 2 cups low-sodium beef broth

Optional: 1 tablespoon chopped fresh parsley for serving, or a pinch of cayenne or Louisiana-style hot sauce for more heat. If the broth or Cajun seasoning is salty, omit the initial salt and season after the rice cooks.

How to Make Ground Beef Dirty Rice

A full bowl of ground beef dirty rice on a neutral tabletop, with rice, beef, and vegetables mixed throughout
  1. Brown the beef: Heat the oil in a heavy-bottomed 3- to 4-quart saucepan or Dutch oven over medium-high heat. Add the beef and cook for 5 to 7 minutes, breaking it into small crumbles and letting it brown against the pot before stirring. It should be browned and no longer pink; if checked with a thermometer, ground beef should reach 160°F (70°C). Drain excess fat if needed, leaving a little in the pot.
  2. Soften the vegetables: Reduce the heat to medium. Add the onion, bell pepper, celery, garlic, Cajun seasoning, thyme, salt, and black pepper. Cook, stirring, for 4 to 5 minutes, until the onion begins to turn translucent and the vegetables soften. Do not let the garlic darken.
  3. Add the rice and broth: Stir the uncooked rice into the beef and vegetables to coat and distribute the grains. Pour in the broth, scraping up any browned bits from the bottom of the pot.
  4. Simmer covered: Bring the liquid to a gentle simmer, stir once to level the rice, then reduce the heat to low and cover tightly. Cook without lifting the lid for about 15 minutes.
  5. Check the rice: Lift the lid briefly and taste a grain. If it is still firm and liquid remains, cover promptly and simmer a few minutes longer, up to about 20 minutes total. If the pot is nearly dry but the rice is firm, add a small splash of hot broth, cover, and continue gently. The rice is ready when the grains are tender through the center and little or no free liquid remains.
  6. Rest and fluff: Turn off the heat and leave the pot covered for 5 minutes. Fluff gently with a fork, then taste and adjust the salt, Cajun seasoning, or heat. Add parsley only if desired.

How to Keep the Rice Tender and Distinct

Use a heavy pot with a tight-fitting lid rather than a wide, shallow skillet, which can let the broth evaporate before the rice is tender. Keep the simmer low and the lid closed until it is time to check; trapped steam helps the grains cook evenly. Stop cooking once the rice is tender, then fluff instead of stirring vigorously so the grains do not break down.

Adjusting the Seasoning

Cajun blends vary in salt and heat, and the rice absorbs the seasoned broth as it cooks. Start with 1 teaspoon of Cajun seasoning if the blend is strong, then taste the finished rice before adding more. Add cayenne or hot sauce gradually if you want extra heat.

For a beef-and-pork variation, replace up to 1/2 lb of the beef with ground pork or sausage. Brown it with the beef and drain excess fat as needed. Sausage may add enough salt that the rice needs less seasoning; neither sausage nor chicken liver is required for this ground-beef version.

Serving Suggestions

Serve as a main dish in generous bowls, or offer smaller portions with cornbread, coleslaw, collard greens, or a green salad. For a corn side, try corn soufflé or jalapeño cheddar corn casserole. Offer hot sauce at the table for anyone who wants more heat.

Storing and Reheating Leftovers

Cool leftovers promptly and refrigerate in an airtight container for up to 4 days. Reheat in the microwave in short intervals, stirring as needed, until steaming hot. On the stovetop, warm over medium-low heat with a splash of water or broth if the rice has dried out.

Freeze cooled portions in airtight freezer-safe containers for up to 2 months for best quality. Thaw in the refrigerator and reheat thoroughly, adding a little water or broth if needed.

Nutrition

Approximate nutrition per serving, based on 4 generous main-dish servings: 520 calories, 28g protein, 27g fat, and 44g carbohydrates. Approximate nutrition per 100g: 155 calories, 8g protein, 8g fat, and 14g carbohydrates. Values vary with the beef, broth, and Cajun seasoning used.

Ground Beef Dirty Rice

Long-grain rice simmers with browned ground beef, vegetables, Cajun seasoning, and beef broth in one pot.
Course: Main Course
Cuisine: Cajun
Prep: 15 min
Cook: 37 min
Total: 52 min
Servings: 4 Calories: 520 kcal

Equipment

  • 3- to 4-quart heavy-bottomed saucepan or Dutch oven
  • Tight-fitting lid

Ingredients

For the Dirty Rice

  • 1 tablespoon neutral oil
  • 1 lb ground beef (450g)
  • 1 medium yellow onion, finely diced (150g)
  • 1 small green bell pepper, finely diced (120g)
  • 2 ribs celery, finely diced (80g)
  • 2 cloves garlic, minced
  • 1 to 1 1/2 teaspoons Cajun seasoning
  • 1/2 teaspoon dried thyme
  • 1/4 teaspoon kosher salt, plus more to taste
  • 1/4 teaspoon black pepper
  • 1 cup uncooked long-grain white rice (185g)
  • 2 cups low-sodium beef broth

Optional for Serving

  • 1 tablespoon chopped fresh parsley
  • Pinch of cayenne or Louisiana-style hot sauce

Instructions

  1. Heat the oil in a heavy-bottomed 3- to 4-quart saucepan or Dutch oven over medium-high heat.
  2. Add the ground beef and cook for 5 to 7 minutes, breaking it into small crumbles and allowing it to brown before stirring. Cook until no longer pink and the internal temperature reaches 160°F (70°C). Drain excess fat if needed, leaving a little in the pot.
  3. Reduce the heat to medium. Add the onion, bell pepper, celery, garlic, Cajun seasoning, thyme, salt, and black pepper. Cook, stirring, for 4 to 5 minutes, until the vegetables soften and the onion begins to turn translucent. Do not let the garlic darken.
  4. Stir in the uncooked rice until the grains are coated and distributed through the beef and vegetables.
  5. Pour in the beef broth and scrape up any browned bits from the bottom of the pot.
  6. Bring the liquid to a gentle simmer, stir once to level the rice, then reduce the heat to low and cover tightly. Cook for about 15 minutes without lifting the lid.
  7. Briefly check a grain of rice. If it is still firm and liquid remains, cover promptly and simmer a few minutes longer, up to about 20 minutes total. If the pot is nearly dry but the rice is firm, add a small splash of hot broth and continue cooking covered.
  8. Turn off the heat when the rice is tender through the center and little or no free liquid remains. Leave the pot covered for 5 minutes.
  9. Fluff gently with a fork. Taste and adjust the salt, Cajun seasoning, or heat, then add parsley if desired.

Tips

  • Use a heavy pot with a tight-fitting lid to help the rice cook evenly.
  • Keep the simmer low and avoid lifting the lid until it is time to check the rice.
  • Start with 1 teaspoon of Cajun seasoning if your blend is strong or salty, then adjust after cooking.
  • Fluff gently rather than stirring vigorously to keep the rice grains distinct.
  • If the broth or Cajun seasoning is salty, omit the initial salt and season after the rice cooks.

Variations

  • Ground Beef and Pork Dirty Rice: Replace up to 1/2 lb of the ground beef with ground pork or sausage. Brown it with the beef and drain excess fat as needed.

Notes

Refrigerate leftovers in an airtight container for up to 4 days or freeze for up to 2 months. Reheat until steaming hot, adding a splash of water or broth if needed.

Nutrition

Calories: 520 kcal | Protein: 28 g | Fat: 27 g | Carbohydrates: 44 g