Author

Julia

Browsing

Walking Taco Casserole

Walking taco casserole turns taco-seasoned beef, beans, corn, tomatoes, corn chips, and melted cheese into a scoopable dinner. A brief simmer thickens the filling before it goes over the chips, so the casserole stays saucy rather than watery. Chips beneath the filling soften as they bake; those near the top and edges keep more texture. Serve extra chips on the side for crunch, and add the green onions after baking.

Ingredients for Walking Taco Casserole
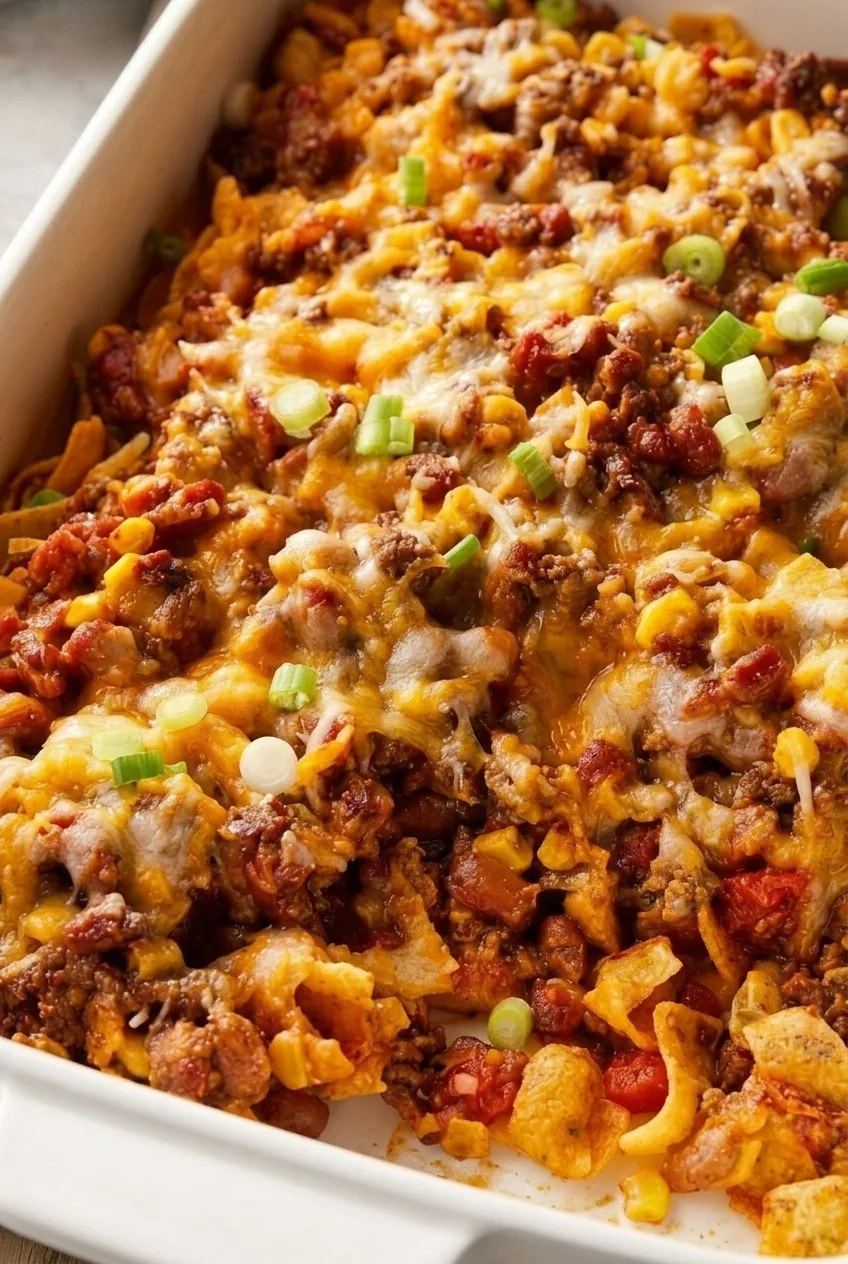
Close-up of walking taco casserole showing chunky beef, beans, corn chips, melted cheese, and scallions
  • 1 teaspoon neutral cooking oil, as needed
  • 1/2 medium yellow onion, finely diced (about 75g)
  • 1 pound lean ground beef (450g)
  • 1 (1-ounce) packet taco seasoning (28g)
  • 1 (10-ounce) can diced tomatoes with green chiles, with juices (280g)
  • 1 (15-ounce) can black or pinto beans, drained and rinsed (425g can)
  • 1 cup corn kernels, drained if canned (165g)
  • 5 ounces sturdy corn chips, divided (140g)
  • 2 cups shredded Mexican-style cheese blend (220g)
  • 2 green onions, thinly sliced

Optional for serving: sour cream, salsa or pico de gallo, and extra corn chips.

How to Make Walking Taco Casserole
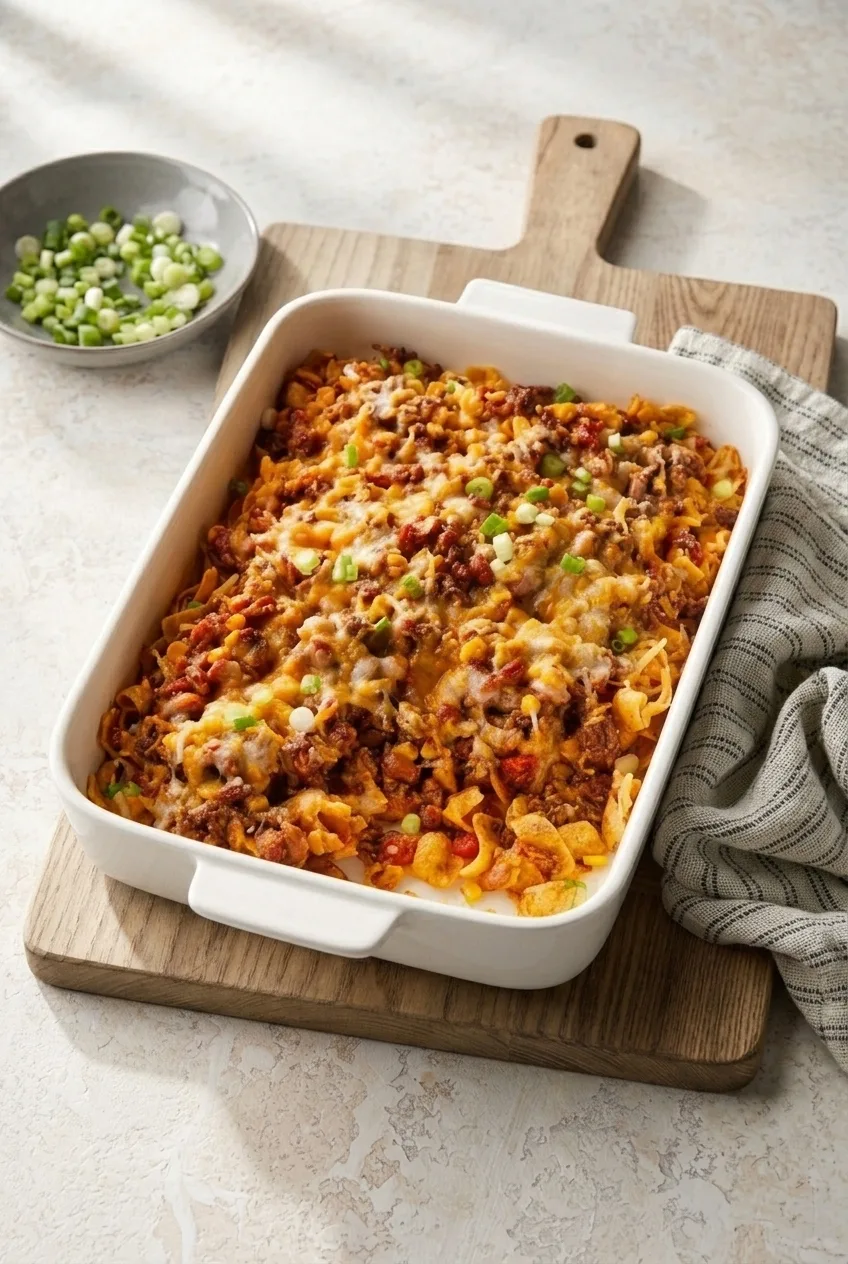
Full rectangular dish of walking taco casserole centered on a light surface with room around it
  1. Preheat the oven: Heat the oven to 350°F (175°C). Have a 9-by-13-inch baking dish ready; lightly grease it if desired.
  2. Brown the beef: Heat the oil in a large skillet over medium heat, using it only if the skillet needs it. Add the onion and beef. Cook for 7 to 9 minutes, breaking up the meat and stirring, until no pink remains. Drain excess fat if needed.
  3. Thicken the filling: Stir in the taco seasoning, tomatoes with their juices, drained beans, and corn. Simmer over medium-low heat for 5 to 7 minutes, stirring occasionally, until hot and cohesive. It should be saucy, with no pool of liquid in the skillet.
  4. Assemble: Spread about half the chips across the bottom of the baking dish. Spoon the filling over them, then scatter the remaining chips across the surface and near the edges. Assemble shortly before baking so the chips do not sit in the filling.
  5. Bake: Scatter the cheese over the filling and chips, leaving a few chips visible near the edges. Bake uncovered for 15 to 20 minutes. Start checking at 15 minutes; stop when the filling is hot throughout and the cheese is melted and bubbling around the edges. A cold make-ahead filling may need longer than a warm one.
  6. Rest and serve: Let stand for about 5 minutes, then scatter the green onions over the top. Scoop portions from the baking dish and offer any other toppings separately.

How to Manage the Corn Chip Texture

Chips under the filling absorb moisture and soften; baking longer will not make them crisp again. The brief bake and exposed top chips provide some texture, while chips served separately stay crunchiest. If the filling looks soupy before assembly, simmer it a little longer rather than letting the chips absorb the extra liquid.

Toppings and Easy Swaps

Ground turkey or chicken can replace the beef; cook until no pink remains and drain excess liquid or fat as needed. Cheddar, Monterey Jack, or pepper jack can replace the cheese blend. Keep sour cream, salsa, lettuce, and avocado on the side rather than adding them to the hot casserole; green onions are the garnish added after baking.

For another baked taco-style dinner, try this Taco Casserole with Ground Beef.

Make-Ahead, Storage, and Reheating

For advance prep, cook the filling and refrigerate it separately from the chips and toppings. Assemble close to baking time. The cooked filling can also be frozen separately for up to about 3 months; thaw it overnight in the refrigerator, then assemble with fresh chips and cheese. Freezing the assembled casserole is less suitable if chip texture matters.

Cool leftovers and refrigerate in an airtight container or tightly covered dish for 3 to 4 days. Reheat individual portions in the microwave until hot, or loosely cover the baking dish and warm it in a 350°F oven until heated through. Stored chips will be soft; add fresh chips after reheating for crunch.

Nutrition

Approximate nutrition per serving, based on 1/8 of the casserole: 370 calories, 23g protein, 20g fat, and 26g carbohydrates. Approximate nutrition per 100g: 205 calories, 13g protein, 11g fat, and 14g carbohydrates. Values vary with the brands used, how much fat is drained, and the weight of the finished casserole.

Walking Taco Casserole

Taco-seasoned beef, beans, corn, tomatoes, corn chips, and melted cheese bake into a scoopable casserole.
Course: Main Course
Cuisine: American
Prep: 15 min
Cook: 41 min
Total: 56 min
Servings: 8 Calories: 370 kcal

Equipment

  • 9-by-13-inch baking dish
  • Large skillet

Ingredients

For the Casserole

  • 1 teaspoon neutral cooking oil, as needed
  • 1/2 medium yellow onion, finely diced (about 75g)
  • 1 pound lean ground beef (450g)
  • 1 (1-ounce) packet taco seasoning (28g)
  • 1 (10-ounce) can diced tomatoes with green chiles, with juices (280g)
  • 1 (15-ounce) can black or pinto beans, drained and rinsed (425g can)
  • 1 cup corn kernels, drained if canned (165g)
  • 5 ounces sturdy corn chips, divided (140g)
  • 2 cups shredded Mexican-style cheese blend (220g)
  • 2 green onions, thinly sliced

Optional for Serving

  • Sour cream
  • Salsa or pico de gallo
  • Extra corn chips

Instructions

  1. Preheat the oven to 350°F (175°C). Lightly grease a 9-by-13-inch baking dish if desired.
  2. Heat the oil in a large skillet over medium heat, using it only if needed. Add the onion and beef; cook for 7 to 9 minutes, breaking up the meat, until no pink remains. Drain excess fat if needed.
  3. Stir in the taco seasoning, tomatoes with their juices, drained beans, and corn. Simmer over medium-low heat for 5 to 7 minutes, stirring occasionally, until hot and cohesive with no pool of liquid.
  4. Spread about half the chips across the bottom of the baking dish. Spoon the filling over the chips, then scatter the remaining chips over the surface and near the edges.
  5. Scatter the cheese over the filling and chips, leaving a few chips visible near the edges. Bake uncovered for 15 to 20 minutes, until hot throughout and the cheese is melted and bubbling around the edges.
  6. Let the casserole stand for about 5 minutes. Scatter the green onions over the top and serve with optional toppings.

Tips

  • Simmer the filling longer if it looks soupy before assembly.
  • Assemble shortly before baking so the chips do not sit in the filling.
  • Chips beneath the filling soften as they absorb moisture; baking longer will not crisp them again.
  • Serve extra chips on the side for the crunchiest texture.
  • Add green onions after baking.

Variations

  • Ground Turkey or Chicken: Replace the beef with ground turkey or chicken; cook until no pink remains and drain excess liquid or fat as needed.
  • Cheese Swap: Replace the Mexican-style cheese blend with cheddar, Monterey Jack, or pepper jack.
Notes

Refrigerate leftovers in an airtight container for 3 to 4 days. Reheat portions in the microwave or loosely covered in a 350°F oven until hot. The cooked filling can be frozen separately for up to about 3 months; thaw overnight in the refrigerator before assembling.

Nutrition

Calories: 370 kcal | Protein: 23 g | Fat: 20 g | Carbohydrates: 26 g

Classic Sloppy Joes

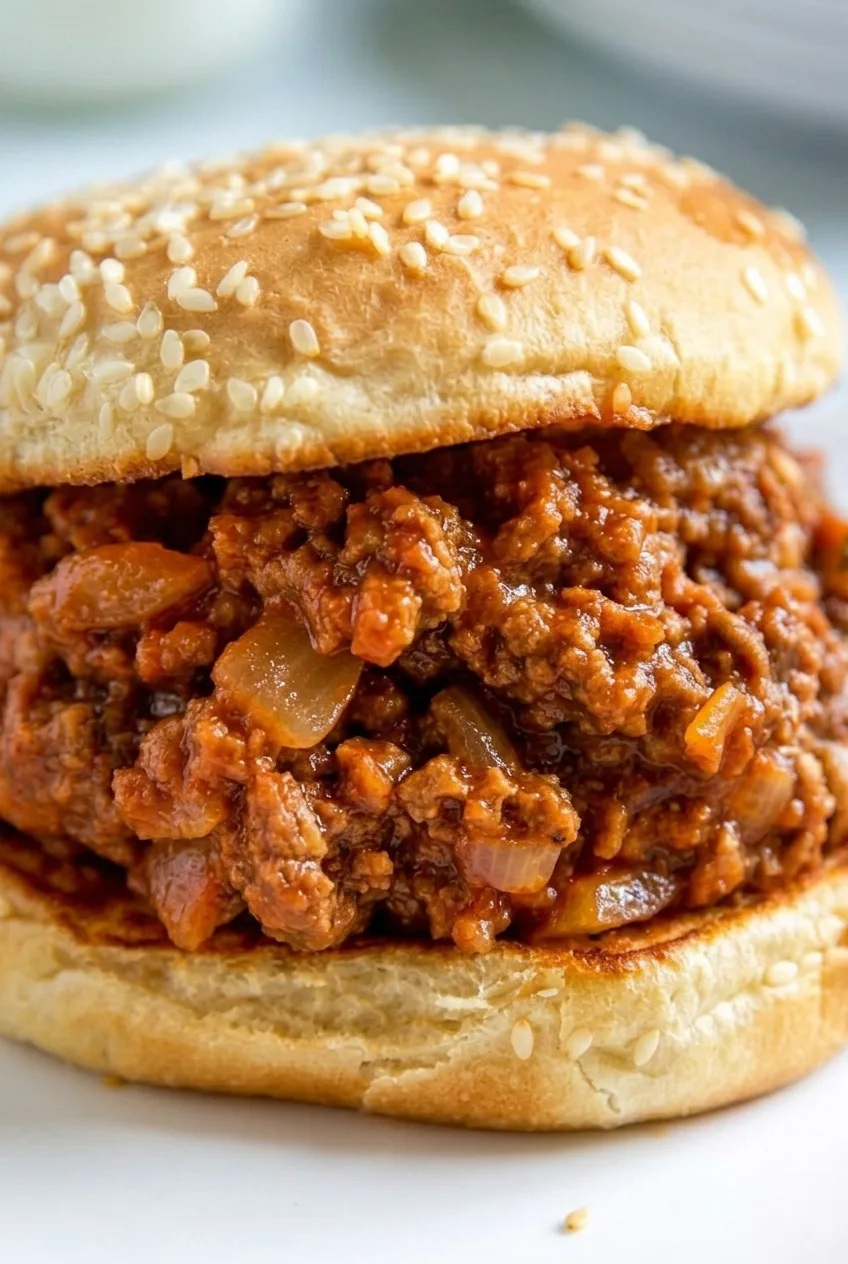
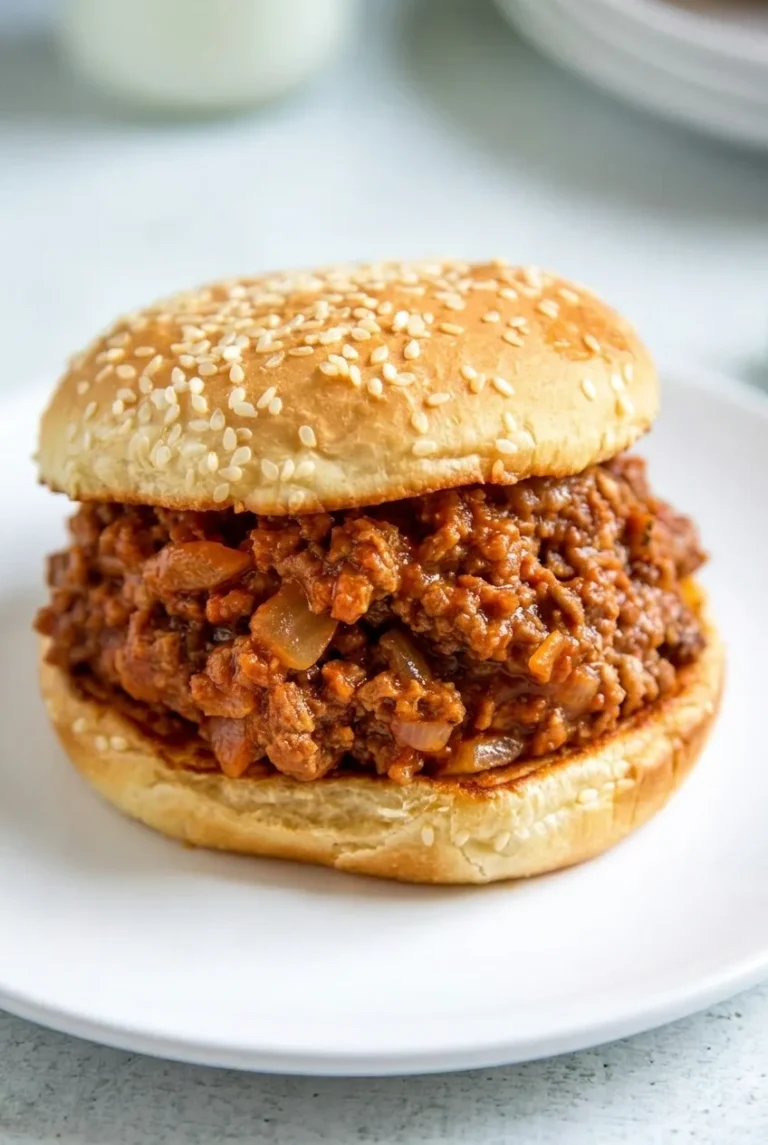
Classic sloppy joes pile tender onion and small crumbles of ground beef onto sesame-seed hamburger buns. This skillet version uses ketchup, tomato sauce, mustard, and Worcestershire for a sweet-tangy filling. The key is to simmer it uncovered until the sauce clings to the beef: it should be glossy and moist, but thick enough to mound on a bun. Lightly toasting the buns is optional and helps them hold up to the filling.

Ingredients for Classic Sloppy Joes

Close view of thick sloppy joe beef crumbles and onion beneath a sesame-seed bun.
  • 1 pound 90/10 ground beef (450g)
  • 1/2 medium yellow onion, finely diced (about 3/4 cup or 75g)
  • 1 garlic clove, minced
  • 1/2 cup ketchup (120g)
  • 1/2 cup plain tomato sauce (120g)
  • 1 tablespoon Worcestershire sauce
  • 1 teaspoon yellow mustard
  • 1 teaspoon packed light brown sugar, or to taste
  • 1/2 teaspoon kosher salt, plus more to taste
  • 1/4 teaspoon black pepper
  • 4 sesame-seed hamburger buns

Optional: Use up to 1 teaspoon neutral oil if the skillet needs it. For skillet-toasted buns, use a thin smear of butter if desired. Keep up to 1 teaspoon apple cider vinegar on hand in case the finished sauce needs more tang.

How to Make Classic Sloppy Joes

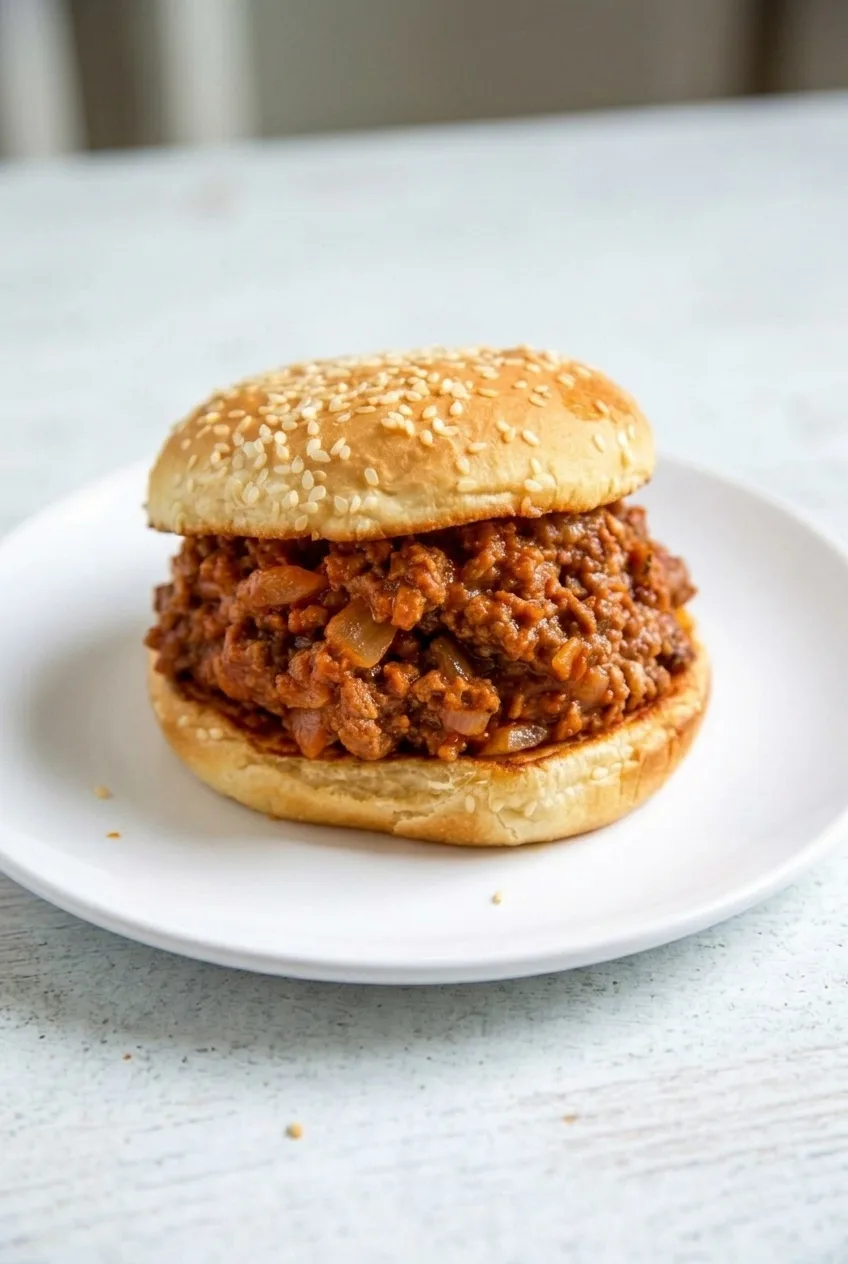
A complete sesame-bun sloppy joe on a plate, with its thick beef-and-onion filling visible.
  1. Soften the onion: Heat a large 10- to 12-inch skillet over medium heat. Add the onion, using a little of the optional oil if it sticks. Cook for 3 to 4 minutes, until softened and beginning to turn translucent without browning deeply.
  2. Brown the beef: Add the ground beef and increase the heat to medium-high. Cook for 6 to 8 minutes, breaking it into small crumbles. Ground beef should reach 160°F (70°C); color alone is not a reliable doneness check. Before adding the sauce, spoon off excess fat or liquid only if it visibly pools.
  3. Add the sauce: Stir in the garlic and cook for about 1 minute, until fragrant. Add the ketchup, tomato sauce, Worcestershire, mustard, brown sugar, salt, and pepper. Stir until the beef is coated, scraping up any browned bits from the skillet.
  4. Simmer until thick: Bring the filling to a gentle simmer, then reduce the heat to medium-low. Simmer uncovered for about 8 to 12 minutes, stirring occasionally so the tomato sauce does not stick. Start checking at 8 minutes. The filling is ready when it looks glossy, clings to the beef, and holds together on a spoon rather than running off it. Taste and adjust the seasoning.
  5. Toast the buns, if desired: While the filling finishes, toast the cut sides of the sesame-seed buns in a dry skillet over medium heat for 1 to 2 minutes, until lightly golden. A toaster or broiler also works; watch closely under the broiler.
  6. Assemble: Take the filling off the heat and let it sit for 2 to 3 minutes. Mound it generously onto the bottom buns, add the tops, and serve promptly.

How to Keep Sloppy Joe Filling Thick

A wide skillet gives moisture room to evaporate. If you use a narrower pan, the filling may need longer than 12 minutes to thicken. Keep it uncovered at a gentle simmer and stir occasionally. If it is still loose, continue simmering in short increments rather than adding flour; it should remain moist, not dry.

Ketchup varies in sweetness, so taste the filling after simmering before adding more brown sugar. If it tastes too sweet or flat, stir in a little of the optional apple cider vinegar and taste again. For another ketchup-forward ground beef dinner, try Classic Homemade Meatloaf with Glossy Ketchup Glaze.

Make-Ahead and Leftovers

Make the filling ahead, but store it separately from the buns. Cool it promptly and refrigerate it in an airtight container for up to 3 to 4 days. Reheat in a covered skillet over low heat, stirring occasionally until hot throughout. If it has become too thick, stir in a small splash of water. Toast the buns and assemble just before serving rather than storing assembled sandwiches.

For longer storage, freeze the cooled filling in an airtight freezer-safe container for up to 3 months for best quality. Thaw it in the refrigerator, then reheat until hot throughout.

Nutrition

Approximate nutrition per sandwich, based on 4 sandwiches: 435 calories, 29g protein, 14g fat, and 48g carbohydrates. Approximate nutrition per 100g of prepared recipe: 190 calories, 13g protein, 6g fat, and 21g carbohydrates. Values vary with the beef, buns, and ketchup used.

Classic Sloppy Joes

Ground beef simmers with onion, ketchup, tomato sauce, mustard, and Worcestershire until thick enough to pile onto sesame-seed buns.
Course: Main Course
Cuisine: American
Prep: 10 min
Cook: 25 min
Total: 35 min
Servings: 4 Calories: 435 kcal

Equipment

  • 10- to 12-inch skillet
  • Meat thermometer

Ingredients

For the filling

  • 1 pound 90/10 ground beef (450g)
  • 1/2 medium yellow onion, finely diced (about 3/4 cup or 75g)
  • 1 garlic clove, minced
  • 1/2 cup ketchup (120g)
  • 1/2 cup plain tomato sauce (120g)
  • 1 tablespoon Worcestershire sauce
  • 1 teaspoon yellow mustard
  • 1 teaspoon packed light brown sugar, or to taste
  • 1/2 teaspoon kosher salt, plus more to taste
  • 1/4 teaspoon black pepper

To serve

  • 4 sesame-seed hamburger buns

Optional

  • Up to 1 teaspoon neutral oil, if needed
  • A thin smear of butter for toasting buns, if desired
  • Up to 1 teaspoon apple cider vinegar, to taste

Instructions

  1. Heat a large skillet over medium heat. Add the onion and cook for 3 to 4 minutes, using a little optional oil if it sticks, until softened and beginning to turn translucent.
  2. Add the ground beef and increase the heat to medium-high. Cook for 6 to 8 minutes, breaking it into small crumbles, until it reaches 160°F (70°C). Spoon off excess fat or liquid if it visibly pools.
  3. Stir in the garlic and cook for about 1 minute, until fragrant.
  4. Add the ketchup, tomato sauce, Worcestershire sauce, mustard, brown sugar, salt, and pepper. Stir to coat the beef, scraping up any browned bits.
  5. Bring the filling to a gentle simmer, then reduce the heat to medium-low. Simmer uncovered for 8 to 12 minutes, stirring occasionally, until glossy and thick enough to cling to the beef. Taste and adjust the seasoning.
  6. If desired, toast the cut sides of the buns in a dry skillet over medium heat for 1 to 2 minutes, until lightly golden.
  7. Remove the filling from the heat and let it sit for 2 to 3 minutes. Spoon onto the bottom buns, add the tops, and serve.

Tips

  • Use a wide skillet to help moisture evaporate and the filling thicken.
  • Start checking the consistency at 8 minutes; simmer longer in short increments if the sauce is still loose.
  • Taste before adding more brown sugar because ketchup sweetness varies.
  • If the finished sauce tastes too sweet or flat, add a little apple cider vinegar and taste again.
  • Toast the buns lightly to help them hold up to the filling.

Notes

Refrigerate filling separately from the buns in an airtight container for 3 to 4 days. Reheat covered over low heat until hot throughout, adding a splash of water if needed. Freeze for up to 3 months for best quality. Approximate nutrition per 100g: 190 calories, 13g protein, 6g fat, and 21g carbohydrates.

Nutrition

Calories: 435 kcal | Protein: 29 g | Fat: 14 g | Carbohydrates: 48 g

Creamy Beef and Shells

Medium shells and small browned beef crumbles are coated in a creamy tomato-cheddar sauce that stays loose enough to pool between the pasta. This is a stovetop dish, served straight from the skillet—not a baked pasta.

Cooking the shells separately makes it easier to keep them intact and tender. Drain them just shy of al dente, then finish them briefly in the sauce. Add the cream and cheddar near the end over low heat to help keep the sauce smooth.

Ingredients for Creamy Beef and Shells

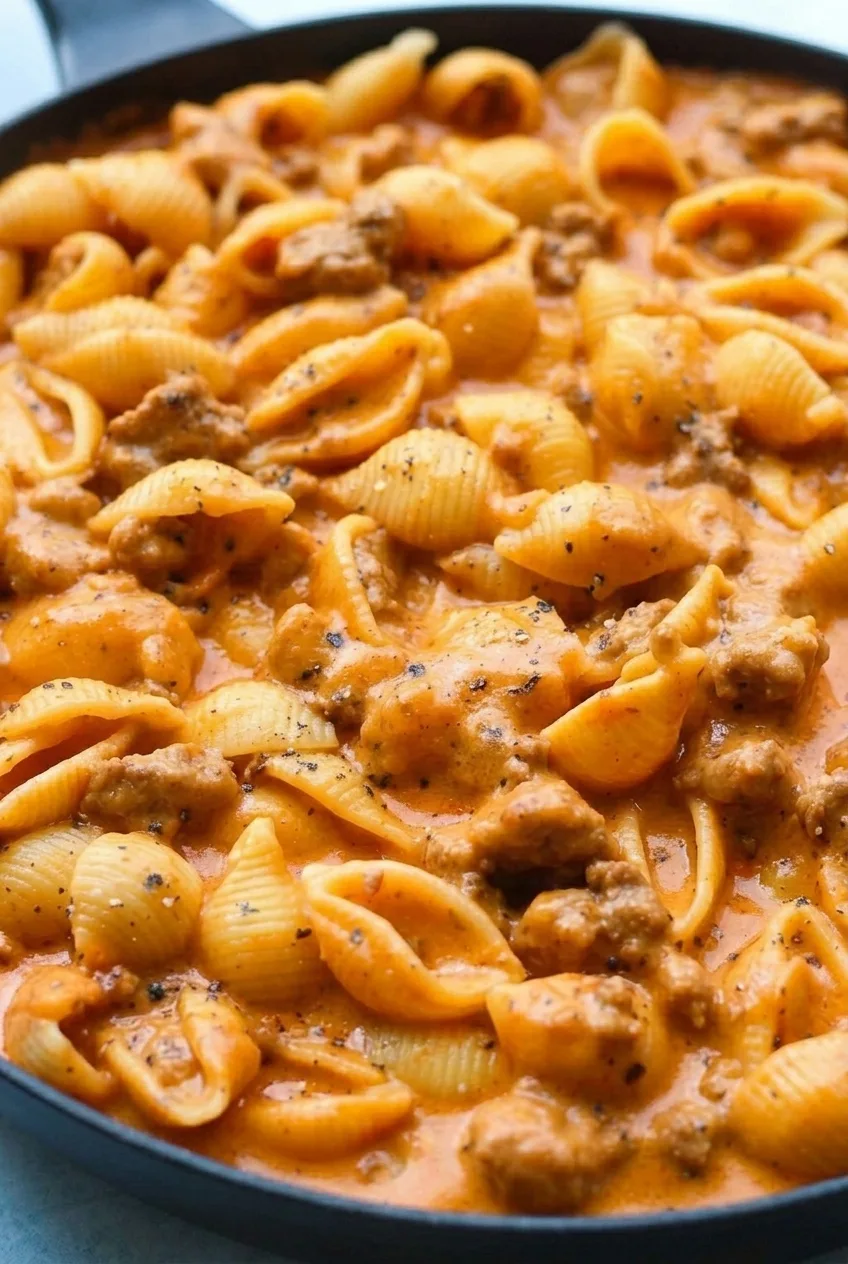
Close detail of ridged pasta shells, browned beef crumbles, and creamy orange sauce.

Serves 6. Allow about 15 minutes to prepare and 25 minutes to cook.

  • 12 ounces medium pasta shells (340g)
  • 1 tablespoon olive oil, as needed
  • 1 pound ground beef, preferably 85% to 90% lean (450g)
  • 1 small yellow onion, finely diced (110g)
  • 3 garlic cloves, minced
  • 2 tablespoons all-purpose flour (15g)
  • 2 cups beef broth, plus more as needed (480ml)
  • 1 can (15 ounces) tomato sauce (425g)
  • 1 teaspoon Italian seasoning
  • About 1 teaspoon kosher salt, plus salt for the pasta water; adjust to taste
  • About 1/2 teaspoon freshly ground black pepper, plus a little for serving
  • 1/2 cup heavy cream (120ml)
  • 1 1/2 cups lightly packed sharp cheddar, freshly shredded (170g)

Use a large, deep skillet, about 12 inches across, so there is room to fold in the shells. The amount of oil and salt needed will depend on the beef and broth you use.

How to Make Creamy Beef and Shells

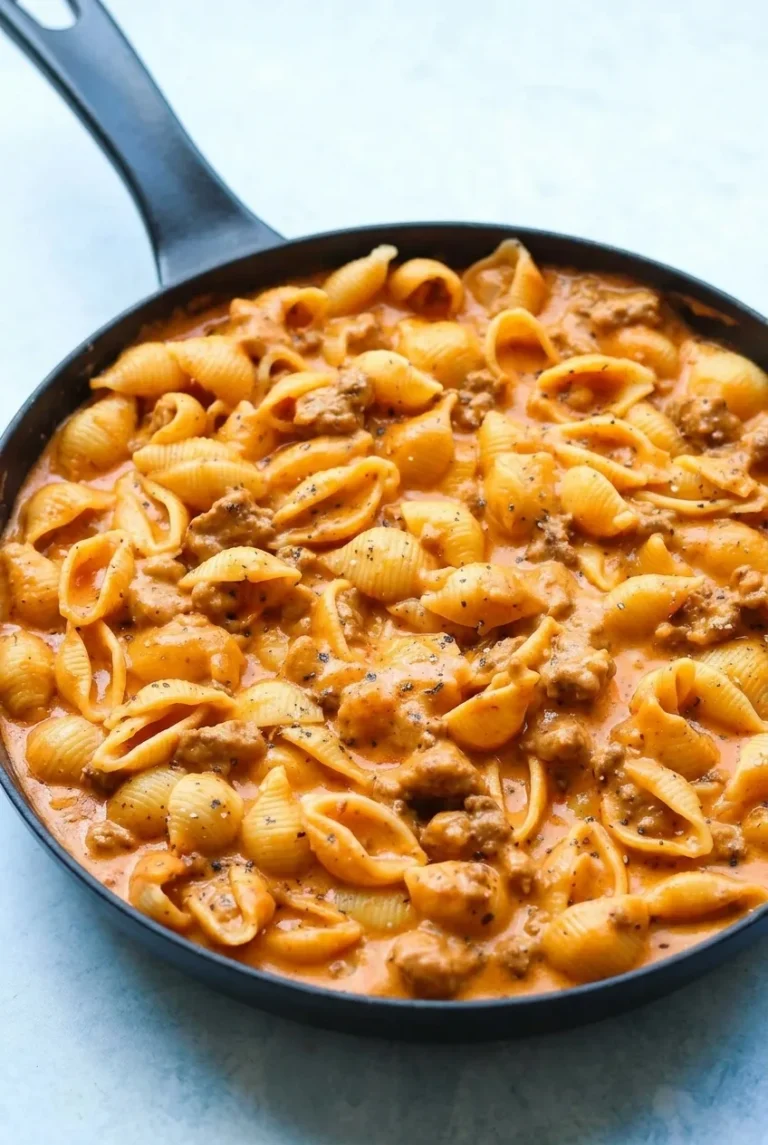
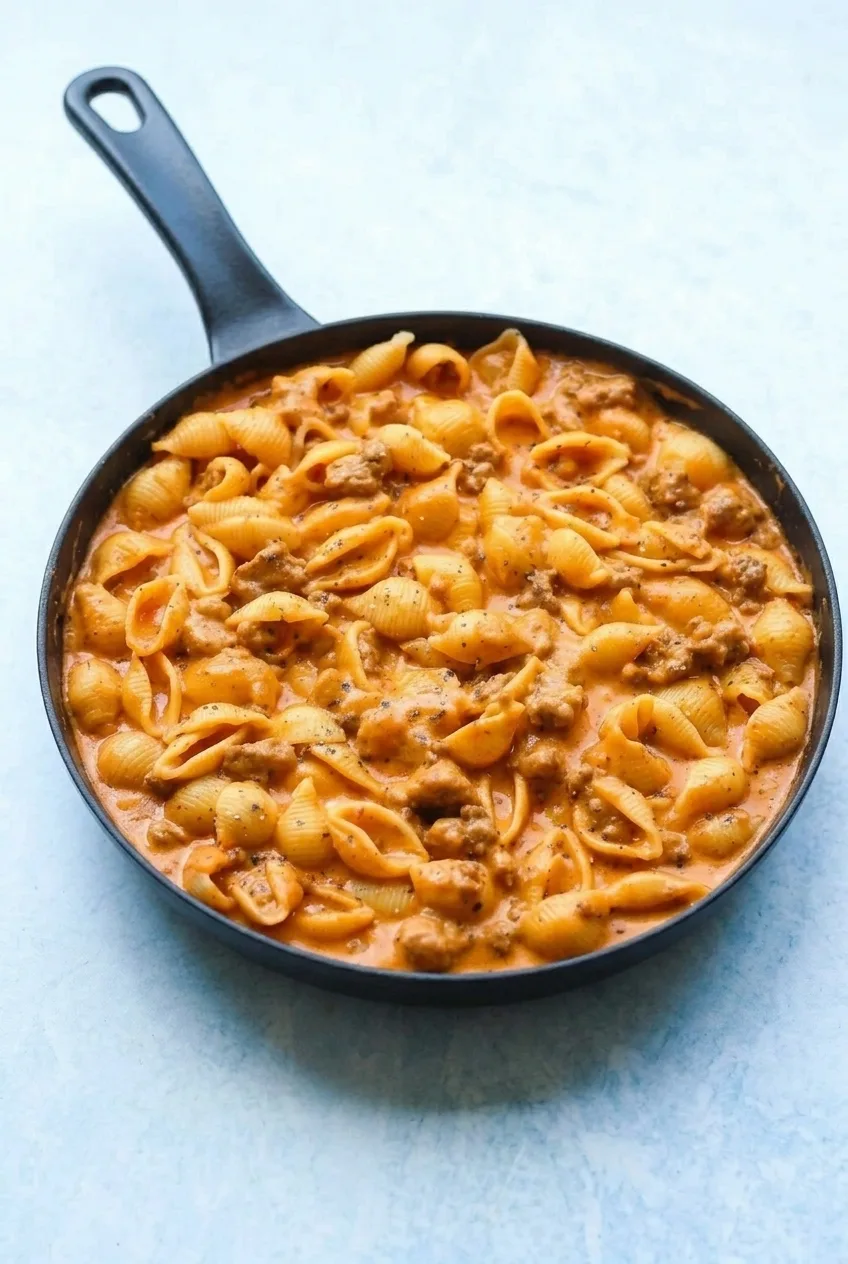
Full skillet of creamy beef and shells centered on a pale blue surface with room around the pan.
  1. Boil the shells: Bring a large pot of well-salted water to a boil. Cook the shells according to the package directions, checking at the lower end of the timing range. Drain when they are flexible but still have a slight firm bite. Reserve about 1 cup of pasta water before draining.
  2. Brown the beef: While the pasta cooks, warm the skillet over medium heat. Add the olive oil if needed, then add the beef and increase the heat to medium-high. Cook for 5 to 7 minutes, breaking the beef into small crumbles, until browned with no pink remaining. Spoon off excess fat if the skillet looks greasy, leaving a light film behind.
  3. Soften the aromatics: Reduce the heat to medium. Add the onion and cook for 3 to 4 minutes, until softened and beginning to turn translucent. Stir in the garlic and Italian seasoning just until fragrant; do not let the garlic brown.
  4. Simmer the sauce: Sprinkle the flour over the beef mixture and stir for about 1 minute, until no dry flour remains. Gradually stir in the broth, then add the tomato sauce, salt, and black pepper. Bring to a gentle simmer, reduce the heat to medium-low, and simmer uncovered for 7 to 9 minutes, stirring occasionally. Start checking after about 6 minutes. The sauce should thicken slightly but still flow easily.
  5. Add the cream and cheddar: Reduce the heat to low and slowly stir in the cream. Add the cheddar a few handfuls at a time, stirring until each addition melts. Do not let the sauce come to a hard boil.
  6. Finish the shells: Gently fold in the drained shells. Cook over low heat for 1 to 2 minutes, until the shells are tender and coated. If the sauce becomes too thick, stir in reserved pasta water or warm broth a splash at a time. It should coat the shells while pooling slightly between them.
  7. Season and serve: Taste and adjust the salt and pepper. Let the skillet stand off the heat for about 2 minutes, then serve with a modest grind of black pepper. Add another splash of warm broth if the sauce tightens while it rests.

How to Keep the Sauce Smooth and Spoonable

Let the broth-and-tomato base thicken slightly before adding dairy. Once the cream and cheddar go in, keep the heat low: vigorous boiling can make the cheese sauce grainy or cause it to separate.

The shells will continue absorbing sauce as they sit. Keep the reserved pasta water or some warm broth nearby and add a splash whenever the sauce stops looking glossy and loose.

Why Cook the Shells Separately?

Boiling the shells in water gives you control over their doneness before their short finish in the skillet. Do not add dry shells directly to this sauce: cooking them in one pot would require substantially more broth, frequent stirring, and different timing.

Serving and Leftovers

Serve the pasta family-style from the skillet, with a green salad or roasted broccoli alongside. For another stovetop ground-beef pasta dinner, try Homemade Beefaroni with Cheddar.

Cool leftovers promptly and refrigerate in an airtight container for 3 to 4 days. Reheat gently over low heat on the stovetop or in the microwave, stirring as needed. Add a splash of broth or cream to loosen the sauce. The beef can also be browned ahead and refrigerated in an airtight container.

For better pasta texture, freeze the sauce separately and cook fresh shells when ready to serve. Fully assembled pasta may soften, and the creamy sauce may change texture after thawing.

Nutrition

Approximate nutrition per serving, based on 1/6 of the recipe: 645 calories, 31g protein, 32g fat, and 51g carbohydrates. Approximate nutrition per 100g: 155 calories, 7g protein, 8g fat, and 12g carbohydrates. Values are estimates and vary with the ingredients used and the finished recipe weight.

Creamy Beef and Shells

Medium pasta shells and browned ground beef are tossed in a creamy tomato-cheddar sauce on the stovetop.
Course: Main Course
Cuisine: American
Prep: 15 min
Cook: 25 min
Total: 42 min
Servings: 6 Calories: 645 kcal

Equipment

  • Large pot
  • Colander
  • 12-inch deep skillet

Ingredients

Pasta

  • 12 ounces medium pasta shells (340 g)
  • Salt, for the pasta water

Beef and Sauce

  • 1 tablespoon olive oil, as needed
  • 1 pound ground beef, preferably 85% to 90% lean (450 g)
  • 1 small yellow onion, finely diced (110 g)
  • 3 garlic cloves, minced
  • 2 tablespoons all-purpose flour (15 g)
  • 2 cups beef broth, plus more as needed (480 ml)
  • 1 can (15 ounces) tomato sauce (425 g)
  • 1 teaspoon Italian seasoning
  • About 1 teaspoon kosher salt, plus more to taste
  • About 1/2 teaspoon freshly ground black pepper, plus more for serving
  • 1/2 cup heavy cream (120 ml)
  • 1 1/2 cups lightly packed sharp cheddar, freshly shredded (170 g)

Instructions

  1. Bring a large pot of well-salted water to a boil. Cook the shells according to the package directions, checking at the lower end of the timing range.
  2. Drain the shells when they are flexible but still slightly firm, reserving about 1 cup of pasta water.
  3. While the pasta cooks, heat a large deep skillet over medium heat. Add the olive oil if needed, then add the beef and increase the heat to medium-high.
  4. Cook the beef for 5 to 7 minutes, breaking it into small crumbles, until browned with no pink remaining. Spoon off excess fat if the skillet looks greasy.
  5. Reduce the heat to medium. Add the onion and cook for 3 to 4 minutes, until softened. Stir in the garlic and Italian seasoning until fragrant.
  6. Sprinkle the flour over the beef mixture and stir for about 1 minute. Gradually stir in the broth, then add the tomato sauce, salt, and black pepper.
  7. Bring the sauce to a gentle simmer. Reduce the heat to medium-low and simmer uncovered for 7 to 9 minutes, stirring occasionally, until slightly thickened but still flowing easily.
  8. Reduce the heat to low and slowly stir in the cream. Add the cheddar a few handfuls at a time, stirring until each addition melts. Do not let the sauce boil hard.
  9. Gently fold in the drained shells and cook over low heat for 1 to 2 minutes, until tender and coated. Add reserved pasta water or warm broth a splash at a time if the sauce is too thick.
  10. Taste and adjust the salt and pepper. Let the skillet stand off the heat for about 2 minutes, then serve with a little black pepper.

Tips

  • Cook the shells separately and drain them while they still have a slight firm bite.
  • Keep the heat low after adding the cream and cheddar to help prevent a grainy or separated sauce.
  • Reserve pasta water to loosen the sauce as needed.
  • Use a large, deep skillet so there is room to fold in the shells.
  • Add a splash of warm broth if the sauce thickens while resting.

Notes

Refrigerate leftovers in an airtight container for 3 to 4 days. Reheat gently, adding a splash of broth or cream as needed. For better texture, freeze the sauce separately and cook fresh shells when serving.

Nutrition

Calories: 645 kcal | Protein: 31 g | Fat: 32 g | Carbohydrates: 51 g

Ground Beef Stroganoff

Ground beef stroganoff brings browned beef and sliced mushrooms together in a pale, creamy gravy that lightly coats wide egg noodles. Ground beef makes this a quicker skillet version than one made with steak. Cook the noodles in a separate pot, then toss them with the finished sauce so they stay tender without soaking up too much gravy.

The gravy starts with flour and beef broth. Full-fat sour cream goes in off heat, after a little hot gravy has been stirred into it, to help keep the sauce smooth.

Ingredients for Ground Beef Stroganoff

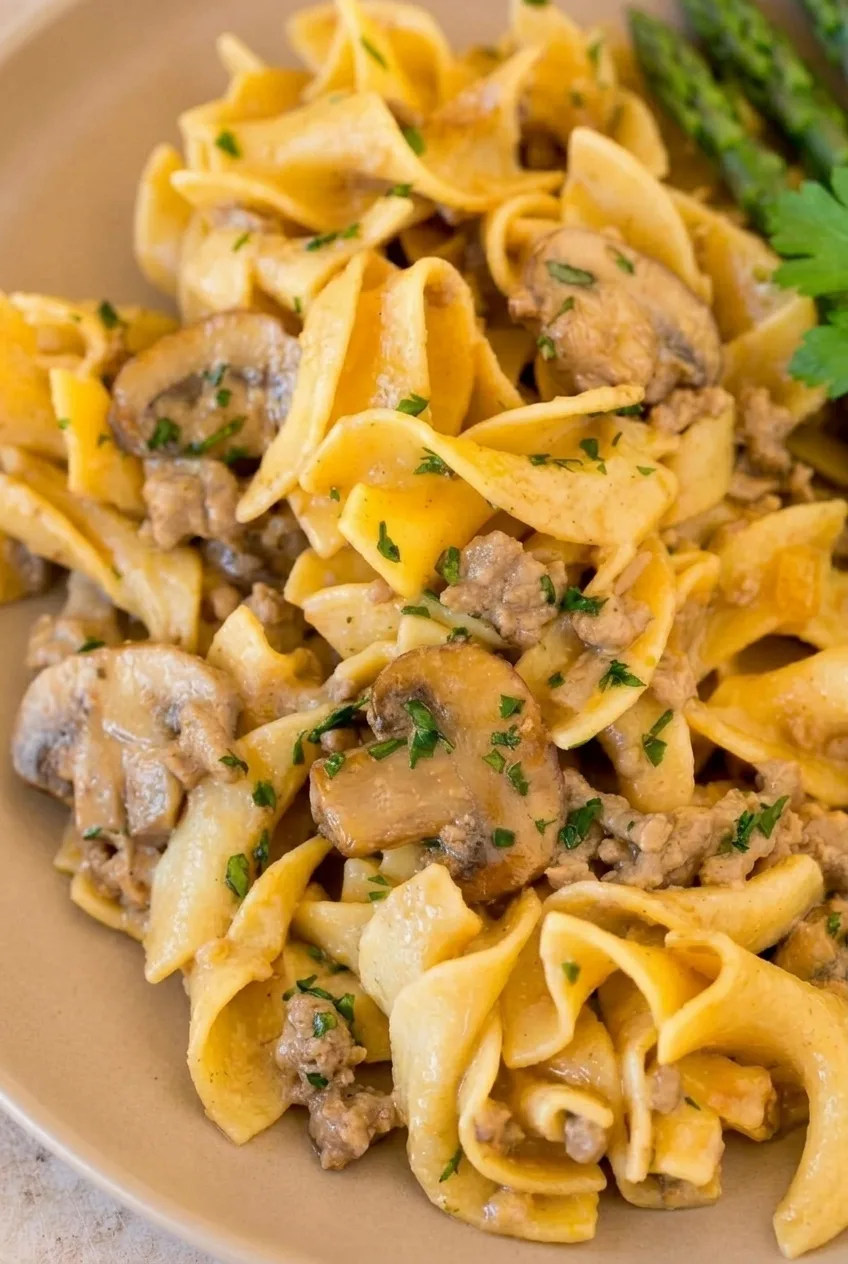
Close-up of creamy ground beef stroganoff showing folded egg noodles, mushroom slices, beef crumbles, and parsley
  • 12 ounces wide egg noodles (340g)
  • 1 pound lean ground beef (450g)
  • 8 ounces cremini or white button mushrooms, sliced (225g)
  • 1 medium yellow onion, finely chopped, about 1 cup (150g)
  • 1 tablespoon unsalted butter (15g)
  • 2 cloves garlic, minced (6g)
  • 2 tablespoons all-purpose flour (15g)
  • 2 cups low-sodium beef broth
  • 1 tablespoon Worcestershire sauce
  • 1/2 teaspoon paprika
  • About 1/2 teaspoon kosher salt, divided, plus more for the noodle water and to taste
  • 1/4 teaspoon black pepper, plus more to taste
  • 1/2 cup full-fat sour cream (120g)
  • 2 tablespoons chopped fresh parsley, plus more for garnish

Optional side: About 1 pound asparagus spears, steamed or sautéed and served alongside.

How to Make Ground Beef Stroganoff

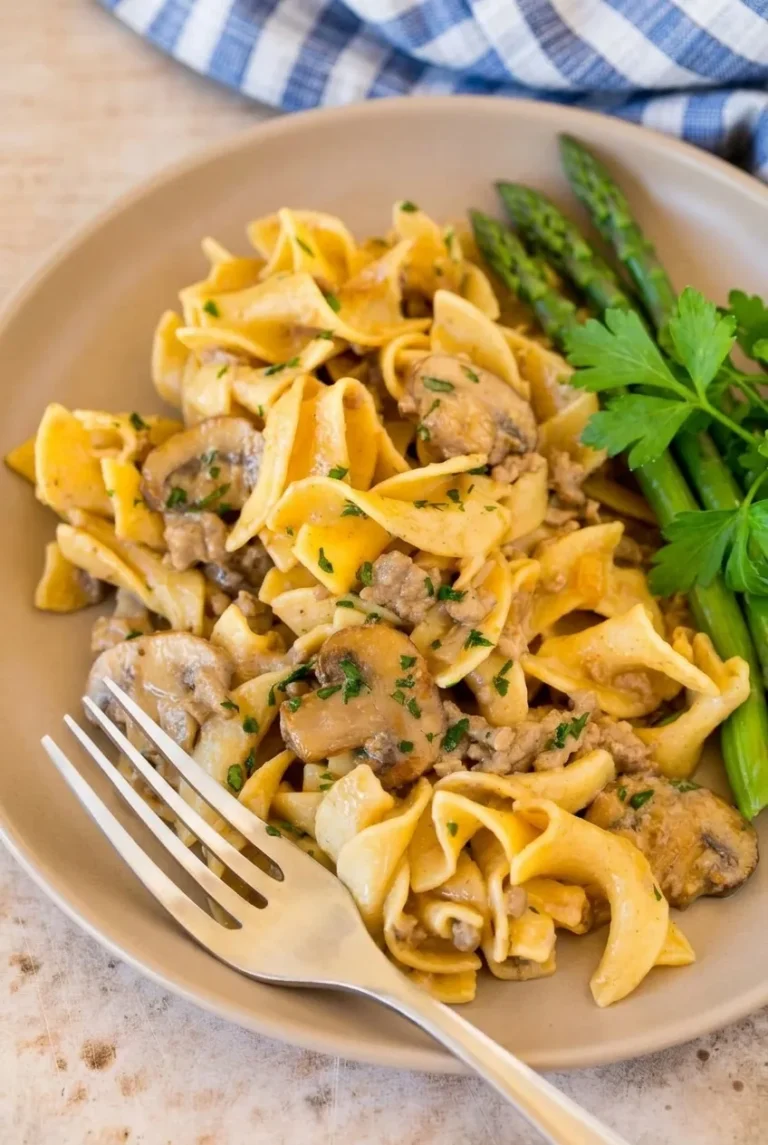
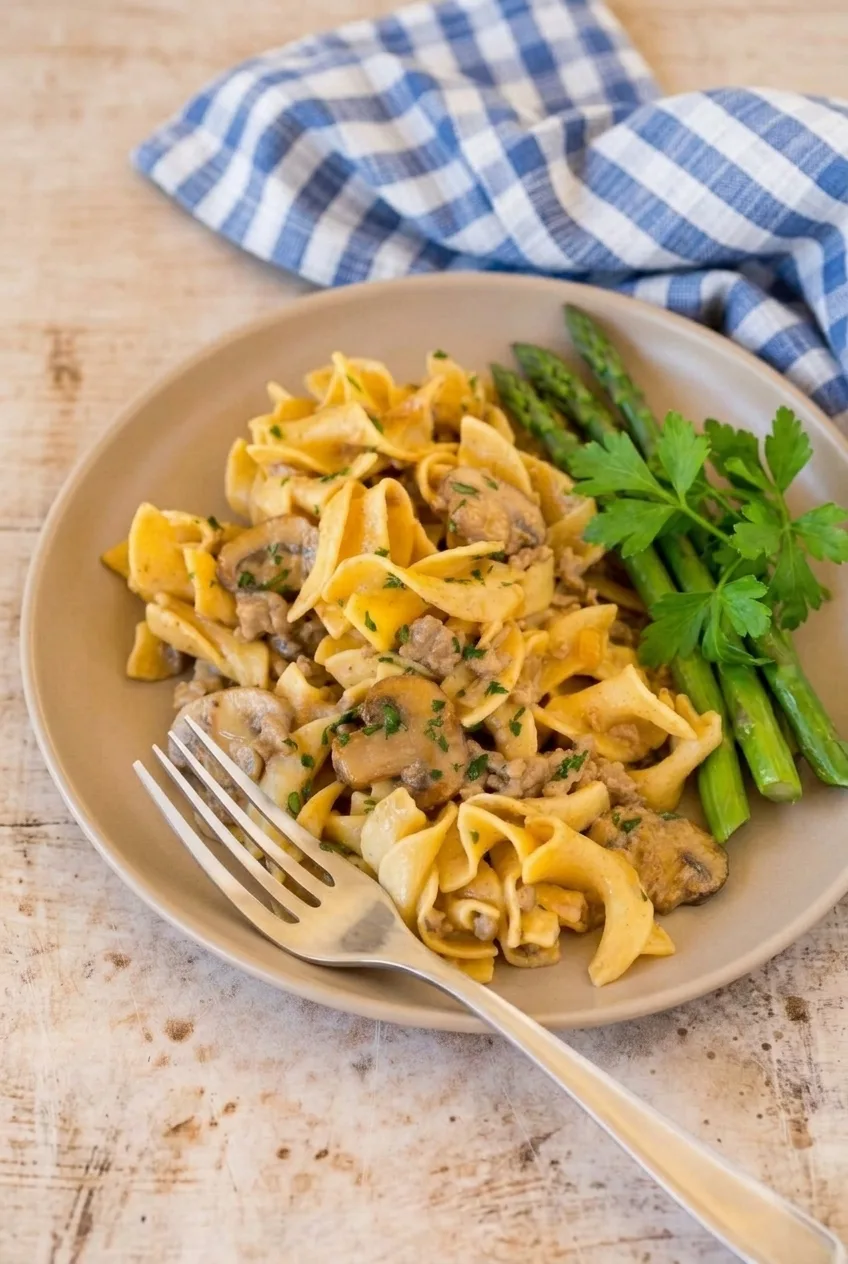
A full plate of ground beef stroganoff with egg noodles, mushrooms, parsley, and asparagus on a wood surface
  1. Prepare the noodles: Chop the onion and garlic, slice the mushrooms, and measure the remaining ingredients. Bring a large pot of salted water to a boil. Cook the egg noodles according to package directions until tender but still holding their shape. Reserve a little noodle water, then drain. The noodles can cook while you make the sauce.
  2. Brown the beef: Heat a 12-inch skillet over medium-high heat. Add the ground beef and about 1/4 teaspoon of the salt. Cook uncovered for 5 to 7 minutes, breaking the beef into small crumbles, until browned and cooked through with no raw-looking pieces. If fat pools in the skillet, drain off the excess, leaving a small amount behind.
  3. Cook the vegetables: Reduce the heat to medium. Add the butter, onion, and mushrooms. Cook uncovered for 5 to 6 minutes, stirring occasionally, until the onion softens and the mushrooms are tender with some golden edges. Add the garlic near the end and cook just until fragrant. A wide skillet lets mushroom moisture evaporate rather than trapping it in the pan.
  4. Make the gravy: Sprinkle the flour, paprika, remaining 1/4 teaspoon salt, and pepper over the beef and vegetables. Stir for about 1 minute to cook the flour. Gradually stir in the beef broth, then add the Worcestershire sauce. Reduce the heat as needed to maintain a gentle, uncovered simmer. Stir occasionally for about 5 to 7 minutes, starting to check after 4 to 5 minutes. The gravy should be smooth and lightly coat a spoon while still flowing easily.
  5. Add the sour cream: Remove the skillet from the heat. In a small bowl, stir a few spoonfuls of hot gravy into the sour cream. Stir this mixture into the skillet until smooth. Do not boil the sauce after adding the sour cream.
  6. Toss and serve: Add the drained noodles and 2 tablespoons parsley. Toss gently until the noodles are lightly coated, with beef crumbles and mushroom slices distributed throughout. If the sauce is too thick, add warm beef broth or reserved noodle water a tablespoon at a time. Taste, adjust the seasoning, and finish with more parsley. Serve promptly, with asparagus alongside if desired.

How to Keep the Stroganoff Sauce Smooth

Full-fat sour cream is less likely to separate than low-fat sour cream. Warming it with a little gravy before adding it to the off-heat skillet helps it blend into the sauce. If the stroganoff needs reheating after that, use low heat and stir gently rather than bringing it to a boil.

Mushrooms can be omitted if needed, though the finished dish will differ from this beef-and-mushroom version. Keep the wide egg noodles cooked separately; cooking dry pasta in the skillet would require different liquid amounts and timing.

For another ground-beef dinner with mushroom gravy, try Salisbury Steak with Mushroom Gravy.

Storage and Reheating

Refrigerate leftovers promptly in a covered container and use within 3 days. If possible, store the noodles and sauce separately so the noodles absorb less sauce. Reheat gently in a skillet over low heat with a splash of beef broth, stirring until warmed through without boiling. Freezing is not recommended for the best texture because the sour-cream sauce may separate after thawing.

Nutrition

Approximate nutrition per serving, based on 4 generous servings (about 550g each): 655 calories, 38g protein, 22g fat, and 79g carbohydrates. Approximate nutrition per 100g: 120 calories, 7g protein, 4g fat, and 14g carbohydrates. Values vary with ingredient brands, beef fat content, and portion size.

Ground Beef Stroganoff

Browned ground beef, mushrooms, and egg noodles are tossed in a creamy beef gravy finished with sour cream.
Course: Main Course
Cuisine: American
Prep: 15 min
Cook: 25 min
Total: 40 min
Servings: 4

Equipment

  • Large pot
  • Colander
  • 12-inch skillet
  • Small bowl

Ingredients

For the Stroganoff

  • 12 ounces wide egg noodles (340g)
  • 1 pound lean ground beef (450g)
  • 8 ounces cremini or white button mushrooms, sliced (225g)
  • 1 medium yellow onion, finely chopped, about 1 cup (150g)
  • 1 tablespoon unsalted butter (15g)
  • 2 cloves garlic, minced (6g)
  • 2 tablespoons all-purpose flour (15g)
  • 2 cups low-sodium beef broth, plus more as needed
  • 1 tablespoon Worcestershire sauce
  • 1/2 teaspoon paprika
  • About 1/2 teaspoon kosher salt, divided, plus more for the noodle water and to taste
  • 1/4 teaspoon black pepper, plus more to taste
  • 1/2 cup full-fat sour cream (120g)
  • 2 tablespoons chopped fresh parsley, plus more for garnish

Optional Side

  • About 1 pound asparagus spears, steamed or sautéed

Instructions

  1. Chop the onion and garlic, slice the mushrooms, and measure the remaining ingredients.
  2. Bring a large pot of salted water to a boil. Cook the egg noodles according to package directions until tender but still holding their shape. Reserve a little noodle water, then drain.
  3. Heat a 12-inch skillet over medium-high heat. Add the ground beef and about 1/4 teaspoon of the salt. Cook uncovered for 5 to 7 minutes, breaking the beef into small crumbles, until browned and cooked through. Drain excess fat if needed, leaving a small amount in the skillet.
  4. Reduce the heat to medium. Add the butter, onion, and mushrooms. Cook uncovered for 5 to 6 minutes, stirring occasionally, until the onion softens and the mushrooms are tender with some golden edges. Add the garlic near the end and cook until fragrant.
  5. Sprinkle the flour, paprika, remaining 1/4 teaspoon salt, and pepper over the beef and vegetables. Stir for about 1 minute.
  6. Gradually stir in the beef broth, then add the Worcestershire sauce. Maintain a gentle, uncovered simmer and stir occasionally for 5 to 7 minutes, until the gravy is smooth and lightly coats a spoon while still flowing easily.
  7. Remove the skillet from the heat. Stir a few spoonfuls of hot gravy into the sour cream, then stir the sour cream mixture into the skillet until smooth. Do not boil the sauce.
  8. Add the drained noodles and 2 tablespoons parsley. Toss gently until the noodles are lightly coated. If the sauce is too thick, add warm beef broth or reserved noodle water a tablespoon at a time. Taste and adjust the seasoning.
  9. Finish with more parsley and serve promptly. Serve with asparagus alongside if desired.

Tips

  • Cook the noodles separately so they stay tender and do not absorb too much gravy.
  • Use a wide skillet so moisture from the mushrooms can evaporate.
  • Temper the sour cream with hot gravy before adding it to the off-heat skillet.
  • Do not boil the sauce after adding the sour cream.
  • If the sauce thickens too much, loosen it with warm broth or reserved noodle water, a tablespoon at a time.

Variations

  • Mushroom-Free Stroganoff: Omit the mushrooms if needed; the finished dish will differ from the beef-and-mushroom version.

Notes

Refrigerate leftovers promptly in a covered container and use within 3 days. Store noodles and sauce separately if possible. Reheat gently over low heat with a splash of beef broth; do not boil. Freezing is not recommended because the sour-cream sauce may separate.

Nutrition

Per Serving Calories: 655 kcal | Per Serving Protein: 38 g | Per Serving Fat: 22 g | Per Serving Carbohydrates: 79 g | Per 100 G Calories: 120 kcal | Per 100 G Protein: 7 g | Per 100 G Fat: 4 g | Per 100 G Carbohydrates: 14 g

Classic Homemade Meatloaf

This free-form beef meatloaf has lightly browned edges, a tender center that holds together in thick slices, and a glossy ketchup glaze. Milk-hydrated breadcrumbs, egg, and finely minced onion give the loaf its even texture.

Baking it on a rimmed sheet pan leaves the sides exposed and lets some rendered fat drain away. Add the glaze near the end so it can set without getting too dark, and use the center temperature—not the clock alone—to judge doneness. The recipe makes 6 to 8 servings.

Ingredients for Classic Homemade Meatloaf

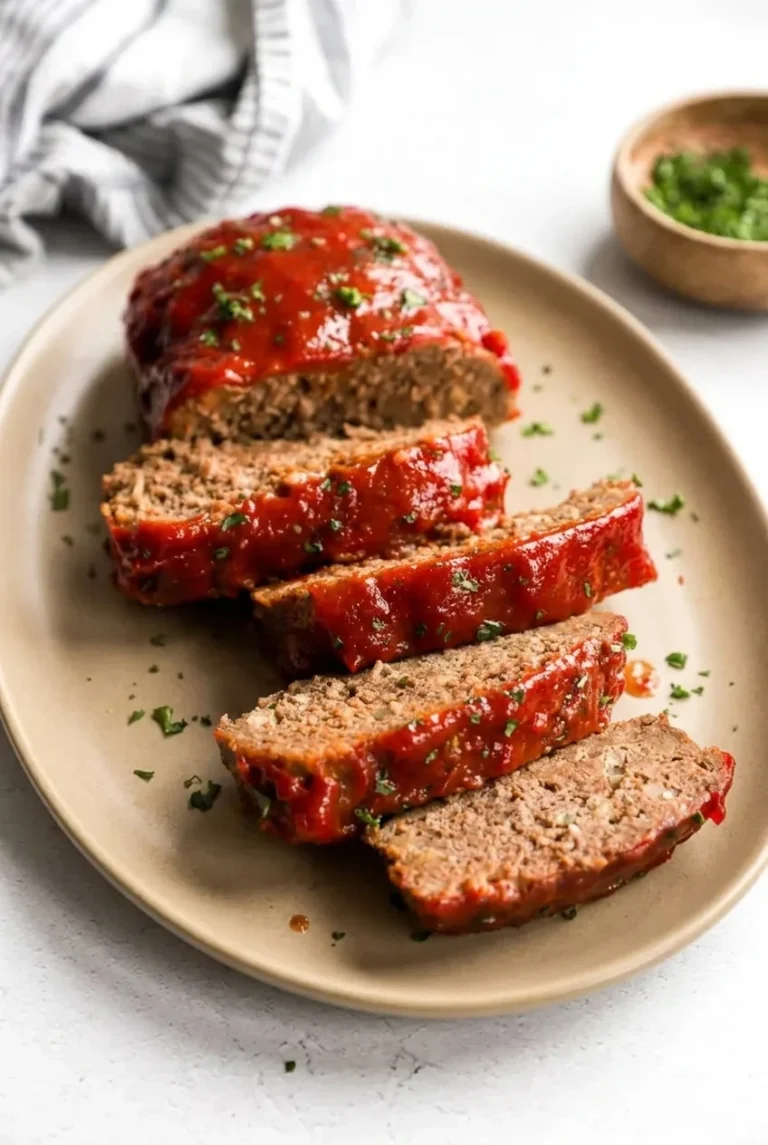
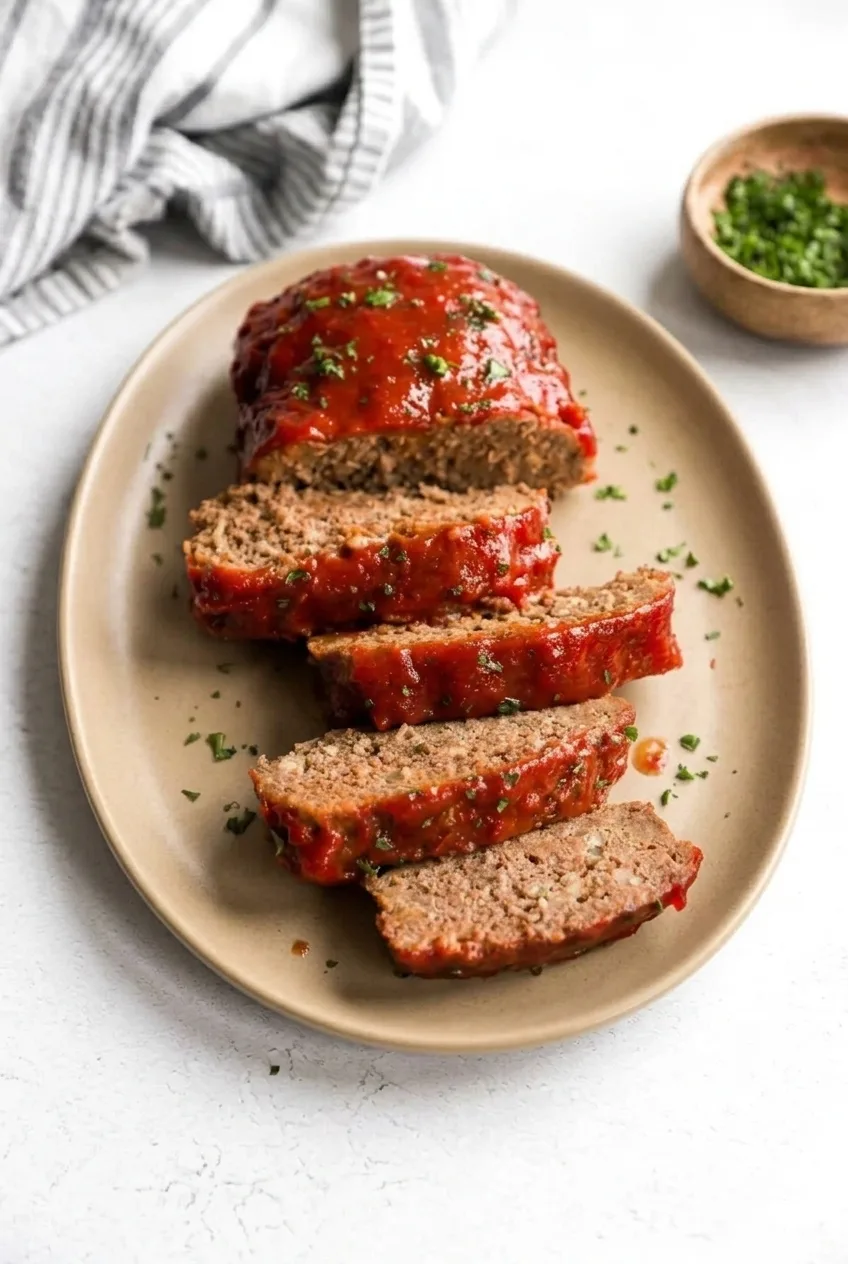
Full platter of sliced, ketchup-glazed homemade meatloaf centered on a pale tabletop

For the meatloaf

  • 1 teaspoon neutral oil
  • 1 small yellow onion, finely minced (about 3/4 cup or 100g)
  • 1 cup plain breadcrumbs (100g)
  • 1/2 cup milk (120g)
  • 2 pounds ground beef, about 85% lean (900g)
  • 1 large egg
  • 1 tablespoon Worcestershire sauce
  • 1 teaspoon Italian seasoning
  • 1 1/2 teaspoons kosher salt
  • 1/2 teaspoon black pepper

For the glaze and finish

  • 1/2 cup ketchup (120g)
  • 2 tablespoons packed brown sugar (25g)
  • 1 teaspoon yellow or Dijon mustard
  • 1 tablespoon finely chopped fresh parsley, plus a little more for the platter
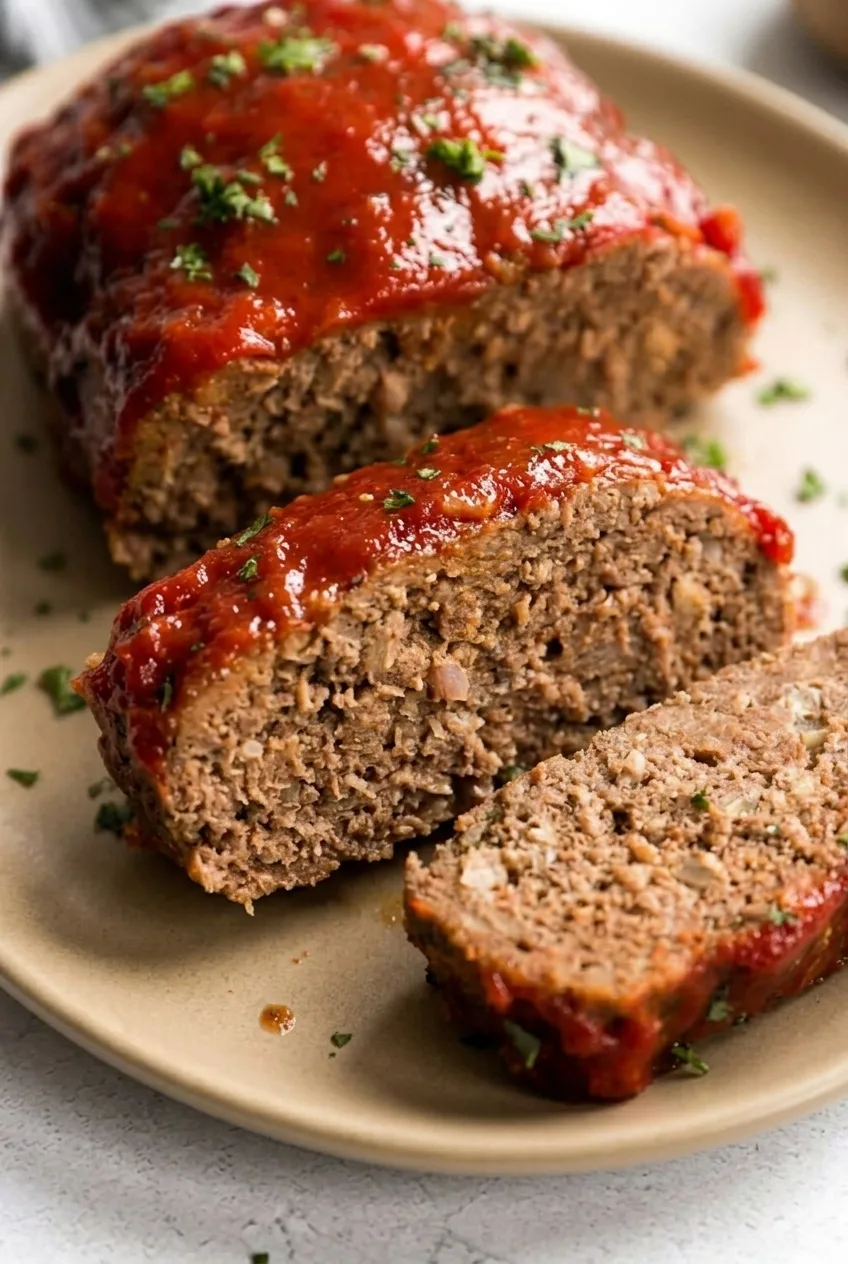
Close view of a glazed meatloaf slice showing its tender, finely textured beef interior and parsley flecks

How to Bake Classic Homemade Meatloaf

  1. Prepare the oven and pan: Heat the oven to 350°F (175°C) with a rack in the middle position. Line a rimmed baking sheet with foil.
  2. Soften the onion and soak the breadcrumbs: Warm the oil in a small skillet over medium heat. Cook the onion for 4 to 5 minutes, until soft but not browned, then let it cool briefly. Meanwhile, stir the breadcrumbs and milk together in a large bowl. Let stand for a few minutes, until the crumbs absorb the milk.
  3. Mix gently: Add the egg, Worcestershire sauce, Italian seasoning, salt, pepper, onion, and beef to the breadcrumb mixture. Fold with your hands or a fork just until evenly combined. Stop before the mixture becomes paste-like.
  4. Shape the loaf: Transfer the mixture to the baking sheet and gently shape it into an even oblong loaf about 9 by 5 inches, with rounded ends and sloped sides. Do not pack it tightly.
  5. Bake before glazing: Bake uncovered for 40 to 45 minutes. While the loaf bakes, stir the ketchup, brown sugar, and mustard together until smooth.
  6. Glaze and finish baking: Carefully brush or spoon the glaze over the top and sides. Bake for another 15 to 20 minutes. Begin checking the thickest part of the center around 50 minutes of total baking time, or sooner if the loaf is unusually narrow or your oven runs hot. The loaf is done when the center reaches 160°F (70°C) on an instant-read thermometer; avoid touching the pan with the probe. The glaze should look glossy and set. If it darkens before the center is done, tent the loaf loosely with foil.
  7. Rest and slice: Let the loaf rest on the pan for 10 minutes so it firms up before cutting. Transfer it to a platter, cut several slices about 3/4 to 1 inch thick, and arrange them overlapping in front of the remaining loaf. Scatter the parsley lightly over the glaze and platter.

Why Bake Meatloaf Free-Form?

On a rimmed sheet pan, the loaf’s exposed sides can brown while some rendered fat drains onto the foil. The rim catches the drips. A loaf pan produces a more defined shape and retains more juices, but it also changes the browning and cooking time; do not rely on the sheet-pan timing if you use one.

How to Keep Meatloaf Tender and Sliceable

Soaking the breadcrumbs helps distribute moisture, while the crumbs and egg bind the beef. Finely minced, softened onion blends into the loaf without leaving large pieces that can interrupt a slice.

Overworking the mixture or packing it tightly can make the loaf dense. For a cleaner cut, give it the full 10-minute rest and slice gently. Loaf thickness affects baking time as much as weight does, so check the center with a thermometer rather than waiting for a fixed time.

Serving, Storage, and Reheating

Serve the meatloaf with mashed potatoes and green beans, or with roasted or steamed vegetables. For other ground-beef dinners, try Salisbury steak with mushroom gravy or classic beef shepherd’s pie.

Cool leftovers promptly and refrigerate them in an airtight container for 3 to 4 days. Reheat slices covered in a 350°F oven until hot, adding a small splash of water or broth to help keep them moist. Individual slices can also be microwaved in short increments until hot.

You can assemble the loaf ahead and refrigerate it for a short period before baking. A cold loaf may take longer to cook, so check its center temperature. Cooked slices may also be wrapped airtight and frozen; thaw them in the refrigerator before reheating.

Nutrition Information

Approximate nutrition per serving, based on 1 of 8 portions: 300 calories, 24g protein, 19g fat, and 18g carbohydrates. Per 100g: approximately 190 calories, 16g protein, 12g fat, and 12g carbohydrates. Values vary with the beef, ingredient brands, and how much fat drains during baking.

Classic Homemade Meatloaf

Free-form beef meatloaf is baked on a sheet pan, glazed with ketchup, and rested before slicing.
Course: Main Course
Cuisine: American
Prep: 20 min
Cook: 60 min
Total: 90 min
Servings: 8 Calories: 300 kcal

Equipment

  • Rimmed baking sheet
  • Aluminum foil
  • Small skillet
  • Large mixing bowl
  • Instant-read thermometer
  • Pastry brush

Ingredients

For the meatloaf

  • 1 teaspoon neutral oil
  • 1 small yellow onion, finely minced (about 3/4 cup or 100 g)
  • 1 cup plain breadcrumbs (100 g)
  • 1/2 cup milk (120 g)
  • 2 pounds ground beef, about 85% lean (900 g)
  • 1 large egg
  • 1 tablespoon Worcestershire sauce
  • 1 teaspoon Italian seasoning
  • 1 1/2 teaspoons kosher salt
  • 1/2 teaspoon black pepper

For the glaze and finish

  • 1/2 cup ketchup (120 g)
  • 2 tablespoons packed brown sugar (25 g)
  • 1 teaspoon yellow or Dijon mustard
  • 1 tablespoon finely chopped fresh parsley, plus a little more for the platter

Instructions

  1. Preheat the oven to 350°F (175°C) with a rack in the middle position. Line a rimmed baking sheet with foil.
  2. Warm the oil in a small skillet over medium heat. Cook the onion for 4 to 5 minutes, until soft but not browned, then let it cool briefly.
  3. Stir the breadcrumbs and milk together in a large bowl. Let stand for a few minutes until the crumbs absorb the milk.
  4. Add the egg, Worcestershire sauce, Italian seasoning, salt, pepper, softened onion, and beef. Fold gently with your hands or a fork just until evenly combined.
  5. Transfer the mixture to the prepared baking sheet. Shape it gently into an oblong loaf about 9 by 5 inches, with rounded ends and sloped sides; do not pack it tightly.
  6. Bake uncovered for 40 to 45 minutes. Meanwhile, stir the ketchup, brown sugar, and mustard together until smooth.
  7. Brush or spoon the glaze over the top and sides of the loaf. Bake for another 15 to 20 minutes.
  8. Begin checking the thickest part of the center around 50 minutes of total baking time. Bake until it reaches 160°F (70°C) on an instant-read thermometer, avoiding contact between the probe and pan. If the glaze darkens before the center is done, tent the loaf loosely with foil.
  9. Rest the meatloaf on the pan for 10 minutes. Transfer it to a platter, slice about 3/4 to 1 inch thick, and scatter parsley over the glaze and platter.

Tips

  • Soak the breadcrumbs in milk before mixing to help keep the meatloaf moist.
  • Cook and cool the onion before adding it to the meat mixture.
  • Mix gently and avoid packing the loaf tightly so it stays tender.
  • Check the center temperature rather than relying on baking time alone; loaf thickness affects how quickly it cooks.
  • Let the meatloaf rest for 10 minutes before slicing for cleaner cuts.

Notes

Refrigerate leftovers in an airtight container for 3 to 4 days. Reheat covered at 350°F or microwave slices in short increments; add a splash of water or broth to help keep them moist. Cooked slices can be frozen airtight and thawed in the refrigerator before reheating.

Nutrition

Calories: 300 kcal | Protein: 24 g | Fat: 19 g | Carbohydrates: 18 g | Per 100 G Calories: 190 kcal | Per 100 G Protein: 16 g | Per 100 G Fat: 12 g | Per 100 G Carbohydrates: 12 g

Cuban Beef Picadillo

Cuban-style beef picadillo combines ground beef, tomato sauce, cumin, oregano, and briny green olives in a chunky skillet dish. In this version, small potato cubes simmer in the sauce alongside diced carrot. Keep the potatoes in contact with the liquid so they turn tender before the sauce reduces too far.

The finished picadillo should be moist but not soupy, with whole olives and intact potato pieces visible among the beef. Serve it beside separate portions of fluffy white rice and browned ripe plantains. Raisins and capers are optional, not part of the savory base recipe.

Ingredients for Cuban Beef Picadillo

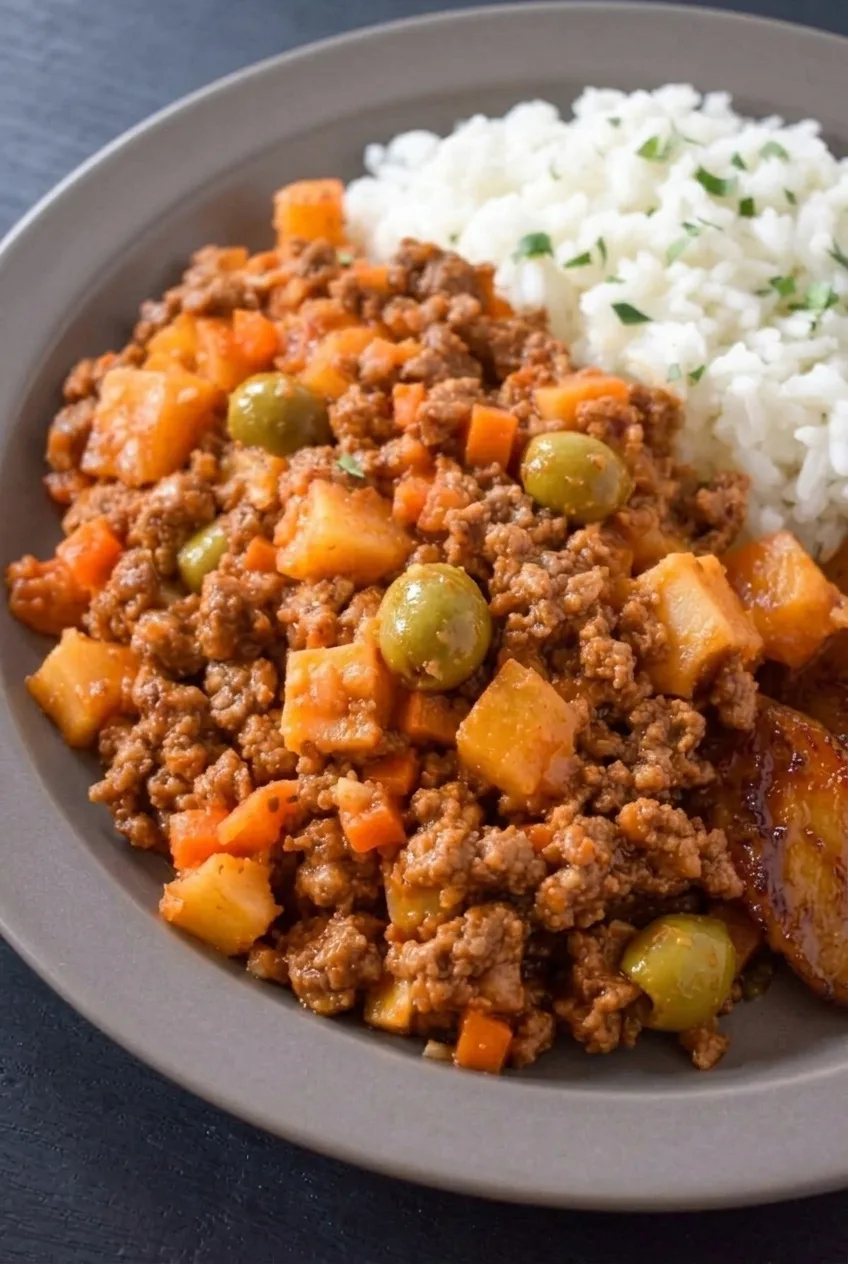
Close view of Cuban beef picadillo showing saucy beef crumbles, tender potatoes, carrots, and whole green olives
  • 1 1/4 pounds lean ground beef (575g)
  • 1 tablespoon olive oil
  • 1 medium yellow onion, finely diced (150g)
  • 1 medium carrot, peeled and finely diced (60g)
  • 3 garlic cloves, minced
  • 1 teaspoon ground cumin
  • 1 teaspoon dried oregano
  • 1/4 teaspoon black pepper, plus more to taste
  • Kosher salt, to taste
  • 1 cup tomato sauce (245g)
  • 3/4 cup low-sodium beef broth (180g), plus more as needed
  • 1 medium-large russet or Yukon Gold potato, peeled and cut into 1/2-inch cubes (250g)
  • 1/2 cup pitted green olives (75g), keeping most whole
  • 1 bay leaf
  • 1 1/2 cups dry long-grain white rice (285g)
  • 2 1/4 cups water for the rice, or the amount specified on the package
  • 2 ripe plantains with mostly black or heavily spotted peels (about 450g)
  • 2 to 3 tablespoons neutral oil for frying the plantains, as needed
  • 1 tablespoon chopped parsley or cilantro, for garnish (optional)

How to Make Cuban Beef Picadillo

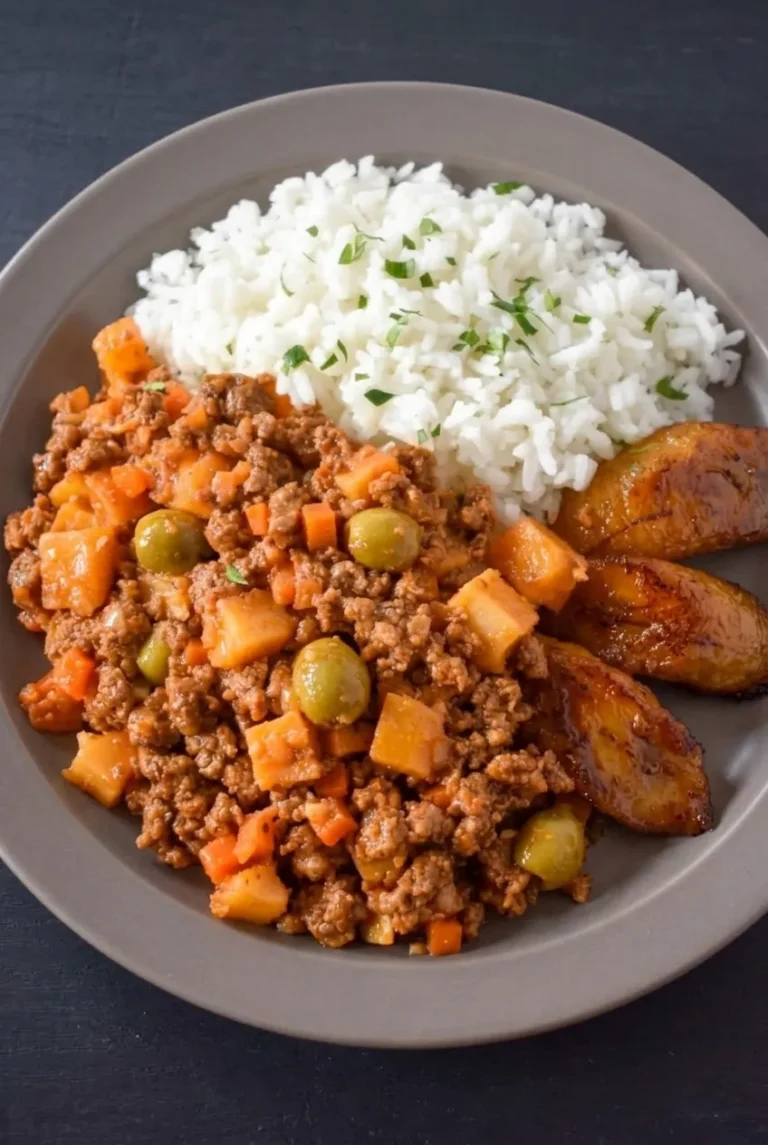
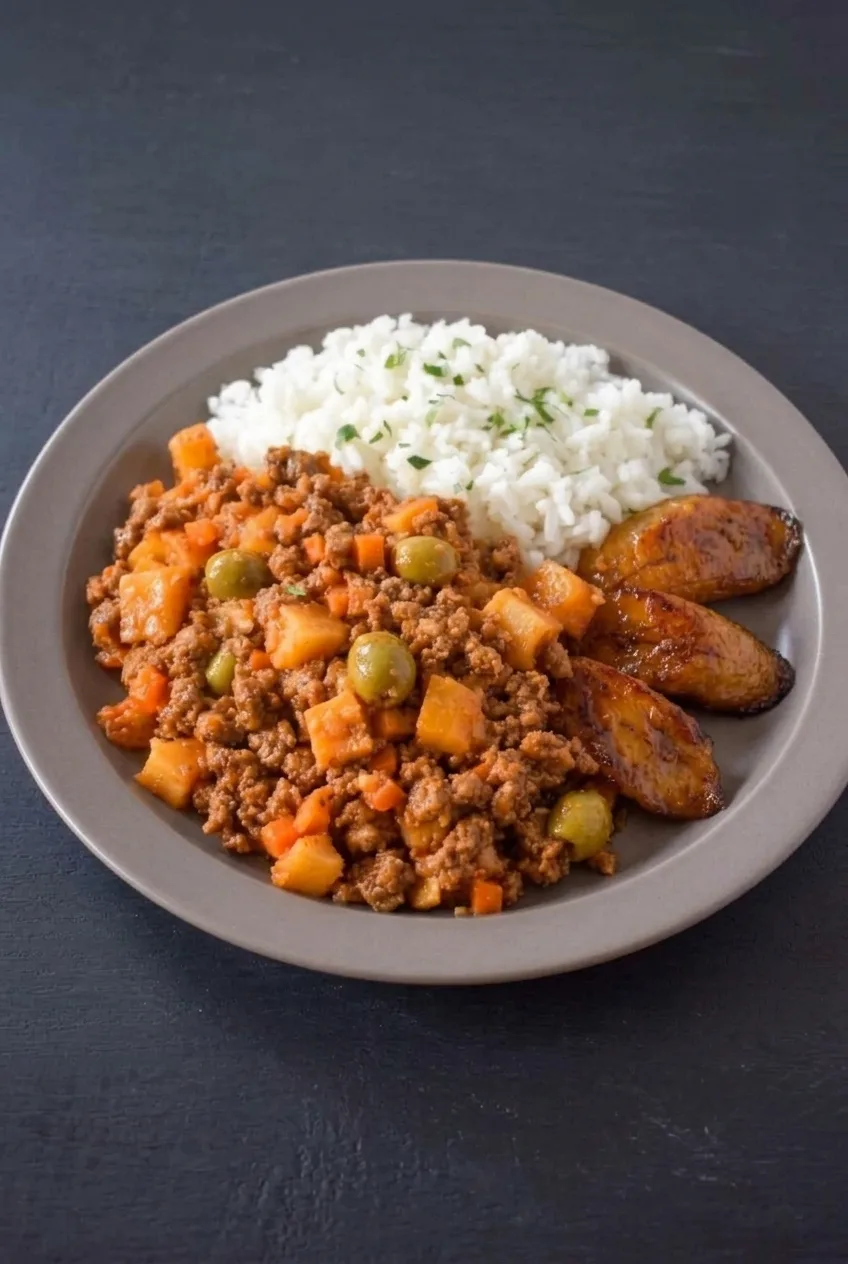
Full plate of Cuban beef picadillo, white rice, and fried plantains on a dark tabletop
  1. Prep and start the rice: Dice the onion and carrot, mince the garlic, and cut the potato into even 1/2-inch cubes. Cook the rice with the water according to package directions. Once tender, leave it covered off the heat until serving.
  2. Brown the beef: Warm a 12-inch lidded skillet over medium heat, then add the olive oil and beef. Cook for 6 to 8 minutes, breaking the meat into small crumbles, until browned. Drain excess fat if needed. If the pan fills with moisture, let it cook off so the beef can brown. Cook ground beef to 160°F (70°C) for food safety; use an instant-read thermometer if checking rather than relying on color alone.
  3. Soften the vegetables: Reduce the heat to medium-low. Add the onion and carrot and cook for 4 to 5 minutes, until they begin to soften. Stir in the garlic, cumin, oregano, black pepper, and a small pinch of salt. Cook briefly, stirring so the garlic does not scorch.
  4. Add the sauce and potatoes: Stir in the tomato sauce, broth, potato, bay leaf, and olives. Bring to a gentle simmer, then stir or press the potato cubes so most are nestled in the liquid.
  5. Simmer: Cover and cook over low or medium-low heat for about 15 to 20 minutes, stirring once or twice. Start checking the potatoes at 15 minutes; they should be fork-tender but still hold their shape. If the sauce thickens before they soften, add broth or water a few tablespoons at a time and continue simmering, covered.
  6. Finish the picadillo: Remove the bay leaf. Taste before adding more salt, since the olives and broth contribute salt. If liquid is pooling, simmer uncovered over low heat for 2 to 4 minutes, until the sauce lightly clings to the beef and vegetables. If it is too thick, add a splash of broth. Let stand for 3 to 5 minutes.
  7. Fry the plantains: While the picadillo simmers, peel the plantains and cut them lengthwise into thick pieces. Heat a thin layer of neutral oil in a second skillet over medium to medium-low heat. Cook for 8 to 12 minutes, turning once or twice, until browned on both sides and soft in the center. Lower the heat if they darken before softening, then drain briefly.
  8. Serve: Fluff the rice and mound it on one side of each plate. Spoon the picadillo beside it and add several plantain pieces, keeping all three components distinct. Scatter parsley or cilantro over the rice if desired.

How to Keep the Potatoes Tender

Potato cubes larger than 1/2 inch, or pieces sitting above the sauce, may still be firm when the liquid has reduced. Keep them mostly nestled in the sauce and check with a fork after 15 minutes. A wide skillet can reduce liquid quickly; if the potatoes need more time, add a few tablespoons of broth or water and cover the pan again.

Raisins, Capers, and Salt

For a sweet-salty variation, stir in 2 to 3 tablespoons of raisins during the final 5 to 10 minutes of simmering. For more brininess, add 1 tablespoon drained capers with the olives. Neither is required. Because olives vary in saltiness, make the final seasoning adjustment after they have simmered in the sauce.

Picadillo Variations

Use bell pepper instead of carrot

Replace the carrot with 1/2 medium finely diced green bell pepper. Cook it with the onion as directed.

Make it without potatoes

Omit the potato for a saucier meat mixture. Simmer only until the sauce lightly coats the beef; without potatoes to tenderize, it may need less time. This variation will not have the potato pieces in the plated version above.

Serving and Storing Picadillo

For the complete plate, serve the picadillo beside white rice and fried ripe plantains. For a different ground-beef dinner served with rice, try these Korean Ground Beef Rice Bowls.

Cool leftover picadillo promptly and refrigerate it in an airtight container for 3 to 4 days. Refrigerate the rice promptly, storing it separately when practical. Reheat picadillo in a covered skillet over medium-low heat, stirring occasionally, or microwave it covered in short intervals. Add a splash of water or broth if the sauce has thickened.

Picadillo can be frozen in airtight portions, though the potatoes may soften after thawing. Thaw overnight in the refrigerator and reheat gently with a little water or broth. For the best browned texture, fry the plantains close to serving.

Nutrition Information

Approximate nutrition per serving, including picadillo, rice, and plantains, based on 4 servings: 850 calories, 36g protein, 25g fat, and 112g carbohydrates. Approximate nutrition per 100g: 140 calories, 6g protein, 4g fat, and 19g carbohydrates. Values vary with beef leanness, the amount of oil absorbed by the plantains, and the final cooked weight.

Cuban Beef Picadillo

Ground beef simmers with tomato sauce, olives, and tender potatoes, served with white rice and fried ripe plantains.
Course: Main Course
Cuisine: Cuban
Prep: 20 min
Cook: 40 min
Total: 60 min
Servings: 4 Calories: 850 kcal

Equipment

  • 12-inch lidded skillet
  • second skillet
  • rice pot
  • instant-read thermometer
  • knife and cutting board

Ingredients

For the Picadillo

  • 1 1/4 pounds lean ground beef (575g)
  • 1 tablespoon olive oil
  • 1 medium yellow onion, finely diced (150g)
  • 1 medium carrot, peeled and finely diced (60g)
  • 3 garlic cloves, minced
  • 1 teaspoon ground cumin
  • 1 teaspoon dried oregano
  • 1/4 teaspoon black pepper, plus more to taste
  • Kosher salt, to taste
  • 1 cup tomato sauce (245g)
  • 3/4 cup low-sodium beef broth (180g), plus more as needed
  • 1 medium-large russet or Yukon Gold potato, peeled and cut into 1/2-inch cubes (250g)
  • 1/2 cup pitted green olives (75g), keeping most whole
  • 1 bay leaf

For the Rice

  • 1 1/2 cups dry long-grain white rice (285g)
  • 2 1/4 cups water, or the amount specified on the package

For the Plantains and Garnish

  • 2 ripe plantains with mostly black or heavily spotted peels (about 450g)
  • 2 to 3 tablespoons neutral oil for frying, as needed
  • 1 tablespoon chopped parsley or cilantro, for garnish (optional)

Instructions

  1. Dice the onion and carrot, mince the garlic, and cut the potato into even 1/2-inch cubes.
  2. Cook the rice with the water according to package directions. Once tender, keep it covered off the heat until serving.
  3. Warm a 12-inch lidded skillet over medium heat. Add the olive oil and beef, and cook for 6 to 8 minutes, breaking the meat into small crumbles. Drain excess fat if needed and cook off excess moisture so the beef browns. Cook ground beef to 160°F (70°C).
  4. Reduce the heat to medium-low. Add the onion and carrot and cook for 4 to 5 minutes, until they begin to soften.
  5. Stir in the garlic, cumin, oregano, black pepper, and a small pinch of salt. Cook briefly, stirring so the garlic does not scorch.
  6. Stir in the tomato sauce, broth, potato, bay leaf, and olives. Bring to a gentle simmer and nestle most of the potato cubes in the liquid.
  7. Cover and simmer over low or medium-low heat for about 15 to 20 minutes, stirring once or twice. Start checking the potatoes at 15 minutes; they should be fork-tender but hold their shape. If the sauce thickens before they soften, add broth or water a few tablespoons at a time and continue cooking covered.
  8. Remove the bay leaf and taste before adding more salt. If liquid is pooling, simmer uncovered over low heat for 2 to 4 minutes, until the sauce lightly clings to the beef and vegetables. Add a splash of broth if it is too thick, then let stand for 3 to 5 minutes.
  9. While the picadillo simmers, peel the plantains and cut them lengthwise into thick pieces. Heat a thin layer of neutral oil in a second skillet over medium to medium-low heat.
  10. Fry the plantains for 8 to 12 minutes, turning once or twice, until browned on both sides and soft in the center. Lower the heat if they darken before softening, then drain briefly.
  11. Fluff the rice and serve it beside the picadillo with several plantain pieces. Garnish with parsley or cilantro if desired.

Tips

  • Cut the potato into even 1/2-inch cubes so the pieces cook at the same rate.
  • Keep the potato cubes mostly nestled in the sauce and start checking them for tenderness after 15 minutes.
  • If the liquid reduces before the potatoes are tender, add broth or water a few tablespoons at a time and cover the skillet again.
  • Taste for salt after the olives have simmered, since olives and broth contribute salt.
  • Cook the beef to 160°F (70°C), checking with an instant-read thermometer if needed.

Variations

  • Bell Pepper Picadillo: Replace the carrot with 1/2 medium finely diced green bell pepper and cook it with the onion.
  • Picadillo Without Potatoes: Omit the potato and simmer until the sauce lightly coats the beef; the mixture may need less cooking time.
  • Raisin and Caper Picadillo: Stir in 2 to 3 tablespoons of raisins during the final 5 to 10 minutes of simmering, or add 1 tablespoon drained capers with the olives.

Notes

Refrigerate leftover picadillo promptly in an airtight container for 3 to 4 days; store rice separately when practical. Reheat covered over medium-low heat or in the microwave, adding a splash of water or broth if needed. Picadillo can be frozen, though the potatoes may soften. Approximate nutrition is per serving unless marked per 100g.

Nutrition

Calories: 850 kcal | Protein: 36 g | Fat: 25 g | Carbohydrates: 112 g | Calories Per 100g: 140 kcal | Protein Per 100g: 6 g | Fat Per 100g: 4 g | Carbohydrates Per 100g: 19 g

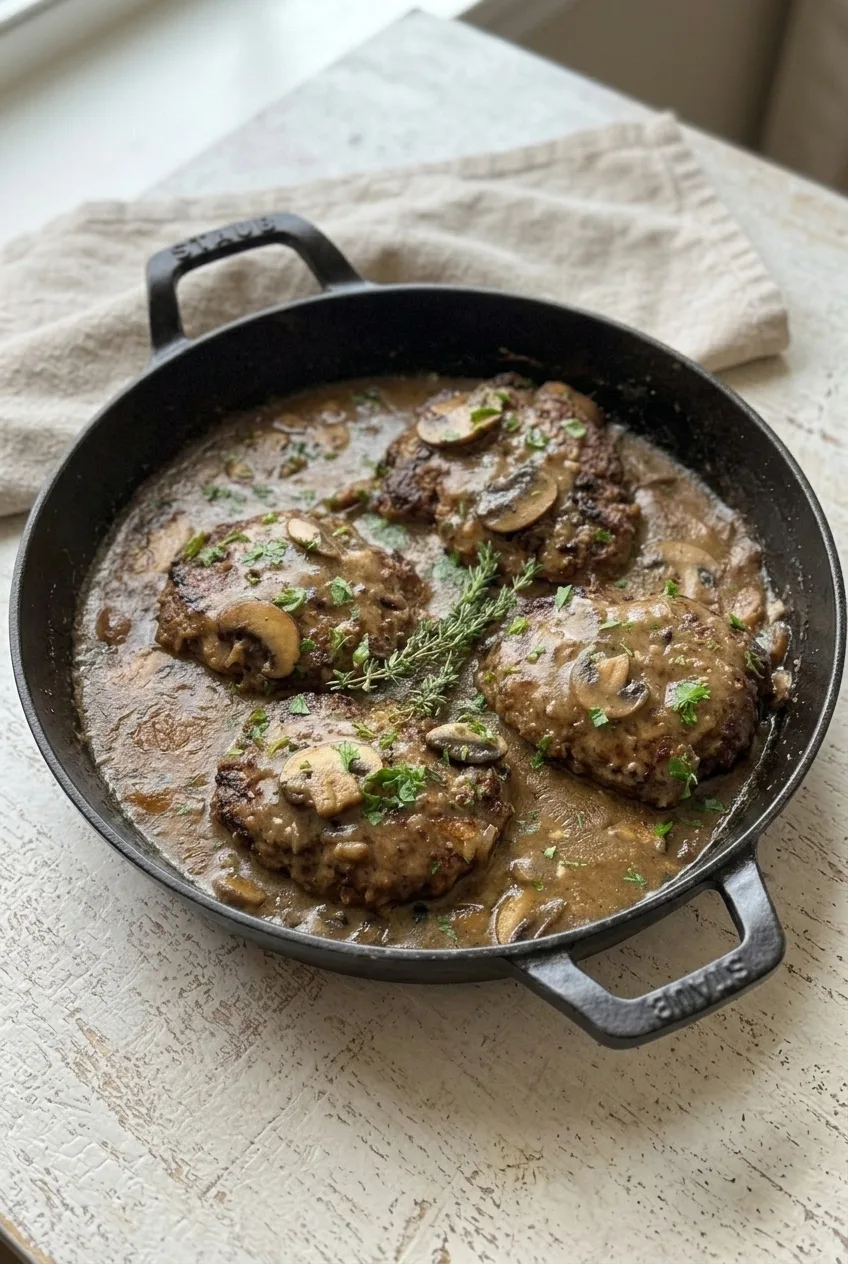
Salisbury Steak with Mushroom Gravy

Four oval beef patties are browned in a skillet, then nestled into mushroom gravy made in the same pan. The browned bits left behind deepen the gravy, while egg and breadcrumbs help the patties hold together. Cook the patties through before returning them to the gravy for a brief warm-up; their thickness and the heat of the skillet can change the timing. Serve from the skillet with mashed potatoes to catch the gravy.

Ingredients for Salisbury Steak with Mushroom Gravy

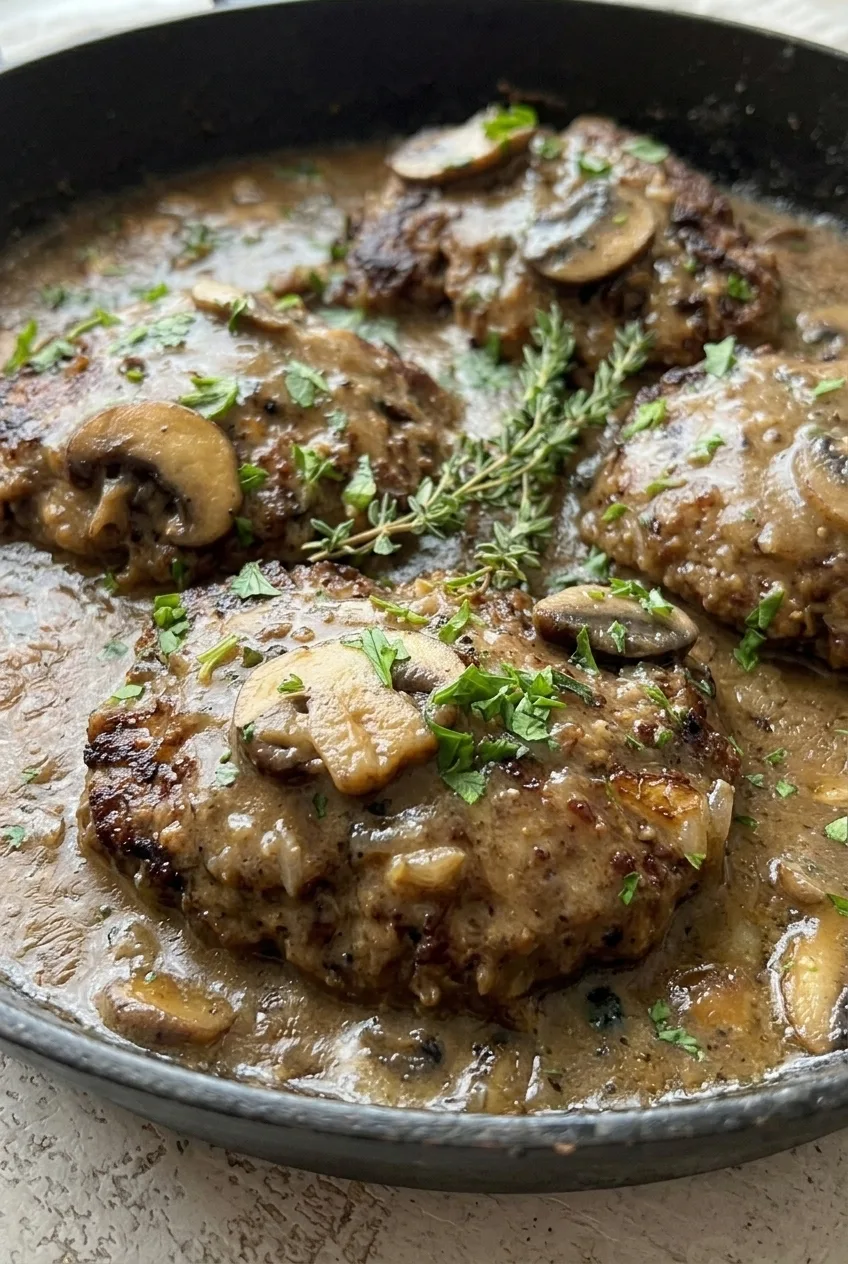
Close detail of browned Salisbury steak, sliced mushrooms, glossy gravy, parsley, and thyme.
  • 1 1/2 pounds ground beef, 85% to 90% lean (680g)
  • 1/3 cup panko breadcrumbs (20g), or plain breadcrumbs
  • 1 large egg
  • 1/2 medium yellow onion, finely diced (75g), divided
  • 2 garlic cloves, minced, divided
  • 1 tablespoon Worcestershire sauce
  • 1 teaspoon Dijon mustard
  • 1 teaspoon kosher salt, divided, or to taste
  • 1/2 teaspoon black pepper
  • 1 tablespoon neutral oil, as needed
  • 8 ounces cremini or white mushrooms, sliced (225g)
  • 2 tablespoons unsalted butter
  • 2 tablespoons all-purpose flour
  • 2 cups beef broth
  • 1 tablespoon chopped fresh parsley, plus a little more for finishing
  • 2 sprigs fresh thyme

How to Make Salisbury Steak with Mushroom Gravy

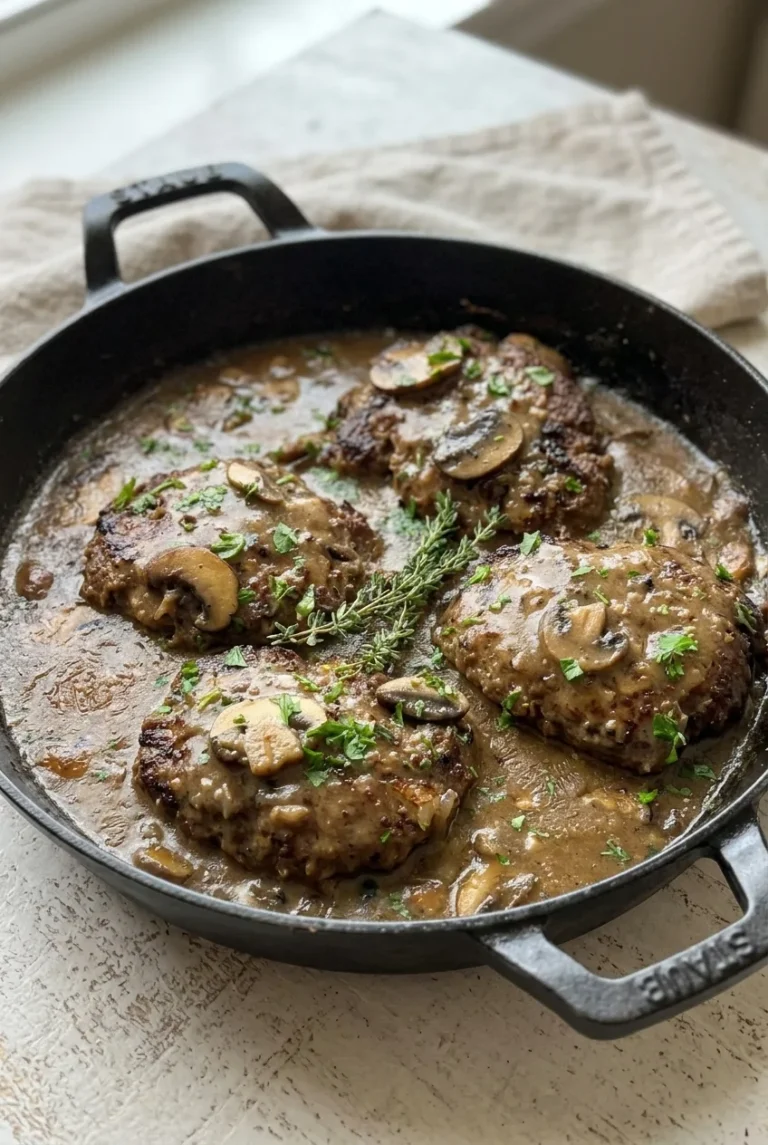
The complete skillet of Salisbury steak with mushroom gravy, centered on a neutral tabletop.
  1. Soften the aromatics: Heat a little of the oil in a 12-inch heavy skillet over medium heat. Add about 2 tablespoons of the diced onion and half the garlic. Cook for 3 to 4 minutes, until the onion is soft and translucent. Transfer to a plate and let cool briefly.
  2. Shape the patties: Combine the ground beef, panko, egg, softened onion and garlic, Worcestershire, Dijon, 3/4 teaspoon of the salt, and the pepper. Mix just until combined. Gently shape into four evenly thick oval patties, about 3/4 inch thick.
  3. Brown and cook the patties: Heat the skillet over medium-high heat, then add more oil as needed. Add the patties without crowding; cook in batches if necessary. Leave them undisturbed for about 4 to 5 minutes, until browned and easier to lift. Turn once and cook for about 3 to 5 minutes more. Start checking the thickest patty after the second side browns, and continue cooking as needed until its center reaches 160°F (70°C). Lower the heat to medium if the pan starts to scorch. Transfer the patties to a plate.
  4. Brown the vegetables: Leave about 1 tablespoon of drippings in the skillet and remove any excess. Add the butter, mushrooms, remaining onion, and remaining garlic. Cook over medium heat for 5 to 7 minutes, stirring occasionally and scraping up the browned bits, until the mushrooms have browned edges and the onion is soft.
  5. Make the gravy: Stir in the flour until it coats the vegetables and no dry flour remains. Gradually whisk in the beef broth, scraping the bottom of the skillet. Add one thyme sprig and simmer uncovered over medium-low heat for 5 to 7 minutes, until the gravy coats a spoon but still flows. Taste and add the remaining salt as needed. Remove the thyme sprig.
  6. Warm and serve: Nestle the cooked patties into the gravy and spoon the mushrooms over them. Simmer gently over low to medium-low heat for 2 to 3 minutes, just until warmed and coated. Finish with the chopped parsley and reserved thyme sprig, and serve from the skillet.

How to Keep the Patties Tender and Intact

Beef that is 85% to 90% lean gives the patties some fat without leaving excessive grease in the skillet. Extra-lean beef can dry out more readily. Mix and shape with a light touch so the patties hold together without becoming dense.

Let the first side form a crust before turning. If the patties stick, give them a little longer rather than pulling them loose; a thin spatula helps lift them once browned. Cooking times are estimates, so use the thermometer to check the center.

How to Keep Mushroom Gravy Smooth

Stir the flour into the butter-coated vegetables before adding broth, then whisk in the broth gradually. Simmer uncovered until the gravy is spoonable. If it thickens too much as it cooks or stands, whisk in a small splash of beef broth.

Serving and Storage

Mashed potatoes are a natural match for the mushroom gravy. Egg noodles, rice, or roasted potatoes also work, with asparagus or green beans on the side. For another ground-beef dinner, try classic skillet shepherd’s pie.

To make ahead, shape the uncooked patties, cover, and refrigerate for up to 1 day before cooking. Cool cooked leftovers and refrigerate in an airtight container for 3 to 4 days. Reheat the patties gently with the gravy in a covered skillet over low heat until hot throughout, adding a splash of broth if the gravy has thickened.

Freeze cooked patties with the gravy in an airtight freezer-safe container for up to 3 months. The patties and gravy can also be frozen separately.

Nutrition

Approximate nutrition per serving, based on one patty with one-quarter of the gravy: 490 calories, 41g protein, 33g fat, and 12g carbohydrates. Approximate nutrition per 100g: 140 calories, 12g protein, 9g fat, and 3g carbohydrates. Values vary with the beef’s fat percentage, broth, and final cooked weight.

Salisbury Steak with Mushroom Gravy

Four browned beef patties simmer briefly in a mushroom gravy made in the same skillet.
Course: Main Course
Cuisine: American
Prep: 15 min
Cook: 30 min
Total: 45 min
Servings: 4 Calories: 490 kcal

Equipment

  • 12-inch heavy skillet
  • Instant-read thermometer
  • Whisk

Ingredients

For the Patties

  • 1 1/2 pounds ground beef, 85% to 90% lean (680g)
  • 1/3 cup panko breadcrumbs (20g), or plain breadcrumbs
  • 1 large egg
  • 1/2 medium yellow onion, finely diced (75g), divided
  • 2 garlic cloves, minced, divided
  • 1 tablespoon Worcestershire sauce
  • 1 teaspoon Dijon mustard
  • 1 teaspoon kosher salt, divided, or to taste
  • 1/2 teaspoon black pepper
  • 1 tablespoon neutral oil, as needed

For the Mushroom Gravy

  • 8 ounces cremini or white mushrooms, sliced (225g)
  • 2 tablespoons unsalted butter
  • 2 tablespoons all-purpose flour
  • 2 cups beef broth
  • 2 sprigs fresh thyme
  • 1 tablespoon chopped fresh parsley, plus a little more for finishing

Instructions

  1. Heat a little oil in a 12-inch heavy skillet over medium heat. Add about 2 tablespoons of the diced onion and half the garlic. Cook for 3 to 4 minutes, until soft and translucent. Transfer to a plate and cool briefly.
  2. Combine the ground beef, panko, egg, softened onion and garlic, Worcestershire, Dijon, 3/4 teaspoon of the salt, and the pepper. Mix just until combined, then gently shape into four evenly thick oval patties about 3/4 inch thick.
  3. Heat the skillet over medium-high heat and add more oil as needed. Brown the patties without crowding, working in batches if necessary. Cook the first side undisturbed for about 4 to 5 minutes, then turn and cook for about 3 to 5 minutes more.
  4. Check the center of the thickest patty and continue cooking as needed until it reaches 160°F (70°C). Lower the heat to medium if the pan starts to scorch. Transfer the patties to a plate.
  5. Leave about 1 tablespoon of drippings in the skillet and remove any excess. Add the butter, mushrooms, remaining onion, and remaining garlic. Cook over medium heat for 5 to 7 minutes, stirring occasionally and scraping up browned bits, until the mushrooms have browned edges and the onion is soft.
  6. Stir in the flour until it coats the vegetables and no dry flour remains. Gradually whisk in the beef broth, scraping the skillet bottom.
  7. Add one thyme sprig and simmer uncovered over medium-low heat for 5 to 7 minutes, until the gravy coats a spoon but still flows. Taste and add the remaining salt as needed, then remove the thyme sprig.
  8. Nestle the cooked patties into the gravy and spoon the mushrooms over them. Simmer gently over low to medium-low heat for 2 to 3 minutes, until warmed and coated.
  9. Finish with the chopped parsley and reserved thyme sprig. Serve from the skillet.

Tips

  • Use 85% to 90% lean beef for patties that stay tender without leaving excessive grease.
  • Mix and shape the patties gently to keep them from becoming dense.
  • Let the first side form a crust before turning; if a patty sticks, give it more time rather than pulling it loose.
  • Whisk the broth in gradually after coating the vegetables with flour to help keep the gravy smooth.
  • If the gravy gets too thick, whisk in a small splash of beef broth.

Notes

Refrigerate cooked leftovers in an airtight container for 3 to 4 days. Reheat gently with the gravy in a covered skillet until hot throughout. Freeze cooked patties with gravy for up to 3 months. Approximate nutrition per 100g: 140 calories, 12g protein, 9g fat, and 3g carbohydrates.

Nutrition

Calories: 490 kcal | Protein: 41 g | Fat: 33 g | Carbohydrates: 12 g

Homemade Beefaroni

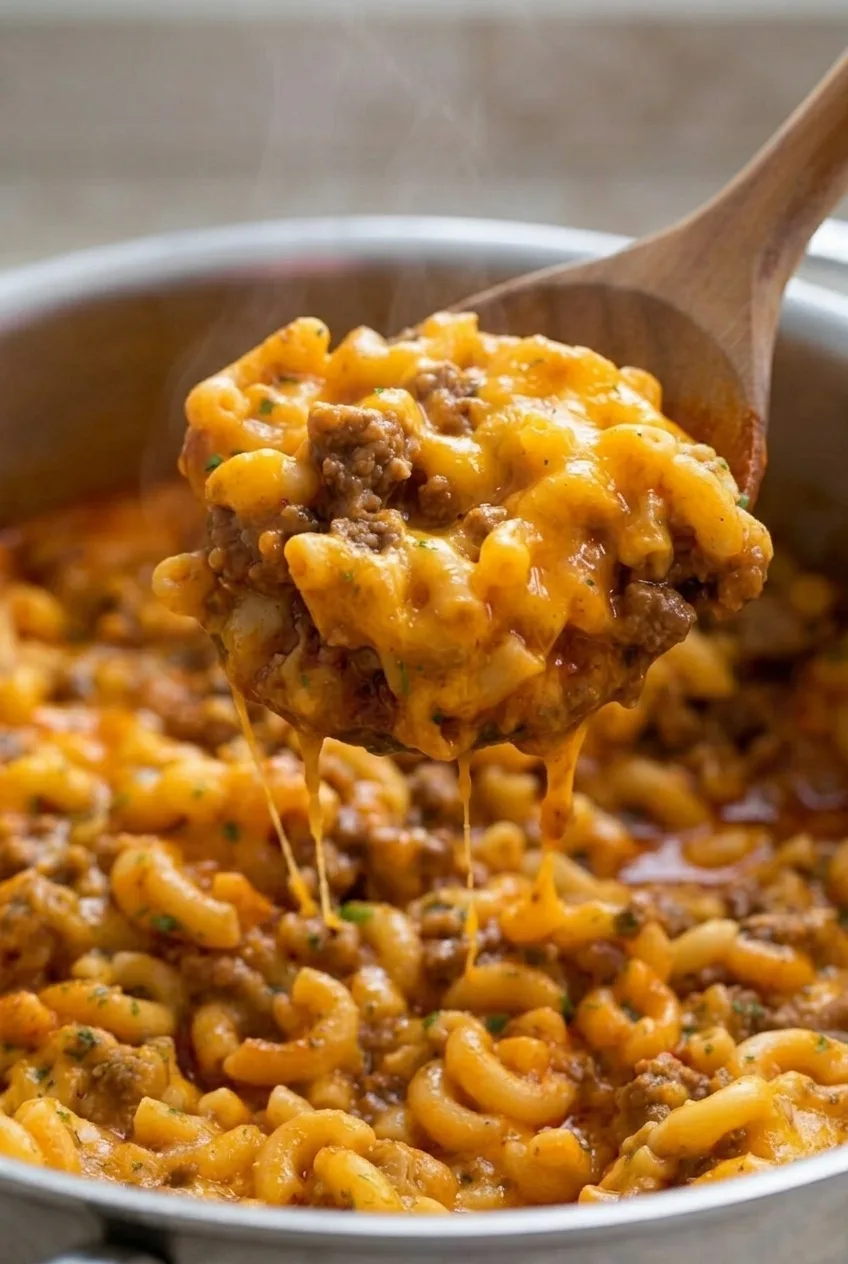
Elbow macaroni and browned ground beef are coated in a tomato sauce, then finished with melted cheddar for a saucy stovetop Beefaroni. Boiling the macaroni separately makes it easier to drain while it still has a slight bite; it will soften further when folded into the sauce. Cheddar gives this version its cheesy finish, though Beefaroni can also be made without it.

Serves 6. Allow about 15 minutes to prep and 25 minutes to cook.

Ingredients for Homemade Beefaroni

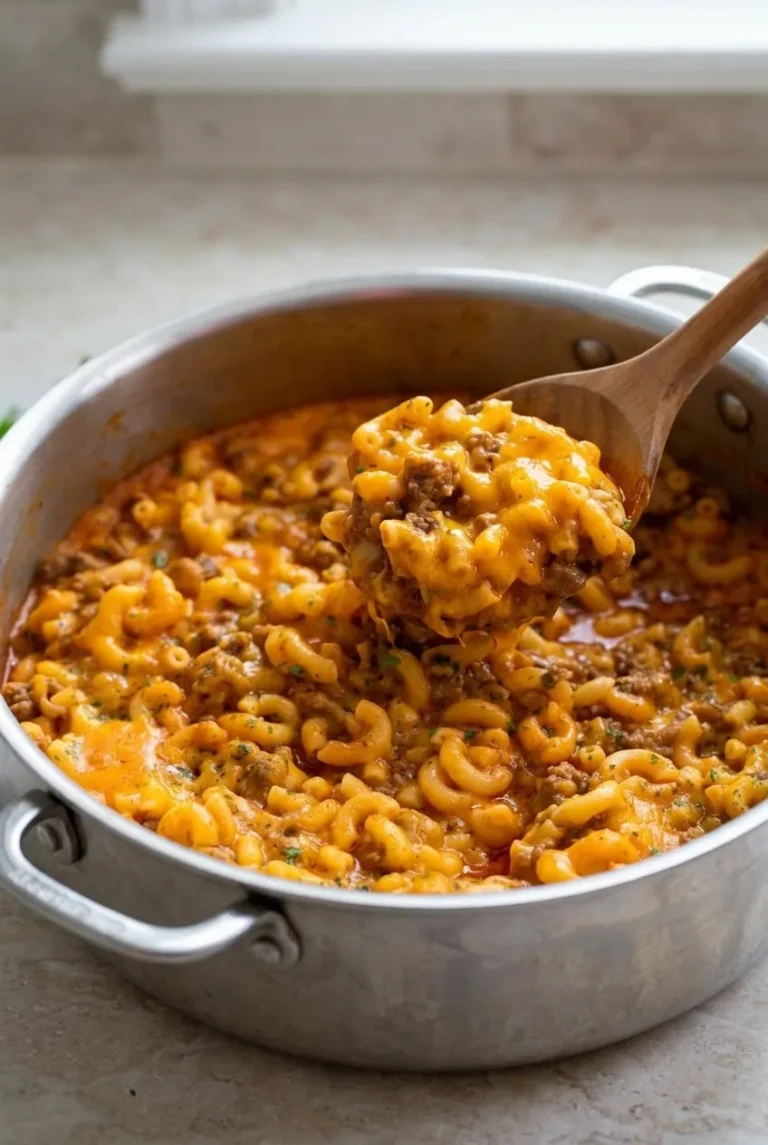
Close-up of cheesy Homemade Beefaroni showing glossy tomato sauce, elbow macaroni, and browned beef crumbles
  • 12 ounces elbow macaroni (340g)
  • 1 pound ground beef (450g)
  • 1 tablespoon olive oil, if needed
  • 1 small yellow onion, finely diced (about 100g)
  • 2 cloves garlic, minced
  • 2 tablespoons tomato paste (about 30g)
  • 1 can (15 ounces) tomato sauce (425g)
  • 1/2 cup beef broth (120ml)
  • 1 teaspoon Italian seasoning
  • About 3/4 teaspoon kosher salt, plus more to taste
  • 1/2 teaspoon black pepper
  • 1 1/2 cups shredded sharp cheddar cheese (170g), divided

For an optional garnish, use 1 tablespoon chopped fresh parsley. Add a pinch of red pepper flakes with the Italian seasoning if you want a little heat. Other short pasta shapes will work, but elbows give this dish its familiar shape. For a gluten-free version, use gluten-free elbow pasta and follow its package timing.

How to Make Homemade Beefaroni

A full pot of Homemade Beefaroni with melted cheddar and a wooden spoon, photographed with more countertop around it
  1. Boil the macaroni: Bring a large pot of salted water to a boil. Cook the elbows according to the package directions, checking at the low end of the timing, usually around 7–9 minutes. When tender but still slightly firm, reserve 1/2 cup pasta water, then drain. Do not rinse.
  2. Brown the beef: While the pasta cooks, heat a roomy pot or Dutch oven over medium-high heat. Add the beef and break it into small crumbles as it cooks, about 6–8 minutes, until browned and cooked through. Drain excess fat, leaving a little in the pot.
  3. Soften the onion: Reduce the heat to medium. If the pot is dry, add the olive oil. Add the onion and cook for 4–5 minutes, stirring, until softened and translucent. Add the garlic and cook briefly, just until fragrant.
  4. Simmer the sauce: Stir in the tomato paste and Italian seasoning. Cook briefly, stirring, until the paste darkens slightly and coats the beef. Add the tomato sauce, broth, salt, and pepper. Bring to a simmer, then reduce the heat to medium-low. Simmer uncovered for 10–15 minutes, stirring occasionally, until lightly thickened but still loose and glossy.
  5. Coat the macaroni: Fold the drained elbows into the sauce over low heat. If the mixture is too thick, add reserved pasta water or a little more broth, a splash at a time, until the sauce coats the pasta and remains spoonable.
  6. Melt in the cheddar: Turn the heat to low or remove the pot from the burner. Stir in most of the cheddar gradually until melted, then scatter the rest over the top and let it soften. Do not boil the sauce after adding the cheese. Let stand for 2–3 minutes, garnish with parsley if using, and serve from the pot.

How to Keep the Macaroni from Getting Mushy

Drain the elbows while they still have a slight bite, even if they seem a little firmer than you want to serve them. They continue to soften in the hot sauce and absorb more liquid as the Beefaroni rests.

How to Keep the Sauce Smooth and Saucy

Cheddar can turn grainy or oily in a vigorously boiling sauce. Add it over low or residual heat and stir gently. If the Beefaroni thickens while standing, add a splash of reserved pasta water or broth; the sauce should cling to the elbows without becoming dry or pooling in the pot.

Serving Homemade Beefaroni

Serve hot by the spoonful, with garlic bread or dinner rolls and a simple vegetable such as green beans or corn.

For a different ground-beef pasta dinner, try One Pot Taco Pasta with Ground Beef and Shells. For a longer-simmered beef pasta sauce, see Pappardelle Bolognese with Beef, Pork & Parmesan.

How to Store and Reheat Beefaroni

Refrigerate leftovers in an airtight container for about 3 days. Reheat gently on the stovetop or in the microwave until hot, stirring in a splash of water or broth to loosen the pasta. The cheese may be less glossy after refrigeration.

Beefaroni can be frozen, but the macaroni may soften after thawing and reheating.

Nutrition

Approximate nutrition per serving, based on 1/6 of the recipe: 555 calories, 28g protein, 28g fat, and 47g carbohydrates. Per 100g: about 165 calories, 9g protein, 8g fat, and 14g carbohydrates. Values will vary with the beef, broth, tomato sauce, and cheddar used.

Homemade Beefaroni

Elbow macaroni and browned ground beef simmer in tomato sauce and are finished with melted cheddar.
Course: Main Course
Cuisine: American
Prep: 15 min
Cook: 25 min
Total: 40 min
Servings: 6 Calories: 555 kcal

Equipment

  • Large pot
  • Colander
  • Dutch oven or roomy pot

Ingredients

For the Beefaroni

  • 12 ounces elbow macaroni (340 g)
  • 1 pound ground beef (450 g)
  • 1 tablespoon olive oil, if needed
  • 1 small yellow onion, finely diced (about 100 g)
  • 2 cloves garlic, minced
  • 2 tablespoons tomato paste (about 30 g)
  • 1 can tomato sauce (15 ounces/425 g)
  • 1/2 cup beef broth (120 ml), plus more as needed
  • 1 teaspoon Italian seasoning
  • About 3/4 teaspoon kosher salt, plus more to taste
  • 1/2 teaspoon black pepper
  • 1 1/2 cups shredded sharp cheddar cheese (170 g), divided

Optional Garnishes and Additions

  • 1 tablespoon chopped fresh parsley, for garnish
  • Pinch of red pepper flakes, for heat

Instructions

  1. Bring a large pot of salted water to a boil. Cook the macaroni according to package directions, checking at the low end of the timing, usually 7–9 minutes, until tender but still slightly firm.
  2. Reserve 1/2 cup pasta water, then drain the macaroni without rinsing.
  3. While the pasta cooks, heat a roomy pot or Dutch oven over medium-high heat. Add the ground beef and cook, breaking it into small crumbles, for 6–8 minutes, until browned and cooked through. Drain excess fat, leaving a little in the pot.
  4. Reduce the heat to medium. Add the olive oil if the pot is dry, then add the onion and cook for 4–5 minutes, stirring, until softened and translucent. Add the garlic and cook briefly until fragrant.
  5. Stir in the tomato paste and Italian seasoning. Cook briefly, stirring, until the paste darkens slightly and coats the beef.
  6. Add the tomato sauce, beef broth, salt, and pepper. Bring to a simmer, then reduce the heat to medium-low. Simmer uncovered for 10–15 minutes, stirring occasionally, until lightly thickened but still loose and glossy.
  7. Fold the drained macaroni into the sauce over low heat. If the mixture is too thick, add reserved pasta water or more broth a splash at a time until the sauce coats the pasta and remains spoonable.
  8. Turn the heat to low or remove the pot from the burner. Gradually stir in most of the cheddar until melted, then scatter the remaining cheese over the top and let it soften. Do not boil the sauce after adding the cheese.
  9. Let stand for 2–3 minutes. Garnish with parsley if using and serve hot.

Tips

  • Drain the macaroni while it is still slightly firm; it will soften further in the hot sauce.
  • Reserve pasta water before draining so you can loosen the sauce as needed.
  • Add the cheddar over low or residual heat and stir gently to help keep the sauce smooth.
  • If the Beefaroni thickens while standing, stir in a splash of pasta water or broth.

Variations

  • Gluten-Free Beefaroni: Use gluten-free elbow pasta and follow the package cooking time.
  • Spicy Beefaroni: Add a pinch of red pepper flakes with the Italian seasoning.
  • Beefaroni Without Cheese: Omit the cheddar for a tomato-sauce version without cheese.
  • Beefaroni with Other Pasta Shapes: Use another short pasta shape in place of the elbow macaroni.

Notes

Refrigerate leftovers in an airtight container for about 3 days. Reheat gently on the stovetop or in the microwave until hot, adding a splash of water or broth to loosen. The pasta may soften after freezing and thawing.

Nutrition

Calories: 555 kcal | Protein: 28 g | Fat: 28 g | Carbohydrates: 47 g

Classic Shepherd’s Pie with Ground Beef

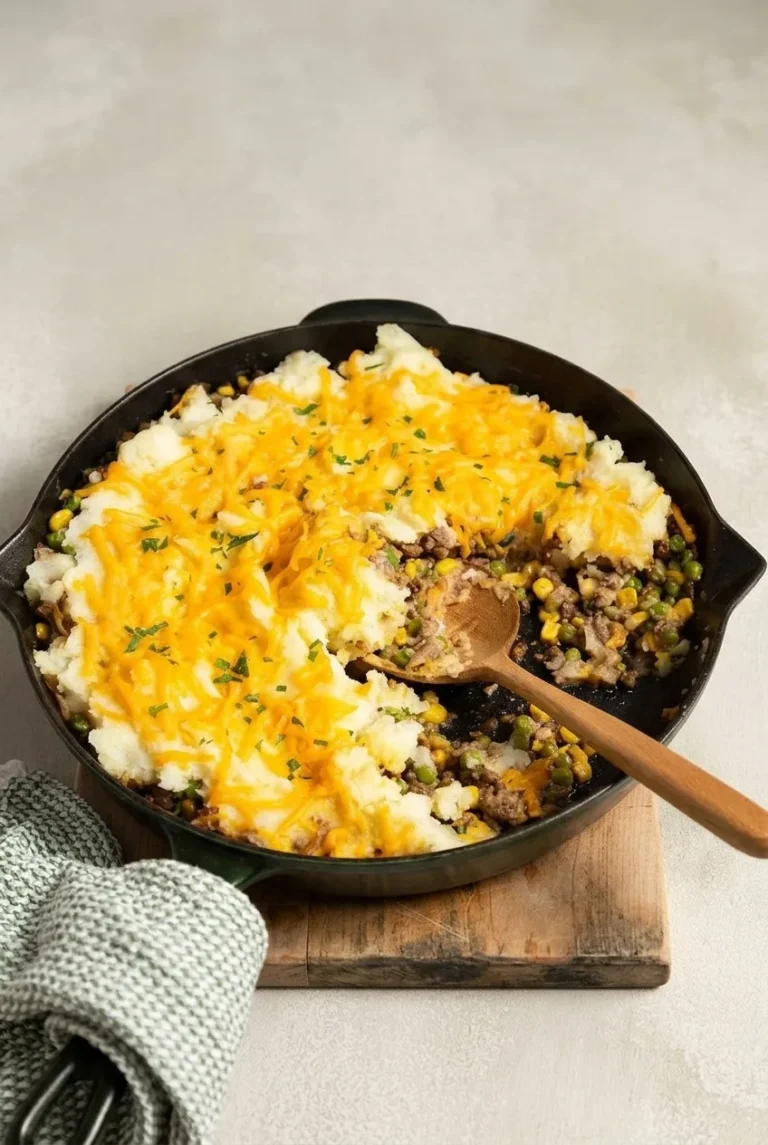
Ground beef, peas, and corn simmer in a thick gravy beneath rustic spoonfuls of mashed potatoes and melted cheddar. The pie bakes and goes to the table in a cast-iron skillet. For a filling that scoops rather than runs, thicken the gravy before adding the potatoes—the short bake won’t reduce a watery sauce.

This version uses the common US name shepherd’s pie. When distinguishing it from lamb shepherd’s pie, a beef version is traditionally called cottage pie.

Ingredients

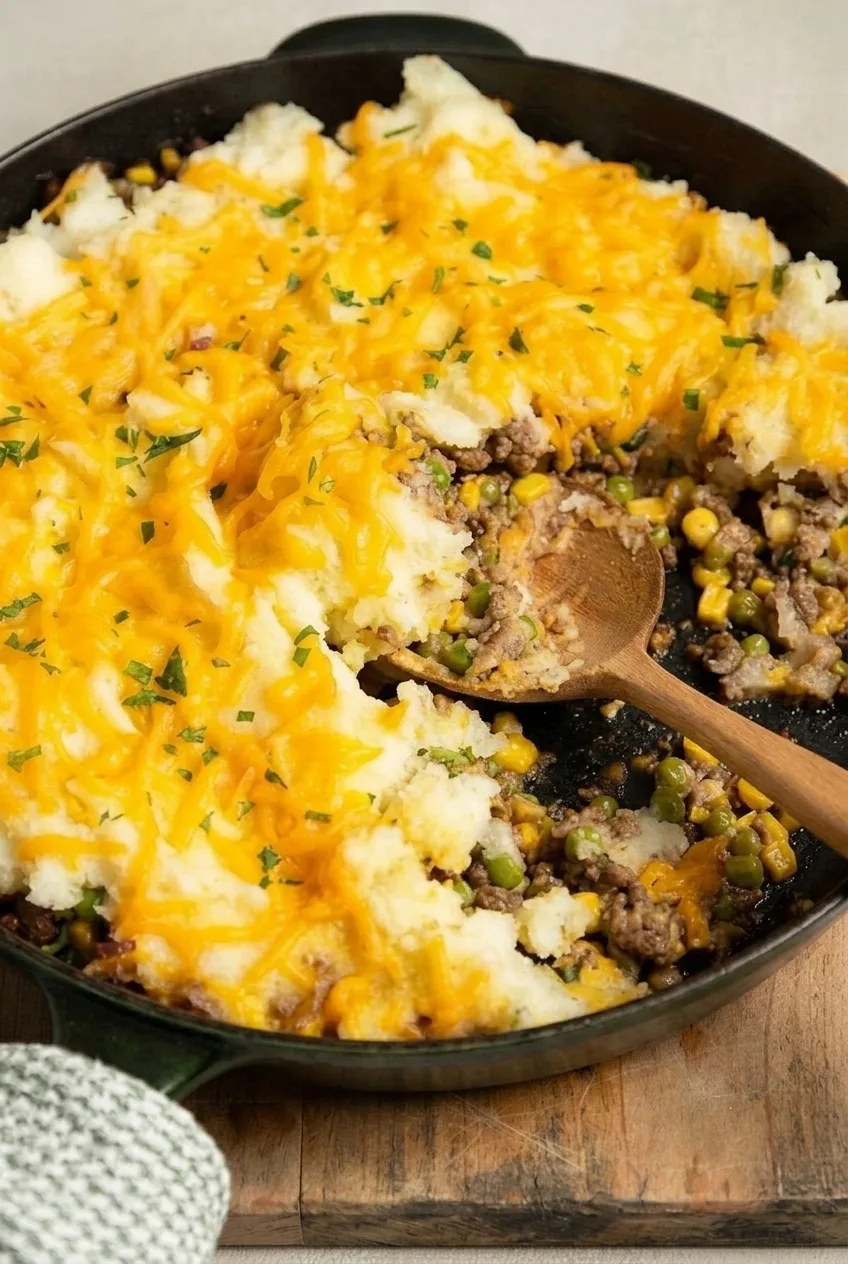
Close detail of melted cheddar and rustic mashed potatoes above the beef, peas, and corn filling
  • 2 1/2 pounds russet potatoes, peeled and cut into chunks (1,150g)
  • 4 tablespoons unsalted butter (55g)
  • 1/2 cup milk, warmed (120g)
  • About 1 1/2 teaspoons kosher salt, divided, or to taste
  • 1/2 teaspoon black pepper, or to taste
  • 1 tablespoon neutral cooking oil, as needed
  • 1 1/2 pounds ground beef, preferably 85–90% lean (680g)
  • 1 medium yellow onion, finely diced (150g)
  • 2 tablespoons all-purpose flour (15g)
  • 1 tablespoon tomato paste (15g)
  • 1 cup beef broth (240g)
  • 1 tablespoon Worcestershire sauce
  • 1 cup frozen peas (145g)
  • 1 cup frozen corn kernels (165g)
  • 1 1/2 cups shredded cheddar cheese (170g)
  • 1 tablespoon chopped fresh parsley

How to Make Shepherd’s Pie in a Skillet

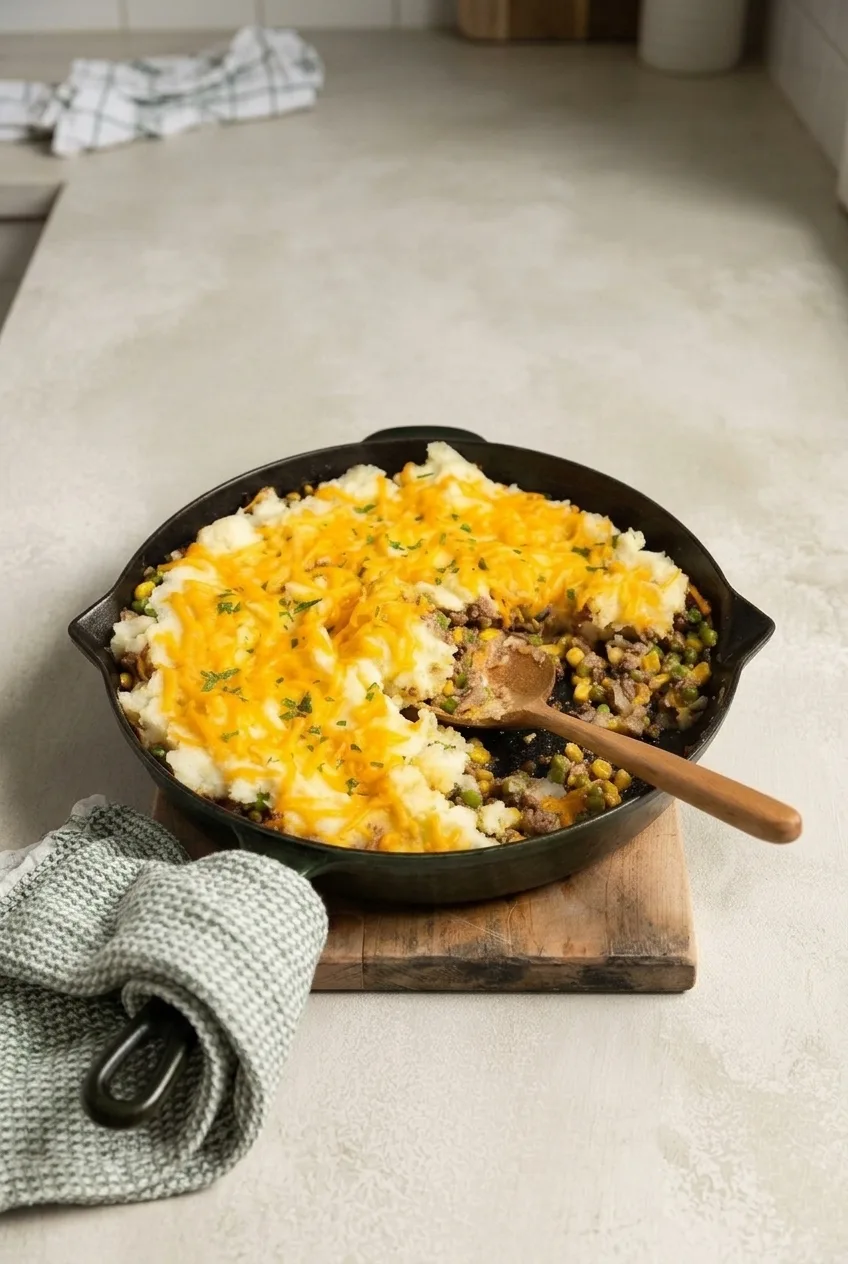
A complete cast-iron skillet of ground beef shepherd’s pie with cheddar potatoes and a serving scooped out
  1. Boil the potatoes: Preheat the oven to 375°F (190°C). Put the potatoes in a large pot, cover with cold water, and season with some of the measured salt. Bring to a boil, then simmer for 15–20 minutes, until fork-tender. Drain thoroughly and return to the warm pot over low heat briefly, until excess moisture steams off.
  2. Mash the potatoes: Mash with the butter, warm milk, and some of the remaining salt and pepper. Stop when creamy but thick enough to hold soft mounds; overworking the potatoes can make them gummy. Keep warm while preparing the filling.
  3. Brown the beef and onion: Set a 12-inch oven-safe cast-iron skillet over medium-high heat. Add the oil only if the skillet is dry. Cook the beef, breaking it into small crumbles, then add the onion and cook until softened, about 8–10 minutes total. The beef should be browned throughout and reach 160°F (70°C). Drain excess fat.
  4. Thicken the filling: Reduce the heat to medium. Stir in the flour and tomato paste and cook briefly, stirring, until they coat the beef. Gradually stir in the broth and Worcestershire sauce. Add the peas and corn without any extra liquid, then simmer for 6–8 minutes. Season with the remaining salt and pepper. The gravy should cling to the meat and vegetables, with no watery liquid pooling in the skillet.
  5. Add the topping: While the filling and potatoes are hot, gently spoon the mash over the beef in irregular mounds. Join some of the mounds without smoothing the surface flat, then scatter the cheddar over the potatoes.
  6. Bake: Bake uncovered for 15–20 minutes, checking at 15 minutes. The filling should bubble at the edges, the potatoes should be hot, and the cheddar should be melted and glossy. Keep the potato surface mostly pale; if you want more color, broil only briefly and watch closely.
  7. Rest and serve: Let the skillet stand for about 10 minutes so the filling settles. Sprinkle with parsley and scoop portions from the skillet, revealing the beef, peas, and corn beneath the topping. Use care with the hot handle.

Skillet and Bake-Time Notes

Use a 12-inch oven-safe skillet deep enough to hold both the filling and potatoes. If your skillet cannot go in the oven, transfer the hot filling to a similarly sized baking dish before adding the topping.

The 15–20-minute bake is for hot filling and hot potatoes. A chilled assembled pie or a deeper dish will need longer. Look for bubbling edges and a hot topping rather than relying on the clock alone.

Serving and Storage

Serve from the skillet on its own or with a green salad or green beans. Refrigerate leftovers in an airtight container for up to 4 days. Reheat individual portions in the microwave until hot throughout, or warm larger portions covered in the oven.

The beef filling can be made 2–3 days ahead and refrigerated. Prepare or rewarm the potatoes before assembling. An assembled pie can also be frozen in a covered, freezer-safe dish for up to 2 months. Thaw overnight in the refrigerator before reheating until hot throughout; the topping’s texture and the time needed to heat the pie may vary.

For another baked ground beef dinner, try Taco Casserole with Ground Beef. For a quicker option, see Korean Ground Beef Rice Bowls.

Nutrition

Approximate nutrition per serving, based on 6 servings: 700 calories, 35g protein, 38g fat, and 49g carbohydrates. Approximate nutrition per 100g: 150 calories, 8g protein, 8g fat, and 11g carbohydrates. Values vary with the ingredients used and the final cooked weight.

Classic Shepherd’s Pie with Ground Beef

Ground beef, peas, and corn simmer in thick gravy beneath mashed potatoes and melted cheddar, baked in a skillet.
Course: Main Course
Cuisine: American
Prep: 20 min
Cook: 60 min
Total: 80 min
Servings: 6 Calories: 700 kcal

Equipment

  • Large pot
  • 12-inch oven-safe cast-iron skillet
  • Potato masher

Ingredients

For the Potatoes

  • 2 1/2 pounds russet potatoes, peeled and cut into chunks (1,150 g)
  • 4 tablespoons unsalted butter (55 g)
  • 1/2 cup milk, warmed (120 g)
  • About 1 1/2 teaspoons kosher salt, divided, or to taste
  • 1/2 teaspoon black pepper, or to taste

For the Beef Filling

  • 1 tablespoon neutral cooking oil, as needed
  • 1 1/2 pounds ground beef, preferably 85–90% lean (680 g)
  • 1 medium yellow onion, finely diced (150 g)
  • 2 tablespoons all-purpose flour (15 g)
  • 1 tablespoon tomato paste (15 g)
  • 1 cup beef broth (240 g)
  • 1 tablespoon Worcestershire sauce
  • 1 cup frozen peas (145 g)
  • 1 cup frozen corn kernels (165 g)

For the Topping

  • 1 1/2 cups shredded cheddar cheese (170 g)
  • 1 tablespoon chopped fresh parsley

Instructions

  1. Preheat the oven to 375°F (190°C).
  2. Put the potatoes in a large pot, cover with cold water, and season with some of the measured salt. Bring to a boil, then simmer for 15–20 minutes, until fork-tender.
  3. Drain the potatoes thoroughly and return them to the warm pot over low heat briefly to steam off excess moisture.
  4. Mash the potatoes with the butter, warm milk, and some of the remaining salt and pepper. Keep the mash creamy but thick enough to hold soft mounds, and keep warm.
  5. Heat a 12-inch oven-safe cast-iron skillet over medium-high heat. Add the oil if the skillet is dry. Brown the beef, breaking it into small crumbles, then add the onion and cook until softened, about 8–10 minutes total. Check that the beef reaches 160°F (70°C), then drain excess fat.
  6. Reduce the heat to medium. Stir in the flour and tomato paste until they coat the beef.
  7. Gradually stir in the broth and Worcestershire sauce. Add the peas and corn without extra liquid, then simmer for 6–8 minutes. Season with the remaining salt and pepper; cook until the gravy clings to the filling with no watery liquid pooling in the skillet.
  8. While the filling and potatoes are hot, spoon the mash over the filling in irregular mounds. Join some of the mounds without smoothing the surface, then scatter the cheddar over the potatoes.
  9. Bake uncovered for 15–20 minutes, checking at 15 minutes, until the filling bubbles at the edges, the potatoes are hot, and the cheddar is melted and glossy.
  10. Rest the skillet for about 10 minutes. Sprinkle with parsley and serve carefully, avoiding the hot handle.

Tips

  • Use a 12-inch oven-safe skillet deep enough to hold the filling and potato topping.
  • If the skillet is not oven-safe, transfer the hot filling to a similarly sized baking dish before adding the topping.
  • Steam excess moisture from the drained potatoes so the mash stays thick.
  • Thicken the filling until the gravy clings to the meat and vegetables before adding the topping.
  • The baking time assumes hot filling and potatoes; check for bubbling edges and a hot topping rather than relying only on the clock.

Notes

Refrigerate leftovers in an airtight container for up to 4 days and reheat until hot throughout. The beef filling can be made 2–3 days ahead. Freeze an assembled pie in a covered freezer-safe dish for up to 2 months; thaw overnight in the refrigerator before reheating.

Nutrition

Calories: 700 kcal | Protein: 35 g | Fat: 38 g | Carbohydrates: 49 g | Per 100g Calories: 150 kcal | Per 100g Protein: 8 g | Per 100g Fat: 8 g | Per 100g Carbohydrates: 11 g

Korean Ground Beef Rice Bowls

Browned ground beef gets a light coating of soy sauce, sesame oil, garlic, ginger, and brown sugar, then goes over white rice with crisp carrot ribbons and cucumber slices. Keeping the vegetables raw and in separate sections gives each bowl a contrast of warm, savory beef and fresh toppings.

Use a wide skillet to brown the beef before adding the sauce; a brief uncovered simmer is all it needs to coat the crumbles. The recipe takes about 30 minutes when cooked rice is ready. If you’re starting with uncooked rice, get it going first and allow extra time.

Ingredients for Korean Ground Beef Rice Bowls

Close view of glossy ground beef crumbles, white rice, carrot ribbons, cucumber, and green onion
  • 3 cups cooked white rice (475g)
  • 1 lb ground beef, preferably 85–90% lean (450g)
  • 3 tablespoons low-sodium soy sauce
  • 1 tablespoon brown sugar
  • 1 tablespoon toasted sesame oil
  • 2 garlic cloves, minced
  • 1 teaspoon finely grated fresh ginger
  • 1 teaspoon rice vinegar
  • 2 medium carrots, shaved into long ribbons (120g)
  • 1 medium cucumber, thinly sliced into rounds (200g)
  • 2 green onions, thinly sliced (30g)
  • Up to 1 teaspoon neutral oil, only if needed

Optional: A pinch to 1/4 teaspoon red pepper flakes for heat, and 1 teaspoon sesame seeds for serving.

How to Make Korean Ground Beef Rice Bowls

Korean ground beef rice bowl centered on a neutral woven surface, with the full bowl visible
  1. Prepare the rice and vegetables: Have the cooked rice ready. Use a vegetable peeler to shave the carrots into long ribbons. Slice the cucumber into rounds and thinly slice the green onions. Keep the vegetables raw.
  2. Whisk the sauce: In a small bowl, whisk together the soy sauce, brown sugar, sesame oil, garlic, ginger, rice vinegar, and optional red pepper flakes until the sugar is mostly dissolved. Taste before adding it to the beef; soy sauce brands vary in saltiness.
  3. Brown the beef: Heat a 10- to 12-inch skillet over medium-high heat. Add the beef, using a little neutral oil only if it sticks. Cook uncovered, breaking it into small crumbles and stirring periodically. Start checking after about 5 minutes; it should be browned with no pink remaining after about 6–8 minutes. Ground beef should reach 160°F (70°C). Spoon or drain off any visible pool of fat. A wide skillet helps the beef brown rather than steam; if your pan is smaller, brown it in batches.
  4. Coat with sauce: Pour the sauce into the skillet and reduce the heat to medium or medium-low. Cook uncovered for 1–2 minutes, stirring frequently, until the beef is lightly glossy and the sauce clings to the crumbles rather than pooling in the pan. If it still looks watery after a minute, keep stirring briefly as it reduces.
  5. Assemble the bowls: Divide the rice among four shallow bowls, leaving some visible around the edges. Mound the hot beef near the center of each bowl. Arrange carrot ribbons on one side and cucumber rounds on the other, without mixing them into the beef. Scatter green onions over the top and add sesame seeds, if using.

Adjusting the Sauce

Low-sodium soy sauce helps keep the beef from becoming overly salty. The brown sugar gives the sauce modest sweetness; use less if you prefer a less sweet coating. Leave out the red pepper flakes for a mild bowl, or add them to taste. Tamari can replace the soy sauce; if you need a gluten-free option, check that it is certified gluten-free.

Storage and Meal Prep

Refrigerate the cooked beef and rice in airtight containers for up to 3 days. Keep the carrot ribbons and cucumber separate so they stay crisp. Reheat the beef and rice in a skillet or microwave until hot, adding a small splash of water to the rice if it has dried out. Add the cold vegetables and green onions after reheating.

For longer storage, freeze the cooled cooked beef in an airtight freezer-safe container for up to 3 months for best quality. Thaw it in the refrigerator before reheating. Do not freeze the fresh carrot or cucumber toppings.

For another ground-beef dinner, try this Taco Casserole with Ground Beef.

Nutrition

Approximate nutrition per bowl, based on 4 servings: 475 calories, 28g protein, 21g fat, and 44g carbohydrates. Approximate nutrition per 100g: 140 calories, 8g protein, 6g fat, and 13g carbohydrates. Values vary with the ground beef and other ingredients used.

Korean Ground Beef Rice Bowls

Savory soy-sesame ground beef is served over white rice with crisp carrot ribbons, cucumber, and green onions.
Course: Main Course
Cuisine: Korean
Prep: 20 min
Cook: 10 min
Total: 30 min
Servings: 4 Calories: 475 kcal

Equipment

  • 10- to 12-inch skillet
  • Small bowl
  • Whisk
  • Vegetable peeler
  • Knife
  • Cutting board

Ingredients

Bowls

  • 3 cups cooked white rice (475g)
  • 1 lb ground beef, preferably 85–90% lean (450g)
  • 2 medium carrots, shaved into long ribbons (120g)
  • 1 medium cucumber, thinly sliced into rounds (200g)
  • 2 green onions, thinly sliced (30g)

Sauce

  • 3 tablespoons low-sodium soy sauce
  • 1 tablespoon brown sugar
  • 1 tablespoon toasted sesame oil
  • 2 garlic cloves, minced
  • 1 teaspoon finely grated fresh ginger
  • 1 teaspoon rice vinegar
  • Up to 1 teaspoon neutral oil, only if needed
  • Optional: a pinch to 1/4 teaspoon red pepper flakes

For Serving

  • Optional: 1 teaspoon sesame seeds

Instructions

  1. Have the cooked rice ready. Shave the carrots into long ribbons, slice the cucumber into rounds, and thinly slice the green onions. Keep the vegetables raw.
  2. Whisk the soy sauce, brown sugar, sesame oil, garlic, ginger, rice vinegar, and optional red pepper flakes in a small bowl until the sugar is mostly dissolved.
  3. Heat a 10- to 12-inch skillet over medium-high heat. Add the beef, using neutral oil only if needed.
  4. Cook the beef uncovered for about 6–8 minutes, breaking it into small crumbles and stirring periodically, until browned with no pink remaining. Ensure it reaches 160°F (70°C). Spoon or drain off any visible pool of fat.
  5. Pour the sauce into the skillet and reduce the heat to medium or medium-low. Cook uncovered for 1–2 minutes, stirring frequently, until the sauce clings to the beef.
  6. Divide the rice among four shallow bowls. Add the beef near the center, then arrange the carrot ribbons and cucumber separately alongside it.
  7. Scatter the green onions over the bowls and add sesame seeds, if using.

Tips

  • Use a wide skillet to help the beef brown instead of steam; cook it in batches if your pan is small.
  • Drain visible pools of fat before adding the sauce.
  • Check the soy sauce for saltiness before mixing it into the beef, as brands vary.
  • If the sauce looks watery after a minute, keep stirring briefly as it reduces.

Variations

  • Gluten-Free Bowls: Replace the soy sauce with tamari and check that it is certified gluten-free.
  • Spicy Bowls: Add red pepper flakes to the sauce to taste.
  • Less-Sweet Sauce: Use less brown sugar for a less sweet coating.

Notes

Refrigerate cooked beef and rice in airtight containers for up to 3 days, keeping the fresh vegetables separate. Reheat until hot and add the vegetables afterward. Freeze cooked beef for up to 3 months; thaw in the refrigerator before reheating. Do not freeze the carrot or cucumber toppings.

Nutrition

Calories: 475 kcal | Protein: 28 g | Fat: 21 g | Carbohydrates: 44 g