Author

Julia

Browsing

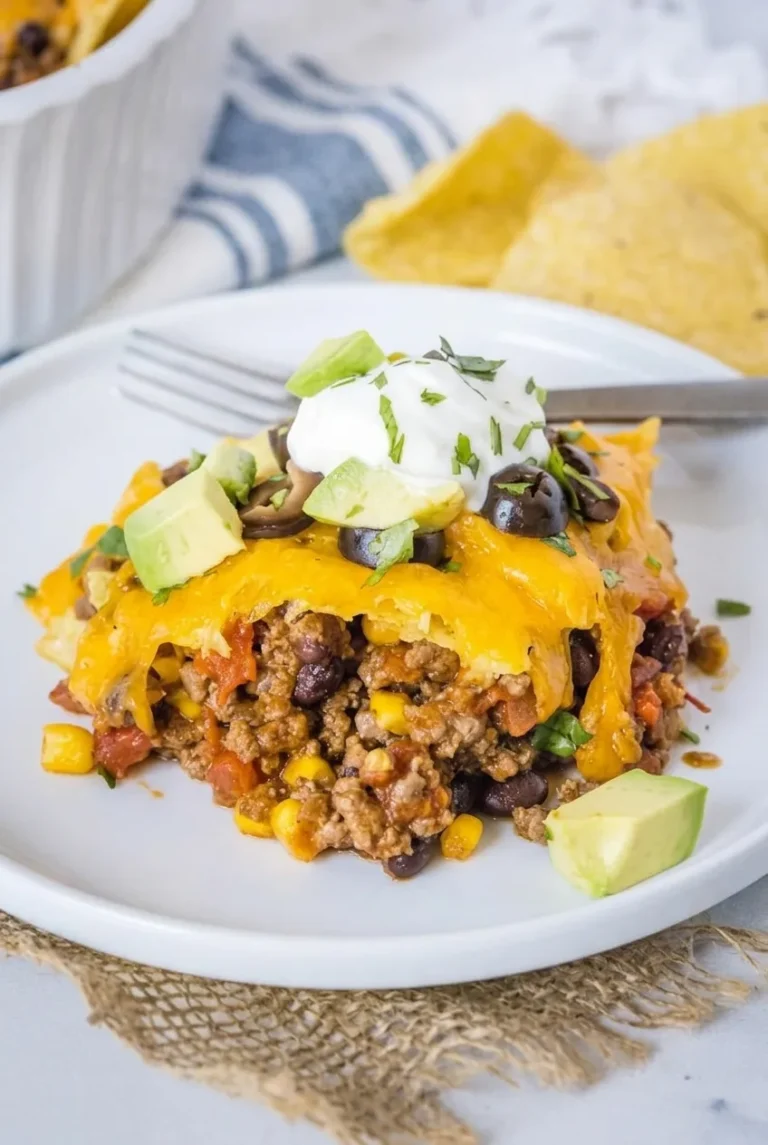
Taco Casserole with Ground Beef

Seasoned ground beef, black beans, corn, tomatoes, and salsa make a chunky filling for this corn-tortilla casserole. Simmer the filling until thick before layering it with tortillas and cheddar; that keeps excess liquid from pooling in the baking dish. The tortillas soften as they bake, so the finished casserole is best served in generous scoops rather than neat slices.

Add sour cream, avocado, black olives, and cilantro after baking for a cool contrast to the hot filling. Prep time is about 20 minutes, cook time is about 35 minutes, and the recipe makes 6 servings.

Ingredients for Taco Casserole with Ground Beef
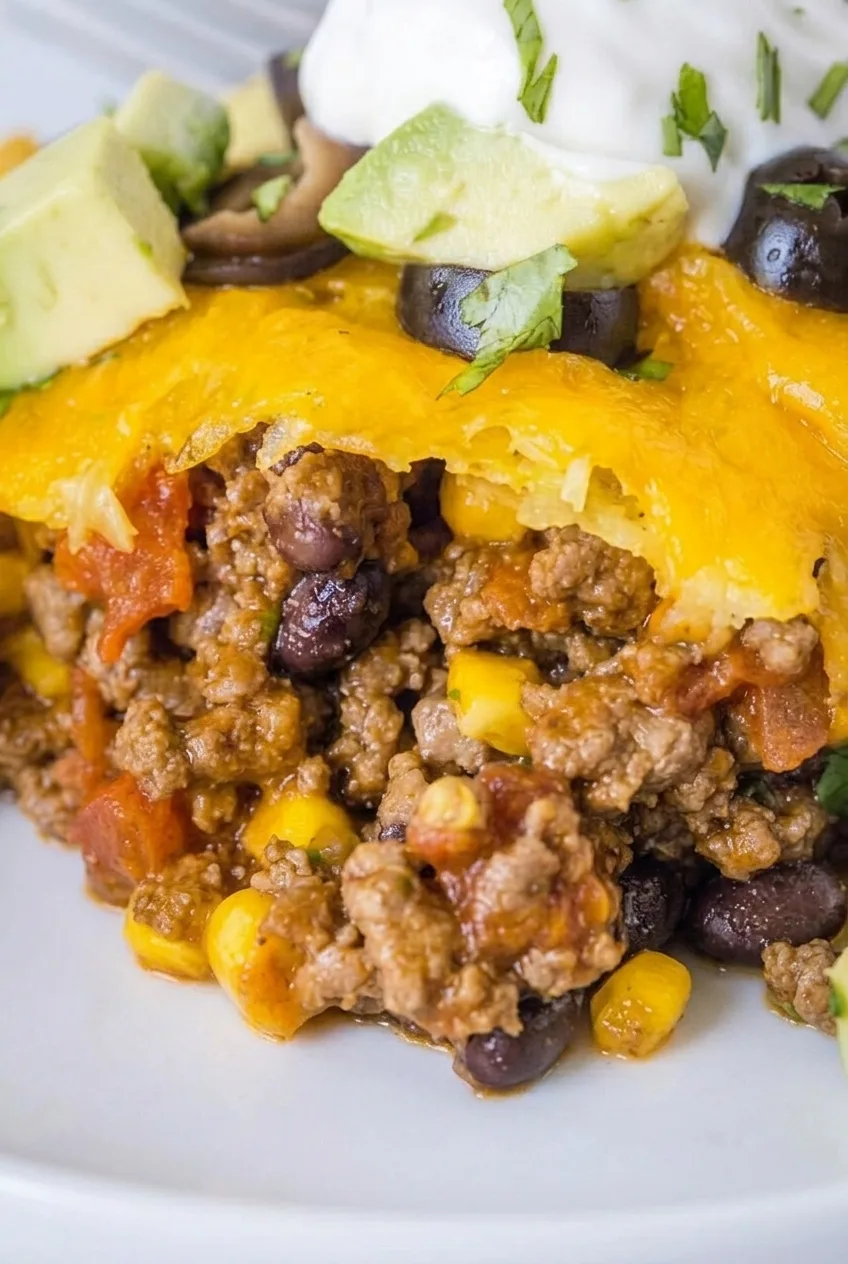
Close-up of the taco casserole's chunky beef, black beans, corn, and tomato beneath melted cheddar and fresh toppings.
  • 1 lb lean ground beef (450g)
  • 1 teaspoon neutral oil, only if needed
  • 1 small yellow onion, finely diced (about 100g)
  • 2 teaspoons chili powder
  • 1 teaspoon ground cumin
  • 1/2 teaspoon dried oregano
  • 1/2 teaspoon garlic powder
  • 1 cup salsa (250g)
  • 1 cup canned diced tomatoes, drained (170g)
  • 1 can (15 oz) black beans, rinsed and drained (425g before draining)
  • 1 cup corn kernels, drained if canned (165g)
  • 8 corn tortillas, about 6 inches wide (180g)
  • 2 cups shredded cheddar cheese, divided (225g)
  • 1/2 cup sour cream (115g), for serving
  • 1 medium ripe avocado, diced (about 150g), for serving
  • 1/4 cup sliced black olives, drained (35g), for serving
  • 2 tablespoons loosely packed fresh cilantro leaves, for serving
  • Kosher salt and black pepper, to taste, if needed
  • Tortilla chips, for serving, optional

How to Make Taco Casserole with Ground Beef
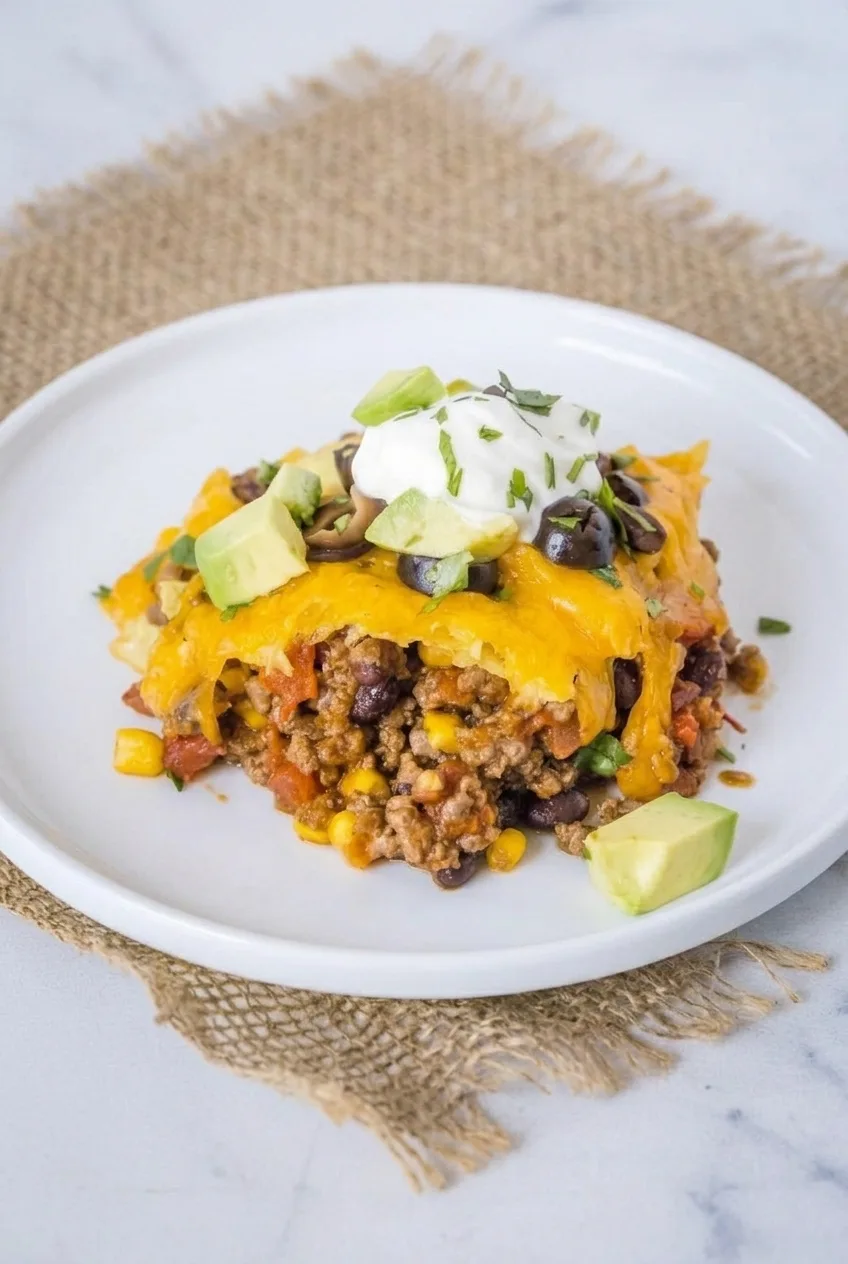
Ground beef taco casserole with cheddar and fresh toppings centered on a white plate, shown with more surrounding surface.
  1. Preheat and prepare: Heat the oven to 350°F (175°C). Lightly grease a 9-by-13-inch baking dish. Rinse and drain the beans, and drain the diced tomatoes well.
  2. Brown the beef: Heat a 10- to 12-inch skillet over medium to medium-high heat. Add the oil only if the skillet is dry. Add the beef and onion, breaking up the meat as it cooks, for 6–8 minutes, until the beef is browned and the onion is soft. Drain any excess fat.
  3. Thicken the filling: Stir in the chili powder, cumin, oregano, and garlic powder. Add the salsa, tomatoes, beans, and corn. Simmer over medium heat for 5–8 minutes, stirring occasionally and lowering the heat if needed. The filling should be moist and chunky but thick enough to spoon without watery liquid pooling in the skillet. Taste before adding salt or pepper; the salsa and cheese may provide enough salt.
  4. Layer the casserole: Arrange 4 tortillas in the dish, overlapping or tearing them to cover gaps. Spread half the filling over them and sprinkle with about 1/2 cup of the cheddar. Add the remaining tortillas and filling, then cover with the remaining cheddar.
  5. Bake: Bake uncovered for 20–25 minutes, checking at 20 minutes. The cheese should be fully melted, the edges bubbling, and the center hot. The time may differ depending on the baking dish and how warm the filling was when assembled. If the cheese browns before the center is hot, tent the dish loosely with foil and continue baking.
  6. Rest and serve: Let the casserole rest for 5–10 minutes so the soft layers settle slightly. Serve in generous scoops, topping each with sour cream, avocado, black olives, and cilantro.

How to Keep Taco Casserole from Getting Watery

Draining the beef removes excess fat, but draining the tomatoes and beans matters just as much for texture. Salsa also adds liquid: simmer the assembled filling until it is thick and spoonable before it goes into the dish. It should still be moist, not dry.

What to Expect from the Tortilla Layers

Corn tortillas give the casserole soft layers that help hold each scoop together. They will not stay crisp or produce a firm, clean-cut slice. If you want crunch, serve tortilla chips alongside rather than baking them beneath the moist filling, where they will soften.

For another baked beef-and-cheese dinner, try Classic Beef Enchiladas with Red Sauce and Cheese.

Taco Casserole Variations

Flour Tortillas

Replace the corn tortillas with flour tortillas for an even softer layer and a less pronounced corn flavor. Keep the filling and baking method the same.

Ground Turkey or Chicken

Replace the beef with ground turkey or chicken. Cook it with the onion until fully cooked before adding the spices and other filling ingredients. The finished casserole will have a different color and a less beef-forward flavor.

Storage and Reheating

Refrigerate covered leftovers for several days. Keep the sour cream and avocado separate when practical; the tortillas will soften further as the casserole sits.

Reheat individual portions in the microwave in short intervals, checking that the center is hot throughout. For a larger portion, cover and warm it in a 350°F oven until heated through, uncovering briefly if the cheese needs refreshing. Add the fresh toppings after reheating.

Baked portions can be frozen in airtight packaging for up to 3 months. Thaw overnight in the refrigerator and reheat until hot. Expect a softer texture after freezing, and freeze the casserole without its fresh toppings.

For a one-pot dinner with similar taco flavors, try One Pot Taco Pasta with Ground Beef and Shells.

Nutrition

Approximate nutrition per serving, based on 1 of 6 servings and including the casserole and listed toppings: 520 calories, 32g protein, 28g fat, and 33g carbohydrates. Per 100g: about 160 calories, 10g protein, 9g fat, and 10g carbohydrates. Values vary with the ingredients used and how much fat is drained from the beef.

Taco Casserole with Ground Beef

Seasoned ground beef, beans, corn, tomatoes, and salsa are layered with corn tortillas and cheddar, then baked until bubbling.
Course: Main Course
Cuisine: Mexican
Prep: 20 min
Cook: 35 min
Total: 65 min
Servings: 6 Calories: 520 kcal

Equipment

  • 9-by-13-inch baking dish
  • 10- to 12-inch skillet
  • Oven

Ingredients

For the casserole

  • 1 lb lean ground beef (450 g)
  • 1 teaspoon neutral oil, only if needed
  • 1 small yellow onion, finely diced (about 100 g)
  • 2 teaspoons chili powder
  • 1 teaspoon ground cumin
  • 1/2 teaspoon dried oregano
  • 1/2 teaspoon garlic powder
  • 1 cup salsa (250 g)
  • 1 cup canned diced tomatoes, drained (170 g)
  • 1 can (15 oz) black beans, rinsed and drained (425 g before draining)
  • 1 cup corn kernels, drained if canned (165 g)
  • 8 corn tortillas, about 6 inches wide (180 g)
  • 2 cups shredded cheddar cheese, divided (225 g)
  • Kosher salt and black pepper, to taste, if needed

For serving

  • 1/2 cup sour cream (115 g)
  • 1 medium ripe avocado, diced (about 150 g)
  • 1/4 cup sliced black olives, drained (35 g)
  • 2 tablespoons loosely packed fresh cilantro leaves
  • Tortilla chips, optional

Instructions

  1. Preheat the oven to 350°F (175°C). Lightly grease a 9-by-13-inch baking dish. Rinse and drain the beans, and drain the diced tomatoes well.
  2. Heat a skillet over medium to medium-high heat. Add the oil if the skillet is dry, then add the beef and onion. Cook for 6–8 minutes, breaking up the beef, until browned and the onion is soft. Drain excess fat.
  3. Stir in the chili powder, cumin, oregano, and garlic powder. Add the salsa, tomatoes, beans, and corn. Simmer for 5–8 minutes, stirring occasionally, until the filling is moist and chunky but thick enough to spoon without watery liquid pooling. Taste and add salt or pepper if needed.
  4. Arrange 4 tortillas in the prepared dish, overlapping or tearing them to cover gaps. Spread half the filling over the tortillas and sprinkle with about 1/2 cup cheddar. Add the remaining tortillas and filling, then cover with the remaining cheddar.
  5. Bake uncovered for 20–25 minutes, checking at 20 minutes, until the cheese is melted, the edges are bubbling, and the center is hot. If the cheese browns before the center is hot, tent loosely with foil and continue baking.
  6. Rest for 5–10 minutes. Serve in generous scoops topped with sour cream, avocado, black olives, and cilantro.

Tips

  • Drain the tomatoes and beans well to help prevent a watery casserole.
  • Simmer the filling until thick and spoonable before layering, but do not let it dry out.
  • Taste the filling before adding salt; the salsa and cheese may already provide enough.
  • Corn tortillas soften as they bake, so serve the casserole in scoops rather than expecting clean slices.
  • Serve tortilla chips on the side for crunch; they will soften if layered beneath the filling.

Variations

  • Flour Tortillas: Replace the corn tortillas with flour tortillas for softer layers and a milder corn flavor.
  • Ground Turkey or Chicken: Replace the beef with ground turkey or chicken, cooking it with the onion until fully cooked before adding the spices and other filling ingredients.
Notes

Refrigerate covered leftovers for several days and keep the sour cream and avocado separate when practical. Reheat portions until hot throughout. Freeze baked portions without fresh toppings for up to 3 months; thaw overnight in the refrigerator before reheating. The tortillas soften further during storage and freezing.

Nutrition

Calories: 520 kcal | Protein: 32 g | Fat: 28 g | Carbohydrates: 33 g

Classic Beef Enchiladas

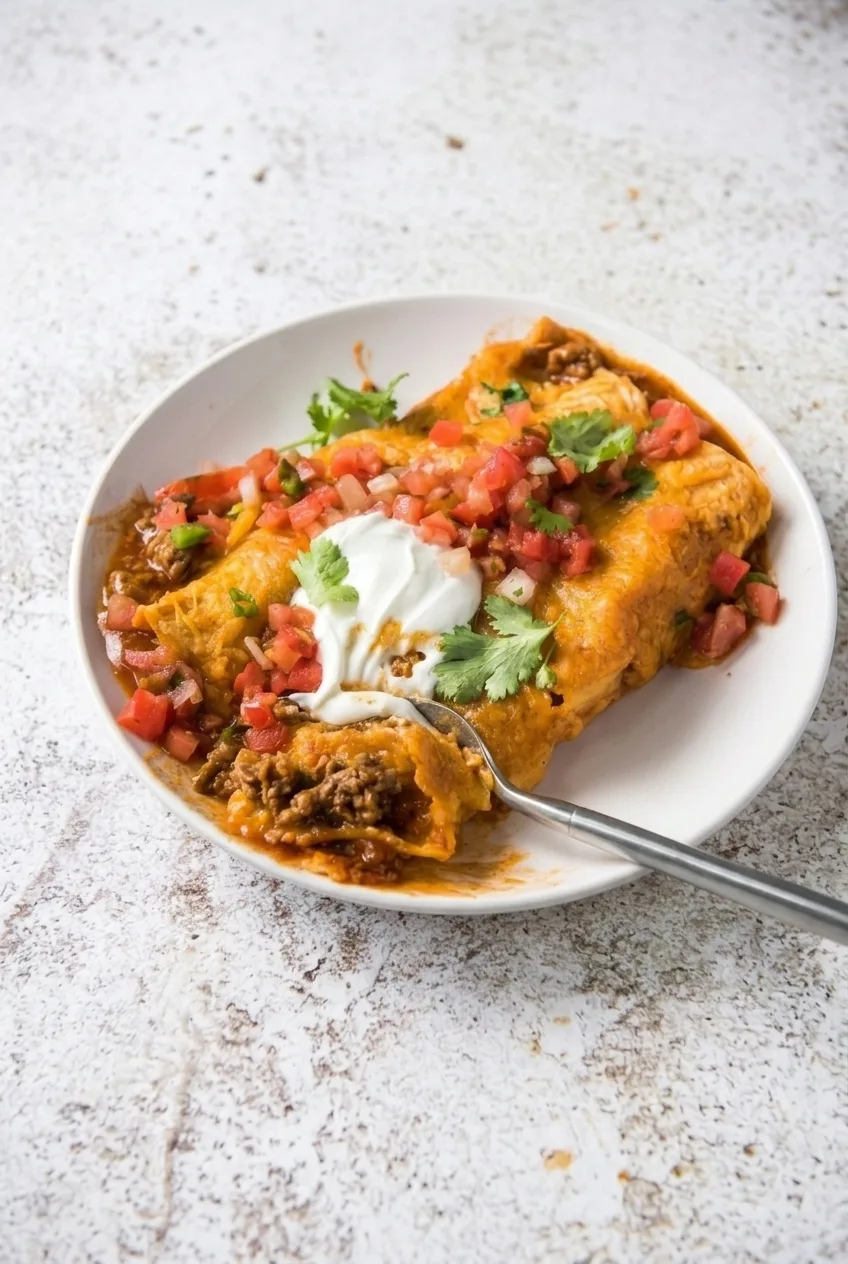
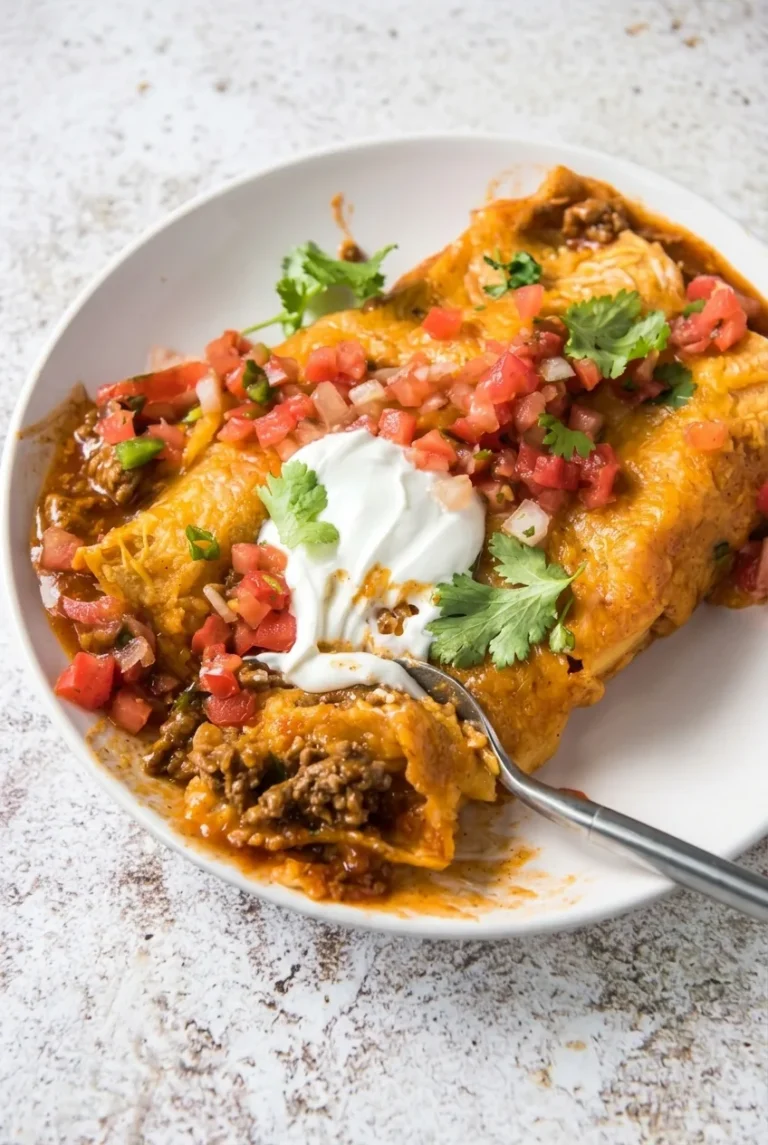
These beef enchiladas are individual flour-tortilla rolls filled with seasoned ground beef, baked under red sauce and melted cheese, then topped with pico de gallo, sour cream, and cilantro. The tortillas should be tender and saucy, with the beef filling moist but not greasy.

Two steps make assembly easier: drain the browned beef before adding sauce, and warm the tortillas just before rolling so they bend without cracking. A thin layer of sauce beneath the rolls and an uncovered bake keep the pan saucy without leaving the enchiladas in a deep pool of liquid.

Ingredients for Classic Beef Enchiladas

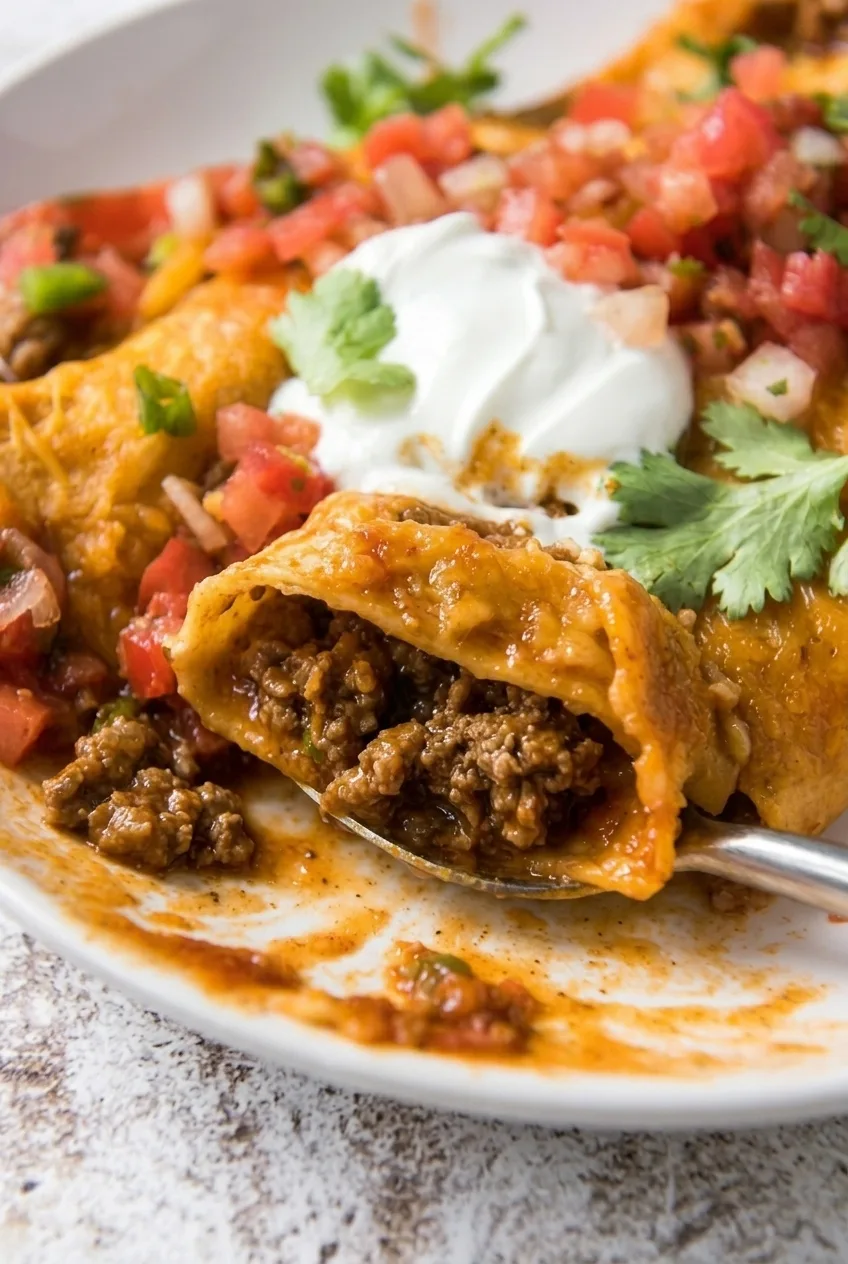
Close detail of a beef enchilada opened to show its crumbled filling beneath red sauce and melted cheese.
  • 1 lb ground beef, preferably 85–90% lean (450g)
  • 1/2 cup finely diced yellow onion (80g)
  • 2 cloves garlic, minced
  • 1 teaspoon chili powder
  • 1 teaspoon ground cumin
  • 3/4 teaspoon kosher salt, or to taste
  • 2 cups red enchilada sauce, divided (480g)
  • 8 soft flour tortillas, about 8 inches each
  • 2 cups freshly shredded Monterey Jack or Mexican-blend cheese, divided (225g)
  • 1 cup pico de gallo (180g)
  • 1/2 cup sour cream (120g)
  • 1/4 cup loosely packed fresh cilantro leaves

Freshly shredded cheese tends to melt more smoothly than pre-shredded cheese. Corn tortillas can replace flour tortillas, but they need careful warming and may crack more readily.

How to Make Classic Beef Enchiladas

A wider view of a plate of rolled beef enchiladas topped with pico de gallo, sour cream, and cilantro.
  1. Prepare the dish: Preheat the oven to 350°F (175°C). Spread a thin layer of enchilada sauce over the bottom of a 9-by-13-inch baking dish. Lightly coat the bottom without flooding it.
  2. Cook the beef: Cook the ground beef and onion in a large skillet over medium heat for 8–10 minutes, breaking the beef into small crumbles, until the beef is no longer pink and the onion has softened. If the beef is very lean and sticks to the skillet, add a little neutral oil. Stir in the garlic, chili powder, cumin, and salt; cook briefly until fragrant. Drain off excess fat.
  3. Finish the filling: Remove the skillet from the heat. Stir 1/2 cup enchilada sauce and 1/2 cup cheese into the beef. The filling should hold together without looking soupy.
  4. Warm the tortillas: Warm them briefly in the microwave under a damp paper towel or in a dry skillet over low heat. Work in batches and keep the warm tortillas covered with a clean towel. They should bend easily without becoming crisp or dry.
  5. Fill and roll: Divide the beef mixture among the tortillas. Roll each one snugly without overfilling, then place it seam-side down in the dish. Arrange the rolls in a single layer; use a second dish if they do not fit without stacking.
  6. Sauce and bake: Pour the remaining enchilada sauce over the rolls and sprinkle with the remaining cheese. Bake uncovered for 20–25 minutes, checking at 20 minutes. The cheese should be melted, the sauce bubbling at the edges, and the center rolls hot. If the cheese browns too quickly, tent the dish loosely with foil while it finishes baking.
  7. Rest and serve: Let the enchiladas rest for 5 minutes so they are easier to lift. Serve two per person with pico de gallo, a dollop of sour cream, and cilantro. Cut or open one roll on the plate to show the beef filling.

How to Keep the Tortillas from Cracking

Warm the tortillas immediately before filling them, then keep them covered as you work. If using corn tortillas, make sure each one is pliable before rolling and handle it gently at the seam. Tortilla size and flexibility vary, so use a little less filling in any tortilla that is difficult to close.

How to Avoid Soggy Enchiladas

Excess fat in the beef or too much sauce beneath the rolls can leave liquid pooling in the dish. Drain the beef well and use only enough sauce to coat the bottom before arranging the enchiladas. Bake uncovered so some moisture can escape; the finished tortillas should be soft and coated with sauce, not crisp.

Make-Ahead and Leftovers

Assemble the enchiladas up to about 24 hours ahead, cover, and refrigerate. Bake uncovered, allowing extra time if the dish is cold. Check that the sauce is bubbling and the center rolls are hot. Add the pico de gallo, sour cream, and cilantro after baking.

Refrigerate cooled leftovers in an airtight container for 3–4 days. Reheat individual portions in the microwave until hot throughout, or cover a larger portion with foil and warm it in a 350°F oven until heated through. Keep extra pico de gallo and sour cream separate when possible, and add them after reheating.

Cooked enchiladas can be frozen for up to about 3 months, though the tortillas may soften. Thaw overnight in the refrigerator, then reheat covered in a 350°F oven until hot throughout.

Nutrition

Approximate nutrition per serving, based on 2 enchiladas: 775 calories, 45g protein, 48g fat, and 46g carbohydrates. Approximate nutrition per 100g: 170 calories, 10g protein, 11g fat, and 10g carbohydrates. Values will vary with the tortillas, sauce, beef, and cheese used.

Classic Beef Enchiladas

Seasoned ground beef and cheese are rolled in flour tortillas, baked with red enchilada sauce, and served with fresh toppings.
Course: Main Course
Cuisine: Mexican
Prep: 20 min
Cook: 35 min
Total: 60 min
Servings: 4 Calories: 775 kcal

Equipment

  • Large skillet
  • 9-by-13-inch baking dish

Ingredients

For the Enchiladas

  • 1 lb ground beef, preferably 85–90% lean (450g)
  • 1/2 cup finely diced yellow onion (80g)
  • 2 cloves garlic, minced
  • 1 teaspoon chili powder
  • 1 teaspoon ground cumin
  • 3/4 teaspoon kosher salt, or to taste
  • 2 cups red enchilada sauce, divided (480g)
  • 8 soft flour tortillas, about 8 inches each
  • 2 cups freshly shredded Monterey Jack or Mexican-blend cheese, divided (225g)

For Serving

  • 1 cup pico de gallo (180g)
  • 1/2 cup sour cream (120g)
  • 1/4 cup loosely packed fresh cilantro leaves

Instructions

  1. Preheat the oven to 350°F (175°C). Spread a thin layer of enchilada sauce over the bottom of a 9-by-13-inch baking dish.
  2. Cook the ground beef and onion in a large skillet over medium heat for 8–10 minutes, breaking the beef into small crumbles, until the beef is no longer pink and the onion is softened. If very lean beef sticks, add a little neutral oil.
  3. Stir in the garlic, chili powder, cumin, and salt; cook briefly until fragrant. Drain off excess fat.
  4. Remove the skillet from the heat. Stir in 1/2 cup enchilada sauce and 1/2 cup cheese. The filling should hold together without looking soupy.
  5. Warm the tortillas briefly in the microwave under a damp paper towel or in a dry skillet over low heat. Work in batches and keep them covered with a clean towel.
  6. Divide the beef mixture among the tortillas. Roll them snugly without overfilling and place them seam-side down in the dish in a single layer. Use a second dish if needed rather than stacking.
  7. Pour the remaining enchilada sauce over the rolls and sprinkle with the remaining cheese.
  8. Bake uncovered for 20–25 minutes, checking at 20 minutes, until the cheese is melted, the sauce bubbles at the edges, and the center rolls are hot. Loosely tent with foil if the cheese browns too quickly.
  9. Rest for 5 minutes. Serve two enchiladas per person with pico de gallo, sour cream, and cilantro.

Tips

  • Drain the browned beef well to help prevent excess liquid in the dish.
  • Use only a thin layer of sauce beneath the enchiladas.
  • Warm tortillas just before filling and keep them covered so they stay pliable.
  • Do not overfill the tortillas; use a little less filling if one is difficult to roll.
  • Use freshly shredded cheese for a smoother melt.

Variations

  • Corn Tortilla Beef Enchiladas: Replace the flour tortillas with corn tortillas, warming them until pliable and handling them gently to prevent cracking.

Notes

Make ahead and refrigerate covered for up to 24 hours; allow extra baking time if cold. Refrigerate leftovers in an airtight container for 3–4 days or freeze for up to about 3 months. Reheat until hot throughout. Nutrition is approximate per serving of 2 enchiladas.

Nutrition

Calories: 775 kcal | Protein: 45 g | Fat: 48 g | Carbohydrates: 46 g

Oreo Pudding Cups

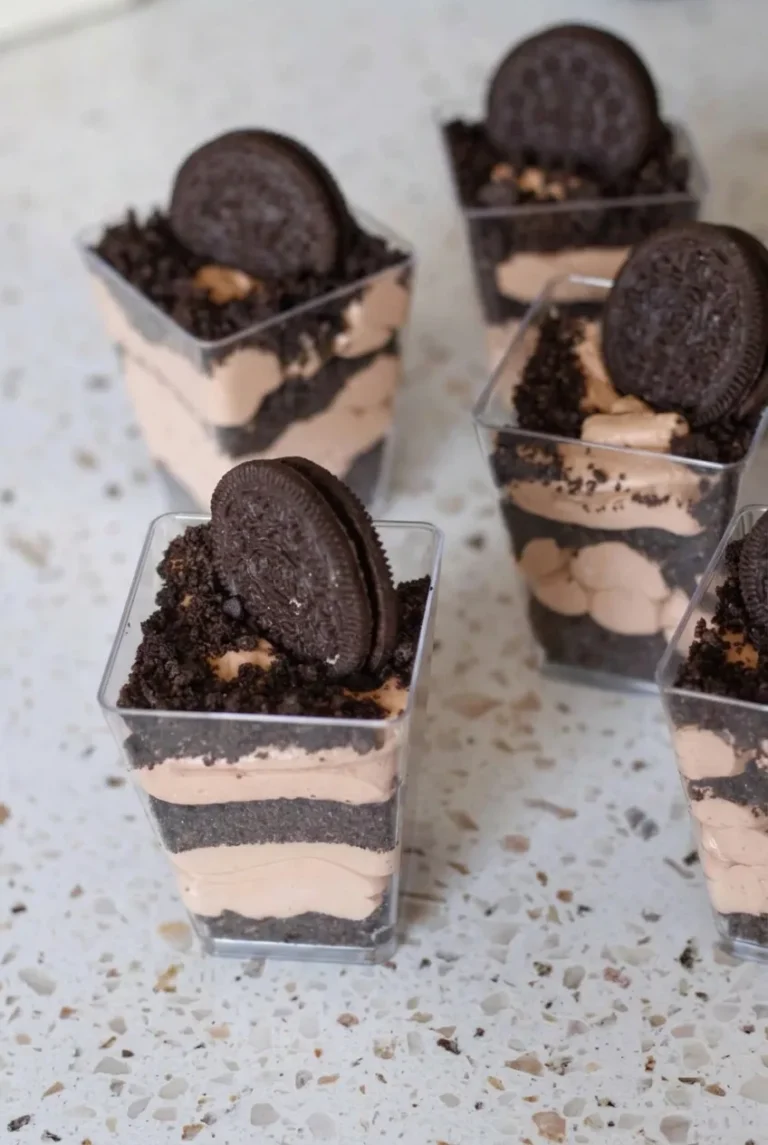
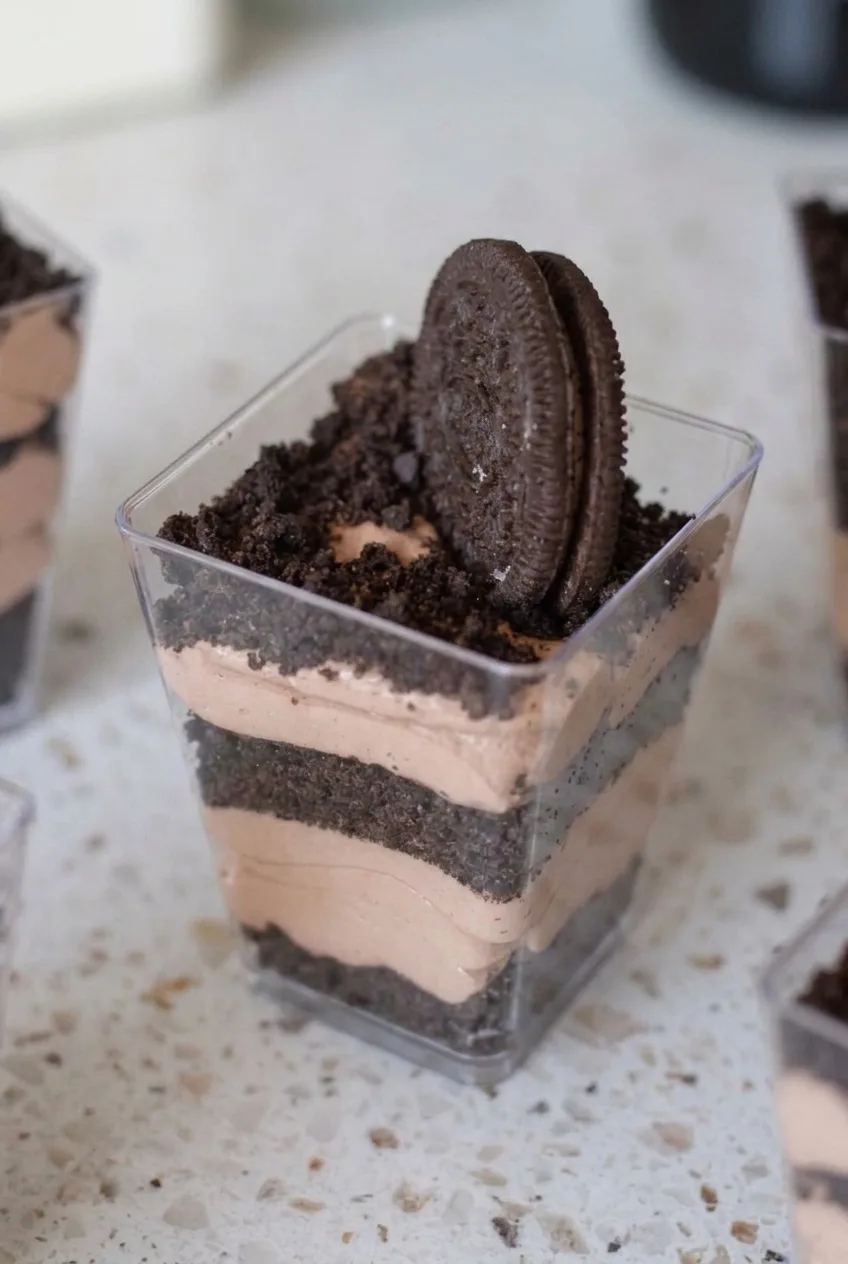
These no-bake cups have alternating bands of fluffy chocolate pudding filling and dark Oreo crumbs, with a generous crumb topping and a whole cookie standing upright in each cup. Let the instant pudding thicken before folding in the whipped topping; filling that is too loose will run into the crumb layers. A separate chill after assembly helps the layers settle.

Ingredients for Oreo Pudding Cups

Close view of an Oreo pudding cup showing fluffy chocolate filling, dark crumb layers, and an upright cookie.
  • 1 standard 3.4-ounce packet instant chocolate pudding mix (about 95g)
  • 2 cups cold milk (480g), or the amount directed on the pudding packet
  • 1 8-ounce tub frozen whipped topping, thawed (about 225g)
  • 24 Oreo cookies: 18 for crushing and 6 whole for garnish

How to Make Oreo Pudding Cups

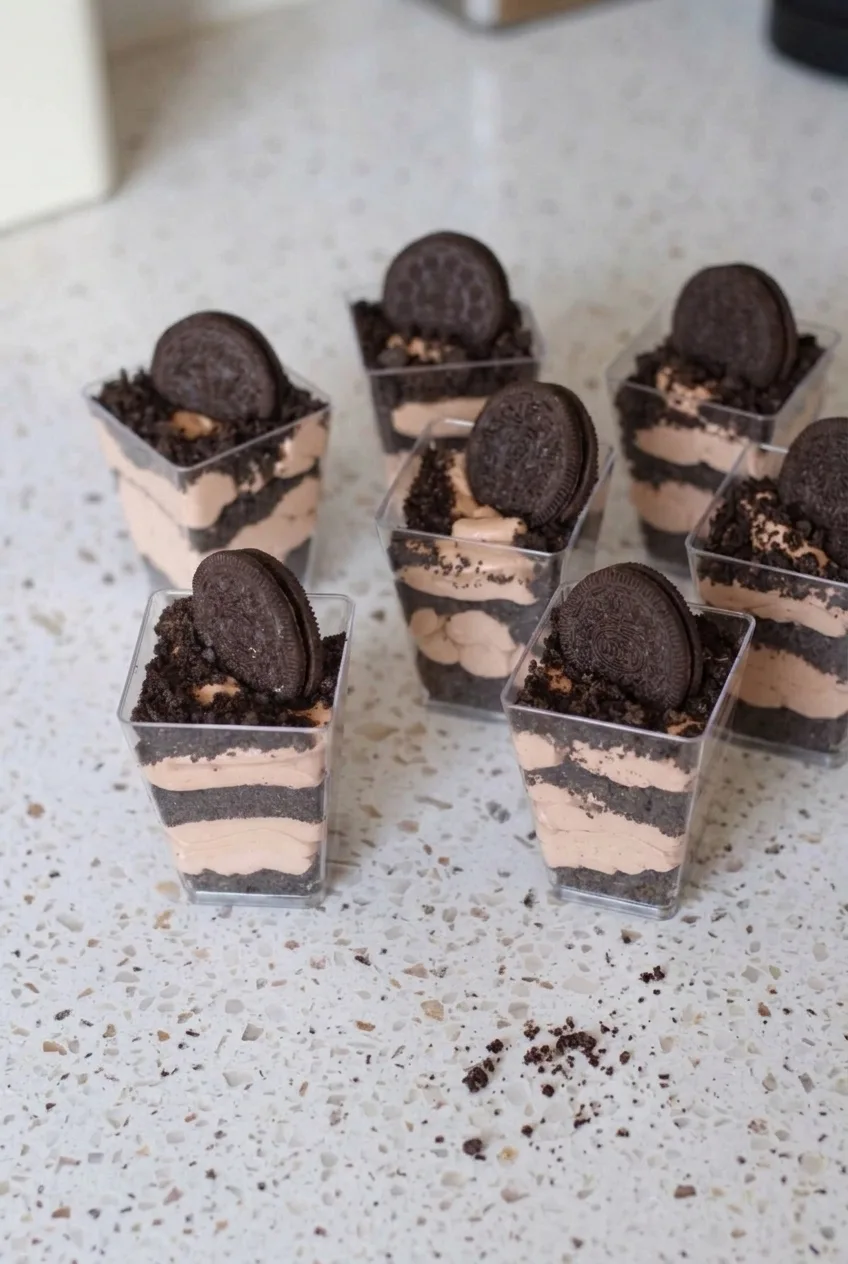
A wider view of individual layered Oreo pudding cups arranged together on a light neutral surface.
  1. Crush the cookies: Set aside 6 whole Oreos. Crush the remaining 18 in a food processor or sealed bag with a rolling pin until mostly fine, with a few small pieces for texture.
  2. Thicken the pudding: Whisk the pudding mix with the cold milk according to the packet directions. Start checking after 5 minutes; within about 5 to 10 minutes, it should be smooth and visibly thickened, not watery.
  3. Fold in the whipped topping: Use a spatula to gently fold the thawed whipped topping into the thickened pudding until the filling is evenly colored and fluffy. Stop once combined rather than stirring vigorously.
  4. Layer the cups: Divide the crumbs and filling among 6 clear, square-sided dessert cups. Spoon in crumbs, then filling; repeat to make several visible bands and finish with a generous crumb layer. Add the filling gently with a spoon or piping bag so it does not sweep the crumbs aside. Leave room at the top for the whole-cookie garnish.
  5. Chill: Cover the cups without pressing the cover into the crumbs. Refrigerate for about 1 hour, until the filling is cold and the layers look settled. The cups can be served after a shorter chill if needed, though the layers may be softer.
  6. Garnish: Just before serving, press one whole Oreo gently into the crumb topping of each cup so it stands upright. Serve chilled.

How to Keep the Oreo Layers Visible

Use mostly fine, even crumbs, but do not pack them down hard. If the filling spreads into the crumb bands, give the pudding more time to thicken before folding in the whipped topping and assembling the cups. The number and thickness of the layers will depend on the size of your cups; leave enough headroom for the topping and upright cookie.

Make-Ahead and Storage

Cover and refrigerate assembled cups, and serve within about 3 days for the best texture and appearance. The crumb layers gradually soften, so keep the whole cookies separate and add them just before serving. Freezing is not recommended because the pudding and whipped topping may become watery after thawing.

For a larger layered Oreo dessert, try Oreo dirt cake. For a chilled dessert with cheesecake-style filling instead of pudding, see this no-bake Oreo cheesecake.

Nutrition

Approximate nutrition per serving, based on 1 of 6 cups: 425 calories, 5g protein, 17g fat, and 65g carbohydrates. Per 100g: about 240 calories, 3g protein, 10g fat, and 36g carbohydrates. Values vary with the pudding mix, milk, and whipped topping used.

Oreo Pudding Cups

No-bake dessert cups layered with fluffy chocolate pudding filling and Oreo crumbs, then topped with a whole cookie.
Course: Dessert
Cuisine: American
Prep: 20 min
Total: 80 min
Servings: 6 Calories: 425 kcal

Equipment

  • Food processor or rolling pin
  • Mixing bowl
  • Whisk
  • Spatula
  • 6 dessert cups

Ingredients

  • 1 standard 3.4-ounce packet instant chocolate pudding mix (about 95g)
  • 2 cups cold milk (480g), or the amount directed on the pudding packet
  • 1 8-ounce tub frozen whipped topping, thawed (about 225g)
  • 24 Oreo cookies: 18 for crushing and 6 whole for garnish

Instructions

  1. Set aside 6 whole Oreos. Crush the remaining 18 in a food processor or in a sealed bag with a rolling pin until mostly fine, leaving a few small pieces for texture.
  2. Whisk the pudding mix with the cold milk according to the packet directions. Check after 5 minutes; in about 5 to 10 minutes, it should be smooth and visibly thickened.
  3. Gently fold the thawed whipped topping into the thickened pudding with a spatula until evenly colored and fluffy.
  4. Divide the crumbs and filling among 6 clear, square-sided dessert cups. Spoon in a crumb layer, then filling, and repeat to create visible bands. Finish with a generous crumb layer, leaving room for the garnish.
  5. Cover the cups without pressing the cover into the crumbs. Refrigerate for about 1 hour, until cold and settled.
  6. Just before serving, gently press one whole Oreo into the crumb topping of each cup so it stands upright. Serve chilled.

Tips

  • Let the pudding thicken before folding in the whipped topping so the filling does not run into the crumb layers.
  • Fold gently and stop once the filling is combined to keep it fluffy.
  • Use mostly fine, even crumbs, but do not pack them down hard.
  • Add the filling gently with a spoon or piping bag to keep the crumb bands visible.
  • Leave headroom for the crumb topping and upright cookie.

Notes

Cover and refrigerate assembled cups for up to about 3 days. Keep the whole cookies separate and add them just before serving. Freezing is not recommended.

Nutrition

Calories: 425 kcal | Protein: 5 g | Fat: 17 g | Carbohydrates: 65 g

Oreo Dirt Cake

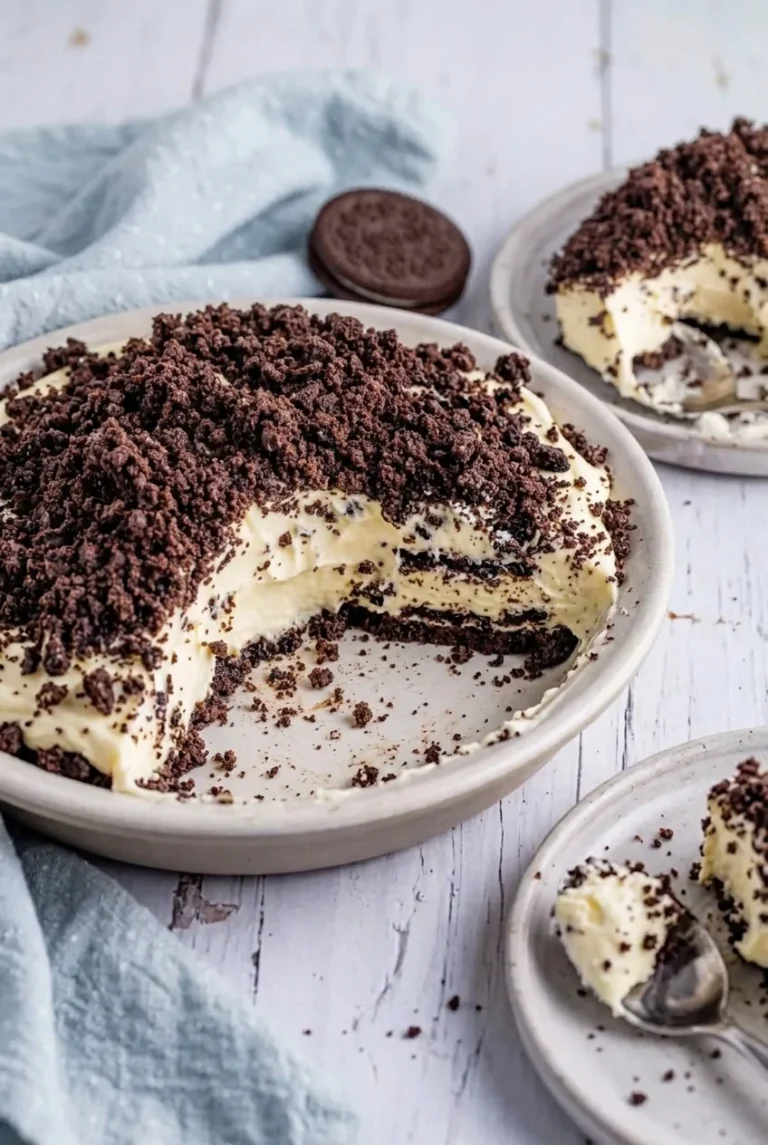
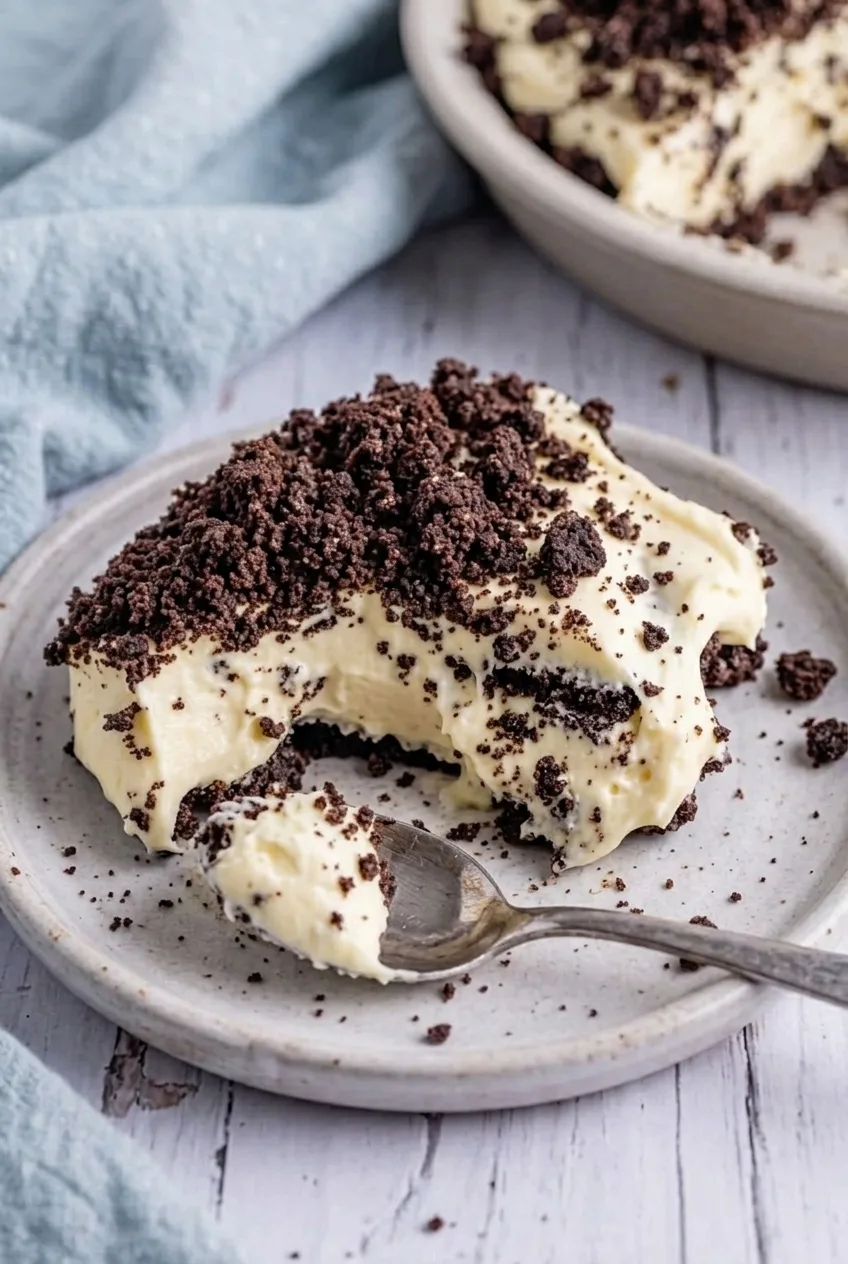
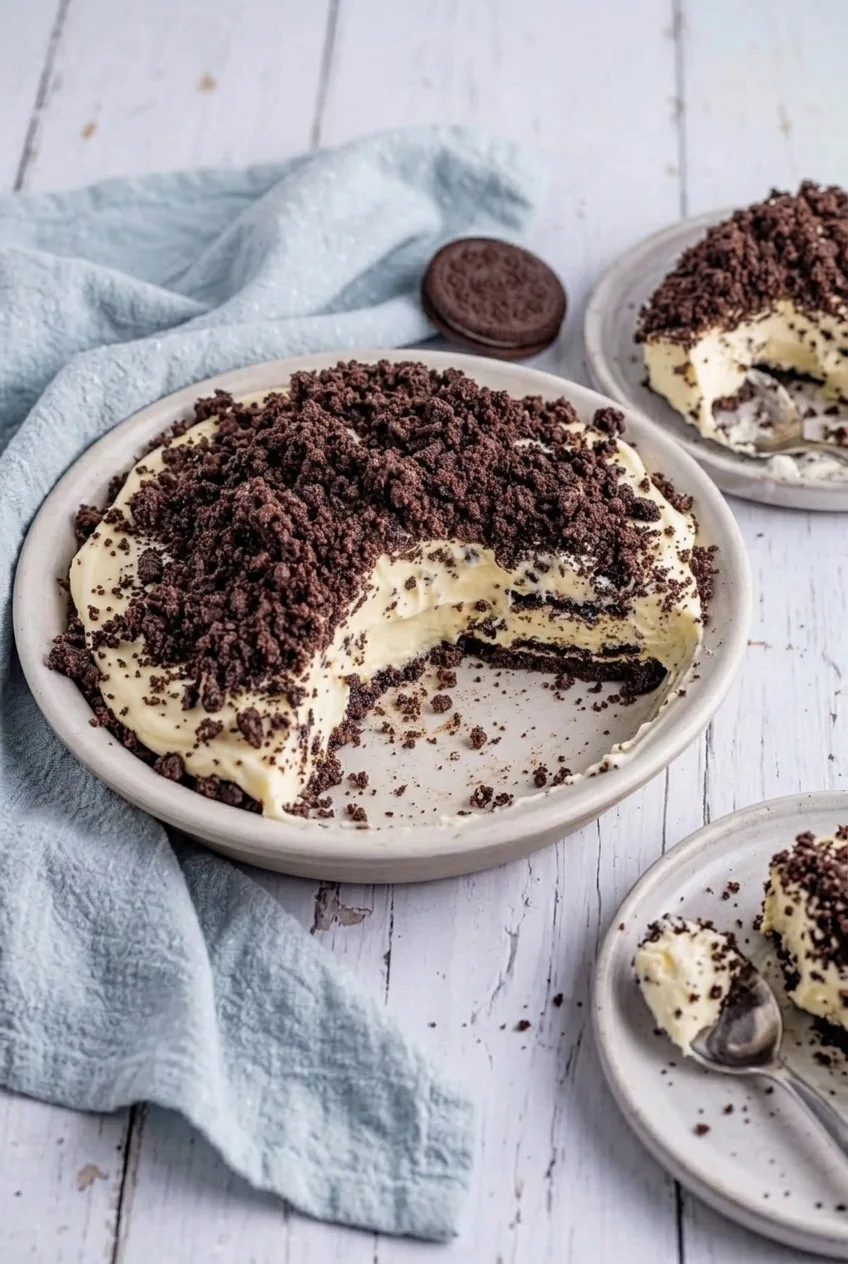
Oreo dirt cake is a chilled, no-bake dessert served by the spoonful. Loose layers of chocolate cookie crumbs run through a pale vanilla pudding and cream-cheese filling, with a thick, coarse layer of crumbs on top. A shallow dish keeps the layers visible; there’s no pressed crust or baking.

Allow at least 4 hours for the filling to set softly. An overnight chill makes the layers more cohesive, though the cookies will soften as they sit against the filling. Plan on about 25 minutes of preparation and 10 to 12 servings.

Ingredients for Oreo Dirt Cake

Close detail of Oreo dirt cake showing coarse chocolate crumbs and soft vanilla filling between the layers.
  • 1 package chocolate sandwich cookies, such as Oreos, about 14.3 ounces (405g), creme filling intact
  • 2 packages instant vanilla pudding mix, 3.4 ounces each (about 195g total); not cook-and-serve pudding
  • 3 cups cold whole milk
  • 1 package full-fat cream cheese, softened, 8 ounces (225g)
  • 1/2 cup (1 stick) butter, softened (113g), salted or unsalted
  • 1 cup powdered sugar (120g)
  • 1 tub frozen whipped topping, thawed, 8 ounces (225g)

For an optional garnish, set aside 1 whole Oreo from the package before crushing the cookies.

How to Make Oreo Dirt Cake

A full shallow dish of Oreo dirt cake centered on a light tabletop, with its crumb topping and spooned layers visible.
  1. Crush the cookies: Pulse the cookies, creme filling and all, in a food processor until most are small crumbs with some coarse, pebbly pieces. Alternatively, crush them in a large sealed bag with a rolling pin. Reserve a generous portion of the coarser crumbs for the top.
  2. Thicken the pudding: Whisk the instant pudding mix with the cold milk until smooth and beginning to thicken. Let it stand briefly while you make the cream-cheese base.
  3. Beat the cream-cheese base: With an electric mixer, beat the softened cream cheese and butter until smooth. Beat in the powdered sugar, scraping the bowl so no dense lumps remain.
  4. Finish the filling: Beat the thickened pudding into the cream-cheese mixture until combined. Gently fold in the thawed whipped topping with a spatula until no large streaks remain. The filling should be thick and creamy, not runny.
  5. Layer the dessert: Scatter loose crumbs across the bottom of a shallow, broad 3-quart ceramic dish. Add about half the filling, another layer of crumbs, and the remaining filling. Cover generously with the reserved coarse crumbs. Do not press the crumbs into a crust. A 9-by-13-inch dish also works, though the layers may look different.
  6. Chill and serve: Cover and refrigerate at 40°F (5°C) or below for at least 4 hours, preferably overnight. Start checking after 4 hours: the dessert should be cold throughout, and a spoonful should hold softly rather than run. Add the optional whole cookie just before serving.

How to Keep the Filling Smooth

Soften the cream cheese and butter without melting them, and beat them smooth before adding the pudding. Cold milk and accurately measured amounts help instant pudding thicken; cook-and-serve pudding will not give this no-bake filling the intended set. French vanilla instant pudding can replace regular vanilla if desired.

Chilling, Storage, and Freezing

Four hours is the practical minimum chill, while overnight gives the filling more time to set and the layers time to meld. The dessert remains soft and spoonable, not firm enough for neat slices. Cover leftovers and refrigerate them; for the best crumb texture, serve within about 3 days. The cookies will continue to soften.

Refrigeration is the standard storage method. Freezing the dessert intentionally produces a firmer, ice-cream-cake-like serving, but the cream-cheese filling may change texture after thawing. Freezing and thawing is not a dependable way to preserve leftovers.

Nutrition

Approximate nutrition per serving, based on 1 of 12 servings: 535 calories, 5g protein, 29g fat, and 66g carbohydrates. Per 100g: about 320 calories, 3g protein, 17g fat, and 39g carbohydrates. Values vary with the brands used and portion size.

Oreo Dirt Cake

A no-bake dessert layered with chocolate cookie crumbs and a creamy vanilla pudding and cream-cheese filling.
Course: Dessert
Cuisine: American
Prep: 25 min
Total: 265 min
Servings: 12 Calories: 535 kcal

Equipment

  • Food processor or rolling pin
  • Large sealed bag
  • Whisk
  • Electric mixer
  • Spatula
  • Shallow 3-quart dish

Ingredients

For the Cake

  • 1 package chocolate sandwich cookies, such as Oreos, about 14.3 ounces (405 g), creme filling intact
  • 2 packages instant vanilla pudding mix, 3.4 ounces each (about 195 g total)
  • 3 cups cold whole milk
  • 1 package full-fat cream cheese, softened, 8 ounces (225 g)
  • 1/2 cup (1 stick) butter, softened (113 g), salted or unsalted
  • 1 cup powdered sugar (120 g)
  • 1 tub frozen whipped topping, thawed, 8 ounces (225 g)

Optional Garnish

  • 1 whole Oreo, reserved from the package

Instructions

  1. Pulse the cookies, including the creme filling, in a food processor until mostly fine crumbs form, with some coarse pieces. Alternatively, crush them in a sealed bag with a rolling pin. Reserve a generous portion of coarse crumbs for the topping.
  2. Whisk the instant pudding mix with the cold milk until smooth and beginning to thicken. Let it stand briefly.
  3. Beat the softened cream cheese and butter with an electric mixer until smooth.
  4. Beat in the powdered sugar, scraping the bowl to remove any dense lumps.
  5. Beat the thickened pudding into the cream-cheese mixture until combined.
  6. Gently fold in the thawed whipped topping until no large streaks remain.
  7. Scatter loose cookie crumbs across the bottom of a shallow, broad 3-quart dish. Add about half the filling, another layer of crumbs, and the remaining filling. Top generously with the reserved coarse crumbs without pressing them into a crust.
  8. Cover and refrigerate at 40°F (5°C) or below for at least 4 hours, preferably overnight. The dessert is ready when cold throughout and a spoonful holds softly rather than running.
  9. Add the optional whole Oreo just before serving.

Tips

  • Soften the cream cheese and butter without melting them, then beat them smooth before adding the pudding.
  • Use cold milk and measure the ingredients accurately to help the instant pudding thicken.
  • Use instant pudding, not cook-and-serve pudding.
  • Keep the cookie crumbs loose rather than pressing them into a crust.
  • Start checking the dessert after 4 hours of chilling; overnight chilling helps the layers meld.

Variations

  • French Vanilla Dirt Cake: Replace the regular vanilla instant pudding with French vanilla instant pudding.

Notes

Cover leftovers and refrigerate; for the best crumb texture, serve within about 3 days. The cookies soften as the dessert sits. Freezing can make it firmer but may change the filling’s texture after thawing.

Nutrition

Calories: 535 kcal | Protein: 5 g | Fat: 29 g | Carbohydrates: 66 g

No-Bake Oreo Cheesecake

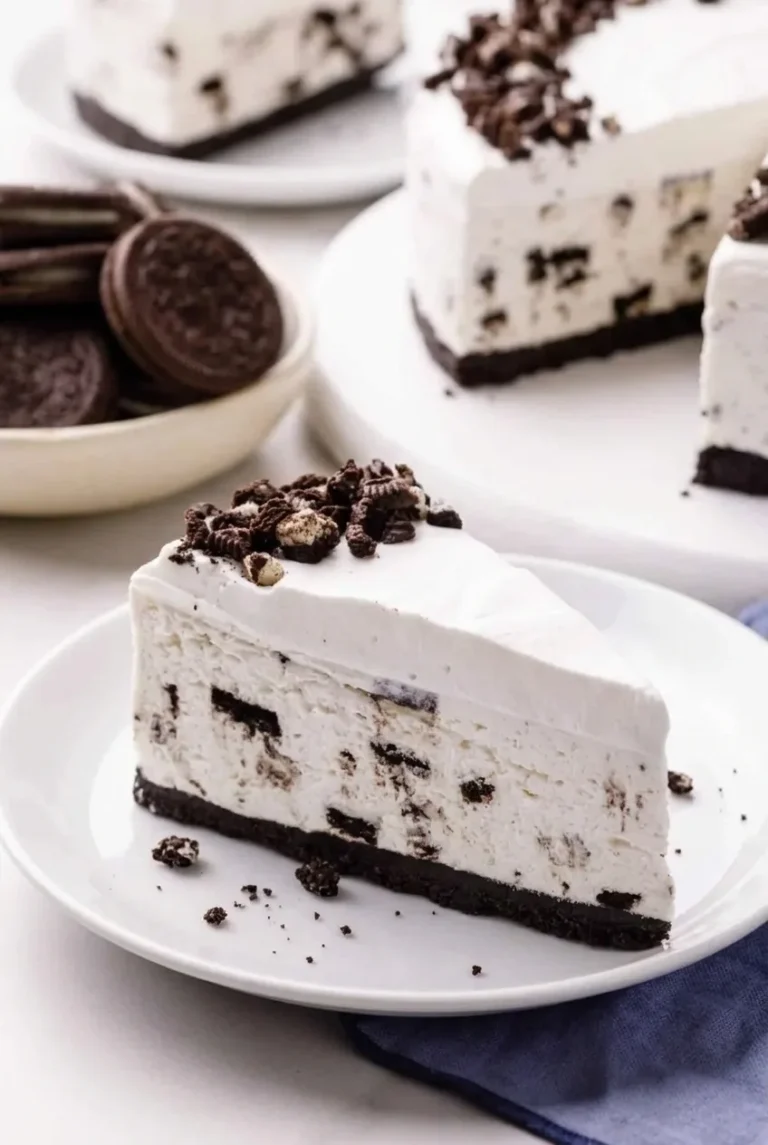
A fine Oreo-butter crust supports a thick cream-cheese filling with visible cookie pieces. A separate whipped-cream layer covers the top, with coarsely crushed cookies added before serving. For a smooth, airy filling, soften the cream cheese, whip the cold cream separately, and fold the two together gently.

Refrigeration sets this cheesecake, so plan ahead. The filling needs at least 6 hours before the topping goes on; an overnight chill gives the tall cake more time to firm up for slicing.

Prep time: 35 minutes; Chilling time: At least 6 hours for the filling, plus 30 minutes after topping; Total time: About 8 hours 35 minutes, including chilling; Yield: 12 slices

Ingredients for No-Bake Oreo Cheesecake

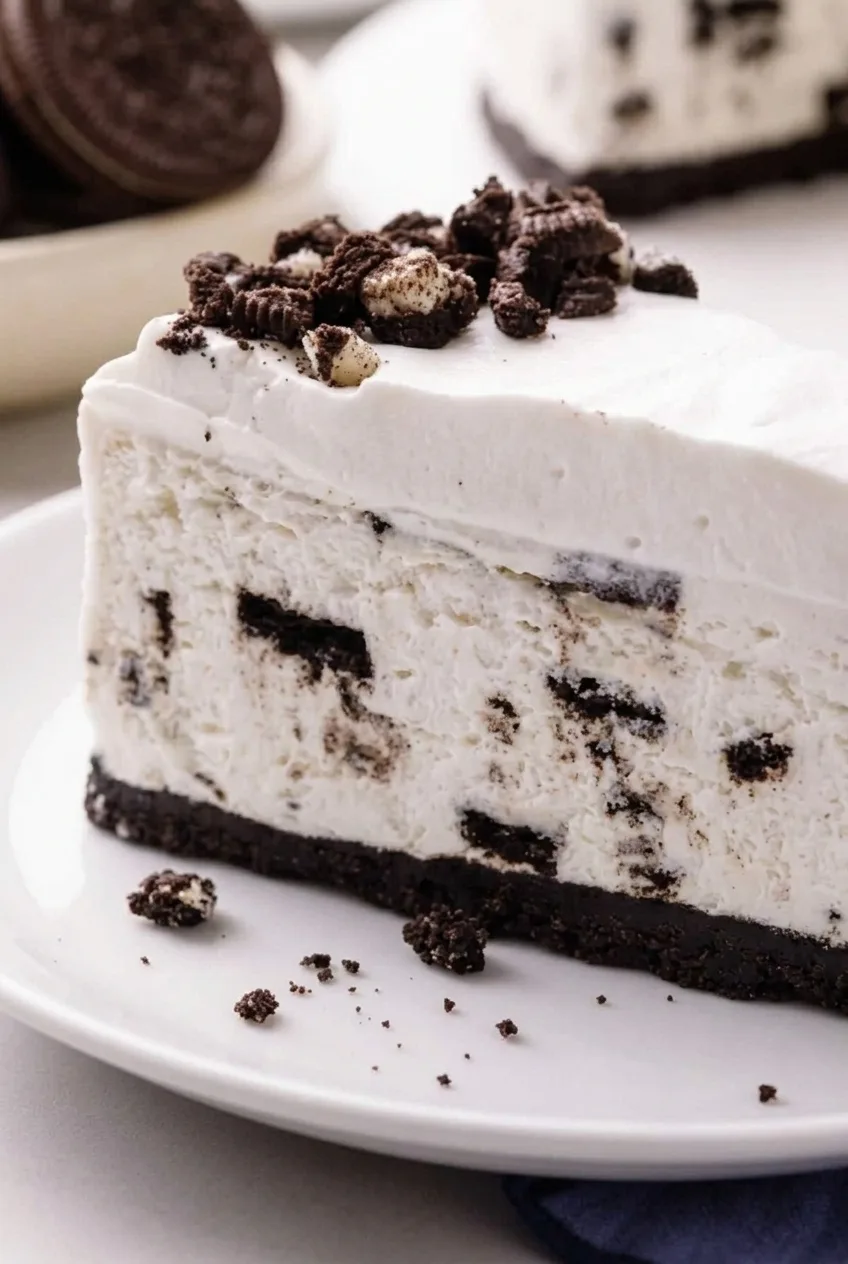
Close view of the Oreo cheesecake's dark crust, cookie-studded cream filling, and thick whipped topping.

Crust

  • 24 Oreo or chocolate sandwich cookies, finely crushed (270g)
  • 5 tablespoons unsalted butter, melted (70g)

Filling

  • Three 8-ounce packages full-fat block cream cheese, softened (680g)
  • 1 cup powdered sugar (120g)
  • 1 teaspoon vanilla extract
  • 1 1/2 cups cold heavy whipping cream (360g)
  • 12 Oreo or chocolate sandwich cookies, coarsely chopped (135g)

Topping

  • 1 cup cold heavy whipping cream (240g)
  • 2 tablespoons powdered sugar (15g)
  • 3 Oreo or chocolate sandwich cookies, coarsely crushed (about 35g)

Use fine crumbs for a compact crust, but leave the cookies for the filling and topping in larger pieces. Store-brand chocolate sandwich cookies also work; use the same type throughout. For a gluten-free version, use gluten-free chocolate sandwich cookies and check the labels of the other ingredients.
How to Make No-Bake Oreo Cheesecake

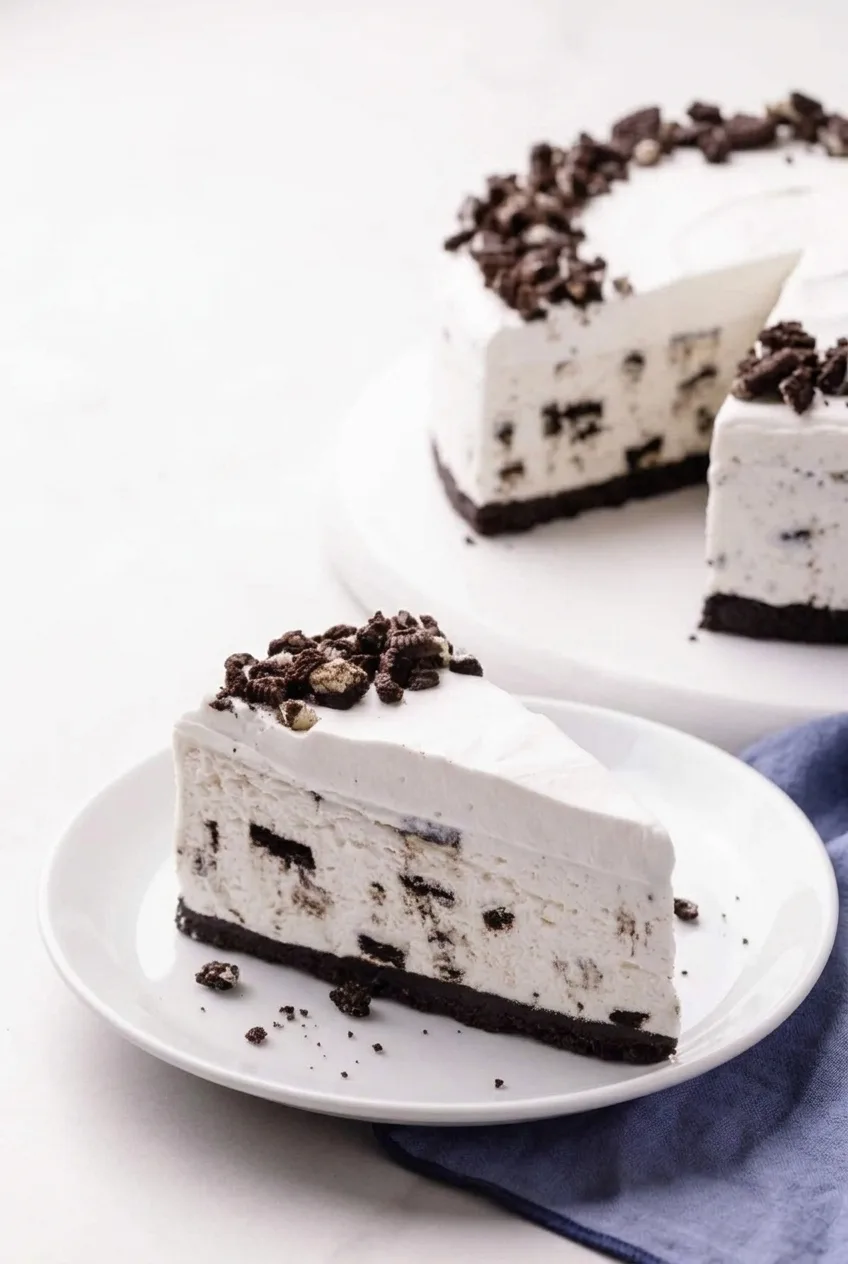
A whole no-bake Oreo cheesecake and a wedge showing its dark crust, cookie pieces, and whipped-cream layer.
  1. Press the crust: If desired, line the base of a 9-inch springform pan with a parchment round. Mix the finely crushed cookies and melted butter until evenly moistened. Press firmly and evenly across the pan base, then refrigerate while making the filling.
  2. Whip the filling cream: In a clean bowl, beat 1 1/2 cups cold heavy cream until it holds stiff peaks, about 3 to 5 minutes. Stop before it looks grainy.
  3. Beat the cream cheese: In another bowl, beat the softened cream cheese until smooth. Add 1 cup powdered sugar and the vanilla; beat until combined, scraping the bowl so no lumps remain.
  4. Fold the filling together: Gently fold the whipped cream into the cream-cheese mixture in two additions, stopping when no large streaks remain. Fold in the 12 coarsely chopped cookies just until distributed.
  5. Fill and chill: Spread the filling over the crust and smooth the top. Refrigerate at 40°F (5°C) or below for at least 6 hours, preferably overnight. Cover loosely without touching the surface. Start checking after 6 hours: the center should show little movement when the pan is gently nudged. Chill longer if it still looks soft or fluid.
  6. Add the top layer: Once the filling is set, beat the remaining 1 cup cold heavy cream with 2 tablespoons powdered sugar until it holds stiff peaks. Spread it in a thick layer all the way to the edges.
  7. Chill and serve: Refrigerate for about 30 minutes to firm the topping. Release the springform ring and cut the cheesecake into wedges with a sharp knife, wiping the blade between cuts. Finish each slice with a small mound of the coarsely crushed cookies.

How to Tell When the Cheesecake Is Set

The filling should look set rather than glossy or fluid, and its center should barely move when the pan is nudged. It should hold a cut edge, though it will remain softer than a baked cheesecake. If it slumps when sliced, give it more refrigerator time. Freezing is not a shortcut for setting the filling; it can change the texture.

Storing and Freezing

Keep the cheesecake chilled between servings. Cover leftovers and refrigerate for up to 3 days for best quality. The filling can be made a day ahead; add the whipped-cream layer after it has set.

Leftover slices can be tightly wrapped in a freezer-safe container for up to about 2 months. Thaw overnight in the refrigerator, keeping in mind that the texture may change.

For a different chilled cheesecake dessert, try No-Bake Cherry Cheesecake Cups or No-Bake Cookie Butter Cheesecake Cups.

Nutrition

Approximate nutrition per slice, based on 12 slices: 630 calories, 7g protein, 50g fat, and 41g carbohydrates. Per 100g: approximately 390 calories, 4g protein, 31g fat, and 26g carbohydrates. Values vary by ingredient brand.

No-Bake Oreo Cheesecake

A chocolate cookie crust holds a cream cheese filling with chopped cookies and a whipped cream topping.
Course: Dessert
Cuisine: American
Prep: 35 min
Total: 515 min
Servings: 12 Calories: 630 kcal

Equipment

  • 9-inch springform pan
  • Mixing bowls
  • Electric mixer
  • Spatula
  • Sharp knife

Ingredients

Crust

  • 24 Oreo or chocolate sandwich cookies, finely crushed (270 g)
  • 5 tablespoons unsalted butter, melted (70 g)

Filling

  • Three 8-ounce packages full-fat block cream cheese, softened (680 g)
  • 1 cup powdered sugar (120 g)
  • 1 teaspoon vanilla extract
  • 1 1/2 cups cold heavy whipping cream (360 g)
  • 12 Oreo or chocolate sandwich cookies, coarsely chopped (135 g)

Topping

  • 1 cup cold heavy whipping cream (240 g)
  • 2 tablespoons powdered sugar (15 g)
  • 3 Oreo or chocolate sandwich cookies, coarsely crushed (about 35 g)

Instructions

  1. If desired, line the base of a 9-inch springform pan with a parchment round.
  2. Mix the finely crushed cookies with the melted butter until evenly moistened. Press firmly and evenly into the pan base, then refrigerate while preparing the filling.
  3. Beat 1 1/2 cups cold heavy cream in a clean bowl until stiff peaks form, about 3 to 5 minutes. Stop before the cream looks grainy.
  4. In another bowl, beat the softened cream cheese until smooth. Add 1 cup powdered sugar and the vanilla, then beat until combined, scraping the bowl to remove lumps.
  5. Gently fold the whipped cream into the cream cheese mixture in two additions. Stop when no large streaks remain, then fold in the chopped cookies.
  6. Spread the filling over the crust and smooth the top. Cover loosely without touching the surface and refrigerate at 40°F (5°C) or below for at least 6 hours, preferably overnight, until the center barely moves when the pan is nudged.
  7. Once the filling is set, beat the remaining 1 cup cold heavy cream with 2 tablespoons powdered sugar until stiff peaks form. Spread it over the filling in a thick layer, all the way to the edges.
  8. Refrigerate for about 30 minutes to firm the topping. Release the springform ring and cut into wedges with a sharp knife, wiping the blade between cuts. Add a small mound of crushed cookies to each slice before serving.

Tips

  • Use fine cookie crumbs for a compact crust and larger cookie pieces in the filling and topping.
  • Soften the cream cheese before mixing to help prevent lumps.
  • Whip the filling cream separately and fold it in gently to keep the filling airy.
  • Check the filling after 6 hours; chill it longer if the center still looks soft or fluid.
  • Use the same type of chocolate sandwich cookies throughout the recipe.

Variations

  • Gluten-Free Oreo Cheesecake: Use gluten-free chocolate sandwich cookies and check the labels of the other ingredients.

Notes

Keep chilled between servings. Cover leftovers and refrigerate for up to 3 days. Wrapped slices can be frozen for up to about 2 months; thaw overnight in the refrigerator. Freezing is not a shortcut for setting the filling and may change its texture.

Nutrition

Calories: 630 kcal | Protein: 7 g | Fat: 50 g | Carbohydrates: 41 g

No-Bake Cookie Butter Cheesecake Cups

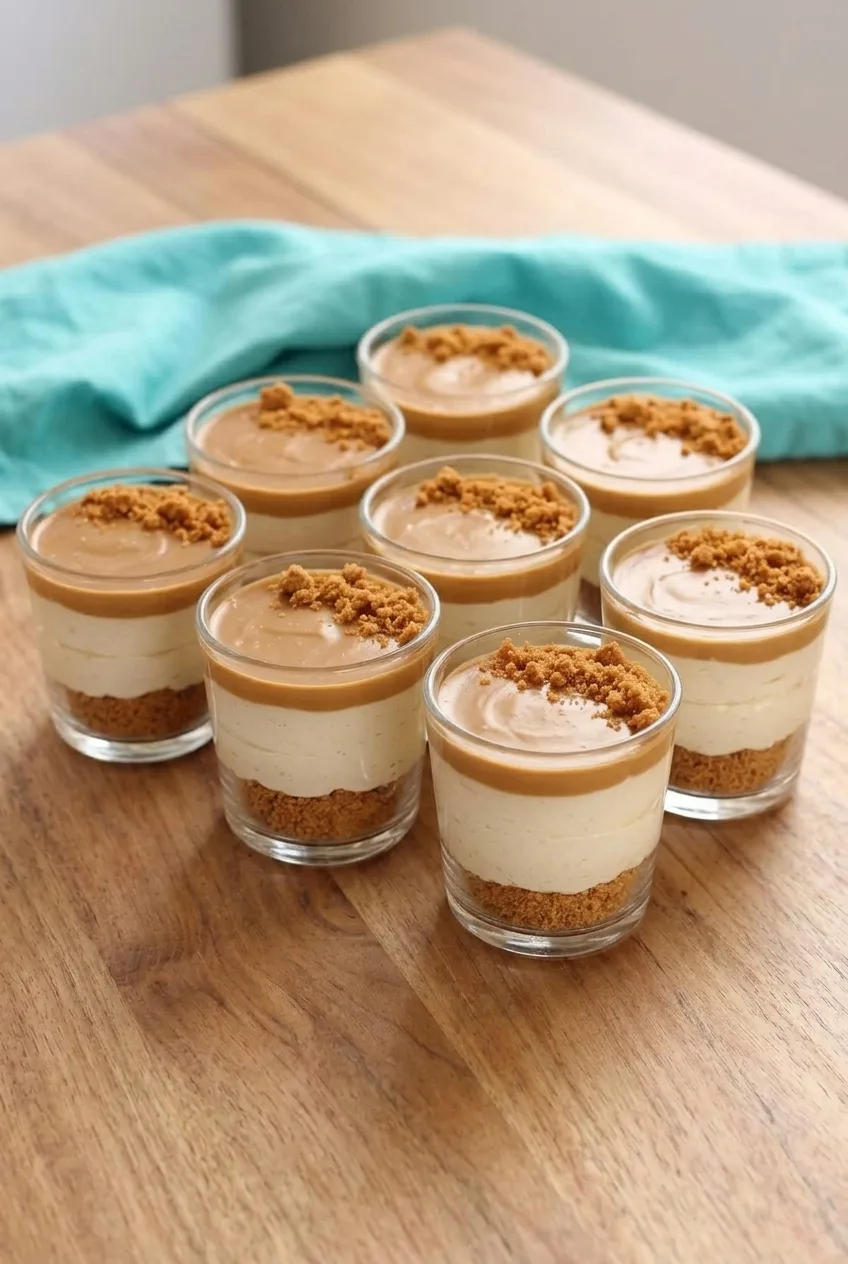
These individual cups have a pressed Biscoff crumb base, a pale cookie-butter cheesecake filling, and a smooth cookie-butter top. Softened cream cheese beats smooth, while cold heavy cream is whipped separately and folded in for a lighter filling. Chill the filled cups for at least 2 hours before adding the topping; the filling needs to hold its shape so the warm cookie butter stays in a distinct layer.

Ingredients for No-Bake Cookie Butter Cheesecake Cups

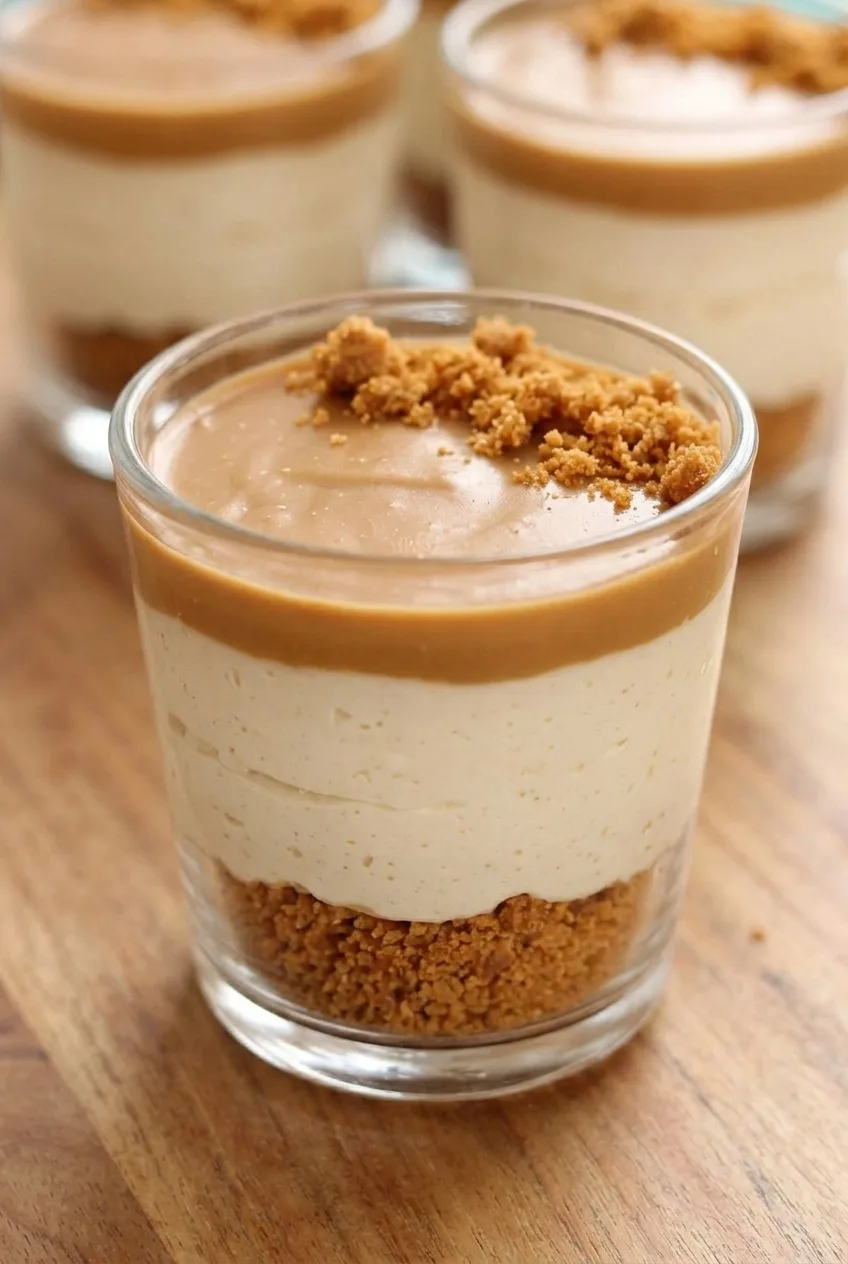
Close detail of a cookie butter cheesecake cup showing its crumb base, creamy filling, and caramel topping
  • 1 1/2 cups finely crushed Biscoff cookie crumbs, about 20 cookies (150g)
  • 4 tablespoons unsalted butter, melted (55g)
  • 8 ounces cream cheese, softened to room temperature (225g)
  • 1 cup cookie butter, divided (240g)
  • 1/3 cup powdered sugar (40g)
  • 1/2 teaspoon vanilla extract
  • 1 cup cold heavy whipping cream (240g)

Optional garnish: 2 to 3 tablespoons extra Biscoff crumbs or up to 8 Biscoff cookie halves.

How to Make No-Bake Cookie Butter Cheesecake Cups

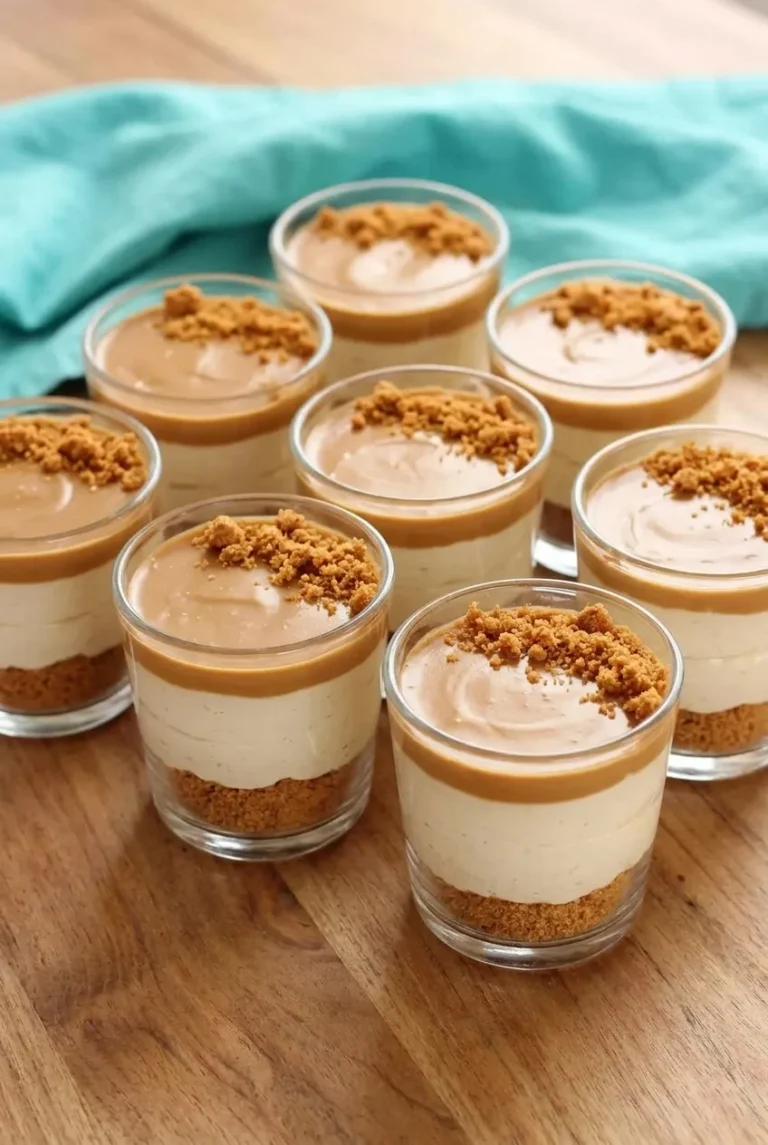
Eight No-Bake Cookie Butter Cheesecake Cups arranged together on a tabletop, with all three layers visible
  1. Prepare the crumbs: Set out eight clear 4-ounce dessert cups. Crush the Biscoff cookies into fine, even crumbs, then mix with the melted butter until the mixture resembles damp sand.
  2. Press the bases: Divide the crumbs among the cups and press firmly into level layers with the back of a spoon. Refrigerate while you make the filling.
  3. Mix the cream cheese: Beat the softened cream cheese until smooth. Add 1/2 cup cookie butter, the powdered sugar, and vanilla. Beat just until combined, scraping down the bowl as needed.
  4. Whip and fold: In a separate cold bowl, whip the heavy cream to stiff peaks that stand upright when the beaters are lifted. Gently fold it into the cream-cheese mixture with a spatula, stopping when no obvious streaks remain.
  5. Fill and chill: Divide the filling among the cups, leaving a shallow space for the topping. Smooth the surfaces and refrigerate for at least 2 hours. The filling should look set and hold its shape when lightly touched with a spoon; if it still looks soft, chill it longer.
  6. Add the topping: Briefly warm the remaining 1/2 cup cookie butter until pourable, then let it cool until warm, not hot. Spoon a thin, even layer over each chilled cup. If using extra crumbs, sprinkle them on before the topping sets. Refrigerate uncovered for about 15 to 30 minutes, until the topping no longer runs when a cup is tilted slightly. Add optional cookie halves just before serving.

How to Keep the Filling Light and Smooth

Room-temperature cream cheese beats smooth without leaving lumps. The heavy cream needs to stay cold so it can whip to stiff peaks. Once the cream is whipped, fold it in by hand rather than beating it into the filling; vigorous mixing can deflate it and leave the cheesecake dense.

How to Keep the Layers Distinct

Fine, evenly buttered crumbs form a compact base when pressed firmly into each cup. Keep the crumbs level instead of pushing them up the sides. Add the cookie-butter topping only after the filling has chilled, and let the warmed cookie butter cool before spooning it on so it does not soften or dent the cheesecake.

Make-Ahead and Storage

The cups can be made a day ahead. Once the topping has set, cover them without letting the covering touch the surface. Keep refrigerated at 40°F (5°C) or below, serve chilled, and use within 3 to 4 days.

For another individual chilled dessert, try No-Bake Cherry Cheesecake Cups with Graham Crust. For a different layered dessert, see No-Bake Pineapple Delight with Graham Cracker Crumbs.

Nutrition

Approximate nutrition per cup, based on 8 servings: 540 calories, 5g protein, 41g fat, and 37g carbohydrates. Approximate values per 100g: 450 calories, 4g protein, 34g fat, and 31g carbohydrates. Values vary with the brands used and do not include optional garnish.

No-Bake Cookie Butter Cheesecake Cups

Individual cheesecake cups layer a pressed Biscoff crumb base with a light cookie-butter filling and a smooth cookie-butter topping.
Course: Dessert
Cuisine: American
Prep: 30 min
Total: 165 min
Servings: 8 Calories: 540 kcal per cup

Equipment

  • Eight 4-ounce dessert cups
  • Food processor or rolling pin
  • Electric mixer
  • Mixing bowls
  • Spatula

Ingredients

For the crumb bases

  • 1 1/2 cups finely crushed Biscoff cookie crumbs, about 20 cookies (150 g)
  • 4 tablespoons unsalted butter, melted (55 g)

For the filling and topping

  • 8 ounces cream cheese, softened to room temperature (225 g)
  • 1 cup cookie butter, divided (240 g)
  • 1/3 cup powdered sugar (40 g)
  • 1/2 teaspoon vanilla extract
  • 1 cup cold heavy whipping cream (240 g)

Optional garnish

  • 2 to 3 tablespoons extra Biscoff crumbs or up to 8 Biscoff cookie halves

Instructions

  1. Set out eight clear 4-ounce dessert cups.
  2. Crush the Biscoff cookies into fine, even crumbs and mix them with the melted butter until the mixture resembles damp sand.
  3. Divide the crumb mixture among the cups and press it firmly into level layers. Refrigerate while you make the filling.
  4. Beat the softened cream cheese until smooth.
  5. Add 1/2 cup cookie butter, the powdered sugar, and vanilla. Beat just until combined, scraping down the bowl as needed.
  6. In a separate cold bowl, whip the heavy cream to stiff peaks.
  7. Gently fold the whipped cream into the cream-cheese mixture until no obvious streaks remain.
  8. Divide the filling among the cups, leaving a shallow space for the topping, and smooth the surfaces.
  9. Refrigerate for at least 2 hours, until the filling looks set and holds its shape when lightly touched.
  10. Briefly warm the remaining 1/2 cup cookie butter until pourable, then let it cool until warm but not hot.
  11. Spoon a thin, even layer of cookie butter over each chilled cup. Add extra crumbs before the topping sets, if using.
  12. Refrigerate uncovered for 15 to 30 minutes, until the topping no longer runs when a cup is tilted slightly. Add cookie halves just before serving, if using.

Tips

  • Use room-temperature cream cheese to help the filling beat smoothly.
  • Keep the heavy cream cold so it whips to stiff peaks.
  • Fold the whipped cream in gently by hand to keep the filling light.
  • Chill the filling until set before adding the topping.
  • Let the warmed cookie butter cool until warm, not hot, before spooning it over the filling.

Notes

Make up to a day ahead. Once the topping has set, cover without touching the surface and refrigerate at 40°F (5°C) or below. Serve chilled and use within 3 to 4 days.

Nutrition

Calories: 540 kcal per cup | Protein: 5 g per cup | Fat: 41 g per cup | Carbohydrates: 37 g per cup | Per 100g Calories: 450 kcal | Per 100g Protein: 4 g | Per 100g Fat: 34 g | Per 100g Carbohydrates: 31 g

No-Bake Pineapple Delight

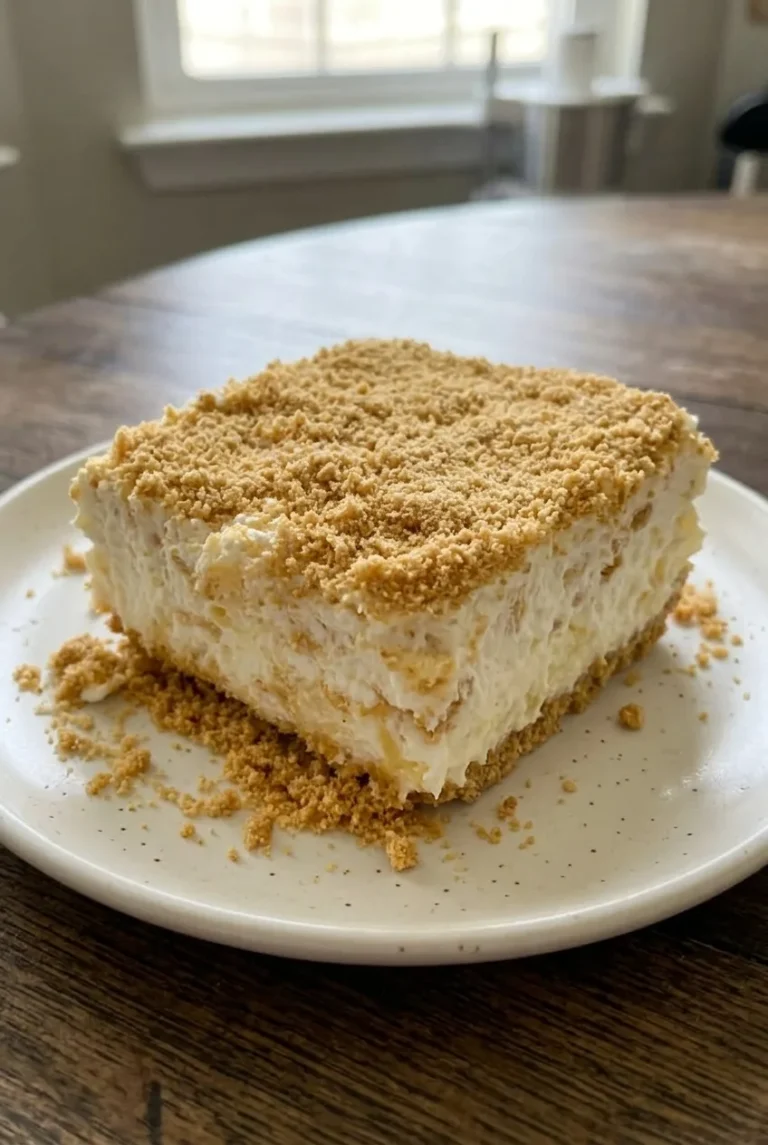
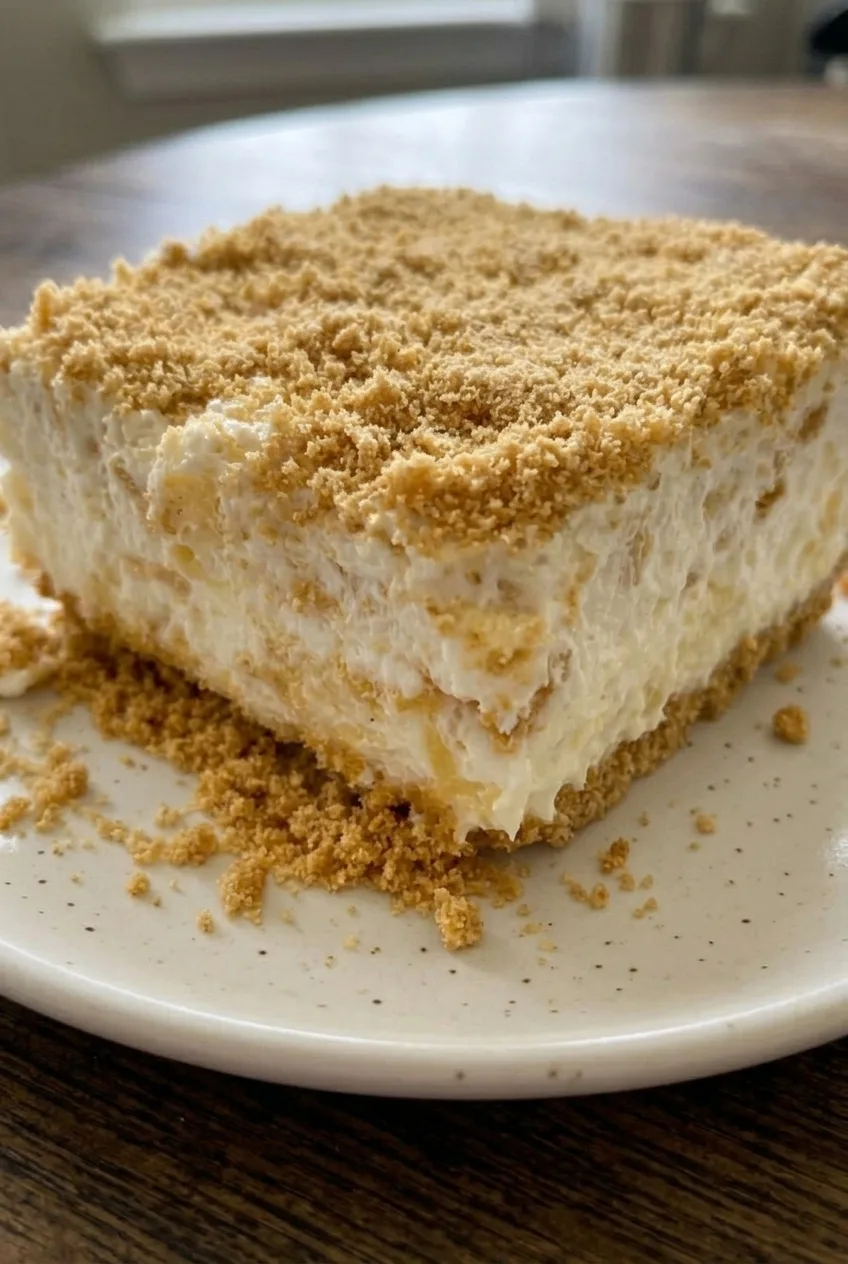
No-Bake Pineapple Delight is a chilled pan dessert with a compact graham-cracker base, a fluffy cream-cheese layer, and a separate pineapple-whipped layer beneath a generous coating of fine crumbs. The crust sets in the refrigerator, so no oven is needed. Drain the pineapple until it stops releasing free juice, then give the assembled dessert at least 4 hours to chill. Overnight is better for squares that hold their shape.

Prep time: 25 minutes | Cook time: 0 minutes | Chill time: At least 4 hours, plus 15 minutes for the crust | Yield: 9 generous squares

Ingredients for No-Bake Pineapple Delight

Close view of No-Bake Pineapple Delight showing its creamy pineapple flecks and buttery crumb layers.
  • 2 1/2 cups graham-cracker crumbs (250g), divided
  • 1/2 cup unsalted butter, melted (115g)
  • 2 tablespoons granulated sugar (25g)
  • 8 ounces cream cheese, softened (225g)
  • 4 tablespoons unsalted butter, softened (55g)
  • 1 cup powdered sugar (120g)
  • 1 teaspoon vanilla extract
  • 8 ounces frozen whipped topping, thawed (225g; about 3 cups), divided
  • 1 can (20 ounces) crushed pineapple, well drained

How to Make No-Bake Pineapple Delight

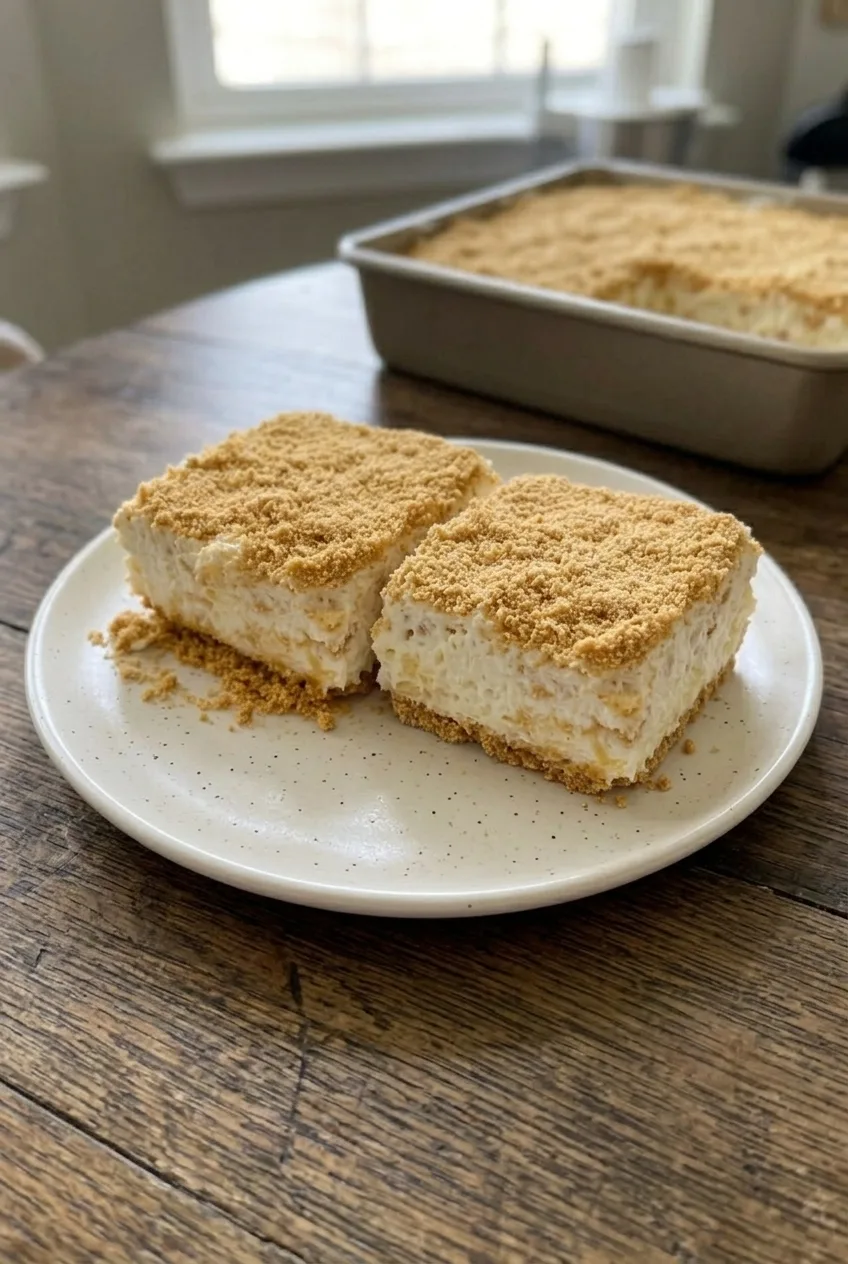
Two crumb-topped No-Bake Pineapple Delight squares on a plate, with the dessert pan softly visible behind.
  1. Prepare the crumbs: Line an 8-inch square pan with parchment paper, if desired. Mix the graham-cracker crumbs, melted butter, and granulated sugar until evenly moistened. Set aside about 1/2 cup of the mixture for the topping.
  2. Press and chill the crust: Press the remaining crumbs firmly into an even layer, including the corners. A flat-bottomed measuring cup helps compact them. Refrigerate for at least 15 minutes, until the crust does not shift when lightly touched.
  3. Drain the pineapple: Press the crushed pineapple gently in a fine-mesh strainer. If it still releases free juice, squeeze it gently in cheesecloth or a clean towel. The pineapple should remain moist but should not drip freely; do not add the can liquid to the filling.
  4. Make the cream-cheese layer: Beat the softened cream cheese and softened butter until smooth. Beat in the powdered sugar and vanilla, then gently fold in about 1 cup of the whipped topping.
  5. Spread the first layer: Spread the cream-cheese mixture over the chilled crust, reaching the corners without pulling up the crumbs.
  6. Add the pineapple layer: Fold the drained pineapple into the remaining whipped topping. Spread it gently over the cream-cheese layer without blending the two together.
  7. Top and chill: Scatter the reserved crumbs evenly over the surface. Refrigerate for at least 4 hours, preferably overnight, until the center looks set rather than flowing when the pan is gently moved. Cover the pan without pressing the covering into the crumbs.
  8. Cut and serve: Cut into 9 squares, wiping the knife between cuts. Serve cold and refrigerate the remaining dessert between servings.

How to Keep the Bars Sliceable

Free juice from the pineapple can loosen the whipped layer, so drain it thoroughly without squeezing the fruit dry. The assembled dessert needs a much longer chill than the crust. If the center still shifts when the pan moves, refrigerate it longer before cutting. The filling should hold a square shape while remaining soft and creamy, not firm like baked cheesecake.

No-Bake Pineapple Delight Variations

  • Vanilla-wafer crumbs: Use them in place of the graham-cracker crumbs, reserving some for the topping.
  • Homemade whipped cream: Sweetened homemade whipped cream can replace the whipped topping, though the bars may be softer. Keep them well chilled.
  • Briefly baked crust: For a toastier base, the pressed crust can be baked briefly. Cool it completely before adding the filling; baking is not needed for the main recipe.

For another no-bake dessert with a graham crust, try these No-Bake Cherry Cheesecake Cups.

Make-Ahead and Storage

Assemble the dessert a day ahead if possible; an overnight chill helps it set. Cover leftovers and refrigerate them for up to about 3 days for the best texture. Keep the pan cold between servings, as the creamy layers soften at room temperature.

Freezing is possible, but the texture after thawing is uncertain. If freezing, wrap the dessert well, freeze for up to 3 months, and thaw overnight in the refrigerator. Expect the filling to be softer than when freshly chilled.

Nutrition

Approximate nutrition per serving, based on 1 of 9 squares (about 165g): 500 calories, 4g protein, 30g fat, and 52g carbohydrates. Approximate values per 100g: 305 calories, 3g protein, 18g fat, and 31g carbohydrates. Values vary with the brands used and the amount of liquid drained from the pineapple.

No-Bake Pineapple Delight

A chilled dessert with a graham-cracker crust, a creamy cream-cheese layer, and a pineapple-whipped topping.
Course: Dessert
Cuisine: American
Prep: 25 min
Total: 280 min
Servings: 9 Calories: 500 kcal

Equipment

  • 8-inch square pan
  • Parchment paper
  • Mixing bowl
  • Electric mixer
  • Fine-mesh strainer
  • Flat-bottomed measuring cup
  • Cheesecloth or clean towel

Ingredients

For the crust and topping

  • 2 1/2 cups graham-cracker crumbs (250 g), divided
  • 1/2 cup unsalted butter, melted (115 g)
  • 2 tablespoons granulated sugar (25 g)

For the cream-cheese layer

  • 8 ounces cream cheese, softened (225 g)
  • 4 tablespoons unsalted butter, softened (55 g)
  • 1 cup powdered sugar (120 g)
  • 1 teaspoon vanilla extract
  • About 1 cup of the whipped topping

For the pineapple layer

  • 8 ounces frozen whipped topping, thawed (225 g; about 3 cups), divided
  • 1 can (20 ounces) crushed pineapple, well drained

Instructions

  1. Line an 8-inch square pan with parchment paper, if desired.
  2. Mix the graham-cracker crumbs, melted butter, and granulated sugar until evenly moistened. Set aside about 1/2 cup for the topping.
  3. Press the remaining crumb mixture firmly into the pan in an even layer, including the corners. Refrigerate for at least 15 minutes, until the crust does not shift when lightly touched.
  4. Press the crushed pineapple gently in a fine-mesh strainer. If it still releases free juice, squeeze it gently in cheesecloth or a clean towel. Do not add the can liquid to the filling.
  5. Beat the softened cream cheese and butter until smooth. Beat in the powdered sugar and vanilla, then gently fold in about 1 cup of the whipped topping.
  6. Spread the cream-cheese mixture evenly over the chilled crust, reaching the corners without pulling up the crumbs.
  7. Fold the drained pineapple into the remaining whipped topping. Spread it gently over the cream-cheese layer without blending the layers together.
  8. Scatter the reserved crumbs evenly over the top. Cover the pan without pressing the covering into the crumbs.
  9. Refrigerate for at least 4 hours, preferably overnight, until the center looks set when the pan is gently moved.
  10. Cut into 9 squares, wiping the knife between cuts. Serve cold.

Tips

  • Drain the pineapple thoroughly so its free juice does not loosen the whipped layer.
  • Keep the pineapple moist; do not squeeze it completely dry.
  • Chill the crust for at least 15 minutes before adding the filling.
  • Give the assembled dessert at least 4 hours to chill; overnight chilling helps the squares hold their shape.
  • If the center shifts when the pan moves, refrigerate the dessert longer before cutting.

Variations

  • Vanilla-Wafer Crust: Replace the graham-cracker crumbs with vanilla-wafer crumbs and reserve some for the topping.
  • Homemade Whipped Cream: Use sweetened homemade whipped cream instead of whipped topping; keep the dessert well chilled because the bars may be softer.
  • Briefly Baked Crust: Bake the pressed crust briefly for a toastier base, then cool it completely before adding the filling.

Notes

Cover leftovers and refrigerate for up to about 3 days. The dessert can be frozen for up to 3 months and thawed overnight in the refrigerator, though the filling may be softer after thawing.

Nutrition

Calories: 500 kcal | Protein: 4 g | Fat: 30 g | Carbohydrates: 52 g | Per 100 G Calories: 305 kcal | Per 100 G Protein: 3 g | Per 100 G Fat: 18 g | Per 100 G Carbohydrates: 31 g

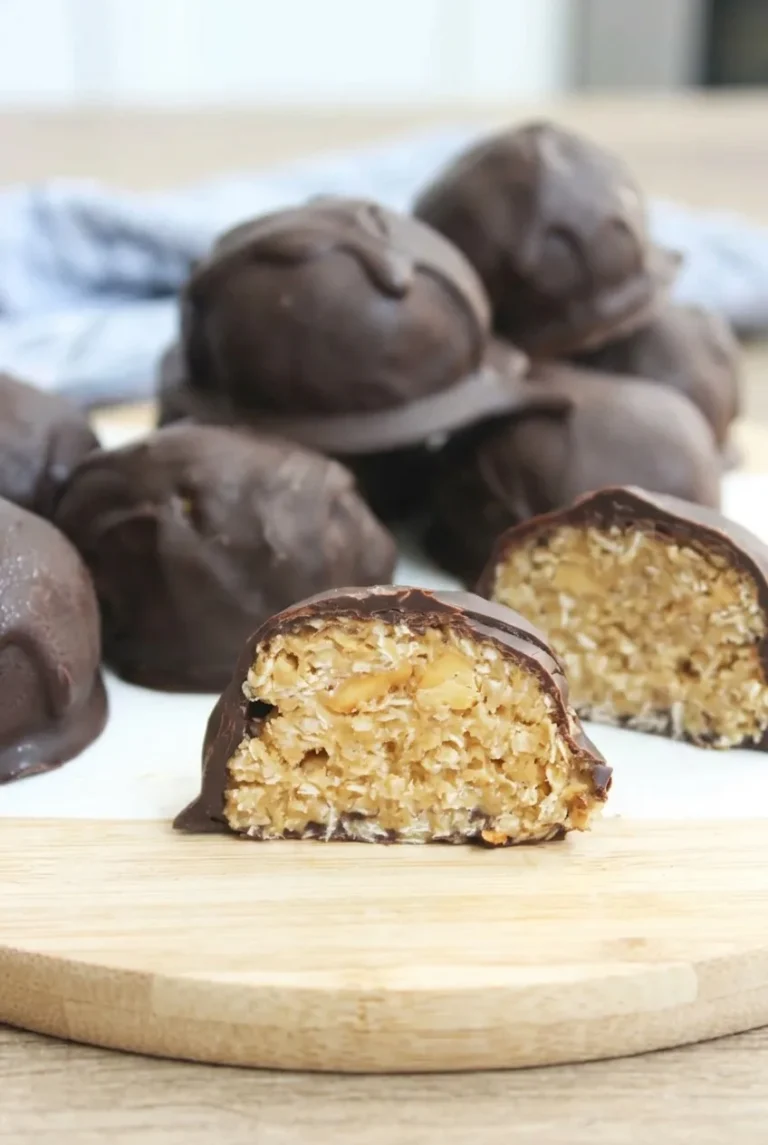
No-Bake Chocolate Peanut Butter Balls

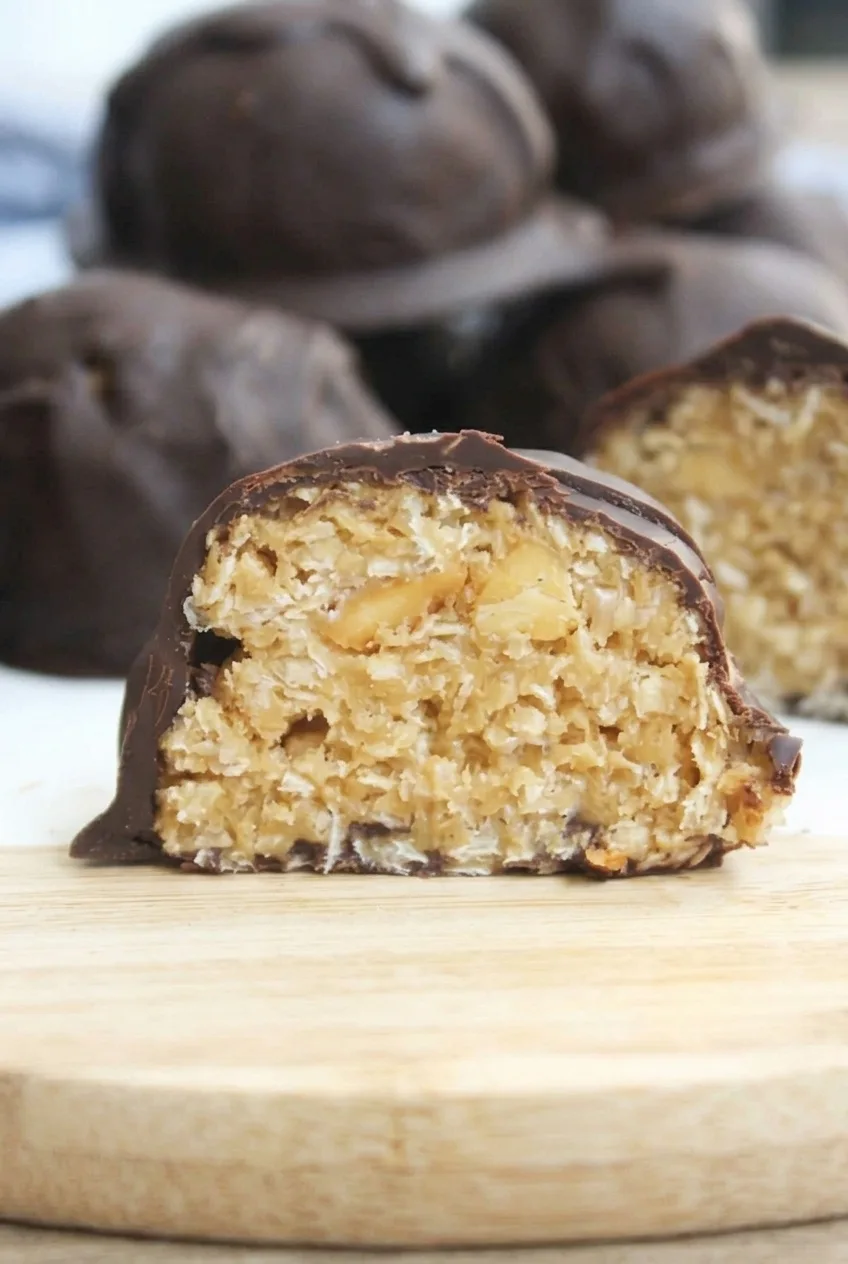
A thin semisweet chocolate shell surrounds a chewy peanut butter filling with visible oats, coconut, and chopped peanuts. These are intentionally coarser than the smooth peanut butter candies made with powdered sugar.

The key to shaping and dipping them is chilling the filling twice: first until it is easy to roll, then until the balls are firm enough to lift without flattening. Use those texture cues rather than relying on the clock alone.

Ingredients for No-Bake Chocolate Peanut Butter Balls

Close view of a chocolate peanut butter ball cross-section showing its flaky filling and chopped peanuts

Makes about 18 balls.

  • 1 cup creamy conventional peanut butter (260g)
  • 1/3 cup honey (115g)
  • 1 teaspoon vanilla extract
  • 1/4 teaspoon fine salt, or less if the peanut butter is salted
  • 1 cup quick oats (90g)
  • 3/4 cup unsweetened shredded coconut (60g)
  • 1/2 cup dry-roasted peanuts, finely chopped (70g)
  • 10 ounces semisweet chocolate, chopped or in melting wafers (285g)

How to Make No-Bake Chocolate Peanut Butter Balls

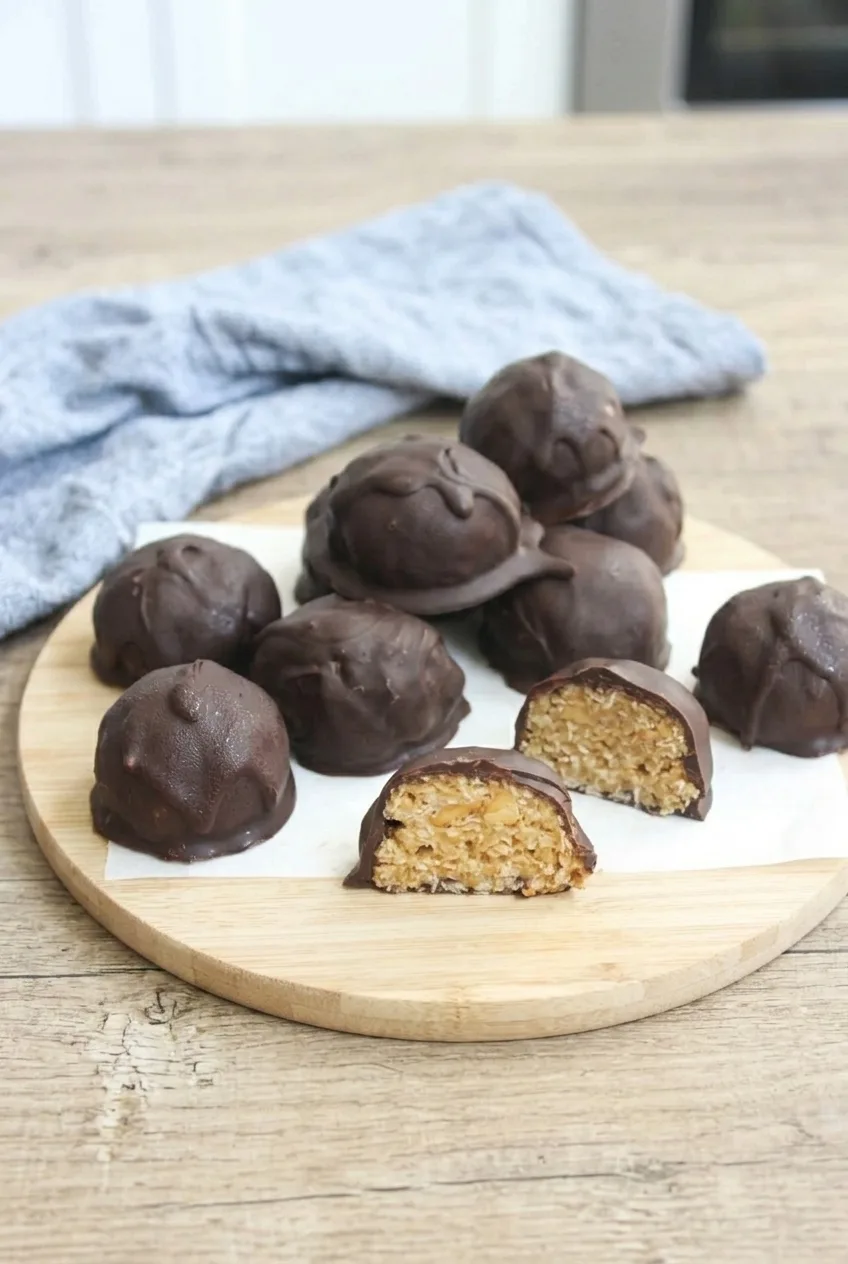
A serving of whole chocolate peanut butter balls with one halved ball on a light wooden board
  1. Mix the filling: Stir the peanut butter, honey, vanilla, and salt in a mixing bowl until smooth. Fold in the oats, coconut, and peanuts. The mixture should be thick and hold together when squeezed.
  2. Chill the mixture: Cover the bowl and refrigerate for 15 to 20 minutes, until the filling is cool and easier to scoop. If it is still sticky, chill it longer before changing the ingredient balance.
  3. Shape the balls: Scoop 1 to 1 1/2 tablespoons of filling per ball and roll between your hands. Place on a parchment-lined baking sheet and refrigerate for about 20 minutes, or until a ball can be lifted without flattening.
  4. Melt the chocolate: Put the chocolate in a dry microwave-safe bowl. Microwave at medium power, if available, for 20 to 30 seconds, then stir well. Continue in 15- to 20-second intervals, stirring each time. Stop heating when a few small pieces remain; stir until the chocolate is smooth and fluid.
  5. Dip and coat: Lower each chilled ball into the chocolate with a fork and turn to coat it completely. Lift it out, let the excess drip into the bowl, and return it to the parchment. Spoon chocolate over any bare spots.
  6. Chill until set: Refrigerate the coated balls uncovered for 15 to 20 minutes, until the chocolate is firm and no longer looks wet. If desired, cut one set ball in half and serve it alongside the whole balls to show the textured center.

How to Check and Adjust the Filling

Press a small portion between your fingers before rolling. It should hold together without smearing or crumbling. Chill a sticky mixture first; if it remains too soft, mix in a little more oats and chill again. If it crumbles, add peanut butter a teaspoon at a time until it holds together.

Creamy conventional peanut butter gives the most predictable consistency. Thoroughly stirred natural peanut butter can also work, but a looser batch may need more chilling or a gradual addition of oats. Old-fashioned rolled oats will make the center coarser than quick oats; avoid steel-cut oats in this no-bake filling.

How to Keep the Chocolate Smooth for Dipping

Stir thoroughly between short heating intervals and let residual heat melt the last pieces. Overheating can make chocolate thick or scorched, while water or steam can make it grainy. A double boiler is another option for gentle melting; keep the bowl and utensils dry.

Dip the centers while they are cold and firm. Letting excess chocolate drip off the fork keeps the shell from becoming too thick, though its finish will vary with the chocolate used.

Make-Ahead and Storage

You can shape the filling ahead and keep the uncoated balls covered in the refrigerator until ready to dip. Store finished balls in an airtight container in the refrigerator for up to 1 week, with parchment between layers if stacking. Serve chilled or let them stand briefly to soften the centers slightly.

To freeze, separate layers with parchment in an airtight container for up to 1 month. Thaw in the refrigerator with the container covered to help reduce condensation on the chocolate. No reheating is needed.

Nutrition

Approximate nutrition per ball, based on 18 balls: 255 calories, 6g protein, 17g fat, and 22g carbohydrates. Per 100g: about 525 calories, 13g protein, 34g fat, and 46g carbohydrates. Values vary with ingredient brands and portion size.

No-Bake Chocolate Peanut Butter Balls

Chewy peanut butter balls with oats, coconut, and chopped peanuts are dipped in a thin semisweet chocolate shell.
Course: Dessert
Cuisine: American
Prep: 20 min
Total: 80 min
Servings: 18 Calories: 255 kcal

Equipment

  • Mixing bowl
  • Baking sheet
  • Parchment paper
  • Microwave-safe bowl
  • Microwave
  • Fork
  • Refrigerator

Ingredients

Filling

  • 1 cup creamy conventional peanut butter (260 g)
  • 1/3 cup honey (115 g)
  • 1 teaspoon vanilla extract
  • 1/4 teaspoon fine salt, or less if the peanut butter is salted
  • 1 cup quick oats (90 g)
  • 3/4 cup unsweetened shredded coconut (60 g)
  • 1/2 cup dry-roasted peanuts, finely chopped (70 g)

Coating

  • 10 ounces semisweet chocolate, chopped or in melting wafers (285 g)

Instructions

  1. Stir the peanut butter, honey, vanilla, and salt in a mixing bowl until smooth.
  2. Fold in the oats, coconut, and chopped peanuts until the mixture is thick and holds together when squeezed.
  3. Cover and refrigerate for 15 to 20 minutes, until cool and easier to scoop.
  4. Scoop 1 to 1 1/2 tablespoons of filling per ball and roll between your hands. Place the balls on a parchment-lined baking sheet.
  5. Refrigerate the shaped balls for about 20 minutes, until firm enough to lift without flattening.
  6. Place the chocolate in a dry microwave-safe bowl. Microwave at medium power, if available, for 20 to 30 seconds, then stir well.
  7. Continue microwaving in 15- to 20-second intervals, stirring each time. Stop when a few small pieces remain, then stir until smooth and fluid.
  8. Dip each chilled ball in the chocolate with a fork, turning to coat. Let excess chocolate drip into the bowl and return the ball to the parchment. Spoon chocolate over any bare spots.
  9. Refrigerate the coated balls uncovered for 15 to 20 minutes, until the chocolate is firm and no longer looks wet.

Tips

  • Chill the filling before shaping; if it is still sticky, chill it longer before adjusting the ingredients.
  • If the filling remains too soft, mix in a little more oats and chill again. If it crumbles, add peanut butter a teaspoon at a time.
  • Use thoroughly stirred natural peanut butter if desired, but a looser batch may need more chilling or additional oats.
  • Stir chocolate between short heating intervals and let residual heat melt the last pieces.
  • Keep the chocolate bowl and utensils completely dry to prevent the chocolate from turning grainy.
  • Dip the centers while cold and firm, and let excess chocolate drip off to keep the coating thin.

Notes

Store in an airtight container in the refrigerator for up to 1 week, separating layers with parchment if stacking. Freeze for up to 1 month and thaw covered in the refrigerator. No reheating is needed. Nutrition is approximate per ball; per 100 g: about 525 calories, 13 g protein, 34 g fat, and 46 g carbohydrates.

Nutrition

Calories: 255 kcal | Protein: 6 g | Fat: 17 g | Carbohydrates: 22 g

No-Bake Coconut Truffles

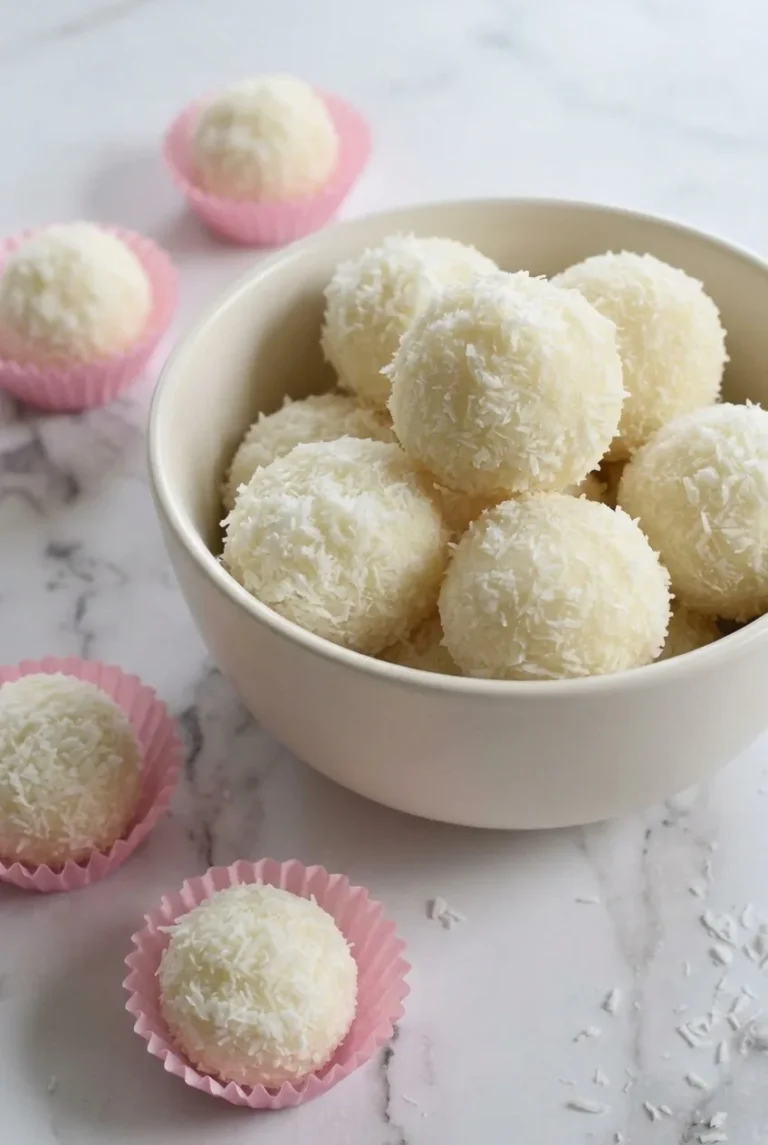
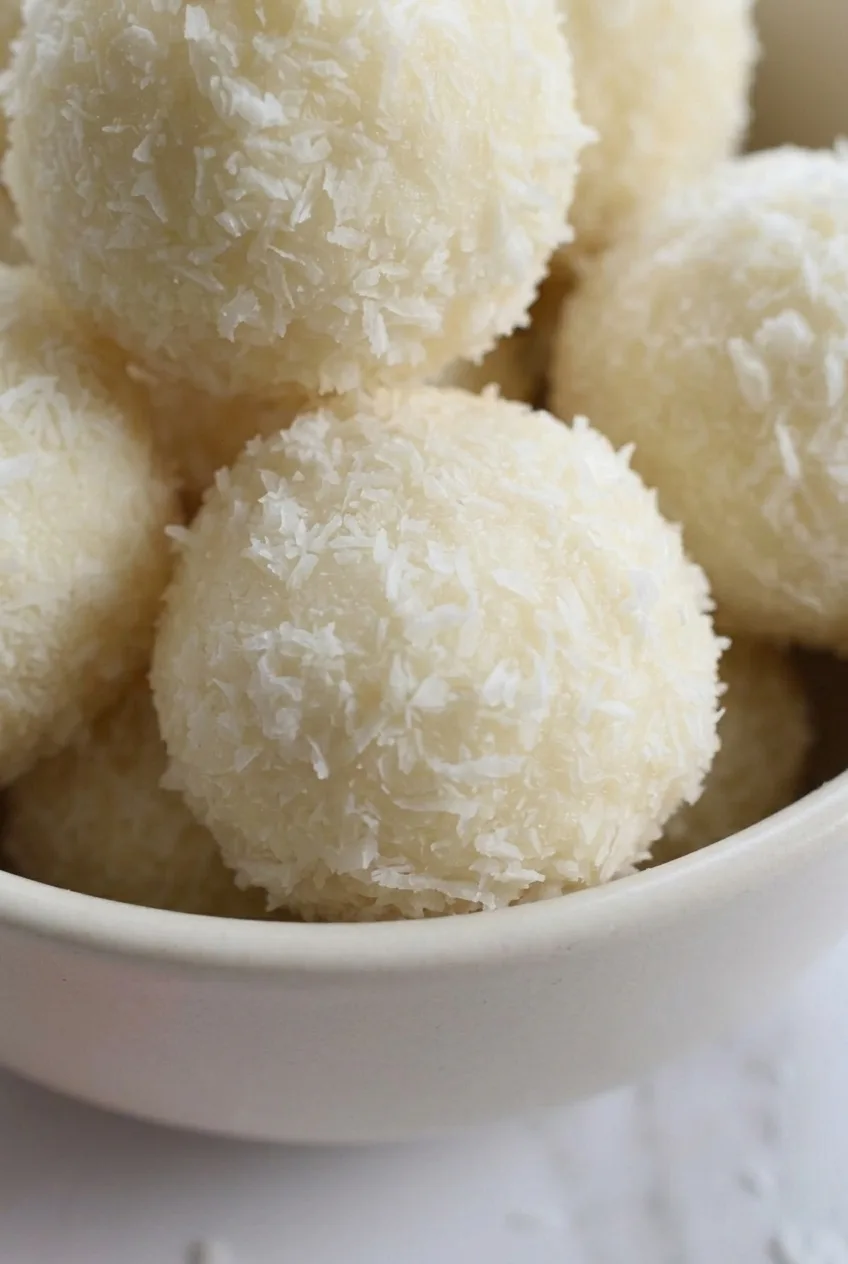
These no-bake coconut truffles have chewy centers and a fluffy coating of shredded coconut. Sweetened condensed milk binds the coconut into small, hand-rolled balls, which firm up in the refrigerator. Coconut varies in dryness, so let the mixture rest before squeezing a small portion to check whether it will hold its shape. A little more condensed milk or coconut, added gradually, is usually all it needs.

Ingredients for No-Bake Coconut Truffles

Close view of a coconut truffle's fluffy shredded coating and slightly irregular round shape
  • 3 cups finely shredded unsweetened coconut (240g), divided: 2 1/2 cups for the centers and 1/2 cup for coating, plus a little extra if needed
  • 1/2 cup sweetened condensed milk (150g), plus up to 1 to 2 tablespoons if needed

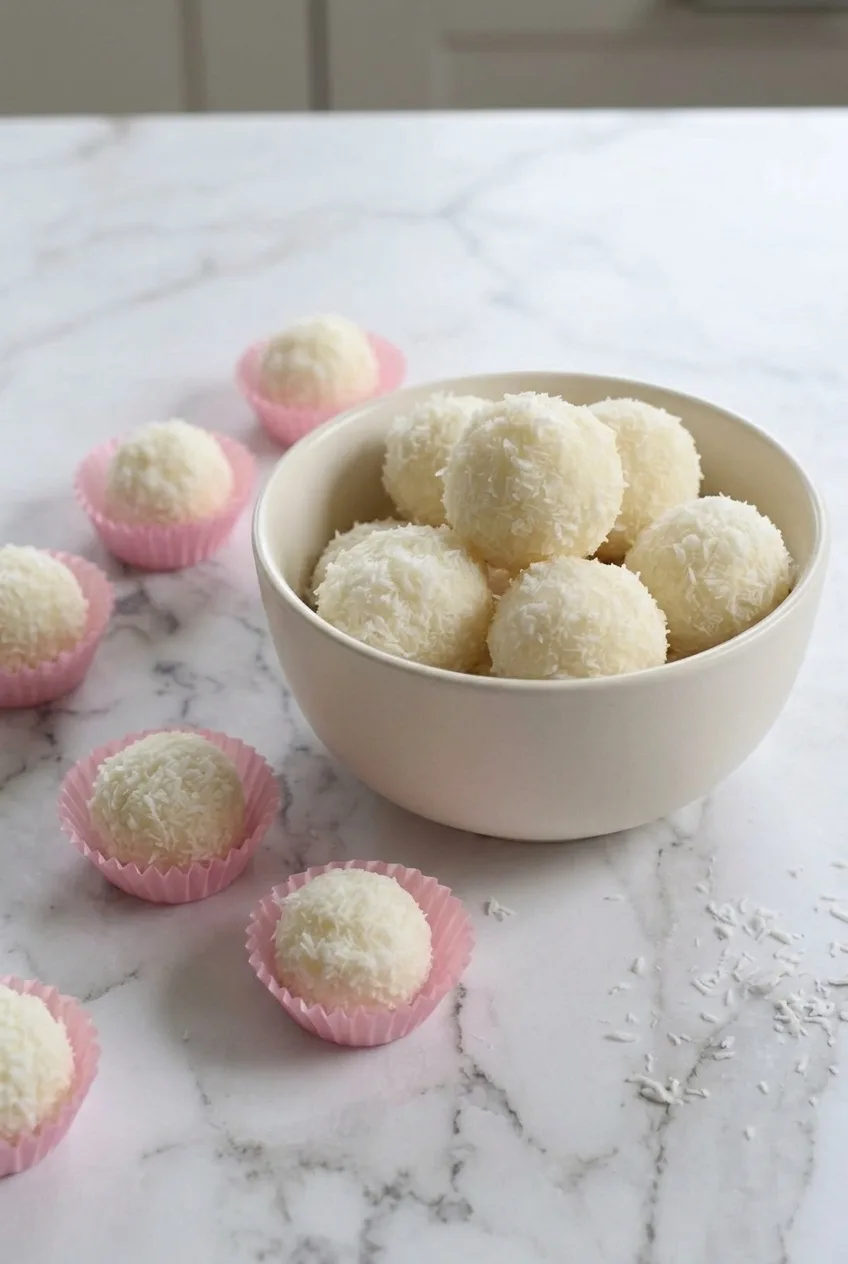
Finely shredded unsweetened coconut gives the truffles their pale, textured coating. Sweetened shredded coconut will make them sweeter and may produce a softer mixture; if using it, start with less condensed milk and adjust by texture. Mini paper liners are optional for serving.

How to Make No-Bake Coconut Truffles

A wider view of coconut truffles in a bowl with pink paper liners on a light stone surface

Makes about 14 to 16 truffles. Allow about 20 minutes to prepare them and about 1 hour to chill.

  1. Mix and rest: Stir 2 1/2 cups coconut and 1/2 cup condensed milk together in a medium bowl until evenly moistened. Let stand for 10 minutes so the coconut can absorb some moisture.
  2. Check the texture: Squeeze a small portion. It should clump together and hold its shape. If it crumbles, stir in more condensed milk a teaspoon at a time. If it is too sticky or soft to hold a ball, add extra coconut a tablespoon at a time. Retest after each addition.
  3. Shape and coat: Put the remaining 1/2 cup coconut in a shallow bowl. Roll the mixture into 14 to 16 balls, about 1 to 1 1/4 inches across. Lightly dampen your hands if the mixture sticks. Roll each ball in coconut as soon as you shape it, turning to coat all sides; gently press coconut onto any bare spots.
  4. Chill: Arrange the truffles in a single layer on a parchment-lined plate or tray. Refrigerate for about 1 hour, checking after 45 minutes. They are ready when they feel firm enough to lift without losing their shape; chill longer if they still feel soft.

How to Get a Rollable Mixture

Wait until after the 10-minute rest to judge the texture: coconut can continue absorbing condensed milk as it sits. Make small adjustments rather than adding a large amount at once. The mixture should hold together when squeezed but remain firm enough to roll without slumping.

How to Store and Freeze Coconut Truffles

Store the truffles in an airtight container in the refrigerator for up to 1 week. Separate stacked layers with parchment to protect the coating. Serve chilled for a firmer bite, or let them stand briefly at room temperature to soften.

For longer storage, freeze the plain truffles in an airtight container for up to 3 months. Thaw overnight in the refrigerator, then let stand at room temperature for about 10 minutes before serving.

For other no-bake desserts, try No-Bake Avalanche Cookies with Peanut Butter or No-Bake Rocky Road Bars with Peanuts.

Nutrition

Approximate nutrition per truffle, based on 15 truffles (about 26g each): 140 calories, 2g protein, 11g fat, and 9g carbohydrates. Per 100g: approximately 530 calories, 8g protein, 43g fat, and 35g carbohydrates. Values vary with the ingredients used.

No-Bake Coconut Truffles

Chewy coconut and sweetened condensed milk are rolled into bite-size truffles and coated in shredded coconut.
Course: Dessert
Cuisine: Global
Prep: 20 min
Total: 80 min
Servings: 15 Calories: 140 kcal per truffle

Equipment

  • Mixing bowl
  • Shallow bowl
  • Parchment-lined plate or tray

Ingredients

For the truffles

  • 2 1/2 cups finely shredded unsweetened coconut (about 200 g), plus extra if needed
  • 1/2 cup sweetened condensed milk (150 g), plus up to 1 to 2 tablespoons if needed

For coating

  • 1/2 cup finely shredded unsweetened coconut (about 40 g)

Instructions

  1. Stir 2 1/2 cups coconut and 1/2 cup condensed milk together in a medium bowl until evenly moistened.
  2. Let the mixture rest for 10 minutes.
  3. Squeeze a small portion to check whether it clumps and holds its shape.
  4. If the mixture crumbles, stir in condensed milk a teaspoon at a time. If it is too sticky or soft, add coconut a tablespoon at a time, retesting after each addition.
  5. Place the remaining 1/2 cup coconut in a shallow bowl.
  6. Roll the mixture into 14 to 16 balls, about 1 to 1 1/4 inches across. Lightly dampen your hands if the mixture sticks.
  7. Roll each ball in the coating coconut, turning to cover all sides and gently pressing coconut onto any bare spots.
  8. Arrange the truffles in a single layer on a parchment-lined plate or tray.
  9. Refrigerate for about 1 hour, checking after 45 minutes. Chill longer if needed, until firm enough to lift without losing their shape.

Tips

  • Wait until after the 10-minute rest to check the mixture, since the coconut will continue absorbing moisture.
  • Add condensed milk or coconut in small amounts to avoid making the mixture too wet or too dry.
  • Lightly dampen your hands if the mixture sticks while shaping.
  • Roll each ball in the coating coconut as soon as it is shaped so the coating adheres.

Variations

  • Sweetened Coconut Truffles: Use sweetened shredded coconut for a sweeter result; start with less condensed milk and adjust the mixture by texture.

Notes

Refrigerate in an airtight container for up to 1 week, separating stacked layers with parchment. Freeze plain truffles for up to 3 months; thaw overnight in the refrigerator and let stand at room temperature for about 10 minutes before serving.

Nutrition

Calories: 140 kcal per truffle | Protein: 2 g per truffle | Fat: 11 g per truffle | Carbohydrates: 9 g per truffle | Per 100g Calories: 530 kcal | Per 100g Protein: 8 g | Per 100g Fat: 43 g | Per 100g Carbohydrates: 35 g

No-Bake Orange Creamsicle Pie

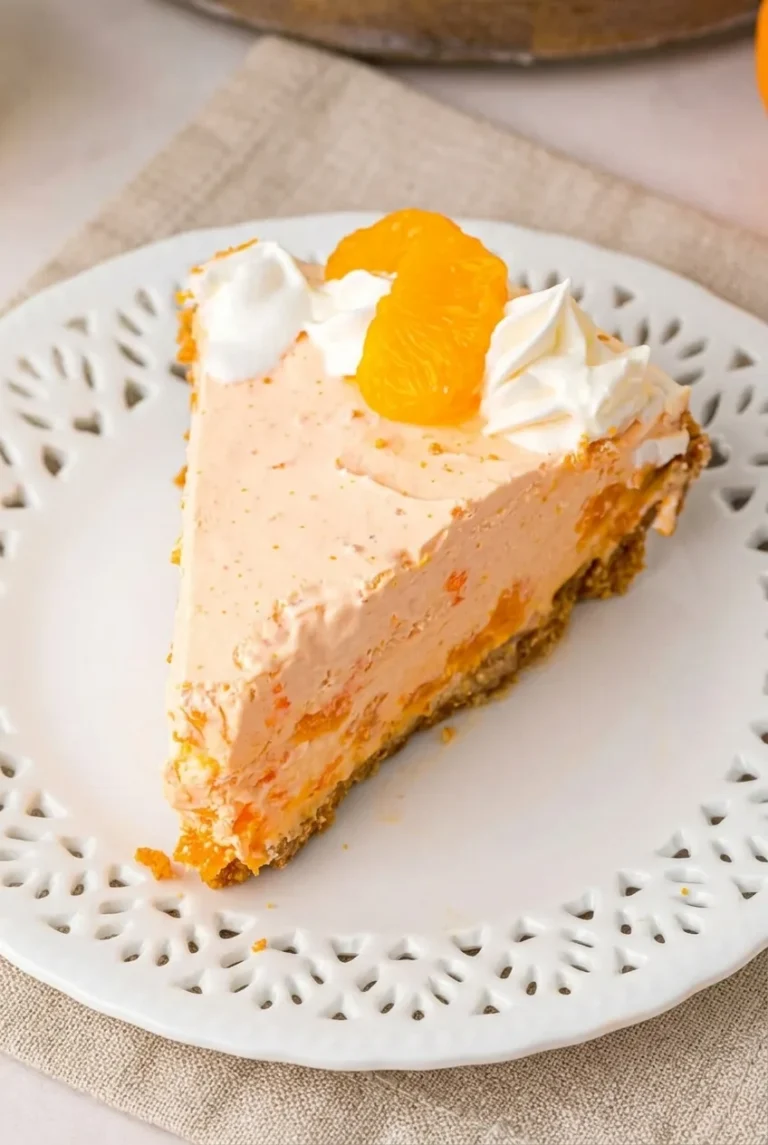
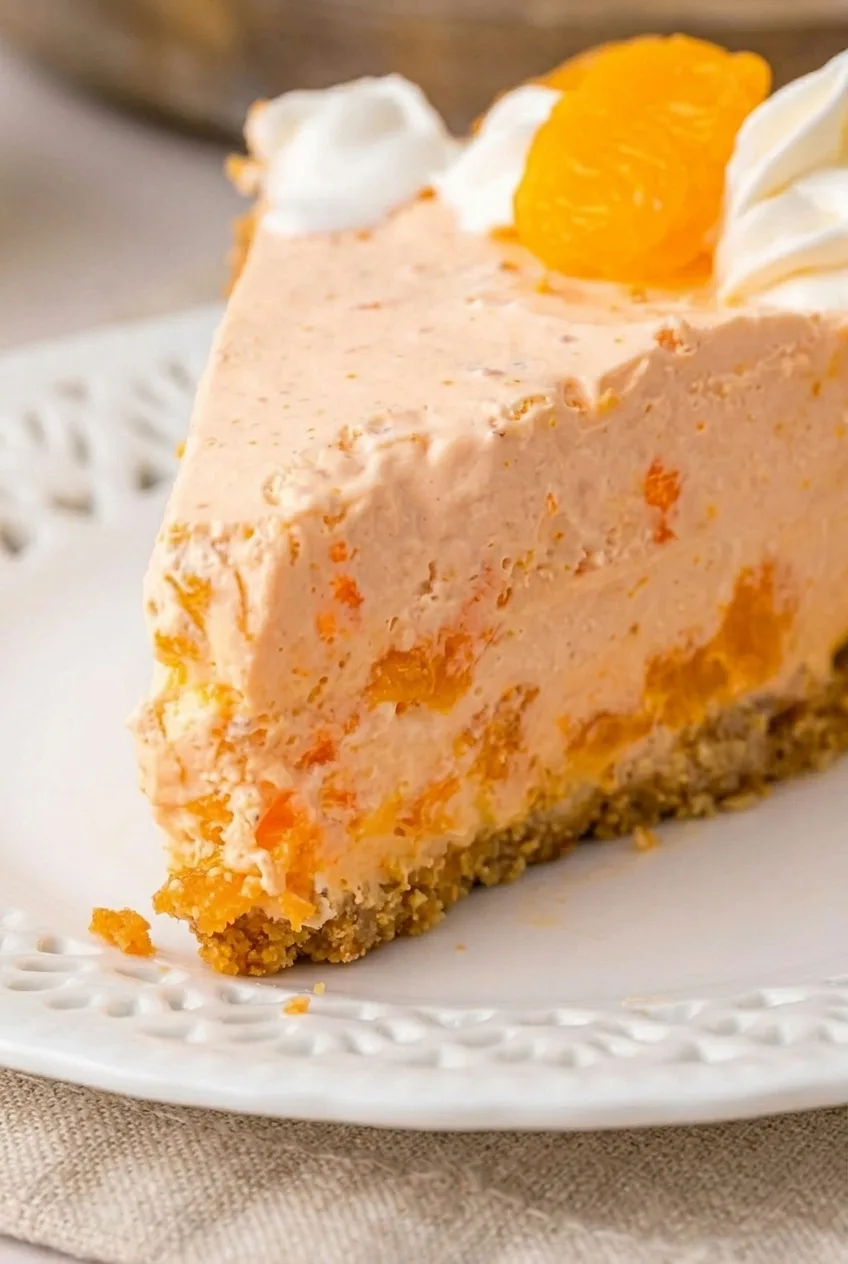
A graham cracker crust supports this chilled pie’s fluffy, pale orange filling, with mandarin pieces throughout and whipped cream on each slice. Orange gelatin sets the filling without baking, while vanilla yogurt and whipped topping give it a creamy texture.

Drain the mandarins well, and let the gelatin cool until slightly thickened before folding in the whipped topping. Refrigerate the pie for at least 4 hours, then check the center rather than relying on the clock alone. For another chilled citrus dessert with a graham crust, try this No-Bake Key Lime Pie.

Ingredients for No-Bake Orange Creamsicle Pie

Close view of the creamy mandarin-speckled filling and crumbly graham crust of orange creamsicle pie.
  • 1 1/2 cups graham cracker crumbs (150g)
  • 6 tablespoons unsalted butter, melted (85g)
  • 2 tablespoons granulated sugar (25g)
  • 1 package orange gelatin dessert mix (3 ounces/about 85g)
  • 1/2 cup boiling water
  • 1/2 cup cold mandarin-orange juice or cold water
  • 1 cup vanilla yogurt (245g)
  • 1 tub frozen whipped topping, thawed (8 ounces/225g)
  • 1 can mandarin-orange segments (about 11 ounces), drained well and divided
  • About 1/2 cup whipped cream or additional whipped topping, for garnish

Optional: Add 1/2 teaspoon finely grated orange zest to the filling or use it sparingly as a garnish. A prepared 9-inch graham cracker crust can replace the homemade crust; check its capacity before filling it.

How to Make No-Bake Orange Creamsicle Pie

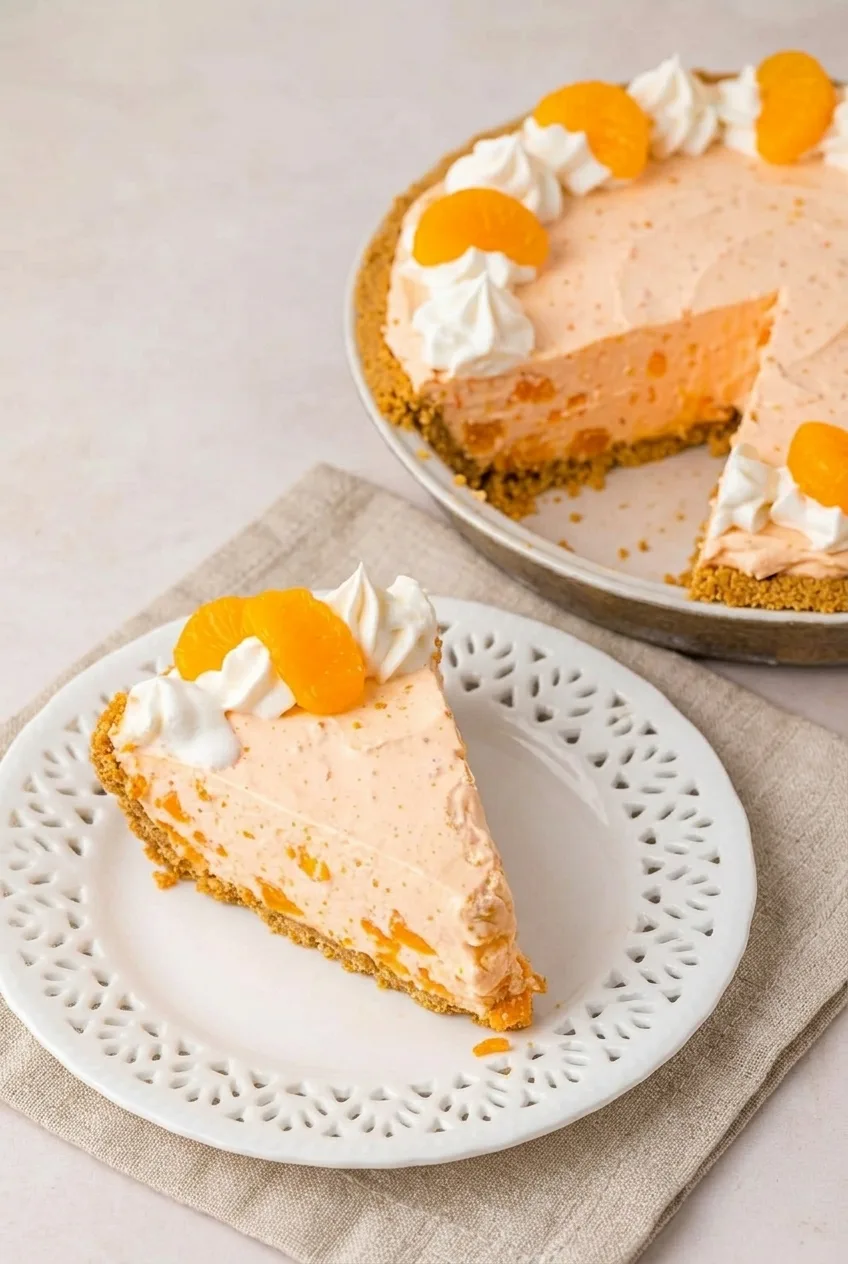
A plated slice of orange creamsicle pie beside the remaining pie, showing the full graham crust and creamy filling.
  1. Make the crust: Stir the graham cracker crumbs, melted butter, and sugar until the crumbs resemble damp sand. Press firmly across the bottom and up the sides of a 9-inch pie plate. Refrigerate for at least 15 minutes while you prepare the filling.
  2. Drain the mandarins: Drain the segments, reserving juice if you plan to use it in the gelatin mixture. Add cold water if needed to make exactly 1/2 cup of liquid. Gently blot the fruit so it is moist but not dripping, and set aside a few intact segments for garnish.
  3. Dissolve and cool the gelatin: Whisk the gelatin mix into the boiling water until no granules remain. Stir in the measured cold juice or water. Let cool for about 15 to 25 minutes, stirring and checking often. It should be cool, lightly thickened, and still fluid—not firm or lumpy.
  4. Make the filling: Whisk the vanilla yogurt into the cooled gelatin until smooth. Gently fold in the thawed whipped topping in two additions, then fold in the drained mandarins without crushing them. The filling should look fluffy and pale orange, with fruit pieces throughout.
  5. Fill and chill: Spoon the filling into the chilled crust and smooth the top. Refrigerate uncovered until the surface has set, then cover without touching the filling. Start checking after 4 hours: the center should not ripple when the plate is gently nudged. If it still moves, chill longer.
  6. Garnish and slice: Top each slice with whipped-cream peaks and a reserved mandarin segment, or garnish the whole pie before cutting. For cleaner wedges, warm a sharp knife in hot water, wipe it dry, and clean it between cuts.

How to Keep the Filling Fluffy and Sliceable

Cool the gelatin until it lightly coats a spoon but still flows. A warm base can soften the whipped topping; a fully set base can leave lumps in the filling. Fold the topping in gently rather than beating it, then give the assembled pie enough refrigerator time for a cut wedge to hold its shape.

Excess liquid on the mandarins can loosen the filling. Drain and blot the fruit, and use only the measured 1/2 cup of juice or water in the gelatin mixture.

Make-Ahead and Storage

Make the pie at least 4 hours ahead, or refrigerate it overnight. Once the surface has set, cover it carefully without pressing the covering into the filling. Keep leftovers covered in the refrigerator and use within about 3 days for best quality.

The set pie can also be wrapped airtight and frozen for a firmer, semifrozen texture. Let it soften briefly before slicing or serving; the time needed depends on whether you are softening a slice or the whole pie.

Nutrition

Approximate nutrition per serving, based on 1 of 8 slices: 390 calories, 3g protein, 20g fat, and 49g carbohydrates. Per 100g: about 235 calories, 2g protein, 12g fat, and 30g carbohydrates. Values vary with the ingredients and garnish used.

No-Bake Orange Creamsicle Pie

A graham cracker crust holds a fluffy orange filling with vanilla yogurt, whipped topping, and mandarin segments.
Course: Dessert
Cuisine: American
Prep: 30 min
Total: 270 min
Servings: 8 Calories: 390 kcal

Equipment

  • 9-inch pie plate
  • Mixing bowls
  • Whisk
  • Rubber spatula

Ingredients

For the crust

  • 1 1/2 cups graham cracker crumbs (150g)
  • 6 tablespoons unsalted butter, melted (85g)
  • 2 tablespoons granulated sugar (25g)

For the filling

  • 1 package orange gelatin dessert mix (3 ounces/about 85g)
  • 1/2 cup boiling water
  • 1/2 cup cold mandarin-orange juice or cold water
  • 1 cup vanilla yogurt (245g)
  • 1 tub frozen whipped topping, thawed (8 ounces/225g)
  • 1 can mandarin-orange segments (about 11 ounces), drained well and divided

For garnish

  • About 1/2 cup whipped cream or additional whipped topping
  • 1/2 teaspoon finely grated orange zest (optional)

Instructions

  1. Stir the graham cracker crumbs, melted butter, and sugar until the crumbs resemble damp sand.
  2. Press the crumb mixture firmly across the bottom and up the sides of a 9-inch pie plate. Refrigerate for at least 15 minutes.
  3. Drain and gently blot the mandarin segments. Reserve a few intact pieces for garnish.
  4. Whisk the gelatin mix into the boiling water until dissolved. Stir in exactly 1/2 cup cold juice or water.
  5. Cool the gelatin for about 15 to 25 minutes, stirring and checking often, until it is cool, lightly thickened, and still fluid.
  6. Whisk the vanilla yogurt into the cooled gelatin until smooth.
  7. Gently fold in the whipped topping in two additions, then fold in the drained mandarins.
  8. Spoon the filling into the chilled crust and smooth the top.
  9. Refrigerate uncovered until the surface has set, then cover without touching the filling. Chill for at least 4 hours, until the center does not ripple when gently nudged.
  10. Garnish with whipped cream and reserved mandarin segments. For clean slices, warm a sharp knife in hot water, wipe it dry, and clean it between cuts.

Tips

  • Drain and blot the mandarins well so excess liquid does not loosen the filling.
  • Let the gelatin cool until lightly thickened but still fluid before mixing it with the yogurt.
  • Fold the whipped topping in gently rather than beating it.
  • Check that the center is set before slicing; chill longer if it still moves.

Variations

  • Orange Zest Filling: Fold 1/2 teaspoon finely grated orange zest into the filling, or use it sparingly as a garnish.
  • Prepared Crust: Use a prepared 9-inch graham cracker crust instead of making the crust; check its capacity before filling.

Notes

Refrigerate covered leftovers and use within about 3 days. The pie can be wrapped airtight and frozen for a firmer, semifrozen texture; let it soften briefly before serving.

Nutrition

Calories: 390 kcal | Protein: 3 g | Fat: 20 g | Carbohydrates: 49 g