Author

Julia

Browsing

No-Bake Chocolate Peanut Butter Bars

These square bars have a thin, dark chocolate base beneath a thicker peanut butter layer, with chopped roasted peanuts on top. They set in the refrigerator rather than the oven. Let the chocolate base firm up before adding the filling so the layers stay distinct, then chill the assembled bars until they feel firm through the center. Refrigerator temperature and peanut butter choice can affect how long that takes.

Prep: 25 minutes   Active melting: 1 to 2 minutes   Total: about 2 hours 25 minutes, including chilling   Makes: 16 bars

Ingredients for No-Bake Chocolate Peanut Butter Bars
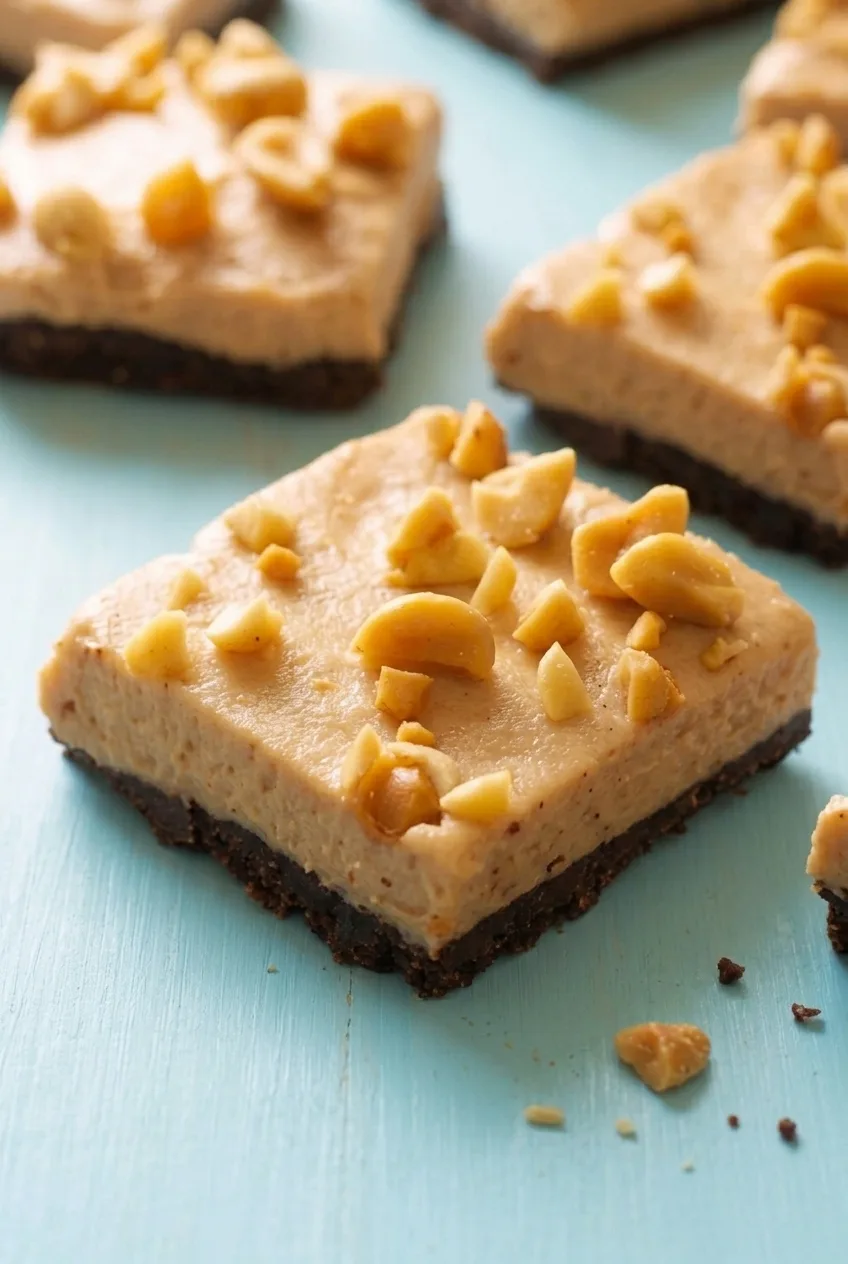
Close detail of a chocolate peanut butter bar showing its smooth top, chopped peanuts, and distinct dark base.
  • 1 1/2 cups semisweet chocolate chips (255g)
  • 1 cup creamy peanut butter, divided (about 260g): 2 tablespoons for the base and 14 tablespoons for the filling
  • 1/2 cup unsalted butter, softened (115g)
  • 2 cups powdered sugar (240g)
  • 1 teaspoon vanilla extract
  • 1/4 teaspoon fine salt, or to taste
  • 1/3 cup chopped roasted peanuts (45g)
  • Optional: a small pinch of flaky salt

Conventional creamy peanut butter gives the filling a more predictable set. If the peanut butter or butter is salted, reduce or omit the fine salt.

How to Make No-Bake Chocolate Peanut Butter Bars
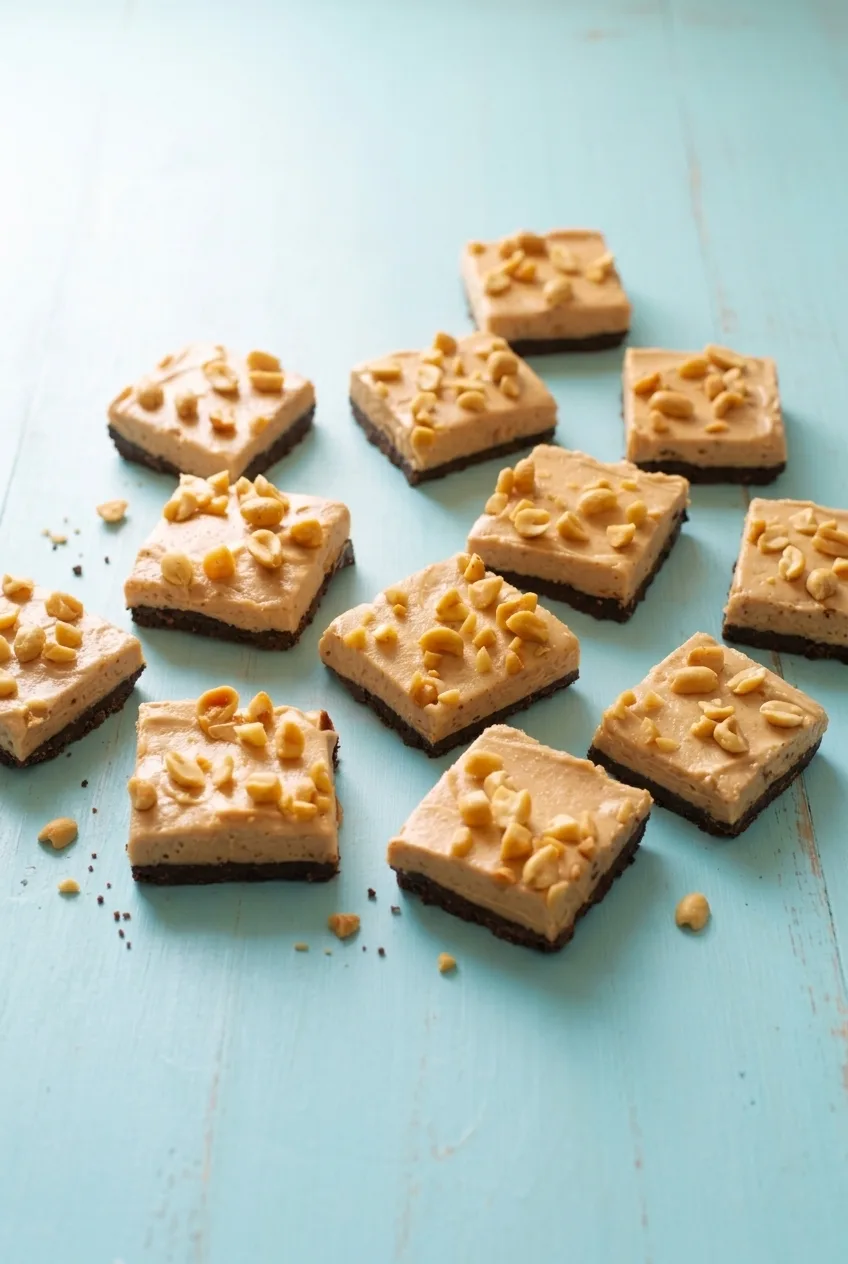
A wider serving of square chocolate peanut butter bars arranged on a pale turquoise surface.
  1. Line the pan: Line an 8-inch-square pan with parchment, leaving overhang on two opposite sides for lifting out the bars.
  2. Make the chocolate base: Combine the chocolate chips and 2 tablespoons peanut butter in a microwave-safe bowl. Microwave at medium power for 30 seconds and stir. Continue in 15- to 20-second bursts, stirring each time, until smooth, about 1 to 2 minutes total. Spread evenly in the pan and refrigerate for 15 to 20 minutes, until set to the touch and no longer smears with gentle contact.
  3. Mix the filling: Stir the softened butter and remaining 14 tablespoons peanut butter until smooth, with no visible butter streaks. Mix in the vanilla and fine salt, then gradually add the powdered sugar. The filling should be thick enough to hold its shape but still spreadable.
  4. Add the filling: Place it over the set chocolate and gently press or spread it to the edges. Avoid dragging hard across the base, which can pull up the chocolate.
  5. Top and chill: Scatter the chopped peanuts over the filling while it is soft and press them in lightly. Add the flaky salt, if using. Refrigerate uncovered for about 2 hours, until the center feels firm and the layers do not shift when lifted.
  6. Cut into squares: Lift out the slab using the parchment. If it is very hard, let it stand briefly at room temperature. Cut into 16 squares with a warm, dry knife, wiping the blade between cuts to help prevent the chocolate base from cracking.

Peanut Butter and Melting Notes

Natural peanut butter may separate and leave the filling softer or oilier. If using it, stir it thoroughly before measuring and allow extra chilling time if the center is not firm.

To melt the chocolate without a microwave, set a heatproof bowl over gently simmering water and stir until smooth. Keep water and steam out of the chocolate.

Milk Chocolate Variation

For a sweeter, milder base, replace the semisweet chocolate chips with the same amount of milk chocolate chips. The bottom layer will be lighter than in the main version.

Serving and Storage

Serve the bars chilled, or let them stand briefly for a softer bite. Store them in an airtight container in the refrigerator, with parchment between layers if stacking.

For a make-ahead option, freeze the bars in an airtight container with parchment between layers for up to about 2 months. Thaw in the refrigerator; their texture may change after freezing.

For another chilled dessert, try these No-Bake Banana Split Dessert Bars. For a softer chocolate dessert, see this Easy Chocolate Mousse.

Nutrition

Approximate nutrition per bar, based on 16 bars: 300 calories, 6g protein, 20g fat, and 28g carbohydrates. Per 100g: approximately 525 calories, 10g protein, 35g fat, and 49g carbohydrates. Values vary with the chocolate and peanut butter used.

No-Bake Chocolate Peanut Butter Bars

Chocolate and peanut butter are layered in an 8-inch pan, topped with roasted peanuts, and chilled until firm.
Course: Dessert
Cuisine: American
Prep: 25 min
Cook: 2 min
Total: 145 min
Servings: 16 Calories: 300 kcal

Equipment

  • 8-inch-square pan
  • Parchment paper
  • Microwave-safe bowl
  • Microwave
  • Knife

Ingredients

Chocolate Base

  • 1 1/2 cups semisweet chocolate chips (255 g)
  • 2 tablespoons creamy peanut butter

Peanut Butter Filling

  • 14 tablespoons creamy peanut butter
  • 1/2 cup unsalted butter, softened (115 g)
  • 2 cups powdered sugar (240 g)
  • 1 teaspoon vanilla extract
  • 1/4 teaspoon fine salt, or to taste

Topping

  • 1/3 cup chopped roasted peanuts (45 g)
  • Small pinch of flaky salt (optional)

Instructions

  1. Line an 8-inch-square pan with parchment, leaving overhang on two opposite sides.
  2. Combine the chocolate chips and 2 tablespoons peanut butter in a microwave-safe bowl.
  3. Microwave at medium power for 30 seconds and stir. Continue in 15- to 20-second bursts, stirring each time, until smooth, about 1 to 2 minutes total.
  4. Spread the chocolate mixture evenly in the pan. Refrigerate for 15 to 20 minutes, until set to the touch and no longer smears with gentle contact.
  5. Stir the softened butter and remaining 14 tablespoons peanut butter until smooth. Mix in the vanilla and fine salt.
  6. Gradually mix in the powdered sugar until the filling is thick enough to hold its shape but still spreadable.
  7. Gently press or spread the filling over the set chocolate and out to the edges.
  8. Scatter the chopped peanuts over the filling and press them in lightly. Add flaky salt, if using.
  9. Refrigerate uncovered for about 2 hours, until the center feels firm and the layers do not shift when lifted.
  10. Lift the slab from the pan using the parchment. If very hard, let it stand briefly at room temperature.
  11. Cut into 16 squares with a warm, dry knife, wiping the blade between cuts.

Tips

  • Let the chocolate base set before adding the filling to keep the layers distinct.
  • Use conventional creamy peanut butter for a more predictable set.
  • If using natural peanut butter, stir it thoroughly before measuring and allow extra chilling time if needed.
  • Reduce or omit the fine salt if your peanut butter or butter is salted.
  • Wipe the knife between cuts to help prevent the chocolate base from cracking.

Variations

  • Milk Chocolate Base: Replace the semisweet chocolate chips with the same amount of milk chocolate chips for a sweeter, milder, lighter-colored base.
Notes

Store in an airtight container in the refrigerator, with parchment between layers if stacking. Freeze airtight for up to about 2 months and thaw in the refrigerator; texture may change after freezing.

Nutrition

Calories: 300 kcal | Protein: 6 g | Fat: 20 g | Carbohydrates: 28 g

No-Bake Banana Split Dessert

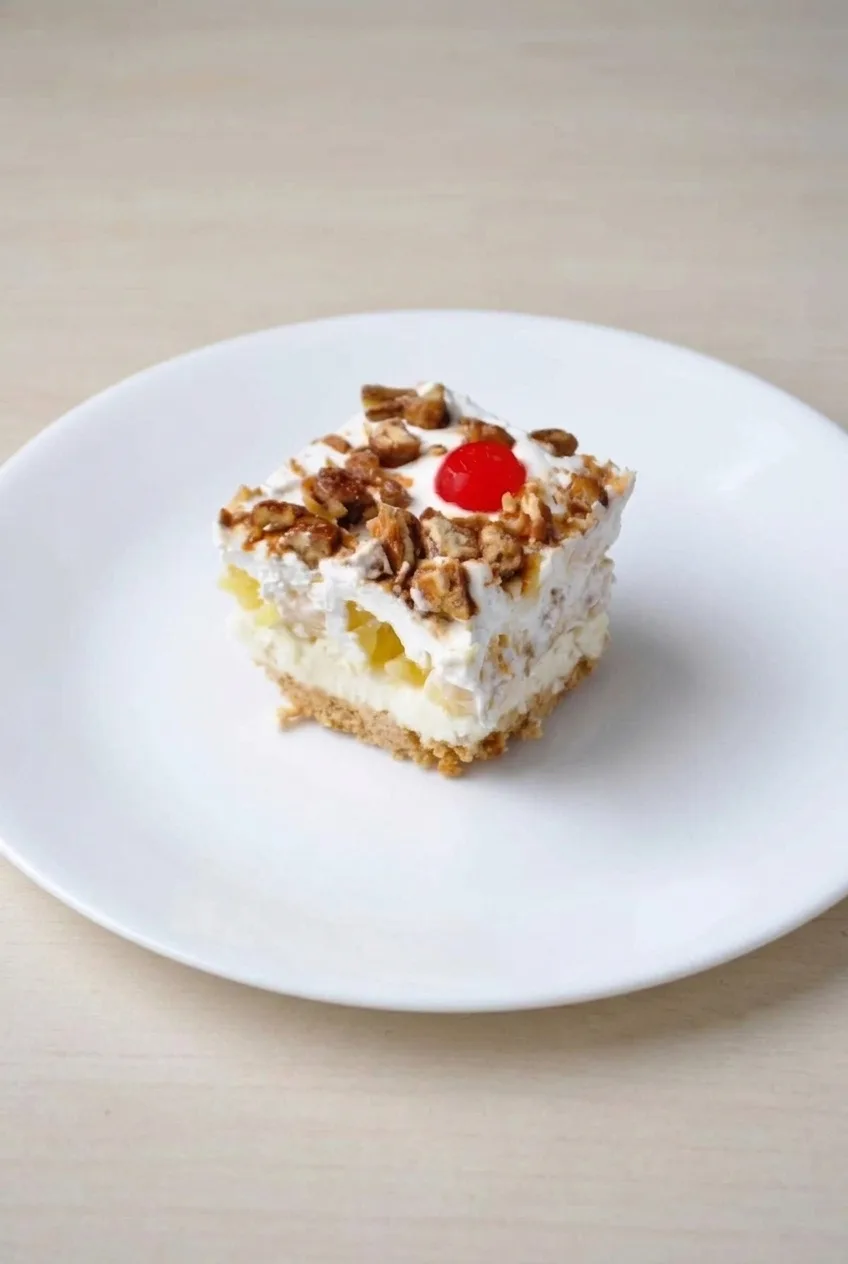
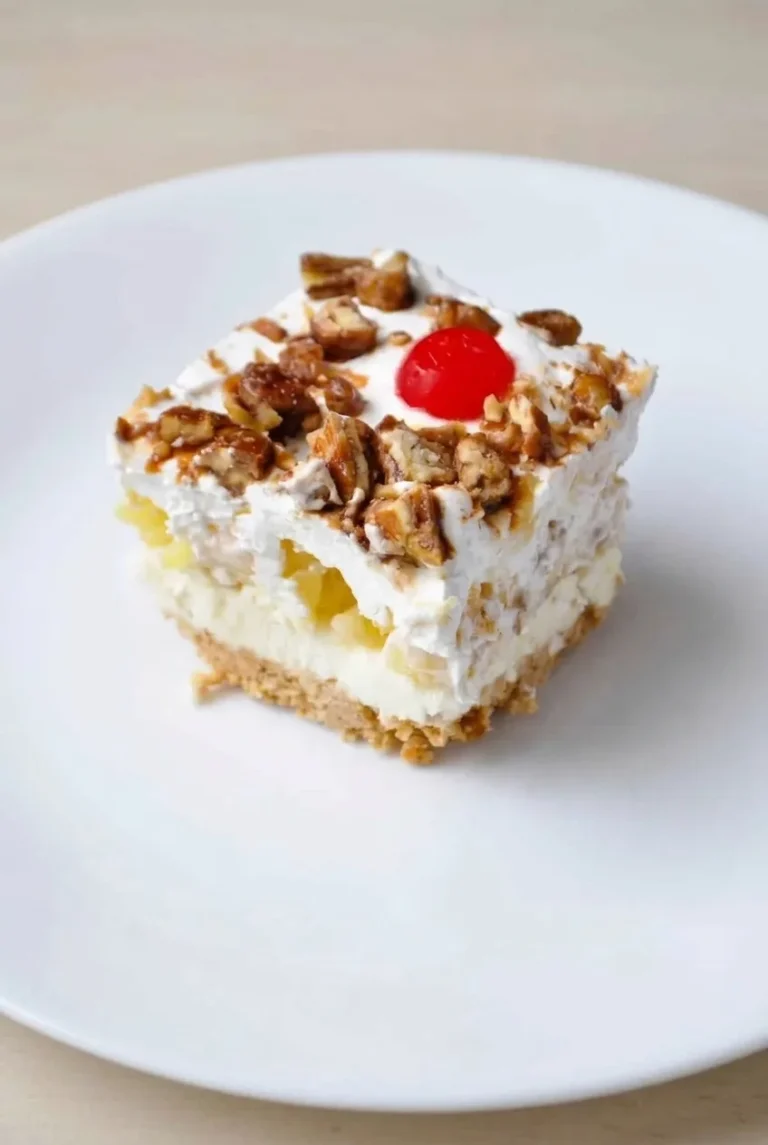
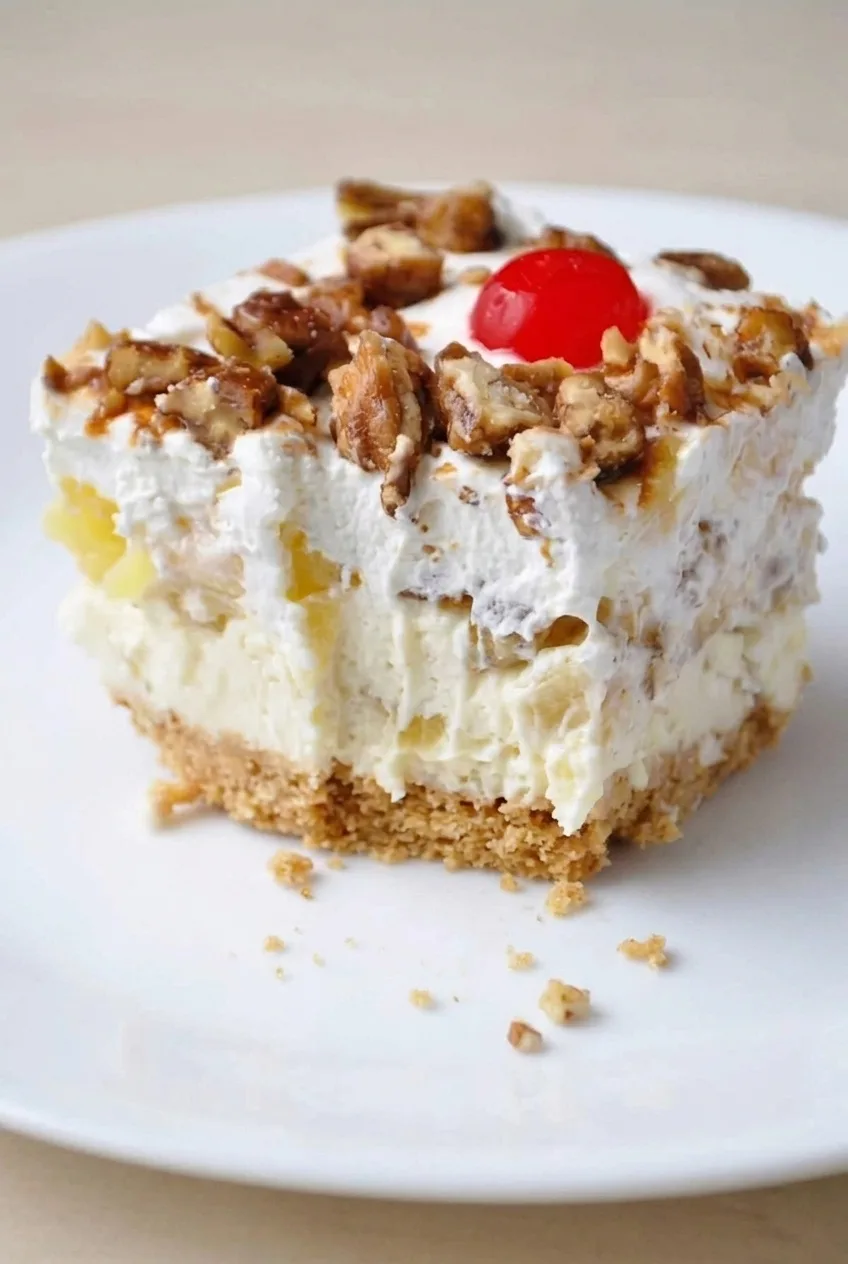
A pressed graham cracker crust supports layers of egg-free cream cheese filling, sliced bananas, crushed pineapple, and fluffy whipped topping. Cut into squares and finished with pecans and a maraschino cherry, it has the look of a banana split in a chilled pan dessert.

The two details that matter most for slices that hold together are draining the pineapple thoroughly and allowing a full 8-hour chill. Overnight is even better.

Prep time: 30 minutes | Chill time: At least 8 hours | Total time: 8 hours 30 minutes | Yield: 15 squares

Ingredients for No-Bake Banana Split Dessert

Close view of the banana split dessert’s graham crust and creamy banana-pineapple filling beneath whipped topping
  • 2 cups graham cracker crumbs (240g)
  • 1/2 cup (1 stick) unsalted butter, melted (115g)
  • 16 ounces block cream cheese, softened (two 8-ounce packages; 450g)
  • 1 cup powdered sugar (120g)
  • 1 teaspoon vanilla extract
  • 16 ounces thawed whipped topping, divided (450g)
  • 3 medium ripe but not overripe bananas, thinly sliced
  • 1 can (20 ounces) crushed pineapple, drained very well
  • 1/2 cup roughly chopped pecans (55g)
  • 15 maraschino cherries, drained and patted dry

Optional: 1 to 2 tablespoons chocolate sauce for a light drizzle just before serving.

How to Make No-Bake Banana Split Dessert

A plated square of banana split dessert with pecans and a cherry, shown with more of the plate and tabletop
  1. Drain the pineapple: Set the crushed pineapple in a fine-mesh sieve for 10 to 15 minutes while you prepare the other layers. Press gently if needed. It should still look like crushed fruit, but have little free juice.
  2. Press the crust: Stir the graham cracker crumbs and melted butter until evenly moistened. Press firmly into an even layer in a 9-by-13-inch dish. Refrigerate while you make the filling.
  3. Make the filling: Beat the softened cream cheese until smooth, then beat in the powdered sugar and vanilla. Fold in 8 ounces of the thawed whipped topping until no large streaks remain. The mixture should be thick but spreadable.
  4. Layer the fruit: Spread the filling over the crust, reaching the corners. Slice the bananas just before adding them and arrange them evenly over the filling. Distribute the drained pineapple over the bananas.
  5. Add the topping: Gently spread the remaining 8 ounces of whipped topping over the fruit, all the way to the edges. Cover the fruit without pressing the topping down into the layers.
  6. Chill: Cover the dish without letting the cover touch the topping. Keep it level in the refrigerator at 40°F (5°C) or below for at least 8 hours, preferably overnight. The center should feel set rather than loose, and a test square should hold its layers when lifted.
  7. Garnish and serve: Scatter the pecans over the top and cut into 15 squares, wiping the knife between cuts. Add a cherry to each serving and, if desired, a light drizzle of chocolate sauce. Serve chilled.

How to Keep the Layers Set

Extra pineapple juice can make the dessert watery and cause the layers to slide. If the drained fruit still looks wet, blot away excess surface moisture before layering it. Press the crust firmly, too, so the crumbs hold together when cut.

For a smooth filling, let block cream cheese soften before beating it. Cold cream cheese can leave lumps that are difficult to remove once the whipped topping has been folded in.

How to Limit Banana Browning

Slice the bananas close to assembly time and keep them between the filling and whipped topping rather than exposed on the surface. Spreading the topping to the edges helps limit contact with air, though the bananas may still soften or darken as the dessert sits.

Variations

Nut-Free Finish

Omit the pecans and keep the cherry garnish. Check packaged ingredient labels if you are avoiding nuts.

Gluten-Free Crust

Replace the graham crumbs with gluten-free graham-style crumbs and check the other packaged ingredients. Press the crust firmly; crumb texture and butter absorption can vary by brand.

Stabilized Homemade Whipped Cream

A stabilized homemade whipped cream can replace the whipped topping. Ordinary unstabilized whipped cream may not hold the same shape during a long chill.

Make-Ahead and Storage

Assemble the dessert the day before serving so it can chill overnight. Add the pecans, cherries, and optional sauce shortly before serving.

Cover leftovers and refrigerate promptly. For the best banana color and texture, serve within about 1 to 2 days; the fruit may soften or discolor after that. Freezing is not recommended for this version because the banana and whipped topping textures may change.

For another chilled layered dessert, try Classic No-Bake Tiramisu with Mascarpone Cream.

Nutrition

Approximate nutrition per square, based on 15 servings and excluding optional chocolate sauce: 410 calories, 4g protein, 25g fat, and 42g carbohydrates. Per 100g: about 270 calories, 3g protein, 17g fat, and 28g carbohydrates. Values vary with ingredient brands and portion size.

No-Bake Banana Split Dessert

A chilled layered dessert with graham cracker crust, cream cheese filling, bananas, pineapple, and whipped topping.
Course: Dessert
Cuisine: American
Prep: 30 min
Total: 510 min
Servings: 15 Calories: 410 kcal

Equipment

  • 9-by-13-inch dish
  • Fine-mesh sieve
  • Electric mixer
  • Mixing bowls
  • Knife

Ingredients

For the Crust

  • 2 cups graham cracker crumbs (240 g)
  • 1/2 cup (1 stick) unsalted butter, melted (115 g)

For the Filling

  • 16 ounces block cream cheese, softened (two 8-ounce packages; 450 g)
  • 1 cup powdered sugar (120 g)
  • 1 teaspoon vanilla extract
  • 8 ounces thawed whipped topping

For the Layers and Topping

  • 3 medium ripe but not overripe bananas, thinly sliced
  • 1 can (20 ounces) crushed pineapple, drained very well
  • 8 ounces thawed whipped topping
  • 1/2 cup roughly chopped pecans (55 g)
  • 15 maraschino cherries, drained and patted dry
  • 1 to 2 tablespoons chocolate sauce, optional

Instructions

  1. Set the crushed pineapple in a fine-mesh sieve for 10 to 15 minutes. Press gently if needed, then blot away any excess surface moisture.
  2. Stir the graham cracker crumbs and melted butter until evenly moistened. Press firmly into an even layer in a 9-by-13-inch dish and refrigerate while preparing the filling.
  3. Beat the softened cream cheese until smooth. Beat in the powdered sugar and vanilla, then fold in 8 ounces of whipped topping until no large streaks remain.
  4. Spread the filling evenly over the crust, reaching the corners.
  5. Slice the bananas just before adding them and arrange them evenly over the filling. Distribute the drained pineapple over the bananas.
  6. Gently spread the remaining 8 ounces of whipped topping over the fruit, spreading it to the edges without pressing it into the layers.
  7. Cover the dish without letting the cover touch the topping. Refrigerate level at 40°F (5°C) or below for at least 8 hours, preferably overnight, until the center is set.
  8. Scatter the pecans over the top and cut into 15 squares, wiping the knife between cuts. Add a cherry to each serving and drizzle with chocolate sauce if desired. Serve chilled.

Tips

  • Drain the pineapple thoroughly so excess juice does not make the dessert watery or cause the layers to slide.
  • Press the crust firmly so it holds together when cut.
  • Let the cream cheese soften before beating to help prevent lumps.
  • Slice the bananas just before assembly and keep them covered between the filling and topping to limit browning.
  • Allow a full 8-hour chill for slices that hold their layers.

Variations

  • Nut-Free Finish: Omit the pecans and keep the cherry garnish. Check packaged ingredient labels if avoiding nuts.
  • Gluten-Free Crust: Use gluten-free graham-style crumbs and check the other packaged ingredients.
  • Stabilized Homemade Whipped Cream: Replace the whipped topping with stabilized homemade whipped cream; ordinary unstabilized whipped cream may not hold its shape during a long chill.

Notes

Assemble the day before serving and add the pecans, cherries, and optional sauce shortly before serving. Cover leftovers and refrigerate promptly; for best banana color and texture, serve within 1 to 2 days. Freezing is not recommended.

Nutrition

Calories: 410 kcal | Protein: 4 g | Fat: 25 g | Carbohydrates: 42 g

No-Bake Peanut Butter Pie

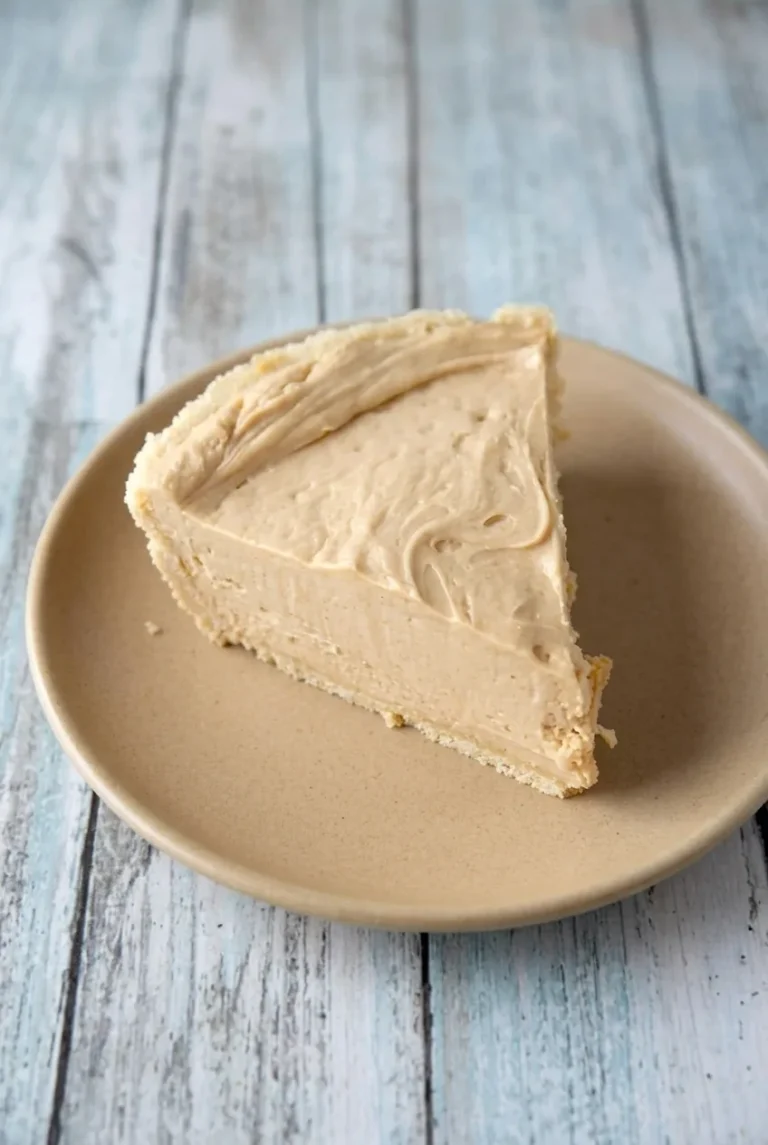
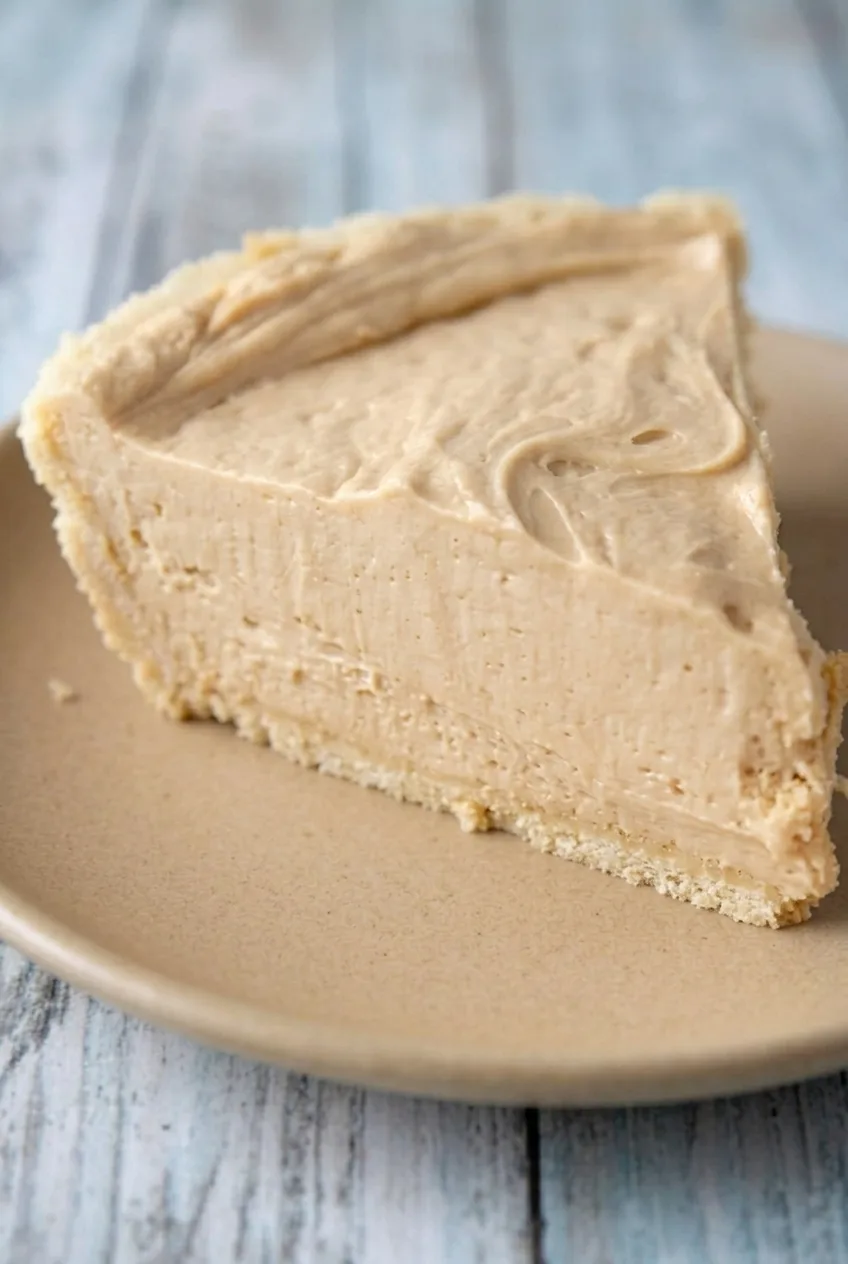
A thin graham cracker crust holds a thick, pale tan peanut butter filling that cuts into clean wedges. Cream cheese, regular creamy peanut butter, powdered sugar, and whipped topping make a smooth filling without cooking.

The pie needs at least 3 hours in the freezer, but firmness matters more than the clock: the center should be set before slicing. A brief rest at room temperature softens the filling enough to taste creamy while the wedges still hold their shape. Plan on about 20 minutes of preparation, plus freezing and a 5–10 minute rest before serving. Makes 8 slices.

Ingredients for No-Bake Peanut Butter Pie

Close view of the creamy peanut butter pie filling, spatula-swept top, and thin crumb crust.
  • 1 prepared 9-inch graham cracker crumb crust (about 225g)
  • 8 ounces cream cheese, softened to room temperature (225g)
  • 1 cup regular creamy shelf-stable peanut butter (260g)
  • 1 cup powdered sugar (120g)
  • 8 ounces frozen whipped topping, thawed but still cold (225g)

How to Make No-Bake Peanut Butter Pie

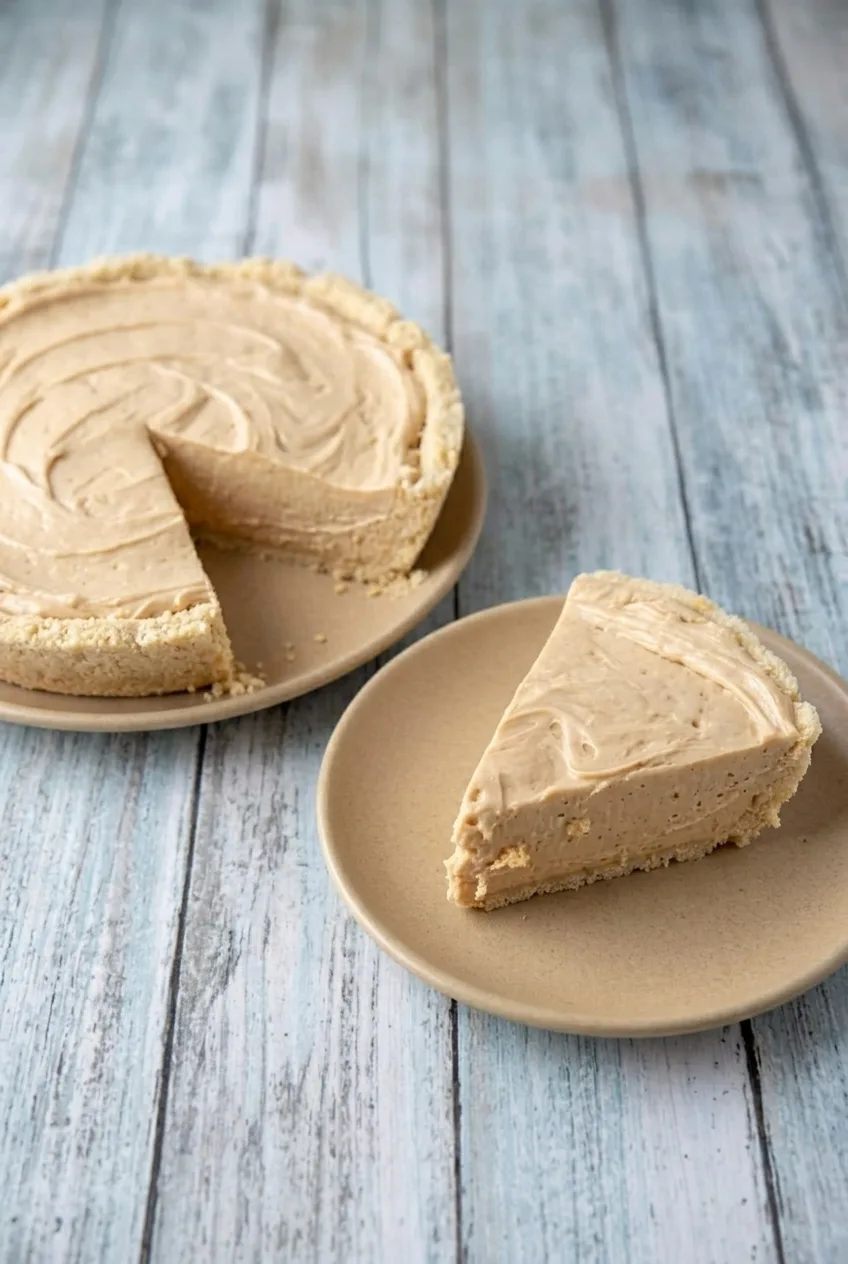
A slice of no-bake peanut butter pie beside the remaining round pie, showing its plain top and graham crust.
  1. Prepare the crust: If the prepared crust is in a flimsy foil pan, set it inside a sturdy pie dish before filling. Check that the cream cheese yields easily when pressed and the whipped topping is soft enough to fold.
  2. Mix the filling base: In a large bowl, beat the cream cheese with an electric mixer until smooth. Add the peanut butter and beat until fully blended, scraping down the bowl as needed. No cream cheese lumps should remain.
  3. Add the sugar: Gradually beat in the powdered sugar on low speed, then beat briefly until the mixture is evenly tan with no dry pockets.
  4. Fold in the whipped topping: Use a flexible spatula to fold it in gently until the filling is pale tan with no large white streaks. Do not beat it vigorously.
  5. Fill the crust: Spoon the filling into the crust and spread it evenly to the edges. Leave shallow spatula sweeps across the plain, ungarnished top.
  6. Freeze until set: Place the pie level in the freezer, uncovered, for at least 3 hours. Check that the center looks set and feels firm rather than loose or sloshy; freeze longer if needed. Once firm, cover without pressing the covering onto the surface.
  7. Rest and slice: Let the pie stand at room temperature for 5–10 minutes. Cut with a warm, dry knife, wiping the blade between slices. Serve while the wedges hold their shape and the filling is creamy rather than hard.

How to Keep the Filling Smooth

Fully softened cream cheese blends with the peanut butter more evenly than cold cream cheese. Beat those dense ingredients smooth before adding the powdered sugar, then fold in the whipped topping to keep the filling light.

Choosing Peanut Butter and Crust

Use regular creamy, shelf-stable peanut butter for this filling. Natural peanut butter is less reliable because separated oil can leave the pie loose or grainy. The prepared graham cracker crust gives the pie a pale golden crumb edge; a chocolate cookie crust works as an optional variation but makes the finished pie darker.

Freezing and Serving the Pie

Freezer temperature and filling depth can affect how long the pie takes to set. If a slice slumps after the brief rest, return the pie to the freezer until firm. Avoid leaving it at room temperature for an extended period before serving.

How to Store No-Bake Peanut Butter Pie

Keep the covered pie in the freezer between servings for the most reliable slice structure. For best quality, serve it within about 1 week. If refrigerating leftovers, keep them covered and use within about 3 days; they may be softer than freezer-stored slices. Let frozen slices rest briefly before serving. No reheating is needed.

Nutrition

Approximate nutrition per serving, based on 1 of 8 slices (about 132g): 580 calories, 12g protein, 38g fat, and 52g carbohydrates. Per 100g: approximately 440 calories, 9g protein, 29g fat, and 39g carbohydrates. Values vary with the brands used.

No-Bake Peanut Butter Pie

A graham cracker crust filled with a smooth peanut butter and cream cheese filling, set in the freezer.
Course: Dessert
Cuisine: American
Prep: 20 min
Total: 210 min
Servings: 8 Calories: 580 kcal

Equipment

  • Large mixing bowl
  • Electric mixer
  • Flexible spatula
  • Sturdy pie dish
  • Knife

Ingredients

  • 1 prepared 9-inch graham cracker crumb crust (about 225 g)
  • 8 ounces cream cheese, softened (225 g)
  • 1 cup regular creamy shelf-stable peanut butter (260 g)
  • 1 cup powdered sugar (120 g)
  • 8 ounces frozen whipped topping, thawed but still cold (225 g)

Instructions

  1. If the crust is in a flimsy foil pan, set it inside a sturdy pie dish.
  2. Beat the softened cream cheese in a large bowl until smooth.
  3. Add the peanut butter and beat until fully blended, scraping down the bowl as needed.
  4. Gradually beat in the powdered sugar on low speed, then mix briefly until evenly combined.
  5. Gently fold in the whipped topping with a flexible spatula until the filling is pale tan with no large white streaks.
  6. Spoon the filling into the crust and spread it evenly to the edges.
  7. Freeze the pie uncovered for at least 3 hours, until the center looks set and feels firm. Freeze longer if needed.
  8. Once firm, cover the pie without pressing the covering onto the surface.
  9. Rest at room temperature for 5–10 minutes, then slice with a warm, dry knife, wiping the blade between cuts.

Tips

  • Soften the cream cheese fully before mixing to prevent lumps.
  • Use regular creamy, shelf-stable peanut butter; natural peanut butter can make the filling loose or grainy.
  • Beat the cream cheese and peanut butter smooth before adding the powdered sugar.
  • Fold in the whipped topping gently to keep the filling light.
  • Check that the center is firm before slicing, and return the pie to the freezer if a slice slumps.

Variations

  • Chocolate Cookie Crust: Use a prepared chocolate cookie crust instead of the graham cracker crust for a darker finished pie.

Notes

Keep the covered pie in the freezer and serve within about 1 week for best quality. Refrigerated leftovers keep for about 3 days and may be softer. No reheating is needed.

Nutrition

Calories: 580 kcal | Protein: 12 g | Fat: 38 g | Carbohydrates: 52 g

Classic No-Bake Tiramisu

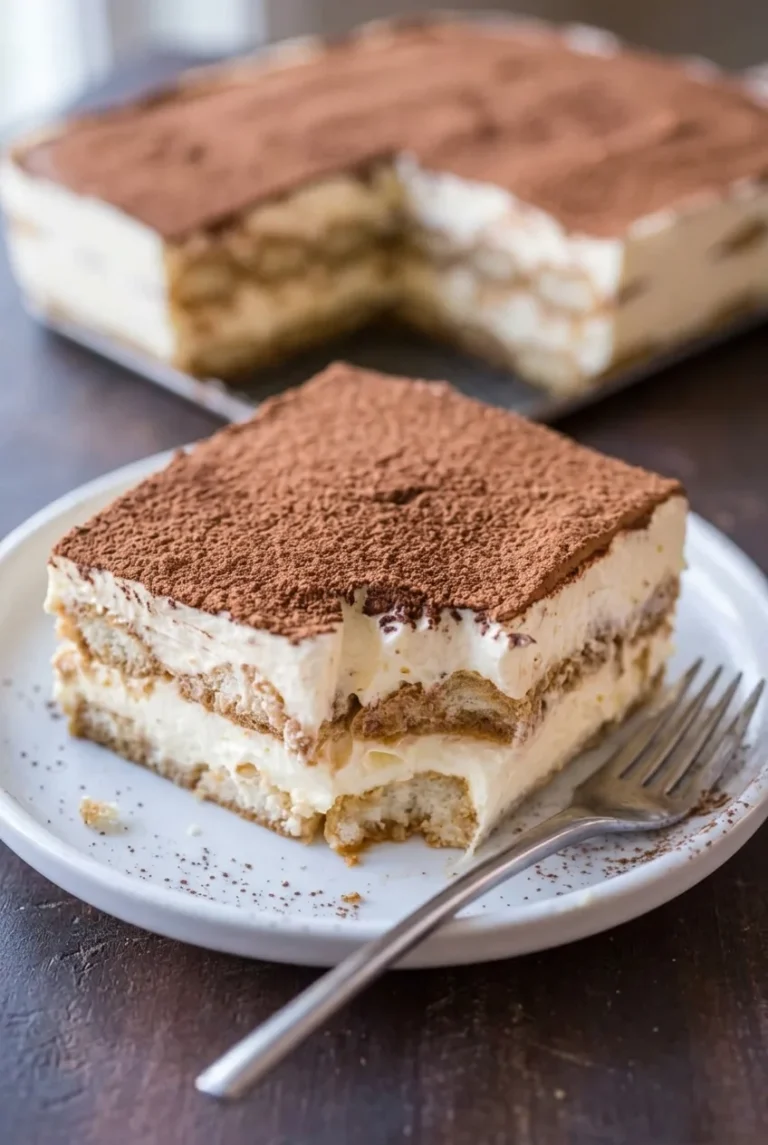
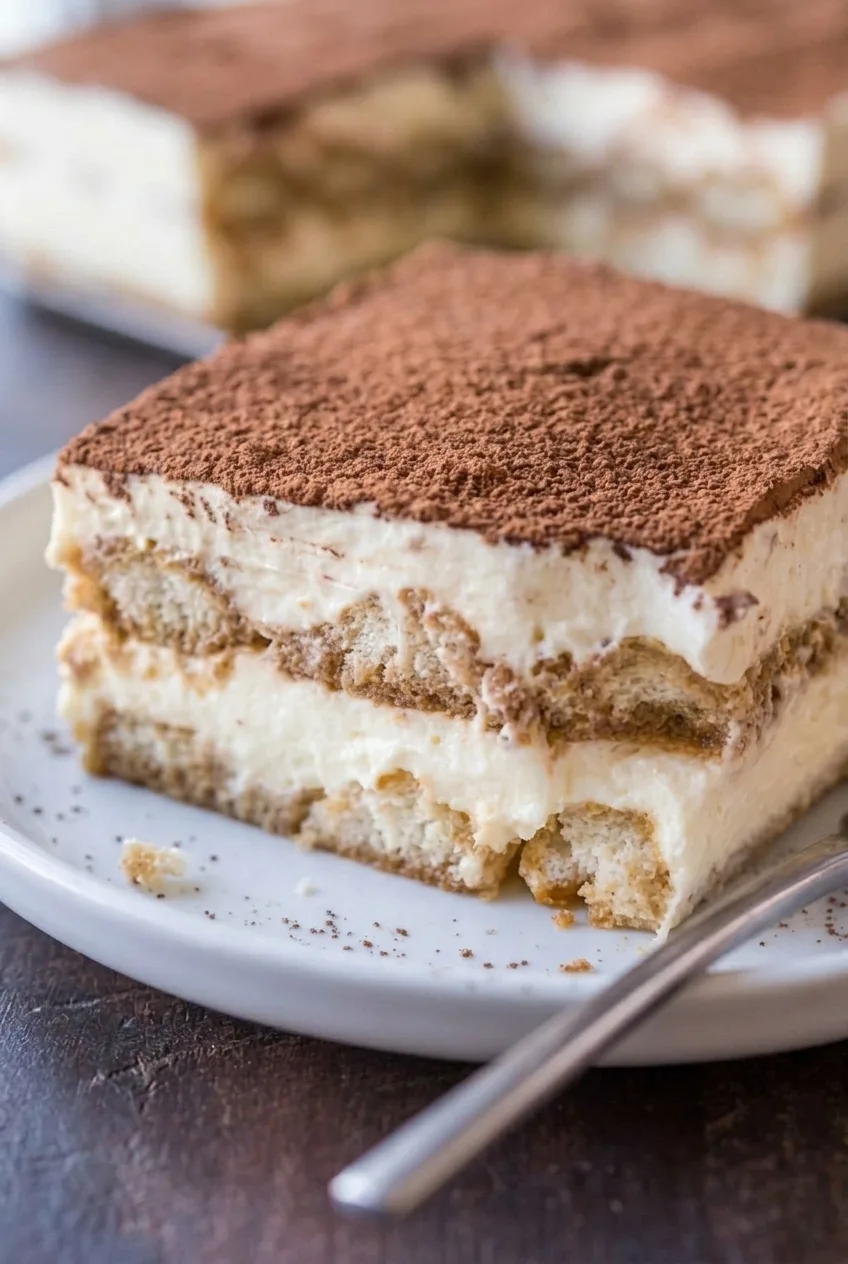
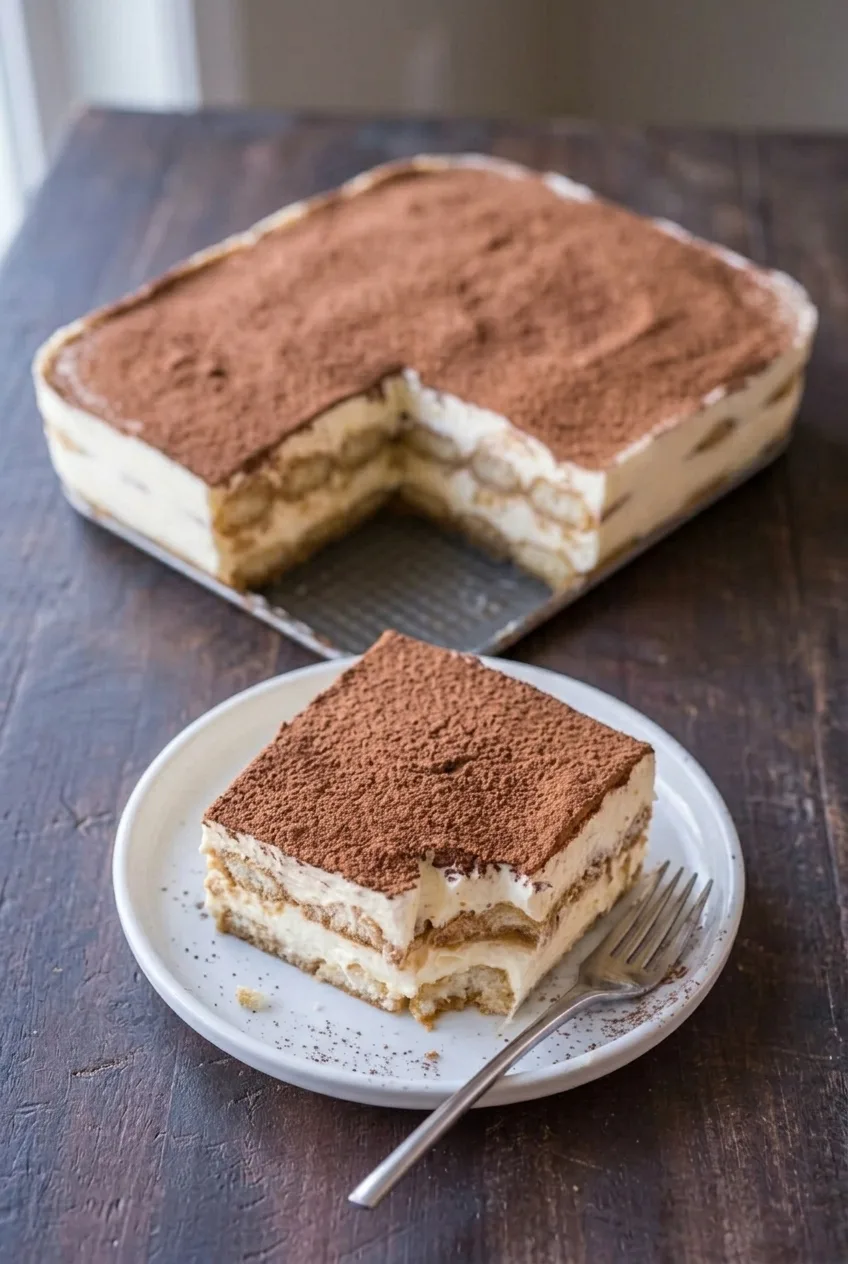
This rectangular tiramisu has two layers of coffee-dipped ladyfingers and pale mascarpone cream beneath an even coating of cocoa. The filling starts with egg yolks and sugar cooked gently over steam, then cooled before being combined with mascarpone and whipped cream. Dip the cookies briefly so they hold their shape, and chill the assembled dessert overnight for squares that show the layers when cut.

Allow about 35 minutes of prep, 8–12 minutes to cook the yolk base, and at least 8 hours to chill. Makes 12 servings.

Ingredients for Classic No-Bake Tiramisu

Close view of cocoa-dusted tiramisu showing pale mascarpone cream and coffee-soaked ladyfinger layers.
  • 6 large egg yolks
  • 3/4 cup granulated sugar (150g)
  • 16 ounces mascarpone cheese (450g)
  • 2 cups cold heavy whipping cream (480g)
  • 1 1/2 cups strong brewed coffee or espresso, cooled (360g); decaf works too
  • About 40 dry sponge-style ladyfinger cookies (400g), or enough for two layers
  • About 3 tablespoons unsweetened cocoa powder (15g), or enough to cover the top evenly

Optional: Add 1–2 tablespoons dark or golden rum to the cooled coffee, or 1 teaspoon vanilla extract to the cooled yolk base or mascarpone mixture. The tiramisu can also be made without either addition.

How to Make Classic No-Bake Tiramisu

A rectangular dish of cocoa-topped tiramisu with a square serving on a plate beside it.
  1. Prepare the coffee: Let the brewed coffee or espresso cool completely, then pour it into a wide, shallow bowl. Set out a 9-by-13-inch rectangular baking dish.
  2. Cook the yolk base: Whisk the egg yolks and sugar in a heatproof bowl set securely over a saucepan of gently simmering water. Keep the bowl above the water and whisk continuously until the mixture is pale, smooth, thickened, and reaches 160°F (70°C). Start checking after about 5 minutes; this usually takes 8–12 minutes, but use the temperature and texture rather than the clock alone.
  3. Combine with mascarpone: Remove the yolk mixture from the heat and let it cool until no longer warm, about 10–15 minutes. In another bowl, mix the mascarpone just until smooth. Mix in the cooled yolk base and the vanilla, if using, stopping as soon as they are combined.
  4. Whip the cream: Beat the cold heavy cream in a separate bowl until firm peaks hold their shape. Fold it into the mascarpone mixture in additions, just until no large streaks remain. Do not keep mixing once the filling is even.
  5. Build the first layers: Stir the rum into the cooled coffee, if using. Dip each ladyfinger quickly on both sides and transfer it straight to the dish. Arrange a close-fitting layer, trimming cookies as needed, then spread half the cream evenly over it.
  6. Add the second layers: Quickly dip enough ladyfingers to make a second layer over the cream. Spread the remaining cream smoothly to the edges.
  7. Chill: Cover without pressing the wrap onto the cream. Refrigerate for at least 8 hours, preferably overnight, until the filling holds its layers when cut.
  8. Dust and serve: Just before serving, sift a generous, even layer of cocoa over the top. Cut into squares with a sharp knife and serve cold.

Keeping the Layers Distinct

Ladyfingers absorb coffee quickly and continue to soften as the tiramisu chills. Dip them one at a time, just long enough to moisten both sides; they should still hold their shape when placed in the dish. Soaking them can make the cookie layers collapse.

Gentle heat and continuous whisking keep the yolk base smooth rather than scrambled. Let it cool before adding it to the mascarpone, and fold in the whipped cream gently to keep the filling airy. The overnight chill gives the cream time to firm and makes the dessert easier to cut into squares.

Storage and Make-Ahead

Assemble the tiramisu at least 8 hours ahead, preferably the day before. Keep it covered in the refrigerator and add the cocoa just before serving for a drier, more distinct top. Refrigerate leftovers, covered, for 3–4 days. Serve chilled; do not reheat.

Freezing is possible, but the texture after thawing is uncertain. Refrigeration is the preferred storage method.

Nutrition

Approximate nutrition per serving, based on 12 servings: 500 calories, 7g protein, 34g fat, and 42g carbohydrates. Per 100g: about 330 calories, 5g protein, 22g fat, and 28g carbohydrates. Values vary with the ingredients used and how much coffee the ladyfingers absorb.

Classic No-Bake Tiramisu

Coffee-dipped ladyfingers are layered with mascarpone cream and cocoa, then chilled until firm.
Course: Dessert
Cuisine: Italian
Prep: 35 min
Cook: 12 min
Total: 527 min
Servings: 12 Calories: 500 kcal

Equipment

  • 9-by-13-inch baking dish
  • Heatproof bowl
  • Saucepan
  • Whisk
  • Instant-read thermometer
  • Mixing bowls
  • Electric mixer
  • Shallow bowl
  • Fine-mesh sieve

Ingredients

For the mascarpone cream

  • 6 large egg yolks
  • 3/4 cup granulated sugar (150g)
  • 16 ounces mascarpone cheese (450g)
  • 2 cups cold heavy whipping cream (480g)

For assembly

  • 1 1/2 cups strong brewed coffee or espresso, cooled (360g)
  • About 40 dry sponge-style ladyfinger cookies (400g), or enough for two layers
  • About 3 tablespoons unsweetened cocoa powder (15g), or enough to cover the top evenly

Optional

  • 1–2 tablespoons dark or golden rum
  • 1 teaspoon vanilla extract

Instructions

  1. Cool the brewed coffee or espresso completely, then pour it into a wide, shallow bowl. Set out a 9-by-13-inch baking dish.
  2. Whisk the egg yolks and sugar in a heatproof bowl set securely over a saucepan of gently simmering water. Keep the bowl above the water and whisk continuously until the mixture is pale, smooth, and thickened, and reaches 160°F (70°C). Start checking after about 5 minutes; cooking usually takes 8–12 minutes.
  3. Remove the yolk mixture from the heat and cool until no longer warm, about 10–15 minutes.
  4. Mix the mascarpone in a separate bowl just until smooth. Mix in the cooled yolk base and vanilla, if using, stopping as soon as combined.
  5. Beat the cold heavy cream in another bowl until firm peaks hold their shape. Fold it into the mascarpone mixture in additions, just until no large streaks remain.
  6. Stir the rum into the cooled coffee, if using. Quickly dip each ladyfinger on both sides and arrange a close-fitting layer in the baking dish, trimming cookies as needed.
  7. Spread half the cream evenly over the ladyfingers.
  8. Quickly dip enough ladyfingers to make a second layer over the cream. Spread the remaining cream smoothly to the edges.
  9. Cover the dish without pressing the wrap onto the cream. Refrigerate for at least 8 hours, preferably overnight, until the filling holds its layers when cut.
  10. Just before serving, sift an even layer of cocoa over the top. Cut into squares with a sharp knife and serve cold.

Tips

  • Dip each ladyfinger briefly on both sides; they should hold their shape and not become soaked.
  • Whisk the yolk mixture continuously and keep the bowl above, not in, the simmering water.
  • Cool the yolk base before combining it with the mascarpone.
  • Fold in the whipped cream gently and stop once the filling is even.
  • Chill overnight for firmer layers and cleaner slices.
  • Dust with cocoa just before serving for a drier top.

Variations

  • Rum Tiramisu: Stir 1–2 tablespoons of dark or golden rum into the cooled coffee.
  • Vanilla Tiramisu: Add 1 teaspoon of vanilla extract to the cooled yolk base or mascarpone mixture.

Notes

Keep covered in the refrigerator for 3–4 days. Serve chilled and do not reheat. The yolk mixture should reach 160°F (70°C).

Nutrition

Calories: 500 kcal | Protein: 7 g | Fat: 34 g | Carbohydrates: 42 g

Easy Chocolate Mousse

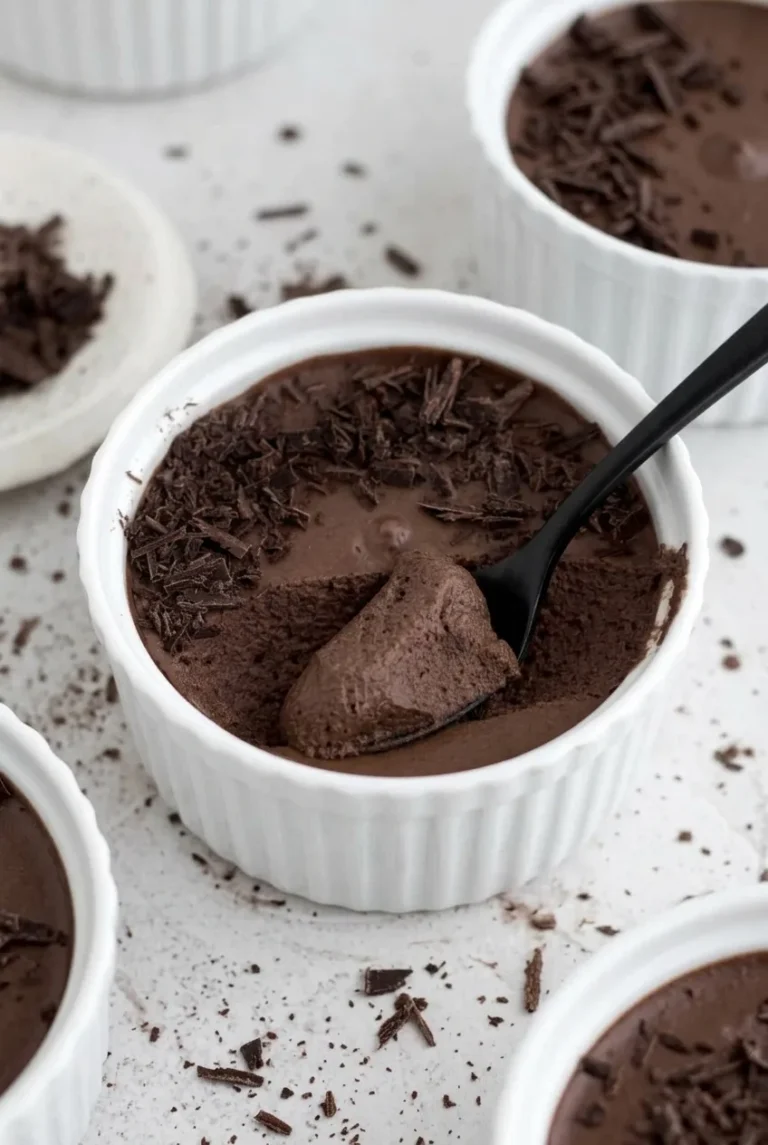
Melted chocolate and softly whipped cream make this eggless mousse airy without gelatin or pudding mix. Serve it chilled in individual ramekins, with a soft, spoonable texture and dark chocolate shavings on top.

The key is to let the chocolate base cool before folding it into the cream—but not so long that it thickens into a paste. Plan for at least four hours of chilling before serving.

Prep time: 20 minutes | Active melting time: About 5 minutes | Chill time: At least 4 hours | Total time: About 4 hours 25 minutes | Serves: 4

Ingredients for Easy Chocolate Mousse

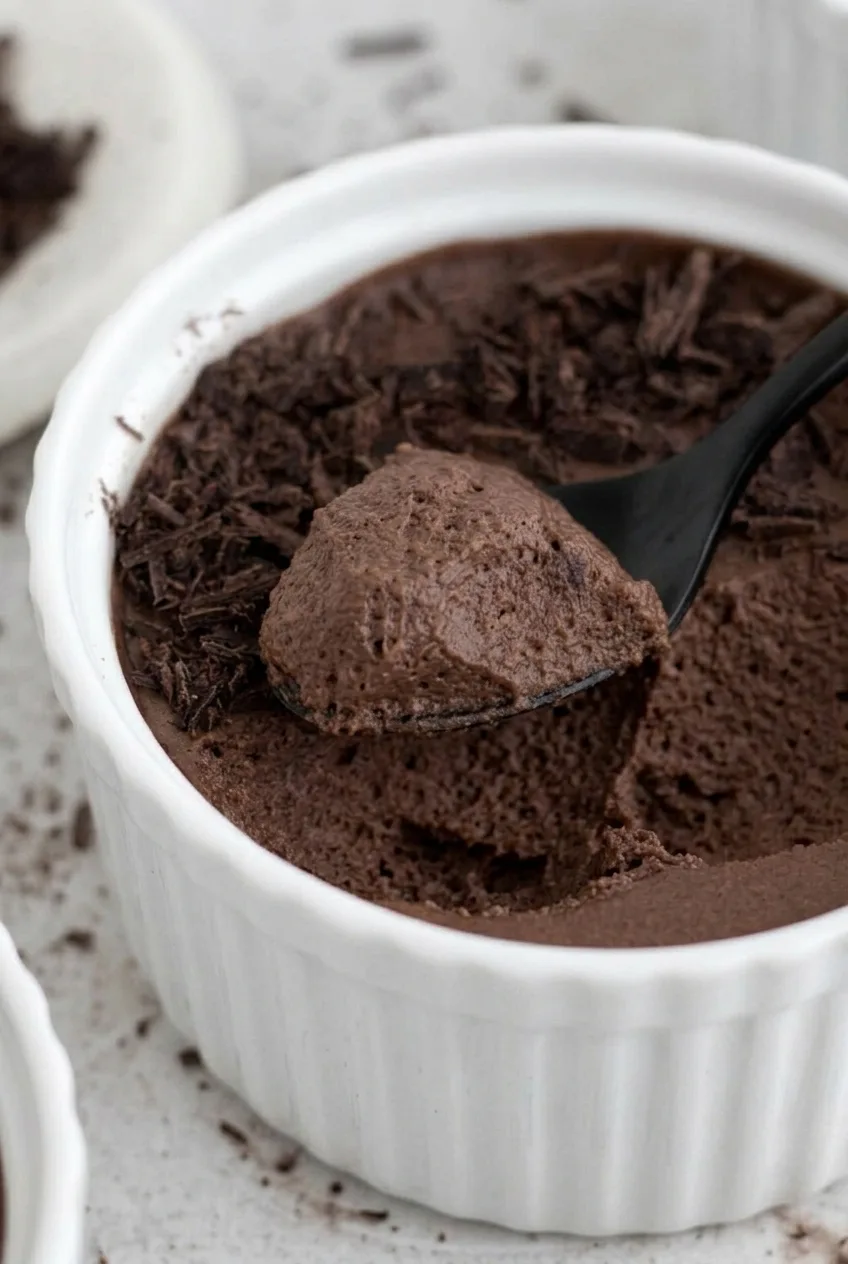
Close detail of a soft, airy spoonful of chocolate mousse beneath dark chocolate shavings.
  • 6 ounces semisweet chocolate, finely chopped (170g)
  • 1 1/2 cups heavy whipping cream, divided (360g)
  • 2 tablespoons granulated sugar (25g)
  • 1 teaspoon vanilla extract
  • Small pinch of fine salt
  • About 1 ounce semisweet or bittersweet chocolate, for shavings (30g)

Use 1/2 cup of the cream for the chocolate base and keep the remaining 1 cup cold for whipping. Bittersweet chocolate can replace the semisweet chocolate in the base for a less sweet mousse.

How to Make Easy Chocolate Mousse

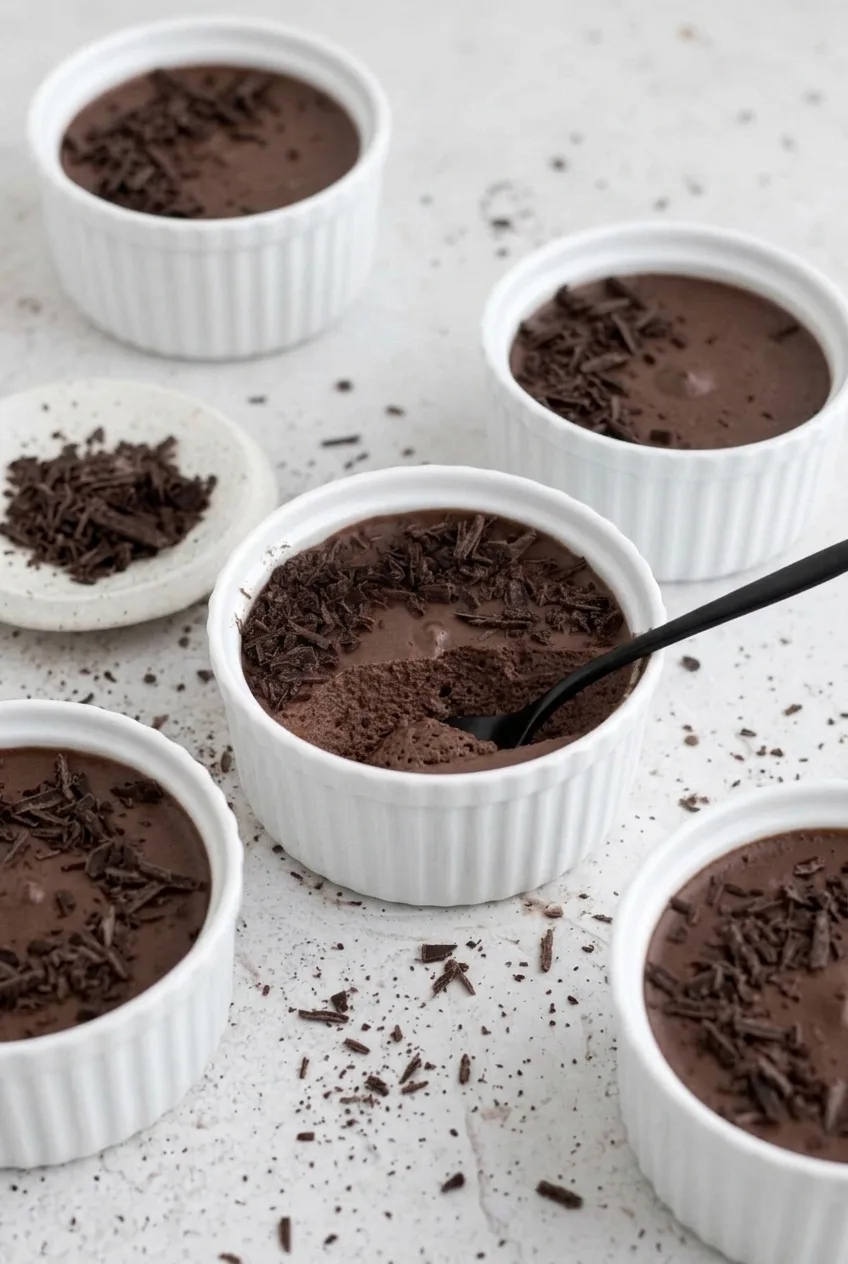
Several white ramekins of chocolate mousse with chocolate shavings, shown together on a pale speckled surface.
  1. Make the chocolate base: Place the chopped chocolate in a heat-safe bowl. Warm 1/2 cup of the cream in a small saucepan over low heat or in the microwave until steaming, but not boiling. Pour it over the chocolate, let stand briefly, then stir until smooth. If pieces remain, warm the mixture in short microwave intervals or return it to the saucepan over low heat, stirring often.
  2. Cool the chocolate: Let the mixture stand for 10 to 20 minutes, stirring occasionally, until it is no longer warm to the touch but still flows easily. If it thickens too much, warm it gently until fluid again, then let it cool before folding.
  3. Whip the cream: Beat the remaining 1 cup of cold cream with the sugar, vanilla, and salt until soft peaks form, about 2 to 4 minutes. A peak should bend over when you lift the whisk. Stop before the cream becomes stiff or grainy.
  4. Fold the mousse: Fold about one-third of the whipped cream into the cooled chocolate to loosen it. Gently fold in the remaining cream in two additions, lifting from the bottom of the bowl. Stop when the color is mostly even; beating or prolonged folding will knock out air.
  5. Portion and chill: Divide among four small ramekins, about 4 to 6 ounces each, and lightly smooth the tops. Cover and refrigerate for at least 4 hours. The mousse should be cold and softly set, with a spoonful that holds its shape without feeling hard.
  6. Garnish and serve: Use a vegetable peeler, sharp knife, or fine grater to shave the remaining chocolate over each ramekin just before serving. If the mousse feels very firm, let it stand at room temperature for 10 to 15 minutes before eating.

Serving and Storage

For a make-ahead dessert, portion and cover the mousse the day before, then add the chocolate shavings shortly before serving. If the portions are still loose after four hours, continue chilling until they are cold and softly set.

Cover and refrigerate leftovers promptly. For the best texture, serve within about 2 days. Freezing is not recommended for this version.

Nutrition

Approximate nutrition per serving, based on 4 servings: 610 calories, 4g protein, 48g fat, and 39g carbohydrates. Per 100g: about 415 calories, 3g protein, 33g fat, and 27g carbohydrates. Values vary with the chocolate and cream used.

Easy Chocolate Mousse

An eggless chocolate mousse made with melted semisweet chocolate and softly whipped cream, then chilled until softly set.
Course: Dessert
Cuisine: French
Prep: 20 min
Cook: 5 min
Total: 265 min
Servings: 4 Calories: 610 kcal

Equipment

  • Heat-safe bowl
  • Small saucepan
  • Whisk or electric mixer
  • Spatula
  • Four small ramekins
  • Vegetable peeler or fine grater

Ingredients

For the mousse

  • 6 ounces (170 g) semisweet chocolate, finely chopped
  • 1 1/2 cups (360 g) heavy whipping cream, divided
  • 2 tablespoons (25 g) granulated sugar
  • 1 teaspoon vanilla extract
  • Small pinch of fine salt

For garnish

  • About 1 ounce (30 g) semisweet or bittersweet chocolate

Instructions

  1. Place the chopped chocolate in a heat-safe bowl.
  2. Warm 1/2 cup of the cream until steaming but not boiling. Pour it over the chocolate, let stand briefly, then stir until smooth.
  3. If chocolate pieces remain, warm the mixture in short microwave intervals or in a saucepan over low heat, stirring often.
  4. Let the chocolate mixture cool for 10 to 20 minutes, stirring occasionally, until it is no longer warm but still flows easily. If it thickens too much, warm it gently until fluid, then cool it again.
  5. Beat the remaining 1 cup of cold cream with the sugar, vanilla, and salt until soft peaks form, about 2 to 4 minutes.
  6. Fold about one-third of the whipped cream into the cooled chocolate to loosen it.
  7. Gently fold in the remaining whipped cream in two additions, stopping when the color is mostly even.
  8. Divide the mousse among four small ramekins, about 4 to 6 ounces each, and smooth the tops lightly.
  9. Cover and refrigerate for at least 4 hours, until cold and softly set.
  10. Shave the remaining chocolate over the mousse just before serving.

Tips

  • Keep 1 cup of the cream cold for whipping while using the other 1/2 cup for the chocolate base.
  • Cool the chocolate base until it is no longer warm but still flows easily before folding.
  • Whip the cream only to soft peaks; stiff or grainy cream can affect the mousse texture.
  • Fold gently and stop once the color is mostly even to keep the mixture airy.
  • If the mousse feels very firm, let it stand at room temperature for 10 to 15 minutes before serving.

Variations

  • Bittersweet Chocolate Mousse: Replace the semisweet chocolate in the mousse base with bittersweet chocolate for a less sweet result.

Notes

Cover and refrigerate leftovers promptly; serve within about 2 days for the best texture. Freezing is not recommended. Approximate nutrition per 100 g: 415 calories, 3 g protein, 33 g fat, and 27 g carbohydrates.

Nutrition

Calories: 610 kcal | Protein: 4 g | Fat: 48 g | Carbohydrates: 39 g

Creamy Sausage and Spinach Pasta

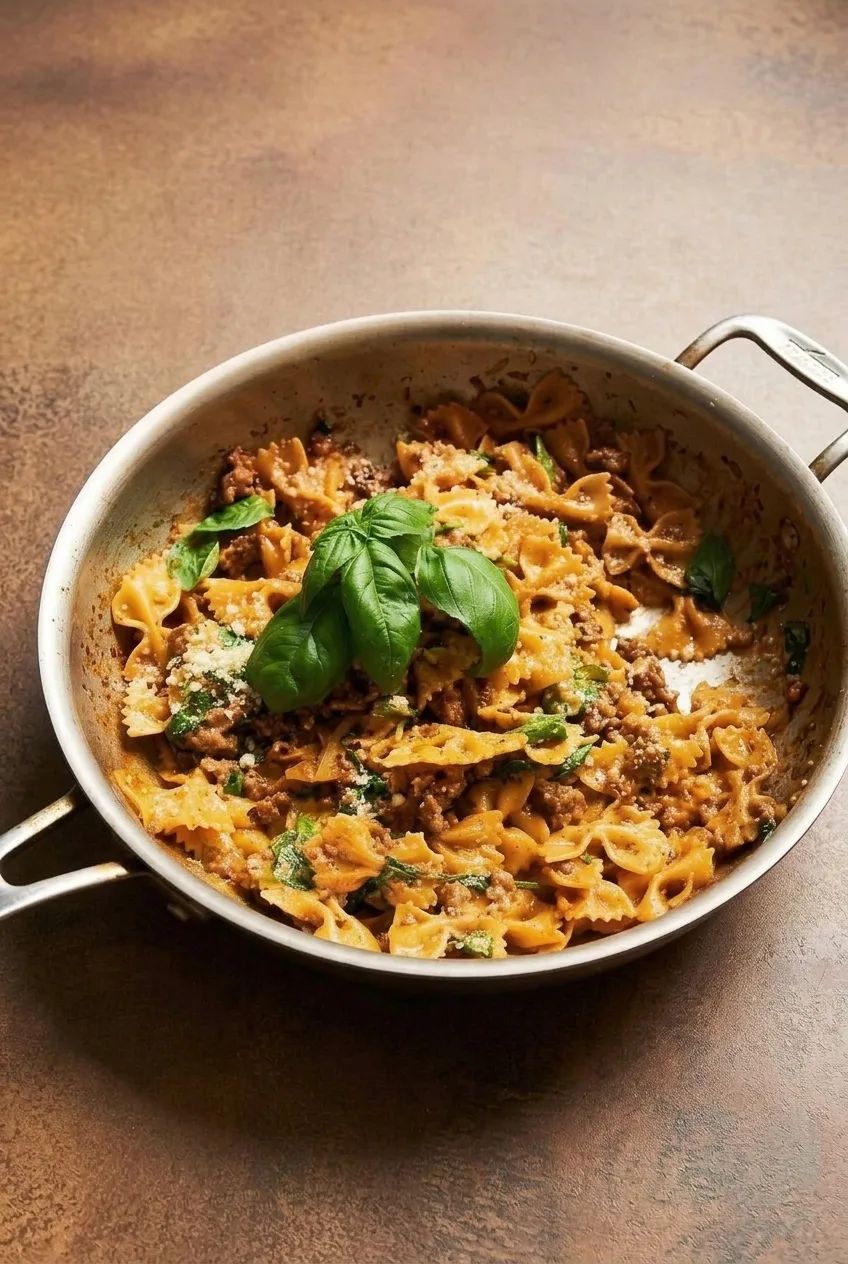
Farfalle, browned Italian sausage, and spinach are tossed in a creamy Parmesan sauce tinted orange-red with a little tomato paste. The sauce should cling to the bow ties without pooling in the skillet.

Boil the farfalle separately so you can stop it at al dente, then give it a brief toss in the sauce. Save some pasta water before draining: a splash will loosen the sauce if the pasta absorbs too much.

Makes 4 to 6 servings. Prep: 15 minutes. Cook: about 25 minutes.

Ingredients

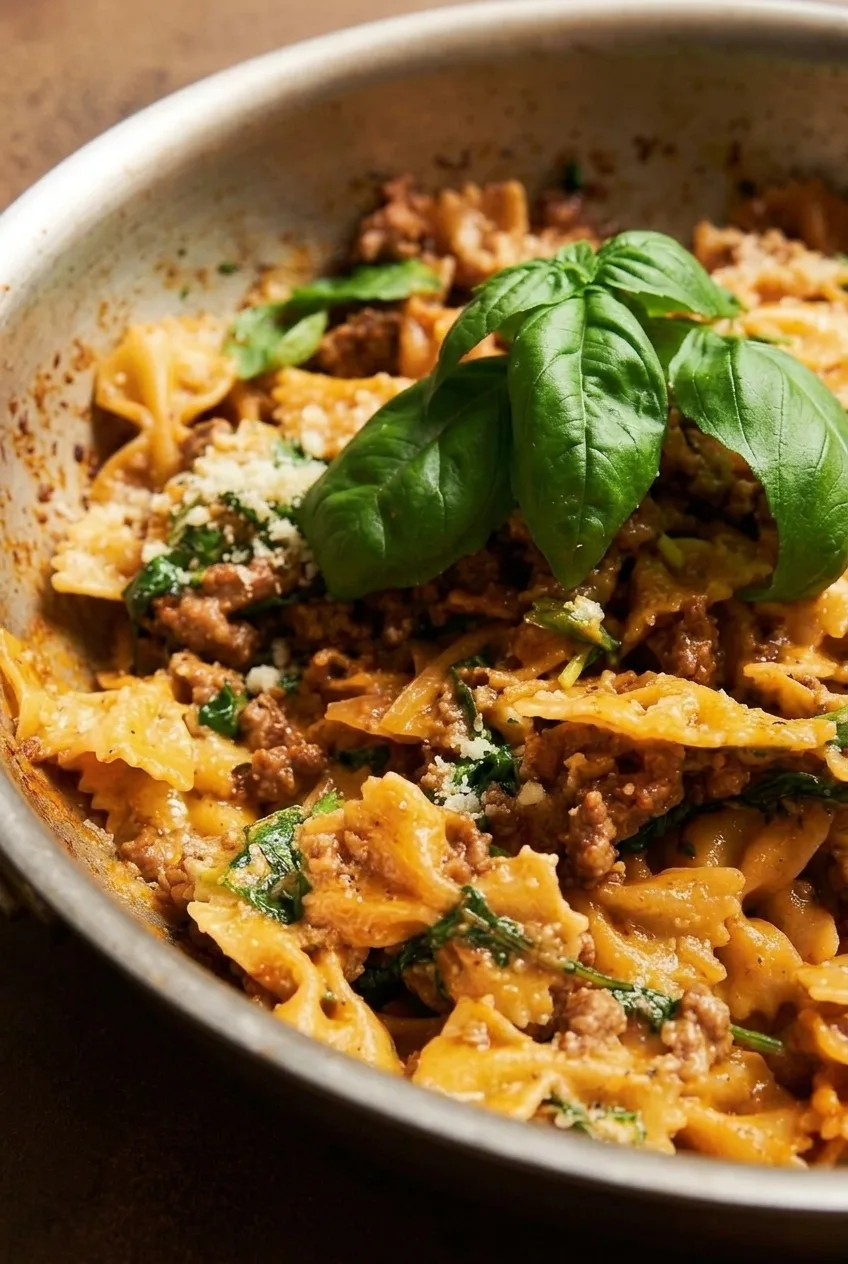
Close-up of creamy farfalle coated in sauce with browned sausage, wilted spinach, Parmesan, and basil
  • 12 ounces farfalle (340g)
  • Kosher salt, for the pasta water and to taste
  • 1 teaspoon olive oil, plus more only if needed
  • 1 pound bulk Italian sausage or sausage removed from casings (450g)
  • 1 small yellow onion, finely diced (about 100g)
  • 3 garlic cloves, minced
  • 2 tablespoons tomato paste
  • 1/2 cup low-sodium chicken broth
  • 3/4 cup heavy cream
  • 1/4 teaspoon black pepper, or to taste
  • 1/2 cup finely grated Parmesan (about 50g), plus more for serving
  • 5 ounces fresh baby spinach (about 140g)
  • 1 small bunch fresh basil (about 1/2 cup loosely packed leaves)
  • Optional: up to 1/4 teaspoon red pepper flakes, preferably with mild sausage

How to Make Creamy Sausage and Spinach Pasta

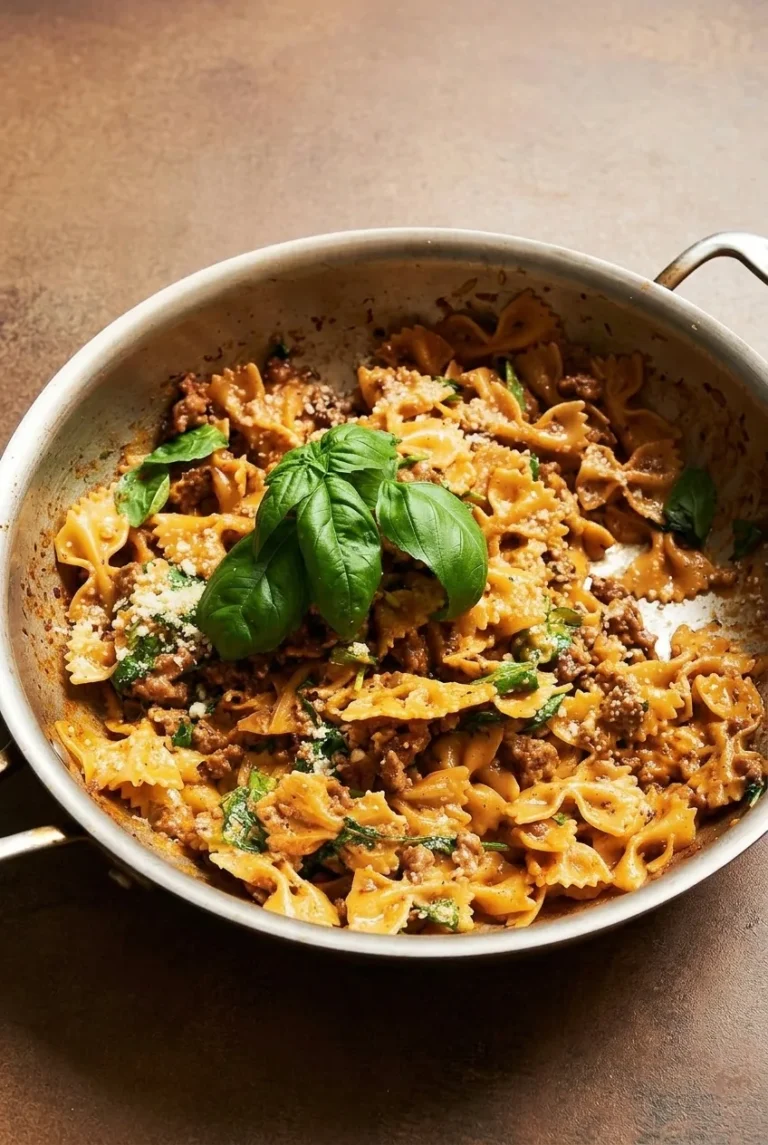
Wide view of a full skillet of creamy sausage and spinach farfalle on a warm brown countertop
  1. Boil the farfalle: Cook in a large pot of well-salted boiling water according to the package directions. Begin checking 1 to 2 minutes before the lower end of the package’s time range. The pasta should be tender but still firm at the center. Reserve at least 1 cup of pasta water, then drain.
  2. Brown the sausage: While the pasta cooks, warm a wide 12-inch skillet over medium heat. Add the olive oil and sausage. Break the sausage into small crumbles and cook uncovered over medium to medium-high heat for 6 to 8 minutes, stirring as it browns. Lower the heat if it starts to scorch. The sausage should be browned with no pink remaining; ground pork sausage should reach 160°F (70°C) if checked with a thermometer. Spoon off excess fat, leaving a thin coating in the skillet.
  3. Make the sauce: Add the onion and cook for 3 to 4 minutes, until softened. Stir in the garlic, tomato paste, and optional red pepper flakes; cook briefly, until fragrant. Pour in the broth and scrape up the browned bits. Stir in the cream and black pepper, reduce the heat to medium-low, and bring to a gentle simmer rather than a hard boil.
  4. Coat the pasta: Add the drained farfalle and 1/2 cup Parmesan. Toss uncovered over low to medium-low heat for 1 to 2 minutes, until the sauce lightly coats the pasta. Add reserved pasta water a splash at a time if the sauce looks too thick.
  5. Wilt the spinach: Fold it in by the handful and toss over low heat or residual heat for 1 to 2 minutes, just until wilted and still green. Turn off the heat. Tear in a few basil leaves if desired, reserving the rest for serving. Taste and adjust the salt and pepper.
  6. Serve: Scatter more Parmesan over the pasta and place a generous cluster of fresh basil leaves in the center. Serve family-style from the skillet while the sauce is glossy and moist.

Why Boil the Farfalle Separately?

Farfalle cooking times vary by brand, and boiling it separately makes its texture easier to check. The short skillet toss coats the pasta without leaving it to simmer until soft. A one-pot method would need different liquid amounts and timing; don’t apply them to this recipe.

Keeping the Sauce Creamy

Pasta continues to absorb liquid after it leaves the heat. If the sauce tightens before serving, toss in a little reserved pasta water until it coats the farfalle again. It should be moist, not soupy.

Sausage and Spinach Options

Mild Italian sausage gives a gentler result; hot sausage adds more heat, so reduce or omit the red pepper flakes if using it. Spoon off excess rendered fat after browning, but keep a thin coating in the skillet to cook the onion.

Fresh spinach needs only a short wilt at the end. To use frozen spinach, thaw it, squeeze out excess moisture, and add it near the end just long enough to heat through.

For another creamy farfalle dinner, try Creamy Mushroom Pasta with Farfalle. For a spicier tomato-cream pasta, see Gigi Hadid Spicy Vodka Pasta with Creamy Penne.

Storage and Reheating

Refrigerate leftovers in an airtight container for 3 to 4 days. Reheat gently in a skillet over medium-low heat, stirring often and adding a splash of cream or broth to loosen the sauce. To microwave, heat in short intervals and stir between them, adding a little liquid if needed.

Freezing is not recommended as the default because creamy pasta may dry out or lose its texture.

Nutrition

Approximate nutrition per serving, based on 1/6 of the recipe: 600 calories, 24g protein, 36g fat, and 48g carbohydrates. Approximate nutrition per 100g: 210 calories, 8g protein, 12g fat, and 16g carbohydrates. Values vary with the sausage, cream, and Parmesan used.

Creamy Sausage and Spinach Pasta

Farfalle, browned Italian sausage, and spinach are tossed in a creamy Parmesan and tomato sauce.
Course: Main Course
Cuisine: Italian
Prep: 15 min
Cook: 25 min
Total: 40 min
Servings: 6 Calories: 600 kcal

Equipment

  • Large pot
  • Colander
  • 12-inch skillet
  • Measuring cup

Ingredients

Pasta

  • 12 ounces farfalle (340 g)
  • Kosher salt, for the pasta water and to taste

Sauce

  • 1 teaspoon olive oil, plus more only if needed
  • 1 pound bulk Italian sausage or sausage removed from casings (450 g)
  • 1 small yellow onion, finely diced (about 100 g)
  • 3 garlic cloves, minced
  • 2 tablespoons tomato paste
  • 1/2 cup low-sodium chicken broth
  • 3/4 cup heavy cream
  • 1/4 teaspoon black pepper, or to taste
  • Optional: up to 1/4 teaspoon red pepper flakes, preferably with mild sausage

To Finish

  • 1/2 cup finely grated Parmesan (about 50 g), plus more for serving
  • 5 ounces fresh baby spinach (about 140 g)
  • 1 small bunch fresh basil (about 1/2 cup loosely packed leaves)

Instructions

  1. Bring a large pot of well-salted water to a boil. Cook the farfalle according to package directions, beginning to check 1 to 2 minutes before the lower end of the suggested time. Cook until tender but still firm at the center.
  2. Reserve at least 1 cup of pasta water, then drain the farfalle.
  3. While the pasta cooks, warm a 12-inch skillet over medium heat. Add the olive oil and sausage, breaking the sausage into small crumbles.
  4. Cook uncovered for 6 to 8 minutes over medium to medium-high heat, stirring as it browns. Lower the heat if it starts to scorch. Cook until browned with no pink remaining; ground pork sausage should reach 160°F (70°C). Spoon off excess fat, leaving a thin coating in the skillet.
  5. Add the onion and cook for 3 to 4 minutes, until softened.
  6. Stir in the garlic, tomato paste, and optional red pepper flakes. Cook briefly, until fragrant.
  7. Pour in the broth and scrape up the browned bits. Stir in the cream and black pepper, reduce the heat to medium-low, and bring to a gentle simmer.
  8. Add the drained farfalle and 1/2 cup Parmesan. Toss uncovered over low to medium-low heat for 1 to 2 minutes, until the sauce lightly coats the pasta. Add reserved pasta water a splash at a time if the sauce is too thick.
  9. Fold in the spinach by the handful and toss over low or residual heat for 1 to 2 minutes, just until wilted and still green. Turn off the heat.
  10. Tear in a few basil leaves if desired, reserving the rest for serving. Taste and adjust the salt and pepper.
  11. Scatter more Parmesan over the pasta and serve with fresh basil leaves.

Tips

  • Check the farfalle early so it stays al dente before the skillet toss.
  • Reserve pasta water before draining; add it a splash at a time to loosen a thick sauce.
  • Keep the cream at a gentle simmer rather than letting it boil hard.
  • Spoon off excess sausage fat but leave a thin coating in the skillet for cooking the onion.
  • Add fresh spinach at the end and cook only until wilted.

Variations

  • Hot Sausage Version: Use hot Italian sausage and reduce or omit the red pepper flakes.
  • Frozen Spinach Version: Thaw frozen spinach, squeeze out excess moisture, and add it near the end just long enough to heat through.

Notes

Refrigerate leftovers in an airtight container for 3 to 4 days. Reheat gently with a splash of cream or broth, or microwave in short intervals and stir between them. Freezing is not recommended because the creamy pasta may dry out or lose its texture.

Nutrition

Calories: 600 kcal | Protein: 24 g | Fat: 36 g | Carbohydrates: 48 g

Lemon Basil Parmesan Pasta Salad

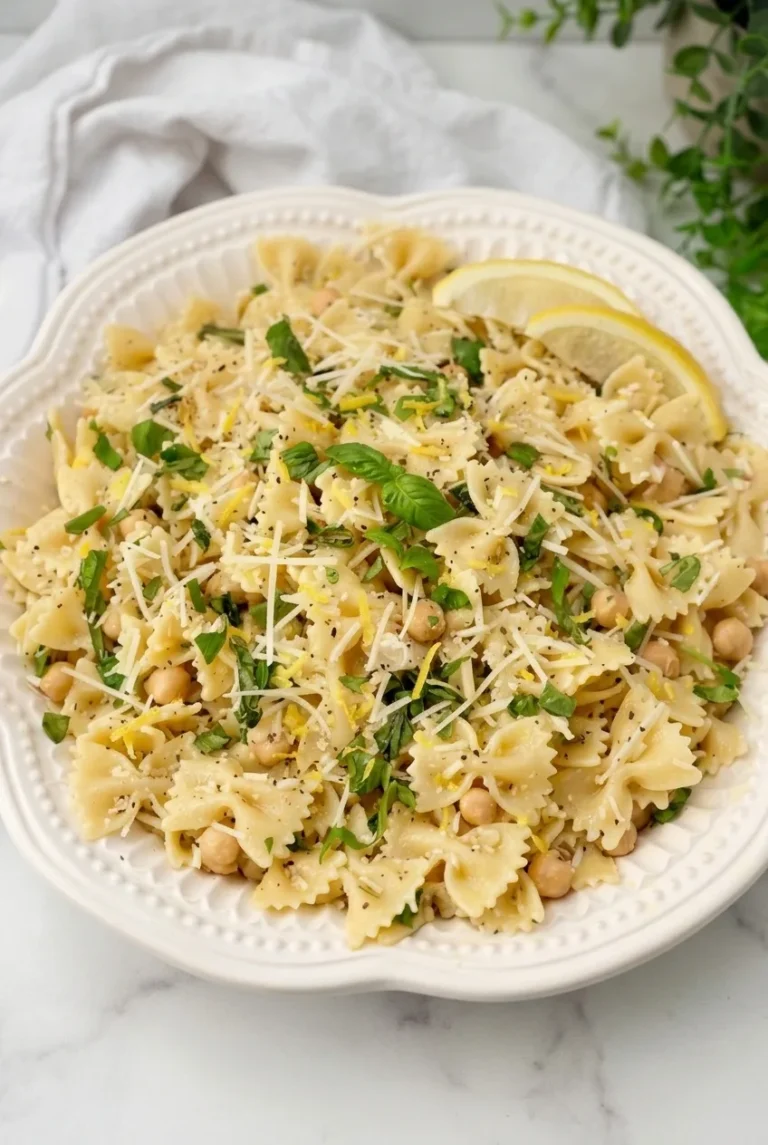
Farfalle and chickpeas make up this lemon basil Parmesan pasta salad, with a light olive oil dressing that leaves the bow ties distinct rather than heavily coated. Fresh basil, Parmesan, lemon zest, and black pepper finish the platter. Serve it chilled or at room temperature, with lemon wedges for anyone who wants an extra squeeze.

The key is to drain the pasta while it still holds its shape. If you rinse it for a cold salad, let it drain thoroughly before adding the dressing so the salad stays glossy, not watery.

Ingredients

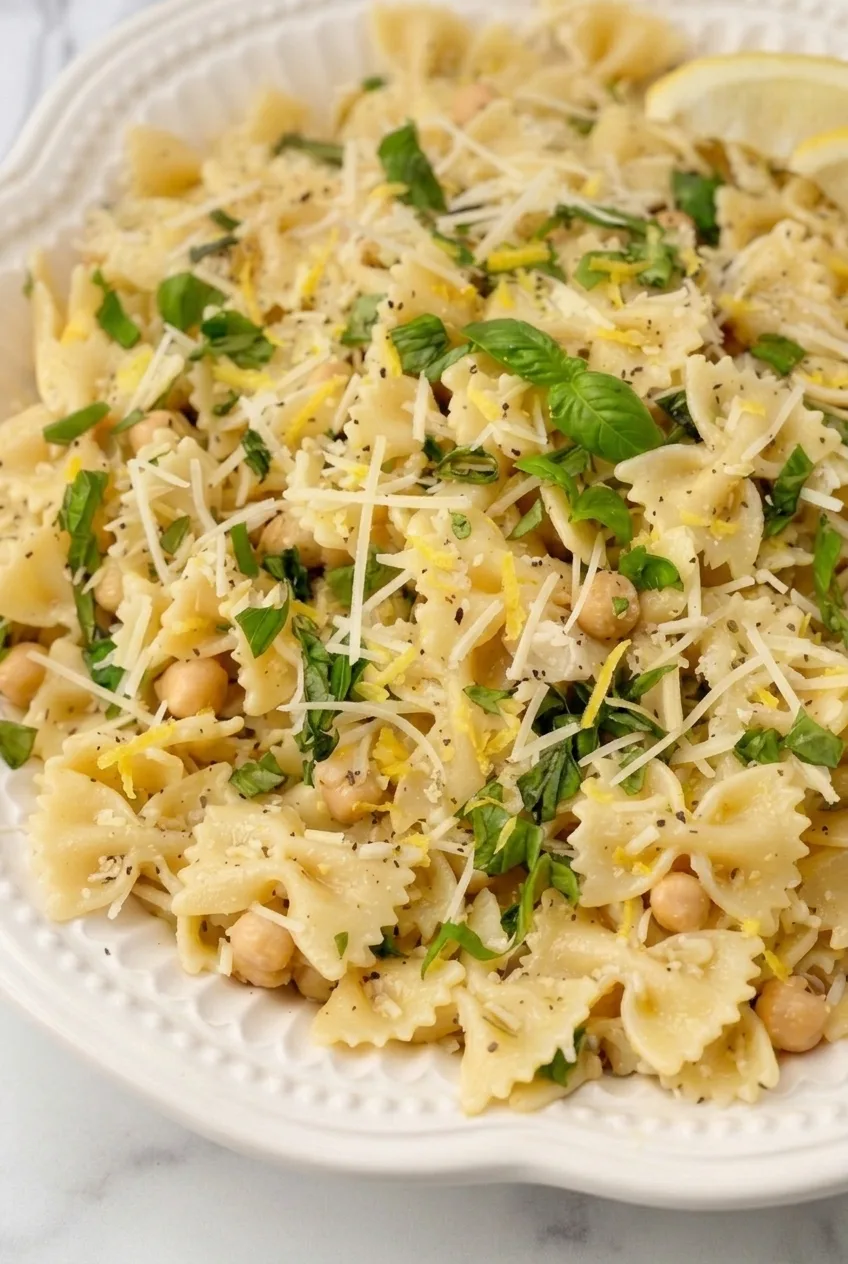
Close-up of farfalle and chickpeas with fresh basil, Parmesan strands, lemon zest, and pepper
  • 8 ounces farfalle pasta (225g)
  • Salt, for the pasta water
  • 1 (15-ounce) can chickpeas, drained and rinsed
  • 1/4 cup extra-virgin olive oil
  • 3 tablespoons fresh lemon juice, plus more to taste
  • 1 teaspoon finely grated lemon zest, plus a little for garnish
  • 1 small garlic clove, finely grated or minced
  • 1/2 teaspoon kosher salt
  • 1/4 teaspoon freshly ground black pepper, plus more to taste
  • 1/2 cup chopped or torn fresh basil leaves, plus a few whole leaves
  • 3/4 cup finely grated or shaved Parmesan cheese, divided
  • 4 small lemon wedges, from 1 lemon

How to Make Lemon Basil Parmesan Pasta Salad

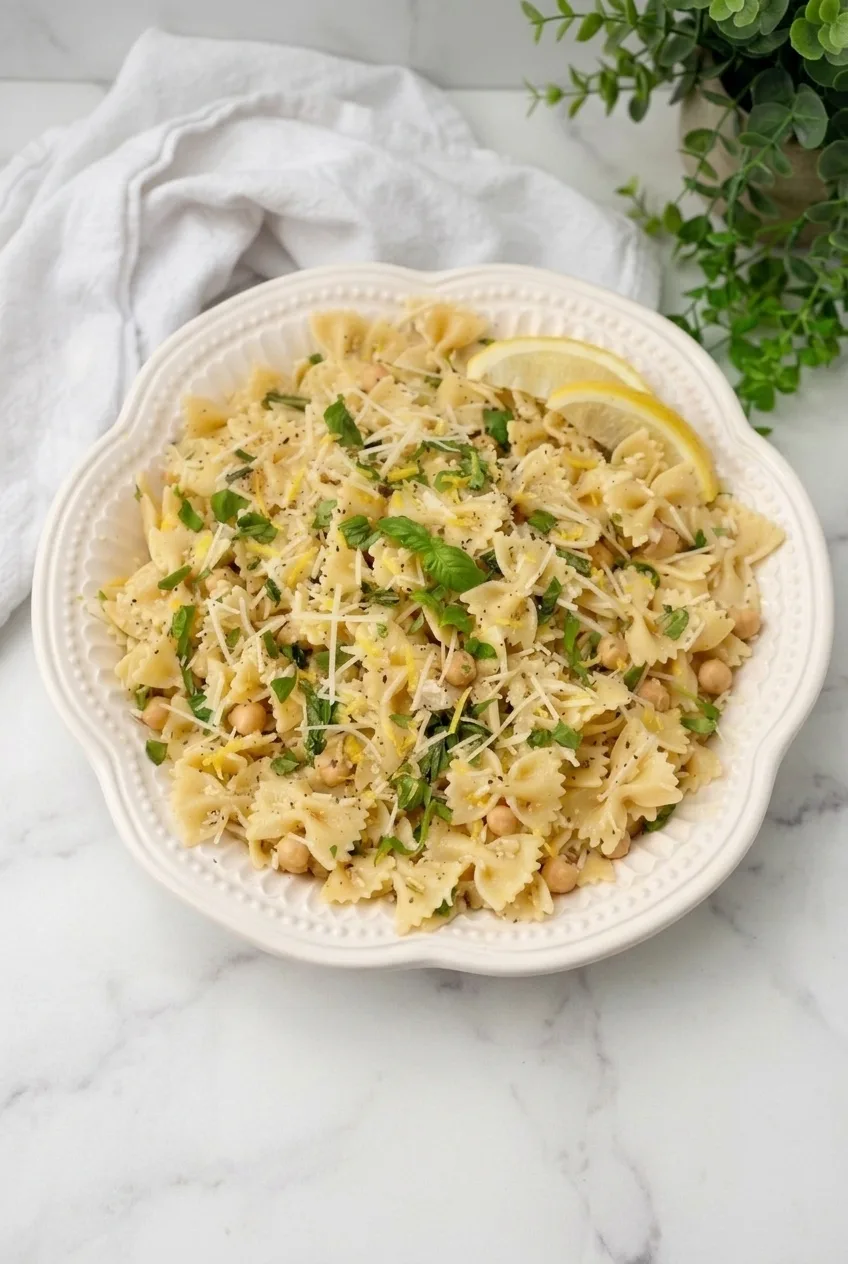
A full platter of lemon basil Parmesan pasta salad with chickpeas on a pale surface
  1. Cook the farfalle: Bring a large pot of salted water to a boil over high heat. Add the pasta and cook uncovered at a steady boil according to the package directions. Stir after adding it and occasionally as it cooks. Begin checking 1 to 2 minutes before the package’s minimum time; drain when tender but still holding its bow-tie shape.
  2. Cool and drain: For a cold salad, briefly rinse the pasta with cool water. Shake the colander and let the pasta drain thoroughly. For room-temperature service, skip the rinse and let the drained pasta cool before assembling.
  3. Make the dressing: Whisk together the olive oil, lemon juice, lemon zest, garlic, kosher salt, and pepper in a small bowl. Taste and adjust the lemon or seasoning as needed.
  4. Dress the pasta and chickpeas: Add both to a large bowl. Pour in most of the dressing, saving a little in case the salad needs refreshing after chilling. Toss gently until the pasta and chickpeas are lightly coated, with no liquid pooling at the bottom.
  5. Add basil and Parmesan: Fold in most of the chopped basil and about half the Parmesan. Keep the remaining basil and cheese for the top.
  6. Finish and serve: Spoon the salad into a loose mound on a large platter, leaving the chickpeas visible among the pasta. Scatter the reserved basil, Parmesan, a little extra lemon zest, and black pepper over the top. Set the lemon wedges along the edge. Serve at room temperature or refrigerate until ready to serve.

How to Keep the Pasta from Getting Soft

Package times vary, so check the farfalle early rather than cooking until it feels very soft. It should be tender but not floppy when drained; it can soften further as it sits with the dressing. A cool rinse is useful for this chilled version, but water left on the pasta will dilute the lemon dressing.

Variations

  • Green peas: Add 1/2 cup briefly cooked and cooled fresh or frozen peas. Avoid canned peas if you want a firmer texture.
  • Toasted pine nuts: Scatter 2 tablespoons over the salad just before serving. Watch them closely while toasting; they brown quickly.
  • Vegan: Replace the Parmesan with dairy-free Parmesan-style cheese and adjust the salt to taste.

If farfalle is unavailable, another short shape such as rotini, penne, gemelli, or fusilli will work, though the finished salad will look different.

Make-Ahead and Serving

To make the salad ahead, refrigerate the dressed pasta and chickpeas, but hold back some basil and Parmesan until just before serving. If the chilled salad looks dry, toss it gently with the reserved dressing or a small splash of olive oil and lemon juice.

Serve as a side dish or light lunch with grilled chicken, steak, or barbecue tofu. For another pasta-salad option, try Sun-Dried Tomato Pasta Salad with Artichokes.

How to Store Leftovers

Store leftovers in an airtight container in the refrigerator for up to three days. The basil may lose some of its fresh appearance. Add any reserved basil and Parmesan when serving, and refresh the salad with a little olive oil and lemon juice if needed.

Nutrition

Approximate nutrition per serving, based on 1 of 6 side-dish servings: 325 calories, 12g protein, 12g fat, and 38g carbohydrates. Per 100g: approximately 200 calories, 7g protein, 7g fat, and 24g carbohydrates. Values vary with the ingredients used and portion size.

Lemon Basil Parmesan Pasta Salad

Farfalle and chickpeas are tossed with a light lemon dressing, fresh basil, and Parmesan.
Course: Salad
Cuisine: Italian
Prep: 15 min
Cook: 12 min
Total: 27 min
Servings: 6 Calories: 325 kcal

Equipment

  • Large pot
  • Colander
  • Small bowl
  • Whisk
  • Large mixing bowl
  • Serving platter

Ingredients

  • 8 ounces farfalle pasta (225g)
  • Salt, for the pasta water
  • 1 (15-ounce) can chickpeas, drained and rinsed
  • 1/4 cup extra-virgin olive oil
  • 3 tablespoons fresh lemon juice, plus more to taste
  • 1 teaspoon finely grated lemon zest, plus a little for garnish
  • 1 small garlic clove, finely grated or minced
  • 1/2 teaspoon kosher salt
  • 1/4 teaspoon freshly ground black pepper, plus more to taste
  • 1/2 cup chopped or torn fresh basil leaves, plus a few whole leaves
  • 3/4 cup finely grated or shaved Parmesan cheese, divided
  • 4 small lemon wedges, from 1 lemon

Instructions

  1. Bring a large pot of salted water to a boil. Add the farfalle and cook according to the package directions, stirring occasionally. Begin checking 1 to 2 minutes before the package’s minimum cooking time; drain when tender but still holding its shape.
  2. For a cold salad, briefly rinse the pasta with cool water, then shake the colander and let it drain thoroughly. For room-temperature service, skip the rinse and let the pasta cool.
  3. Whisk the olive oil, lemon juice, lemon zest, garlic, kosher salt, and pepper in a small bowl. Taste and adjust the lemon or seasoning as needed.
  4. Add the pasta and chickpeas to a large bowl. Pour in most of the dressing, reserving a little for refreshing the salad later if needed. Toss gently until lightly coated, with no liquid pooling at the bottom.
  5. Fold in most of the chopped basil and about half the Parmesan.
  6. Spoon the salad onto a platter. Top with the remaining basil and Parmesan, a little extra lemon zest, and black pepper. Arrange the lemon wedges alongside and serve at room temperature or chilled.

Tips

  • Check the farfalle early and drain it while it is tender but still holds its shape.
  • If rinsing the pasta for a cold salad, drain it thoroughly so water does not dilute the dressing.
  • Reserve some dressing to refresh the salad after chilling.
  • Hold back some basil and Parmesan to add just before serving.

Variations

  • Green Pea: Add 1/2 cup briefly cooked and cooled fresh or frozen peas.
  • Toasted Pine Nut: Scatter 2 tablespoons toasted pine nuts over the salad just before serving.
  • Vegan: Replace the Parmesan with dairy-free Parmesan-style cheese and adjust the salt to taste.
  • Alternative Pasta Shapes: Use rotini, penne, gemelli, or fusilli in place of the farfalle.

Notes

Store leftovers in an airtight container in the refrigerator for up to three days. Refresh with a little olive oil and lemon juice if needed.

Nutrition

Calories: 325 kcal | Protein: 12 g | Fat: 12 g | Carbohydrates: 38 g | Per 100g: Approximately 200 kcal, 7 g protein, 7 g fat, and 24 g carbohydrates

Caramelized Onion Pasta

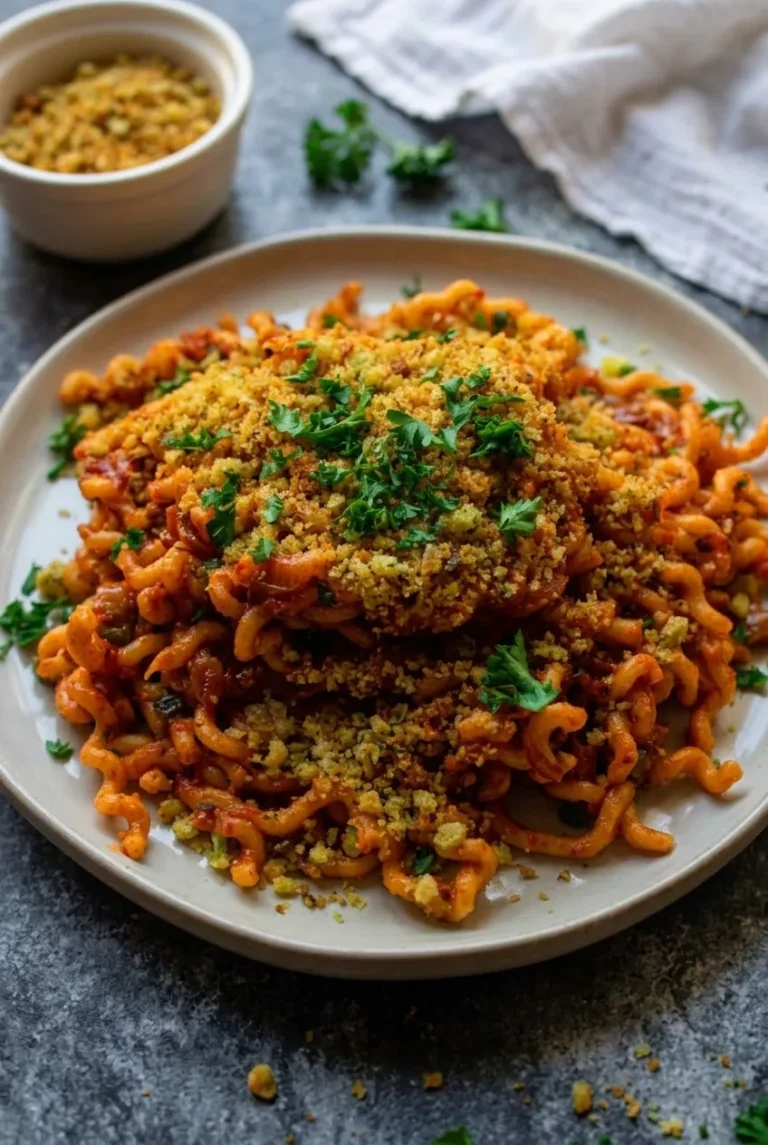
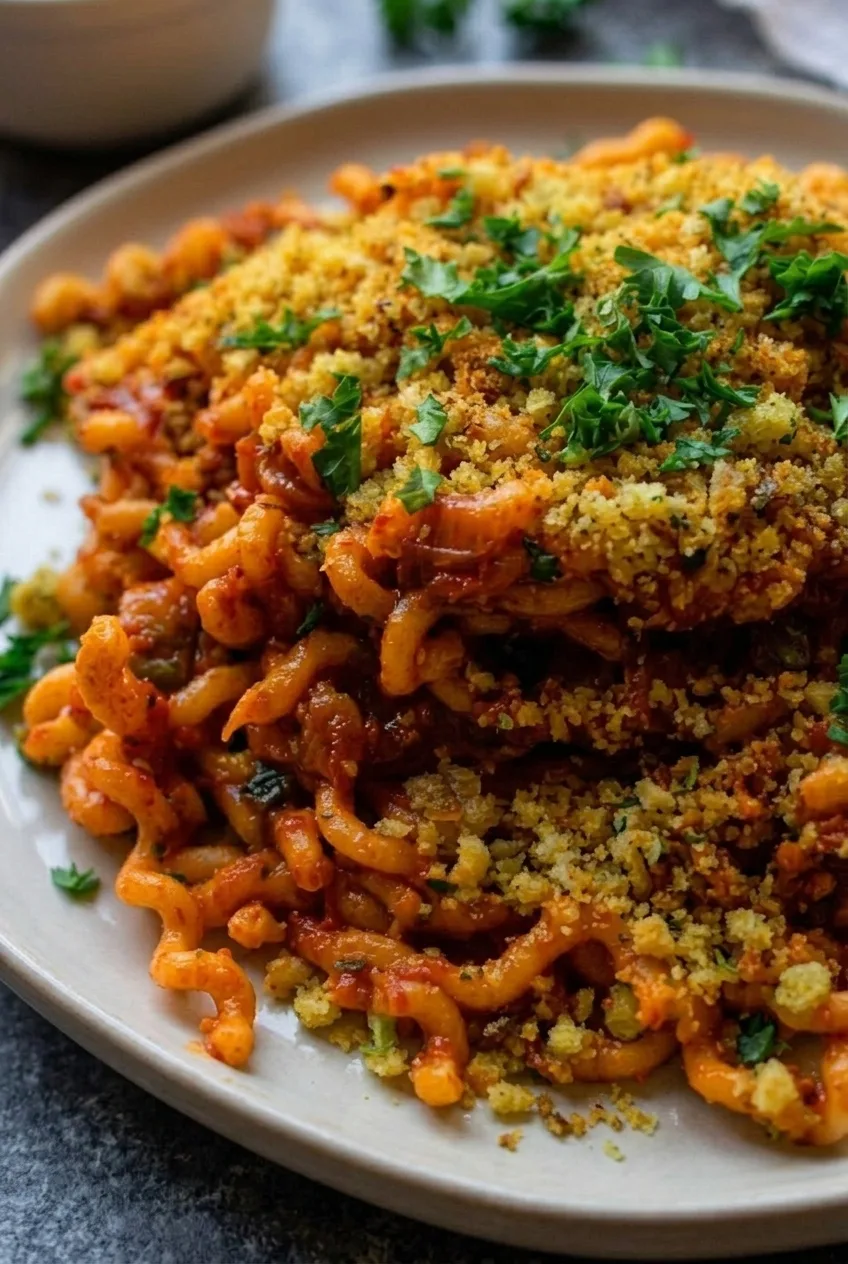
Deeply caramelized onions give this stovetop pasta its sweet-savory base. Tomato paste, red wine, and capers turn them into a red-orange sauce that coats short, curly pasta; reserved pasta water makes it glossy without cream. A generous layer of golden garlic-parsley breadcrumbs adds crunch.

The onions take the most time. Cook them until they have shrunk considerably and become deep golden and jammy, rather than stopping when they are merely soft. The exact timing depends on the skillet and stove.

Ingredients for Caramelized Onion Pasta

Close-up of glossy curly pasta, jammy onions, crisp golden breadcrumbs, and parsley
  • 12 ounces short curly pasta, such as cavatappi (340g)
  • About 2 pounds yellow onions, halved and thinly sliced (3–4 large; 900g)
  • 4 tablespoons extra-virgin olive oil, divided
  • 1 cup coarse breadcrumbs or panko (60g)
  • 3 garlic cloves, finely minced and divided
  • 2 tablespoons tomato paste (30g)
  • 1/3 cup dry red wine
  • 1 tablespoon capers, drained and roughly chopped
  • Up to 1 cup reserved pasta water, as needed
  • 3 tablespoons chopped fresh flat-leaf parsley, divided
  • Kosher salt, to taste, plus more for the pasta water
  • 1/4 teaspoon black pepper, plus more to taste

How to Make Caramelized Onion Pasta

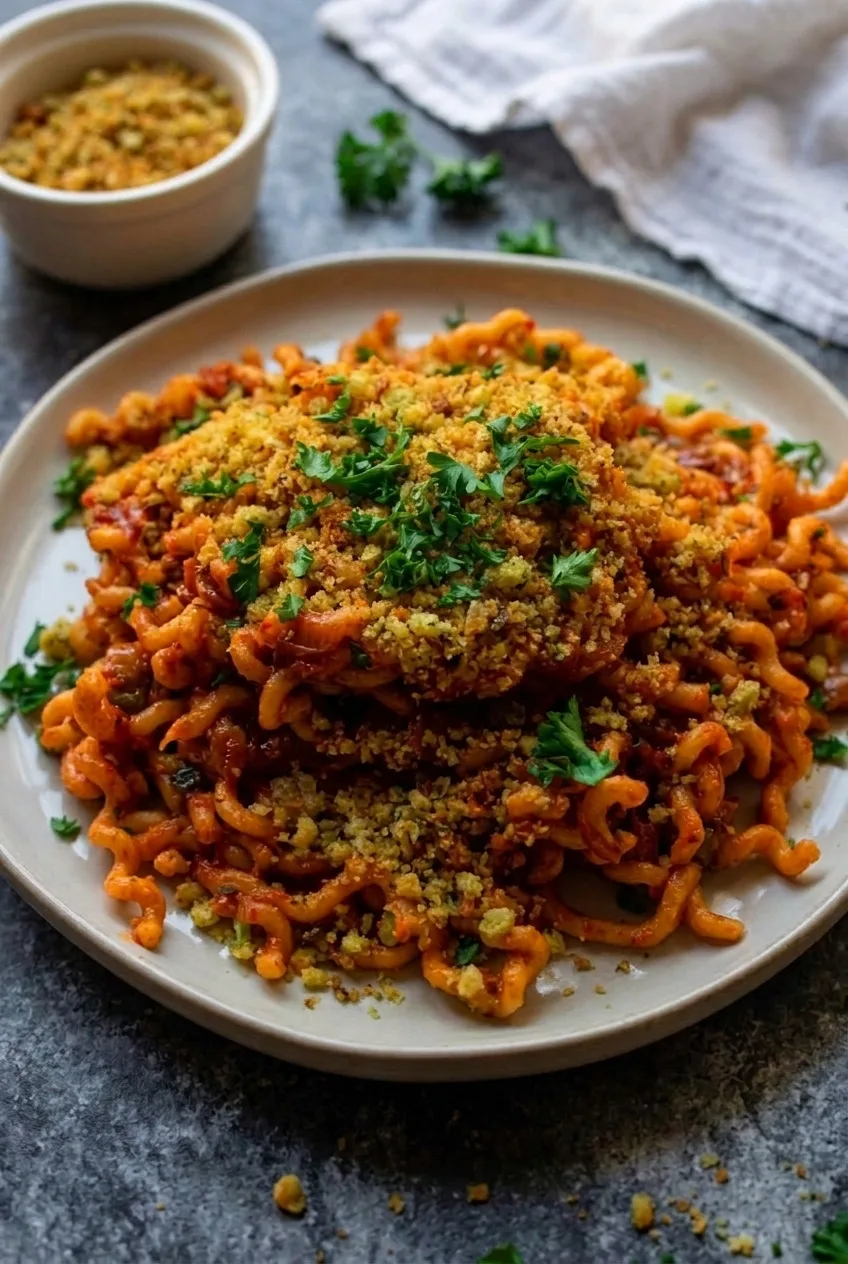
A full plate of caramelized onion pasta with golden breadcrumbs on a dark stone surface
  1. Toast the breadcrumbs: Warm 2 tablespoons olive oil in a 12-inch skillet over medium heat. Add the breadcrumbs and 1 minced garlic clove. Stir frequently for 4–6 minutes, until evenly golden. Stir in about 1 tablespoon parsley, then transfer the crumbs to a bowl so they do not continue browning in the hot skillet.
  2. Start the onions: Add the remaining 2 tablespoons olive oil to the skillet. Add the uniformly sliced onions, a pinch of salt, and the black pepper. Cook uncovered over medium-low heat, stirring occasionally. The onions may fill the skillet at first but will shrink as they soften.
  3. Caramelize the onions: Continue cooking for about 35–40 minutes, stirring occasionally and scraping the skillet as needed. Start checking for sticking and color after 20 minutes. The onions are ready when substantially reduced, very soft, and deep golden to light brown. If the pan dries or the onions stick, lower the heat if needed and add 1–2 tablespoons water. Scrape up the browned bits and let the water cook off as the onions continue to brown.
  4. Boil the pasta: When the onions are nearly ready, cook the pasta in a large pot of well-salted boiling water until al dente, following the package directions. Start checking at the earliest suggested time. Reserve at least 1 cup pasta water before draining; do not rinse the pasta.
  5. Build the sauce: Stir the remaining 2 minced garlic cloves into the onions for about 30 seconds, until fragrant but not browned. Add the tomato paste and cook briefly, until it darkens slightly. Pour in the wine and scrape up the browned bits. Add the capers and simmer over medium heat for 3–5 minutes, until the wine has reduced and the mixture looks saucy rather than watery.
  6. Coat the pasta: Add the drained pasta and about 1/2 cup reserved pasta water to the skillet. Toss over medium-low heat for 2–3 minutes, adding more pasta water a splash at a time until the sauce looks glossy and clings to the curls without pooling. Stir in some of the remaining parsley and adjust the salt and pepper to taste.
  7. Top and serve: Pile the pasta loosely on a broad plate or divide it among plates. Spoon the breadcrumbs generously over the center, scatter the remaining parsley on top, and serve promptly. Offer any extra crumbs on the side.

How to Tell When the Onions Are Caramelized

Translucent onions need more time. Look for a deep golden color, substantial reduction, and a soft, jammy texture. A wide skillet helps moisture evaporate; a smaller, crowded pan may take longer. Stir occasionally rather than constantly so the onions have a chance to brown, but check often enough to catch sticking.

Keeping the Sauce Glossy

Pasta absorbs liquid as it is tossed, so a sauce that first looks loose may tighten quickly. Start with about 1/2 cup pasta water and add more gradually. Stop when the sauce coats the pasta and looks moist, not dry or submerged.

Keeping the Breadcrumbs Crisp

Keep the toasted crumbs out of the sauce and add them just before serving. Store any extras separately from leftover pasta. If they soften, refresh them in a dry skillet before using.

Ingredient Swaps

Fusilli or rotini work in place of cavatappi; choose a short shape with curves or ridges to hold the sauce. For an alcohol-free version, deglaze the onions with a splash of reserved pasta water, then add a small splash of red wine vinegar to taste. Do not replace the wine with an equal amount of vinegar.

Make-Ahead, Storage, and Reheating

The onions can be cooked ahead and refrigerated in an airtight container. Cook the pasta and finish the sauce closer to serving for the best texture.

Refrigerate cooled leftover pasta in an airtight container for 3–4 days, keeping any extra breadcrumbs separate. Reheat the pasta gently in a skillet over medium-low heat with a splash of water, stirring until loosened and hot. Add the breadcrumbs after reheating. Freezing the finished pasta is not recommended because its texture may suffer.

Nutrition

Approximate nutrition per serving, based on 4 main-course servings: 610 calories, 16g protein, 16g fat, and 99g carbohydrates. Approximate nutrition per 100g: 175 calories, 5g protein, 5g fat, and 28g carbohydrates. Values are estimates and vary with the ingredients used.

Caramelized Onion Pasta

Short curly pasta is tossed with a red wine, tomato, and caper sauce made from deeply caramelized onions and topped with garlic-parsley breadcrumbs.
Course: Main Course
Cuisine: Italian
Prep: 15 min
Cook: 50 min
Total: 65 min
Servings: 4 Calories: 610 kcal per serving; 175 kcal per 100 g

Equipment

  • 12-inch skillet
  • Large pot
  • Colander
  • Mixing bowl

Ingredients

Pasta and sauce

  • 12 ounces short curly pasta, such as cavatappi (340g)
  • About 2 pounds yellow onions, halved and thinly sliced (3–4 large; 900g)
  • 4 tablespoons extra-virgin olive oil, divided
  • 3 garlic cloves, finely minced and divided
  • 2 tablespoons tomato paste (30g)
  • 1/3 cup dry red wine
  • 1 tablespoon capers, drained and roughly chopped
  • Up to 1 cup reserved pasta water, as needed
  • 3 tablespoons chopped fresh flat-leaf parsley, divided
  • Kosher salt, to taste, plus more for the pasta water
  • 1/4 teaspoon black pepper, plus more to taste

Breadcrumb topping

  • 1 cup coarse breadcrumbs or panko (60g)

Instructions

  1. Warm 2 tablespoons olive oil in a 12-inch skillet over medium heat. Add the breadcrumbs and 1 minced garlic clove. Stir frequently for 4–6 minutes, until evenly golden.
  2. Stir about 1 tablespoon parsley into the breadcrumbs, then transfer them to a bowl.
  3. Add the remaining 2 tablespoons olive oil to the skillet. Add the onions, a pinch of salt, and the black pepper. Cook uncovered over medium-low heat, stirring occasionally.
  4. Continue cooking the onions for about 35–40 minutes, scraping the skillet as needed, until substantially reduced, very soft, and deep golden to light brown. If the pan dries or the onions stick, lower the heat and add 1–2 tablespoons water; scrape up the browned bits and let the water cook off.
  5. When the onions are nearly ready, cook the pasta in a large pot of well-salted boiling water until al dente, following the package directions. Reserve at least 1 cup pasta water, then drain the pasta without rinsing.
  6. Stir the remaining 2 minced garlic cloves into the onions for about 30 seconds, until fragrant but not browned. Add the tomato paste and cook briefly, until it darkens slightly.
  7. Pour in the wine and scrape up the browned bits. Add the capers and simmer over medium heat for 3–5 minutes, until reduced and saucy rather than watery.
  8. Add the drained pasta and about 1/2 cup reserved pasta water. Toss over medium-low heat for 2–3 minutes, adding more pasta water a splash at a time until the sauce is glossy and clings to the pasta.
  9. Stir in some of the remaining parsley and adjust the salt and pepper to taste.
  10. Serve the pasta topped with the breadcrumbs and remaining parsley. Offer extra breadcrumbs on the side.

Tips

  • Cook the onions until deep golden, substantially reduced, and jammy; translucent onions need more time.
  • Stir occasionally rather than constantly, but check often enough to catch sticking.
  • Add a little water if the skillet dries or the onions start to stick.
  • Add reserved pasta water gradually and stop when the sauce coats the pasta without pooling.
  • Keep the breadcrumbs separate from the sauce until serving so they stay crisp.

Variations

  • Fusilli or Rotini Pasta: Use fusilli or rotini in place of cavatappi; short shapes with curves or ridges hold the sauce well.
  • Alcohol-Free Version: Deglaze the onions with a splash of reserved pasta water, then add a small splash of red wine vinegar to taste instead of the wine.

Notes

Cook onions ahead and refrigerate airtight. Refrigerate leftover pasta for 3–4 days with extra breadcrumbs stored separately; reheat gently in a skillet with a splash of water and add crumbs afterward. Freezing the finished pasta is not recommended.

Nutrition

Calories: 610 kcal per serving; 175 kcal per 100 g | Protein: 16 g per serving; 5 g per 100 g | Fat: 16 g per serving; 5 g per 100 g | Carbohydrates: 99 g per serving; 28 g per 100 g

Gigi Hadid Spicy Vodka Pasta

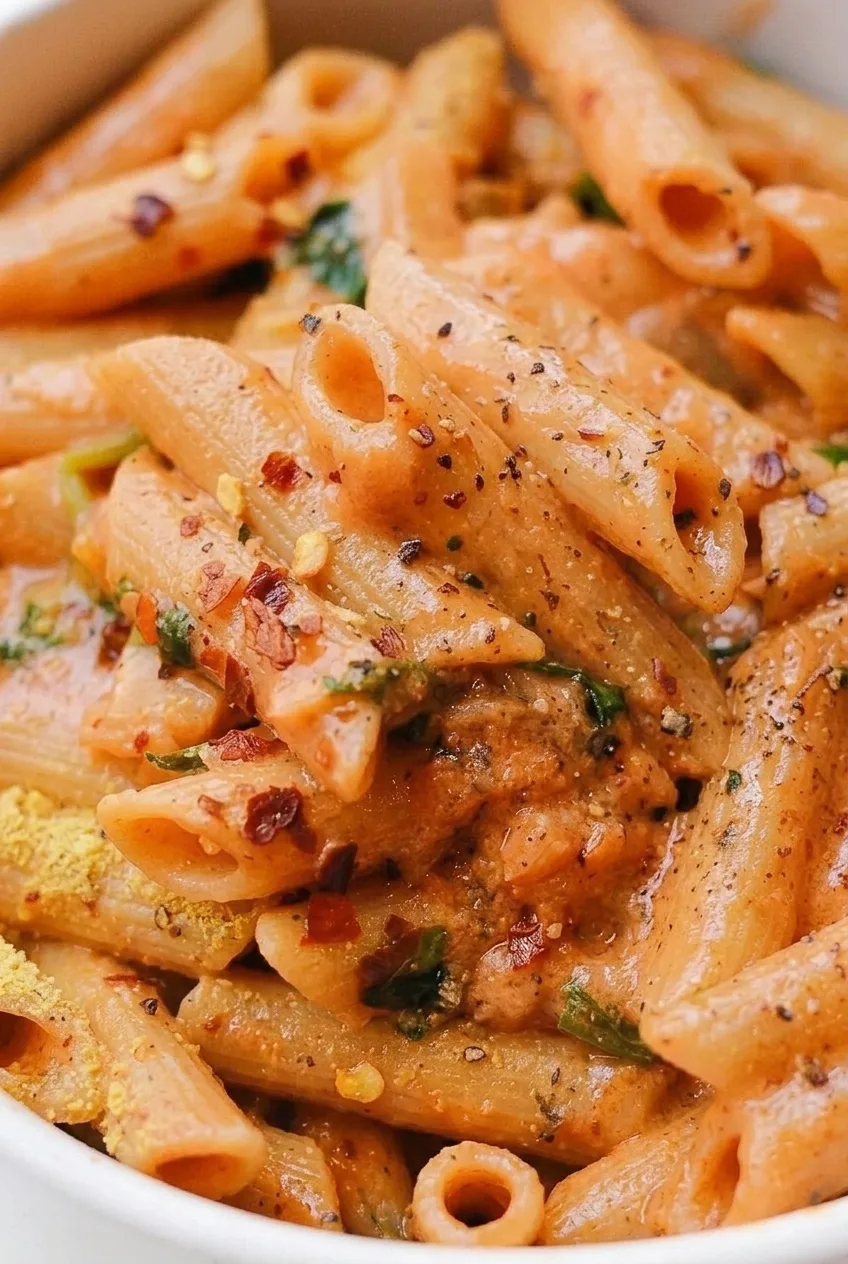
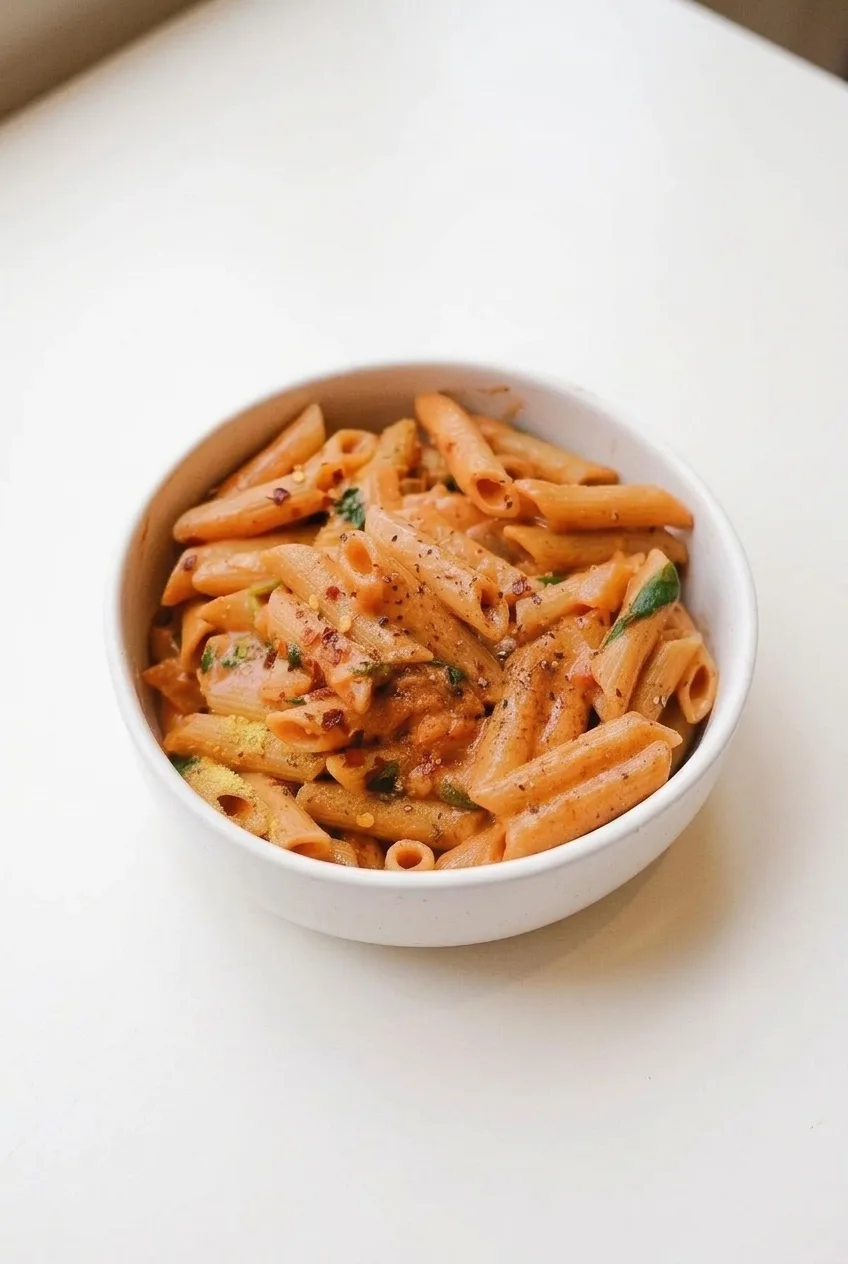
Penne coated in a glossy orange-pink sauce is the goal here—not pasta sitting under a spoonful of sauce. Shallot and garlic start the sauce, tomato paste cooks until concentrated, and vodka simmers briefly before the cream goes in. Red pepper flakes add heat that you can adjust to taste.

Cook the penne just to al dente, then finish it in a wide skillet with butter, Parmesan, and a little reserved pasta water. Tossing everything together helps the sauce cling to each piece before it thickens.

Prep: 10 minutes; cook: about 20 minutes; serves 4.

Ingredients for Gigi Hadid Spicy Vodka Pasta

Close-up of creamy spicy vodka sauce clinging to ridged penne with basil and red pepper flakes
  • 12 ounces penne pasta (340g)
  • Kosher salt, for the pasta water and to taste
  • 2 tablespoons olive oil
  • 1 medium shallot, finely chopped (about 40g)
  • 2 garlic cloves, minced
  • 1/2 cup tomato paste (130g)
  • 1/4 cup vodka
  • 1/2 teaspoon crushed red pepper flakes, or to taste
  • 3/4 cup heavy cream (180g)
  • 2 tablespoons unsalted butter (30g)
  • 1/2 cup finely grated Parmesan (50g), plus more for serving
  • 1/4 cup loosely packed fresh basil, thinly sliced or torn (about 6g)
  • Black pepper, to taste

How to Make Gigi Hadid Spicy Vodka Pasta

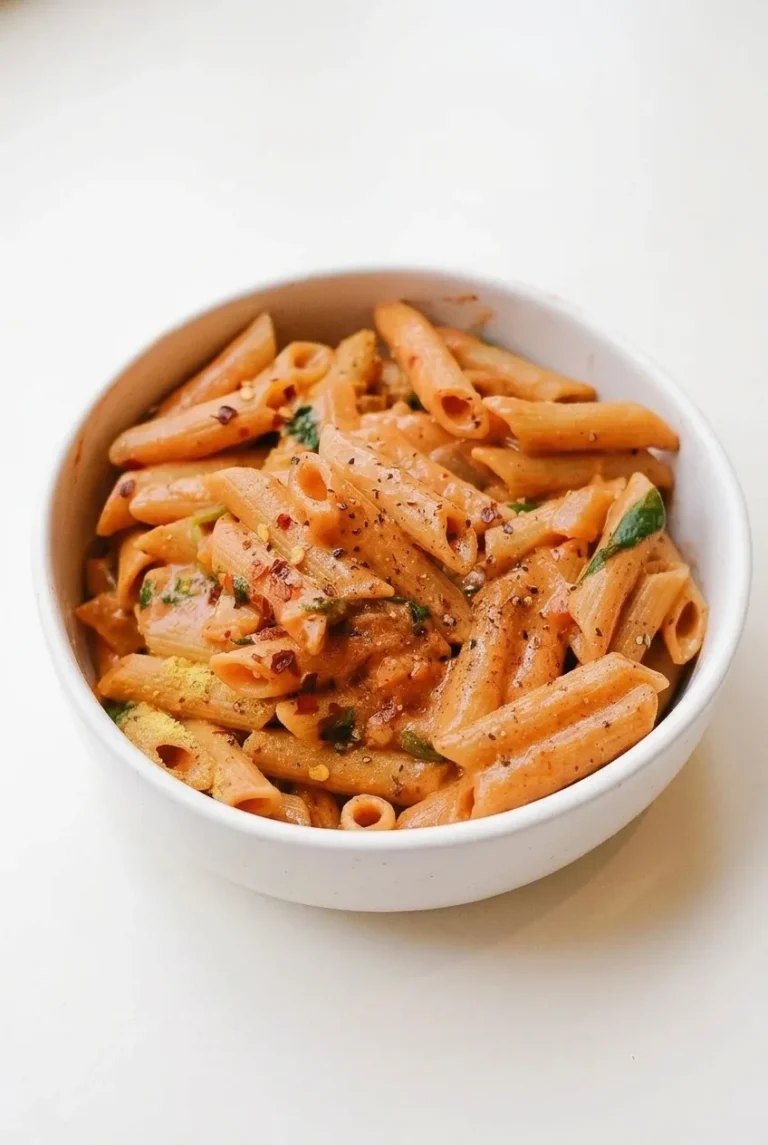
A full white bowl of Gigi Hadid spicy vodka pasta centered on a pale surface
  1. Boil the penne: Bring a large pot of well-salted water to a boil. Cook the penne according to the package directions, starting to taste it 1 to 2 minutes before the suggested al dente time. It should be tender with a slight bite. Reserve at least 1 cup of pasta water, then drain.
  2. Soften the aromatics: While the pasta cooks, heat the olive oil in a wide skillet large enough to hold all the penne. Cook the shallot over medium heat for 4 to 5 minutes, stirring, until soft and translucent. Add the garlic and stir briefly, just until fragrant; do not let it brown.
  3. Cook the tomato paste: Stir in the tomato paste and red pepper flakes. Cook uncovered over medium to medium-low heat for 2 to 4 minutes, stirring frequently. The paste should deepen in color and look concentrated, but not blacken or scorch.
  4. Add the vodka and cream: Stir in the vodka, scraping up any paste from the skillet. Let it simmer gently for about 2 to 3 minutes, until its sharp aroma softens. This brief simmer does not mean all the alcohol cooks off. Reduce the heat to low and stir in the cream for 1 to 2 minutes, until the sauce is smooth and orange-pink.
  5. Finish the pasta in the sauce: Add the drained penne, butter, and Parmesan. Toss over low heat for 1 to 3 minutes, adding reserved pasta water a few tablespoons at a time. Stop when the sauce looks glossy and coats the penne without pooling in the skillet.
  6. Season and serve: Taste and add salt, black pepper, or more red pepper flakes as needed. Fold in some of the basil, then serve promptly in bowls with the remaining basil and a light dusting of Parmesan.

How to Keep the Sauce Glossy

Starchy pasta water loosens the cream sauce while helping it cling to the penne. Add it gradually as you toss rather than pouring in the full cup; you may not need it all. The sauce thickens as it stands, so serve the pasta while the coating still moves easily around the skillet.

Adjusting the Heat

Start with the listed 1/2 teaspoon of red pepper flakes, then taste before adding more. Their heat varies, and extra flakes can be added to individual bowls.

Can You Make It Without Vodka?

You can omit the vodka, but the sauce will taste different from the vodka version. Lemon juice or vinegar is not an identical replacement. A small yellow onion can replace the shallot if needed.

Serving and Leftovers

Serve the penne as soon as it is tossed, with basil and red pepper flakes visible on top. For another creamy pasta, try Creamy Mushroom Pasta with Farfalle.

Refrigerate leftovers promptly in a covered container. The sauce will thicken as it cools; if reheating, warm the pasta gently with a small splash of water to loosen it. This recipe does not establish a specific storage duration or freezing method for the finished pasta.

Nutrition

Approximate nutrition per serving, based on 4 servings: 700 calories, 19g protein, 34g fat, and 74g carbohydrates. Approximate nutrition per 100g: 210 calories, 6g protein, 10g fat, and 22g carbohydrates. Values vary with the ingredients used and the finished pasta’s weight.

Gigi Hadid Spicy Vodka Pasta

Penne is tossed with a creamy tomato-vodka sauce, Parmesan, butter, and fresh basil.
Course: Main Course
Cuisine: Italian
Prep: 10 min
Cook: 20 min
Total: 30 min
Servings: 4 Calories: 700 kcal per serving

Equipment

  • Large pot
  • Wide skillet
  • Colander

Ingredients

Pasta and sauce

  • 12 ounces penne pasta (340g)
  • Kosher salt, for the pasta water and to taste
  • 2 tablespoons olive oil
  • 1 medium shallot, finely chopped (about 40g)
  • 2 garlic cloves, minced
  • 1/2 cup tomato paste (130g)
  • 1/4 cup vodka
  • 1/2 teaspoon crushed red pepper flakes, or to taste
  • 3/4 cup heavy cream (180g)
  • 2 tablespoons unsalted butter (30g)
  • 1/2 cup finely grated Parmesan (50g), plus more for serving
  • 1/4 cup loosely packed fresh basil, thinly sliced or torn (about 6g)
  • Black pepper, to taste

Instructions

  1. Bring a large pot of well-salted water to a boil. Cook the penne according to package directions, tasting 1 to 2 minutes before the suggested al dente time. Reserve at least 1 cup of pasta water, then drain.
  2. While the pasta cooks, heat the olive oil in a wide skillet over medium heat. Add the shallot and cook for 4 to 5 minutes, stirring, until soft and translucent.
  3. Add the garlic and stir briefly until fragrant, without letting it brown.
  4. Stir in the tomato paste and red pepper flakes. Cook uncovered over medium to medium-low heat for 2 to 4 minutes, stirring frequently, until the paste darkens and looks concentrated.
  5. Stir in the vodka, scraping up any paste from the skillet. Simmer gently for about 2 to 3 minutes, until its sharp aroma softens.
  6. Reduce the heat to low and stir in the cream for 1 to 2 minutes, until the sauce is smooth and orange-pink.
  7. Add the drained penne, butter, and Parmesan. Toss over low heat for 1 to 3 minutes, adding reserved pasta water a few tablespoons at a time, until the sauce is glossy and coats the penne.
  8. Taste and adjust with salt, black pepper, or more red pepper flakes. Fold in some of the basil and serve promptly with the remaining basil and extra Parmesan.

Tips

  • Taste the penne 1 to 2 minutes before the package’s suggested al dente time.
  • Cook the tomato paste until concentrated and darker in color, but do not let it scorch.
  • Add reserved pasta water gradually; you may not need the full cup.
  • Serve promptly, as the sauce thickens as it stands.
  • Adjust the red pepper flakes to taste, since their heat can vary.

Variations

  • Vodka-Free Version: Omit the vodka; the sauce will taste different from the vodka version.
  • Onion Instead of Shallot: Use a small yellow onion in place of the shallot.

Notes

Refrigerate leftovers promptly in a covered container. Reheat gently with a small splash of water to loosen the thickened sauce. The vodka simmers briefly; this does not mean all the alcohol cooks off.

Nutrition

Calories: 700 kcal per serving | Protein: 19 g per serving | Fat: 34 g per serving | Carbohydrates: 74 g per serving | Per 100g Calories: 210 kcal | Per 100g Protein: 6 g | Per 100g Fat: 10 g | Per 100g Carbohydrates: 22 g

Bolognese Pasta with Pappardelle

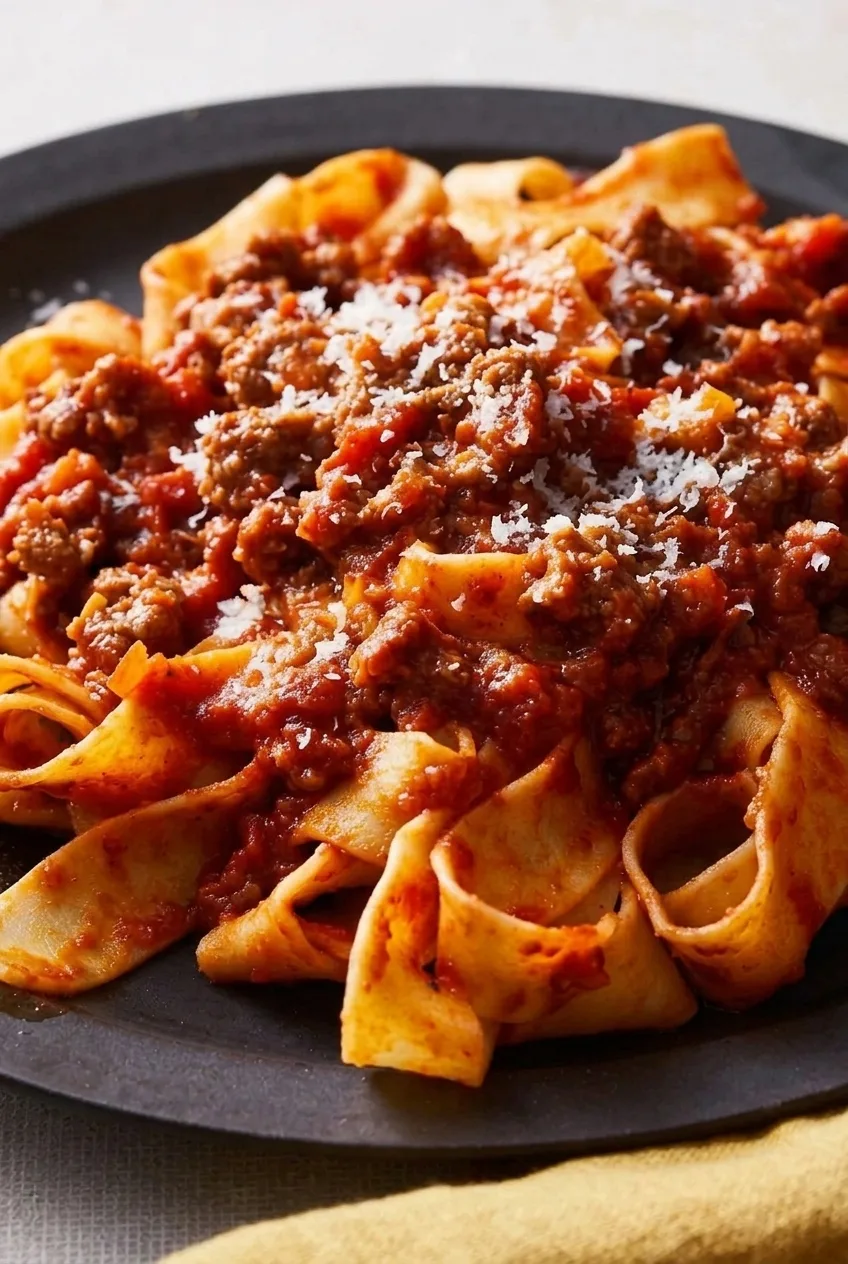
Broad pappardelle ribbons hold a thick, chunky beef-and-pork sauce without disappearing beneath it. For this from-scratch version, milk is reduced into the browned meat, followed by red wine and tomatoes. The sauce then simmers gently for about 1½ hours, until it clings to the pasta rather than pooling on the plate.

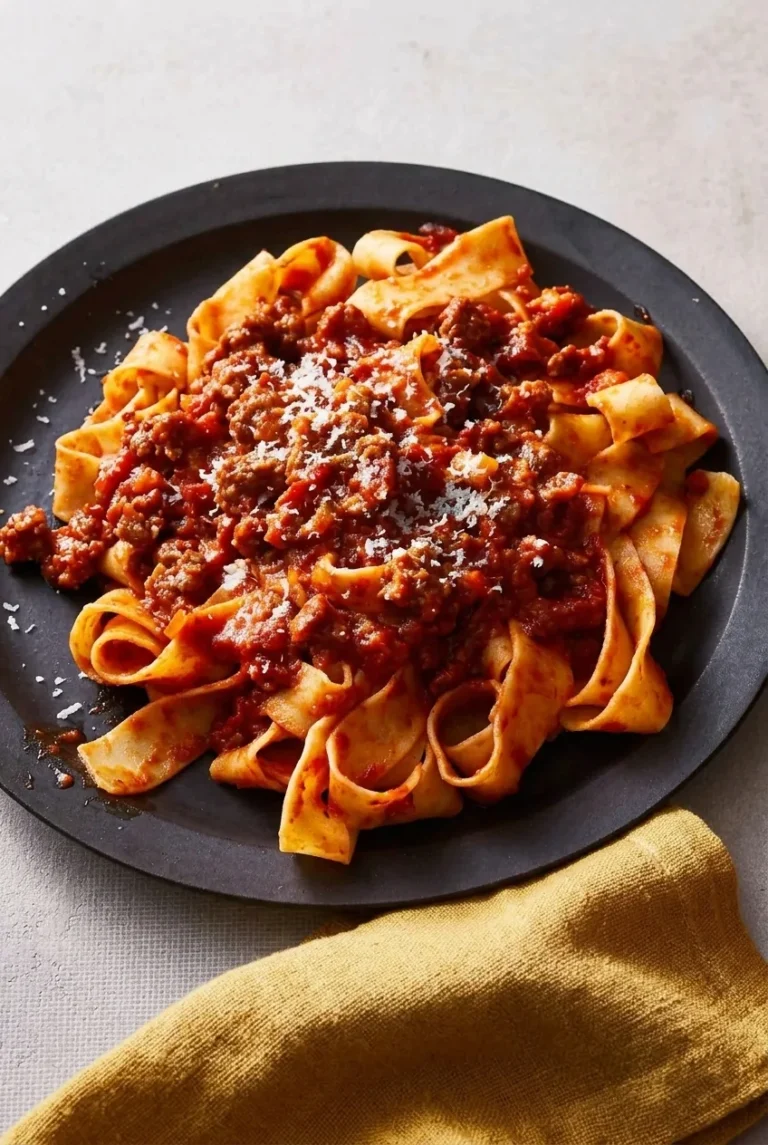
A brief toss with some sauce, butter, Parmesan, and reserved pasta water gives the ribbons a light coating. Spoon the remaining sauce over the center of each loose mound, leaving the folded pappardelle visible around the edges.

Ingredients for Pappardelle Bolognese

Close view of glossy Bolognese meat crumbles, Parmesan flecks, and folded pappardelle ribbons
  • 12 ounces dried pappardelle (340g)
  • 1 tablespoon olive oil
  • 1 medium yellow onion, finely diced (150g)
  • 1 medium carrot, finely diced (75g)
  • 1 celery rib, finely diced (50g)
  • 3 garlic cloves, minced
  • 12 ounces ground beef (340g)
  • 8 ounces ground pork (225g)
  • About 1 teaspoon kosher salt for the sauce, plus more for the pasta water and to taste
  • 1/2 teaspoon black pepper, plus more to taste
  • 2 tablespoons tomato paste
  • 3/4 cup whole milk
  • 3/4 cup dry red wine
  • One 28-ounce can crushed tomatoes
  • 1 tablespoon unsalted butter
  • 1/2 cup finely grated Parmesan (50g), plus more for serving

Optional: Add a small pinch of ground nutmeg with the milk, or finish with 1 tablespoon finely chopped flat-leaf parsley. Omit the parsley to keep the Parmesan as the only garnish.

How to Make Bolognese Pasta with Pappardelle

A full plate of pappardelle Bolognese with Parmesan on a pale gray surface
  1. Soften the vegetables: Warm the olive oil in a heavy-bottomed Dutch oven or 5- to 6-quart saucepan over medium heat. Add the onion, carrot, celery, salt, and pepper. Cook for 8 to 10 minutes, stirring occasionally, until the vegetables are tender and the onion is translucent. Add the garlic and cook briefly, just until fragrant; do not let it brown.
  2. Brown the meat: Add the beef and pork. Cook over medium to medium-high heat for 8 to 10 minutes, breaking the meat into small crumbles, until browned. If the pot looks greasy, spoon off excess fat. If the meat is crowded and steaming rather than browning, cook it in batches.
  3. Reduce the milk: Stir in the tomato paste, then add the milk. Simmer gently over medium-low heat, stirring, for 8 to 10 minutes, until most of the loose liquid is gone and the meat looks moist but not soupy.
  4. Reduce the wine: Pour in the red wine and scrape up any browned bits from the bottom of the pot. Simmer over medium heat for 6 to 8 minutes, until the sharp wine aroma mellows and little loose liquid remains.
  5. Simmer the sauce: Stir in the crushed tomatoes and bring the sauce just to a gentle bubble. Reduce the heat to low and simmer, partially covered with a small opening for steam, for about 1½ hours. Stir periodically, scraping the bottom. Start checking the texture and seasoning after about 1 hour. The sauce is ready when it is thick and cohesive, with no watery ring around the meat. If it gets too thick before the meat and vegetables are tender, lower the heat and stir in a small splash of water. Taste and adjust the salt and pepper.
  6. Cook the pappardelle: Near the end of the simmer, bring a large pot of well-salted water to a boil. Cook the dried pappardelle according to the package directions, checking at the earliest suggested time. It generally takes 6 to 10 minutes; drain when tender but still slightly firm to the bite. Reserve at least 1 cup of pasta water before draining.
  7. Coat the ribbons: Transfer the pasta to a wide skillet or the drained pasta pot. Add a portion of the sauce, the butter, the 1/2 cup Parmesan, and a splash of pasta water. Toss gently with tongs over low to medium-low heat for 1 to 2 minutes. Add more pasta water a little at a time only if needed; the ribbons should have a light sheen, not swim in liquid.
  8. Plate and top: Loosely mound the pappardelle on warm plates. Spoon the remaining chunky sauce over the center, leaving folded ribbons visible around the edges. Scatter a little more finely grated Parmesan over the sauce and serve hot.

How to Tell When the Bolognese Is Ready

Keep the sauce at an occasional lazy bubble rather than a rapid boil. Pot width and simmer intensity affect how quickly it reduces, so use its texture as the final guide: it should hold together on a spoon and cling to the pasta without a pool of thin liquid. Stir and scrape the bottom periodically to prevent sticking, adding a small splash of water if the sauce thickens before the meat and vegetables are tender.

Why Toss the Pappardelle with Only Some of the Sauce?

A short, gentle toss coats the wide ribbons while keeping them intact. Add reserved pasta water gradually—the amount needed depends on how thick the sauce is. Saving most of the sauce for the top gives each serving a generous topping without hiding the pappardelle beneath it.

Ingredient and Timing Notes

  • Ground meat: The main recipe uses beef and pork. For an all-beef version, use 1 pound of ground beef; this makes a slightly smaller batch of meat sauce.
  • No-wine option: Replace the red wine with 3/4 cup beef broth or water. Reduce it before adding the tomatoes; the finished flavor will be different.
  • Fresh pappardelle: Fresh pasta cooks much faster than dried. Follow its package directions and check for doneness after a couple of minutes rather than using the dried-pasta timing.

For another ground-beef pasta dinner with a different sauce, try Ground Beef Stroganoff Pasta. For a skillet-style alternative, see Bowtie Pasta Lasagna.

How to Store and Reheat

Refrigerate leftovers promptly in airtight containers and use within 3 to 4 days. Store the sauce and pasta separately when possible to help the ribbons keep their texture. The sauce can be made ahead and gently reheated on the stovetop with a splash of water if it has thickened. Reheat pasta gently with a little water or sauce, without cooking it for so long that it softens further.

For longer storage, freeze the sauce separately in airtight portions for up to about 3 months. Thaw it in the refrigerator and reheat gently. Cook the pappardelle shortly before serving for better texture than pasta frozen with the sauce.

Nutrition

Approximate nutrition per serving, based on 4 generous servings: 950 calories, 48g protein, 40g fat, and 82g carbohydrates. Per 100g: about 145 calories, 7g protein, 6g fat, and 12g carbohydrates. Values vary with ingredient brands and the fat content of the meat.

Bolognese Pasta with Pappardelle

Dried pappardelle is tossed with a rich beef-and-pork Bolognese, butter, Parmesan, and pasta water, then topped with more sauce.
Course: Main Course
Cuisine: Italian
Prep: 15 min
Cook: 140 min
Total: 155 min
Servings: 4 Calories: 950 kcal

Equipment

  • Dutch oven or 5- to 6-quart saucepan
  • Large pot
  • Wide skillet
  • Tongs

Ingredients

For the sauce

  • 1 tablespoon olive oil
  • 1 medium yellow onion, finely diced (150g)
  • 1 medium carrot, finely diced (75g)
  • 1 celery rib, finely diced (50g)
  • 3 garlic cloves, minced
  • 12 ounces ground beef (340g)
  • 8 ounces ground pork (225g)
  • About 1 teaspoon kosher salt, plus more to taste
  • 1/2 teaspoon black pepper, plus more to taste
  • 2 tablespoons tomato paste
  • 3/4 cup whole milk
  • 3/4 cup dry red wine
  • One 28-ounce can crushed tomatoes

For the pasta and finishing

  • 12 ounces dried pappardelle (340g)
  • Salt, for the pasta water
  • 1 tablespoon unsalted butter
  • 1/2 cup finely grated Parmesan (50g), plus more for serving
  • Reserved pasta water, as needed

Optional

  • A small pinch of ground nutmeg
  • 1 tablespoon finely chopped flat-leaf parsley

Instructions

  1. Warm the olive oil in a heavy-bottomed Dutch oven or 5- to 6-quart saucepan over medium heat. Add the onion, carrot, celery, salt, and pepper. Cook for 8 to 10 minutes, stirring occasionally, until tender and the onion is translucent.
  2. Add the garlic and cook briefly, just until fragrant. Do not let it brown.
  3. Add the beef and pork. Cook over medium to medium-high heat for 8 to 10 minutes, breaking the meat into small crumbles, until browned. Cook in batches if needed, and spoon off excess fat if the pot looks greasy.
  4. Stir in the tomato paste and milk. Simmer gently over medium-low heat for 8 to 10 minutes, stirring, until most of the loose liquid has evaporated. Add the optional nutmeg with the milk, if using.
  5. Pour in the red wine and scrape up the browned bits from the bottom of the pot. Simmer over medium heat for 6 to 8 minutes, until the sharp wine aroma mellows and little loose liquid remains.
  6. Stir in the crushed tomatoes and bring the sauce to a gentle bubble. Reduce the heat to low, partially cover the pot with a small opening for steam, and simmer for about 1½ hours. Stir and scrape the bottom periodically. Begin checking the texture and seasoning after about 1 hour.
  7. When the sauce is thick and cohesive, taste and adjust the salt and pepper. If it thickens before the meat and vegetables are tender, lower the heat and stir in a small splash of water.
  8. Near the end of the simmer, bring a large pot of well-salted water to a boil. Cook the pappardelle according to package directions, checking at the earliest suggested time. Drain when tender but still slightly firm, reserving at least 1 cup of pasta water.
  9. Transfer the pasta to a wide skillet or the drained pasta pot. Add a portion of the sauce, the butter, Parmesan, and a splash of pasta water. Toss gently with tongs over low to medium-low heat for 1 to 2 minutes, adding more pasta water a little at a time if needed.
  10. Loosely mound the pasta on warm plates. Spoon the remaining sauce over the center, leaving folded ribbons visible around the edges. Finish with more Parmesan and optional parsley, then serve hot.

Tips

  • Keep the sauce at an occasional gentle bubble rather than a rapid boil.
  • Stir and scrape the bottom of the pot periodically to prevent sticking.
  • Use the sauce’s texture as your guide: it should cling to a spoon and the pasta without a watery ring.
  • Reserve at least 1 cup of pasta water, and add it gradually so the ribbons get a light sheen without becoming soupy.
  • Check dried pappardelle at the earliest package-recommended time; it generally cooks in 6 to 10 minutes.

Variations

  • All-Beef Bolognese: Replace the beef and pork with 1 pound of ground beef for a slightly smaller batch of meat sauce.
  • No-Wine Bolognese: Replace the red wine with 3/4 cup beef broth or water and reduce it before adding the tomatoes.
  • Fresh Pappardelle: Use fresh pappardelle and follow its package directions, checking for doneness after a couple of minutes.
  • Nutmeg or Parsley Finish: Add a small pinch of ground nutmeg with the milk, or finish with 1 tablespoon finely chopped flat-leaf parsley.

Notes

Refrigerate leftovers in airtight containers and use within 3 to 4 days; store sauce and pasta separately when possible. Reheat gently with a splash of water or sauce. Freeze the sauce separately for up to about 3 months. Nutrition is approximate per generous serving.

Nutrition

Calories: 950 kcal | Protein: 48 g | Fat: 40 g | Carbohydrates: 82 g