Author

Julia

Browsing

Garlic Parmesan Pasta

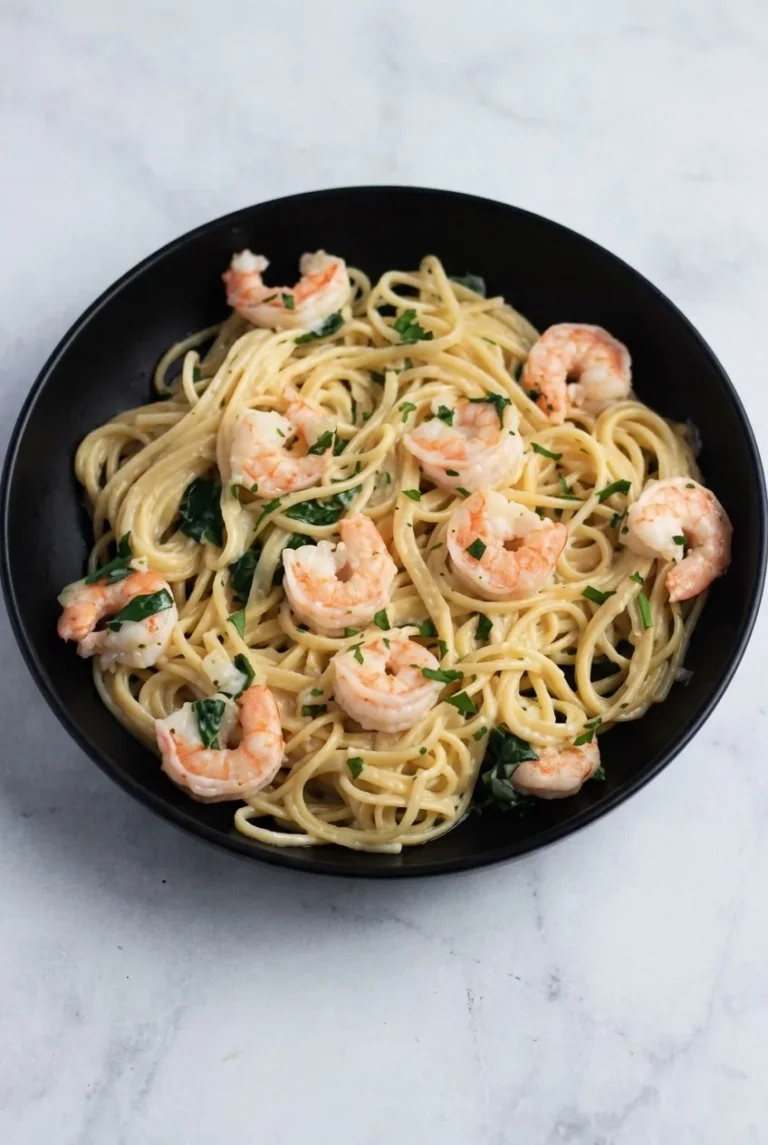
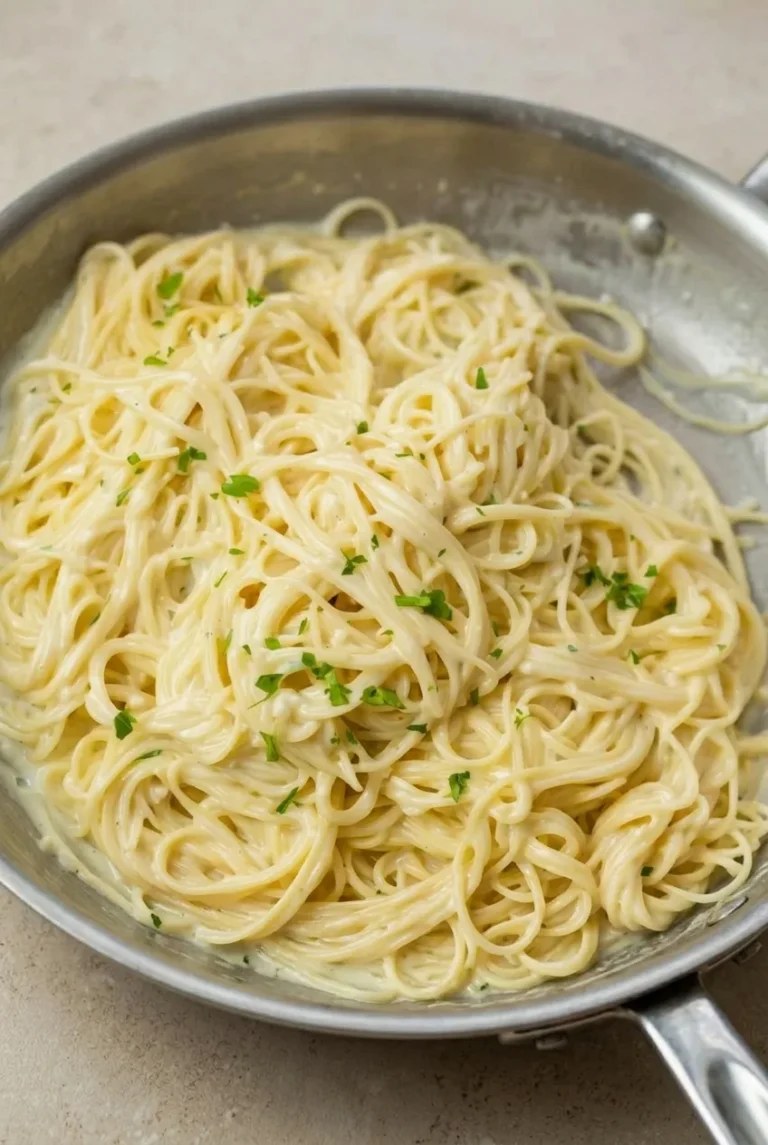
Long strands of spaghetti are coated in a pale, creamy sauce of garlic, butter, half-and-half, and Parmesan. This version cooks the pasta separately so you can stop it at al dente, then uses reserved pasta water to make the sauce glossy and loose enough to cling to the strands. Add the Parmesan off the heat to help it melt smoothly, and serve the pasta while the coating is still silky.

Makes 4 side portions or 2 to 3 main-course portions. Allow about 5 minutes to prep and 15 minutes to cook.

Ingredients for Garlic Parmesan Pasta
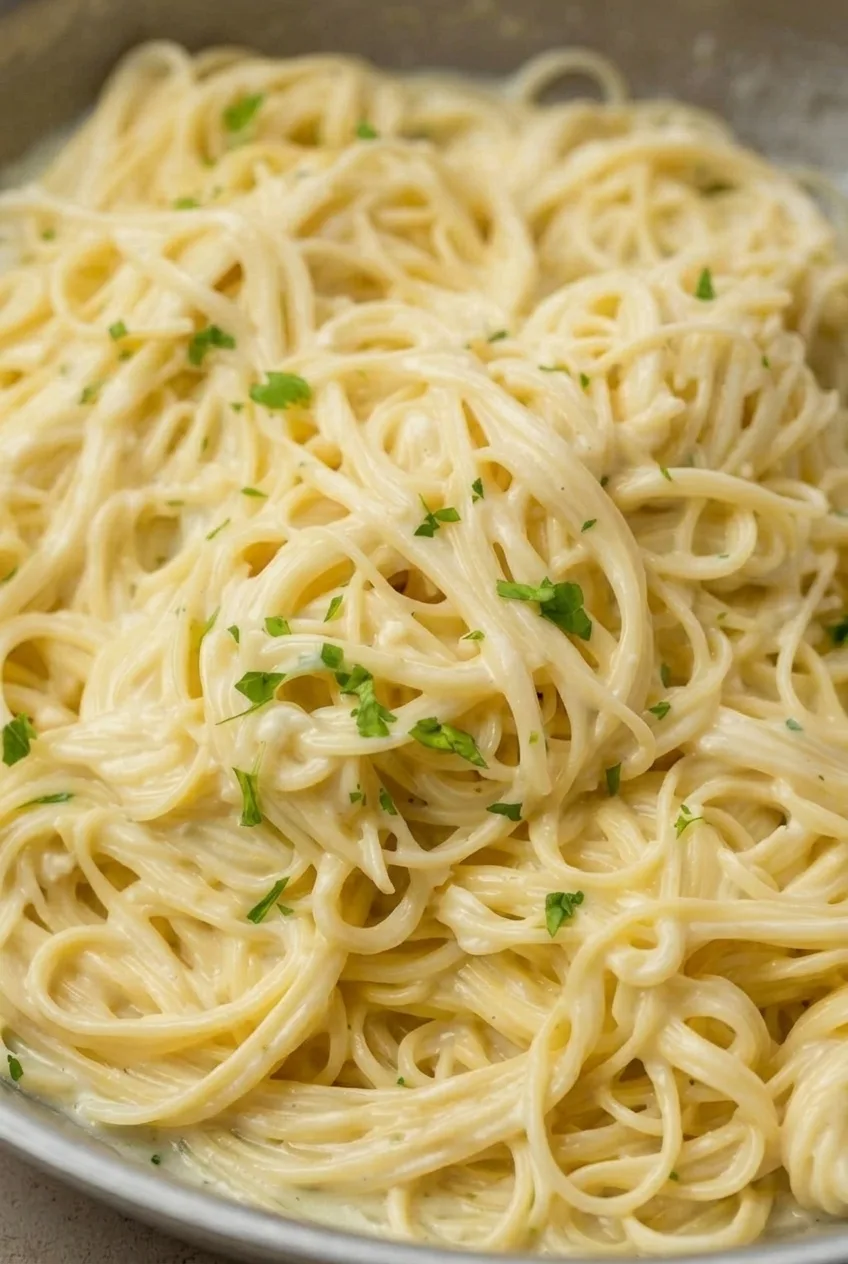
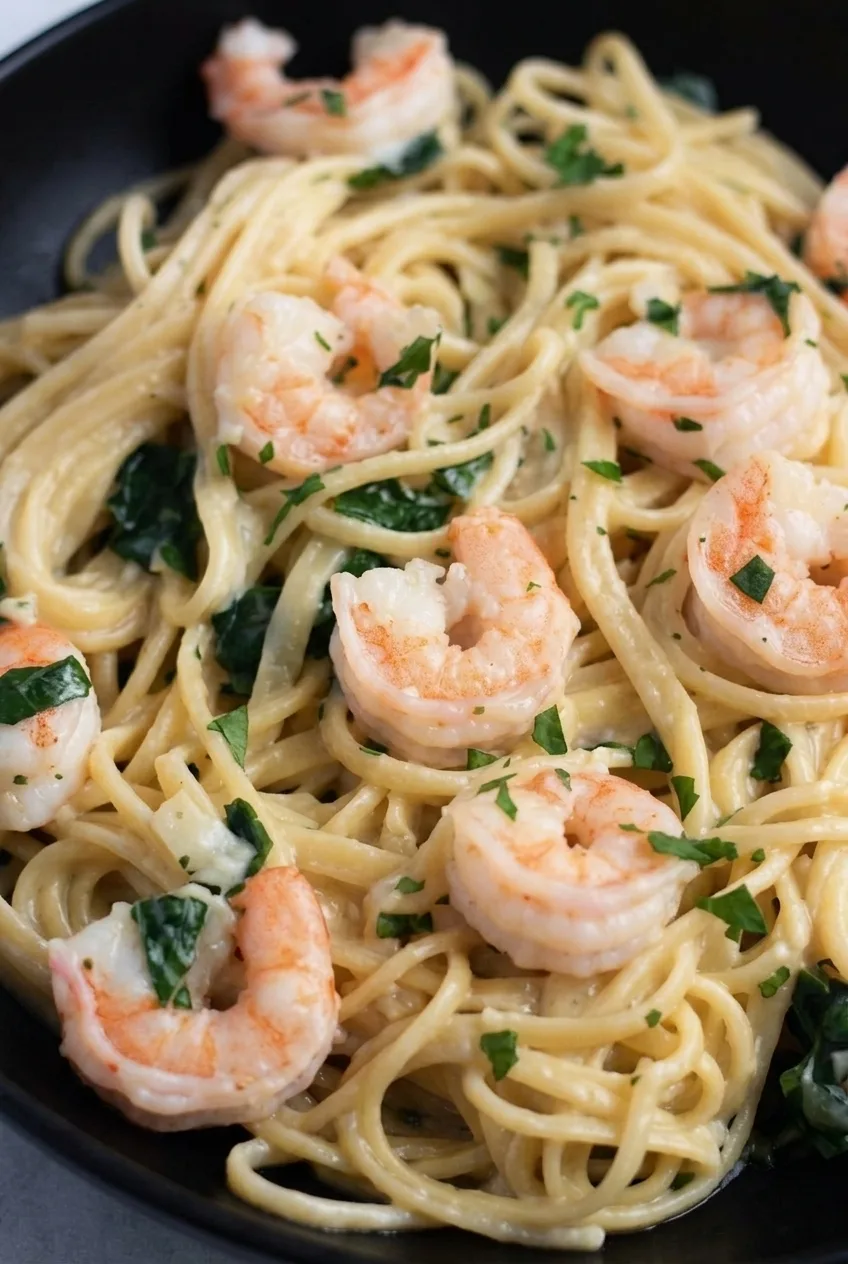
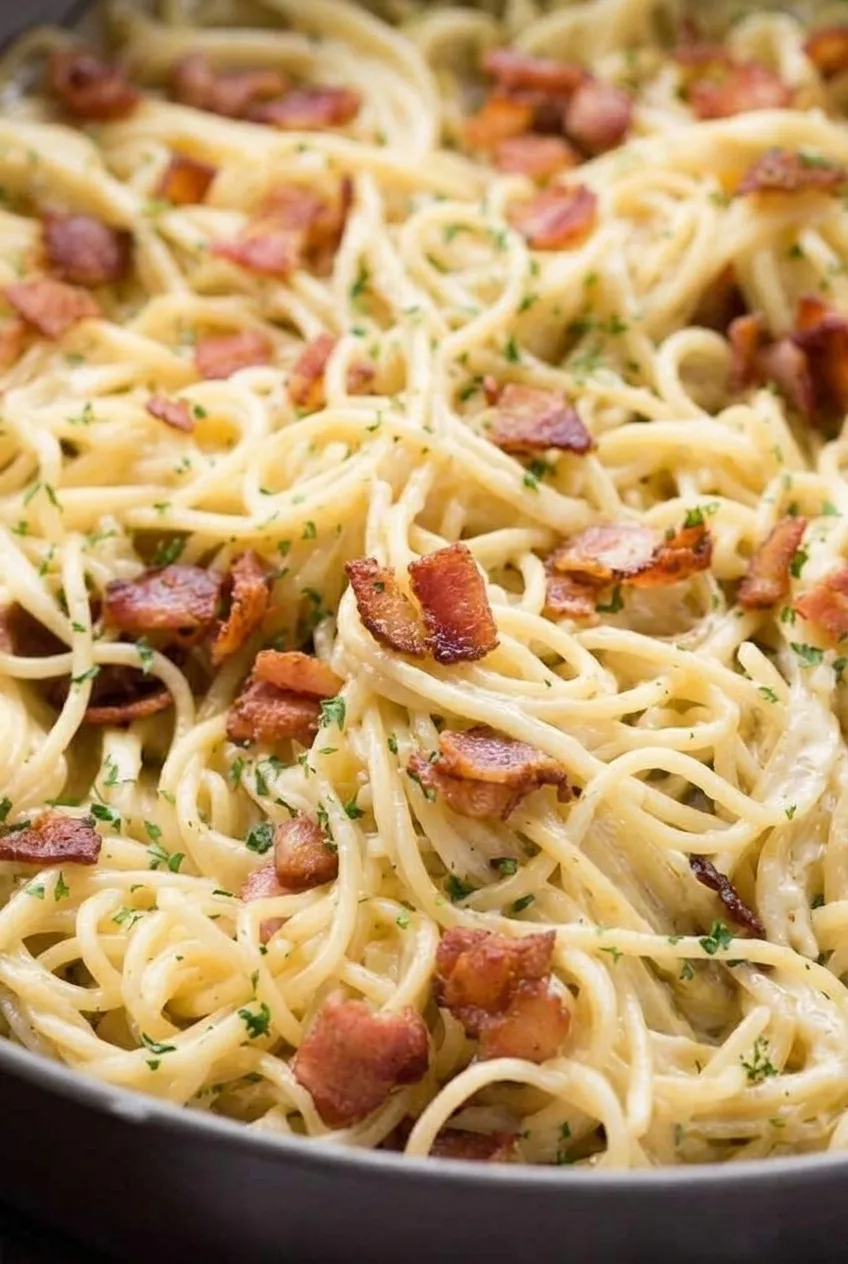
Close detail of glossy garlic Parmesan sauce clinging to spaghetti strands and parsley
  • 8 ounces spaghetti (225g)
  • Kosher salt, about 1 tablespoon for a large pot of pasta water
  • 3 tablespoons unsalted butter (45g)
  • 3 medium garlic cloves, finely minced
  • 3/4 cup half-and-half (180g)
  • 1/4 teaspoon black pepper, or to taste
  • 1 cup lightly packed finely grated Parmesan (90g), preferably freshly grated
  • Reserved pasta water, up to 1/2 cup as needed
  • 1 tablespoon finely chopped fresh parsley

How to Make Garlic Parmesan Pasta
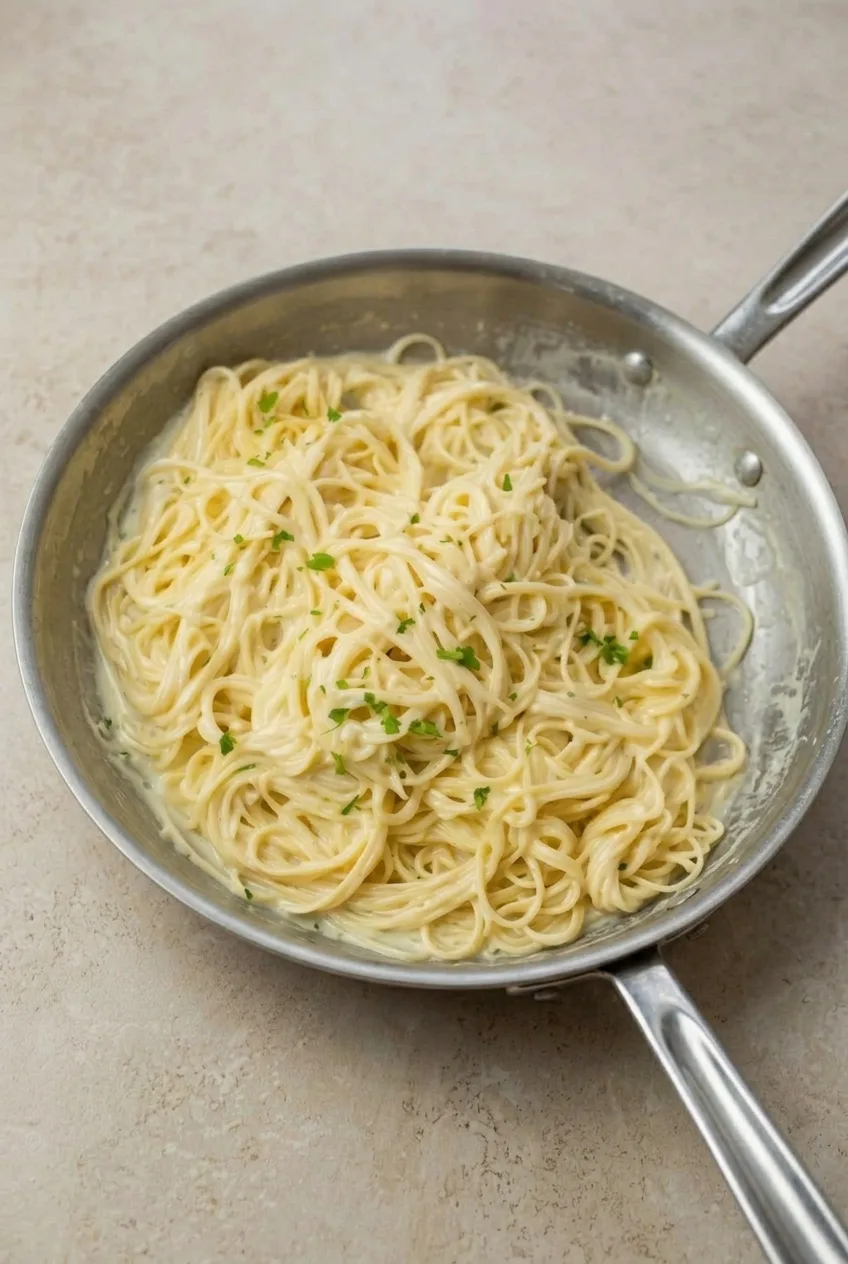
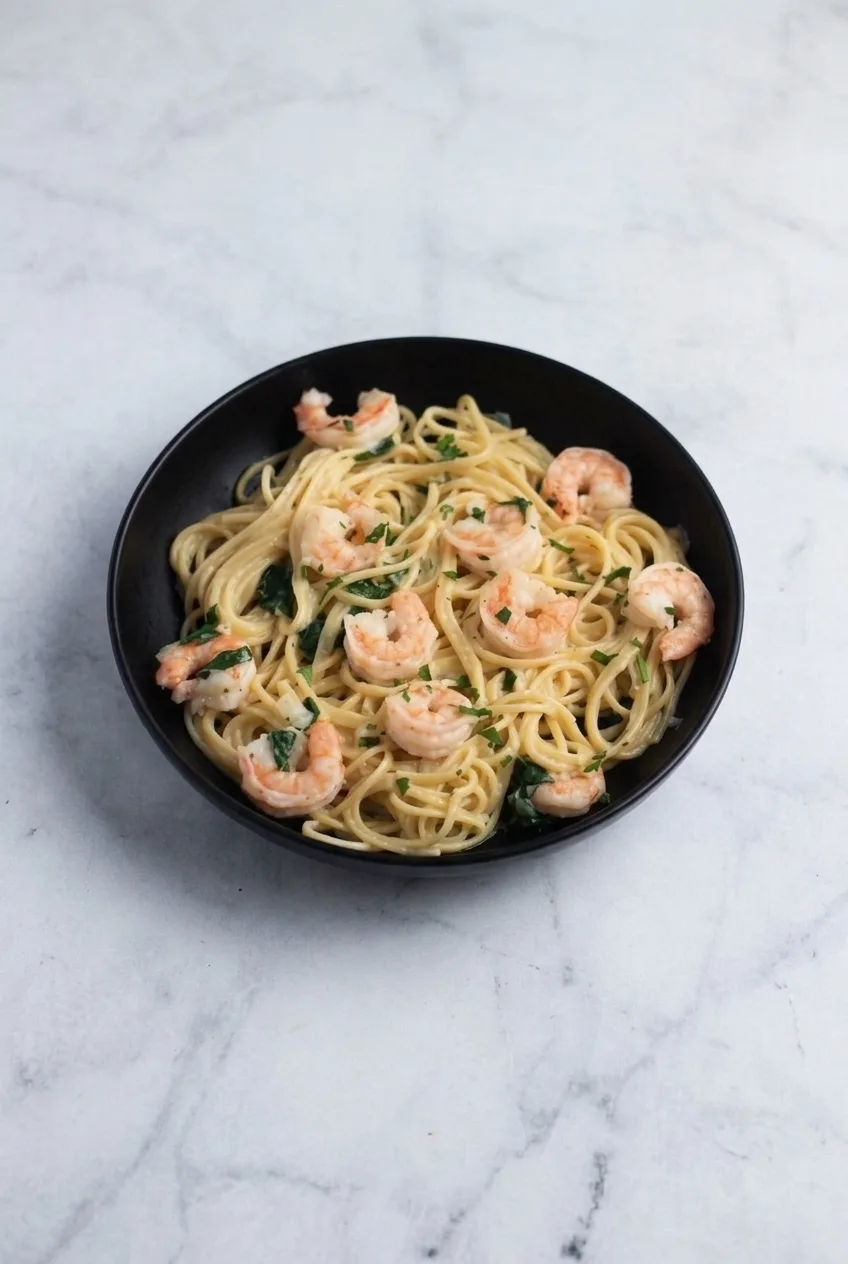
A full shallow skillet of creamy garlic Parmesan spaghetti centered on a neutral surface
  1. Cook the spaghetti: Bring a large pot of salted water to a boil. Add the spaghetti and cook uncovered according to the package directions, stirring soon after adding it and occasionally afterward. Start checking at the earliest package time; it usually takes about 8 to 10 minutes. The strands should be tender with slight firmness at the center.
  2. Reserve water and drain: Before draining, scoop out at least 1 cup of the starchy pasta water. Drain the spaghetti without rinsing it.
  3. Cook the garlic: While the spaghetti cooks, melt the butter in a wide 10- to 12-inch skillet over medium-low heat. Add the garlic and stir for 30 to 60 seconds, until fragrant but still pale. Lower the heat if it begins to brown.
  4. Warm the sauce: Add the half-and-half and black pepper. Stir over low to medium-low heat for 2 to 3 minutes, until warm and lightly steamy. Do not let it boil hard or reduce substantially.
  5. Toss with Parmesan: Add the drained spaghetti and about 1/4 cup reserved pasta water to the skillet. Toss to coat, then turn off the heat. Stir in the Parmesan gradually until the sauce is smooth and clings to the strands. If it looks thick or dry, toss in more pasta water a splash at a time, using up to 1/2 cup total as needed.
  6. Finish and serve: Scatter the parsley lightly over the pasta. Serve promptly in the shallow skillet or a warm bowl, while the sauce is glossy.

How to Keep the Parmesan Sauce Smooth

Finely grated Parmesan incorporates more readily than coarse shreds. Letting the skillet come off the heat before adding the cheese helps prevent clumps or a grainy sauce. Stir it in a little at a time, and do not bring the finished sauce back to a boil.

When to Add More Pasta Water

The spaghetti continues absorbing sauce after it is tossed. If the coating tightens before serving, add a small splash of the reserved water and toss again. Stop when the strands look glossy and coated, without liquid pooling in the pan.

Serving and Variations

Serve as a main dish or alongside roasted broccoli, a green salad, or garlic bread. For a less creamy version, omit the half-and-half and make a lighter sauce with butter, Parmesan, and reserved pasta water; it will not have the same creamy finish.

For a seafood variation, try Creamy Garlic Shrimp Pasta with Parmesan Sauce. For a different cream-free spaghetti dinner, see Classic Spaghetti Carbonara Without Cream.

Storing and Reheating Leftovers

Refrigerate cooled leftovers in an airtight container for up to 3 days. The spaghetti will absorb sauce as it sits, so leftovers will be thicker than freshly made pasta.

Reheat gently in a skillet over low heat with a splash of water, milk, or half-and-half, stirring until warmed and loosened. For one portion, microwave in short intervals, stirring between intervals and adding a little liquid if needed. Avoid a hard boil.

Nutrition

Approximate nutrition per side portion, based on 4 portions: 450 calories, 18g protein, 21g fat, and 46g carbohydrates. Per 100g: approximately 210 calories, 8g protein, 10g fat, and 22g carbohydrates. Values vary with the ingredients used.

Garlic Parmesan Pasta

Spaghetti is tossed with a creamy garlic butter sauce, Parmesan, and reserved pasta water until glossy.
Course: Main Course
Cuisine: Italian
Prep: 5 min
Cook: 15 min
Total: 20 min
Servings: 4

Equipment

  • Large pot
  • 10- to 12-inch skillet
  • Colander
  • Measuring cup

Ingredients

  • 8 ounces spaghetti (225 g)
  • Kosher salt, about 1 tablespoon for a large pot of pasta water
  • 3 tablespoons unsalted butter (45 g)
  • 3 medium garlic cloves, finely minced
  • 3/4 cup half-and-half (180 g)
  • 1/4 teaspoon black pepper, or to taste
  • 1 cup lightly packed finely grated Parmesan (90 g), preferably freshly grated
  • Reserved pasta water, up to 1/2 cup as needed
  • 1 tablespoon finely chopped fresh parsley

Instructions

  1. Bring a large pot of salted water to a boil. Add the spaghetti and cook uncovered according to the package directions, stirring soon after adding and occasionally afterward. Start checking at the earliest package time; it usually takes 8 to 10 minutes. Cook until tender with slight firmness at the center.
  2. Before draining, scoop out at least 1 cup of the pasta water. Drain the spaghetti without rinsing.
  3. While the spaghetti cooks, melt the butter in a wide 10- to 12-inch skillet over medium-low heat. Add the garlic and stir for 30 to 60 seconds, until fragrant but still pale. Lower the heat if it begins to brown.
  4. Add the half-and-half and black pepper. Stir over low to medium-low heat for 2 to 3 minutes, until warm and lightly steamy. Do not let it boil hard or reduce substantially.
  5. Add the drained spaghetti and about 1/4 cup reserved pasta water to the skillet. Toss to coat, then turn off the heat.
  6. Stir in the Parmesan gradually until the sauce is smooth and clings to the spaghetti. If the pasta looks thick or dry, add more pasta water a splash at a time, using up to 1/2 cup total as needed.
  7. Scatter the parsley over the pasta and serve promptly while the sauce is glossy.

Tips

  • Finely grated Parmesan melts more readily than coarse shreds.
  • Take the skillet off the heat before adding the Parmesan to help prevent clumps or a grainy sauce.
  • Add pasta water a splash at a time until the spaghetti looks glossy and coated, without liquid pooling in the pan.
  • Do not boil the finished sauce.

Variations

  • Cream-Free Garlic Parmesan Pasta: Omit the half-and-half and make a lighter sauce with butter, Parmesan, and reserved pasta water.
Notes

Refrigerate cooled leftovers in an airtight container for up to 3 days. Reheat gently over low heat or in short microwave intervals, adding a splash of water, milk, or half-and-half to loosen the sauce.

Nutrition

Per Serving Calories: 450 kcal | Per Serving Protein: 18 g | Per Serving Fat: 21 g | Per Serving Carbohydrates: 46 g | Per 100 G Calories: 210 kcal | Per 100 G Protein: 8 g | Per 100 G Fat: 10 g | Per 100 G Carbohydrates: 22 g

Classic Pasta Salad with Italian Dressing

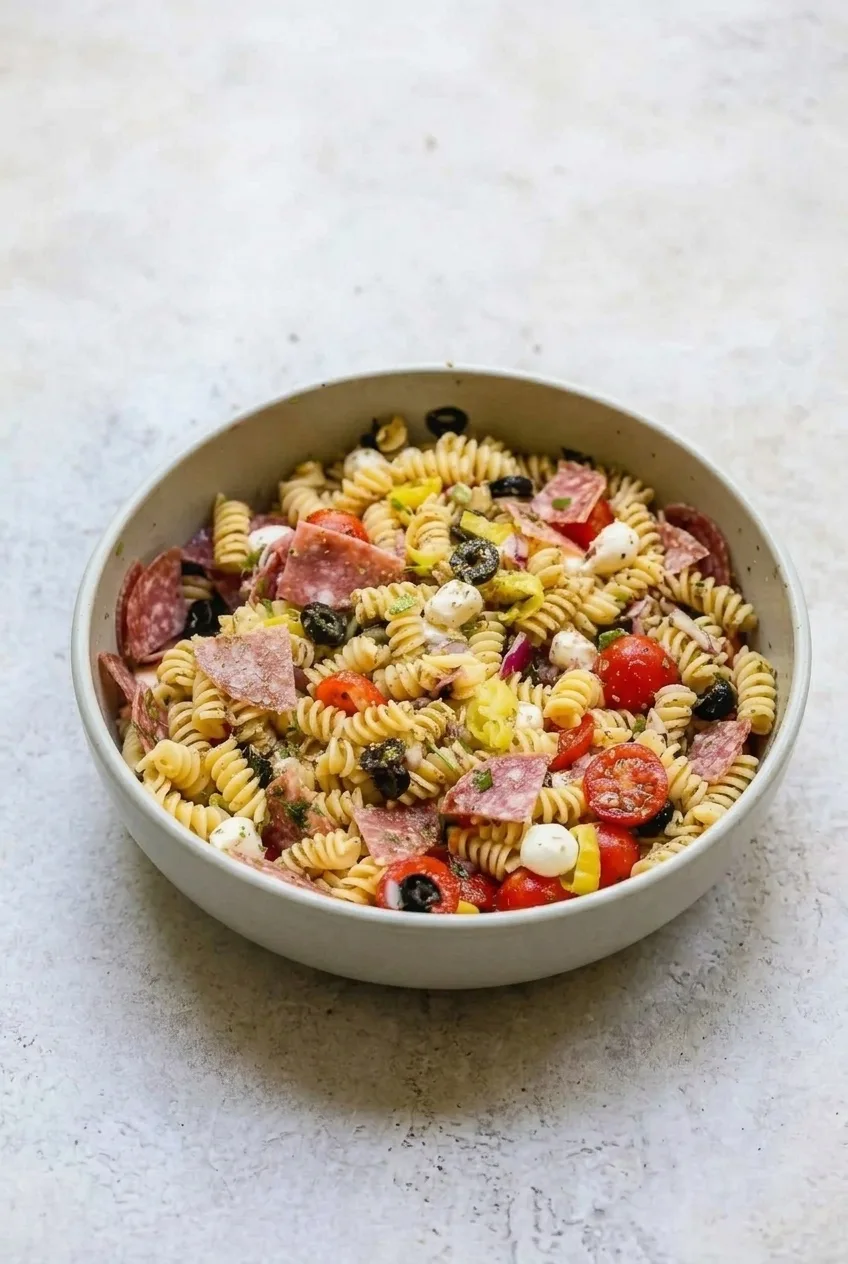
Rotini, broad pieces of salami, mozzarella pearls, cherry tomatoes, olives, banana peppers, and red onion make a colorful, scoopable pasta salad. Bottled Italian dressing gives everything a light, tangy coating without making the salad creamy.

Cook the rotini just to al dente, then cool and dry it before tossing. The salad needs at least an hour in the refrigerator, and a little dressing held back will refresh the pasta before serving. Makes 8 side-dish servings.

Ingredients

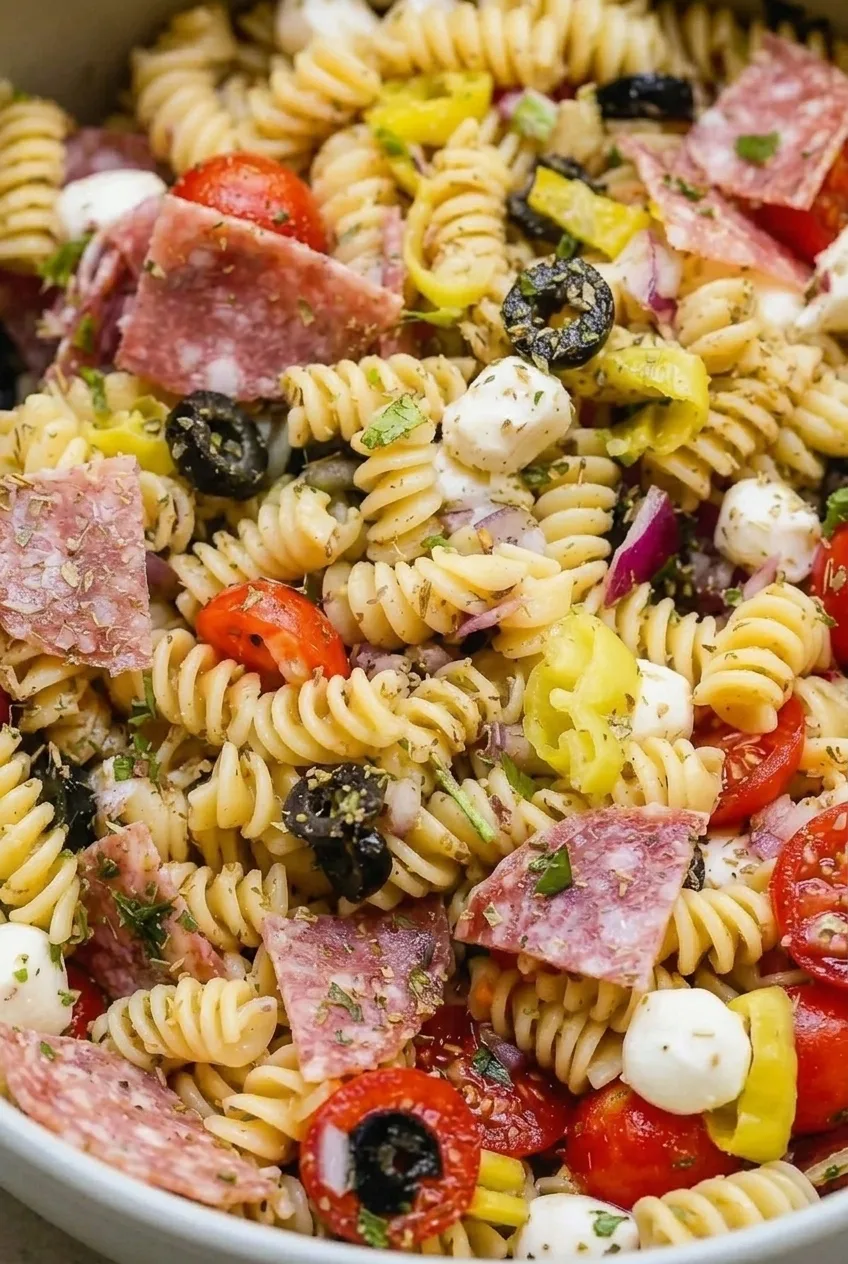
Close detail of Italian pasta salad showing glossy rotini, salami, mozzarella pearls, tomatoes, and herbs
  • 1 pound rotini pasta (450g)
  • 1 cup bottled Italian dressing, divided (240ml)
  • 5 ounces thinly sliced salami, cut into broad bite-size pieces (140g)
  • 8 ounces mozzarella pearls, drained (225g)
  • 1 pint cherry tomatoes, halved (about 300g)
  • 1/2 cup sliced black olives, drained (75g)
  • 1/2 cup sliced banana peppers or pepperoncini, drained (75g)
  • 1/4 small red onion, thinly sliced (about 35g)
  • 2 tablespoons chopped fresh parsley
  • 1 teaspoon Italian seasoning
  • 1/4 cup finely grated Parmesan (25g)

How to Make Classic Pasta Salad

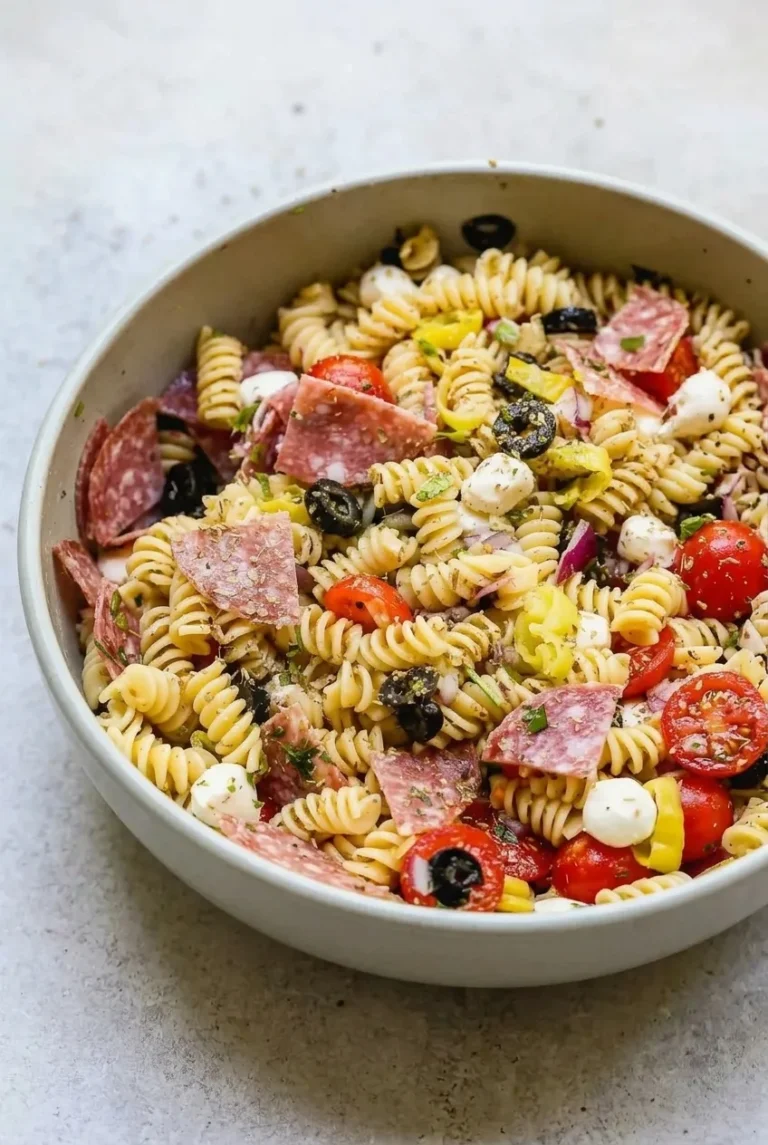
Full bowl of classic pasta salad with rotini, salami, mozzarella, tomatoes, olives, and banana peppers
  1. Cook the rotini: Bring a large pot of salted water to a boil over high heat. Add the pasta, stir to separate the spirals, and cook uncovered at a steady boil, stirring occasionally. Follow the package directions, usually about 8 to 10 minutes, but start checking a minute or two before the lower suggested time. Drain when the pasta is tender but still slightly firm and holding its shape.
  2. Cool and dry the pasta: Briefly rinse the drained rotini under cold water to stop the cooking. Drain thoroughly and pat dry so rinse water does not dilute the dressing. Alternatively, spread the drained pasta on a rimmed sheet pan to cool promptly without rinsing.
  3. Prepare the mix-ins: While the pasta cools, halve the tomatoes, thinly slice the onion, and cut the salami into broad pieces. Drain the mozzarella, olives, and peppers well.
  4. Toss the salad: In a large bowl, gently combine the cool pasta with the salami, mozzarella, tomatoes, olives, peppers, onion, parsley, Italian seasoning, and Parmesan. Add 3/4 cup of the dressing and toss until lightly coated, with no dressing pooling in the bowl. Reserve the remaining 1/4 cup.
  5. Chill and serve: Cover and refrigerate for at least 1 hour. Toss again before serving. If the pasta looks dry, add reserved dressing a little at a time, then taste and adjust as needed.

Why Save Some Dressing?

Rotini absorbs dressing as it chills, so a salad that looks lightly coated when assembled may look dry later. Adding the reserved dressing just before serving restores a light sheen without making the salad soggy. How much you need depends on the dressing and how long the salad has rested.

Ingredient Swaps

  • Make it meatless: Omit the salami and add extra vegetables if desired.
  • Use another short spiral: Fusilli can replace rotini.
  • Make the dressing: Use a light, oil-and-vinegar Italian-style dressing in place of bottled dressing, not a creamy one.

Make-Ahead and Storage

Assemble the salad at least an hour ahead or make it the day before. Keep it covered in the refrigerator, then toss and refresh with reserved dressing before serving. For fuller flavor, let it sit out briefly to take the chill off, but keep it refrigerated until shortly before serving.

Store leftovers in an airtight container in the refrigerator and aim to use them within about three days for best quality. The tomatoes and cheese may soften as they sit. Freezing is not recommended because the pasta, vegetables, and cheese can lose their texture.

Nutrition Information

Approximate nutrition per serving, based on 8 side-dish servings: 470 calories, 18g protein, 23g fat, and 47g carbohydrates. Per 100g of prepared salad: about 175 calories, 7g protein, 9g fat, and 18g carbohydrates. Values will vary with the dressing, salami, cheese, and cooked pasta yield.

Classic Pasta Salad with Italian Dressing

Rotini, salami, mozzarella, vegetables, and Parmesan are tossed in Italian dressing and chilled for a tangy, colorful side dish.
Course: Salad
Cuisine: American
Prep: 20 min
Cook: 10 min
Total: 90 min
Servings: 8 Calories: 470 kcal

Equipment

  • Large pot
  • Colander
  • Large mixing bowl
  • Rimmed sheet pan
  • Knife and cutting board

Ingredients

  • 1 pound rotini pasta (450 g)
  • 1 cup bottled Italian dressing, divided (240 ml)
  • 5 ounces thinly sliced salami, cut into broad bite-size pieces (140 g)
  • 8 ounces mozzarella pearls, drained (225 g)
  • 1 pint cherry tomatoes, halved (about 300 g)
  • 1/2 cup sliced black olives, drained (75 g)
  • 1/2 cup sliced banana peppers or pepperoncini, drained (75 g)
  • 1/4 small red onion, thinly sliced (about 35 g)
  • 2 tablespoons chopped fresh parsley
  • 1 teaspoon Italian seasoning
  • 1/4 cup finely grated Parmesan (25 g)

Instructions

  1. Bring a large pot of salted water to a boil. Add the rotini and cook according to package directions, usually 8 to 10 minutes, until tender but still slightly firm.
  2. Drain the pasta. Briefly rinse under cold water to stop the cooking, then drain thoroughly and pat dry. Alternatively, spread it on a rimmed sheet pan to cool without rinsing.
  3. While the pasta cools, halve the tomatoes, thinly slice the onion, and cut the salami into broad bite-size pieces. Drain the mozzarella, olives, and peppers well.
  4. Combine the cooled pasta, salami, mozzarella, tomatoes, olives, peppers, onion, parsley, Italian seasoning, and Parmesan in a large bowl.
  5. Add 3/4 cup of the dressing and toss until the ingredients are lightly coated. Reserve the remaining 1/4 cup dressing.
  6. Cover and refrigerate for at least 1 hour.
  7. Toss before serving. If the salad looks dry, add reserved dressing a little at a time and adjust to taste.

Tips

  • Start checking the pasta a minute or two before the package’s lower suggested cooking time.
  • Drain the pasta and mix-ins well so excess water does not dilute the dressing.
  • Hold back some dressing because the pasta absorbs it as it chills.
  • Add reserved dressing gradually just before serving to refresh the salad without making it soggy.

Variations

  • Meatless Pasta Salad: Omit the salami and add extra vegetables if desired.
  • Fusilli Pasta Salad: Replace the rotini with fusilli.
  • Homemade Italian-Style Dressing: Use a light oil-and-vinegar Italian-style dressing in place of bottled dressing; avoid creamy dressing.

Notes

Make at least an hour ahead or the day before. Store covered in an airtight container in the refrigerator and use within about three days for best quality. Freezing is not recommended. Nutrition per 100 g is approximately 175 calories, 7 g protein, 9 g fat, and 18 g carbohydrates.

Nutrition

Calories: 470 kcal | Protein: 18 g | Fat: 23 g | Carbohydrates: 47 g

Baked Feta Pasta

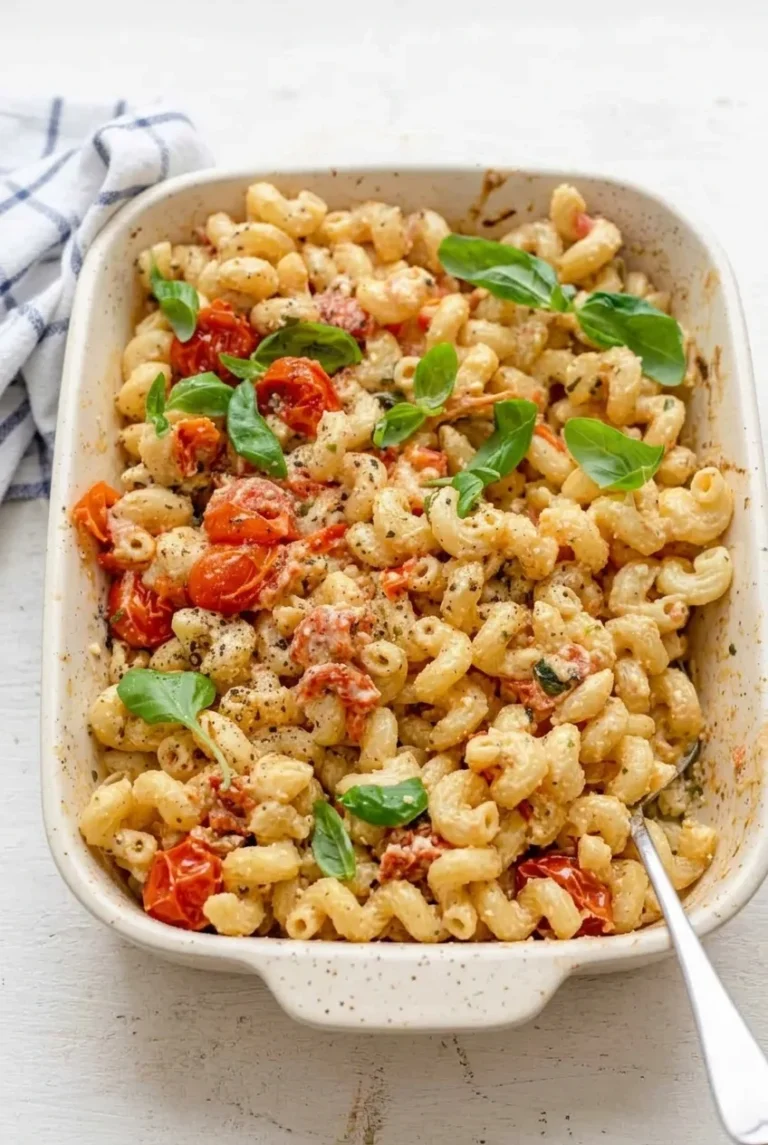
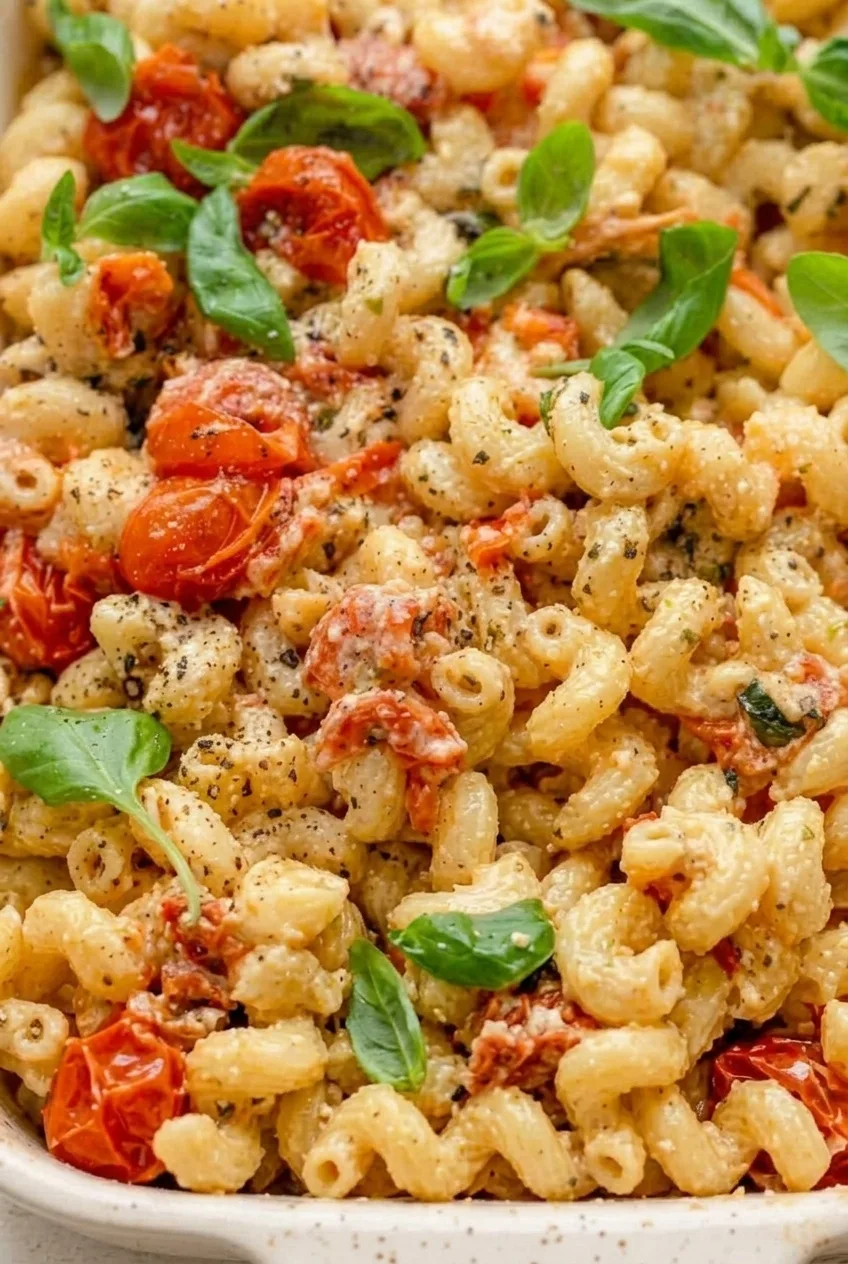
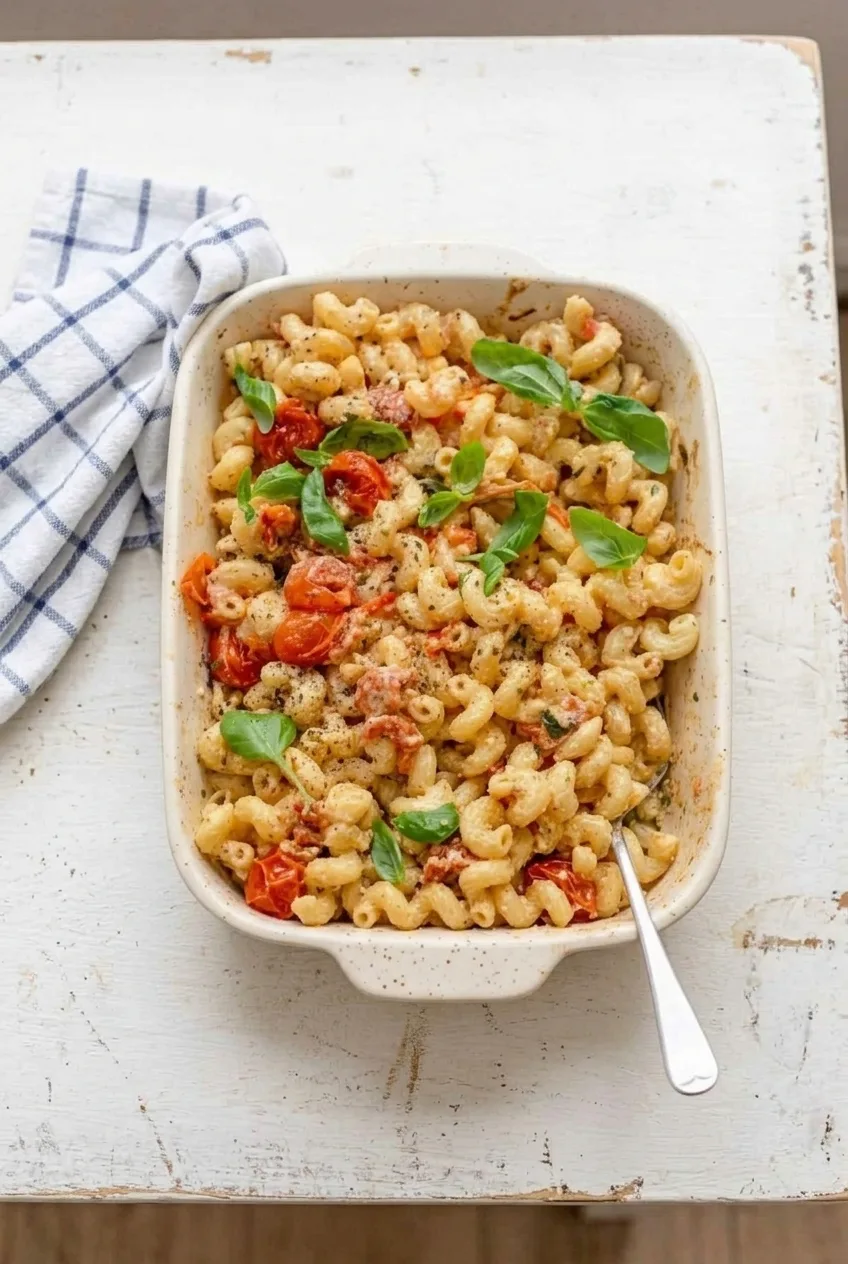
Roasted cherry tomatoes and softened feta mash into a sauce that coats short, ridged cavatappi. Keep the tomatoes close to the feta as they roast so their juices collect in the baking dish, then toss the sauce with separately cooked, al dente pasta. The finished dish should be moist, with burst tomato pieces throughout and fresh basil leaves on top.

The sauce can vary with the moisture in the tomatoes and feta. Save some pasta cooking water before draining so you can loosen it if needed.

Ingredients for Baked Feta Pasta

Close detail of creamy cavatappi coated in feta-tomato sauce with burst tomatoes and basil

Makes 4 to 6 servings. Allow about 10 minutes to prepare and about 50 minutes total.

  • 12 ounces cavatappi pasta (340g)
  • 8 ounces block feta, preferably packed in brine and drained (225g)
  • 2 pints cherry tomatoes (about 575g)
  • 1/3 cup extra-virgin olive oil
  • 3 garlic cloves, lightly smashed and peeled
  • About 1/2 cup torn fresh basil, plus a handful of whole leaves for topping (about 20g total)
  • 1/4 teaspoon kosher salt, plus more for the pasta water
  • 1/2 teaspoon freshly ground black pepper, or to taste
  • Up to 1 cup reserved pasta cooking water, as needed

How to Make Baked Feta Pasta

A full baking dish of creamy baked feta cavatappi with tomatoes and basil, photographed with more tabletop visible
  1. Arrange the feta and tomatoes: Heat the oven to 400°F (205°C) with a rack in the center. Place the feta in the center of a 9-by-13-inch oven-safe baking dish. Cluster the tomatoes around it and add the garlic. Drizzle the olive oil over the feta and tomatoes, then sprinkle with 1/4 teaspoon salt and the black pepper.
  2. Roast until soft: Bake uncovered for 35 to 40 minutes, without stirring. Start checking around 30 minutes. The tomatoes should be burst and collapsed, with juices in the dish, and the feta should be soft enough to mash. If the tomatoes are still firm or the feta resists mashing, continue roasting and check again. A few light golden spots on the feta are fine.
  3. Cook the pasta: While the feta and tomatoes roast, cook the cavatappi in a large pot of salted boiling water according to the package directions, stopping when it is al dente. Reserve at least 1 cup of cooking water before draining.
  4. Mash the sauce: Remove the baking dish from the oven. Mash the hot feta, tomatoes, and roasted garlic together with a fork or sturdy spoon. Leave some recognizable tomato pieces in the sauce.
  5. Toss with the pasta: Add the drained cavatappi and torn basil to the baking dish. Toss until coated. If the sauce is too thick to coat the pasta, stir in reserved pasta water a tablespoon or two at a time until it looks creamy and lightly glossy, not soupy.
  6. Finish and serve: Taste before adding more salt; feta is already salty. Scatter the whole basil leaves over the pasta and serve warm from the baking dish.

How to Keep the Sauce Creamy

Tomatoes release different amounts of juice, and the feta sauce can tighten when tossed with pasta. Keeping the tomatoes clustered around the feta helps their juices collect rather than roast away in a thin layer. If the finished pasta seems dry, use the reserved pasta water gradually; you may not need the full cup.

Choosing Feta and Pasta

A block of feta, especially one packed in brine, is the best choice for a cohesive sauce. If using crumbled feta, pack it together in the center of the dish before roasting; the finished sauce may be less cohesive.

Fusilli or penne can replace cavatappi, and grape tomatoes can replace cherry tomatoes. Cook any pasta shape to al dente before tossing it with the hot sauce.

Baked Feta Pasta Variations

  • For gentle heat: Add 1/4 teaspoon red pepper flakes before roasting, or offer them at the table.
  • For a brighter finish: Stir 1/2 teaspoon lemon zest into the mashed sauce.
  • For sweet-salty contrast: Add a small drizzle of honey to an individual serving.

How to Store and Reheat Baked Feta Pasta

Refrigerate leftovers in an airtight container and use within 3 to 4 days. The sauce may thicken as it chills. Warm leftovers gently, adding a small splash of water if needed to loosen the sauce; the original texture may not fully return.

For another tomato-forward pasta dinner, try One Pot Creamy Tomato Pasta with Fusilli.

Nutrition

Approximate nutrition per serving, based on 1 of 6 servings: 445 calories, 14g protein, 21g fat, and 51g carbohydrates. Approximate nutrition per 100g: 155 calories, 5g protein, 7g fat, and 18g carbohydrates. Values vary with the feta, pasta, and final sauce consistency.

Baked Feta Pasta

Cavatappi is tossed with a creamy roasted feta and cherry tomato sauce, fresh basil, and pasta cooking water.
Course: Main Course
Cuisine: Italian
Prep: 10 min
Cook: 40 min
Total: 50 min
Servings: 6 Calories: 445 kcal

Equipment

  • 9-by-13-inch oven-safe baking dish
  • Oven
  • Large pot
  • Colander
  • Fork or sturdy spoon

Ingredients

For the pasta

  • 12 ounces cavatappi pasta (340 g)
  • Kosher salt, for the pasta water

For the sauce

  • 8 ounces block feta, preferably packed in brine and drained (225 g)
  • 2 pints cherry tomatoes (about 575 g)
  • 1/3 cup extra-virgin olive oil
  • 3 garlic cloves, lightly smashed and peeled
  • 1/4 teaspoon kosher salt
  • 1/2 teaspoon freshly ground black pepper, or to taste
  • About 1/2 cup torn fresh basil (about 20 g total, including topping leaves)
  • Up to 1 cup reserved pasta cooking water, as needed

Instructions

  1. Preheat the oven to 400°F (205°C) with a rack in the center.
  2. Place the feta in the center of a 9-by-13-inch oven-safe baking dish. Cluster the tomatoes around it and add the garlic.
  3. Drizzle the olive oil over the feta and tomatoes. Sprinkle with 1/4 teaspoon salt and the black pepper.
  4. Roast uncovered for 35 to 40 minutes without stirring. Start checking around 30 minutes; the tomatoes should be burst and collapsed, and the feta soft enough to mash.
  5. While the feta and tomatoes roast, cook the cavatappi in a large pot of salted boiling water according to package directions until al dente. Reserve at least 1 cup of cooking water before draining.
  6. Remove the baking dish from the oven. Mash the hot feta, tomatoes, and roasted garlic together with a fork or sturdy spoon, leaving some tomato pieces intact.
  7. Add the drained pasta and torn basil to the baking dish and toss until coated.
  8. If the sauce is too thick, stir in reserved pasta water a tablespoon or two at a time until creamy and lightly glossy.
  9. Taste before adding more salt. Top with whole basil leaves and serve warm.

Tips

  • Keep the tomatoes clustered around the feta so their juices collect in the baking dish.
  • Start checking the tomatoes and feta around 30 minutes; continue roasting if the tomatoes are firm or the feta is difficult to mash.
  • Reserve pasta cooking water before draining, and add it gradually only as needed.
  • Cook the pasta al dente so it holds its shape when tossed with the hot sauce.
  • Taste before adding extra salt because feta is already salty.

Variations

  • Gentle Heat: Add 1/4 teaspoon red pepper flakes before roasting, or offer them at the table.
  • Brighter Finish: Stir 1/2 teaspoon lemon zest into the mashed sauce.
  • Sweet-Salty Contrast: Add a small drizzle of honey to an individual serving.
  • Alternative Pasta or Tomatoes: Replace the cavatappi with fusilli or penne, or use grape tomatoes instead of cherry tomatoes.

Notes

Refrigerate leftovers in an airtight container for 3 to 4 days. Reheat gently with a splash of water to loosen the sauce; the original texture may not fully return. Approximate nutrition per 100 g: 155 calories, 5 g protein, 7 g fat, and 18 g carbohydrates.

Nutrition

Calories: 445 kcal | Protein: 14 g | Fat: 21 g | Carbohydrates: 51 g

Creamy Garlic Shrimp Pasta

Whole shrimp and linguine are tossed in a light garlic-Parmesan cream sauce, then finished with lemon juice and parsley. The sauce should cling to the long strands without pooling in the bowl.

Sear the shrimp briefly and set it aside while the sauce cooks; returning it at the end helps keep it tender. Reserve some pasta water before draining so you can loosen the sauce a splash at a time as it coats the noodles.

Ingredients for Creamy Garlic Shrimp Pasta

Close view of creamy linguine strands, whole shrimp, and parsley in garlic-Parmesan sauce.
  • 8 ounces linguine (225g)
  • 1 pound large raw shrimp, peeled and deveined (450g)
  • 1 tablespoon olive oil
  • 2 tablespoons unsalted butter
  • 4 cloves garlic, finely minced (about 12g)
  • 1 cup heavy cream
  • 1/2 cup lightly packed freshly grated Parmesan (45g)
  • 1 tablespoon lemon juice, or to taste
  • Kosher salt, for the pasta water and about 1/4 teaspoon for the shrimp, plus more to taste
  • 1/4 teaspoon black pepper, plus more to taste
  • 2 tablespoons finely chopped fresh parsley (about 8g)

Fettuccine or spaghetti can replace the linguine; follow the package cooking time. If using frozen shrimp, thaw it completely, drain it, and pat it dry before seasoning. For mild heat, add an optional pinch of red pepper flakes to the butter before the garlic.

How to Make Creamy Garlic Shrimp Pasta

A full bowl of creamy garlic shrimp pasta on a pale stone surface, seen from a wider angle.
  1. Boil the linguine: Bring a large pot of salted water to a boil. Cook the pasta until al dente, checking at the earliest time on the package. Before draining, reserve about 1 cup of pasta water.
  2. Season the shrimp: Pat the shrimp thoroughly dry. Season with about 1/4 teaspoon kosher salt and a little of the black pepper.
  3. Sear and set aside: Heat a 12-inch skillet over medium-high heat until hot, then add the olive oil. Arrange the shrimp in a single layer, working in batches if needed so they sear rather than steam. Check after about 1 minute on the first side, then turn once. Large shrimp may take about 1–2 minutes per side, depending on their size and the pan heat. Transfer them to a plate when pink and opaque throughout; an instant-read thermometer should register 145°F (65°C).
  4. Make the garlic cream sauce: Reduce the heat to medium-low and melt the butter in the same skillet. Stir in the garlic just until fragrant, keeping it pale. Pour in the cream, scrape up the browned bits, and simmer gently, uncovered, for about 3–5 minutes, until the sauce lightly coats a spoon.
  5. Add the Parmesan: Lower the heat and stir in the Parmesan until melted. Stir in the lemon juice and remaining black pepper. Keep the sauce below a hard boil.
  6. Coat the pasta: Add the drained linguine and toss over low heat. Add reserved pasta water a splash at a time until the sauce lightly coats the strands without pooling; you may not need all of it. Taste and add salt if needed, keeping in mind that the Parmesan and pasta water also season the sauce.
  7. Finish and serve: Fold in the shrimp and any juices from the plate just long enough to warm through, about 1 minute. Remove from the heat, scatter the parsley over the pasta, and serve promptly in shallow bowls.

How to Keep the Shrimp Tender

Shrimp size changes the cooking time, so check for pink, opaque flesh rather than relying only on the clock. Remove the shrimp as soon as it is cooked instead of leaving it in the skillet while the sauce simmers. Smaller shrimp may be ready sooner than the times given for large shrimp.

How to Get a Sauce That Clings

Let the cream simmer gently before adding the Parmesan over low heat. Freshly grated cheese melts more smoothly than pre-shredded cheese. If the sauce still looks thin, give it a little more time at a gentle simmer before adding any pasta water.

Once the linguine is in the skillet, use small splashes of reserved pasta water to adjust the coating. Leave the sauce slightly looser than you want on the plate: it thickens as the pasta rests and cools.

Storing and Reheating Leftovers

Refrigerate leftovers in an airtight container and use within 2 days. Reheat gently over low heat on the stovetop or in short microwave intervals, stirring as needed. Add a splash of water, milk, or cream to loosen the sauce as it warms.

For another rich pasta dinner with a different sauce style, try classic spaghetti carbonara.

Nutrition

Approximate nutrition per serving, based on 4 servings: 655 calories, 35g protein, 36g fat, and 45g carbohydrates. Approximate nutrition per 100g: 200 calories, 11g protein, 11g fat, and 14g carbohydrates. Values are estimates and vary with the ingredients and final serving size.

Creamy Garlic Shrimp Pasta

Linguine and tender shrimp are tossed in a garlic-Parmesan cream sauce with lemon and parsley.
Course: Main Course
Cuisine: Italian
Prep: 15 min
Cook: 20 min
Total: 35 min
Servings: 4

Equipment

  • large pot
  • 12-inch skillet
  • colander
  • instant-read thermometer

Ingredients

Pasta and Shrimp

  • 8 ounces linguine (225g)
  • 1 pound large raw shrimp, peeled and deveined (450g)
  • 1 tablespoon olive oil

Sauce and Seasoning

  • 2 tablespoons unsalted butter
  • 4 cloves garlic, finely minced (about 12g)
  • 1 cup heavy cream
  • 1/2 cup lightly packed freshly grated Parmesan (45g)
  • 1 tablespoon lemon juice, or to taste
  • Kosher salt, for the pasta water and about 1/4 teaspoon for the shrimp, plus more to taste
  • 1/4 teaspoon black pepper, plus more to taste
  • 2 tablespoons finely chopped fresh parsley (about 8g)

Instructions

  1. Bring a large pot of salted water to a boil. Cook the linguine until al dente, checking at the earliest package time. Reserve about 1 cup of pasta water, then drain.
  2. Pat the shrimp thoroughly dry and season with about 1/4 teaspoon kosher salt and a little black pepper.
  3. Heat a 12-inch skillet over medium-high heat until hot, then add the olive oil. Arrange the shrimp in a single layer, working in batches if needed.
  4. Sear the shrimp for about 1 minute on the first side, then turn once. Cook for about 1–2 minutes per side, until pink and opaque throughout and an instant-read thermometer registers 145°F (65°C). Transfer to a plate.
  5. Reduce the heat to medium-low and melt the butter in the same skillet. Stir in the garlic just until fragrant, keeping it pale.
  6. Pour in the cream, scrape up the browned bits, and simmer gently, uncovered, for 3–5 minutes, until the sauce lightly coats a spoon.
  7. Lower the heat and stir in the Parmesan until melted. Stir in the lemon juice and remaining black pepper; do not let the sauce boil hard.
  8. Add the drained linguine and toss over low heat. Add reserved pasta water a splash at a time until the sauce lightly coats the pasta. Taste and add salt if needed.
  9. Fold in the shrimp and any juices from the plate and warm for about 1 minute. Remove from the heat, scatter with parsley, and serve promptly.

Tips

  • Pat shrimp dry before seasoning so they sear instead of steam.
  • Cook shrimp just until pink and opaque, then remove them from the skillet while the sauce simmers.
  • Use freshly grated Parmesan for a smoother-melting sauce.
  • Add pasta water a splash at a time; you may not need the full cup.
  • Leave the sauce slightly looser than desired, as it thickens while the pasta rests.

Variations

  • Fettuccine or Spaghetti: Replace the linguine with fettuccine or spaghetti and follow the package cooking time.
  • Mildly Spicy Shrimp Pasta: Add an optional pinch of red pepper flakes to the butter before adding the garlic.

Notes

Refrigerate leftovers in an airtight container and use within 2 days. Reheat gently on the stovetop or in short microwave intervals, adding a splash of water, milk, or cream to loosen the sauce. Shrimp should reach 145°F (65°C).

Nutrition

Per Serving Calories: 655 kcal | Per Serving Protein: 35 g | Per Serving Fat: 36 g | Per Serving Carbohydrates: 45 g | Per 100g Calories: 200 kcal | Per 100g Protein: 11 g | Per 100g Fat: 11 g | Per 100g Carbohydrates: 14 g

One Pot Creamy Tomato Pasta

Dry fusilli cooks directly in tomato broth, then gets a creamy finish from cream cheese and Parmesan. Diced tomatoes leave small pieces in the orange-red sauce, while the spirals catch it in their grooves. Stir and scrape the pot regularly, especially as the sauce thickens, and taste the pasta before the expected cook time is up. Serve it while the sauce is still glossy and slightly loose; the fusilli will keep absorbing liquid after the heat is off.

Prep: 10 minutes | Cook: 20–25 minutes | Total: 30–35 minutes | Serves 4

Ingredients for One Pot Creamy Tomato Pasta

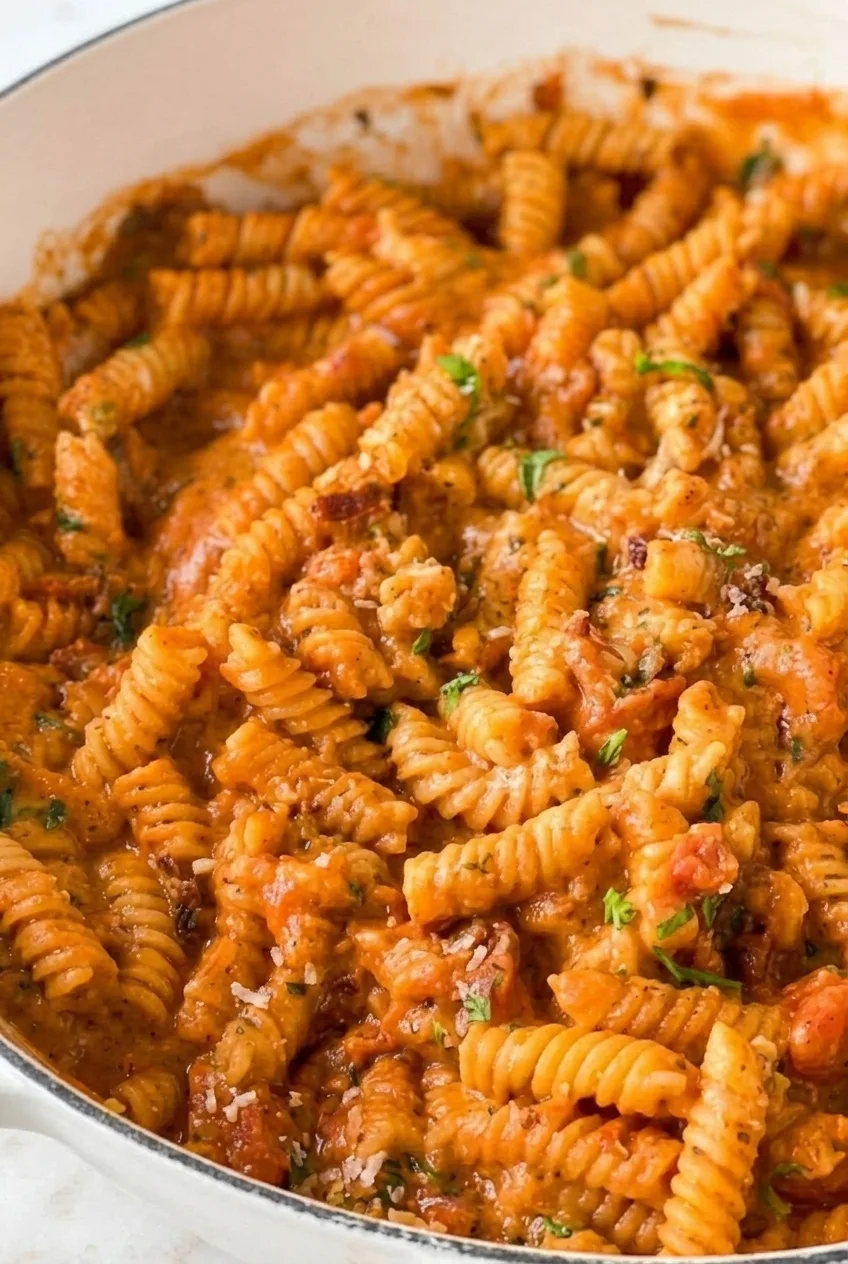
Close-up of creamy tomato sauce clinging to fusilli ridges with visible tomato pieces and herb flecks
  • 12 ounces short fusilli pasta (340g)
  • 1 tablespoon olive oil
  • 1 small yellow onion, finely chopped (about 1 cup or 110g)
  • 3 garlic cloves, minced
  • 2 tablespoons tomato paste (about 30g)
  • 1 teaspoon Italian seasoning
  • 1/8 teaspoon red pepper flakes, or to taste
  • 1 can (14.5 ounces) diced tomatoes, with juices
  • 3 cups low-sodium vegetable broth, plus up to 1 cup more as needed
  • 1/2 teaspoon kosher salt, plus more to taste
  • 1/4 teaspoon black pepper, plus more to taste
  • 4 ounces cream cheese, softened and cut into small pieces (115g)
  • 1/2 cup finely grated Parmesan, divided (45g)
  • 1–2 tablespoons chopped fresh parsley, optional

Use a wide 4- to 5-quart Dutch oven or deep lidded skillet. The pasta should fit comfortably enough to stir and sit mostly beneath the cooking liquid.

How to Make One Pot Creamy Tomato Pasta

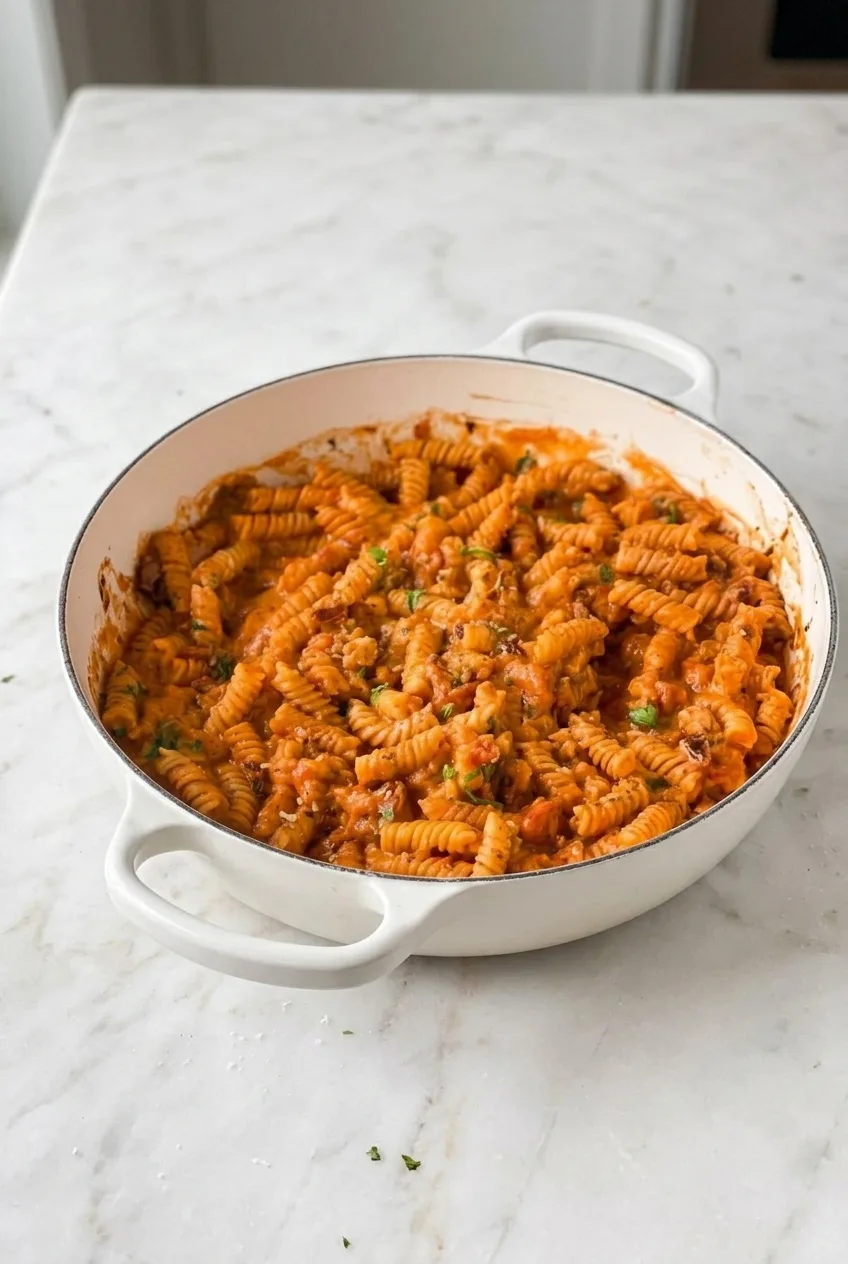
Wide view of the complete pot of creamy tomato fusilli centered on a pale countertop
  1. Soften the onion: Warm the olive oil in the pot over medium heat. Add the onion and cook, stirring, for 4–5 minutes, until tender and translucent but not browned.
  2. Cook the aromatics: Stir in the garlic, Italian seasoning, red pepper flakes, and tomato paste. Cook for 1–2 minutes, stirring, until fragrant and the paste darkens slightly. Do not let the garlic brown.
  3. Add the pasta and liquid: Stir in the diced tomatoes with their juices, 3 cups broth, salt, pepper, and dry fusilli. Spread the pasta through the pot so most of it is beneath the liquid. Bring to a simmer over medium-high heat.
  4. Simmer and stir: Reduce the heat to medium-low to maintain a steady simmer. Cover between stirring intervals, opening the pot to stir and scrape the bottom every 2–3 minutes. Stir more often as the sauce thickens near the end. Start tasting after about 10 minutes; the pasta will take roughly 12–16 minutes to simmer, depending on the brand and pot. It is ready when tender with a slight bite and no firm, chalky center. If it is still firm and the pot is getting dry, add broth or water a few tablespoons at a time and continue simmering.
  5. Make the sauce creamy: Uncover the pot and reduce the heat to low. Stir in the cream cheese and most of the Parmesan for 1–2 minutes, until no large white streaks remain. Add a splash of broth if needed. The sauce should coat the fusilli but still look glossy and slightly loose.
  6. Rest and serve: Turn off the heat and let the pasta stand for about 2 minutes. Scatter over the reserved Parmesan and optional parsley, then serve promptly from the pot.

How to Keep the Pasta Saucy

If the fusilli is still firm but the liquid is nearly gone, add a few tablespoons of broth or water rather than turning up the heat. If the pasta is tender, add the creamy ingredients instead of cooking until the pot looks dry. The sauce will thicken during its brief rest and continue thickening as the pasta sits.

Fusilli and Cooking Time

Fusilli’s ridges hold the sauce, but its cooking time can vary by brand. Pot width and stove heat also affect how quickly liquid evaporates, so use the package time as a guide and taste for doneness. Rotini or penne can work in place of fusilli, though either may need a different simmer time or amount of liquid.

Serving, Storage, and Reheating

Serve family-style with the remaining Parmesan and optional parsley. A simple green salad makes a light side. For another creamy-textured pasta dinner made without cream, try Classic Spaghetti Carbonara Without Cream.

Refrigerate leftovers promptly in an airtight container and use within about 3 days. The pasta will soften and the sauce will thicken. Reheat gently on the stovetop over low to medium-low heat with a splash of broth or water, stirring until hot. For an individual portion, microwave loosely covered and stir partway through heating. Freezing is not recommended for the best texture; the pasta may soften further and absorb more sauce after thawing.

Nutrition

Approximate nutrition per serving (1/4 of the recipe): 550 calories, 20g protein, 18g fat, and 75g carbohydrates. Approximate nutrition per 100g: 140 calories, 5g protein, 5g fat, and 19g carbohydrates. Values vary with ingredient brands and the amount of broth used.

One Pot Creamy Tomato Pasta

Fusilli simmers in tomato broth and is finished with cream cheese and Parmesan for a creamy, lightly tangy sauce.
Course: Main Course
Cuisine: Italian
Prep: 10 min
Cook: 25 min
Total: 35 min
Servings: 4

Equipment

  • 4- to 5-quart Dutch oven or deep lidded skillet

Ingredients

Pasta and sauce

  • 12 ounces short fusilli pasta (340g)
  • 1 tablespoon olive oil
  • 1 small yellow onion, finely chopped (about 1 cup or 110g)
  • 3 garlic cloves, minced
  • 2 tablespoons tomato paste (about 30g)
  • 1 teaspoon Italian seasoning
  • 1/8 teaspoon red pepper flakes, or to taste
  • 1 can (14.5 ounces) diced tomatoes, with juices
  • 3 cups low-sodium vegetable broth, plus up to 1 cup more as needed
  • 1/2 teaspoon kosher salt, plus more to taste
  • 1/4 teaspoon black pepper, plus more to taste
  • 4 ounces cream cheese, softened and cut into small pieces (115g)
  • 1/2 cup finely grated Parmesan, divided (45g)
  • 1–2 tablespoons chopped fresh parsley, optional

Instructions

  1. Warm the olive oil in a wide Dutch oven or deep lidded skillet over medium heat. Add the onion and cook, stirring, for 4–5 minutes, until tender and translucent but not browned.
  2. Stir in the garlic, Italian seasoning, red pepper flakes, and tomato paste. Cook for 1–2 minutes, until fragrant and the paste darkens slightly; do not let the garlic brown.
  3. Add the diced tomatoes and their juices, 3 cups broth, salt, pepper, and dry fusilli. Stir to distribute the pasta so most of it sits beneath the liquid.
  4. Bring to a simmer over medium-high heat, then reduce the heat to medium-low. Cover between stirring intervals, opening the pot every 2–3 minutes to stir and scrape the bottom.
  5. Start tasting the pasta after about 10 minutes. Simmer for roughly 12–16 minutes, stirring more often as the sauce thickens, until tender with a slight bite and no firm, chalky center.
  6. If the pasta is still firm and the pot is getting dry, add broth or water a few tablespoons at a time and continue simmering.
  7. Uncover the pot and reduce the heat to low. Stir in the cream cheese and most of the Parmesan for 1–2 minutes, until no large white streaks remain. Add a splash of broth if needed.
  8. Turn off the heat and let the pasta stand for about 2 minutes. Top with the reserved Parmesan and optional parsley, then serve promptly.

Tips

  • Stir and scrape the bottom regularly, especially as the sauce thickens.
  • Taste the pasta before the expected cook time is up; timing varies by pasta brand and pot.
  • If the pasta is firm but the liquid is low, add broth or water a few tablespoons at a time instead of raising the heat.
  • Serve while the sauce is glossy and slightly loose, since it thickens as it rests.

Variations

  • Rotini or Penne Tomato Pasta: Use rotini or penne in place of fusilli, adjusting the simmer time and liquid as needed.

Notes

Refrigerate leftovers in an airtight container for up to about 3 days. Reheat gently with a splash of broth or water. Freezing is not recommended; the pasta may soften and absorb more sauce.

Nutrition

Per Serving Calories: 550 kcal | Per Serving Protein: 20 g | Per Serving Fat: 18 g | Per Serving Carbohydrates: 75 g | Per 100g Calories: 140 kcal | Per 100g Protein: 5 g | Per 100g Fat: 5 g | Per 100g Carbohydrates: 19 g

Classic Spaghetti Carbonara

Spaghetti carbonara should have a glossy, pale-yellow sauce that clings to the noodles, with tender pieces of cured pork and plenty of black pepper. Eggs, Pecorino Romano, rendered pork fat, and starchy pasta water create that coating without cream.

This version uses pancetta in place of guanciale and combines whole eggs with extra yolks. Tossing the very hot pasta with the egg mixture in a heatproof bowl, away from the burner, helps the sauce turn silky rather than scrambled.

Prep time: 10 minutes | Cook time: 15 minutes | Total time: 25 minutes | Serves: 4

Ingredients for Spaghetti Carbonara

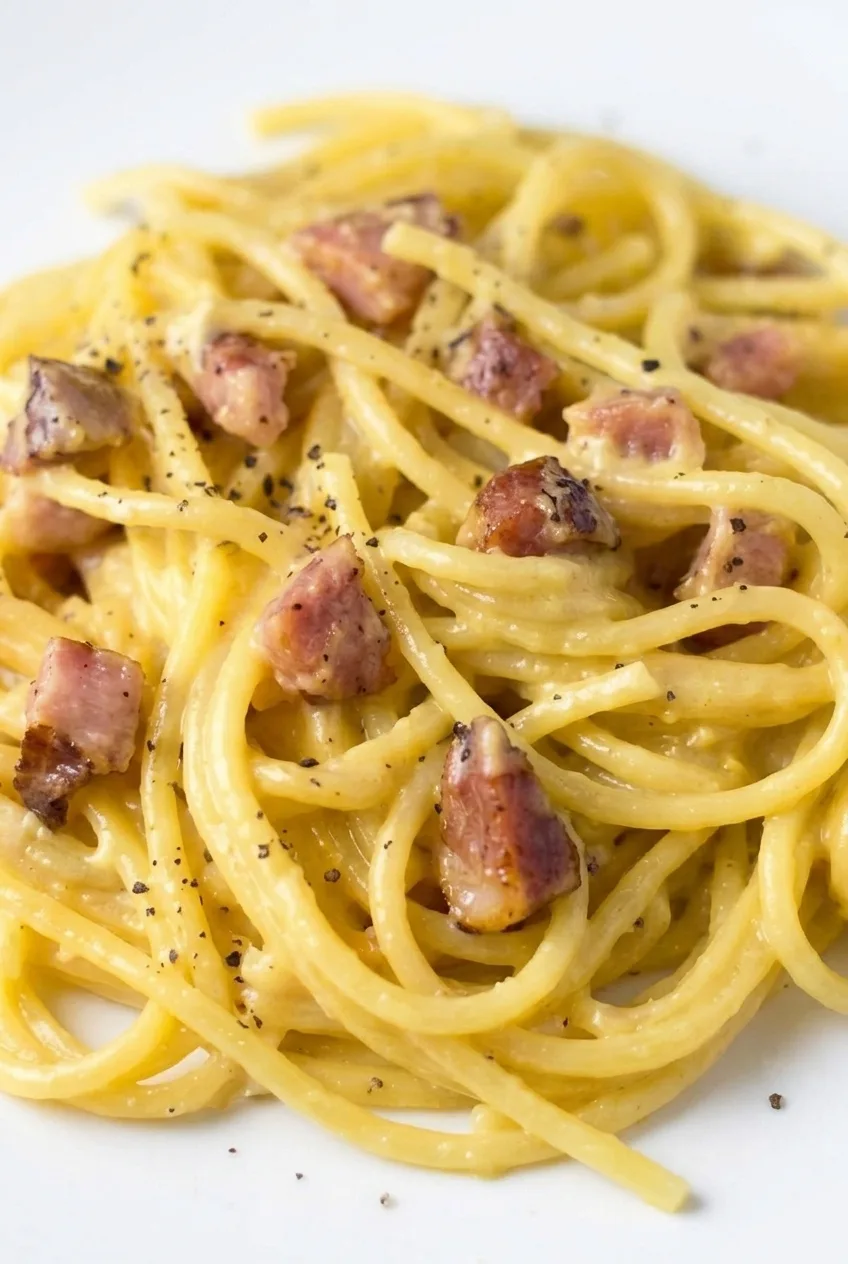
Close detail of spaghetti carbonara showing its glossy egg-and-cheese coating, pancetta, and black pepper
  • 12 ounces spaghetti (340g)
  • 4 ounces pancetta, cut into small pieces (115g)
  • 2 large eggs
  • 2 large egg yolks
  • About 3/4 cup freshly and finely grated Pecorino Romano (75g), plus more to serve if desired
  • About 1 teaspoon freshly ground black pepper, plus more to finish
  • About 2 teaspoons kosher salt for the pasta water, adjusted to the amount of water
  • About 1 cup starchy pasta cooking water, reserved; use only as needed

Grate the cheese finely so it mixes readily with the eggs. Salt the pasta water with restraint: the pancetta and Pecorino will also season the finished dish.

How to Make Spaghetti Carbonara

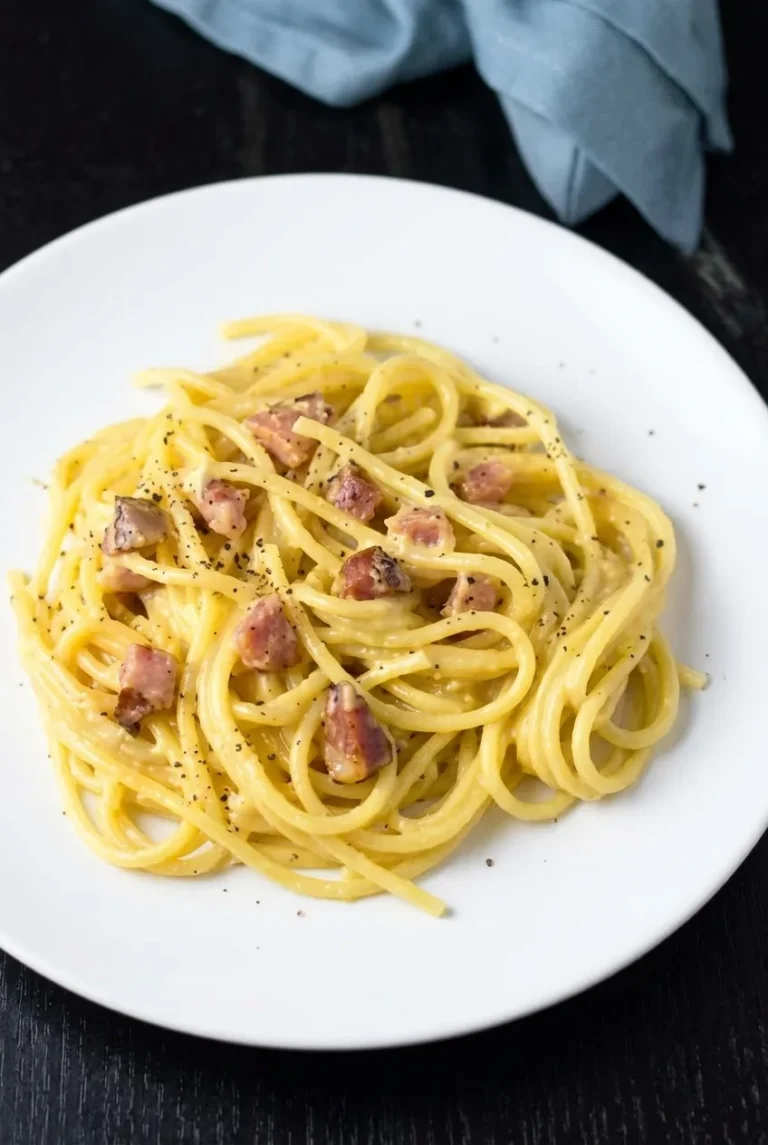
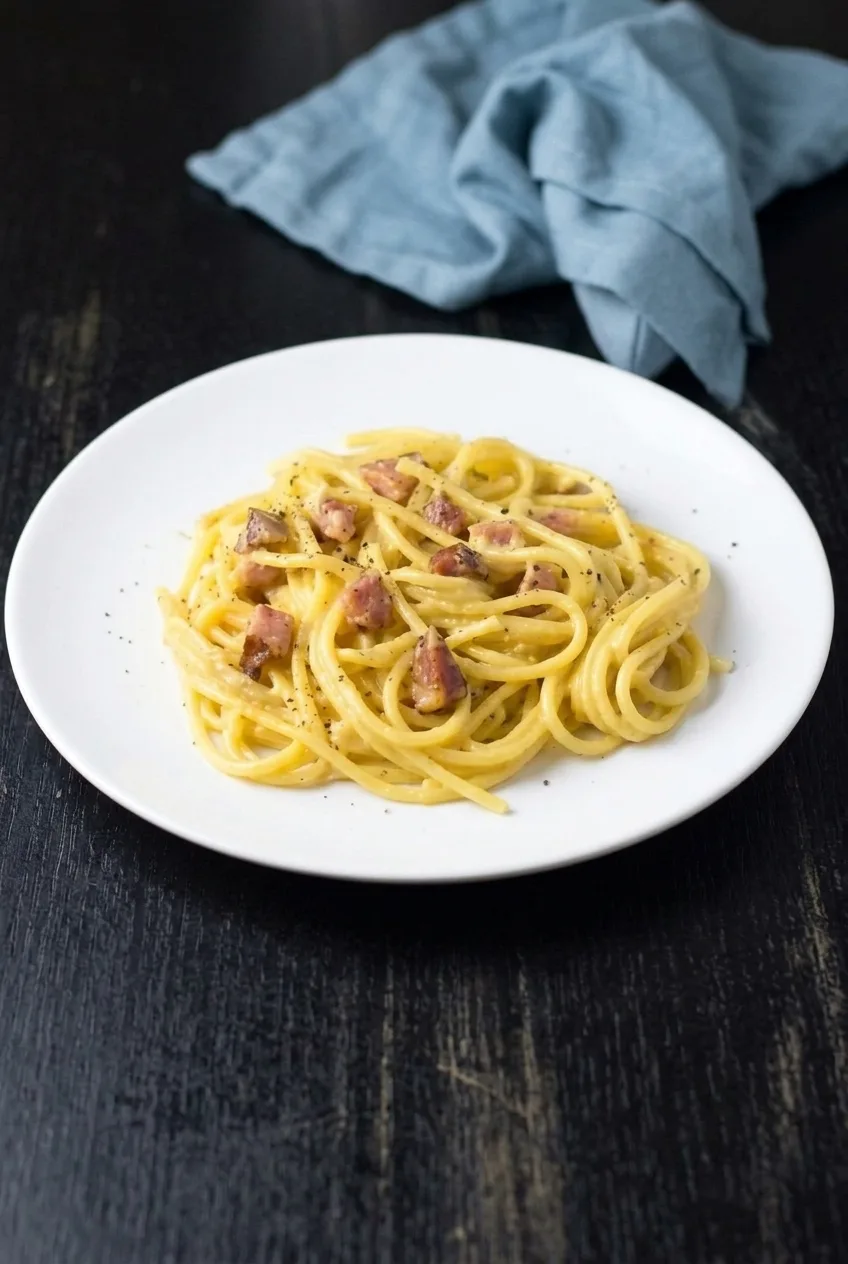
A full plate of spaghetti carbonara centered on a dark tabletop, with pancetta and pepper visible
  1. Prepare the egg mixture. Set a large pot of water over high heat. In a large heatproof bowl, whisk the eggs, yolks, Pecorino, and black pepper until evenly combined. Keep the bowl near the stove so it is ready for the hot pasta.
  2. Render the pancetta. Put the pancetta in a cool skillet in a single layer. Cook uncovered over medium-low to medium heat for about 6 to 8 minutes, stirring occasionally, until the fat renders and the pieces have golden edges but remain tender. Turn off the heat and leave the pancetta in the skillet with its fat.
  3. Cook the spaghetti. Salt the boiling water and cook the spaghetti until al dente, following the package directions and checking 1 to 2 minutes early. This usually takes 8 to 10 minutes. Reserve about 1 cup of cloudy cooking water, then drain the pasta.
  4. Coat the pasta. Add the very hot spaghetti to the skillet with the pancetta, keeping the burner off. Toss for about 30 seconds, just until the strands have a light sheen and the pancetta is distributed. If there is substantially more fat than needed to coat the noodles lightly, remove the excess.
  5. Make the sauce off heat. Immediately transfer the spaghetti and pancetta to the bowl of egg mixture. Toss continuously with tongs, adding reserved pasta water a small splash at a time and tossing well after each addition. Stop when the sauce is smooth and glossy and clings to the strands without pooling. You may not need all the water; do not return the egg-coated pasta to the burner.
  6. Serve immediately. Lift the spaghetti into loose mounds on plates, with pancetta pieces visible throughout. Finish with more black pepper and a little Pecorino, if desired.

How to Keep Carbonara Silky

The pasta must still be very hot when it reaches the egg mixture. Start tossing immediately so its residual heat thickens the sauce evenly, rather than forming egg curds against a hot pan.

If the sauce looks thick or clumpy, toss in another small splash of warm pasta water. Add water gradually: too much at once can leave a thin sauce beneath the noodles. The finished spaghetti should look glossy, not wet.

Choosing the Pork and Cheese

Guanciale is the traditional cured-pork choice and can replace the pancetta in the same amount. Thick-cut unsmoked bacon can also work, though it gives the pasta a smokier flavor. Whichever you use, cook the pieces until their edges are golden rather than dry and deeply crisp.

Pecorino Romano gives the sauce a sharp, salty flavor. Parmesan or Parmigiano-Reggiano can replace some or all of it for a milder result. For a distinctly different bacon-and-cheese pasta, try Garlic Parmesan Bacon Ranch Spaghetti.

Serving and Storing Carbonara

Serve carbonara as soon as the sauce turns glossy; it thickens as it sits. You can grate the cheese and prepare the egg mixture before cooking the spaghetti, but wait until serving time to toss everything together.

Refrigerate leftovers promptly in a covered container and use within 3 to 4 days. Reheat gently in a covered nonstick skillet with a small splash of water. The sauce will not return to its freshly made texture. Freezing is not recommended because the egg-and-cheese sauce may lose its smoothness.

Nutrition

Approximate nutrition per serving, based on 4 servings: 580 calories, 24g protein, 25g fat, and 64g carbohydrates. Approximate nutrition per 100g of finished pasta: 210 calories, 9g protein, 9g fat, and 23g carbohydrates. Values vary with the pasta, pancetta, and cheese used.

Classic Spaghetti Carbonara

Spaghetti tossed with pancetta, eggs, Pecorino Romano, black pepper, and starchy pasta water for a glossy sauce.
Course: Main Course
Cuisine: Italian
Prep: 10 min
Cook: 15 min
Total: 25 min
Servings: 4 Calories: 580 kcal

Equipment

  • Large pot
  • Skillet
  • Heatproof bowl
  • Whisk
  • Tongs

Ingredients

For the Carbonara

  • 12 ounces spaghetti (340 g)
  • 4 ounces pancetta, cut into small pieces (115 g)
  • 2 large eggs
  • 2 large egg yolks
  • About 3/4 cup finely grated Pecorino Romano (75 g), plus more to serve if desired
  • About 1 teaspoon freshly ground black pepper, plus more to finish
  • About 2 teaspoons kosher salt for the pasta water, adjusted to the amount of water
  • About 1 cup reserved starchy pasta cooking water, as needed

Instructions

  1. Bring a large pot of water to a boil.
  2. In a large heatproof bowl, whisk the eggs, egg yolks, Pecorino Romano, and black pepper until combined. Set the bowl near the stove.
  3. Place the pancetta in a single layer in a cool skillet. Cook uncovered over medium-low to medium heat for 6 to 8 minutes, stirring occasionally, until the fat renders and the edges are golden but the pieces remain tender.
  4. Turn off the heat and leave the pancetta in the skillet with its rendered fat.
  5. Salt the boiling water and cook the spaghetti until al dente, following the package directions and checking 1 to 2 minutes early. This usually takes 8 to 10 minutes.
  6. Reserve about 1 cup of pasta water, then drain the spaghetti.
  7. Add the hot spaghetti to the skillet with the pancetta, keeping the burner off. Toss for about 30 seconds to coat the strands lightly. Remove excess fat if needed.
  8. Immediately transfer the spaghetti and pancetta to the bowl with the egg mixture. Toss continuously with tongs, adding reserved pasta water a small splash at a time until the sauce is smooth, glossy, and clings to the pasta.
  9. Serve immediately, topped with more black pepper and Pecorino Romano if desired.

Tips

  • Grate the Pecorino finely so it mixes smoothly with the eggs.
  • Salt the pasta water lightly because the pancetta and cheese are already salty.
  • Keep the pasta very hot when adding it to the egg mixture, and toss immediately.
  • Add pasta water gradually to avoid making the sauce too thin.
  • Do not return the egg-coated pasta to the burner; residual heat thickens the sauce without scrambling the eggs.

Variations

  • Guanciale Carbonara: Replace the pancetta with the same amount of guanciale.
  • Bacon Carbonara: Use thick-cut unsmoked bacon instead of pancetta for a smokier flavor.
  • Parmesan Carbonara: Replace some or all of the Pecorino Romano with Parmesan or Parmigiano-Reggiano for a milder flavor.

Notes

Serve as soon as the sauce turns glossy. Refrigerate leftovers promptly in a covered container and use within 3 to 4 days; reheat gently in a covered nonstick skillet with a splash of water. Freezing is not recommended. Approximate nutrition per 100 g: 210 calories, 9 g protein, 9 g fat, and 23 g carbohydrates.

Nutrition

Calories: 580 kcal | Protein: 24 g | Fat: 25 g | Carbohydrates: 64 g

Creamy Chicken Pesto Pasta

Penne, browned chicken, wilted spinach, and sun-dried tomatoes come together in a pale, creamy pesto sauce. Boiling the pasta separately makes it easier to keep al dente before a brief toss in the skillet. A little reserved pasta water keeps the sauce glossy as the Parmesan melts, while adding the pesto off heat preserves its basil flavor and green flecks.

Makes 4 servings. Allow about 10 minutes to prep and 20 minutes to cook, depending on how quickly the pasta water boils.

Ingredients for Creamy Chicken Pesto Pasta

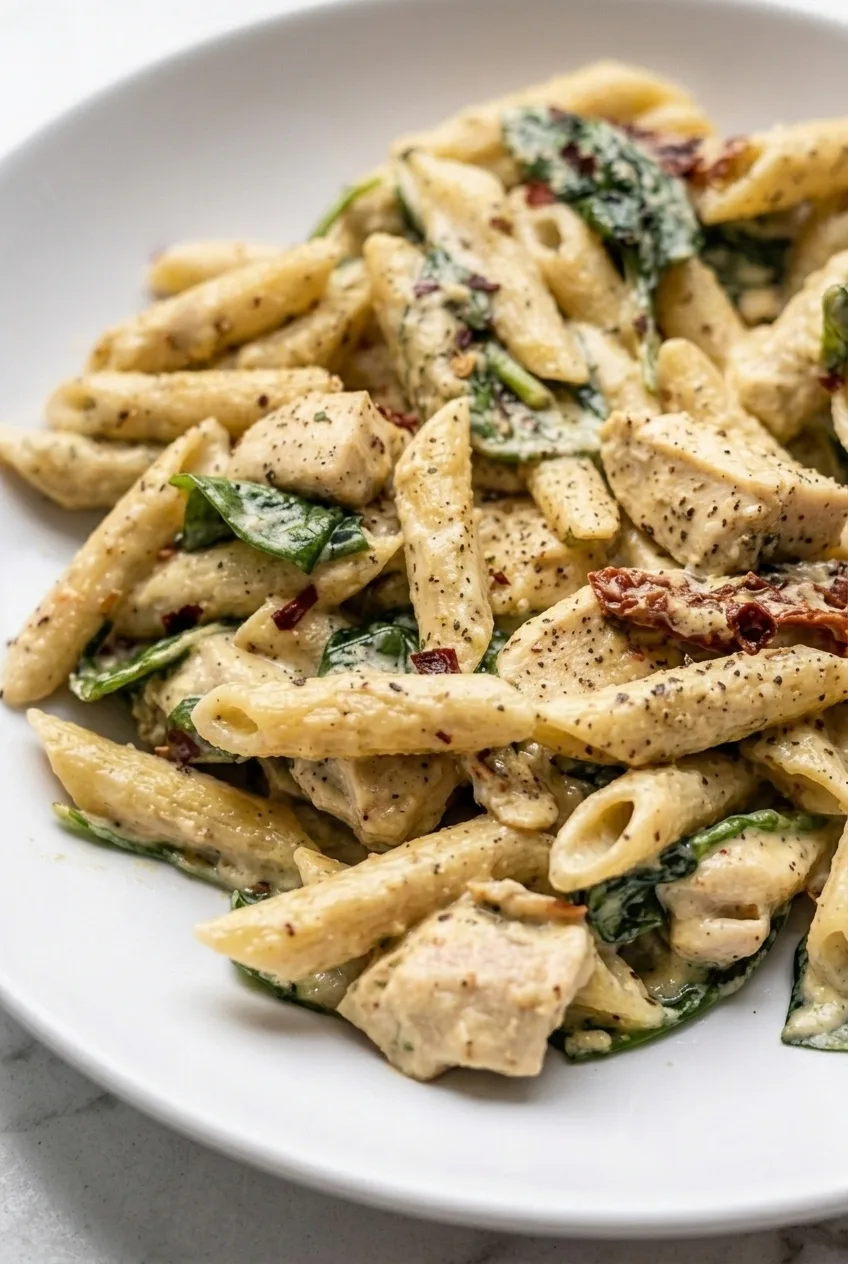
Close view of creamy pesto-coated penne with chicken, wilted spinach, sun-dried tomatoes, and Parmesan.
  • 12 ounces penne (340g)
  • 1 pound boneless, skinless chicken breast, cut into evenly sized bite-size pieces (450g)
  • 1 tablespoon olive oil
  • Kosher salt, for the pasta water and to taste
  • 1/4 teaspoon black pepper, plus more for serving
  • 1 tablespoon unsalted butter
  • 2 garlic cloves, minced
  • 3/4 cup heavy cream
  • 1/2 cup finely grated Parmesan (50g), plus more for serving
  • 1/3 cup sun-dried tomatoes, drained if oil-packed and chopped (35g)
  • 3 packed cups baby spinach (90g)
  • 1/3 cup basil pesto (80g)

Optional: A pinch of crushed red pepper flakes or a few torn fresh basil leaves for serving. Pesto and Parmesan vary in saltiness, so wait until the end to adjust the salt.

How to Make Creamy Chicken Pesto Pasta

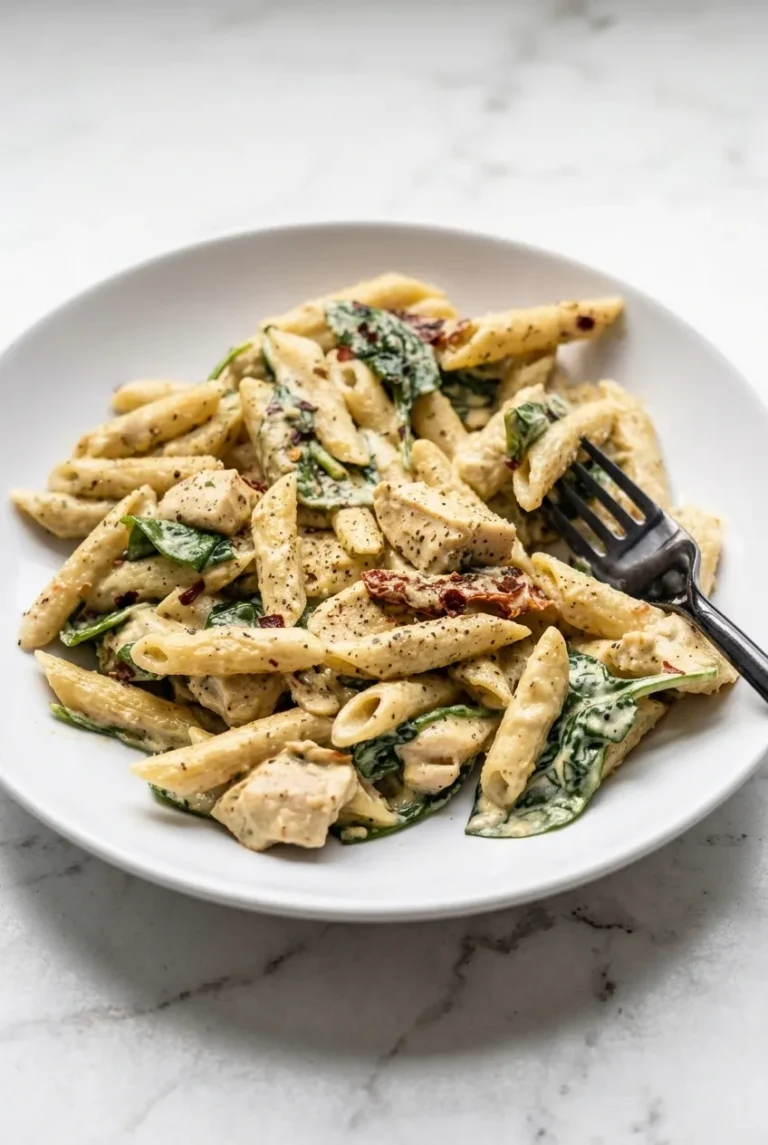
A full plate of creamy chicken pesto penne with spinach and sun-dried tomatoes on a light stone surface.
  1. Boil the penne: Bring a large pot of well-salted water to a boil. Cook the penne according to the package directions, starting to check at the lower end of the time range. Drain when it has a slight bite but no hard center, reserving about 1 cup of pasta water first.
  2. Brown the chicken: While the pasta cooks, season the chicken with salt and the 1/4 teaspoon black pepper. Heat a large skillet, about 12 inches, over medium-high heat, then add the olive oil. Cook the chicken in a single layer, turning as it browns, for about 5–8 minutes, until browned in spots and the thickest pieces reach 165°F (75°C). Work in batches if needed so the pieces brown rather than steam. Transfer to a plate.
  3. Start the sauce: Reduce the heat to medium-low. Add the butter and garlic to the skillet and stir for about 30 seconds, until fragrant but not browned. Pour in the cream and scrape up the browned bits from the pan.
  4. Melt in the Parmesan: Stir in the Parmesan and a small splash of reserved pasta water. Warm gently over low to medium-low heat for about 2–3 minutes, stirring until the cheese melts into a smooth sauce. Avoid a hard boil.
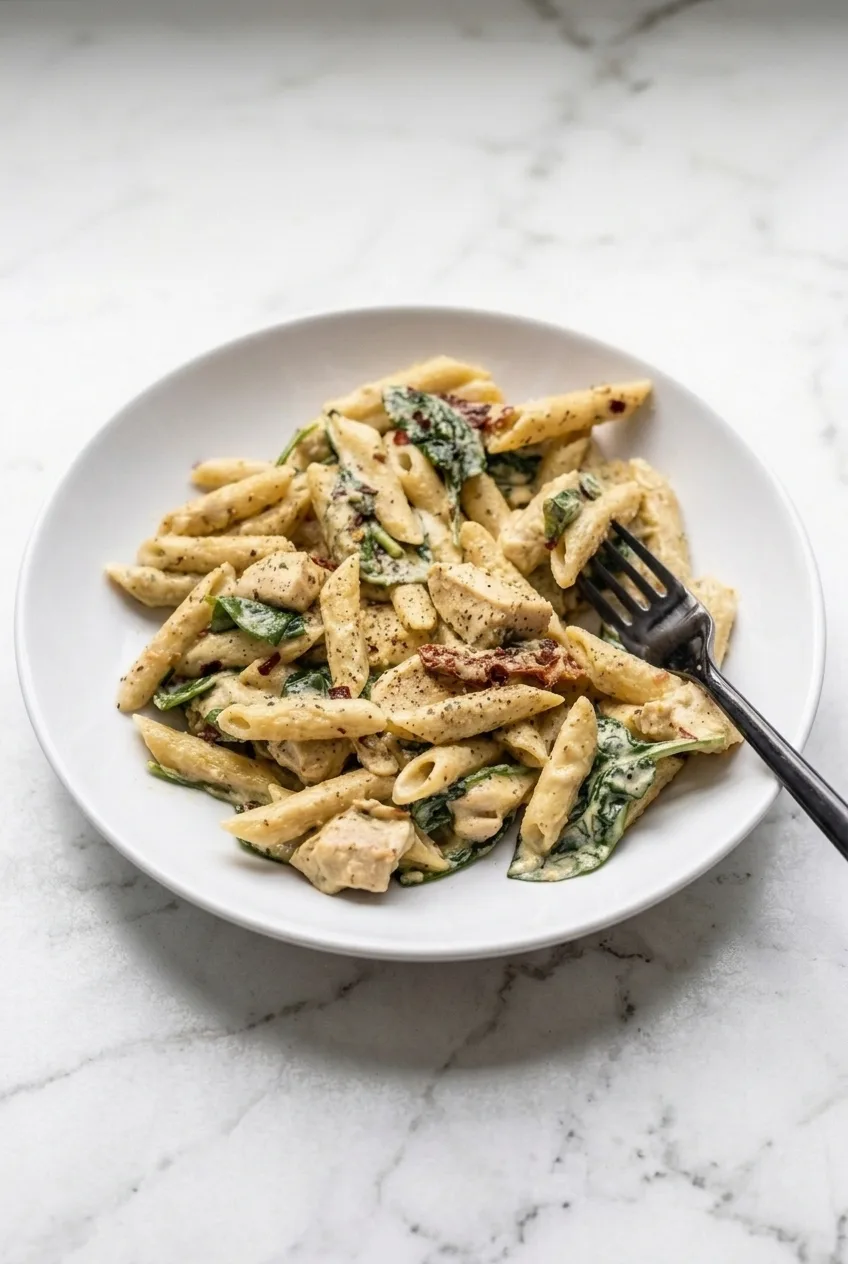
  5. Combine: Add the drained penne, chicken, sun-dried tomatoes, and spinach. Toss over low heat for 1–2 minutes, just until the spinach wilts and the pasta is coated. Add more pasta water a splash at a time if the sauce becomes too thick.
  6. Finish off heat: Remove the skillet from the heat and stir in the pesto. Taste before adding more salt or pepper. Serve promptly with extra Parmesan and black pepper, plus red pepper flakes or basil if desired.

How to Keep the Sauce Silky

Add reserved pasta water gradually while tossing the penne. The sauce should look glossy and cling to the pasta without pooling at the bottom of the skillet. Keep the remaining pasta water nearby while serving; the sauce thickens as the pasta stands.

Stir the pesto in only after the skillet comes off the heat. Residual warmth will mix it through the sauce without simmering away its fresh basil flavor or dulling its green flecks.

How to Store and Reheat Leftovers

Cool leftovers and refrigerate in an airtight container for up to 3 days. The pasta will absorb sauce as it sits. Reheat gently over low heat on the stovetop or in short microwave intervals, stirring between intervals and adding a splash of milk or water to loosen the sauce.

Freezing is not recommended for best quality: the cream sauce may separate, and the pesto may lose its fresh color.

Nutrition

Approximate nutrition per serving, based on 4 servings: 830 calories, 45g protein, 39g fat, and 69g carbohydrates. Per 100g: about 200 calories, 11g protein, 10g fat, and 17g carbohydrates. Values vary with the brands of pesto, cream, Parmesan, and sun-dried tomatoes used.

Creamy Chicken Pesto Pasta

Penne, browned chicken, spinach, and sun-dried tomatoes are tossed in a creamy Parmesan pesto sauce.
Course: Main Course
Cuisine: Italian
Prep: 10 min
Cook: 20 min
Total: 30 min
Servings: 4 Calories: 830 kcal per serving

Equipment

  • Large pot
  • Colander
  • 12-inch skillet
  • Measuring cup

Ingredients

Pasta and Chicken

  • 12 ounces penne (340g)
  • 1 pound boneless, skinless chicken breast, cut into evenly sized bite-size pieces (450g)
  • 1 tablespoon olive oil
  • Kosher salt, for the pasta water and to taste
  • 1/4 teaspoon black pepper, plus more for serving

Sauce and Finish

  • 1 tablespoon unsalted butter
  • 2 garlic cloves, minced
  • 3/4 cup heavy cream
  • 1/2 cup finely grated Parmesan (50g), plus more for serving
  • 1/3 cup sun-dried tomatoes, drained if oil-packed and chopped (35g)
  • 3 packed cups baby spinach (90g)
  • 1/3 cup basil pesto (80g)

Optional Garnishes

  • Crushed red pepper flakes
  • Fresh basil leaves, torn

Instructions

  1. Bring a large pot of well-salted water to a boil. Cook the penne according to package directions, checking at the lower end of the time range. Before draining, reserve about 1 cup of pasta water.
  2. Season the chicken with kosher salt and 1/4 teaspoon black pepper.
  3. Heat a large skillet over medium-high heat and add the olive oil. Cook the chicken in a single layer, turning as it browns, for 5–8 minutes, until browned in spots and the thickest pieces reach 165°F (75°C). Cook in batches if needed, then transfer the chicken to a plate.
  4. Reduce the heat to medium-low. Add the butter and garlic to the skillet and stir for about 30 seconds, until fragrant but not browned.
  5. Pour in the cream and scrape up the browned bits. Stir in the Parmesan and a small splash of reserved pasta water.
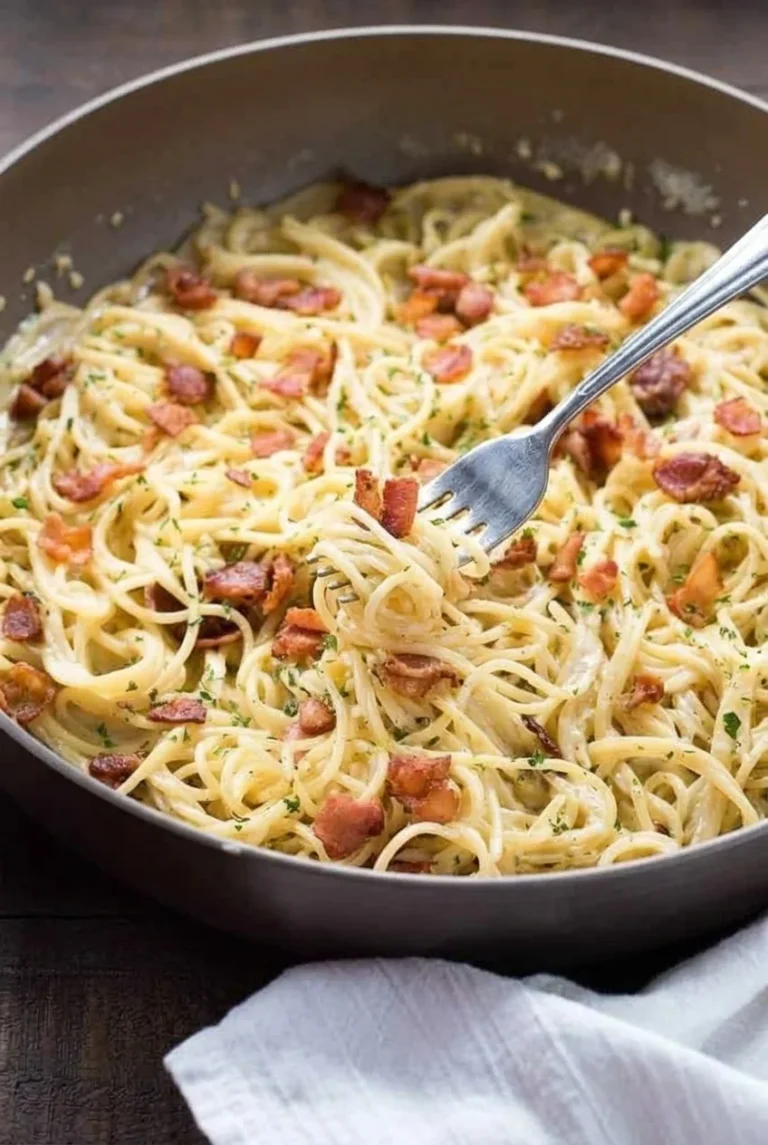
  6. Warm the sauce over low to medium-low heat for 2–3 minutes, stirring until smooth. Do not let it boil hard.
  7. Add the drained penne, chicken, sun-dried tomatoes, and spinach. Toss over low heat for 1–2 minutes, until the spinach wilts and the pasta is coated. Add pasta water a splash at a time if the sauce is too thick.
  8. Remove the skillet from the heat and stir in the pesto. Taste and adjust the salt and pepper. Serve with extra Parmesan and black pepper, and add red pepper flakes or basil if desired.

Tips

  • Reserve about 1 cup of pasta water before draining the penne.
  • Cook the chicken in batches if needed so it browns instead of steaming.
  • Keep the sauce at a gentle heat and avoid a hard boil after adding the Parmesan.
  • Add pasta water gradually until the sauce is glossy and clings to the pasta.
  • Stir in the pesto off the heat to preserve its fresh basil flavor and green color.

Notes

Refrigerate leftovers in an airtight container for up to 3 days. Reheat gently on the stovetop or in short microwave intervals, stirring and adding a splash of milk or water to loosen the sauce. Freezing is not recommended; the sauce may separate and the pesto may lose color.

Nutrition

Calories: 830 kcal per serving | Protein: 45 g per serving | Fat: 39 g per serving | Carbohydrates: 69 g per serving | Per 100g Calories: 200 kcal | Per 100g Protein: 11 g | Per 100g Fat: 10 g | Per 100g Carbohydrates: 17 g

Garlic Parmesan Bacon Ranch Spaghetti

Spaghetti simmers directly in broth and milk for this one-pan dinner, then gets a creamy garlic-Parmesan finish with sour cream and dry ranch seasoning. The sauce should cling to the long strands rather than pool in the skillet.

Use a wide pan and stir frequently as the spaghetti softens so it cooks evenly. Cook the bacon first, drain off excess fat, and fold the browned pieces in near the end. Makes 4 to 6 servings.

Ingredients for Garlic Parmesan Bacon Ranch Spaghetti

Close detail of creamy spaghetti strands coated in sauce with browned bacon pieces and fine parsley flecks.
  • 1 pound spaghetti (450g)
  • 8 ounces bacon, cut into small pieces (225g; about 8 slices)
  • 1 tablespoon unsalted butter, as needed
  • 3 cloves garlic, minced
  • 4 cups low-sodium chicken broth, plus more as needed
  • 2 cups whole milk, plus more as needed
  • 1-ounce packet dry ranch seasoning mix (28g; about 2 tablespoons), not ranch dip mix
  • 1 cup finely grated Parmesan (90g), plus more for serving if desired
  • 1/2 cup sour cream (120g)
  • 1 tablespoon chopped fresh parsley
  • Black pepper to taste, starting with 1/4 teaspoon

Keep a little extra broth or milk warm to adjust the pasta or sauce. Wait until the ranch seasoning, Parmesan, and bacon are mixed in before deciding whether the dish needs salt.

How to Make Garlic Parmesan Bacon Ranch Spaghetti

A full dark skillet of creamy bacon ranch spaghetti centered on a table, with the surrounding surface visible.
  1. Cook the bacon: Warm a wide, deep 12-inch skillet over medium heat. Add the bacon and cook for 6 to 8 minutes, stirring occasionally, until browned and crisp at the edges. Transfer to a plate. Carefully drain the excess fat, leaving about 1 tablespoon in the skillet.
  2. Cook the garlic: Reduce the heat to medium-low. Add the butter if there is not enough bacon fat to coat the skillet, then stir in the garlic for 30 to 60 seconds, until fragrant but still pale.
  3. Add the liquid and spaghetti: Pour in the broth and milk and bring to a gentle simmer over medium heat. Add the spaghetti. Let the ends soften briefly if needed, then ease the strands into the liquid without breaking them.
  4. Simmer the spaghetti: Reduce the heat to medium-low and cook uncovered for about 12 to 16 minutes, stirring and turning the strands frequently and scraping the skillet bottom as needed. Start checking at about 10 minutes. The spaghetti is ready when tender throughout, with no firm, chalky center, and a little creamy liquid remains in the pan. Keep the liquid at a gentle simmer; if the skillet gets dry before the pasta is tender, lower the heat and add warm broth or milk a small splash at a time.
  5. Finish the sauce: Take the skillet off the heat. Stir in the ranch seasoning, Parmesan, and sour cream until the sauce coats the strands. If it becomes too thick, stir in a little warm broth or milk. Add black pepper and taste before adding any salt.
  6. Add the bacon and serve: Fold in most of the bacon and parsley. Scatter the rest over the spaghetti and serve promptly from the skillet, with extra Parmesan if desired.

Why the Skillet and Heat Matter

A wide skillet gives the long strands room to soften and separate. A hard boil can reduce the broth-and-milk liquid before the spaghetti finishes cooking, so maintain a gentle simmer and stir often. Add the Parmesan and sour cream only after the noodles are tender and the skillet is off the heat for a smoother sauce.

Serving and Storage

Serve straight from the skillet or transfer the spaghetti to a warm, shallow bowl. A green salad or green vegetable makes a simple side. For another spaghetti dinner, try Mongolian Ground Beef Noodles.

Refrigerate leftovers promptly in an airtight container and use within about 3 days. Reheat gently over low heat or in short microwave intervals, stirring often and adding a splash of milk or broth to loosen the sauce. The texture may differ from freshly made pasta. Freezing is not a dependable option for this creamy sauce, which may change texture when thawed.

Nutrition Information

Approximate nutrition per serving, based on 1/6 of the recipe: 675 calories, 35g protein, 30g fat, and 64g carbohydrates. Approximate nutrition per 100g: 195 calories, 10g protein, 9g fat, and 18g carbohydrates. Values vary with the bacon, ranch seasoning, and other ingredients used.

Garlic Parmesan Bacon Ranch Spaghetti

Spaghetti cooks in broth and milk, then gets tossed with a creamy garlic-Parmesan ranch sauce and crisp bacon.
Course: Main Course
Cuisine: American
Prep: 10 min
Cook: 25 min
Total: 35 min
Servings: 6 Calories: 675 kcal

Equipment

  • Wide, deep 12-inch skillet
  • Measuring cups
  • Tongs

Ingredients

For the Spaghetti

  • 1 pound spaghetti (450 g)
  • 8 ounces bacon, cut into small pieces (225 g; about 8 slices)
  • 1 tablespoon unsalted butter, as needed
  • 3 cloves garlic, minced
  • 4 cups low-sodium chicken broth, plus more as needed
  • 2 cups whole milk, plus more as needed
  • 1-ounce packet dry ranch seasoning mix (28 g; about 2 tablespoons), not ranch dip mix
  • 1 cup finely grated Parmesan (90 g), plus more for serving if desired
  • 1/2 cup sour cream (120 g)
  • 1 tablespoon chopped fresh parsley
  • Black pepper to taste, starting with 1/4 teaspoon

Instructions

  1. Warm a wide, deep 12-inch skillet over medium heat. Add the bacon and cook for 6 to 8 minutes, stirring occasionally, until browned and crisp at the edges.
  2. Transfer the bacon to a plate. Carefully drain the excess fat from the skillet, leaving about 1 tablespoon.
  3. Reduce the heat to medium-low. Add the butter if needed to coat the skillet, then stir in the garlic for 30 to 60 seconds, until fragrant but still pale.
  4. Pour in the broth and milk and bring to a gentle simmer over medium heat. Add the spaghetti, letting the ends soften briefly if needed before easing the strands into the liquid without breaking them.
  5. Reduce the heat to medium-low. Cook uncovered for about 12 to 16 minutes, stirring and turning the spaghetti frequently and scraping the bottom of the skillet as needed. Start checking at about 10 minutes.
  6. Continue cooking until the spaghetti is tender throughout with no firm, chalky center and a little creamy liquid remains in the pan. If the skillet gets dry before the pasta is tender, lower the heat and add warm broth or milk a small splash at a time.
  7. Take the skillet off the heat. Stir in the ranch seasoning, Parmesan, and sour cream until the sauce coats the spaghetti. Add a little warm broth or milk if the sauce is too thick.
  8. Add black pepper and taste before adding any salt. Fold in most of the bacon and parsley, then scatter the rest over the spaghetti.
  9. Serve promptly, with extra Parmesan if desired.

Tips

  • Use a wide skillet to give the spaghetti room to soften and separate.
  • Keep the liquid at a gentle simmer and stir often to prevent it from reducing too quickly.
  • Keep extra broth or milk warm so you can add it gradually if the pan gets dry or the sauce thickens too much.
  • Wait until the ranch seasoning, Parmesan, and bacon are mixed in before deciding whether to add salt.
  • Stir in the Parmesan and sour cream only after the noodles are tender and the skillet is off the heat.

Notes

Refrigerate leftovers promptly in an airtight container and use within about 3 days. Reheat gently, stirring often and adding a splash of milk or broth; freezing is not recommended. Approximate nutrition per 100 g: 195 calories, 10 g protein, 9 g fat, and 18 g carbohydrates.

Nutrition

Calories: 675 kcal | Protein: 35 g | Fat: 30 g | Carbohydrates: 64 g | Per 100 G Calories: 195 kcal | Per 100 G Protein: 10 g | Per 100 G Fat: 9 g | Per 100 G Carbohydrates: 18 g

Mongolian Ground Beef Noodles

Spaghetti and browned ground beef are tossed in a glossy, savory-sweet Mongolian-style sauce, then finished with green onions and sesame seeds. Cook the spaghetti separately and stop at al dente: it will soften a little more during the final toss. The sauce needs only a brief simmer to coat the noodles without turning sticky.

Ingredients for Mongolian Ground Beef Noodles

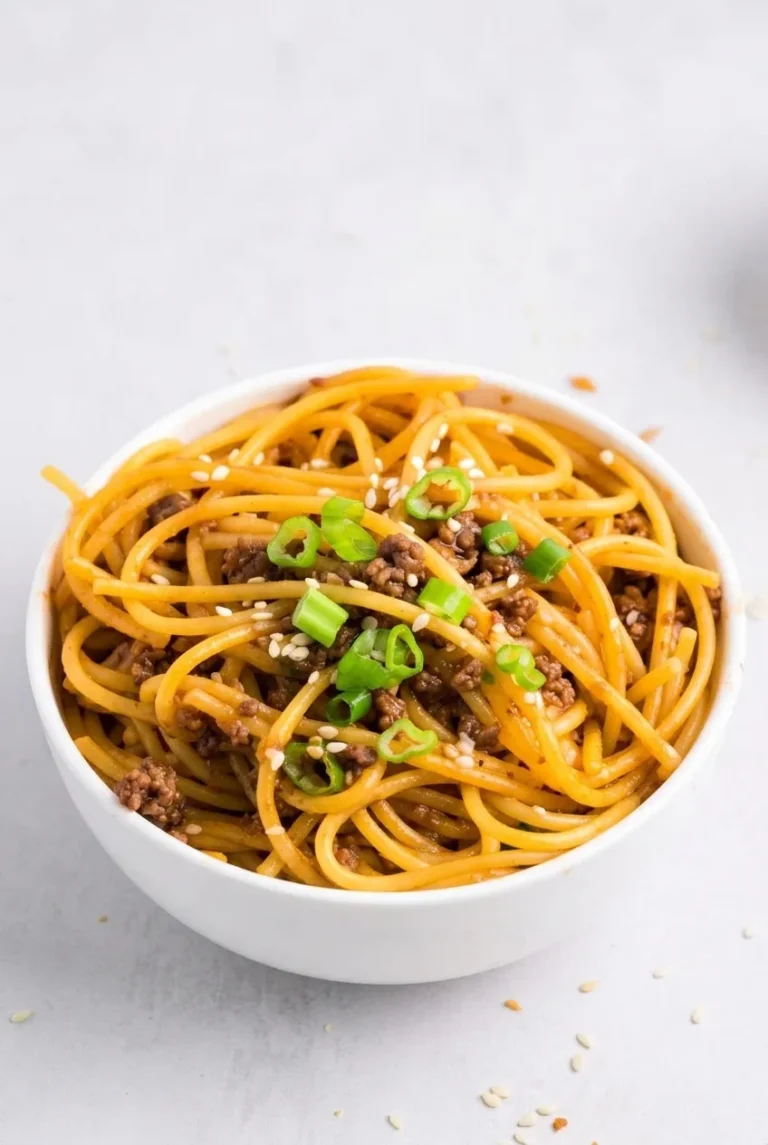
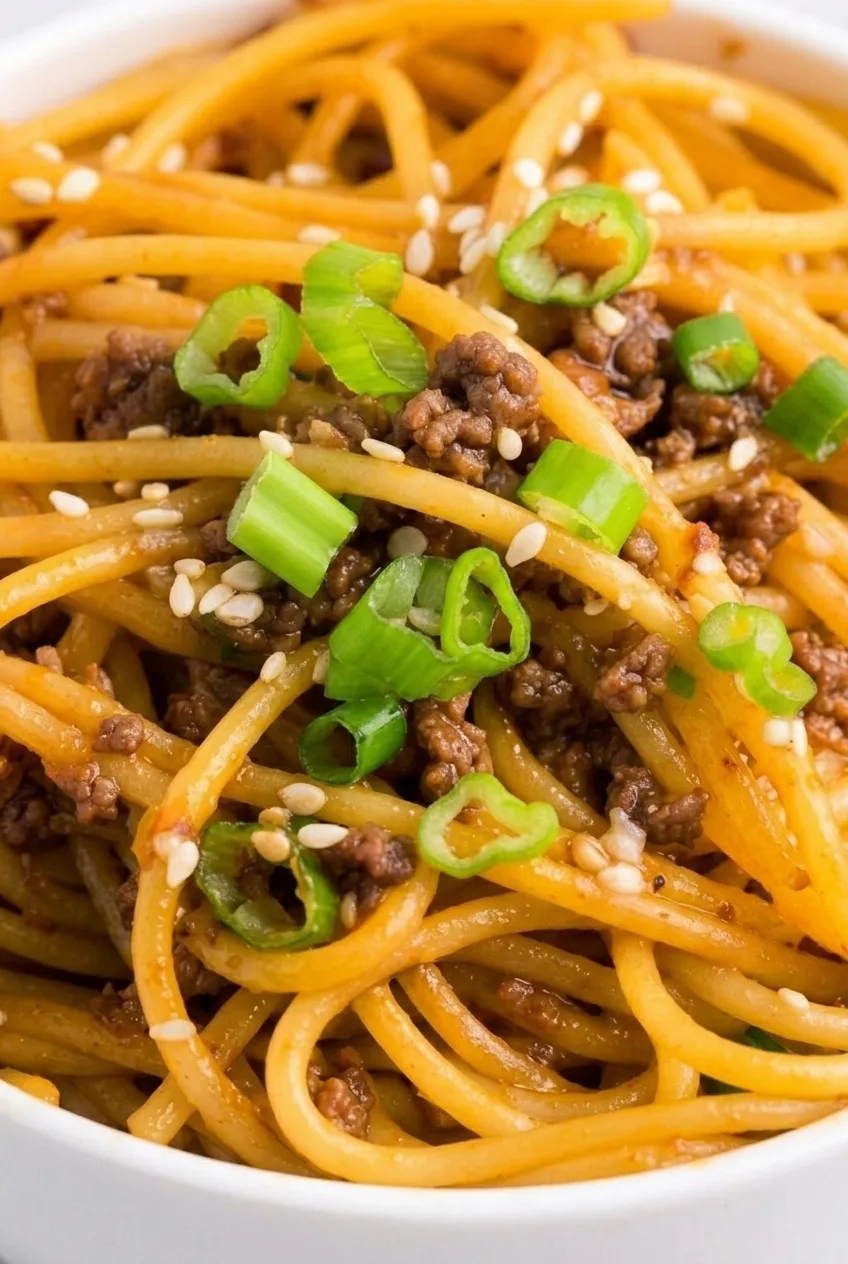
Close detail of glossy spaghetti strands, browned beef crumbles, green onions, and sesame seeds.

Makes 4 servings. Prep time: 10 minutes. Cook time: about 20 minutes.

  • 8 ounces dried spaghetti (225g)
  • 1 pound lean ground beef, preferably 90/10 (450g)
  • 1/3 cup low-sodium soy sauce (80g)
  • 1/2 cup beef broth (120g)
  • 2 tablespoons honey (40g)
  • 2 tablespoons hoisin sauce (30g)
  • 1 tablespoon cornstarch (8g)
  • 3 garlic cloves, minced
  • 1 tablespoon finely grated fresh ginger
  • 1 teaspoon neutral cooking oil, only if needed
  • 2 green onions, thinly sliced
  • 1 teaspoon sesame seeds

Optional: 1/8 to 1/4 teaspoon red pepper flakes for heat, or 1 teaspoon toasted sesame oil to stir in just before serving.

How to Make Mongolian Ground Beef Noodles

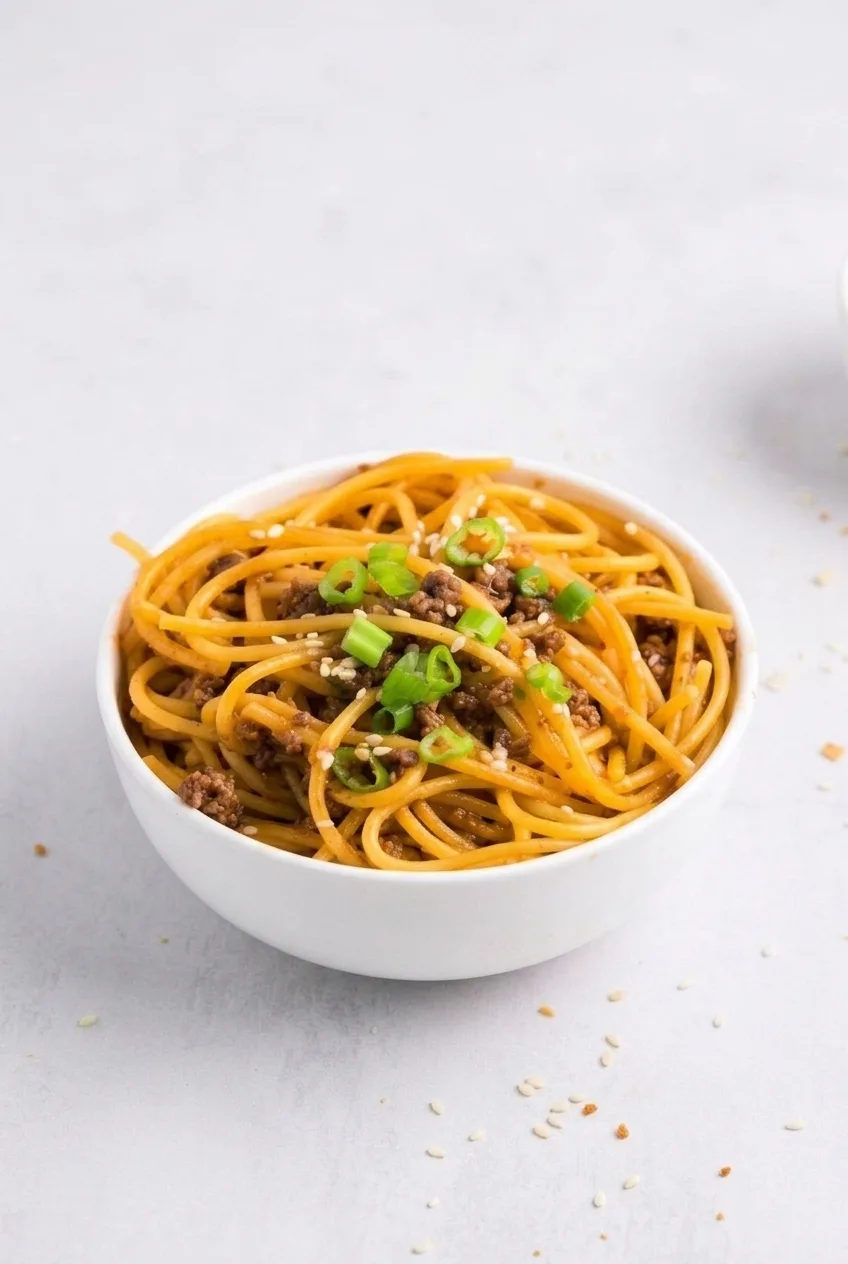
A wider view of a full bowl of Mongolian ground beef noodles with green onions and sesame seeds.
  1. Cook the spaghetti: Bring a large pot of salted water to a boil. Cook the spaghetti according to the package directions, checking at the earliest suggested al dente time. It should still have a slight bite. Reserve about 1/2 cup pasta water, then drain. Time the spaghetti to finish close to the sauce so the strands do not sit and clump.
  2. Whisk the sauce: In a bowl, whisk the soy sauce, broth, honey, hoisin, and cornstarch until no dry starch remains.
  3. Brown the beef: Heat a 12-inch skillet over medium-high heat. Add the beef, using the oil only if needed to prevent sticking. Break it into small crumbles and cook uncovered for 5 to 7 minutes, stirring until browned and no longer pink. Ground beef should reach 160°F (70°C). Drain excess fat if the skillet looks greasy.
  4. Add the aromatics: Reduce the heat to medium. Stir in the garlic and ginger for 30 to 60 seconds, until fragrant but not browned.
  5. Simmer the sauce: Whisk the sauce again in case the cornstarch has settled, then pour it into the skillet. Stir as it reaches a gentle simmer. Cook for 1 to 3 minutes, checking after the first minute, until smooth and glossy and able to lightly coat a spoon. Lower the heat if it bubbles vigorously; do not reduce it to a sticky glaze.
  6. Toss the noodles: Add the drained spaghetti and toss over medium-low heat for 1 to 2 minutes, until the beef is distributed and the sauce coats the strands. If the sauce is too thick, add reserved pasta water 1 tablespoon at a time until the noodles loosen.
  7. Serve: Divide among bowls and top with the sliced green onions and sesame seeds. Serve promptly.

How to Keep the Sauce Glossy

Whisking cornstarch into the cool sauce ingredients prevents lumps when the mixture hits the hot skillet. Stop simmering once the sauce lightly coats a spoon; it will thicken further as it cools. If the noodles look dry before serving, toss them with a splash of reserved pasta water or broth.

Noodle and Sauce Variations

Spaghetti is the noodle for this version. Rice noodles, ramen, or glass noodles need their own package directions and may handle differently during the final toss. For a vegetable-added version, sauté 1 to 2 cups thinly sliced bell pepper or snap peas before adding the sauce; avoid crowding the skillet.

Tamari can replace soy sauce for a gluten-free adaptation only if the noodles, hoisin, and all other ingredients are also certified gluten-free. The standard recipe is not gluten-free or soy-free. Coconut aminos will change the sauce’s saltiness and sweetness. Arrowroot can replace cornstarch if whisked into the cool sauce; avoid boiling it vigorously for a prolonged time.

Serve with broccoli or snap peas on the side, and offer red pepper flakes or chili crisp at the table for adjustable heat. For another ground-beef dinner with a different flavor profile, try these Mexican Street Corn Sweet Potato Bowls with Beef.

Make-Ahead, Storage, and Reheating

For the best texture, prepare the beef and sauce ahead and cook the spaghetti close to serving time. Refrigerate leftovers in an airtight container for up to 3 days. Reheat gently in a skillet over medium-low heat with a splash of water or broth, stirring until hot. For the microwave, heat in short intervals, stirring between them and adding a little liquid if needed.

To freeze, cool the beef and sauce mixture and freeze it without the noodles for up to about 1 month. Thaw and reheat it, then toss with freshly cooked spaghetti. Fully assembled noodles may lose texture in the freezer.

Nutrition

Approximate nutrition per serving, based on 4 servings: 505 calories, 33g protein, 13g fat, and 60g carbohydrates. Approximate nutrition per 100g: 155 calories, 10g protein, 4g fat, and 18g carbohydrates. Values vary with ingredient brands, beef fat content, and the amount of liquid used to loosen the sauce.

Mongolian Ground Beef Noodles

Spaghetti and browned ground beef are tossed in a glossy soy, honey, and hoisin sauce, then topped with green onions and sesame seeds.
Course: Main Course
Cuisine: Asian
Prep: 10 min
Cook: 20 min
Total: 30 min
Servings: 4 Calories: 505 kcal per serving

Equipment

  • Large pot
  • 12-inch skillet
  • Mixing bowl
  • Whisk
  • Colander

Ingredients

Noodles and beef

  • 8 ounces dried spaghetti (225 g)
  • 1 pound lean ground beef, preferably 90/10 (450 g)
  • 1 teaspoon neutral cooking oil, only if needed
  • Salt, for pasta water
  • About 1/2 cup reserved pasta water, as needed

For the sauce

  • 1/3 cup low-sodium soy sauce (80 g)
  • 1/2 cup beef broth (120 g)
  • 2 tablespoons honey (40 g)
  • 2 tablespoons hoisin sauce (30 g)
  • 1 tablespoon cornstarch (8 g)
  • 3 garlic cloves, minced
  • 1 tablespoon finely grated fresh ginger

For serving

  • 2 green onions, thinly sliced
  • 1 teaspoon sesame seeds
  • Optional: 1/8 to 1/4 teaspoon red pepper flakes
  • Optional: 1 teaspoon toasted sesame oil

Instructions

  1. Bring a large pot of salted water to a boil. Cook the spaghetti according to package directions, checking at the earliest suggested al dente time.
  2. Reserve about 1/2 cup pasta water, then drain the spaghetti. Time it to finish close to the sauce.
  3. Whisk the soy sauce, beef broth, honey, hoisin sauce, and cornstarch in a bowl until no dry starch remains.
  4. Heat a 12-inch skillet over medium-high heat. Add the ground beef and oil only if needed. Break the beef into small crumbles and cook uncovered for 5 to 7 minutes, stirring, until browned and no longer pink. Cook to 160°F (70°C); drain excess fat if needed.
  5. Reduce the heat to medium. Stir in the garlic and ginger for 30 to 60 seconds, until fragrant but not browned.
  6. Whisk the sauce again, then pour it into the skillet. Stir over a gentle simmer for 1 to 3 minutes, until smooth and glossy and able to lightly coat a spoon.
  7. Add the drained spaghetti and toss over medium-low heat for 1 to 2 minutes, until coated. Add reserved pasta water 1 tablespoon at a time if the sauce is too thick.
  8. Divide among bowls and top with green onions and sesame seeds. Serve promptly.

Tips

  • Cook the spaghetti just to al dente; it will soften further when tossed with the sauce.
  • Whisk the sauce again just before adding it, since the cornstarch can settle.
  • Stop simmering when the sauce lightly coats a spoon; it thickens further as it cools.
  • Use reserved pasta water a tablespoon at a time to loosen thick sauce or noodles that look dry.

Variations

  • Add vegetables: Sauté 1 to 2 cups thinly sliced bell pepper or snap peas before adding the sauce, taking care not to crowd the skillet.
  • Use different noodles: Replace the spaghetti with rice noodles, ramen, or glass noodles, cooking them according to their package directions.
  • Gluten-free adaptation: Use tamari and ensure the noodles, hoisin, and all other ingredients are certified gluten-free.
  • Adjust the heat: Add red pepper flakes to the sauce or serve chili crisp at the table.
  • Use arrowroot: Replace the cornstarch with arrowroot, whisking it into the cool sauce and avoiding a prolonged vigorous boil.

Notes

Refrigerate leftovers in an airtight container for up to 3 days. Reheat gently with a splash of water or broth. Freeze the beef and sauce without the noodles for up to about 1 month; cook fresh spaghetti after thawing.

Nutrition

Calories: 505 kcal per serving | Protein: 33 g per serving | Fat: 13 g per serving | Carbohydrates: 60 g per serving | Per 100 G Calories: 155 kcal | Per 100 G Protein: 10 g | Per 100 G Fat: 4 g | Per 100 G Carbohydrates: 18 g

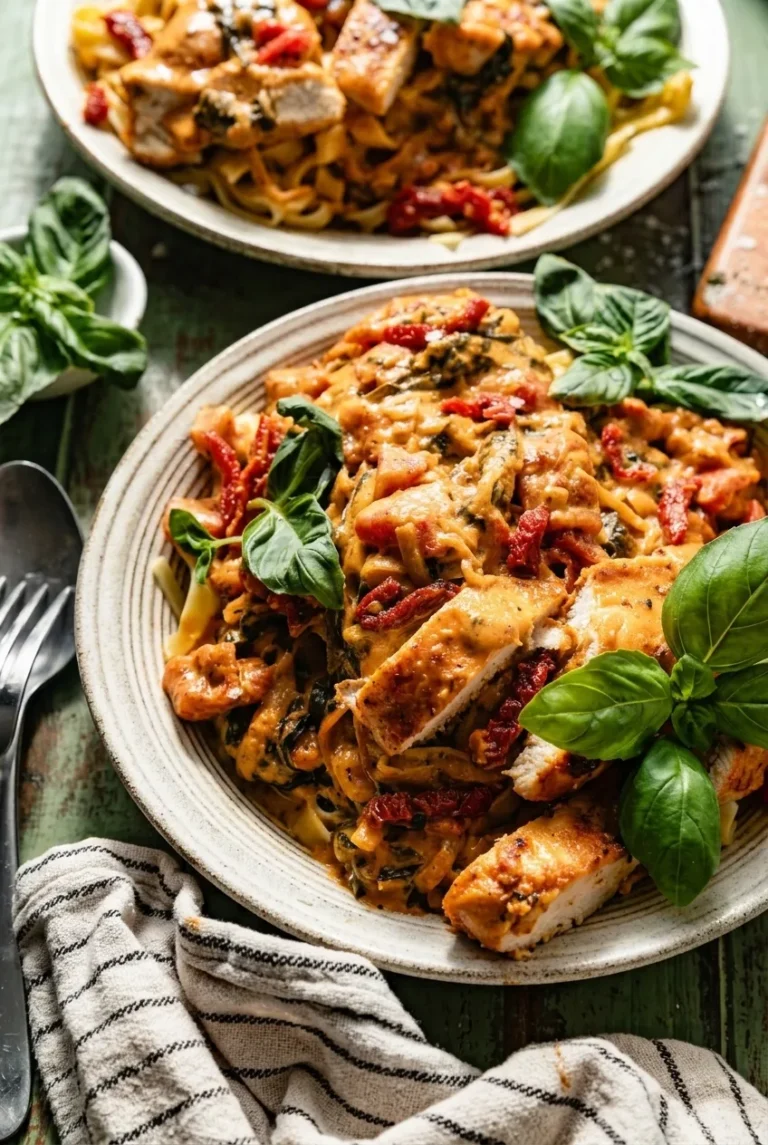
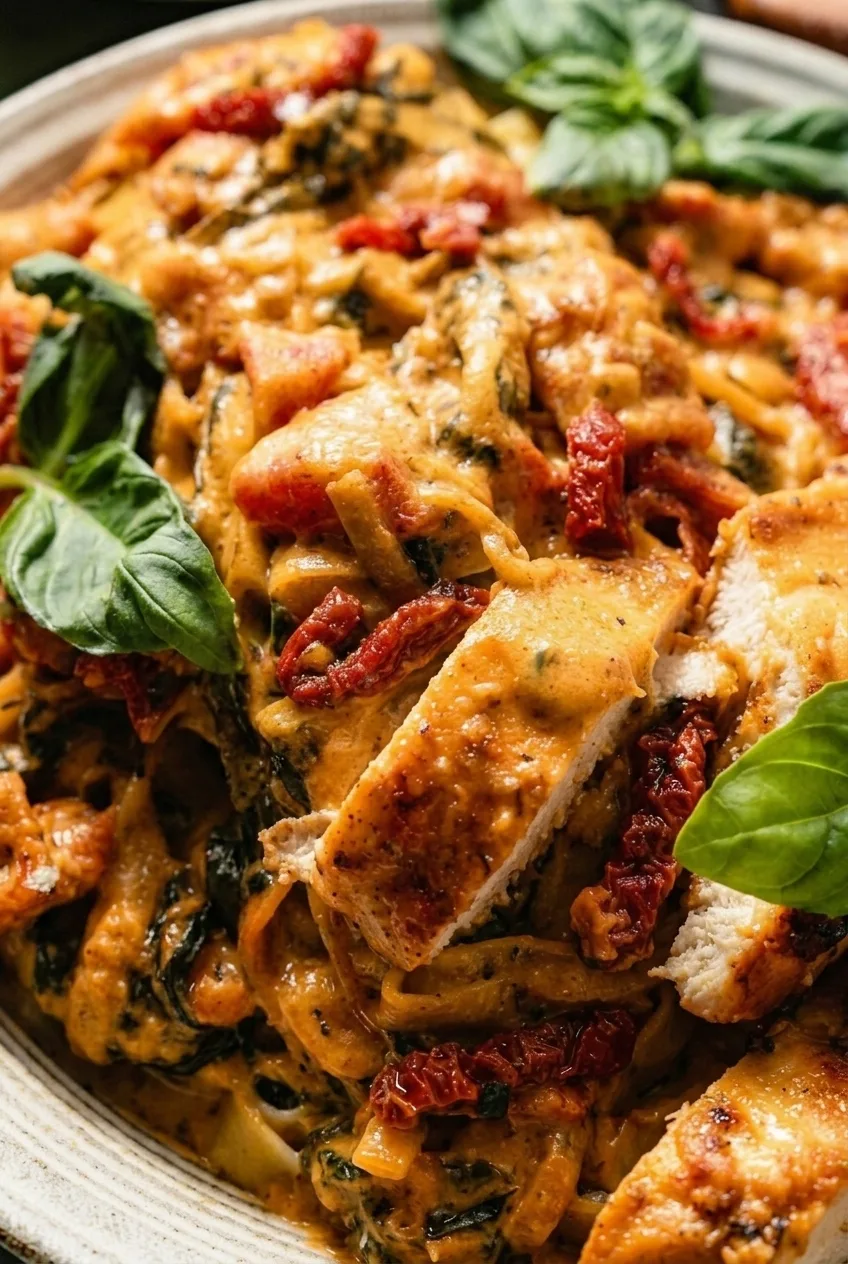
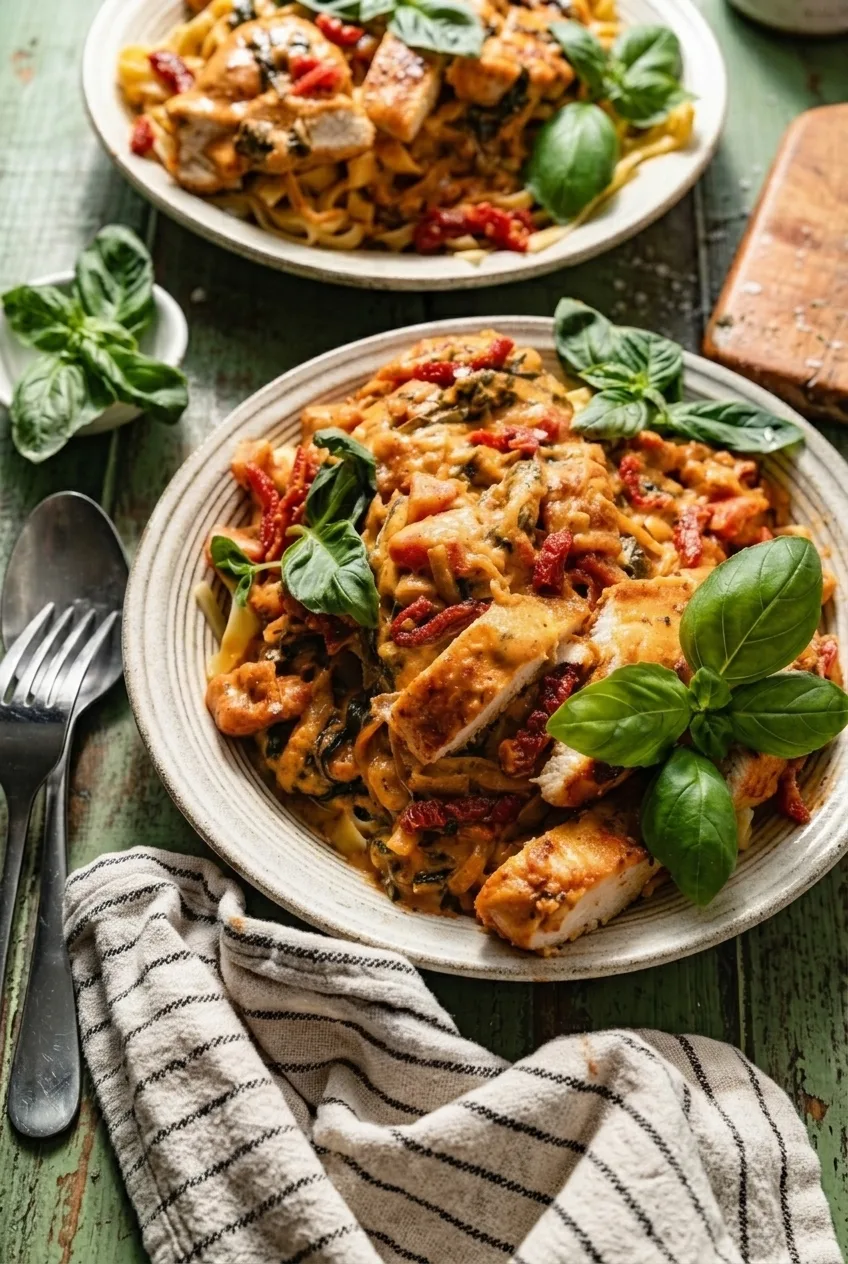
Marry Me Chicken Pasta

Fettuccine, browned chicken, and strips of sun-dried tomato are tossed in a creamy Parmesan sauce and finished with fresh basil. The pasta boils separately while the chicken and sauce cook in one skillet, giving the chicken room to brown and keeping the noodles al dente.

The sauce needs only a short, gentle simmer. Once the pasta is added, reserved pasta water loosens it as needed so it stays glossy and coats the ribbons rather than pooling in the bowl. This recipe serves 4 and takes about 40 minutes.

Ingredients for Marry Me Chicken Pasta

Close view of creamy Parmesan sauce coating fettuccine with browned chicken, tomato strips, and basil.
  • 12 ounces fettuccine (340g)
  • 1 1/4 pounds boneless, skinless chicken breast, cut into roughly 1-inch pieces (575g)
  • 1 teaspoon kosher salt, divided, plus more for the pasta water
  • 1/2 teaspoon black pepper
  • 1 tablespoon oil from the sun-dried tomato jar
  • 2 tablespoons unsalted butter
  • 3 garlic cloves, minced
  • 1/2 cup oil-packed sun-dried tomatoes, drained and sliced (70g)
  • 3/4 cup low-sodium chicken broth (180ml)
  • 1 cup heavy cream (240ml)
  • 3/4 cup finely grated Parmesan (75g), plus more for serving
  • 1/2 cup loosely packed fresh basil leaves, plus a few leaves for serving

Grate the Parmesan finely so it melts smoothly. Reserve at least 1 cup of pasta water before draining; you may not need all of it.

How to Make Marry Me Chicken Pasta

A full plate of Marry Me Chicken Pasta on a rustic tabletop, with fettuccine, chicken, tomatoes, and basil.
  1. Cook the pasta: Boil the fettuccine in a large pot of well-salted water until just al dente, following the package timing. Reserve at least 1 cup of pasta water, then drain.
  2. Brown the chicken: Pat the chicken dry and season it with some of the measured salt and the black pepper. Heat a wide 12-inch skillet over medium-high heat, then add the sun-dried tomato oil. Brown the chicken in uncrowded batches, turning occasionally, for about 5 to 7 minutes per batch. Start checking after 5 minutes: the pieces should be golden on more than one side but need not be fully cooked. Transfer to a plate; add a little olive oil if the skillet becomes dry.
  3. Cook the garlic and tomatoes: Reduce the heat to medium and add the butter. Stir in the garlic for about 30 seconds, until fragrant but not dark, then add the sun-dried tomatoes.
  4. Simmer the sauce: Pour in the broth and scrape up the browned bits from the skillet. Stir in the cream and simmer gently, uncovered, for 3 to 5 minutes, until the sauce begins to thicken and lightly coats a spoon. Do not let it boil hard.
  5. Finish the chicken: Return the chicken and any juices to the skillet. Check the largest pieces with an instant-read thermometer and simmer gently only as long as needed for them to reach 165°F (75°C), about 3 to 6 minutes depending on how far they cooked during browning. Reduce the heat to low and stir in the Parmesan until smooth. Taste and add the remaining measured salt as needed.
  6. Toss and serve: Add the fettuccine and toss to coat. If the sauce is too thick, add reserved pasta water 1 to 2 tablespoons at a time until it flows around and clings to the noodles. Turn off the heat, fold in some of the basil, and serve with the remaining fresh basil leaves and a little extra Parmesan.

How to Keep the Chicken Golden and Juicy

Dry the chicken before it goes into the hot skillet and leave space between the pieces. In a crowded pan, released moisture makes the chicken steam instead of brown. Because 1-inch pieces can finish at different rates, check the largest pieces and avoid simmering them longer than needed to reach 165°F.

How to Keep the Sauce Smooth

Keep the cream at a gentle simmer and lower the heat before adding Parmesan; vigorous boiling can leave the cheese sauce grainy. The sauce will thicken further as the cheese melts and the pasta absorbs liquid. Adjust it after tossing the noodles, adding pasta water gradually rather than all at once.

Pasta and Chicken Variations

  • Different pasta: Penne or rigatoni can replace fettuccine. Cook it al dente and reserve pasta water as directed.
  • Chicken thighs: Boneless, skinless thighs can replace breasts. Adjust the cooking time and check the thickest pieces for 165°F.
  • Gentle heat: Stir 1/8 to 1/4 teaspoon red pepper flakes into the garlic.
  • Spinach: Fold 2 packed cups of baby spinach into the sauce near the end and cook just until wilted. This changes the appearance of the finished dish.

For a one-pot dish with a similar flavor profile, try Marry Me Chicken Orzo.

How to Store and Reheat Leftovers

Refrigerate leftovers promptly in an airtight container for up to 3 to 4 days. Reheat gently in a skillet over low heat or in short microwave intervals, stirring as needed. Add a small splash of broth, cream, or water to loosen the sauce. Freezing is less reliable because the cream sauce may change texture after thawing.

Nutrition Information

Approximate nutrition per serving, based on 4 servings: 900 calories, 52g protein, 45g fat, and 69g carbohydrates. Per 100g: approximately 190 calories, 11g protein, 9g fat, and 15g carbohydrates. Values vary with ingredient brands and serving size.

Marry Me Chicken Pasta

Fettuccine and browned chicken are tossed in a creamy Parmesan sauce with sun-dried tomatoes and fresh basil.
Course: Main Course
Cuisine: Italian
Prep: 15 min
Cook: 25 min
Total: 40 min
Servings: 4 Calories: 900 kcal

Equipment

  • Large pot
  • Colander
  • 12-inch skillet
  • Instant-read thermometer
  • Grater

Ingredients

Pasta and Chicken

  • 12 ounces fettuccine (340g)
  • 1 1/4 pounds boneless, skinless chicken breast, cut into roughly 1-inch pieces (575g)
  • 1 teaspoon kosher salt, divided, plus more for the pasta water
  • 1/2 teaspoon black pepper
  • 1 tablespoon oil from the sun-dried tomato jar

Sauce and Garnish

  • 2 tablespoons unsalted butter
  • 3 garlic cloves, minced
  • 1/2 cup oil-packed sun-dried tomatoes, drained and sliced (70g)
  • 3/4 cup low-sodium chicken broth (180ml)
  • 1 cup heavy cream (240ml)
  • 3/4 cup finely grated Parmesan (75g), plus more for serving
  • 1/2 cup loosely packed fresh basil leaves, plus a few leaves for serving

Instructions

  1. Boil the fettuccine in a large pot of well-salted water until just al dente, following the package timing. Reserve at least 1 cup of pasta water, then drain.
  2. Pat the chicken dry and season with some of the measured salt and the black pepper.
  3. Heat a wide 12-inch skillet over medium-high heat and add the sun-dried tomato oil. Brown the chicken in uncrowded batches, turning occasionally, for about 5 to 7 minutes per batch. Transfer it to a plate; add a little olive oil if the skillet becomes dry.
  4. Reduce the heat to medium and add the butter. Stir in the garlic for about 30 seconds, until fragrant but not dark, then add the sun-dried tomatoes.
  5. Pour in the broth and scrape up the browned bits. Stir in the cream and simmer gently, uncovered, for 3 to 5 minutes, until the sauce begins to thicken and lightly coats a spoon. Do not let it boil hard.
  6. Return the chicken and any juices to the skillet. Check the largest pieces with an instant-read thermometer and simmer gently until they reach 165°F (75°C), about 3 to 6 minutes. Reduce the heat to low and stir in the Parmesan until smooth. Taste and add the remaining measured salt as needed.
  7. Add the fettuccine and toss to coat. If the sauce is too thick, add reserved pasta water 1 to 2 tablespoons at a time until it flows around and clings to the noodles.
  8. Turn off the heat and fold in some of the basil. Serve with the remaining basil and extra Parmesan.

Tips

  • Dry the chicken before cooking and leave space between pieces so they brown instead of steam.
  • Brown the chicken in batches if needed to avoid crowding the skillet.
  • Grate the Parmesan finely so it melts smoothly.
  • Keep the cream at a gentle simmer and lower the heat before adding Parmesan.
  • Reserve at least 1 cup of pasta water and add it gradually after tossing the pasta.

Variations

  • Penne or Rigatoni: Replace the fettuccine with penne or rigatoni and cook until al dente.
  • Chicken Thighs: Replace the chicken breasts with boneless, skinless thighs and cook until the thickest pieces reach 165°F.
  • Gentle Heat: Stir 1/8 to 1/4 teaspoon red pepper flakes into the garlic.
  • Spinach: Fold 2 packed cups of baby spinach into the sauce near the end and cook until wilted.

Notes

Refrigerate leftovers promptly in an airtight container for 3 to 4 days. Reheat gently, adding a splash of broth, cream, or water to loosen the sauce. Check chicken reaches 165°F (75°C).

Nutrition

Calories: 900 kcal | Protein: 52 g | Fat: 45 g | Carbohydrates: 69 g