Author

Julia

Browsing

Slow Cooker Corn Casserole

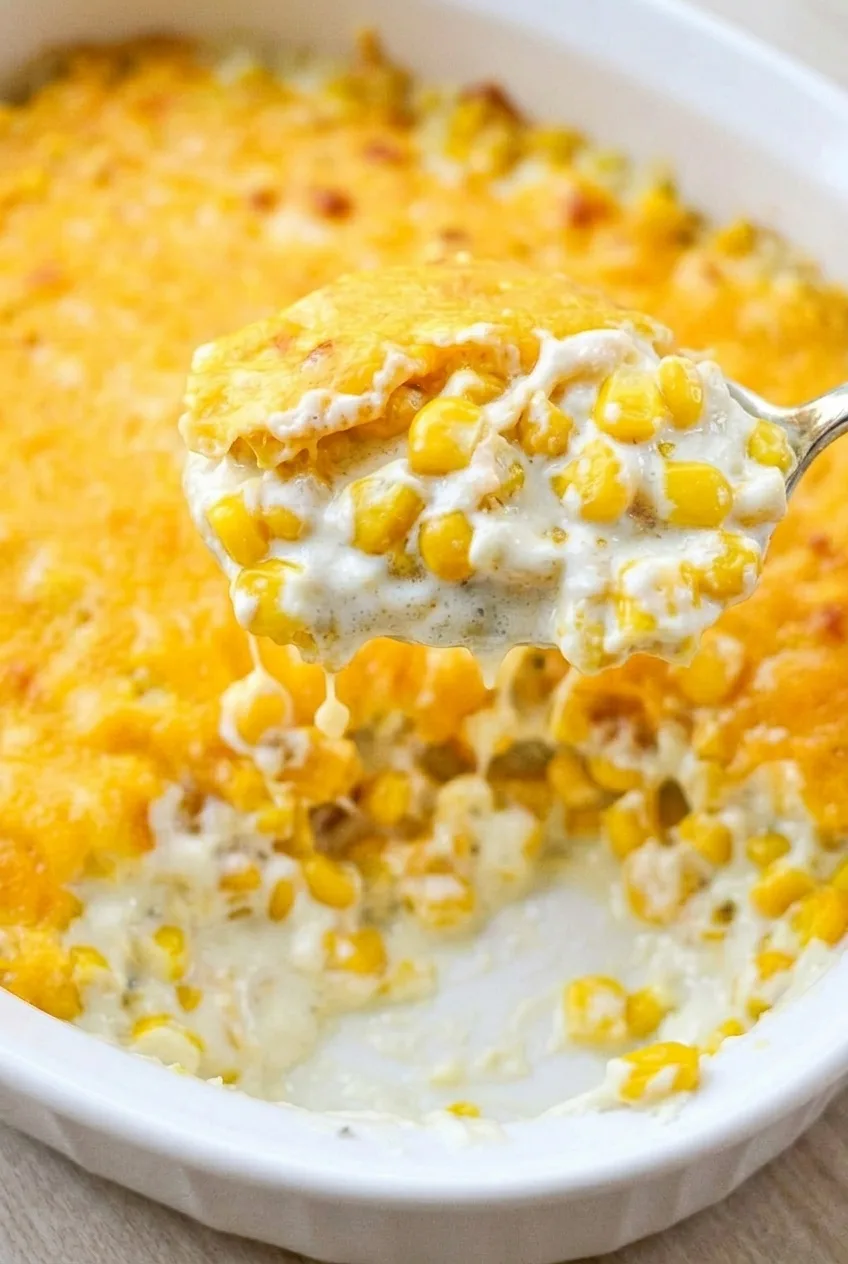
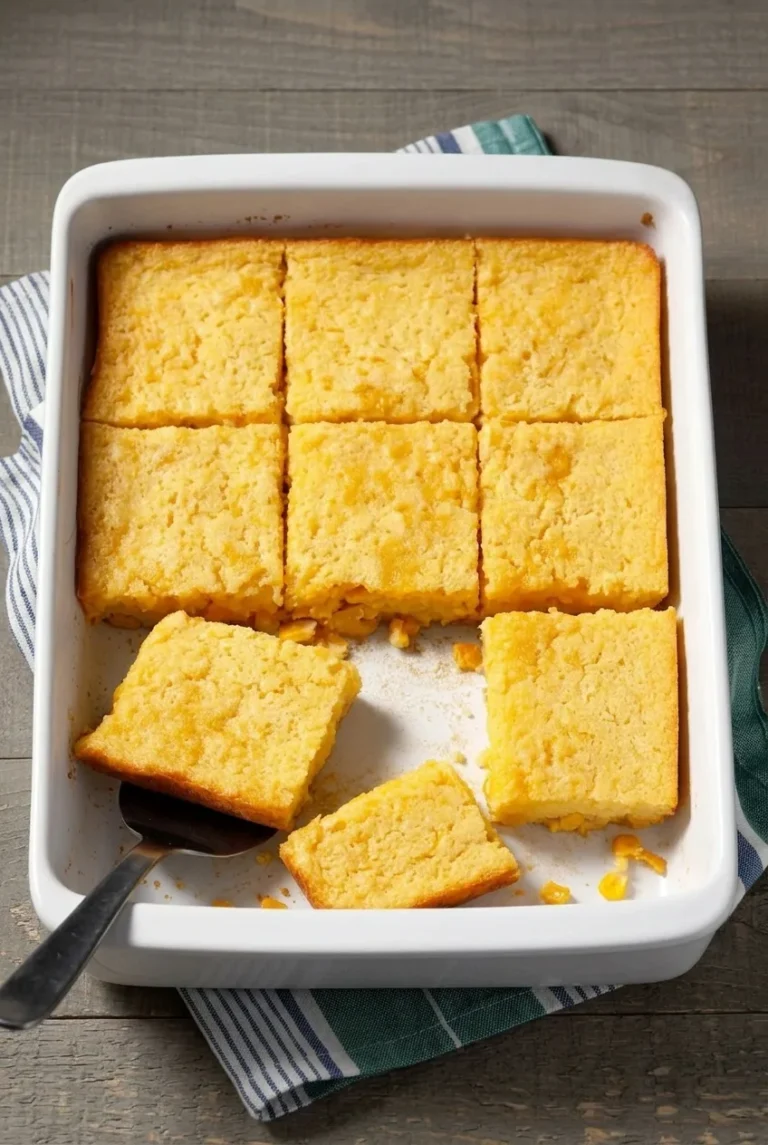
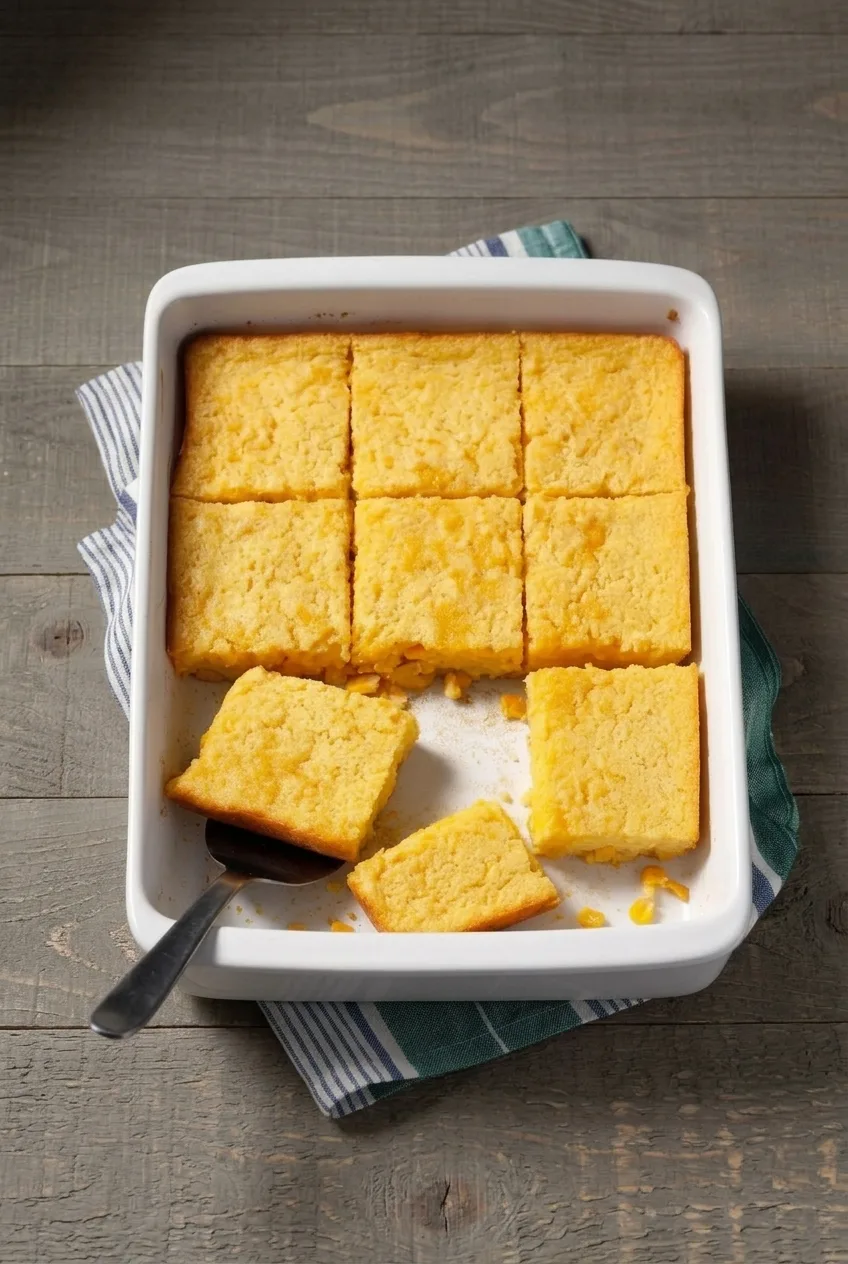
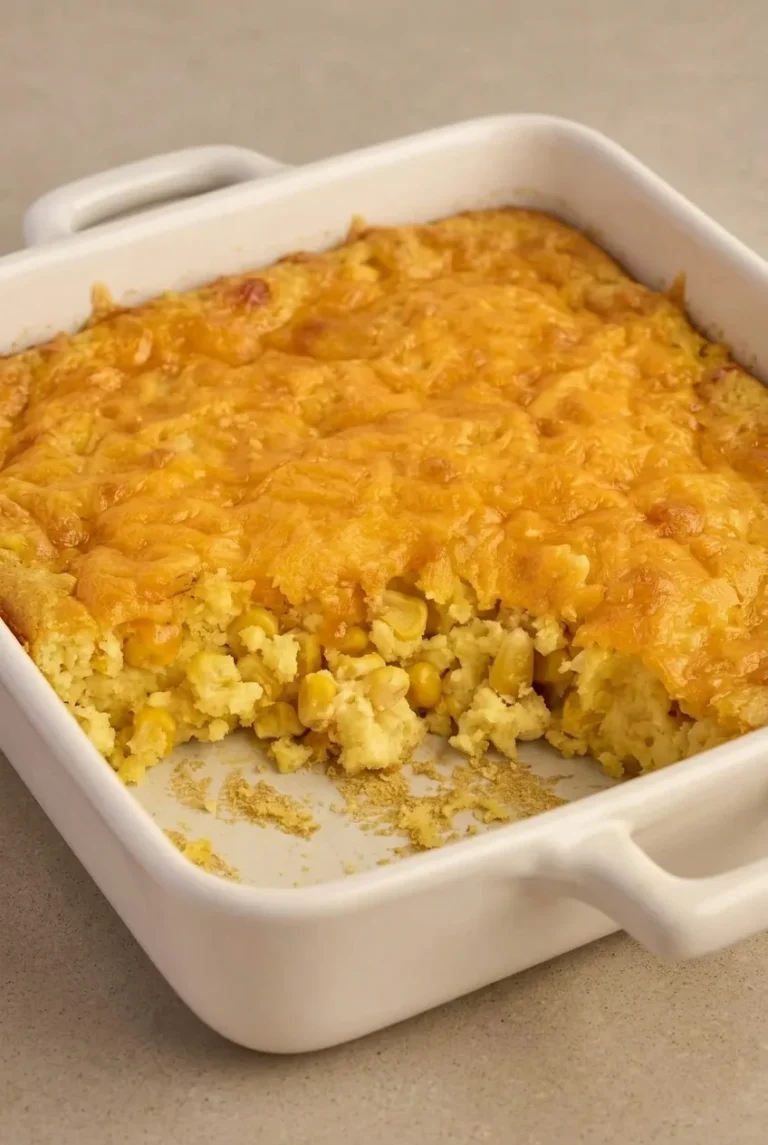
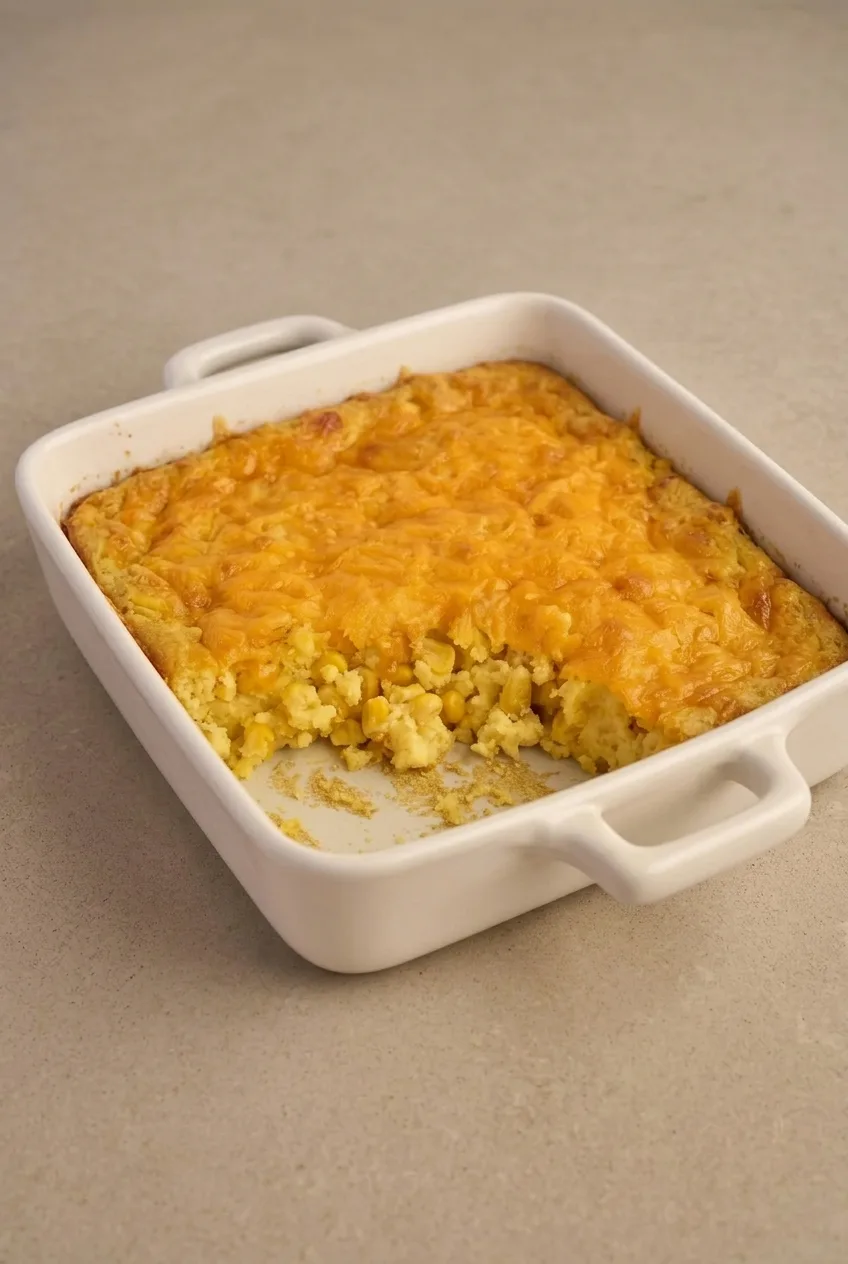
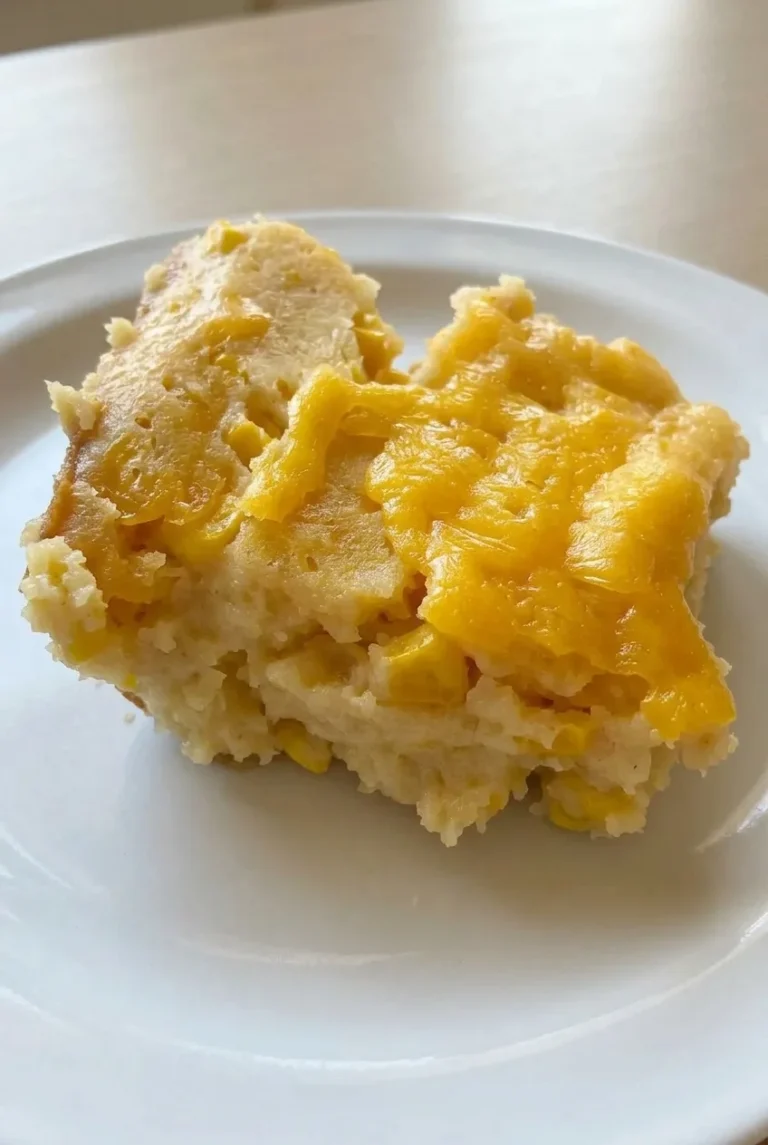
Slow cooker corn casserole should be soft and moist, with whole corn kernels throughout and a generous layer of melted cheddar on top. Corn muffin mix and eggs give it enough structure to serve in thick, rustic portions without turning it into firm cornbread.

The slow cooker leaves the oven free, but the center may set at different times depending on the appliance. Drain the whole-kernel corn well, start checking early, and add the cheddar only when the casserole is mostly set so it stays visible on top.

Ingredients for Slow Cooker Corn Casserole
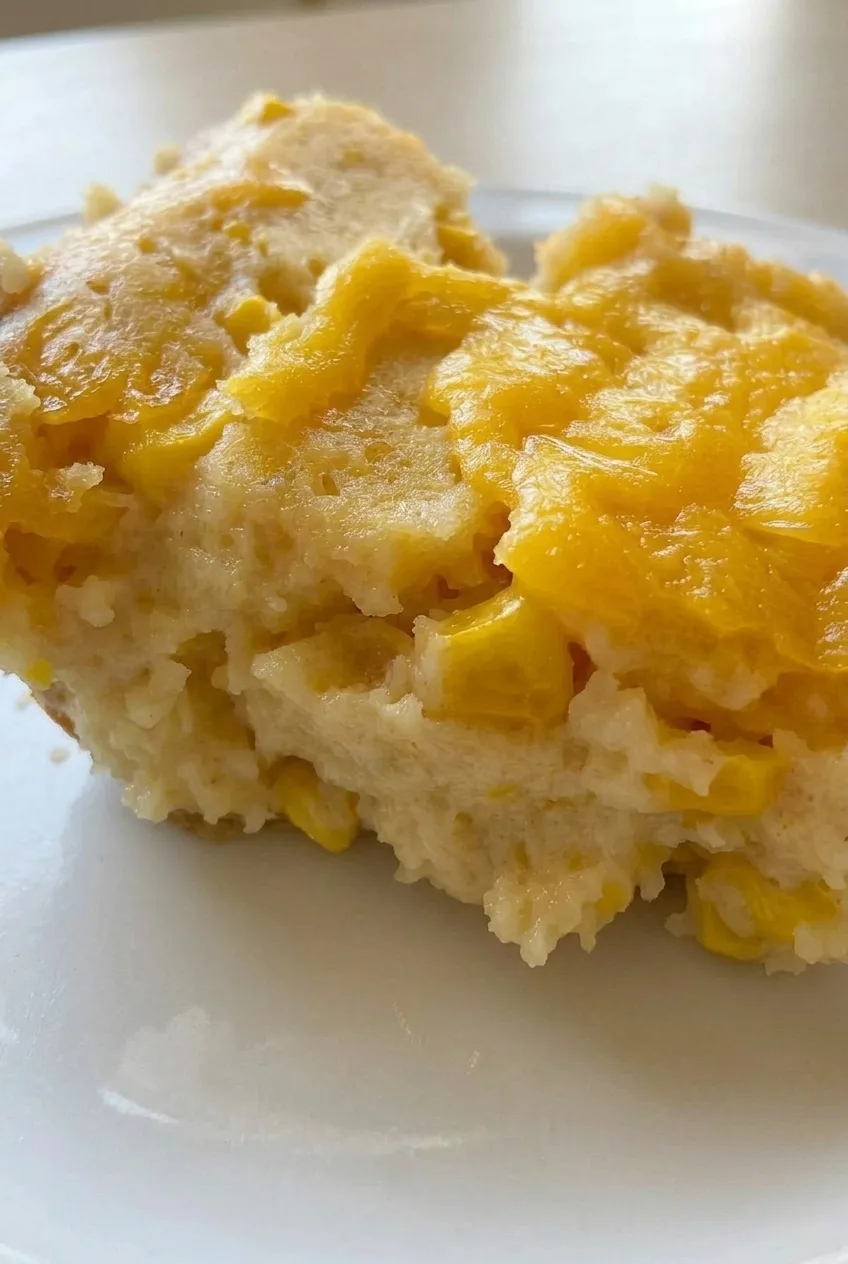
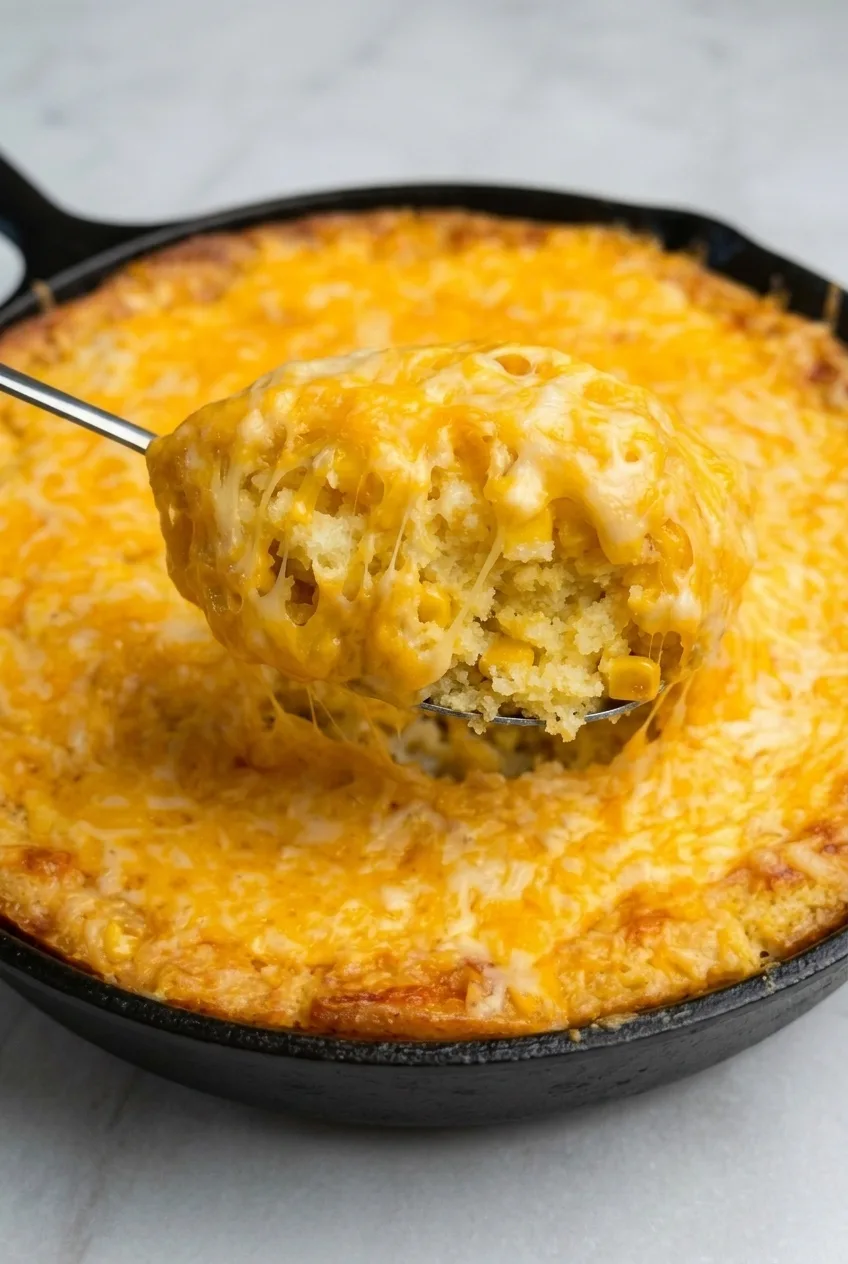
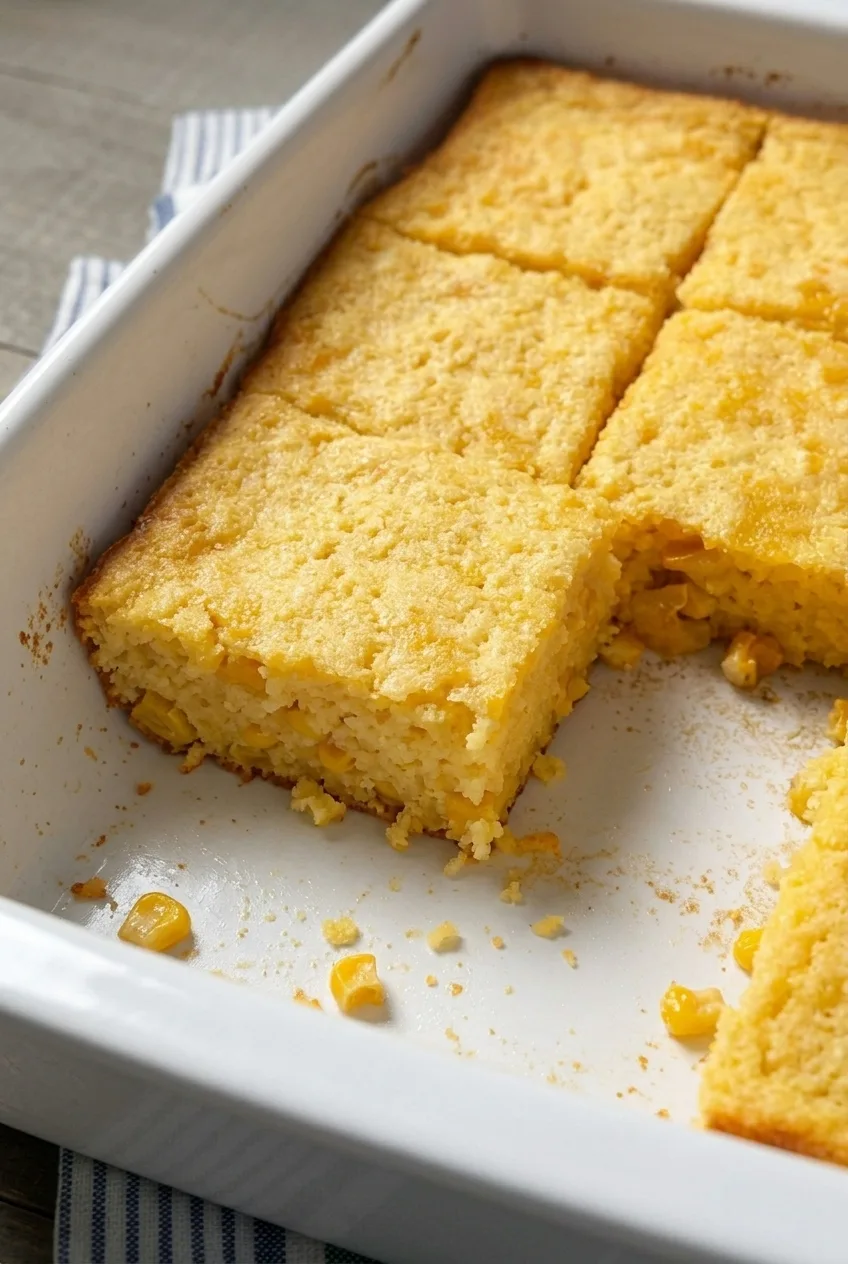
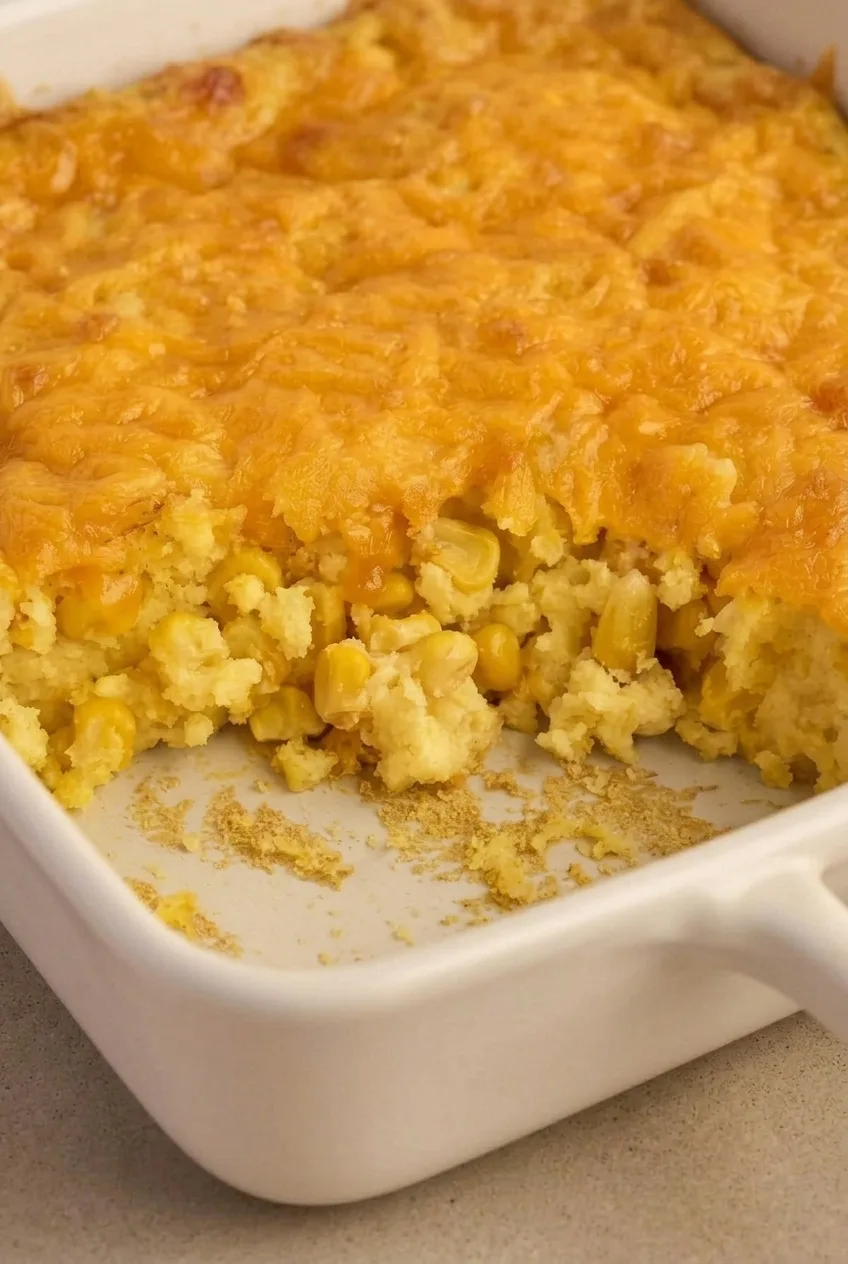
Close detail of melted cheddar over the moist corn-kernel interior of slow cooker corn casserole
  • Cooking spray or a thin layer of butter, for greasing the slow cooker
  • 2 large eggs
  • 1/2 cup sour cream (120g)
  • 1/2 cup unsalted butter, melted (1 stick; about 115g)
  • 1 box Jiffy-style corn muffin mix (about 8.5 ounces; 240g)
  • 1 can cream-style corn (about 14.75 ounces; 420g), undrained
  • 1 can whole-kernel corn (about 15 ounces; 425g before draining), drained well
  • 1 1/2 cups shredded cheddar cheese (170g)

Makes 8 side-dish servings. Use a 5- to 6-quart slow cooker.

How to Make Slow Cooker Corn Casserole
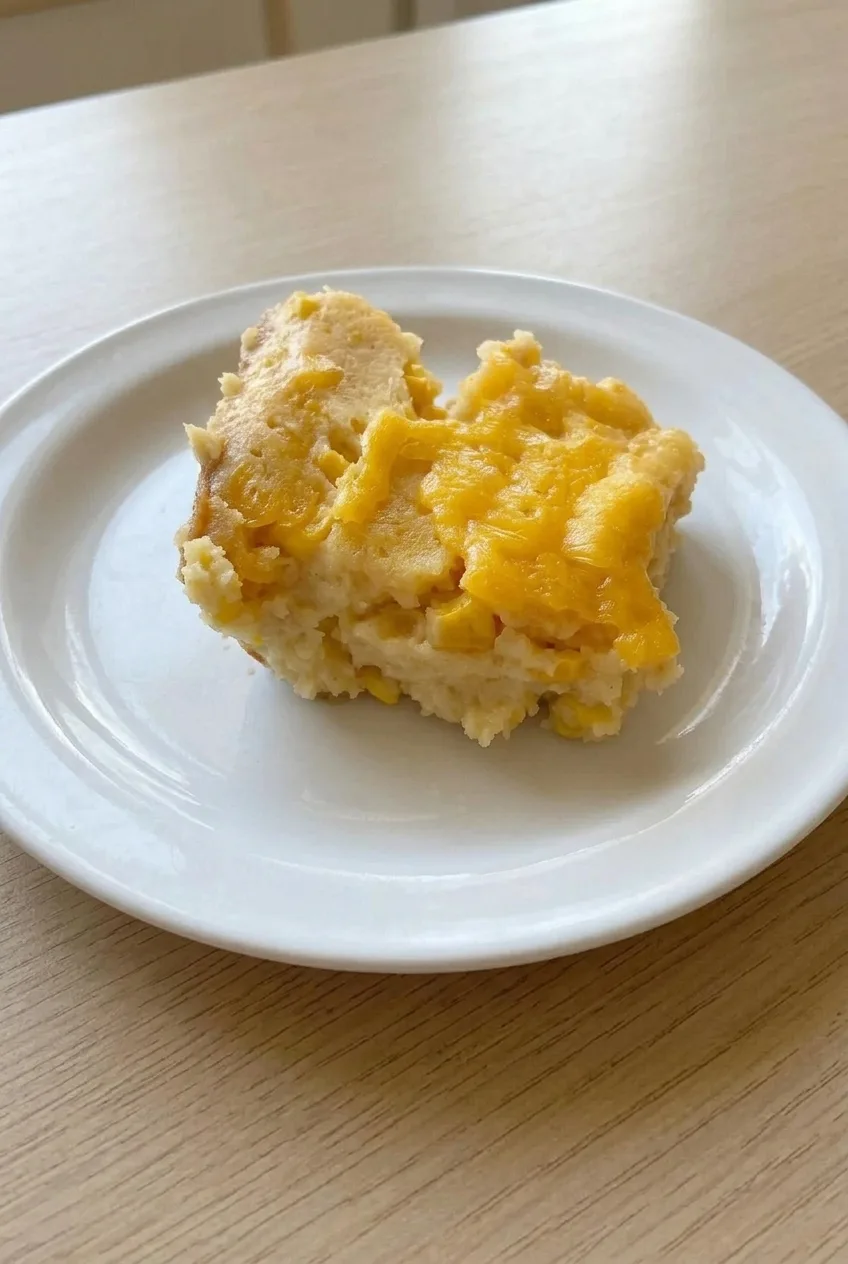
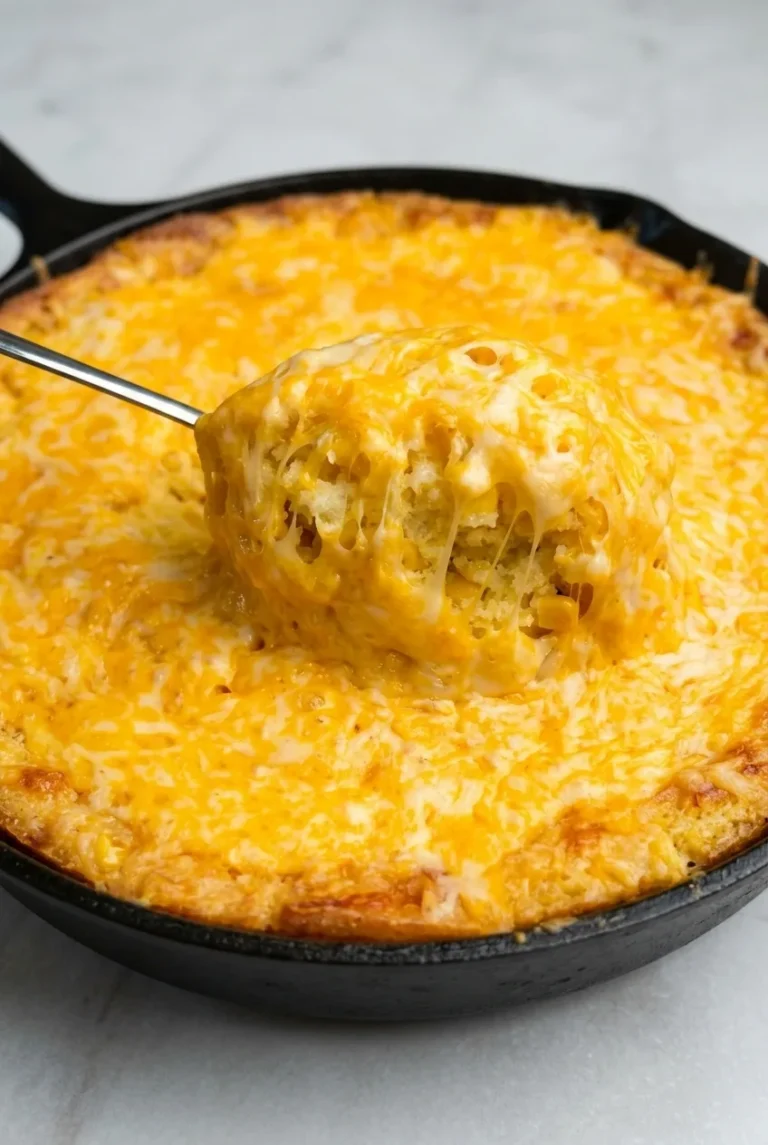
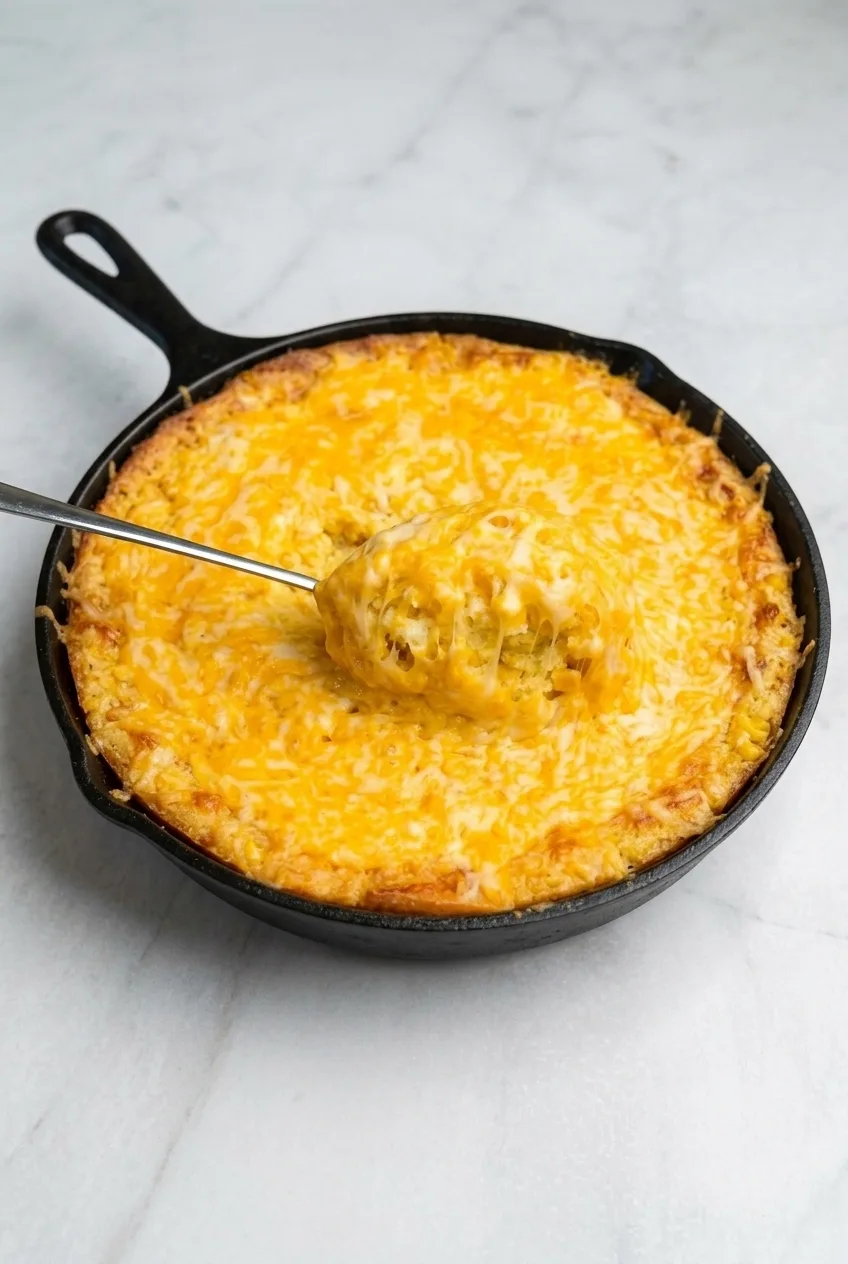
A full serving of cheddar-topped slow cooker corn casserole on a plate, shown with more of the surrounding surface
  1. Prepare the slow cooker: Grease the insert. Drain the whole-kernel corn thoroughly, but do not drain the cream-style corn.
  2. Mix the casserole: In a large bowl, whisk the eggs, sour cream, and melted butter until combined. Stir in the corn muffin mix and both kinds of corn just until evenly mixed. The batter should be thick and spoonable, with kernels throughout.
  3. Fill and cover: Scrape the batter into the slow cooker and level it gently. Cover and set to HIGH. If your lid collects condensation, place a paper towel beneath it only if your appliance instructions allow it; secure the edges well away from the heating surface.
  4. Cook until mostly set: Start checking at 2 1/2 hours. Gently shake the insert: the center should no longer slosh, though it should still look moist. If it is loose, continue cooking in short increments while watching for dark or scorched edges. Expect about 2 1/2 to 3 1/2 hours on HIGH, depending on the slow cooker.
  5. Melt the cheddar: Once the center is mostly set, scatter the cheese evenly over the top. Cover and cook for about 15 to 25 minutes, just until the cheddar is melted and glossy.
  6. Rest and serve: Turn off the slow cooker and leave the casserole uncovered for 10 minutes so it firms slightly. Spoon or cut generous, rustic portions and serve warm.

How to Tell When the Center Is Done

Check the middle rather than relying on the clock. It should not slosh when the insert is gently shaken, but it should remain tender and moist. The edges may be lightly golden; they should not be dark or scorched. If the center is still loose, keep cooking in short increments before adding the cheddar.

You can use the LOW setting, but it will take longer and timing varies widely. Use the same center-set cue to decide when to add the cheese.

How to Keep Corn Casserole from Turning Watery

Drain the whole-kernel corn well; its packing liquid adds moisture the casserole does not need. Leave the cream-style corn undrained. If condensation drips from your slow-cooker lid, a safely placed paper towel beneath it can help keep the surface from getting wet.

If the casserole still looks watery near the end, cook it uncovered briefly and reassess the center. Watch the edges so they do not overcook while the middle sets.

Why Add the Cheddar Near the End?

Cheddar added at the start can blend into the surface during the long cook. Adding it once the center is mostly set leaves a distinct melted layer on top rather than cheese mixed through the casserole.

Serving Slow Cooker Corn Casserole

Serve warm alongside roasted meat, green beans, mashed potatoes, or stuffing. For an oven-baked alternative, try Easy Jiffy Corn Casserole with a Golden Cheddar Top.

Storing and Reheating Leftovers

Refrigerate leftovers in an airtight container for 3 to 4 days. Reheat individual portions in the microwave until warm. For a larger amount, place the casserole in a greased baking dish, cover, and warm in a 325°F (165°C) oven until heated through.

Freezing is not the preferred option for the best texture; this soft, dairy-rich casserole may change after thawing.

Nutrition Information

Approximate nutrition per serving, based on 8 side-dish servings: 430 calories, 12g protein, 27g fat, and 41g carbohydrates. Approximate nutrition per 100g: 245 calories, 7g protein, 15g fat, and 23g carbohydrates. Values vary with the brands used.

Slow Cooker Corn Casserole

A soft, moist corn casserole made in the slow cooker and finished with melted cheddar.
Course: Side Dish
Cuisine: American
Prep: 15 min
Cook: 225 min
Total: 240 min
Servings: 8 Calories: 430 kcal

Equipment

  • 5- to 6-quart slow cooker
  • Large mixing bowl
  • Whisk

Ingredients

  • Cooking spray or a thin layer of butter, for greasing the slow cooker
  • 2 large eggs
  • 1/2 cup sour cream (120g)
  • 1/2 cup unsalted butter, melted (1 stick; about 115g)
  • 1 box Jiffy-style corn muffin mix (about 8.5 ounces; 240g)
  • 1 can cream-style corn (about 14.75 ounces; 420g), undrained
  • 1 can whole-kernel corn (about 15 ounces; 425g before draining), drained well
  • 1 1/2 cups shredded cheddar cheese (170g)

Instructions

  1. Grease the slow cooker insert. Drain the whole-kernel corn well, but leave the cream-style corn undrained.
  2. Whisk the eggs, sour cream, and melted butter in a large bowl until combined.
  3. Stir in the corn muffin mix and both kinds of corn just until evenly mixed.
  4. Scrape the batter into the slow cooker and gently level the top. Cover and cook on HIGH.
  5. Start checking after 2 1/2 hours. The center should no longer slosh when the insert is gently shaken, but should still look moist. Continue cooking in short increments if it is loose, watching the edges to prevent scorching. Cooking typically takes 2 1/2 to 3 1/2 hours.
  6. When the center is mostly set, scatter the cheddar evenly over the top. Cover and cook for 15 to 25 minutes, until the cheese is melted and glossy.
  7. Turn off the slow cooker and leave the casserole uncovered for 10 minutes. Serve warm.

Tips

  • Drain the whole-kernel corn thoroughly to avoid excess moisture.
  • Check the center rather than relying only on the cooking time.
  • Add the cheddar after the center is mostly set so it stays as a distinct layer on top.
  • If condensation collects on the lid, use a paper towel underneath only if your appliance instructions allow it, and keep the towel edges away from the heating surface.
  • If the casserole looks watery near the end, cook it uncovered briefly and watch the edges.
Notes

Refrigerate leftovers in an airtight container for 3 to 4 days. Reheat individual portions in the microwave, or cover a larger amount and warm in a greased baking dish at 325°F (165°C) until heated through. Freezing is not recommended for the best texture.

Nutrition

Calories: 430 kcal | Protein: 12 g | Fat: 27 g | Carbohydrates: 41 g

Cowboy Corn Casserole

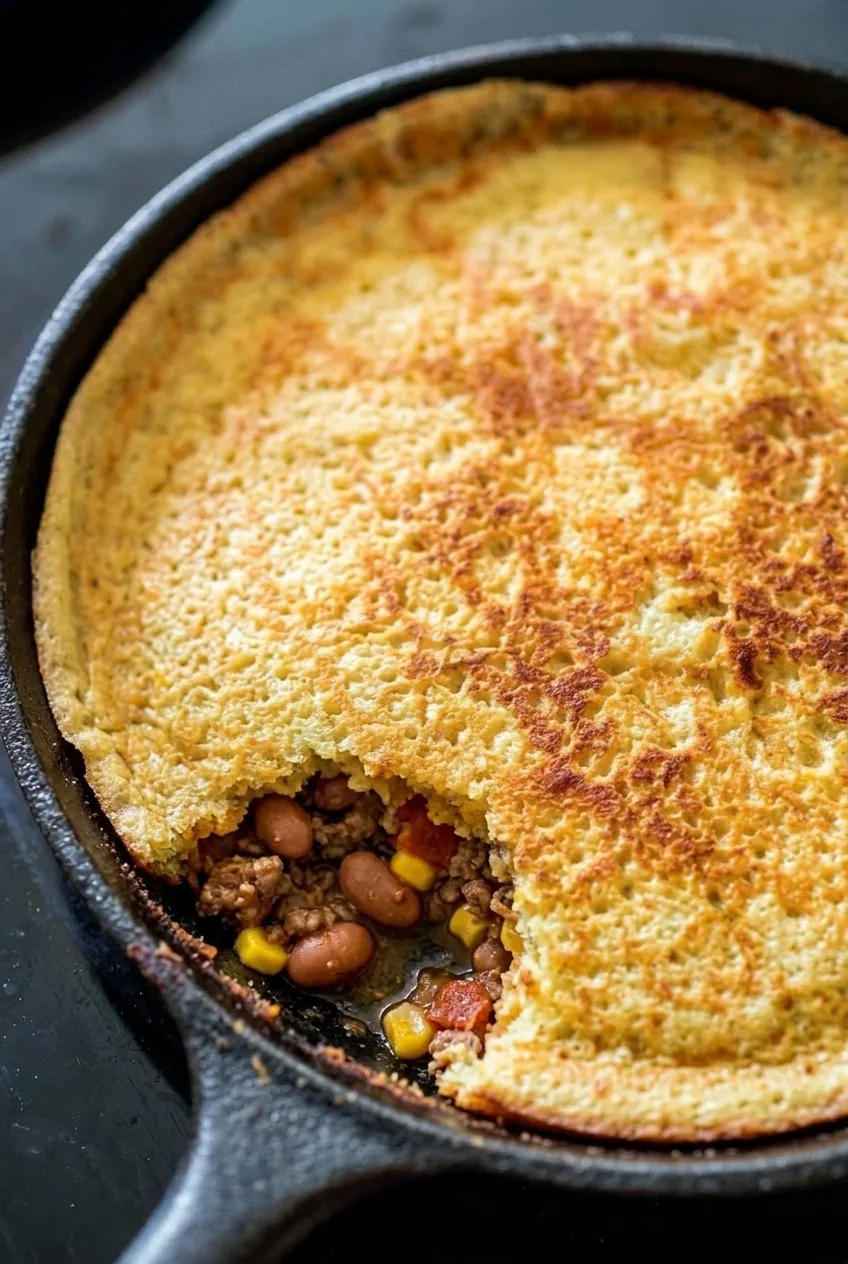
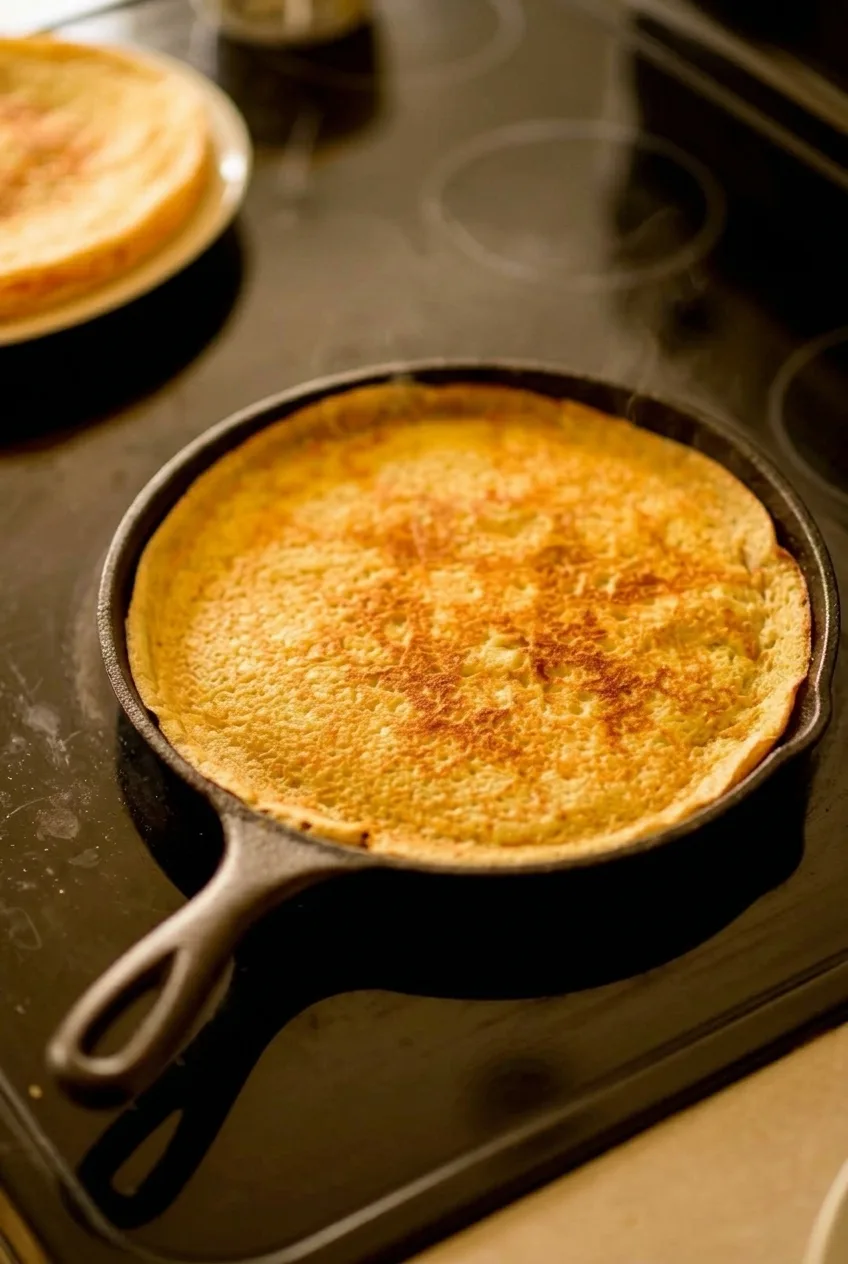
Cowboy corn casserole bakes a seasoned beef, pinto bean, and corn filling beneath one continuous layer of golden cornbread. The 10-inch cast-iron skillet goes from stovetop to oven and then to the table, with the cheddar tucked into the filling rather than scattered over the top.

The key is to keep the filling moist but not watery. Drain the canned vegetables and simmer the filling briefly before spooning on the separately mixed cornbread batter. Bake until the center is set; the time can shift with the depth of the skillet and the cornbread mix.

Ingredients for Cowboy Corn Casserole

Close view of craggy cornbread topping and a small scoop showing the beef, bean, and corn filling
  • 1 lb lean ground beef (450g)
  • 1 small yellow onion, diced (110g)
  • 1 tablespoon chili powder
  • 1 teaspoon ground cumin
  • 1 teaspoon garlic powder
  • 1 (15 oz) can pinto beans, drained and rinsed
  • 1 cup canned corn, drained (165g)
  • 1 (10 oz) can diced tomatoes with green chiles, drained
  • 1/2 teaspoon kosher salt, or to taste
  • 1 cup shredded cheddar cheese (115g)
  • 1 package cornbread mix (about 8.5 oz/240g)
  • Egg and milk as directed on the cornbread mix package; an 8.5 oz Jiffy-style mix commonly calls for 1 large egg and 1/3 cup milk

Follow the directions for your particular cornbread mix if its egg or milk amounts differ.

How to Make Cowboy Corn Casserole

Full cast-iron skillet of cowboy corn casserole centered on a dark surface with room around the dish
  1. Preheat and prep: Heat the oven to 375°F (190°C). Dice the onion, drain and rinse the beans, and drain the corn and tomatoes with green chiles.
  2. Brown the beef: Cook the beef and onion in a 10-inch oven-safe cast-iron skillet over medium to medium-high heat for 7–9 minutes, breaking the beef into crumbles. When the beef is browned with no visible pink and the onion is soft, carefully drain off excess fat.
  3. Simmer the filling: Stir in the chili powder, cumin, garlic powder, salt, beans, corn, and tomatoes with green chiles. Simmer uncovered over medium-low heat for 4–6 minutes, stirring occasionally. The filling should be hot and spoonable, with no pool of liquid around the edge. Fold in the cheddar until melted.
  4. Mix the cornbread: In a bowl, prepare the mix with the egg and milk amounts listed on its package. Stir just until combined; a few small lumps are fine.
  5. Cover the filling: Remove the skillet from the heat. Spoon the batter in dollops across the filling, then gently spread them together into a continuous layer. Do not press the batter down or stir it into the filling.
  6. Bake: Bake uncovered for an estimated 25–30 minutes, beginning to check at 22 minutes. The top should be golden and set in the center, a toothpick inserted into the cornbread should come out clean or with a few dry crumbs, and the filling should bubble at the edges. If the top browns before the center sets, tent it loosely with foil and continue baking.
  7. Rest: Let the casserole stand for 10 minutes before scooping so the filling can settle. Keep an oven mitt on the cast-iron handle; it remains hot after baking.

Why the Cornbread Center May Need More Time

Liquid pooling in the filling can leave the cornbread wet where the layers meet. Drain the corn and tomatoes well, but simmer only until the filling is saucy rather than dry. A smaller or deeper skillet, a different oven, or another cornbread mix may also lengthen the bake. Check the center with a toothpick instead of relying on the clock alone.

If cast iron is unavailable, transfer the hot filling to a 9-inch square oven-safe baking dish before adding the batter. The different dish may change the bake time, so use the same center-set and toothpick cues.

Cowboy Corn Casserole Variations

  • Spicier filling: Cook 1 diced small jalapeño with the onion, or use a spicier canned tomatoes-with-green-chiles product.
  • Ground turkey or chicken: Use it in place of the beef and cook until no longer pink. Add a little oil if the skillet is dry and the meat begins to stick.

Serving, Storage, and Reheating

Serve hot from the skillet. Offer sour cream or sliced green onion at the table if desired, leaving the whole cornbread top uncovered.

Cool leftovers promptly and refrigerate in an airtight container for up to 3 days. Reheat covered in a 350°F (175°C) oven until hot throughout, or warm individual portions in the microwave.

To make the filling ahead, refrigerate it and reheat until hot before adding freshly mixed cornbread batter and baking. For longer storage, cool the baked casserole completely, wrap it tightly, and freeze for up to 3 months. Thaw overnight in the refrigerator before reheating; the cornbread may be softer after thawing.

Nutrition

Approximate nutrition per serving, based on 1/6 of the casserole: 475 calories, 29g protein, 19g fat, and 42g carbohydrates. Approximate values per 100g: 175 calories, 11g protein, 7g fat, and 16g carbohydrates. Values vary with the beef, cheese, canned ingredients, and cornbread mix used.

Cowboy Corn Casserole

Seasoned beef, pinto beans, corn, and cheddar bake beneath a continuous golden cornbread topping.
Course: Main Course
Cuisine: American
Prep: 15 min
Cook: 45 min
Total: 70 min
Servings: 6 Calories: 475 kcal

Equipment

  • 10-inch oven-safe cast-iron skillet
  • Mixing bowl
  • Toothpick

Ingredients

For the filling

  • 1 lb lean ground beef (450 g)
  • 1 small yellow onion, diced (110 g)
  • 1 tablespoon chili powder
  • 1 teaspoon ground cumin
  • 1 teaspoon garlic powder
  • 1 (15 oz) can pinto beans, drained and rinsed
  • 1 cup canned corn, drained (165 g)
  • 1 (10 oz) can diced tomatoes with green chiles, drained
  • 1/2 teaspoon kosher salt, or to taste
  • 1 cup shredded cheddar cheese (115 g)

For the cornbread topping

  • 1 package cornbread mix (about 8.5 oz/240 g)
  • Egg and milk as directed on the package; an 8.5 oz Jiffy-style mix commonly calls for 1 large egg and 1/3 cup milk

Instructions

  1. Preheat the oven to 375°F (190°C). Dice the onion, drain and rinse the beans, and drain the corn and tomatoes with green chiles.
  2. Cook the ground beef and onion in a 10-inch oven-safe cast-iron skillet over medium to medium-high heat for 7–9 minutes, breaking the beef into crumbles, until browned and the onion is soft. Carefully drain excess fat.
  3. Stir in the chili powder, cumin, garlic powder, salt, beans, corn, and tomatoes with green chiles. Simmer uncovered over medium-low heat for 4–6 minutes, stirring occasionally, until hot and spoonable with no pool of liquid around the edge.
  4. Fold in the cheddar until melted.
  5. Prepare the cornbread mix in a bowl with the egg and milk amounts specified on the package. Stir just until combined; a few small lumps are fine.
  6. Remove the skillet from the heat. Spoon the batter in dollops across the filling, then gently spread into one continuous layer without pressing it down or stirring it into the filling.
  7. Bake uncovered for an estimated 25–30 minutes, beginning to check at 22 minutes. Bake until the top is golden and set in the center, a toothpick inserted into the cornbread comes out clean or with a few dry crumbs, and the filling bubbles at the edges. If the top browns before the center sets, tent loosely with foil and continue baking.
  8. Let the casserole rest for 10 minutes before serving. Keep an oven mitt on the cast-iron handle because it remains hot.

Tips

  • Drain the canned vegetables well to help keep the cornbread from turning wet where it meets the filling.
  • Simmer the filling until saucy but not watery before adding the batter.
  • Use a toothpick to check the center rather than relying on the baking time alone.
  • If you do not have cast iron, transfer the hot filling to a 9-inch square oven-safe dish before adding the batter; check doneness using the same cues.

Variations

  • Spicier Filling: Cook 1 diced small jalapeño with the onion, or use a spicier canned tomatoes-with-green-chiles product.
  • Ground Turkey or Chicken: Replace the beef with ground turkey or chicken and cook until no longer pink. Add a little oil if the skillet is dry and the meat begins to stick.

Notes

Refrigerate leftovers in an airtight container for up to 3 days. Reheat covered in a 350°F (175°C) oven until hot throughout, or microwave individual portions. Freeze the cooled casserole for up to 3 months and thaw overnight in the refrigerator before reheating.

Nutrition

Calories: 475 kcal | Protein: 29 g | Fat: 19 g | Carbohydrates: 42 g

Bacon and Cheese Corn Casserole

Bacon and cheese corn casserole should be creamy enough to spoon, yet cohesive enough to hold a loose mound—not firm enough to cut into squares. Half the corn is coarsely pulsed to give the filling body while leaving plenty of whole kernels visible. Dry the corn well before mixing, then bake until the edges bubble and the center looks set. A short rest helps it firm up; broken corn tortilla chips add crunch to each serving at the last moment.

Ingredients for Bacon and Cheese Corn Casserole

  • 4 cups frozen corn kernels, thawed, drained, and patted dry (680g)
  • 6 slices bacon (about 170g)
  • 4 ounces cream cheese, softened (113g)
  • 1/2 cup sour cream (120g)
  • 2 tablespoons unsalted butter (28g)
  • 1 large egg
  • 1 1/2 cups freshly shredded sharp cheddar, divided (170g)
  • 1/2 cup finely diced red bell pepper (75g)
  • 2 green onions, thinly sliced, white and green parts separated
  • 1/2 teaspoon kosher salt, or to taste
  • 1/4 teaspoon black pepper
  • About 1 1/2 cups plain corn tortilla chips, broken into large, irregular shards (35g)
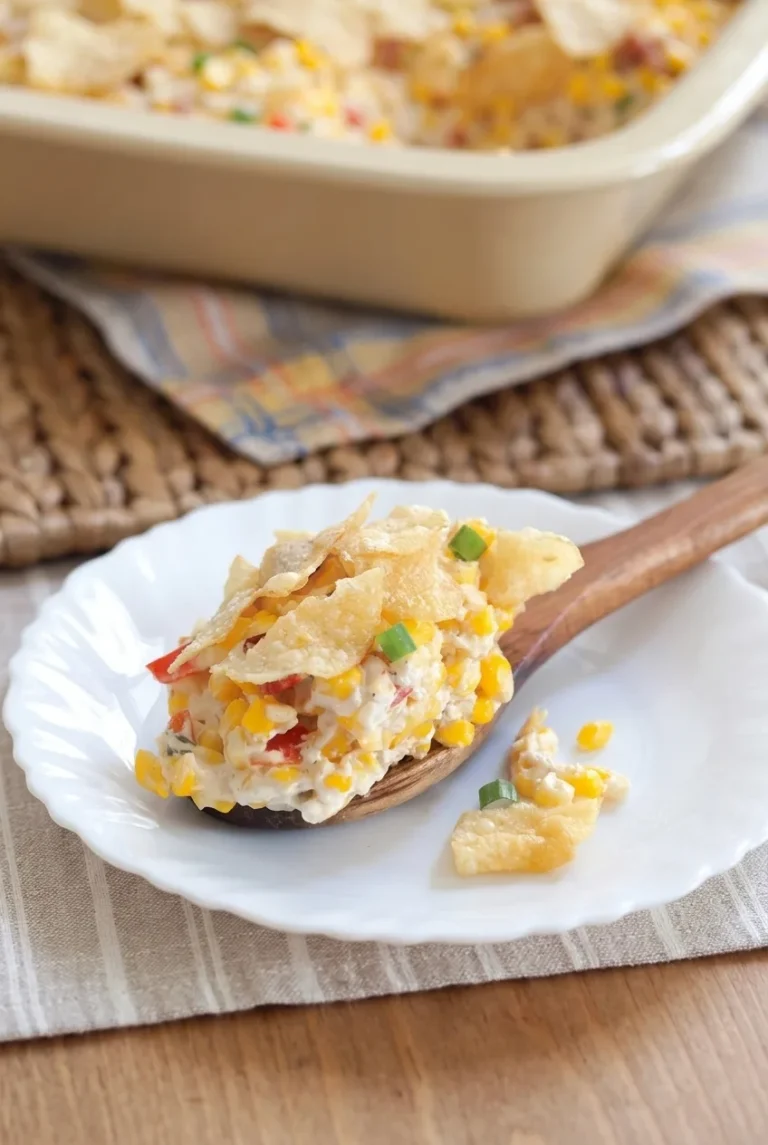
A wooden spoon lifts a shard-topped serving of bacon and cheese corn casserole from the full baking dish.

For a garnish, reserve about 2 tablespoons of the cooked bacon and a little of the sliced green onion before mixing the filling.

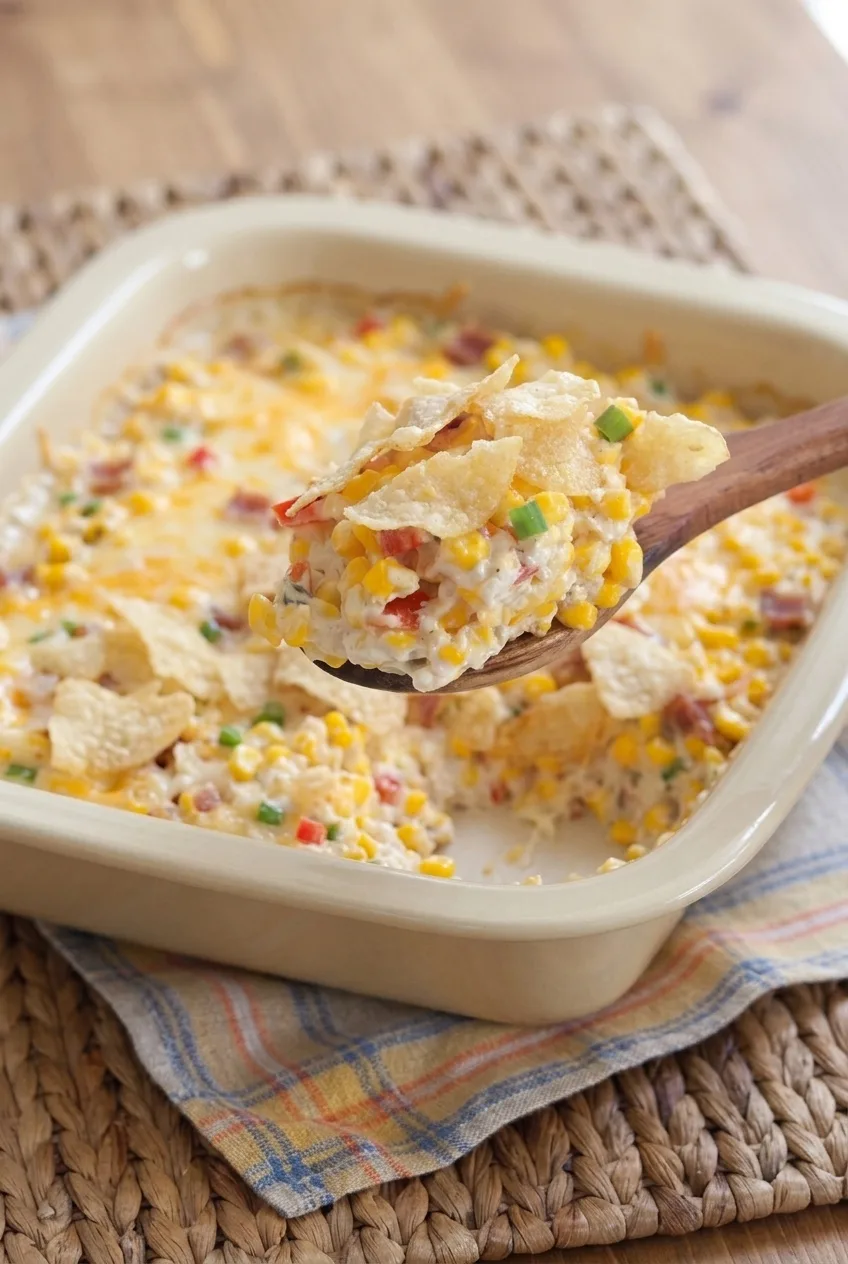
Close view of creamy bacon and cheese corn casserole showing whole kernels, bacon pieces, and crisp golden shards.

How to Bake Bacon and Cheese Corn Casserole

  1. Prepare the corn and oven: Preheat the oven to 350°F (175°C). Drain the thawed corn and pat it dry; it should have no visible ice or surface moisture. Divide it in half.
  2. Cook the bacon and vegetables: Cook the bacon in a skillet over medium heat until browned and crisp, then chop it. Leave about 1 tablespoon of rendered fat in the skillet and discard the rest. Cook the red pepper and white parts of the green onions in the fat until softened but not heavily browned. Transfer the vegetables to a mixing bowl.
  3. Make the creamy base: In the skillet over low heat, warm the butter and cream cheese just until softened. Stir in the sour cream, salt, and pepper. Transfer the mixture to the bowl and let it cool for about 5 minutes. Once it is warm rather than hot, whisk in the egg so it does not scramble.
  4. Combine the filling: Briefly pulse half the corn in a food processor or blender until the kernels are coarsely broken, not smooth. Stir it into the creamy base with the whole corn, cooked vegetables, green parts of the onions, chopped bacon, and 1 cup of cheddar. Reserve any bacon or green onion you want for serving. The filling should be thick and spoonable, with whole kernels visible.
  5. Bake: Spread the filling in a 2-quart or 8-inch square baking dish. Bake uncovered for about 35 to 45 minutes total. Start checking at 30 minutes; when the edges are bubbling and the center is beginning to set, scatter the remaining 1/2 cup cheddar on top. Bake for another 10 to 12 minutes, until the cheese has melted with a few light golden spots and the center looks set rather than liquid. Rotate the dish once if it browns unevenly.
  6. Rest and serve: Let the casserole rest for 10 to 15 minutes. Spoon out generous portions and add tortilla-chip shards just before eating, along with any reserved bacon or green onion.

Why Pulse Only Half the Corn?

Coarsely broken corn helps the filling hold together without making it smooth. Leaving the other half whole keeps the kernels distinct in each spoonful. A potato masher can break up the corn if you do not have a food processor or blender.

For a related baked corn side with a more pudding-like texture, try Southern corn pudding. For another creamy version, see this cream cheese corn casserole.

How to Keep the Center from Turning Watery

Thawed corn can carry enough moisture to leave the center loose. Drain it thoroughly and pat it dry before pulsing or mixing. Canned corn can replace frozen corn, but drain and dry it just as carefully. For fresh corn, use the same volume of kernels and sauté them briefly until just tender.

Judge the texture after the 10- to 15-minute rest, when the center has had time to firm up. It should hold a loose mound on a spoon. If it is still very loose, bake it for another 5 to 10 minutes. A deeper dish or a casserole assembled ahead and baked cold may need extra time; use the bubbling edges and set-looking center as your guide.

When to Add the Crunchy Topping

Add the large tortilla-chip shards to individual servings just before eating. Mixed into the filling or added ahead of time, they absorb moisture and lose their crunch.

Storage and Reheating

Refrigerate leftover casserole in an airtight container for up to 4 days. Keep the tortilla chips separate. Reheat individual portions in the microwave, or cover a larger amount with foil and warm it in a 300°F (150°C) oven until heated through. Add fresh chip shards after reheating.

Freezing is not recommended because the cream-cheese and sour-cream base may separate after thawing. For a spicier cheesy corn side, try this jalapeño cheddar corn casserole.

Nutrition

Approximate nutrition per serving, based on 1/8 of the casserole with the tortilla-chip topping: 415 calories, 18g protein, 29g fat, and 23g carbohydrates. Approximate values per 100g: 240 calories, 11g protein, 17g fat, and 13g carbohydrates. Values vary with the ingredients used and the amount of bacon fat retained.

Bacon and Cheese Corn Casserole

A creamy corn casserole with crisp bacon, cheddar, and tortilla-chip shards added just before serving.
Course: Side Dish
Cuisine: American
Prep: 20 min
Cook: 55 min
Total: 90 min
Servings: 8 Calories: 415 kcal

Equipment

  • Skillet
  • Mixing bowl
  • Food processor or blender
  • Whisk
  • 2-quart or 8-inch square baking dish

Ingredients

For the Casserole

  • 4 cups frozen corn kernels, thawed, drained, and patted dry (680g)
  • 6 slices bacon (about 170g)
  • 4 ounces cream cheese, softened (113g)
  • 1/2 cup sour cream (120g)
  • 2 tablespoons unsalted butter (28g)
  • 1 large egg
  • 1 1/2 cups freshly shredded sharp cheddar, divided (170g)
  • 1/2 cup finely diced red bell pepper (75g)
  • 2 green onions, thinly sliced, white and green parts separated
  • 1/2 teaspoon kosher salt, or to taste
  • 1/4 teaspoon black pepper

For Serving

  • About 1 1/2 cups plain corn tortilla chips, broken into large shards (35g)
  • Reserved cooked bacon and sliced green onion, for garnish

Instructions

  1. Preheat the oven to 350°F (175°C). Drain and pat the thawed corn dry, then divide it in half.
  2. Cook the bacon in a skillet over medium heat until browned and crisp. Chop the bacon, reserve about 2 tablespoons for garnish, and leave about 1 tablespoon of bacon fat in the skillet.
  3. Cook the red pepper and the white parts of the green onions in the skillet until softened. Transfer the vegetables to a mixing bowl.
  4. Over low heat, warm the butter and cream cheese in the skillet until softened. Stir in the sour cream, salt, and pepper, then transfer the mixture to the bowl. Let it cool for about 5 minutes.
  5. Whisk the egg into the warm, not hot, creamy mixture.
  6. Coarsely pulse half the corn in a food processor or blender. Stir it into the bowl with the remaining whole corn, cooked vegetables, green parts of the onions, chopped bacon, and 1 cup of cheddar.
  7. Spread the filling in a 2-quart or 8-inch square baking dish. Bake uncovered for about 35 to 45 minutes total.
  8. When the edges are bubbling and the center is beginning to set, scatter the remaining 1/2 cup cheddar over the casserole. Continue baking until the cheese is melted with a few light golden spots and the center looks set rather than liquid. Rotate the dish once if it browns unevenly.
  9. Let the casserole rest for 10 to 15 minutes. Serve in generous portions with tortilla-chip shards and the reserved bacon and green onion.

Tips

  • Pat the thawed corn thoroughly dry to help keep the casserole from turning watery.
  • Pulse only half the corn so the filling has body while whole kernels remain visible.
  • Use a potato masher to break up the corn if you do not have a food processor or blender.
  • Add tortilla-chip shards to individual servings just before eating so they stay crunchy.
  • Judge the texture after the resting time; bake another 5 to 10 minutes if the center is still very loose.

Variations

  • Canned or Fresh Corn: Replace the frozen corn with the same volume of canned corn, drained and dried well, or fresh corn kernels sautéed briefly until just tender.

Notes

Refrigerate leftovers in an airtight container for up to 4 days, keeping chips separate. Reheat individual portions in the microwave or larger amounts covered with foil in a 300°F (150°C) oven until heated through. Freezing is not recommended.

Nutrition

Calories: 415 kcal | Protein: 18 g | Fat: 29 g | Carbohydrates: 23 g

Jalapeño Cheddar Corn Casserole

Jalapeño cheddar corn casserole bakes into thick squares with a tender, coarse cornbread-style crumb. Whole corn kernels and chopped fresh jalapeño run through the center, while cheddar mixed into the batter and added near the end forms a lightly browned top.

Corn muffin mix, creamed corn, and sour cream give this version a sliceable texture rather than a spoonable, cream-cheese-style base. Drain the whole-kernel corn well, and judge doneness by the center—not just the golden edges. Removing the jalapeño seeds and membranes, or using less chopped pepper, reduces the heat.

Ingredients for Jalapeño Cheddar Corn Casserole

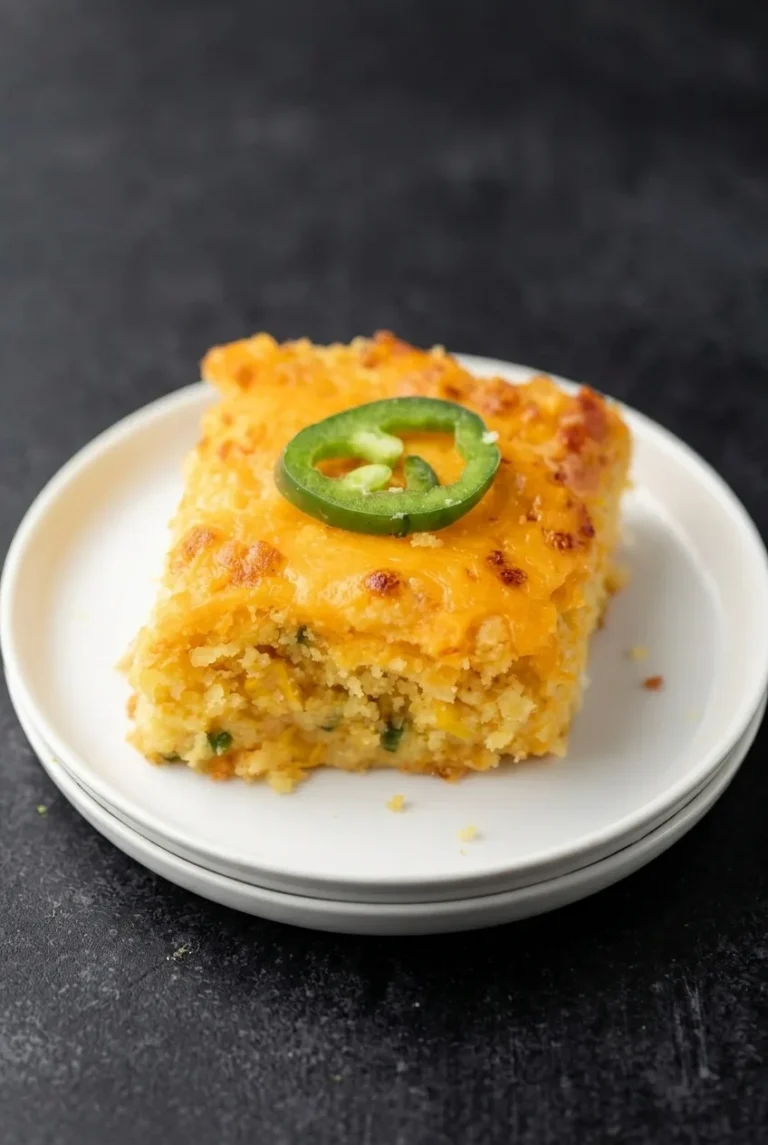
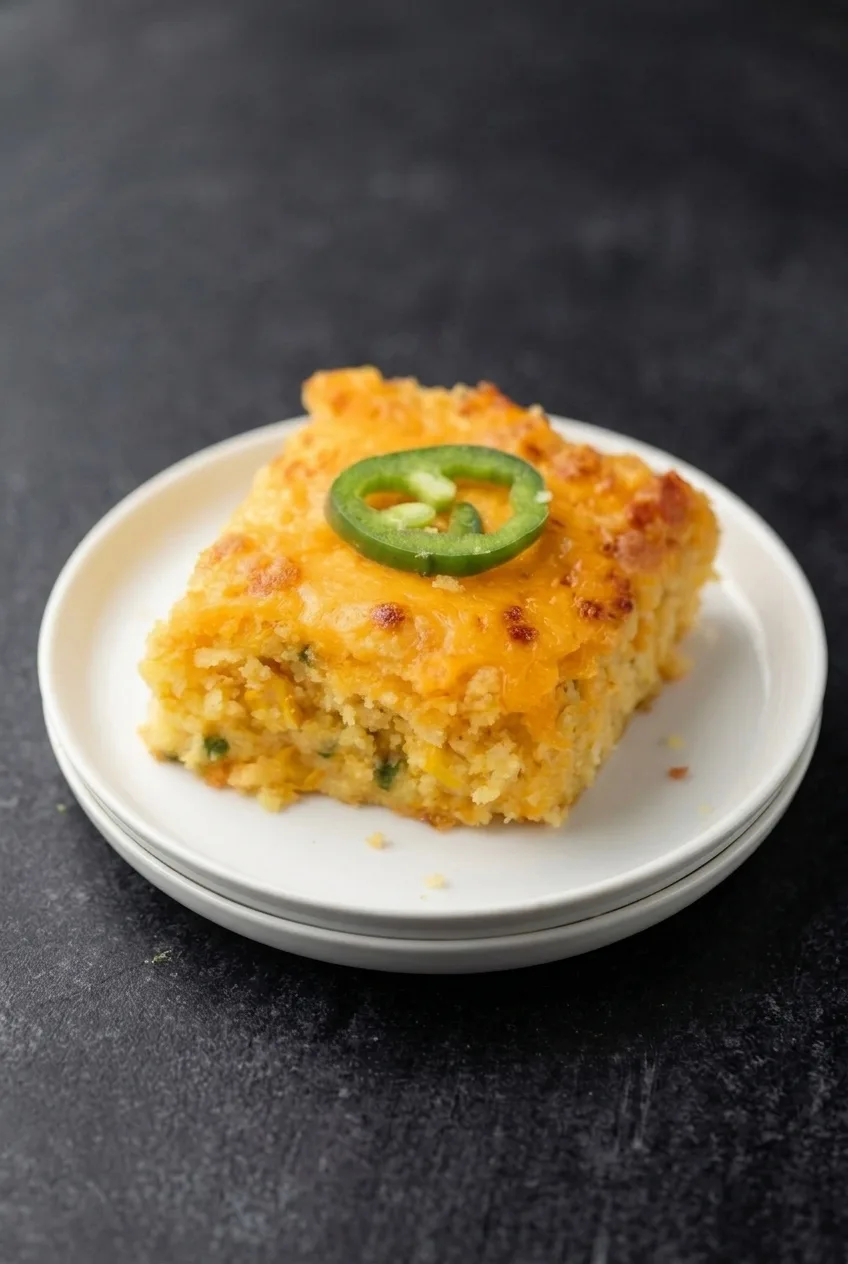
A full white plate with a square serving of jalapeño cheddar corn casserole, shown on a dark tabletop
  • 1 box corn muffin mix (about 8.5 ounces/240g)
  • 1 can creamed corn (about 14.75 ounces/420g)
  • 1 can whole-kernel corn (15 ounces), thoroughly drained (about 255g drained)
  • 1 cup sour cream (240g)
  • 2 large eggs
  • 4 tablespoons unsalted butter, melted (about 55g)
  • 1 1/2 cups freshly shredded sharp cheddar, divided (170g)
  • 2 medium fresh jalapeños (about 30g total); finely chop one and slice the other into thin rings
  • Optional: 1/2 teaspoon garlic powder

Drain the whole-kernel corn even though the batter contains creamed corn. The kernels add texture; their canning liquid adds moisture the batter does not need.

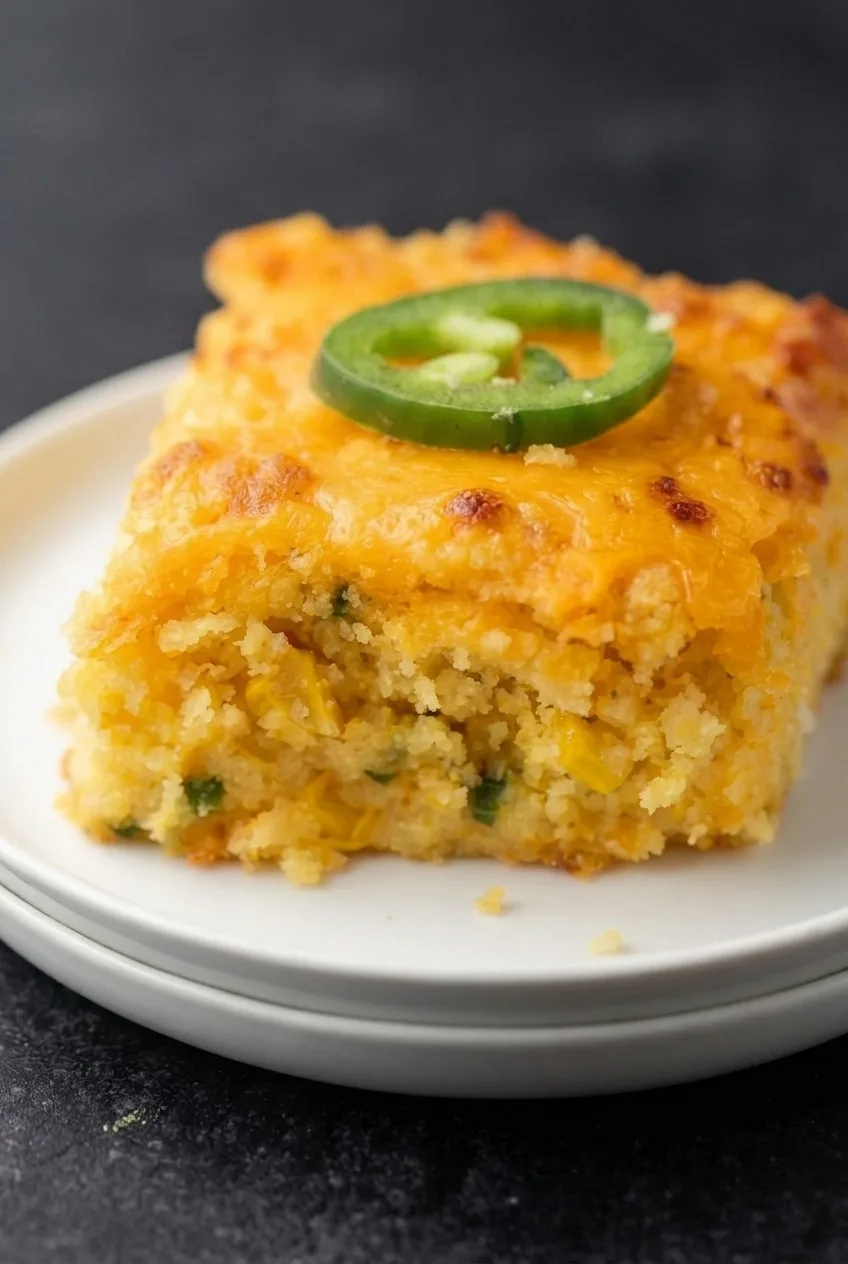
Close view of the casserole’s coarse, corn-studded crumb, green jalapeño pieces, and melted cheddar topping

How to Bake Jalapeño Cheddar Corn Casserole

  1. Prepare the dish and peppers: Heat the oven to 350°F (175°C) and lightly grease an 8-inch square baking dish. Drain the whole-kernel corn thoroughly. Finely chop one jalapeño and cut the other into enough thin rings to garnish the finished servings. Remove the seeds and membranes for less heat.
  2. Mix the batter: Whisk the eggs, sour cream, and melted butter in a large bowl. Stir in the creamed corn, drained whole corn, chopped jalapeño, corn muffin mix, 1 cup of the cheddar, and the garlic powder, if using. Mix just until combined; the batter will be thick and studded with corn. Reserve the remaining cheddar.
  3. Bake the base: Spread the batter evenly in the dish. Bake uncovered for about 35 to 43 minutes, until the edges are golden and the center is mostly set. Begin checking around 40 minutes; the center will finish baking after the cheese is added.
  4. Add the cheddar topping: Scatter the remaining 1/2 cup cheddar over the casserole. Bake for another 10 to 12 minutes, until the cheese is melted with a few lightly browned spots and the center looks set, with no wet or loose batter. Total baking time is usually 45 to 55 minutes. If the top darkens before the center sets, loosely shield it and continue baking.
  5. Rest and serve: Let the casserole rest for about 15 minutes so the tender crumb holds together when cut. Cut into 9 squares and top each serving with a fresh jalapeño ring just before serving.

How to Avoid a Watery Center

Golden edges can appear before the middle has set. If the center still looks wet or loose, give it more time in the oven, then let the casserole rest before cutting. A deeper dish or a casserole baked straight from the refrigerator may need longer than the stated range. A larger, shallower dish makes thinner squares and may finish sooner.

Adjusting the Jalapeño Heat

Fresh jalapeños vary in heat. For a milder casserole, remove the seeds and membranes and use less chopped pepper in the batter. The fresh ring garnish can be added only to servings whose diners want it.

Serve the squares warm alongside chili or grilled meat. For another corn-muffin-mix bake, try Easy Jiffy Corn Casserole with a Golden Cheddar Top. If you prefer a creamier base instead of this sliceable crumb, see Cream Cheese Corn Casserole.

How to Store and Reheat

Refrigerate leftovers promptly in an airtight container or tightly covered baking dish for 3 to 4 days. Reheat individual squares in the microwave until hot throughout. For a larger amount, cover and warm in a 350°F oven until hot; uncover briefly at the end if the top needs refreshing.

You can assemble the casserole ahead and refrigerate it before baking. Allow extra oven time if it starts cold, and bake until the center is set. Freezing is possible, though the texture may change: cool the baked casserole fully, wrap it airtight, and freeze for up to 2 to 3 months. Thaw in the refrigerator and reheat until hot throughout.

Nutrition Information

Approximate nutrition per serving, based on 1 of 9 squares: 365 calories, 11g protein, 20g fat, and 33g carbohydrates. Approximate values per 100g: 215 calories, 6g protein, 12g fat, and 19g carbohydrates. Values vary by brand and portion size.

Jalapeño Cheddar Corn Casserole

A sliceable corn casserole with a tender cornbread-style crumb, fresh jalapeño, and a browned cheddar topping.
Course: Side Dish
Cuisine: American
Prep: 15 min
Cook: 55 min
Total: 85 min
Servings: 9 Calories: 365 kcal

Equipment

  • 8-inch square baking dish
  • Mixing bowl
  • Whisk
  • Knife
  • Colander

Ingredients

For the Casserole

  • 1 box corn muffin mix (about 8.5 ounces/240g)
  • 1 can creamed corn (about 14.75 ounces/420g)
  • 1 can whole-kernel corn (15 ounces), thoroughly drained (about 255g drained)
  • 1 cup sour cream (240g)
  • 2 large eggs
  • 4 tablespoons unsalted butter, melted (about 55g)
  • 1 1/2 cups freshly shredded sharp cheddar, divided (170g)
  • 2 medium fresh jalapeños (about 30g total), one finely chopped and one sliced into thin rings
  • Optional: 1/2 teaspoon garlic powder

Instructions

  1. Heat the oven to 350°F (175°C) and lightly grease an 8-inch square baking dish.
  2. Drain the whole-kernel corn thoroughly. Finely chop one jalapeño and slice the other into thin rings. Remove the seeds and membranes for less heat.
  3. Whisk the eggs, sour cream, and melted butter in a large bowl.
  4. Stir in the creamed corn, drained whole corn, chopped jalapeño, corn muffin mix, 1 cup of the cheddar, and garlic powder if using. Mix just until combined.
  5. Spread the batter evenly in the prepared dish. Bake uncovered for about 35 to 43 minutes, until the edges are golden and the center is mostly set.
  6. Scatter the remaining 1/2 cup cheddar over the casserole. Bake for another 10 to 12 minutes, until the cheese is melted and lightly browned and the center is set, with no wet or loose batter.
  7. If the top darkens before the center sets, loosely shield it and continue baking.
  8. Let the casserole rest for about 15 minutes. Cut into 9 squares and garnish with jalapeño rings before serving.

Tips

  • Drain the whole-kernel corn well to keep excess liquid out of the batter.
  • Check the center for doneness; golden edges alone do not mean the casserole is fully baked.
  • Remove jalapeño seeds and membranes, or use less chopped pepper, to reduce the heat.
  • A deep dish or cold casserole may need extra baking time; a wider, shallower dish may bake faster.
  • Loosely cover the top if it browns before the center is set.

Variations

  • Milder Jalapeño Corn Casserole: Remove the jalapeño seeds and membranes, use less chopped pepper in the batter, and add fresh rings only to servings that want them.

Notes

Refrigerate leftovers in an airtight container for 3 to 4 days. Reheat individual squares in the microwave or cover and warm a larger portion in a 350°F oven until hot throughout. Freeze for up to 2 to 3 months; thaw in the refrigerator before reheating.

Nutrition

Calories: 365 kcal | Protein: 11 g | Fat: 20 g | Carbohydrates: 33 g

Mexican Street Corn Casserole

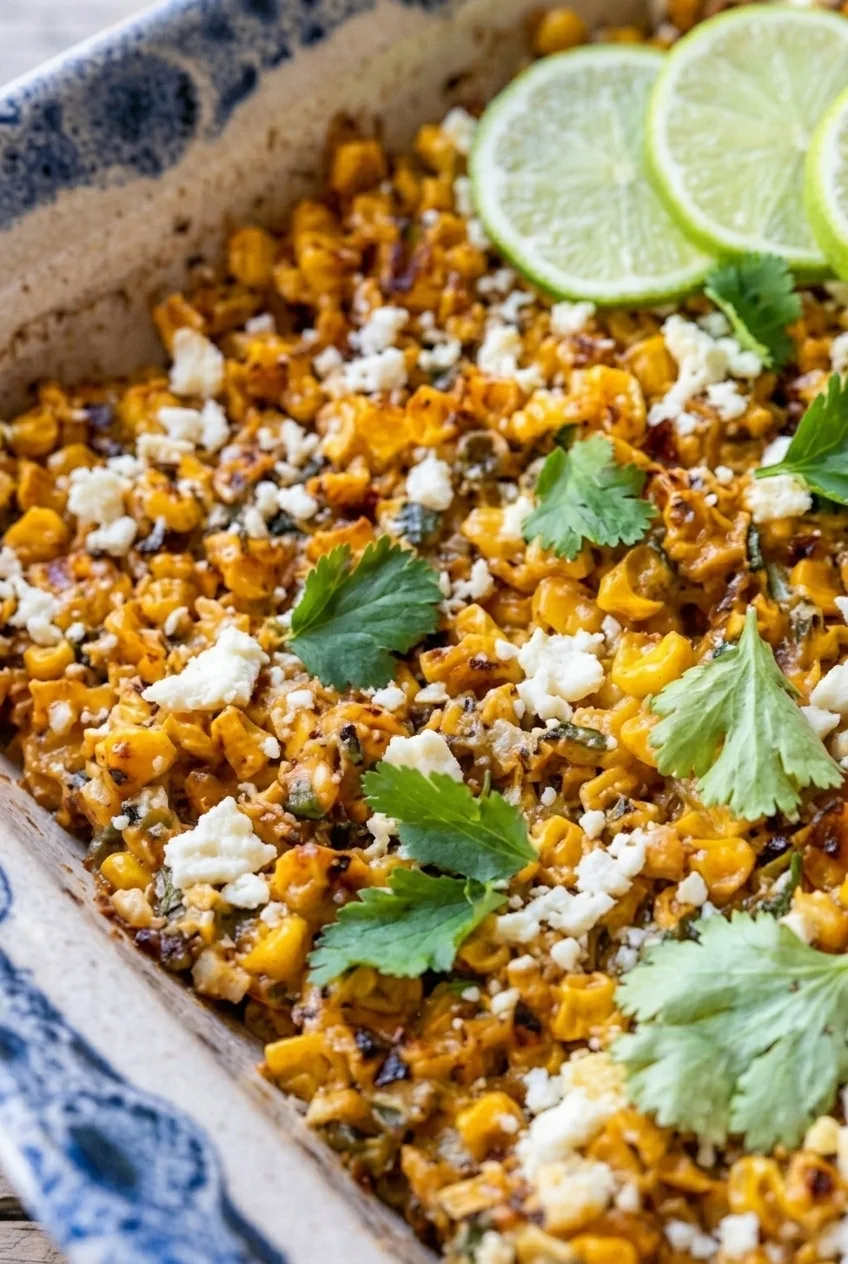
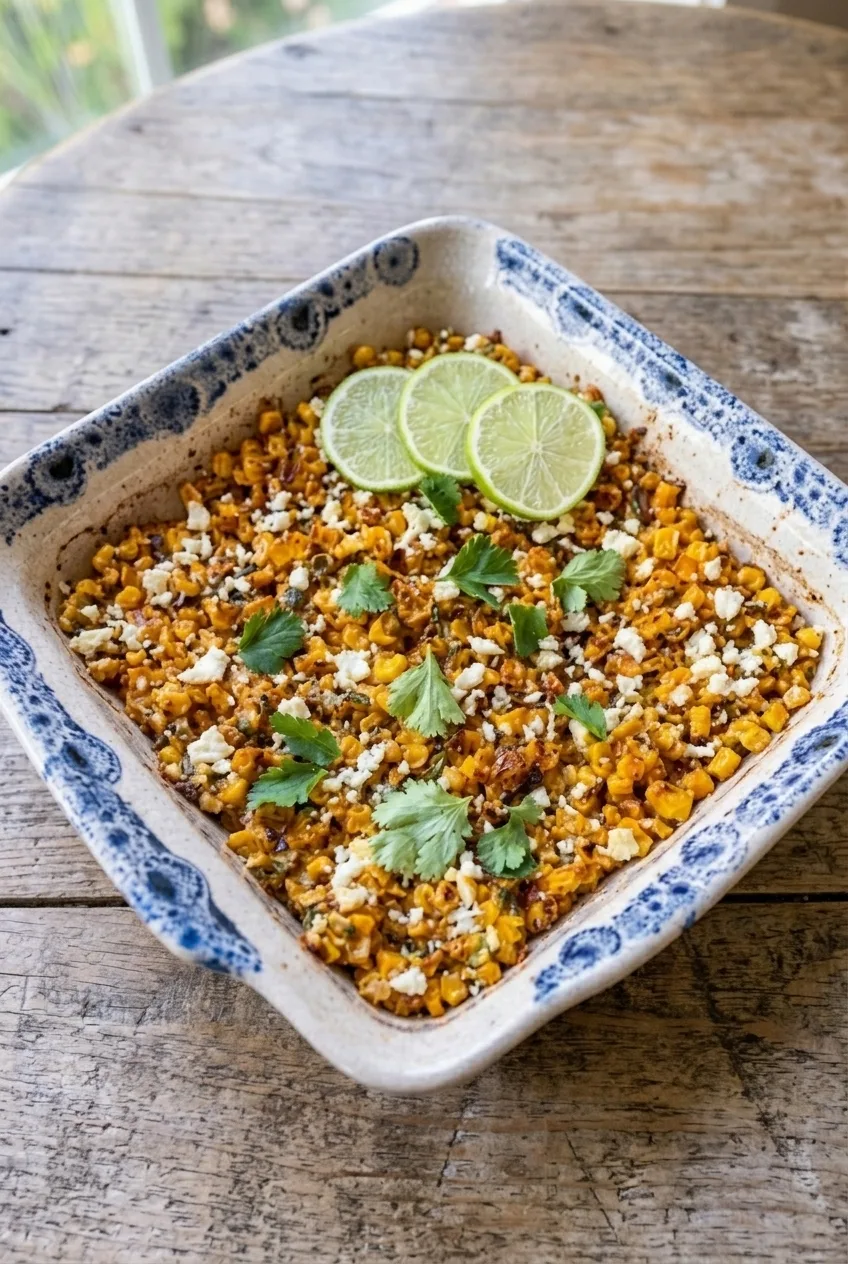
Skillet-charred corn gives this baked side its browned spots and roasted flavor. A light coating of mayonnaise, full-fat sour cream, lime, and chile seasoning keeps the kernels creamy but distinct, so the casserole stays loose and spoonable rather than setting into squares.

After a short, uncovered bake, finish it with crumbly cotija, fresh cilantro, and lime slices for squeezing over each serving. Start checking the oven early: bubbling edges and a hot center are more reliable than the clock.

Ingredients for Mexican Street Corn Casserole

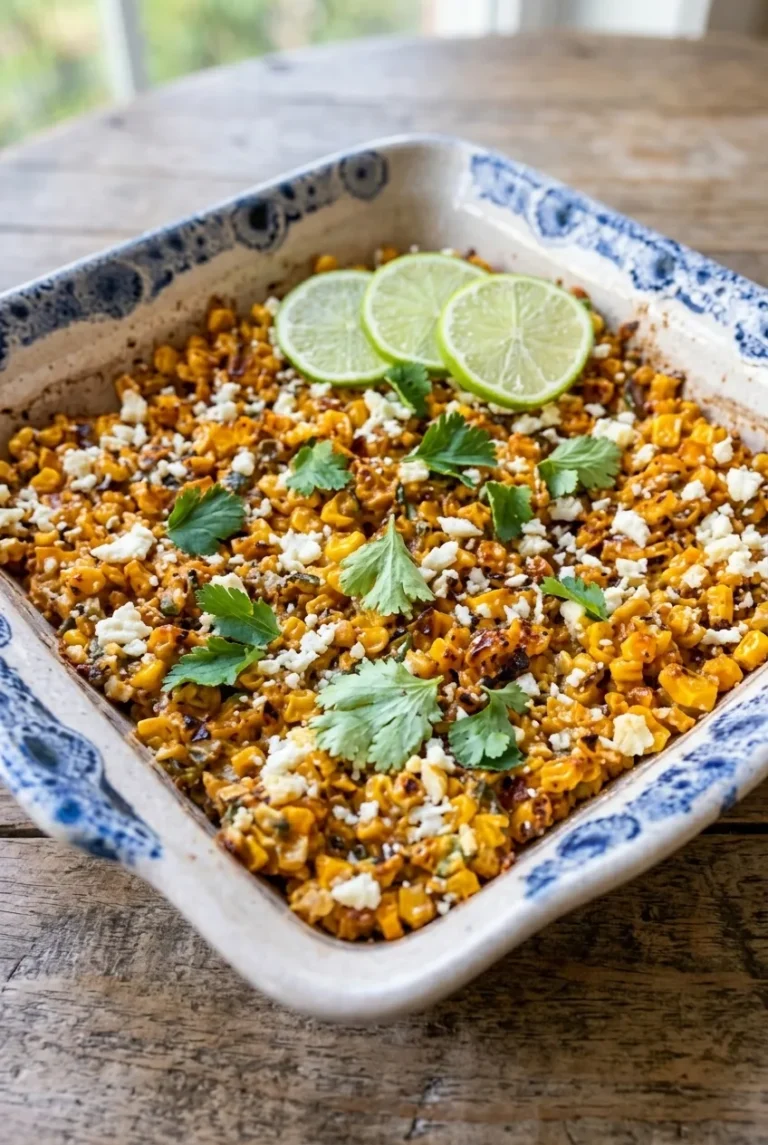
Close detail of creamy charred corn kernels with crumbly cotija and fresh cilantro
  • 4 cups corn kernels (600g; about 5–6 ears if using fresh)
  • 1 tablespoon neutral oil
  • 1/3 cup mayonnaise (75g)
  • 1/3 cup full-fat sour cream (80g)
  • 1 tablespoon fresh lime juice
  • 1 teaspoon chili powder
  • 1/2 teaspoon smoked paprika
  • 1 small garlic clove, finely grated or minced
  • 1/4 teaspoon kosher salt, or to taste
  • 1/2 cup crumbled cotija cheese (55g), divided
  • 1/3 cup chopped fresh cilantro leaves and tender stems (10g), divided
  • 1 lime, cut into thin rounds or wedges

Use fresh corn or fully thawed, well-drained frozen corn. Drained canned corn also works; pat it dry if it looks wet. Queso fresco or feta can replace cotija, though feta is tangier and saltier. Full-fat Greek yogurt can replace the sour cream.

How to Make Mexican Street Corn Casserole

A full shallow dish of Mexican street corn casserole centered on a pale textured surface
  1. Prepare the oven and corn: Preheat the oven to 400°F (205°C) with a rack near the center. Cut fresh kernels from the cobs, or thaw frozen corn completely, drain it well, and pat it dry if needed.
  2. Char the corn: Heat the oil in a wide skillet over medium-high heat. Add the corn in a single layer, working in batches if needed. Let the kernels sit briefly before tossing, then cook for about 8–12 minutes total, until some have browned or lightly charred spots. A crowded skillet will steam the corn instead of browning it.
  3. Mix the filling: In a bowl, stir together the mayonnaise, sour cream, lime juice, chili powder, smoked paprika, garlic, and salt. Stir in half the cotija, then fold in the corn and half the cilantro. The kernels should be coated, not swimming in liquid.
  4. Fill the dish: Spread the mixture evenly in a shallow 8-inch square or similar 1 1/2- to 2-quart baking dish. Bake uncovered.
  5. Bake until hot: Start checking at about 18 minutes. Bake for approximately 20–25 minutes, until the edges bubble, the center is hot, and the top is lightly browned in places. The kernels should remain visible; a thick crust is not needed.
  6. Rest and garnish: Let stand for about 5 minutes. Scatter the remaining cotija and cilantro over the top, and arrange the lime slices on the casserole or along one edge. Serve warm, with the lime for squeezing.

Why Char the Corn First?

Direct contact with a hot skillet gives the corn roasted flavor and visible browned flecks. Charring is optional: for a quicker version, fold well-drained corn directly into the filling before baking. It will have less of that roasted character.

How to Keep the Casserole from Turning Watery

Moisture left on thawed frozen corn or drained canned corn can thin the creamy coating. Drain the kernels thoroughly and pat them dry if they still look wet. Use full-fat sour cream; low-fat or fat-free sour cream may release more liquid or separate during baking.

Serving and Variations

Serve as a side with fish or shrimp tacos, tostadas, refried beans, or Mexican rice. Tortilla chips or small tortillas work well for scooping. For more heat, stir a finely diced small jalapeño into the filling, or add a pinch of cayenne or a few dashes of hot sauce.

For a different creamy corn side, try Cream Cheese Corn Casserole. For a cheesier skillet-style dish, see Cheesy Corn Casserole in a Cast-Iron Skillet.

How to Store and Reheat Leftovers

Refrigerate leftovers in an airtight container for up to 3 days. Reheat individual portions in the microwave until warm, or warm them gently on the stovetop with a small splash of milk to loosen the creamy coating. Freezing results for this casserole are uncertain.

Nutrition

Approximate nutrition per serving, based on 6 side-dish servings: 265 calories, 6g protein, 19g fat, and 22g carbohydrates. Approximate nutrition per 100g: 185 calories, 4g protein, 13g fat, and 16g carbohydrates. Values vary by ingredient brand and the amount of garnish eaten.

Mexican Street Corn Casserole

Skillet-charred corn is baked in a creamy lime and chile coating, then finished with cotija, cilantro, and lime.
Course: Side Dish
Cuisine: Mexican
Prep: 15 min
Cook: 37 min
Total: 57 min
Servings: 6 Calories: 265 kcal

Equipment

  • Oven
  • Wide skillet
  • Mixing bowl
  • 8-inch square or 1 1/2- to 2-quart baking dish

Ingredients

For the casserole

  • 4 cups corn kernels (600g; about 5–6 ears if using fresh)
  • 1 tablespoon neutral oil
  • 1/3 cup mayonnaise (75g)
  • 1/3 cup full-fat sour cream (80g)
  • 1 tablespoon fresh lime juice
  • 1 teaspoon chili powder
  • 1/2 teaspoon smoked paprika
  • 1 small garlic clove, finely grated or minced
  • 1/4 teaspoon kosher salt, or to taste
  • 1/2 cup crumbled cotija cheese (55g), divided
  • 1/3 cup chopped fresh cilantro leaves and tender stems (10g), divided

For serving

  • 1 lime, cut into thin rounds or wedges

Instructions

  1. Preheat the oven to 400°F (205°C) with a rack near the center.
  2. If using fresh corn, cut the kernels from the cobs. Thaw frozen corn completely, drain well, and pat dry if needed.
  3. Heat the oil in a wide skillet over medium-high heat. Add the corn in a single layer, working in batches if needed.
  4. Let the kernels sit briefly before tossing. Cook for 8–12 minutes total, until some kernels have browned or lightly charred spots.
  5. Stir together the mayonnaise, sour cream, lime juice, chili powder, smoked paprika, garlic, and salt in a bowl.
  6. Stir in half the cotija, then fold in the corn and half the cilantro.
  7. Spread the mixture evenly in a shallow 8-inch square or similar 1 1/2- to 2-quart baking dish.
  8. Bake uncovered, starting to check at about 18 minutes. Bake approximately 20–25 minutes, until the edges bubble, the center is hot, and the top is lightly browned in places.
  9. Let stand for about 5 minutes. Top with the remaining cotija and cilantro, and arrange the lime slices on top or along one edge. Serve warm.

Tips

  • Use fresh corn or fully thawed, well-drained frozen corn; pat kernels dry if they look wet.
  • Cook the corn in batches if needed so it browns rather than steams.
  • Use full-fat sour cream to reduce the chance of the coating releasing liquid or separating.
  • Start checking the casserole early; bubbling edges and a hot center are better doneness cues than the clock.

Variations

  • Quick No-Char Version: Fold well-drained corn directly into the filling before baking; the casserole will have less roasted flavor.
  • Spicy Street Corn Casserole: Stir a finely diced small jalapeño into the filling, or add a pinch of cayenne or a few dashes of hot sauce.
  • Cotija Substitutes: Replace cotija with queso fresco or feta; feta will make the casserole tangier and saltier.

Notes

Refrigerate leftovers in an airtight container for up to 3 days. Reheat portions in the microwave or gently on the stovetop with a small splash of milk. Freezing results are uncertain.

Nutrition

Calories: 265 kcal | Protein: 6 g | Fat: 19 g | Carbohydrates: 22 g

Cream Cheese Corn Casserole

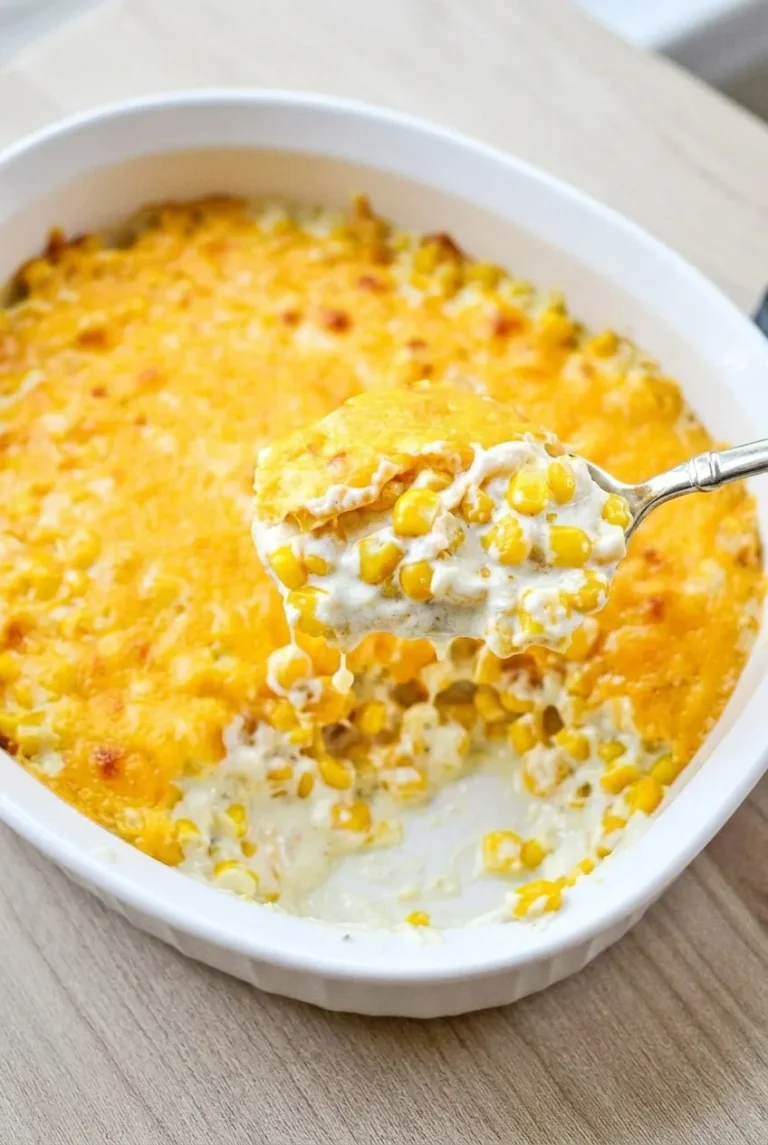
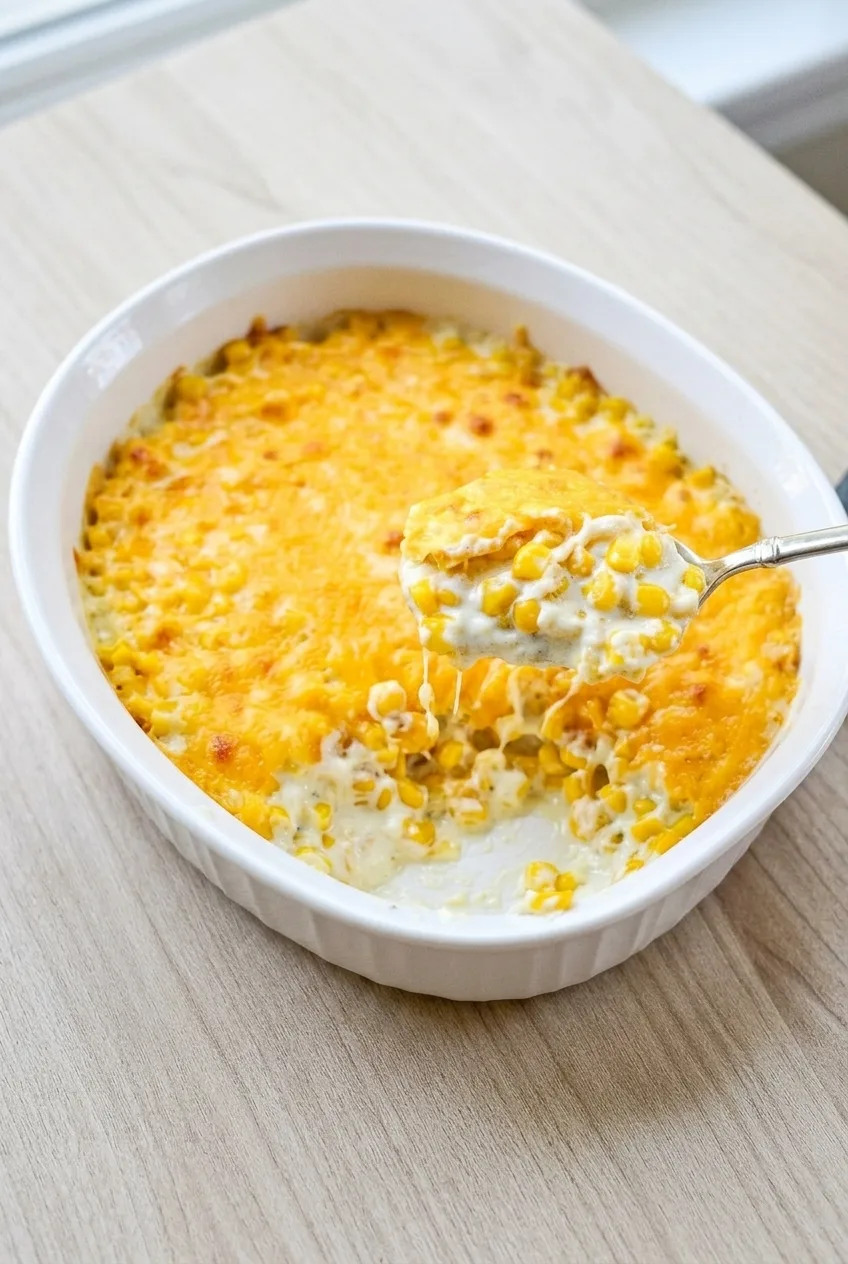
Whole-kernel corn in a smooth cream cheese sauce makes this casserole creamy enough to serve by the spoonful. A layer of cheddar melts over the top and browns lightly while the corn heats through. Unlike corn pudding, this version is not meant to set or be cut into squares. Drain the corn well and use only the measured milk so the sauce clings to the kernels without turning watery.

Ingredients for Cream Cheese Corn Casserole

  • 4 cups thawed frozen whole-kernel sweet corn, drained (680g)
  • 8 ounces full-fat cream cheese, softened and cut into cubes (225g)
  • 2 tablespoons unsalted butter (30g)
  • ⅓ cup milk (80g)
  • ½ teaspoon fine salt, or to taste
  • ¼ teaspoon black pepper
  • 1½ cups shredded cheddar cheese (170g)
Full white oval dish of spoonable cream cheese corn casserole with a lightly browned cheddar topping

Thoroughly drained canned whole-kernel corn can replace the frozen corn; drain it before measuring. Colby Jack can replace cheddar, though its topping will have a different color. Cream-style corn is not a direct substitute because it makes the casserole sweeter and softer.

Close view of whole corn kernels coated in cream cheese sauce beneath melted cheddar in the casserole

How to Bake Cream Cheese Corn Casserole

  1. Prepare the dish: Preheat the oven to 350°F (175°C). Lightly grease a shallow 1½- to 2-quart casserole dish. Make sure the thawed corn is well drained.
  2. Make the sauce: Warm the cream cheese and butter in a small saucepan over low heat, stirring until softened. Whisk in the milk, salt, and pepper until smooth, about 3 to 5 minutes. The mixture may look lumpy at first; keep whisking as the milk incorporates. Do not let it boil.
  3. Add the corn: Stir the drained corn into the sauce until the kernels are evenly coated. Transfer to the prepared dish and spread into an even layer. The mixture should be creamy and spoonable, with no liquid pooling around it.
  4. Top and bake: Scatter the cheddar evenly over the entire surface. Bake uncovered for about 25 to 30 minutes, starting to check at 25 minutes. It is ready when the edges are bubbling and the cheese is fully melted with light golden spots. A deeper or chilled casserole may take longer to heat through.
  5. Rest and serve: If the cheese needs more color, broil briefly, watching continuously. Let the casserole rest for about 5 minutes, then serve by the spoonful. The center should remain creamy rather than firm.

Serve warm alongside pork chops, ribs, or fried chicken.

How to Keep the Casserole Creamy, Not Watery

Thaw and drain frozen corn well, or thoroughly drain canned corn. Do not add reserved can liquid or extra milk: either can thin the cream cheese sauce. The unbaked mixture should coat the kernels without flooding the dish.

Why This Casserole Stays Spoonable

This version has no eggs, flour, or corn muffin mix, so it stays loose rather than setting into a sliceable bake. Bubbling edges and melted cheese—not a firm center—tell you it is done. For a more set corn side, see Southern Corn Pudding with a Tender, Golden Crumb. A muffin-mix-based option, Easy Jiffy Corn Casserole with a Golden Cheddar Top, has a different texture.

Make-Ahead and Browning Notes

You can assemble the casserole ahead and refrigerate it before baking. Let it stand briefly while the oven heats, then allow extra baking time if needed. Check that the center is hot and the edges are bubbling rather than relying on the usual timing.

If the cheddar has melted but remains pale, a brief broil can add light browning. Watch it continuously; the cheese can brown quickly.

How to Store and Reheat

Refrigerate leftovers in an airtight container for up to 2 to 3 days. Reheat portions gently until hot, stirring if needed to redistribute the sauce.

Nutrition

Approximate nutrition per serving, based on 8 side-dish servings: 285 calories, 10g protein, 21g fat, and 19g carbohydrates. Per 100g: about 190 calories, 7g protein, 14g fat, and 13g carbohydrates. Values vary with the ingredients used and serving size.

Cream Cheese Corn Casserole

Whole-kernel corn is coated in a smooth cream cheese sauce and baked with a melted cheddar topping.
Course: Side Dish
Cuisine: American
Prep: 15 min
Cook: 30 min
Total: 50 min
Servings: 8 Calories: 285 kcal per serving; about 190 kcal per 100 g

Equipment

  • Oven
  • Small saucepan
  • Whisk
  • Shallow 1½- to 2-quart casserole dish

Ingredients

  • 4 cups thawed frozen whole-kernel sweet corn, drained (680 g)
  • 8 ounces full-fat cream cheese, softened and cubed (225 g)
  • 2 tablespoons unsalted butter (30 g)
  • ⅓ cup milk (80 g)
  • ½ teaspoon fine salt, or to taste
  • ¼ teaspoon black pepper
  • 1½ cups shredded cheddar cheese (170 g)

Instructions

  1. Preheat the oven to 350°F (175°C). Lightly grease a shallow 1½- to 2-quart casserole dish and make sure the thawed corn is well drained.
  2. Warm the cream cheese and butter in a small saucepan over low heat, stirring until softened.
  3. Whisk in the milk, salt, and pepper until smooth, about 3 to 5 minutes. Do not let the sauce boil.
  4. Stir the drained corn into the sauce until evenly coated. Transfer it to the prepared dish and spread it into an even layer.
  5. Scatter the cheddar evenly over the corn. Bake uncovered for 25 to 30 minutes, until the edges bubble and the cheese is melted with light golden spots.
  6. If desired, broil briefly for more color, watching continuously. Rest for about 5 minutes before serving.

Tips

  • Drain thawed or canned corn thoroughly to keep the sauce from becoming watery.
  • Use only the measured milk; do not add reserved can liquid or extra milk.
  • The unbaked mixture should coat the kernels without liquid pooling in the dish.
  • Check a deeper or chilled casserole for hot centers and bubbling edges; it may need extra baking time.
  • Watch continuously while broiling because the cheese can brown quickly.

Variations

  • Canned Corn: Replace the frozen corn with thoroughly drained canned whole-kernel corn, measuring it after draining.
  • Colby Jack Topping: Replace the cheddar with Colby Jack; the topping will have a different color.

Notes

Refrigerate leftovers in an airtight container for 2 to 3 days. Reheat portions gently until hot, stirring if needed. Approximate nutrition is based on 8 side-dish servings.

Nutrition

Calories: 285 kcal per serving; about 190 kcal per 100 g | Protein: 10 g per serving; about 7 g per 100 g | Fat: 21 g per serving; about 14 g per 100 g | Carbohydrates: 19 g per serving; about 13 g per 100 g

Cheesy Corn Casserole

Creamed corn keeps this skillet casserole moist, while drained whole kernels give its tender, corn-bread-like center some texture. Cheddar is mixed into the batter and added again near the end of baking for a generous melted top.

Serve it warm by the spoonful from the cast-iron skillet. The center should be set but still soft, not firm enough to cut into neat wedges. Because skillet depth affects how quickly it bakes, check the center before adding the final layer of cheese.

Ingredients for Cheesy Corn Casserole

Close detail of melted cheddar, whole corn kernels, and the soft corn-bread-like interior of cheesy corn casserole.
  • Butter or cooking spray, for greasing the skillet
  • 1 box corn muffin mix (about 8.5 ounces/240g)
  • 1 can creamed corn (about 14.75 ounces/420g), including its sauce
  • 1 can whole-kernel corn (about 15 ounces/425g before draining), drained well
  • 1 cup sour cream (240g)
  • 1/2 cup unsalted butter (1 stick/115g), melted
  • 2 1/2 cups freshly shredded cheddar cheese (280g), divided

Use 1 cup of the cheddar in the mixture and reserve 1 1/2 cups for the top. This corn-muffin-mix version does not need added eggs or extra liquid.

How to Make Cheesy Corn Casserole

A full cast-iron skillet of cheesy corn casserole, shown with more of the neutral countertop around it.
  1. Prepare the skillet: Preheat the oven to 350°F (175°C). Lightly grease a 10-inch oven-safe cast-iron skillet with enough depth to hold the mixture below the rim.
  2. Drain the corn: Drain the whole-kernel corn well. Excess canning liquid can leave the center too loose.
  3. Mix: In a bowl, stir together the corn muffin mix, creamed corn, drained whole corn, sour cream, melted butter, and 1 cup cheddar just until combined. The mixture will be thick and spoonable. Spread it in the skillet.
  4. Bake the base: Bake uncovered for about 35–42 minutes, starting to check at 35 minutes. The center should look set rather than liquid or glossy-wet, and the edges should be lightly browned. If the center still looks wet, continue baking and check again in short intervals before adding the cheese.
  5. Add the topping: Scatter the remaining 1 1/2 cups cheddar evenly over the casserole. Bake for about 8–12 minutes more, until the cheese is melted and bubbling in spots. Remove it before the top becomes deeply browned or firm.
  6. Rest and serve: Let the casserole rest in the skillet for 5–10 minutes, then serve warm by the spoonful.

How to Tell When the Center Is Set

Check the center before adding the topping cheese: it should no longer look liquid or glossy-wet, though it will still be moist. The edges should be lightly browned and may pull slightly from the skillet. Resting helps the casserole settle, but it will not finish setting a wet center.

Why the Skillet Can Change the Bake Time

The timing is an estimate for a 10-inch cast-iron skillet. A deeper skillet may need longer for the center to set, while a wider, shallower pan may bake faster. Go by the center and edges rather than the clock alone. Adding the reserved cheddar only after the base is nearly set keeps the topping from browning too much during a longer bake.

Make-Ahead, Leftovers, and Serving

For advance preparation, bake the casserole first and reheat it later. Holding the unbaked mixture overnight may change its consistency. Refrigerate leftovers in a covered container.

To reheat, cover and warm in a 350°F oven for about 10 minutes, checking that the portion is heated through. Larger or colder portions may take longer.

Serve alongside roast, pulled pork, or chili. For another corn-muffin-mix variation, see Easy Jiffy Corn Casserole with a Golden Cheddar Top. For a softer, pudding-style corn side, try Southern Corn Pudding with a Tender, Golden Crumb.

Nutrition

Approximate nutrition per serving, based on 8 side-dish servings: 510 calories, 15g protein, 33g fat, and 40g carbohydrates. Values will vary with ingredient brands and portion sizes.

Cheesy Corn Casserole

Creamed corn, whole-kernel corn, sour cream, and cheddar bake into a moist, tender casserole with a melted cheese topping.
Course: Side Dish
Cuisine: American
Prep: 10 min
Cook: 50 min
Total: 70 min
Servings: 8 Calories: 510 kcal

Equipment

  • 10-inch oven-safe cast-iron skillet
  • Mixing bowl

Ingredients

Casserole

  • Butter or cooking spray, for greasing the skillet
  • 1 box corn muffin mix (about 8.5 ounces/240g)
  • 1 can creamed corn (about 14.75 ounces/420g), including its sauce
  • 1 can whole-kernel corn (about 15 ounces/425g before draining), drained well
  • 1 cup sour cream (240g)
  • 1/2 cup unsalted butter (1 stick/115g), melted
  • 1 cup freshly shredded cheddar cheese (about 112g)

Topping

  • 1 1/2 cups freshly shredded cheddar cheese (about 168g)

Instructions

  1. Preheat the oven to 350°F (175°C). Lightly grease a 10-inch oven-safe cast-iron skillet with enough depth to hold the mixture below the rim.
  2. Drain the whole-kernel corn well.
  3. In a bowl, stir together the corn muffin mix, creamed corn, drained whole corn, sour cream, melted butter, and 1 cup cheddar just until combined.
  4. Spread the mixture in the prepared skillet.
  5. Bake uncovered for about 35–42 minutes, starting to check at 35 minutes. The center should look set rather than liquid or glossy-wet, and the edges should be lightly browned. If the center still looks wet, continue baking and check again in short intervals.
  6. Scatter the remaining 1 1/2 cups cheddar evenly over the casserole. Bake for about 8–12 minutes more, until the cheese is melted and bubbling in spots.
  7. Remove the casserole before the top becomes deeply browned or firm. Rest in the skillet for 5–10 minutes, then serve warm by the spoonful.

Tips

  • Drain the whole-kernel corn well to help prevent a loose center.
  • Check that the center is set before adding the topping cheese.
  • Use the center and edges to judge doneness, since skillet depth can change the baking time.
  • Add the reserved cheddar only after the base is nearly set to keep the topping from overbrowning.
  • The casserole should remain soft and spoonable rather than firm enough to cut into wedges.

Notes

Refrigerate leftovers in a covered container. Reheat covered in a 350°F oven for about 10 minutes, or longer for larger or colder portions, until heated through. Baking the casserole ahead and reheating it later is preferred to holding the unbaked mixture overnight.

Nutrition

Calories: 510 kcal | Protein: 15 g | Fat: 33 g | Carbohydrates: 40 g

Southern Corn Pudding

Corn pudding can be spoonable or firm enough to slice. This version uses cream-style corn, whole kernels, and corn muffin mix to bake into moist, golden squares. The mix gives it structure, while sour cream and butter keep the crumb tender rather than dry like cornbread. Drain the whole kernels well and let the casserole rest before cutting so the portions hold together.

Prep time: 10 minutes | Cook time: 40–50 minutes | Rest time: 10 minutes | Total time: About 60–70 minutes | Serves: 8–10

Ingredients for Southern Corn Pudding

A full white casserole of square-cut Southern corn pudding on a simple wood surface.
  • Butter or nonstick cooking spray, for greasing the dish
  • 2 large eggs
  • 1 cup sour cream (240g)
  • 1/2 cup unsalted butter, melted (1 stick; 115g)
  • 1 can cream-style corn (about 14.75 ounces; 420g), undrained
  • 1 can whole-kernel corn (15 ounces; about 255g drained), well drained
  • 1 package corn muffin mix (about 8.5 ounces; 240g)

Corn muffin mix varies in sweetness and package size. Use a package close to 8.5 ounces; no extra sugar or dry thickener is needed.

Close view of a Southern corn pudding square showing its moist crumb and visible corn kernels.

How to Bake Southern Corn Pudding

  1. Prepare the oven and dish: Preheat the oven to 350°F (175°C). Lightly grease a 9-by-13-inch rectangular baking dish, including the corners.
  2. Drain the corn: Drain the whole-kernel corn in a colander until it is no longer dripping. Leave the cream-style corn undrained; its liquid is part of the batter.
  3. Mix the batter: Whisk the eggs, sour cream, and melted butter in a large bowl. Stir in both types of corn, then fold in the corn muffin mix just until no dry pockets remain. The batter will be thick and studded with kernels. Do not add extra liquid.
  4. Fill the dish: Spread the batter evenly in the prepared dish and lightly smooth the top without packing it down.
  5. Bake: Bake uncovered for about 40–50 minutes, beginning to check at 38–40 minutes. The top should be dry-looking and golden, the edges lightly browned, and the center set rather than rippling like liquid. A toothpick inserted near the center should come out without wet batter; a few moist crumbs are fine. If the center is still wet, bake a little longer and check again.
  6. Rest and serve: Let the pudding rest for 10 minutes. Cut it into large squares and lift them from the dish with a thin spatula.

How to Tell When Corn Pudding Is Done

Look for a set center, not a dry cornbread-like crumb. The baking time is an estimate for a shallow 9-by-13-inch dish; a smaller, deeper dish may need longer and will make thicker, softer portions. Use the center and toothpick checks rather than the clock alone.

Serving and Storage

Serve the squares warm from the baking dish alongside roasted chicken, pork, or barbecued ribs. Greens or a green salad pair well with the rich casserole. For a cheesier variation, try Easy Jiffy Corn Casserole with a Golden Cheddar Top.

Cool leftovers, cover tightly, and refrigerate for 3–4 days. Reheat covered in a 350°F oven until warmed through. Freezing may change the texture, so it is not recommended as a standard storage method for this recipe.

Nutrition

Approximate nutrition per serving, based on 9 servings: 340 calories, 6g protein, 21g fat, and 33g carbohydrates. Approximate nutrition per 100g: 220 calories, 4g protein, 14g fat, and 20g carbohydrates. Values are estimates and may vary by brand.

Southern Corn Pudding

Cream-style corn, whole kernels, and corn muffin mix bake into tender, golden squares.
Course: Side Dish
Cuisine: American
Prep: 10 min
Cook: 45 min
Total: 65 min
Servings: 9 Calories: 340 kcal

Equipment

  • 9-by-13-inch baking dish
  • Colander
  • Large mixing bowl
  • Whisk
  • Thin spatula

Ingredients

  • Butter or nonstick cooking spray, for greasing the dish
  • 2 large eggs
  • 1 cup sour cream (240 g)
  • 1/2 cup unsalted butter, melted (1 stick; 115 g)
  • 1 can cream-style corn (about 14.75 oz; 420 g), undrained
  • 1 can whole-kernel corn (15 oz; about 255 g drained), well drained
  • 1 package corn muffin mix (about 8.5 oz; 240 g)

Instructions

  1. Preheat the oven to 350°F (175°C). Lightly grease a 9-by-13-inch baking dish, including the corners.
  2. Drain the whole-kernel corn in a colander until it is no longer dripping. Leave the cream-style corn undrained.
  3. Whisk the eggs, sour cream, and melted butter in a large bowl.
  4. Stir in both types of corn, then fold in the corn muffin mix just until no dry pockets remain. Do not add extra liquid.
  5. Spread the batter evenly in the prepared dish and lightly smooth the top without packing it down.
  6. Bake uncovered for about 40–50 minutes, beginning to check at 38–40 minutes. The top should look dry and golden, the edges should be lightly browned, and the center should be set. A toothpick inserted near the center should come out without wet batter; a few moist crumbs are fine.
  7. If the center is still wet, continue baking and check again.
  8. Rest for 10 minutes, then cut into squares and lift them from the dish with a thin spatula.

Tips

  • Drain the whole-kernel corn well to avoid excess moisture.
  • Keep the cream-style corn undrained; its liquid is part of the batter.
  • Use a corn muffin mix package close to 8.5 ounces; no extra sugar or thickener is needed.
  • Check the center for doneness rather than relying on the clock alone.
  • Let the pudding rest before cutting so the squares hold together.

Notes

Refrigerate cooled leftovers, tightly covered, for 3–4 days. Reheat covered in a 350°F oven until warmed through. Freezing is not recommended because it may change the texture.

Nutrition

Calories: 340 kcal | Protein: 6 g | Fat: 21 g | Carbohydrates: 33 g

Jiffy Corn Casserole

Jiffy corn casserole is a soft, spoonable side dish with whole corn kernels in a moist, cornbread-like base. This version has a continuous layer of melted cheddar on top, added partway through baking so the cheese turns lightly golden while the center finishes setting.

Bake it in one rectangular dish and serve it by scooping, not cutting it into squares. Check the center rather than relying on the clock alone: it should be just set, then given a short rest before serving.

Ingredients for Jiffy Corn Casserole

A full rectangular dish of Jiffy corn casserole with cheddar and a serving scooped out, shown on a neutral surface
  • Nonstick spray or butter, for greasing the dish
  • 1 can (about 14.75 ounces, 420g) creamed corn, undrained
  • 1 can (about 15 ounces) whole-kernel corn, drained (about 250g drained)
  • 1 cup sour cream (230g)
  • 2 large eggs
  • 4 tablespoons (½ stick) unsalted butter, melted (about 55g)
  • 1 box Jiffy corn muffin mix (8.5 ounces, 240g)
  • 1½ cups shredded cheddar cheese (170g)

Drain the whole-kernel corn for this version, but keep the creamed corn undrained. The creamed corn supplies moisture; draining the kernels keeps extra canning liquid out of the batter.

Close detail of the soft Jiffy corn casserole interior, whole corn kernels, and melted cheddar topping

How to Bake Jiffy Corn Casserole

  1. Preheat and prepare the dish: Heat the oven to 350°F (175°C). Lightly grease a 9-by-13-inch casserole dish.
  2. Mix the batter: Stir together the creamed corn, drained whole-kernel corn, sour cream, eggs, and melted butter in a large bowl. Add the Jiffy mix directly to the bowl and stir just until no dry pockets remain. The batter will be thick and spoonable.
  3. Bake the base: Spread the batter evenly in the dish and bake uncovered for 30–35 minutes. Start checking around 30 minutes: the edges should look set, while the center may still be slightly soft.
  4. Add the cheese: Scatter the cheddar evenly over the surface, reaching close to the edges. Do not stir it into the casserole.
  5. Finish baking: Return the dish to the oven for 10–15 minutes, until the cheese is melted and lightly golden. The center should no longer look liquid or slosh when the dish is gently nudged. If the cheese browns before the center sets, tent the dish loosely with foil.
  6. Rest and serve: Let the casserole rest for 10–15 minutes so it settles slightly, then scoop portions directly from the dish.

Total baking time is about 40–50 minutes. Dish material, batter depth, and oven differences can shift the timing, so use the center to judge doneness.

How to Tell When Corn Casserole Is Done

The edges should be set, and a tester inserted into the center should come out mostly clean; a few moist crumbs are fine. Don’t wait for the casserole to become firm throughout. It should remain tender and moist after its rest, not dry like a pan of cornbread.

Frozen Corn and Make-Ahead Notes

To replace the canned whole-kernel corn, use 1½ cups frozen corn straight from the freezer without thawing.

To make the casserole ahead, assemble it, cover, and refrigerate for up to 24 hours. Chilled batter may need roughly 10–15 extra minutes in the oven; check for a set center rather than relying on that estimate.

Serving, Storage, and Reheating

Serve warm alongside roast chicken, turkey, ham, or ribs. The recipe makes 8–10 side-dish servings.

Cool leftovers, transfer them to an airtight container, and refrigerate for up to 3 days. Microwave individual portions until heated through, or cover a larger portion with foil and warm it in a 325°F (165°C) oven until hot.

To freeze, cool the baked casserole completely, wrap it tightly, and freeze for up to 2 months. Thaw overnight in the refrigerator and reheat covered in the oven. The texture may be softer after freezing.

Nutrition

Approximate nutrition per serving, based on 1 of 10 servings: 315 calories, 9g protein, 17g fat, and 32g carbohydrates. Approximate nutrition per 100g: 235 calories, 7g protein, 13g fat, and 24g carbohydrates. Values vary with the brands and ingredients used.

Jiffy Corn Casserole

A moist, spoonable corn casserole with a cornbread-like base and a lightly golden cheddar topping.
Course: Side Dish
Cuisine: American
Prep: 15 min
Cook: 50 min
Total: 80 min
Servings: 10 Calories: 315 kcal

Equipment

  • 9-by-13-inch casserole dish
  • Large mixing bowl

Ingredients

  • Nonstick spray or butter, for greasing the dish
  • 1 can (about 14.75 ounces, 420 g) creamed corn, undrained
  • 1 can (about 15 ounces) whole-kernel corn, drained (about 250 g drained)
  • 1 cup sour cream (230 g)
  • 2 large eggs
  • 4 tablespoons (½ stick) unsalted butter, melted (about 55 g)
  • 1 box Jiffy corn muffin mix (8.5 ounces, 240 g)
  • 1½ cups shredded cheddar cheese (170 g)

Instructions

  1. Preheat the oven to 350°F (175°C). Lightly grease a 9-by-13-inch casserole dish.
  2. In a large bowl, stir together the creamed corn, drained whole-kernel corn, sour cream, eggs, and melted butter.
  3. Add the Jiffy mix and stir just until no dry pockets remain.
  4. Spread the batter evenly in the prepared dish and bake uncovered for 30–35 minutes, until the edges look set.
  5. Scatter the cheddar evenly over the surface without stirring it in.
  6. Return the dish to the oven for 10–15 minutes, until the cheese is melted and lightly golden and the center no longer looks liquid or sloshes when gently nudged. Tent loosely with foil if the cheese browns before the center sets.
  7. Check the center with a tester; it should come out mostly clean, with a few moist crumbs.
  8. Rest the casserole for 10–15 minutes, then scoop portions directly from the dish.

Tips

  • Drain the whole-kernel corn, but leave the creamed corn undrained.
  • Start checking the casserole at 30 minutes; baking time can vary with dish material, batter depth, and oven.
  • Keep the casserole tender and moist; it should not become firm throughout.
  • If preparing it from chilled, allow roughly 10–15 extra minutes in the oven and check the center for doneness.

Variations

  • Frozen Corn Version: Replace the canned whole-kernel corn with 1½ cups frozen corn straight from the freezer.

Notes

Refrigerate leftovers in an airtight container for up to 3 days. Reheat individual portions in the microwave or larger portions covered with foil in a 325°F (165°C) oven. For longer storage, freeze the cooled casserole for up to 2 months; thaw overnight in the refrigerator and reheat covered.

Nutrition

Calories: 315 kcal | Protein: 9 g | Fat: 17 g | Carbohydrates: 32 g

Chocolate-Dipped Gingerbread Cookies

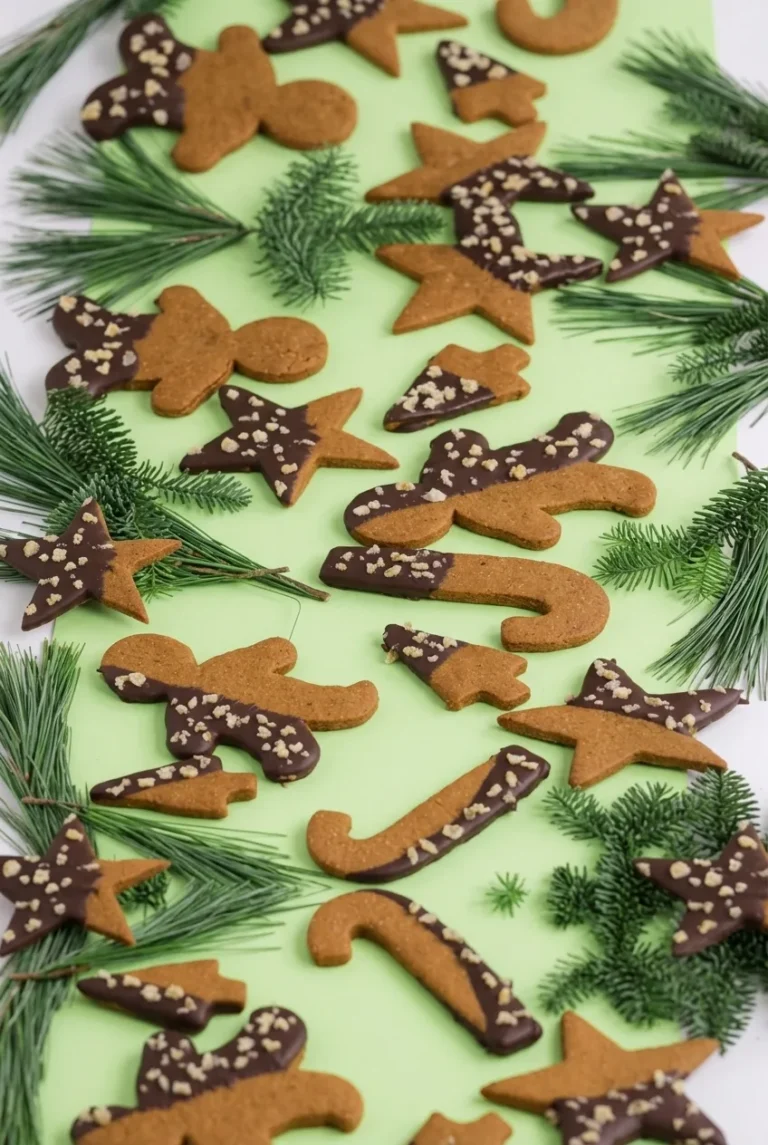
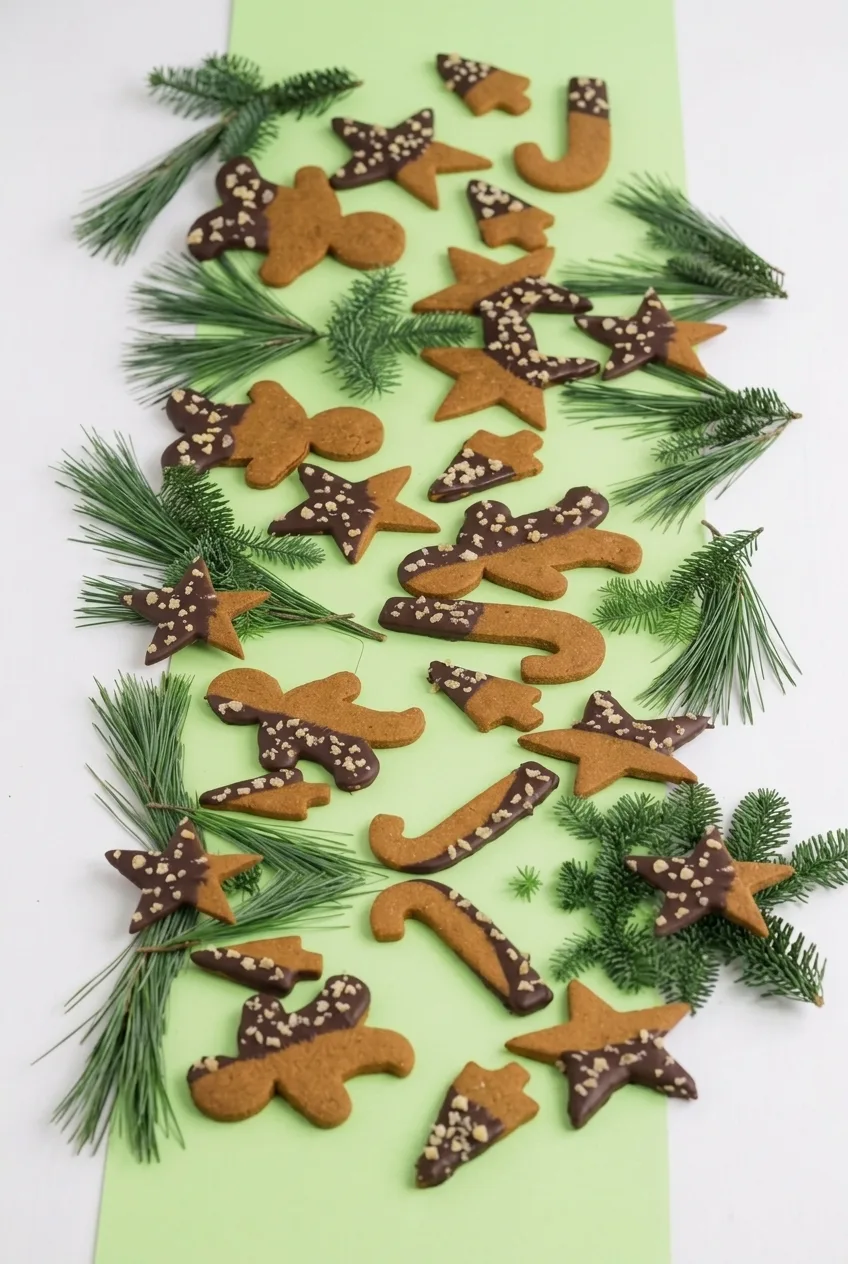
These molasses-spice gingerbread cookies are rolled thin and cut into people, stars, candy canes, and other holiday shapes. They bake with set edges and tender centers, then get a partial dip in dark chocolate and a scattering of pale sprinkles. Leaving much of each cookie uncovered keeps the shapes visible.

Plan for at least 2 hours of chilling before rolling and enough time for the baked cookies to cool completely before dipping. Cutter size affects baking time, so use the set edges as your guide rather than waiting for deep browning.

Ingredients

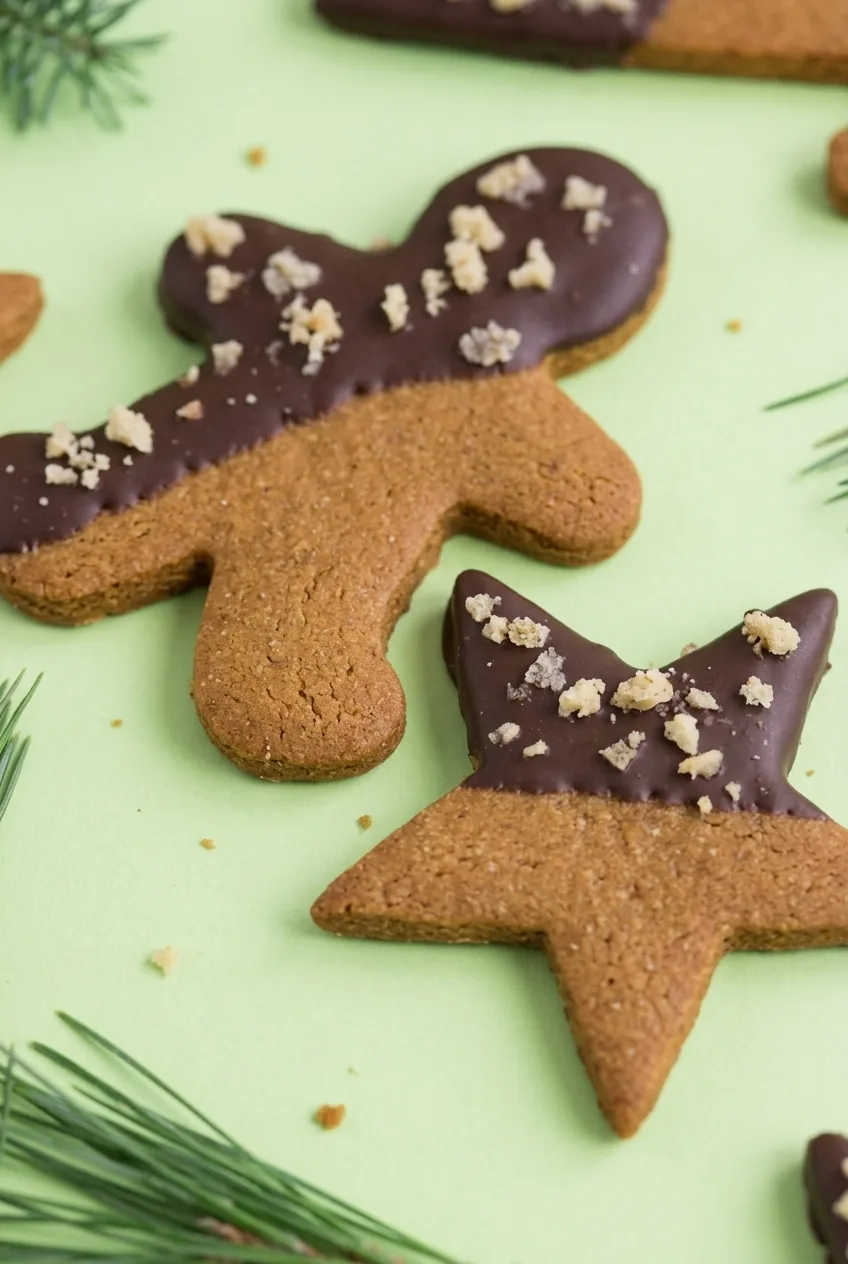
Close view of a gingerbread cookie’s textured surface, dark chocolate dip, and pale sprinkles
  • 3 cups all-purpose flour (375g)
  • 2 teaspoons ground ginger
  • 1 1/2 teaspoons ground cinnamon
  • 1/4 teaspoon ground cloves
  • 3/4 teaspoon baking soda
  • 1/2 teaspoon fine salt
  • 3/4 cup unsalted butter, softened (1 1/2 sticks; 170g)
  • 3/4 cup packed light brown sugar (150g)
  • 1/2 cup unsulfured molasses (160g; avoid blackstrap molasses, which can taste harsh)
  • 1 large egg
  • 1 teaspoon vanilla extract
  • 10 ounces dark chocolate, chopped, or dark chocolate melting wafers (285g)
  • 2 tablespoons small white or ivory sprinkles (20g)

How to Make Chocolate-Dipped Gingerbread Cookies

A full assortment of chocolate-dipped gingerbread cutouts arranged on a pale green surface
  1. Mix the dry ingredients: Whisk the flour, ginger, cinnamon, cloves, baking soda, and salt together in a medium bowl.
  2. Make the dough: Beat the butter and brown sugar until creamy. Mix in the molasses, egg, and vanilla. Add the dry ingredients and mix just until the dough holds together and no dry flour remains.
  3. Chill: Divide the dough into two flat disks, wrap, and refrigerate for at least 2 hours. The dough should feel firm enough to cut cleanly but still roll without cracking apart.
  4. Roll and cut: Preheat the oven to 350°F (175°C) with a rack in the center. Working with one disk at a time, roll the dough on a lightly floured surface to about 1/4 inch thick. Cut into gingerbread people, stars, candy canes, and other holiday shapes. Transfer to parchment-lined, cool baking sheets, leaving about 1 inch between cookies. Refrigerate the dough again if it softens and the cut edges begin to stretch.
  5. Bake and cool: Bake one sheet at a time, checking smaller shapes at 10 minutes. Typical 3- to 4-inch cutouts take about 10–13 minutes; larger shapes may need a few minutes longer. Remove them when the edges look set and the surfaces no longer look wet, before they brown deeply. Cool briefly on the sheet, then transfer to a wire rack to cool completely.
  6. Melt the chocolate: Microwave the chocolate in short bursts, stirring between each, or melt it in a double boiler over gentle heat. Use a dry bowl and utensils, and stop heating as soon as the chocolate is smooth.
  7. Dip and decorate: Dip one end or side of each completely cool cookie in the chocolate, leaving plenty of gingerbread visible. Place on parchment and add the sprinkles while the chocolate is wet.
  8. Let the coating set: Leave the cookies in a cool room until the chocolate is firm, about 30–60 minutes. Refrigerate briefly if it remains tacky. Wait until the coating has set before stacking or storing.

How to Keep the Cutout Shapes Distinct

Roll each dough portion to an even 1/4-inch thickness so different shapes bake at a similar rate. Keep the second disk chilled while working with the first, and use only enough flour to prevent sticking. If the dough becomes sticky or detailed edges lose their shape, refrigerate it until firm again.

Transfer cutouts to cool baking sheets. Let each sheet cool completely before using it for another batch; a hot sheet can soften the dough before the cookies reach the oven.

How to Set the Chocolate Coating

Dip only fully cooled cookies: warmth can soften the coating and make it slide. Untempered chocolate may also remain soft or smear in a warm room, even after it appears set. If that happens, refrigerate the cookies and keep them cool until serving.

Variations

White Chocolate Finish

Replace the dark chocolate with white chocolate for a lighter finish. Keep the dip partial, and melt the white chocolate gently to avoid scorching. This variation will look different from the dark-chocolate version.

Extra Ginger

For a stronger ginger bite, mix 1–2 tablespoons finely chopped crystallized ginger into the dough. Keep the pale sprinkles on the chocolate finish.

Serving and Storage

Arrange the assorted cookies on a platter and serve with coffee or tea. Store them in an airtight container once the chocolate has set. If the coating smears at room temperature, refrigerate the cookies and let them stand for 10–15 minutes before serving. No reheating is needed.

For a gluten-free option, use a dedicated recipe such as these gluten-free gingerbread cookies with white icing rather than assuming a direct flour swap will work in this dough.

Nutrition

Approximate nutrition per cookie, based on 24 cookies: 230 calories, 3g protein, 11g fat, and 29g carbohydrates. Per 100g: approximately 490 calories, 7g protein, 23g fat, and 62g carbohydrates. Values vary with cutter size and the chocolate and sprinkles used.

Chocolate-Dipped Gingerbread Cookies

Thin-cut molasses gingerbread cookies are baked until just set, then partially dipped in dark chocolate and topped with pale sprinkles.
Course: Dessert
Cuisine: American
Prep: 150 min
Cook: 13 min
Total: 223 min
Servings: 24 Calories: 230 kcal

Equipment

  • Mixing bowls
  • Electric mixer
  • Rolling pin
  • Cookie cutters
  • Baking sheets
  • Parchment paper
  • Wire rack
  • Microwave or double boiler

Ingredients

For the Cookies

  • 3 cups all-purpose flour (375 g)
  • 2 teaspoons ground ginger
  • 1 1/2 teaspoons ground cinnamon
  • 1/4 teaspoon ground cloves
  • 3/4 teaspoon baking soda
  • 1/2 teaspoon fine salt
  • 3/4 cup unsalted butter, softened (1 1/2 sticks; 170 g)
  • 3/4 cup packed light brown sugar (150 g)
  • 1/2 cup unsulfured molasses (160 g; avoid blackstrap molasses)
  • 1 large egg
  • 1 teaspoon vanilla extract

For the Chocolate Coating

  • 10 ounces dark chocolate, chopped, or dark chocolate melting wafers (285 g)
  • 2 tablespoons small white or ivory sprinkles (20 g)

Instructions

  1. Whisk the flour, ginger, cinnamon, cloves, baking soda, and salt together in a medium bowl.
  2. Beat the butter and brown sugar until creamy. Mix in the molasses, egg, and vanilla.
  3. Add the dry ingredients and mix just until the dough holds together and no dry flour remains.
  4. Divide the dough into two flat disks, wrap, and refrigerate for at least 2 hours.
  5. Preheat the oven to 350°F (175°C) with a rack in the center.
  6. Roll one dough disk at a time on a lightly floured surface to about 1/4 inch thick. Cut into shapes and transfer to parchment-lined, cool baking sheets, leaving about 1 inch between cookies.
  7. Refrigerate the dough again if it softens or the cut edges begin to stretch.
  8. Bake one sheet at a time. Check smaller shapes at 10 minutes; 3- to 4-inch cookies typically take 10–13 minutes, while larger shapes may need a few minutes longer. Remove when the edges are set and the surfaces no longer look wet, before they brown deeply.
  9. Cool the cookies briefly on the baking sheet, then transfer them to a wire rack and cool completely.
  10. Melt the chocolate in short microwave bursts, stirring between each, or in a double boiler over gentle heat. Use a dry bowl and utensils, and stop heating when smooth.
  11. Dip one end or side of each cooled cookie in chocolate, leaving much of the gingerbread uncovered. Place on parchment and add sprinkles while the chocolate is wet.
  12. Let the chocolate set in a cool room for 30–60 minutes. Refrigerate briefly if it remains tacky, and wait until firm before stacking or storing.

Tips

  • Roll the dough to an even 1/4-inch thickness so different shapes bake at a similar rate.
  • Keep the second dough disk chilled while working with the first.
  • Use only enough flour to prevent sticking, and chill the dough again if it becomes sticky or loses its shape.
  • Use cool baking sheets for each batch; hot sheets can soften the cutouts before baking.
  • Dip only completely cooled cookies, and keep the chocolate and utensils dry.

Variations

  • White Chocolate Finish: Replace the dark chocolate with white chocolate and melt it gently to avoid scorching.
  • Extra Ginger: Mix 1–2 tablespoons finely chopped crystallized ginger into the dough.

Notes

Store in an airtight container after the chocolate has set. If the coating smears in a warm room, refrigerate the cookies and let them stand for 10–15 minutes before serving. Nutrition is approximate per cookie based on 24 cookies.

Nutrition

Calories: 230 kcal | Protein: 3 g | Fat: 11 g | Carbohydrates: 29 g