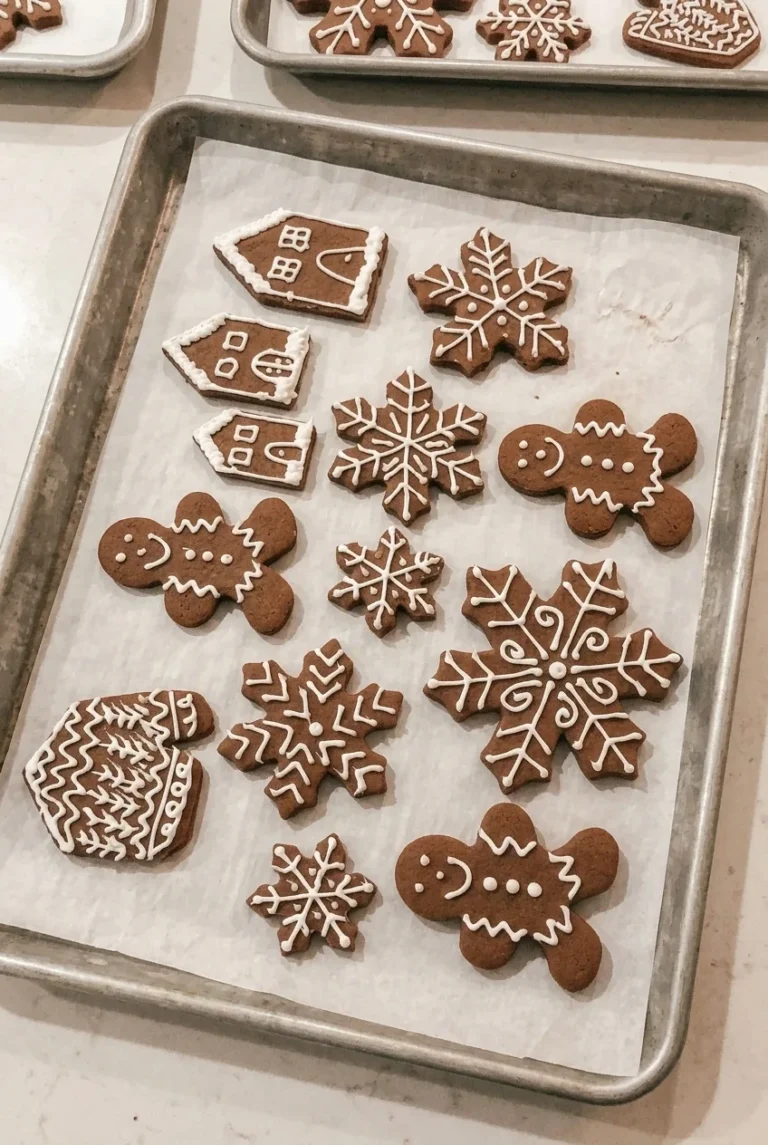
Author

Julia

Browsing

No-Spread Gingerbread Cutout Cookies

Gingerbread people and snowflakes need a dough that holds their outlines, especially at the points and other small details. These molasses-spiced cookies are rolled 1/4 inch thick and baked until set, with firm, lightly crisp edges. Mixing the butter and sugar without whipping in extra air helps keep the shapes defined.

There is no routine chill: roll the dough while it is pliable, then chill it briefly only if the cutouts become too soft to transfer. Once the cookies are completely cool, pipe white faces, buttons, and snowflake patterns directly onto them, leaving most of the brown surface visible.

Ingredients for Gingerbread Cutout Cookies
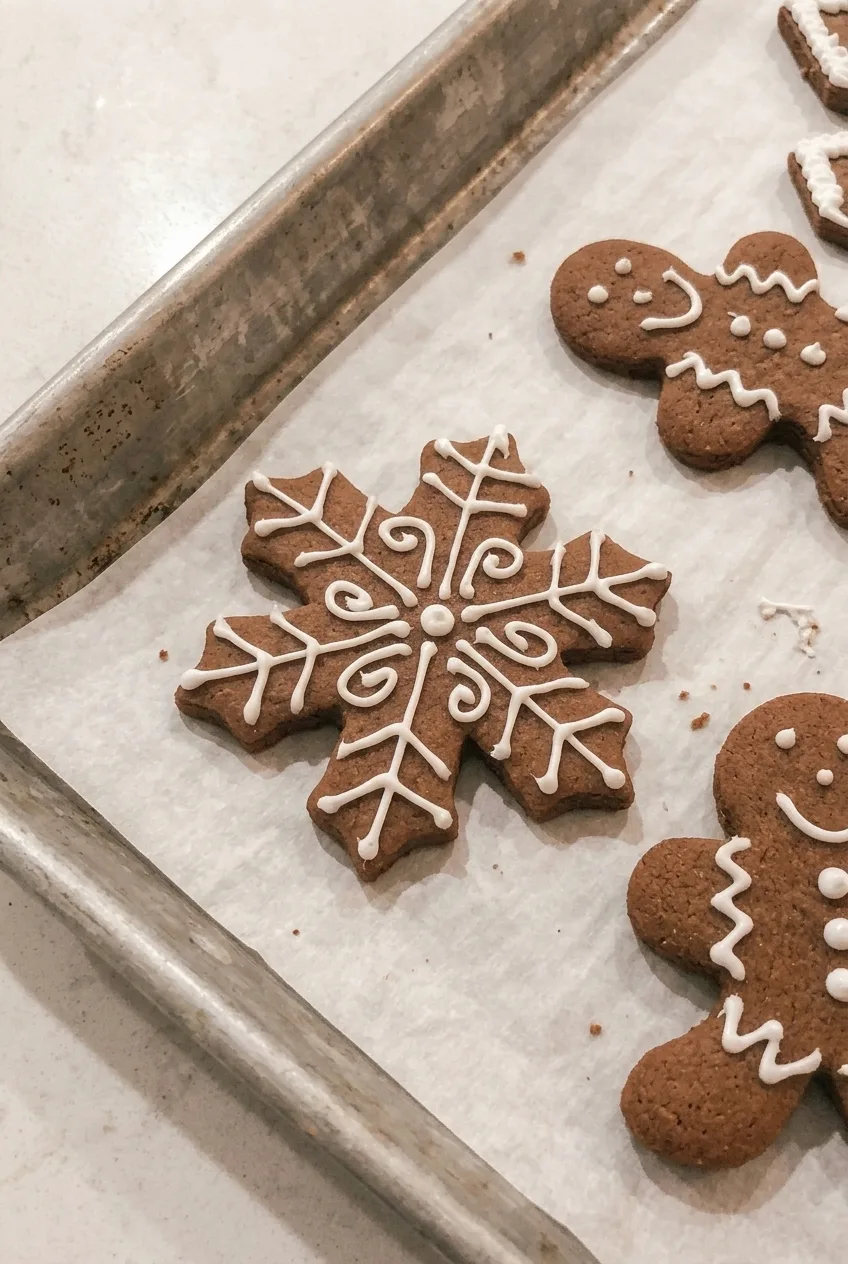
Close view of sharp snowflake points and raised white icing on matte gingerbread cookies

Cookies

  • 3 1/2 cups all-purpose flour, spooned and leveled (420g)
  • 2 teaspoons ground ginger
  • 2 teaspoons ground cinnamon
  • 1/4 teaspoon ground cloves
  • 1/2 teaspoon fine salt
  • 3/4 cup unsalted butter, softened but not greasy (170g)
  • 3/4 cup packed brown sugar (150g)
  • 1/2 cup unsulphured molasses, not blackstrap (170g)
  • 1 large egg
  • 1 teaspoon vanilla extract
  • 1 to 2 teaspoons milk, only if the mixed dough is crumbly

White Piping Icing

  • 2 cups powdered sugar (240g)
  • 1 1/2 tablespoons meringue powder (15g)
  • About 3 to 4 tablespoons water, as needed

Yield: About 24 medium cookies, depending on cutter size. Allow 30 to 40 minutes to prepare and cut the dough, about 20 to 30 minutes to bake in batches, and 30 to 45 minutes for cooling. Total time through decorating is about 1 hour 45 minutes, plus several hours for the icing to dry before stacking.

How to Make Gingerbread Cutout Cookies
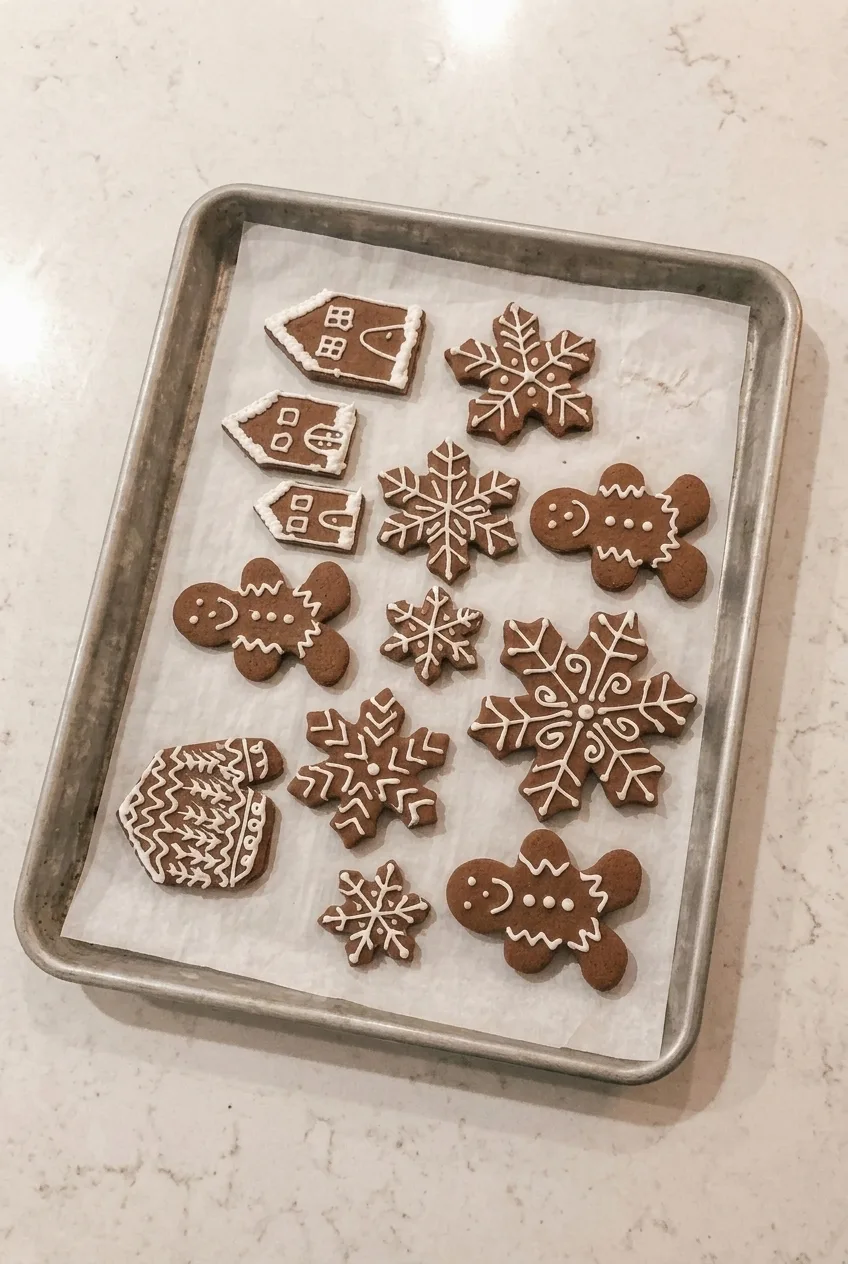
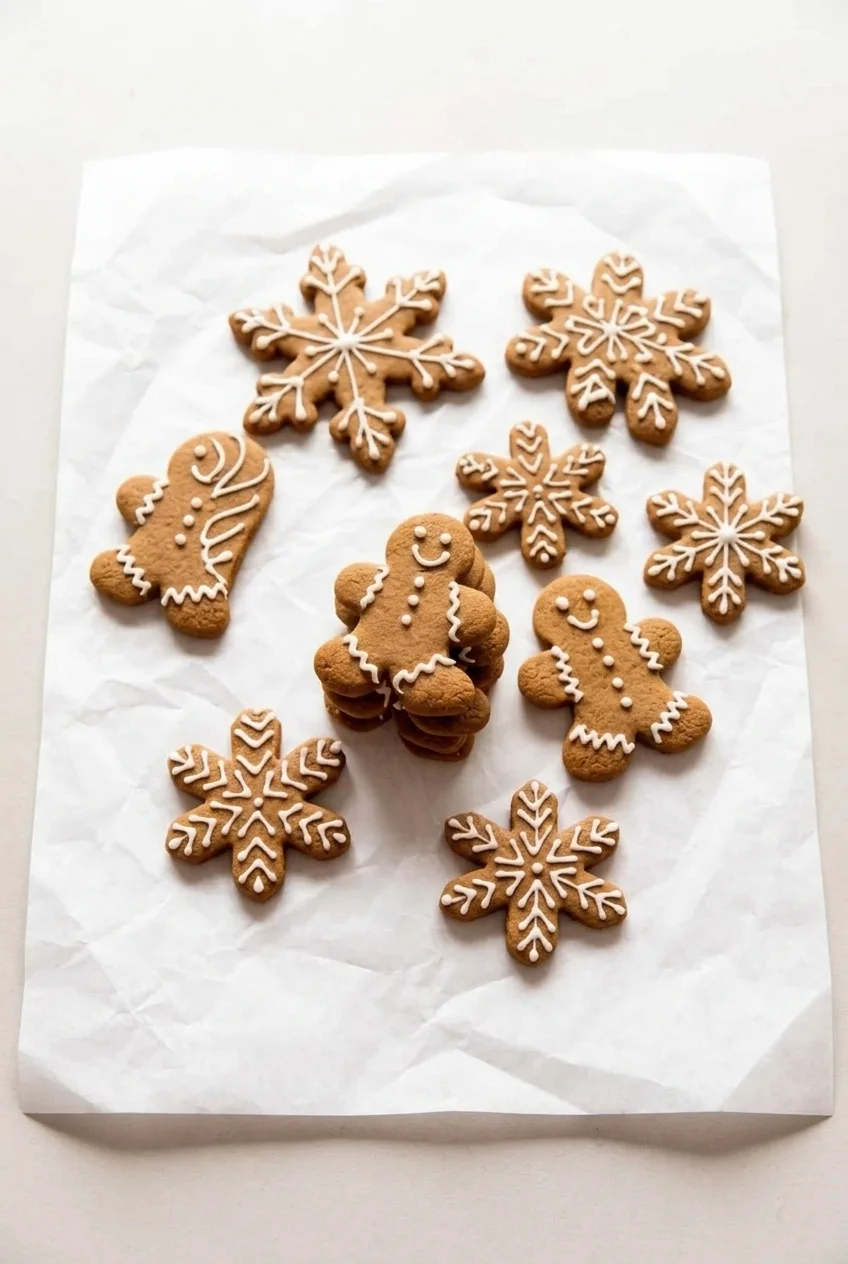
Full baking sheet of white-piped gingerbread people and snowflakes on a neutral countertop
  1. Prepare the oven: Fully preheat to 375°F (190°C). Line metal baking sheets with parchment. Whisk together the flour, ginger, cinnamon, cloves, and salt.
  2. Mix the dough: Beat the butter and brown sugar just until evenly combined, not light and fluffy. Mix in the molasses, egg, and vanilla. Add the dry ingredients and mix on low speed just until the dough holds together.
  3. Roll and cut: On a lightly floured surface, roll portions of dough to an even 1/4-inch thickness. Cut gingerbread people and snowflakes, plus a few squares if desired. Use a thin spatula to transfer intricate shapes without bending their points. Place them about 1 inch apart on the prepared sheets, grouping similar sizes when practical. Gently reroll the scraps.
  4. Bake: Bake uncovered for about 7 to 9 minutes per sheet of medium cutouts, starting checks at 7 minutes. Check very small shapes earlier; larger ones may need longer. The centers should look set rather than wet or shiny, and the edges should feel set without becoming deeply browned. Rotate the sheet near the end if your oven bakes unevenly. Use a cool sheet for each new batch of dough.
  5. Cool completely: Let the cookies firm up on the baking sheet for about 5 minutes, then transfer them to a rack. Do not decorate them while they still feel warm.
  6. Mix and pipe the icing: Mix the powdered sugar and meringue powder, adding water gradually and following the meringue-powder package directions. Adjust the icing until piped lines stay raised and distinct. Use a piping bag or a sturdy small plastic bag with a tiny opening to add faces, buttons, and cuffs to the people; branches and dots to the snowflakes; and borders to any squares. Leave most of each cookie surface exposed.
  7. Let the icing dry: Keep the cookies in a single layer for several hours, until the piping feels firm and does not smudge. Thick lines or humid conditions may require more time.

How to Keep the Cutout Edges Sharp

Whipping the butter and sugar until fluffy adds air that can soften fine outlines as the cookies bake. Mix only until blended, roll the dough evenly, and do not add baking soda or baking powder. If the dough cuts and transfers cleanly, it does not need chilling; if it becomes warm and soft, chill it briefly before baking. Cool baking sheets also keep fresh cutouts from softening on contact.

These are sturdy cutouts with lightly crisp edges, not thick, pillowy cookies. For a different texture, try these soft and chewy gingerbread cookies.

Dough Too Dry or Too Soft?

If the dough cracks while rolling, check its temperature first. Refrigerated dough may only need to soften until pliable. Weigh the flour when possible and use minimal flour on the rolling surface; excess flour can make the cookies dry. If the mixed dough still will not hold together when pressed, add milk 1 teaspoon at a time, up to 2 teaspoons.

If the dough sticks or snowflake points distort during transfer, chill the dough or cut shapes briefly instead of working in a large amount of extra flour.

Piping the White Details

If icing lines run together, make sure the cookies are completely cool and adjust the icing to a firmer piping consistency. Keep the details thin and unflooded so the gingerbread shapes and brown surfaces remain visible. Stack the cookies only after the piping has dried firm. For another take on decorated people, see these classic gingerbread man cookies.

Storing and Freezing Gingerbread Cutouts

Once the icing is completely dry, store the cookies in an airtight container at room temperature. Aim to enjoy them within about 4 to 5 days for best quality, and use parchment between layers only when the piping is firm.

To bake ahead, freeze completely cooled, undecorated cookies airtight for up to 2 months; thaw before piping. You can also freeze tightly wrapped dough for up to 2 months. Thaw it in the refrigerator, then let it soften until pliable enough to roll.

Nutrition

Approximate nutrition per cookie, based on 24 medium decorated cookies: 205 calories, 2g protein, 6g fat, and 35g carbohydrates. Approximate values per 100g: 410 calories, 5g protein, 12g fat, and 71g carbohydrates. Values vary with cutter size, icing amounts, and moisture lost during baking.

No-Spread Gingerbread Cutout Cookies

Molasses and warm spices flavor these firm gingerbread cookies, which are cut into shapes and decorated with white piping icing.
Course: Dessert
Cuisine: American
Prep: 40 min
Cook: 25 min
Total: 345 min
Servings: 24 Calories: 205 kcal

Equipment

  • Mixing bowls
  • Whisk
  • Electric mixer
  • Rolling pin
  • Cookie cutters
  • Parchment-lined baking sheets
  • Cooling rack
  • Piping bag

Ingredients

Cookies

  • 3 1/2 cups all-purpose flour, spooned and leveled (420 g)
  • 2 teaspoons ground ginger
  • 2 teaspoons ground cinnamon
  • 1/4 teaspoon ground cloves
  • 1/2 teaspoon fine salt
  • 3/4 cup unsalted butter, softened but not greasy (170 g)
  • 3/4 cup packed brown sugar (150 g)
  • 1/2 cup unsulphured molasses, not blackstrap (170 g)
  • 1 large egg
  • 1 teaspoon vanilla extract
  • 1 to 2 teaspoons milk, only if the mixed dough is crumbly

White Piping Icing

  • 2 cups powdered sugar (240 g)
  • 1 1/2 tablespoons meringue powder (15 g)
  • About 3 to 4 tablespoons water, as needed

Instructions

  1. Preheat the oven to 375°F (190°C). Line metal baking sheets with parchment.
  2. Whisk together the flour, ginger, cinnamon, cloves, and salt.
  3. Beat the butter and brown sugar just until evenly combined; do not whip until fluffy.
  4. Mix in the molasses, egg, and vanilla.
  5. Add the dry ingredients and mix on low speed just until the dough holds together. If it remains crumbly, add milk 1 teaspoon at a time, up to 2 teaspoons.
  6. Roll portions of dough on a lightly floured surface to an even 1/4-inch thickness. Cut into shapes and use a thin spatula to transfer intricate cutouts without bending them.
  7. Arrange the cookies about 1 inch apart on the prepared baking sheets. Gently reroll the scraps and use a cool baking sheet for each new batch.
  8. Bake medium cutouts for about 7 to 9 minutes per sheet, checking from 7 minutes. Bake small shapes for less time and larger shapes for longer, until centers look set and edges feel set without becoming deeply browned.
  9. Let the cookies firm on the baking sheet for about 5 minutes, then transfer them to a rack and cool completely.
  10. Mix the powdered sugar and meringue powder. Gradually add water, following the meringue-powder package directions, until piped lines stay raised and distinct.
  11. Pipe details onto the cooled cookies, keeping most of each surface exposed.
  12. Leave the cookies in a single layer for several hours, until the icing feels firm and does not smudge.

Tips

  • Mix the butter and sugar only until blended to help the cookies keep their outlines.
  • Roll the dough evenly to 1/4-inch thickness for consistent baking.
  • Chill the dough briefly only if it becomes too warm or soft to transfer cleanly.
  • Use minimal flour on the rolling surface to avoid dry dough.
  • Make sure cookies are completely cool before piping, and let the icing dry fully before stacking.


Notes

Store fully iced and dried cookies in an airtight container at room temperature for about 4 to 5 days. Freeze cooled, undecorated cookies or tightly wrapped dough for up to 2 months. Total time includes several hours for the icing to dry. Nutrition is approximate per cookie; per 100 g, about 410 calories, 5 g protein, 12 g fat, and 71 g carbohydrates.

Nutrition

Calories: 205 kcal | Protein: 2 g | Fat: 6 g | Carbohydrates: 35 g

Soft and Chewy Gingerbread Cookies

These molasses-spiced gingerbread cookies have defined cutout edges and soft centers. A two-hour chill makes the dough easier to shape into gingerbread people and snowflakes, while rolling it 1/4 inch thick helps the cookies stay tender. Bake until the edges are set rather than waiting for the centers to feel firm; the cookies will finish setting on the sheet. Once cool, decorate both shapes with fine white icing.

Yield: About 24–30 cookies with 3- to 4-inch cutters; the count depends on cutter size. Time: About 35 minutes of active dough preparation, at least 2 hours of chilling, 8–11 minutes of baking per sheet, and about 20 minutes to decorate, plus cooling and icing-drying time. Allow about 4–5 hours overall.

Ingredients for Gingerbread Cutouts

Close view of a gingerbread person's thick edge, matte surface, and raised white icing

Cookies

  • 3 1/2 cups all-purpose flour, spooned and leveled (420g), plus a few tablespoons as needed for rolling
  • 1 teaspoon baking soda
  • 1/2 teaspoon fine salt
  • 2 teaspoons ground ginger
  • 2 teaspoons ground cinnamon
  • 1/4 teaspoon ground cloves
  • 1/4 teaspoon ground nutmeg
  • 3/4 cup unsalted butter, softened (170g)
  • 3/4 cup packed brown sugar (150g)
  • 2/3 cup unsulphured molasses, not blackstrap (225g)
  • 1 large egg

White Piping Icing

  • 1 1/2 cups powdered sugar, sifted if lumpy (180g)
  • 1 tablespoon meringue powder (9g)
  • 2–3 tablespoons water, added gradually

Light or dark brown sugar works; dark brown sugar gives the cookies a deeper molasses flavor.

How to Make Soft Gingerbread Cookies

Wider view of decorated gingerbread people and snowflake cookies arranged on a light surface
  1. Mix the dry ingredients: Whisk the flour, baking soda, salt, ginger, cinnamon, cloves, and nutmeg in a bowl until evenly combined.
  2. Make the dough: Beat the butter and brown sugar until smooth and creamy. Beat in the molasses and egg. Add the dry ingredients and mix just until a cohesive dough forms. It will be soft and may feel sticky.
  3. Chill the dough: Divide it into two flattened discs, wrap them, and refrigerate for at least 2 hours or up to 2 days. The chilled dough should be firm enough to roll without smearing.
  4. Roll and cut: Fully preheat the oven to 350°F (175°C) and line baking sheets with parchment; do not grease them. Keep one dough disc refrigerated while working with the other. On a lightly floured surface, roll the dough evenly to 1/4 inch thick. Lightly flour the cutters as needed, then cut gingerbread people and snowflakes. Transfer them to cool baking sheets, about 1 inch apart, using a thin spatula to support the snowflake arms. Gather scraps for another rolling without repeatedly reworking them. If the dough sticks or the cutouts soften, chill them briefly before baking.
  5. Bake until just set: Bake similar-sized cutouts together, uncovered, for about 8–11 minutes per sheet. Begin checking at 8 minutes. Remove them when the edges look set and the surfaces no longer look wet, but the centers still feel slightly soft when gently touched. Smaller shapes may finish first; larger snowflakes may need another minute or two, so watch their narrow tips for darkening. Let the cookies firm on the sheet for about 5 minutes, then transfer them to a rack to cool completely.
  6. Mix the icing: Beat the powdered sugar, meringue powder, and 2 tablespoons water until smooth. Add more water a few drops at a time, just until the icing flows through a small piping tip or snipped bag corner while holding a raised line. If it spreads flat, mix in a little more powdered sugar.
  7. Decorate: On the completely cooled gingerbread people, pipe white eyes, smiles, three buttons, and zigzag trim on the arms and legs. Pipe branching lines and dots on the snowflakes. Leave the cookies in a single layer until the icing feels dry before stacking or packing them, about 1 hour or longer for thicker lines.

How to Keep the Cutouts Soft and Well Shaped

Measure the flour by spooning it into the cup and leveling it, or use a scale. Too much flour can make the dough crumbly, and heavy dusting during repeated rolling can make the last cookies tougher. If chilled dough still sticks to the rolling pin, roll it between two sheets of parchment.

Keep the dough close to 1/4 inch thick. A cookie that feels hard throughout when it leaves the oven has baked past the soft-center stage; the slightly soft centers will firm as the cookies cool on the sheet. Cutter size and narrow snowflake tips matter more than an exact minute on the timer.

Serving, Make-Ahead, and Storage

Serve the iced people and snowflakes together on a cookie platter, or add a few to a dessert charcuterie board. For another decorated cutout idea, try these classic gingerbread man cookies.

Wrapped dough can be refrigerated for up to 2 days. If it becomes very firm, let it sit just until pliable enough to roll. Once the icing has dried completely, store the cookies in an airtight container at cool room temperature and use them within about 1 week for the best soft texture. Reheating is unnecessary.

For longer storage, freeze completely cooled cookies, preferably undecorated, with parchment between layers in an airtight container for up to 2 months. Thaw at room temperature before icing. Wrapped dough discs can be frozen for up to 3 months; thaw them in the refrigerator until firm but rollable.

Nutrition

Approximately 180 calories, 2g protein, 5g fat, and 31g carbohydrates per cookie, based on a yield of 27 cookies and using all the icing. Approximate values per 100g are 400 calories, 5g protein, 12g fat, and 69g carbohydrates. Values are estimates and vary with cutter size, icing used, and moisture lost during baking.

Soft and Chewy Gingerbread Cookies

Molasses-spiced gingerbread cutouts bake with defined edges and soft centers, then are decorated with white piping icing.
Course: Dessert
Cuisine: American
Prep: 155 min
Cook: 11 min
Total: 300 min
Servings: 27 Calories: 180 kcal

Equipment

  • Mixing bowls
  • Electric mixer
  • Whisk
  • Baking sheets
  • Parchment paper
  • Rolling pin
  • Cookie cutters
  • Thin spatula
  • Cooling rack
  • Piping bag or small piping tip

Ingredients

Cookies

  • 3 1/2 cups all-purpose flour, spooned and leveled (420g), plus a few tablespoons for rolling
  • 1 teaspoon baking soda
  • 1/2 teaspoon fine salt
  • 2 teaspoons ground ginger
  • 2 teaspoons ground cinnamon
  • 1/4 teaspoon ground cloves
  • 1/4 teaspoon ground nutmeg
  • 3/4 cup unsalted butter, softened (170g)
  • 3/4 cup packed brown sugar (150g)
  • 2/3 cup unsulphured molasses, not blackstrap (225g)
  • 1 large egg

White Piping Icing

  • 1 1/2 cups powdered sugar, sifted if lumpy (180g)
  • 1 tablespoon meringue powder (9g)
  • 2–3 tablespoons water, added gradually

Instructions

  1. Whisk the flour, baking soda, salt, ginger, cinnamon, cloves, and nutmeg together in a bowl.
  2. Beat the butter and brown sugar until smooth and creamy. Beat in the molasses and egg.
  3. Add the dry ingredients and mix just until a soft, cohesive dough forms.
  4. Divide the dough into two flattened discs, wrap, and refrigerate for at least 2 hours or up to 2 days.
  5. Preheat the oven to 350°F (175°C). Line baking sheets with parchment paper without greasing them.
  6. Keep one dough disc refrigerated while working with the other. Roll the dough on a lightly floured surface to 1/4 inch thick.
  7. Cut out gingerbread people and snowflakes, lightly flouring the cutters as needed. Transfer the shapes to cool baking sheets about 1 inch apart, supporting snowflake arms with a thin spatula.
  8. Gather the scraps and reroll gently. Chill the dough or cutouts briefly if they become sticky or soft.
  9. Bake similar-sized cutouts together for about 8–11 minutes per sheet, beginning to check at 8 minutes. Remove them when the edges are set and the surfaces no longer look wet, while the centers still feel slightly soft.
  10. Let the cookies firm on the baking sheet for about 5 minutes, then transfer them to a rack to cool completely.
  11. Beat the powdered sugar, meringue powder, and 2 tablespoons water until smooth. Add more water a few drops at a time until the icing holds a raised line when piped.
  12. Pipe eyes, smiles, buttons, and trim on the gingerbread people, and branching lines and dots on the snowflakes. Let the icing dry before stacking or packing.

Tips

  • Measure flour by spooning it into the cup and leveling it, or weigh it, to avoid a dry dough.
  • Roll the dough evenly to 1/4 inch thick for tender cookies.
  • Use parchment between the rolling pin and dough if chilled dough sticks.
  • Avoid heavily flouring or repeatedly reworking scraps, which can make later cookies tough.
  • Bake similar-sized cutouts together and watch narrow snowflake tips for darkening.
  • Take the cookies out while the centers are still slightly soft; they will firm as they cool.

Variations

  • Deeper Molasses Flavor: Use dark brown sugar instead of light brown sugar for a deeper molasses flavor.

Notes

Store fully iced cookies in an airtight container at cool room temperature for about 1 week. Freeze undecorated cookies for up to 2 months or wrapped dough discs for up to 3 months. Reheating is unnecessary.

Nutrition

Calories: 180 kcal | Protein: 2 g | Fat: 5 g | Carbohydrates: 31 g

Classic Gingerbread Man Cookies

These molasses-spiced gingerbread people have tender centers, set edges, and enough structure for piped decorations. Chill the dough before rolling it about 1/4 inch thick; if the cut shapes soften, a brief second chill helps their arms and legs hold their outlines. Once the cookies are cool, pipe white eyes, smiles, and wavy lines, then add small red and green sprinkles while the icing is wet.

Ingredients for Gingerbread Man Cookies

Close detail of a gingerbread man cookie with a white icing smile, wavy lines, and sprinkle buttons

Cookies

  • 3 cups all-purpose flour (360g), plus a little for rolling
  • 1 tablespoon ground ginger
  • 2 teaspoons ground cinnamon
  • 1/4 teaspoon ground cloves
  • 1 teaspoon baking soda
  • 1/2 teaspoon fine salt
  • 3/4 cup unsalted butter, softened (170g)
  • 3/4 cup packed brown sugar (150g)
  • 1/2 cup unsulphured, non-blackstrap molasses (170g)
  • 1 large egg
  • 1 teaspoon vanilla extract

Icing and Decorations

  • 1 1/2 cups powdered sugar (180g)
  • 1 1/2 tablespoons water, plus a little more as needed
  • About 2 tablespoons small red and green cookie sprinkles

Yield: About 24–30 cookies with a 3- to 4-inch gingerbread-person cutter; yield varies with cutter size. Allow about 40 minutes to prepare and cut the dough, at least 2 hours to chill it, 8–10 minutes to bake each sheet, and additional time for decorating and drying.

How to Make Gingerbread Man Cookies

Wider view of decorated gingerbread man cookies grouped on a dark surface
  1. Mix the dry ingredients: Whisk together the flour, ginger, cinnamon, cloves, baking soda, and salt.
  2. Make the dough: Beat the butter and brown sugar until creamy. Mix in the molasses, egg, and vanilla. Add the dry ingredients and mix just until no dry flour remains. The dough will be soft and may feel slightly sticky.
  3. Chill the dough: Divide it in half, flatten each portion into a disc, and wrap. Refrigerate for at least 2 hours, until firm enough to roll without smearing.
  4. Roll and cut: Position a rack in the center of the oven and preheat to 350°F (175°C). Line baking sheets with parchment. Keep one disc refrigerated while rolling the other on a lightly floured surface to about 1/4 inch thick. Cut with a 3- to 4-inch gingerbread-person cutter and place the shapes about 1 inch apart, grouping similar sizes on each sheet. Gently reroll the scraps. If the dough sticks or tears, chill it briefly rather than working more flour into it.
  5. Firm the shapes if needed: If the cut-outs feel soft or their outlines have distorted, refrigerate the baking sheet for about 10–15 minutes before baking.
  6. Bake and cool: Bake one sheet at a time on the center rack for about 8–10 minutes, starting to check at 8 minutes. The edges should look set and hold their outlines, while the centers may still feel slightly soft. Avoid very dark edges or tips. Smaller shapes may finish sooner. Let the cookies rest on the sheet for about 5 minutes, then transfer to a rack to cool completely.
  7. Decorate: Stir the powdered sugar with 1 1/2 tablespoons water. Add more water a few drops at a time, only if needed, until the icing flows through a small piping opening but holds a narrow line. Pipe white eyes, curved smiles, and short wavy lines across the arms, waists, or legs. Press red and green sprinkles into the wet icing as buttons or small accents. If the lines run together, stir in a little more powdered sugar.
  8. Dry the icing: Leave the cookies in a single layer for at least 1 hour, or longer if needed. Stack or package them only when the icing feels firm and does not transfer when lightly touched.

How to Keep the People Shaped

Flattening the dough before chilling makes it easier to roll once firm. Lightly flour the rolling surface, rolling pin, and cutter as needed, but avoid kneading extra flour into the dough. If the arms or legs soften during transfer, chill the cut-outs on their baking sheet before baking.

Thickness, Bake Time, and Texture

At about 1/4 inch thick, these cookies are intended to have tender centers. Start checking 3- to 4-inch shapes at 8 minutes and take them out when the edges are set; larger or thicker shapes may need longer. Baking until the tips turn very dark can leave the cookies hard.

For deliberately crisper gingerbread people, roll the dough closer to 1/8 inch and bake until the cookies feel firmer and drier, watching closely for browning. The main recipe’s bake time may not apply to thinner shapes.

Serving and Storage

Arrange the fully dry cookies close together on a tray, or serve them with hot chocolate or coffee. They can also be added alongside a dessert charcuterie board.

Store cookies with fully dry icing in an airtight container at room temperature for up to 5 days. Separate layers if needed to protect the piping. Well-wrapped dough can be frozen for up to 3 months; thaw it overnight in the refrigerator before rolling. Fully cooled, undecorated cookies can also be frozen for up to 3 months and thawed at room temperature before decorating.

Nutrition

Approximate nutrition per cookie, based on a yield of 27: 165 calories, 2g protein, 5g fat, and 28g carbohydrates. Approximate values per 100g of finished cookies: 440 calories, 4g protein, 14g fat, and 72g carbohydrates. Cookie size, yield, and the amount of icing used will affect these estimates.

Classic Gingerbread Man Cookies

Tender-centered gingerbread cookies are chilled, cut into people, baked, and decorated with simple icing and sprinkles.
Course: Dessert
Cuisine: American
Prep: 40 min
Cook: 10 min
Total: 235 min
Servings: 27 Calories: 165 kcal

Equipment

  • Mixing bowls
  • Whisk
  • Electric mixer
  • Rolling pin
  • Gingerbread-person cookie cutter
  • Baking sheets
  • Parchment paper
  • Cooling rack
  • Piping bag

Ingredients

Cookies

  • 3 cups all-purpose flour (360 g), plus a little for rolling
  • 1 tablespoon ground ginger
  • 2 teaspoons ground cinnamon
  • 1/4 teaspoon ground cloves
  • 1 teaspoon baking soda
  • 1/2 teaspoon fine salt
  • 3/4 cup unsalted butter, softened (170 g)
  • 3/4 cup packed brown sugar (150 g)
  • 1/2 cup unsulphured, non-blackstrap molasses (170 g)
  • 1 large egg
  • 1 teaspoon vanilla extract

Icing and Decorations

  • 1 1/2 cups powdered sugar (180 g)
  • 1 1/2 tablespoons water, plus a little more as needed
  • About 2 tablespoons small red and green cookie sprinkles

Instructions

  1. Whisk together the flour, ginger, cinnamon, cloves, baking soda, and salt.
  2. Beat the butter and brown sugar until creamy. Mix in the molasses, egg, and vanilla.
  3. Add the dry ingredients and mix just until no dry flour remains.
  4. Divide the soft dough in half, flatten each portion into a disc, wrap, and refrigerate for at least 2 hours.
  5. Position a rack in the center of the oven and preheat to 350°F (175°C). Line baking sheets with parchment.
  6. Keep one dough disc refrigerated while rolling the other on a lightly floured surface to about 1/4 inch thick.
  7. Cut the dough with a 3- to 4-inch gingerbread-person cutter. Place the shapes about 1 inch apart, grouping similar sizes on each sheet. Gently reroll the scraps.
  8. If the cut-outs feel soft or their outlines have distorted, refrigerate the baking sheet for 10–15 minutes.
  9. Bake one sheet at a time on the center rack for about 8–10 minutes, starting to check at 8 minutes. Remove when the edges are set and the centers are still slightly soft.
  10. Let the cookies rest on the baking sheet for about 5 minutes, then transfer them to a rack to cool completely.
  11. Stir the powdered sugar with 1 1/2 tablespoons water. Add more water a few drops at a time, if needed, until the icing pipes easily and holds a narrow line.
  12. Pipe eyes, smiles, and wavy lines onto the cooled cookies. Add the sprinkles while the icing is wet.
  13. Leave the cookies in a single layer for at least 1 hour, or until the icing is firm before stacking or packaging.

Tips

  • Flatten the dough into discs before chilling so it is easier to roll.
  • Keep one dough portion refrigerated while working with the other.
  • Use only enough flour to prevent sticking; avoid kneading extra flour into the dough.
  • Chill cut-outs on the baking sheet if their arms, legs, or outlines soften.
  • Start checking 3- to 4-inch cookies at 8 minutes; smaller shapes may bake sooner.
  • Add water to the icing a few drops at a time so it does not become too runny.

Variations

  • Crisp Gingerbread People: Roll the dough closer to 1/8 inch thick and bake until the cookies feel firmer and drier, watching closely for browning.

Notes

Store cookies with fully dry icing in an airtight container at room temperature for up to 5 days. Freeze well-wrapped dough or undecorated cookies for up to 3 months.

Nutrition

Calories: 165 kcal | Protein: 2 g | Fat: 5 g | Carbohydrates: 28 g

Cottage Cheese Breakfast Biscuits

These savory cottage cheese breakfast biscuits are scooped into tall, craggy mounds rather than rolled and cut. Bacon, cheddar, red bell pepper, and scallions run through a tender, speckled crumb—not flaky layers. The key is a thick dough that holds its shape: cook and cool the fillings before mixing, then fold gently and stop as soon as the flour is incorporated.

Ingredients for Cottage Cheese Breakfast Biscuits

  • 2 cups all-purpose flour, spooned and leveled (240g)
  • 1 tablespoon baking powder (12g)
  • 1/2 teaspoon fine salt
  • 1/4 teaspoon black pepper
  • 1 cup thick 4% cottage cheese (225g)
  • 1 large egg
  • 3 tablespoons unsalted butter, melted and cooled slightly (40g)
  • 1/2 cup shredded sharp cheddar (55g)
  • 3 slices cooked bacon, finely chopped (about 30g)
  • 1/3 cup finely diced red bell pepper (about 50g)
  • 1 teaspoon reserved bacon drippings or neutral oil
  • 3 tablespoons thinly sliced scallions (about 20g)
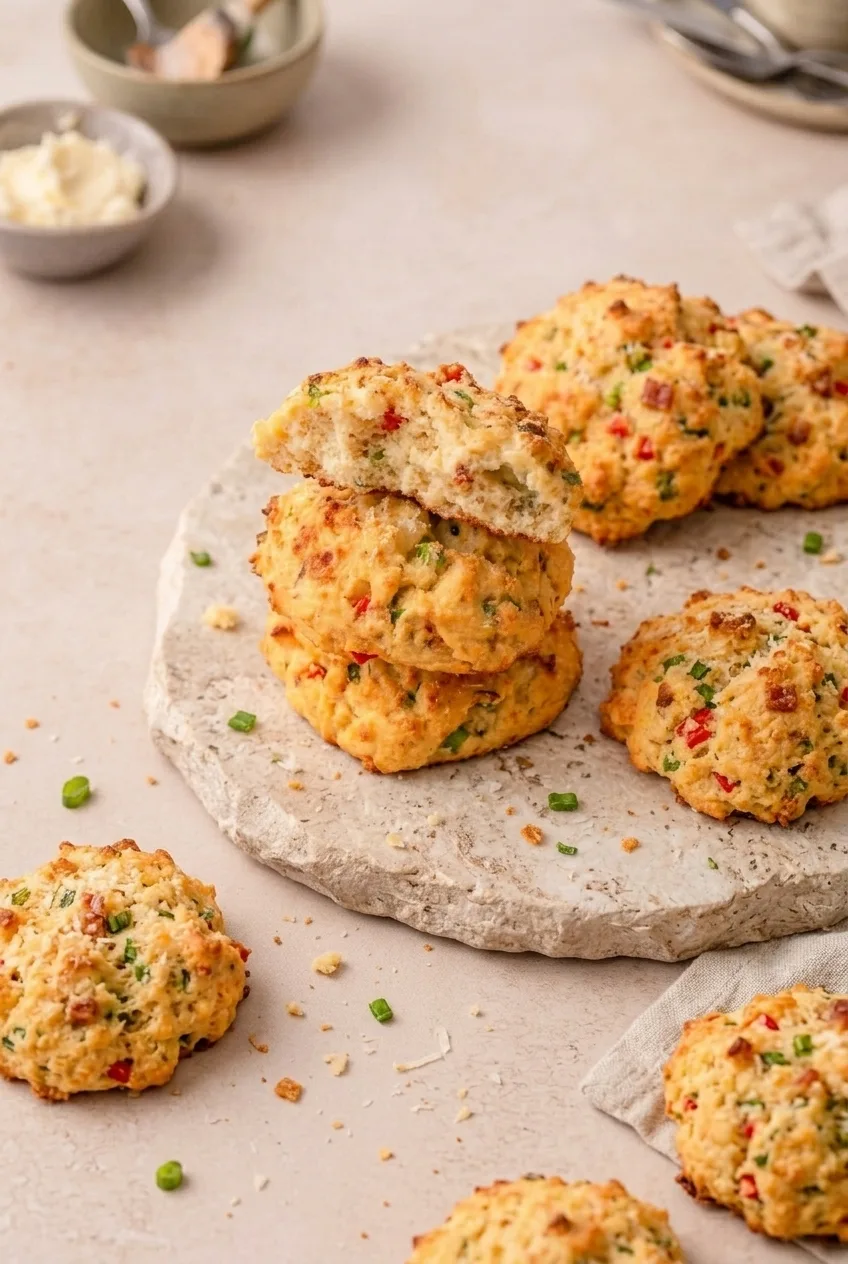
Full serving of golden cottage cheese breakfast biscuits on a light board, with one biscuit split

Only if needed: Up to 2 tablespoons milk for dry dough, or a little additional all-purpose flour if the dough is too loose.

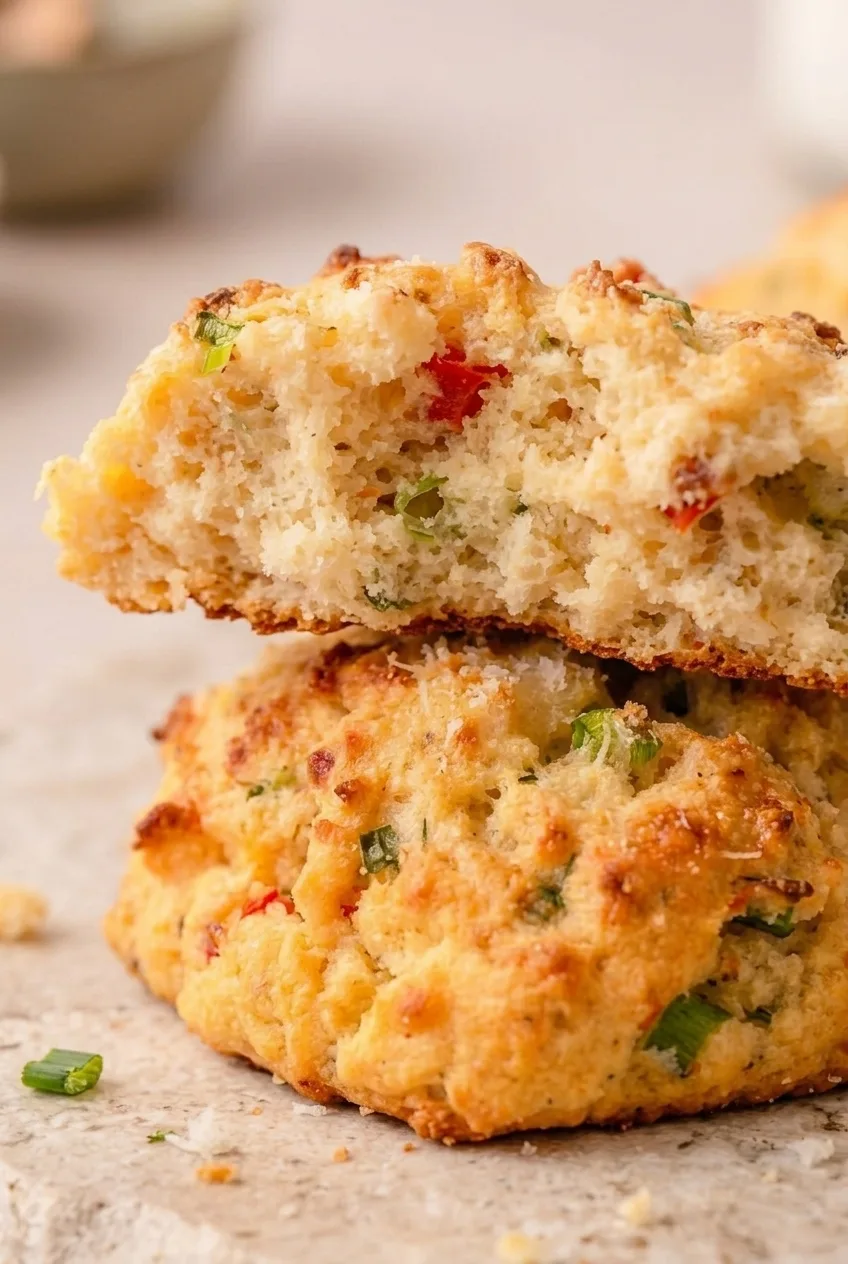
Close view of a split cottage cheese biscuit showing its tender crumb, red pepper, scallions, and bacon

How to Bake Cottage Cheese Breakfast Biscuits

  1. Preheat the oven: Fully preheat to 425°F (220°C). Line a baking sheet with parchment paper.
  2. Cook the fillings: If the bacon is not already cooked, cook it and chop it finely. Heat the bacon drippings or oil in a skillet over medium heat. Cook the pepper for 3 to 5 minutes, until softened but still in distinct pieces. Set the pepper and bacon aside until no longer hot.
  3. Mix the dry ingredients: Whisk the flour, baking powder, salt, and black pepper in a large bowl.
  4. Mix the wet ingredients: In a second bowl, stir together the cottage cheese, egg, and slightly cooled butter. The cottage cheese curds can remain visible.
  5. Fold the dough: Add the wet mixture, cheddar, bacon, pepper, and scallions to the flour mixture. Fold gently just until no dry flour remains. The dough should be thick and sticky, not smooth or pourable. If dry flour remains, add milk 1 tablespoon at a time, up to 2 tablespoons. If a scoop slumps, fold in additional flour 1 tablespoon at a time until it holds a mound.
  6. Scoop: Divide the dough into eight roughly 1/3-cup mounds on the prepared sheet, leaving about 2 inches between them. Keep the scoops tall and the tops uneven; do not press them flat.
  7. Bake: Bake uncovered for approximately 15 to 19 minutes, beginning checks at 15 minutes. The biscuits should be puffed, hold their shape, and have golden ridges with some darker toasted spots. Do not flip them; rotate the sheet only if your oven browns unevenly. If the center is uncertain, split a biscuit. The crumb should be set, with no shiny raw dough; bake longer if needed.
  8. Cool briefly: Let the biscuits stand on the baking sheet for about 5 minutes before moving or splitting them.

What the Dough Should Look Like

A scoop should stand as a rough mound rather than spread across the sheet. Cottage cheese moisture varies by brand, so use the dough’s shape to guide any small milk or flour adjustment. Avoid mixing longer to make the dough smooth; that can make the biscuits dense.

How to Tell When the Biscuits Are Done

The craggy tops will brown unevenly, and every surface does not need to turn deep golden. A thick biscuit may brown outside before its center is ready, so check for a tender, set crumb without shiny raw dough. Bake for the center, not for uniform color.

Serving and Flour Questions

Serve the biscuits warm on their own, or let them cool enough to split cleanly and use them as breakfast sandwich bases. For assembly ideas, see these egg and cheddar breakfast sandwiches.

Do you need to blend the cottage cheese? No. Thick, unblended cottage cheese works in this rustic drop-biscuit dough.

Can you use gluten-free or almond flour? Not as a direct swap. Those flours need different ingredient balances from the all-purpose flour used here.

Make-Ahead, Storage, and Reheating

Cool the biscuits completely, then refrigerate them in an airtight container for up to 4 days. For another make-ahead breakfast, try these cottage cheese egg bites with Canadian bacon.

Microwave one refrigerated biscuit for roughly 20 to 30 seconds, then check that it is heated through. For a drier exterior, reheat in a 375°F (190°C) oven for about 10 minutes, checking earlier if the biscuit is small. Completely cooled biscuits can also be frozen airtight for up to 3 months; thaw overnight in the refrigerator before reheating.

Nutrition

Approximate per biscuit, based on 8 biscuits: 240 calories, 10g protein, 11g fat, and 25g carbohydrates. Approximate per 100g of baked biscuit: 300 calories, 12g protein, 13g fat, and 31g carbohydrates. Values vary with ingredient brands and moisture lost during baking.

Cottage Cheese Breakfast Biscuits

Savory drop biscuits made with cottage cheese, cheddar, bacon, red bell pepper, and scallions.
Course: Breakfast
Cuisine: American
Prep: 20 min
Cook: 19 min
Total: 44 min
Servings: 8 Calories: 240 kcal

Equipment

  • Baking sheet
  • Parchment paper
  • Skillet
  • Large mixing bowl
  • Medium mixing bowl
  • Whisk

Ingredients

For the Biscuits

  • 2 cups all-purpose flour, spooned and leveled (240 g), plus more if needed
  • 1 tablespoon baking powder (12 g)
  • 1/2 teaspoon fine salt
  • 1/4 teaspoon black pepper
  • 1 cup thick 4% cottage cheese (225 g)
  • 1 large egg
  • 3 tablespoons unsalted butter, melted and cooled slightly (40 g)
  • 1/2 cup shredded sharp cheddar (55 g)
  • 3 slices cooked bacon, finely chopped (about 30 g)
  • 1/3 cup finely diced red bell pepper (about 50 g)
  • 1 teaspoon reserved bacon drippings or neutral oil
  • 3 tablespoons thinly sliced scallions (about 20 g)

Optional, Only If Needed

  • Up to 2 tablespoons milk for dry dough

Instructions

  1. Preheat the oven to 425°F (220°C) and line a baking sheet with parchment paper.
  2. If needed, cook the bacon and chop it finely.
  3. Heat the bacon drippings or oil in a skillet over medium heat. Cook the pepper for 3 to 5 minutes, until softened but still in distinct pieces. Set aside with the bacon to cool.
  4. Whisk the flour, baking powder, salt, and black pepper in a large bowl.
  5. In a second bowl, stir together the cottage cheese, egg, and slightly cooled butter.
  6. Add the wet mixture, cheddar, bacon, pepper, and scallions to the flour mixture. Fold gently just until no dry flour remains.
  7. If dry flour remains, add milk 1 tablespoon at a time, up to 2 tablespoons. If the dough slumps instead of holding a mound, fold in additional flour 1 tablespoon at a time.
  8. Divide the dough into eight roughly 1/3-cup mounds on the prepared baking sheet, leaving about 2 inches between them. Keep the scoops tall and uneven; do not flatten them.
  9. Bake uncovered for 15 to 19 minutes, checking from 15 minutes. Bake until puffed and set, with golden ridges and some darker toasted spots. Do not flip; rotate the sheet only if your oven browns unevenly.
  10. If unsure whether the centers are done, split a biscuit and check for a set crumb with no shiny raw dough. Bake longer if needed.
  11. Let the biscuits stand on the baking sheet for about 5 minutes before moving or splitting them.

Tips

  • Cook and cool the fillings before mixing them into the dough.
  • Keep the cottage cheese unblended; visible curds are fine.
  • Fold only until the flour is incorporated to help keep the biscuits tender.
  • Use the dough’s shape to guide small milk or flour adjustments; it should hold a rough mound.
  • Check the center for a set crumb rather than waiting for every surface to turn evenly golden.

Notes

Cool completely and refrigerate in an airtight container for up to 4 days. Reheat in the microwave for 20 to 30 seconds or in a 375°F (190°C) oven for about 10 minutes. Freeze airtight for up to 3 months and thaw overnight in the refrigerator before reheating.

Nutrition

Calories: 240 kcal | Protein: 10 g | Fat: 11 g | Carbohydrates: 25 g

Savory Breakfast Skillet with Potatoes and Eggs

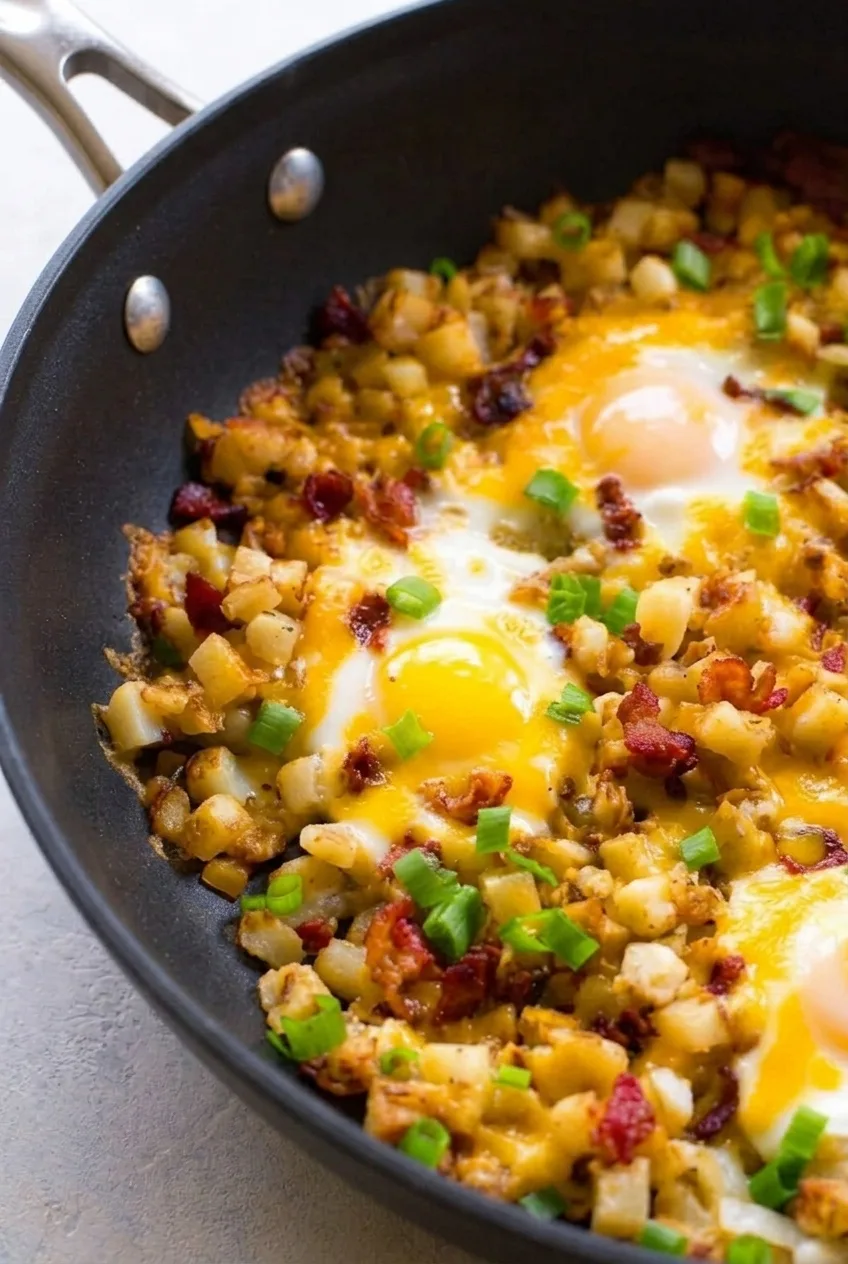
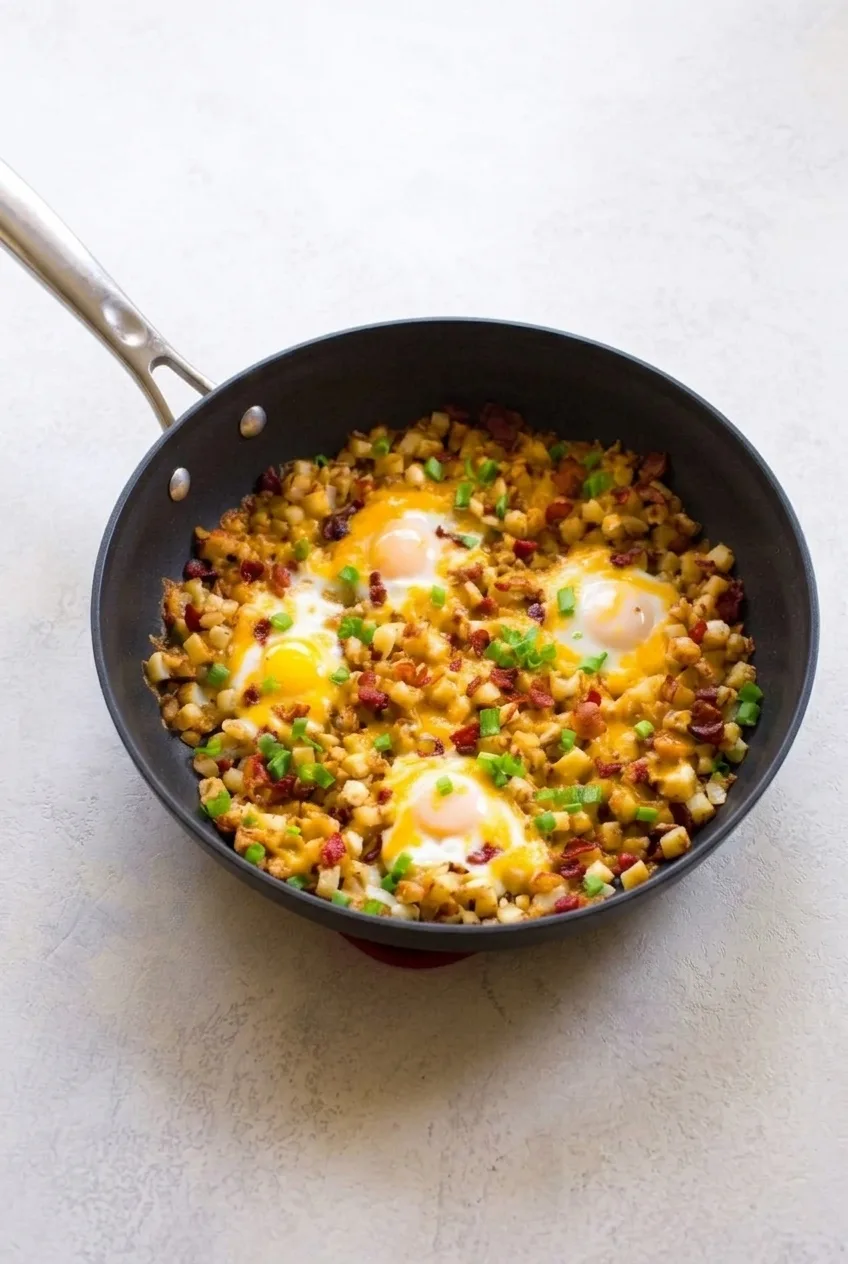
Small cubes of browned potato fill this skillet, with four eggs cooked in separate wells rather than mixed into the hash. Cheddar melts around the eggs; crisp bacon and sliced green onions go on just before serving.

Cook the potatoes until their centers are fork-tender before adding the eggs—the brief covered finish will set the whites but won’t soften hard potatoes. Check the eggs early to keep the yolks soft, or leave them covered a little longer for firmer yolks.

Ingredients for the Breakfast Skillet

Close view of a soft-yolk egg among browned potato cubes, melted cheddar, bacon and green onions
  • 1 1/4 pounds Yukon gold potatoes (about 565g), unpeeled and cut into roughly 1/2-inch cubes
  • 4 slices bacon (about 100g)
  • 1/2 medium yellow onion (about 75g), diced
  • Up to 1 tablespoon neutral cooking oil, as needed
  • About 1/2 teaspoon kosher salt, plus more to taste
  • 1/4 teaspoon freshly ground black pepper, plus more to taste
  • 4 large eggs
  • 3/4 cup shredded cheddar cheese (about 85g)
  • 2 green onions, thinly sliced

How to Make the Potato and Egg Skillet

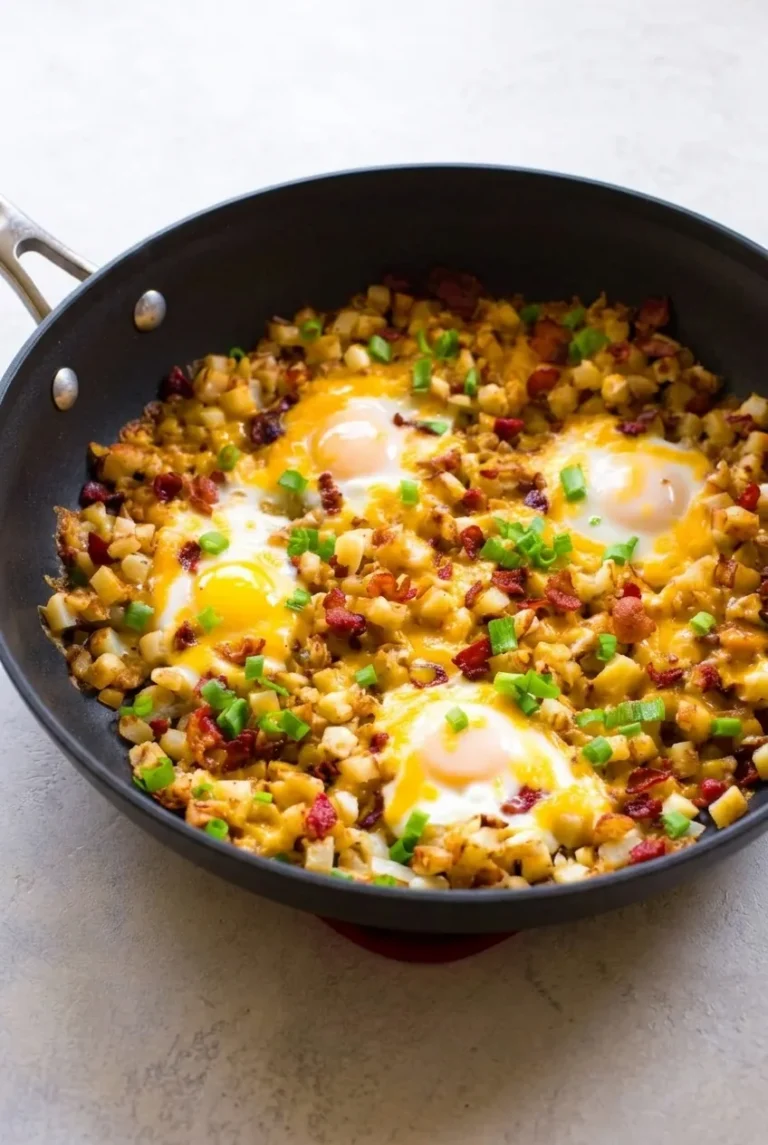
Full dark skillet of potato hash with four eggs, cheddar, bacon and green onions on a pale surface
  1. Prepare the vegetables: Cut the potatoes into similar-size cubes so they cook evenly. Dice the yellow onion and slice the green onions.
  2. Crisp the bacon: Heat a 12-inch skillet over medium heat. Cook the bacon uncovered until browned and crisp, about 5 to 7 minutes. Transfer it to a plate, then chop or crumble it. Leave about 1 tablespoon of drippings in the skillet.
  3. Cook the potatoes: Add the potatoes, salt, and pepper. Add a little oil if the pan is dry or the potatoes begin to stick. Spread the potatoes out and cook uncovered over medium to medium-high heat, leaving them undisturbed for 3 to 4 minutes at a time before turning. Add the diced onion after about 8 to 10 minutes. Cook until the potatoes have browned edges and fork-tender centers, about 17 to 22 minutes total. Start checking tenderness around 15 minutes, and taste for seasoning before adding the eggs. If the potatoes darken before they soften, lower the heat and cover briefly; then uncover to let moisture evaporate.
  4. Add the eggs and cheese: Reduce the heat to low. Make four separate wells in the tender potatoes and crack one egg into each. Scatter the cheddar over the potatoes and around the eggs, leaving most of the yolks visible.
  5. Cover and finish: Cover the skillet and cook until the whites are opaque and set and the cheese has melted, approximately 4 to 7 minutes. Begin checking after 3 minutes. Remove the skillet from the heat when the yolks reach your preferred firmness, then scatter the bacon and green onions over the top. Serve directly from the skillet.

How to Get Tender Potatoes with Browned Edges

A 12-inch skillet gives the potato cubes room to brown instead of steaming in a crowded pan. If using a smaller skillet, cook the potatoes in batches and return them all to the pan before making the egg wells. Let the cubes sit briefly between turns, but turn them before they scorch. The potatoes must be tender before the eggs go in.

When Are the Skillet Eggs Done?

Look for whites that are opaque and set, including near the edges of each well. A tight-fitting lid can cook the yolks quickly, so check early if you want them soft. The hot skillet will continue to firm the eggs after it comes off the burner. Offer hot sauce at the table, if desired.

Potato Options and a Meatless Variation

Baby red potatoes can replace Yukon golds if cut equally small. Frozen diced hash browns also work, but their moisture and cooking time may differ. Cook them until browned and tender before adding the eggs rather than relying on the fresh-potato timing.

For a meatless version, omit the bacon, cook the potatoes in oil, and add diced bell pepper with the onion. This variation will look different from the bacon-and-cheddar skillet.

Leftovers and Reheating

Promptly refrigerate leftovers in a covered container. Reheat gently in a covered skillet until hot throughout; the yolks will firm up and the potatoes may soften. For better make-ahead texture, prepare the potato mixture ahead and cook fresh eggs in it just before serving.

For another savory potato-and-egg breakfast, try these breakfast tacos with eggs, potatoes, and chorizo. For a baked option to feed a group, see this hash brown breakfast casserole.

Nutrition

Approximate nutrition per serving (1/4 of the skillet): 400 calories, 18g protein, 24g fat, and 28g carbohydrates. Approximate per 100g: 170 calories, 8g protein, 10g fat, and 12g carbohydrates. Values vary with the bacon drippings retained, oil used, and cooked weight.

Savory Breakfast Skillet with Potatoes and Eggs

Crispy potatoes, bacon, cheddar, and eggs cook together in a skillet for a hearty breakfast.
Course: Breakfast
Cuisine: American
Prep: 10 min
Cook: 30 min
Total: 40 min
Servings: 4 Calories: 400 kcal

Equipment

  • 12-inch skillet
  • Skillet lid
  • Cutting board
  • Knife

Ingredients

For the Skillet

  • 1 1/4 pounds Yukon gold potatoes (about 565 g), unpeeled and cut into roughly 1/2-inch cubes
  • 4 slices bacon (about 100 g)
  • 1/2 medium yellow onion (about 75 g), diced
  • Up to 1 tablespoon neutral cooking oil, as needed
  • About 1/2 teaspoon kosher salt, plus more to taste
  • 1/4 teaspoon freshly ground black pepper, plus more to taste
  • 4 large eggs
  • 3/4 cup shredded cheddar cheese (about 85 g)
  • 2 green onions, thinly sliced

Instructions

  1. Cut the potatoes into similar-size cubes. Dice the yellow onion and slice the green onions.
  2. Heat a 12-inch skillet over medium heat. Cook the bacon uncovered until browned and crisp, about 5 to 7 minutes.
  3. Transfer the bacon to a plate and chop or crumble it. Leave about 1 tablespoon of drippings in the skillet.
  4. Add the potatoes, salt, and pepper. Add a little oil if the pan is dry or the potatoes begin to stick.
  5. Spread the potatoes out and cook uncovered over medium to medium-high heat, turning every 3 to 4 minutes. Add the diced onion after about 8 to 10 minutes.
  6. Cook until the potatoes have browned edges and fork-tender centers, about 17 to 22 minutes total. Start checking around 15 minutes and adjust the seasoning before adding the eggs.
  7. Reduce the heat to low. Make four wells in the potatoes and crack one egg into each.
  8. Scatter the cheddar over the potatoes and around the eggs, leaving most of the yolks visible.
  9. Cover and cook until the whites are opaque and set and the cheese has melted, about 4 to 7 minutes. Begin checking after 3 minutes.
  10. Remove the skillet from the heat when the yolks reach your preferred firmness. Top with the bacon and green onions, then serve.

Tips

  • Use a 12-inch skillet to give the potatoes room to brown; cook in batches if using a smaller pan.
  • Let the potatoes cook undisturbed for 3 to 4 minutes between turns so they develop browned edges.
  • Make sure the potato centers are fork-tender before adding the eggs.
  • Check the eggs early, since a tight-fitting lid can cook the yolks quickly.
  • If the potatoes darken before they soften, lower the heat and cover briefly, then uncover to let moisture evaporate.

Variations

  • Meatless Skillet: Omit the bacon, cook the potatoes in oil, and add diced bell pepper with the onion.
  • Red Potato Skillet: Replace the Yukon gold potatoes with equally small cubes of baby red potatoes.
  • Frozen Hash Brown Skillet: Use frozen diced hash browns and cook them until browned and tender before adding the eggs.

Notes

Refrigerate leftovers promptly in a covered container. Reheat gently in a covered skillet until hot throughout; the yolks will firm and the potatoes may soften. For make-ahead preparation, cook the potato mixture ahead and add fresh eggs just before serving.

Nutrition

Calories: 400 kcal | Protein: 18 g | Fat: 24 g | Carbohydrates: 28 g

Breakfast Tacos with Eggs and Potatoes

Golden potato cubes, tender scrambled eggs, and browned chorizo fill warm, lightly blistered corn tortillas. Cooking the potatoes before the eggs gives them time to soften and brown without drying out the eggs. Fold the filling loosely so the pieces stay distinct, then finish each open taco with queso fresco, cilantro, and a little red salsa or hot sauce.

Prep: 15 minutes | Cook: 25–30 minutes | Total: 40–45 minutes | Yield: 8 tacos; 4 servings of 2 tacos each

Ingredients for Breakfast Tacos with Eggs and Potatoes

Close view of egg curds, golden potato cubes, and chorizo inside a lightly charred breakfast taco
  • 1 lb Yukon Gold potatoes (about 450g), cut into roughly 1/2-inch cubes
  • 2 tablespoons neutral cooking oil
  • 1/2 teaspoon fine salt, plus more to taste
  • 1 small white onion, diced (about 1/2 cup)
  • 8 oz fresh Mexican-style chorizo (about 225g), casings removed if necessary
  • 8 large eggs
  • 8 small corn tortillas, about 5 to 6 inches each
  • 1/2 cup crumbled queso fresco (about 60g)
  • 1/4 cup chopped fresh cilantro
  • 2 tablespoons red salsa or red hot sauce, or to taste

How to Make Breakfast Tacos in a Skillet

Four topped breakfast tacos overlapping on a paper-lined plate with the full serving visible
  1. Prepare the ingredients: Dice the potatoes and onion, then whisk the eggs until evenly beaten. Have the cheese, cilantro, and sauce ready so the tacos can be assembled as soon as the eggs are done.
  2. Cook the potatoes: Heat the oil in a 12-inch skillet over medium heat. Add the potatoes and 1/2 teaspoon salt, spread them out, and cover for 5–7 minutes. Uncover and cook for another 7–11 minutes, turning occasionally and leaving the pieces against the pan between turns. Start checking for tenderness after about 12 minutes total. Add the onion during the last 3–4 minutes. When the potatoes are fork-tender with golden edges and the onion is soft, transfer them to a bowl.
  3. Brown the chorizo: Add the chorizo to the same skillet. Cook uncovered over medium heat for 5–7 minutes, breaking it into small crumbles, until cooked through with no raw-looking patches. If using fresh ground-pork chorizo, check that it reaches 160°F (70°C) with a food thermometer. Spoon off excess rendered fat, leaving about 1 teaspoon to 1 tablespoon in the pan for the eggs.
  4. Scramble and combine: Reduce the heat to medium-low. Pour the eggs into the skillet with the chorizo and fold gently as soft curds form, about 3–4 minutes. When the eggs are nearly set, briefly fold in the potatoes and onion without mashing them. Transfer the filling out of the hot skillet as soon as no liquid egg remains. Taste before adding more salt; chorizo varies in saltiness.
  5. Warm the tortillas: Use a separate dry skillet, or wipe out the cooking skillet. Warm the tortillas in batches over medium to medium-high heat for about 20–30 seconds per side, until they bend easily and have scattered blister marks. Stack them under a clean kitchen towel to keep them pliable.
  6. Assemble the tacos: Divide the filling among the eight tortillas. Fold them loosely, leaving the tops open, and sprinkle with queso fresco and cilantro. Add a modest drizzle of red salsa or hot sauce and serve promptly.

How to Get Golden, Tender Potatoes

Keep the potato cubes close to 1/2 inch so they cook at a similar rate. Covering the skillet briefly helps soften their centers; cooking uncovered afterward lets moisture escape so the edges can brown. If the edges darken before the centers are tender, lower the heat and cover briefly before continuing uncovered.

Give the potatoes room in the pan. In a smaller skillet, cook them in batches rather than piling them up, which can leave them steamed instead of golden.

Keeping the Eggs Tender and Tortillas Flexible

The chorizo should leave a light coating of fat for the eggs, not a deep pool. Spoon off the excess before scrambling, then move the filling out of the skillet once the eggs are just set; they can dry out if left in the hot pan.

Cold corn tortillas can crack when folded. Warm them until flexible, keep them covered between batches, and divide the filling evenly so the tacos stay handheld.

Breakfast Taco Variations

Small flour tortillas can replace corn tortillas; warm them before filling. For a bacon version, replace the chorizo with cooked, drained, crumbled bacon and adjust the seasoning to taste. For meatless tacos, omit the chorizo, use a little additional oil to cook the eggs, and season the filling to taste.

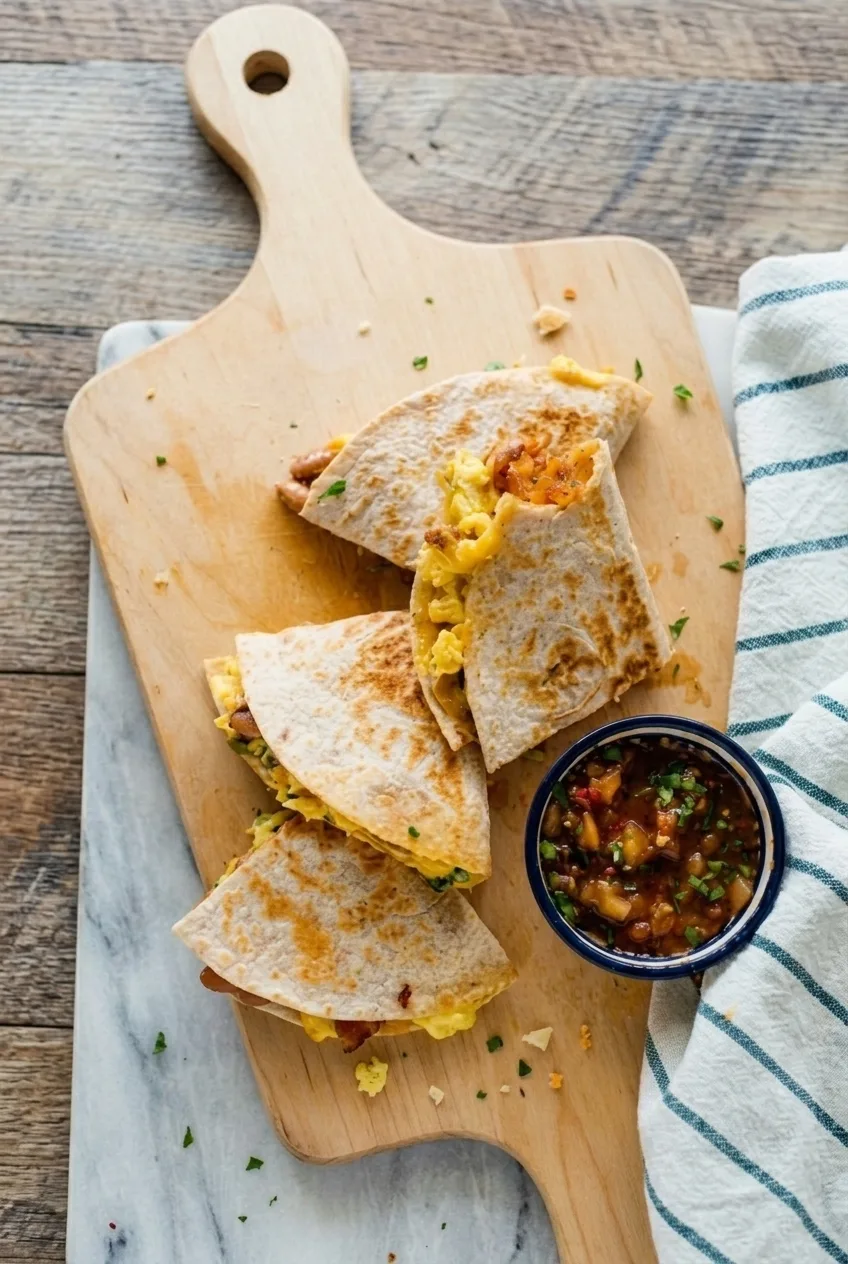
For another tortilla breakfast in a different format, try these breakfast quesadillas with bacon, eggs and cheese.

Make-Ahead and Leftovers

Refrigerate cooled egg, chorizo, and potato filling in an airtight container for up to 4 days. Keep it separate from the tortillas, cheese, cilantro, and sauce. Gently reheat the filling in a skillet until thoroughly hot, then warm the tortillas and add the toppings just before serving.

Separately stored filling can be frozen for up to 3 months, though the eggs and potatoes may lose some texture. Freeze the filling rather than assembled, topped tacos. For another breakfast to prepare ahead, see these egg and cheddar breakfast sandwiches.

Nutrition

Approximate nutrition per serving (2 tacos): 640 calories, 29g protein, 38g fat, and 47g carbohydrates. Per 100g of finished tacos: approximately 200 calories, 9g protein, 12g fat, and 15g carbohydrates. Values vary with the chorizo, tortillas, sauce, and amount of rendered fat removed.

Breakfast Tacos with Eggs and Potatoes

Warm corn tortillas are filled with golden potatoes, scrambled eggs, browned chorizo, queso fresco, cilantro, and red salsa.
Course: Breakfast
Cuisine: Mexican
Prep: 15 min
Cook: 30 min
Total: 45 min
Servings: 4 Calories: 640 kcal

Equipment

  • 12-inch skillet
  • Mixing bowl
  • Whisk
  • Food thermometer
  • Kitchen towel

Ingredients

For the Filling

  • 1 lb Yukon Gold potatoes (about 450 g), cut into roughly 1/2-inch cubes
  • 2 tablespoons neutral cooking oil
  • 1/2 teaspoon fine salt, plus more to taste
  • 1 small white onion, diced (about 1/2 cup)
  • 8 oz fresh Mexican-style chorizo (about 225 g), casings removed if necessary
  • 8 large eggs

For Serving

  • 8 small corn tortillas, about 5 to 6 inches each
  • 1/2 cup crumbled queso fresco (about 60 g)
  • 1/4 cup chopped fresh cilantro
  • 2 tablespoons red salsa or red hot sauce, or to taste

Instructions

  1. Dice the potatoes and onion. Whisk the eggs until evenly beaten, and prepare the queso fresco, cilantro, and sauce.
  2. Heat the oil in a 12-inch skillet over medium heat. Add the potatoes and 1/2 teaspoon salt, spread them out, and cover for 5–7 minutes.
  3. Uncover and cook the potatoes for another 7–11 minutes, turning occasionally. Add the onion during the last 3–4 minutes. Cook until the potatoes are fork-tender with golden edges and the onion is soft, then transfer to a bowl.
  4. Add the chorizo to the same skillet and cook uncovered over medium heat for 5–7 minutes, breaking it into small crumbles, until cooked through. If using fresh ground-pork chorizo, check that it reaches 160°F (70°C) with a food thermometer.
  5. Spoon off excess rendered fat, leaving about 1 teaspoon to 1 tablespoon in the skillet. Reduce the heat to medium-low and pour in the eggs.
  6. Fold the eggs gently as soft curds form, about 3–4 minutes. When nearly set, briefly fold in the potatoes and onion without mashing them. Transfer the filling out of the hot skillet as soon as no liquid egg remains.
  7. Warm the tortillas in a separate dry skillet, or wipe out the cooking skillet. Cook in batches over medium to medium-high heat for about 20–30 seconds per side, until flexible with scattered blister marks. Keep them stacked under a clean kitchen towel.
  8. Divide the filling among the tortillas. Fold loosely with the tops open, then finish with queso fresco, cilantro, and red salsa or hot sauce.

Tips

  • Cut the potatoes into similar 1/2-inch cubes so they cook evenly.
  • Cover the potatoes briefly to soften their centers, then cook uncovered to brown the edges.
  • Avoid crowding the skillet; cook the potatoes in batches if needed.
  • Leave only a light coating of chorizo fat in the skillet before adding the eggs.
  • Move the filling out of the hot skillet as soon as the eggs are just set.
  • Keep warmed tortillas covered so they stay flexible.

Variations

  • Bacon Breakfast Tacos: Replace the chorizo with cooked, drained, crumbled bacon and adjust the seasoning to taste.
  • Meatless Breakfast Tacos: Omit the chorizo, use a little additional oil to cook the eggs, and season the filling to taste.
  • Flour Tortilla Tacos: Replace the corn tortillas with small flour tortillas and warm them before filling.

Notes

Refrigerate cooled filling separately from the tortillas and toppings in an airtight container for up to 4 days. Reheat until thoroughly hot. The filling can be frozen for up to 3 months; freeze it separately rather than assembling the tacos.

Nutrition

Calories: 640 kcal | Protein: 29 g | Fat: 38 g | Carbohydrates: 47 g

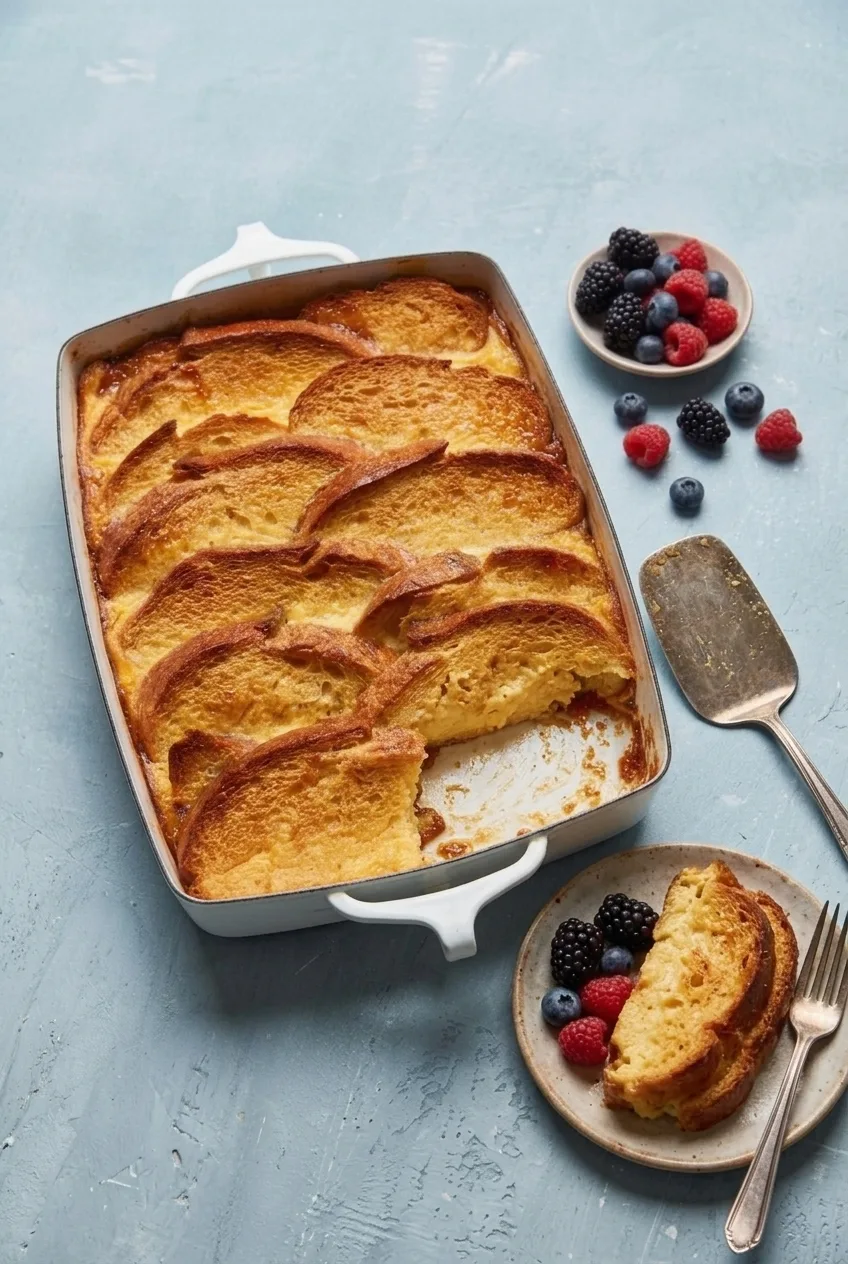
Crème Brûlée French Toast

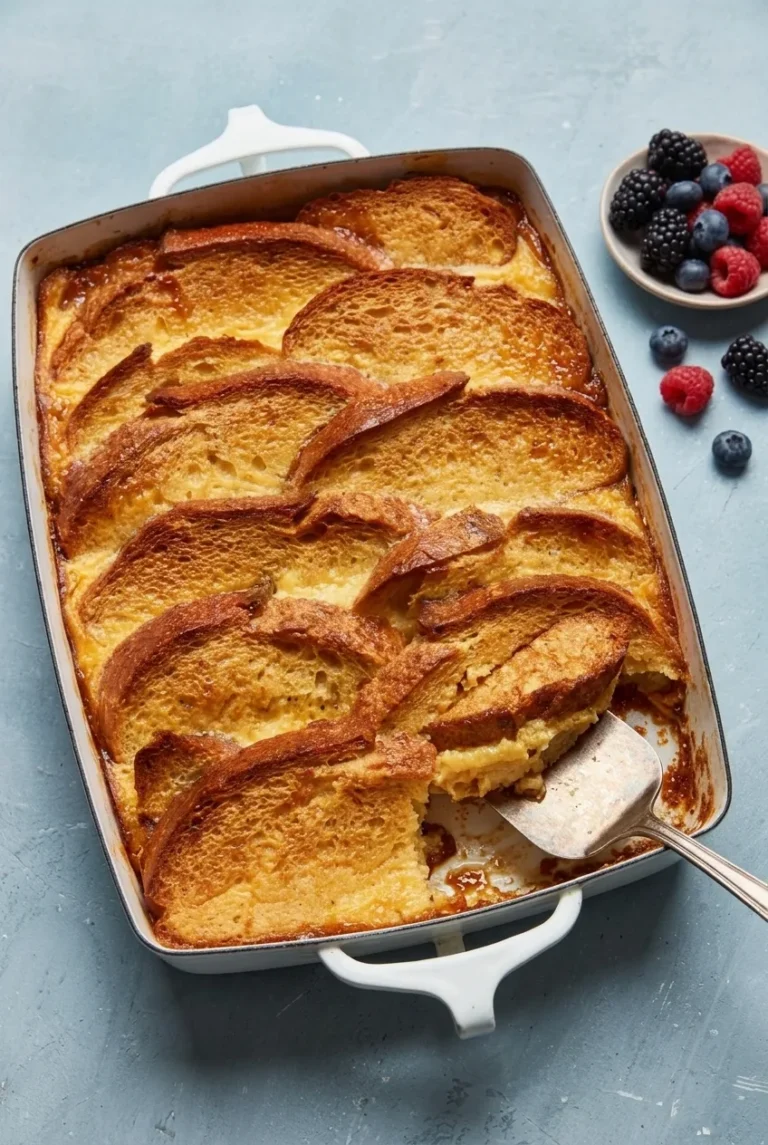
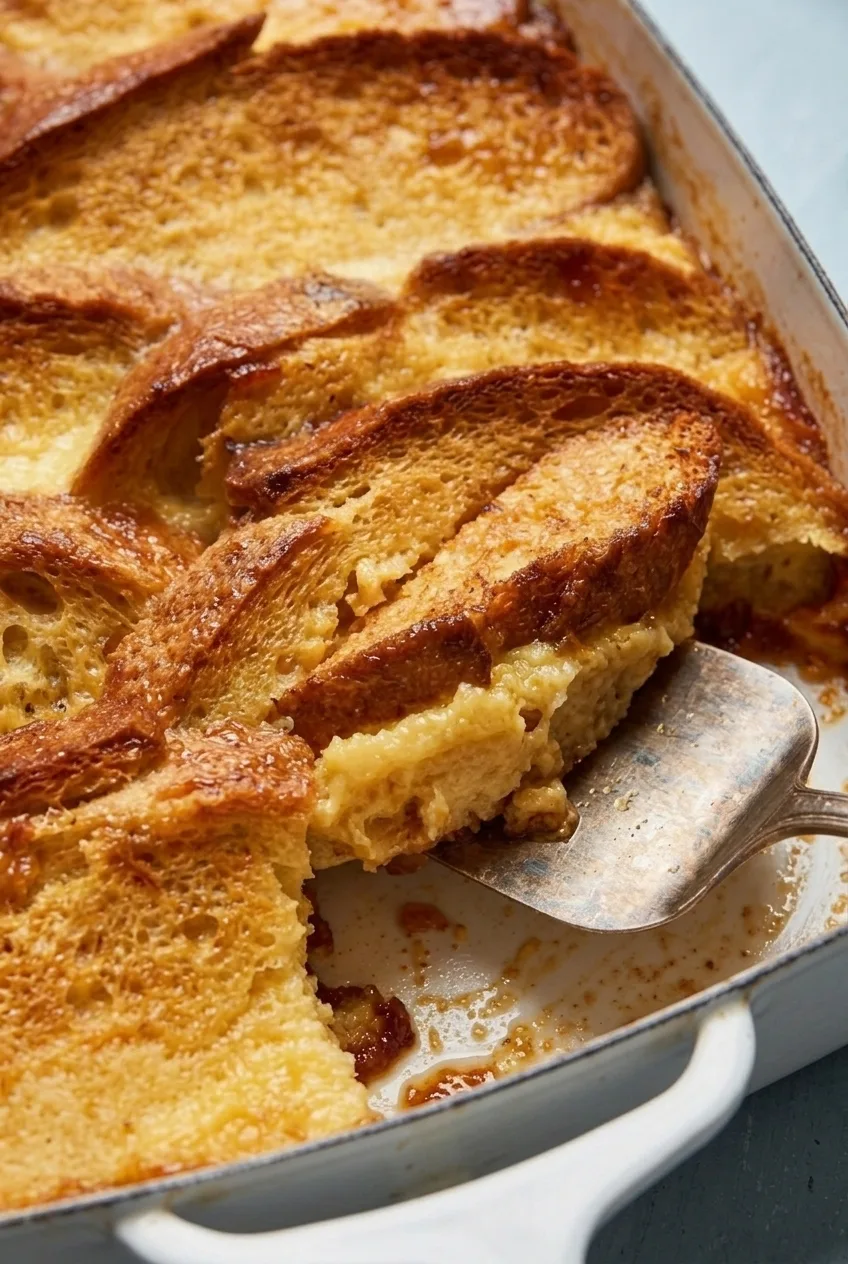
Thick slices of bread soak overnight over a butter-and-brown-sugar caramel base, then bake with golden tops and soft, custardy centers. Arrange the slices in one slightly overlapping layer so they stay distinct and can be lifted from the dish without falling apart.

This baked version needs no kitchen torch. Its caramel bubbles around the bread and can be spooned over each serving, but it stays glossy rather than forming a hard, crackable sugar crust.

Ingredients for Crème Brûlée French Toast

Close view of a lifted French toast slice showing its soft custardy interior and caramel-coated edge
  • 8 to 10 slices sturdy country-style bread, about 1 inch thick (about 1 lb or 450g)
  • 6 tablespoons unsalted butter (85g)
  • 3/4 cup packed light brown sugar (150g)
  • 1 tablespoon light corn syrup (20g)
  • 5 large eggs
  • 1 1/2 cups half-and-half (360g)
  • 2 teaspoons vanilla extract
  • 1/4 teaspoon fine salt
  • 1 to 2 cups fresh mixed berries, optional, for serving

How to Make Crème Brûlée French Toast

Full baking dish of golden crème brûlée French toast with a served slice and berries alongside

Yield: 6 servings. Prep: 20 minutes, plus 8 to 24 hours refrigerated. Bake: 35 to 40 minutes. Allow 20 to 30 minutes for the dish to stand before baking and 5 minutes to rest afterward.

  1. Prepare the bread: Cut the bread into roughly 1-inch-thick slices. Fit 8 to 10 slices in a 9-by-13-inch oven-safe baking dish in one close-fitting, slightly overlapping layer, without making a deep stack. If the bread is very fresh and soft, let the slices dry before assembling.
  2. Make the caramel base: Stir the butter, brown sugar, and corn syrup in a small saucepan over medium-low heat for 3 to 5 minutes, until smooth and pourable. Pour evenly into the baking dish.
  3. Add the bread and custard: Arrange the slices over the caramel, keeping them distinct. Whisk the eggs, half-and-half, vanilla, and salt in a bowl. Pour evenly over the bread and press the slices gently to moisten their tops.
  4. Refrigerate: Cover the dish and refrigerate for 8 to 24 hours so the thick slices can absorb the custard throughout.
  5. Bake until set: Uncover the dish and let it stand for 20 to 30 minutes while the oven preheats to 350°F (175°C). Follow the baking dish manufacturer’s guidance for putting a chilled dish in a hot oven. Bake uncovered for 35 to 40 minutes, checking at 35 minutes. The bread should be puffed with golden to deep golden-brown edges, the caramel should bubble, and no loose custard should slosh between the center slices. If the center is still wet, continue baking until set. Do not flip the slices; rotate the dish only if it browns unevenly.
  6. Rest and serve: Let the bake rest for about 5 minutes, then lift the slices with a wide spatula. Spoon a little hot caramel from the dish over each portion. Serve berries alongside, if using.

Choose Bread That Holds Its Shape

Sturdy, slightly stale country-style bread can absorb an overnight soak and still lift out as individual slices. Thin sandwich bread is more likely to fall apart. Sturdy challah or thick French bread can also work; let especially soft slices dry before assembling.

How the Caramel Finishes

The caramel starts beneath the bread, then bubbles around the slices as they bake. After lifting a portion, spoon on just enough caramel from the dish to lightly coat it without hiding the browned top. It will be hot and sticky, not a brittle sugar shell.

How to Tell When the Center Is Done

Check between the middle slices rather than relying only on the baking time. Dense bread or a deeper dish may need longer: the exposed bread should be puffed and browned, with no free-flowing custard in the center. A 5-minute rest helps the slices hold together when lifted.

Make-Ahead and Leftovers

Assemble the dish the night before and keep it covered in the refrigerator for 8 to 24 hours before baking. For a different fruit-forward brunch bake, try this berry French toast casserole.

The browned edges are best freshly baked. Refrigerate leftovers promptly in a covered container and use within 3 to 4 days as general food-safety guidance. Warm until heated through; reheated bread will likely be softer.

Nutrition

Approximate nutrition per serving, based on 6 servings and excluding optional berries: 530 calories, 14g protein, 24g fat, and 68g carbohydrates. Approximate values per 100g of prepared French toast: 255 calories, 6g protein, 11g fat, and 33g carbohydrates. Values vary with the bread, the amount of caramel served, and moisture lost during baking.

Crème Brûlée French Toast

Overnight-soaked slices of sturdy bread bake over a buttery brown-sugar caramel until golden and custardy.
Course: Breakfast
Cuisine: American
Prep: 20 min
Cook: 45 min
Total: 1535 min
Servings: 6 Calories: 530 kcal

Equipment

  • 9-by-13-inch baking dish
  • Small saucepan
  • Mixing bowl
  • Whisk
  • Wide spatula

Ingredients

French Toast

  • 8 to 10 slices sturdy country-style bread, about 1 inch thick (about 1 lb or 450g)
  • 6 tablespoons unsalted butter (85g)
  • 3/4 cup packed light brown sugar (150g)
  • 1 tablespoon light corn syrup (20g)
  • 5 large eggs
  • 1 1/2 cups half-and-half (360g)
  • 2 teaspoons vanilla extract
  • 1/4 teaspoon fine salt

For Serving

  • 1 to 2 cups fresh mixed berries, optional

Instructions

  1. Cut the bread into roughly 1-inch-thick slices. Arrange 8 to 10 slices in a close-fitting, slightly overlapping layer in a 9-by-13-inch baking dish. If the bread is very fresh and soft, let the slices dry before assembling.
  2. Stir the butter, brown sugar, and corn syrup in a small saucepan over medium-low heat for 3 to 5 minutes, until smooth and pourable.
  3. Pour the caramel evenly into the baking dish.
  4. Arrange the bread over the caramel, keeping the slices distinct.
  5. Whisk the eggs, half-and-half, vanilla, and salt in a bowl. Pour the custard evenly over the bread and gently press the slices to moisten their tops.
  6. Cover and refrigerate for 8 to 24 hours.
  7. Uncover the dish and let it stand for 20 to 30 minutes while the oven preheats to 350°F (175°C). Follow the baking dish manufacturer’s guidance for placing a chilled dish in a hot oven.
  8. Bake uncovered for 35 to 40 minutes, checking at 35 minutes. Bake until the bread is puffed with golden to deep golden-brown edges, the caramel is bubbling, and no loose custard sloshes between the center slices. Continue baking if the center is still wet. Do not flip the slices; rotate the dish only if it browns unevenly.
  9. Rest for about 5 minutes. Lift out the slices with a wide spatula and spoon a little hot caramel over each portion. Serve with berries, if desired.

Tips

  • Use sturdy, slightly stale bread so the slices absorb the custard without falling apart.
  • Arrange the slices in one slightly overlapping layer rather than stacking them deeply.
  • Check for doneness between the middle slices; dense bread or a deeper dish may need more baking time.
  • Spoon on just enough caramel to lightly coat each serving while leaving the browned top visible.

Variations

  • Challah or French Bread: Use sturdy challah or thick French bread in place of country-style bread; let especially soft slices dry before assembling.

Notes

Refrigerate leftovers promptly in a covered container and use within 3 to 4 days. Reheat until heated through; the bread will likely be softer. The caramel stays glossy and sticky rather than forming a hard sugar crust.

Nutrition

Calories: 530 kcal | Protein: 14 g | Fat: 24 g | Carbohydrates: 68 g | Calories Per 100g: 255 kcal | Protein Per 100g: 6 g | Fat Per 100g: 11 g | Carbohydrates Per 100g: 33 g

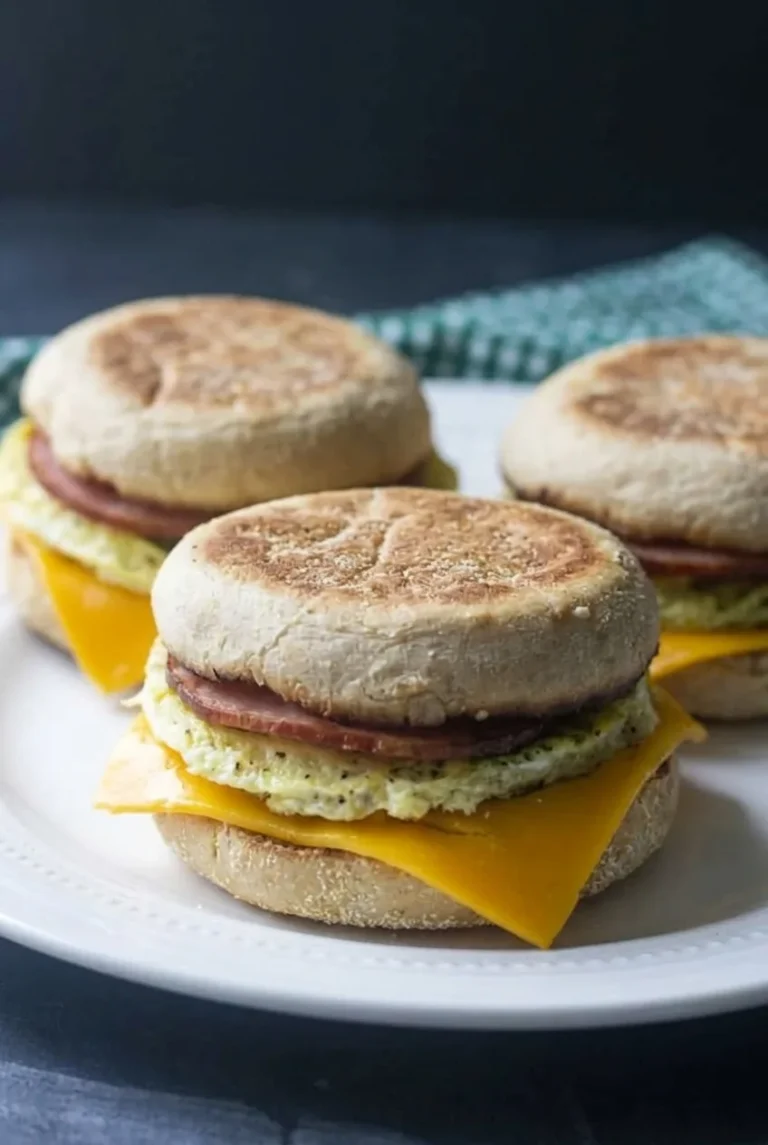
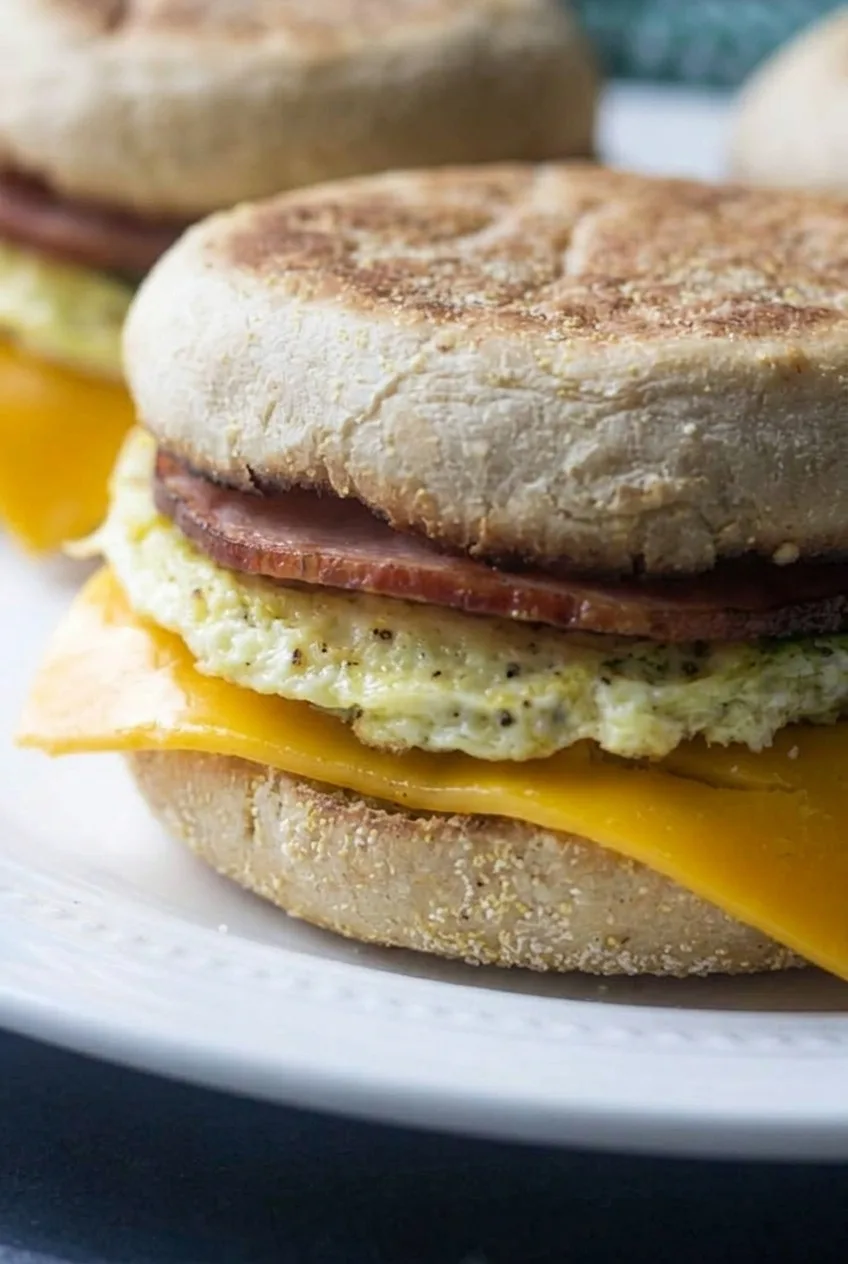
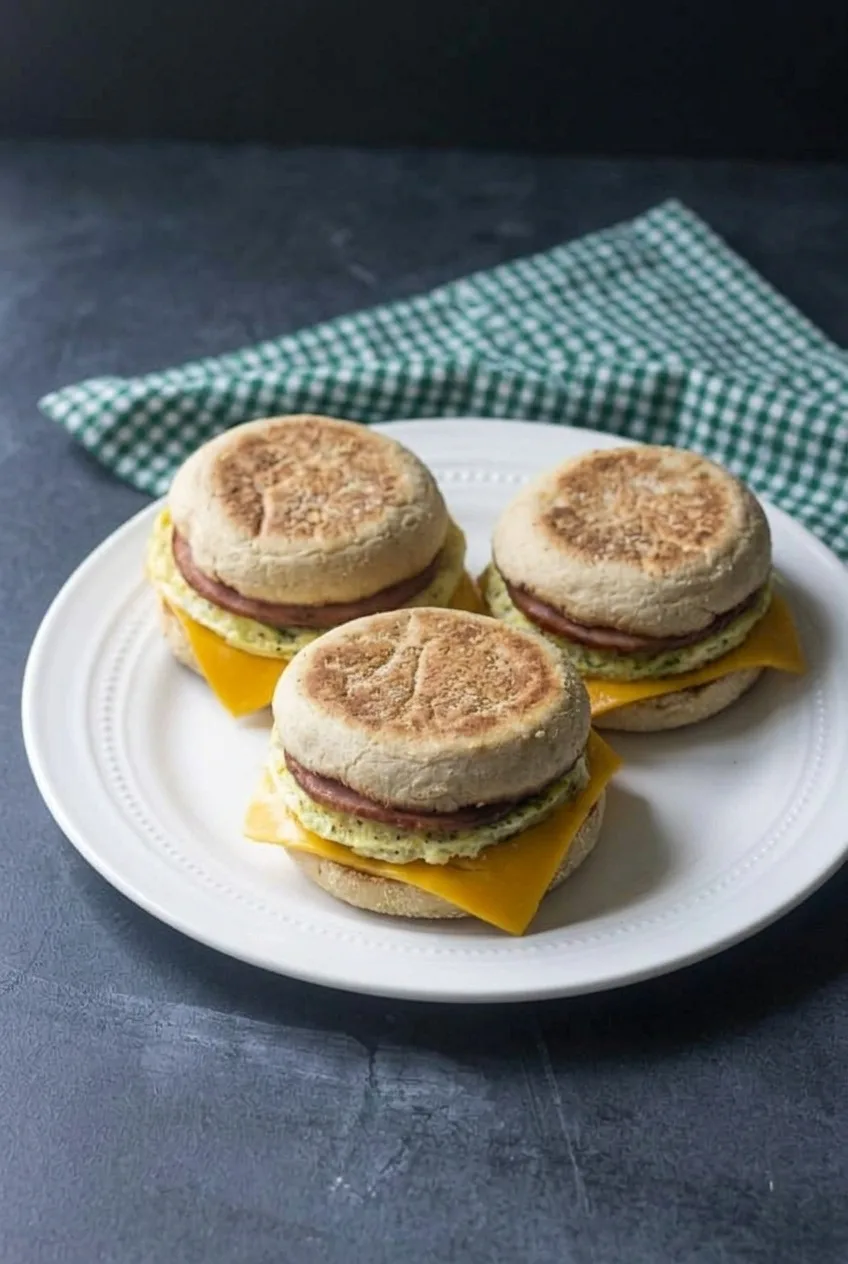
Breakfast Sandwiches for Meal Prep

These English-muffin sandwiches layer orange cheddar, tender baked egg, and thin rounds of Canadian bacon. Baking the eggs in one 9-by-13-inch pan makes six portions at once, while lightly toasted muffins and blotted bacon help the bread hold up in storage.

Let the eggs, muffins, and bacon stop steaming before assembly, then wrap the cooled sandwiches individually for the refrigerator or freezer. Reheat until the egg center is hot; microwave time depends on whether the sandwich is chilled or frozen.

Ingredients for 6 Breakfast Sandwiches

Close view of toasted English muffin, baked egg, Canadian bacon, and overhanging cheddar layers
  • 10 large eggs (about 500g)
  • 2 tablespoons milk (30g)
  • 1/2 teaspoon kosher salt
  • 1/4 teaspoon black pepper
  • Nonstick cooking spray, for the baking pan
  • 6 English muffins, split (about 340g)
  • 6 orange cheddar cheese slices, about 1 ounce each (170g total)
  • 12 thin rounds fully cooked Canadian bacon (about 340g)

Yield: 6 sandwiches. Time: About 20 minutes prep, 25 minutes cooking, and 1 hour 15 minutes total, including cooling and wrapping.

How to Make Breakfast Sandwiches for Meal Prep

Full plate of three assembled egg, cheddar, and Canadian-bacon breakfast sandwiches
  1. Prepare the pan: Preheat the oven to 350°F (175°C). Coat a 9-by-13-inch baking pan with nonstick spray, including the corners. Alternatively, line the pan with parchment and grease the parchment.
  2. Bake the eggs: Whisk the eggs, milk, salt, and pepper until combined. Pour into the pan and bake uncovered. Start checking at 18 minutes; the eggs will usually take 20 to 25 minutes. Remove them when the center is set, with no liquid or jiggle. Baking much longer can make the egg rubbery after reheating.
  3. Toast and warm: While the eggs bake, lightly toast the muffin halves until the cut sides are golden and crisp. Warm the fully cooked Canadian bacon in a skillet over medium heat for about 1 to 2 minutes per side, turning once, until heated with lightly browned edges. Blot with a paper towel.
  4. Cool and portion: Let the egg sheet cool, then lift it out if you used parchment. Cut it into a two-by-three grid for six roughly muffin-sized portions. Trim protruding corners only if needed. Let the eggs, muffins, and bacon finish cooling until they no longer release steam.
  5. Assemble: Place one cheddar slice on each muffin bottom. Add an egg portion and two Canadian-bacon rounds, then close with the muffin top. There is no need to press the layers into a tight stack.
  6. Wrap: Once the assembled sandwiches are fully cool, wrap each one individually. Label and date them, then refrigerate or freeze promptly.

How to Keep the Muffins From Getting Soggy

Light toasting gives the cut sides some structure, and blotting the warmed bacon keeps surface moisture and grease off the bread. Cooling every component before wrapping matters just as much: trapped steam can dampen refrigerated sandwiches and form ice crystals in frozen ones.

Breakfast Sandwich Variations

For a meatless sandwich, omit the Canadian bacon and keep the baked egg and cheddar. Fully cooked ham or separately cooked sausage can also replace the bacon, though a sausage patty makes a thicker sandwich. Cook any raw meat fully and drain excess grease before assembly.

For a different handheld breakfast, try Breakfast Quesadillas with Bacon, Eggs and Cheese.

How to Store and Reheat the Sandwiches

Refrigerate: Keep individually wrapped sandwiches in an airtight container for 2 to 3 days. Freeze: Place individually wrapped sandwiches in a labeled freezer bag and use within one month for best quality.

Remove all storage wrapping before microwaving and cover the sandwich with a paper towel. For a refrigerated or overnight-thawed sandwich, start with about 35 to 60 seconds, then continue as needed until the egg center is hot.

From frozen, microwave at 50% power for about 1 to 2 minutes, then at full power in 30-second increments until hot throughout. If the bread is hot but the egg center is cold, open the sandwich to expose the egg and heat it in another short increment. Microwave times vary with the sandwich and appliance. For a crisper muffin, separate and toast it after microwaving. Add hot sauce after reheating, if desired.

For another make-ahead egg breakfast, try Cottage Cheese Egg Bites with Canadian Bacon.

Nutrition

Approximate nutrition per sandwich: 440 calories, 35g protein, 20g fat, and 28g carbohydrates. Approximate nutrition per 100g: 195 calories, 16g protein, 9g fat, and 12g carbohydrates. Values are estimates and vary with the muffins, cheese, and Canadian bacon used.

Breakfast Sandwiches for Meal Prep

English muffins are layered with baked egg, cheddar, and Canadian bacon for six sandwiches that can be refrigerated or frozen.
Course: Breakfast
Cuisine: American
Prep: 20 min
Cook: 25 min
Total: 75 min
Servings: 6 Calories: 440 kcal

Equipment

  • 9-by-13-inch baking pan
  • Oven
  • Whisk
  • Skillet
  • Paper towels

Ingredients

  • 10 large eggs (about 500 g)
  • 2 tablespoons milk (30 g)
  • 1/2 teaspoon kosher salt
  • 1/4 teaspoon black pepper
  • Nonstick cooking spray, for the baking pan
  • 6 English muffins, split (about 340 g)
  • 6 orange cheddar cheese slices, about 1 ounce each (170 g total)
  • 12 thin rounds fully cooked Canadian bacon (about 340 g)

Instructions

  1. Preheat the oven to 350°F (175°C). Coat a 9-by-13-inch baking pan with nonstick spray, including the corners. Alternatively, line it with parchment and grease the parchment.
  2. Whisk the eggs, milk, salt, and pepper until combined. Pour the mixture into the pan and bake uncovered, checking at 18 minutes. Bake for 20 to 25 minutes, until the center is set with no liquid or jiggle.
  3. While the eggs bake, lightly toast the muffin halves until the cut sides are golden and crisp.
  4. Warm the fully cooked Canadian bacon in a skillet over medium heat for 1 to 2 minutes per side, turning once, until heated through with lightly browned edges. Blot with a paper towel.
  5. Let the egg sheet cool, then lift it out if you used parchment. Cut it into a two-by-three grid to make six portions. Let the eggs, muffins, and bacon cool until they no longer release steam.
  6. Place one cheddar slice on each muffin bottom. Add an egg portion and two Canadian bacon rounds, then close with the muffin top.
  7. Once the sandwiches are fully cool, wrap each one individually. Label and date them, then refrigerate or freeze promptly.

Tips

  • Start checking the eggs at 18 minutes and remove them once the center is set to help prevent a rubbery texture after reheating.
  • Lightly toast the muffins to help them hold up in storage.
  • Blot the warmed bacon to keep excess moisture and grease off the bread.
  • Cool all components completely before wrapping to prevent trapped steam.

Variations

  • Meatless: Omit the Canadian bacon and use the baked egg and cheddar.
  • Ham or Sausage: Replace the Canadian bacon with fully cooked ham or separately cooked sausage. Cook raw meat fully and drain excess grease before assembly.

Notes

Refrigerate individually wrapped sandwiches in an airtight container for 2 to 3 days, or freeze in a labeled freezer bag for up to one month for best quality. Remove all storage wrapping before microwaving. Reheat refrigerated or thawed sandwiches for 35 to 60 seconds, or microwave from frozen at 50% power for 1 to 2 minutes, then in 30-second increments until the egg center is hot.

Nutrition

Calories: 440 kcal | Protein: 35 g | Fat: 20 g | Carbohydrates: 28 g | Per 100g Calories: 195 kcal | Per 100g Protein: 16 g | Per 100g Fat: 9 g | Per 100g Carbohydrates: 12 g

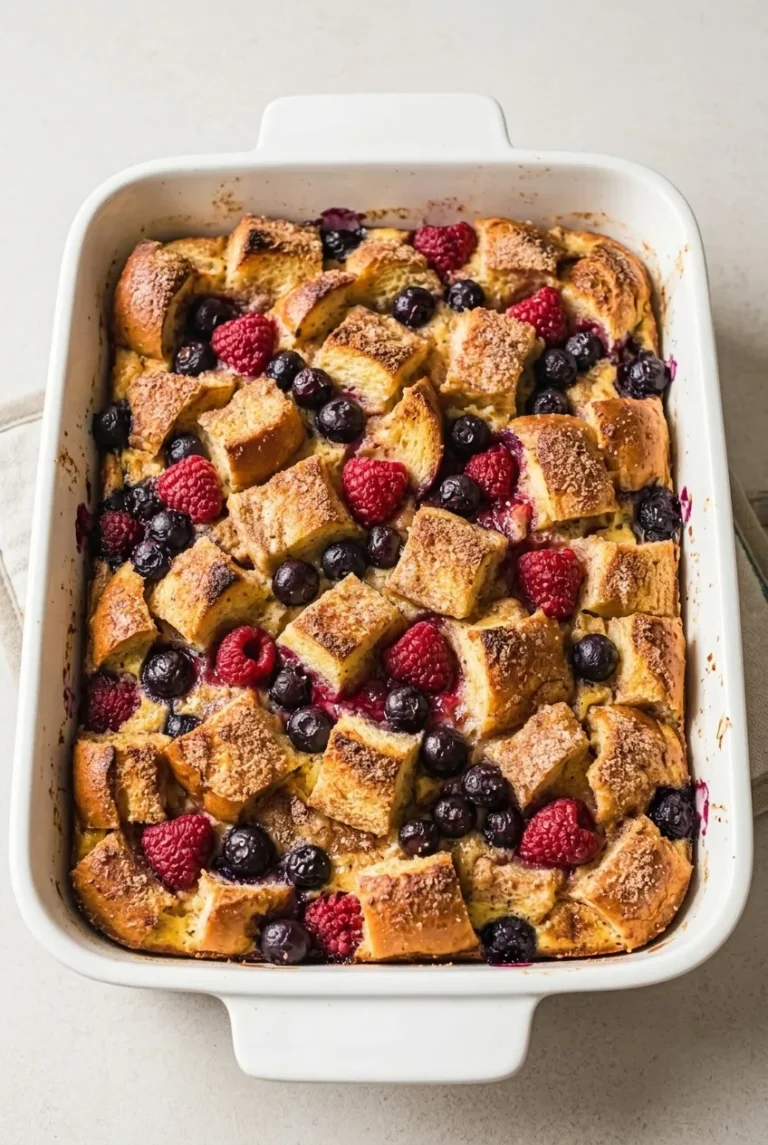
Berry French Toast Casserole

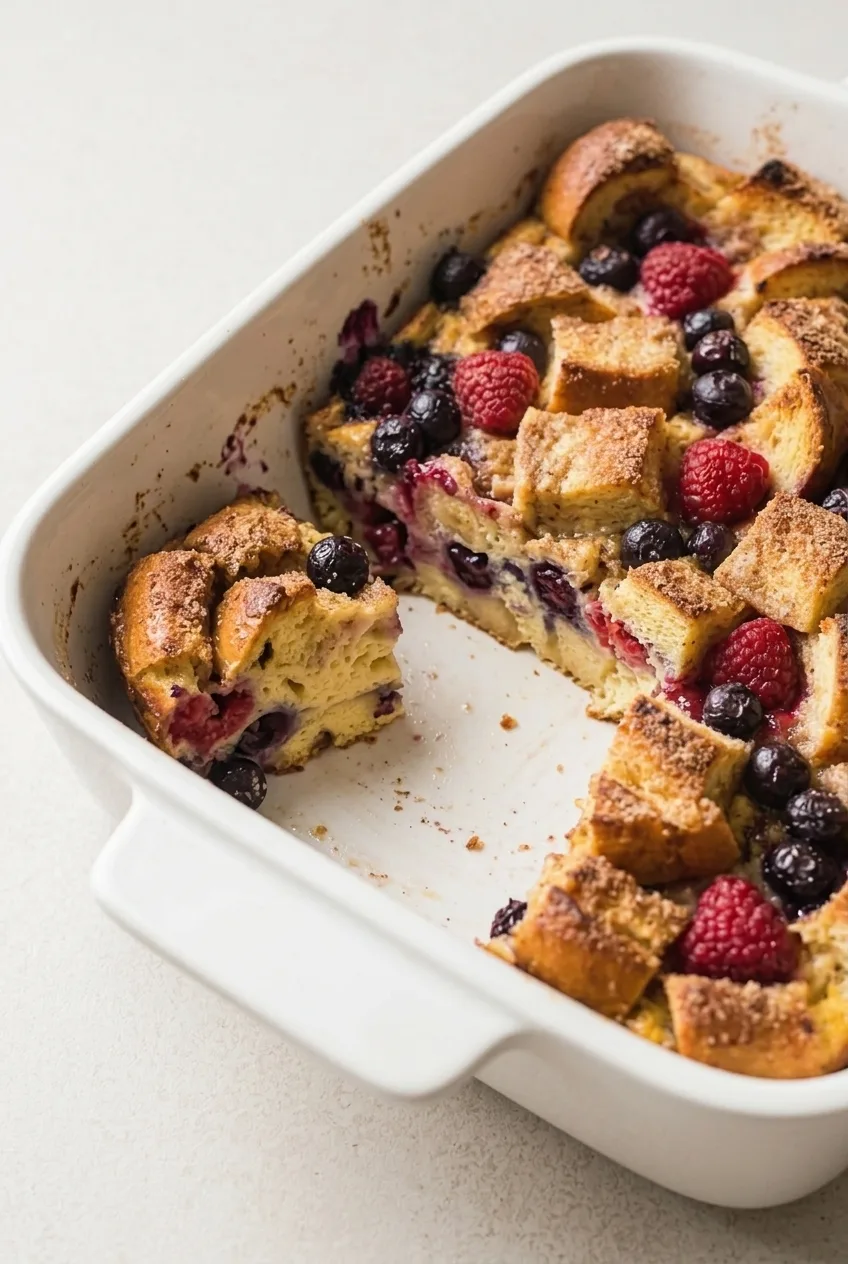
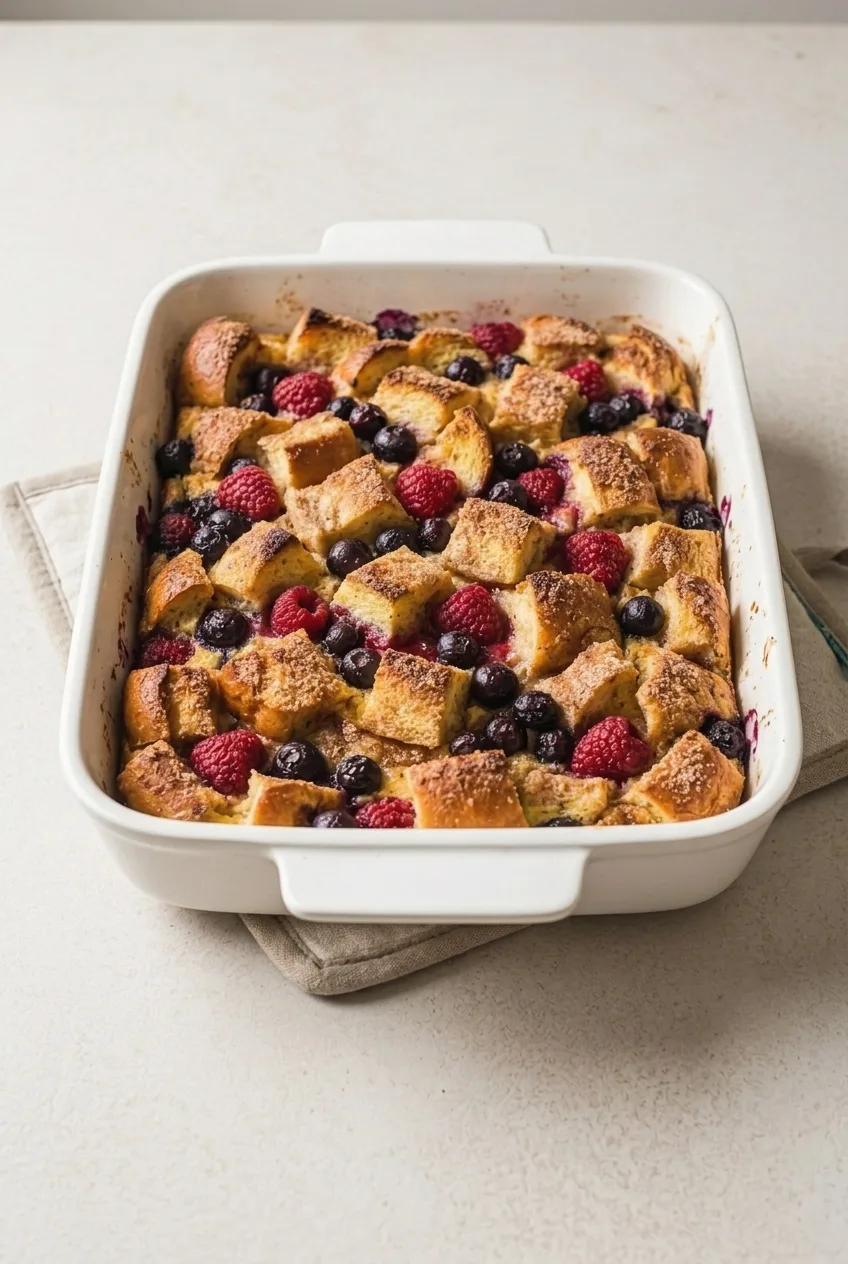
This make-ahead casserole has distinct cubes of custardy challah or brioche, berries baked throughout, and a golden cinnamon-sugar top. The bread and custard soak overnight, so the next morning’s work is limited to adding the topping and baking.

Drying the bread before assembly helps it hold its shape. During baking, check the center as well as the top: the bread can brown before the egg custard has set.

Ingredients for Berry French Toast Casserole

Close view of a berry French toast casserole portion showing custardy bread and berries inside
  • 12 ounces challah or brioche, cut into roughly 1-inch cubes (340g)
  • 3 tablespoons unsalted butter, divided (about 45g)
  • 8 large eggs
  • 2 cups whole milk
  • 1/2 cup heavy cream
  • 6 tablespoons granulated sugar, divided: 1/4 cup for the custard and 2 tablespoons for the topping (75g total)
  • 2 teaspoons vanilla extract
  • 1/4 teaspoon fine salt
  • 2 cups firm fresh mixed berries, such as blueberries and raspberries (about 280g)
  • 1 teaspoon ground cinnamon

Extra fresh berries and maple syrup are optional for serving. If using strawberries in the casserole, cut large ones into small pieces and pat them dry.

How to Make Berry French Toast Casserole

Complete berry French toast casserole in a rectangular dish on a light tabletop
  1. Dry the bread: Preheat the oven to 300°F (150°C). Spread the bread cubes on a rimmed baking sheet and bake for 12–15 minutes, tossing once. They should feel dry on the surface but not deeply toasted. Let cool briefly.
  2. Make the custard: Grease a 9-by-13-inch baking dish with 1 tablespoon of the butter. Whisk the eggs, milk, cream, 1/4 cup sugar, vanilla, and salt in a large bowl until no obvious streaks of egg white remain.
  3. Assemble: Spread the bread in the dish and tuck about 1 1/2 cups berries between the cubes, distributing them across the dish. Pour the custard evenly over the bread. Gently press exposed cubes into the liquid without mashing them, then scatter the remaining 1/2 cup berries on top.
  4. Refrigerate: Cover tightly and refrigerate for 8–12 hours. Most of the visible custard should be absorbed before baking.
  5. Add the topping: Preheat the oven to 350°F (175°C) while the casserole remains refrigerated. Uncover it and drizzle with the remaining 2 tablespoons butter, melted. Mix the remaining 2 tablespoons sugar with the cinnamon and sprinkle evenly over the top.
  6. Bake: Bake uncovered for about 45–55 minutes. Check the top at 35 minutes; if it is browning too quickly, tent loosely with foil. Start checking the center at 45 minutes and bake longer if needed. The bread edges should be golden, and no liquid custard should slosh when the dish is gently nudged.
  7. Rest and serve: Let the casserole rest for 15 minutes, then scoop or cut into 8 portions. Offer extra berries and maple syrup separately, if desired.

Why Dry the Bread First?

Surface-dried challah or brioche absorbs custard while keeping recognizable bread cubes. Aim for roughly even pieces that feel dry, not crisp or deeply toasted. Very soft bread is more likely to turn mushy during the overnight soak.

How to Tell When the Center Is Done

A browned top alone does not mean the custard is cooked. A knife inserted near the middle should come out without runny custard, although berry juice may stain it. For an additional check, the center should reach 160°F (70°C).

Juicy berries, a deeper dish, or oven differences can extend the bake. If the top darkens before the center sets, leave the loose foil tent in place and continue baking.

Berry Choices and Make-Ahead Timing

Use firm fresh berries and spread them throughout the dish rather than concentrating them in one area, which can leave wet pockets. Frozen berries are not a direct substitute: they can release more liquid and change the baking time.

If an overnight soak is not possible, refrigerate the assembled casserole for at least 2 hours. The bread may absorb the custard less evenly than it does after 8–12 hours. Choose a baking dish suitable for the transition from refrigeration to a preheated oven, and avoid abrupt temperature changes with cold glass.

For an individual French toast option, try these strawberry cream cheese French toast roll-ups. For a savory dish alongside the casserole, try this hash brown breakfast casserole.

Storing and Reheating Leftovers

Refrigerate leftovers in a covered container within 2 hours of baking and use within 3–4 days. Reheat individual portions in the microwave or covered in a 325°F (165°C) oven until hot throughout; timing depends on portion size.

Freezing is not recommended for this version because thawed berries and custardy bread may become wetter.

Nutrition

Approximate nutrition per serving, based on 8 servings and excluding optional toppings: 380 calories, 12g protein, 19g fat, and 39g carbohydrates. Per 100g of finished casserole: approximately 190 calories, 6g protein, 9g fat, and 20g carbohydrates. Values vary with the bread, berries, and moisture lost during baking.

Berry French Toast Casserole

Challah or brioche soaks overnight in vanilla custard with fresh berries, then bakes with a cinnamon-sugar topping.
Course: Breakfast
Cuisine: American
Prep: 20 min
Cook: 70 min
Total: 585 min
Servings: 8 Calories: 380 kcal

Equipment

  • Rimmed baking sheet
  • 9-by-13-inch baking dish
  • Large mixing bowl
  • Whisk
  • Aluminum foil

Ingredients

For the Casserole

  • 12 ounces challah or brioche, cut into roughly 1-inch cubes (340g)
  • 3 tablespoons unsalted butter, divided (about 45g)
  • 8 large eggs
  • 2 cups whole milk
  • 1/2 cup heavy cream
  • 6 tablespoons granulated sugar, divided: 1/4 cup for the custard and 2 tablespoons for the topping (75g total)
  • 2 teaspoons vanilla extract
  • 1/4 teaspoon fine salt
  • 2 cups firm fresh mixed berries, such as blueberries and raspberries (about 280g)
  • 1 teaspoon ground cinnamon

For Serving (Optional)

  • Extra fresh berries
  • Maple syrup

Instructions

  1. Preheat the oven to 300°F (150°C). Spread the bread cubes on a rimmed baking sheet and bake for 12–15 minutes, tossing once, until dry on the surface but not deeply toasted. Let cool briefly.
  2. Grease a 9-by-13-inch baking dish with 1 tablespoon of the butter.
  3. Whisk the eggs, milk, cream, 1/4 cup sugar, vanilla, and salt in a large bowl until no obvious streaks of egg white remain.
  4. Spread the bread in the dish and tuck about 1 1/2 cups berries between the cubes. Pour the custard evenly over the bread, gently press exposed cubes into the liquid, then scatter the remaining 1/2 cup berries on top.
  5. Cover tightly and refrigerate for 8–12 hours, until most of the visible custard has been absorbed.
  6. While the casserole is still refrigerated, preheat the oven to 350°F (175°C). Uncover the casserole and drizzle with the remaining 2 tablespoons melted butter. Mix the remaining 2 tablespoons sugar with the cinnamon and sprinkle evenly over the top.
  7. Bake uncovered for about 45–55 minutes. Check the top at 35 minutes and tent loosely with foil if it is browning too quickly. Start checking the center at 45 minutes; continue baking until the bread edges are golden and no liquid custard sloshes when the dish is gently nudged.
  8. Rest the casserole for 15 minutes, then cut or scoop into 8 portions. Serve with extra berries and maple syrup, if desired.

Tips

  • Dry the bread until its surface feels dry, but do not toast it deeply.
  • Use roughly even bread cubes so they soak evenly and hold their shape.
  • Spread the berries throughout the casserole to help prevent wet pockets.
  • Check the center as well as the top; a browned top does not mean the custard is set.
  • For an additional doneness check, the center should reach 160°F (70°C).

Variations

  • Strawberry French Toast Casserole: Use strawberries in place of some or all of the mixed berries; cut large strawberries into small pieces and pat them dry.

Notes

Refrigerate leftovers in a covered container within 2 hours and use within 3–4 days. Reheat portions in the microwave or covered in a 325°F (165°C) oven until hot throughout. Freezing is not recommended. Avoid abrupt temperature changes with cold glass baking dishes. Approximate nutrition per 100g: 190 calories, 6g protein, 9g fat, and 20g carbohydrates.

Nutrition

Calories: 380 kcal | Protein: 12 g | Fat: 19 g | Carbohydrates: 39 g

Breakfast Quesadillas

These breakfast quesadillas are made as two full tortilla rounds, then cut into eight substantial wedges. Crisp bacon, soft scrambled eggs, and melted cheese fill the lightly browned tortillas, with chunky salsa on the side for dipping.

Cook the eggs just until set before assembly; they will heat again as the tortillas brown. A layer of cheese on each side of the filling helps hold the rounds together when you flip and cut them.

Prep: 10 minutes | Cook: 25 minutes | Total: 35 minutes | Servings: 4 (2 wedges each)

Ingredients for Breakfast Quesadillas

Close view of a golden quesadilla wedge showing soft eggs, bacon pieces and melted cheese at the cut edge
  • 6 slices bacon (about 170g)
  • 6 large eggs
  • 1/4 teaspoon kosher salt, or to taste
  • 1/8 teaspoon black pepper
  • 1 tablespoon butter, divided
  • 4 large flour tortillas, about 10 inches each (about 260g total)
  • 1 1/2 cups shredded cheddar or cheddar–Monterey Jack blend (about 170g)
  • 2 tablespoons sliced green onion
  • 1/2 cup chunky salsa, for serving (about 120g)

How to Make Breakfast Quesadillas in a Skillet

Wider view of breakfast quesadilla wedges on a board with a separate bowl of chunky red salsa
  1. Cook the bacon: In a 12-inch nonstick skillet over medium heat, cook the bacon until crisp, about 7 to 9 minutes. Transfer to a paper towel and chop into small pieces. Pour off the drippings so no pool of fat remains in the skillet.
  2. Scramble the eggs: Whisk the eggs with the salt and pepper. Melt 2 teaspoons of the butter in the skillet over medium-low heat. Add the eggs and stir gently for about 3 to 4 minutes, until no liquid egg remains but the curds are still soft. Remove them from the skillet before they brown.
  3. Assemble two rounds: Sprinkle one-quarter of the cheese over a tortilla. Spread half the eggs, half the bacon, and some green onion over it, leaving a narrow border clear. Add another quarter of the cheese and top with a second tortilla. Repeat with the remaining tortillas and filling, reserving a little green onion for serving.
  4. Brown the quesadillas: Melt a thin film of the remaining butter in the skillet over medium heat. Cook one round at a time, uncovered, for about 2 to 3 minutes per side. Check the first side after about 2 minutes and turn when it is pale golden with scattered brown spots. Flip carefully with a wide spatula or a plate-assisted turn. Cook until the second side is similarly browned and the cheese has melted. Lower the heat if the tortilla darkens before the cheese melts; repeat with the second round.
  5. Rest and serve: Let each quesadilla rest for about 2 minutes, then cut it into four large wedges. Arrange the wedges with some filling visible at the cut edges. Scatter over the reserved green onion and serve the salsa in a separate bowl.

How to Flip a Full-Round Quesadilla

If the top tortilla slides when you lift the round, place a dinner plate over the quesadilla. Hold the plate securely against the skillet, carefully invert the quesadilla onto it, then slide it back into the skillet with the uncooked side down. Keeping the filling evenly spread and the edges clear makes the turn easier. The brief rest before slicing gives the melted cheese time to hold the wedges together.

Simple Filling Swaps

For a vegetarian version, replace the bacon with about 3/4 cup well-drained black or pinto beans. Monterey Jack or pepper Jack can replace the cheddar blend; keep the total cheese amount the same. Whole-wheat or gluten-free tortillas can also work, though they may flex and brown differently.

Make-Ahead, Storage, and Reheating

You can cook the bacon and shred the cheese ahead, but scramble the eggs close to assembly for the tenderest filling. Cool cooked leftovers and refrigerate them in an airtight container for up to 3 days. Reheat wedges in a dry skillet over medium heat until hot and crisp, roughly 2 to 3 minutes per side depending on thickness. A microwave is quicker but softens the tortillas.

To freeze, cool the cooked quesadillas completely, wrap portions individually, and place them in a freezer bag for about 2 months. Thaw in the refrigerator before reheating in a skillet. For a different make-ahead egg breakfast, see these cottage cheese egg bites with Canadian bacon.

Nutrition

Approximate nutrition per serving of 2 wedges, including salsa: 620 calories, 33g protein, 38g fat, and 38g carbohydrates. Approximate values per 100g of the finished recipe: 265 calories, 14g protein, 16g fat, and 16g carbohydrates. Values are estimates; tortilla and bacon brands, rendered bacon fat, and cooked weight will affect the totals.

Breakfast Quesadillas

Crisp flour tortillas hold soft scrambled eggs, bacon, and melted cheese, with chunky salsa for dipping.
Course: Breakfast
Cuisine: American
Prep: 10 min
Cook: 25 min
Total: 35 min
Servings: 4 Calories: 620 kcal

Equipment

  • 12-inch nonstick skillet
  • Whisk
  • Wide spatula
  • Dinner plate
  • Knife

Ingredients

  • 6 slices bacon (about 170 g)
  • 6 large eggs
  • 1/4 teaspoon kosher salt, or to taste
  • 1/8 teaspoon black pepper
  • 1 tablespoon butter, divided
  • 4 large flour tortillas, about 10 inches each (about 260 g total)
  • 1 1/2 cups shredded cheddar or cheddar–Monterey Jack blend (about 170 g)
  • 2 tablespoons sliced green onion
  • 1/2 cup chunky salsa (about 120 g), for serving

Instructions

  1. Cook the bacon in a 12-inch nonstick skillet over medium heat until crisp, about 7 to 9 minutes.
  2. Transfer the bacon to a paper towel, chop it into small pieces, and pour off the drippings.
  3. Whisk the eggs with the salt and pepper.
  4. Melt 2 teaspoons of the butter in the skillet over medium-low heat. Add the eggs and stir gently for 3 to 4 minutes, until no liquid egg remains and the curds are still soft. Remove from the skillet before they brown.
  5. Sprinkle one-quarter of the cheese over a tortilla. Add half the eggs, half the bacon, and some green onion, leaving a narrow border clear. Sprinkle another quarter of the cheese over the filling and top with a second tortilla.
  6. Repeat with the remaining tortillas and filling, reserving a little green onion for serving.
  7. Melt a thin film of the remaining butter in the skillet over medium heat. Cook one quesadilla round uncovered for 2 to 3 minutes per side, checking the first side after about 2 minutes.
  8. Flip carefully with a wide spatula or by inverting the quesadilla onto a dinner plate and sliding it back into the skillet. Cook until the second side is similarly browned and the cheese has melted. Lower the heat if the tortilla darkens too quickly. Repeat with the second round.
  9. Rest each quesadilla for about 2 minutes, then cut into four wedges. Scatter over the reserved green onion and serve with salsa.

Tips

  • Cook the eggs only until just set; they will heat again as the tortillas brown.
  • Use a layer of cheese on both sides of the filling to help hold the quesadilla together.
  • Keep the tortilla edges clear and spread the filling evenly to make flipping easier.
  • Lower the heat if the tortilla browns before the cheese has melted.
  • Let the quesadillas rest briefly before slicing so the melted cheese can help hold the wedges together.

Variations

  • Vegetarian Quesadillas: Replace the bacon with about 3/4 cup well-drained black or pinto beans.
  • Cheese or Tortilla Swaps: Use Monterey Jack or pepper Jack instead of the cheddar blend, keeping the same amount of cheese, or use whole-wheat or gluten-free tortillas.

Notes

Refrigerate cooled leftovers in an airtight container for up to 3 days. Reheat in a dry skillet over medium heat for about 2 to 3 minutes per side. Freeze cooled portions, individually wrapped, for about 2 months; thaw in the refrigerator before reheating.

Nutrition

Calories: 620 kcal | Protein: 33 g | Fat: 38 g | Carbohydrates: 38 g | Per 100 G Calories: 265 kcal | Per 100 G Protein: 14 g | Per 100 G Fat: 16 g | Per 100 G Carbohydrates: 16 g