Author

Julia

Browsing

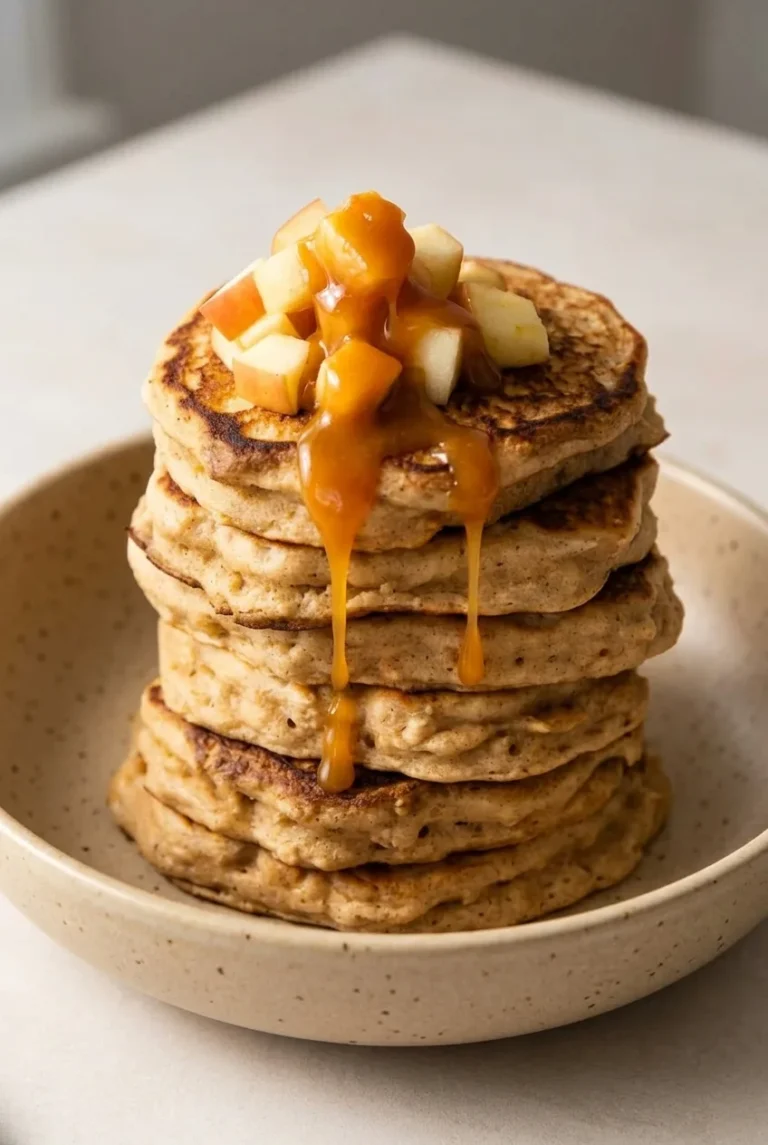
Apple Cinnamon Oatmeal Pancakes

These thick skillet pancakes have finely diced apple in the batter and a soft texture from quick oats. A 10-minute rest gives the oats time to soften; mixing just until the flour disappears keeps the pancakes tender. Cook them in small rounds so their centers finish before the outsides get too dark, then top the warm stack with fresh apple cubes and a drizzle of pourable caramel-style sauce.

Time: 15 minutes prep, 20–25 minutes cooking, plus a 10-minute batter rest; about 45–50 minutes total. Yield: About 8 pancakes, or 4 servings of 2 pancakes each.

Ingredients for Apple Cinnamon Oatmeal Pancakes
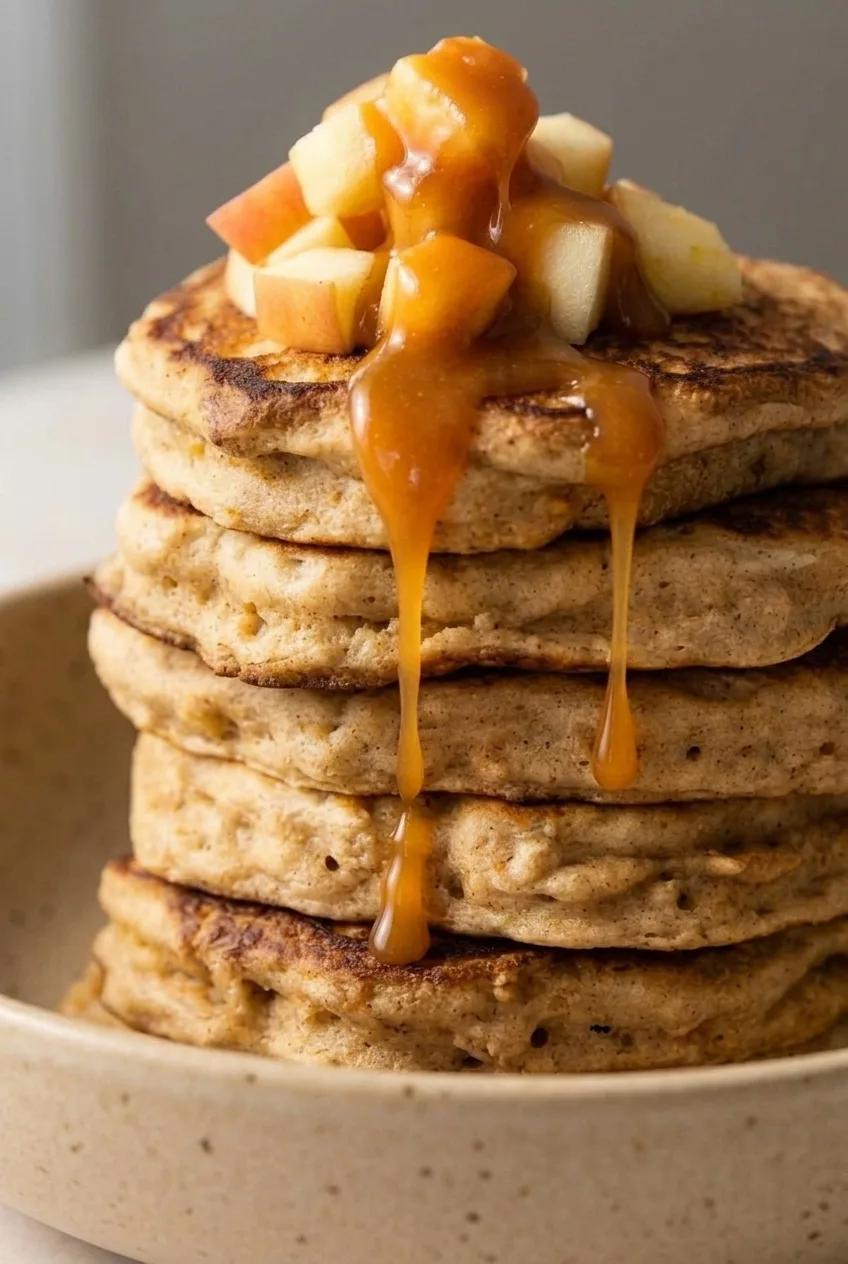
Close view of thick apple oatmeal pancake edges, diced apple topping, and amber sauce
  • 1 cup all-purpose flour (120g)
  • 3/4 cup quick-cooking oats (60g)
  • 2 teaspoons baking powder
  • 1/4 teaspoon baking soda
  • 1 1/2 teaspoons ground cinnamon
  • 1/4 teaspoon fine salt
  • 1 tablespoon packed light brown sugar
  • 1 1/4 cups buttermilk (300g), plus 1–2 tablespoons if needed
  • 1 large egg
  • 2 tablespoons unsalted butter, melted (about 30g)
  • 1 large apple, preferably red-skinned (about 200g)
  • About 1 tablespoon unsalted butter for the skillet, as needed
  • 1/4 cup pourable caramel-style sauce (about 80g), for serving

Optional: Add 1 teaspoon vanilla extract to the wet ingredients.

How to Make Apple Cinnamon Oatmeal Pancakes
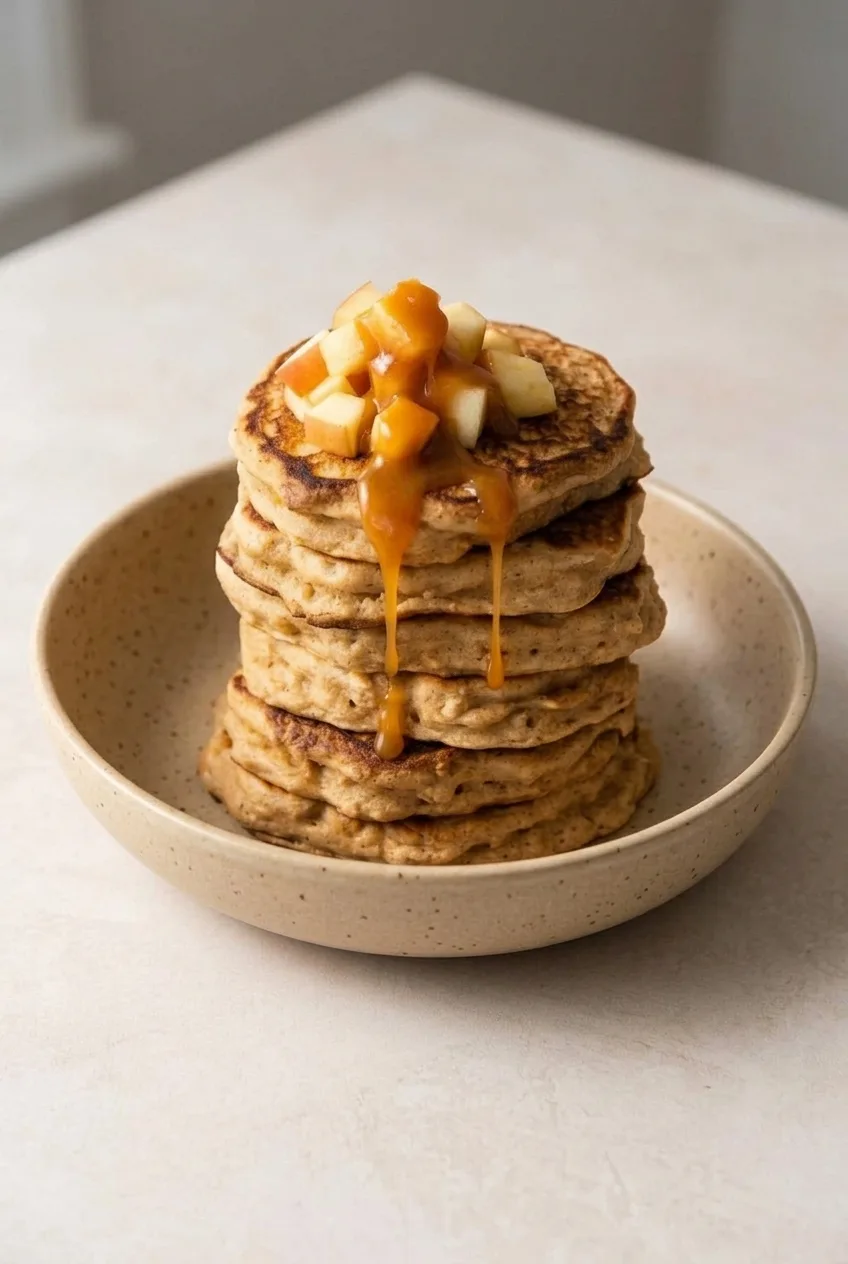
Full bowl of stacked apple cinnamon oatmeal pancakes with diced apple and amber sauce on a pale table
  1. Cut the apple: Core the apple. Finely dice half for the batter, then cut the other half into slightly larger topping cubes, leaving some red peel on. Set the topping cubes aside.
  2. Mix the dry and wet ingredients: In one bowl, whisk the flour, oats, baking powder, baking soda, cinnamon, salt, and brown sugar. In another bowl, whisk the buttermilk, egg, and melted butter, along with the vanilla if using.
  3. Combine and rest: Fold the wet ingredients into the dry just until no dry flour remains; small lumps are fine. Fold in the finely diced apple. Rest the batter for 10 minutes to soften the oats. If the rested batter is too stiff to spread gently, stir in buttermilk 1 tablespoon at a time.
  4. Preheat the skillet: During the final few minutes of the rest, heat a large nonstick skillet or griddle over medium heat. Lightly butter the surface and wipe away excess. The butter should melt and gently sizzle, not smoke.
  5. Cook in batches: Add about 1/3 cup batter per pancake, leaving room for a spatula. Gently nudge each portion into a thick, roughly 4-inch round. Cook uncovered, checking around 3 minutes, until bubbles appear, the edges lose their wet sheen, and the underside is golden, about 3–4 minutes. Flip once and cook for another 1–2 minutes, until the second side is golden and the center no longer looks wet or doughy. Lightly re-butter between batches as needed.
  6. Top and serve: Stack the warm pancakes on plates or in a shallow bowl. Pile the reserved apple cubes on top and pour over the caramel-style sauce, letting some run down the pancakes. Serve promptly.

How Thick Should the Batter Be?

Quick oats keep absorbing buttermilk during the rest, so check the batter afterward rather than thinning it right away. It should fall from a measuring cup and hold a substantial round in the skillet, not sit like firm dough. Add only enough extra buttermilk to make it easy to portion.

When to Flip the Pancakes

Look for bubbles, edges that no longer appear wet, and an underside that lifts cleanly. If a pancake resists lifting, give the first side more time. If its underside darkens before bubbles appear, reduce the heat toward medium-low so the thick center can cook through.

Apple in the Batter and on Top

Fine apple pieces cook inside the thick pancakes without leaving large, firm chunks. Slightly larger fresh cubes stay distinct on top. Add the topping apple and sauce just before eating so the pancakes do not become soggy. A tall stack makes a serving presentation; an everyday portion is about two pancakes.

For a savory addition to breakfast, serve these alongside cottage cheese egg bites.

Storing and Reheating

Cool untopped pancakes completely, then refrigerate them airtight for up to 4 days. Keep the apple topping and sauce separate. To freeze, place parchment between cooled pancakes and store them airtight for up to 3 months.

Microwave a refrigerated pancake for about 15–30 seconds, checking that it is warmed through. A toaster or toaster oven gives plain pancakes a firmer exterior and can also reheat them from frozen. Add fresh apple and sauce after reheating. For make-ahead breakfasts, cook the pancakes in advance rather than storing the batter overnight; the oats will continue absorbing liquid.

Nutrition

Approximate nutrition per serving of 2 pancakes with one-fourth of the apple topping and sauce: 390 calories, 10g protein, 13g fat, and 59g carbohydrates. Per 100g: approximately 195 calories, 5g protein, 7g fat, and 30g carbohydrates. Values are estimates; sauce, skillet-butter use, and moisture lost during cooking will affect them.

Apple Cinnamon Oatmeal Pancakes

Thick, tender pancakes made with quick oats, cinnamon, and diced apple, served with fresh apple and caramel-style sauce.
Course: Breakfast
Cuisine: American
Prep: 15 min
Cook: 25 min
Total: 50 min
Servings: 4 Calories: 390 kcal

Equipment

  • Mixing bowls
  • Whisk
  • Large nonstick skillet or griddle
  • Spatula
  • Measuring cup

Ingredients

For the Pancakes

  • 1 cup all-purpose flour (120 g)
  • 3/4 cup quick-cooking oats (60 g)
  • 2 teaspoons baking powder
  • 1/4 teaspoon baking soda
  • 1 1/2 teaspoons ground cinnamon
  • 1/4 teaspoon fine salt
  • 1 tablespoon packed light brown sugar
  • 1 1/4 cups buttermilk (300 g), plus 1–2 tablespoons if needed
  • 1 large egg
  • 2 tablespoons unsalted butter, melted (about 30 g)
  • 1 large apple (about 200 g), preferably red-skinned
  • 1 teaspoon vanilla extract (optional)

For Cooking and Serving

  • About 1 tablespoon unsalted butter, for the skillet as needed
  • 1/4 cup pourable caramel-style sauce (about 80 g)

Instructions

  1. Core the apple. Finely dice half for the batter and cut the other half into slightly larger topping cubes, leaving some red peel on. Set the topping cubes aside.
  2. Whisk the flour, oats, baking powder, baking soda, cinnamon, salt, and brown sugar in a bowl.
  3. In a separate bowl, whisk the buttermilk, egg, melted butter, and vanilla if using.
  4. Fold the wet ingredients into the dry ingredients just until no dry flour remains; small lumps are fine. Fold in the finely diced apple.
  5. Rest the batter for 10 minutes. If it is too stiff to spread gently, stir in additional buttermilk 1 tablespoon at a time.
  6. During the final few minutes of the rest, heat a large nonstick skillet or griddle over medium heat. Lightly butter the surface and wipe away excess.
  7. Add about 1/3 cup batter per pancake, leaving room for a spatula. Gently shape each portion into a thick, roughly 4-inch round.
  8. Cook uncovered for about 3–4 minutes, until bubbles appear, the edges lose their wet sheen, and the underside is golden.
  9. Flip each pancake once and cook for another 1–2 minutes, until the second side is golden and the center no longer looks wet or doughy. Lightly re-butter between batches as needed.
  10. Serve the warm pancakes topped with the reserved apple cubes and caramel-style sauce.

Tips

  • Let the batter rest for 10 minutes so the quick oats can soften.
  • Mix only until the flour disappears; small lumps help keep the pancakes tender.
  • Check batter consistency after resting and add buttermilk only if needed.
  • Cook small rounds so the centers finish before the outsides become too dark.
  • If the underside darkens before bubbles appear, lower the heat toward medium-low.

Variations

  • Vanilla Apple Cinnamon Pancakes: Add 1 teaspoon vanilla extract to the wet ingredients.
Notes

Cool untopped pancakes completely and refrigerate airtight for up to 4 days, or freeze with parchment between pancakes for up to 3 months. Reheat refrigerated pancakes in the microwave for 15–30 seconds or use a toaster or toaster oven. Add fresh apple and sauce after reheating.

Nutrition

Calories: 390 kcal | Protein: 10 g | Fat: 13 g | Carbohydrates: 59 g

Cottage Cheese Egg Bites

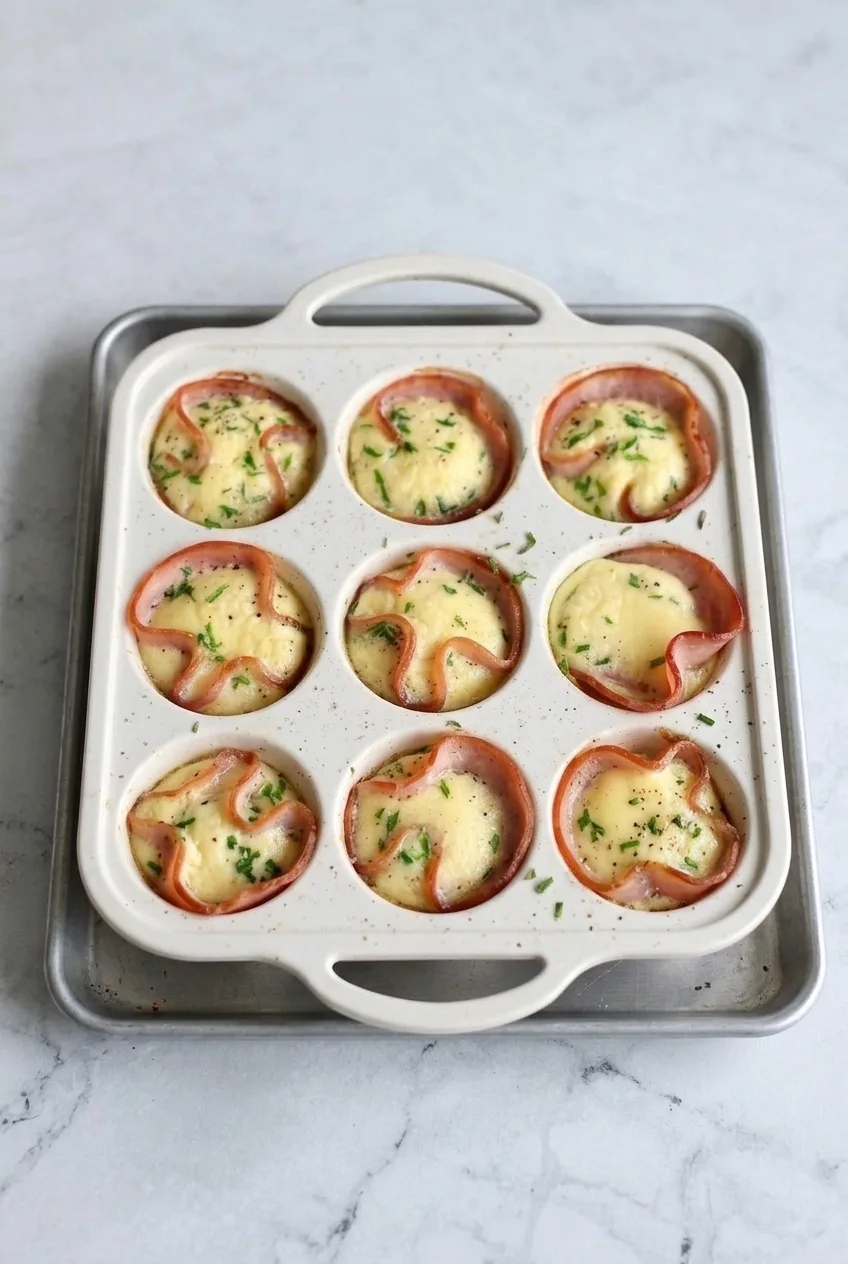
Whole Canadian bacon slices cradle the pale, chive-flecked filling in these cottage cheese egg bites. Pressed into a standard muffin pan, the slices fold around each portion and leave their pink edges visible after baking.

Briefly blending the eggs and cottage cheese makes the centers smoother without whipping in too much air. The bites will puff in the oven and settle a little as they cool. Take them out when the centers are set; the tops do not need to brown.

Ingredients for Cottage Cheese Egg Bites

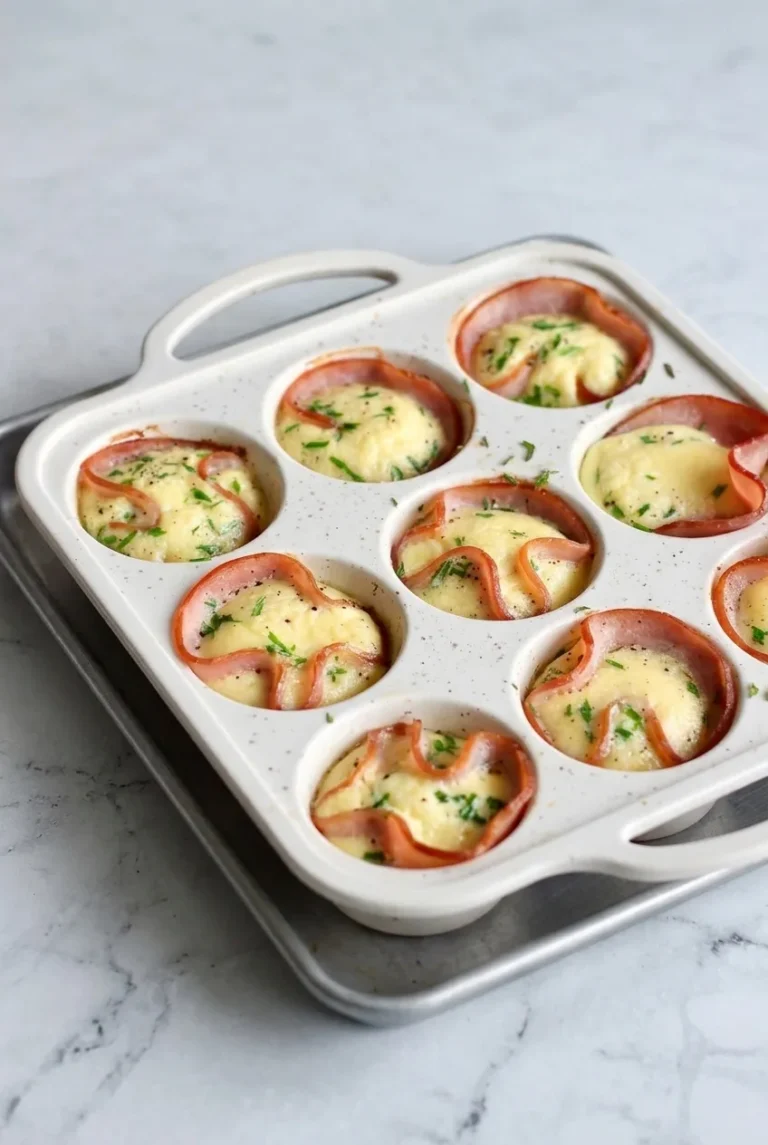
Full muffin pan of Canadian bacon-lined cottage cheese egg bites on a baking sheet
  • Cooking spray or neutral oil, enough to thoroughly grease 12 muffin cups
  • 12 round slices Canadian bacon
  • 10 large eggs
  • 1 cup cottage cheese (225g), whole-milk or 2%
  • 1/2 cup shredded Monterey Jack or mild white cheddar (55g)
  • 1/4 teaspoon fine salt
  • 1/4 teaspoon freshly ground black pepper
  • 2 tablespoons finely chopped fresh chives, divided
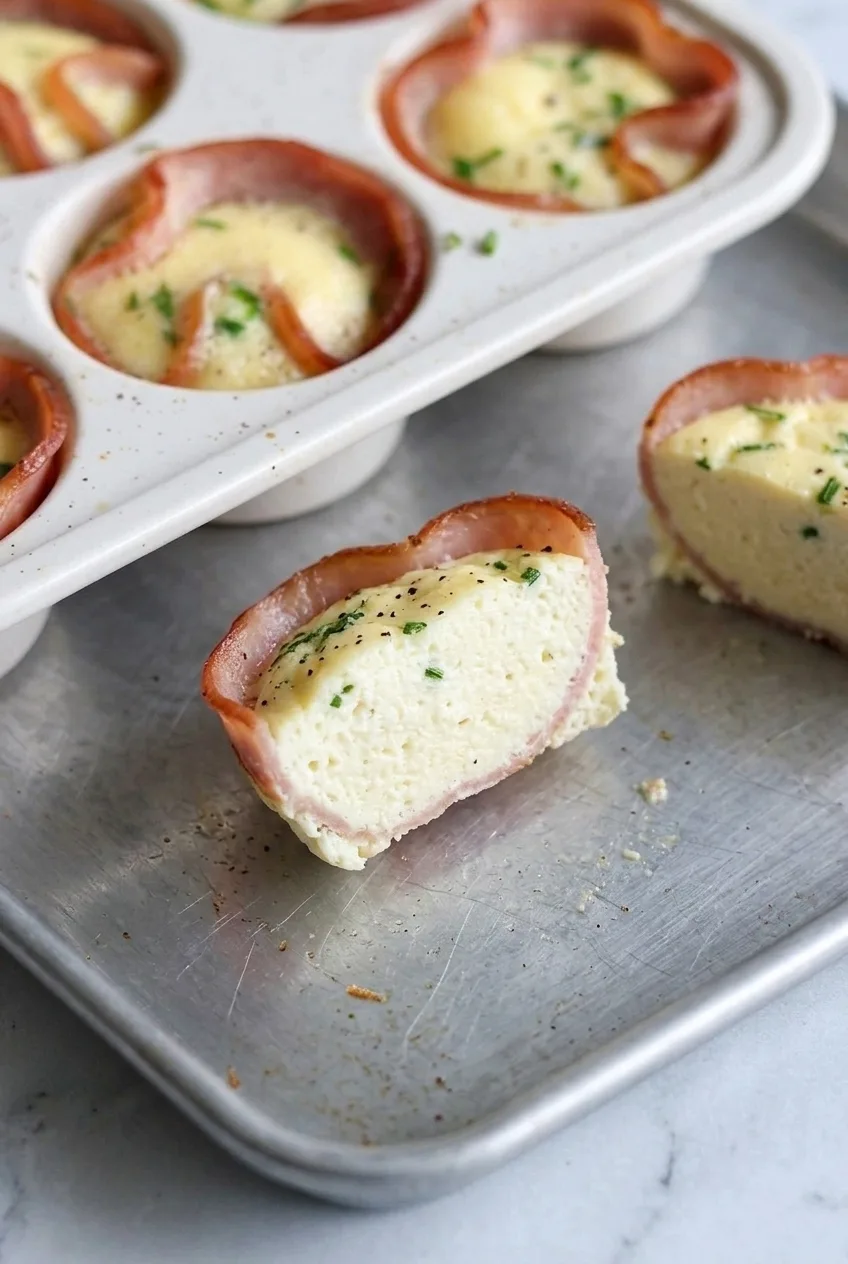
Close view of a cut cottage cheese egg bite showing its soft center and folded Canadian bacon liner

How to Bake Cottage Cheese Egg Bites

  1. Preheat and grease: Heat the oven to 350°F (175°C). Thoroughly grease the bottoms and sides of a 12-cup standard muffin pan. Egg can seep behind the bacon and stick to the pan.
  2. Line the cups: Press one whole Canadian bacon slice into each cup. Let it fold naturally, leaving some of its curved edge raised to frame the filling.
  3. Blend the filling: Briefly blend the eggs, cottage cheese, shredded cheese, salt, and pepper until the cottage cheese is mostly smooth. The mixture should be pourable, not frothy. Stir in most of the chives, reserving a little for the tops.
  4. Fill: Divide the mixture evenly among the bacon-lined cups, keeping it below the rims to leave room for puffing. Sprinkle with the reserved chives and lift any bacon edges that have folded over the filling.
  5. Bake: Bake uncovered for 22 to 26 minutes, beginning to check at 20 minutes. The centers should look set rather than liquid and feel gently firm when touched. Do not wait for deep browning.
  6. Rest and release: Let the bites rest in the pan for about 5 minutes. Gently loosen any egg touching the pan, then lift out each bacon-lined bite. Cool completely before storing.

How to Keep the Bacon Liners Visible

Use one intact slice per cup rather than chopping the bacon into the filling. Canadian bacon slices vary in diameter, so the folds will not all look alike. The important detail is a raised edge around each egg center. Keeping the filling below the cup rims helps those edges stay visible as the eggs puff.

How to Prevent Sticking and Overbaking

Grease the entire muffin cup, even beneath the bacon. If egg slips behind a loose fold, the greased surface and a short rest after baking make the bite easier to release without tearing.

Blend only until the cottage cheese is mostly smooth, then judge doneness by the centers rather than color alone. Prolonged blending can add too much air, while extra oven time can make the filling spongy. A little settling is normal. Pan material and filling level can affect the bake time; mini muffin cups bake faster and will not hold whole bacon slices in the same way.

For a vegetable-focused option with a different form, try spinach and cheese egg muffins.

Serving, Storing, and Reheating

Serve two bites warm for breakfast. For a larger meal, pair them with avocado toast with eggs.

Cool the bites completely, then refrigerate in an airtight container for up to 4 days. Microwave refrigerated bites for about 30 seconds, adding brief increments until the centers are warm. Avoid overheating.

To freeze, arrange completely cooled bites in a single layer until firm, then transfer to an airtight container or freezer bag for up to 2 months. Thaw overnight in the refrigerator before reheating for more even warming.

Nutrition

Serving: 2 egg bites; approximately 6 servings per batch. Estimated per serving: 250 calories, 27g protein, 14g fat, and 3g carbohydrates. Estimated per 100g: 165 calories, 18g protein, 9g fat, and 2g carbohydrates. Values are approximate and vary with the size of the Canadian bacon slices, dairy choices, and moisture lost during baking.

Cottage Cheese Egg Bites

Canadian bacon slices hold a smooth, chive-flecked cottage cheese and egg filling baked in a muffin pan.
Course: Breakfast
Cuisine: American
Prep: 15 min
Cook: 26 min
Total: 46 min
Servings: 6 Calories: 250 kcal

Equipment

  • 12-cup standard muffin pan
  • Blender

Ingredients

  • Cooking spray or neutral oil, enough to thoroughly grease 12 muffin cups
  • 12 round slices Canadian bacon
  • 10 large eggs
  • 1 cup cottage cheese (225 g), whole-milk or 2%
  • 1/2 cup shredded Monterey Jack or mild white cheddar (55 g)
  • 1/4 teaspoon fine salt
  • 1/4 teaspoon freshly ground black pepper
  • 2 tablespoons finely chopped fresh chives, divided

Instructions

  1. Preheat the oven to 350°F (175°C). Thoroughly grease the bottoms and sides of a 12-cup standard muffin pan.
  2. Press one whole Canadian bacon slice into each muffin cup, leaving some of the curved edge raised.
  3. Briefly blend the eggs, cottage cheese, shredded cheese, salt, and pepper until the cottage cheese is mostly smooth and the mixture is pourable but not frothy.
  4. Stir most of the chives into the egg mixture, reserving a little for the tops.
  5. Divide the mixture among the bacon-lined cups, keeping it below the rims. Sprinkle with the reserved chives and lift any bacon edges that have folded over the filling.
  6. Bake uncovered for 22 to 26 minutes, beginning to check at 20 minutes. Remove when the centers look set and feel gently firm; the tops do not need to brown.
  7. Rest the bites in the pan for about 5 minutes. Gently loosen any egg touching the pan, then lift out the bites.
  8. Cool completely before storing.

Tips

  • Grease the entire muffin cup, including beneath the bacon, to help prevent sticking.
  • Use one intact bacon slice per cup so its raised edge frames the filling.
  • Keep the filling below the rims to leave room for puffing and help the bacon edges stay visible.
  • Blend only until the cottage cheese is mostly smooth; blending too long can add excess air.
  • Check doneness by the centers rather than browning, since overbaking can make the filling spongy.

Variations

  • Mild White Cheddar Egg Bites: Use mild white cheddar instead of Monterey Jack.

Notes

Refrigerate cooled bites in an airtight container for up to 4 days. Reheat in the microwave for about 30 seconds, adding short increments as needed. Freeze cooled bites for up to 2 months and thaw overnight in the refrigerator before reheating. Nutrition estimates are approximate.

Nutrition

Calories: 250 kcal | Protein: 27 g | Fat: 14 g | Carbohydrates: 3 g

Avocado Toast with Eggs

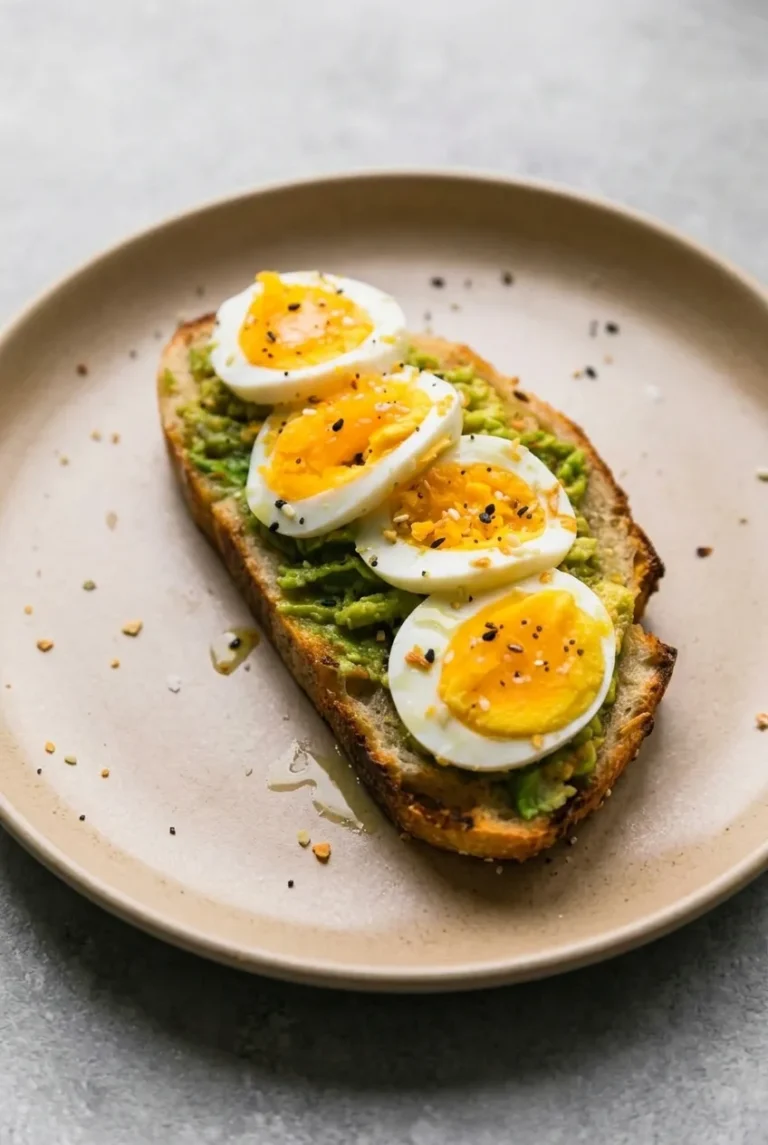
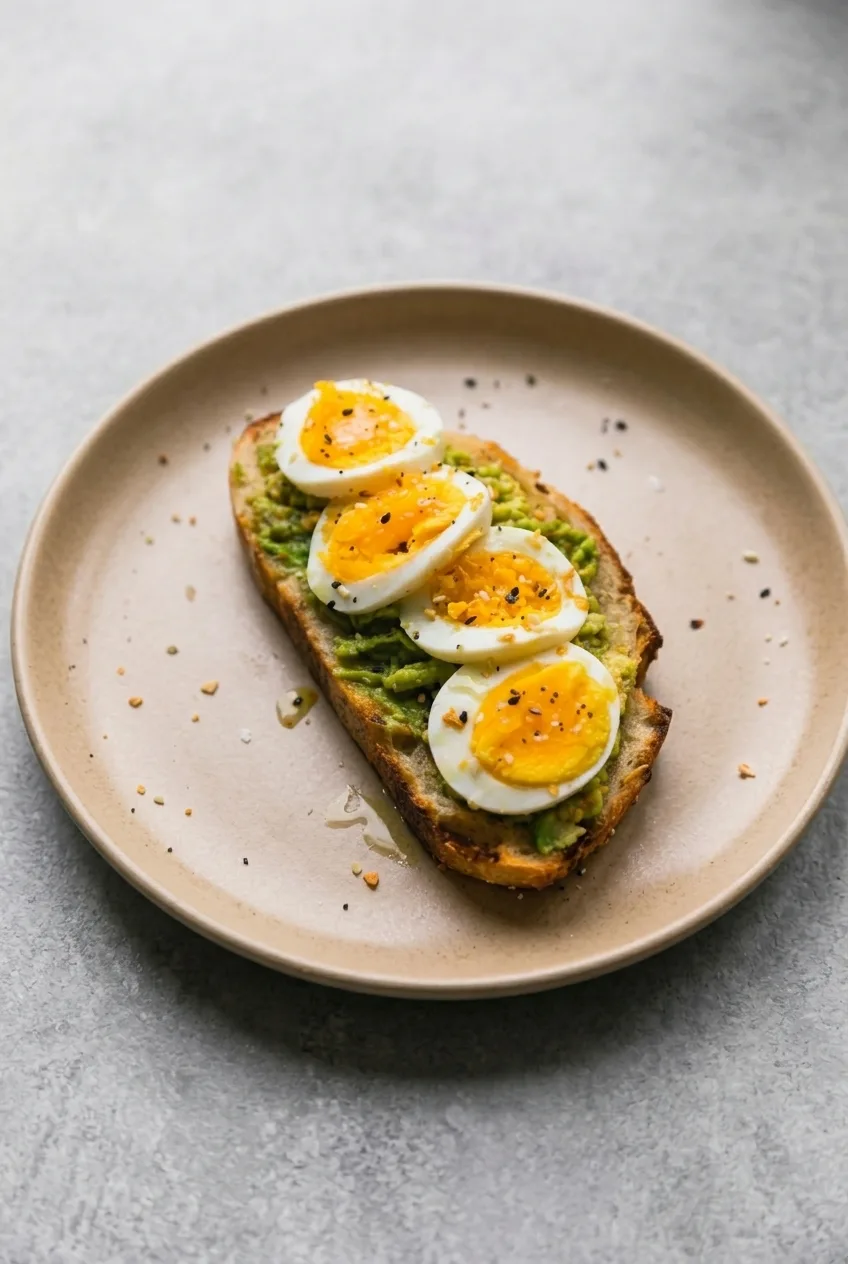
One thick slice of toast holds chunky avocado and two boiled eggs, cut lengthwise into four halves. The yolks should be set and golden, with a light sprinkle of everything bagel seasoning. Toast the bread until it can support the toppings but is still easy to bite.

The eggs can be boiled ahead for quicker assembly. Mash the avocado and put the toast together just before eating so the bread stays crisp.

Ingredients for Avocado Toast with Eggs

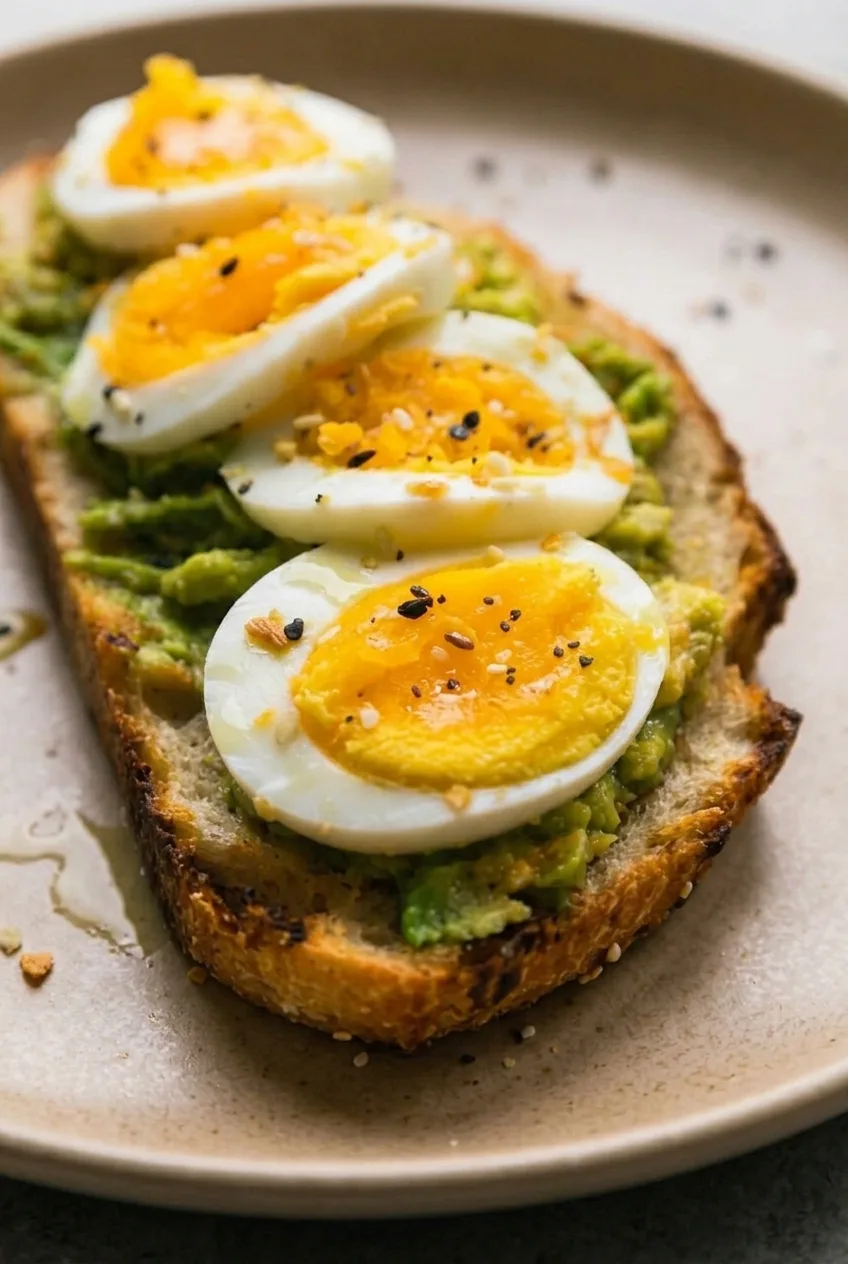
Close view of set golden egg yolks, chunky avocado, and the browned edge of sourdough toast
  • 1 large slice thick-cut sourdough bread (about 55g)
  • 2 large eggs
  • 1/2 medium ripe avocado (about 75g)
  • 1 teaspoon lemon juice
  • Small pinch of fine salt, to taste
  • Small pinch of black pepper, to taste
  • 1/4 teaspoon everything bagel seasoning, or to taste

Another thick, sturdy bread can replace the sourdough, and lime juice can replace the lemon juice. If the seasoning blend is salty, use less salt in the avocado.

How to Make Avocado Toast with Eggs

A complete avocado toast with four boiled-egg halves on a plate surrounded by a neutral tabletop
  1. Simmer the eggs: Bring enough water to cover the eggs by about 1 inch to a boil in a small saucepan. Gently lower in the eggs, reduce the heat to a gentle simmer, and cook uncovered for about 10 to 11 minutes. Choose 10 minutes for set, golden yolks or the longer end for firmer yolks.
  2. Chill and halve: Transfer the eggs promptly to ice water for about 5 minutes to stop the cooking. Peel them and cut each egg lengthwise in half.
  3. Toast the bread: While the eggs chill, toast the sourdough until golden and firm, about 2 to 4 minutes depending on its thickness and your toaster. The center should still be easy to bite, not hard or brittle.
  4. Mash the avocado: In a small bowl, mash the avocado with the lemon juice, salt, and pepper, leaving some small pieces. Mashing it separately keeps the toast from breaking.
  5. Assemble: Spread the avocado over the toast, leaving a little crust visible. Arrange all four egg halves in a loose row, yolks up. Sprinkle lightly with everything bagel seasoning and serve immediately.

Choosing Avocado and Bread

Choose an avocado that yields slightly to gentle pressure. A hard one will be difficult to spread; a mushy one will not hold the chunky texture. Use a large, sturdy bread slice to support both eggs.

Getting Set, Golden Yolks

Egg size, starting temperature, and simmer intensity can change how the yolks turn out. If they look dry or have gray edges, use the shorter end of the cooking range next time and move them to ice water promptly.

Make-Ahead and Storage

Boil the eggs ahead and keep them refrigerated. Toast the bread and mash the avocado close to serving; lemon juice can help limit browning but will not prevent it entirely. If you need to save leftover avocado mash, press wrap directly against its surface, refrigerate it in an airtight container, and use it within about 1 day.

Do not store, reheat, or freeze the assembled toast; the bread will soften. Bread can be sliced and frozen for later toasting. For another egg-based breakfast you can prepare ahead, try these spinach and cheese egg muffins.

Nutrition

Approximate nutrition for 1 substantial toast: 420 calories, 19g protein, 22g fat, and 36g carbohydrates. Per 100g: approximately 180 calories, 8g protein, 9g fat, and 15g carbohydrates. Values vary with the bread, avocado size, and seasoning blend.

Avocado Toast with Eggs

Thick sourdough toast is topped with chunky lemon-seasoned avocado, boiled eggs, and everything bagel seasoning.
Course: Breakfast
Cuisine: American
Prep: 5 min
Cook: 11 min
Total: 21 min
Servings: 1 Calories: 420 kcal

Equipment

  • Small saucepan
  • Bowl for ice water
  • Toaster
  • Small mixing bowl
  • Fork
  • Knife

Ingredients

  • 1 large slice thick-cut sourdough bread (about 55 g)
  • 2 large eggs
  • 1/2 medium ripe avocado (about 75 g)
  • 1 teaspoon lemon juice
  • Small pinch of fine salt, to taste
  • Small pinch of black pepper, to taste
  • 1/4 teaspoon everything bagel seasoning, or to taste

Instructions

  1. Bring enough water to cover the eggs by about 1 inch to a boil in a small saucepan.
  2. Gently lower in the eggs, reduce the heat to a gentle simmer, and cook uncovered for 10 to 11 minutes.
  3. Transfer the eggs to ice water for about 5 minutes. Peel them and cut each egg lengthwise in half.
  4. While the eggs chill, toast the sourdough for 2 to 4 minutes, until golden and firm but still easy to bite.
  5. Mash the avocado with the lemon juice, salt, and pepper, leaving some small pieces.
  6. Spread the avocado over the toast, leaving a little crust visible.
  7. Arrange the four egg halves on top with the yolks facing up. Sprinkle with everything bagel seasoning and serve immediately.

Tips

  • Choose an avocado that yields slightly to gentle pressure for a chunky, spreadable texture.
  • Use a thick, sturdy slice of bread that can support the toppings.
  • Toast the bread until firm but not hard or brittle.
  • Use the shorter egg-cooking time for set, golden yolks, and transfer the eggs promptly to ice water.
  • If your seasoning blend is salty, use less salt in the avocado.

Variations

  • Alternative Bread: Replace the sourdough with another thick, sturdy bread.
  • Lime Avocado Toast: Use lime juice instead of lemon juice.

Notes

Boiled eggs can be refrigerated ahead. Assemble just before serving; do not store, reheat, or freeze the finished toast. Refrigerate leftover avocado mash in an airtight container with wrap pressed against its surface and use within about 1 day.

Nutrition

Calories: 420 kcal | Protein: 19 g | Fat: 22 g | Carbohydrates: 36 g

French Toast Roll-Ups

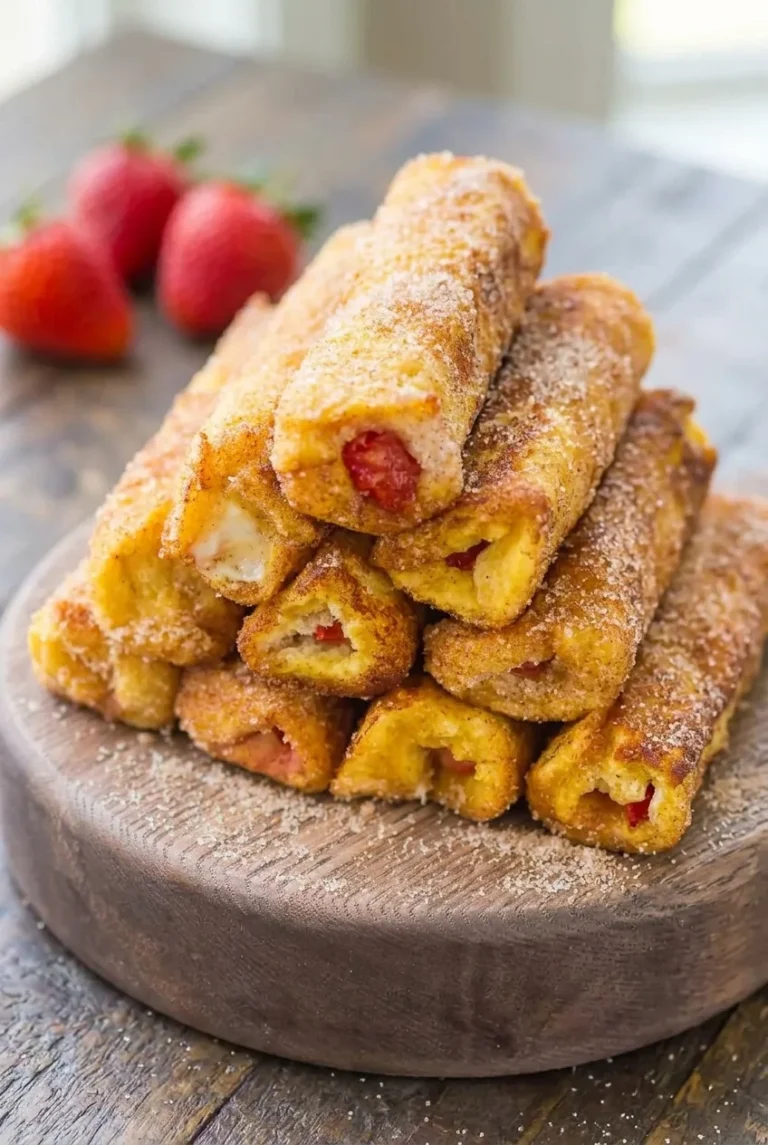
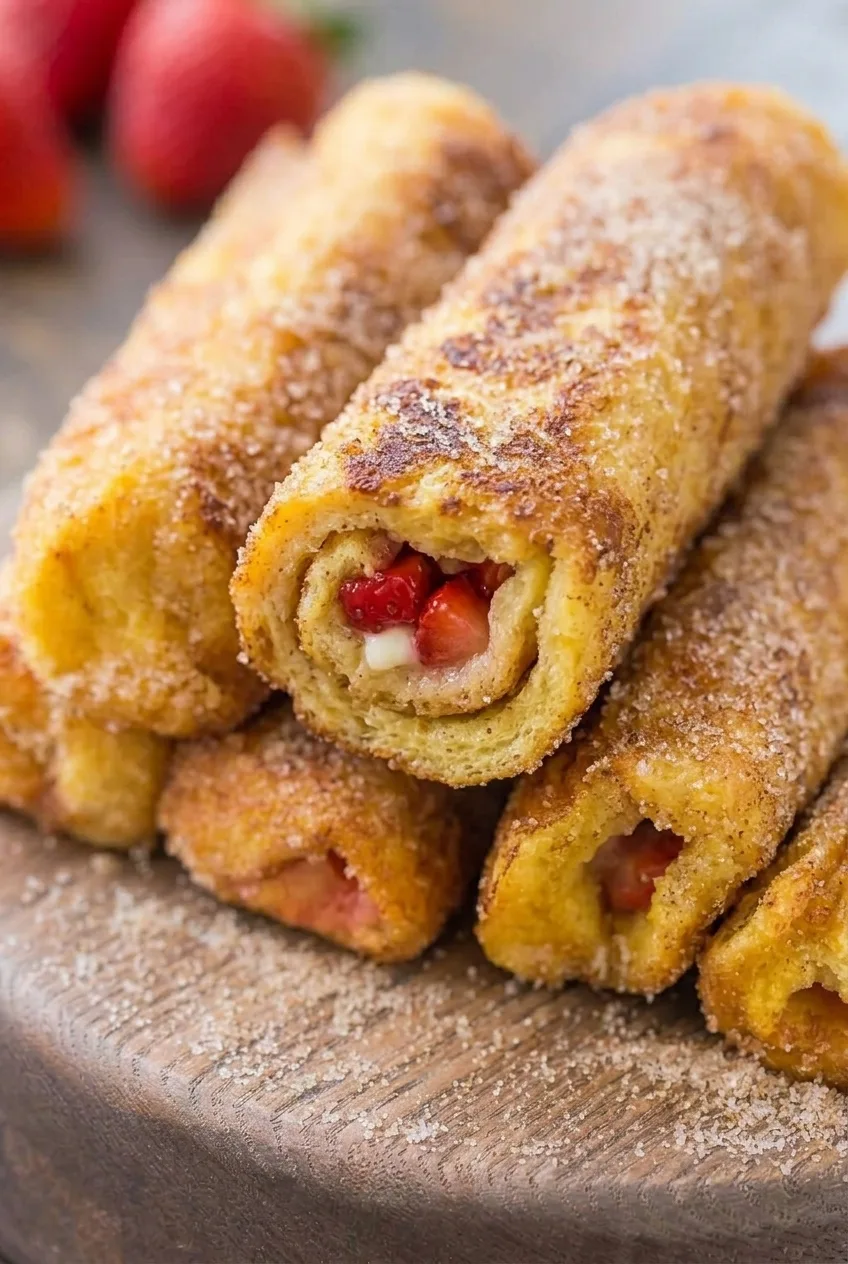
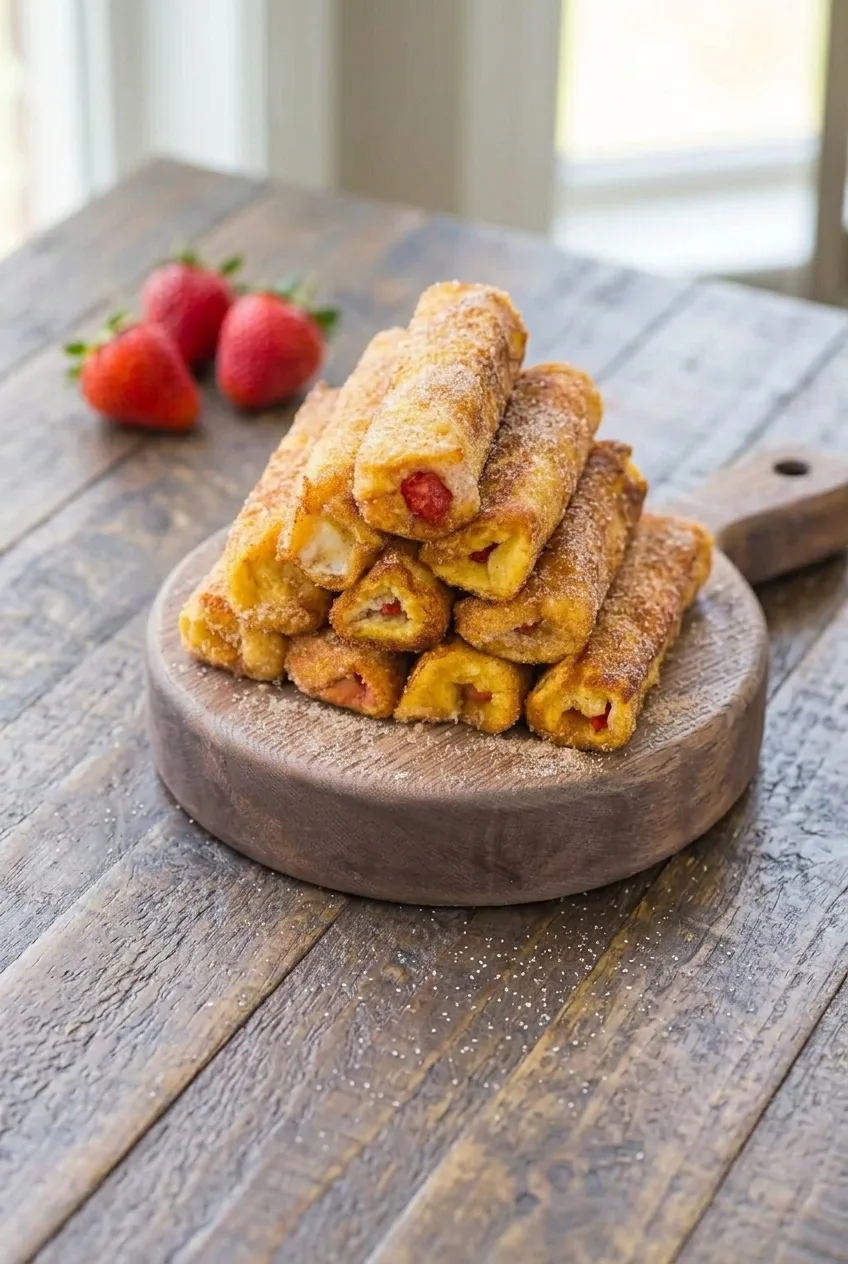
Soft sandwich bread wraps small centers of strawberries and cream cheese in these French toast roll-ups. A quick dip in egg and milk, followed by turning in a buttered skillet, gives each roll a golden exterior. Cinnamon sugar goes on after cooking so its fine grains stay visible.

Keep the filling modest and the strawberries patted dry: too much moisture can soften the bread or escape into the skillet. Serve the rolls warm, while the coating is at its best.

Ingredients for French Toast Roll-Ups

Close view of a French toast roll-up showing strawberry and cream cheese inside cinnamon-sugar-coated bread.
  • 12 slices soft white sandwich bread, crusts removed (about 300g)
  • 4 ounces cream cheese, softened (about 115g)
  • 1/2 cup fresh strawberries, finely diced and patted dry (about 75g)
  • 2 large eggs
  • 1/4 cup milk
  • 1/2 teaspoon vanilla extract
  • 2 tablespoons unsalted butter, divided (about 30g)
  • 1/4 cup granulated sugar (50g)
  • 1 teaspoon ground cinnamon

Makes 12 roll-ups, or about 4 servings of 3. Allow about 20 minutes to prepare and 15–20 minutes to cook in batches, for 35–40 minutes total.

How to Make French Toast Roll-Ups in a Skillet

A loose stack of strawberry and cream cheese French toast roll-ups on a wooden serving board.
  1. Flatten the bread: Gently roll each crustless slice with a rolling pin until it bends easily. Do not press it paper-thin, or it may tear.
  2. Fill and roll: Spread about 2 teaspoons cream cheese on each slice. Add about 2 teaspoons strawberries near one short edge, leaving roughly a 1/2-inch border at the sides. Roll snugly from the filled edge and set seam-side down.
  3. Prepare the coatings and skillet: Whisk the eggs, milk, and vanilla in a shallow bowl. Mix the sugar and cinnamon in a separate shallow dish. Warm a 10- to 12-inch nonstick skillet over medium heat and melt about half the butter, keeping it from turning dark brown.
  4. Cook the first batch: Quickly turn 6 rolls in the egg mixture to coat without soaking them. Place seam-side down in the skillet with room to turn. Check the seam side after about 1–2 minutes, then turn the rolls with tongs as each side becomes golden. Cook uncovered for about 6–8 minutes total, until golden all around with no wet-looking egg patches and the bread feels set rather than soggy.
  5. Coat and repeat: Roll the cooked rolls in cinnamon sugar while warm. Add the remaining butter as needed, then dip, cook, and coat the other 6 rolls. If the butter or skillet residue browns too quickly, lower the heat slightly. Serve promptly.

How to Keep the Rolls Closed

Leave the side borders clear and avoid piling on extra filling. Starting seam-side down helps each roll hold its shape while the egg coating sets. If the bread splits during assembly, choose a softer slice and flatten it more gently.

The 6–8-minute batch time is a guide, not the only doneness test. Turn the rolls to brown the full exterior, and keep the cinnamon sugar out of the skillet so it does not interfere with browning.

For a separate oven-cooked option, try sheet-pan French toast.

Fillings and Bread Swaps

Soft wheat or honey wheat sandwich bread can replace white bread; stiff slices are more likely to crack. If strawberries are unavailable, use a thin layer of jam with the cream cheese, keeping it away from the edges. Finely chopped blueberries or raspberries also work, though their moisture and the color of the centers will differ.

Serving and Leftovers

Stack the warm rolls loosely with a few filled ends facing outward. Serve extra strawberries or maple syrup on the side rather than pouring syrup over the cinnamon sugar. For a savory dish alongside them, try spinach and cheese egg muffins.

These fruit-filled rolls are best eaten soon after cooking because the bread softens as it sits. Refrigerate leftovers promptly in a covered container. The cinnamon sugar and diced strawberries can be prepared separately ahead of time, but assemble the rolls close to cooking. If reheating leftovers, warm them until heated through and expect a softer coating.

Nutrition

Approximate nutrition per serving (3 roll-ups, based on 4 servings): 450 calories, 12g protein, 21g fat, and 54g carbohydrates. Per 100g: approximately 245 calories, 7g protein, 11g fat, and 30g carbohydrates. Values vary with the bread, milk, and amount of butter and coating retained.

French Toast Roll-Ups

Soft bread rolls filled with strawberries and cream cheese are dipped in egg, skillet-cooked until golden, and coated in cinnamon sugar.
Course: Breakfast
Cuisine: American
Prep: 20 min
Cook: 18 min
Total: 38 min
Servings: 4 Calories: 450 kcal

Equipment

  • Rolling pin
  • Shallow bowls
  • 10- to 12-inch nonstick skillet
  • Tongs

Ingredients

For the rolls

  • 12 slices soft white sandwich bread, crusts removed (about 300 g)
  • 4 ounces cream cheese, softened (about 115 g)
  • 1/2 cup fresh strawberries, finely diced and patted dry (about 75 g)

For the egg coating

  • 2 large eggs
  • 1/4 cup milk
  • 1/2 teaspoon vanilla extract

For cooking and coating

  • 2 tablespoons unsalted butter, divided (about 30 g)
  • 1/4 cup granulated sugar (50 g)
  • 1 teaspoon ground cinnamon

Instructions

  1. Flatten each bread slice gently with a rolling pin until it bends easily without becoming paper-thin.
  2. Spread about 2 teaspoons cream cheese over each slice.
  3. Add about 2 teaspoons strawberries near one short edge, leaving a 1/2-inch border at the sides. Roll snugly from the filled edge and place seam-side down.
  4. Whisk the eggs, milk, and vanilla in a shallow bowl. Mix the sugar and cinnamon in a separate shallow dish.
  5. Warm a nonstick skillet over medium heat and melt about half the butter without letting it brown.
  6. Quickly turn 6 rolls in the egg mixture to coat without soaking them.
  7. Place the rolls seam-side down in the skillet, leaving room to turn. Cook uncovered, turning as each side becomes golden, for about 6–8 minutes total, until golden all around and set.
  8. Roll the cooked rolls in cinnamon sugar while warm.
  9. Add the remaining butter as needed and repeat with the other 6 rolls. Serve promptly.

Tips

  • Pat the strawberries dry and keep the filling modest to help prevent soggy bread and leaking.
  • Leave the side borders clear when adding filling, and start cooking with the seam side down.
  • Dip the rolls quickly so the bread does not become soaked.
  • Keep cinnamon sugar out of the skillet to avoid interfering with browning.
  • Lower the heat slightly if the butter or skillet residue browns too quickly.

Variations

  • Wheat Bread Roll-Ups: Replace the white sandwich bread with soft wheat or honey wheat bread.
  • Jam Roll-Ups: Replace the strawberries with a thin layer of jam spread with the cream cheese, keeping it away from the edges.
  • Berry Roll-Ups: Use finely chopped blueberries or raspberries in place of the strawberries.

Notes

Best eaten warm soon after cooking. Refrigerate leftovers promptly in a covered container; reheat until heated through, noting the coating may soften. Nutrition is approximate per serving of 3 roll-ups.

Nutrition

Calories: 450 kcal | Protein: 12 g | Fat: 21 g | Carbohydrates: 54 g

Hash Brown Breakfast Casserole

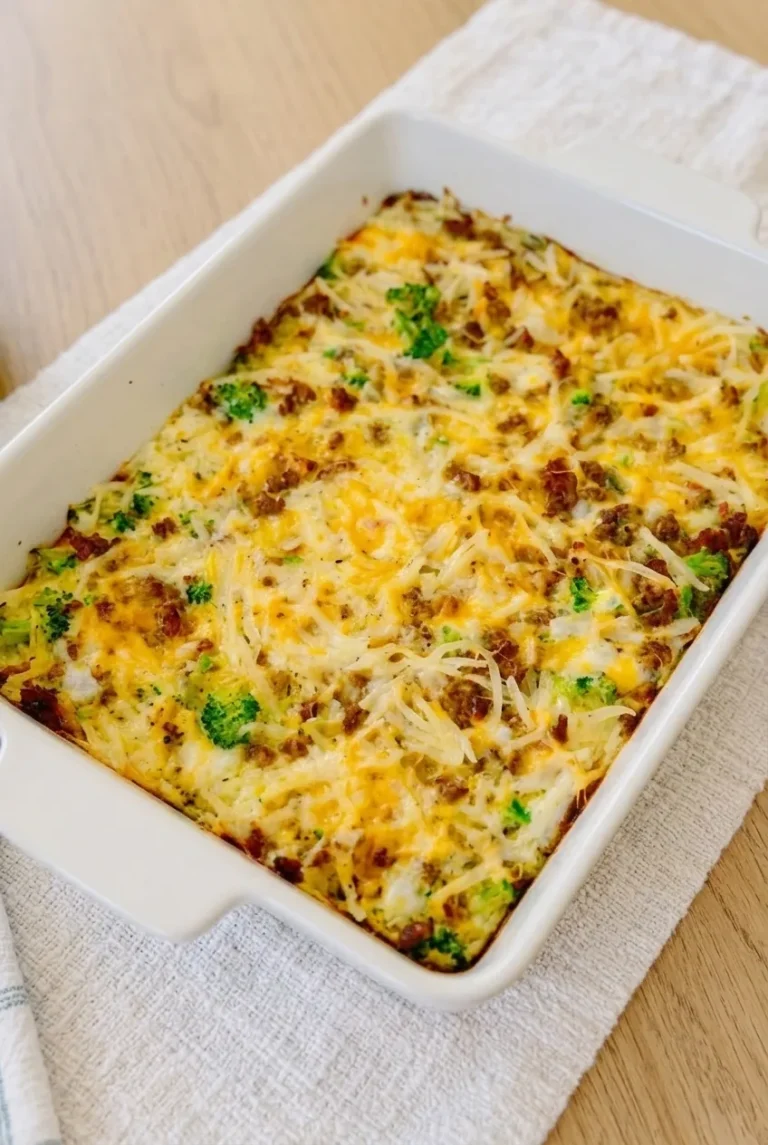
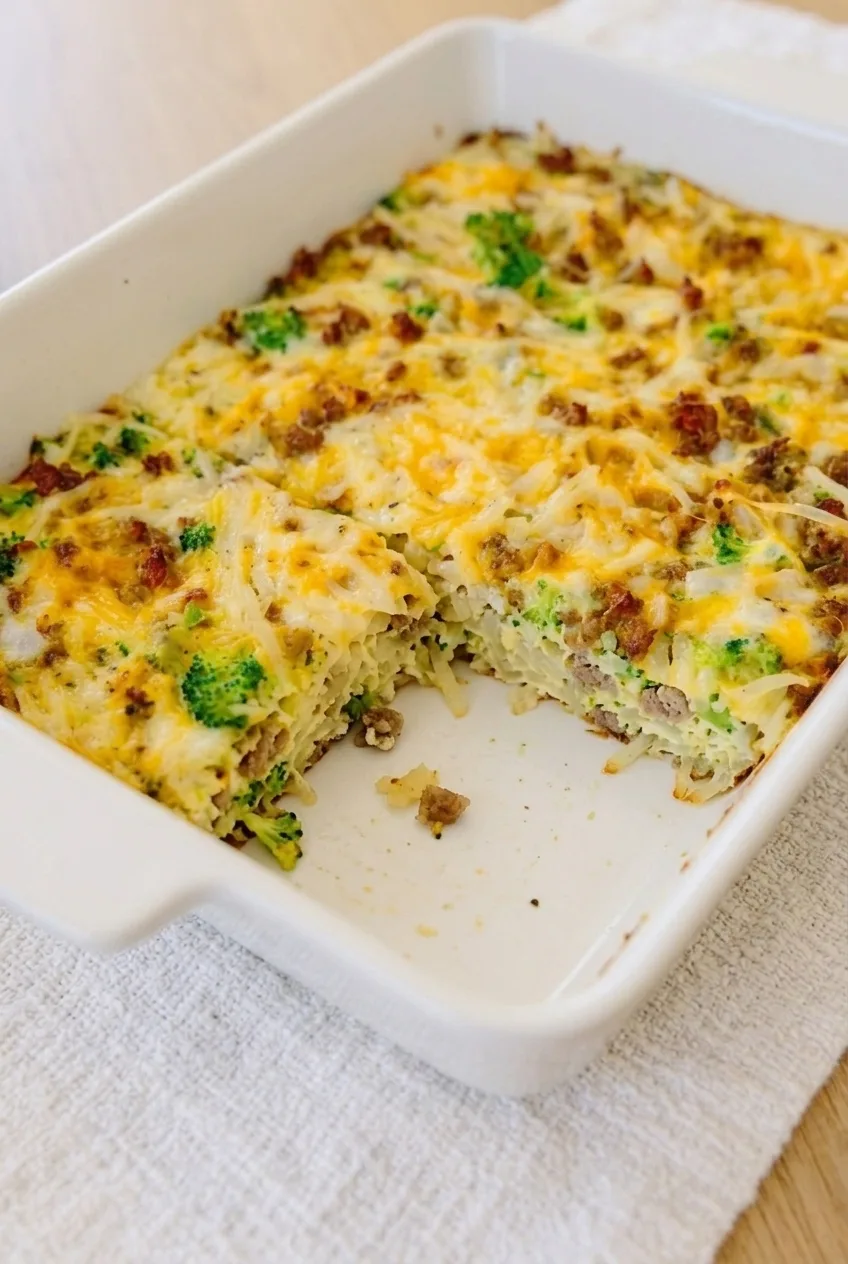
Shredded hash browns, breakfast sausage, small broccoli pieces, eggs, and cheddar bake into a casserole with a set, sliceable center. Potato strands, browned sausage, and green broccoli remain visible beneath patches of melted cheese.

This version can be baked as soon as it is assembled; it does not need an overnight soak. Drying the thawed potatoes, draining the sausage, and cooking moisture off the broccoli help keep the casserole from turning watery.

Ingredients for Hash Brown Breakfast Casserole

Close view of a cut casserole portion showing set egg, potato strands, sausage, broccoli, and cheddar.
  • 1 teaspoon unsalted butter or neutral oil, or as needed to grease the dish
  • 1 bag (20 ounces) frozen shredded hash browns, thawed and patted dry (about 570g)
  • 1 pound pork breakfast sausage (about 450g)
  • 1 1/2 cups broccoli florets, cut into small pieces (about 135g)
  • 8 large eggs
  • 1 cup whole milk (about 240g)
  • 1/2 teaspoon kosher salt
  • 1/4 teaspoon ground black pepper
  • 2 cups shredded sharp cheddar cheese (about 225g)

Optional: Add 1/4 teaspoon garlic powder to the eggs. Keep the saltiness of the sausage and cheddar in mind when seasoning.

How to Make Hash Brown Breakfast Casserole

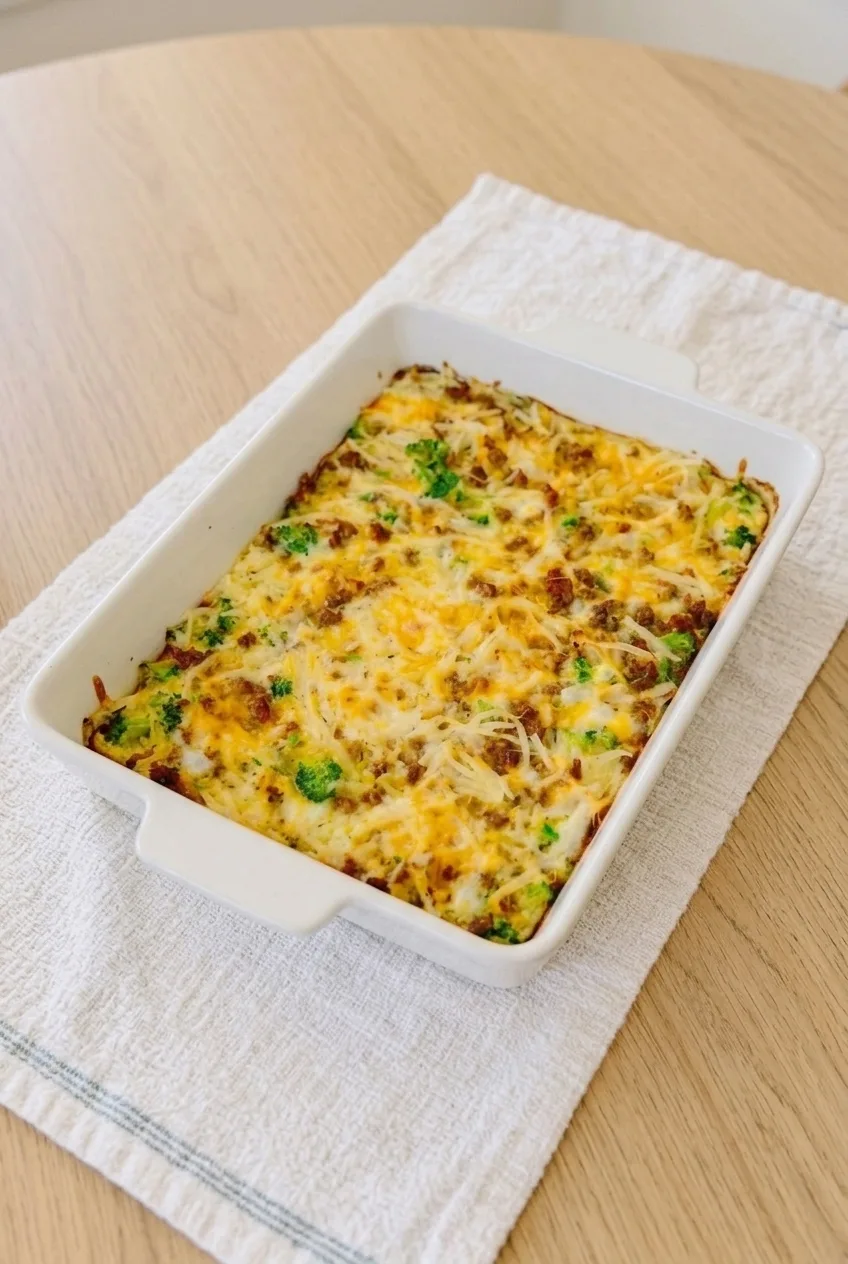
Whole sausage and broccoli hash brown breakfast casserole in its baking dish on a light wood table.
  1. Prepare the dish and potatoes: Fully preheat the oven to 350°F (175°C). Lightly grease a 9-by-13-inch baking dish. Pat the thawed hash browns dry with clean kitchen towels or paper towels; they should not be icy or dripping. Reserve about 1 cup of loose potato strands for the top.
  2. Cook the sausage and broccoli: Brown and crumble the sausage in a large skillet over medium heat until fully cooked. Drain excess fat. Add the broccoli and cook for 3 to 4 minutes, until bright green and tender-crisp, with no puddle of moisture left in the skillet. Let the fillings cool briefly before adding them to the eggs.
  3. Mix the casserole: Whisk the eggs, milk, salt, and pepper in a large bowl, adding the garlic powder if using. Stir in the remaining hash browns, most of the sausage and broccoli, and 1 1/4 cups of the cheddar. Spread the mixture evenly in the prepared dish.
  4. Top the casserole: Scatter the reserved potato strands and remaining sausage and broccoli over the surface. Sprinkle the remaining 3/4 cup cheddar in patches, leaving some potato and broccoli visible. Gently press loose potato strands into the moist mixture so they do not dry out.
  5. Bake: Bake uncovered, starting to check the center at 45 minutes. Expect about 50 to 65 minutes total. The center should not visibly jiggle when the dish is nudged, and a knife inserted into the center should show no liquid egg. The cheese should be melted and the edges lightly browned. If the top browns before the center sets, tent it loosely with foil and continue baking.
  6. Rest and slice: Leave the whole casserole in its dish for about 10 minutes before cutting it into 10 to 12 portions. Resting helps the slices hold together.

Time: About 25 minutes prep, excluding potato thawing; 50 to 65 minutes baking; and 10 minutes resting. Total: about 1 hour 25 minutes to 1 hour 40 minutes.

How to Keep the Casserole from Turning Watery

Thawed hash browns release moisture, so pat them dry rather than adding their thawing liquid to the eggs. Cut the broccoli small and cook it until moisture has evaporated from the skillet. Drain the browned sausage so excess grease does not collect around the slices.

How to Tell When the Center Is Done

Use the center, not the browned top, to decide when the casserole is ready. A smaller, deeper dish may take longer than a 9-by-13-inch dish. If the center still jiggles or shows liquid egg on a knife, keep baking and tent the top with foil if needed.

Make It Ahead

To bake the casserole the next day, assemble it, cover it, and refrigerate it overnight. Let the dish stand briefly while the oven preheats, following the manufacturer’s guidance for your bakeware; do not move a refrigerator-cold glass dish directly into a hot oven. A chilled casserole may need longer than the stated bake window, so check that the center is set.

For individual make-ahead portions in a different format, try these spinach and cheese egg muffins.

Serving and Variations

Serve warm squares with fresh fruit or hot sauce on the side. For a sweet addition to brunch, serve sheet pan French toast alongside the casserole.

Cooked diced ham can replace the sausage, though it will not give the surface the same browned crumbles. Cooked turkey breakfast sausage is another option; drain it as needed before assembly. Keep the broccoli and shredded potatoes in place for either variation.

Storing and Reheating Leftovers

Cool leftover casserole and refrigerate portions in an airtight container for up to 3 days. Reheat individual portions in the microwave until heated through.

Completely cooled, baked portions can be tightly wrapped and frozen for up to 2 months. Thaw them in the refrigerator, then reheat until heated through.

Nutrition

Approximate nutrition per serving, based on 12 servings: 290 calories, 16g protein, 21g fat, and 11g carbohydrates. Approximate nutrition per 100g of baked casserole: 190 calories, 11g protein, 14g fat, and 7g carbohydrates. Values will vary with the sausage, cheese, and moisture lost during baking.

Hash Brown Breakfast Casserole

Shredded hash browns, breakfast sausage, broccoli, eggs, and cheddar bake into a sliceable breakfast casserole.
Course: Breakfast
Cuisine: American
Prep: 25 min
Cook: 65 min
Total: 100 min
Servings: 12 Calories: 290 kcal

Equipment

  • 9-by-13-inch baking dish
  • Large skillet
  • Large mixing bowl
  • Whisk

Ingredients

Casserole

  • 1 teaspoon unsalted butter or neutral oil, or as needed to grease the dish
  • 1 bag (20 ounces) frozen shredded hash browns, thawed and patted dry (about 570g)
  • 1 pound pork breakfast sausage (about 450g)
  • 1 1/2 cups broccoli florets, cut into small pieces (about 135g)
  • 8 large eggs
  • 1 cup whole milk (about 240g)
  • 1/2 teaspoon kosher salt
  • 1/4 teaspoon ground black pepper
  • 2 cups shredded sharp cheddar cheese (about 225g)

Optional

  • 1/4 teaspoon garlic powder

Instructions

  1. Preheat the oven to 350°F (175°C). Lightly grease a 9-by-13-inch baking dish.
  2. Pat the thawed hash browns dry. Reserve about 1 cup of potato strands for the topping.
  3. Brown and crumble the sausage in a large skillet over medium heat until fully cooked. Drain excess fat.
  4. Add the broccoli and cook for 3 to 4 minutes, until bright green and tender-crisp and no moisture remains in the skillet. Let the fillings cool briefly.
  5. Whisk the eggs, milk, salt, pepper, and optional garlic powder in a large bowl.
  6. Stir in the remaining hash browns, most of the sausage and broccoli, and 1 1/4 cups of the cheddar.
  7. Spread the mixture evenly in the prepared baking dish.
  8. Top with the reserved potato strands and remaining sausage and broccoli. Sprinkle with the remaining 3/4 cup cheddar, leaving some potato and broccoli visible.
  9. Gently press loose potato strands into the mixture.
  10. Bake uncovered for about 50 to 65 minutes, checking the center starting at 45 minutes. The center should not jiggle, and a knife inserted into it should show no liquid egg. Tent loosely with foil if the top browns before the center sets.
  11. Rest the casserole in the dish for about 10 minutes before cutting into 10 to 12 portions.

Tips

  • Pat the thawed hash browns dry to help prevent a watery casserole.
  • Cook the broccoli until moisture has evaporated from the skillet.
  • Drain excess fat from the sausage before mixing the filling.
  • Check doneness at the center; a smaller, deeper dish may take longer.
  • Tent the top loosely with foil if it browns before the center is set.

Variations

  • Ham: Replace the sausage with cooked diced ham.
  • Turkey Sausage: Use cooked turkey breakfast sausage and drain it as needed before assembly.

Notes

Refrigerate leftovers in an airtight container for up to 3 days and reheat individual portions in the microwave until heated through. Freeze fully cooled portions for up to 2 months; thaw in the refrigerator before reheating. For an overnight make-ahead casserole, refrigerate it covered and follow bakeware guidance before placing a chilled dish in the oven.

Nutrition

Calories: 290 kcal | Protein: 16 g | Fat: 21 g | Carbohydrates: 11 g

Breakfast Crunchwraps

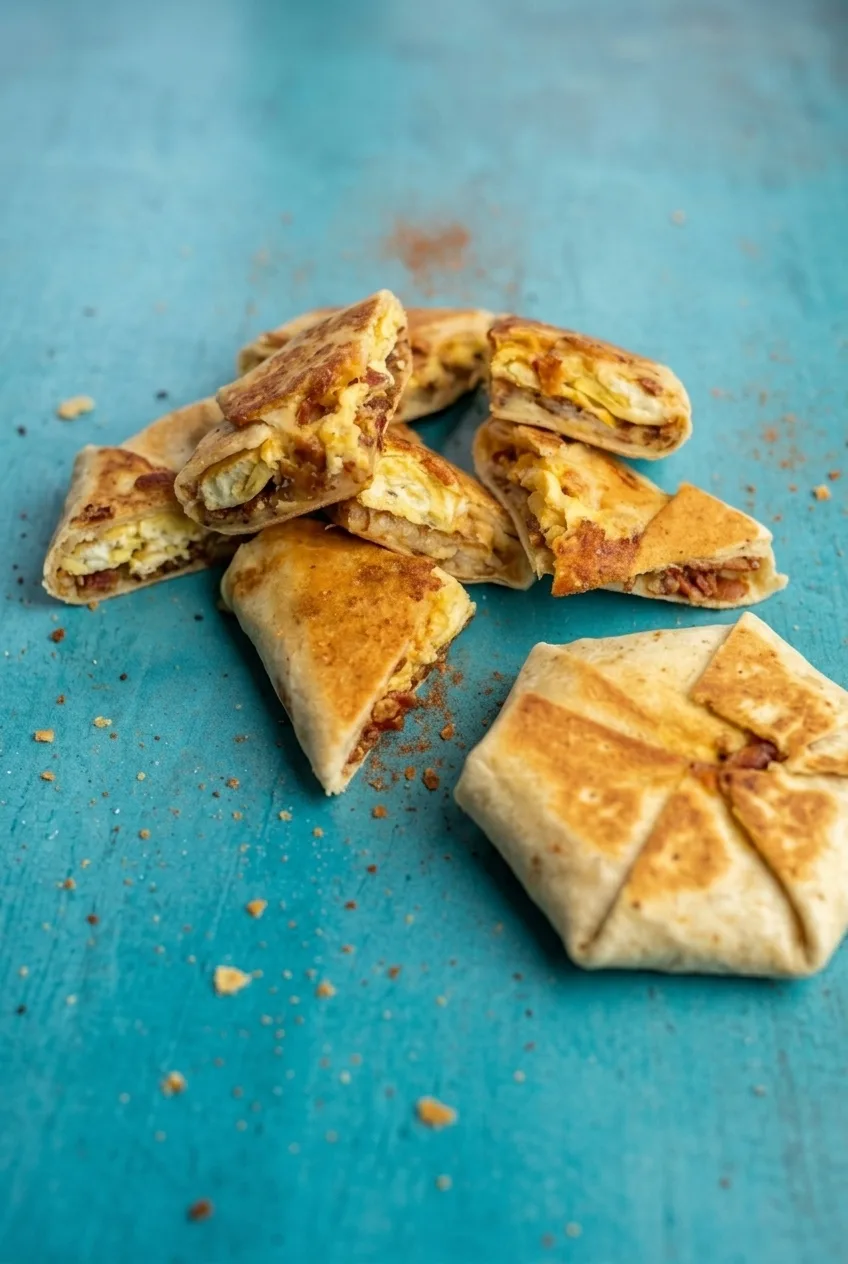
These breakfast crunchwraps enclose soft scrambled eggs, browned hash browns, crisp bacon, and melted cheddar in pleated flour tortillas. The potatoes are cooked before assembly, then each wrap is toasted seam-side down to secure the folds and give the outside golden-brown patches.

Hash browns provide the potato crunch in this version; there’s no tostada layer. Serve the wraps soon after toasting, cut in half to show the filling.

Makes 4 crunchwraps. Prep time: 15 minutes. Cook time: 35 to 40 minutes, depending on how many wraps fit in the skillet.

Ingredients for Breakfast Crunchwraps

Close view of eggs, browned hash browns, bacon, and melted cheddar inside a toasted crunchwrap
  • 4 large (12-inch) flour tortillas (about 320g)
  • 2 cups frozen shredded hash browns, thawed (about 280g)
  • 4 large eggs
  • 4 slices bacon (about 115g)
  • 1 cup shredded sharp cheddar (about 115g)
  • 2 tablespoons neutral cooking oil, divided
  • 1 teaspoon butter
  • 1/4 teaspoon kosher salt, or to taste
  • 1/4 teaspoon freshly ground black pepper

Optional for serving: hot sauce or salsa, served alongside the wraps.

How to Make Breakfast Crunchwraps

Wider view of cut breakfast crunchwraps loosely arranged on a turquoise serving surface
  1. Dry the potatoes: Squeeze the thawed hash browns in a clean kitchen towel or paper towels until little liquid comes out. Season with about half the salt and pepper; reserve the rest for the eggs.
  2. Cook the bacon: Heat a 12-inch nonstick or well-seasoned skillet over medium heat. Cook the bacon for 6 to 10 minutes, turning as needed, until browned and crisp. Drain and chop it, then carefully remove excess grease from the skillet.
  3. Brown the hash browns: Add 1 tablespoon oil to the skillet. Spread the potatoes in a thin layer and leave them undisturbed until the underside browns. Turn and cook for 8 to 12 minutes total, until they have deep golden patches and crisp edges. Transfer to a plate.
  4. Soft-scramble the eggs: Whisk the eggs with the remaining salt and pepper. Reduce the heat to medium-low, melt the butter in the skillet, and gently scramble for 2 to 3 minutes. Remove the eggs when the curds are moist and softly set, with no pool of raw egg; they will heat again inside the wraps.
  5. Fill and fold: Warm one tortilla briefly over low heat until pliable. Place one-quarter each of the cheddar, hash browns, bacon, and eggs in a compact mound at the center, leaving a wide border. Fold the edge inward over the filling, making tight, overlapping pleats as you work around the mound. If the folds cannot meet, remove a little filling rather than forcing them. Repeat with the remaining tortillas.
  6. Toast the wraps: Lightly oil the skillet with some of the remaining tablespoon of oil. Working in batches over medium to medium-low heat, place each wrap seam-side down and press gently. Start checking after 2 minutes; cook for about 2 to 3 minutes, until the pleats hold and the underside is golden with toasted patches. Flip carefully and cook the other side for about 2 to 3 minutes, until browned and the cheese has melted. Use the remaining oil sparingly, and lower the heat if the tortilla darkens before the cheese melts.
  7. Cut and serve: Let each wrap stand for about 1 minute to reduce spills, then cut it in half. Serve hot with the egg-and-potato filling visible.

How to Fold a Breakfast Crunchwrap

A warm 12-inch tortilla is easier to pleat without cracking. Keep the filling in a compact mound rather than spreading it toward the edges, and overlap each fold with the last. Toasting the pleated side first helps seal the wrap before you flip it. If a smaller or stiff tortilla leaves a gap, don’t force it closed.

How to Brown the Hash Browns

Wet potato shreds steam instead of browning. Squeeze them well, spread them thinly in the skillet, and let the first side develop golden patches before turning. The potatoes add texture to freshly made wraps but will soften as the filling sits. For a separate crispy potato dish, see these sweet potato hash browns.

Ingredient Swaps

Cooked, well-drained breakfast sausage can replace the bacon; keep the portion similar so the tortillas still close. For a meatless version, omit the bacon and season the potatoes to taste. A gluten-free burrito-size tortilla may work if it becomes flexible when warmed, though folding varies by brand.

For a rolled breakfast instead of a pleated, skillet-sealed wrap, try these breakfast burritos with eggs, avocado and cheddar.

Leftovers and Reheating

For the best initial texture, cook the bacon and potatoes ahead, then fold and toast the wraps near serving time. Refrigerate leftover wraps promptly in an airtight container and use within 3 to 4 days, following general cooked-leftover guidance.

Reheat in a covered skillet over medium-low heat until the center is thoroughly hot, reaching 165°F (75°C) if checked with a thermometer. Uncover briefly to re-crisp the tortilla. The potato filling may remain softer than it was when freshly made.

Nutrition

Approximate per serving (1 of 4 crunchwraps): 675 calories, 26g protein, 39g fat, and 63g carbohydrates. Approximate per 100g of finished wrap: 290 calories, 11g protein, 17g fat, and 27g carbohydrates. Values vary with tortilla and bacon brands, rendered fat, and finished weight; optional sauce is not included.

Breakfast Crunchwraps

Soft scrambled eggs, crisp bacon, browned hash browns, and cheddar are folded into flour tortillas and toasted until golden.
Course: Breakfast
Cuisine: American
Prep: 15 min
Cook: 40 min
Total: 55 min
Servings: 4 Calories: 675 kcal

Equipment

  • 12-inch skillet
  • Kitchen towel or paper towels
  • Whisk
  • Spatula
  • Knife

Ingredients

For the Crunchwraps

  • 4 large (12-inch) flour tortillas (about 320 g)
  • 2 cups frozen shredded hash browns, thawed (about 280 g)
  • 4 large eggs
  • 4 slices bacon (about 115 g)
  • 1 cup shredded sharp cheddar (about 115 g)
  • 2 tablespoons neutral cooking oil, divided
  • 1 teaspoon butter
  • 1/4 teaspoon kosher salt, or to taste
  • 1/4 teaspoon freshly ground black pepper

Optional for Serving

  • Hot sauce or salsa

Instructions

  1. Squeeze the thawed hash browns in a clean kitchen towel or paper towels until little liquid comes out. Season with about half the salt and pepper; reserve the rest for the eggs.
  2. Heat a 12-inch nonstick or well-seasoned skillet over medium heat. Cook the bacon for 6 to 10 minutes, turning as needed, until browned and crisp. Drain and chop it, then carefully remove excess grease from the skillet.
  3. Add 1 tablespoon oil to the skillet. Spread the potatoes in a thin layer and leave them undisturbed until the underside browns. Turn and cook for 8 to 12 minutes total, until deeply golden in spots with crisp edges. Transfer to a plate.
  4. Whisk the eggs with the remaining salt and pepper. Reduce the heat to medium-low and melt the butter in the skillet. Gently scramble the eggs for 2 to 3 minutes, until the curds are moist and softly set with no pool of raw egg. Transfer them from the skillet.
  5. Warm one tortilla briefly over low heat until pliable. Place one-quarter each of the cheddar, hash browns, bacon, and eggs in a compact mound at the center, leaving a wide border.
  6. Fold the tortilla edge inward over the filling, making tight, overlapping pleats around the mound. If the folds cannot meet, remove a little filling rather than forcing them. Repeat with the remaining tortillas.
  7. Lightly oil the skillet with some of the remaining tablespoon of oil. Working in batches over medium to medium-low heat, place each wrap seam-side down and press gently.
  8. Start checking after 2 minutes; cook each wrap for about 2 to 3 minutes, until the pleats hold and the underside is golden with toasted patches. Flip carefully and cook the other side for about 2 to 3 minutes, until browned and the cheese has melted. Use the remaining oil sparingly and lower the heat if the tortilla darkens before the cheese melts.
  9. Let each wrap stand for about 1 minute, then cut it in half. Serve hot with hot sauce or salsa, if desired.

Tips

  • Squeeze the hash browns well so they brown instead of steaming.
  • Spread the potatoes thinly and let the first side develop golden patches before turning.
  • Warm the tortillas briefly so they pleat without cracking.
  • Keep the filling in a compact mound and overlap each fold with the last.
  • Toast the pleated side first to help seal the wrap.

Variations

  • Breakfast Sausage Crunchwraps: Replace the bacon with a similar portion of cooked, well-drained breakfast sausage.
  • Meatless Crunchwraps: Omit the bacon and season the potatoes to taste.
  • Gluten-Free Crunchwraps: Use a gluten-free burrito-size tortilla that becomes flexible when warmed; folding may vary by brand.

Notes

Refrigerate leftovers promptly in an airtight container and use within 3 to 4 days. Reheat covered in a skillet over medium-low heat until thoroughly hot, reaching 165°F (75°C) if checked with a thermometer; uncover briefly to re-crisp.

Nutrition

Calories: 675 kcal | Protein: 26 g | Fat: 39 g | Carbohydrates: 63 g

Spinach and Cheese Egg Muffins

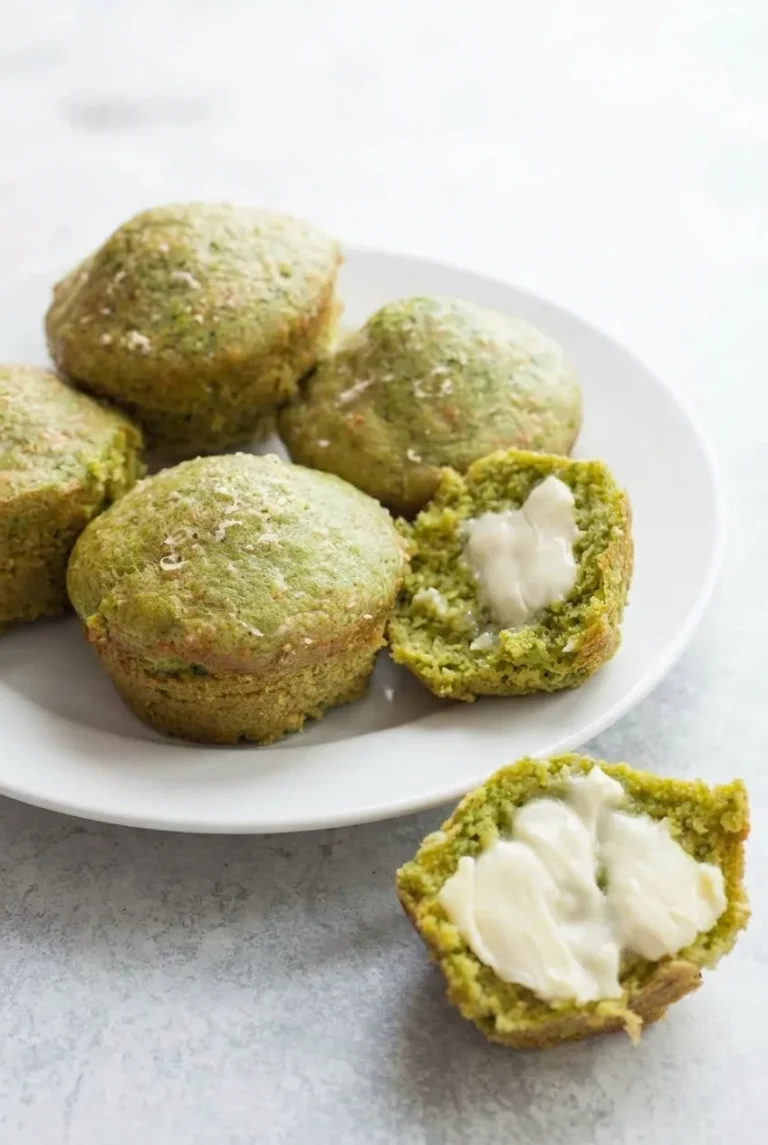
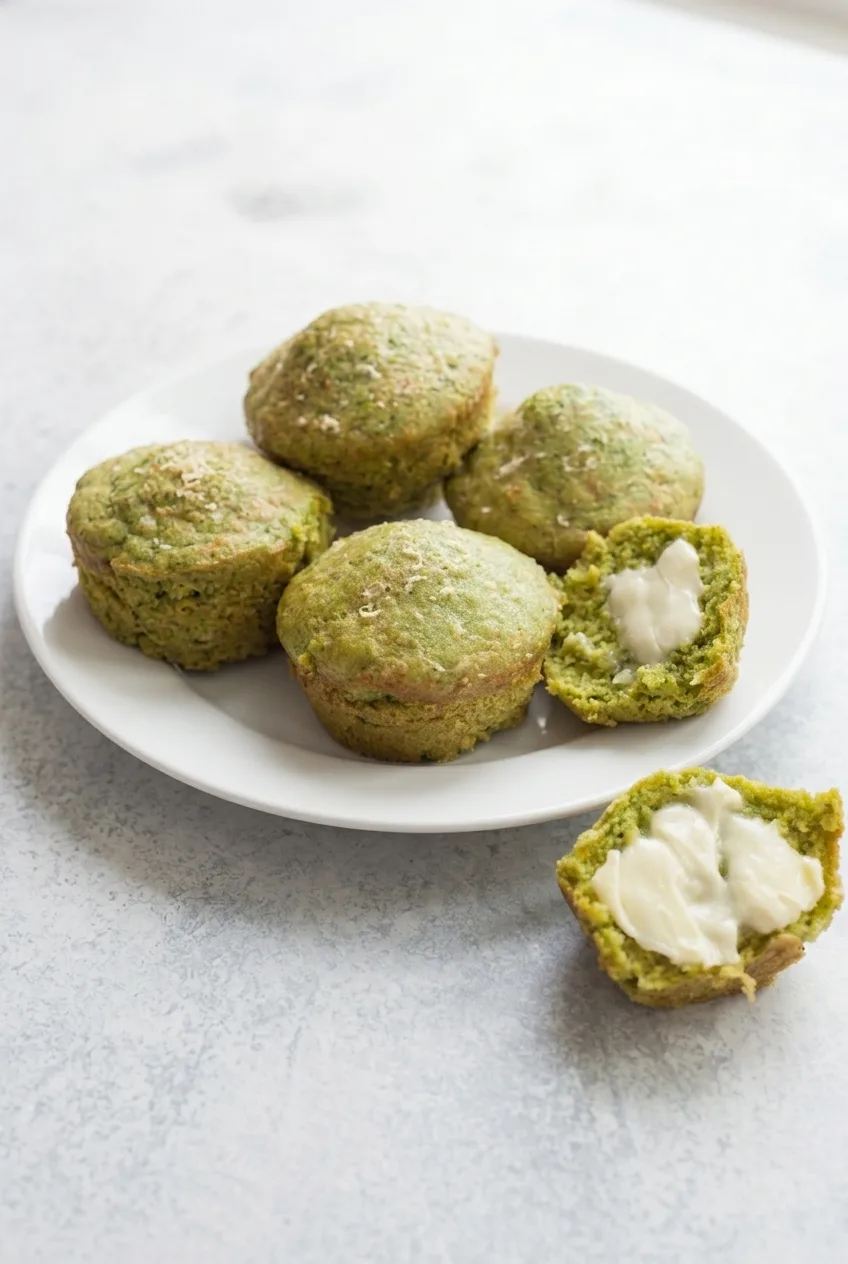
These oven-baked egg muffins have finely chopped spinach throughout, Parmesan on top, and softly set centers. A little whole-wheat flour helps them hold together when split, but they remain egg muffins, not bread muffins. Dry the spinach well and stir the batter as you portion it so each muffin gets an even share of the green flecks. Serve one warm and split open with softened butter.

Makes about 8 muffins. Allow about 45 to 50 minutes, including 5 minutes of cooling.

Ingredients for Spinach and Cheese Egg Muffins

Full plate of spinach and cheese egg muffins with a split buttered muffin nearby
  • Nonstick cooking spray, for 8 standard muffin wells
  • 2 packed cups fresh spinach before chopping (about 60g), well dried
  • 1/2 cup finely grated Parmesan (about 45g), divided
  • 1/3 cup whole-wheat flour (about 40g)
  • 1/4 cup milk
  • 6 large eggs
  • 1/4 teaspoon fine salt
  • 1/8 teaspoon ground black pepper
  • 2 teaspoons softened butter, for one split muffin
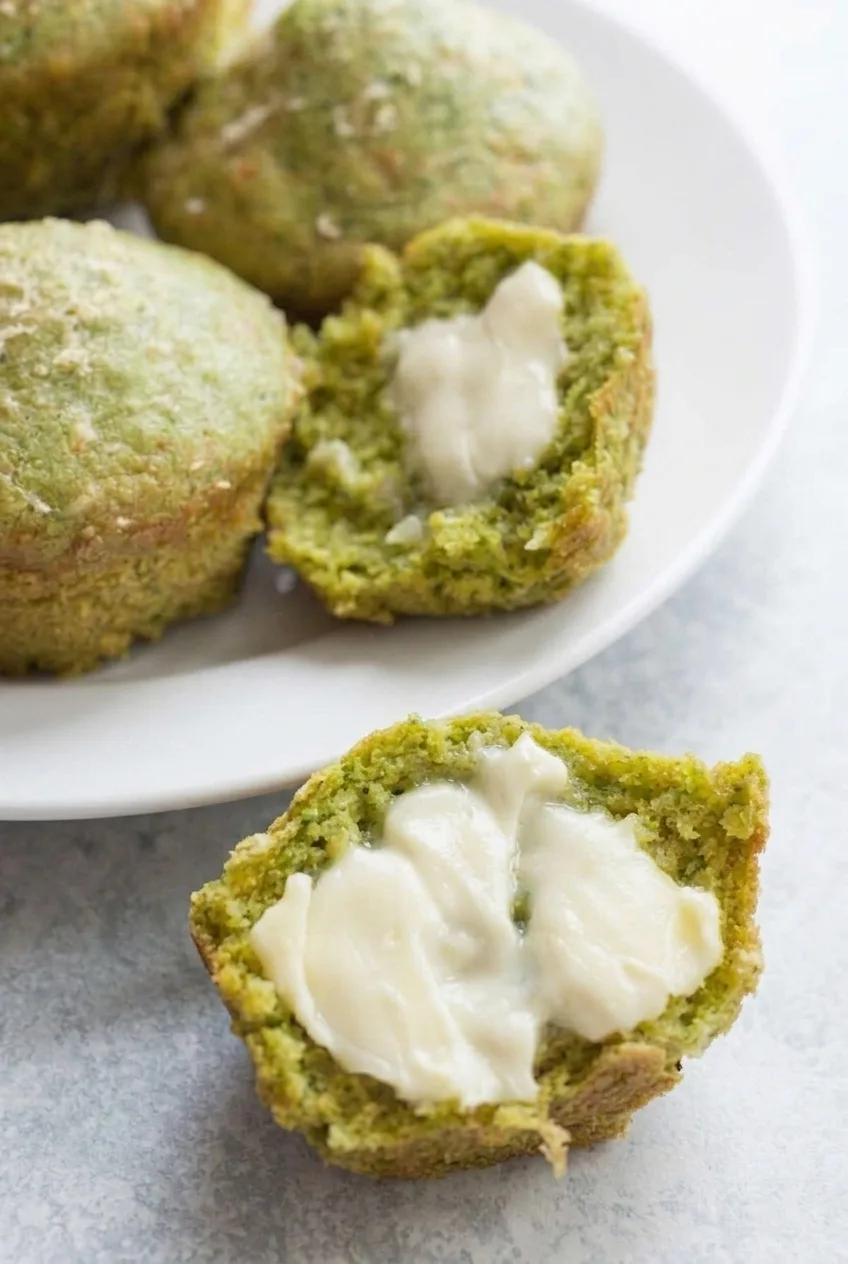
Close view of a buttered egg muffin split open to show its set interior and fine spinach flecks

How to Bake Spinach and Cheese Egg Muffins

  1. Preheat and grease: Fully preheat the oven to 350°F (175°C). Thoroughly spray the bottoms and sides of 8 wells in a standard muffin pan.
  2. Prepare the spinach: Chop the dried spinach into small flecks rather than large leaf pieces. Set aside about 1 tablespoon of the Parmesan for the tops.
  3. Mix the batter: Whisk the flour into the milk until no dry flour remains. Whisk in the eggs, salt, and pepper, then fold in the spinach and remaining Parmesan.
  4. Fill the pan: Stir the batter and divide it evenly among the greased wells. Stir between scoops if the spinach settles. Fill each well about halfway to two-thirds full; if there is extra batter, grease another well rather than filling the others to the rim. Sprinkle the reserved Parmesan on top.
  5. Bake until set: Bake uncovered, starting to check at 22 minutes. The muffins will usually take 25 to 30 minutes. They are done when the tops are gently puffed and lightly golden, the centers show no liquid egg, and a knife inserted into a center comes out without wet egg batter. If the centers are still wet, bake for a few more minutes and check again.
  6. Cool and serve: Let the muffins cool in the pan for 5 minutes, then loosen and lift them out. Split one warm muffin and spread the softened butter on its cut surfaces just before serving.

Why Dry and Finely Chop the Spinach?

Small pieces of spinach spread through the batter instead of forming large leafy pockets. Drying the leaves after washing keeps excess water out of the muffins. The fresh spinach does not need to be cooked first.

What Does the Flour Do?

The modest amount of whole-wheat flour gives these egg muffins enough structure to split while leaving their centers softer than a bread muffin. For a flour-free version, omit it and expect a softer, more egg-cup-like result. The baking time may change, so check that the centers are set. Cheddar or feta can replace the Parmesan, though the flavor and appearance will change.

Serving Ideas

Serve the muffins warm with fruit, or add crispy sweet potato hash browns for a fuller breakfast. For a larger breakfast cooked in one dish, try this sausage egg and cheese breakfast casserole.

How to Store and Reheat

Cool the muffins completely before sealing them in an airtight container. Refrigerate and use or freeze within 4 days. A paper towel in the container can help absorb condensation.

Freeze cooled muffins for up to 1 month and thaw overnight in the refrigerator. Reheat refrigerated or thawed muffins gently in the microwave, checking frequently because microwave power varies. Split and butter a muffin after reheating.

Nutrition

Serving size: 1 muffin. Approximate nutrition per muffin, averaged across 8 muffins and including the 2 teaspoons of serving butter: 115 calories, 8g protein, 7g fat, and 5g carbohydrates. Approximate values per 100g of finished muffins: 190 calories, 13g protein, 12g fat, and 8g carbohydrates. The buttered muffin will contain more calories and fat than an unbuttered one.

Spinach and Cheese Egg Muffins

Oven-baked egg muffins with finely chopped spinach, Parmesan, and a little whole-wheat flour for structure.
Course: Breakfast
Cuisine: American
Prep: 15 min
Cook: 30 min
Total: 50 min
Servings: 8 Calories: 115 kcal

Equipment

  • Standard muffin pan
  • Mixing bowl
  • Whisk
  • Knife

Ingredients

  • Nonstick cooking spray, for 8 standard muffin wells
  • 2 packed cups fresh spinach before chopping (about 60 g), well dried
  • 1/2 cup finely grated Parmesan (about 45 g), divided
  • 1/3 cup whole-wheat flour (about 40 g)
  • 1/4 cup milk
  • 6 large eggs
  • 1/4 teaspoon fine salt
  • 1/8 teaspoon ground black pepper
  • 2 teaspoons softened butter, for serving with one split muffin

Instructions

  1. Preheat the oven to 350°F (175°C). Thoroughly spray the bottoms and sides of 8 wells in a standard muffin pan.
  2. Finely chop the dried spinach into small flecks. Set aside about 1 tablespoon of the Parmesan for topping.
  3. Whisk the flour into the milk until no dry flour remains.
  4. Whisk in the eggs, salt, and pepper, then fold in the spinach and remaining Parmesan.
  5. Stir the batter and divide it evenly among the greased muffin wells, stirring between scoops if the spinach settles. Fill each well about halfway to two-thirds full; grease another well if there is extra batter.
  6. Sprinkle the reserved Parmesan over the tops.
  7. Bake uncovered, checking at 22 minutes. Bake for about 25 to 30 minutes total, until the tops are gently puffed and lightly golden, the centers show no liquid egg, and a knife inserted into a center comes out without wet batter. If needed, bake a few minutes longer and check again.
  8. Cool the muffins in the pan for 5 minutes, then loosen and lift them out. Split one warm muffin and spread softened butter on the cut surfaces before serving.

Tips

  • Dry the spinach well after washing to keep excess water out of the muffins.
  • Chop the spinach into small flecks so it distributes evenly through the batter.
  • Stir the batter between scoops if the spinach settles.
  • Do not fill the muffin wells to the rim; use another greased well if needed.

Variations

  • Flour-Free Egg Muffins: Omit the whole-wheat flour for a softer, more egg-cup-like texture; check the centers for doneness as the baking time may change.
  • Cheddar or Feta Egg Muffins: Replace the Parmesan with cheddar or feta; the flavor and appearance will change.

Notes

Cool completely before storing airtight in the refrigerator for up to 4 days or freezing for up to 1 month. Thaw frozen muffins overnight in the refrigerator and reheat gently in the microwave, checking frequently. Nutrition estimates include the serving butter.

Nutrition

Calories: 115 kcal | Protein: 8 g | Fat: 7 g | Carbohydrates: 5 g | Per 100 G Calories: 190 kcal | Per 100 G Protein: 13 g | Per 100 G Fat: 12 g | Per 100 G Carbohydrates: 8 g

Breakfast Sliders with Ham, Egg and Cheese

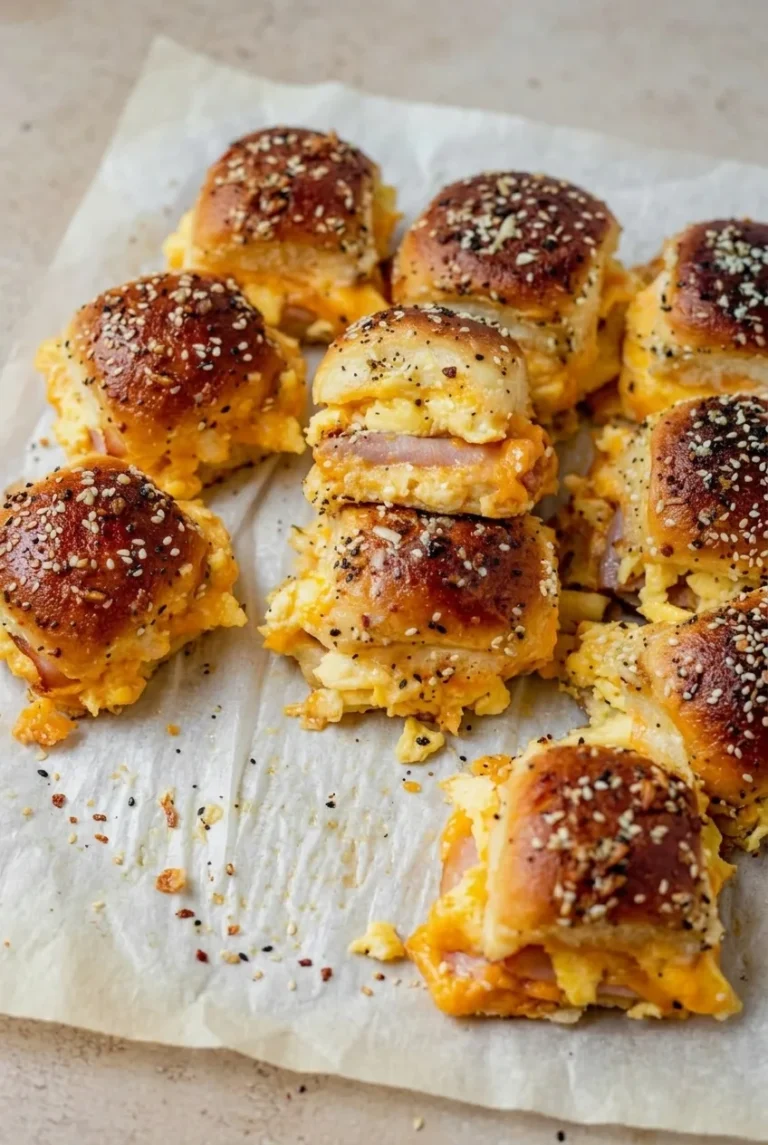
These breakfast sliders bake as one connected slab, then cut into 12 small sandwiches with visible layers of fluffy scrambled eggs, folded ham, and melted cheddar. A butter-Dijon topping and everything bagel seasoning give the rolls glossy, seeded tops.

The eggs leave the skillet softly set so they stay tender through baking. Foil helps the center heat before the sweet, buttered rolls brown.

Yield: 12 sliders | Prep: 20 minutes | Cook: 25 to 30 minutes | Total: About 50 to 55 minutes, including resting

Ingredients for Breakfast Sliders

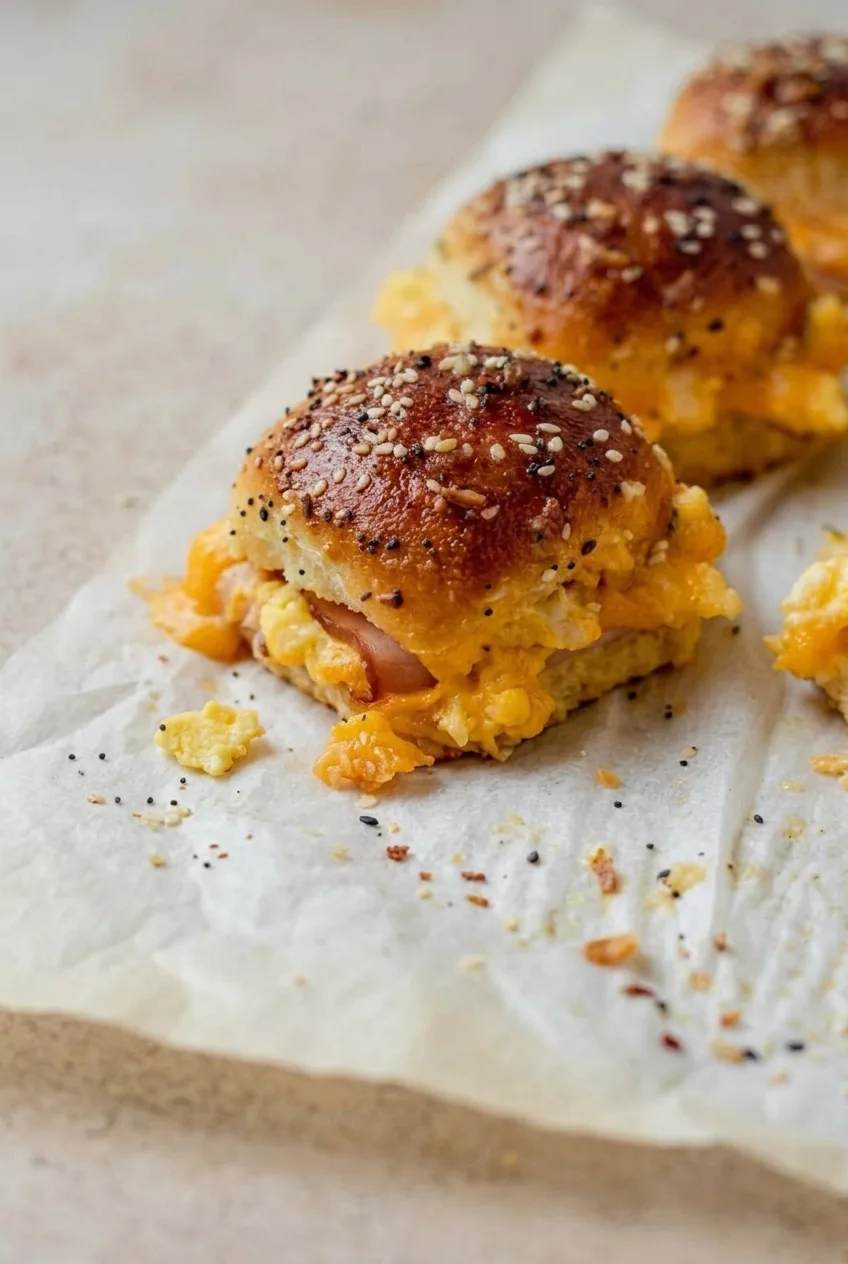
Close view of a slider showing fluffy scrambled egg, folded ham and melted cheddar beneath a seeded roll
  • 1 package connected Hawaiian-style slider rolls (12 rolls, about 340g)
  • 8 large eggs
  • 2 tablespoons milk
  • 1/4 teaspoon fine salt
  • 1/4 teaspoon black pepper
  • 5 tablespoons unsalted butter, divided
  • 8 oz sliced deli ham (about 225g)
  • 8 oz sliced cheddar cheese, about 12 slices (about 225g)
  • 1 tablespoon Dijon mustard
  • 1 tablespoon everything bagel seasoning

Ham and everything bagel seasoning both add salt, so season the eggs lightly.

How to Make Breakfast Sliders

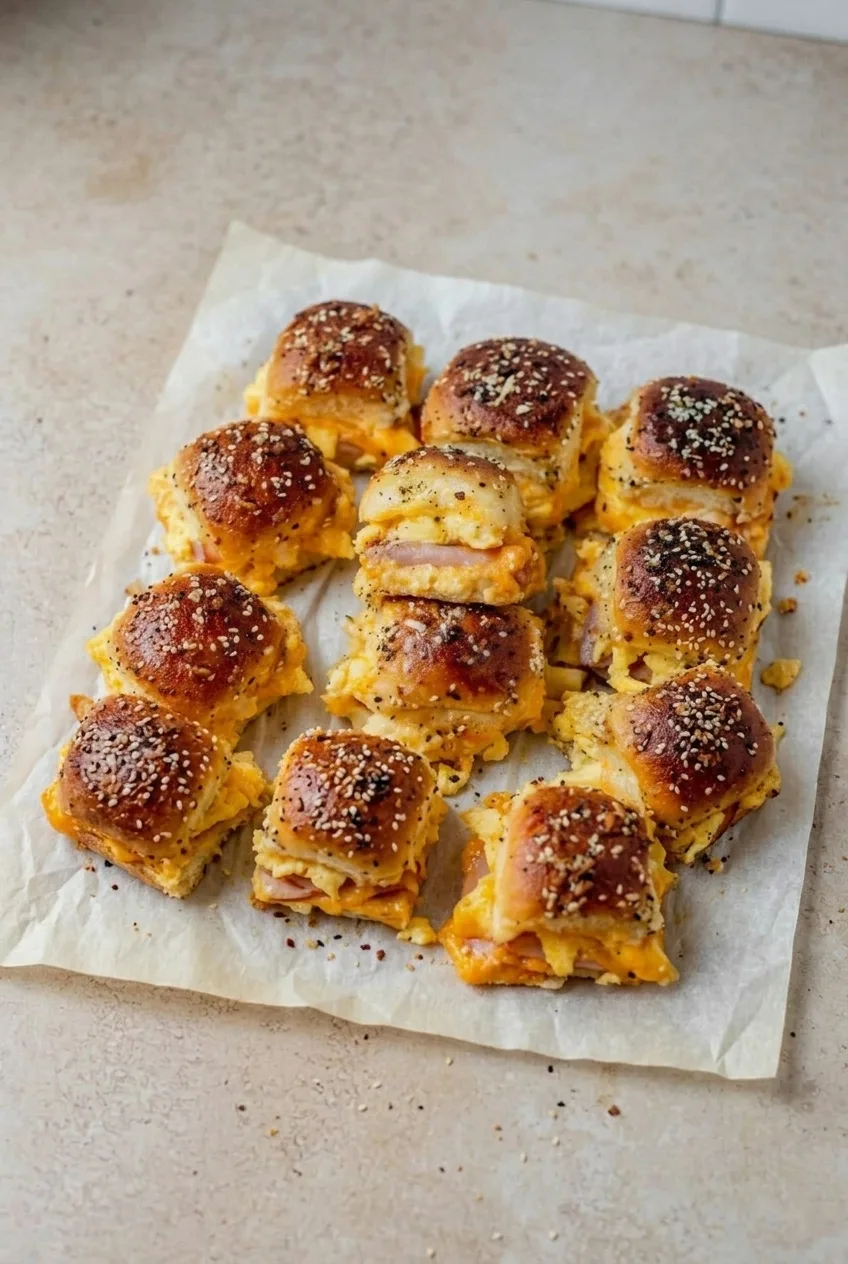
Twelve ham, egg and cheese breakfast sliders grouped on parchment with browned, everything-seasoned tops
  1. Prepare the rolls: Preheat the oven to 350°F (175°C). Use a serrated knife to split the connected rolls horizontally, keeping the top and bottom slabs intact. Place the bottom slab in a 9-by-13-inch baking dish.
  2. Scramble the eggs: Whisk the eggs, milk, salt, and pepper. Melt 1 tablespoon butter in a 10- to 12-inch nonstick skillet over medium-low heat. Add the eggs and stir gently until they form soft, slightly glossy curds with no pools of raw egg, about 5 to 7 minutes. Remove from the heat before they turn dry; they will finish setting in the oven.
  3. Layer the filling: Arrange half the cheddar over the bottom rolls. Add the folded ham, spread the eggs evenly across the slab, and top with the remaining cheddar. Set the top slab in place, aligning it with the bottom rolls. Cheese against both bread surfaces helps hold the sliders together.
  4. Season the tops: Melt the remaining 4 tablespoons butter and mix with the Dijon. Brush over the rolls without soaking them, then sprinkle evenly with everything bagel seasoning.
  5. Bake covered, then uncover: Loosely tent the dish with foil, keeping it off the seasoned tops if possible. Bake for about 15 minutes, then check the center. Uncover and bake for another 5 to 8 minutes, watching closely, until the cheese is melted near the middle, the center sandwiches are hot, and the tops are glossy and golden to deep golden brown. If the tops darken before the middle is hot, tent them again and continue baking.
  6. Rest and cut: Let the slab rest for about 5 minutes so the cheese settles. Cut along the roll seams with a serrated knife to make 12 sliders.

Assemble the Sliders the Night Before

Layer the rolls with cheese, ham, and cooked eggs, then cover and refrigerate for up to one day. Leave off the butter-Dijon topping and everything seasoning until just before baking so the rolls do not sit overnight with a wet topping.

A chilled slab may need longer under foil. Keep it covered until the center is hot, then uncover to brown the tops.

Serving Breakfast Sliders

Serve warm with fruit or crispy sweet potato hash browns. For a fork-and-plate option at brunch, try this sausage egg and cheese breakfast casserole.

How to Store and Reheat Breakfast Sliders

Cool baked leftovers, then refrigerate in an airtight container for up to 3 days. Reheat individual sliders in a covered 350°F oven for about 8 to 10 minutes, or microwave briefly, until hot throughout.

To freeze, cool the baked sliders completely, wrap them individually, and place them in a freezer-safe bag or container for up to 2 months. Thaw overnight in the refrigerator when practical, then reheat until hot throughout.

Nutrition

Approximate nutrition per slider (1 of 12): 280 calories, 15g protein, 17g fat, and 17g carbohydrates. Approximate values per 100g of finished sliders: 270 calories, 14g protein, 16g fat, and 16g carbohydrates. Values vary with the rolls, ham, cheese, and final cooked weight.

Breakfast Sliders with Ham, Egg and Cheese

Connected Hawaiian-style rolls are layered with scrambled eggs, ham, and cheddar, then brushed with butter-Dijon topping and baked until golden.
Course: Breakfast
Cuisine: American
Prep: 20 min
Cook: 30 min
Total: 55 min
Servings: 12 Calories: 280 kcal

Equipment

  • 9-by-13-inch baking dish
  • Serrated knife
  • Whisk
  • Nonstick skillet
  • Aluminum foil

Ingredients

For the sliders

  • 1 package connected Hawaiian-style slider rolls (12 rolls, about 340g)
  • 8 large eggs
  • 2 tablespoons milk
  • 1/4 teaspoon fine salt
  • 1/4 teaspoon black pepper
  • 5 tablespoons unsalted butter, divided
  • 8 oz sliced deli ham (about 225g)
  • 8 oz sliced cheddar cheese, about 12 slices (about 225g)
  • 1 tablespoon Dijon mustard
  • 1 tablespoon everything bagel seasoning

Instructions

  1. Preheat the oven to 350°F (175°C). Split the connected rolls horizontally with a serrated knife, keeping both slabs intact. Place the bottom slab in a 9-by-13-inch baking dish.
  2. Whisk the eggs, milk, salt, and pepper.
  3. Melt 1 tablespoon butter in a 10- to 12-inch nonstick skillet over medium-low heat. Add the eggs and stir gently for 5 to 7 minutes, until softly set with no pools of raw egg. Remove from the heat before they become dry.
  4. Arrange half the cheddar over the bottom rolls. Add the folded ham, spread the eggs evenly over the ham, and top with the remaining cheddar.
  5. Set the top slab of rolls in place, aligning it with the bottom.
  6. Melt the remaining 4 tablespoons butter and mix with the Dijon. Brush the mixture over the rolls, then sprinkle with everything bagel seasoning.
  7. Loosely tent the dish with foil and bake for about 15 minutes. Uncover and bake for another 5 to 8 minutes, until the center sandwiches are hot, the cheese is melted, and the tops are glossy and golden to deep golden brown. If the tops darken before the center is hot, tent again and continue baking.
  8. Rest for about 5 minutes, then cut along the roll seams into 12 sliders.

Tips

  • Season the eggs lightly because the ham and everything bagel seasoning add salt.
  • Cook the eggs until softly set; they will finish cooking in the oven.
  • Brush the butter-Dijon topping over the rolls without soaking them.
  • If preparing the slab ahead, refrigerate it covered for up to one day and add the topping and seasoning just before baking.
  • A chilled slab may need extra time covered; uncover it once the center is hot to brown the tops.

Notes

Refrigerate baked leftovers in an airtight container for up to 3 days. Reheat covered in a 350°F oven for 8 to 10 minutes or microwave until hot throughout. Freeze individually wrapped sliders for up to 2 months. Approximate nutrition per 100g: 270 calories, 14g protein, 16g fat, and 16g carbohydrates.

Nutrition

Calories: 280 kcal | Protein: 15 g | Fat: 17 g | Carbohydrates: 17 g

Biscuits and Gravy Casserole

Quartered biscuits form the base of this sliceable breakfast casserole, with eggs and cheddar beneath a topping of peppery sausage gravy. The biscuits go on the bottom so each portion has a tender biscuit-and-egg interior rather than separate biscuits sitting on top.

Spread the dough loosely in a 9-by-13-inch dish and thicken the gravy before spooning it over the cheese. The top may brown before the center finishes, so check the biscuits and eggs beneath the gravy before taking the casserole out of the oven.

Ingredients for Biscuits and Gravy Casserole

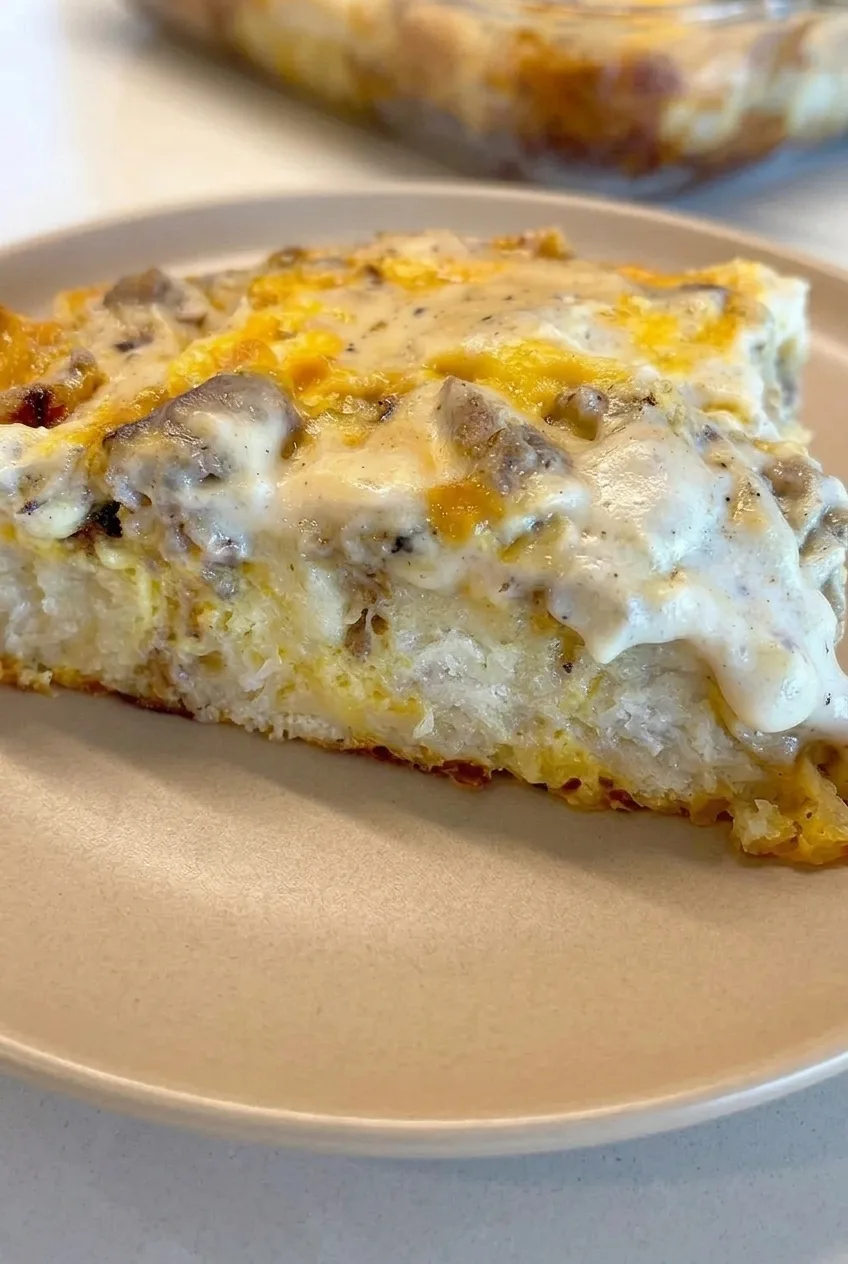
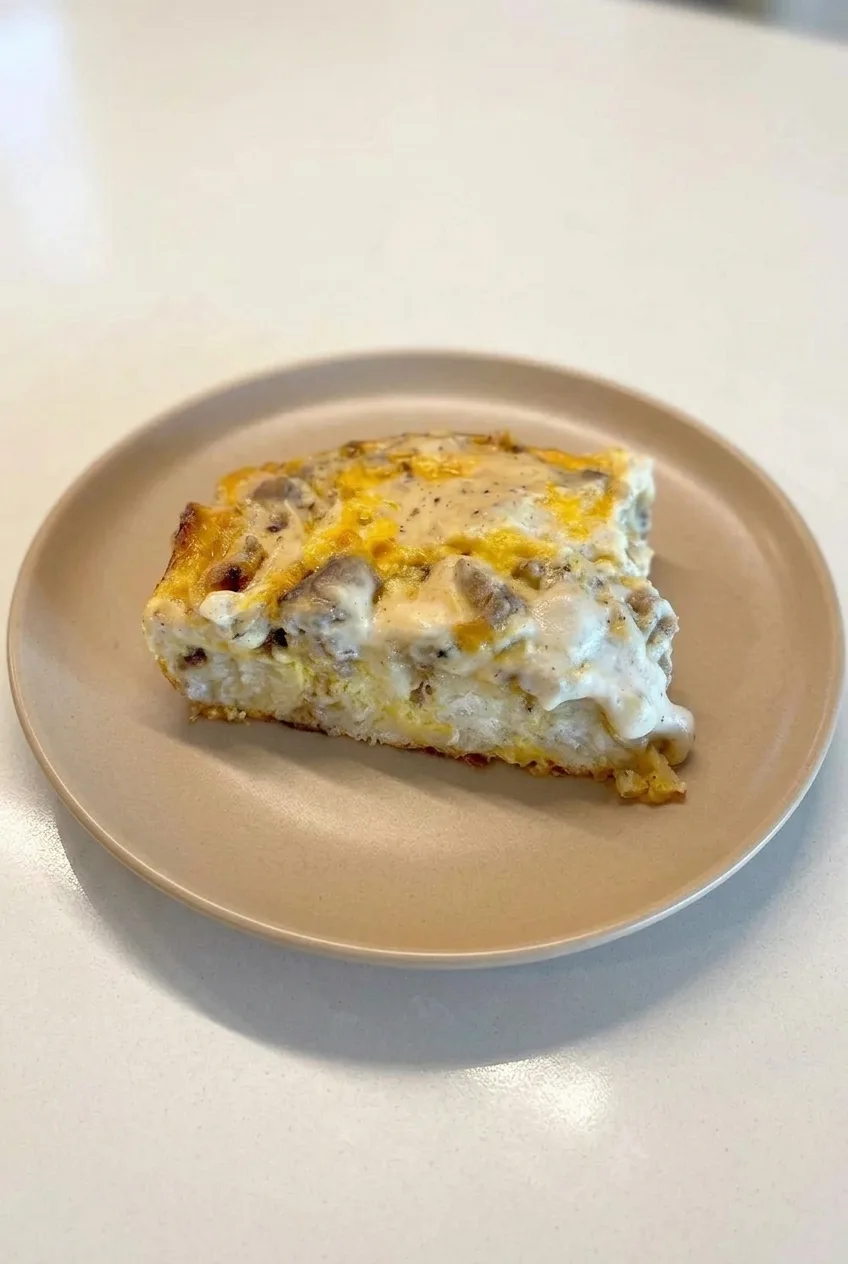
Close view of the casserole’s cooked biscuit-and-egg interior beneath thick, sausage-studded gravy
  • Butter or nonstick cooking spray, for greasing the dish
  • 1 lb pork breakfast sausage (about 450g)
  • 1/4 cup all-purpose flour (30g)
  • 2 1/2 cups whole milk, for the gravy
  • 1 teaspoon freshly ground black pepper, divided
  • 1 can refrigerated flaky biscuits (about 16.3 oz or 460g; typically 8 biscuits), quartered
  • 6 large eggs
  • 1/2 cup whole milk, for the eggs
  • 1/4 teaspoon salt, plus more for the gravy only if needed
  • 1 1/2 cups shredded sharp cheddar (about 170g)
  • Up to 2 tablespoons butter, only if needed to supplement the sausage drippings

How to Make Biscuits and Gravy Casserole

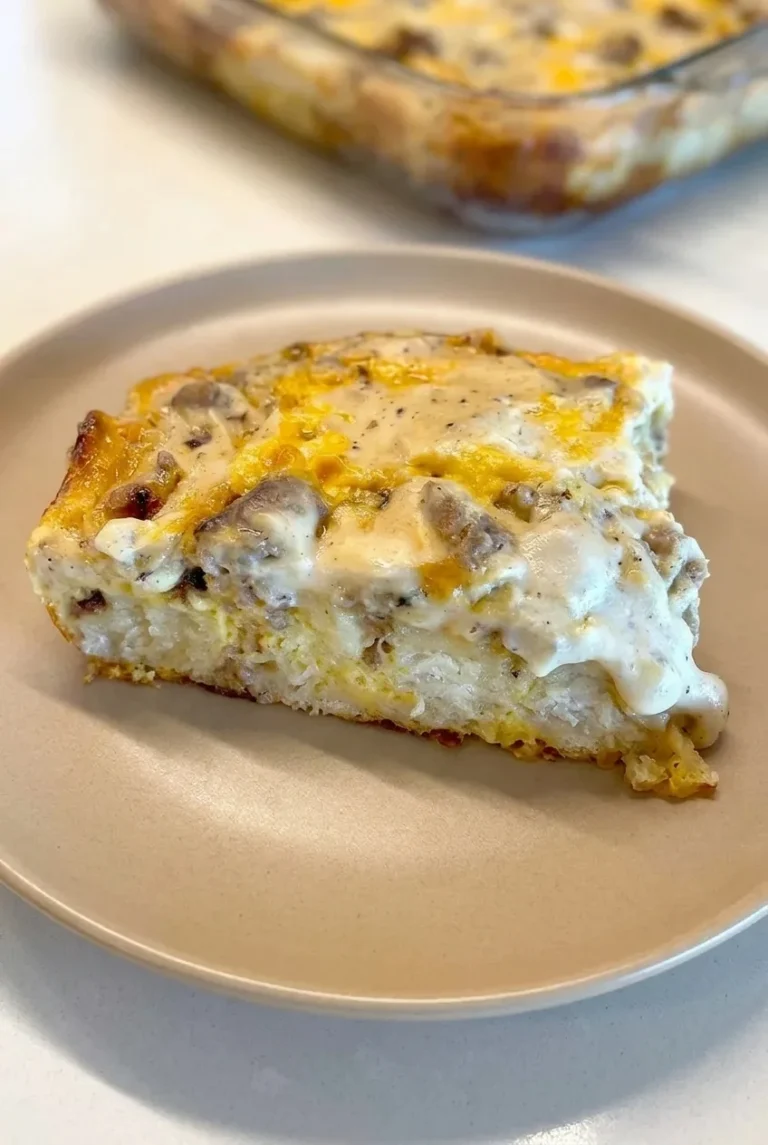
Full plate with a slice of biscuits and gravy casserole, its cut face and gravy-covered top visible
  1. Prepare the dish: Preheat the oven to 350°F (175°C). Lightly grease a 9-by-13-inch baking dish.
  2. Brown the sausage: Cook the sausage in a large skillet over medium heat for about 7 to 9 minutes, breaking it into crumbles, until browned and no longer pink. Transfer it to a bowl. Leave about 2 tablespoons of drippings in the skillet, pouring off any excess. If there is less than 2 tablespoons of fat, add enough butter to make up the difference.
  3. Make the gravy: Stir the flour into the fat and cook briefly, until no dry flour remains. Gradually whisk in the 2 1/2 cups milk. Return the sausage to the skillet and add 3/4 teaspoon pepper. Reduce the heat to medium-low and simmer, stirring, for about 6 to 8 minutes. The gravy should coat a spoon and briefly leave a track when stirred, but still be easy to spoon. Taste before adding salt; the sausage may provide enough.
  4. Build the biscuit base: Spread the biscuit quarters in a single, loosely spaced layer across the dish. Whisk the eggs with the remaining 1/2 cup milk, 1/4 teaspoon salt, and 1/4 teaspoon pepper. Pour evenly over the biscuits.
  5. Add the cheese and gravy: Scatter the cheddar over the egg mixture. Spoon the sausage gravy unevenly across the top, leaving some cheese visible rather than forming a deep pool. If desired, reserve a few spoonfuls of gravy for serving.
  6. Bake: Bake uncovered and start checking at 35 minutes. It will generally take about 35 to 45 minutes, but continue baking as needed until the center is set, a biscuit piece near the center has no sticky raw dough, and the gravy bubbles near the edges. If the top browns before the center cooks, tent it loosely with foil.
  7. Rest and serve: Let the casserole rest for 10 minutes so it holds together when cut. Slice into 8 portions. Gently warm any reserved gravy and spoon a little over the edge of each serving.

How to Tell When the Center Is Done

A golden top does not mean the bottom biscuits are baked. Check beneath the topping near the middle: the eggs should be set rather than sloshy, and a biscuit piece should look cooked through, not sticky or raw. A pool of thin liquid when you cut a portion can also signal that the center needed more baking time.

Gravy Consistency and a Shortcut

The gravy needs to be thick enough to sit on top of the casserole, but loose enough to flow off a spoon. Whisking in the milk gradually helps prevent lumps; simmering the gravy before assembly keeps it from running into the biscuit layer.

Prepared country-style or sausage gravy can replace the homemade gravy. Brown the sausage separately, then combine it with prepared gravy that is thick and spoonable. Use enough to coat the top without submerging it, and taste before adding salt.

Make It the Night Before

Cover and refrigerate the assembled casserole overnight. Uncover it before baking. Starting from cold may extend the baking time, so check the center rather than relying on a fixed number of extra minutes. Tent loosely with foil if the top browns before the eggs and biscuits are cooked.

Storing and Reheating Leftovers

Refrigerate leftovers covered or in an airtight container for up to 3 days. Microwave individual portions until hot, or reheat larger portions in the oven until hot. The biscuits will be softer after storage.

Serve with fresh fruit on the side or hot sauce at the table. For another hearty baked meal, try this kielbasa sausage and potato casserole.

Nutrition

Approximate per serving, based on 8 servings: 530 calories, 24g protein, 32g fat, and 33g carbohydrates. Approximate per 100g of finished casserole: 215 calories, 10g protein, 13g fat, and 13g carbohydrates. Values vary with the biscuit and sausage brands, the amount of fat retained, and moisture lost during baking; optional butter is not included.

Biscuits and Gravy Casserole

Quartered biscuits bake beneath eggs, cheddar, and peppery sausage gravy in a sliceable breakfast casserole.
Course: Breakfast
Cuisine: American
Prep: 15 min
Cook: 62 min
Total: 87 min
Servings: 8 Calories: 530 kcal per serving; 215 kcal per 100 g

Equipment

  • 9-by-13-inch baking dish
  • Large skillet
  • Mixing bowl
  • Whisk

Ingredients

For the sausage gravy

  • 1 lb pork breakfast sausage (about 450 g)
  • 1/4 cup all-purpose flour (30 g)
  • 2 1/2 cups whole milk
  • 3/4 teaspoon freshly ground black pepper
  • Salt, only if needed
  • Up to 2 tablespoons butter, optional, to supplement the sausage drippings

For the casserole

  • Butter or nonstick cooking spray, for greasing the dish
  • 1 can refrigerated flaky biscuits (about 16.3 oz or 460 g; typically 8 biscuits), quartered
  • 6 large eggs
  • 1/2 cup whole milk
  • 1/4 teaspoon salt
  • 1/4 teaspoon freshly ground black pepper
  • 1 1/2 cups shredded sharp cheddar (about 170 g)

Instructions

  1. Preheat the oven to 350°F (175°C). Lightly grease a 9-by-13-inch baking dish.
  2. Cook the sausage in a large skillet over medium heat for 7 to 9 minutes, breaking it into crumbles, until browned and no longer pink. Transfer it to a bowl.
  3. Leave about 2 tablespoons of sausage drippings in the skillet and pour off any excess. If needed, add butter to make up the difference.
  4. Stir the flour into the fat and cook briefly, until no dry flour remains. Gradually whisk in 2 1/2 cups milk.
  5. Return the sausage to the skillet and add 3/4 teaspoon pepper. Simmer over medium-low heat for 6 to 8 minutes, stirring, until the gravy coats a spoon but is still easy to spoon. Taste and add salt only if needed.
  6. Spread the biscuit quarters in a single, loosely spaced layer in the prepared dish.
  7. Whisk the eggs with the remaining 1/2 cup milk, 1/4 teaspoon salt, and 1/4 teaspoon pepper. Pour evenly over the biscuits.
  8. Scatter the cheddar over the egg mixture. Spoon the sausage gravy unevenly over the top, leaving some cheese visible. Reserve a few spoonfuls of gravy for serving, if desired.
  9. Bake uncovered, checking at 35 minutes. Continue baking for about 35 to 45 minutes total, until the center is set, a biscuit piece near the center has no sticky raw dough, and the gravy bubbles near the edges. Tent loosely with foil if the top browns before the center is done.
  10. Rest the casserole for 10 minutes before cutting into 8 portions. Gently warm any reserved gravy and spoon it over the servings.

Tips

  • Simmer the gravy until thick enough to sit on top without pooling, but loose enough to flow off a spoon.
  • Whisk the milk into the flour gradually to help prevent lumps.
  • Check a biscuit piece near the center; a golden top alone does not confirm the biscuits underneath are cooked.
  • Tent the casserole loosely with foil if the top browns before the center is set.
  • Taste the gravy before adding salt because the sausage may already provide enough.

Variations

  • Prepared gravy shortcut: Use thick, spoonable prepared country-style or sausage gravy instead of homemade gravy. Brown the sausage separately, combine it with the gravy, and spoon enough over the casserole to coat the top without submerging it.

Notes

Refrigerate leftovers covered for up to 3 days. Reheat individual portions in the microwave or larger portions in the oven until hot. The casserole can be assembled, covered, and refrigerated overnight; baking from cold may take longer.

Nutrition

Calories: 530 kcal per serving; 215 kcal per 100 g | Protein: 24 g per serving; 10 g per 100 g | Fat: 32 g per serving; 13 g per 100 g | Carbohydrates: 33 g per serving; 13 g per 100 g

Breakfast Pizza with Eggs and Bacon

This large sheet-pan pizza has a thin layer of peppery white gravy beneath soft scrambled eggs, cooked bacon, and patches of melted cheddar and mozzarella. It goes to the table whole, then gets cut into squares.

The dough gets a short par-bake before the toppings go on. That sets the center beneath the gravy, while a brief final bake melts the cheese without drying out the eggs.

Ingredients for Breakfast Pizza

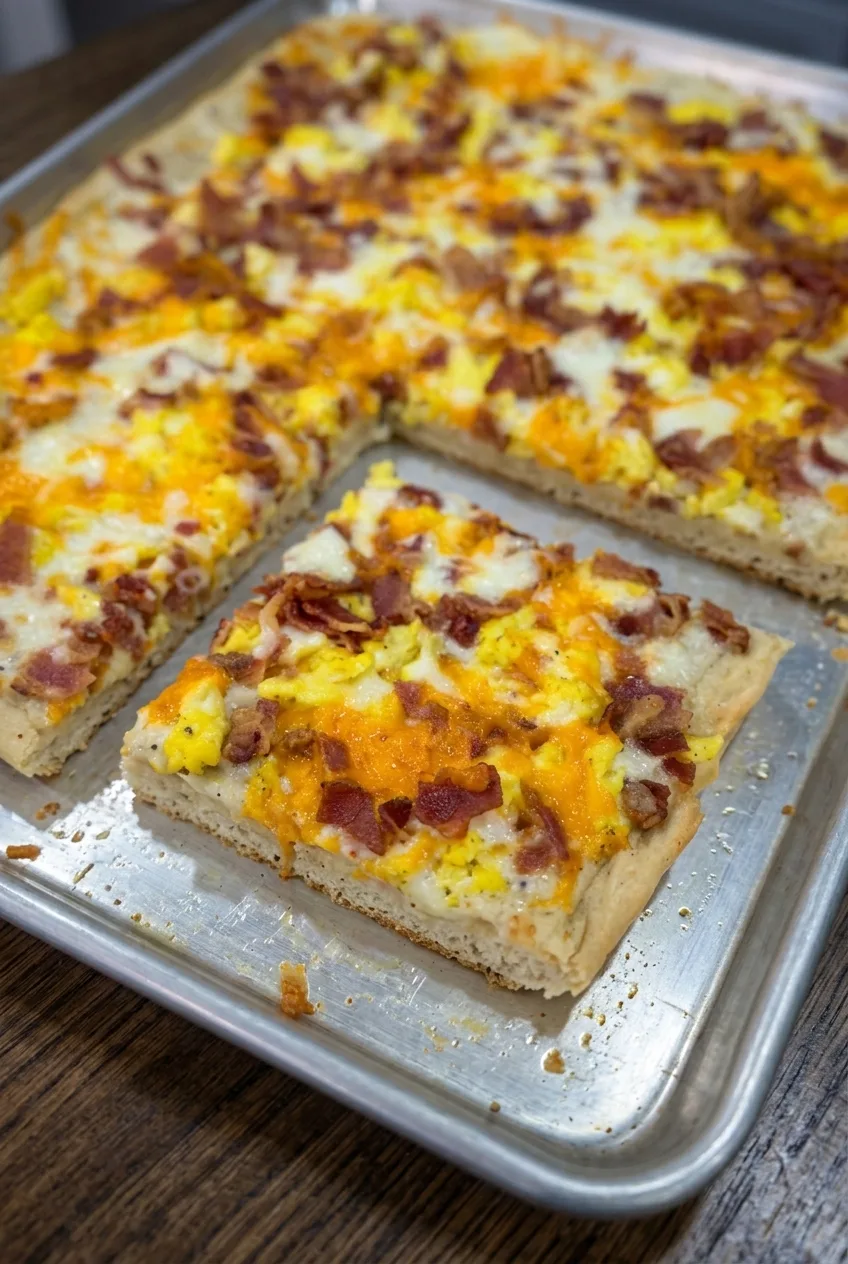
Close view of a breakfast pizza square showing eggs, bacon, white gravy, melted cheese, and baked crust
  • 1 1/2 pounds pizza dough (680g)
  • 1 tablespoon olive oil
  • 10 ounces bacon, about 10 standard slices (280g)
  • 2 tablespoons unsalted butter (30g)
  • 2 tablespoons all-purpose flour (15g)
  • 1 cup whole milk for the gravy, plus 2 tablespoons for the eggs
  • 8 large eggs
  • 1/2 teaspoon fine salt, divided, or to taste
  • 1/2 teaspoon freshly ground black pepper, divided
  • 1 cup shredded cheddar (about 115g)
  • 1 cup shredded low-moisture mozzarella (about 115g)

Yield: 1 large rectangular pizza, or 8 servings. Time: About 20 minutes prep, 25–30 minutes cooking, and 45–55 minutes total; some stovetop work overlaps the oven time.

How to Make Breakfast Pizza with Eggs and Bacon

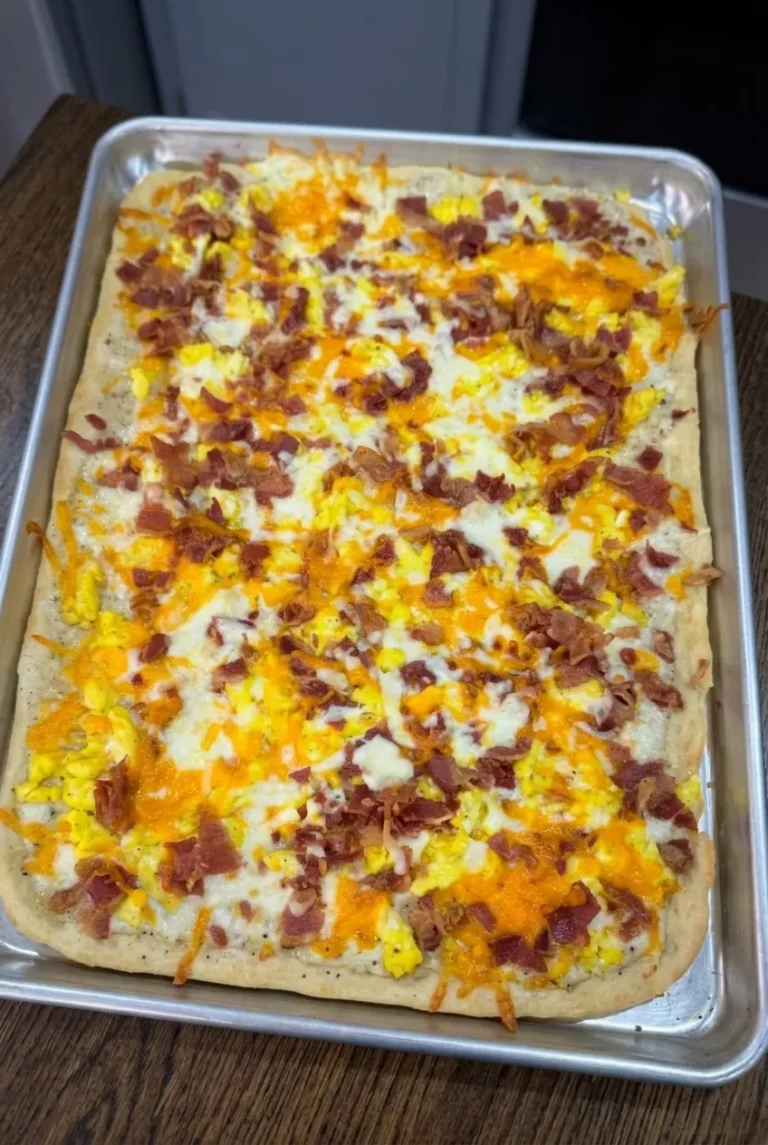
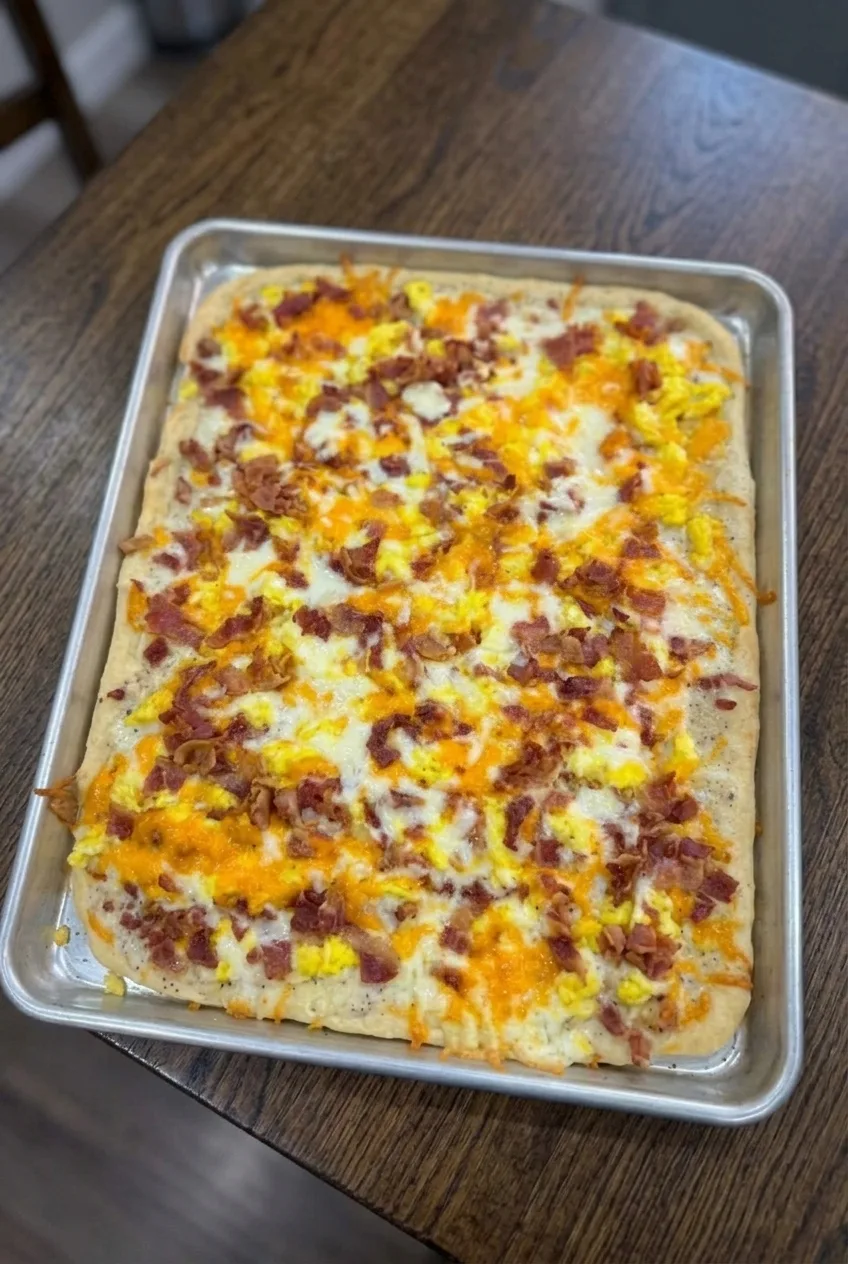
Whole rectangular breakfast pizza on a rimmed baking sheet, viewed with more countertop around it
  1. Preheat and prepare the pan: Set a rack near the center of the oven and heat to 425°F (220°C). Lightly coat an 18-by-13-inch rimmed metal baking sheet with the olive oil.
  2. Cook the bacon: Cook the bacon in a large skillet over medium heat until browned and fully cooked, about 10–12 minutes, depending on thickness. Drain, then chop or break it into irregular pieces. The brief final bake will not cook raw bacon through.
  3. Par-bake the dough: Stretch the dough nearly to the edges of the sheet pan, leaving a modest raised border. Lightly prick the center. Bake uncovered for 9–11 minutes, checking at 9 minutes. The surface should look set, not raw or sticky, and the edges should just begin to color.
  4. Make the gravy: Melt the butter in a small saucepan over medium heat. Whisk in the flour and cook briefly, then gradually whisk in 1 cup milk. Simmer, whisking, until the gravy coats a spoon but still spreads easily, about 5–7 minutes. Stir in 1/4 teaspoon each salt and pepper. If it runs like milk, simmer it a little longer.
  5. Softly scramble the eggs: Whisk the eggs with the remaining 2 tablespoons milk, 1/4 teaspoon salt, and 1/4 teaspoon pepper. Wipe excess bacon fat from the skillet. Cook the eggs over medium-low heat, stirring gently, for about 3–4 minutes. Remove them from the heat when soft curds have formed and no liquid egg pools in the pan; they should still look moist.
  6. Top and bake: Spread the gravy thinly over the par-baked center, leaving the border visible. Add the eggs and bacon, then scatter on the cheddar and mozzarella, leaving some sauce, egg, and bacon visible. Bake uncovered for 10–14 minutes, checking at 10 minutes. The cheese should be melted, the edges lightly golden, and the center of the crust baked rather than doughy. Rotate the pan only if your oven browns unevenly.
  7. Rest and serve: Leave the whole pizza on its baking sheet for about 5 minutes so the cheese settles, then cut it into squares.

How to Keep the Crust from Turning Doughy

The par-baked center should look set before the gravy goes on; it does not need to be fully browned. Use a thin layer of spreadably thick gravy, and check the center of the crust at the end of the final bake rather than judging by melted cheese alone.

A smaller pan will make the dough thicker and may require more baking time. If using a prepared crust, follow its baking directions where applicable.

Why the Eggs and Bacon Cook Differently

Cook the bacon completely before assembly because the final bake is short. Take the eggs off the heat while they are softly set: they will heat again on the pizza, and dry scrambled eggs can turn rubbery.

White Gravy and Topping Options

For a shortcut, use about 1 cup thick prepared white gravy in place of the homemade gravy. Spread it thinly and taste before adding salt, since prepared gravies vary. Fully cooked, crumbled breakfast sausage can replace the bacon, though bacon defines this version. Offer hot sauce or red pepper flakes at the table if desired.

For another shareable brunch dish, try sheet pan French toast.

Storage and Reheating

Refrigerate leftover cooked pizza in an airtight container or zip-top bag for up to 3 days. To reheat refrigerated slices, preheat an air fryer to 350°F (175°C) and heat for about 3–4 minutes, checking early and making sure the center is hot.

Cooked slices can also be frozen, separated with parchment in freezer-safe wrapping or bags, for up to 1 month. Reheat frozen slices in an air fryer at 400°F (205°C) for about 5–7 minutes, until hot in the center. Thicker slices and different air fryers may need more or less time.

Nutrition

Approximate nutrition per serving (1/8 of the pizza): 610 calories, 27g protein, 36g fat, and 48g carbohydrates. Approximate values per 100g of finished pizza: 290 calories, 13g protein, 17g fat, and 23g carbohydrates. Values will vary with the dough, bacon, cheese, and moisture lost during cooking.

Breakfast Pizza with Eggs and Bacon

A sheet-pan pizza topped with peppery white gravy, soft scrambled eggs, cooked bacon, cheddar, and mozzarella.
Course: Breakfast
Cuisine: American
Prep: 20 min
Cook: 30 min
Total: 55 min
Servings: 8 Calories: 610 kcal

Equipment

  • Oven
  • 18-by-13-inch rimmed baking sheet
  • Large skillet
  • Small saucepan
  • Whisk

Ingredients

For the Pizza

  • 1 1/2 pounds pizza dough (680 g)
  • 1 tablespoon olive oil
  • 10 ounces bacon, about 10 standard slices (280 g)
  • 1 cup shredded cheddar (about 115 g)
  • 1 cup shredded low-moisture mozzarella (about 115 g)

For the Gravy

  • 2 tablespoons unsalted butter (30 g)
  • 2 tablespoons all-purpose flour (15 g)
  • 1 cup whole milk
  • 1/4 teaspoon fine salt
  • 1/4 teaspoon freshly ground black pepper

For the Eggs

  • 8 large eggs
  • 2 tablespoons whole milk
  • 1/4 teaspoon fine salt
  • 1/4 teaspoon freshly ground black pepper

Instructions

  1. Set a rack near the center of the oven and preheat to 425°F (220°C). Lightly coat an 18-by-13-inch rimmed baking sheet with olive oil.
  2. Cook the bacon in a large skillet over medium heat until browned and fully cooked, about 10–12 minutes. Drain and chop or break it into pieces.
  3. Stretch the dough nearly to the edges of the baking sheet, leaving a modest raised border. Lightly prick the center and bake uncovered for 9–11 minutes, until the surface is set and the edges just begin to color.
  4. Melt the butter in a small saucepan over medium heat. Whisk in the flour and cook briefly, then gradually whisk in 1 cup milk. Simmer, whisking, for 5–7 minutes until the gravy coats a spoon but still spreads easily. Stir in 1/4 teaspoon each salt and pepper.
  5. Whisk the eggs with the remaining 2 tablespoons milk, 1/4 teaspoon salt, and 1/4 teaspoon pepper. Wipe excess bacon fat from the skillet. Cook the eggs over medium-low heat, stirring gently, for 3–4 minutes, until soft curds form and no liquid egg pools in the pan. Remove from the heat while the eggs still look moist.
  6. Spread the gravy thinly over the par-baked dough, leaving the border visible. Add the eggs and bacon, then scatter on the cheddar and mozzarella.
  7. Bake uncovered for 10–14 minutes, until the cheese melts, the edges are lightly golden, and the center crust is baked through. Rotate the pan if your oven browns unevenly.
  8. Let the pizza rest on the baking sheet for about 5 minutes, then cut into squares.

Tips

  • Par-bake the dough until the center looks set before adding gravy.
  • Keep the gravy spreadably thick and use a thin layer to help prevent a doughy crust.
  • Cook the bacon fully before assembling; the final bake is too short to cook raw bacon.
  • Remove the eggs from the heat while they are still moist so they do not turn rubbery in the oven.
  • Check the center crust for doneness rather than judging by melted cheese alone.

Variations

  • Prepared White Gravy: Use about 1 cup thick prepared white gravy in place of the homemade gravy; spread it thinly and taste before adding salt.
  • Breakfast Sausage: Replace the bacon with fully cooked, crumbled breakfast sausage.
  • Spicy Topping: Serve with hot sauce or red pepper flakes, if desired.

Notes

Refrigerate leftovers in an airtight container for up to 3 days. Reheat refrigerated slices in an air fryer at 350°F (175°C) for 3–4 minutes, until hot in the center. Freeze slices for up to 1 month; reheat from frozen at 400°F (205°C) for 5–7 minutes, checking that the center is hot.

Nutrition

Calories: 610 kcal | Protein: 27 g | Fat: 36 g | Carbohydrates: 48 g | Per 100g Calories: 290 kcal | Per 100g Protein: 13 g | Per 100g Fat: 17 g | Per 100g Carbohydrates: 23 g