Author

Julia

Browsing

No-Bake Rocky Road Bars

These rocky road bars set into a chunky chocolate slab with roasted peanuts for crunch and miniature marshmallows throughout. This version uses chocolate and creamy peanut butter as the binder, with peanuts rather than cereal as the crunchy mix-in. Let the melted chocolate cool briefly before adding the marshmallows so they remain visible. Press the mixture into a lined pan without smoothing away its rough top, then chill until firm enough to cut.

Prep time: 15 minutes | Active cook time: 5 minutes | Chill time: At least 3 hours | Makes: 16 bars or squares

Ingredients for No-Bake Rocky Road Bars
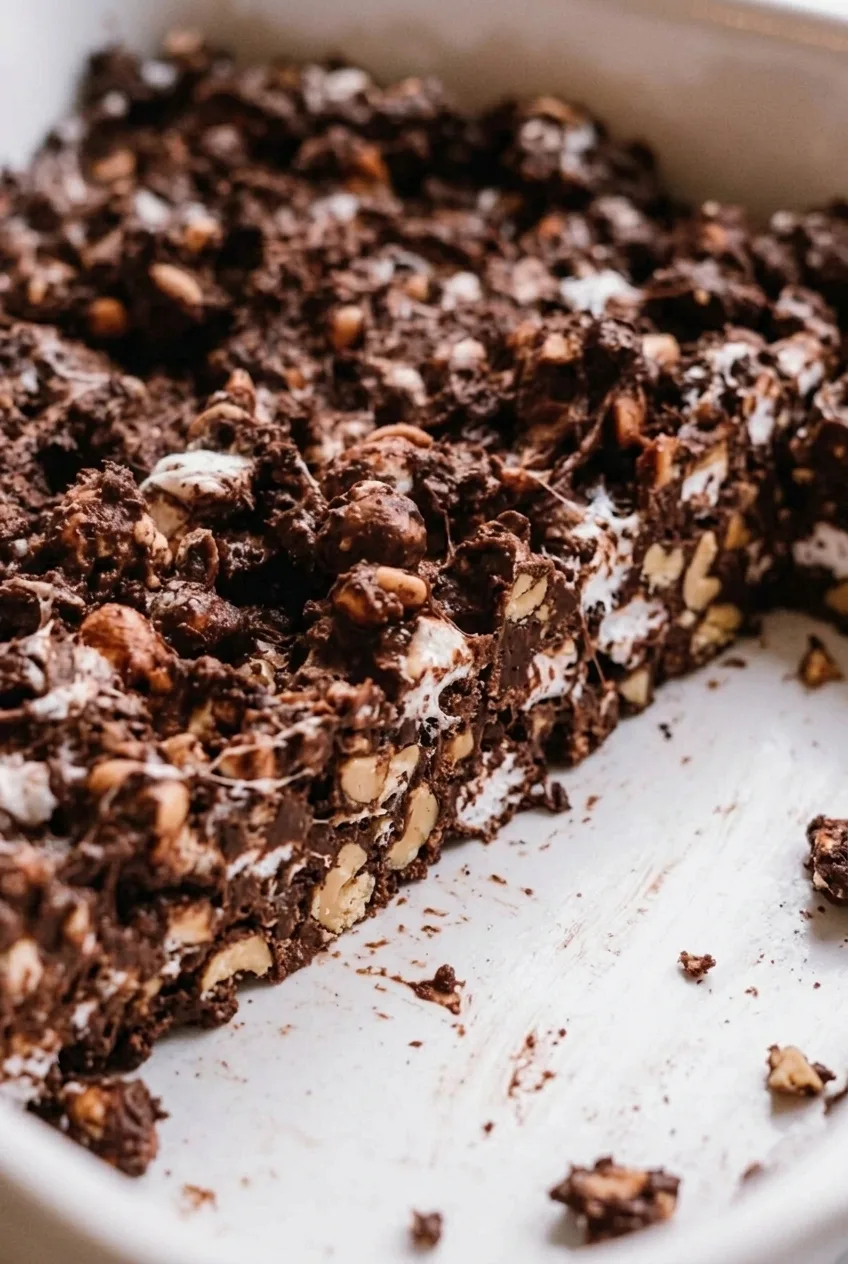
Close detail of No-Bake Rocky Road Bars showing peanut pieces and distinct marshmallow pockets in the chocolate.
  • 12 ounces semisweet chocolate chips (about 2 cups; 340g)
  • 1/2 cup conventional creamy peanut butter (about 130g)
  • 1 cup roasted peanuts, salted or unsalted (145g)
  • 2 cups miniature marshmallows (100g)
  • Optional: a pinch of flaky salt, if using unsalted peanuts

Use conventional creamy peanut butter for a more predictable set; natural peanut butter may behave differently.

How to Make No-Bake Rocky Road Bars
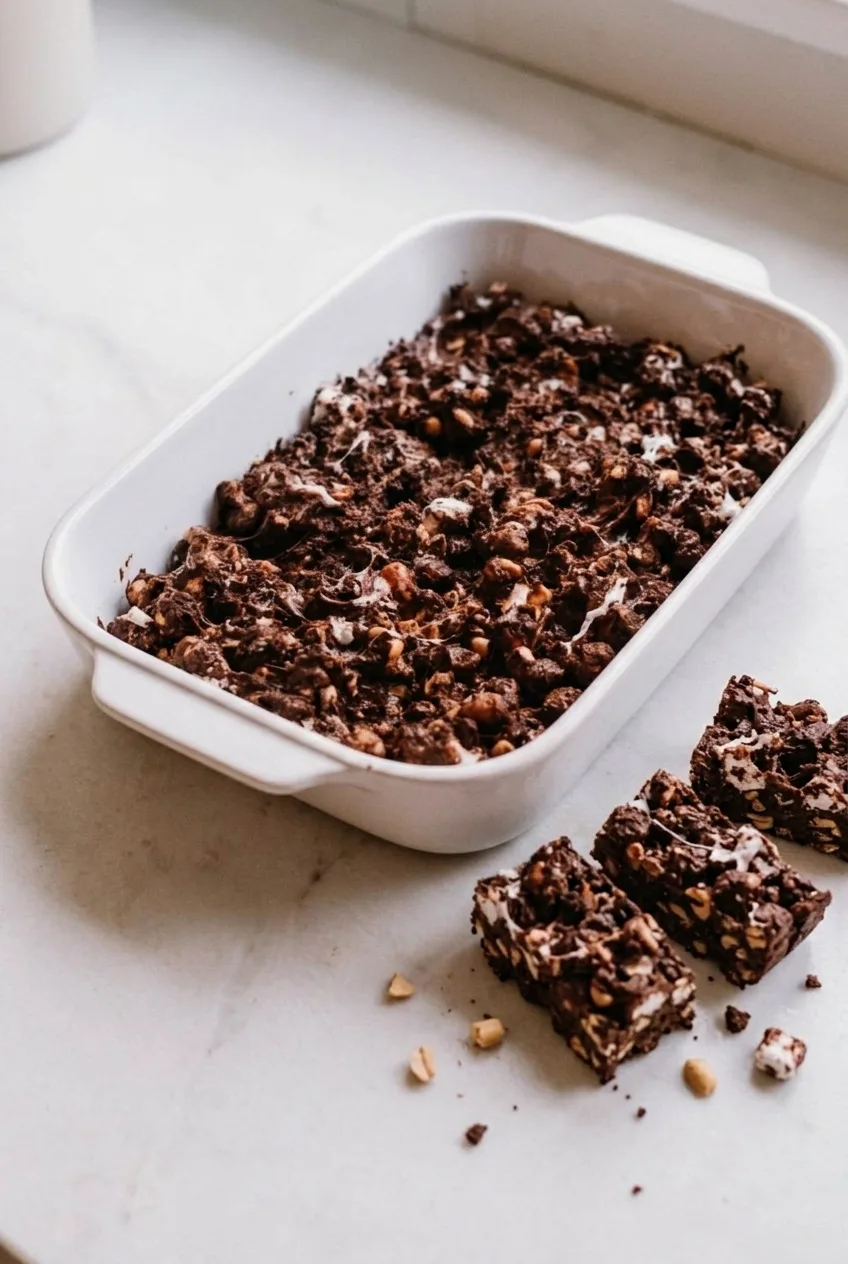
A white rectangular dish of No-Bake Rocky Road Bars with a few cut squares beside the full slab.
  1. Line the pan: Line an 8-inch square pan or similarly sized shallow rectangular dish with parchment, leaving overhang on two sides for lifting out the slab.
  2. Melt the binder: Combine the chocolate chips and peanut butter in a medium heavy-bottomed saucepan. Stir continuously over low heat for about 4 to 5 minutes, checking as soon as the chips begin to soften. Remove from the heat when the mixture is smooth and no unmelted chips remain. Do not let it bubble.
  3. Cool briefly: Let the mixture stand for about 3 to 5 minutes, stirring once or twice. It should still be fluid and easy to stir, but no longer steaming or intensely hot.
  4. Add the mix-ins: Fold in the peanuts and, if using, the salt. Gently fold in the marshmallows just until distributed so the white pieces remain distinct.
  5. Fill the pan: Transfer the mixture to the lined pan and press it to the edges in an even layer. Leave the top rough and uneven.
  6. Chill: Refrigerate uncovered for at least 3 hours. The center should feel firm, and the slab should hold its shape when lifted by the parchment. If it bends, chill it longer.
  7. Cut: Lift out the slab and cut it into 16 bars or squares with a sharp knife. If the knife drags or the bars soften while cutting, return them to the refrigerator until firm.

How to Keep the Marshmallows Visible

Very hot chocolate can melt the marshmallows into the binder. The short cooling pause lets the mixture stay fluid enough to coat them without losing their shape. Once the binder has cooled, fold the marshmallows in gently rather than stirring them for an extended time.

For another no-bake chocolate-and-peanut-butter treat, try these No-Bake Avalanche Cookies.

Storage

Keep the bars covered in the refrigerator and return them to the fridge between servings, especially in warm conditions. They can be made ahead and kept chilled until serving. About a week is a storage guide, not a guarantee.

For a smoother bar without the rocky road mix-ins, see these No-Bake Chocolate Peanut Butter Bars.

Nutrition

Approximate nutrition per bar, based on 16 bars: 225 calories, 6g protein, 15g fat, and 21g carbohydrates. Per 100g: about 505 calories, 12g protein, 33g fat, and 47g carbohydrates. Values vary by ingredient brand and portion size.

No-Bake Rocky Road Bars

Chocolate and creamy peanut butter bind roasted peanuts and miniature marshmallows into chilled bars.
Course: Dessert
Cuisine: American
Prep: 15 min
Cook: 5 min
Total: 200 min
Servings: 16 Calories: 225 kcal

Equipment

  • 8-inch square pan
  • Parchment paper
  • Medium heavy-bottomed saucepan
  • Sharp knife

Ingredients

  • 12 ounces semisweet chocolate chips (about 2 cups; 340g)
  • 1/2 cup conventional creamy peanut butter (about 130g)
  • 1 cup roasted peanuts, salted or unsalted (145g)
  • 2 cups miniature marshmallows (100g)
  • Optional: a pinch of flaky salt, if using unsalted peanuts

Instructions

  1. Line an 8-inch square pan or similarly sized shallow rectangular dish with parchment, leaving overhang on two sides.
  2. Combine the chocolate chips and peanut butter in a medium heavy-bottomed saucepan.
  3. Stir continuously over low heat for about 4 to 5 minutes, until the mixture is smooth and no chips remain. Do not let it bubble.
  4. Remove the pan from the heat and let the mixture cool for 3 to 5 minutes, stirring once or twice.
  5. Fold in the peanuts and optional salt, then gently fold in the marshmallows just until distributed.
  6. Transfer the mixture to the lined pan and press it into an even layer, leaving the top rough.
  7. Refrigerate uncovered for at least 3 hours, until the center is firm and the slab holds its shape.
  8. Lift the slab out using the parchment and cut it into 16 bars or squares with a sharp knife.

Tips

  • Use conventional creamy peanut butter for a more predictable set.
  • Let the melted chocolate cool briefly before adding the marshmallows so they stay visible.
  • Fold the marshmallows in gently rather than stirring for a long time.
  • If the slab bends when lifted or the knife drags while cutting, chill it longer.
Notes

Keep covered in the refrigerator and return the bars to the fridge between servings, especially in warm conditions. About a week is a storage guide, not a guarantee.

Nutrition

Calories: 225 kcal | Protein: 6 g | Fat: 15 g | Carbohydrates: 21 g

No-Bake Cherry Cheesecake Cups

These individual cheesecake cups have a pressed graham cracker base, an airy cream cheese filling, and glossy cherries spooned on after chilling. Whipping the cream separately gives the filling its mousse-like texture; it will hold its shape without becoming as dense as baked cheesecake. Allow at least 6 hours in the refrigerator, or make the cups the day before and add the cherries when ready to serve.

Prep time: 30 minutes | Cook time: 0 minutes | Total time: At least 6 hours 30 minutes, mostly chilling | Yield: 12 cheesecake cups

Ingredients for No-Bake Cherry Cheesecake Cups

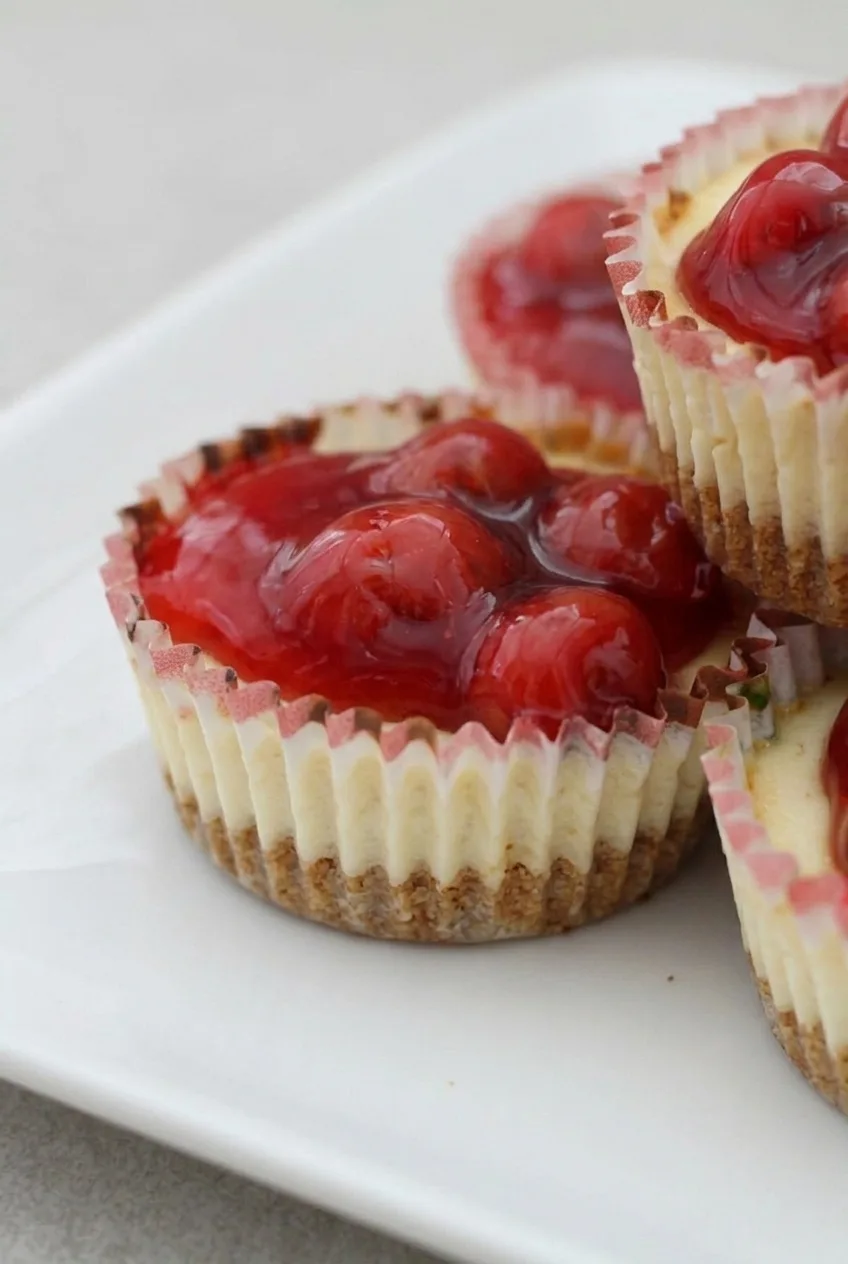
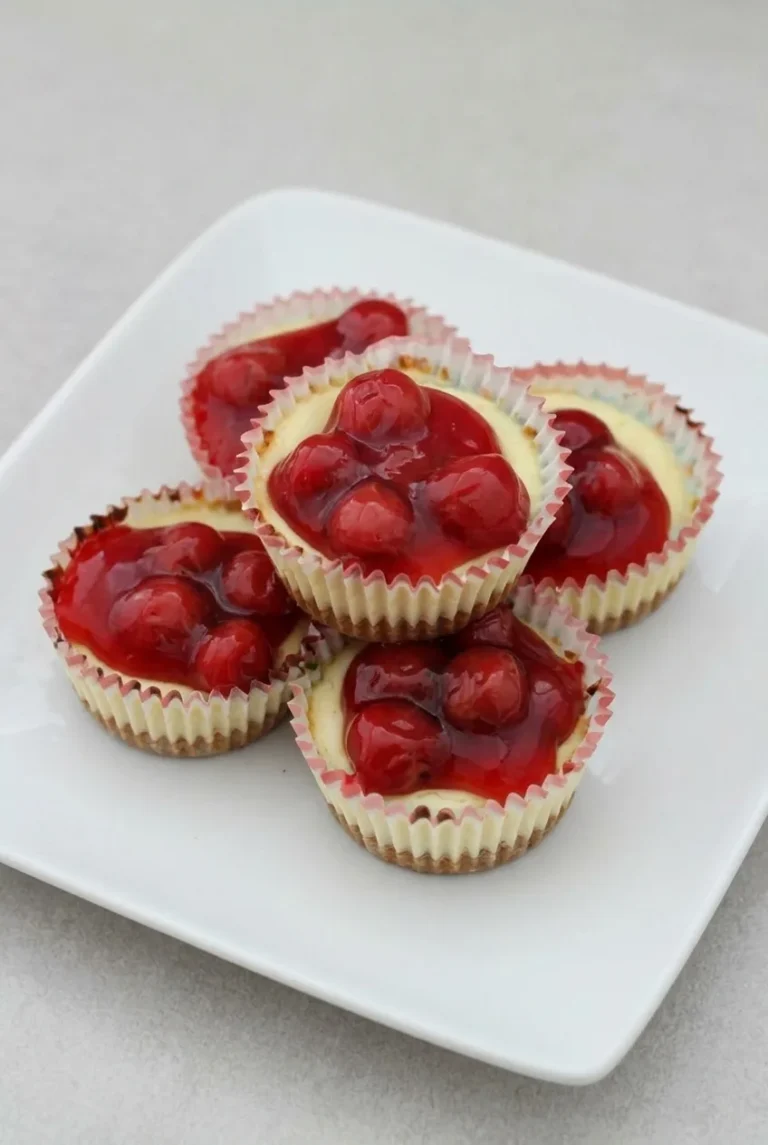
Close view of a cherry cheesecake cup showing its creamy filling, glossy cherries, and graham crust
  • 1 cup graham cracker crumbs (120g)
  • 4 tablespoons unsalted butter, melted (55g)
  • 2 tablespoons light or dark brown sugar (25g)
  • 16 ounces full-fat cream cheese, softened to room temperature (450g)
  • 1/2 cup powdered sugar (60g)
  • 1/4 cup sour cream (60g)
  • 1 teaspoon vanilla extract
  • 1 teaspoon lemon juice
  • 1 cup cold heavy whipping cream (240g)
  • 1 can cherry pie filling, about 21 ounces (600g)
  • 12 fluted paper cupcake liners

Optional: Add 1/2 teaspoon finely grated lemon zest to the filling for a stronger citrus note. Add whipped cream as a garnish just before serving, if desired.

How to Make No-Bake Cherry Cheesecake Cups

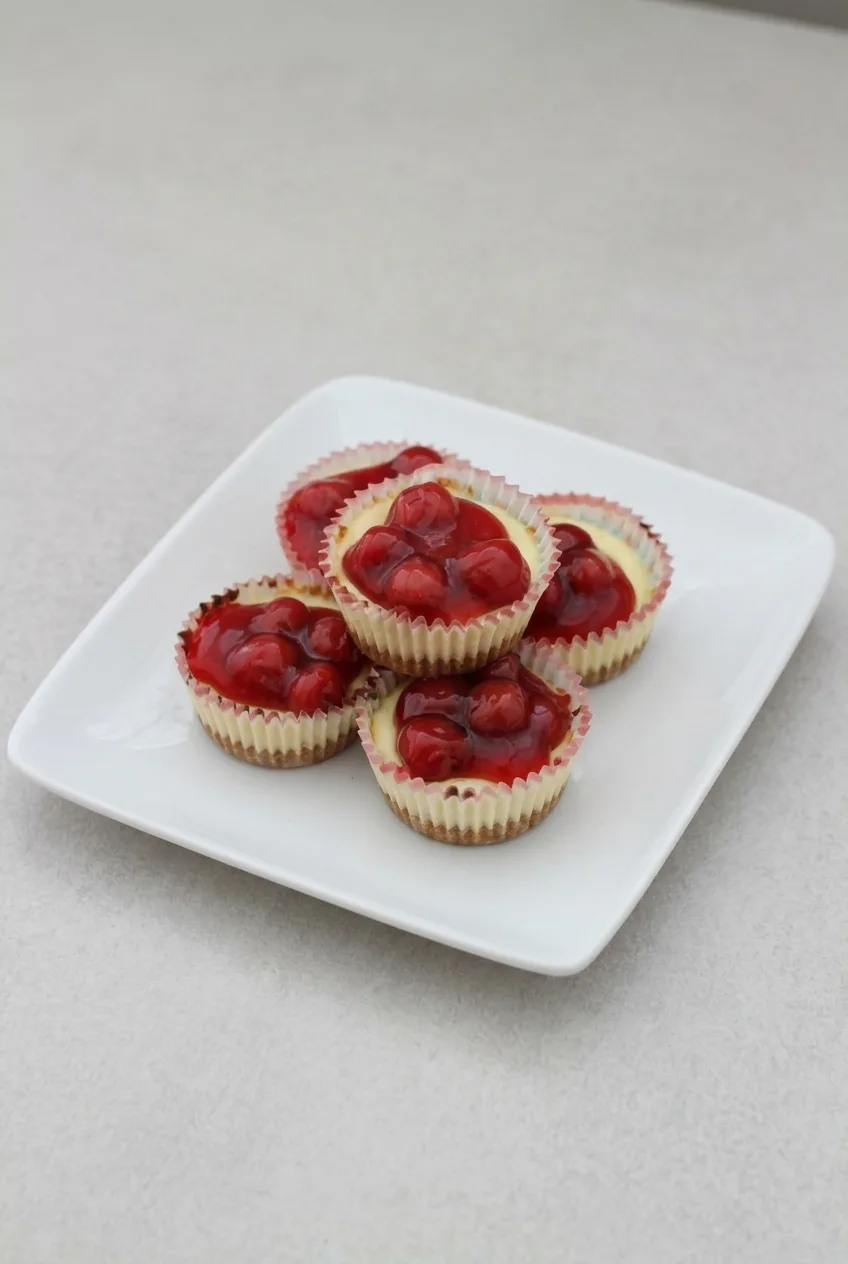
A wider view of individual cherry cheesecake cups in fluted liners arranged on a serving plate
  1. Line the tin: Set 12 fluted paper liners in a standard 12-cup muffin tin. If starting with whole graham crackers, crush them into fine, even crumbs.
  2. Press the crusts: Stir together the graham cracker crumbs, melted butter, and brown sugar until the crumbs are evenly moistened and hold together when pinched. Divide among the liners and press firmly into level bases.
  3. Mix the cream cheese: Beat the softened cream cheese until smooth. Add the powdered sugar, sour cream, vanilla, and lemon juice. Beat until creamy, scraping down the bowl as needed.
  4. Whip and fold: In a separate clean, dry bowl, whip the cold heavy cream to stiff peaks that hold their shape when the beaters are lifted. Fold it into the cream cheese mixture in portions with a spatula, stopping when no large streaks remain.
  5. Fill the cups: Divide the filling among the crusts and smooth the tops, leaving room for cherries. Keep the liners supported in the muffin tin.
  6. Chill: Cover the tin without letting the cover touch the filling. Refrigerate at 40°F (5°C) or below for at least 6 hours, preferably overnight. Start checking after 6 hours; the filling should hold its shape, though a slight jiggle is fine. Chill longer if the centers still look loose.
  7. Add the cherries: Spoon cherry pie filling onto the set cups, keeping it centered so a ring of pale filling remains visible. Serve cold in the liners.

How to Keep the Filling Smooth and Airy

Softened cream cheese beats smooth more easily; cold cream cheese can leave lumps. The heavy cream, by contrast, needs to be cold so it whips to stiff peaks. Fold the whipped cream in gently rather than beating the combined filling, which can deflate it and leave the cups too soft.

When Are the Cups Set?

After chilling, the filling should hold its shape when a cup is handled but still feel creamy and mousse-like. It does not need to become rigid. Wait until it sets before adding the cherry filling so the topping stays on the surface instead of sinking or smearing.

Variations

Vanilla wafer crumbs or Oreo cookie crumbs can replace the graham cracker crumbs for a different crust flavor. Raspberry, blueberry, or strawberry pie filling can replace the cherries, though cherry gives these cups their intended finish. For another chilled fruit dessert, try No-Bake Strawberry Cheesecake with Chunky Sauce.

Storage and Freezing

Store the cups covered in the refrigerator for up to 5 days, and keep them chilled when not serving. For make-ahead cups, chill the filling overnight and add the cherries after it has set.

Freezing for up to 1 month is an option, but the texture after thawing—particularly the cherry topping—is uncertain. For a different chilled dessert format, see No-Bake Oreo Dessert Lasagna.

Nutrition

Approximate nutrition per cheesecake cup, based on 12 servings: 370 calories, 4g protein, 26g fat, and 33g carbohydrates. Per 100g: approximately 275 calories, 3g protein, 19g fat, and 25g carbohydrates. Values vary with the ingredients used.

No-Bake Cherry Cheesecake Cups

Individual cheesecake cups with a pressed graham cracker crust, airy cream cheese filling, and cherry topping.
Course: Dessert
Cuisine: American
Prep: 30 min
Total: 390 min
Servings: 12 Calories: 370 kcal

Equipment

  • 12-cup muffin tin
  • Mixing bowls
  • Electric mixer
  • Spatula

Ingredients

For the crust

  • 1 cup graham cracker crumbs (120 g)
  • 4 tablespoons unsalted butter, melted (55 g)
  • 2 tablespoons light or dark brown sugar (25 g)
  • 12 fluted paper cupcake liners

For the filling

  • 16 ounces full-fat cream cheese, softened to room temperature (450 g)
  • 1/2 cup powdered sugar (60 g)
  • 1/4 cup sour cream (60 g)
  • 1 teaspoon vanilla extract
  • 1 teaspoon lemon juice
  • 1 cup cold heavy whipping cream (240 g)

For the topping

  • 1 can cherry pie filling, about 21 ounces (600 g)

Optional

  • 1/2 teaspoon finely grated lemon zest
  • Whipped cream, for garnish

Instructions

  1. Set 12 paper liners in a standard 12-cup muffin tin. If using whole graham crackers, crush them into fine crumbs.
  2. Stir the graham cracker crumbs, melted butter, and brown sugar together until evenly moistened.
  3. Divide the crumb mixture among the liners and press firmly into level bases.
  4. Beat the softened cream cheese until smooth.
  5. Add the powdered sugar, sour cream, vanilla, and lemon juice, then beat until creamy, scraping down the bowl as needed.
  6. In a separate clean, dry bowl, whip the cold heavy cream to stiff peaks.
  7. Fold the whipped cream into the cream cheese mixture in portions until no large streaks remain.
  8. Divide the filling among the crusts and smooth the tops, leaving room for the cherries. Keep the liners supported in the muffin tin.
  9. Cover the tin without letting the cover touch the filling. Refrigerate at 40°F (5°C) or below for at least 6 hours, preferably overnight.
  10. Once set, spoon cherry pie filling onto each cup, keeping it centered. Serve cold in the liners.

Tips

  • Use softened cream cheese to help prevent lumps.
  • Keep the heavy cream cold so it whips to stiff peaks.
  • Fold the whipped cream in gently to preserve the airy texture.
  • Chill the cups until the filling holds its shape before adding the cherries.
  • Add the cherry topping just before serving for the neatest finish.

Variations

  • Alternative crusts: Replace the graham cracker crumbs with vanilla wafer crumbs or Oreo cookie crumbs.
  • Other fruit toppings: Replace the cherry pie filling with raspberry, blueberry, or strawberry pie filling.
  • Lemon zest filling: Add 1/2 teaspoon finely grated lemon zest to the filling for a stronger citrus note.

Notes

Store covered in the refrigerator for up to 5 days and keep chilled when not serving. Freezing for up to 1 month is possible, but the texture after thawing, especially the topping, may vary. Approximate nutrition per 100 g: 275 calories, 3 g protein, 19 g fat, and 25 g carbohydrates.

Nutrition

Calories: 370 kcal | Protein: 4 g | Fat: 26 g | Carbohydrates: 33 g

No-Bake Chocolate Tart

A pressed chocolate-cookie crust holds a smooth, dark ganache filling in this full-size tart. Firmly packing and chilling the crust helps it stay intact when the warm ganache goes in. The filled tart needs at least 6 hours in the refrigerator before it can be sliced; overnight works well, too.

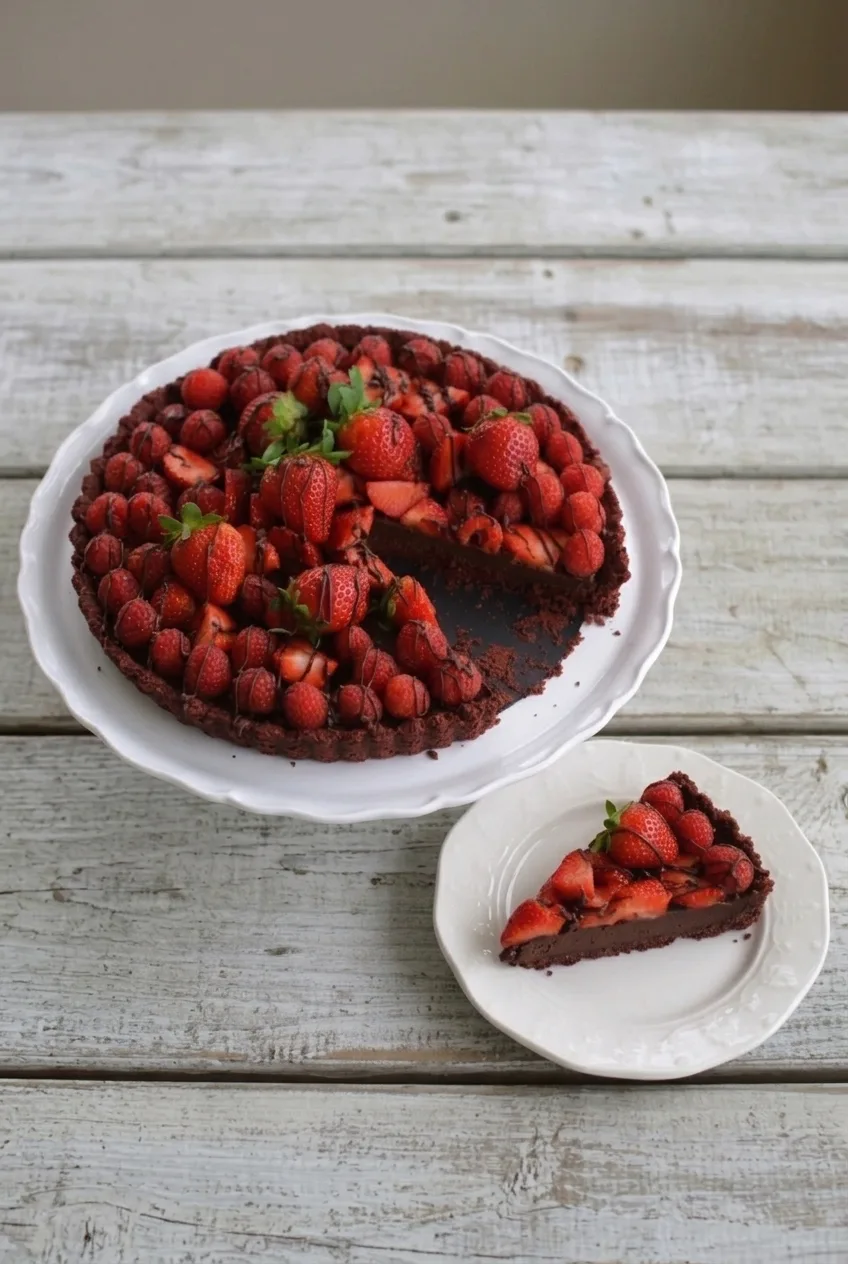
Just before serving, cover the set tart with strawberries and raspberries, then finish with thin lines of dark chocolate. Adding the fruit late keeps cut berries from leaving juice on the ganache. Makes 10–12 wedges.

Ingredients

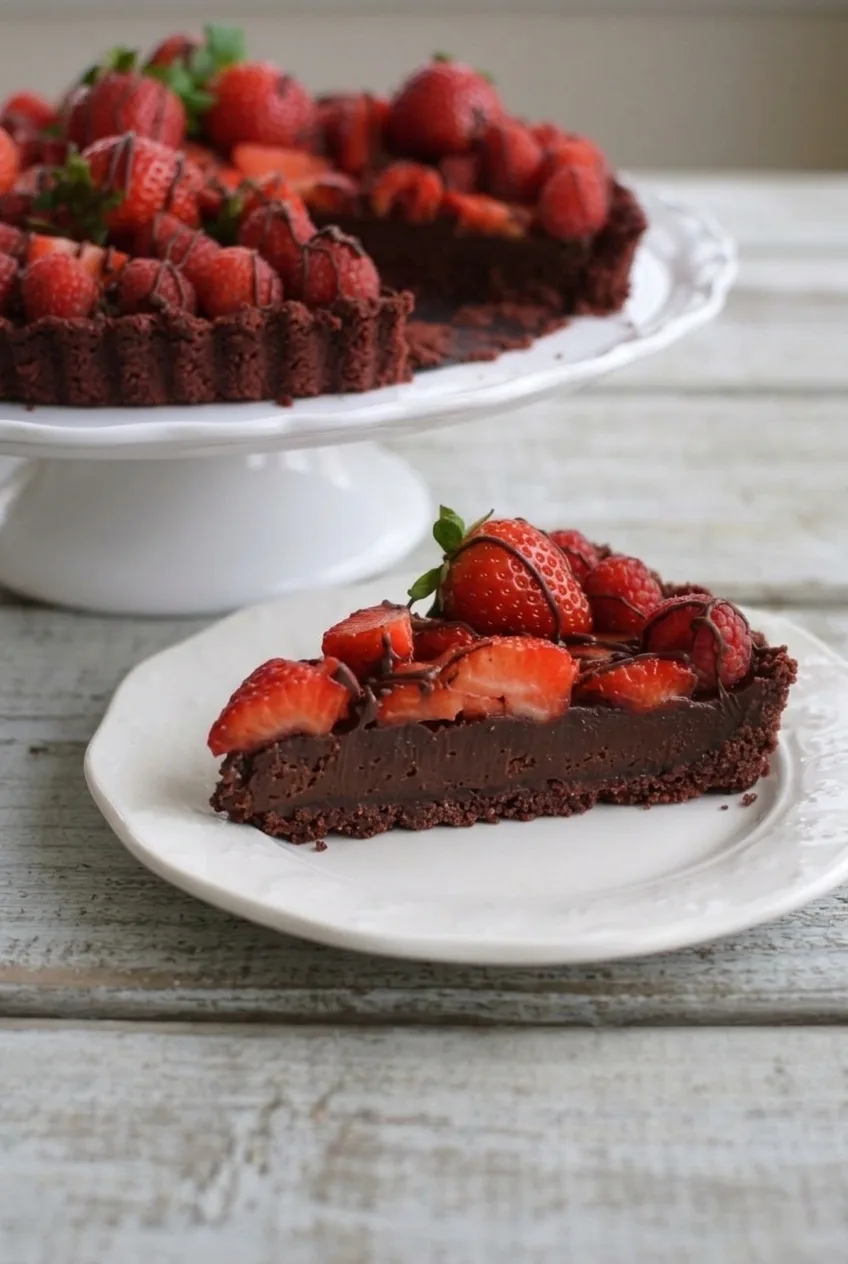
Close view of a no-bake chocolate tart slice showing dark ganache, crumb crust, berries, and chocolate drizzle.

For the crust

  • 2 cups chocolate wafer cookie crumbs (220g)
  • 6 tablespoons unsalted butter, melted (85g)
  • 1/8 teaspoon fine salt

For the ganache

  • 12 ounces bittersweet chocolate, finely chopped, about 60–70% cacao (340g)
  • 1 cup heavy cream (240g)
  • 1 teaspoon vanilla extract
  • 1/4 teaspoon fine salt

For the topping

  • About 1 pound fresh strawberries, washed and thoroughly dried; leave some whole and halve or slice the rest shortly before serving (450g)
  • 6 ounces fresh raspberries, gently washed and thoroughly dried (170g)
  • 2 ounces bittersweet chocolate, finely chopped, for the drizzle (55g)

How to Make No-Bake Chocolate Tart

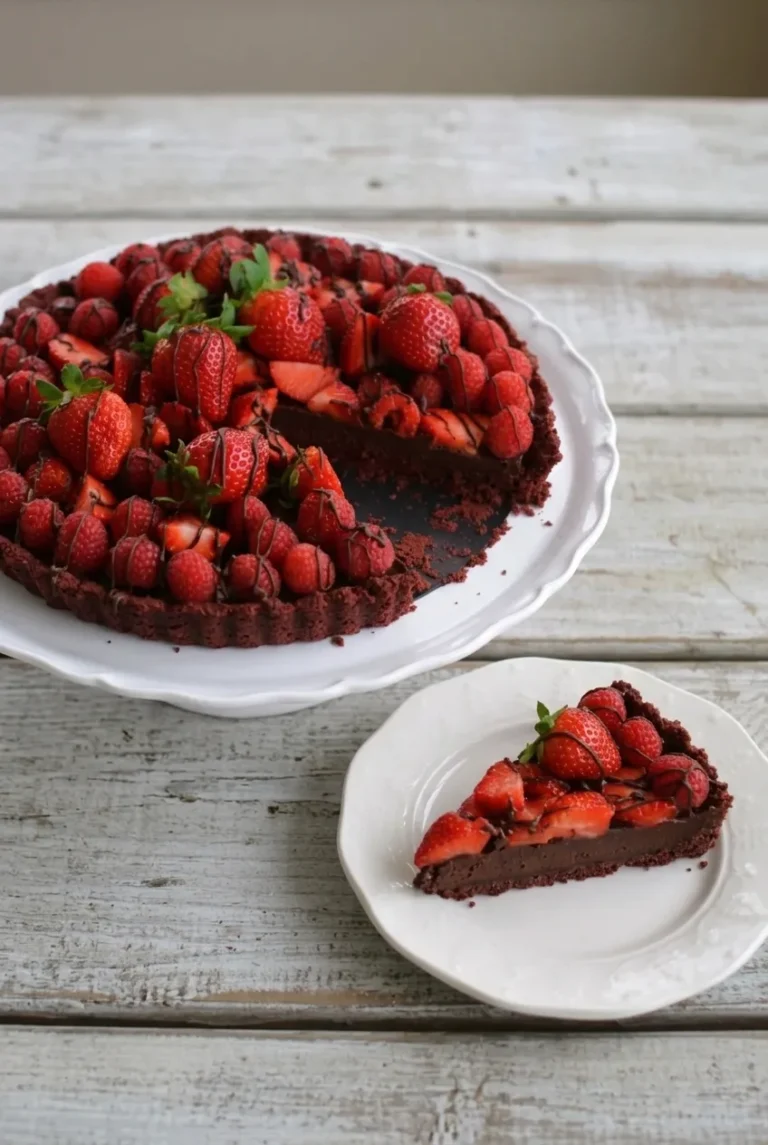
Wider view of a berry-topped no-bake chocolate tart and a separate slice on a pale wood table.
  1. Press the crust: Stir the cookie crumbs, melted butter, and crust salt until evenly moistened, like damp sand. Press firmly across the bottom and up the sides of a 9-inch tart pan with a removable bottom. Check the base, corners, and rim for thin spots.
  2. Chill the shell: Refrigerate for at least 20 minutes, until firm. You can make the ganache while the shell chills, but wait until the crust is firm before filling it.
  3. Make the ganache: Put the chopped chocolate and ganache salt in a heatproof bowl. Heat the cream in a small saucepan over medium-low to medium heat until steaming and just beginning to simmer; do not boil it vigorously. Pour it over the chocolate and let stand undisturbed for 3–5 minutes. Stir gently from the center outward until smooth and glossy, then stir in the vanilla.
  4. Fill the shell: Pour the ganache into the chilled crust and spread it evenly to the edges without overflowing the sides. Tap the pan gently once or twice to release large air bubbles.
  5. Chill until set: Refrigerate uncovered for at least 6 hours, or overnight. Check after 6 hours: the surface should be set, and the center should not visibly ripple when you move the pan gently. If it still shifts, keep chilling. Leave the berries off until shortly before serving.
  6. Add the topping: Release the set tart from the pan. Arrange the dry whole and cut strawberries and raspberries generously over the ganache. Melt the remaining chocolate gently over low heat or in short microwave intervals, then flick or pipe thin lines over the fruit.
  7. Slice and serve: Let the tart stand at room temperature for about 10 minutes. Cut wedges with a warm knife, wiping it clean between cuts. Keep the remaining tart chilled.

How to Keep the Crust Intact

Fine, even cookie crumbs pack together more reliably than large pieces. Press the moistened crumbs firmly into both the base and raised sides, then chill the shell before adding ganache. A loose or unchilled crust can shift as it is filled and crumble when sliced.

When to Add the Berries

Wash and dry the berries ahead if convenient, but cut the strawberries and arrange the fruit shortly before serving. Wet berries or cut fruit left on the tart for hours can leave juice on the ganache. Add the chocolate drizzle after the berries are in place.

Storing the Tart

The untopped tart can be made a day ahead. Let the ganache set uncovered, then cover the tart without touching its surface and keep it refrigerated. Add the berries and drizzle shortly before serving.

Cover and refrigerate leftovers for up to 3–4 days. Once topped, the fruit may soften or release juice sooner than the ganache loses quality. To freeze, tightly wrap the chilled tart without berries and freeze for up to 1 month. Thaw in the refrigerator until sliceable, then add fresh fruit and drizzle; the ganache texture may change slightly after freezing.

For another chilled chocolate dessert, try easy chocolate mousse. For a strawberry dessert, see no-bake strawberry cheesecake.

Nutrition

Approximate nutrition per wedge, based on 12 wedges: 385 calories, 4g protein, 26g fat, and 36g carbohydrates. Per 100g: about 295 calories, 3g protein, 20g fat, and 27g carbohydrates. Values vary with the chocolate and cookie brands used.

No-Bake Chocolate Tart

A chocolate-cookie crust is filled with smooth bittersweet ganache and topped with fresh berries and a dark chocolate drizzle.
Course: Dessert
Cuisine: American
Prep: 30 min
Total: 390 min
Servings: 12 Calories: 385 kcal

Equipment

  • 9-inch tart pan with removable bottom
  • Heatproof bowl
  • Small saucepan

Ingredients

For the crust

  • 2 cups chocolate wafer cookie crumbs (220 g)
  • 6 tablespoons unsalted butter, melted (85 g)
  • 1/8 teaspoon fine salt

For the ganache

  • 12 ounces bittersweet chocolate, finely chopped, about 60–70% cacao (340 g)
  • 1 cup heavy cream (240 g)
  • 1 teaspoon vanilla extract
  • 1/4 teaspoon fine salt

For the topping

  • About 1 pound fresh strawberries, washed and thoroughly dried (450 g)
  • 6 ounces fresh raspberries, gently washed and thoroughly dried (170 g)
  • 2 ounces bittersweet chocolate, finely chopped, for drizzling (55 g)

Instructions

  1. Stir the cookie crumbs, melted butter, and crust salt until evenly moistened.
  2. Press the mixture firmly across the bottom and up the sides of a 9-inch tart pan with a removable bottom, checking for thin spots.
  3. Refrigerate the crust for at least 20 minutes, until firm.
  4. Place the chopped ganache chocolate and ganache salt in a heatproof bowl.
  5. Heat the cream in a small saucepan over medium-low to medium heat until steaming and just beginning to simmer; do not boil vigorously.
  6. Pour the cream over the chocolate and let stand undisturbed for 3–5 minutes. Stir gently from the center outward until smooth and glossy, then stir in the vanilla.
  7. Pour the ganache into the chilled crust and spread it evenly to the edges without overflowing. Tap the pan gently once or twice to release large air bubbles.
  8. Refrigerate uncovered for at least 6 hours or overnight, until the surface is set and the center does not visibly ripple when the pan is moved gently.
  9. Release the tart from the pan shortly before serving. Arrange whole and cut strawberries and raspberries over the ganache.
  10. Gently melt the remaining chocolate over low heat or in short microwave intervals, then drizzle thin lines over the fruit.
  11. Let the tart stand at room temperature for about 10 minutes. Slice with a warm knife, wiping it clean between cuts.

Tips

  • Use fine, even cookie crumbs so the crust packs together reliably.
  • Press the crumbs firmly into both the base and sides, then chill the shell before filling.
  • Make sure the berries are thoroughly dry before arranging them on the tart.
  • Cut the strawberries and add the fruit shortly before serving to help prevent juice from marking the ganache.
  • Use a warm, clean knife between cuts for neater slices.

Notes

Keep the tart refrigerated. The untopped tart can be made a day ahead; refrigerate leftovers for up to 3–4 days. Freeze the chilled tart without berries for up to 1 month, then thaw in the refrigerator before topping. Nutrition is approximate per wedge based on 12 wedges; per 100 g: about 295 calories, 3 g protein, 20 g fat, and 27 g carbohydrates.

Nutrition

Calories: 385 kcal | Protein: 4 g | Fat: 26 g | Carbohydrates: 36 g

No-Bake S’mores Icebox Cake

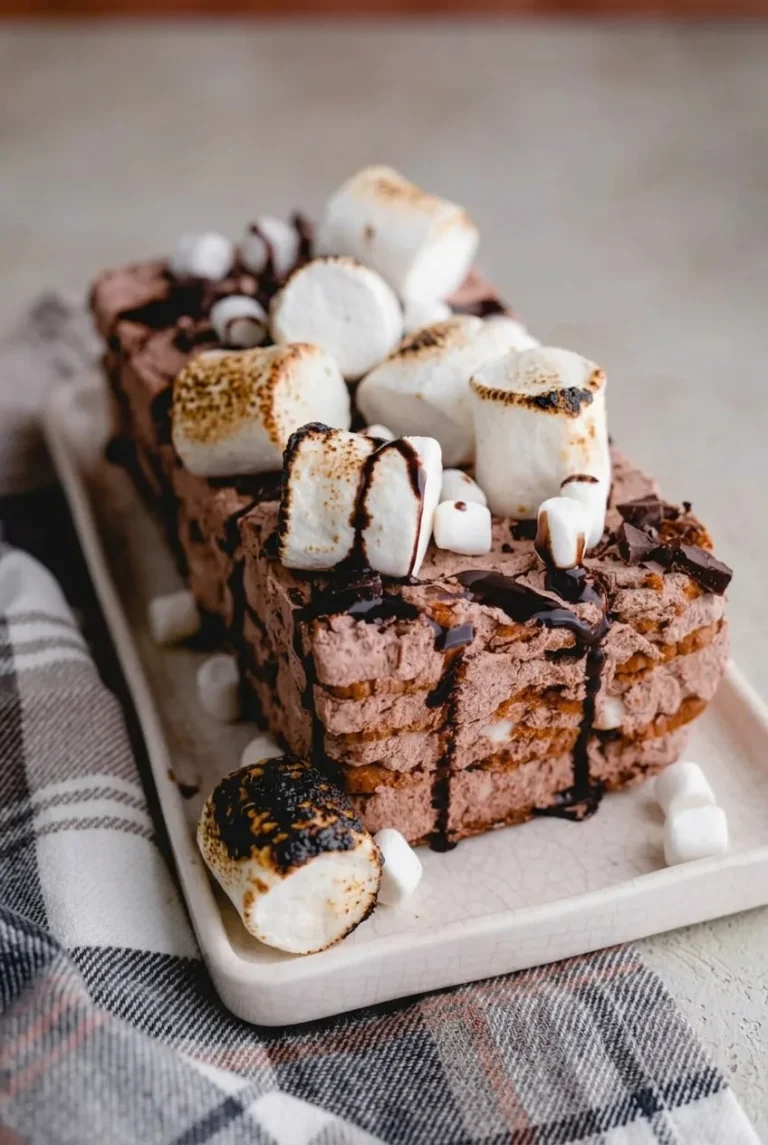
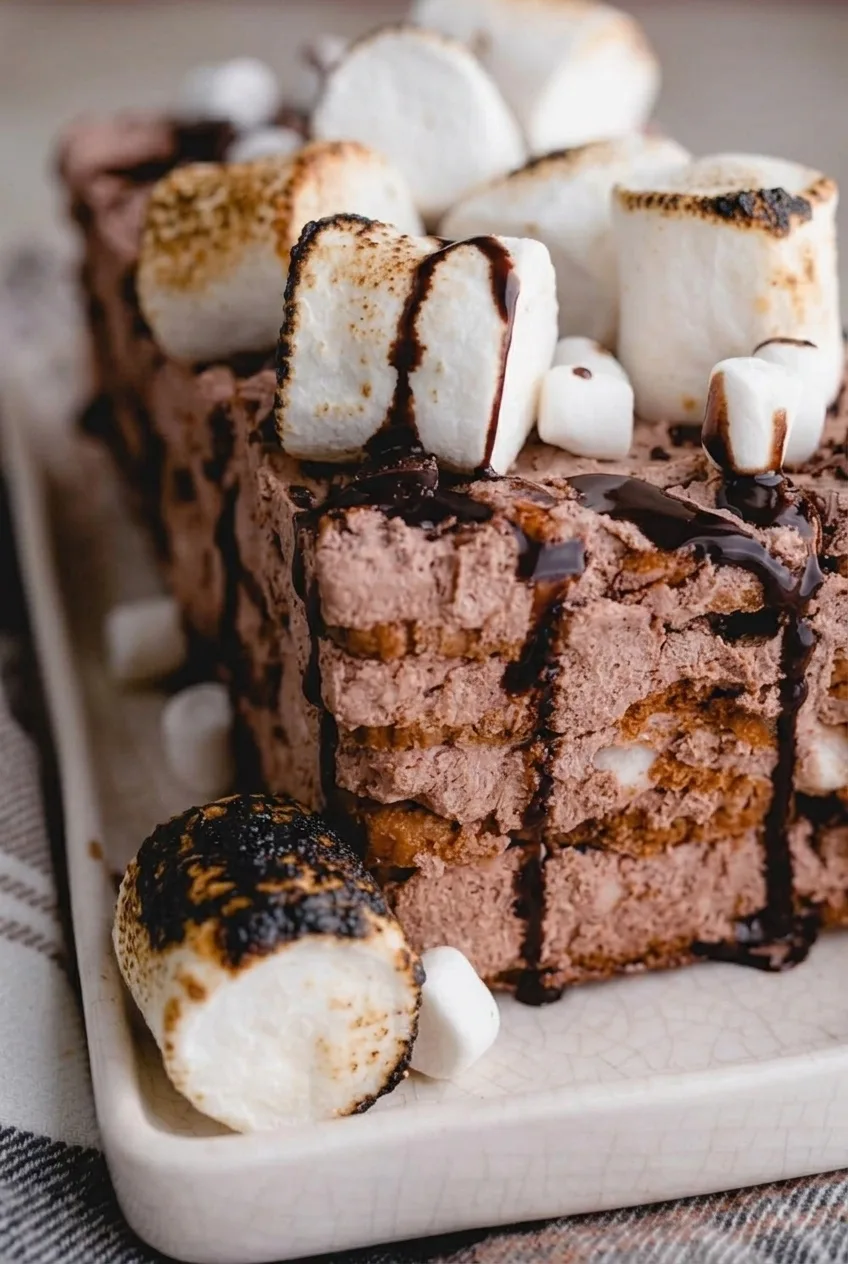
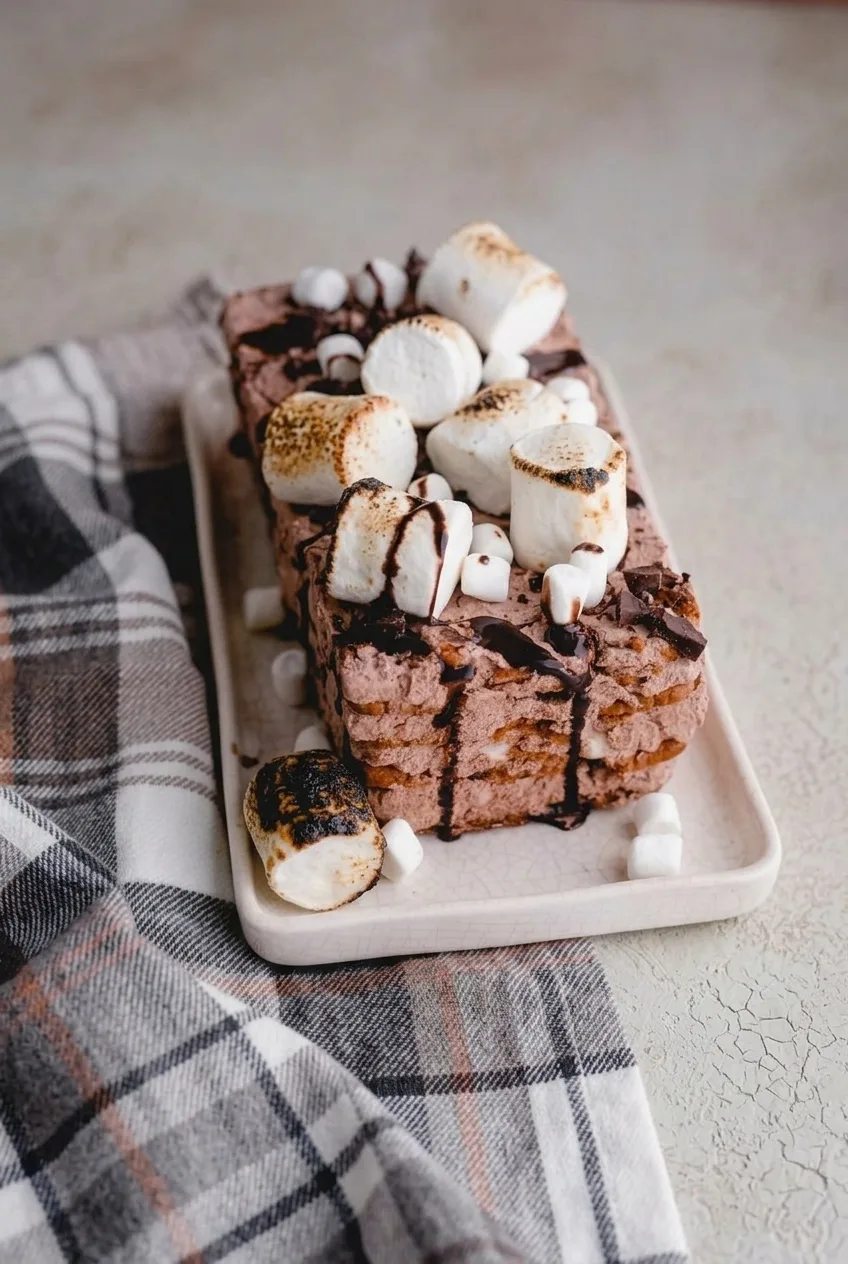
Graham crackers and chocolate-marshmallow whipped cream form the visible layers of this rectangular icebox cake. An overnight chill firms the filling and softens the crackers enough to cut into thick slices. Build it in a parchment-lined loaf pan, then lift it out and finish with dark chocolate drizzle, chopped chocolate, and large marshmallows toasted just before serving.

Prep: 35 minutes | Chill: at least 8 hours, preferably overnight | Total: at least 8 hours 40 minutes | Serves: 8 to 10

Ingredients

Close view of the s’mores icebox cake’s softened graham cracker layers and creamy chocolate-marshmallow filling.
  • About 18 full graham cracker sheets (270g), broken as needed
  • 2 cups cold heavy whipping cream (480g), divided
  • 1 cup marshmallow crème (170g)
  • 1/3 cup unsweetened cocoa powder (30g)
  • 1/3 cup powdered sugar (40g)
  • 1 teaspoon vanilla extract
  • 4 ounces semisweet chocolate, finely chopped (115g)
  • 6 to 8 large marshmallows (about 45g)
  • 2 tablespoons chopped chocolate or chocolate chunks (20g)

Optional: Add 1/2 cup mini marshmallows sparingly between selected layers, or add 1/8 teaspoon fine salt to the whipped filling.

How to Make No-Bake S’mores Icebox Cake

Whole s’mores icebox cake on a pale platter, with its layered sides, chocolate drizzle, and toasted marshmallows visible.
  1. Line the pan: Line a 9-by-5-inch loaf pan with parchment paper, leaving long overhangs on the two long sides. Break some graham crackers into pieces to fit the corners and edges.
  2. Whip the filling: Reserve 1/3 cup of the measured cream for the ganache. Whip the remaining cold cream with the cocoa powder, powdered sugar, and vanilla until it holds firm peaks. Gently fold in the marshmallow crème until the filling is evenly cocoa-brown and thick enough to spread. Fold in the optional salt, if using.
  3. Make the ganache: Warm the reserved cream until steaming but not boiling. Pour it over the finely chopped semisweet chocolate and let stand briefly, then stir until smooth. Let cool until pourable but no longer hot.
  4. Build the layers: Spread a thin layer of filling in the pan. Add a flat layer of graham crackers, fitting broken pieces into gaps. Spread on more filling and a thin drizzle of ganache. Repeat to make several cracker-and-cream layers, adding the optional mini marshmallows sparingly if using. Finish with an even layer of filling. Use only a little ganache inside the cake; reserve most of it for the outside drizzle.
  5. Chill: Cover loosely without pressing the cover into the filling. Refrigerate for at least 8 hours, preferably overnight. Starting at 8 hours, check that the top feels set and the cake holds its rectangular shape when lifted. If it slumps, return it to the refrigerator before cutting.
  6. Unmold and decorate: Lift the chilled cake onto a serving platter using the parchment overhang. If the reserved ganache has thickened, warm it gently until fluid but not hot. Drizzle it across the top and down the sides, leaving the layers visible, then scatter the chopped chocolate over the top.
  7. Toast the marshmallows: Arrange the large marshmallows on top. Briefly toast them with a kitchen torch, moving the flame to brown their surfaces without warming the filling underneath. Serve the cake chilled, soon after torching. If you do not have a torch, leave the marshmallows untoasted; do not broil the assembled cake.

How to Get Clean Slices

Fit each graham-cracker layer snugly against the edges of the pan; broad gaps make the cut sides uneven. Keep the ganache between layers thin so the cake does not slide. After the full chill, lift the cake with the parchment sling and cut it with a sharp knife, wiping the blade between slices.

Make-Ahead and Storage

Assemble the cake a day ahead and let it set in the refrigerator overnight. Keep leftovers covered and refrigerated. Toasted marshmallows lose their freshly browned texture as they sit, so add them close to serving when possible. Serve the cake chilled rather than reheating it.

For another chilled layered dessert, try this No-Bake Chocolate Éclair Cake.

Nutrition

Approximate nutrition per serving, based on 1/9 of the cake: 500 calories, 5g protein, 29g fat, and 56g carbohydrates. Per 100g: approximately 380 calories, 4g protein, 22g fat, and 43g carbohydrates. Values vary with the brands used and serving size.

No-Bake S'mores Icebox Cake

Graham crackers are layered with chocolate-marshmallow whipped cream, chilled overnight, and topped with ganache, chocolate, and toasted marshmallows.
Course: Dessert
Cuisine: American
Prep: 35 min
Total: 520 min
Servings: 8 Calories: 500 kcal

Equipment

  • 9-by-5-inch loaf pan
  • Parchment paper
  • Electric mixer
  • Mixing bowls
  • Rubber spatula
  • Small saucepan
  • Kitchen torch
  • Sharp knife

Ingredients

For the Cake

  • About 18 full graham cracker sheets (270 g), broken as needed
  • 2 cups cold heavy whipping cream (480 g), divided
  • 1 cup marshmallow crème (170 g)
  • 1/3 cup unsweetened cocoa powder (30 g)
  • 1/3 cup powdered sugar (40 g)
  • 1 teaspoon vanilla extract
  • 1/8 teaspoon fine salt (optional)
  • 1/2 cup mini marshmallows (optional)

For the Ganache and Topping

  • 4 ounces semisweet chocolate, finely chopped (115 g)
  • 6 to 8 large marshmallows (about 45 g)
  • 2 tablespoons chopped chocolate or chocolate chunks (20 g)

Instructions

  1. Line a 9-by-5-inch loaf pan with parchment paper, leaving long overhangs on the two long sides. Break some graham crackers into pieces to fit the edges and corners.
  2. Reserve 1/3 cup of the measured cream for the ganache. Whip the remaining cold cream with the cocoa powder, powdered sugar, and vanilla until firm peaks form.
  3. Gently fold the marshmallow crème into the whipped cream until evenly combined. Fold in the optional salt, if using.
  4. Warm the reserved cream until steaming but not boiling. Pour it over the chopped semisweet chocolate, let it stand briefly, then stir until smooth. Let the ganache cool until pourable but no longer hot.
  5. Spread a thin layer of filling in the pan. Add a layer of graham crackers, fitting broken pieces into gaps, then spread on more filling and drizzle with a little ganache.
  6. Repeat the cracker and filling layers, adding optional mini marshmallows sparingly if desired. Finish with an even layer of filling and reserve most of the ganache for the outside.
  7. Cover loosely without pressing the cover into the filling. Refrigerate for at least 8 hours, preferably overnight, until set and able to hold its rectangular shape.
  8. Lift the cake onto a serving platter using the parchment overhang. If needed, gently warm the reserved ganache until fluid but not hot.
  9. Drizzle ganache over the top and sides, then scatter the chopped chocolate over the cake.
  10. Arrange the large marshmallows on top and briefly toast them with a kitchen torch, moving the flame to brown their surfaces without warming the filling. Serve chilled soon after torching.

Tips

  • Fit the graham crackers snugly against the pan edges for even cut sides.
  • Keep the ganache between layers thin so the cake does not slide.
  • Check the cake after 8 hours of chilling; return it to the refrigerator if it slumps when lifted.
  • Wipe the knife between slices for cleaner cuts.
  • Toast the marshmallows just before serving to preserve their browned texture.

Variations

  • Mini Marshmallow Layers: Add mini marshmallows sparingly between selected layers.
  • Salted Chocolate-Marshmallow Filling: Fold 1/8 teaspoon fine salt into the filling.

Notes

Keep leftovers covered and refrigerated. Serve chilled; do not reheat or broil the assembled cake. If you do not have a kitchen torch, leave the marshmallows untoasted.

Nutrition

Calories: 500 kcal | Protein: 5 g | Fat: 29 g | Carbohydrates: 56 g

Edible Chocolate Chip Cookie Dough

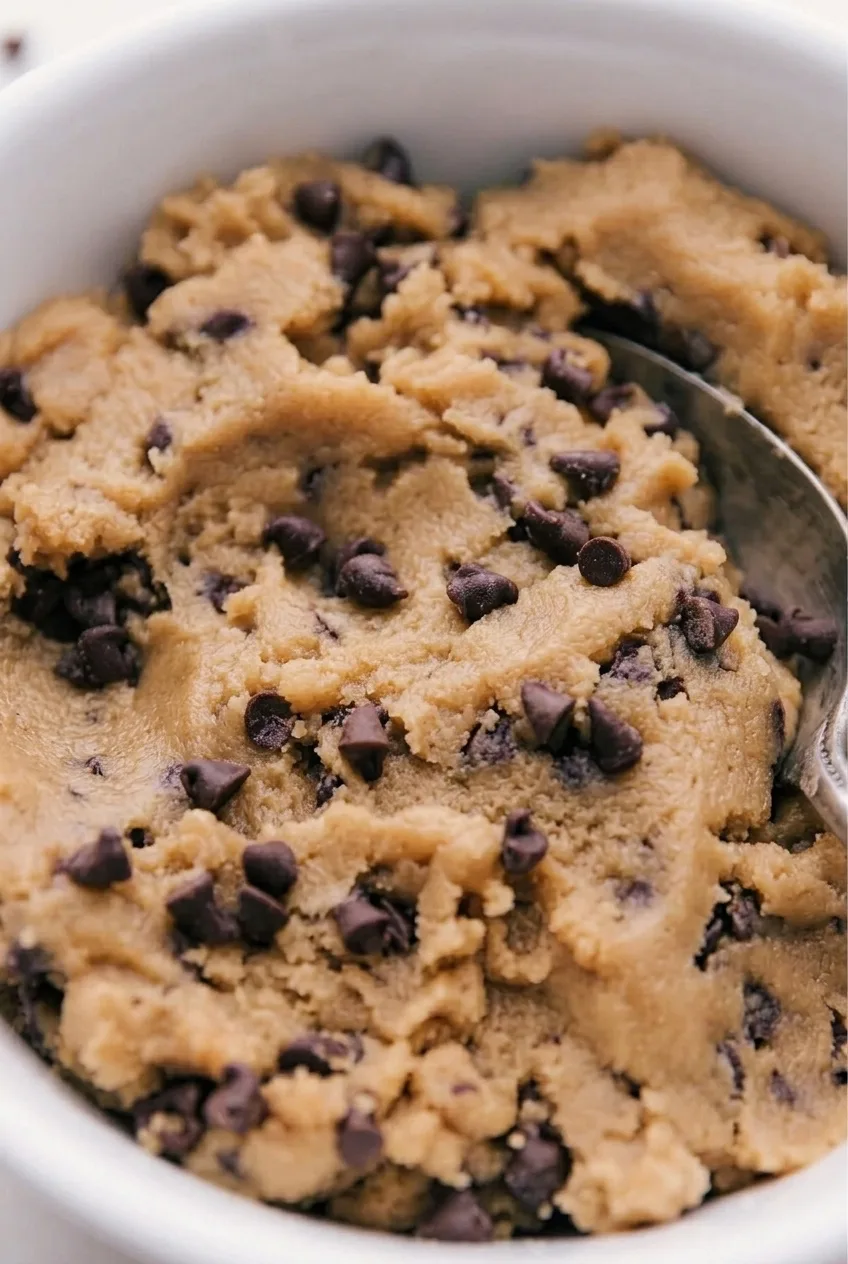
Soft, thick, and studded with mini chocolate chips, this egg-free cookie dough is made to eat by the spoonful, not to bake. The key step is heat-treating the flour: stir it between microwave intervals, check its temperature in several spots, and let it cool completely before it touches the butter.

Start with a tablespoon of milk, then add only enough more to make the dough hold a soft scoop. It should mound in the bowl rather than spread like batter. Makes about 8 small servings.

Ingredients for Edible Chocolate Chip Cookie Dough

Close view of the soft, craggy cookie dough texture and embedded chocolate chips
  • 1 cup all-purpose flour, spooned and leveled (125g)
  • 1/2 cup unsalted butter, softened but not melted (1 stick; 115g)
  • 1/2 cup packed light brown sugar (100g)
  • 2 tablespoons granulated sugar (25g)
  • 1 teaspoon vanilla extract
  • 1/4 teaspoon fine salt
  • 1–2 tablespoons milk, added gradually (up to 30g)
  • 1/2 cup semisweet mini chocolate chips (85g)
  • Optional: 1–2 tablespoons extra semisweet chocolate chips for the top

How to Make Edible Chocolate Chip Cookie Dough

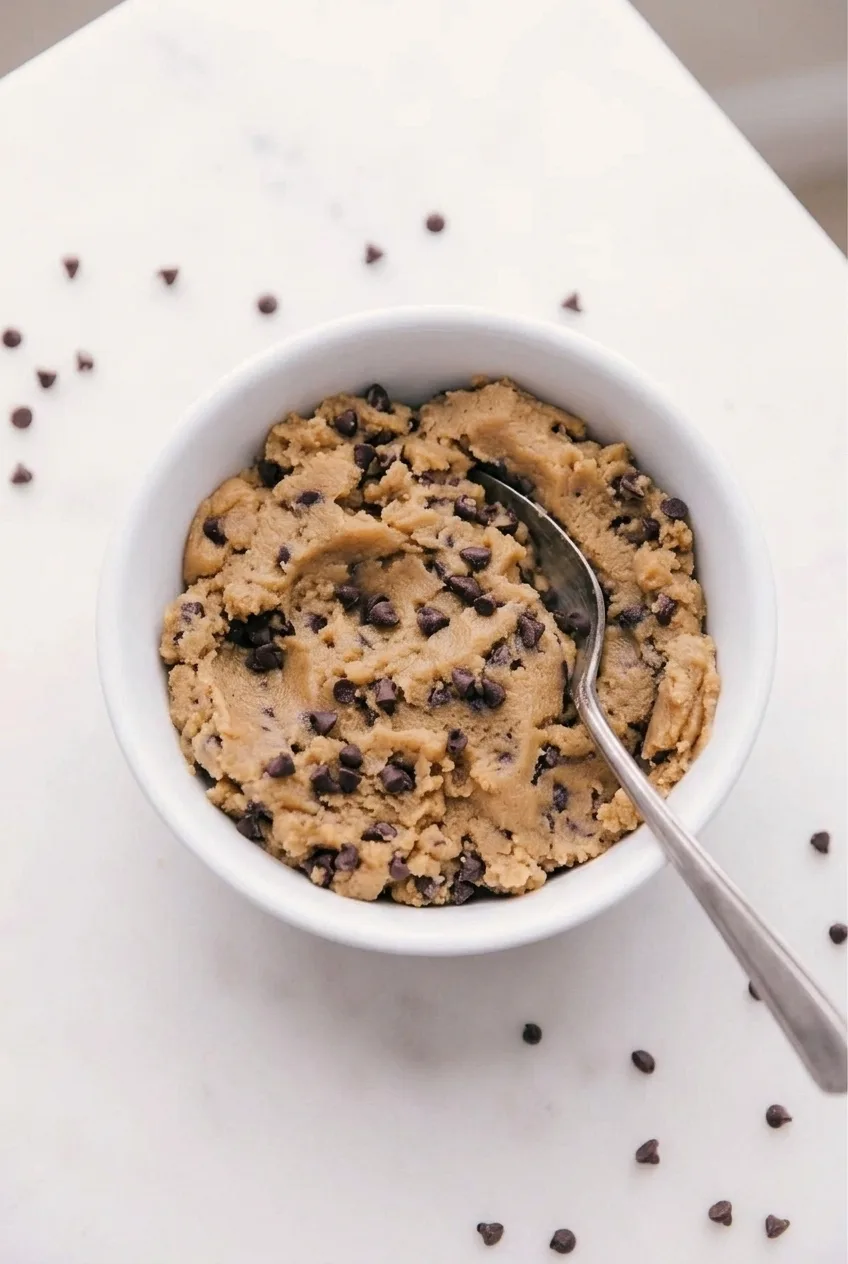
Full white bowl of edible chocolate chip cookie dough and a spoon on a pale surface
  1. Heat-treat the flour: Spread it in a shallow, even layer in an uncovered microwave-safe dish. Microwave for 30 seconds, then stir thoroughly and check the temperature. Continue in 30-second intervals, stirring each time, until the flour reaches 165°F (75°C) in several spots after stirring. This usually takes 1–2 minutes total, but use the temperature—not the time—as your endpoint. Discard scorched flour.
  2. Cool the flour: Spread it thinly on a cool plate or baking sheet. Let it cool completely, about 10–15 minutes or longer if needed, then whisk or sift to break up clumps.
  3. Cream the butter and sugars: Beat the softened butter, brown sugar, and granulated sugar until creamy and well combined, about 2–3 minutes. Mix in the vanilla and salt, scraping down the bowl.
  4. Bring the dough together: Mix in 1 tablespoon of milk, then add the cooled flour. Mix just until no dry pockets remain. If the dough is crumbly, add the remaining milk a little at a time, stopping when it holds a soft scoop.
  5. Add the chips: Fold in the mini chocolate chips until evenly distributed.
  6. Serve: Spoon the dough into a shallow bowl and add the optional extra chips, if using. Serve with a spoon, or chill for 10–15 minutes first if the dough is too soft.

Why the Flour Needs a Temperature Check

Because the dough will not be baked, the flour needs to be treated before mixing. Microwave heating can be uneven, so stir between intervals and check several spots rather than relying on a fixed time. Cool the flour fully afterward; warm flour can soften the butter and make the dough greasy.

For an oven alternative, spread the flour evenly on a baking sheet and heat at 350°F (175°C) for about 5–8 minutes. Check that it reaches 165°F, then let it cool completely. Oven time depends on the thickness of the flour layer.

Getting the Dough Texture Right

  • Dry or crumbly: Add milk in small increments until the dough comes together. Spoon and level the flour when measuring so it is not packed into the cup.
  • Greasy or too soft: Use butter that is softened, not warm or melted, and make sure the flour is fully cool. Chill the finished dough briefly if needed.
  • Slightly grainy: Beat the butter and sugars thoroughly before adding the flour. Some sugar texture may remain.

This dough omits eggs and leavening and is not formulated to bake into standard cookies.

Serving and Storage

Serve the dough by the spoonful or with graham crackers for dipping. For a different no-bake chocolate treat, try No-Bake Avalanche Cookies with Peanut Butter or No-Bake Chocolate Peanut Butter Bars.

As a conservative guide, store the dough in an airtight container in the refrigerator for up to five days, or freeze it for up to one month. Thaw frozen dough in the refrigerator. Chilled dough firms as the butter cools; let the portion you plan to eat stand briefly at room temperature until it is easy to scoop.

Nutrition Information

Approximate nutrition per small serving, based on 1 of 8 servings: 275 calories, 3g protein, 15g fat, and 35g carbohydrates. Per 100g: approximately 455 calories, 5g protein, 24g fat, and 57g carbohydrates. Values will vary with the ingredients and amount of milk used.

Edible Chocolate Chip Cookie Dough

A soft, egg-free cookie dough made with heat-treated flour and mini chocolate chips for eating by the spoonful.
Course: Dessert
Cuisine: American
Prep: 20 min
Cook: 2 min
Total: 22 min
Servings: 8 Calories: 275 kcal

Equipment

  • Microwave-safe dish
  • Food thermometer
  • Plate or baking sheet
  • Mixing bowl
  • Electric mixer
  • Whisk or sieve

Ingredients

  • 1 cup all-purpose flour, spooned and leveled (125g)
  • 1/2 cup unsalted butter, softened but not melted (1 stick; 115g)
  • 1/2 cup packed light brown sugar (100g)
  • 2 tablespoons granulated sugar (25g)
  • 1 teaspoon vanilla extract
  • 1/4 teaspoon fine salt
  • 1–2 tablespoons milk, added gradually (up to 30g)
  • 1/2 cup semisweet mini chocolate chips (85g)
  • Optional: 1–2 tablespoons extra semisweet chocolate chips for the top

Instructions

  1. Spread the flour in an even layer in an uncovered microwave-safe dish.
  2. Microwave the flour for 30 seconds, stir thoroughly, and check its temperature in several spots. Continue microwaving in 30-second intervals, stirring and checking each time, until it reaches 165°F (75°C) in several spots. Discard any scorched flour.
  3. Spread the heated flour thinly on a cool plate or baking sheet. Let it cool completely, about 10–15 minutes or longer, then whisk or sift to break up clumps.
  4. Beat the softened butter, brown sugar, and granulated sugar until creamy and well combined, about 2–3 minutes.
  5. Mix in the vanilla and salt, scraping down the bowl.
  6. Mix in 1 tablespoon of milk, then add the cooled flour. Mix just until no dry pockets remain.
  7. If the dough is crumbly, add the remaining milk a little at a time until the dough holds a soft scoop.
  8. Fold in the mini chocolate chips until evenly distributed.
  9. Spoon the dough into a shallow bowl and top with extra chocolate chips, if desired. Serve by the spoonful, or chill for 10–15 minutes if it is too soft.

Tips

  • Stir the flour between microwave intervals and check several spots with a thermometer; microwave heating can be uneven.
  • Let the flour cool completely before mixing it with the butter so the dough does not become greasy.
  • Spoon and level the flour rather than packing it into the measuring cup.
  • Add milk gradually and stop when the dough holds a soft scoop.

Variations

  • Oven Heat-Treated Flour: Spread the flour evenly on a baking sheet and heat at 350°F (175°C) for about 5–8 minutes, checking that it reaches 165°F (75°C), then cool completely.

Notes

This dough omits eggs and leavening and is not formulated for baking into standard cookies. Store airtight in the refrigerator for up to five days or freeze for up to one month; thaw frozen dough in the refrigerator.

Nutrition

Calories: 275 kcal | Protein: 3 g | Fat: 15 g | Carbohydrates: 35 g

No-Bake Avalanche Cookies

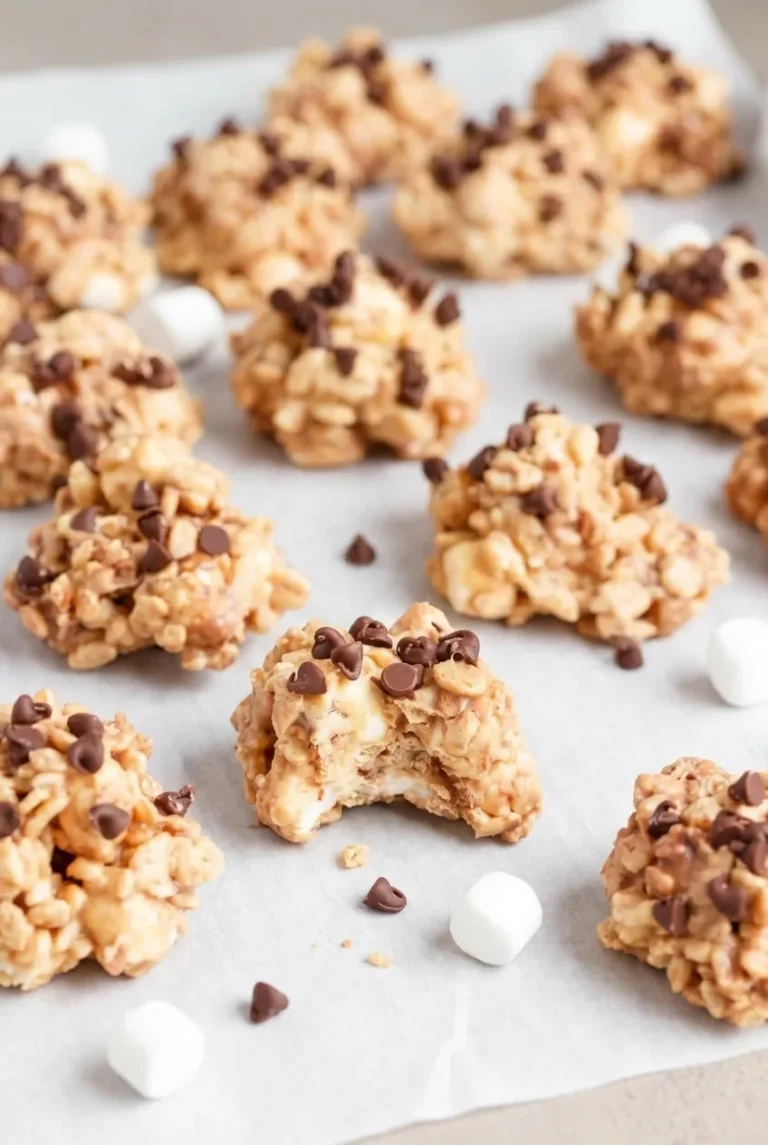
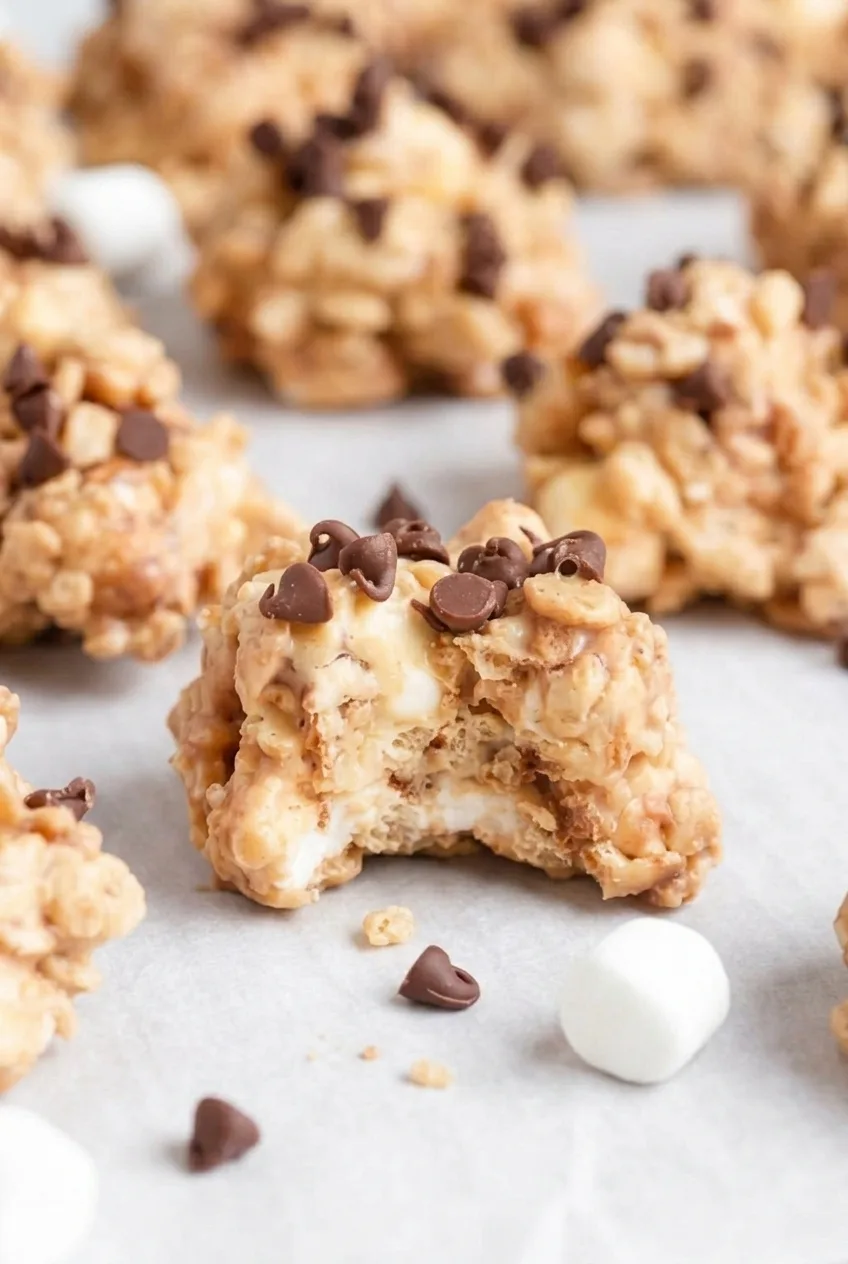
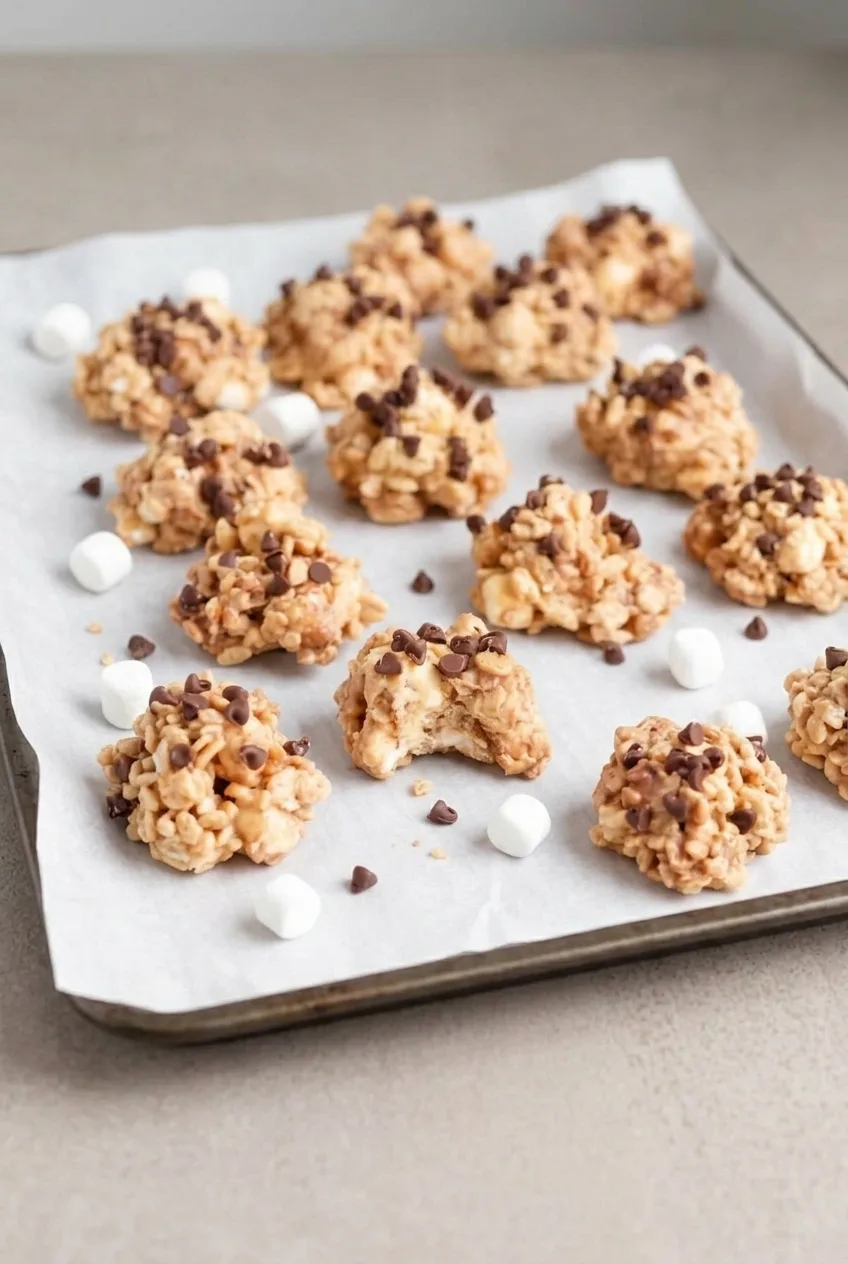
No-Bake Avalanche Cookies are craggy clusters of crispy rice cereal and chewy mini marshmallows held together with a pale-tan peanut butter coating. Mini chocolate chips pressed onto the tops add contrast without melting into the warm mixture.

The key is to melt the white coating gently, then let it cool briefly before adding the marshmallows. Scoop the mixture into loose mounds and chill until the clusters hold their shape and lift cleanly from the parchment.

Ingredients for No-Bake Avalanche Cookies

Close view of a broken No-Bake Avalanche Cookie showing its crispy cereal and marshmallow interior
  • 12 ounces white almond bark or white melting wafers, chopped if needed (340g)
  • 1/2 cup conventional creamy peanut butter (130g)
  • 4 cups crispy rice cereal (110g)
  • 2 cups mini marshmallows (100g)
  • 1/2 cup mini chocolate chips, for topping (85g)
  • Parchment paper, enough to line one large baking sheet

Use almond bark or wafers made to melt and set. Ordinary white chocolate chips may behave differently. Conventional creamy peanut butter is the more dependable choice here; oil separation in natural peanut butter may affect how the clusters set.

How to Make No-Bake Avalanche Cookies

A wider view of No-Bake Avalanche Cookies arranged on a parchment-lined tray

Makes about 18–20 clusters. Allow about 15 minutes to prepare them and 20–30 minutes to chill, for about 40–50 minutes total.

  1. Line the tray: Cover a large baking sheet with parchment paper. Set the mini chocolate chips nearby so they are ready when you scoop the clusters.
  2. Melt the coating: Place the almond bark or melting wafers in a microwave-safe bowl. Microwave in 20–30-second bursts, stirring thoroughly after each one and checking after the first burst. Use low or medium power if the coating tends to overheat. Stop when it is smooth and fluid, with no hard pieces; melting takes about 2–3 minutes, depending on the microwave and coating.
  3. Add the peanut butter: Stir it into the melted coating until evenly blended and pale tan. Let the mixture stand for 2–3 minutes to cool slightly. It should still be fluid enough to coat the cereal.
  4. Fold in the cereal and marshmallows: Gently fold in the crispy rice cereal, then the mini marshmallows, until distributed. Avoid crushing the cereal or overworking the mixture.
  5. Scoop and top: Drop generous spoonfuls onto the lined sheet, leaving a little space between them. Keep the clusters loosely mounded and roughly 2 inches across; do not press them into smooth balls or flatten them. Press the mini chocolate chips onto the tops while the coating is tacky.
  6. Chill until firm: Refrigerate the uncovered tray for about 20–30 minutes. The clusters are ready when they hold their shape and lift from the parchment without smearing or collapsing.

How to Keep the Coating Smooth

White melting coating can become thick or grainy if overheated. Stir well between short microwave bursts and stop heating as soon as it is smooth. For a microwave-free method, melt the coating gently in a double boiler, then stir in the peanut butter and continue as directed.

The brief cooling pause helps the marshmallows stay distinct rather than softening into the coating. Adding the chocolate chips after scooping keeps them visible on the rough, cereal-studded tops.

How to Store Avalanche Cookies

Store fully set clusters in an airtight container in the refrigerator for up to about one week. In a cool room, they can sit at room temperature briefly, but warmth may make them soft or sticky. No reheating is needed.

To freeze, place the fully set clusters in a freezer-safe container or bag with parchment between layers. Freezer-storage guidance varies, so use them within a few months for best quality. Thaw in the refrigerator or serve slightly chilled.

For another no-bake peanut-butter treat, try No-Bake Chocolate Peanut Butter Bars. For a layered dessert, see No-Bake Oreo Dessert Lasagna.

Nutrition

Approximate nutrition per cluster, based on 19 clusters: 195 calories, 2g protein, 10g fat, and 24g carbohydrates. Per 100g: approximately 485 calories, 5g protein, 26g fat, and 60g carbohydrates. Values vary by brand and cluster size.

No-Bake Avalanche Cookies

Crispy rice cereal and mini marshmallows are coated in peanut butter and white melting coating, then topped with mini chocolate chips.
Course: Dessert
Cuisine: American
Prep: 15 min
Total: 45 min
Servings: 19 Calories: 195 kcal

Equipment

  • Large baking sheet
  • Parchment paper
  • Microwave-safe bowl
  • Microwave
  • Spatula

Ingredients

  • 12 ounces white almond bark or white melting wafers, chopped if needed (340 g)
  • 1/2 cup conventional creamy peanut butter (130 g)
  • 4 cups crispy rice cereal (110 g)
  • 2 cups mini marshmallows (100 g)
  • 1/2 cup mini chocolate chips, for topping (85 g)
  • Parchment paper, enough to line one large baking sheet

Instructions

  1. Line a large baking sheet with parchment paper and set the mini chocolate chips nearby.
  2. Place the almond bark or melting wafers in a microwave-safe bowl. Microwave in 20–30-second bursts, stirring thoroughly after each burst, until smooth and fluid, about 2–3 minutes.
  3. Stir the peanut butter into the melted coating until evenly blended. Let the mixture cool for 2–3 minutes while remaining fluid.
  4. Gently fold in the crispy rice cereal, then the mini marshmallows, until evenly distributed.
  5. Drop generous spoonfuls of the mixture onto the prepared baking sheet, forming loose mounds about 2 inches across.
  6. Press mini chocolate chips onto the tops while the coating is tacky.
  7. Refrigerate uncovered for 20–30 minutes, until the clusters hold their shape and lift cleanly from the parchment.

Tips

  • Use almond bark or melting wafers designed to melt and set; ordinary white chocolate chips may behave differently.
  • Use conventional creamy peanut butter for more dependable setting.
  • Melt the coating in short bursts and stir well to prevent it from overheating or becoming grainy.
  • Let the melted mixture cool briefly before adding marshmallows so they stay distinct.
  • Keep the clusters loosely mounded rather than pressing them into smooth balls.

Notes

Store fully set clusters in an airtight container in the refrigerator for up to about one week. Freeze with parchment between layers and use within a few months for best quality. No reheating is needed.

Nutrition

Calories: 195 kcal | Protein: 2 g | Fat: 10 g | Carbohydrates: 24 g

No-Bake Key Lime Pie

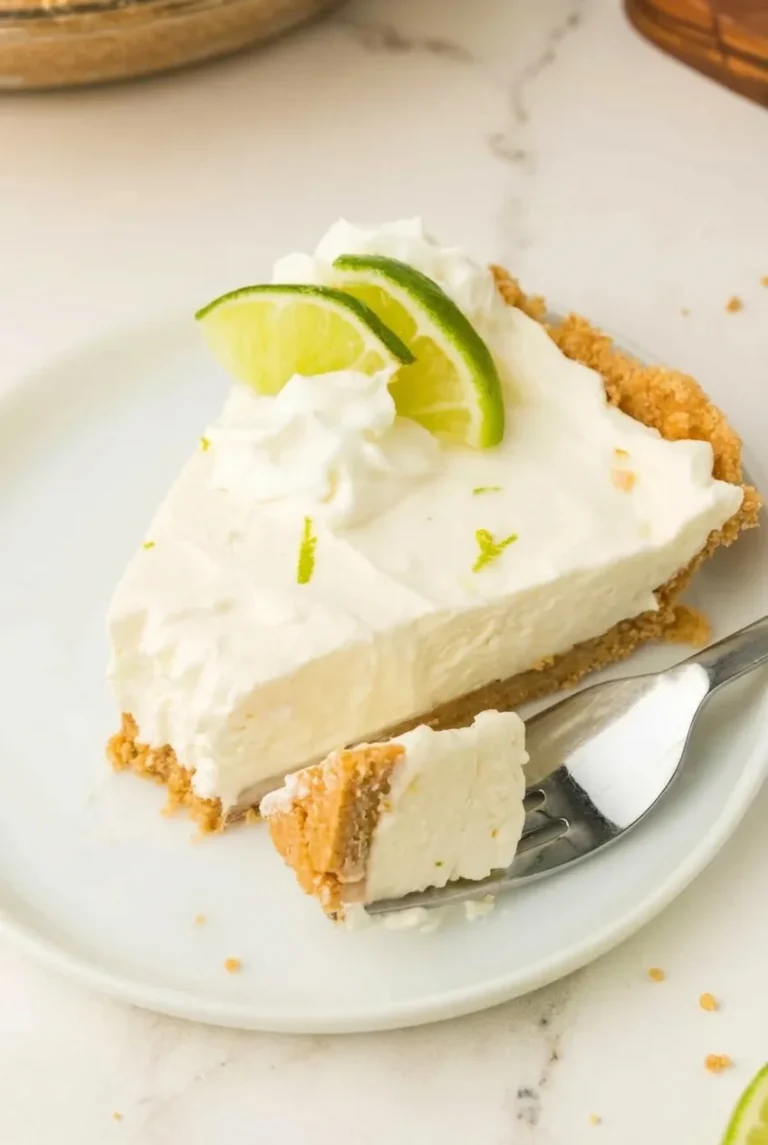
A firm graham cracker crust supports the thick, pale filling in this no-bake key lime pie. Cream cheese and sweetened condensed milk give it a creamy base, while folded-in whipped topping keeps it light. Soften the cream cheese before mixing to avoid lumps, then refrigerate the assembled pie for at least 6 hours. An overnight chill makes it more likely to hold a neat wedge.

Fresh or bottled key lime juice works here, and regular lime juice is an option when key limes are unavailable. This version is served chilled, with whipped cream and fresh lime slices—not frozen solid.

Prep time: 20 minutes. Cook time: 0 minutes. Chill time: At least 6 hours. Total time: 6 hours 20 minutes, or longer if chilled overnight. Yield: 8 slices.

Ingredients for No-Bake Key Lime Pie

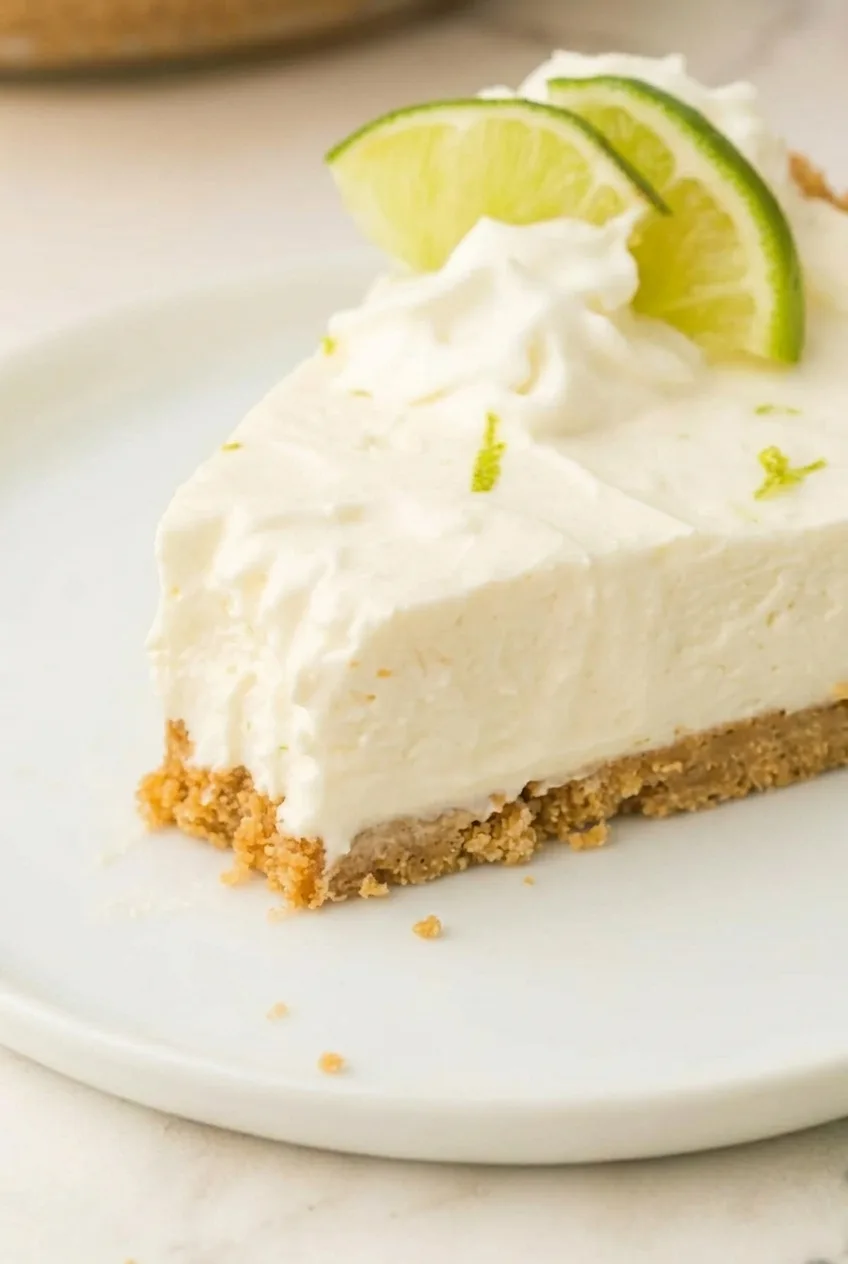
Close view of the creamy key lime pie filling and crumbly graham cracker crust
  • 1 1/2 cups graham cracker crumbs (150g)
  • 2 tablespoons granulated sugar (25g)
  • 6 tablespoons unsalted butter, melted (85g)
  • 8 ounces cream cheese, softened to room temperature (225g)
  • 1 can (14 ounces) sweetened condensed milk (397g)
  • 1/2 cup key lime juice
  • 1 tablespoon finely grated lime zest
  • 8 ounces whipped topping, thawed (225g)
  • 1/2 cup cold heavy whipping cream
  • 1 tablespoon powdered sugar
  • 1 fresh lime, thinly sliced or cut into wedges, for garnish

Optional: A small pinch of extra finely grated lime zest for serving. For a shortcut, use a prepared 9-inch graham cracker crust and omit the crumbs, sugar, and butter. Check its capacity before adding all the filling.

How to Make No-Bake Key Lime Pie

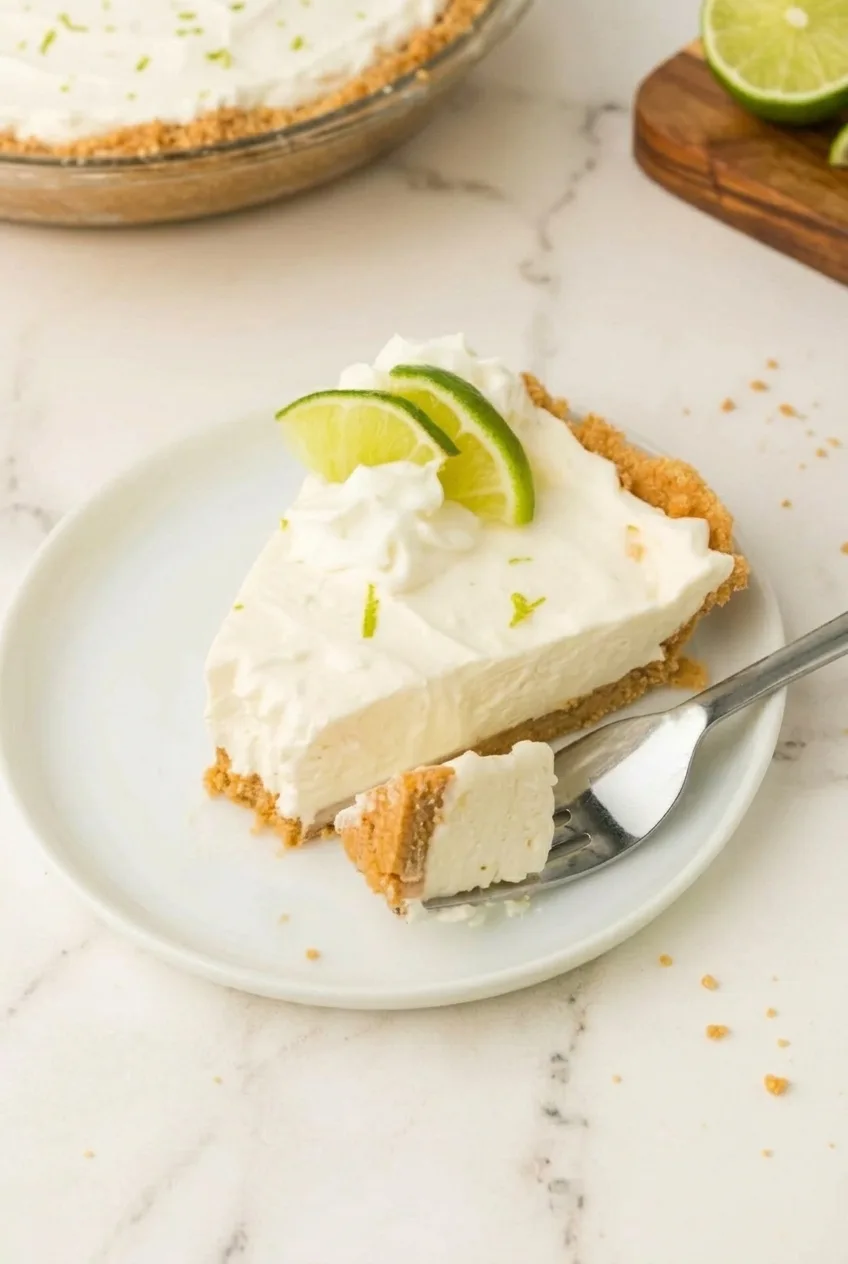
A full plate with a slice of no-bake key lime pie and a forkful in front
  1. Make the crust: Mix the graham cracker crumbs, granulated sugar, and melted butter until the crumbs are evenly moistened and hold together when squeezed. Press firmly and evenly across the bottom and up the sides of a 9-inch pie plate. Refrigerate while you make the filling.
  2. Mix the filling base: Beat the softened cream cheese until smooth, scraping down the bowl as needed. Add the sweetened condensed milk, lime juice, and zest, then mix until uniform. Use the measured amount of juice; adding more can make the filling softer.
  3. Fold in the whipped topping: Add it in two batches, folding with a flexible spatula until no large streaks remain. Do not beat it in vigorously, which can flatten the filling.
  4. Fill and chill: Spoon the filling into the crust and smooth the top. Cover loosely without pressing the cover against the filling. Refrigerate at 40°F (5°C) or below for at least 6 hours, preferably overnight. Start checking at 6 hours: the center should be cold and hold its shape when cut. If it is still too soft, chill longer.
  5. Add the garnish: Just before serving, beat the cold heavy cream and powdered sugar to soft-to-medium peaks. Spoon or pipe a mound onto the pie or individual slices, then top with overlapping lime slices or wedges. Add a little extra zest if desired.
  6. Slice: Cut with a sharp knife, wiping the blade between cuts. Lift each wedge carefully to keep the crumb crust attached.

How to Keep the Filling Smooth

Room-temperature cream cheese blends readily; cold cream cheese can leave firm bits in the filling. Beat it smooth before adding the condensed milk and lime. Once the base is uniform, switch to a spatula to fold in the whipped topping and preserve its airy texture.

Key Lime Juice Options

Use fresh key lime juice if available. Bottled key lime juice is also suitable; if using a concentrate, follow its package directions for preparing the equivalent amount of juice. Regular fresh lime juice works too, though the flavor will be slightly different.

Make-Ahead, Storage, and Freezing

Assemble the pie a day ahead and keep it covered in the refrigerator. Add the whipped cream and lime garnish close to serving. Refrigerate leftovers promptly and use them within about 3 to 4 days.

For longer storage, wrap the pie well and freeze it for up to 3 months. Thaw overnight in the refrigerator; the filling may be softer or less airy afterward. If you want a deliberately frozen icebox pie instead, freeze the assembled pie for at least 4 hours and let slices soften briefly before eating. It will have a colder, firmer texture than the main refrigerated version.

For another chilled dessert with a crumb crust, try this No-Bake Peanut Butter Pie. For a baked option, see this Classic Southern Sweet Potato Pie.

Nutrition Information

Approximate nutrition per slice, based on 8 slices: 570 calories, 7g protein, 35g fat, and 58g carbohydrates. Approximate nutrition per 100g: 335 calories, 4g protein, 21g fat, and 34g carbohydrates. Values vary with the products used.

No-Bake Key Lime Pie

A graham cracker crust holds a creamy key lime filling folded with whipped topping and chilled until set.
Course: Dessert
Cuisine: American
Prep: 20 min
Total: 380 min
Servings: 8 Calories: 570 kcal

Equipment

  • 9-inch pie plate
  • Mixing bowl
  • Electric mixer
  • Flexible spatula
  • Fine grater
  • Sharp knife

Ingredients

For the Crust

  • 1 1/2 cups graham cracker crumbs (150g)
  • 2 tablespoons granulated sugar (25g)
  • 6 tablespoons unsalted butter, melted (85g)

For the Filling

  • 8 ounces cream cheese, softened to room temperature (225g)
  • 1 can (14 ounces) sweetened condensed milk (397g)
  • 1/2 cup key lime juice
  • 1 tablespoon finely grated lime zest
  • 8 ounces whipped topping, thawed (225g)

For the Garnish

  • 1/2 cup cold heavy whipping cream
  • 1 tablespoon powdered sugar
  • 1 fresh lime, thinly sliced or cut into wedges
  • Extra finely grated lime zest, optional

Instructions

  1. Mix the graham cracker crumbs, granulated sugar, and melted butter until evenly moistened and able to hold together when squeezed.
  2. Press the crumb mixture firmly across the bottom and up the sides of a 9-inch pie plate. Refrigerate while preparing the filling.
  3. Beat the softened cream cheese until smooth, scraping down the bowl as needed.
  4. Add the sweetened condensed milk, key lime juice, and lime zest. Mix until uniform.
  5. Fold in the whipped topping in two batches with a flexible spatula until no large streaks remain.
  6. Spoon the filling into the crust and smooth the top. Cover loosely without letting the cover touch the filling.
  7. Refrigerate at 40°F (5°C) or below for at least 6 hours, preferably overnight, until the center is cold and holds its shape when cut. Chill longer if needed.
  8. Just before serving, beat the cold heavy cream and powdered sugar to soft-to-medium peaks.
  9. Spoon or pipe the whipped cream onto the pie or individual slices. Garnish with lime slices or wedges and extra zest, if desired.
  10. Cut with a sharp knife, wiping the blade between cuts, and lift each slice carefully.

Tips

  • Soften the cream cheese to room temperature before mixing to help prevent lumps.
  • Use the measured amount of lime juice; extra juice can make the filling softer.
  • Fold in the whipped topping gently with a spatula to preserve its airy texture.
  • Chill overnight when possible for neater slices.
  • Add whipped cream and lime garnish close to serving.

Variations

  • Regular Lime Pie: Use fresh regular lime juice if key limes are unavailable; the flavor will be slightly different.
  • Prepared Crust Shortcut: Use a prepared 9-inch graham cracker crust and omit the crumbs, sugar, and butter. Check the crust capacity before adding all the filling.
  • Frozen Icebox Pie: Freeze the assembled pie for at least 4 hours and let slices soften briefly before serving for a colder, firmer texture.

Notes

Cover and refrigerate leftovers promptly; use within 3 to 4 days. For longer storage, wrap well and freeze for up to 3 months, then thaw overnight in the refrigerator. The filling may be softer or less airy after freezing.

Nutrition

Calories: 570 kcal | Protein: 7 g | Fat: 35 g | Carbohydrates: 58 g

No-Bake Chocolate Éclair Cake

Graham crackers, vanilla pudding cream, and chocolate frosting become a sliceable cake after a long chill. The crackers soften into distinct, cake-like layers beneath a smooth chocolate top; no baking is needed. Assemble the cake in a 9-by-13-inch dish, then refrigerate it for at least 8 hours, preferably overnight. Allow about 20 minutes for assembly before chilling.

Ingredients for No-Bake Chocolate Éclair Cake

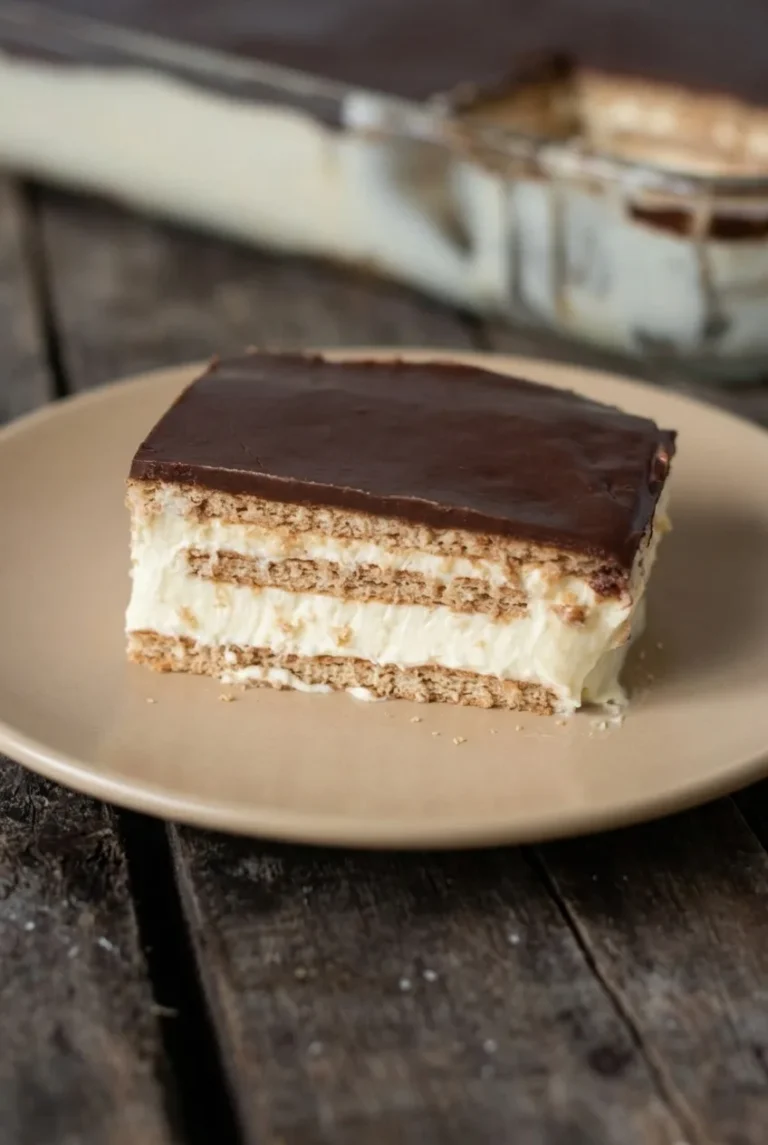
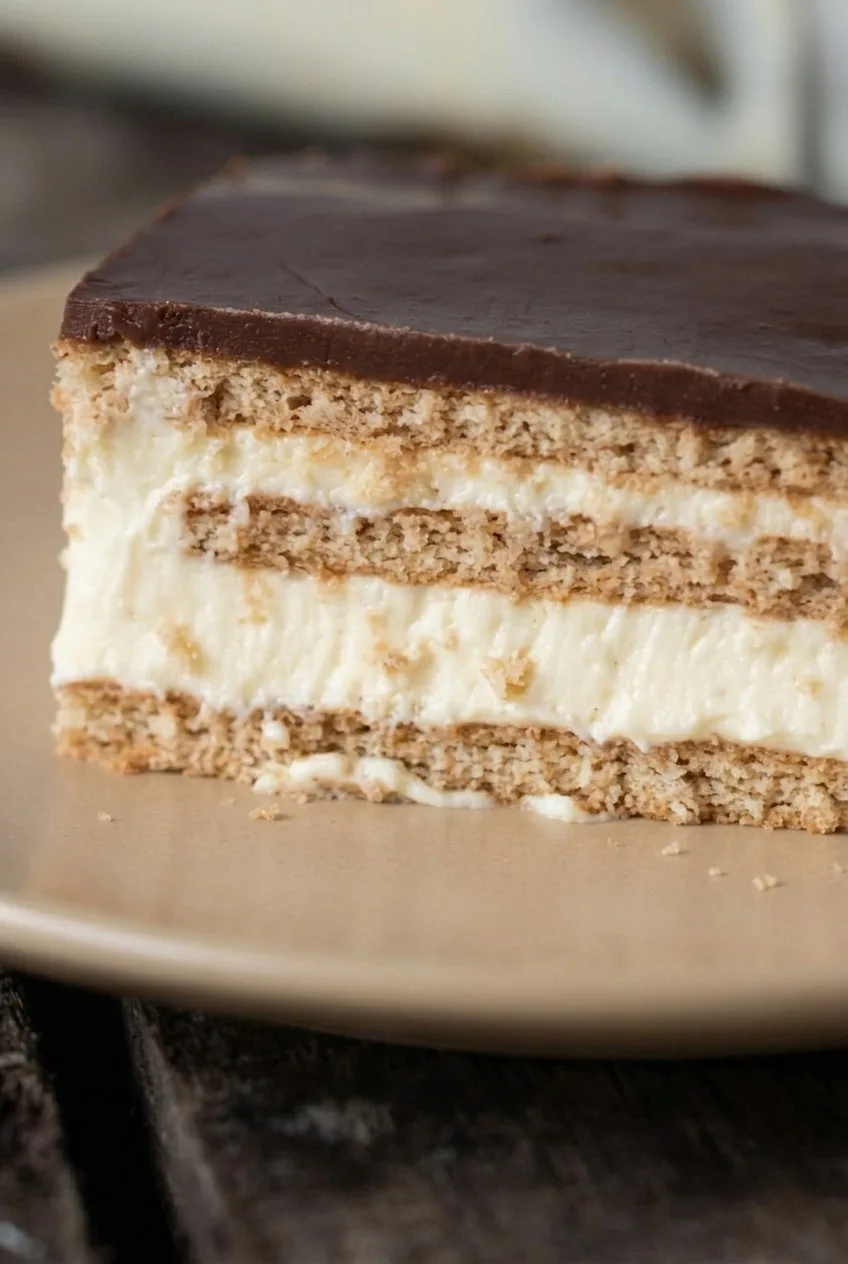
Close view of the éclair cake’s softened graham cracker layers, creamy vanilla filling, and smooth chocolate topping.
  • About 24 full graham cracker sheets (340g), or enough for 3 complete layers
  • 2 packages (3.4 ounces each; about 195g total) instant vanilla pudding mix
  • 3 cups cold milk
  • 1 tub (8 ounces; about 225g) prepared whipped topping, thawed
  • 1 container (about 16 ounces; 450g) prepared chocolate frosting

Use instant pudding, not cook-and-serve. Whole, low-fat, or nonfat milk can be used.

How to Make No-Bake Chocolate Éclair Cake

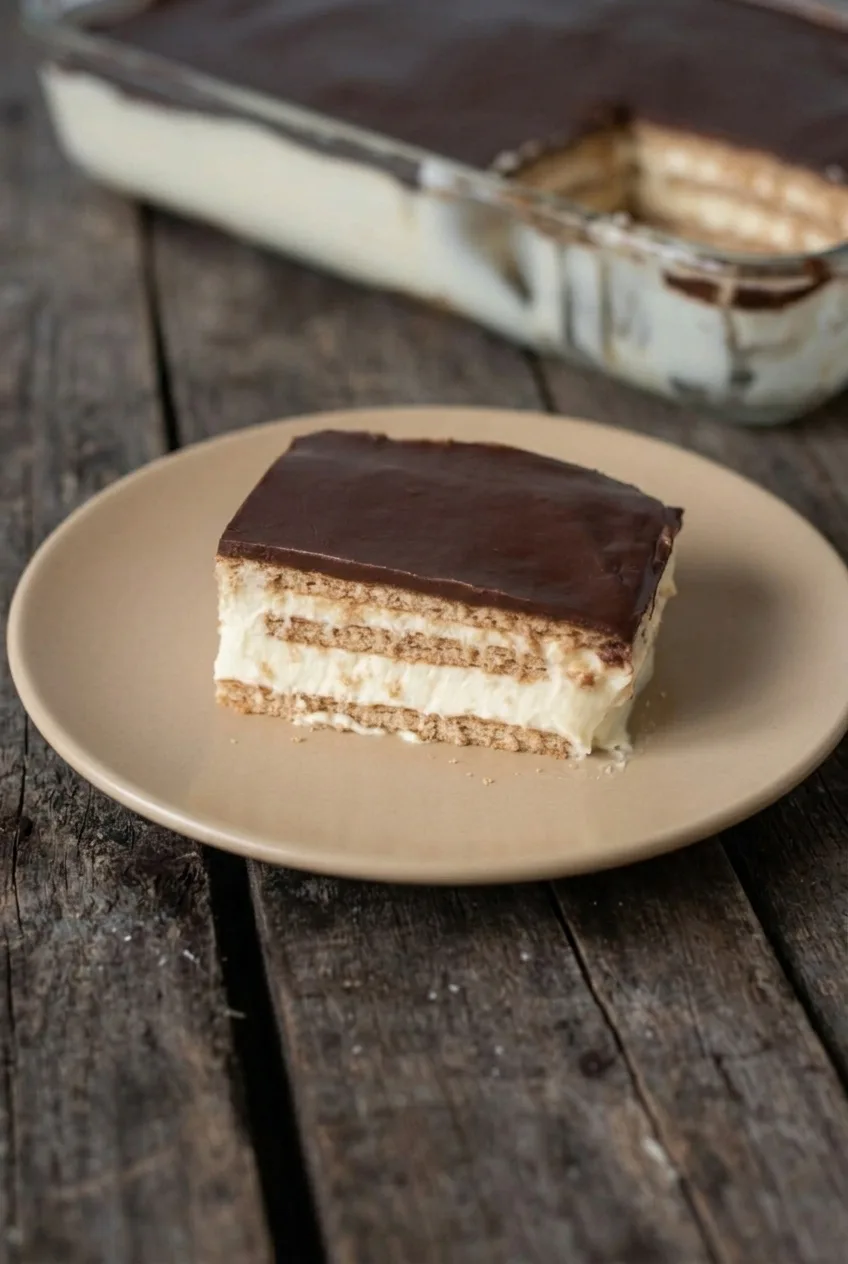
A plated slice of no-bake chocolate éclair cake centered in a wider view on a dark wooden tabletop.
  1. Whisk the pudding: In a large bowl, whisk the pudding mix with the cold milk until smooth and beginning to thicken. Let it stand for the brief setting time on the package if needed.
  2. Fold in the whipped topping: Gently fold the thawed topping into the pudding until no large white streaks remain. The filling should be pale, airy, and thick enough to spread.
  3. Build the first layers: Cover the bottom of a 9-by-13-inch dish with a snug layer of graham crackers, breaking sheets to fill the edges and large gaps. Spread half the filling evenly over the crackers, then add a second complete cracker layer.
  4. Finish the layers: Spread the remaining filling over the crackers. Add a third cracker layer, fitting pieces together to cover the filling closely.
  5. Add the chocolate top: Transfer the frosting to a microwave-safe bowl. Warm it in short bursts, stirring between each, just until spreadable—not hot or runny. If it feels hot, let it cool briefly. Spread it gently over the top crackers in a smooth layer, without pressing down through them.
  6. Cover and chill: Refrigerate the cake, covered, for at least 8 hours, preferably overnight, at 40°F (5°C) or below. The crackers should be soft rather than crisp, and the filling should hold its layers when cut.
  7. Cut and serve: Cut into 12 thick rectangular slices with a warm, clean knife, wiping the blade between cuts. Lift each portion with a thin spatula or dessert lifter and serve cold.

Why Overnight Chilling Matters

Chilling does more than cool the cake: moisture from the filling softens the graham crackers, while the pudding cream sets enough to support clean slices. Check after 8 hours. If the crackers are still firm or the layers seem loose, cover the dish and give it more time in the refrigerator.

Variations

Chocolate Ganache Topping

Ganache can replace the prepared frosting for a different chocolate finish. Make it separately and cool it to room temperature before spreading; warm ganache can loosen the filling.

Homemade Whipped Cream Filling

Sweetened homemade whipped cream can replace the prepared whipped topping, but its handling and how firmly the filling sets may differ.

Make-Ahead and Storage

Make the cake the day before serving so it can chill overnight. For the best cracker texture, aim to serve it within about 48 hours of assembly; the crackers may become softer with longer storage.

Cover leftovers and refrigerate for up to 5 days. Keep the cake chilled during transport and return leftovers promptly to the refrigerator. Freezing is not the preferred storage method because thawing may change the texture. Serve cold; no reheating is needed.

For another chilled layered dessert, try No-Bake Oreo Dessert Lasagna. Another make-ahead option is Classic No-Bake Tiramisu with Mascarpone Cream.

Nutrition

Approximate nutrition per slice, based on 12 slices: 425 calories, 5g protein, 15g fat, and 69g carbohydrates. Per 100g: approximately 265 calories, 3g protein, 9g fat, and 43g carbohydrates. Values vary with the brands and milk used.

No-Bake Chocolate Éclair Cake

Graham crackers are layered with vanilla pudding cream and chocolate frosting, then chilled until sliceable.
Course: Dessert
Cuisine: American
Prep: 20 min
Total: 500 min
Servings: 12 Calories: 425 kcal

Equipment

  • 9-by-13-inch dish
  • Large bowl
  • Whisk
  • Microwave-safe bowl
  • Warm knife
  • Thin spatula

Ingredients

  • About 24 full graham cracker sheets (340 g), enough for 3 complete layers
  • 2 packages instant vanilla pudding mix (3.4 ounces each; about 195 g total)
  • 3 cups cold milk
  • 1 tub prepared whipped topping (8 ounces; about 225 g), thawed
  • 1 container prepared chocolate frosting (about 16 ounces; 450 g)

Instructions

  1. Whisk the pudding mix and cold milk in a large bowl until smooth and beginning to thicken. Let it stand briefly if needed, following the package directions.
  2. Gently fold the thawed whipped topping into the pudding until no large white streaks remain.
  3. Arrange a snug layer of graham crackers in the bottom of a 9-by-13-inch dish, breaking sheets to fill gaps.
  4. Spread half of the filling evenly over the crackers, then add a second complete cracker layer.
  5. Spread the remaining filling over the crackers, then add a third cracker layer.
  6. Warm the frosting in a microwave-safe bowl in short bursts, stirring between each, just until spreadable. Let it cool briefly if it feels hot.
  7. Gently spread the frosting over the top cracker layer without pressing down.
  8. Cover and refrigerate for at least 8 hours, preferably overnight, at 40°F (5°C) or below.
  9. Cut into 12 slices with a warm, clean knife, wiping the blade between cuts. Lift the slices with a thin spatula and serve cold.

Tips

  • Use instant pudding mix, not cook-and-serve pudding.
  • Fit the crackers snugly and break pieces as needed to cover the layers.
  • Warm the frosting only until spreadable; do not let it become hot or runny.
  • Chill for at least 8 hours and check that the crackers are soft and the layers hold before slicing.
  • Use a warm, clean knife and wipe it between cuts for neater slices.

Variations

  • Chocolate Ganache Topping: Replace the prepared frosting with ganache cooled to room temperature before spreading.
  • Homemade Whipped Cream Filling: Replace the prepared whipped topping with sweetened homemade whipped cream; the filling may set differently.

Notes

Cover leftovers and refrigerate for up to 5 days; serve within about 48 hours for the best cracker texture. Keep chilled during transport. Freezing is not recommended, and reheating is unnecessary.

Nutrition

Calories: 425 kcal | Protein: 5 g | Fat: 15 g | Carbohydrates: 69 g

No-Bake Strawberry Cheesecake

A compact graham-cracker crust supports a thick, pale cheesecake filling, while chunky strawberry sauce goes over each slice just before serving. This version uses cream cheese, sweetened condensed milk, and lemon juice—no gelatin or whipped cream—and sets in the refrigerator rather than the freezer.

Give the cake at least 8 hours to chill, preferably overnight. Cook the sauce separately and let it cool completely so it stays glossy and spoonable without softening the filling.

Ingredients for No-Bake Strawberry Cheesecake

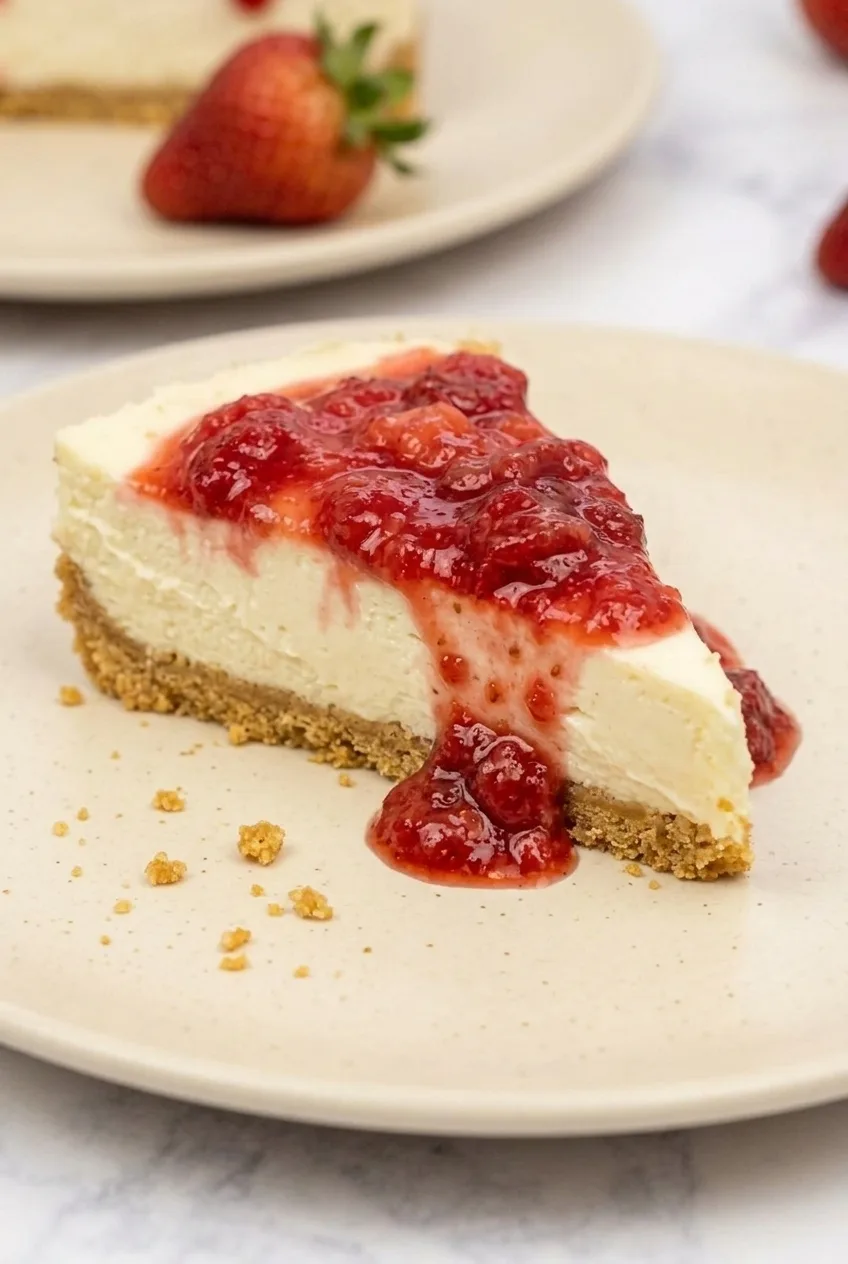
Close view of the cheesecake’s smooth filling, compact graham crust, and chunky strawberry topping

Graham-Cracker Crust

  • 2 cups finely ground graham-cracker crumbs (200g)
  • 7 tablespoons unsalted butter, melted (100g)
  • 2 tablespoons granulated sugar (25g)

Cheesecake Filling

  • 16 ounces full-fat cream cheese, softened (450g)
  • 1 can sweetened condensed milk (14 ounces/395g)
  • 1/3 cup fresh lemon juice
  • 1 teaspoon vanilla extract

Strawberry Sauce and Garnish

  • 1 pound fresh strawberries (450g); hull and chop most for the sauce, reserving several whole berries for serving
  • 1/3 cup granulated sugar (65g)
  • 1 tablespoon fresh lemon juice
  • Optional, if the sauce remains unusually loose: 1 teaspoon cornstarch mixed with 1 tablespoon cold water

How to Make No-Bake Strawberry Cheesecake

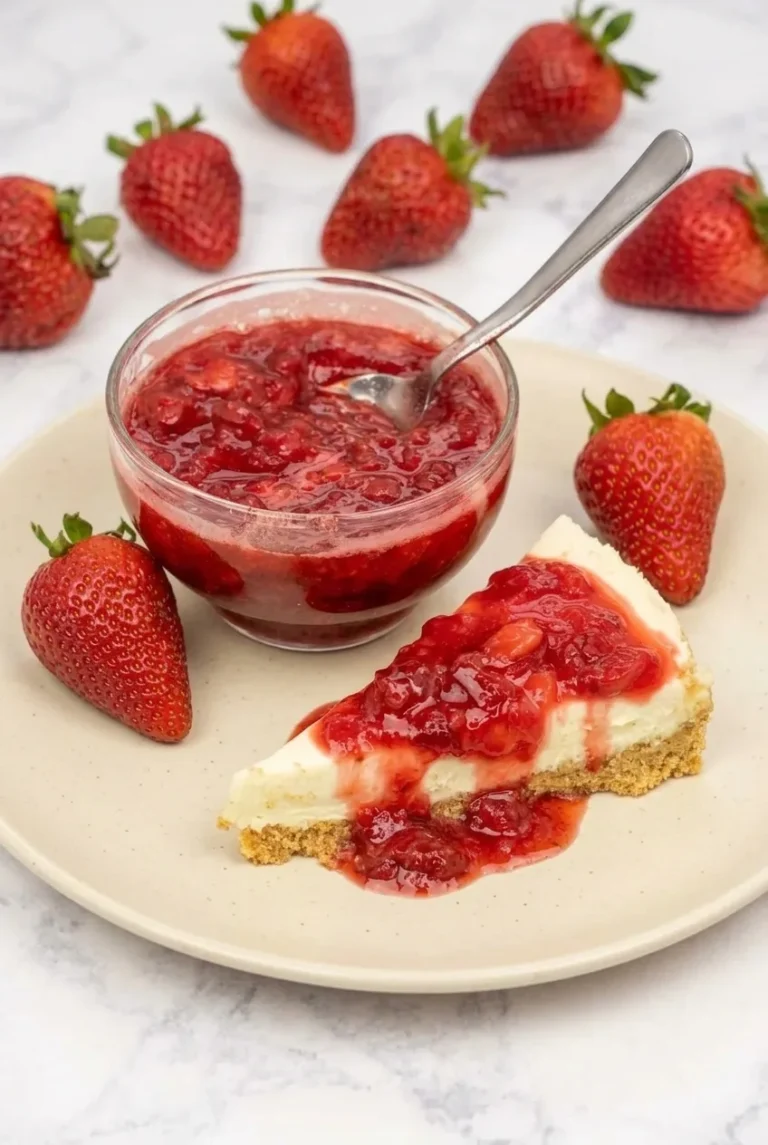
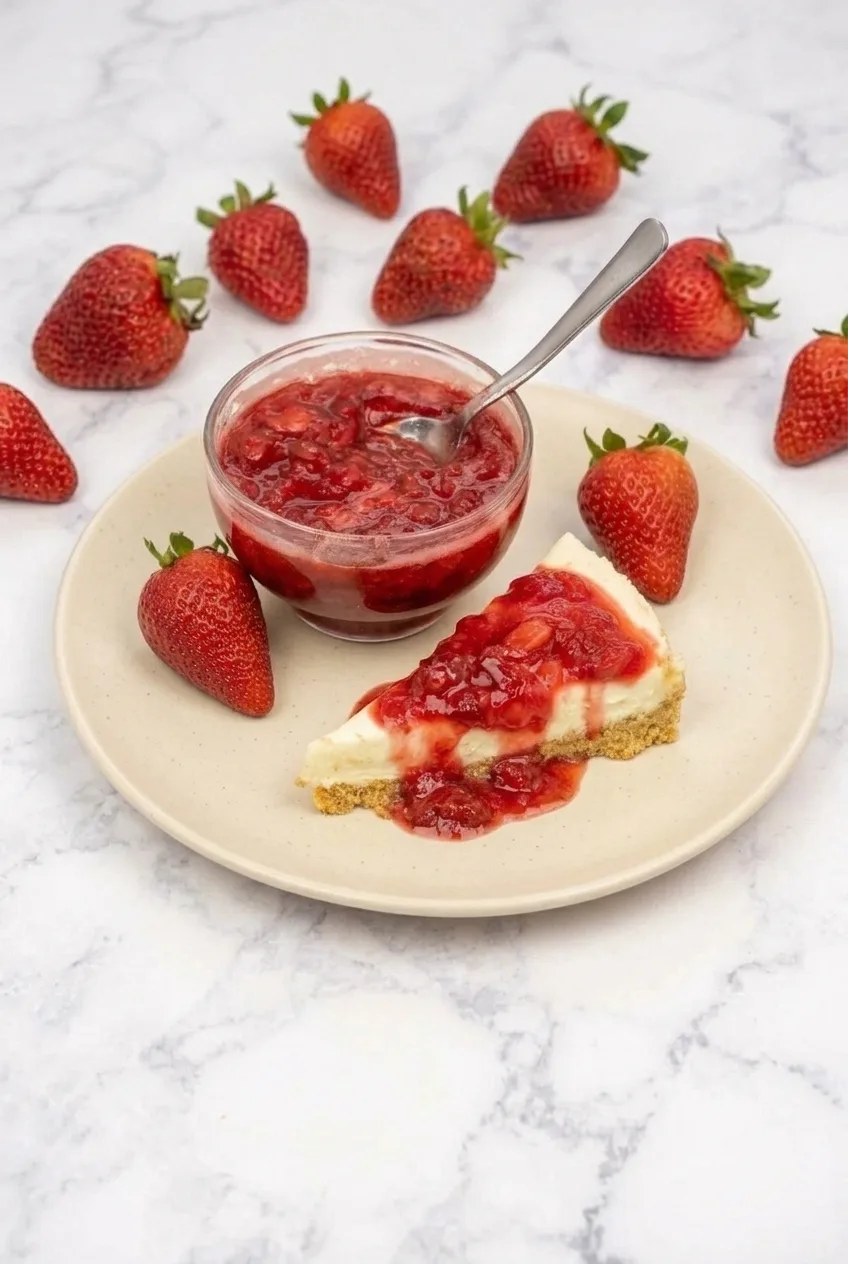
A wider view of a strawberry cheesecake slice with extra sauce and whole strawberries on the plate

Prep: 30 minutes. Cook: 8 to 12 minutes. Total: at least 8 hours 40 minutes, mostly chilling. Yield: 10 to 12 slices.

  1. Press the crust: Mix the graham-cracker crumbs, melted butter, and crust sugar until no dry pockets remain. Press firmly into an even layer across the bottom of a 9-inch springform pan. Refrigerate while you make the filling.
  2. Mix the filling: Beat the softened cream cheese until smooth, scraping down the bowl. Add the sweetened condensed milk, 1/3 cup lemon juice, and vanilla. Mix just until combined and no lumps remain; avoid beating in excess air.
  3. Fill and chill: Spread the filling over the crust and smooth the top. Cover the pan and refrigerate for at least 8 hours, preferably overnight. The center should be thoroughly cold and firm before you release the pan.
  4. Cook the strawberry sauce: Combine the chopped strawberries, sauce sugar, and 1 tablespoon lemon juice in a small saucepan. Cook uncovered over medium heat for 8 to 12 minutes, stirring occasionally. Start checking around 8 minutes: the berries should be soft but still chunky, and the glossy liquid should lightly cling to a spoon. If it remains unusually loose, let it reduce a little longer or stir in the optional cornstarch mixture and cook briefly until thickened.
  5. Cool the sauce: Transfer it to a heat-safe bowl and let it cool completely, about 30 minutes. It will thicken further as it cools. Refrigerate it separately if making it ahead.
  6. Slice and serve: Release the springform sides. Warm a knife under hot water, dry it, and wipe it clean between cuts. Spoon cooled sauce generously over each wedge, letting it run slightly down the sides. Arrange the reserved whole strawberries alongside.

Why the Filling Needs a Long Chill

The cream cheese, condensed milk, and lemon filling is designed to firm up in the refrigerator. Full-fat cream cheese gives it more body than a lower-fat version, and softening it before mixing helps prevent lumps. If the center is still too soft to hold a slice, leave the cake covered in the refrigerator longer rather than rushing to unmold it.

Keep strawberries out of the filling. Their extra juice can make this cheesecake harder to slice cleanly; the cooked sauce and whole-berry garnish provide the strawberry finish instead.

How to Keep the Crust and Slices Neat

Grind the graham crackers finely and press the evenly moistened crumbs firmly into the pan. Coarse or loosely packed crumbs are more likely to break when you lift a wedge.

Add the sauce only after it has cooled and the cheesecake has been sliced. Warm sauce can soften the filling, while sauce that has not reduced enough may run off the top.

Make-Ahead and Storage

Make the cheesecake 1 to 2 days ahead and keep it covered in the refrigerator. Refrigerate the sauce separately, then add it near serving to keep the top and cut edges neat. Keep leftovers covered and chilled; do not leave the cake at room temperature for extended periods.

For longer make-ahead storage, the untopped cheesecake can be tightly wrapped and frozen for up to 2 months. Thaw it overnight in the refrigerator, then add the sauce before serving. Freezing is optional storage, not the setting step for this recipe.

Nutrition

Approximate nutrition per serving, based on 1 of 12 slices with strawberry sauce: 410 calories, 6g protein, 24g fat, and 44g carbohydrates. Approximate nutrition per 100g: 285 calories, 4g protein, 17g fat, and 30g carbohydrates. Values vary with ingredient brands, slice size, and the amount of sauce served.

No-Bake Strawberry Cheesecake

A chilled cream cheese and condensed milk cheesecake with a graham-cracker crust, topped with cooked strawberry sauce.
Course: Dessert
Cuisine: American
Prep: 30 min
Cook: 12 min
Total: 520 min
Servings: 12 Calories: 410 kcal

Equipment

  • 9-inch springform pan
  • Electric mixer
  • Small saucepan
  • Heat-safe bowl

Ingredients

Graham-Cracker Crust

  • 2 cups finely ground graham-cracker crumbs (200 g)
  • 7 tablespoons unsalted butter, melted (100 g)
  • 2 tablespoons granulated sugar (25 g)

Cheesecake Filling

  • 16 ounces full-fat cream cheese, softened (450 g)
  • 1 can sweetened condensed milk (14 ounces/395 g)
  • 1/3 cup fresh lemon juice
  • 1 teaspoon vanilla extract

Strawberry Sauce and Garnish

  • 1 pound fresh strawberries (450 g), most hulled and chopped, with several whole berries reserved for serving
  • 1/3 cup granulated sugar (65 g)
  • 1 tablespoon fresh lemon juice
  • Optional: 1 teaspoon cornstarch mixed with 1 tablespoon cold water

Instructions

  1. Mix the graham-cracker crumbs, melted butter, and crust sugar until evenly moistened.
  2. Press the crumb mixture firmly into an even layer across the bottom of a 9-inch springform pan. Refrigerate while preparing the filling.
  3. Beat the softened cream cheese until smooth, scraping down the bowl as needed.
  4. Add the condensed milk, 1/3 cup lemon juice, and vanilla. Mix just until combined and smooth.
  5. Spread the filling over the crust and smooth the top. Cover and refrigerate for at least 8 hours, preferably overnight, until thoroughly cold and firm.
  6. Combine the chopped strawberries, sauce sugar, and 1 tablespoon lemon juice in a small saucepan.
  7. Cook uncovered over medium heat for 8 to 12 minutes, stirring occasionally, until the berries are soft but chunky and the glossy liquid lightly clings to a spoon.
  8. If the sauce is unusually loose, cook it a little longer or stir in the optional cornstarch mixture and cook briefly until thickened.
  9. Transfer the sauce to a heat-safe bowl and cool completely, about 30 minutes. Refrigerate separately if making it ahead.
  10. Release the springform sides. Slice the cheesecake with a hot, dry knife, wiping it clean between cuts.
  11. Spoon cooled sauce over each slice and serve with the reserved whole strawberries.

Tips

  • Soften the cream cheese before mixing to help prevent lumps.
  • Mix the filling only until smooth to avoid beating in excess air.
  • Chill the cheesecake until the center is firm before releasing the pan.
  • Cool the strawberry sauce completely before serving it over the cheesecake.
  • Press finely ground, evenly moistened crumbs firmly into the pan for neater slices.

Notes

Make the cheesecake 1 to 2 days ahead and refrigerate it covered. Store sauce separately and add it near serving. Leftovers should remain covered and chilled. The untopped cheesecake can be tightly wrapped and frozen for up to 2 months; thaw overnight in the refrigerator. Approximate nutrition per 100 g: 285 calories, 4 g protein, 17 g fat, and 30 g carbohydrates.

Nutrition

Calories: 410 kcal | Protein: 6 g | Fat: 24 g | Carbohydrates: 44 g

No-Bake Oreo Dessert Lasagna

A compact Oreo crumb crust supports a smooth cream-cheese layer, thick chocolate pudding, and a white whipped-topping finish scattered with mini chocolate chips. The pudding needs to thicken before it is spread so the layers stay distinct. Once assembled, the dessert needs at least 4 hours in the refrigerator to hold its shape when cut into thick rectangular slices.

Prep time: 25 minutes | Cook time: 0 minutes | Chill time: at least 4 hours | Total time: at least 4 hours 25 minutes | Servings: 12 generous slices

Ingredients for Oreo Dessert Lasagna

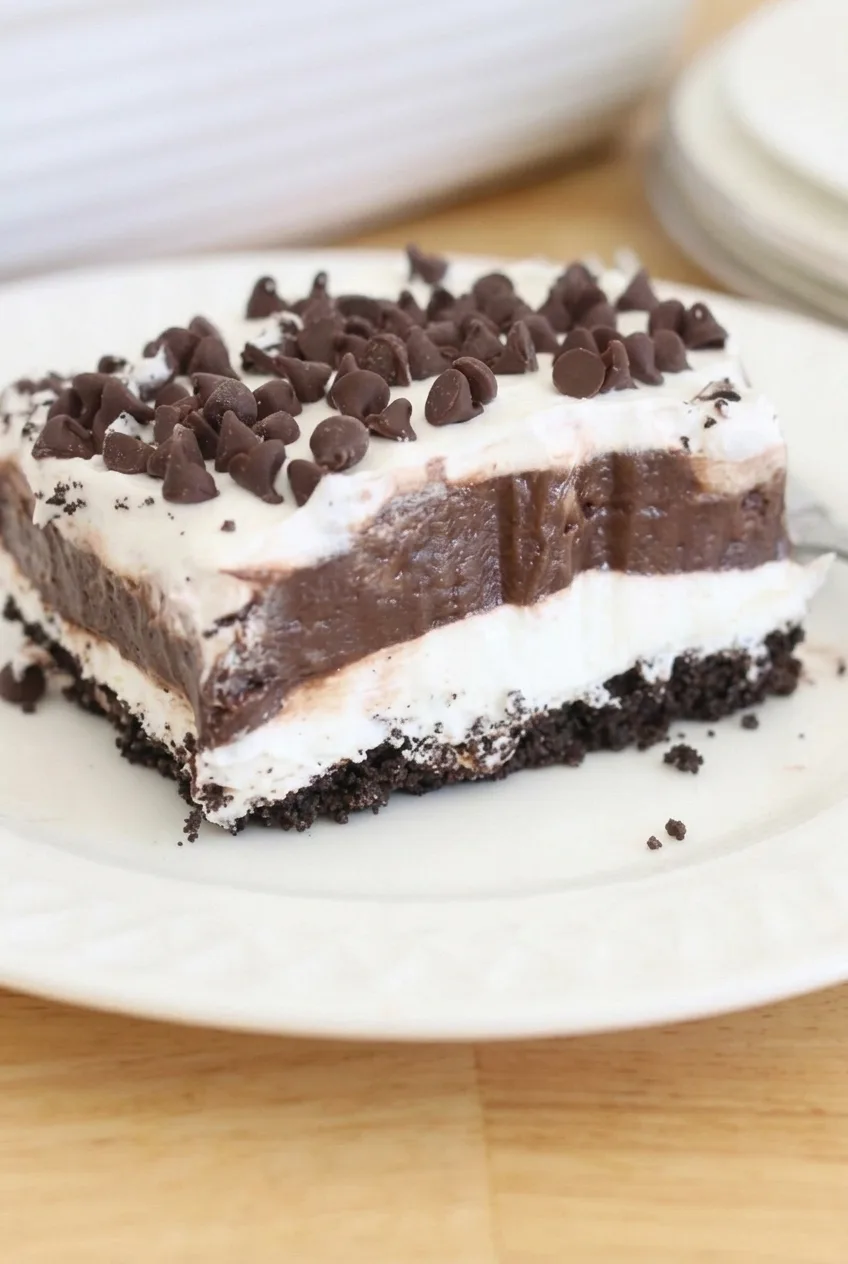
Close detail of Oreo dessert lasagna layers, with a compact crumb crust, smooth chocolate pudding, and mini chips.
  • 36 regular chocolate sandwich cookies, such as Oreos (about 410g)
  • 6 tablespoons unsalted butter, melted (85g)
  • 8 ounces cream cheese, softened (about 225g)
  • 1/2 cup powdered sugar (60g)
  • 2 tablespoons milk, for the cream-cheese layer
  • 16 ounces frozen whipped topping, thawed and divided (about 450g)
  • Two 3.4-ounce packages instant chocolate pudding mix (about 190g total)
  • 3 cups cold whole milk, for the pudding
  • 1/2 cup mini semi-sweet chocolate chips (85g)

How to Make No-Bake Oreo Dessert Lasagna

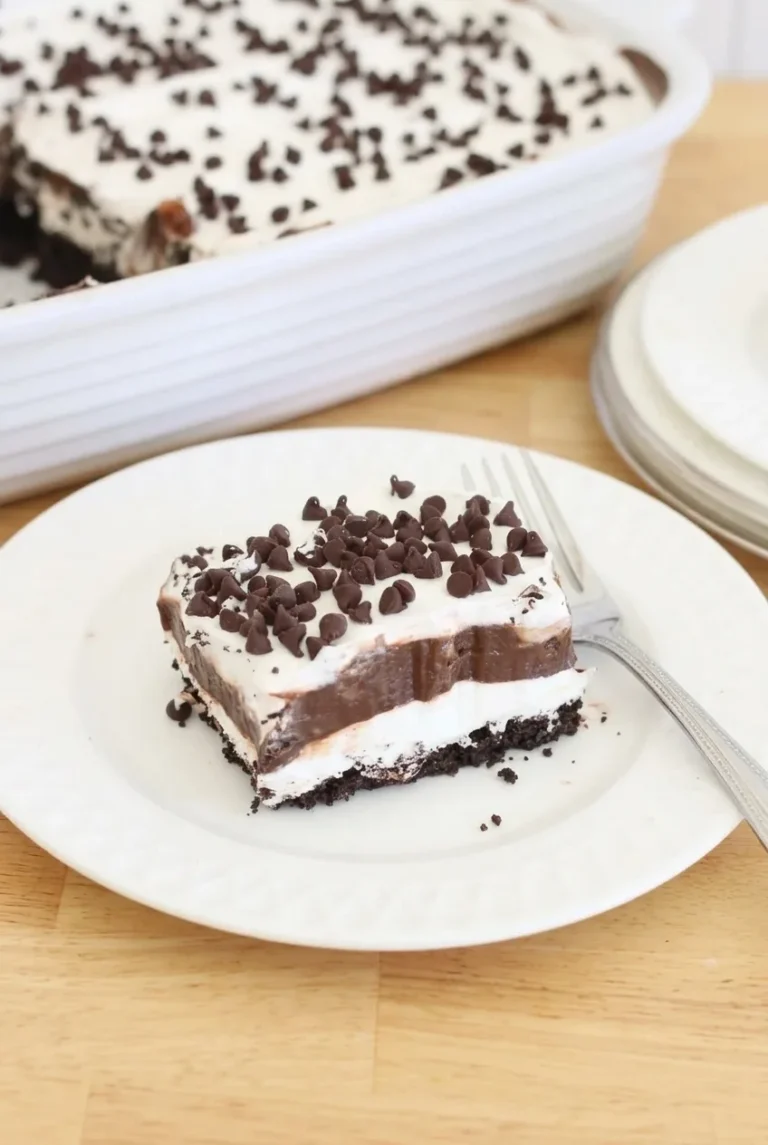
A rectangular dish of Oreo dessert lasagna with a cut slice beside it, showing the layered filling and chip topping.
  1. Press the crust: Crush the cookies into fine, even crumbs in a food processor. Or seal them in a sturdy resealable bag with the excess air pressed out and crush them with a rolling pin. Stir in the melted butter, then press the crumbs firmly and evenly into the bottom of a 9-by-13-inch baking dish. Refrigerate while you make the next layer.
  2. Make the cream-cheese layer: Beat the softened cream cheese, powdered sugar, and 2 tablespoons milk until smooth. Fold in half of the whipped topping, about 8 ounces. Spread gently over the crust without pulling up the crumbs.
  3. Thicken the pudding: Whisk both packages of instant pudding mix with 3 cups cold whole milk. Let it stand briefly if needed, until it mounds slightly on a spoon rather than running freely. Spread it carefully over the cream-cheese layer. If using pudding packages of a different size, follow their milk directions and make sure the pudding thickens before layering.
  4. Finish the layers: Spread the remaining whipped topping over the pudding, then scatter the mini chocolate chips across the top.
  5. Chill and slice: Cover the dish without touching the topping. Refrigerate for at least 4 hours, until the center is thoroughly cold and the layers hold when cut. Slice into 12 rectangular portions, wiping the knife between cuts as needed. For neater cuts, you can put the chilled dish in the freezer for 20 to 30 minutes immediately before slicing.

How to Keep the Layers Distinct

Spread each layer gently, especially the pudding, so it does not drag the cream-cheese layer beneath it. If a slice slumps, the dessert likely needs more time in the refrigerator. A brief freezer rest can help with cutting, but it cannot replace the initial chill. Expect the edges to look homemade rather than perfectly sharp.

Make-Ahead and Storage

Assemble the dessert ahead and keep it covered in the refrigerator until serving. Refrigerate leftovers, covered, for about 3 to 4 days. The Oreo crust will soften as it sits.

Long-term freezing is less predictable than refrigeration because the texture may change after thawing. For another chilled, layered dessert, try No-Bake Banana Split Dessert Bars.

Nutrition

Approximate nutrition per serving, based on 1 of 12 slices (about 188g): 475 calories, 6g protein, 25g fat, and 52g carbohydrates. Approximate nutrition per 100g: 250 calories, 3g protein, 14g fat, and 27g carbohydrates. Values vary by brand, particularly for the cookies, pudding mix, and whipped topping.

No-Bake Oreo Dessert Lasagna

A chilled layered dessert with an Oreo crust, cream-cheese filling, chocolate pudding, whipped topping, and mini chocolate chips.
Course: Dessert
Cuisine: American
Prep: 25 min
Total: 265 min
Servings: 12 Calories: 475 kcal

Equipment

  • Food processor or resealable bag and rolling pin
  • 9-by-13-inch baking dish
  • Mixing bowls
  • Electric mixer or whisk
  • Spatula
  • Knife

Ingredients

For the crust

  • 36 regular chocolate sandwich cookies, such as Oreos (about 410 g)
  • 6 tablespoons unsalted butter, melted (85 g)

For the cream-cheese layer

  • 8 ounces cream cheese, softened (about 225 g)
  • 1/2 cup powdered sugar (60 g)
  • 2 tablespoons milk
  • 16 ounces frozen whipped topping, thawed and divided (about 450 g)

For the pudding layer and topping

  • Two 3.4-ounce packages instant chocolate pudding mix (about 190 g total)
  • 3 cups cold whole milk
  • 1/2 cup mini semi-sweet chocolate chips (85 g)

Instructions

  1. Crush the cookies into fine, even crumbs using a food processor or a resealable bag and rolling pin.
  2. Stir the melted butter into the cookie crumbs. Press the mixture firmly and evenly into the bottom of a 9-by-13-inch baking dish, then refrigerate while preparing the next layer.
  3. Beat the cream cheese, powdered sugar, and 2 tablespoons milk until smooth.
  4. Fold in about half of the whipped topping, then gently spread the mixture over the crust.
  5. Whisk the pudding mix with 3 cups cold milk. Let it stand until thick enough to mound slightly on a spoon.
  6. Carefully spread the thickened pudding over the cream-cheese layer.
  7. Spread the remaining whipped topping over the pudding and scatter the chocolate chips on top.
  8. Cover the dish without letting the cover touch the topping. Refrigerate for at least 4 hours, until thoroughly cold and set.
  9. Slice into 12 portions, wiping the knife between cuts as needed. For neater cuts, freeze the chilled dessert for 20 to 30 minutes before slicing.

Tips

  • Press the crust firmly and evenly into the dish.
  • Let the pudding thicken before spreading so the layers stay distinct.
  • Spread each layer gently to avoid disturbing the layer beneath it.
  • Chill for at least 4 hours; a brief freezer rest helps with slicing but does not replace chilling.
  • Follow the package milk directions if using pudding packages of a different size.

Notes

Keep covered in the refrigerator; leftovers keep for about 3 to 4 days. The crust softens as it sits. Long-term freezing may change the texture.

Nutrition

Calories: 475 kcal | Protein: 6 g | Fat: 25 g | Carbohydrates: 52 g