Author

Julia

Browsing

Chicken Alfredo Bake

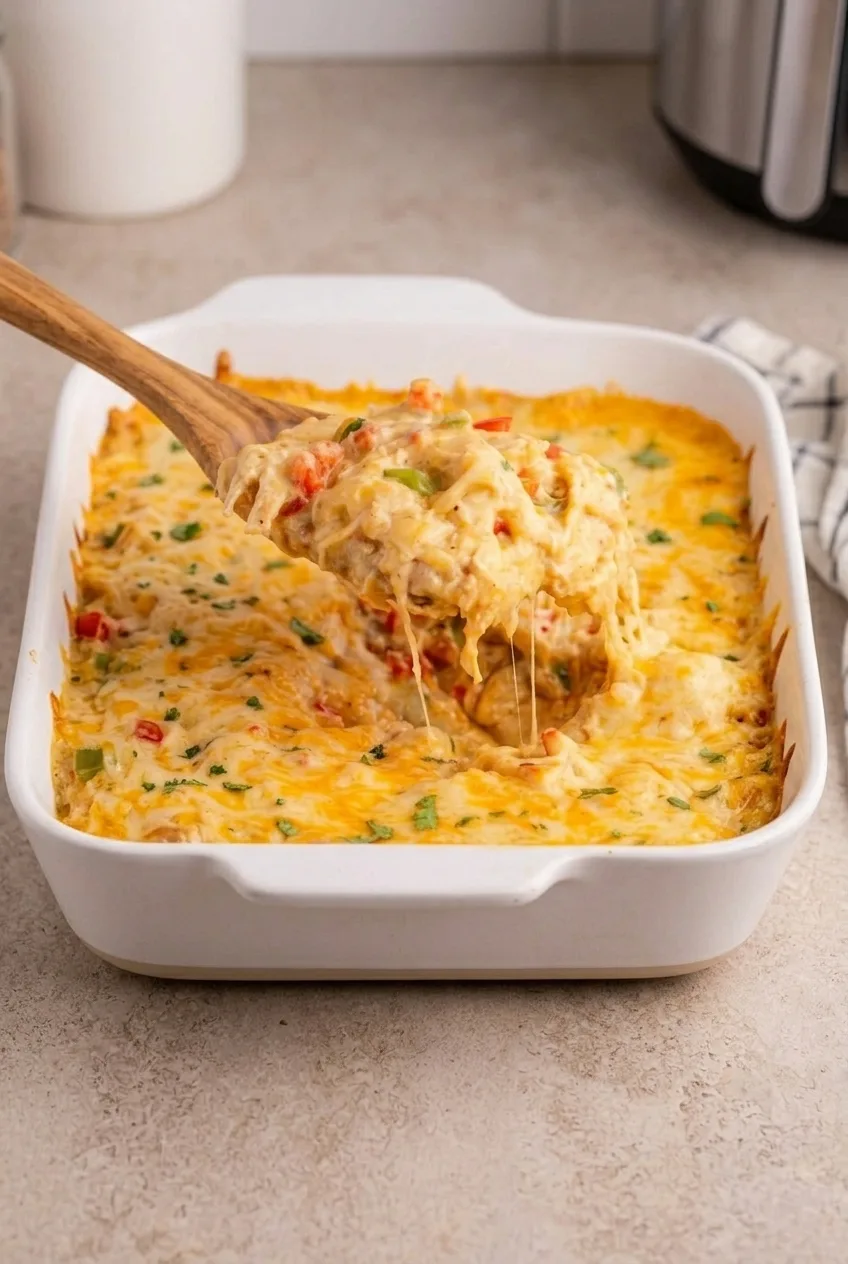
Chicken Alfredo Bake layers creamy short pasta, cooked chicken, and broccoli beneath a generous mozzarella topping. The casserole should be hot and saucy in the center, with browned spots across the cheese—not dry around the edges.

Rotisserie or leftover chicken and jarred Alfredo sauce keep assembly simple. Cook the pasta slightly firm before it goes into the oven, then bake the casserole covered before uncovering it to brown the top. A casserole assembled cold will need longer in the oven than one assembled with warm pasta.

Prep time: 15 minutes | Cook time: about 30 minutes, including boiling and baking | Serves: 6–8

Ingredients
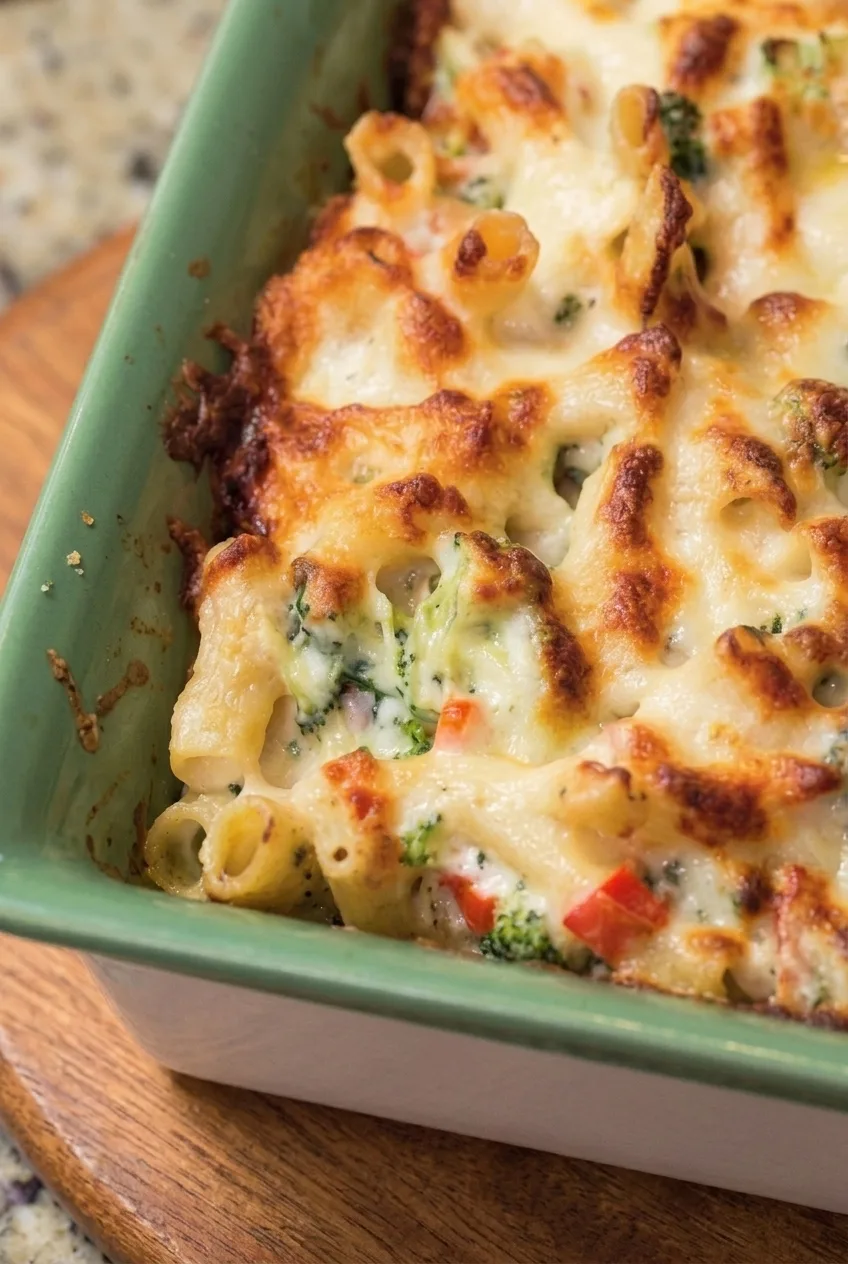
Close view of browned mozzarella over creamy chicken, penne and broccoli in the Alfredo bake
  • 12 ounces short pasta, such as penne (340g)
  • 2 cups small broccoli florets (180g)
  • 3 cups cooked chicken, shredded or chopped (420g)
  • Two 15-ounce jars Alfredo sauce (about 850g)
  • 1/2 cup milk (120g)
  • 2 cups shredded mozzarella, divided (225g)
  • 1/2 cup grated Parmesan (50g)
  • 1/2 teaspoon garlic powder
  • 1/2 teaspoon Italian seasoning
  • 1/4 teaspoon black pepper, or to taste
  • Salt, for the pasta water

Optional: Add 1/2 cup finely diced red bell pepper to the filling, or scatter 1–2 tablespoons chopped fresh parsley over the baked casserole.

How to Make Chicken Alfredo Bake
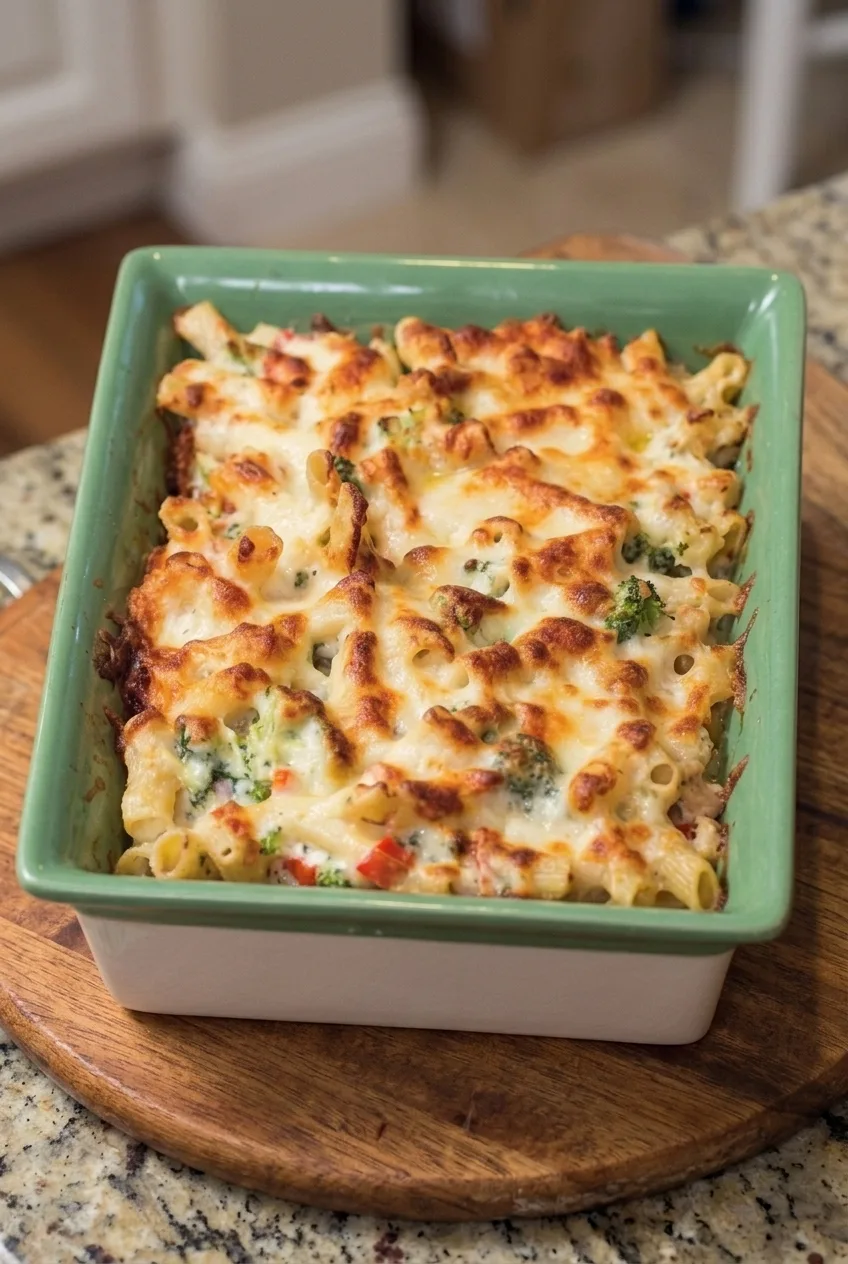
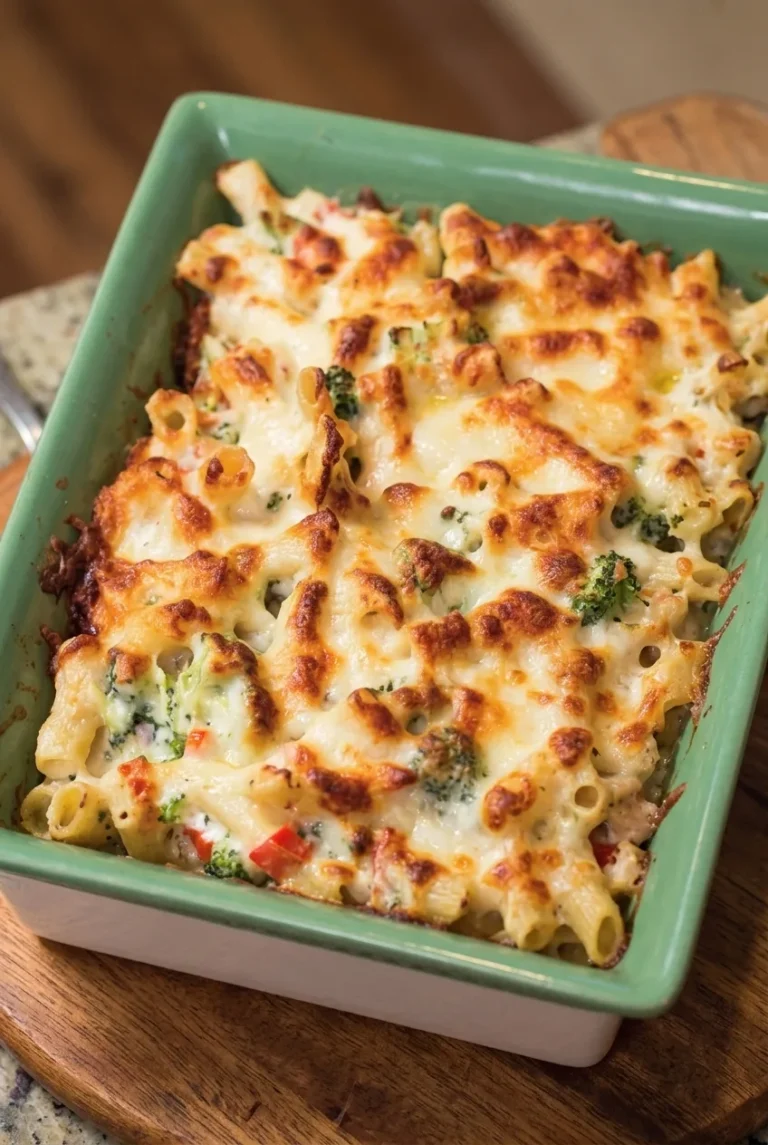
Whole chicken Alfredo bake in a green casserole dish, centered on a wooden surface with extra space around it
  1. Prepare the oven and dish: Preheat the oven to 350°F (175°C). Lightly grease a deep 9-by-13-inch baking dish, including the corners.
  2. Boil the pasta and broccoli: Bring a large pot of salted water to a boil. Cook the pasta for 1–2 minutes less than the package directions for al dente. Add the broccoli for the final 2 minutes, then drain promptly and well. The pasta should still be firm to the bite; the broccoli should be bright green and just beginning to soften.
  3. Mix the filling: In a large bowl, stir together the Alfredo sauce, milk, Parmesan, garlic powder, Italian seasoning, and black pepper. Fold in the pasta, broccoli, cooked chicken, and 1 cup of the mozzarella until evenly coated. Add the red bell pepper here if using.
  4. Fill the dish: Spread the mixture evenly in the prepared dish, keeping it below the rim. Sprinkle the remaining mozzarella over the top.
  5. Bake covered, then uncovered: Cover with foil and bake for about 15 minutes. Remove the foil and bake for another 5–10 minutes, checking the center and cheese as soon as the dish is uncovered. The center should be hot, the sauce should bubble at the edges, and the mozzarella should be melted with browned spots. A cold or deeper casserole will need more time; if reheating one assembled ahead, check that its center reaches 165°F (75°C). If the filling is hot but the top is pale, broil briefly, watching closely.
  6. Rest: Let the casserole stand for 5–10 minutes before serving. Add parsley if using.

How to Keep the Pasta Creamy, Not Mushy

The pasta continues to soften as it bakes in the sauce, so stop boiling it just shy of al dente and drain it promptly. Cut the broccoli into small florets so its brief time in the pasta water is enough to start tenderizing it without making it fall apart.

Alfredo sauces vary in thickness and saltiness. The 1/2 cup of milk helps the sauce coat the filling; taste the mixture before adding any extra salt. Keep the dish covered for the first part of baking to limit moisture loss, and avoid extending the bake solely to brown the cheese.

Make-Ahead, Storage, and Freezing

To make ahead, assemble the casserole, cover it, and refrigerate it. Bake until hot throughout rather than relying on the warm-assembly timing; a cold dish takes longer to heat in the center.

Cool leftovers and refrigerate them in an airtight container for 3–4 days. Reheat individual portions in the microwave in short intervals until hot, checking the center. For a larger portion, cover and warm it in a 350°F oven until hot throughout. A small splash of milk can loosen sauce that has thickened.

Freezing is possible but less reliable for texture: the pasta may soften, and the creamy sauce may separate or turn grainy. If frozen, thaw the casserole in the refrigerator before reheating it thoroughly.

What to Serve with Chicken Alfredo Bake

Serve with garlic bread or a Caesar or simple green salad. For another creamy chicken pasta casserole, try Chicken Bacon Ranch Casserole with Creamy Penne.

Nutrition

Approximate nutrition per 1/8 of the casserole: 550 calories, 35g protein, 28g fat, and 39g carbohydrates. Approximate nutrition per 100g: 170 calories, 11g protein, 9g fat, and 12g carbohydrates. Values vary with the Alfredo sauce, chicken, and cheese used.

Chicken Alfredo Bake

A creamy casserole of short pasta, chicken, and broccoli baked with a mozzarella topping.
Course: Main Course
Cuisine: American
Prep: 15 min
Cook: 30 min
Total: 55 min
Servings: 8 Calories: 550 kcal

Equipment

  • 9-by-13-inch baking dish
  • Large pot
  • Colander
  • Large mixing bowl
  • Aluminum foil

Ingredients

For the casserole

  • 12 ounces short pasta, such as penne (340g)
  • 2 cups small broccoli florets (180g)
  • 3 cups cooked chicken, shredded or chopped (420g)
  • Two 15-ounce jars Alfredo sauce (about 850g)
  • 1/2 cup milk (120g)
  • 2 cups shredded mozzarella, divided (225g)
  • 1/2 cup grated Parmesan (50g)
  • 1/2 teaspoon garlic powder
  • 1/2 teaspoon Italian seasoning
  • 1/4 teaspoon black pepper, or to taste
  • Salt, for the pasta water

Optional

  • 1/2 cup finely diced red bell pepper
  • 1–2 tablespoons chopped fresh parsley

Instructions

  1. Preheat the oven to 350°F (175°C). Lightly grease a deep 9-by-13-inch baking dish, including the corners.
  2. Bring a large pot of salted water to a boil. Cook the pasta for 1–2 minutes less than the package directions for al dente.
  3. Add the broccoli to the pot for the final 2 minutes of cooking. Drain the pasta and broccoli promptly and well.
  4. In a large bowl, stir together the Alfredo sauce, milk, Parmesan, garlic powder, Italian seasoning, and black pepper.
  5. Fold in the pasta, broccoli, cooked chicken, and 1 cup of the mozzarella until evenly coated. Add the diced red bell pepper if using.
  6. Spread the mixture evenly in the prepared baking dish, keeping it below the rim. Sprinkle the remaining mozzarella over the top.
  7. Cover the dish with foil and bake for about 15 minutes. Remove the foil and bake for another 5–10 minutes, until the center is hot, the sauce bubbles at the edges, and the cheese is melted with browned spots.
  8. If the filling is hot but the cheese is pale, broil briefly while watching closely. Let the casserole rest for 5–10 minutes before serving, and add parsley if using.

Tips

  • Cook the pasta just shy of al dente because it will continue to soften in the oven.
  • Cut the broccoli into small florets so it begins to soften during its brief time in the pasta water.
  • Drain the pasta and broccoli promptly to prevent them from becoming too soft.
  • Taste the sauce mixture before adding extra salt; Alfredo sauces vary in saltiness.
  • Keep the casserole covered for the first part of baking to limit moisture loss, and avoid baking longer just to brown the cheese.

Variations

  • Red Bell Pepper: Add 1/2 cup finely diced red bell pepper to the filling.
  • Fresh Parsley: Scatter 1–2 tablespoons chopped fresh parsley over the baked casserole.
Notes

Refrigerate leftovers in an airtight container for 3–4 days. Reheat until hot throughout; a cold make-ahead casserole takes longer to heat, and its center should reach 165°F (75°C). Add a splash of milk if the sauce has thickened. Freezing may affect the pasta and sauce texture.

Nutrition

Calories: 550 kcal | Protein: 35 g | Fat: 28 g | Carbohydrates: 39 g

Cheesy Sausage and Hash Brown Casserole

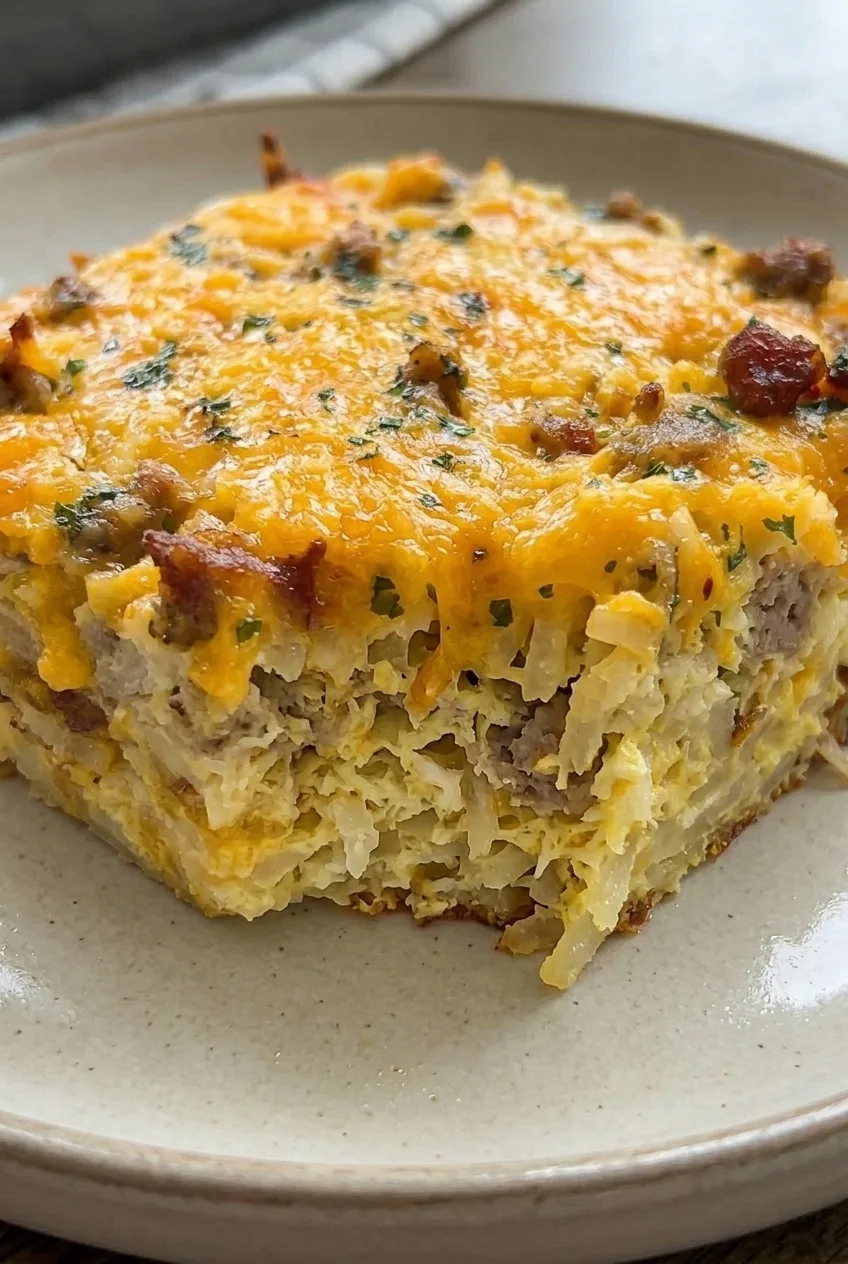
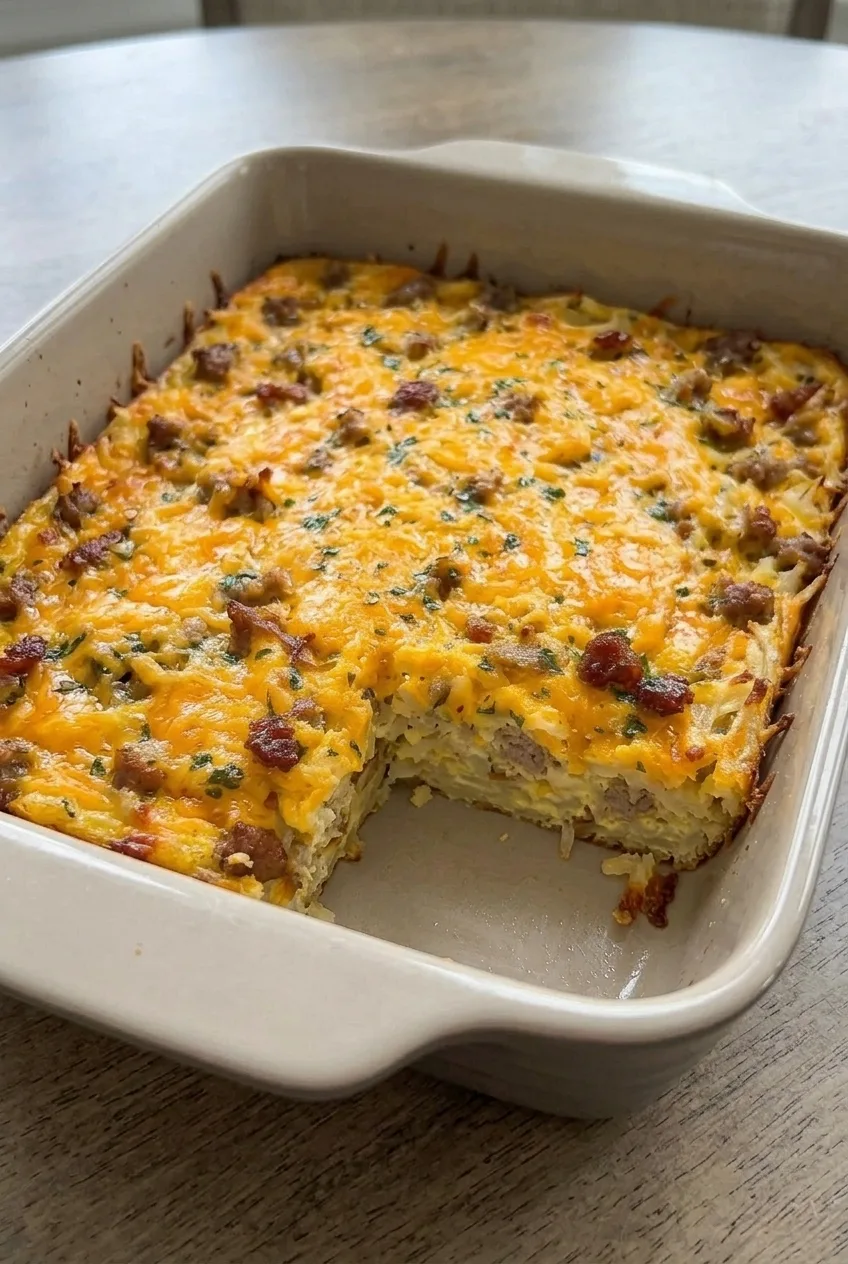
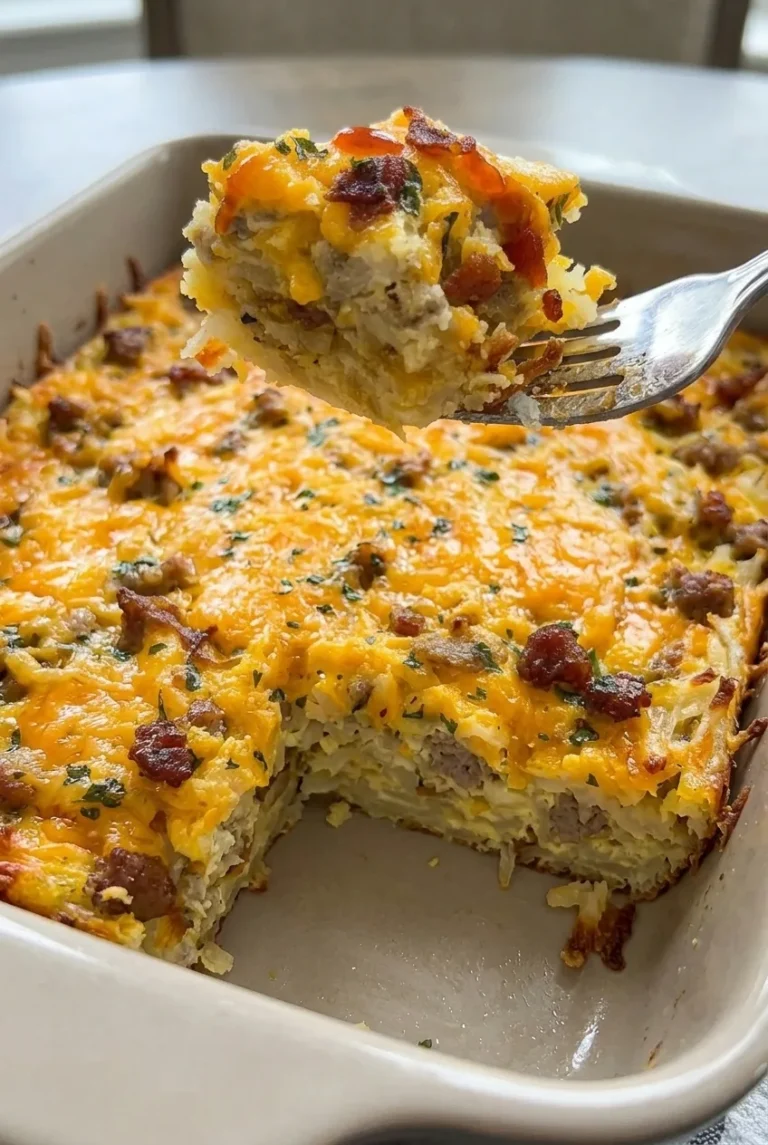
Shredded hash browns, browned breakfast sausage, eggs, and cheddar bake into thick squares with visible potato shreds and a set, moist center. Half the cheese goes into the filling; the rest melts across the top.

This 9-by-13-inch casserole starts covered at 350°F (175°C), giving the center time to cook before the cheese topping goes on. Bake time is an estimate, especially if the assembled dish is cold. Check the middle before cutting, even when the edges are golden.

Ingredients

Close view of the set egg, shredded potato, sausage, and melted cheddar inside a casserole slice.
  • Cooking spray or softened butter, for the baking dish
  • 30 ounces frozen shredded hash brown potatoes (850g), thawed
  • 1 pound bulk breakfast sausage (450g)
  • 8 large eggs
  • 1 cup whole milk (245g)
  • 2 cups shredded cheddar cheese (225g), divided
  • 1/2 teaspoon kosher salt, or to taste depending on the sausage and cheese
  • 1/4 teaspoon black pepper
  • Optional: 1/2 cup finely diced yellow onion and/or 1/2 cup diced bell pepper
  • Optional: 1/4 teaspoon garlic powder
  • Optional: 1 tablespoon chopped fresh parsley, for serving

How to Make Cheesy Sausage and Hash Brown Casserole

A full baking dish of cheesy sausage and hash brown casserole with a cut square showing its potato-filled interior.
  1. Prepare the dish: Preheat the oven to 350°F. Lightly grease a 9-by-13-inch baking dish. If the thawed hash browns are visibly wet, drain or pat them dry so they do not add excess moisture to the filling.
  2. Brown the sausage: Cook the sausage in a large skillet over medium heat for 8–10 minutes, breaking it into small crumbles, until browned and cooked through. If using onion or bell pepper, cook it with the sausage until softened. Drain excess fat so it does not make the casserole greasy.
  3. Whisk the eggs: In a large bowl, whisk the eggs, milk, salt, and pepper until evenly combined. Whisk in the garlic powder if using.
  4. Assemble: Combine the hash browns, drained sausage, and 1 cup of the cheddar. Spread evenly in the prepared dish. Pour the egg mixture over the filling and gently level it.
  5. Bake covered: Cover loosely with foil, keeping it from pressing into the filling. Bake for about 40 minutes, until the edges are beginning to set. The center may still jiggle slightly at this point.
  6. Add the cheese and finish baking: Remove the foil and scatter the remaining 1 cup cheddar over the top. Bake uncovered for about 10–20 minutes more, beginning to check at 50 minutes total. The center should no longer jiggle or look wet, and the cheese should be melted and bubbly. If the top gets too dark before the center sets, tent it loosely with foil and continue baking.
  7. Rest and serve: Let the casserole rest for about 10 minutes before cutting so the squares hold together. Scatter with parsley if desired.

How to Tell When the Center Is Set

Gently nudge the dish: the middle should not wobble, and no wet egg mixture should be visible. Melted cheese and golden edges are useful signs, but they can appear before the center is done. A deeper dish or a casserole baked straight from the refrigerator may need longer than the estimated 50–60 minutes.

Make-Ahead and Hash Brown Notes

For overnight prep, assemble the casserole through step 4, reserving the topping cheese. Cover and refrigerate overnight. Bake as directed, allowing more time if needed until the center is set; chilling does not add a predictable number of minutes.

Thawed shredded hash browns are used here so they distribute evenly through the filling. Pat them dry if wet. Other hash brown casserole formulas may use frozen or precooked potatoes, but those methods are not interchangeable with the timing given here.

Serving, Storage, and Reheating

Serve warm in thick squares, with hot sauce at the table if desired. For a sweet brunch companion, consider this Berry French Toast Casserole with Cinnamon-Sugar Top.

Refrigerate leftovers promptly in a covered container and use within 3–4 days. Reheat individual portions until hot throughout; the time depends on the portion size and appliance.

Nutrition

Approximate nutrition per serving, based on 1/9 of the casserole: 420 calories, 23g protein, 28g fat, and 20g carbohydrates. Approximate nutrition per 100g: 215 calories, 12g protein, 14g fat, and 10g carbohydrates. Values will vary with the sausage, hash browns, and cheese used.

Cheesy Sausage and Hash Brown Casserole

Shredded hash browns, browned breakfast sausage, eggs, and cheddar bake into a set, moist casserole topped with melted cheese.
Course: Breakfast
Cuisine: American
Prep: 20 min
Cook: 60 min
Total: 90 min
Servings: 9 Calories: 420 kcal

Equipment

  • 9-by-13-inch baking dish
  • Large skillet
  • Large mixing bowl
  • Whisk
  • Aluminum foil

Ingredients

For the casserole

  • Cooking spray or softened butter, for the baking dish
  • 30 ounces frozen shredded hash brown potatoes (850 g), thawed
  • 1 pound bulk breakfast sausage (450 g)
  • 8 large eggs
  • 1 cup whole milk (245 g)
  • 2 cups shredded cheddar cheese (225 g), divided
  • 1/2 teaspoon kosher salt, or to taste
  • 1/4 teaspoon black pepper

Optional additions

  • 1/2 cup finely diced yellow onion and/or 1/2 cup diced bell pepper
  • 1/4 teaspoon garlic powder
  • 1 tablespoon chopped fresh parsley, for serving

Instructions

  1. Preheat the oven to 350°F (175°C). Lightly grease a 9-by-13-inch baking dish.
  2. If the thawed hash browns are wet, drain or pat them dry.
  3. Cook the sausage in a large skillet over medium heat for 8–10 minutes, breaking it into small crumbles, until browned and cooked through. If using onion or bell pepper, cook it with the sausage until softened. Drain excess fat.
  4. Whisk the eggs, milk, salt, and pepper in a large bowl. Whisk in the garlic powder if using.
  5. Combine the hash browns, drained sausage, and 1 cup of the cheddar. Spread the mixture evenly in the prepared dish.
  6. Pour the egg mixture over the filling and gently level it.
  7. Cover loosely with foil and bake for about 40 minutes, until the edges begin to set.
  8. Remove the foil and scatter the remaining 1 cup of cheddar over the top. Bake uncovered for about 10–20 minutes more, checking from 50 minutes total.
  9. Check that the center no longer jiggles or looks wet and that the cheese is melted and bubbly. If the top browns before the center sets, tent loosely with foil and continue baking.
  10. Rest the casserole for about 10 minutes before cutting. Scatter with parsley if desired.

Tips

  • Pat wet thawed hash browns dry to avoid adding excess moisture.
  • Drain excess fat from the cooked sausage so the casserole is not greasy.
  • Keep the foil from pressing into the filling while the casserole bakes covered.
  • Check the center for doneness; golden edges and melted cheese do not guarantee the middle is set.
  • Allow extra baking time if the assembled casserole is cold or baked in a deeper dish.

Variations

  • Onion or Bell Pepper: Cook 1/2 cup finely diced yellow onion and/or 1/2 cup diced bell pepper with the sausage until softened.
  • Garlic: Add 1/4 teaspoon garlic powder to the egg mixture.

Notes

For overnight prep, assemble through the filling and egg mixture, reserve the topping cheese, cover, and refrigerate. Bake until the center is set; a chilled casserole may need longer. Refrigerate leftovers promptly in a covered container and use within 3–4 days. Reheat portions until hot throughout.

Nutrition

Calories: 420 kcal | Protein: 23 g | Fat: 28 g | Carbohydrates: 20 g | Per 100g Calories: 215 kcal | Per 100g Protein: 12 g | Per 100g Fat: 14 g | Per 100g Carbohydrates: 10 g

King Ranch Chicken Casserole

King Ranch chicken casserole layers cooked chicken, sautéed peppers and onion, corn tortillas, a creamy tomato-and-green-chile filling, and cheese. Rotisserie or leftover chicken keeps assembly simple. In this condensed-soup version, draining the tomatoes and leaving out broth keeps the filling thick enough to scoop without turning soupy.

The tortillas soften as they bake, making a tender, cohesive casserole rather than crisp layers or firm slices. Let it rest briefly, then serve warm scoops straight from the dish.

Ingredients for King Ranch Chicken Casserole

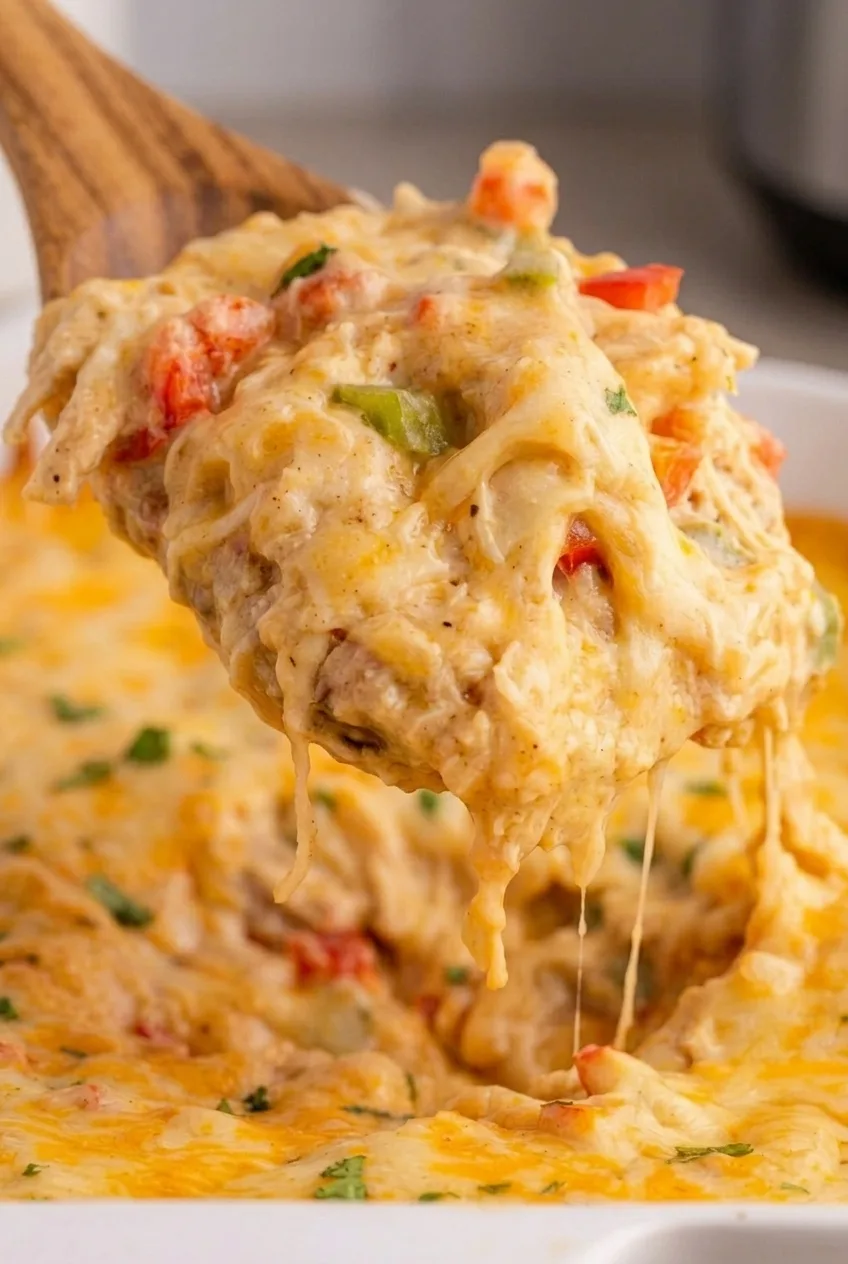
Close detail of creamy King Ranch chicken casserole with tender chicken, softened tortilla pieces, peppers, and stretchy melted cheese.
  • 1 tablespoon neutral cooking oil, plus a little for greasing the dish
  • 1 medium yellow onion, diced (about 150g)
  • 1 medium red bell pepper, diced (about 150g)
  • 1 medium green bell pepper, diced (about 150g)
  • 1 can (10 ounces) diced tomatoes with green chiles, drained (about 170g drained)
  • 1 can (10.5 ounces) condensed cream of chicken soup (about 300g)
  • 1 can (10.5 ounces) condensed cream of mushroom soup (about 300g)
  • 1/2 cup sour cream (120g)
  • 1 teaspoon ground cumin
  • 1 teaspoon chili powder
  • 1/2 teaspoon garlic powder
  • 3 cups cooked shredded or chopped chicken (about 420g)
  • 12 corn tortillas, about 6 inches each, cut or torn into bite-size pieces (about 300g)
  • 3 cups shredded Cheddar or Cheddar-Monterey Jack blend, divided (about 340g)
  • 2 tablespoons chopped fresh cilantro

Use rotisserie or leftover cooked chicken. Taste the filling before adding any salt; the soups and chicken may already be well seasoned.

How to Make King Ranch Chicken Casserole

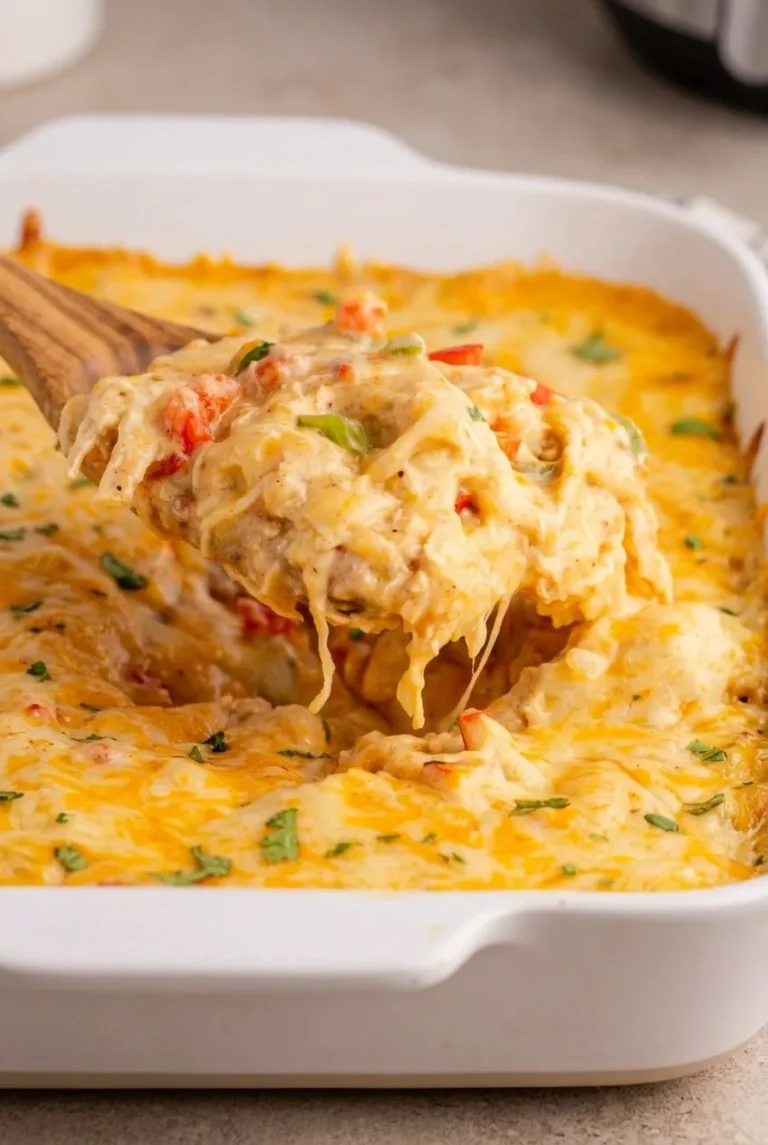
A rectangular dish of King Ranch chicken casserole with a soft, cheesy serving lifted above the creamy layers.
  1. Prepare the oven and dish: Heat the oven to 350°F (175°C). Lightly grease a 9-by-13-inch baking dish. Drain the tomatoes with green chiles.
  2. Soften the vegetables: Heat the oil in a large skillet over medium heat. Add the onion and both bell peppers. Cook, stirring occasionally, for 6 to 8 minutes, until the onion is translucent at the edges and the peppers have softened but still hold their shape.
  3. Mix the filling: In a large bowl, stir together both soups, the sour cream, drained tomatoes, cumin, chili powder, and garlic powder. Fold in the vegetables and cooked chicken. The filling should be thick enough to coat the chicken. Taste before adding salt.
  4. Layer the casserole: Spread one-third of the tortilla pieces across the bottom of the dish, overlapping them slightly. Add one-third of the filling and some of the cheese. Repeat twice, reserving enough cheese to cover the top.
  5. Bake: Bake uncovered for about 30 to 40 minutes, beginning to check at 30 minutes. The filling should bubble around the edges and in a few spots toward the center, and the cheese should be melted with light golden patches. If the top browns before the center is hot and bubbling, tent loosely with foil and continue baking.
  6. Rest and serve: Let the casserole rest for about 10 minutes so the creamy layers settle slightly. Scatter the cilantro over the top and scoop warm portions from the dish.

How to Keep the Casserole from Turning Soupy

Drain the tomatoes and do not add broth to this condensed-soup filling. The soups, sour cream, and tomatoes provide enough moisture for the tortillas to soften without making the sauce too loose. Resting the casserole before serving also makes the soft portions easier to lift.

What to Expect from the Tortilla Layers

Corn tortillas absorb the sauce and become tender during baking. Toasting them first may add corn flavor, but it will not guarantee crisp layers. They soften further as leftovers sit in the refrigerator.

Make-Ahead and Baking from Cold

Assemble the casserole, cover, and refrigerate for up to one day before baking. A cold casserole may need longer than the usual 30 to 40 minutes. Check for bubbling toward the center rather than relying on the clock, and tent loosely with foil if the cheese browns before the center is hot.

How to Store and Reheat

Refrigerate leftovers in an airtight container for 3 to 4 days. Reheat portions until hot throughout; if using a thermometer, the food-safety target for reheated leftovers is 165°F (75°C).

For longer storage, freeze a fully cooled casserole or tightly wrapped portions for up to about one month. Thaw overnight in the refrigerator before reheating. The tortillas may be softer after freezing.

For another layered chicken dinner with a different sauce, try this chicken enchilada casserole with red sauce.

Nutrition

Approximate nutrition per serving, based on 8 generous servings: 465 calories, 33g protein, 23g fat, and 30g carbohydrates. Approximate nutrition per 100g: 155 calories, 11g protein, 8g fat, and 10g carbohydrates. Values vary with the brands of soup, cheese, tortillas, and chicken used.

King Ranch Chicken Casserole

This casserole layers cooked chicken, peppers, corn tortillas, a creamy tomato-and-green-chile filling, and cheese.
Course: Main Course
Cuisine: Tex-Mex
Prep: 25 min
Cook: 40 min
Total: 75 min
Servings: 8 Calories: 465 kcal

Equipment

  • 9-by-13-inch baking dish
  • Large skillet
  • Large mixing bowl

Ingredients

For the casserole

  • 1 tablespoon neutral cooking oil, plus a little for greasing the dish
  • 1 medium yellow onion, diced (about 150g)
  • 1 medium red bell pepper, diced (about 150g)
  • 1 medium green bell pepper, diced (about 150g)
  • 1 can (10 ounces) diced tomatoes with green chiles, drained (about 170g drained)
  • 1 can (10.5 ounces) condensed cream of chicken soup (about 300g)
  • 1 can (10.5 ounces) condensed cream of mushroom soup (about 300g)
  • 1/2 cup sour cream (120g)
  • 1 teaspoon ground cumin
  • 1 teaspoon chili powder
  • 1/2 teaspoon garlic powder
  • 3 cups cooked shredded or chopped chicken (about 420g)
  • 12 corn tortillas, about 6 inches each, cut or torn into bite-size pieces (about 300g)
  • 3 cups shredded Cheddar or Cheddar-Monterey Jack blend, divided (about 340g)
  • 2 tablespoons chopped fresh cilantro

Instructions

  1. Preheat the oven to 350°F (175°C). Lightly grease a 9-by-13-inch baking dish and drain the tomatoes with green chiles.
  2. Heat the oil in a large skillet over medium heat. Add the onion and both bell peppers, then cook for 6 to 8 minutes, stirring occasionally, until softened.
  3. In a large bowl, stir together the chicken soup, mushroom soup, sour cream, drained tomatoes, cumin, chili powder, and garlic powder.
  4. Fold the softened vegetables and cooked chicken into the soup mixture. Taste the filling before adding any salt.
  5. Spread one-third of the tortilla pieces in the baking dish. Add one-third of the filling and some of the cheese.
  6. Repeat the tortilla, filling, and cheese layers twice, reserving enough cheese to cover the top.
  7. Bake uncovered for 30 to 40 minutes, beginning to check at 30 minutes, until bubbling around the edges and in spots toward the center, with melted cheese and light golden patches. If the top browns before the center is hot and bubbling, tent loosely with foil and continue baking.
  8. Rest the casserole for about 10 minutes. Scatter the cilantro over the top and serve warm.

Tips

  • Drain the tomatoes well and do not add broth; this keeps the filling thick.
  • Use rotisserie or leftover cooked chicken to simplify preparation.
  • Taste the filling before adding salt because the soups and chicken may already be well seasoned.
  • Check for bubbling toward the center rather than relying only on the baking time.
  • Let the casserole rest before serving so the soft layers settle slightly.

Notes

Refrigerate leftovers in an airtight container for 3 to 4 days. Freeze fully cooled portions for up to about one month and thaw overnight in the refrigerator. Reheat until hot throughout, reaching 165°F (75°C) if checked with a thermometer.

Nutrition

Calories: 465 kcal | Protein: 33 g | Fat: 23 g | Carbohydrates: 30 g

John Wayne Casserole

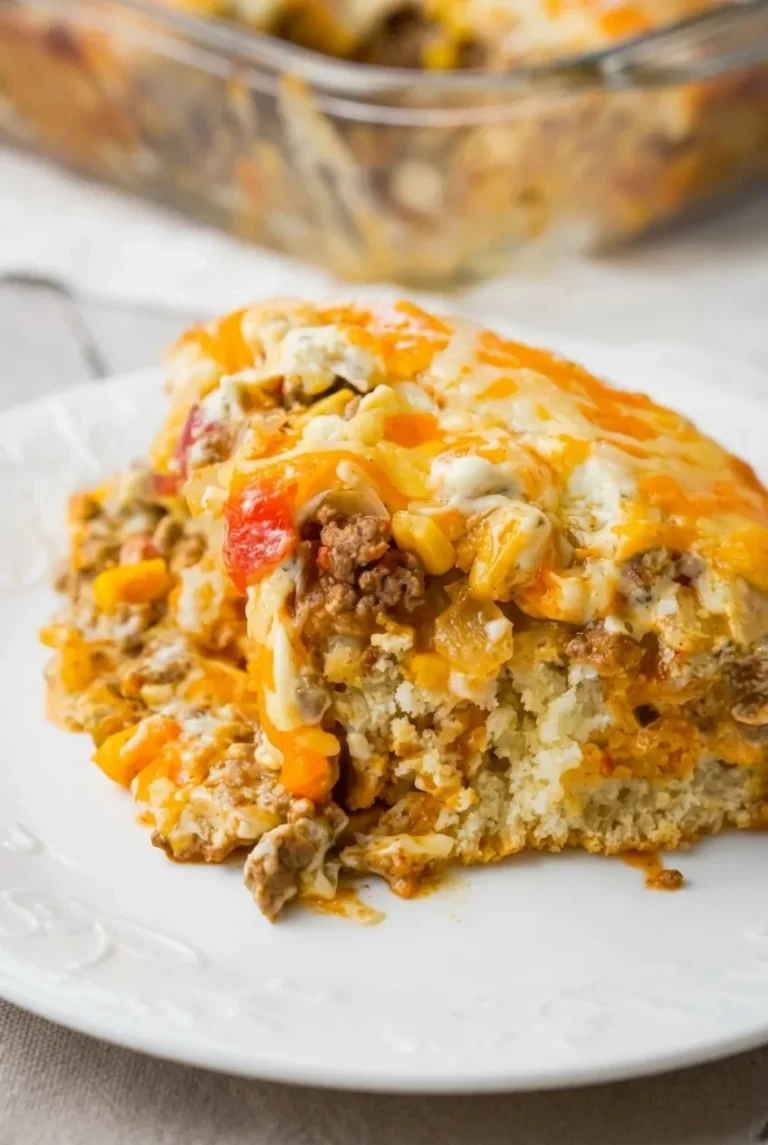
John Wayne Casserole has a biscuit-style base topped with seasoned ground beef, corn, vegetables, a creamy cheese layer, and melted cheese. Partially baking the crust before adding the moist filling helps keep that bottom layer defined. The finished casserole is hearty and soft-edged rather than firm enough for perfectly neat slices.

This is the modern beef-and-biscuit version of the dish. The same name is also used for a different egg-and-cheese casserole.

Ingredients for John Wayne Casserole

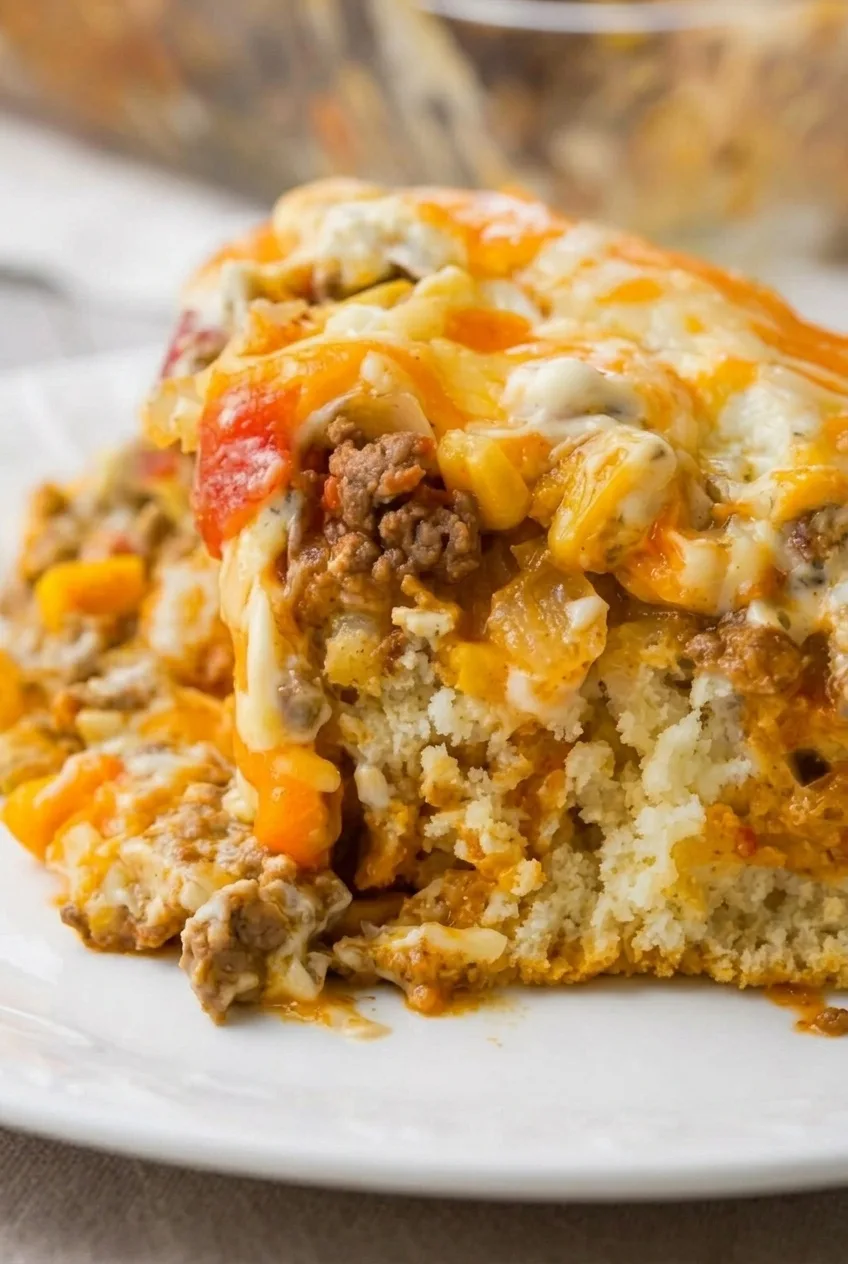
Close view of John Wayne Casserole layers, with crumbly biscuit crust, beef and vegetables, creamy cheese, and melted topping.
  • Cooking spray or neutral oil, for the baking dish
  • 2 cups baking mix, such as Bisquick (240g)
  • 2/3 cup water, or enough to make a soft, pressable dough
  • 1 1/2 pounds lean ground beef (680g)
  • 1 medium yellow onion, diced (150g)
  • 1 medium bell pepper, diced (150g)
  • 1 packet taco seasoning, about 1 ounce (30g)
  • 1 can diced tomatoes with green chiles, 10 ounces, well drained (285g before draining)
  • 1 cup corn kernels (165g), drained if canned
  • 8 ounces cream cheese, softened (225g)
  • 1/2 cup mayonnaise (110g)
  • 1 1/2 cups shredded cheddar cheese, divided (170g)
  • 1 cup shredded Monterey Jack or cheddar blend (115g)
  • Kosher salt and black pepper, to taste if needed

Optional for serving: sliced jalapeño, chopped cilantro, or sour cream.

How to Make John Wayne Casserole

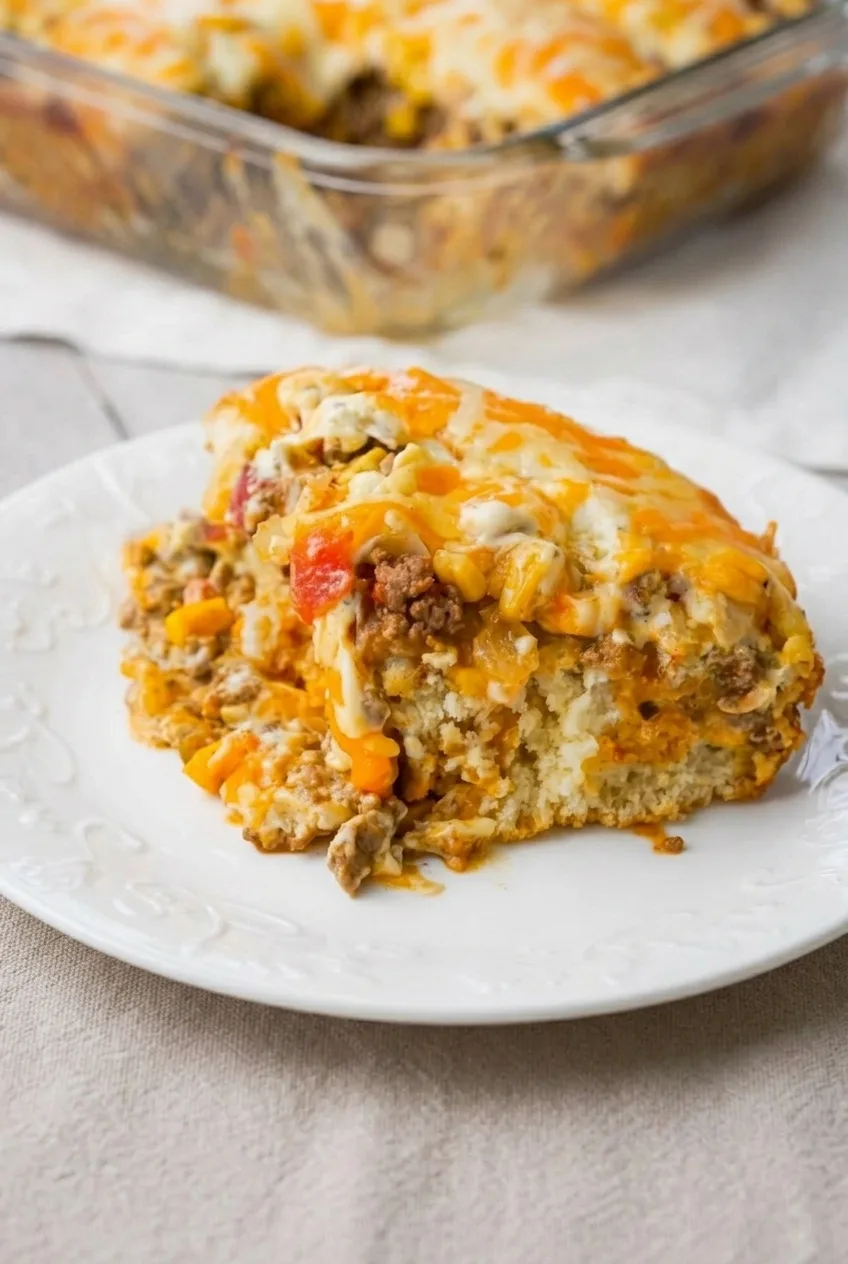
A full plate holding a rustic serving of John Wayne Casserole, with its layered biscuit crust and cheesy beef filling visible.
  1. Prepare the oven and dish: Preheat the oven to 350°F (175°C). Grease a 9-by-13-inch baking dish. Drain the tomatoes with green chiles and the corn well.
  2. Partially bake the crust: Stir the baking mix and water together until a soft, pressable dough forms, adding a little more water only if needed. Press it evenly across the bottom of the dish. Bake for 12 to 15 minutes, until the surface looks set rather than wet, but is not deeply browned.
  3. Cook the beef and vegetables: While the crust bakes, cook the beef in a large skillet over medium heat, breaking it into small crumbles. When no pink remains, drain the excess fat. Add the onion and bell pepper and cook until they begin to soften. Stir in the taco seasoning, then taste and add salt or pepper if needed.
  4. Add the tomatoes and corn: Stir them into the beef, then remove the skillet from the heat. Spread the filling over the partially baked crust. If liquid remains in the skillet, use a slotted spoon so that liquid stays behind.
  5. Add the creamy layer: Stir the softened cream cheese and mayonnaise until smooth, then mix in 1/2 cup of the cheddar. Spoon the mixture over the beef and spread it gently into an even layer.
  6. Top and bake: Scatter the remaining cheddar and the Monterey Jack or cheddar blend over the top. Bake uncovered for about 25 to 30 minutes, starting to check at 20 minutes. The cheese should be fully melted, with bubbling and light browning around the edges.
  7. Rest and serve: Let the casserole rest for about 10 minutes before cutting into 8 portions. The layers will hold together better after resting, though the creamy filling may still loosen at the cut edges.

How to Keep the Biscuit Crust Defined

The short first bake sets the baking-mix dough before the filling goes on, but it cannot compensate for a watery filling. Drain the beef fat, tomatoes with green chiles, and canned corn. If the finished beef mixture has liquid in the skillet, leave it behind when transferring the filling. Pressing the dough to an even thickness also helps the center and edges bake consistently.

How to Tell When the Casserole Is Done

Check the assembled casserole at 20 minutes, then continue baking until the cheese has melted and the edges are bubbling and lightly browned. A thicker crust or wetter filling can change the timing. The filling should be hot, but the finished casserole will remain creamy rather than setting like a pie.

Creamy Layer and Heat Options

Some versions use sour cream and mayonnaise instead of cream cheese and mayonnaise. That makes a tangier, softer layer; it will not have the same thick, spreadable texture as the cream-cheese layer used here. For more or less heat without changing the method, choose hot or mild tomatoes with green chiles.

Serving and Related Recipes

Serve the casserole with a simple salad or roasted vegetables, and offer sour cream, sliced jalapeño, or cilantro at the table. For another beef casserole, try this ground beef taco casserole. This ground beef and rice casserole uses rice instead of a biscuit crust.

Storage, Reheating, and Make-Ahead

Cool leftovers and refrigerate them in an airtight container for up to 3 days. Reheat covered in a 350°F oven until hot; about 20 minutes is a guide, depending on portion size. The crust and filling may be softer after reheating.

To work ahead, prepare the beef filling and creamy layer separately, then assemble the casserole close to baking time. Refrigerating it fully assembled overnight may soften the crust. Cooled leftovers can be frozen in an airtight, freezer-safe container for up to 3 months. Thaw overnight in the refrigerator when practical, then reheat covered until hot.

Nutrition Information

Approximate nutrition per serving, based on 8 servings: 650 calories, 32g protein, 43g fat, and 34g carbohydrates. Approximate nutrition per 100g: 220 calories, 11g protein, 15g fat, and 12g carbohydrates. Values vary with the baking mix, beef, cheese, and portion size.

John Wayne Casserole

A biscuit-style crust is topped with seasoned beef, vegetables, a creamy cheese layer, and melted cheese.
Course: Main Course
Cuisine: American
Prep: 20 min
Cook: 45 min
Total: 75 min
Servings: 8 Calories: 650 kcal

Equipment

  • 9-by-13-inch baking dish
  • Large skillet
  • Mixing bowl
  • Slotted spoon

Ingredients

For the crust

  • Cooking spray or neutral oil, for the baking dish
  • 2 cups baking mix, such as Bisquick (240 g)
  • 2/3 cup water, plus more if needed

For the beef filling

  • 1 1/2 pounds lean ground beef (680 g)
  • 1 medium yellow onion, diced (150 g)
  • 1 medium bell pepper, diced (150 g)
  • 1 packet taco seasoning, about 1 ounce (30 g)
  • 1 can diced tomatoes with green chiles, 10 ounces, well drained (285 g before draining)
  • 1 cup corn kernels (165 g), drained if canned
  • Kosher salt and black pepper, to taste if needed

For the creamy topping

  • 8 ounces cream cheese, softened (225 g)
  • 1/2 cup mayonnaise (110 g)
  • 1 1/2 cups shredded cheddar cheese, divided (170 g)
  • 1 cup shredded Monterey Jack or cheddar blend (115 g)

Optional for serving

  • Sliced jalapeño
  • Chopped cilantro
  • Sour cream

Instructions

  1. Preheat the oven to 350°F (175°C). Grease a 9-by-13-inch baking dish.
  2. Drain the tomatoes with green chiles and the corn well.
  3. Stir the baking mix and water together until a soft, pressable dough forms, adding a little more water only if needed.
  4. Press the dough evenly across the bottom of the prepared dish. Bake for 12 to 15 minutes, until the surface looks set but is not deeply browned.
  5. While the crust bakes, cook the ground beef in a large skillet over medium heat, breaking it into small crumbles.
  6. When no pink remains, drain the excess fat. Add the onion and bell pepper and cook until they begin to soften.
  7. Stir in the taco seasoning. Taste and add salt or pepper if needed.
  8. Stir in the drained tomatoes and corn, then remove the skillet from the heat.
  9. Spread the beef mixture over the partially baked crust. Use a slotted spoon if needed to leave any excess liquid in the skillet.
  10. Stir the cream cheese and mayonnaise until smooth, then mix in 1/2 cup of the cheddar.
  11. Spoon the creamy mixture over the beef and gently spread it into an even layer.
  12. Scatter the remaining cheddar and the Monterey Jack or cheddar blend over the top.
  13. Bake uncovered for about 25 to 30 minutes, starting to check at 20 minutes, until the cheese is melted and the edges are bubbling and lightly browned.
  14. Rest the casserole for about 10 minutes before cutting into 8 portions.

Tips

  • Drain the beef fat, tomatoes, and canned corn well to help keep the crust defined.
  • Leave any liquid in the skillet behind when transferring the beef filling.
  • Press the dough to an even thickness so the crust bakes consistently.
  • Check the casserole at 20 minutes; baking time can vary with crust thickness and filling moisture.
  • Let the casserole rest before serving so the layers hold together better.

Variations

  • Sour Cream Layer: Use sour cream and mayonnaise instead of cream cheese and mayonnaise for a tangier, softer topping.
  • Milder or Hotter Casserole: Choose mild or hot tomatoes with green chiles to adjust the heat.

Notes

Refrigerate leftovers in an airtight container for up to 3 days. Reheat covered in a 350°F oven until hot; about 20 minutes is a guide. Leftovers can be frozen for up to 3 months. The casserole remains creamy and may soften at the edges after reheating.

Nutrition

Calories: 650 kcal | Protein: 32 g | Fat: 43 g | Carbohydrates: 34 g | Per 100g Calories: 220 kcal | Per 100g Protein: 11 g | Per 100g Fat: 15 g | Per 100g Carbohydrates: 12 g

Million Dollar Spaghetti Casserole

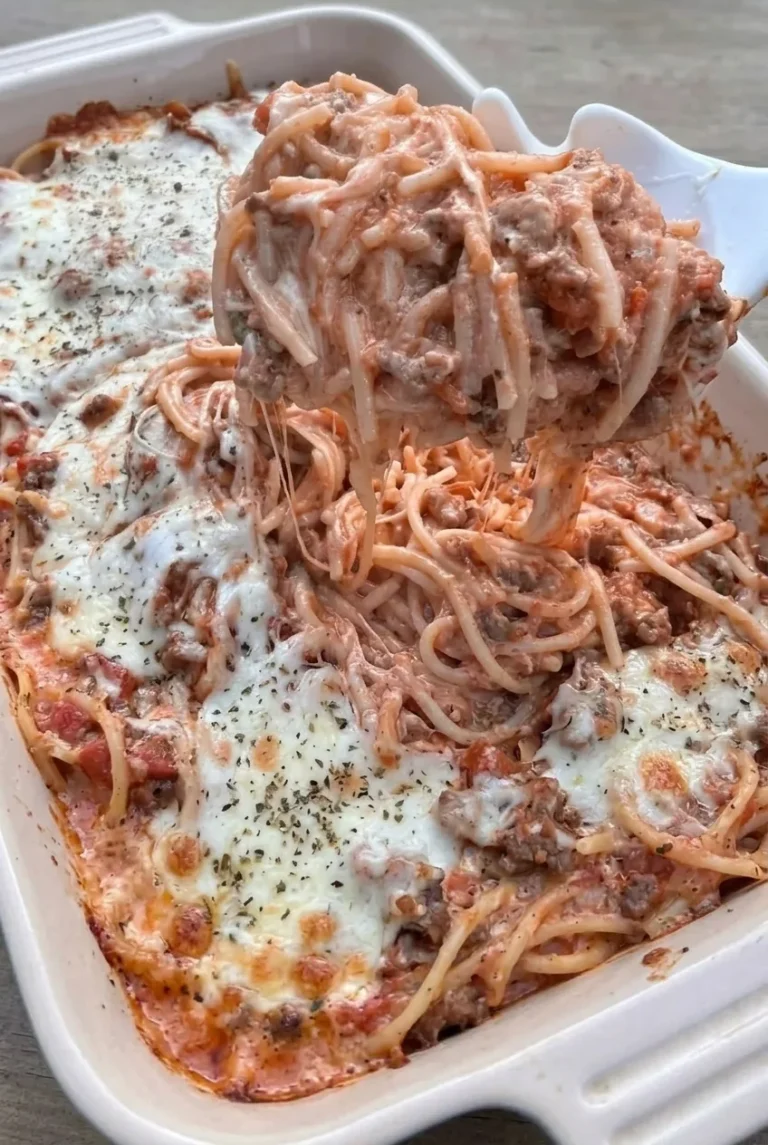
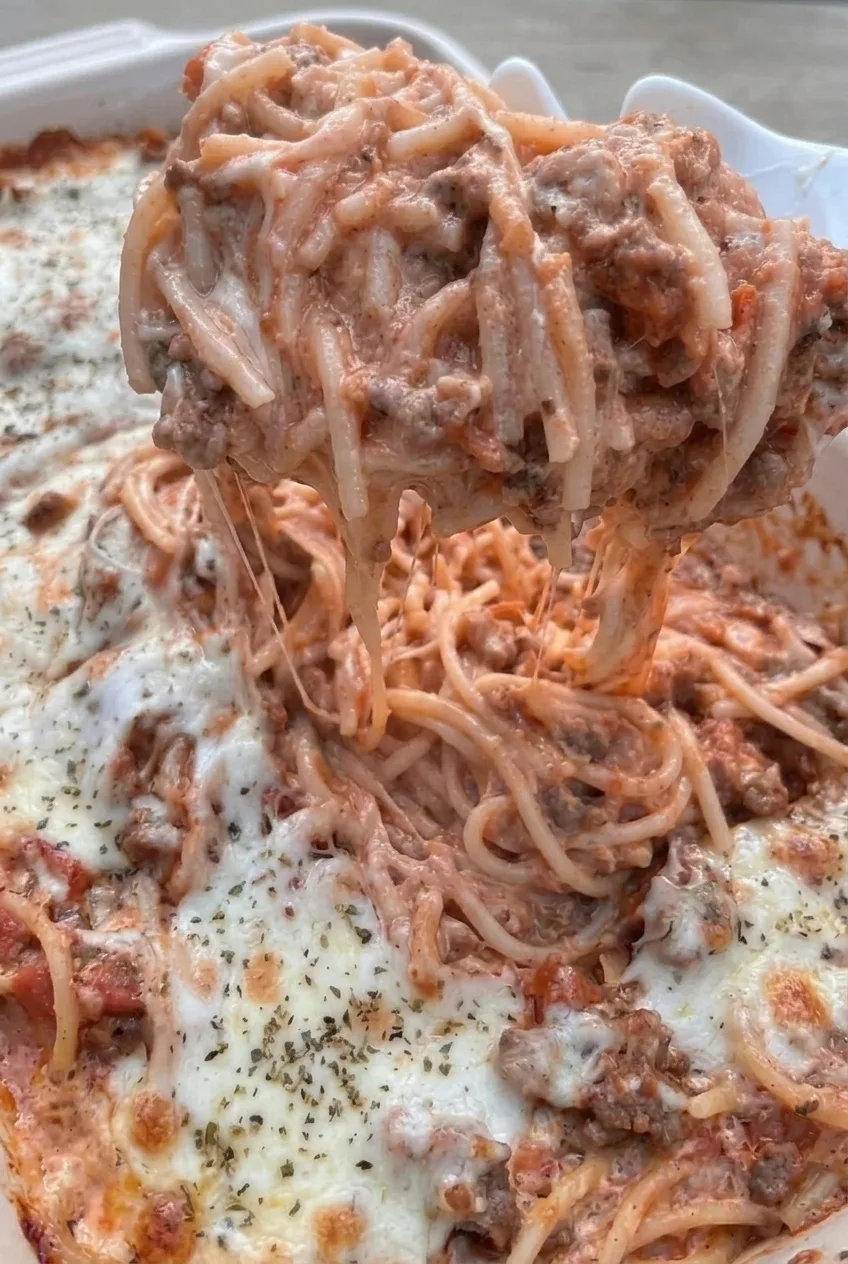
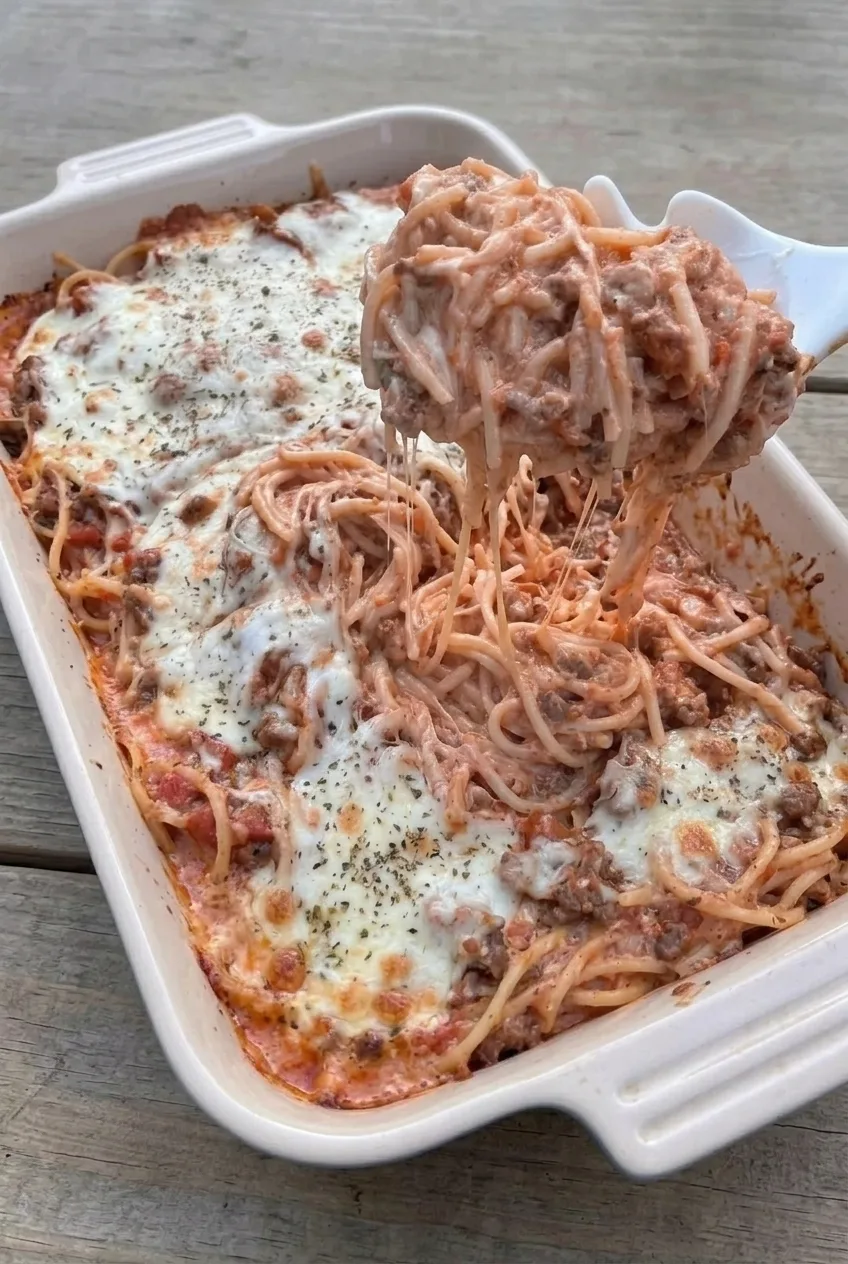
Long spaghetti strands, ground beef marinara, and melted cheese come together in a saucy casserole meant for generous scoops, not tidy slices. In this version, Alfredo sauce coats the noodles before baking, while some of the beef sauce is folded through them so each serving has pasta, meat, and creamy tomato sauce.

Cook the spaghetti just to al dente and keep the beef sauce moist. Those two steps help the noodles hold their texture through the uncovered bake without drying out.

Ingredients

Close detail of creamy spaghetti, ground beef, and stretchy melted cheese in Million Dollar Spaghetti Casserole.
  • 1 pound spaghetti (450g)
  • 1 pound ground beef (450g)
  • 1/2 cup finely chopped yellow onion (80g)
  • 2 cloves garlic, minced
  • 1 teaspoon Italian seasoning
  • 1/4 teaspoon black pepper, or to taste
  • 24 ounces marinara sauce (about 3 cups; 680g)
  • 15 ounces Alfredo sauce (about 1 3/4 cups; 425g)
  • 2 cups shredded mozzarella (200g)
  • 1/2 cup grated Parmesan, divided (50g)
  • Kosher salt, for the pasta water and to taste
  • Cooking spray or a little oil, for greasing the dish
  • Optional: 1 to 2 tablespoons chopped fresh parsley, for serving

How to Make Million Dollar Spaghetti Casserole

A full casserole dish of Million Dollar Spaghetti with a generous scoop showing saucy noodles, beef, and melted cheese.
  1. Prepare the oven and dish: Preheat the oven to 350°F (175°C). Lightly grease a 9-by-13-inch baking dish. Bring a large pot of salted water to a boil.
  2. Cook the spaghetti: Boil the spaghetti according to the package directions, checking early. Drain when the strands are al dente and still have a slight bite. Do not rinse.
  3. Make the beef sauce: In a large skillet over medium heat, cook the onion and ground beef, breaking the meat into small pieces, until the onion softens and no pink remains in the beef. If very lean beef sticks at the start, add a little oil. Drain excess fat. Stir in the garlic, Italian seasoning, and pepper; cook briefly, then add the marinara. Simmer until hot, keeping the sauce moist rather than reducing it until thick. Taste and add salt if needed.
  4. Coat the noodles: Toss the drained spaghetti with the Alfredo sauce and half of the Parmesan until the strands are evenly coated.
  5. Assemble: Spread the spaghetti in the prepared dish. Fold about half of the beef sauce through the noodles, then spoon the remaining sauce over the top. Sprinkle with the mozzarella and remaining Parmesan.
  6. Bake uncovered: Begin checking at 20 minutes. If assembled warm, the casserole will take about 25 to 30 minutes; a cold casserole may take longer. It is ready when the cheese is melted, the sauce bubbles at the edges, and the center is hot when gently parted with a spoon.
  7. Rest and serve: Let stand for 5 to 10 minutes so the sauce settles slightly, then serve in generous scoops while the cheese is still stretchy.

Why Cook the Spaghetti Al Dente?

The spaghetti continues cooking as the casserole bakes. Draining it while it still has a slight bite helps prevent overly soft noodles. Drain well without rinsing so the Alfredo can coat the strands.

How to Keep the Casserole Moist

Coat the spaghetti evenly with Alfredo before assembly, and leave the beef marinara saucy enough to spread through the noodles. Once the cheese has melted, the edges are bubbling, and the center is hot, take the casserole out rather than baking it well past that point. Draining the browned beef before adding marinara also keeps excess fat out of the sauce.

What to Serve with Spaghetti Casserole

Serve with a green salad, roasted broccoli, or garlic bread. For another creamy beef-and-noodle dinner, try Beef Lombardi Casserole.

Make-Ahead and Leftover Notes

Cover and refrigerate the assembled casserole if making it ahead. Baking from cold will take longer than baking with warm components; check for bubbling edges, melted cheese, and a hot center rather than relying on the 25- to 30-minute estimate.

Cool leftovers and refrigerate them in an airtight container for up to three days. Reheat portions until steaming hot; no specific reheating time is established for this version.

Nutrition

Approximate nutrition per serving, based on 1/8 of the casserole (about 360g): 580 calories, 31g protein, 27g fat, and 53g carbohydrates. Approximate nutrition per 100g: 160 calories, 9g protein, 8g fat, and 15g carbohydrates. Values will vary with the sauces and the fat content of the ground beef.

Million Dollar Spaghetti Casserole

Spaghetti coated in Alfredo sauce is baked with saucy ground beef marinara, mozzarella, and Parmesan.
Course: Main Course
Cuisine: Italian-American
Prep: 20 min
Cook: 45 min
Total: 70 min
Servings: 8 Calories: 580 kcal per serving; 160 kcal per 100 g

Equipment

  • Large pot
  • Colander
  • Large skillet
  • 9-by-13-inch baking dish

Ingredients

Pasta

  • 1 pound spaghetti (450 g)
  • Kosher salt, for the pasta water

Beef Marinara

  • 1 pound ground beef (450 g)
  • 1/2 cup finely chopped yellow onion (80 g)
  • 2 cloves garlic, minced
  • 1 teaspoon Italian seasoning
  • 1/4 teaspoon black pepper, or to taste
  • 24 ounces marinara sauce (about 3 cups; 680 g)
  • Salt, to taste

Assembly and Serving

  • 15 ounces Alfredo sauce (about 1 3/4 cups; 425 g)
  • 2 cups shredded mozzarella (200 g)
  • 1/2 cup grated Parmesan, divided (50 g)
  • Cooking spray or a little oil, for greasing the dish
  • Optional: 1 to 2 tablespoons chopped fresh parsley, for serving

Instructions

  1. Preheat the oven to 350°F (175°C). Lightly grease a 9-by-13-inch baking dish.
  2. Bring a large pot of salted water to a boil. Cook the spaghetti according to package directions, checking early, until al dente. Drain well without rinsing.
  3. In a large skillet over medium heat, cook the onion and ground beef, breaking the beef into small pieces, until the onion softens and the beef is no longer pink. Add a little oil if very lean beef sticks.
  4. Drain excess fat. Stir in the garlic, Italian seasoning, and pepper; cook briefly.
  5. Add the marinara and simmer until hot, keeping the sauce moist. Taste and add salt if needed.
  6. Toss the drained spaghetti with the Alfredo sauce and half of the Parmesan until evenly coated.
  7. Spread the spaghetti in the prepared baking dish. Fold about half of the beef sauce through the noodles, then spoon the remaining sauce over the top.
  8. Sprinkle with the mozzarella and remaining Parmesan.
  9. Bake uncovered, beginning to check at 20 minutes. Bake about 25 to 30 minutes if assembled warm, or longer if cold, until the cheese is melted, the edges bubble, and the center is hot.
  10. Let stand for 5 to 10 minutes. Serve in generous scoops, with parsley if desired.

Tips

  • Cook the spaghetti just to al dente so it does not become overly soft in the oven.
  • Drain the pasta well but do not rinse it, so the Alfredo sauce coats the strands.
  • Keep the beef marinara moist rather than reducing it until thick.
  • Check the casserole for bubbling edges and a hot center instead of relying only on baking time, especially if it starts cold.

Notes

Refrigerate leftovers in an airtight container for up to 3 days. Reheat portions until steaming hot. A casserole assembled ahead and baked from cold will take longer.

Nutrition

Calories: 580 kcal per serving; 160 kcal per 100 g | Protein: 31 g per serving; 9 g per 100 g | Fat: 27 g per serving; 8 g per 100 g | Carbohydrates: 53 g per serving; 15 g per 100 g

Poppy Seed Chicken Casserole

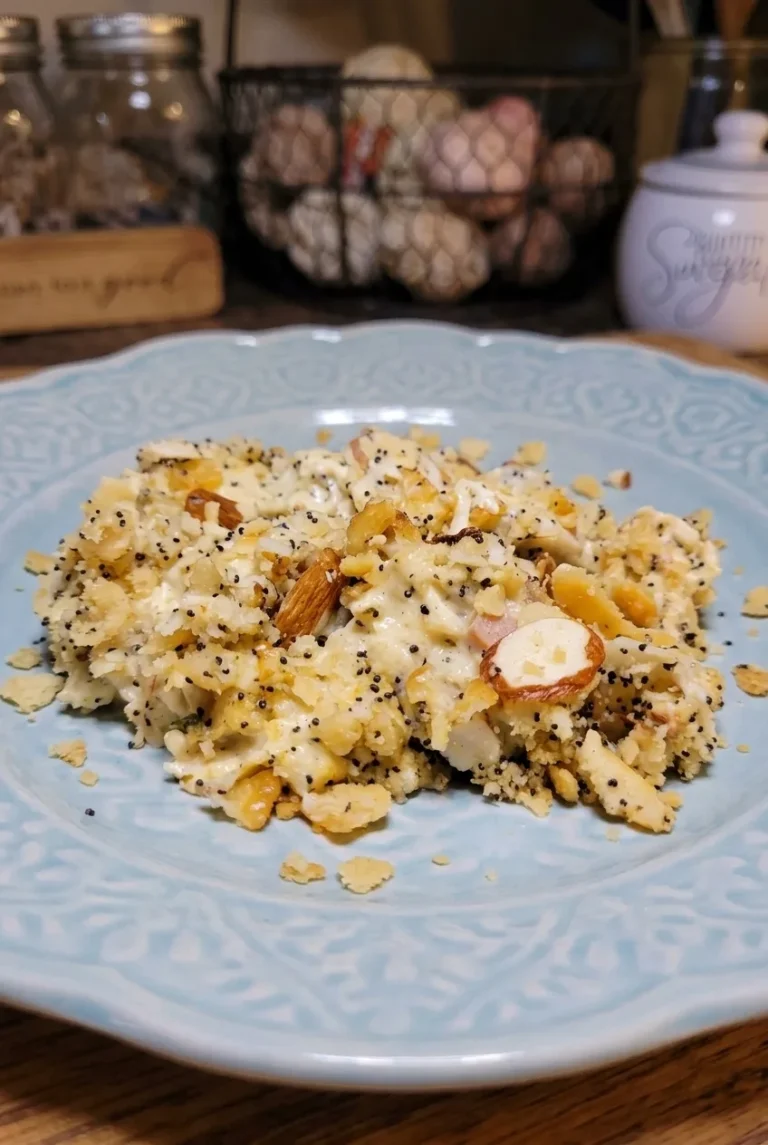
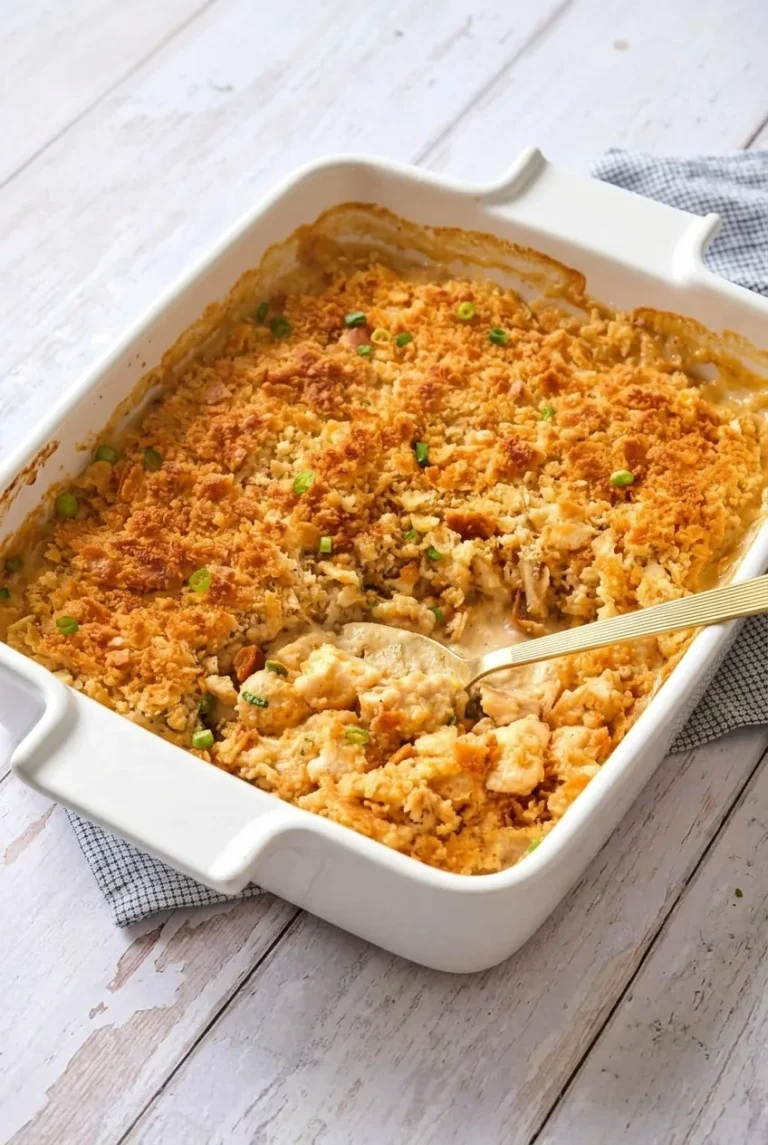
Cooked chicken, cream of chicken soup, and sour cream make a thick, creamy filling with distinct pieces of chicken. A topping of coarse buttery cracker crumbs, poppy seeds, and sliced almonds bakes golden while the filling heats through.

The almonds are part of this version’s topping, though they are not in every poppy seed chicken casserole. Spoon the finished casserole onto plates rather than cutting it into squares. Rice or a green vegetable can be served alongside, but neither goes into the baking dish.

Ingredients for Poppy Seed Chicken Casserole

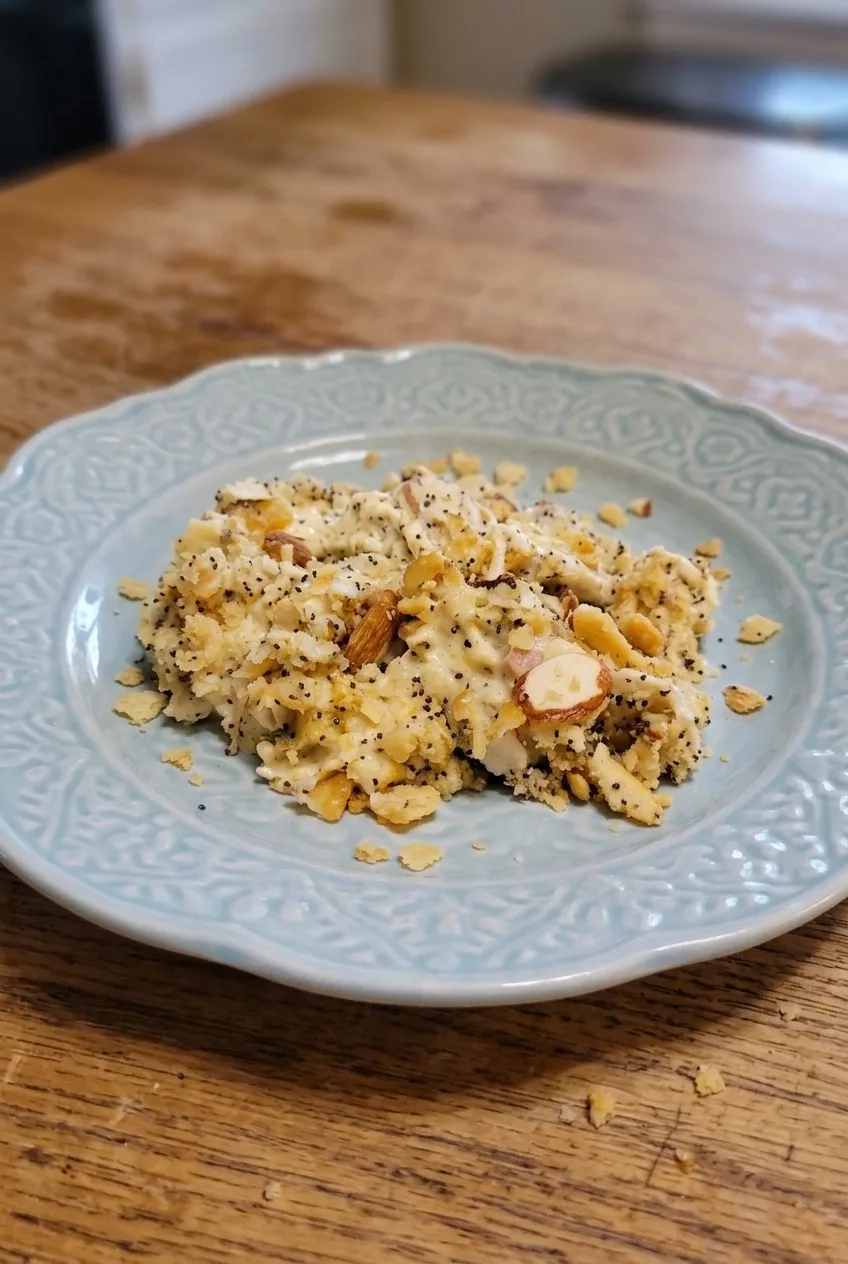
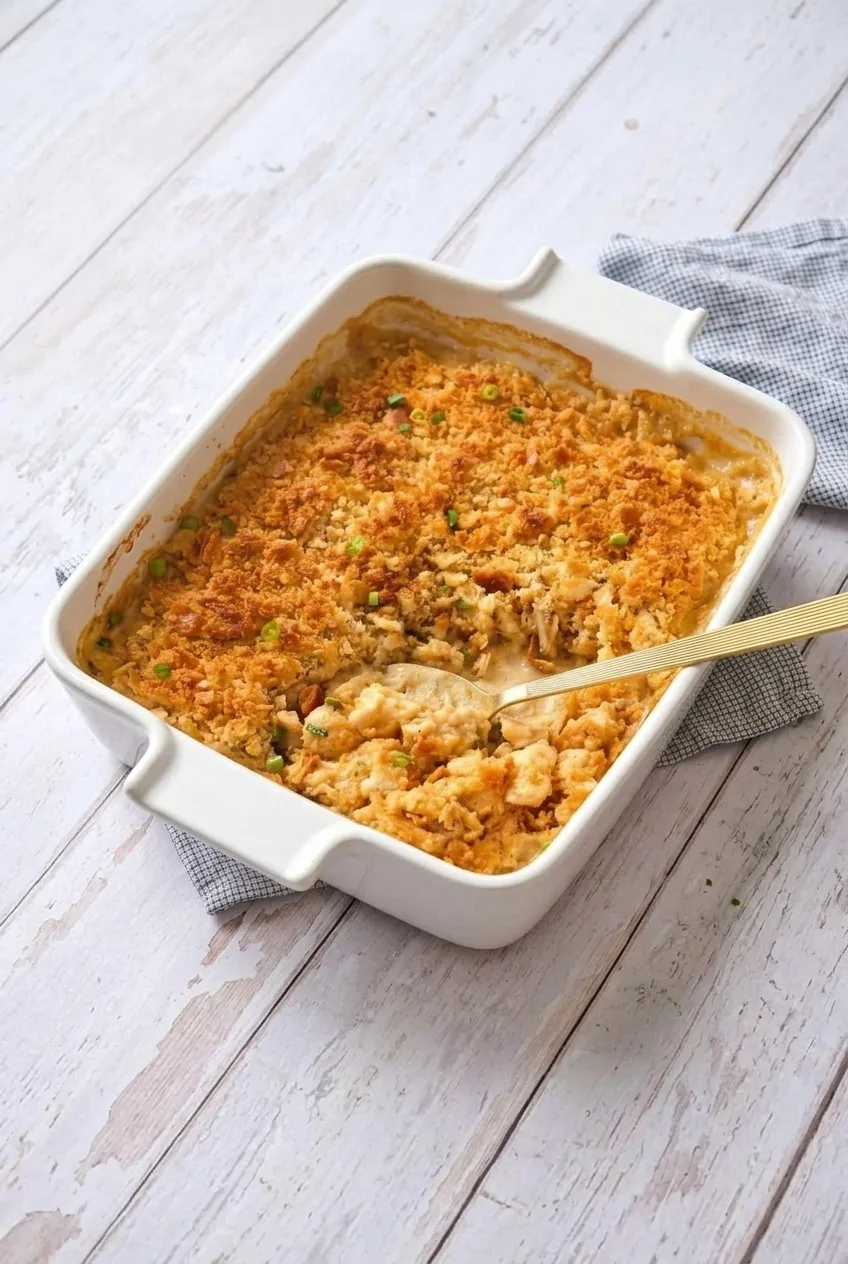
A full blue plate with a spooned serving of poppy seed chicken casserole, shown with more of the surrounding surface.
  • 4 cups cooked chicken, shredded or cut into bite-size pieces (600g); rotisserie or leftover chicken works well
  • 1 can (10.5 ounces) condensed cream of chicken soup (300g)
  • 1 cup sour cream (240g)
  • 1/4 teaspoon ground black pepper
  • 1 1/2 cups loosely crushed buttery round crackers (45g)
  • 4 tablespoons unsalted butter, melted (55g)
  • 1 tablespoon poppy seeds (10g)
  • 1/3 cup sliced almonds (30g)
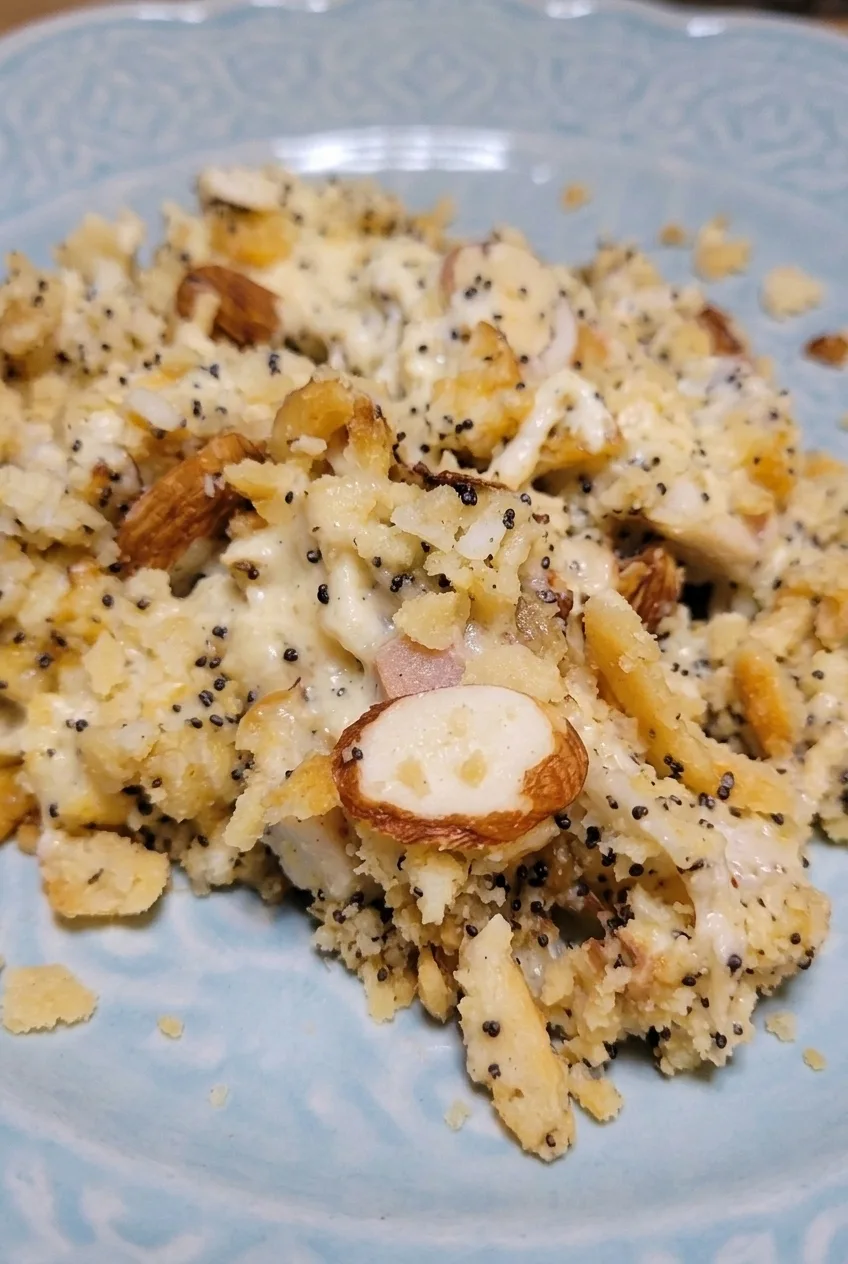
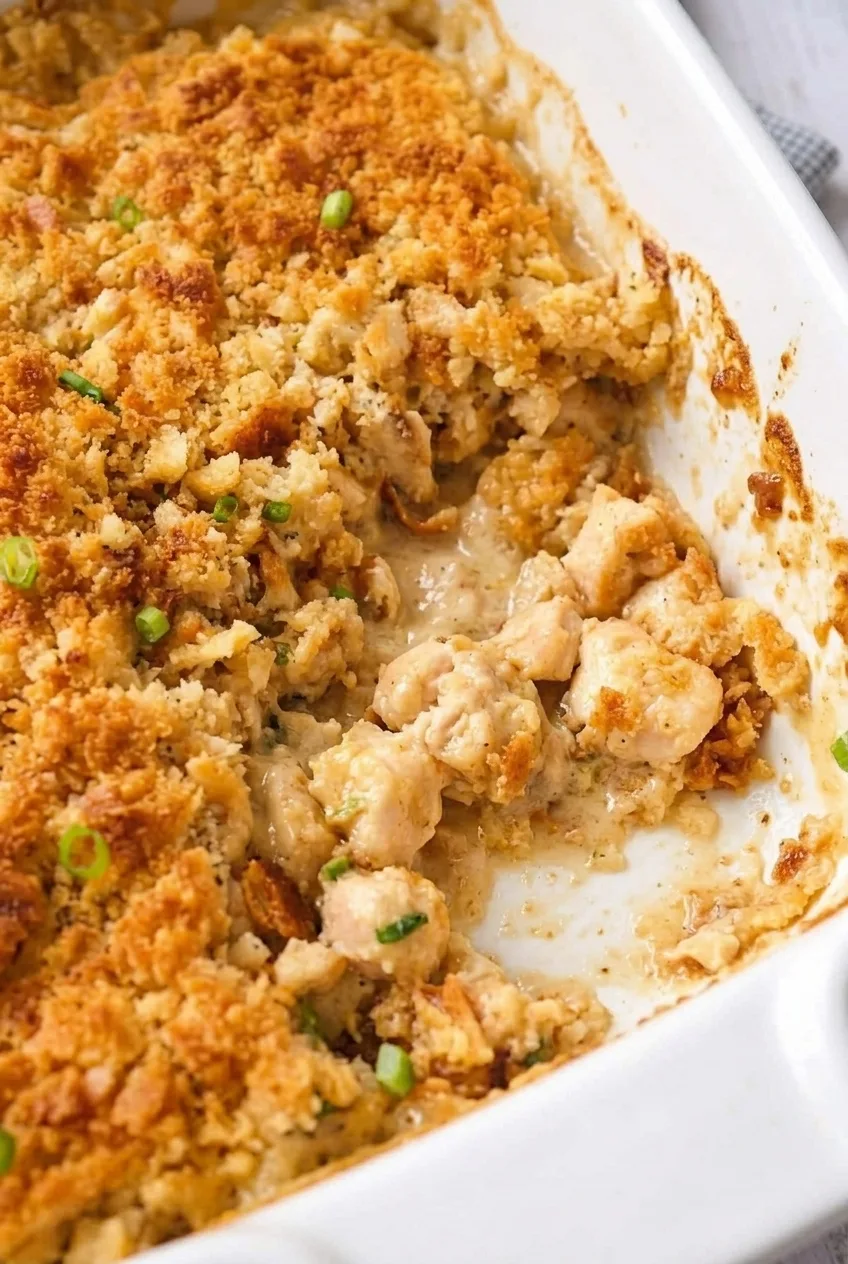
Close detail of creamy chicken pieces, coarse buttery cracker crumbs, black poppy seeds, and sliced almonds.

How to Bake Poppy Seed Chicken Casserole

  1. Prepare the oven and dish: Preheat the oven to 350°F (175°C). Lightly grease a 9-by-13-inch baking dish. Make sure the chicken is fully cooked and drain away any excess liquid.
  2. Mix the filling: Stir the chicken, condensed soup, sour cream, and pepper together until the chicken is evenly coated. Spread the thick mixture in the prepared dish. Do not add extra liquid.
  3. Add the topping: Crush the crackers into coarse crumbs. Toss them with the melted butter, poppy seeds, and sliced almonds, then scatter the mixture over the filling without pressing it down.
  4. Bake: Bake uncovered for about 25–30 minutes, checking at 25 minutes. The filling should bubble around the edges, the center should be hot, and the crumbs should be golden in spots. If the topping browns before the filling is hot, loosely tent the dish with foil and continue baking.
  5. Rest and serve: Let the casserole rest uncovered for 10 minutes so the filling settles without trapping steam against the topping. Spoon onto plates, keeping the creamy chicken and topping together.

How to Keep the Cracker Topping Crisp

For make-ahead assembly, cover and refrigerate the filling for up to one day, but keep the topping separate. Add the buttered cracker, poppy-seed, and almond mixture just before baking. Crumbs left on the moist filling during refrigeration will soften.

If the Topping Browns Before the Filling Is Hot

A casserole baked straight from the refrigerator, or one made in a deeper dish, may need more than 25–30 minutes. Once the crumbs and almonds are golden, tent the dish loosely with foil and continue baking in 5–10 minute increments until the filling bubbles around the edges and the center is hot.

Ingredient Swaps and Serving Ideas

Condensed cream of mushroom soup can replace the cream of chicken soup. Plain Greek yogurt can replace the sour cream, though the filling will be tangier and less rich. Keep the buttery crackers, poppy seeds, and sliced almonds for this version’s topping.

Serve the casserole over or alongside cooked rice, or pair it with a green salad or simple green vegetable. For another creamy chicken bake with a cracker topping, see Million Dollar Chicken Casserole.

Make-Ahead, Storage, and Reheating

Refrigerate leftovers in an airtight container for 3–4 days. Reheat individual portions in the microwave in short intervals until hot; the topping may soften. For a crisper surface, reheat covered in a 300°F (150°C) to 325°F (165°C) oven until hot, then uncover briefly. A few fresh crushed crackers can replace some of the lost crunch.

For freezing, leave the topping off the assembled filling. Thaw the filling overnight in the refrigerator, add the topping, and bake until hot and bubbly. Two to three months is a general freezer-quality guide, not a guarantee.

Nutrition

Approximate nutrition per serving, based on 8 servings: 320 calories, 26g protein, 20g fat, and 8g carbohydrates. Per 100g: about 200 calories, 16g protein, 12g fat, and 5g carbohydrates. Values vary with the chicken, soup, sour cream, and crackers used.

Poppy Seed Chicken Casserole

Cooked chicken and a creamy soup-and-sour-cream filling bake under a buttery cracker, poppy seed, and almond topping.
Course: Main Course
Cuisine: American
Prep: 15 min
Cook: 30 min
Total: 55 min
Servings: 8 Calories: 320 kcal

Equipment

  • 9-by-13-inch baking dish
  • Mixing bowl

Ingredients

For the filling

  • 4 cups cooked chicken, shredded or cut into bite-size pieces (600 g)
  • 1 can (10.5 ounces) condensed cream of chicken soup (300 g)
  • 1 cup sour cream (240 g)
  • 1/4 teaspoon ground black pepper

For the topping

  • 1 1/2 cups loosely crushed buttery round crackers (45 g)
  • 4 tablespoons unsalted butter, melted (55 g)
  • 1 tablespoon poppy seeds (10 g)
  • 1/3 cup sliced almonds (30 g)

Instructions

  1. Preheat the oven to 350°F (175°C). Lightly grease a 9-by-13-inch baking dish.
  2. Make sure the chicken is fully cooked and drain away any excess liquid.
  3. Stir the chicken, condensed soup, sour cream, and pepper together until the chicken is evenly coated.
  4. Spread the filling in the prepared baking dish without adding extra liquid.
  5. Toss the coarse cracker crumbs with the melted butter, poppy seeds, and sliced almonds.
  6. Scatter the topping over the filling without pressing it down.
  7. Bake uncovered for 25–30 minutes, checking at 25 minutes. Bake until the filling bubbles around the edges, the center is hot, and the crumbs are golden in spots.
  8. If the topping browns before the filling is hot, loosely tent the dish with foil and continue baking in 5–10 minute increments.
  9. Rest the casserole uncovered for 10 minutes, then spoon onto plates.

Tips

  • Keep the cracker topping separate if assembling the filling ahead; add it just before baking.
  • Drain excess liquid from the cooked chicken and do not add extra liquid to the filling.
  • Tent the casserole loosely with foil if the topping browns before the center is hot.
  • Serve by spooning the casserole onto plates rather than cutting it into squares.

Variations

  • Cream of Mushroom Version: Replace the condensed cream of chicken soup with condensed cream of mushroom soup.
  • Greek Yogurt Version: Replace the sour cream with plain Greek yogurt for a tangier, less rich filling.

Notes

Refrigerate leftovers in an airtight container for 3–4 days. Reheat portions until hot; use a 300°F (150°C) to 325°F (165°C) oven for a crisper topping. For freezing, freeze the filling without the topping and use within 2–3 months for best quality.

Nutrition

Calories: 320 kcal | Protein: 26 g | Fat: 20 g | Carbohydrates: 8 g

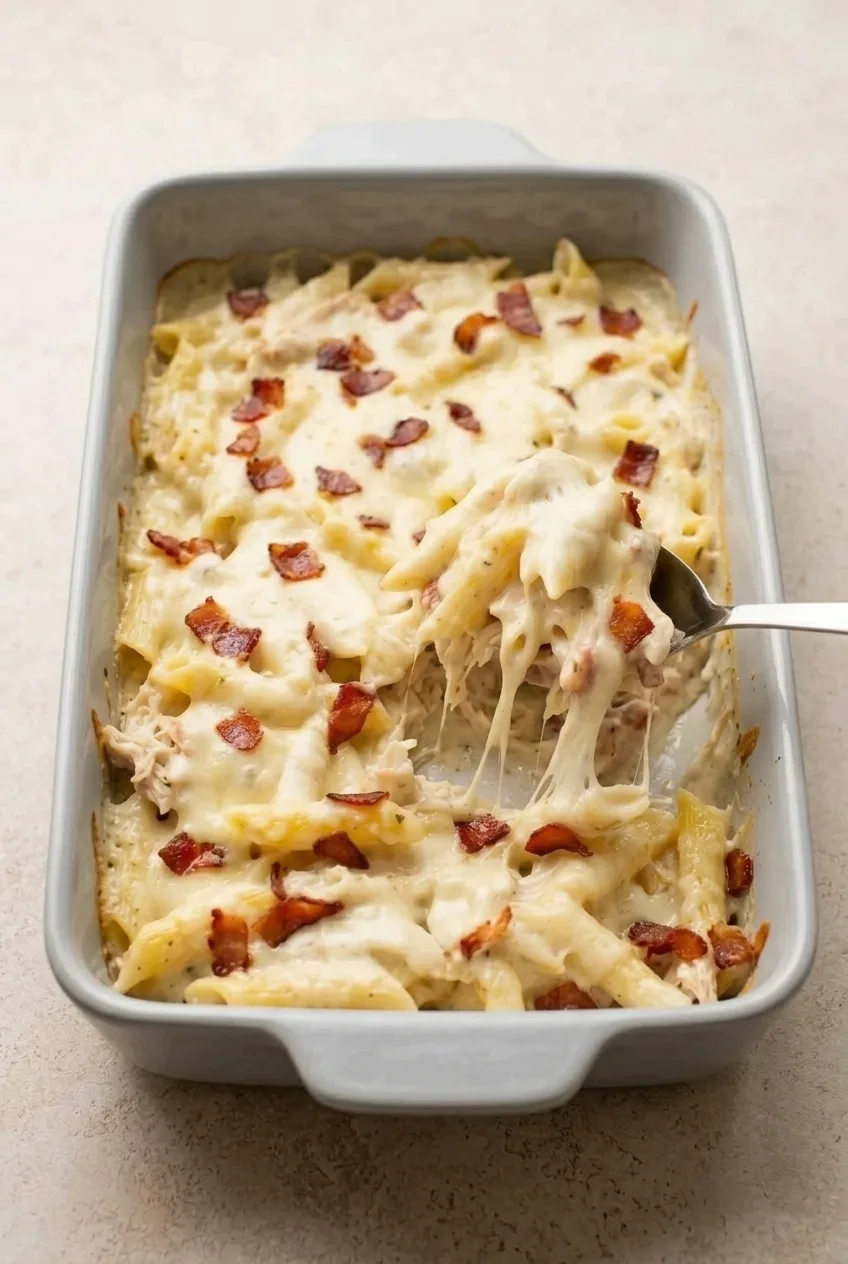
Chicken Bacon Ranch Casserole

Penne, cooked chicken, and crisp bacon are coated in ranch-seasoned Alfredo sauce, then topped with mozzarella. A short oven bake heats the filling and melts the cheese, leaving the casserole creamy rather than browned and crusty.

Cook the penne slightly short of al dente so it holds its shape in the oven. Use fully cooked chicken and bacon before assembly; the brief bake will not cook raw chicken.

Ingredients

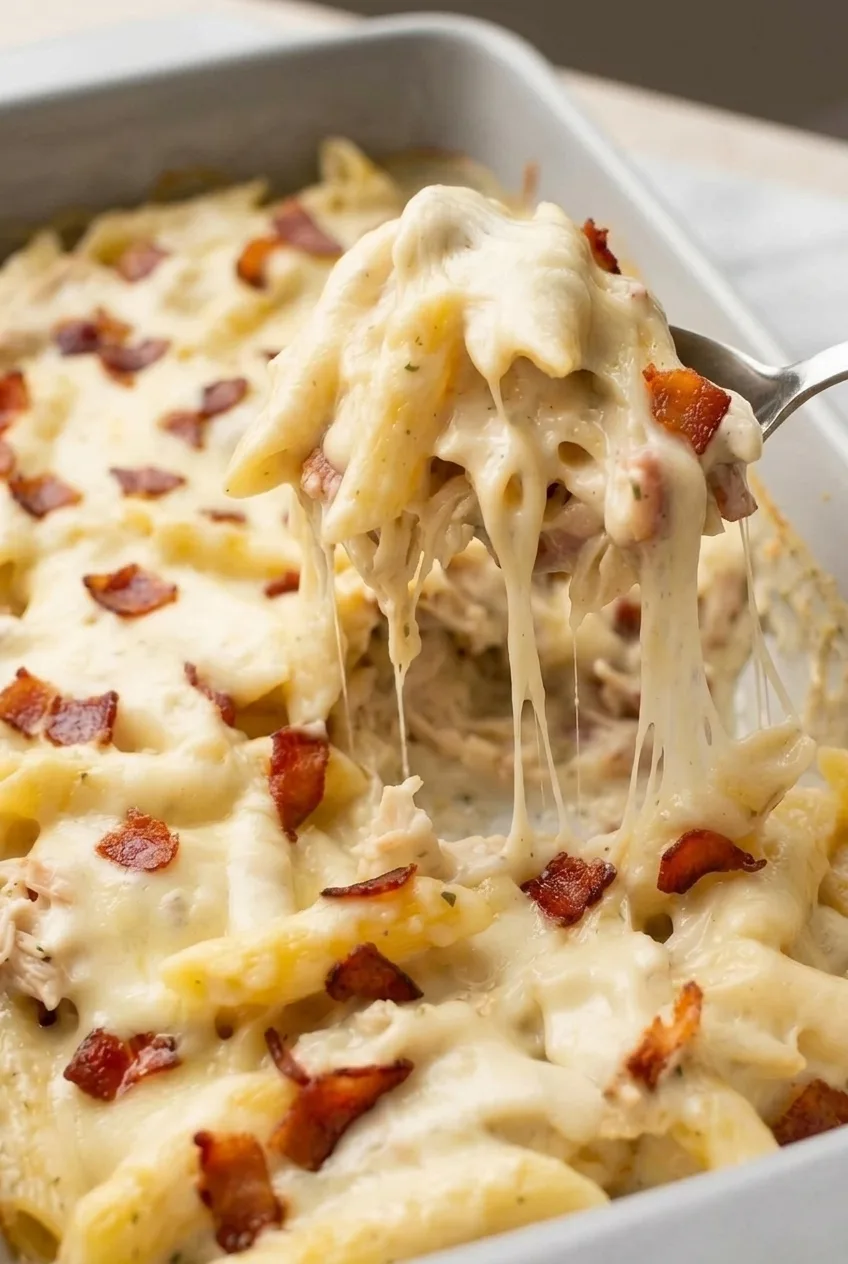
Close detail of creamy penne, chicken, crisp bacon, and stretchy melted mozzarella in Chicken Bacon Ranch Casserole
  • 12 ounces penne pasta (340g)
  • 3 cups cooked chicken, shredded or cut into bite-size pieces (420g)
  • 6 slices cooked bacon, chopped (about 1 cup or 170g)
  • 1 jar Alfredo sauce, 15 ounces (425g)
  • 1 packet dry ranch seasoning, 1 ounce (28g)
  • 2 cups shredded mozzarella, divided (225g)

Optional

  • Black pepper, to taste
  • 1 tablespoon chopped fresh parsley or chives, for serving

Rotisserie or leftover chicken works well. If cooking the bacon yourself, drain off excess fat before chopping it. Taste the Alfredo and ranch mixture before adding pepper or any extra salt; both prepared ingredients may already be salty.

How to Make Chicken Bacon Ranch Casserole

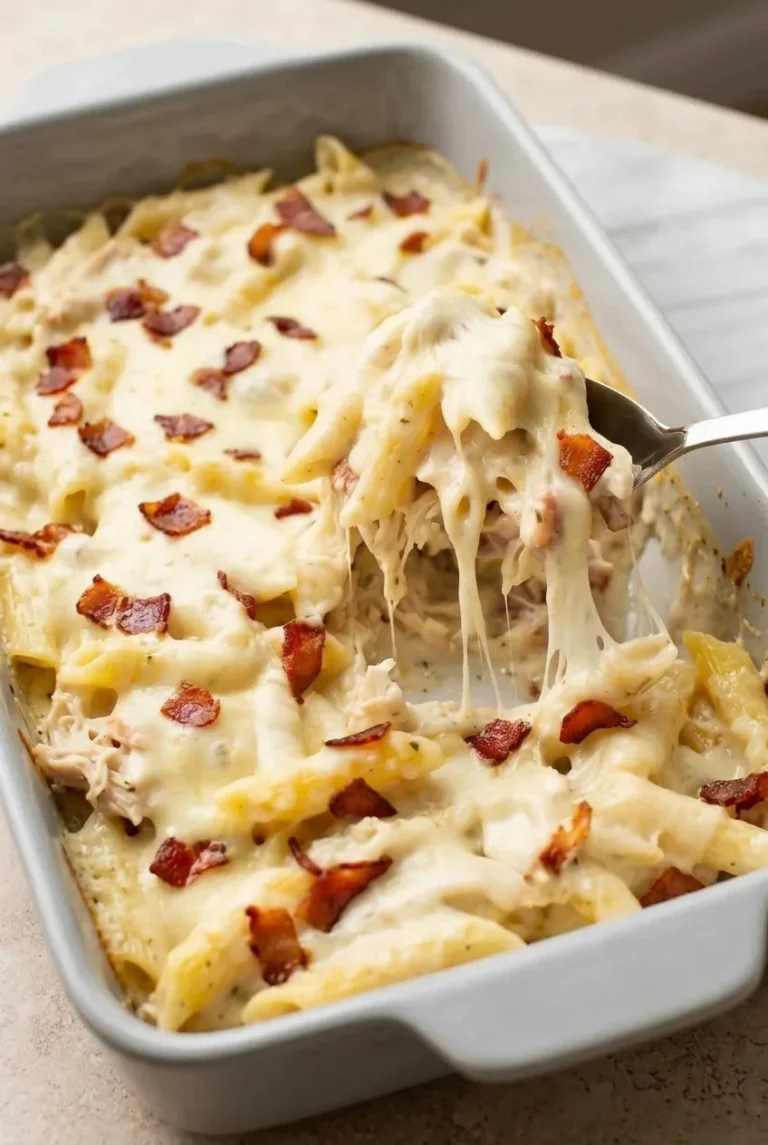
A full rectangular dish of creamy Chicken Bacon Ranch Casserole with penne, chicken, bacon, and melted cheese
  1. Heat the oven: Preheat to 375°F (190°C). Lightly grease a 9-by-13-inch baking dish if needed.
  2. Cook the penne: Boil in salted water, stopping about 1 minute before the package’s al dente time. Drain promptly. The pasta will soften further in the oven.
  3. Prepare the bacon: If it is not already cooked, cook it in a skillet over medium heat until browned and crisp. Drain off excess fat, chop it, and reserve a small handful for the top.
  4. Mix the filling: In a large bowl or the pasta pot, combine the Alfredo sauce and ranch seasoning. Fold in the cooked chicken, drained penne, most of the bacon, and about 1 cup of the mozzarella. The sauce should coat the pasta generously.
  5. Top and bake: Spread the mixture in the baking dish. Add the remaining mozzarella and reserved bacon. Bake uncovered for 15 to 20 minutes, starting to check at 15 minutes. The edges should be hot and gently bubbling, the center hot, and the cheese fully melted. There is no need to brown the top. If it browns before the center heats through, cover loosely with foil.
  6. Rest and serve: Let the casserole rest for 5 minutes so the sauce settles slightly. Sprinkle with parsley or chives, if using, and serve in generous scoops.

Making It Ahead

Assemble the casserole, cover it, and refrigerate it promptly. The pasta will absorb some sauce and may soften as it sits. A casserole baked directly from the refrigerator will need longer than 15 to 20 minutes; check that the center is hot, and cover loosely with foil if the top browns too quickly.

Serving and Related Recipes

Serve warm with a simple garden salad. Garlic bread or dinner rolls also work alongside it. For another baked chicken pasta, see Creamy Chicken Spaghetti Casserole with Cheddar. For a different creamy chicken dish, try Million Dollar Chicken Casserole with Cracker Topping.

Storage and Reheating

Refrigerate leftovers in an airtight container for 3 to 4 days. Reheat individual portions in short microwave intervals, stirring when practical. For a larger portion, cover and warm in a 350°F (175°C) oven until hot. Reheat gently: prolonged high heat can dry out the pasta or cause the creamy sauce to separate. Add a small splash of Alfredo sauce or milk if the pasta has absorbed too much sauce.

Freezing is not recommended for this creamy cooked-pasta casserole because the pasta and sauce may change texture after thawing and reheating.

Nutrition

Approximate nutrition per serving, based on 1/8 of the casserole: 540 calories, 39g protein, 25g fat, and 37g carbohydrates. Approximate nutrition per 100g: 220 calories, 16g protein, 10g fat, and 15g carbohydrates. Values vary with the Alfredo sauce, ranch seasoning, bacon, and cheese used.

Chicken Bacon Ranch Casserole

Penne, cooked chicken, and bacon are tossed in ranch-seasoned Alfredo sauce, topped with mozzarella, and baked until hot and creamy.
Course: Main Course
Cuisine: American
Prep: 15 min
Cook: 30 min
Total: 50 min
Servings: 8

Equipment

  • 9-by-13-inch baking dish
  • Large pot
  • Colander
  • Large mixing bowl
  • Skillet

Ingredients

Casserole

  • 12 ounces penne pasta (340 g)
  • 3 cups cooked chicken, shredded or cut into bite-size pieces (420 g)
  • 6 slices cooked bacon, chopped (about 1 cup or 170 g)
  • 1 jar Alfredo sauce, 15 ounces (425 g)
  • 1 packet dry ranch seasoning, 1 ounce (28 g)
  • 2 cups shredded mozzarella, divided (225 g)

Optional

  • Black pepper, to taste
  • 1 tablespoon chopped fresh parsley or chives, for serving

Instructions

  1. Preheat the oven to 375°F (190°C). Lightly grease a 9-by-13-inch baking dish if needed.
  2. Boil the penne in salted water until about 1 minute short of the package’s al dente time. Drain promptly.
  3. If needed, cook the bacon in a skillet over medium heat until browned and crisp. Drain excess fat, chop the bacon, and reserve a small handful for the topping.
  4. Combine the Alfredo sauce and ranch seasoning in a large bowl or the pasta pot.
  5. Fold in the chicken, drained penne, most of the bacon, and about 1 cup of the mozzarella.
  6. Spread the mixture in the baking dish. Top with the remaining mozzarella and reserved bacon.
  7. Bake uncovered for 15 to 20 minutes, checking at 15 minutes, until the center is hot, the edges are gently bubbling, and the cheese is melted. Cover loosely with foil if the top browns before the center heats through.
  8. Rest the casserole for 5 minutes. Sprinkle with parsley or chives, if using, and serve.

Tips

  • Cook the penne slightly short of al dente so it holds its shape in the oven.
  • Use fully cooked chicken and bacon; the short bake is not long enough to cook raw chicken.
  • Drain excess fat from freshly cooked bacon before chopping it.
  • Taste the Alfredo and ranch mixture before adding pepper or extra salt, since both may already be salty.
  • Avoid baking until the top is browned and crusty; the casserole should stay creamy.

Notes

Refrigerate leftovers in an airtight container for 3 to 4 days. Reheat gently in the microwave or, covered, in a 350°F (175°C) oven; add a splash of Alfredo sauce or milk if needed. Freezing is not recommended. For a make-ahead casserole baked cold from the refrigerator, allow extra time and check that the center is hot.

Nutrition

Per Serving Calories: 540 kcal | Per Serving Protein: 39 g | Per Serving Fat: 25 g | Per Serving Carbohydrates: 37 g | Per 100 G Calories: 220 kcal | Per 100 G Protein: 16 g | Per 100 G Fat: 10 g | Per 100 G Carbohydrates: 15 g

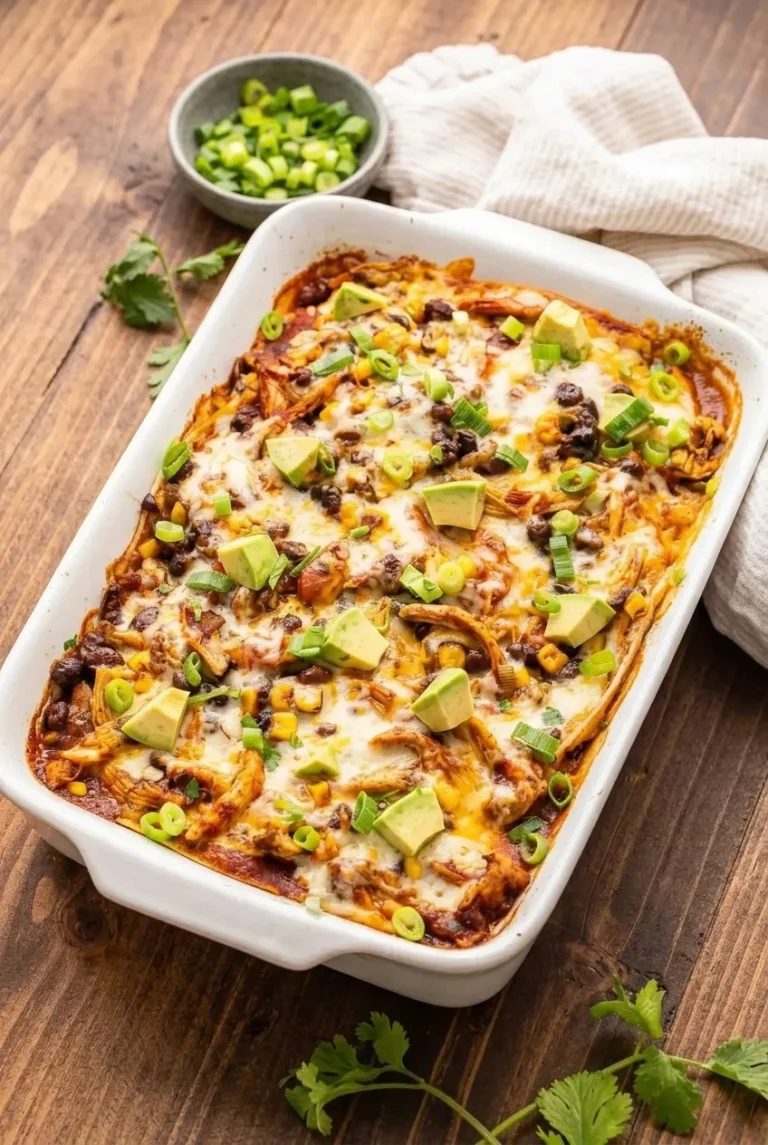
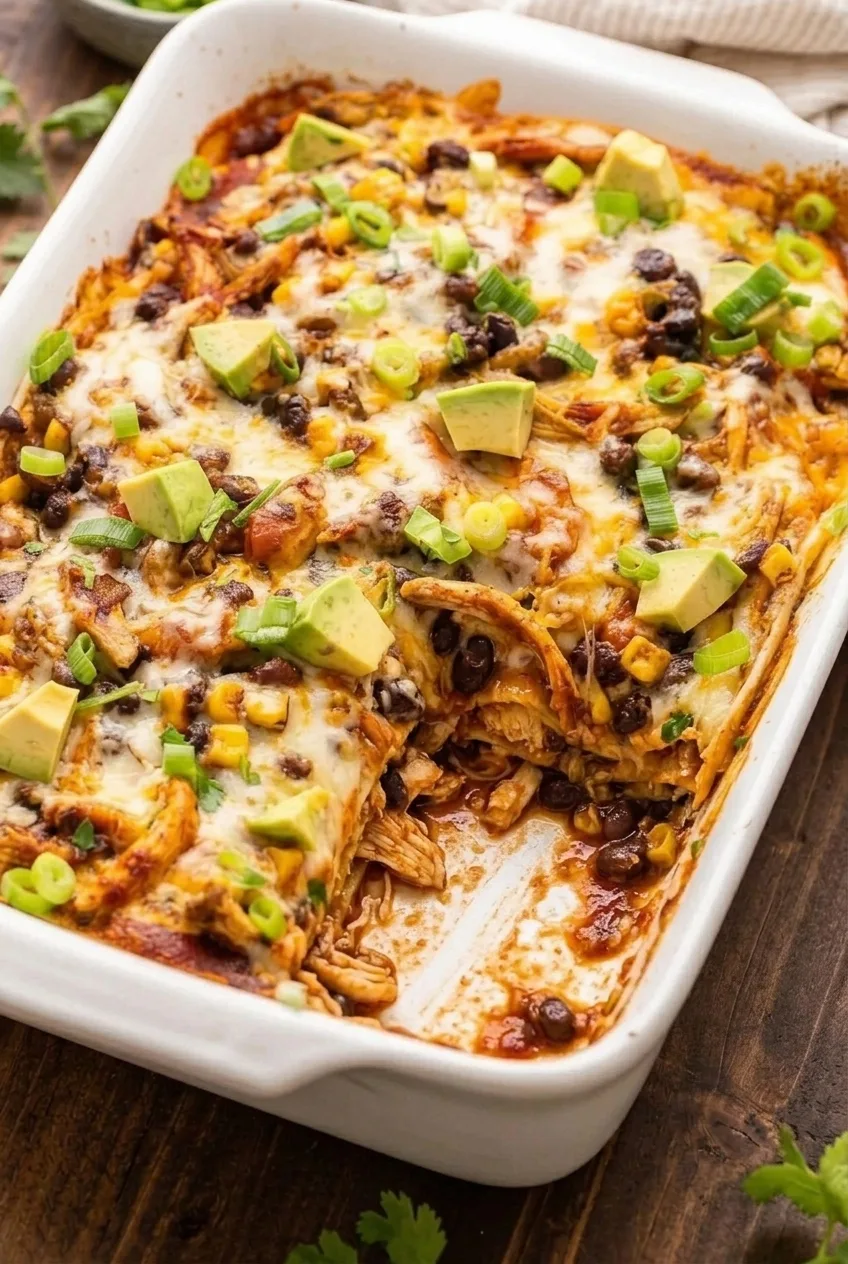
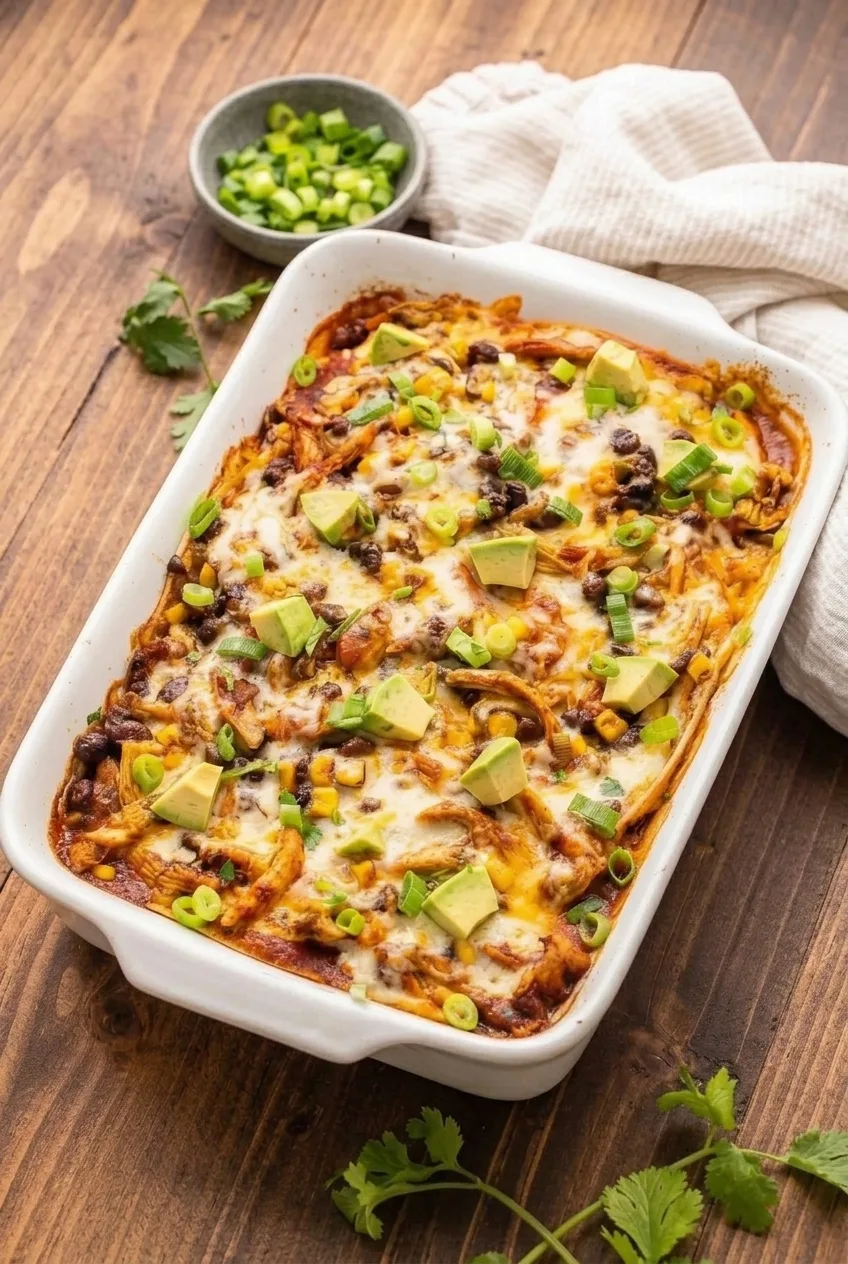
Chicken Enchilada Casserole with Red Sauce

Corn tortillas, shredded chicken, black beans, and corn are layered with red enchilada sauce and cheese in a 9-by-13-inch dish—no rolling required. The casserole bakes covered so the center can heat through, then uncovered just long enough to melt and lightly color the cheese. It stays saucy and scoopable, with avocado chunks and green onions added after baking for a fresh finish.

Ingredients

Close view of saucy chicken enchilada casserole layers with melted cheese, black beans, corn, and avocado
  • 3 cups cooked shredded chicken (about 340g); rotisserie chicken works well
  • 2 cups red enchilada sauce (about 455g)
  • 12 small (6-inch) corn tortillas (about 300g), cut into halves or quarters as needed
  • 2 cups shredded Monterey Jack or Mexican-blend cheese (about 225g), divided
  • 1 can (15 ounces) black beans, drained and rinsed (about 255g drained)
  • 1 cup corn kernels (about 165g), drained if canned or thawed and patted dry if frozen
  • 1/2 medium yellow onion, finely diced (about 1/2 cup or 75g)
  • 1 teaspoon chili powder
  • 1 teaspoon ground cumin
  • 1/2 teaspoon kosher salt, or to taste
  • 1 medium avocado, cut into chunks (about 150g)
  • 3 green onions, thinly sliced
  • 2 tablespoons roughly chopped fresh cilantro

How to Make Chicken Enchilada Casserole

Full chicken enchilada casserole in a white baking dish on a wooden table, topped with avocado and green onion
  1. Prepare the oven and dish: Preheat the oven to 350°F (175°C) with a rack in the center. Lightly grease a 9-by-13-inch baking dish. Drain the beans and corn well so they do not add excess liquid to the casserole.
  2. Season the filling: Combine the cooked chicken, beans, corn, onion, chili powder, and cumin in a bowl. Taste the enchilada sauce, then add up to 1/2 teaspoon salt to the filling as needed. Sauce brands vary in saltiness.
  3. Build the layers: Spread a thin layer of sauce in the dish. Add overlapping tortilla pieces, then some chicken filling, sauce, and cheese. Repeat to make two or three layers, reserving enough sauce and cheese for the top. Finish with tortillas and the remaining sauce; scatter a few spoonfuls of filling over them so some chicken, beans, and corn remain visible, then add the remaining cheese.
  4. Bake covered: Cover loosely with foil, keeping it off the cheese if possible. Bake for about 25 minutes. Check that the casserole is hot at the edges and the sauce is beginning to bubble.
  5. Finish uncovered: Remove the foil and bake for 5 to 10 minutes more, until the cheese is fully melted, the sauce bubbles around the edges, and the top has a few lightly golden spots. If the cheese browns before the center is hot, cover the dish again and continue baking.
  6. Rest and serve: Let the casserole rest for about 5 minutes. Scatter the avocado, green onions, and cilantro over the top just before scooping into portions.

How to Keep the Layers Saucy, Not Watery

Use the measured 2 cups of sauce rather than pouring in extra. A thin layer beneath the first tortillas keeps them moist; dividing the rest among the layers coats the filling without flooding the pan. Sauce thickness varies by brand, so thoroughly draining the beans and corn also matters.

Corn tortillas are the planned choice. Thin flour tortillas can be substituted, but they absorb sauce differently and may become softer.

Serving Ideas

Serve scooped portions with lime wedges or sour cream at the table, if desired. Rice or refried beans work well alongside the casserole.

Make-Ahead, Storage, and Reheating

To make ahead, assemble the casserole without the fresh toppings, cover, and refrigerate for up to one day. A cold casserole may need more baking time. Keep it covered until the center is hot and the sauce bubbles, then uncover to finish the cheese.

Cool leftovers and refrigerate in an airtight container for up to 3 days. Reheat individual portions in the microwave, or cover the baking dish and warm it in a 350°F oven until heated through. Keep avocado off portions you plan to store and add it after reheating.

For longer storage, tightly wrap the assembled, unbaked casserole and freeze for up to 3 months. Bake from frozen, covered, until hot and bubbling, then uncover to melt and lightly color the cheese. The tortillas may be softer after freezing; add avocado and green onions only after baking.

Nutrition

Approximate nutrition per serving, based on 8 servings (about 250g each): 380 calories, 27g protein, 15g fat, and 36g carbohydrates. Per 100g: about 150 calories, 11g protein, 6g fat, and 14g carbohydrates. Values vary with the sauce, tortillas, and cheese used.

Chicken Enchilada Casserole with Red Sauce

Corn tortillas, shredded chicken, beans, and corn are layered with red enchilada sauce and cheese, then baked until hot and bubbly.
Course: Main Course
Cuisine: Mexican
Prep: 20 min
Cook: 35 min
Total: 60 min
Servings: 8 Calories: 380 kcal

Equipment

  • 9-by-13-inch baking dish
  • Mixing bowl
  • Aluminum foil

Ingredients

For the casserole

  • 3 cups cooked shredded chicken (about 340g)
  • 2 cups red enchilada sauce (about 455g)
  • 12 small (6-inch) corn tortillas (about 300g), cut into halves or quarters as needed
  • 2 cups shredded Monterey Jack or Mexican-blend cheese (about 225g), divided
  • 1 can (15 ounces) black beans, drained and rinsed (about 255g drained)
  • 1 cup corn kernels (about 165g), drained if canned or thawed and patted dry if frozen
  • 1/2 medium yellow onion, finely diced (about 1/2 cup or 75g)
  • 1 teaspoon chili powder
  • 1 teaspoon ground cumin
  • Up to 1/2 teaspoon kosher salt, to taste

For topping

  • 1 medium avocado, cut into chunks (about 150g)
  • 3 green onions, thinly sliced
  • 2 tablespoons roughly chopped fresh cilantro

Instructions

  1. Preheat the oven to 350°F (175°C) with a rack in the center. Lightly grease a 9-by-13-inch baking dish.
  2. Drain the black beans and corn well.
  3. Combine the chicken, beans, corn, onion, chili powder, and cumin in a bowl. Taste the enchilada sauce, then season the filling with up to 1/2 teaspoon salt as needed.
  4. Spread a thin layer of enchilada sauce in the baking dish. Add overlapping tortilla pieces, followed by some filling, sauce, and cheese.
  5. Repeat the layers two or three times, reserving enough sauce and cheese for the top.
  6. Finish with tortillas and the remaining sauce. Scatter a few spoonfuls of filling over the top, then add the remaining cheese.
  7. Cover loosely with foil, keeping it off the cheese if possible. Bake for about 25 minutes, until hot at the edges and the sauce begins to bubble.
  8. Remove the foil and bake for 5 to 10 minutes more, until the cheese is melted, the sauce bubbles around the edges, and the top has a few lightly golden spots. If the cheese browns before the center is hot, cover the dish again and continue baking.
  9. Rest the casserole for about 5 minutes. Add the avocado, green onions, and cilantro just before serving.

Tips

  • Use the measured 2 cups of sauce; extra sauce can make the casserole watery.
  • Drain the beans and corn thoroughly to avoid adding excess liquid.
  • Taste the sauce before adding salt because brands vary in saltiness.
  • Keep foil from touching the cheese when covering the casserole, if possible.
  • Add avocado and other fresh toppings after baking.

Variations

  • Flour tortilla version: Use thin flour tortillas in place of the corn tortillas; they absorb sauce differently and may become softer.

Notes

Assemble without fresh toppings up to 1 day ahead and refrigerate; a cold casserole may need extra baking time. Refrigerate leftovers in an airtight container for up to 3 days. Freeze the tightly wrapped, unbaked casserole for up to 3 months. Nutrition is approximate per serving, based on 8 servings of about 250g each.

Nutrition

Calories: 380 kcal | Protein: 27 g | Fat: 15 g | Carbohydrates: 36 g

Million Dollar Chicken Casserole

Million Dollar Chicken Casserole has a thick, creamy chicken filling beneath a generous layer of golden, buttery cracker crumbs. This version uses cooked rotisserie or leftover chicken with cream cheese, cottage cheese, sour cream, and condensed cream of chicken soup. Baking heats the filling and browns the topping; it does not cook raw chicken.

Beat the softened cream cheese smooth before mixing the filling, and add the coarse cracker crumbs just before baking. Those two steps help keep the filling free of cream-cheese lumps and the topping crisp.

Ingredients

Close view of Million Dollar Chicken Casserole showing browned cracker crumbs and chunky chicken in creamy filling.
  • 4 cups cooked shredded or chopped chicken (560g), well drained
  • 8 ounces cream cheese (225g), softened
  • 1 cup cottage cheese (225g)
  • 1 cup sour cream (230g)
  • 1 can (10.5 ounces) condensed cream of chicken soup (300g)
  • 1/2 teaspoon garlic powder
  • 1/2 teaspoon onion powder
  • 1/4 teaspoon black pepper, or to taste
  • About 30 buttery round crackers, coarsely crushed (120g)
  • 6 tablespoons unsalted butter (85g), melted

Optional garnish: 2 tablespoons chopped green onions.

How to Make Million Dollar Chicken Casserole

A full baking dish of Million Dollar Chicken Casserole on a pale tabletop, with its golden topping and scooped chicken filling visible.
  1. Prepare the oven and dish: Preheat the oven to 350°F (175°C). Lightly grease a 9-by-13-inch baking dish if needed.
  2. Mix the filling: Beat the softened cream cheese until smooth. Mix in the cottage cheese, sour cream, condensed soup, garlic powder, onion powder, and black pepper until combined.
  3. Add the chicken: Fold in the cooked chicken until evenly coated. Spread the filling in an even layer in the baking dish.
  4. Make the topping: Crush the crackers into a mix of small crumbs and larger pieces. Toss with the melted butter, then scatter evenly over the filling.
  5. Bake: Bake uncovered for about 30–40 minutes, checking at 30 minutes. The topping should be golden brown, the edges bubbling, and the center hot throughout. If the topping browns before the center is hot, tent the dish loosely with foil and continue baking. If using a thermometer to check the reheated filling, the center should reach 165°F (75°C).
  6. Rest and serve: Let the casserole rest for 5–10 minutes so the filling settles slightly. Scatter with green onions, if using, and scoop portions directly from the dish.

Make-Ahead and Freezing

For the best topping texture, add the buttered crumbs immediately before baking. You can assemble the filling in the baking dish and refrigerate it for up to about 24 hours, keeping the topping separate. A chilled casserole may take longer to heat through; look for bubbling edges and a hot center rather than relying only on the bake time.

To freeze, freeze the filling without the topping. Thaw it overnight in the refrigerator, add freshly buttered cracker crumbs, and bake until the filling is hot and bubbling and the top is golden. Topping that sits on the filling during storage can soften.

How to Keep the Filling Thick

Use well-drained cooked chicken, and do not add broth or water. If you want vegetables in the casserole, fold in up to 1 cup of peas or broccoli. Cook the broccoli first, prepare the peas as needed, and drain either vegetable well so it does not loosen the filling.

Serving and Storage

Serve with a crisp green salad or simply prepared green beans or broccoli. For a pasta-based chicken casserole, try Creamy Chicken Spaghetti Casserole with Cheddar.

Refrigerate leftovers in an airtight container or covered dish for 3–4 days. Reheat individual portions in the microwave until hot throughout, or warm a larger portion in a 325°F (165°C) oven until heated through. Cover it if the topping is browning further.

Nutrition

Approximate nutrition per serving, based on 1/8 of the casserole: 475 calories, 30g protein, 34g fat, and 15g carbohydrates. Approximate nutrition per 100g: 220 calories, 14g protein, 15g fat, and 7g carbohydrates. Values vary with the chicken, soup, and dairy products used.

Million Dollar Chicken Casserole

Cooked chicken is baked in a creamy filling under a buttery cracker topping until hot and golden.
Course: Main Course
Cuisine: American
Prep: 15 min
Cook: 40 min
Total: 65 min
Servings: 8 Calories: 475 kcal per serving; 220 kcal per 100 g

Equipment

  • 9-by-13-inch baking dish
  • Electric mixer
  • Mixing bowl

Ingredients

For the Filling

  • 4 cups cooked shredded or chopped chicken (560 g), well drained
  • 8 ounces cream cheese (225 g), softened
  • 1 cup cottage cheese (225 g)
  • 1 cup sour cream (230 g)
  • 1 can (10.5 ounces) condensed cream of chicken soup (300 g)
  • 1/2 teaspoon garlic powder
  • 1/2 teaspoon onion powder
  • 1/4 teaspoon black pepper, or to taste

For the Topping

  • About 30 buttery round crackers, coarsely crushed (120 g)
  • 6 tablespoons unsalted butter (85 g), melted

Optional Garnish

  • 2 tablespoons chopped green onions

Instructions

  1. Preheat the oven to 350°F (175°C). Lightly grease a 9-by-13-inch baking dish if needed.
  2. Beat the softened cream cheese until smooth.
  3. Mix in the cottage cheese, sour cream, condensed soup, garlic powder, onion powder, and black pepper until combined.
  4. Fold in the cooked chicken until evenly coated, then spread the filling in the baking dish.
  5. Crush the crackers into a mix of small crumbs and larger pieces. Toss them with the melted butter and scatter over the filling.
  6. Bake uncovered for 30–40 minutes, checking at 30 minutes, until the topping is golden, the edges are bubbling, and the center is hot throughout.
  7. If the topping browns before the center is hot, tent the dish loosely with foil and continue baking. The center should reach 165°F (75°C) if checked with a thermometer.
  8. Rest the casserole for 5–10 minutes. Garnish with green onions, if using, and serve.

Tips

  • Beat the softened cream cheese smooth before mixing the filling to prevent lumps.
  • Drain the cooked chicken well and do not add broth or water, so the filling stays thick.
  • Add the buttered cracker crumbs just before baking to help keep the topping crisp.
  • If baking the casserole chilled, allow extra time and check that the center is hot and the edges are bubbling.

Variations

  • Chicken Casserole with Vegetables: Fold in up to 1 cup of peas or cooked, well-drained broccoli.

Notes

Refrigerate leftovers in an airtight container for 3–4 days. Reheat until hot throughout; the reheated filling should reach 165°F (75°C). Approximate nutrition is per 1/8 casserole; values vary with the ingredients used.

Nutrition

Calories: 475 kcal per serving; 220 kcal per 100 g | Protein: 30 g per serving; 14 g per 100 g | Fat: 34 g per serving; 15 g per 100 g | Carbohydrates: 15 g per serving; 7 g per 100 g

Stuffed Pepper Casserole

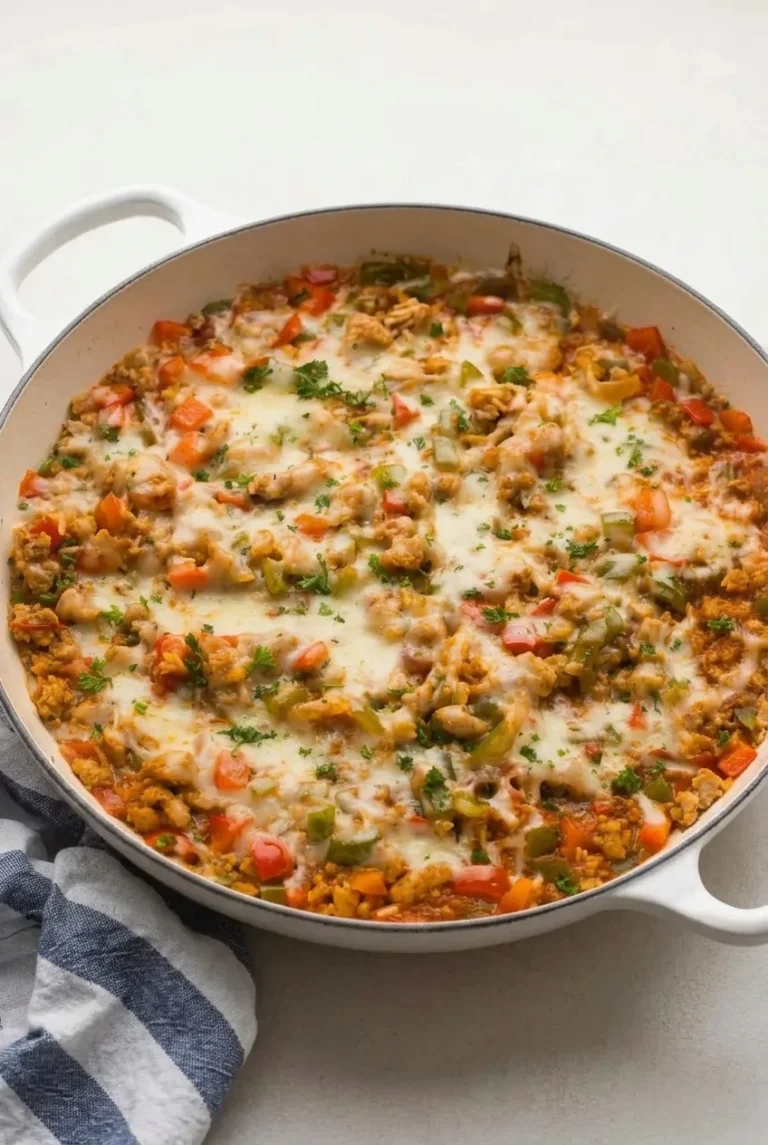
Stuffed pepper casserole brings browned beef, tomato-coated rice, and bite-size red and green peppers together in a loose, spoonable skillet meal. The rice goes in uncooked and simmers under a lid in the tomato-and-broth mixture. Once it is tender, mozzarella melts over the top in patches, leaving the peppers and filling visible. Check the rice rather than relying on the simmer time alone; the pan and lid can affect how quickly it cooks.

For the individual-pepper version, try Ground Beef Stuffed Bell Peppers with Rice.

Ingredients for Stuffed Pepper Casserole

Close view of the casserole's tender tomato rice, browned beef, peppers, and melted mozzarella.
  • 1 pound lean ground beef (450g)
  • 1 tablespoon olive oil, as needed
  • 1 medium yellow onion, diced (150g)
  • 1 large red bell pepper, cut into bite-size pieces (180g)
  • 1 large green bell pepper, cut into bite-size pieces (180g)
  • 3 cloves garlic, minced
  • 1 cup uncooked white long-grain rice, rinsed and drained (185g)
  • 1 can (14.5 ounces) diced tomatoes, with their juices (about 410g)
  • 1 1/2 cups beef broth
  • 1 tablespoon Worcestershire sauce
  • 1 teaspoon Italian seasoning
  • 3/4 teaspoon kosher salt, or to taste depending on the broth
  • 1/4 teaspoon black pepper
  • 1 1/2 cups shredded mozzarella (170g)
  • 1 tablespoon chopped fresh parsley, for garnish

Use uncooked white long-grain rice for this method. Brown rice needs a different cooking time and may need more liquid; cooked rice is not a direct substitute.

How to Make Stuffed Pepper Casserole

A full shallow skillet of stuffed pepper casserole, with red and green peppers visible through melted mozzarella.
  1. Prepare the ingredients: Rinse and drain the rice. Dice the onion and cut both peppers into similar-size, bite-size pieces so they remain recognizable after simmering.
  2. Brown the beef: Heat a wide, deep, 12-inch oven-safe skillet with a tight-fitting lid over medium-high heat. Add the beef and cook for 5 to 7 minutes, breaking it into small crumbles, until browned and no longer pink. Drain excess fat if needed.
  3. Soften the vegetables: Reduce the heat to medium. Add the onion and peppers, along with the olive oil if the skillet looks dry. Cook for 4 to 5 minutes, until the onion begins to soften and the peppers are just starting to give. Stir in the garlic and cook for about 30 seconds.
  4. Add the rice and liquid: Stir in the uncooked rice, tomatoes and their juices, broth, Worcestershire sauce, Italian seasoning, salt, and pepper. Scrape the bottom of the skillet, distribute the rice evenly, and bring the mixture to a gentle simmer, about 2 to 4 minutes.
  5. Cook the rice: Cover tightly, reduce the heat to low, and maintain a gentle simmer. Start checking the rice after about 18 minutes; it will typically take 20 to 25 minutes from the start of the simmer. If the rice is still firm and the skillet is nearly dry, add broth a few tablespoons at a time, cover again, and continue cooking. Stop when the rice is tender through the center and most of the liquid is absorbed. The filling should still be moist and spoonable.
  6. Melt the cheese: Preheat the oven to 375°F (190°C) while the rice finishes cooking. Once the rice is tender, scatter the mozzarella in irregular patches, leaving some filling visible. Transfer the uncovered skillet to the oven for 3 to 5 minutes, just until the cheese melts. If the skillet is not oven-safe, add the cheese, cover, and heat over low stovetop heat until melted.
  7. Rest and serve: Let the casserole stand for about 5 minutes so the rice settles. Add a light scattering of parsley and serve in scoops directly from the skillet.

How to Keep the Rice Tender

Keep the lid on during the low simmer so the rice cooks in the trapped steam, and avoid frequent stirring. Lid fit, skillet size, and the amount of juice in the tomatoes can change the cooking time. The rice, not the clock, is the best guide: it should be tender rather than firm or chalky.

Cutting the peppers into bite-size pieces also helps them hold their shape during the simmer. Once the rice is done, move on to the cheese finish rather than continuing to cook the peppers.

Serving and Storing Leftovers

Serve the casserole on its own or with a green salad, garlic bread, or cornbread. For another beef-and-rice dish, see Ground Beef and Rice Casserole with Cheddar.

Cool leftovers and refrigerate promptly in an airtight container; use within a few days. The rice continues to absorb moisture as it sits. To reheat, stir a splash of broth or water into each portion, cover, and heat gently until hot.

Nutrition

Approximate nutrition per serving, based on 1/6 of the recipe: 400 calories, 26g protein, 16g fat, and 36g carbohydrates. Approximate values per 100g: 125 calories, 8g protein, 5g fat, and 11g carbohydrates. Values will vary with the beef, broth, and cheese used.

Stuffed Pepper Casserole

Ground beef, rice, and red and green bell peppers simmer in a tomato broth and finish with melted mozzarella.
Course: Main Course
Cuisine: American
Prep: 15 min
Cook: 50 min
Total: 65 min
Servings: 6 Calories: 400 kcal

Equipment

  • 12-inch oven-safe skillet with tight-fitting lid
  • Knife
  • Cutting board

Ingredients

For the casserole

  • 1 pound lean ground beef (450g)
  • 1 tablespoon olive oil, as needed
  • 1 medium yellow onion, diced (150g)
  • 1 large red bell pepper, cut into bite-size pieces (180g)
  • 1 large green bell pepper, cut into bite-size pieces (180g)
  • 3 cloves garlic, minced
  • 1 cup uncooked white long-grain rice, rinsed and drained (185g)
  • 1 can (14.5 ounces) diced tomatoes, with their juices (about 410g)
  • 1 1/2 cups beef broth
  • 1 tablespoon Worcestershire sauce
  • 1 teaspoon Italian seasoning
  • 3/4 teaspoon kosher salt, or to taste
  • 1/4 teaspoon black pepper
  • 1 1/2 cups shredded mozzarella (170g)

For garnish

  • 1 tablespoon chopped fresh parsley

Instructions

  1. Rinse and drain the rice. Dice the onion and cut the peppers into bite-size pieces.
  2. Heat a wide, deep, 12-inch oven-safe skillet with a tight-fitting lid over medium-high heat. Add the beef and cook for 5 to 7 minutes, breaking it into small crumbles, until browned and no longer pink. Drain excess fat if needed.
  3. Reduce the heat to medium. Add the onion and peppers, along with the olive oil if the skillet looks dry. Cook for 4 to 5 minutes, until the onion begins to soften and the peppers just start to give.
  4. Stir in the garlic and cook for about 30 seconds.
  5. Add the uncooked rice, tomatoes and their juices, broth, Worcestershire sauce, Italian seasoning, salt, and pepper. Scrape the bottom of the skillet and distribute the rice evenly.
  6. Bring the mixture to a gentle simmer, about 2 to 4 minutes.
  7. Cover tightly, reduce the heat to low, and maintain a gentle simmer. Start checking the rice after about 18 minutes; it typically takes 20 to 25 minutes from the start of the simmer.
  8. If the rice is still firm and the skillet is nearly dry, add broth a few tablespoons at a time, cover, and continue cooking. Stop when the rice is tender through the center and most of the liquid is absorbed, while the filling is still moist and spoonable.
  9. Preheat the oven to 375°F (190°C) while the rice finishes cooking.
  10. Scatter the mozzarella over the casserole in irregular patches, leaving some filling visible. Transfer the uncovered skillet to the oven for 3 to 5 minutes, just until the cheese melts. If the skillet is not oven-safe, cover and heat over low stovetop heat until the cheese melts.
  11. Let the casserole stand for about 5 minutes. Garnish with parsley and serve.

Tips

  • Use uncooked white long-grain rice; brown rice needs different cooking time and liquid, and cooked rice is not a direct substitute.
  • Keep the lid on during the low simmer so the rice cooks in the trapped steam.
  • Avoid frequent stirring while the rice cooks.
  • Check the rice for tenderness rather than relying only on the cooking time.
  • Cut the peppers into similar-size pieces so they hold their shape during simmering.

Notes

Cool leftovers promptly and refrigerate in an airtight container for a few days. Add a splash of broth or water to each portion before reheating gently, covered, until hot. Approximate nutrition per 100g: 125 calories, 8g protein, 5g fat, and 11g carbohydrates.

Nutrition

Calories: 400 kcal | Protein: 26 g | Fat: 16 g | Carbohydrates: 36 g