Author

Julia

Browsing

Teriyaki Chicken Ramen

These brothy ramen bowls have substantial slices of teriyaki-glazed chicken over noodles, baby bok choy, and thin carrots in a ginger-garlic broth. Most of the sauce coats the chicken, so the broth stays savory and pourable rather than thick and sweet. Cook the noodles separately and assemble the bowls just before serving to keep the strands distinct.

Makes 4 bowls. Allow about 15 minutes to prepare and 25 minutes to cook.

Ingredients for Teriyaki Chicken Ramen
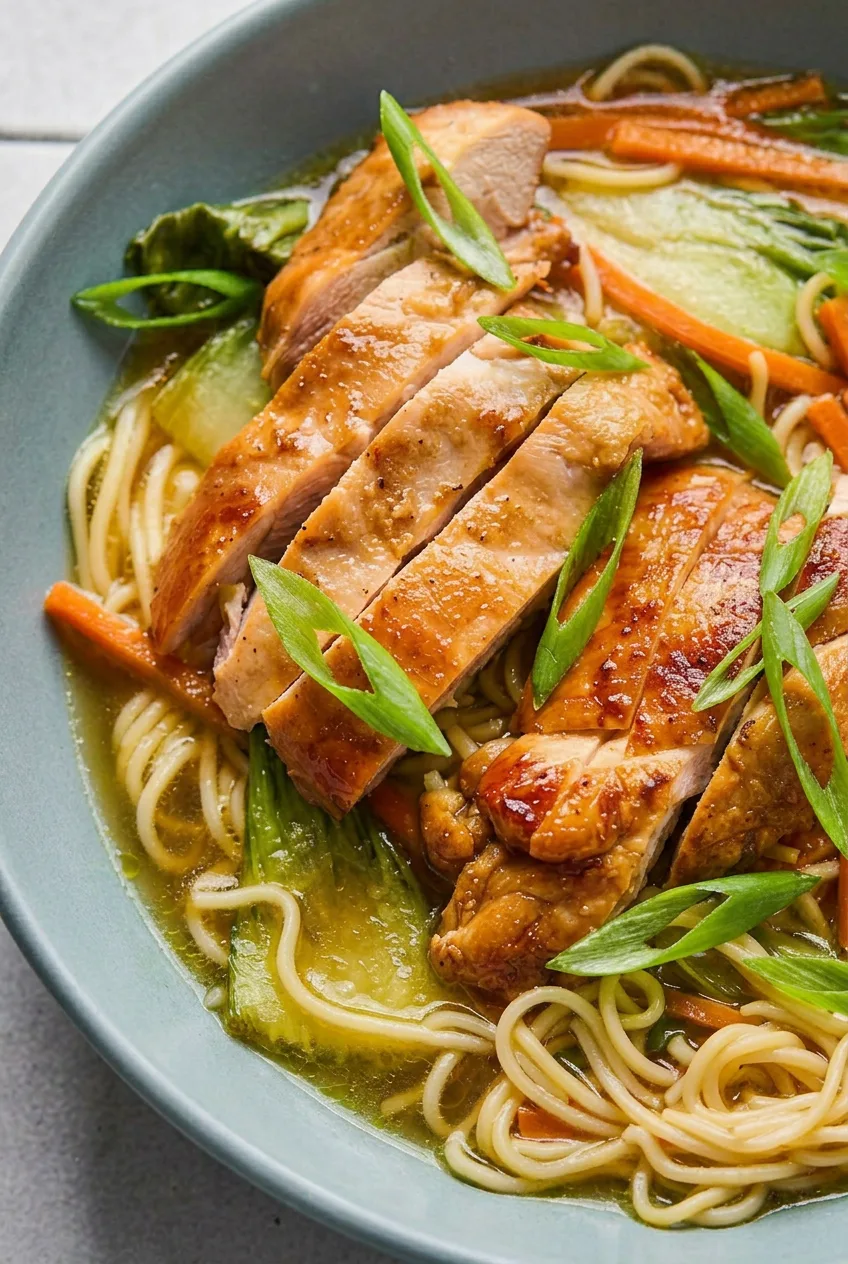
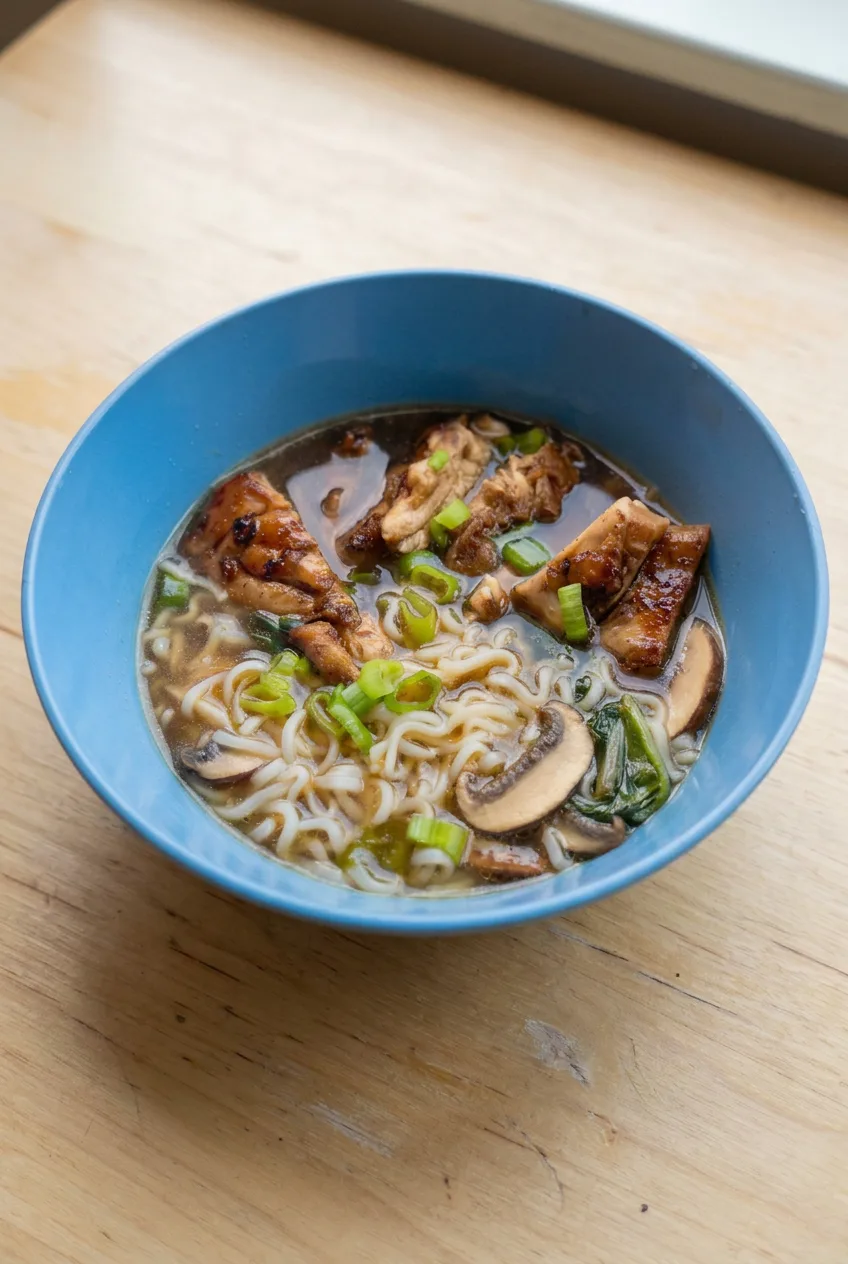
Close view of glazed chicken slices, distinct ramen noodles, bok choy, and amber broth
  • 1 1/2 pounds boneless skinless chicken thighs (about 680g)
  • 1/2 cup bottled teriyaki sauce (about 120g), divided: 1/3 cup for the chicken, 2 tablespoons for the broth, and the remaining 2 teaspoons for adjusting to taste if needed
  • 1 tablespoon neutral cooking oil
  • 6 cups low-sodium chicken broth
  • 1 tablespoon finely grated fresh ginger
  • 2 garlic cloves, minced
  • 2 medium carrots, cut into thin matchsticks (about 120g)
  • 4 small heads baby bok choy, halved or quartered lengthwise (about 450g)
  • 4 packages instant ramen noodles, about 3 ounces each (about 340g total); discard the seasoning packets
  • 3 green onions, thinly sliced on the diagonal

How to Make Teriyaki Chicken Ramen
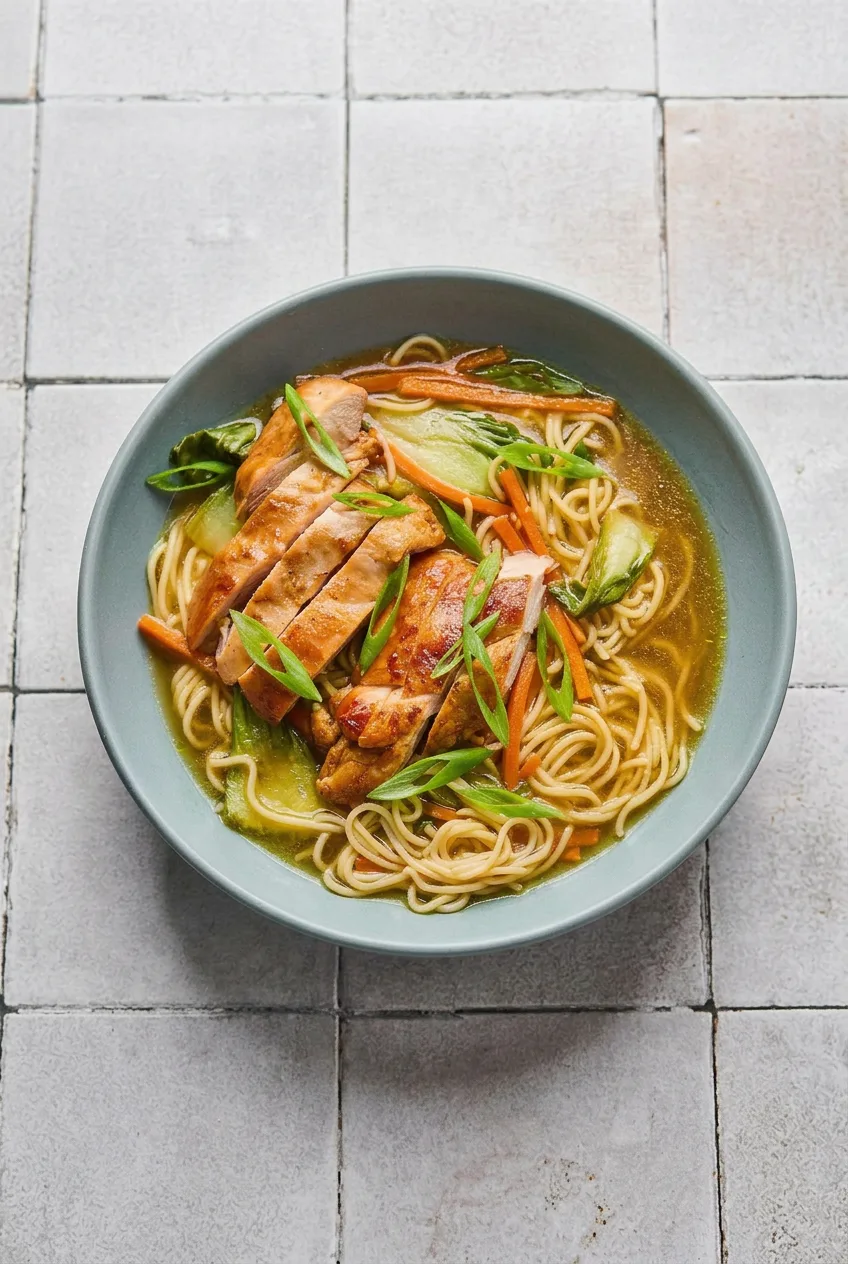
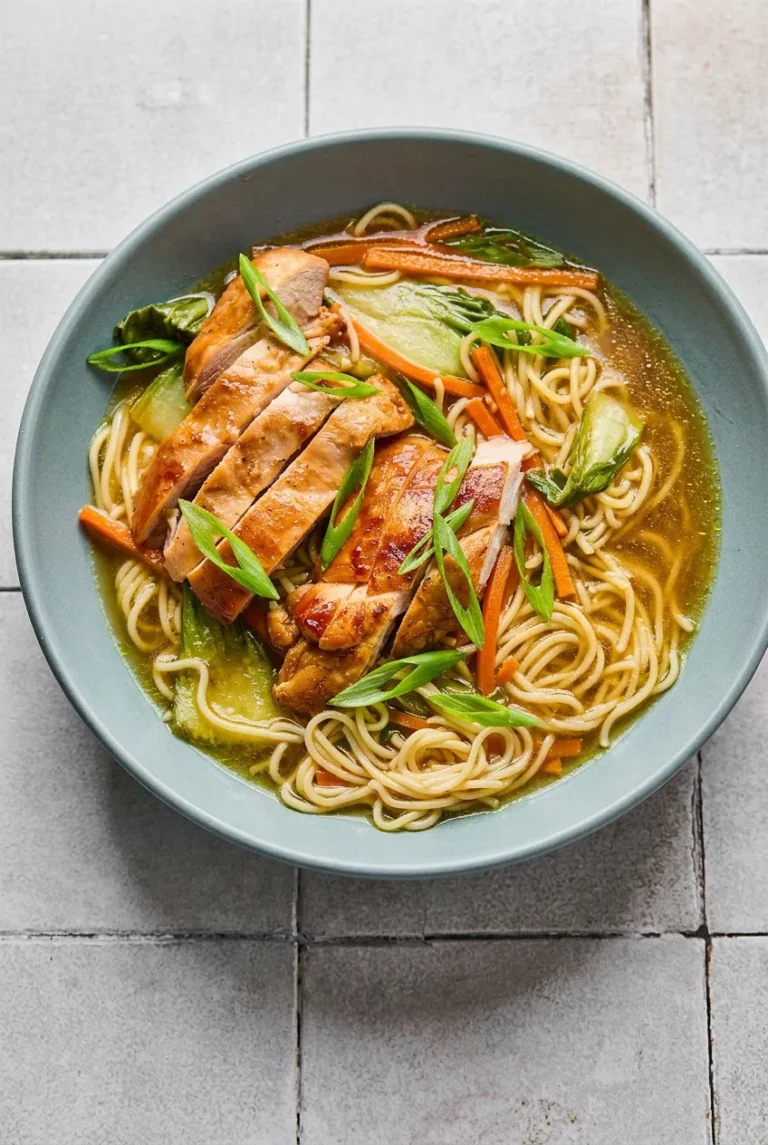
Complete bowl of teriyaki chicken ramen on a light gray tiled table
  1. Prepare the ingredients: Cut the carrots into thin matchsticks. Halve or quarter the bok choy lengthwise, keeping the stems and leaves attached. Slice the green onions and pat the chicken dry.
  2. Brown the chicken: Heat the oil in a 12-inch skillet over medium heat. Add the thighs in one layer; cook in batches if they would crowd the pan. Cook uncovered, turning once, until browned and nearly cooked through, about 10 to 14 minutes total depending on thickness. Start checking the first side after about 5 minutes. Meanwhile, bring a separate pot of water to a boil for the noodles and begin warming the broth in a saucepan.
  3. Glaze and rest: Reduce the skillet heat to medium-low. Add 1/3 cup teriyaki sauce and turn the chicken for 1 to 2 minutes, until glossy. Check the thickest part with an instant-read thermometer: the chicken must reach at least 165°F (75°C). Thighs can cook to about 175°F (80°C) for a more tender result. Transfer to a board, rest for about 5 minutes, then cut into substantial slices across the grain.
  4. Simmer the vegetables: Add the ginger, garlic, and 2 tablespoons teriyaki sauce to the warming broth. Bring to a gentle simmer, then add the carrots and bok choy with the stem ends submerged. Simmer uncovered for about 5 to 7 minutes, pressing the leafy tops into the broth only toward the end. The carrots and stems should be just tender and the leaves still green. Taste the broth before adding any more teriyaki sauce.
  5. Cook the noodles: Boil the ramen in plain water according to the package directions, usually 2 to 4 minutes. Stir to separate the strands and start checking at the short end of the package range. Drain when just tender; do not use the seasoning packets.
  6. Assemble the bowls: Divide the noodles among four deep bowls. Ladle in the vegetables and enough hot broth to visibly surround the noodles. Arrange the sliced chicken on top, scatter with green onions, and serve immediately.

Why Cook the Noodles Separately?

Ramen keeps absorbing liquid after it cooks. Draining the noodles when just tender and adding broth at serving keeps them from becoming swollen and leaves the broth lighter. It also lets you store leftover noodles apart from the soup.

Getting the Broth and Glaze Right

Teriyaki sauce contains sugar that can scorch during a long sear. Brown the chicken first, then lower the heat and coat it briefly for a glossy glaze.

Bottled sauces vary in saltiness and sweetness. Taste the broth before using the reserved sauce; if it is already too strong, dilute it with a little more low-sodium broth. It should remain pourable around the noodles.

Chicken and Noodle Options

Boneless skinless chicken breast can replace the thighs, but its skillet time will depend on thickness. Check the thickest part and cook to 165°F rather than following the thigh timing. For a gluten-free bowl, use certified gluten-free ramen and check that the teriyaki sauce and broth meet your needs. Add a few drops of chili oil to individual bowls if desired.

For another chicken noodle bowl, try honey garlic chicken ramen.

Make-Ahead and Leftovers

The chicken and broth can be prepared ahead; cook the noodles close to serving when practical. Refrigerate leftovers within 2 hours in airtight containers, keeping the noodles separate from the broth, chicken, and vegetables. Use refrigerated leftovers within 2 days.

Reheat the broth and chicken until hot on the stovetop or in the microwave, then assemble with the noodles. Leftover noodles may be softer than freshly cooked ones. Avoid freezing assembled bowls; the noodles may lose their texture when thawed.

Nutrition

Approximate per bowl, based on 4 generously filled bowls: 745 calories, 46g protein, 33g fat, and 69g carbohydrates. Approximate per 100g of finished ramen: 85 calories, 5g protein, 4g fat, and 8g carbohydrates. Values vary with the ramen, teriyaki sauce, chicken, and amount of broth served.

Teriyaki Chicken Ramen

Brothy ramen bowls with teriyaki-glazed chicken, bok choy, carrots, and ginger-garlic broth.
Course: Soup
Cuisine: Global
Prep: 15 min
Cook: 25 min
Total: 40 min
Servings: 4 Calories: 745 kcal per bowl; 85 kcal per 100 g

Equipment

  • 12-inch skillet
  • Saucepan
  • Large pot
  • Cutting board
  • Knife
  • Instant-read thermometer
  • Colander

Ingredients

Chicken

  • 1 1/2 pounds boneless skinless chicken thighs (about 680 g)
  • 1 tablespoon neutral cooking oil
  • 1/3 cup bottled teriyaki sauce

Broth and Vegetables

  • 6 cups low-sodium chicken broth
  • 1 tablespoon finely grated fresh ginger
  • 2 garlic cloves, minced
  • 2 medium carrots, cut into thin matchsticks (about 120 g)
  • 4 small heads baby bok choy, halved or quartered lengthwise (about 450 g)
  • 2 tablespoons bottled teriyaki sauce, plus up to 2 teaspoons reserved for adjusting to taste

Noodles and Garnish

  • 4 packages instant ramen noodles, about 3 ounces each (about 340 g total); discard seasoning packets
  • 3 green onions, thinly sliced on the diagonal

Instructions

  1. Cut the carrots into thin matchsticks, halve or quarter the bok choy lengthwise, slice the green onions, and pat the chicken dry.
  2. Heat the oil in a 12-inch skillet over medium heat. Add the chicken in one layer, working in batches if needed.
  3. Cook uncovered, turning once, until browned and nearly cooked through, about 10 to 14 minutes total. Start checking the first side after about 5 minutes.
  4. While the chicken cooks, bring a pot of water to a boil for the noodles and begin warming the broth in a saucepan.
  5. Reduce the skillet heat to medium-low. Add 1/3 cup teriyaki sauce and turn the chicken for 1 to 2 minutes, until glossy.
  6. Check the thickest part of the chicken with an instant-read thermometer; it must reach at least 165°F (75°C). For more tender thighs, cook to about 175°F (80°C). Transfer to a board and rest for about 5 minutes, then slice across the grain.
  7. Add the ginger, garlic, and 2 tablespoons teriyaki sauce to the warming broth. Bring to a gentle simmer.
  8. Add the carrots and bok choy, keeping the stem ends submerged. Simmer uncovered for 5 to 7 minutes, pressing the leafy tops into the broth toward the end, until the carrots and stems are just tender and the leaves remain green.
  9. Taste the broth before adding any of the reserved teriyaki sauce.
  10. Boil the ramen in plain water according to package directions, usually 2 to 4 minutes. Stir to separate the strands and start checking at the shorter end of the time range.
  11. Drain the noodles when just tender. Divide them among four deep bowls, then add the vegetables and enough hot broth to surround the noodles.
  12. Arrange the sliced chicken on top, scatter with green onions, and serve immediately.

Tips

  • Brown the chicken before adding teriyaki sauce to help prevent the sauce’s sugar from scorching.
  • Cook the noodles separately and drain them when just tender to keep the broth light and the strands distinct.
  • Taste the broth before using the reserved teriyaki sauce; dilute with extra low-sodium broth if it is too strong.
  • Keep the leafy bok choy tops out of the simmering broth until near the end so they stay green.

Variations

  • Chicken Breast Ramen: Replace the thighs with boneless skinless chicken breast and cook according to thickness, checking that the thickest part reaches 165°F (75°C).
  • Gluten-Free Ramen: Use certified gluten-free ramen and check that the teriyaki sauce and broth meet your needs.
  • Chili Oil Ramen: Add a few drops of chili oil to individual bowls before serving.
Notes

Refrigerate leftovers within 2 hours in airtight containers, keeping noodles separate, and use within 2 days. Reheat the broth and chicken until hot; leftover noodles may soften. Avoid freezing assembled bowls.

Nutrition

Calories: 745 kcal per bowl; 85 kcal per 100 g | Protein: 46 g per bowl; 5 g per 100 g | Fat: 33 g per bowl; 4 g per 100 g | Carbohydrates: 69 g per bowl; 8 g per 100 g

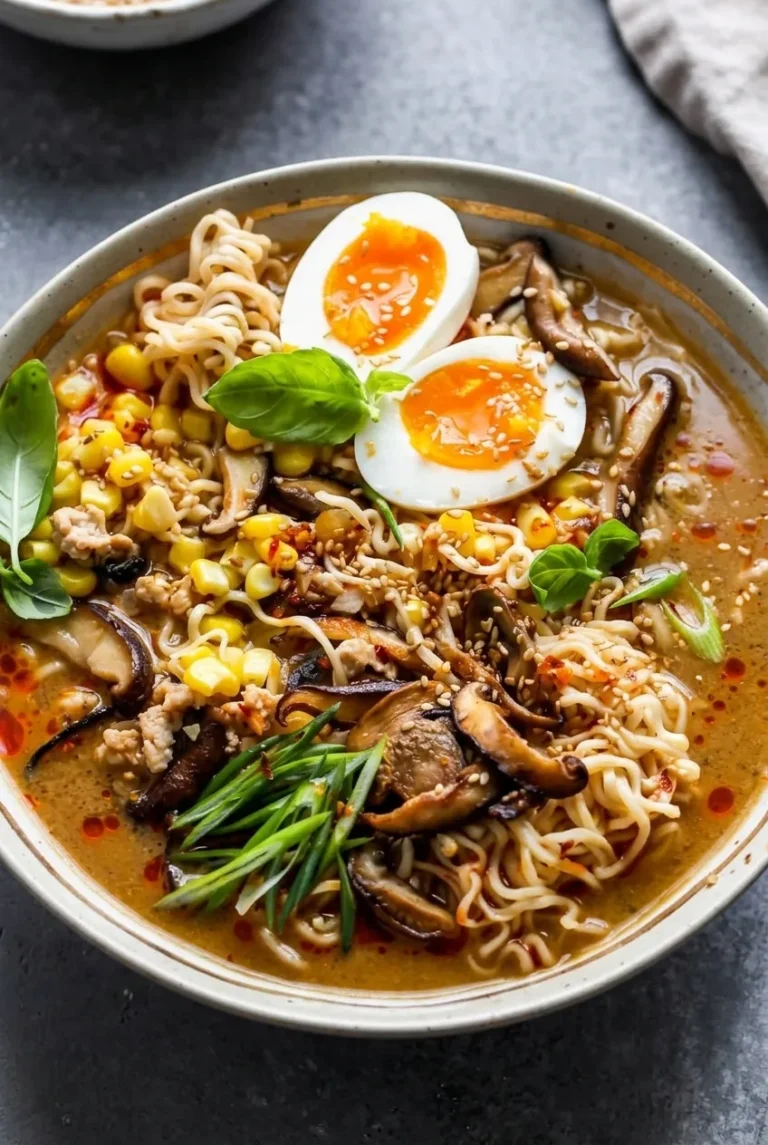
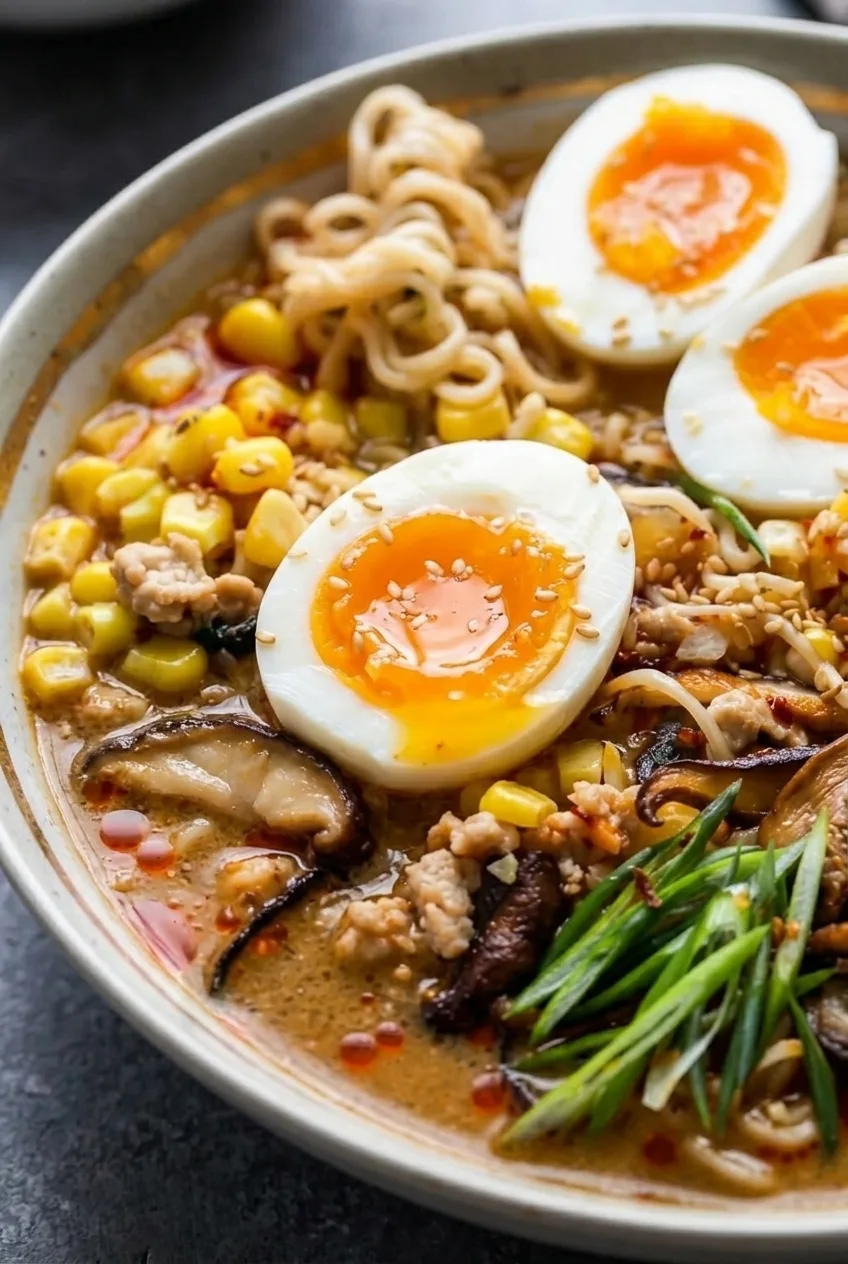
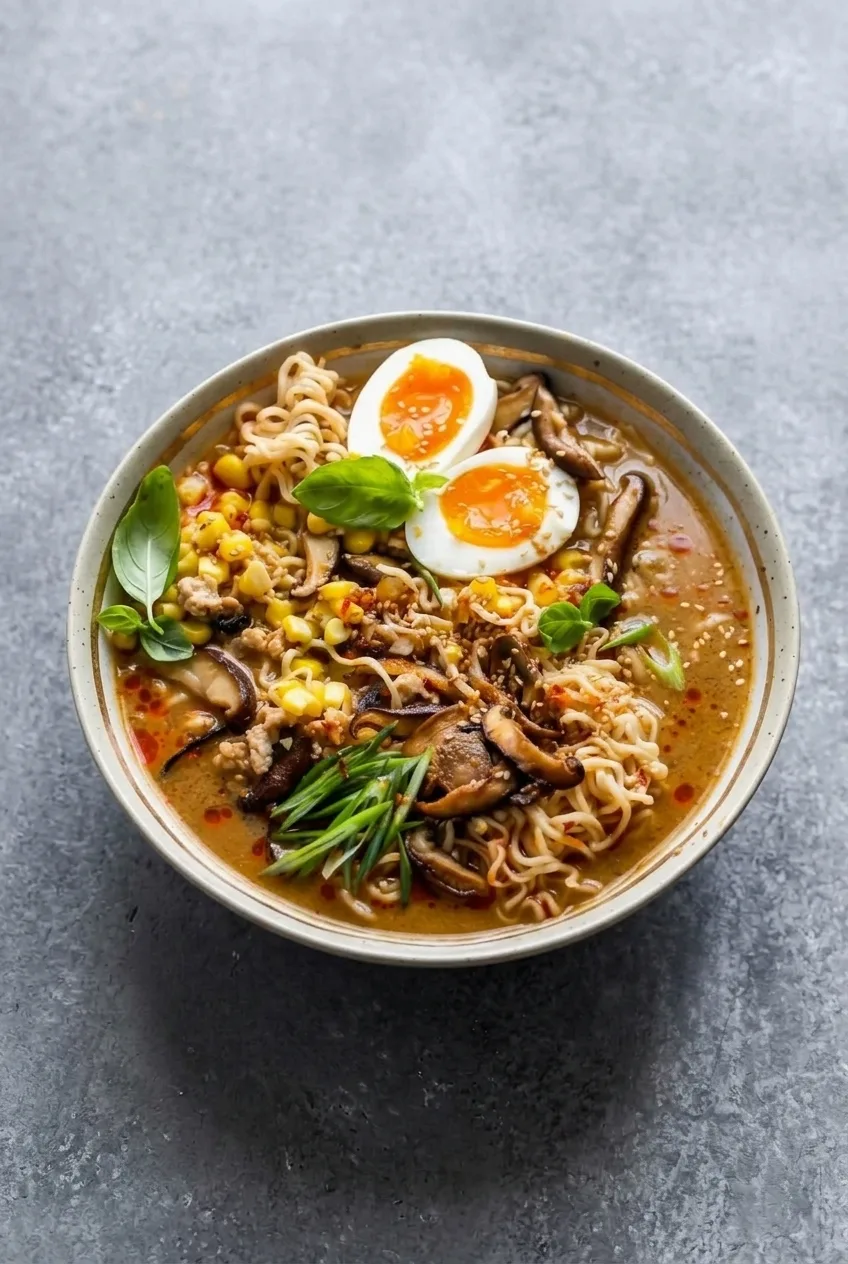
Creamy Spicy Ramen

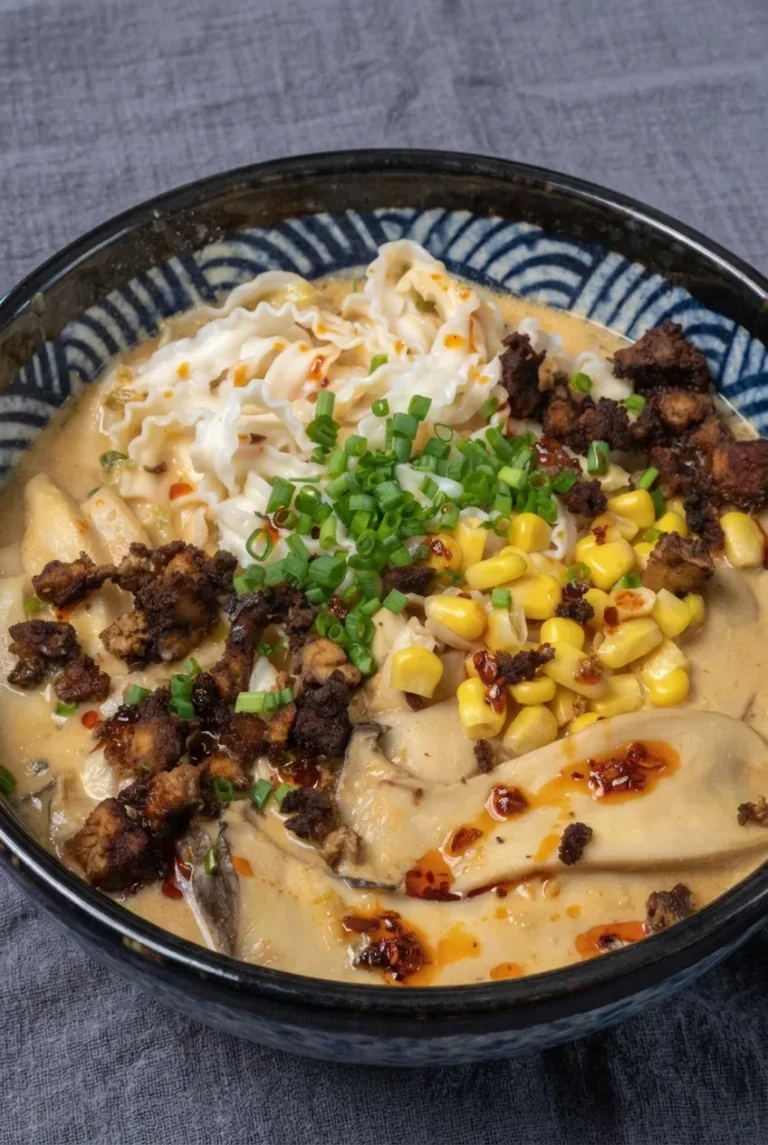
Wavy noodles sit in a pale-orange soy-milk-and-miso broth, topped with browned pork, mushrooms, corn, scallions, and chili oil. Doubanjiang gives the soup savory heat; the chili oil adds a little more heat at the table without turning the whole broth red.

This version is deliberately brothy rather than sauce-coated. Cook the noodles in a separate pot and add them just before serving so they keep their bite and the broth stays smooth and pourable. It makes two generous bowls in about 30 minutes.

Ingredients for Creamy Spicy Ramen

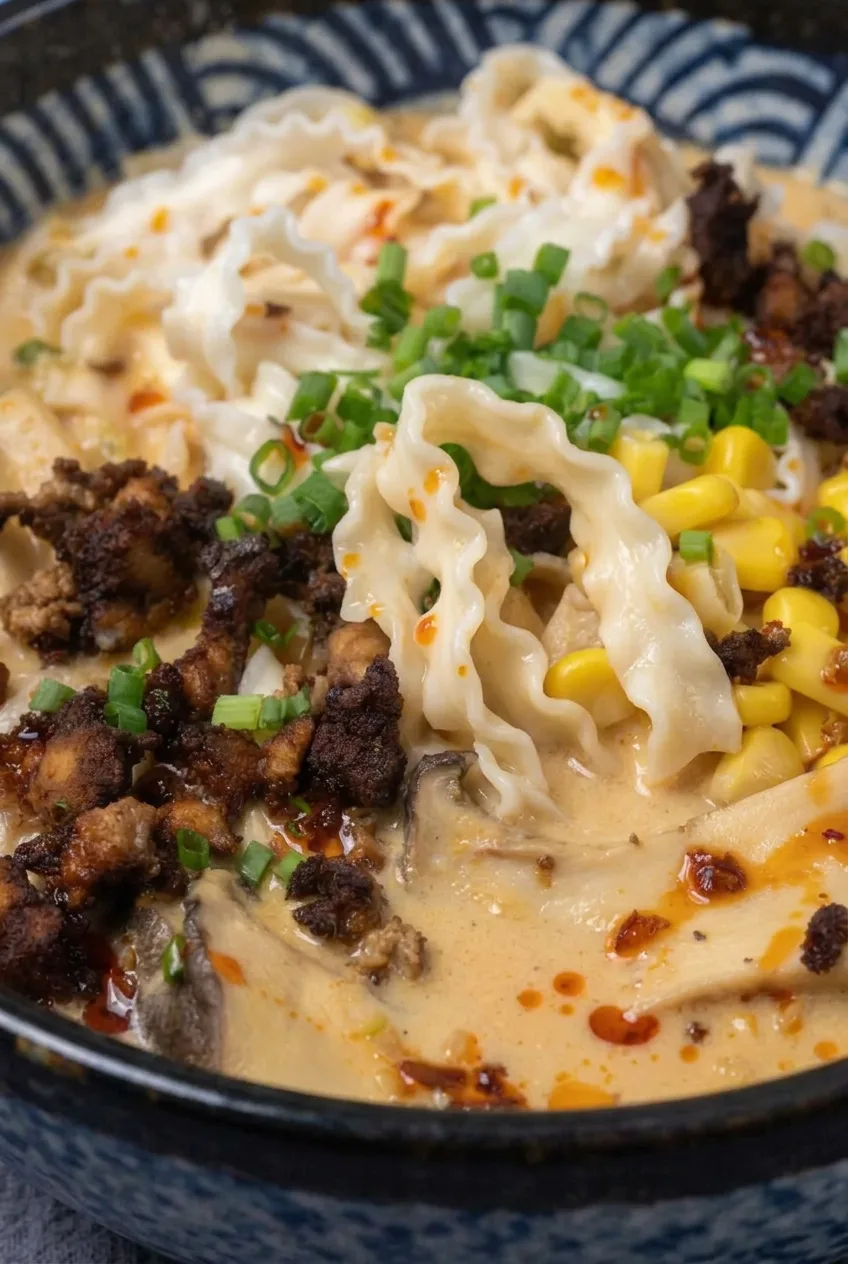
Close view of wavy ramen noodles, browned pork and chili-oil droplets in creamy broth
  • 2 teaspoons neutral cooking oil
  • 8 ounces ground pork (about 225g)
  • 4 ounces cremini or white mushrooms, sliced (about 115g)
  • 3 garlic cloves, minced
  • 2 teaspoons grated fresh ginger
  • 3 green onions, sliced, whites and greens separated
  • 2 teaspoons doubanjiang (fermented chili bean paste), plus more to taste
  • 1 1/2 cups low-sodium chicken broth
  • 1 tablespoon white miso
  • 2 cups unsweetened, unflavored soy milk
  • 2 blocks dry wavy ramen noodles, about 6 ounces total (170g); discard the seasoning packets
  • 1/2 cup sweet corn kernels, thawed if frozen
  • 2 teaspoons chili crisp or chili oil, plus more to taste

Optional: Up to 1 teaspoon low-sodium soy sauce, added only after tasting the broth. The doubanjiang and miso may provide enough salt.

How to Make Creamy Spicy Ramen

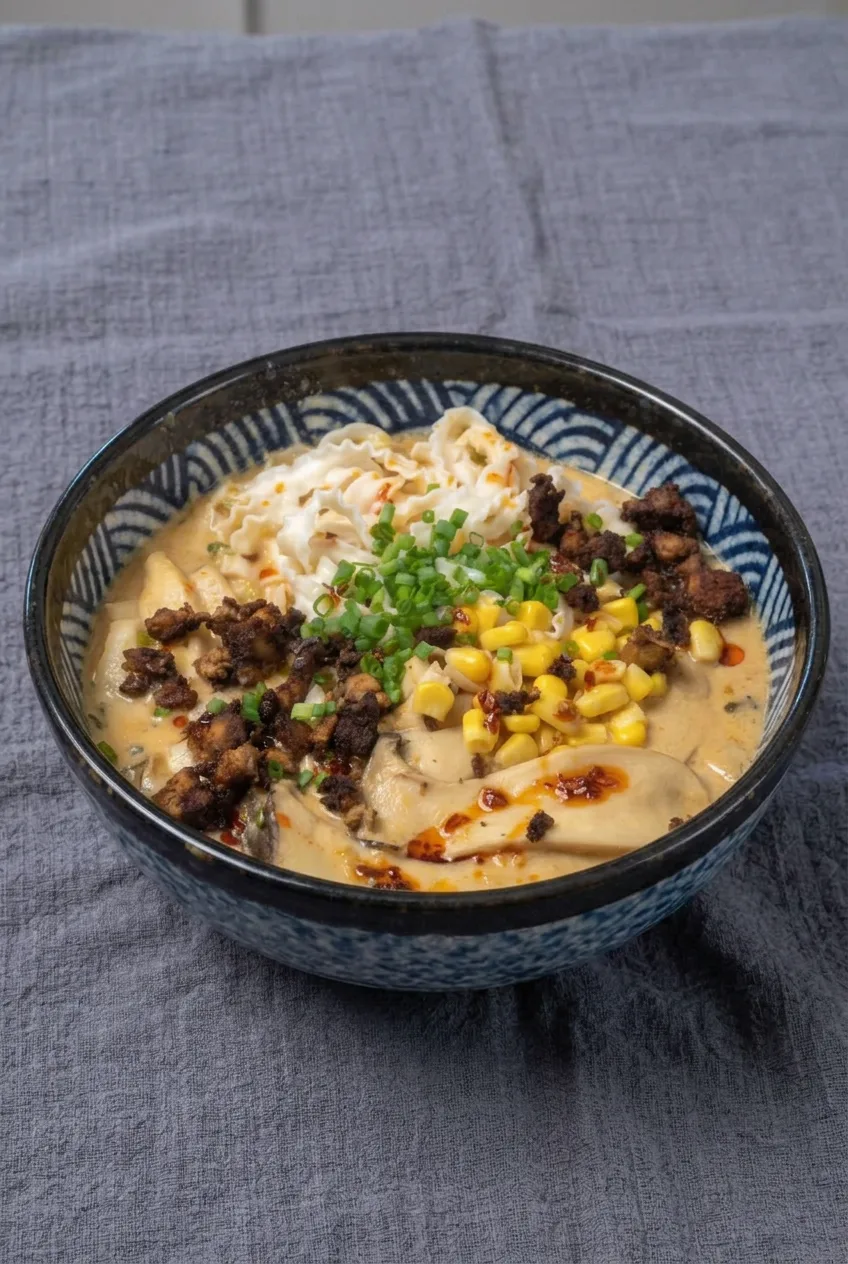
Complete bowl of creamy spicy ramen on a neutral tabletop, with its toppings and broth visible
  1. Prepare the toppings: Slice the mushrooms and green onions, keeping the onion whites separate from the greens. Mince the garlic, grate the ginger, and have the corn and chili oil ready.
  2. Brown the pork: Heat the oil in a 3- to 4-quart pot or deep saucepan over medium-high heat. Use a pot wide enough that the pork can brown rather than steam. Add the pork, break it into small crumbles, and cook uncovered for 5 to 7 minutes, turning occasionally, until fully cooked with dark browned edges. Ground pork should reach 160°F (70°C) if checked with a thermometer. Transfer it to a plate, leaving a little rendered fat in the pot.
  3. Cook the mushrooms and aromatics: Reduce the heat to medium. Add the mushrooms and cook for about 4 minutes, stirring, until softened. Set aside a few slices for topping. Add the green onion whites, garlic, and ginger; stir briefly until fragrant but not browned. Stir in the doubanjiang.
  4. Make the broth: Pour in the chicken broth and scrape up the browned bits from the pot. In a small bowl, whisk the miso with a little warm broth until smooth, then stir it into the pot. Add the soy milk and reduce the heat to low or medium-low. Heat uncovered for 4 to 5 minutes, until steaming with only occasional gentle bubbles; do not let it boil vigorously. Taste before adding optional soy sauce or more doubanjiang.
  5. Cook the noodles separately: While the broth heats, bring a second pot of water to a boil. Add the ramen without its seasoning packets. Start checking about 1 minute before the package time ends; drain without rinsing when the noodles separate easily but still have a little bite.
  6. Assemble the bowls: Warm the corn briefly in the hot broth, then spoon it out for topping. Divide the noodles between two deep bowls. Ladle the broth and mushrooms around them, leaving some wavy noodles above the surface. Arrange the pork, reserved mushroom slices, and corn in separate clusters. Add the green onion greens and drizzle chili crisp or oil over the broth. Serve immediately.

How to Keep the Broth Creamy

Whisking miso with warm broth helps it dissolve evenly. Once the soy milk is added, gentle heat keeps the soup smooth: it should steam, not boil hard. The 3 1/2 cups of broth and soy milk should remain pourable, with liquid visible around the noodles.

Plain unsweetened oat milk can replace soy milk, but its flavor and texture may differ. Heat it gently, too.

How to Keep the Noodles from Getting Soggy

Hot broth continues to soften ramen noodles. Stop cooking while they still have a little bite, and keep them out of the broth if serving is delayed. For a less-brothy noodle dish, see these garlic butter ramen noodles.

Adjusting the Spice and Salt

Doubanjiang seasons the broth, while chili crisp or oil adds finishing heat. Brands vary in saltiness and heat, so start with the listed amounts and taste the broth before adding soy sauce. Offer extra chili oil at the table rather than stirring it all into the pot.

Storing and Reheating

Refrigerate the broth and pork toppings in airtight containers, separate from cooked noodles, for up to 3 days. Reheat the broth and toppings gently on the stovetop over medium-low heat until hot, without a hard boil. Cook fresh noodles while they reheat when possible; noodles stored in broth will be softer.

If freezing, freeze the broth without noodles for up to 2 months. Thaw it in the refrigerator before gently reheating, and cook fresh noodles for serving.

Nutrition

Approximate nutrition per generous bowl, based on 2 servings: 930 calories, 39g protein, 53g fat, and 75g carbohydrates. Approximate values per 100g of prepared ramen: 110 calories, 5g protein, 6g fat, and 9g carbohydrates. Values vary with the pork, soy milk, chili oil, noodle brand, and amount of water the noodles absorb.

Creamy Spicy Ramen

Wavy ramen noodles are served in a creamy soy milk and miso broth with browned pork, mushrooms, corn, scallions, and chili oil.
Course: Soup
Cuisine: Japanese
Prep: 10 min
Cook: 20 min
Total: 30 min
Servings: 2 Calories: 930 kcal

Equipment

  • 3- to 4-quart pot
  • Pot for noodles
  • Small bowl
  • Whisk
  • Meat thermometer

Ingredients

For the Broth and Toppings

  • 2 teaspoons neutral cooking oil
  • 8 ounces ground pork (about 225g)
  • 4 ounces cremini or white mushrooms, sliced (about 115g)
  • 3 garlic cloves, minced
  • 2 teaspoons grated fresh ginger
  • 3 green onions, sliced, whites and greens separated
  • 2 teaspoons doubanjiang (fermented chili bean paste), plus more to taste
  • 1 1/2 cups low-sodium chicken broth
  • 1 tablespoon white miso
  • 2 cups unsweetened, unflavored soy milk
  • 1/2 cup sweet corn kernels, thawed if frozen
  • 2 teaspoons chili crisp or chili oil, plus more to taste
  • Optional: up to 1 teaspoon low-sodium soy sauce, to taste

For the Noodles

  • 2 blocks dry wavy ramen noodles, about 6 ounces total (170g); discard the seasoning packets

Instructions

  1. Slice the mushrooms and green onions, keeping the onion whites separate from the greens. Mince the garlic and grate the ginger.
  2. Heat the oil in a 3- to 4-quart pot over medium-high heat. Add the pork, break it into small crumbles, and cook uncovered for 5 to 7 minutes, turning occasionally, until fully cooked and browned. Check that it reaches 160°F (70°C). Transfer the pork to a plate, leaving a little rendered fat in the pot.
  3. Reduce the heat to medium. Add the mushrooms and cook for about 4 minutes, stirring, until softened. Set aside a few slices for topping.
  4. Add the green onion whites, garlic, and ginger. Stir briefly until fragrant but not browned, then stir in the doubanjiang.
  5. Pour in the chicken broth and scrape up the browned bits. Whisk the miso with a little warm broth in a small bowl until smooth, then stir it into the pot.
  6. Add the soy milk and reduce the heat to low or medium-low. Heat uncovered for 4 to 5 minutes, until steaming with only occasional gentle bubbles. Taste before adding optional soy sauce or more doubanjiang.
  7. While the broth heats, bring a second pot of water to a boil. Cook the ramen without its seasoning packets, starting to check about 1 minute before the package time ends. Drain without rinsing when the noodles separate easily but still have a little bite.
  8. Warm the corn briefly in the hot broth, then spoon it out for topping.
  9. Divide the noodles between two deep bowls. Ladle the broth and mushrooms around them, then arrange the pork, reserved mushroom slices, and corn in separate clusters.
  10. Top with the green onion greens and drizzle with chili crisp or chili oil. Serve immediately.

Tips

  • Cook the noodles separately and add them just before serving to keep them from getting soggy.
  • Whisk the miso with warm broth before adding it so it dissolves smoothly.
  • Keep the soy milk broth at a gentle heat; do not let it boil vigorously.
  • Taste the broth before adding soy sauce because the miso and doubanjiang may provide enough salt.
  • Serve extra chili oil at the table so each person can adjust the heat.

Variations

  • Oat Milk Ramen: Replace the soy milk with plain, unsweetened oat milk and heat it gently.

Notes

Refrigerate broth and pork toppings separately from the noodles for up to 3 days. Reheat gently without boiling; cook fresh noodles when possible. Freeze broth without noodles for up to 2 months. Approximate nutrition per 100g: 110 calories, 5g protein, 6g fat, and 9g carbohydrates.

Nutrition

Calories: 930 kcal | Protein: 39 g | Fat: 53 g | Carbohydrates: 75 g

Honey Garlic Chicken Ramen

Glossy honey-garlic chicken tops curly noodles in a savory broth with mushrooms and spinach. The chicken is glazed in a skillet, then cut into pieces that stay visible above the noodles. Green onions add a fresh finish to each bowl.

Keeping the glaze on the chicken, rather than stirring it into the pot, prevents the broth from becoming too sweet. The noodles also cook separately and go into the bowls just before serving, so they retain some spring. This stovetop recipe makes four generous bowls in about 40 minutes.

Ingredients for Honey Garlic Chicken Ramen

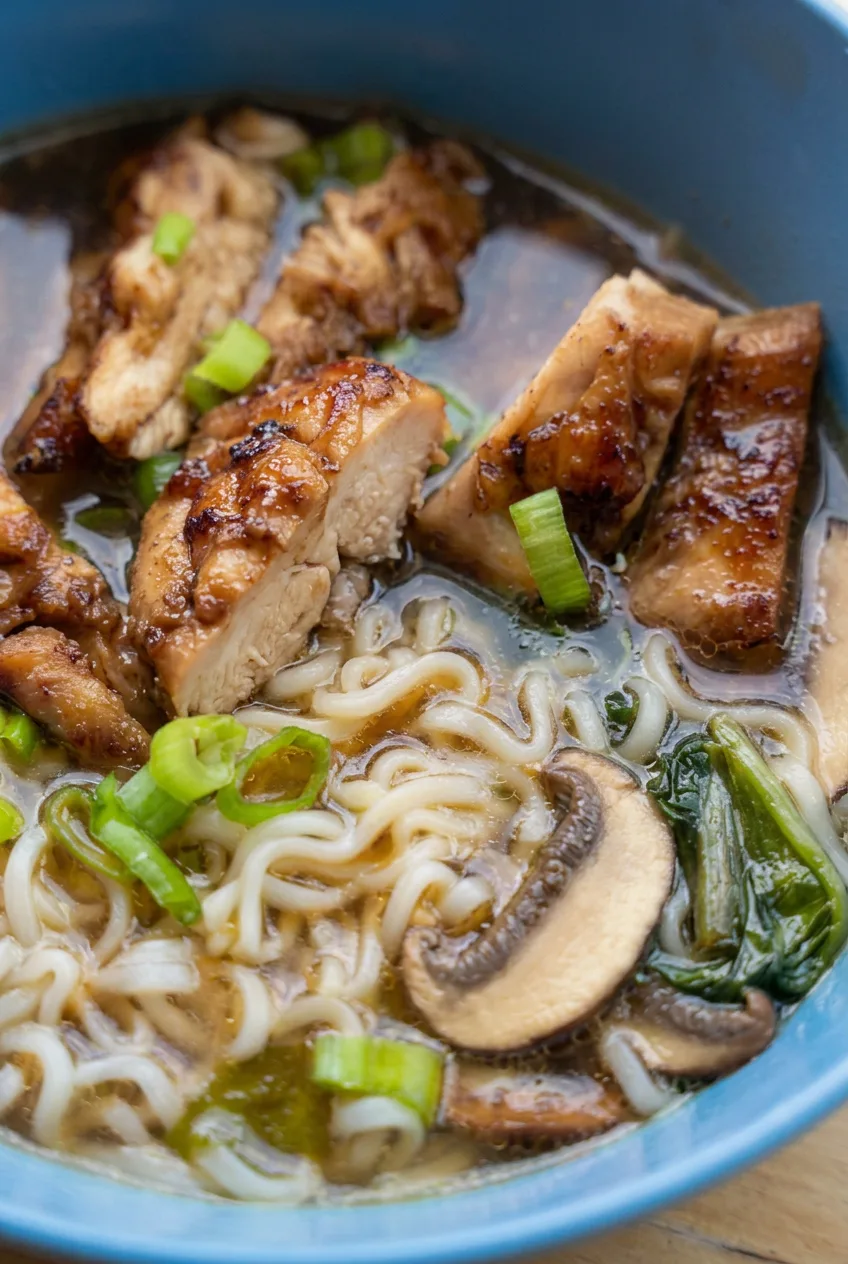
Close view of glossy chicken pieces above curly ramen noodles, mushrooms, spinach, and brown broth
  • 1 lb boneless skinless chicken thighs (450g)
  • 1 tablespoon neutral oil or olive oil
  • 3 tablespoons honey (about 65g)
  • 3 tablespoons low-sodium soy sauce, divided
  • 4 garlic cloves, minced
  • 2 tablespoons water, plus more for boiling the noodles
  • 6 cups low-sodium chicken broth
  • 8 oz sliced mushrooms (225g)
  • 2 packed cups baby spinach (about 60g)
  • 8 oz dry ramen noodles, usually 4 small blocks (225g); discard the seasoning packets
  • 3 green onions, thinly sliced

Optional: Add a pinch of red pepper flakes to the broth for heat, or add 1 teaspoon freshly grated ginger to the glaze.

How to Make Honey Garlic Chicken Ramen

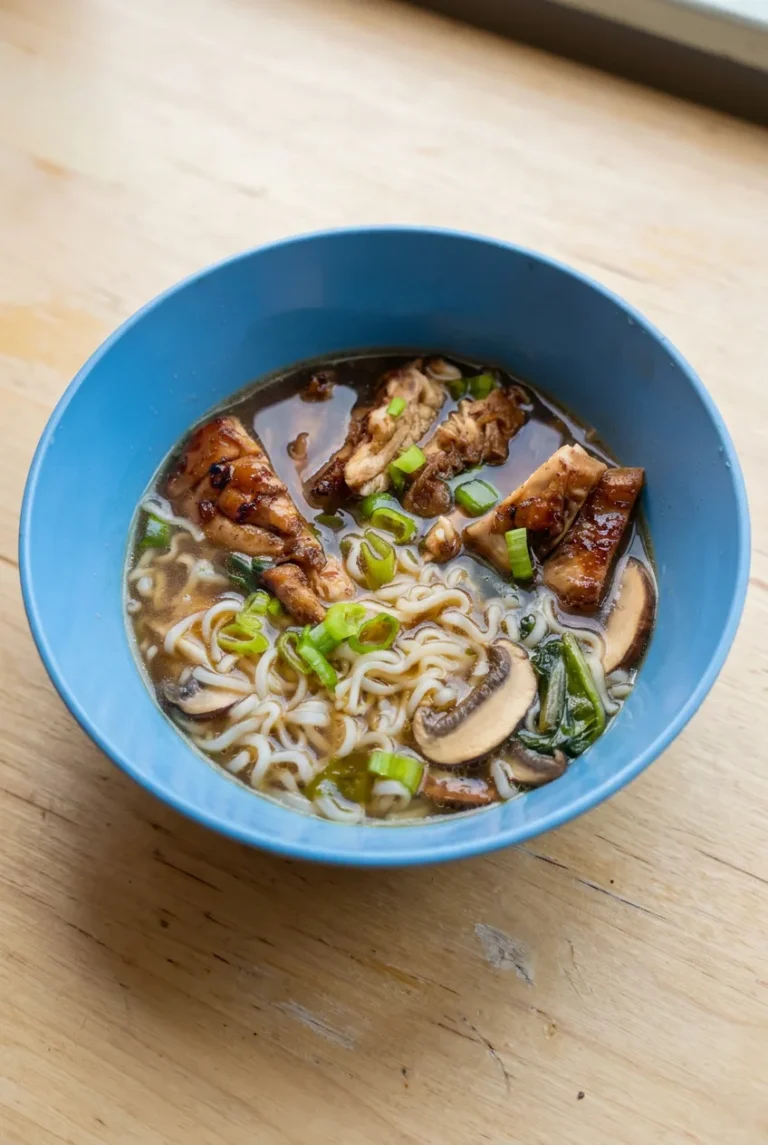
Complete blue bowl of honey garlic chicken ramen on a light surface, with broth and toppings visible
  1. Mix the glaze: Whisk together the honey, 2 tablespoons soy sauce, garlic, and 2 tablespoons water. Add the ginger here if using. Have the spinach and green onions ready.
  2. Simmer the broth: In a soup pot large enough to hold 6 cups of broth and the vegetables, bring the broth and mushrooms to a gentle simmer. Cook uncovered for 7 to 10 minutes, until the mushrooms are tender. Taste, then add up to the remaining 1 tablespoon soy sauce. Add red pepper flakes if using. Keep the broth at a gentle simmer while the chicken cooks.
  3. Sear the chicken: Heat the oil in a 10- to 12-inch skillet over medium-high heat until it shimmers. Add the thighs without crowding them so they brown rather than steam. Cook uncovered, turning once, for about 5 to 7 minutes per side. Start checking after about 5 minutes per side; an instant-read thermometer inserted into the thickest part must register 165°F (75°C). If the outside browns before the center is done, lower the heat and finish cooking before adding the glaze.
  4. Glaze and rest: Reduce the skillet heat to medium-low. Pour in the honey-garlic mixture and turn the chicken, or spoon the glaze over it, for 1 to 2 minutes. Transfer the chicken to a board as soon as the glaze lightly coats it and looks glossy, before it darkens or smokes. Rest for about 5 minutes, then cut into substantial pieces.
  5. Cook the noodles and spinach: While the chicken rests, boil the ramen in a separate pot of water for about 1 minute less than the package directs. Drain when the noodles have loosened but still feel springy. Stir the spinach into the hot broth just until wilted.
  6. Assemble the bowls: Divide the noodles among four deep bowls. Ladle in the hot broth, mushrooms, and spinach, leaving some broth visible around the noodles. Arrange the chicken on top and scatter with green onions. If desired, spoon a little remaining skillet glaze over the chicken rather than into the broth. Serve immediately.

How to Keep the Glaze from Burning

Finish cooking the chicken before adding the honey mixture. Honey darkens quickly in a hot skillet, so reduce the heat and stop glazing once the coating turns glossy. If the broth tastes too salty, dilute it with a little hot water rather than adding more glaze.

Why the Noodles Cook Separately

Hot broth continues to soften ramen after assembly. Package times vary, so drain the noodles about a minute early and combine them with the broth just before serving. If dinner is delayed, hold the drained noodles apart from the broth.
Chicken Breast Option

Boneless skinless chicken breast can replace the thighs. Adjust the skillet time to the thickness of the breast and check that it reaches 165°F before adding the glaze.

For another glazed thigh dinner, try cranberry glazed chicken thighs.

How to Store and Reheat Leftovers

Refrigerate leftovers promptly in covered containers and use within 3 to 4 days. Keep the noodles separate from the broth and chicken when possible so they absorb less liquid. Gently reheat the broth and chicken until thoroughly hot, then add the noodles just long enough to warm.

Freezing assembled bowls is not recommended because the noodles and greens lose texture. For best quality, the broth and cooked chicken can be frozen separately for up to about 2 months; prepare fresh noodles and greens when serving.

Nutrition

Approximate per bowl (1 of 4): 560 calories, 32g protein, 23g fat, and 56g carbohydrates. Approximate per 100g: 80 calories, 5g protein, 3g fat, and 8g carbohydrates. Values are estimates; noodle and broth brands, portion sizes, and the amount of glaze served can change them.

Honey Garlic Chicken Ramen

Curly ramen noodles, mushrooms, and spinach are served in savory broth with honey-garlic glazed chicken and green onions.
Course: Soup
Cuisine: Japanese-inspired
Prep: 10 min
Cook: 30 min
Total: 40 min
Servings: 4 Calories: 560 kcal

Equipment

  • Soup pot
  • 10- to 12-inch skillet
  • Separate pot for noodles
  • Instant-read thermometer

Ingredients

For the Chicken and Glaze

  • 1 lb boneless skinless chicken thighs (450 g)
  • 1 tablespoon neutral oil or olive oil
  • 3 tablespoons honey (about 65 g)
  • 2 tablespoons low-sodium soy sauce
  • 4 garlic cloves, minced
  • 2 tablespoons water
  • 1 teaspoon freshly grated ginger (optional)

For the Broth and Noodles

  • 6 cups low-sodium chicken broth
  • 8 oz sliced mushrooms (225 g)
  • Up to 1 tablespoon low-sodium soy sauce
  • Pinch of red pepper flakes (optional)
  • 8 oz dry ramen noodles, usually 4 small blocks (225 g); discard seasoning packets
  • Water for boiling the noodles

To Finish

  • 2 packed cups baby spinach (about 60 g)
  • 3 green onions, thinly sliced

Instructions

  1. Whisk together the honey, 2 tablespoons soy sauce, garlic, and 2 tablespoons water. Add the ginger if using.
  2. Bring the chicken broth and mushrooms to a gentle simmer in a soup pot. Cook uncovered for 7 to 10 minutes, until the mushrooms are tender.
  3. Taste the broth and add up to 1 tablespoon more soy sauce. Add red pepper flakes if using, then keep the broth at a gentle simmer.
  4. Heat the oil in a 10- to 12-inch skillet over medium-high heat until it shimmers. Add the chicken thighs without crowding the pan.
  5. Cook the chicken uncovered, turning once, for about 5 to 7 minutes per side. Check that the thickest part reaches 165°F (75°C). If the outside browns before the center is done, lower the heat and finish cooking before glazing.
  6. Reduce the skillet heat to medium-low. Add the honey-garlic mixture and turn the chicken or spoon the glaze over it for 1 to 2 minutes, until lightly coated and glossy.
  7. Transfer the chicken to a board before the glaze darkens or smokes. Rest for about 5 minutes, then cut into substantial pieces.
  8. While the chicken rests, boil the ramen in a separate pot of water for about 1 minute less than the package directs. Drain when loosened but still springy.
  9. Stir the spinach into the hot broth just until wilted.
  10. Divide the noodles among four deep bowls. Ladle in the broth, mushrooms, and spinach, then arrange the chicken on top and scatter with green onions. Spoon any remaining skillet glaze over the chicken if desired, and serve immediately.

Tips

  • Cook the chicken through before adding the honey glaze, which can darken quickly in a hot skillet.
  • Stop glazing as soon as the coating looks glossy.
  • Cook the noodles separately and drain them about a minute before the package time so they stay springy.
  • If the broth tastes too salty, dilute it with a little hot water rather than adding more glaze.

Variations

  • Ginger Honey Garlic Ramen: Add 1 teaspoon freshly grated ginger to the honey-garlic glaze.
  • Spicy Honey Garlic Ramen: Add a pinch of red pepper flakes to the broth.
  • Chicken Breast Ramen: Replace the thighs with boneless skinless chicken breast, adjust the skillet time for thickness, and cook to 165°F (75°C) before glazing.

Notes

Refrigerate leftovers in covered containers and use within 3 to 4 days. Store noodles separately when possible; reheat the broth and chicken until thoroughly hot, then add noodles just to warm. Freeze broth and cooked chicken separately for up to about 2 months; freezing assembled bowls is not recommended. Approximate nutrition per 100 g: 80 calories, 5 g protein, 3 g fat, and 8 g carbohydrates.

Nutrition

Calories: 560 kcal | Protein: 32 g | Fat: 23 g | Carbohydrates: 56 g | Per 100g Calories: 80 kcal | Per 100g Protein: 5 g | Per 100g Fat: 3 g | Per 100g Carbohydrates: 8 g

Garlic Butter Ramen Noodles

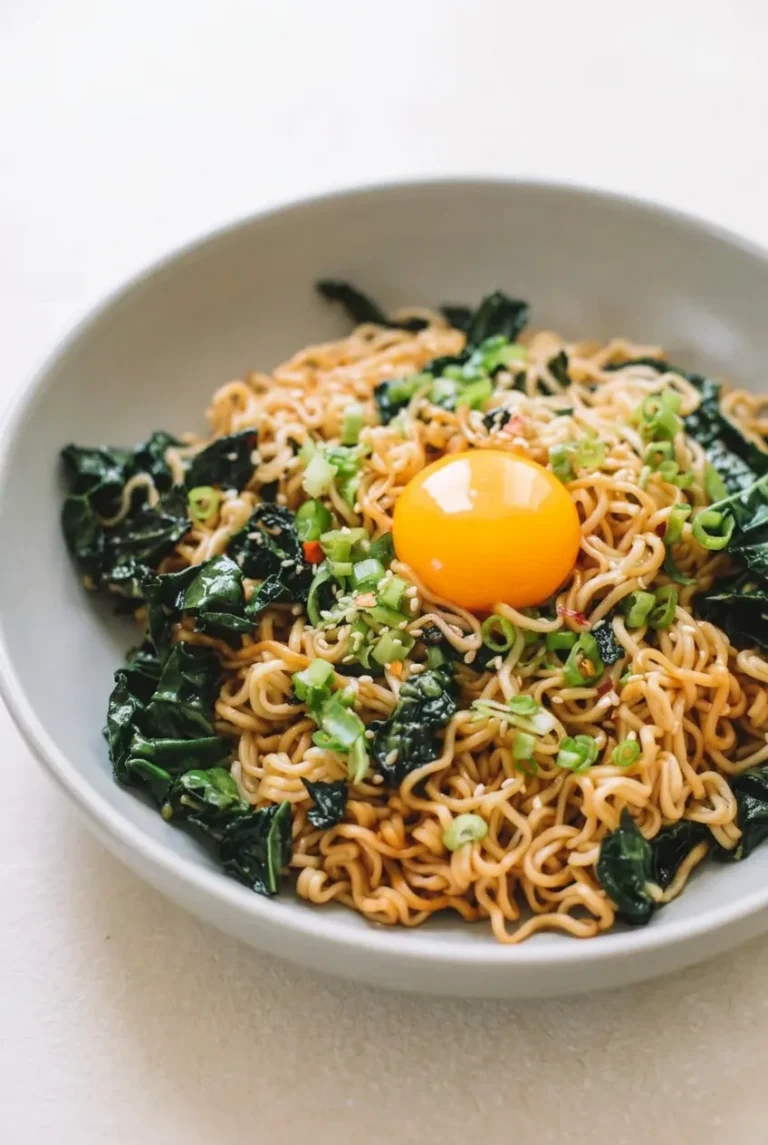
These broth-free ramen noodles are tossed in a skillet with butter, lightly golden garlic, and soy sauce until the curly strands are glossy and distinct. Boiling and draining the noodles separately keeps the sauce on the ramen instead of in the bottom of the bowl.

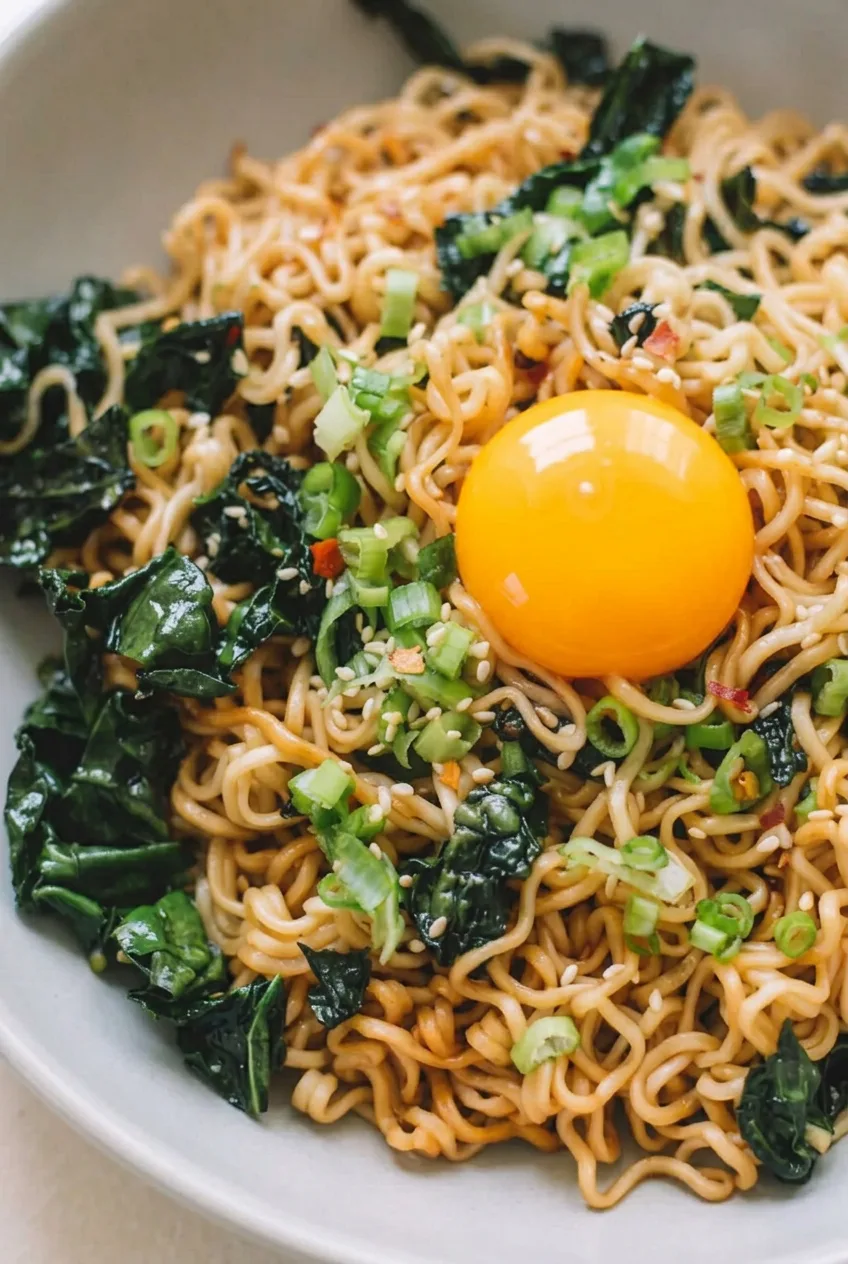
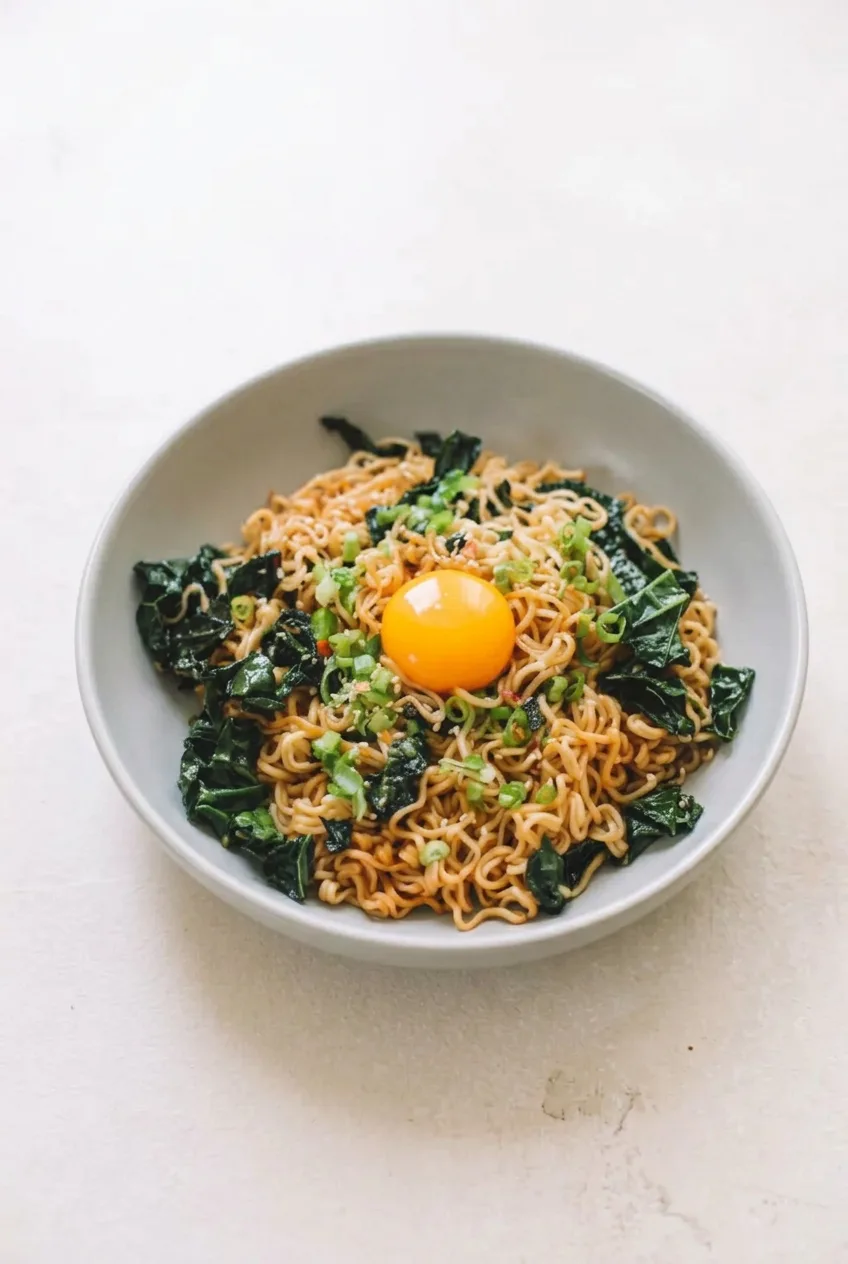
Broad pieces of wilted kale run through the noodles, while an intact golden yolk, scallions, and a light scattering of sesame seeds finish each portion. The yolk is added uncooked, so use pasteurized shell eggs and place it on the noodles just before serving.
Prep: 10 minutes | Cook: 10 minutes | Total: 20 minutes | Yield: 2 bowls

Ingredients for Garlic Butter Ramen Noodles

Close view of glossy garlic butter ramen strands, dark kale, scallions, sesame, and an intact golden yolk
  • 2 packages plain curly ramen noodles, about 3 ounces each (170g total); discard any seasoning packets
  • 3 tablespoons unsalted butter (about 40g)
  • 4 garlic cloves, minced
  • 2 loosely packed cups lacinato kale, stemmed and torn into broad, bite-size pieces (about 60g)
  • 2 tablespoons water, plus a small splash only if needed
  • 1 1/2 tablespoons soy sauce
  • 2 large pasteurized shell eggs, for the yolks only
  • 2 scallions, thinly sliced
  • 1 teaspoon sesame seeds

Optional: a pinch of crushed red pepper flakes for serving. The soy sauce seasons the noodles in place of a ramen packet; taste before adding any extra salt.

How to Make Garlic Butter Ramen Noodles

Full bowl of garlic butter ramen with kale and an intact egg yolk on a light tabletop
  1. Prepare the ingredients: Stem and tear the kale, mince the garlic, and slice the scallions. Keep the pasteurized eggs refrigerated until serving.
  2. Cook and drain the ramen: Bring water to a boil in a medium saucepan. Cook the noodles according to the package directions, without adding any seasoning packet. Start checking at the earliest package time, commonly 2 to 3 minutes; the noodles should be tender but still springy. Drain well in a colander.
  3. Cook the garlic and kale: Melt the butter in a 10- to 12-inch skillet over medium-low heat. Add the garlic and stir frequently, checking after about 1 minute. When it is fragrant and lightly golden, add the kale and 2 tablespoons water. Turn the leaves as they wilt, cooking uncovered until the kale is tender and glossy and most of the water has evaporated, about 4 to 5 minutes total for the garlic and kale.
  4. Coat the noodles: Add the drained ramen and soy sauce to the skillet. Toss gently over medium-low heat for 1 to 2 minutes, until the strands are distinct and glossy. Add only a small splash of water if needed to distribute the sauce; no liquid should pool in the pan.
  5. Finish the bowls: Divide the noodles and kale between two shallow bowls, keeping the greens visible. Carefully separate the yolks from the pasteurized eggs and place one intact yolk near the center of each bowl. Scatter with scallions and sesame seeds, and add red pepper flakes if desired. Serve immediately.

How to Keep the Noodles Glossy, Not Brothy

Drain the ramen thoroughly, and let most of the measured water evaporate after the kale softens. A wide skillet gives the greens room to wilt and makes it easier to toss the noodles without tearing the leaves. If the butter-soy coating needs loosening, add water a small splash at a time rather than pouring in enough to make broth.

Keep the heat at medium-low while the garlic cooks. Add the kale as soon as the garlic turns lightly golden; letting minced garlic become dark brown can make it bitter.

About the Egg Yolk Topping

The yolk remains uncooked; warmth from the noodles does not cook it safely. Use pasteurized shell eggs, separate the yolks carefully, and add them only after plating. If pasteurized shell eggs are unavailable or you are avoiding uncooked eggs, use a fully cooked egg instead. The bowl will look different, but the egg will be cooked.

Variations

Baby spinach can replace kale, though it wilts into smaller leaves. For a more substantial bowl, add separately cooked tofu or meat. For a brothy alternative, try spicy ramen noodles with jammy eggs.

Storing and Reheating

If you expect leftovers, set aside cooked noodles and greens before adding a yolk. Refrigerate them promptly in a covered container. Gently reheat until hot, adding a small splash of water if the noodles need loosening, then add fresh garnishes. Do not store or reheat a bowl with the uncooked yolk already on top. Freezing is not recommended; the noodles are best served fresh.

Nutrition

Approximate nutrition per bowl (half the recipe, about 300g): 625 calories, 14g protein, 37g fat, and 58g carbohydrates. Approximate values per 100g: 205 calories, 5g protein, 12g fat, and 19g carbohydrates. Values vary by ramen brand, water absorbed during cooking, and the amount of sauce left in the pan.

Garlic Butter Ramen Noodles

Curly ramen noodles are tossed with garlic butter, soy sauce, and wilted kale, then topped with a pasteurized egg yolk, scallions, and sesame seeds.
Course: Main Course
Cuisine: Global
Prep: 10 min
Cook: 10 min
Total: 20 min
Servings: 2 Calories: 625 kcal

Equipment

  • Medium saucepan
  • Colander
  • 10- to 12-inch skillet
  • Knife
  • Cutting board

Ingredients

Noodles and Greens

  • 2 packages plain curly ramen noodles, about 3 ounces each (170g total); discard seasoning packets
  • 2 loosely packed cups lacinato kale, stemmed and torn into broad, bite-size pieces (about 60g)
  • 2 tablespoons water, plus a small splash only if needed

Garlic Butter Sauce

  • 3 tablespoons unsalted butter (about 40g)
  • 4 garlic cloves, minced
  • 1 1/2 tablespoons soy sauce

Toppings

  • 2 large pasteurized shell eggs, yolks only
  • 2 scallions, thinly sliced
  • 1 teaspoon sesame seeds
  • Pinch of crushed red pepper flakes, optional

Instructions

  1. Stem and tear the kale, mince the garlic, and slice the scallions. Keep the pasteurized eggs refrigerated until serving.
  2. Bring water to a boil in a medium saucepan. Cook the ramen according to the package directions without adding the seasoning packets; start checking at the earliest package time, commonly 2 to 3 minutes. Drain well.
  3. Melt the butter in a 10- to 12-inch skillet over medium-low heat. Add the garlic and stir frequently until fragrant and lightly golden, checking after about 1 minute.
  4. Add the kale and 2 tablespoons water. Turn the leaves as they wilt and cook uncovered until tender and glossy and most of the water has evaporated, about 4 to 5 minutes total for the garlic and kale.
  5. Add the drained ramen and soy sauce. Toss gently over medium-low heat for 1 to 2 minutes, until the strands are distinct and glossy. Add only a small splash of water if needed to distribute the sauce.
  6. Divide the noodles and kale between two shallow bowls. Carefully separate the yolks from the pasteurized eggs and place one intact yolk near the center of each bowl.
  7. Scatter the scallions and sesame seeds over the bowls. Add red pepper flakes if desired and serve immediately.

Tips

  • Drain the ramen thoroughly so the sauce coats the noodles instead of pooling in the bowl.
  • Use a wide skillet to give the kale room to wilt and make tossing easier.
  • Add the kale as soon as the garlic turns lightly golden; dark brown garlic can taste bitter.
  • Add water a small splash at a time if the sauce needs loosening.
  • Taste before adding salt because the soy sauce seasons the noodles.

Variations

  • Spinach Ramen: Replace the kale with baby spinach, which wilts into smaller leaves.
  • Heartier Ramen: Add separately cooked tofu or meat.
  • Brothy Ramen: Try a brothy version with spicy ramen noodles and jammy eggs.
  • Cooked Egg Topping: Use a fully cooked egg instead of an uncooked yolk.

Notes

The yolks remain uncooked; use pasteurized shell eggs and add them only after plating. For leftovers, refrigerate the noodles and greens without yolks in a covered container, reheat until hot with a splash of water if needed, and add fresh garnishes. Freezing is not recommended.

Nutrition

Calories: 625 kcal | Protein: 14 g | Fat: 37 g | Carbohydrates: 58 g

Spicy Ramen Noodles

These spicy ramen noodles are served in a generous miso-soy broth, not a thick sauce. Browned mushrooms and corn fill the bowls, with jammy egg halves, scallions, sesame seeds and chili oil on top.

Instant ramen keeps the cooking quick, but the seasoning packets stay out. Cook the noodles separately and drain them well so they stay springy without diluting the broth. The recipe makes 2 generous bowls in about 35 minutes.

Ingredients for Spicy Ramen Noodles

Close view of springy ramen noodles, a jammy egg and browned mushrooms in chili-dotted broth
  • 2 large eggs
  • 1 teaspoon neutral oil
  • 5 oz shiitake or cremini mushrooms, sliced (140g)
  • 2 garlic cloves, minced
  • 2 teaspoons grated fresh ginger
  • 4 cups reduced-sodium chicken or vegetable broth
  • 1 tablespoon soy sauce, plus more to taste
  • 1 teaspoon rice vinegar
  • 1 teaspoon brown sugar
  • 3/4 cup corn kernels, thawed if frozen (115g)
  • 1 tablespoon white miso paste
  • 1 to 2 tablespoons chili oil, divided
  • 2 packages instant ramen noodles, about 3 oz each (170g total); discard the seasoning packets
  • 2 scallions, thinly sliced
  • 1 teaspoon sesame seeds

How to Make Spicy Ramen Noodles

Complete bowl of spicy ramen noodles with eggs, mushrooms and corn on a dark tabletop
  1. Prepare the toppings: Slice the mushrooms and scallions, measure the corn and set out two deep serving bowls. Bring a saucepan of water to a boil and prepare a bowl of ice water.
  2. Cook the eggs: Gently lower the eggs into the water and maintain a gentle boil for about 7 minutes. Transfer them immediately to the ice water. Once cool enough to handle, peel and halve them. The whites should be set and the yolks soft and glossy; egg size and starting temperature can affect the timing.
  3. Brown the mushrooms: Heat the oil in a 3- to 4-quart soup pot over medium heat. Add the mushrooms and cook for 5 to 6 minutes, stirring occasionally, until tender with browned edges.
  4. Make the broth: Stir the garlic and ginger into the mushrooms for about 30 seconds, stirring constantly. Promptly add the broth, soy sauce, vinegar and sugar. Bring to a gentle simmer, add the corn and cook uncovered until the corn is hot. Whisk the miso with a little hot broth in a small bowl until smooth, then stir it into the pot with about 2 teaspoons chili oil. Keep the broth at a gentle simmer, not a hard boil, and taste before adding more soy sauce or chili oil.
  5. Cook the noodles: Bring fresh water to a boil in the egg saucepan, using enough to submerge both ramen blocks. Add the noodles without their seasoning packets and gently separate the strands. Check about 1 minute before the package’s stated cook time; the noodles should be springy and just shy of fully soft. Drain thoroughly.
  6. Assemble the bowls: Divide the noodles between the bowls and ladle over the hot broth, mushrooms and corn, leaving broth visible around the noodles. Place two egg halves on each bowl, then add the scallions and sesame seeds. Dot with the remaining chili oil to taste and serve immediately.

How to Keep the Noodles Springy

Ramen continues to soften in hot broth. Have the eggs and garnishes ready before cooking the noodles, then drain and assemble them at the last minute. Cooking the noodles separately also keeps their starchy cooking water from weakening the seasoned broth.

Adjusting the Spice and Salt

Chili oils vary in heat. Start with about 2 teaspoons in the pot, then add more to individual bowls after tasting. Miso and soy sauce both contribute salt, so use reduced-sodium broth and taste before adding extra soy sauce.

For a meat-free bowl, use vegetable broth. If desired, warm 4 to 6 oz cooked tofu briefly in the finished broth without replacing the eggs, mushrooms or corn.

Make-Ahead and Leftovers

Prepare the broth and eggs ahead, then cook the noodles when ready to serve. Refrigerate leftover broth, noodles and eggs in separate airtight containers for up to 2 to 3 days.

Gently reheat the broth until hot on the stovetop or in the microwave, then assemble the bowls. Freshly cooked noodles have the best texture; noodles stored in broth absorb it and soften.

Nutrition

Approximate nutrition per generous bowl, based on 2 servings and 1 tablespoon chili oil total: 675 calories, 22g protein, 30g fat and 74g carbohydrates. Approximate values per 100g of prepared ramen: 80 calories, 3g protein, 4g fat and 9g carbohydrates. Values vary with the noodles, broth, chili oil and amount of broth served in each bowl.

Spicy Ramen Noodles

Instant ramen noodles are served in a savory miso-soy broth with mushrooms, corn, jammy eggs, scallions, sesame seeds and chili oil.
Course: Soup
Cuisine: Japanese
Prep: 15 min
Cook: 20 min
Total: 35 min
Servings: 2 Calories: 675 kcal

Equipment

  • Saucepan
  • 3- to 4-quart soup pot
  • Small bowl
  • Whisk
  • Deep serving bowls

Ingredients

  • 2 large eggs
  • 1 teaspoon neutral oil
  • 5 oz shiitake or cremini mushrooms, sliced (140g)
  • 2 garlic cloves, minced
  • 2 teaspoons grated fresh ginger
  • 4 cups reduced-sodium chicken or vegetable broth
  • 1 tablespoon soy sauce, plus more to taste
  • 1 teaspoon rice vinegar
  • 1 teaspoon brown sugar
  • 3/4 cup corn kernels, thawed if frozen (115g)
  • 1 tablespoon white miso paste
  • 1 to 2 tablespoons chili oil, divided
  • 2 packages instant ramen noodles, about 3 oz each (170g total), seasoning packets discarded
  • 2 scallions, thinly sliced
  • 1 teaspoon sesame seeds

Instructions

  1. Slice the mushrooms and scallions, measure the corn, and set out two deep serving bowls.
  2. Bring a saucepan of water to a boil and prepare a bowl of ice water.
  3. Gently lower the eggs into the boiling water and cook at a gentle boil for about 7 minutes.
  4. Transfer the eggs to the ice water. When cool enough to handle, peel and halve them.
  5. Heat the neutral oil in a 3- to 4-quart soup pot over medium heat.
  6. Add the mushrooms and cook for 5 to 6 minutes, stirring occasionally, until tender with browned edges.
  7. Add the garlic and ginger and stir constantly for about 30 seconds.
  8. Add the broth, soy sauce, rice vinegar and brown sugar. Bring to a gentle simmer.
  9. Add the corn and cook uncovered until hot.
  10. Whisk the miso with a little hot broth in a small bowl until smooth, then stir it into the pot with about 2 teaspoons chili oil.
  11. Keep the broth at a gentle simmer. Taste and add more soy sauce or chili oil if desired.
  12. Bring fresh water to a boil in the saucepan. Add the ramen noodles without their seasoning packets and gently separate the strands.
  13. Check the noodles about 1 minute before the package’s stated cook time; drain them when springy and just shy of fully soft.
  14. Divide the noodles between the bowls and ladle over the broth, mushrooms and corn.
  15. Top each bowl with two egg halves, scallions and sesame seeds. Add remaining chili oil to taste and serve immediately.

Tips

  • Cook the noodles separately and drain them thoroughly so their cooking water does not dilute the broth.
  • Have the eggs and garnishes ready before cooking the noodles, which continue softening in hot broth.
  • Keep the broth at a gentle simmer rather than a hard boil after adding the miso.
  • Start with about 2 teaspoons of chili oil in the pot and add more to individual bowls after tasting.
  • Taste before adding extra soy sauce because the miso and soy sauce both contribute salt.

Variations

  • Meat-Free Ramen: Use vegetable broth instead of chicken broth.
  • Ramen with Tofu: Warm 4 to 6 oz cooked tofu briefly in the finished broth; keep the eggs, mushrooms and corn.

Notes

Refrigerate leftover broth, noodles and eggs separately in airtight containers for 2 to 3 days. Reheat the broth until hot before assembling; noodles stored in broth will soften. Nutrition per 100g is approximately 80 calories, 3g protein, 4g fat and 9g carbohydrates.

Nutrition

Calories: 675 kcal | Protein: 22 g | Fat: 30 g | Carbohydrates: 74 g

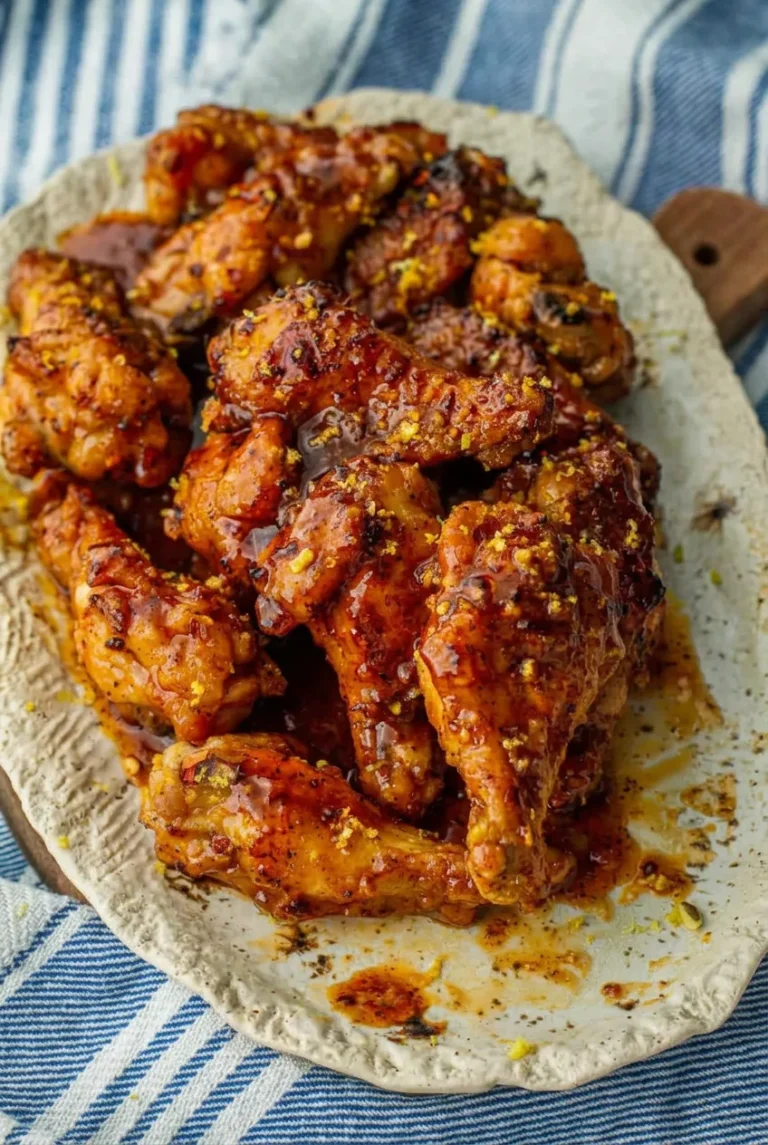
Hot Honey Lemon Pepper Wings

These lemon-pepper-seasoned flats and drumettes brown in the air fryer before they meet a warm honey, hot sauce, butter, and lemon glaze. A light coating of cornstarch and baking powder helps the skin brown without creating a breaded crust. Toss the wings with sauce just before serving, then scatter fresh lemon zest over the glossy pile. The glaze will soften the skin over time, so these wings are best served promptly.

Ingredients for Hot Honey Lemon Pepper Wings

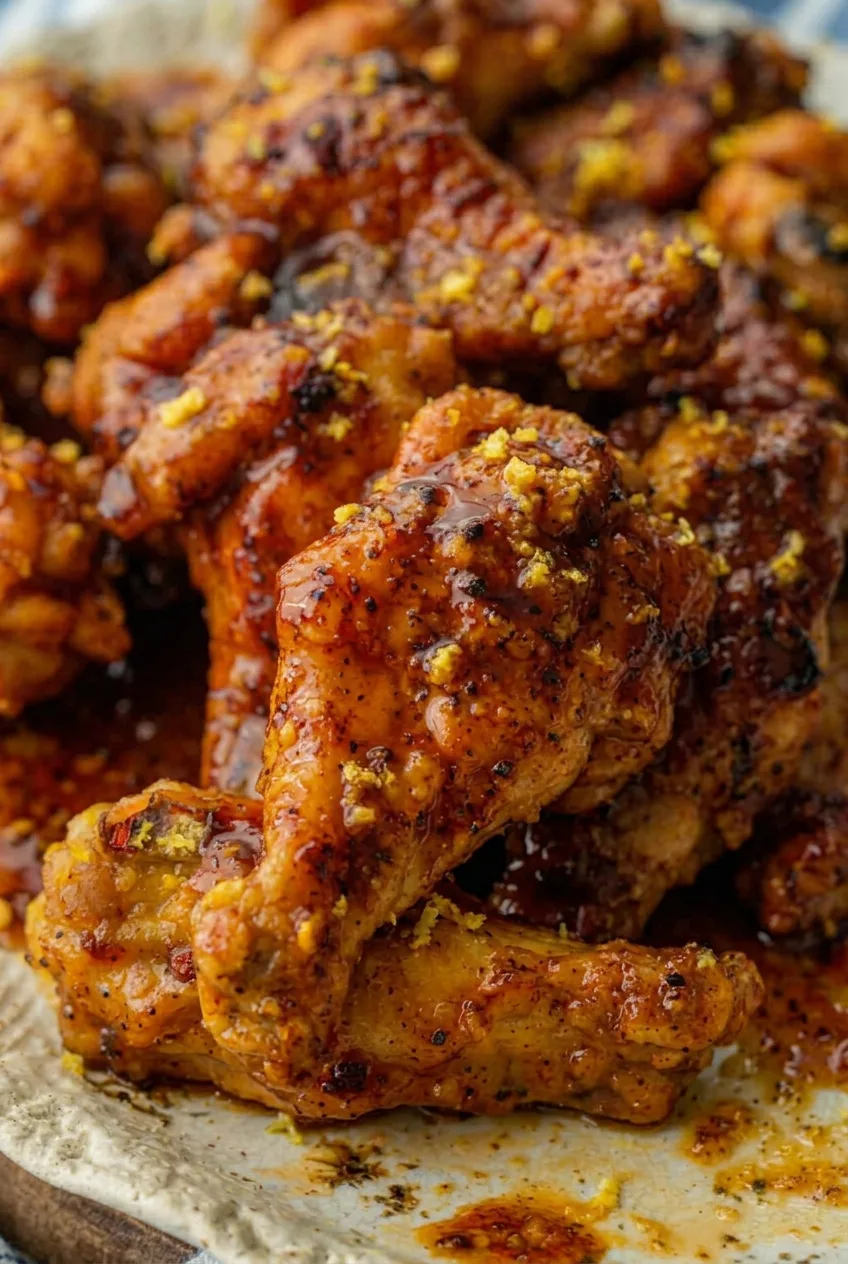
Close view of glazed wing skin with browned edges, lemon pepper flecks, and fresh zest

Makes 4 appetizer servings. Prep time: 15 minutes. Cook time: 20–25 minutes per air-fryer batch. Total time: about 40 minutes if the wings fit in one batch; allow longer for additional batches.

  • 2 pounds chicken wing sections, flats and drumettes (900g)
  • 1 tablespoon neutral oil
  • 2 teaspoons lemon pepper seasoning
  • 2 teaspoons cornstarch
  • 1 teaspoon aluminum-free baking powder, not baking soda
  • 1/3 cup honey (115g)
  • 2 tablespoons hot sauce
  • 2 tablespoons unsalted butter (30g)
  • 1 small garlic clove, finely minced
  • 1 medium lemon, for 1 tablespoon juice and about 2 teaspoons finely grated zest
  • Optional: a pinch of crushed red pepper flakes for more heat

Check whether the lemon pepper seasoning contains salt before adding any separately. Hot sauces also vary in saltiness and heat.

How to Make Hot Honey Lemon Pepper Wings

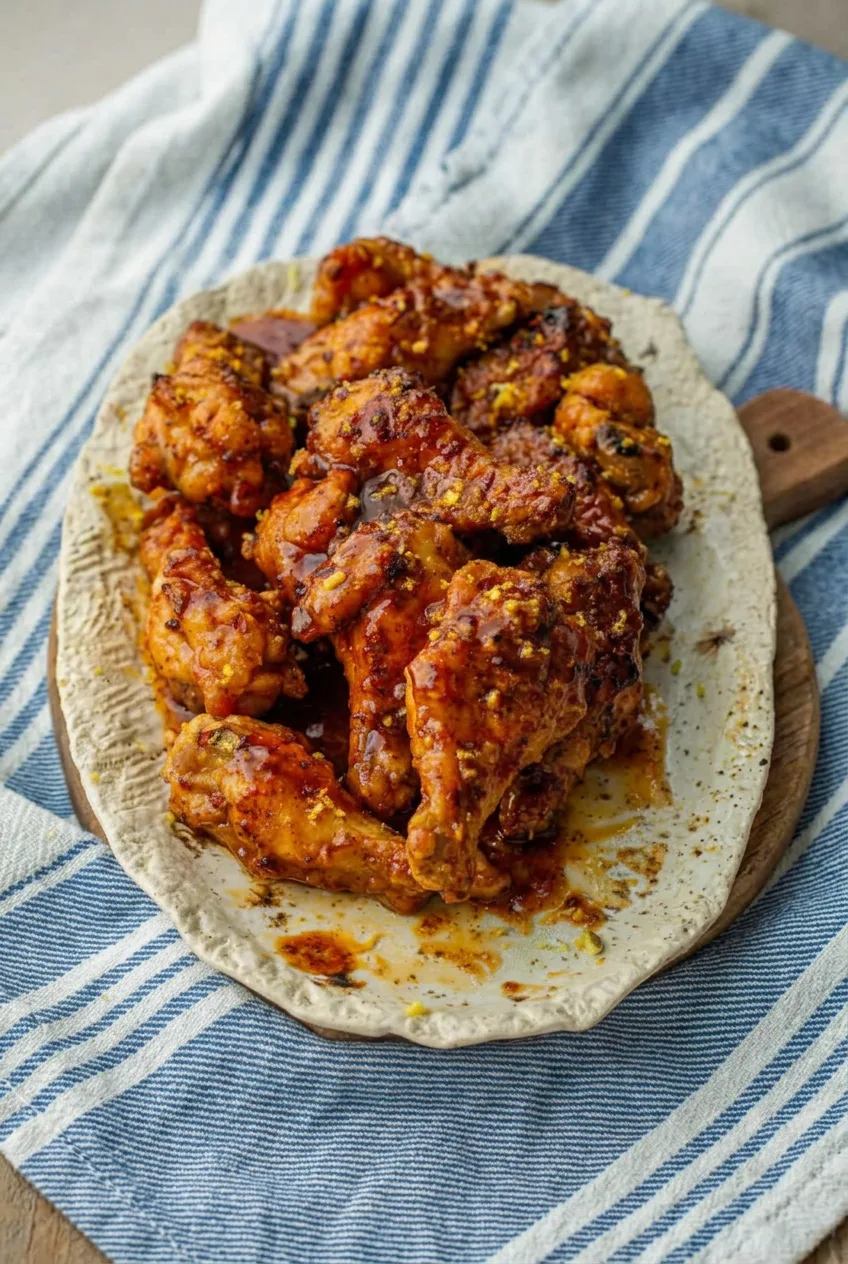
Full platter of glazed hot honey lemon pepper wings on blue-and-white striped fabric
  1. Dry and season: Pat the wings thoroughly dry with paper towels. Toss with the oil, then add the lemon pepper, cornstarch, and baking powder. Toss until lightly and evenly coated, with no powdery clumps.
  2. Air fry: Preheat the air fryer to 375°F (190°C) if your appliance recommends it. Arrange the wings in a spaced, single layer, working in batches rather than stacking them. Lightly oil the basket if sticking is a concern. Air fry for 10 minutes, flip, then cook for about 10–15 minutes more. Begin checking around 20 minutes, or sooner for small wings or an air fryer that runs hot. Before glazing, the skin should be browned and lightly crisp, and a thick section should reach at least 165°F (75°C) on an instant-read thermometer without touching bone. An unpreheated air fryer may need more time.
  3. Warm the glaze: While the wings cook, combine the honey, hot sauce, butter, and garlic in a small saucepan over low heat. Stir until smooth, then let the sauce bubble gently for 2–3 minutes, stirring often. It should lightly coat a spoon but still flow easily. Remove from the heat and stir in the lemon juice and half the zest. Taste before adding the optional pepper flakes.
  4. Glaze and serve: Toss the hot wings with enough warm glaze to coat them generously. Pile the separate flats and drumettes on a platter, spoon over more glaze as needed, and scatter the reserved zest on top. Serve promptly.

Browning and Air-Fryer Batch Size

Dry skin and space around each wing let moisture escape so the surfaces brown instead of steam. The thin seasoning coating supports browning without hiding the skin beneath a thick crust. Wait until the wings are browned before adding the honey glaze; saucing them earlier makes it harder for the skin to brown.

The 20–25-minute cooking range applies per batch. Whether 2 pounds fits in one batch depends on the usable area of your air fryer. If the wings look pale at 20 minutes, keep cooking and check both their color and internal temperature before glazing.

Serving and Other Wing Options

Serve the wings hot as an appetizer, or pair them with macaroni and cheese or a crisp side salad for a meal. For a wing without a wet glaze, try these air fryer Cajun dry rub chicken wings. These chipotle honey chicken wings are a separate oven-roasted option.

Make-Ahead, Storage, and Reheating

Season raw wings up to one day ahead and keep them refrigerated. For better make-ahead texture, refrigerate cooked wings without glaze for 1–2 days, then reheat and toss with warm glaze shortly before serving.
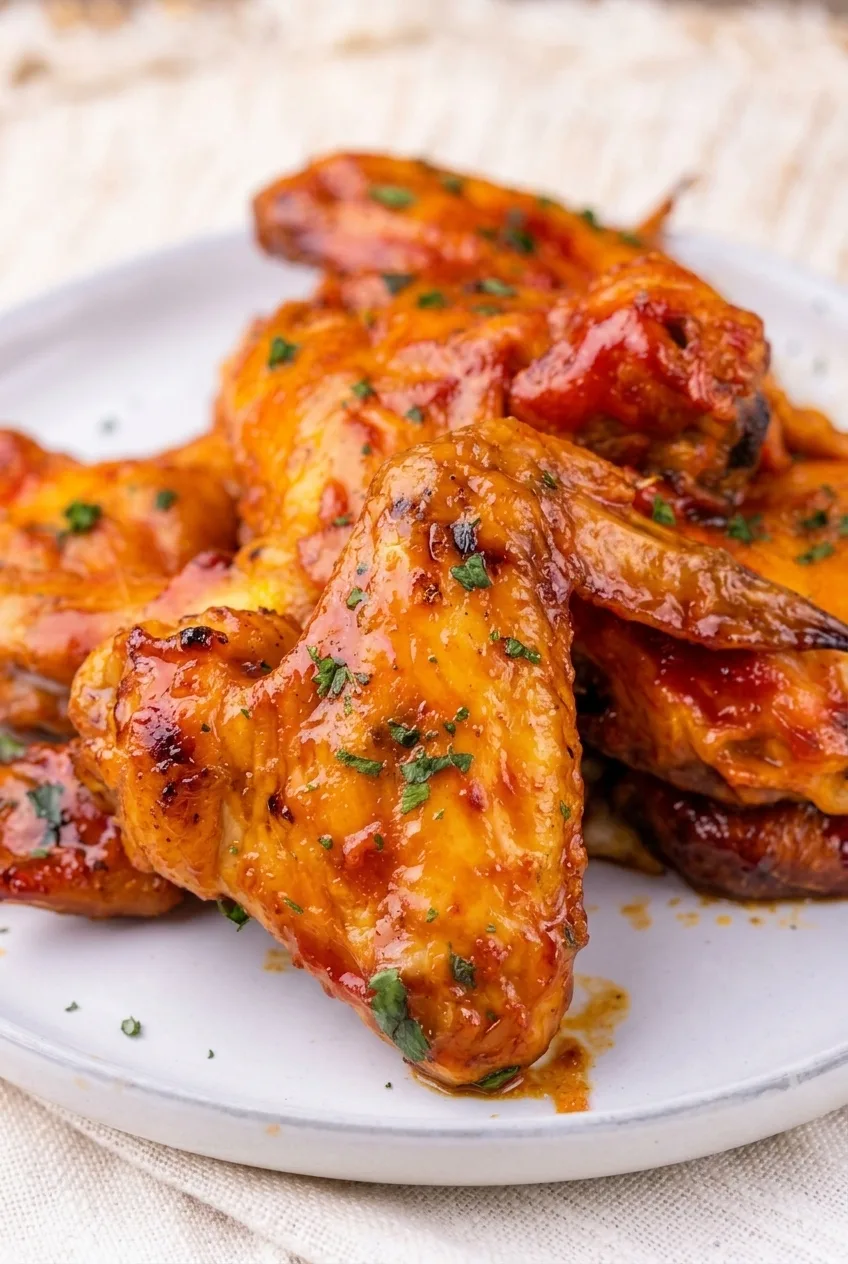
Refrigerate leftover cooked wings in an airtight container for up to 4 days. Reheat refrigerated wings in the air fryer for approximately 5–7 minutes, checking that they are thoroughly hot. Already-glazed wings will be stickier and less crisp. Freezing cooked wings for up to 3 months is an option, though the coating may soften after thawing and reheating.

Nutrition

Approximate nutrition per appetizer serving, based on 4 servings: 500 calories, 30g protein, 34g fat, and 27g carbohydrates. Approximate values per 100g of edible finished wings: 300 calories, 18g protein, 20g fat, and 16g carbohydrates. Values vary with wing size, the amount of edible meat, and how much glaze is served.

Hot Honey Lemon Pepper Wings

Air-fried lemon pepper wings are tossed in a warm honey, hot sauce, butter, and lemon glaze.
Course: Appetizer
Cuisine: American
Prep: 15 min
Cook: 25 min
Total: 40 min
Servings: 4 Calories: 500 kcal

Equipment

  • Air fryer
  • Small saucepan
  • Instant-read thermometer

Ingredients

For the Wings

  • 2 pounds chicken wing sections, flats and drumettes (900g)
  • 1 tablespoon neutral oil
  • 2 teaspoons lemon pepper seasoning
  • 2 teaspoons cornstarch
  • 1 teaspoon aluminum-free baking powder, not baking soda

For the Glaze

  • 1/3 cup honey (115g)
  • 2 tablespoons hot sauce
  • 2 tablespoons unsalted butter (30g)
  • 1 small garlic clove, finely minced
  • 1 medium lemon, for 1 tablespoon juice and about 2 teaspoons finely grated zest
  • Optional: a pinch of crushed red pepper flakes

Instructions

  1. Pat the wings thoroughly dry with paper towels.
  2. Toss the wings with the oil. Add the lemon pepper seasoning, cornstarch, and baking powder, and toss until evenly coated without powdery clumps.
  3. Preheat the air fryer to 375°F (190°C) if your appliance recommends it. Arrange the wings in a spaced single layer, working in batches as needed. Lightly oil the basket if sticking is a concern.
  4. Air fry for 10 minutes, then flip the wings and cook for about 10–15 minutes more. Begin checking around 20 minutes. Before glazing, make sure the skin is browned and lightly crisp and the thickest section reaches at least 165°F (75°C) on an instant-read thermometer without touching bone.
  5. While the wings cook, combine the honey, hot sauce, butter, and garlic in a small saucepan over low heat. Stir until smooth, then let the sauce bubble gently for 2–3 minutes, stirring often.
  6. Remove the glaze from the heat and stir in the lemon juice and half the zest. Taste and add optional red pepper flakes if desired.
  7. Toss the hot wings with enough warm glaze to coat them generously. Serve promptly with more glaze as needed and the reserved lemon zest scattered on top.

Tips

  • Dry the wings thoroughly so their surfaces brown instead of steam.
  • Arrange wings in a spaced single layer; cook in batches rather than stacking them.
  • Wait until the wings are browned before adding the honey glaze.
  • Check that the thickest section reaches at least 165°F (75°C) before glazing.
  • Check the salt level of the lemon pepper seasoning and hot sauce before adding any extra salt.

Variations

  • Extra-Hot Wings: Add a pinch of crushed red pepper flakes to the glaze for more heat.

Notes

Cook time is 20–25 minutes per air-fryer batch; additional batches will increase total time. Refrigerate leftovers in an airtight container for up to 4 days and reheat in the air fryer for approximately 5–7 minutes. Cooked wings can be frozen for up to 3 months, though the coating may soften.

Nutrition

Calories: 500 kcal | Protein: 30 g | Fat: 34 g | Carbohydrates: 27 g | Per 100g Calories: 300 kcal | Per 100g Protein: 18 g | Per 100g Fat: 20 g | Per 100g Carbohydrates: 16 g

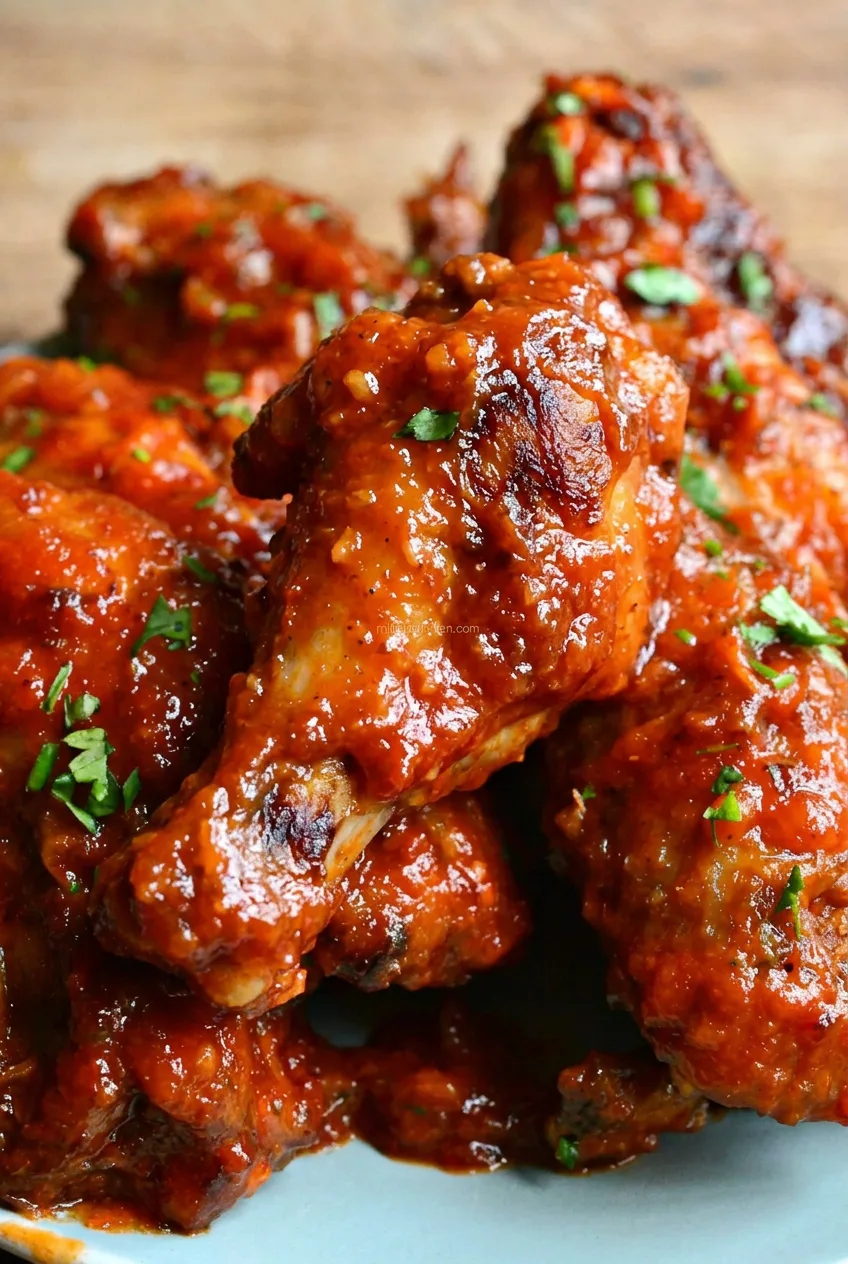
Pineapple BBQ Chicken Wings

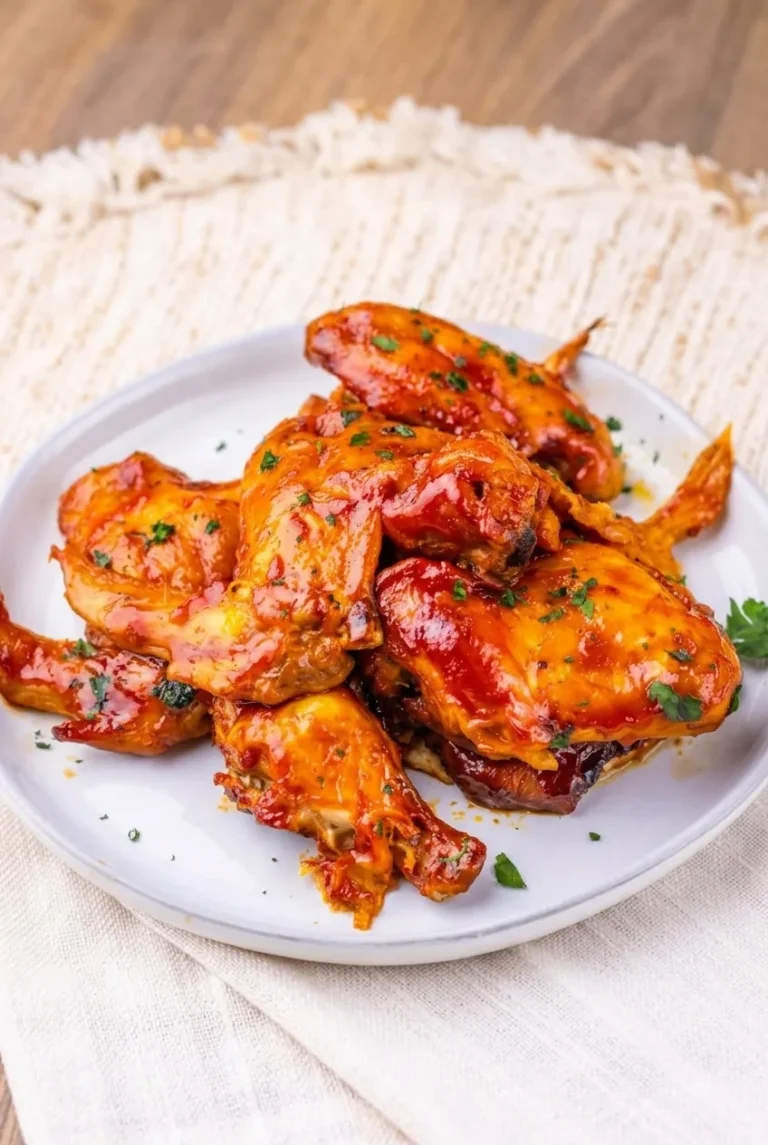
These oven-baked whole wings are coated in a thick, glossy pineapple barbecue glaze. Pineapple juice flavors the sauce without leaving fruit chunks on the wings. Baking the chicken before glazing gives the skin time to brown and keeps the sweet sauce from darkening before the wings cook through.

Prep: 15 minutes | Cook: 50–60 minutes | Total: About 1 hour 5 minutes to 1 hour 15 minutes | Serves: 4 as a main dish or 6 as an appetizer

Ingredients for Pineapple BBQ Chicken Wings

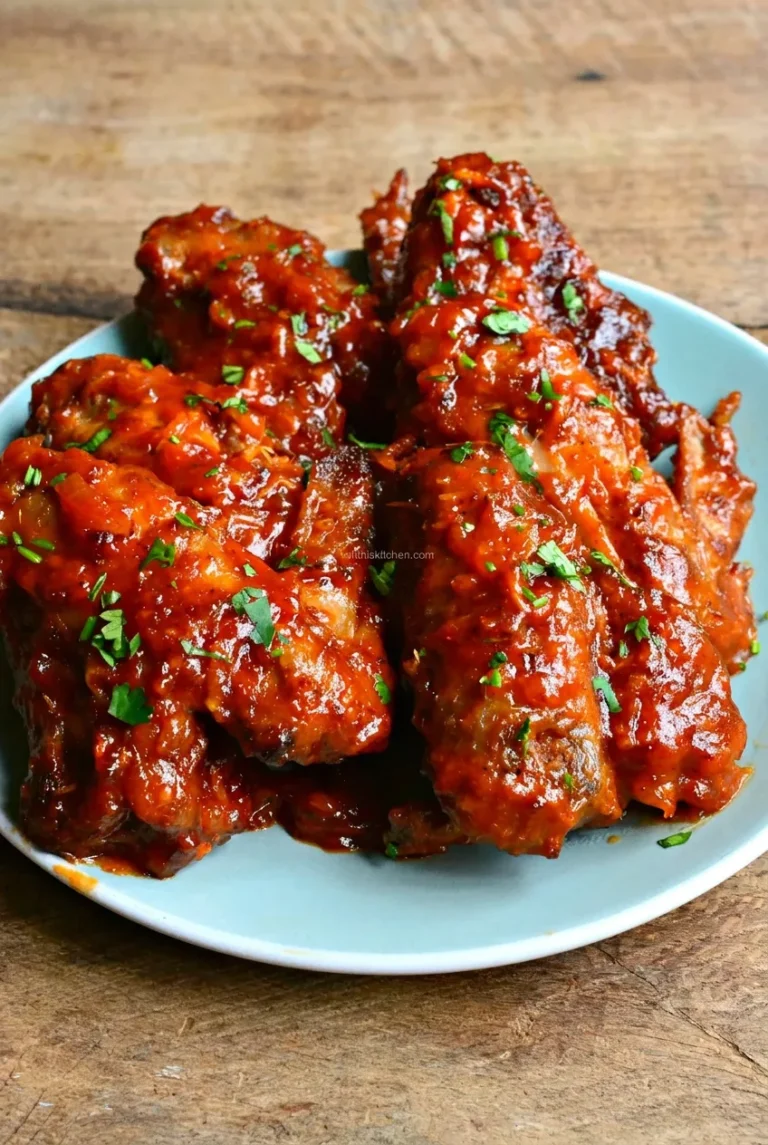
Full plate of glazed pineapple BBQ chicken wings on a rustic table
  • 2 1/2 pounds whole chicken wings, about 6–8 depending on size (1,150g)
  • 3/4 teaspoon kosher salt, adjusted to taste depending on the barbecue sauce
  • 1/2 teaspoon black pepper
  • 1 cup prepared barbecue sauce (280g)
  • 1/4 cup unsweetened pineapple juice
  • 2 tablespoons chopped cilantro

Optional: Add 1–2 teaspoons hot sauce to the glaze for a sweet-hot finish. A thin barbecue sauce may need a little longer on the stove to thicken.

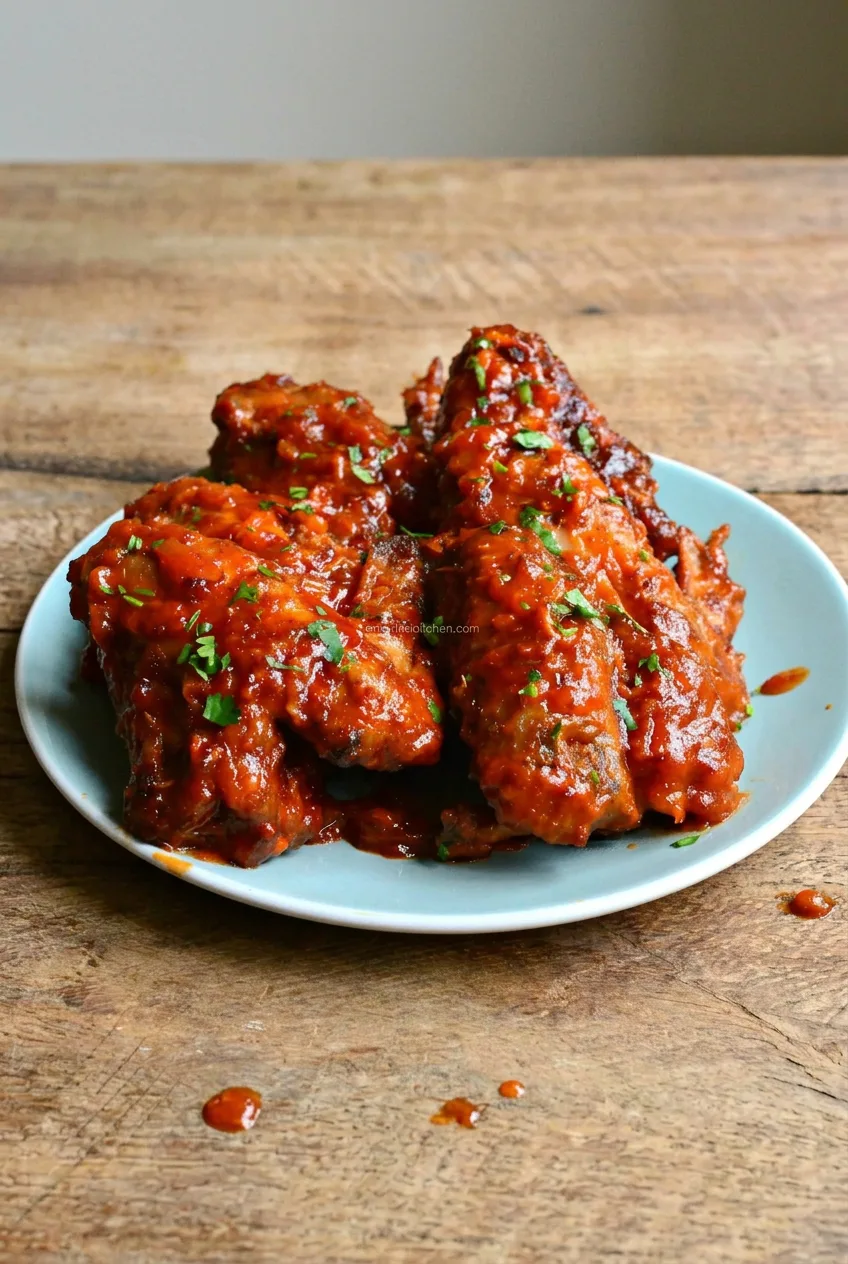
Close view of thick pineapple BBQ glaze clinging to a browned whole chicken wing

How to Bake Pineapple BBQ Chicken Wings

  1. Prepare the oven and pan: Preheat the oven to 400°F (205°C). Set a lightly oiled wire rack over a rimmed baking sheet.
  2. Season the wings: Pat the wings dry and season with salt and pepper. Arrange them in a single layer with space between them, using a second prepared sheet and rack if needed.
  3. Bake before glazing: Bake uncovered for about 40–45 minutes, turning the wings halfway through. Start checking their color and the thickest meaty sections at about 40 minutes. The skin should be browned before the sauce goes on.
  4. Thicken the sauce: While the wings bake, combine the barbecue sauce and pineapple juice in a small saucepan. Simmer gently over medium-low heat for about 5–8 minutes, stirring, until the sauce coats the back of a spoon but still spreads easily. Stir in the hot sauce, if using.
  5. Glaze and finish: Brush or toss the wings with the sauce, turning them as needed for generous coverage. Return them to the rack and bake for about 10–15 minutes more, until the glaze is shiny and clingy. Watch for overly dark patches. Check the thickest meaty part of a wing without touching bone; the chicken must reach at least 165°F (75°C).
  6. Rest and serve: Let the wings stand for about 5 minutes, then pile them on a serving plate and scatter the cilantro lightly over the top.

How to Keep the Pineapple BBQ Glaze on the Wings

Pineapple juice thins barbecue sauce, so simmer the two together before glazing. The sauce should coat a spoon rather than run straight off it; if it still looks watery, let it simmer a little longer. Adding the glaze after the wings have browned gives it a short time to set in the oven. If the sauce starts getting too dark, check the chicken’s temperature instead of leaving it in for the full estimated time.

Whole Wings Versus Split Wings

This baking schedule is for whole wings, and larger pieces may take longer than smaller ones. Split flats and drumettes generally cook faster, so begin checking them earlier. In either case, use browning and a thermometer reading in the thickest meat, away from bone, to judge doneness.

Serving and Storing Leftovers

Serve the wings with rice, or with celery, carrots, and ranch dressing. Pineapple chunks can be offered separately rather than piled over the glaze. For a different sticky finish, try sticky sesame chicken wings.

Refrigerate leftover cooked wings promptly in a covered container. Reheat them thoroughly; the sauce will remain sticky, but the skin will be softer than when freshly cooked.

Nutrition

Approximate nutrition per serving, based on 4 main-dish servings: 460 calories, 30g protein, 23g fat, and 34g carbohydrates. Approximate values per 100g of edible finished wings and sauce: 235 calories, 15g protein, 12g fat, and 17g carbohydrates. Estimates exclude the bones and vary with wing size, barbecue sauce, and how much glaze is eaten.

Pineapple BBQ Chicken Wings

Whole chicken wings are baked until browned, then finished with a thick pineapple barbecue glaze.
Course: Main Course
Cuisine: American
Prep: 15 min
Cook: 55 min
Total: 75 min
Servings: 4 Calories: 460 kcal

Equipment

  • Rimmed baking sheet
  • Wire rack
  • Small saucepan
  • Pastry brush

Ingredients

For the Wings

  • 2 1/2 pounds whole chicken wings, about 6–8 depending on size (1,150 g)
  • 3/4 teaspoon kosher salt, adjusted to taste depending on the barbecue sauce
  • 1/2 teaspoon black pepper

For the Glaze

  • 1 cup prepared barbecue sauce (280 g)
  • 1/4 cup unsweetened pineapple juice
  • 1–2 teaspoons hot sauce (optional)

For Serving

  • 2 tablespoons chopped cilantro

Instructions

  1. Preheat the oven to 400°F (205°C). Set a lightly oiled wire rack over a rimmed baking sheet.
  2. Pat the wings dry and season with salt and pepper. Arrange them in a single layer with space between them, using a second prepared rack and sheet if needed.
  3. Bake uncovered for 40–45 minutes, turning halfway through, until the skin is browned. Begin checking the wings at about 40 minutes.
  4. While the wings bake, combine the barbecue sauce and pineapple juice in a small saucepan. Simmer gently over medium-low heat for 5–8 minutes, stirring, until the sauce coats the back of a spoon but still spreads easily. Stir in the hot sauce, if using.
  5. Brush or toss the wings with the glaze, turning them for even coverage. Return them to the rack and bake for 10–15 minutes, until the glaze is shiny and clingy.
  6. Check the thickest meaty part of a wing without touching bone; it must reach at least 165°F (75°C). Watch for overly dark patches.
  7. Rest the wings for about 5 minutes. Arrange on a serving plate and scatter the cilantro over the top.

Tips

  • Pat the wings dry before seasoning to help the skin brown.
  • Simmer the sauce until it coats a spoon so the pineapple juice does not make the glaze runny.
  • Bake the wings until browned before adding the glaze to reduce the chance of the sweet sauce darkening too soon.
  • Start checking split wings earlier, as they generally cook faster than whole wings.
  • Use a thermometer to check the thickest meat away from the bone.

Variations

  • Sweet-Hot Pineapple BBQ Wings: Stir 1–2 teaspoons of hot sauce into the glaze for a sweet-hot finish.

Notes

Refrigerate leftover wings promptly in a covered container and reheat thoroughly. The skin will be softer after reheating. Nutrition estimates exclude bones and vary with the wings, sauce, and amount of glaze eaten.

Nutrition

Calories: 460 kcal | Protein: 30 g | Fat: 23 g | Carbohydrates: 34 g

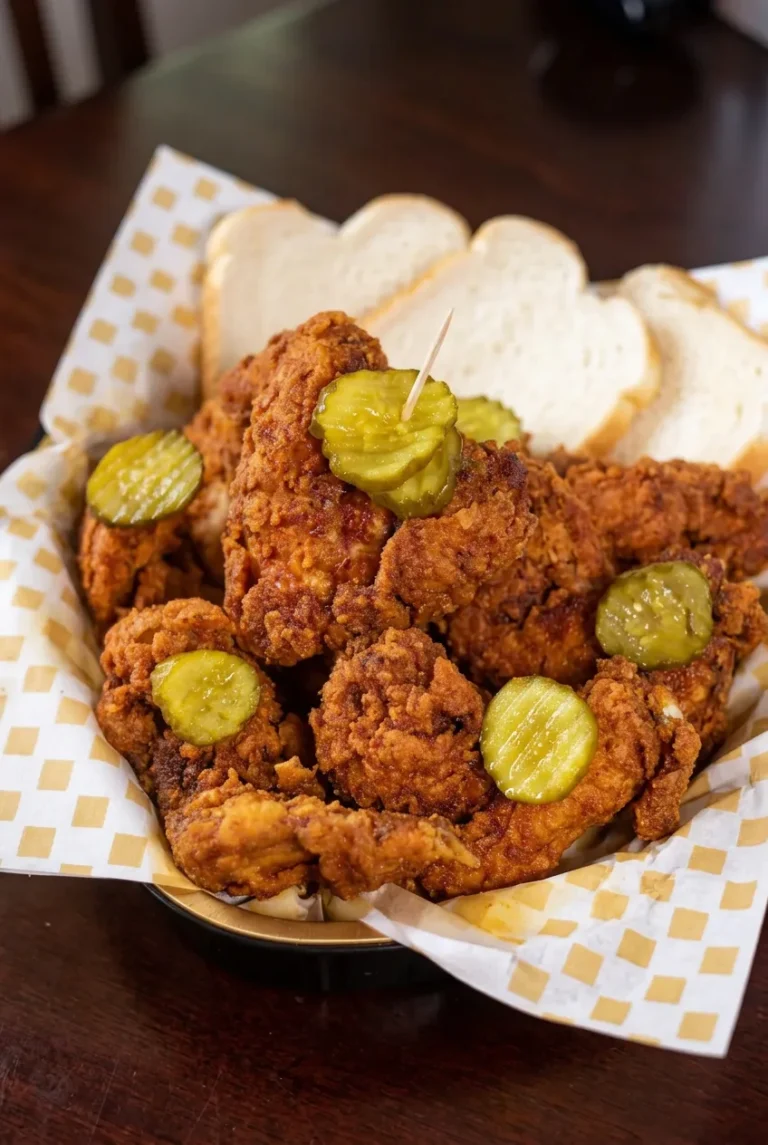
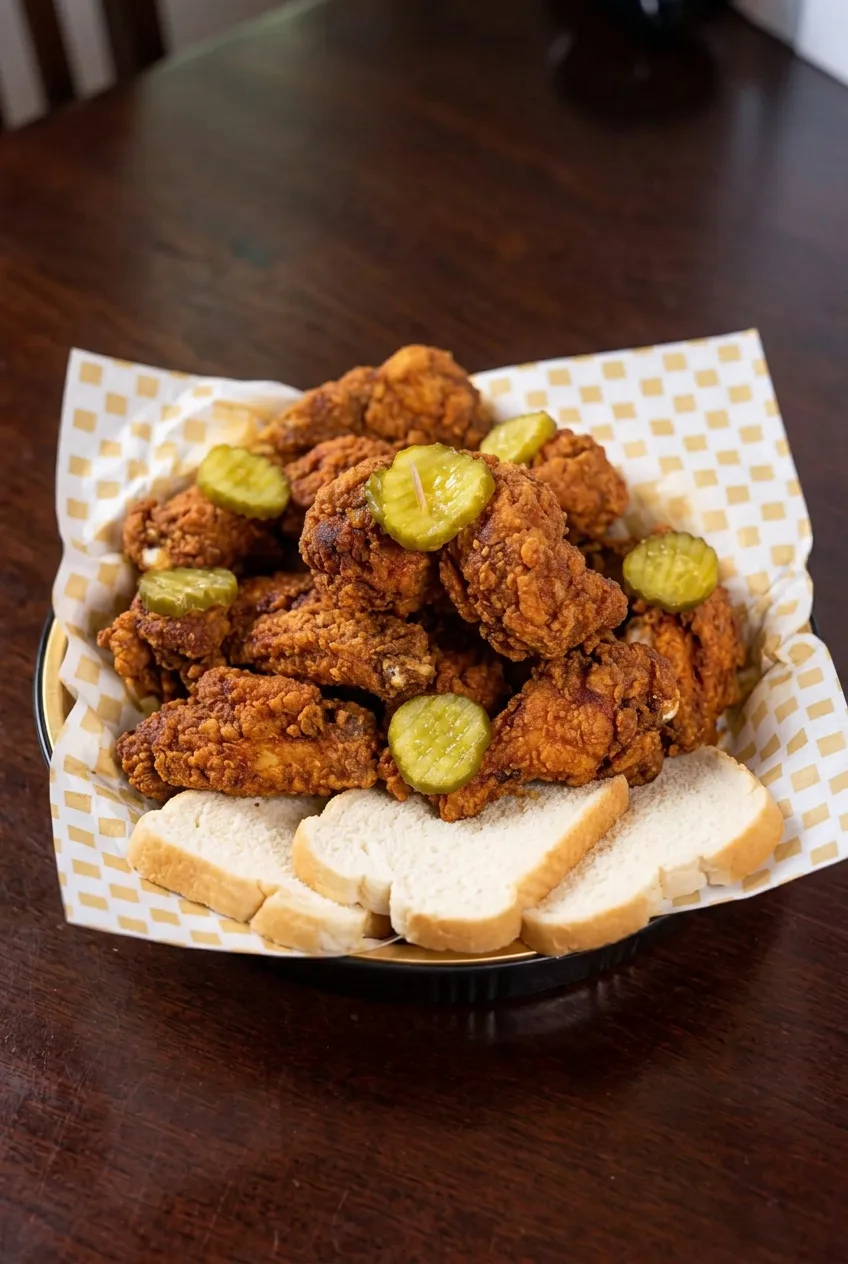
Nashville Hot Chicken Wings

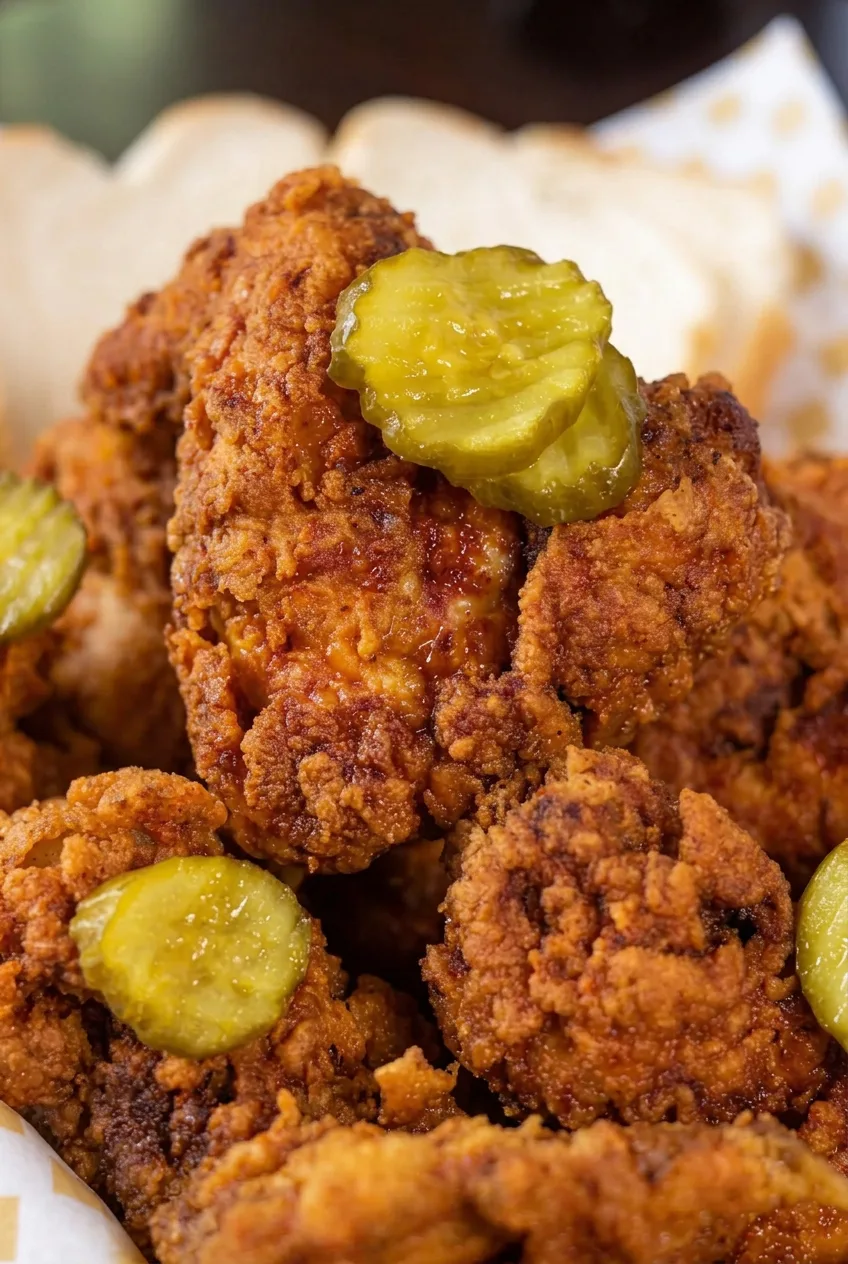
These bone-in drumettes and flats get their craggy crust from a pressed-on flour coating and a rest before frying. After they cook, a thin layer of cayenne-spiced oil is brushed over the ridges rather than tossed with the wings. The result is a reddish finish that leaves the fried coating visible, served with pickle chips on top and soft white bread beneath or beside the pile.

Serves 4. Allow at least 4 hours to marinate, about 25 minutes of active prep, a 10-minute coating rest, and 25 to 35 minutes to fry in batches.

Ingredients for Nashville Hot Chicken Wings

Paper-lined tray of Nashville hot chicken wings, pickle chips and white bread on a dark table

Wings and marinade

  • 2 lb chicken wings, separated into drumettes and flats (900g)
  • 1 cup buttermilk (240g)
  • 1 tablespoon hot sauce
  • 1 1/2 teaspoons coarse kosher salt, divided

Coating and frying

  • 1 1/2 cups all-purpose flour (180g)
  • 1/4 cup cornstarch (30g)
  • 1/2 teaspoon black pepper
  • Neutral high-smoke-point oil, such as canola oil, enough to fill the pot to a depth of about 2 inches

Hot-oil finish and serving

  • 1 tablespoon cayenne pepper
  • 1 tablespoon light brown sugar
  • 1 teaspoon paprika
  • 1/2 teaspoon garlic powder
  • 1/2 teaspoon onion powder
  • About 1/2 cup pickle chips (75g)
  • 4 slices soft white sandwich bread (100g)

The hot-oil finish uses 1/3 cup of the frying oil after the wings are cooked; no separate sauce oil is needed. The salt amount assumes coarse kosher salt, not fine table salt.

Close view of reddish, crisp breading on a Nashville hot chicken wing topped with a pickle chip

How to Fry Nashville Hot Chicken Wings

  1. Marinate the wings: Stir together the buttermilk, hot sauce, and 1/2 teaspoon kosher salt. Add the wings, coat them, and refrigerate for at least 4 hours or overnight.
  2. Coat the wings: Whisk the flour, cornstarch, black pepper, and remaining 1 teaspoon salt in a bowl. Let excess marinade drip off each wing, then press it firmly into the flour mixture. Work the coating into irregular ridges and cover any bare patches.
  3. Rest the coating and heat the oil: Set the coated wings on a wire rack for about 10 minutes so the dredge can adhere. Meanwhile, heat about 2 inches of oil in a deep, heavy pot to 350°F (175°C). Keep the oil well below the rim.
  4. Fry in batches: Carefully lower a few wings into the oil, leaving room around each piece. Fry uncovered, turning gently as needed. Start checking the first batch at about 8 minutes. Most batches take 8 to 10 minutes, but large wings may need longer. The crust should be crisp and deep golden brown, and the thickest part of the largest wings should reach at least 165°F (75°C) without the thermometer touching bone. Let the oil return near 350°F before adding the next batch.
  5. Drain and reserve oil: Transfer cooked wings to a clean wire rack set over a baking sheet. Let excess oil drip off for 2 to 3 minutes. Carefully measure 1/3 cup of warm frying oil for the finish, leaving dark crumbs behind.
  6. Mix the hot oil: Combine the cayenne, brown sugar, paprika, garlic powder, and onion powder in a small heatproof bowl. If the measured oil is smoking or extremely hot, let it cool briefly. Carefully whisk it into the spices until evenly mixed.
  7. Brush and serve: Brush or spoon a thin layer of seasoned oil over the hot wings, reaching the crust’s ridges without soaking them. Pile the wings onto a paper-lined tray with the white bread visible beneath or beside them. Place pickle chips on several wings and serve warm.

How to Keep the Crust Craggy

Let excess buttermilk drip off before dredging: the wings should be damp enough to hold flour, but not covered in a slick layer of marinade. Press the coating on firmly, then give it 10 minutes to adhere before frying.

Drain fried wings on a rack so steam does not collect underneath. Brush the spiced oil on gently rather than tossing the wings; a thin coat colors the crust without breaking its ridges. For another approach to fried-wing coating, see these crispy fried chicken wings.

Frying Temperature and Doneness

Small batches help the oil stay near 350°F. If it drops too far, the coating can turn greasy; if the crust darkens before the chicken reaches 165°F, check the oil temperature and keep frying until the thickest pieces are cooked through. Wing size and oil-temperature recovery affect the time, so do not rely on crust color alone.

For less heat, replace up to 2 teaspoons of the cayenne with additional paprika. Keep some cayenne for the hot-oil finish.

Serving and Reheating

Keep the pickle chips on top of the wings and the soft white bread visible when serving. Ranch dressing can be offered separately as an optional cooling dip.

Refrigerate leftover wings promptly in an airtight container for up to 3 days; store extra pickles and bread separately. Reheat the wings on a baking sheet in a 375°F (190°C) oven until hot throughout. The crust will not be as crisp as it was fresh from the fryer.

Nutrition

Approximate nutrition per serving (1/4 of the recipe, including bread and pickles): 780 calories, 32g protein, 50g fat, and 47g carbohydrates. Approximate values per 100g: 290 calories, 12g protein, 19g fat, and 17g carbohydrates. These are estimates; the amount of coating and frying oil retained by the wings can vary.

Nashville Hot Chicken Wings

Crispy fried wings are brushed with cayenne-spiced oil and served with pickle chips and soft white bread.
Course: Appetizer
Cuisine: American
Prep: 25 min
Cook: 30 min
Total: 305 min
Servings: 4 Calories: 780 kcal

Equipment

  • Deep heavy pot
  • Wire rack
  • Baking sheet
  • Kitchen thermometer
  • Heatproof bowl

Ingredients

Wings and Marinade

  • 2 lb chicken wings, separated into drumettes and flats (900 g)
  • 1 cup buttermilk (240 g)
  • 1 tablespoon hot sauce
  • 1 1/2 teaspoons coarse kosher salt, divided

Coating and Frying

  • 1 1/2 cups all-purpose flour (180 g)
  • 1/4 cup cornstarch (30 g)
  • 1/2 teaspoon black pepper
  • Neutral high-smoke-point oil, such as canola oil, enough to fill the pot to a depth of about 2 inches

Hot-Oil Finish and Serving

  • 1 tablespoon cayenne pepper
  • 1 tablespoon light brown sugar
  • 1 teaspoon paprika
  • 1/2 teaspoon garlic powder
  • 1/2 teaspoon onion powder
  • 1/3 cup warm frying oil, reserved after frying
  • About 1/2 cup pickle chips (75 g)
  • 4 slices soft white sandwich bread (100 g)

Instructions

  1. Stir together the buttermilk, hot sauce, and 1/2 teaspoon kosher salt. Add the wings and coat them in the marinade.
  2. Cover and refrigerate the wings for at least 4 hours or overnight.
  3. Whisk together the flour, cornstarch, black pepper, and remaining 1 teaspoon salt.
  4. Let excess marinade drip off each wing, then press the wing firmly into the flour mixture. Work the coating into ridges and cover any bare patches.
  5. Set the coated wings on a wire rack and let them rest for about 10 minutes.
  6. Meanwhile, heat about 2 inches of oil in a deep, heavy pot to 350°F (175°C), keeping the oil well below the rim.
  7. Fry the wings in small batches, leaving room around each piece. Fry uncovered, turning gently as needed, for about 8 to 10 minutes per batch.
  8. Check that the crust is crisp and deep golden brown and that the thickest part of the largest wings reaches at least 165°F (75°C), without the thermometer touching bone. Let the oil return near 350°F (175°C) before frying another batch.
  9. Transfer the cooked wings to a clean wire rack set over a baking sheet and let them drain for 2 to 3 minutes.
  10. Carefully measure 1/3 cup warm frying oil, leaving dark crumbs behind.
  11. Combine the cayenne, brown sugar, paprika, garlic powder, and onion powder in a small heatproof bowl. If the oil is smoking or extremely hot, let it cool briefly, then carefully whisk it into the spices.
  12. Brush or spoon a thin layer of seasoned oil over the hot wings, coating the ridges without soaking them.
  13. Serve the wings on or beside the white bread with pickle chips on top.

Tips

  • Let excess marinade drip off before dredging so the coating does not become slick.
  • Press the flour coating firmly onto the wings and let it rest for 10 minutes before frying.
  • Fry in small batches to help the oil stay near 350°F (175°C).
  • Drain wings on a rack to keep steam from collecting underneath.
  • Brush on the seasoned oil rather than tossing the wings to preserve the crust.

Variations

  • Milder Nashville Hot Wings: Replace up to 2 teaspoons of the cayenne with additional paprika, keeping some cayenne in the hot-oil finish.

Notes

Refrigerate leftovers promptly in an airtight container for up to 3 days; store pickles and bread separately. Reheat wings on a baking sheet in a 375°F (190°C) oven until hot throughout. Use coarse kosher salt, not fine table salt.

Nutrition

Calories: 780 kcal | Protein: 32 g | Fat: 50 g | Carbohydrates: 47 g

Sticky Sesame Chicken Wings

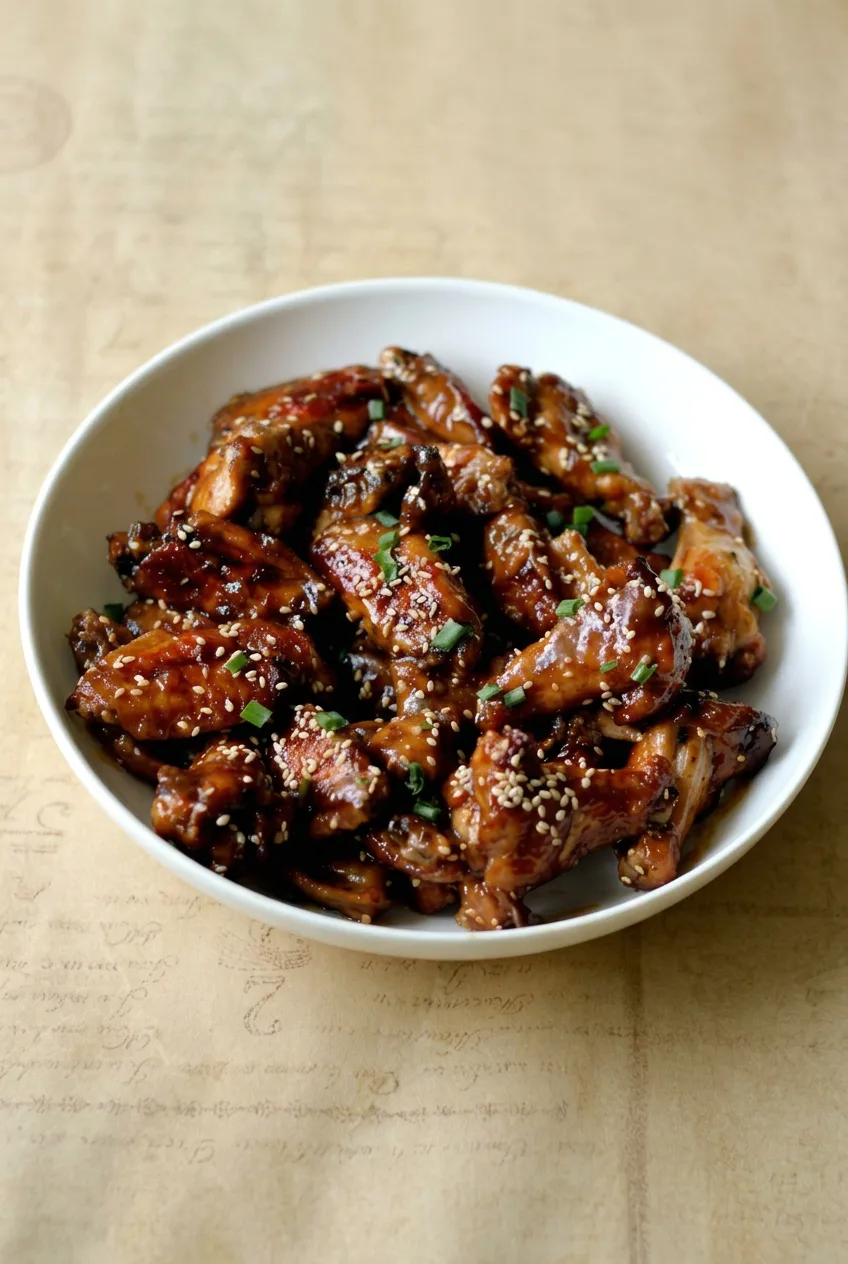
These split chicken wings are roasted until browned, then coated in a dark, glossy honey-soy glaze with garlic and toasted sesame oil. Adding the glaze near the end gives the wings time to cook through without exposing the honey to high oven heat for the full roast. A short final bake sets the coating so it clings to the drumettes and flats rather than pooling in the serving bowl.

Serves: 4 as an appetizer. Prep: 15 minutes. Cook: 40–50 minutes. Total: 55–65 minutes.

Ingredients for Sticky Sesame Chicken Wings

Close view of sesame seeds and green onion on the thick glaze coating individual chicken wings
  • 2 lb split chicken wings, drumettes and flats (900g)
  • 1 tablespoon neutral oil, plus a little for the rack
  • 1/3 cup honey (113g)
  • 1/4 cup low-sodium soy sauce
  • 1 tablespoon rice vinegar
  • 2 teaspoons toasted sesame oil
  • 2 garlic cloves, minced
  • 1 tablespoon toasted sesame seeds
  • 1 small green onion, thinly sliced

How to Make Sticky Sesame Chicken Wings

Full bowl of sticky sesame chicken wings on a beige tabletop, seen from a wider angle
  1. Prepare the pan: Preheat the oven to 425°F (220°C). Line a rimmed sheet pan with foil if desired, set an oven-safe wire rack securely inside it, and lightly oil the rack.
  2. Arrange the wings: Pat the wings dry and toss with the neutral oil. Place them on the rack in a single layer with space between pieces. Use a second pan and rack if they do not fit without overlapping; crowded wings brown less evenly.
  3. Roast: Roast uncovered for about 35–45 minutes, turning the wings halfway through. Start checking at 35 minutes. The wings should be browned, and an instant-read thermometer inserted into the thickest meat, away from bone, must read at least 165°F (75°C). Larger wings may need more time.
  4. Simmer the glaze: While the wings roast, combine the honey, soy sauce, rice vinegar, toasted sesame oil, and garlic in a small saucepan. Bring to a gentle simmer over medium-low heat. Stir for about 4–6 minutes once it begins bubbling, until the glaze lightly coats a spoon.
  5. Coat and set: Transfer the cooked wings to a clean bowl and toss with the warm glaze. Return them to the rack and bake for 3–5 minutes, watching closely. Remove them when the coating looks glossy and clings to the wings, before it smokes or develops blackened patches.
  6. Garnish: Let the wings stand for about 3 minutes. Pile them loosely into a shallow bowl and scatter the toasted sesame seeds and green onion over the top.

Why Glaze the Wings Near the End?

The first roast browns and cooks the wings before the honey goes into the oven. Simmering the glaze separately until it coats a spoon helps it stick; if it still runs off the spoon like a thin liquid, give it a little more time over gentle heat. The final bake sets the glaze, so do not use it to finish undercooked wings.

Serving and Variations

Serve the wings in a shared bowl, with rice alongside for a more substantial meal. For gentle heat, whisk 1–2 teaspoons Sriracha into the glaze before simmering. For a different sticky glaze, try these honey-hoisin chicken wings.

How to Store and Reheat Leftovers

Refrigerate leftover wings promptly in an airtight container and use within 3–4 days. Reheat in a moderate oven until thoroughly hot and the thickest meat reaches 165°F. The glaze and skin will be softer than when freshly made.

Nutrition

Approximate per appetizer serving, based on 4 servings: 420 calories, 27g protein, 24g fat, and 26g carbohydrates. Approximate per 100g of finished edible wings: 255 calories, 16g protein, 15g fat, and 16g carbohydrates. Values vary with wing size, the amount of edible meat, and how much glaze remains on the wings.

Sticky Sesame Chicken Wings

Roasted chicken wings are tossed in a honey-soy glaze and finished in the oven until glossy.
Course: Appetizer
Cuisine: Asian-inspired
Prep: 15 min
Cook: 45 min
Total: 60 min
Servings: 4 Calories: 420 kcal

Equipment

  • Rimmed sheet pan
  • Oven-safe wire rack
  • Small saucepan
  • Mixing bowl
  • Instant-read thermometer

Ingredients

For the Wings

  • 2 lb split chicken wings, drumettes and flats (900g)
  • 1 tablespoon neutral oil, plus a little for the rack

For the Glaze

  • 1/3 cup honey (113g)
  • 1/4 cup low-sodium soy sauce
  • 1 tablespoon rice vinegar
  • 2 teaspoons toasted sesame oil
  • 2 garlic cloves, minced

For Garnish

  • 1 tablespoon toasted sesame seeds
  • 1 small green onion, thinly sliced

Instructions

  1. Preheat the oven to 425°F (220°C). Line a rimmed sheet pan with foil if desired, set an oven-safe wire rack inside it, and lightly oil the rack.
  2. Pat the wings dry and toss them with the neutral oil.
  3. Arrange the wings in a single layer on the rack with space between pieces. Use a second pan and rack if needed to avoid crowding.
  4. Roast uncovered for 35–45 minutes, turning halfway through. Start checking at 35 minutes; the wings should be browned and reach at least 165°F (75°C) in the thickest meat, away from the bone.
  5. While the wings roast, combine the honey, soy sauce, rice vinegar, toasted sesame oil, and garlic in a small saucepan.
  6. Bring the glaze to a gentle simmer over medium-low heat. Stir for 4–6 minutes, until it lightly coats a spoon.
  7. Transfer the cooked wings to a clean bowl and toss them with the warm glaze.
  8. Return the wings to the rack and bake for 3–5 minutes, watching closely, until the coating is glossy and clings to the wings.
  9. Let the wings stand for about 3 minutes. Arrange them in a shallow bowl and garnish with sesame seeds and green onion.

Tips

  • Dry the wings well before roasting to help them brown.
  • Leave space between the wings; use a second pan and rack if needed.
  • Check the wings with an instant-read thermometer and make sure they reach at least 165°F (75°C) before glazing.
  • Simmer the glaze until it lightly coats a spoon so it will cling to the wings.
  • Watch closely during the final bake to keep the honey glaze from smoking or blackening.

Variations

  • Spicy Sesame Wings: Whisk 1–2 teaspoons Sriracha into the glaze before simmering.

Notes

Refrigerate leftovers promptly in an airtight container and use within 3–4 days. Reheat in a moderate oven until thoroughly hot and the thickest meat reaches 165°F. Nutrition is approximate per serving: 420 calories, 27g protein, 24g fat, and 26g carbohydrates; per 100g of finished edible wings: 255 calories, 16g protein, 15g fat, and 16g carbohydrates.

Nutrition

Calories: 420 kcal | Protein: 27 g | Fat: 24 g | Carbohydrates: 26 g

Chipotle Honey Chicken Wings

Whole chicken wings roast until browned, then get a generous coating of sweet, smoky chipotle-honey glaze. Adding the glaze only after the wings are cooked gives it time to cling without leaving the honey in the hot oven long enough to burn.

A brief final roast sets the sauce, and a little glaze reserved in a clean container adds shine just before serving. Keep the wings spaced apart while they cook, then pile them on a plate with a light scattering of cilantro.
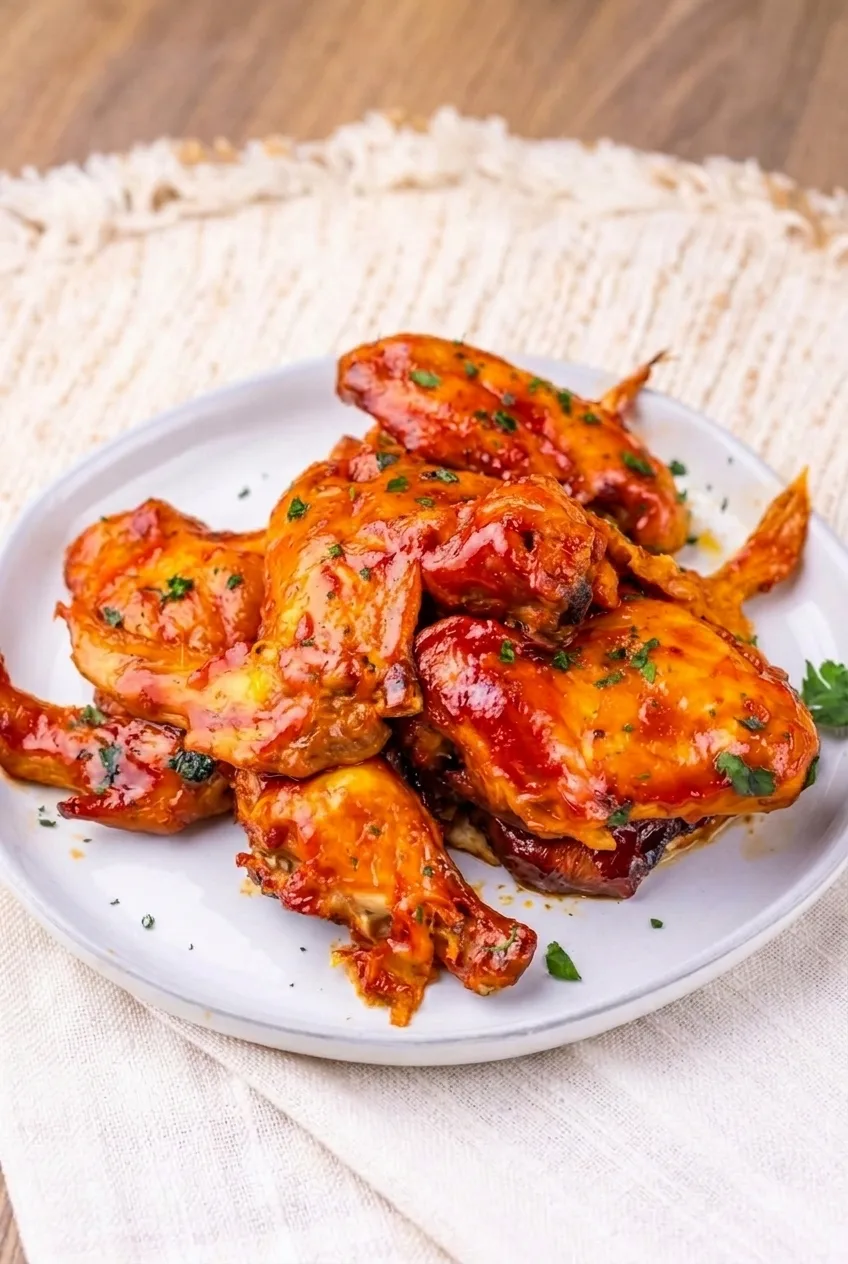
Ingredients for Chipotle Honey Chicken Wings

Close view of a whole chicken wing showing sticky chipotle-honey glaze, browned skin, and a pointed tip
  • 2 1/2 pounds whole chicken wings, tips attached (about 1,150g)
  • 1 tablespoon neutral oil
  • 1 teaspoon kosher salt
  • 1 teaspoon smoked paprika
  • 1/2 teaspoon garlic powder
  • 1/3 cup honey (about 115g)
  • 1 chipotle chile in adobo, minced, plus 1 tablespoon adobo sauce
  • 2 tablespoons ketchup
  • 1 tablespoon apple cider vinegar
  • 1 tablespoon finely chopped fresh cilantro

Yield: 4 appetizer servings. Time: 15 minutes prep; 45–55 minutes cooking.

How to Make Chipotle Honey Chicken Wings

Full plate of glossy chipotle honey chicken wings on a light woven surface, photographed from farther back
  1. Preheat the oven: Heat to 425°F (220°C). Set an oven-safe wire rack on a rimmed baking sheet, or use the sheet without a rack. Lightly oil the rack or sheet with a little of the measured oil.
  2. Season the wings: Pat them thoroughly dry. Toss with the remaining oil, salt, smoked paprika, and garlic powder. Arrange in a single layer with space between the wings; use a second sheet if needed. Roast uncovered so moisture can escape and the skin can brown.
  3. Roast until cooked through: Roast for about 40–50 minutes, flipping halfway through. Start checking around 35 minutes, since whole wings vary in size. Before glazing, the skin should be browned and a thermometer inserted into the thickest meaty part, without touching bone, should read at least 165°F (75°C).
  4. Make the glaze: While the wings roast, combine the honey, minced chipotle, adobo sauce, ketchup, and vinegar in a small saucepan. Simmer over medium-low heat for 3–5 minutes, until cohesive and thick enough to lightly coat a spoon. Transfer about 2 tablespoons to a clean container for finishing.
  5. Glaze briefly: Transfer the cooked wings away from the rendered pan fat and toss in a clean bowl with the remaining glaze. Return them to the rack or sheet for 3–5 minutes, keeping excess glaze from pooling on the pan. Check after 3 minutes: the coating should be glossy and cling to the wings, without blackened edges.
  6. Finish and serve: Let the wings stand for a few minutes. Brush or lightly toss with the reserved clean glaze, then pile them on a serving plate with some wing tips visible. Scatter the cilantro sparingly over the top.

How to Keep the Honey Glaze from Burning

The long roast browns and cooks the wings; the final trip to the oven only sets the glaze. Watch that short step closely and remove the wings if the sauce starts to blacken. Simmering the glaze first and tossing the wings away from their pan drippings helps the coating stay thick rather than sliding off with the fat.

Whole Wings Versus Split Wings

Whole wings keep the pointed tips and substantial shape of the plated dish. You can use the same weight of split flats and drumettes, but start checking them earlier because they may finish roasting sooner. Use the temperature of the thickest meaty part to judge doneness in either case.

Adjusting the Chipotle Heat

For less heat, omit the minced chile and use 1–2 tablespoons adobo sauce instead. Add it gradually and taste the simmered glaze before coating the wings; heat varies by brand.

For another smoky-sweet wing recipe, try smoky paprika chicken wings with honey glaze.

Storing and Reheating

Refrigerate leftover wings in an airtight container for up to 3–4 days. Reheat in a 400°F (205°C) oven or air fryer until hot, checking after about 5–8 minutes; thick whole wings may need longer. The glazed skin will be softer than freshly roasted, unsauced skin.

The glaze can be made ahead and refrigerated separately. Warm it just enough to loosen before tossing it with the cooked wings.

Nutrition

Approximate per appetizer serving (1/4 of the recipe): 455 calories, 30g protein, 26g fat, and 26g carbohydrates. Approximate per 100g of edible wings and glaze, excluding bones: 260 calories, 17g protein, 15g fat, and 15g carbohydrates. Wing size, edible meat yield, rendered fat, and the amount of glaze consumed will affect these estimates.

Chipotle Honey Chicken Wings

Whole chicken wings are roasted until browned, coated in a smoky chipotle-honey glaze, then briefly roasted to set the sauce.
Course: Appetizer
Cuisine: American
Prep: 15 min
Cook: 50 min
Total: 65 min
Servings: 4 Calories: 455 kcal

Equipment

  • Rimmed baking sheet
  • Oven-safe wire rack
  • Small saucepan
  • Mixing bowl
  • Meat thermometer

Ingredients

For the Wings

  • 2 1/2 pounds whole chicken wings, tips attached (about 1,150 g)
  • 1 tablespoon neutral oil, divided
  • 1 teaspoon kosher salt
  • 1 teaspoon smoked paprika
  • 1/2 teaspoon garlic powder

For the Glaze

  • 1/3 cup honey (about 115 g)
  • 1 chipotle chile in adobo, minced
  • 1 tablespoon adobo sauce
  • 2 tablespoons ketchup
  • 1 tablespoon apple cider vinegar

For Finishing

  • 1 tablespoon finely chopped fresh cilantro

Instructions

  1. Preheat the oven to 425°F (220°C). Set an oven-safe wire rack on a rimmed baking sheet, or use the baking sheet without a rack. Lightly oil the rack or sheet with a little of the measured oil.
  2. Pat the wings thoroughly dry. Toss them with the remaining oil, salt, smoked paprika, and garlic powder.
  3. Arrange the wings in a single layer with space between them, using a second baking sheet if needed.
  4. Roast uncovered for about 40–50 minutes, flipping halfway through. Start checking around 35 minutes. Before glazing, the skin should be browned and the thickest meaty part should reach at least 165°F (75°C), without the thermometer touching bone.
  5. While the wings roast, combine the honey, minced chipotle, adobo sauce, ketchup, and vinegar in a small saucepan. Simmer over medium-low heat for 3–5 minutes, until cohesive and thick enough to lightly coat a spoon.
  6. Transfer about 2 tablespoons of the glaze to a clean container. Move the cooked wings away from the rendered pan fat and toss them with the remaining glaze in a clean bowl.
  7. Return the wings to the rack or baking sheet and roast for 3–5 minutes, checking after 3 minutes. Remove them when the coating is glossy and clings to the wings, before the edges blacken.
  8. Let the wings stand for a few minutes. Brush or lightly toss with the reserved glaze, then serve with a light scattering of cilantro.

Tips

  • Dry the wings thoroughly and leave space between them so the skin can brown.
  • Check whole wings for doneness early because their size can vary.
  • Keep the final roast brief and watch closely to prevent the honey from burning.
  • Toss the cooked wings with glaze away from the rendered pan fat so the coating stays thick.

Variations

  • Milder Chipotle Honey Wings: Omit the minced chipotle and use 1–2 tablespoons of adobo sauce, adding it gradually and tasting the glaze.
  • Split Chicken Wings: Use the same weight of split flats and drumettes, and start checking for doneness earlier.

Notes

Refrigerate leftovers in an airtight container for 3–4 days. Reheat in a 400°F (205°C) oven or air fryer until hot, checking after 5–8 minutes. Glazed skin will be softer than freshly roasted skin.

Nutrition

Calories: 455 kcal | Protein: 30 g | Fat: 26 g | Carbohydrates: 26 g