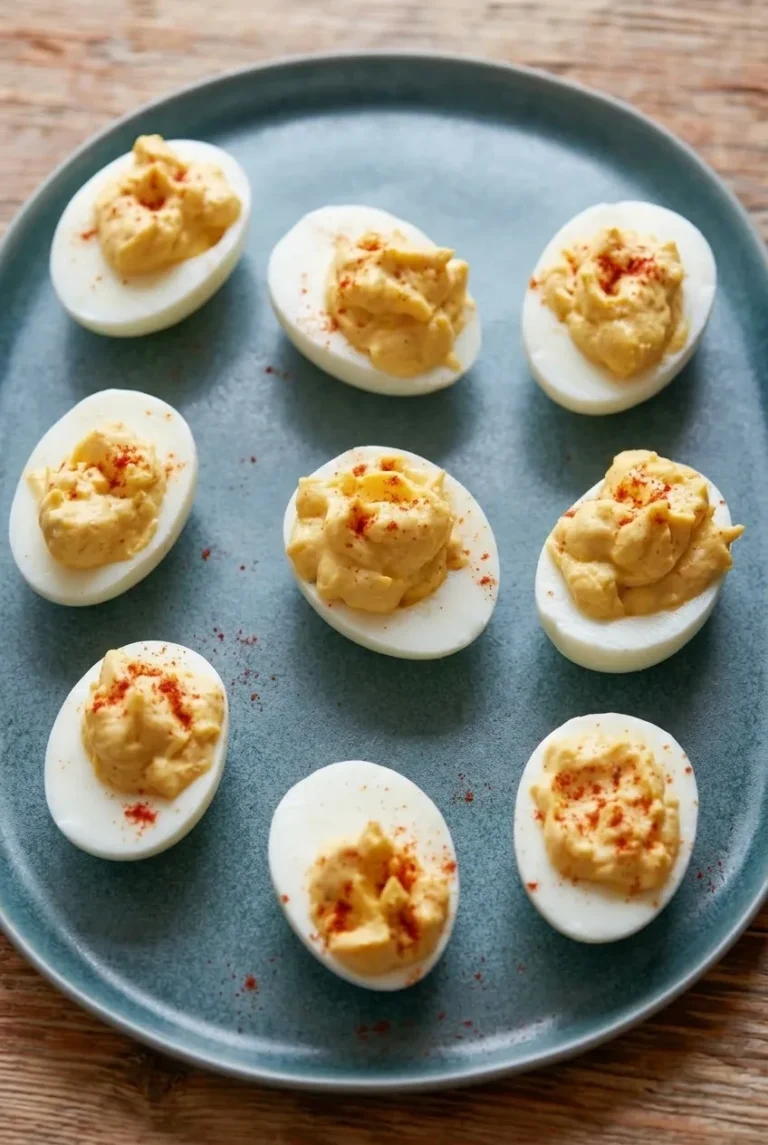
Author

Julia

Browsing

Cranberry Pecan Cheese Ball

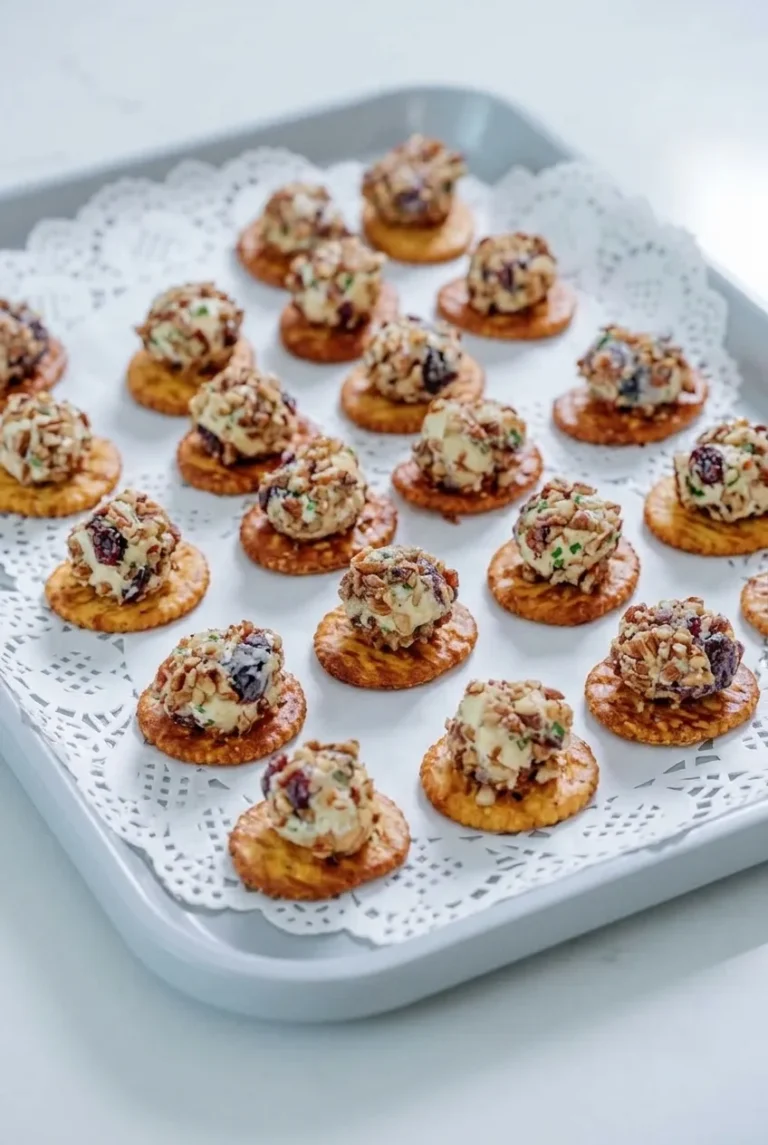
These mini cranberry pecan cheese balls turn the familiar appetizer into individual bites, each served on a round cracker. The cream cheese and cheddar centers stay creamy beneath an irregular coating of chopped pecans, dried cranberries, and chives, with some pale cheese showing through. Shape and chill the balls ahead, then coat them and add the crackers shortly before serving so the nuts and bases keep their crunch.

Ingredients for Mini Cranberry Pecan Cheese Balls
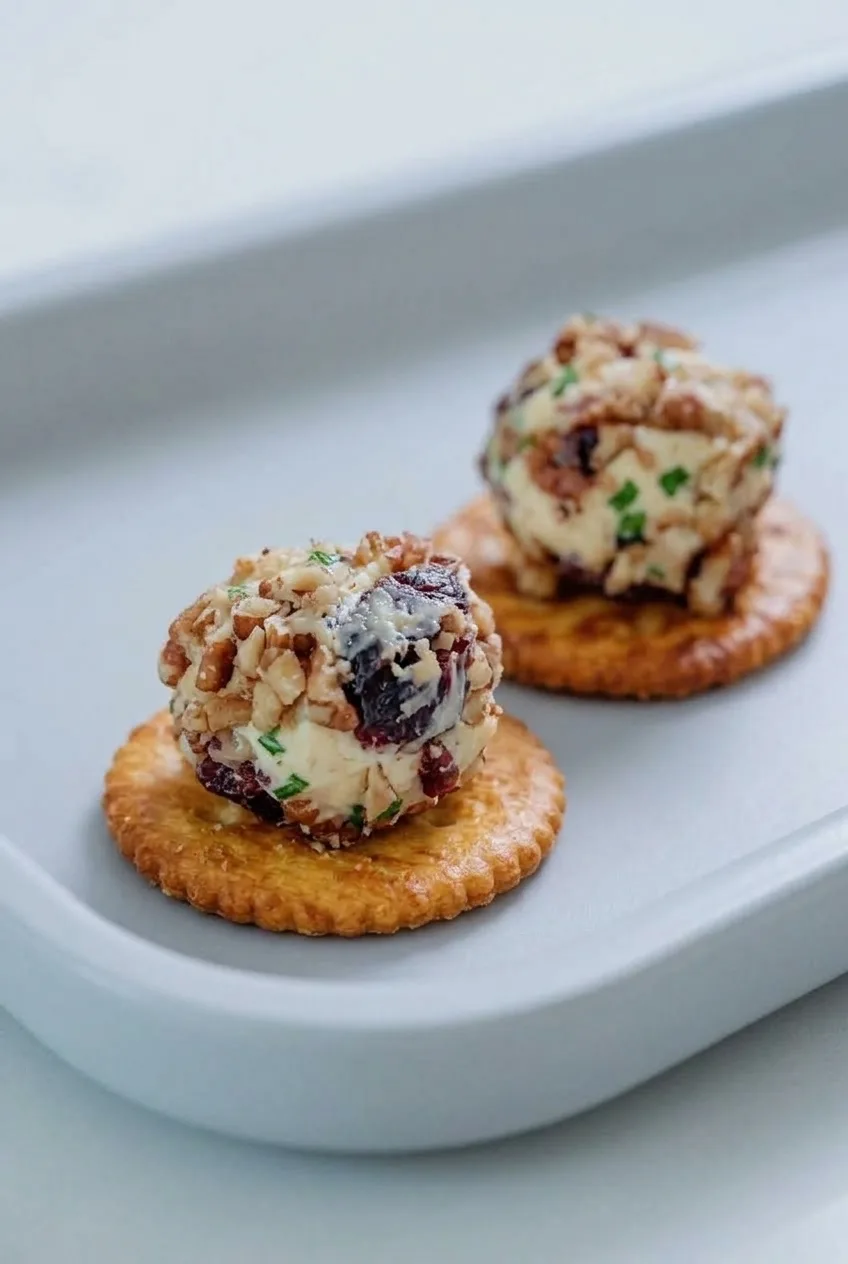
Close view of cheese balls on crackers showing chopped pecans, cranberries, chives, and creamy cheese
  • 8 ounces full-fat cream cheese, softened (225g)
  • 1 cup finely shredded sharp cheddar (115g)
  • 1/2 cup dried cranberries, finely chopped and divided (60g)
  • 3/4 cup pecans, finely chopped and divided (75g)
  • 2 tablespoons fresh chives, finely chopped and divided
  • 1/4 teaspoon garlic powder
  • 24 sturdy round crackers

Yield: About 24 appetizer bites. Prep time: 30 minutes. Chill time: At least 1 hour. Total time: About 1 hour 30 minutes.

How to Make Mini Cranberry Pecan Cheese Balls
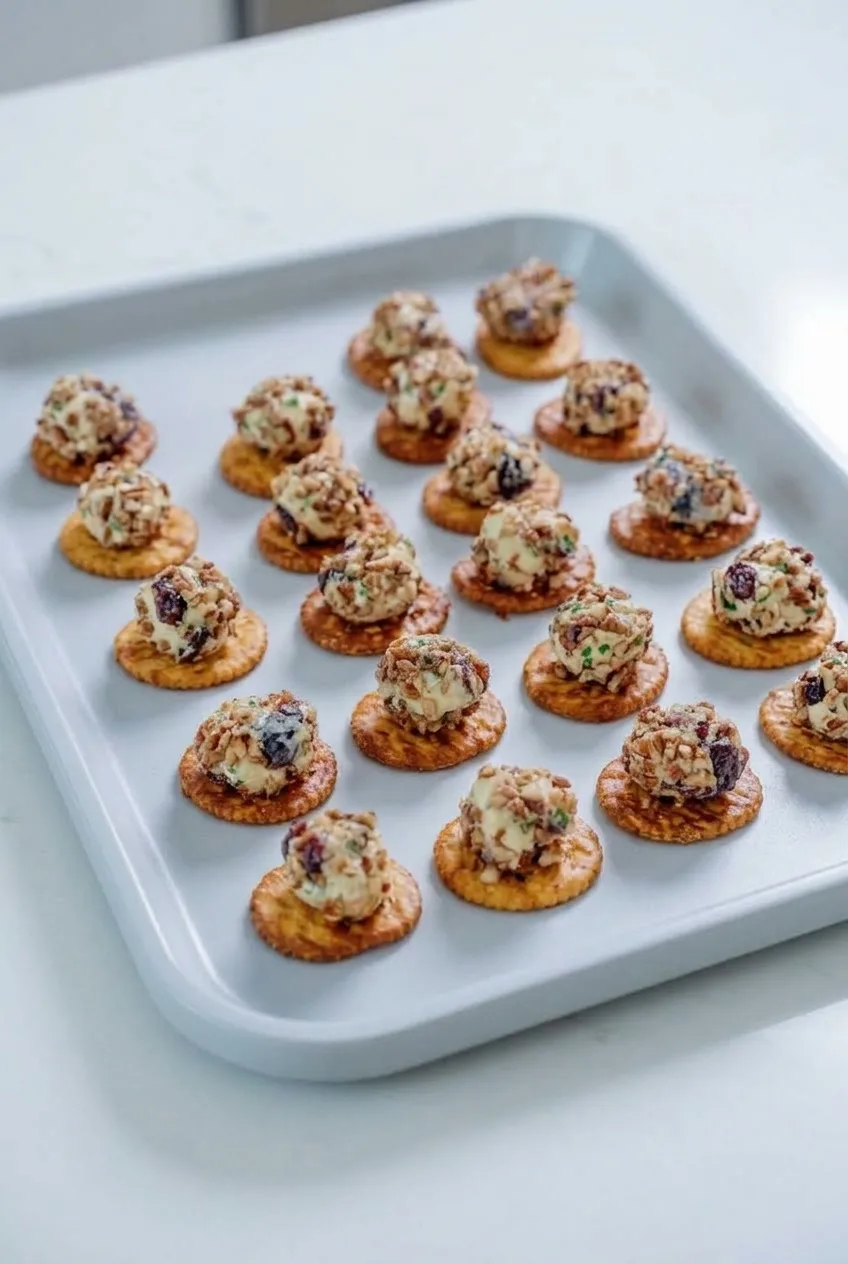
Full tray of individual cranberry pecan cheese ball bites on round crackers
  1. Divide the coating ingredients: Set aside 1/4 cup of the cranberries, 1/2 cup of the pecans, and 1 tablespoon of the chives for coating. Chop the pieces finely so they will cling to the small balls.
  2. Mix the filling: Stir the softened cream cheese, cheddar, and garlic powder in a medium bowl until evenly combined. Fold in the remaining cranberries, pecans, and chives.
  3. Shape the balls: Divide the mixture into about 24 portions. Gently roll each into a compact ball, roughly 1 to 1 1/4 inches across. Set them apart on a parchment-lined plate or small tray and cover. Lightly dampen your hands if the mixture sticks.
  4. Chill until firm: Refrigerate for at least 1 hour. A ball should hold its rounded shape when lifted; if it flattens easily, chill the portions longer.
  5. Coat and assemble: Combine the reserved cranberries, pecans, and chives in a shallow bowl. Gently roll and press each chilled ball in the coating, leaving some pale cheese visible. Place one ball on each cracker shortly before serving.

How to Keep the Mini Cheese Balls Round

A small cookie scoop or measuring tablespoon helps keep the portions similar in size and small enough to sit securely on their crackers. Softened cream cheese is easier to mix, but the shaped balls need refrigerator time to firm up. If they still feel too soft to handle after an hour, use the shape-holding check rather than the clock.

Serving and Simple Substitutions

Sturdy round crackers support the individual bites without breaking easily. White cheddar can replace sharp cheddar, and finely chopped green onions can replace chives, though their green flecks will be larger. For another bite-size appetizer, serve these alongside stuffed mushrooms with cream cheese and Parmesan.

Make-Ahead and Storage

Refrigerate the shaped cheese balls covered in an airtight container and keep the reserved coating separate. For better pecan crunch, press on the coating closer to serving; add the crackers last so they stay crisp.

For best quality, use refrigerated cheese portions within about 3 to 5 days. Keep the finished bites chilled until shortly before serving and refrigerate leftovers promptly. No reheating is needed; a brief stand before serving will soften the cheese slightly.

Nutrition

Approximate nutrition per appetizer bite, including one cracker: 100 calories, 2g protein, 8g fat, and 5g carbohydrates. Approximate nutrition per 100g: 420 calories, 10g protein, 34g fat, and 21g carbohydrates. Values will vary with the crackers and cheese used.

Cranberry Pecan Cheese Ball Bites

Creamy cheddar and cream cheese balls are coated with cranberries, pecans, and chives, then served on round crackers.
Course: Appetizer
Cuisine: American
Prep: 30 min
Total: 90 min
Servings: 24 Calories: 100 kcal per bite; 420 kcal per 100 g

Equipment

  • Mixing bowl
  • Parchment-lined tray
  • Shallow bowl
  • Small cookie scoop or measuring tablespoon

Ingredients

For the Cheese Balls

  • 8 ounces full-fat cream cheese, softened (225g)
  • 1 cup finely shredded sharp cheddar (115g)
  • 1/2 cup dried cranberries, finely chopped and divided (60g)
  • 3/4 cup pecans, finely chopped and divided (75g)
  • 2 tablespoons fresh chives, finely chopped and divided
  • 1/4 teaspoon garlic powder

For Serving

  • 24 sturdy round crackers

Instructions

  1. Set aside 1/4 cup of the cranberries, 1/2 cup of the pecans, and 1 tablespoon of the chives for the coating.
  2. Stir the softened cream cheese, cheddar, and garlic powder in a medium bowl until evenly combined.
  3. Fold in the remaining cranberries, pecans, and chives.
  4. Divide the mixture into about 24 portions and roll each into a compact ball about 1 to 1 1/4 inches across. Lightly dampen your hands if the mixture sticks.
  5. Arrange the balls apart on a parchment-lined plate or small tray, cover, and refrigerate for at least 1 hour, until firm enough to hold their shape.
  6. Combine the reserved cranberries, pecans, and chives in a shallow bowl.
  7. Gently roll and press each chilled ball in the coating, leaving some pale cheese visible.
  8. Place one cheese ball on each cracker shortly before serving.

Tips

  • Use a small cookie scoop or measuring tablespoon to keep the portions even.
  • Chop the coating ingredients finely so they cling to the small balls.
  • If the balls flatten easily when lifted, chill them longer.
  • Add the coating and crackers close to serving time to help keep the pecans and cracker bases crisp.

Variations

  • White Cheddar Version: Replace the sharp cheddar with white cheddar.
  • Green Onion Version: Replace the chives with finely chopped green onions.
Notes

Store covered cheese balls in an airtight container in the refrigerator, keeping the coating separate until serving. Use refrigerated portions within 3 to 5 days, keep finished bites chilled until shortly before serving, and refrigerate leftovers promptly. No reheating is needed.

Nutrition

Calories: 100 kcal per bite; 420 kcal per 100 g | Protein: 2 g per bite; 10 g per 100 g | Fat: 8 g per bite; 34 g per 100 g | Carbohydrates: 5 g per bite; 21 g per 100 g

Baked Brie with Pecans and Honey

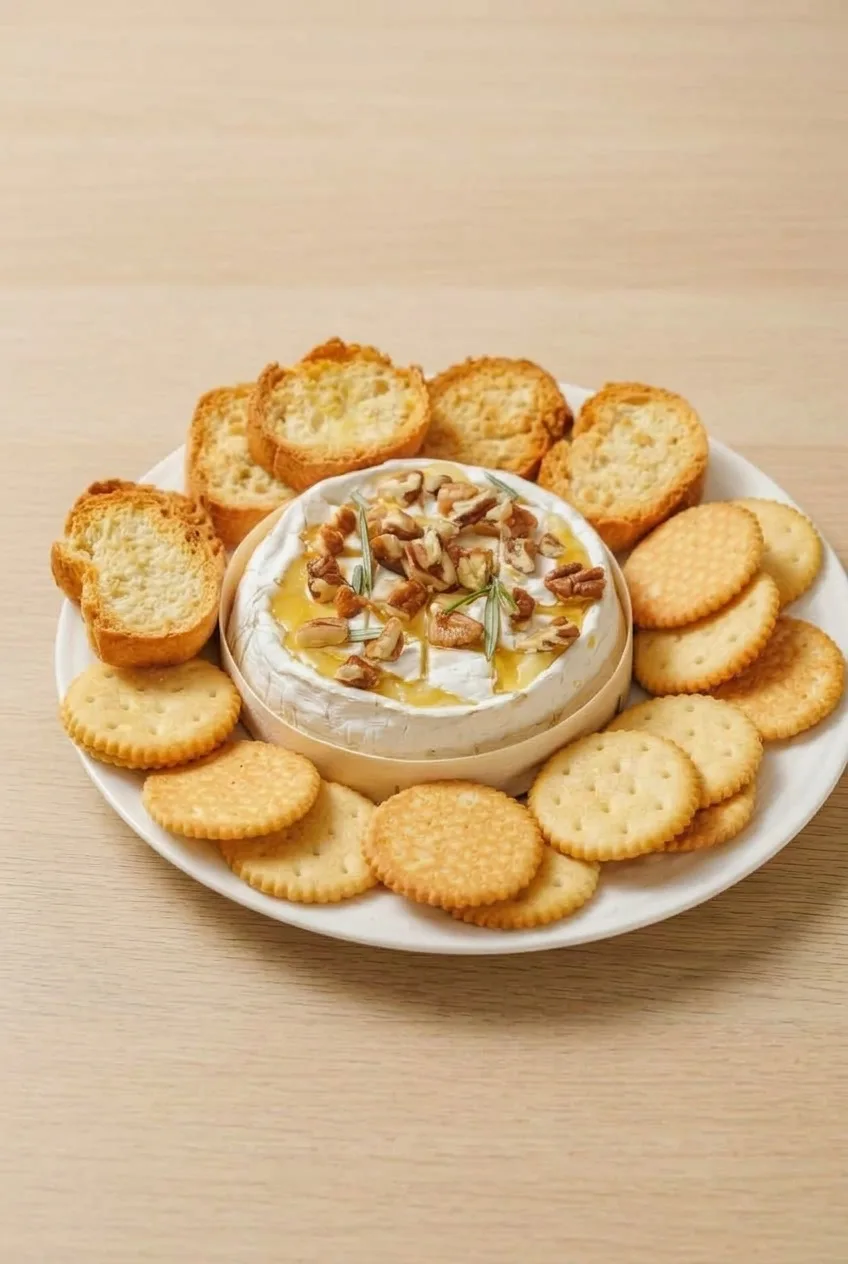
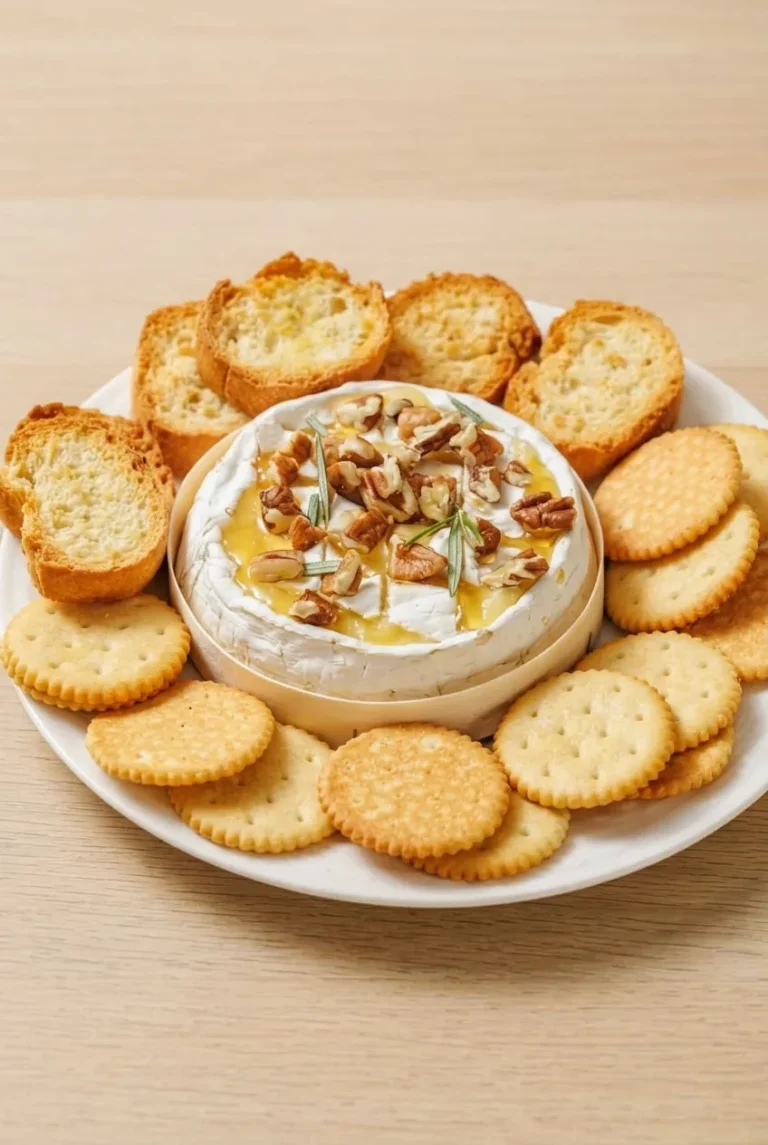
A whole Brie wheel bakes until the center is soft enough to scoop, while its white rind keeps it in one piece. Honey, chopped pecans, and a little fresh rosemary go on after baking, so the topping stays glossy and distinct. Serve the warm Brie in its shallow dish with both crackers and crostini. Start checking early: the cheese is ready when the center yields gently, before the wheel collapses.

Prep: 10 minutes Cook: about 15–20 minutes Total: about 25–30 minutes Yield: 6 appetizer servings

Ingredients for Baked Brie with Pecans and Honey

White platter of baked Brie with honey and pecans, crostini behind it and round crackers around the front
  • 1 whole 8-ounce Brie wheel, rind on (225g)
  • 2 tablespoons honey (42g)
  • 1/3 cup coarsely chopped pecans (35g)
  • 1 small sprig fresh rosemary
  • 12–16 round crackers
  • 6–8 prepared baguette crostini
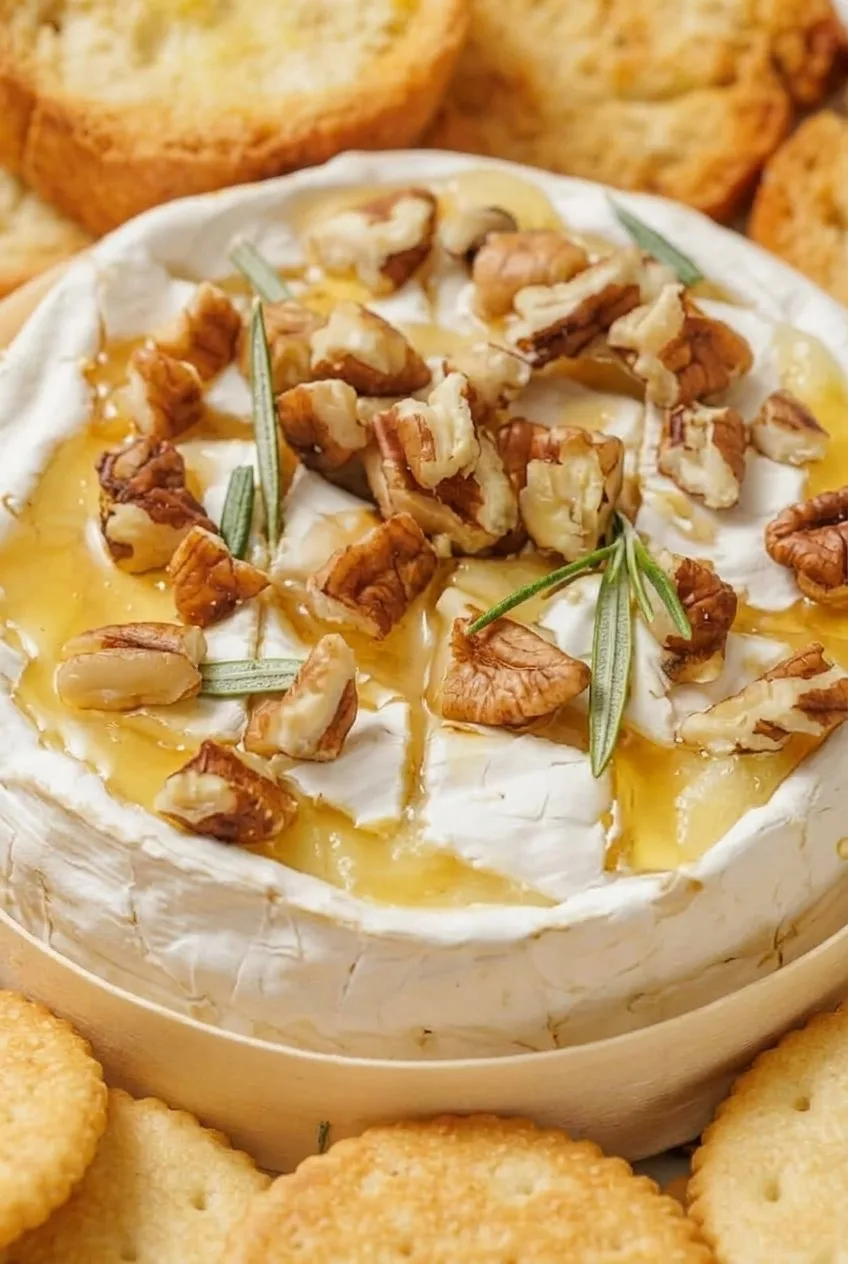
Close view of honey and chopped pecans over baked Brie, with soft cheese showing through the scored rind

How to Bake the Brie

  1. Preheat and position: Heat the oven to 350°F (175°C). Remove all packaging from the Brie. Place the whole wheel in a snug, shallow oven-safe dish that leaves its top and white-rind sides visible. Set the dish on a baking sheet for easier handling.
  2. Score the top: Make a few shallow crossing cuts in the top rind with a small sharp knife. Do not cut through the sides; they help the Brie hold its shape.
  3. Bake uncovered: Bake for about 15–20 minutes, beginning to check at 12 minutes. Gently press the top with a spoon: the center should yield, and a little cheese may begin to show through the cuts. If the center is still firm, bake a little longer and check again.
  4. Add the topping: Let the dish stand for 2–3 minutes. Drizzle the honey over the Brie, scatter on the pecans, and add a few rosemary needles or a short tender piece of the sprig. Leave some white rind visible. Adding the topping after baking keeps the honey glossy, the pecans distinct, and the rosemary green.
  5. Serve: Move the warm dish, not the softened wheel by itself, to the center of a large serving plate. Arrange the crostini behind the Brie and the round crackers around the front and sides. Serve while warm.

How to Tell When Baked Brie Is Ready

Look for a gently yielding center and the first slight oozing at the score marks. Remove the Brie while it still holds its round outline; if it slumps completely, it has baked too long. A larger or very cold wheel may need more time than an 8-ounce Brie, so use its texture rather than the clock alone.

Why the Rind and Baking Dish Matter

Leave the edible rind on to support the warm cheese, and score only the top. A dish just wider than the wheel gives the softened Brie support without hiding its sides. Do not bake it in a wooden Brie box unless the packaging explicitly says the box bottom is oven-safe.

Serving and Leftovers

Apple or pear slices are an optional addition to the crackers and crostini. For another warm appetizer, serve the Brie alongside stuffed mushrooms with cream cheese and Parmesan.

Once the Brie has cooled, cover leftovers and refrigerate for up to 2 days. Reheat gently in an oven-safe dish just until warm and soft, watching closely so it does not bake through again. Reheated Brie may be less creamy than when freshly baked.

Nutrition

Approximate nutrition per appetizer serving, including a share of the crackers and crostini: 275 calories, 11g protein, 17g fat, and 21g carbohydrates. Per 100g: approximately 390 calories, 15g protein, 24g fat, and 30g carbohydrates. Values vary with the Brie, crackers, and crostini used.

Baked Brie with Pecans and Honey

A whole Brie wheel is baked until soft, then topped with honey, chopped pecans, and fresh rosemary.
Course: Appetizer
Cuisine: American
Prep: 10 min
Cook: 20 min
Total: 30 min
Servings: 6 Calories: 275 kcal

Equipment

  • Oven-safe shallow dish
  • Baking sheet
  • Small sharp knife
  • Spoon

Ingredients

  • 1 whole 8-ounce Brie wheel, rind on (225 g)
  • 2 tablespoons honey (42 g)
  • 1/3 cup coarsely chopped pecans (35 g)
  • 1 small sprig fresh rosemary
  • 12–16 round crackers
  • 6–8 prepared baguette crostini

Instructions

  1. Preheat the oven to 350°F (175°C). Remove all packaging from the Brie.
  2. Place the Brie in a snug, shallow oven-safe dish with the top and sides visible. Set the dish on a baking sheet.
  3. Make a few shallow crossing cuts in the top rind without cutting through the sides.
  4. Bake uncovered for about 15–20 minutes, beginning to check at 12 minutes. Press the top gently with a spoon; the center should yield and may just begin to ooze at the cuts. Bake a little longer if it is still firm.
  5. Let the dish stand for 2–3 minutes. Drizzle the honey over the Brie, scatter on the pecans, and add a few rosemary needles or a short tender piece of the sprig.
  6. Move the warm dish to the center of a large serving plate. Arrange the crostini behind the Brie and the crackers around the front and sides. Serve warm.

Tips

  • Start checking the Brie at 12 minutes; use its texture rather than the clock alone.
  • Score only the top rind so the sides help the wheel keep its shape.
  • Add the honey, pecans, and rosemary after baking to keep the topping glossy and distinct.
  • Bake the Brie in a dish just wider than the wheel for support, with the sides still visible.
  • Do not use a wooden Brie box unless its bottom is explicitly labeled oven-safe.

Notes

Refrigerate covered leftovers for up to 2 days. Reheat gently in an oven-safe dish just until warm and soft; reheated Brie may be less creamy. Larger or very cold wheels may need more baking time.

Nutrition

Calories: 275 kcal | Protein: 11 g | Fat: 17 g | Carbohydrates: 21 g | Calories Per 100g: 390 kcal | Protein Per 100g: 15 g | Fat Per 100g: 24 g | Carbohydrates Per 100g: 30 g

Stuffed Mushrooms with Cream Cheese

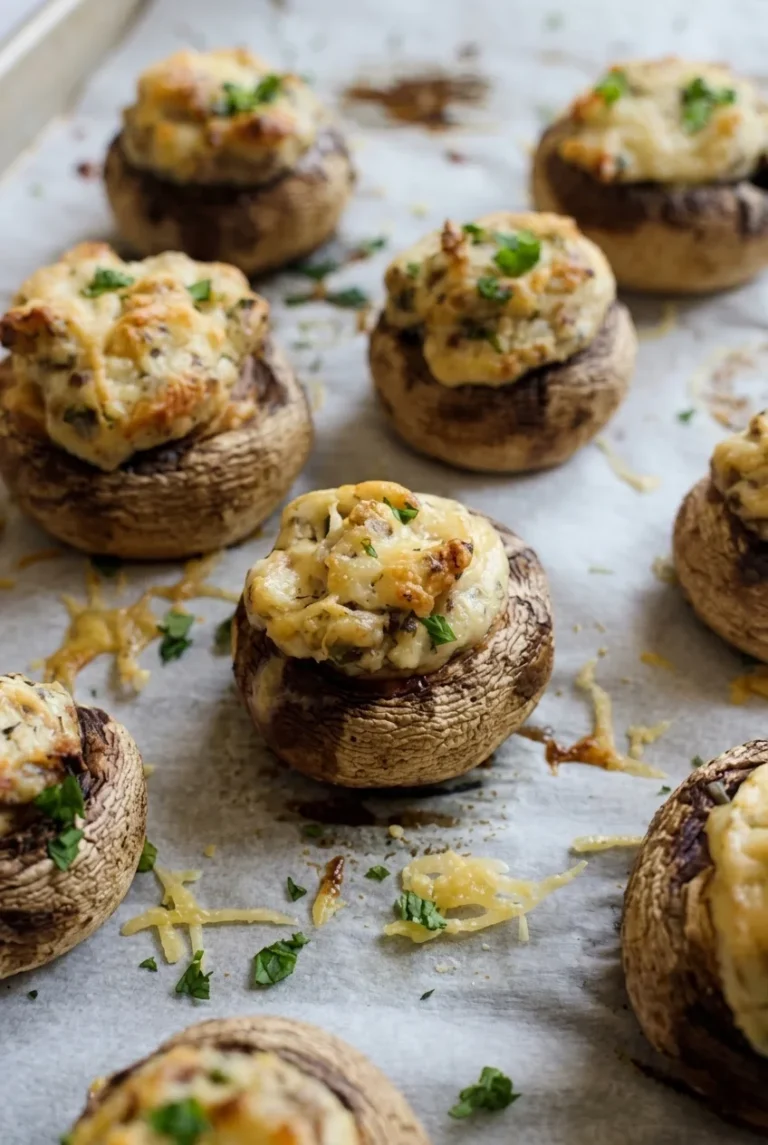
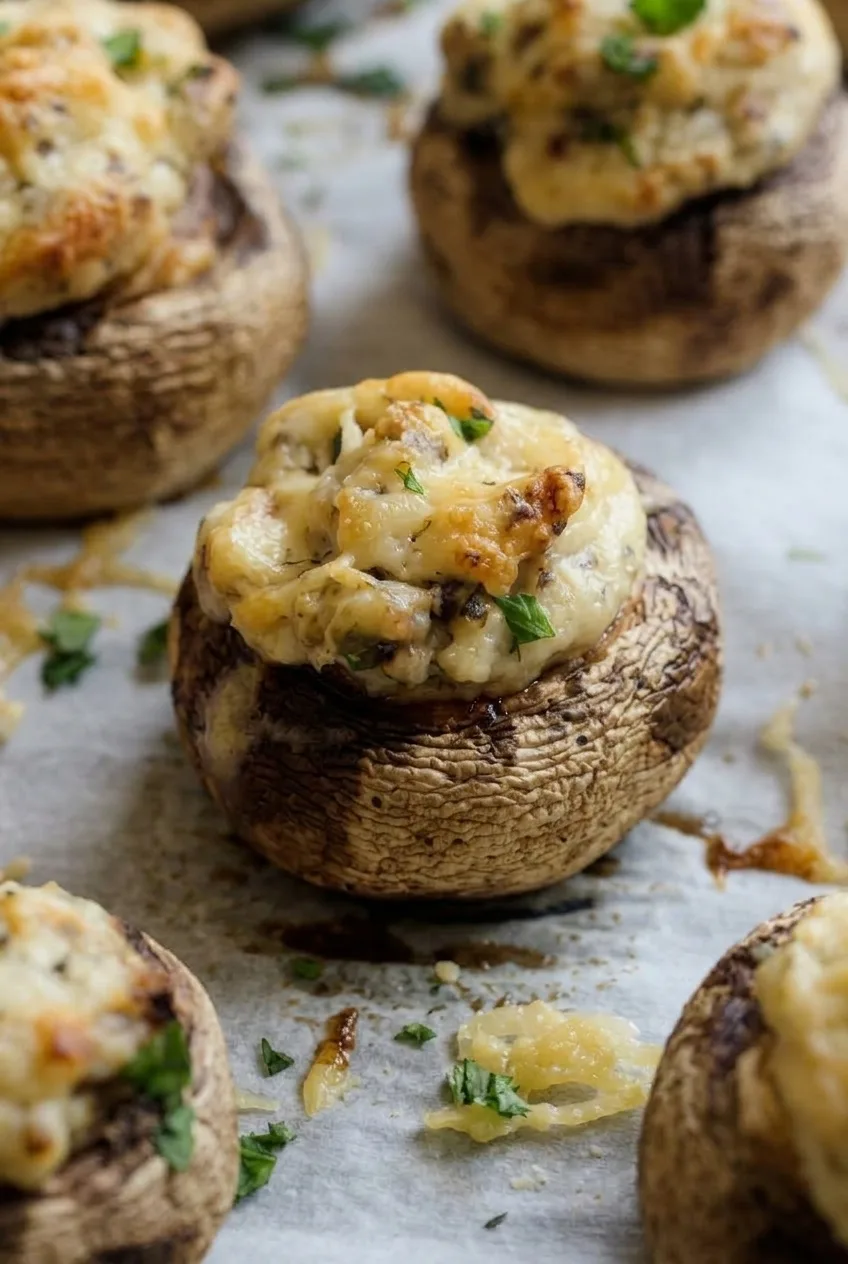
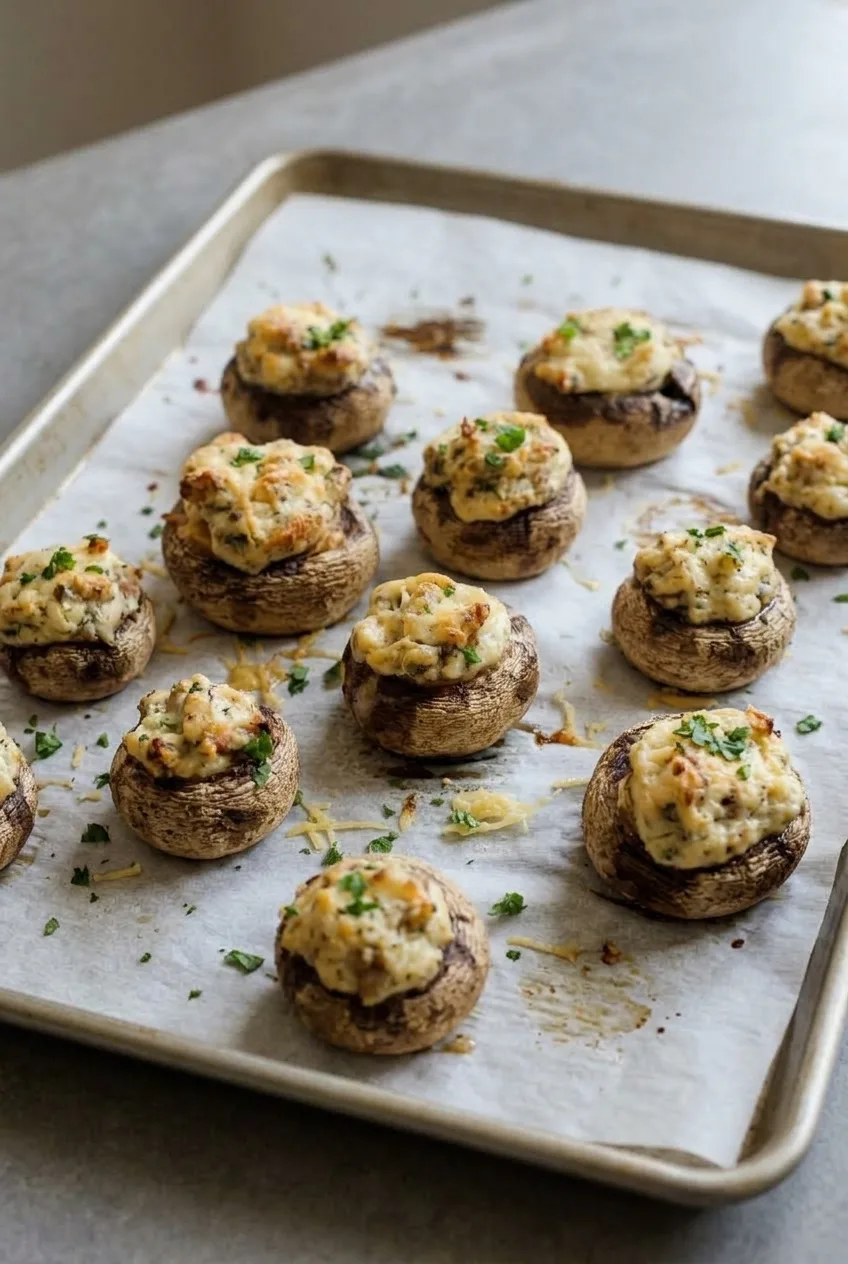
These baked Baby Bella mushrooms hold generous, rustic mounds of cream cheese filling with cooked mushroom stems, garlic, Parmesan, and parsley. The caps turn tender while the Parmesan develops a few golden spots on top.

Cooking the chopped stems first lets their moisture evaporate in the skillet instead of loosening the filling. Bake the stuffed caps uncovered, and take them out when the mushrooms are tender and the centers are hot—there’s no need to wait for every top to brown.

Ingredients for Stuffed Mushrooms

Close view of a tender brown mushroom cap and its textured cream cheese-Parmesan filling
  • About 1 lb medium Baby Bella mushrooms, approximately 16 similarly sized mushrooms (450g)
  • 8 oz cream cheese, softened (225g)
  • 2 teaspoons olive oil
  • 2 garlic cloves, minced
  • 1/2 cup finely grated Parmesan, divided (45g)
  • 2 tablespoons finely chopped fresh parsley, divided
  • 1/4 teaspoon kosher salt, or to taste
  • 1/8 teaspoon freshly ground black pepper

A pound may contain more or fewer than 16 mushrooms. Choose similarly sized medium caps when possible and divide the filling according to how much each can hold. Similarly sized white button mushrooms also work, though they will look paler.

How to Make Stuffed Mushrooms with Cream Cheese

Wider view of cream cheese stuffed mushrooms spaced across a parchment-lined baking sheet
  1. Prepare the caps: Fully preheat the oven to 400°F (205°C) and line a rimmed baking sheet with parchment. Wipe the mushrooms clean, gently remove the stems, and arrange the intact caps open-side up with a little space between them. Finely chop the usable stems.
  2. Cook the stems: Heat the olive oil in a small skillet over medium heat. Add the stems and cook, stirring, for 5 to 7 minutes, until softened and most of their released moisture has evaporated. Add the garlic for the final 30 to 60 seconds and cook until fragrant without letting it brown. Let cool briefly.
  3. Mix the filling: Stir together the softened cream cheese, stem mixture, about 1/3 cup of the Parmesan, most of the parsley, salt, and pepper. The filling should be evenly mixed and thick enough to mound.
  4. Fill the mushrooms: Spoon or scoop the filling into the caps, leaving a generous, slightly irregular mound above each rim. Give larger caps more filling rather than measuring an exact amount into each one. Sprinkle the remaining Parmesan over the tops.
  5. Bake: Bake uncovered for about 18 to 22 minutes, beginning to check at 17 minutes or sooner for smaller caps. The caps should yield easily to a fork but still hold their shape, and the filling should be hot and creamy with a few light golden spots. Remove any smaller mushrooms that finish early; rotate the pan only if the oven browns unevenly.
  6. Rest and finish: Let the mushrooms stand for about 5 minutes so the filling is less hot to eat. Sprinkle with the reserved parsley and serve warm.

How to Tell When Stuffed Mushrooms Are Done

Use cap tenderness and a hot filling as the main doneness checks. Light, uneven browning is enough; continuing to bake tender mushrooms just to darken every top can leave the filling too loose.

A little liquid on the parchment is normal because mushrooms release moisture as they bake. Lift the finished mushrooms from the pan with a spoon or small spatula rather than pouring the liquid over them.

Serving Stuffed Mushrooms

Serve warm as individual appetizers. For a make-ahead option alongside them, try classic deviled eggs. Sausage stuffing balls offer another warm, bite-size option.

Make Ahead and Leftovers

For the best texture, assemble the mushrooms up to 1 day ahead, cover, and refrigerate. Bake from cold, allowing several extra minutes beyond the usual baking window. Check for tender caps and hot filling.

Refrigerate cooked leftovers in an airtight container for up to 3 days. To reheat, place them on a baking sheet in a 350°F (175°C) oven until hot, checking after about 8 minutes.

Nutrition

Approximate nutrition per serving of 2 mushrooms, based on 8 servings: 150 calories, 6g protein, 13g fat, and 4g carbohydrates. Approximate values per 100g of ingredients before cooking: 160 calories, 6g protein, 14g fat, and 5g carbohydrates. Values vary with mushroom size, ingredient brands, and moisture lost during baking.

Stuffed Mushrooms with Cream Cheese

Baby Bella mushroom caps are filled with cream cheese, cooked stems, garlic, Parmesan, and parsley, then baked until tender.
Course: Appetizer
Cuisine: American
Prep: 20 min
Cook: 22 min
Total: 47 min
Servings: 8 Calories: 150 kcal

Equipment

  • Oven
  • Rimmed baking sheet
  • Parchment paper
  • Small skillet
  • Spoon or small spatula

Ingredients

For the Mushrooms

  • About 1 lb medium Baby Bella mushrooms, approximately 16 similarly sized mushrooms (450g)
  • 2 teaspoons olive oil
  • 2 garlic cloves, minced
  • 8 oz cream cheese, softened (225g)
  • 1/2 cup finely grated Parmesan, divided (45g)
  • 2 tablespoons finely chopped fresh parsley, divided
  • 1/4 teaspoon kosher salt, or to taste
  • 1/8 teaspoon freshly ground black pepper

Instructions

  1. Preheat the oven to 400°F (205°C). Line a rimmed baking sheet with parchment.
  2. Wipe the mushrooms clean, gently remove the stems, and arrange the caps open-side up on the baking sheet. Finely chop the usable stems.
  3. Heat the olive oil in a small skillet over medium heat. Cook the chopped stems, stirring, for 5 to 7 minutes, until softened and most of their moisture has evaporated.
  4. Add the garlic and cook for the final 30 to 60 seconds, until fragrant. Let the mixture cool briefly.
  5. Mix the softened cream cheese, stem mixture, about 1/3 cup of the Parmesan, most of the parsley, salt, and pepper until evenly combined.
  6. Spoon the filling into the mushroom caps, making a generous mound above each rim. Sprinkle the remaining Parmesan over the tops.
  7. Bake uncovered for about 18 to 22 minutes, beginning to check at 17 minutes or sooner for smaller caps. Remove any smaller mushrooms that finish early. The caps should be fork-tender but hold their shape, and the filling should be hot and creamy.
  8. Rest the mushrooms for about 5 minutes. Sprinkle with the reserved parsley and serve warm.

Tips

  • Cook the chopped stems until most of their moisture evaporates so the filling stays thick.
  • Choose similarly sized caps for more even baking.
  • Give larger caps more filling rather than dividing it into exact portions.
  • Check early; tender caps and hot filling matter more than browning every top.
  • A little liquid on the parchment is normal; lift the mushrooms off rather than pouring it over them.

Variations

  • White Button Stuffed Mushrooms: Use similarly sized white button mushrooms in place of Baby Bella mushrooms.

Notes

Assemble up to 1 day ahead and refrigerate; bake from cold, adding several minutes as needed. Refrigerate cooked leftovers in an airtight container for up to 3 days. Reheat at 350°F (175°C), checking after about 8 minutes.

Nutrition

Calories: 150 kcal | Protein: 6 g | Fat: 13 g | Carbohydrates: 4 g

Sausage Stuffing Balls

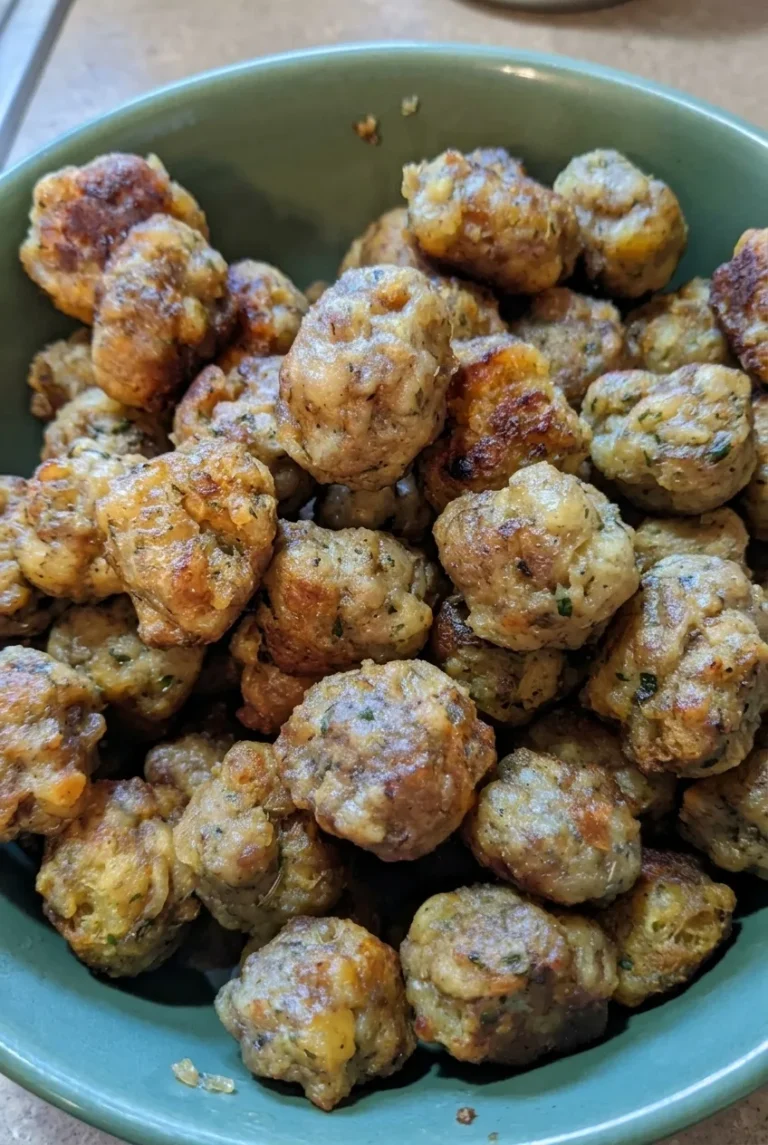
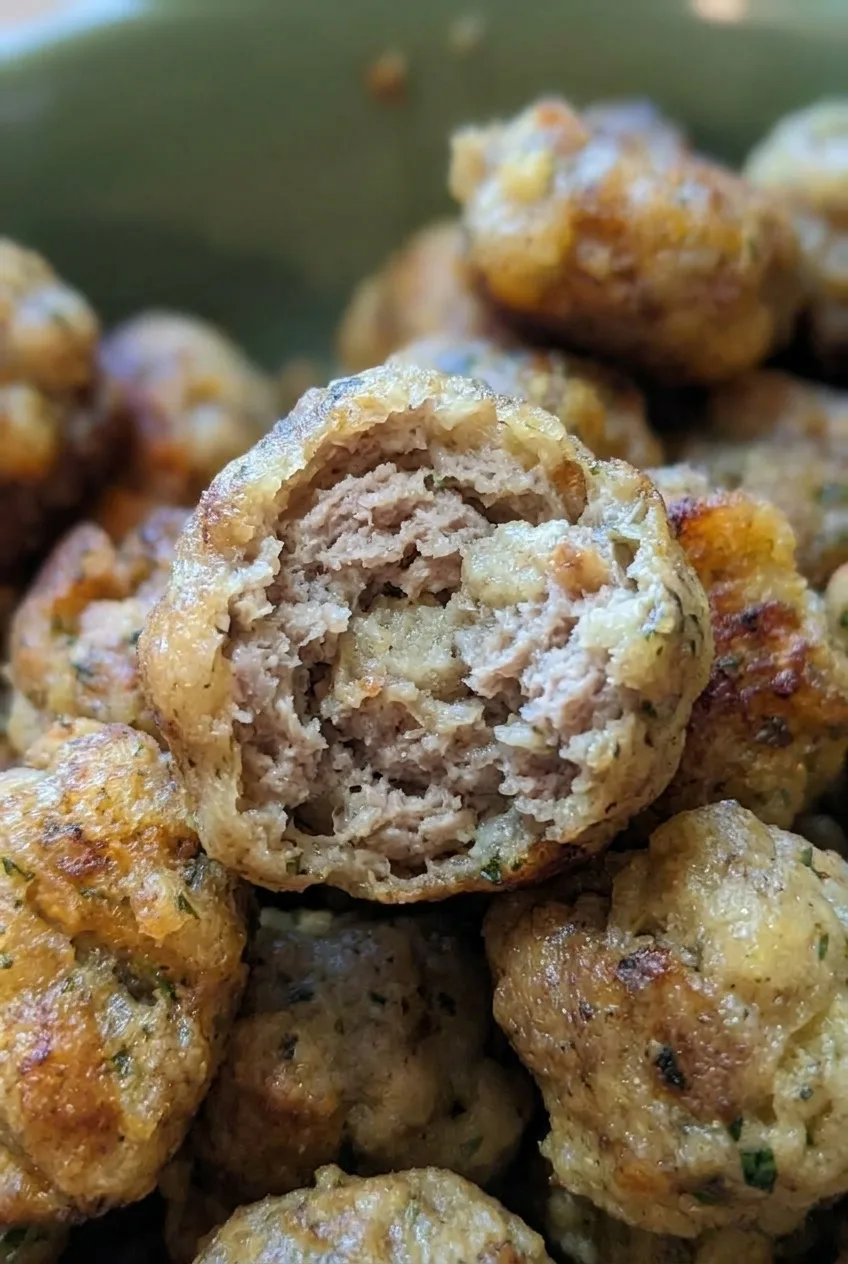
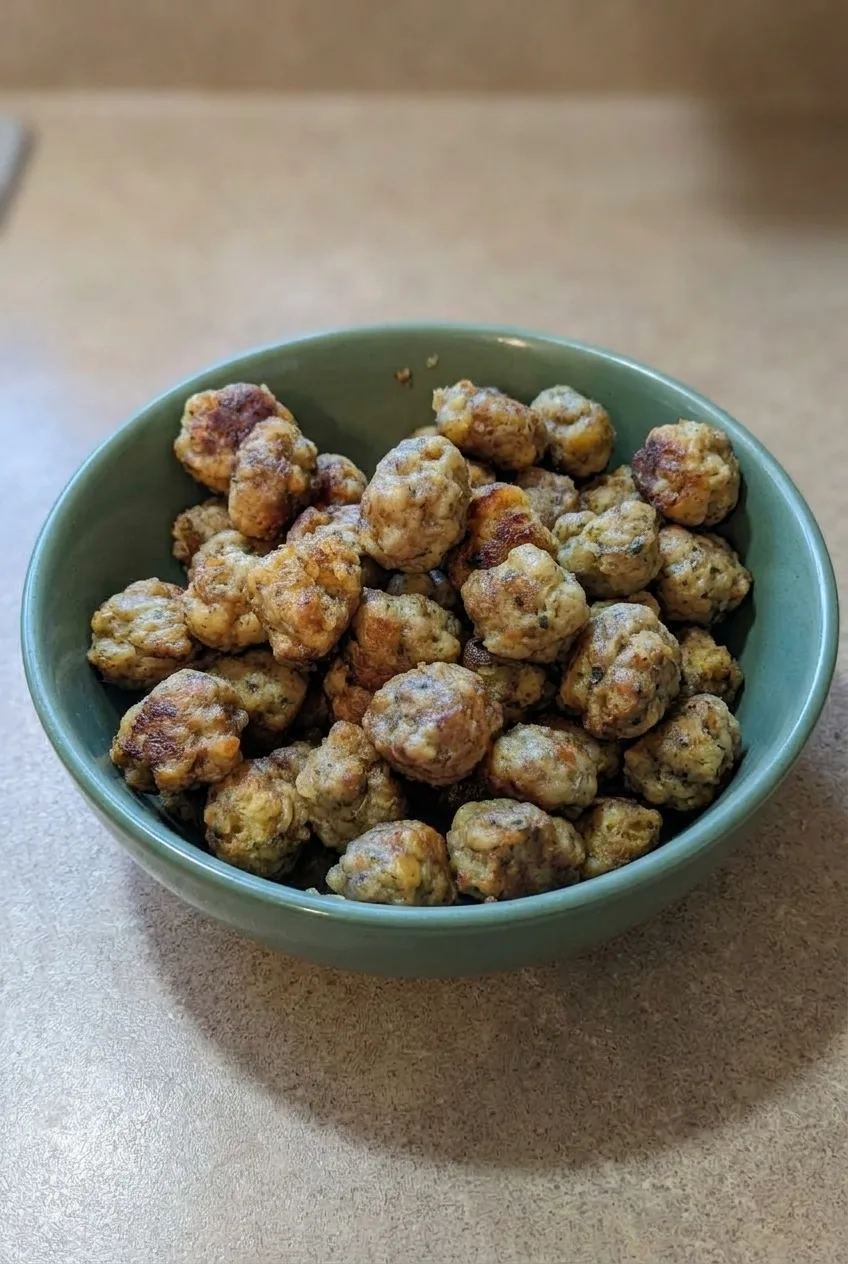
These oven-baked sausage stuffing balls have mottled golden-brown surfaces, visible bread pieces, and tender centers. Dry boxed stuffing absorbs warm broth before it’s mixed with uncooked pork sausage, egg, softened onion, and parsley. That short rest softens the bread so the small bites hold together; gentle mixing keeps them from becoming dense.

Serve the balls piled in a bowl as an appetizer or side dish, with cranberry sauce or gravy alongside if you like.

Ingredients for Sausage Stuffing Balls

Broken-open sausage stuffing ball showing its tender bread-and-sausage interior
  • 1 package (6 ounces; 170g) seasoned dry boxed stuffing mix, unprepared
  • ½ cup warm low-sodium chicken broth (120g), plus up to 2 tablespoons more if needed
  • 1 pound bulk pork breakfast sausage (about 450g), uncooked
  • ⅓ cup finely diced yellow onion (about 55g)
  • 1 large egg
  • 2 tablespoons finely chopped fresh parsley
  • 1 tablespoon neutral cooking oil, divided

The stuffing mix and sausage are already seasoned, so the base recipe does not include additional salt. Makes about 28–32 balls, or approximately 8 appetizer servings.

How to Make Sausage Stuffing Balls

Full green bowl of sausage stuffing balls on a simple tabletop
  1. Prepare the oven and sheet: Preheat the oven to 400°F (205°C). Lightly coat a large rimmed baking sheet with 1 teaspoon of the oil.
  2. Soften the onion: Heat the remaining 2 teaspoons oil in a small skillet over medium heat. Cook the onion for 4–5 minutes, until soft but not deeply browned. Let it cool slightly.
  3. Moisten the stuffing: Toss the dry stuffing mix with ½ cup warm broth in a large bowl. Let it stand for 5–7 minutes, until the bread pieces feel soft and moist with no liquid pooling in the bowl. If hard, dry pieces remain, add broth 1 tablespoon at a time, up to 2 tablespoons more.
  4. Mix gently: Stir the onion, egg, and parsley into the stuffing. Add the uncooked sausage and mix just until evenly distributed, without packing the mixture tightly.
  5. Shape: Scoop and gently press the mixture into roughly round 1¼- to 1½-inch balls. Arrange them about 1 inch apart on the oiled sheet, using a second sheet if needed. If the mixture is too sticky to shape, chill it briefly first.
  6. Bake and check: Bake uncovered for about 20–25 minutes, rotating the sheet halfway through if it is browning unevenly. Begin checking at 18–20 minutes, especially for smaller balls. The surfaces should be mottled golden-brown with darker toasted spots, and the center of a representative ball must reach 160°F (70°C) on an instant-read thermometer. Keep baking if the outsides brown before the centers reach temperature.
  7. Rest and serve: Let the balls rest for about 5 minutes so they are easier to lift intact, then pile them in a serving bowl. Offer any sauce separately.

Getting the Stuffing Moisture Right

Give the stuffing its full resting time before adding more broth. Different mixes absorb liquid differently: the bread should be softened, but the bowl should not contain pooled liquid. Add extra broth only if hard, dry pieces remain. If the fully mixed batch is soft and sticky, chill it briefly rather than adding more liquid.

Shaping Balls That Cook Evenly

A small scoop helps keep the portions consistent. Press each ball just firmly enough to hold together; lightly oiled hands can help if the mixture clings. Larger balls may need longer than the stated bake window, so check the center temperature instead of relying on the clock.

Serving and Variations

Serve the warm balls unsauced, with cranberry sauce or warm turkey gravy on the side. For an appetizer spread, pair them with classic deviled eggs. For a larger holiday meal, add cheesy scalloped potatoes as another side.

For a spicier version, use hot Italian pork sausage or spicy breakfast sausage. If using links, remove the uncooked sausage from its casings. Seasoning will vary, but keep the balls small and check for a 160°F center.

Make-Ahead and Leftovers

Shape the uncooked balls up to 24 hours ahead, cover, and refrigerate. Chilled balls may need about 2–3 extra minutes in the oven; check their center temperature rather than relying on the clock. You can also freeze uncooked shaped balls individually on a tray, then transfer them to a freezer-safe container. Thaw overnight in the refrigerator before baking.

Cool cooked leftovers and refrigerate in an airtight container for up to 3 days, or freeze for up to 2 months and thaw before reheating. Reheat in the oven or microwave until hot throughout. Heat only as long as needed, since prolonged reheating can dry them out.

Nutrition

Approximate nutrition per serving (⅛ of the recipe, about 3–4 balls): 275 calories, 11g protein, 18g fat, and 16g carbohydrates. Approximate values per 100g cooked: 290 calories, 12g protein, 19g fat, and 16g carbohydrates. Estimates exclude optional sauces and will vary with the sausage, stuffing mix, and moisture lost during baking.

Sausage Stuffing Balls

Oven-baked bites of softened boxed stuffing, pork sausage, onion, egg, and parsley with golden-brown surfaces and tender centers.
Course: Appetizer
Cuisine: American
Prep: 20 min
Cook: 25 min
Total: 50 min
Servings: 8 Calories: 275 kcal per serving; 290 kcal per 100 g cooked

Equipment

  • Rimmed baking sheet
  • Small skillet
  • Large mixing bowl
  • Small scoop
  • Instant-read thermometer

Ingredients

  • 1 package (6 ounces; 170 g) seasoned dry boxed stuffing mix, unprepared
  • 1/2 cup warm low-sodium chicken broth (120 g), plus up to 2 tablespoons more if needed
  • 1 pound (about 450 g) uncooked bulk pork breakfast sausage
  • 1/3 cup finely diced yellow onion (about 55 g)
  • 1 large egg
  • 2 tablespoons finely chopped fresh parsley
  • 1 tablespoon neutral cooking oil, divided

Instructions

  1. Preheat the oven to 400°F (205°C). Lightly coat a large rimmed baking sheet with 1 teaspoon of the oil.
  2. Heat the remaining 2 teaspoons oil in a small skillet over medium heat. Cook the onion for 4–5 minutes, until soft but not deeply browned. Let it cool slightly.
  3. Toss the stuffing mix with 1/2 cup warm broth in a large bowl. Let it stand for 5–7 minutes, until the bread is soft and moist and no liquid pools in the bowl. If hard, dry pieces remain, add more broth 1 tablespoon at a time, up to 2 tablespoons.
  4. Stir the onion, egg, and parsley into the stuffing. Add the uncooked sausage and mix gently until evenly distributed.
  5. Shape the mixture into roughly round 1 1/4- to 1 1/2-inch balls. Arrange them about 1 inch apart on the prepared baking sheet, using a second sheet if needed.
  6. Bake uncovered for 20–25 minutes, rotating the sheet halfway through if browning unevenly. Begin checking at 18–20 minutes, especially for smaller balls. Bake until mottled golden-brown and a representative ball reaches 160°F (70°C) in the center.
  7. Let the balls rest for about 5 minutes before serving.

Tips

  • Let the stuffing absorb the broth for the full resting time before adding more.
  • If the mixture is sticky, chill it briefly rather than adding more liquid.
  • Shape the balls to a consistent size so they cook evenly, and avoid packing them tightly.
  • Use an instant-read thermometer to check the center, especially for larger balls.
  • Lightly oil your hands if the mixture clings while shaping.

Variations

  • Spicy Sausage Stuffing Balls: Use hot Italian pork sausage or spicy breakfast sausage; remove the casings first if using links.

Notes

Refrigerate cooked leftovers in an airtight container for up to 3 days or freeze for up to 2 months. Reheat until hot throughout. Shape uncooked balls up to 24 hours ahead and refrigerate, or freeze them and thaw overnight in the refrigerator before baking.

Nutrition

Calories: 275 kcal per serving; 290 kcal per 100 g cooked | Protein: 11 g per serving; 12 g per 100 g cooked | Fat: 18 g per serving; 19 g per 100 g cooked | Carbohydrates: 16 g per serving; 16 g per 100 g cooked

Classic Deviled Eggs

Six eggs make 12 deviled egg halves with firm white cups and a creamy, tangy filling. Bring the eggs to a boil in cold water, then cover the pan off heat to finish cooking them. An ice-water bath limits carryover cooking and cools the eggs for careful peeling. Mash the yolks finely, spoon the filling into soft mounds, and add a light dusting of paprika near serving.

Ingredients for Classic Deviled Eggs

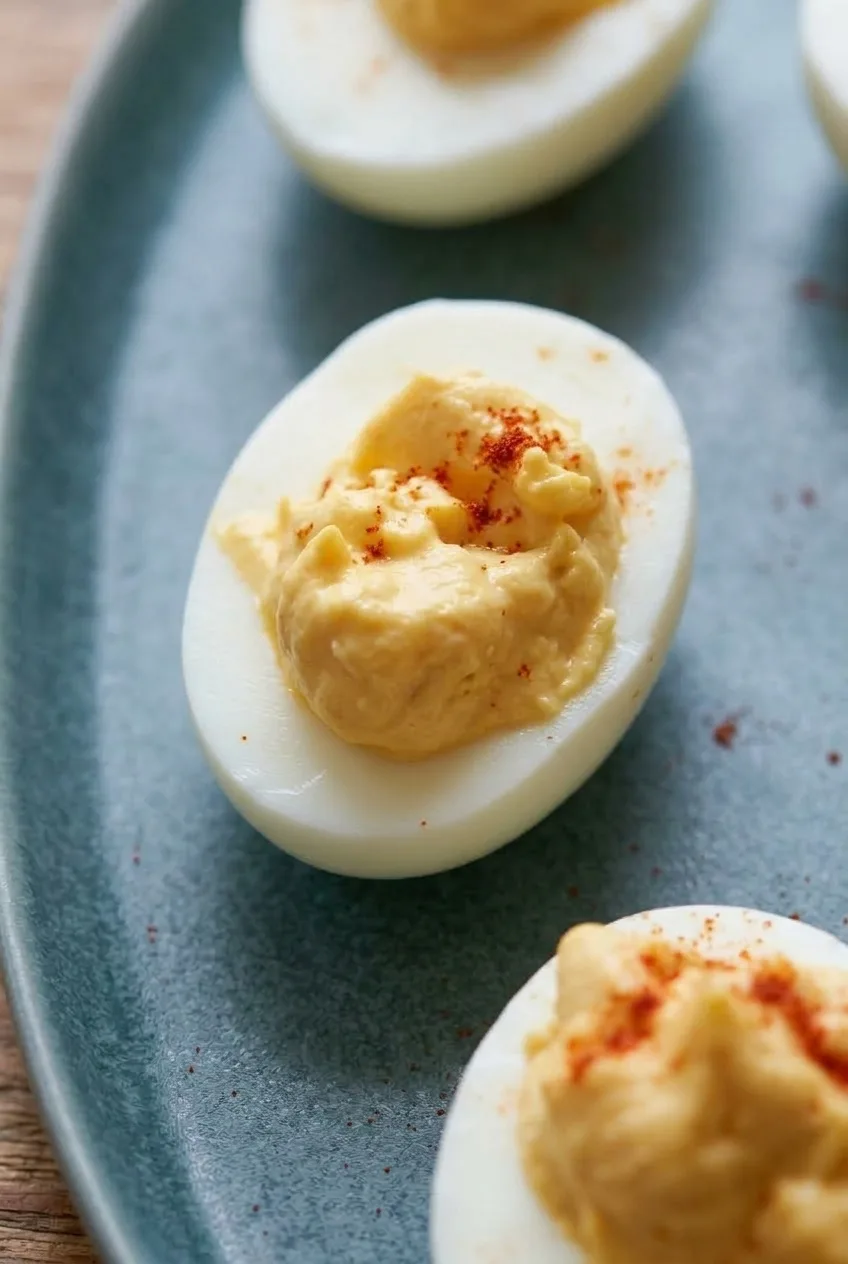
Close view of a deviled egg's creamy spooned filling, paprika specks, and intact white cup
  • 6 large eggs
  • 1/4 cup mayonnaise (about 60g)
  • 1 teaspoon Dijon mustard
  • 1 teaspoon white-wine vinegar
  • 1/8 teaspoon fine salt, plus more to taste
  • Small pinch of ground black pepper, plus more to taste
  • About 1/4 teaspoon paprika, for dusting

How to Make Classic Deviled Eggs

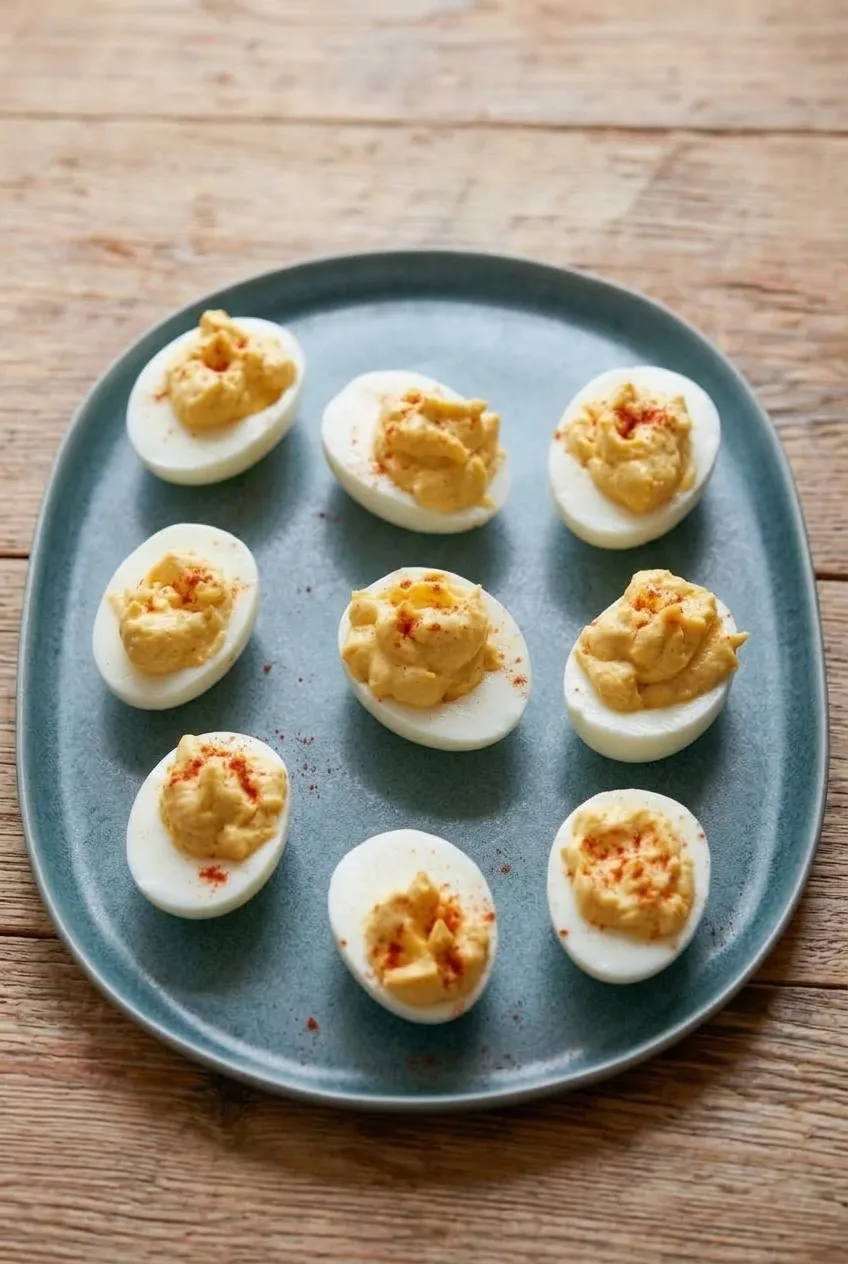
Full platter of classic deviled egg halves loosely arranged on a wooden table
  1. Bring the eggs to a boil: Place the eggs in one layer in a saucepan and cover with cold water by about 1 inch. Bring to a full rolling boil over high heat, uncovered.
  2. Finish cooking off heat: Turn off the heat, remove the pan from the burner, and cover it. Start a 12-minute timer when the pan is covered; leave the lid on throughout.
  3. Chill and peel: Promptly transfer the eggs to enough ice water to submerge them. After about 5 minutes, gently crack both ends of each egg, roll it lightly to loosen the shell, and peel without squeezing the white. The ice bath stops carryover cooking and helps limit a gray-green ring around the yolks.
  4. Halve and mash: Cut the eggs lengthwise. Lift the fully set yolks into a bowl and arrange the white halves cut side up on a platter. Mash the yolks finely with a fork before adding the other ingredients.
  5. Mix the filling: Stir in the mayonnaise, Dijon, vinegar, salt, and pepper until creamy. Taste and adjust the seasoning. A spoonful should hold a soft peak rather than slump.
  6. Fill and serve: Spoon generous, irregular mounds of filling into all 12 white cups. Dust lightly with paprika and serve chilled, or refrigerate until serving.

How to Keep the Egg Whites Intact

Eggs that are not exceptionally fresh may peel more readily, though shells can still cling. Cool them in ice water before peeling, then crack and roll gently rather than pressing hard enough to dent the whites. Take particular care around the thin edges of each cup.

How to Keep the Filling Creamy and Mounded

Mash the yolks thoroughly before adding the mayonnaise; large yolk crumbs are harder to smooth out afterward. Keep to the measured mayonnaise amount so the filling stays thick enough to mound. For a more savory filling, stir in 1 teaspoon finely minced shallot or a few drops of hot sauce before the final seasoning adjustment.

Serving Classic Deviled Eggs

Arrange the halves separately on a platter so they are easy to pick up. For another cold dish, serve them alongside tuna pasta salad with shells and dill. Broccoli cheese pinwheels make a warm, handheld option.

Make-Ahead and Refrigeration

To prepare a day ahead, cook and peel the eggs and make the filling. Refrigerate the whites and filling separately in covered containers, with wrap pressed against the filling. Fill the whites and add paprika shortly before serving for the freshest appearance.

Keep prepared eggs refrigerated at 40°F (5°C) or below. Refrigerate assembled leftovers promptly and use within 2 days. Do not leave the eggs at room temperature for more than 2 hours, or more than 1 hour when the temperature is above 90°F (30°C). Serve cold; do not reheat.

Nutrition

Approximate nutrition per serving of 2 halves (1 egg; about 6 servings total): 140 calories, 6g protein, 12g fat, and 1g carbohydrates. Per 100g: approximately 225 calories, 10g protein, 20g fat, and 1g carbohydrates. Values vary with the eggs and mayonnaise used.

Classic Deviled Eggs

Boiled eggs are filled with a creamy, tangy yolk mixture and finished with paprika.
Course: Appetizer
Cuisine: American
Prep: 15 min
Cook: 12 min
Total: 32 min
Servings: 6 Calories: 140 kcal

Equipment

  • Saucepan
  • Mixing bowl
  • Fork
  • Knife
  • Platter

Ingredients

  • 6 large eggs
  • 1/4 cup mayonnaise (about 60 g)
  • 1 teaspoon Dijon mustard
  • 1 teaspoon white-wine vinegar
  • 1/8 teaspoon fine salt, plus more to taste
  • Small pinch ground black pepper, plus more to taste
  • About 1/4 teaspoon paprika, for dusting

Instructions

  1. Place the eggs in a single layer in a saucepan and cover with cold water by about 1 inch.
  2. Bring the water to a full rolling boil over high heat, uncovered.
  3. Turn off the heat, remove the pan from the burner, and cover it. Set a timer for 12 minutes and leave the lid on.
  4. Transfer the eggs promptly to enough ice water to submerge them. Cool for about 5 minutes.
  5. Gently crack both ends of each egg, roll it lightly to loosen the shell, and peel without squeezing the white.
  6. Cut the eggs lengthwise. Remove the yolks and arrange the white halves cut side up on a platter.
  7. Mash the yolks finely with a fork.
  8. Stir in the mayonnaise, Dijon, vinegar, salt, and pepper until creamy. Taste and adjust the seasoning.
  9. Spoon the filling into the 12 white halves, forming soft mounds.
  10. Dust lightly with paprika and serve chilled, or refrigerate until serving.

Tips

  • Use an ice-water bath to cool the eggs and help limit a gray-green ring around the yolks.
  • Crack and roll the eggs gently when peeling to avoid denting or tearing the whites.
  • Mash the yolks thoroughly before adding the other ingredients for a smoother filling.
  • Keep to the measured mayonnaise amount so the filling holds a soft peak.
  • Add paprika shortly before serving for the freshest appearance.

Variations

  • Shallot Deviled Eggs: Stir 1 teaspoon finely minced shallot into the filling before adjusting the seasoning.
  • Spicy Deviled Eggs: Add a few drops of hot sauce to the filling before adjusting the seasoning.

Notes

For make-ahead preparation, refrigerate the peeled whites and filling separately in covered containers, pressing wrap against the filling. Keep prepared eggs at 40°F (5°C) or below; refrigerate leftovers promptly and use within 2 days. Do not leave at room temperature for more than 2 hours, or 1 hour above 90°F (30°C). Serve cold; do not reheat.

Nutrition

Calories: 140 kcal | Protein: 6 g | Fat: 12 g | Carbohydrates: 1 g

Mushroom Wellington

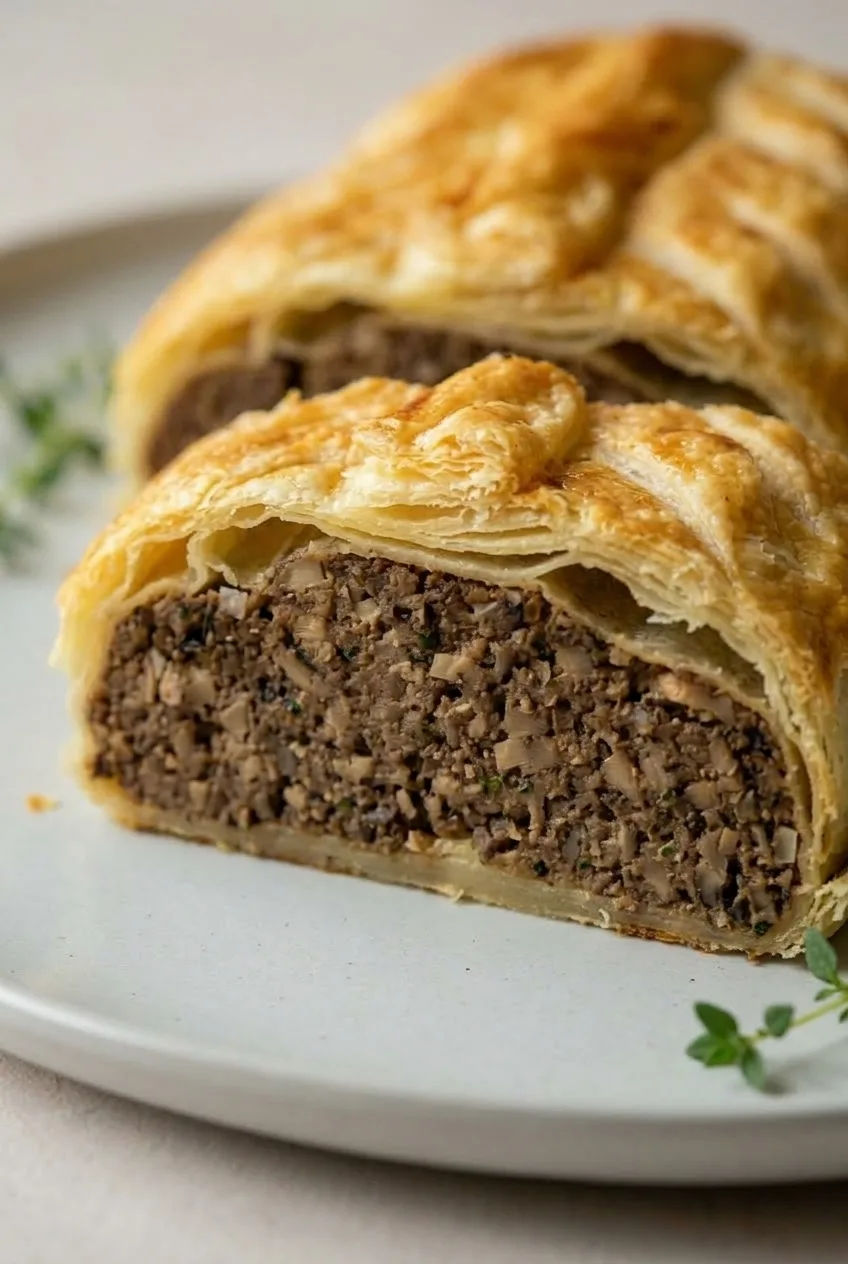
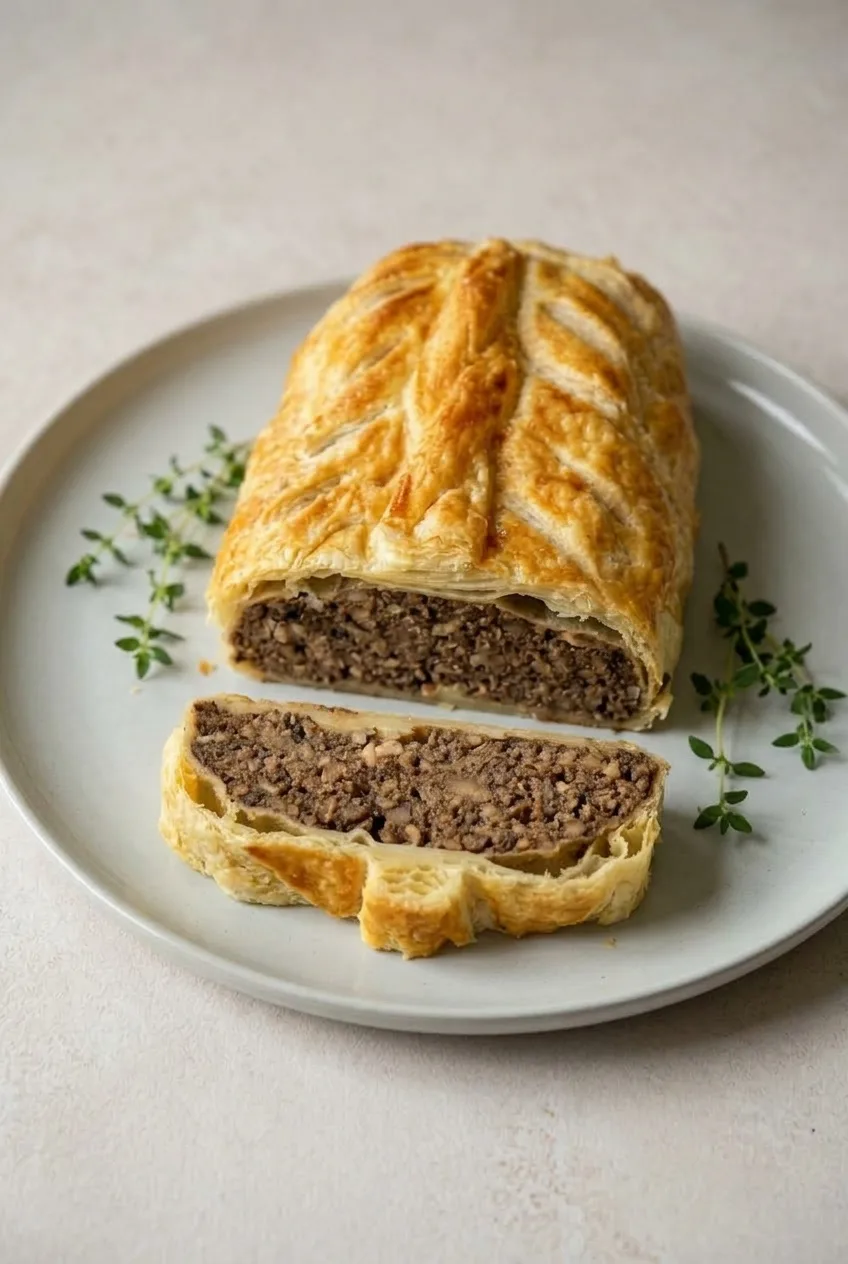
This Mushroom Wellington is one golden, diagonally scored puff-pastry loaf filled with finely chopped mushrooms, thyme, and toasted walnuts. A little breadcrumb helps the filling hold together in thick slices. For a crisp shell, cook the mushrooms until no liquid pools in the skillet, then cool the filling completely before wrapping it in cold pastry.

Makes one 9- to 10-inch loaf; serves 6. Allow about 2 hours, including cooling, chilling, and resting.

Ingredients for Mushroom Wellington

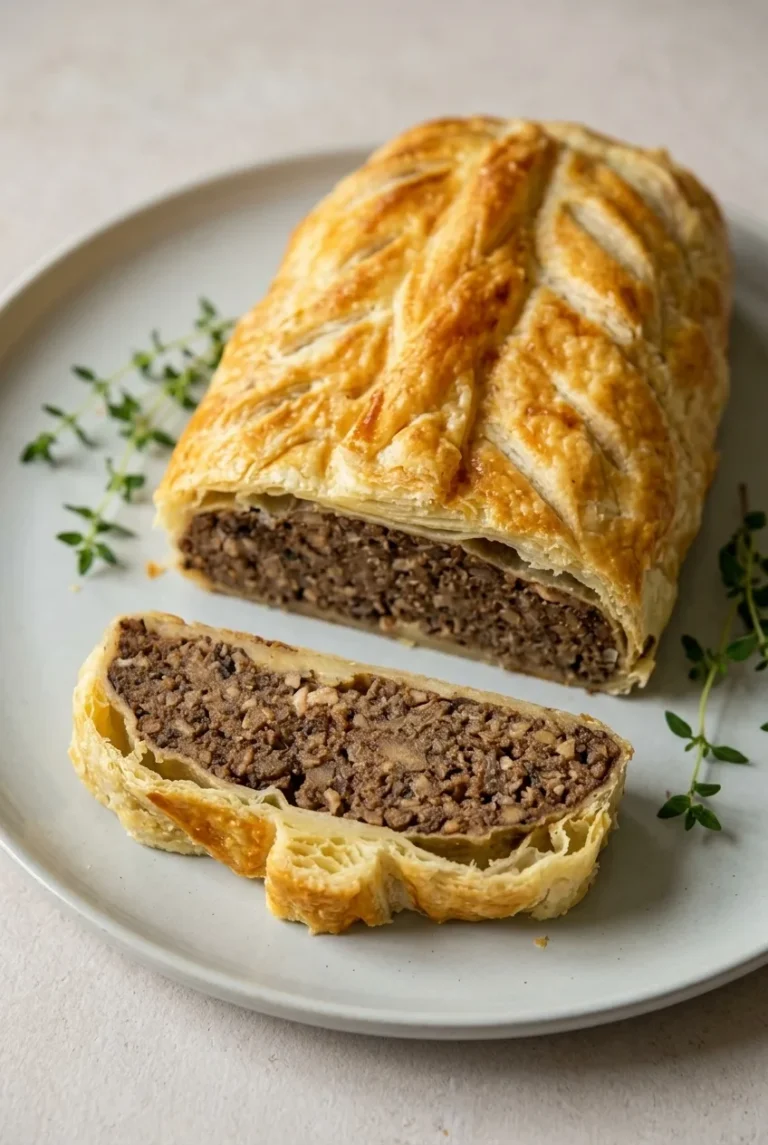
Close view of a Mushroom Wellington slice showing compact mushroom filling and flaky pastry layers
  • 1 1/2 pounds cremini mushrooms, finely chopped (680g)
  • 1 medium yellow onion, finely diced (about 150g)
  • 3 garlic cloves, minced
  • 2 tablespoons olive oil
  • 2 teaspoons fresh thyme leaves
  • 1 tablespoon soy sauce
  • 1/2 cup toasted walnuts, finely chopped (about 55g)
  • 1/3 cup plain dry breadcrumbs (about 35g)
  • 3/4 teaspoon kosher salt, plus more to taste
  • 1/2 teaspoon freshly ground black pepper
  • 1 sheet puff pastry, about 8 to 9 ounces (245g), thawed but cold
  • 1 large egg, beaten with 1 tablespoon water

Keep the mushrooms in small, distinct pieces rather than a paste. If using a food processor, pulse briefly in batches.

How to Make Mushroom Wellington

Whole scored Mushroom Wellington and a thick cut slice on a plate, viewed from farther back
  1. Prepare the ingredients: Chop the mushrooms, onion, garlic, and toasted walnuts. Keep the puff pastry refrigerated while you make and cool the filling.
  2. Cook the filling: Heat the olive oil in a 12-inch skillet over medium heat. Cook the onion until softened. Increase the heat to medium-high and add the mushrooms, letting each addition reduce before adding more if the skillet is crowded. Stir as the mushrooms release liquid and cook down, adjusting the heat to medium if needed. Stir in the garlic, thyme, soy sauce, salt, and pepper. Continue cooking until the mushrooms are reduced and browned in spots, about 20 to 25 minutes total. When you drag a spatula across the skillet, no liquid should pool in the cleared space. Taste and adjust the salt, accounting for the soy sauce.
  3. Bind and cool: Remove the skillet from the heat and stir in the walnuts and breadcrumbs. Spread the filling on a wide plate or shallow tray and cool completely, about 25 to 30 minutes. It should feel room-temperature throughout and hold together when pressed, without wet patches. Preheat the oven to 400°F (205°C) with a rack in the lower-middle position while the filling cools.
  4. Wrap the loaf: Line a rimmed baking sheet with parchment. If needed, roll the cold pastry to roughly 12 by 13 inches—just large enough to enclose the filling without stretching it thin. Pack the filling into a compact, 9- to 10-inch log along the center. Fold the pastry around it, brush the joining edges with egg wash, and seal the long seam and ends. Place the loaf seam-side down on the baking sheet.
  5. Score, vent, and chill: Brush the top with egg wash. Make shallow diagonal scores across the top without cutting through the pastry, then cut a few short slits through the shell to release steam. Refrigerate the assembled loaf for 15 minutes.
  6. Bake: Bake uncovered for about 35 to 45 minutes. Start checking the color at 30 minutes. The top and sides should be puffed and deeply golden; carefully lift an edge with a spatula to check that the underside is browned and firm, not pale and soft. If the top darkens before the bottom is done, tent it loosely with foil and continue baking.
  7. Rest and slice: Let the Wellington rest for 10 minutes so the filling holds together. Cut thick slices with a serrated knife, using gentle strokes to preserve the pastry layers.

How to Keep the Pastry Crisp

A crowded skillet traps steam instead of letting the mushrooms brown. Use a wide pan, add the mushrooms gradually if needed, and keep cooking until the skillet is nearly dry. Even a warm filling can release steam inside the pastry, so let it cool all the way through before assembly.

The diagonal scores mark the top but should not cut through the shell. Separate, deeper slits provide the steam vents. After baking, check the underside as well as the top: golden pastry on top can still have a soft bottom.

Serving and Variations

Serve thick slices with mashed potatoes and roasted Brussels sprouts or green beans. Offer mushroom or vegetable gravy on the side rather than pouring it over the pastry. A few fresh thyme sprigs can go beside the sliced loaf.

For another vegetable-centered main, try stuffed butternut squash with mushrooms and spinach.

  • Nut-free filling: Replace the walnuts with an equal volume of toasted sunflower seeds. Check the pastry and breadcrumb labels for other relevant allergens.
  • Vegan version: Use labeled vegan puff pastry and a plant-based pastry wash instead of the egg wash. Check the breadcrumbs, too; the pastry may brown differently.

Make-Ahead, Storage, and Reheating

For advance preparation, cool the cooked filling completely and refrigerate it separately until assembly. An assembled, unbaked Wellington can be kept covered in the refrigerator for up to 2 days; keep the pastry cold and dry.

Refrigerate baked leftovers in a covered container for up to 3 days. Reheat slices in a 350°F (175°C) oven for about 15 to 20 minutes, until heated through and the pastry is crisp.

To freeze an assembled, unbaked loaf, wrap it tightly and freeze for up to 1 month. Bake from frozen, allowing roughly 15 to 20 minutes beyond the usual baking range. Use a browned, firm underside—not the clock alone—as the final doneness cue.

Nutrition

Approximate nutrition per thick slice, based on 6 servings: 350 calories, 10g protein, 23g fat, and 29g carbohydrates. Per 100g of finished Wellington: approximately 235 calories, 7g protein, 15g fat, and 19g carbohydrates. Values are estimates; puff-pastry brands, moisture loss, and slice size will affect the results.

Mushroom Wellington

Finely chopped mushrooms, thyme, and toasted walnuts are wrapped in puff pastry and baked until golden.
Course: Main Course
Cuisine: Global
Prep: 50 min
Cook: 70 min
Total: 120 min
Servings: 6 Calories: 350 kcal

Equipment

  • 12-inch skillet
  • wide plate or shallow tray
  • rimmed baking sheet
  • parchment paper
  • serrated knife

Ingredients

For the filling

  • 1 1/2 pounds cremini mushrooms, finely chopped (680 g)
  • 1 medium yellow onion, finely diced (about 150 g)
  • 3 garlic cloves, minced
  • 2 tablespoons olive oil
  • 2 teaspoons fresh thyme leaves
  • 1 tablespoon soy sauce
  • 1/2 cup toasted walnuts, finely chopped (about 55 g)
  • 1/3 cup plain dry breadcrumbs (about 35 g)
  • 3/4 teaspoon kosher salt, plus more to taste
  • 1/2 teaspoon freshly ground black pepper

For the pastry

  • 1 sheet puff pastry, about 8 to 9 ounces (245 g), thawed but cold
  • 1 large egg, beaten with 1 tablespoon water

Instructions

  1. Finely chop the mushrooms, onion, garlic, and toasted walnuts. Keep the puff pastry refrigerated.
  2. Heat the olive oil in a 12-inch skillet over medium heat. Cook the onion until softened.
  3. Increase the heat to medium-high and add the mushrooms, letting each addition reduce before adding more if the skillet is crowded. Cook, stirring, until reduced and browned in spots, about 20 to 25 minutes total. Reduce the heat to medium if needed.
  4. Stir in the garlic, thyme, soy sauce, salt, and pepper. Cook until no liquid pools when you clear a space in the skillet with a spatula. Taste and adjust the salt.
  5. Remove the skillet from the heat and stir in the walnuts and breadcrumbs. Spread the filling on a wide plate or shallow tray and cool completely, about 25 to 30 minutes. Preheat the oven to 400°F (205°C) with a rack in the lower-middle position.
  6. Line a rimmed baking sheet with parchment. If needed, roll the cold pastry to about 12 by 13 inches.
  7. Shape the cooled filling into a compact 9- to 10-inch log along the center of the pastry. Fold the pastry around the filling, brush the joining edges with egg wash, and seal the long seam and ends. Place seam-side down on the baking sheet.
  8. Brush the top with egg wash. Make shallow diagonal scores across the top without cutting through the pastry, then cut a few short slits through the shell to vent steam. Refrigerate the assembled loaf for 15 minutes.
  9. Bake uncovered for about 35 to 45 minutes, checking the color at 30 minutes. Bake until the top and sides are deeply golden and the underside is browned and firm. If the top darkens before the bottom is done, tent loosely with foil and continue baking.
  10. Rest for 10 minutes, then cut into thick slices with a serrated knife using gentle strokes.

Tips

  • Keep the mushrooms in small, distinct pieces rather than processing them into a paste.
  • Use a wide skillet and cook the mushrooms until the pan is nearly dry so the pastry stays crisp.
  • Cool the filling completely before wrapping it in cold pastry.
  • Keep diagonal scores shallow; use separate deeper slits to vent steam.
  • Check that the underside is browned and firm before removing the Wellington from the oven.

Variations

  • Nut-Free Mushroom Wellington: Replace the walnuts with an equal volume of toasted sunflower seeds, and check pastry and breadcrumb labels for allergens.
  • Vegan Mushroom Wellington: Use labeled vegan puff pastry and a plant-based pastry wash instead of the egg wash; check the breadcrumbs as well.

Notes

Refrigerate baked leftovers in a covered container for up to 3 days. Reheat slices at 350°F (175°C) for 15 to 20 minutes. An assembled unbaked loaf keeps refrigerated for up to 2 days or frozen for up to 1 month; bake from frozen for roughly 15 to 20 minutes beyond the usual range.

Nutrition

Calories: 350 kcal | Protein: 10 g | Fat: 23 g | Carbohydrates: 29 g

Stuffed Butternut Squash

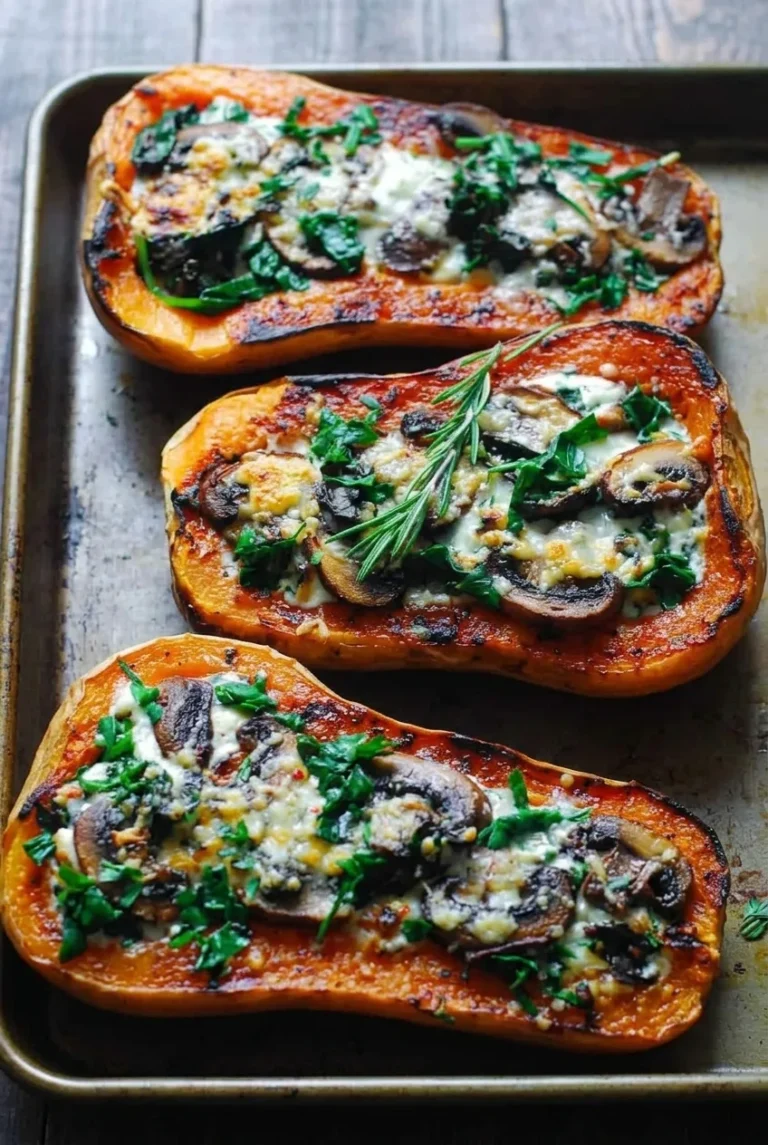
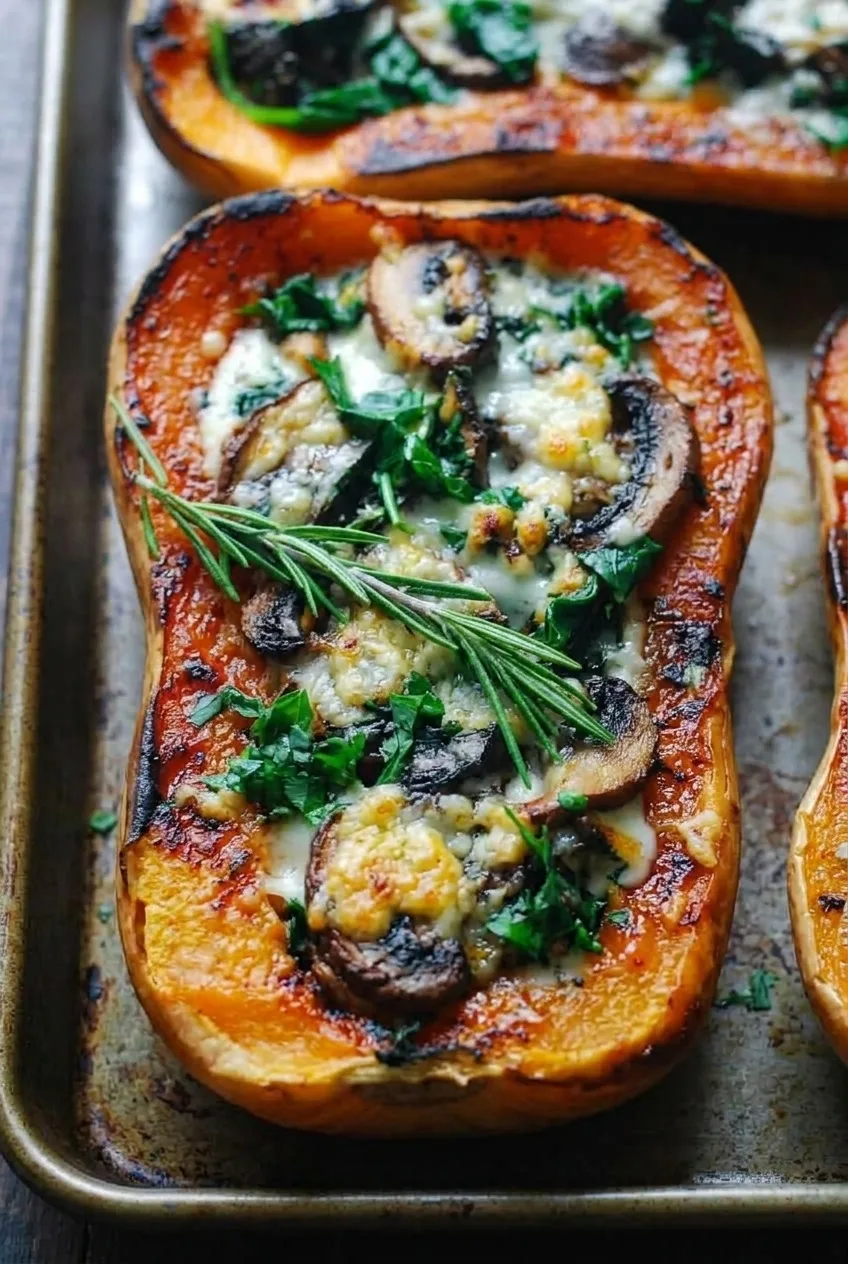
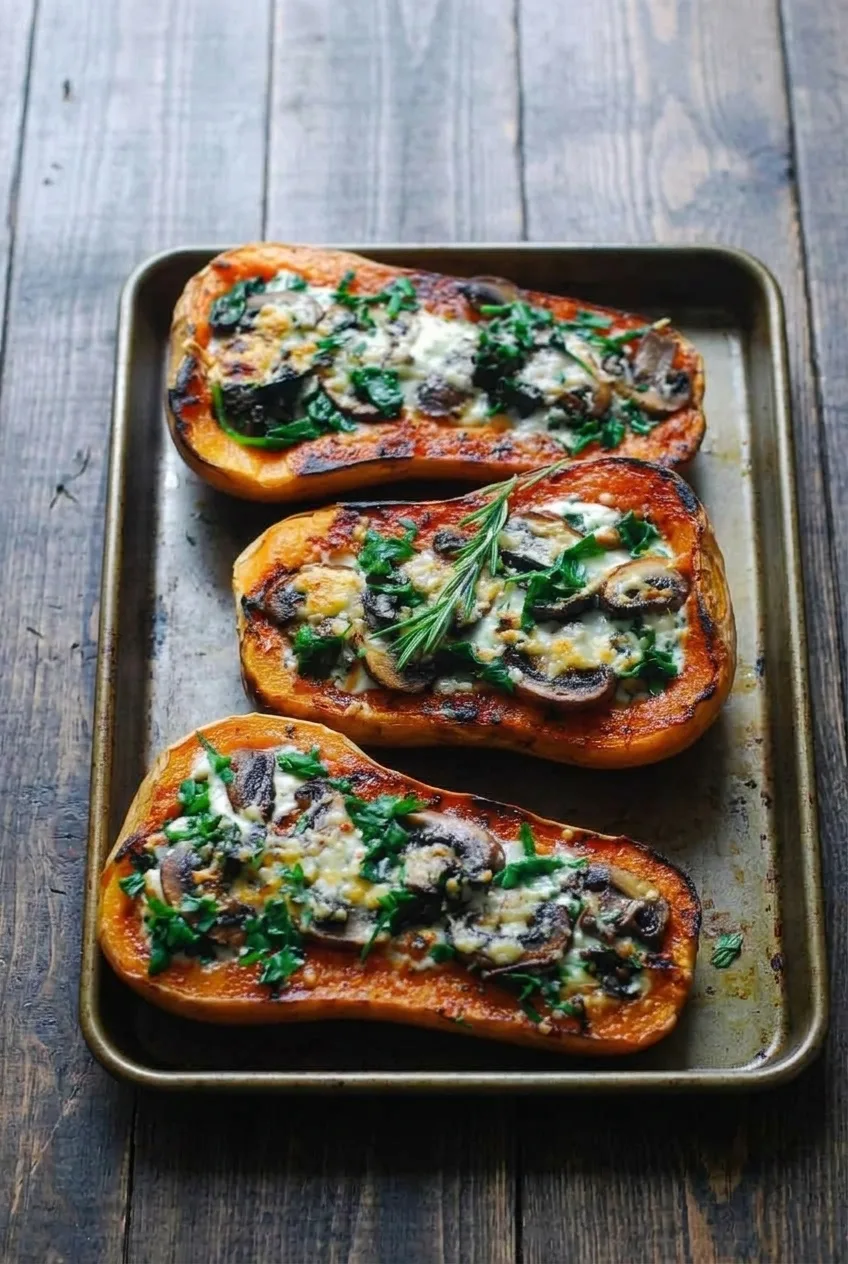
Roasted butternut squash halves make sturdy, skin-on boats for browned mushrooms, spinach, and patches of melted cheese. Leave a broad border of orange squash around the filling so each serving holds together and tastes like squash, not just stuffing.

Roast the halves until the thick necks are fork-tender while you cook the filling in a skillet. A shallow channel pressed into the tender neck makes room for the mushrooms without hollowing out the squash. Serve one half as a vegetarian main or a substantial side.

Ingredients for Stuffed Butternut Squash

Close view of mushroom slices, spinach, and melted cheese inside a roasted butternut squash half
  • 2 medium butternut squash, about 1½–2 pounds each
  • 2 tablespoons olive oil, divided
  • 1 teaspoon kosher salt, divided, plus more to taste
  • ½ teaspoon freshly ground black pepper, divided
  • 12 ounces sliced cremini mushrooms (340g)
  • 1 small yellow onion, finely diced (about 110g)
  • 2 garlic cloves, minced
  • 5 ounces baby spinach (about 140g)
  • 1 teaspoon fresh thyme leaves
  • ¾ cup shredded low-moisture mozzarella (about 85g)
  • ¼ cup finely grated Parmesan (about 25g)
  • 2 tablespoons chopped fresh flat-leaf parsley

Yield: 4 servings, one squash half each. Time: About 20 minutes prep and 45–65 minutes cooking, or 65–85 minutes total. Make the filling while the squash roasts.

How to Make Stuffed Butternut Squash

Wider view of three stuffed butternut squash halves on a baking sheet over dark wood
  1. Prepare the squash: Preheat the oven to 400°F (205°C) with a rack near the center. Trim a small amount from each end of each squash. Steady the squash on a sturdy cutting board and carefully cut them in half lengthwise with a sharp chef’s knife. Scoop out the seeds, leaving the skin on. Rub the cut surfaces with 1 tablespoon olive oil and season with ½ teaspoon salt and ¼ teaspoon pepper.
  2. Roast until tender: Place the halves cut-side down, with space between them, on a large rimmed baking sheet. Roast uncovered, starting to check after 35 minutes. Expect about 40–55 minutes, but continue until a fork easily pierces the thick flesh at the neck. Browning alone does not mean the squash is ready to stuff.
  3. Brown the mushrooms: While the squash roasts, heat the remaining tablespoon of oil in a large skillet over medium-high heat. Add the mushrooms and cook for about 8–10 minutes, stirring occasionally and allowing the slices time to brown. Cook until their released liquid has evaporated and none pools in the skillet.
  4. Finish the filling: Reduce the heat to medium. Add the onion and cook until softened, then stir in the garlic and thyme. Add the spinach in batches and cook until wilted. Continue cooking uncovered if liquid collects in the skillet. Season with the remaining ½ teaspoon salt and ¼ teaspoon pepper; taste and adjust the salt if needed.
  5. Shape and fill: Let the roasted squash stand for a few minutes, then carefully turn the halves cut-side up. Gently press down the tender flesh along each narrow neck with a spoon to form a shallow channel. Scoop out only a little flesh if necessary, keeping the halves intact. Divide the filling among them, leaving a broad orange border visible.
  6. Melt the cheese: Scatter the mozzarella and Parmesan in loose patches over the filling, leaving some mushrooms and greens visible. Return the sheet to the 400°F oven for about 5–8 minutes. Start checking after 5 minutes; the filling should be hot and the cheese melted and lightly golden in places. Sprinkle with parsley before serving.

Check the Thick Neck Before Stuffing

The flesh around the seed cavity can soften before the thick neck does. Test the neck with a fork: it should slide in easily. Larger or thicker halves may need more than 55 minutes. Finish roasting them before adding the filling, since the short cheese-melting bake will not cook a firm neck through.

Keep the Filling in the Squash

The bulbous end has a natural cavity, but the neck has little room for filling. Pressing its cooked flesh into a shallow channel gives the mushrooms a place to sit without turning the squash into a thin shell. Keep the filling below the edges so it does not slip off.

Keep the Mushroom Filling from Getting Watery

Use a roomy skillet so mushroom moisture can evaporate and the slices can brown rather than steam. Add the spinach only after the mushroom liquid has cooked off, then cook away any moisture the greens release before stuffing the squash. Chopped kale can replace the spinach, but cook it until tender and dry.

Serving, Make-Ahead, and Storage

Serve one half with a simple salad for a vegetarian dinner. For a holiday meal, serve smaller portions alongside prime rib roast.

To make the dish ahead, roast the squash and prepare the filling separately up to one day in advance. Refrigerate both, then assemble and heat until hot throughout and the cheese melts. Cold components may need longer than the brief final bake for freshly cooked squash.

Refrigerate cooled leftovers covered or in an airtight container for up to 3 days. Reheat in the oven until hot throughout; the time depends on the size and temperature of the portions.

Nutrition

Approximate nutrition per serving (one stuffed squash half): 340 calories, 15g protein, 14g fat, and 46g carbohydrates. Approximate values per 100g of finished dish: 75 calories, 3g protein, 3g fat, and 10g carbohydrates. Values vary with squash size, edible yield, and cheese brands.

Stuffed Butternut Squash

Roasted butternut squash halves are filled with browned mushrooms, spinach, and melted mozzarella and Parmesan.
Course: Main Course
Cuisine: American
Prep: 20 min
Cook: 55 min
Total: 75 min
Servings: 4 Calories: 340 kcal

Equipment

  • Oven
  • Rimmed baking sheet
  • Large skillet
  • Chef's knife
  • Cutting board

Ingredients

For the squash

  • 2 medium butternut squash, about 1½–2 pounds each
  • 1 tablespoon olive oil
  • ½ teaspoon kosher salt
  • ¼ teaspoon freshly ground black pepper

For the filling

  • 1 tablespoon olive oil
  • 12 ounces sliced cremini mushrooms (340g)
  • 1 small yellow onion, finely diced (about 110g)
  • 2 garlic cloves, minced
  • 5 ounces baby spinach (about 140g)
  • 1 teaspoon fresh thyme leaves
  • ½ teaspoon kosher salt, plus more to taste
  • ¼ teaspoon freshly ground black pepper

For topping

  • ¾ cup shredded low-moisture mozzarella (about 85g)
  • ¼ cup finely grated Parmesan (about 25g)
  • 2 tablespoons chopped fresh flat-leaf parsley

Instructions

  1. Preheat the oven to 400°F (205°C) with a rack near the center.
  2. Trim a small amount from each end of each squash. Carefully cut the squash in half lengthwise and scoop out the seeds, leaving the skin on.
  3. Rub the cut surfaces with 1 tablespoon olive oil and season with ½ teaspoon salt and ¼ teaspoon pepper.
  4. Place the squash halves cut-side down, spaced apart, on a large rimmed baking sheet. Roast uncovered for about 40–55 minutes, checking after 35 minutes, until a fork easily pierces the thick neck.
  5. While the squash roasts, heat the remaining tablespoon of oil in a large skillet over medium-high heat. Add the mushrooms and cook for 8–10 minutes, stirring occasionally, until browned and their liquid has evaporated.
  6. Reduce the heat to medium. Add the onion and cook until softened, then stir in the garlic and thyme.
  7. Add the spinach in batches and cook until wilted. Continue cooking uncovered until any liquid in the skillet evaporates. Season with the remaining ½ teaspoon salt and ¼ teaspoon pepper; taste and adjust the salt if needed.
  8. Let the squash stand for a few minutes, then carefully turn the halves cut-side up. Press down the tender flesh along each narrow neck to form a shallow channel, scooping out only a little flesh if necessary.
  9. Divide the filling among the squash halves, leaving a broad orange border visible.
  10. Scatter the mozzarella and Parmesan over the filling in loose patches. Return the baking sheet to the 400°F (205°C) oven for about 5–8 minutes, checking after 5 minutes, until the filling is hot and the cheese is melted and lightly golden in places.
  11. Sprinkle with parsley before serving.

Tips

  • Check the thick neck with a fork before stuffing; it should be easily pierced.
  • Give the mushrooms room in the skillet so their moisture evaporates and they brown instead of steaming.
  • Cook off any liquid released by the spinach before filling the squash.
  • Keep a broad border of squash around the filling and keep the filling below the edges.

Variations

  • Kale Stuffed Butternut Squash: Replace the spinach with chopped kale and cook it until tender and dry.

Notes

Roast the squash and prepare the filling up to one day ahead; refrigerate separately, then assemble and heat until hot throughout. Refrigerate cooled leftovers in an airtight container for up to 3 days and reheat in the oven until hot throughout.

Nutrition

Calories: 340 kcal | Protein: 15 g | Fat: 14 g | Carbohydrates: 46 g

Prime Rib Roast

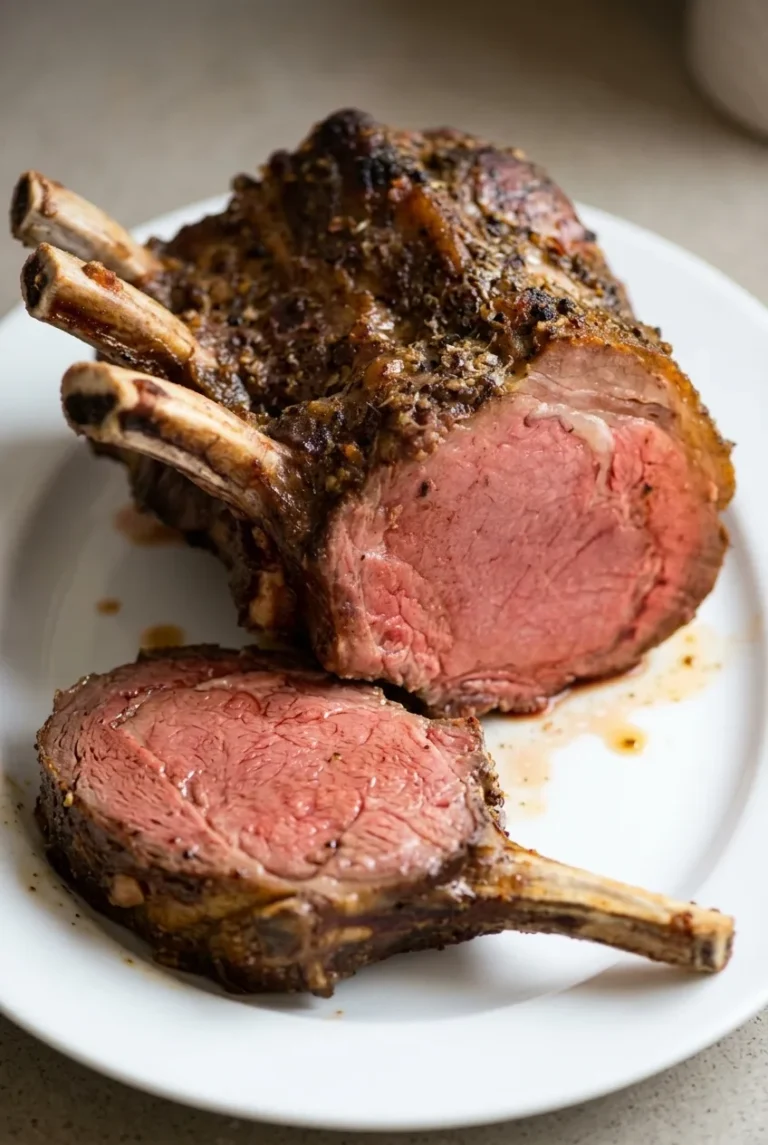
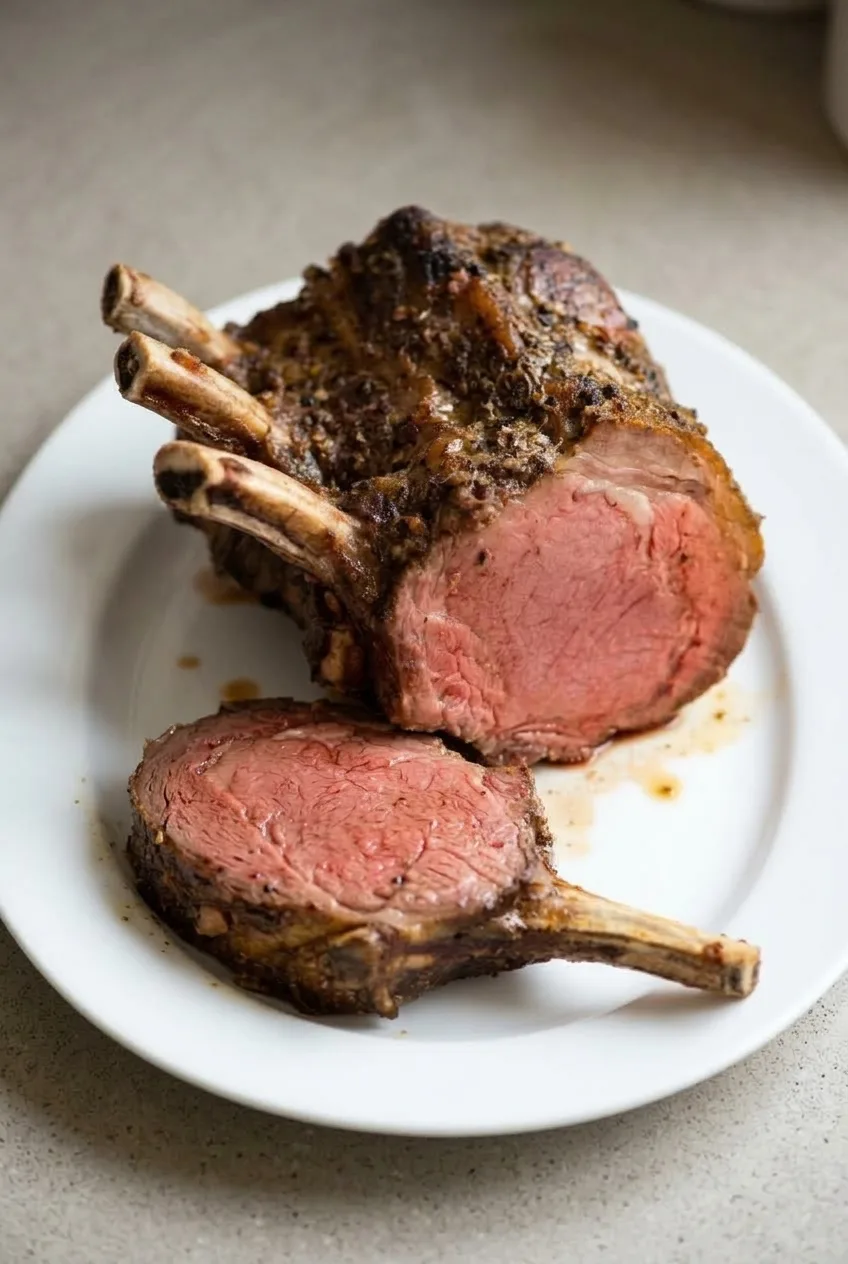
This bone-in prime rib gets its dark, garlic-herb crust from a hot start in the oven, then finishes at a lower temperature for a rosy center. The roast’s thickness and the oven can change the cooking time, so a thermometer matters more than the clock. After resting, cut one thick slice with its rib attached to reveal the pink center, then carve the remaining beef into smaller portions.

Serves: 6–8. Prep: 20 minutes, plus an optional 45-minute wait before roasting. Roast: Approximately 1 hour 45 minutes to 2 hours 30 minutes. Rest: 25–30 minutes.

Ingredients for Prime Rib Roast

Partially carved prime rib roast and one bone-in slice on a white platter
  • 1 bone-in standing rib roast, 2–3 ribs, about 5 lb (2.3 kg)
  • 4 tablespoons unsalted butter, softened (55g)
  • 1 tablespoon Diamond Crystal kosher salt or 2 teaspoons Morton kosher salt
  • 2 teaspoons coarsely ground black pepper
  • 4 garlic cloves, finely minced
  • 2 teaspoons chopped fresh thyme leaves
  • 1 teaspoon finely chopped fresh rosemary leaves
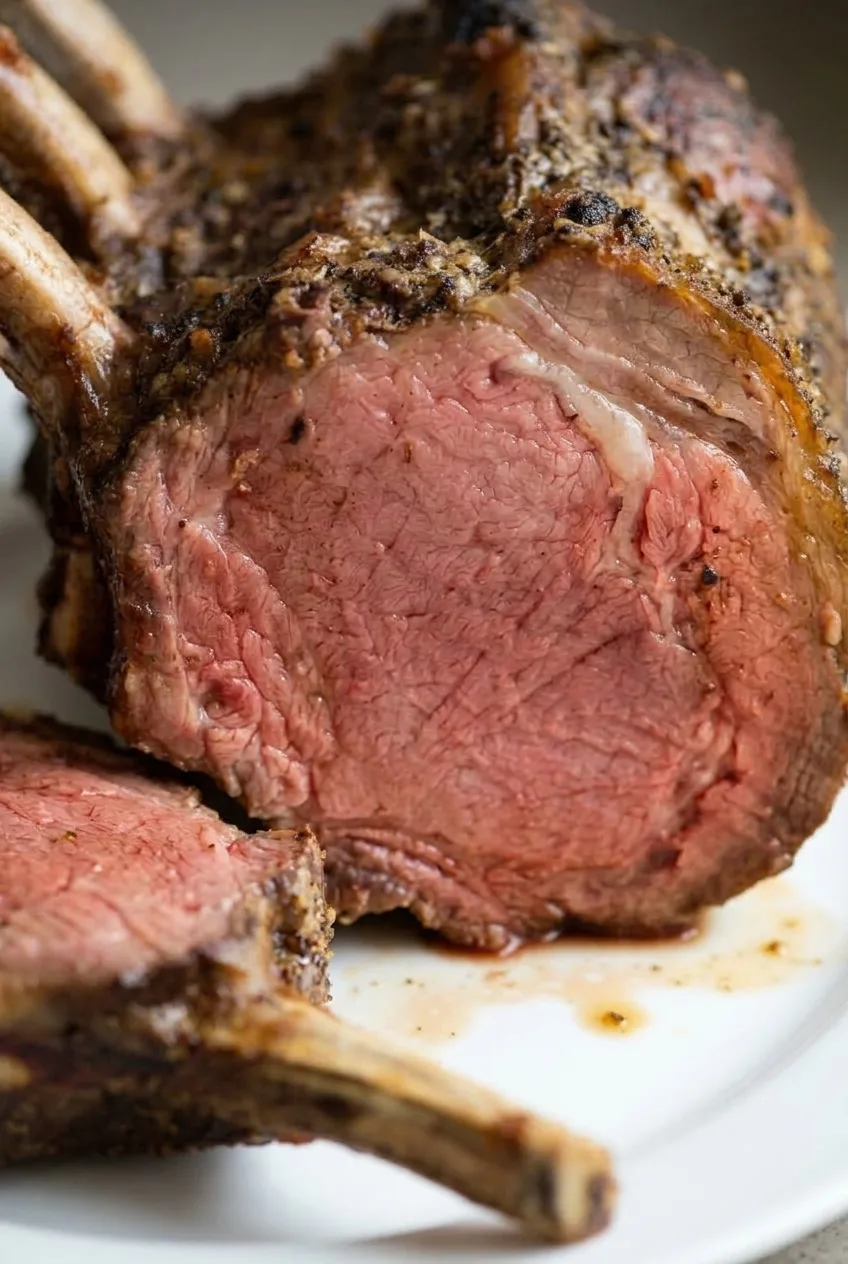
Close view of the rosy prime rib cut face, rendered fat, and dark herb-flecked crust

How to Roast Prime Rib

  1. Prepare the roast: Pat the beef dry and keep the ribs attached. If convenient, leave it out for up to 45 minutes while you prepare the oven; do not leave it at room temperature for more than 2 hours total. Fully preheat a conventional oven to 450°F (230°C).
  2. Season and position: Mix the butter, salt, pepper, garlic, thyme, and rosemary. Rub over the exposed beef and fat. Place the roast fat side up, bones down, on a rack in a sturdy roasting pan. If using an oven-safe probe, set its tip in the thickest meat, away from bone and large fat pockets.
  3. Brown the exterior: Roast uncovered at 450°F for 20 minutes. Without removing the roast, reduce the oven to 250°F (120°C).
  4. Finish by temperature: Continue roasting until the center reaches 122–125°F (about 50°C) for the selected medium-rare finish. Begin checking about 75 minutes into this lower-temperature stage, or earlier if the roast is unusually thin. The exterior should be dark brown and herb-flecked. If drippings begin to scorch, carefully add about 1/2 cup hot water to the pan bottom, not over the beef; hot drippings may splash. Total oven time is approximately 1 hour 45 minutes to 2 hours 30 minutes, but use the thermometer to decide when to remove the roast.
  5. Rest: Transfer the roast to a large cutting board and tent loosely with foil for 25–30 minutes. Check its temperature during the rest; it may rise toward 130–135°F (about 55°C), but the amount of carryover varies. Rest before carving so less juice spills onto the board.
  6. Carve: Cut one thick slice alongside a rib, leaving the bone attached to the slice. Set it in front of the roast so the rosy cut face and rib bones remain visible. Carve the remaining beef into smaller serving portions.

Where to Put the Thermometer

Insert the probe into the center of the thickest meat without touching the ribs along one side or sitting in a large fat seam. If a reading seems out of line with earlier checks, test a second spot in the center. A thinner roast may reach the target sooner; a boneless roast also needs earlier checks and will not make the same bone-in presentation slice.

Pull Temperature, Resting, and Food Safety

The 122–125°F target is the temperature when the roast leaves the oven, not after it rests. The planned medium-rare result is approximately 130–135°F after resting, though that rise is not guaranteed. This medium-rare target is below the USDA minimum for beef roasts: 145°F (65°C) followed by a 3-minute rest. Cook to that minimum if you need to follow it.

Serving and Storing Prime Rib

Serve with mashed potatoes or potatoes au gratin and a green vegetable. Offer pan juices separately so they do not cover the crust or cut face. The thick bone-in slice is a presentation piece, not necessarily one individual serving.

Refrigerate leftovers promptly in a covered container and use within 3–4 days. Keeping the remaining beef in a larger piece lets you slice portions as needed. Warm thin slices gently only until heated to your desired level; aggressive reheating will cook the pink interior further.

For a beef centerpiece made from a different cut, try roasted beef tenderloin with garlic herb butter.

Nutrition

Approximate per serving: Based on 7 portions of cooked, edible beef, 550 calories, 35g protein, 45g fat, and 1g carbohydrates. Approximate per 100g: 315 calories, 20g protein, 26g fat, and less than 1g carbohydrates. Values vary substantially with fat, bone weight, trimming, and portion size.

Prime Rib Roast

A bone-in prime rib roast is seared at high heat, then slow-roasted with garlic, thyme, and rosemary until medium-rare.
Course: Main Course
Cuisine: American
Prep: 20 min
Cook: 150 min
Total: 245 min
Servings: 7 Calories: 550 kcal

Equipment

  • Roasting pan with rack
  • Oven-safe probe thermometer
  • Cutting board
  • Aluminum foil

Ingredients

  • 1 bone-in standing rib roast, 2–3 ribs, about 5 lb (2.3 kg)
  • 4 tablespoons unsalted butter, softened (55 g)
  • 1 tablespoon Diamond Crystal kosher salt or 2 teaspoons Morton kosher salt
  • 2 teaspoons coarsely ground black pepper
  • 4 garlic cloves, finely minced
  • 2 teaspoons chopped fresh thyme leaves
  • 1 teaspoon finely chopped fresh rosemary leaves
  • About 1/2 cup hot water, as needed if drippings begin to scorch

Instructions

  1. Pat the roast dry and keep the ribs attached. If convenient, let it sit out for up to 45 minutes while the oven heats; do not leave it at room temperature for more than 2 hours total.
  2. Preheat a conventional oven to 450°F (230°C).
  3. Mix the butter, salt, pepper, garlic, thyme, and rosemary. Rub the mixture over the exposed beef and fat.
  4. Place the roast fat side up and bones down on a rack in a sturdy roasting pan. If using an oven-safe probe, insert it into the thickest part of the meat, away from bone and large fat pockets.
  5. Roast uncovered at 450°F (230°C) for 20 minutes. Without removing the roast, reduce the oven temperature to 250°F (120°C).
  6. Continue roasting until the center reaches 122–125°F (about 50°C). Begin checking about 75 minutes into this lower-temperature stage, or earlier if the roast is unusually thin. If drippings begin to scorch, carefully add about 1/2 cup hot water to the pan bottom, not over the beef.
  7. Transfer the roast to a cutting board and tent loosely with foil for 25–30 minutes. Check the temperature during the rest; it may rise toward 130–135°F (about 55°C).
  8. Cut one thick slice alongside a rib, leaving the bone attached. Set it in front of the roast, then carve the remaining beef into serving portions.

Tips

  • Use a thermometer rather than relying on the estimated cooking time.
  • Place the thermometer in the thickest meat without touching bone or sitting in a large fat seam.
  • If a thermometer reading seems inconsistent, check a second spot in the center.
  • Add hot water carefully to the pan if drippings begin to scorch; hot drippings may splash.
  • Rest the roast before carving to help reduce juice loss.

Notes

The 122–125°F pull temperature is below the USDA minimum for beef roasts. For that standard, cook to 145°F (65°C) and rest for 3 minutes. Refrigerate leftovers promptly in a covered container and use within 3–4 days; reheat slices gently.

Nutrition

Calories: 550 kcal | Protein: 35 g | Fat: 45 g | Carbohydrates: 1 g

Beef Tenderloin with Garlic Herb Butter

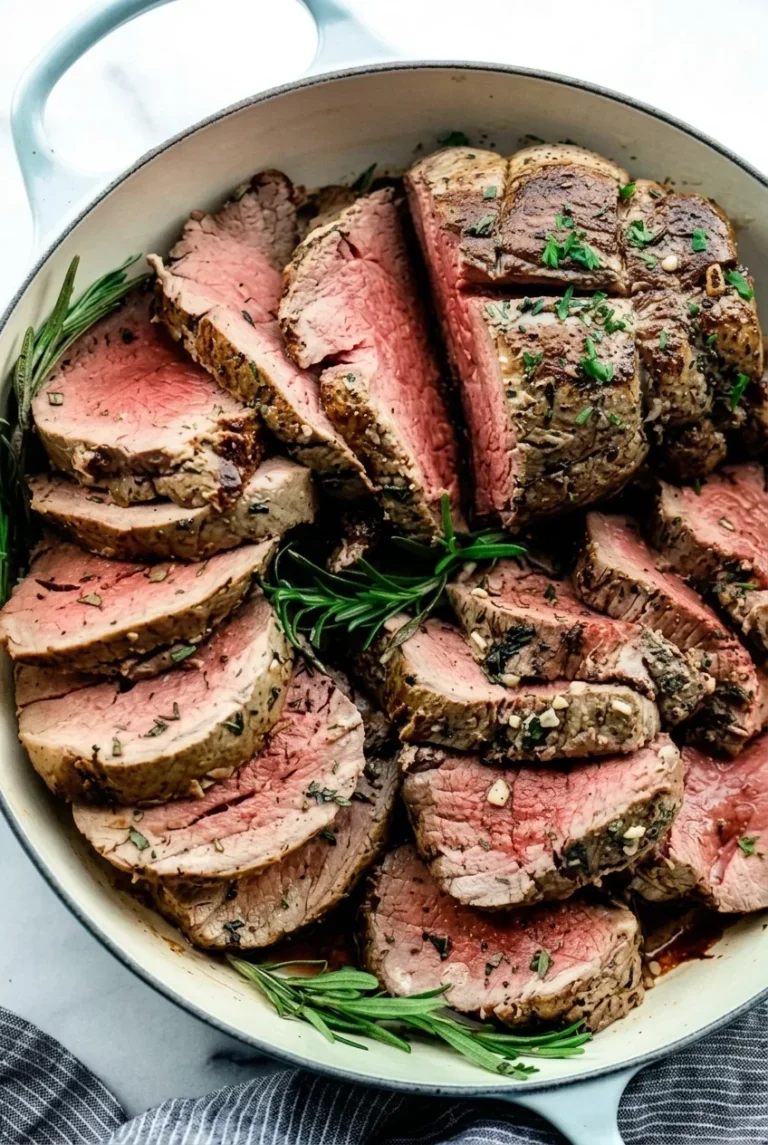
Beef tenderloin is a whole roast that cooks quickly enough to need close attention near the end. Searing it before adding the garlic herb butter builds browned edges without exposing the garlic and herbs to the hottest part of the cook. A thermometer, rather than a fixed roasting time, helps you keep the center pink.

After resting, carve the tenderloin into thick slices and overlap them in a shallow serving pan. A little buttery pan juice adds a sheen while leaving the browned crust and cut faces visible.

Ingredients for Beef Tenderloin with Garlic Herb Butter

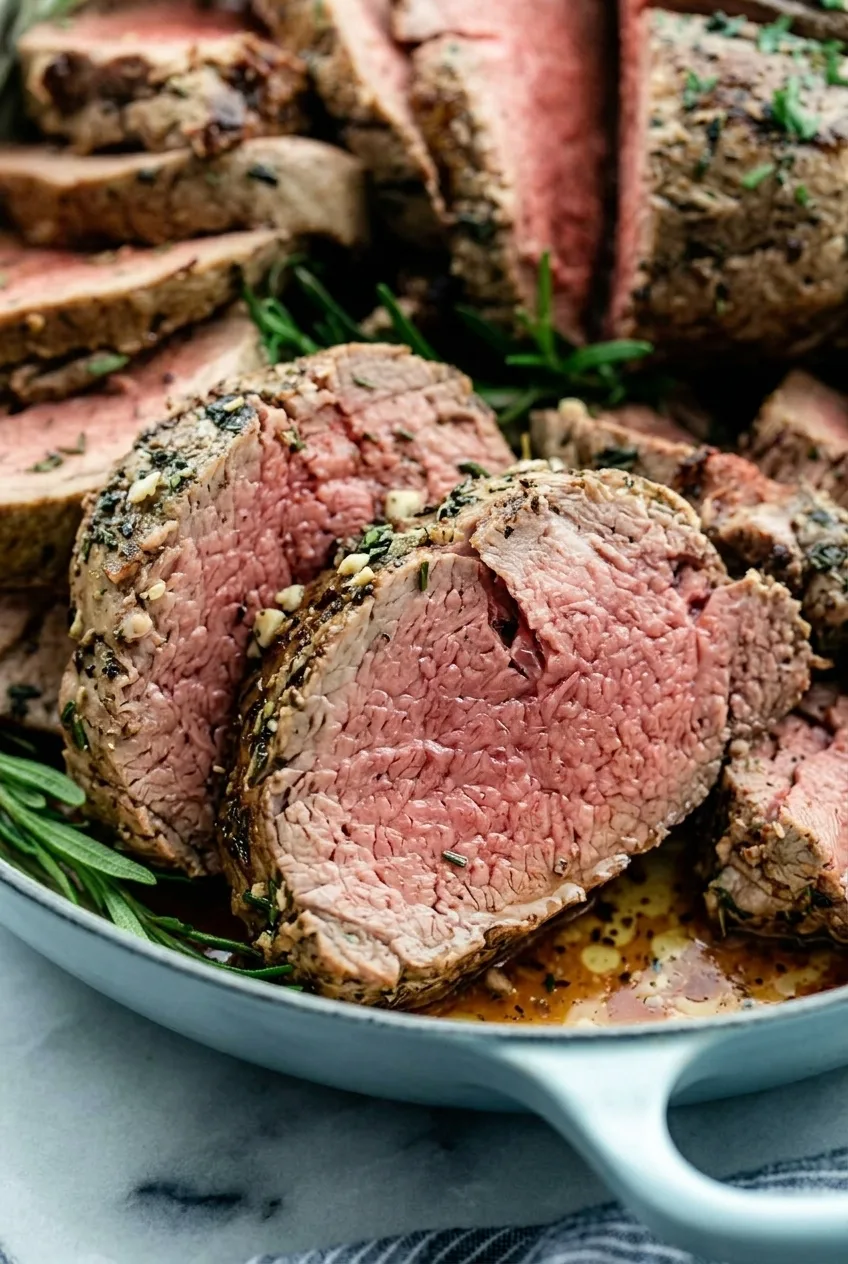
Close view of thick beef tenderloin slices showing moist pink centers and browned garlic-herb crust.
  • 1 trimmed beef tenderloin roast, about 2 1/2 pounds (about 1,150g)
  • 1 1/2 teaspoons kosher salt, adjusted for the brand and your taste
  • 1 teaspoon freshly ground black pepper
  • 1/2 teaspoon onion powder
  • 1 tablespoon olive oil
  • 4 tablespoons unsalted butter, softened (about 55g)
  • 3 garlic cloves, finely minced
  • 1 tablespoon finely chopped fresh rosemary
  • 1 tablespoon chopped fresh thyme leaves
  • 1 tablespoon chopped fresh parsley, plus a little more for serving
  • Optional: 2 to 3 small fresh rosemary sprigs, for serving

Yield: 6 to 8 servings. Time: About 20 minutes prep, 35 to 45 minutes cooking, and 10 to 15 minutes resting; about 65 to 80 minutes total.

How to Make Beef Tenderloin with Garlic Herb Butter

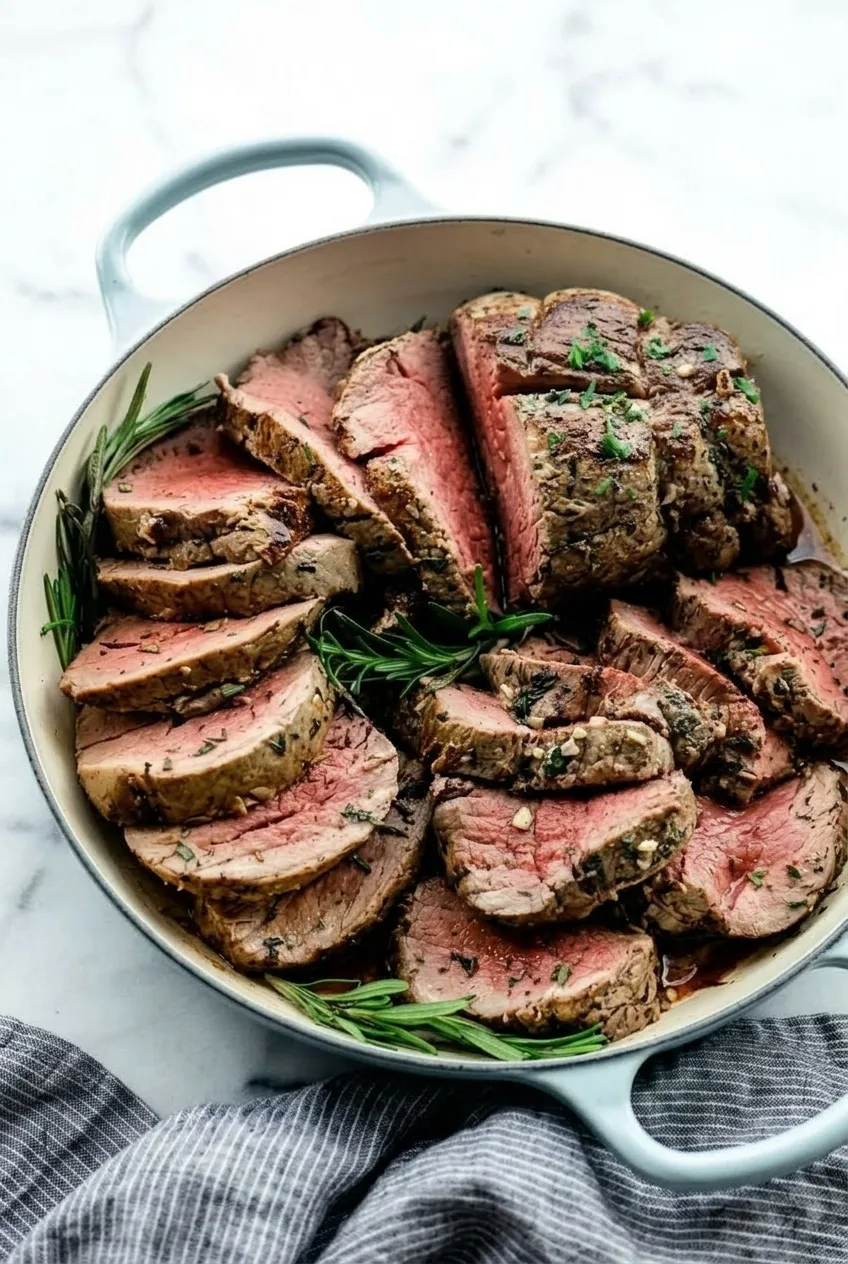
Full pan of sliced beef tenderloin with garlic herb butter on a light tabletop.
  1. Prepare the beef: Preheat the oven to 425°F (220°C). Pat the tenderloin dry and remove any remaining silver skin. If one end is noticeably thin, tuck it under and tie the roast with kitchen twine for a more even shape. Season all over with the salt, pepper, and onion powder.
  2. Mix the butter: Stir together the softened butter, garlic, rosemary, thyme, and 1 tablespoon parsley. The butter should be spreadable, not melted. Reserve the extra parsley for serving.
  3. Sear: Heat the olive oil in an approximately 12-inch oven-safe skillet over medium-high heat. Add the beef and sear for about 2 to 3 minutes per exposed side, turning to brown it all around, about 8 to 12 minutes total. Let each side brown before turning.
  4. Butter and roast: Remove the skillet from the burner and spread the garlic herb butter over the browned beef. Roast uncovered, without adding liquid, for an estimated 25 to 35 minutes. Begin checking the thickest center with an instant-read thermometer after 18 to 20 minutes, or sooner for a thin roast.
  5. Rest: For a medium-rare finish, remove the roast when its center reads around 125–130°F (50–55°C). Transfer it to a cutting board and rest loosely tented with foil for 10 to 15 minutes before carving. The temperature may rise toward about 130–135°F (about 55°C) during the rest, but the amount of carryover varies.
  6. Slice and serve: Remove any twine. Cut the tenderloin into 3/4- to 1-inch-thick slices and overlap them in a shallow serving pan with the cut faces visible. Spoon a little warm buttery pan juice over the slices, then finish with extra parsley and, if desired, the rosemary sprigs.

How to Check Tenderloin Doneness

Insert the thermometer into the thickest part of the roast, aiming for the center without touching the skillet. The tapered end may cook faster, and roasting time depends on the beef’s thickness and shape. Check the temperature again during the rest if precise doneness matters; do not assume it will rise by a fixed amount.

The pull temperature in the method is for a pink-centered, medium-rare result. USDA guidance for beef roasts is 145°F (65°C) followed by a rest of at least 3 minutes.

How to Get a Browned, Evenly Cooked Roast

A dry surface browns more readily than a wet one. Tucking and tying a pronounced thin end helps it cook more evenly with the thicker center. Use a skillet that holds the roast without crowding and has a handle rated for a 425°F oven.

Keep the garlic herb butter out of the initial sear. Adding it after the beef has browned lets the crust develop first and helps prevent the garlic and herbs from turning too dark against the hot pan.

Serving and Leftovers

Serve the sliced tenderloin with mashed potatoes and green beans, roasted carrots, or a crisp salad. For another herb-butter centerpiece, try garlic herb butter turkey breast.

Cool leftovers and refrigerate in an airtight container for up to 3 days. Serve the slices cold, or warm them gently in a skillet with a little butter or broth to limit drying.

Nutrition

Approximate nutrition per serving, based on 8 servings: 320 calories, 30g protein, 22g fat, and 1g carbohydrates. Approximate values per 100g of cooked beef with butter: 270 calories, 25g protein, 18g fat, and less than 1g carbohydrates. Values vary with trimming, cooking loss, and the amount of pan juice served.

Beef Tenderloin with Garlic Herb Butter

Seared beef tenderloin is roasted with garlic herb butter and sliced for serving.
Course: Main Course
Cuisine: American
Prep: 20 min
Cook: 40 min
Total: 70 min
Servings: 8 Calories: 320 kcal

Equipment

  • Oven-safe 12-inch skillet
  • Instant-read thermometer
  • Kitchen twine
  • Cutting board

Ingredients

For the Beef

  • 1 trimmed beef tenderloin roast, about 2 1/2 pounds (about 1,150g)
  • 1 1/2 teaspoons kosher salt
  • 1 teaspoon freshly ground black pepper
  • 1/2 teaspoon onion powder
  • 1 tablespoon olive oil

For the Garlic Herb Butter

  • 4 tablespoons unsalted butter, softened (about 55g)
  • 3 garlic cloves, finely minced
  • 1 tablespoon finely chopped fresh rosemary
  • 1 tablespoon chopped fresh thyme leaves
  • 1 tablespoon chopped fresh parsley, plus more for serving

For Serving

  • Optional: 2 to 3 small fresh rosemary sprigs

Instructions

  1. Preheat the oven to 425°F (220°C). Pat the tenderloin dry and remove any remaining silver skin.
  2. If one end is noticeably thin, tuck it under and tie the roast with kitchen twine. Season all over with the salt, pepper, and onion powder.
  3. Stir together the softened butter, garlic, rosemary, thyme, and 1 tablespoon parsley until spreadable. Set aside the extra parsley for serving.
  4. Heat the olive oil in an oven-safe skillet over medium-high heat. Sear the beef for 2 to 3 minutes per exposed side, turning until browned all around, about 8 to 12 minutes total.
  5. Remove the skillet from the burner and spread the garlic herb butter over the beef.
  6. Roast uncovered, without adding liquid, for an estimated 25 to 35 minutes. Begin checking the thickest center with an instant-read thermometer after 18 to 20 minutes, or sooner for a thin roast.
  7. For medium-rare, remove the roast when the center reads about 125–130°F (50–55°C). Transfer to a cutting board and rest loosely tented with foil for 10 to 15 minutes.
  8. Remove the twine and cut the tenderloin into 3/4- to 1-inch-thick slices. Overlap the slices in a shallow serving pan with the cut faces visible.
  9. Spoon a little warm buttery pan juice over the slices. Finish with extra parsley and rosemary sprigs, if desired.

Tips

  • Pat the beef dry before searing to help the surface brown.
  • Tuck and tie a thin end to help the roast cook more evenly.
  • Use a skillet rated for a 425°F oven that holds the roast without crowding.
  • Add the garlic herb butter after searing so the garlic and herbs are less likely to scorch.
  • Check the thickest part of the roast without letting the thermometer touch the skillet; cooking time varies with the roast’s shape and thickness.

Notes

Temperature may rise during resting, but carryover varies. USDA guidance for beef roasts is 145°F (65°C) followed by a rest of at least 3 minutes. Refrigerate leftovers in an airtight container for up to 3 days; warm gently with a little butter or broth.

Nutrition

Calories: 320 kcal | Protein: 30 g | Fat: 22 g | Carbohydrates: 1 g | Per 100g Calories: 270 kcal | Per 100g Protein: 25 g | Per 100g Fat: 18 g | Per 100g Carbohydrates: less than 1 g

Maple Dijon Pork Loin

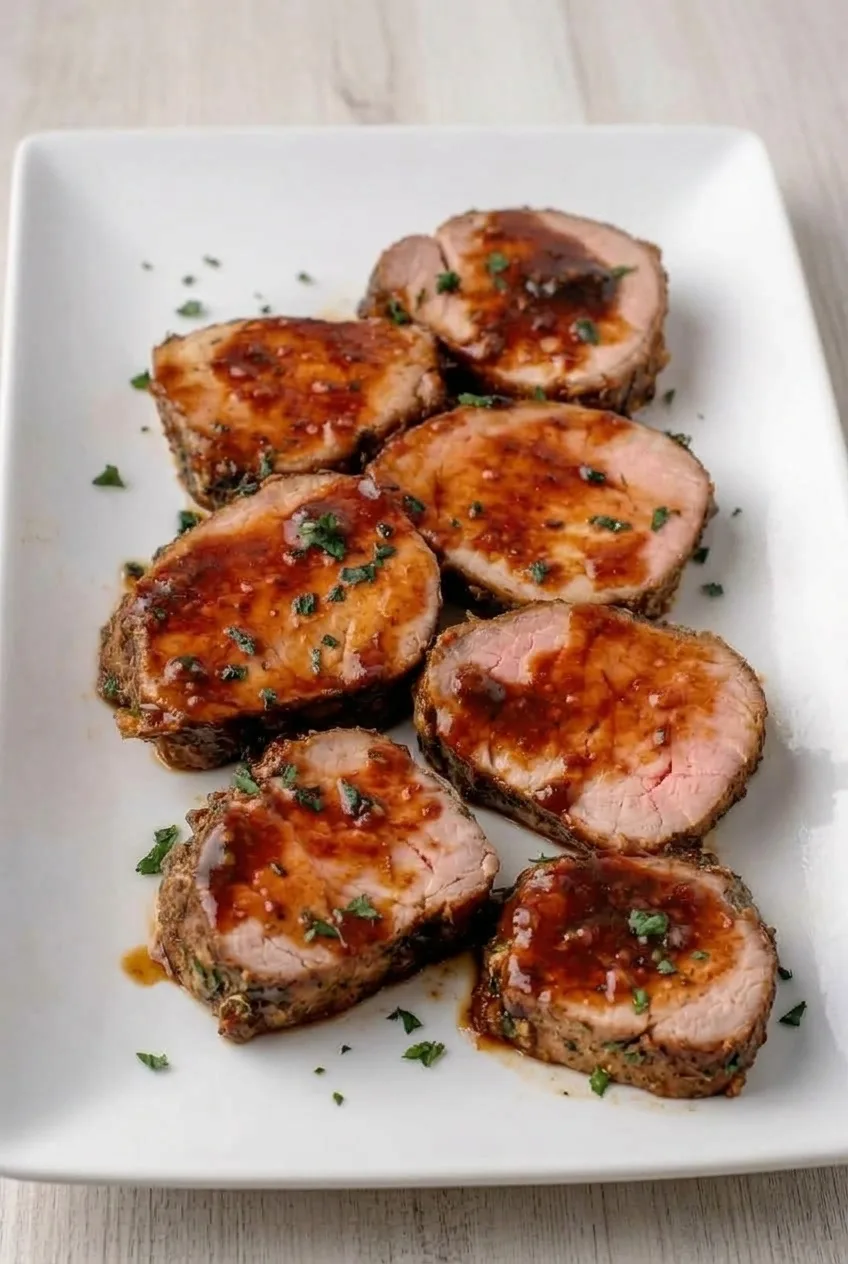
Boneless pork loin roasts uncovered until browned, then gets a maple-Dijon glaze during the latter part of cooking. After a short rest, cut it into thick slices and spoon warm glaze over the cut faces for a glossy, sweet-tangy finish.

This method is designed for a 2 1/2-pound loin roast, not pork tenderloin. Roast thickness and starting temperature affect the timing, so use a thermometer to decide when the pork is done.

Ingredients for Maple Dijon Pork Loin

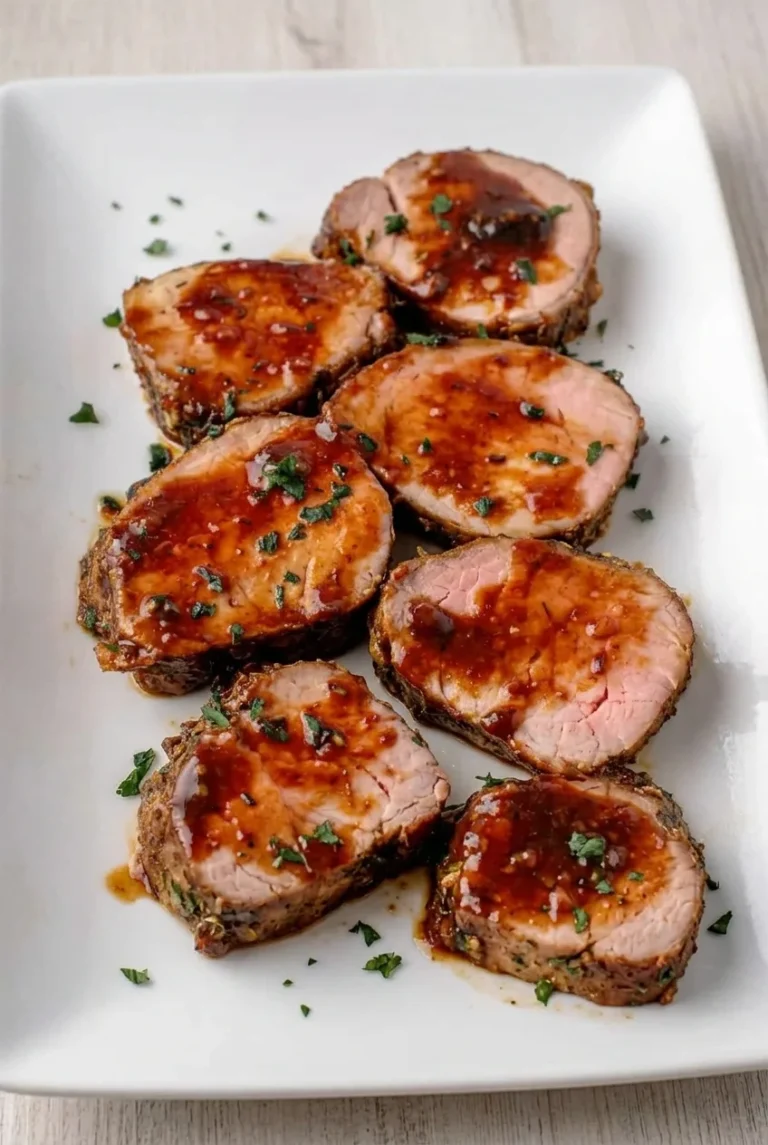
Full white platter of overlapping glazed maple Dijon pork loin slices in a wider serving view
  • 1 boneless pork loin roast, about 2 1/2 pounds (1,150g)
  • 1 teaspoon kosher salt, adjusted for your salt brand
  • 1/2 teaspoon freshly ground black pepper
  • 1 teaspoon finely chopped fresh rosemary
  • 1/3 cup pure maple syrup (105g)
  • 3 tablespoons Dijon mustard (45g)
  • 1 tablespoon apple cider vinegar
  • 2 teaspoons reduced-sodium soy sauce
  • 1 tablespoon chopped fresh parsley

Yield: 6 to 8 servings. Time: About 15 minutes prep, 55 to 75 minutes roasting, and a 10- to 15-minute rest.

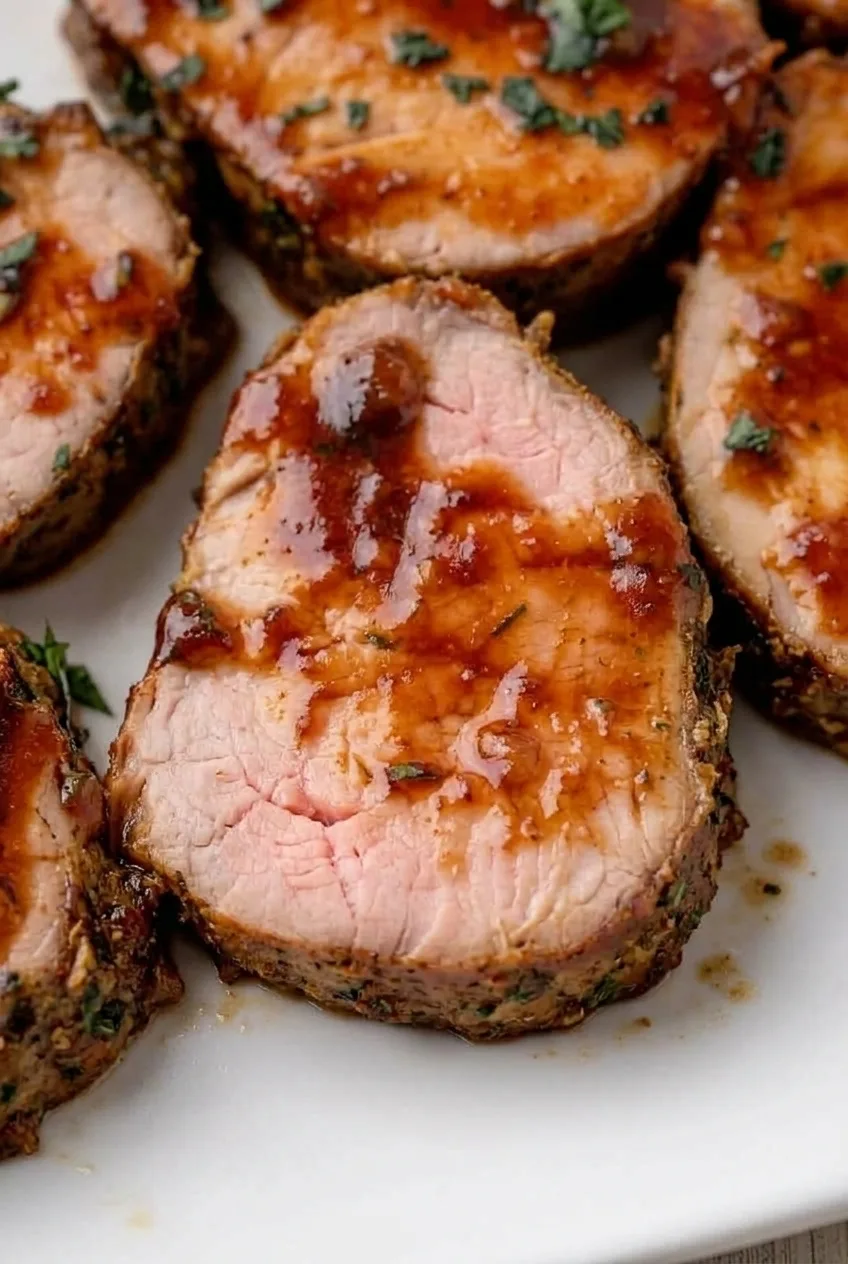
Close view of a thick pork loin slice showing its lightly blushed center, browned edge, and maple-Dijon glaze

How to Roast Maple Dijon Pork Loin

  1. Preheat and season: Heat the oven to 350°F (175°C). Pat the pork dry and place it in a shallow roasting pan or rimmed baking pan with room around it. Season all over with the salt, pepper, and rosemary. Do not add water to the pan or cover the roast.
  2. Mix and divide the glaze: Whisk together the maple syrup, Dijon, vinegar, and soy sauce. Pour about half into a separate clean container for the finishing sauce. Use the other half for brushing the pork, and never return a brush or utensil used on the pork to the reserved sauce.
  3. Roast, then glaze: Roast uncovered for about 30 minutes. Brush the top and sides with the portion designated for the roast, then return it to the oven. Keep the reserved finishing sauce out of the roasting pan.
  4. Check the center: Begin checking the thickest center with an instant-read thermometer at about 45 minutes of total roasting time. Remove the pork when it reaches 145°F (65°C). A 2 1/2-pound roast may take about 55 to 75 minutes total; a particularly thick roast can take longer. The outside should be browned and the glaze shiny, not blackened.
  5. Rest and finish the sauce: Transfer the pork to a cutting board and rest for 10 to 15 minutes. Meanwhile, gently simmer the untouched reserved glaze in a small saucepan over low to medium-low heat for 2 to 3 minutes, stirring, until it lightly coats a spoon but still flows easily. Do not mix scorched pan residue into the sauce.
  6. Slice and serve: Cut across the grain into slices about 3/4 inch thick. Loosely overlap them on a platter, spoon the warm glaze over the exposed cut faces, and scatter the parsley lightly over the top.

Pork Loin vs. Pork Tenderloin

Choose a boneless pork loin roast around 2 1/2 pounds. Pork tenderloin is much thinner, so this roasting window does not apply to it. Even among loin roasts, thickness affects how quickly the center cooks. Check the temperature rather than judging doneness by the pork’s color.

Keeping the Maple Glaze Spoonable

Brushing the roast after its first 30 minutes limits how long the maple syrup spends in the oven. The separately reserved glaze gives the sliced pork a glossy sauce without relying on darkened pan drippings. If the simmered sauce becomes too thick, stir in a teaspoon or two of water and warm it briefly over low heat.

Serving and Storing Leftovers

Serve the glazed slices with mashed potatoes or roasted root vegetables and a green salad or simply cooked vegetables. For another maple-glazed main, try Maple Glazed Ham.

Refrigerate leftover pork promptly in an airtight container for up to 3 to 4 days, with extra sauce alongside it or in a separate container. Rewarm slices gently, covered with a little sauce or water to limit drying, and heat them thoroughly.

Leftover slices can also be wrapped airtight with a little sauce and frozen. Thaw them in the refrigerator before reheating; quality is best if they are not frozen for an extended period.

Nutrition

Approximate nutrition per serving, based on 8 servings: 240 calories, 30g protein, 8g fat, and 9g carbohydrates. Approximate values per 100g of finished pork with glaze: 190 calories, 24g protein, 6g fat, and 7g carbohydrates. Values vary with the roast’s fat content, cooking loss, and how much glaze is served.

Maple Dijon Pork Loin

A boneless pork loin roast is seasoned with rosemary, brushed with maple-Dijon glaze, and served with warm finishing sauce.
Course: Main Course
Cuisine: American
Prep: 15 min
Cook: 65 min
Total: 92 min
Servings: 8 Calories: 240 kcal

Equipment

  • Shallow roasting pan
  • Instant-read thermometer
  • Whisk
  • Pastry brush
  • Small saucepan
  • Cutting board
  • Carving knife

Ingredients

For the Pork

  • 1 boneless pork loin roast, about 2 1/2 pounds (1,150g)
  • 1 teaspoon kosher salt, adjusted for your salt brand
  • 1/2 teaspoon freshly ground black pepper
  • 1 teaspoon finely chopped fresh rosemary

For the Glaze

  • 1/3 cup pure maple syrup (105g)
  • 3 tablespoons Dijon mustard (45g)
  • 1 tablespoon apple cider vinegar
  • 2 teaspoons reduced-sodium soy sauce

For Serving

  • 1 tablespoon chopped fresh parsley

Instructions

  1. Preheat the oven to 350°F (175°C).
  2. Pat the pork dry and place it in a shallow roasting pan with room around it. Season all over with the salt, pepper, and rosemary. Leave the pan uncovered and do not add water.
  3. Whisk together the maple syrup, Dijon mustard, vinegar, and soy sauce. Transfer about half to a separate clean container for the finishing sauce.
  4. Roast the pork uncovered for about 30 minutes. Brush the top and sides with the remaining glaze, then return the roast to the oven.
  5. Begin checking the thickest part of the roast with an instant-read thermometer at about 45 minutes of total roasting time. Remove it when it reaches 145°F (65°C); total roasting time may be about 55 to 75 minutes.
  6. Transfer the pork to a cutting board and rest for 10 to 15 minutes.
  7. While the pork rests, gently simmer the reserved glaze in a small saucepan over low to medium-low heat for 2 to 3 minutes, stirring, until it lightly coats a spoon but still flows easily.
  8. Slice the pork across the grain into pieces about 3/4 inch thick. Arrange on a platter, spoon the warm glaze over the cut faces, and scatter parsley over the top.

Tips

  • Use a thermometer to determine doneness; roast thickness and starting temperature affect cooking time.
  • Keep the finishing glaze separate, and do not return a brush or utensil used on the pork to the reserved sauce.
  • Brush the roast after its first 30 minutes in the oven to limit how long the maple syrup cooks.
  • Simmer the finishing sauce gently and keep scorched pan residue out of it.
  • If the sauce becomes too thick, stir in a teaspoon or two of water and warm briefly over low heat.

Notes

Refrigerate leftovers promptly in an airtight container for 3 to 4 days. Reheat slices gently with a little sauce or water until thoroughly heated. Slices can also be frozen airtight with a little sauce and thawed in the refrigerator before reheating.

Nutrition

Calories: 240 kcal | Protein: 30 g | Fat: 8 g | Carbohydrates: 9 g