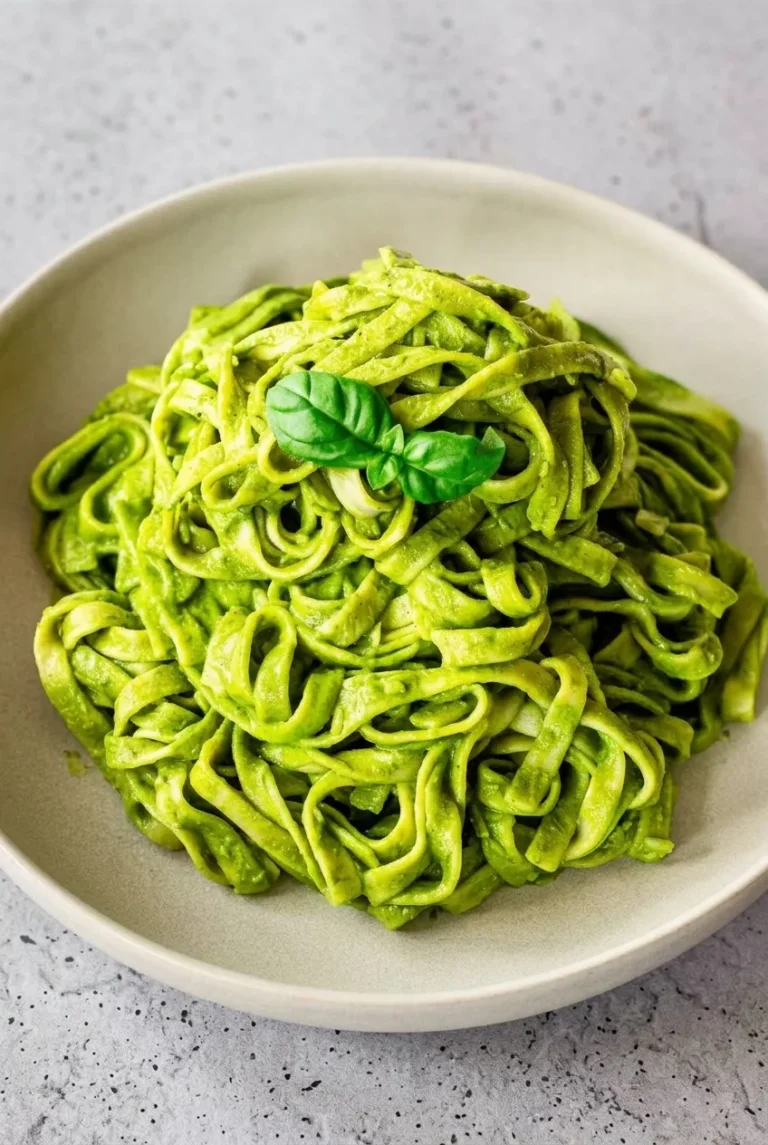
Author

Julia

Browsing

Easy Spinach Pasta for Kids

Fettuccine ribbons get a smooth green coating from spinach blended with cream cheese and milk. The pasta boils while the spinach wilts, then the sauce and noodles are tossed briefly over low heat. Draining wet spinach and adding pasta water only as needed help the sauce cling to the ribbons rather than pool in the bowl.

Makes 4 family servings. Prep time is about 10 minutes; cook time is about 15 minutes.

Ingredients for Spinach Pasta
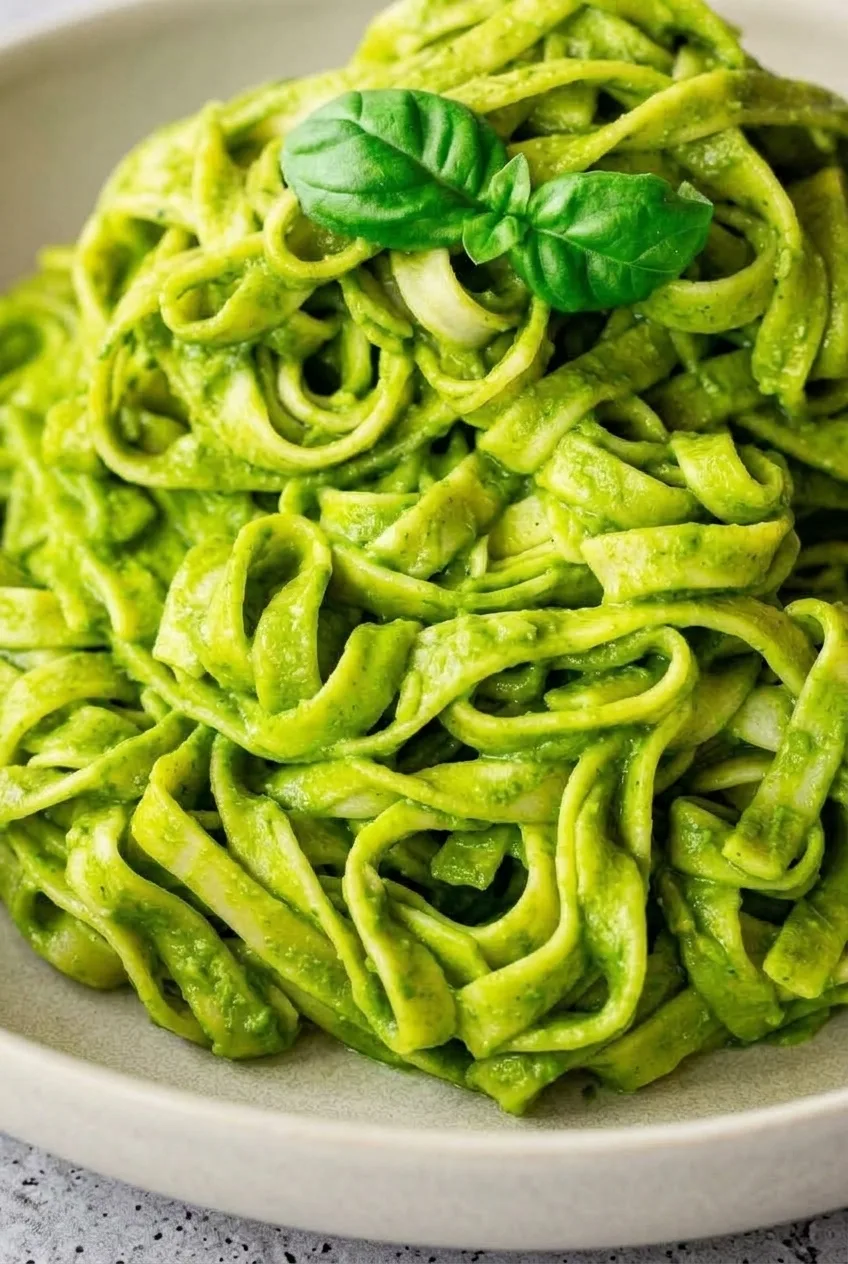
Close view of glossy green spinach sauce clinging to distinct fettuccine ribbons beneath a small basil sprig
  • 12 ounces dry fettuccine (340g)
  • 5 ounces fresh baby spinach (140g)
  • 1 tablespoon unsalted butter (15g)
  • 3 ounces plain cream cheese, softened (85g)
  • 1/3 cup milk (80g)
  • Up to 1/4 teaspoon salt for the sauce, or to taste, plus salt for the pasta water as appropriate for the eaters
  • 1 small sprig fresh basil, about 2 to 4 leaves, for serving

Optional: Add a small pinch of garlic powder to the blender if your household likes garlic.

Frozen spinach: Use about 1/2 cup thawed frozen spinach in place of the fresh spinach. Squeeze it very dry and warm it briefly in the skillet before blending. The sauce may be darker.

How to Make Spinach Fettuccine
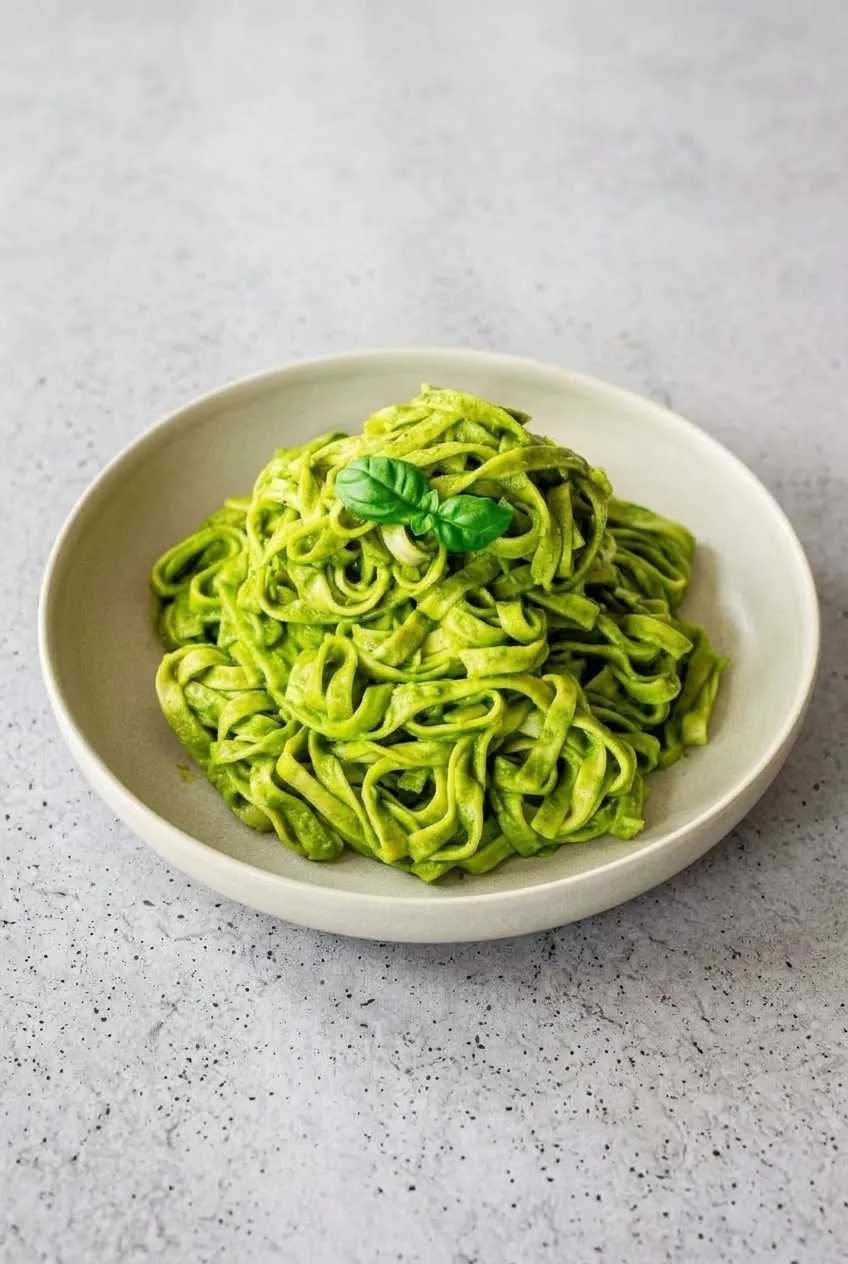
Complete bowl of basil-topped spinach fettuccine on a light gray surface, photographed from farther back
  1. Cook the pasta: Bring a large pot of water to a boil and salt it as appropriate for the eaters. Add the fettuccine and cook uncovered, stirring occasionally. Begin checking at the package’s earliest suggested time; the ribbons should be tender but still hold their shape. Reserve 1 cup pasta water, then drain.
  2. Wilt the spinach: While the pasta cooks, melt the butter in a 10- to 12-inch skillet over medium heat. Add the spinach in batches if needed. Start checking after 1 minute and turn the leaves until fully wilted, about 2 to 3 minutes total. Drain off any pooled liquid so it does not thin the sauce.
  3. Blend the sauce: Let the spinach stop steaming heavily, then transfer it to a blender with the softened cream cheese, milk, and a little salt. Blend for about 1 minute, until smooth with no visible cream-cheese lumps. Vent the blender as directed by its manufacturer when blending warm ingredients.
  4. Coat the fettuccine: Return the sauce to the skillet and add the drained pasta. Toss gently over low heat for 1 to 2 minutes, until warmed through. If the sauce is too thick to coat the ribbons, add reserved pasta water 1 tablespoon at a time. Stop when the coating clings without pooling beneath the pasta; do not boil the sauce.
  5. Serve: Mound the ribbons loosely in shallow bowls and top with the basil sprig. Cut an individual child’s portion into manageable lengths if needed, and let it cool to an appropriate eating temperature.

How to Keep the Spinach Sauce Smooth

Start with the measured milk rather than adding extra liquid to the blender. If the sauce looks thin once it meets the pasta, toss it briefly over low heat without adding pasta water. If it tightens as it stands, stir in a small splash of warm water or milk.

Keep the final toss gentle. Prolonged high heat can separate the dairy sauce and dull its green color.

Serving Ribbon Pasta to Kids

Fettuccine gives this dish its long, sauce-coated ribbons. For a child who needs shorter noodles, cut the cooked portion on their plate rather than changing the pasta shape for the whole batch. Remove or finely cut the basil garnish on that portion if preferred.

Storing and Reheating

Cool leftovers promptly and refrigerate in an airtight container for up to 3 days. Reheat gently in a skillet or microwave with a splash of water or milk, stirring until heated through.

For make-ahead preparation, keep the sauce separate and toss it with just-cooked pasta before serving. If freezing the sauce, freeze it separately from the pasta; its dairy-based texture may change after thawing.

For a different green-vegetable pasta, see Parmesan pea pasta for kids.

Nutrition

Approximate per family serving (1/4 of the recipe): 435 calories, 14g protein, 12g fat, and 67g carbohydrates. Approximate per 100g of finished pasta: 160 calories, 5g protein, 4g fat, and 24g carbohydrates. Values vary with the pasta, dairy, and amount of cooking water retained.

Easy Spinach Pasta for Kids

Fettuccine is tossed with a smooth spinach, cream cheese, and milk sauce for a simple family meal.
Course: Main Course
Cuisine: Italian
Prep: 10 min
Cook: 15 min
Total: 25 min
Servings: 4 Calories: 435 kcal

Equipment

  • Large pot
  • 10- to 12-inch skillet
  • Blender
  • Colander

Ingredients

For the Pasta and Sauce

  • 12 ounces dry fettuccine (340 g)
  • 5 ounces fresh baby spinach (140 g)
  • 1 tablespoon unsalted butter (15 g)
  • 3 ounces plain cream cheese, softened (85 g)
  • 1/3 cup milk (80 g)
  • Up to 1/4 teaspoon salt for the sauce, or to taste
  • Salt for the pasta water, as appropriate

For Serving

  • 1 small sprig fresh basil, about 2 to 4 leaves

Optional

  • A small pinch of garlic powder

Instructions

  1. Bring a large pot of water to a boil and salt it as appropriate. Add the fettuccine and cook uncovered, stirring occasionally, until tender but still holding its shape.
  2. Reserve 1 cup of pasta water, then drain the fettuccine.
  3. While the pasta cooks, melt the butter in a 10- to 12-inch skillet over medium heat. Add the spinach in batches if needed and turn the leaves until fully wilted, about 2 to 3 minutes.
  4. Drain any pooled liquid from the spinach and let it stop steaming heavily.
  5. Transfer the spinach to a blender with the cream cheese, milk, and a little salt. Blend for about 1 minute until smooth, venting the blender as directed by its manufacturer.
  6. Return the sauce to the skillet and add the drained pasta. Toss gently over low heat for 1 to 2 minutes, until warmed through.
  7. If needed, add reserved pasta water 1 tablespoon at a time until the sauce clings to the pasta without pooling. Do not boil the sauce.
  8. Serve the pasta topped with basil. Cut a child’s portion into manageable lengths if needed and let it cool to a suitable eating temperature.

Tips

  • Drain the wilted spinach well so excess liquid does not thin the sauce.
  • Start with the measured milk and add pasta water only if the sauce needs thinning.
  • Toss gently over low heat; prolonged high heat can separate the sauce and dull its color.
  • If the sauce thickens as it stands, stir in a small splash of warm water or milk.

Variations

  • Frozen Spinach Pasta: Use about 1/2 cup thawed frozen spinach instead of fresh spinach. Squeeze it very dry and warm it briefly in the skillet before blending; the sauce may be darker.
  • Garlic Spinach Pasta: Add a small pinch of garlic powder to the blender if desired.
Notes

Refrigerate leftovers in an airtight container for up to 3 days. Reheat gently with a splash of water or milk, stirring until heated through. For make-ahead preparation, store the sauce separately and toss it with just-cooked pasta before serving.

Nutrition

Calories: 435 kcal | Protein: 14 g | Fat: 12 g | Carbohydrates: 67 g | Per 100g Calories: 160 kcal | Per 100g Protein: 5 g | Per 100g Fat: 4 g | Per 100g Carbohydrates: 24 g

Kid-Friendly Garlic Butter Pasta

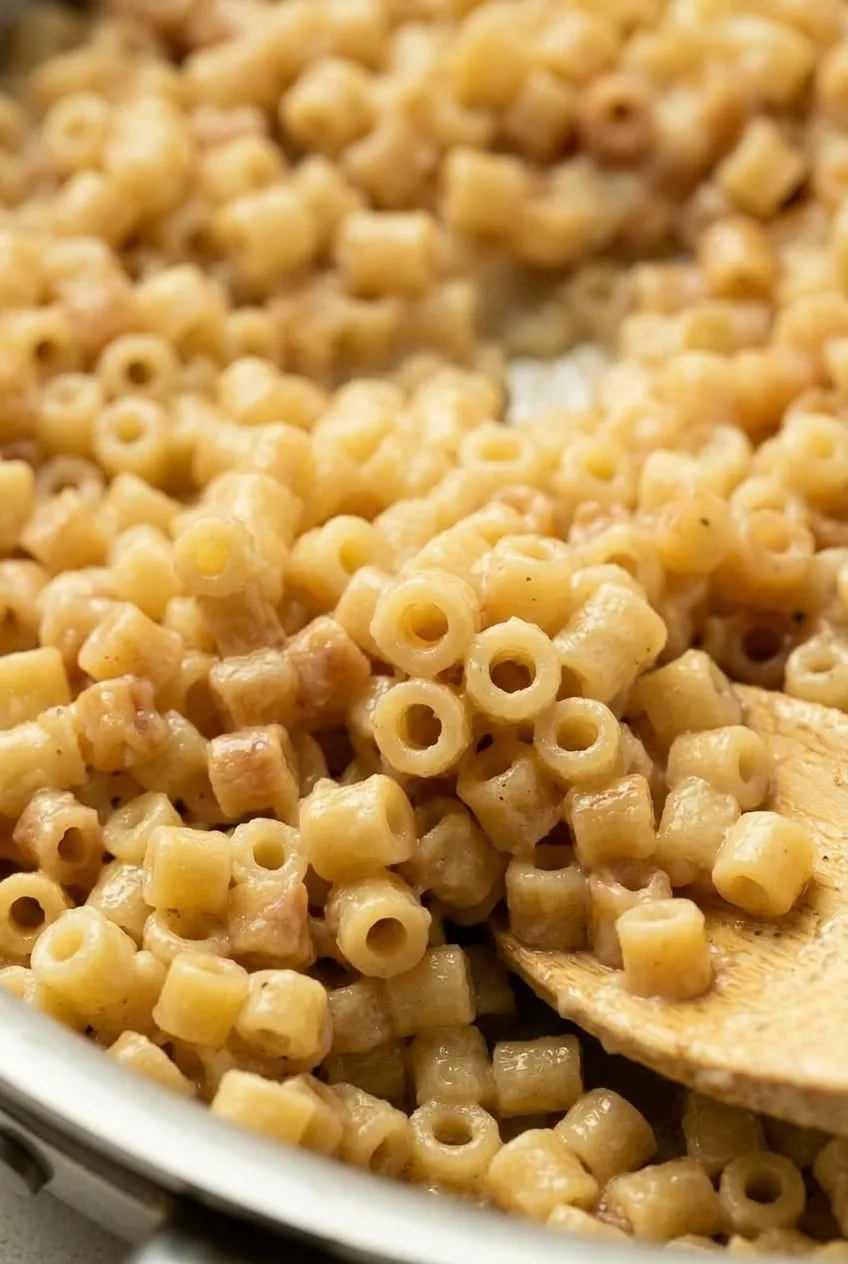
Small, hollow ditalini noodles make this garlic butter pasta easy to spoon. Briefly cooked garlic keeps the flavor mild, while a little Parmesan and starchy pasta water give the noodles a light, glossy coating—not a thick sauce. Check the pasta early so the small tubes stay distinct when tossed in the skillet.

Makes 4 child-size servings or 2 to 3 larger servings. Allow about 5 minutes to prepare and 10 to 15 minutes to cook, depending on the pasta package.

Ingredients for Garlic Butter Pasta

Close view of hollow ditalini tubes with a thin, glossy garlic butter and Parmesan coating.
  • 8 ounces dried ditalini pasta (about 225g)
  • 1 teaspoon kosher salt for the pasta water, plus more to taste
  • 3 tablespoons unsalted butter (about 45g)
  • 2 small garlic cloves, finely minced or pressed
  • 1/3 cup finely grated Parmesan (about 30g)
  • 1/2 cup reserved pasta-cooking water, used as needed

Finely grated Parmesan coats the noodles more readily than pre-shredded cheese.

How to Make Kid-Friendly Garlic Butter Pasta

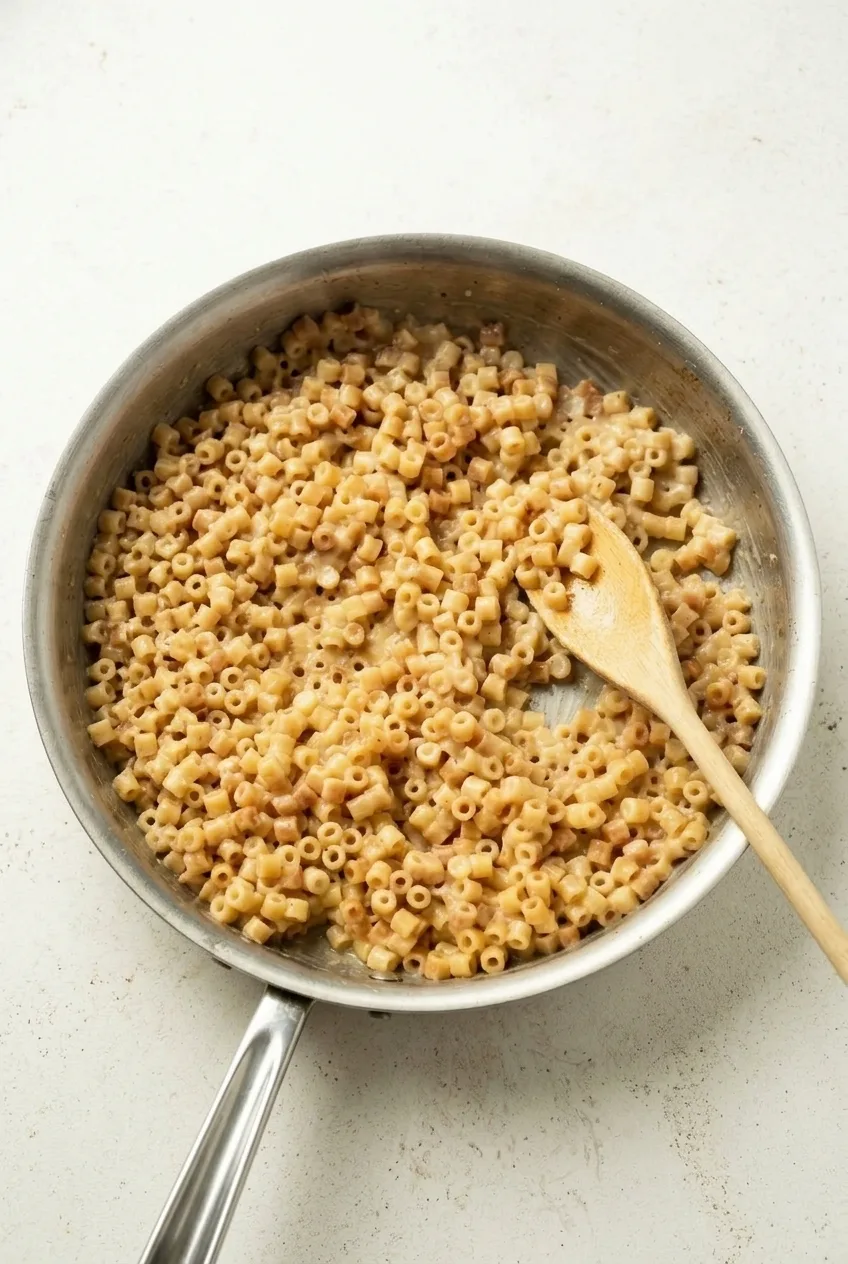
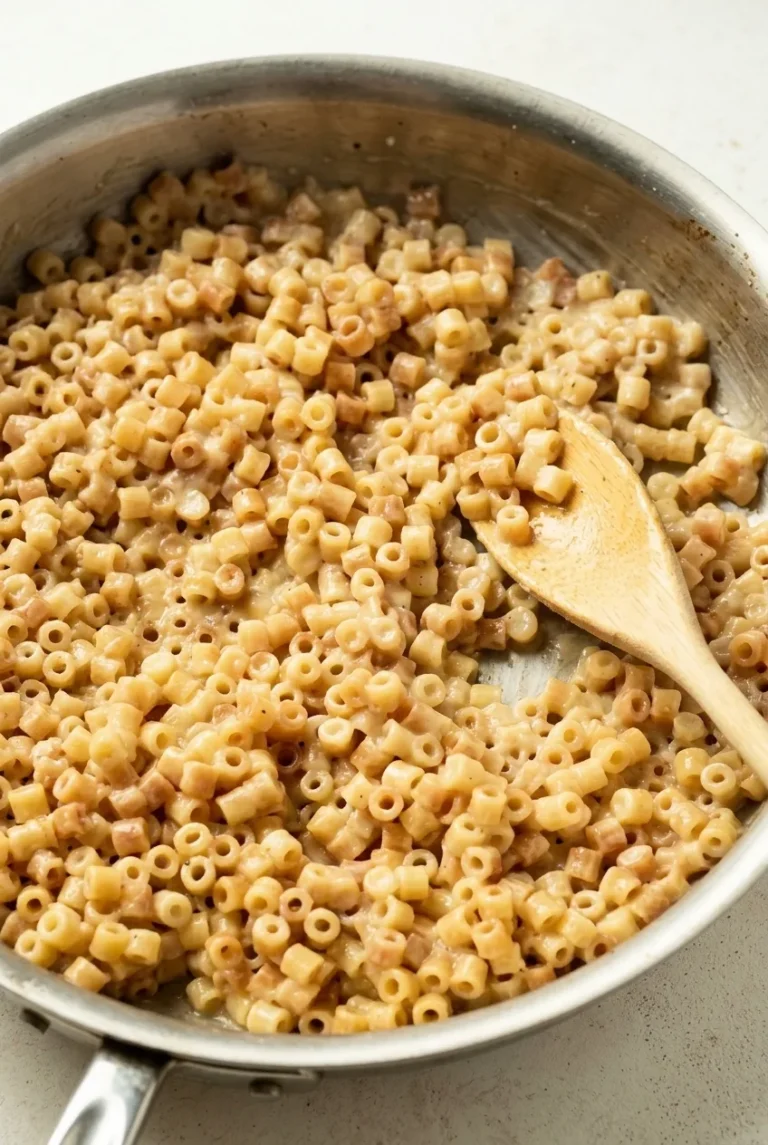
Full shallow pan of garlic butter ditalini with a wooden spoon on a pale countertop.
  1. Boil the pasta: Bring a large pot of water to a full boil. Add the salt and ditalini, stir, and cook uncovered according to the package directions. Start tasting at the earliest suggested al dente time. The noodles should be tender with a slight bite and no hard center.
  2. Reserve water and drain: Before draining, scoop out 1/2 cup of the pasta-cooking water. Drain the ditalini.
  3. Cook the garlic: As the pasta finishes, melt the butter in a wide, shallow skillet over medium-low heat. Add the garlic and stir for about 30 to 60 seconds, until fragrant but still pale. If it begins to brown quickly, take the skillet off the heat.
  4. Coat the noodles: Add the drained pasta to the skillet and toss with the garlic butter. Turn off the heat, add the Parmesan and about 2 tablespoons of reserved pasta water, and toss again. Add more water 1 tablespoon at a time only as needed, until the noodles are separate and lightly glossy, with no liquid pooling in the pan.
  5. Serve: Taste before adding more salt, since Parmesan adds saltiness. Serve promptly, letting children’s portions cool to a comfortable eating temperature.

Getting a Light, Glossy Coating

Add the Parmesan off heat so it coats the noodles rather than clumping in a hot, dry skillet. If the pasta looks dry or small cheese clumps remain, toss in another tablespoon of reserved pasta water. Stop once the coating clings to the noodles; it should not collect in the bottom of the pan.

Serving and Pasta Options

Serve the pasta on its own or with a familiar vegetable or protein alongside it. For another pasta idea, try Parmesan pea pasta for kids.

Another small, hollow dried pasta can replace ditalini; follow its package directions and check the texture before draining. For simpler garlic butter noodles, omit the Parmesan and use only enough pasta water to help the butter coat the pasta. The finish will be less creamy.

How to Store and Reheat

For the loosest, glossiest texture, finish the pasta shortly before serving. Promptly refrigerate leftovers in a covered container. Warm them gently with a small splash of water, stirring until the coating loosens. The texture may be less glossy than when freshly tossed; freezing is not recommended for the best texture.

Nutrition

Approximate nutrition per child-size serving, based on 4 servings: 310 calories, 10g protein, 12g fat, and 43g carbohydrates. Approximate values per 100g of finished pasta: 190 calories, 6g protein, 7g fat, and 26g carbohydrates. Values vary with the pasta, Parmesan, and amount of cooking water retained.

Kid-Friendly Garlic Butter Pasta

Ditalini is tossed with gently cooked garlic, butter, Parmesan, and pasta water for a light, glossy coating.
Course: Main Course
Cuisine: Italian
Prep: 5 min
Cook: 15 min
Total: 20 min
Servings: 4

Equipment

  • Large pot
  • Colander
  • Wide skillet
  • Measuring cup

Ingredients

  • 8 ounces dried ditalini pasta (about 225 g)
  • 1 teaspoon kosher salt for the pasta water, plus more to taste
  • 3 tablespoons unsalted butter (about 45 g)
  • 2 small garlic cloves, finely minced or pressed
  • 1/3 cup finely grated Parmesan (about 30 g)
  • 1/2 cup reserved pasta-cooking water, used as needed

Instructions

  1. Bring a large pot of water to a full boil. Add the salt and ditalini, stir, and cook uncovered according to the package directions.
  2. Start tasting the pasta at the earliest suggested al dente time. Cook until tender with a slight bite and no hard center.
  3. Before draining, scoop out 1/2 cup of the pasta-cooking water. Drain the ditalini.
  4. As the pasta finishes cooking, melt the butter in a wide skillet over medium-low heat.
  5. Add the garlic and stir for 30 to 60 seconds, until fragrant but still pale. If it begins to brown quickly, remove the skillet from the heat.
  6. Add the drained pasta to the skillet and toss with the garlic butter.
  7. Turn off the heat. Add the Parmesan and about 2 tablespoons of reserved pasta water, then toss.
  8. Add more pasta water 1 tablespoon at a time as needed, until the noodles are separate and lightly glossy, with no liquid pooling in the pan.
  9. Taste before adding more salt. Serve promptly, allowing children’s portions to cool to a comfortable eating temperature.

Tips

  • Check the ditalini early so the small tubes stay distinct and do not overcook.
  • Add the Parmesan off the heat to help it coat the noodles without clumping.
  • Use finely grated Parmesan so it coats the pasta readily.
  • Add pasta water a tablespoon at a time and stop once the coating clings to the noodles.
  • Taste before adding extra salt because Parmesan adds saltiness.

Variations

  • Other Small Pasta: Replace the ditalini with another small, hollow dried pasta and follow its package directions.
  • Garlic Butter Noodles: Omit the Parmesan and use only enough pasta water to help the butter coat the pasta; the finish will be less creamy.

Notes

Refrigerate leftovers promptly in a covered container. Reheat gently with a small splash of water, stirring until the coating loosens. The texture may be less glossy after reheating; freezing is not recommended for the best texture.

Nutrition

Per Serving Calories: 310 kcal | Per Serving Protein: 10 g | Per Serving Fat: 12 g | Per Serving Carbohydrates: 43 g | Per 100g Calories: 190 kcal | Per 100g Protein: 6 g | Per 100g Fat: 7 g | Per 100g Carbohydrates: 26 g

Parmesan Pea Pasta for Kids

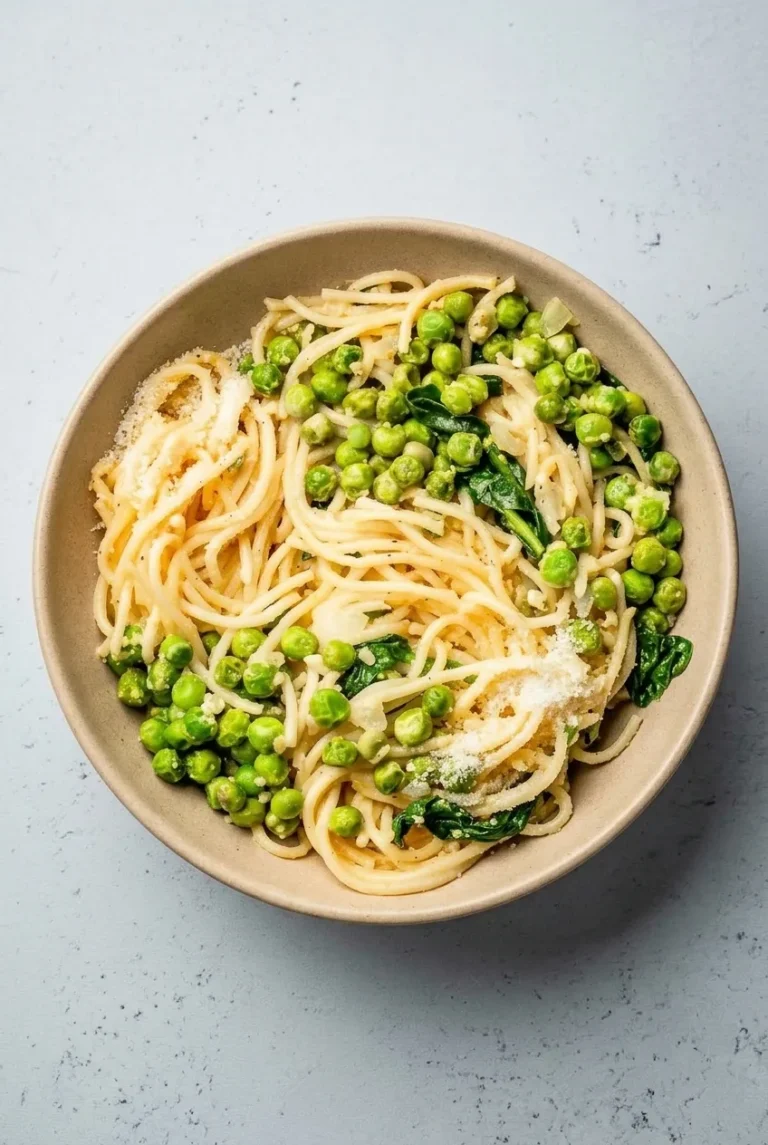
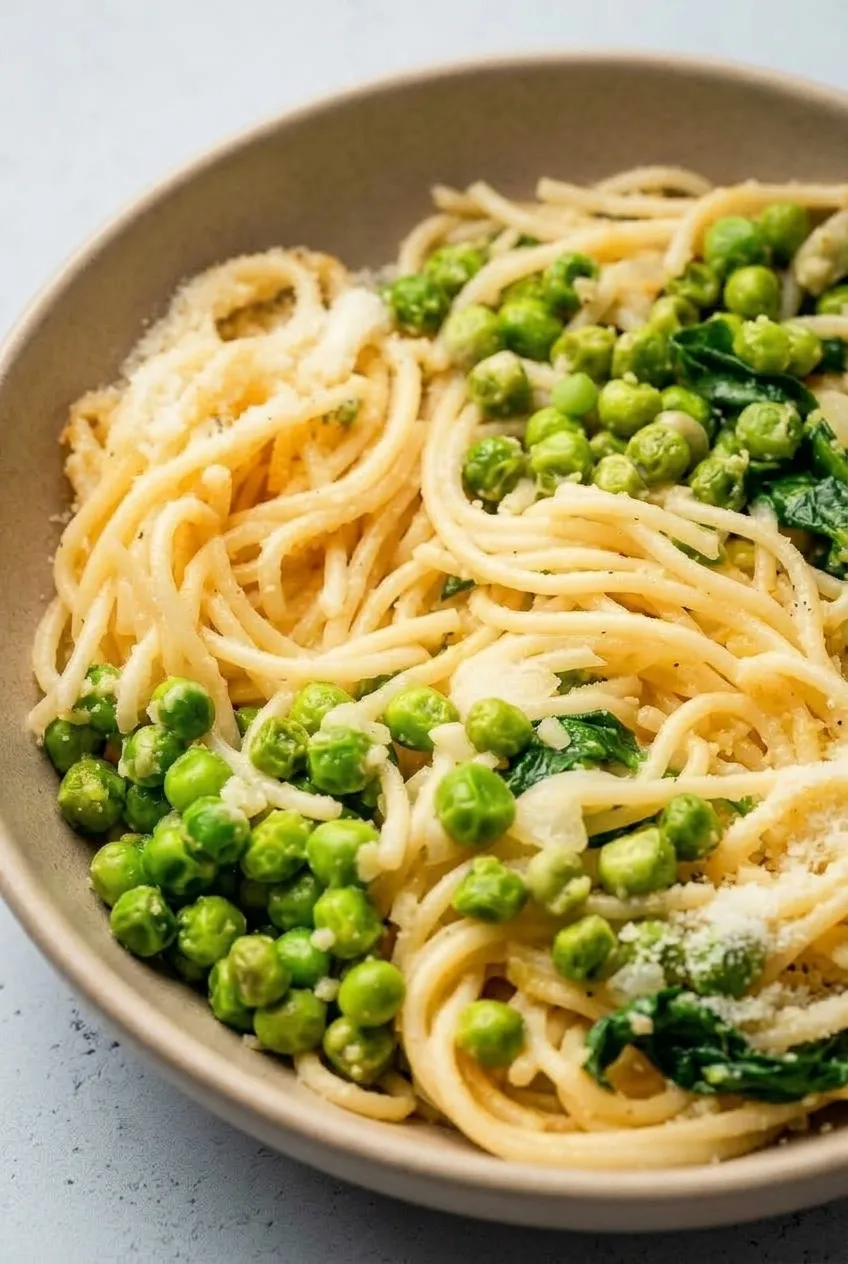
Long spaghetti strands, whole peas, and a few wilted spinach leaves get a light Parmesan coating in this stovetop pasta. Frozen peas cook in the same pot as the spaghetti, while butter and reserved pasta water help the cheese coat the strands without heavy cream.

Cook the spaghetti to the tenderness that suits the child eating it, keeping the strands intact. Add the Parmesan off heat to help it coat smoothly, then serve the pasta while it is glossy.

Ingredients for Parmesan Pea Pasta

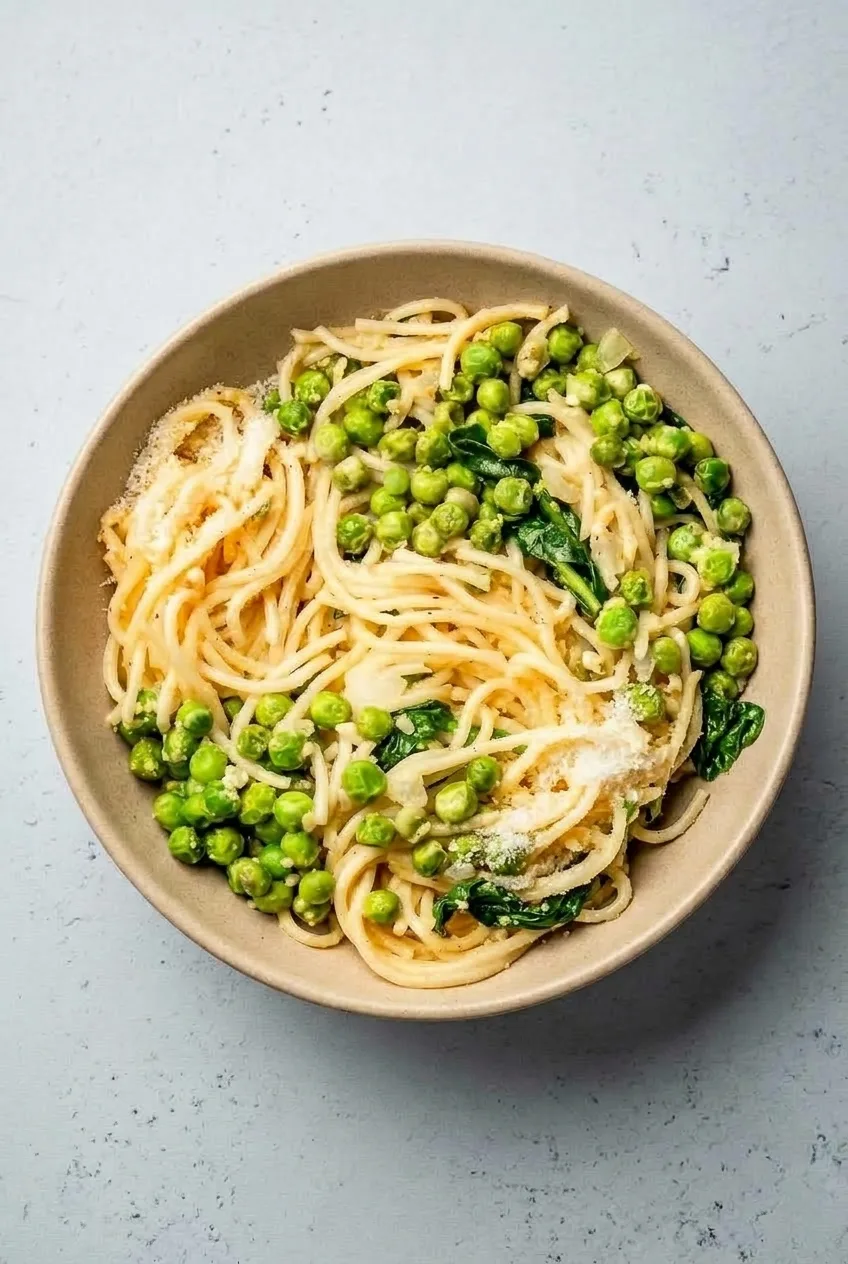
Close view of glossy spaghetti strands, whole peas, spinach leaves and grated Parmesan
  • 8 ounces dry spaghetti (about 225g)
  • 1 1/2 cups frozen peas (about 225g)
  • 2 loosely packed cups baby spinach (about 60g)
  • 2 tablespoons unsalted butter (28g)
  • 1/2 cup finely grated Parmesan, plus 2 tablespoons for serving (about 55g total)
  • Salt for the pasta water, plus a pinch at the end if needed
  • Reserved pasta cooking water: about 1/4 cup to start; reserve at least 1 cup

Optional: Offer a small pinch of freshly ground black pepper at the table.

Yield: 4 child-size servings or 2–3 larger servings. Time: 5 minutes prep; 12–15 minutes cooking, depending on the spaghetti; about 20 minutes total.

How to Make Parmesan Pea Pasta

Complete bowl of Parmesan pea spaghetti on a pale gray tabletop, with space around the bowl
  1. Boil the spaghetti: Bring a large pot of salted water to a boil. Add the spaghetti and stir during the first minute to separate the strands. Boil uncovered according to the package directions. Check the pasta shortly before the package time ends so you can add the peas with 2 minutes remaining.
  2. Add the peas: Stir the frozen peas into the boiling water for the final 2 minutes. The spaghetti should be tender to your family’s preference but still hold its shape; the peas should be hot, bright green, and distinct. Scoop out at least 1 cup of pasta water, then drain the spaghetti and peas.
  3. Wilt the spinach: Return the spaghetti and peas to the pot with the butter and baby spinach. Toss over low heat for 30–60 seconds, until the butter melts and the spinach softens but remains visibly leafy.
  4. Coat with Parmesan: Turn off the heat. Add about 1/4 cup reserved pasta water, then gradually add the 1/2 cup Parmesan, tossing with tongs. Add more warm pasta water a tablespoon or two at a time until the cheese lightly coats the strands. The pasta should look glossy, not dry or soupy. Taste and add a pinch of salt if needed.
  5. Serve: Divide among bowls, distributing any peas left in the pot. Sprinkle with the remaining 2 tablespoons Parmesan and serve promptly. Offer pepper separately if desired.

How to Keep the Parmesan Coating Smooth

Finely grated Parmesan disperses more easily than coarse shreds. Active heat or too little liquid can make it clump, so add it only after turning off the heat and toss it in gradually with warm pasta water. If the spaghetti looks dry while you portion it, toss it with another small splash of the reserved water.

Pasta Shape and Pea Timing

Spaghetti gives this version its long strands. If shorter pieces are easier to eat, cut the spaghetti after serving or substitute small shells or macaroni, following that pasta’s package timing. Add frozen peas for the final 2 minutes either way so they heat through without becoming mushy.

Fresh peas can be used instead; cook them until tender. If using drained canned peas, add them near the end just long enough to warm through.

How to Store and Reheat Leftovers

For the best texture, cook and sauce the pasta just before serving. Refrigerate leftovers promptly in a covered container for up to 2 days. Reheat gently in a saucepan over low heat with a splash of water, stirring until warmed through. The coating will be less silky than when freshly made. Freezing the finished pasta is not recommended because the strands may become mushy after thawing.

For another easy stovetop lunch, try these kid-friendly grilled cheese roll-ups.

Nutrition

Approximate nutrition per child-size serving, based on 4 servings: 365 calories, 16g protein, 11g fat, and 51g carbohydrates. Per 100g of finished pasta: approximately 155 calories, 7g protein, 5g fat, and 22g carbohydrates. Values are estimates and vary with the Parmesan used and the amount of water the pasta retains.

Parmesan Pea Pasta for Kids

Spaghetti, peas, and baby spinach are tossed with butter, Parmesan, and pasta water for a light, glossy coating.
Course: Main Course
Cuisine: Italian
Prep: 5 min
Cook: 15 min
Total: 20 min
Servings: 4 Calories: 365 kcal

Equipment

  • Large pot
  • Colander
  • Measuring cup
  • Tongs

Ingredients

  • 8 ounces dry spaghetti (about 225 g)
  • 1 1/2 cups frozen peas (about 225 g)
  • 2 loosely packed cups baby spinach (about 60 g)
  • 2 tablespoons unsalted butter (28 g)
  • 1/2 cup finely grated Parmesan, plus 2 tablespoons for serving (about 55 g total)
  • Salt, for the pasta water, plus a pinch at the end if needed
  • Reserved pasta cooking water: about 1/4 cup to start; reserve at least 1 cup
  • Optional: freshly ground black pepper, for serving

Instructions

  1. Bring a large pot of salted water to a boil. Add the spaghetti and stir during the first minute to separate the strands.
  2. Boil the spaghetti uncovered according to package directions. Check it shortly before the package time ends.
  3. Add the frozen peas for the final 2 minutes of cooking.
  4. Scoop out at least 1 cup of pasta water, then drain the spaghetti and peas.
  5. Return the spaghetti and peas to the pot. Add the butter and spinach, then toss over low heat for 30–60 seconds, until the butter melts and the spinach softens.
  6. Turn off the heat. Add about 1/4 cup reserved pasta water and gradually toss in 1/2 cup Parmesan.
  7. Add more warm pasta water a tablespoon or two at a time until the cheese lightly coats the strands. Taste and add a pinch of salt if needed.
  8. Divide among bowls, sprinkle with the remaining 2 tablespoons Parmesan, and serve promptly. Offer pepper separately if desired.

Tips

  • Check the spaghetti before the package cooking time ends so you can add the peas for the final 2 minutes.
  • Finely grated Parmesan coats more smoothly than coarse shreds.
  • Add the Parmesan off the heat and toss it in gradually with warm pasta water to help prevent clumping.
  • If the pasta looks dry while portioning, toss it with another small splash of reserved pasta water.
  • Cook the spaghetti to the tenderness that suits the child eating it while keeping the strands intact.

Variations

  • Short pasta: Use small shells or macaroni instead of spaghetti, following the package timing, and add the peas for the final 2 minutes.
  • Fresh or canned peas: Cook fresh peas until tender, or add drained canned peas near the end just long enough to warm through.

Notes

Refrigerate leftovers promptly in a covered container for up to 2 days. Reheat gently in a saucepan over low heat with a splash of water; the coating will be less silky than when freshly made. Freezing is not recommended. Per 100 g: approximately 155 calories, 7 g protein, 5 g fat, and 22 g carbohydrates.

Nutrition

Calories: 365 kcal | Protein: 16 g | Fat: 11 g | Carbohydrates: 51 g

Cold Tortellini Pasta Salad for Kids

Green and pale yellow cheese tortellini make the base of this cold pasta salad, with tomatoes, cucumber, mozzarella, mild salami, olives, and banana peppers adding color and distinct bites. A little Italian dressing gives everything a light gloss without pooling in the bowl.

Cook the tortellini just until tender, rinse it cold, and fold it gently so the pieces keep their shape. Before mixing the shared bowl, you can set aside plain tortellini and chosen additions for a child who prefers foods served separately.

Ingredients for Cold Tortellini Pasta Salad

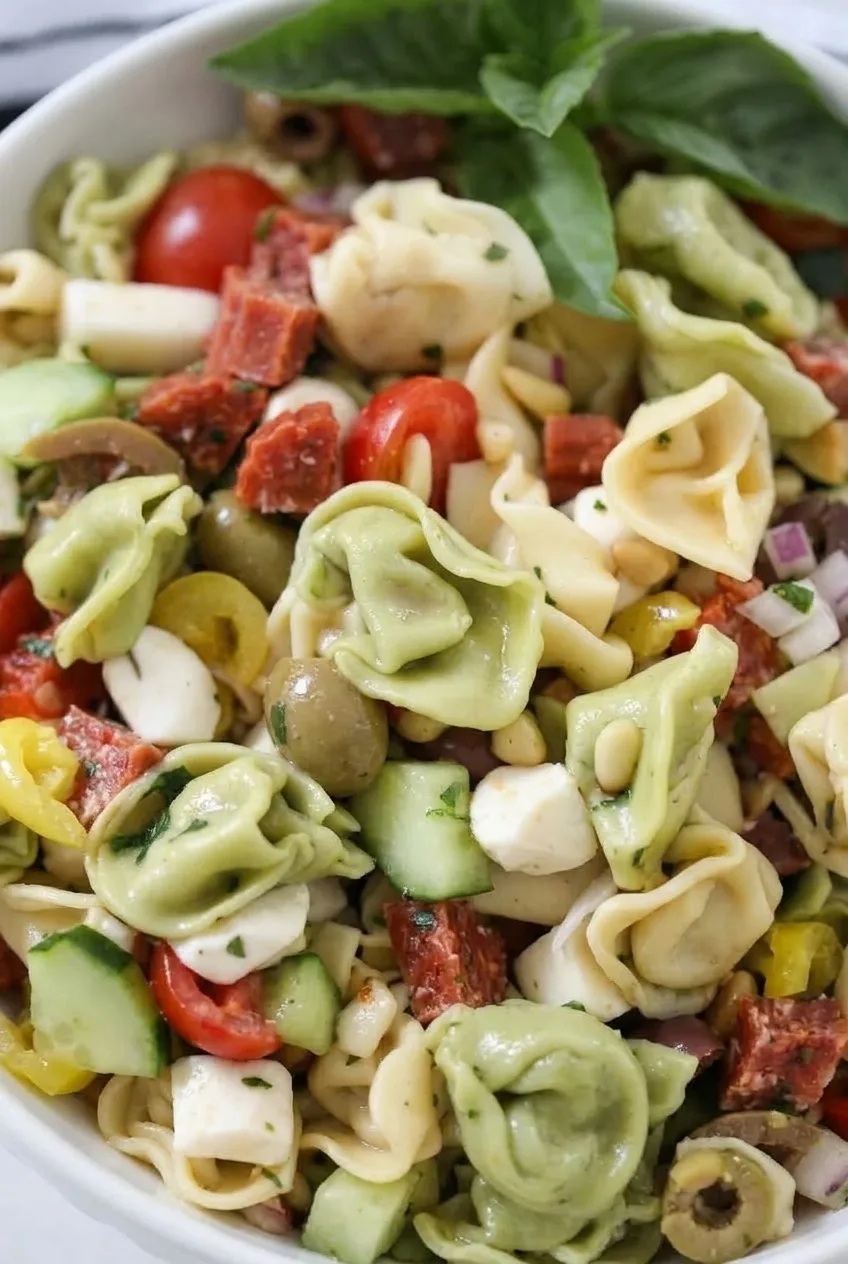
Close view of intact tortellini folds with lightly dressed vegetables, mozzarella, and salami
  • 1 package (about 18–20 ounces) tricolor or mixed green-and-pale refrigerated cheese tortellini
  • 1/2 cup mild bottled Italian dressing, divided
  • 1 cup cherry or grape tomatoes, halved or quartered (about 150g)
  • 1 cup diced cucumber (about 130g)
  • 4 ounces small fresh mozzarella balls, drained (about 115g)
  • 2 ounces mild salami, diced small (about 55g)
  • 1/3 cup pitted olives, sliced (about 50g)
  • 1/4 cup mild yellow banana pepper rings, drained and chopped if large (about 35g)
  • 2 tablespoons finely diced red onion (about 20g)
  • 4–6 fresh basil leaves, with a few left whole for serving

Yield: 6 side-dish servings. Time: About 15 minutes prep, package-directed cooking, and 1 hour chilling; about 1 hour 25 minutes total, depending on the tortellini.

How to Make Cold Tortellini Pasta Salad

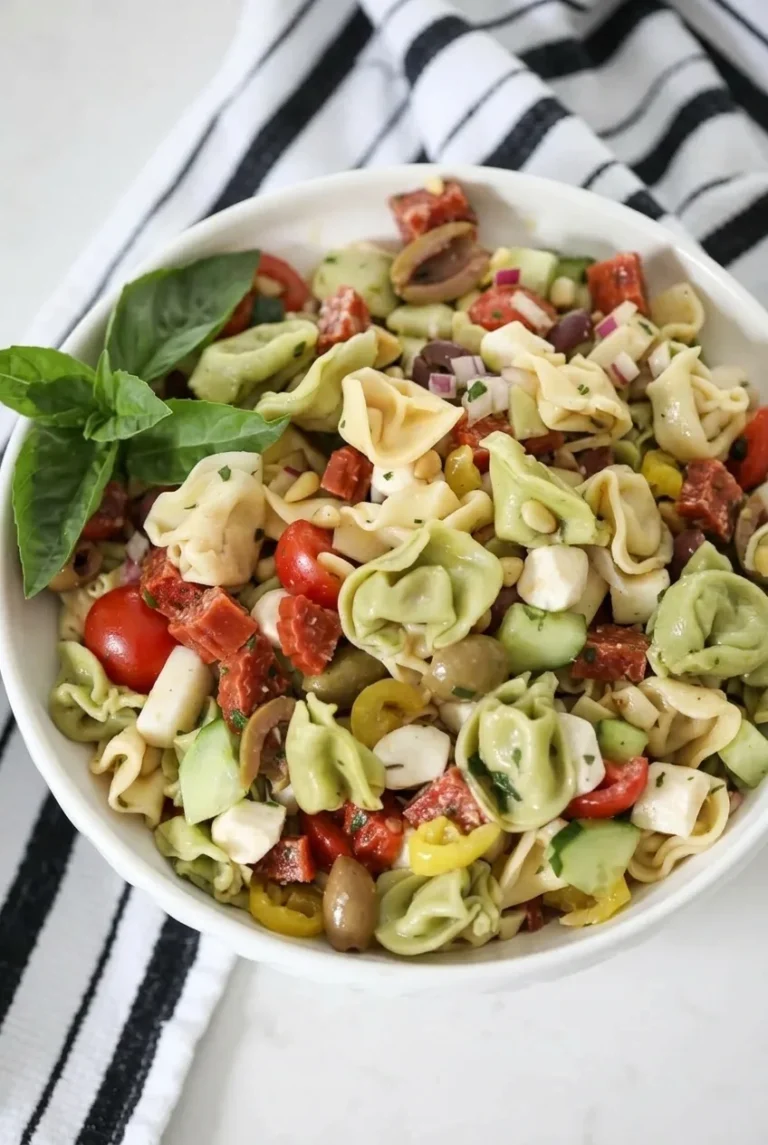
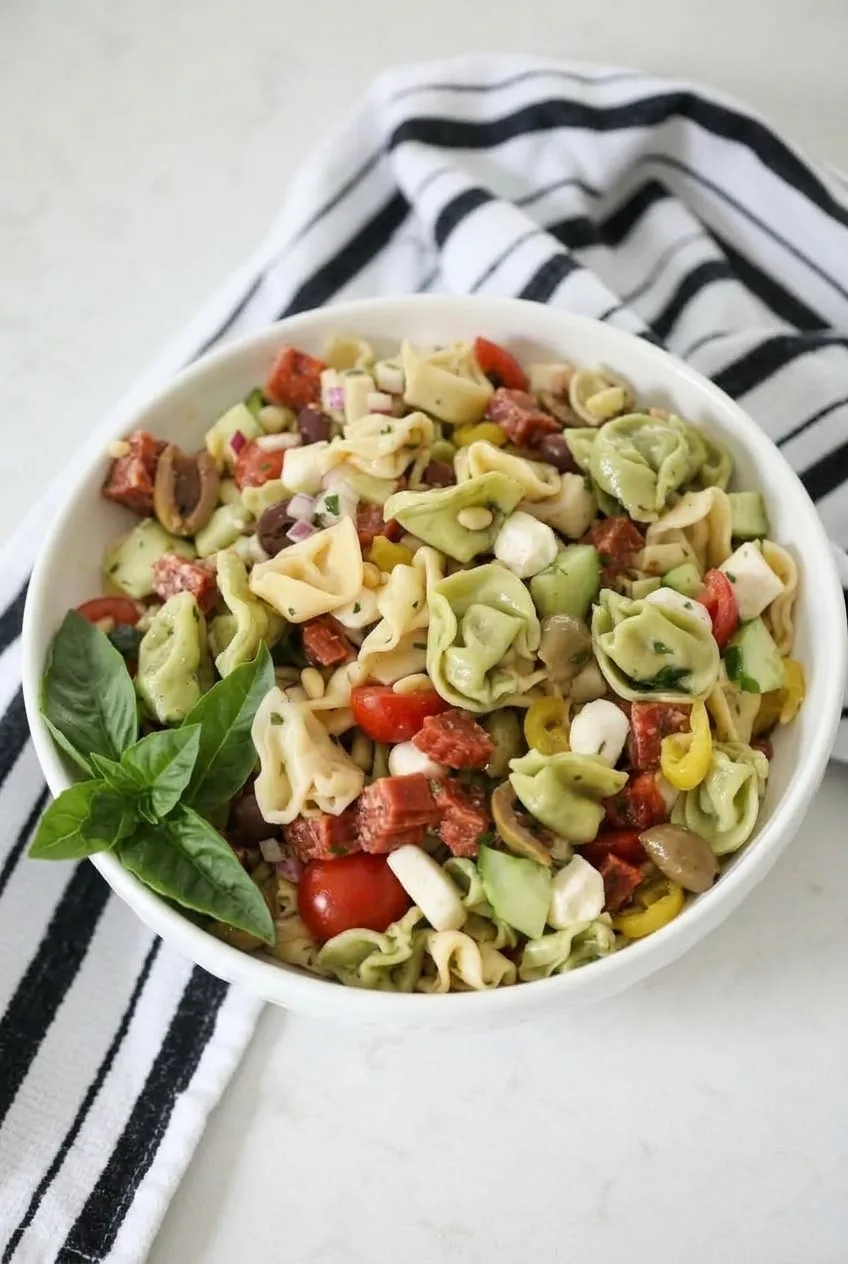
Full white serving bowl of colorful cold tortellini pasta salad on a striped cloth
  1. Cook the tortellini: Bring a large pot of water to a boil. Add the tortellini, stir gently, and cook according to the package directions. Start checking near the earliest listed time. Drain when the pasta is tender but still holds its folded shape.
  2. Cool and drain: Rinse the tortellini under cold running water until it feels cold, about 2–3 minutes. Let it drain thoroughly so excess water does not dilute the dressing.
  3. Prepare the mix-ins: Cut any large mozzarella balls into smaller pieces. Prepare the tomatoes, cucumber, salami, olives, peppers, and onion as listed. Leave a few basil leaves whole for serving.
  4. Reserve separate portions, if needed: Set aside some plain tortellini and preferred mix-ins before dressing the shared salad. Offer dressing on the side for those portions.
  5. Toss and chill: In a large bowl, gently fold the tortellini with the tomatoes, cucumber, mozzarella, salami, olives, banana peppers, onion, and 1/3 cup of the dressing. Cover and refrigerate for about 1 hour.
  6. Refresh and serve: Fold the salad gently again. If the pasta looks dry, add some or all of the remaining dressing a little at a time, stopping when the tortellini looks glossy without sitting in liquid. Transfer to a large serving bowl with the colorful mix-ins visible on top. Tear the basil leaves not reserved whole over the salad, and place the whole leaves along one edge. Serve chilled.

Choosing Tortellini

Refrigerated, frozen, and dry cheese tortellini need different cooking times, so use the directions on the package you have. Mixed-color tortellini gives the salad its green-and-pale appearance; regular cheese tortellini works with the same method but makes a single-color salad. Whichever you choose, stop cooking while the folds are still intact—the pasta will soften further if overcooked or tossed roughly.

Serving Separate Portions

The shared bowl includes salami, olives, and peppers, but an individual portion can be as simple as reserved tortellini with chosen vegetables or mozzarella alongside it. Dressing can be served as a dip. For younger children, cut round tomatoes and mozzarella into pieces appropriate for their age and chewing ability; serve the olives sliced.

Serve the salad for lunch or as a side dish. For another kid-oriented savory option, try broccoli cheese pinwheels.

Making the Salad a Day Ahead

For day-ahead preparation, refrigerate the cut tomatoes separately and add them shortly before serving; they can release liquid into the salad as they sit. Reserve some or all of the dressing, too. After chilling, fold in only enough to restore a light coating.

Storage

Cover and refrigerate the salad promptly. This fresh-ingredient version has its best texture within about two days, though the basil and cut vegetables soften over time. Serve it cold rather than reheating it. Do not freeze the assembled salad; the pasta and vegetables lose texture after thawing.

Nutrition

Approximate per serving (1/6 of the recipe): 400 calories, 16g protein, 21g fat, and 38g carbohydrates. Approximate per 100g of finished salad: 170 calories, 7g protein, 9g fat, and 16g carbohydrates. Values vary with the tortellini, dressing, and amount of dressing added before serving.

Cold Tortellini Pasta Salad for Kids

A chilled cheese tortellini salad with tomatoes, cucumber, mozzarella, mild salami, olives, banana peppers, and Italian dressing.
Course: Salad
Cuisine: Italian
Prep: 15 min
Cook: 10 min
Total: 85 min
Servings: 6 Calories: 400 kcal

Equipment

  • Large pot
  • Colander
  • Large bowl
  • Cutting board
  • Knife

Ingredients

For the Salad

  • 1 package (about 18–20 ounces) tricolor or mixed green-and-pale refrigerated cheese tortellini
  • 1/2 cup mild bottled Italian dressing, divided
  • 1 cup cherry or grape tomatoes, halved or quartered (about 150 g)
  • 1 cup diced cucumber (about 130 g)
  • 4 ounces small fresh mozzarella balls, drained (about 115 g)
  • 2 ounces mild salami, diced small (about 55 g)
  • 1/3 cup pitted olives, sliced (about 50 g)
  • 1/4 cup mild yellow banana pepper rings, drained and chopped if large (about 35 g)
  • 2 tablespoons finely diced red onion (about 20 g)
  • 4–6 fresh basil leaves, with a few left whole for serving

Instructions

  1. Bring a large pot of water to a boil.
  2. Add the tortellini, stir gently, and cook according to the package directions. Start checking near the earliest listed time and drain when tender but still holding its folded shape.
  3. Rinse the tortellini under cold running water for 2–3 minutes, until cold. Drain thoroughly.
  4. Cut any large mozzarella balls into smaller pieces. Prepare the tomatoes, cucumber, salami, olives, banana peppers, and onion.
  5. If desired, set aside plain tortellini and preferred mix-ins before dressing the shared salad. Serve dressing on the side for those portions.
  6. In a large bowl, gently fold the tortellini with the tomatoes, cucumber, mozzarella, salami, olives, banana peppers, onion, and 1/3 cup of the dressing.
  7. Cover and refrigerate for about 1 hour.
  8. Gently fold the salad again. Add some or all of the remaining dressing a little at a time if needed, stopping when the tortellini looks lightly glossy.
  9. Transfer to a serving bowl. Tear the basil leaves over the salad and arrange the reserved whole leaves along one edge. Serve chilled.

Tips

  • Follow the package cooking directions because refrigerated, frozen, and dry tortellini have different cooking times.
  • Stop cooking while the tortellini folds still hold their shape.
  • Drain the rinsed tortellini thoroughly so excess water does not dilute the dressing.
  • Add the reserved dressing gradually after chilling, using only enough to lightly coat the pasta.
  • For younger children, cut tomatoes and mozzarella into pieces appropriate for their age and chewing ability; serve olives sliced.

Variations

  • Single-Color Tortellini Salad: Use regular cheese tortellini instead of mixed-color tortellini.

Notes

Cover and refrigerate promptly; the salad has its best texture within about two days. Serve cold, do not reheat, and do not freeze. For day-ahead preparation, refrigerate cut tomatoes separately and add shortly before serving.

Nutrition

Calories: 400 kcal | Protein: 16 g | Fat: 21 g | Carbohydrates: 38 g | Per 100 G Calories: 170 kcal | Per 100 G Protein: 7 g | Per 100 G Fat: 9 g | Per 100 G Carbohydrates: 16 g

Air Fryer Grilled Cheese for Kids

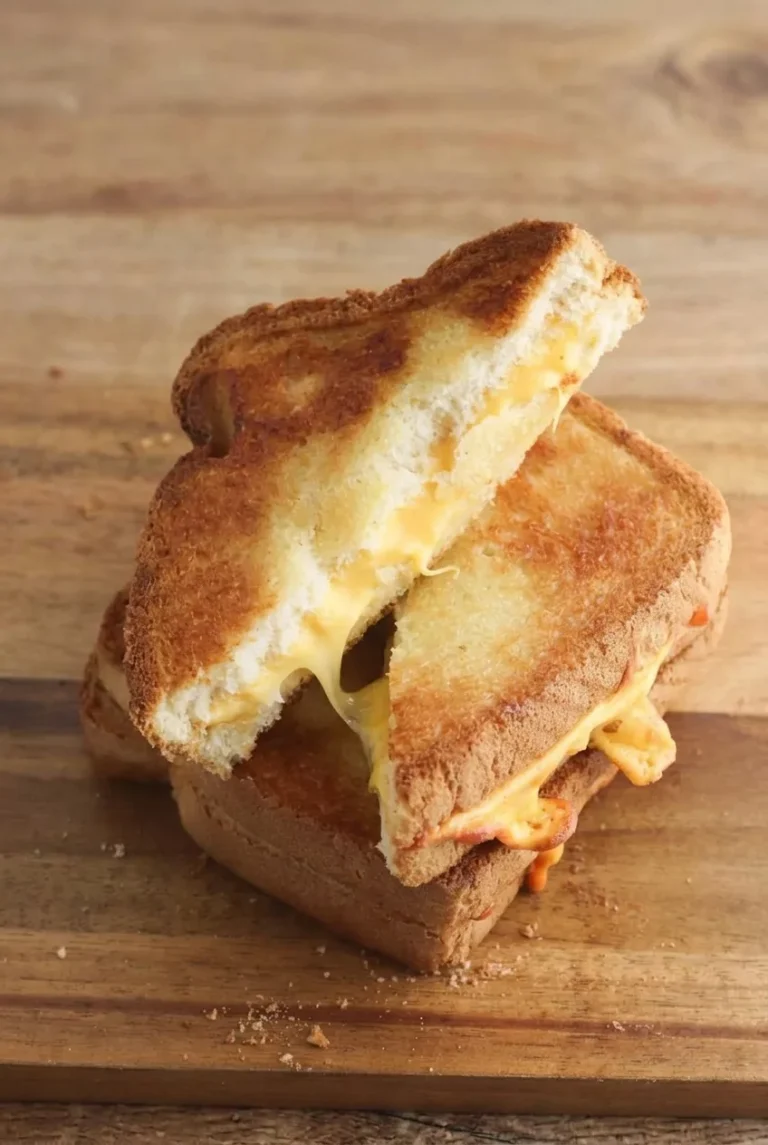
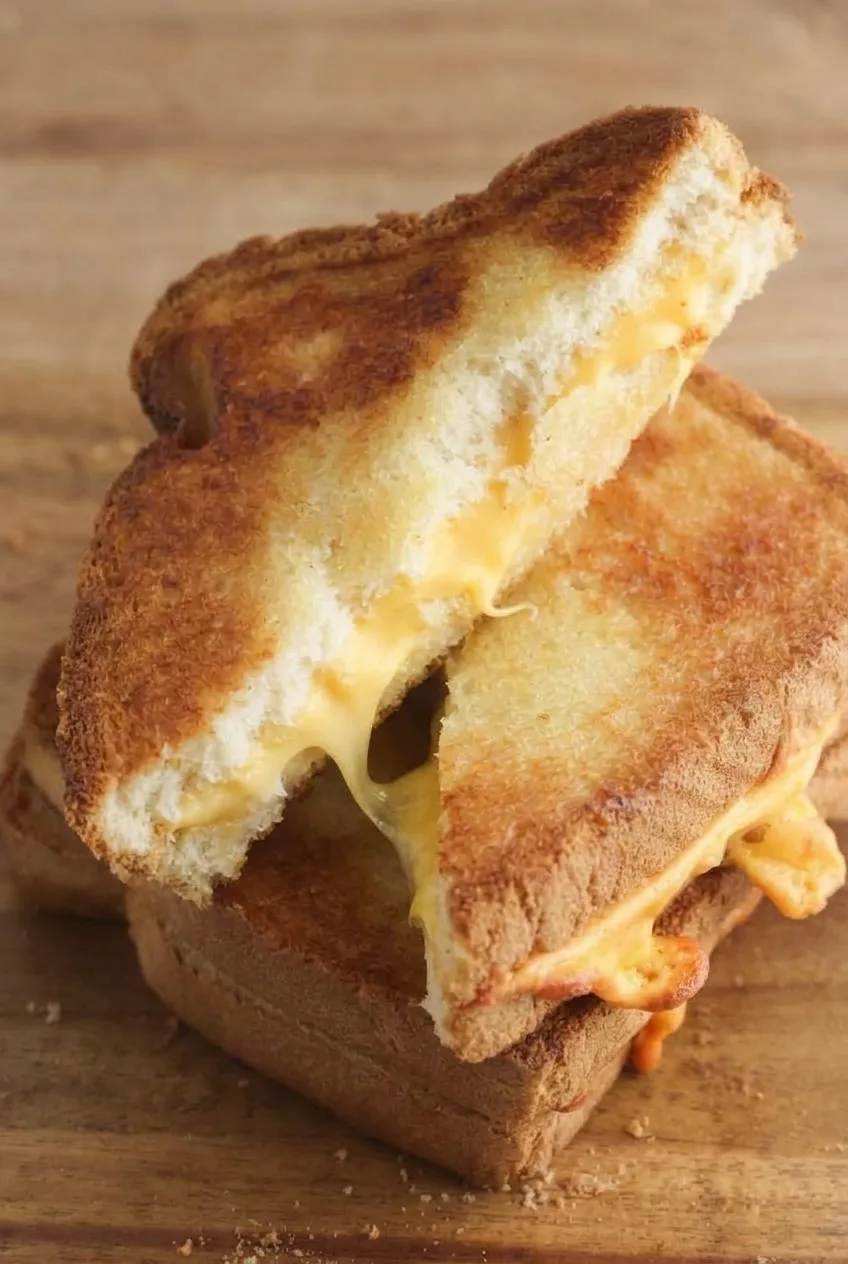
Golden, crisp bread and cheese melted through the center are the goal for this three-ingredient grilled cheese. Substantial white bread gives the sandwich a soft interior, but it may need more air-fryer time than thin sandwich bread. Flip it halfway through and check the toast and cheese together rather than relying on the clock. A diagonal cut makes two generous triangles with the melted center visible.

Ingredients for One Grilled Cheese

Close view of the grilled cheese cut edge, showing pale bread and melted cheese between golden crusts
  • 2 slices white sandwich bread, about 1/2 to 3/4 inch thick
  • 2 slices American cheese
  • 2 teaspoons softened butter

Yield: 1 sandwich. Time: About 5 minutes prep and 6–8 minutes cooking, plus air-fryer preheating.

How to Make Air Fryer Grilled Cheese

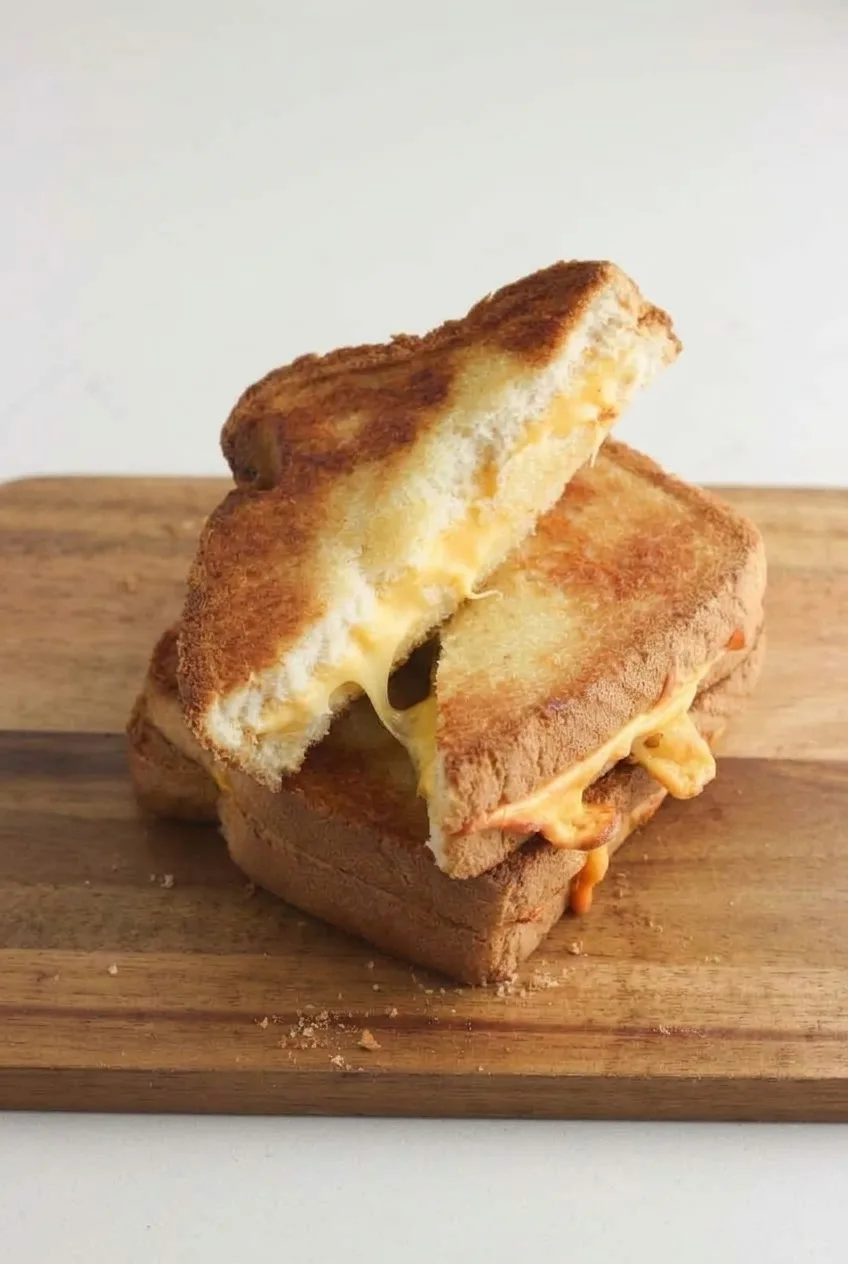
Two triangular grilled cheese halves on a wooden board, photographed from farther back
  1. Preheat: Preheat the air fryer to 350°F (175°C) according to its instructions.
  2. Assemble: Spread a thin, even layer of butter on one side of each bread slice. Put the cheese between the unbuttered sides, mostly within the bread edges. The buttered sides should face out.
  3. Air-fry and flip: Place the sandwich in the basket with space around it. Cook for 3–4 minutes, checking around 3 minutes, then carefully flip it so both sides brown. An adult should handle the hot basket and sandwich.
  4. Finish: Continue cooking, checking again near 5–6 minutes total. The substantial bread may take about 6–8 minutes total, but remove the sandwich sooner if both sides are golden and crisp and the cheese is fully melted. If airflow lifts the top slice, pause the air fryer and have an adult secure the bread with toothpicks. Remove every toothpick before cutting or serving.
  5. Cut and serve: Let the sandwich stand briefly until safe to handle. Cut it diagonally into two triangles and lean one half against the other to show the melted center. Let it cool to a comfortable temperature before serving to a child.

Cook two sandwiches at once only if they fit in one layer with air space around each; otherwise, cook in batches. If using multiple trays, rotate their positions if one browns faster.

How to Tell When It’s Done

Check for golden bread on both sides and soft, melted cheese at the edges. The diagonal cut will show whether the center has melted too. Thin bread may finish in 4–6 minutes, while substantial bread can take longer; air fryers also brown at different speeds. Watch closely if the toast darkens before the cheese melts.

Bread and Cheese Swaps

Good-melting sliced cheddar or Havarti can replace American cheese, but check the center rather than assuming the timing will be the same. Thin white bread may cook faster and lift more easily in the airflow; extra-thick Texas toast may need longer. A thin layer of mayonnaise can replace the butter on the outside.

Serve with tomato soup, fruit, or a simple salad, if desired. For a different take, try these kid-friendly grilled cheese roll-ups. For another lunch option, see these turkey and cheese wraps for kids.

Leftovers and Reheating

Grilled cheese is crispiest right after cooking. Cool leftovers and refrigerate in an airtight container for up to 3 days. Reheat in the air fryer at 375°F (190°C) for about 2–3 minutes, checking until warmed through.

Nutrition

Approximate nutrition per sandwich: 460 calories, 16g protein, 21g fat, and 51g carbohydrates. Based on an estimated 150g finished sandwich, that is about 305 calories, 11g protein, 14g fat, and 34g carbohydrates per 100g. Values vary with bread size and cheese brand.

Air Fryer Grilled Cheese for Kids

A crisp, buttery air-fried sandwich with American cheese melted between slices of white bread.
Course: Main Course
Cuisine: American
Prep: 5 min
Cook: 7 min
Total: 12 min
Servings: 1 Calories: 460 kcal

Equipment

  • Air fryer
  • Butter knife
  • Toothpicks (optional)

Ingredients

  • 2 slices white sandwich bread, about 1/2 to 3/4 inch thick
  • 2 slices American cheese
  • 2 teaspoons softened butter

Instructions

  1. Preheat the air fryer to 350°F (175°C) according to its instructions.
  2. Spread a thin, even layer of butter on one side of each bread slice.
  3. Place the cheese between the unbuttered sides, keeping it mostly within the bread edges.
  4. Place the sandwich in the air fryer basket with space around it.
  5. Cook for 3–4 minutes, checking around 3 minutes, then carefully flip the sandwich.
  6. Continue cooking, checking near 5–6 minutes total. Cook for about 6–8 minutes total, until both sides are golden and crisp and the cheese is melted.
  7. If airflow lifts the top slice, pause the air fryer and have an adult secure the bread with toothpicks. Remove every toothpick before cutting or serving.
  8. Let the sandwich stand briefly until safe to handle, then cut it diagonally into two triangles. Cool to a comfortable temperature before serving to a child.

Tips

  • Check the toast and cheese together rather than relying only on the cooking time.
  • Thin bread may cook in 4–6 minutes; substantial bread may need 6–8 minutes.
  • Watch closely if the bread browns before the cheese melts.
  • Cook multiple sandwiches in one layer with air space around each; otherwise, cook in batches.
  • If using multiple trays, rotate their positions if one browns faster.

Variations

  • Cheddar or Havarti: Replace the American cheese with sliced cheddar or Havarti, and check that the center is fully melted.
  • Mayonnaise Exterior: Replace the butter with a thin layer of mayonnaise on the outside of the bread.
  • Different Bread: Use thin white bread for a quicker cook or extra-thick Texas toast for a longer cook.

Notes

Grilled cheese is crispiest fresh. Refrigerate cooled leftovers in an airtight container for up to 3 days; reheat at 375°F (190°C) for about 2–3 minutes, checking until warmed through. Approximate nutrition per 100 g: 305 calories, 11 g protein, 14 g fat, and 34 g carbohydrates.

Nutrition

Calories: 460 kcal | Protein: 16 g | Fat: 21 g | Carbohydrates: 51 g

Turkey and Cheese Wraps for Kids

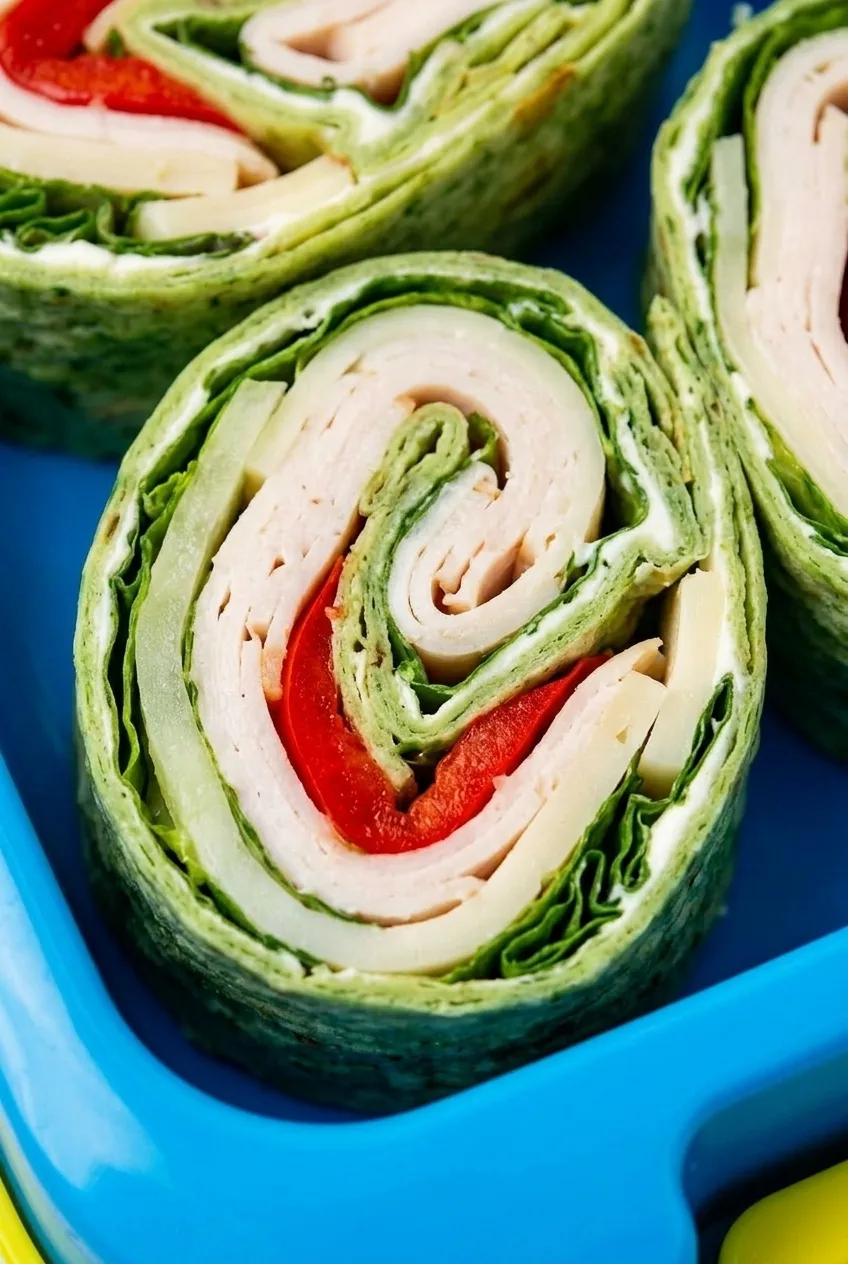
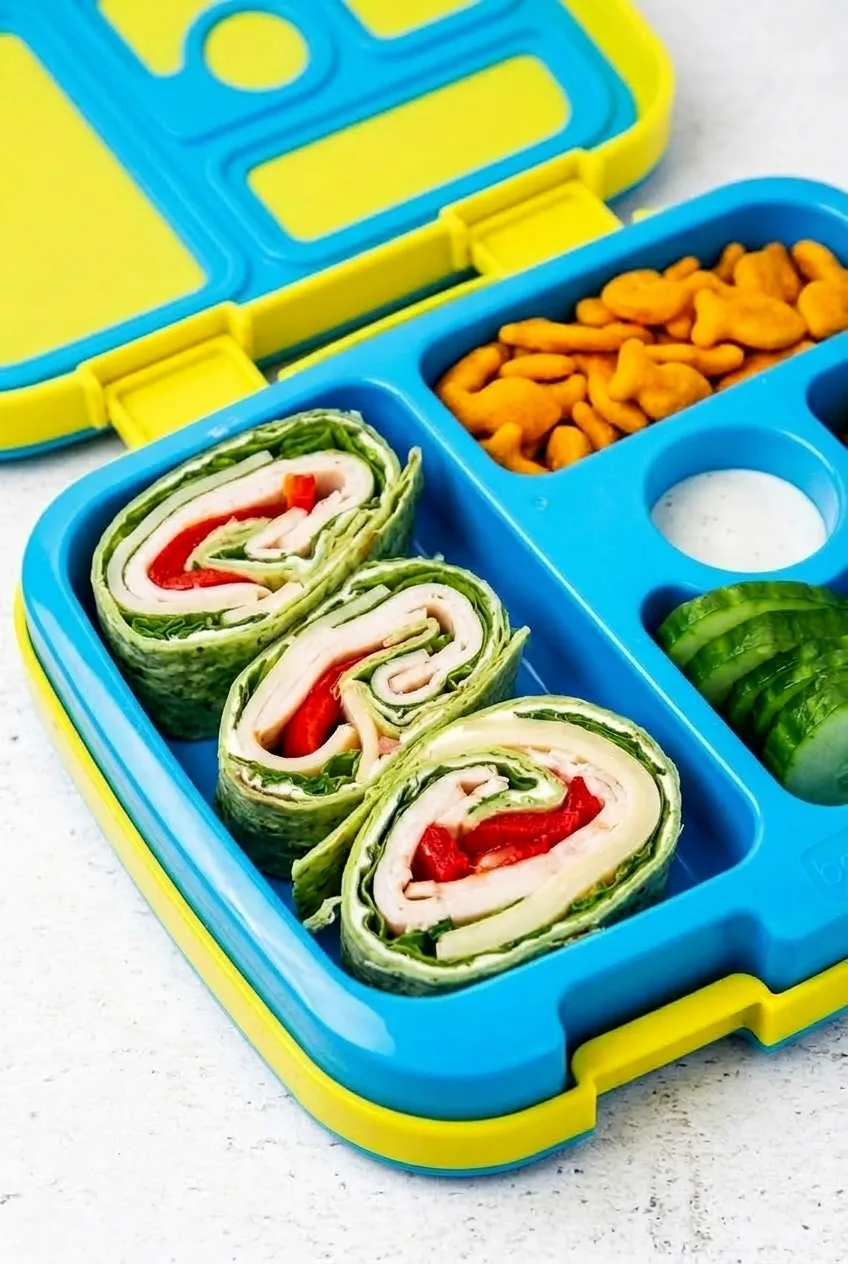
These cold turkey-and-cheese wraps are sliced into thick pinwheels that show their layers: green tortilla and lettuce, pale turkey and cheese, and a strip of red pepper. A thin layer of cream cheese helps seal each roll without covering the fillings.

Roll the tortillas snugly, then chill them for about an hour before slicing. The chill helps the pinwheels hold their shape when they’re lifted into a lunchbox.

Prep: 15 minutes | Cook: 0 minutes | Total: 1 hour 15 minutes, including chilling | Yield: About 16 pinwheels; 4 servings

Ingredients for Turkey and Cheese Wraps

Close view of a turkey and cheese pinwheel showing lettuce, red pepper, and distinct spiral layers
  • 4 soft 8-inch spinach tortillas (about 200g total)
  • 4 ounces plain cream cheese, softened (1/2 cup; about 115g)
  • 8 ounces thinly sliced deli turkey (about 225g)
  • 4 slices mild cheese, such as Monterey Jack or provolone (about 80g)
  • 4 medium tender lettuce leaves, washed and thoroughly dried (about 40g)
  • 1 small red bell pepper, seeded and cut into thin strips (about 120g)

Soft plain flour tortillas also work, though the pinwheels will lose their green outer layer. Any mild sliced cheese can stand in for Monterey Jack or provolone.

How to Make Turkey and Cheese Pinwheels

Open divided lunchbox with turkey and cheese pinwheels, cucumber, crackers, and dip
  1. Prepare the fillings: Let the tortillas come to room temperature so they bend without cracking. Soften the cream cheese, dry the lettuce and pepper thoroughly, and cut the pepper into thin strips.
  2. Spread and layer: Spread about 2 tablespoons of cream cheese thinly over each tortilla, including the edge that will close the roll. Add one lettuce leaf, about 2 ounces of turkey, one cheese slice, and a few pepper strips to each. Run the pepper strips across the tortilla so they extend through the pinwheel slices. Keep the layers thin and leave a narrow border free of bulky filling.
  3. Roll and wrap: Roll each tortilla into a snug log, finishing at the cream-cheese-coated edge. Wrap each log tightly in plastic wrap or reusable food wrap.
  4. Chill and slice: Refrigerate for about 1 hour, then check whether the rolls stay closed when unwrapped. Trim loose ends if needed. With a sharp knife, cut each roll crosswise into about four pinwheels, roughly 1 to 1 1/4 inches thick. The slices should hold together and show distinct layers.
  5. Serve cold: Arrange the pinwheels cut-side up on a plate or in a divided lunchbox.

How to Keep the Pinwheels Together

If the slices unravel or flatten, the roll may be too loose or too full. Keep cream cheese at the closing edge, use only a few thin pepper strips, and leave room to roll the tortilla snugly. Chill each wrapped log before slicing, and cut with a sharp knife rather than pressing down with a dull one.

Packing Pinwheels Without Soggy Wraps

Water left on the lettuce or pepper can soften the tortillas, so dry both thoroughly before assembly. For an advance-packed lunch, leave juicy tomato out of the wraps. Cucumber slices, crackers, and dip can go in separate compartments.

Make-Ahead and Storage

Keep assembled rolls tightly wrapped and refrigerated until you’re ready to slice or pack them. Keep packed pinwheels cold; use an insulated lunch bag with a cold pack when refrigeration is unavailable. Serve them cold rather than reheating them.

The hour-long chill helps with slicing; it does not establish how long assembled wraps can be stored. Freezing is not recommended for these fresh, layered wraps.

Nutrition

Approximate nutrition per serving of 4 pinwheels: 390 calories, 22g protein, 21g fat, and 31g carbohydrates. Per 100g: approximately 200 calories, 11g protein, 11g fat, and 16g carbohydrates. Values vary by tortilla, turkey, and cheese brand; optional lunchbox sides are not included.

Turkey and Cheese Wraps for Kids

Spinach tortillas filled with turkey, cheese, lettuce, and red pepper are chilled and sliced into pinwheels for lunch.
Course: Main Course
Cuisine: American
Prep: 15 min
Total: 75 min
Servings: 4 Calories: 390 kcal per serving; approximately 200 kcal per 100 g

Equipment

  • Cutting board
  • Sharp knife
  • Plastic wrap or reusable food wrap
  • Refrigerator

Ingredients

  • 4 soft 8-inch spinach tortillas (about 200 g total)
  • 4 ounces plain cream cheese, softened (1/2 cup; about 115 g)
  • 8 ounces thinly sliced deli turkey (about 225 g)
  • 4 slices mild cheese, such as Monterey Jack or provolone (about 80 g)
  • 4 medium tender lettuce leaves, washed and thoroughly dried (about 40 g)
  • 1 small red bell pepper, seeded and cut into thin strips (about 120 g)

Instructions

  1. Bring the tortillas to room temperature. Soften the cream cheese, thoroughly dry the lettuce and pepper, and cut the pepper into thin strips.
  2. Spread about 2 tablespoons of cream cheese thinly over each tortilla, including the edge that will close the roll.
  3. Top each tortilla with one lettuce leaf, about 2 ounces of turkey, one cheese slice, and a few pepper strips. Arrange the pepper strips across the tortilla so they extend through the pinwheel slices, and leave a narrow border free of bulky filling.
  4. Roll each tortilla into a snug log, finishing at the cream-cheese-coated edge. Wrap each log tightly in plastic wrap or reusable food wrap.
  5. Refrigerate the wrapped rolls for about 1 hour. Check that they stay closed when unwrapped and trim loose ends if needed.
  6. Use a sharp knife to cut each roll crosswise into about four pinwheels, roughly 1 to 1 1/4 inches thick.
  7. Arrange the pinwheels cut-side up and serve cold.

Tips

  • Let tortillas come to room temperature so they bend without cracking.
  • Dry the lettuce and pepper thoroughly to help keep the tortillas from becoming soggy.
  • Use thin layers and leave a narrow border free of bulky filling so the tortilla rolls snugly.
  • Keep cream cheese on the closing edge to help seal the roll.
  • Chill the wrapped rolls before slicing and use a sharp knife to avoid flattening the pinwheels.

Variations

  • Plain Flour Tortilla Wraps: Use soft plain flour tortillas instead of spinach tortillas; the pinwheels will not have a green outer layer.
  • Alternative Mild Cheese: Use another mild sliced cheese in place of Monterey Jack or provolone.

Notes

Keep assembled rolls refrigerated and packed pinwheels cold; use an insulated lunch bag with a cold pack when refrigeration is unavailable. Serve cold, not reheated. Freezing is not recommended.

Nutrition

Calories: 390 kcal per serving; approximately 200 kcal per 100 g | Protein: 22 g per serving; approximately 11 g per 100 g | Fat: 21 g per serving; approximately 11 g per 100 g | Carbohydrates: 31 g per serving; approximately 16 g per 100 g

Chicken Bacon Ranch Pinwheels for Lunch

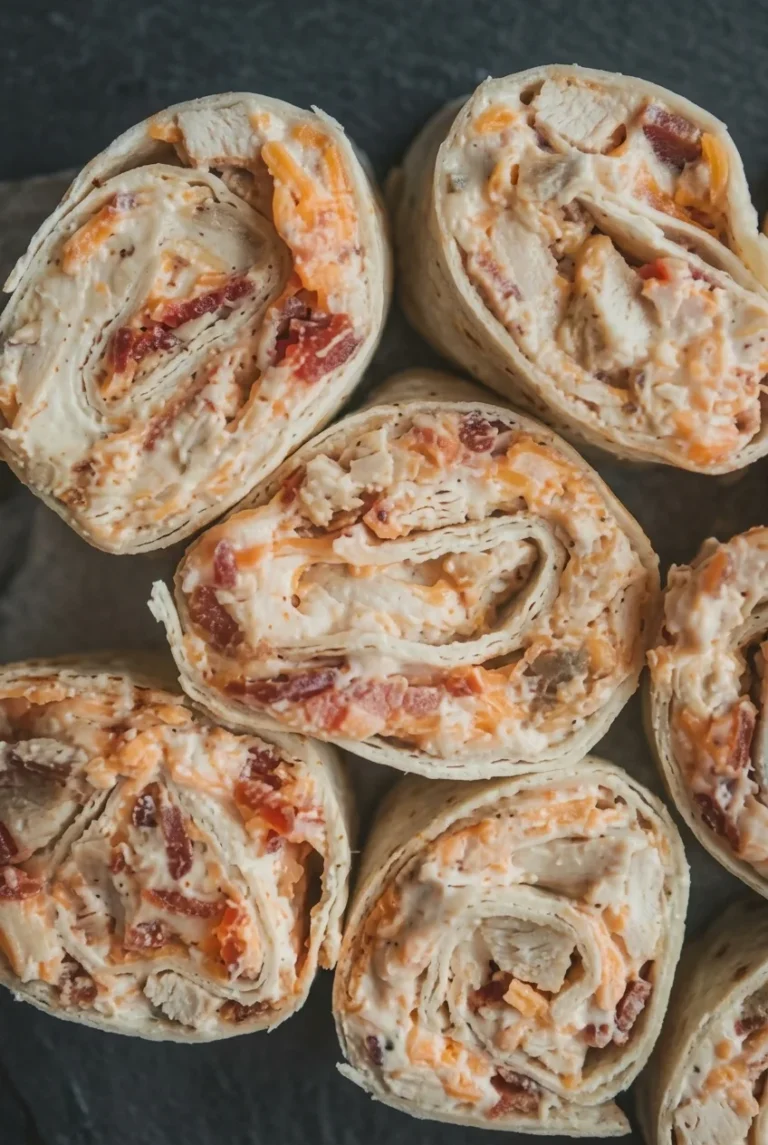
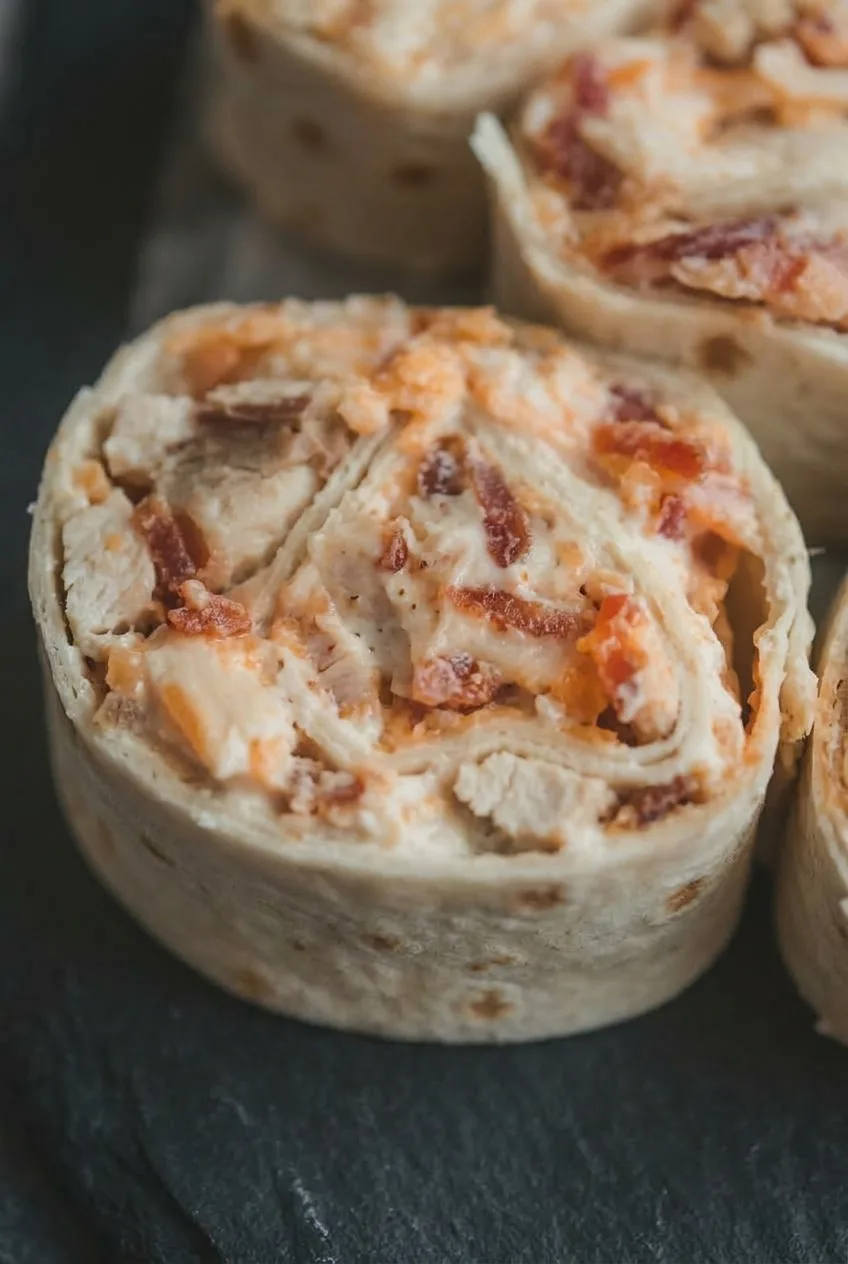
These chilled flour-tortilla pinwheels have a thick ranch-seasoned filling with chicken, bacon, and cheddar in each slice. Use fully cooked chicken and bacon, and chop them small so the tortillas roll tightly without bulky spots. Wrap and chill the rolls whole, then slice them near packing or serving time to keep the spirals intact and the tortilla edges from drying out.

Ingredients for Chicken Bacon Ranch Pinwheels

Close view of creamy chicken, bacon, and cheddar inside a tightly rolled tortilla pinwheel
  • 4 large flour tortillas, about 10 inches each (about 280g total)
  • 8 ounces cream cheese, softened (225g)
  • 1 tablespoon dry ranch seasoning mix
  • 2 cups fully cooked chicken, finely chopped or shredded (about 280g)
  • 6 slices cooked bacon, finely crumbled (about 55g)
  • 1 cup shredded sharp cheddar cheese (about 115g)
  • Optional: 2 tablespoons finely sliced green onion

Rotisserie or leftover cooked chicken works well. Use dry ranch seasoning rather than an equal amount of prepared ranch dressing; the extra liquid can make the filling too loose for defined spirals. For a milder cheese flavor, replace the cheddar with the same amount of shredded Colby Jack.

How to Make Chicken Bacon Ranch Pinwheels

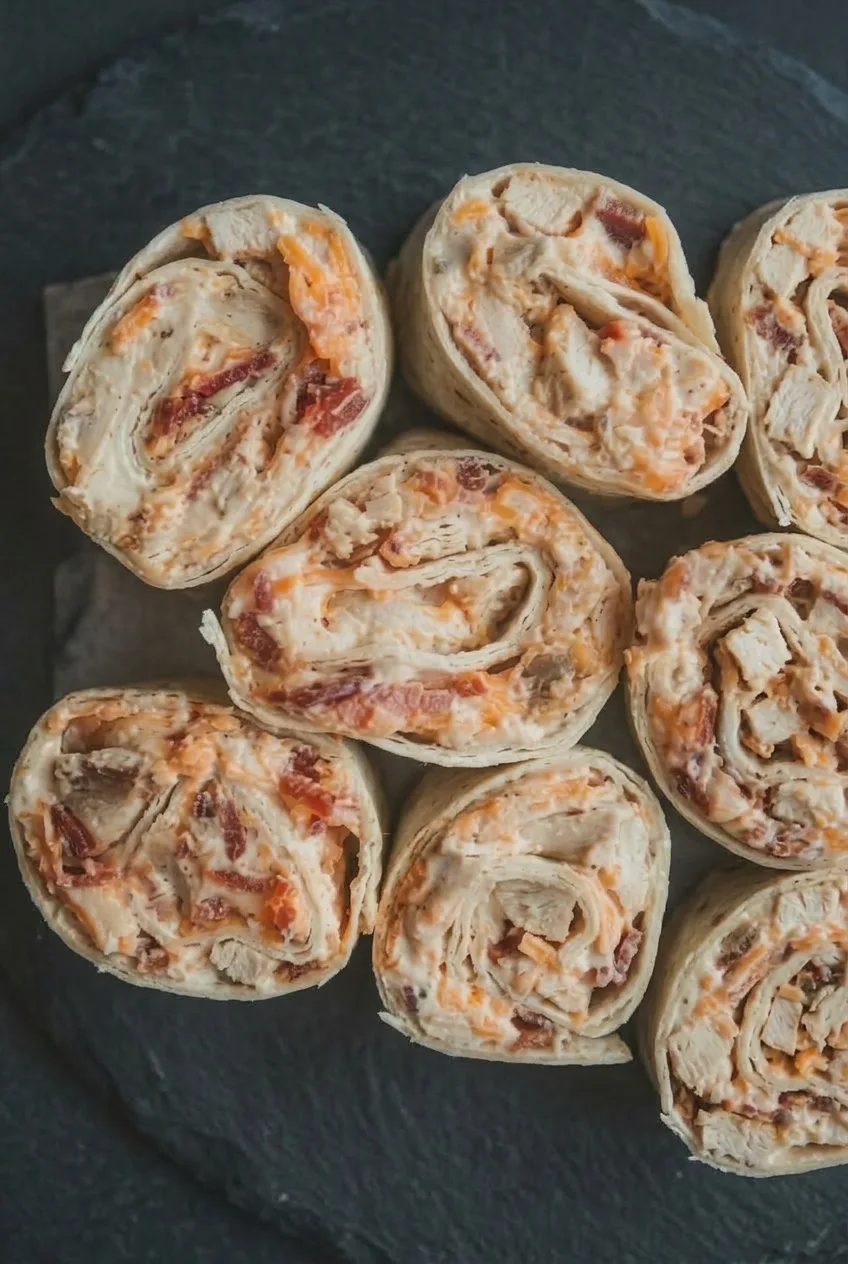
Wider view of a full serving of chicken bacon ranch pinwheels on a dark board

Prep: 20 minutes. Chill: At least 30 minutes. Total: About 50 minutes. Yield: About 32 pinwheels, or 8 servings of 4.

  1. Prepare the filling pieces: Finely chop or shred the fully cooked chicken and crumble the cooked bacon. Large pieces can make the rolls lumpy and catch on the knife when sliced.
  2. Mix the filling: Stir the softened cream cheese and dry ranch seasoning together until smooth. Fold in the chicken, bacon, cheddar, and green onion, if using. The filling should be thick and spreadable, not runny.
  3. Soften stiff tortillas: If needed, briefly warm the empty tortillas under a damp paper towel in the microwave or in a dry skillet until pliable. Keep them soft, with only light golden spots if using a skillet. Let them cool to room temperature before adding the filling.
  4. Spread and roll: Divide the filling evenly among the four tortillas. Spread it in an even layer without large mounds, leaving about a 1-inch bare strip along the far edge of each tortilla. Roll tightly toward the bare edge and set each roll seam-side down.
  5. Wrap and chill: Wrap each roll tightly and refrigerate for at least 30 minutes. Start checking then: the rolls should hold their rounded shape when gently pressed. About 1 hour of chilling gives firmer slices.
  6. Slice and serve: Unwrap the rolls and use a sharp knife to cut each into about eight thick pinwheels, trimming loose ends if needed. Arrange cut-side up and serve chilled.

How to Keep the Pinwheels from Unraveling

If the slices flatten or fall open, leave the wrapped rolls in the refrigerator longer before cutting. Finely chopped filling, an even layer, and a firm roll help keep the tortilla spiral distinct; a sharp knife cuts through the chilled filling without pulling the layers apart.

Optional Warm Pinwheels

For pinwheels served immediately rather than packed for lunch, briefly toast the chilled, sliced pinwheels in an air fryer at 400°F (205°C) for about 3 minutes total, turning halfway and checking early. The filling may soften as it warms. The assembled rolls do not need cooking for the main chilled version.

Make-Ahead Lunch and Storage

For the neatest lunch portions, refrigerate the rolls tightly wrapped and slice them close to packing time. They can be made the day before or up to two days ahead, though they look freshest when sliced nearer serving. Store sliced leftovers in an airtight container to limit drying, and keep the pinwheels chilled during storage and transport. No reheating is needed.

Freezing is not recommended as the main meal-prep method because the filling’s texture after thawing is uncertain.

For another chicken lunch, try these Crockpot Santa Fe Chicken Rice Bowls.

Nutrition

Approximate per serving of 4 pinwheels: 370 calories, 22g protein, 22g fat, and 20g carbohydrates. Approximate per 100g: 300 calories, 18g protein, 18g fat, and 17g carbohydrates. Values vary with the tortillas, chicken, bacon, and cheese used.

Chicken Bacon Ranch Pinwheels

Chilled flour tortillas are filled with ranch-seasoned cream cheese, chicken, bacon, and cheddar, then rolled and sliced into pinwheels.
Course: Snack
Cuisine: American
Prep: 20 min
Total: 50 min
Servings: 8 Calories: 370 kcal

Equipment

  • Mixing bowl
  • Sharp knife
  • Plastic wrap
  • Microwave or skillet

Ingredients

  • 4 large flour tortillas, about 10 inches each (about 280 g total)
  • 8 ounces cream cheese, softened (225 g)
  • 1 tablespoon dry ranch seasoning mix
  • 2 cups fully cooked chicken, finely chopped or shredded (about 280 g)
  • 6 slices cooked bacon, finely crumbled (about 55 g)
  • 1 cup shredded sharp cheddar cheese (about 115 g)
  • Optional: 2 tablespoons finely sliced green onion

Instructions

  1. Finely chop or shred the cooked chicken and crumble the cooked bacon.
  2. Stir the softened cream cheese and dry ranch seasoning together until smooth.
  3. Fold in the chicken, bacon, cheddar, and green onion, if using, until the filling is thick and evenly combined.
  4. If the tortillas are stiff, warm them briefly under a damp paper towel in the microwave or in a dry skillet until pliable. Let them cool to room temperature.
  5. Divide the filling evenly among the tortillas. Spread it in an even layer, leaving about a 1-inch bare strip along the far edge of each tortilla.
  6. Roll each tortilla tightly toward the bare edge and place it seam-side down.
  7. Wrap each roll tightly and refrigerate for at least 30 minutes, or about 1 hour for firmer slices.
  8. Unwrap the rolls and use a sharp knife to cut each into about eight pinwheels. Trim loose ends if needed, then arrange cut-side up and serve chilled.

Tips

  • Use fully cooked chicken and bacon, and chop them finely so the rolls are easier to slice.
  • Use dry ranch seasoning rather than prepared ranch dressing to keep the filling thick.
  • Warm stiff tortillas just until pliable, then cool them before adding the filling.
  • Spread the filling evenly and roll tightly to help the spirals hold their shape.
  • Chill the wrapped rolls longer if they flatten or come apart when sliced.
  • Slice close to serving or packing time to help keep the tortilla edges from drying out.

Variations

  • Colby Jack Pinwheels: Replace the cheddar with the same amount of shredded Colby Jack for a milder cheese flavor.
  • Warm Pinwheels: Toast chilled, sliced pinwheels in an air fryer at 400°F (205°C) for about 3 minutes total, turning halfway and checking early.

Notes

Make up to two days ahead and refrigerate the tightly wrapped rolls; slice nearer serving for the freshest appearance. Store sliced leftovers in an airtight container and keep chilled during storage and transport. Freezing is not recommended. The main version is served chilled and does not need cooking.

Nutrition

Calories: 370 kcal | Protein: 22 g | Fat: 22 g | Carbohydrates: 20 g | Per 100g Calories: 300 kcal | Per 100g Protein: 18 g | Per 100g Fat: 18 g | Per 100g Carbohydrates: 17 g

Broccoli Cheese Pinwheels for Kids

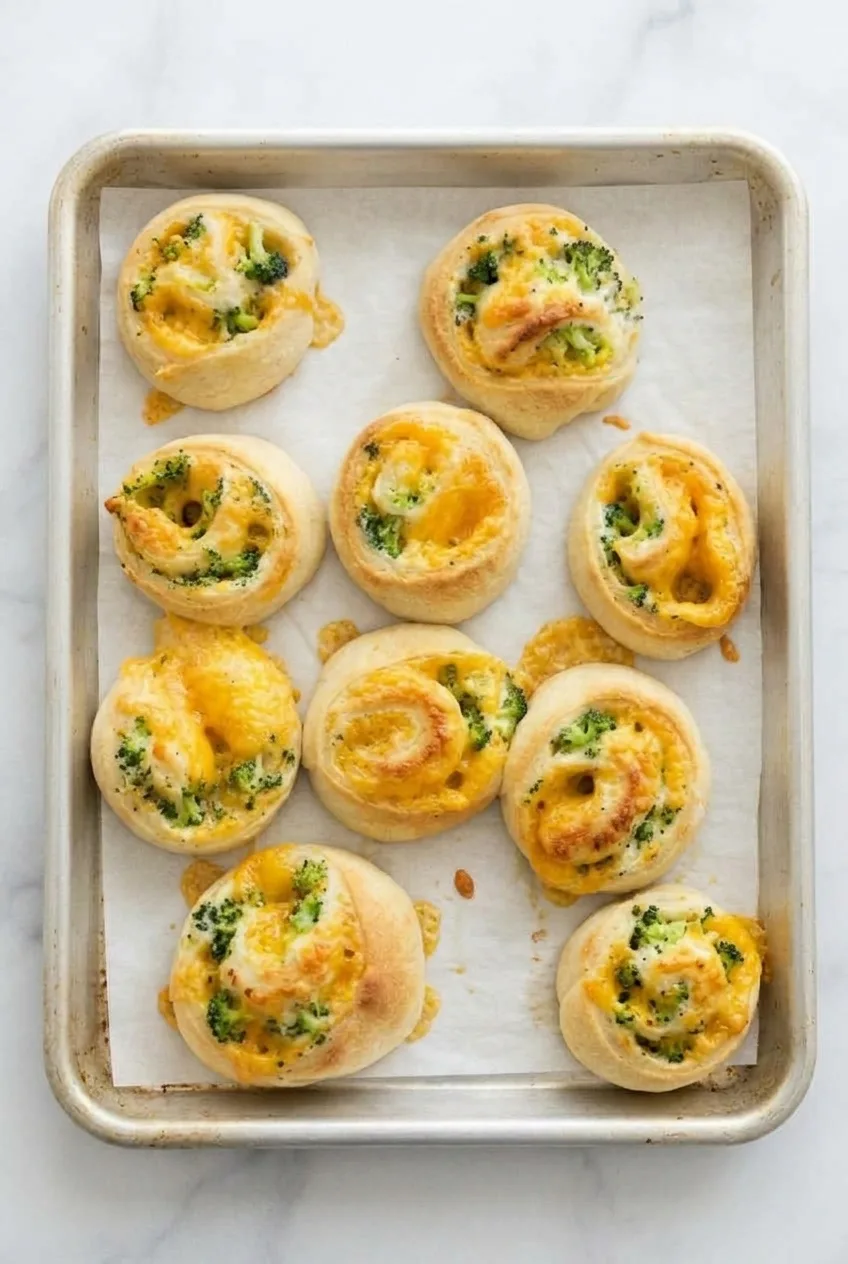
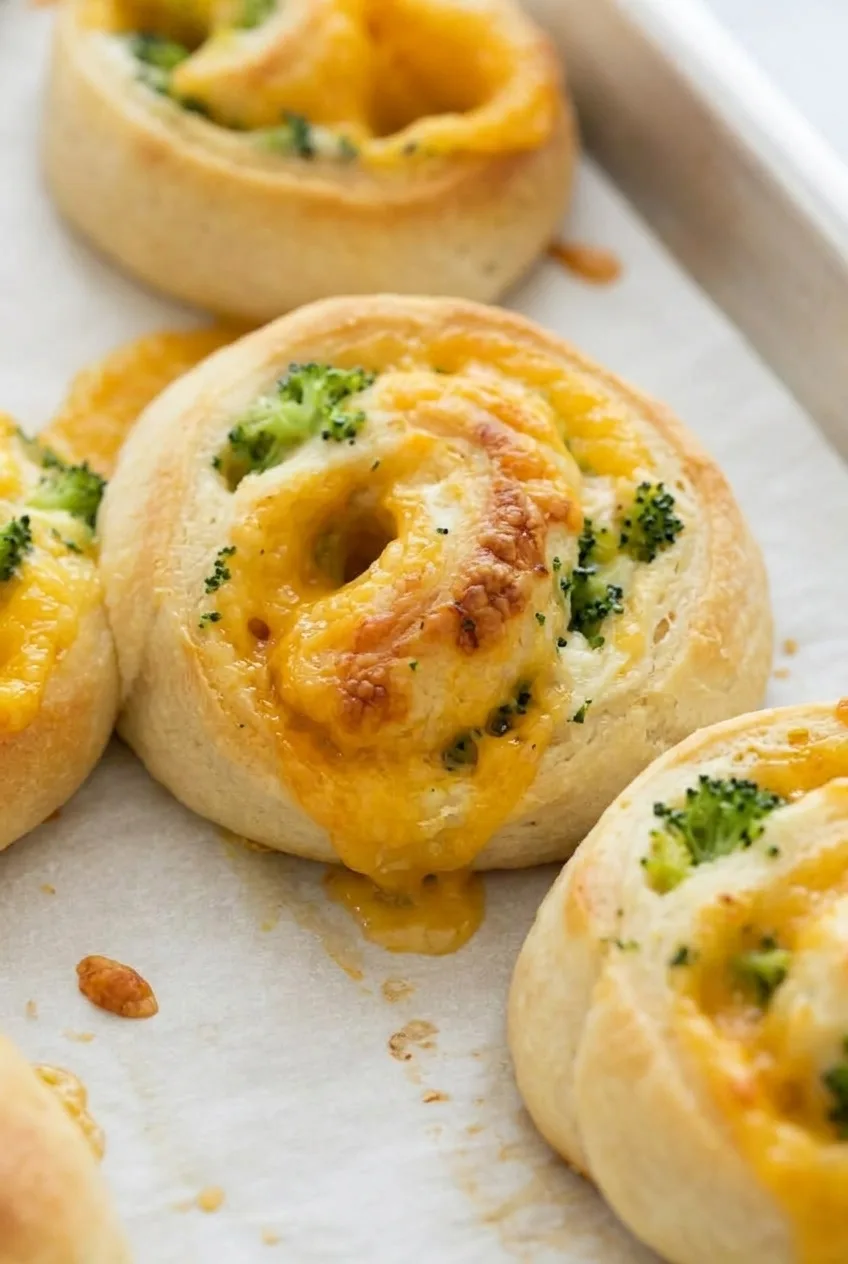
Rolled crescent dough turns broccoli, cream cheese, and cheddar into individual pinwheels with visible green-and-cheese spirals. They bake on a sheet until the dough is puffed and lightly golden, with melted cheddar between the layers.

Finely chopped, dry broccoli is the key to keeping the filling in place and the centers from turning soggy. Cut the roll into roughly 1-inch rounds, then check the inner dough—not just the browned edges—before taking them out of the oven.

Ingredients for Broccoli Cheese Pinwheels

Wider view of separate broccoli cheese pinwheels on a parchment-lined baking sheet
  • 1 refrigerated crescent dough sheet, about 8 ounces (225g)
  • 2 ounces cream cheese, softened (about 1/4 cup; 55g)
  • 1 cup shredded cheddar cheese (about 115g)
  • 3/4 cup finely chopped broccoli florets, measured after steaming and drying (about 65g)
  • Optional: 1/8 teaspoon garlic powder
Close view of a baked pinwheel spiral filled with green broccoli and melted cheddar

How to Bake Broccoli Cheese Pinwheels

  1. Preheat the oven: Heat to 375°F (190°C). Line a baking sheet with parchment paper.
  2. Prepare the broccoli: Finely chop the florets and steam for about 2 minutes, until just tender and still green. Let cool, blot thoroughly with a clean towel or paper towels, then measure 3/4 cup. The pieces should have no visible surface moisture.
  3. Fill the dough: Unroll the crescent dough sheet into a rectangle. If using garlic powder, stir it into the cream cheese. Spread the cream cheese thinly over the dough, leaving a 1/2-inch border along one long edge. Scatter the cheddar and broccoli evenly over the spread without piling them up.
  4. Roll and slice: Starting at the filled long edge, roll the dough snugly toward the bare edge. Pinch the seam closed. Use a serrated knife to cut the log crosswise into approximately 1-inch rounds; you should have about 12.
  5. Bake: Place the rounds cut-side up on the prepared sheet, about 2 inches apart. Bake uncovered for approximately 12 to 16 minutes, checking at 12 minutes. The dough should be puffed and lightly golden, the cheddar melted, and the inner spirals set rather than wet-looking. Rotate the sheet only if your oven browns unevenly.
  6. Cool briefly: Let the pinwheels stand on the sheet for about 5 minutes before serving. The cheese will be very hot straight from the oven.

How to Keep the Spirals Together

Large or wet broccoli pieces can push the dough layers apart and leave the filling soggy. Chop the broccoli small and blot it well after steaming. Keep the filling in thin, even layers so the roll closes without squeezing out the cheese.

The bare long edge gives the dough a place to seal. Pinch that seam after rolling, and use a serrated knife to slice without flattening the spirals.

How to Tell When the Centers Are Done

Golden outer edges can appear before the dough in the middle is baked. Check an inner spiral: it should look puffed and set, not shiny or raw. If it still looks wet at 12 minutes, keep baking and check again after a few minutes. Thick slices or broccoli holding extra moisture may need the longer end of the range.

If you have perforated crescent dough instead of a solid sheet, press the seams together before filling. Thinly rolled pizza dough can also make pinwheels, but they will be breadier and may need a different baking time; check that the center is fully baked.

Serving and Storing Leftovers

Serve the pinwheels warm for lunch, a snack, or an appetizer, with a dip on the side if desired. For another savory lunch roll, try these lunchbox ham and cheese rolls.

Let leftover pinwheels cool, then refrigerate in an airtight container for up to 5 days.

Nutrition

Approximate per snack serving: 3 pinwheels, based on 4 servings from a batch of about 12: 365 calories, 13g protein, 24g fat, and 25g carbohydrates.

Approximate per 100g: 315 calories, 11g protein, 21g fat, and 22g carbohydrates, estimated from the combined ingredient weight before baking. Values will vary with the dough and cheese used and with moisture lost during baking.

Broccoli Cheese Pinwheels for Kids

Crescent dough is rolled with cream cheese, cheddar, and finely chopped broccoli, then baked into golden individual pinwheels.
Course: Snack
Cuisine: American
Prep: 20 min
Cook: 16 min
Total: 41 min
Servings: 4

Equipment

  • Baking sheet
  • Parchment paper
  • Steamer
  • Serrated knife

Ingredients

  • 1 refrigerated crescent dough sheet, about 8 ounces (225 g)
  • 2 ounces cream cheese, softened (about 1/4 cup; 55 g)
  • 1 cup shredded cheddar cheese (about 115 g)
  • 3/4 cup finely chopped broccoli florets, measured after steaming and drying (about 65 g)
  • Optional: 1/8 teaspoon garlic powder

Instructions

  1. Preheat the oven to 375°F (190°C) and line a baking sheet with parchment paper.
  2. Finely chop the broccoli and steam for about 2 minutes, until just tender and still green. Let it cool, blot it thoroughly dry, then measure 3/4 cup.
  3. Unroll the crescent dough into a rectangle. If using garlic powder, stir it into the cream cheese. Spread the cream cheese thinly over the dough, leaving a 1/2-inch border along one long edge.
  4. Scatter the cheddar and broccoli evenly over the cream cheese without piling them up.
  5. Starting at the filled long edge, roll the dough snugly toward the bare edge. Pinch the seam closed, then use a serrated knife to cut the log crosswise into approximately 1-inch rounds.
  6. Place the rounds cut-side up on the prepared baking sheet, about 2 inches apart. Bake uncovered for 12 to 16 minutes, checking at 12 minutes, until puffed and lightly golden with set, not wet-looking, inner spirals.
  7. Let the pinwheels stand on the baking sheet for about 5 minutes before serving.

Tips

  • Blot the steamed broccoli thoroughly dry to help prevent soggy centers.
  • Chop the broccoli finely so it does not push the dough layers apart.
  • Spread the filling in thin, even layers so the roll closes easily.
  • Leave a bare long edge and pinch the seam closed to help the spirals hold together.
  • Use a serrated knife to slice the log without flattening the pinwheels.
  • Check an inner spiral for doneness; browned edges can appear before the center is baked.

Variations

  • Pizza Dough Pinwheels: Use thinly rolled pizza dough instead of crescent dough; the pinwheels will be breadier and may need a different baking time.

Notes

Let leftovers cool and refrigerate in an airtight container for up to 5 days. The cheese is very hot straight from the oven. If using perforated crescent dough, press the seams together before filling.

Nutrition

Per Serving Serving Size: 3 pinwheels | Per Serving Calories: 365 kcal | Per Serving Protein: 13 g | Per Serving Fat: 24 g | Per Serving Carbohydrates: 25 g | Per 100g Calories: 315 kcal | Per 100g Protein: 11 g | Per 100g Fat: 21 g | Per 100g Carbohydrates: 22 g

Peanut Butter Banana Roll-Ups for Kids

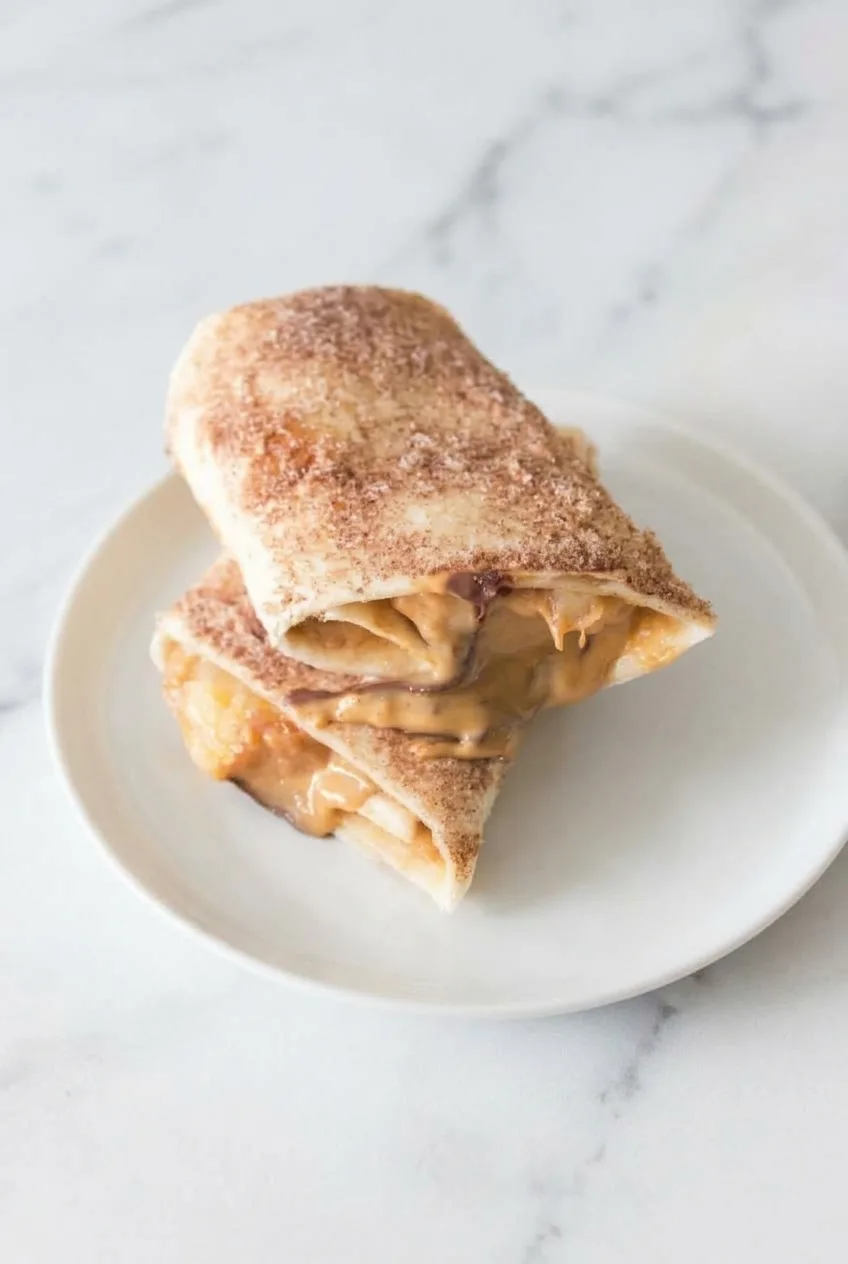
Peanut butter and banana rolled in a soft flour tortilla make a simple snack without any cooking. For this warm version, a few mini chocolate chips melt alongside the banana while a short turn in the air fryer lightly toasts the tortilla. Butter and cinnamon sugar go on afterward, leaving a speckled finish rather than a dark crust. Cut each roll once on the diagonal for four generous halves with the filling visible.

Ingredients for Peanut Butter Banana Roll-Ups

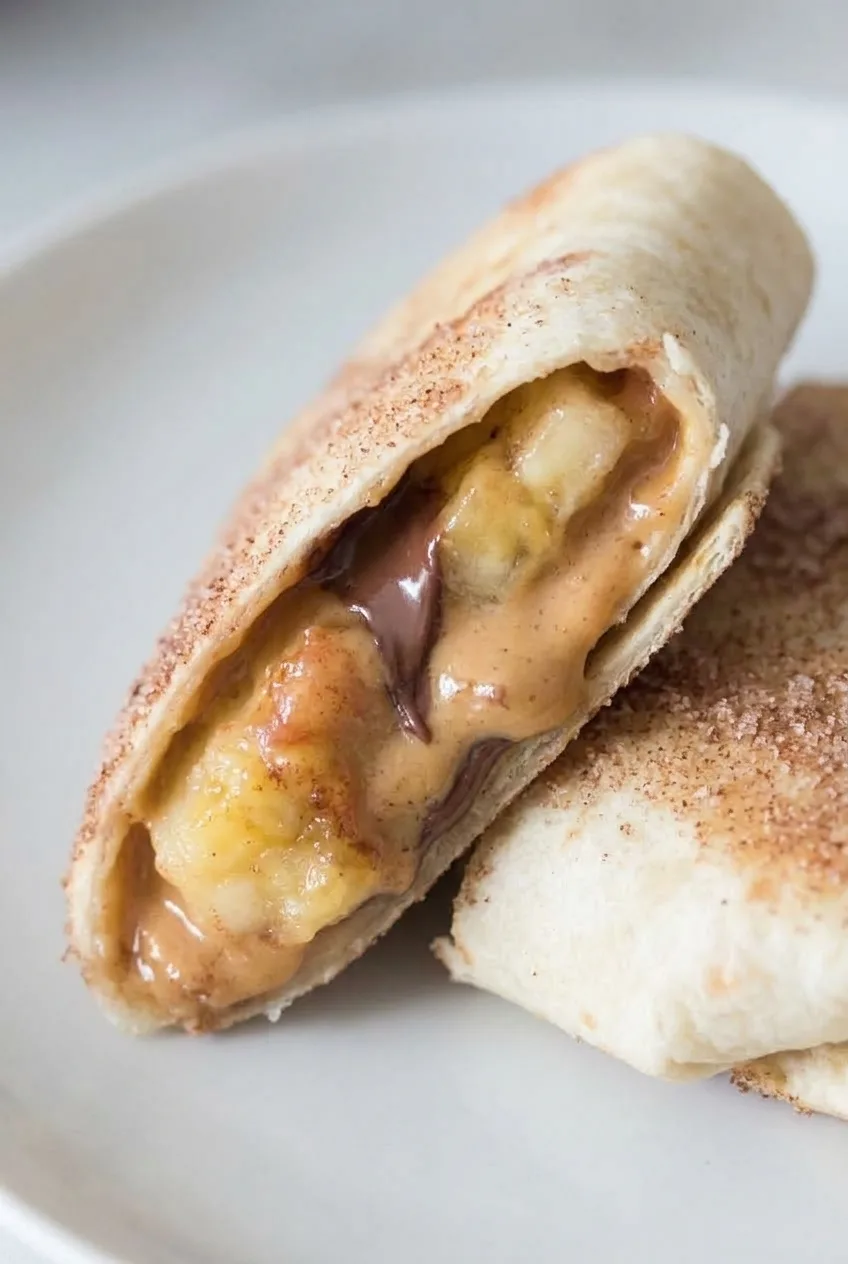
Close view of banana, peanut butter, and a little melted chocolate inside a toasted tortilla roll-up
  • 2 soft 8-inch flour tortillas
  • 2 tablespoons creamy peanut butter (about 30g)
  • 2 small bananas, peeled and firm enough to hold their shape
  • 2 teaspoons mini chocolate chips
  • 1 teaspoon melted butter
  • 2 teaspoons granulated sugar
  • 1/4 teaspoon ground cinnamon

Yield: 2 servings, or 4 large halves. Time: About 8 minutes to prepare, 3 minutes to cook, and 1 minute to rest.

How to Make Peanut Butter Banana Roll-Ups in the Air Fryer

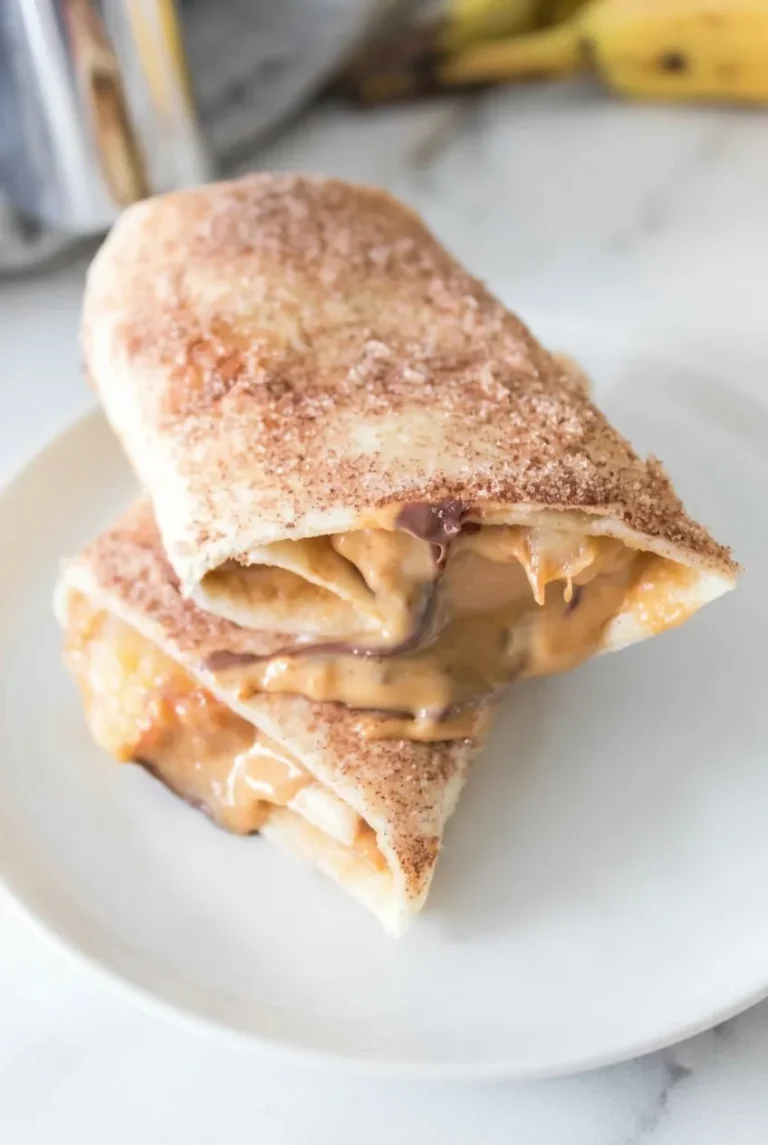
Two stacked cinnamon-sugar banana roll-up halves on a pale plate, seen in a wider view
  1. Prepare the filling and finish: Mix the sugar and cinnamon in a small bowl. If a banana is too long to fit inside its tortilla, trim it so it will not stick out of the sides.
  2. Fill the tortillas: Spread 1 tablespoon peanut butter thinly over each tortilla, leaving a narrow border. Place a banana near the lower edge of each and scatter 1 teaspoon mini chocolate chips alongside it. If a tortilla is stiff, warm it briefly, just until flexible enough to roll without cracking.
  3. Roll snugly: Wrap each tortilla firmly around its banana, then continue rolling until the seam rests underneath. Keep the ends as neat as the tortilla allows.
  4. Air fry: Place the intact rolls seam-side down in a single layer in the air-fryer basket, leaving space around them. Work in batches if needed. Air fry at 350°F (175°C) for about 3 minutes, checking at 2 minutes, especially with thin tortillas. Look for light golden spots and a slightly crisp surface; the rolls should not become dark or brittle.
  5. Finish and slice: Brush the warm rolls lightly with melted butter and sprinkle with cinnamon sugar. Let stand about 1 minute, then transfer to a cutting board. Use a serrated knife to cut each roll once on the diagonal. Check that the peanut butter and melted chocolate are cool enough before serving to children.

How to Keep the Roll-Ups Together

A soft tortilla and restrained filling make the rolls easier to close. Too much peanut butter or chocolate can squeeze out of the ends, while a loose roll can open during cooking. Keep the seam underneath in the air fryer, then let the filling settle briefly before slicing. Saw gently with a serrated knife rather than pressing down and squashing the cut ends.

For a Soft, No-Cook Roll-Up

For the quicker version, roll up the tortilla, peanut butter, and banana and serve without heating. You can omit the chocolate and cinnamon-sugar finish. The tortilla will stay soft, and the filling will not have the melted chocolate of the air-fried version.

Sunflower seed butter can replace peanut butter when appropriate, but check the product label for allergens and follow any school nut policies. A substitute is not automatically safe for every allergy.

For a savory tortilla breakfast another day, try this quick and cheesy breakfast quesadilla.

Storage and Reheating

The air-fried roll-ups are best served soon after cooking. Refrigerate leftovers in an airtight container for up to 2 days; the banana and tortilla will soften. Warm refrigerated pieces briefly in a skillet over low heat or microwave for roughly 10 to 15 seconds. Microwaving will not restore the lightly crisp exterior.

For packing ahead, the unheated version is simpler, though the banana may brown. Keep perishable packed food appropriately chilled and check school nut policies.

Nutrition

Approximate per serving (2 large halves): 380 calories, 10g protein, 15g fat, and 57g carbohydrates. Approximate per 100g: 220 calories, 5g protein, 9g fat, and 33g carbohydrates. Values vary with tortilla and banana size and the brands used.

Peanut Butter Banana Roll-Ups for Kids

Soft flour tortillas filled with peanut butter, banana, and mini chocolate chips are air-fried until lightly toasted and finished with cinnamon sugar.
Course: Snack
Cuisine: American
Prep: 8 min
Cook: 3 min
Total: 12 min
Servings: 2 Calories: 380 kcal

Equipment

  • Air fryer
  • Small bowl
  • Pastry brush
  • Cutting board
  • Serrated knife

Ingredients

For the roll-ups

  • 2 soft 8-inch flour tortillas
  • 2 tablespoons creamy peanut butter (about 30g)
  • 2 small bananas, peeled
  • 2 teaspoons mini chocolate chips

For the finish

  • 1 teaspoon melted butter
  • 2 teaspoons granulated sugar
  • 1/4 teaspoon ground cinnamon

Instructions

  1. Mix the granulated sugar and cinnamon in a small bowl.
  2. Trim the bananas if needed so they fit inside the tortillas.
  3. Spread 1 tablespoon peanut butter thinly over each tortilla, leaving a narrow border.
  4. Place one banana near the lower edge of each tortilla and scatter 1 teaspoon mini chocolate chips alongside it. Briefly warm any stiff tortilla until flexible enough to roll.
  5. Wrap each tortilla firmly around its banana and continue rolling until the seam rests underneath. Keep the ends as neat as possible.
  6. Place the rolls seam-side down in a single layer in the air-fryer basket, leaving space around them. Cook in batches if needed.
  7. Air fry at 350°F (175°C) for about 3 minutes, checking at 2 minutes. Cook until lightly golden-spotted and slightly crisp, not dark or brittle.
  8. Brush the warm rolls lightly with melted butter and sprinkle with cinnamon sugar.
  9. Let the rolls rest for about 1 minute, then cut each once on the diagonal with a serrated knife. Check that the peanut butter and melted chocolate are cool enough before serving to children.

Tips

  • Use soft tortillas and avoid overfilling so the rolls close neatly.
  • Keep the seam underneath in the air fryer to help the rolls stay closed.
  • Check thin tortillas after 2 minutes to prevent them from becoming too crisp.
  • Let the filling settle briefly before slicing, and saw gently with a serrated knife.

Variations

  • Soft No-Cook Roll-Ups: Roll the tortillas with peanut butter and banana and serve without heating; omit the chocolate and cinnamon-sugar finish if desired.
  • Sunflower Butter Roll-Ups: Replace the peanut butter with sunflower seed butter when appropriate, checking the product label and any school nut policies.

Notes

Best served soon after cooking. Refrigerate leftovers in an airtight container for up to 2 days; rewarm briefly in a low skillet or microwave for 10 to 15 seconds. Microwaving will not restore the crisp exterior.

Nutrition

Calories: 380 kcal | Protein: 10 g | Fat: 15 g | Carbohydrates: 57 g

Lunchbox Ham and Cheese Rolls

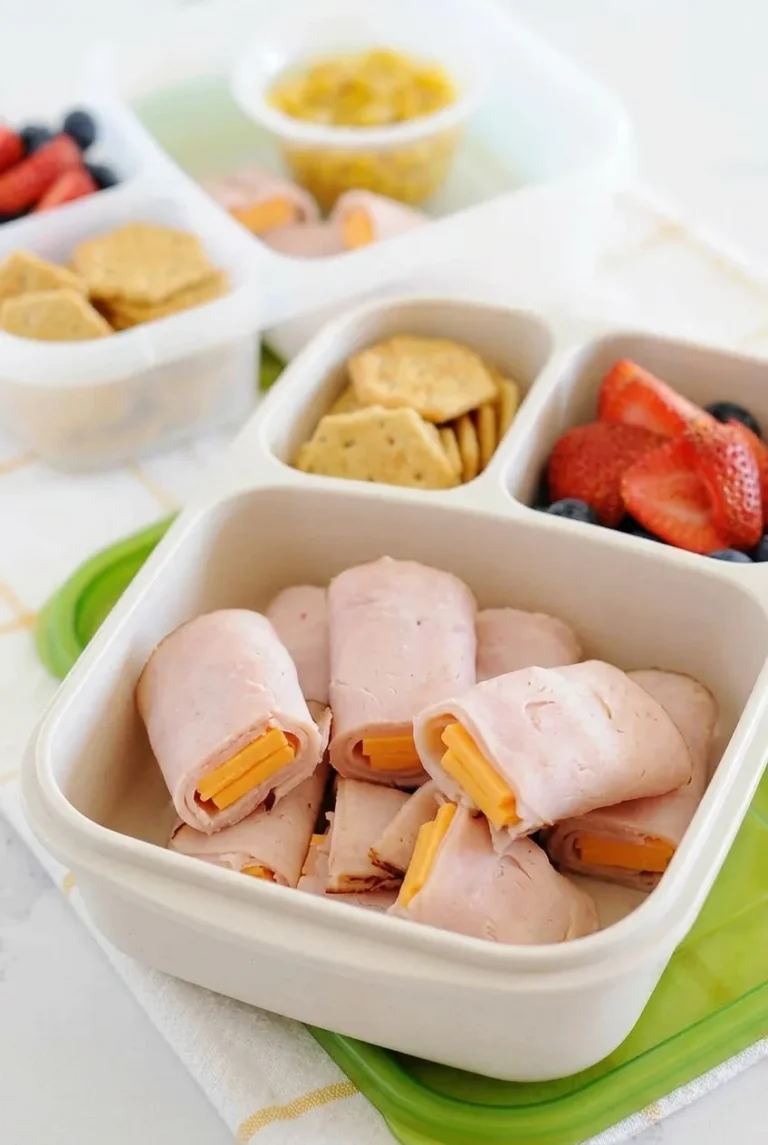
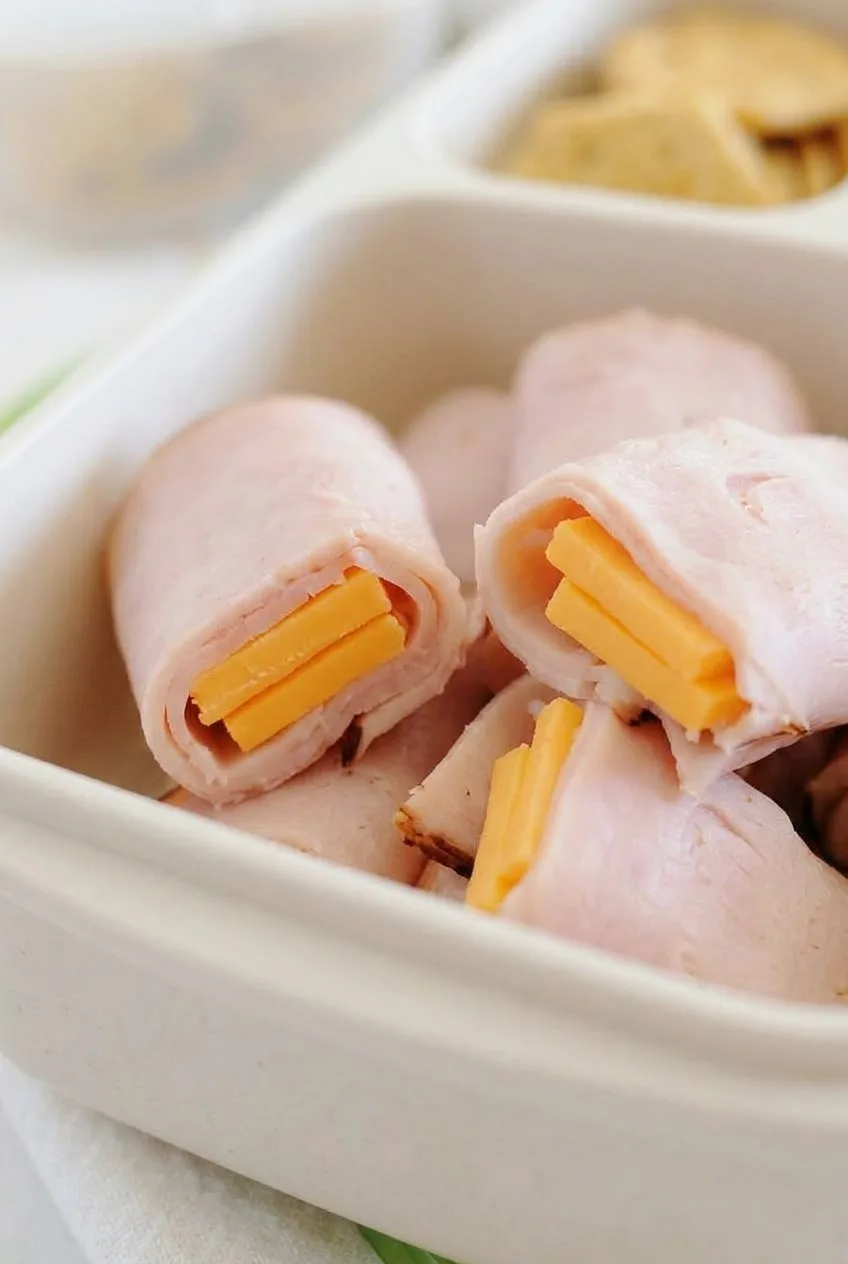
Thin deli ham wrapped around sticks of orange cheddar makes short, no-cook rolls with cheese visible at the ends. Cut each roll in half and pack the pieces seam-side down in a divided lunchbox. Snug wrapping helps them hold together, while a sharp knife keeps the cheese from slipping out.

Use ready-to-eat ham and keep the rolls cold until they are eaten. These are chilled ham-and-cheese rolls, not baked pastry pinwheels.

Ingredients for Lunchbox Ham and Cheese Rolls

Close view of pale pink ham wrapped around orange cheddar in short lunchbox rolls
  • 8 large slices thin-sliced, ready-to-eat deli ham, about 8 oz (225g)
  • 4 oz block medium or sharp orange cheddar cheese (115g)

Yield: About 16 pieces, or 4 snack-size servings of 4 pieces each. Time: 15 minutes; no cooking.

How to Make Ham and Cheese Rolls

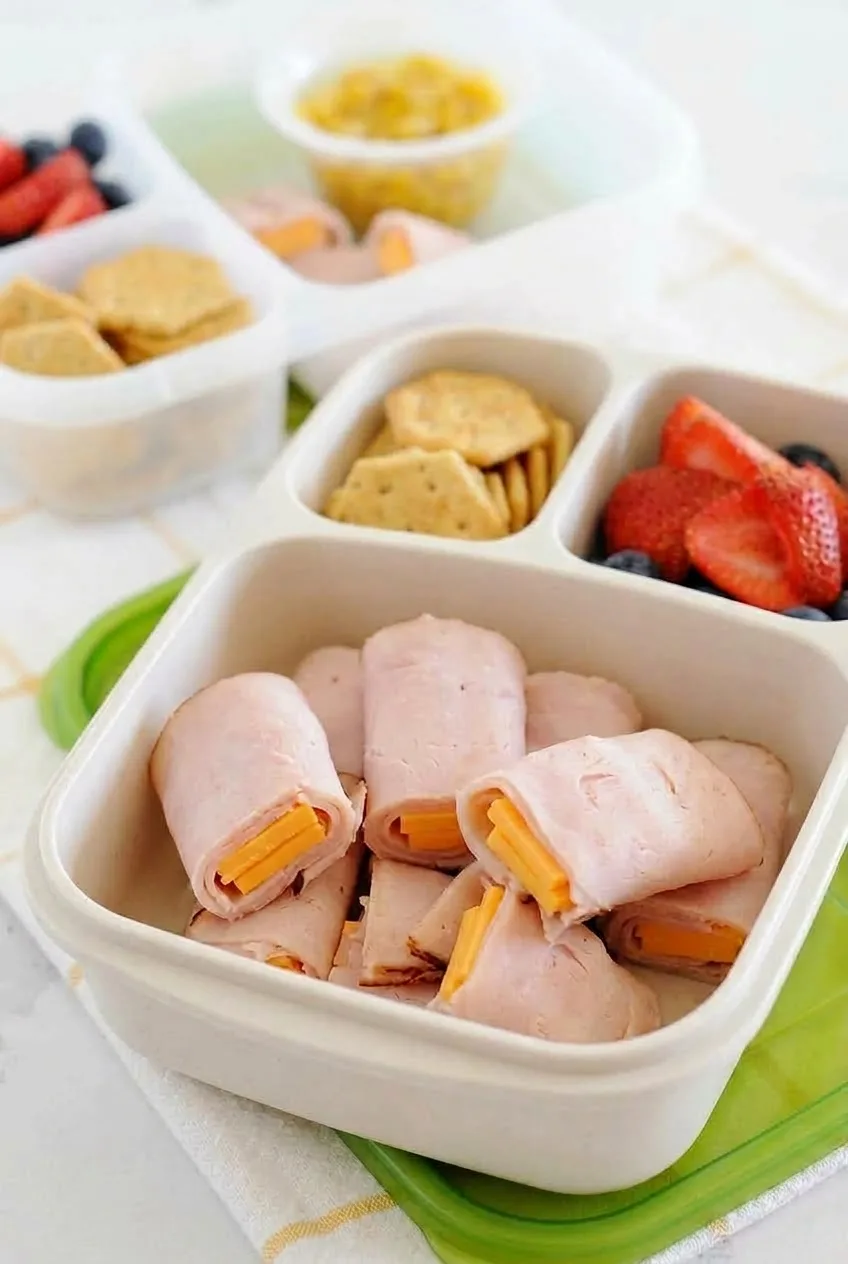
Divided lunchbox of ham and cheese rolls with crackers, berries, and corn on a light surface
  1. Cut the cheddar: Cut the block into 8 sturdy sticks, roughly 3 inches long. Check one against a ham slice and trim it if needed so the cheese will show at the open ends without extending far past them.
  2. Roll the ham: Lay a ham slice on a clean cutting board, folding it into a neater rectangle if necessary. Place a cheese stick near one edge, running along that edge, and wrap the ham snugly around it. Set the roll seam-side down and repeat with the remaining ham and cheese.
  3. Cut into pieces: With a sharp knife and gentle pressure, cut each roll crosswise in half. Arrange the roughly 16 pieces seam-side down; they should be about 1 to 1½ inches long, with cheddar visible at the ends.
  4. Pack cold: Place the pieces in a clean divided lunchbox, away from moist sides. Refrigerate until departure, then carry the lunchbox in an insulated bag with a cold pack.

How to Keep the Rolls Together

Thin, pliable ham is easier to wrap than thick slices. If a roll unwinds, wrap it more snugly and keep the seam underneath while cutting and packing. If the cheese slips out, shorten the stick and use gentle strokes with a sharp knife rather than pressing down hard. A brief chill can firm up rolls that are difficult to slice.

Packing and Storing the Rolls

Cover and refrigerate the assembled rolls promptly at 40°F (5°C) or below. For the best texture, make them the day they will be eaten or the night before, and follow the opened ham package’s storage guidance. Pack them straight from the refrigerator with a cold pack; they are meant to be eaten cold, not reheated. Freezing is not recommended because thawing can change the texture of the ham and cheese.

Crackers and washed, drained berries can go in separate lunchbox compartments. If adding corn, use a small covered cup so it does not make the rolls wet.

Nutrition

Approximate nutrition per serving of 4 pieces, excluding optional sides: 180 calories, 17g protein, 12g fat, and 1g carbohydrates. Per 100g: approximately 210 calories, 20g protein, 14g fat, and 1g carbohydrates. Values vary by ham and cheddar brand.

Lunchbox Ham and Cheese Rolls

Ready-to-eat deli ham wrapped around cheddar sticks and cut into cold, lunchbox-friendly pieces.
Course: Snack
Cuisine: American
Prep: 15 min
Total: 15 min
Servings: 4 Calories: 180 kcal

Equipment

  • Cutting board
  • Sharp knife
  • Divided lunchbox

Ingredients

  • 8 large slices thin-sliced, ready-to-eat deli ham, about 8 oz (225 g)
  • 4 oz (115 g) block medium or sharp orange cheddar cheese

Instructions

  1. Cut the cheddar into 8 sturdy sticks, roughly 3 inches long. Trim them as needed so they show at the ham’s open ends without extending far past them.
  2. Lay a ham slice on a clean cutting board, folding it into a neat rectangle if needed. Place a cheese stick near one edge and wrap the ham snugly around it.
  3. Set each roll seam-side down and repeat with the remaining ham and cheese.
  4. Use a sharp knife and gentle pressure to cut each roll crosswise in half.
  5. Arrange the pieces seam-side down in a clean divided lunchbox, away from moist sides. Refrigerate until departure and carry in an insulated bag with a cold pack.

Tips

  • Use thin, pliable ham for easier wrapping.
  • Keep the seam underneath while cutting and packing so the rolls stay together.
  • Use gentle knife strokes instead of pressing down hard to help keep the cheese in place.
  • Shorten the cheese sticks if they slip out of the ham.
  • Briefly chill the rolls if they are difficult to slice.

Notes

Cover and refrigerate promptly at 40°F (5°C) or below. Make the rolls the day they will be eaten or the night before, follow the opened ham package’s storage guidance, and keep them cold until serving. Do not reheat; freezing is not recommended.

Nutrition

Calories: 180 kcal | Protein: 17 g | Fat: 12 g | Carbohydrates: 1 g