Author

Julia

Browsing

Kid-Friendly Grilled Cheese Roll-Ups

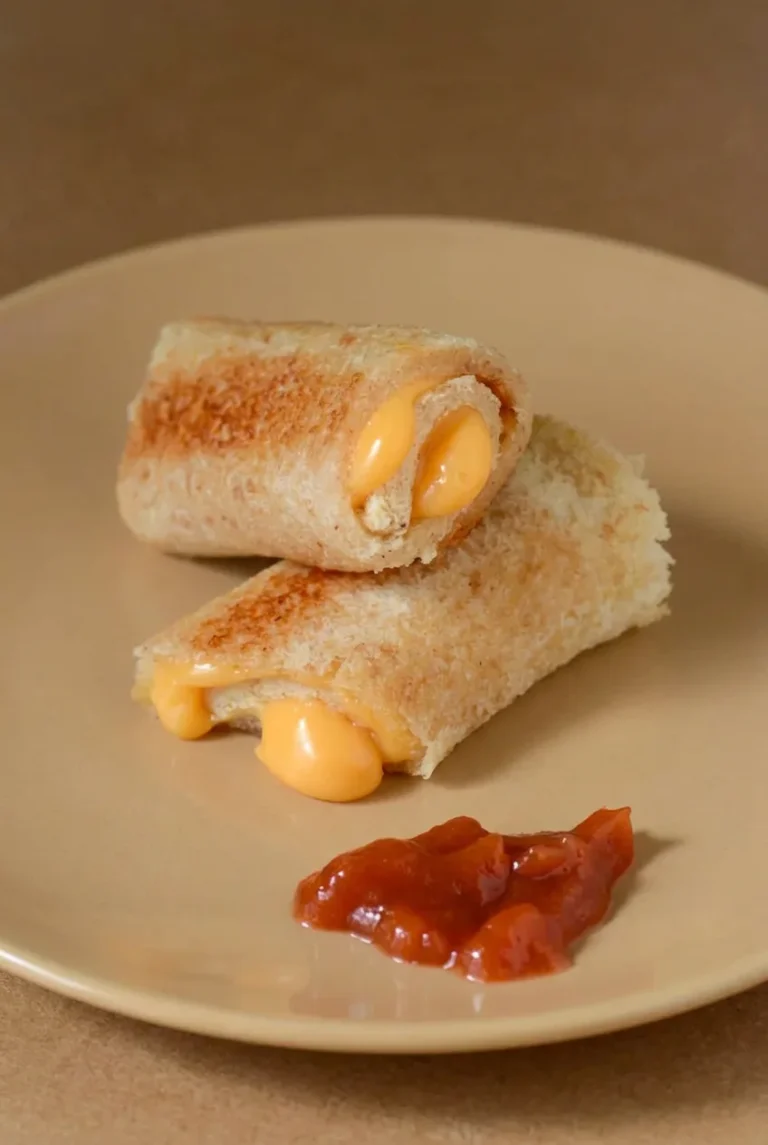
Flattened sandwich bread wraps around orange cheese to make small, hand-held grilled cheese rolls. Toasting the seam first keeps each roll closed; turning it gradually browns the curved sides while the cheese melts. Keep the skillet at moderate heat and look for lightly crisp bread and glossy cheese at the open ends rather than relying only on the clock.

Makes 6 roll-ups, or about 3 snack servings. Allow about 10 minutes to prepare them and 8–12 minutes to cook, depending on how many batches your skillet holds.

Ingredients for Grilled Cheese Roll-Ups
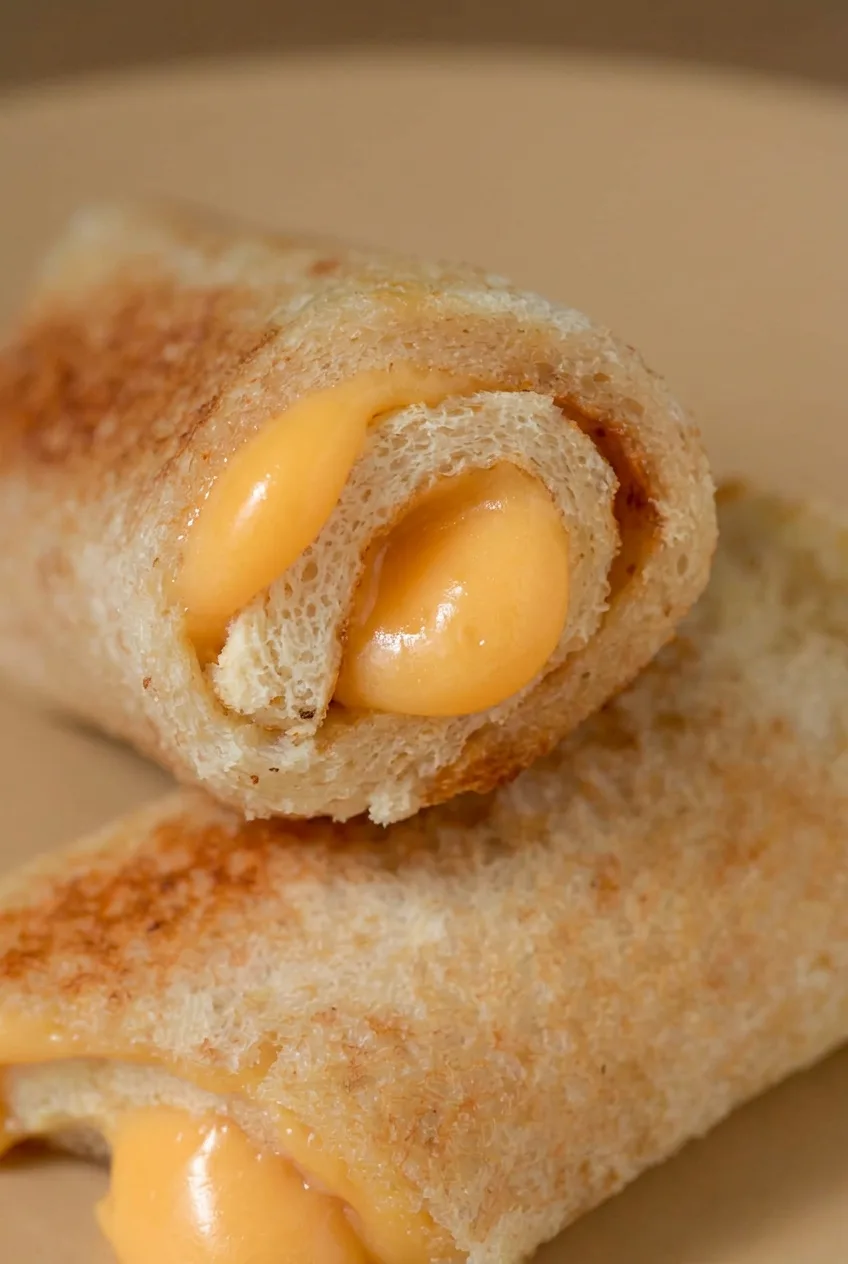
Close view of a grilled cheese roll-up’s toasted bread spiral and glossy melted orange cheese
  • 6 large slices soft sandwich bread, preferably white, crusts trimmed
  • 6 slices orange American cheese, about 4–5 ounces total (about 130g)
  • 2 tablespoons butter, divided (about 30g)
  • Optional: About 2 tablespoons thick tomato-based dipping sauce, such as ketchup, for serving

How to Make Grilled Cheese Roll-Ups in a Skillet
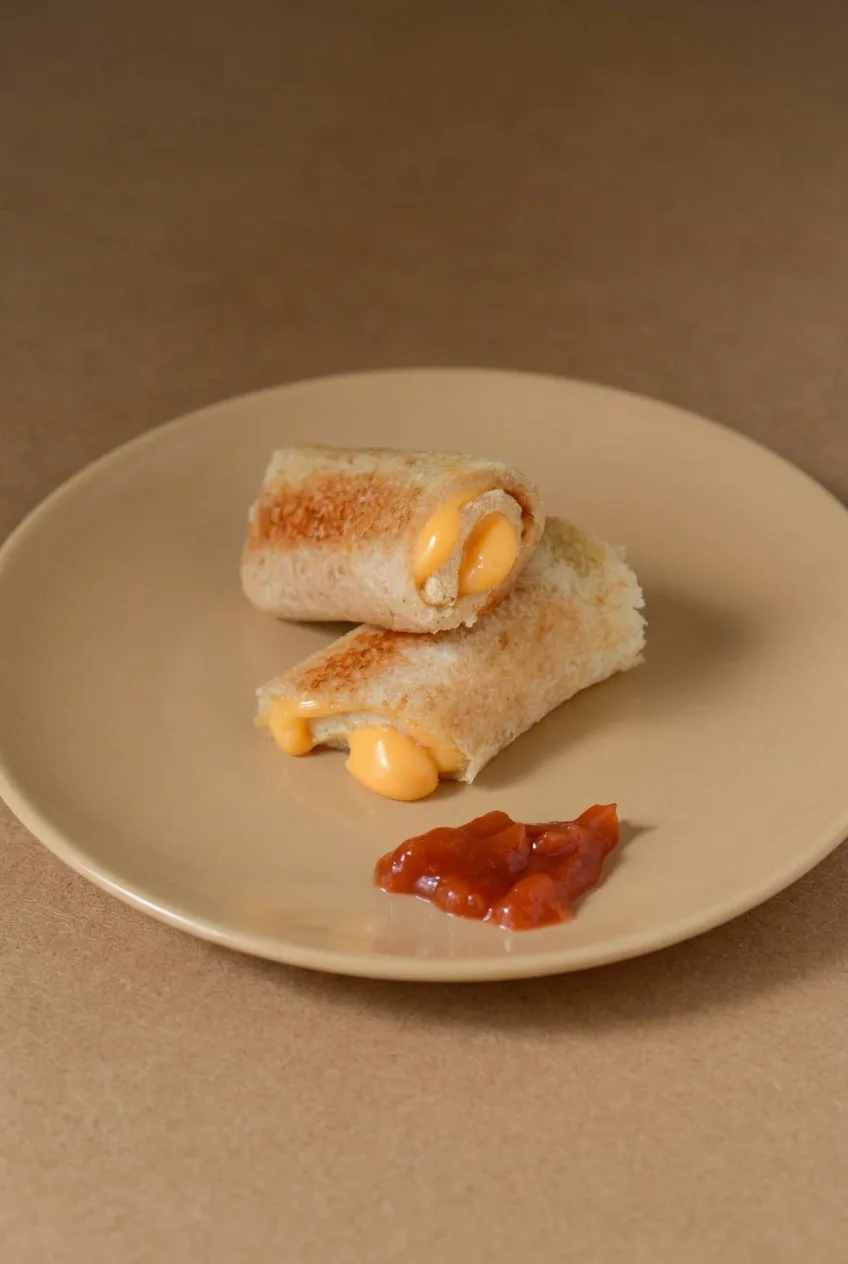
Wider view of two stacked grilled cheese roll-ups and a small red dip on a plate
  1. Flatten the bread: Trim the crusts, then flatten each slice with a rolling pin until thin and flexible but still intact. A heavy, flat-bottomed pan also works.
  2. Fill and roll: Place one cheese slice on each piece of bread, leaving about 1/2 inch of bread bare along the edge that will form the seam. Roll snugly toward that bare edge and press the seam closed.
  3. Set the seams: Warm a 10- to 12-inch nonstick or well-seasoned skillet over medium-low heat. Melt enough butter to coat it with a thin film. Add a few rolls seam-side down, leaving room to turn them, and press gently. Start checking after 45–60 seconds; turn them once the seams hold when nudged.
  4. Toast every side: Rotate each roll about a quarter turn at a time, cooking uncovered until the bread is lightly golden and crisp around its curved surface and the cheese at the open ends looks soft and glossy. Allow about 3–5 minutes per batch, using those cues rather than the time alone. Lower the heat if the bread darkens before the cheese melts. Repeat with the remaining rolls, adding butter as needed to keep a thin film in the skillet.
  5. Serve warm: Keep the rolls intact, with their cheese-filled ends visible. Let them cool briefly before serving to young children; the melted cheese can be hot.

How to Keep the Roll-Ups Closed

Soft, well-flattened bread bends around the cheese without cracking. The bare edge lets bread overlap bread at the seam, and cooking that seam first helps it stay closed. A little cheese peeking from an open end is expected. If cheese leaks along the seam, leave more of that sealing edge bare and roll the next one more snugly.

Bread, Cheese, and Dipping Options

Soft wheat or multigrain bread works if it flattens without tearing. Pliable crusts can stay on, though trimming them makes neater rolls. Sliced cheddar or mozzarella can replace American cheese, but the color and melt will differ. Neutral cooking oil can replace the butter, with a different flavor.

Serve a small dollop of tomato-based sauce beside the rolls, or offer tomato soup for dipping. Keep the plain cheese filling free of sauce so the bread is easier to roll.

Serving and Reheating

Serve the roll-ups fresh while the bread is crisp and the cheese is melted. For a plated snack, loosely stack two with their open ends showing and put the dip beside them. For another cheesy meal, try Crock Pot Rotel Pasta with Beef and Creamy Cheese.

If you refrigerate leftovers, rewarm them gently in a lightly buttered skillet until the cheese melts again.

Nutrition

Approximate nutrition per snack serving of 2 roll-ups: 310 calories, 11g protein, 20g fat, and 23g carbohydrates. Approximate values per 100g: 335 calories, 12g protein, 22g fat, and 25g carbohydrates. Estimates include the bread, cheese, and butter but not optional dips; values vary with the ingredients and the amount of butter absorbed.

Kid-Friendly Grilled Cheese Roll-Ups

Soft sandwich bread wraps around orange cheese and is toasted in a skillet until crisp outside and melted inside.
Course: Snack
Cuisine: American
Prep: 10 min
Cook: 10 min
Total: 20 min
Servings: 3 Calories: 310 kcal

Equipment

  • Rolling pin
  • 10- to 12-inch skillet

Ingredients

  • 6 large slices soft sandwich bread, preferably white, crusts trimmed
  • 6 slices orange American cheese, about 4–5 ounces total (about 130 g)
  • 2 tablespoons butter, divided (about 30 g)
  • Optional: about 2 tablespoons thick tomato-based dipping sauce, such as ketchup, for serving

Instructions

  1. Trim the crusts from the bread and flatten each slice with a rolling pin until thin and flexible but still intact.
  2. Place one slice of cheese on each piece of bread, leaving about 1/2 inch bare along the edge that will form the seam.
  3. Roll each slice snugly toward the bare edge and press the seam closed.
  4. Warm a 10- to 12-inch nonstick or well-seasoned skillet over medium-low heat. Melt enough butter to coat the skillet with a thin film.
  5. Add a few rolls seam-side down, leaving room to turn them, and press gently. Start checking after 45–60 seconds; turn once the seams hold when nudged.
  6. Rotate each roll about a quarter turn at a time until the bread is lightly golden and crisp and the cheese at the open ends looks soft and glossy, about 3–5 minutes per batch.
  7. Lower the heat if the bread darkens before the cheese melts. Repeat with the remaining rolls, adding butter as needed to keep a thin film in the skillet.
  8. Serve warm with the cheese-filled ends visible. Let the rolls cool briefly before serving to young children.

Tips

  • Flatten the bread until flexible, but not so thin that it tears.
  • Leave a bare edge for the bread to overlap and seal.
  • Cook the seam first and check that it holds before turning the rolls.
  • Use the bread’s color and the cheese’s glossy appearance to judge doneness; lower the heat if the bread browns too quickly.
  • Keep dipping sauce beside the rolls rather than inside them.

Variations

  • Wheat or Multigrain Roll-Ups: Use soft wheat or multigrain bread that can be flattened without tearing.
  • Cheddar or Mozzarella Roll-Ups: Replace the American cheese with sliced cheddar or mozzarella; the color and melt will differ.
  • Oil-Toasted Roll-Ups: Replace the butter with neutral cooking oil for a different flavor.
Notes

Serve fresh for the crispest bread. Refrigerate leftovers and rewarm gently in a lightly buttered skillet until the cheese melts again. Let the rolls cool briefly before serving to young children, as the melted cheese can be hot.

Nutrition

Calories: 310 kcal | Protein: 11 g | Fat: 20 g | Carbohydrates: 23 g

No Peek Chicken Casserole

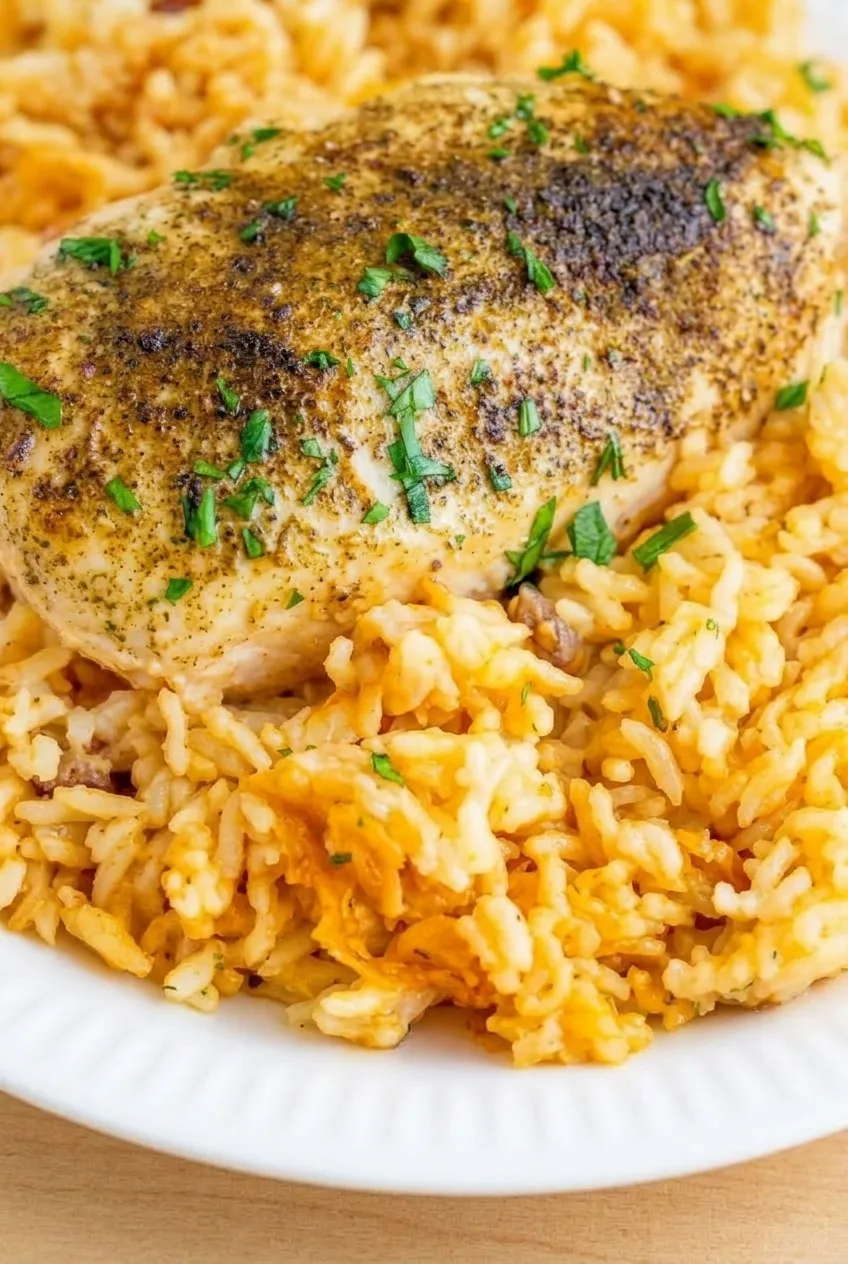
No peek chicken casserole bakes whole, seasoned chicken breasts over rice in a creamy mixture of condensed soup, broth, and onion soup mix. The finished rice should be moist and scoopable, with recognizable long grains—not firm enough to cut into squares.

The foil stays sealed for the first 75 minutes so steam can cook the uncooked rice. After that, check the rice and chicken separately: the rice needs to be tender, and each breast needs to reach a safe internal temperature.

Yield: 4 generous servings. Prep: 15 minutes. Bake: About 75 to 90 minutes, plus a 10-minute rest.

Close view of seasoned chicken, distinct creamy rice grains, and chopped parsley

Ingredients for No Peek Chicken Casserole

  • Nonstick cooking spray, for the baking dish
  • 2 cups dry, unrinsed regular long-grain white rice (about 370g)
  • 1 can (10.5 ounces) condensed cream of chicken soup, undiluted (about 300g)
  • 1 can (10.5 ounces) condensed cream of mushroom soup, undiluted (about 300g)
  • 2 cups low-sodium chicken broth, plus up to 1/2 cup more if needed
  • 1 packet dry onion soup mix (about 1 ounce or 28g)
  • 4 similarly sized boneless skinless chicken breasts, about 6 ounces each (1 1/2 pounds total; about 675g)
  • 1 teaspoon paprika
  • 1/2 teaspoon freshly ground black pepper
  • 2 tablespoons finely chopped fresh parsley

The soups and onion mix already contain salt. Use low-sodium broth and taste the cooked casserole before adding any more salt.

How to Bake No Peek Chicken Casserole

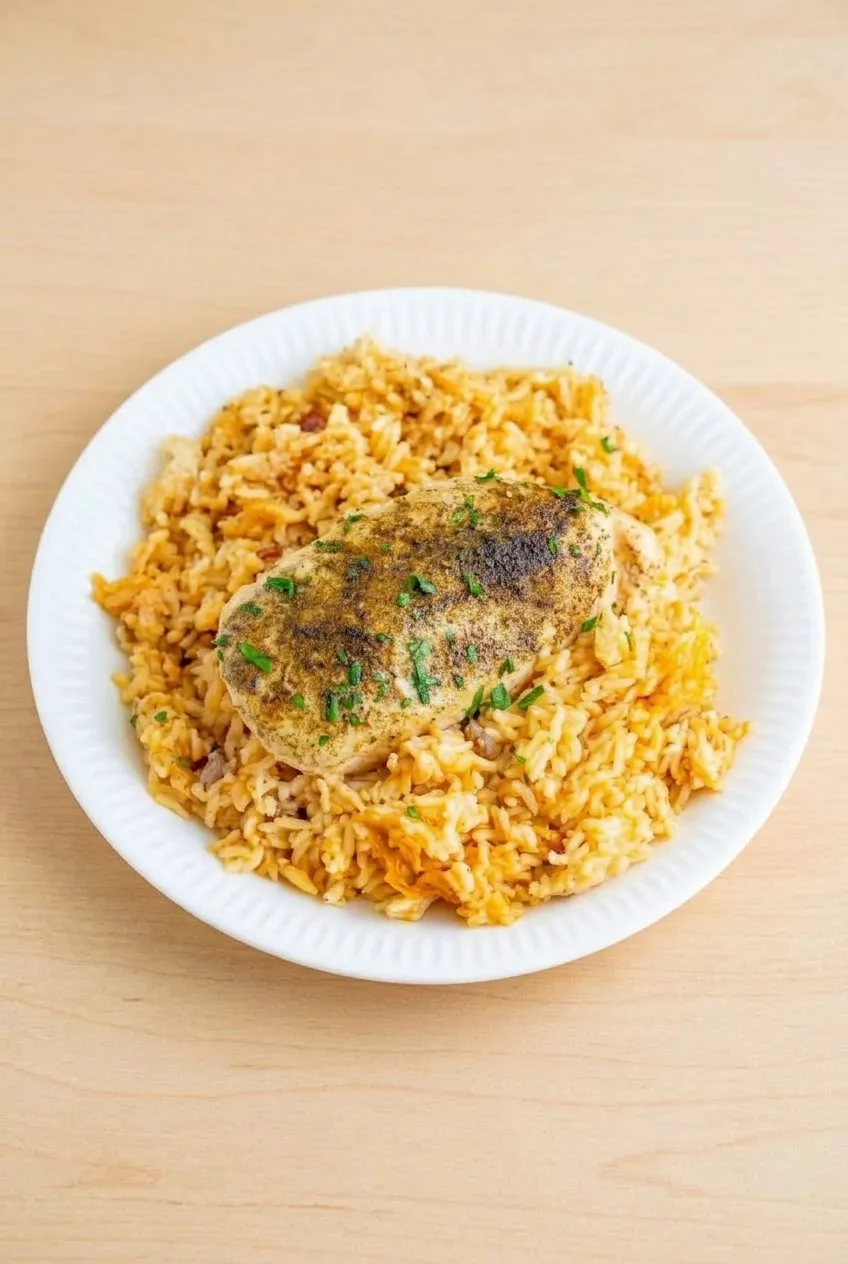
Full plate of no peek chicken casserole on a wood table, with chicken over golden rice
  1. Prepare the dish: Preheat the oven to 350°F (175°C). Lightly coat a 9-by-13-inch baking dish with cooking spray. If a breast is substantially thicker than the others, slice it horizontally into two thinner, intact pieces.
  2. Mix the rice base: Whisk both undiluted soups with 2 cups broth in the baking dish until mostly smooth. Stir in the dry rice and half the onion soup mix. Spread the rice evenly so it is coated with liquid throughout.
  3. Add the chicken: Space the chicken on top of the rice without pressing it to the bottom. Sprinkle the upper surfaces with paprika, pepper, and the remaining onion soup mix.
  4. Seal and bake: Cover the dish tightly with foil, crimping it around the entire rim. Use two overlapping sheets if one will not cover the dish completely. Bake for 75 minutes without lifting the foil, stirring, or turning the chicken.
  5. Check both components: Lift the foil away from your face to avoid the steam. Check the thickest part of each breast with an instant-read thermometer; it must reach 165°F (75°C). Taste rice near the center. It should be tender, with most of the liquid absorbed. If either component needs more time, reseal and bake in 10- to 15-minute increments. If the chicken is done but the rice is still firm, move the chicken to a covered plate while the rice finishes.
  6. Rest and serve: Once the chicken and rice are done, cover the casserole and rest it for 10 minutes. Fluff the rice around the chicken. Spoon a generous mound onto each plate, top with an intact seasoned chicken portion, and scatter parsley lightly over it.

Why the Foil Seal Matters

“No peek” means leaving the dish sealed until the first check at 75 minutes. The rice needs both the measured liquid and the steam trapped under the foil. A loose seal or early peek can let moisture escape and leave grains crunchy. The covered bake seasons the chicken’s surface, but it will not produce a crisp, seared crust.

Use Regular Long-Grain Rice

The liquid and bake time are intended for dry, unrinsed regular long-grain white rice. Instant rice and brown rice cook differently and are not cup-for-cup substitutes. If you prefer a different soup flavor, replace the cream of mushroom soup with an equal-size can of condensed cream of chicken or cream of celery.

What to Do If the Rice Is Still Firm

Check whether the dish looks dry before adding liquid. If the rice is firm and dry, pour 1/4 to 1/2 cup hot broth or water around it, reseal the foil, and bake in 10- to 15-minute increments. If the rice is still moist, reseal and give it more time without adding liquid. Keep any chicken that has already reached 165°F on a covered plate while the rice finishes.

Serving No Peek Chicken Casserole

Serve with green beans, broccoli, or a simple salad. For a separate slow-cooker dinner, try crockpot chicken and stuffing.

How to Store and Reheat Leftovers

Refrigerate leftovers promptly in a sealed container for up to 3 days. Reheat covered in the microwave or a 350°F oven until hot throughout, adding a splash of water or broth if the rice seems dry.

Cooked leftovers can be frozen airtight for up to 3 months. Thaw overnight in the refrigerator before reheating.

Nutrition

Approximate per serving (one chicken portion and one-fourth of the rice): 710 calories, 50g protein, 14g fat, and 90g carbohydrates. Approximate per 100g of finished casserole: 140 calories, 10g protein, 3g fat, and 18g carbohydrates. Values vary with the soup and broth brands, chicken size, and moisture lost during baking.

No Peek Chicken Casserole

Chicken breasts bake over long-grain rice in a creamy soup and onion-seasoned broth mixture.
Course: Main Course
Cuisine: American
Prep: 15 min
Cook: 90 min
Total: 115 min
Servings: 4 Calories: 710 kcal

Equipment

  • 9-by-13-inch baking dish
  • Aluminum foil
  • Instant-read thermometer

Ingredients

For the Casserole

  • Nonstick cooking spray, for the baking dish
  • 2 cups dry, unrinsed regular long-grain white rice (about 370 g)
  • 1 can (10.5 oz / 300 g) condensed cream of chicken soup, undiluted
  • 1 can (10.5 oz / 300 g) condensed cream of mushroom soup, undiluted
  • 2 cups low-sodium chicken broth, plus up to 1/2 cup more if needed
  • 1 packet dry onion soup mix (about 1 oz / 28 g)
  • 4 similarly sized boneless, skinless chicken breasts, about 6 oz each (1 1/2 lb total / about 675 g)
  • 1 teaspoon paprika
  • 1/2 teaspoon freshly ground black pepper
  • 2 tablespoons finely chopped fresh parsley

Instructions

  1. Preheat the oven to 350°F (175°C). Lightly coat a 9-by-13-inch baking dish with cooking spray. If a chicken breast is substantially thicker than the others, slice it horizontally into two thinner, intact pieces.
  2. Whisk both undiluted soups with 2 cups broth in the baking dish until mostly smooth.
  3. Stir in the dry rice and half the onion soup mix. Spread the rice evenly so it is coated with liquid.
  4. Arrange the chicken breasts over the rice without pressing them to the bottom. Sprinkle with paprika, pepper, and the remaining onion soup mix.
  5. Cover the dish tightly with foil, crimping it around the entire rim. Use two overlapping sheets if needed.
  6. Bake for 75 minutes without lifting the foil, stirring, or turning the chicken.
  7. Lift the foil away from your face to avoid steam. Check the thickest part of each breast with an instant-read thermometer; each must reach 165°F (75°C). Taste the rice near the center to check that it is tender and most of the liquid is absorbed.
  8. If either the chicken or rice needs more time, reseal the dish and bake in 10- to 15-minute increments. If the chicken is done before the rice, move it to a covered plate while the rice finishes.
  9. If the rice is firm and dry, pour 1/4 to 1/2 cup hot broth or water around it before resealing and baking. If it is still moist, reseal and continue baking without adding liquid.
  10. When the chicken and rice are done, cover the casserole and rest it for 10 minutes. Fluff the rice around the chicken, serve, and sprinkle with parsley.

Tips

  • Keep the foil tightly sealed until the first check at 75 minutes so steam can cook the rice.
  • Use dry, unrinsed regular long-grain white rice; instant and brown rice are not direct substitutes.
  • Use similarly sized chicken breasts, or split a substantially thicker breast horizontally so the pieces cook more evenly.
  • Taste before adding salt because the soups and onion soup mix already contain salt.
  • If the rice is firm, check whether it is dry before adding extra broth or water.

Variations

  • Cream of Chicken or Celery: Replace the cream of mushroom soup with an equal-size can of condensed cream of chicken or cream of celery soup.

Notes

Refrigerate leftovers in a sealed container for up to 3 days or freeze airtight for up to 3 months. Thaw frozen leftovers overnight in the refrigerator. Reheat covered until hot throughout, adding a splash of water or broth if the rice seems dry.

Nutrition

Calories: 710 kcal | Protein: 50 g | Fat: 14 g | Carbohydrates: 90 g | Per 100g Calories: 140 kcal | Per 100g Protein: 10 g | Per 100g Fat: 3 g | Per 100g Carbohydrates: 18 g

3-Ingredient Crockpot BBQ Ribs

These Crockpot BBQ ribs cook in substantial, bone-in sections until the meat is tender but still sturdy enough to lift onto a platter. Baby back ribs, seasoned salt, and bottled barbecue sauce are the only ingredients. Seasoned salt fills the third-ingredient role without adding soda or another liquid to the slow cooker.

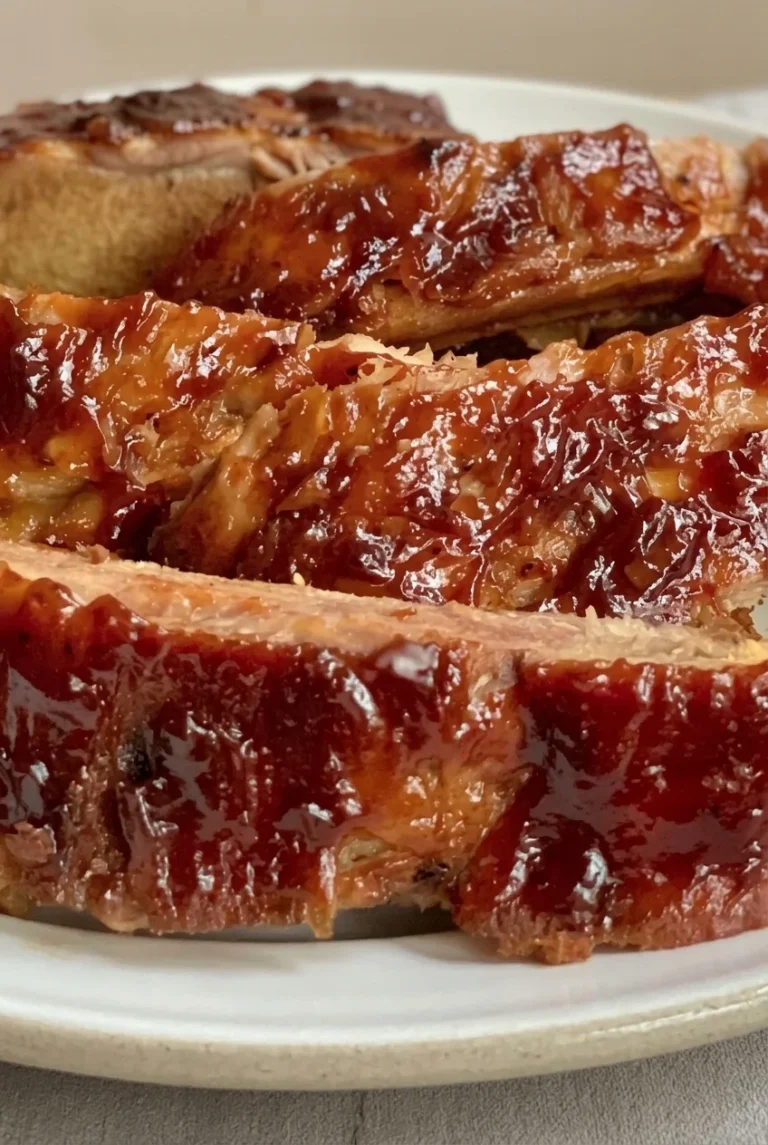
Save some sauce before it touches the raw pork. Brushing that clean sauce onto the cooked ribs gives them a thick, glossy coating, even after the sauce in the cooker has thinned with pork juices. A brief broil can set the glaze, but it’s optional.

Ingredients for Crockpot BBQ Ribs

  • 1 rack baby back pork ribs, about 2 to 2 1/2 pounds (about 1kg)
  • 1 teaspoon seasoned salt, or a little less if the barbecue sauce is particularly salty
  • 1 1/2 cups bottled barbecue sauce (about 360g), divided

Yield: 4 servings. Prep time: 15 minutes. Cook time: 6 to 8 hours on LOW, plus an optional 2 to 4 minutes under the broiler.

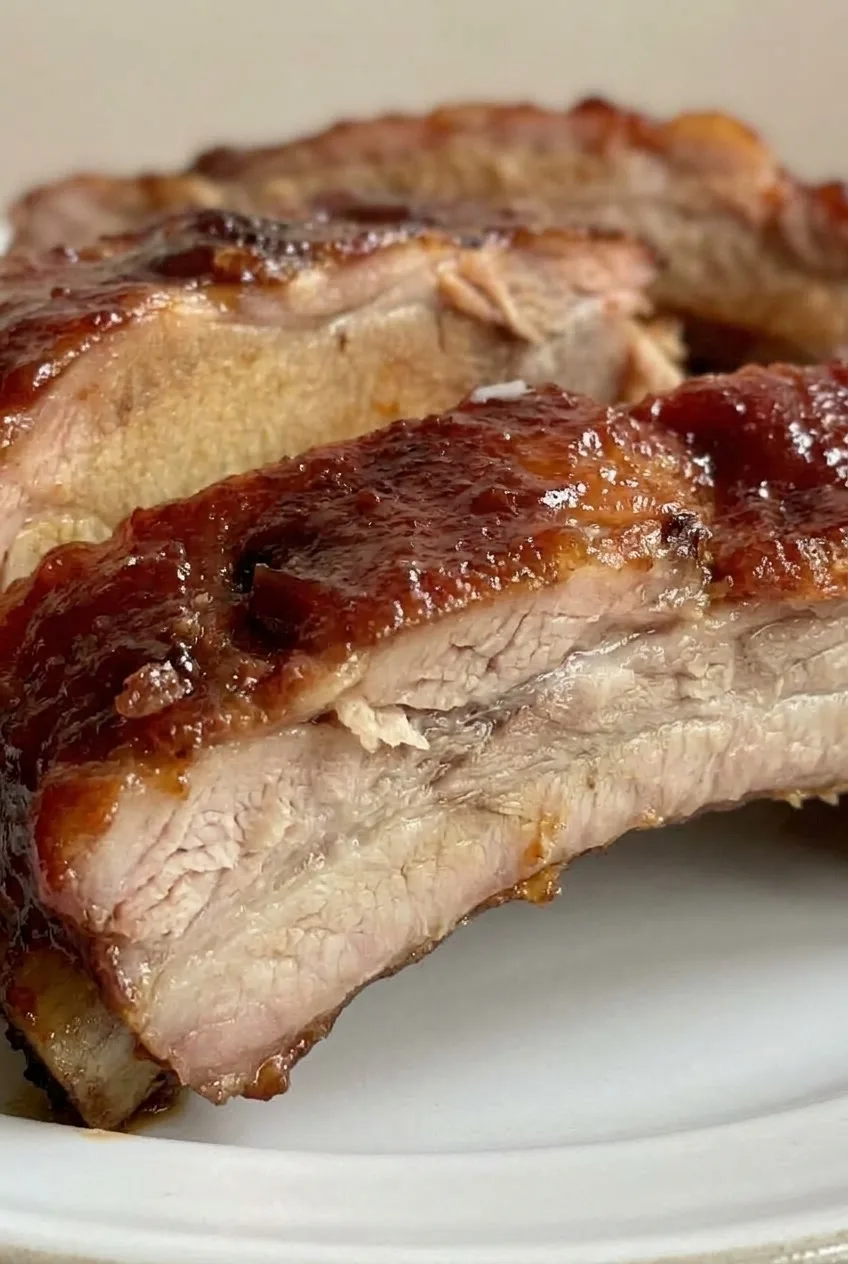
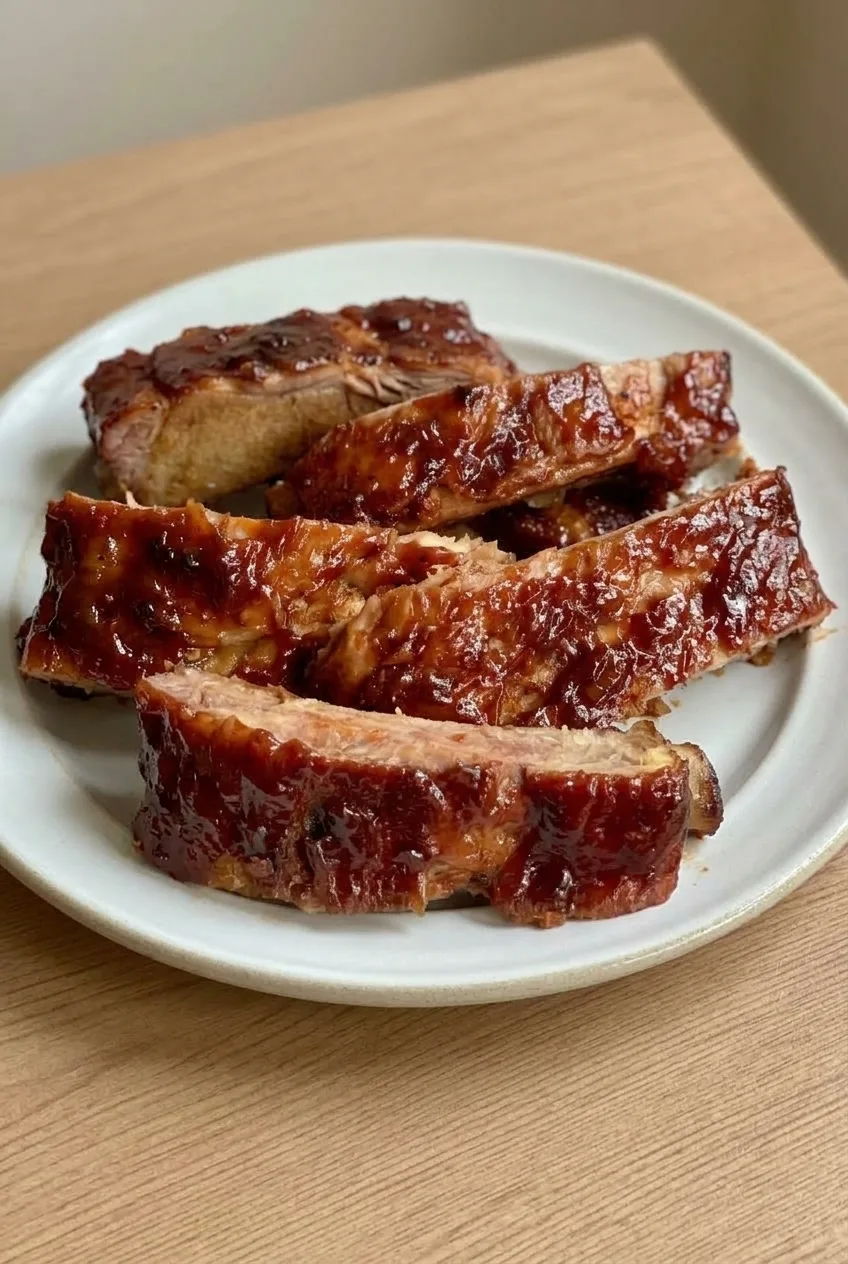
Close view of glossy BBQ sauce and tender meat along the cut edge of a bone-in rib section

How to Make Crockpot BBQ Ribs

Full platter of saucy, bone-in Crockpot BBQ rib sections on a neutral tabletop
  1. Prepare the ribs: If a thin, papery membrane covers the bone side, slip a small knife under one edge and pull it off, using a paper towel for grip. Skip this if the membrane has already been removed. Cut the rack into substantial two- to four-bone sections that fit in a 6-quart slow cooker with the lid fully closed.
  2. Season and sauce: Set aside 1/2 cup barbecue sauce in a clean container before handling the raw ribs. Sprinkle the sections with seasoned salt. Arrange them against the cooker wall or in a loose stack, then spread the remaining 1 cup sauce over them. Do not add water or soda.
  3. Cook until tender: Cover and cook on LOW for 6 to 8 hours without stirring or flipping. Start checking at 6 hours. A fork should enter the meat easily, the sections should bend, and you may see some meat pull back from the bones. If the ribs are still tough, continue cooking and check periodically.
  4. Brush and serve: Slide a broad spatula under each section and use tongs to guide it onto a platter. Brush with the reserved sauce and serve. For a more set glaze, preheat the broiler on high while transferring the ribs to a foil-lined rimmed baking sheet. Brush with sauce, then broil for 2 to 4 minutes, watching closely, until it bubbles and develops a few darker spots. Rotate the pan if it browns unevenly. Let stand about 5 minutes before serving.

How to Prep Ribs for the Crockpot

Some racks are sold with the membrane already removed, so check the bone side before trying to peel it away. Cutting the rack before cooking lets the lid close without forcing it and leaves you with bone-in sections that are easier to lift and serve.

When Are Slow Cooker Ribs Done?

The 6-to-8-hour window is a guide: rack thickness and how the sections fit in the cooker affect the timing. For ribs that hold their shape on a platter, stop when the meat yields easily to a fork and the sections bend but can still be lifted with support. Cooking longer makes them softer and more likely to break during transfer. Spareribs can also be used, but they may need longer than baby backs; judge them by tenderness.

Getting a Glossy BBQ Finish

Pork juices loosen the sauce in the cooker. The reserved, untouched sauce clings to the cooked ribs for a thicker-looking finish. Brushing is enough for saucy ribs; broil only if you want the coating more set, and watch closely because sweet barbecue sauce can scorch quickly.

Serving and Storing Leftover Ribs

Serve with any remaining clean barbecue sauce. Coleslaw and potato salad, or corn and baked beans, make simple sides. For another slow-cooker pork dinner, try Crock Pot Pork Loin.

Refrigerate leftover ribs in an airtight container for 3 to 4 days, or freeze in a freezer-safe container for up to 3 months. To reheat, cover with a little barbecue sauce and warm gently until hot throughout. Avoid prolonged reheating, which can dry the meat.

Nutrition

Approximate per serving (1/4 of the recipe): 515 calories, 30g protein, 27g fat, and 38g carbohydrates. Approximate per 100g of edible cooked ribs with sauce: 310 calories, 18g protein, 16g fat, and 23g carbohydrates. These estimates vary with the amount of bone and fat, the sauce used, and how much sauce remains in the cooker.

3-Ingredient Crockpot BBQ Ribs

Baby back ribs cook slowly with seasoned salt and barbecue sauce until tender, then get brushed with reserved sauce.
Course: Main Course
Cuisine: American
Prep: 15 min
Cook: 480 min
Total: 495 min
Servings: 4 Calories: 515 kcal

Equipment

  • 6-quart slow cooker
  • Small knife
  • Tongs
  • Broad spatula
  • Rimmed baking sheet
  • Aluminum foil

Ingredients

  • 1 rack baby back pork ribs, about 2 to 2 1/2 pounds (about 1 kg)
  • 1 teaspoon seasoned salt, or slightly less if the barbecue sauce is particularly salty
  • 1 1/2 cups bottled barbecue sauce (about 360 g), divided

Instructions

  1. Check the bone side of the ribs for a thin membrane. If present, loosen an edge with a small knife and pull it off with a paper towel for grip.
  2. Cut the rack into substantial sections of two to four bones, sized to fit in a 6-quart slow cooker with the lid closed.
  3. Set aside 1/2 cup barbecue sauce in a clean container before handling the raw ribs.
  4. Sprinkle the ribs with seasoned salt and arrange them against the slow cooker wall or in a loose stack.
  5. Spread the remaining 1 cup barbecue sauce over the ribs. Do not add water or soda.
  6. Cover and cook on LOW for 6 to 8 hours without stirring or flipping. Start checking at 6 hours; the meat should yield easily to a fork and the sections should bend but remain liftable with support.
  7. Transfer the rib sections to a platter with a broad spatula and tongs. Brush with the reserved sauce and serve.
  8. For a more set glaze, preheat the broiler on high. Transfer the ribs to a foil-lined rimmed baking sheet, brush with sauce, and broil for 2 to 4 minutes, watching closely. Rotate the pan if the ribs brown unevenly.
  9. Let the broiled ribs stand for about 5 minutes before serving.

Tips

  • Check whether the membrane has already been removed before trying to peel it off.
  • Cut the rack into sections so the slow cooker lid can close fully.
  • Reserve clean sauce before handling raw pork to brush on the cooked ribs.
  • Start checking tenderness at 6 hours; cooking longer can make the ribs break apart during transfer.
  • Watch closely under the broiler because sweet barbecue sauce can scorch quickly.

Variations

  • Spareribs: Use spareribs instead of baby back ribs and cook until tender; they may need longer.

Notes

Refrigerate leftovers in an airtight container for 3 to 4 days or freeze for up to 3 months. Reheat gently, covered with a little barbecue sauce, until hot throughout. Nutrition is approximate per serving.

Nutrition

Calories: 515 kcal | Protein: 30 g | Fat: 27 g | Carbohydrates: 38 g

Crock Pot Cajun Red Beans and Rice

Red kidney beans and thick rounds of smoked andouille cook with onion, bell pepper, celery, and Cajun seasoning until the beans are tender. Mashing a small portion at the end turns the cooking liquid into a creamy, spoonable sauce while leaving most of the beans whole. Cook the white rice separately and spoon the beans over it to serve.

This is not a slow-cooker-only recipe: dried kidney beans must be soaked, then boiled vigorously on the stovetop for 30 minutes before they go into the cooker.

Ingredients for Crock Pot Cajun Red Beans and Rice

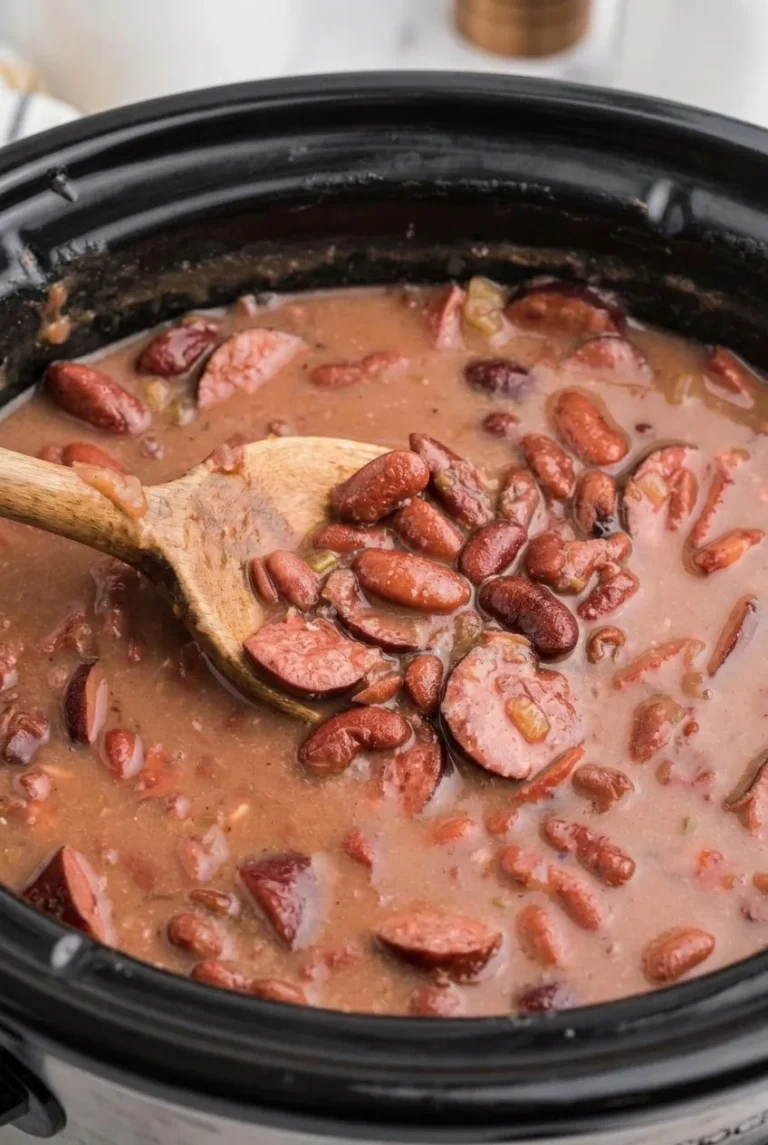
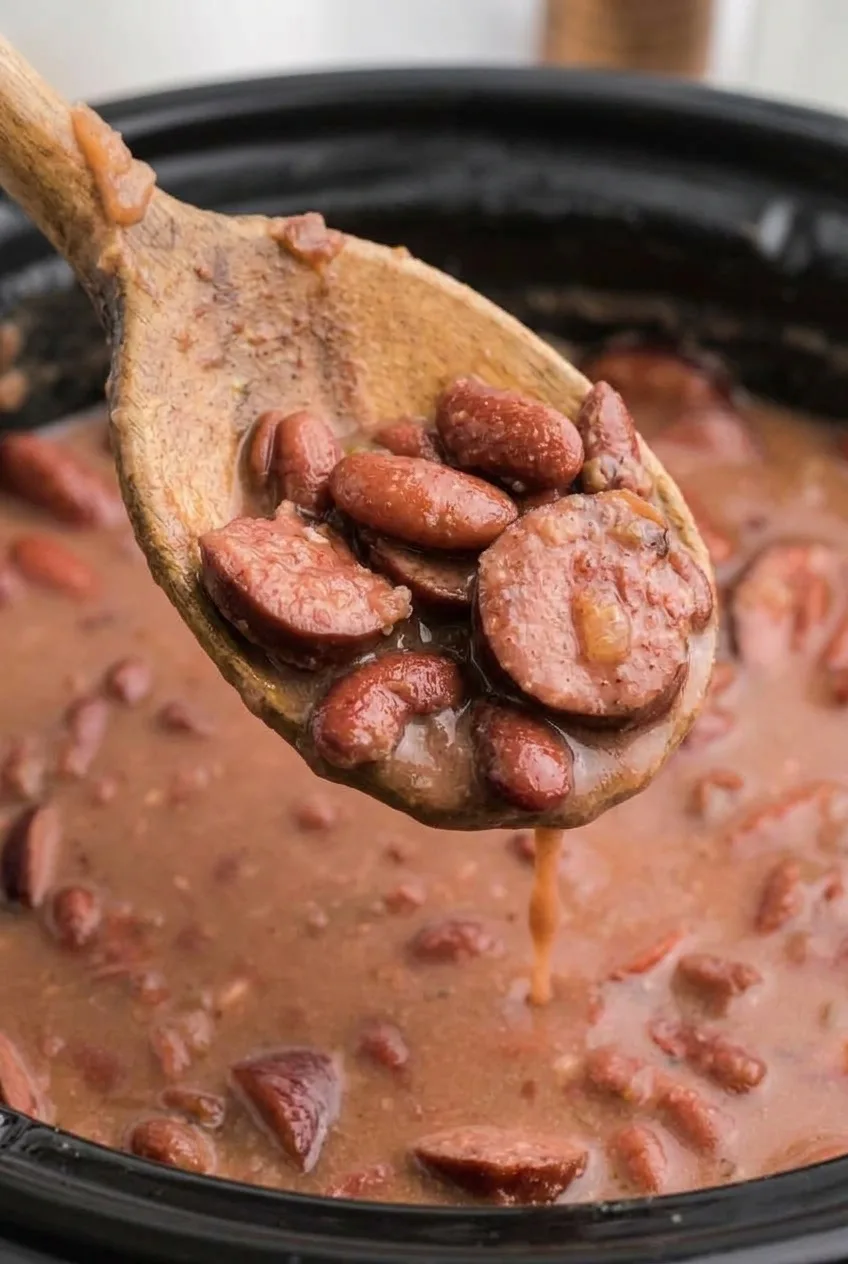
Close view of whole red beans and thick andouille slices coated in creamy sauce on a wooden spoon
  • 1 lb dried red kidney beans, sorted and rinsed (450g)
  • 12 oz fully cooked smoked andouille sausage, cut into 1/2-inch rounds (340g)
  • 1 medium yellow onion, diced (about 150g)
  • 1 medium green bell pepper, diced (about 150g)
  • 2 celery ribs, diced (about 100g)
  • 4 garlic cloves, minced
  • 2 tablespoons salt-free Cajun seasoning
  • 2 bay leaves
  • About 3 1/2 cups reduced-sodium chicken broth, plus more if needed to just cover the beans
  • 2 cups uncooked white rice (about 370g)

Optional for serving: hot sauce and 2 to 3 tablespoons sliced green onions. You will also need water for soaking and boiling the beans; discard that water before slow cooking.

Yield: 6 servings. Timing: About 20 minutes active prep, plus 8 to 12 hours soaking, a 30-minute rolling boil, and approximately 8 to 10 hours on LOW. Cook the rice near serving time.

How to Make Slow Cooker Red Beans and Rice

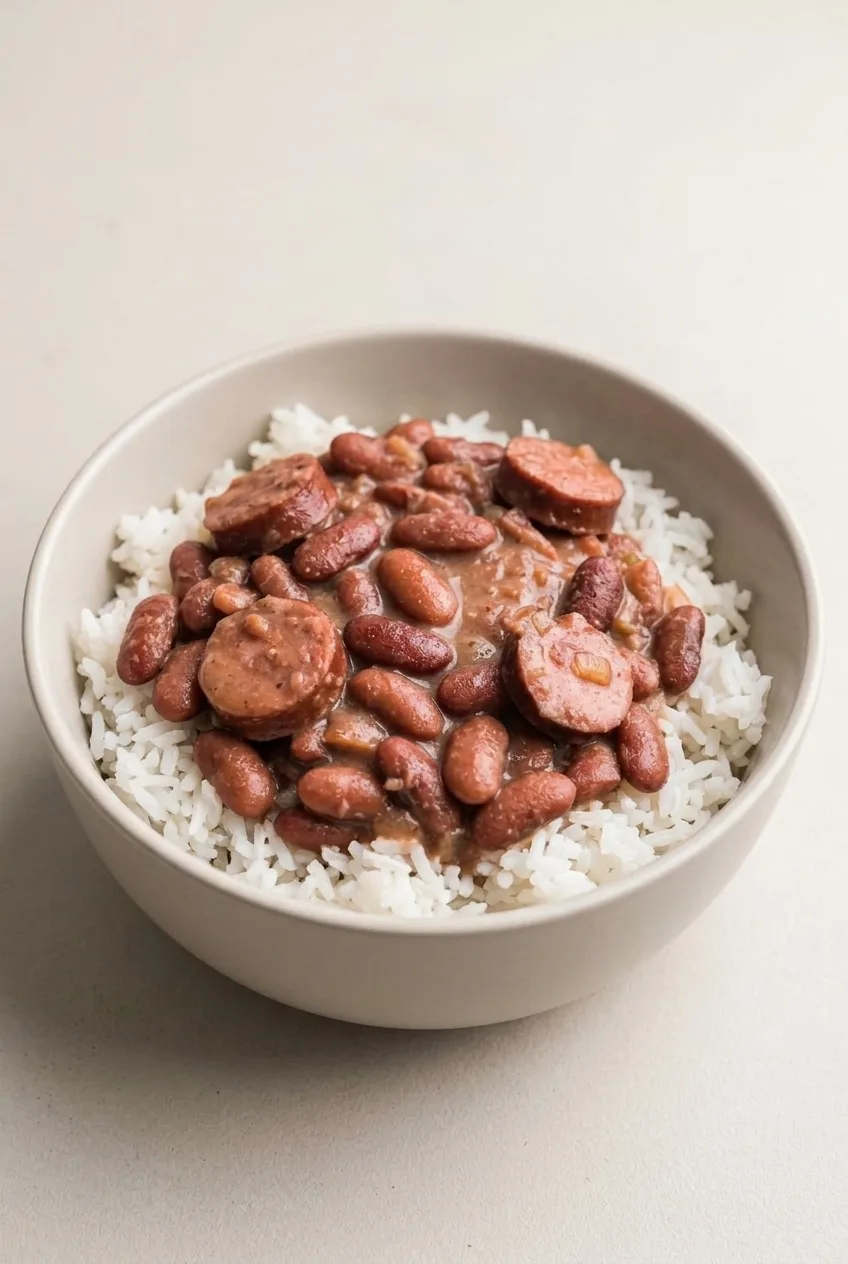
Bowl of Crock Pot Cajun red beans and andouille over white rice on a plain tabletop
  1. Soak the beans: Cover the sorted, rinsed beans generously with water in a large bowl. Soak for 8 to 12 hours, keeping them submerged. Drain and discard the soaking water.
  2. Boil the beans: Put the soaked beans in a large pot and cover with fresh water. Bring to a vigorous rolling boil and maintain it for a full 30 minutes, not merely a simmer. Drain.
  3. Fill the slow cooker: Add the drained beans, fully cooked sausage, onion, bell pepper, celery, garlic, Cajun seasoning, and bay leaves to a 5- to 6-quart slow cooker. Pour in about 3 1/2 cups broth, adding more only if needed to just cover the beans. Stir and keep the mixture below the cooker’s maximum-fill line.
  4. Cook until tender: Cover and cook on LOW. Begin checking the beans and liquid level around 6 hours; they may need approximately 8 to 10 hours, but stop once several beans are tender all the way through, with no firm or chalky centers. If they are still firm, continue cooking and check periodically. Add hot water if the liquid falls enough to expose the beans or the cooker looks dry.
  5. Thicken the sauce: Remove the bay leaves. Mash a small portion of the tender beans against the side of the cooker, then stir and let stand for a few minutes. The sauce should coat the mostly whole beans and sausage but still flow easily from a spoon. If it is thin, cook uncovered on HIGH briefly, watching closely. Taste before adding salt or hot sauce.
  6. Cook the rice and serve: Prepare the rice separately according to its package directions, timing it to finish near the beans. Spoon the beans, sausage, and sauce over the hot rice.

Why the Kidney Beans Need a Stovetop Boil

Dried kidney beans require the vigorous boil before slow cooking; soaking and slow-cooker heat alone do not replace it. Use fresh water after soaking, keep the water at a rolling boil for the full 30 minutes, and drain the beans before adding them to the cooker. Do not start dried kidney beans directly in the slow cooker.

How to Keep the Beans Creamy and Spoonable

Wait until the beans are tender throughout before mashing any. Crushing just a small portion thickens the liquid without turning the pot into a paste. If the finished sauce is too thick, stir in a little hot water. If it remains watery after mashing, let it reduce briefly uncovered on HIGH.

Bean age and slow-cooker performance affect finishing time, so check tenderness rather than relying on the clock. Andouille also varies in salt and heat; the salt-free seasoning and reduced-sodium broth leave room to adjust the finished pot.

Serving and Sausage Options

Keep rice out of the slow cooker so it does not soften during the long bean cook. For a milder version, replace andouille with fully cooked mild smoked sausage or fully cooked smoked turkey sausage. Taste the finished beans before adjusting salt or heat. Canned kidney beans should not follow this full dried-bean cooking schedule.

How to Store and Reheat Beans and Rice

Cool leftovers promptly and refrigerate beans and rice in separate airtight containers for up to 4 days. Reheat each until thoroughly hot, adding a splash of water to the beans if the sauce has thickened. Do not leave cooked rice at room temperature for an extended period.

Freeze the cooled bean-and-sausage mixture without rice for up to 3 months. For another slow-cooker dinner, try slow cooker brisket.

Nutrition

Approximate nutrition per serving, including rice, based on 6 servings: 680 calories, 32g protein, 16g fat, and 102g carbohydrates. Approximate values per 100g of prepared food: 110 calories, 5g protein, 3g fat, and 16g carbohydrates. Values vary with the sausage, broth, cooked rice yield, and amount of liquid retained in the beans.

Crock Pot Cajun Red Beans and Rice

Dried kidney beans and smoked andouille cook with Cajun-seasoned vegetables until tender, then are served over separately cooked rice.
Course: Main Course
Cuisine: Cajun
Prep: 620 min
Cook: 570 min
Total: 1190 min
Servings: 6 Calories: 680 kcal

Equipment

  • Large bowl
  • Large pot
  • 5- to 6-quart slow cooker
  • Saucepan for rice

Ingredients

For the Beans

  • 1 lb dried red kidney beans, sorted and rinsed (450g)
  • 12 oz fully cooked smoked andouille sausage, cut into 1/2-inch rounds (340g)
  • 1 medium yellow onion, diced (about 150g)
  • 1 medium green bell pepper, diced (about 150g)
  • 2 celery ribs, diced (about 100g)
  • 4 garlic cloves, minced
  • 2 tablespoons salt-free Cajun seasoning
  • 2 bay leaves
  • About 3 1/2 cups reduced-sodium chicken broth, plus more if needed to just cover the beans

For Serving

  • 2 cups uncooked white rice (about 370g)
  • Optional: hot sauce
  • Optional: 2 to 3 tablespoons sliced green onions

Instructions

  1. Cover the beans generously with water in a large bowl and soak for 8 to 12 hours, keeping them submerged. Drain and discard the soaking water.
  2. Put the soaked beans in a large pot and cover with fresh water. Bring to a vigorous rolling boil and maintain the boil for a full 30 minutes. Drain.
  3. Add the beans, sausage, onion, bell pepper, celery, garlic, Cajun seasoning, and bay leaves to a 5- to 6-quart slow cooker.
  4. Pour in about 3 1/2 cups broth, adding more only if needed to just cover the beans. Stir and keep the mixture below the slow cooker’s maximum-fill line.
  5. Cover and cook on LOW. Begin checking the beans and liquid level around 6 hours; continue cooking for approximately 8 to 10 hours, until several beans are tender throughout with no firm or chalky centers. Add hot water if the beans become exposed or the cooker looks dry.
  6. Remove the bay leaves. Mash a small portion of the tender beans against the side of the cooker, stir, and let stand for a few minutes.
  7. If the sauce is thin, cook uncovered on HIGH briefly, watching closely. If it is too thick, stir in a little hot water. Taste before adding salt or hot sauce.
  8. Near serving time, cook the rice separately according to its package directions.
  9. Spoon the beans, sausage, and sauce over the hot rice. Serve with optional hot sauce and green onions.

Tips

  • Soak the beans, then boil them vigorously in fresh water for the full 30 minutes before slow cooking.
  • Check tenderness rather than relying only on the cooking time; bean age and slow-cooker performance can affect how long they take.
  • Mash only a small portion of the beans to thicken the sauce while keeping most of them whole.
  • Keep the rice out of the slow cooker and cook it near serving time.
  • Taste before adding salt or heat, since andouille varies in saltiness and spice.

Variations

  • Milder Smoked Sausage: Replace the andouille with fully cooked mild smoked sausage or fully cooked smoked turkey sausage.

Notes

Dried kidney beans must be soaked and boiled vigorously for 30 minutes; do not cook them directly in the slow cooker. Refrigerate beans and rice separately in airtight containers for up to 4 days and reheat thoroughly. Freeze the bean-and-sausage mixture without rice for up to 3 months.

Nutrition

Calories: 680 kcal | Protein: 32 g | Fat: 16 g | Carbohydrates: 102 g

Slow Cooker Brisket

Slow cooking turns brisket tender enough to pull into long strands, but it cannot brown the surface. A skillet sear gives this brisket its dark exterior before it cooks on LOW with onions, beef broth, and Worcestershire. The juices stay savory and pourable rather than becoming a thick barbecue sauce.

Serve it with most of the brisket intact and one end pulled apart. Spoon the soft onions and a little juice over the meat, then offer the rest alongside. Start checking around 8 hours, but let fork tenderness—not the clock—tell you when it is done.

Ingredients for Slow Cooker Brisket

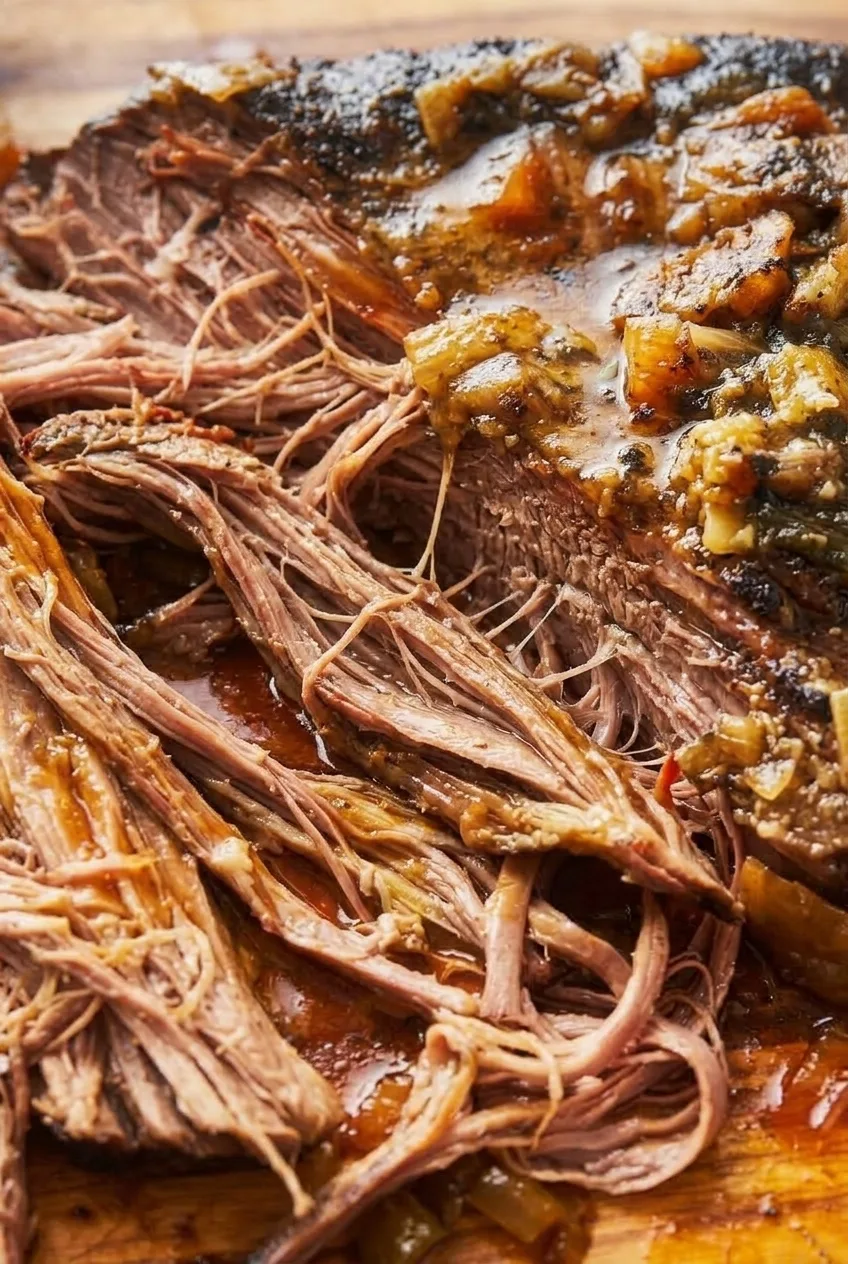
Close view of long, moist brisket fibers beside browned beef and soft onion pieces
  • 1 beef brisket, 3–4 lb, preferably point or a well-marbled flat
  • 1 1/4 teaspoons fine salt
  • 1 teaspoon black pepper
  • 1 teaspoon smoked paprika
  • 1 tablespoon neutral cooking oil
  • 2 medium yellow onions, coarsely chopped (about 300g)
  • 4 garlic cloves, minced
  • 1 tablespoon tomato paste
  • 1 cup low-sodium beef broth
  • 2 tablespoons Worcestershire sauce

Optional: 2 sprigs fresh thyme.

How to Make Slow Cooker Brisket

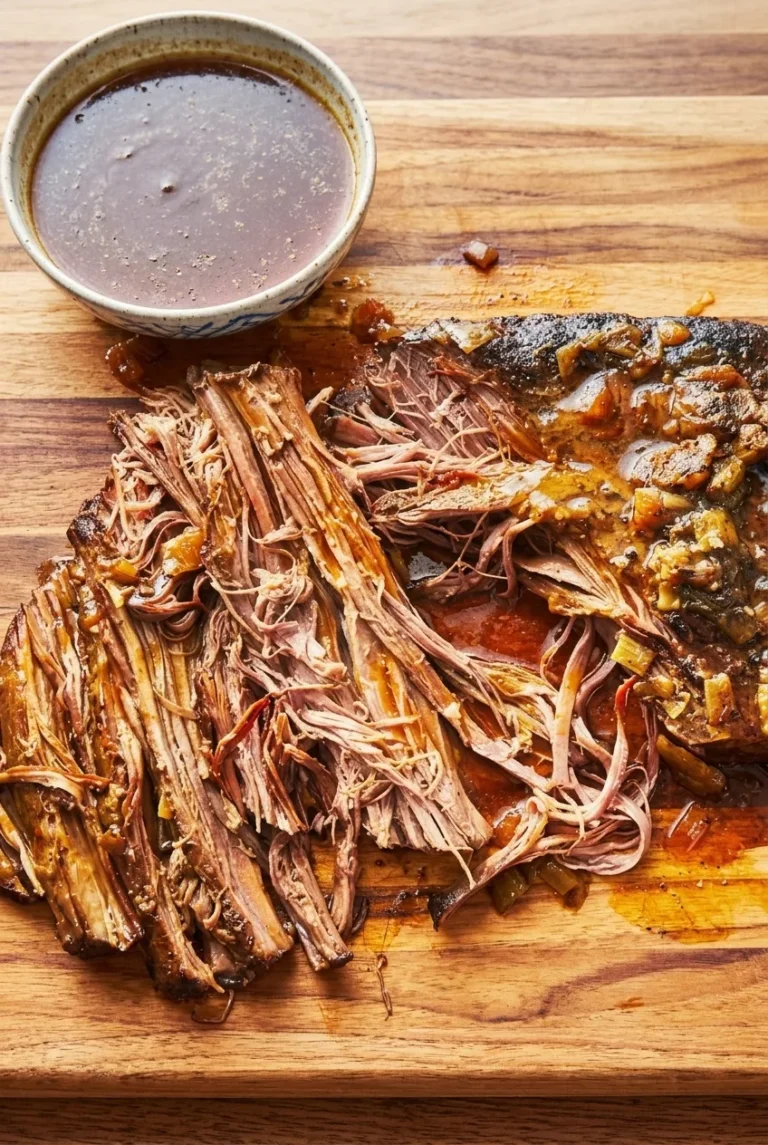
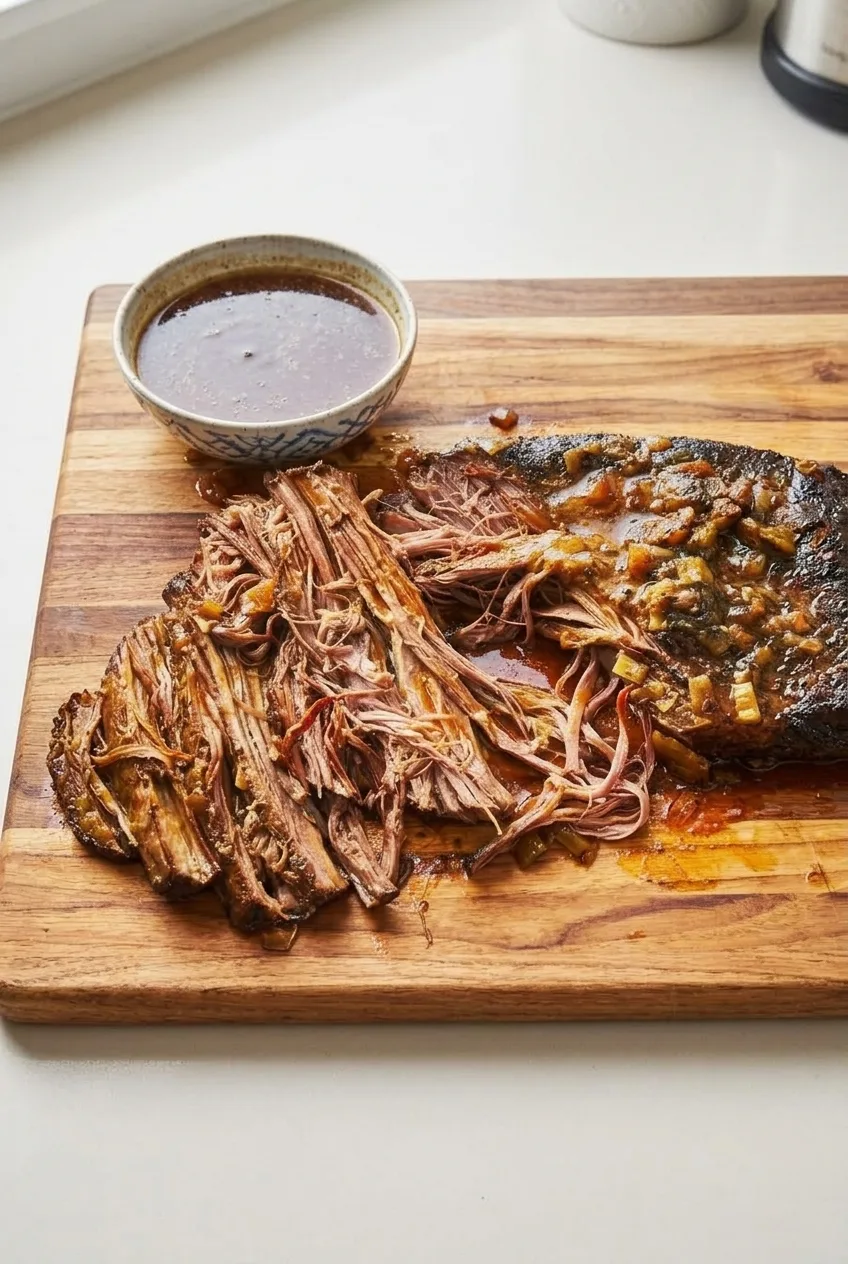
Partly pulled brisket and a small bowl of onion-rich juices on a wooden serving board

Serves: 6–8. Prep: 20–25 minutes. Cook: About 8–10 hours on LOW, plus up to 10 minutes to reduce the juices if needed. Allow about 15 minutes for resting and additional slow-cooker time if the brisket is not yet tender.

  1. Trim and season: Trim an exceptionally thick fat cap to about 1/4 inch, leaving a modest layer. Pat the brisket dry and season it all over with the salt, pepper, and smoked paprika. If it will not fit in a 6-quart or larger slow cooker with the lid closed, cut it into two large pieces.
  2. Brown the brisket: Heat the oil in a large heavy skillet over medium-high heat. Sear the broad sides for about 4–5 minutes per side, until deeply browned but not charred. Transfer to the slow cooker. The browned surface will soften during cooking; it will not stay crisp.
  3. Make the onion base: Reduce the skillet heat to medium. Cook the onions for 4–5 minutes, until beginning to soften. Stir in the garlic and tomato paste and cook for 1 minute. Add the broth and Worcestershire, scraping up the browned bits from the skillet. Pour the mixture around and partly over the brisket. Add the thyme, if using.
  4. Slow-cook: Cover and cook on LOW for about 8–10 hours. Keep the lid closed rather than routinely turning the meat. Start checking around 8 hours: a fork should enter the thickest part easily, and the fibers should pull away with little effort. If the brisket is resistant or chewy, cover and continue cooking, checking every 30–60 minutes.
  5. Rest and finish the juices: Transfer the brisket to a cutting or serving board and rest for about 15 minutes. Remove the thyme, if used. Let the cooking juices stand briefly, then skim off visible fat. If the juices are watery, simmer them uncovered in a saucepan over medium heat for up to 10 minutes, until they lightly coat a spoon but remain pourable. Keep the softened onions in the juices.
  6. Pull one end and serve: Use two forks to pull long strands from one end, leaving most of the brisket intact. Spoon some onions and juices over the meat without covering all of its browned surface. Serve the extra juices in a small bowl alongside.

Choosing a Brisket Cut

A well-marbled point suits the partly pulled finish and makes rich juices, though it may leave more fat to skim. A well-marbled flat also works; its more uniform shape makes it easier to slice if you prefer that for leftovers. With either cut, trim unusually thick exterior fat rather than removing it all.

Does the Broth Need to Cover the Brisket?

No. The brisket only needs to be partly surrounded by liquid. The beef and onions release more moisture as they cook, so adding broth just to submerge the meat can leave the finished juices thin.

Serving Slow Cooker Brisket

Serve the partly pulled brisket with mashed potatoes or roasted vegetables to catch the onion juices. For another saucy beef dinner, try Crockpot Cube Steak and Gravy.

Storing and Reheating Brisket

Refrigerate leftovers promptly in a covered container with some of their juices for up to 3–4 days. Reheat covered with the juices in a 300°F (150°C) oven until warmed through. For make-ahead serving, refrigerate the cooked brisket in its juices, remove the hardened fat, then reheat gently.

Freeze cooled portions with a little juice for up to 3 months. Thaw in the refrigerator before reheating. Fully pulled leftovers can also be used in sandwiches.

Nutrition

Approximate per serving, based on 7 servings: 575 calories, 42g protein, 42g fat, and 7g carbohydrates. Approximate per 100g: 275 calories, 20g protein, 20g fat, and 3g carbohydrates. Values vary considerably with the brisket cut, portion size, and how much rendered fat is skimmed.

Slow Cooker Brisket

Brisket is seared, slow-cooked with onions and broth until fork-tender, then served with its savory cooking juices.
Course: Main Course
Cuisine: American
Prep: 25 min
Cook: 610 min
Total: 650 min
Servings: 7 Calories: 575 kcal

Equipment

  • 6-quart or larger slow cooker
  • Large heavy skillet
  • Saucepan
  • Cutting board
  • Two forks

Ingredients

  • 1 beef brisket, 3–4 lb, preferably point or a well-marbled flat
  • 1 1/4 teaspoons fine salt
  • 1 teaspoon black pepper
  • 1 teaspoon smoked paprika
  • 1 tablespoon neutral cooking oil
  • 2 medium yellow onions, coarsely chopped (about 300g)
  • 4 garlic cloves, minced
  • 1 tablespoon tomato paste
  • 1 cup low-sodium beef broth
  • 2 tablespoons Worcestershire sauce
  • 2 sprigs fresh thyme (optional)

Instructions

  1. Trim an exceptionally thick fat cap to about 1/4 inch, leaving a modest layer. Pat the brisket dry and season all over with the salt, pepper, and smoked paprika.
  2. If the brisket will not fit in a 6-quart or larger slow cooker with the lid closed, cut it into two large pieces.
  3. Heat the oil in a large heavy skillet over medium-high heat. Sear the broad sides of the brisket for 4–5 minutes per side, until deeply browned but not charred. Transfer it to the slow cooker.
  4. Reduce the skillet heat to medium. Cook the onions for 4–5 minutes, until beginning to soften. Stir in the garlic and tomato paste and cook for 1 minute.
  5. Add the broth and Worcestershire sauce, scraping up the browned bits from the skillet. Pour the mixture around and partly over the brisket. Add the thyme, if using.
  6. Cover and cook on LOW for about 8–10 hours without routinely turning the meat. Start checking around 8 hours; the brisket is ready when a fork enters the thickest part easily and the fibers pull away with little effort. If it is still resistant or chewy, continue cooking and check every 30–60 minutes.
  7. Transfer the brisket to a cutting or serving board and rest for about 15 minutes. Remove the thyme, if used.
  8. Let the cooking juices stand briefly, then skim off visible fat. If the juices are watery, simmer them uncovered in a saucepan over medium heat for up to 10 minutes, until they lightly coat a spoon but remain pourable. Keep the softened onions in the juices.
  9. Use two forks to pull long strands from one end of the brisket, leaving most of it intact. Spoon some onions and juices over the meat and serve the remaining juices alongside.

Tips

  • Use a well-marbled brisket for rich, tender results; a point may leave more fat to skim.
  • Trim unusually thick exterior fat, but leave a modest layer.
  • Do not add broth to submerge the brisket; it only needs to be partly surrounded by liquid.
  • Keep the slow cooker lid closed and use fork tenderness, not the clock, to judge doneness.
  • Skim visible fat before serving, and reduce watery juices only as needed.

Notes

Refrigerate leftovers promptly with some juices for 3–4 days. Reheat covered with the juices in a 300°F (150°C) oven until warmed through. Freeze cooled portions with a little juice for up to 3 months; thaw in the refrigerator before reheating.

Nutrition

Calories: 575 kcal | Protein: 42 g | Fat: 42 g | Carbohydrates: 7 g

Crockpot Beef and Broccoli

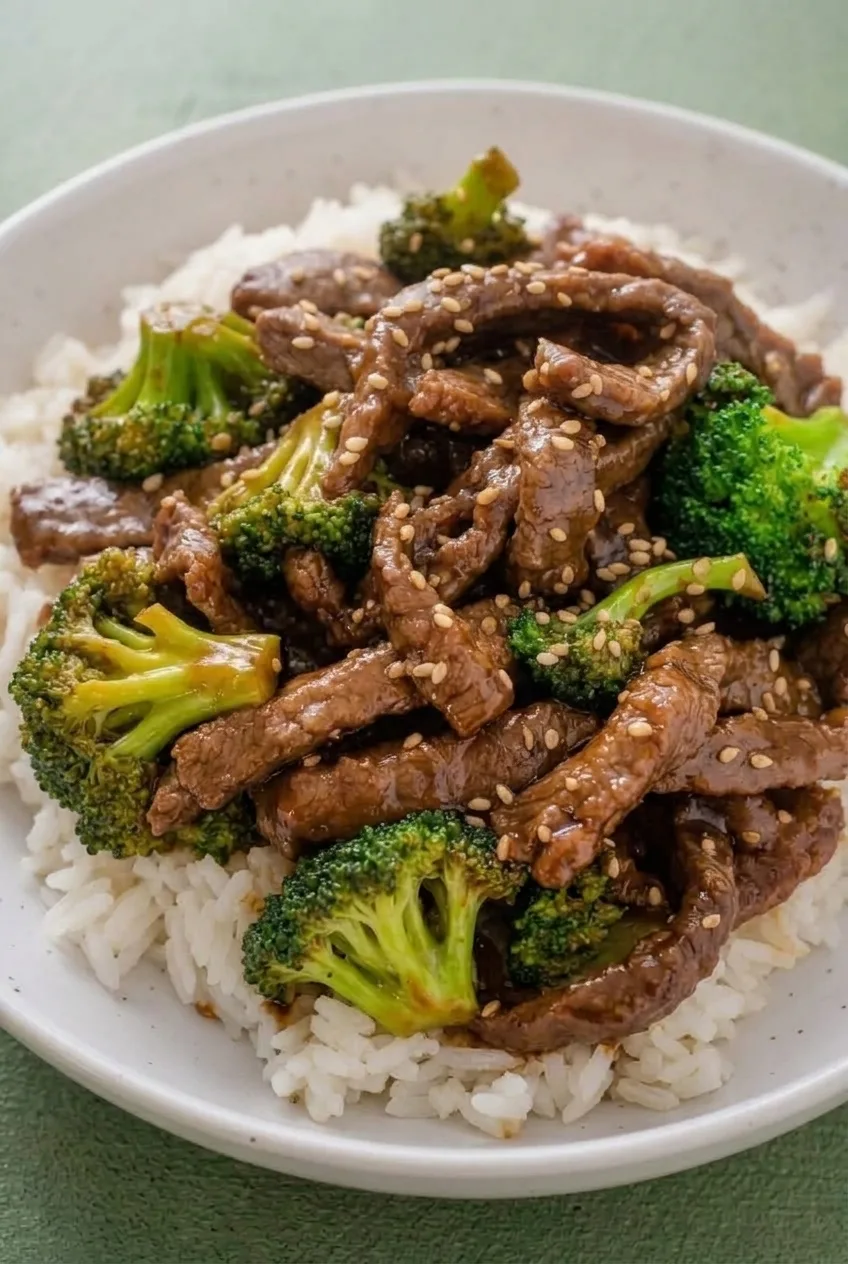
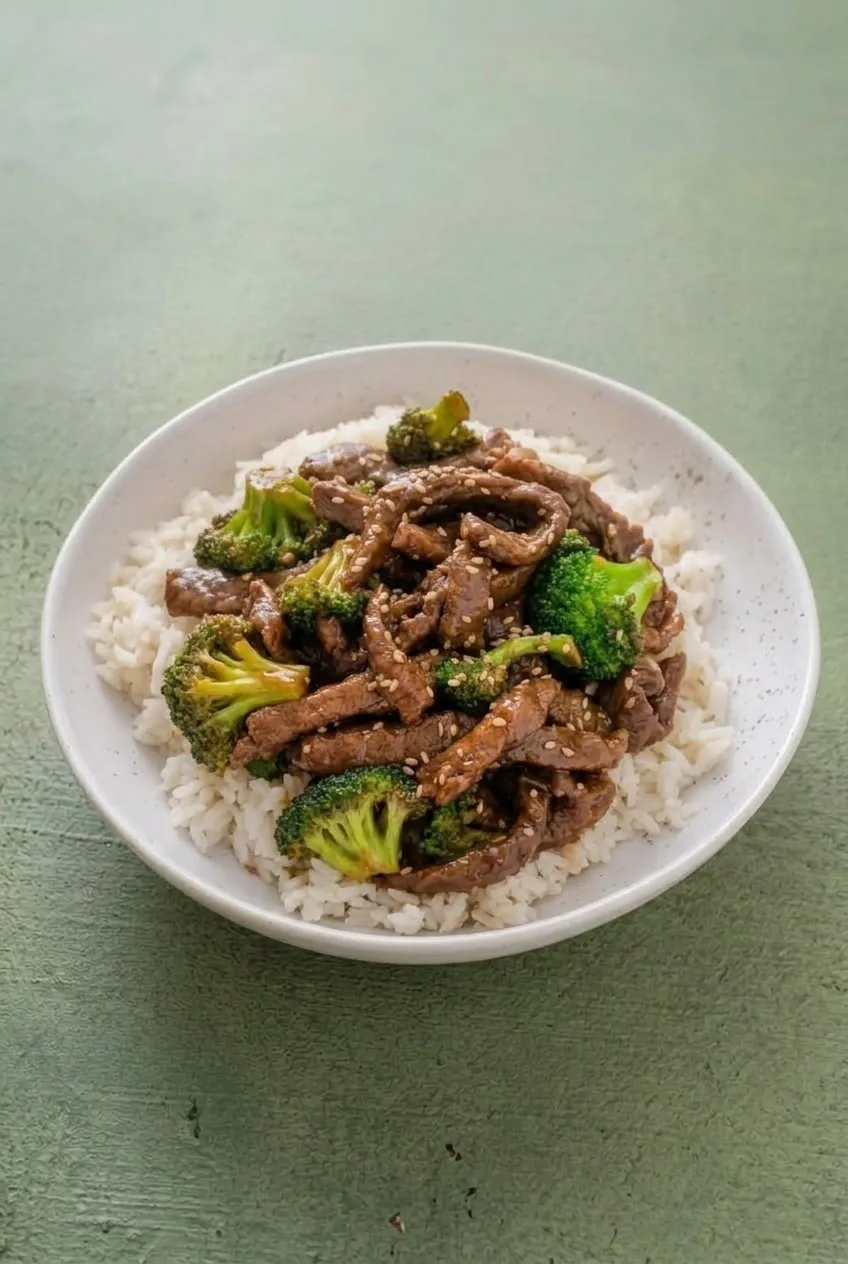
Sliced chuck cooks directly in a soy-garlic sauce for this slow-cooker beef and broccoli—no browning needed. Check the beef for tenderness before adding the broccoli; a hot-running cooker may finish it sooner than expected. Fresh florets and a cornstarch slurry go in only at the end, giving the sauce time to thicken without cooking the broccoli until it falls apart. Spoon everything over white rice and finish with sesame seeds.

Servings: 4 | Prep time: 20 minutes | Cook time: About 4 hours 20 minutes to 6 hours 30 minutes | Total time: About 4 hours 40 minutes to 6 hours 50 minutes

Ingredients for Crockpot Beef and Broccoli

  • 1 1/2 pounds boneless chuck roast (about 680g), sliced against the grain into 1/4- to 1/2-inch strips
  • 1/2 cup low-sodium beef broth
  • 1/3 cup low-sodium soy sauce
  • 2 tablespoons packed brown sugar (about 25g)
  • 1 tablespoon toasted sesame oil
  • 3 garlic cloves, minced
  • 4 cups fresh broccoli florets (about 300g), cut to similar sizes
  • 2 tablespoons cornstarch (about 15g)
  • 2 tablespoons cold water
  • 3 cups cooked white rice (about 475g), for serving
  • 2 teaspoons sesame seeds, for finishing
Close view of glossy beef strips, broccoli florets, sesame seeds, and white rice

Choose and Slice the Beef

Use chuck roast for the cooking window below; leaner cuts may need a different schedule. Cut across the visible grain, so it runs across each strip rather than along its length. Keep the strips similar in thickness so they cook evenly and remain distinct in the sauce.

How to Make Crockpot Beef and Broccoli

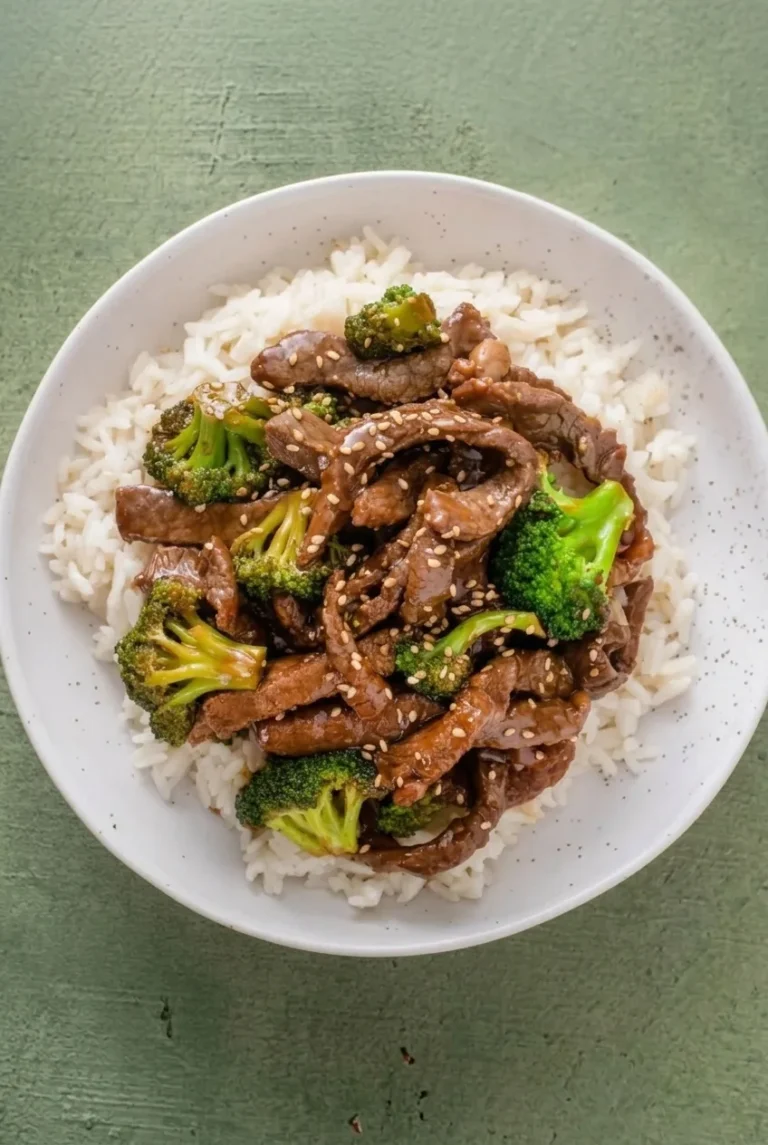
Full bowl of crockpot beef and broccoli over rice on a muted green tabletop
  1. Slice the beef: Cut the chuck against the grain into 1/4- to 1/2-inch strips of similar thickness.
  2. Mix the sauce: In a 5- to 6-quart slow cooker, whisk together the broth, soy sauce, brown sugar, sesame oil, and garlic. Add the raw beef and toss to coat.
  3. Cook until tender: Cover and cook on LOW for about 4 to 6 hours. Check at 4 hours, or earlier if your cooker runs particularly hot. The beef should be fully cooked and yield easily when pierced or bitten, while the strips still hold together. If it is firm, continue cooking on LOW; wait to add the broccoli.
  4. Thicken the sauce and add broccoli: Whisk the cornstarch with the cold water until smooth, then stir it into the hot cooking liquid. Fold in the broccoli. Cover, switch to HIGH, and cook for 20 to 30 minutes, checking at 20 minutes. Stop when the broccoli is tender with some bite and still holds its shape, and the glossy sauce coats the beef instead of running off like broth. If the sauce is still thin, stir and cook briefly longer on HIGH. Let it stand uncovered for about 5 minutes if it needs a slightly thicker finish.
  5. Serve: Divide the white rice among four shallow bowls. Spoon the beef and broccoli over the rice, leaving some visible around the edges, and scatter the sesame seeds on top.

Cook the rice while the beef is in the slow cooker so it is ready when the sauce finishes.

For Firmer Broccoli

Steam or microwave the fresh broccoli separately until crisp-tender. Stir the cornstarch slurry into the tender beef and let the sauce thicken on HIGH, then fold in the cooked broccoli just before serving.

Frozen florets can also be added near the end. Check them frequently: the time needed to heat them through varies, and they may soften faster than fresh broccoli.

For another no-browning beef dinner, try Crockpot Cube Steak and Gravy.

Storage and Reheating

Refrigerate leftovers in an airtight container for up to 3 days. Refrigerate the rice promptly and store it separately if convenient. Reheat individual portions until hot throughout, stirring between short microwave intervals; prolonged heating will soften the broccoli further.

Cooked leftovers can be frozen in airtight containers for up to 2 months. Expect the broccoli to be softer after thawing and reheating.

Nutrition

Approximate per serving, including rice and sesame seeds: 640 calories, 41g protein, 30g fat, and 50g carbohydrates. Approximate per 100g of finished dish: 155 calories, 10g protein, 7g fat, and 12g carbohydrates. These estimates vary with the fat content of the chuck and the finished weight of the dish.

Crockpot Beef and Broccoli

Chuck roast cooks in a soy-garlic sauce in the slow cooker, then gets finished with broccoli and served over rice.
Course: Main Course
Cuisine: Chinese-American
Prep: 20 min
Cook: 390 min
Total: 410 min
Servings: 4 Calories: 640 kcal

Equipment

  • 5- to 6-quart slow cooker
  • Knife
  • Cutting board
  • Whisk
  • Small bowl

Ingredients

For the Beef and Broccoli

  • 1 1/2 pounds boneless chuck roast (about 680 g), sliced against the grain into 1/4- to 1/2-inch strips
  • 1/2 cup low-sodium beef broth
  • 1/3 cup low-sodium soy sauce
  • 2 tablespoons packed brown sugar (about 25 g)
  • 1 tablespoon toasted sesame oil
  • 3 garlic cloves, minced
  • 4 cups fresh broccoli florets (about 300 g), cut to similar sizes
  • 2 tablespoons cornstarch (about 15 g)
  • 2 tablespoons cold water

For Serving

  • 3 cups cooked white rice (about 475 g)
  • 2 teaspoons sesame seeds

Instructions

  1. Slice the chuck roast against the grain into strips of similar thickness.
  2. Whisk the beef broth, soy sauce, brown sugar, sesame oil, and garlic together in a 5- to 6-quart slow cooker.
  3. Add the raw beef and toss to coat. Cover and cook on LOW for about 4 to 6 hours.
  4. Check the beef at 4 hours, or earlier if your cooker runs hot. Continue cooking on LOW if the beef is still firm; wait to add the broccoli until the beef is tender and fully cooked.
  5. Whisk the cornstarch and cold water together until smooth, then stir the slurry into the hot cooking liquid.
  6. Fold in the broccoli, cover, switch the slow cooker to HIGH, and cook for 20 to 30 minutes. Check at 20 minutes and stop when the broccoli is tender but still holds its shape and the glossy sauce coats the beef.
  7. Stir and cook briefly longer on HIGH if the sauce is still thin. Let stand uncovered for about 5 minutes if you want it slightly thicker.
  8. Cook the rice while the beef cooks. Divide it among four shallow bowls, spoon the beef and broccoli over it, and finish with sesame seeds.

Tips

  • Cut the beef across the visible grain and keep the strips similar in thickness for even cooking.
  • Check the beef early if your slow cooker runs hot.
  • Wait until the beef is tender before adding the broccoli.
  • Check the broccoli at 20 minutes so it stays tender with some bite.
  • Cook the rice while the beef is in the slow cooker.

Variations

  • Firmer Broccoli: Steam or microwave the broccoli separately until crisp-tender, thicken the beef sauce, then fold in the broccoli just before serving.
  • Frozen Broccoli: Add frozen florets near the end and check frequently, since they may heat through and soften faster than fresh broccoli.

Notes

Refrigerate leftovers in an airtight container for up to 3 days; store rice separately if convenient. Reheat portions until hot throughout, stirring between short microwave intervals. Freeze leftovers for up to 2 months; broccoli will soften after thawing and reheating. Approximate nutrition per 100 g: 155 calories, 10 g protein, 7 g fat, and 12 g carbohydrates.

Nutrition

Calories: 640 kcal | Protein: 41 g | Fat: 30 g | Carbohydrates: 50 g | Per 100g Calories: 155 kcal | Per 100g Protein: 10 g | Per 100g Fat: 7 g | Per 100g Carbohydrates: 12 g

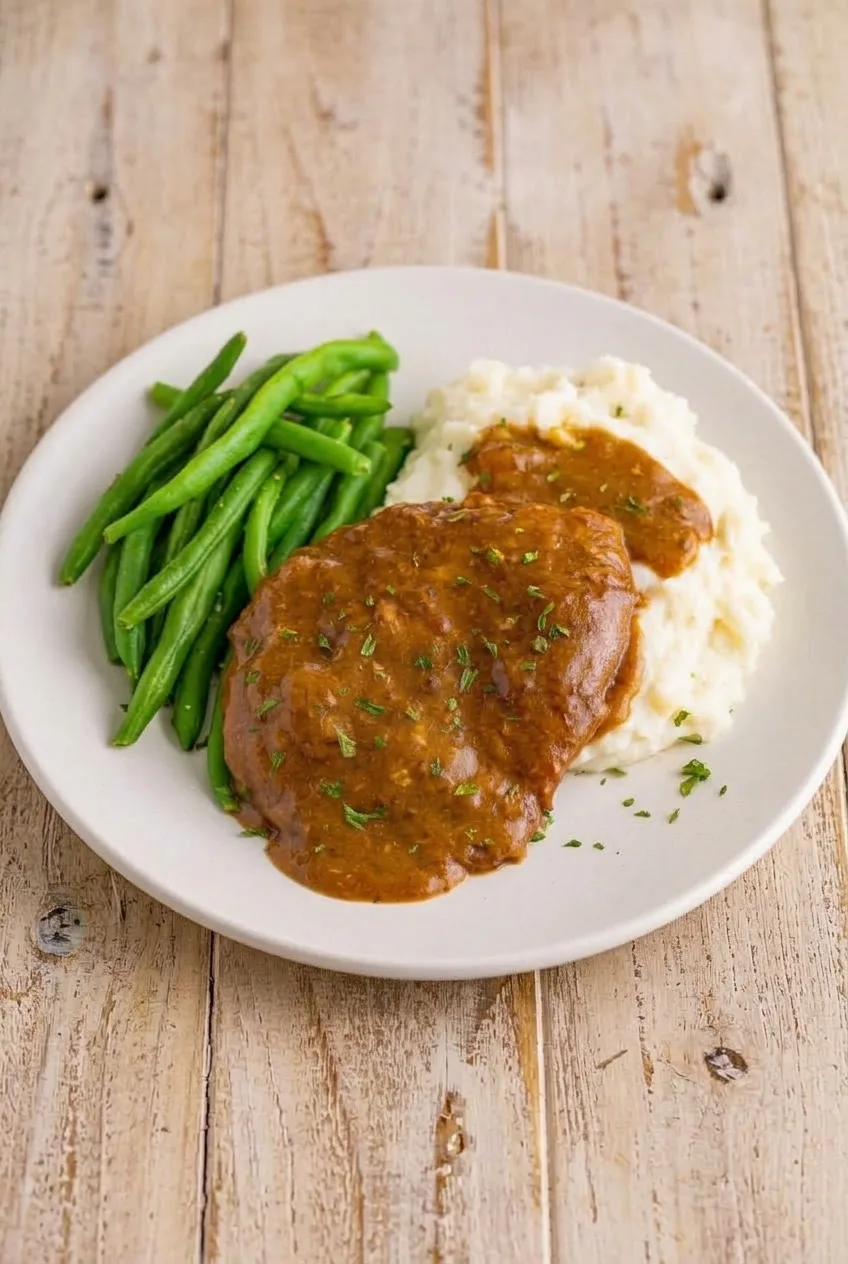
Crockpot Cube Steak and Gravy

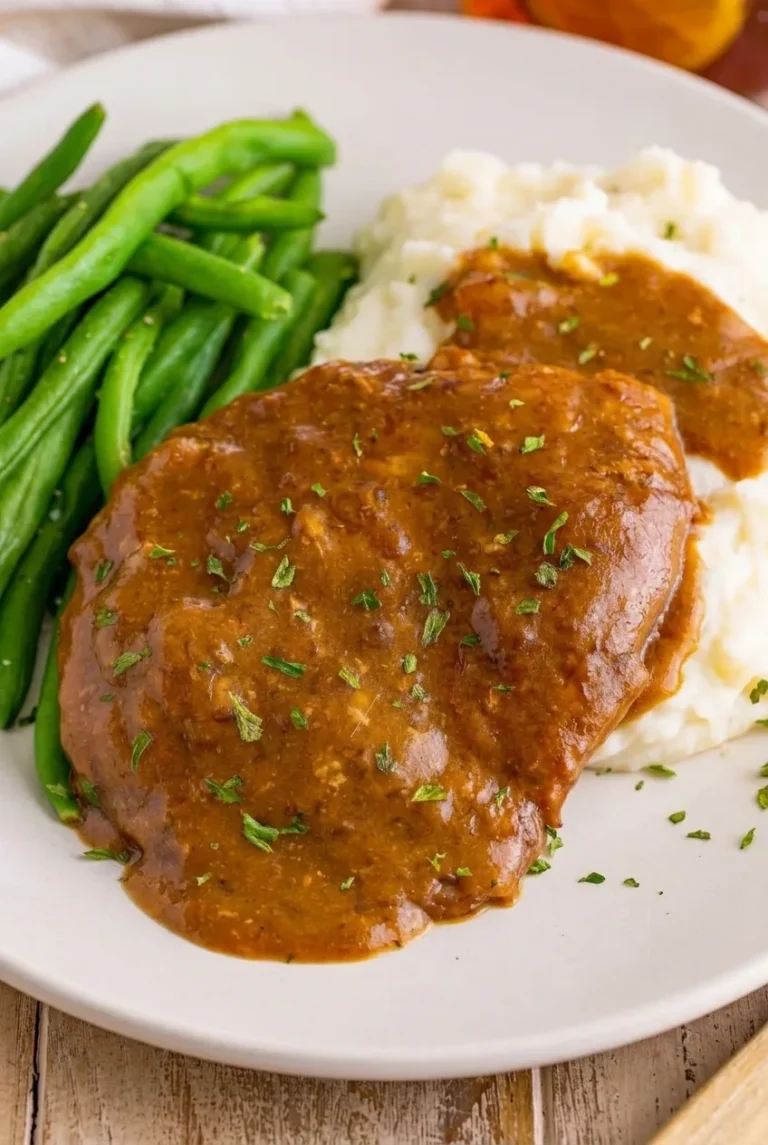
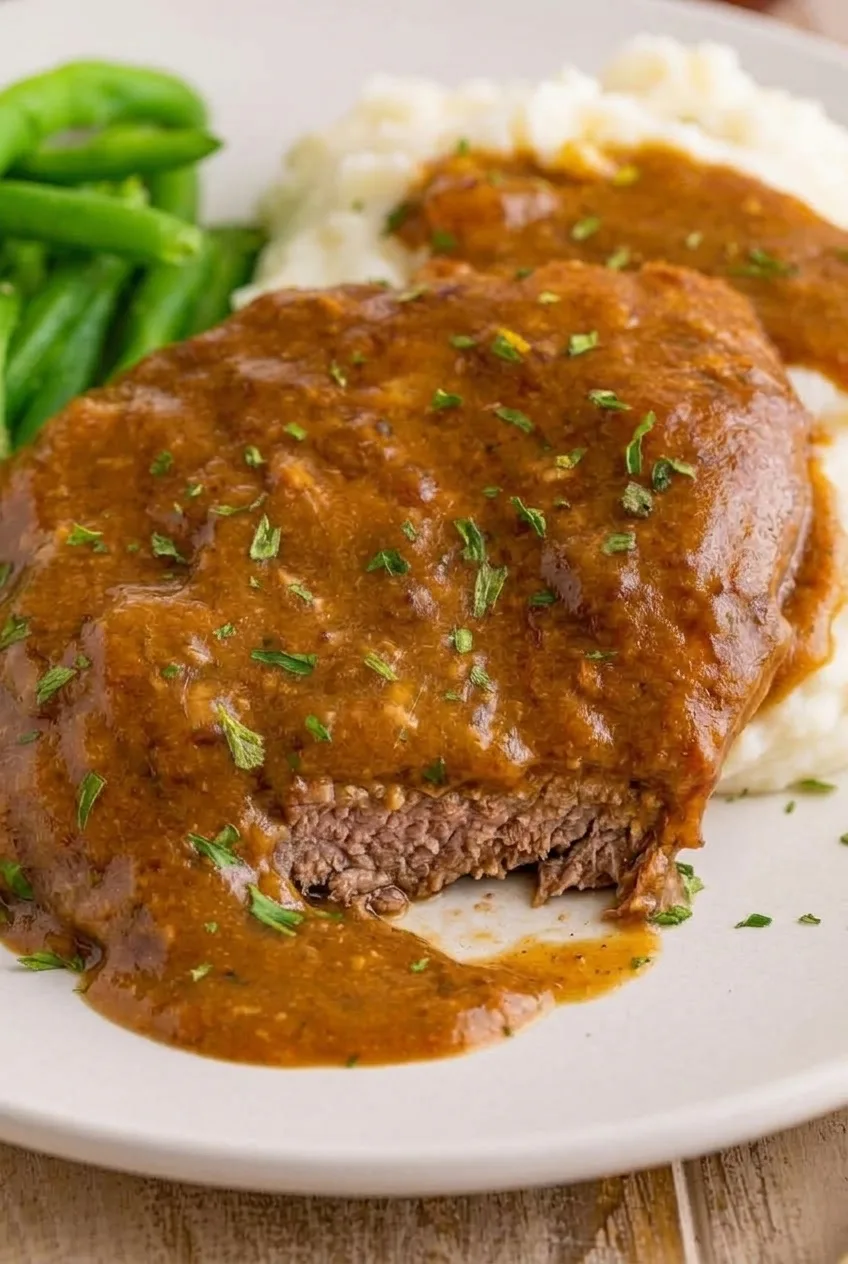
Whole cube steaks cook in brown gravy until a fork cuts through them easily, but the pieces still hold together for serving. There’s no skillet browning: whisk condensed soup, gravy mix, and broth together, then let the slow cooker do the braising.

Cook on LOW and start checking at 6 hours rather than waiting for a fixed finish time. Steak thickness and slow cookers vary. Before serving, whisk the gravy and make sure it coats a spoon; it may not need any extra thickening. Serve the steaks with mashed potatoes and green beans prepared separately.

Ingredients for Crockpot Cube Steak and Gravy

Close view of a tender cube steak edge beneath smooth brown gravy and parsley

Makes 4 servings.

  • 2 pounds beef cube steak, fully thawed (about 4 steaks; 910g)
  • 1 can (10.5 ounces) reduced-sodium condensed cream of mushroom soup (298g)
  • 1 packet reduced-sodium brown gravy mix (about 0.87–1 ounce; approximately 25g)
  • 3/4 cup reduced-sodium beef broth
  • 1/2 teaspoon onion powder
  • 1 tablespoon chopped fresh parsley

Optional for thickening: 1 tablespoon cornstarch mixed with 1 tablespoon cold water.

For serving, if desired: About 3 cups prepared mashed potatoes and 3 cups cooked green beans for four plates. Prepare both separately; they do not go in the slow cooker.

How to Make Crockpot Cube Steak and Gravy

Full plate of gravy-covered cube steaks with mashed potatoes and green beans on a wooden table
  1. Arrange the steaks: Place the thawed cube steaks in a 4- to 6-quart slow cooker. Slight overlap is fine, but leave enough of each surface exposed for the gravy to reach it. Keep the steaks whole.
  2. Add the gravy: Whisk the condensed soup, dry gravy mix, beef broth, and onion powder until no large pockets of dry mix remain. Do not add the extra water called for on the soup can or gravy packet. Pour the mixture over the steaks and spread it across their exposed surfaces. They should be coated but need not be submerged.
  3. Cook on LOW: Cover and cook for 6–8 hours, beginning the tenderness check at 6 hours. A fork should cut through a steak readily, while the piece still holds together. If it resists the fork, cover and continue on LOW, checking periodically. Once tender, avoid cooking it well beyond that point.
  4. Finish the gravy: Lift out the steaks carefully with a wide spatula or tongs. Whisk the gravy to bring any separated juices together. If it still does not coat the back of a spoon, mix the optional cornstarch and cold water, stir the slurry into the gravy, and cover. Cook on HIGH for about 20–30 minutes, until thickened, then return the steaks briefly to coat them.
  5. Serve: Place the whole steaks on plates, overlapping them if desired. Spoon the brown gravy generously over them and sprinkle lightly with parsley. Add the separately prepared mashed potatoes and green beans alongside.

When Is Cube Steak Tender?

Judge the steaks by the fork test, not their appearance alone. If the fork meets resistance at 6 hours, the beef needs more time covered on LOW. When the fork cuts through easily, lift the steaks gently so they stay intact. Thinner steaks may be ready sooner than thicker ones, and slow cookers do not all cook at the same rate.

How to Adjust the Gravy

Whisk before deciding the gravy is too thin; cooking juices can settle apart during the long braise. It should flow easily while clinging to a spoon and the plated steaks. Soup and gravy-mix brands thicken differently, so use the cold-water cornstarch slurry only if whisking leaves the gravy too thin.

Ingredient Swaps and Salt

Condensed cream of chicken or cream of celery soup can replace the mushroom soup, though either may change the gravy’s flavor and brown color. Even reduced-sodium soup, broth, and gravy mix contribute salt. Taste the finished gravy before adding any more.

Slow-Cooker Questions

Can I start with frozen cube steak?

Thaw the steaks fully in the refrigerator before adding them to the slow cooker so they cook more evenly.

Can I cook the whole recipe on HIGH?

This recipe uses LOW for the braise; there is no reliable HIGH-setting equivalent for the full cook. HIGH is used only briefly if the finished gravy needs thickening.

For another gravy-rich dinner, try slow cooker Swedish meatballs.

Leftovers and Reheating

Refrigerate cooled steaks with their gravy in a covered container for up to 3 days. Reheat portions with gravy in the microwave or gently on the stovetop until hot, stirring the gravy if it looks separated.

If freezing leftovers, cool and package them promptly, then thaw in the refrigerator. The creamy gravy may change texture after freezing; whisk it during reheating.

Nutrition

Approximate nutrition per serving of beef and gravy, based on 4 servings: 440 calories, 54g protein, 20g fat, and 10g carbohydrates. Approximate values per 100g of finished beef and gravy: 135 calories, 16g protein, 6g fat, and 3g carbohydrates. Values vary with the steak, packaged ingredients, and cooking moisture loss. Optional slurry, mashed potatoes, and green beans are not included.

Crockpot Cube Steak and Gravy

Whole cube steaks cook slowly in a creamy brown gravy until fork-tender and ready to serve with your favorite sides.
Course: Main Course
Cuisine: American
Prep: 10 min
Cook: 480 min
Total: 490 min
Servings: 4 Calories: 440 kcal

Equipment

  • 4- to 6-quart slow cooker
  • Whisk
  • Wide spatula or tongs

Ingredients

For the Steak and Gravy

  • 2 pounds beef cube steak, fully thawed (about 4 steaks; 910 g)
  • 1 can (10.5 ounces) reduced-sodium condensed cream of mushroom soup (298 g)
  • 1 packet reduced-sodium brown gravy mix (about 0.87–1 ounce; approximately 25 g)
  • 3/4 cup reduced-sodium beef broth
  • 1/2 teaspoon onion powder
  • 1 tablespoon chopped fresh parsley

Optional

  • 1 tablespoon cornstarch mixed with 1 tablespoon cold water, for thickening

For Serving, If Desired

  • About 3 cups prepared mashed potatoes
  • 3 cups cooked green beans

Instructions

  1. Arrange the thawed cube steaks in a 4- to 6-quart slow cooker, keeping them whole. Slight overlap is fine.
  2. Whisk together the condensed soup, dry gravy mix, beef broth, and onion powder until no large pockets of dry mix remain. Do not add the extra water called for on the soup can or gravy packet.
  3. Pour the gravy mixture over the steaks and spread it across their exposed surfaces.
  4. Cover and cook on LOW for 6–8 hours. Begin checking at 6 hours; the steaks are ready when a fork cuts through easily but the pieces still hold together.
  5. Lift out the steaks carefully. Whisk the gravy to combine any separated juices.
  6. If the gravy does not coat the back of a spoon, stir in the optional cornstarch slurry. Cover and cook on HIGH for about 20–30 minutes, until thickened.
  7. Return the steaks briefly to the gravy to coat them. Serve with parsley and, if desired, separately prepared mashed potatoes and green beans.

Tips

  • Thaw the cube steaks fully in the refrigerator before adding them to the slow cooker.
  • Start checking tenderness at 6 hours because steak thickness and slow cookers vary.
  • Keep the steaks whole and handle them gently after cooking so they hold together.
  • Whisk the gravy before deciding whether it needs thickening.
  • Taste the finished gravy before adding salt; the packaged ingredients already contribute sodium.

Variations

  • Cream of Chicken Gravy: Replace the cream of mushroom soup with condensed cream of chicken soup; the flavor and gravy color will change.
  • Cream of Celery Gravy: Replace the cream of mushroom soup with condensed cream of celery soup; the flavor and gravy color will change.

Notes

Refrigerate cooled steaks with gravy in a covered container for up to 3 days. Reheat with gravy in the microwave or gently on the stovetop until hot. If frozen, thaw in the refrigerator and whisk the gravy during reheating.

Nutrition

Calories: 440 kcal | Protein: 54 g | Fat: 20 g | Carbohydrates: 10 g

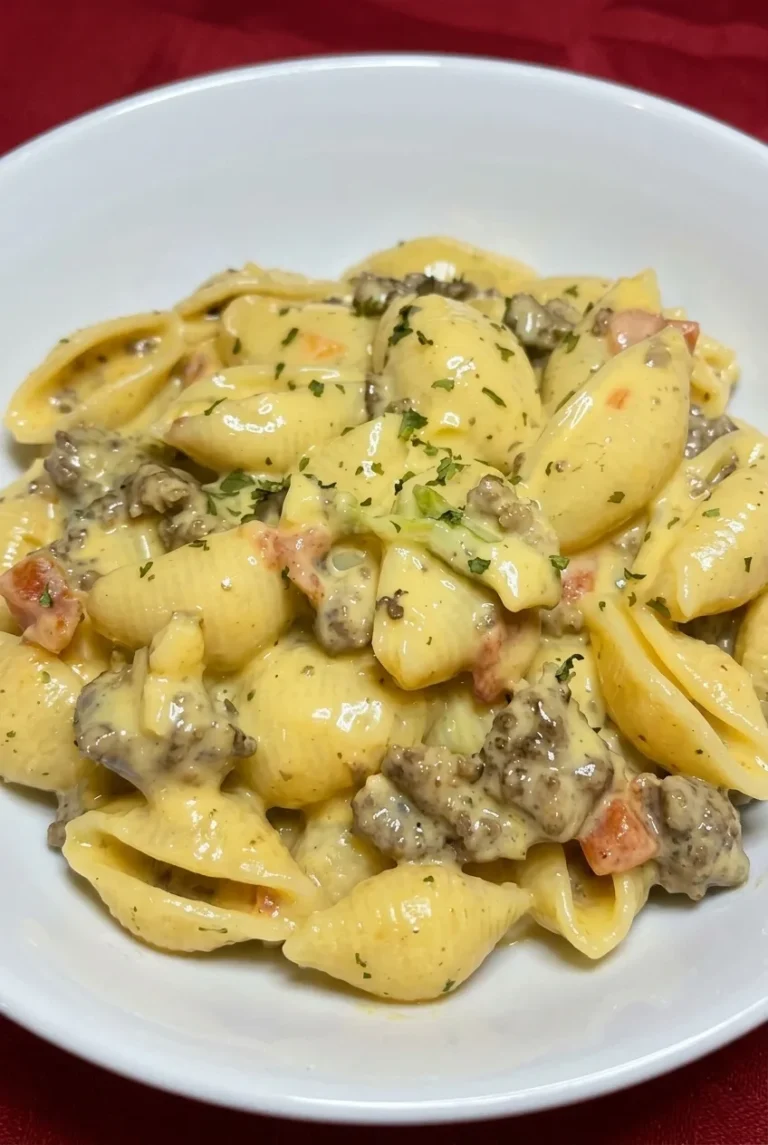
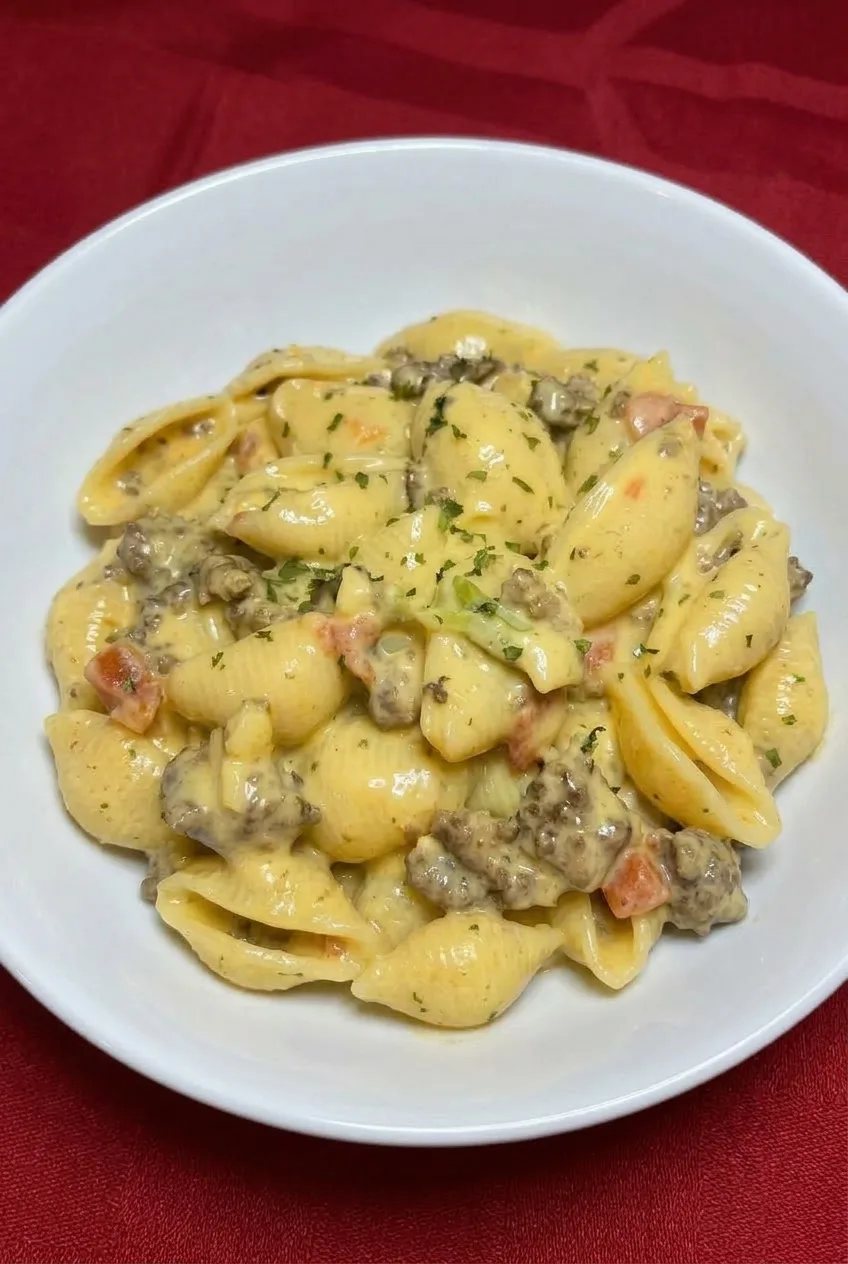
Crock Pot Rotel Pasta

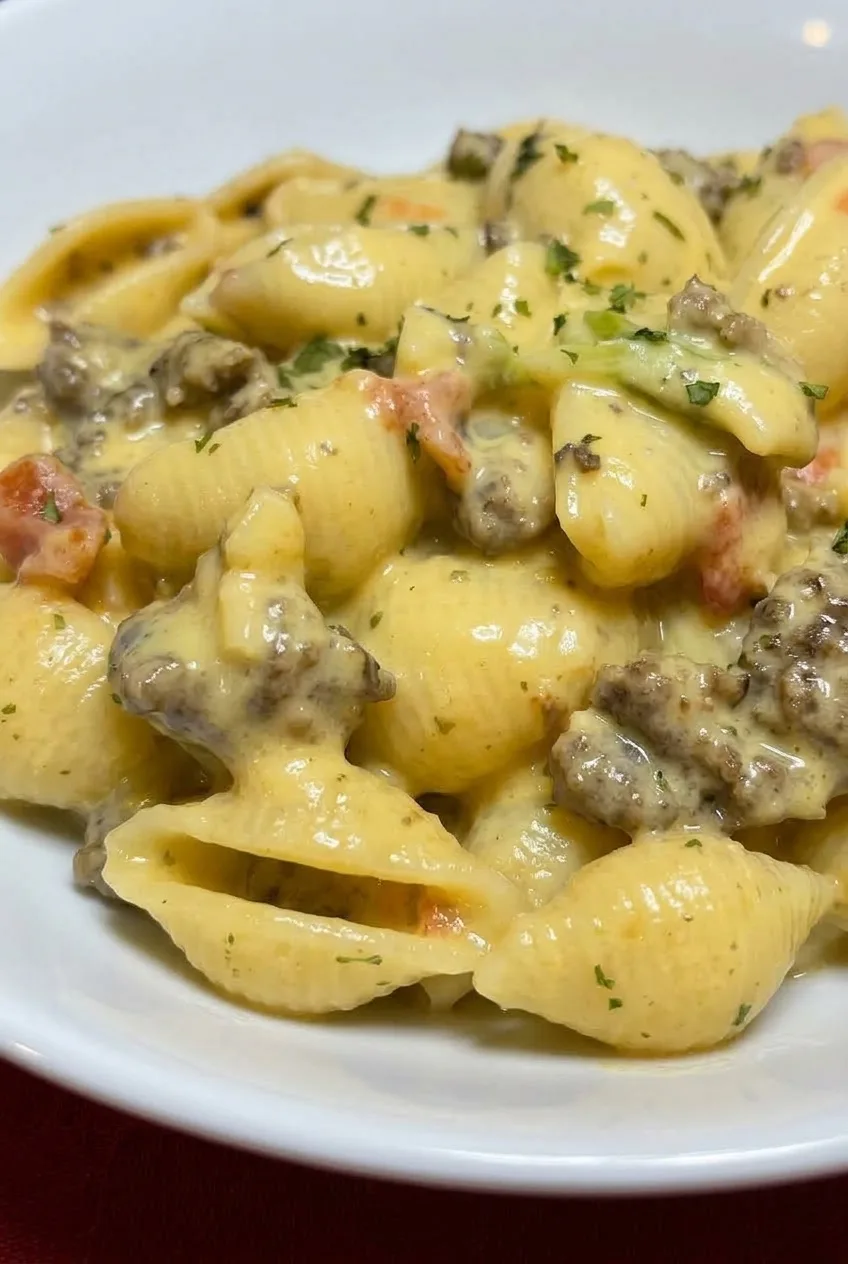
Browned ground beef and medium shells are coated in a glossy, golden cheese sauce with small bites of tomato and green chile. The beef and sauce melt together in the slow cooker, but the shells are boiled separately and added near serving. That extra pot keeps the pasta tender and distinct instead of letting it turn gummy in the sauce.

Ingredients for Crock Pot Rotel Pasta

Close view of cheese sauce filling pasta shells beside browned beef and fine parsley flecks
  • 1 pound ground beef (about 450g)
  • 1 teaspoon garlic powder
  • 1 (10-ounce) can Rotel diced tomatoes with green chiles, undrained (about 280g)
  • 12 ounces Velveeta, cubed (about 340g)
  • 1/2 cup milk, plus 1 to 2 tablespoons more if needed
  • 12 ounces dry medium pasta shells (about 340g)
  • 1 cup freshly shredded cheddar cheese (about 115g)
  • 1 tablespoon finely chopped parsley

Choose mild, original, or hot Rotel to adjust the heat. Use the juices from the can; they help form the sauce.

How to Make Crock Pot Rotel Pasta

Full bowl of Crock Pot Rotel Pasta with beef, golden cheese sauce, and a light parsley garnish

Serves: 6. Prep time: 15 minutes. Cook time: about 1 hour 10 minutes to 2 hours 10 minutes. Total time: about 1 hour 25 minutes to 2 hours 25 minutes.

  1. Brown the beef: Cook the ground beef in a large skillet over medium-high heat for about 8 to 10 minutes, breaking it into small crumbles. Stir in the garlic powder. When no pink remains, drain the fat well so the sauce does not become greasy. If using a thermometer, cook the beef to 160°F (70°C).
  2. Melt the sauce: Add the beef, undrained Rotel, Velveeta, and 1/2 cup milk to a 4- to 6-quart slow cooker. Cover and cook on LOW for about 1 to 2 hours, stirring once or twice. Start checking after 1 hour; the sauce is ready when no cheese cubes remain and it smoothly coats a spoon.
  3. Boil the shells: When the sauce is nearly smooth, boil the shells according to the package directions until al dente. They should hold their shape and have a slight bite. Drain well.
  4. Finish the pasta: Stir the cheddar into the smooth sauce until melted. Gently fold in the drained shells. Cover and keep on LOW for 5 to 10 minutes, just until the pasta is hot and coated. If the sauce looks stiff rather than loose and glossy, stir in 1 to 2 tablespoons of milk.
  5. Serve: Scatter the parsley lightly over the pasta and serve promptly.

Why the Shells Go in Last

Dry shells need more liquid than this cheese sauce provides. Boiling them separately gives them an al dente finish, and adding them at the end keeps them from softening too much. The cooked shells will continue absorbing sauce, so avoid holding the assembled pasta on WARM for an extended period. If dinner is delayed, keep the sauce and pasta separate until serving.

How to Keep the Cheese Sauce Smooth

Cube the Velveeta so it melts evenly, and use LOW heat. Add the cheddar only after the base sauce is smooth; prolonged cooking after it goes in can make the sauce look grainy. Slow cookers melt cheese at different rates, so follow the smooth-sauce cue rather than the clock alone. Taste before adding salt, since the cheese and Rotel may provide enough.

Serve with a green salad or garlic bread. For another slow-cooker beef pasta dinner, try Crock Pot Goulash.

Make-Ahead and Leftovers

For make-ahead serving, prepare the beef-cheese sauce first. Reheat it gently, then fold in freshly boiled shells. Refrigerate assembled leftovers in an airtight container for 3 to 4 days.

Reheat individual portions gently in the microwave or in a pan over low heat, adding a splash of milk, broth, or water to loosen the sauce. Freezing the assembled pasta is not recommended for best texture; the cheese sauce may separate or become grainy.

Nutrition

Approximate nutrition per serving, based on 6 servings: 610 calories, 36g protein, 30g fat, and 51g carbohydrates. Per 100g of finished pasta: approximately 180 calories, 11g protein, 9g fat, and 15g carbohydrates. Values vary with the beef, cheese, and final cooked weight.

Crock Pot Rotel Pasta

Ground beef and Rotel simmer with Velveeta in a slow cooker, then combine with cheddar and separately boiled pasta shells.
Course: Main Course
Cuisine: American
Prep: 15 min
Cook: 130 min
Total: 145 min
Servings: 6 Calories: 610 kcal

Equipment

  • Large skillet
  • 4- to 6-quart slow cooker
  • Large pot
  • Colander

Ingredients

  • 1 pound ground beef (about 450g)
  • 1 teaspoon garlic powder
  • 1 (10-ounce) can Rotel diced tomatoes with green chiles, undrained (about 280g)
  • 12 ounces Velveeta, cubed (about 340g)
  • 1/2 cup milk, plus 1 to 2 tablespoons more if needed
  • 12 ounces dry medium pasta shells (about 340g)
  • 1 cup freshly shredded cheddar cheese (about 115g)
  • 1 tablespoon finely chopped parsley

Instructions

  1. Brown the ground beef in a large skillet over medium-high heat for 8 to 10 minutes, breaking it into small crumbles.
  2. Stir in the garlic powder. Cook until no pink remains, then drain the fat well. If using a thermometer, cook the beef to 160°F (70°C).
  3. Add the beef, undrained Rotel, cubed Velveeta, and 1/2 cup milk to a 4- to 6-quart slow cooker.
  4. Cover and cook on LOW for about 1 to 2 hours, stirring once or twice. Begin checking after 1 hour; the sauce is ready when the cheese has melted and the mixture smoothly coats a spoon.
  5. When the sauce is nearly smooth, boil the shells according to the package directions until al dente. Drain well.
  6. Stir the cheddar into the smooth sauce until melted, then gently fold in the drained shells.
  7. Cover and keep on LOW for 5 to 10 minutes, just until the pasta is hot and coated. If the sauce is stiff, stir in 1 to 2 tablespoons of milk.
  8. Scatter parsley over the pasta and serve promptly.

Tips

  • Drain the beef well to keep the cheese sauce from becoming greasy.
  • Use the Rotel juices to help form the sauce.
  • Cook the shells separately and add them near serving so they stay tender and distinct.
  • Cube the Velveeta and use LOW heat for even melting.
  • Add the cheddar only after the base sauce is smooth to help prevent a grainy texture.
  • Taste before adding salt, since the cheese and Rotel may provide enough.

Variations

  • Mild Rotel Pasta: Use mild Rotel for a gentler flavor.
  • Hot Rotel Pasta: Use hot Rotel for more heat.

Notes

Refrigerate assembled leftovers in an airtight container for 3 to 4 days. Reheat gently with a splash of milk, broth, or water. Avoid holding assembled pasta on WARM for an extended period; freezing is not recommended for best texture.

Nutrition

Calories: 610 kcal | Protein: 36 g | Fat: 30 g | Carbohydrates: 51 g

Crock Pot Chicken Pot Pie

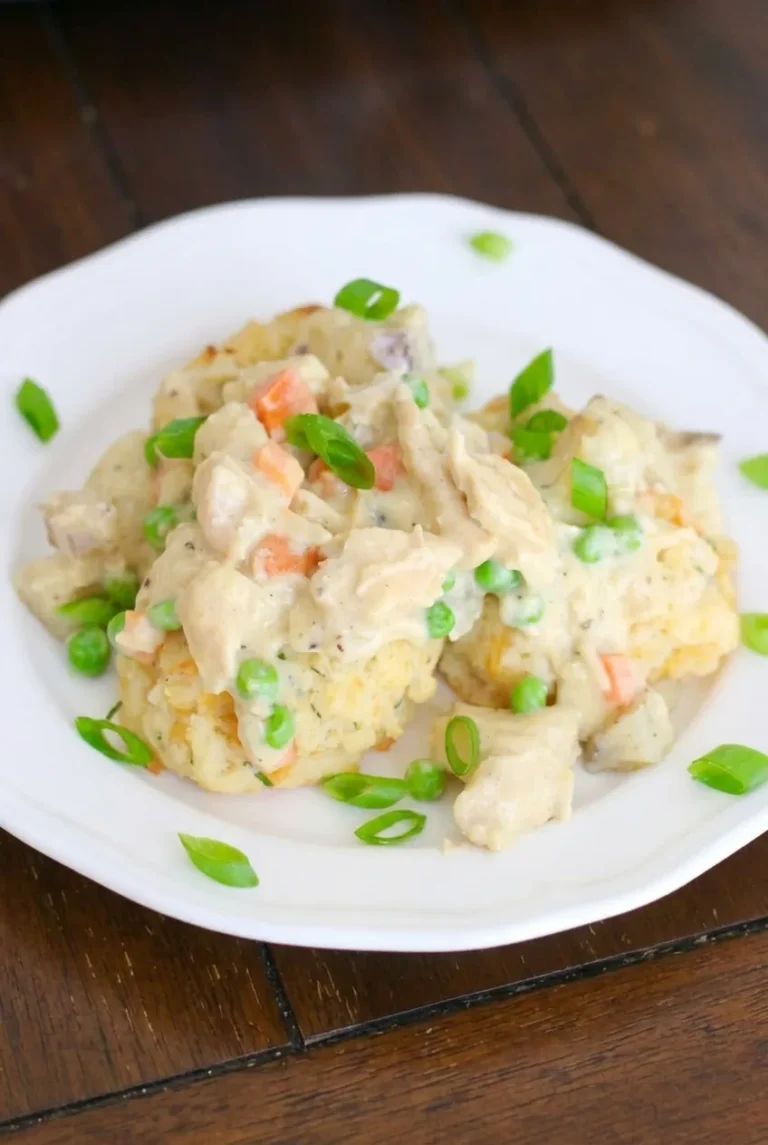
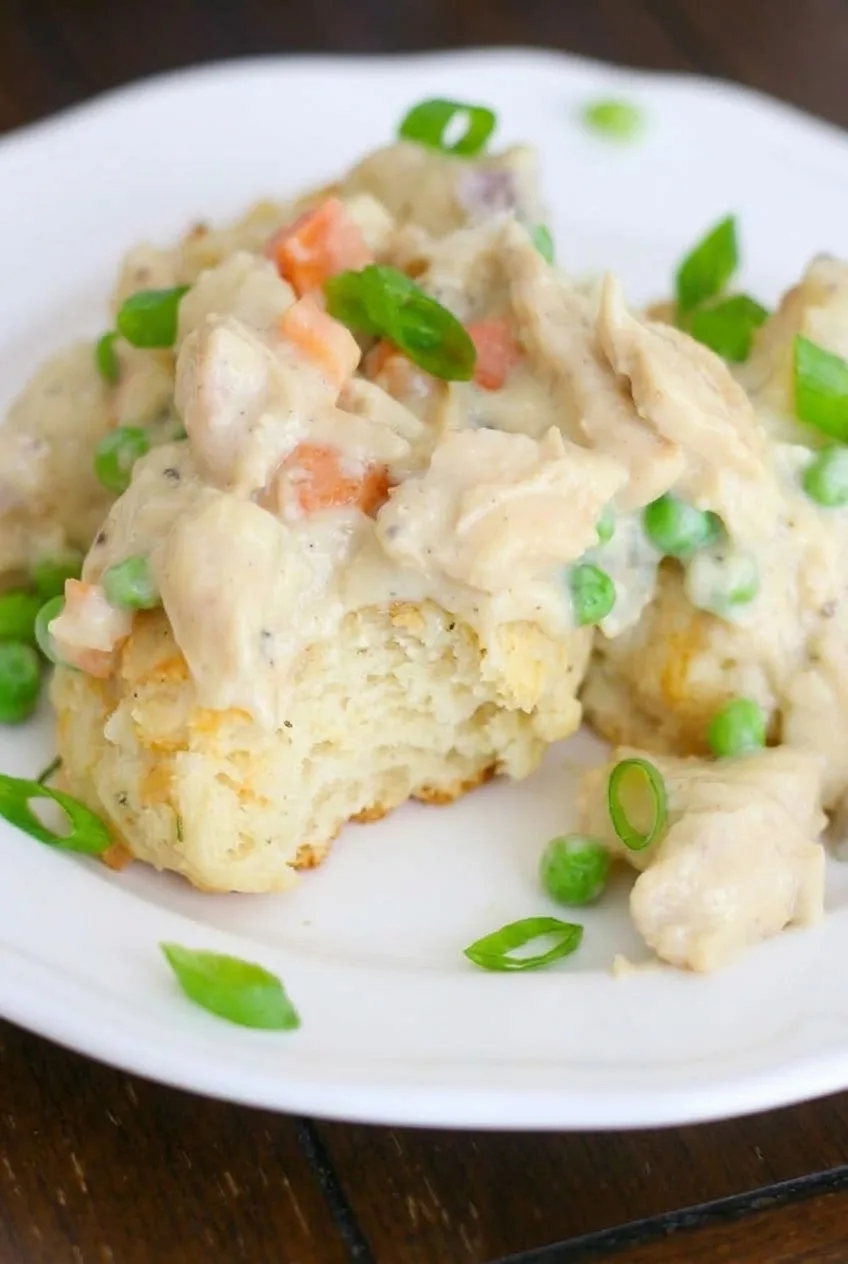
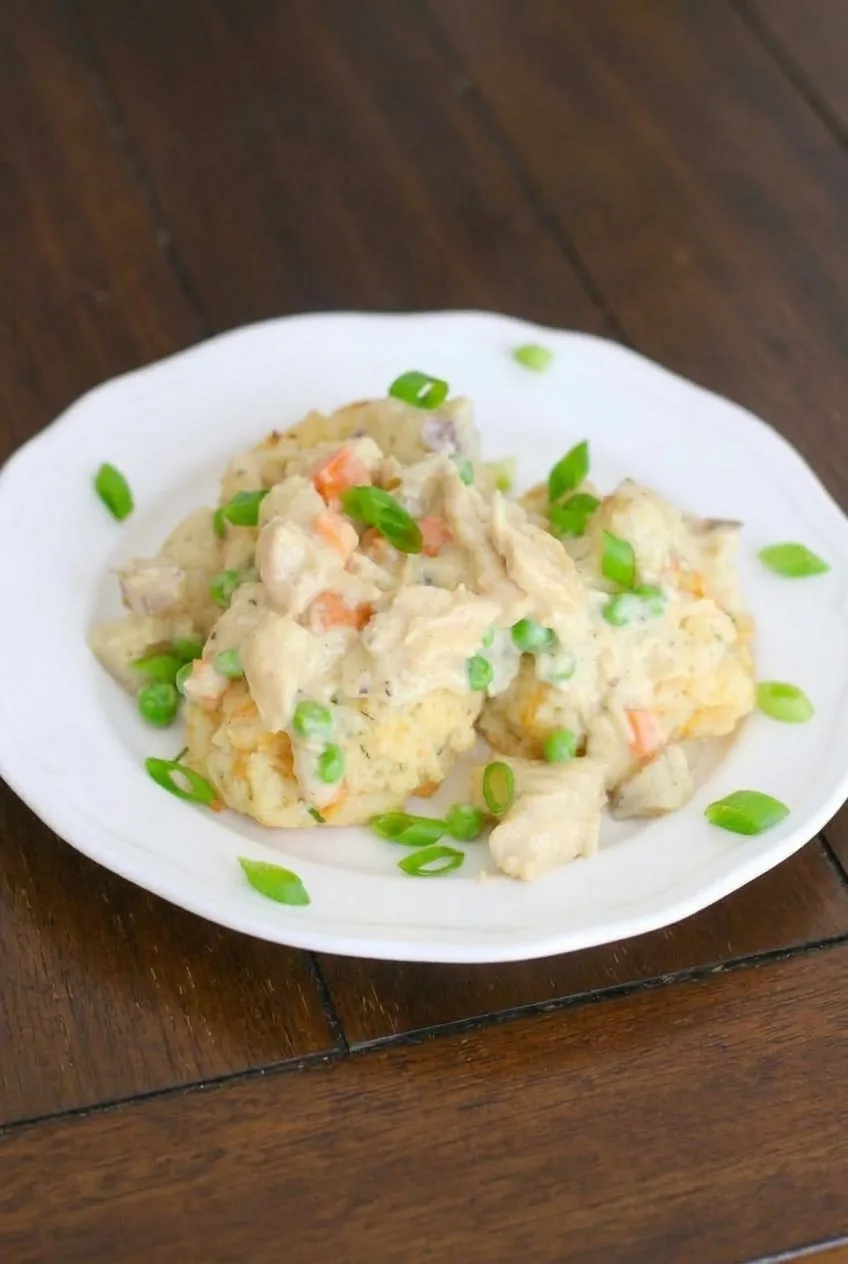
Creamy chicken pot pie filling goes over warm, split biscuits rather than under a pastry crust. The slow cooker makes the chicken and potatoes tender; baking the biscuits separately keeps their edges golden. Peas and carrots go in near the end so they stay distinct in the thick gravy. Spoon the filling onto individual plates just before serving, leaving some biscuit visible, and finish with sliced green onions.

Prep: 20 minutes | Cook: 6–7 hours on LOW or 3–4 hours on HIGH, plus 20–30 minutes to finish | Servings: 6 generous servings

Ingredients for Crock Pot Chicken Pot Pie

Close view of fluffy biscuit beneath creamy chicken, potatoes, peas, carrots, and green onions
  • 1 1/2 pounds boneless skinless chicken breasts, thawed (680g)
  • 1 pound Yukon Gold or other all-purpose potatoes, diced into 1/2-inch pieces (450g)
  • 1 small yellow onion, diced
  • 2 cans condensed cream of chicken soup (10.5 ounces each)
  • 1/2 cup milk
  • 1 teaspoon poultry seasoning
  • 1/2 teaspoon garlic powder
  • 1/4 teaspoon black pepper
  • 2 cups frozen peas and carrots (280g)
  • 1 package refrigerated biscuits (8 biscuits)
  • 2 green onions, thinly sliced

Optional, if the filling is thin: 1 tablespoon cornstarch mixed with 1 tablespoon cold water. Have salt available for seasoning after cooking; the condensed soup may provide enough.

How to Make Crock Pot Chicken Pot Pie

Complete plate of Crock Pot chicken pot pie over biscuits on a dark wooden table
  1. Load the slow cooker: Place the evenly diced potatoes and onion in a 6-quart slow cooker. Lay the whole chicken breasts on top, making sure the lid closes fully.
  2. Add the sauce: Whisk together the condensed soups, milk, poultry seasoning, garlic powder, and pepper. Pour over the chicken and potatoes. Hold back the frozen vegetables, and do not add broth.
  3. Cook until tender: Cover and cook on LOW for 6–7 hours or HIGH for 3–4 hours. Start checking near the beginning of the chosen window. The potatoes should pierce easily with a fork, and the thickest part of the chicken should reach 165°F (75°C). If the potatoes are still firm, keep cooking with the lid on.
  4. Finish the filling: Transfer the chicken to a cutting board, chop it into bite-size pieces, and return it to the cooker. Stir in the frozen peas and carrots. If the gravy looks too thin to coat the filling, stir in the optional cornstarch mixture now. Cover and cook on HIGH for 20–30 minutes, until the vegetables are hot throughout and any added slurry has thickened the gravy. Taste and add salt only if needed.
  5. Bake the biscuits: Near serving time, preheat the oven and bake the biscuits on a baking sheet according to the package directions, until golden and cooked through. Split them while warm.
  6. Plate and serve: Place one or two split biscuits on each plate. Spoon the filling over them, leaving some golden edges visible, and scatter the green onions on top. Serve promptly.

Why Bake the Biscuits Separately?

The Crock Pot cooks the filling, but biscuits baked under its lid would be soft rather than golden. Bake them near serving time and add the filling only when each plate is ready; biscuits soften as they sit under hot gravy.

How Thick Should the Filling Be?

The gravy should coat the chicken and potatoes and mound over the biscuits, not run across the plate like soup. The condensed soup may be thick enough without cornstarch. Use the optional slurry only if needed, giving it time to thicken during the final covered cook on HIGH. If the filling is too thick instead, stir in milk a tablespoon at a time.

Storing and Reheating

Let leftover filling cool, then refrigerate it in an airtight container for 3–4 days. Store the biscuits separately. Reheat the filling on the stovetop over medium-low heat, stirring, or microwave it in intervals until hot throughout. Add a small splash of milk if needed, warm the biscuits separately, and assemble just before serving.

Freeze cooled filling without the biscuits for up to 3 months. Thaw overnight in the refrigerator before reheating.

For another creamy slow-cooker dinner, try Crockpot Chicken and Stuffing.

Nutrition

Approximate nutrition per serving, based on 6 servings with 8 biscuits divided among them: 540 calories, 36g protein, 19g fat, and 55g carbohydrates. Approximate values per 100g of prepared food: 120 calories, 8g protein, 4g fat, and 12g carbohydrates. Values vary with the brands of soup and biscuits, the milk used, and the moisture retained during cooking.

Crock Pot Chicken Pot Pie

Tender chicken, potatoes, peas, and carrots simmer in a creamy slow-cooker gravy served over golden baked biscuits.
Course: Main Course
Cuisine: American
Prep: 20 min
Cook: 450 min
Total: 470 min
Servings: 6

Equipment

  • 6-quart slow cooker
  • Whisk
  • Cutting board
  • Baking sheet
  • Oven

Ingredients

Filling

  • 1 1/2 pounds boneless skinless chicken breasts, thawed (680 g)
  • 1 pound Yukon Gold or other all-purpose potatoes, diced into 1/2-inch pieces (450 g)
  • 1 small yellow onion, diced
  • 2 cans condensed cream of chicken soup (10.5 ounces each)
  • 1/2 cup milk
  • 1 teaspoon poultry seasoning
  • 1/2 teaspoon garlic powder
  • 1/4 teaspoon black pepper
  • 2 cups frozen peas and carrots (280 g)
  • Salt, as needed

To Serve

  • 1 package refrigerated biscuits (8 biscuits)
  • 2 green onions, thinly sliced

Optional Thickener

  • 1 tablespoon cornstarch mixed with 1 tablespoon cold water

Instructions

  1. Place the diced potatoes and onion in a 6-quart slow cooker. Lay the whole chicken breasts on top.
  2. Whisk together the condensed soups, milk, poultry seasoning, garlic powder, and black pepper. Pour the mixture over the chicken and potatoes; do not add broth or the frozen vegetables.
  3. Cover and cook on LOW for 6–7 hours or HIGH for 3–4 hours, checking near the beginning of the chosen cooking window. Cook until the potatoes pierce easily with a fork and the thickest part of the chicken reaches 165°F (75°C).
  4. Transfer the chicken to a cutting board, chop it into bite-size pieces, and return it to the slow cooker. Stir in the frozen peas and carrots. If the gravy is too thin, stir in the optional cornstarch mixture.
  5. Cover and cook on HIGH for 20–30 minutes, until the vegetables are hot throughout and the gravy has thickened if using the slurry. Taste and add salt if needed.
  6. Near serving time, bake the biscuits on a baking sheet according to the package directions until golden and cooked through. Split while warm.
  7. Place one or two split biscuits on each plate. Spoon the filling over them, leaving some biscuit edges visible, and top with sliced green onions. Serve promptly.

Tips

  • Dice the potatoes evenly into 1/2-inch pieces so they cook consistently.
  • Add the frozen peas and carrots near the end to keep them distinct in the filling.
  • Use the cornstarch slurry only if the gravy is too thin; allow time for it to thicken during the final covered cook.
  • If the filling is too thick, stir in milk a tablespoon at a time.
  • Bake the biscuits separately and assemble just before serving to keep their edges golden.

Notes

Refrigerate leftover filling in an airtight container for 3–4 days and store biscuits separately. Reheat the filling until hot throughout; add a splash of milk if needed. Freeze the filling without biscuits for up to 3 months and thaw overnight in the refrigerator before reheating.

Nutrition

Per Serving Calories: 540 kcal | Per Serving Protein: 36 g | Per Serving Fat: 19 g | Per Serving Carbohydrates: 55 g | Per 100g Calories: 120 kcal | Per 100g Protein: 8 g | Per 100g Fat: 4 g | Per 100g Carbohydrates: 12 g

Crock Pot Mexican Lasagna

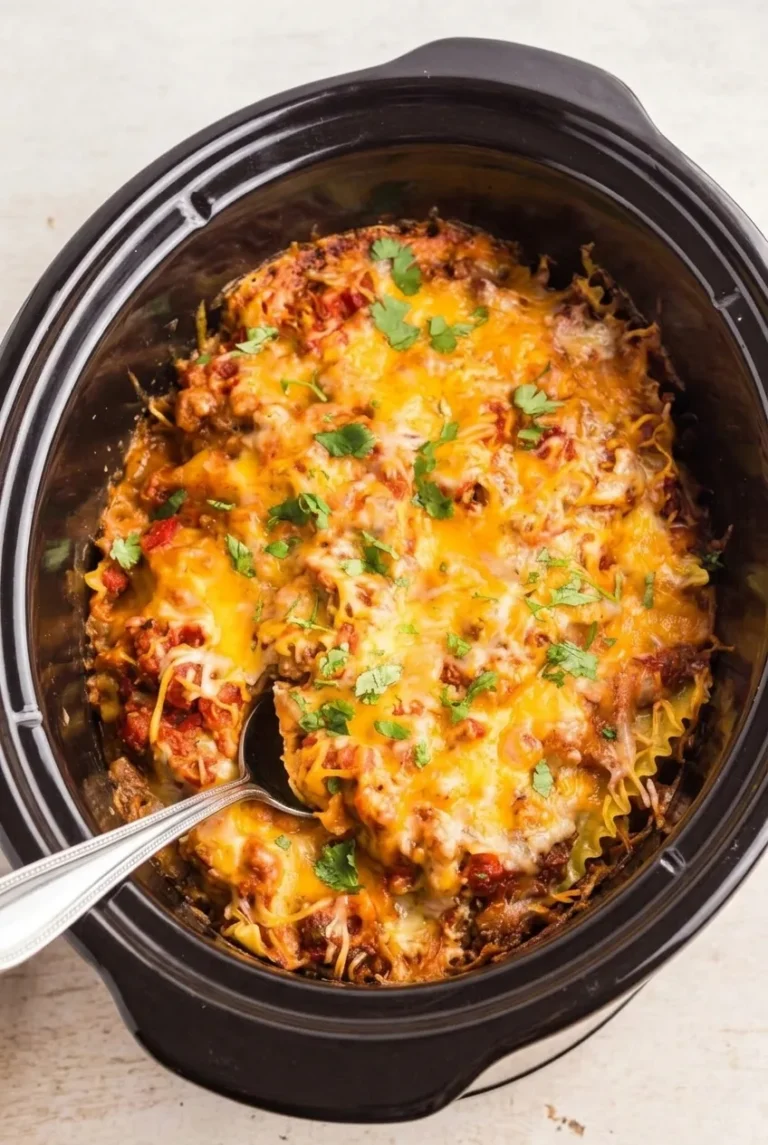
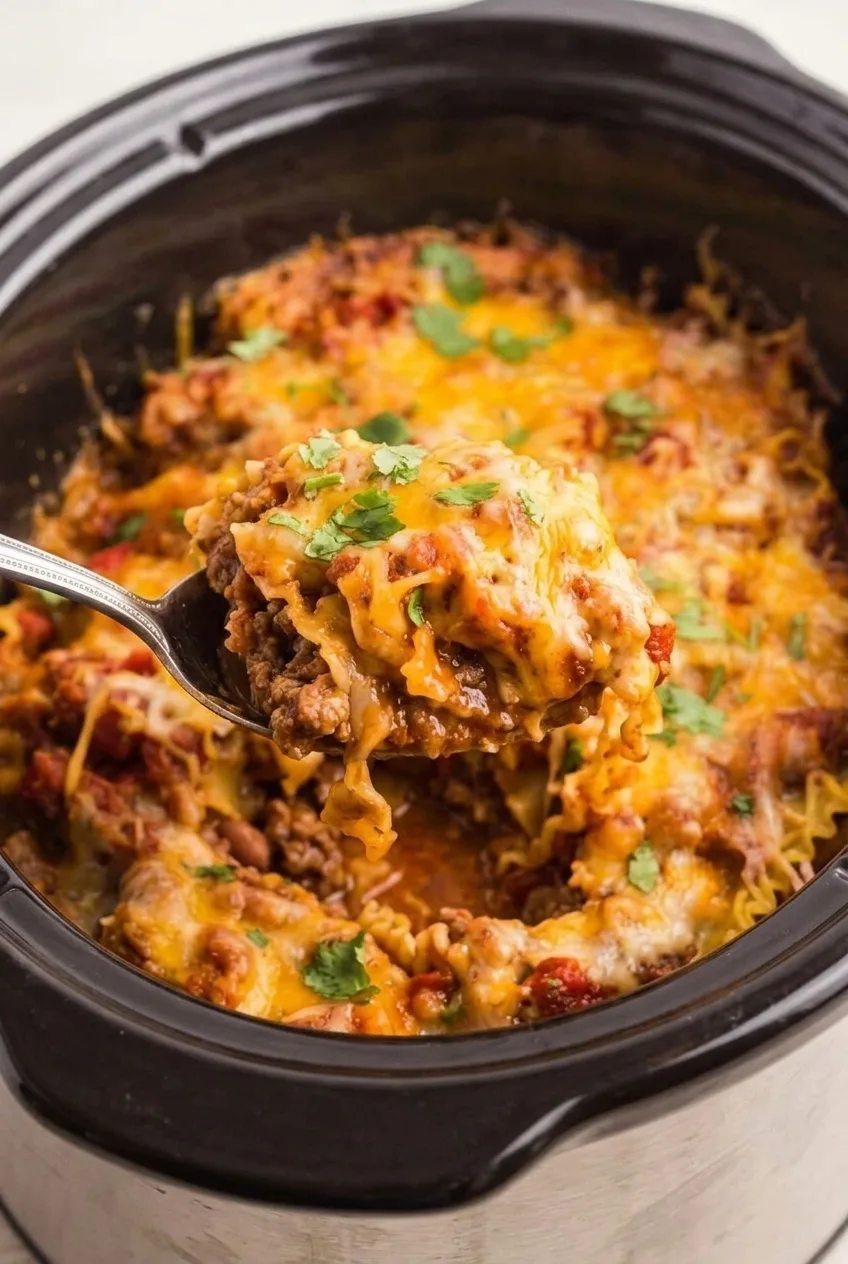
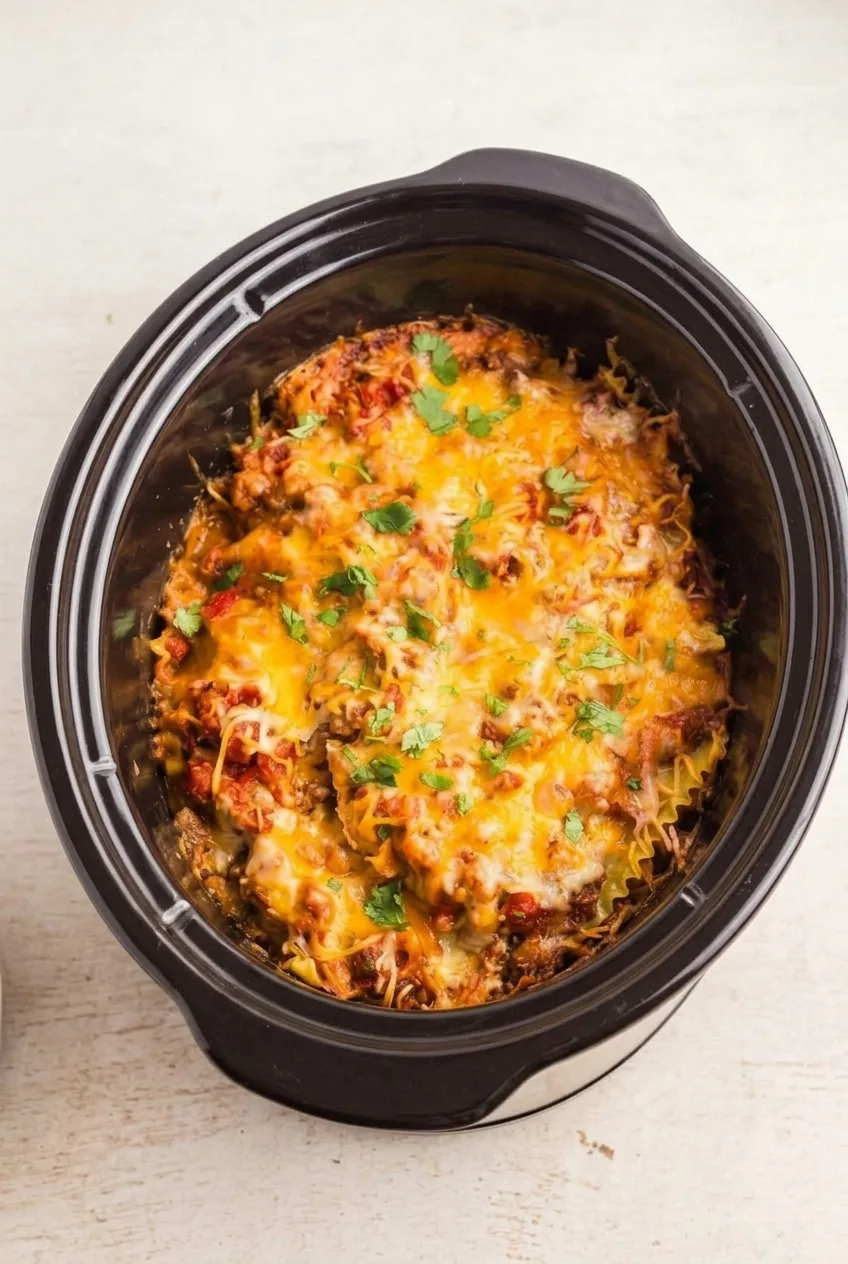
This Crock Pot Mexican lasagna uses oven-ready lasagna noodles, not tortillas. The noodles soften between layers of taco-seasoned beef, refried beans, red sauce, and melted cheese. Fresh cilantro finishes the casserole, which is served in saucy scoops straight from the oval slow cooker rather than neat squares.

Sauce contact is what keeps the noodles tender. Break the sheets to fit the insert, cover any exposed corners, and check the center before the edges dry out. The recipe makes 6 to 8 servings.

Ingredients for Crock Pot Mexican Lasagna

Close view of a saucy scoop showing ruffled lasagna noodles, beef-bean filling, and melted cheese
  • 1 lb ground beef (450g)
  • 1 medium yellow onion, diced (about 150g)
  • 1 packet taco seasoning, about 1 oz (28g)
  • 1 can refried beans, 15 to 16 oz (about 425g)
  • 2 cups thick red salsa (about 480g)
  • 1 cup red enchilada sauce (about 240g)
  • About 9 oven-ready lasagna noodles (about 225g), broken as needed for 3 layers
  • 2 1/2 cups shredded Mexican-style cheese blend (about 280g)
  • 1/4 cup chopped fresh cilantro
  • Cooking oil or nonstick spray, enough to lightly coat the insert

Use a 5- to 6-quart oval slow cooker. The number of noodles needed depends on the shape of the sheets and the insert; ruffled-edge oven-ready noodles work well if available.

How to Make Crock Pot Mexican Lasagna

Full oval slow cooker of Mexican lasagna with a scooped opening and cilantro on top
  1. Cook the filling: In a large skillet over medium heat, cook the beef and onion for 10 to 12 minutes, until the beef is fully browned and the onion is soft. Drain the fat so it does not make the casserole greasy. Stir in the taco seasoning and refried beans, and warm until combined.
  2. Prepare the sauce and cooker: Stir the salsa and enchilada sauce together. Lightly grease the slow-cooker insert, then spread 1/2 cup sauce across the bottom.
  3. Build three layers: Arrange about 3 noodles over the sauce, breaking them to follow the oval shape without stacking wide pieces. Add one-third of the beef-bean filling, 2/3 cup sauce, and 2/3 cup cheese. Repeat once. For the final layer, add the remaining noodles, filling, and another 2/3 cup sauce. Pour the remaining 1/2 cup sauce over the top, making sure exposed noodle corners are coated, then add all the remaining cheese.
  4. Slow-cook: Cover and cook on LOW for about 2 1/2 to 3 1/2 hours. Start checking at 2 1/2 hours. The lasagna is ready when a fork passes easily through an interior noodle, the center is hot, and the cheese has melted. Stop cooking before the edges dry out or burn.
  5. Rest and serve: Turn off the cooker and let the lasagna rest uncovered for about 10 minutes so the layers settle slightly. Scatter the cilantro over the top and serve rustic scoops directly from the insert.

How to Keep the Noodles Tender

Use oven-ready noodles for this amount of sauce and the stated cook window. Break sheets to fit around the oval insert with modest overlap; several stacked pieces in one spot may not soften evenly. Every noodle layer needs sauce beneath or over it, especially at the corners. Ordinary dry lasagna noodles are not a direct substitute without changing the liquid and method.

How to Tell When the Lasagna Is Done

Test an interior noodle rather than judging by the melted cheese alone. The sauce may gently bubble at the edges, but covered slow cooking will not produce a browned oven-style crust. A hot-running cooker may finish near the early end of the range, so let noodle tenderness and a hot center guide you.

Drain the beef and use a reasonably thick salsa to keep the filling from becoming greasy or watery. Use all 3 cups of combined sauce to soften the noodles, but do not add water by default.

Serving and Variations

Offer sour cream, avocado, or sliced jalapeños with individual portions. A simple green salad works alongside the lasagna.

Ground turkey can replace the beef; cook it through and drain any released liquid before layering. Tortillas make a different casserole, so do not assume they will need the same sauce quantity or cook time. For a chicken-based slow-cooker dinner, try this crockpot enchilada casserole. For another ground-beef dinner, see this crockpot hobo casserole.

Storage and Reheating

Transfer cooled leftovers to an airtight container and refrigerate for up to 3 days. Reheat individual portions in the microwave until hot throughout. Handle them gently, as the noodle layers soften while stored.

The beef-bean filling can be cooked ahead and refrigerated separately before assembly. Portions can also be frozen for up to 3 months, though the noodles may be softer after thawing. Thaw in the refrigerator and reheat gently until hot.

Nutrition

Approximate nutrition per serving, based on 8 servings: 450 calories, 25g protein, 22g fat, and 39g carbohydrates. Per 100g: approximately 165 calories, 9g protein, 8g fat, and 15g carbohydrates. Values vary with the beef, salsa, beans, cheese, and portion size; optional toppings are not included.

Crock Pot Mexican Lasagna

Oven-ready lasagna noodles layer with taco-seasoned beef, refried beans, red sauce, and cheese in a slow cooker.
Course: Main Course
Cuisine: Mexican
Prep: 25 min
Cook: 180 min
Total: 215 min
Servings: 8 Calories: 450 kcal

Equipment

  • 5- to 6-quart oval slow cooker
  • Large skillet

Ingredients

For the Lasagna

  • 1 lb ground beef (450g)
  • 1 medium yellow onion, diced (about 150g)
  • 1 packet taco seasoning, about 1 oz (28g)
  • 1 can refried beans, 15 to 16 oz (about 425g)
  • 2 cups thick red salsa (about 480g)
  • 1 cup red enchilada sauce (about 240g)
  • About 9 oven-ready lasagna noodles (about 225g), broken as needed for 3 layers
  • 2 1/2 cups shredded Mexican-style cheese blend (about 280g)
  • 1/4 cup chopped fresh cilantro
  • Cooking oil or nonstick spray, enough to lightly coat the insert

Instructions

  1. Cook the beef and onion in a large skillet over medium heat for 10 to 12 minutes, until the beef is fully browned and the onion is soft.
  2. Drain the fat. Stir in the taco seasoning and refried beans, and warm until combined.
  3. Stir the salsa and enchilada sauce together.
  4. Lightly grease the slow-cooker insert and spread 1/2 cup of the sauce across the bottom.
  5. Arrange about one-third of the noodles over the sauce, breaking them to fit the oval insert without stacking wide pieces.
  6. Add one-third of the beef-bean filling, 2/3 cup sauce, and 2/3 cup cheese.
  7. Repeat the noodle, filling, sauce, and cheese layers once.
  8. Add the remaining noodles and filling, then pour over 2/3 cup sauce. Add the remaining 1/2 cup sauce, coating any exposed noodle corners, and top with the remaining cheese.
  9. Cover and cook on LOW for about 2 1/2 to 3 1/2 hours. Start checking at 2 1/2 hours; the lasagna is ready when an interior noodle is tender, the center is hot, and the cheese has melted.
  10. Turn off the cooker and rest uncovered for about 10 minutes. Scatter the cilantro over the top and serve in scoops.

Tips

  • Use oven-ready noodles; ordinary dry lasagna noodles are not a direct substitute.
  • Break the noodles to fit the oval insert, and avoid stacking several wide pieces in one spot.
  • Make sure every noodle layer has sauce beneath or over it, especially at the corners.
  • Use thick salsa and drain the beef to help prevent a watery or greasy casserole.
  • Check noodle tenderness and the temperature of the center rather than relying on melted cheese alone.

Variations

  • Ground Turkey Mexican Lasagna: Replace the ground beef with ground turkey; cook it through and drain any released liquid before layering.

Notes

Refrigerate cooled leftovers in an airtight container for up to 3 days and reheat portions until hot throughout. Freeze portions for up to 3 months; thaw in the refrigerator and reheat gently. Noodles may soften after storage.

Nutrition

Calories: 450 kcal | Protein: 25 g | Fat: 22 g | Carbohydrates: 39 g