Author

Julia

Browsing

Cranberry Glazed Chicken

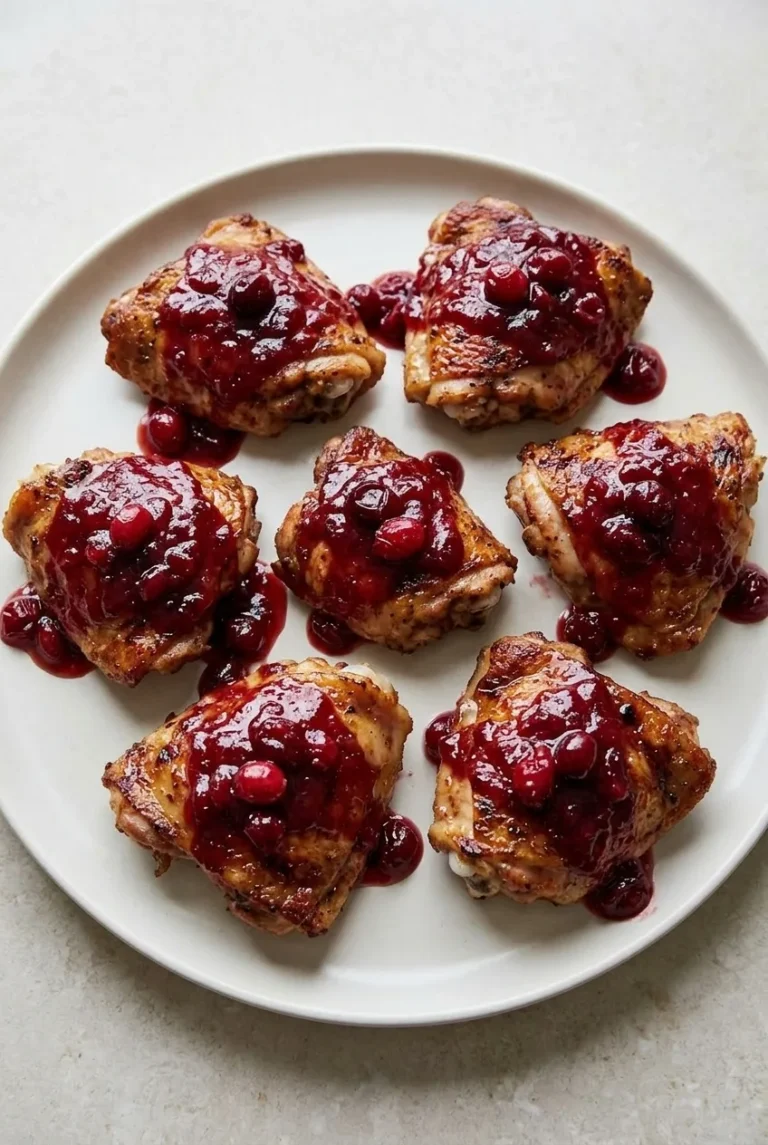
These bone-in chicken thighs are browned in a skillet, then baked with a sweet-tart glaze made from whole cranberries, brown sugar, vinegar, mustard, and garlic. The finished chicken has browned skin beneath a glossy red coating with some berries still visible.

Chicken juices can thin a glaze as it bakes. Reserving some sauce before it touches the chicken gives you a thicker portion to brush on near the end—or at serving if the thighs are already done. Start checking the chicken early, since thigh size affects the baking time.

Ingredients for Cranberry Glazed Chicken
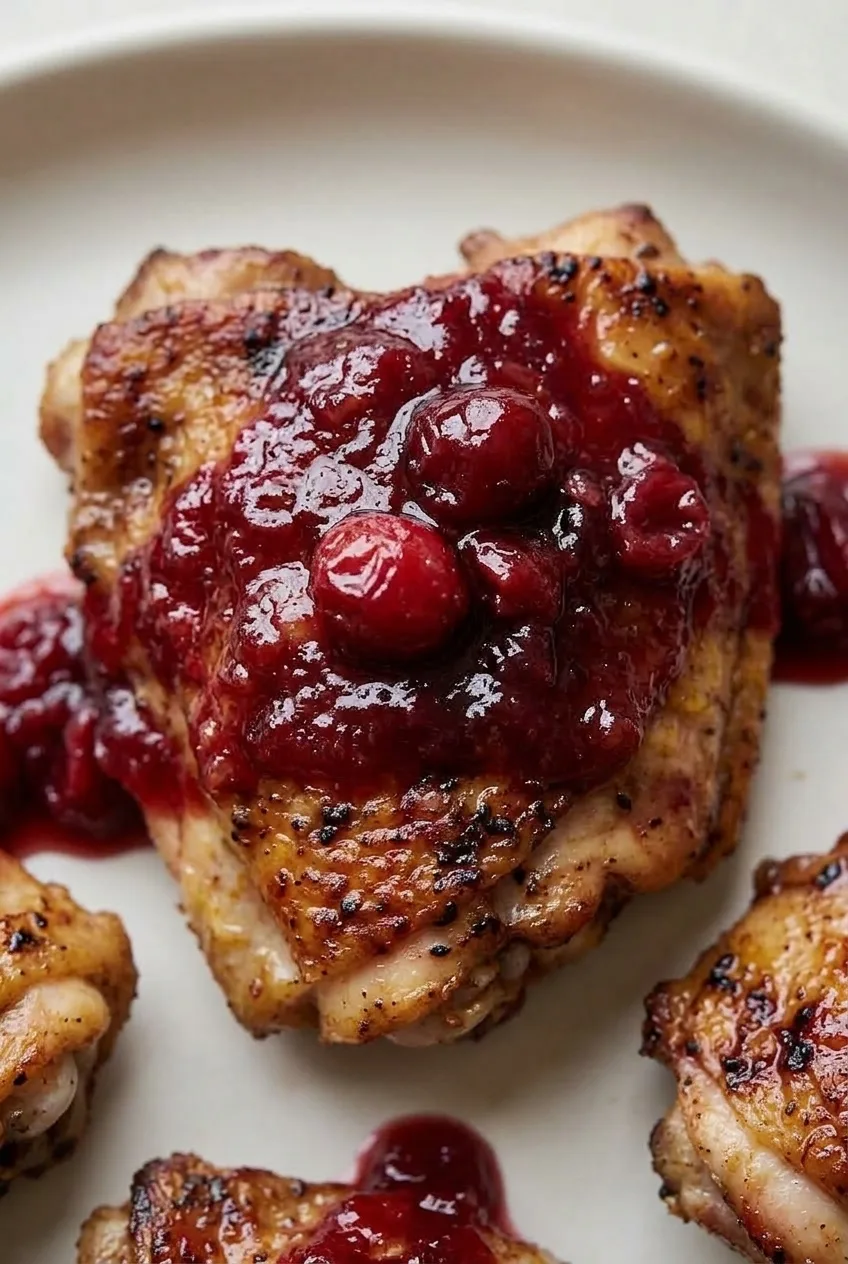
Close view of browned chicken skin beneath glossy cranberry glaze and partly burst berries
  • 6 bone-in, skin-on chicken thighs, about 2 1/2 to 3 lb (1,150 to 1,350g)
  • 1 teaspoon kosher salt, or to taste
  • 1/2 teaspoon black pepper
  • 1 1/2 cups fresh or frozen whole cranberries (150g)
  • 1/3 cup packed brown sugar (70g)
  • 1 tablespoon apple cider vinegar
  • 1 tablespoon Dijon mustard
  • 2 garlic cloves, minced
  • 1/4 cup water
  • 1 tablespoon olive oil

Optional: Add a few sprigs of fresh thyme to the baking dish. Frozen cranberries can go into the saucepan without thawing, though they may need a little longer to simmer. Dried cranberries and jellied cranberry sauce are not direct substitutes for whole berries.

How to Make Cranberry Glazed Chicken
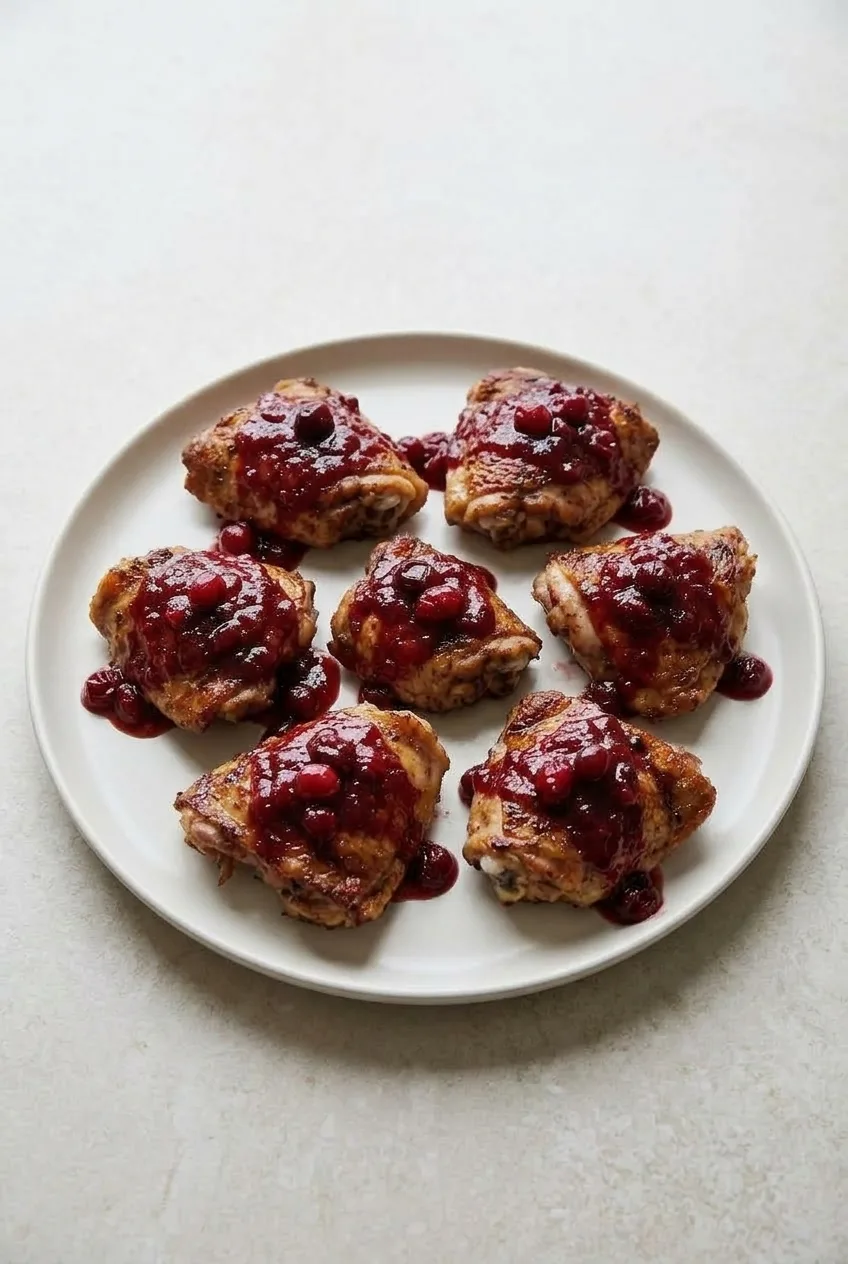
Full platter of cranberry glazed chicken thighs on a pale stone surface
  1. Preheat and season: Heat the oven to 375°F (190°C). Pat the thighs dry and season with the salt and pepper. Dry skin browns more readily.
  2. Simmer the sauce: Combine the cranberries, brown sugar, vinegar, mustard, garlic, and water in a small saucepan. Bring to a simmer over medium heat, then reduce to medium-low. Cook for 8 to 12 minutes, until most berries have burst and the sauce lightly coats a spoon but remains spoonable. Taste and add a little more brown sugar if it is too tart. Transfer about one-third of the sauce to a clean bowl; keep it away from the chicken and any utensils used on the chicken.
  3. Sear the thighs: Heat the olive oil in a 12-inch skillet over medium-high heat. Sear the thighs skin-side down until golden, then turn briefly to brown the other side, about 8 to 12 minutes total; allow more time if working in batches. Leave space between pieces so they brown instead of steaming. Transfer skin-side up to a 9-by-13-inch baking dish, or a larger dish if they overlap.
  4. Glaze and bake: Spoon the sauce left in the saucepan around and lightly over the thighs. Do not add liquid to the dish; the chicken will release juices. Bake uncovered, skin-side up, in the 375°F oven. Start checking the thickest thigh after 30 minutes. Baking typically takes about 35 to 40 minutes, but large thighs may need longer.
  5. Finish and rest: If the chicken is not yet done and appears to need another 8 to 10 minutes, brush it with the clean reserved sauce and continue baking. If it is already done, brush on the reserved sauce at serving instead. Check each thigh in its thickest part without touching bone; each must reach at least 165°F (75°C). Rest for about 5 minutes before serving.

How to Keep the Cranberry Glaze Glossy

Simmer the cranberry mixture until it coats a spoon before adding it to the baking dish. Juices released by the chicken will thin the sauce in the dish, but the separately reserved portion stays thick enough for a finishing coat. Leave excess watery liquid behind rather than pouring it over the plated thighs.

Chicken Thigh Size and Doneness

The baking window applies to seared, bone-in thighs, not breasts or mixed chicken pieces. Check at 30 minutes, then continue baking as needed until every thigh reaches 165°F. Insert the thermometer into the thickest part without touching bone; the color of the glaze cannot tell you whether the chicken is done.

Serving and Leftovers

Serve with mashed potatoes or rice to catch the cranberry sauce. Roasted vegetables or a crisp green salad make good accompaniments. For a different oven-baked dinner, try No Peek Chicken Casserole with Creamy Rice.

As general food-safety guidance, refrigerate leftovers promptly in a covered container and use within 3 to 4 days. Reheat gently with a spoonful of sauce until the chicken reaches 165°F. The skin and glaze may be softer than when freshly cooked.

Nutrition

Approximate per serving: 390 calories, 25g protein, 26g fat, and 15g carbohydrates. One serving is one thigh with about one-sixth of the glaze. Approximate per 100g of edible chicken and sauce: 260 calories, 17g protein, 17g fat, and 10g carbohydrates. Values vary with thigh size, edible meat yield, and how much sauce is served.

Cranberry Glazed Chicken

Bone-in chicken thighs are seared and baked with a sweet-tart glaze of whole cranberries, brown sugar, vinegar, mustard, and garlic.
Course: Main Course
Cuisine: American
Prep: 10 min
Cook: 65 min
Total: 75 min
Servings: 6 Calories: 390 kcal

Equipment

  • Small saucepan
  • 12-inch skillet
  • 9-by-13-inch baking dish
  • Meat thermometer

Ingredients

For the Chicken

  • 6 bone-in, skin-on chicken thighs, about 2 1/2 to 3 lb (1,150 to 1,350 g)
  • 1 teaspoon kosher salt, or to taste
  • 1/2 teaspoon black pepper
  • 1 tablespoon olive oil

For the Cranberry Glaze

  • 1 1/2 cups fresh or frozen whole cranberries (150 g)
  • 1/3 cup packed brown sugar (70 g)
  • 1 tablespoon apple cider vinegar
  • 1 tablespoon Dijon mustard
  • 2 garlic cloves, minced
  • 1/4 cup water

Optional

  • A few sprigs of fresh thyme

Instructions

  1. Preheat the oven to 375°F (190°C). Pat the chicken thighs dry and season with the salt and pepper.
  2. Combine the cranberries, brown sugar, vinegar, mustard, garlic, and water in a small saucepan. Bring to a simmer over medium heat, then reduce the heat to medium-low and cook for 8 to 12 minutes, until most berries have burst and the sauce lightly coats a spoon.
  3. Taste the sauce and add a little more brown sugar if it is too tart. Transfer about one-third of the sauce to a clean bowl and keep it separate from the chicken.
  4. Heat the olive oil in a 12-inch skillet over medium-high heat. Sear the thighs skin-side down until golden, then turn briefly to brown the other side, about 8 to 12 minutes total. Work in batches if needed to leave space between the pieces.
  5. Transfer the thighs skin-side up to a 9-by-13-inch baking dish, or a larger dish if needed. Spoon the sauce remaining in the saucepan around and lightly over the chicken. Add the optional thyme if using.
  6. Bake uncovered at 375°F (190°C), skin-side up. Start checking the thickest thigh after 30 minutes; baking typically takes 35 to 40 minutes, with larger thighs taking longer.
  7. If the chicken needs another 8 to 10 minutes, brush it with the clean reserved sauce and continue baking. If it is already done, brush on the reserved sauce just before serving.
  8. Check each thigh in its thickest part without touching the bone; each must reach at least 165°F (75°C). Rest for about 5 minutes before serving, and leave excess watery liquid in the baking dish.

Tips

  • Pat the chicken skin dry before seasoning to help it brown.
  • Avoid crowding the skillet so the chicken sears instead of steaming.
  • Reserve some glaze before it touches the chicken for a thicker finishing coat.
  • Frozen cranberries can be simmered without thawing, but may need a little longer.
  • Start checking the chicken at 30 minutes because thigh size affects baking time.
Notes

Refrigerate leftovers promptly in a covered container and use within 3 to 4 days. Reheat gently with a spoonful of sauce until the chicken reaches 165°F (75°C).

Nutrition

Calories: 390 kcal | Protein: 25 g | Fat: 26 g | Carbohydrates: 15 g

Brown Sugar Glazed Ham

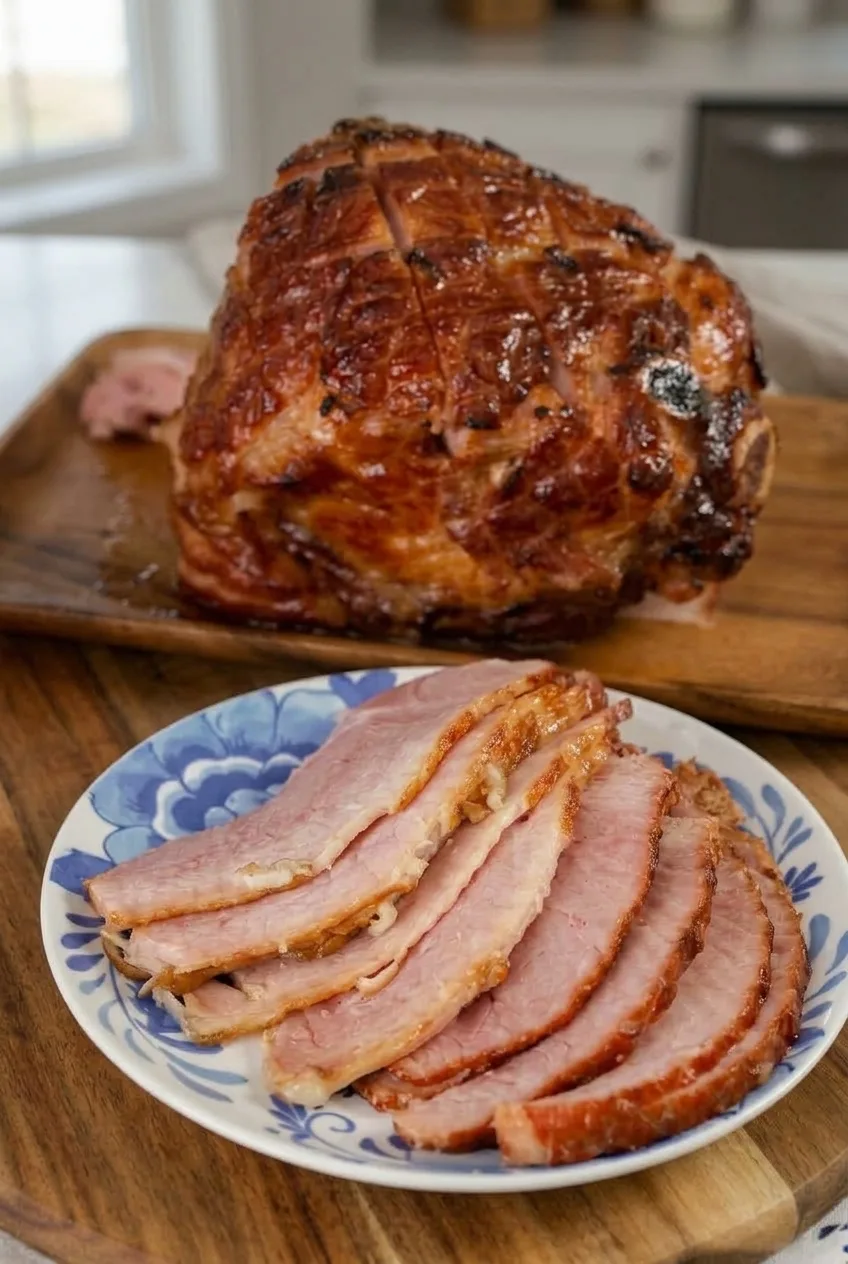
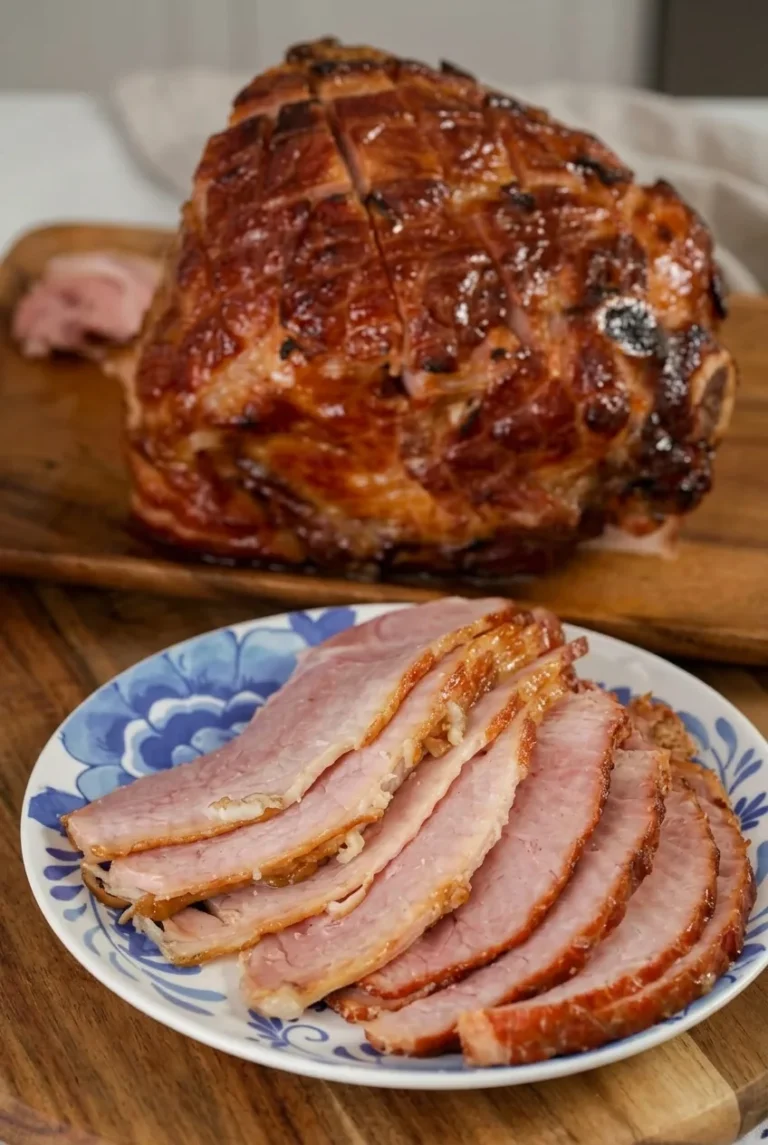
This brown sugar glazed ham starts as a fully cooked, unsliced bone-in ham with a fat cap that can be scored into diamonds. Warming it under foil helps keep the slices moist; brushing on the pineapple-Dijon glaze near the end gives the whole ham a glossy, amber-brown finish without leaving the sugar in the oven long enough to burn.

Check the package before you begin. Its reheating directions and a thermometer matter more than a fixed cooking time, especially for a ham this size.

Serves: 12–16. Prep: 15–20 minutes. Cook: Approximately 2–3 hours, depending on the ham and its package directions. Rest: 15 minutes.

Whole scored glazed ham on a board behind a full plate of thin carved slices

Ingredients for Brown Sugar Glazed Ham

  • 1 fully cooked, unsliced bone-in ham with a scoreable fat cap, 8–10 pounds
  • 1 cup packed light brown sugar (200g)
  • 1/3 cup pineapple juice
  • 2 tablespoons Dijon mustard
  • 2 tablespoons honey
  • 1 cup water, for the roasting pan
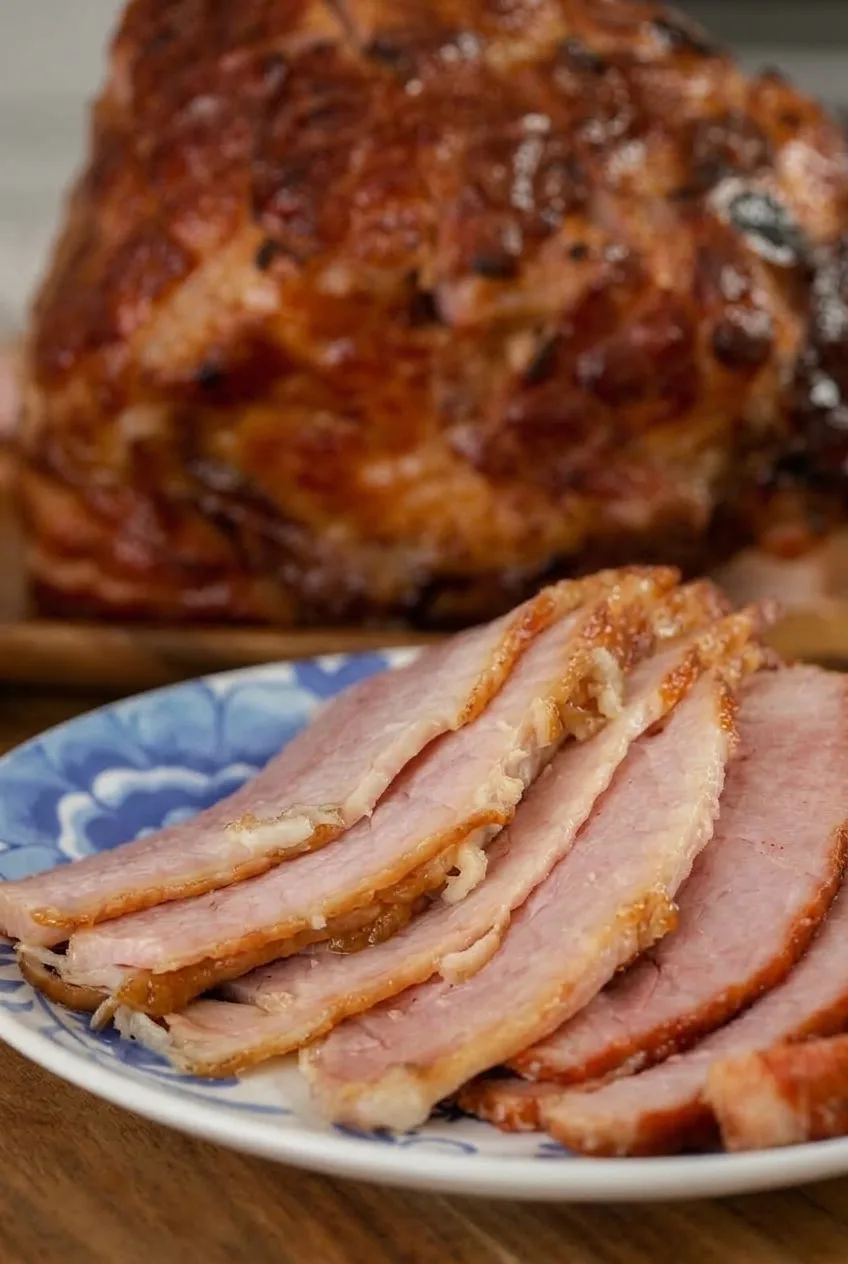
Close view of moist pink ham slices with glossy caramelized edges and scored glazed ham behind them

Choosing and Scoring the Ham

Look for a ham labeled fully cooked, and keep its reheating directions. This recipe is not for a ham labeled “cook before eating.” Choose an unsliced ham with enough surface fat to score; a ham without a usable fat cap will not develop the same diamond pattern.

Remove the packaging and any plastic bone guard. If the ham has skin, trim it away as needed while leaving a thin fat cap. Cut shallow diagonal lines through the fat in both directions to form diamonds. Do not cut deeply into the pink meat.

How to Bake Brown Sugar Glazed Ham

  1. Preheat and cover: Heat the oven to 325°F (165°C). Set the scored ham in a large roasting pan, cut-side down if it has a flat cut face. Pour the water into the pan and cover the ham tightly with foil.
  2. Warm the ham: Bake according to its package directions. Begin checking the thickest part after about 1 hour 30 minutes, or sooner if the package suggests a shorter time. Keep the thermometer tip away from the bone. Plan on roughly 2–3 hours of cooking overall, but move to glazing when the center is about 15–20°F below the package’s final reheating target.
  3. Simmer the glaze: Near the end of the covered bake, combine the brown sugar, pineapple juice, Dijon, and honey in a small saucepan. Simmer over medium-low heat for 5–8 minutes, stirring, until the sugar dissolves and the glaze lightly coats a spoon. It should be syrupy but still brushable.
  4. Glaze and finish: Uncover the ham and blot excess surface moisture if needed. Brush the glaze over the top and into the score lines. Increase the oven to 425°F (220°C), then bake the ham uncovered for about 10–20 minutes. If the first coat sets, brush on a second thin coat. Watch closely and remove the ham when the glaze is glossy and amber-brown and the thickest part reaches the package’s reheating target. Do not leave it in longer just for darker color.
  5. Rest and carve: Let the ham rest for 15 minutes. Carve thin slices from around the bone and overlap them on a plate, with the remaining scored ham visible beside them.

When Is the Ham Ready?

The covered bake does most of the warming; the short, hotter finish caramelizes the glaze. If the package specifies 140°F (60°C) as the reheating target, check for that temperature in the thickest part without touching bone. Follow a different target if your ham’s package gives one.

If the glaze slides off, the ham may be too wet or the glaze too thin. Blot excess surface moisture before brushing, and simmer the glaze until it clings to a spoon. At 425°F, remove the ham before broad blackened patches develop.

Variations and Serving

Orange juice can replace the pineapple juice, and dark brown sugar can replace light brown sugar for a deeper molasses flavor. A fully cooked spiral-cut ham is another option, but follow its package timing; it will not have the same scored whole exterior or carving presentation. For a different sweet glaze, try maple glazed ham.

Serve the thin slices beside the remaining whole ham with mashed potatoes, scalloped potatoes, or green bean casserole.

Make-Ahead Glaze and Leftovers

Make the glaze up to 5 days ahead and refrigerate it. Warm it gently until brushable before using. Refrigerate leftover ham in an airtight container for up to 5 days.

Nutrition

Approximate per serving, based on 14 servings: 330 calories, 32g protein, 12g fat, and 18g carbohydrates. Approximate per 100g: 165 calories, 16g protein, 6g fat, and 9g carbohydrates. Values vary with the ham’s edible yield, fat content, portion size, and amount of glaze eaten.

Brown Sugar Glazed Ham

A fully cooked bone-in ham is warmed under foil, then finished with a glossy pineapple-Dijon brown sugar glaze.
Course: Main Course
Cuisine: American
Prep: 20 min
Cook: 180 min
Total: 215 min
Servings: 14 Calories: 330 kcal per serving; 165 kcal per 100 g

Equipment

  • Oven
  • Roasting pan
  • Aluminum foil
  • Meat thermometer
  • Small saucepan
  • Pastry brush
  • Sharp knife

Ingredients

For the Ham

  • 1 fully cooked, unsliced bone-in ham with a scoreable fat cap, 8–10 pounds
  • 1 cup water, for the roasting pan

For the Glaze

  • 1 cup packed light brown sugar (200 g)
  • 1/3 cup pineapple juice
  • 2 tablespoons Dijon mustard
  • 2 tablespoons honey

Instructions

  1. Preheat the oven to 325°F (165°C).
  2. Remove the ham packaging and any plastic bone guard. If the ham has skin, trim it as needed while leaving a thin fat cap.
  3. Score shallow diagonal lines through the fat in both directions to form diamonds, taking care not to cut deeply into the meat.
  4. Place the ham in a large roasting pan, cut-side down if it has a flat cut face. Add the water and cover the ham tightly with foil.
  5. Bake according to the package directions. Begin checking the thickest part after about 1 hour 30 minutes, or sooner if the package recommends, keeping the thermometer tip away from the bone.
  6. When the center is about 15–20°F below the package’s final reheating target, combine the brown sugar, pineapple juice, Dijon mustard, and honey in a small saucepan.
  7. Simmer the glaze over medium-low heat for 5–8 minutes, stirring until the sugar dissolves and the glaze lightly coats a spoon.
  8. Uncover the ham and blot excess surface moisture if needed. Brush the glaze over the ham and into the score lines.
  9. Increase the oven to 425°F (220°C) and bake uncovered for about 10–20 minutes. If the first coat sets, brush on a second thin coat.
  10. Remove the ham when the glaze is glossy and amber-brown and the thickest part reaches the package’s reheating target. Watch closely to prevent burning.
  11. Rest the ham for 15 minutes, then carve thin slices from around the bone.

Tips

  • Follow the ham package’s reheating directions and temperature target; do not use this recipe for ham labeled “cook before eating.”
  • Keep the thermometer tip away from the bone for an accurate reading.
  • Score only the fat cap, not deeply into the meat.
  • Blot excess surface moisture so the glaze clings to the ham.
  • Remove the ham once it reaches its reheating target rather than baking longer for a darker glaze.

Variations

  • Orange Glazed Ham: Replace the pineapple juice with orange juice.
  • Dark Brown Sugar Glazed Ham: Replace the light brown sugar with dark brown sugar for a deeper molasses flavor.
  • Spiral-Cut Ham: Use a fully cooked spiral-cut ham, following its package timing; it will have a different exterior and carving presentation.

Notes

Make the glaze up to 5 days ahead and refrigerate; warm gently until brushable before using. Refrigerate leftover ham in an airtight container for up to 5 days. If the package specifies 140°F (60°C), check for that temperature in the thickest part without touching bone.

Nutrition

Calories: 330 kcal per serving; 165 kcal per 100 g | Protein: 32 g per serving; 16 g per 100 g | Fat: 12 g per serving; 6 g per 100 g | Carbohydrates: 18 g per serving; 9 g per 100 g

Maple Glazed Ham

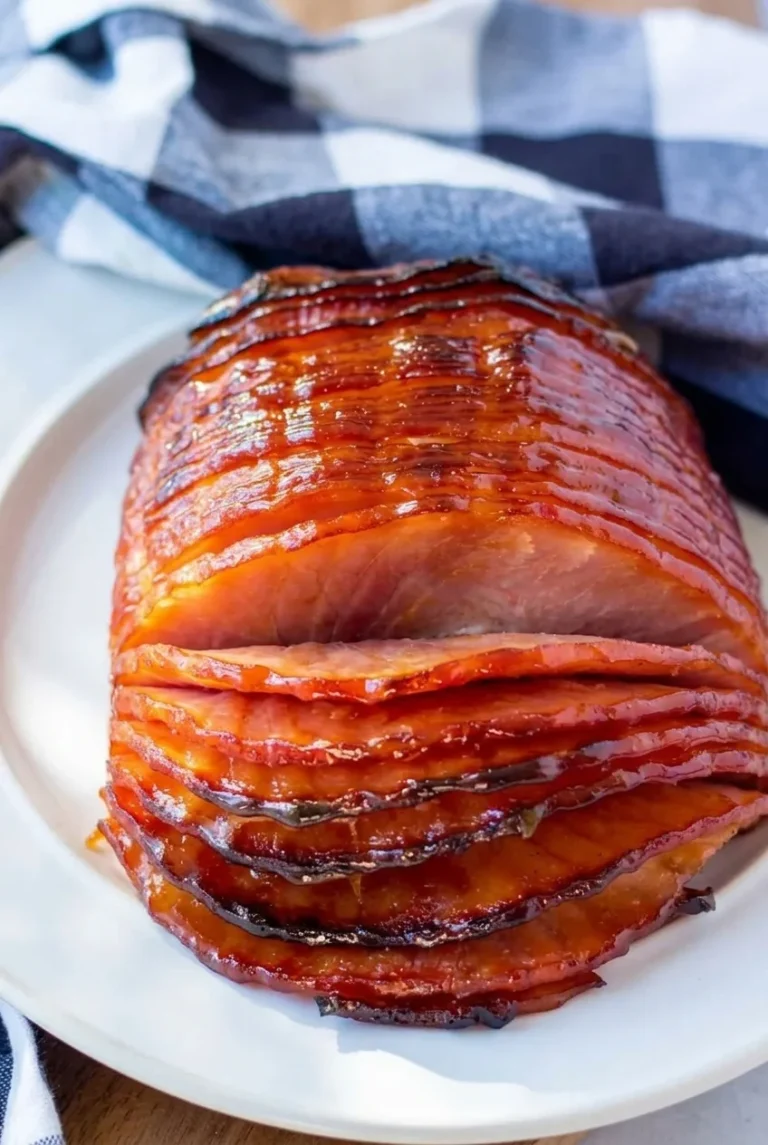
Spiral-sliced ham is easy to serve, but its exposed slices can dry out during reheating. Keep this fully cooked ham covered in a low oven until the center is nearly warm, then brush on two coats of maple-mustard glaze for a brief, hotter finish. The ham stays whole, with a glossy amber-brown surface, lightly caramelized edges, and a few attached slices fanned forward for serving.

Ingredients for Maple Glazed Ham

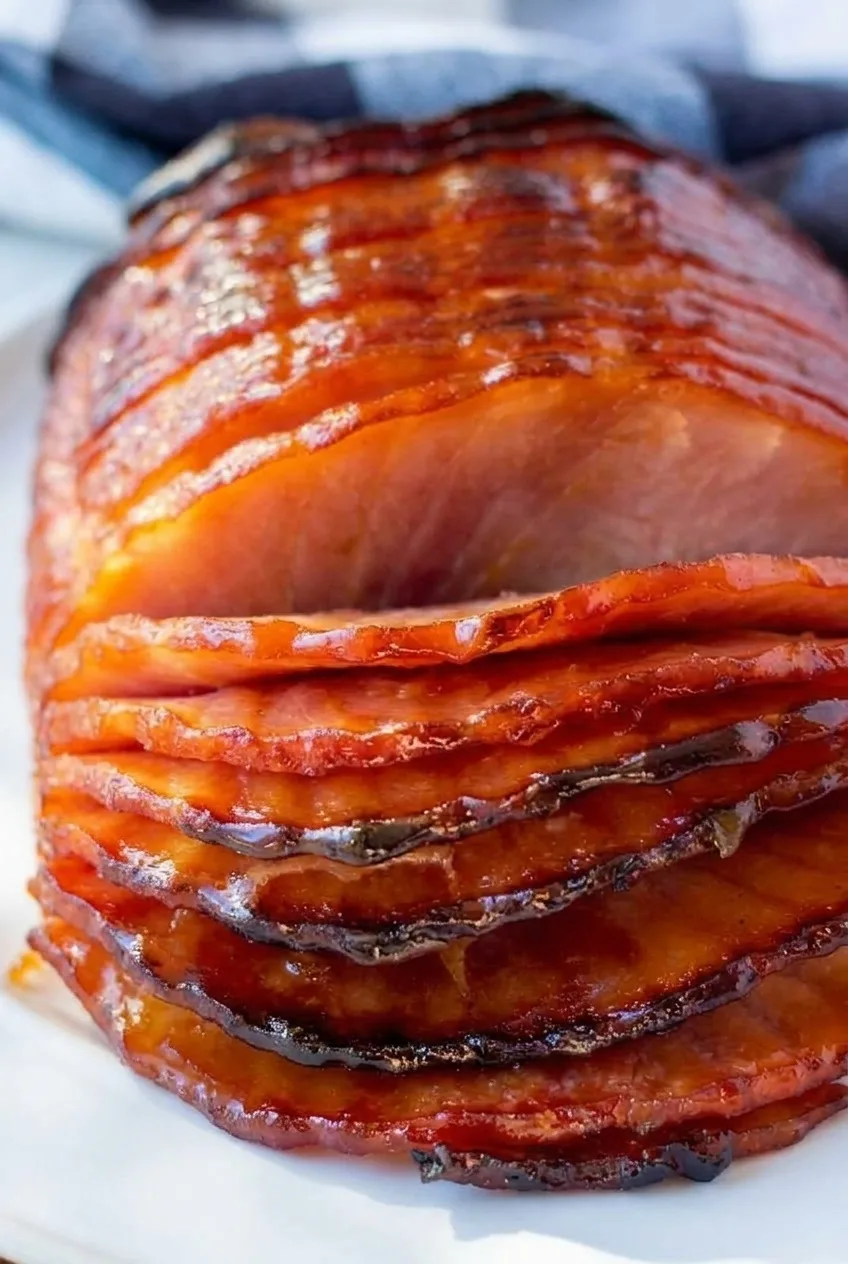
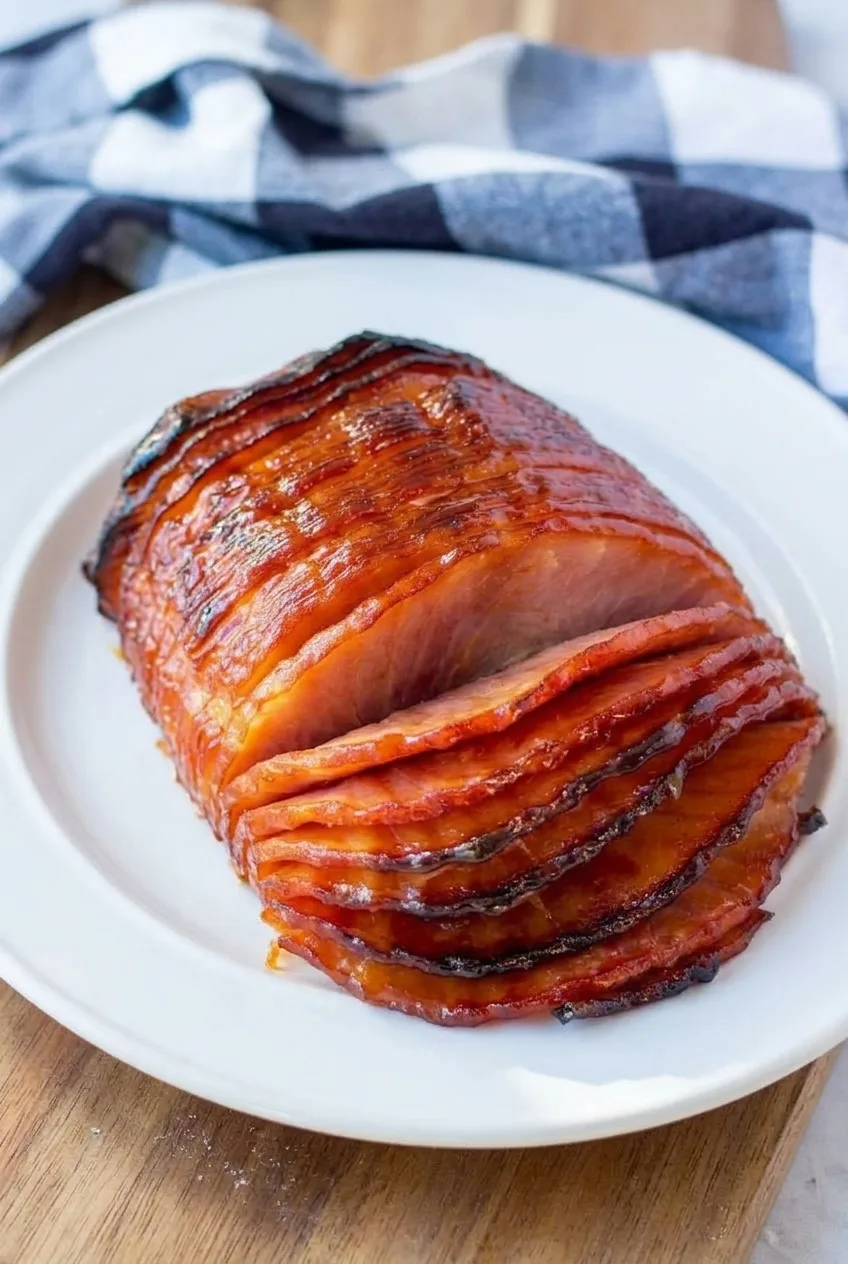
Close view of moist, overlapping spiral ham slices coated in amber glaze with caramelized edges
  • 1 fully cooked boneless spiral-sliced ham, about 7–8 pounds (about 3.4kg)
  • 1/2 cup pure maple syrup (160g)
  • 1/3 cup packed brown sugar (70g)
  • 2 tablespoons Dijon mustard (30g)
  • 1/4 cup orange juice (60g)
  • 1/2 cup water, for the roasting pan

Yield: About 14–18 servings. Timing: Allow 15–20 minutes to prepare, approximately 1 hour 50 minutes to 2 hours 30 minutes in the oven, and 15 minutes to rest. The ham’s shape, starting temperature, and package directions affect the heating time.

How to Make Maple Glazed Ham

Whole maple glazed ham and its white oval platter in a wider view, with front slices gently fanned
  1. Prepare the ham: Check that the package says fully cooked and read its reheating directions. Preheat the oven to 300°F (150°C). Place the ham cut side down in a foil-lined roasting pan large enough to hold it whole. Pour the water into the pan, not over the ham, and cover the pan snugly with foil.
  2. Warm it covered: Begin checking the thickest center after about 1 hour 20 minutes. Continue heating until it reaches roughly 130–135°F (about 55°C); this stage may take about 1 hour 35 minutes to 2 hours 15 minutes. Insert the thermometer into the meat, not a gap between slices. Keep the ham covered while it warms to protect the cut surfaces.
  3. Make the glaze: While the ham warms, combine the maple syrup, brown sugar, Dijon mustard, and orange juice in a small saucepan. Simmer over medium-low heat for 4–6 minutes, stirring, until the sugar dissolves and the glaze is glossy and lightly syrupy. It should coat a spoon but still pour easily. Pour a little into a separate bowl for serving before the pastry brush touches the ham.
  4. Glaze twice: Raise the oven to 400°F (205°C). Once it reaches temperature, uncover the ham and brush glaze over the top and accessible slice edges. Bake for about 7 minutes, brush again, then bake until the coating is shiny and gently bubbling, with a few darker edges. The uncovered finish should take about 10–15 minutes total; watch closely so the sugar does not burn.
  5. Check and rest: The thickest center should reach 140°F (60°C), unless the package specifies a different endpoint. If the glaze is dark enough before the center is ready, cover the ham loosely and continue warming at 300°F. Rest for about 15 minutes, then transfer it whole to a platter. Gently ease a few attached front slices forward into an overlapping fan. Serve the reserved clean glaze warm alongside, if desired.

Choose the Right Ham

Look for both “fully cooked” and “spiral-sliced” on the package. These directions warm an already cooked ham; they are not suitable for one labeled “cook before eating.” A fully cooked bone-in spiral ham can also work, but its shape and heating time may differ. Follow its package directions and keep the thermometer probe away from the bone.

How to Keep the Glaze from Running or Burning

If the glaze runs straight into the pan, simmer it a little longer before brushing. A lightly syrupy glaze clings to the curved top and exposed slice edges. Keep the 400°F finish short: once the edges deepen in color, check the center rather than leaving the ham uncovered to brown further.

Serving and Leftovers

Present the ham whole with just a few front slices loosened after resting. Potatoes and green beans make simple sides. For another holiday centerpiece, try garlic herb butter turkey breast.

Refrigerate leftover ham promptly in airtight containers and use within 3–4 days, or sooner if the package directs. Use leftovers in pasta with peas and ham. The glaze can be made ahead and gently rewarmed until pourable.

Nutrition

Approximate nutrition: Based on 16 servings, each serving has about 345 calories, 43g protein, 13g fat, and 16g carbohydrates. Per 100g, that is approximately 150 calories, 18g protein, 5g fat, and 7g carbohydrates. Values vary with the ham, portion size, and amount of glaze served.

Maple Glazed Ham

Fully cooked spiral-sliced ham is warmed covered, then brushed twice with a maple-mustard glaze and briefly baked until glossy.
Course: Main Course
Cuisine: American
Prep: 20 min
Cook: 150 min
Total: 185 min
Servings: 16 Calories: 345 kcal

Equipment

  • Oven
  • Roasting pan
  • Aluminum foil
  • Meat thermometer
  • Small saucepan
  • Pastry brush

Ingredients

For the Ham

  • 1 fully cooked boneless spiral-sliced ham, about 7–8 pounds (about 3.4 kg)
  • 1/2 cup water, for the roasting pan

For the Glaze

  • 1/2 cup pure maple syrup (160 g)
  • 1/3 cup packed brown sugar (70 g)
  • 2 tablespoons Dijon mustard (30 g)
  • 1/4 cup orange juice (60 g)

Instructions

  1. Check that the ham package says fully cooked and read its reheating directions. Preheat the oven to 300°F (150°C).
  2. Place the ham cut side down in a foil-lined roasting pan. Pour the water into the pan, not over the ham, and cover the pan snugly with foil.
  3. Warm the ham covered, beginning to check the thickest center after about 1 hour 20 minutes. Continue heating until it reaches roughly 130–135°F (about 55°C), about 1 hour 35 minutes to 2 hours 15 minutes. Insert the thermometer into the meat, not between slices.
  4. While the ham warms, combine the maple syrup, brown sugar, Dijon mustard, and orange juice in a small saucepan. Simmer over medium-low heat for 4–6 minutes, stirring, until the sugar dissolves and the glaze is glossy and lightly syrupy.
  5. Pour some glaze into a separate bowl for serving before using the pastry brush on the ham.
  6. Raise the oven temperature to 400°F (205°C). Once it reaches temperature, uncover the ham and brush glaze over the top and accessible slice edges.
  7. Bake for about 7 minutes, brush with glaze again, then bake until shiny and gently bubbling with a few darker edges, about 10–15 minutes total. Watch closely to prevent burning.
  8. Check that the thickest center reaches 140°F (60°C), unless the package specifies a different endpoint. If the glaze darkens before the center is ready, cover the ham loosely and continue warming at 300°F (150°C).
  9. Rest the ham for about 15 minutes. Transfer it whole to a platter and gently fan a few attached front slices forward. Serve the reserved glaze warm, if desired.

Tips

  • Keep the ham covered while it warms to protect the exposed slices from drying out.
  • Check the thermometer in the meat, not in a gap between slices.
  • Simmer the glaze longer if it runs straight into the pan; it should coat a spoon but still pour easily.
  • Keep the uncovered finish short and watch the glaze closely so the sugar does not burn.
  • Reserve clean glaze for serving before the pastry brush touches the ham.

Variations

  • Fully Cooked Bone-In Spiral Ham: Use a fully cooked bone-in spiral ham, follow its package directions, and keep the thermometer probe away from the bone.

Notes

Refrigerate leftovers promptly in airtight containers and use within 3–4 days, or sooner if the package directs. Reheat reserved glaze gently until pourable.

Nutrition

Calories: 345 kcal | Protein: 43 g | Fat: 13 g | Carbohydrates: 16 g

Classic Roast Turkey

Roast turkey should have deeply browned skin and meat that is cooked through without relying on the clock. This whole, unstuffed bird gets a coating of softened butter, salt, and pepper, with onion placed loosely in the cavity. It roasts breast-side up at a steady temperature, without scheduled basting.

Start checking the breast and thigh before the estimated roasting time is up; skin color cannot tell you whether either is done. After a rest, present the turkey whole on a platter with roasted garlic and red onion, fresh parsley, and orange wedges.

Serves: About 10–12. Prep: 25 minutes, excluding thawing. Roast: About 3–4 hours. Rest: 30 minutes. Total: About 3 hours 55 minutes to 4 hours 55 minutes, excluding thawing.

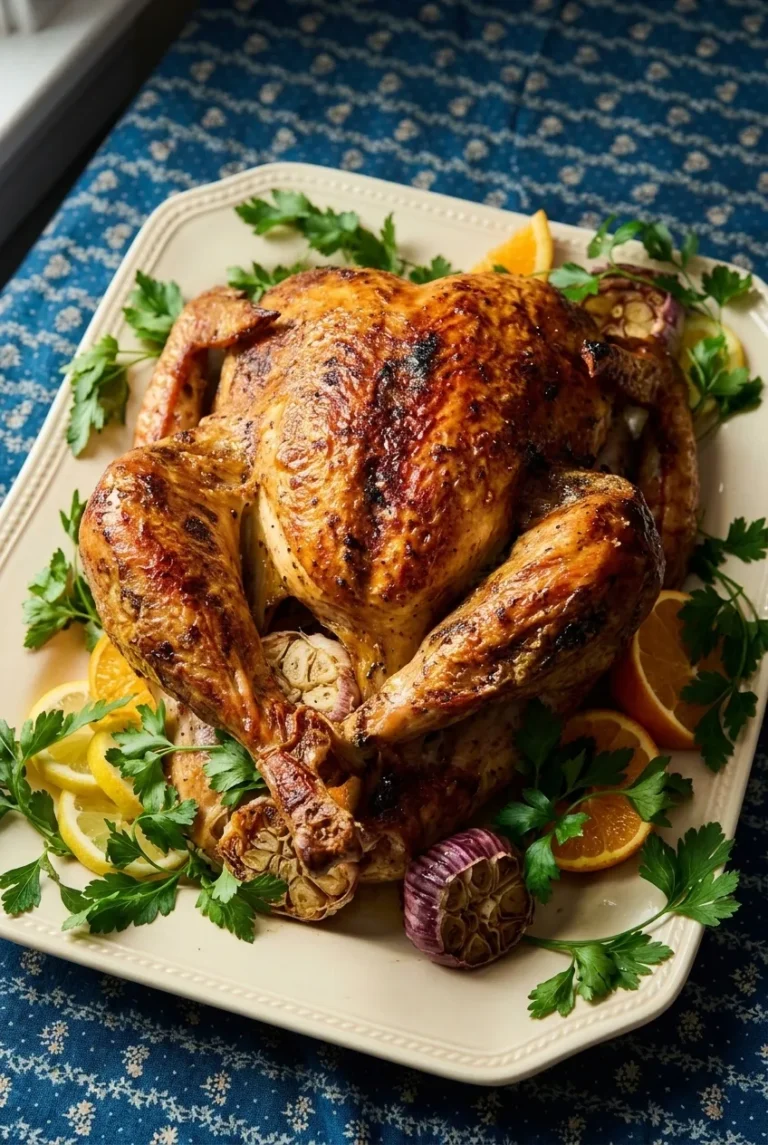
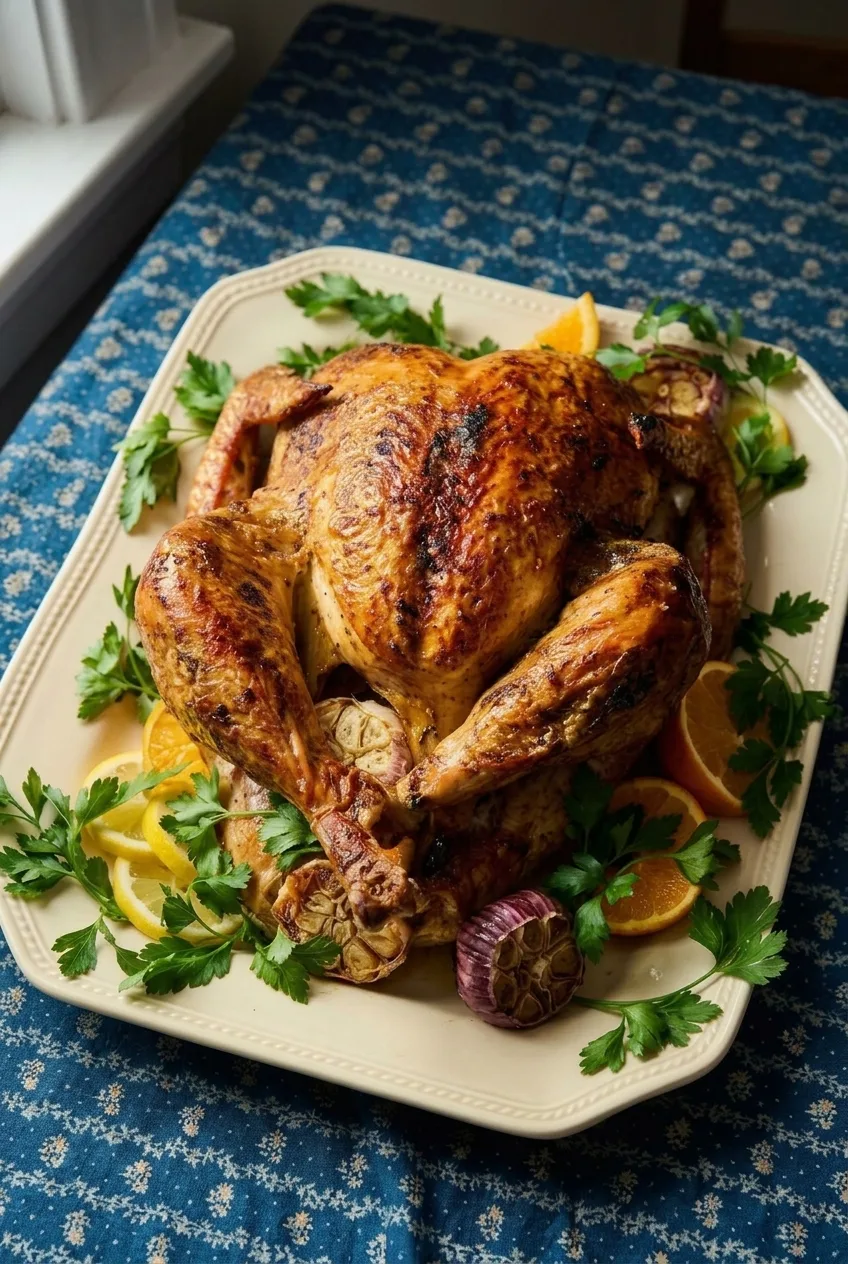
Whole roast turkey and its garnishes on a rectangular platter, photographed with more tabletop visible.

Ingredients for Classic Roast Turkey

  • 1 whole turkey (12–14 pounds), fully thawed, with neck and giblets removed
  • 1/2 cup (1 stick; 113g) unsalted butter, softened
  • 1 tablespoon Diamond Crystal kosher salt or about 2 teaspoons Morton kosher salt; reduce if the turkey is pre-brined or salt-enhanced
  • 2 teaspoons freshly ground black pepper
  • 1 medium yellow onion, quartered
  • 1 cup water, plus more as needed
  • 1 whole garlic bulb, halved crosswise
  • 1 medium red onion, halved
  • 1 orange, cut into wedges
  • 1 small bunch fresh flat-leaf parsley
  • 3–4 fresh thyme sprigs (optional)

The yellow onion and optional thyme are loose cavity aromatics, not serving stuffing. The garlic and red onion roast for the platter; the orange and parsley go on fresh.

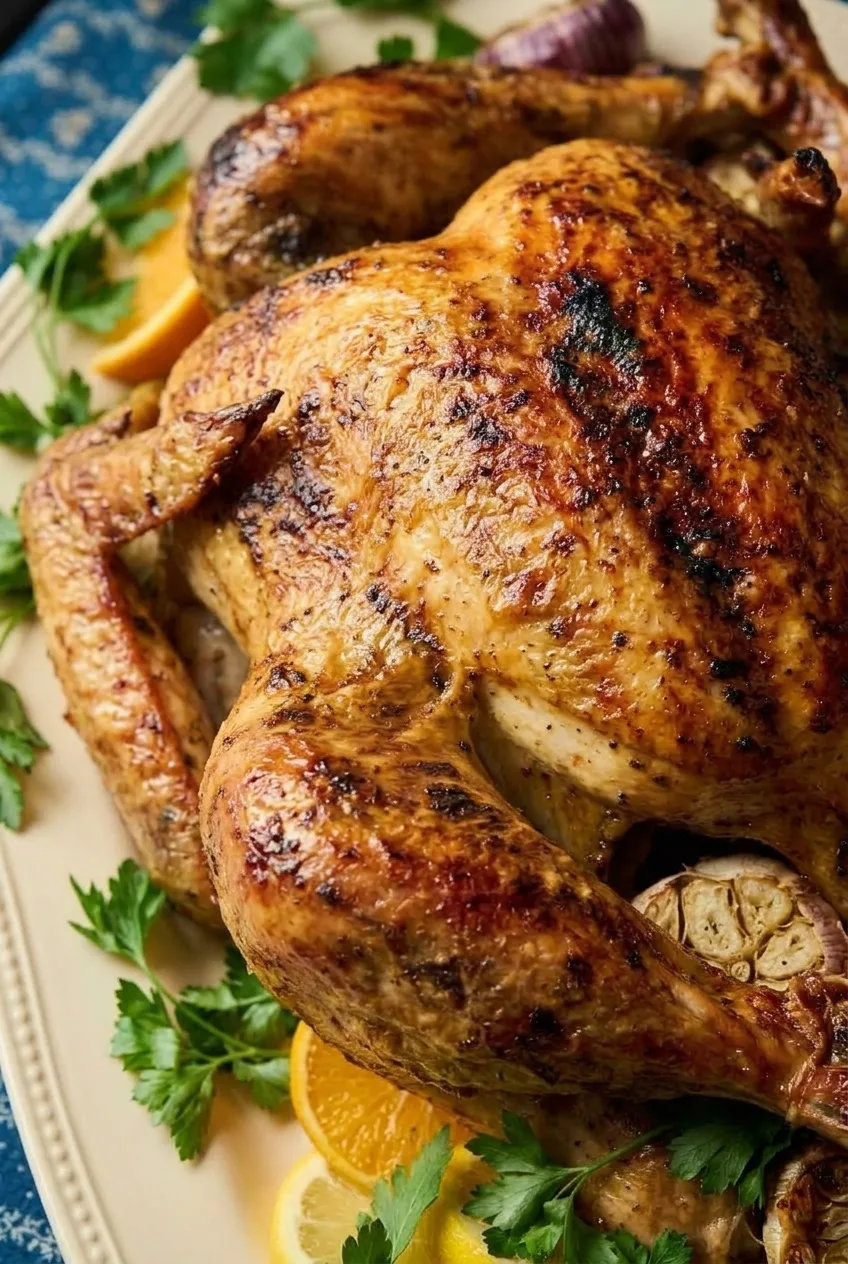
Close view of the browned breast and wing of a whole roast turkey, with parsley and orange at the platter edge.

How to Roast the Turkey

  1. Prepare the oven and pan: Heat the oven to 325°F (165°C). Position an oven rack low enough to leave room above the turkey. Set a roasting rack in a large pan with enough space that the bird will not press against the sides. Pour 1 cup water beneath the rack.
  2. Dry and season: Check that the turkey is fully thawed, including inside the cavity, and remove the neck and giblets if needed. Pat the skin thoroughly dry so the butter spreads evenly and the skin can brown. Season the cavity and exterior with the salt and pepper. Place the yellow onion and optional thyme loosely in the cavity; do not pack it.
  3. Butter and position: Spread the softened butter over the exposed skin. Set the turkey securely on the rack, breast-side up. Tuck the wing tips beneath the bird to help protect them from burning, and leave the legs untrussed.
  4. Roast: Roast uncovered, planning on about 3–4 hours for this unstuffed bird. Check the pan occasionally and add a little water beneath the rack if it dries out or the drippings threaten to scorch. If an area darkens too quickly, tent just that area loosely with foil. Begin checking the breast and thigh temperatures at about 2 hours 30 minutes; recheck as the turkey approaches doneness.
  5. Roast the platter vegetables: During roughly the final hour, place the garlic and red onion halves cut-side up in a sheltered area of the roasting pan. Roast for about 45–60 minutes, until tender and visibly roasted but not blackened. Remove them when ready, even if the turkey needs more time.
  6. Check and rest: Remove the turkey only when an instant-read thermometer reads 165°F (75°C) in both the thickest part of the breast and the innermost, thickest part of the thigh, without touching bone. Rest the turkey whole for about 30 minutes. Save the pan drippings for gravy if desired.
  7. Arrange the platter: Transfer the uncarved turkey to a large rectangular platter. Arrange the roasted garlic and red onion around it, then add the fresh orange wedges and parsley sprigs without covering the browned breast. Carve for serving.

How to Tell When the Turkey Is Done

Use the 3–4-hour roasting time as a planning window, not a deadline: a bird’s shape and the oven can change how quickly it cooks. Check the thickest breast meat and the thickest inner thigh separately, keeping the thermometer tip away from bone. Both must reach 165°F, even if the skin is already deeply browned.

When to Use Foil

Start uncovered so the skin can brown. If the breast or another area becomes dark before the meat is done, lay foil loosely over that area and continue roasting. Foil limits further browning; it does not replace temperature checks.

Preparing a Frozen Turkey

The listed prep time does not include thawing. Allow roughly 24 hours of refrigerator thawing per 4–5 pounds, or about 3–4 days for a 12–14-pound turkey. Check that no ice remains in the cavity before preparing the bird.

Serving and Storing Leftovers

Present the rested turkey whole, then carve it for serving. Keep edible dressing out of the cavity; serve Grandma’s Thanksgiving Dressing baked separately.

Refrigerate leftover turkey in airtight containers within 2 hours after cooking and use it within 3–4 days.

Nutrition

Approximate per serving, based on 12 servings: 460 calories, 60g protein, 22g fat, and 3g carbohydrates. Approximate per 100g of served turkey and garnish: 205 calories, 27g protein, 10g fat, and 1g carbohydrates. Estimates vary with the amount of meat and skin served, how much butter remains with the turkey, and whether the garnishes are eaten.

Classic Roast Turkey

A whole turkey is buttered, seasoned, and roasted until the breast and thigh reach 165°F, then served with roasted garlic and red onion.
Course: Main Course
Cuisine: American
Prep: 25 min
Cook: 210 min
Total: 265 min
Servings: 10 Calories: 460 kcal

Equipment

  • Oven
  • Roasting pan
  • Roasting rack
  • Instant-read thermometer
  • Large platter

Ingredients

For the Turkey

  • 1 whole turkey (12–14 pounds), fully thawed, with neck and giblets removed
  • 1/2 cup (1 stick; 113g) unsalted butter, softened
  • 1 tablespoon Diamond Crystal kosher salt or about 2 teaspoons Morton kosher salt
  • 2 teaspoons freshly ground black pepper
  • 1 medium yellow onion, quartered
  • 3–4 fresh thyme sprigs (optional)
  • 1 cup water, plus more as needed

For the Platter

  • 1 whole garlic bulb, halved crosswise
  • 1 medium red onion, halved
  • 1 orange, cut into wedges
  • 1 small bunch fresh flat-leaf parsley

Instructions

  1. Heat the oven to 325°F (165°C). Position a rack low enough to leave room above the turkey.
  2. Set a roasting rack in a large roasting pan and pour 1 cup water beneath the rack.
  3. Confirm the turkey is fully thawed, including inside the cavity, and remove the neck and giblets if needed.
  4. Pat the turkey skin thoroughly dry. Season the cavity and exterior with salt and pepper.
  5. Place the yellow onion and optional thyme loosely in the cavity without packing it.
  6. Spread the softened butter over the exposed skin. Set the turkey breast-side up on the rack, tuck the wing tips beneath the bird, and leave the legs untrussed.
  7. Roast uncovered for about 3–4 hours. Check the pan occasionally and add water beneath the rack if it dries out or the drippings threaten to scorch.
  8. Begin checking the breast and thigh temperatures at about 2 hours 30 minutes. If any area darkens too quickly, tent that area loosely with foil.
  9. During roughly the final hour, place the garlic and red onion cut-side up in a sheltered area of the pan. Roast for about 45–60 minutes until tender and visibly roasted, removing them when ready.
  10. Remove the turkey when an instant-read thermometer reads 165°F (75°C) in both the thickest part of the breast and the innermost, thickest part of the thigh, without touching bone.
  11. Rest the turkey whole for about 30 minutes. Save the pan drippings for gravy if desired.
  12. Transfer the turkey to a platter. Arrange the roasted garlic and red onion around it, add the fresh orange wedges and parsley, and carve to serve.

Tips

  • Use the roasting time as a planning window, not a deadline; check doneness with a thermometer.
  • Check the breast and thigh separately, keeping the thermometer tip away from bone.
  • Start with dry skin so the butter spreads evenly and the skin can brown.
  • Keep the cavity aromatics loose; do not pack the cavity.
  • Use foil only over areas browning too quickly, and continue checking the internal temperature.
  • Reduce the salt if the turkey is pre-brined or salt-enhanced.

Notes

Thaw in the refrigerator for roughly 24 hours per 4–5 pounds, and confirm no ice remains in the cavity. Refrigerate leftovers in airtight containers within 2 hours and use within 3–4 days.

Nutrition

Calories: 460 kcal | Protein: 60 g | Fat: 22 g | Carbohydrates: 3 g

Garlic Herb Butter Turkey Breast

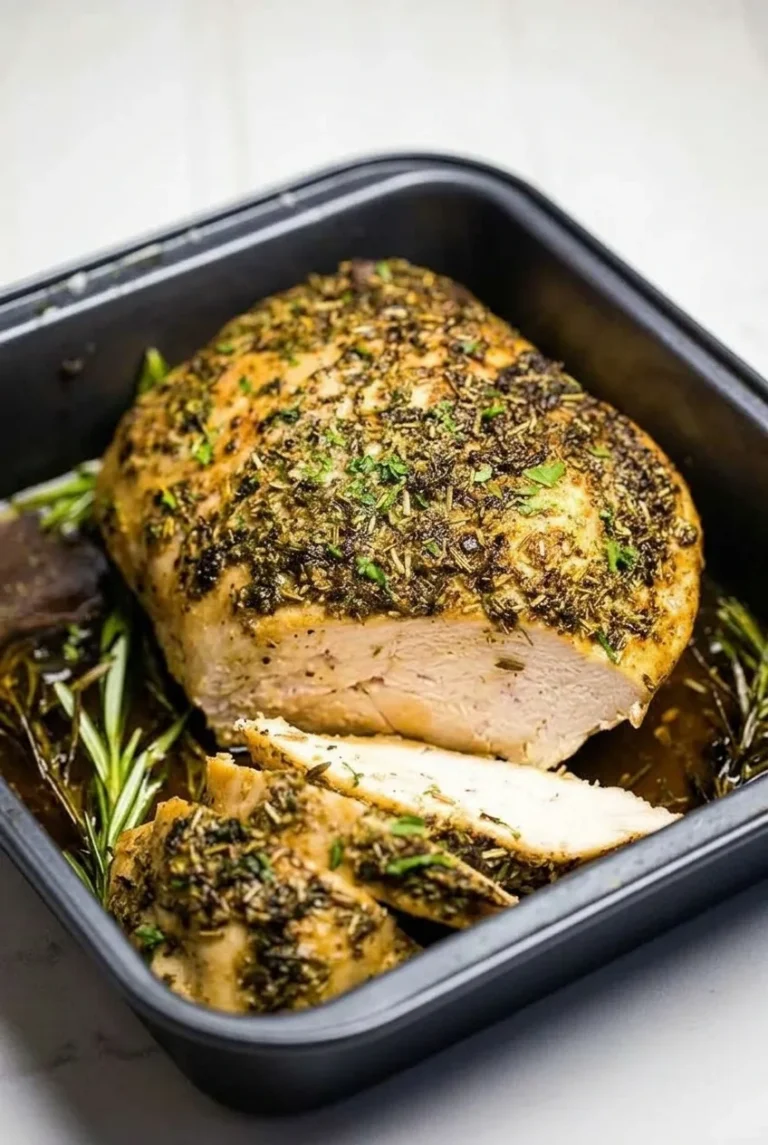
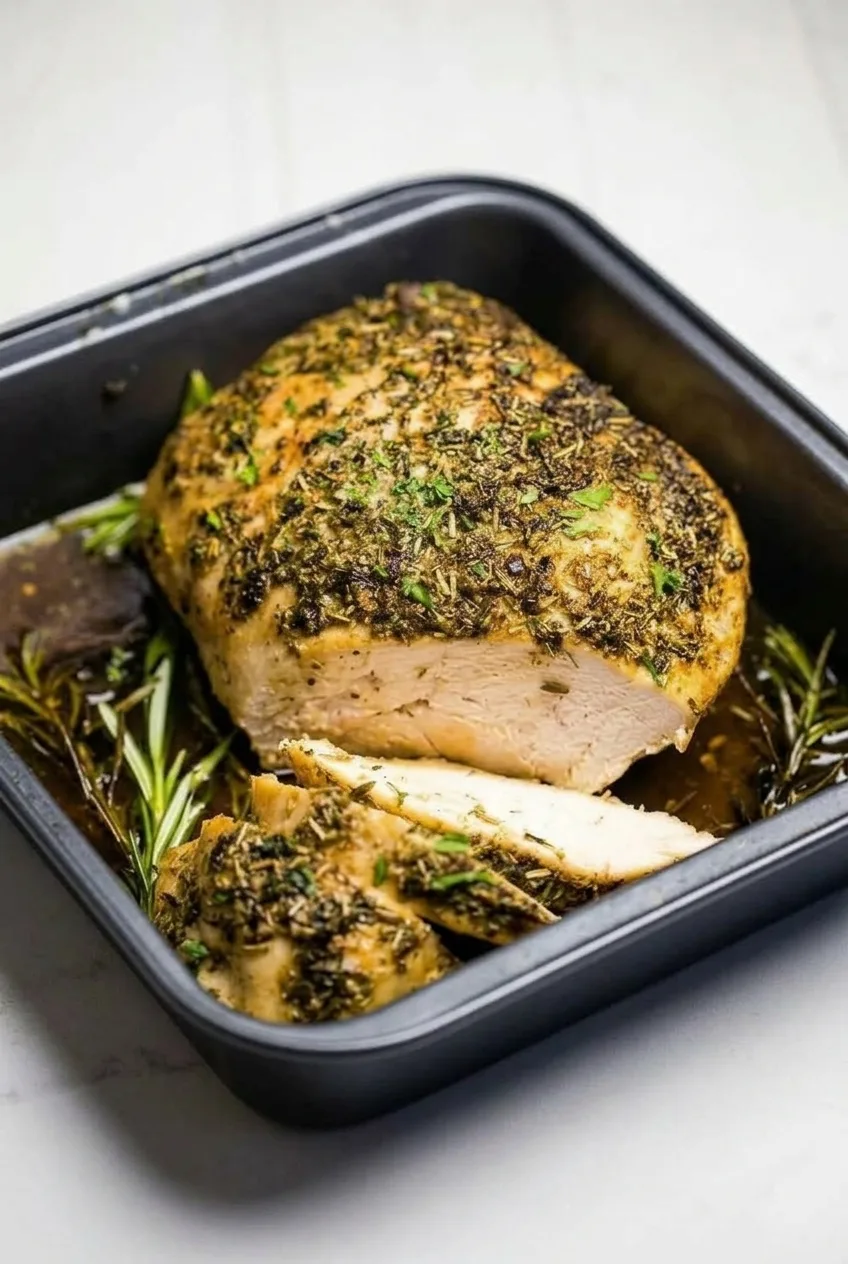
Garlic-herb butter goes beneath the skin of this turkey breast to season the meat, while a second layer browns with the skin. The roast starts in a hot oven for color, then finishes at a lower temperature so the herb coating does not darken before the center is cooked.

Serve the breast mostly intact, with a few thick slices arranged in front and a little pan juice around it. Roasting time is only an estimate for a 5–6-pound bone-in breast; a thermometer determines when it is done.

Ingredients for Garlic Herb Butter Turkey Breast

Full roasting pan of partly carved garlic herb butter turkey breast on a light surface
  • 1 bone-in, skin-on turkey breast, about 5–6 pounds (about 2,500g)
  • 6 tablespoons unsalted butter, softened (85g)
  • 4 garlic cloves, finely minced
  • 1 tablespoon finely chopped fresh rosemary
  • 1 tablespoon chopped fresh thyme leaves
  • 2 tablespoons chopped fresh flat-leaf parsley, divided
  • 2 teaspoons Morton kosher salt or 1 tablespoon Diamond Crystal kosher salt
  • 1 teaspoon freshly ground black pepper

Optional: Add 1 teaspoon finely chopped fresh sage to the butter. For serving, use 2–3 fresh rosemary sprigs if desired.

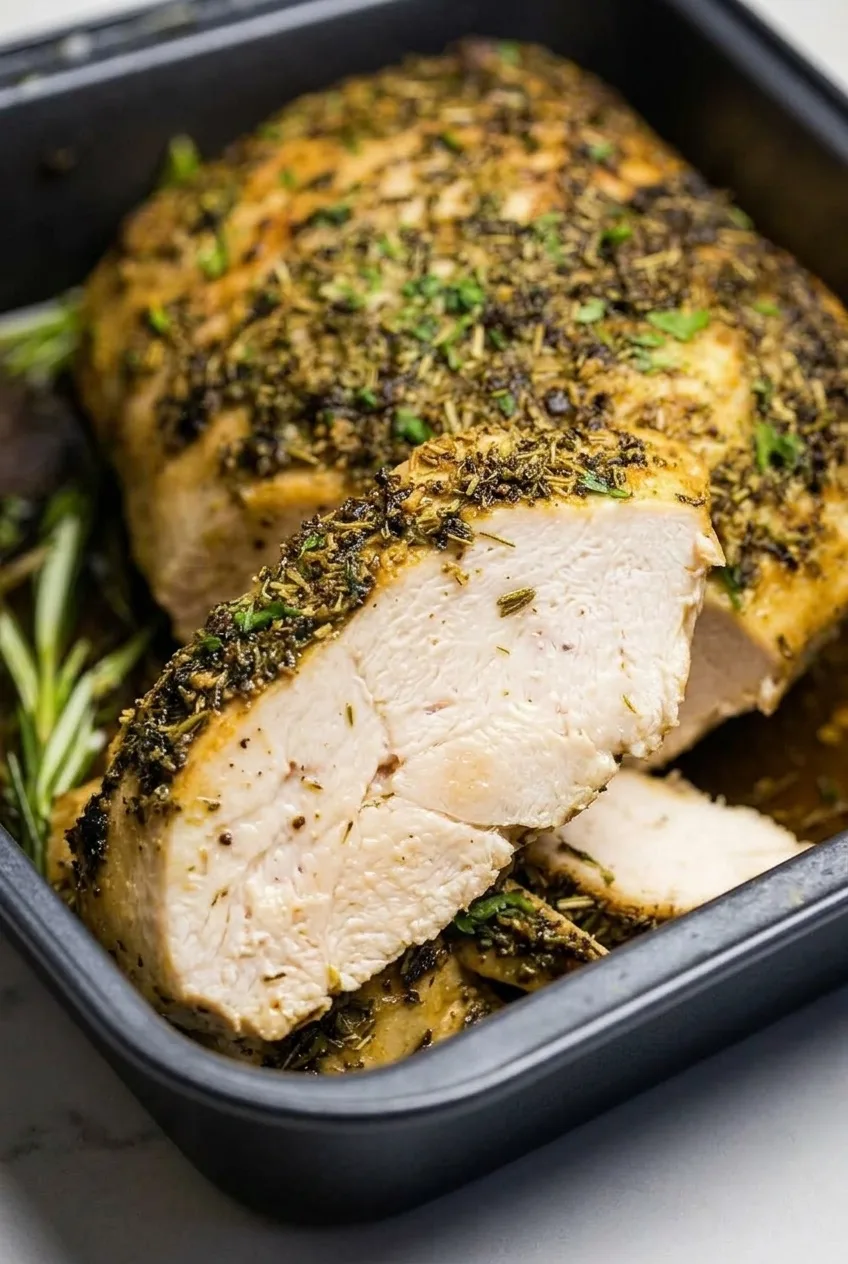
Close view of a thick turkey breast slice showing pale meat and toasted garlic-herb skin

How to Roast Garlic Herb Butter Turkey Breast

Prep: 20 minutes | Roast: about 1 hour 45 minutes to 2 hours 15 minutes | Rest: 20 minutes | Serves: 8–10

  1. Preheat and prepare: Set an oven rack in the lower-middle position and preheat to 450°F (230°C). Pat the turkey dry and place it skin-side up in a roasting pan large enough that it does not press against the sides. Gently loosen the skin over the breast, leaving it attached around the edges.
  2. Apply the herb butter: Mix the butter, garlic, rosemary, thyme, 1 tablespoon parsley, salt, pepper, and optional sage. Spread about half beneath the skin, against the meat. Spread the rest over the outside of the skin.
  3. Start the roast hot: Roast uncovered for 15 minutes, then reduce the oven to 350°F (175°C). The skin should begin to turn golden; the herbs may toast but should not burn.
  4. Finish by temperature: Continue roasting for approximately 1 hour 30 minutes to 2 hours more. Begin checking after about 1 hour 15 minutes of total roasting time. Insert an instant-read thermometer into the thickest breast meat without touching bone. Remove the turkey when it reaches 165°F (75°C). If the skin or herbs darken too quickly, loosely tent the breast with foil. Rotate the pan only if your oven browns unevenly.
  5. Rest and carve: Rest for 20 minutes before slicing. Cut breast meat away from the ribs as needed, then carve two or three thick slices, leaving most of the roast intact.
  6. Arrange and serve: Place the slices against the front of the roast in the pan. Spoon a little pan juice around the turkey rather than over the browned skin. Scatter the remaining tablespoon of parsley on top and add rosemary sprigs, if using.

How to Get Butter Under the Skin

Ease your fingers between the skin and breast meat to make a pocket without pulling the skin free. If the softened butter catches as you spread it, loosen a little more skin rather than forcing it. Butter beneath the skin seasons the meat directly; butter on the outside leaves visible garlic and herbs on the browned surface.

When Is Turkey Breast Done?

Check the thickest part of the breast, keeping the thermometer tip away from bone. Breast shape and oven performance affect roasting time, so begin checking early and recheck as needed. The skin should be golden brown with darker toasted herb patches when the meat reaches 165°F. Resting before carving helps keep the juices in the slices.

Serving and Storing Leftovers

Serve the thick slices with warm pan juice, alongside mashed potatoes or roasted vegetables. Refrigerate leftover turkey in an airtight container for 3–4 days, or freeze it for up to 3 months.

For a different baked turkey main, see these baked turkey meatballs.

Ingredient Questions

Can I use dried rosemary and thyme?

Yes. Use about 1 teaspoon dried rosemary and 1 teaspoon dried thyme in place of the fresh herbs. Crush coarse dried rosemary before mixing it into the butter.

Can I use a boneless turkey breast?

A boneless breast will roast on a different schedule. The time range here is for a 5–6-pound bone-in breast, so use the thermometer rather than treating that range as a direct swap.

Nutrition

Approximate per serving, based on 9 servings: 335 calories, 37g protein, 18g fat, and 1g carbohydrates. Approximate per 100g of edible cooked turkey and coating: 230 calories, 25g protein, 12g fat, and less than 1g carbohydrates. Values vary with the amount of edible meat, skin, butter, and pan juices served.

Garlic Herb Butter Turkey Breast

Bone-in turkey breast is roasted with garlic-herb butter beneath and over the skin until golden and cooked through.
Course: Main Course
Cuisine: American
Prep: 20 min
Cook: 120 min
Total: 160 min
Servings: 9 Calories: 335 kcal

Equipment

  • Roasting pan
  • Instant-read thermometer

Ingredients

Turkey

  • 1 bone-in, skin-on turkey breast, about 5–6 pounds (about 2,500g)

Herb Butter

  • 6 tablespoons unsalted butter, softened (85g)
  • 4 garlic cloves, finely minced
  • 1 tablespoon finely chopped fresh rosemary
  • 1 tablespoon chopped fresh thyme leaves
  • 2 tablespoons chopped fresh flat-leaf parsley, divided
  • 2 teaspoons Morton kosher salt or 1 tablespoon Diamond Crystal kosher salt
  • 1 teaspoon freshly ground black pepper

Optional

  • 1 teaspoon finely chopped fresh sage
  • 2–3 fresh rosemary sprigs, for serving

Instructions

  1. Set an oven rack in the lower-middle position and preheat the oven to 450°F (230°C).
  2. Pat the turkey dry and place it skin-side up in a roasting pan. Gently loosen the skin over the breast, keeping it attached around the edges.
  3. Mix the butter, garlic, rosemary, thyme, 1 tablespoon parsley, salt, pepper, and optional sage.
  4. Spread about half of the butter mixture beneath the skin against the meat. Spread the rest over the skin.
  5. Roast uncovered for 15 minutes, then reduce the oven temperature to 350°F (175°C).
  6. Continue roasting for about 1 hour 30 minutes to 2 hours more. Begin checking after about 1 hour 15 minutes of total roasting time.
  7. Insert an instant-read thermometer into the thickest breast meat without touching bone. Remove the turkey when it reaches 165°F (75°C). Loosely tent with foil if the skin or herbs darken too quickly.
  8. Rest the turkey for 20 minutes. Cut breast meat away from the ribs as needed, then carve two or three thick slices while leaving most of the roast intact.
  9. Arrange the slices against the front of the roast and spoon a little pan juice around the turkey. Top with the remaining parsley and optional rosemary sprigs.

Tips

  • Loosen more skin if the softened butter catches; avoid forcing it.
  • Check the thickest part of the breast with the thermometer tip away from bone.
  • Use temperature to determine doneness rather than relying on the estimated roasting time.
  • Rotate the pan only if your oven browns unevenly.
  • Spoon pan juice around the turkey rather than over the browned skin.

Variations

  • Sage Herb Butter: Add 1 teaspoon finely chopped fresh sage to the butter mixture.
  • Dried Herb Butter: Replace the fresh rosemary and thyme with about 1 teaspoon dried rosemary and 1 teaspoon dried thyme; crush coarse dried rosemary before mixing.

Notes

Refrigerate leftovers in an airtight container for 3–4 days or freeze for up to 3 months. Nutrition is approximate and based on 9 servings.

Nutrition

Calories: 335 kcal | Protein: 37 g | Fat: 18 g | Carbohydrates: 1 g

Kid-Friendly Pizza Waffles

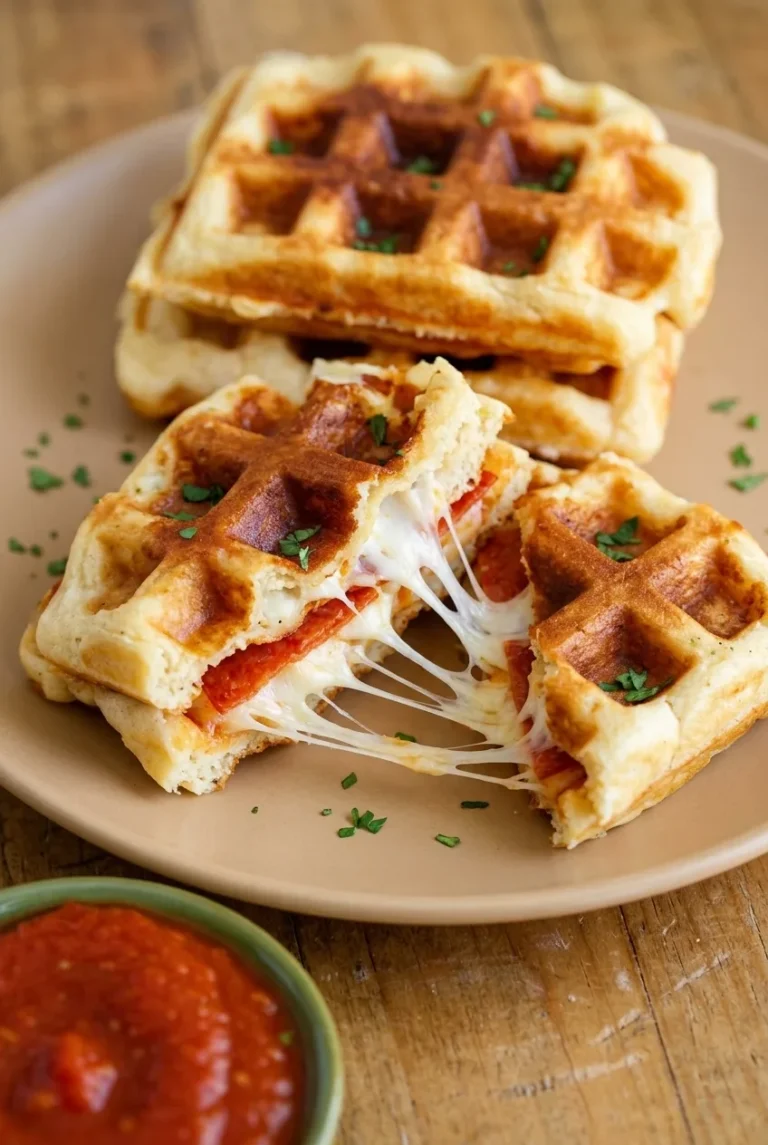
These square pizza waffles are sealed pockets of pizza dough, not waffles made from batter. The waffle iron browns the outside into a crisp grid while mozzarella and pepperoni melt inside. Add just 1 teaspoon of sauce to each pocket and serve the rest for dipping; too much sauce inside can soften the dough and make the seams leak.

Shape the dough to fit your iron and pinch the edges closed. Because waffle irons and pocket thicknesses vary, use browned ridges and cooked-through seams—not just the timer—to judge when they’re done.

Ingredients for Pizza Waffles

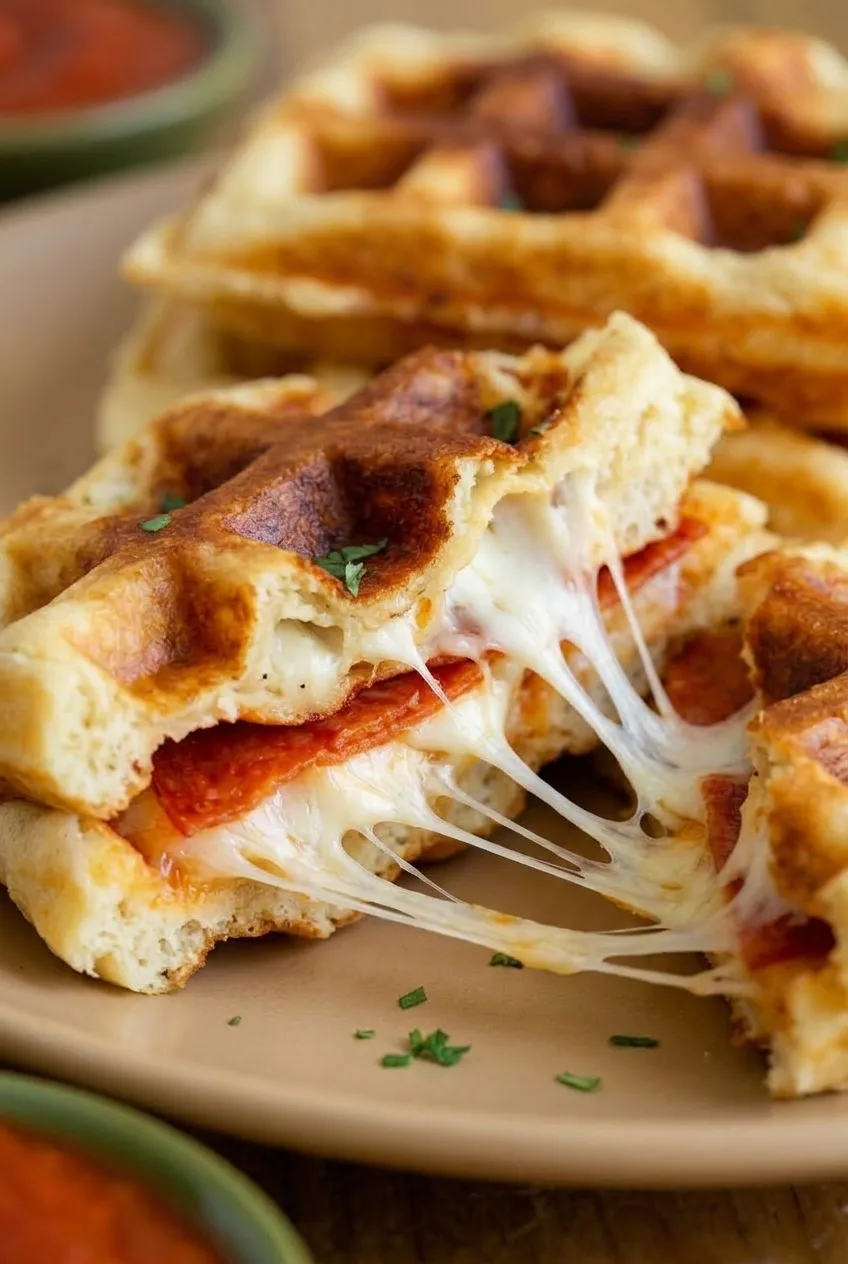
Close view inside a pizza waffle showing cooked dough, pepperoni and strands of melted mozzarella
  • 1 lb refrigerated pizza dough (about 450g)
  • 1 cup shredded low-moisture mozzarella (about 115g)
  • 16 small pepperoni slices, or about 1/4 cup chopped (about 30g)
  • 1/2 cup thick pizza sauce or marinara (about 120g), divided
  • Cooking spray, for lightly coating the waffle iron
  • 1 tablespoon finely chopped fresh parsley

Yield: 4 waffles; 4 snack servings or 2 larger meal servings. Time: About 15 minutes prep and 16–24 minutes cooking in a single-waffle iron; allow about 35–45 minutes total, including preheating and cooling.

How to Make Pizza Waffles in a Waffle Iron

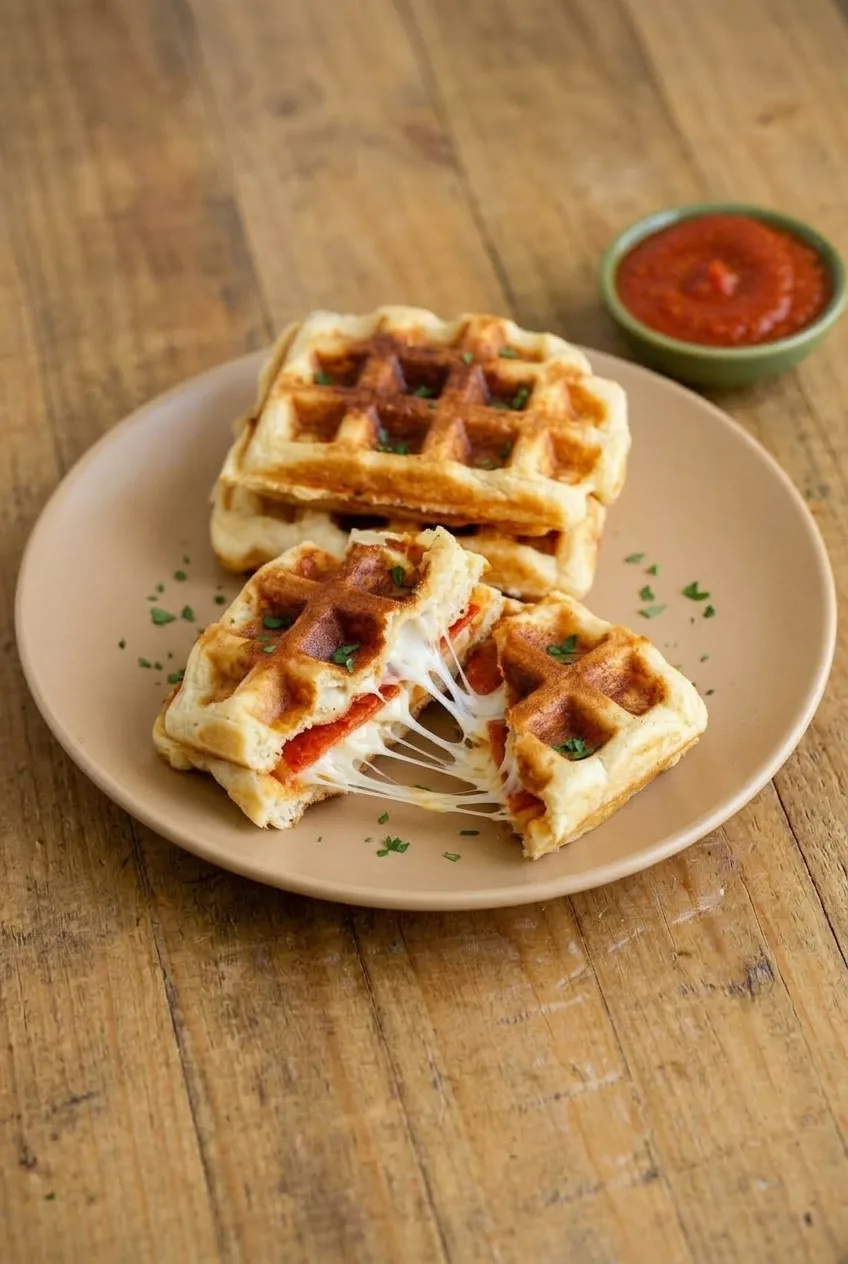
Full plate of square pizza waffles with one opened and a small bowl of sauce for dipping
  1. Preheat the iron: Fully preheat a square waffle iron, ideally with plates about 5 inches across, on its normal waffle setting. Lightly coat the plates with cooking spray if needed.
  2. Shape the dough: Divide the dough into 8 equal pieces. Stretch or roll each into a thin square slightly smaller than the waffle plates so it fits inside the rim. If the dough springs back, let it rest briefly before finishing the squares.
  3. Fill and seal: In the center of each of 4 squares, place 1 teaspoon sauce, 1/4 cup mozzarella, and one-quarter of the pepperoni. Leave a clean border around the filling. Cover with the remaining squares and pinch each seam firmly closed all the way around.
  4. Cook: Center one pocket on the plates and close the lid gently without forcing it down. Start checking at about 3 minutes if practical for your iron, but avoid repeatedly opening the lid. Cook for about 4–6 minutes total, until the waffle is golden and crisp with browned ridges and no pale, gummy dough at the thick seams. Repeat with the remaining pockets.
  5. Cool and serve: Transfer the waffles to a rack for 2–3 minutes. Sprinkle with parsley and serve with the remaining sauce for dipping. Cut or open a waffle and check the temperature of the melted filling before serving to young children.

How to Keep the Filling Inside

Sauce or cheese caught in a seam can prevent the dough from sealing. Keep the filling centered, limit the sauce to 1 teaspoon per waffle, and pinch the entire clean border closed. If a pocket leaks, use a little less filling in the next one.

How to Tell When Pizza Waffles Are Done

Look for golden dough, browned waffle ridges, and crisp edges, then check a thick seam. If the seam looks pale or feels gummy, cook the waffle longer, even if the center is browned. Shape the next pocket more evenly at the edges. Deeper irons and thicker pockets may need more than 6 minutes.

Filling Swaps That Won’t Make Waffles Soggy

For cheese-only waffles, omit the pepperoni without adding extra sauce. To replace some pepperoni with vegetables, use up to 2 tablespoons of finely chopped, well-dried bell pepper. Cook and drain mushrooms or other moisture-heavy vegetables first, and keep the overall filling modest so the pockets still seal.

Storing and Reheating

Cool the waffles completely, then refrigerate in an airtight container for up to 3 days. To freeze, place them separately on a tray until frozen, then transfer to a freezer bag for up to 2 months.

Reheat in a toaster oven until hot throughout and crisp. The time depends on the waffle size and appliance. A microwave will warm them but won’t restore the crisp exterior.

For another build-your-own pizza lunch, try DIY Pizza Lunchables.

Nutrition

Approximate nutrition per waffle, including its share of the dipping sauce: 440 calories, 19g protein, 15g fat, and 57g carbohydrates. Approximate values per 100g: 245 calories, 11g protein, 8g fat, and 32g carbohydrates. Values vary with the dough, pepperoni, sauce, and amount of cooking spray used.

Kid-Friendly Pizza Waffles

Pizza dough pockets filled with mozzarella, pepperoni, and sauce are cooked in a waffle iron until crisp and golden.
Course: Snack
Cuisine: Italian-American
Prep: 15 min
Cook: 24 min
Total: 45 min
Servings: 4 Calories: 440 kcal

Equipment

  • Waffle iron
  • Cooling rack

Ingredients

For the pizza waffles

  • 1 lb refrigerated pizza dough (about 450 g)
  • 1 cup shredded low-moisture mozzarella (about 115 g)
  • 16 small pepperoni slices, or about 1/4 cup chopped (about 30 g)
  • 1/2 cup thick pizza sauce or marinara (about 120 g), divided
  • Cooking spray, for lightly coating the waffle iron
  • 1 tablespoon finely chopped fresh parsley

Instructions

  1. Fully preheat a square waffle iron, ideally with plates about 5 inches across, on its normal waffle setting. Lightly coat the plates with cooking spray if needed.
  2. Divide the dough into 8 equal pieces. Stretch or roll each piece into a thin square slightly smaller than the waffle plates. If the dough springs back, let it rest briefly before shaping.
  3. Place 1 teaspoon sauce, 1/4 cup mozzarella, and one-quarter of the pepperoni in the center of 4 dough squares, leaving a clean border around the filling.
  4. Cover each filled square with a remaining dough square and pinch the seams firmly closed all the way around.
  5. Center one pocket on the waffle iron and close the lid gently without forcing it down. Cook for about 4–6 minutes, checking around 3 minutes if practical, until golden and crisp with browned ridges and cooked-through seams. Repeat with the remaining pockets.
  6. Transfer the waffles to a rack and cool for 2–3 minutes. Sprinkle with parsley and serve with the remaining sauce for dipping.
  7. Cut or open a waffle and check the temperature of the melted filling before serving to young children.

Tips

  • Keep the filling centered and the dough border clean so the seams seal properly.
  • Limit the sauce inside each pocket to 1 teaspoon; serve the rest for dipping.
  • Use browned ridges and cooked-through seams to judge doneness rather than relying only on the timer.
  • If a pocket leaks, use less filling in the next one.
  • Thicker pockets or deeper waffle irons may need more than 6 minutes.

Variations

  • Cheese-Only Pizza Waffles: Omit the pepperoni without adding extra sauce.
  • Vegetable Pizza Waffles: Replace some of the pepperoni with up to 2 tablespoons finely chopped, well-dried bell pepper. Cook and drain moisture-heavy vegetables such as mushrooms before using.

Notes

Cool completely and refrigerate in an airtight container for up to 3 days, or freeze separately for up to 2 months. Reheat in a toaster oven until hot throughout and crisp; a microwave will not restore the crisp exterior. Approximate nutrition per 100 g: 245 calories, 11 g protein, 8 g fat, and 32 g carbohydrates.

Nutrition

Calories: 440 kcal | Protein: 19 g | Fat: 15 g | Carbohydrates: 57 g

Chicken Avocado Roll-Ups

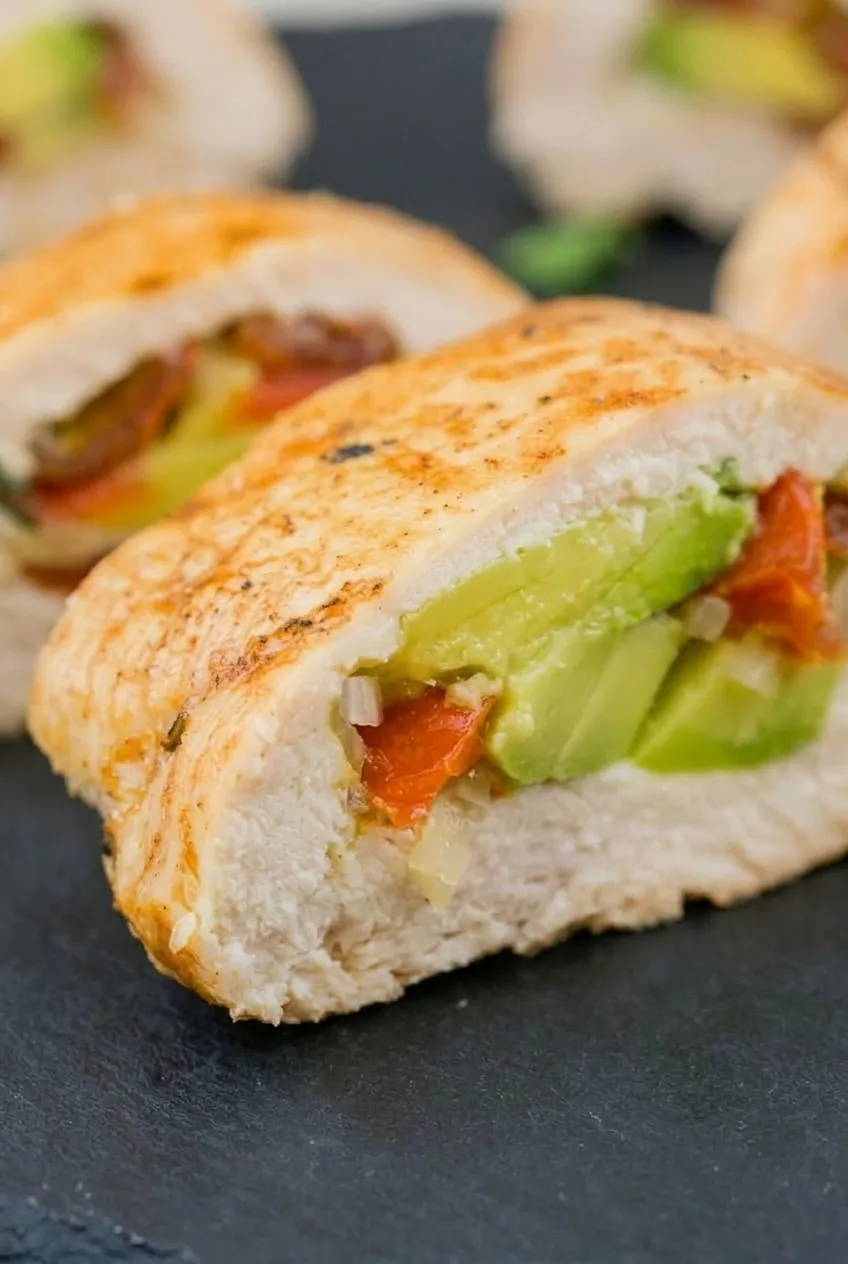
Chicken breast cutlets wrap around sliced avocado, tomato, and red onion in these baked roll-ups—no tortillas needed. Cut into thick halves, they show distinct avocado slices inside a lightly golden chicken exterior.

The filling needs a little restraint: too much can slip out as the chicken bakes. Pound the cutlets evenly, seed the tomato to remove excess juice, and secure each roll with toothpicks. The avocado will be warm and softer than it is fresh.

Ingredients for Chicken Avocado Roll-Ups

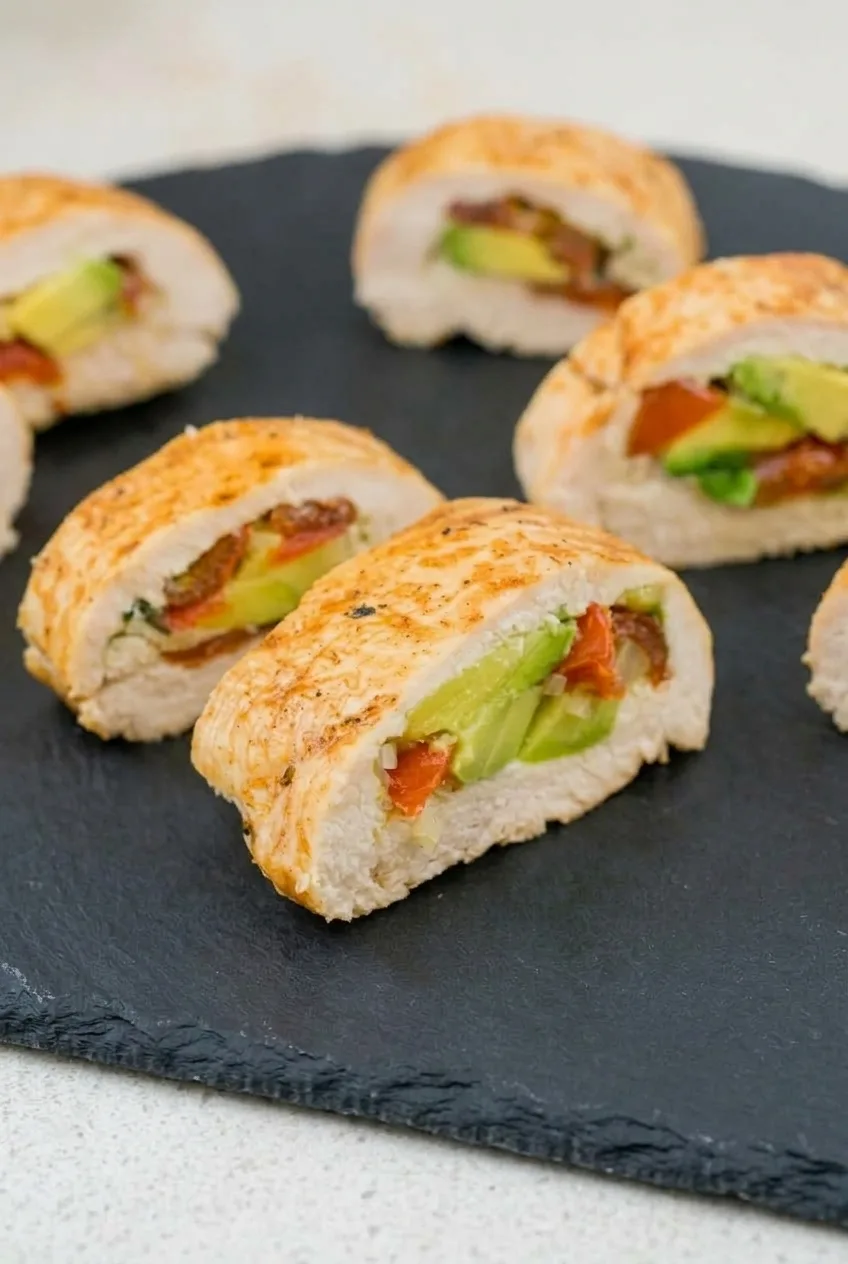
Full serving of thick-cut chicken avocado roll-ups arranged on a dark platter
  • 4 boneless, skinless chicken breast cutlets, about 1½ lb total (680g)
  • 2 small ripe but firm avocados, about 240g flesh, sliced
  • 1 medium Roma tomato (about 100g), seeded and finely diced
  • 2 tablespoons finely minced red onion (20g)
  • 1 tablespoon lime juice
  • 1 tablespoon olive oil
  • 1 teaspoon sweet paprika
  • ½ teaspoon garlic powder
  • ¾ teaspoon kosher salt, or to taste
  • ¼ teaspoon black pepper

Choose cutlets broad enough to enclose a modest line of filling. If starting with whole chicken breasts, slice them horizontally into cutlets before pounding.

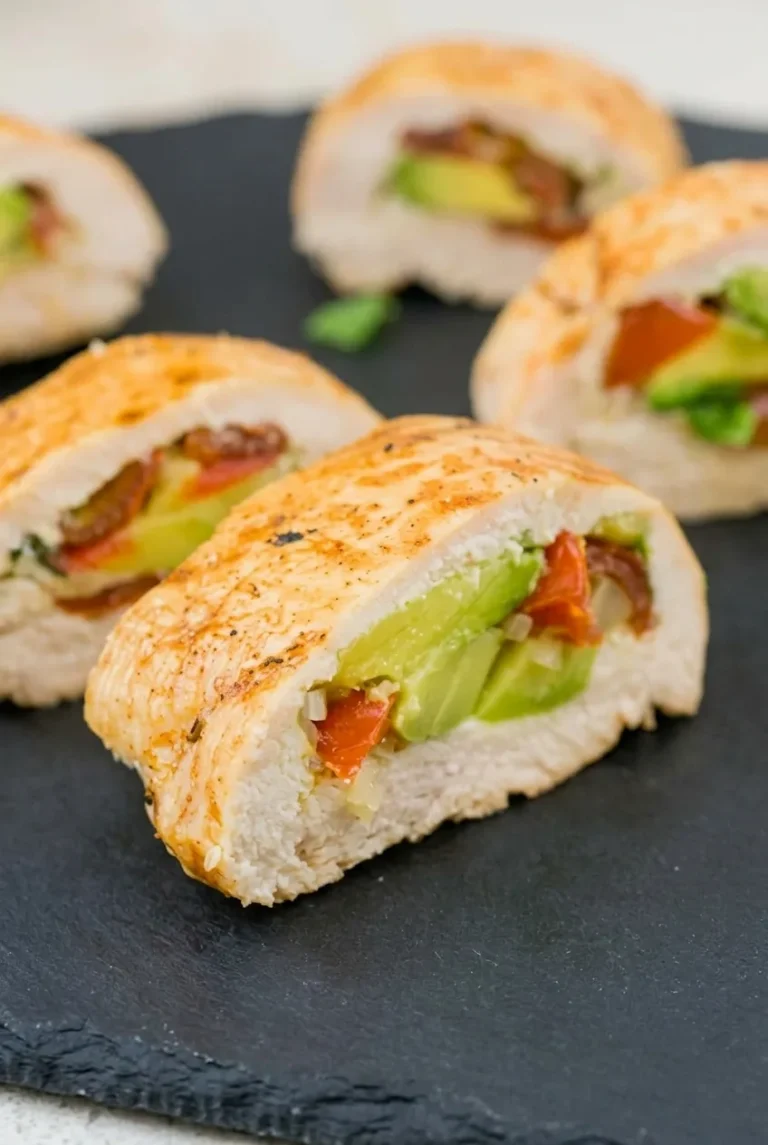
Close view of sliced avocado and tomato inside a thick cut of fully cooked chicken

How to Bake Chicken Avocado Roll-Ups

  1. Prepare the oven and chicken: Preheat the oven to 400°F (205°C). Line a rimmed baking sheet with parchment or lightly grease it with some of the measured oil. Pound the cutlets between sheets of parchment or plastic wrap to an even ¼-inch thickness without tearing them.
  2. Prepare the filling: Drain any loose juice from the seeded tomato. Slice the avocados and gently coat them with the lime juice. Mince the red onion.
  3. Fill and roll: Season the chicken with the paprika, garlic powder, salt, and pepper. Divide the avocado, tomato, and onion among the cutlets, arranging each portion in a modest line with a clear border around it. Roll the chicken snugly around the filling and secure the seams with toothpicks.
  4. Bake: Set the rolls seam-side down on the baking sheet with space between them. Brush with the remaining olive oil and bake uncovered, without flipping. Begin checking at 18–20 minutes; baking will take approximately 22–28 minutes, depending on the cutlets. The chicken should be opaque with a lightly golden exterior, and a thermometer inserted into the thickest part of the chicken, away from the filling, must read 165°F (75°C).
  5. Rest and serve: Rest the rolls for 5 minutes. Remove every toothpick, then cut each roll into two thick pieces. Serve warm with the cut faces showing.

How to Keep the Roll-Ups Together

Even, intact cutlets are easier to roll; a tear gives the filling a place to escape. Keep the avocado, tomato, and onion away from the edges, and make sure each roll holds its shape before placing it on the baking sheet. Resting before cutting and making thick slices help keep the avocado visible inside the chicken.

Where to Check the Chicken for Doneness

Insert an instant-read thermometer from the side into the thickest layer of chicken, not the avocado-filled center. A golden surface alone does not establish that the chicken has reached 165°F. Cutlet size, thickness, and filling volume can all affect the baking time.
Make-Ahead and Leftovers

For the clearest cut faces, bake and slice the roll-ups shortly before serving. Refrigerate cooked leftovers in an airtight container within 2 hours and use within 3–4 days. Reheat gently until the chicken reaches 165°F; the avocado may darken and soften further, and the tomato may release moisture.

Freezing the assembled avocado-filled rolls is not recommended because the filling’s texture is likely to suffer. For a separate chilled tortilla option, try these chicken bacon ranch pinwheels.

Nutrition

Approximate nutrition per serving (2 thick pieces; 4 servings): 340 calories, 40g protein, 17g fat, and 8g carbohydrates. Approximate values per 100g of cooked roll-ups: 150 calories, 18g protein, 8g fat, and 3g carbohydrates. Values vary with cutlet size, avocado yield, and moisture lost during baking.

Chicken Avocado Roll-Ups

Chicken cutlets are rolled around avocado, tomato, and red onion, then baked until the chicken is cooked through.
Course: Main Course
Cuisine: American
Prep: 20 min
Cook: 25 min
Total: 50 min
Servings: 4 Calories: 340 kcal

Equipment

  • Rimmed baking sheet
  • Parchment paper
  • Meat mallet
  • Toothpicks
  • Instant-read thermometer

Ingredients

For the Roll-Ups

  • 4 boneless, skinless chicken breast cutlets, about 1½ lb (680 g) total
  • 2 small ripe but firm avocados, about 240 g flesh, sliced
  • 1 medium Roma tomato (about 100 g), seeded and finely diced
  • 2 tablespoons finely minced red onion (20 g)
  • 1 tablespoon lime juice
  • 1 tablespoon olive oil
  • 1 teaspoon sweet paprika
  • ½ teaspoon garlic powder
  • ¾ teaspoon kosher salt, or to taste
  • ¼ teaspoon black pepper

Instructions

  1. Preheat the oven to 400°F (205°C). Line a rimmed baking sheet with parchment or lightly grease it with some of the measured olive oil.
  2. Pound the chicken cutlets between sheets of parchment or plastic wrap to an even ¼-inch thickness, taking care not to tear them.
  3. Drain any loose juice from the seeded tomato. Gently coat the avocado slices with the lime juice.
  4. Season the chicken with paprika, garlic powder, salt, and pepper. Divide the avocado, tomato, and onion among the cutlets, keeping the filling away from the edges.
  5. Roll each cutlet snugly around the filling and secure the seams with toothpicks. Place the rolls seam-side down on the baking sheet with space between them.
  6. Brush the rolls with the remaining olive oil. Bake uncovered without flipping, beginning to check at 18–20 minutes; the total baking time will be about 22–28 minutes.
  7. Check the thickest layer of chicken, away from the filling, with an instant-read thermometer. Bake until it reaches 165°F (75°C).
  8. Rest the rolls for 5 minutes, remove all toothpicks, and cut each roll into two thick pieces to serve.

Tips

  • Pound the cutlets evenly and avoid tearing them so they roll easily and hold the filling.
  • Seed the tomato and drain excess juice to help keep the filling from becoming wet.
  • Use a modest amount of filling and leave a clear border around each cutlet.
  • Check the chicken temperature from the side in the thickest layer, not in the filled center.
  • Rest the rolls before cutting and slice them thickly to help keep the avocado visible.

Notes

Refrigerate cooked leftovers in an airtight container within 2 hours and use within 3–4 days. Reheat until the chicken reaches 165°F (75°C). Freezing assembled rolls is not recommended; the avocado may darken and soften as leftovers.

Nutrition

Calories: 340 kcal | Protein: 40 g | Fat: 17 g | Carbohydrates: 8 g

Cheeseburger Bombs for Kids

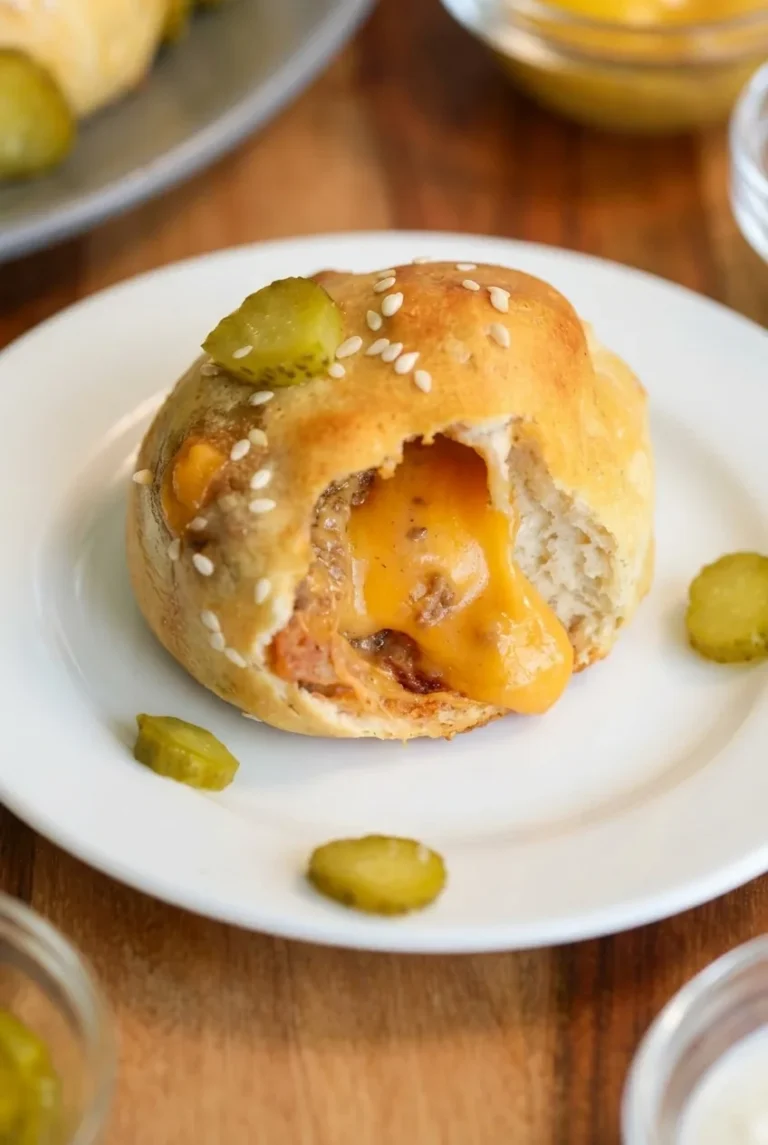
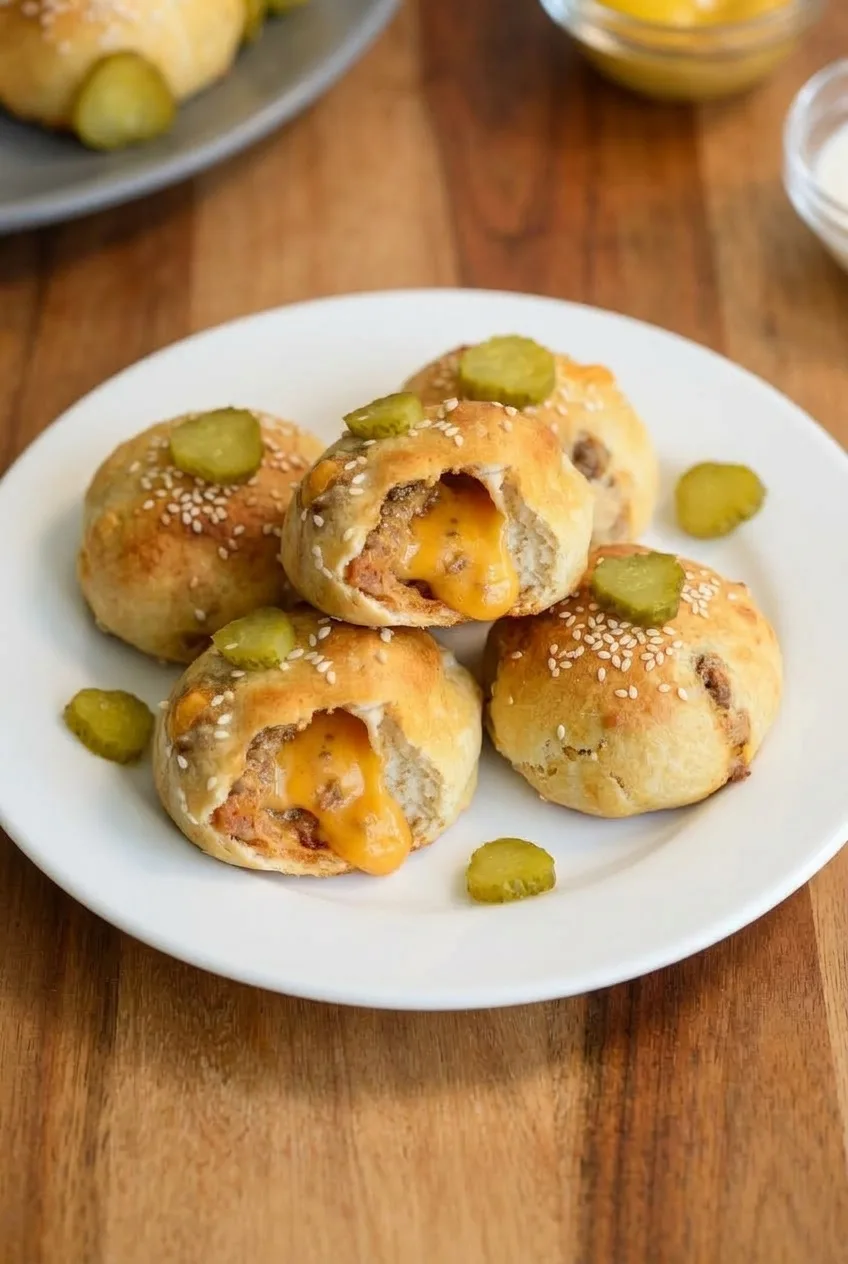
These individual biscuit parcels hold cooked ground beef and melted orange cheese beneath golden, sesame-topped crusts. A dill pickle slice goes on each one after baking. Draining the beef helps keep the dough from getting greasy, while leaving a clear border around the filling makes each biscuit easier to seal. Bake until the dough is cooked through, then let the bombs rest and check the hot center before serving them to children.

Ingredients for Cheeseburger Bombs

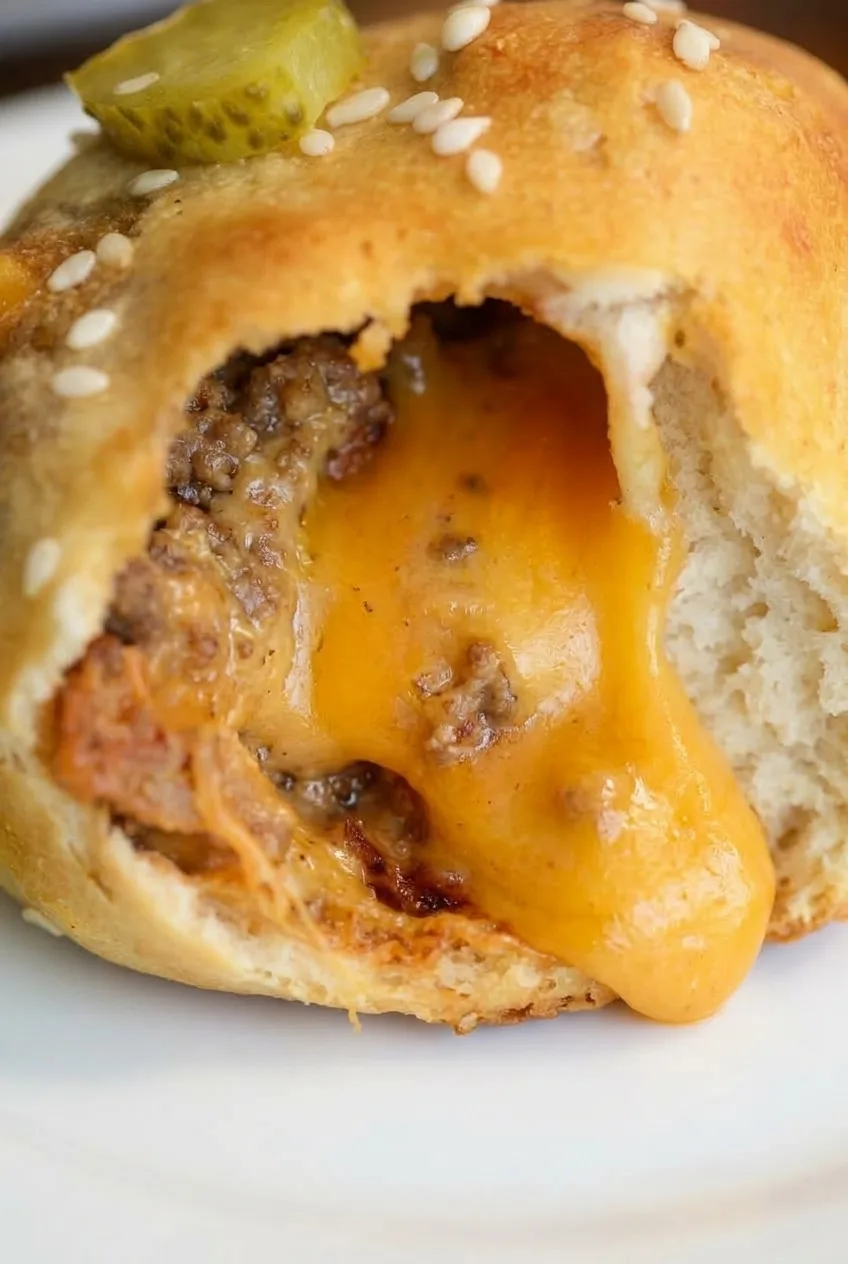
Close view inside a baked cheeseburger bomb showing browned beef, melted orange cheese and soft biscuit
  • 1 package refrigerated large biscuits (8 biscuits)
  • 1 lb ground beef, preferably 85–90% lean (450g)
  • 1/4 cup finely diced onion (about 40g)
  • 1/2 teaspoon kosher salt
  • 1/4 teaspoon black pepper
  • 8 orange American cheese slices, about 6 oz total (170g)
  • 1 tablespoon unsalted butter, melted
  • 2 teaspoons sesame seeds
  • At least 8 dill pickle slices, plus more for serving

Ketchup and mustard are optional for dipping. Keep them outside the biscuits so they do not wet the filling.

How to Make Cheeseburger Bombs

Plate of golden sesame-topped cheeseburger bombs, one opened to show its beef and cheese filling
  1. Preheat the oven: Heat to 375°F (190°C). Line a rimmed baking sheet with parchment paper.
  2. Cook the beef: In a large skillet over medium heat, cook the beef and onion for 7 to 10 minutes, breaking up and stirring the meat. Add the salt and pepper. Cook until the beef has no raw pink portions and the onion is soft. If using a thermometer, check that the ground beef reaches 160°F (70°C). Drain well and let cool briefly before filling the biscuits.
  3. Fill the biscuits: Flatten each biscuit into a roughly 5-inch round without tearing it. Place about 1/4 cup cooked beef in the center of each, using less if necessary to leave a clear border of dough. Fold one cheese slice and place it over the beef.
  4. Seal and top: Pull the dough edges over the filling and pinch them firmly closed, avoiding a thick lump at the seam. Set the bombs seam-side down on the baking sheet, about 1 inch apart. Brush the tops lightly with melted butter and sprinkle with sesame seeds.
  5. Bake: Bake uncovered for approximately 15 to 20 minutes. Start checking at 15 minutes. The tops and sides should be golden, with dough near the filling and seam baked through rather than gummy. Larger biscuits or thick folds may need more time.
  6. Rest and serve: Let the bombs rest for at least 5 minutes, then add a dill pickle slice to each. Open one after baking and resting to show the beef and melted cheese. Cut or open a child’s portion and check that the center is comfortable to eat before serving.

How to Keep the Filling Inside

If the beef and folded cheese slice leave too little dough to pinch closed, reduce the beef portion rather than stretching the biscuit until it tears. A securely pinched seam placed underneath helps contain the cheese. The bombs should be fully closed during baking; open one afterward for serving. This bake time is for fully cooked beef, not raw ground beef sealed inside the dough.

When Are Cheeseburger Bombs Done?

The beef is cooked before assembly, but the biscuit still needs to bake through. A golden top alone is not enough: check the sides and dough near the seam for pale, gummy spots. Give thicker or larger parcels more oven time if needed.

Serving and Cheese Variation

Serve with extra pickles and, if desired, ketchup and mustard for dipping. For another handheld option, try muffin tin corn dogs for kids.

Orange cheddar slices can replace American cheese for a sharper flavor, though the center may melt less smoothly.

Leftovers and Reheating

Promptly refrigerate leftover bombs in a covered container. Reheat until hot throughout, then let the filling cool before serving, especially to children. Microwave time depends on the portion and appliance, so check the center rather than relying on a fixed time.

Nutrition

Yield: 8 bombs, or about 4 dinner servings. Approximate nutrition per bomb: 370 calories, 18g protein, 21g fat, and 28g carbohydrates. Approximate values per 100g: 285 calories, 14g protein, 16g fat, and 22g carbohydrates. Values vary with the biscuit brand, cheese, beef leanness, and how much fat is drained.

Cheeseburger Bombs for Kids

Cooked ground beef and melted cheese are wrapped in biscuits, baked until golden, and topped with dill pickles.
Course: Main Course
Cuisine: American
Prep: 15 min
Cook: 30 min
Total: 50 min
Servings: 4 Calories: 370 kcal

Equipment

  • Large skillet
  • Rimmed baking sheet
  • Parchment paper

Ingredients

For the bombs

  • 1 package refrigerated large biscuits (8 biscuits)
  • 1 lb ground beef, preferably 85–90% lean (450g)
  • 1/4 cup finely diced onion (about 40g)
  • 1/2 teaspoon kosher salt
  • 1/4 teaspoon black pepper
  • 8 orange American cheese slices, about 6 oz total (170g)
  • 1 tablespoon unsalted butter, melted
  • 2 teaspoons sesame seeds
  • At least 8 dill pickle slices, plus more for serving

For serving (optional)

  • Ketchup
  • Mustard

Instructions

  1. Preheat the oven to 375°F (190°C). Line a rimmed baking sheet with parchment paper.
  2. Cook the ground beef and onion in a large skillet over medium heat for 7 to 10 minutes, breaking up and stirring the meat.
  3. Add the salt and pepper. Cook until the beef has no raw pink portions and the onion is soft. If using a thermometer, check that the beef reaches 160°F (70°C). Drain well and let cool briefly.
  4. Flatten each biscuit into a roughly 5-inch round without tearing it.
  5. Place about 1/4 cup cooked beef in the center of each biscuit, using less if needed to leave a clear dough border. Fold one cheese slice and place it over the beef.
  6. Pull the dough edges over the filling and pinch firmly closed. Place the bombs seam-side down on the baking sheet, about 1 inch apart.
  7. Brush the tops lightly with melted butter and sprinkle with sesame seeds.
  8. Bake uncovered for approximately 15 to 20 minutes, checking from 15 minutes. Bake until the tops and sides are golden and the dough near the filling and seam is cooked through.
  9. Let the bombs rest for at least 5 minutes, then top each with a dill pickle slice. Check that the center is comfortable to eat before serving to children.

Tips

  • Drain the cooked beef well to help keep the biscuit dough from getting greasy.
  • Leave a clear border of dough around the filling so the biscuits are easier to seal.
  • Use less beef if needed rather than stretching the dough until it tears.
  • Pinch the seam firmly and place it underneath during baking.
  • Check the sides and dough near the seam for pale, gummy spots; larger parcels may need extra baking time.

Variations

  • Orange Cheddar Cheeseburger Bombs: Replace the American cheese with orange cheddar slices for a sharper flavor; the cheese may melt less smoothly.

Notes

Refrigerate leftovers promptly in a covered container. Reheat until hot throughout and let the filling cool before serving. Approximate nutrition is per bomb; values vary by ingredients.

Nutrition

Calories: 370 kcal | Protein: 18 g | Fat: 21 g | Carbohydrates: 28 g

Cheese and Spinach Ravioli for Kids

Thin egg pasta wraps a mild filling of spinach, ricotta, Parmesan, and mozzarella in these homemade ravioli. Small mounds of filling create rounded centers; careful sealing and a fluted pastry wheel give each piece its square shape without a ravioli mold.

The filling needs to be dry enough to hold its shape, and the pasta borders need to be sealed before cutting. Boil the ravioli gently until tender, then serve warm marinara on the side. Allow about 75–85 minutes from start to finish, including the dough rest.

Ingredients for Cheese and Spinach Ravioli

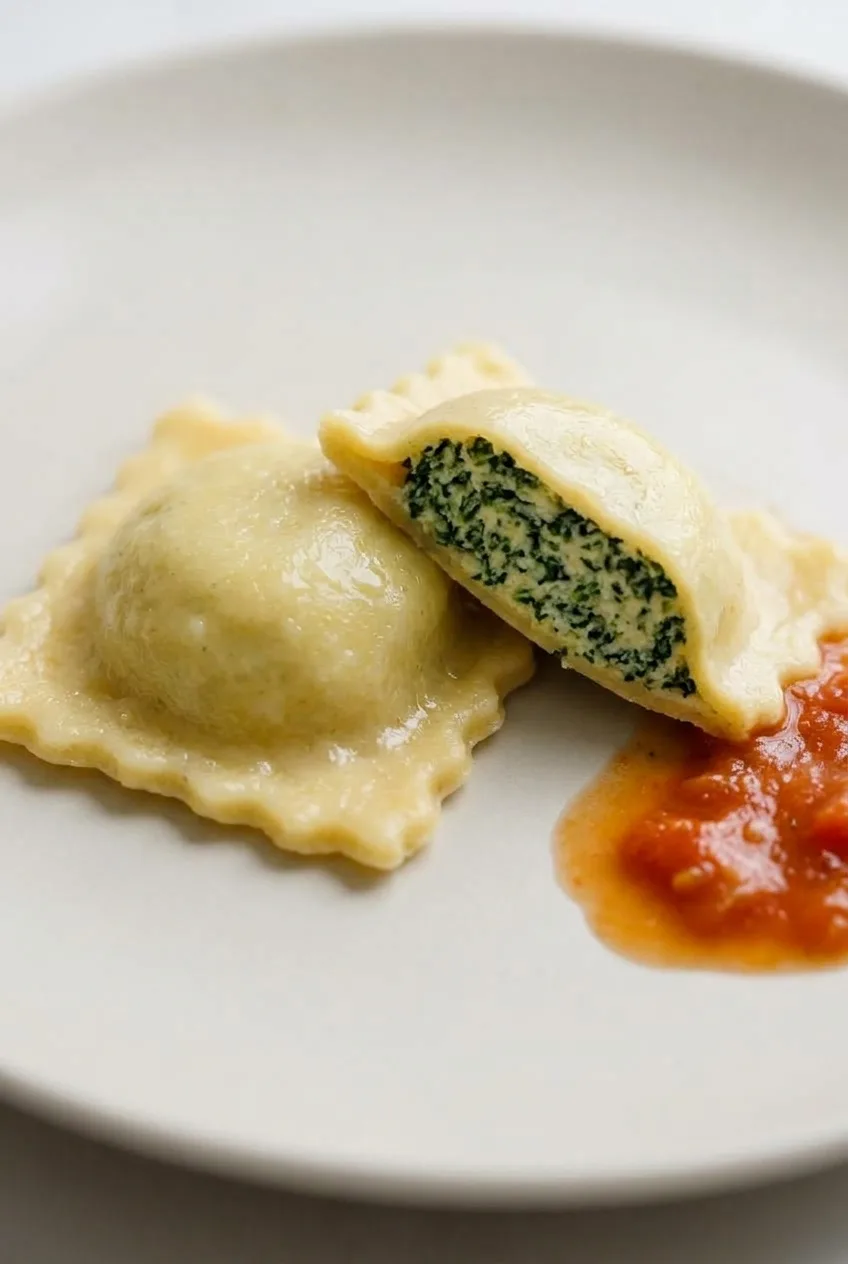
Cooked cheese and spinach ravioli, one cut open to show the filling inside tender egg pasta
  • 2 cups all-purpose flour (240g), plus 2–3 tablespoons for dusting as needed
  • 3 large eggs
  • 1/4 teaspoon kosher salt for the dough
  • 5 ounces frozen chopped spinach, thawed (140g before squeezing)
  • 3/4 cup whole-milk ricotta (185g)
  • 1/4 cup finely grated Parmesan (25g)
  • 1/4 cup shredded low-moisture mozzarella (30g)
  • 1/4 teaspoon kosher salt for the filling
  • About 2 teaspoons kosher salt for the pasta water
  • 1 cup mild prepared marinara (240g), for serving

Optional: Serve with 1–2 tablespoons extra grated Parmesan.

How to Make Cheese and Spinach Ravioli

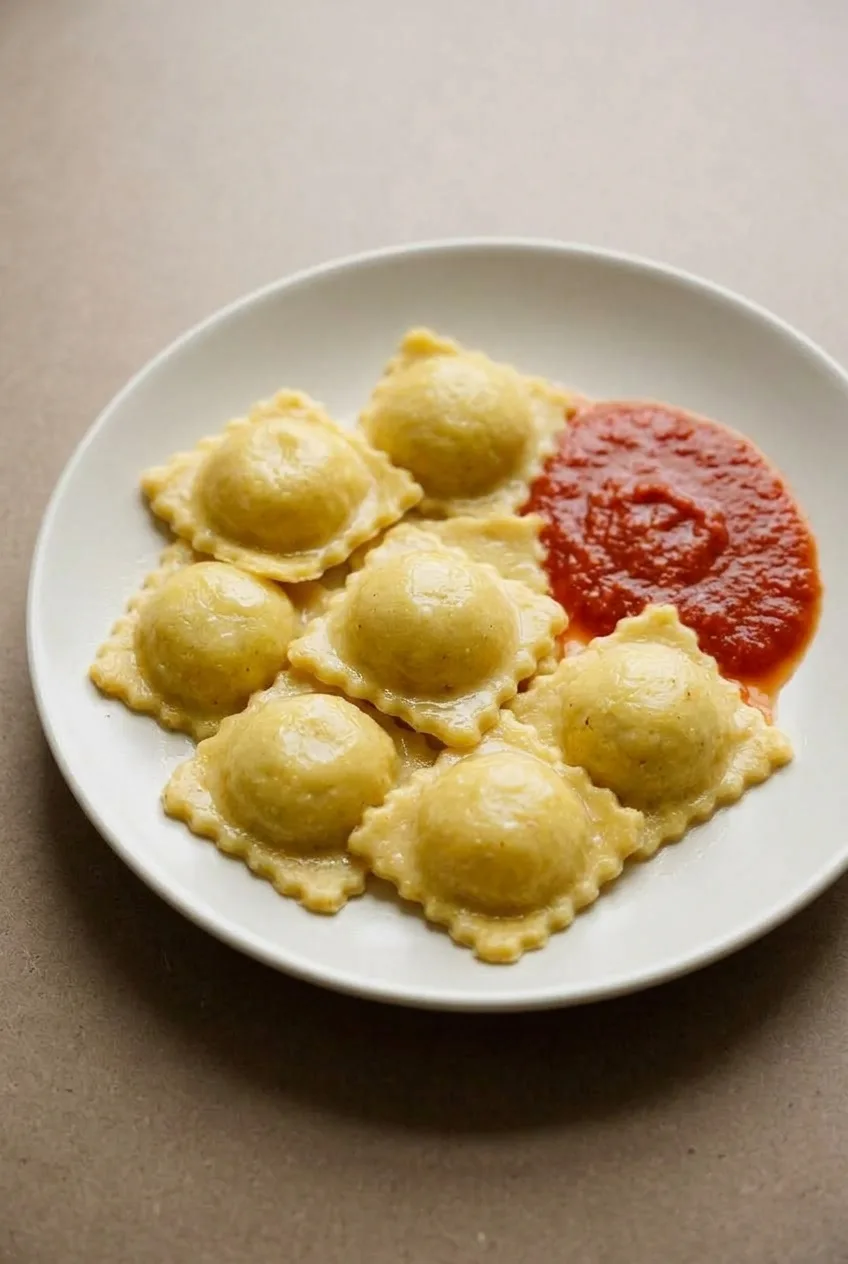
A serving of cooked cheese and spinach ravioli with marinara alongside on a plate
  1. Mix and rest the dough: Mix the 2 cups flour, eggs, and dough salt with a fork until a dough forms. Knead until cohesive and reasonably smooth, using a little dusting flour if it sticks. Cover and rest at room temperature for 30 minutes.
  2. Make the filling: During the rest, squeeze the thawed spinach firmly in a clean kitchen towel until no liquid drips out. Break up large pieces. Drain the ricotta if it looks watery, then mix it with the spinach, Parmesan, mozzarella, and filling salt. A spoonful of filling should hold its shape.
  3. Roll the pasta: Divide the dough into manageable portions and keep unused portions covered. On a lightly floured surface, roll a pair of thin, pliable sheets with a rolling pin or pasta roller, aiming for about 1/32–1/16 inch thick. Work with one pair at a time so the pasta stays soft enough to seal.
  4. Fill and seal: Place about 2 teaspoons of filling in spaced mounds on one sheet, leaving room for approximately 2 1/2-inch squares. Lay the second sheet over the mounds. Press close to each mound, then outward to remove trapped air. Firmly seal the flat dough around each pocket, keeping filling out of the seams.
  5. Cut the ravioli: Use a fluted pastry wheel to cut squares with about 1/4–3/8 inch of continuous sealed border around each mound. Re-press loose edges. Set the pieces apart on a lightly floured, parchment-lined tray. Repeat with the remaining dough and filling; expect about 28–32 ravioli.
  6. Boil in batches: Bring about 4 quarts of water and the pasta-water salt to a boil in a large pot. Add 8–12 ravioli at a time, depending on the pot’s width. Adjust the heat to maintain a gentle, uncovered boil and stir carefully once to prevent sticking. Start checking at about 3 minutes. Thin, fresh ravioli generally take 3–5 minutes per batch; they should float, and a sampled pasta border should be tender rather than floury or tough.
  7. Serve: Lift the ravioli with a spider or slotted spoon rather than draining them into a colander. Warm the marinara separately and offer about 1/4 cup alongside each of four portions.

How to Shape the Domed Ravioli

Keep the filling mounds small so they rise above a flat border without pushing cheese into the seam. Press air out before cutting, and run the fluted wheel outside the sealed area. Overfilling, trapped air, or a gap in the border can cause a pocket to open in the water.

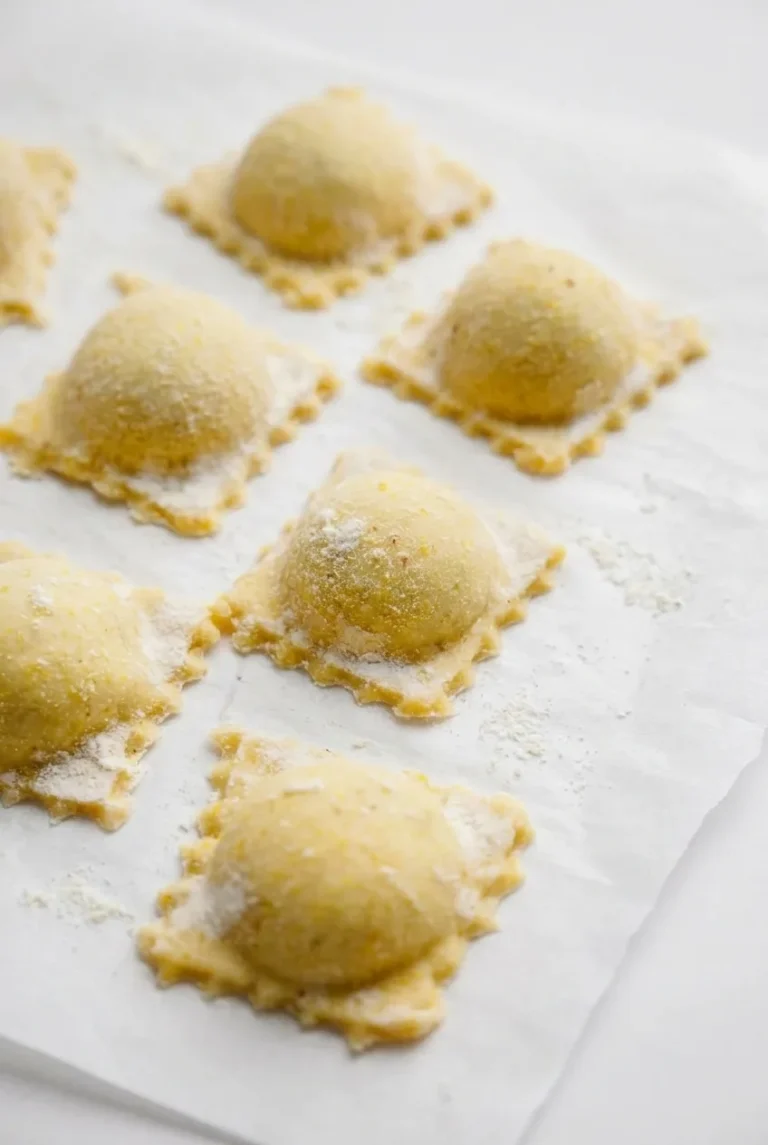
The lightly floured ravioli on the tray are still uncooked. After boiling, the pasta should be tender and lightly glossy, without a dry flour coating. For a simpler spinach pasta dinner, try Easy Spinach Pasta for Kids.

Keep the Filling Dry

If liquid pools around the spinach, squeeze it again. Drain visibly watery ricotta before filling the pasta, too. Moist filling spreads instead of forming a rounded mound and can make the dough too slippery to seal.

How to Tell When the Ravioli Are Done

Floating is a cue to check the ravioli, not a guarantee that the pasta is cooked through. Taste or cut a border: it should be tender, while the pocket remains intact and the pasta is not mushy. Thicker sheets may need longer than the suggested 3–5 minutes.

Make Ahead, Freeze, and Reheat

Keep uncooked ravioli covered and separate in a single layer on lightly floured parchment. If refrigerating them, cook within about 4 hours. For longer make-ahead storage, freeze them on the tray until firm, then transfer to a freezer-safe bag. Use within about 2–3 weeks for best quality.

Boil frozen ravioli directly from frozen in uncrowded batches. They will need longer than fresh ravioli; check a border for tenderness rather than relying on the fresh cooking time.

Refrigerate cooked leftovers promptly in a covered container. Reheat gently with a little sauce or water until hot, without vigorous stirring that could tear the pasta. For another dinner with marinara, see Baked Turkey Meatballs for Kids.

Can Kids Help Make the Ravioli?

Kids can portion filling and press pasta borders with supervision. An adult should handle the sharp pastry wheel and boiling water. Wonton wrappers can be used for a separate shortcut version, but they require different shaping and cooking directions and will not produce these homemade fluted squares.

Nutrition

Approximate per serving: 445 calories, 23g protein, 14g fat, and 55g carbohydrates, based on 4 servings with marinara. Approximate per 100g of the cooked dish: 155 calories, 8g protein, 5g fat, and 19g carbohydrates. Values will vary with the marinara and the amount of water absorbed by the pasta.

Cheese and Spinach Ravioli for Kids

Homemade egg pasta is filled with spinach, ricotta, Parmesan, and mozzarella, then served with warm marinara.
Course: Main Course
Cuisine: Italian
Prep: 65 min
Cook: 15 min
Total: 80 min
Servings: 4 Calories: 445 kcal

Equipment

  • Mixing bowl
  • Clean kitchen towel
  • Rolling pin or pasta roller
  • Fluted pastry wheel
  • Parchment-lined tray
  • Large pot
  • Spider or slotted spoon

Ingredients

For the Dough

  • 2 cups all-purpose flour (240 g), plus 2–3 tablespoons for dusting
  • 3 large eggs
  • 1/4 teaspoon kosher salt

For the Filling

  • 5 ounces frozen chopped spinach, thawed (140 g before squeezing)
  • 3/4 cup whole-milk ricotta (185 g)
  • 1/4 cup finely grated Parmesan (25 g)
  • 1/4 cup shredded low-moisture mozzarella (30 g)
  • 1/4 teaspoon kosher salt

For Cooking and Serving

  • About 2 teaspoons kosher salt, for the pasta water
  • 1 cup mild prepared marinara (240 g)
  • Optional: 1–2 tablespoons extra grated Parmesan

Instructions

  1. Mix the flour, eggs, and dough salt with a fork until a dough forms.
  2. Knead until the dough is cohesive and reasonably smooth, using a little dusting flour if needed. Cover and rest at room temperature for 30 minutes.
  3. Squeeze the thawed spinach firmly in a clean kitchen towel until no liquid drips out, then break up any large pieces.
  4. Drain the ricotta if it looks watery. Mix it with the spinach, Parmesan, mozzarella, and filling salt until the filling holds its shape.
  5. Divide the dough into manageable portions and keep unused portions covered. Roll pairs of sheets on a lightly floured surface to about 1/32–1/16 inch thick.
  6. Place about 2 teaspoons of filling in spaced mounds on one sheet, leaving room for approximately 2 1/2-inch squares.
  7. Lay a second sheet over the filling. Press close to each mound and outward to remove trapped air, then firmly seal the dough around each pocket without getting filling in the seams.
  8. Cut around the pockets with a fluted pastry wheel, leaving about 1/4–3/8 inch of sealed border. Re-press any loose edges and place the ravioli apart on a lightly floured, parchment-lined tray. Repeat with the remaining dough and filling to make about 28–32 ravioli.
  9. Bring about 4 quarts of water and the pasta-water salt to a boil in a large pot.
  10. Boil 8–12 ravioli at a time. Adjust the heat to maintain a gentle, uncovered boil and stir carefully once to prevent sticking. Start checking at about 3 minutes; fresh ravioli generally take 3–5 minutes per batch.
  11. Check that the ravioli float and that a sampled pasta border is tender. Lift them out with a spider or slotted spoon.
  12. Warm the marinara separately and serve about 1/4 cup alongside each portion. Offer extra Parmesan if desired.

Tips

  • Squeeze the spinach until no liquid drips out, and drain ricotta that looks watery.
  • Keep filling mounds small and leave a clean border so the ravioli seal properly.
  • Press trapped air out before cutting and re-press any loose edges.
  • Boil in uncrowded batches and check a pasta border for tenderness; floating alone does not mean the ravioli are done.
  • Keep unused dough covered so it stays soft enough to seal.

Notes

Refrigerate uncooked ravioli on lightly floured parchment and cook within about 4 hours. For longer storage, freeze on a tray until firm, then transfer to a freezer-safe bag and use within 2–3 weeks. Boil from frozen until the pasta border is tender. Refrigerate cooked leftovers promptly and reheat gently with a little sauce or water.

Nutrition

Calories: 445 kcal | Protein: 23 g | Fat: 14 g | Carbohydrates: 55 g | Per 100g Calories: 155 kcal | Per 100g Protein: 8 g | Per 100g Fat: 5 g | Per 100g Carbohydrates: 19 g

DIY Pizza Lunchables

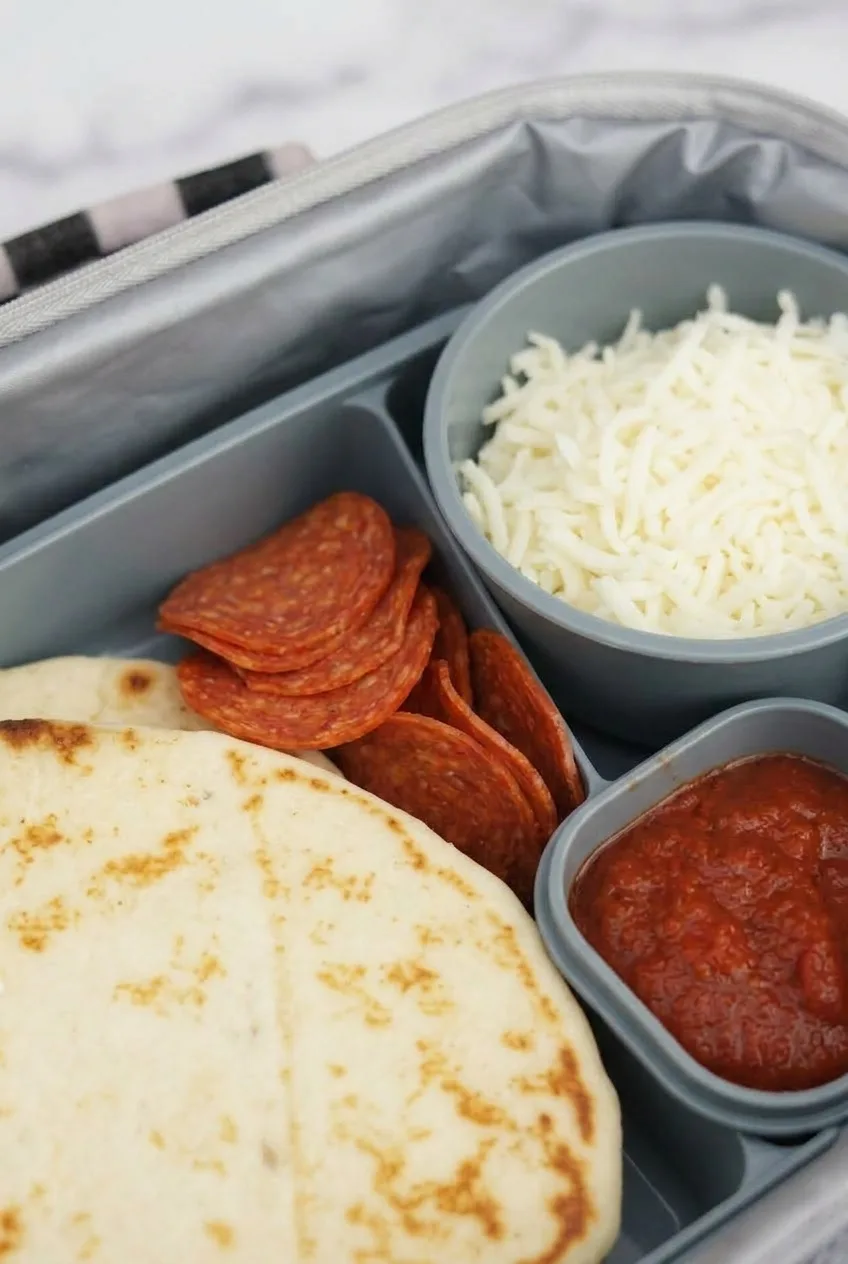
Each DIY Pizza Lunchables kit has two soft mini flatbreads, pizza sauce, shredded mozzarella, and pepperoni. Pack the toppings separately, then assemble the pizzas at lunchtime. The bread is already baked, so there’s no cooking or heating to do; a sealed sauce cup keeps it from soaking into the bread on the way to lunch.

Yield: 2 lunchbox kits | Prep time: 10 minutes | Cook time: 0 minutes | Total time: 10 minutes

Ingredients for DIY Pizza Lunchables

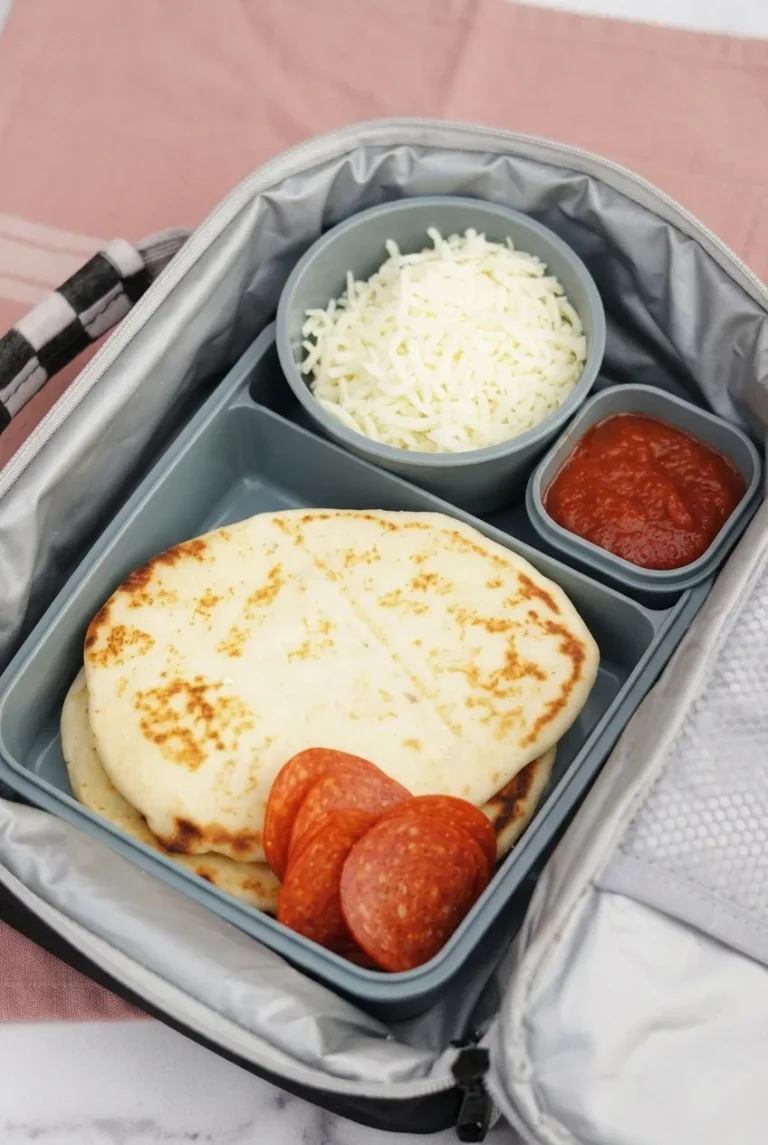
Open insulated lunch bag holding a complete DIY Pizza Lunchables kit with toppings packed separately
  • 4 ready-to-eat mini naan or similarly soft, round baked flatbreads, about 5 inches across (about 200g total)
  • 1/4 cup pizza sauce (about 60g)
  • 1/2 cup shredded mozzarella (about 55g)
  • About 12 pepperoni slices (about 25g)
Close view of browned mini flatbread, pepperoni, shredded mozzarella, and pizza sauce in a lunchbox

How to Pack DIY Pizza Lunchables

  1. Check the bread: Use fully baked flatbreads that fit in the lunch containers without being crushed. If using homemade rounds, bake and cool them completely before packing.
  2. Portion the toppings: Put 2 tablespoons pizza sauce in a small, leak-resistant lidded cup for each lunch. Put 1/4 cup mozzarella in a separate lidded cup for each lunch. Check that the filled cups fit under the lunchbox lids.
  3. Pack the kits: Overlap two flatbreads in each container and place about six pepperoni slices beside them. Add the sealed sauce and cheese cups, keeping the sauce off the bread.
  4. Keep cold and serve: Refrigerate the kits until departure, then carry them in insulated lunch bags with frozen ice packs. At lunchtime, spread sauce on the flatbreads and add the mozzarella and pepperoni. Eat cold; the cheese does not need to melt.

Choosing the Mini Pizza Bases

Mini naan makes a soft, roughly round base with light brown spots. Choose fully baked rounds that fit your containers. Homemade baked pizza-dough rounds also work if cooled completely before packing; they can be frozen separately for future lunches, but thawing time depends on their thickness and packing conditions. Sandwich thins are another ready-to-eat option, though they make a thinner base.

Turkey pepperoni can replace regular pepperoni. Thick marinara or tomato-basil pasta sauce can replace pizza sauce if it spreads without dripping.

Keeping the Lunches Cold

Keep the mozzarella and pepperoni refrigerated until packing. Use an insulated bag and frozen ice packs to keep the packed lunch at 40°F (5°C) or below. You can portion the components ahead, but keep them separate and wait until lunchtime to sauce the bread. Store unused ingredients separately according to their package directions.

If there’s room, add fruit or another side in its own compartment and pack a small spoon or spreader for the sauce. For another packable lunch idea, try muffin tin corn dogs for kids.

Nutrition

Approximate per lunchbox kit: 450 calories, 19g protein, 18g fat, and 55g carbohydrates. Approximate per 100g: 265 calories, 11g protein, 11g fat, and 32g carbohydrates. Values vary with the flatbread, sauce, cheese, and pepperoni used.

DIY Pizza Lunchables

Pack soft mini flatbreads with separate cups of pizza sauce and mozzarella, plus pepperoni, for a no-heat lunch.
Course: Main Course
Cuisine: American
Prep: 10 min
Total: 10 min
Servings: 2

Equipment

  • Lunch containers
  • Small leak-resistant lidded cups
  • Insulated lunch bag
  • Frozen ice packs

Ingredients

  • 4 ready-to-eat mini naan or similarly soft, round baked flatbreads, about 5 inches across (about 200 g total)
  • 1/4 cup pizza sauce (about 60 g)
  • 1/2 cup shredded mozzarella (about 55 g)
  • About 12 pepperoni slices (about 25 g)

Instructions

  1. Check that the flatbreads are fully baked and fit in the lunch containers without being crushed. If using homemade rounds, bake and cool them completely first.
  2. Portion 2 tablespoons of pizza sauce into a small, leak-resistant lidded cup for each kit.
  3. Portion 1/4 cup of mozzarella into a separate lidded cup for each kit. Make sure the cups fit under the lunchbox lids.
  4. Overlap two flatbreads in each container and add about six pepperoni slices beside them.
  5. Add the sealed sauce and cheese cups, keeping the sauce off the bread.
  6. Refrigerate the kits until departure and carry them in insulated lunch bags with frozen ice packs.
  7. At lunchtime, spread the sauce on the flatbreads and add the mozzarella and pepperoni. Eat cold; the cheese does not need to melt.

Tips

  • Choose fully baked flatbreads that fit the containers without being crushed.
  • Use sealed sauce cups to keep the bread from getting soggy.
  • Check that the filled topping cups fit under the lunchbox lids.
  • Keep the sauce, cheese, and pepperoni separate from the bread until lunchtime.

Variations

  • Turkey Pepperoni: Replace regular pepperoni with turkey pepperoni.
  • Marinara or Tomato-Basil Sauce: Use thick marinara or tomato-basil pasta sauce instead of pizza sauce, as long as it spreads without dripping.
  • Alternative Pizza Bases: Use cooled homemade baked pizza-dough rounds or ready-to-eat sandwich thins instead of mini naan.

Notes

Keep the packed lunch at 40°F (5°C) or below with an insulated bag and frozen ice packs. Store unused ingredients according to their package directions.

Nutrition

Per Lunchbox Kit Calories: 450 kcal | Per Lunchbox Kit Protein: 19 g | Per Lunchbox Kit Fat: 18 g | Per Lunchbox Kit Carbohydrates: 55 g | Per 100g Calories: 265 kcal | Per 100g Protein: 11 g | Per 100g Fat: 11 g | Per 100g Carbohydrates: 32 g