Author

Julia

Browsing

Classic Baked Mac and Cheese

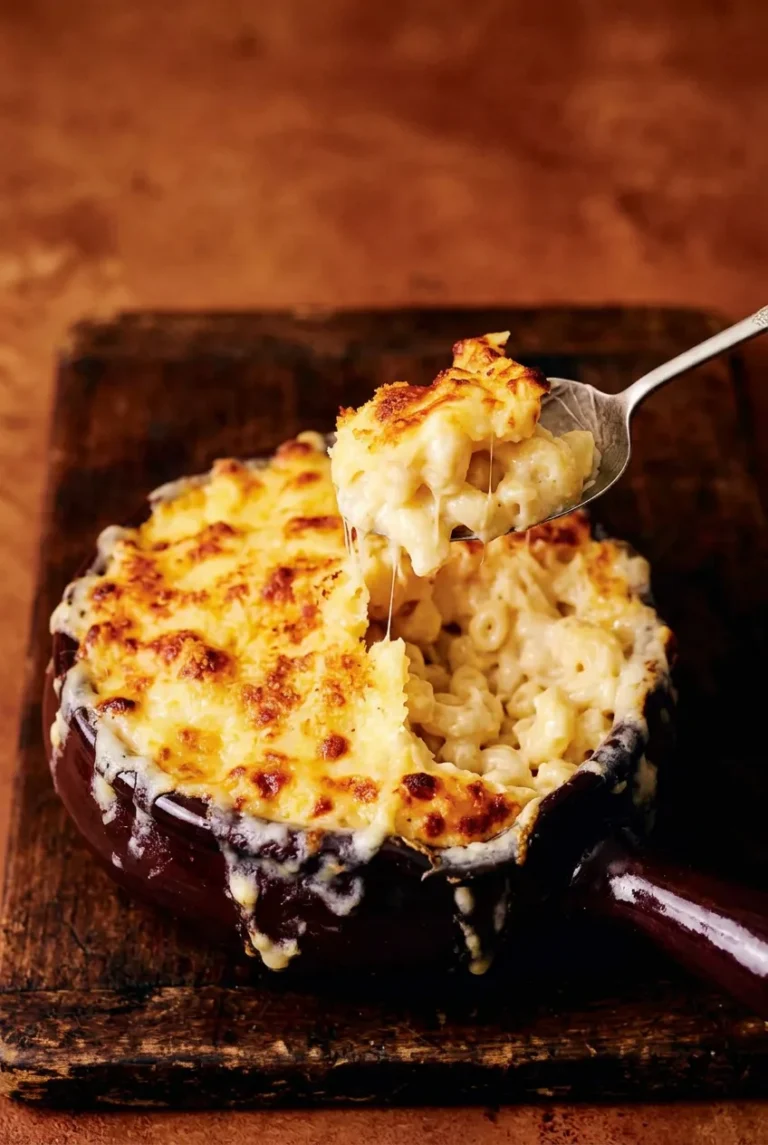
This deep-dish mac and cheese has a browned cheese top and creamy macaroni underneath—no breadcrumb crust. The elbows go into the oven slightly firm, with enough cheddar-mozzarella sauce to stay moist as they bake. A little of both cheeses is reserved for the top, where it melts into golden patches. Serve it warm from the dish after a short rest, while the cheese is still stretchy.

Time: 20 minutes prep, 35 to 40 minutes cooking, plus a 5 to 10 minute rest. Yield: 8 side-dish servings or 6 main-dish servings.

Ingredients for Classic Baked Mac and Cheese
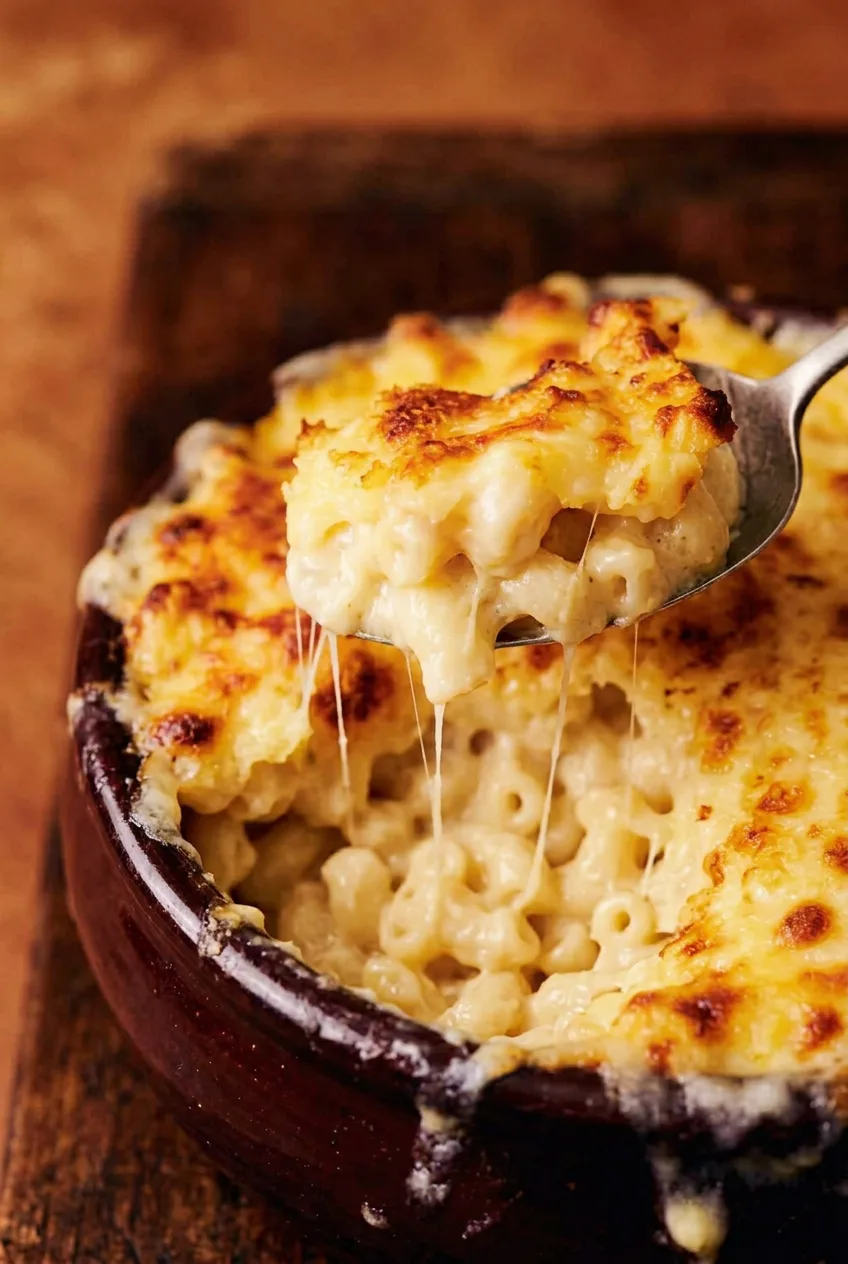
Close view of creamy elbow macaroni and melted cheese strands beneath the browned cheese top
  • 12 ounces dry elbow macaroni (340g)
  • 3 tablespoons unsalted butter for the sauce, plus about 1 teaspoon for the baking dish
  • 3 tablespoons all-purpose flour (25g)
  • 3 cups whole milk
  • 10 ounces sharp cheddar cheese, freshly shredded, divided (about 280g)
  • 6 ounces low-moisture mozzarella cheese, freshly shredded, divided (about 170g)
  • 1/2 teaspoon fine salt, plus salt for the pasta water
  • 1/4 teaspoon freshly ground black pepper

How to Make Baked Mac and Cheese
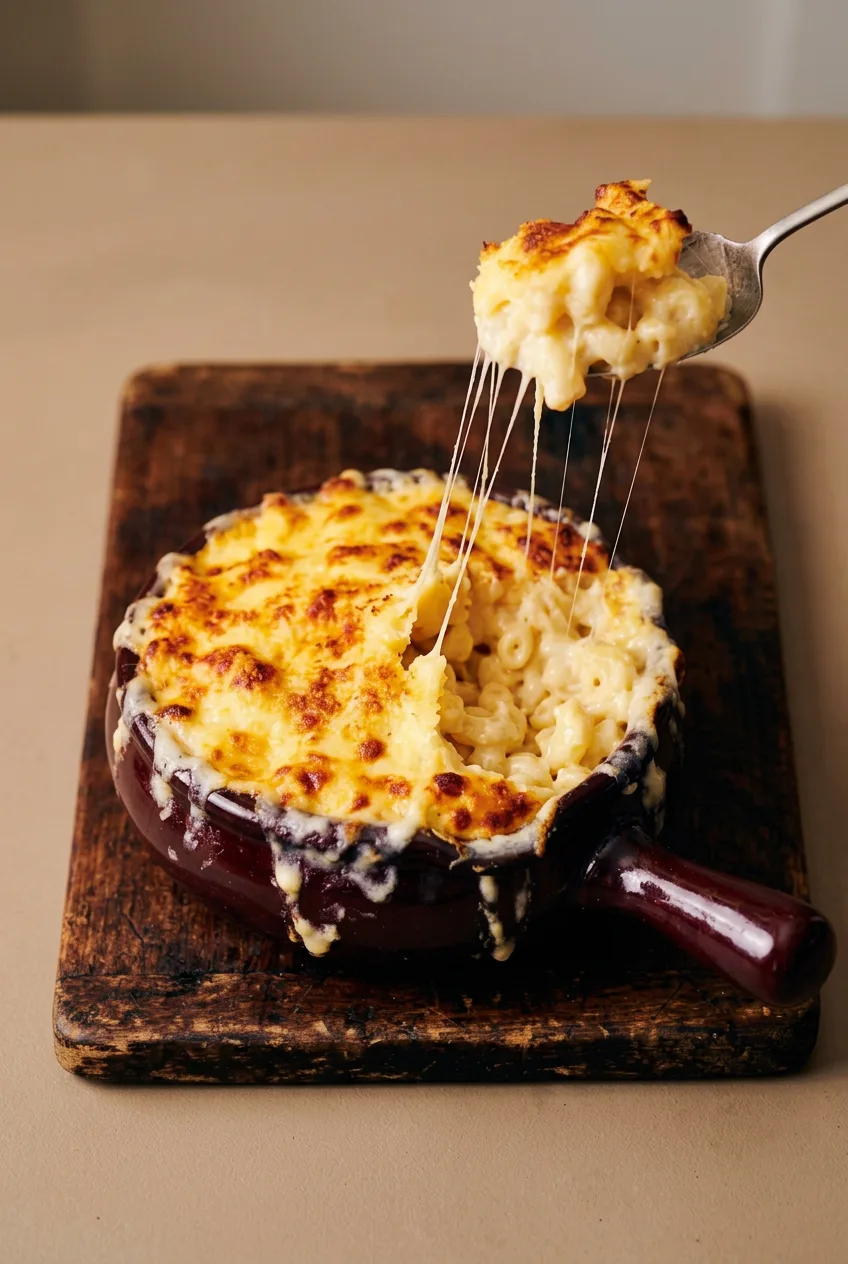
Full deep dish of baked mac and cheese on a wooden board, with one stretchy serving lifted above it
  1. Prepare the oven and dish: Preheat the oven to 375°F (190°C). Lightly butter a deep, approximately 3-quart oven-safe baking dish. Reserve about 1 ounce of the cheddar and 2 ounces of the mozzarella for the top.
  2. Cook the macaroni: Boil the elbows in salted water until al dente or about 1 minute shy of the package’s al dente timing, roughly 6 to 9 minutes. They should still offer slight resistance when bitten. Drain.
  3. Thicken the milk sauce: Melt 3 tablespoons butter in a saucepan over medium heat. Whisk in the flour and cook for about 1 minute without letting it darken. Gradually whisk in the milk. Cook, stirring, for about 6 to 9 minutes, until the sauce coats a spoon but still pours easily.
  4. Add the cheese off the heat: Remove the saucepan from the burner. Stir in the unreserved cheddar and mozzarella a handful at a time until melted and smooth. Add the 1/2 teaspoon salt and the pepper; taste and adjust the salt if needed. Do not boil the sauce after adding the cheese, or it may turn grainy or oily.
  5. Fill the dish: Fold the macaroni into the sauce. It should look generously coated and slightly loose. Transfer to the prepared dish, leaving room for bubbling, and scatter the reserved cheese over the surface.
  6. Bake uncovered: Bake for about 20 to 25 minutes, checking at 20 minutes. Remove when the edges bubble and the top has scattered golden-brown patches. Do not keep baking to brown every inch; the macaroni can dry out. Rotate the dish only if your oven browns unevenly.
  7. Rest and serve: Let stand for 5 to 10 minutes, then scoop warm portions directly from the dish.

How to Keep Baked Mac and Cheese Creamy

The macaroni softens further in the oven, so it should still be slightly firm when drained. It also absorbs sauce as it bakes. If the pasta looks a little loose and generously coated before it goes into the dish, that is what helps it stay creamy beneath the browned top.

Thicken the milk before melting in the freshly shredded cheese off the heat. Once the casserole is bubbling at the edges and browned in patches, take it out rather than waiting for the entire surface to darken.

Baking Dish Size and Doneness

Use a deep dish with about 3 quarts of capacity, but leave headroom for bubbling. If the dish is nearly full, set it on a rimmed baking sheet to catch spills.

A wide, shallow dish may brown sooner, so start checking it before 20 minutes. A narrower, deeper dish may need longer. In either case, look for bubbling edges and a patchily browned cheese top rather than relying on the timer alone.

Serving and Variations

Serve warm with a green salad or Parmesan Roasted Brussels Sprouts. For a holiday spread, it also fits alongside Homemade Green Bean Casserole with Fried Onions.

For a crunchy variation, mix about 1/2 cup panko with 1 tablespoon melted butter and scatter it over the cheese before baking. This replaces the cheese-only look of the main recipe. For a separate version with add-ins, try Baked Mac and Cheese with Bacon and Caramelized Onions.

Storage, Make-Ahead, and Reheating

Cool leftovers, transfer to an airtight container, and refrigerate for up to 4 days. To reheat, add a splash of milk and warm loosely covered at 350°F (175°C) for about 20 minutes, checking until hot. Microwave individual portions in 30-second intervals, stirring between intervals. Reheated mac and cheese will be less stretchy than it is fresh from the oven.

To make ahead, assemble the casserole, cover, and refrigerate for up to 24 hours before baking. A cold casserole may take longer; bake until the edges bubble and the top browns in patches.

Cooled individual portions can be frozen for up to 2 months. Thaw overnight in the refrigerator before reheating; the texture may be less creamy than when freshly baked.

Nutrition

Approximate nutrition per side-dish serving, based on 8 servings: 470 calories, 23g protein, 25g fat, and 39g carbohydrates. Approximate values per 100g of finished casserole: 190 calories, 9g protein, 10g fat, and 16g carbohydrates. Values vary with the cheeses used and moisture lost during baking.

Classic Baked Mac and Cheese

Elbow macaroni is folded into a cheddar-mozzarella sauce and baked until bubbly with golden patches of cheese on top.
Course: Side Dish
Cuisine: American
Prep: 20 min
Cook: 40 min
Total: 70 min
Servings: 8 Calories: 470 kcal

Equipment

  • 3-quart baking dish
  • Saucepan
  • Whisk
  • Colander
  • Rimmed baking sheet

Ingredients

For the Mac and Cheese

  • 12 ounces dry elbow macaroni (340 g)
  • 3 tablespoons unsalted butter, plus about 1 teaspoon for the baking dish
  • 3 tablespoons all-purpose flour (25 g)
  • 3 cups whole milk
  • 10 ounces sharp cheddar cheese, freshly shredded and divided (about 280 g)
  • 6 ounces low-moisture mozzarella cheese, freshly shredded and divided (about 170 g)
  • 1/2 teaspoon fine salt, plus salt for the pasta water
  • 1/4 teaspoon freshly ground black pepper

Instructions

  1. Preheat the oven to 375°F (190°C). Lightly butter a deep, approximately 3-quart oven-safe baking dish.
  2. Reserve about 1 ounce of cheddar and 2 ounces of mozzarella for the topping.
  3. Boil the macaroni in salted water until al dente or about 1 minute shy of the package timing, roughly 6 to 9 minutes. Drain.
  4. Melt 3 tablespoons butter in a saucepan over medium heat. Whisk in the flour and cook for about 1 minute without browning.
  5. Gradually whisk in the milk. Cook, stirring, for 6 to 9 minutes, until the sauce coats a spoon but still pours easily.
  6. Remove the saucepan from the heat. Stir in the remaining cheddar and mozzarella a handful at a time until melted and smooth.
  7. Stir in the 1/2 teaspoon salt and pepper. Taste and adjust the salt if needed. Do not boil the sauce after adding the cheese.
  8. Fold the macaroni into the sauce until generously coated. Transfer it to the prepared dish and scatter the reserved cheese over the top.
  9. Bake uncovered for about 20 to 25 minutes, checking at 20 minutes. Remove when the edges bubble and the top has scattered golden-brown patches.
  10. Let stand for 5 to 10 minutes before serving warm.

Tips

  • Drain the pasta while it is still slightly firm; it will soften more as it bakes.
  • Keep the sauce slightly loose before baking so the pasta stays creamy.
  • Add the shredded cheese off the heat and avoid boiling the sauce to help prevent a grainy or oily texture.
  • Remove the casserole when the edges bubble and the top browns in patches; baking until the whole surface is dark can dry it out.
  • Start checking earlier if using a wide, shallow dish, and use a rimmed baking sheet if the dish is nearly full.

Variations

  • Panko-Topped Mac and Cheese: Mix about 1/2 cup panko with 1 tablespoon melted butter and scatter over the cheese before baking.
Notes

Refrigerate leftovers in an airtight container for up to 4 days. Reheat loosely covered at 350°F (175°C) with a splash of milk, or microwave individual portions in 30-second intervals. Assemble up to 24 hours ahead and refrigerate before baking. Freeze cooled portions for up to 2 months and thaw overnight in the refrigerator. Approximate nutrition per 100 g: 190 calories, 9 g protein, 10 g fat, and 16 g carbohydrates.
Nutrition

Calories: 470 kcal | Protein: 23 g | Fat: 25 g | Carbohydrates: 39 g

Poblano Chicken Chili

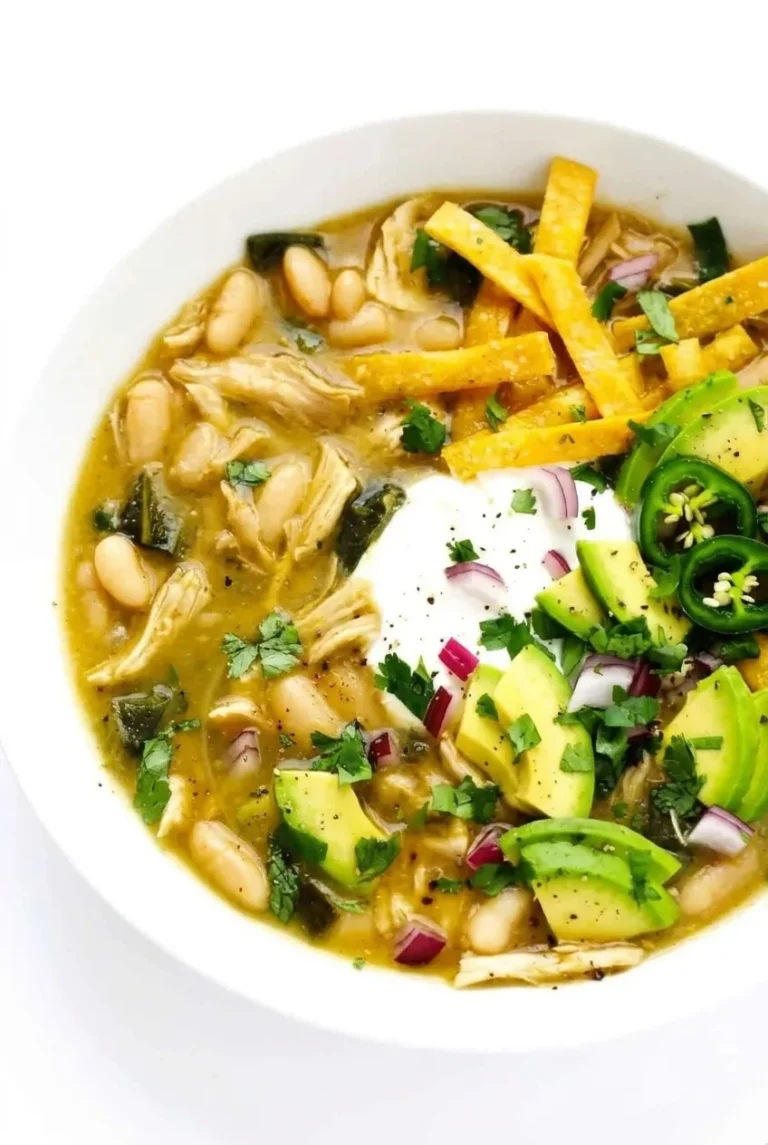
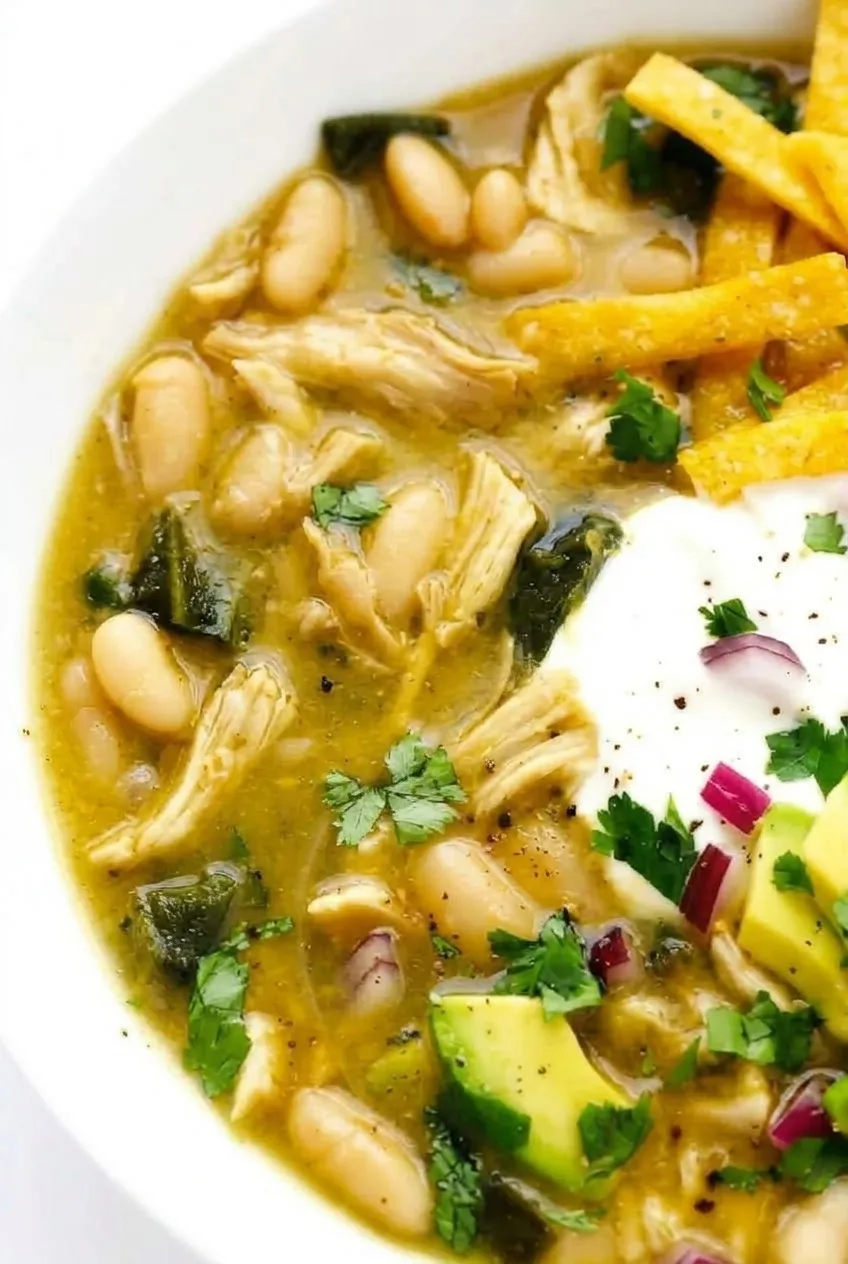
This tomato-free chili has shredded chicken, whole white beans, and softened poblanos in a golden-green broth. Mashing just a cup of beans gives the broth body without making it thick or creamy. The chicken thighs simmer gently in the same pot, then each bowl gets sour cream, avocado, crisp tortilla strips, jalapeño, red onion, and cilantro.

Ingredients for Poblano Chicken Chili

Close view of chicken shreds, whole white beans, and poblano pieces in golden-green chili broth

Makes 6 bowls. Prep time: 20 minutes. Cook time: 35–40 minutes. Total time: 55–60 minutes.

  • 1 tablespoon olive oil
  • 1 medium yellow onion, diced (about 150g)
  • 2 medium poblano peppers, seeded and chopped (about 250g)
  • 4 garlic cloves, minced
  • 2 teaspoons ground cumin
  • 1 teaspoon dried oregano
  • 3 cups low-sodium chicken broth, plus more as needed
  • 1 1/2 pounds boneless, skinless chicken thighs (about 680g)
  • 2 cans (15 ounces each) Great Northern beans, drained and rinsed
  • 1/2 teaspoon kosher salt, plus more to taste
  • 1/4 teaspoon black pepper, plus more to taste
  • About 2 tablespoons lime juice, from 1 lime

For serving

  • About 1/2 cup sour cream
  • 1 large avocado, diced or sliced
  • About 1 cup crisp tortilla strips
  • 1 small fresh jalapeño, thinly sliced
  • 1/4 cup finely diced red onion
  • 1/3 cup chopped fresh cilantro

How to Make Poblano Chicken Chili

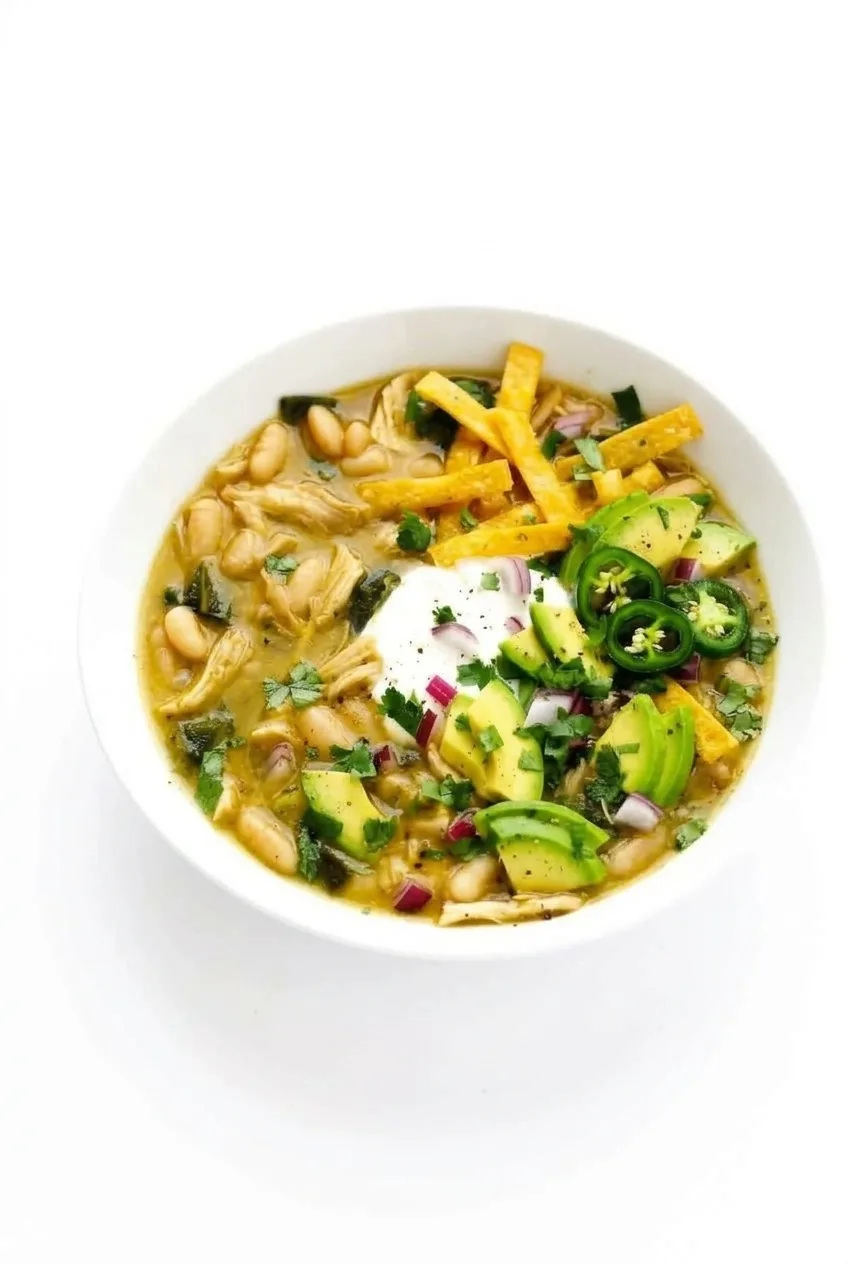
Complete bowl of poblano chicken chili with fresh toppings on a plain white surface
  1. Mash some of the beans: Coarsely mash about 1 cup of the drained, rinsed beans with a fork. Leave the rest whole. Keep the serving toppings out of the pot.
  2. Soften the onion and poblanos: Heat the oil in a 5- to 6-quart Dutch oven or soup pot over medium heat. Add the yellow onion and poblanos. Cook, stirring, for 8–10 minutes, until the onion begins to look translucent and the peppers soften. Add the garlic, cumin, and oregano; stir briefly, until fragrant.
  3. Simmer the chili: Add the 3 cups broth, chicken thighs, mashed beans, whole beans, salt, and pepper. Bring just to a simmer, then reduce the heat to medium-low. Cook partially covered, maintaining small, steady bubbles rather than a rolling boil. Stir occasionally, scraping the bottom so the mashed beans do not stick.
  4. Check and shred the chicken: Start checking after about 18 minutes of simmering. The thighs should reach 165°F (75°C) in the thickest part on an instant-read thermometer and shred readily. This usually takes 18–25 minutes after the pot reaches a simmer, depending on their thickness. Lift out the chicken, shred it into substantial pieces with forks, and return it to the pot.
  5. Finish the broth: Simmer for a few more minutes, then stir in the lime juice. The broth should lightly coat the chicken and beans but still ladle easily. If it is too thin, simmer briefly uncovered; if too thick, add broth a little at a time. Taste and adjust the salt and pepper, then let the chili settle for about 5 minutes.
  6. Serve: Ladle into wide bowls. Add sour cream, avocado, tortilla strips, jalapeño, red onion, and cilantro in a loose cluster, leaving some chicken, beans, poblanos, and broth visible.

How to Keep the Chili Brothy

Mashing only about 1 cup of beans thickens the broth while leaving plenty of beans intact. The finished chili should flow easily from a ladle, with broth surrounding distinct chicken shreds and poblano pieces. The beans absorb liquid as the chili stands, so loosen it with a splash of broth if needed.

Using Cooked Chicken or Roasted Poblanos

For a shortcut, replace the raw thighs with about 3 cups cooked shredded chicken. Simmer the pepper-and-bean base until the vegetables are tender, then add the chicken just long enough to heat through. Do not give cooked chicken the raw-thigh simmer time.

Fresh chopped poblanos need only the sauté in the main method. For a smokier variation, roast, steam, peel, and chop them first, then add them to the aromatic base after the onion softens. Allow extra prep time. For a tangier, tomatillo-led dish, try chicken chili verde with roasted tomatillos.

Finish Each Bowl Just Before Serving

Keep the sour cream on top rather than stirring it into the pot. Add avocado and tortilla strips just before eating so they stay fresh and crisp. The fresh jalapeño rounds are separate from the cooked poblano base; serve them on the side for anyone who wants to choose how much extra heat to add.

Storage and Reheating

Cool the chili and refrigerate it in an airtight container for 3–4 days, keeping the toppings separate. Reheat over medium-low heat, stirring regularly and adding broth if the beans have thickened the chili. Add fresh toppings after reheating.

Freeze the cooled chili base airtight for up to 3 months without the sour cream or fresh toppings. Thaw in the refrigerator, reheat gently, and dress the bowls just before serving.

Nutrition

Approximate per bowl, based on 6 bowls and including the listed toppings: 400 calories, 30g protein, 18g fat, and 33g carbohydrates. Approximate per 100g: 95 calories, 7g protein, 4g fat, and 8g carbohydrates. Drained bean weight, broth reduction, and topping portions will affect the totals.

Poblano Chicken Chili

Chicken thighs, white beans, and poblanos simmer in a golden-green broth finished with lime and fresh toppings.
Course: Soup
Cuisine: American
Prep: 20 min
Cook: 40 min
Total: 60 min
Servings: 6 Calories: 400 kcal

Equipment

  • 5- to 6-quart Dutch oven or soup pot
  • Instant-read thermometer
  • Forks

Ingredients

For the Chili

  • 1 tablespoon olive oil
  • 1 medium yellow onion, diced (about 150 g)
  • 2 medium poblano peppers, seeded and chopped (about 250 g)
  • 4 garlic cloves, minced
  • 2 teaspoons ground cumin
  • 1 teaspoon dried oregano
  • 3 cups low-sodium chicken broth, plus more as needed
  • 1 1/2 pounds boneless, skinless chicken thighs (about 680 g)
  • 2 cans (15 ounces each) Great Northern beans, drained and rinsed
  • 1/2 teaspoon kosher salt, plus more to taste
  • 1/4 teaspoon black pepper, plus more to taste
  • About 2 tablespoons lime juice, from 1 lime

For Serving

  • About 1/2 cup sour cream
  • 1 large avocado, diced or sliced
  • About 1 cup crisp tortilla strips
  • 1 small fresh jalapeño, thinly sliced
  • 1/4 cup finely diced red onion
  • 1/3 cup chopped fresh cilantro

Instructions

  1. Coarsely mash about 1 cup of the drained beans with a fork, leaving the remaining beans whole. Set the toppings aside.
  2. Heat the oil in a 5- to 6-quart Dutch oven or soup pot over medium heat. Add the yellow onion and poblanos and cook, stirring, for 8–10 minutes, until the onion begins to turn translucent and the peppers soften.
  3. Add the garlic, cumin, and oregano. Stir briefly, until fragrant.
  4. Add the broth, chicken thighs, mashed beans, whole beans, salt, and pepper. Bring just to a simmer, then reduce the heat to medium-low.
  5. Partially cover and simmer with small, steady bubbles for 18–25 minutes, stirring occasionally and scraping the bottom of the pot.
  6. Check that the chicken reaches 165°F (75°C) in the thickest part. Lift it out, shred it into substantial pieces with forks, and return it to the pot.
  7. Simmer for a few more minutes, then stir in the lime juice. If the broth is too thin, simmer briefly uncovered; if it is too thick, add broth a little at a time. Taste and adjust the salt and pepper, then let the chili settle for about 5 minutes.
  8. Ladle into bowls and top with sour cream, avocado, tortilla strips, jalapeño, red onion, and cilantro.

Tips

  • Mash only about 1 cup of beans to give the broth body while keeping the chili brothy.
  • Keep the simmer gentle rather than letting the chili boil vigorously.
  • Stir occasionally and scrape the bottom of the pot so the mashed beans do not stick.
  • Add broth a little at a time if the chili thickens as it stands.
  • Add avocado and tortilla strips just before serving so they stay fresh and crisp.

Variations

  • Cooked Chicken Shortcut: Use about 3 cups cooked shredded chicken; simmer the pepper-and-bean base until the vegetables are tender, then add the chicken just long enough to heat through.
  • Roasted Poblanos: Roast, steam, peel, and chop the poblanos, then add them to the aromatic base after the onion softens for a smokier flavor.

Notes

Refrigerate the chili without toppings in an airtight container for 3–4 days, or freeze the chili base for up to 3 months. Reheat gently, adding broth as needed, and add fresh toppings after reheating.

Nutrition

Calories: 400 kcal | Protein: 30 g | Fat: 18 g | Carbohydrates: 33 g | Per 100 G: 95 calories, 7 g protein, 4 g fat, 8 g carbohydrates

Sweet Corn White Chicken Chili

Browned sweet corn gives this stovetop white chicken chili its defining flavor and topping. Most of the corn simmers with cooked shredded chicken and white beans; about 1/2 cup stays out of the pot so the golden, blistered kernels remain distinct on top. Mashing some of the beans thickens the broth without making it smooth, and sour cream stirred in off heat gives the chili a creamy, tangy finish.

Prep: 15 minutes | Cook: About 25 minutes | Total: About 40 minutes | Servings: 6

Ingredients for Sweet Corn White Chicken Chili

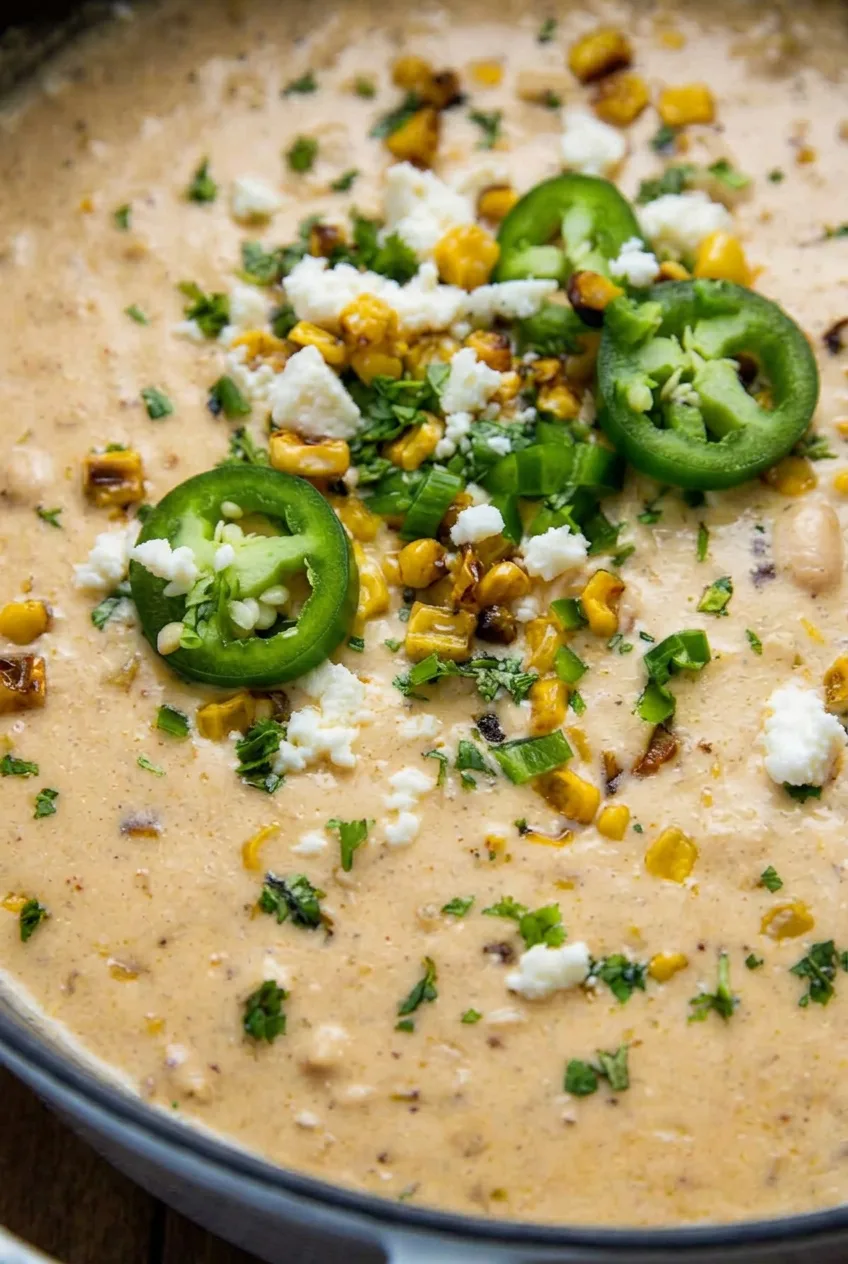
Close view of creamy white chicken chili with shredded chicken, beans, corn, and a charred-corn garnish
  • 3 cups frozen sweet corn, thawed and patted dry (about 500g)
  • 2 tablespoons olive oil, divided
  • 1 medium yellow onion, diced (about 150g)
  • 2 small jalapeños, 1 diced for the chili and 1 sliced into rings for topping
  • 3 garlic cloves, minced
  • 1 1/2 teaspoons ground cumin
  • 1 teaspoon dried oregano
  • 1/4 teaspoon smoked paprika
  • 2 (15-ounce) cans cannellini or Great Northern beans, drained and rinsed (about 500g drained)
  • 3 cups low-sodium chicken broth
  • 3 cups cooked shredded chicken (about 420g)
  • 1/2 cup sour cream (about 120g)
  • 2 tablespoons fresh lime juice, plus more to taste
  • 1/3 cup crumbled cotija cheese (about 40g)
  • 1/4 cup chopped fresh cilantro
  • Kosher salt and black pepper, to taste

Optional for serving: About 1 cup tortilla strips and extra lime wedges.

How to Make Sweet Corn White Chicken Chili

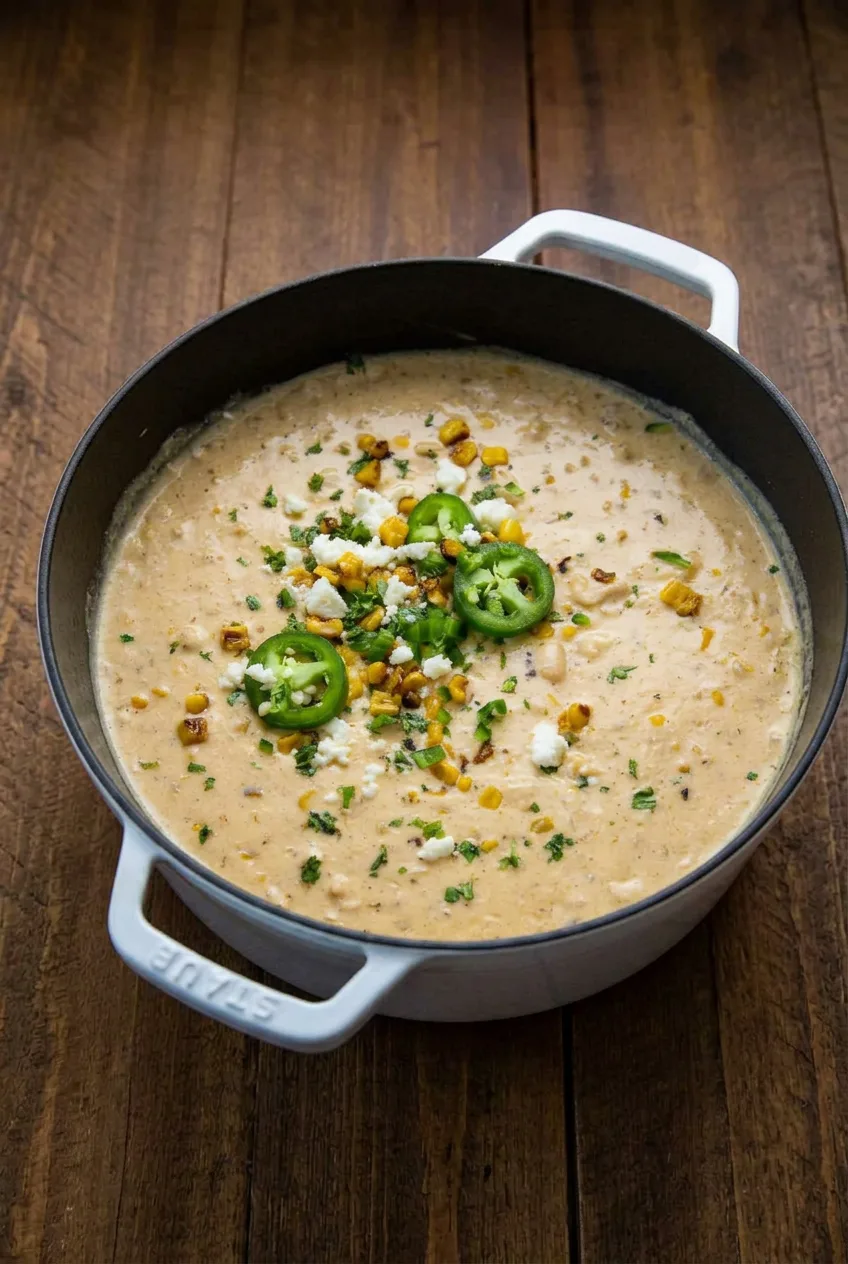
Wide view of a full Dutch oven of sweet corn white chicken chili on a wooden table
  1. Brown the corn: Heat an empty 5- to 6-quart Dutch oven or heavy soup pot over medium-high heat. Add 1 tablespoon oil and the dry corn, spreading it in a thin layer. Cook for 6 to 8 minutes, stirring occasionally and letting the kernels sit between stirs. Start checking after 4 minutes; the corn should be golden with scattered dark, blistered spots. If it crowds the pot or releases water, brown it in batches. Transfer to a bowl and reserve about 1/2 cup for topping.
  2. Soften the aromatics: Reduce the heat to medium. Add the remaining tablespoon of oil, onion, and diced jalapeño. Cook for about 5 minutes, stirring regularly, until the onion softens. Stir in the garlic, cumin, oregano, and smoked paprika; cook briefly, until fragrant but not browned.
  3. Simmer the chili: Mash about 1 cup of the drained beans with a fork, leaving the rest whole. Add the broth, mashed and whole beans, cooked chicken, and corn that was not reserved. Bring to a gentle simmer, then reduce the heat to medium-low. Simmer uncovered for 10 to 12 minutes, stirring occasionally. Check after about 8 minutes: the broth should coat a spoon but still ladle easily, and the chicken and beans should be hot throughout.
  4. Finish off heat: Turn off the heat and let vigorous bubbling stop. Stir a few spoonfuls of warm broth into the sour cream in a small bowl, then gently stir it into the chili. Add the lime juice. Taste before adding salt and pepper; the chicken, broth, and cotija may already be salty. If the chili is too thick, stir in a splash of broth. Do not boil it after adding the sour cream.
  5. Garnish and serve: Scatter the reserved browned corn, cotija, jalapeño rings, and cilantro loosely across the center of the pot, leaving some creamy chili visible. Ladle into bowls and offer tortilla strips and extra lime separately, if desired.

How to Keep the Chili Creamy and Ladleable

Mash only about 1 cup of beans so the broth thickens while whole beans, corn, and chicken remain visible. The uncovered simmer reduces the broth slightly. If it still looks thin before adding sour cream, mash another spoonful of beans and simmer briefly; decide whether it needs extra broth only after the sour cream goes in.

Loosening the sour cream with warm broth helps it blend evenly. Keep the heat off as you stir it in, since vigorous boiling can make the dairy look grainy.

Corn, Cheese, and Chicken Options

Fresh kernels or well-drained canned corn can replace frozen corn. Dry them before browning so they make contact with the hot pot instead of steaming. Queso fresco can replace cotija for a milder white cheese topping. Mexican crema can replace sour cream, though the chili’s thickness and tang may change.

Starting with raw chicken? It needs a longer simmer than the main recipe. Cook it in the broth until it reaches 165°F (75°C), then remove it, shred it, and return it to the chili before adding dairy. Do not use the cooked-chicken timing above.

For a tangier chicken chili, try Chicken Chili Verde with Roasted Tomatillos. For a separate slow cooker option, see Slow Cooker Taco Chili with Shredded Chicken.

Storage, Reheating, and Freezing

Refrigerate cooled chili in an airtight container for 3 to 4 days. Keep the reserved corn and fresh garnishes separate when practical. Reheat the chili gently over low to medium-low heat, stirring in a little broth if it has thickened, then add the garnishes.

For make-ahead serving or freezing, prepare the chili base without the sour cream, lime, or garnishes. Freeze the base for up to 3 months. Thaw it in the refrigerator, reheat gently, then add the sour cream, lime, and toppings. Freezing fully finished chili may change its dairy texture.

Nutrition

Approximate nutrition per serving (1/6 of the recipe, including cotija but excluding optional tortilla strips): 430 calories, 36g protein, 16g fat, and 40g carbohydrates. Approximate values per 100g of finished chili: 105 calories, 9g protein, 4g fat, and 10g carbohydrates. Values vary with the prepared chicken, beans, broth, and amount of reduction.

Sweet Corn White Chicken Chili

A creamy white chicken chili with browned sweet corn, white beans, lime, and cotija.
Course: Soup
Cuisine: American
Prep: 15 min
Cook: 25 min
Total: 40 min
Servings: 6 Calories: 430 kcal

Equipment

  • 5- to 6-quart Dutch oven or heavy soup pot
  • Small bowl
  • Fork

Ingredients

For the Chili

  • 3 cups frozen sweet corn, thawed and patted dry (about 500 g)
  • 2 tablespoons olive oil, divided
  • 1 medium yellow onion, diced (about 150 g)
  • 1 jalapeño, diced
  • 3 garlic cloves, minced
  • 1 1/2 teaspoons ground cumin
  • 1 teaspoon dried oregano
  • 1/4 teaspoon smoked paprika
  • 2 (15-ounce) cans cannellini or Great Northern beans, drained and rinsed (about 500 g drained)
  • 3 cups low-sodium chicken broth
  • 3 cups cooked shredded chicken (about 420 g)
  • 1/2 cup sour cream (about 120 g)
  • 2 tablespoons fresh lime juice, plus more to taste
  • Kosher salt and black pepper, to taste

For Topping and Serving

  • 1 jalapeño, sliced into rings
  • 1/3 cup crumbled cotija cheese (about 40 g)
  • 1/4 cup chopped fresh cilantro
  • About 1 cup tortilla strips, optional
  • Extra lime wedges, optional

Instructions

  1. Heat an empty 5- to 6-quart Dutch oven or heavy soup pot over medium-high heat. Add 1 tablespoon oil and the corn in a thin layer. Cook for 6 to 8 minutes, stirring occasionally and letting the kernels sit between stirs, until golden with scattered blistered spots. Brown in batches if the pot is crowded or the corn releases water.
  2. Transfer the corn to a bowl and reserve about 1/2 cup for topping.
  3. Reduce the heat to medium. Add the remaining tablespoon of oil, diced onion, and diced jalapeño. Cook for about 5 minutes, stirring regularly, until the onion softens. Stir in the garlic, cumin, oregano, and smoked paprika; cook briefly until fragrant.
  4. Mash about 1 cup of the drained beans with a fork, leaving the remaining beans whole. Add the broth, mashed and whole beans, cooked chicken, and unreserved corn to the pot.
  5. Bring the chili to a gentle simmer, then reduce the heat to medium-low. Simmer uncovered for 10 to 12 minutes, stirring occasionally, until the broth coats a spoon and the chicken and beans are hot throughout.
  6. Turn off the heat and wait for vigorous bubbling to stop. Stir a few spoonfuls of warm broth into the sour cream in a small bowl, then gently stir the mixture into the chili. Add the lime juice and season with salt and pepper to taste. Add a splash of broth if the chili is too thick.
  7. Top with the reserved corn, cotija, jalapeño rings, and cilantro. Serve with optional tortilla strips and extra lime wedges.

Tips

  • Pat the corn dry before browning so it sears instead of steaming.
  • Brown the corn in batches if it crowds the pot.
  • Mash only about 1 cup of beans to thicken the broth while keeping the chili chunky.
  • Temper the sour cream with warm broth and stir it in off heat; do not boil the chili afterward.
  • Taste before adding salt, since the chicken, broth, and cotija may already be salty.

Variations

  • Fresh or Canned Corn: Replace the frozen corn with fresh kernels or well-drained canned corn, and dry it before browning.
  • Queso Fresco Topping: Use queso fresco instead of cotija for a milder cheese topping.
  • Mexican Crema: Replace the sour cream with Mexican crema; the chili’s thickness and tang may differ.
  • Raw Chicken: Simmer raw chicken in the broth until it reaches 165°F (75°C), then remove, shred, and return it to the chili before adding dairy.

Notes

Refrigerate cooled chili in an airtight container for 3 to 4 days and reheat gently over low to medium-low heat, adding broth if needed. For freezing, omit the sour cream, lime, and garnishes; freeze the base for up to 3 months. Add them after thawing and reheating. Approximate nutrition is 430 calories, 36 g protein, 16 g fat, and 40 g carbohydrates per serving; per 100 g, about 105 calories, 9 g protein, 4 g fat, and 10 g carbohydrates.

Nutrition

Calories: 430 kcal | Protein: 36 g | Fat: 16 g | Carbohydrates: 40 g | Per100g Calories: 105 kcal | Per100g Protein: 9 g | Per100g Fat: 4 g | Per100g Carbohydrates: 10 g

Hot Dog Chili

Hot dog chili needs to be thick enough to stay on the dog but moist enough to spoon along the bun. This bean-free version has small beef crumbles in a reddish-brown sauce made with tomato paste, chili powder, and water. Break up the beef as it browns with onion, then simmer the sauce uncovered until a spoonful holds together without a watery rim. Serve it on warm hot dogs with different finishes of cheddar, mustard, and raw onion.

Time: 10 minutes prep, about 35 minutes cook; about 45 minutes total. Yield: About 8 chili dogs.

Ingredients for Hot Dog Chili

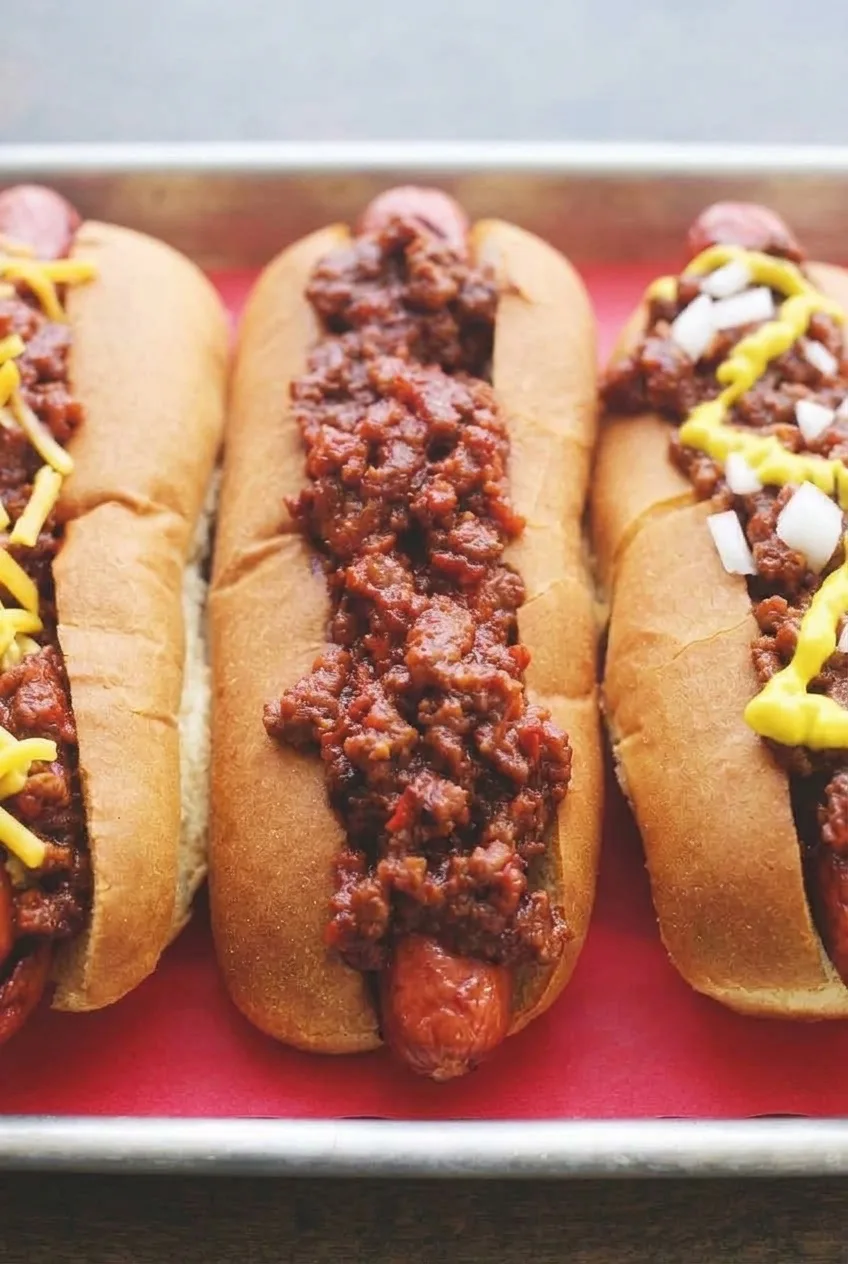
Close view of moist, finely crumbled hot dog chili clinging to a hot dog beside mustard and diced onion

For the chili

  • 1 lb ground beef, preferably 85–90% lean (about 450g)
  • 1/2 cup finely minced onion (75g)
  • 1 1/2 tablespoons chili powder
  • 1/2 teaspoon garlic powder
  • 3/4 teaspoon fine salt, plus more to taste
  • 1/4 teaspoon ground black pepper
  • 3 tablespoons tomato paste (about 50g)
  • 3/4 cup water, plus more as needed
  • Optional: a pinch to 1/4 teaspoon cayenne pepper, for a hotter chili

For serving

  • 8 hot dogs
  • 8 hot dog buns
  • 1/2 cup shredded yellow cheddar cheese (55g)
  • 1/4 cup finely diced white onion (40g)
  • 2 tablespoons yellow mustard, or as needed

The minced onion cooks in the chili. Keep the diced white onion raw for topping the finished dogs.

How to Make Hot Dog Chili

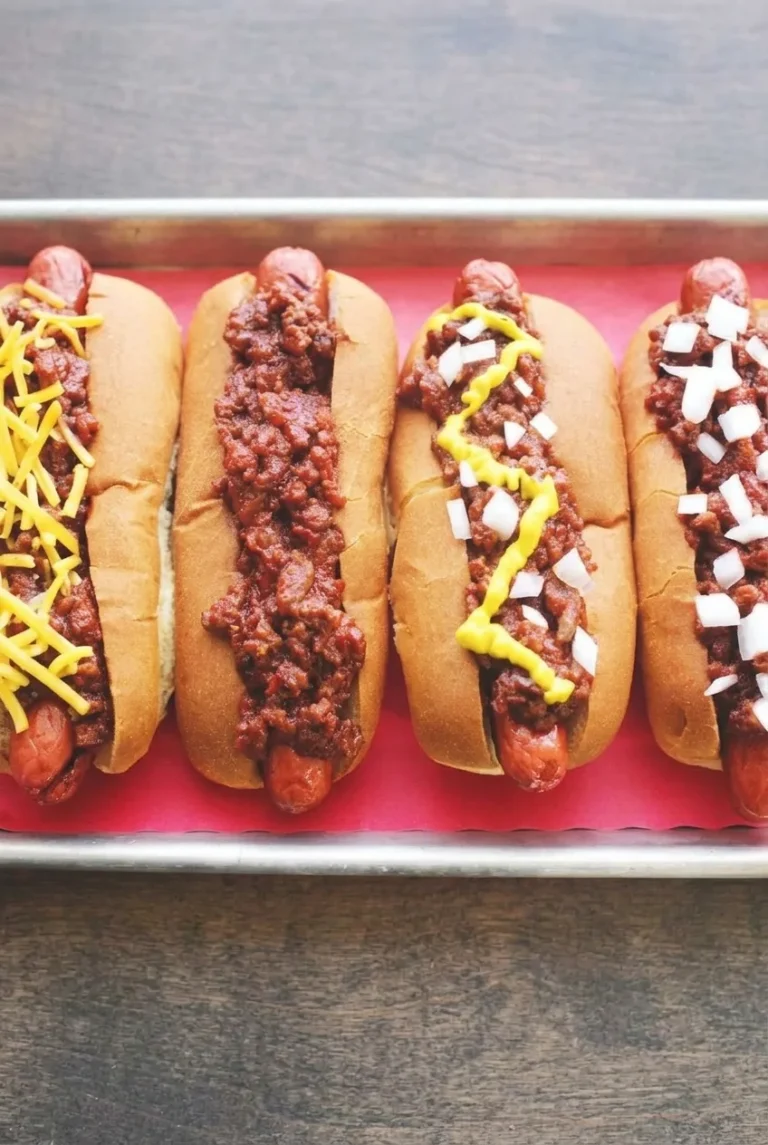
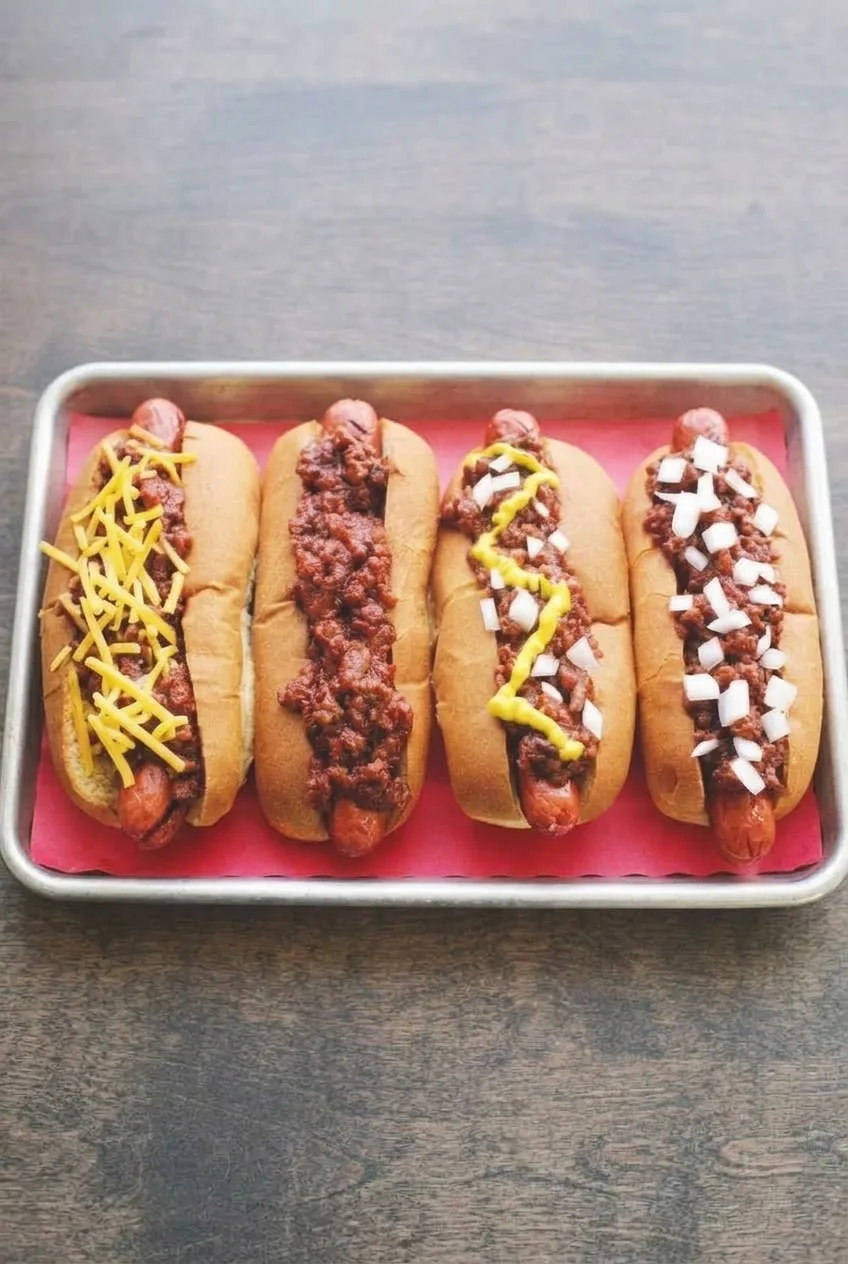
Full tray of four differently topped hot dog chili dogs on a table
  1. Prepare the onions: Finely mince the onion for the chili. Dice the separate white onion for serving and set it aside.
  2. Cook and crumble the beef: Warm a 10- to 12-inch skillet or medium saucepan over medium heat. Add the beef and minced onion. Cook for 7 to 9 minutes, breaking up the beef immediately and repeatedly pressing apart larger pieces, until the onion softens and the beef is lightly browned and cooked through. Ground beef should reach 160°F (70°C) if checked with a food thermometer. Drain excess fat before making the sauce.
  3. Build the sauce: Stir in the chili powder, garlic powder, salt, pepper, and optional cayenne. Add the tomato paste and 3/4 cup water; stir until the paste is evenly distributed.
  4. Simmer uncovered: Reduce the heat to medium-low and keep the chili at a gentle simmer for 25 to 30 minutes, stirring occasionally and more often as it thickens. Start checking after about 20 minutes. A spoonful should hold together without watery liquid collecting around it, while the beef stays moist and coated. Simmer a little longer if loose; if dry or pasty, stir in water 1 tablespoon at a time. Taste and adjust the salt.
  5. Warm and assemble: Near the end of the simmer, heat the hot dogs according to their package directions and warm the buns if desired. Place each hot dog in a split bun and spoon chili along its length.
  6. Add the toppings: For a row of four differently finished dogs, top one with cheddar, leave one with chili alone, add mustard and diced white onion to the third, and add diced onion to the fourth. Offer the remaining toppings separately. Serve while warm.

How to Get Fine Beef Crumbles

Break up the beef while it is still soft in the pan; once large pieces brown, they are harder to separate. Keep pressing and stirring as it cooks. The finished chili should have small, distinct crumbles, not a smooth texture. Draining the excess rendered fat before adding the sauce also helps it coat the beef rather than separate.

How Thick Should Hot Dog Chili Be?

Lift a spoonful from the pan. It should hold together with no watery rim, yet still look moist enough to spread along a hot dog. A wide skillet may reduce the sauce faster than a narrower saucepan, so use the texture rather than the clock as the final guide. Keep simmering uncovered if the chili is runny, or add water a tablespoon at a time if it becomes pasty.

If you want a bean-filled chili for a bowl instead, try Wendy’s copycat chili.

Storage and Reheating

Let leftover chili sauce cool, then refrigerate it in a covered container for up to 3 to 4 days, separate from the hot dogs, buns, and raw toppings. Reheat it thoroughly in a saucepan over medium-low heat, stirring in a splash of water if it has thickened. Heat the hot dogs and assemble just before serving so the buns do not become soggy.

For longer storage, freeze the cooled chili sauce alone in an airtight container for up to 2 months for best quality. Thaw it in the refrigerator before reheating.

Nutrition

Approximate nutrition per assembled chili dog, based on 8 servings with the listed cheese, mustard, and onion divided across the batch: 420 calories, 23g protein, 24g fat, and 28g carbohydrates. Per 100g: approximately 215 calories, 12g protein, 12g fat, and 14g carbohydrates. Values vary with the hot dogs, buns, beef leanness, drained fat, and toppings used.

Hot Dog Chili

A thick, bean-free beef chili with tomato paste and chili powder, made to spoon over hot dogs.
Course: Main Course
Cuisine: American
Prep: 10 min
Cook: 35 min
Total: 45 min
Servings: 8 Calories: 420 kcal

Equipment

  • 10- to 12-inch skillet or medium saucepan
  • Food thermometer

Ingredients

For the chili

  • 1 lb ground beef, preferably 85–90% lean (about 450g)
  • 1/2 cup finely minced onion (75g)
  • 1 1/2 tablespoons chili powder
  • 1/2 teaspoon garlic powder
  • 3/4 teaspoon fine salt, plus more to taste
  • 1/4 teaspoon ground black pepper
  • 3 tablespoons tomato paste (about 50g)
  • 3/4 cup water, plus more as needed
  • Optional: a pinch to 1/4 teaspoon cayenne pepper

For serving

  • 8 hot dogs
  • 8 hot dog buns
  • 1/2 cup shredded yellow cheddar cheese (55g)
  • 1/4 cup finely diced white onion (40g)
  • 2 tablespoons yellow mustard, or as needed

Instructions

  1. Finely mince the onion for the chili. Dice the separate white onion for serving and set it aside.
  2. Warm a 10- to 12-inch skillet or medium saucepan over medium heat. Add the ground beef and minced onion.
  3. Cook for 7 to 9 minutes, breaking up the beef immediately and repeatedly until the onion softens and the beef is lightly browned and cooked through. Check that the beef reaches 160°F (70°C), then drain excess fat.
  4. Stir in the chili powder, garlic powder, salt, pepper, and optional cayenne.
  5. Add the tomato paste and 3/4 cup water. Stir until the paste is evenly distributed.
  6. Reduce the heat to medium-low and simmer uncovered for 25 to 30 minutes, stirring occasionally and more often as the chili thickens. Start checking after about 20 minutes.
  7. Continue simmering until a spoonful holds together without watery liquid around it. If the chili is loose, simmer longer; if it becomes dry or pasty, stir in water 1 tablespoon at a time. Taste and adjust the salt.
  8. Near the end of the simmer, heat the hot dogs according to their package directions. Warm the buns if desired.
  9. Place each hot dog in a split bun and spoon chili along its length. Add cheddar, mustard, and diced white onion as desired, then serve warm.

Tips

  • Break up the beef while it is still soft; browned pieces are harder to separate.
  • Drain excess rendered fat before adding the sauce so it coats the beef rather than separating.
  • Use the chili’s texture as the final guide, since a wide skillet may reduce the sauce faster than a narrow saucepan.
  • Keep the minced onion for cooking separate from the diced raw onion topping.

Variations

  • Spicy Hot Dog Chili: Add a pinch to 1/4 teaspoon cayenne pepper for a hotter chili.

Notes

Refrigerate leftover chili sauce separately from hot dogs, buns, and toppings for 3 to 4 days. Reheat thoroughly over medium-low heat, adding a splash of water if needed. Freeze cooled chili sauce for up to 2 months for best quality; thaw in the refrigerator before reheating.

Nutrition

Calories: 420 kcal | Protein: 23 g | Fat: 24 g | Carbohydrates: 28 g | Per 100g Calories: 215 kcal | Per 100g Protein: 12 g | Per 100g Fat: 12 g | Per 100g Carbohydrates: 14 g

Wendy’s Copycat Chili

This stovetop chili has small beef crumbles, kidney and pinto beans, and softened vegetables in a mild, tomato-forward sauce. It should be hearty but still loose enough for the sauce to pool around the beef and beans.

Draining the browned beef keeps the sauce from becoming greasy. Draining and rinsing the beans lets a measured amount of water set the starting consistency. From there, a gentle uncovered simmer brings the chili together without reducing it into a thick meat sauce.

Ingredients for Wendy’s Copycat Chili

Close view of beef crumbles and whole beans in the chili’s glossy tomato sauce

Yield: 8 servings, about 1 cup each. Prep: 15 minutes. Cook: About 1 hour 35 minutes to 1 hour 50 minutes.

  • 1 1/2 pounds 85% lean ground beef (680g)
  • 1 medium yellow onion, diced, about 1 cup (150g)
  • 1 medium green bell pepper, diced, about 1 cup (150g)
  • 2 celery stalks, diced, about 3/4 cup (75g)
  • 2 garlic cloves, minced
  • 2 tablespoons mild chili powder blend
  • 1 1/2 teaspoons ground cumin
  • 1 can (28 ounces) tomato sauce
  • 1 can (14.5 ounces) diced tomatoes, with their juice
  • 1 can (15 ounces) kidney beans, drained and rinsed
  • 1 can (15 ounces) pinto beans, drained and rinsed
  • 3/4 cup water, plus more as needed
  • 3/4 teaspoon kosher salt to start, plus more to taste
  • 1/2 teaspoon ground black pepper

Use a mild chili powder seasoning blend, not straight ground hot chile. Blends and canned tomato products vary in salt and heat, so adjust the seasoning after simmering.

How to Make Wendy’s Copycat Chili

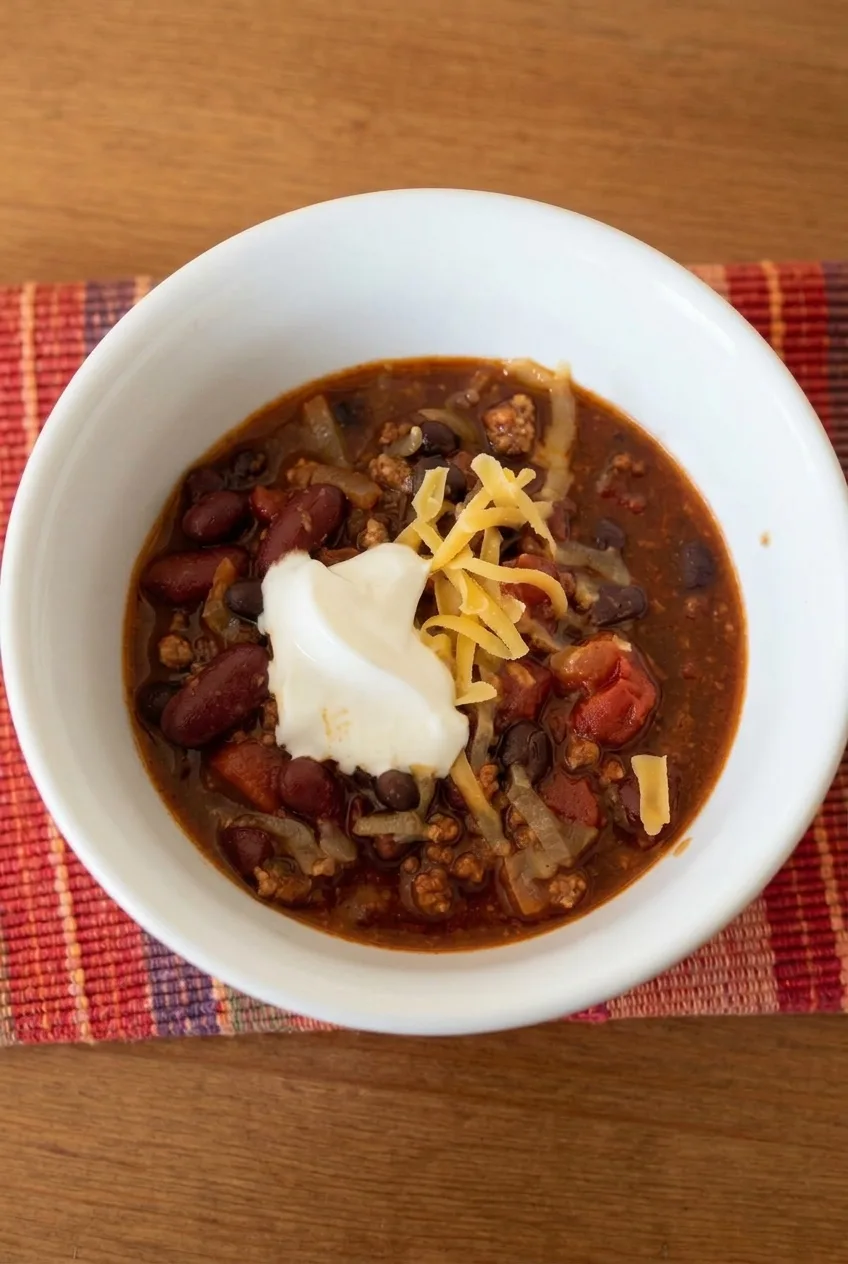
Complete white bowl of ungarnished beef-and-bean chili on a pale tabletop
  1. Prepare the vegetables and beans: Dice the onion, bell pepper, and celery into small pieces, and mince the garlic. Drain and rinse both kinds of beans, leaving them whole.
  2. Brown and drain the beef: Heat a 5- to 6-quart heavy-bottomed pot or Dutch oven over medium-high heat. Add the beef and cook for 8 to 10 minutes, breaking it into small, irregular crumbles, until no pink remains. Carefully drain off the rendered fat, leaving a thin film in the pot.
  3. Soften the vegetables: Return the pot to medium heat. Add the onion, bell pepper, and celery. Cook with the beef for 6 to 8 minutes, stirring, until the onion begins to look translucent. Stir in the garlic, chili powder, and cumin for the final 30 to 60 seconds, just until fragrant.
  4. Add the tomatoes and beans: Stir in the tomato sauce, diced tomatoes with their juice, both kinds of beans, 3/4 cup water, salt, and black pepper. Scrape the bottom of the pot as you stir. Bring just to a simmer over medium heat, about 5 to 8 minutes, then reduce the heat to low or medium-low.
  5. Simmer gently: Cook uncovered for 75 to 90 minutes, stirring along the bottom every 15 to 20 minutes to prevent scorching. Only small bubbles should break the surface; lower the heat if the chili boils vigorously. Start checking after 60 minutes. The vegetables should be tender, and the beef and beans should remain distinct in sauce that pools slightly around them. If the chili gets too thick, stir in water a few tablespoons at a time.
  6. Season and serve: Taste and add more salt if needed. Let stand off the heat for 5 minutes, then ladle into bowls.

How Saucy Should the Chili Be?

A spoonful should show whole beans and beef crumbles coated in red-orange sauce, with enough sauce to flow around them. If the vegetables are tender but the chili is still thin, simmer it uncovered a little longer. If needed, mash a small spoonful of beans to thicken the sauce without losing the whole-bean texture.

A wide pot or strong burner can reduce the sauce faster. If the chili becomes dense, add water a few tablespoons at a time until it is spoonable again.

Why Drain the Beef and Beans?

Draining the beef removes rendered fat that could make the sauce greasy. Draining and rinsing the beans serves a different purpose: the tomato products and measured 3/4 cup water determine this recipe’s starting consistency. Using liquid from the bean cans instead would change both the liquid balance and seasoning.

Serving and Variations

Serve the chili plain, or set out shredded cheddar, sour cream, finely diced onion, and hot sauce for individual bowls. Crackers or cornbread work alongside.

For more heat, add hot sauce or a pinch of cayenne to individual servings. Ground turkey can replace the beef, though it changes the flavor and may need a little oil to brown without sticking. For a separate turkey version, try ground turkey chili with kidney and black beans.

Storage and Reheating

Refrigerate leftovers promptly in shallow, airtight containers for up to 3 to 4 days. The chili can be made a day ahead and may thicken as it sits.

Reheat individual portions in the microwave, stirring partway through, or warm a larger amount over medium-low heat, stirring occasionally, until hot throughout. Add a little water if needed to loosen the sauce.

For longer storage, cool promptly and freeze in portions in freezer-safe containers or bags for up to 3 months. Thaw in the refrigerator before reheating when practical.

Nutrition

Approximate nutrition per serving, based on 8 servings without optional toppings: 300 calories, 23g protein, 12g fat, and 25g carbohydrates. Per 100g: approximately 100 calories, 8g protein, 4g fat, and 8g carbohydrates. Values are estimates; the amount of beef fat drained, canned products, and final sauce reduction will affect them.

Wendy’s Copycat Chili

A mild, tomato-forward chili with small beef crumbles, kidney beans, pinto beans, and softened vegetables.
Course: Soup
Cuisine: American
Prep: 15 min
Cook: 103 min
Total: 123 min
Servings: 8 Calories: 300 kcal

Equipment

  • 5- to 6-quart heavy-bottomed pot or Dutch oven
  • Colander

Ingredients

For the Chili

  • 1 1/2 pounds 85% lean ground beef (680 g)
  • 1 medium yellow onion, diced, about 1 cup (150 g)
  • 1 medium green bell pepper, diced, about 1 cup (150 g)
  • 2 celery stalks, diced, about 3/4 cup (75 g)
  • 2 garlic cloves, minced
  • 2 tablespoons mild chili powder blend
  • 1 1/2 teaspoons ground cumin
  • 1 can (28 ounces) tomato sauce
  • 1 can (14.5 ounces) diced tomatoes, with their juice
  • 1 can (15 ounces) kidney beans, drained and rinsed
  • 1 can (15 ounces) pinto beans, drained and rinsed
  • 3/4 cup water, plus more as needed
  • 3/4 teaspoon kosher salt, plus more to taste
  • 1/2 teaspoon ground black pepper

Optional Toppings

  • Shredded cheddar
  • Sour cream
  • Finely diced onion
  • Hot sauce

Instructions

  1. Dice the onion, bell pepper, and celery into small pieces and mince the garlic. Drain and rinse both kinds of beans.
  2. Heat a heavy-bottomed pot or Dutch oven over medium-high heat. Add the beef and cook for 8 to 10 minutes, breaking it into small crumbles, until no pink remains. Carefully drain the rendered fat, leaving a thin film in the pot.
  3. Return the pot to medium heat. Add the onion, bell pepper, and celery and cook for 6 to 8 minutes, stirring, until the onion begins to look translucent. Stir in the garlic, chili powder, and cumin for 30 to 60 seconds, until fragrant.
  4. Stir in the tomato sauce, diced tomatoes and their juice, beans, water, salt, and black pepper, scraping the bottom of the pot. Bring to a simmer over medium heat, about 5 to 8 minutes, then reduce the heat to low or medium-low.
  5. Simmer uncovered for 75 to 90 minutes, stirring along the bottom every 15 to 20 minutes. Keep the chili at a gentle simmer, lowering the heat if it boils vigorously. Start checking after 60 minutes; the vegetables should be tender and the sauce should pool slightly around the beef and beans. Add water a few tablespoons at a time if it gets too thick.
  6. Taste and add more salt if needed. Let stand off the heat for 5 minutes, then ladle into bowls.

Tips

  • Use a mild chili powder seasoning blend, not straight ground hot chile.
  • Drain the browned beef to keep the sauce from becoming greasy.
  • Drain and rinse the beans so the measured water controls the starting consistency.
  • Keep the chili at a gentle simmer and stir along the bottom regularly to prevent scorching.
  • If the chili is thin after the vegetables are tender, simmer it uncovered longer or mash a small spoonful of beans to thicken it.
  • Add water a few tablespoons at a time if the sauce becomes too thick.

Variations

  • Spicier Chili: Add hot sauce or a pinch of cayenne to individual servings.
  • Ground Turkey Chili: Replace the beef with ground turkey; a little oil may help it brown without sticking.

Notes

Refrigerate promptly in shallow, airtight containers for 3 to 4 days. Reheat until hot throughout, adding water as needed. Freeze in portions for up to 3 months; thaw in the refrigerator when practical.

Nutrition

Calories: 300 kcal | Protein: 23 g | Fat: 12 g | Carbohydrates: 25 g

Cincinnati Chili

Cincinnati-style chili goes over spaghetti, but the saucy beef and beans take center stage in these bowls. Browning the beef creates distinct crumbles, and a short simmer brings together tomato, chili powder, cinnamon, and a touch of allspice. The finished chili should spoon easily over the pasta without leaving a watery pool.

This bean-containing version is topped generously with yellow and white cheddar, diced white onion, and fresh cilantro. It makes 6 bowls in about 50 minutes, including 15 minutes of prep.

Ingredients for Cincinnati Chili

Close view of beef crumbles and kidney beans in Cincinnati chili beneath cheese, onion, and cilantro
  • 1 lb lean ground beef, preferably 90% lean (about 450g)
  • 1 medium white onion, divided: about 3/4 cup finely chopped for the chili and 1/2 cup diced for topping (about 170g total)
  • 2 garlic cloves, minced
  • 2 tablespoons chili powder (about 15g)
  • 1/2 teaspoon ground cinnamon
  • 1/8 teaspoon ground allspice
  • 2 tablespoons tomato paste (about 30g)
  • 1 can (15 ounces) tomato sauce (about 425g)
  • 3/4 cup water, plus more as needed
  • 1 can (15 ounces) kidney beans, drained and rinsed (about 255g drained)
  • 1 teaspoon kosher salt to start, plus more to taste
  • 12 ounces dry spaghetti (about 340g)
  • 1 1/2 cups shredded yellow and white cheddar (about 170g)
  • 1/4 cup loosely packed fresh cilantro leaves

How to Make Cincinnati Chili

Complete white bowl of Cincinnati chili over spaghetti, with cheddar, onion, and cilantro on a patterned cloth
  1. Prepare the toppings: Reserve about 1/2 cup diced onion for serving and finely chop the remaining onion for the chili. Mince the garlic and have the cheese and cilantro ready.
  2. Brown the beef: Warm a 5-quart Dutch oven or heavy pot over medium heat. Add the beef and cook for 6 to 8 minutes, breaking it into small but distinct crumbles, until no pink remains. Drain excess fat, leaving a light coating in the pot for the onion.
  3. Cook the onion and spices: Add the finely chopped onion and cook until softened. Stir in the garlic, chili powder, cinnamon, allspice, and tomato paste; cook briefly, stirring, until aromatic. This should take about 3 to 4 minutes total after adding the onion. Lower the heat if the paste begins to catch.
  4. Simmer the chili: Stir in the tomato sauce, 3/4 cup water, kidney beans, and 1 teaspoon salt. Bring to a gentle bubble, then reduce the heat to medium-low or low. Simmer uncovered for 20 to 25 minutes, stirring occasionally and scraping the bottom. Check the thickness after about 15 minutes; if the sauce is drying out, add water a few tablespoons at a time. Taste and adjust the salt.
  5. Cook the spaghetti: While the chili simmers, cook the spaghetti in a separate pot of boiling water according to the package directions. Drain well.
  6. Assemble the bowls: Divide the hot spaghetti among 6 shallow bowls. Spoon on enough chili to mostly cover the pasta, leaving some beef and whole beans visible around the edges. Pile on the cheddar, add the reserved diced onion, and scatter cilantro over the top. Serve immediately.

Why This Chili Has a Chunkier Texture

Browning the beef before adding liquid gives this version separate crumbles. Break the meat up as it cooks, but do not whisk it into the sauce or mash the beans. Dispersing raw beef in water produces a much finer sauce and requires a different, longer cooking method.

How Thick Should the Sauce Be?

The sauce should look glossy and coat the beef and beans while still spooning easily over spaghetti. If it reduces into a dry mound, lower the heat and add water a few tablespoons at a time. If it looks watery, simmer it gently a little longer. Pot width and simmer strength affect how quickly the sauce thickens.

Optional Chocolate Finish

Chocolate is not needed for this version. For a subtle variation, stir 1/2 ounce unsweetened chocolate into the hot chili near the end of simmering until melted, then taste before adding more.

For a more conventional bowl-style option, try this beef chili. For a meatless option, make this black bean chili with sweet potato.

Storage and Make-Ahead

Refrigerate leftover chili in an airtight container for up to 3 days. Keep the spaghetti and fresh toppings separate so the pasta does not become soggy. Reheat the chili until hot, adding a splash of water if it has thickened, then serve with separately heated spaghetti and fresh toppings.

The chili can be made ahead. If fat solidifies on top after overnight refrigeration, lift it off before reheating. Freeze the chili alone for up to 3 months; serve it with freshly prepared spaghetti and toppings.

Nutrition

Approximate nutrition per bowl, based on 6 bowls with spaghetti and toppings: 550 calories, 34g protein, 18g fat, and 60g carbohydrates. Estimated per 100g of finished dish: 135 calories, 8g protein, 4g fat, and 15g carbohydrates. Values will vary with the beef, cheese, canned ingredients, and finished weight.

Cincinnati Chili

A chunky beef and kidney bean chili served over spaghetti with cheddar, diced onion, and cilantro.
Course: Main Course
Cuisine: American
Prep: 15 min
Cook: 35 min
Total: 50 min
Servings: 6 Calories: 550 kcal

Equipment

  • 5-quart Dutch oven or heavy pot
  • Pot for spaghetti
  • Colander

Ingredients

For the Chili

  • 1 lb lean ground beef, preferably 90% lean (about 450g)
  • 1 medium white onion, divided: 3/4 cup finely chopped for the chili and 1/2 cup diced for topping (about 170g total)
  • 2 garlic cloves, minced
  • 2 tablespoons chili powder (about 15g)
  • 1/2 teaspoon ground cinnamon
  • 1/8 teaspoon ground allspice
  • 2 tablespoons tomato paste (about 30g)
  • 1 can (15 ounces) tomato sauce (about 425g)
  • 3/4 cup water, plus more as needed
  • 1 can (15 ounces) kidney beans, drained and rinsed (about 255g drained)
  • 1 teaspoon kosher salt, plus more to taste

For Serving

  • 12 ounces dry spaghetti (about 340g)
  • 1 1/2 cups shredded yellow and white cheddar (about 170g)
  • 1/4 cup loosely packed fresh cilantro leaves

Instructions

  1. Reserve 1/2 cup diced onion for topping and finely chop the remaining onion for the chili. Mince the garlic and prepare the cheese and cilantro.
  2. Warm a 5-quart Dutch oven or heavy pot over medium heat. Add the beef and cook for 6 to 8 minutes, breaking it into small but distinct crumbles, until no pink remains.
  3. Drain excess fat, leaving a light coating in the pot.
  4. Add the finely chopped onion and cook until softened. Stir in the garlic, chili powder, cinnamon, allspice, and tomato paste. Cook, stirring, until aromatic, about 3 to 4 minutes total after adding the onion. Lower the heat if the paste begins to catch.
  5. Stir in the tomato sauce, 3/4 cup water, kidney beans, and 1 teaspoon salt. Bring to a gentle bubble, then reduce the heat to medium-low or low.
  6. Simmer uncovered for 20 to 25 minutes, stirring occasionally and scraping the bottom. Check the thickness after about 15 minutes; if the sauce is drying out, add water a few tablespoons at a time. Taste and adjust the salt.
  7. While the chili simmers, cook the spaghetti in a separate pot of boiling water according to the package directions. Drain well.
  8. Divide the hot spaghetti among 6 shallow bowls. Spoon chili over the pasta, then top with cheddar, reserved diced onion, and cilantro. Serve immediately.

Tips

  • Break up the beef as it browns, but keep the crumbles distinct.
  • Do not mash the kidney beans when stirring the chili.
  • Add water a few tablespoons at a time if the sauce becomes too thick.
  • If the sauce looks watery, simmer it gently a little longer.

Variations

  • Chocolate Finish: Stir 1/2 ounce unsweetened chocolate into the hot chili near the end of simmering until melted, then taste before adding more.

Notes

Refrigerate leftover chili in an airtight container for up to 3 days, keeping spaghetti and fresh toppings separate. Reheat chili until hot, adding a splash of water if needed. Freeze chili alone for up to 3 months.

Nutrition

Calories: 550 kcal | Protein: 34 g | Fat: 18 g | Carbohydrates: 60 g | Per 100g Calories: 135 kcal | Per 100g Protein: 8 g | Per 100g Fat: 4 g | Per 100g Carbohydrates: 15 g

Chicken Chili Verde

Roasted tomatillos, poblanos, and jalapeño make the thick green sauce for this stovetop chicken chili verde. Boneless chicken thighs simmer gently in the sauce, then are pulled into a mix of bite-size pieces and loose shreds. With just enough broth to keep it spoonable, the finished chili coats the chicken rather than turning brothy. This version is bean-free; bottled salsa verde would need a different method and seasoning.

Prep: 20 minutes | Cook: 45–55 minutes | Total: About 65–75 minutes | Yield: 6 bowls

Ingredients for Chicken Chili Verde

Close view of chicken pieces and loose shreds coated in thick, flecked chili verde sauce
  • 1 1/2 pounds fresh tomatillos, husked and rinsed (680g)
  • 2 medium poblano peppers (about 220g)
  • 1 jalapeño, seeded for gentler heat
  • 2 pounds boneless, skinless chicken thighs (about 900g)
  • 1 teaspoon kosher salt to start, divided, plus more to taste
  • 1 tablespoon neutral oil
  • 1 medium yellow onion, diced (about 150g)
  • 4 garlic cloves, minced
  • 1/2 teaspoon ground cumin
  • 1 cup low-sodium chicken broth, divided, plus a little more only if needed
  • 1 tablespoon fresh lime juice, plus more to taste
  • 1/4 cup chopped fresh cilantro

How to Make Chicken Chili Verde

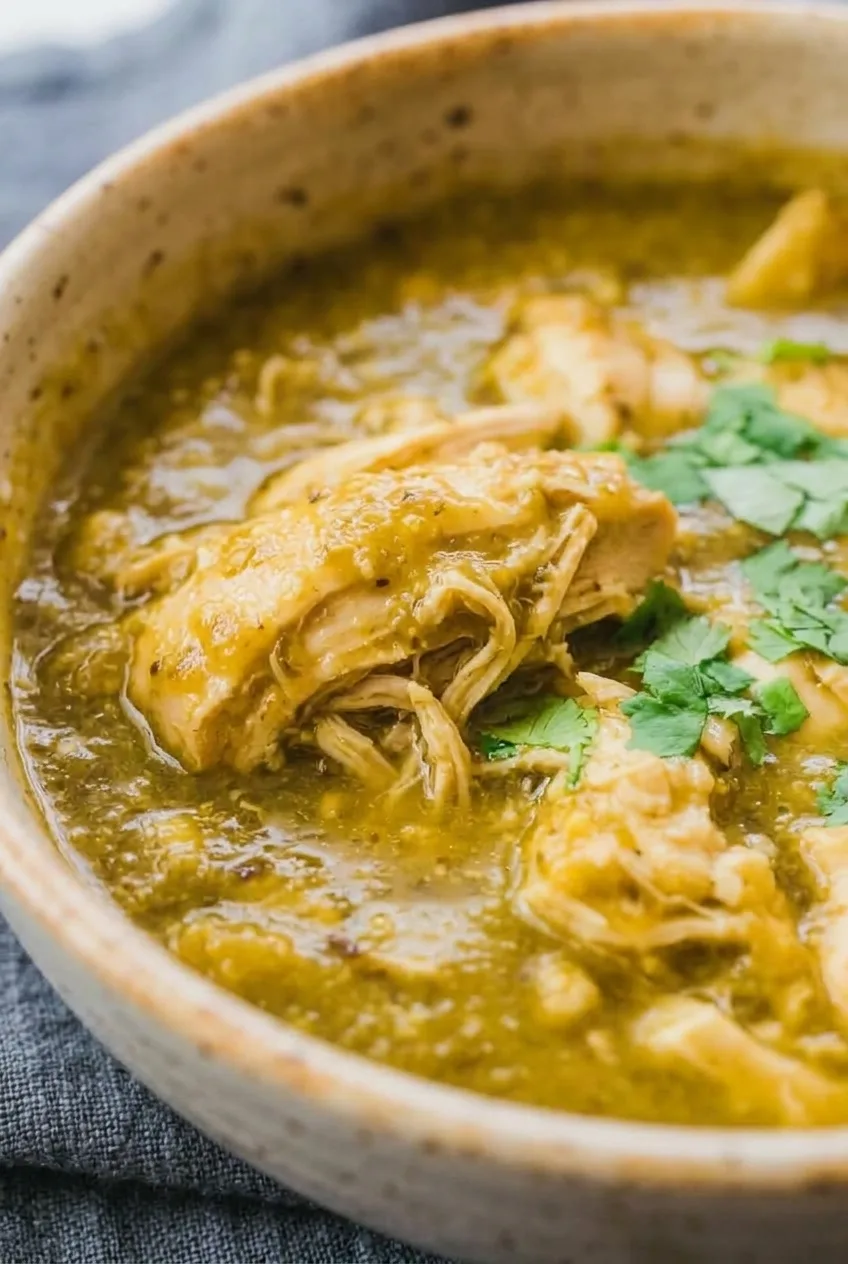
Complete bowl of chicken chili verde on dark gray fabric, with cilantro at the center
  1. Broil the vegetables: Set the broiler to high and place a rack about 6 inches from the heat. Halve and seed the poblanos and jalapeño. Arrange them with the husked, rinsed tomatillos in one layer on a rimmed, broiler-safe sheet pan. Broil for about 12–18 minutes, turning once and checking at 10 minutes. The tomatillos should be soft and blistered, with charred patches on the peppers rather than all-over scorching.
  2. Brown the chicken: Season the thighs with 1/2 teaspoon salt. Heat the oil in a 5- to 6-quart Dutch oven or heavy soup pot over medium-high heat. Brown the chicken on both sides, about 6–8 minutes total per batch. Leave room between the pieces so they brown instead of steam. Transfer to a plate; the chicken will finish cooking in the sauce.
  3. Cook the aromatics: Reduce the heat to medium. Cook the onion in the same pot for about 5–7 minutes, until softened, adding a small splash of oil only if the pot is dry. Stir in the garlic and cumin until fragrant, without letting the garlic brown deeply.
  4. Blend the sauce: Remove any loose, heavily blackened pepper skin. Blend the broiled vegetables with 1/2 cup broth until mostly smooth but still lightly flecked. Take care with the hot vegetables: vent the blender lid and cover it with a towel, or let the vegetables cool slightly first.
  5. Simmer the chicken: Pour the sauce and remaining 1/2 cup broth into the pot, scraping up the browned bits. Return the chicken and any collected juices. Partially cover and simmer over low to medium-low heat for about 18–25 minutes, stirring the sauce occasionally. Begin checking after about 18 minutes, or sooner for thin pieces. Keep the sauce at small, steady bubbles rather than a hard boil. The chicken is done when its thickest part reaches 165°F (75°C) and the meat pulls apart easily.
  6. Finish and serve: Let the chicken stand briefly on a plate until manageable. Pull some into loose strands, leaving plenty in bite-size pieces, then return it to the sauce. Turn off the heat and stir in the lime juice. Taste and add the remaining 1/2 teaspoon salt as needed. Spoon into bowls and scatter a little cilantro near the center of each.

How to Broil Tomatillos and Peppers

Rinse the tomatillos well after removing their husks; the fruit has a sticky coating. Broiler strength and vegetable size can change the timing, so look for softened tomatillos and blistered peppers rather than waiting for a uniformly dark surface. Heavily scorched pepper skin can make the sauce bitter.

How Thick Should Chicken Chili Verde Be?

The sauce should coat the chicken and a spoon but still settle into the bowl, with a little sauce pooling around the pieces. Tomatillos vary in moisture, so add extra broth only if the chili is too thick to simmer comfortably, a few tablespoons at a time. If it looks watery at the end, simmer it briefly uncovered to reduce it.

Chicken Chili Verde Variations

For less heat: Omit the jalapeño and keep both poblanos. For more heat, leave some of the jalapeño seeds in; individual peppers vary.

For a white-bean variation: Fold drained, rinsed cooked white beans in near the end and adjust the broth if needed. This makes a more bean-forward chili. For another bean-based option, try White Bean Turkey Chili.

For chicken breast: Begin checking earlier than you would with thighs and stop cooking once the thickest part reaches 165°F. Breast meat can toughen with a prolonged simmer.

Storage and Reheating

Cool leftovers and refrigerate promptly in an airtight container for up to 4 days. Reheat gently on the stovetop, stirring occasionally, until hot throughout. Add a little broth if the sauce has thickened in the refrigerator. If making the chili ahead, add fresh cilantro when serving.

Freeze in airtight portions for up to 3 months. Thaw in the refrigerator before reheating.

Nutrition

Approximate nutrition per bowl, based on 6 bowls: 285 calories, 32g protein, 12g fat, and 13g carbohydrates. Approximate values per 100g: 90 calories, 10g protein, 4g fat, and 4g carbohydrates. Values vary with the chicken, vegetables, and finished yield; optional additions are not included.

Chicken Chili Verde

Chicken thighs simmer in a thick roasted tomatillo, poblano, and jalapeño sauce until tender.
Course: Main Course
Cuisine: Mexican
Prep: 20 min
Cook: 50 min
Total: 70 min
Servings: 6 Calories: 285 kcal

Equipment

  • Broiler
  • Rimmed sheet pan
  • Dutch oven or heavy soup pot
  • Blender

Ingredients

For the Chili

  • 1 1/2 pounds fresh tomatillos, husked and rinsed (680 g)
  • 2 medium poblano peppers (about 220 g)
  • 1 jalapeño, seeded for gentler heat
  • 2 pounds boneless, skinless chicken thighs (about 900 g)
  • 1 teaspoon kosher salt, divided, plus more to taste
  • 1 tablespoon neutral oil
  • 1 medium yellow onion, diced (about 150 g)
  • 4 garlic cloves, minced
  • 1/2 teaspoon ground cumin
  • 1 cup low-sodium chicken broth, divided, plus more only if needed
  • 1 tablespoon fresh lime juice, plus more to taste
  • 1/4 cup chopped fresh cilantro

Instructions

  1. Set the broiler to high and position a rack about 6 inches from the heat.
  2. Halve and seed the poblanos and jalapeño. Arrange them with the tomatillos in one layer on a rimmed, broiler-safe sheet pan.
  3. Broil the vegetables for 12–18 minutes, turning once and checking at 10 minutes, until the tomatillos are soft and blistered and the peppers have charred patches.
  4. Season the chicken with 1/2 teaspoon salt. Heat the oil in a 5- to 6-quart Dutch oven or heavy soup pot over medium-high heat.
  5. Brown the chicken on both sides, about 6–8 minutes total per batch, leaving space between pieces. Transfer to a plate.
  6. Reduce the heat to medium. Cook the onion for 5–7 minutes until softened, adding a small splash of oil if the pot is dry. Stir in the garlic and cumin until fragrant.
  7. Remove any loose, heavily blackened pepper skin. Blend the roasted vegetables with 1/2 cup broth until mostly smooth but lightly flecked. Vent the blender lid and cover it with a towel, or let the vegetables cool slightly first.
  8. Pour the sauce and remaining 1/2 cup broth into the pot, scraping up the browned bits. Return the chicken and any collected juices.
  9. Partially cover and simmer over low to medium-low heat for 18–25 minutes, stirring occasionally, until the thickest part of the chicken reaches 165°F (75°C) and the meat pulls apart easily.
  10. Let the chicken stand briefly until manageable. Pull some into loose strands while leaving plenty in bite-size pieces, then return it to the sauce.
  11. Turn off the heat and stir in the lime juice. Taste and add the remaining 1/2 teaspoon salt as needed. Serve with cilantro.

Tips

  • Rinse tomatillos well after removing their husks to remove the sticky coating.
  • Check the vegetables early; aim for softened tomatillos and blistered peppers, not uniformly blackened skin.
  • Vent the blender lid when blending hot vegetables to release steam.
  • Keep the chili at small, steady bubbles rather than a hard boil.
  • Add extra broth a few tablespoons at a time if the sauce is too thick; simmer uncovered briefly if it is too watery.

Variations

  • Milder Chili Verde: Omit the jalapeño and keep both poblanos.
  • Hotter Chili Verde: Leave some jalapeño seeds in for more heat.
  • White-Bean Chicken Chili Verde: Fold in drained, rinsed cooked white beans near the end and adjust the broth if needed.
  • Chicken Breast Chili Verde: Use chicken breast, begin checking earlier, and stop cooking when the thickest part reaches 165°F (75°C).

Notes

Refrigerate leftovers in an airtight container for up to 4 days or freeze for up to 3 months. Thaw frozen portions in the refrigerator and reheat gently until hot throughout, adding broth if needed. Add fresh cilantro when serving.

Nutrition

Calories: 285 kcal | Protein: 32 g | Fat: 12 g | Carbohydrates: 13 g | Per 100 G Calories: 90 kcal | Per 100 G Protein: 10 g | Per 100 G Fat: 4 g | Per 100 G Carbohydrates: 4 g

Black Bean Chili

Whole black beans and sweet potato cubes simmer in a red tomato-chile broth in this meatless stovetop chili. The finished pot should be easy to ladle, with broth visible between the vegetables rather than a thick, mashed texture. Canned beans make the short simmer possible; the sweet potato determines when the chili is done. Finish with cilantro after cooking so it stays fresh and green.

Prep: 15 minutes | Cook: 30–35 minutes | Total: 45–50 minutes | Yield: 6 bowls

Ingredients for Black Bean Chili

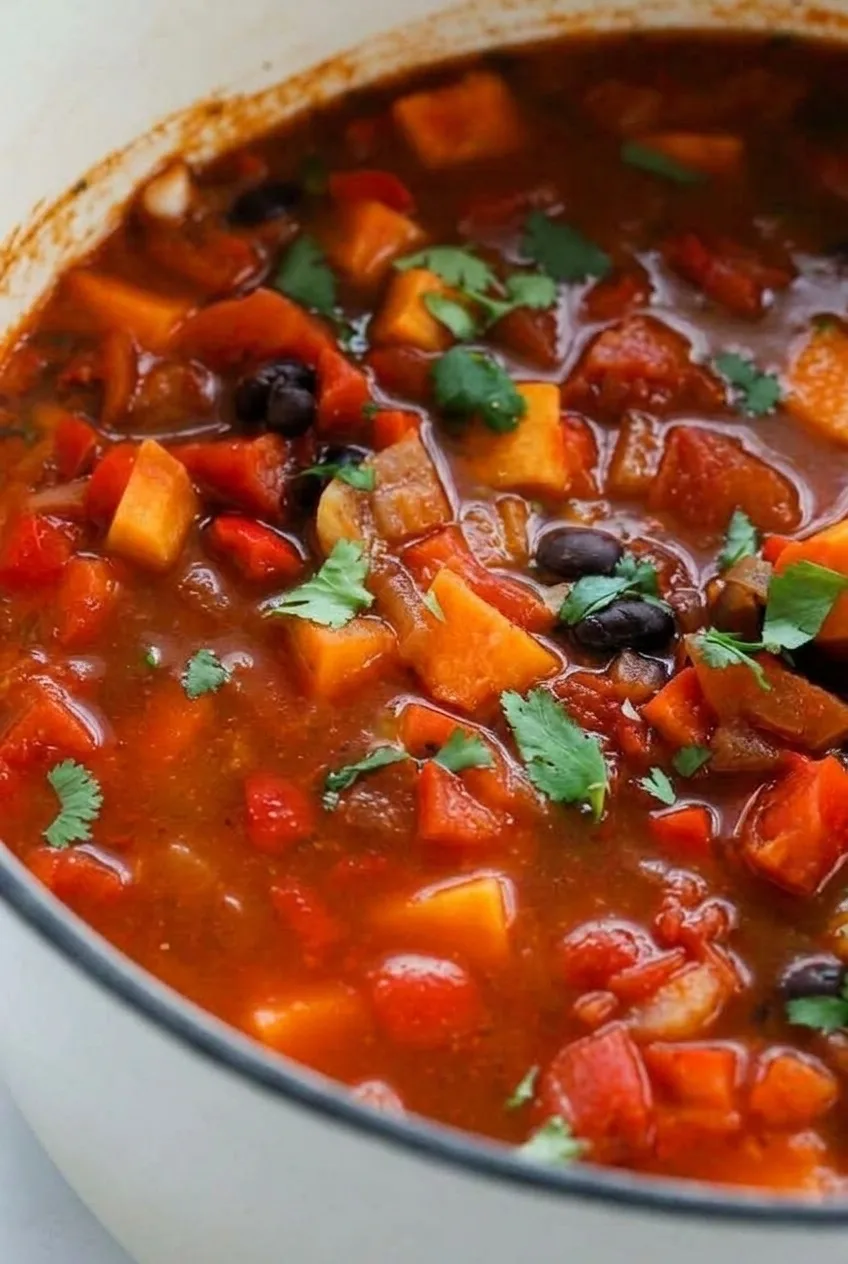
Close view of black beans, intact sweet potato cubes and cilantro in red chili broth
  • 1 tablespoon olive oil
  • 1 medium yellow onion, diced (about 150g)
  • 1 medium red bell pepper, diced (about 150g)
  • 3 garlic cloves, minced
  • 1 1/2 tablespoons mild-to-medium chili powder
  • 1 1/2 teaspoons ground cumin
  • 1 teaspoon dried oregano
  • 2 tablespoons tomato paste (about 30g)
  • 1 medium-large sweet potato, peeled and cut into roughly 1/2-inch cubes (about 12 ounces or 340g)
  • 1 can (28 ounces) fire-roasted diced tomatoes, with their juices
  • 2 cans (15 ounces each) black beans, drained and rinsed
  • 1 1/2 cups low-sodium vegetable broth, plus more as needed
  • 1/2 teaspoon kosher salt to start, plus more to taste
  • 1/4 cup loosely packed chopped fresh cilantro

How to Make Black Bean Chili

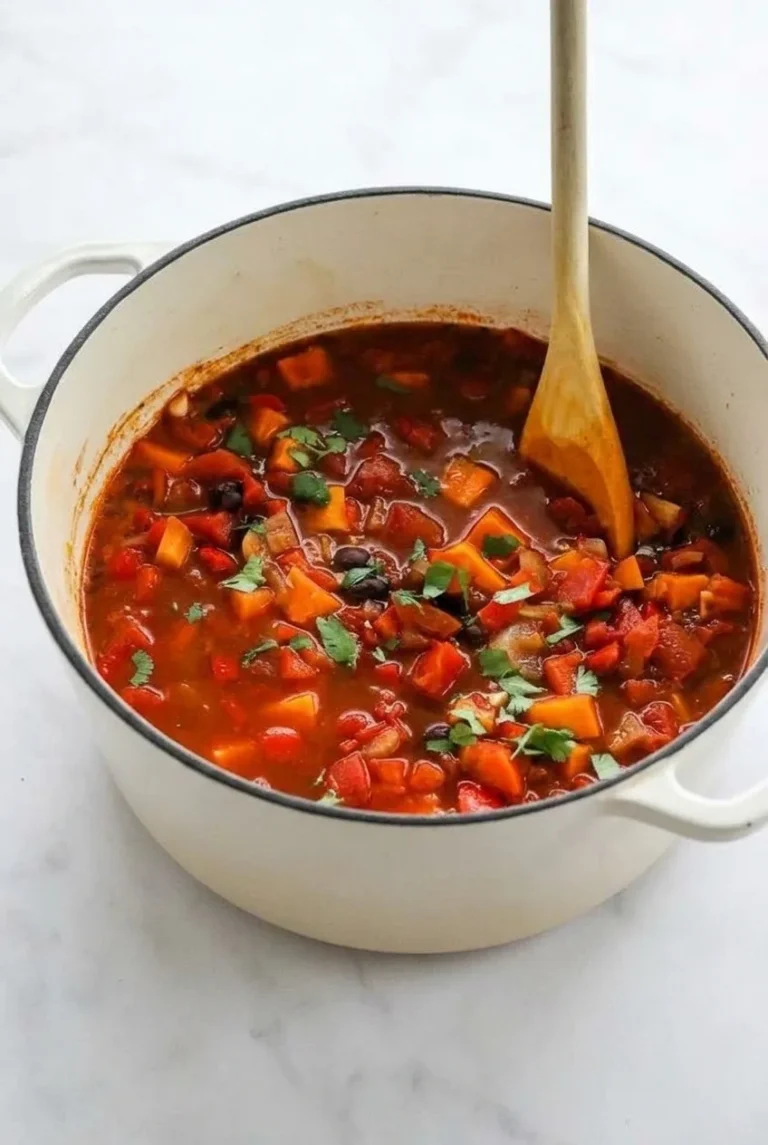
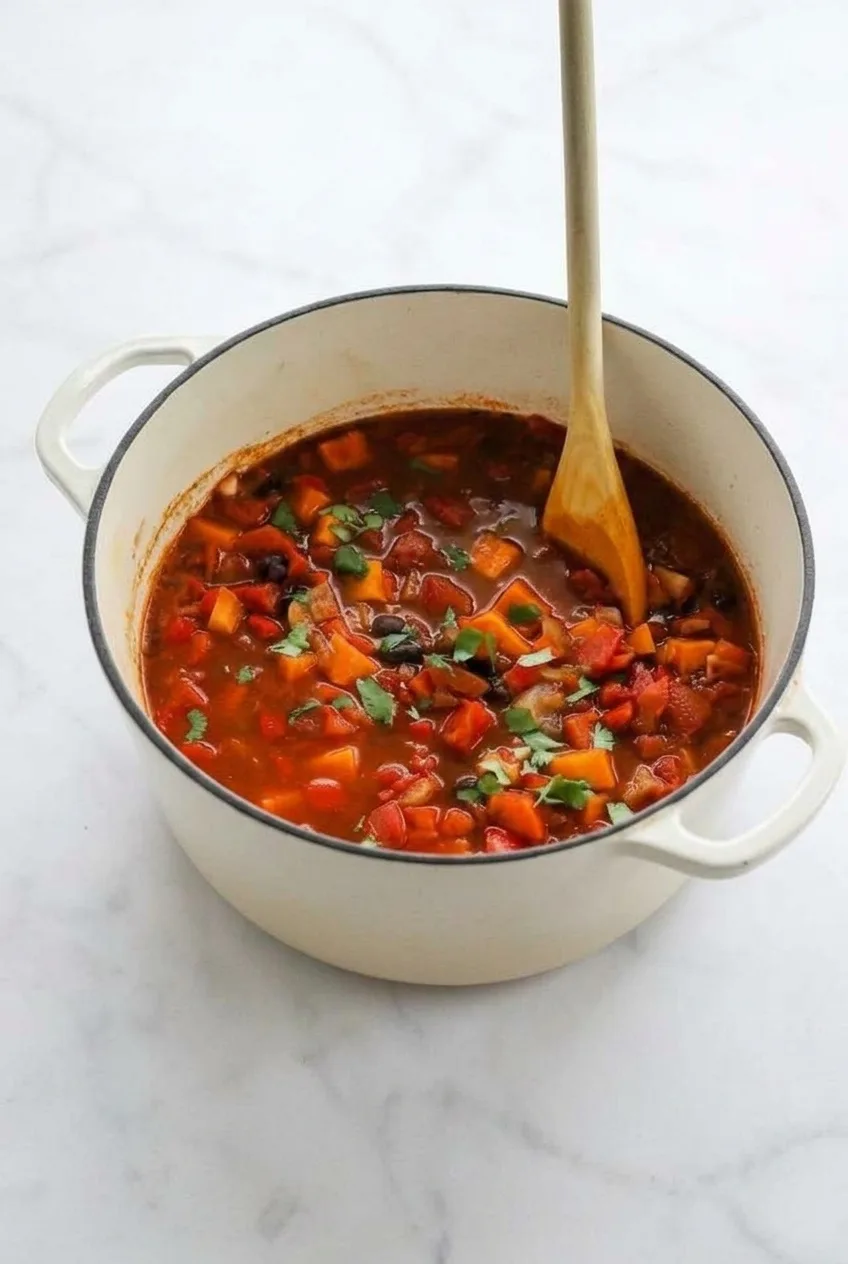
Full Dutch oven of black bean and sweet potato chili on a pale countertop
  1. Prepare the ingredients: Dice the onion and bell pepper, mince the garlic, and cut the peeled sweet potato into even, roughly 1/2-inch cubes. Drain and rinse the beans.
  2. Soften the vegetables: Warm the oil in a 5- to 6-quart Dutch oven or soup pot over medium heat. Add the onion and bell pepper. Cook for 6–8 minutes, stirring occasionally, until the onion is translucent and the pepper begins to soften. Stir in the garlic just until fragrant.
  3. Cook the seasonings: Stir in the chili powder, cumin, oregano, and tomato paste. Cook for about 1 minute, stirring constantly, until fragrant and the paste darkens slightly. Add the remaining ingredients promptly so the spices do not scorch.
  4. Simmer: Add the sweet potato, tomatoes and their juices, black beans, broth, and 1/2 teaspoon salt. Bring to a gentle bubble over medium heat, then reduce to medium-low. Loosely cover and simmer for about 15 minutes, stirring occasionally and scraping the bottom. Uncover and simmer for another 5–10 minutes. Start checking the sweet potato after about 18 minutes of simmering: a fork should slip through a cube easily, but the cubes should mostly hold their shape.
  5. Adjust and finish: The chili should ladle easily, with red broth visible between the beans and vegetables. If it is too thick, stir in broth or water a splash at a time. If unusually loose, simmer uncovered briefly. Taste and adjust the salt; add a pinch of cayenne or chipotle powder only if you want more heat. Turn off the heat and scatter the cilantro over the chili just before serving.

How Thick Should This Chili Be?

A gentle simmer helps the sweet potato soften without reducing the chili to a nearly dry bean mixture. If the broth begins to disappear or the vegetables become exposed, lower the heat and add a little broth or water. Leave the beans and vegetables intact rather than mashing or pureeing them.

When Is the Sweet Potato Done?

Even 1/2-inch cubes cook more consistently, but use a fork rather than the timer alone to check them. Larger pieces may need a few extra minutes and a splash of liquid as they simmer. The canned beans are already cooked and only need to heat through; uncooked dried beans must be cooked separately until tender before they can be used in this chili.

Serving and Storing

Ladle into bowls with the cilantro visible on top. Offer lime wedges or sliced avocado alongside if desired; add avocado to individual bowls, not the pot. For a different, meat-containing chili, try ground turkey chili.

Cool leftovers promptly and refrigerate in covered containers. Reheat gently on the stovetop, adding a splash of water or broth if the chili has thickened. Add fresh cilantro after reheating. Cooled, ungarnished portions can also be frozen, though the sweet potato may soften further after thawing.

Nutrition

Approximate nutrition per bowl, based on 6 bowls: 260 calories, 11g protein, 4g fat, and 47g carbohydrates. Per 100g: approximately 70 calories, 3g protein, 1g fat, and 13g carbohydrates. Values exclude optional toppings and vary with the beans, tomatoes, broth, and amount of liquid left after simmering.

Black Bean Chili

A meatless stovetop chili with black beans, sweet potato, and vegetables simmered in a red tomato-chile broth.
Course: Main Course
Cuisine: American
Prep: 15 min
Cook: 35 min
Total: 50 min
Servings: 6 Calories: 260 kcal

Equipment

  • 5- to 6-quart Dutch oven or soup pot

Ingredients

For the Chili

  • 1 tablespoon olive oil
  • 1 medium yellow onion, diced (about 150 g)
  • 1 medium red bell pepper, diced (about 150 g)
  • 3 garlic cloves, minced
  • 1 1/2 tablespoons mild-to-medium chili powder
  • 1 1/2 teaspoons ground cumin
  • 1 teaspoon dried oregano
  • 2 tablespoons tomato paste (about 30 g)
  • 1 medium-large sweet potato, peeled and cut into roughly 1/2-inch cubes (about 12 ounces or 340 g)
  • 1 can (28 ounces) fire-roasted diced tomatoes, with their juices
  • 2 cans (15 ounces each) black beans, drained and rinsed
  • 1 1/2 cups low-sodium vegetable broth, plus more as needed
  • 1/2 teaspoon kosher salt, plus more to taste
  • 1/4 cup loosely packed chopped fresh cilantro

Instructions

  1. Dice the onion and bell pepper, mince the garlic, and cut the peeled sweet potato into even, roughly 1/2-inch cubes. Drain and rinse the beans.
  2. Warm the olive oil in a 5- to 6-quart Dutch oven or soup pot over medium heat. Add the onion and bell pepper and cook for 6–8 minutes, stirring occasionally, until the onion is translucent and the pepper begins to soften.
  3. Stir in the garlic and cook just until fragrant.
  4. Add the chili powder, cumin, oregano, and tomato paste. Cook for about 1 minute, stirring constantly, until fragrant and the paste darkens slightly.
  5. Add the sweet potato, tomatoes and their juices, black beans, broth, and 1/2 teaspoon salt. Bring to a gentle bubble over medium heat, then reduce the heat to medium-low.
  6. Loosely cover and simmer for about 15 minutes, stirring occasionally and scraping the bottom of the pot. Uncover and simmer for another 5–10 minutes.
  7. Check the sweet potato with a fork starting at about 18 minutes of simmering. Cook until a fork slips through easily while the cubes mostly hold their shape.
  8. Check the consistency and stir in broth or water a splash at a time if the chili is too thick. If it is unusually loose, simmer uncovered briefly.
  9. Taste and adjust the salt. If desired, add a pinch of cayenne or chipotle powder for more heat. Turn off the heat and scatter the cilantro over the chili just before serving.

Tips

  • Cut the sweet potato into even, roughly 1/2-inch cubes so it cooks consistently.
  • Keep the chili at a gentle simmer to soften the sweet potato without reducing the broth too much.
  • Add broth or water a splash at a time if the vegetables become exposed or the chili gets too thick.
  • Check the sweet potato with a fork rather than relying on the timer alone.
  • Avoid mashing or pureeing the beans and vegetables; the chili should remain easy to ladle with broth visible.

Notes

Cool leftovers promptly and refrigerate in covered containers. Reheat gently with a splash of broth or water, then add fresh cilantro. Dried beans must be cooked separately until tender before using. Approximate nutrition per 100 g: 70 calories, 3 g protein, 1 g fat, and 13 g carbohydrates.

Nutrition

Calories: 260 kcal | Protein: 11 g | Fat: 4 g | Carbohydrates: 47 g

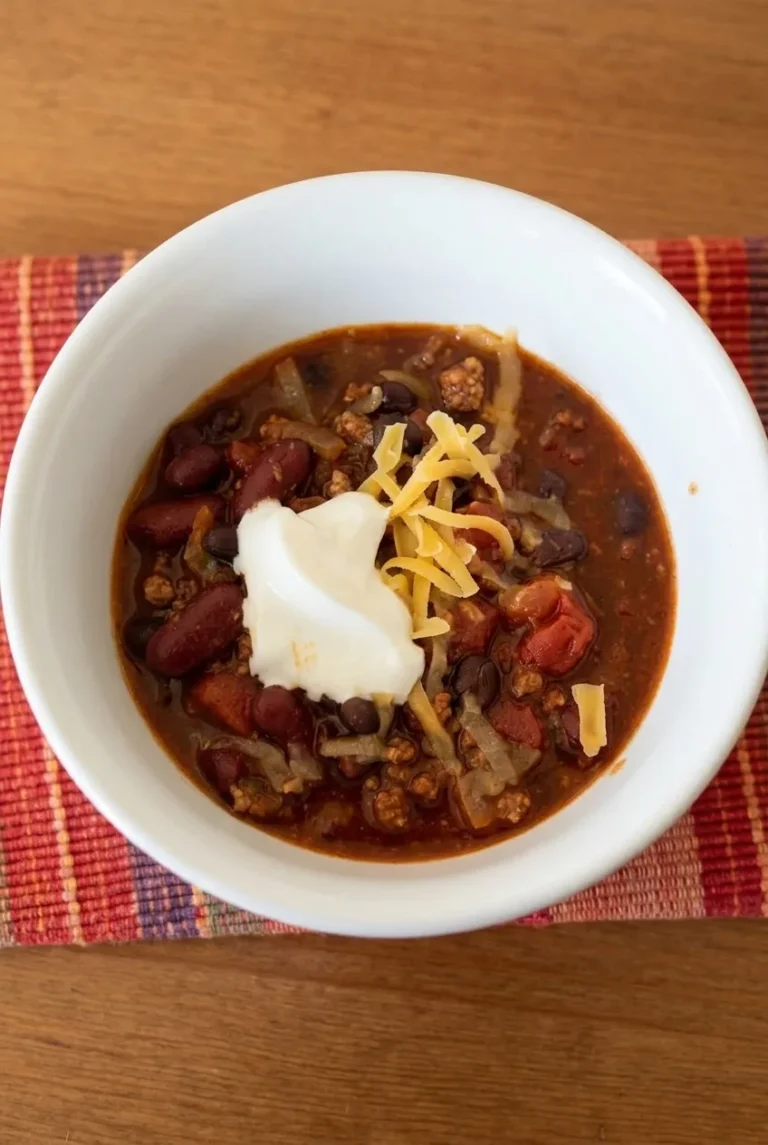
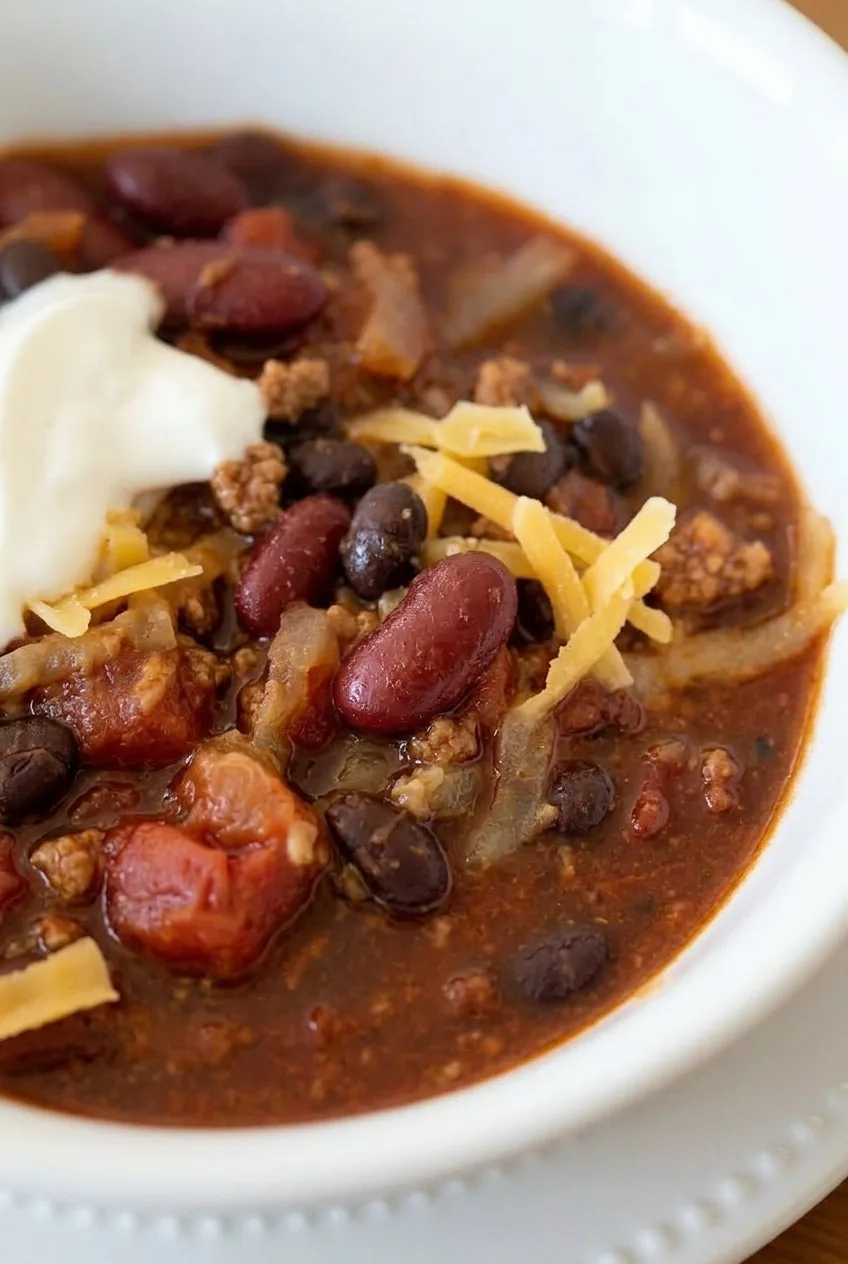
Ground Turkey Chili

This stovetop chili has distinct ground turkey crumbles, whole kidney and black beans, and diced tomatoes in a red sauce. Brown the turkey before adding the liquid, then simmer the chili uncovered until the sauce coats the beans but still pools lightly around them.

Serve it in bowls with a dollop of sour cream and a little shredded cheddar. Allow about 15 minutes to prep and 40–45 minutes to cook; the recipe makes 6 bowls.

Ingredients for Ground Turkey Chili

Close view of turkey crumbles, whole beans, and diced tomatoes in the chili's red sauce
  • 1 tablespoon olive oil
  • 1 medium yellow onion, diced (about 150g)
  • 3 garlic cloves, minced
  • 1 lb ground turkey (about 450g)
  • 2 tablespoons chili powder
  • 2 teaspoons ground cumin
  • 2 tablespoons tomato paste
  • 1 can (14.5 ounces) diced tomatoes, with their juices
  • 1 can (15 ounces) tomato sauce
  • 1/2 cup low-sodium chicken broth, plus more if needed
  • 1 can (15 ounces) kidney beans, drained and rinsed
  • 1 can (15 ounces) black beans, drained and rinsed
  • 1 teaspoon kosher salt and 1/4 teaspoon black pepper to start, plus more to taste
  • Optional: a pinch to 1/4 teaspoon cayenne pepper
  • 6 tablespoons sour cream, for serving
  • 1/2 cup shredded cheddar cheese, for serving

How to Make Ground Turkey Chili

Complete bowl of ground turkey chili with sour cream and cheddar on a warm tabletop
  1. Prepare the ingredients: Dice the onion and mince the garlic. Drain and rinse both cans of beans, but keep the diced tomatoes and their juices together.
  2. Soften the onion: Warm the oil in a 5- to 6-quart heavy pot or Dutch oven over medium heat. Add the onion and cook for about 5 minutes, stirring occasionally, until softened. Add the garlic and stir for about 1 minute, until fragrant.
  3. Brown the turkey: Add the ground turkey and cook over medium to medium-high heat for 7–9 minutes, breaking it into small, irregular crumbles as it cooks. The turkey should be fully cooked with no pink remaining before the simmer; ground turkey should reach 165°F (75°C) for food safety. Small crumbles can be difficult to probe individually. Drain excess fat only if the turkey releases an appreciable amount.
  4. Cook the paste and spices: Stir in the tomato paste, chili powder, cumin, salt, pepper, and optional cayenne. Cook over medium heat for 1–2 minutes, stirring, until the paste coats the turkey and darkens slightly without burning.
  5. Simmer the chili: Stir in the diced tomatoes with their juices, tomato sauce, 1/2 cup broth, and both kinds of beans. Bring to a gentle simmer over medium heat, then reduce to medium-low. Simmer uncovered for 25–30 minutes, stirring periodically and scraping the bottom of the pot. Start checking at 25 minutes: the beans should be hot and intact, with sauce coating the solids and pooling lightly around them.
  6. Adjust and serve: Taste and add salt or pepper as needed. If the chili is thin, simmer it uncovered for a few more minutes; if it is too thick, add broth a few tablespoons at a time. Let stand off the heat for about 5 minutes. Ladle into bowls and top each with about 1 tablespoon sour cream and a light scattering of cheddar.

How Thick Should Turkey Chili Be?

A spoonful should hold the beans and turkey together without looking dry. Canned tomato products vary in thickness, so judge the finished chili by the sauce visible around the solids. Stir as it reduces to keep the tomato base from sticking; if it thickens too much while resting, loosen it with a little broth.

Which Cans Should You Drain?

Drain and rinse the kidney and black beans, but use all the juices from the diced tomatoes. Start with the measured 1/2 cup broth rather than adding extra liquid before the chili has simmered.

Storing and Reheating

Cool the chili promptly and refrigerate it without toppings in an airtight container for up to 3–4 days. Reheat in a saucepan over medium heat, stirring, or microwave until hot throughout. Add a splash of broth if needed, then top each bowl with fresh sour cream and cheddar.

For longer storage, freeze cooled, untopped chili in airtight, portion-sized containers for up to 3 months. Thaw in the refrigerator before reheating.

Nutrition

Approximate nutrition per bowl, including sour cream and cheddar: 360 calories, 27g protein, 15g fat, and 32g carbohydrates. A bowl is approximately 350g; per 100g, that is about 103 calories, 8g protein, 4g fat, and 9g carbohydrates. Values vary with the ground turkey and canned products used and how much the chili reduces.

Ground Turkey Chili

Ground turkey, kidney beans, black beans, and tomatoes simmer together in a lightly thickened chili sauce.
Course: Main Course
Cuisine: American
Prep: 15 min
Cook: 45 min
Total: 65 min
Servings: 6 Calories: 360 kcal

Equipment

  • 5- to 6-quart heavy pot or Dutch oven
  • Colander

Ingredients

For the chili

  • 1 tablespoon olive oil
  • 1 medium yellow onion, diced (about 150 g)
  • 3 garlic cloves, minced
  • 1 lb ground turkey (about 450 g)
  • 2 tablespoons chili powder
  • 2 teaspoons ground cumin
  • 2 tablespoons tomato paste
  • 1 can (14.5 ounces) diced tomatoes, with their juices
  • 1 can (15 ounces) tomato sauce
  • 1/2 cup low-sodium chicken broth, plus more if needed
  • 1 can (15 ounces) kidney beans, drained and rinsed
  • 1 can (15 ounces) black beans, drained and rinsed
  • 1 teaspoon kosher salt, plus more to taste
  • 1/4 teaspoon black pepper, plus more to taste
  • Optional: a pinch to 1/4 teaspoon cayenne pepper

For serving

  • 6 tablespoons sour cream
  • 1/2 cup shredded cheddar cheese

Instructions

  1. Dice the onion and mince the garlic. Drain and rinse the kidney and black beans; leave the diced tomatoes with their juices.
  2. Warm the olive oil in a 5- to 6-quart heavy pot or Dutch oven over medium heat. Add the onion and cook for about 5 minutes, stirring occasionally, until softened.
  3. Add the garlic and cook for about 1 minute, stirring, until fragrant.
  4. Add the ground turkey. Cook over medium to medium-high heat for 7–9 minutes, breaking it into small crumbles, until fully cooked with no pink remaining. The turkey should reach 165°F (75°C). Drain excess fat only if a noticeable amount has collected.
  5. Stir in the tomato paste, chili powder, cumin, salt, pepper, and optional cayenne. Cook over medium heat for 1–2 minutes, stirring, until the paste coats the turkey and darkens slightly.
  6. Add the diced tomatoes and their juices, tomato sauce, 1/2 cup broth, kidney beans, and black beans. Bring to a gentle simmer over medium heat.
  7. Reduce the heat to medium-low and simmer uncovered for 25–30 minutes, stirring periodically and scraping the bottom of the pot. Start checking at 25 minutes; the beans should be hot and intact, and the sauce should coat the solids while pooling lightly around them.
  8. Taste and adjust the salt and pepper. If the chili is thin, simmer uncovered for a few more minutes; if it is too thick, add broth a few tablespoons at a time.
  9. Remove from the heat and let stand for about 5 minutes. Serve in bowls topped with about 1 tablespoon sour cream and a light scattering of cheddar per serving.

Tips

  • Drain and rinse the kidney and black beans, but use all the juices from the diced tomatoes.
  • Start with 1/2 cup broth and wait until the chili has simmered before adding more.
  • Stir periodically and scrape the bottom of the pot as the chili simmers to prevent sticking.
  • Judge thickness by the sauce around the beans and turkey; loosen the chili with broth if it thickens too much while resting.

Notes

Refrigerate cooled chili without toppings in an airtight container for 3–4 days. Reheat until hot throughout, adding broth if needed. Freeze untopped chili for up to 3 months and thaw in the refrigerator before reheating.

Nutrition

Calories: 360 kcal | Protein: 27 g | Fat: 15 g | Carbohydrates: 32 g

Shredded Beef Chili

Chuck roast gives this chili long, tender beef strands instead of the texture of ground beef. The beef braises in a tomato-and-spice sauce until it pulls apart easily, then returns to the pot with pinto beans. An uncovered simmer thickens the sauce so it coats the beef but stays moist enough to ladle into bowls.

Allow about 20 minutes to prepare the ingredients and 3 to 4 hours to cook. The beef determines the timing: if it resists shredding, it needs more time in the covered pot. Makes 6 to 8 servings.

Ingredients for Shredded Beef Chili

Close view of long beef shreds and intact beans coated in thick brick-red chili sauce.
  • 2 1/2 pounds boneless beef chuck roast, cut into roughly 3-inch pieces (1,150g)
  • 1 teaspoon kosher salt, plus more to taste
  • 1/2 teaspoon black pepper
  • 1 tablespoon neutral cooking oil
  • 1 large yellow onion, diced (about 180g)
  • 4 garlic cloves, minced
  • 2 tablespoons tomato paste
  • 3 tablespoons chili powder blend
  • 2 teaspoons ground cumin
  • 1 teaspoon smoked paprika
  • 1 can (28 ounces) crushed tomatoes
  • 1 cup low-sodium beef broth, plus more if needed
  • 2 cans (15 ounces each) pinto beans, drained and rinsed (about 500g drained)
  • 1/4 cup loosely packed fresh cilantro leaves

For more heat, add 1/8 to 1/4 teaspoon cayenne with the other spices. Use a chili powder blend, not the same amount of pure ground chile, which may be much hotter. Drained, rinsed kidney beans can replace the pinto beans, though they will be larger and more prominent in the finished chili.

How to Make Shredded Beef Chili

A bowl of shredded beef chili with pinto beans and a light cilantro garnish on a simple table.
  1. Preheat and season: Heat the oven to 325°F (165°C). Pat the beef dry and season it with the salt and pepper.
  2. Brown the beef: Heat the oil in a 5- to 6-quart oven-safe Dutch oven over medium-high heat. Sear the beef in batches, turning until several sides are browned, about 8 to 12 minutes total. Leave space between the pieces so they brown instead of steam. Transfer to a plate.
  3. Build the chili base: Reduce the heat to medium and cook the onion until softened. Stir in the garlic, tomato paste, chili powder, cumin, and smoked paprika. Cook for about 1 minute, stirring so the spices become fragrant without scorching. Add the crushed tomatoes and broth, scraping up the browned bits from the pot.
  4. Braise until tender: Return the beef and any collected juices to the pot, nestling the pieces into the sauce. Cover tightly and cook in the oven for about 2 1/2 to 3 1/2 hours. Start checking at 2 1/2 hours. If a fork does not pull the beef easily into strands, keep braising covered and check again in 20 to 30 minutes.
  5. Shred and add the beans: Lift out the beef and let it cool just enough to handle. Shred it into distinct strands with two forks, discarding any large pieces of fat. Skim excess fat from the sauce if needed. Return the beef to the pot and gently stir in the beans. Adding canned beans after the long braise helps them stay whole.
  6. Thicken and serve: Simmer uncovered over medium-low heat for 15 to 25 minutes, stirring occasionally. The beans should be hot, and the sauce should coat the beef while still flowing from a ladle. If the chili is too thick, stir in broth a splash at a time. Season with more salt if needed, then ladle into bowls and scatter the cilantro over the top.

How to Tell When the Beef Is Ready

Chuck roasts vary, so use tenderness rather than the clock to decide when to shred. A fork should pull a piece into strands without resistance. If the beef is still firm, leave it in the covered pot with sauce around it and continue braising; pulling harder will not make it tender.

Getting the Right Chili Thickness

The sauce may look loose before the final simmer. Leave the pot uncovered to reduce it, stirring occasionally and checking after about 15 minutes. A ladleful should show distinct beef strands and whole beans coated in sauce, not sitting in a thin broth. If the chili becomes pasty or starts catching on the bottom, add a little broth until it is easy to ladle again.

Serving Shredded Beef Chili

Serve in bowls with a light cilantro garnish and cornbread on the side. For a different take on beef chili, try Award-Winning Beef Chili.

How to Store and Reheat Shredded Beef Chili

Cool leftovers promptly and refrigerate in shallow airtight containers within 2 hours. Use within 3 to 4 days. Reheat gently on the stovetop, stirring in a splash of broth if the chili has thickened, until it reaches 165°F (75°C). Add fresh cilantro after reheating.

For longer storage, freeze cooled chili in airtight portions for best quality within about 2 to 3 months. Thaw in the refrigerator before reheating.

Nutrition

Approximate nutrition per serving, based on 8 servings: 440 calories, 37g protein, 23g fat, and 25g carbohydrates. Approximate values per 100g: 145 calories, 12g protein, 8g fat, and 8g carbohydrates. Values vary with the chuck roast, the amount of fat skimmed, and how much the sauce reduces.

Shredded Beef Chili

Chuck roast braises in a tomato-and-spice sauce until tender, then simmers with pinto beans until the chili thickens.
Course: Main Course
Cuisine: American
Prep: 20 min
Cook: 240 min
Total: 260 min
Servings: 8 Calories: 440 kcal

Equipment

  • 5- to 6-quart oven-safe Dutch oven
  • Two forks

Ingredients

For the Chili

  • 2 1/2 pounds boneless beef chuck roast, cut into roughly 3-inch pieces (1,150 g)
  • 1 teaspoon kosher salt, plus more to taste
  • 1/2 teaspoon black pepper
  • 1 tablespoon neutral cooking oil
  • 1 large yellow onion, diced (about 180 g)
  • 4 garlic cloves, minced
  • 2 tablespoons tomato paste
  • 3 tablespoons chili powder blend
  • 2 teaspoons ground cumin
  • 1 teaspoon smoked paprika
  • 1 can (28 ounces) crushed tomatoes
  • 1 cup low-sodium beef broth, plus more if needed
  • 2 cans (15 ounces each) pinto beans, drained and rinsed (about 500 g drained)
  • 1/4 cup loosely packed fresh cilantro leaves

Instructions

  1. Preheat the oven to 325°F (165°C). Pat the beef dry and season it with the salt and pepper.
  2. Heat the oil in a 5- to 6-quart oven-safe Dutch oven over medium-high heat. Sear the beef in batches, turning until several sides are browned, about 8 to 12 minutes total. Transfer the beef to a plate.
  3. Reduce the heat to medium and cook the onion until softened. Stir in the garlic, tomato paste, chili powder, cumin, and smoked paprika. Cook for about 1 minute, stirring until fragrant.
  4. Add the crushed tomatoes and broth, scraping up the browned bits from the pot.
  5. Return the beef and any collected juices to the pot, nestling the pieces into the sauce. Cover tightly and braise in the oven for 2 1/2 to 3 1/2 hours, checking from 2 1/2 hours. If the beef does not pull apart easily with a fork, continue braising and check again in 20 to 30 minutes.
  6. Lift out the beef and let it cool just enough to handle. Shred it into strands with two forks, discarding any large pieces of fat. Skim excess fat from the sauce if needed.
  7. Return the shredded beef to the pot and gently stir in the beans.
  8. Simmer uncovered over medium-low heat for 15 to 25 minutes, stirring occasionally, until the beans are hot and the sauce coats the beef but still flows from a ladle. Add broth a splash at a time if the chili is too thick.
  9. Taste and add more salt if needed. Serve topped with cilantro.

Tips

  • Brown the beef in batches with space between the pieces so it sears instead of steams.
  • Use a fork to check tenderness; if the beef resists shredding, continue braising it covered.
  • Add the canned beans after braising to help them stay whole.
  • Simmer uncovered to thicken the sauce, adding broth if it becomes too thick.

Variations

  • Spicier Chili: Add 1/8 to 1/4 teaspoon cayenne with the other spices.
  • Kidney Bean Chili: Replace the pinto beans with drained and rinsed kidney beans.

Notes

Refrigerate leftovers in shallow airtight containers within 2 hours and use within 3 to 4 days. Reheat gently with a splash of broth until the chili reaches 165°F (75°C). Freeze cooled portions for best quality within 2 to 3 months; thaw in the refrigerator before reheating.

Nutrition

Calories: 440 kcal | Protein: 37 g | Fat: 23 g | Carbohydrates: 25 g