Author

Julia

Browsing

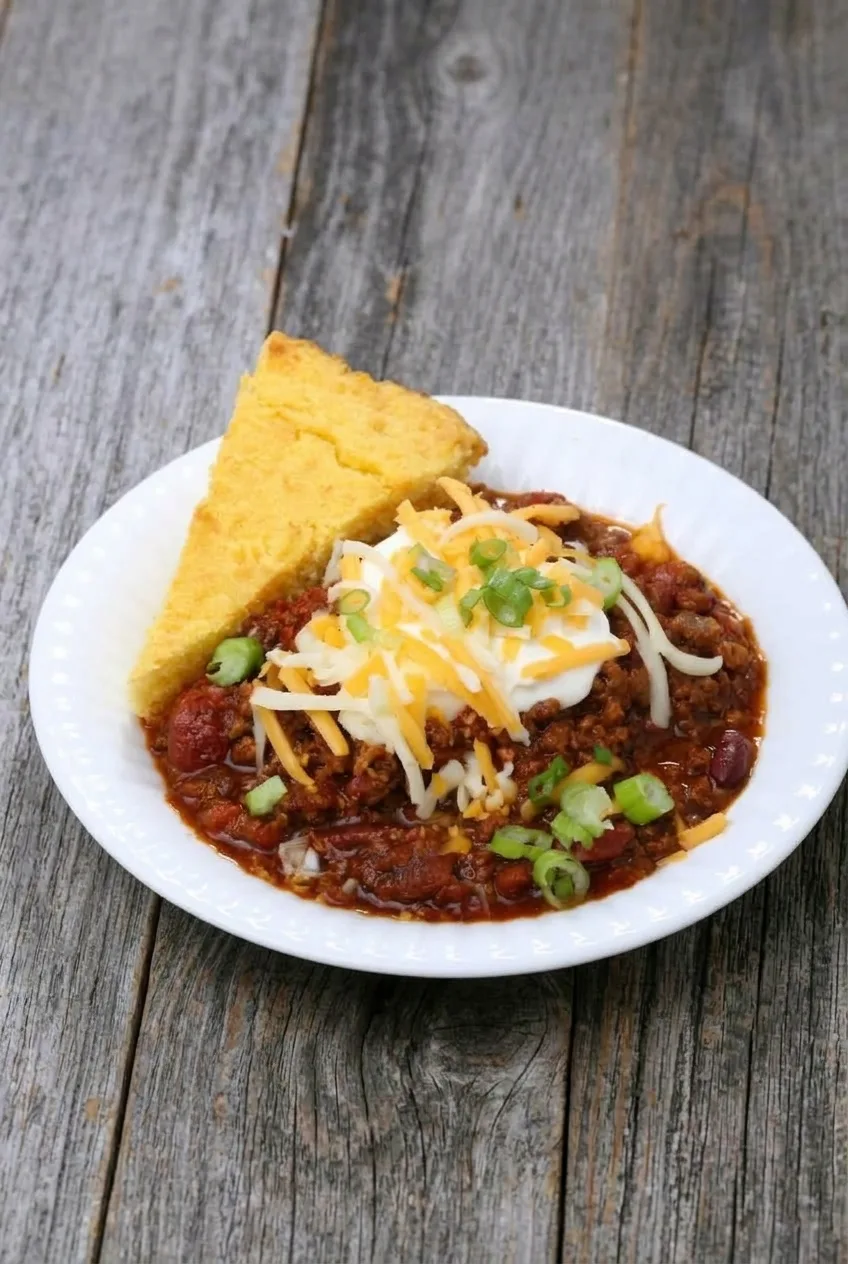
Texas-Style Beef Chili

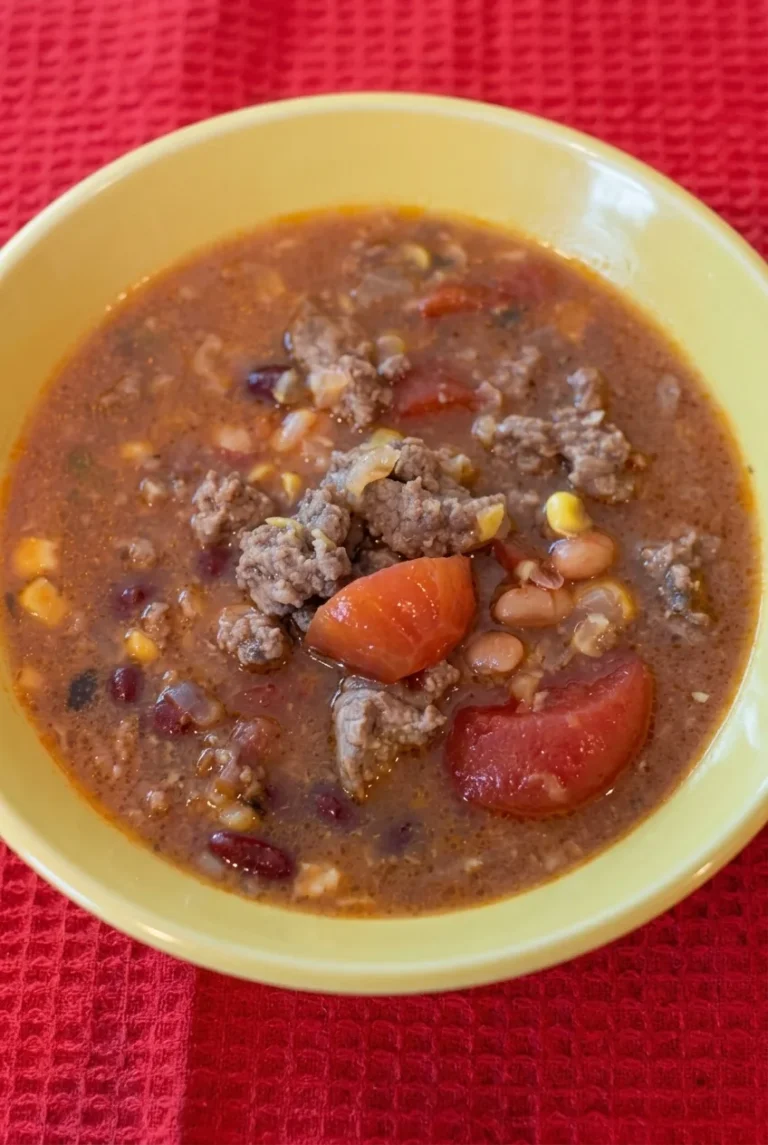
Ground beef, pinto and kidney beans, corn, and chunky tomatoes make this a loose, spoonable chili with reddish-brown liquid around the solids. Browning the beef builds the base; a gentle stovetop simmer develops the chile seasoning without cooking the beans and corn until they lose their shape.

This is a home-style Texas-inspired adaptation, not a bean-free chuck chili. Use a mild American-style chili powder blend, then add cayenne only if you want more heat. Makes 6 generous servings.

Ingredients for Texas-Style Beef Chili
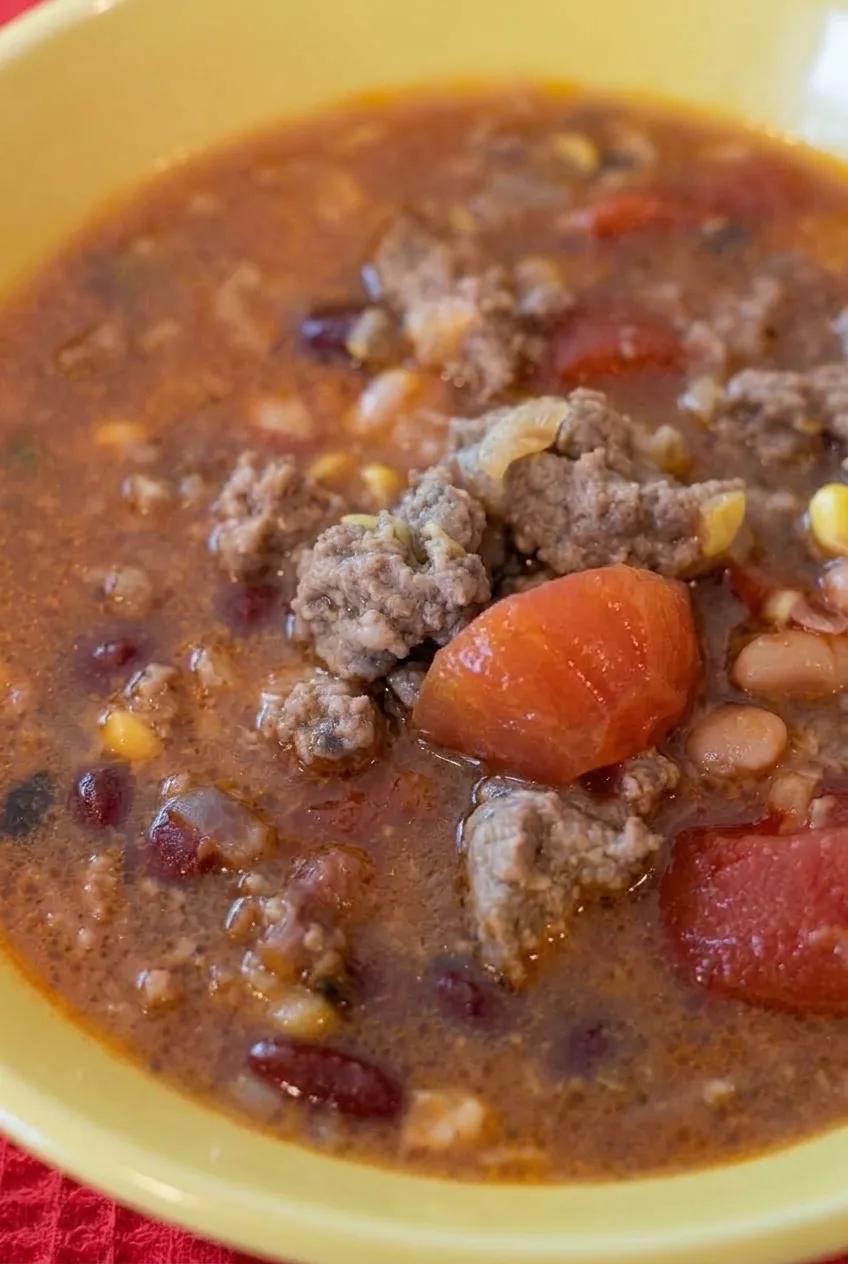
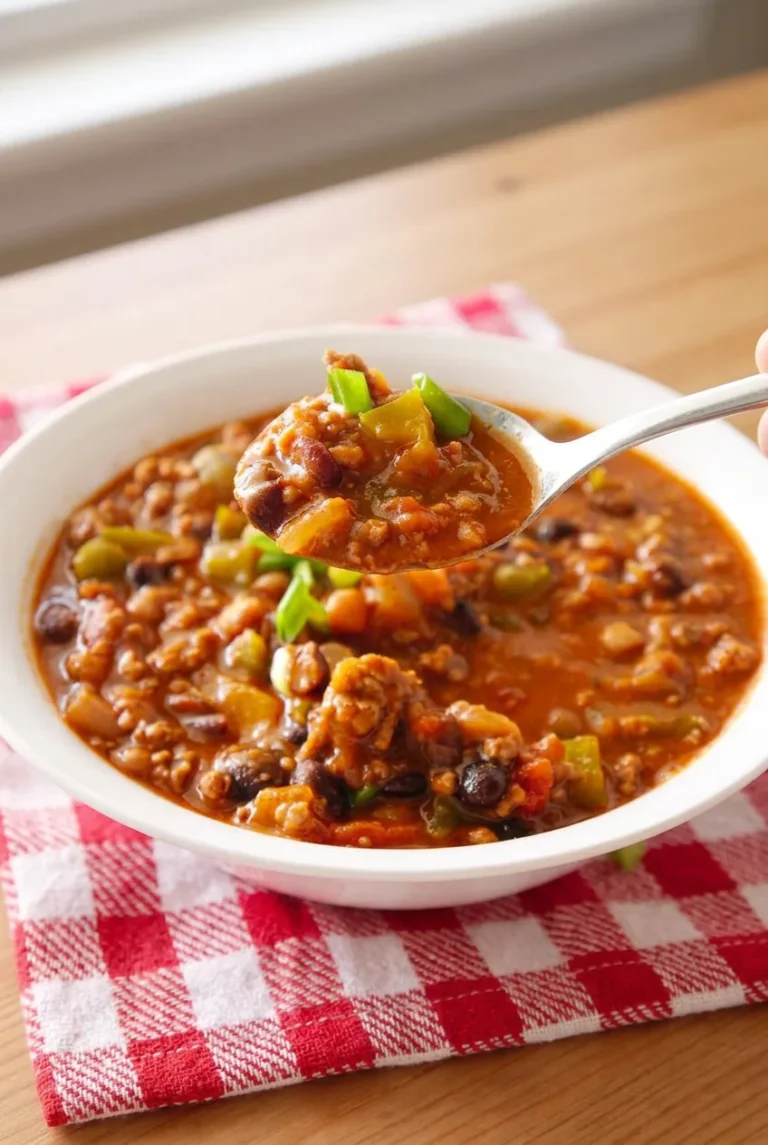
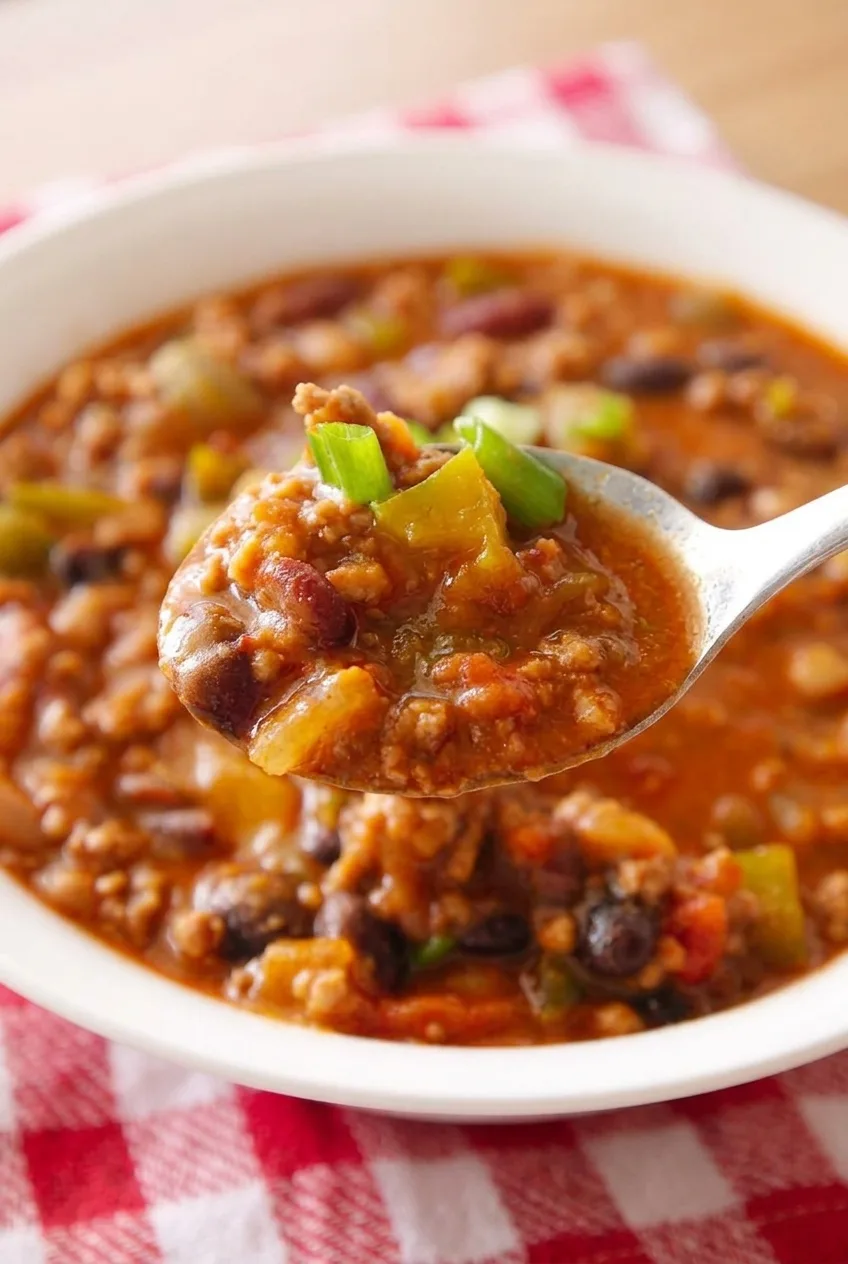
Close view of beef crumbles, intact beans, corn and tomato pieces in saucy beef chili
  • 1 1/2 pounds 85% lean ground beef (680g)
  • 1 medium yellow onion, diced (about 180g)
  • 3 garlic cloves, minced
  • 3 tablespoons mild American-style chili powder blend
  • 2 teaspoons ground cumin
  • 2 tablespoons tomato paste (about 30g)
  • 1 can (28 ounces) whole peeled tomatoes with their juices, roughly chopped (about 795g)
  • 1 1/2 cups low-sodium beef broth, plus up to 1/2 cup more if needed
  • 1 can (15 ounces) pinto beans, drained and rinsed
  • 1 can (15 ounces) kidney beans, drained and rinsed
  • 1 cup frozen corn kernels (about 165g)
  • 1 teaspoon kosher salt to start, plus more to taste

Optional heat: Add a pinch of cayenne with the chili powder, up to 1/4 teaspoon total. Adjust to taste after simmering.

How to Make Texas-Style Beef Chili
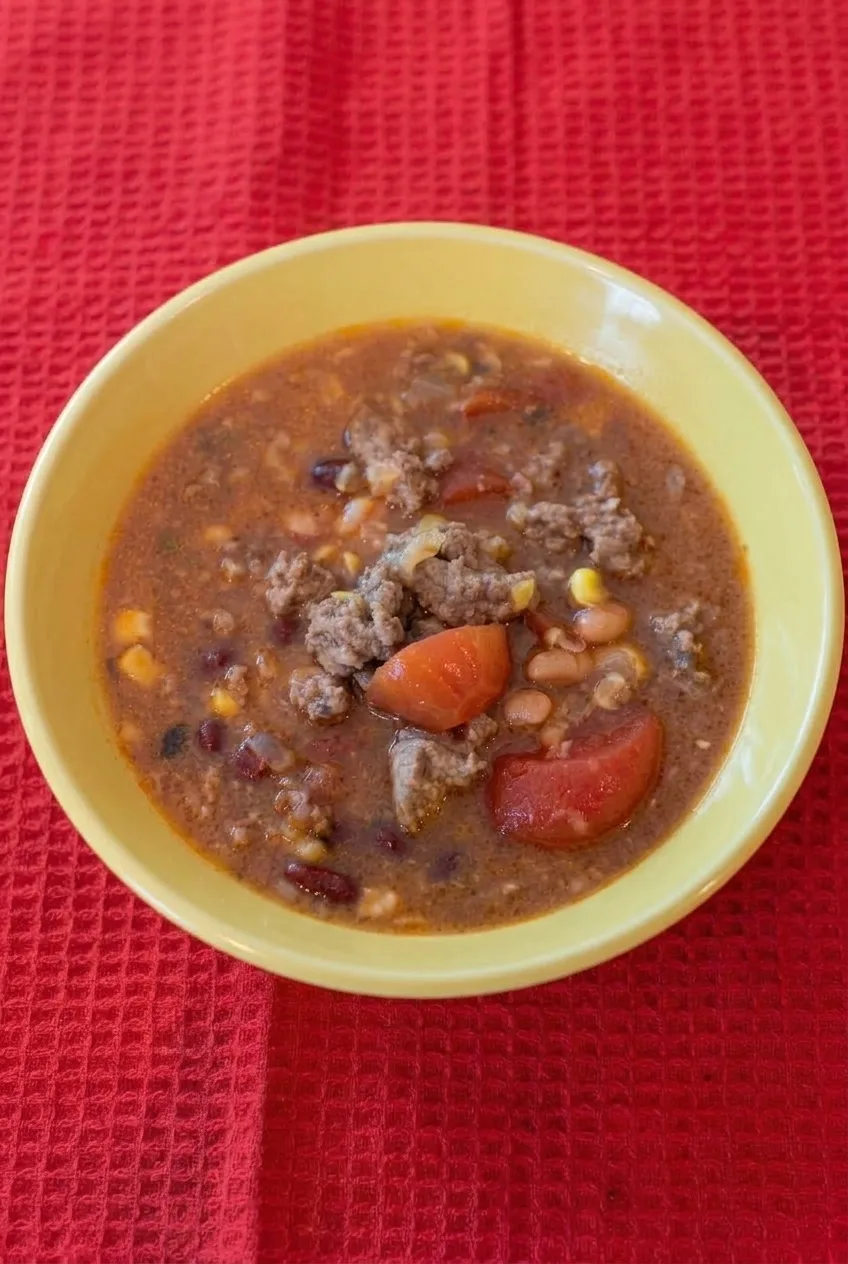
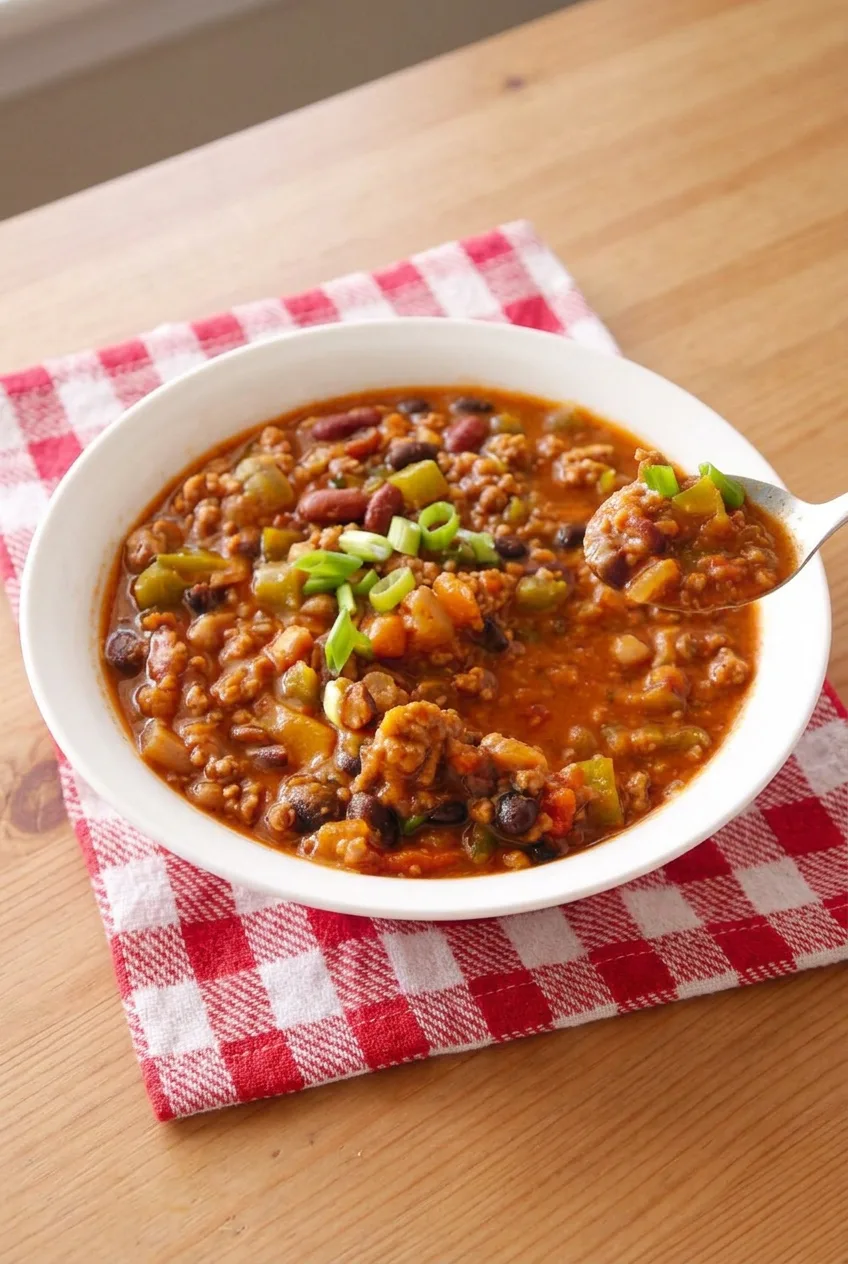
Complete pale yellow bowl of Texas-style beef chili on red textured fabric
  1. Prepare the ingredients: Dice the onion and mince the garlic. Roughly chop the tomatoes, keeping their juices and leaving some recognizable pieces. Set aside about one-third of the tomato pieces for the end. Drain and rinse the beans.
  2. Brown the beef: Heat a 5- to 6-quart Dutch oven or heavy soup pot over medium-high heat. Add the beef without oil and cook for 7 to 9 minutes, turning and breaking it into substantial, irregular crumbles. When no pink remains and some edges are browned, spoon off excess fat, leaving about 1 tablespoon in the pot. If a smaller pot crowds the beef, brown it in two batches.
  3. Build the seasoned base: Reduce the heat to medium. Add the onion and cook until softened, about 4 to 5 minutes. Stir in the garlic, chili powder, cumin, tomato paste, salt, and optional cayenne. Cook for about 1 minute, stirring, until fragrant and the paste darkens slightly without scorching.
  4. Simmer gently: Add the 1 1/2 cups broth, tomato juices, and all but the reserved tomato pieces. Scrape the bottom of the pot and bring to a simmer. Reduce the heat to low or medium-low and cook partially covered for 30 to 35 minutes, stirring occasionally. Keep small, steady bubbles rather than a rolling boil. Check after about 20 minutes; if little liquid remains around the beef, add a splash of broth or water.
  5. Add the beans, corn, and tomatoes: Gently stir in both beans, the frozen corn, and the reserved tomato pieces. Simmer on low for 8 to 10 minutes, until heated through. Avoid vigorous stirring so the beans stay intact and some tomato pieces remain visible. Add a little more broth or water if the chili is too thick.
  6. Finish: Taste and adjust the salt and optional cayenne. Turn off the heat and let the chili stand for 5 minutes. Ladle into bowls, leaving the beef, beans, corn, and tomatoes visible without a garnish.

Why Does This Texas-Style Chili Have Beans and Corn?

Texas-style chili means different things to different cooks. This home-style version keeps beef and chile seasoning at its center while including the beans and corn that define this bowl. Cubed chuck is not a direct substitute for the ground beef: it needs a substantially longer simmer and produces a different texture.

For another beef-and-bean version, try classic beef chili with beans and green pepper. For a separate slow-cooker option, see slow cooker chili with ground beef and two beans.

How Saucy Should the Chili Be?

Move a spoonful aside: reddish-brown liquid should gather in the space, even though the chili is full of beef and beans. A wide pot can reduce the liquid faster, so adjust the lid opening as it simmers. If the chili gets too thick, stir in broth or water a little at a time until it flows easily from a ladle, then taste for salt again.

Serving and Storing Leftovers

Serve the chili plain, with cornbread or crackers alongside. Offer sour cream or shredded cheese separately if desired.

The chili can be made ahead; its flavors may meld by the next day. Transfer leftovers to covered containers and refrigerate promptly. As general food-safety guidance, use refrigerated leftovers within 3 to 4 days. Reheat gently on the stovetop, stirring until steaming hot and adding a splash of broth or water if needed. Freeze cooled portions in freezer-safe containers with room for expansion; thaw in the refrigerator before reheating.

Nutrition

Approximate nutrition per generous serving, based on 6 servings: 430 calories, 31g protein, 18g fat, and 36g carbohydrates. Approximately per 100g: 105 calories, 8g protein, 4g fat, and 9g carbohydrates. Values are estimates; drained beef fat, evaporation, and ingredient brands will affect the results.

Texas-Style Beef Chili

A loose, spoonable beef chili with pinto and kidney beans, corn, tomatoes, and mild chile seasoning.
Course: Main Course
Cuisine: American
Prep: 15 min
Cook: 60 min
Total: 75 min
Servings: 6 Calories: 430 kcal

Equipment

  • 5- to 6-quart Dutch oven or heavy soup pot
  • Cutting board
  • Knife
  • Wooden spoon

Ingredients

For the Chili

  • 1 1/2 pounds (680 g) 85% lean ground beef
  • 1 medium yellow onion, diced (about 180 g)
  • 3 garlic cloves, minced
  • 3 tablespoons mild American-style chili powder blend
  • 2 teaspoons ground cumin
  • 2 tablespoons tomato paste (about 30 g)
  • 1 can (28 ounces/about 795 g) whole peeled tomatoes with juices, roughly chopped
  • 1 1/2 cups low-sodium beef broth, plus up to 1/2 cup more if needed
  • 1 can (15 ounces) pinto beans, drained and rinsed
  • 1 can (15 ounces) kidney beans, drained and rinsed
  • 1 cup frozen corn kernels (about 165 g)
  • 1 teaspoon kosher salt, plus more to taste

Optional Heat

  • Pinch of cayenne pepper, up to 1/4 teaspoon total

Instructions

  1. Dice the onion, mince the garlic, and roughly chop the tomatoes, keeping their juices. Set aside about one-third of the tomato pieces for later. Drain and rinse the beans.
  2. Heat a 5- to 6-quart Dutch oven or heavy soup pot over medium-high heat. Add the beef without oil and cook for 7 to 9 minutes, turning and breaking it into substantial crumbles, until no pink remains and some edges are browned. Spoon off excess fat, leaving about 1 tablespoon in the pot. Brown in batches if needed.
  3. Reduce the heat to medium. Add the onion and cook for 4 to 5 minutes, until softened.
  4. Stir in the garlic, chili powder, cumin, tomato paste, salt, and optional cayenne. Cook for about 1 minute, until fragrant and the paste darkens slightly.
  5. Add the broth, tomato juices, and all but the reserved tomato pieces. Scrape the bottom of the pot and bring to a simmer.
  6. Reduce the heat to low or medium-low. Partially cover and simmer for 30 to 35 minutes, stirring occasionally and maintaining small, steady bubbles. Add a splash of broth or water if little liquid remains.
  7. Gently stir in the pinto beans, kidney beans, corn, and reserved tomato pieces. Simmer on low for 8 to 10 minutes, until heated through. Add broth or water if the chili is too thick.
  8. Taste and adjust the salt and cayenne. Turn off the heat and let stand for 5 minutes before serving.

Tips

  • Brown the beef in batches if the pot is crowded.
  • Keep the simmer gentle to help the beans and corn hold their shape.
  • Reserve some tomato pieces to add near the end so they remain visible.
  • Add broth or water a little at a time if the chili becomes too thick, then taste for salt.

Variations

  • Spicier Chili: Add a pinch of cayenne with the chili powder, up to 1/4 teaspoon total, and adjust to taste after simmering.
Notes

Refrigerate leftovers promptly in covered containers and use within 3 to 4 days. Reheat gently until steaming hot, adding broth or water if needed. Freeze cooled portions in freezer-safe containers and thaw in the refrigerator before reheating.

Nutrition

Calories: 430 kcal | Protein: 31 g | Fat: 18 g | Carbohydrates: 36 g

Healthy Turkey Chili

This stovetop turkey chili is thick and tomato-red, with distinct turkey crumbles, kidney beans, and diced tomatoes in every spoonful. Browning the turkey before adding liquid keeps it crumbled, while a gentle uncovered simmer concentrates the sauce without turning the chili into a soup.

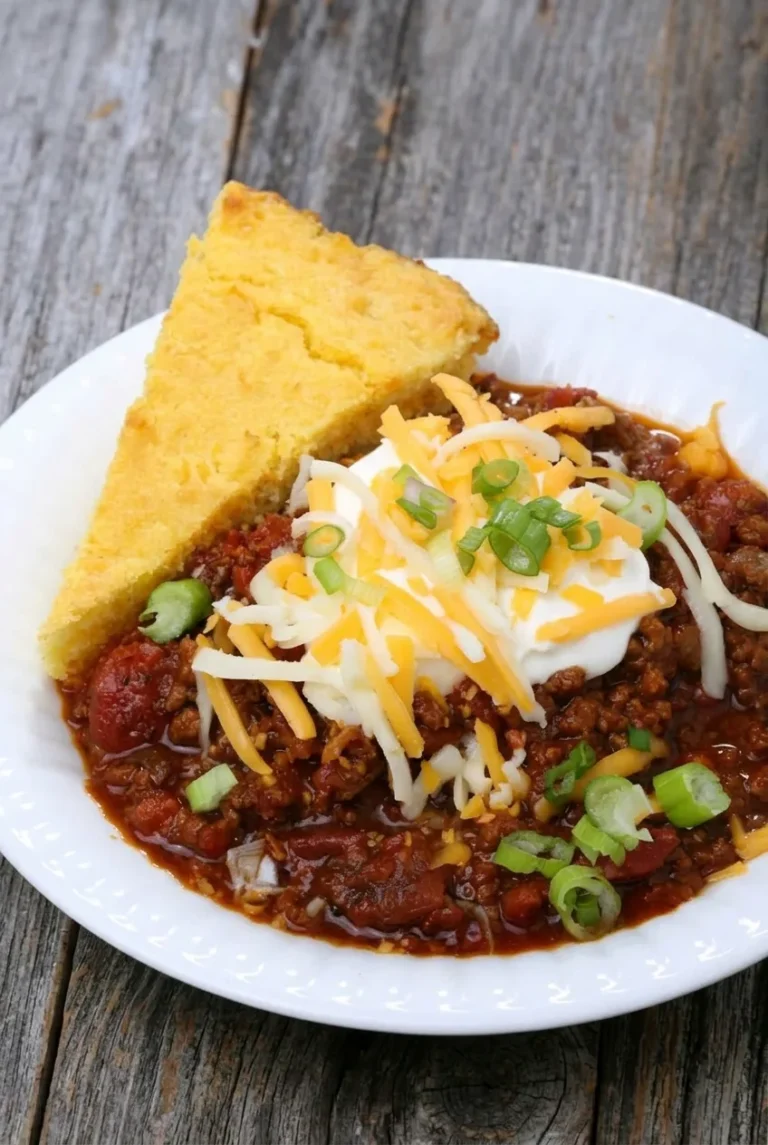
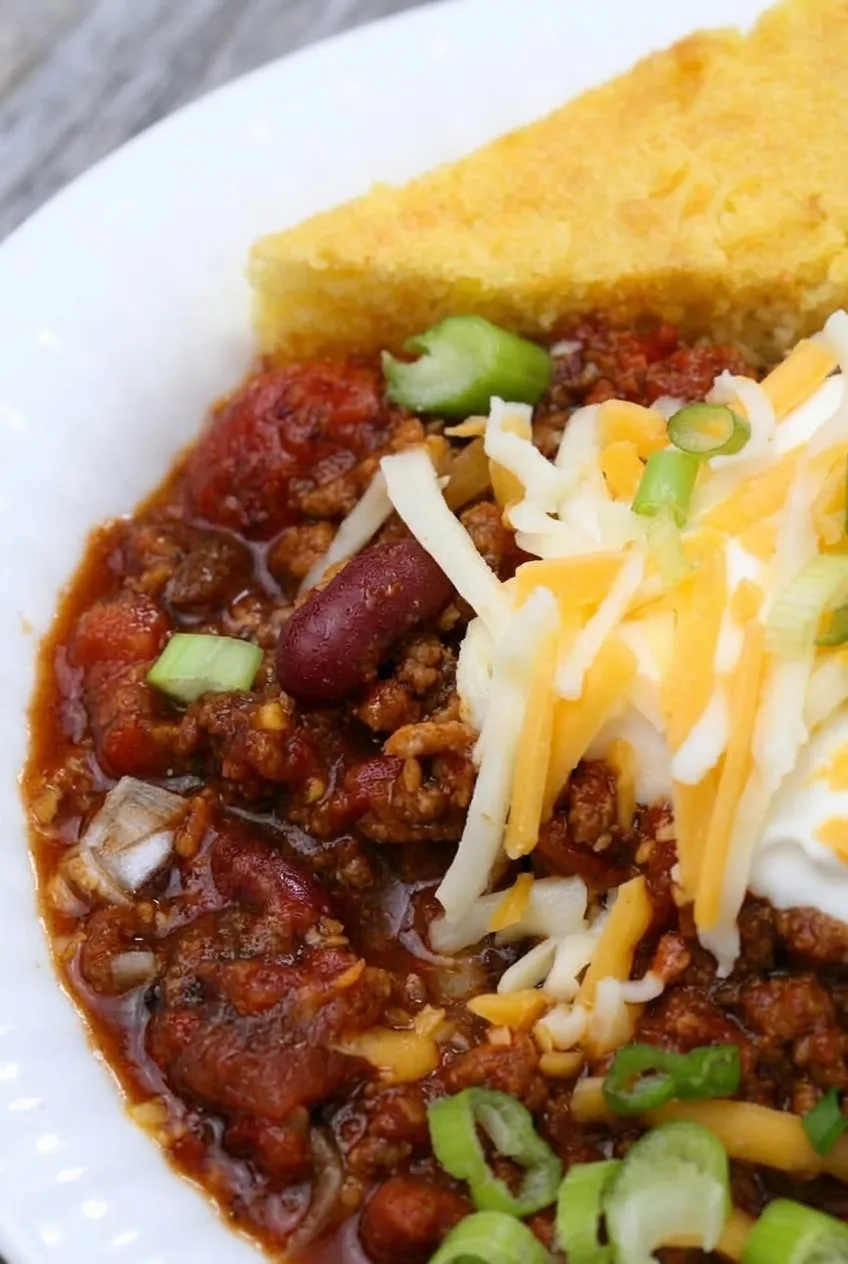
Start with just 1/2 cup of broth and adjust only if the pot needs it. Finish each bowl with sour cream, shredded cheese, green onions, and a wedge of prepared cornbread.

Ingredients for Healthy Turkey Chili

Close view of thick turkey chili with kidney beans, tomato pieces, cheese, sour cream, and green onions

Makes 6 bowls. Prep: 15 minutes. Cook: 40–50 minutes. Total: about 55–65 minutes, plus a 5-minute rest.

  • 1 tablespoon olive oil
  • 1 medium yellow onion, diced (about 150g)
  • 1 pound 93/7 lean ground turkey (about 450g)
  • 3 garlic cloves, minced
  • 2 tablespoons chili powder
  • 2 teaspoons ground cumin
  • 1 teaspoon smoked paprika
  • 2 tablespoons tomato paste
  • 1 (28-ounce) can diced tomatoes with their juices
  • 2 (15-ounce) cans kidney beans, rinsed and drained (about 510g drained)
  • 1/2 cup low-sodium chicken broth or water, plus more if needed
  • 1/2 teaspoon kosher salt to start, plus more to taste
  • 3/4 cup shredded cheddar-jack cheese, for serving (about 85g)
  • 1/2 cup sour cream, for serving (about 115g)
  • 3 green onions, thinly sliced, for serving
  • 6 triangular wedges prepared cornbread, for serving

How to Make Turkey Chili on the Stovetop

Full bowl of garnished turkey chili and a cornbread wedge on a wooden table
  1. Prepare the ingredients: Rinse and drain the beans. Dice the onion, mince the garlic, and slice the green onions. Have the prepared cornbread wedges ready for serving.
  2. Cook the onion and turkey: Warm the oil in a 5- to 6-quart Dutch oven or heavy soup pot over medium heat. Add the onion and cook for 4–5 minutes, until soft. Add the turkey and break it into small crumbles as it cooks, about 7–9 minutes. It should have no raw pink remaining and reach 165°F (75°C) on a food thermometer.
  3. Build the tomato base: Stir in the garlic, chili powder, cumin, smoked paprika, and tomato paste. Cook for about 1 minute, stirring so the garlic does not burn. Add the tomatoes with their juices, drained beans, 1/2 cup broth or water, and 1/2 teaspoon salt. Stir well.
  4. Simmer until thick: Bring to a gentle bubble, then reduce the heat to medium-low. Simmer uncovered for 25–35 minutes, stirring every few minutes and scraping the bottom of the pot. Start checking the thickness after 25 minutes. If the chili sticks or gets too thick, add broth or water a splash at a time. If it is loose, continue simmering uncovered. If the tomatoes splatter, lower the heat and partially cover the pot until the bubbling settles, then uncover it to finish reducing.
  5. Season and serve: Taste and add more salt if needed. Let the chili stand off the heat for 5 minutes. Spoon it into shallow bowls. Add a dollop of sour cream to each, then scatter the cheese and green onions over the top. Rest a cornbread wedge against the chili in each bowl.

How Thick Should Turkey Chili Be?

A spoonful should hold visible beans, tomato pieces, and small turkey crumbles in a moist sauce, without a watery pool around it. Diced tomatoes vary in how much liquid they contain, so use that texture rather than the timer alone to decide when to stop simmering. Keep the heat gentle; a hard boil splatters and cooks the turkey more aggressively than necessary.

Serving and Variations

The sour cream, cheese, and green onions go on individual bowls, not into the simmering pot. The cornbread is a prepared accompaniment; it is not made as part of this recipe.

For a tangier topping, use thick plain Greek yogurt instead of sour cream. For more heat, add a little cayenne near the end of the simmer or offer sliced jalapeño at the table. Drained pinto or black beans can replace the kidney beans, though they will change the look of the finished bowl.

If you prefer beef, try classic beef chili with beans and green pepper. For a different style, see slow-cooker white chicken chili.

Storing and Reheating

Transfer leftover chili to shallow containers and refrigerate promptly for up to 3–4 days. Store cornbread and fresh toppings separately. Freeze cooled chili in portion-sized freezer-safe containers for up to 3 months, leaving room for expansion. Thaw overnight in the refrigerator.

Reheat the chili on the stovetop over medium-low heat or in the microwave, stirring until thoroughly hot. It may thicken in storage; add a splash of water or broth while reheating, then add the cold toppings after the chili is hot.

Nutrition

Approximate nutrition per bowl, including sour cream, cheese, green onions, and one prepared cornbread wedge: 540 calories, 28g protein, 22g fat, and 53g carbohydrates. Approximate values per 100g of the finished serving: 130 calories, 7g protein, 5g fat, and 13g carbohydrates. Values will vary with cornbread wedge size, ingredient brands, and how much liquid reduces during simmering.

Healthy Turkey Chili

Stovetop turkey chili with kidney beans and diced tomatoes, simmered until thick and served with sour cream, cheese, green onions, and cornbread.
Course: Soup
Cuisine: American
Prep: 15 min
Cook: 50 min
Total: 70 min
Servings: 6 Calories: 540 kcal

Equipment

  • 5- to 6-quart Dutch oven or heavy soup pot
  • Food thermometer

Ingredients

For the Chili

  • 1 tablespoon olive oil
  • 1 medium yellow onion, diced (about 150g)
  • 1 pound 93/7 lean ground turkey (about 450g)
  • 3 garlic cloves, minced
  • 2 tablespoons chili powder
  • 2 teaspoons ground cumin
  • 1 teaspoon smoked paprika
  • 2 tablespoons tomato paste
  • 1 (28-ounce) can diced tomatoes with their juices
  • 2 (15-ounce) cans kidney beans, rinsed and drained (about 510g drained)
  • 1/2 cup low-sodium chicken broth or water, plus more if needed
  • 1/2 teaspoon kosher salt, plus more to taste

For Serving

  • 3/4 cup shredded cheddar-jack cheese (about 85g)
  • 1/2 cup sour cream (about 115g)
  • 3 green onions, thinly sliced
  • 6 triangular wedges prepared cornbread

Instructions

  1. Rinse and drain the kidney beans. Dice the onion, mince the garlic, and slice the green onions. Set out the prepared cornbread wedges.
  2. Warm the olive oil in a 5- to 6-quart Dutch oven or heavy soup pot over medium heat. Add the onion and cook for 4–5 minutes, until soft.
  3. Add the turkey and break it into small crumbles as it cooks, about 7–9 minutes. Cook until no raw pink remains and it reaches 165°F (75°C) on a food thermometer.
  4. Stir in the garlic, chili powder, cumin, smoked paprika, and tomato paste. Cook for about 1 minute, stirring so the garlic does not burn.
  5. Add the tomatoes and their juices, drained beans, 1/2 cup broth or water, and 1/2 teaspoon salt. Stir well.
  6. Bring the chili to a gentle bubble, then reduce the heat to medium-low. Simmer uncovered for 25–35 minutes, stirring every few minutes and scraping the bottom of the pot.
  7. Check the thickness after 25 minutes. If the chili sticks or gets too thick, add broth or water a splash at a time. If it is loose, continue simmering uncovered. If the tomatoes splatter, lower the heat and partially cover the pot until the bubbling settles, then uncover to finish reducing.
  8. Taste and add more salt if needed. Remove from the heat and let stand for 5 minutes.
  9. Spoon into bowls and top with sour cream, cheese, and green onions. Serve each bowl with a cornbread wedge.

Tips

  • Start with 1/2 cup of broth or water and add more only if needed.
  • Keep the simmer gentle; a hard boil can cause splattering and cook the turkey more aggressively.
  • Use the chili’s texture, not just the timer, to judge when it is thick enough.
  • Add sour cream, cheese, and green onions to individual bowls rather than to the simmering pot.

Variations

  • Greek Yogurt Topping: Use thick plain Greek yogurt instead of sour cream for a tangier topping.
  • Spicier Turkey Chili: Add a little cayenne near the end of the simmer or serve with sliced jalapeño.
  • Pinto or Black Bean Chili: Replace the kidney beans with drained pinto or black beans.

Notes

Refrigerate leftover chili in shallow containers for 3–4 days or freeze for up to 3 months. Thaw overnight in the refrigerator and reheat until thoroughly hot, adding a splash of water or broth if needed. Store cornbread and fresh toppings separately.

Nutrition

Calories: 540 kcal | Protein: 28 g | Fat: 22 g | Carbohydrates: 53 g

Slow Cooker Chili

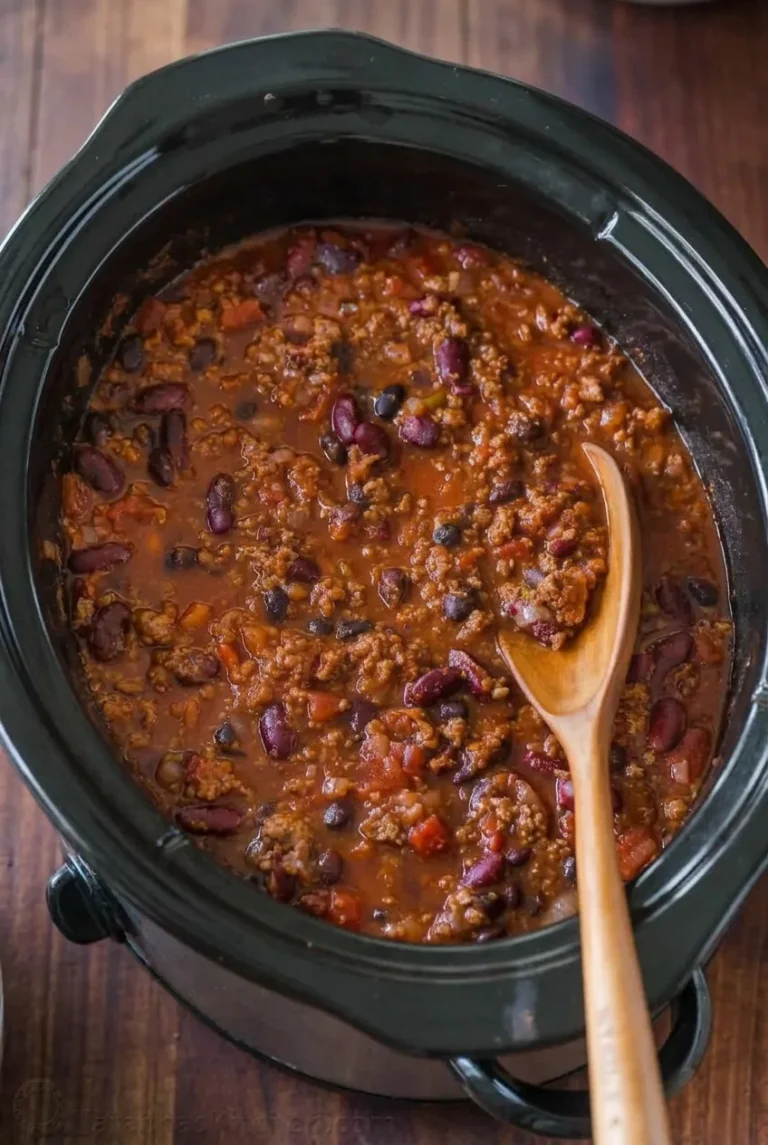
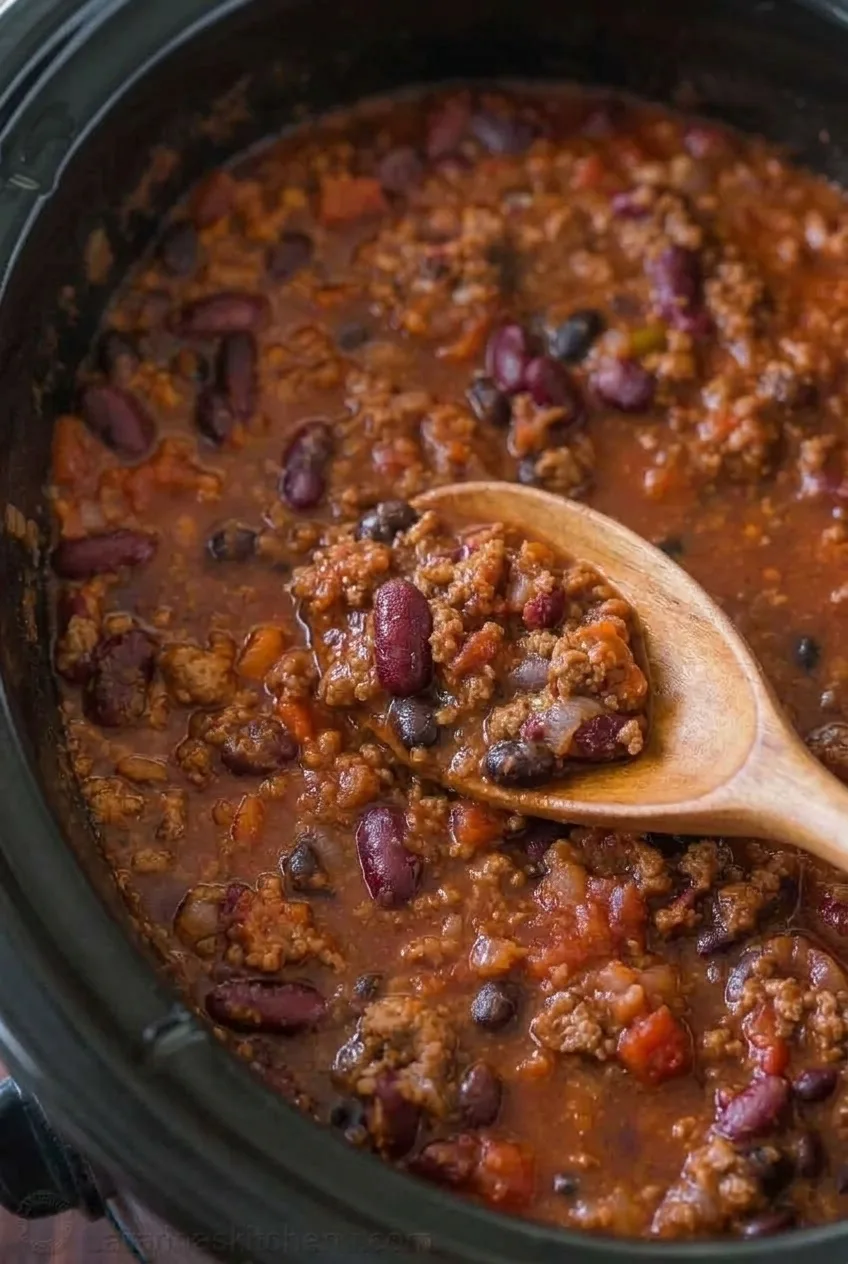
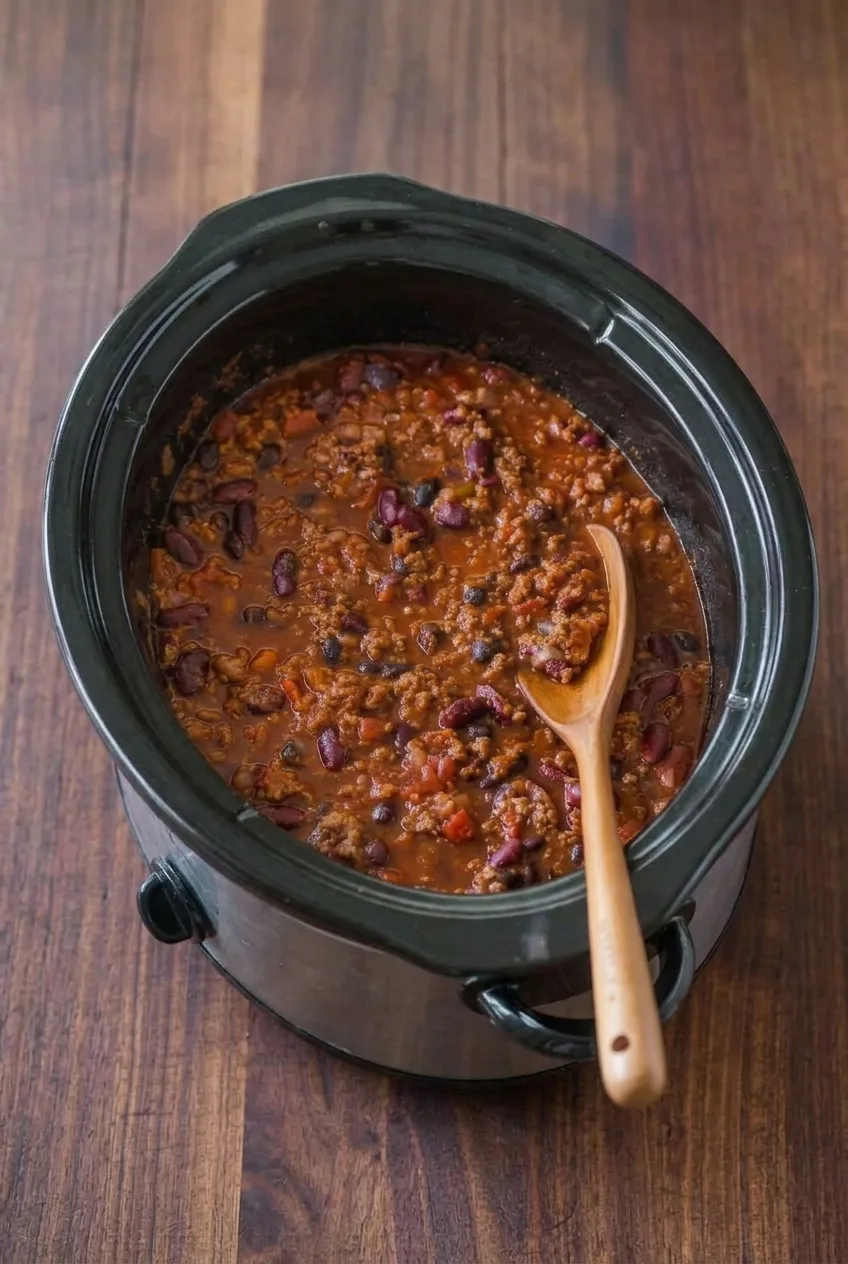
This slow cooker chili has distinct ground-beef crumbles, kidney beans, and black beans in a thick but spoonable tomato sauce. Browning the beef, softening the onion, and briefly cooking the spices in a skillet build flavor before everything goes into the cooker. The tomatoes supply the liquid, so there’s no need to add broth at the start. Serve the finished batch untopped and let everyone dress their own bowl.

Makes 8 generous servings. Allow about 25 minutes to prepare, plus 6 to 8 hours on LOW or 3 to 4 hours on HIGH.

Ingredients for Slow Cooker Chili

Close view of beef crumbles, kidney beans, and black beans in the chili's thick tomato sauce
  • 2 pounds lean ground beef (about 900g)
  • 1 large yellow onion, diced (about 200g)
  • 4 garlic cloves, minced
  • 3 tablespoons chili powder
  • 2 teaspoons ground cumin
  • 1 teaspoon smoked paprika
  • 1 can (28 ounces) crushed tomatoes (about 795g)
  • 1 can (14.5 ounces) diced tomatoes, with juices (about 410g)
  • 1 can (8 ounces) tomato sauce (about 225g)
  • 1 can (15 ounces) red kidney beans, drained and rinsed
  • 1 can (15 ounces) black beans, drained and rinsed
  • 1/2 teaspoon kosher salt, plus more to taste
  • 1/2 teaspoon freshly ground black pepper
  • 1 teaspoon neutral cooking oil, only if needed for the onion

You’ll need a large skillet and a 6-quart slow cooker with room to stir the chili.

How to Make Slow Cooker Chili

Full black slow cooker of beef-and-two-bean chili on a wooden table, with a serving spoon at the right
  1. Brown the beef: Heat the skillet over medium-high heat. Add the beef and cook for about 10 to 12 minutes, breaking it into crumbles and turning it until no raw-looking meat remains and some edges are browned. Work in batches if the pan is crowded so the beef browns instead of steaming. Transfer it to the slow cooker, draining excess fat but leaving a little in the skillet for the onion.
  2. Soften the onion and cook the spices: Reduce the skillet heat to medium. Add the onion and cook until softened, 5 to 7 minutes; add the teaspoon of oil only if the skillet is dry. Stir in the garlic, chili powder, cumin, smoked paprika, salt, and pepper. Cook briefly, stirring, until fragrant without scorching the garlic or spices.
  3. Fill the slow cooker: Add the onion mixture to the beef. Stir in the crushed tomatoes, diced tomatoes with their juices, tomato sauce, kidney beans, and black beans. The mixture should be thick and moist; do not add broth.
  4. Cook covered: Cook on LOW for 6 to 8 hours or HIGH for 3 to 4 hours. Start checking near 6 hours on LOW or 3 hours on HIGH. The chili is ready when it is hot throughout, the onion is tender, and the tomato and spices no longer taste sharp. Slow cookers vary, so use those cues along with the time window.
  5. Taste and serve: Stir the chili and taste before adding more salt; canned ingredients vary in sodium. The sauce should coat the beef and mostly intact beans but still ladle easily. Adjust the thickness if needed, then serve untopped from the slow cooker.

How Thick Should Slow Cooker Chili Be?

The canned tomatoes and tomato sauce provide enough liquid for the covered cook. If the finished chili is too thick to ladle, stir in water or broth a few tablespoons at a time.

If it is too thin, mash a small spoonful of beans into the sauce, leaving most beans whole. You can also cook it uncovered on HIGH for 15 to 30 minutes, checking as it thickens.

When to Add the Beans

Adding the drained beans at the start is simplest and lets them soften into the chili. For firmer beans, hold back both varieties and stir them in for the last 30 to 45 minutes instead.

Serving Ideas

Offer shredded cheddar, sour cream, sliced scallions, or tortilla chips for individual bowls. Serve the chili with cornbread or spoon it over baked potatoes. For another beef-and-bean variation, see classic beef chili with green pepper.

Storage and Reheating

Cool leftovers promptly and refrigerate in airtight containers for up to 4 days. Freeze cooled chili in airtight, portion-sized containers for up to 3 months; thaw in the refrigerator before reheating.

Reheat portions in the microwave, stirring as needed, until hot throughout. For a larger amount, reheat in a saucepan over medium heat, stirring occasionally. Add a splash of water or broth if the sauce has thickened.

Nutrition

Approximate nutrition per serving, based on 8 generous servings without optional oil or toppings: 350 calories, 30g protein, 12g fat, and 30g carbohydrates. Approximate values per 100g: 95 calories, 8g protein, 3g fat, and 8g carbohydrates. Values vary with the leanness of the beef, how much fat is drained, and the canned ingredients used.

Slow Cooker Chili

Ground beef, kidney beans, and black beans simmer in a thick tomato sauce in the slow cooker.
Course: Main Course
Cuisine: American
Prep: 25 min
Cook: 360 min
Total: 385 min
Servings: 8 Calories: 350 kcal

Equipment

  • Large skillet
  • 6-quart slow cooker

Ingredients

For the Chili

  • 2 pounds lean ground beef (about 900g)
  • 1 large yellow onion, diced (about 200g)
  • 4 garlic cloves, minced
  • 3 tablespoons chili powder
  • 2 teaspoons ground cumin
  • 1 teaspoon smoked paprika
  • 1 can (28 ounces) crushed tomatoes (about 795g)
  • 1 can (14.5 ounces) diced tomatoes, with juices (about 410g)
  • 1 can (8 ounces) tomato sauce (about 225g)
  • 1 can (15 ounces) red kidney beans, drained and rinsed
  • 1 can (15 ounces) black beans, drained and rinsed
  • 1/2 teaspoon kosher salt, plus more to taste
  • 1/2 teaspoon freshly ground black pepper
  • 1 teaspoon neutral cooking oil, only if needed for the onion

Instructions

  1. Heat a large skillet over medium-high heat. Add the beef and cook for 10 to 12 minutes, breaking it into crumbles, until no raw-looking meat remains and some edges are browned. Work in batches if needed.
  2. Transfer the beef to the slow cooker, draining excess fat but leaving a little in the skillet.
  3. Reduce the skillet heat to medium. Add the onion and cook for 5 to 7 minutes, until softened. Add the oil only if the skillet is dry.
  4. Stir in the garlic, chili powder, cumin, smoked paprika, salt, and pepper. Cook briefly, stirring, until fragrant.
  5. Add the onion mixture, crushed tomatoes, diced tomatoes with their juices, tomato sauce, kidney beans, and black beans to the slow cooker. Stir to combine; do not add broth.
  6. Cover and cook on LOW for 6 to 8 hours or HIGH for 3 to 4 hours. Start checking near 6 hours on LOW or 3 hours on HIGH. The chili is ready when hot throughout, the onion is tender, and the tomato and spices no longer taste sharp.
  7. Stir and taste before adding more salt. If too thick to ladle, add water or broth a few tablespoons at a time. If too thin, mash a small spoonful of beans into the sauce or cook uncovered on HIGH for 15 to 30 minutes, checking as it thickens.
  8. Serve untopped, with toppings offered separately if desired.

Tips

  • Brown the beef in batches if the skillet is crowded so it browns instead of steaming.
  • Drain most of the beef fat, but leave a little in the skillet to cook the onion.
  • Add oil only if the skillet is dry when cooking the onion.
  • Taste before adding extra salt because canned ingredients vary in sodium.
  • For a thicker chili, mash a small spoonful of beans into the sauce.

Variations

  • Firmer Beans: Hold back both varieties of beans and stir them into the chili for the last 30 to 45 minutes of cooking.

Notes

Refrigerate leftovers in airtight containers for up to 4 days, or freeze for up to 3 months. Thaw frozen chili in the refrigerator and reheat until hot throughout; add a splash of water or broth if needed.

Nutrition

Calories: 350 kcal | Protein: 30 g | Fat: 12 g | Carbohydrates: 30 g

White Chicken Chili

This slow-cooker white chicken chili has shredded chicken and whole white beans in a pale broth that coats the solids without hiding them. Chicken, beans, and mild green chiles cook together; blending a small portion of the beans adds body, and cream cheese goes in after the chicken is cooked.

Serve generous bowls with a central dollop of sour cream, fresh jalapeño and cilantro, and tortilla chips added just before eating.

Ingredients for White Chicken Chili

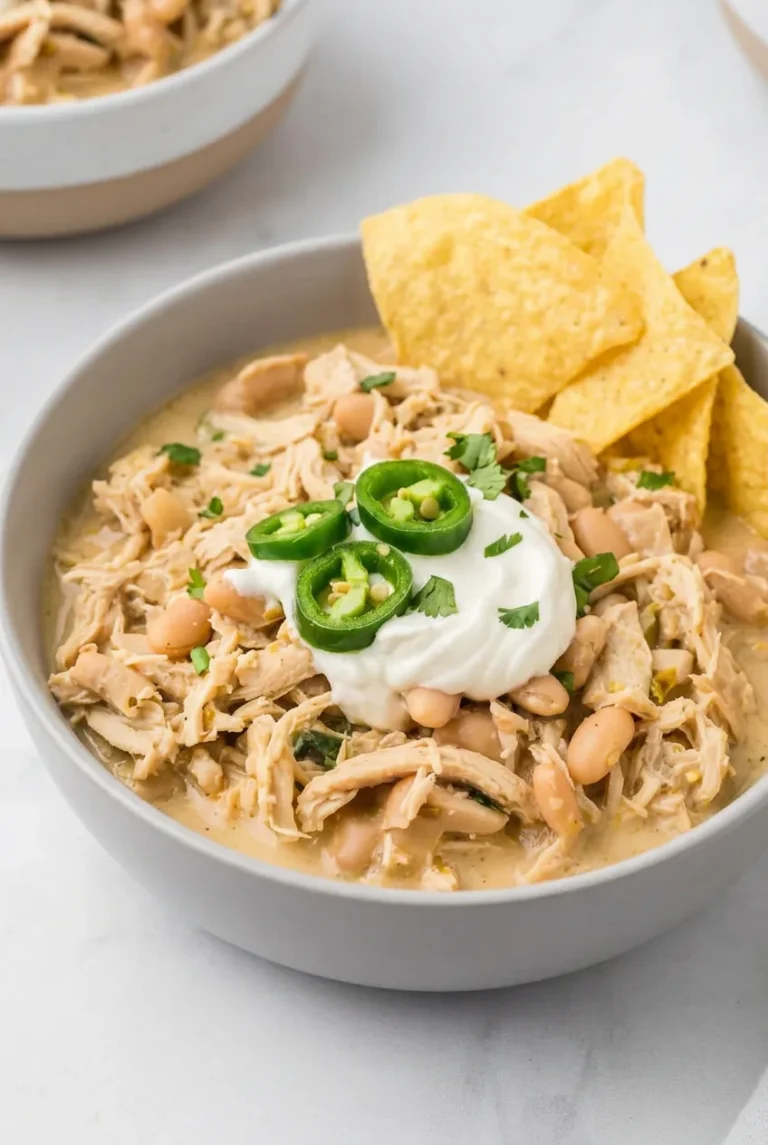
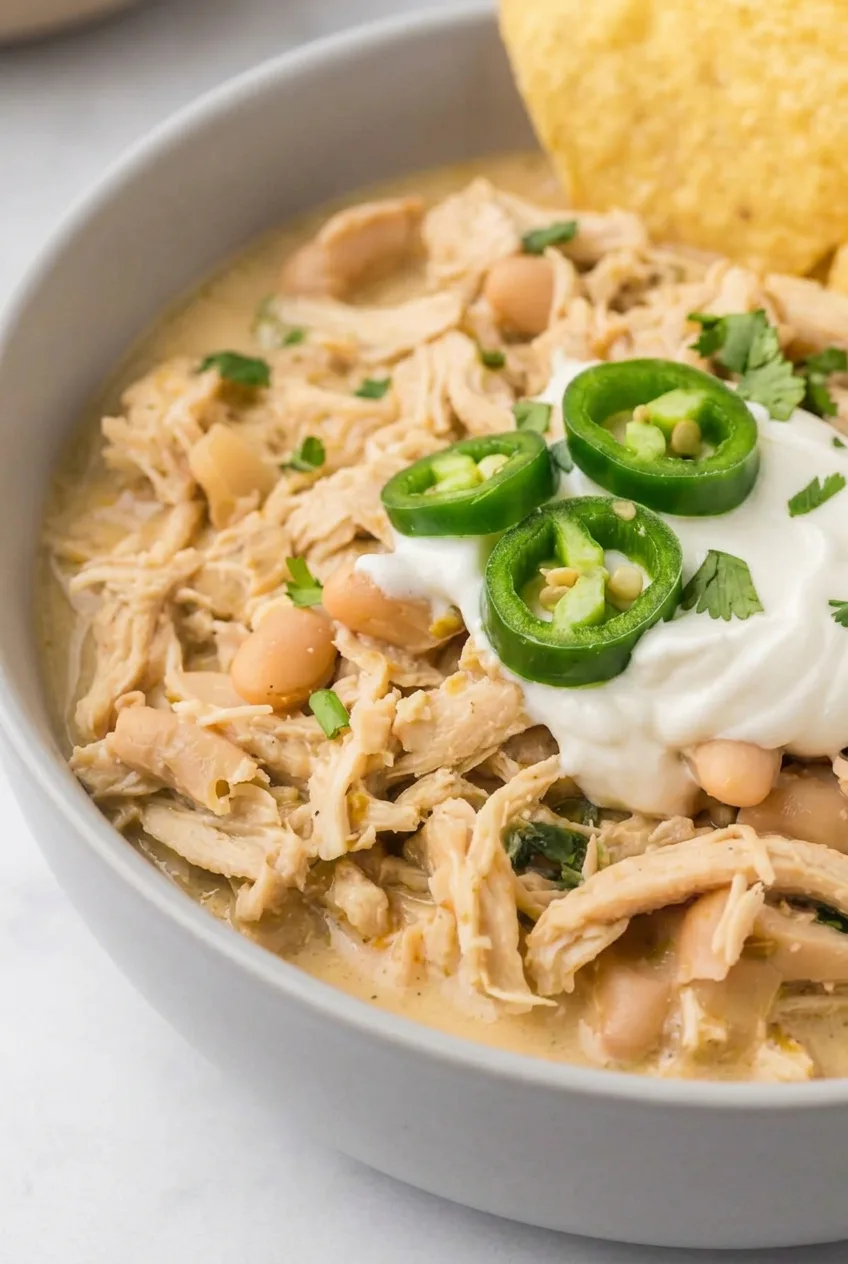
Close view of chicken shreds and whole white beans in creamy chili beneath sour cream and jalapeño

Makes 6 bowls. Prep time: about 15 minutes. Cook time: about 3–4 hours on HIGH or 6–8 hours on LOW, plus 15–20 minutes to finish.

For the chili

  • 1 1/2 lb boneless skinless chicken breasts (about 680g)
  • 2 cans (15 oz each) cannellini or great northern beans, drained and rinsed
  • 2 cups low-sodium chicken broth, plus more if needed
  • 1 medium yellow onion, finely diced
  • 3 garlic cloves, minced
  • 1 can (4 oz) mild diced green chiles, with their juices
  • 2 teaspoons ground cumin
  • 1 teaspoon dried oregano
  • About 1/2 teaspoon kosher salt to start, plus more to taste
  • 4 oz cream cheese, softened and cubed (about 115g)

For serving

  • About 6 tablespoons sour cream
  • 1 fresh jalapeño, thinly sliced
  • About 1/4 cup chopped fresh cilantro
  • About 18 large tortilla chips

How to Make White Chicken Chili in the Slow Cooker

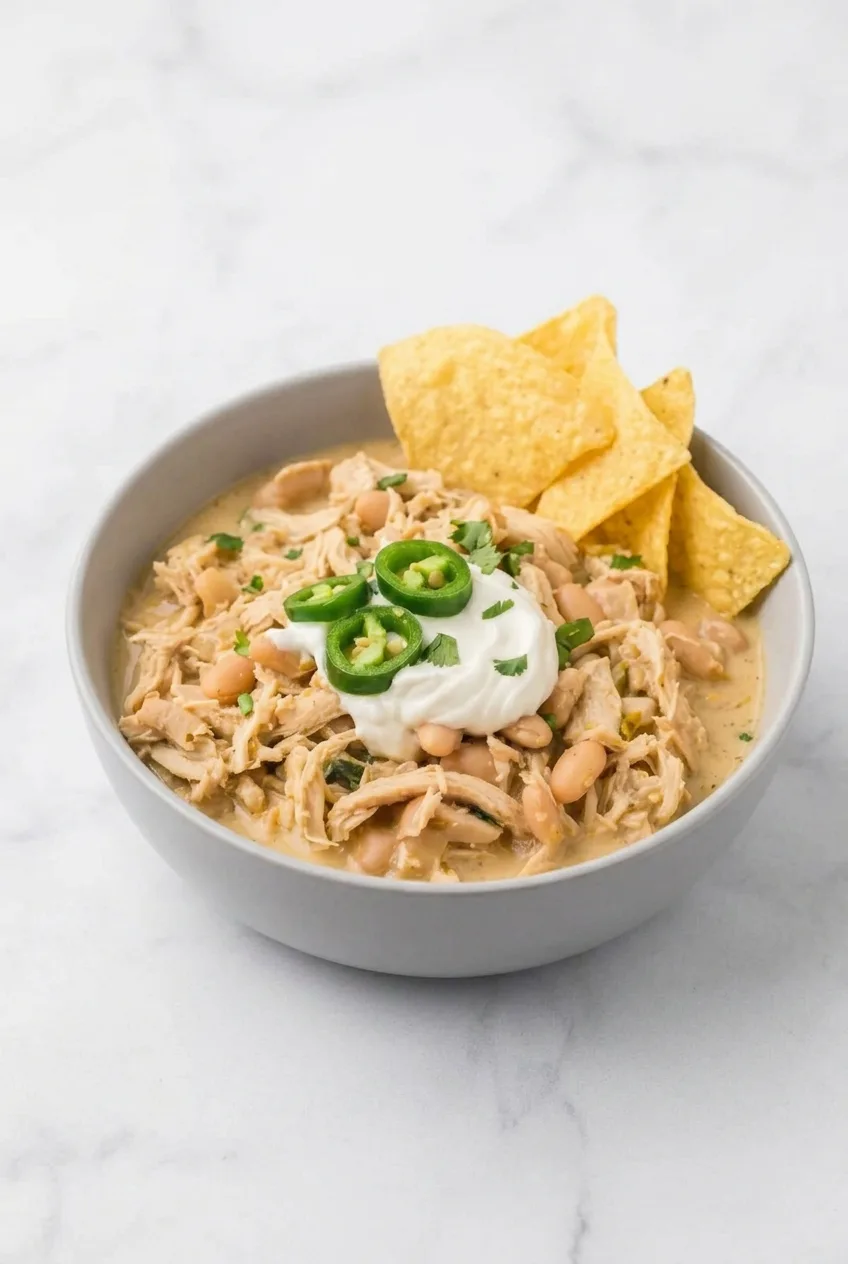
Full bowl of garnished white chicken chili on a light surface, with tortilla chips standing at the back
  1. Load the slow cooker: Add the chicken, beans, onion, garlic, green chiles and their juices, cumin, oregano, salt, and 2 cups broth to a 5- to 6-quart slow cooker. Nestle the chicken in the liquid rather than stacking it high. Cover.
  2. Cook the chicken: Cook covered on HIGH for about 3–4 hours or LOW for about 6–8 hours. Start checking near 3 hours on HIGH or 6 hours on LOW. When the thickest part of the chicken reaches 165°F (75°C) and the meat shreds easily, transfer it to a plate.
  3. Shred and thicken: Shred the chicken with two forks. Scoop about 1 cup of beans and enough hot cooking liquid to blend easily into a tall, heat-safe container. Blend until smooth, then stir the purée back into the slow cooker, leaving the other beans whole. If using a countertop blender, vent the lid and handle the hot liquid carefully.
  4. Finish the chili: Return the chicken to the slow cooker and stir in the softened cream cheese cubes. Cover and cook on HIGH for 15–20 minutes, then stir thoroughly until no cream-cheese lumps remain. Taste and adjust the salt. The broth should coat the chicken and beans but remain spoonable; if it is too thick, add warm broth a little at a time.
  5. Serve: Let the chili stand for about 5 minutes if needed, then ladle it into wide bowls. Place a dollop of sour cream in the center of each and add jalapeño rings and cilantro. Prop several tortilla chips along the back edge just before serving so they stay crisp.

How to Keep the Chili Creamy but Chunky

Blend the measured cup of beans only after removing the chicken. The purée thickens the broth while the remaining beans and chicken shreds stay distinct. Wait until the cream cheese has fully dispersed before deciding whether the chili needs more broth.

Slow-Cooker Timing and Chicken Doneness

Chicken breast size and slow-cooker performance affect when the meat is ready. Use the early end of your chosen HIGH or LOW window as a checking point, not a fixed finish time. Remove the chicken when it reaches 165°F and shreds easily; the additional 15–20 minutes on HIGH is for the cream-cheese finish.

Substitutions and Serving Options

Boneless skinless chicken thighs can replace the breasts at the same weight. Check their temperature and tenderness rather than assuming they will finish at the same time. For a heat-sensitive diner, serve the fresh jalapeño rings on the side.

Optional lime wedges or a light scattering of shredded Monterey Jack can accompany the finished bowls. For a red chili instead, try classic beef chili with beans and green pepper.

Store and Reheat Leftovers

Refrigerate cooled chili in an airtight container for up to 3 days, keeping the sour cream, jalapeño, cilantro, and chips separate. Reheat gently on the stovetop, stirring occasionally, or microwave in short intervals and stir between them. Add a splash of broth if the chili has thickened.

For advance assembly, refrigerate the uncooked ingredients without the cream cheese for no more than 1 day; add the cream cheese during the final cooking stage. You can also freeze cooled chili without toppings in airtight portions for up to 3 months. Thaw overnight in the refrigerator, then reheat gently and stir well. The creamy broth may change texture after freezing.

Nutrition

Approximate nutrition per bowl, based on 6 servings and including the listed toppings: 390 calories, 34g protein, 15g fat, and 27g carbohydrates. Approximate values per 100g of prepared chili with toppings: 115 calories, 10g protein, 4g fat, and 8g carbohydrates. Values vary with bean brands, drained weight, portion size, and toppings.

White Chicken Chili

Slow-cooked chicken and white beans make a creamy, mild chili finished with cream cheese and fresh toppings.
Course: Soup
Cuisine: American
Prep: 15 min
Cook: 260 min
Total: 275 min
Servings: 6 Calories: 390 kcal

Equipment

  • 5- to 6-quart slow cooker
  • Blender or immersion blender
  • Meat thermometer

Ingredients

For the chili

  • 1 1/2 lb boneless skinless chicken breasts (about 680 g)
  • 2 cans (15 oz each) cannellini or great northern beans, drained and rinsed
  • 2 cups low-sodium chicken broth, plus more if needed
  • 1 medium yellow onion, finely diced
  • 3 garlic cloves, minced
  • 1 can (4 oz) mild diced green chiles, with their juices
  • 2 teaspoons ground cumin
  • 1 teaspoon dried oregano
  • About 1/2 teaspoon kosher salt, plus more to taste
  • 4 oz cream cheese, softened and cubed (about 115 g)

For serving

  • About 6 tablespoons sour cream
  • 1 fresh jalapeño, thinly sliced
  • About 1/4 cup chopped fresh cilantro
  • About 18 large tortilla chips

Instructions

  1. Add the chicken, beans, onion, garlic, green chiles and their juices, cumin, oregano, salt, and 2 cups broth to a 5- to 6-quart slow cooker. Nestle the chicken in the liquid and cover.
  2. Cook on HIGH for about 3–4 hours or LOW for about 6–8 hours. Start checking near 3 hours on HIGH or 6 hours on LOW.
  3. When the thickest part of the chicken reaches 165°F (75°C) and the meat shreds easily, transfer it to a plate.
  4. Shred the chicken with two forks. Scoop about 1 cup of beans and enough hot cooking liquid to blend easily into a heat-safe container. Blend until smooth, then stir the purée back into the slow cooker.
  5. Return the chicken to the slow cooker and stir in the cream cheese. Cover and cook on HIGH for 15–20 minutes, then stir until the cream cheese is fully incorporated.
  6. Taste and adjust the salt. If the chili is too thick, add warm broth a little at a time.
  7. Let the chili stand for about 5 minutes if needed. Serve in bowls topped with sour cream, jalapeño, and cilantro, with tortilla chips added just before eating.

Tips

  • Use the early end of the cooking window as a time to start checking; slow cookers and chicken breast sizes vary.
  • Blend the beans after removing the chicken so the purée thickens the broth while the remaining beans stay whole.
  • Wait until the cream cheese is fully mixed in before deciding whether to add more broth.
  • Vent a countertop blender lid and handle hot cooking liquid carefully.

Variations

  • Chicken Thigh White Chili: Replace the chicken breasts with boneless skinless chicken thighs at the same weight, checking for doneness and tenderness.
  • Mild Serving Option: Serve fresh jalapeño on the side for diners who prefer less heat.
  • Additional Toppings: Serve with optional lime wedges or a light scattering of shredded Monterey Jack.

Notes

Refrigerate cooled chili in an airtight container for up to 3 days, keeping toppings separate. Reheat gently and add broth if needed. Freeze without toppings for up to 3 months; thaw overnight in the refrigerator. The creamy broth may change texture after freezing.

Nutrition

Calories: 390 kcal | Protein: 34 g | Fat: 15 g | Carbohydrates: 27 g

Classic Beef Chili

This stovetop beef chili has small beef crumbles, whole black and kidney beans, and tender green pepper in a tomato sauce that stays visibly saucy. Cooking the tomato paste and spices before adding liquid builds flavor, while a gentle, uncovered simmer thickens the sauce. Stop when a spoonful holds its shape but glossy sauce still surrounds the beef and beans.

Ingredients for Classic Beef Chili

Close view of a spoonful of beef chili showing small crumbles, whole beans, green pepper, and tomato sauce
  • 1 tablespoon olive oil
  • 1 medium yellow onion, diced (about 150g)
  • 1 medium green bell pepper, diced (about 150g)
  • 1 lb ground beef, about 85% lean (450g)
  • 3 garlic cloves, minced
  • 2 tablespoons tomato paste (about 30g)
  • 2 tablespoons chili powder
  • 2 teaspoons ground cumin
  • 1 teaspoon dried oregano
  • 1 can (14.5 oz) diced tomatoes, with their juices
  • 1 can (15 oz) tomato sauce
  • 1/2 cup beef broth, plus more only as needed
  • 1 can (15 oz) black beans, drained and rinsed
  • 1 can (15 oz) kidney beans, drained and rinsed
  • 1 teaspoon kosher salt to start, plus more to taste
  • 2 scallions, thinly sliced, for serving

Optional: Add 1/8 to 1/4 teaspoon cayenne with the dried spices for more heat. If the finished chili tastes heavy, stir in 1 to 2 teaspoons lime juice after tasting.

How to Make Classic Beef Chili

Full white bowl of classic beef chili with black and kidney beans, green pepper, and sliced scallions
  1. Soften the vegetables: Heat the oil in a 5- to 6-quart Dutch oven or heavy soup pot over medium heat. Add the onion and green pepper. Cook, stirring occasionally, for about 5 minutes, until the onion begins to look translucent and the pepper softens but still holds its shape.
  2. Brown the beef: Add the ground beef and increase the heat to medium-high as needed. Break it into small crumbles and cook for 6 to 8 minutes, until no pink remains. Spoon off excess rendered fat, leaving a light coating in the pot.
  3. Cook the paste and spices: Reduce the heat to medium. Stir in the garlic and cook briefly, just until fragrant. Add the tomato paste, chili powder, cumin, oregano, and optional cayenne. Stir continuously for about 2 minutes, until the paste darkens slightly and the spices smell fragrant. Lower the heat if they begin to stick.
  4. Build the chili: Add the diced tomatoes and their juices, tomato sauce, 1/2 cup broth, both kinds of beans, and 1 teaspoon salt. Scrape the bottom of the pot to loosen any tomato paste, then bring the mixture to a gentle bubble.
  5. Simmer uncovered: Reduce the heat to medium-low and simmer gently for about 35 to 45 minutes, stirring occasionally and scraping across the bottom of the pot. Start checking the thickness after about 25 minutes. If the chili is watery, continue simmering uncovered. If it begins to stick or the sauce disappears around the beef and beans, lower the heat and add broth a splash at a time.
  6. Taste and serve: When a lifted spoonful is chunky and coated in sauce, with some glossy sauce still visible in the pot, taste and adjust the salt. Add lime juice only if desired. Let stand off the heat for about 5 minutes, then ladle into 6 bowls and finish each with a few sliced scallions.

How Thick Should Beef Chili Be?

The beef and beans should remain distinct, not packed into a dry mound. Sauce should cling to a spoonful and still be visible in the bowl. A wider pot or stronger simmer may reduce the liquid faster, so use that texture cue rather than cooking for a fixed number of minutes. Keep the bubbles gentle and stir across the bottom as the sauce thickens to prevent scorching.

Beans, Heat, and Toppings

Pinto beans can replace either can of beans, though the chili will have less dark-and-reddish color contrast. For more heat, add the optional cayenne with the spices. Offer shredded cheddar, sour cream or Greek yogurt, and tortilla chips at the table so the chili can be topped to taste.

Make-Ahead, Storage, and Reheating

Chili can be made a day ahead; its flavors may become more melded after chilling. Cool leftovers promptly and refrigerate in an airtight container for up to 4 days. Reheat over medium-low heat, stirring until hot and adding a splash of broth if the chili has thickened. Microwave individual portions until hot, stirring partway through.

For longer storage, freeze cooled chili in airtight portions for up to 3 months. Thaw overnight in the refrigerator before reheating.

Nutrition

Approximate nutrition: Per bowl, based on 6 servings: 350 calories, 23g protein, 15g fat, and 31g carbohydrates. Per 100g of finished chili: approximately 105 calories, 7g protein, 4g fat, and 9g carbohydrates. Values vary with the beef, canned products, fat removed, and amount of liquid reduced.

Classic Beef Chili

A stovetop beef chili with black and kidney beans, green pepper, and a gently simmered tomato sauce.
Course: Main Course
Cuisine: American
Prep: 15 min
Cook: 60 min
Total: 75 min
Servings: 6 Calories: 350 kcal

Equipment

  • 5- to 6-quart Dutch oven or heavy soup pot
  • Wooden spoon

Ingredients

For the Chili

  • 1 tablespoon olive oil
  • 1 medium yellow onion, diced (about 150g)
  • 1 medium green bell pepper, diced (about 150g)
  • 1 lb ground beef, about 85% lean (450g)
  • 3 garlic cloves, minced
  • 2 tablespoons tomato paste (about 30g)
  • 2 tablespoons chili powder
  • 2 teaspoons ground cumin
  • 1 teaspoon dried oregano
  • 1 can (14.5 oz) diced tomatoes, with their juices
  • 1 can (15 oz) tomato sauce
  • 1/2 cup beef broth, plus more only as needed
  • 1 can (15 oz) black beans, drained and rinsed
  • 1 can (15 oz) kidney beans, drained and rinsed
  • 1 teaspoon kosher salt to start, plus more to taste
  • Optional: 1/8 to 1/4 teaspoon cayenne
  • Optional: 1 to 2 teaspoons lime juice

For Serving

  • 2 scallions, thinly sliced

Instructions

  1. Heat the olive oil in a 5- to 6-quart Dutch oven or heavy soup pot over medium heat. Add the onion and green pepper and cook, stirring occasionally, for about 5 minutes, until the onion begins to turn translucent and the pepper softens.
  2. Add the ground beef and increase the heat to medium-high as needed. Break the beef into small crumbles and cook for 6 to 8 minutes, until no pink remains. Spoon off excess fat, leaving a light coating in the pot.
  3. Reduce the heat to medium. Stir in the garlic and cook briefly, just until fragrant.
  4. Add the tomato paste, chili powder, cumin, oregano, and optional cayenne. Stir continuously for about 2 minutes, until the paste darkens slightly and the spices smell fragrant. Lower the heat if the mixture begins to stick.
  5. Add the diced tomatoes and their juices, tomato sauce, 1/2 cup broth, black beans, kidney beans, and 1 teaspoon salt. Scrape the bottom of the pot and bring the mixture to a gentle bubble.
  6. Reduce the heat to medium-low and simmer uncovered for about 35 to 45 minutes, stirring occasionally and scraping across the bottom. Start checking the thickness after about 25 minutes. If watery, continue simmering uncovered; if it begins to stick or the sauce disappears, lower the heat and add broth a splash at a time.
  7. When a spoonful is chunky and coated in sauce, with some glossy sauce still visible in the pot, taste and adjust the salt. Stir in optional lime juice if desired.
  8. Let the chili stand off the heat for about 5 minutes. Ladle into 6 bowls and top with sliced scallions.

Tips

  • Cook the tomato paste and spices before adding liquids to deepen their flavor.
  • Keep the simmer gentle and stir across the bottom of the pot as the sauce thickens.
  • Use the texture of the chili to judge when it is ready; pot width and simmer strength affect how quickly it reduces.
  • Add extra broth a splash at a time if the sauce reduces too much or begins to stick.
  • Taste before adding lime juice; it can brighten chili that tastes heavy.

Variations

  • Pinto Bean Chili: Replace either can of beans with pinto beans.
  • Spicy Beef Chili: Add 1/8 to 1/4 teaspoon cayenne with the dried spices.

Notes

Refrigerate cooled leftovers in an airtight container for up to 4 days. Reheat over medium-low heat or microwave individual portions, stirring partway through; add a splash of broth if needed. Freeze in airtight portions for up to 3 months and thaw overnight in the refrigerator before reheating. Nutrition per 100g is approximately 105 calories, 7g protein, 4g fat, and 9g carbohydrates.

Nutrition

Calories: 350 kcal | Protein: 23 g | Fat: 15 g | Carbohydrates: 31 g

Salmon & Garlic Asparagus Dinner

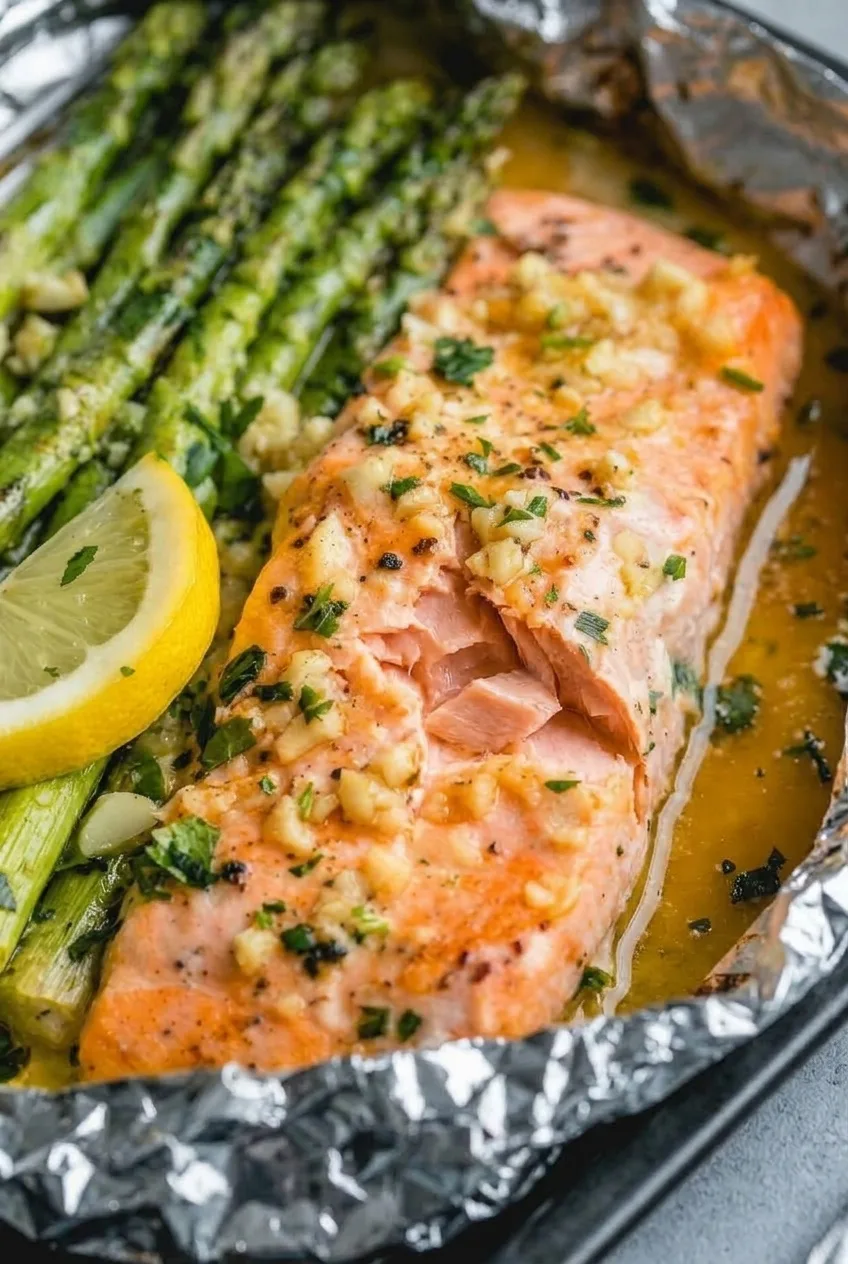
One large salmon fillet roasts beside whole asparagus spears in an open, foil-lined pan. Chopped garlic, olive oil, and lemon give the fish a light coating rather than a heavy sauce; parsley and the collected pan juices finish it.

Start checking the salmon and asparagus separately at 12 minutes. Medium to thick spears may finish alongside the fillet, but thinner asparagus can turn limp before the fish is done.

Ingredients for Salmon and Garlic Asparagus

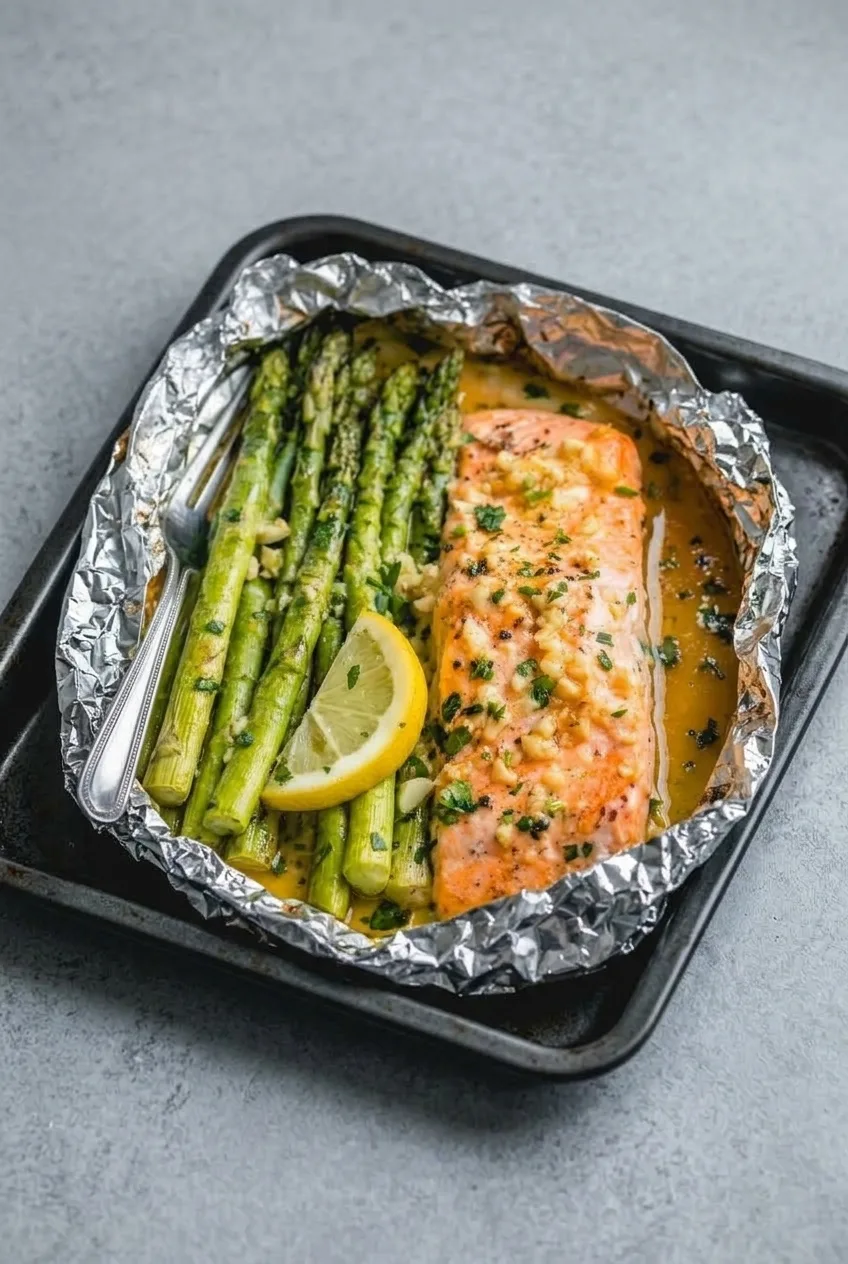
Wider view of the complete salmon and garlic asparagus dinner in its open foil-lined pan
  • 1 large center-cut salmon fillet, preferably skin-on, about 1 1/4 pounds (570g)
  • 1 pound medium to thick asparagus, woody ends trimmed (450g)
  • 2 tablespoons olive oil
  • 4 garlic cloves, finely chopped
  • 1 medium lemon, for 1 tablespoon juice and serving wedges
  • 3/4 teaspoon kosher salt, or to taste
  • 1/4 teaspoon freshly ground black pepper
  • 2 tablespoons chopped fresh flat-leaf parsley

Yield: 4 servings. Prep: 10–15 minutes. Cook: about 15–20 minutes, depending on fillet thickness.

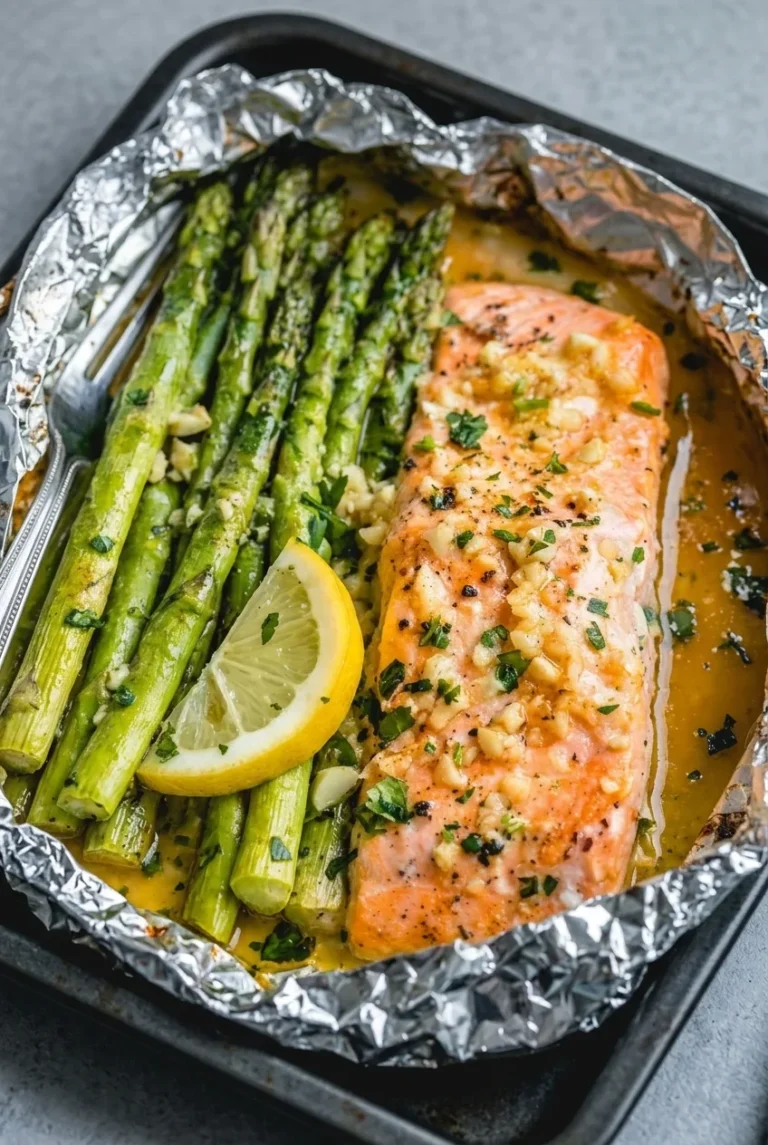
Close view of moist roasted salmon with chopped garlic, parsley, and glossy juices beside asparagus

How to Roast Salmon and Garlic Asparagus

  1. Prepare the pan: Preheat the oven to 450°F (230°C). Line a rimmed baking sheet with sturdy foil, turning up the edges slightly to catch the juices. Leave the top open so the food roasts rather than steaming in a sealed packet.
  2. Arrange the salmon and asparagus: Pat the salmon dry and place it intact on one side of the pan. Spread the asparagus beside it in a mostly single layer.
  3. Season: Mix the olive oil, chopped garlic, and 1 tablespoon lemon juice. Coat the asparagus with some of the mixture and spoon the rest over the salmon. Keep the garlic on the food rather than bare foil, where it can scorch. Season both with salt and pepper.
  4. Roast and check: Roast uncovered, without flipping. Begin checking both foods at 12 minutes. If the asparagus is tender at the thick end but still green and holding its shape, transfer it off the hot pan with tongs. Continue roasting the salmon as needed. A roughly 1- to 1 1/4-inch-thick fillet may take 15–20 minutes total, but thickness affects the timing. Check the thickest part: the flesh should be opaque and separate into moist flakes when gently pressed. For the US food-safety endpoint, use an instant-read thermometer to check for 145°F (65°C).
  5. Finish: Return any removed asparagus beside the salmon. Spoon the collected pan juices over both, scatter with parsley, and add the lemon wedges. Let the salmon stand for about 3 minutes before dividing it into four portions.

How to Keep the Asparagus from Overcooking

Medium to thick spears are better suited to roasting alongside a large fillet. If the asparagus finishes first, move it off the hot pan until the salmon is ready. For very thin spears, add them partway through the salmon’s roast instead of cooking them for the full time.

Serving and Variations

Serve from the open pan and squeeze the lemon wedges over individual portions. For a more substantial dinner, add Mediterranean lentils and rice on the side.

Fresh dill can replace the parsley. If using individual salmon portions instead of one large fillet, arrange them beside the asparagus and begin checking earlier; their size and thickness will affect the roast time.

How to Store and Reheat Leftovers

Refrigerate leftover salmon and asparagus in an airtight container for up to 3 days. Reheat gently in a 350°F (175°C) oven just until warmed through; extended reheating can dry out the fish.

Nutrition

Approximate nutrition per serving, based on 4 servings: 385 calories, 31g protein, 26g fat, and 6g carbohydrates. Approximate values per 100g of raw recipe ingredients: 130 calories, 11g protein, 9g fat, and 2g carbohydrates. Values exclude uneaten lemon wedges and vary with the salmon and the amount of pan juices served; cooking also changes the finished weight.

Salmon & Garlic Asparagus Dinner

A center-cut salmon fillet and asparagus roast together with garlic, olive oil, lemon, and parsley.
Course: Main Course
Cuisine: American
Prep: 15 min
Cook: 20 min
Total: 38 min
Servings: 4 Calories: 385 kcal

Equipment

  • Oven
  • Rimmed baking sheet
  • Sturdy foil
  • Small bowl
  • Tongs
  • Instant-read thermometer

Ingredients

For the Salmon and Asparagus

  • 1 large center-cut salmon fillet, preferably skin-on, about 1 1/4 pounds (570g)
  • 1 pound medium to thick asparagus, woody ends trimmed (450g)
  • 2 tablespoons olive oil
  • 4 garlic cloves, finely chopped
  • 1 medium lemon, for 1 tablespoon juice and serving wedges
  • 3/4 teaspoon kosher salt, or to taste
  • 1/4 teaspoon freshly ground black pepper
  • 2 tablespoons chopped fresh flat-leaf parsley

Instructions

  1. Preheat the oven to 450°F (230°C). Line a rimmed baking sheet with sturdy foil and turn up the edges slightly to catch juices, leaving the top open.
  2. Pat the salmon dry and place it intact on one side of the pan. Arrange the asparagus beside it in a mostly single layer.
  3. Mix the olive oil, chopped garlic, and 1 tablespoon lemon juice.
  4. Coat the asparagus with some of the oil mixture and spoon the rest over the salmon, keeping the garlic on the food rather than the foil.
  5. Season the salmon and asparagus with salt and pepper.
  6. Roast uncovered without flipping. Begin checking the salmon and asparagus at 12 minutes.
  7. When the asparagus is tender at the thick end but still green and holding its shape, transfer it off the hot pan with tongs. Continue roasting the salmon as needed.
  8. Check the thickest part of the salmon for opaque flesh that separates into moist flakes. For the US food-safety endpoint, verify it reaches 145°F (65°C) with an instant-read thermometer.
  9. Return the asparagus beside the salmon. Spoon the pan juices over both, scatter with parsley, and serve with lemon wedges.
  10. Let the salmon stand for about 3 minutes, then divide it into four portions.

Tips

  • Use medium to thick asparagus spears so they are more likely to finish alongside the salmon.
  • Check the asparagus and salmon separately starting at 12 minutes.
  • Move asparagus off the hot pan as soon as it is tender to prevent overcooking.
  • Add very thin asparagus partway through the salmon’s roasting time.
  • Keep the garlic on the food rather than bare foil to prevent it from scorching.

Variations

  • Dill Salmon: Replace the parsley with fresh dill.
  • Individual Salmon Portions: Use individual salmon portions and begin checking earlier, since their size and thickness affect roasting time.

Notes

Refrigerate leftovers in an airtight container for up to 3 days. Reheat gently in a 350°F (175°C) oven just until warmed through. Roasting time varies with fillet thickness.

Nutrition

Calories: 385 kcal | Protein: 31 g | Fat: 26 g | Carbohydrates: 6 g

Mediterranean Lentils and Rice

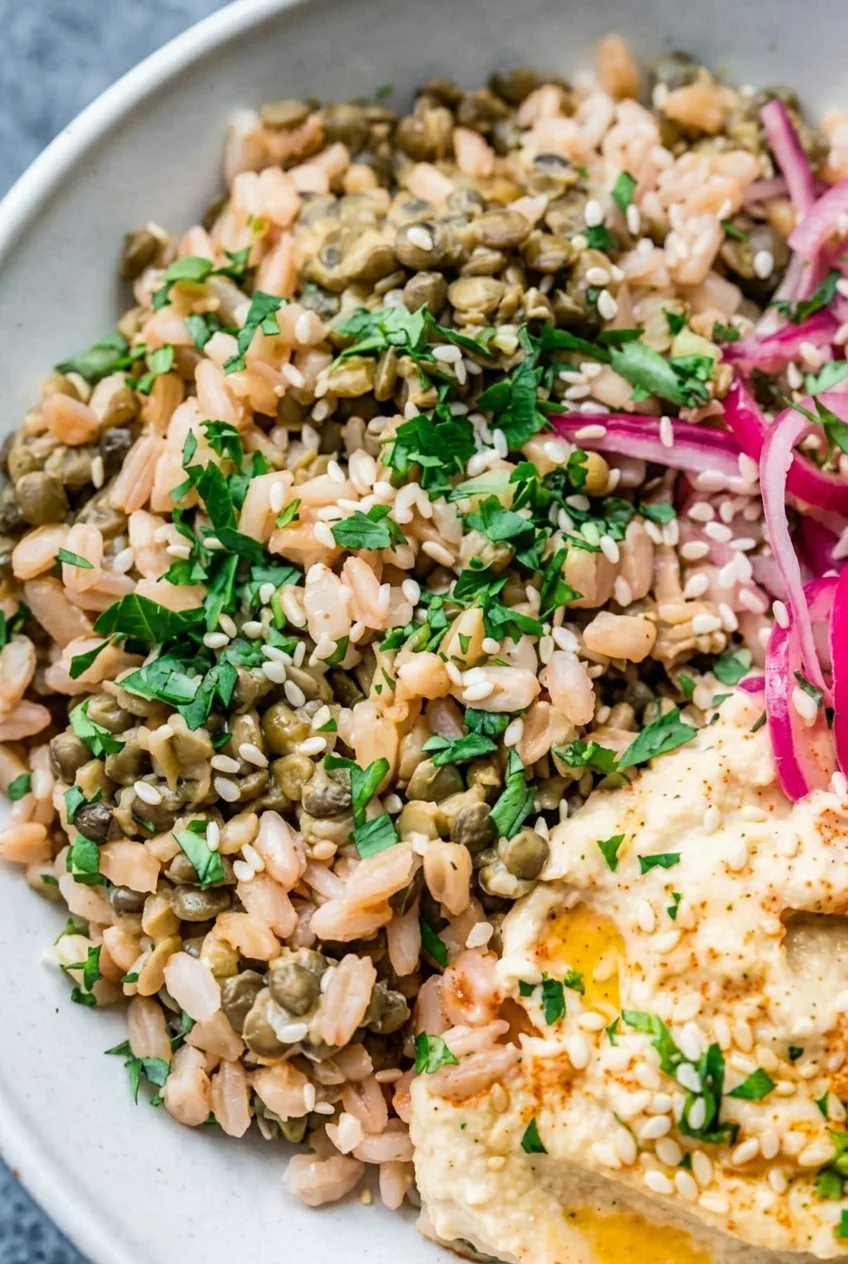
Whole brown lentils and separate grains of rice form a lightly spiced stovetop pilaf. The lentils simmer first, just until their outsides soften, then finish cooking with the rice. Stopping that first simmer early helps them hold their shape.

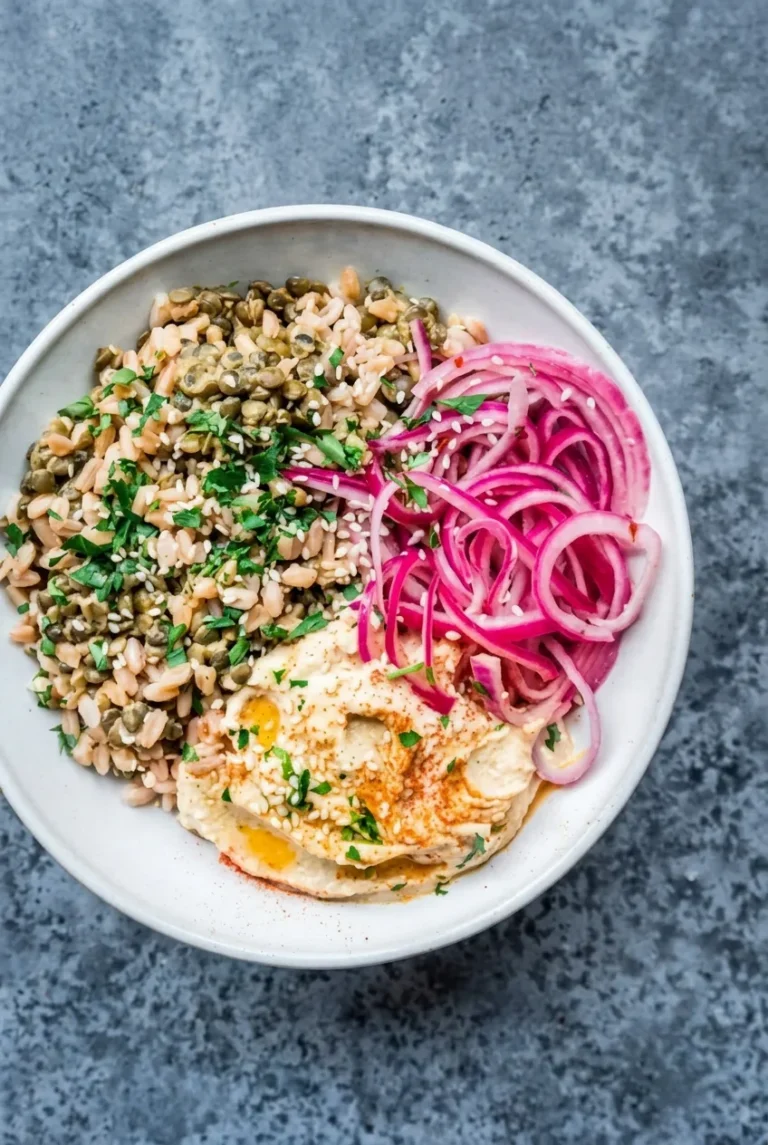
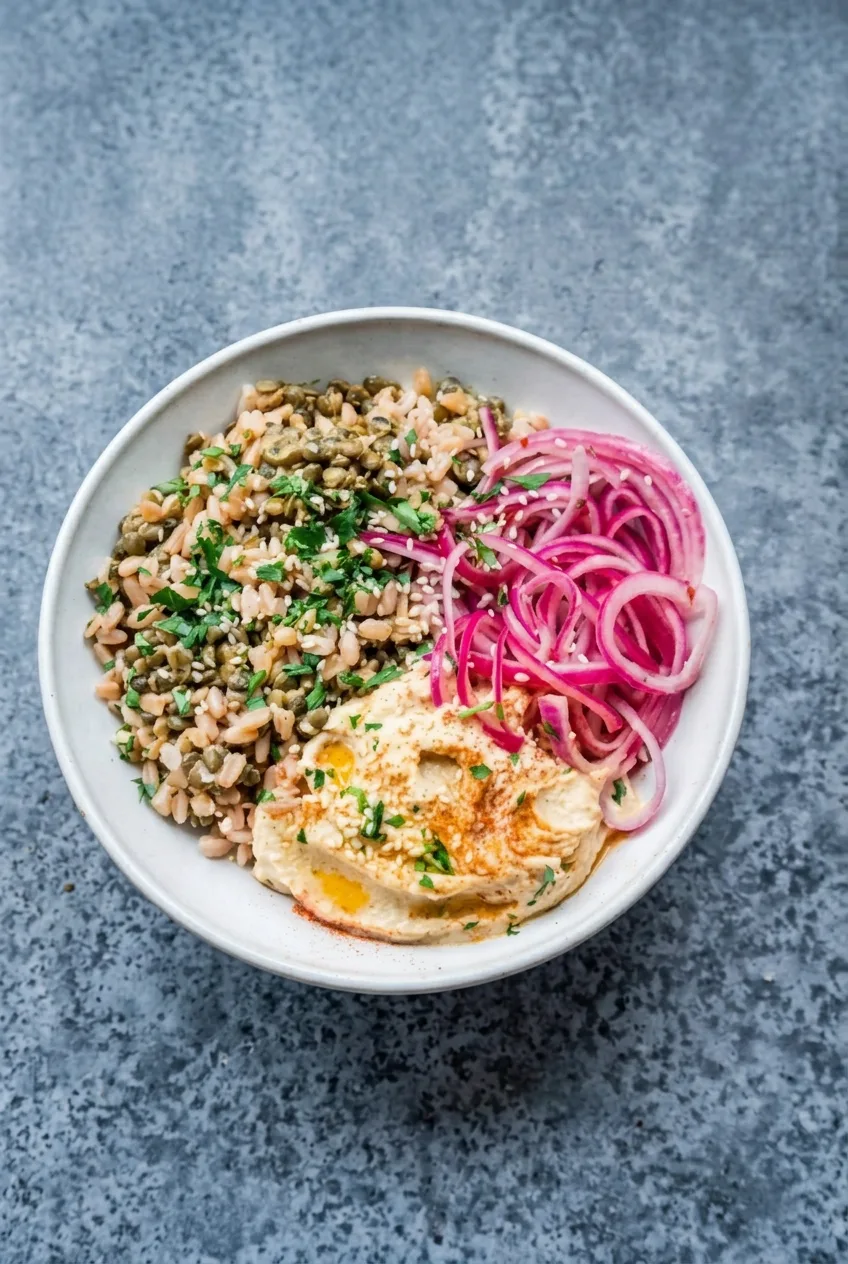
Quick-pickled red onions add a bright, tangy contrast to the warm pilaf. Serve them in a separate pile with a swoosh of hummus, rather than stirring either topping into the rice.

Ingredients for Mediterranean Lentils and Rice

Close view of separate rice grains and whole lentils beside pink onion rings and swirled hummus

For the lentils and rice

  • 1 cup dry brown lentils, picked over and rinsed (190g)
  • 1 cup long-grain white rice, rinsed and drained (185g)
  • 1 medium yellow onion, finely chopped (about 150g)
  • 2 tablespoons olive oil
  • 1 teaspoon cumin seeds, lightly crushed
  • 1/4 teaspoon ground cinnamon
  • 1 teaspoon fine salt, plus more to taste
  • Water for simmering the lentils, plus 1 3/4 cups fresh water for the pilaf
  • Freshly ground black pepper, to taste (optional)

For the toppings

  • 1 medium red onion, thinly sliced into rings or half-rings (about 150g)
  • 1/3 cup red wine vinegar
  • 1/3 cup water
  • 1 teaspoon granulated sugar
  • 1/2 teaspoon fine salt
  • 3/4 cup prepared plain hummus (about 180g)
  • 1/4 cup chopped flat-leaf parsley (about 15g)
  • 1/4 teaspoon sweet paprika
  • 1 teaspoon olive oil

Yield: 4 servings. Time: About 15 minutes prep, 40–50 minutes cooking, and a 10-minute covered rest. Allow about 1 hour total when prep and pickling overlap with cooking.

How to Make Mediterranean Lentils and Rice

Complete lentil-and-rice bowl with pickled onions and hummus on a blue-gray tabletop
  1. Quick-pickle the red onion: Combine the red onion, vinegar, 1/3 cup water, sugar, and 1/2 teaspoon salt in a small bowl or jar. Press the slices into the liquid and let stand at room temperature for at least 20 minutes while you cook. The onions should soften and turn pink.
  2. Partially cook the lentils: Put the lentils in a 3- to 4-quart pot with a tight-fitting lid and cover generously with water. Bring to a boil, then reduce to a gentle simmer, uncovered or partly covered. Start checking at 15 minutes. After about 15–25 minutes, the outsides should yield while the centers still resist slightly when bitten. Drain and set aside.
  3. Cook the onion and toast the rice: In the drained pot, heat 2 tablespoons olive oil over medium heat. Cook the yellow onion until soft with a few golden edges. Stir in the cumin and cinnamon briefly, then add the drained rice and stir until coated and lightly toasted. Allow about 7–9 minutes total for this step.
  4. Simmer the pilaf: Add the lentils, 1 3/4 cups fresh water, and 1 teaspoon salt. Bring to a simmer and stir once. Cover tightly, reduce the heat to low, and cook undisturbed. Start checking at 18 minutes; the rice should be tender and the liquid absorbed after about 18–22 minutes. If the rice is still firm but the pot is dry, add 1–2 tablespoons hot water, cover, and cook a few minutes longer on low.
  5. Rest and fluff: Remove the pot from the heat and leave it covered for 10 minutes. Fluff gently to keep the lentils intact. Taste and add more salt or black pepper if desired.
  6. Assemble the bowls: Divide the warm pilaf among four shallow bowls. Lift the pickled onions from their liquid, drain well, and place them beside the pilaf. Add a separate swoosh of hummus to each bowl and scatter parsley over the top. Dust the hummus lightly with paprika and drizzle the remaining teaspoon of olive oil over it.

How Tender Should the Lentils Be Before Adding the Rice?

Stop the first simmer before the lentils are fully tender. Their outsides should have softened, but the centers should still feel firm; they will finish cooking during the covered rice simmer. Check early rather than relying on a fixed time, since lentil size and age affect how quickly they soften. The finished lentils should be tender and hold their shape.

This version uses unsoaked lentils and long-grain white rice. Brown rice needs a longer cooking method and a different amount of liquid, so it is not a direct swap.

Keep the Toppings Separate

Drain the pickled onions before adding them to the bowls, and spoon the hummus beside the pilaf. Keeping the pickling liquid and hummus out of the rice helps the grains stay fluffy and the three parts of the bowl remain distinct.

Storage and Reheating

Refrigerate the cooked rice and lentils promptly, within 2 hours, in an airtight container for up to 3–4 days. Keep the pickled onions and hummus in separate refrigerated containers, following any package guidance for the hummus. The onions can be made ahead; assemble the bowls just before serving.

Reheat the pilaf with a splash of water until steaming hot throughout, then add the chilled toppings. For longer storage, freeze portions of the plain pilaf without hummus or onions for about 1–2 months for best quality. Thaw in the refrigerator and reheat thoroughly.

Nutrition

Approximate nutrition per serving (1 of 4 bowls): 525 calories, 19g protein, 12g fat, and 83g carbohydrates. Approximate nutrition per 100g: 135 calories, 5g protein, 3g fat, and 21g carbohydrates. Values are estimates; hummus brands, the amount of pickling liquid retained, and the finished weight will affect the totals.

Mediterranean Lentils and Rice

Brown lentils and long-grain rice simmer with onion and spices, served with quick-pickled red onion, hummus, and parsley.
Course: Main Course
Cuisine: Mediterranean
Prep: 15 min
Cook: 50 min
Total: 60 min
Servings: 4 Calories: 525 kcal

Equipment

  • 3- to 4-quart pot with lid
  • Small bowl or jar
  • Colander

Ingredients

For the lentils and rice

  • 1 cup dry brown lentils, picked over and rinsed (190 g)
  • 1 cup long-grain white rice, rinsed and drained (185 g)
  • 1 medium yellow onion, finely chopped (about 150 g)
  • 2 tablespoons olive oil
  • 1 teaspoon cumin seeds, lightly crushed
  • 1/4 teaspoon ground cinnamon
  • 1 teaspoon fine salt, plus more to taste
  • Water for simmering the lentils
  • 1 3/4 cups fresh water for the pilaf
  • Freshly ground black pepper, to taste (optional)

For the toppings

  • 1 medium red onion, thinly sliced into rings or half-rings (about 150 g)
  • 1/3 cup red wine vinegar
  • 1/3 cup water
  • 1 teaspoon granulated sugar
  • 1/2 teaspoon fine salt
  • 3/4 cup prepared plain hummus (about 180 g)
  • 1/4 cup chopped flat-leaf parsley (about 15 g)
  • 1/4 teaspoon sweet paprika
  • 1 teaspoon olive oil

Instructions

  1. Combine the sliced red onion, vinegar, 1/3 cup water, sugar, and 1/2 teaspoon salt in a small bowl or jar. Press the onion into the liquid and let stand at room temperature for at least 20 minutes.
  2. Put the lentils in a 3- to 4-quart pot and cover generously with water. Bring to a boil, then reduce to a gentle simmer, uncovered or partly covered.
  3. Begin checking the lentils after 15 minutes. Simmer for about 15–25 minutes, until the outsides have softened but the centers still resist slightly when bitten. Drain and set aside.
  4. Heat 2 tablespoons olive oil in the drained pot over medium heat. Cook the yellow onion until soft with a few golden edges.
  5. Stir in the cumin and cinnamon briefly. Add the drained rice and stir until coated and lightly toasted, about 7–9 minutes total for this step.
  6. Add the lentils, 1 3/4 cups fresh water, and 1 teaspoon salt. Bring to a simmer and stir once.
  7. Cover tightly, reduce the heat to low, and cook undisturbed for about 18–22 minutes, starting to check at 18 minutes. If the rice is still firm and the pot is dry, add 1–2 tablespoons hot water, cover, and cook a few minutes longer.
  8. Remove the pot from the heat and leave covered for 10 minutes. Fluff gently, then taste and add more salt or black pepper if desired.
  9. Divide the pilaf among four shallow bowls. Drain the pickled onions well and place them beside the pilaf.
  10. Add a separate swoosh of hummus to each bowl. Scatter with parsley, dust the hummus with paprika, and drizzle with 1 teaspoon olive oil.

Tips

  • Start checking the lentils at 15 minutes; their size and age affect how quickly they soften.
  • Stop simmering the lentils while their centers are still firm so they finish cooking with the rice.
  • Keep the pot covered and avoid stirring during the rice simmer.
  • Drain the pickled onions and serve them and the hummus separately to help keep the rice fluffy.
  • Brown rice is not a direct substitute because it needs a different cooking time and amount of liquid.

Notes

Refrigerate the pilaf within 2 hours in an airtight container for 3–4 days; store the onions and hummus separately. Reheat the pilaf with a splash of water until steaming hot throughout. Plain pilaf can be frozen for 1–2 months. Approximate nutrition per 100 g: 135 calories, 5 g protein, 3 g fat, and 21 g carbohydrates.

Nutrition

Calories: 525 kcal | Protein: 19 g | Fat: 12 g | Carbohydrates: 83 g

Garlic Butter Chicken and Zucchini

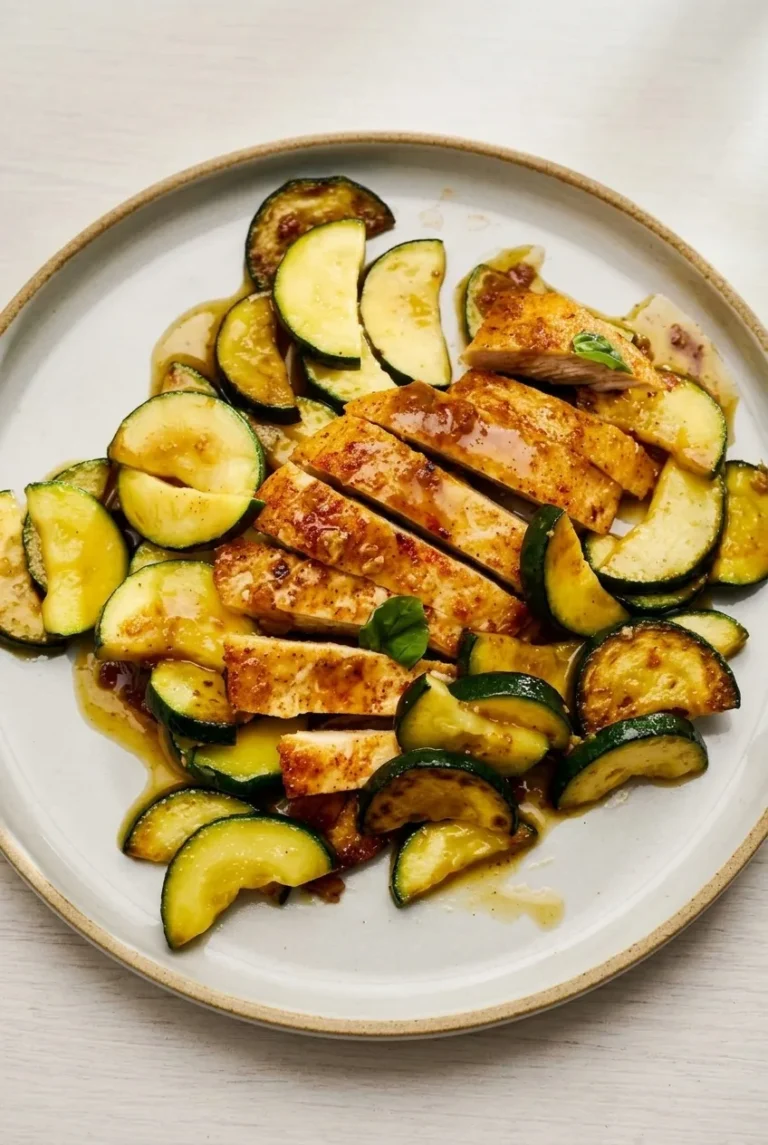
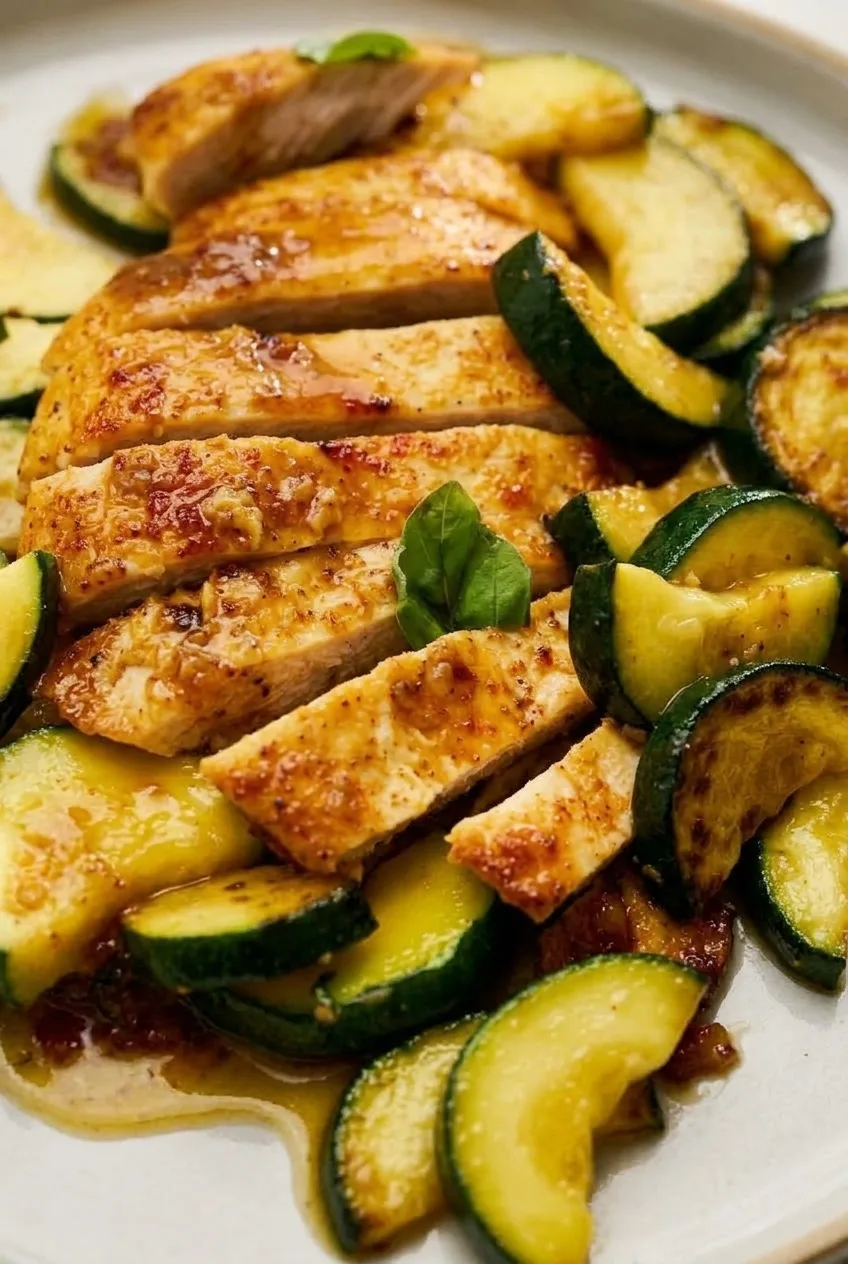
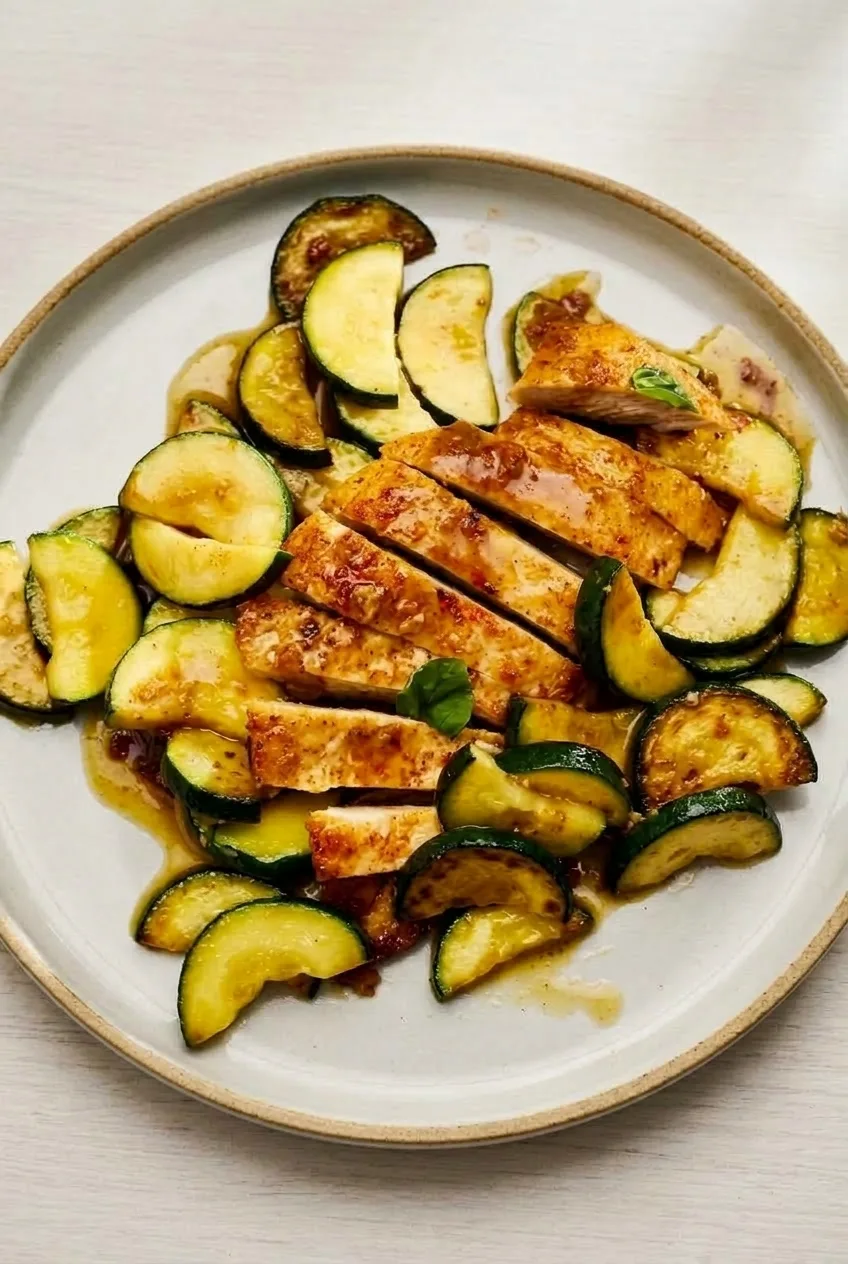
Golden slices of chicken breast and thick zucchini half-moons get a light coating of garlic butter in this stovetop dinner. Sear the chicken as intact cutlets, then let it rest while the zucchini cooks in the same skillet. Slicing the chicken just before the final toss keeps its browned tops visible and prevents it from spending too long over the heat. The zucchini should be tender but still hold its shape, with just enough sauce to give everything a glossy finish.

Servings: 4 | Prep: 12–15 minutes | Cook: about 20–25 minutes | Total: about 35–40 minutes

Ingredients for Garlic Butter Chicken and Zucchini

Close view of browned chicken slices, their cooked interiors, and glossy zucchini half-moons
  • 1 1/4 pounds boneless skinless chicken breasts (about 570g, or 2 large breasts), halved horizontally into 4 cutlets
  • 2 medium zucchini (about 1 pound or 450g total), cut into 1/2-inch-thick half-moons
  • 1 tablespoon olive oil
  • 3 tablespoons unsalted butter
  • 4 garlic cloves, minced
  • 3/4 teaspoon kosher salt, divided, plus more to taste
  • 1/4 teaspoon freshly ground black pepper
  • 1 teaspoon paprika
  • 1/2 teaspoon dried Italian seasoning
  • 2 tablespoons low-sodium chicken broth
  • 1 teaspoon fresh lemon juice
  • 4–6 small fresh basil leaves

How to Make Garlic Butter Chicken and Zucchini

Full plate of garlic butter chicken and zucchini on a plain, pale surface
  1. Prepare the chicken and zucchini: Pat the cutlets dry and season them with the paprika, Italian seasoning, pepper, and 1/2 teaspoon of the salt. Cut the zucchini into thick, skin-on half-moons and pat away surface moisture.
  2. Sear the chicken: Heat the oil in a 12-inch skillet over medium-high heat until it shimmers. Add the cutlets in one uncrowded layer, cooking in two batches if needed. Leave them undisturbed until browned, then turn once. Cook for about 3–5 minutes per side per batch, depending on thickness; start checking thin cutlets after about 3 minutes per side. The thickest part should reach 165°F (75°C). Transfer to a plate and rest for about 5 minutes while the zucchini cooks.
  3. Cook the zucchini: Reduce the heat to medium. Add the zucchini and remaining 1/4 teaspoon salt to the same skillet. Cook uncovered for about 4–6 minutes, stirring occasionally. Start checking after about 3 minutes: the pieces should have some browned edges and be tender when pierced, but still hold their shape.
  4. Make the garlic-butter sauce: Lower the heat to medium-low. Add the butter and garlic and stir for about 30 seconds, until fragrant but not browned. Add the broth and lemon juice, scraping up the browned bits, and simmer for about 1–2 minutes. If the zucchini has released a lot of liquid, briefly raise the heat to medium and reduce it uncovered until only a small amount of glossy sauce remains.
  5. Slice and finish: Slice the rested chicken across the grain into broad strips. Return it and any juices on the plate to the skillet. Toss over low or residual heat for 1–2 minutes, just long enough to coat and warm the chicken. Plate the zucchini with the chicken loosely layered over it, then spoon on the sauce and add a few basil leaves.

Why Sear the Chicken Before Slicing?

Searing intact cutlets gives the finished strips broad browned tops and visible, tender interiors. Removing the chicken while the zucchini cooks also keeps it from drying out. Cutlet thickness and skillet space affect the timing, so check the thickest part with a thermometer rather than relying on minutes alone. If the cutlets overlap, cook them in batches so they brown instead of steam.

How to Keep the Zucchini and Sauce from Turning Watery

Thick half-moons hold their shape better than thin slices or zucchini noodles in this skillet dish. Cook them uncovered and stop when they bend slightly but are not limp. If liquid collects in the pan, reduce it before returning the sliced chicken. The sauce should coat the pieces lightly, not submerge them.

Serving and Variations

Serve the chicken loosely layered over the zucchini. For a larger meal, offer bread or rice alongside. A pinch of crushed red pepper flakes on individual servings adds heat. Small broccoli florets can replace the zucchini; cook them until tender-crisp, adding a splash of water if needed. The finished dish will have a different texture and appearance.

For another garlic-forward chicken dinner, try these grilled chicken and broccoli bowls. For a different way to use chicken and zucchini, make these baked chicken zucchini-feta meatballs.

Storing and Reheating

Refrigerate leftovers promptly in a covered container for up to 3–4 days. Reheat gently in a covered skillet over low heat with a splash of water until the chicken is thoroughly hot; the zucchini will soften further. You can cut the zucchini ahead, but pat away surface moisture before cooking. Freezing the assembled dish is not recommended if you want the zucchini to retain its texture.

Nutrition

Approximate nutrition per serving, based on 4 servings: 305 calories, 34g protein, 16g fat, and 5g carbohydrates. Approximate values per 100g of finished dish: 125 calories, 14g protein, 7g fat, and 2g carbohydrates. Values are estimates and will vary with chicken size and moisture lost during cooking.

Garlic Butter Chicken and Zucchini

Chicken cutlets and zucchini are seared in a skillet and finished in a light garlic butter sauce.
Course: Main Course
Cuisine: American
Prep: 15 min
Cook: 25 min
Total: 40 min
Servings: 4 Calories: 305 kcal

Equipment

  • 12-inch skillet
  • Instant-read thermometer
  • Cutting board
  • Chef's knife

Ingredients

Chicken and Zucchini

  • 1 1/4 pounds boneless skinless chicken breasts (about 570g, or 2 large breasts), halved horizontally into 4 cutlets
  • 2 medium zucchini (about 1 pound or 450g total), cut into 1/2-inch-thick half-moons
  • 1 tablespoon olive oil
  • 3/4 teaspoon kosher salt, divided, plus more to taste
  • 1/4 teaspoon freshly ground black pepper
  • 1 teaspoon paprika
  • 1/2 teaspoon dried Italian seasoning

Garlic Butter Sauce and Garnish

  • 3 tablespoons unsalted butter
  • 4 garlic cloves, minced
  • 2 tablespoons low-sodium chicken broth
  • 1 teaspoon fresh lemon juice
  • 4–6 small fresh basil leaves

Instructions

  1. Pat the chicken cutlets dry. Season with the paprika, Italian seasoning, pepper, and 1/2 teaspoon of the salt.
  2. Pat the zucchini half-moons dry.
  3. Heat the olive oil in a 12-inch skillet over medium-high heat until shimmering.
  4. Sear the chicken in a single uncrowded layer, working in batches if needed. Cook undisturbed until browned, then turn and cook for about 3–5 minutes per side. Start checking thinner cutlets after about 3 minutes per side; the thickest part should reach 165°F (75°C).
  5. Transfer the chicken to a plate and let it rest for about 5 minutes.
  6. Reduce the heat to medium. Add the zucchini and remaining 1/4 teaspoon salt to the skillet. Cook uncovered for about 4–6 minutes, stirring occasionally, until lightly browned and tender but still holding its shape.
  7. Lower the heat to medium-low. Add the butter and garlic and stir for about 30 seconds, until fragrant but not browned.
  8. Add the chicken broth and lemon juice, scraping up the browned bits. Simmer for about 1–2 minutes. If the zucchini has released excess liquid, raise the heat to medium and reduce it uncovered until only a small amount of glossy sauce remains.
  9. Slice the rested chicken across the grain into broad strips. Return it and any plate juices to the skillet and toss over low or residual heat for 1–2 minutes, just until warmed and coated.
  10. Serve the chicken loosely layered over the zucchini. Spoon the sauce over the top and garnish with basil leaves.

Tips

  • Cook the cutlets in batches if they would overlap, so they brown instead of steam.
  • Check the thickest part of the chicken with a thermometer rather than relying on timing alone.
  • Cook the zucchini uncovered and stop when it is tender but still holds its shape.
  • Reduce excess liquid before returning the chicken so the sauce lightly coats the ingredients.

Variations

  • Broccoli Garlic Butter Chicken: Replace the zucchini with small broccoli florets and cook until tender-crisp, adding a splash of water if needed.
  • Spicy Garlic Butter Chicken: Add a pinch of crushed red pepper flakes to individual servings.

Notes

Refrigerate leftovers promptly in a covered container for up to 3–4 days. Reheat gently in a covered skillet over low heat with a splash of water until thoroughly hot; the zucchini will soften further. Freezing the assembled dish is not recommended if you want the zucchini to retain its texture.

Nutrition

Calories: 305 kcal | Protein: 34 g | Fat: 16 g | Carbohydrates: 5 g | Per 100g Calories: 125 kcal | Per 100g Protein: 14 g | Per 100g Fat: 7 g | Per 100g Carbohydrates: 2 g

Chicken Taco Rice Bowls

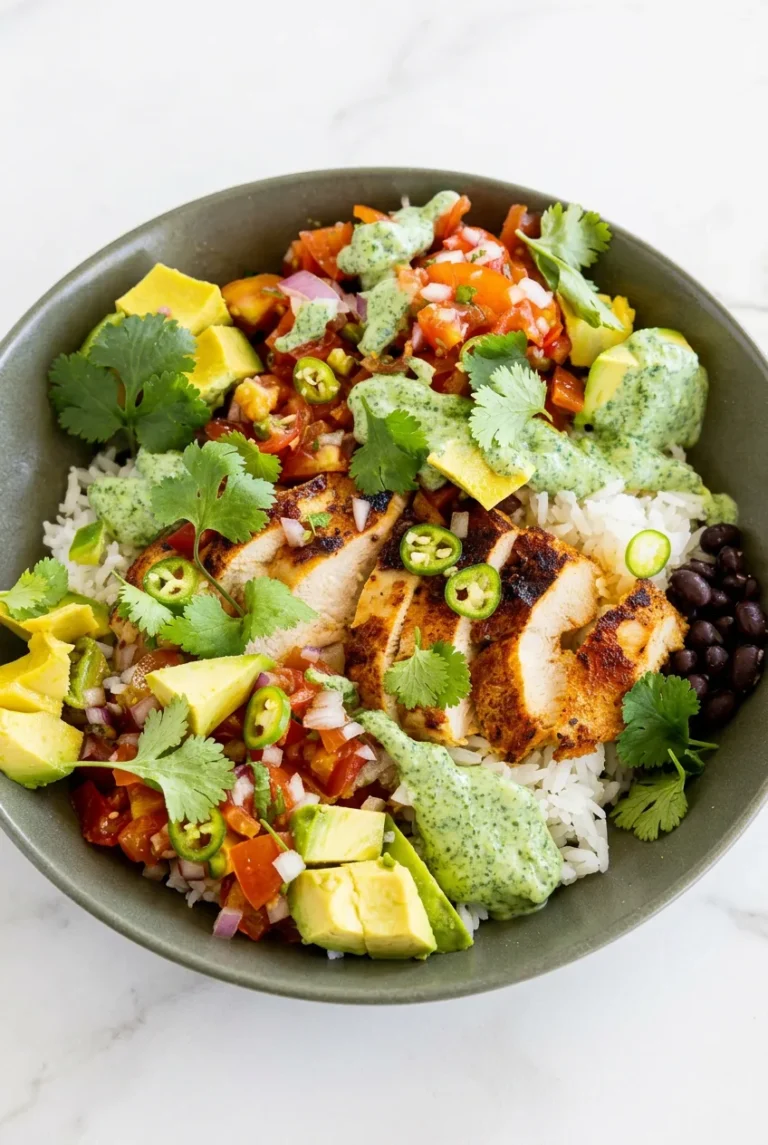
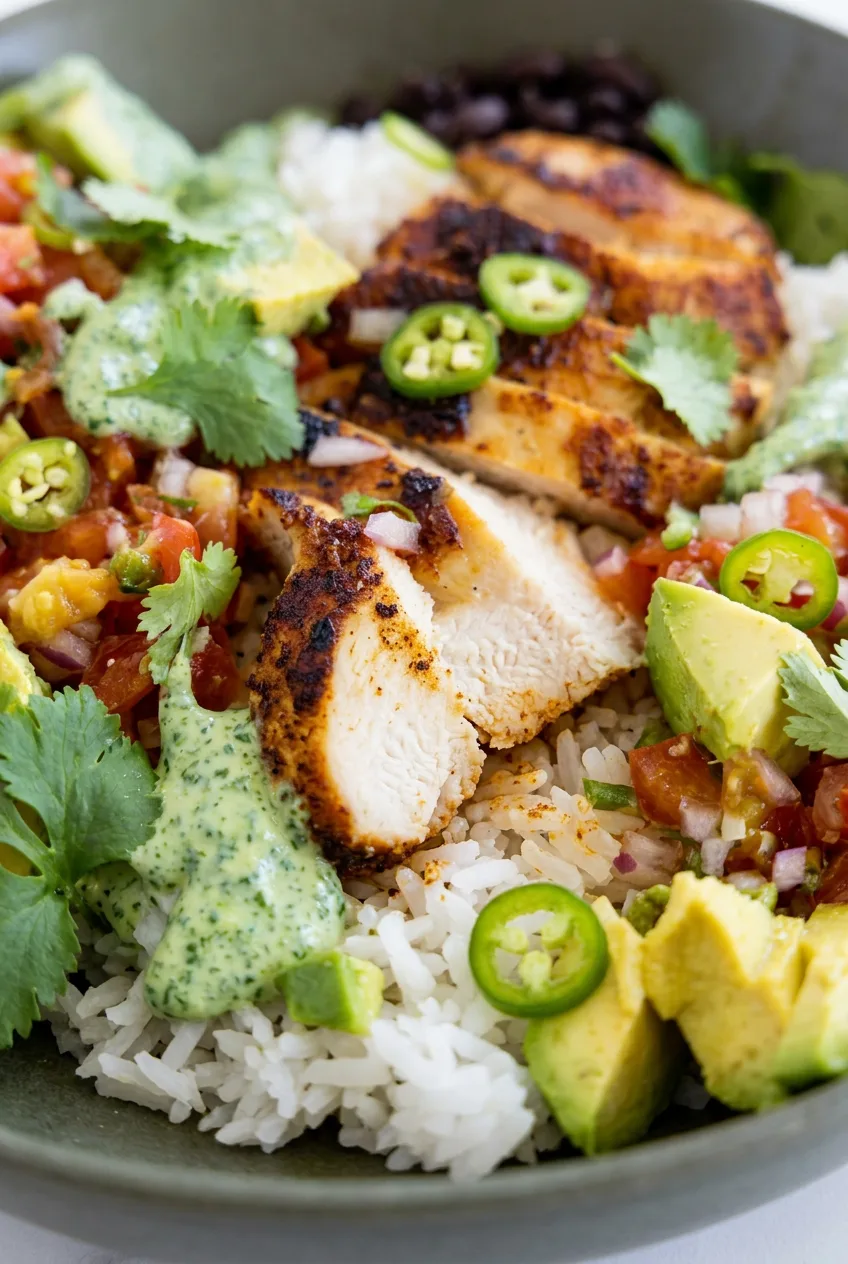
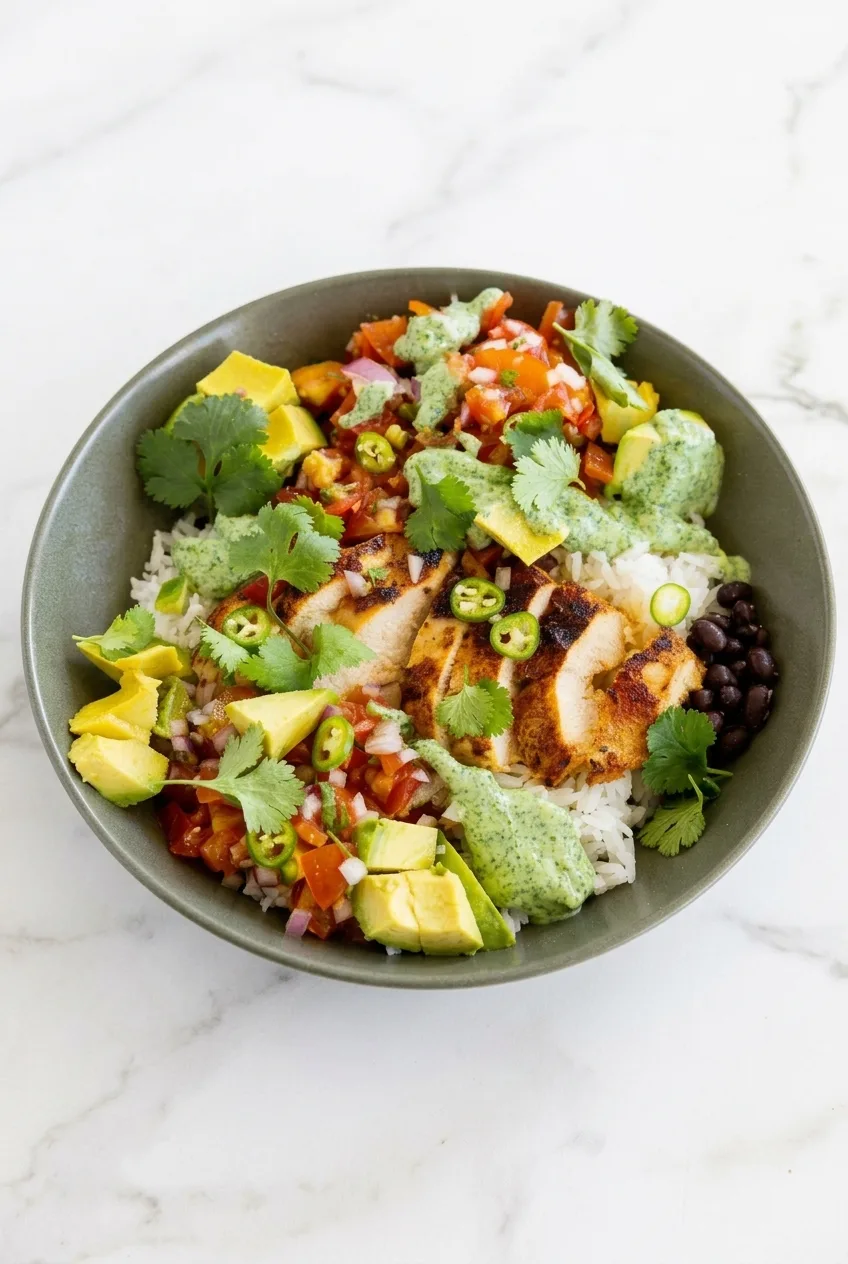
Browned slices of taco-seasoned chicken sit over white rice with black beans, fresh pico de gallo, chunky avocado, and a creamy cilantro-lime sauce. The chicken cooks in a skillet rather than in salsa, so it stays sliceable and develops browned edges. Cook the rice and chicken at the same time, then add the cool toppings just before serving. Leave some rice visible and spoon the sauce across the bowl instead of stirring everything together.

Ingredients for Chicken Taco Rice Bowls

Close view of browned chicken slices over distinct rice grains with pico and creamy green sauce
  • 1 cup dry white rice (about 185g), plus the liquid called for on the package
  • 1¼ lb boneless, skinless chicken breasts (about 575g)
  • 2 tablespoons taco seasoning
  • 1 tablespoon olive oil
  • 1 can (15 oz) black beans, drained and rinsed (about 250g drained)
  • 1½ cups fresh pico de gallo (about 300g)
  • 2 medium avocados, diced (about 300g)
  • ½ cup sour cream (about 120g)
  • ¾ cup loosely packed cilantro leaves, divided
  • 2 tablespoons lime juice, from about 1 lime
  • 1 small jalapeño, thinly sliced
  • 1–3 tablespoons water, as needed for the sauce

How to Make Chicken Taco Rice Bowls

Complete chicken taco rice bowl on a light countertop, with fresh toppings and cilantro-lime sauce
  1. Cook the rice: Cook the rice with the liquid specified on its package, usually about 15–20 minutes for white rice. Let it stand covered briefly, then fluff with a fork. Start the chicken while the rice cooks.
  2. Season the chicken: Horizontally split particularly thick breasts so the pieces are more even. Pat them dry and coat both sides with the taco seasoning.
  3. Cook and slice the chicken: Heat the olive oil in a 12-inch skillet over medium-high heat until it shimmers. Add the chicken without crowding the pan; cook in batches if needed. Cook uncovered for about 4–6 minutes per side, turning once. Begin checking thinner pieces near the early end of that range. If the seasoning darkens before the center is done, reduce the heat. Remove the chicken when its thickest part reaches 165°F (75°C). Rest for 5 minutes, then slice.
  4. Make the green sauce: Blend the sour cream, ½ cup cilantro leaves, and lime juice until pale green. Add water 1 tablespoon at a time until the sauce falls from a spoon in loose, creamy ribbons. Without a blender, finely chop the cilantro and whisk the sauce together; it will have visible herb flecks.
  5. Prepare the toppings: Gently warm the drained beans. Dice the avocados and slice the jalapeño. If the pico is watery, spoon off excess liquid.
  6. Assemble four bowls: Divide the rice among shallow bowls. Add the beans beside it, leaving some rice visible, and arrange the chicken slices across the center. Place the pico and avocado in separate clusters. Spoon the sauce in loose streaks over the bowls, then finish with the remaining cilantro and jalapeño slices.

How to Keep the Chicken Browned and Juicy

Chicken thickness matters more than a fixed skillet time. Splitting thick breasts helps the centers cook before the thinner edges dry out, while space between pieces lets moisture escape so the seasoning browns rather than steams. Use the temperature at the thickest point as the final check, and rest the chicken before slicing. There is no need for a lime-juice marinade; the lime goes into the finishing sauce.

Fresh Toppings and Rice Options

Keep the sauce creamy but pourable, and add it with the avocado and pico after the warm components are in the bowls. Draining the beans and spooning off excess pico liquid helps keep the rice from becoming soggy. Use fewer jalapeño slices for less heat.

Brown rice can replace white rice, but follow its package directions and allow for a longer cooking time. If using previously cooked rice, reheat it until steaming hot before assembling. Up to ½ cup shredded cheese can be offered at the table rather than covering the chicken and fresh toppings.

For another chicken-and-rice dinner, try Hawaiian Chicken Rice Bowls with Seared Pineapple.

Make-Ahead and Leftovers

For meal prep, promptly refrigerate the cooked chicken, rice, and beans in shallow, covered containers and use within 3–4 days. Keep the pico and sauce separately refrigerated, and cut the avocado near serving time. Reheat the cooked components until steaming hot, then add the cool toppings and sauce.

Cooked chicken and rice can be frozen separately for later bowls. Add fresh toppings after reheating rather than freezing assembled bowls.

Nutrition

Approximate nutrition per bowl, based on 4 bowls: 660 calories, 44g protein, 25g fat, and 66g carbohydrates. Approximate values per 100g: 130 calories, 9g protein, 5g fat, and 13g carbohydrates. Values are estimates and exclude optional toppings; ingredient brands and portion sizes will affect them.

Chicken Taco Rice Bowls

Taco-seasoned chicken is served over rice with black beans, pico de gallo, avocado, and creamy cilantro-lime sauce.
Course: Main Course
Cuisine: Mexican
Prep: 15 min
Cook: 25 min
Total: 40 min
Servings: 4 Calories: 660 kcal

Equipment

  • 12-inch skillet
  • Rice pot with lid
  • Blender
  • Instant-read thermometer

Ingredients

For the Bowls

  • 1 cup dry white rice (about 185 g), plus the liquid called for on the package
  • 1¼ lb boneless, skinless chicken breasts (about 575 g)
  • 2 tablespoons taco seasoning
  • 1 tablespoon olive oil
  • 1 can (15 oz) black beans, drained and rinsed (about 250 g drained)
  • 1½ cups fresh pico de gallo (about 300 g)
  • 2 medium avocados, diced (about 300 g)
  • 1 small jalapeño, thinly sliced

For the Cilantro-Lime Sauce

  • ½ cup sour cream (about 120 g)
  • ¾ cup loosely packed cilantro leaves, divided
  • 2 tablespoons lime juice, from about 1 lime
  • 1–3 tablespoons water, as needed

Instructions

  1. Cook the rice with the liquid specified on its package. Let it stand covered briefly, then fluff with a fork.
  2. While the rice cooks, split particularly thick chicken breasts horizontally to make the pieces more even. Pat the chicken dry and coat both sides with taco seasoning.
  3. Heat the olive oil in a 12-inch skillet over medium-high heat until it shimmers. Add the chicken without crowding the pan, working in batches if needed.
  4. Cook uncovered for about 4–6 minutes per side, turning once. Reduce the heat if the seasoning darkens before the chicken is cooked through.
  5. Check the thickest part of the chicken and remove it from the pan when it reaches 165°F (75°C). Rest for 5 minutes, then slice.
  6. Blend the sour cream, ½ cup of the cilantro, and lime juice until pale green. Add water 1 tablespoon at a time until the sauce falls from a spoon in loose ribbons.
  7. Gently warm the drained beans. Dice the avocados and slice the jalapeño. Spoon off excess liquid from the pico if needed.
  8. Divide the rice among four shallow bowls. Add the beans beside the rice, leaving some rice visible, and arrange the chicken slices across the center.
  9. Place the pico and avocado in separate clusters. Spoon the sauce over the bowls and finish with the remaining cilantro and jalapeño.

Tips

  • Split thick chicken breasts so they cook more evenly.
  • Leave space between chicken pieces in the skillet to help them brown instead of steam.
  • Use the chicken’s internal temperature rather than skillet time as the final doneness check.
  • Drain the beans and remove excess liquid from the pico to help keep the rice from getting soggy.
  • Add water to the sauce gradually until it is creamy but pourable.

Variations

  • Brown Rice Bowls: Replace the white rice with brown rice and cook it according to its package directions, allowing more time.
  • Cheesy Taco Bowls: Offer up to ½ cup shredded cheese at the table.

Notes

Refrigerate cooked chicken, rice, and beans promptly in shallow, covered containers and use within 3–4 days. Store pico and sauce separately, and cut avocado near serving time. Reheat cooked components until steaming hot; freeze chicken and rice separately if storing longer.

Nutrition

Calories: 660 kcal | Protein: 44 g | Fat: 25 g | Carbohydrates: 66 g

Grilled Chicken & Broccoli Bowls with Creamy Garlic Sauce

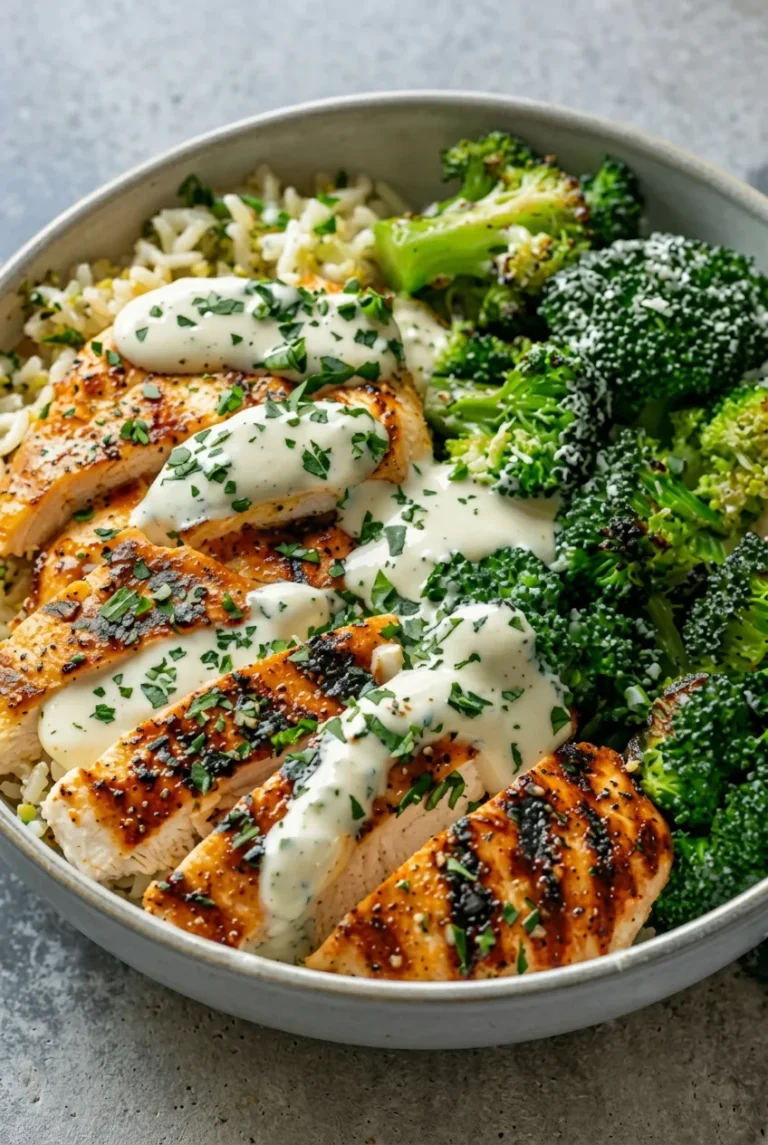
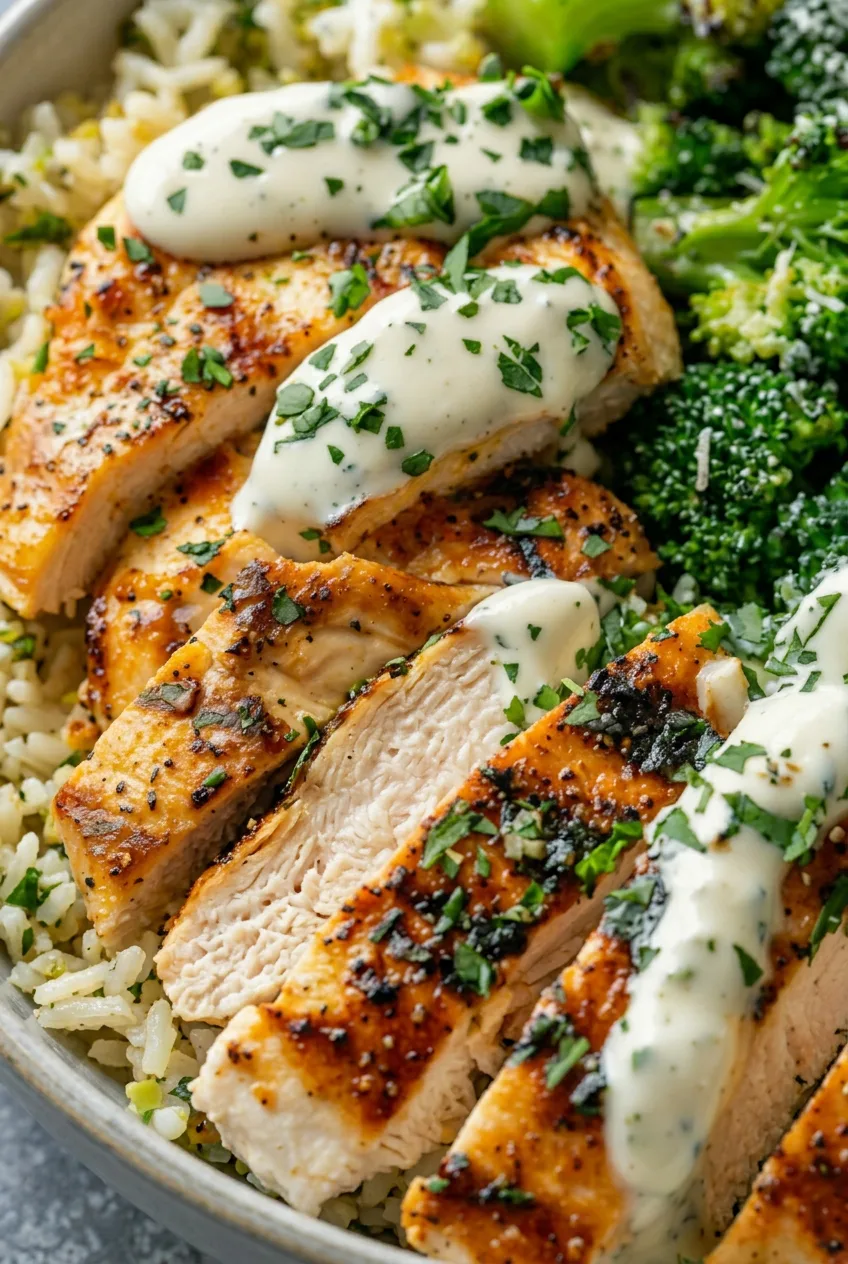
Grill-marked chicken, just-tender broccoli, and white rice stay in distinct sections of these bowls, with a thick lemon-garlic sauce spooned over the chicken. Roast the broccoli while the chicken grills, then whisk the sauce as the chicken rests. Using similarly thick pieces of chicken helps them cook evenly without drying out.

The recipe starts with cooked rice; allow extra time if you need to make it. For meal prep, keep the sauce separate and add it after reheating.

Ingredients for 4 Bowls

Close view of grill-marked chicken slices with thick garlic sauce beside broccoli and rice
  • 1 1/2 lb boneless, skinless chicken breasts (680g), cut into pieces about 3/4 inch thick
  • 3 cups cooked white rice (about 480g)
  • 1 1/2 lb broccoli florets (680g)
  • 2 1/2 tablespoons olive oil, divided
  • 1 teaspoon garlic powder
  • 1 teaspoon smoked paprika
  • 1 1/4 teaspoons kosher salt, divided, plus more to taste
  • 1/2 teaspoon freshly ground black pepper, divided
  • 3/4 cup plain Greek yogurt (180g)
  • 1 garlic clove, finely grated
  • 1 tablespoon fresh lemon juice
  • 1 to 3 tablespoons water, as needed
  • 2 tablespoons finely chopped fresh flat-leaf parsley

How to Make Grilled Chicken and Broccoli Bowls

Complete grilled chicken and broccoli rice bowl on a neutral tabletop
  1. Season the chicken: Heat the oven to 425°F (220°C). Coat the chicken with 1 1/2 tablespoons olive oil, the garlic powder, smoked paprika, 3/4 teaspoon salt, and 1/4 teaspoon pepper. Set aside briefly while you prepare the broccoli.
  2. Roast the broccoli: Toss the florets with the remaining 1 tablespoon olive oil and 1/4 teaspoon salt. Spread them in a single layer on a rimmed sheet pan. Roast uncovered for 16 to 20 minutes, turning once. Start checking at 15 minutes; the stems should be just tender when pierced, with deep-green florets and a few browned edges.
  3. Grill and rest the chicken: While the broccoli roasts, preheat an outdoor grill or stovetop grill pan over medium-high heat. Lightly oil the grates or pan if needed. Leave space between the chicken pieces, cooking in batches if necessary. Grill for about 5 to 7 minutes per side, turning once, until marked and an instant-read thermometer reads 165°F (75°C) in the thickest part. Start checking before the end of the estimated time; thicker pieces and different grills may need more or less time. If the chicken browns before the center is done, reduce the heat and continue cooking to temperature. Rest for 5 minutes.
  4. Whisk the garlic sauce: While the chicken rests, whisk together the yogurt, grated garlic, lemon juice, remaining 1/4 teaspoon salt, and remaining 1/4 teaspoon pepper. Add water 1 tablespoon at a time until the sauce falls from a spoon in thick ribbons.
  5. Assemble the bowls: Warm the cooked rice if needed and divide it among four bowls. Cut the chicken into substantial slices and arrange them over the rice with the grill marks facing up. Group the broccoli alongside, leaving some rice visible. Spoon the sauce mainly over the chicken and finish with parsley.

How to Keep the Chicken Juicy

Chicken pieces of similar thickness finish cooking at about the same time. The per-side grilling time is only a guide: use a thermometer rather than waiting for every piece to develop identical grill marks. Rest the chicken before slicing so its juices have time to settle.

For another grilling option, try Greek yogurt marinated chicken breasts.

Getting the Broccoli and Sauce Right

Give the broccoli room on the sheet pan so its edges can brown rather than steam. Remove it when the stems are just tender; extra roasting can leave the florets soft.

Greek yogurt varies in thickness, so add water to the sauce gradually. It should sit visibly on the chicken but still be easy to spoon over it. For another chicken dinner with a yogurt-based sauce, try these sheet pan chicken pitas.

Simple Swaps

A stovetop grill pan works in place of an outdoor grill, though the marks and cooking time may differ. Boneless, skinless thighs can replace the breasts; check them for 165°F rather than following the breast timing. You can steam the broccoli until bright green and crisp-tender, but it will not have roasted edges. Brown rice or another grain will change the white-rice base of the featured bowl.

Meal Prep and Reheating

Refrigerate leftovers in airtight containers for up to 4 days, keeping the sauce separately covered. Let the broccoli release steam before closing meal-prep containers.

Microwave the rice, chicken, and broccoli until warmed through, then add the sauce. If the chilled sauce has thickened, stir in a little water until it is spoonable again.

Nutrition

Approximate nutrition: Per bowl (1 of 4): 530 calories, 51g protein, 15g fat, and 49g carbohydrates. Per 100g of finished bowl: approximately 115 calories, 11g protein, 3g fat, and 11g carbohydrates. Values are estimates; yogurt choice and moisture lost during cooking will affect them.

Grilled Chicken and Broccoli Bowls with Creamy Garlic Sauce

Grilled chicken, roasted broccoli, and white rice are served with a thick lemon-garlic yogurt sauce.
Course: Main Course
Cuisine: American
Prep: 15 min
Cook: 25 min
Total: 40 min
Servings: 4 Calories: 530 kcal

Equipment

  • Oven
  • Rimmed sheet pan
  • Outdoor grill or grill pan
  • Instant-read thermometer
  • Mixing bowl
  • Whisk

Ingredients

For the Bowls

  • 1 1/2 lb boneless, skinless chicken breasts (680 g), cut into pieces about 3/4 inch thick
  • 3 cups cooked white rice (about 480 g)
  • 1 1/2 lb broccoli florets (680 g)
  • 2 1/2 tablespoons olive oil, divided
  • 1 teaspoon garlic powder
  • 1 teaspoon smoked paprika
  • 1 1/4 teaspoons kosher salt, divided, plus more to taste
  • 1/2 teaspoon freshly ground black pepper, divided

For the Garlic Sauce

  • 3/4 cup plain Greek yogurt (180 g)
  • 1 garlic clove, finely grated
  • 1 tablespoon fresh lemon juice
  • 1 to 3 tablespoons water, as needed
  • 2 tablespoons finely chopped fresh flat-leaf parsley

Instructions

  1. Heat the oven to 425°F (220°C).
  2. Coat the chicken with 1 1/2 tablespoons olive oil, garlic powder, smoked paprika, 3/4 teaspoon salt, and 1/4 teaspoon pepper.
  3. Toss the broccoli with the remaining 1 tablespoon olive oil and 1/4 teaspoon salt. Spread it in a single layer on a rimmed sheet pan.
  4. Roast the broccoli uncovered for 16 to 20 minutes, turning once. Start checking at 15 minutes; remove it when the stems are just tender and the florets are deep green with a few browned edges.
  5. While the broccoli roasts, preheat an outdoor grill or stovetop grill pan over medium-high heat. Lightly oil the grates or pan if needed.
  6. Grill the chicken with space between the pieces, working in batches if needed, for about 5 to 7 minutes per side. Cook until marked and an instant-read thermometer reads 165°F (75°C) in the thickest part. Rest for 5 minutes.
  7. While the chicken rests, whisk together the yogurt, grated garlic, lemon juice, remaining 1/4 teaspoon salt, and remaining 1/4 teaspoon pepper. Add water 1 tablespoon at a time until the sauce falls from a spoon in thick ribbons.
  8. Warm the cooked rice if needed and divide it among four bowls. Slice the chicken and arrange it over the rice with the grill marks facing up.
  9. Arrange the broccoli alongside the chicken, leaving some rice visible. Spoon the sauce mainly over the chicken and finish with parsley.

Tips

  • Use chicken pieces of similar thickness so they finish cooking at about the same time.
  • Check chicken doneness with a thermometer rather than relying on grill marks or timing alone.
  • Give the broccoli room on the sheet pan so it browns instead of steaming.
  • Add water to the yogurt sauce gradually; yogurt thickness can vary.
  • Keep the sauce separate when preparing bowls ahead.

Variations

  • Stovetop Grill Pan: Use a stovetop grill pan instead of an outdoor grill; grill marks and cooking time may differ.
  • Chicken Thighs: Replace the chicken breasts with boneless, skinless thighs and cook to 165°F (75°C).
  • Steamed Broccoli: Steam the broccoli until bright green and crisp-tender instead of roasting it.
  • Alternate Grain: Use brown rice or another grain in place of the white rice.

Notes

Refrigerate leftovers in airtight containers for up to 4 days, storing the sauce separately. Reheat the rice, chicken, and broccoli until warmed through, then add the sauce. Chicken is done at 165°F (75°C).

Nutrition

Calories: 530 kcal | Protein: 51 g | Fat: 15 g | Carbohydrates: 49 g