Author

Julia

Browsing

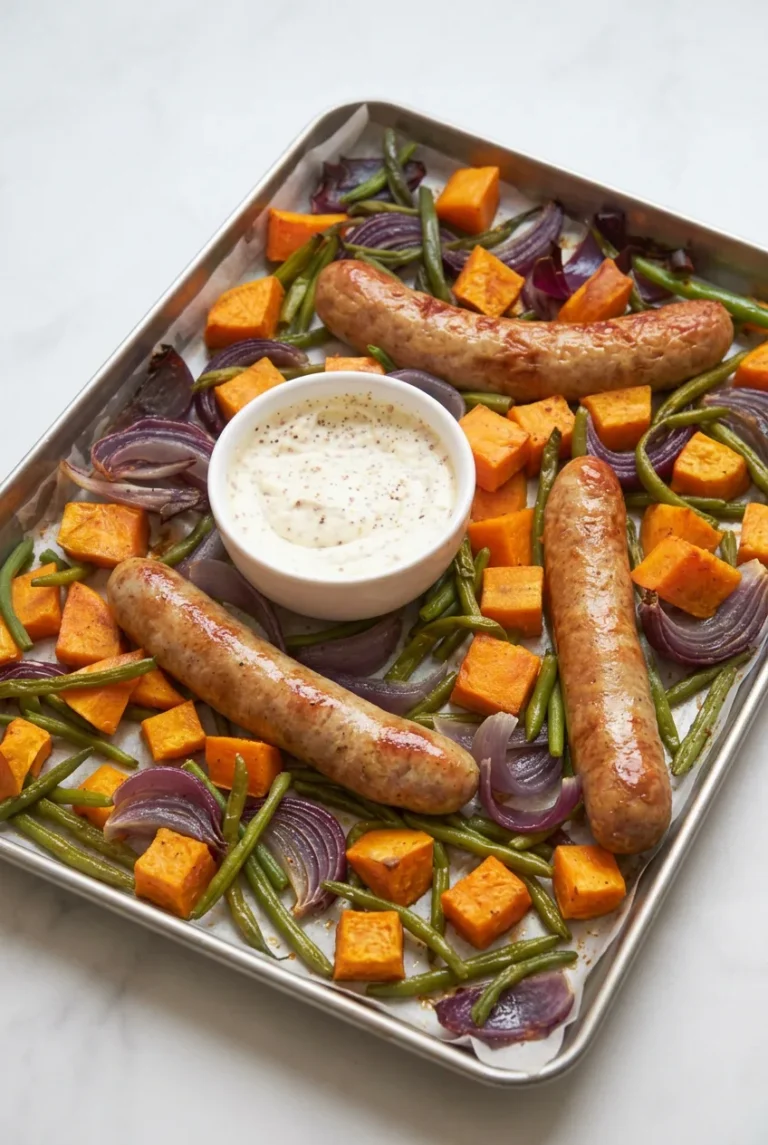
One-Pan Sausage & Sweet Potato Bake

Whole sweet Italian sausage links roast with sweet potato cubes and red onion until the links are browned and the potatoes are tender. Fresh green beans join halfway through, leaving them tender with some green color. A cool sour cream and whole-grain mustard sauce is served in a small bowl on the finished pan, not roasted with the food.

Cutting the potatoes into even 3/4-inch cubes helps them finish alongside the raw sausage. Give everything room on the pan so the vegetables can brown instead of steam.

Ingredients
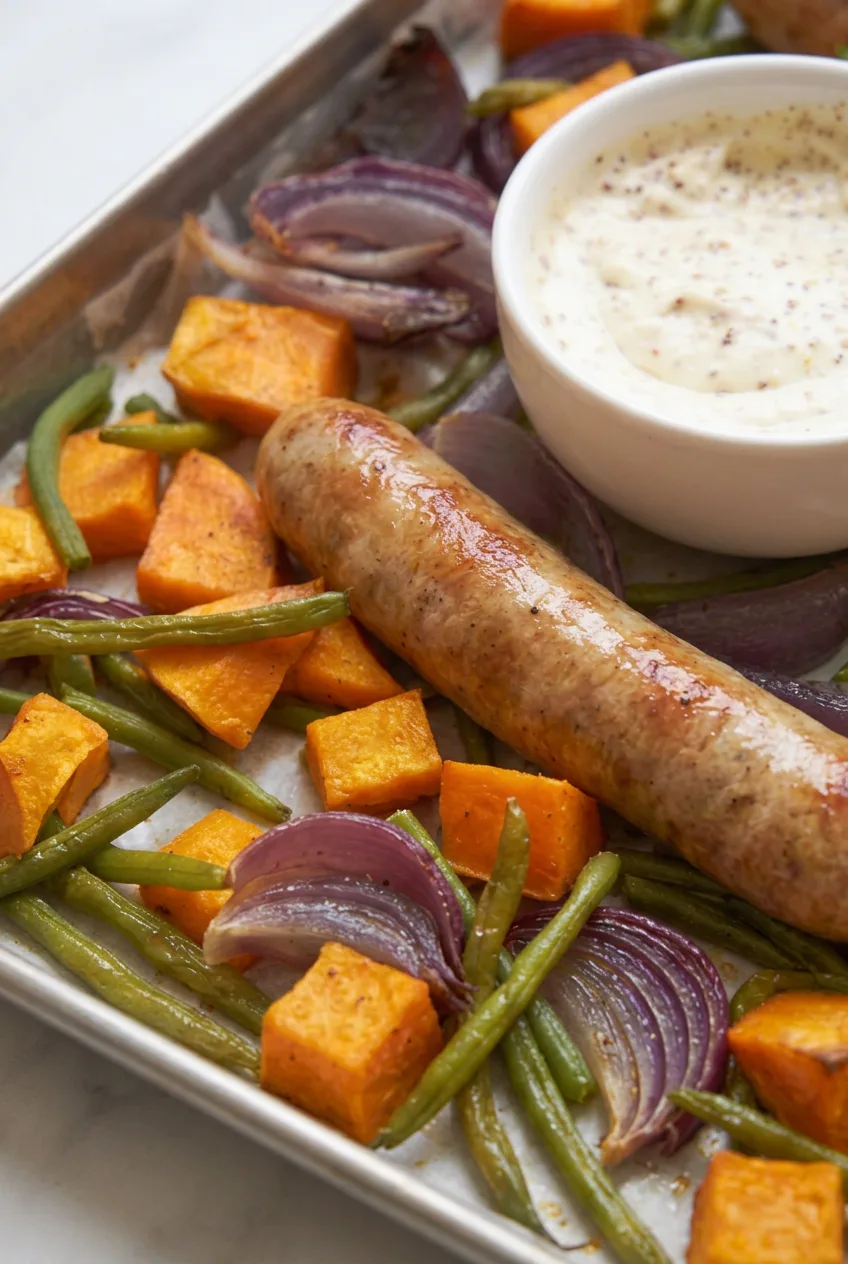
Close view of a browned whole sausage beside roasted vegetables and speckled mustard sauce

Serves 4. Prep time: 15 minutes. Cook time: about 30–35 minutes. Total time: about 45–50 minutes.

  • 4 raw sweet Italian pork sausage links, about 1 to 1 1/4 pounds total (450–565g)
  • About 1 1/4 pounds sweet potatoes, peeled and cut into 3/4-inch cubes (about 575g)
  • 10 ounces fresh green beans, trimmed and dried (about 285g)
  • 1 medium red onion, cut into thick wedges (about 180g)
  • 2 tablespoons olive oil, divided
  • 1 teaspoon garlic powder
  • 1/2 teaspoon paprika
  • 3/4 teaspoon kosher salt
  • 1/4 teaspoon black pepper, plus a pinch for the sauce
  • 1/2 cup sour cream (120g)
  • 1 tablespoon whole-grain mustard (15g)

How to Make the Sausage and Sweet Potato Bake
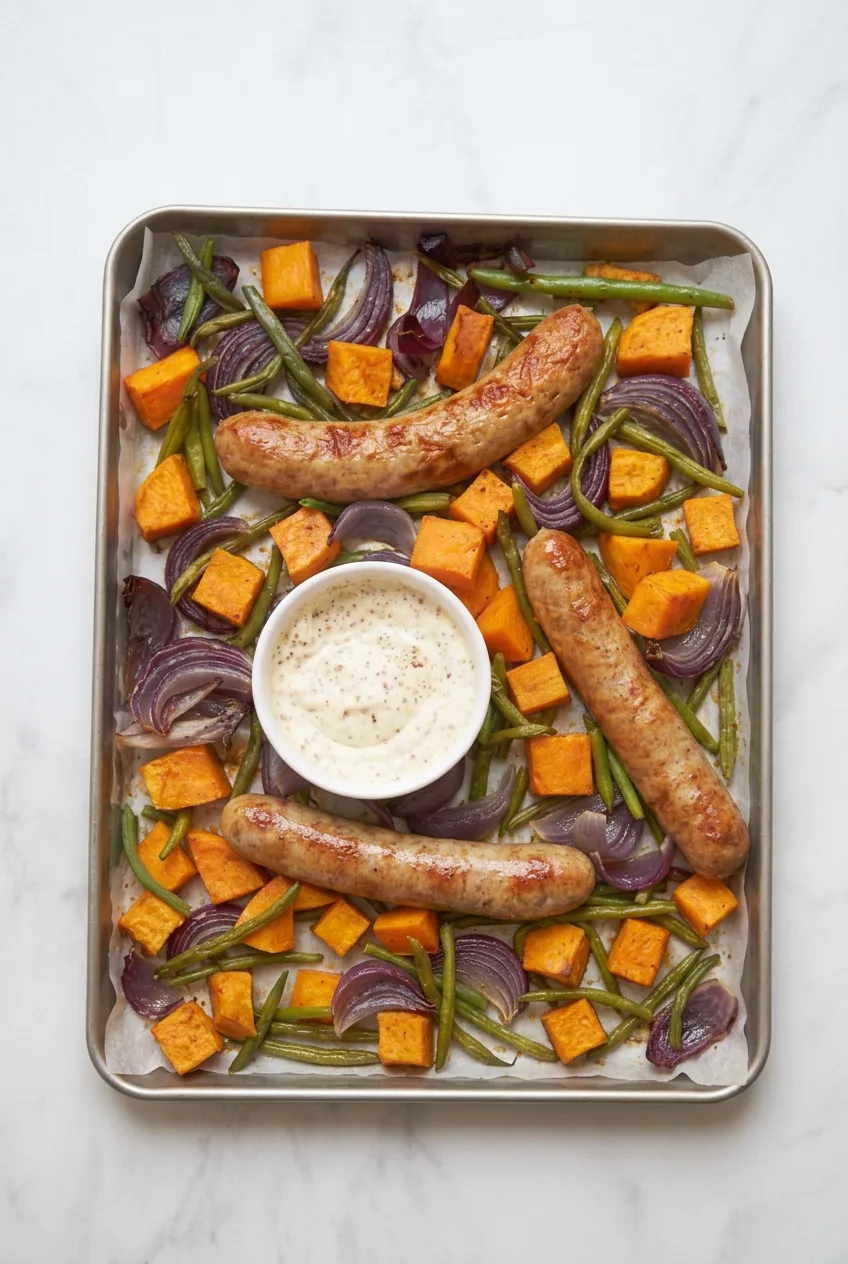
Full sheet pan of sausage, sweet potatoes, green beans and red onion with a bowl of mustard sauce
  1. Preheat the oven: Set a rack in the middle of the oven and heat to 400°F (205°C). Line a large rimmed half-sheet pan, about 18 x 13 inches, with parchment rated for that temperature.
  2. Start the roast: Toss the sweet potatoes and onion with 1 1/2 tablespoons olive oil, the garlic powder, paprika, salt, and 1/4 teaspoon black pepper. Spread them on the pan and place the whole raw sausage links among them. Keep the vegetables in a mostly single layer rather than piling them beneath the links. Roast uncovered for 15 minutes.
  3. Turn and add the beans: Turn the sausage links and stir the potatoes and onion. Toss the dry green beans with the remaining 1/2 tablespoon olive oil, then spread them into open spaces on the pan.
  4. Finish roasting: Roast for another 15–20 minutes, beginning to check at about 28 minutes total. The sweet potatoes should be fork-tender with some browned edges, the onion soft, and the beans tender with some green color remaining. Check the center of a pork sausage with an instant-read thermometer; it must reach 160°F (70°C). If the sausage finishes before the potatoes, remove the links to rest and continue roasting the vegetables until tender.
  5. Make the sauce and serve: While the pan finishes, stir the sour cream, whole-grain mustard, and a pinch of black pepper together in a small bowl. Let the sausages rest briefly after roasting. Clear a space on the finished pan and set the cold sauce bowl there for serving.

Why Add the Green Beans Halfway Through?

Raw sausage links and dense sweet potatoes need more oven time than green beans. Adding the beans after 15 minutes keeps them from spending the entire roast in the oven. Dry them first: extra moisture makes browning harder.

If the ingredients cannot fit in a mostly single layer, use a second pan or reduce the amount of vegetables. Crowding leaves moisture with nowhere to escape.

Using a Different Sausage or Frozen Beans

The method above is for raw pork links. For fully cooked chicken or smoked sausage, give the potatoes and onion a head start, then add the links long enough to heat and brown them, following the package directions. Do not use the raw-link timing unchanged.

If using raw poultry sausage, check its center for 165°F (75°C); its cooking time may differ from the pork links. Frozen green beans can be added midway, but they release more moisture and will finish softer, with less browning.

For another sweet potato dinner, try the Sweet Potato Taco Bowl with Ground Beef. For a skillet dinner, see the Lemon Garlic Shrimp and Asparagus Skillet.

Leftovers and Make-Ahead Prep

Refrigerate leftovers promptly in covered containers, keeping the sauce separate. Warm the sausage and vegetables until thoroughly hot, then add the cold sauce.

The sweet potatoes and onion can be cut ahead and refrigerated separately from the raw sausage. Dry the green beans before they go on the pan.

Nutrition

Approximate per serving, including sauce (1/4 of the recipe): 680 calories, 27g protein, 47g fat, and 41g carbohydrates. Approximate per 100g of ingredients before roasting: 155 calories, 6g protein, 11g fat, and 9g carbohydrates. Values vary with sausage size and brand and with moisture lost during roasting.

One-Pan Sausage & Sweet Potato Bake

Raw sweet Italian sausage roasts with sweet potatoes, red onion, and green beans, served with a cool sour cream and mustard sauce.
Course: Main Course
Cuisine: American
Prep: 15 min
Cook: 35 min
Total: 50 min
Servings: 4 Calories: 680 kcal

Equipment

  • Oven
  • Large rimmed half-sheet pan
  • Parchment paper
  • Instant-read thermometer
  • Small bowl

Ingredients

For the bake

  • 4 raw sweet Italian pork sausage links, about 1 to 1 1/4 pounds total (450–565 g)
  • About 1 1/4 pounds sweet potatoes, peeled and cut into 3/4-inch cubes (about 575 g)
  • 10 ounces fresh green beans, trimmed and dried (about 285 g)
  • 1 medium red onion, cut into thick wedges (about 180 g)
  • 2 tablespoons olive oil, divided
  • 1 teaspoon garlic powder
  • 1/2 teaspoon paprika
  • 3/4 teaspoon kosher salt
  • 1/4 teaspoon black pepper

For the sauce

  • 1/2 cup sour cream (120 g)
  • 1 tablespoon whole-grain mustard (15 g)
  • Pinch of black pepper

Instructions

  1. Set a rack in the middle of the oven and preheat to 400°F (205°C). Line a large rimmed half-sheet pan, about 18 x 13 inches, with parchment rated for that temperature.
  2. Toss the sweet potatoes and onion with 1 1/2 tablespoons olive oil, garlic powder, paprika, salt, and 1/4 teaspoon black pepper.
  3. Spread the vegetables in a mostly single layer on the pan and place the whole raw sausage links among them. Roast uncovered for 15 minutes.
  4. Turn the sausage links and stir the potatoes and onion.
  5. Toss the dry green beans with the remaining 1/2 tablespoon olive oil and spread them into open spaces on the pan.
  6. Roast for another 15–20 minutes, beginning to check at about 28 minutes total. Cook until the sweet potatoes are fork-tender with browned edges, the onion is soft, and the beans are tender with some green color remaining.
  7. Check the center of a pork sausage with an instant-read thermometer; it must reach 160°F (70°C). If the sausage is done before the potatoes, remove the links to rest and continue roasting the vegetables until tender.
  8. Stir the sour cream, whole-grain mustard, and a pinch of black pepper together in a small bowl.
  9. Let the sausages rest briefly, then clear a space on the finished pan and set the cold sauce bowl there for serving.

Tips

  • Cut the sweet potatoes into even 3/4-inch cubes so they cook alongside the raw sausage.
  • Give the vegetables room in a mostly single layer to help them brown rather than steam.
  • Dry the green beans before roasting; extra moisture makes browning harder.
  • Use a second pan or reduce the vegetables if everything will not fit without crowding.

Variations

  • Fully Cooked Chicken or Smoked Sausage: Give the potatoes and onion a head start, then add the links long enough to heat and brown them, following package directions.
  • Raw Poultry Sausage: Check the center for 165°F (75°C); cooking time may differ from pork sausage.
  • Frozen Green Beans: Add them midway through roasting; they release more moisture and finish softer with less browning.
Notes

Refrigerate leftovers promptly in covered containers, keeping the sauce separate. Reheat the sausage and vegetables until thoroughly hot, then add the cold sauce. Approximate nutrition per 100 g before roasting: 155 calories, 6 g protein, 11 g fat, and 9 g carbohydrates.

Nutrition

Calories: 680 kcal | Protein: 27 g | Fat: 47 g | Carbohydrates: 41 g

Sheet Pan Chicken Pitas

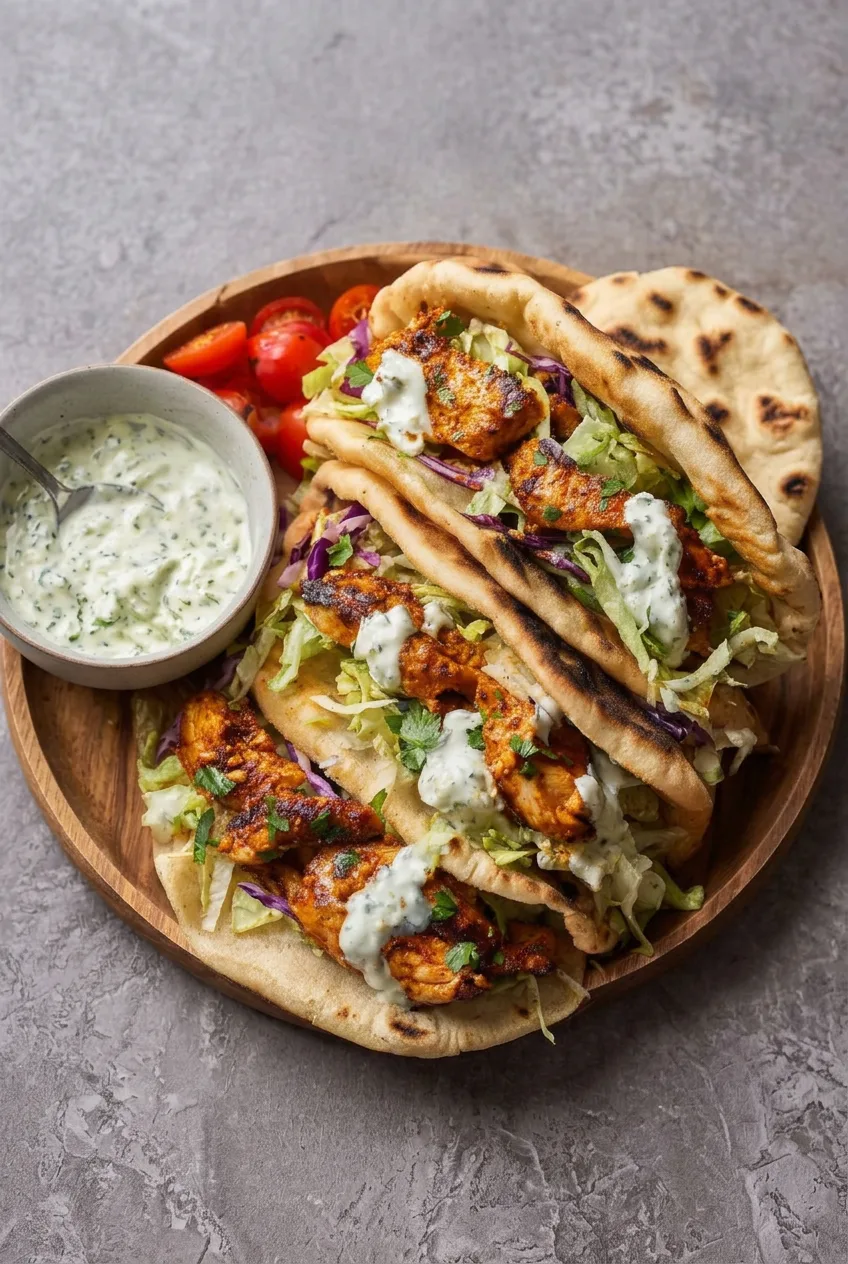
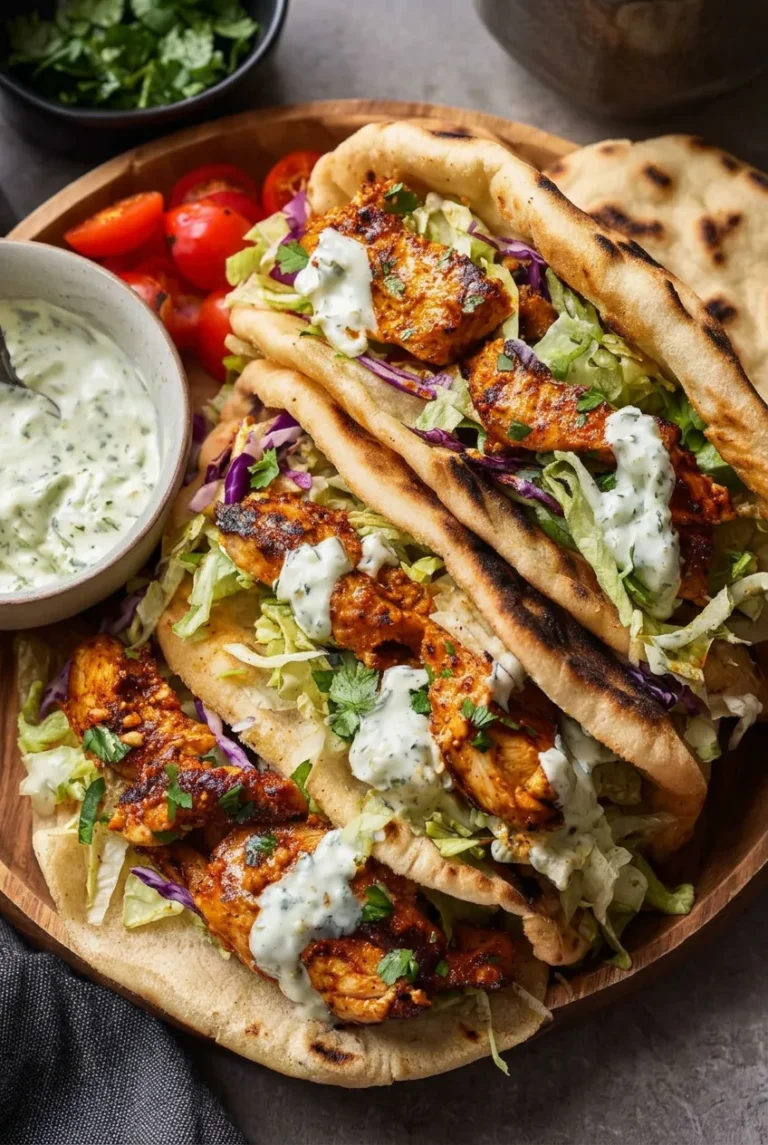
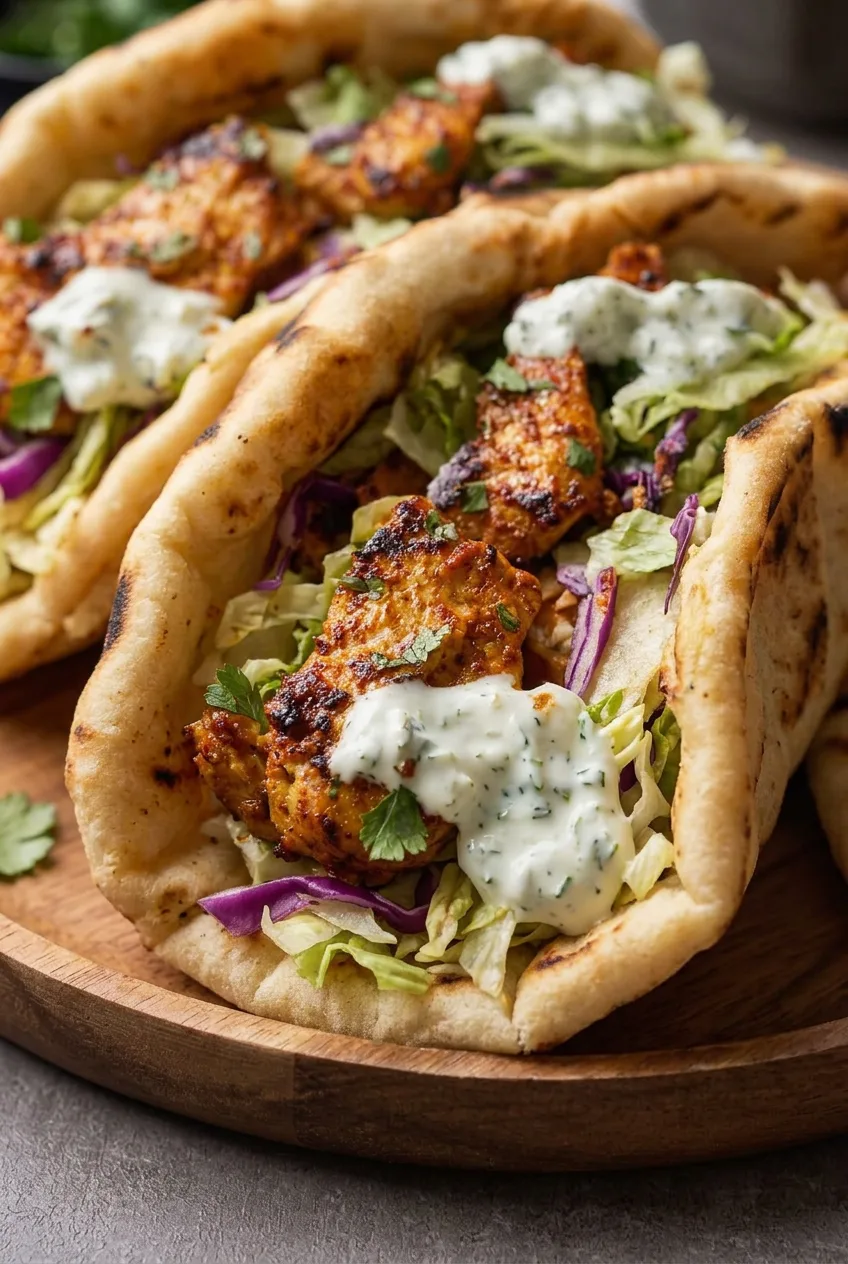
Smoky-spiced chicken roasts until it has browned edges, then goes into warm, folded pitas with shredded lettuce and purple cabbage. A thick lemon-herb yogurt mixture lightly dresses the cabbage, while the rest stays in distinct dollops over the filling.

Spread the chicken out so it browns rather than steams, and check its temperature when you toss it partway through roasting. There’s no need to marinate it first. This recipe makes 4 generously filled pitas in about 40 to 45 minutes.

Ingredients for Sheet Pan Chicken Pitas

Close view of browned chicken, purple cabbage, lettuce, and thick herb yogurt in a folded pita
  • 1 1/2 lb boneless, skinless chicken breasts, cut into roughly 1-inch pieces (680g)
  • 2 tablespoons plus 1 teaspoon olive oil, divided
  • 1 tablespoon light brown sugar (about 15g)
  • 2 teaspoons smoked paprika
  • 1 teaspoon garlic powder
  • 1 teaspoon onion powder
  • 1/8 teaspoon cayenne pepper
  • 1 1/4 teaspoons kosher salt, divided
  • 1 large lemon, for about 2 tablespoons juice and a few thin slices
  • 3/4 cup plain Greek yogurt (170g)
  • 1 tablespoon chopped fresh dill
  • 2 tablespoons chopped fresh parsley, divided
  • 1 cup finely shredded red cabbage (70g)
  • 3 cups finely shredded lettuce (110g)
  • 4 large pita breads

Use thick Greek yogurt so the finishing sauce holds its shape. If substituting regular plain yogurt, drain it first if it is thin. Adjust the salt if using a type other than kosher salt.

How to Make Sheet Pan Chicken Pitas

Wider view of four filled sheet pan chicken pitas on a round wooden board
  1. Season the chicken: Fully preheat the oven to 425°F (220°C). Toss the chicken with 2 tablespoons olive oil, the brown sugar, smoked paprika, garlic powder, onion powder, cayenne, and 1 teaspoon kosher salt until evenly coated.
  2. Roast: Spread the chicken in one uncrowded layer on a large rimmed sheet pan. Place a few thin lemon slices alongside the pieces, not underneath them. Roast uncovered for about 15 minutes, then toss and check the thickest pieces with an instant-read thermometer. Roast for another 4 to 7 minutes as needed, stopping when the chicken has browned patches and the thickest piece reaches 165°F (75°C).
  3. Mix the yogurt sauce: While the chicken roasts, stir together the yogurt, about 2 tablespoons lemon juice, the remaining 1 teaspoon olive oil, dill, most of the parsley, and the remaining 1/4 teaspoon salt. Reserve roughly half the sauce for topping the pitas.
  4. Dress the cabbage: Toss the cabbage with just enough of the unreserved yogurt mixture to coat it lightly. Let stand for 10 to 15 minutes while the chicken cooks. Keep the lettuce separate and dry.
  5. Toast the pitas: Warm each pita in a dry skillet over medium to medium-high heat for about 30 to 60 seconds per side, until pliable with scattered brown spots.
  6. Fill and serve: Fold the warm pitas around the lettuce, dressed cabbage, and chicken, leaving the filling visible along the open sides. Dollop with the reserved yogurt sauce, scatter over the remaining parsley, and serve promptly.

How to Brown the Chicken Without Drying It Out

Leave room around most pieces so moisture can escape from the pan. If the chicken will not fit in one layer, use two rimmed sheet pans rather than crowding one. Cut the pieces to a similar size so they finish cooking at about the same time.

The sugar and paprika can darken at the edges before every surface browns. Begin checking at the 15-minute toss—smaller pieces may already be done—and stop cooking when the thickest piece reaches 165°F. Color alone is not a reliable doneness test, and extra roasting can dry out cooked chicken.

Keep the Cabbage Crunchy and the Sauce Thick

The cabbage needs only a light coating of yogurt and a short rest. If dressing collects beneath it, leave the excess behind when filling the pitas. Add the dry lettuce and reserved sauce just before serving so the bread stays pliable rather than soggy.

Make-Ahead and Leftovers

You can refrigerate the seasoned chicken for a few hours before roasting, though marinating is optional. The yogurt mixture and shredded vegetables can also be prepared ahead; dress the cabbage shortly before serving.

Refrigerate cooked chicken and yogurt sauce in separate airtight containers for up to 3 to 4 days. Keep the lettuce separate and dry, and use dressed cabbage within 1 to 2 days. Reheat the chicken until hot throughout and warm the pita separately, then add the cold vegetables and sauce. Assembled pitas are best eaten right away.

If freezing leftovers, freeze the cooked chicken alone. Thaw it safely and reheat before adding fresh pita, vegetables, and sauce; do not freeze assembled pitas or yogurt slaw.

Nutrition

Approximate nutrition per pita, based on 4 servings: 550 calories, 50g protein, 16g fat, and 50g carbohydrates. Approximate values per 100g of finished food: 180 calories, 16g protein, 5g fat, and 16g carbohydrates. Values will vary with pita size, yogurt, and the weight of the cooked chicken.

Sheet Pan Chicken Pitas

Smoky roasted chicken is folded into warm pitas with lettuce, lightly dressed red cabbage, and lemon-herb yogurt sauce.
Course: Main Course
Cuisine: Mediterranean
Prep: 20 min
Cook: 25 min
Total: 45 min
Servings: 4 Calories: 550 kcal

Equipment

  • Rimmed sheet pan
  • Instant-read thermometer
  • Mixing bowl
  • Skillet

Ingredients

For the Chicken

  • 1 1/2 lb boneless, skinless chicken breasts, cut into roughly 1-inch pieces (680 g)
  • 2 tablespoons olive oil
  • 1 tablespoon light brown sugar (about 15 g)
  • 2 teaspoons smoked paprika
  • 1 teaspoon garlic powder
  • 1 teaspoon onion powder
  • 1/8 teaspoon cayenne pepper
  • 1 teaspoon kosher salt
  • A few thin lemon slices

For the Yogurt Sauce and Cabbage

  • 3/4 cup plain Greek yogurt (170 g)
  • 1 large lemon, for about 2 tablespoons juice and a few thin slices
  • 1 teaspoon olive oil
  • 1 tablespoon chopped fresh dill
  • 2 tablespoons chopped fresh parsley, divided
  • 1/4 teaspoon kosher salt
  • 1 cup finely shredded red cabbage (70 g)

For Serving

  • 3 cups finely shredded lettuce (110 g)
  • 4 large pita breads

Instructions

  1. Fully preheat the oven to 425°F (220°C).
  2. Toss the chicken with 2 tablespoons olive oil, brown sugar, smoked paprika, garlic powder, onion powder, cayenne, and 1 teaspoon kosher salt until evenly coated.
  3. Spread the chicken in one uncrowded layer on a large rimmed sheet pan. Place a few thin lemon slices alongside the chicken, not underneath it.
  4. Roast uncovered for about 15 minutes. Toss the chicken and check the thickest pieces with an instant-read thermometer.
  5. Roast for another 4 to 7 minutes as needed, until the chicken has browned patches and the thickest piece reaches 165°F (75°C).
  6. While the chicken roasts, stir together the yogurt, about 2 tablespoons lemon juice, the remaining 1 teaspoon olive oil, dill, most of the parsley, and the remaining 1/4 teaspoon salt. Reserve roughly half the sauce for topping.
  7. Toss the cabbage with just enough of the remaining yogurt mixture to coat it lightly. Let it stand for 10 to 15 minutes while the chicken cooks. Keep the lettuce separate and dry.
  8. Warm each pita in a dry skillet over medium to medium-high heat for about 30 to 60 seconds per side, until pliable with scattered brown spots.
  9. Fill the warm pitas with lettuce, dressed cabbage, and chicken. Dollop with the reserved yogurt sauce, scatter over the remaining parsley, and serve promptly.

Tips

  • Leave space around the chicken so it browns instead of steaming; use two sheet pans if needed.
  • Cut the chicken into similarly sized pieces so they cook evenly.
  • Start checking for doneness at the 15-minute toss; smaller pieces may be ready sooner.
  • Use thick Greek yogurt so the sauce holds its shape. Drain regular yogurt first if it is thin.
  • Keep the lettuce dry and add it and the reserved sauce just before serving to help keep the pita pliable.

Notes

Refrigerate cooked chicken and yogurt sauce separately for 3 to 4 days; use dressed cabbage within 1 to 2 days. Reheat chicken until hot throughout. Freeze cooked chicken alone, not assembled pitas or yogurt slaw.

Nutrition

Calories: 550 kcal | Protein: 50 g | Fat: 16 g | Carbohydrates: 50 g

Ground Beef Zucchini Bake

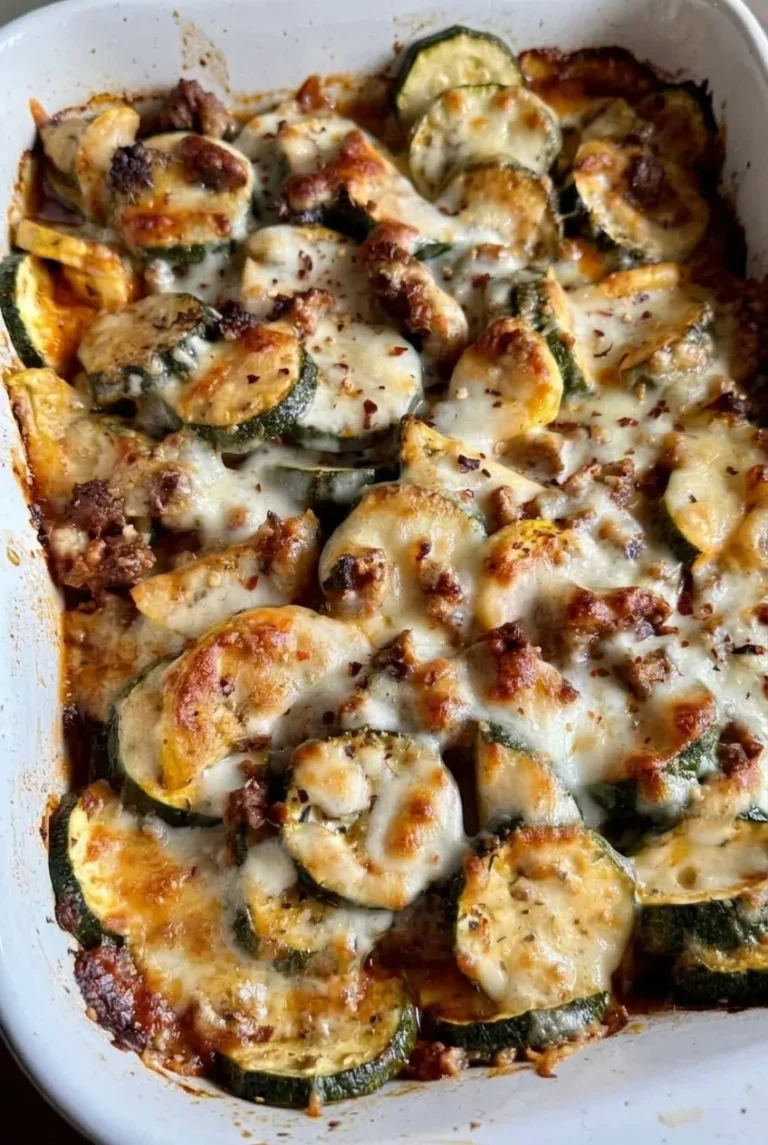
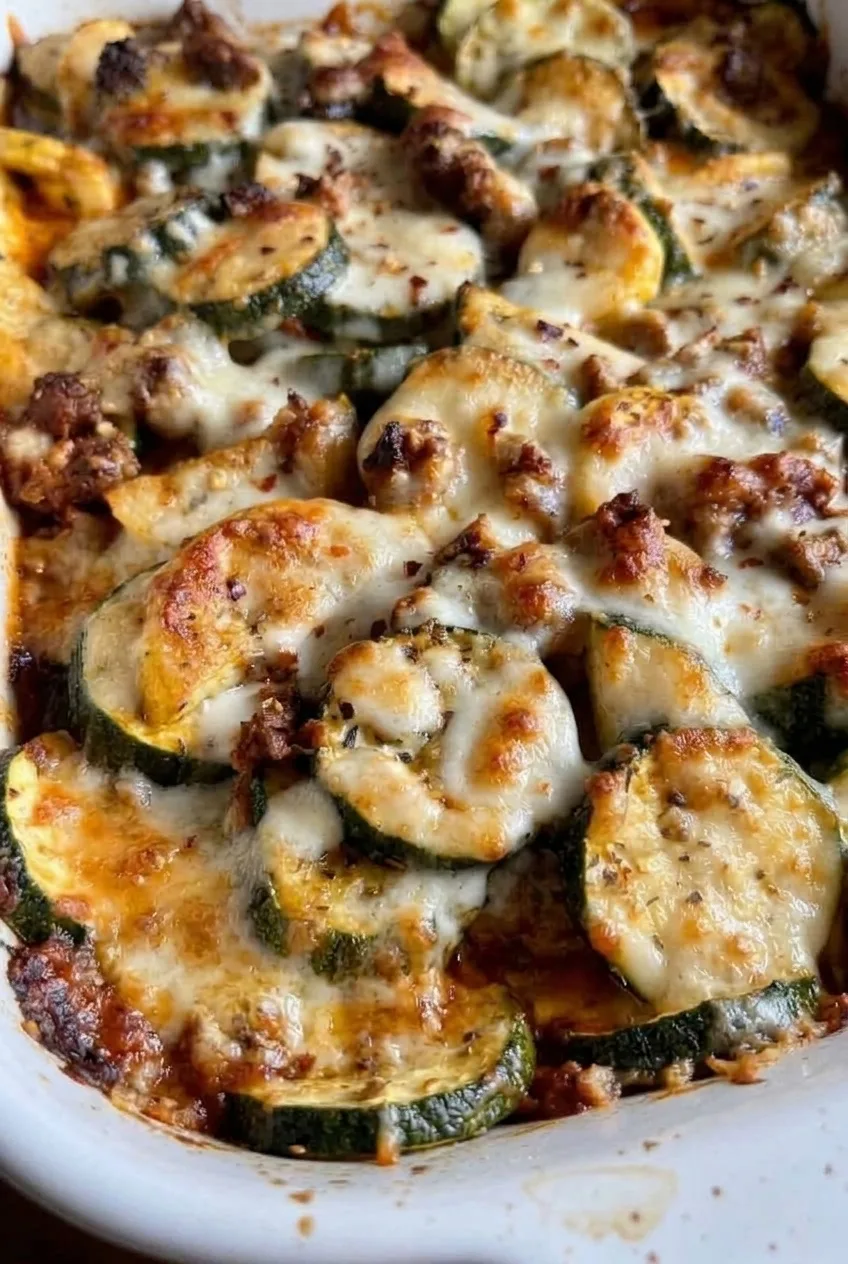
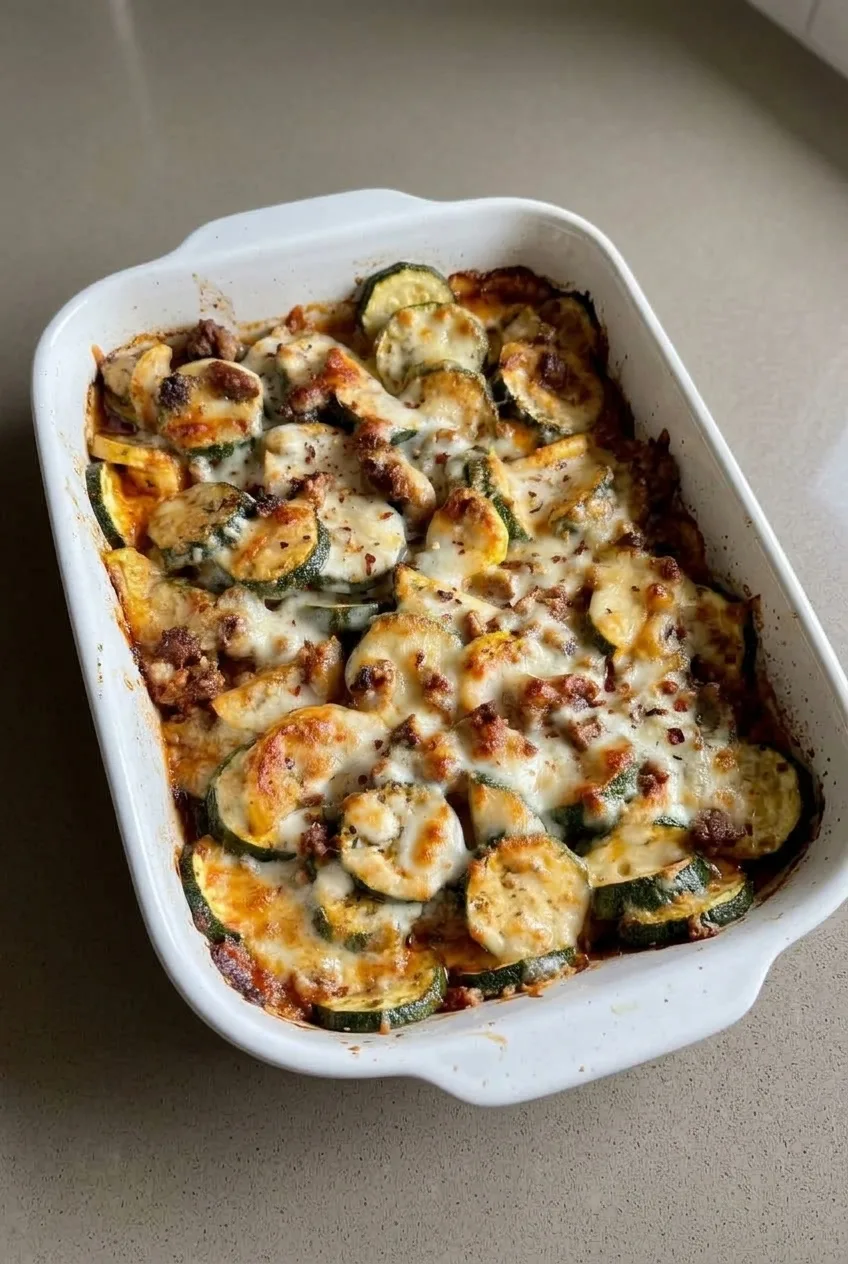
Thick zucchini rounds and crumbled beef show through pockets of bubbly, browned mozzarella in this rustic bake. The layers are loose, so serve it by the spoonful rather than expecting tidy lasagna-style squares.

To keep the filling from turning soupy, salt and dry the zucchini, drain the tomatoes, and cook the beef filling before it goes into the oven. A compact baking dish gives the rounds room to overlap while leaving plenty visible on top.

Ingredients for Ground Beef Zucchini Bake

Close view of zucchini rounds, beef crumbles, and bubbly mozzarella in the bake

Serves 4–6.

  • 2 medium zucchini, about 1 lb total (450g), cut into approximately 1/2-inch rounds
  • 3/4 teaspoon kosher salt, divided
  • 1 tablespoon olive oil, plus a little for the baking dish
  • 1 lb lean ground beef (450g)
  • 1 small onion, diced (about 1/2 cup)
  • 2 garlic cloves, minced
  • 1 can (14.5 oz) petite diced tomatoes, thoroughly drained
  • 1 teaspoon Italian seasoning
  • 1/4 teaspoon black pepper
  • 1 1/2 cups shredded mozzarella (about 6 oz or 170g)
  • Small pinch of red pepper flakes, optional

How to Make Ground Beef Zucchini Bake

Complete white baking dish of ground beef zucchini bake on a neutral countertop
  1. Salt the zucchini: Toss the rounds with 1/2 teaspoon kosher salt. Let stand in a colander for 15–20 minutes while you prepare the filling, then pat them thoroughly dry.
  2. Prepare the oven and dish: Preheat the oven to 350°F (175°C). Lightly oil an 8-inch square baking dish. Drain the diced tomatoes until little free liquid remains.
  3. Cook the filling: Heat 1 tablespoon olive oil in a large skillet over medium heat. Add the onion and ground beef. Cook, stirring and breaking up the meat, until no pink remains. Drain any visible excess grease. Stir in the garlic, tomatoes, Italian seasoning, remaining 1/4 teaspoon salt, and black pepper. Cook briefly, until the tomatoes cling to the beef without liquid pooling in the skillet. Allow about 10–15 minutes for the skillet stage.
  4. Assemble the bake: Spread half the beef mixture in the dish. Add overlapping zucchini rounds and scatter with some mozzarella. Repeat with the remaining beef, zucchini, and cheese, arranging the top loosely so several rounds and bits of beef remain visible.
  5. Bake uncovered: Start checking at 20 minutes; the bake usually takes 20–25 minutes, though it may need about 5 minutes more. It is ready when a zucchini round is tender when pierced but still holds its shape, the edges are bubbling, and the mozzarella has scattered golden-brown spots. If the cheese is pale at 25 minutes, check the zucchini and bubbling edges before giving it more time.
  6. Rest and serve: Let stand for 10 minutes so the bubbling filling can settle. Add red pepper flakes if desired, then spoon portions from the dish.

How to Keep the Zucchini Bake from Getting Watery

Salting draws moisture to the surface of the zucchini; blotting the rounds removes it before assembly. Drained tomatoes and beef filling with no pooled liquid help prevent excess moisture in the dish. The finished bake will still be spoonable rather than firm and dry. Letting it rest for 10 minutes makes serving less messy.

Pan Size and the Cheesy Top

An 8-inch square dish gives the loose layers enough depth for zucchini and beef to show between pockets of melted cheese. Scatter the mozzarella rather than pressing it into a solid blanket over the rounds.

A 9-by-13-inch dish makes a shallower bake that may finish sooner. Check it earlier, using tender zucchini and bubbling edges—not the clock alone—to judge doneness.

Substitutions

Ground turkey can replace the beef; cook it thoroughly in the skillet before assembling. For a saucier bake, use a modest amount of marinara instead of the drained tomatoes. A full jar is not an equal swap and may leave too much liquid in the dish.

Serving, Storing, and Reheating

Serve on its own or with a green salad or roasted broccoli. For another vegetable-forward ground beef dinner, try Egg Roll in a Bowl with Ground Beef and Cabbage. The Sweet Potato Burger Bowl with Ground Beef offers a different take on ground beef.

Refrigerate cooled leftovers in an airtight container for 3–4 days. Microwave individual portions until warmed through; prolonged heating will soften the zucchini further. Freezing is not recommended for the best texture because zucchini can become watery after thawing.

Nutrition

Approximate nutrition per serving, based on 5 servings: 320 calories, 30g protein, 19g fat, and 9g carbohydrates. Estimated per 100g: 140 calories, 13g protein, 8g fat, and 4g carbohydrates. Values vary with the beef and mozzarella used, how much grease is drained, and the finished weight of the bake.

Ground Beef Zucchini Bake

Zucchini rounds, seasoned ground beef, and mozzarella bake together in a spoonable casserole.
Course: Main Course
Cuisine: American
Prep: 20 min
Cook: 40 min
Total: 70 min
Servings: 5 Calories: 320 kcal

Equipment

  • Colander
  • 8-inch square baking dish
  • Large skillet

Ingredients

For the Bake

  • 2 medium zucchini, about 1 lb (450g) total, cut into approximately 1/2-inch rounds
  • 3/4 teaspoon kosher salt, divided
  • 1 tablespoon olive oil, plus a little for the baking dish
  • 1 lb lean ground beef (450g)
  • 1 small onion, diced (about 1/2 cup)
  • 2 garlic cloves, minced
  • 1 can (14.5 oz) petite diced tomatoes, thoroughly drained
  • 1 teaspoon Italian seasoning
  • 1/4 teaspoon black pepper
  • 1 1/2 cups shredded mozzarella (about 6 oz or 170g)
  • Small pinch of red pepper flakes, optional

Instructions

  1. Toss the zucchini rounds with 1/2 teaspoon kosher salt. Place them in a colander for 15–20 minutes, then pat thoroughly dry.
  2. Preheat the oven to 350°F (175°C). Lightly oil an 8-inch square baking dish.
  3. Drain the diced tomatoes until little free liquid remains.
  4. Heat 1 tablespoon olive oil in a large skillet over medium heat. Add the onion and ground beef and cook, breaking up the meat, until no pink remains.
  5. Drain any visible excess grease. Stir in the garlic, drained tomatoes, Italian seasoning, remaining 1/4 teaspoon salt, and black pepper.
  6. Cook briefly until the tomatoes cling to the beef and no liquid pools in the skillet, about 10–15 minutes total for the skillet stage.
  7. Spread half the beef mixture in the baking dish. Add overlapping zucchini rounds and scatter with some mozzarella. Repeat with the remaining beef, zucchini, and cheese, leaving some rounds and beef visible on top.
  8. Bake uncovered, starting to check at 20 minutes. Bake for about 20–25 minutes, or up to 5 minutes longer if needed, until the zucchini is tender but holds its shape, the edges bubble, and the mozzarella has golden-brown spots.
  9. Let stand for 10 minutes. Add red pepper flakes if desired, then serve by the spoonful.

Tips

  • Salt and thoroughly dry the zucchini before assembling to help limit excess moisture.
  • Drain the tomatoes well and cook the beef mixture until no liquid pools in the skillet.
  • Scatter the mozzarella rather than covering the zucchini in a solid layer.
  • For a 9-by-13-inch dish, check for doneness earlier because the shallower bake may finish sooner.
  • Judge doneness by tender zucchini and bubbling edges, not the clock alone.

Variations

  • Ground Turkey Zucchini Bake: Replace the ground beef with ground turkey and cook it thoroughly in the skillet before assembling.
  • Saucier Zucchini Bake: Use a modest amount of marinara instead of the drained tomatoes; avoid adding a full jar, which may make the bake too wet.

Notes

Refrigerate cooled leftovers in an airtight container for 3–4 days. Microwave individual portions until warmed through; prolonged heating softens the zucchini. Freezing is not recommended because the zucchini can become watery after thawing.

Nutrition

Calories: 320 kcal | Protein: 30 g | Fat: 19 g | Carbohydrates: 9 g

Sweet Potato Taco Bowl with Ground Beef

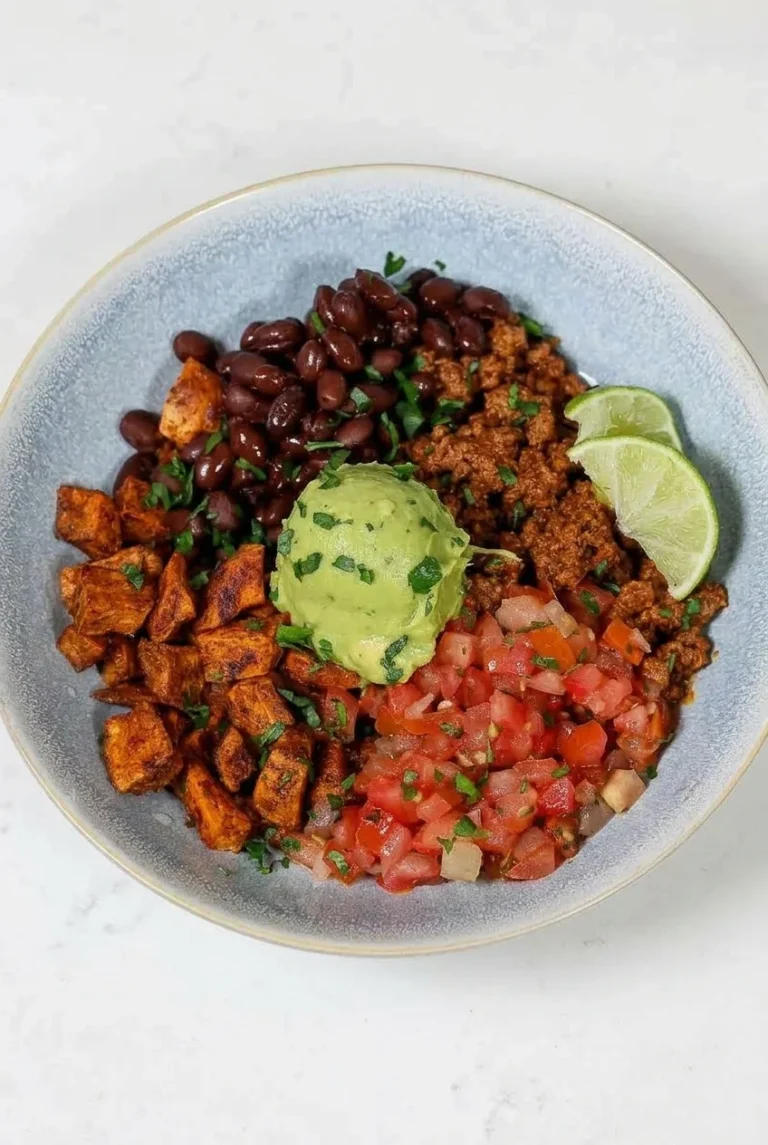
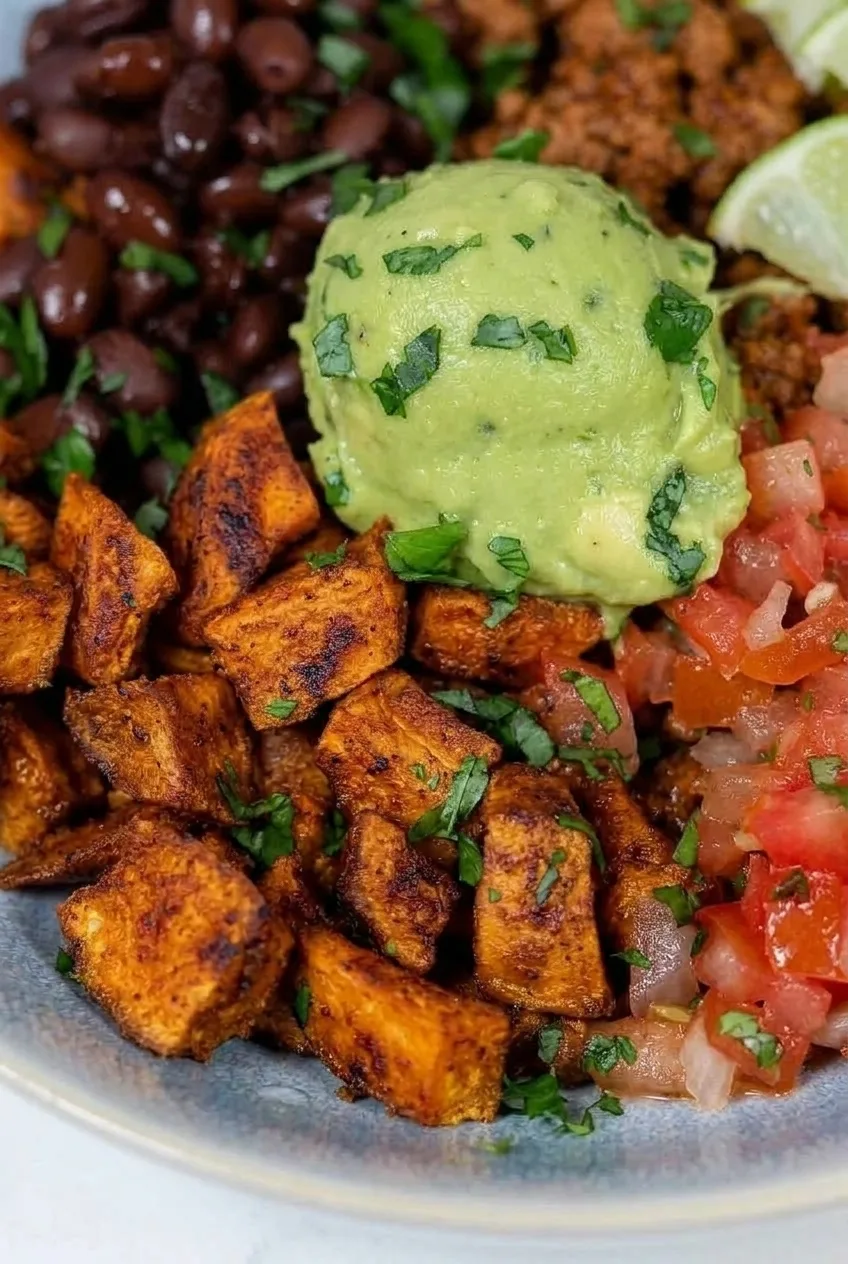
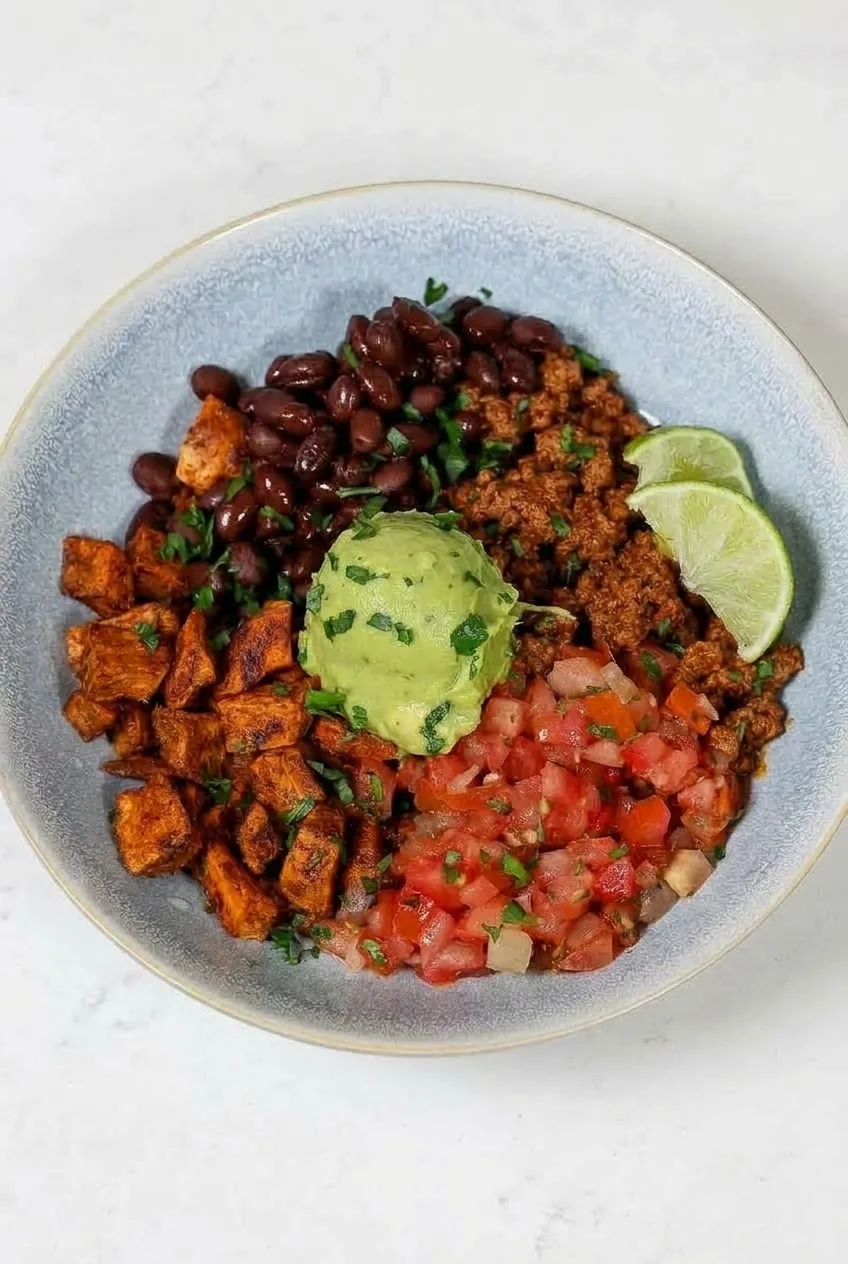
Roasted sweet potato cubes and taco-seasoned ground beef form the warm base of these bowls. Black beans and pico de gallo sit alongside them in separate sections, with a scoop of mashed avocado in the center and cilantro and lime to finish.

Roast the potatoes while the beef cooks in a skillet. Give the potato cubes room to brown, and add just enough water to the seasoned beef to keep the crumbles moist without making them saucy.

Yield: 4 bowls | Prep: 15–20 minutes | Cook: 25–30 minutes | Total: about 40–50 minutes

Ingredients

Close view of browned sweet potatoes, beef crumbles, black beans, pico de gallo, and mashed avocado
  • 1 1/2 lb sweet potatoes (680g), peeled and cut into approximately 3/4-inch cubes
  • 1 1/2 tablespoons olive oil
  • 2 teaspoons chili powder, divided
  • 1 teaspoon ground cumin, divided
  • 1 teaspoon garlic powder, divided
  • 1 teaspoon smoked paprika, divided
  • 1 teaspoon kosher salt, divided, plus a pinch for the avocado and more to taste
  • 1 lb lean ground beef (450g)
  • 2 tablespoons water
  • 1 can (15 oz) black beans, drained and rinsed
  • 1 cup pico de gallo (about 240g)
  • 2 medium ripe avocados
  • 2 limes, cut into wedges
  • 1/4 cup chopped fresh cilantro

How to Make Sweet Potato Taco Bowls

Full sweet potato taco bowl with ground beef, beans, pico, avocado, cilantro, and lime on a light surface
  1. Season the potatoes: Preheat the oven to 425°F (220°C). Toss the sweet potatoes with the olive oil, 1 teaspoon chili powder, and 1/2 teaspoon each of the cumin, garlic powder, smoked paprika, and salt.
  2. Roast: Spread the potatoes in one layer on a large rimmed sheet pan; use a second pan if needed to avoid crowding. Roast uncovered, turning about halfway through. Start checking at 20 minutes. The cubes will usually be fork-tender with browned edges after 25–30 minutes.
  3. Brown the beef: While the potatoes roast, cook the ground beef in a 10- to 12-inch skillet over medium-high heat, breaking it into small crumbles. Cook until browned and cooked through, about 8–12 minutes. Lean beef usually needs no added oil, but add a teaspoon if it sticks. Drain excess fat if needed.
  4. Season the beef: Reduce the heat to medium-low. Add the remaining chili powder, cumin, garlic powder, smoked paprika, and salt with the 2 tablespoons water. Stir uncovered until the spices coat the beef and no liquid pools in the skillet. The crumbles should be moist, not soupy. Ground beef should reach 160°F (70°C) if checked with a food thermometer.
  5. Prepare the toppings: Gently warm the beans in a microwave-safe bowl or in the emptied beef skillet, keeping them separate from the beef. Mash the avocados with juice from one lime wedge and a pinch of salt, leaving them thick enough to scoop. Drain excess liquid from the pico de gallo.
  6. Assemble: Divide the potatoes, beans, beef, and pico among four wide, shallow bowls, placing each in its own section. Add a rounded scoop of avocado near the center, scatter with cilantro, and serve with the remaining lime wedges.

How to Get Browned Sweet Potatoes

Cut the potatoes into similarly sized 3/4-inch cubes so they finish at about the same time. If they are piled together, trapped moisture will leave them tender but pale. Spread them out and use browned edges and fork-tender centers—not the clock alone—to judge when they are done.

Air-fryer option: Cook the potato cubes at 400°F (205°C) for about 12–15 minutes, shaking halfway through. Work in uncrowded batches and check for tenderness and browning; a full four-serving batch may not fit in one basket.

For a different topping direction, try this Mexican street corn sweet potato bowl.

Meal Prep and Reheating

Let the cooked components cool briefly, then refrigerate the potatoes, beef, and beans in airtight containers for up to 3–4 days. Keep the pico separate and use it within about 2–3 days. Prepare the avocado near serving when practical.

Reheat the cooked components until hot in the microwave, then add the pico, avocado, cilantro, and lime. For better potato texture, reheat the potatoes in a skillet over medium heat or briefly in an air fryer. They may be softer than when freshly roasted, especially after microwaving.

Cooked beef can be frozen for about 2–3 months. Sweet potatoes may soften after freezing, so fresh-roasted potatoes are preferable for these bowls. Do not freeze assembled bowls with the fresh toppings.

For a different way to pair sweet potatoes and ground beef, see the sweet potato burger bowl with ground beef.

Nutrition

Approximate per bowl (1 of 4): 600 calories, 31g protein, 28g fat, and 56g carbohydrates. Approximate per 100g of finished bowl: 130 calories, 7g protein, 6g fat, and 12g carbohydrates. Values will vary with beef leanness, bean draining, avocado size, and finished bowl weight.

Sweet Potato Taco Bowl with Ground Beef

Roasted sweet potatoes, taco-seasoned ground beef, black beans, pico de gallo, and mashed avocado are served in separate sections with cilantro and lime.
Course: Main Course
Cuisine: Mexican
Prep: 20 min
Cook: 30 min
Total: 50 min
Servings: 4 Calories: 600 kcal

Equipment

  • Oven
  • Large rimmed sheet pan
  • 10- to 12-inch skillet
  • Microwave-safe bowl

Ingredients

For the bowls

  • 1 1/2 lb sweet potatoes (680g), peeled and cut into approximately 3/4-inch cubes
  • 1 1/2 tablespoons olive oil
  • 2 teaspoons chili powder, divided
  • 1 teaspoon ground cumin, divided
  • 1 teaspoon garlic powder, divided
  • 1 teaspoon smoked paprika, divided
  • 1 teaspoon kosher salt, divided, plus a pinch for the avocado and more to taste
  • 1 lb lean ground beef (450g)
  • 2 tablespoons water
  • 1 can (15 oz) black beans, drained and rinsed
  • 1 cup pico de gallo (about 240g)
  • 2 medium ripe avocados
  • 2 limes, cut into wedges
  • 1/4 cup chopped fresh cilantro

Instructions

  1. Preheat the oven to 425°F (220°C).
  2. Toss the sweet potatoes with the olive oil, 1 teaspoon chili powder, and 1/2 teaspoon each of the cumin, garlic powder, smoked paprika, and salt.
  3. Spread the potatoes in a single layer on a large rimmed sheet pan, using a second pan if needed. Roast uncovered, turning about halfway through, until fork-tender with browned edges, usually 25–30 minutes. Start checking at 20 minutes.
  4. While the potatoes roast, cook the ground beef in a 10- to 12-inch skillet over medium-high heat, breaking it into small crumbles, until browned and cooked through, about 8–12 minutes. Add a teaspoon of oil if it sticks, and drain excess fat if needed.
  5. Reduce the heat to medium-low. Add the remaining chili powder, cumin, garlic powder, smoked paprika, and salt along with the water. Stir uncovered until the spices coat the beef and no liquid pools in the skillet. Check that the beef reaches 160°F (70°C).
  6. Warm the beans in a microwave-safe bowl or in the emptied skillet, keeping them separate from the beef.
  7. Mash the avocados with the juice from one lime wedge and a pinch of salt, keeping the mixture thick enough to scoop. Drain excess liquid from the pico de gallo.
  8. Divide the potatoes, beans, beef, and pico among four wide, shallow bowls, placing each in its own section. Add a rounded scoop of avocado near the center, scatter with cilantro, and serve with the remaining lime wedges.

Tips

  • Cut the sweet potatoes into similarly sized 3/4-inch cubes so they cook evenly.
  • Spread the potatoes out and use a second pan if needed; crowding traps moisture and can prevent browning.
  • Judge the potatoes by their browned edges and fork-tender centers, not the clock alone.
  • Add only enough water to coat the beef with seasoning; the crumbles should be moist, not soupy.
  • Drain excess liquid from the pico de gallo before assembling the bowls.

Variations

  • Air-Fryer Sweet Potatoes: Cook the potato cubes at 400°F (205°C) for about 12–15 minutes, shaking halfway through. Work in uncrowded batches and check for tenderness and browning.

Notes

Refrigerate the potatoes, beef, and beans in airtight containers for up to 3–4 days; keep pico separate and use within about 2–3 days. Prepare avocado near serving. Reheat cooked components until hot. Cooked beef can be frozen for 2–3 months; do not freeze assembled bowls with fresh toppings.

Nutrition

Calories: 600 kcal | Protein: 31 g | Fat: 28 g | Carbohydrates: 56 g

Mexican Street Corn Sweet Potato Bowl

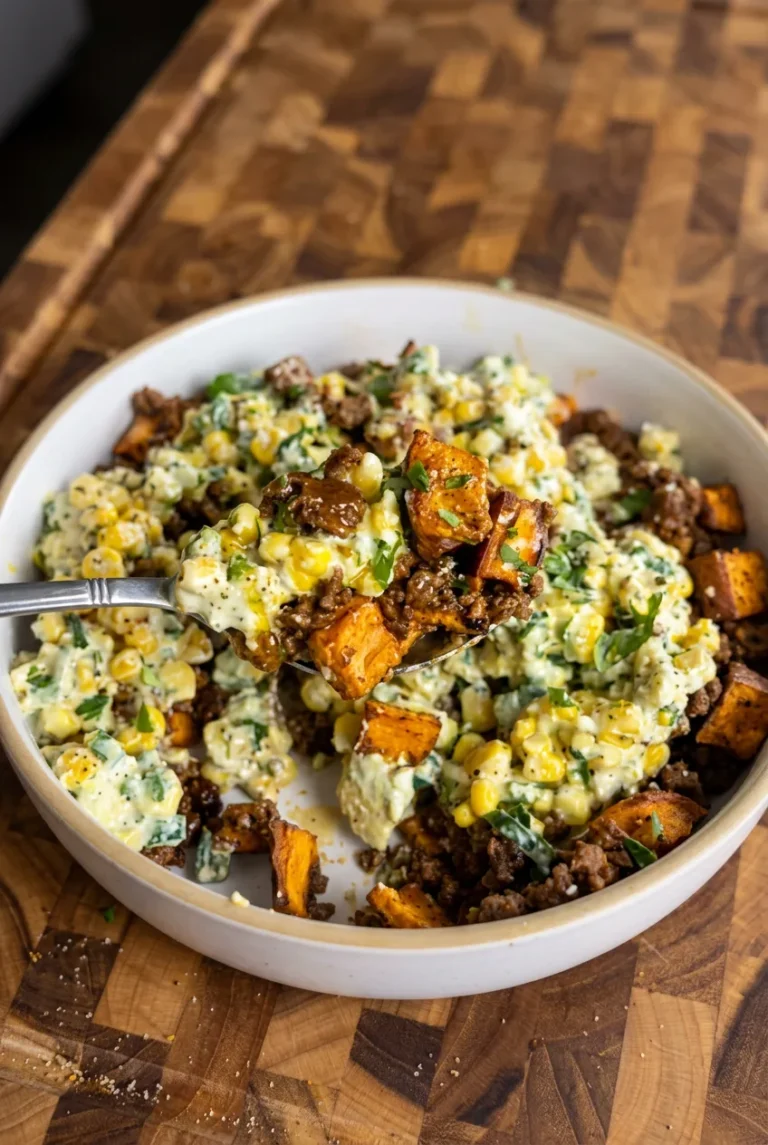
Roasted sweet-potato cubes and taco-seasoned ground beef make the warm base for a generous spoonful of cool, creamy corn. The elote-inspired topping combines lime, cotija, cilantro, and cottage cheese blended until smooth. Cook the frozen corn until its moisture evaporates, then let it cool before adding the dressing. That keeps the dressing thick enough to cling to the kernels.

Servings: 4 bowls | Prep: 15 minutes | Cook: 30–35 minutes | Total: 45–50 minutes

Ingredients

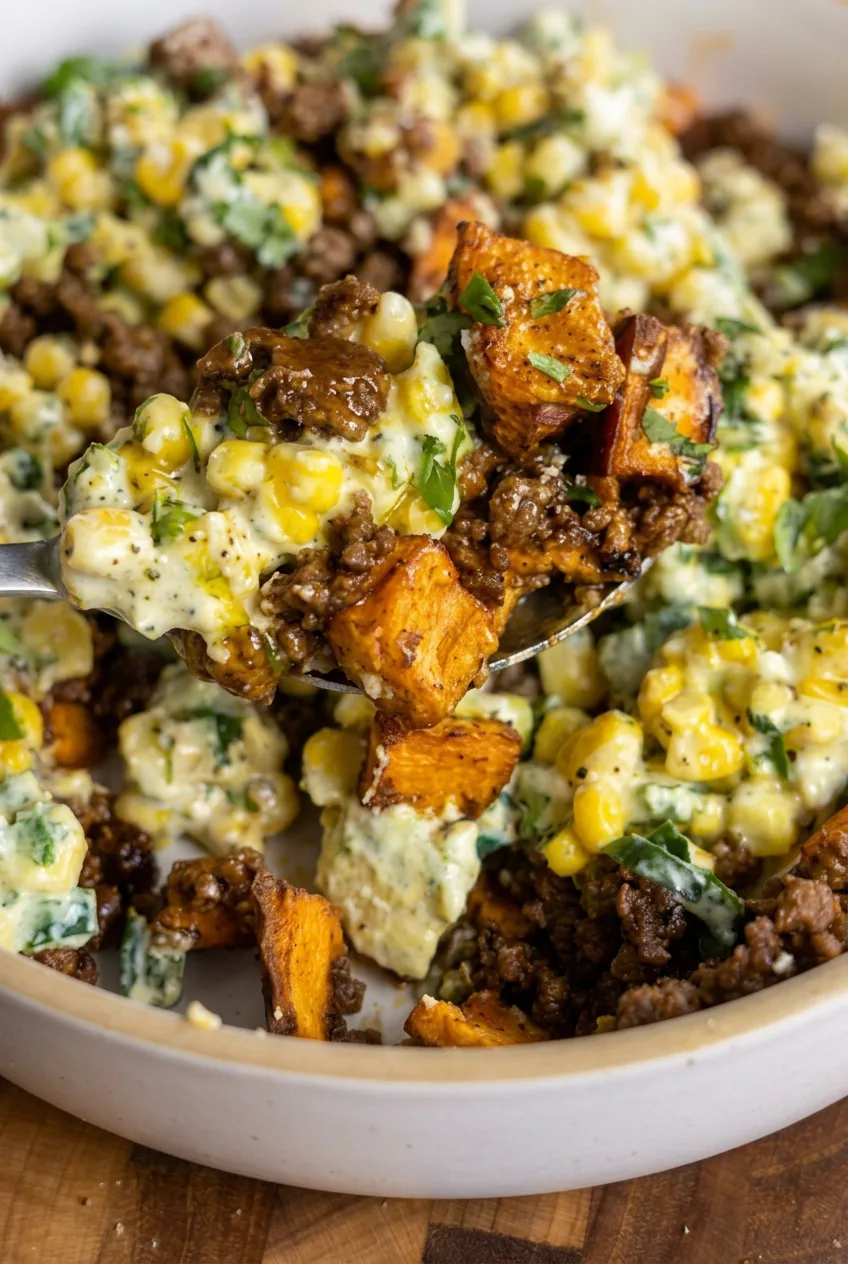
Close view of creamy corn kernels beside browned beef crumbles and roasted sweet-potato cubes
  • 1 1/2 pounds sweet potatoes, cut into approximately 3/4-inch cubes (680g)
  • 1 1/2 tablespoons olive oil
  • 1/2 teaspoon kosher salt, plus more to taste
  • 2 cups frozen corn kernels (300g)
  • 3/4 cup cottage cheese (170g)
  • 2 tablespoons fresh lime juice
  • 1/3 cup crumbled cotija cheese (35g)
  • 1/4 cup loosely packed chopped fresh cilantro
  • 1 pound lean ground beef (450g)
  • 2 tablespoons taco seasoning
  • 1/3 cup water

How to Make Mexican Street Corn Sweet Potato Bowls

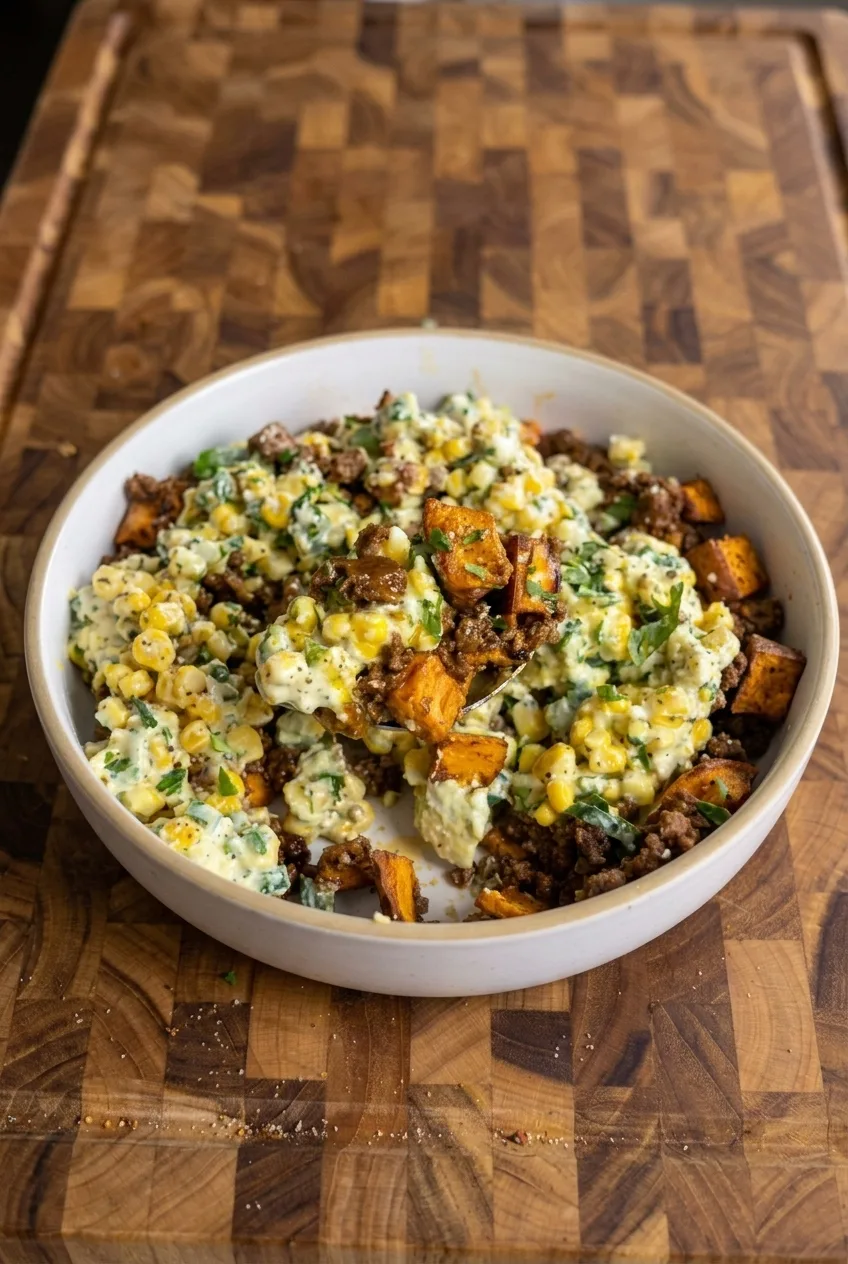
Complete sweet potato, beef, and creamy street corn bowl on a wooden surface
  1. Roast the sweet potatoes: Preheat the oven to 425°F (220°C). Toss the cubes with the olive oil and 1/2 teaspoon salt. Spread in one layer on a large rimmed sheet pan; use a second pan if they would be crowded. Roast uncovered for 25–35 minutes, starting to check at 25 minutes. Leave the cubes undisturbed at first, turning them once near the end only if they brown unevenly. They are ready when the edges are browned and the centers are fork-tender.
  2. Cook and cool the corn: While the potatoes roast, heat a wide 12-inch skillet over medium-high heat. Add the frozen corn and cook uncovered for 5–7 minutes, stirring intermittently, until no visible moisture remains in the skillet and a few kernels have lightly browned spots. Transfer to a mixing bowl and let cool to room temperature.
  3. Make the corn topping: Blend the cottage cheese and lime juice until smooth, with no visible curds. Once the corn has cooled, fold in the dressing, cotija, and cilantro. The dressing should coat the kernels rather than pool beneath them.
  4. Brown the beef: Wipe out the skillet and return it to medium-high heat. Add the beef and let it sear briefly before breaking it into crumbles. Cook until browned with no pink remaining; drain excess fat if needed. If checking with a thermometer, ground beef should reach 160°F (70°C). Stir in the taco seasoning and water, reduce the heat to medium, and simmer until the liquid lightly coats the beef without pooling. Allow about 8–12 minutes total for browning and reduction.
  5. Assemble the bowls: Divide the warm potatoes and beef among four shallow bowls. Spoon the creamy corn generously over and between them, leaving some potatoes and beef visible. Add the topping cool or at room temperature; do not heat it with the beef.

How to Keep the Corn Topping Thick

Frozen corn can release enough water to loosen the dressing. A wide skillet gives that moisture room to evaporate; look for a dry skillet and a few browned kernels before transferring the corn to a bowl. Let it cool completely before mixing it with the blended cottage cheese.

Getting Browned Sweet-Potato Cubes

Cut the potatoes into similarly sized 3/4-inch cubes so they cook evenly. If they fit tightly on the pan, divide them between two pans: crowded cubes steam instead of brown. Use browned edges and fork-tender centers to judge doneness, since the timing depends on cube size and pan space.

Swaps and Serving Options

Feta can replace cotija. If using canned corn, drain and dry it well before browning; fresh corn can also be charred, though its cooking time may differ. Offer avocado, pickled red onions, jalapeño, Tajín, or tortilla chips at the table rather than adding them to every bowl.

For an air-fryer alternative, cook the oiled potato cubes in uncrowded batches at 400°F (205°C), flipping halfway through. Start checking at 12 minutes; they may take about 12–16 minutes, depending on the appliance.

For another beef-and-sweet-potato dinner, try this sweet potato burger bowl.

Meal Prep and Reheating

Refrigerate the beef, potatoes, and creamy corn in separate airtight containers for up to 4 days. Reheat the beef and potatoes in the microwave or gently on the stovetop until heated through, then add the corn cold or at room temperature. If using avocado, slice it just before serving.

Nutrition

Approximate per bowl (1 of 4): 545 calories, 35g protein, 21g fat, and 55g carbohydrates. Approximate per 100g of finished bowl: 150 calories, 10g protein, 6g fat, and 15g carbohydrates. Estimates exclude optional toppings and vary with the leanness of the beef, ingredient brands, and moisture lost during cooking.

Mexican Street Corn Sweet Potato Bowl

Roasted sweet potatoes and taco-seasoned ground beef are served with a cool, creamy corn topping made with lime, cotija, cilantro, and cottage cheese.
Course: Main Course
Cuisine: Mexican
Prep: 15 min
Cook: 35 min
Total: 50 min
Servings: 4 Calories: 545 kcal

Equipment

  • Rimmed sheet pan
  • 12-inch skillet
  • Blender
  • Mixing bowl

Ingredients

For the Sweet Potatoes

  • 1 1/2 pounds sweet potatoes, cut into approximately 3/4-inch cubes (680g)
  • 1 1/2 tablespoons olive oil
  • 1/2 teaspoon kosher salt, plus more to taste

For the Creamy Corn

  • 2 cups frozen corn kernels (300g)
  • 3/4 cup cottage cheese (170g)
  • 2 tablespoons fresh lime juice
  • 1/3 cup crumbled cotija cheese (35g)
  • 1/4 cup loosely packed chopped fresh cilantro

For the Beef

  • 1 pound lean ground beef (450g)
  • 2 tablespoons taco seasoning
  • 1/3 cup water

Instructions

  1. Preheat the oven to 425°F (220°C).
  2. Toss the sweet potato cubes with the olive oil and 1/2 teaspoon salt. Spread them in a single layer on a large rimmed sheet pan, using a second pan if needed.
  3. Roast for 25–35 minutes, checking at 25 minutes. Turn the cubes near the end if they are browning unevenly; they are ready when browned at the edges and fork-tender.
  4. While the potatoes roast, heat a wide 12-inch skillet over medium-high heat. Add the frozen corn and cook uncovered for 5–7 minutes, stirring intermittently, until the skillet is dry and some kernels have browned spots.
  5. Transfer the corn to a mixing bowl and let it cool to room temperature.
  6. Blend the cottage cheese and lime juice until smooth. Fold the dressing into the cooled corn with the cotija and cilantro.
  7. Wipe out the skillet and return it to medium-high heat. Add the ground beef and sear briefly before breaking it into crumbles.
  8. Cook the beef until browned with no pink remaining, draining excess fat if needed. If checking with a thermometer, cook it to 160°F (70°C).
  9. Stir in the taco seasoning and water. Reduce the heat to medium and simmer until the liquid lightly coats the beef without pooling, allowing about 8–12 minutes total for browning and reduction.
  10. Divide the warm potatoes and beef among four shallow bowls. Spoon the cool or room-temperature corn topping over and between them.

Tips

  • Use a wide skillet to help the corn’s moisture evaporate before adding the dressing.
  • Cool the corn completely before mixing it with the cottage cheese dressing so the topping stays thick.
  • Keep the sweet potatoes in a single layer; use two pans if they would be crowded.
  • Cut the potatoes into similar 3/4-inch cubes for even cooking.
  • Leave some potatoes and beef visible when assembling the bowls.

Variations

  • Feta Corn Topping: Replace the cotija with feta.
  • Canned or Fresh Corn: Use canned corn, drained and dried well before browning, or char fresh corn; cooking time may vary.
  • Air-Fryer Sweet Potatoes: Cook the oiled potato cubes in uncrowded batches at 400°F (205°C), flipping halfway through. Start checking at 12 minutes; they may take about 12–16 minutes.
  • Optional Bowl Toppings: Serve with avocado, pickled red onions, jalapeño, Tajín, or tortilla chips.

Notes

Refrigerate the beef, potatoes, and corn separately in airtight containers for up to 4 days. Reheat the beef and potatoes until heated through, then add the corn cold or at room temperature. Ground beef should reach 160°F (70°C).

Nutrition

Calories: 545 kcal | Protein: 35 g | Fat: 21 g | Carbohydrates: 55 g

Asian Ground Chicken Rice Bowl

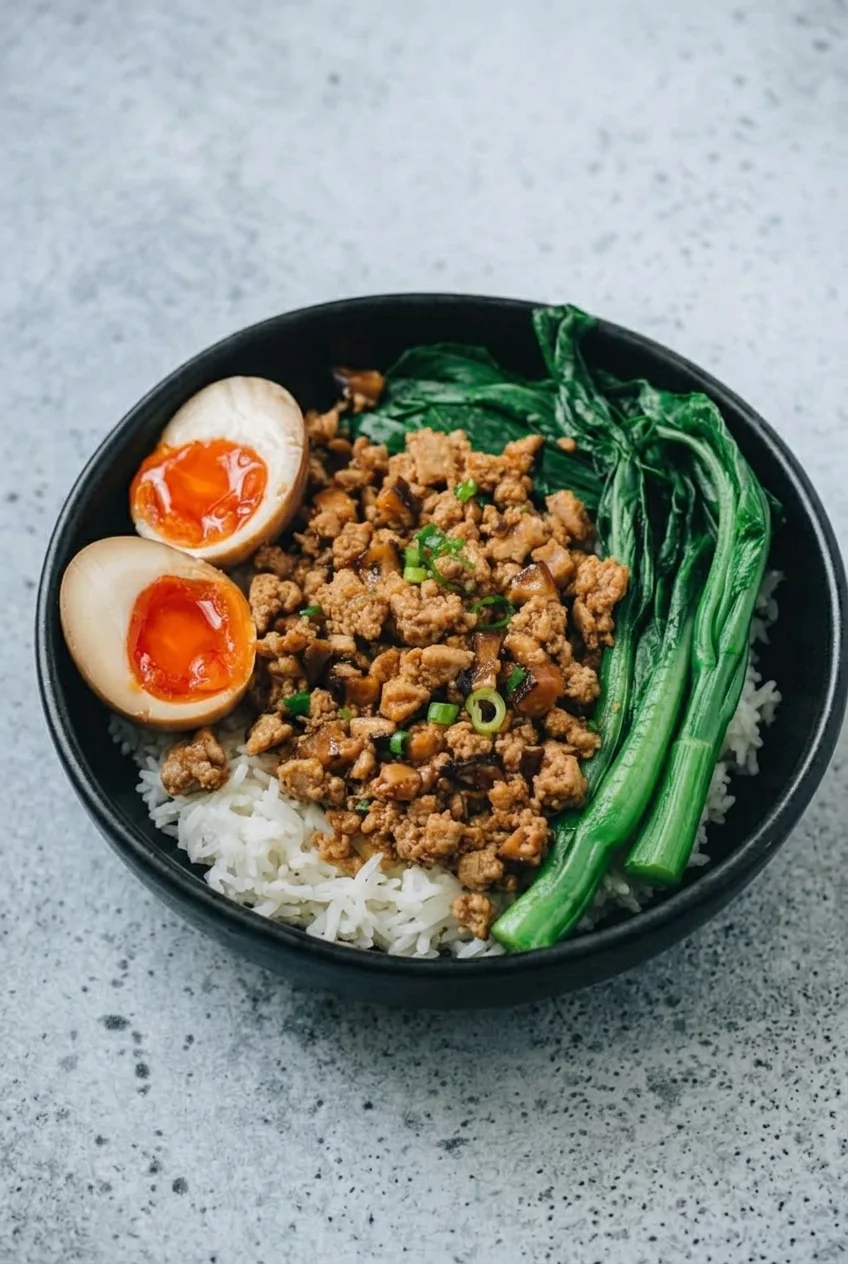
Ginger-soy ground chicken and chopped mushrooms sit over white rice, with long-stemmed greens and a halved jammy egg arranged alongside. Scallions and a light coating of sauce finish the chicken without turning the bowl into a stir-fry.

Cook the mushrooms until their moisture evaporates before adding the chicken. That gives the crumbles a chance to brown and keeps the sauce from becoming watery. Start the rice first, then use the egg pot to blanch the greens while the skillet topping cooks.

Ingredients for Asian Ground Chicken Rice Bowls

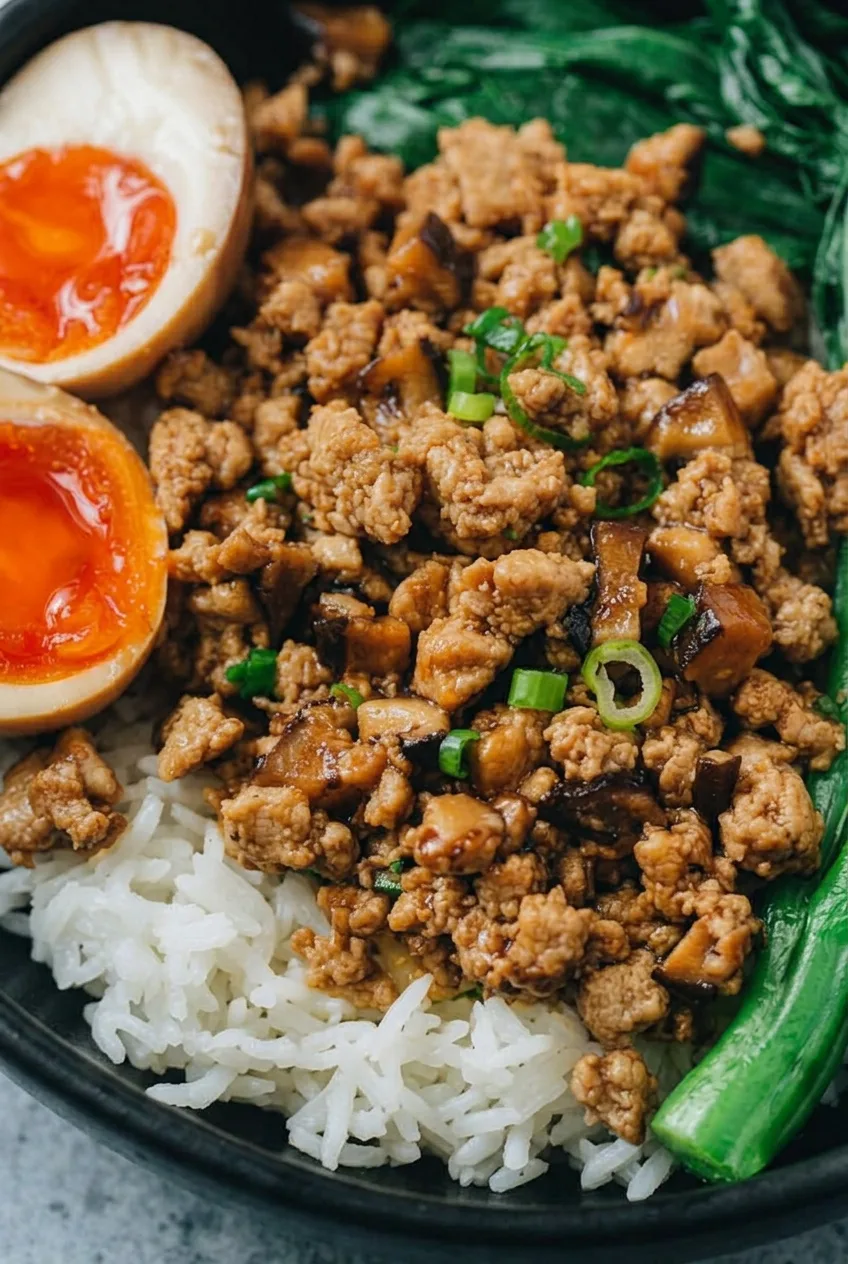
Close view of glossy chicken and mushroom crumbles beside white rice and a soft orange egg yolk

Yield: 4 bowls
Prep time: 15 minutes
Cook time: About 25 minutes, with components cooking concurrently
Total time: About 40 minutes

  • 1 cup uncooked white rice (185g)
  • 1 1/2 cups water for the rice, or the amount directed on the package
  • 4 large eggs
  • 12 oz Chinese broccoli (gai lan), tough stem ends trimmed (340g)
  • 2 tablespoons neutral cooking oil
  • 8 oz mushrooms, finely chopped (225g)
  • 1 lb ground chicken (450g)
  • 1 tablespoon minced fresh ginger
  • 3 garlic cloves, minced
  • 3 scallions, thinly sliced, white and light-green parts separated from the dark-green tops

For the Sauce and Eggs

  • 1/4 cup reduced-sodium soy sauce for the chicken, plus 1 tablespoon for the eggs
  • 1/3 cup water for the sauce, plus 2 tablespoons for the eggs
  • 1 tablespoon rice vinegar
  • 1 tablespoon brown sugar
  • 2 teaspoons cornstarch
  • 1 teaspoon toasted sesame oil

Optional for serving: Chili crisp, to taste.

How to Make Asian Ground Chicken Rice Bowls

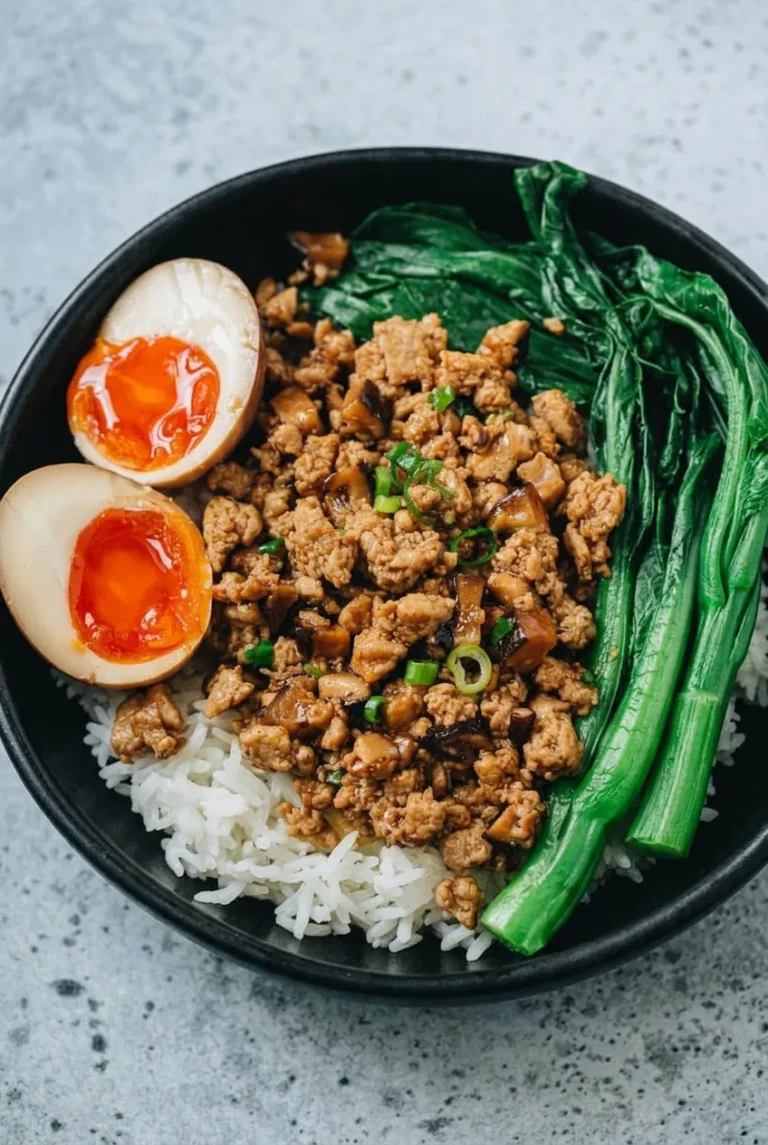
Complete ground chicken rice bowl with greens and egg on a gray tabletop, photographed from a wider view
  1. Start the rice: Rinse the rice if desired. Combine it with 1 1/2 cups water in a lidded saucepan and bring to a boil. Cover, reduce to a gentle simmer, and cook according to the package directions, about 15 to 20 minutes, until tender with no standing water. Let stand, covered, for 5 minutes, then fluff.
  2. Cook and cool the eggs: While the rice cooks, bring a separate pot of water to a gentle boil. Carefully lower in the eggs and cook for about 7 minutes as a starting point for soft yolks; egg size and starting temperature affect the result. Transfer immediately to ice water for about 5 minutes. Peel, then turn the whole eggs in a small bowl with 1 tablespoon soy sauce and 2 tablespoons water. Let stand for about 10 to 15 minutes while you finish the other components. Halve just before serving.
  3. Blanch the greens: Return the egg pot to a boil. Keeping the stems and leaves together, cook the Chinese broccoli for about 2 to 3 minutes, or a little longer for thick stems. Drain well when the leaves are vibrant and the stems are just tender with a slight bite.
  4. Mix the sauce: Whisk together 1/4 cup soy sauce, 1/3 cup water, the vinegar, brown sugar, cornstarch, and sesame oil until no dry cornstarch remains.
  5. Cook the mushrooms and chicken: Heat the oil in a 12-inch skillet over medium-high heat. Add the mushrooms and cook, stirring occasionally, until most of their released liquid evaporates and they begin to brown. Add the ground chicken, breaking it into small crumbles. Let it sit briefly between stirs so it can brown. Start checking after about 6 minutes of chicken cooking; continue until no pink remains and the chicken reaches 165°F (75°C). When practical, check a sufficiently large clump with an instant-read thermometer, and make sure the smaller crumbles are cooked through. Stir in the ginger, garlic, and white and light-green scallion parts near the end; cook until fragrant, lowering the heat if they begin to scorch.
  6. Coat and assemble: Whisk the sauce again, pour it into the skillet, and reduce the heat to medium. Simmer uncovered for about 2 to 3 minutes, just until the sauce lightly coats the crumbles without pooling. Divide the rice among four bowls and spoon the chicken and mushrooms over it, leaving some rice visible. Group the greens along one side and place one egg, cut into two halves, cut-side up on each bowl. Scatter the scallion tops over the chicken. Offer chili crisp at the table, if desired.

How to Keep the Chicken Moist and the Sauce Glossy

A wide skillet gives mushroom moisture room to evaporate before the chicken goes in. A smaller or crowded pan may take longer; wait until the mushrooms stop releasing much liquid rather than adding the sauce to a watery skillet.

Give the chicken brief contact with the hot pan for browning, but add the sauce once it is cooked through instead of continuing to fry it. Whisking cornstarch into the cool sauce prevents lumps. Stop simmering as soon as the sauce coats the crumbles so it does not become pasty or dry out the chicken.

Greens and Bowl Variations

If Chinese broccoli is unavailable, use a similarly long-stemmed green such as baby bok choy. Halve larger heads lengthwise, keep the stems intact, and adjust the blanching time to their thickness.

Cooked brown rice or separately cooked riced cauliflower can replace the white rice as a base, though either changes the bowl’s appearance. Ground turkey can replace the chicken; its moisture and skillet timing may differ, so cook it to 165°F.

For another chicken bowl with an egg, try these teriyaki chicken and broccoli bowls.

Storing and Reheating the Components

Refrigerate the cooked chicken, rice, and greens promptly in covered containers and use within 3 to 4 days. Refrigerate the cooked eggs separately and use within 1 week. Keep them whole until serving, or cook fresh eggs for the best soft-yolk texture.

Reheat the chicken and rice until steaming hot throughout; leftovers should reach 165°F. Warm the greens briefly if desired, and serve the jammy eggs chilled rather than microwaving them.

The chicken-mushroom topping can be frozen separately for about 2 to 3 months for best quality. Thaw it in the refrigerator and reheat thoroughly. Do not freeze the jammy eggs or blanched greens for this presentation.

Nutrition

Approximate nutrition per bowl (1 of 4): 545 calories, 33g protein, 22g fat, and 50g carbohydrates. Approximate nutrition per 100g: 125 calories, 8g protein, 5g fat, and 12g carbohydrates. Estimates exclude optional chili crisp; values vary with the ground chicken, rice, and moisture lost during cooking.

Asian Ground Chicken Rice Bowl

Ginger-soy ground chicken and mushrooms are served over white rice with Chinese broccoli and jammy eggs.
Course: Main Course
Cuisine: Asian
Prep: 15 min
Cook: 25 min
Total: 40 min
Servings: 4 Calories: 545 kcal

Equipment

  • Lidded saucepan
  • Small pot
  • Ice bath
  • 12-inch skillet
  • Whisk
  • Instant-read thermometer

Ingredients

For the Bowls

  • 1 cup uncooked white rice (185 g)
  • 1 1/2 cups water for the rice, or the amount directed on the package
  • 4 large eggs
  • 12 oz Chinese broccoli (gai lan), tough stem ends trimmed (340 g)
  • 2 tablespoons neutral cooking oil
  • 8 oz mushrooms, finely chopped (225 g)
  • 1 lb ground chicken (450 g)
  • 1 tablespoon minced fresh ginger
  • 3 garlic cloves, minced
  • 3 scallions, thinly sliced, white and light-green parts separated from dark-green tops

For the Sauce and Eggs

  • 1/4 cup reduced-sodium soy sauce for the chicken, plus 1 tablespoon for the eggs
  • 1/3 cup water for the sauce, plus 2 tablespoons for the eggs
  • 1 tablespoon rice vinegar
  • 1 tablespoon brown sugar
  • 2 teaspoons cornstarch
  • 1 teaspoon toasted sesame oil

Optional for Serving

  • Chili crisp, to taste

Instructions

  1. Combine the rice and 1 1/2 cups water in a lidded saucepan. Bring to a boil, cover, reduce to a gentle simmer, and cook according to package directions, about 15 to 20 minutes, until tender and no water remains. Let stand covered for 5 minutes, then fluff.
  2. While the rice cooks, bring a separate pot of water to a gentle boil. Carefully add the eggs and cook for about 7 minutes. Transfer them immediately to ice water for about 5 minutes, then peel.
  3. Turn the peeled eggs in a small bowl with 1 tablespoon soy sauce and 2 tablespoons water. Let stand for 10 to 15 minutes, then halve just before serving.
  4. Bring the egg pot back to a boil. Add the Chinese broccoli and blanch for 2 to 3 minutes, or longer for thick stems, until the leaves are vibrant and the stems are just tender. Drain well.
  5. Whisk together 1/4 cup soy sauce, 1/3 cup water, rice vinegar, brown sugar, cornstarch, and sesame oil until the cornstarch dissolves.
  6. Heat the oil in a 12-inch skillet over medium-high heat. Add the mushrooms and cook, stirring occasionally, until most of their liquid evaporates and they begin to brown.
  7. Add the ground chicken, breaking it into small crumbles. Let it sit briefly between stirs to brown. Cook until no pink remains and it reaches 165°F (75°C). Stir in the ginger, garlic, and white and light-green scallion parts near the end, cooking until fragrant.
  8. Whisk the sauce again and pour it into the skillet. Reduce the heat to medium and simmer uncovered for 2 to 3 minutes, until the sauce lightly coats the chicken.
  9. Divide the rice among four bowls and top with the chicken and mushrooms. Add the greens and one halved egg to each bowl, scatter the scallion tops over the chicken, and serve with chili crisp if desired.

Tips

  • Cook the mushrooms until most of their released liquid evaporates before adding the chicken.
  • Use a wide skillet to help the mushrooms brown without crowding.
  • Let the chicken sit briefly between stirs so it can brown.
  • Whisk the cornstarch into the cool sauce before adding it to the skillet to prevent lumps.
  • Stop simmering once the sauce coats the chicken to keep it glossy and avoid drying out the topping.

Variations

  • Baby Bok Choy: Replace the Chinese broccoli with baby bok choy; halve larger heads lengthwise and adjust blanching time to the stem thickness.
  • Brown Rice or Riced Cauliflower: Use cooked brown rice or separately cooked riced cauliflower in place of the white rice.
  • Ground Turkey: Replace the ground chicken with ground turkey and cook it to 165°F.

Notes

Refrigerate chicken, rice, and greens promptly and use within 3 to 4 days; use cooked eggs within 1 week. Reheat chicken and rice until steaming hot throughout and leftovers reach 165°F. Keep eggs whole until serving; do not microwave them.

Nutrition

Calories: 545 kcal | Protein: 33 g | Fat: 22 g | Carbohydrates: 50 g

Hawaiian Chicken Rice Bowls

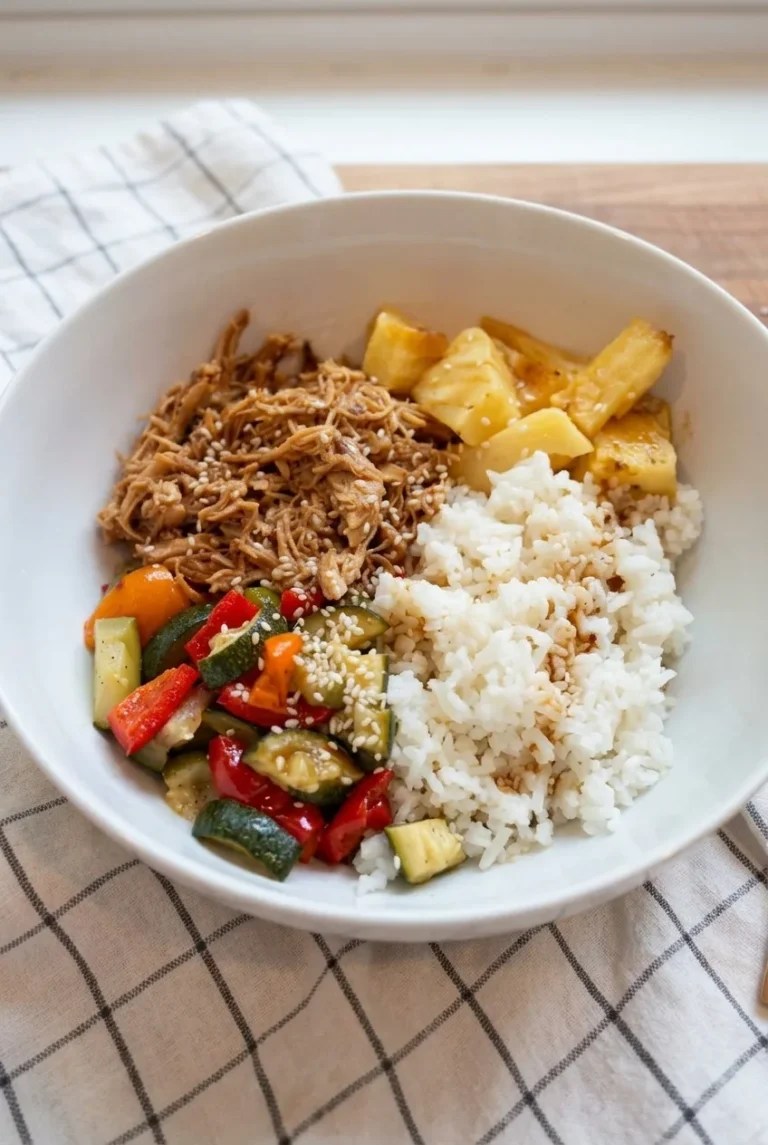
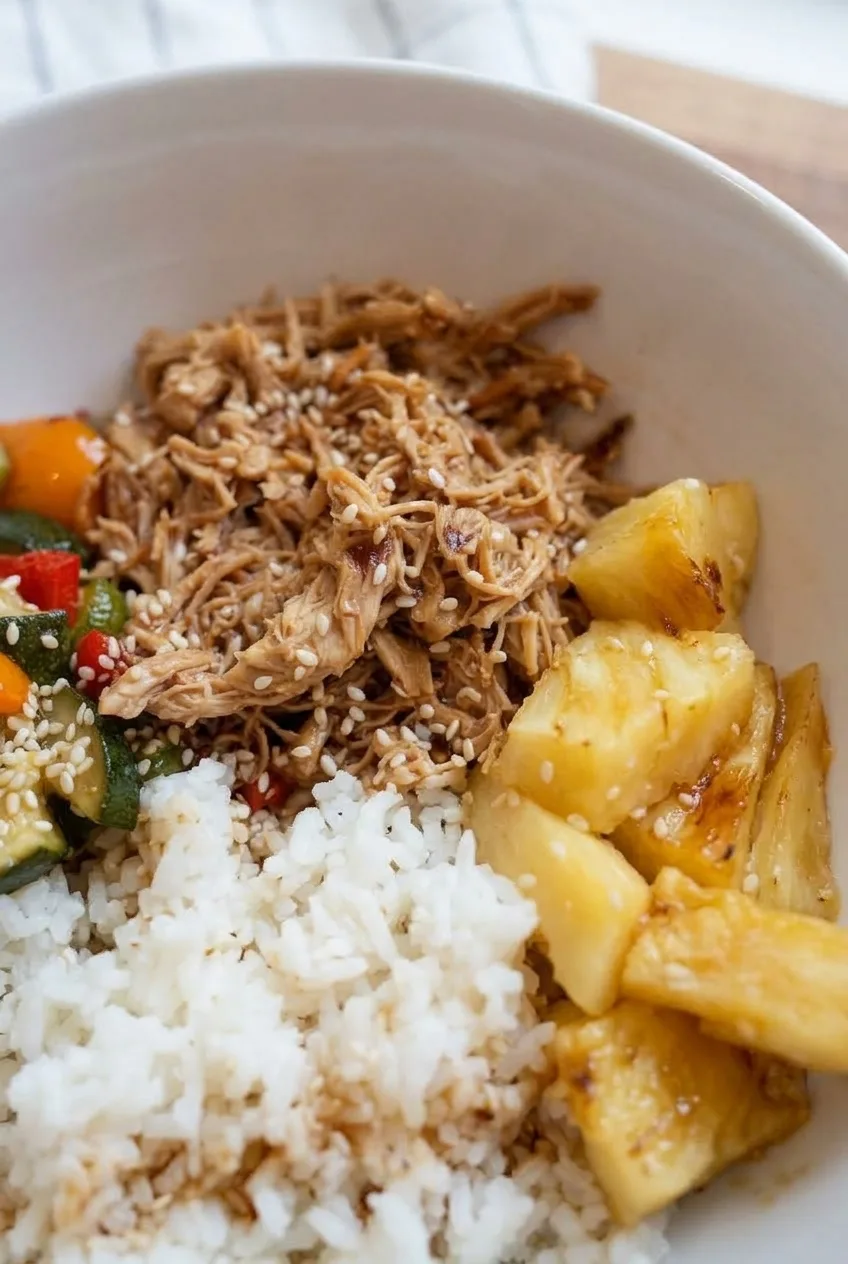
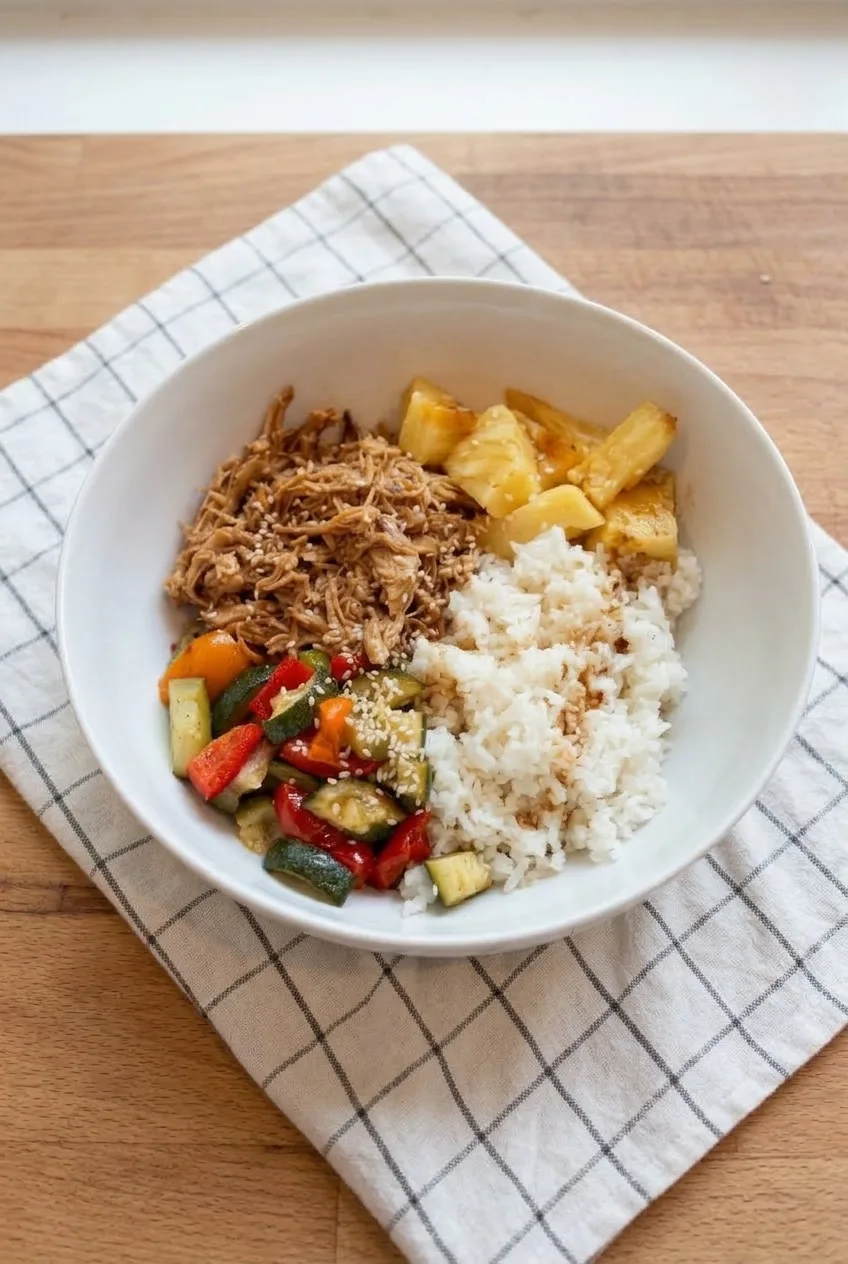
These Hawaiian-inspired bowls bring together fluffy white rice, golden pineapple, skillet-cooked zucchini and peppers, and sweet-savory shredded chicken. The chicken cooks as whole breasts, then rests before being pulled into strands and tossed with a light pineapple-soy sauce. Saucing it after shredding keeps the meat moist without coating the whole bowl in a thick glaze.

Cook the components separately in a large skillet while the rice cooks in a saucepan, then arrange them in four bowls. Allow about 65–70 minutes total, including a 20-minute marinade.

Ingredients for Hawaiian Chicken Rice Bowls

Close view of sauced chicken strands, golden pineapple, separate rice grains, and sesame seeds
  • 1 1/2 lb boneless, skinless chicken breasts (about 680g), pounded to an even thickness if needed
  • 1 1/2 cups uncooked white jasmine rice (about 280g)
  • 2 cups pineapple chunks (about 330g), fresh or drained from a can packed in 100% juice
  • 5 tablespoons low-sodium soy sauce, divided: 1/4 cup for the marinade and 1 tablespoon for the sauce
  • 3 tablespoons honey, divided: 2 tablespoons for the marinade and 1 tablespoon for the sauce
  • 1/2 cup pineapple juice, reserved from juice-packed pineapple or unsweetened
  • 2 teaspoons grated fresh ginger, divided
  • 3 garlic cloves, minced and divided: 2 for the marinade and 1 for the sauce
  • 1 tablespoon lime juice
  • 2 tablespoons olive oil or neutral cooking oil, divided: 1 tablespoon for the marinade and up to 1 tablespoon for the skillet
  • 1 medium zucchini (about 200g), cut into bite-size pieces
  • 1 medium red bell pepper (about 150g), cut into bite-size pieces
  • 1 medium orange bell pepper (about 150g), cut into bite-size pieces
  • 1 small onion (about 110g), cut into bite-size pieces
  • 1 tablespoon white sesame seeds

Optional for serving: lime wedges or a little thinly sliced green onion.

How to Make Hawaiian Chicken Rice Bowls

Complete Hawaiian chicken rice bowl on a checked cloth, with pineapple, vegetables, rice, and shredded chicken
  1. Marinate the chicken: Mix 1/4 cup soy sauce, 2 tablespoons honey, 1 teaspoon ginger, 2 minced garlic cloves, the lime juice, and 1 tablespoon oil. Coat the chicken and refrigerate for 20 minutes. Keep the ingredients for the finishing sauce separate from the raw chicken.
  2. Cook the rice: Cook the jasmine rice in water according to the package directions, then fluff it. While it cooks, cut the vegetables. Drain and pat the pineapple dry so it browns rather than releases liquid into the skillet.
  3. Sear the pineapple: Preheat a 12-inch skillet over medium-high heat. Add a little of the remaining oil and cook the pineapple uncovered, turning to brown more than one side, about 2–3 minutes per side. Transfer the golden-edged chunks to a plate. Work in batches if they do not fit without crowding.
  4. Cook the vegetables: Add the zucchini, peppers, and onion to the hot skillet, using more of the remaining oil as needed. Cook uncovered, stirring occasionally, for 6–8 minutes, until tender-crisp and lightly colored. Work in batches if necessary so the vegetables brown instead of steam. Transfer to a plate.
  5. Cook and rest the chicken: Remove the chicken from the marinade and discard the used marinade. Cook the chicken in the skillet over medium to medium-high heat, turning once when the first side is browned. Allow approximately 5–7 minutes per side, but begin checking the thickest part near the end of that window; thickness determines the actual time. The chicken is done at 165°F (75°C). Reduce the heat if the honey coating darkens too quickly. If thick breasts brown before cooking through, lower the heat and cover briefly to finish. Transfer to a plate and rest for 5 minutes.
  6. Make the sauce and shred: Add the pineapple juice, remaining 1 tablespoon soy sauce, 1 tablespoon honey, 1 teaspoon ginger, and 1 garlic clove to the skillet. Simmer over medium heat for 3–5 minutes, until slightly reduced but still pourable. Shred the rested chicken with two forks and toss with enough sauce to moisten the strands without submerging them.
  7. Assemble four bowls: Divide the rice among wide bowls. Arrange the shredded chicken, pineapple, and cooked vegetables alongside it in distinct portions. Scatter the white sesame seeds over the bowls and serve warm.

How to Keep the Shredded Chicken Juicy

Evenly thick breasts cook more consistently, but a thermometer matters more than minutes per side. Honey can brown before the center reaches 165°F, so lower the heat rather than waiting for a darker crust. Rest the chicken before shredding, then toss the warm strands with the freshly simmered sauce. The marinade that touched raw chicken must be discarded, not used as the finishing sauce.

Fresh or Canned Pineapple

Fresh pineapple and canned chunks packed in 100% juice both work. If using canned fruit, reserve 1/2 cup juice for the sauce, then drain and pat the chunks dry before searing. Avoid syrup-packed pineapple, which makes this lightly sauced bowl sweeter and can leave the fruit too wet to brown well.

Make-Ahead and Storage

Refrigerate cooked components in airtight containers for up to 3 days. Keep the rice, chicken, pineapple, and vegetables separate when practical; store any extra sauce with the chicken or on its own. Reheat the chicken and rice thoroughly in the microwave or a skillet, add the reheated vegetables and pineapple, then finish with sesame seeds.

You can chop the vegetables ahead and keep the raw chicken refrigerated while it marinates. Freezing fully assembled bowls is not recommended because their texture after thawing is uncertain.

For a different pineapple-and-chicken bowl that uses an air fryer, see these garlic lime chicken bowls with pineapple salsa.

Nutrition

Approximate nutrition per bowl, based on 4 servings: 695 calories, 46g protein, 14g fat, and 95g carbohydrates. Approximate values per 100g of prepared food: 115 calories, 8g protein, 2g fat, and 16g carbohydrates. Values vary with the chicken, pineapple, rice preparation, and amount of sauce used.

Hawaiian Chicken Rice Bowls

Shredded chicken tossed in pineapple-soy sauce is served with jasmine rice, seared pineapple, and skillet-cooked vegetables.
Course: Main Course
Cuisine: Hawaiian
Prep: 25 min
Cook: 45 min
Total: 70 min
Servings: 4 Calories: 695 kcal

Equipment

  • 12-inch skillet
  • Saucepan
  • Meat thermometer
  • Two forks

Ingredients

For the Chicken and Marinade

  • 1 1/2 lb boneless, skinless chicken breasts (about 680 g), pounded to an even thickness if needed
  • 1/4 cup low-sodium soy sauce
  • 2 tablespoons honey
  • 1 teaspoon grated fresh ginger
  • 2 garlic cloves, minced
  • 1 tablespoon lime juice
  • 1 tablespoon olive oil or neutral cooking oil

For the Rice and Bowls

  • 1 1/2 cups uncooked white jasmine rice (about 280 g)
  • 2 cups pineapple chunks (about 330 g), fresh or drained from pineapple packed in 100% juice
  • 1 medium zucchini (about 200 g), cut into bite-size pieces
  • 1 medium red bell pepper (about 150 g), cut into bite-size pieces
  • 1 medium orange bell pepper (about 150 g), cut into bite-size pieces
  • 1 small onion (about 110 g), cut into bite-size pieces
  • Up to 1 tablespoon olive oil or neutral cooking oil, for the skillet
  • 1 tablespoon white sesame seeds
  • Lime wedges or thinly sliced green onion, optional

For the Finishing Sauce

  • 1/2 cup pineapple juice
  • 1 tablespoon low-sodium soy sauce
  • 1 tablespoon honey
  • 1 teaspoon grated fresh ginger
  • 1 garlic clove, minced

Instructions

  1. Mix the marinade soy sauce, honey, ginger, garlic, lime juice, and 1 tablespoon oil. Coat the chicken and refrigerate for 20 minutes.
  2. Cook the rice in water according to package directions, then fluff. Meanwhile, prepare the vegetables. Drain and pat the pineapple dry.
  3. Heat a 12-inch skillet over medium-high heat. Add a little of the remaining oil and sear the pineapple uncovered for about 2–3 minutes per side, turning to brown more than one side. Transfer to a plate, working in batches if needed.
  4. Add the zucchini, bell peppers, and onion to the skillet, using more oil as needed. Cook uncovered for 6–8 minutes, stirring occasionally, until tender-crisp and lightly colored. Transfer to a plate.
  5. Remove the chicken from the marinade and discard the used marinade. Cook in the skillet over medium to medium-high heat, turning once the first side is browned, about 5–7 minutes per side. Reduce the heat if the honey coating darkens too quickly; cover briefly over lower heat if thick breasts need more time.
  6. Check the thickest part of the chicken with a thermometer and cook to 165°F (75°C). Transfer to a plate and rest for 5 minutes.
  7. Add the pineapple juice, remaining soy sauce, honey, ginger, and garlic to the skillet. Simmer over medium heat for 3–5 minutes, until slightly reduced but still pourable.
  8. Shred the rested chicken with two forks and toss with enough sauce to moisten the strands.
  9. Divide the rice among four bowls. Arrange the chicken, pineapple, and vegetables alongside it. Sprinkle with sesame seeds and serve warm.

Tips

  • Pat the pineapple dry before searing so it browns instead of releasing liquid.
  • Cook the vegetables in batches if needed to prevent them from steaming.
  • Use a thermometer to check chicken doneness; cooking time depends on breast thickness.
  • Lower the heat if the honey coating browns before the chicken is cooked through.
  • Rest the chicken before shredding, then toss it with the warm finishing sauce.

Notes

Refrigerate cooked components in airtight containers for up to 3 days. Reheat the chicken and rice thoroughly. Discard marinade that has touched raw chicken.

Nutrition

Calories: 695 kcal | Protein: 46 g | Fat: 14 g | Carbohydrates: 95 g

Egg Roll in a Bowl

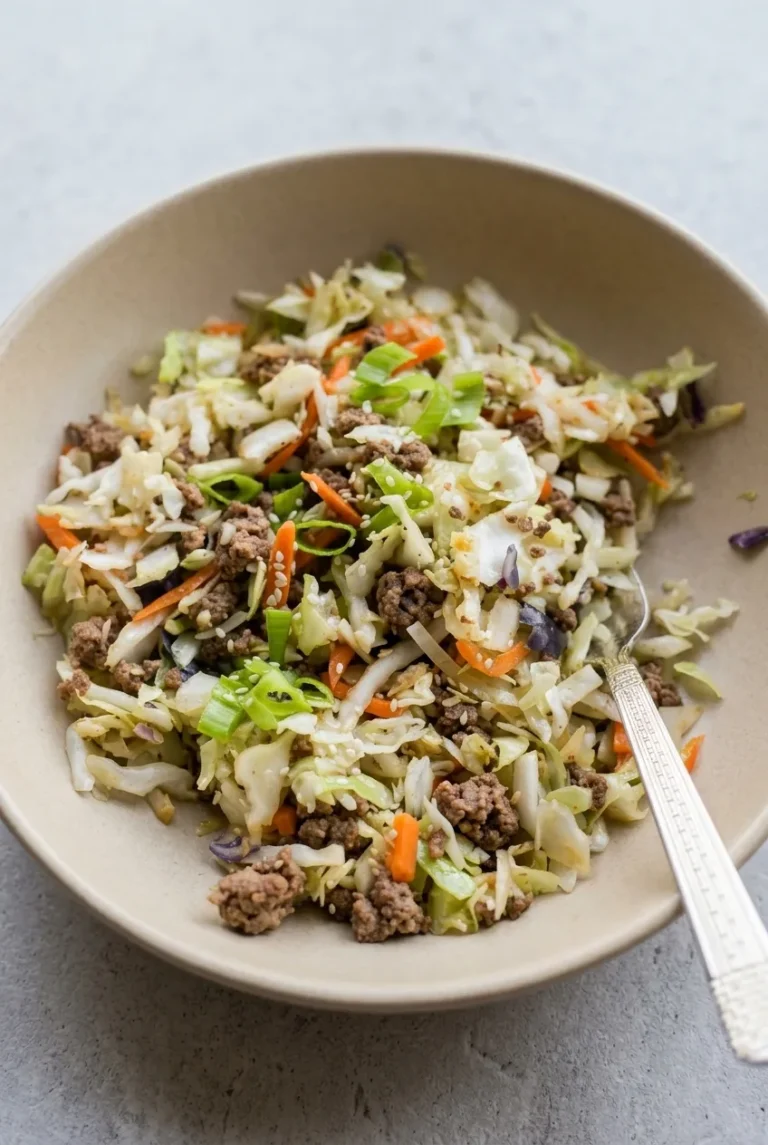
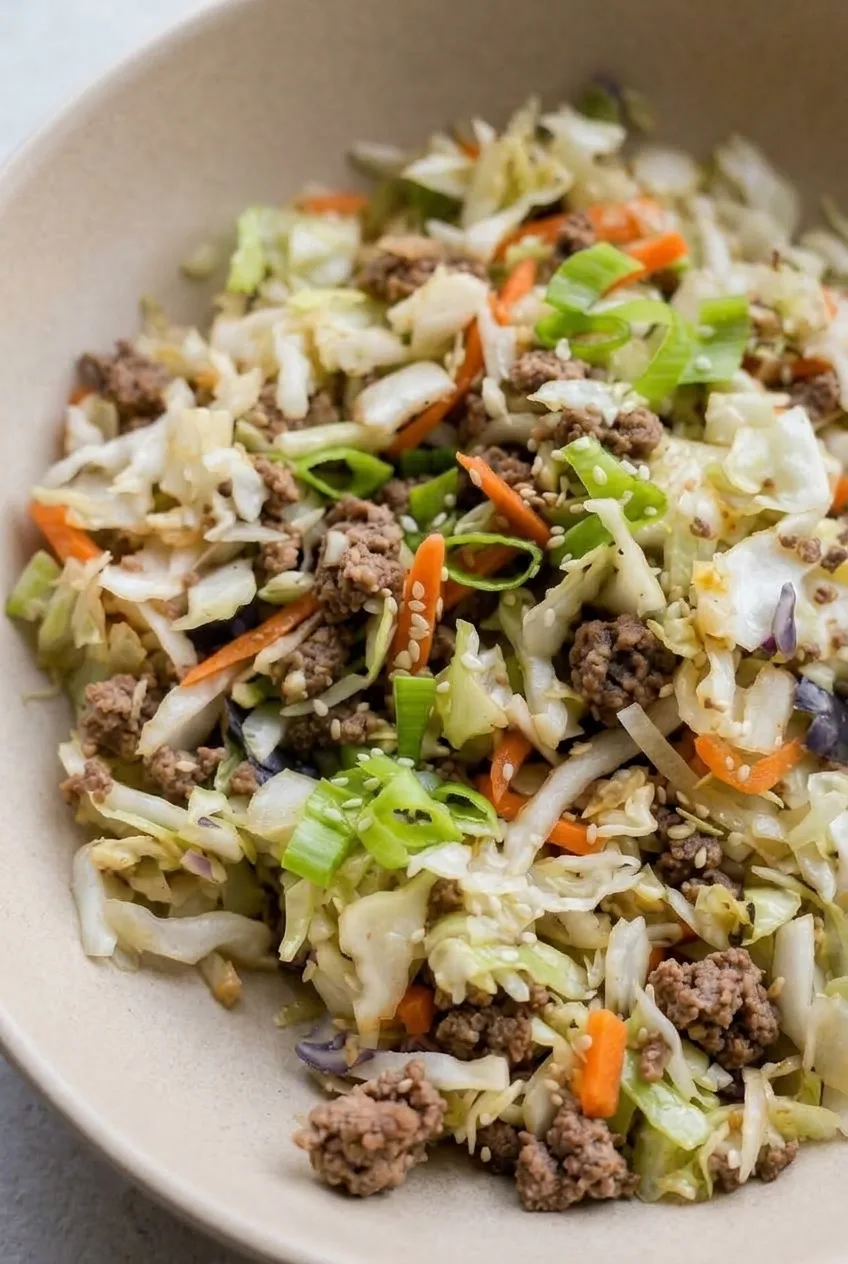
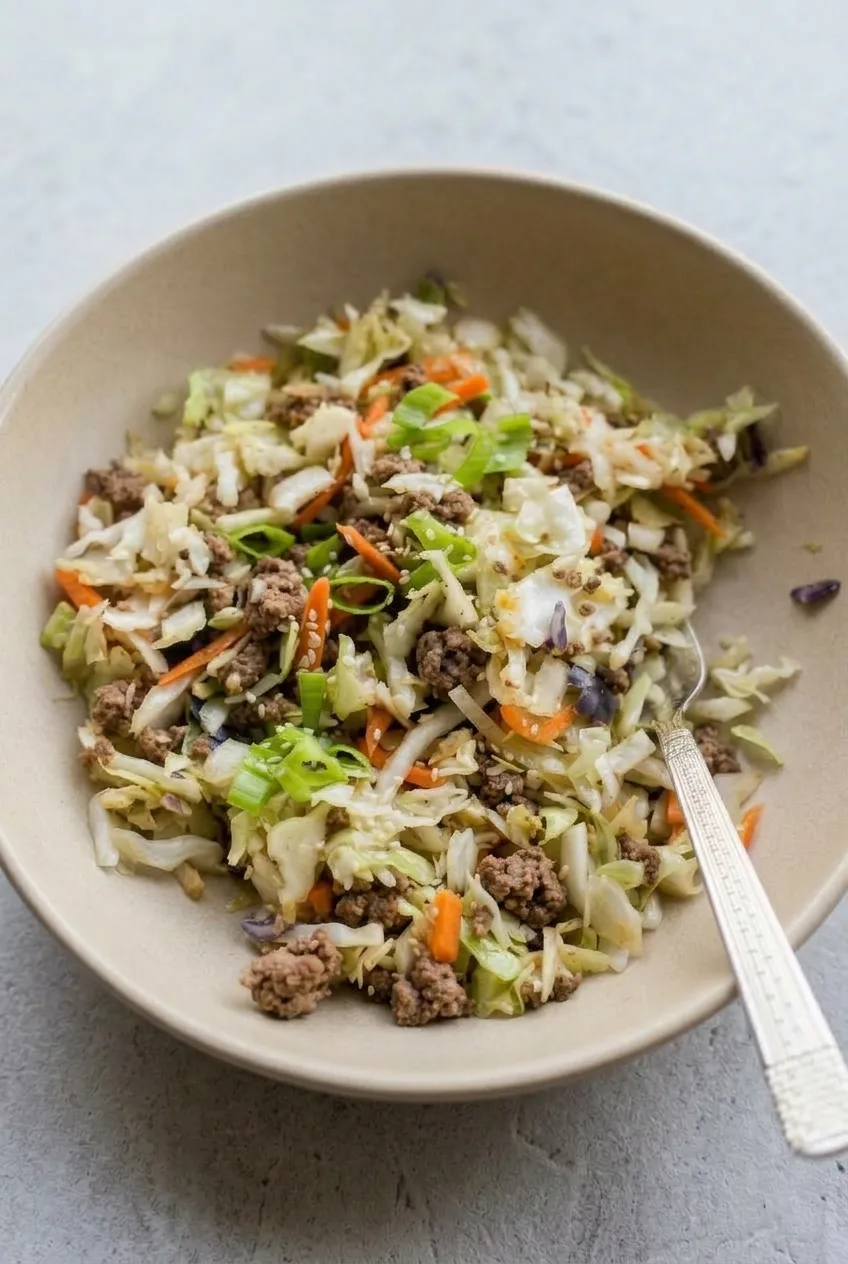
Egg roll in a bowl is a wrapper-free skillet filling of browned ground beef, cabbage, and carrots, served directly in bowls. Bagged coleslaw mix keeps the prep short, while ginger, garlic, and a measured soy-vinegar sauce give the filling its savory flavor.

The key is to cook the slaw just until it wilts but still has some bite. A roomy, uncovered skillet lets moisture escape so the sauce lightly coats the beef and vegetables instead of pooling underneath them.

Ingredients for Egg Roll in a Bowl

Close detail of browned beef crumbles, crisp-tender cabbage and carrots in egg roll in a bowl
  • 1 pound ground beef, preferably about 90% lean (450g)
  • 1 bag (16 ounces) cabbage-and-carrot coleslaw mix (450g)
  • 1 tablespoon finely grated fresh ginger
  • 3 garlic cloves, minced
  • 3 tablespoons low-sodium soy sauce
  • 1 tablespoon unseasoned rice vinegar
  • 1 teaspoon toasted sesame oil
  • 3 green onions, thinly sliced
  • 2 teaspoons sesame seeds
  • 1 teaspoon neutral cooking oil, only if needed to prevent sticking

Time: 10 minutes prep, about 15 minutes cooking; 25 minutes total. Servings: 4.

How to Make Egg Roll in a Bowl

Complete bowl of beef and cabbage egg roll filling on a neutral tabletop
  1. Prepare the sauce: Stir the soy sauce and rice vinegar together in a small bowl. Prepare the ginger, garlic, and green onions. Set the green onions and sesame seeds aside for serving.
  2. Brown the beef: Heat a 12-inch skillet over medium-high heat. Add the beef, using the neutral oil only if needed to prevent sticking. Let the beef brown briefly, then break it into crumbles. Cook for 6 to 8 minutes, until browned, no pink remains, and the beef reaches 160°F (70°C). Spoon off excess fat so the filling does not turn greasy.
  3. Cook the aromatics: Reduce the heat to medium. Stir in the ginger and garlic for 30 to 60 seconds, until fragrant. Keep the garlic from darkening.
  4. Stir-fry the slaw: Add the coleslaw mix, in two batches if the skillet is too full to toss it easily. Cook uncovered, tossing frequently. Once the slaw begins to wilt, pour in the measured soy-vinegar sauce. Cook for 5 to 7 minutes total, starting to check the cabbage after about 3 minutes. Stop when it is wilted but still has some bite and the sauce coats the filling without pooling. If liquid collects in the skillet, keep tossing uncovered briefly to cook it off.
  5. Finish and serve: Remove the skillet from the heat and toss with the toasted sesame oil. Taste before adding any more soy sauce. Spoon the filling loosely into shallow bowls and top with the green onions and sesame seeds. Serve promptly.

How to Keep the Cabbage Crisp-Tender

The cabbage is ready when it has softened and reduced in volume but still holds distinct pieces, with carrot strips visible throughout. A smaller, crowded pan traps moisture and steams the slaw; use a 12-inch skillet and add the slaw in batches if necessary. Keep it uncovered, and take it off the heat before it becomes soft throughout.

Sauce and Salt Adjustments

Measure the low-sodium soy sauce rather than pouring it into the pan freely. The restrained sauce coats the filling without adding excess liquid, so there is no need for broth. Soy sauce brands vary, and regular soy sauce may make the same amount too salty; taste the finished filling before adding more.

Meat and Slaw Substitutions

Ground pork makes a richer bowl; drain excess fat after browning. Ground turkey or chicken also works. Add a little neutral oil if needed, and cook ground poultry to 165°F (75°C). In place of bagged slaw, use 16 ounces of freshly shredded cabbage and carrots.

For another ground-meat skillet dinner, try Ground Turkey Stir Fry with Broccoli and Rice.

Serving Egg Roll in a Bowl

Serve the filling directly in bowls with green onions and sesame seeds on top. Offer rice or cauliflower rice separately for anyone who wants a base. Sriracha or chili garlic sauce can be added at the table for heat.

For a different ground-beef bowl, try this Sweet Potato Burger Bowl with Ground Beef.

Leftovers and Reheating

Refrigerate cooled leftovers in an airtight container for up to 3 days. Reheat in a skillet over medium-low heat, stirring until hot, or microwave until heated through. The cabbage will be softer after storage; add fresh green onions and sesame seeds after reheating.

Freezing is not recommended if the crisp-tender texture matters. Thawed cabbage may be soft and watery.

Nutrition

Approximate nutrition per serving, based on 4 servings: 270 calories, 26g protein, 13g fat, and 10g carbohydrates. Per 100g of cooked filling: approximately 120 calories, 12g protein, 6g fat, and 4g carbohydrates. Values vary with the beef, slaw, amount of fat drained, and final cooked weight; optional oil and table sauces are not included.

Egg Roll in a Bowl

Ground beef, cabbage, and carrots are tossed with ginger, garlic, and a measured soy-vinegar sauce for a wrapper-free skillet meal.
Course: Main Course
Cuisine: American
Prep: 10 min
Cook: 15 min
Total: 25 min
Servings: 4 Calories: 270 kcal

Equipment

  • 12-inch skillet
  • Small bowl
  • Grater
  • Knife and cutting board

Ingredients

For the filling

  • 1 pound ground beef, preferably about 90% lean (450g)
  • 1 bag (16 ounces) cabbage-and-carrot coleslaw mix (450g)
  • 1 tablespoon finely grated fresh ginger
  • 3 garlic cloves, minced
  • 1 teaspoon neutral cooking oil, only if needed to prevent sticking

For the sauce and serving

  • 3 tablespoons low-sodium soy sauce
  • 1 tablespoon unseasoned rice vinegar
  • 1 teaspoon toasted sesame oil
  • 3 green onions, thinly sliced
  • 2 teaspoons sesame seeds

Instructions

  1. Stir the soy sauce and rice vinegar together in a small bowl. Prepare the ginger, garlic, and green onions; set the green onions and sesame seeds aside for serving.
  2. Heat a 12-inch skillet over medium-high heat. Add the beef, using neutral oil only if needed to prevent sticking.
  3. Let the beef brown briefly, then break it into crumbles. Cook for 6 to 8 minutes, until browned, no pink remains, and it reaches 160°F (70°C). Spoon off excess fat.
  4. Reduce the heat to medium. Stir in the ginger and garlic for 30 to 60 seconds, until fragrant, taking care not to let the garlic darken.
  5. Add the coleslaw mix, in batches if needed. Cook uncovered, tossing frequently. When the slaw begins to wilt, add the soy-vinegar sauce.
  6. Cook for 5 to 7 minutes total, starting to check the cabbage after about 3 minutes. Stop when it is wilted but still has some bite and the sauce coats the filling without pooling. If liquid collects, keep tossing uncovered briefly to cook it off.
  7. Remove the skillet from the heat and toss the filling with the sesame oil. Taste before adding any more soy sauce.
  8. Spoon loosely into shallow bowls and top with the green onions and sesame seeds. Serve promptly.

Tips

  • Use a roomy 12-inch skillet so moisture can escape instead of steaming the slaw.
  • Add the coleslaw mix in batches if the skillet is too full to toss easily.
  • Check the cabbage after about 3 minutes of cooking and stop while it still has some bite.
  • Measure the soy sauce and taste before adding more, since brands vary in saltiness.
  • Drain excess fat after browning to keep the filling from becoming greasy.

Variations

  • Ground Pork: Use ground pork for a richer bowl and drain excess fat after browning.
  • Ground Turkey or Chicken: Replace the beef with ground turkey or chicken, adding a little neutral oil if needed and cooking poultry to 165°F (75°C).
  • Freshly Shredded Slaw: Replace the bagged mix with 16 ounces of freshly shredded cabbage and carrots.

Notes

Refrigerate cooled leftovers in an airtight container for up to 3 days. Reheat in a skillet over medium-low heat or in the microwave until hot; add fresh green onions and sesame seeds afterward. Freezing is not recommended because the cabbage may become soft and watery.

Nutrition

Calories: 270 kcal | Protein: 26 g | Fat: 13 g | Carbohydrates: 10 g

Greek Yogurt Marinated Chicken

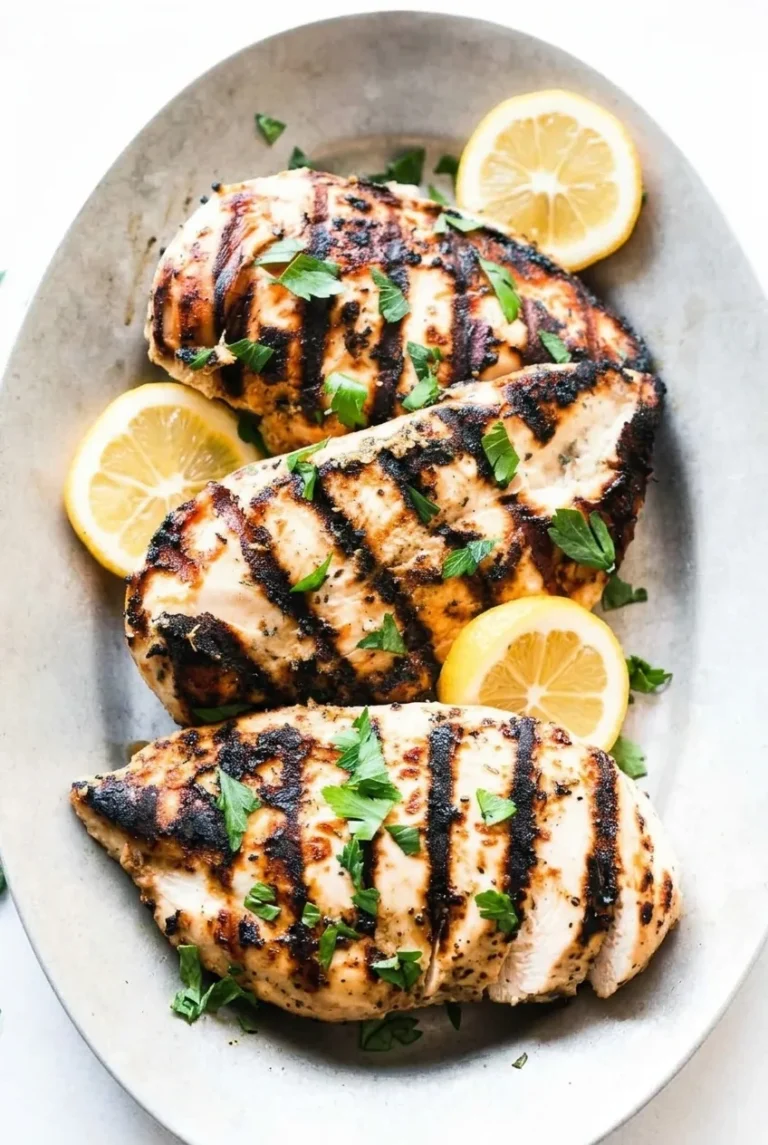
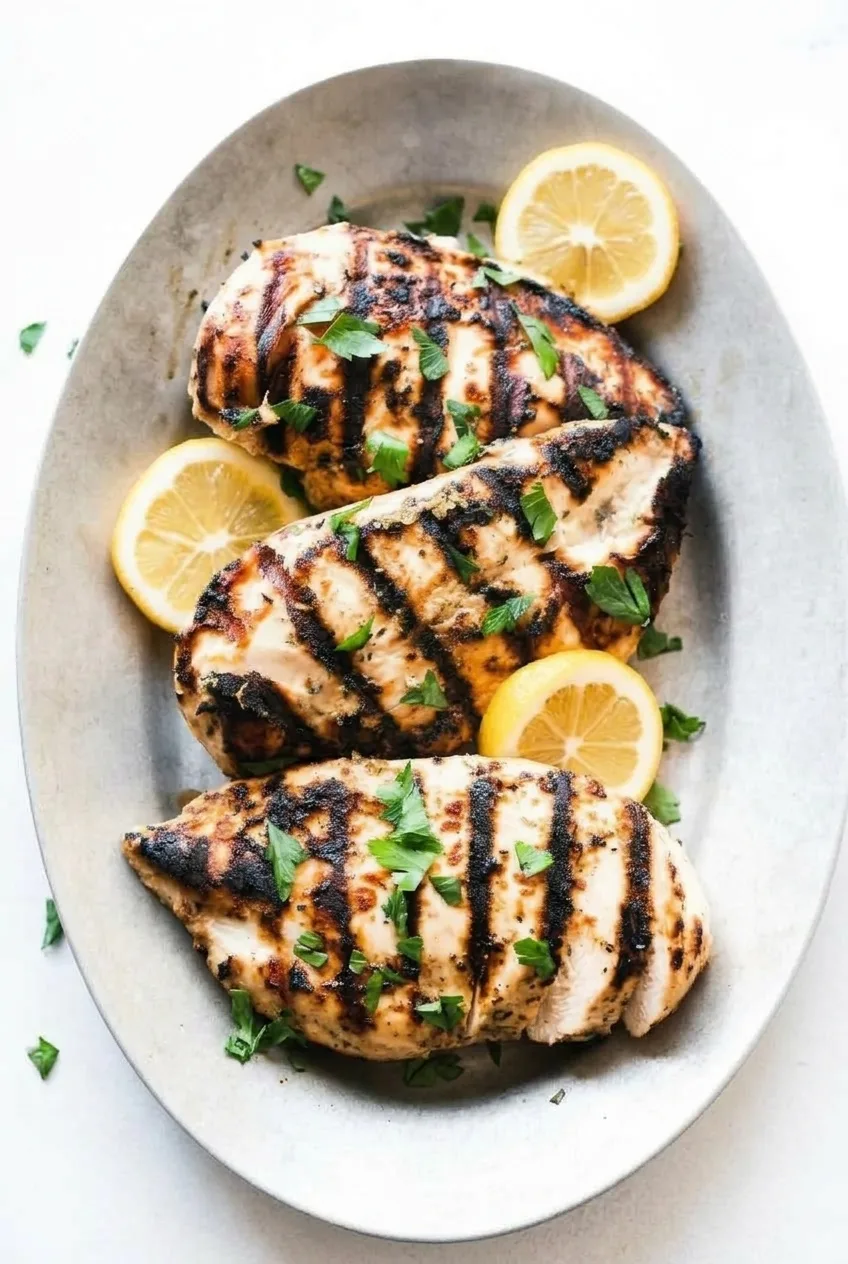
Whole chicken breasts marinate in Greek yogurt, lemon, garlic, and oregano before grilling. They should come off the grill with browned patches and distinct marks, then rest before one breast is sliced for the platter.

The key is to even out the thick ends and check each breast with a thermometer. A heavy yogurt coating can darken before the center cooks, so let the excess drip off and keep a cooler area of the grill available. Allow at least 2 hours for refrigerated marinating; the recipe makes three generous servings.

Ingredients for Greek Yogurt Marinated Chicken

Full platter of three grilled yogurt-marinated chicken breasts with parsley and cut lemon
  • 3 boneless skinless chicken breasts, about 1 1/2 pounds total (680g)
  • 1/2 cup plain Greek yogurt (120g)
  • 1 large lemon, for 1 tablespoon juice and cut pieces for serving
  • 2 garlic cloves, minced
  • 1 tablespoon olive oil
  • 1 teaspoon dried oregano
  • 1 teaspoon kosher salt, adjusted for the brand used
  • 1/2 teaspoon freshly ground black pepper
  • 2 tablespoons chopped fresh flat-leaf parsley
  • About 1 teaspoon neutral oil for the grill grates, optional
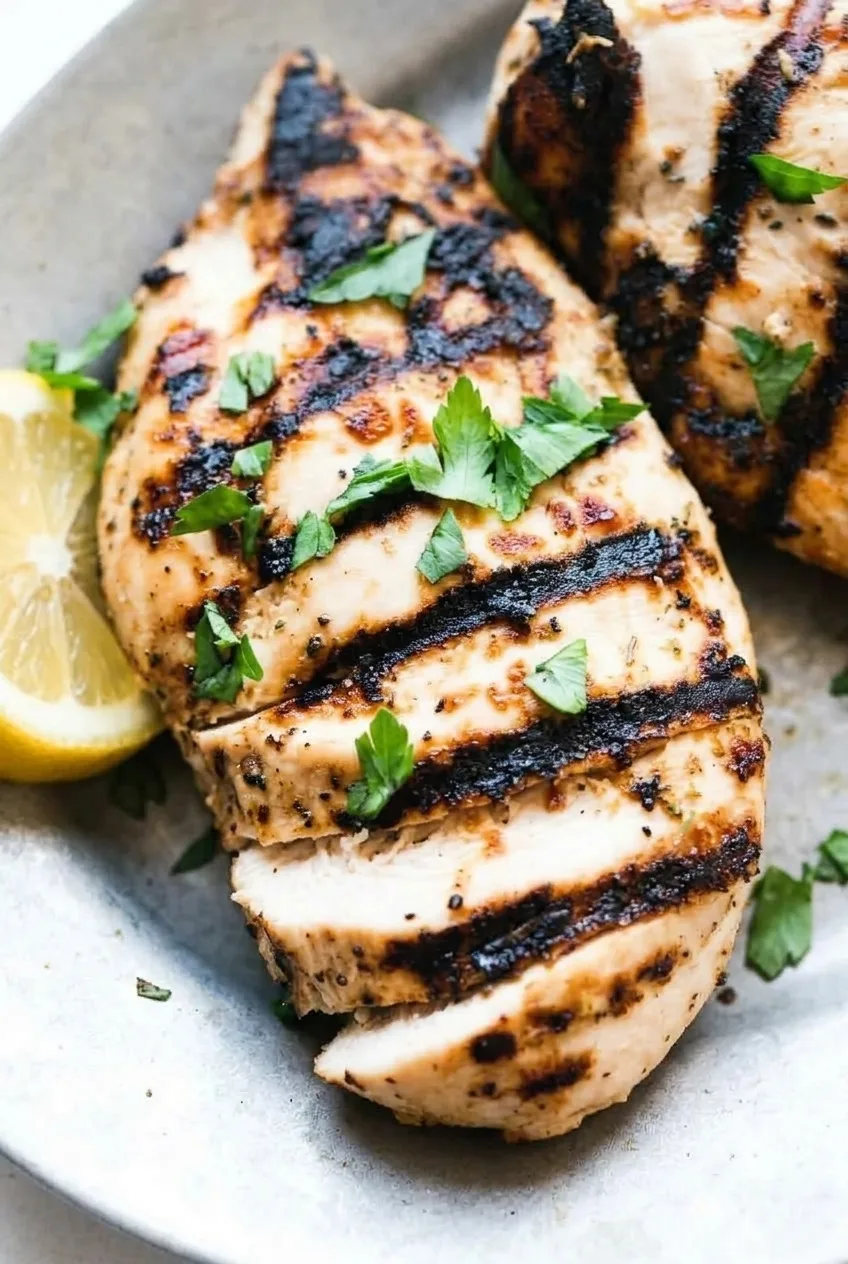
Close view of thick chicken breast slices showing a pale interior and dark grill marks

How to Grill Greek Yogurt Marinated Chicken

  1. Even out the breasts: Pat the chicken dry. Gently pound the thick ends until each breast is roughly 3/4 to 1 inch thick, keeping all three breasts whole. This helps the centers cook without drying out the thinner ends.
  2. Marinate: Mix the yogurt, 1 tablespoon lemon juice, garlic, olive oil, oregano, salt, and pepper in a bowl or marinating container. Coat the chicken on all sides, cover, and refrigerate for at least 2 hours, preferably 2 to 8 hours. Save the remaining lemon for serving.
  3. Prepare the grill: Preheat for 10 to 15 minutes over medium-high direct heat, roughly 425°F (220°C) to 450°F (230°C) if your grill has a gauge. Keep a cooler area available. Clean the grates and, if needed, apply a thin coating of neutral oil without letting it pool.
  4. Grill: Lift the breasts from the marinade, let heavy excess coating drip off, and discard the used marinade. Place the breasts apart on the grates. Close the lid between checks when practical and grill for about 5 to 8 minutes per side, turning once when the chicken releases readily. If the surface darkens before the center is done, move it to the cooler area.
  5. Check and rest: Start checking the thickest part of each breast around 10 minutes total. Cooking generally takes 12 to 16 minutes, but each breast must reach 165°F (75°C). Grill marks show surface browning, not internal doneness. Rest for 5 minutes.
  6. Serve: Cut one rested breast into thick crosswise slices, keeping them together in the breast’s original shape. Arrange it with the two whole breasts on a shallow platter. Scatter parsley over the chicken and tuck cut lemon pieces alongside it.

How Long to Marinate Whole Chicken Breasts

Keep the chicken refrigerated while it marinates. Two to 8 hours is a useful planning window for whole breasts; cook them within 24 hours of adding them to the marinade. Marinating is hands-off time, separate from the roughly 15 minutes of prep and 12 to 16 minutes of grilling.

Using Thighs or an Oven Instead

Boneless skinless thighs can take the same marinade, but their size and cooking time will differ. Check each piece with a thermometer rather than using the breast timing.

Without a grill, place the whole marinated breasts on a baking pan and roast at 400°F (205°C). Start checking around 25 minutes and cook until the thickest part reaches 165°F. Roasting will not produce the grill marks of this version.

For a different grilling flavor profile, try this Greek chicken marinade.

Serving and Leftovers

Serve the chicken with the cut lemon for squeezing, alongside rice, orzo, couscous, or a crisp salad. Refrigerate cooked leftovers in an airtight container for up to 4 days. Reheat gently to limit drying, or use the chicken cold in a salad or wrap.

Nutrition

Approximate nutrition per serving: 350 calories, 55g protein, 12g fat, and 4g carbohydrates. Approximate nutrition per 100g of cooked chicken: 180 calories, 28g protein, 6g fat, and 2g carbohydrates. Estimates are based on three servings and an approximate cooked yield; actual values vary with chicken size, yogurt choice, and how much marinade remains on the chicken.

Greek Yogurt Marinated Chicken

Whole chicken breasts marinate in Greek yogurt, lemon, garlic, and oregano, then grill until browned and cooked through.
Course: Main Course
Cuisine: Greek
Prep: 15 min
Cook: 21 min
Total: 156 min
Servings: 3 Calories: 350 kcal

Equipment

  • Grill
  • Meat mallet
  • Mixing bowl or marinating container
  • Instant-read thermometer
  • Tongs
  • Shallow platter

Ingredients

For the Chicken

  • 3 boneless skinless chicken breasts, about 1 1/2 pounds total (680 g)

For the Marinade

  • 1/2 cup plain Greek yogurt (120 g)
  • 1 large lemon, juiced for 1 tablespoon juice, with the remainder cut into pieces for serving
  • 2 garlic cloves, minced
  • 1 tablespoon olive oil
  • 1 teaspoon dried oregano
  • 1 teaspoon kosher salt, adjusted for the brand used
  • 1/2 teaspoon freshly ground black pepper

For Grilling and Serving

  • 2 tablespoons chopped fresh flat-leaf parsley
  • About 1 teaspoon neutral oil for the grill grates, optional

Instructions

  1. Pat the chicken dry. Gently pound the thick ends until each whole breast is roughly 3/4 to 1 inch thick.
  2. Mix the yogurt, 1 tablespoon lemon juice, garlic, olive oil, oregano, salt, and pepper in a bowl or marinating container.
  3. Coat the chicken on all sides, cover, and refrigerate for at least 2 hours, preferably 2 to 8 hours.
  4. Preheat the grill for 10 to 15 minutes over medium-high direct heat, about 425°F (220°C) to 450°F (230°C). Keep a cooler area available.
  5. Clean the grates and, if needed, apply a thin coating of neutral oil without letting it pool.
  6. Lift the chicken from the marinade and let heavy excess coating drip off. Discard the used marinade.
  7. Place the breasts apart on the grates. Close the lid between checks when practical and grill for about 5 to 8 minutes per side, turning once when the chicken releases readily. Move chicken to the cooler area if the surface darkens before the center is done.
  8. Start checking the thickest part of each breast around 10 minutes total. Continue grilling until each breast reaches 165°F (75°C), usually 12 to 16 minutes total.
  9. Rest the chicken for 5 minutes. Slice one breast into thick crosswise slices, keeping the slices together in its original shape, and arrange it with the two whole breasts on a platter.
  10. Scatter parsley over the chicken and tuck the cut lemon pieces alongside it.

Tips

  • Pound the thick ends evenly so the breasts cook more uniformly.
  • Keep the chicken refrigerated while it marinates and cook it within 24 hours of adding the marinade.
  • Let excess yogurt coating drip off before grilling to help limit surface darkening.
  • Keep a cooler area of the grill available in case the outside browns before the center is done.
  • Use a thermometer to check every breast; grill marks do not indicate internal doneness.

Variations

  • Boneless Skinless Chicken Thighs: Use the same marinade, but check each thigh with a thermometer rather than following the breast timing.
  • Oven-Roasted Chicken: Roast the whole marinated breasts on a baking pan at 400°F (205°C), checking around 25 minutes and cooking until the thickest part reaches 165°F (75°C).

Notes

Refrigerate cooked leftovers in an airtight container for up to 4 days. Reheat gently or serve cold in a salad or wrap. Approximate nutrition per 100 g cooked chicken: 180 calories, 28 g protein, 6 g fat, and 2 g carbohydrates.

Nutrition

Calories: 350 kcal | Protein: 55 g | Fat: 12 g | Carbohydrates: 4 g

Garlic Lime Chicken Bowls

Browned garlic-lime chicken, fluffy white rice, and chunky pineapple salsa make up these generously filled bowls. The chicken cooks as loose pieces in the air fryer, with no skewers to manage. A short yogurt marinade coats the lean breast meat, while a separate honey-lime glaze goes on only at the end so the chicken gets a light sheen without the honey scorching. Add the fresh salsa just before serving to keep the pineapple distinct and the rice from turning soggy.

Servings: 4 bowls. Time: About 55–75 minutes, including 20–30 minutes of marinating; allow longer if the chicken needs multiple air-fryer batches.

Ingredients for Garlic Lime Chicken Bowls

Close view of lightly glazed chicken, distinct rice grains, and fresh pineapple salsa in a garlic lime chicken bowl
  • 1½ lb boneless, skinless chicken breasts, cut into roughly 1½-inch pieces (680g)
  • ¼ cup plain Greek yogurt (60g)
  • 3 medium limes, for about ¼ cup juice and 1 teaspoon zest total
  • 4 garlic cloves, minced, divided
  • 1 tablespoon olive oil
  • 2 tablespoons plus 1 teaspoon honey, divided
  • 1¼ teaspoons chili powder, divided
  • About 1 teaspoon kosher salt, divided, plus more to taste
  • 1½ cups uncooked long-grain white rice (280g), plus water as directed on the package
  • 2 cups fresh pineapple, cut into chunky bite-size pieces and a few short spears (330g)
  • 1 medium red bell pepper, diced
  • ¼ cup finely diced red onion (40g)
  • ¼ cup chopped fresh cilantro, plus more for serving

You can use about 4–4½ cups prepared plain white rice instead of cooking it from dry. For a spicier salsa, add 1–2 teaspoons finely chopped jalapeño or ancho chile to taste.

How to Make Garlic Lime Chicken Bowls

Complete garlic lime chicken and pineapple salsa rice bowl on a neutral tabletop
  1. Marinate the chicken: Mix the yogurt, 2 tablespoons lime juice, half the zest, 3 minced garlic cloves, olive oil, 1 teaspoon honey, 1 teaspoon chili powder, and about ¾ teaspoon salt. Add the evenly cut chicken and toss to coat. Cover and refrigerate for 20–30 minutes.
  2. Cook the rice: Cook the rice with the package-directed amount of water. Let it stand briefly, then fluff with a fork and keep warm.
  3. Make the pineapple salsa: Gently combine the pineapple, bell pepper, red onion, cilantro, 1 tablespoon lime juice, and a pinch of salt. Add the optional chile if using. Refrigerate until serving, leaving the pineapple pieces chunky.
  4. Warm the glaze: In a small saucepan, combine the remaining 2 tablespoons honey, 1 tablespoon lime juice, 1 minced garlic clove, remaining zest, and ¼ teaspoon chili powder. Warm over low heat for 2–3 minutes, until pourable and fragrant. Do not let it boil hard or darken. Set aside.
  5. Air-fry the chicken: Preheat the air fryer if its instructions call for it. Lift the chicken from the marinade, letting thick excess coating drip off, and discard the used marinade. Arrange the pieces in a single layer with a little space between them; cook in batches rather than stacking. Air-fry at 400°F (205°C), turning or shaking about halfway through. Start checking the thickest pieces at 8 minutes. Allow an estimated 10–16 minutes per batch, but cook until the edges are browned and the center of the thickest piece reaches 165°F (75°C).
  6. Glaze and finish: Brush or toss the cooked chicken with a thin coating of the clean honey-lime glaze. Return it to the air fryer at 400°F for about 1 minute, just until lightly glossy. Remove promptly and rest for 2–3 minutes.
  7. Assemble the bowls: Divide the warm rice among four bowls. Add the chicken, then scatter the pineapple salsa over and around it, leaving some rice and chicken visible. Finish with extra cilantro and serve immediately.

How to Keep the Chicken Tender and Browned

Similar-size pieces finish more evenly. Letting excess yogurt coating drip off and leaving space in the basket helps the edges brown instead of staying pale and wet. If the pieces do not fit in one layer, cook another batch.

Loose pieces may cook faster than chicken on skewers, so skewer timing is not a reliable guide. The 10–16-minute range is an estimate: begin checking at 8 minutes and use the thickest piece’s temperature to decide when the chicken is done.

Why the Honey-Lime Glaze Goes on Last

Honey can darken quickly at high heat. Warm the separate glaze gently, apply a thin coating after the chicken has cooked, and return it to the air fryer only briefly to set the sheen. Never use the marinade that touched raw chicken as a finishing glaze.

Storing and Reassembling the Bowls

For meal prep or leftovers, promptly chill the chicken, rice, and salsa in separate covered containers and refrigerate for a few days. Warm the chicken and rice until hot, then add the salsa cold. Keeping the juicy pineapple off the rice until serving helps the grains stay distinct.

For another chicken bowl dinner, try these teriyaki chicken and broccoli bowls.

Nutrition

Approximate nutrition per bowl, based on 4 bowls: 590 calories, 46g protein, 9g fat, and 82g carbohydrates. Per 100g of prepared food: approximately 120 calories, 9g protein, 2g fat, and 16g carbohydrates. Values vary with ingredient brands, how much marinade remains on the chicken, and the rice’s cooked weight.

Garlic Lime Chicken Bowls

Air-fried garlic-lime chicken is served with white rice and chunky pineapple salsa, finished with a honey-lime glaze.
Course: Main Course
Cuisine: Global
Prep: 30 min
Cook: 35 min
Total: 65 min
Servings: 4 Calories: 590 kcal per bowl; approximately 120 kcal per 100 g

Equipment

  • Air fryer
  • Rice cooking pot
  • Small saucepan
  • Mixing bowls
  • Meat thermometer

Ingredients

For the Chicken and Marinade

  • 1.5 lb boneless, skinless chicken breasts, cut into roughly 1.5-inch pieces (680 g)
  • 1/4 cup plain Greek yogurt (60 g)
  • 2 tablespoons lime juice
  • 1/2 teaspoon lime zest
  • 3 garlic cloves, minced
  • 1 tablespoon olive oil
  • 1 teaspoon honey
  • 1 teaspoon chili powder
  • About 3/4 teaspoon kosher salt

For the Rice

  • 1.5 cups uncooked long-grain white rice (280 g)
  • Water as directed on the package

For the Pineapple Salsa

  • 2 cups fresh pineapple, cut into chunky bite-size pieces, plus a few short spears (330 g)
  • 1 medium red bell pepper, diced
  • 1/4 cup finely diced red onion (40 g)
  • 1/4 cup chopped fresh cilantro, plus more for serving
  • 1 tablespoon lime juice
  • A pinch of salt
  • 1–2 teaspoons finely chopped jalapeño or ancho chile, optional

For the Honey-Lime Glaze

  • 2 tablespoons honey
  • 1 tablespoon lime juice
  • 1 garlic clove, minced
  • Remaining lime zest
  • 1/4 teaspoon chili powder

For Serving

  • Remaining lime juice from 3 medium limes, as needed to make about 1/4 cup total
  • Extra chopped cilantro

Instructions

  1. Mix the yogurt, 2 tablespoons lime juice, half the lime zest, 3 minced garlic cloves, olive oil, 1 teaspoon honey, 1 teaspoon chili powder, and about 3/4 teaspoon salt.
  2. Add the chicken and toss to coat evenly. Cover and refrigerate for 20–30 minutes.
  3. Cook the rice with the amount of water directed on the package. Let it stand briefly, fluff with a fork, and keep warm.
  4. Gently combine the pineapple, bell pepper, red onion, cilantro, 1 tablespoon lime juice, and a pinch of salt. Add the optional chile if desired, then refrigerate until serving.
  5. Combine the remaining 2 tablespoons honey, 1 tablespoon lime juice, 1 minced garlic clove, remaining lime zest, and 1/4 teaspoon chili powder in a small saucepan.
  6. Warm the glaze over low heat for 2–3 minutes, until pourable and fragrant. Do not let it boil hard or darken; set aside.
  7. Preheat the air fryer if its instructions call for it. Lift the chicken from the marinade, let thick excess coating drip off, and discard the used marinade.
  8. Arrange the chicken in a single layer with space between pieces, cooking in batches if needed. Air-fry at 400°F (205°C), turning or shaking about halfway through.
  9. Start checking the thickest pieces at 8 minutes. Cook for an estimated 10–16 minutes per batch, until browned and the thickest piece reaches 165°F (75°C).
  10. Brush or toss the cooked chicken with a thin coating of the clean glaze. Return it to the air fryer at 400°F (205°C) for about 1 minute, until lightly glossy.
  11. Rest the chicken for 2–3 minutes. Divide the warm rice among four bowls, add the chicken and salsa, and finish with extra cilantro. Serve immediately.

Tips

  • Cut the chicken into similar-size pieces so they cook evenly.
  • Let excess yogurt coating drip off to help the chicken brown.
  • Keep the chicken in a single layer; cook additional batches rather than stacking pieces.
  • Begin checking the chicken at 8 minutes because loose pieces may cook faster than skewered chicken.
  • Apply the honey-lime glaze only after cooking and return the chicken to the air fryer briefly to avoid scorching the honey.

Variations

  • Spicy Pineapple Salsa: Add 1–2 teaspoons finely chopped jalapeño or ancho chile to the salsa.
  • Prepared Rice Shortcut: Use about 4–4.5 cups prepared plain white rice instead of cooking rice from dry.

Notes

Refrigerate chicken, rice, and salsa promptly in separate covered containers for a few days. Reheat the chicken and rice until hot and add the salsa cold. Discard the marinade that touched raw chicken; the thickest chicken piece must reach 165°F (75°C).

Nutrition

Calories: 590 kcal per bowl; approximately 120 kcal per 100 g | Protein: 46 g per bowl; approximately 9 g per 100 g | Fat: 9 g per bowl; approximately 2 g per 100 g | Carbohydrates: 82 g per bowl; approximately 16 g per 100 g