Author

Julia

Browsing

Parmesan Pasta Soup

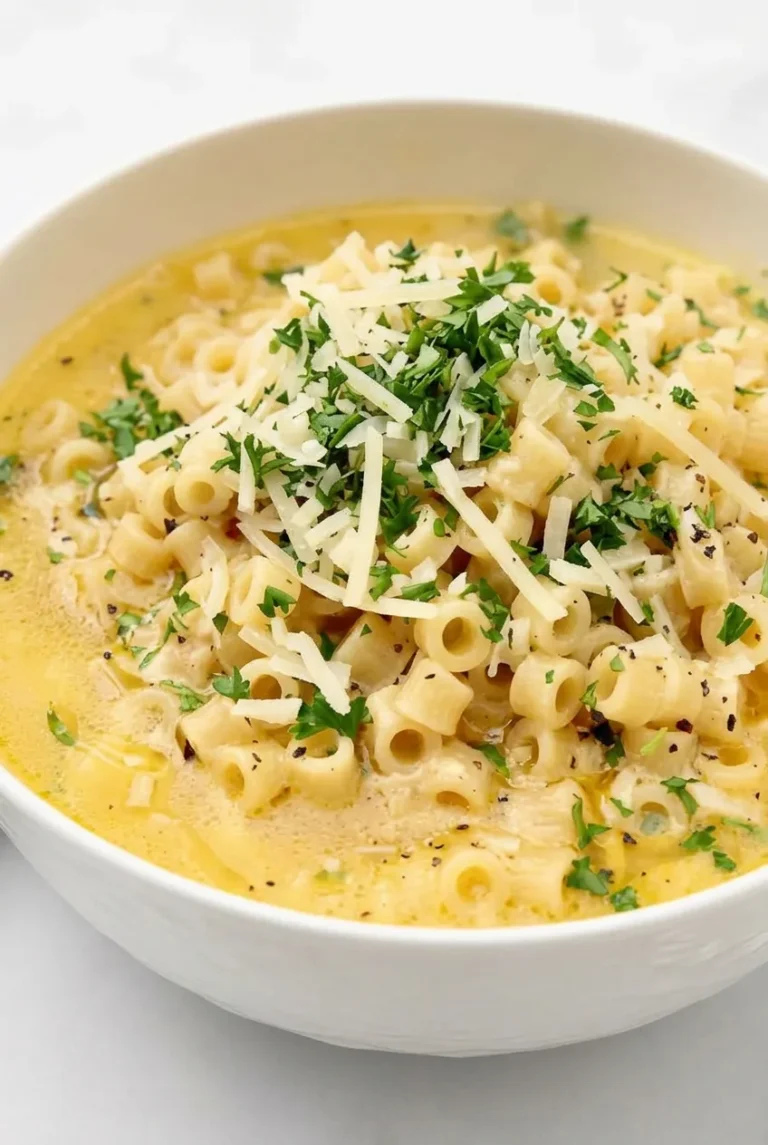
Parmesan pasta soup should be creamy and pale golden, but loose enough for broth to pool around the ditalini. This version pairs the small pasta with shredded chicken and finishes each bowl with Parmesan, parsley, and black pepper.

Cook the ditalini separately and add it when serving. It stays distinct instead of soaking up the broth, and leftovers are easier to reheat without turning the soup thick.

Ingredients for Parmesan Pasta Soup
Close view of ditalini, shredded chicken, Parmesan shreds, parsley, and pepper in creamy golden soup broth.

Makes 6 main-course servings. Prep time: 15 minutes. Cook time: about 20 minutes. Total time: about 35 minutes.

  • 8 ounces ditalini pasta (225g)
  • 1 tablespoon olive oil
  • 1 medium yellow onion, finely diced (about 1 cup)
  • 1 medium carrot, finely diced (about 1/2 cup)
  • 1 celery rib, finely diced (about 1/2 cup)
  • 3 garlic cloves, minced
  • 1 teaspoon Italian seasoning
  • 6 cups low-sodium chicken broth, plus up to 1 additional cup for thinning
  • 2 cups cooked shredded chicken (about 280g)
  • 3/4 cup heavy cream
  • 1 cup freshly grated Parmesan (about 90g), divided
  • 1/4 cup finely chopped fresh flat-leaf parsley
  • Kosher salt and freshly ground black pepper, to taste

Finely grate the Parmesan that will go into the broth so it melts readily. Reserve some shreds for topping the bowls. Low-sodium broth leaves room to adjust the salt after the cheese is added.

How to Make Parmesan Pasta Soup
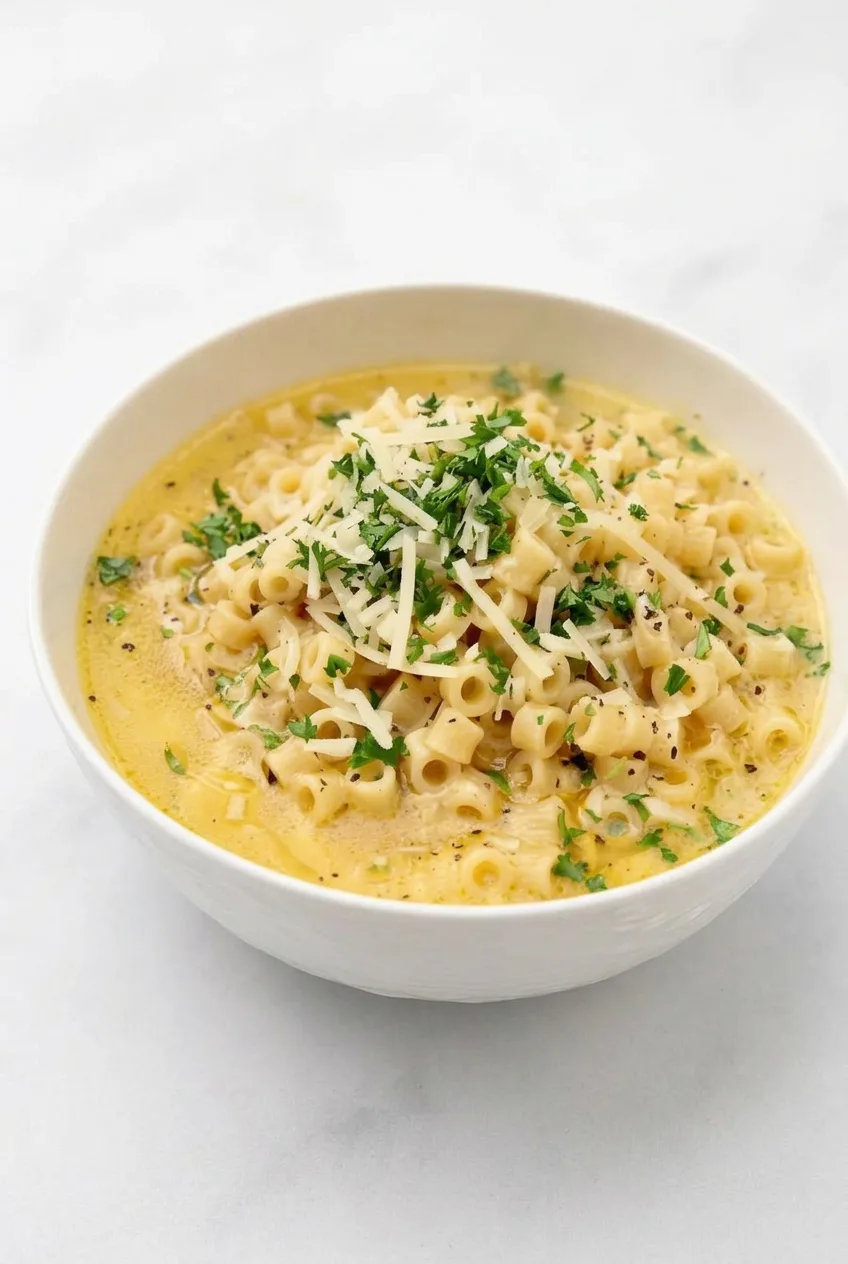
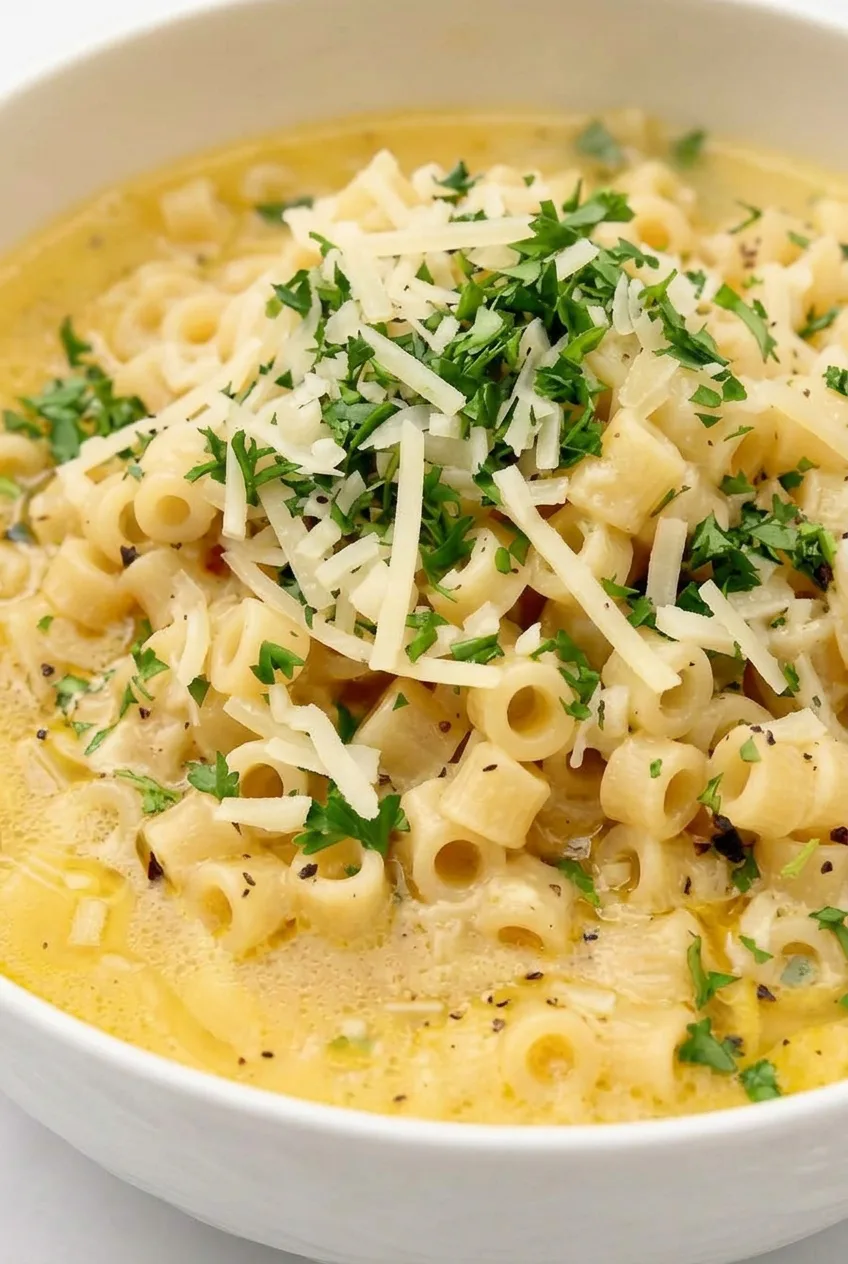
Wide serving view of creamy Parmesan pasta soup in a white bowl with ditalini, chicken, Parmesan, and parsley.
  1. Cook the ditalini: Bring a medium saucepan of salted water to a boil. Start checking the pasta 2 minutes before the package’s al dente time; drain it when tender around the edges but still faintly firm in the center, about 1 to 2 minutes shy of al dente. Set aside rather than adding it to the soup pot.
  2. Soften the vegetables: Meanwhile, heat the olive oil in a 5- to 6-quart Dutch oven or heavy soup pot over medium heat. Add the onion, carrot, celery, and a pinch of salt. Cook uncovered, stirring occasionally, for 6 to 8 minutes. Check after about 5 minutes: the vegetables should be glossy and softening, not browning. Stir in the garlic and Italian seasoning for the final 30 seconds.
  3. Simmer the broth: Pour in 6 cups of chicken broth. Bring just to a boil, then reduce to a gentle medium-low simmer. Cook mostly uncovered for 10 to 12 minutes, until the carrot and celery are tender. Look for small, quiet bubbles; partially cover the pot if the broth is reducing too quickly.
  4. Warm the chicken: Stir in the shredded chicken and simmer gently for 3 to 4 minutes, until hot throughout.
  5. Finish with cream and Parmesan: Reduce the heat to low. Stir in the cream, then gradually stir in about 3/4 cup of the Parmesan until melted and the broth is smooth and lightly opaque, about 2 to 3 minutes. Do not let it boil hard. Taste, add black pepper, and season with more salt only if needed. Let stand off the heat for 3 to 5 minutes.
  6. Assemble the bowls: Divide the warm ditalini among six bowls. Ladle the chicken and broth around and over the pasta. If needed, add a little warm broth so liquid pools around it. Top with the remaining Parmesan, parsley, and more black pepper. Serve hot.

Why Cook the Ditalini Separately?

Ditalini continues absorbing liquid after cooking. Leaving it in the soup pot can make the pasta swollen and the broth too thick, particularly in leftovers. Cooking it just shy of al dente gives it room to soften in the hot soup.

If serving the entire pot immediately, you can stir in the cooked pasta just before ladling. Otherwise, add it to individual bowls and store any remaining pasta separately.

How to Keep the Parmesan Broth Smooth and Brothy

Add the cream and finely grated Parmesan only after the vegetables have simmered, with the heat on low. Stir in the cheese gradually and avoid a hard boil afterward; high heat can leave the broth looking greasy or grainy. Taste for salt once the Parmesan has melted, since both cheese and broth vary in saltiness.

The soup should flow easily from a ladle rather than coat the pasta like a sauce. If it thickens, add warm broth a few tablespoons at a time until liquid is visible around the pasta again.

Substitutions and Serving

Small shells, elbows, or mini bow ties can replace ditalini; cook them separately to the same slightly firm stage. For a meatless version, use vegetable broth and omit the chicken. Half-and-half can replace the heavy cream, though the broth will be less rich and opaque.

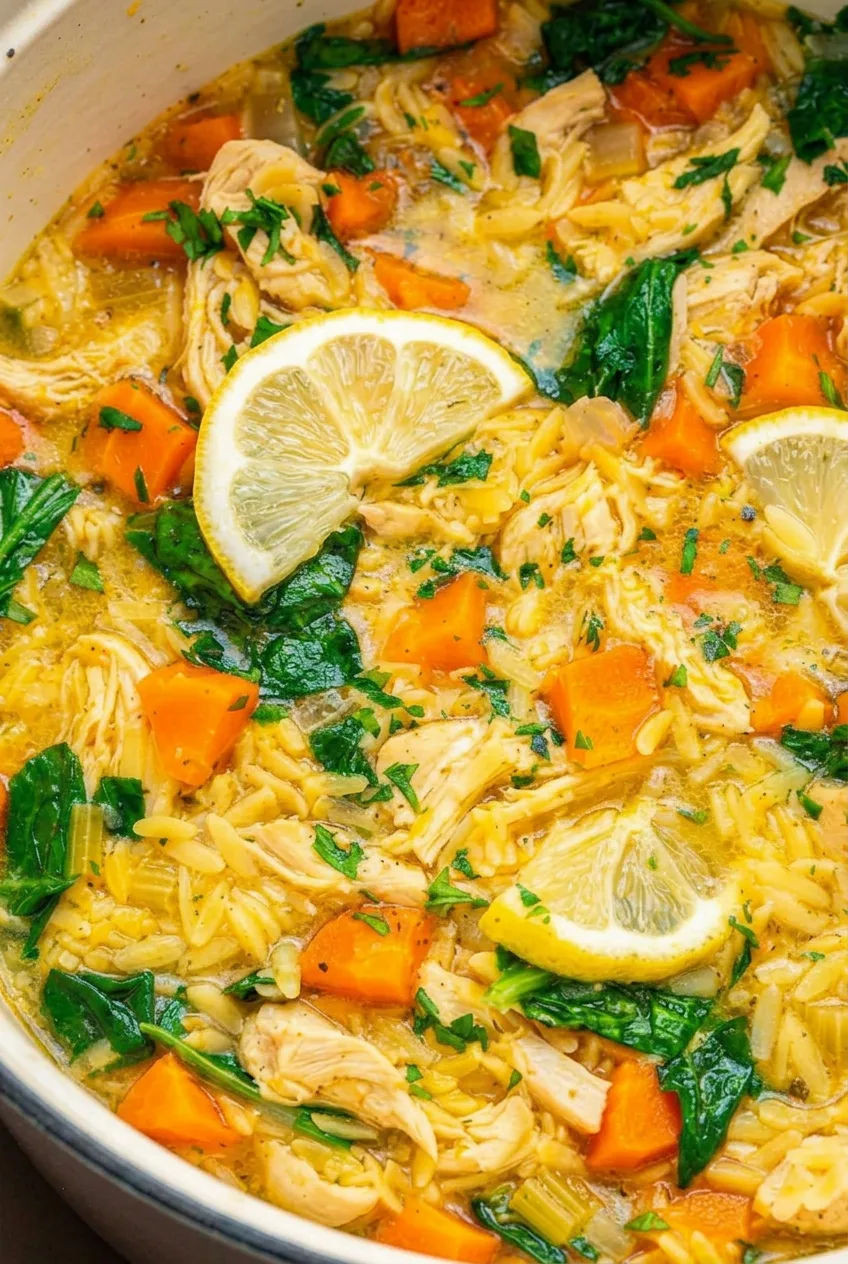
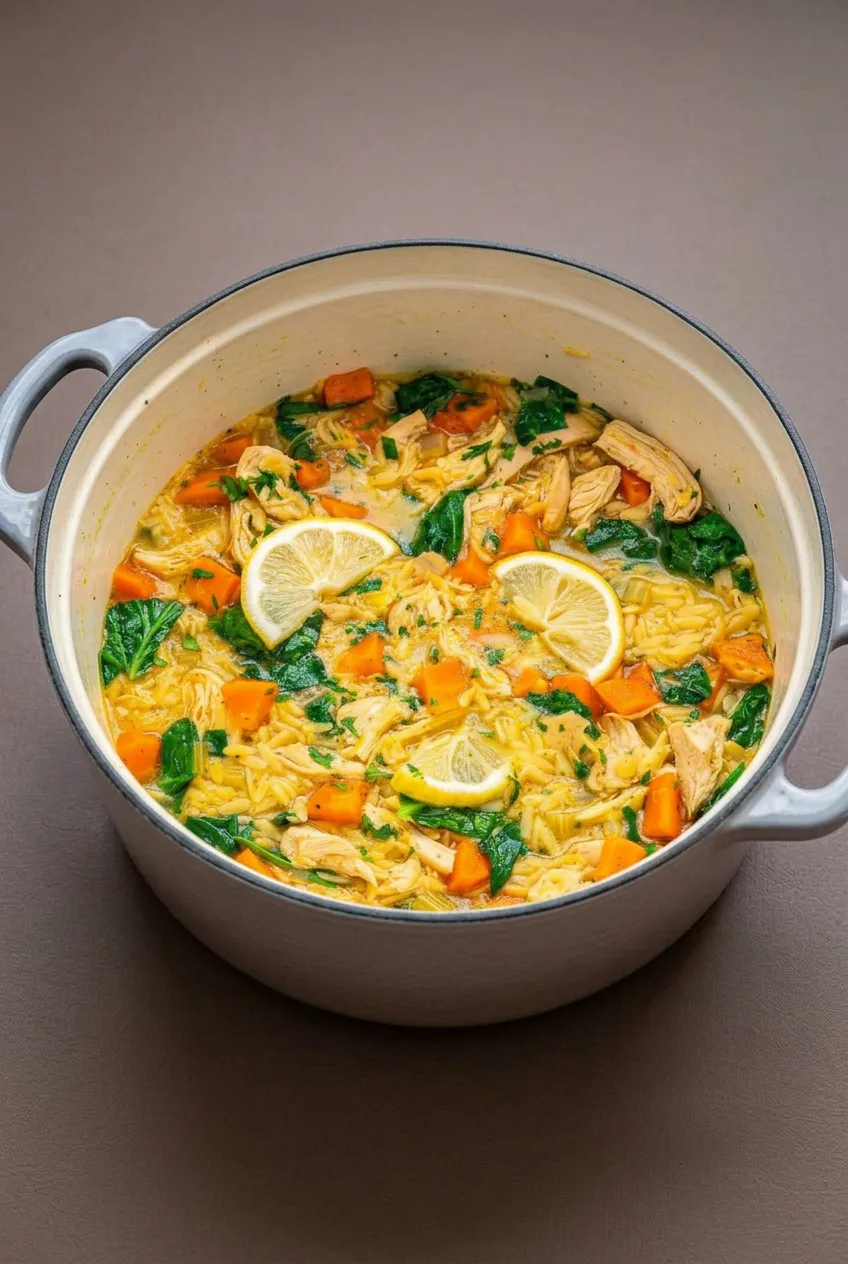
Serve with crusty bread or focaccia. For a brighter chicken-and-pasta soup, try this Lemon Chicken Orzo Soup with Spinach.

How to Store and Reheat

Cool the soup and pasta, then refrigerate them in separate airtight containers. Keep extra Parmesan and parsley separate for topping reheated bowls. Follow standard food-safety guidance for storing cooked chicken soup.

Reheat the soup gently on the stovetop over medium-low heat without boiling it hard. Add broth if it has thickened, then warm only the pasta you need in the hot soup just before serving. Finish each bowl with Parmesan, parsley, and pepper.

For make-ahead prep, prepare the soup and pasta separately and assemble bowls when ready to eat. If freezing, leave out the pasta and cook fresh ditalini after the soup base has thawed and been gently reheated. Dairy-based soup may change texture after freezing; stir or whisk gently and add broth as needed.

Nutrition

Approximate per serving, based on 6 servings: 420 calories, 28g protein, 20g fat, and 33g carbohydrates. Approximate per 100g of prepared soup with pasta: 95 calories, 6g protein, 4g fat, and 7g carbohydrates. Values vary with the broth, chicken, Parmesan, and amount of extra broth used.

Parmesan Pasta Soup

A creamy, pale-golden chicken soup with ditalini pasta, Parmesan, and fresh parsley.
Course: Soup
Cuisine: Italian
Prep: 15 min
Cook: 20 min
Total: 35 min
Servings: 6 Calories: 420 kcal

Equipment

  • Medium saucepan
  • Colander
  • 5- to 6-quart Dutch oven or heavy soup pot
  • Ladle

Ingredients

For the Pasta

  • 8 ounces ditalini pasta (225 g)

For the Soup

  • 1 tablespoon olive oil
  • 1 medium yellow onion, finely diced (about 1 cup)
  • 1 medium carrot, finely diced (about 1/2 cup)
  • 1 celery rib, finely diced (about 1/2 cup)
  • 3 garlic cloves, minced
  • 1 teaspoon Italian seasoning
  • 6 cups low-sodium chicken broth, plus up to 1 additional cup for thinning
  • 2 cups cooked shredded chicken (about 280 g)
  • 3/4 cup heavy cream
  • 1 cup freshly grated Parmesan (about 90 g), divided
  • 1/4 cup finely chopped fresh flat-leaf parsley
  • Kosher salt and freshly ground black pepper, to taste

Instructions

  1. Bring a medium saucepan of salted water to a boil. Cook the ditalini until tender around the edges but still faintly firm in the center, about 1 to 2 minutes shy of al dente. Drain and set aside.
  2. Heat the olive oil in a 5- to 6-quart Dutch oven or heavy soup pot over medium heat. Add the onion, carrot, celery, and a pinch of salt.
  3. Cook the vegetables uncovered, stirring occasionally, until glossy and softened but not browned, 6 to 8 minutes. Stir in the garlic and Italian seasoning for the final 30 seconds.
  4. Pour in 6 cups of chicken broth. Bring to a boil, then reduce the heat to a gentle medium-low simmer. Cook mostly uncovered until the carrot and celery are tender, 10 to 12 minutes.
  5. Stir in the shredded chicken and simmer gently until heated through, 3 to 4 minutes.
  6. Reduce the heat to low. Stir in the cream, then gradually add about 3/4 cup of the Parmesan, stirring until melted and the broth is smooth, 2 to 3 minutes. Do not boil hard.
  7. Season with black pepper and add salt if needed. Remove from the heat and let stand for 3 to 5 minutes.
  8. Divide the warm ditalini among 6 bowls. Ladle the chicken and broth over the pasta, adding warm broth as needed for a looser consistency. Top with the remaining Parmesan, parsley, and more black pepper.

Tips

  • Cook the ditalini separately so it does not absorb too much broth or become swollen in leftovers.
  • Finely grate the Parmesan for smoother melting in the broth.
  • Keep the heat low after adding cream and cheese to prevent a grainy or greasy broth.
  • Add warm broth a few tablespoons at a time if the soup thickens.
  • Taste for salt only after the Parmesan has melted, since broth and cheese vary in saltiness.

Variations

  • Meatless Parmesan Pasta Soup: Use vegetable broth and omit the shredded chicken.
  • Half-and-Half Version: Replace the heavy cream with half-and-half for a lighter, less rich broth.
  • Alternate Pasta: Use small shells, elbows, or mini bow ties instead of ditalini, cooking them separately until slightly firm.
Notes

Store soup and pasta separately in airtight containers. Reheat the soup gently over medium-low heat without hard boiling, thinning with broth if needed. For freezing, freeze the soup base without pasta and cook fresh pasta after thawing and reheating.

Nutrition

Calories: 420 kcal | Protein: 28 g | Fat: 20 g | Carbohydrates: 33 g

Roasted Cauliflower Soup

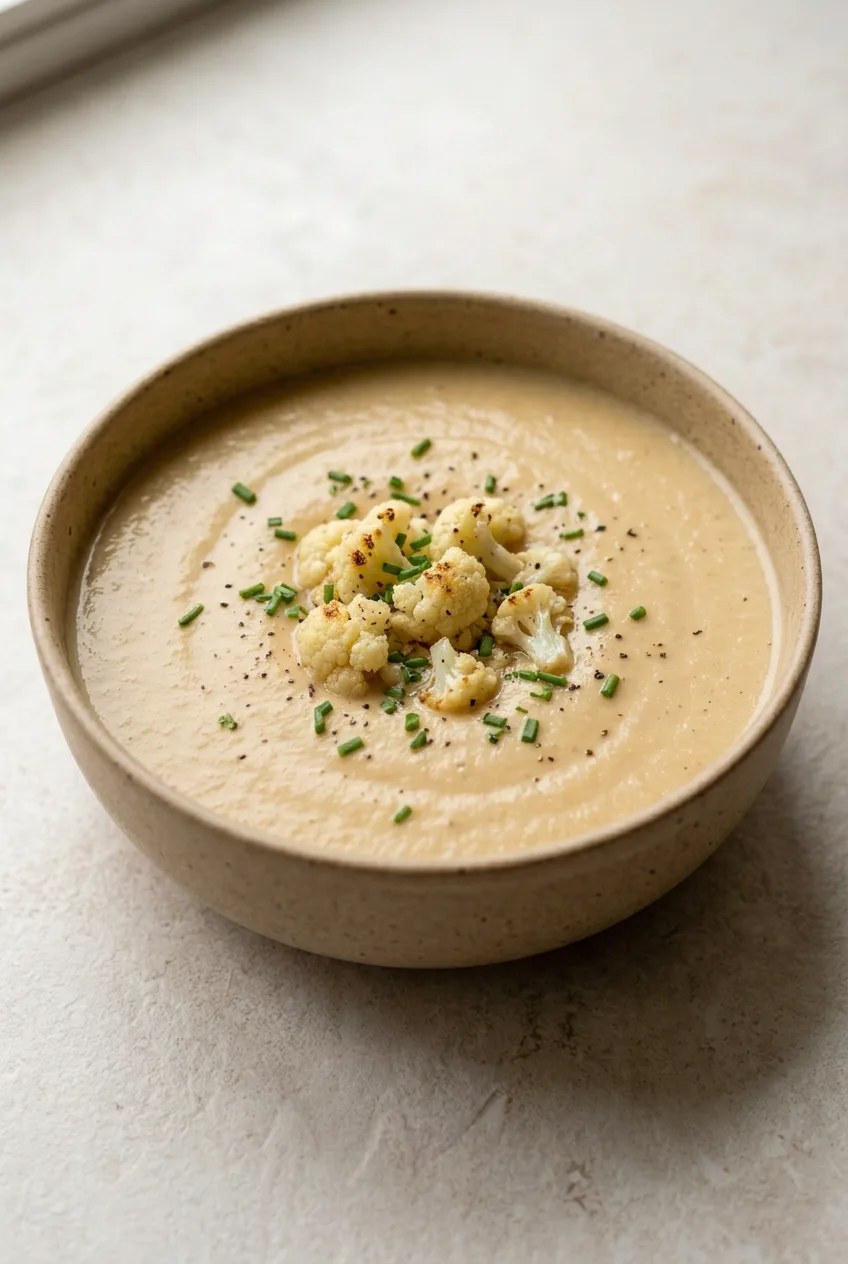
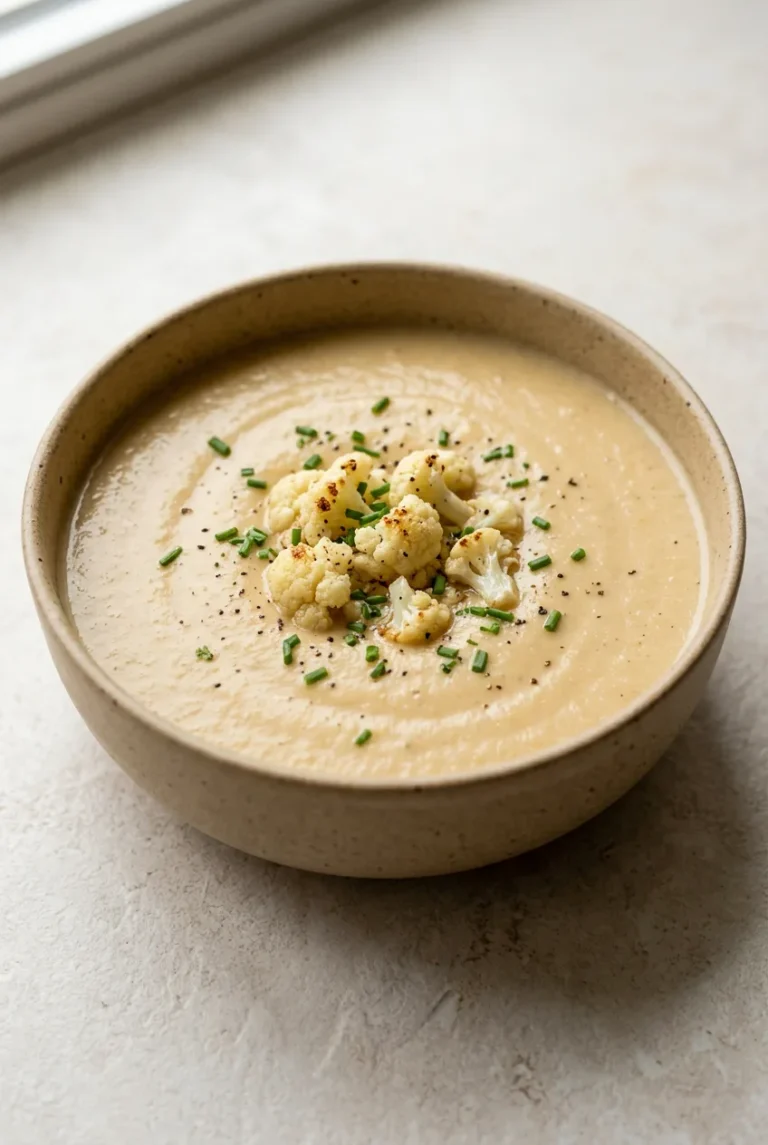
Roasting cauliflower until its edges turn golden gives this soup depth without cheese or potatoes. Onion, garlic, thyme, and a pinch of nutmeg keep the flavor mild, while blending and a little cream make the soup smooth and spoon-coating. Set aside some roasted florets before blending; they add a tender bite to each bowl alongside fresh chives and black pepper.

Ingredients for Roasted Cauliflower Soup

Close view of silky roasted cauliflower soup with browned cauliflower garnish, chopped chives, and pepper flecks.
  • 2 large heads cauliflower, cut into roughly 1 1/2-inch florets (about 2 lb or 900g florets)
  • 3 tablespoons olive oil, divided
  • 1 1/2 teaspoons kosher salt, divided, plus more to taste
  • 1/2 teaspoon freshly ground black pepper, divided, plus more for serving
  • 1 medium yellow onion, diced (about 200g)
  • 3 garlic cloves, minced
  • 1 teaspoon fresh thyme leaves
  • 1/8 teaspoon ground nutmeg
  • 4 to 5 cups low-sodium vegetable broth, divided
  • 1/2 cup heavy cream (about 120g)
  • 2 tablespoons finely chopped fresh chives

Optional: 1 to 2 teaspoons fresh lemon juice, if the finished soup needs brightness.

Yield: 6 servings. Time: About 15 minutes prep and 35 minutes cooking; 50 minutes total.

How to Make Roasted Cauliflower Soup

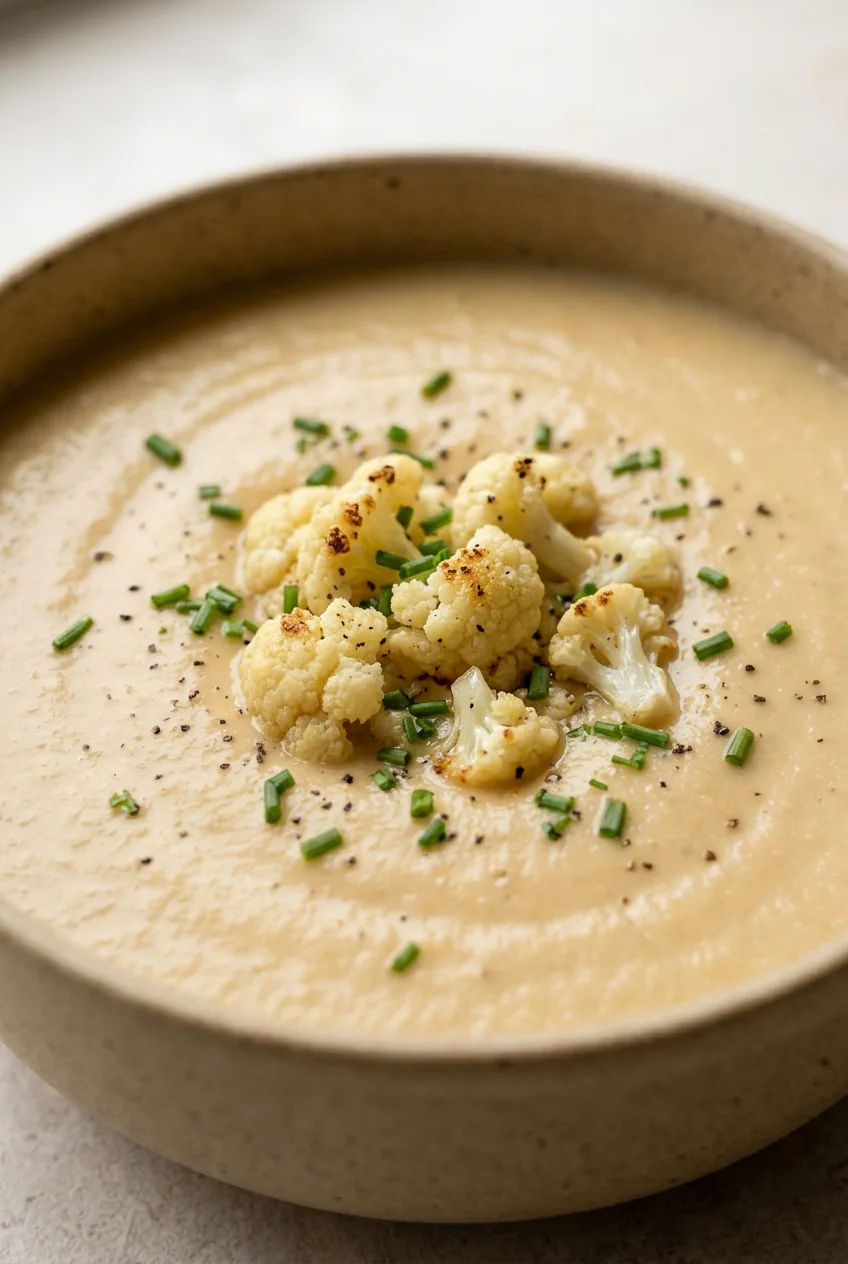
Wide view of a complete bowl of roasted cauliflower soup topped with florets, chives, and black pepper.
  1. Season the cauliflower: Preheat the oven to 425°F (220°C). Pick out about 1 cup of small, neat florets to use as garnish after roasting. Toss all the cauliflower with 2 tablespoons olive oil, 1 teaspoon salt, and 1/4 teaspoon pepper on a large rimmed baking sheet. Spread it in one layer, using two pans if needed so the florets have room to brown.
  2. Roast: Roast uncovered for 25 to 30 minutes, tossing once halfway through. Start checking at about 22 minutes. The cauliflower should be fork-tender with golden-brown edges, not scorched. If small florets brown early, remove them for garnish while the larger pieces finish. Set aside about 1 cup of roasted florets.
  3. Cook the aromatics: While the cauliflower roasts, heat the remaining 1 tablespoon olive oil in a 5- to 6-quart Dutch oven or soup pot over medium heat. Add the onion and remaining 1/2 teaspoon salt. Cook for 8 to 10 minutes, stirring occasionally, until soft and translucent. Add the garlic, thyme, and nutmeg; stir for about 30 seconds, until fragrant, without letting the garlic brown.
  4. Simmer: Add the roasted cauliflower, except the reserved garnish, and 4 cups broth. Bring to a gentle simmer, then reduce the heat to medium-low. Cook for about 10 minutes, partly covered or uncovered, until the cauliflower is very soft.
  5. Blend and finish: Remove the pot from the heat and blend with an immersion blender until completely smooth. Stir in the cream and remaining 1/4 teaspoon pepper. If the soup is too thick, add warm broth a little at a time, up to 1 additional cup, until it coats a spoon but pours easily. Taste and adjust the salt and pepper; add a little lemon juice only if needed. Rewarm over low heat without boiling vigorously, then let stand for 3 to 5 minutes so blending bubbles settle.
  6. Serve: Ladle into bowls. Place a modest mound of reserved roasted cauliflower in the center of each bowl, then scatter with chives and freshly ground black pepper.

How to Get the Roast and Texture Right

Space the florets apart so their edges brown instead of steaming. Use tenderness and color to judge the roast: the centers should yield easily to a fork, with golden patches rather than dark char that could make the soup bitter.

Blend until no cauliflower granules remain before judging the thickness. Cauliflower size and moisture loss during roasting affect how much broth the soup needs, so thin it only after blending. If using a countertop blender instead of an immersion blender, let the soup cool slightly, work in small batches, and vent the lid according to the manufacturer’s hot-liquid instructions.

Serving and Dairy-Free Option

Add the reserved florets and chives just before serving so they remain distinct against the smooth soup. Serve with crusty bread or a simple green salad. For another soup built around deeply cooked aromatics, try Classic French Onion Soup with Gruyère Toast.

For a dairy-free version, replace the heavy cream with unsweetened oat cream or an unflavored, unsweetened plant-based creamer. The finish may be lighter, but the roasting and blending method stays the same. Avoid sweetened or vanilla products.

How to Store and Reheat

Cool leftovers promptly and refrigerate in an airtight container for 3 to 4 days. Store extra roasted cauliflower garnish separately when possible. The soup base can be made a day ahead; add the garnish and fresh chives when serving.

Reheat gently in a saucepan over medium-low heat, stirring occasionally. Blended cauliflower thickens as it chills, so add broth or water as needed. For longer storage, cool the soup completely, portion it into freezer-safe containers with headspace, and freeze for up to 3 months for best quality. Thaw overnight in the refrigerator and reheat gently; add fresh chives after reheating.

Nutrition

Approximate nutrition per serving, based on 6 servings made with 4 cups broth: 190 calories, 5g protein, 15g fat, and 13g carbohydrates. Approximate values per 100g: 55 calories, 1g protein, 4g fat, and 4g carbohydrates. Values vary with the cauliflower, broth, and amount of additional broth used; optional additions are not included.

Roasted Cauliflower Soup

A smooth roasted cauliflower soup with onion, garlic, thyme, cream, and tender roasted florets for garnish.
Course: Soup
Cuisine: American
Prep: 15 min
Cook: 35 min
Total: 50 min
Servings: 6 Calories: 190 kcal

Equipment

  • Large rimmed baking sheet
  • 5- to 6-quart Dutch oven or soup pot
  • Immersion blender
  • Ladle

Ingredients

For the Soup

  • 2 large heads cauliflower, cut into 1 1/2-inch florets (about 2 lb or 900 g florets)
  • 3 tablespoons olive oil, divided
  • 1 1/2 teaspoons kosher salt, divided, plus more to taste
  • 1/2 teaspoon freshly ground black pepper, divided, plus more for serving
  • 1 medium yellow onion, diced (about 200 g)
  • 3 garlic cloves, minced
  • 1 teaspoon fresh thyme leaves
  • 1/8 teaspoon ground nutmeg
  • 4 to 5 cups low-sodium vegetable broth, divided
  • 1/2 cup heavy cream (about 120 g)
  • 2 tablespoons finely chopped fresh chives

Optional

  • 1 to 2 teaspoons fresh lemon juice

Instructions

  1. Preheat the oven to 425°F (220°C). Set aside about 1 cup of small, neat cauliflower florets for garnish after roasting.
  2. Toss all cauliflower with 2 tablespoons olive oil, 1 teaspoon kosher salt, and 1/4 teaspoon black pepper on a large rimmed baking sheet. Arrange in a single layer, using two pans if needed.
  3. Roast for 25 to 30 minutes, tossing halfway through, until the cauliflower is fork-tender with golden-brown edges. Remove smaller florets early if they brown before the larger pieces.
  4. Reserve about 1 cup roasted cauliflower for garnish.
  5. While the cauliflower roasts, heat the remaining 1 tablespoon olive oil in a Dutch oven or soup pot over medium heat. Add the onion and remaining 1/2 teaspoon salt; cook for 8 to 10 minutes until soft and translucent.
  6. Add the garlic, thyme, and nutmeg. Stir for about 30 seconds, until fragrant.
  7. Add the roasted cauliflower, excluding the reserved garnish, and 4 cups vegetable broth. Bring to a gentle simmer, reduce heat to medium-low, and cook for about 10 minutes until very soft.
  8. Remove from the heat and blend with an immersion blender until completely smooth.
  9. Stir in the heavy cream and remaining 1/4 teaspoon black pepper. Add up to 1 additional cup warm broth as needed until the soup is spoon-coating but pourable.
  10. Taste and adjust the salt and pepper. Add lemon juice if needed, then rewarm gently over low heat without boiling vigorously. Let stand for 3 to 5 minutes.
  11. Ladle the soup into bowls and top with reserved roasted cauliflower, chives, and freshly ground black pepper.

Tips

  • Space the cauliflower florets apart so they brown rather than steam.
  • Use two baking sheets if necessary to avoid crowding the cauliflower.
  • Roast until fork-tender with golden patches; avoid dark charring, which can make the soup bitter.
  • Blend the soup completely smooth before deciding whether it needs more broth.
  • If using a countertop blender, cool the soup slightly and blend in small batches with the lid vented according to manufacturer instructions.
  • Add the reserved florets and chives just before serving to keep their texture distinct.

Variations

  • Dairy-Free Roasted Cauliflower Soup: Replace the heavy cream with unsweetened oat cream or an unflavored, unsweetened plant-based creamer.

Notes

Refrigerate cooled leftovers in an airtight container for 3 to 4 days, storing extra roasted garnish separately when possible. Freeze the cooled soup base for up to 3 months. Reheat gently over medium-low heat and add broth or water if the chilled soup has thickened.

Nutrition

Calories: 190 kcal | Protein: 5 g | Fat: 15 g | Carbohydrates: 13 g

Beef Barley Soup

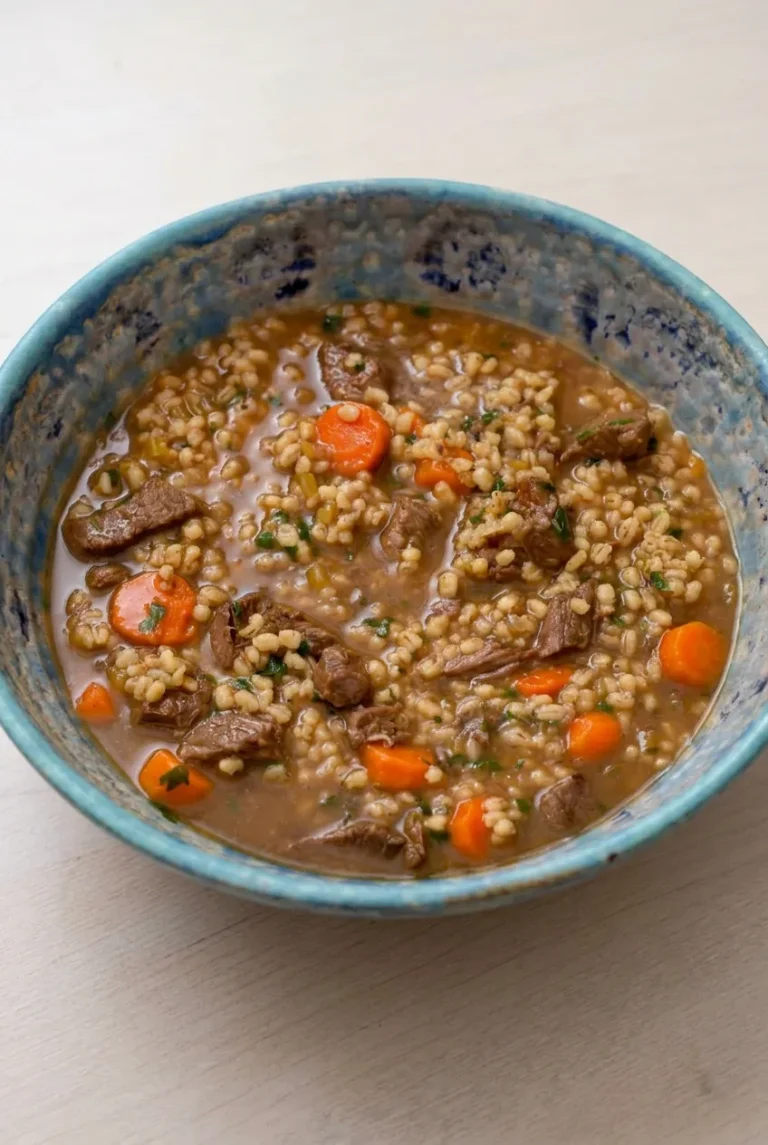
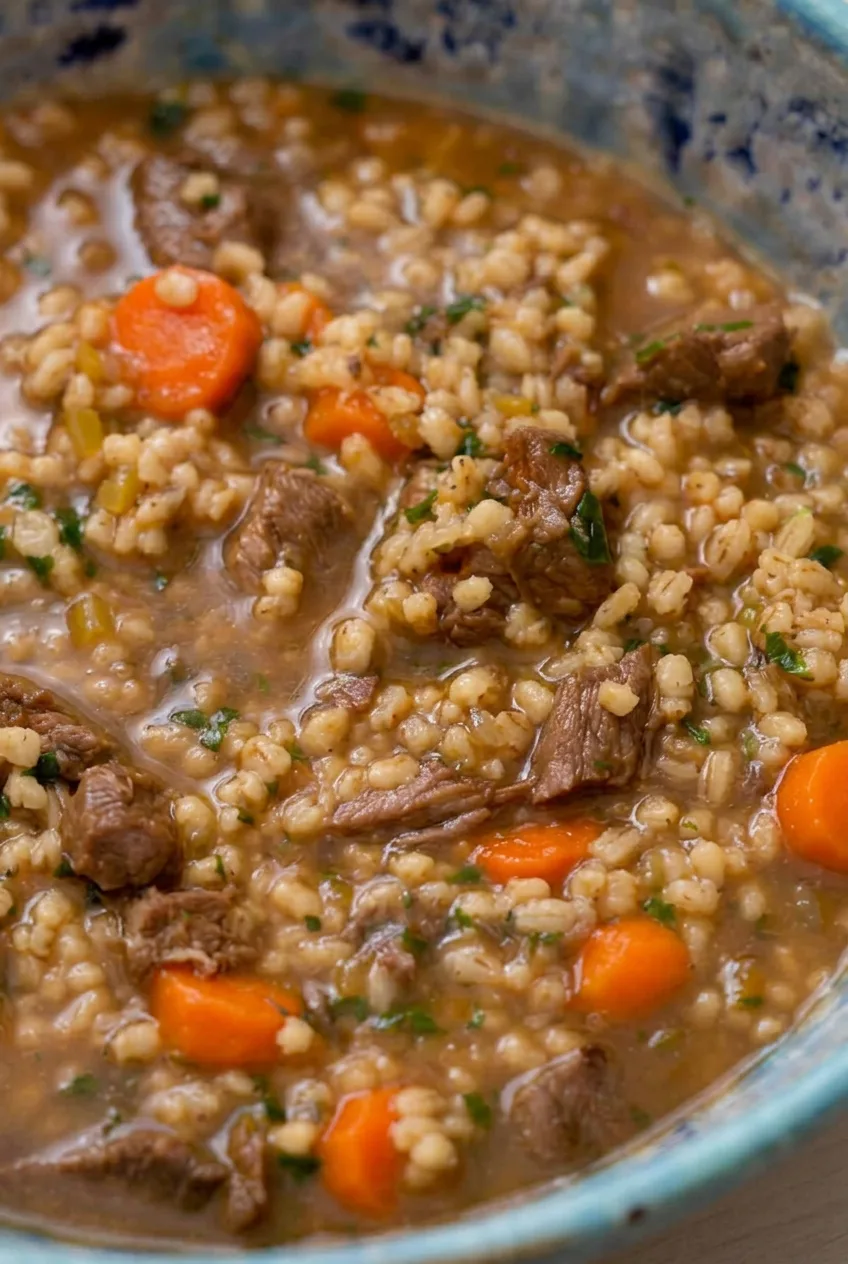
Beef barley soup should be chunky, with fork-tender beef, plump grains, and carrot rounds in a savory brown broth that still ladles easily. Browning the chuck in a Dutch oven builds flavor in the same pot used to simmer the soup. Standard pearl barley goes in after the beef’s first hour of cooking, so it can soften without absorbing broth throughout the entire simmer.

Barley continues to thicken the soup as it rests. Keep extra broth or water nearby to adjust the consistency before serving and when reheating leftovers.

Ingredients for Beef Barley Soup

Close view of glossy beef barley soup showing plump barley, tender beef, carrot rounds, celery, and parsley.

Yield: 6 generous bowls. Prep: 20 minutes. Cook: about 1 hour 40 minutes to 2 hours, or longer if needed for tender beef.

  • 1 1/2 pounds beef chuck roast, trimmed and cut into 1-inch cubes (680g)
  • 1 teaspoon kosher salt, plus more to taste
  • 1/2 teaspoon black pepper, plus more to taste
  • 1 tablespoon olive oil or neutral oil
  • 1 medium yellow onion, diced (about 180g)
  • 3 medium carrots, sliced into 1/4-inch rounds (about 225g)
  • 3 celery ribs, sliced (about 150g)
  • 3 garlic cloves, minced
  • 8 cups low-sodium beef broth, plus more as needed
  • 1 tablespoon Worcestershire sauce
  • 1 teaspoon dried thyme
  • 1 bay leaf
  • 3/4 cup standard pearl barley, rinsed (about 150g)
  • 1/4 cup finely chopped fresh parsley (about 15g)

Have 1 to 2 additional cups of broth or water available in case the barley absorbs more liquid than expected. Beef stew meat can replace chuck, but let tenderness—not the clock—determine when the soup is done.

How to Make Beef Barley Soup

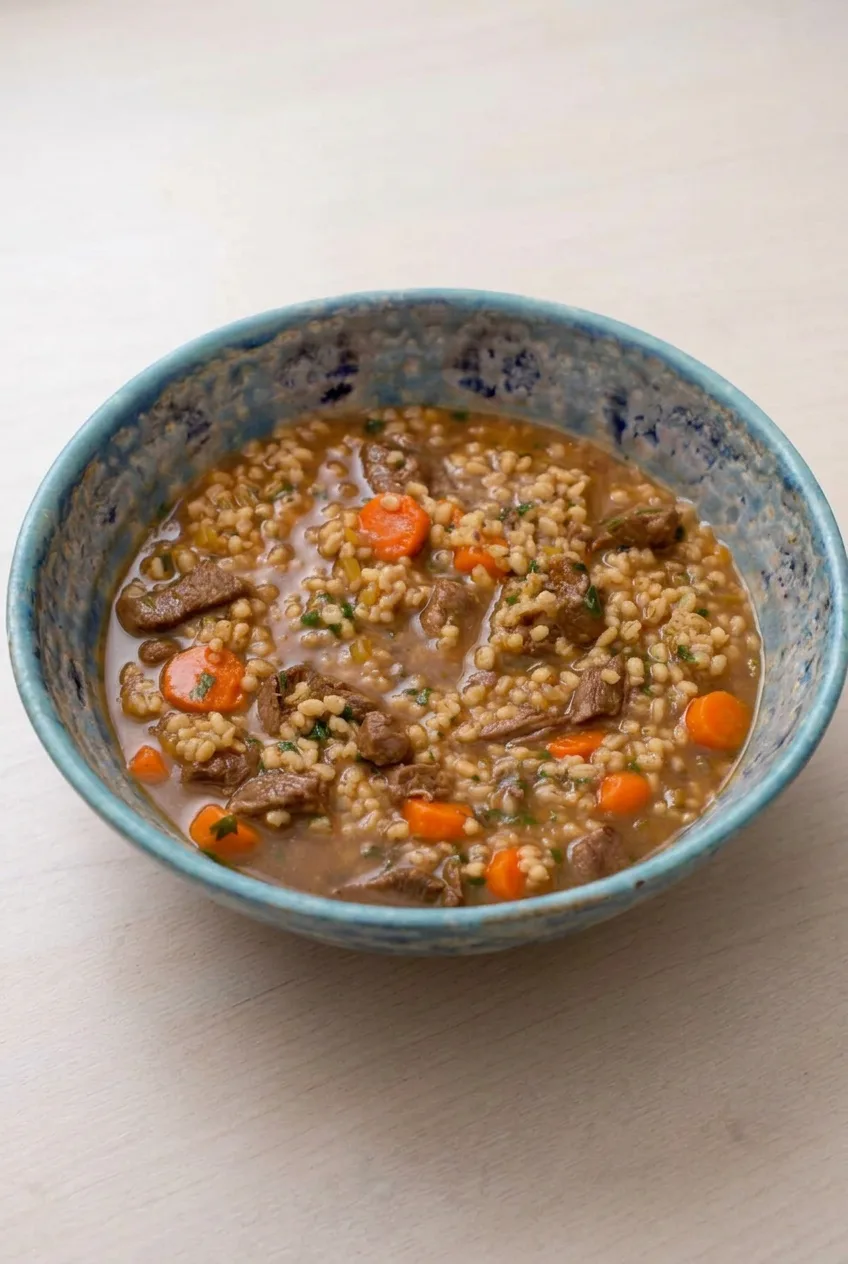
Wide serving of beef barley soup in a rustic blue-gray bowl on a plain neutral tabletop.
  1. Season the beef: Pat the cubes dry and season with the salt and pepper. Heat a 5 1/2- to 7-quart Dutch oven or heavy soup pot over medium-high heat, then add the oil. Wait until it shimmers.
  2. Brown in batches: Add the beef in a single, uncrowded layer. Leave it undisturbed briefly, then turn to brown multiple sides. Transfer to a plate and repeat with the remaining beef, adding a little more oil only if the pot becomes dry. This takes about 10 to 15 minutes. An uncrowded pot lets the beef brown instead of steam and leaves flavorful browned bits for the broth.
  3. Cook the vegetables: Reduce the heat to medium. Add the onion, carrots, and celery. Cook for 7 to 9 minutes, stirring and scraping up browned bits, until the onion softens. Stir in the garlic for the final 30 seconds.
  4. Simmer the beef: Return the beef and any juices to the pot. Add the 8 cups broth, Worcestershire sauce, thyme, and bay leaf, scraping the bottom to release any remaining browned bits. Bring just to a boil, then reduce the heat to low or medium-low. Partially cover and simmer gently for about 60 minutes. Only small bubbles should break the surface; avoid a rapid boil.
  5. Add the barley: Stir in the rinsed pearl barley. Keep the lid slightly ajar and simmer gently for 35 to 45 minutes, stirring and gently scraping the bottom every 10 to 15 minutes. Add a splash of broth if the barley is no longer submerged or the soup becomes too thick.
  6. Check and finish: Start checking once the barley has simmered for 35 minutes. The beef should yield easily to a fork, and the barley should be plump with no hard center. If either needs more time, continue simmering and add broth as needed. Remove the bay leaf, stir in the parsley, and taste before adding more salt or pepper.
  7. Rest and serve: Let the soup stand off the heat for 5 to 10 minutes. Stir in broth or water a little at a time if needed, then ladle into wide bowls with beef, barley, carrots, celery, and visible broth in each serving.

Why Add Pearl Barley Later?

Chuck often needs longer to become fork-tender than standard pearl barley needs to cook. Adding the barley after the beef’s first hour gives the grains roughly 35 to 45 minutes to soften without spending the full simmer in the pot. Quick and instant barley need different timing and should not be added on this schedule.

How to Keep the Soup Thick but Spoonable

The finished broth should lightly coat a spoon while still pooling around the beef and barley. If the soup starts catching on the bottom, lower the heat, stir gently, and add broth. If it becomes too thick after resting, stir in warm broth or water in small additions until it ladles easily.

Serving, Storage, and Reheating

Serve with crusty bread or dinner rolls on the side. For another hearty grain-based soup, try Creamy Ham Wild Rice Soup.

Cool leftovers promptly and refrigerate in airtight containers for 3 to 4 days. The soup can be made a day ahead, but the barley will continue absorbing broth. Reheat gently on the stovetop or in the microwave until hot throughout, adding broth or water to restore a spoonable consistency.

Freeze cooled soup in airtight portions for up to 3 months, leaving a little headspace. Thaw overnight in the refrigerator when possible, then reheat with extra liquid as needed.

Nutrition

Approximate nutrition per generous bowl, based on 6 servings: 375 calories, 29g protein, 17g fat, and 27g carbohydrates. Per 100g of finished soup: approximately 75 calories, 6g protein, 3g fat, and 5g carbohydrates. Estimates vary with the beef, broth, and amount of liquid remaining after simmering.

Beef Barley Soup

A chunky beef barley soup with fork-tender chuck, pearl barley, carrots, celery, and a savory brown broth.
Course: Soup
Cuisine: American
Prep: 20 min
Cook: 120 min
Total: 150 min
Servings: 6 Calories: 375 kcal

Equipment

  • 5 1/2- to 7-quart Dutch oven or heavy soup pot
  • Cutting board
  • Chef's knife
  • Wooden spoon or spatula
  • Ladle

Ingredients

For the Soup

  • 1 1/2 pounds beef chuck roast, trimmed and cut into 1-inch cubes (680 g)
  • 1 teaspoon kosher salt, plus more to taste
  • 1/2 teaspoon black pepper, plus more to taste
  • 1 tablespoon olive oil or neutral oil
  • 1 medium yellow onion, diced (about 180 g)
  • 3 medium carrots, sliced into 1/4-inch rounds (about 225 g)
  • 3 celery ribs, sliced (about 150 g)
  • 3 garlic cloves, minced
  • 8 cups low-sodium beef broth, plus more as needed
  • 1 tablespoon Worcestershire sauce
  • 1 teaspoon dried thyme
  • 1 bay leaf
  • 3/4 cup standard pearl barley, rinsed (about 150 g)
  • 1/4 cup finely chopped fresh parsley (about 15 g)

For Adjusting Consistency

  • 1 to 2 cups additional beef broth or water, as needed

Instructions

  1. Pat the beef dry and season it with the salt and pepper.
  2. Heat a 5 1/2- to 7-quart Dutch oven or heavy soup pot over medium-high heat. Add the oil and heat until shimmering.
  3. Brown the beef in uncrowded batches, turning to brown multiple sides. Transfer each batch to a plate; add more oil only if the pot becomes dry.
  4. Reduce the heat to medium. Add the onion, carrots, and celery, then cook for 7 to 9 minutes, stirring and scraping up browned bits, until the onion softens.
  5. Stir in the garlic and cook for 30 seconds.
  6. Return the beef and any accumulated juices to the pot. Add 8 cups beef broth, Worcestershire sauce, thyme, and bay leaf, scraping the bottom of the pot.
  7. Bring the soup just to a boil, then reduce the heat to low or medium-low. Partially cover and simmer gently for about 60 minutes.
  8. Stir in the rinsed pearl barley. Keep the lid slightly ajar and simmer gently for 35 to 45 minutes, stirring and scraping the bottom every 10 to 15 minutes.
  9. Add broth as needed if the barley is no longer submerged or the soup becomes too thick.
  10. Check that the beef is fork-tender and the barley is plump with no hard center. Continue simmering if needed.
  11. Remove the bay leaf, stir in the parsley, and season with additional salt and pepper to taste.
  12. Let the soup rest off the heat for 5 to 10 minutes. Stir in additional warm broth or water as needed before serving.

Tips

  • Brown the beef in batches so it sears instead of steaming.
  • Keep the soup at a gentle simmer; rapid boiling can make the beef less tender.
  • Add standard pearl barley after the beef has simmered for about 1 hour.
  • Stir and scrape the bottom every 10 to 15 minutes after adding barley to prevent sticking.
  • Keep extra broth or water nearby because barley continues absorbing liquid as the soup rests.
  • Let tenderness, not the clock, determine when the beef is done.

Variations

  • Stew Meat Beef Barley Soup: Use beef stew meat in place of chuck roast, simmering until the meat is fork-tender.

Notes

Refrigerate cooled leftovers in airtight containers for 3 to 4 days. Freeze portions for up to 3 months. Reheat gently with extra broth or water because the barley will continue to absorb liquid.

Nutrition

Calories: 375 kcal | Protein: 29 g | Fat: 17 g | Carbohydrates: 27 g

Moroccan Lentil Soup

This Moroccan-inspired lentil soup has a warm, cumin-and-coriander-spiced tomato broth, tender diced vegetables, and lentils that remain visible in every spoonful. Brown or green lentils soften enough to thicken the soup naturally without turning it into a purée.

Keep the pot at a gentle simmer and judge the lentils by tenderness rather than the clock: older lentils can take longer and may need more broth. Lemon juice and fresh cilantro go in at the end to brighten the finished bowl.

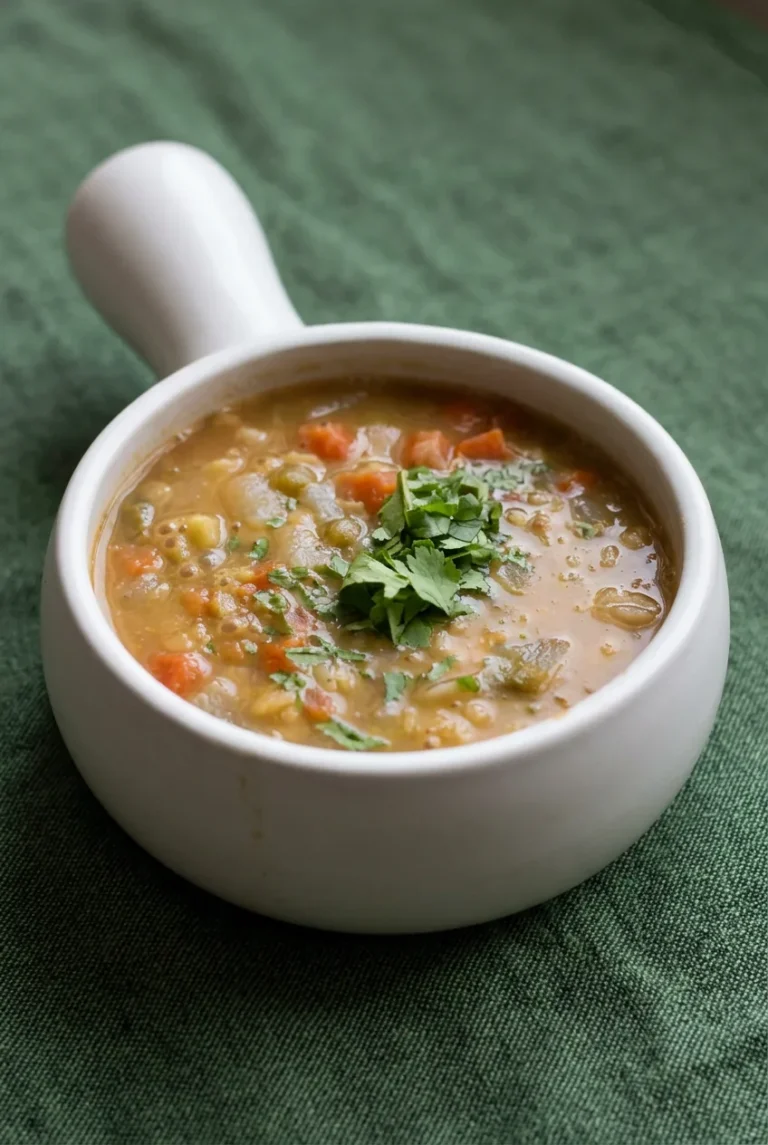
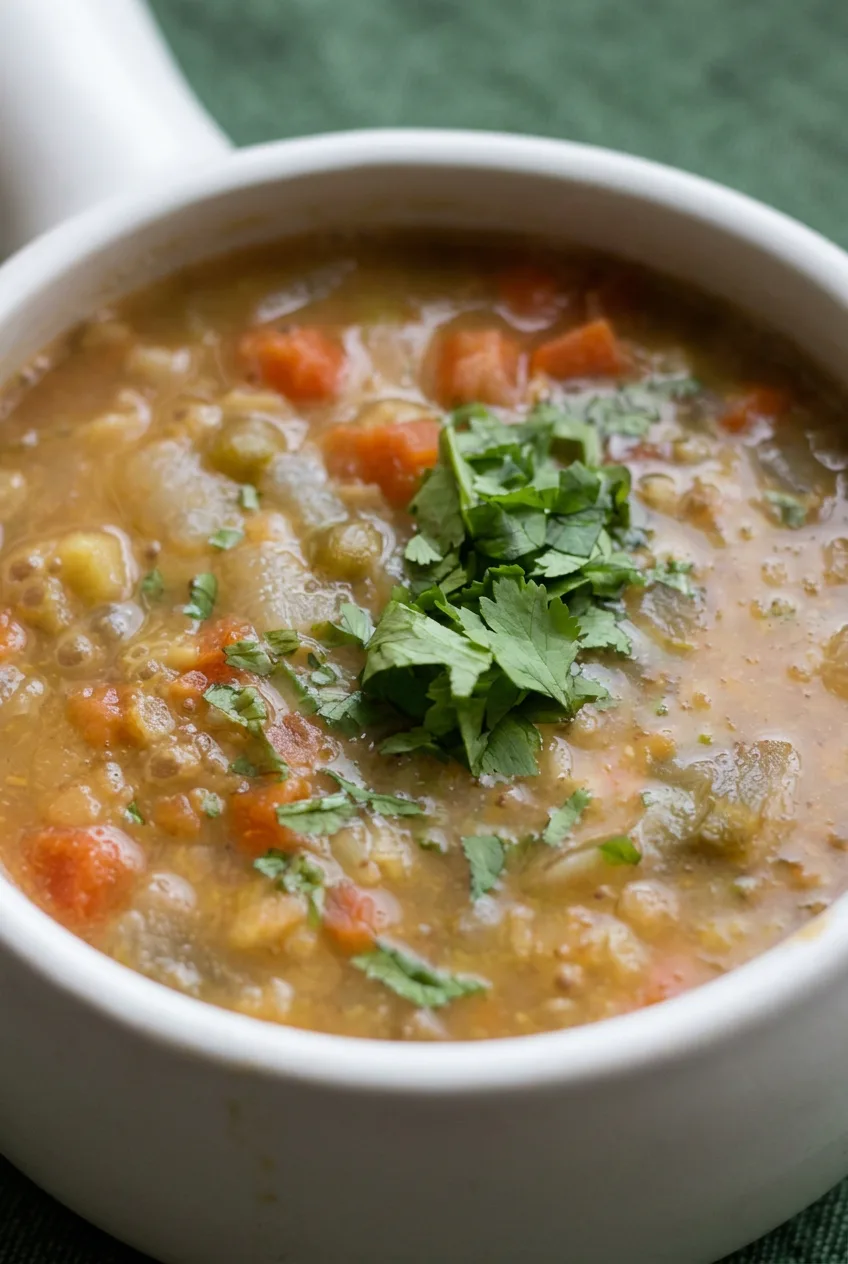
Ingredients for Moroccan Lentil Soup

Close view of thick Moroccan lentil soup showing tender lentils, diced vegetables, and fresh cilantro
  • 2 tablespoons olive oil
  • 1 medium yellow onion, finely diced (about 180g)
  • 2 medium carrots, peeled and diced small (about 150g)
  • 2 celery ribs, diced small (about 100g)
  • 4 garlic cloves, minced
  • 2 teaspoons ground cumin
  • 1 1/2 teaspoons ground coriander
  • 1 teaspoon ground turmeric
  • 1/2 teaspoon ground ginger
  • 1/4 teaspoon ground cinnamon
  • 1/8 to 1/4 teaspoon cayenne pepper
  • 1 teaspoon kosher salt, plus more to taste
  • 1/2 teaspoon black pepper
  • 2 tablespoons tomato paste
  • 1 can (14.5 ounces) no-salt-added diced tomatoes, with their juices
  • 1 1/2 cups dried brown or green lentils, picked over and rinsed (about 290g)
  • 6 cups low-sodium vegetable broth, plus more as needed
  • 1 tablespoon fresh lemon juice
  • 1/3 cup chopped fresh cilantro, divided

If using regular-sodium broth, start with 1/2 teaspoon kosher salt instead of 1 teaspoon. Adjust the seasoning after the lentils are tender.

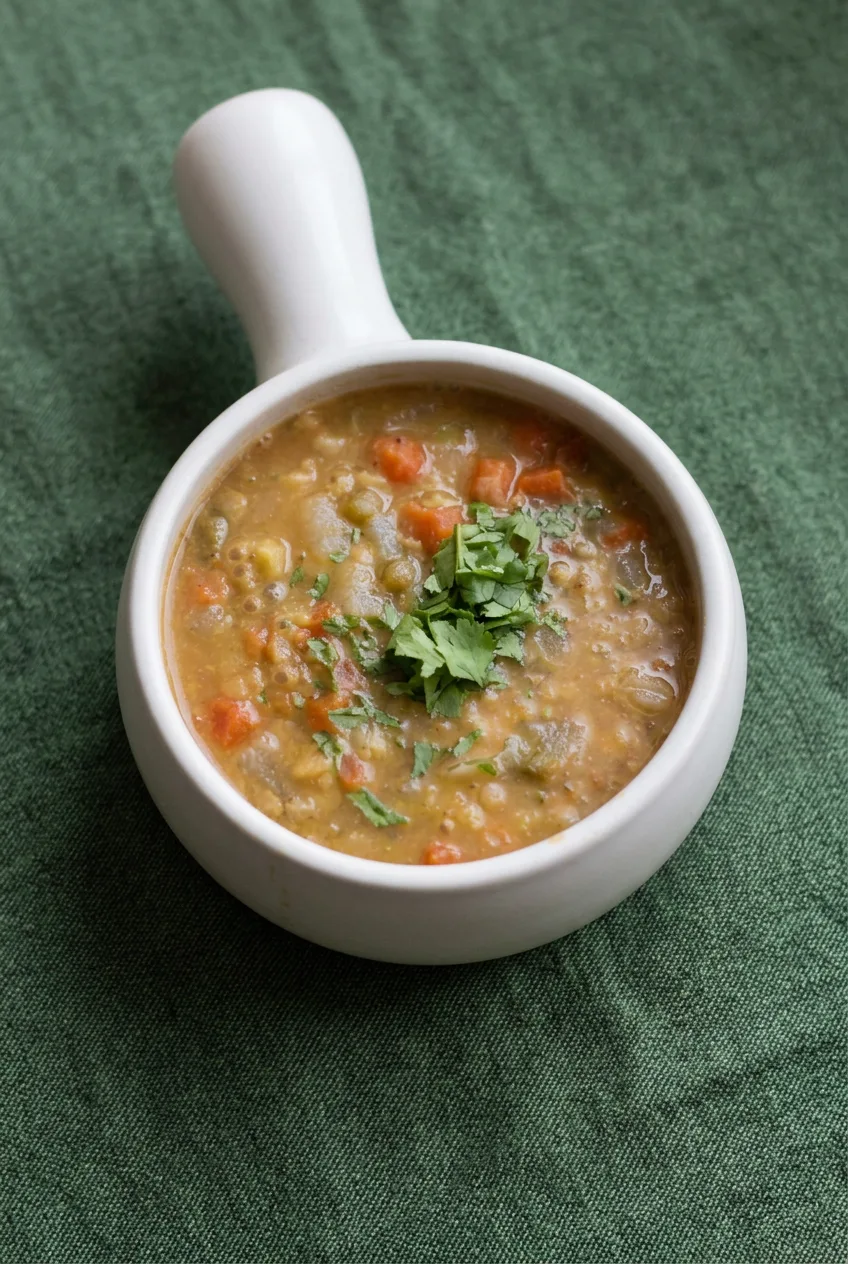
How to Make Moroccan Lentil Soup

Wider view of Moroccan lentil soup in a white handled bowl on a dark green textured cloth
  1. Prepare the ingredients: Pick over the lentils for debris and rinse them in a fine-mesh strainer. Dice the onion, carrots, and celery small enough to fit easily on a spoon. Keep the cilantro separate for finishing.
  2. Soften the vegetables: Heat the olive oil in a 5- to 6-quart Dutch oven or heavy soup pot over medium heat. Add the onion, carrots, celery, salt, and black pepper. Cook, stirring often, for 8 to 10 minutes, until the onion is translucent and the vegetables begin to soften. Add the garlic for the final minute; do not let it brown.
  3. Bloom the spices: Stir in the cumin, coriander, turmeric, ginger, cinnamon, and cayenne. Cook for about 30 seconds, until fragrant, without letting the spices scorch. Add the tomato paste and stir for about 1 minute, until it darkens slightly and coats the vegetables.
  4. Add the lentils and broth: Stir in the diced tomatoes and their juices, the lentils, and 6 cups broth. Scrape the bottom of the pot. Bring just to a boil, then reduce the heat to medium-low so the soup has small, steady bubbles rather than a hard boil.
  5. Simmer until tender: Partially cover the pot and simmer for 30 to 40 minutes, stirring every 8 to 10 minutes and more often as the soup thickens. Begin checking at 30 minutes. The lentils should crush easily against the side of the pot, though most should remain visible; the carrots and celery should be soft. If the lentils rise above the liquid or the soup thickens before they soften, add hot broth or water and continue simmering. Older lentils may need longer.
  6. Adjust the thickness: Once the lentils are tender, the broth should lightly coat a spoon but still flow easily. If it is too thin, simmer uncovered for 5 to 10 minutes, stirring occasionally. If it is too thick, stir in hot broth or water a little at a time.
  7. Finish and serve: Remove the pot from the heat and let the soup rest for 5 minutes. Stir in the lemon juice and about half the cilantro, then taste and adjust the salt, pepper, or cayenne. Ladle into individual white soup bowls, distributing the lentils and vegetables evenly. Place a small mound of the remaining cilantro in the center of each bowl.

Why Use Brown or Green Lentils?

Brown and green lentils become tender while keeping enough shape for a chunky soup. They do not need soaking: sort, rinse, and simmer them until tender. Firmer green varieties and older lentils may take longer than 40 minutes, so keep them submerged and continue cooking if they are still firm.

Red lentils cook faster and break down more completely. They will make a softer soup with fewer distinct lentils, so they are not a direct swap for this method or its timing.

How to Keep Lentil Soup Thick but Spoonable

Keep the pot partially covered at a gentle simmer so the broth does not evaporate before the lentils are tender. The lentils provide the soup’s body without flour or blending, and they continue to absorb liquid as the soup rests. Add broth or water in small amounts whenever the soup becomes too stiff to ladle easily.

Serving and Optional Additions

Reserve the cilantro garnish until serving so it stays bright green. Offer lemon wedges or warm pita on the side. For a heartier variation, stir in one drained and rinsed 15-ounce can of chickpeas during the final 10 minutes of simmering, adding broth if needed. A small dollop of yogurt is optional for individual bowls.

For another tomato-and-legume soup, try this brothy pasta fagioli with spinach.

Storing and Reheating Leftovers

Cool leftovers promptly and refrigerate in airtight containers, keeping extra cilantro separate. The soup will thicken in storage. Reheat gently over medium-low heat on the stovetop, or in the microwave, stirring partway through until hot throughout. Add broth or water a splash at a time to make it spoonable again, then add fresh cilantro and lemon if desired.

To freeze, cool the soup and portion it into freezer-safe containers with room for expansion. Leave off the fresh cilantro garnish. Thaw before reheating and loosen with broth or water as needed.

Nutrition

Yield: 6 servings, about 1 1/2 cups each. Approximate nutrition per serving: 280 calories, 14g protein, 6g fat, and 45g carbohydrates. Approximate nutrition per 100g: 70 calories, 4g protein, 1g fat, and 11g carbohydrates. Values depend on the broth, any added liquid, and portion size.

Moroccan Lentil Soup

A hearty Moroccan-inspired lentil soup with tomatoes, diced vegetables, warming spices, lemon, and fresh cilantro.
Course: Soup
Cuisine: Moroccan
Prep: 15 min
Cook: 50 min
Total: 70 min
Servings: 6 Calories: 280 kcal

Equipment

  • Fine-mesh strainer
  • 5- to 6-quart Dutch oven or heavy soup pot
  • Ladle

Ingredients

For the Soup

  • 2 tablespoons olive oil
  • 1 medium yellow onion, finely diced (about 180 g)
  • 2 medium carrots, peeled and diced small (about 150 g)
  • 2 celery ribs, diced small (about 100 g)
  • 4 garlic cloves, minced
  • 2 teaspoons ground cumin
  • 1 1/2 teaspoons ground coriander
  • 1 teaspoon ground turmeric
  • 1/2 teaspoon ground ginger
  • 1/4 teaspoon ground cinnamon
  • 1/8 to 1/4 teaspoon cayenne pepper
  • 1 teaspoon kosher salt, plus more to taste
  • 1/2 teaspoon black pepper
  • 2 tablespoons tomato paste
  • 1 can (14.5 ounces) no-salt-added diced tomatoes, with juices
  • 1 1/2 cups dried brown or green lentils, picked over and rinsed (about 290 g)
  • 6 cups low-sodium vegetable broth, plus more as needed
  • 1 tablespoon fresh lemon juice
  • 1/3 cup chopped fresh cilantro, divided

Instructions

  1. Pick over the lentils for debris and rinse them in a fine-mesh strainer. Finely dice the onion, carrots, and celery.
  2. Heat the olive oil in a 5- to 6-quart Dutch oven or heavy soup pot over medium heat. Add the onion, carrots, celery, salt, and black pepper; cook, stirring often, for 8 to 10 minutes until softened.
  3. Add the garlic and cook for 1 minute without browning it.
  4. Stir in the cumin, coriander, turmeric, ginger, cinnamon, and cayenne. Cook for about 30 seconds, until fragrant.
  5. Add the tomato paste and cook, stirring, for about 1 minute until slightly darkened and coating the vegetables.
  6. Stir in the diced tomatoes with their juices, lentils, and 6 cups broth. Scrape up any browned bits from the bottom of the pot.
  7. Bring the soup just to a boil, then reduce the heat to medium-low. Partially cover and simmer gently for 30 to 40 minutes, stirring every 8 to 10 minutes.
  8. Check the lentils beginning at 30 minutes. Continue cooking until they crush easily against the side of the pot and the vegetables are soft, adding hot broth or water if the soup becomes too thick before the lentils are tender.
  9. If the soup is too thin once the lentils are tender, simmer uncovered for 5 to 10 minutes. If too thick, stir in hot broth or water a little at a time.
  10. Remove from the heat and rest for 5 minutes. Stir in the lemon juice and about half the cilantro, then adjust the salt, pepper, or cayenne to taste.
  11. Ladle into bowls and garnish with the remaining cilantro.

Tips

  • Use brown or green lentils for a chunky soup with distinct lentils.
  • Keep the soup at a gentle simmer rather than a hard boil.
  • Judge doneness by tenderness, since older lentils may take longer to cook.
  • Keep lentils submerged with additional hot broth or water as needed.
  • Use only 1/2 teaspoon kosher salt initially if using regular-sodium broth.
  • Reserve cilantro for serving so it stays bright and fresh.

Variations

  • Chickpea Lentil Soup: Stir in 1 drained and rinsed 15-ounce can of chickpeas during the final 10 minutes of simmering, adding broth as needed.
  • Yogurt-Topped Soup: Serve individual bowls with a small dollop of yogurt.

Notes

Cool leftovers promptly and refrigerate in airtight containers, keeping extra cilantro separate. Reheat gently with a splash of broth or water because the soup thickens as it sits. Freeze cooled soup without the cilantro garnish, then thaw before reheating.

Nutrition

Calories: 280 kcal | Protein: 14 g | Fat: 6 g | Carbohydrates: 45 g

French Onion Soup

French onion soup gets its sweetness from onions cooked until they are deeply golden and dramatically reduced. That takes patience: the onions need to brown before the beef broth goes in, but they should never scorch. The finished soup should be glossy and brothy, with soft onion ribbons visible in every bowl.

Each serving gets one thick baguette toast topped with melted Gruyère. Broiling the cheese toasts separately gives them lightly browned tops and lets you serve the soup in ordinary bowls without putting them under the broiler.

Ingredients for French Onion Soup

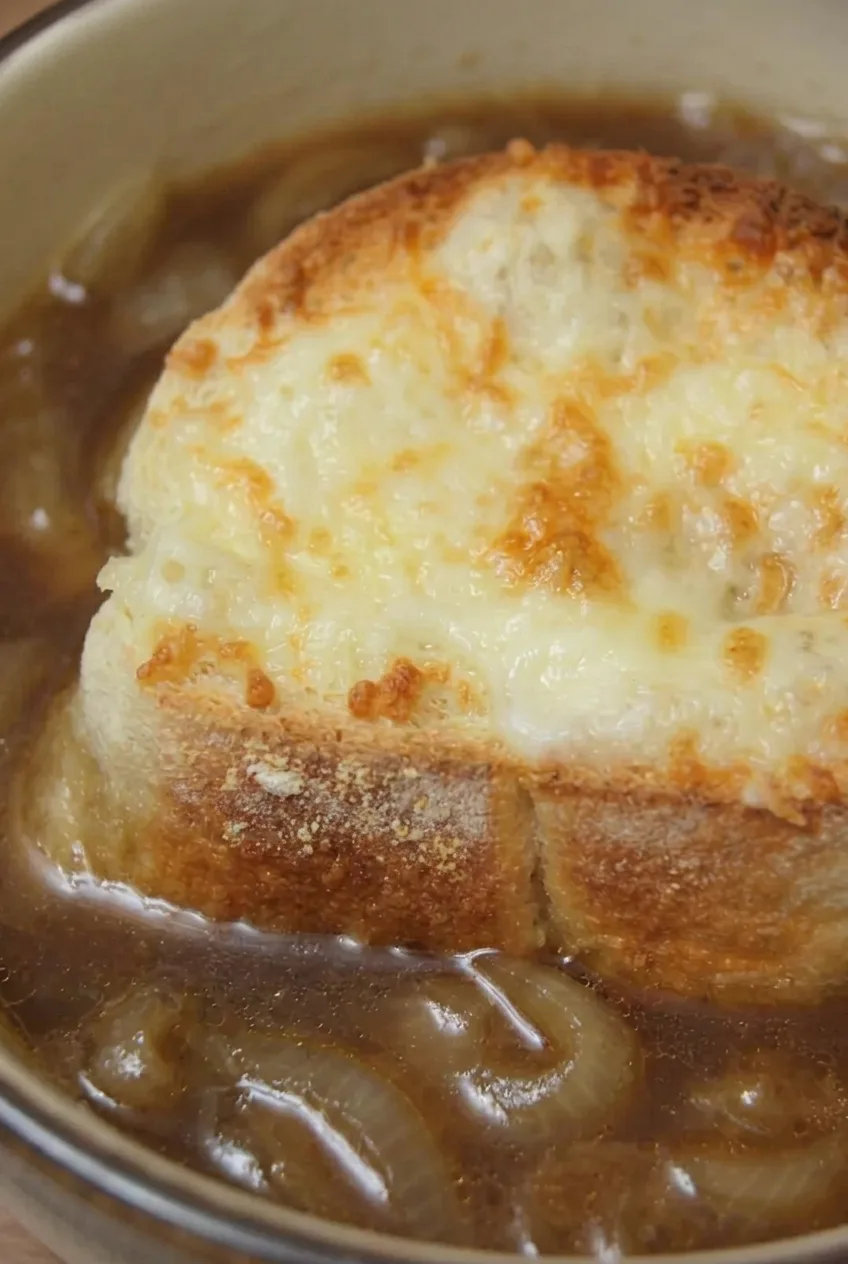
Close view of melted Gruyère, browned baguette crust, onion ribbons, and glossy French onion soup broth.
  • 3 pounds yellow onions, about 6 large, halved and thinly sliced (1,350g)
  • 4 tablespoons unsalted butter (55g)
  • 1 tablespoon olive oil
  • 1 teaspoon kosher salt, plus more to taste
  • 1/2 teaspoon freshly ground black pepper, plus more to taste
  • 1/4 teaspoon granulated sugar
  • 2 tablespoons all-purpose flour (15g)
  • 1/2 cup dry white wine
  • 6 cups low-sodium beef broth, plus up to 1 cup more if needed
  • 3 fresh thyme sprigs
  • 1 bay leaf
  • 8 thick baguette slices, about 1/2 inch thick (about 220g); 4 for the bowls and 4 extras
  • 8 ounces shredded Gruyère cheese (225g)

Yield: 4 servings. Prep: 15 minutes. Cook: About 1 hour 10 minutes to 1 hour 25 minutes. Total: About 1 hour 25 minutes to 1 hour 40 minutes.

How to Make French Onion Soup

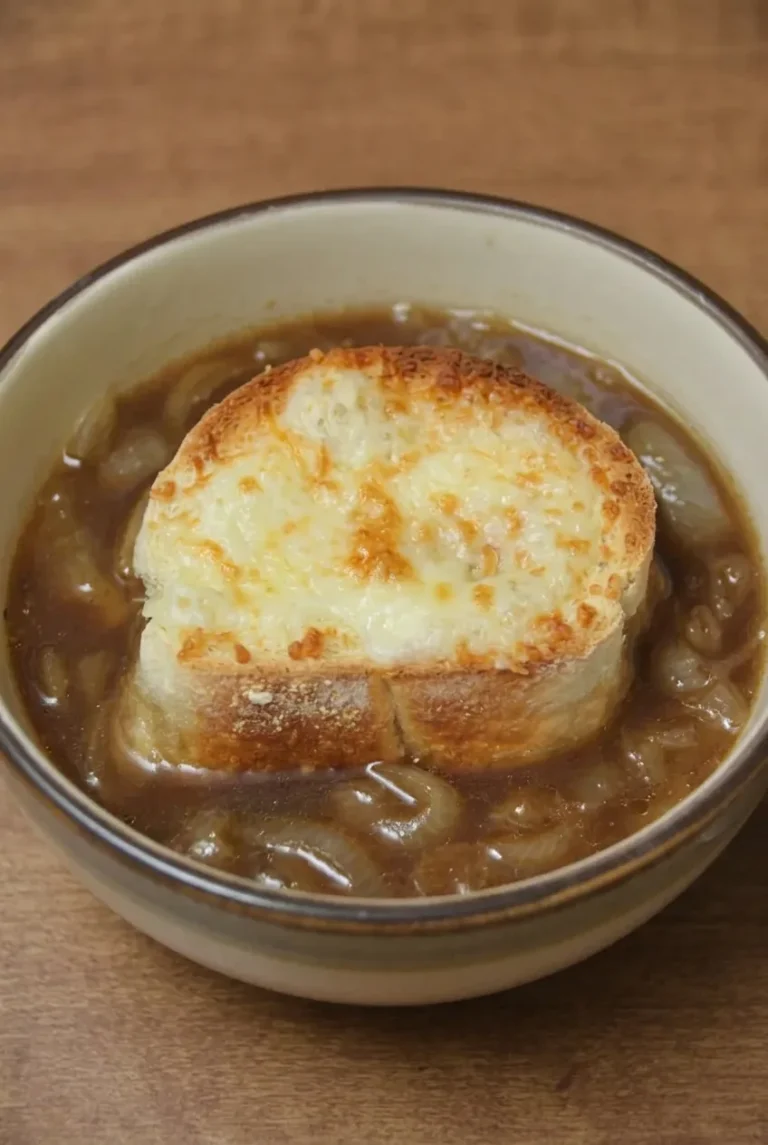
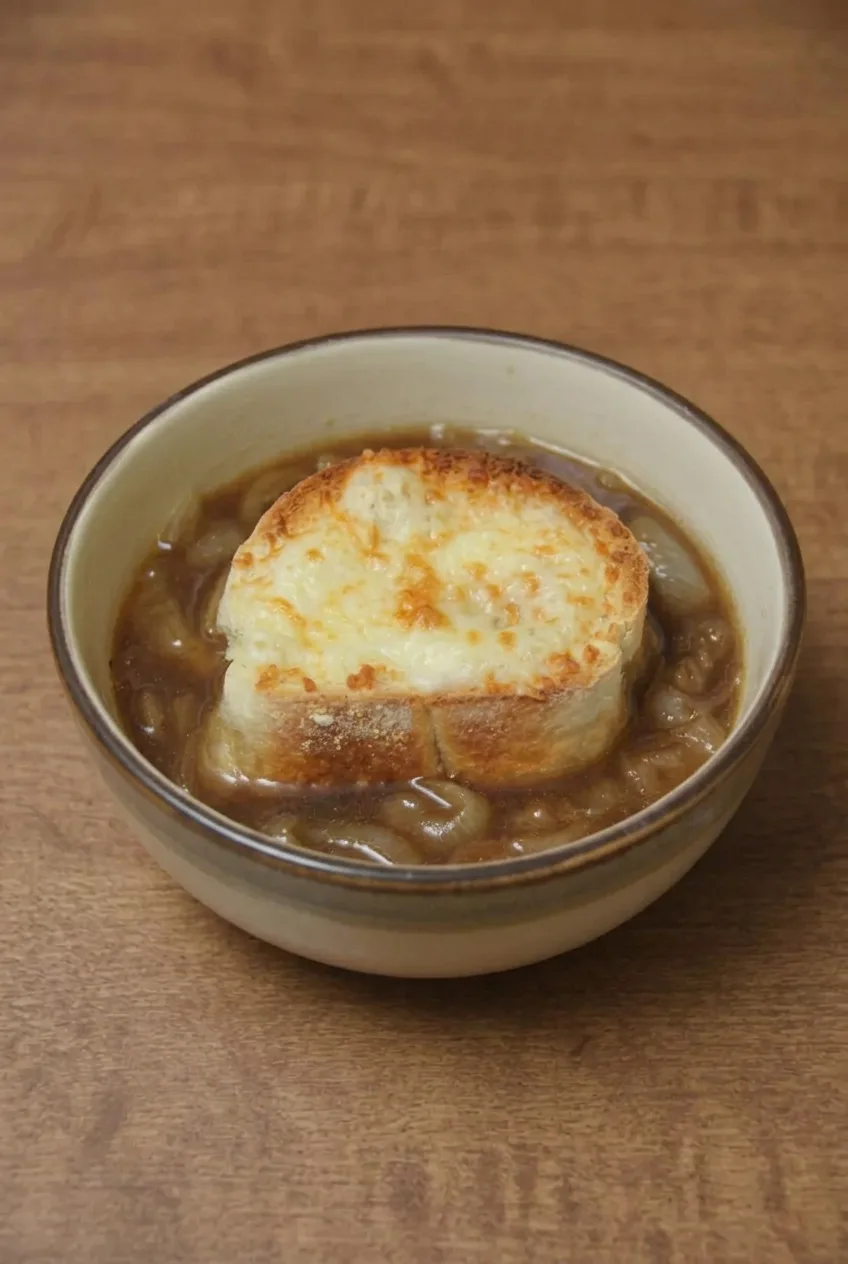
Wide view of a complete bowl of French onion soup with a centered melted cheese toast on a wood table.
  1. Start the onions: Slice the onions thinly from pole to pole to make long ribbons. Melt the butter with the olive oil in a wide, 5- to 6-quart Dutch oven or heavy-bottomed pot over medium heat. Add the onions, salt, pepper, and sugar. Cook uncovered, stirring regularly, until the onions soften.
  2. Caramelize the onions: Reduce the heat to medium-low or low. Continue cooking uncovered until the onions have collapsed, turned deep golden brown, and smell sweet rather than sharp, about 45 to 60 minutes total from when they went into the pot. Begin checking their color around 35 minutes. Once softened, stir and scrape the bottom every 3 to 5 minutes. If browned bits begin to stick or darken toward black, lower the heat and stir in 1 to 2 tablespoons of water or broth to loosen them.
  3. Add the flour and wine: Stir the flour into the onions until no dry flour remains; cook briefly. Pour in the wine and scrape up the browned bits from the bottom of the pot. Let the wine reduce for 1 to 2 minutes, until its raw aroma fades.
  4. Simmer the soup: Add 6 cups of beef broth, the thyme, and the bay leaf. Bring to a simmer over medium heat, then reduce to medium-low. Cook at a gentle bubble for 20 minutes, partially covered or uncovered. Remove the thyme stems and bay leaf. The soup should be glossy and pourable, with broth surrounding the onions. If it has reduced too much, add hot broth a little at a time. Taste before adding more salt or pepper.
  5. Toast the bread: While the soup simmers, arrange the baguette slices on a sheet pan and toast in a 375°F (190°C) oven for 6 to 10 minutes, turning once if needed, until dry on the surface and lightly golden at the edges. During the final 10 minutes of simmering, switch the oven to the high broiler and position a rack about 6 inches from the element.
  6. Broil the cheese toasts: Put 4 toasted slices on a foil-lined rimmed sheet pan and divide the Gruyère among them. Broil for 1 to 3 minutes, watching continuously from the first minute. Remove the toasts when the cheese is melted and bubbling with a few light golden spots, before it turns dark.
  7. Serve: Let the soup stand off the heat for 3 to 5 minutes while the toasts finish. Ladle it into 4 wide bowls and set one cheese toast in the center of each. Leave a ring of broth and onion ribbons visible around the toast, and serve immediately. Offer the extra toasted bread on the side.

How to Caramelize Onions Without Burning Them

Use color and aroma as the final test, not just the clock. Onion moisture, pot width, and burner strength affect how quickly the onions brown. They should be deeply golden and soft enough to collapse into the spoon, without black patches or an acrid smell. Lower the heat as needed, and loosen stuck browned bits with a small splash of water or broth before they scorch.

If the finished soup seems too concentrated or onion-heavy, stir in hot beef broth until liquid flows easily around the onions. Taste again after adding broth.

Why Broil the Cheese Toast Separately?

Toasting the bread before adding cheese gives it a sturdy surface and browned edges. Broil the cheese-topped slices on a sheet pan, then place one on each bowl at the last moment. The lower edge will absorb some broth, while the crust stays visible.

To broil bread and cheese directly on the soup instead, use only crocks confirmed to be broiler-safe and place them on a sheet pan. Do not put glass or unverified bowls under the broiler.

Bread and Cheese Choices

Gruyère gives the topping a nutty flavor and a pale, bubbly melt. Swiss or Emmentaler also melt well, though the flavor will differ. Thick slices of French bread or sturdy sourdough can replace baguette; toast them until the surface feels dry so they do not soften immediately on the soup.

For an alcohol-free version, deglaze with an additional 1/2 cup beef broth instead of wine. The soup will be less bright. For a clearer broth, omit the flour.

Make-Ahead, Storage, and Reheating

Make the soup base up to 2 days ahead, keeping the bread and cheese separate. Cool the soup promptly and refrigerate it in an airtight container for up to 3 to 4 days. Reheat in a saucepan over medium-low heat until steaming, adding a splash of broth if needed. Make the cheese toasts just before serving.

Freeze the cooled soup base without bread or cheese for up to 2 months. Thaw overnight in the refrigerator, reheat gently, and finish with fresh cheese toasts.

Nutrition

Approximate per serving, based on 4 bowls with one cheese toast each and excluding the 4 extra bread slices: 575 calories, 28g protein, 34g fat, and 53g carbohydrates. Approximate per 100g of finished soup with topping: 95 calories, 5g protein, 6g fat, and 9g carbohydrates. Values vary with the broth, bread, cheese, and amount of liquid evaporated.

French Onion Soup

A rich, brothy French onion soup made with deeply caramelized onions, beef broth, and Gruyère-topped baguette toasts.
Course: Soup
Cuisine: French
Prep: 15 min
Cook: 85 min
Total: 100 min
Servings: 4 Calories: 575 kcal

Equipment

  • 5- to 6-quart Dutch oven or heavy-bottomed pot
  • sheet pan
  • foil-lined rimmed sheet pan
  • oven

Ingredients

For the Soup

  • 3 pounds yellow onions, about 6 large, halved and thinly sliced (1,350g)
  • 4 tablespoons unsalted butter (55g)
  • 1 tablespoon olive oil
  • 1 teaspoon kosher salt, plus more to taste
  • 1/2 teaspoon freshly ground black pepper, plus more to taste
  • 1/4 teaspoon granulated sugar
  • 2 tablespoons all-purpose flour (15g)
  • 1/2 cup dry white wine
  • 6 cups low-sodium beef broth, plus up to 1 cup more as needed
  • 3 fresh thyme sprigs
  • 1 bay leaf

For the Cheese Toasts

  • 8 thick baguette slices, about 1/2 inch thick (about 220g)
  • 8 ounces shredded Gruyère cheese (225g)

Instructions

  1. Slice the onions thinly from pole to pole into long ribbons.
  2. Melt the butter with the olive oil in a wide 5- to 6-quart Dutch oven or heavy-bottomed pot over medium heat.
  3. Add the onions, salt, pepper, and sugar. Cook uncovered, stirring regularly, until the onions soften.
  4. Reduce the heat to medium-low or low and cook uncovered until the onions are deeply golden brown, collapsed, and sweet-smelling, about 45 to 60 minutes total. Stir and scrape the pot bottom every 3 to 5 minutes once softened.
  5. If browned bits begin to darken toward black, lower the heat and stir in 1 to 2 tablespoons of water or broth to loosen them.
  6. Stir in the flour until no dry flour remains and cook briefly.
  7. Add the wine, scrape up browned bits from the pot, and cook for 1 to 2 minutes until the raw wine aroma fades.
  8. Add 6 cups beef broth, the thyme sprigs, and bay leaf. Bring to a simmer over medium heat, then reduce to medium-low and simmer gently for 20 minutes.
  9. Remove the thyme stems and bay leaf. Add hot broth as needed for a glossy, pourable soup with broth surrounding the onions, then season with additional salt and pepper to taste.
  10. While the soup simmers, toast the baguette slices on a sheet pan in a 375°F (190°C) oven for 6 to 10 minutes, turning once if needed, until dry on the surface and lightly golden at the edges.
  11. During the final 10 minutes of simmering, switch the oven to high broil and position a rack about 6 inches from the element.
  12. Place 4 toasted baguette slices on a foil-lined rimmed sheet pan and divide the Gruyère among them.
  13. Broil for 1 to 3 minutes, watching continuously, until the cheese is melted, bubbling, and lightly golden.
  14. Let the soup stand off the heat for 3 to 5 minutes. Ladle into 4 wide bowls and place one cheese toast in the center of each bowl. Serve immediately with the extra toasted bread on the side.

Tips

  • Use color and aroma rather than the clock to judge caramelized onions; they should be deep golden, soft, and sweet-smelling.
  • Keep the heat low enough to prevent black patches or an acrid smell.
  • Loosen darkening browned bits with a small splash of water or broth before they scorch.
  • Add hot broth if the finished soup becomes too concentrated or onion-heavy.
  • Watch the cheese toasts continuously under the broiler, especially after the first minute.
  • Toast the bread until dry on the surface so it holds up better in the soup.

Variations

  • Alcohol-Free French Onion Soup: Replace the white wine with an additional 1/2 cup beef broth for a wine-free version.
  • Clearer Broth: Omit the flour for a clearer, less thickened broth.
  • Alternative Bread and Cheese: Use Swiss or Emmentaler instead of Gruyère, and substitute thick French bread or sturdy sourdough for the baguette.

Notes

Make the soup base up to 2 days ahead and refrigerate for 3 to 4 days; keep bread and cheese separate. Freeze the cooled soup base without bread or cheese for up to 2 months. Use only broiler-safe crocks if broiling cheese directly on the soup.

Nutrition

Calories: 575 kcal | Protein: 28 g | Fat: 34 g | Carbohydrates: 53 g

Zuppa Toscana

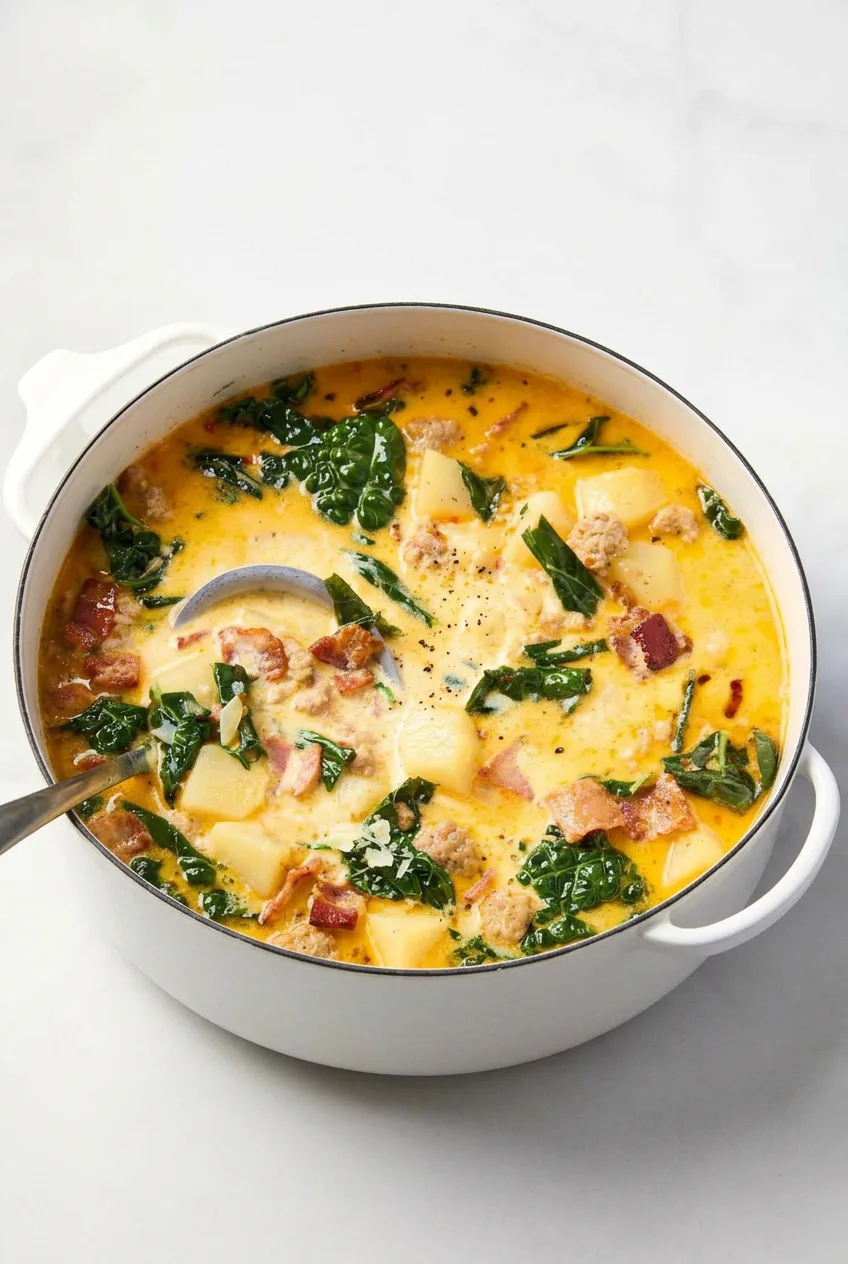
Zuppa Toscana is an Italian-American sausage, potato, and kale soup with a creamy broth that stays loose enough to ladle easily. This stovetop version uses hot Italian sausage for heat, Yukon Gold potatoes that hold their shape, and bacon cooked first in the same Dutch oven.

The potatoes simmer until fork-tender before the kale goes in. Heavy cream is added over low heat, and most of the bacon is saved for serving so it stays crisp rather than softening in the broth. Use mild Italian sausage if you prefer less heat.

Ingredients for Zuppa Toscana

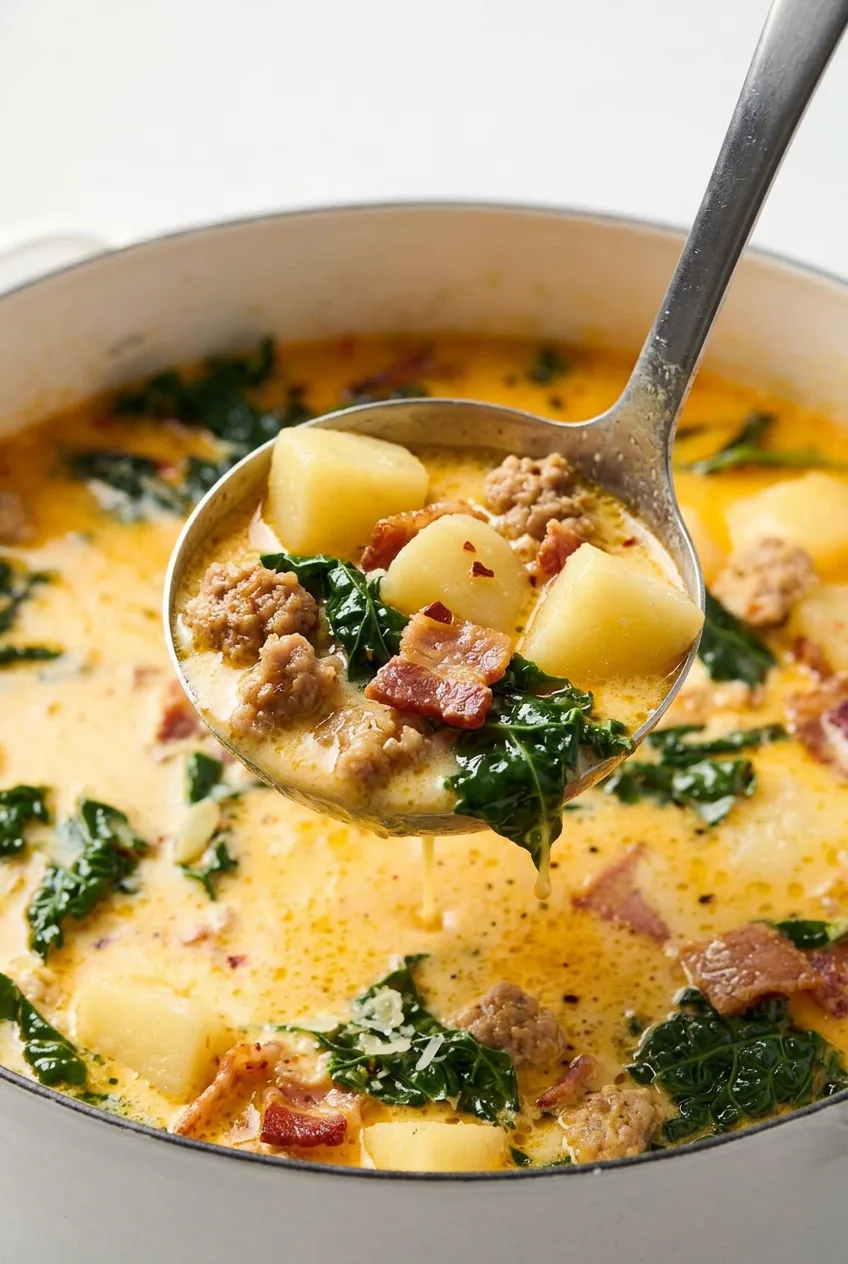
Close view of a ladleful of Zuppa Toscana with potato chunks, sausage, kale, bacon, and creamy broth
  • 6 slices thick-cut bacon, chopped (about 170g)
  • 1 lb hot Italian sausage, casings removed if linked (about 450g)
  • 1 medium yellow onion, diced (about 150g)
  • 4 garlic cloves, minced
  • 5 cups chicken broth, preferably lower sodium
  • 1 cup water
  • 1 1/2 lb Yukon Gold potatoes, scrubbed or peeled and cut into even 3/4-inch chunks (about 680g)
  • 1/2 teaspoon kosher salt, plus more to taste
  • 1/2 teaspoon freshly ground black pepper, plus more to taste
  • 1 small bunch kale, stems removed and leaves torn into bite-size pieces (about 5 packed cups or 150g)
  • 1 cup heavy cream

Optional for serving: Finely grated Parmesan and crusty bread.

How to Make Zuppa Toscana

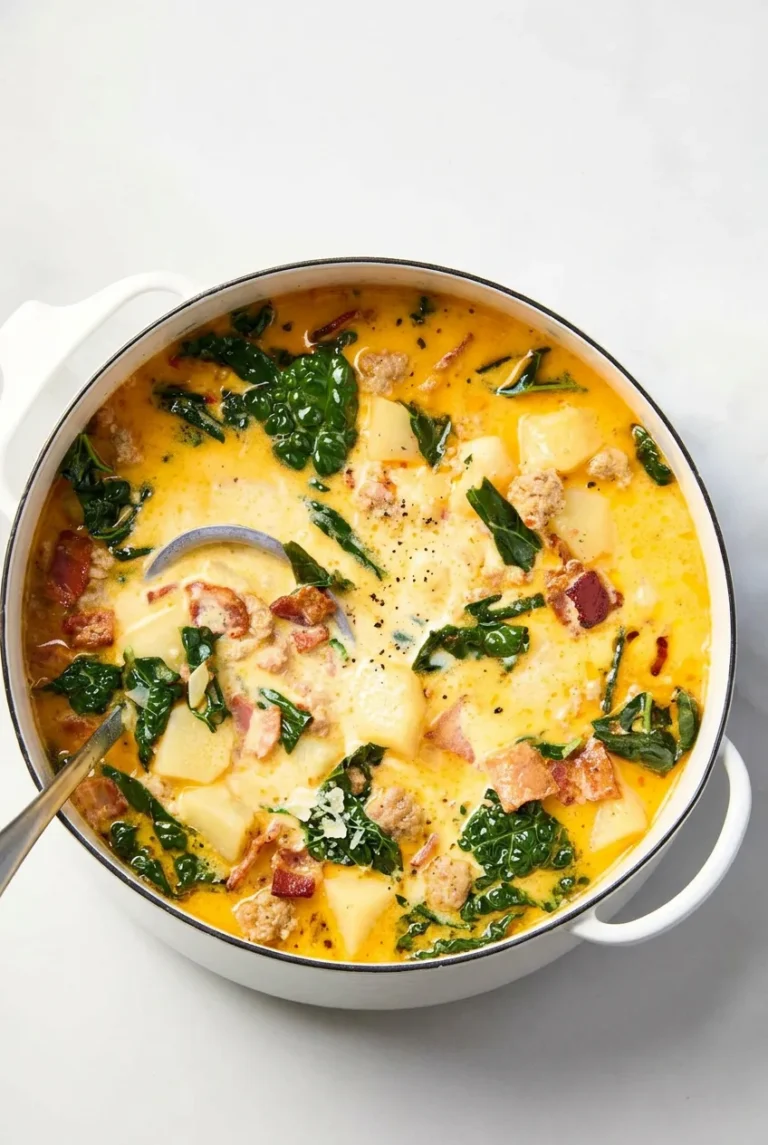
Wide view of a white Dutch oven filled with creamy Zuppa Toscana on a pale neutral surface

Yield: 6 hearty servings. Prep: About 15 minutes. Use a wide-bottomed 5- to 6-quart Dutch oven or heavy soup pot; it gives the meat room to brown and the kale room to wilt.

  1. Crisp the bacon: Put the bacon in the cold pot and set it over medium heat. Cook, stirring occasionally, for 6 to 8 minutes, until browned and crisp. Transfer with a slotted spoon to a paper towel-lined plate. Leave about 1 tablespoon of fat in the pot and drain off the rest.
  2. Brown the sausage: Increase the heat to medium-high. Add the sausage and cook for 5 to 6 minutes, breaking it into small crumbles, until browned and no pink remains. Spoon off excess rendered fat, leaving about 1 tablespoon in the pot for the aromatics.
  3. Cook the onion and garlic: Reduce the heat to medium. Add the onion and cook until soft and translucent. Stir in the garlic and cook just until fragrant, about 4 to 5 minutes total.
  4. Simmer the potatoes: Add the broth, water, potatoes, salt, and pepper. Bring to a boil over medium heat, then reduce to medium-low for a gentle simmer. Cook partially covered or uncovered for about 12 to 15 minutes, stirring once or twice. Start checking at 10 minutes: a fork should slide easily into a potato chunk, but the chunk should still hold its shape.
  5. Wilt the kale: Stir it in by handfuls as room opens up in the pot. Simmer for 3 to 5 minutes, until tender, glossy, and dark green.
  6. Add the cream: Reduce the heat to low and stir in the heavy cream. Stir in half the bacon if desired, reserving the rest for topping. Warm for 1 to 2 minutes, until the broth is steaming but not boiling. Taste before adding more salt; the sausage, bacon, and broth all contribute seasoning.
  7. Rest and serve: Remove from the heat and let stand for 5 minutes. Ladle into bowls or serve from the Dutch oven, topping with the reserved bacon, more black pepper, and Parmesan if desired.

How to Keep the Broth Creamy, Not Greasy

Bacon and sausage give the broth its golden color, but leaving all their rendered fat in the pot can make it oily. Keep only about 1 tablespoon after browning the meat to cook the onion and garlic. Saving most of the bacon for serving also keeps the pieces crisp.

Once the cream is in, the soup should steam gently rather than boil hard. High heat can make the broth look separated.

Best Potatoes for Zuppa Toscana

Yukon Gold potatoes have creamy centers and hold their edges in the broth. Leave the skins on after scrubbing for a more rustic soup, or peel them if preferred. Cut the pieces evenly and add the kale as soon as the potatoes are fork-tender so they do not fall apart.

Russets can replace Yukon Golds, but they soften and break down sooner, making the broth starchier. Check them closely as they simmer.

Zuppa Toscana Variations

  • Less heat: Use mild Italian sausage. For adjustable spice, stir in 1/4 to 1/2 teaspoon crushed red pepper flakes with the garlic, or offer them at the table.
  • Lighter broth: Replace the heavy cream with 1 cup half-and-half. Add it over low heat and do not boil the soup afterward.
  • Spinach instead of kale: Add spinach during only the final 1 to 2 minutes of cooking.
  • Without bacon: Omit it for a sausage-forward soup. If the pot is dry, use 1 tablespoon olive oil to brown the sausage.

Serving Zuppa Toscana

Serve with crusty bread or breadsticks for dipping. For another substantial creamy soup, try Creamy Ham Wild Rice Soup.

Storing, Reheating, and Freezing

Cool leftovers promptly and refrigerate in an airtight container for 3 to 4 days. Keep extra bacon separate, if possible, and add it after reheating. Potatoes absorb broth as they sit, so add a splash of chicken broth or water if the soup thickens.

Reheat on the stovetop over low to medium-low heat, stirring occasionally until hot without boiling hard. For better freezer quality, cook through the potato stage, then cool and freeze the soup before adding kale or cream. Add fresh kale and cream after thawing and reheating. Finished creamy soup can be frozen, but its broth may separate and the potatoes and kale may soften.

Nutrition

Approximate per hearty serving, based on 6 servings: 530 calories, 22g protein, 35g fat, and 27g carbohydrates. Approximate per 100g: 105 calories, 4g protein, 7g fat, and 5g carbohydrates. Values exclude optional toppings and vary with the sausage, bacon, broth, and amount of rendered fat drained.

Zuppa Toscana

A creamy Italian-American soup made with hot Italian sausage, tender Yukon Gold potatoes, kale, and crisp bacon.
Course: Soup
Cuisine: Italian-American
Prep: 15 min
Cook: 38 min
Total: 58 min
Servings: 6 Calories: 530 kcal

Equipment

  • 5- to 6-quart Dutch oven or heavy soup pot
  • slotted spoon
  • paper towel-lined plate
  • ladle

Ingredients

For the Soup

  • 6 slices thick-cut bacon, chopped (about 170 g)
  • 1 lb hot Italian sausage, casings removed if linked (about 450 g)
  • 1 medium yellow onion, diced (about 150 g)
  • 4 garlic cloves, minced
  • 5 cups lower-sodium chicken broth
  • 1 cup water
  • 1 1/2 lb Yukon Gold potatoes, scrubbed or peeled and cut into 3/4-inch chunks (about 680 g)
  • 1/2 teaspoon kosher salt, plus more to taste
  • 1/2 teaspoon freshly ground black pepper, plus more to taste
  • 1 small bunch kale, stems removed and leaves torn into bite-size pieces (about 5 packed cups or 150 g)
  • 1 cup heavy cream

Optional for Serving

  • Finely grated Parmesan
  • Crusty bread

Instructions

  1. Place the bacon in a cold Dutch oven or heavy soup pot over medium heat. Cook, stirring occasionally, for 6 to 8 minutes until browned and crisp.
  2. Transfer the bacon to a paper towel-lined plate with a slotted spoon. Leave about 1 tablespoon bacon fat in the pot and drain away the rest.
  3. Increase the heat to medium-high. Add the sausage and cook for 5 to 6 minutes, breaking it into small crumbles, until browned and no pink remains.
  4. Spoon off excess sausage fat, leaving about 1 tablespoon in the pot. Reduce the heat to medium.
  5. Add the onion and cook until soft and translucent. Stir in the garlic and cook until fragrant, about 4 to 5 minutes total.
  6. Add the chicken broth, water, potatoes, salt, and pepper. Bring to a boil over medium heat.
  7. Reduce the heat to medium-low and simmer partially covered or uncovered for 12 to 15 minutes, stirring once or twice, until the potatoes are fork-tender but still hold their shape.
  8. Stir in the kale by handfuls. Simmer for 3 to 5 minutes, until the kale is tender, glossy, and dark green.
  9. Reduce the heat to low and stir in the heavy cream. Stir in half of the bacon if desired, reserving the remainder for topping.
  10. Warm for 1 to 2 minutes until steaming but not boiling. Taste and adjust the salt and pepper as needed.
  11. Remove from the heat and let stand for 5 minutes. Ladle into bowls and top with reserved bacon, black pepper, and Parmesan if desired.

Tips

  • Start the bacon in a cold pot so it renders fat gradually and crisps evenly.
  • Drain the rendered bacon and sausage fat, leaving only about 1 tablespoon for the aromatics to prevent a greasy broth.
  • Cut potatoes into even pieces so they cook at the same rate.
  • Check potatoes at 10 minutes to keep them from breaking apart.
  • Keep the soup below a boil after adding cream to prevent the broth from separating.
  • Reserve most of the bacon for serving so it stays crisp.

Variations

  • Less Heat: Use mild Italian sausage, or add 1/4 to 1/2 teaspoon crushed red pepper flakes with the garlic for adjustable spice.
  • Lighter Broth: Replace the heavy cream with 1 cup half-and-half and do not boil the soup after adding it.
  • Spinach Instead of Kale: Use spinach in place of kale and add it during the final 1 to 2 minutes of cooking.
  • Without Bacon: Omit the bacon for a sausage-forward soup; use 1 tablespoon olive oil to brown the sausage if the pot is dry.
  • Russet Potatoes: Use russet potatoes instead of Yukon Golds for a starchier broth, checking them closely because they soften faster.

Notes

Refrigerate leftovers promptly in an airtight container for 3 to 4 days. Reheat over low to medium-low heat without boiling hard, adding a splash of broth or water if thickened. For best freezer quality, freeze the soup after the potato stage and add fresh kale and cream after thawing.

Nutrition

Calories: 530 kcal | Protein: 22 g | Fat: 35 g | Carbohydrates: 27 g

Wild Rice Soup

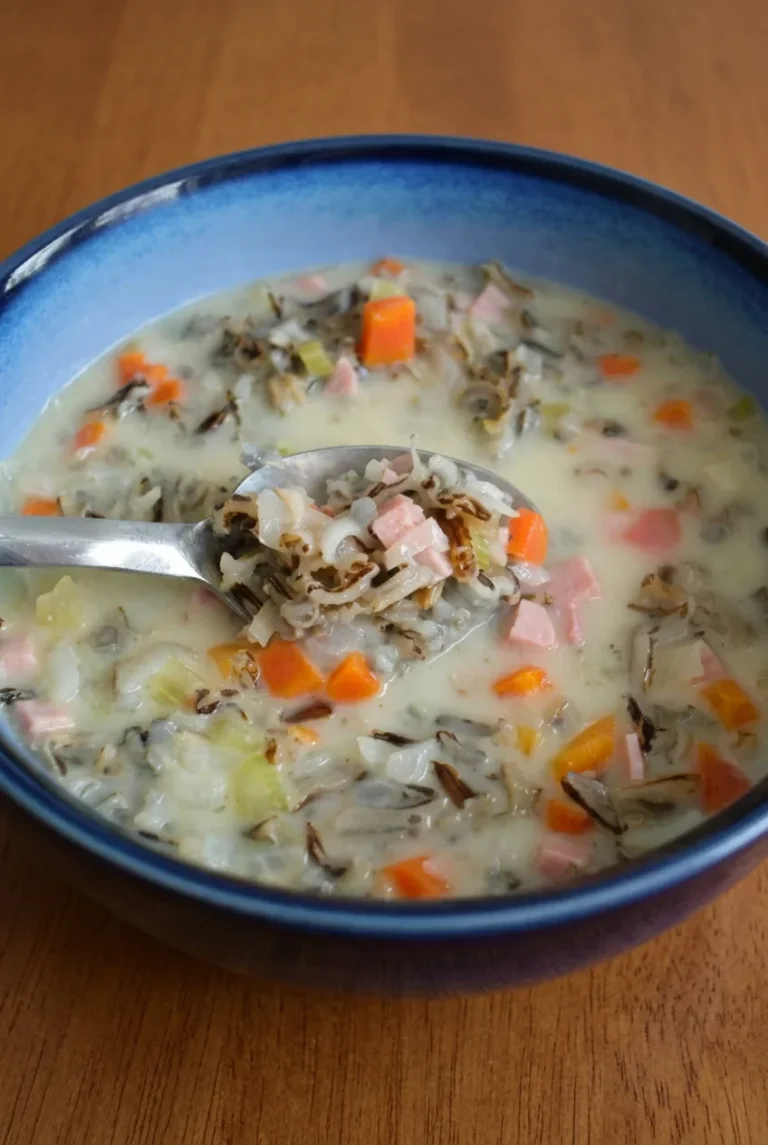
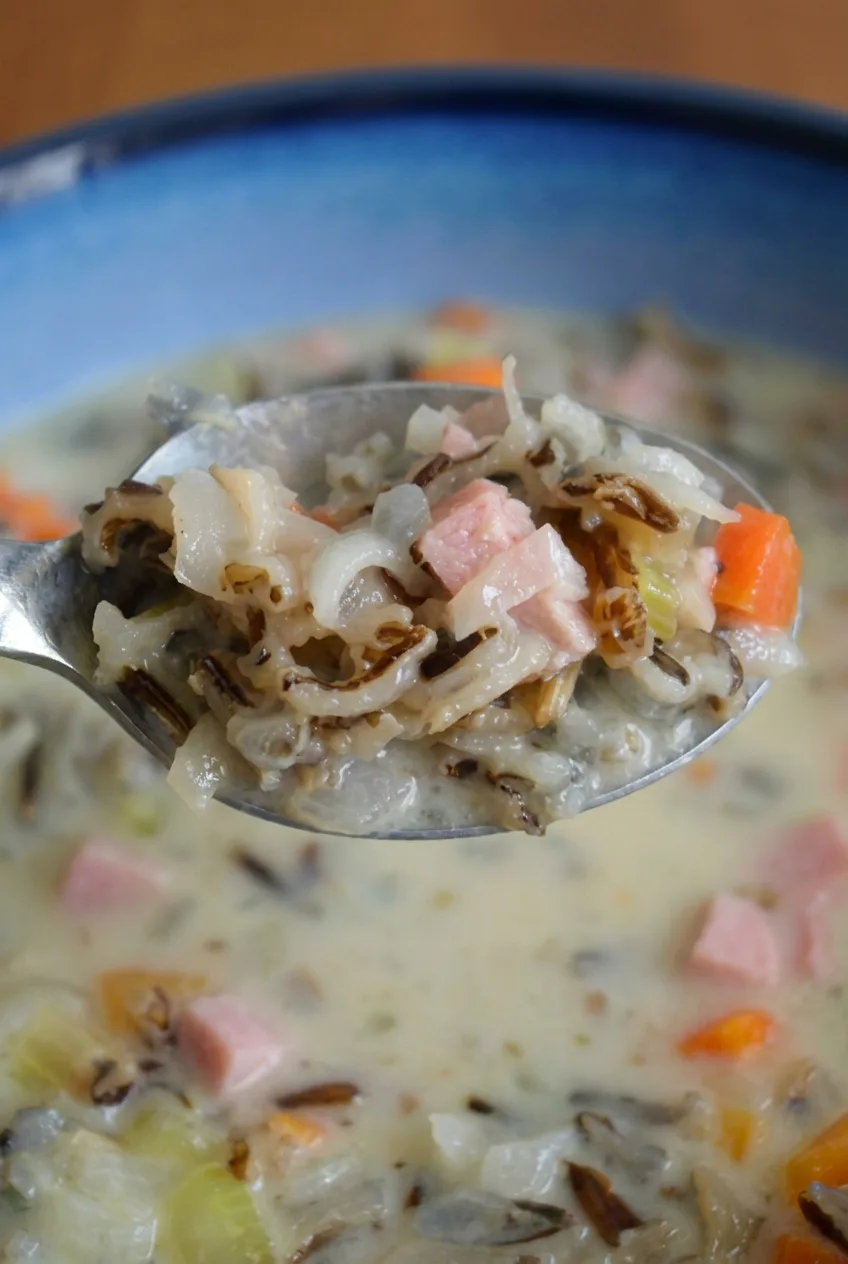
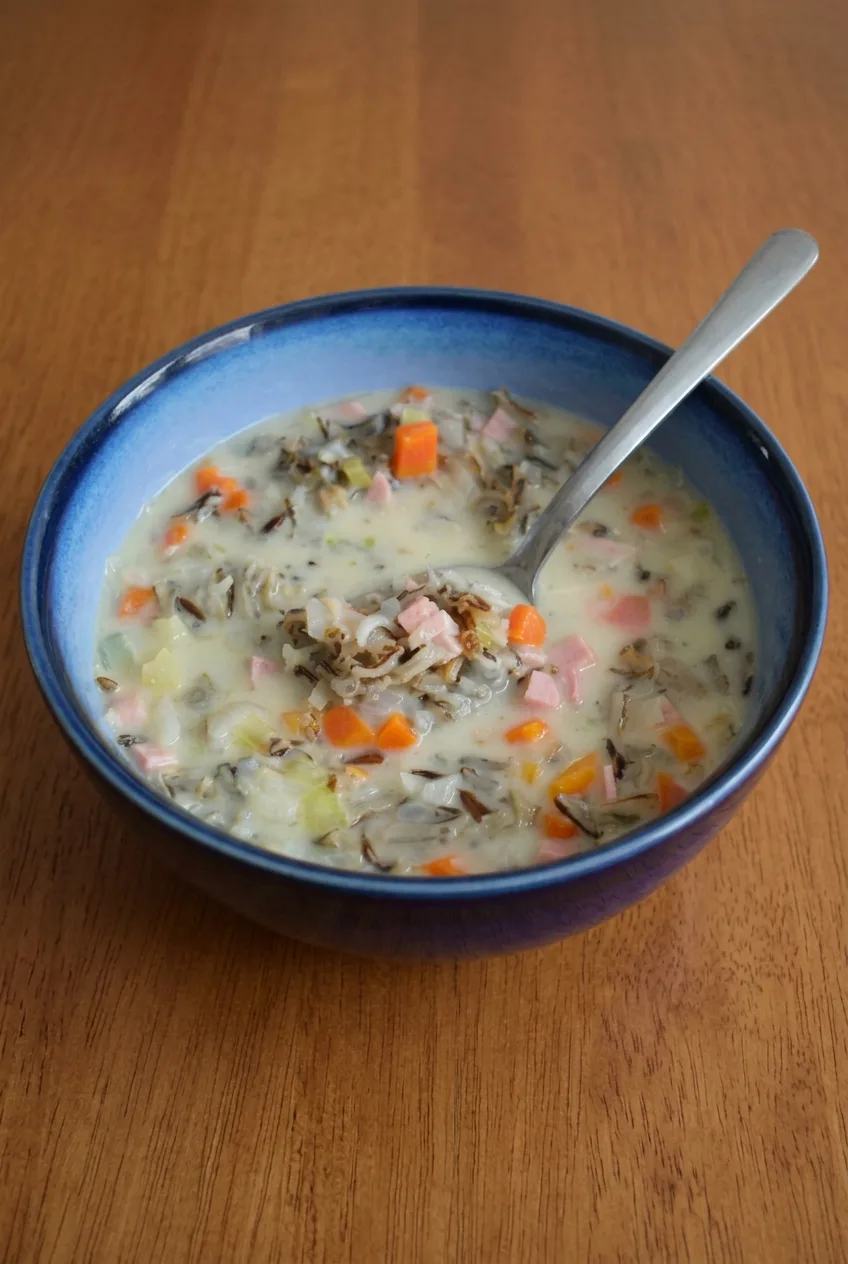
This stovetop wild rice soup has tender dark grains, diced ham, carrots, celery, and onion in a creamy broth that coats a spoon but still flows easily. A butter-flour roux gives the broth body without making it heavy.

Cook the rice separately so it can become tender without soaking up the soup base. Add the milk and half-and-half near the end, then warm them gently to keep the broth smooth.

Ingredients for Wild Rice Soup

Close view of creamy ham wild rice soup showing split dark rice, diced ham, carrots, celery, and onion.

Makes 6 servings. Allow about 15 minutes to prep and 40 to 50 minutes to cook, or 55 to 65 minutes total. The rice can cook while you prepare the soup base.

  • 3/4 cup uncooked wild rice (about 125g)
  • Water or low-sodium chicken broth, as directed on the rice package
  • 4 tablespoons unsalted butter (about 55g)
  • 1 medium yellow onion, finely diced (about 1 cup; 150g)
  • 2 medium carrots, diced into 1/4-inch pieces (about 1 cup; 130g)
  • 2 celery ribs, diced into 1/4-inch pieces (about 3/4 cup; 90g)
  • 2 garlic cloves, minced
  • 1/3 cup all-purpose flour (about 40g)
  • 4 cups low-sodium chicken broth, plus 1/2 to 1 cup more as needed
  • 1 teaspoon dried thyme
  • 1 bay leaf
  • 1 1/2 cups fully cooked ham, diced into 1/4-inch pieces (about 225g)
  • 1 cup whole milk
  • 1 cup half-and-half
  • Kosher salt and black pepper, to taste

Use low-sodium broth and wait until the end to add most of the salt: ham varies considerably in saltiness.

How to Make Wild Rice Soup

Wide view of a full deep blue bowl of creamy ham wild rice soup on a warm wooden table.
  1. Cook the rice: Rinse the wild rice in a fine-mesh strainer. Cook it in a covered medium saucepan with water or broth according to the package directions. True wild rice usually takes 35 to 45 minutes; start checking at the earliest package time. The grains should be tender, with many split open and no hard centers. Drain any excess liquid.
  2. Soften the vegetables: Melt the butter in a 5- to 6-quart Dutch oven or heavy soup pot over medium heat. Add the onion, carrots, celery, and a small pinch of salt. Cook for 7 to 9 minutes, stirring occasionally, until the onion is translucent and the vegetables begin to soften. Lower the heat if they start to brown. Stir in the garlic and cook just until fragrant.
  3. Make the roux: Reduce the heat to medium-low. Sprinkle the flour over the vegetables and stir constantly for 1 minute, until no dry flour remains. Gradually whisk in 4 cups of broth, scraping the bottom and corners of the pot to prevent lumps.
  4. Simmer the vegetables: Add the thyme and bay leaf. Bring to a gentle simmer with small, steady bubbles. Simmer partially covered or uncovered for 12 to 15 minutes, checking after 10 minutes. The carrots and celery should be fork-tender but still hold their shape. Remove the bay leaf.
  5. Add the ham and rice: Stir in the ham and cooked wild rice. Simmer for 3 to 4 minutes, stirring occasionally, until heated through.
  6. Finish with dairy: Reduce the heat to low. Stir in the milk and half-and-half and warm for 4 to 6 minutes, stirring often along the bottom of the pot. Keep the soup steaming but not boiling. Add black pepper, then taste before adding more salt.
  7. Adjust and serve: The broth should lightly coat a spoon while still flowing easily. If it is too thick, stir in warm broth a little at a time. Let stand off the heat for 5 minutes, then ladle into deep bowls.

Why Cook the Wild Rice Separately?

Wild rice absorbs a substantial amount of liquid as it cooks. Cooking it separately lets you add tender grains near the end without reducing the creamy soup base too far. True wild rice and wild-rice blends can have different cooking times, so follow the package directions and check for tender, split grains rather than relying on the clock alone. A blend works if it contains visible dark wild rice grains.

How to Keep the Soup Creamy

Once the milk and half-and-half are in the pot, keep the heat low and stir along the bottom. Boiling can scorch the soup or make the broth look grainy. Stop heating when it is steaming and evenly creamy.

The soup will thicken as it stands. Add warm broth a few tablespoons at a time if it begins to mound on the spoon instead of settling back into the bowl. Taste again after thinning.

Wild Rice Soup Variations

  • Chicken or turkey: Replace the ham with 2 cups cooked chicken or turkey. Add it with the rice so it only needs to heat through.
  • Meatless: Omit the ham, use vegetable broth, and add white beans or 8 ounces sliced mushrooms. If using mushrooms, sauté them with the vegetables until their moisture cooks off.
  • Gluten-free: Omit the flour. Whisk 3 tablespoons cornstarch with 1/4 cup cold milk or broth. Once the vegetables are tender, stir the slurry into the hot broth and cook until thickened, then add the ham, rice, and remaining dairy.

Serving Wild Rice Soup

Serve in deep bowls with crusty bread or dinner rolls. For another hearty rice-based dinner, try this stuffed pepper soup with beef and rice.

Storage and Reheating

Cool leftovers promptly and refrigerate in an airtight container within 2 hours. Use within 4 days. The rice will absorb broth overnight, so expect the soup to be thicker the next day.

Reheat on the stovetop over medium-low heat, stirring often. Add broth or water gradually until the soup is creamy and spoonable again, then taste and adjust the seasoning. Do not boil. To prepare ahead, cook the rice and chop the vegetables up to 1 day in advance; refrigerate them separately.

You can freeze the soup for up to 3 months in containers with room for expansion, though the dairy may separate slightly after thawing. Thaw overnight in the refrigerator and reheat gently while stirring. For better texture when making a batch specifically to freeze, freeze the soup before adding dairy, then stir in fresh milk and half-and-half as you reheat it.

Nutrition

Approximate nutrition per serving, based on 6 servings: 320 calories, 15g protein, 16g fat, and 30g carbohydrates. Approximate values per 100g of finished soup: 75 calories, 4g protein, 4g fat, and 7g carbohydrates. Values vary with the ham, broth, rice-cooking liquid, and any extra broth added.

Wild Rice Soup

A creamy stovetop wild rice soup with tender wild rice, ham, carrots, celery, and onion in a lightly thickened chicken broth.
Course: Soup
Cuisine: American
Prep: 15 min
Cook: 50 min
Total: 65 min
Servings: 6 Calories: 320 kcal

Equipment

  • Fine-mesh strainer
  • Medium saucepan
  • 5- to 6-quart Dutch oven or heavy soup pot
  • Whisk
  • Ladle

Ingredients

For the Wild Rice

  • 3/4 cup uncooked wild rice (about 125 g)
  • Water or low-sodium chicken broth, as directed on the rice package

For the Soup

  • 4 tablespoons unsalted butter (about 55 g)
  • 1 medium yellow onion, finely diced (about 1 cup; 150 g)
  • 2 medium carrots, diced into 1/4-inch pieces (about 1 cup; 130 g)
  • 2 celery ribs, diced into 1/4-inch pieces (about 3/4 cup; 90 g)
  • 2 garlic cloves, minced
  • 1/3 cup all-purpose flour (about 40 g)
  • 4 cups low-sodium chicken broth, plus 1/2 to 1 cup more as needed
  • 1 teaspoon dried thyme
  • 1 bay leaf
  • 1 1/2 cups fully cooked ham, diced into 1/4-inch pieces (about 225 g)
  • 1 cup whole milk
  • 1 cup half-and-half
  • Kosher salt and black pepper, to taste

Instructions

  1. Rinse the wild rice in a fine-mesh strainer. Cook it in water or broth according to the package directions, until the grains are tender, many have split open, and no hard centers remain. Drain any excess liquid.
  2. Melt the butter in a 5- to 6-quart Dutch oven or heavy soup pot over medium heat.
  3. Add the onion, carrots, celery, and a small pinch of salt. Cook for 7 to 9 minutes, stirring occasionally, until the onion is translucent and the vegetables begin to soften.
  4. Stir in the garlic and cook just until fragrant.
  5. Reduce the heat to medium-low. Sprinkle the flour over the vegetables and stir constantly for 1 minute, until no dry flour remains.
  6. Gradually whisk in 4 cups of chicken broth, scraping the bottom and corners of the pot to prevent lumps.
  7. Add the thyme and bay leaf. Bring to a gentle simmer and cook partially covered or uncovered for 12 to 15 minutes, until the carrots and celery are fork-tender. Remove the bay leaf.
  8. Stir in the ham and cooked wild rice. Simmer for 3 to 4 minutes, stirring occasionally, until heated through.
  9. Reduce the heat to low. Stir in the milk and half-and-half, then warm for 4 to 6 minutes, stirring often. Keep the soup steaming but do not let it boil.
  10. Season with black pepper, then taste and add salt as needed. Thin with warm broth a little at a time if the soup is too thick.
  11. Let the soup stand off the heat for 5 minutes before serving.

Tips

  • Cook the wild rice separately so it does not absorb too much of the creamy soup base.
  • Use low-sodium broth and season near the end because ham can be quite salty.
  • Keep the heat low after adding milk and half-and-half to prevent scorching or a grainy texture.
  • Check wild rice for tender, split grains rather than relying only on cooking time.
  • Add warm broth gradually if the soup thickens too much.

Variations

  • Chicken or Turkey: Replace the ham with 2 cups cooked chicken or turkey and add it with the rice.
  • Meatless: Omit the ham, use vegetable broth, and add white beans or 8 ounces sliced mushrooms. Sauté mushrooms with the vegetables until their moisture cooks off.
  • Gluten-Free: Omit the flour. Whisk 3 tablespoons cornstarch with 1/4 cup cold milk or broth, stir it into the hot broth after the vegetables are tender, and cook until thickened before adding the ham, rice, and remaining dairy.

Notes

Refrigerate leftovers in an airtight container within 2 hours and use within 4 days. Reheat gently over medium-low heat with added broth or water as needed; do not boil. Freeze for up to 3 months, preferably before adding dairy for the best texture.

Nutrition

Calories: 320 kcal | Protein: 15 g | Fat: 16 g | Carbohydrates: 30 g

Taco Soup

This stovetop taco soup combines shredded chicken, black and pinto beans, and yellow corn in a golden-orange, taco-seasoned broth. It is hearty but still easy to ladle, rather than thick like chili.

Gently simmer the chicken just until it reaches 165°F (75°C), then shred it and return it to the pot for a short finish. Add cheddar, crushed tortilla chips, and cilantro to individual bowls so the cheese softens while the chips stay crisp.

Ingredients for Taco Soup

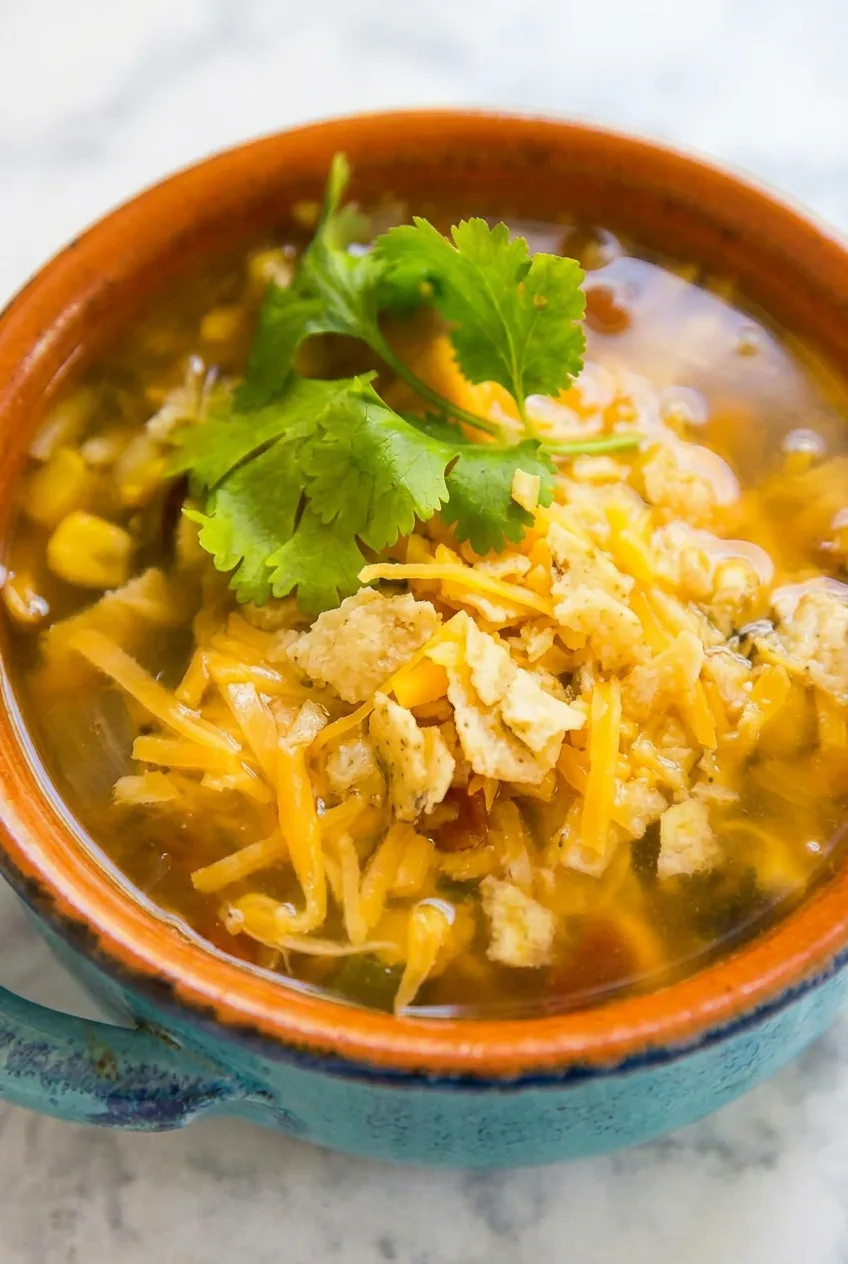
Close view of shredded chicken, corn, melting cheddar, tortilla chips, and cilantro in brothy taco soup.
  • 1 tablespoon olive oil
  • 1 medium yellow onion, finely chopped (about 1 cup or 150g)
  • 3 garlic cloves, minced
  • 4 cups low-sodium chicken broth, plus more as needed
  • 1 can (10 ounces) diced tomatoes with green chiles, undrained
  • 1 packet taco seasoning (about 1 ounce or 28g), or 2 tablespoons homemade taco seasoning
  • 1 1/2 pounds boneless skinless chicken breasts (about 680g)
  • 1 can (15 ounces) black beans, rinsed and drained
  • 1 can (15 ounces) pinto beans, rinsed and drained
  • 1 1/2 cups frozen yellow corn (about 225g)
  • 1 tablespoon fresh lime juice, plus lime wedges for serving

For serving

  • 1 1/2 cups shredded cheddar or cheddar-Jack cheese (about 170g)
  • 2 cups plain tortilla chips, lightly crushed (about 60g)
  • 1/2 cup loosely packed fresh cilantro leaves (about 15g)

Choose mild or hot diced tomatoes with green chiles to adjust the heat. Wait until the soup is finished before adding salt; broth, canned tomatoes, and seasoning packets vary in sodium.

How to Make Stovetop Taco Soup

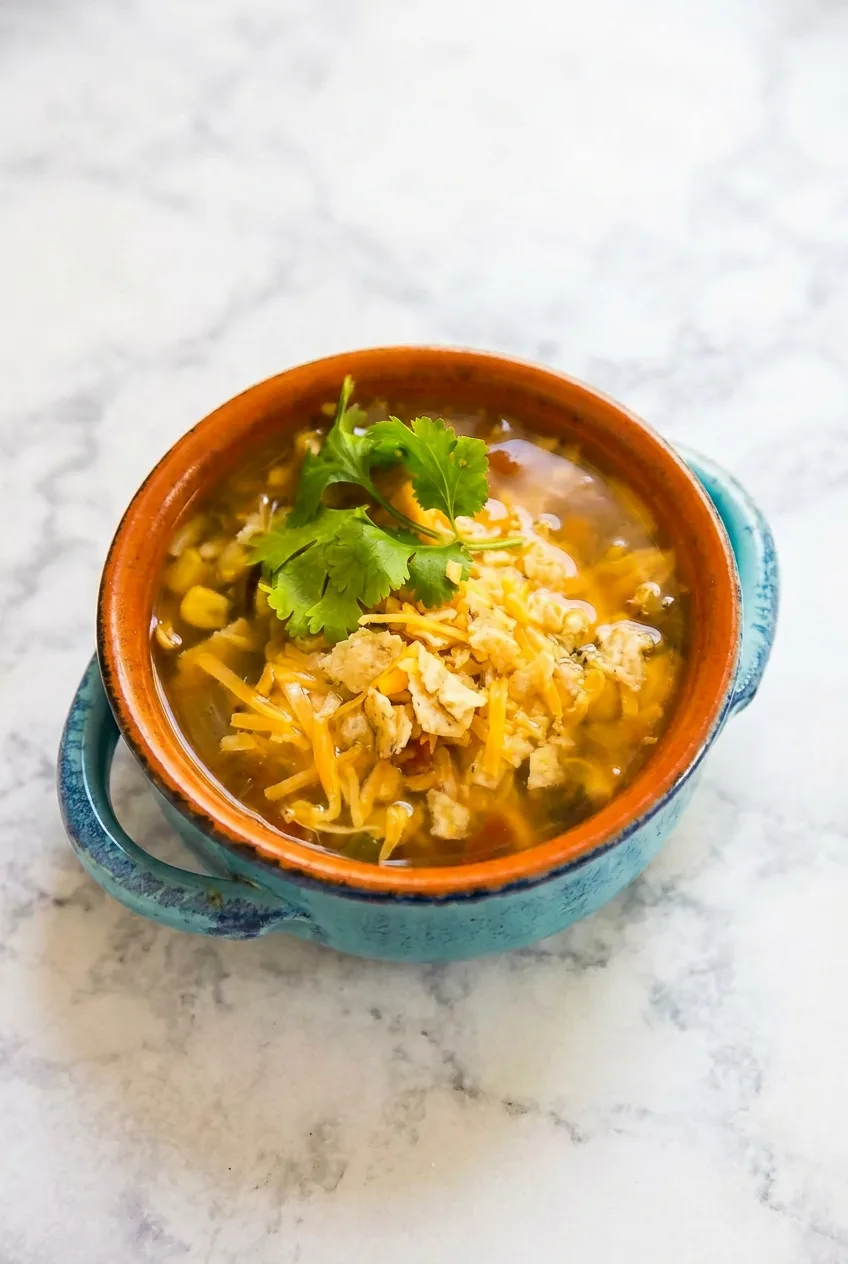
Rustic bowl of chicken taco soup with cheese, chips, cilantro, corn, and visible broth on a neutral stone surface.
  1. Soften the onion and garlic: Heat the olive oil in a 5- to 6-quart Dutch oven or soup pot over medium heat. Cook the onion for about 5 minutes, until softened but not browned. Stir in the garlic for about 30 seconds, just until fragrant.
  2. Build the broth: Add the chicken broth, undrained tomatoes with green chiles, and taco seasoning. Stir until no dry seasoning clumps remain. Increase the heat to medium-high and bring just to a boil, about 3 to 5 minutes.
  3. Simmer the chicken: Add the chicken breasts, reduce the heat to medium-low, and partially cover the pot. Maintain a gentle simmer, not a hard boil. Start checking after 15 minutes; the chicken will generally take 15 to 20 minutes, depending on thickness. Remove it when the thickest part reaches 165°F and it pulls apart easily.
  4. Shred the chicken: Transfer it to a plate or shallow bowl and shred into bite-size strands with two forks. Save any juices that collect on the plate.
  5. Finish the soup: Return the chicken and its juices to the pot with the beans and corn. Stir gently and simmer uncovered over medium-low heat for 5 to 7 minutes, until the beans and corn are hot. Add a little more broth if the soup is no longer easy to ladle. Stir in the lime juice, taste, and add salt only if needed. Let stand off the heat for 5 minutes.
  6. Serve: Ladle into deep bowls or handled soup mugs. Top each serving with a loose mound of cheese and crushed chips, then add cilantro. Serve immediately with lime wedges.

How to Keep Taco Soup Brothy

Four cups of broth give the chicken, beans, and corn room to sit in a spoonable soup. Rinsing and draining the beans keeps their canned liquid from clouding and thickening this broth. Keep rice out of the pot, since it will absorb liquid as the soup sits.

If the soup thickens during storage, stir in warm chicken broth about 1/4 cup at a time while reheating. Taste again after adjusting the consistency; it may need a little lime juice or salt.

How to Avoid Dry Shredded Chicken

Chicken breast thickness matters more than the clock. Check smaller breasts at 15 minutes and lift each piece out once it reaches 165°F and separates easily with two forks. Shredding on a plate keeps the beans intact, and returning the chicken only for the brief final simmer limits further cooking.

Taco Soup Toppings and Variations

Add the cheddar, crushed chips, and cilantro just before serving; chips soften quickly in hot broth. Sour cream or plain Greek yogurt, diced avocado, jalapeño, and hot sauce can be offered on the side. For a different, creamier soup, try Creamy Chicken Tortilla Soup.

Rotisserie chicken shortcut: Omit the raw chicken and use 3 cups shredded cooked chicken. Simmer the broth, tomatoes, seasoning, beans, and corn for 15 minutes, then add the chicken for the final 3 to 5 minutes, just until hot.

Vegetarian variation: Use vegetable broth, omit the chicken, and add another can of beans or 1 1/2 cups cooked brown lentils for body.

Storage, Reheating, and Freezing

Cool the soup promptly and refrigerate it in airtight containers for up to 4 days. Keep the cheese, chips, cilantro, and other toppings separate. The untopped soup can be made a day ahead.

Reheat over medium-low heat, stirring occasionally, until hot. Add broth 1/4 cup at a time if the soup has thickened. To reheat in the microwave, heat in 1- to 2-minute intervals, stirring between intervals until hot.

Freeze cooled soup without toppings for up to 3 months. Thaw overnight in the refrigerator, reheat gently, and add fresh lime juice and toppings before serving. For another brothy bean-based dinner, try Brothy Tomato Pasta Fagioli with Spinach.

Nutrition

Approximate nutrition per serving, based on 6 servings with the listed cheddar, tortilla chips, and cilantro: 495 calories, 42g protein, 18g fat, and 39g carbohydrates. Per 100g: approximately 100 calories, 8g protein, 4g fat, and 8g carbohydrates. Values vary with the chicken, broth, seasoning, canned ingredients, and portion size.

Taco Soup

A brothy stovetop taco soup with shredded chicken, black and pinto beans, corn, and taco-seasoned tomatoes, served with cheddar, tortilla chips, and cilantro.
Course: Soup
Cuisine: Mexican
Prep: 15 min
Cook: 40 min
Total: 55 min
Servings: 6 Calories: 495 kcal

Equipment

  • 5- to 6-quart Dutch oven or soup pot
  • meat thermometer
  • cutting board
  • two forks
  • ladle

Ingredients

For the Taco Soup

  • 1 tablespoon olive oil
  • 1 medium yellow onion, finely chopped (about 1 cup or 150 g)
  • 3 garlic cloves, minced
  • 4 cups low-sodium chicken broth, plus more as needed
  • 1 can (10 ounces) diced tomatoes with green chiles, undrained
  • 1 packet (about 1 ounce or 28 g) taco seasoning, or 2 tablespoons homemade taco seasoning
  • 1 1/2 pounds boneless skinless chicken breasts (about 680 g)
  • 1 can (15 ounces) black beans, rinsed and drained
  • 1 can (15 ounces) pinto beans, rinsed and drained
  • 1 1/2 cups frozen yellow corn (about 225 g)
  • 1 tablespoon fresh lime juice
  • Salt, if needed

For Serving

  • 1 1/2 cups shredded cheddar or cheddar-Jack cheese (about 170 g)
  • 2 cups plain tortilla chips, lightly crushed (about 60 g)
  • 1/2 cup loosely packed fresh cilantro leaves (about 15 g)
  • Lime wedges

Instructions

  1. Heat the olive oil in a 5- to 6-quart Dutch oven or soup pot over medium heat. Cook the onion for about 5 minutes, until softened but not browned.
  2. Stir in the garlic and cook for about 30 seconds, until fragrant.
  3. Add the chicken broth, undrained tomatoes with green chiles, and taco seasoning. Stir until the seasoning dissolves.
  4. Increase the heat to medium-high and bring the broth just to a boil, about 3 to 5 minutes.
  5. Add the chicken breasts, reduce the heat to medium-low, and partially cover the pot. Maintain a gentle simmer for 15 to 20 minutes, until the thickest part of the chicken reaches 165°F (75°C).
  6. Transfer the chicken to a plate or shallow bowl and shred it into bite-size pieces with two forks. Reserve any juices from the plate.
  7. Return the shredded chicken and its juices to the pot. Add the black beans, pinto beans, and corn.
  8. Simmer uncovered over medium-low heat for 5 to 7 minutes, until the beans and corn are hot. Add more broth if needed to keep the soup easy to ladle.
  9. Stir in the lime juice, taste, and add salt only if needed. Remove from the heat and let stand for 5 minutes.
  10. Ladle the soup into bowls and top with cheese, crushed tortilla chips, and cilantro. Serve immediately with lime wedges.

Tips

  • Use mild or hot diced tomatoes with green chiles to adjust the heat level.
  • Keep the soup at a gentle simmer rather than a hard boil to prevent dry chicken.
  • Check thinner chicken breasts at 15 minutes and remove each piece as soon as it reaches 165°F (75°C).
  • Rinse and drain the beans to keep the broth clear and brothy.
  • Add cheese, chips, and cilantro to individual bowls so the chips stay crisp.
  • Wait until the end to add salt because broth, tomatoes, and taco seasoning can vary in sodium.

Variations

  • Rotisserie Chicken Shortcut: Omit the raw chicken and use 3 cups shredded cooked chicken. Simmer the broth, tomatoes, seasoning, beans, and corn for 15 minutes, then add the chicken for the final 3 to 5 minutes.
  • Vegetarian Taco Soup: Use vegetable broth, omit the chicken, and add another can of beans or 1 1/2 cups cooked brown lentils.

Notes

Refrigerate cooled, untopped soup in airtight containers for up to 4 days or freeze for up to 3 months. Store toppings separately. Reheat gently with warm chicken broth, adding about 1/4 cup at a time if the soup thickens.

Nutrition

Calories: 495 kcal | Protein: 42 g | Fat: 18 g | Carbohydrates: 39 g

Creamy Chicken Tortilla Soup

Creamy chicken tortilla soup should lightly coat a spoon while staying loose enough for the shredded chicken, black beans, corn, and diced pepper to move through the broth. This stovetop version simmers the chicken in a tomato-chile base, then adds softened cream cheese over low heat for a smooth, blush-orange finish.

Keep the tortilla chips out of the pot. Tuck them into each bowl just before serving so they stay crisp against the hot soup.

Prep: 15 minutes | Cook: about 25 minutes | Total: about 40 minutes | Servings: 6 generous bowls

Ingredients for Creamy Chicken Tortilla Soup

Close view of creamy chicken tortilla soup showing shredded chicken, corn, black beans, melted cheese, cilantro, and a crisp chip.
  • 1 tablespoon olive oil
  • 1 medium yellow onion, diced (about 150g)
  • 1 medium yellow or orange bell pepper, diced (about 150g)
  • 3 garlic cloves, minced
  • 2 teaspoons ground cumin
  • 1 teaspoon chili powder
  • 1 1/2 pounds boneless, skinless chicken breasts (about 680g)
  • 4 to 5 cups chicken broth, divided
  • 1 cup red enchilada sauce
  • 1 (10-ounce) can diced tomatoes with green chiles, undrained
  • 1 (15-ounce) can black beans, rinsed and drained
  • 1 1/2 cups corn kernels, drained if canned (about 250g)
  • 8 ounces full-fat cream cheese, softened and cubed (about 225g)
  • 2 tablespoons fresh lime juice
  • Kosher salt and black pepper, to taste
  • 1 cup shredded cheddar or Mexican-blend cheese (about 115g), for serving
  • 1/3 cup loosely packed fresh cilantro leaves, for serving
  • 3 to 4 cups corn tortilla chips, for serving

Broth and enchilada sauce vary in saltiness, so season the soup after adding the cream cheese. Frozen corn can replace canned corn; add it directly to the pot.

How to Make Creamy Chicken Tortilla Soup

Two white handled mugs of creamy chicken tortilla soup with cheese, cilantro, lime, and tortilla chips on a stone surface.
  1. Prepare the finish: Set out the cream cheese to soften, then cut it into small cubes. Prepare the shredded cheese, cilantro, and lime juice. Keep the chips dry until serving. If needed, soften the cream cheese in a microwave-safe bowl in brief bursts; it should yield when pressed without melting completely.
  2. Cook the aromatics: Heat the oil in a 5- to 6-quart Dutch oven or heavy soup pot over medium heat. Add the onion and bell pepper. Cook, stirring frequently, until the onion is translucent and the pepper begins to soften, about 5 minutes. Stir in the garlic, cumin, and chili powder for about 1 minute, until fragrant.
  3. Simmer the chicken: Add 4 cups broth, the enchilada sauce, tomatoes with green chiles, black beans, and corn. Nestle the chicken into the liquid in a mostly single layer. Bring just to a boil over medium-high heat, partially covered, then reduce to medium-low. Simmer gently, uncovered or partially covered, for 15 to 20 minutes. Look for small, steady bubbles rather than a rolling boil. Start checking at 15 minutes; the thickest part of the chicken should reach 165°F (75°C).
  4. Shred the chicken: Transfer the chicken to a plate as soon as it is cooked, shred it with two forks, and return it to the pot.
  5. Make the broth creamy: Reduce the heat to low. Add the softened cream cheese a few cubes at a time, stirring until fully melted and no white flecks remain, about 3 to 5 minutes. Do not let the soup boil. Stir in the lime juice, then taste and add salt and pepper as needed. If the broth is too thick, add some of the remaining broth a splash at a time.
  6. Serve: Let the soup stand off heat for 3 to 5 minutes. Ladle into individual bowls or handled mugs, leaving the chicken, beans, corn, and pepper visible. Sprinkle cheese over the hot soup, add cilantro, and tuck one or two large tortilla chips upright at each rim. Serve extra chips alongside.

How to Keep the Cream Cheese Smooth

Cold cream cheese added to boiling soup can leave white flecks or make the broth look oily. Softening and cubing it helps it melt evenly; low heat gives you time to stir it in without a hard boil. If small lumps remain, stir gently for another minute or two. A whisk can help smooth the broth, but avoid whisking the chicken and vegetables vigorously.

How Thick Should the Soup Be?

The broth should lightly coat a spoon and pour easily around the chicken, beans, corn, and peppers—not sit in the bowl like dip. If it is too thick, add warm broth a few tablespoons at a time.

If the soup remains unusually thin after the cream cheese melts, stir together 1 tablespoon cornstarch and 1 tablespoon cold water. Whisk the slurry into the soup and simmer gently for 1 to 2 minutes, without bringing it to a hard boil.

Creamy Chicken Tortilla Soup Variations

Rotisserie Chicken Shortcut

Replace the raw chicken with about 3 cups shredded rotisserie chicken. Simmer the soup base until the pepper is tender, then add the cooked chicken with the cream cheese and warm gently. Do not give cooked chicken the full raw-chicken simmer.

Make It Spicier

Cook a diced jalapeño with the onion and bell pepper, or add a little chipotle in adobo or hot sauce to taste. Increase the heat gradually; enchilada sauces vary in spice and salt.

For a bean substitution, use pinto beans or hominy in place of the black beans rather than adding another full can to the pot.

Storage, Reheating, and Freezing

Cool the soup promptly and refrigerate it in airtight containers for 3 to 4 days. Keep the tortilla chips separate at room temperature.

The soup thickens as it chills. Reheat it gently on the stovetop or in the microwave in 60-second intervals, stirring between intervals. Add a splash of broth as needed and reheat to 165°F. Add fresh cheese, cilantro, and chips after reheating.

For the best frozen texture, freeze the soup base before adding cream cheese. Thaw it overnight in the refrigerator, then warm it gently and stir in softened cream cheese. Finished soup can be frozen for up to 3 months, but the dairy may look less smooth after thawing; stir well and add broth if needed. Freeze without garnishes.

For another chicken soup with a brighter broth, try Lemon Chicken Orzo Soup with Spinach.

Nutrition

Approximate per serving (1 of 6 generous bowls, including cheese and chips): 600 calories, 40g protein, 30g fat, and 40g carbohydrates. Approximate per 100g: 110 calories, 7g protein, 5g fat, and 7g carbohydrates. Values vary with ingredient brands, the amount of broth added, and portion size.

Creamy Chicken Tortilla Soup

A stovetop chicken tortilla soup with black beans, corn, peppers, enchilada sauce, and cream cheese for a smooth, lightly creamy broth.
Course: Soup
Cuisine: Mexican
Prep: 15 min
Cook: 25 min
Total: 40 min
Servings: 6 Calories: 600 kcal

Equipment

  • 5- to 6-quart Dutch oven or heavy soup pot
  • Knife
  • Cutting board
  • Measuring cups and spoons
  • Two forks
  • Ladle

Ingredients

For the Soup

  • 1 tablespoon olive oil
  • 1 medium yellow onion, diced (about 150 g)
  • 1 medium yellow or orange bell pepper, diced (about 150 g)
  • 3 garlic cloves, minced
  • 2 teaspoons ground cumin
  • 1 teaspoon chili powder
  • 1 1/2 pounds boneless, skinless chicken breasts (about 680 g)
  • 4 to 5 cups chicken broth, divided
  • 1 cup red enchilada sauce
  • 1 (10-ounce) can diced tomatoes with green chiles, undrained
  • 1 (15-ounce) can black beans, rinsed and drained
  • 1 1/2 cups corn kernels, drained if canned (about 250 g)
  • 8 ounces full-fat cream cheese, softened and cubed (about 225 g)
  • 2 tablespoons fresh lime juice
  • Kosher salt and black pepper, to taste

For Serving

  • 1 cup shredded cheddar or Mexican-blend cheese (about 115 g)
  • 1/3 cup loosely packed fresh cilantro leaves
  • 3 to 4 cups corn tortilla chips

Instructions

  1. Soften the cream cheese and cut it into small cubes. Prepare the shredded cheese, cilantro, and lime juice, and keep the tortilla chips dry until serving.
  2. Heat the olive oil in a 5- to 6-quart Dutch oven or heavy soup pot over medium heat.
  3. Add the onion and bell pepper and cook, stirring frequently, for about 5 minutes, until the onion is translucent and the pepper begins to soften.
  4. Stir in the garlic, cumin, and chili powder and cook for about 1 minute, until fragrant.
  5. Add 4 cups chicken broth, enchilada sauce, diced tomatoes with green chiles, black beans, and corn.
  6. Nestle the chicken breasts into the liquid in a mostly single layer. Bring just to a boil over medium-high heat, then reduce the heat to medium-low.
  7. Simmer gently for 15 to 20 minutes, uncovered or partially covered, until the thickest part of the chicken reaches 165°F (75°C).
  8. Transfer the cooked chicken to a plate, shred it with two forks, and return it to the pot.
  9. Reduce the heat to low. Add the softened cream cheese a few cubes at a time, stirring until melted and smooth, about 3 to 5 minutes. Do not boil the soup.
  10. Stir in the lime juice and season with salt and pepper to taste. Add the remaining broth a splash at a time if the soup is too thick.
  11. Let the soup stand off the heat for 3 to 5 minutes. Ladle into bowls and top with shredded cheese, cilantro, and tortilla chips. Serve extra chips alongside.

Tips

  • Soften and cube the cream cheese before adding it so it melts smoothly.
  • Keep the soup at low heat after adding cream cheese; boiling can cause an oily or flecked broth.
  • Simmer the chicken gently rather than at a rolling boil to keep it tender.
  • Add broth a few tablespoons at a time if the soup becomes too thick.
  • Keep tortilla chips out of the pot and add them just before serving so they stay crisp.
  • If the soup is too thin, whisk together 1 tablespoon cornstarch and 1 tablespoon cold water, then simmer gently for 1 to 2 minutes.

Variations

  • Rotisserie Chicken Shortcut: Use about 3 cups shredded rotisserie chicken. Simmer the soup base until the pepper is tender, then add the cooked chicken with the cream cheese and warm gently.
  • Spicier Tortilla Soup: Cook a diced jalapeño with the onion and bell pepper, or add chipotle in adobo or hot sauce to taste.
  • Bean Substitution: Replace the black beans with pinto beans or hominy.

Notes

Refrigerate cooled soup in airtight containers for 3 to 4 days, keeping chips separate at room temperature. Reheat gently to 165°F (75°C), adding broth as needed. For best freezing results, freeze the soup base before adding cream cheese; finished soup may separate slightly after thawing.

Nutrition

Calories: 600 kcal | Protein: 40 g | Fat: 30 g | Carbohydrates: 40 g

Lemon Chicken Orzo Soup

This stovetop lemon chicken orzo soup has a golden, spoonable broth filled with shredded chicken, tender vegetables, orzo, and spinach. Rotisserie chicken keeps the cooking short, while the orzo cooks directly in the broth and gives it a lightly silky body without cream.

Stir the orzo often and stop cooking it when it is just tender; it will keep absorbing broth as the soup stands. Add the spinach, lemon, and parsley off heat so the greens stay dark and the lemon remains fresh.

Prep: 15 minutes   Cook: 20 minutes   Total: 35 minutes   Yield: 6 generous servings

Ingredients for Lemon Chicken Orzo Soup

Close view of lemon chicken orzo soup showing tender orzo, shredded chicken, spinach, carrot, and glossy broth.
  • 1 tablespoon olive oil
  • 1 medium yellow onion, diced (about 1 1/2 cups; 200g)
  • 3 medium carrots, peeled and cut into 1/2-inch dice (about 1 1/2 cups; 180g)
  • 3 celery ribs, sliced or diced (about 1 cup; 120g)
  • 1/2 teaspoon kosher salt, plus more to taste
  • 1/2 teaspoon freshly ground black pepper, plus more to taste
  • 4 garlic cloves, minced
  • 1 teaspoon dried oregano
  • 8 cups low-sodium chicken broth, plus 1 to 2 cups more as needed
  • 1 cup dry orzo (about 180g)
  • 3 cups shredded cooked or rotisserie chicken (about 420g)
  • 4 packed cups fresh baby spinach (about 120g)
  • 1 teaspoon lemon zest
  • 3 tablespoons fresh lemon juice, plus more to taste
  • 1/4 cup chopped fresh flat-leaf parsley, divided
  • 1 small lemon, thinly sliced into rounds, for serving

Use low-sodium broth so you can adjust the salt after adding the chicken and lemon. Keep the extra broth nearby in case the orzo thickens the soup.

How to Make Lemon Chicken Orzo Soup

Wide serving view of lemon chicken orzo soup in a light Dutch oven with lemon rounds and parsley.
  1. Soften the vegetables: Heat the olive oil in a 5- to 6-quart Dutch oven or heavy-bottomed soup pot over medium heat. Add the onion, carrots, celery, salt, and pepper. Cook, stirring occasionally, for 7 to 8 minutes, until the onion is translucent and the carrots and celery are beginning to soften but still hold their shape. Stir in the garlic and oregano for about 30 seconds, until fragrant.
  2. Simmer the orzo: Add the 8 cups broth and bring to a boil over medium-high heat. Stir in the orzo, then reduce to medium-low to maintain a gentle simmer. Cook mostly uncovered for 8 to 10 minutes, stirring every 1 to 2 minutes and scraping the bottom of the pot so the orzo does not stick.
  3. Heat the chicken: During the last 2 to 3 minutes of the orzo’s cooking time, stir in the shredded chicken. Start checking the orzo at 8 minutes. It should be just tender with a little bite, and the chicken should be steaming hot. If the soup is getting thick, stir in a splash of additional broth.
  4. Finish off heat: Turn off the heat. Stir in the spinach, lemon zest, lemon juice, and most of the parsley. Let the spinach wilt in the hot broth for 2 to 3 minutes, until dark green. Taste before adding more lemon juice, salt, or pepper.
  5. Rest and serve: Let the soup stand for 3 to 5 minutes, then stir and check its consistency. Add broth as needed to keep it loose and spoonable. Ladle into bowls or serve from the pot, with the remaining parsley and thin lemon rounds on the surface. Remove the lemon rounds before eating if desired.

How to Keep the Orzo from Thickening the Soup

Orzo settles quickly, so scrape the pot bottom each time you stir. Keep the broth at a gentle simmer and stop cooking when the pasta is just tender, not swollen or splitting. It will continue absorbing liquid after the heat is off. If the soup gets too thick, add warm broth or water a little at a time, then taste again for lemon and salt.

Why Add Lemon at the End?

Simmering can mute lemon’s fresh aroma. Add the juice after turning off the heat, taste, and add more only if needed; lemons vary in acidity. Check the salt afterward, since lemon changes how salty the broth tastes and rotisserie chickens vary in seasoning.

Chicken and Greens Options

Leftover cooked chicken or cooked boneless chicken thighs can replace rotisserie chicken. Thighs tend to stay juicier in leftovers. To start with raw chicken, gently simmer about 1 1/2 pounds boneless skinless breasts or thighs in the broth until the thickest part reaches 165°F (75°C). Remove and shred the chicken, cook the orzo in the broth, then return the shreds near the end of the orzo’s cooking time. The chicken’s simmering time will vary by cut and thickness.

Chopped kale can replace spinach, but it needs to simmer in the broth until tender rather than wilt off heat. For a stronger herb finish, add 1 to 2 tablespoons chopped fresh dill with the parsley.

Make-Ahead, Leftovers, and Freezing

Cool leftovers promptly and refrigerate in an airtight container for 3 to 4 days. Orzo stored in the soup will soften and absorb broth. Reheat gently over medium-low heat, stirring occasionally and adding broth or water until the soup is brothy again. For microwave reheating, use short intervals and stir between them.

For meal prep, make the vegetable, broth, and chicken base without orzo. Cook the orzo separately and add it when serving; add the spinach, lemon, and parsley when reheating the base. For freezing, cool and freeze the base without orzo for up to 3 months. Thaw overnight in the refrigerator, reheat gently, and cook fresh orzo in the broth or separately. Completed soup with orzo is less suitable for freezing because the pasta can become overly soft.

Serve with crusty bread or a simple green salad. If you prefer egg noodles, try this Classic Chicken Noodle Soup with Egg Noodles.

Nutrition

Approximate nutrition per serving, based on 6 servings: 320 calories, 28g protein, 8g fat, and 33g carbohydrates. Approximate values per 100g: 60 calories, 5g protein, 2g fat, and 6g carbohydrates. Values vary with the broth and chicken used and the amount of extra liquid added.

Lemon Chicken Orzo Soup

A stovetop chicken soup with tender vegetables, orzo, spinach, and fresh lemon in a lightly silky broth.
Course: Soup
Cuisine: Mediterranean
Prep: 15 min
Cook: 20 min
Total: 35 min
Servings: 6 Calories: 320 kcal

Equipment

  • 5- to 6-quart Dutch oven or soup pot
  • wooden spoon
  • ladle

Ingredients

For the Soup

  • 1 tablespoon olive oil
  • 1 medium yellow onion, diced (about 1 1/2 cups; 200g)
  • 3 medium carrots, peeled and cut into 1/2-inch dice (about 1 1/2 cups; 180g)
  • 3 celery ribs, sliced or diced (about 1 cup; 120g)
  • 1/2 teaspoon kosher salt, plus more to taste
  • 1/2 teaspoon freshly ground black pepper, plus more to taste
  • 4 garlic cloves, minced
  • 1 teaspoon dried oregano
  • 8 cups low-sodium chicken broth, plus 1 to 2 cups more as needed
  • 1 cup dry orzo (about 180g)
  • 3 cups shredded cooked or rotisserie chicken (about 420g)
  • 4 packed cups fresh baby spinach (about 120g)
  • 1 teaspoon lemon zest
  • 3 tablespoons fresh lemon juice, plus more to taste
  • 1/4 cup chopped fresh flat-leaf parsley, divided
  • 1 small lemon, thinly sliced into rounds, for serving

Instructions

  1. Heat the olive oil in a 5- to 6-quart Dutch oven or heavy-bottomed soup pot over medium heat.
  2. Add the onion, carrots, celery, salt, and pepper. Cook for 7 to 8 minutes, stirring occasionally, until the onion is translucent and the vegetables begin to soften.
  3. Stir in the garlic and oregano and cook for about 30 seconds, until fragrant.
  4. Add 8 cups of broth and bring to a boil over medium-high heat.
  5. Stir in the orzo, reduce the heat to medium-low, and simmer mostly uncovered for 8 to 10 minutes. Stir every 1 to 2 minutes and scrape the bottom of the pot to prevent sticking.
  6. During the last 2 to 3 minutes of the orzo cooking time, stir in the shredded chicken. Add a splash of additional broth if the soup becomes too thick.
  7. Turn off the heat and stir in the spinach, lemon zest, lemon juice, and most of the parsley.
  8. Let the spinach wilt in the hot broth for 2 to 3 minutes, then taste and adjust with additional lemon juice, salt, or pepper as needed.
  9. Rest the soup for 3 to 5 minutes, then add more broth if needed to keep it loose and spoonable.
  10. Ladle into bowls and garnish with the remaining parsley and lemon rounds.

Tips

  • Use low-sodium broth so you can adjust the seasoning after adding chicken and lemon.
  • Stir the orzo every 1 to 2 minutes and scrape the pot bottom to prevent sticking.
  • Stop cooking the orzo when it is just tender, since it continues absorbing broth as the soup rests.
  • Add spinach, lemon juice, zest, and parsley off heat to keep their flavor and color fresh.
  • Keep extra warm broth nearby to thin the soup before serving or reheating.

Variations

  • Raw Chicken Version: Gently simmer about 1 1/2 pounds boneless skinless chicken breasts or thighs in the broth until they reach 165°F (75°C), then shred and return the chicken near the end of cooking.
  • Kale Instead of Spinach: Replace the spinach with chopped kale and simmer it in the broth until tender rather than adding it off heat.
  • Dill Herb Finish: Add 1 to 2 tablespoons chopped fresh dill with the parsley for a stronger herb flavor.

Notes

Refrigerate leftovers promptly in an airtight container for 3 to 4 days. Reheat gently with additional broth or water, as the orzo will absorb liquid. For freezing, freeze the soup base without orzo for up to 3 months and cook fresh orzo when serving.

Nutrition

Calories: 320 kcal | Protein: 28 g | Fat: 8 g | Carbohydrates: 33 g