Author

Julia

Browsing

Creamy Corn Chowder

This stovetop corn chowder has a pale, spoon-coating broth with plenty of tender potato cubes, whole corn kernels, and diced ham. A short flour roux and the potatoes give it body without blending away the chunks.

Simmer the potatoes in broth until fork-tender, then add the milk, half-and-half, and frozen corn. Gentle heat keeps the dairy smooth, while the late addition keeps the corn kernels distinct.

Ingredients for Creamy Corn Chowder

Close view of creamy corn chowder on a spoon with a potato cube, corn kernels, diced ham, and black pepper.
  • 3 tablespoons unsalted butter (43g)
  • 1 medium yellow onion, finely diced (about 1 1/2 cups or 200g)
  • 2 celery ribs, finely diced (about 3/4 cup or 100g)
  • 2 garlic cloves, minced
  • 1/4 cup all-purpose flour (30g)
  • 4 cups low-sodium chicken broth
  • 1 1/2 pounds Yukon Gold potatoes, peeled if desired and cut into even 3/4-inch cubes (about 680g)
  • 1/2 teaspoon dried thyme
  • 1 1/2 cups whole milk
  • 1 cup half-and-half
  • 3 cups frozen sweet corn (450g)
  • 1 1/2 cups cooked ham, diced small (225g)
  • 1/2 teaspoon kosher salt, plus more only as needed
  • 1/2 teaspoon freshly ground black pepper, plus more for serving

There is no need to thaw the corn. Use low-sodium broth and season cautiously: the ham and broth will both affect how much salt the finished chowder needs.

How to Make Creamy Corn Chowder

Overhead view of creamy ham and corn chowder with potato chunks and black pepper in a wide ivory bowl.

Prep: 20 minutes | Cook: about 30 minutes | Total: about 50 minutes | Yield: 6 generous servings

  1. Soften the vegetables: Warm a 5- to 6-quart Dutch oven or heavy soup pot over medium heat. Melt the butter, then add the onion and celery with a small pinch of the measured salt. Cook, stirring occasionally, for 6 to 8 minutes, until soft and translucent but not browned. Add the garlic for the final 30 seconds.
  2. Make the roux: Sprinkle the flour over the vegetables and stir until no dry flour remains. Cook for about 2 minutes without browning. Gradually stir in the broth, scraping the bottom of the pot, until smooth.
  3. Simmer the potatoes: Add the potatoes and thyme; keep the potatoes mostly submerged in the broth. Bring to a gentle simmer, reduce the heat to medium-low, and partially cover. Cook for 15 to 18 minutes, stirring gently every few minutes. Start checking at 14 minutes: a fork should slide easily into a potato cube, but the cubes should still hold their shape.
  4. Add the dairy, corn, and ham: Reduce the heat to low. Stir in the milk, half-and-half, frozen corn, and ham. Warm for 5 to 8 minutes, until the corn and ham are hot and the broth coats a spoon. Keep the chowder gently steaming; do not let it boil hard.
  5. Adjust and season: Taste before adding the remaining salt, then stir in the black pepper. If the chowder is thin, mash a few potato cubes against the side of the pot and heat gently for another 1 to 2 minutes. If it is too thick, stir in warm milk or broth a splash at a time.
  6. Rest and serve: Remove from the heat and let stand for 5 minutes. Ladle into wide bowls so the potatoes, corn, and ham are visible, and finish with more freshly ground black pepper.

How to Adjust Chowder Thickness

The roux thickens the broth, and the potatoes add body as they cook. Wait until the potatoes are fork-tender and the chowder has rested before judging its final thickness. Mashing a few cubes will make it creamier while leaving most of the potatoes intact.

If it is still too thin, mix 1 tablespoon cornstarch with 1 tablespoon cold water. Stir the slurry into the chowder a little at a time over low heat, stopping when the broth coats a spoon. If the chowder becomes too thick, loosen it gradually with warm milk or broth.

Why Dairy and Corn Go in Near the End

Potatoes need a longer simmer than milk and half-and-half. Adding the dairy only after the potatoes are tender, then keeping the heat low, helps prevent a grainy-looking broth. Corn needs just the final 5 to 8 minutes to heat through without losing its distinct kernel texture.

Variations and Serving Ideas

For a meatless chowder, omit the ham and use vegetable broth; taste before adding more salt. For a lighter broth, replace the half-and-half with more whole milk. Fresh corn or drained canned corn can replace frozen corn—add either near the end and heat just until tender or warmed through.

Serve with crusty bread, biscuits, or a simple green salad. For another hearty potato soup, try Creamy Loaded Baked Potato Soup.

How to Store and Reheat Corn Chowder

Cool leftovers promptly and refrigerate in an airtight container for up to 3 days. The chowder will thicken as it chills. Reheat over low heat, stirring occasionally, until steaming hot throughout; add a splash of milk or broth to loosen it. Microwave individual portions in short intervals, stirring between them.

Freezing is possible, but the dairy and potatoes may change texture after thawing. If frozen, thaw overnight in the refrigerator and reheat gently, adding milk or broth as needed.

Nutrition

Approximate nutrition per serving, based on 6 generous servings: 395 calories, 17g protein, 16g fat, and 47g carbohydrates. Approximate values per 100g: 75 calories, 3g protein, 3g fat, and 9g carbohydrates. Values vary with the broth, ham, dairy, and amount of liquid in each serving.

Creamy Corn Chowder

A creamy stovetop corn chowder with tender Yukon Gold potatoes, sweet corn, diced ham, and a lightly thickened broth.
Course: Soup
Cuisine: American
Prep: 20 min
Cook: 30 min
Total: 55 min
Servings: 6 Calories: 395 kcal

Equipment

  • 5- to 6-quart Dutch oven or heavy soup pot
  • wooden spoon
  • ladle

Ingredients

For the Chowder

  • 3 tablespoons unsalted butter (43 g)
  • 1 medium yellow onion, finely diced (about 1 1/2 cups or 200 g)
  • 2 celery ribs, finely diced (about 3/4 cup or 100 g)
  • 2 garlic cloves, minced
  • 1/4 cup all-purpose flour (30 g)
  • 4 cups low-sodium chicken broth
  • 1 1/2 pounds Yukon Gold potatoes, peeled if desired and cut into 3/4-inch cubes (about 680 g)
  • 1/2 teaspoon dried thyme
  • 1 1/2 cups whole milk
  • 1 cup half-and-half
  • 3 cups frozen sweet corn (450 g)
  • 1 1/2 cups cooked ham, diced small (225 g)
  • 1/2 teaspoon kosher salt, plus more as needed
  • 1/2 teaspoon freshly ground black pepper, plus more for serving

Instructions

  1. Warm a 5- to 6-quart Dutch oven or heavy soup pot over medium heat. Melt the butter, then add the onion, celery, and a small pinch of the measured salt.
  2. Cook the vegetables for 6 to 8 minutes, stirring occasionally, until soft and translucent but not browned. Add the garlic and cook for 30 seconds.
  3. Sprinkle the flour over the vegetables and stir until no dry flour remains. Cook for about 2 minutes without browning.
  4. Gradually stir in the chicken broth, scraping the bottom of the pot, until smooth.
  5. Add the potatoes and thyme. Bring to a gentle simmer, reduce the heat to medium-low, partially cover, and cook for 15 to 18 minutes, stirring gently every few minutes, until the potatoes are fork-tender but still hold their shape.
  6. Reduce the heat to low and stir in the milk, half-and-half, frozen corn, and ham. Warm for 5 to 8 minutes, until the corn and ham are hot and the broth coats a spoon. Do not let the chowder boil hard.
  7. Taste and add the remaining salt only as needed, then stir in the black pepper. If needed, mash a few potato cubes against the side of the pot to thicken the chowder, or add warm milk or broth to thin it.
  8. Remove from the heat and let stand for 5 minutes. Ladle into bowls and finish with additional black pepper.

Tips

  • Use low-sodium broth and season cautiously because ham can add significant saltiness.
  • Do not thaw frozen corn before adding it to the chowder.
  • Check potatoes at 14 minutes so they become tender without falling apart.
  • Keep the heat low after adding dairy to prevent a grainy or curdled broth.
  • Let the chowder rest for 5 minutes before judging its final thickness.
  • For a thicker chowder, mash a few potato cubes while leaving the rest intact.

Variations

  • Meatless Corn Chowder: Omit the ham and use vegetable broth; taste before adding extra salt.
  • Lighter Corn Chowder: Replace the half-and-half with an equal amount of whole milk.
  • Fresh or Canned Corn Chowder: Use fresh corn or drained canned corn instead of frozen corn and add it near the end just until tender or warmed through.
Notes

Refrigerate leftovers promptly in an airtight container for up to 3 days. Reheat gently over low heat with a splash of milk or broth as needed. Freezing is possible, but the dairy and potatoes may change texture after thawing.

Nutrition

Calories: 395 kcal | Protein: 17 g | Fat: 16 g | Carbohydrates: 47 g

Tuscan White Bean Soup

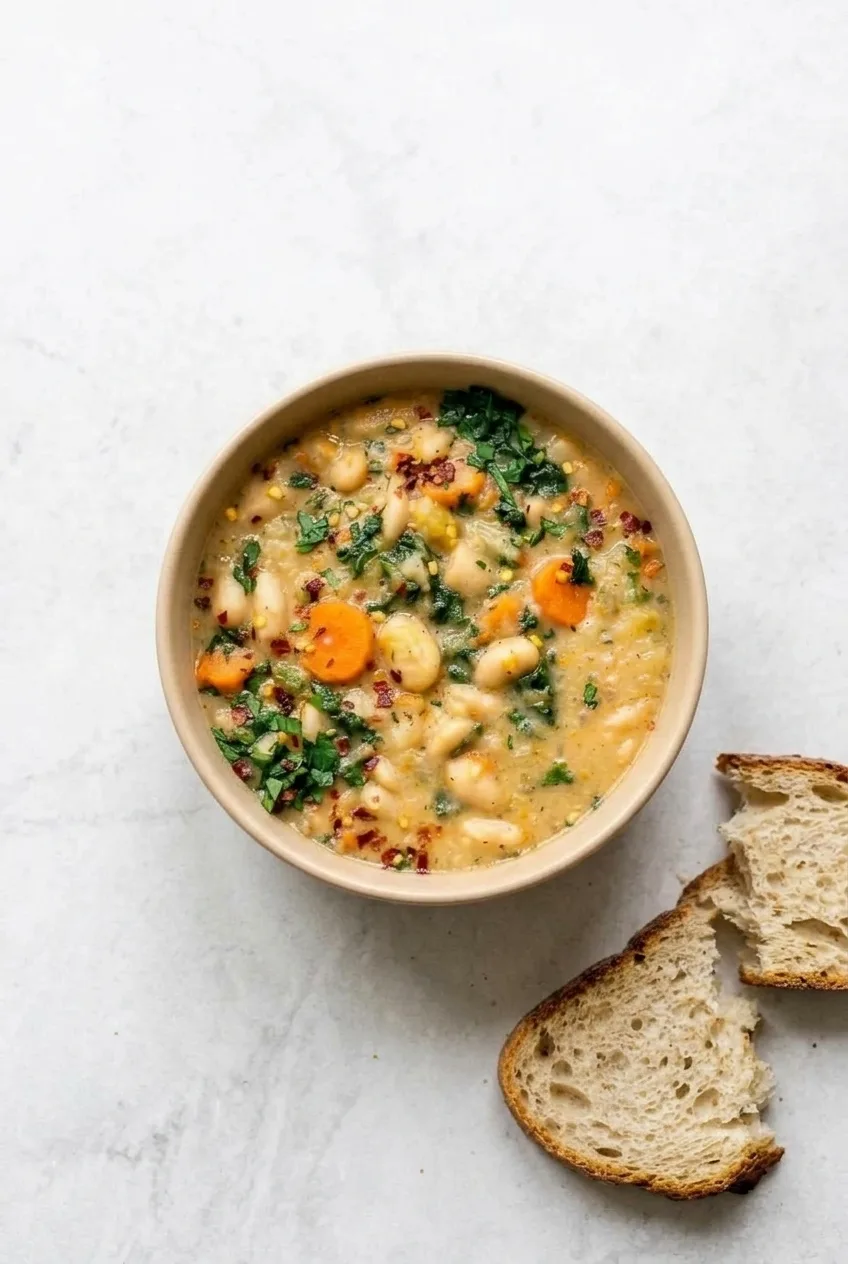
This Tuscan-inspired soup gets its creamy, pale golden broth from cannellini beans, not cream. Mash some of the beans after a short stovetop simmer, but leave plenty whole among the carrot rounds and kale. A little tomato paste adds savory depth without turning the broth red; lemon juice, stirred in off heat, keeps the finish bright.

The soup should lightly coat a spoon but still pour easily from a ladle. Keep extra broth nearby, since the mashed beans will thicken it as it rests.

Ingredients for Tuscan White Bean Soup

Close view of creamy Tuscan white bean soup showing whole beans, carrot rounds, wilted kale, parsley, and pepper flakes.
  • 2 tablespoons extra-virgin olive oil
  • 1 medium yellow onion, diced (about 1 1/2 cups; 200g)
  • 2 medium carrots, thinly sliced into rounds (about 150g)
  • 2 celery ribs, diced (about 100g)
  • 4 garlic cloves, minced
  • 1 tablespoon tomato paste
  • 1 teaspoon dried Italian seasoning
  • 1/2 teaspoon dried rosemary, crushed
  • 1/4 teaspoon red pepper flakes, plus more for serving
  • 5 cups low-sodium vegetable broth, plus up to 1 cup more as needed
  • 3 cans (15 ounces each) cannellini beans, drained and rinsed
  • 4 packed cups chopped lacinato or curly kale, tough stems removed (about 120g)
  • 1 to 2 tablespoons fresh lemon juice
  • Kosher salt and black pepper, to taste
  • 1/4 cup chopped fresh flat-leaf parsley (about 15g)

Low-sodium broth and rinsed beans make the final salt level easier to control. Crusty bread is optional for serving; offer Parmesan separately if desired so the soup itself remains dairy-free.

How to Make Tuscan White Bean Soup

Overhead serving view of Tuscan white bean soup in a ceramic bowl with crusty bread on a pale stone surface.

Prep: 15 minutes   Cook: about 25 minutes   Total: about 40 minutes   Servings: 6

  1. Prepare the vegetables and beans: Dice the onion and celery, slice the carrots into thin rounds, mince the garlic, and remove the kale stems before chopping the leaves. Drain and rinse the beans. Keep the additional cup of broth separate for adjusting the soup later.
  2. Soften the vegetables: Warm the olive oil in a 5- to 6-quart Dutch oven or soup pot over medium heat. Add the onion, carrots, celery, a small pinch of salt, and black pepper. Cook uncovered, stirring occasionally, for 8 to 10 minutes, until the onion is translucent and the carrots are beginning to soften. Add the garlic, Italian seasoning, rosemary, and red pepper flakes. Stir for 1 minute, without letting the garlic brown.
  3. Cook the tomato paste: Stir in the tomato paste and cook for about 1 minute, until it darkens slightly and coats the vegetables. If it sticks, add a splash of broth and scrape the bottom of the pot.
  4. Simmer the beans: Add 5 cups broth and the beans. Bring just to a boil over medium-high heat, then reduce to medium-low. Simmer gently, partially covered or uncovered, for 12 to 15 minutes. Start checking after 10 minutes; the carrots should yield easily when pierced and the beans should be hot throughout.
  5. Thicken the broth: Mash some of the beans directly in the pot with a potato masher, leaving many whole. Or use an immersion blender in one small area for 5 to 10 seconds, then stir. The broth should look creamy, with whole beans and carrot rounds still visible.
  6. Add the kale and lemon: Stir in the kale and simmer for 3 to 5 minutes, checking after 3 minutes. When it is tender, glossy, and dark green, remove the pot from the heat. Stir in 1 tablespoon lemon juice, then taste and add salt, pepper, or more lemon as needed. If the soup is too dense, stir in reserved broth a little at a time until it flows easily from a ladle.
  7. Rest and serve: Let the soup rest off heat for 5 minutes; loosen it with more broth if needed. Ladle into bowls with whole beans, carrots, and kale visible on top. Scatter with parsley and additional red pepper flakes. Serve with crusty bread if desired.

How to Keep the Broth Creamy but Spoonable

Mashing only part of the beans releases starch that gives the broth body without hiding the vegetables in a smooth puree. A potato masher leaves a more rustic texture; a brief pass with an immersion blender makes the broth slightly smoother.

If the soup is too thick, add reserved broth in small splashes. If it is too thin, mash a few more beans against the side of the pot and simmer uncovered for several minutes. Taste again after changing the consistency, especially before adding more salt.

Kale, Bean, and Sausage Variations

Spinach: Replace the kale with 4 packed cups baby spinach. Add it at the end and cook for only 1 to 2 minutes, until wilted. Kale needs longer to become tender but should not simmer with the beans for the full cooking time.

Other white beans: Use the same amount of Great Northern or navy beans in place of cannellini beans. Great Northern beans are softer and may make the broth creamier.

Italian sausage: For a meatier version, brown 1 pound Italian sausage in the pot first and remove it. Cook the vegetables in the rendered fat, then return the sausage with the broth and beans. Chicken broth can replace the vegetable broth if preferred. For a different sausage-based soup, try Creamy Sausage Tortellini Soup.

Storage, Freezing, and Reheating

Cool the soup before refrigerating it in airtight containers for up to 4 days. Keep the parsley separate when possible. For longer storage, freeze cooled portions in freezer-safe containers with room for expansion for up to 2 months for best quality. Thaw overnight in the refrigerator.

The beans continue to absorb liquid, so leftovers will be thicker. Reheat gently over medium-low heat on the stovetop or in the microwave, stirring in broth or water until the soup is ladleable. Taste after thinning and adjust the salt, pepper, and lemon if needed. Add fresh parsley just before serving.

Nutrition

Approximate nutrition per serving, based on 6 servings without optional bread, Parmesan, or olive-oil drizzle: 230 calories, 12g protein, 5g fat, and 40g carbohydrates. Approximate values per 100g of prepared soup: 55 calories, 3g protein, 1g fat, and 10g carbohydrates. Values vary with the drained weight of the beans, broth brand, and amount of extra broth added.

Tuscan White Bean Soup

A creamy, dairy-free Tuscan-inspired soup made with cannellini beans, vegetables, kale, lemon, and herbs.
Course: Soup
Cuisine: Italian
Prep: 15 min
Cook: 25 min
Total: 40 min
Servings: 6 Calories: 230 kcal

Equipment

  • 5- to 6-quart Dutch oven or soup pot
  • Potato masher or immersion blender
  • Ladle

Ingredients

For the Soup

  • 2 tablespoons extra-virgin olive oil
  • 1 medium yellow onion, diced (about 1 1/2 cups; 200g)
  • 2 medium carrots, thinly sliced into rounds (about 150g)
  • 2 celery ribs, diced (about 100g)
  • 4 garlic cloves, minced
  • 1 tablespoon tomato paste
  • 1 teaspoon dried Italian seasoning
  • 1/2 teaspoon dried rosemary, crushed
  • 1/4 teaspoon red pepper flakes, plus more for serving
  • 5 cups low-sodium vegetable broth, plus up to 1 cup more as needed
  • 3 cans (15 ounces each) cannellini beans, drained and rinsed
  • 4 packed cups chopped lacinato or curly kale, tough stems removed (about 120g)
  • 1 to 2 tablespoons fresh lemon juice
  • Kosher salt and black pepper, to taste
  • 1/4 cup chopped fresh flat-leaf parsley (about 15g)

Optional for Serving

  • Crusty bread
  • Parmesan cheese

Instructions

  1. Dice the onion and celery, thinly slice the carrots, mince the garlic, chop the kale, and drain and rinse the beans. Reserve the additional broth for adjusting the consistency.
  2. Warm the olive oil in a 5- to 6-quart Dutch oven or soup pot over medium heat. Add the onion, carrots, celery, a small pinch of salt, and black pepper.
  3. Cook uncovered for 8 to 10 minutes, stirring occasionally, until the onion is translucent and the carrots begin to soften.
  4. Add the garlic, Italian seasoning, rosemary, and red pepper flakes. Cook for 1 minute, stirring constantly so the garlic does not brown.
  5. Stir in the tomato paste and cook for about 1 minute, until slightly darkened and coating the vegetables. Add a splash of broth if it sticks to the pot.
  6. Add 5 cups of broth and the beans. Bring to a boil over medium-high heat, then reduce the heat to medium-low and simmer gently for 12 to 15 minutes, until the carrots are tender.
  7. Mash some of the beans directly in the pot with a potato masher, leaving plenty whole. Alternatively, blend one small area with an immersion blender for 5 to 10 seconds.
  8. Stir in the kale and simmer for 3 to 5 minutes, until tender, glossy, and dark green.
  9. Remove the pot from the heat and stir in 1 tablespoon lemon juice. Taste and adjust with salt, pepper, and additional lemon juice as needed.
  10. Stir in reserved broth a little at a time if the soup is too thick. Let rest for 5 minutes, then ladle into bowls and top with parsley and additional red pepper flakes.

Tips

  • Use low-sodium broth and rinsed beans so you can control the final salt level.
  • Mash only part of the beans to create a creamy broth while keeping a rustic texture.
  • Use an immersion blender briefly in one area only to avoid pureeing the vegetables.
  • Add reserved broth in small splashes if the soup thickens too much.
  • Taste again after thinning the soup, then adjust the salt, pepper, and lemon.

Variations

  • Spinach White Bean Soup: Replace the kale with 4 packed cups baby spinach and cook it for only 1 to 2 minutes at the end, until wilted.
  • Other White Beans: Use an equal amount of Great Northern or navy beans instead of cannellini beans; Great Northern beans will make a creamier broth.
  • Italian Sausage White Bean Soup: Brown 1 pound Italian sausage in the pot first and remove it. Cook the vegetables in the rendered fat, then return the sausage with the broth and beans. Use chicken broth if desired.

Notes

Refrigerate cooled soup in airtight containers for up to 4 days or freeze for up to 2 months. Reheat gently with additional broth or water, as the beans will absorb liquid and thicken the soup.

Nutrition

Calories: 230 kcal | Protein: 12 g | Fat: 5 g | Carbohydrates: 40 g

Chicken Pot Pie Soup

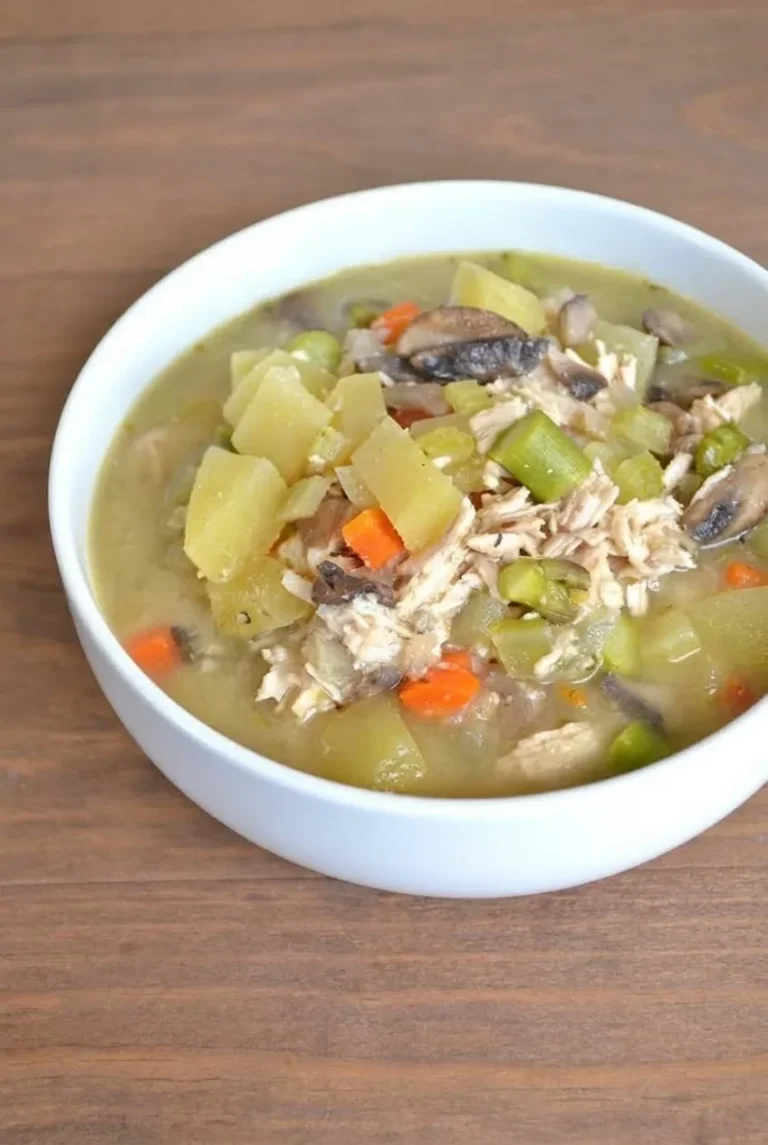
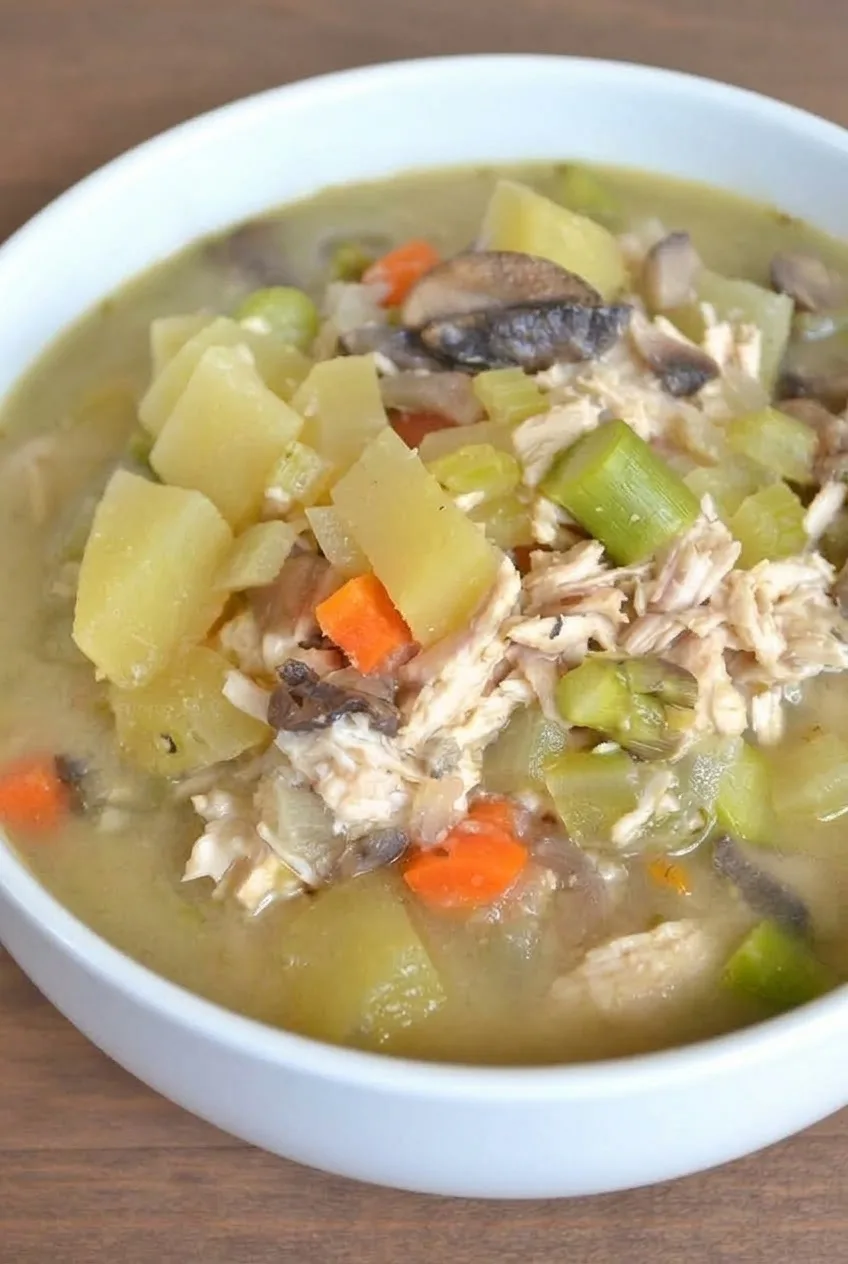
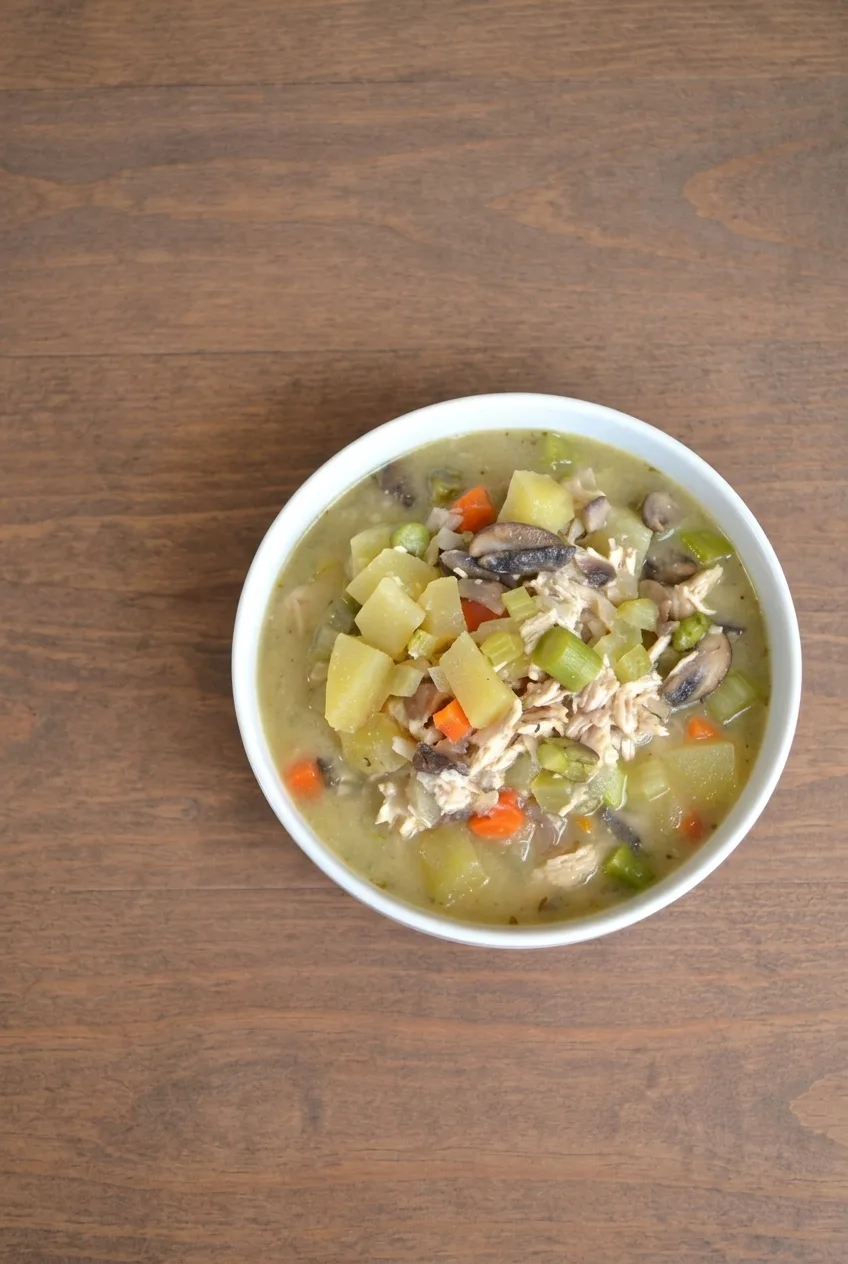
Chicken pot pie soup brings shredded chicken, tender potatoes, and vegetables together in a lightly creamy broth—no crust required. This stovetop version includes sliced mushrooms and asparagus alongside carrots and celery, so the finished soup stays chunky rather than turning into a thick chowder.

Cooked chicken keeps the method short. Simmer the potatoes until fork-tender, then add the chicken and asparagus near the end. Unsweetened cashew milk and a small amount of coconut flour give the broth body while keeping it pourable.

Ingredients for Chicken Pot Pie Soup

Close view of creamy chicken pot pie soup showing shredded chicken, tender potato cubes, mushrooms, and asparagus.
  • 1 tablespoon olive oil or avocado oil
  • 1 medium yellow onion, diced (about 1 1/2 cups or 200g)
  • 3 celery ribs, diced (about 1 cup or 120g)
  • 2 medium carrots, diced (about 1 cup or 130g)
  • 8 ounces cremini or baby bella mushrooms, sliced (225g)
  • 3 garlic cloves, minced
  • 1 teaspoon dried thyme
  • 1/2 teaspoon dried rosemary, crushed
  • 2 tablespoons coconut flour (about 15g)
  • 6 cups low-sodium chicken broth, plus up to 1 cup more as needed
  • 1 1/2 pounds Yukon Gold potatoes, peeled if desired and cut into 1/2- to 3/4-inch cubes (680g)
  • 1 1/2 cups unsweetened plain cashew milk
  • 3 cups cooked shredded chicken (about 420g)
  • 1 bunch fresh asparagus, trimmed and cut into 1-inch pieces (about 8 ounces or 225g)
  • Kosher salt and black pepper, to taste

Rotisserie chicken or leftover roasted chicken works well. Use low-sodium broth so you can adjust the seasoning after the soup is finished.

How to Make Chicken Pot Pie Soup

Overhead view of a white bowl filled with chunky chicken pot pie soup on a warm wooden table.

Yield: 6 main-course servings. Prep: 20 minutes. Cook: About 25 minutes.

  1. Prepare the ingredients: Cut the potatoes and carrots into even bite-size pieces. Keep the asparagus separate from the vegetables that will cook first, and shred the already-cooked chicken into bite-size strands.
  2. Sauté the vegetables: Heat the oil in a 5- to 6-quart Dutch oven or heavy soup pot over medium heat. Add the onion, celery, carrots, mushrooms, and a pinch of salt. Cook for 7 to 8 minutes, stirring occasionally, until the onion is translucent and the mushrooms have softened and released their moisture. Add the garlic, thyme, and rosemary during the last minute.
  3. Add the flour and broth: Sprinkle the coconut flour over the vegetables and stir for about 30 seconds. Slowly pour in the 6 cups of broth, stirring or whisking to prevent clumps. Add the potatoes.
  4. Simmer the potatoes: Bring the soup to a gentle simmer, reduce the heat to medium-low, and partially cover the pot. Simmer for 12 to 15 minutes, stirring gently once or twice. Start checking after 12 minutes: a fork should slide easily into a potato cube, but the cube should still hold its shape. The carrots should be tender, too. Avoid a rolling boil.
  5. Add the final ingredients: Reduce the heat to low. Stir in the cashew milk, cooked chicken, and asparagus. Simmer gently, uncovered, for 4 to 6 minutes. Start checking the asparagus after 4 minutes; it should be bright green and crisp-tender, and the chicken should be hot throughout. Do not boil the soup after adding the cashew milk. Season with salt and pepper.
  6. Rest and serve: Remove the pot from the heat and let the soup stand for 5 minutes. The broth should lightly coat a spoon but still pour easily. If it is too thick, stir in warm broth a little at a time. Ladle into bowls with the chicken and vegetables visible at the surface.

How to Keep the Broth Light and Creamy

Coconut flour absorbs liquid quickly, and the potatoes add starch as they cook. Stick to the measured 2 tablespoons of flour; the soup will thicken further as it rests. If it becomes more like a stew, add warm broth 1/4 cup at a time until it is spoonable again.

Use unsweetened plain cashew milk and add it only after the potatoes are tender. Gentle heat helps the broth stay smooth. Adding the cooked chicken at the same time warms it without a long simmer that could dry it out, while the short cooking time keeps the asparagus green and crisp-tender.

Ingredient Swaps and Serving Options

Red potatoes can replace Yukon Golds if cut to the same size. Unsweetened almond milk or light coconut milk can stand in for cashew milk, though the flavor and body will change. For a different vegetable mix, replace the asparagus with frozen green beans or peas and add them during the final few minutes.

Serve the soup without a crust, or offer warm biscuits or baked pie-crust wedges on the side. For another creamy chicken soup, try creamy chicken gnocchi soup. For a brothy alternative, try chicken noodle soup from scratch.

Storage and Reheating

Cool leftovers promptly and refrigerate in airtight containers. The soup will thicken as it chills. Reheat gently over medium-low heat on the stovetop or in short microwave intervals, stirring between intervals. Add a splash of broth as needed to restore its spoonable consistency.

To make the soup ahead, cook through the potato-simmering step. Reheat the base gently, then add the cashew milk, cooked chicken, and asparagus shortly before serving. If freezing, freeze the base before those final additions when possible; potatoes may soften after thawing.

Nutrition

Approximate nutrition per main-course serving, based on 6 servings: 300 calories, 30g protein, 7g fat, and 31g carbohydrates. Approximate values per 100g: 50 calories, 5g protein, 1g fat, and 5g carbohydrates. Values vary with the chicken, broth, cashew milk, and final amount of liquid.

Chicken Pot Pie Soup

A chunky, lightly creamy chicken soup with potatoes, carrots, celery, mushrooms, asparagus, and shredded chicken.
Course: Soup
Cuisine: American
Prep: 20 min
Cook: 25 min
Total: 50 min
Servings: 6 Calories: 300 kcal

Equipment

  • 5- to 6-quart Dutch oven or soup pot
  • Cutting board
  • Chef's knife
  • Wooden spoon or whisk
  • Ladle

Ingredients

For the Soup

  • 1 tablespoon olive oil or avocado oil
  • 1 medium yellow onion, diced (about 1 1/2 cups or 200g)
  • 3 celery ribs, diced (about 1 cup or 120g)
  • 2 medium carrots, diced (about 1 cup or 130g)
  • 8 ounces cremini or baby bella mushrooms, sliced (225g)
  • 3 garlic cloves, minced
  • 1 teaspoon dried thyme
  • 1/2 teaspoon dried rosemary, crushed
  • 2 tablespoons coconut flour (about 15g)
  • 6 cups low-sodium chicken broth, plus up to 1 cup more as needed
  • 1 1/2 pounds Yukon Gold potatoes, cut into 1/2- to 3/4-inch cubes (680g)
  • 1 1/2 cups unsweetened plain cashew milk
  • 3 cups cooked shredded chicken (about 420g)
  • 1 bunch fresh asparagus, trimmed and cut into 1-inch pieces (about 8 ounces or 225g)
  • Kosher salt and black pepper, to taste

Instructions

  1. Cut the potatoes and carrots into even bite-size pieces. Keep the asparagus separate and shred the cooked chicken into bite-size strands.
  2. Heat the oil in a 5- to 6-quart Dutch oven or heavy soup pot over medium heat.
  3. Add the onion, celery, carrots, mushrooms, and a pinch of salt. Cook for 7 to 8 minutes, stirring occasionally, until the onion is translucent and the mushrooms are softened.
  4. Add the garlic, thyme, and rosemary during the last minute of cooking.
  5. Sprinkle the coconut flour over the vegetables and stir for about 30 seconds.
  6. Slowly pour in 6 cups of chicken broth while stirring or whisking to prevent clumps. Add the potatoes.
  7. Bring the soup to a gentle simmer, reduce the heat to medium-low, and partially cover the pot. Simmer for 12 to 15 minutes, stirring once or twice, until the potatoes and carrots are tender.
  8. Reduce the heat to low. Stir in the cashew milk, shredded chicken, and asparagus.
  9. Simmer gently, uncovered, for 4 to 6 minutes, until the chicken is heated through and the asparagus is bright green and crisp-tender. Do not boil.
  10. Season with salt and pepper. Remove from the heat and let stand for 5 minutes.
  11. If needed, stir in warm broth a little at a time to thin the soup before serving.

Tips

  • Use low-sodium broth so you can adjust the seasoning at the end.
  • Avoid a rolling boil while the potatoes cook so they hold their shape.
  • Add cashew milk only after the potatoes are tender and do not boil the soup afterward.
  • Use only 2 tablespoons of coconut flour, as the soup thickens further while resting.
  • Add warm broth 1/4 cup at a time if the soup becomes too thick.

Variations

  • Red Potato Soup: Use red potatoes instead of Yukon Gold potatoes, cut to the same size.
  • Alternative Milk: Replace the cashew milk with unsweetened almond milk or light coconut milk.
  • Green Bean or Pea Version: Replace the asparagus with frozen green beans or peas and add them during the final few minutes of cooking.

Notes

Refrigerate cooled leftovers in airtight containers. Reheat gently over medium-low heat or in short microwave intervals, adding broth as needed. For make-ahead or freezing, prepare the soup through the potato-simmering step and add the cashew milk, chicken, and asparagus before serving.

Nutrition

Calories: 300 kcal | Protein: 30 g | Fat: 7 g | Carbohydrates: 31 g

Anti-Inflammatory Turmeric Chicken Soup

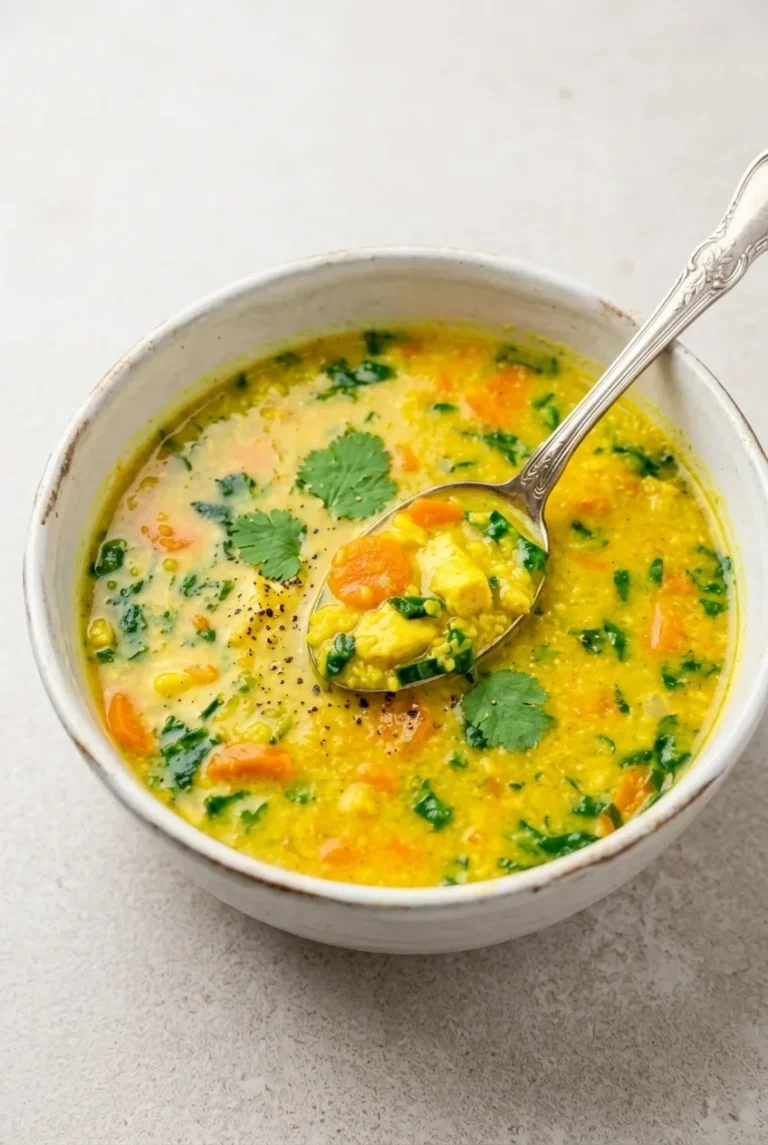
Turmeric and coconut milk give this chicken soup a golden, lightly creamy broth that stays loose enough to ladle. Shredded chicken, tender carrots, peas, and spinach remain visible in every bowl.

The soup cooks in one pot. Soften the vegetables before briefly warming the garlic and spices, then simmer the chicken gently in the broth. Adding the peas, spinach, and cilantro near the end keeps the greens bright.

Ingredients for Turmeric Chicken Soup

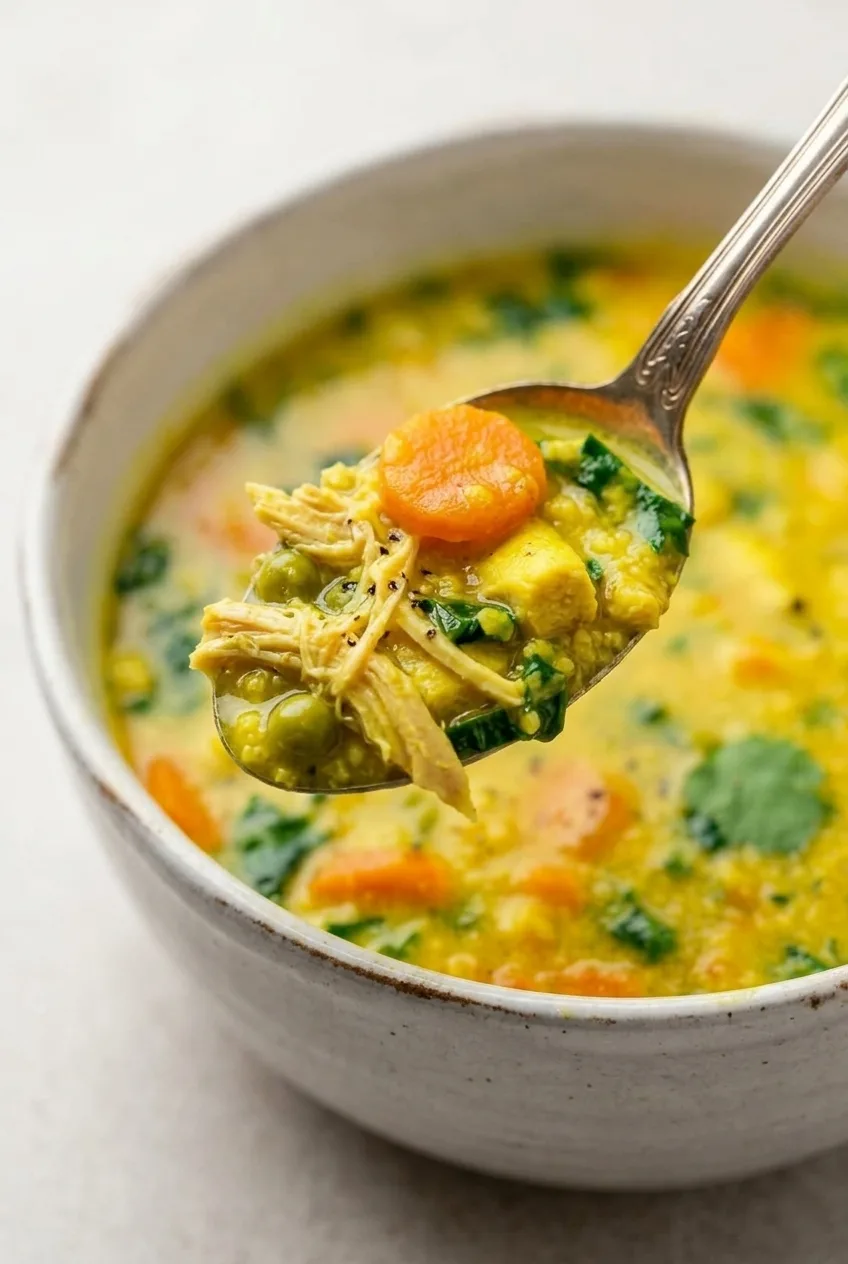
Close view of a spoonful of turmeric chicken soup with tender chicken, carrot, peas, spinach, and creamy golden broth.
  • 1 tablespoon olive oil
  • 1 medium yellow onion, diced (about 1 1/2 cups or 200g)
  • 1 medium leek, white and light-green parts only, cleaned and sliced (about 1 cup or 120g)
  • 2 medium carrots, peeled and diced (about 1 1/2 cups or 180g)
  • 2 celery ribs, diced (about 1 cup or 100g)
  • 4 garlic cloves, minced
  • 2 teaspoons ground turmeric
  • 1 teaspoon poultry seasoning
  • 1 teaspoon kosher salt, plus more to taste
  • 1/2 teaspoon black pepper, plus more for serving
  • 1 1/2 pounds boneless, skinless chicken thighs (680g)
  • 6 cups low-sodium chicken broth, plus up to 1 cup more if needed
  • 1 can (13.5 ounces) full-fat coconut milk (about 400g)
  • 1 cup frozen peas (about 145g)
  • 3 packed cups baby spinach (about 85g)
  • 1/4 cup fresh cilantro leaves, plus whole leaves for garnish
  • Optional: 1 to 2 teaspoons fresh lemon juice

How to Make Turmeric Chicken Soup

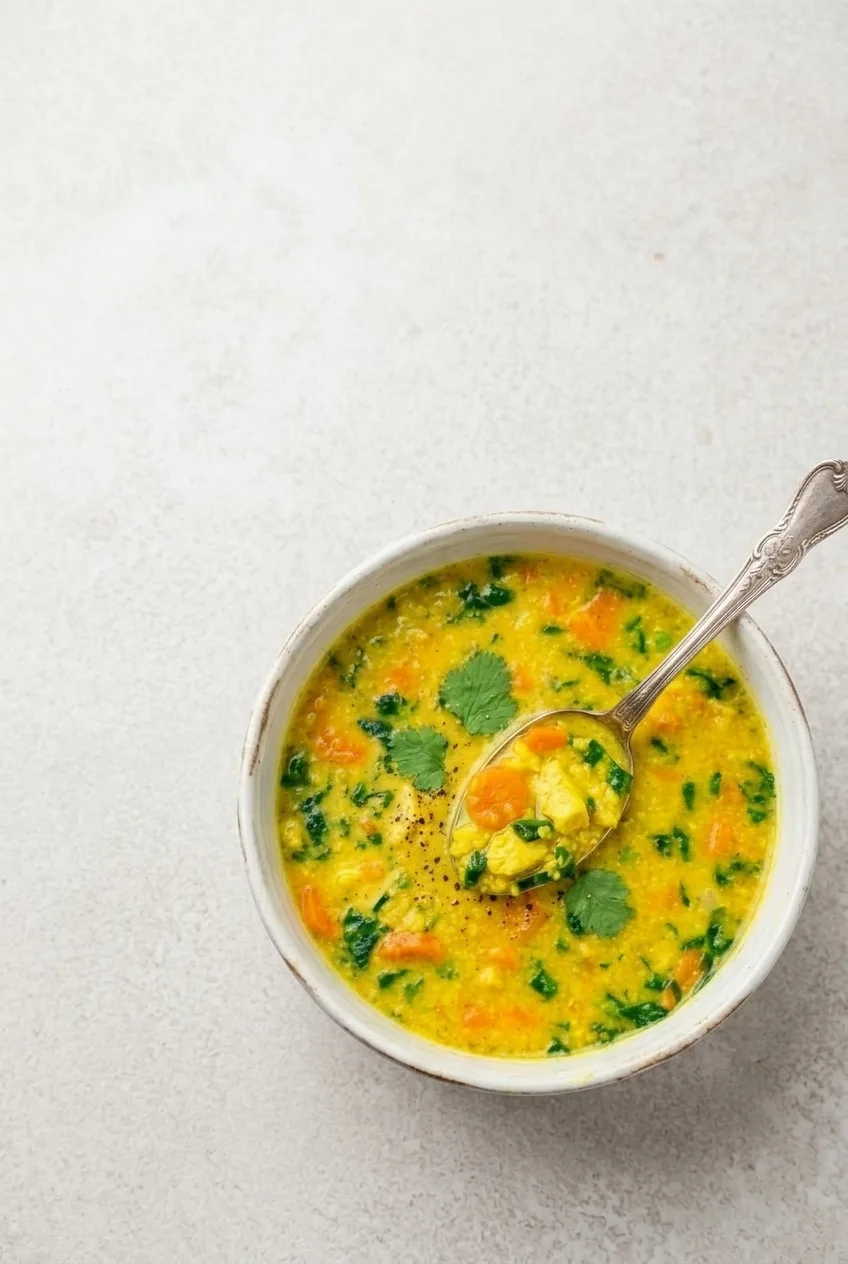
Near-overhead view of golden turmeric chicken soup in a full bowl with visible vegetables, cilantro, and pepper.
  1. Prep the ingredients: Dice the vegetables into small, bite-size pieces. Rinse between the leek layers to remove grit. Leave the chicken thighs whole so they are easy to remove and shred.
  2. Soften the vegetables: Heat the olive oil in a 5- to 6-quart Dutch oven or heavy soup pot over medium heat. Add the onion, leek, carrots, celery, salt, and pepper. Cook uncovered for 8 to 10 minutes, stirring occasionally, until the onion and leek are translucent and the carrots have begun to soften. Keep the vegetables at a gentle sizzle rather than browning them heavily.
  3. Warm the seasonings: Add the garlic, turmeric, and poultry seasoning. Stir constantly for 30 to 60 seconds, until fragrant and vivid yellow. Pour in the broth and coconut milk, scraping the bottom of the pot and stirring until the coconut milk is incorporated.
  4. Simmer the chicken: Add the whole chicken thighs. Bring the soup just to a simmer over medium heat, then reduce to medium-low. Simmer partially covered or uncovered, maintaining small, gentle bubbles rather than a rolling boil. Start checking the chicken after 14 minutes. It will generally take 15 to 18 minutes to reach 165°F (75°C) in the thickest part.
  5. Shred the chicken: Transfer the cooked thighs to a bowl and pull them into bite-size shreds with two forks. Check that the carrots are tender but still hold their shape; if they need longer, keep the soup simmering before returning the chicken. Stir the shreds back into the pot.
  6. Finish the soup: Add the frozen peas and cook until hot. Stir in the spinach and cook just until wilted and still green, about 3 to 4 minutes for this finishing stage. Stir in the cilantro, then taste and adjust the salt and pepper. Add the lemon juice if the broth needs a brighter taste.
  7. Serve: If the soup has become too thick, stir in a little more broth; it should be lightly creamy but easy to ladle. Let it stand off the heat for 5 minutes. Ladle into bowls and finish with whole cilantro leaves and, if desired, more black pepper.

How to Keep the Chicken Tender

A hard boil can make the chicken tough. Keep the soup at a gentle simmer, remove the thighs when they reach 165°F, and shred them outside the pot so they do not keep cooking while the carrots finish. Boneless, skinless chicken breast is a leaner alternative at the same weight, but it may cook faster; begin checking its temperature earlier.

Getting a Creamy but Brothy Texture

Full-fat canned coconut milk gives the broth its lightly creamy body without hiding the chicken and vegetables. There is no need to blend the main version. If the soup reduces too much or thickens as it stands, add broth a little at a time until the vegetables move freely when stirred.

For a thicker variation, blend only 1 to 2 cups of finished soup and stir it back in, leaving most of the chicken and vegetables intact.

Ingredient Swaps and Serving Ideas

  • Herbs: Use 2 tablespoons chopped parsley instead of, or alongside, the cilantro for a milder finish.
  • Greens: Substitute chopped kale for spinach, adding it several minutes earlier so it can soften.
  • Creamy base: Use cashew cream in place of coconut milk for less coconut flavor, adjusting the broth as needed. For a lighter, less creamy soup, omit the coconut milk and add more broth; the result will be paler.

Serve with crusty bread or crackers. If you enjoy coconut-based soups, try this Thai Coconut Curry Soup next.

How to Store, Freeze, and Reheat the Soup

Cool leftovers promptly and refrigerate in airtight containers for up to 5 days. Keep extra cilantro separate for serving. The chicken and vegetables absorb liquid as the soup sits, so add a splash of broth if it thickens.

Reheat in a saucepan over low to medium-low heat, stirring occasionally until hot. Avoid a hard boil, which can make the coconut broth look separated. For individual portions, microwave in short intervals, stirring between them. The soup can be made one day ahead; add fresh cilantro just before serving.

To freeze, cool the soup and portion it into airtight containers, leaving room for expansion. Freeze for up to 4 months. Thaw overnight in the refrigerator, then reheat gently. The peas and spinach may be softer after freezing.

Nutrition

Approximate nutrition per serving, based on 6 servings: 390 calories, 26g protein, 23g fat, and 18g carbohydrates. Per 100g of finished soup: approximately 75 calories, 5g protein, 4g fat, and 3g carbohydrates. Values vary with the chicken, broth, coconut milk, and amount of liquid remaining after cooking.

Anti-Inflammatory Turmeric Chicken Soup

A lightly creamy turmeric chicken soup with coconut milk, shredded chicken, vegetables, peas, and spinach.
Course: Soup
Cuisine: Global
Prep: 20 min
Cook: 35 min
Total: 60 min
Servings: 6 Calories: 390 kcal

Equipment

  • 5- to 6-quart Dutch oven or heavy soup pot
  • cutting board
  • knife
  • measuring cups and spoons
  • instant-read thermometer
  • two forks

Ingredients

For the Soup

  • 1 tablespoon olive oil
  • 1 medium yellow onion, diced (about 1 1/2 cups or 200g)
  • 1 medium leek, white and light-green parts only, cleaned and sliced (about 1 cup or 120g)
  • 2 medium carrots, peeled and diced (about 1 1/2 cups or 180g)
  • 2 celery ribs, diced (about 1 cup or 100g)
  • 4 garlic cloves, minced
  • 2 teaspoons ground turmeric
  • 1 teaspoon poultry seasoning
  • 1 teaspoon kosher salt, plus more to taste
  • 1/2 teaspoon black pepper, plus more for serving
  • 1 1/2 pounds boneless, skinless chicken thighs (680g)
  • 6 cups low-sodium chicken broth, plus up to 1 cup more as needed
  • 1 can (13.5 ounces) full-fat coconut milk (about 400g)
  • 1 cup frozen peas (about 145g)
  • 3 packed cups baby spinach (about 85g)
  • 1/4 cup fresh cilantro leaves, plus more for garnish
  • 1 to 2 teaspoons fresh lemon juice, optional

Instructions

  1. Dice the onion, leek, carrots, and celery into small bite-size pieces. Rinse the leek thoroughly between its layers. Leave the chicken thighs whole.
  2. Heat the olive oil in a 5- to 6-quart Dutch oven or heavy soup pot over medium heat.
  3. Add the onion, leek, carrots, celery, salt, and pepper. Cook uncovered for 8 to 10 minutes, stirring occasionally, until the onion and leek are translucent and the carrots begin to soften.
  4. Add the garlic, turmeric, and poultry seasoning. Stir constantly for 30 to 60 seconds, until fragrant.
  5. Pour in the chicken broth and coconut milk. Scrape the bottom of the pot and stir until the coconut milk is incorporated.
  6. Add the chicken thighs and bring the soup just to a simmer. Reduce the heat to medium-low and simmer partially covered or uncovered with gentle bubbles.
  7. Check the chicken after 14 minutes and cook until it reaches 165°F (75°C) in the thickest part, about 15 to 18 minutes total.
  8. Transfer the chicken to a bowl and shred it with two forks. If needed, continue simmering the soup until the carrots are tender.
  9. Return the shredded chicken to the pot. Add the peas and cook until hot.
  10. Stir in the spinach and cook until wilted but still green, about 3 to 4 minutes. Stir in the cilantro.
  11. Taste and adjust the salt and pepper. Stir in lemon juice, if using.
  12. Add more broth if needed for a loose, ladleable consistency. Remove from the heat, let stand for 5 minutes, and serve with cilantro leaves and additional black pepper.

Tips

  • Keep the soup at a gentle simmer rather than a hard boil to keep the chicken tender.
  • Remove the chicken as soon as it reaches 165°F (75°C) and shred it outside the pot to prevent overcooking.
  • Rinse the leek well between its layers to remove grit.
  • Use full-fat coconut milk for a creamy broth that remains light enough to ladle.
  • Add spinach and cilantro near the end so they stay bright and fresh.
  • Thin leftover soup with a splash of broth because the chicken and vegetables absorb liquid as it sits.

Variations

  • Parsley Herb Variation: Use 2 tablespoons chopped parsley instead of, or alongside, the cilantro for a milder herb flavor.
  • Kale Variation: Replace the spinach with chopped kale and add it several minutes earlier so it can soften.
  • Cashew Cream Variation: Use cashew cream instead of coconut milk for less coconut flavor, adjusting the broth as needed.
  • Thicker Soup Variation: Blend 1 to 2 cups of finished soup and stir it back in, leaving most of the chicken and vegetables intact.

Notes

Refrigerate leftovers in airtight containers for up to 5 days or freeze for up to 4 months. Reheat gently over low to medium-low heat and avoid a hard boil. Add fresh cilantro just before serving when making ahead.

Nutrition

Calories: 390 kcal | Protein: 26 g | Fat: 23 g | Carbohydrates: 18 g

Baked Potato Soup

Baked russet potatoes give this stovetop soup a thick, creamy base without losing the soft chunks that make it taste like a loaded baked potato. Using potatoes baked ahead keeps the soup itself to about 35 minutes, including prep.

Mash only some of the potatoes, then add the cream over low heat so the soup stays smooth. Finish each bowl with shredded sharp cheddar, crisp bacon, sour cream, and green onions rather than stirring the toppings into the pot.

Ingredients for Baked Potato Soup

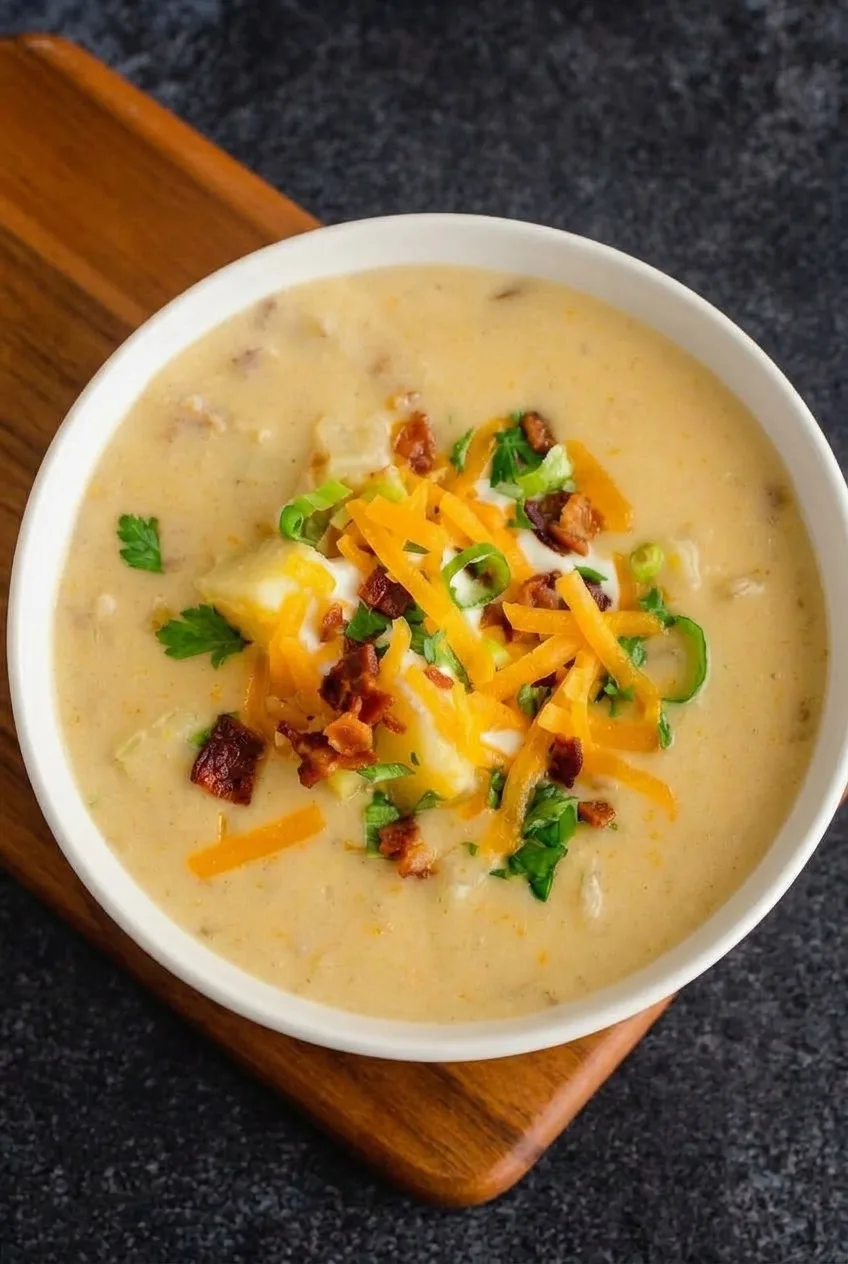
Close view of chunky baked potato soup topped with shredded cheddar, crisp bacon, sour cream, and green onions.
  • 3 large russet potatoes, about 2 1/4 pounds (1kg), baked until tender
  • 6 slices bacon, about 6 ounces (170g)
  • 1 medium yellow onion, finely diced (150g)
  • 2 garlic cloves, minced
  • 4 cups chicken broth, plus up to 1 cup more as needed
  • 3/4 cup heavy cream (180g)
  • 1 1/2 cups freshly shredded sharp cheddar cheese (170g)
  • 1/2 cup sour cream (120g)
  • 1/3 cup thinly sliced green onions or chives
  • Kosher salt and black pepper, to taste

Vegetable broth can replace chicken broth. If the bacon leaves less than 1 tablespoon fat in the pot, add up to 1 tablespoon unsalted butter to cook the onion.

How to Make Baked Potato Soup

Overhead view of loaded baked potato soup in a wide bowl with cheddar, bacon, sour cream, and green onions.

Time: 15 minutes prep, about 20 minutes cooking; about 35 minutes total with baked potatoes ready. Makes 6 bowls. Use a 5- to 6-quart Dutch oven or heavy soup pot.

  1. Prepare the potatoes: If starting with raw potatoes, bake them at 400°F (205°C) for about 50 to 60 minutes, until a knife slides easily through the centers. Baking time is additional to the 35-minute soup time. Cool until you can handle them, remove the skins if desired, and cut the potatoes into rough 3/4-inch pieces.
  2. Cook the bacon and onion: Cook the bacon in the soup pot over medium heat until crisp. Transfer it to a paper-towel-lined plate and crumble when cool. Leave about 1 tablespoon bacon fat in the pot, adding butter if needed. Cook the onion, stirring occasionally, until soft and translucent but not browned. Add the garlic and cook for about 30 seconds, until fragrant.
  3. Simmer the potatoes: Add 4 cups broth and the baked potato pieces. Bring to a gentle simmer over medium-low heat. Cook uncovered or with the lid slightly ajar for 5 to 7 minutes. Start checking after 5 minutes; the potatoes should be hot and crush easily against the side of the pot.
  4. Thicken the soup: Mash some of the potatoes directly in the pot, leaving plenty of distinct pieces. For a creamier base, use an immersion blender for just a few brief pulses. Do not blend the soup smooth.
  5. Add the cream: Reduce the heat to low. Stir in the cream and warm for 3 to 5 minutes, stirring often, until the soup is steaming but not boiling. Taste before adding salt and pepper; the toppings will add saltiness. If the soup is too thick, stir in warm broth a little at a time until it is spoonable.
  6. Serve: Let the soup stand for 3 to 5 minutes, loosening it with more warm broth if needed. Ladle into wide bowls and pile the cheddar and bacon in the center of each. Add a dollop of sour cream and the green onions or chives. Serve while the cheddar is softening but still visibly shredded.

How to Keep Baked Potato Soup Creamy but Chunky

Mashing part of the potato thickens the broth; leaving the rest intact gives each spoonful soft baked-potato pieces. If using an immersion blender, pulse only a small portion of the soup so it does not become a smooth purée.

Baked potatoes continue absorbing liquid as the soup stands. If it becomes too thick, add warm broth a few tablespoons at a time. Keep the heat low after adding cream: boiling can make the dairy-enriched base look grainy or separated. Add sour cream to the bowls, not the pot.

Make-Ahead and Variations

Use baked potatoes prepared ahead: Bake the potatoes up to one day ahead, cool and refrigerate them, then cube them cold. Warm the pieces thoroughly in the broth before mashing.

Make it vegetarian: Use vegetable broth, omit the bacon, and cook the onion in butter or olive oil. Keep the cheddar, sour cream, and green onion toppings, or use vegetarian bacon if desired.

Start with raw potatoes in a slow cooker: This is a separate method, not part of the 35-minute stovetop recipe. Cook the onion and garlic as directed, then add them to a slow cooker with the broth and peeled, cubed raw russet potatoes. Cook on LOW for about 8 hours or HIGH for about 4 hours, until the potatoes are fully tender. Mash some of the potatoes, stir in the cream near the end, and warm gently without boiling. Cook the bacon separately for topping.

Serving, Storage, and Reheating

Serve with crusty bread, dinner rolls, a green salad, or steamed broccoli. For another cheese-forward soup, try this Broccoli Cheddar Soup Recipe.

Cool leftover soup promptly and refrigerate in an airtight container for 3 to 4 days. Store the bacon, cheddar, sour cream, and green onions separately when possible. Reheat the soup over low to medium-low heat, stirring often and adding a splash of broth or milk if it has thickened. Add the toppings after reheating.

Freezing is not preferred because the potato and dairy textures can change after thawing. If needed, freeze the soup without toppings in small portions; it may need extra broth or milk when reheated.

Nutrition

Approximate per serving, based on 6 bowls with toppings: 490 calories, 17g protein, 32g fat, and 35g carbohydrates. Approximate per 100g: 120 calories, 4g protein, 8g fat, and 9g carbohydrates. Values vary with potato size, broth, bacon fat retained, and topping portions.

Baked Potato Soup

A creamy, chunky stovetop potato soup made with baked russet potatoes and finished with cheddar, bacon, sour cream, and green onions.
Course: Soup
Cuisine: American
Prep: 15 min
Cook: 20 min
Total: 35 min
Servings: 6 Calories: 490 kcal

Equipment

  • 5- to 6-quart Dutch oven or heavy soup pot
  • potato masher
  • immersion blender

Ingredients

Soup

  • 3 large russet potatoes, about 2 1/4 pounds (1 kg), baked until tender
  • 6 slices bacon, about 6 ounces (170 g)
  • 1 medium yellow onion, finely diced (150 g)
  • 2 garlic cloves, minced
  • 4 cups chicken broth, plus up to 1 cup more as needed
  • 3/4 cup heavy cream (180 g)
  • Kosher salt and black pepper, to taste

Toppings

  • 1 1/2 cups freshly shredded sharp cheddar cheese (170 g)
  • 1/2 cup sour cream (120 g)
  • 1/3 cup thinly sliced green onions or chives

Instructions

  1. If starting with raw potatoes, bake them at 400°F (205°C) for 50 to 60 minutes, until tender. Cool until handleable, remove the skins if desired, and cut into rough 3/4-inch pieces.
  2. Cook the bacon in a 5- to 6-quart Dutch oven or heavy soup pot over medium heat until crisp. Transfer to a paper-towel-lined plate and crumble when cool.
  3. Leave about 1 tablespoon bacon fat in the pot. Add up to 1 tablespoon unsalted butter if needed.
  4. Cook the onion in the pot, stirring occasionally, until soft and translucent but not browned. Add the garlic and cook for about 30 seconds, until fragrant.
  5. Add 4 cups broth and the baked potato pieces. Bring to a gentle simmer over medium-low heat and cook for 5 to 7 minutes, until the potatoes are hot and crush easily.
  6. Mash some of the potatoes directly in the pot, leaving plenty of distinct pieces. For a creamier base, pulse a small portion briefly with an immersion blender.
  7. Reduce the heat to low. Stir in the heavy cream and warm for 3 to 5 minutes, stirring often, until steaming but not boiling.
  8. Season with salt and pepper to taste. Stir in warm broth a little at a time if the soup is too thick.
  9. Let the soup stand for 3 to 5 minutes, loosening with more warm broth if needed.
  10. Ladle into bowls and top with cheddar, crumbled bacon, sour cream, and green onions or chives. Serve while the cheese is softening but still visibly shredded.

Tips

  • Use baked potatoes for a richer flavor and a faster stovetop cooking time.
  • Mash only part of the potatoes to keep the soup creamy but chunky.
  • If using an immersion blender, pulse only a small portion of the soup; do not blend it smooth.
  • Keep the heat low after adding cream, as boiling can make the soup look grainy or separated.
  • Add warm broth a few tablespoons at a time if the soup thickens as it stands.
  • Add sour cream to individual bowls rather than stirring it into the pot.

Variations

  • Vegetarian Baked Potato Soup: Use vegetable broth, omit the bacon, and cook the onion in butter or olive oil. Use vegetarian bacon as an optional topping.
  • Slow Cooker Potato Soup: Cook the onion and garlic, then add them to a slow cooker with broth and peeled, cubed raw russet potatoes. Cook on LOW for about 8 hours or HIGH for about 4 hours, mash some potatoes, and stir in cream near the end.

Notes

Baked potatoes can be prepared up to 1 day ahead and refrigerated before cubing. Refrigerate leftovers for 3 to 4 days, storing toppings separately when possible. Reheat gently with a splash of broth or milk. Freezing is not preferred because potato and dairy textures may change.

Nutrition

Calories: 490 kcal | Protein: 17 g | Fat: 32 g | Carbohydrates: 35 g

Sausage Tortellini Soup

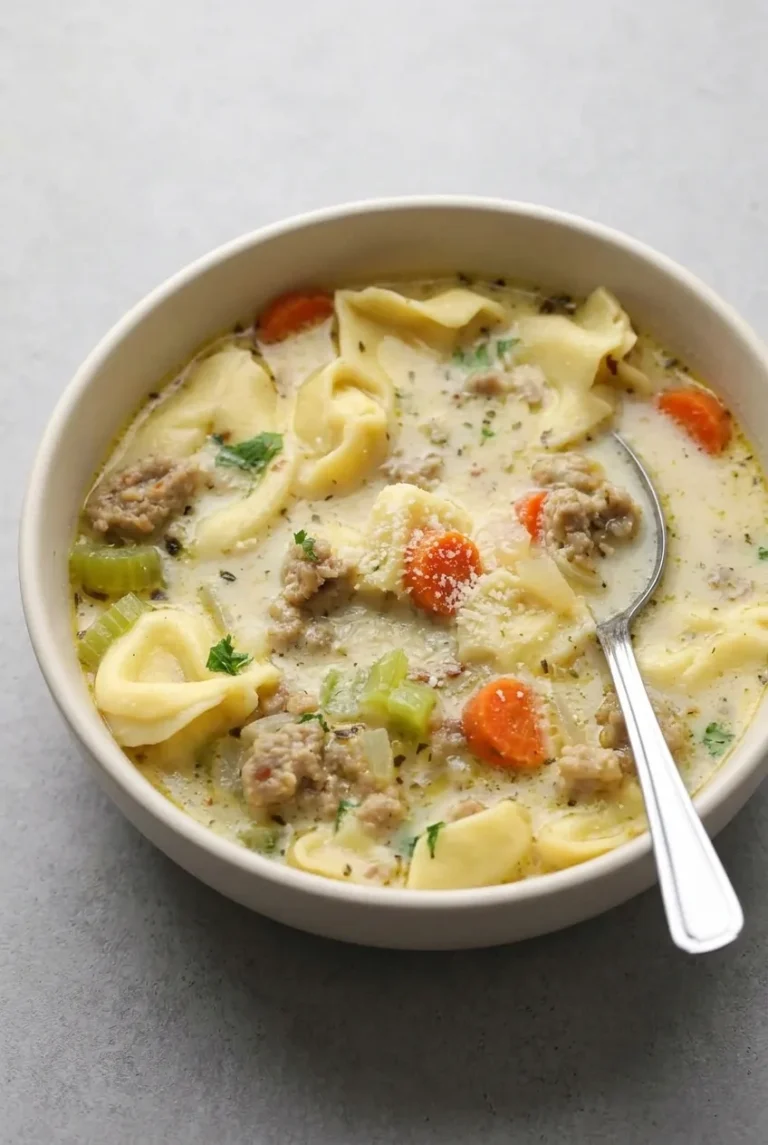
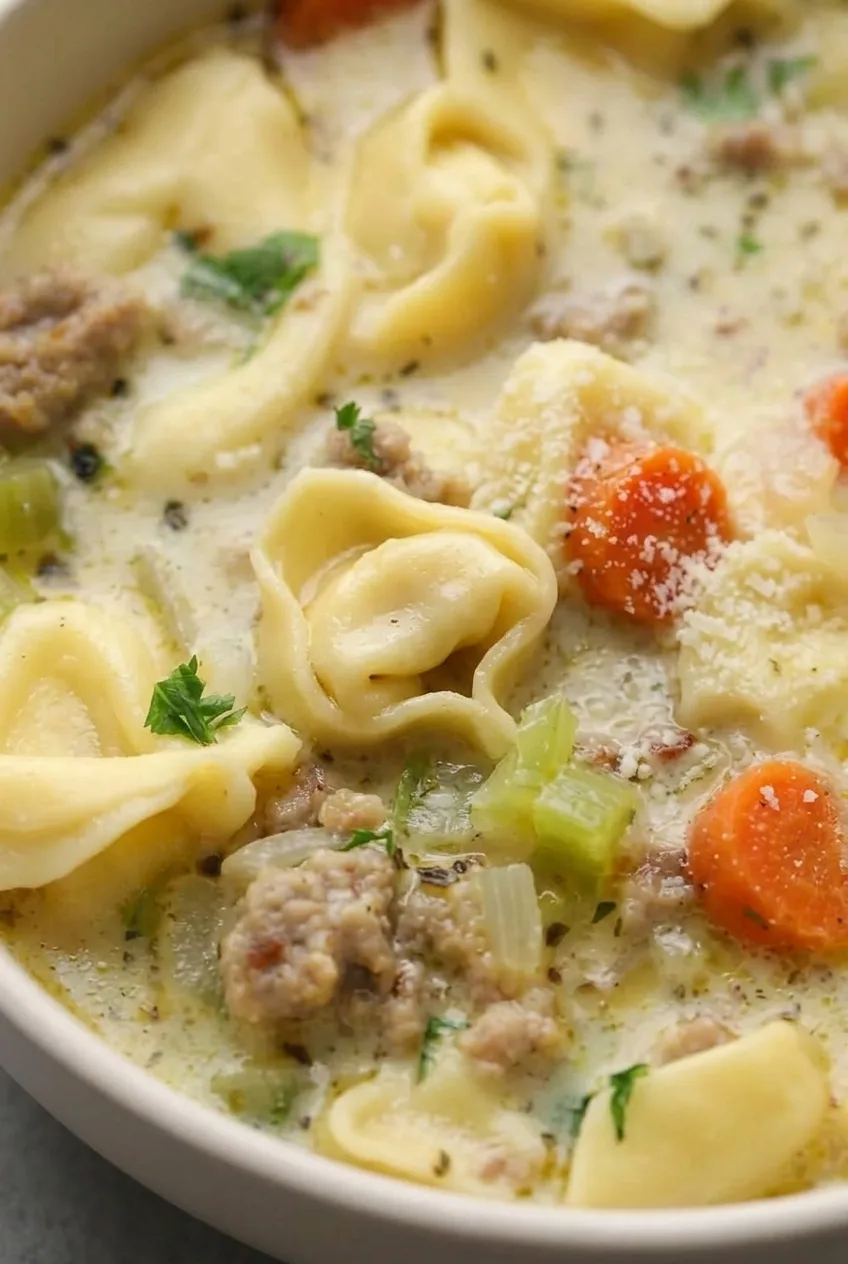
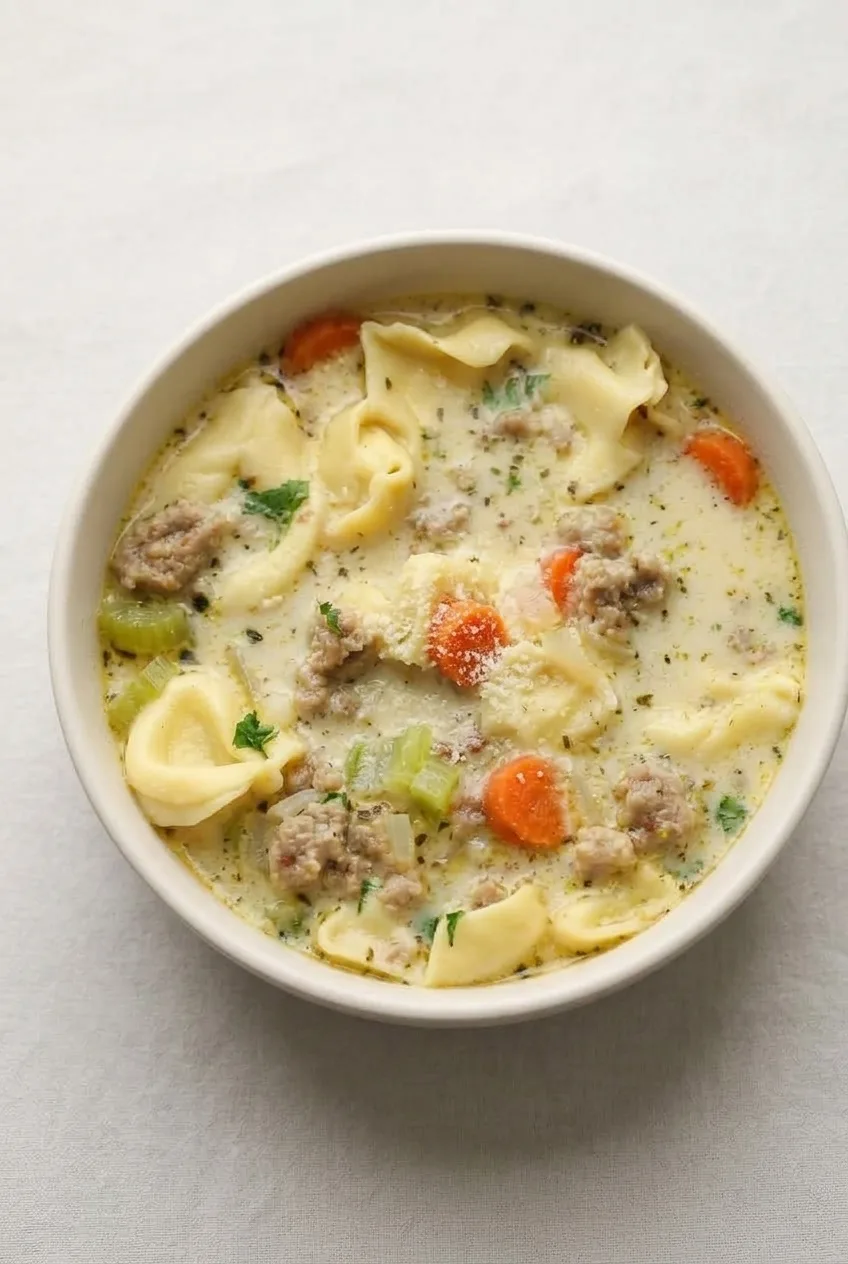
Browned Italian sausage, carrot coins, celery, and folded cheese tortellini fill a pale, lightly creamy broth. The soup stays loose and spoonable because the tortellini goes in only after the vegetables are nearly tender. A low-heat finish of cream and Parmesan keeps the broth smooth.

Made in one Dutch oven, it serves six and takes about 40 minutes, depending on the tortellini’s package directions.

Ingredients for Sausage Tortellini Soup

Close-up of folded cheese tortellini, sausage crumbles, carrots, celery, and creamy Parmesan broth.
  • 1 pound mild Italian sausage, casings removed if needed (about 450g)
  • 1 medium yellow onion, finely diced (about 1 cup or 150g)
  • 2 medium carrots, sliced into 1/4-inch coins (about 180g)
  • 2 celery ribs, diced (about 100g)
  • 1 tablespoon olive oil, only if the pot is dry after browning the sausage
  • 3 garlic cloves, minced
  • 1 teaspoon Italian seasoning
  • 6 cups low-sodium chicken broth
  • 18 ounces refrigerated cheese tortellini (about 510g)
  • 3/4 cup heavy cream
  • 1/2 cup finely grated Parmesan cheese (about 45g), plus more for serving
  • Kosher salt and black pepper, to taste
  • 2 tablespoons chopped fresh parsley

Use low-sodium broth and wait until the end to add salt. The sausage, tortellini, and Parmesan all contribute seasoning.

How to Make Sausage Tortellini Soup

Overhead view of creamy sausage tortellini soup with visible tortellini, vegetables, parsley, and Parmesan.
  1. Brown the sausage: Heat a 5- to 6-quart Dutch oven or heavy soup pot over medium-high heat. Add the sausage without oil and cook for 6 to 8 minutes, breaking it into small, irregular crumbles, until browned in spots with no pink remaining. Drain excess grease, leaving about 1 tablespoon in the pot. Keep the sausage in the pot or return it after draining.
  2. Soften the vegetables: Reduce the heat to medium. Add the onion, carrots, and celery, along with the olive oil only if the pot looks dry. Cook for 6 to 8 minutes, stirring occasionally, until the onion is translucent and the vegetables begin to soften. Stir in the garlic and Italian seasoning for about 30 seconds, until fragrant.
  3. Simmer the broth: Pour in the chicken broth, scraping up the browned bits from the bottom of the pot. Bring just to a boil, then reduce to a gentle medium-low simmer. Cook partly covered or uncovered for about 10 minutes, until the carrots are nearly fork-tender but still hold their shape.
  4. Cook the tortellini: Add the refrigerated tortellini and simmer uncovered according to its package directions, commonly 3 to 5 minutes. Stir gently once or twice to prevent sticking. Begin checking at 3 minutes; the tortellini should be tender and hot through, with its seams intact.
  5. Finish the broth: Reduce the heat to low. Stir in the cream and Parmesan for 2 to 3 minutes, until the broth is pale, creamy, and steaming. Do not let it boil hard. Taste, then add black pepper and salt as needed.
  6. Serve: Remove from the heat and let stand for 3 to 5 minutes. Ladle into large bowls, distributing the tortellini, sausage, carrots, and celery evenly. Top with parsley and a light sprinkle of Parmesan. Serve promptly.

How to Keep the Tortellini Tender

Add tortellini only after the carrots are nearly done, and avoid holding the finished soup in the hot pot for long. The pasta can keep absorbing broth, becoming swollen or splitting at the seams.

Frozen cheese tortellini also works, but follow its package directions rather than the refrigerated pasta timing. Add it to the simmering broth before the cream, and check it several minutes before the package time is up.

Why Add Cream at the End?

Low heat helps the cream and Parmesan blend into the broth without turning grainy or separated. Draining excess sausage grease before adding the vegetables also keeps the finished soup from looking oily. For a lighter broth, substitute half-and-half for the cream; the soup will be less rich and slightly less opaque.

Sausage Tortellini Soup Variations

  • Make it spicy: Use hot Italian sausage instead of mild, or add 1/4 teaspoon crushed red pepper flakes with the Italian seasoning.
  • Add spinach: Stir 2 packed cups baby spinach into the finished soup off heat, just until wilted.

Serve with crusty bread or a simple green salad. For another creamy soup with tender pasta, try Creamy Chicken Gnocchi Soup.

How to Store and Reheat Leftovers

For the best texture, cool the broth and cooked tortellini promptly, then refrigerate them in separate airtight containers for up to 3 days. If the soup is already combined, refrigerate it for up to 3 days; expect softer pasta and a thicker broth.

Reheat gently over medium-low heat or in short microwave intervals. Add chicken broth a splash at a time until the soup is loose and spoonable again. Avoid a hard boil.

To make ahead, prepare the sausage-and-vegetable broth base up to 2 days in advance and refrigerate it without tortellini, cream, or parsley. Reheat the base, cook the tortellini in it, then finish with cream and Parmesan. For longer storage, freeze the cooled broth base without tortellini or cream for up to 3 months. Thaw overnight in the refrigerator before reheating and finishing the soup.

Nutrition

Approximate per serving, based on 6 servings: 600 calories, 26g protein, 37g fat, and 41g carbohydrates. Approximate per 100g of finished soup: 120 calories, 5g protein, 7g fat, and 8g carbohydrates. Values vary with the sausage, tortellini, and amount of fat drained.

Sausage Tortellini Soup

Italian sausage, vegetables, and cheese tortellini simmer in a lightly creamy Parmesan chicken broth.
Course: Soup
Cuisine: Italian
Prep: 10 min
Cook: 35 min
Total: 45 min
Servings: 6 Calories: 600 kcal

Equipment

  • 5- to 6-quart Dutch oven or heavy soup pot
  • Ladle

Ingredients

For the Soup

  • 1 pound mild Italian sausage, casings removed if needed (about 450 g)
  • 1 medium yellow onion, finely diced (about 1 cup or 150 g)
  • 2 medium carrots, sliced into 1/4-inch coins (about 180 g)
  • 2 celery ribs, diced (about 100 g)
  • 1 tablespoon olive oil, if needed
  • 3 garlic cloves, minced
  • 1 teaspoon Italian seasoning
  • 6 cups low-sodium chicken broth
  • 18 ounces refrigerated cheese tortellini (about 510 g)
  • 3/4 cup heavy cream
  • 1/2 cup finely grated Parmesan cheese (about 45 g), plus more for serving
  • Kosher salt, to taste
  • Black pepper, to taste
  • 2 tablespoons chopped fresh parsley

Instructions

  1. Heat a 5- to 6-quart Dutch oven over medium-high heat. Add the sausage and cook for 6 to 8 minutes, breaking it into small crumbles, until browned and no pink remains.
  2. Drain excess grease, leaving about 1 tablespoon in the pot. Return the sausage to the pot if needed.
  3. Reduce the heat to medium. Add the onion, carrots, celery, and olive oil if the pot is dry. Cook for 6 to 8 minutes, stirring occasionally, until the onion is translucent and the vegetables begin to soften.
  4. Stir in the garlic and Italian seasoning and cook for about 30 seconds, until fragrant.
  5. Pour in the chicken broth, scraping up browned bits from the bottom of the pot. Bring to a boil, then reduce to a gentle medium-low simmer.
  6. Simmer for about 10 minutes, partly covered or uncovered, until the carrots are nearly fork-tender.
  7. Add the tortellini and simmer uncovered according to package directions, usually 3 to 5 minutes. Stir gently once or twice to prevent sticking.
  8. Reduce the heat to low. Stir in the heavy cream and Parmesan for 2 to 3 minutes, until the broth is creamy and steaming. Do not boil hard.
  9. Taste and season with salt and black pepper as needed. Remove from the heat and let stand for 3 to 5 minutes.
  10. Ladle into bowls and garnish with parsley and additional Parmesan. Serve promptly.

Tips

  • Use low-sodium broth and season with salt only after adding the sausage, tortellini, and Parmesan.
  • Add tortellini only after the carrots are nearly tender so the pasta does not become swollen or split.
  • Keep the heat low after adding cream and Parmesan to prevent a grainy or separated broth.
  • Drain excess sausage grease before cooking the vegetables to keep the soup from becoming oily.
  • Check refrigerated tortellini at 3 minutes and follow package directions when using frozen tortellini.

Variations

  • Spicy Sausage Tortellini Soup: Use hot Italian sausage or add 1/4 teaspoon crushed red pepper flakes with the Italian seasoning.
  • Spinach Tortellini Soup: Stir 2 packed cups of baby spinach into the finished soup off the heat until just wilted.
  • Lighter Creamy Soup: Substitute half-and-half for the heavy cream for a less rich, slightly less opaque broth.

Notes

For best texture, refrigerate leftover broth and tortellini separately for up to 3 days. Reheat gently with a splash of chicken broth; avoid boiling. Freeze the broth base without tortellini or cream for up to 3 months.

Nutrition

Calories: 600 kcal | Protein: 26 g | Fat: 37 g | Carbohydrates: 41 g

Southern Turkey Salad

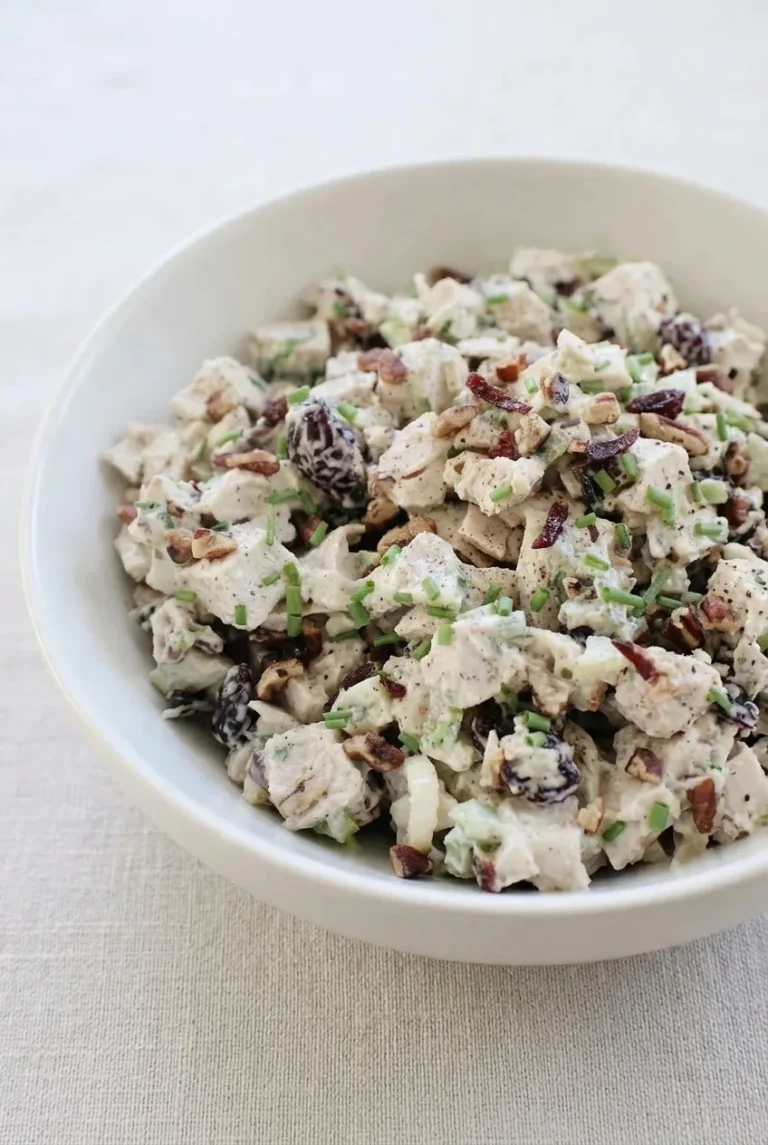
Southern turkey salad should be chunky and scoopable, not a smooth spread. This Southern-inspired version starts with cooked, cooled turkey and crisp celery, coated in a thick mayonnaise dressing brightened with Greek yogurt and lemon. Dried cranberries add a chewy contrast; toasted pecans, chives, and black pepper finish the bowl.

Cut the turkey into bite-size pieces and fold gently so it holds its shape. Chill the dressed salad briefly, then add the pecans just before serving to keep them crunchy. The recipe makes about 4 lunch servings.

Ingredients for Southern Turkey Salad

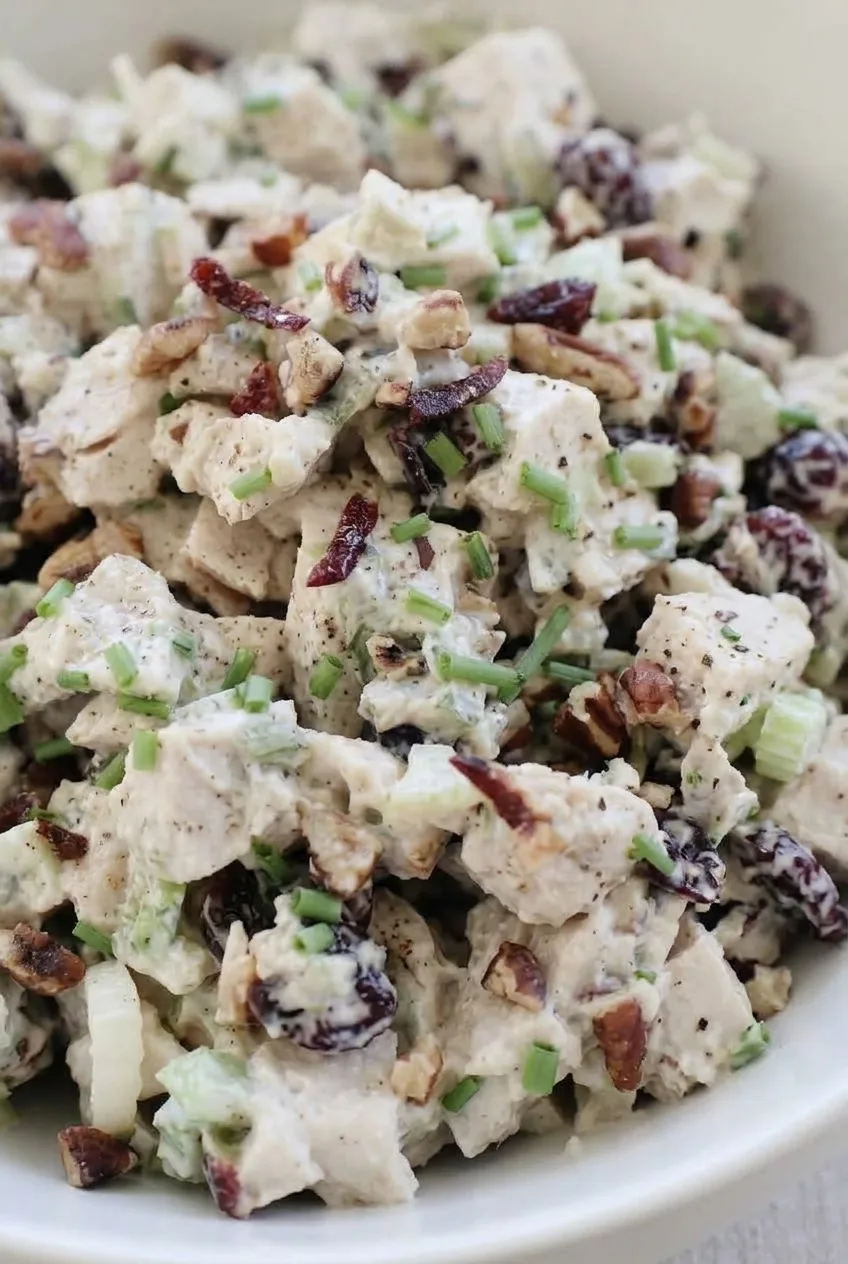
Close view of creamy Southern turkey salad showing turkey chunks, crisp celery, cranberries, pecans, and chives.
  • 3 cups cooked turkey, fully cooled and cut into 1/2-inch pieces (about 420g)
  • 3/4 cup finely diced celery (about 75g)
  • 1/3 cup mayonnaise (about 75g)
  • 1/4 cup plain Greek yogurt (about 60g)
  • 1 tablespoon fresh lemon juice
  • 1/4 teaspoon celery salt
  • 1/4 teaspoon kosher salt, plus more to taste
  • 1/2 teaspoon freshly ground black pepper, plus more for serving
  • 1/3 cup dried cranberries, roughly chopped if large (about 45g)
  • 1/2 cup chopped toasted pecans (about 55g)
  • 2 tablespoons finely chopped fresh chives, divided

Cooked breast meat, dark meat, or a mixture works. Dry the celery well after washing so it does not thin the dressing. For a richer dressing, replace the Greek yogurt with an equal amount of mayonnaise and add lemon juice to taste.

How to Make Southern Turkey Salad

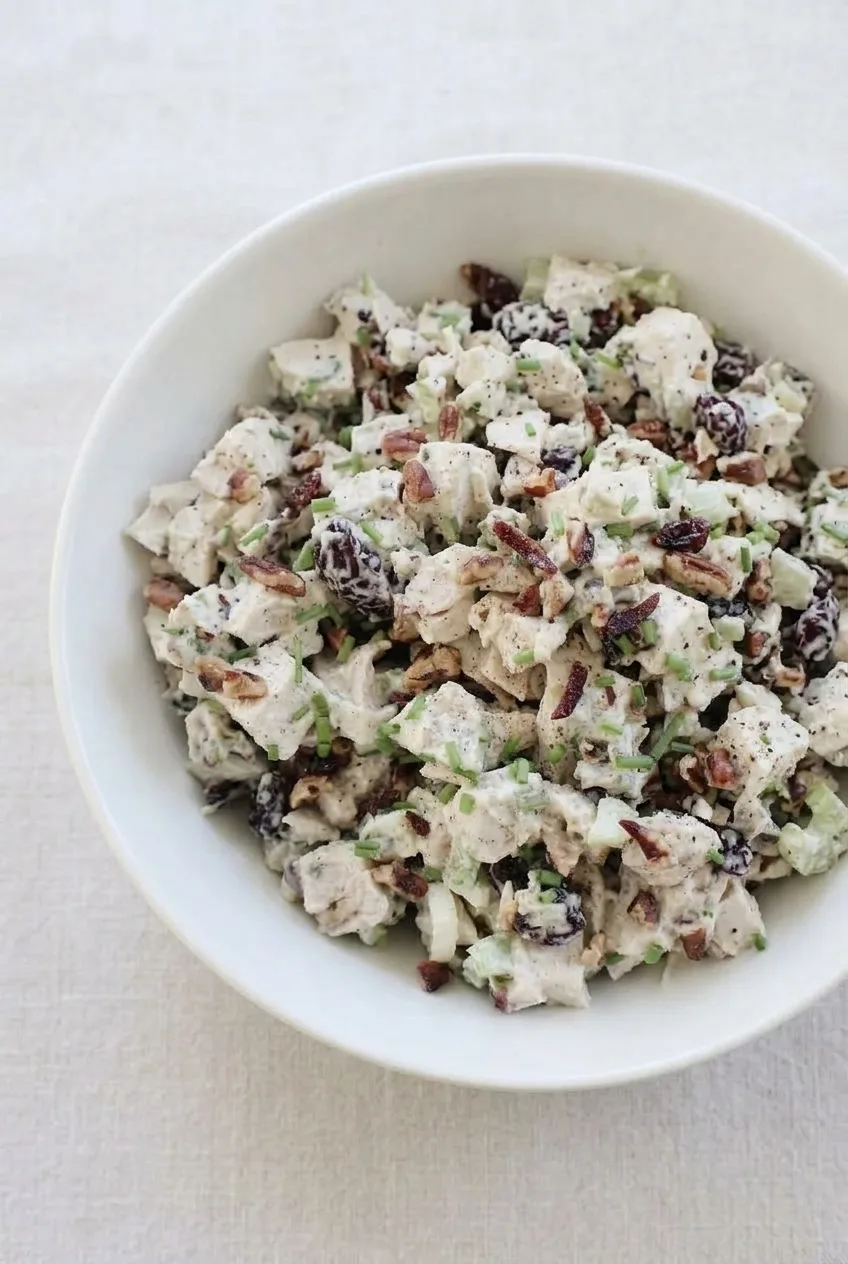
Overhead view of a bowl of chunky cranberry pecan Southern turkey salad on a pale neutral surface.
  1. Prepare the ingredients: Cut the cooled turkey into roughly 1/2-inch pieces. Dice the celery, chop any large cranberries, and reserve about 1 tablespoon of the chives for finishing.
  2. Toast the pecans if needed: Spread the chopped pecans in a small dry skillet over medium-low heat. Stir often and start checking after 3 minutes. After 3 to 5 minutes, when they smell nutty and have deepened slightly in color, transfer them to a plate to cool completely.
  3. Make the dressing: In a large mixing bowl, whisk the mayonnaise, Greek yogurt, lemon juice, celery salt, kosher salt, and black pepper until smooth. Taste and adjust the seasoning.
  4. Fold the salad together: Add the turkey, celery, cranberries, and chives that were not reserved. Fold gently just until coated, keeping the turkey pieces intact. The dressing should cling without pooling at the bottom of the bowl. If the salad looks dry, fold in 1 to 2 teaspoons more mayonnaise or Greek yogurt.
  5. Chill: Cover and refrigerate for at least 15 minutes. Keep the pecans separate.
  6. Finish and serve: Fold most of the cooled pecans into the chilled salad. Spoon it loosely into a serving bowl, then scatter the remaining pecans, reserved chives, and another grind of black pepper over the top.

How to Keep Turkey Salad Chunky, Not Watery

Fully cooled turkey helps the dressing stay thick. Keep the pieces close to 1/2 inch rather than finely shredding them, and stop folding as soon as everything is coated. If liquid collects after chilling, give the salad one gentle fold instead of stirring hard enough to break up the turkey.

Pecans soften in the moist dressing, so add them only when you are ready to serve. Keep any extra toasted pecans separate for leftovers.

Serving Southern Turkey Salad

Serve it from the bowl with crackers, pile it onto croissants or soft sandwich bread with leaf lettuce, or spoon it into lettuce cups. For a lunch pairing, serve it alongside this one-pot lemon chicken soup.

Storage and Make-Ahead

Refrigerate promptly in an airtight container and use within 2 days. You can make the dressed salad several hours ahead; keep the pecans and final chive garnish separate until serving. Serve it cold rather than reheating it. Freezing is not recommended because the creamy dressing can separate and the celery and nuts can lose their texture.

Nutrition

Approximate nutrition per serving, based on 4 lunch servings: 440 calories, 33g protein, 28g fat, and 14g carbohydrates. Per 100g: approximately 220 calories, 17g protein, 14g fat, and 7g carbohydrates. Values vary with the turkey and brands used.

Southern Turkey Salad

A chunky, creamy turkey salad with crisp celery, dried cranberries, toasted pecans, chives, and lemon.
Course: Salad
Cuisine: American
Prep: 15 min
Cook: 5 min
Total: 35 min
Servings: 4 Calories: 440 kcal

Equipment

  • Large mixing bowl
  • Whisk
  • Cutting board
  • Knife
  • Small skillet
  • Measuring cups and spoons

Ingredients

For the Turkey Salad

  • 3 cups cooked turkey, fully cooled and cut into 1/2-inch pieces (about 420 g)
  • 3/4 cup finely diced celery (about 75 g)
  • 1/3 cup dried cranberries, roughly chopped if large (about 45 g)
  • 1/2 cup chopped toasted pecans (about 55 g)
  • 2 tablespoons finely chopped fresh chives, divided

For the Dressing

  • 1/3 cup mayonnaise (about 75 g)
  • 1/4 cup plain Greek yogurt (about 60 g)
  • 1 tablespoon fresh lemon juice
  • 1/4 teaspoon celery salt
  • 1/4 teaspoon kosher salt, plus more to taste
  • 1/2 teaspoon freshly ground black pepper, plus more for serving

Instructions

  1. Cut the cooled turkey into roughly 1/2-inch pieces. Dice the celery, chop any large cranberries, and reserve about 1 tablespoon of the chives for garnish.
  2. If the pecans are not already toasted, toast them in a dry skillet over medium-low heat for 3 to 5 minutes, stirring often, until fragrant and slightly darker. Transfer to a plate and cool completely.
  3. Whisk the mayonnaise, Greek yogurt, lemon juice, celery salt, kosher salt, and black pepper in a large bowl until smooth. Taste and adjust the seasoning.
  4. Add the turkey, celery, cranberries, and unreserved chives. Fold gently until coated, keeping the turkey pieces intact.
  5. If the salad seems dry, fold in 1 to 2 teaspoons more mayonnaise or Greek yogurt.
  6. Cover and refrigerate for at least 15 minutes, keeping the pecans separate.
  7. Fold most of the cooled pecans into the chilled salad. Transfer to a serving bowl and top with the remaining pecans, reserved chives, and additional black pepper.

Tips

  • Use fully cooled turkey so the dressing stays thick.
  • Keep the turkey in 1/2-inch pieces instead of shredding it for a chunky texture.
  • Dry the celery well after washing so it does not thin the dressing.
  • Fold gently and stop once the ingredients are coated to avoid breaking up the turkey.
  • Add pecans just before serving so they stay crunchy.
  • If liquid collects after chilling, give the salad one gentle fold instead of stirring vigorously.

Variations

  • Richer Dressing: Replace the Greek yogurt with an equal amount of mayonnaise and add lemon juice to taste.

Notes

Refrigerate promptly in an airtight container and use within 2 days. Keep extra pecans and the final chive garnish separate until serving. Serve cold; freezing is not recommended.

Nutrition

Calories: 440 kcal | Protein: 33 g | Fat: 28 g | Carbohydrates: 14 g

Turkey Burger Sliders

These turkey burger sliders are individual mini burgers, not a pull-apart tray. Each has a browned patty, melted cheddar, and fresh tomato, red onion, and ruffled lettuce on a soft bun with a toasted cut side. A little mayonnaise adds moisture to the turkey mixture, while gentle shaping and a thermometer help keep the small patties from drying out.

Yield: 12 sliders; serves 4 as a main dish or 6 as an appetizer. Time: About 20 minutes prep, 10 to 14 minutes cooking, and 30 to 35 minutes total.

Ingredients for Turkey Burger Sliders

Overhead view of a platter of pick-secured turkey burger sliders with toasted buns and fresh toppings
  • 1 1/2 pounds 93% lean ground turkey (680g)
  • 2 tablespoons mayonnaise (30g)
  • 1 teaspoon Worcestershire sauce
  • 1 teaspoon garlic powder
  • 1 teaspoon onion powder
  • 1 teaspoon kosher salt
  • 1/2 teaspoon black pepper
  • 12 soft slider buns, split
  • 6 slices cheddar cheese, halved (about 100g)
  • 1 tablespoon neutral oil, divided between the cooking surface and buns, or neutral oil for the cooking surface and butter for the buns
  • 1 medium ripe tomato, cut into 12 thin slices
  • 1 small red onion, cut into thin rings
  • 12 small ruffled pieces green leaf lettuce
  • 12 short wooden cocktail picks, for serving

Optional: About 1/3 cup mayonnaise, burger sauce, or honey mustard for spreading lightly on the buns. American cheese can replace the cheddar.

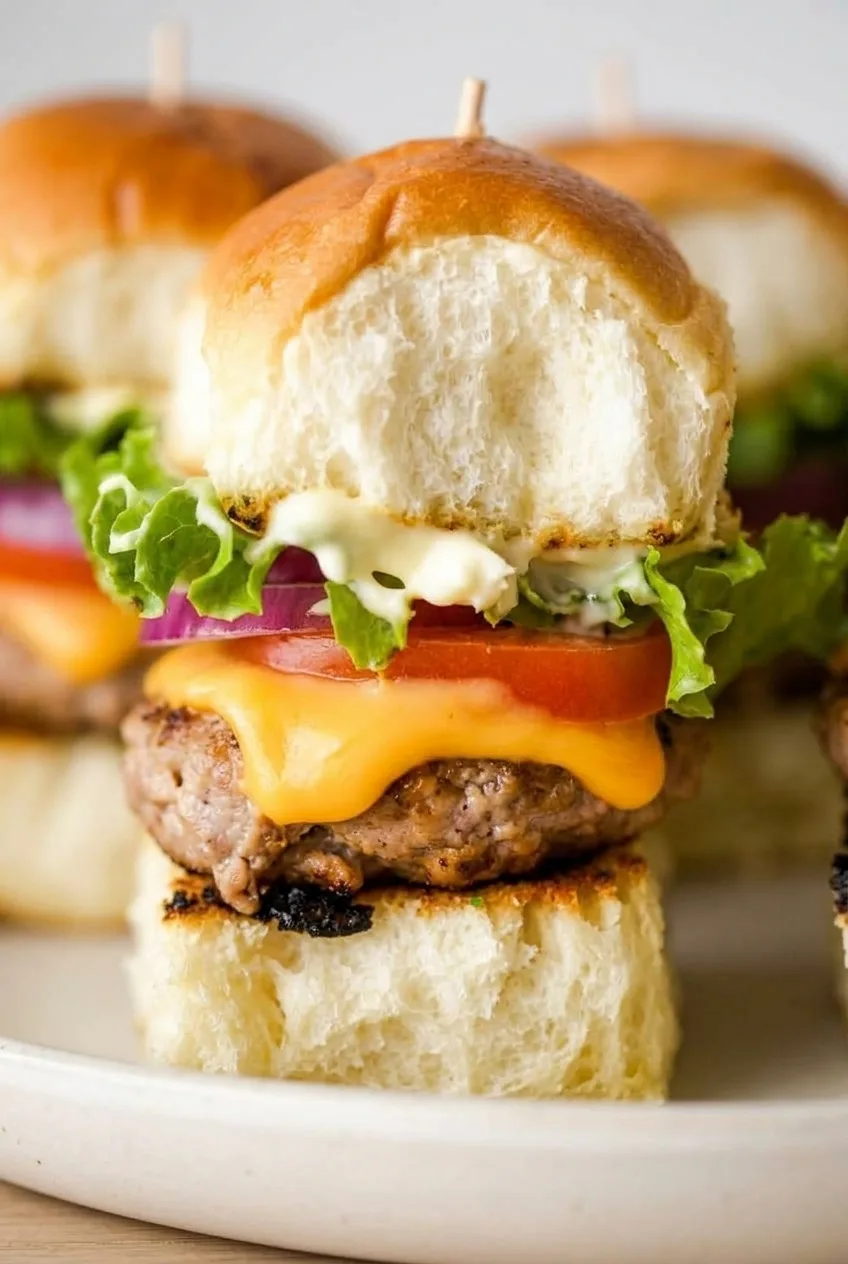
Close view of a turkey burger slider showing the browned patty, melted cheddar, tomato, onion, and lettuce layers

How to Grill Turkey Burger Sliders

  1. Preheat and prepare: Preheat a clean outdoor grill or grill pan over medium-high direct heat. Slice the tomato and onion, separate the lettuce, and set out the buns, cheese, and picks. Blot especially juicy tomato slices.
  2. Shape the patties: Gently mix the turkey, mayonnaise, Worcestershire sauce, garlic powder, onion powder, salt, and pepper just until combined. With damp hands, divide into 12 equal portions. Shape into patties about 2 1/2 inches wide, slightly wider than the buns to allow for shrinkage. Press a shallow indentation into each center. If they are too soft to handle, chill them briefly.
  3. Grill: Lightly oil the hot grates or pan. Add the patties with at least 1 inch between them, working in batches if needed. Cook uncovered and undisturbed for about 3 to 4 minutes, until browned underneath and easy to release. Flip once; cook about 3 to 4 minutes more without pressing on them. Begin checking the center of a patty after about 6 minutes total.
  4. Melt the cheese and check doneness: During the final minute of cooking, add half a cheddar slice to each patty. Close the grill lid or briefly cover the grill pan to melt the cheese. Insert an instant-read thermometer sideways into the center of a thick patty. Remove the patties when they reach 165°F (75°C); browning and cooking time alone cannot confirm that ground turkey is done.
  5. Toast the buns: Rest the patties on a plate for 2 to 3 minutes. Lightly oil or butter the bun cut sides and toast them cut-side down until golden with a few deeper brown patches, about 2 to 3 minutes. Watch closely; small buns brown quickly.
  6. Assemble: Spread sauce lightly on the buns, if using. Layer each bottom bun with a cheesy patty, tomato slice, red onion ring, and ruffled lettuce piece. Add the top bun and secure with a short wooden pick. Serve promptly, and remove the picks before eating.

How to Keep Turkey Slider Patties Juicy

Use 93% lean turkey when available, and mix only until the seasonings are distributed. Equal-sized patties with shallow center indentations cook more evenly; damp hands make the sticky mixture easier to shape without packing it tightly.

Let the patties release from the grill before flipping, and do not press them with a spatula. Patty thickness and grill heat affect the timing, so use the thermometer to catch them at 165°F rather than cooking longer for extra browning.

Grill Pan and Skillet Option

A grill pan or cast-iron skillet works in place of an outdoor grill. Use medium-high heat and leave space between patties so they brown rather than crowd the pan. Cover only briefly to melt the cheese, and check the center for 165°F.

Serving, Make-Ahead, and Leftovers

Arrange the sliders close together on a platter with their picks in place. Coleslaw, cucumber salad, or fries make simple sides. For another appetizer on the table, add Turkey Crescent Bites with Green Chiles.

To get ahead, shape the patties, cover them, and keep them refrigerated until ready to grill. Add the lettuce and tomato just before serving; assembling too far ahead softens the toasted buns and wilts the lettuce.

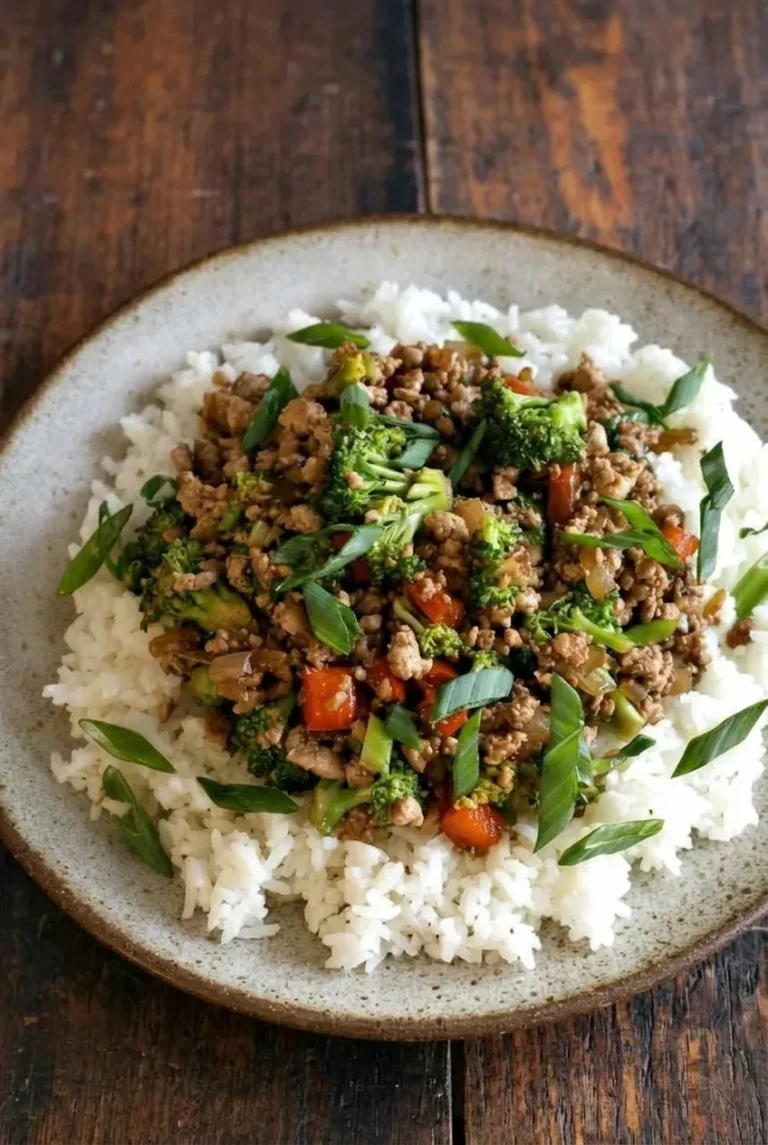
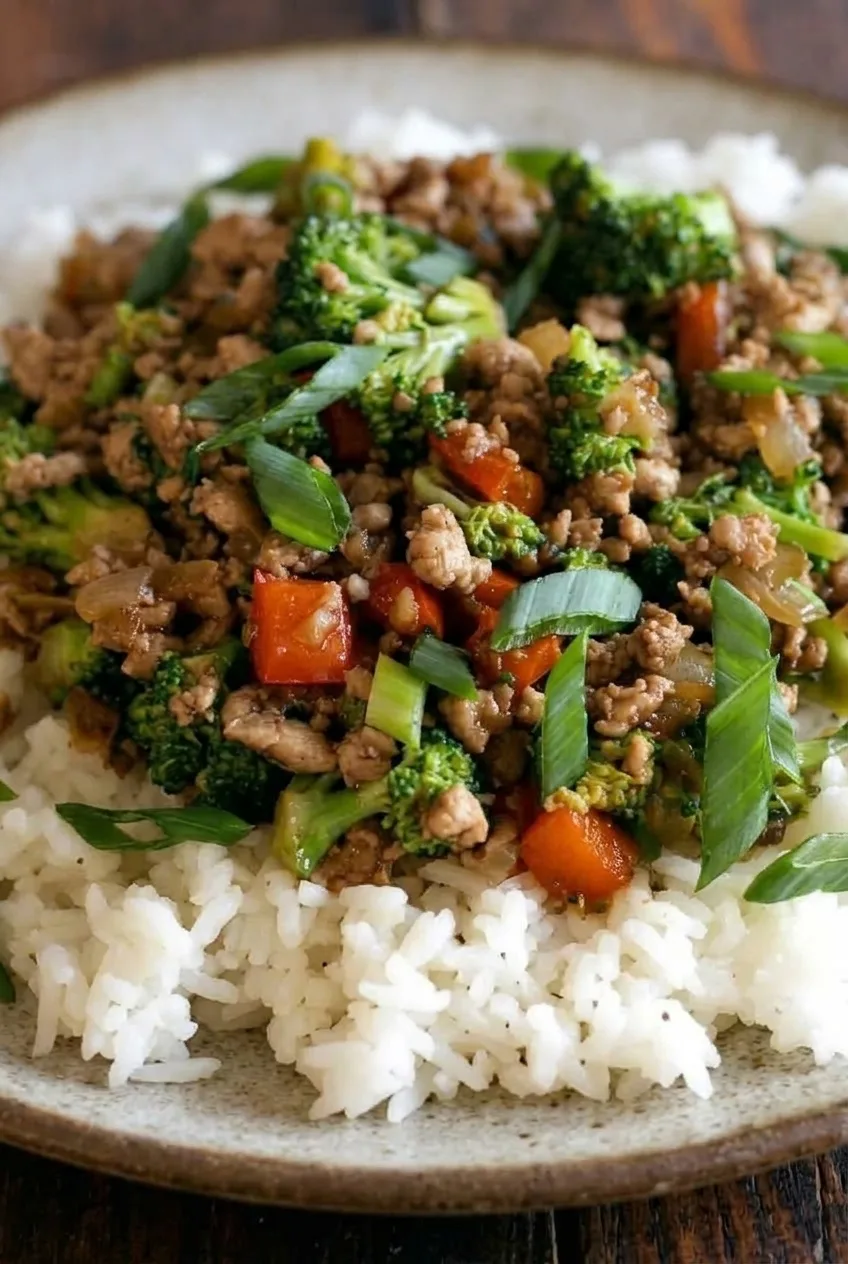
Refrigerate leftovers in an airtight container, keeping fresh toppings separate when possible. Reheat the patties and buns separately on a baking sheet in the oven, then add fresh toppings. If you have extra ground turkey for another meal, try Ground Turkey Stir Fry with Broccoli and Rice.

Nutrition

Approximate per slider: 250 calories, 16g protein, 12g fat, and 20g carbohydrates. Approximate per 100g: 220 calories, 14g protein, 11g fat, and 17g carbohydrates. Estimates include the core ingredients but not optional sauce; values vary with bun size and the turkey and cheese used.

Turkey Burger Sliders

Mini turkey burgers with melted cheddar, tomato, red onion, and lettuce on toasted slider buns.
Course: Main Course
Cuisine: American
Prep: 20 min
Cook: 14 min
Total: 35 min
Servings: 12 Calories: 250 kcal

Equipment

  • Outdoor grill, grill pan, or cast-iron skillet
  • Instant-read thermometer
  • Spatula
  • Wooden cocktail picks

Ingredients

For the Turkey Patties

  • 1 1/2 pounds 93% lean ground turkey (680g)
  • 2 tablespoons mayonnaise (30g)
  • 1 teaspoon Worcestershire sauce
  • 1 teaspoon garlic powder
  • 1 teaspoon onion powder
  • 1 teaspoon kosher salt
  • 1/2 teaspoon black pepper

For Assembly

  • 12 soft slider buns, split
  • 6 slices cheddar cheese, halved (about 100g)
  • 1 tablespoon neutral oil, divided between the cooking surface and buns
  • 1 medium ripe tomato, cut into 12 thin slices
  • 1 small red onion, cut into thin rings
  • 12 small ruffled pieces green leaf lettuce
  • 12 short wooden cocktail picks

Optional

  • About 1/3 cup mayonnaise, burger sauce, or honey mustard, for spreading on buns
  • Butter, for toasting the buns
  • American cheese, in place of cheddar

Instructions

  1. Preheat a clean outdoor grill or grill pan over medium-high direct heat. Slice the tomato and onion, separate the lettuce, and set out the buns, cheese, and cocktail picks.
  2. Gently mix the ground turkey, mayonnaise, Worcestershire sauce, garlic powder, onion powder, salt, and pepper until just combined.
  3. With damp hands, divide the turkey mixture into 12 equal portions. Shape each portion into a patty about 2 1/2 inches wide and press a shallow indentation into the center.
  4. Lightly oil the hot grill grates or pan. Grill the patties, working in batches if needed, for 3 to 4 minutes without moving them, until browned underneath and easy to release.
  5. Flip the patties once and cook for 3 to 4 minutes more. Begin checking the internal temperature after about 6 minutes total cooking time.
  6. During the final minute, top each patty with half a slice of cheddar. Close the grill lid or briefly cover the pan until the cheese melts.
  7. Remove the patties when the center reaches 165°F (75°C) on an instant-read thermometer. Rest for 2 to 3 minutes.
  8. Lightly oil or butter the cut sides of the slider buns. Toast cut-side down for 2 to 3 minutes, until golden brown.
  9. Spread the buns lightly with optional sauce. Layer each bottom bun with a cheesy turkey patty, tomato slice, red onion ring, and lettuce.
  10. Add the top buns, secure with cocktail picks, and serve promptly.

Tips

  • Use 93% lean ground turkey for juicier patties.
  • Mix the turkey only until the seasonings are distributed to avoid tough patties.
  • Use damp hands to shape the sticky turkey mixture without packing it tightly.
  • Make patties slightly wider than the buns because they shrink as they cook.
  • Do not press the patties with a spatula while cooking.
  • Use a thermometer and remove the patties at 165°F (75°C).

Variations

  • American Cheese Sliders: Replace the cheddar with American cheese for a softer, classic burger-style melt.
  • Skillet Turkey Sliders: Cook the patties in a grill pan or cast-iron skillet over medium-high heat instead of an outdoor grill.

Notes

Shape patties ahead and refrigerate them covered until grilling. Store leftovers in an airtight container with fresh toppings separate when possible. Reheat patties and buns separately in the oven, then add fresh toppings. Remove cocktail picks before eating.

Nutrition

Calories: 250 kcal | Protein: 16 g | Fat: 12 g | Carbohydrates: 20 g

Creamy Turkey Soup with Spinach

Wide egg noodles, tender turkey, thin carrots, and plenty of chopped spinach make this a substantial stovetop soup. The pale broth should cling to a loaded spoon but still be easy to ladle.

Butter and flour give the broth its body before the half-and-half goes in. Cooked turkey is added only after the noodles are nearly done, so it warms through without a long simmer. Spinach and dairy go in at the end to keep the greens visible and the broth smooth.

Ingredients for Creamy Turkey Soup with Spinach

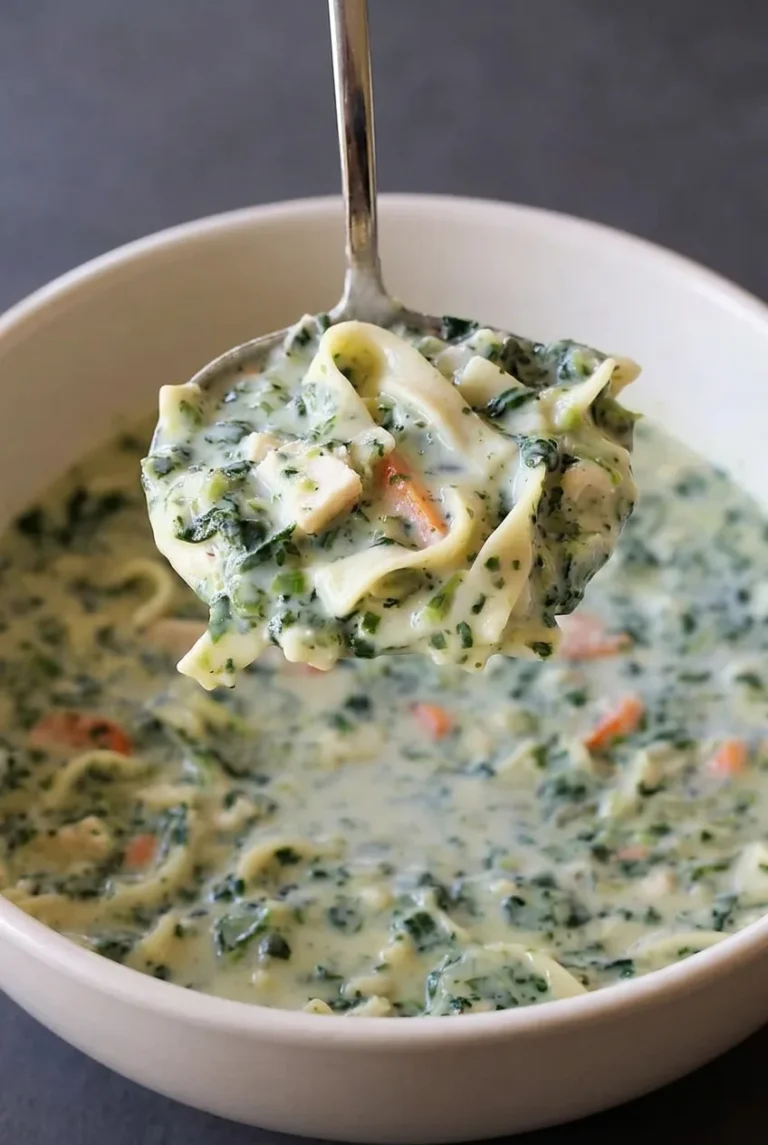
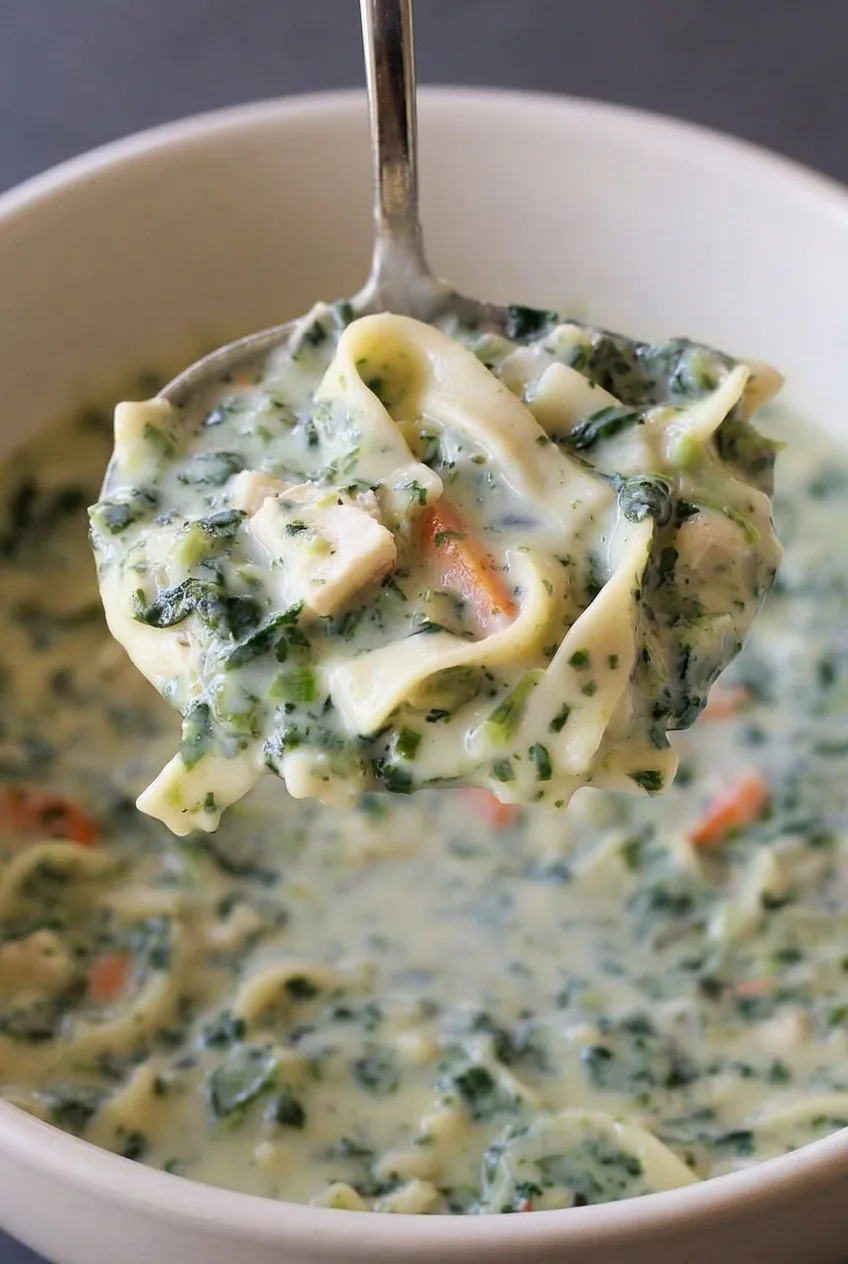
Close view of creamy turkey soup showing folded egg noodles, wilted spinach, carrots, and turkey in thick broth.
  • 3 tablespoons unsalted butter (45g)
  • 1 medium yellow onion, finely diced (about 1 cup or 150g)
  • 2 medium carrots, thinly sliced into half-moons or short matchsticks (about 1 cup or 120g)
  • 2 celery ribs, finely diced (about 3/4 cup or 90g)
  • 2 garlic cloves, minced
  • 1/4 cup all-purpose flour (30g)
  • 5 cups low-sodium chicken or turkey broth
  • 1 teaspoon dried thyme
  • Kosher salt and black pepper, starting with 1/2 teaspoon of each, then more to taste
  • 8 ounces wide egg noodles (about 225g)
  • 2 1/2 cups cooked turkey, shredded or chopped into bite-size pieces (about 350g)
  • 5 ounces fresh baby spinach, roughly chopped (about 5 packed cups or 140g)
  • 1 cup half-and-half, at room temperature if possible

Yield: 6 servings. Prep: 15 minutes. Cook: about 25 minutes. Total: about 40 minutes.

How to Make Creamy Turkey Soup with Spinach

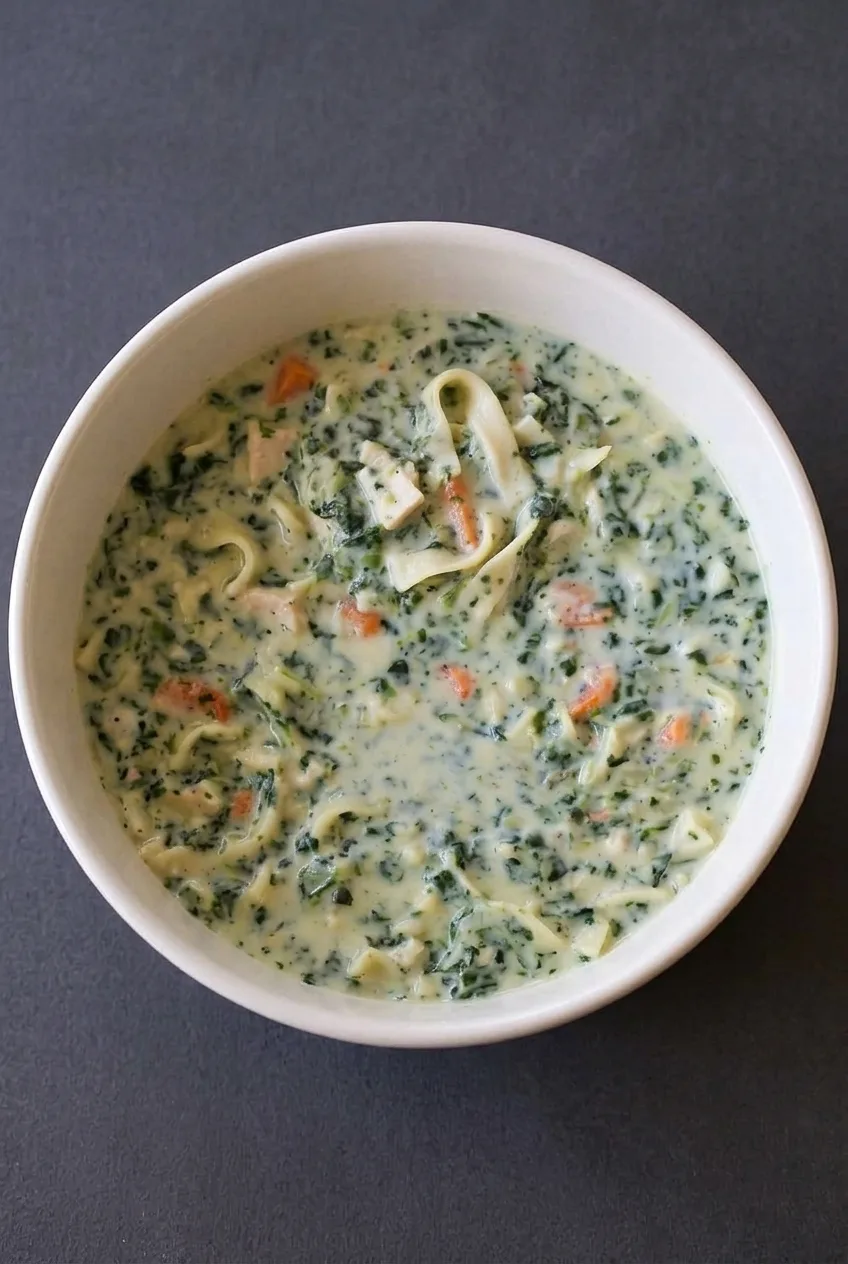
Overhead view of creamy turkey spinach noodle soup with visible carrots and turkey in a full white bowl.
  1. Soften the vegetables: Melt the butter in a 5- to 6-quart Dutch oven or heavy soup pot over medium heat. Add the onion, carrots, and celery with a pinch of the measured salt. Cook, stirring occasionally, for 6 to 8 minutes, until the onion is translucent and the carrots are beginning to soften. Stir in the garlic and thyme for the last 30 seconds, just until fragrant.
  2. Thicken the broth: Sprinkle the flour over the vegetables and stir until no dry flour remains. Cook, stirring constantly, for about 1 minute to remove the raw flour taste. Gradually whisk in the 5 cups of broth until smooth.
  3. Cook the noodles: Bring the soup to a gentle simmer and add the egg noodles. Simmer mostly uncovered, stirring every minute or two to prevent sticking, for about 7 to 9 minutes. Start checking 2 minutes before the package’s shortest suggested cooking time. The noodles should be nearly tender, the carrots tender, and the broth thick enough to lightly coat a spoon. Keep the bubbles small and steady rather than letting the soup boil hard.
  4. Add the turkey and spinach: Reduce the heat to medium-low. Stir in the cooked turkey and chopped spinach. Cook for 1 to 2 minutes, until the turkey is hot and the spinach has wilted throughout the soup.
  5. Finish with half-and-half: Turn the heat to low and stir in the half-and-half. Warm for 2 to 3 minutes, until the broth is smooth and steaming. Do not let it return to a hard boil, which can make the dairy look grainy. Taste and adjust the salt and pepper.
  6. Rest and serve: Remove the pot from the heat and let the soup rest for 3 to 5 minutes. Ladle into wide bowls, scooping from the bottom so each serving has noodles, turkey, spinach, and carrots. The broth should cling to a loaded spoon without becoming gluey.

Using Ground Turkey Instead

To start with raw ground turkey, use 1 pound in place of the cooked turkey. Brown it fully after softening the vegetables and before adding the flour. Season it well, then continue with the broth and noodles. Do not add raw ground turkey at the late warming stage. Cooked shredded chicken can replace cooked turkey without changing the method.

How to Store and Reheat the Soup

Cool the soup promptly and refrigerate it in airtight containers. Egg noodles continue to absorb broth as they sit, so chilled soup will be thicker. Reheat gently over medium-low heat, stirring often and adding broth as needed—about 1/2 to 1 cup if it has thickened considerably. For an individual portion, microwave loosely covered in short intervals, stirring between them. If checking reheated leftovers with a thermometer, aim for 165°F (75°C).

For make-ahead portions, cook the noodles separately and add them to each bowl when serving. You can also prepare the vegetable-and-broth base ahead, then cook the noodles and add the turkey, spinach, and half-and-half shortly before serving. Freezing the finished soup is not ideal because the noodles may soften and the dairy texture may change. If needed, freeze the base before adding those final ingredients.

Serving Ideas

Serve with crusty bread or a crisp salad. For another thick poultry soup, try Creamy Chicken Gnocchi Soup. For a lighter, broth-based option, make Easy Chicken Noodle Soup From Scratch.

Nutrition

Approximate nutrition per serving, based on 6 servings: 380 calories, 27g protein, 13g fat, and 38g carbohydrates. Per 100g: approximately 90 calories, 6g protein, 3g fat, and 9g carbohydrates. Values vary with the broth, turkey, noodles, and final amount of liquid.

Creamy Turkey Soup with Spinach

A hearty stovetop soup with tender turkey, egg noodles, vegetables, spinach, and a smooth creamy broth.
Course: Soup
Cuisine: American
Prep: 15 min
Cook: 25 min
Total: 40 min
Servings: 6 Calories: 380 kcal

Equipment

  • 5- to 6-quart Dutch oven or heavy soup pot
  • Whisk
  • Ladle

Ingredients

For the Soup

  • 3 tablespoons unsalted butter (45g)
  • 1 medium yellow onion, finely diced (about 1 cup or 150g)
  • 2 medium carrots, thinly sliced (about 1 cup or 120g)
  • 2 celery ribs, finely diced (about 3/4 cup or 90g)
  • 2 garlic cloves, minced
  • 1/4 cup all-purpose flour (30g)
  • 5 cups low-sodium chicken or turkey broth
  • 1 teaspoon dried thyme
  • Kosher salt and black pepper, starting with 1/2 teaspoon each, plus more to taste
  • 8 ounces wide egg noodles (about 225g)
  • 2 1/2 cups cooked turkey, shredded or chopped into bite-size pieces (about 350g)
  • 5 ounces fresh baby spinach, roughly chopped (about 5 packed cups or 140g)
  • 1 cup half-and-half, at room temperature if possible

Instructions

  1. Melt the butter in a 5- to 6-quart Dutch oven or heavy soup pot over medium heat.
  2. Add the onion, carrots, celery, and a pinch of the measured salt. Cook, stirring occasionally, for 6 to 8 minutes, until the onion is translucent and the carrots begin to soften.
  3. Stir in the garlic and thyme and cook for 30 seconds, until fragrant.
  4. Sprinkle the flour over the vegetables and stir until no dry flour remains. Cook, stirring constantly, for 1 minute.
  5. Gradually whisk in the broth until smooth.
  6. Bring the soup to a gentle simmer. Add the egg noodles and simmer mostly uncovered for 7 to 9 minutes, stirring every minute or two, until the noodles are nearly tender.
  7. Reduce the heat to medium-low. Stir in the cooked turkey and spinach, then cook for 1 to 2 minutes, until the turkey is hot and the spinach is wilted.
  8. Turn the heat to low and stir in the half-and-half. Warm for 2 to 3 minutes without letting the soup boil hard.
  9. Taste and adjust the salt and pepper. Remove from the heat and let the soup rest for 3 to 5 minutes before serving.

Tips

  • Keep the soup at a gentle simmer rather than a hard boil so the noodles cook evenly.
  • Stir the noodles every minute or two to prevent them from sticking together.
  • Check noodles about 2 minutes before the package’s shortest suggested cooking time.
  • Add the cooked turkey near the end so it warms through without becoming dry.
  • Keep the heat low after adding half-and-half to prevent the broth from looking grainy.
  • Ladle from the bottom of the pot so each serving includes noodles, turkey, spinach, and vegetables.

Variations

  • Ground Turkey Soup: Use 1 pound raw ground turkey instead of cooked turkey. Brown it fully after softening the vegetables and before adding the flour, then continue with the recipe.
  • Chicken Version: Replace the cooked turkey with cooked shredded chicken without changing the method.

Notes

Refrigerate cooled soup in airtight containers. Noodles absorb broth as the soup sits, so reheat gently with an additional 1/2 to 1 cup broth as needed. Reheat leftovers to 165°F (75°C). Freezing is best done before adding the noodles, turkey, spinach, and half-and-half.

Nutrition

Calories: 380 kcal | Protein: 27 g | Fat: 13 g | Carbohydrates: 38 g

Ground Turkey Stir Fry

Ground turkey, broccoli, and red bell pepper come together in a light soy-ginger glaze, then go over fluffy jasmine rice. The rice stays separate, with the stir-fry spooned over the center and fresh green onions scattered on top.

For browned turkey that stays moist, let it sear briefly before breaking it into crumbles. Cook the vegetables separately in the same skillet, adding the sauce only when the broccoli is nearly tender. Plan on about 30 minutes with cooked rice ready, or closer to 40 minutes if starting rice from dry.

Ingredients for Ground Turkey Stir Fry

Close view of glossy ground turkey crumbles with broccoli, red pepper, scallions, and separate fluffy rice.

Makes 4 servings.

  • 4 cups cooked jasmine rice (about 640g)
  • 1 1/4 pounds 93% lean ground turkey (about 575g)
  • 1 tablespoon neutral cooking oil, divided as needed
  • 1 small yellow onion, diced
  • 3 cups small broccoli florets (about 255g)
  • 1 medium red bell pepper, diced
  • 3 garlic cloves, minced
  • 2 teaspoons finely grated fresh ginger
  • 4 green onions, thinly sliced

For the sauce

  • 1/4 cup low-sodium soy sauce
  • 1 tablespoon oyster sauce
  • 1 tablespoon rice vinegar
  • 2 teaspoons honey or light brown sugar
  • 1 teaspoon toasted sesame oil
  • 1 teaspoon cornstarch
  • 1/4 cup water, divided

Cut the broccoli into bite-size florets so the stems can soften before the buds overcook. Use a 12-inch skillet or similarly wide pan; a crowded pan will steam the turkey instead of browning it.

How to Make Ground Turkey Stir Fry

Overhead view of a ground turkey stir fry rice bowl with broccoli, red pepper, and sliced green onions.
  1. Prepare the rice and sauce: Cook enough jasmine rice to yield 4 cups, or reheat cooked rice until steaming hot. Keep it covered and warm. Whisk the soy sauce, oyster sauce, vinegar, honey, sesame oil, cornstarch, and 2 tablespoons of the water until smooth. Chop the vegetables and set the green onions aside before heating the skillet.
  2. Brown the turkey: Preheat a 12-inch skillet over medium-high heat for 1 to 2 minutes. Add about 2 teaspoons of the oil and press the turkey into an even layer. Leave it undisturbed for about 2 minutes, then break it into loose crumbles. Cook, stirring occasionally, for 6 to 8 minutes total, until opaque with browned edges and an internal temperature of 165°F (75°C). Transfer to a bowl. If using a smaller pan, brown the turkey in batches.
  3. Cook the vegetables: Add the remaining oil if the skillet looks dry, followed by the onion, broccoli, and bell pepper. Stir frequently for 4 to 5 minutes, until the onion softens, the broccoli turns bright green, and the pepper softens at the edges. Start checking the broccoli stems after 3 minutes. If they are still firm, add the remaining 2 tablespoons water, cover for 1 to 2 minutes, then uncover and let excess moisture evaporate. Add the garlic and ginger and stir for about 30 seconds, until fragrant.
  4. Glaze the stir-fry: Return the turkey to the skillet and reduce the heat to medium. Whisk the sauce again, pour it in, and toss continuously for 1 to 2 minutes. Remove from the heat when a thin, glossy layer coats the turkey and vegetables, with little liquid left in the pan. If the sauce becomes too thick, add water 1 teaspoon at a time.
  5. Build the bowls: Fluff the rice and divide it among four wide, shallow bowls. Spoon the stir-fry over the center, leaving rice visible around the edges. Scatter the green onions over the bowls just before serving.

How to Keep the Turkey and Vegetables Distinct

93% lean turkey is less prone to drying out than extra-lean turkey. The brief undisturbed sear gives it time to brown before it is broken up; removing it while the vegetables cook prevents it from spending too long over the heat.

Steam the broccoli only if the stems need it, and uncover the skillet before adding the sauce. Extra water can thin the glaze and soften the vegetables. If sauce is still collecting at the bottom after tossing, cook it for another 30 to 60 seconds. Keep the rice out of the skillet so it stays fluffy rather than absorbing the glaze.

Ground Turkey Stir Fry Variations

If oyster sauce is unavailable, use 1 additional tablespoon soy sauce and 1 extra teaspoon honey; taste before adding any more salt. For heat, whisk 1 to 2 teaspoons chili garlic paste or sriracha into the sauce. Brown rice can replace jasmine rice, but keep it separate from the stir-fry.

For another ground turkey dinner, try these Crispy Ground Turkey Tacos with Avocado Crema.

How to Store and Reheat Ground Turkey Stir Fry

Cool leftovers promptly and refrigerate in airtight containers for up to 3 days. Store the rice and stir-fry separately when practical, and add fresh green onions after reheating.

Reheat the stir-fry in a skillet over medium-low heat with a small splash of water, stirring just until hot and glossy. Reheat the rice separately until steaming hot. Prolonged reheating can dry the turkey and soften the broccoli.

To prepare ahead, chop the vegetables and whisk the sauce up to 1 day in advance; refrigerate them separately. The stir-fry can be frozen without rice or green onions for up to 2 months, though the vegetables will be softer after thawing. Thaw overnight in the refrigerator and reheat gently with a splash of water.

Nutrition

Approximate nutrition per serving, based on 4 servings: 545 calories, 36g protein, 15g fat, and 61g carbohydrates. Per 100g of finished dish: approximately 115 calories, 8g protein, 3g fat, and 13g carbohydrates. Values vary with the turkey, sauces, rice, and moisture lost during cooking.

Ground Turkey Stir Fry

Ground turkey, broccoli, and red bell pepper are coated in a light soy-ginger glaze and served over jasmine rice.
Course: Main Course
Cuisine: Asian-Inspired
Prep: 15 min
Cook: 15 min
Total: 30 min
Servings: 4 Calories: 545 kcal

Equipment

  • 12-inch skillet
  • mixing bowl
  • whisk
  • cutting board
  • chef's knife

Ingredients

For the Stir Fry

  • 4 cups cooked jasmine rice (about 640 g)
  • 1 1/4 pounds 93% lean ground turkey (about 575 g)
  • 1 tablespoon neutral cooking oil, divided as needed
  • 1 small yellow onion, diced
  • 3 cups small broccoli florets (about 255 g)
  • 1 medium red bell pepper, diced
  • 3 garlic cloves, minced
  • 2 teaspoons finely grated fresh ginger
  • 4 green onions, thinly sliced

For the Sauce

  • 1/4 cup low-sodium soy sauce
  • 1 tablespoon oyster sauce
  • 1 tablespoon rice vinegar
  • 2 teaspoons honey or light brown sugar
  • 1 teaspoon toasted sesame oil
  • 1 teaspoon cornstarch
  • 1/4 cup water, divided

Instructions

  1. Cook enough jasmine rice to make 4 cups, or reheat cooked rice until steaming hot. Cover and keep warm.
  2. Whisk together the soy sauce, oyster sauce, rice vinegar, honey, sesame oil, cornstarch, and 2 tablespoons water until smooth.
  3. Preheat a 12-inch skillet over medium-high heat for 1 to 2 minutes. Add about 2 teaspoons oil and press the ground turkey into an even layer.
  4. Sear the turkey undisturbed for about 2 minutes, then break it into loose crumbles. Cook for 6 to 8 minutes total, stirring occasionally, until browned at the edges and the internal temperature reaches 165°F (75°C). Transfer to a bowl.
  5. Add the remaining oil to the skillet if needed. Add the onion, broccoli, and bell pepper and stir frequently for 4 to 5 minutes, until the onion softens and the broccoli is bright green.
  6. If the broccoli stems are still firm, add the remaining 2 tablespoons water, cover for 1 to 2 minutes, then uncover and let excess moisture evaporate.
  7. Add the garlic and ginger and stir for about 30 seconds, until fragrant.
  8. Return the turkey to the skillet and reduce the heat to medium. Whisk the sauce again, pour it into the skillet, and toss continuously for 1 to 2 minutes until the turkey and vegetables are lightly glazed.
  9. Fluff the rice and divide it among four bowls. Spoon the stir-fry over the center of the rice and top with sliced green onions.

Tips

  • Use a wide 12-inch skillet so the turkey browns instead of steaming.
  • Let the turkey sear undisturbed before breaking it into crumbles.
  • Cut broccoli into bite-size florets so the stems soften evenly.
  • Steam the broccoli only if the stems need extra time, then uncover the pan before adding the sauce.
  • Keep the rice separate from the stir-fry so it stays fluffy.
  • If the sauce thickens too much, add water 1 teaspoon at a time.

Variations

  • No Oyster Sauce: Replace the oyster sauce with 1 additional tablespoon soy sauce and 1 extra teaspoon honey. Taste before adding more salt.
  • Spicy Turkey Stir Fry: Whisk 1 to 2 teaspoons chili garlic paste or sriracha into the sauce.
  • Brown Rice Version: Serve the stir-fry over cooked brown rice instead of jasmine rice.

Notes

Refrigerate leftovers in airtight containers for up to 3 days, preferably with the rice stored separately. Reheat the stir-fry gently in a skillet with a small splash of water. Freeze the stir-fry without rice or green onions for up to 2 months; thaw overnight before reheating.

Nutrition

Calories: 545 kcal | Protein: 36 g | Fat: 15 g | Carbohydrates: 61 g