Author

Julia

Browsing

Crispy Ground Turkey Tacos

These folded corn tortilla tacos bake until golden and crisp, with seasoned ground turkey, whole black beans, and melted cheese at the open edges. Simmering the filling until thick keeps the turkey moist without soaking the tortillas. A cool cilantro-lime avocado crema goes on after baking, so the shells stay crisp until serving.

Makes 8 tacos, or 4 servings of 2 tacos each. Allow about 20 minutes to prep and 25 minutes to cook.

Ingredients for Crispy Ground Turkey Tacos
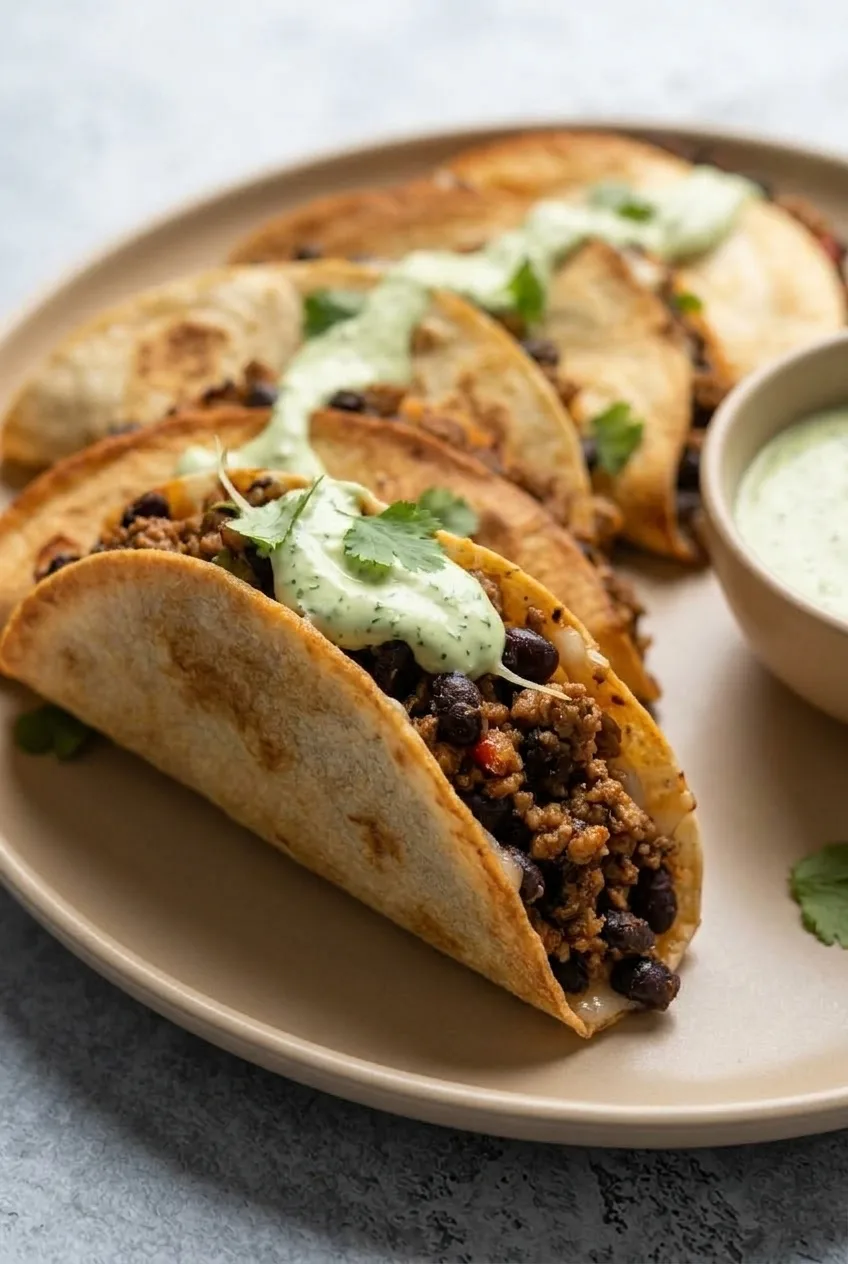
Close view of a crisp folded taco showing seasoned ground turkey, black beans, melted cheese, and crema

Turkey and black bean tacos

  • 2 tablespoons olive oil or avocado oil, divided
  • 1 small yellow onion, finely diced (about 150g)
  • 1 pound ground turkey, preferably 93% lean (about 450g)
  • 2 tablespoons taco seasoning (about 18g)
  • 1 tablespoon tomato paste (about 15g)
  • 1 can (4 ounces) diced green chiles, undrained
  • 1/3 cup chicken broth or water
  • 1 can (15 ounces) black beans, rinsed and well drained
  • Kosher salt, to taste
  • 8 small corn tortillas (about 200g)
  • 1 1/2 cups shredded Monterey Jack or Mexican-blend cheese (about 170g)

Cilantro-lime avocado crema

  • 1 small ripe avocado
  • 1/2 cup sour cream or full-fat plain Greek yogurt (about 120g)
  • 1/2 cup fresh cilantro leaves and tender stems, plus a few leaves for garnish
  • Juice of 1 lime
  • 1 to 2 tablespoons water, as needed
  • Kosher salt, to taste

How to Make Crispy Ground Turkey Tacos
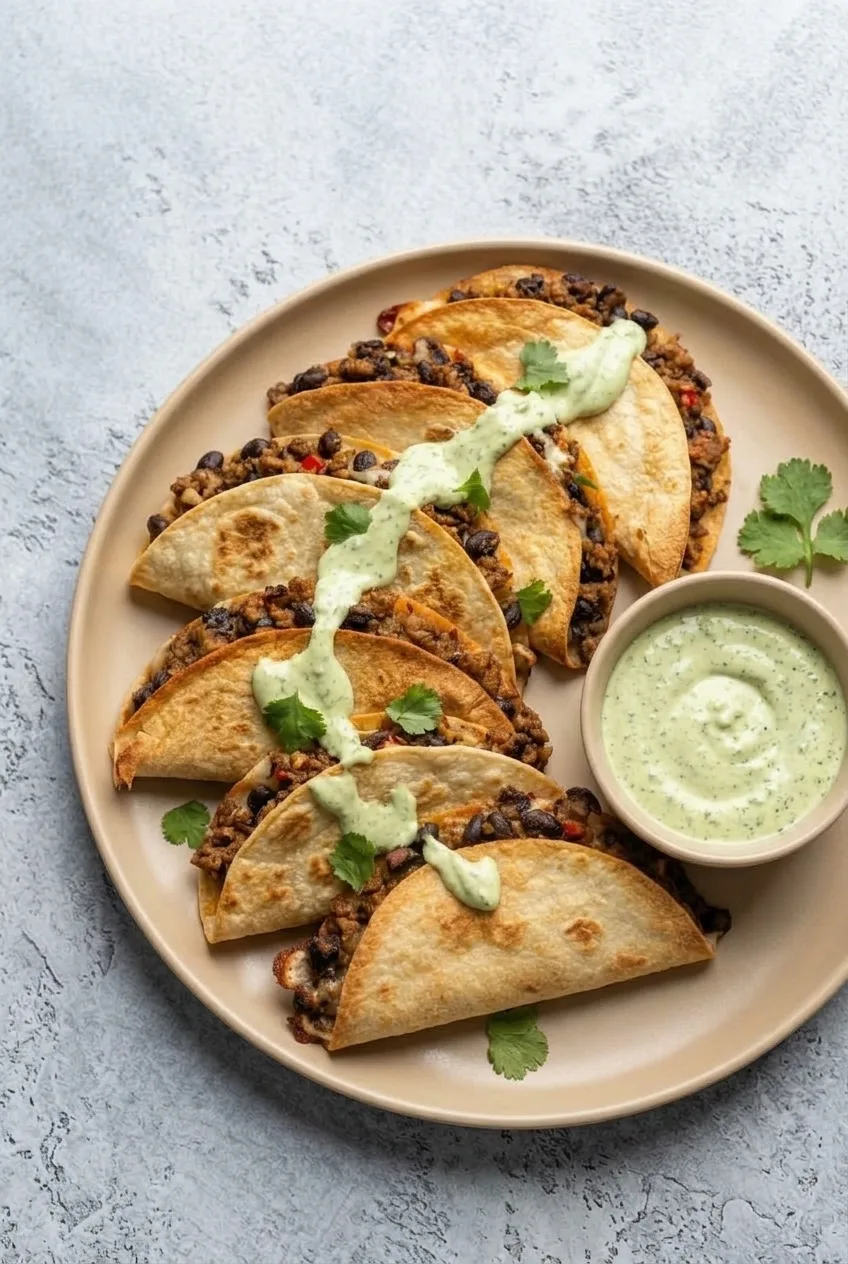
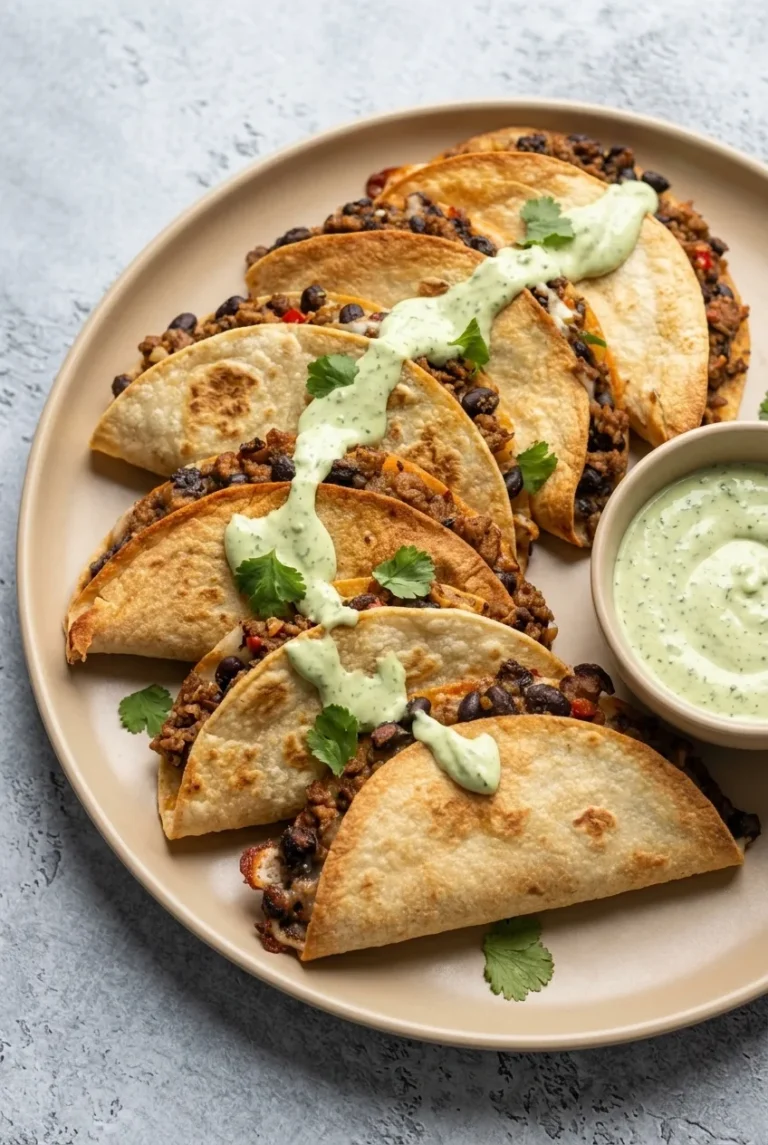
Overhead serving of golden ground turkey and black bean tacos with avocado crema and cilantro
  1. Heat the oven: Set a rack in the center and preheat to 425°F (220°C). Lightly oil a large bare rimmed baking sheet, using a little of the oil reserved for the tortillas.
  2. Cook the turkey: Heat 1 tablespoon oil in a 12-inch skillet over medium-high heat. Cook the onion until softened, then add the turkey. Break it into small crumbles and cook until no pink remains, about 8 to 10 minutes total for the onion and turkey. Ground turkey should reach 165°F (75°C). Stir in the taco seasoning and tomato paste until the paste coats the meat and darkens slightly.
  3. Thicken the filling: Stir in the green chiles, broth, and well-drained black beans. Reduce the heat to medium-low and simmer for 4 to 6 minutes, stirring occasionally. The filling should mound on a spoon, with no liquid pooling in the skillet. Taste and add salt if needed.
  4. Make the crema: Blend the avocado, sour cream or yogurt, cilantro, lime juice, and a pinch of salt. Add 1 to 2 tablespoons water, just enough for the crema to fall from a spoon in thick ribbons. Without a blender, thoroughly mash the avocado and stir in finely chopped cilantro and the remaining ingredients.
  5. Warm, fill, and fold: Wrap the tortillas in damp paper towels and microwave until warm and flexible, about 2 to 3 minutes. Keep them covered, taking out one at a time so they do not dry out and crack. Sprinkle a little cheese on one half of each tortilla, add up to 1/3 cup turkey-bean filling, and top with a little more cheese. Fold into a half-moon and press gently closed without hiding all the filling at the open edge.
  6. Bake until crisp: Use the remaining oil to lightly coat both outside surfaces of the tortillas. Place the tacos flat in a single layer on the baking sheet, leaving at least 1 inch between them. Bake uncovered for 8 to 10 minutes, carefully flip, then bake for 8 to 10 minutes more. Start checking at 16 minutes total, especially with thin tortillas or a dark pan. The shells should be golden with browned patches and firm, crisp edges, and the cheese should be melted at the seams. Bake in two batches if needed.
  7. Finish and serve: Rest the tacos for 2 to 3 minutes so the cheese settles. Overlap them loosely on a platter with the filling visible. Spoon the crema over the tacos, scatter with cilantro leaves, and serve the remaining crema alongside.

How to Keep the Tacos Crisp

Warm tortillas fold without splitting. A thick filling, lightly oiled tortilla exteriors, and space on the pan help the shells brown rather than steam. Flipping halfway gives both sides direct contact with the pan.

Go by color and texture rather than the timer alone: tortilla thickness and pan color affect browning. Add the crema only after baking. Flour tortillas can be used, but they make a thicker, softer taco rather than the same thin corn-shell crunch.

Serving, Make-Ahead, and Reheating

Serve the tacos promptly for the most crunch. Offer lime wedges or pico de gallo at the table instead of adding wet toppings before baking. For another ground turkey dinner, try Glazed Turkey Meatloaf with Ketchup Glaze.

To make ahead, refrigerate the cooked turkey-black bean filling separately for up to 4 days. Rewarm it just enough to spoon into the tortillas, then assemble and bake. Refrigerate cooled leftover tacos in an airtight container for 3 to 4 days. Keep the crema separate, with plastic wrap pressed against its surface, and use it within 1 to 2 days.

Reheat tacos uncovered on a baking sheet at 400°F (205°C) for 8 to 10 minutes, or in an air fryer at 400°F for about 3 to 4 minutes, until hot and crisp. Add crema afterward. Reheated shells will be softer than freshly baked ones; microwaving softens them further.

Nutrition

Approximate nutrition per serving (2 tacos with crema): 730 calories, 40g protein, 41g fat, and 53g carbohydrates. Approximate values per 100g of prepared tacos: 195 calories, 11g protein, 11g fat, and 14g carbohydrates. Values vary with tortilla size, cheese, turkey, and crema ingredients.

Crispy Ground Turkey Tacos

Baked corn tortilla tacos filled with seasoned ground turkey, black beans, melted cheese, and cilantro-lime avocado crema.
Course: Main Course
Cuisine: Mexican
Prep: 20 min
Cook: 25 min
Total: 48 min
Servings: 4 Calories: 730 kcal

Equipment

  • Large rimmed baking sheet
  • 12-inch skillet
  • Blender or food processor
  • Microwave

Ingredients

Turkey and Black Bean Tacos

  • 2 tablespoons olive oil or avocado oil, divided
  • 1 small yellow onion, finely diced (about 150 g)
  • 1 pound ground turkey, preferably 93% lean (about 450 g)
  • 2 tablespoons taco seasoning (about 18 g)
  • 1 tablespoon tomato paste (about 15 g)
  • 1 can (4 ounces) diced green chiles, undrained
  • 1/3 cup chicken broth or water
  • 1 can (15 ounces) black beans, rinsed and well drained
  • Kosher salt, to taste
  • 8 small corn tortillas (about 200 g)
  • 1 1/2 cups shredded Monterey Jack or Mexican-blend cheese (about 170 g)

Cilantro-Lime Avocado Crema

  • 1 small ripe avocado
  • 1/2 cup sour cream or full-fat plain Greek yogurt (about 120 g)
  • 1/2 cup fresh cilantro leaves and tender stems, plus more for garnish
  • Juice of 1 lime
  • 1 to 2 tablespoons water, as needed
  • Kosher salt, to taste

Instructions

  1. Set a rack in the center of the oven and preheat to 425°F (220°C). Lightly oil a large rimmed baking sheet, reserving some oil for the tortillas.
  2. Heat 1 tablespoon oil in a 12-inch skillet over medium-high heat. Cook the onion until softened.
  3. Add the ground turkey and cook, breaking it into small crumbles, until no pink remains and it reaches 165°F (75°C), about 8 to 10 minutes total with the onion.
  4. Stir in the taco seasoning and tomato paste. Cook until the tomato paste coats the meat and darkens slightly.
  5. Add the green chiles, broth, and drained black beans. Reduce the heat to medium-low and simmer for 4 to 6 minutes, until the filling is thick and no liquid pools in the skillet. Season with salt to taste.
  6. Blend the avocado, sour cream or yogurt, cilantro, lime juice, and a pinch of salt until smooth. Add 1 to 2 tablespoons water as needed for a thick, spoonable consistency.
  7. Wrap the tortillas in damp paper towels and microwave for 2 to 3 minutes, until warm and flexible. Keep them covered while assembling.
  8. Sprinkle cheese over one half of each tortilla. Add up to 1/3 cup turkey-bean filling, then top with more cheese. Fold each tortilla into a half-moon, leaving some filling visible at the open edge.
  9. Lightly coat both outside surfaces of the tacos with the remaining oil. Arrange in a single layer on the baking sheet with at least 1 inch between each taco.
  10. Bake uncovered for 8 to 10 minutes. Carefully flip the tacos and bake for 8 to 10 minutes more, until golden with browned patches, crisp edges, and melted cheese.
  11. Rest the tacos for 2 to 3 minutes. Spoon crema over the tacos, garnish with cilantro, and serve the remaining crema alongside.

Tips

  • Simmer the filling until thick so excess moisture does not soften the tortillas.
  • Warm corn tortillas before folding to prevent cracking.
  • Keep tacos spaced apart on the baking sheet so they brown instead of steam.
  • Start checking for doneness at 16 minutes, especially when using thin tortillas or a dark baking pan.
  • Add the crema only after baking to keep the taco shells crisp.

Variations

  • Greek Yogurt Crema: Use full-fat plain Greek yogurt instead of sour cream for the avocado crema.
  • Flour Tortilla Tacos: Use flour tortillas for a thicker, softer taco rather than a thin, crisp corn tortilla shell.
Notes

Refrigerate cooked filling separately for up to 4 days. Store leftover tacos for 3 to 4 days and crema for 1 to 2 days. Reheat tacos uncovered at 400°F (205°C) for 8 to 10 minutes, or air fry at 400°F for 3 to 4 minutes; add crema after reheating.

Nutrition

Calories: 730 kcal | Protein: 40 g | Fat: 41 g | Carbohydrates: 53 g

Turkey Meatloaf

This oven-baked turkey meatloaf is glazed with ketchup and cut into thick, tender slices. Sautéed onion and bell pepper add flavor without leaving the center watery, while egg and measured breadcrumbs help the loaf hold together. Shaping it on a sheet pan exposes the sides for light browning; a second layer of glaze gives the top its glossy finish. Serve with mashed potatoes and green beans for a classic dinner plate.

Servings: 6 | Prep: 20 minutes | Bake: About 50 to 60 minutes | Rest: 10 minutes

Ingredients for Turkey Meatloaf

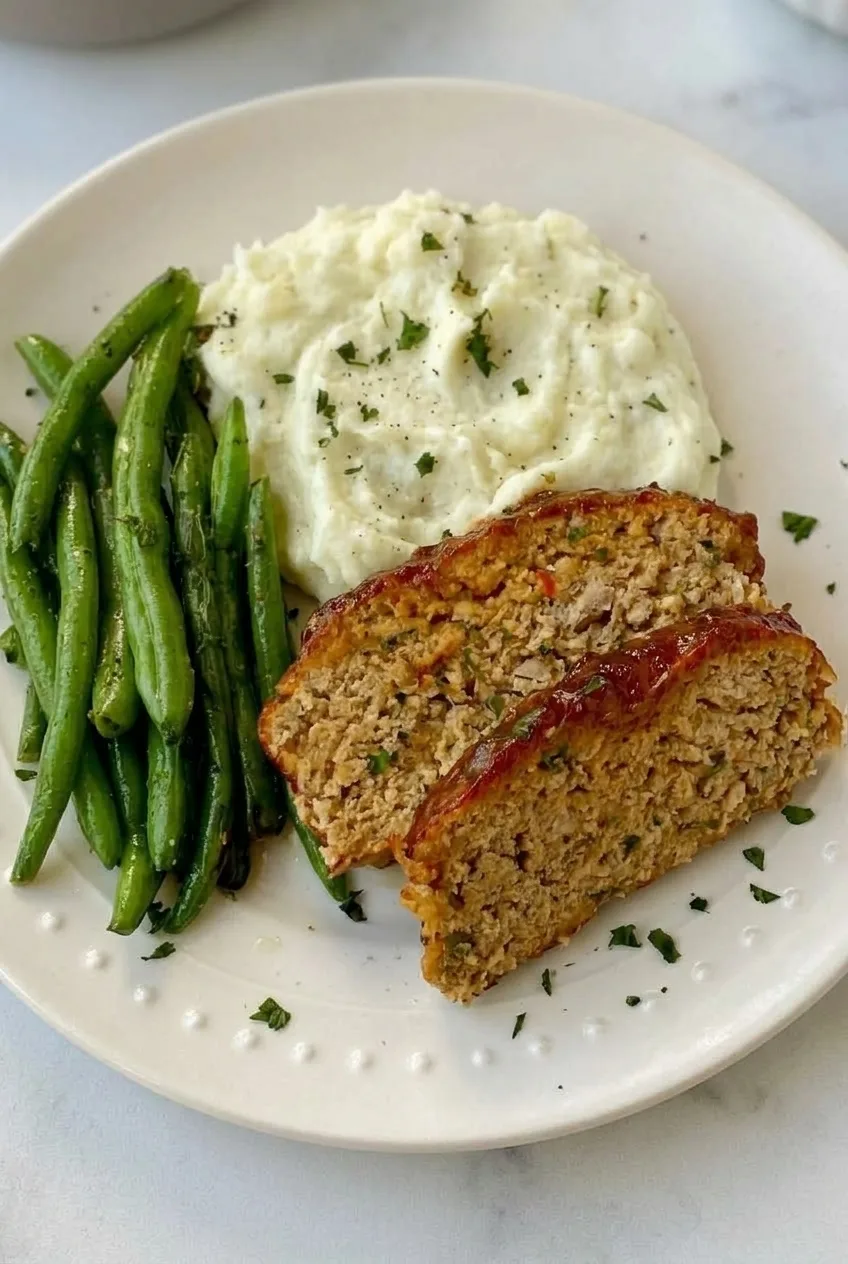
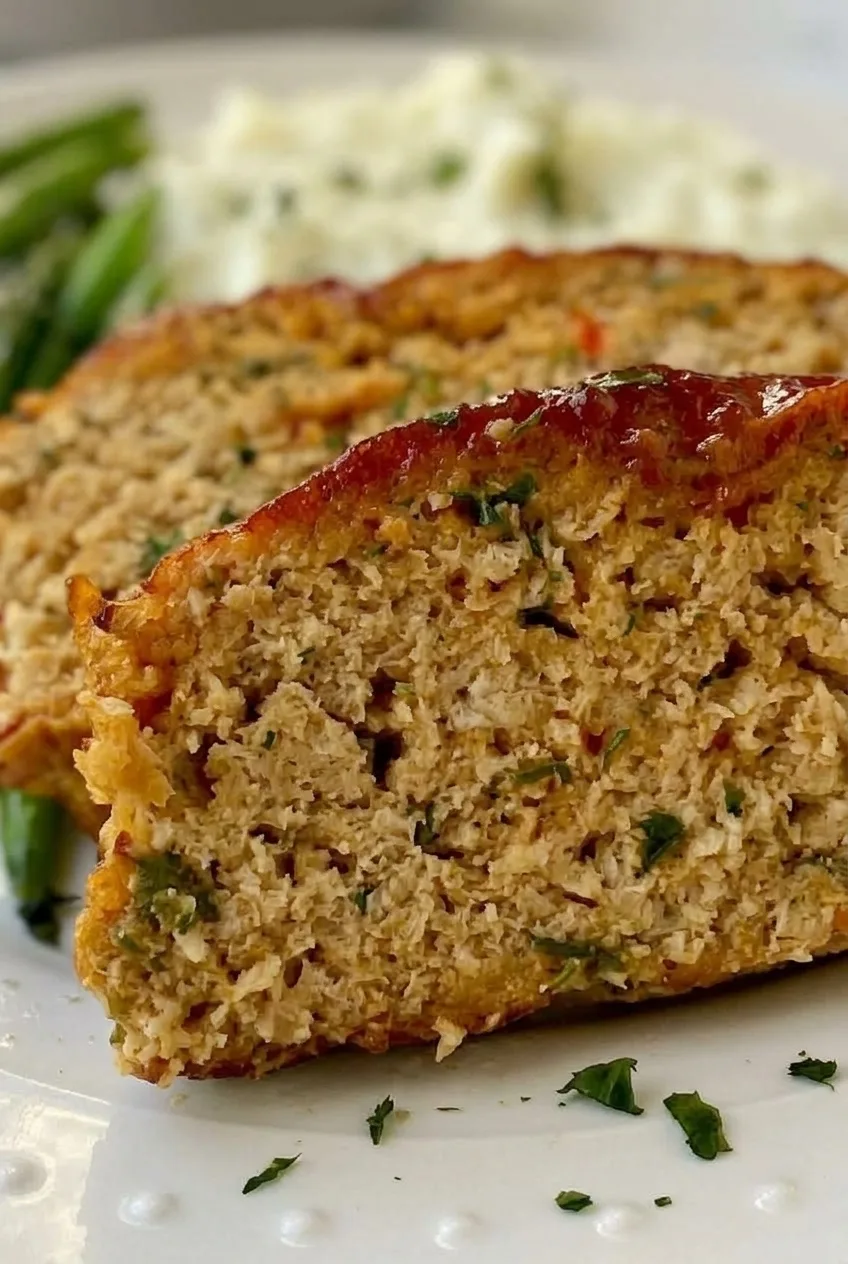
Close view of a thick turkey meatloaf slice showing its moist tan interior, herb flecks, browned edge, and ketchup glaze.
  • 2 pounds 93% lean ground turkey (about 900g)
  • 1 tablespoon olive oil
  • 1 cup finely diced yellow onion (about 150g)
  • 1/2 cup finely diced green bell pepper (about 75g)
  • 2 garlic cloves, minced
  • 3/4 cup plain dry breadcrumbs (about 75g)
  • 1 large egg
  • 3/4 cup ketchup, divided (about 180g)
  • 1 tablespoon Worcestershire sauce, divided
  • 1 teaspoon Dijon mustard
  • 1 teaspoon Italian seasoning
  • 1 1/2 teaspoons kosher salt
  • 1/2 teaspoon black pepper
  • 2 tablespoons finely chopped fresh parsley, plus more for serving if desired

Panko can replace the dry breadcrumbs in an equal volume for a slightly lighter texture. Do not add milk to this formula; the egg, ketchup, and cooked vegetables provide moisture for the measured breadcrumbs.

How to Make Turkey Meatloaf

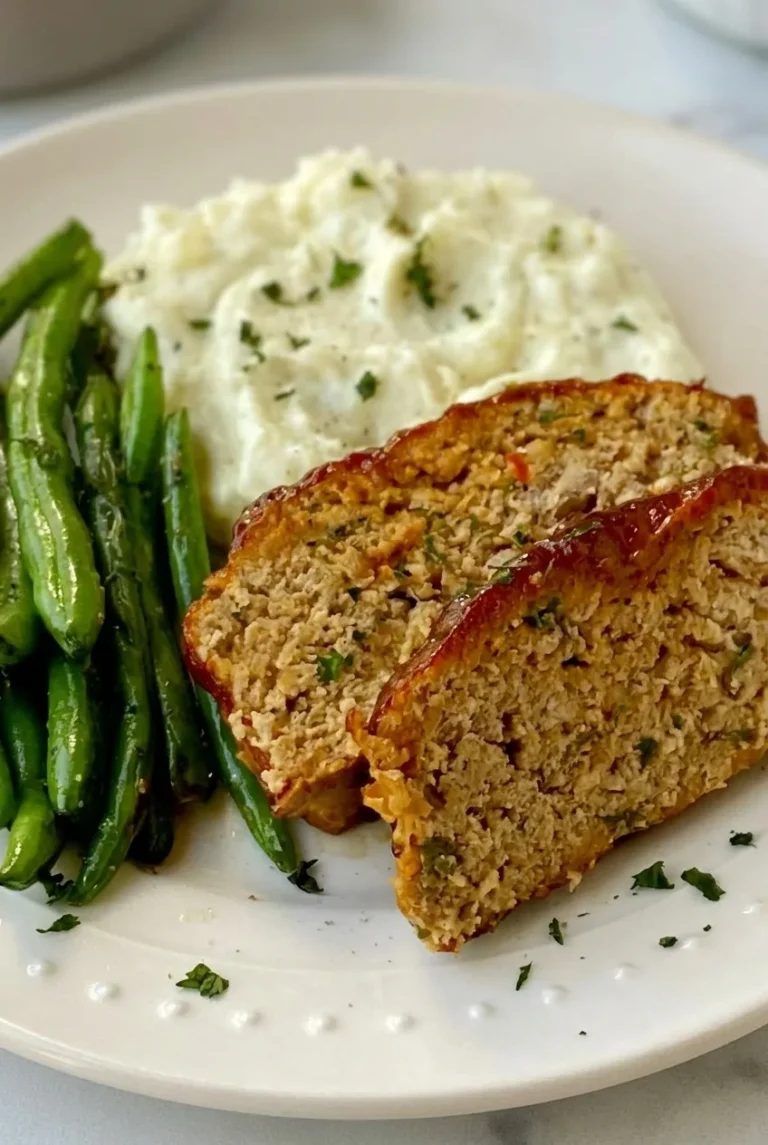
Overhead view of glazed turkey meatloaf slices with mashed potatoes and green beans on a neutral ceramic plate.
  1. Prepare the oven and pan: Preheat the oven to 350°F (175°C). Line a rimmed sheet pan with parchment paper.
  2. Cook the vegetables: Heat the olive oil in a medium skillet over medium heat. Cook the onion and bell pepper for 5 to 7 minutes, until softened and no liquid is pooling in the pan. Add the garlic for the final 30 seconds, until fragrant. Transfer to a plate and cool for about 5 minutes before mixing with the egg and turkey.
  3. Make the glaze: Stir together 1/2 cup ketchup, the Dijon mustard, and 1 teaspoon Worcestershire sauce in a small bowl. Divide the glaze in half and reserve one portion for later.
  4. Mix the meatloaf: In a large bowl, combine the breadcrumbs, egg, remaining 1/4 cup ketchup, remaining 2 teaspoons Worcestershire sauce, Italian seasoning, salt, pepper, parsley, and cooled vegetables. Add the turkey and fold gently just until evenly combined, with no dry breadcrumb patches. Stop mixing once the turkey is distributed; working it further can make the loaf tough.
  5. Shape and glaze: Gently shape the mixture on the prepared pan into a domed loaf about 8 by 4 inches. Leave several inches of open pan around it, and do not pack the mixture tightly. Brush the top and upper sides with one portion of the glaze.
  6. Bake: Bake uncovered for 35 to 40 minutes. Brush with the reserved glaze, then bake for about 15 to 20 minutes more. Begin checking the thickest center with an instant-read thermometer at 45 minutes total. The meatloaf is done at 165°F (75°C); total baking usually takes 50 to 60 minutes. The glaze should be glossy with slightly darkened edges, but color alone does not establish doneness.
  7. Rest and slice: Rest the loaf for 10 minutes so it firms up and holds together when cut. Slice crosswise into 3/4- to 1-inch-thick portions and add more parsley if desired.

How to Keep Turkey Meatloaf Moist and Sliceable

Use 93% lean turkey when available, and cook the diced vegetables until they are no longer watery. Extra liquid can leave the center soft; baking past 165°F can dry out the turkey. Mixing the binder and seasonings before adding the meat also limits handling, while gentle shaping keeps the loaf from becoming densely packed.

A free-form loaf has more exposed surface to brown than one baked in a pan. For a more contained shape, use a 9-by-5-inch loaf pan, but expect less browned surface and possibly a longer bake. Check the center temperature rather than relying on the sheet-pan timing.

Serving and Leftovers

Serve thick glazed slices with mashed potatoes and green beans, or pair them with a simple green salad. One-Pot Tuscan White Beans make a heartier alternative side.

Cool leftovers promptly and refrigerate in an airtight container for 4 to 5 days. To reheat, cover slices with a small splash of water or broth and warm in a 325°F (165°C) oven until hot throughout. For a faster option, microwave covered slices in short intervals. Cold slices also work in a toasted meatloaf sandwich.

Nutrition

Approximate per serving (1/6 of the meatloaf): 360 calories, 33g protein, 16g fat, and 21g carbohydrates. Approximate per 100g cooked meatloaf: 180 calories, 16g protein, 8g fat, and 11g carbohydrates. Values vary with the ground turkey, ketchup, breadcrumbs, and finished loaf weight; side dishes are not included.

Turkey Meatloaf

Oven-baked turkey meatloaf with sautéed onion and bell pepper, a glossy ketchup glaze, and tender slices that hold together well.
Course: Main Course
Cuisine: American
Prep: 20 min
Cook: 60 min
Total: 90 min
Servings: 6 Calories: 360 kcal

Equipment

  • rimmed sheet pan
  • parchment paper
  • medium skillet
  • large mixing bowl
  • small bowl
  • instant-read thermometer
  • pastry brush

Ingredients

For the Meatloaf

  • 2 pounds 93% lean ground turkey (about 900g)
  • 1 tablespoon olive oil
  • 1 cup finely diced yellow onion (about 150g)
  • 1/2 cup finely diced green bell pepper (about 75g)
  • 2 garlic cloves, minced
  • 3/4 cup plain dry breadcrumbs (about 75g)
  • 1 large egg
  • 1/4 cup ketchup
  • 2 teaspoons Worcestershire sauce
  • 1 teaspoon Italian seasoning
  • 1 1/2 teaspoons kosher salt
  • 1/2 teaspoon black pepper
  • 2 tablespoons finely chopped fresh parsley

For the Glaze

  • 1/2 cup ketchup
  • 1 teaspoon Worcestershire sauce
  • 1 teaspoon Dijon mustard

For Serving

  • Additional finely chopped fresh parsley, optional

Instructions

  1. Preheat the oven to 350°F (175°C). Line a rimmed sheet pan with parchment paper.
  2. Heat the olive oil in a medium skillet over medium heat. Cook the onion and bell pepper for 5 to 7 minutes, until softened and no liquid is pooling in the pan.
  3. Add the garlic and cook for 30 seconds, until fragrant. Transfer the vegetables to a plate and cool for about 5 minutes.
  4. Stir together 1/2 cup ketchup, Dijon mustard, and 1 teaspoon Worcestershire sauce in a small bowl. Divide the glaze in half and reserve one portion for later.
  5. Combine the breadcrumbs, egg, remaining 1/4 cup ketchup, remaining 2 teaspoons Worcestershire sauce, Italian seasoning, salt, pepper, parsley, and cooled vegetables in a large bowl.
  6. Add the ground turkey and gently fold until evenly combined and no dry breadcrumb patches remain. Do not overmix.
  7. Shape the mixture on the prepared pan into a domed loaf about 8 by 4 inches. Do not pack it tightly.
  8. Brush the top and upper sides of the loaf with one portion of the glaze.
  9. Bake uncovered for 35 to 40 minutes. Brush with the reserved glaze and bake for 15 to 20 minutes more, until the center reaches 165°F (75°C).
  10. Rest the meatloaf for 10 minutes before slicing into 3/4- to 1-inch-thick portions. Garnish with additional parsley if desired.

Tips

  • Use 93% lean ground turkey for a moist loaf that is not overly greasy.
  • Cook the onion and bell pepper until excess moisture has evaporated to prevent a soft center.
  • Mix the breadcrumbs, egg, and seasonings before adding the turkey to minimize handling.
  • Fold the turkey in gently and stop mixing as soon as it is evenly combined.
  • Use an instant-read thermometer and remove the meatloaf when the center reaches 165°F (75°C).
  • Rest the loaf for 10 minutes before slicing so it firms up and holds together.

Variations

  • Panko Turkey Meatloaf: Replace the dry breadcrumbs with an equal volume of panko for a slightly lighter texture.
  • Loaf Pan Turkey Meatloaf: Bake the mixture in a 9-by-5-inch loaf pan for a more contained shape; expect less browned surface and possibly a longer baking time.

Notes

Refrigerate cooled leftovers in an airtight container for 4 to 5 days. Reheat covered slices with a small splash of water or broth in a 325°F (165°C) oven until hot throughout, or microwave in short covered intervals.

Nutrition

Calories: 360 kcal | Protein: 33 g | Fat: 16 g | Carbohydrates: 21 g

Turkey Crescent Bites

Turkey crescent bites are loose-folded pastries filled with cooked turkey, melted cheese, and mild green chiles. A small open seam shows the filling, while everything bagel seasoning adds a savory crunch to the flaky top. Keep the filling to about 2 tablespoons per triangle so the dough can fold around it without stretching. Bake the bites until lightly golden, then give the hot filling a few minutes to settle before serving.

Ingredients for Turkey Crescent Bites

  • 1 tube (8 ounces) refrigerated crescent roll dough (about 225g)
  • 1 cup finely chopped or shredded cooked turkey (about 140g)
  • 2 ounces cream cheese, softened (about 55g)
  • 1/2 cup shredded Monterey Jack or cheddar cheese (about 55g)
  • 1/4 cup canned diced mild green chiles, well drained (about 30g)
  • 1/4 teaspoon garlic powder
  • 1/8 teaspoon kosher salt, plus more only if needed
  • 1/8 teaspoon black pepper
  • 1 large egg, beaten with 1 teaspoon water
  • 1 1/2 tablespoons everything bagel seasoning
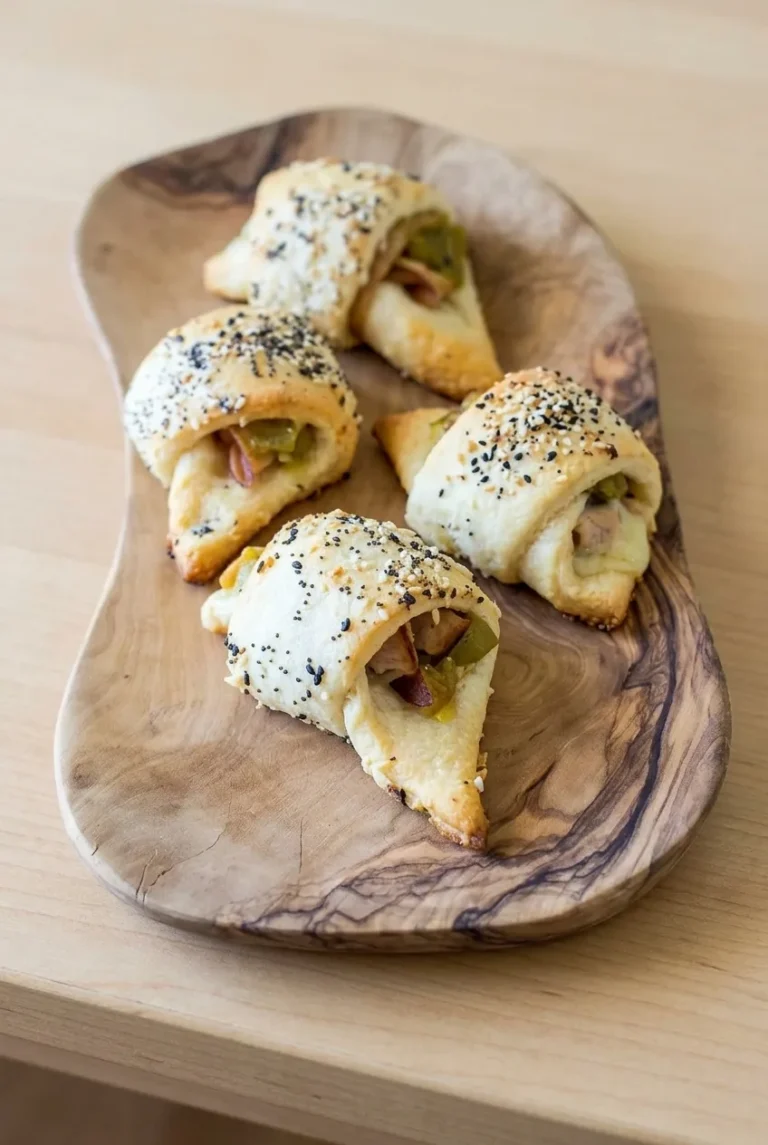
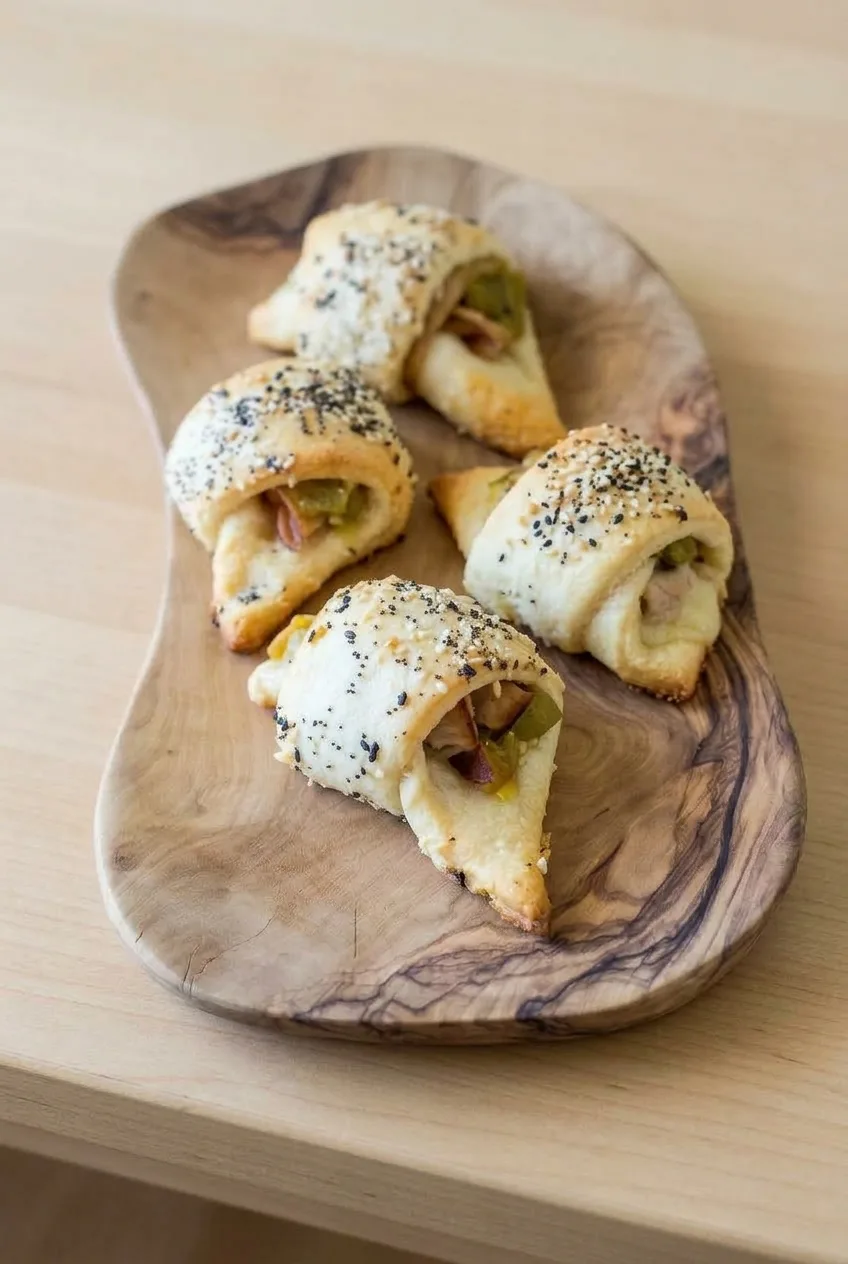
Overhead serving of turkey crescent bites arranged on a rustic wooden board

Fully cooked leftover turkey works well. Drain the chiles thoroughly: excess liquid can soak the dough and make the filling leak. Use salt sparingly, especially if the turkey and everything seasoning are already well seasoned.

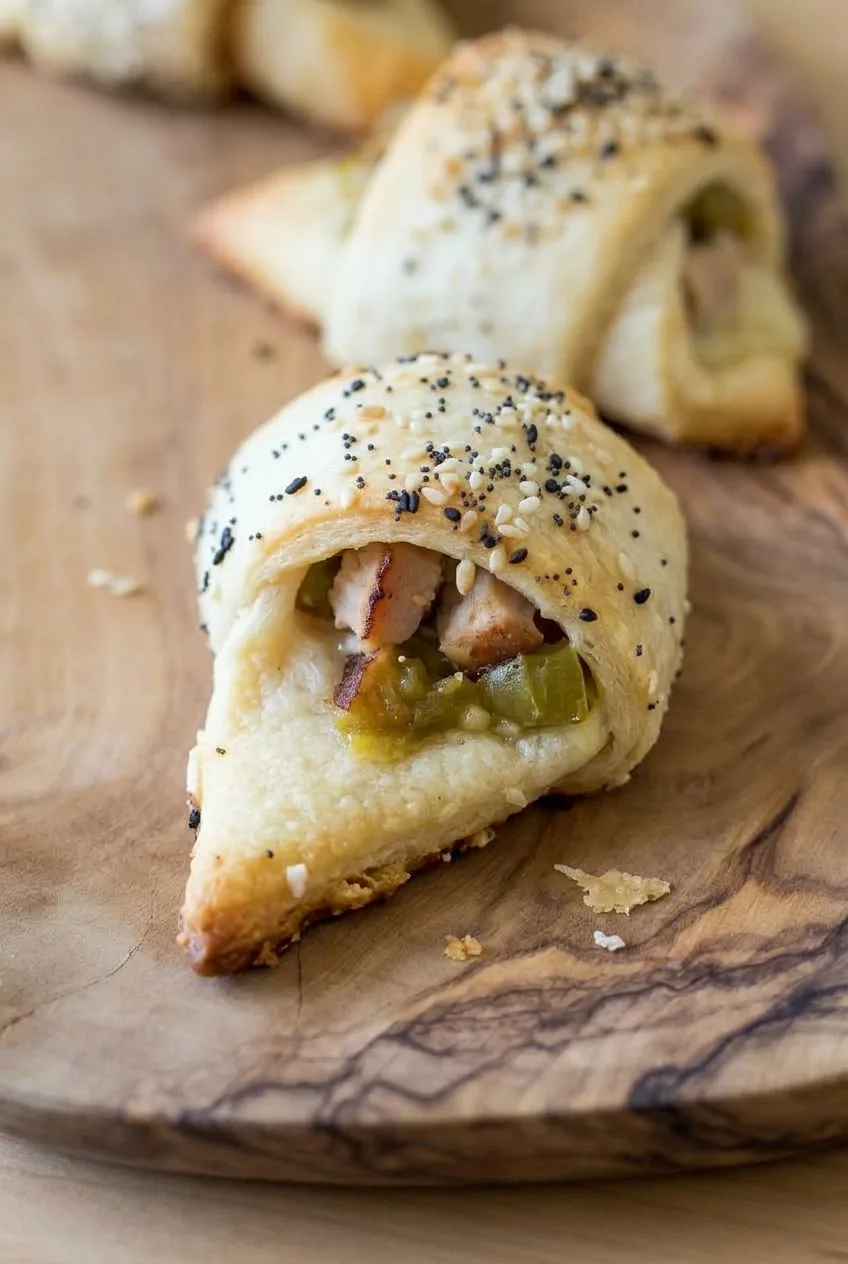
Close view of an open turkey crescent bite showing green chiles, melted cheese, and flaky seasoned dough

How to Bake Turkey Crescent Bites

  1. Heat the oven: Set a rack in the center and preheat to 350°F (175°C). Line a rimmed baking sheet with parchment paper.
  2. Mix the filling: Combine the turkey, cream cheese, shredded cheese, drained chiles, garlic powder, salt, and pepper in a medium bowl. Mix until the turkey is lightly coated and the filling holds together without looking wet.
  3. Fill and fold: Separate the dough into 8 triangles. Place about 2 tablespoons filling near the wide end of each, leaving a clean border along the sides. Fold the side corners inward, then bring the tapered point over the center. Keep the fold loose enough to leave a small upper or side seam showing some turkey and chile, with no filling protruding from the narrow dough points.
  4. Secure and season: Brush a little egg wash under the final dough edge and press it gently into place. Arrange the bites 1 1/2 to 2 inches apart on the sheet, with a secure dough edge against the pan where possible and an open filling seam facing up. Brush the top folds lightly with egg wash and sprinkle the everything bagel seasoning over them.
  5. Bake: Bake uncovered for 11 to 14 minutes, starting to check at 10 minutes. Rotate the pan near the end only if one side browns noticeably faster. The dough should be light golden at the points and seams, the bottoms set, and the cheese melted with the filling hot throughout. If checking chilled leftover turkey with a thermometer, aim for 165°F (75°C) in the center.
  6. Rest: Let the bites stand on the baking sheet for 5 minutes so the filling settles. Transfer to a platter with the open seams visible and serve warm.

How to Keep the Bites from Leaking

The open seam is intentional, but filling that reaches the pointed ends can spill onto the pan and scorch. If a bite opens too widely while shaping, tuck the filling back inside and gently press the final dough edge down with a little egg wash. Avoid adding salsa, gravy, or other loose sauces to the filling.

Thicker folds may need more time than thinner ones. Look for set bottoms and hot filling rather than waiting for the pastry to turn deep brown; the narrow points can darken first.

Serving and Substitutions

Serve the bites on their own or with ranch dip. For a light lunch, pair them with One-Pot Lemon Chicken Soup. Cooked chicken can replace the turkey in equal measure; chopped Juicy Oven Baked Chicken Breast is one option. Use pepper Jack instead of Monterey Jack for more heat.

Make-Ahead, Storage, and Reheating

Make ahead: Assemble the bites a few hours in advance, cover them so the dough does not dry out, and refrigerate. Bake within 24 hours for the best dough texture, using golden pastry and hot filling to judge doneness.

Store: Cool baked bites completely, then refrigerate in an airtight container for up to 3 days. Place parchment between layers if stacking.

Reheat: Heat in a 350°F oven, loosely covered with foil, for 10 to 15 minutes or until hot. Uncover for the final few minutes if the pastry needs crisping, watching the thin points closely. In a toaster oven, begin checking after 5 to 10 minutes. For reheating only, an air fryer at 300°F (150°C) takes about 3 to 5 minutes; check early so the points do not get too dark.

Freeze: Individually wrap fully baked, cooled bites and freeze in a freezer bag for up to 2 months. Thaw overnight in the refrigerator before reheating in the oven.

Nutrition

Approximate nutrition per serving of 2 bites, based on 4 servings: 385 calories, 21g protein, 24g fat, and 25g carbohydrates. Approximate values per 100g of finished bites: 275 calories, 15g protein, 17g fat, and 18g carbohydrates. Values vary with the dough, turkey, cheese, amount of egg wash used, and moisture lost during baking.

Turkey Crescent Bites

Flaky crescent dough bites filled with cooked turkey, creamy cheese, mild green chiles, and everything bagel seasoning.
Course: Appetizer
Cuisine: American
Prep: 20 min
Cook: 14 min
Total: 39 min
Servings: 4 Calories: 385 kcal

Equipment

  • Rimmed baking sheet
  • Parchment paper
  • Medium bowl
  • Pastry brush

Ingredients

For the Turkey Crescent Bites

  • 1 tube (8 ounces) refrigerated crescent roll dough (about 225 g)
  • 1 cup finely chopped or shredded cooked turkey (about 140 g)
  • 2 ounces cream cheese, softened (about 55 g)
  • 1/2 cup shredded Monterey Jack or cheddar cheese (about 55 g)
  • 1/4 cup canned diced mild green chiles, well drained (about 30 g)
  • 1/4 teaspoon garlic powder
  • 1/8 teaspoon kosher salt, plus more only if needed
  • 1/8 teaspoon black pepper
  • 1 large egg, beaten with 1 teaspoon water
  • 1 1/2 tablespoons everything bagel seasoning

Instructions

  1. Preheat the oven to 350°F (175°C) and position a rack in the center. Line a rimmed baking sheet with parchment paper.
  2. Combine the turkey, cream cheese, shredded cheese, drained green chiles, garlic powder, salt, and pepper in a medium bowl. Mix until the filling is lightly coated and holds together without looking wet.
  3. Separate the crescent dough into 8 triangles.
  4. Place about 2 tablespoons of filling near the wide end of each dough triangle, leaving a clean border along the sides.
  5. Fold the side corners inward, then bring the pointed end over the center. Leave a small seam at the top or side with some filling visible.
  6. Brush a little egg wash under the final dough edge and press gently to secure it.
  7. Arrange the bites 1 1/2 to 2 inches apart on the prepared baking sheet, with the open filling seams facing up.
  8. Brush the tops lightly with egg wash and sprinkle with everything bagel seasoning.
  9. Bake uncovered for 11 to 14 minutes, checking at 10 minutes, until the dough is light golden, the bottoms are set, and the cheese is melted. If using chilled leftover turkey, the center should reach 165°F (75°C).
  10. Let the bites rest on the baking sheet for 5 minutes before serving warm.

Tips

  • Drain the green chiles thoroughly to prevent wet filling and leaking dough.
  • Keep the filling to about 2 tablespoons per dough triangle so the pastries do not stretch or split.
  • Keep filling away from the narrow dough points to prevent scorched spills.
  • Use egg wash under the final dough edge to help seal each bite.
  • Look for set bottoms and hot filling rather than deep brown pastry, since the thin points brown first.
  • Use salt sparingly if the turkey and everything bagel seasoning are already salty.

Variations

  • Chicken Crescent Bites: Replace the cooked turkey with an equal amount of cooked chopped or shredded chicken.
  • Spicy Pepper Jack Bites: Use shredded pepper Jack instead of Monterey Jack or cheddar for extra heat.

Notes

Refrigerate baked bites in an airtight container for up to 3 days. Reheat, loosely covered, at 350°F for 10 to 15 minutes; uncover for the last few minutes to crisp. Freeze fully baked and cooled bites for up to 2 months, then thaw overnight before reheating.

Nutrition

Calories: 385 kcal | Protein: 21 g | Fat: 24 g | Carbohydrates: 25 g

Pasta Bake with Pumpkin Tomato Sauce

Cavatappi, browned Italian sausage, and diced tomatoes are coated in a creamy orange sauce made with plain pumpkin puree and tomato sauce. Garlic, oregano, Parmesan, and a little red pepper keep the pumpkin savory.

The pasta is boiled just shy of al dente, then baked briefly to melt scattered pockets of mozzarella. The finished casserole should be moist and spoonable, with the curls, sausage, and tomatoes still visible—not buried under a thick cheese crust.

Ingredients for Pumpkin Tomato Pasta Bake

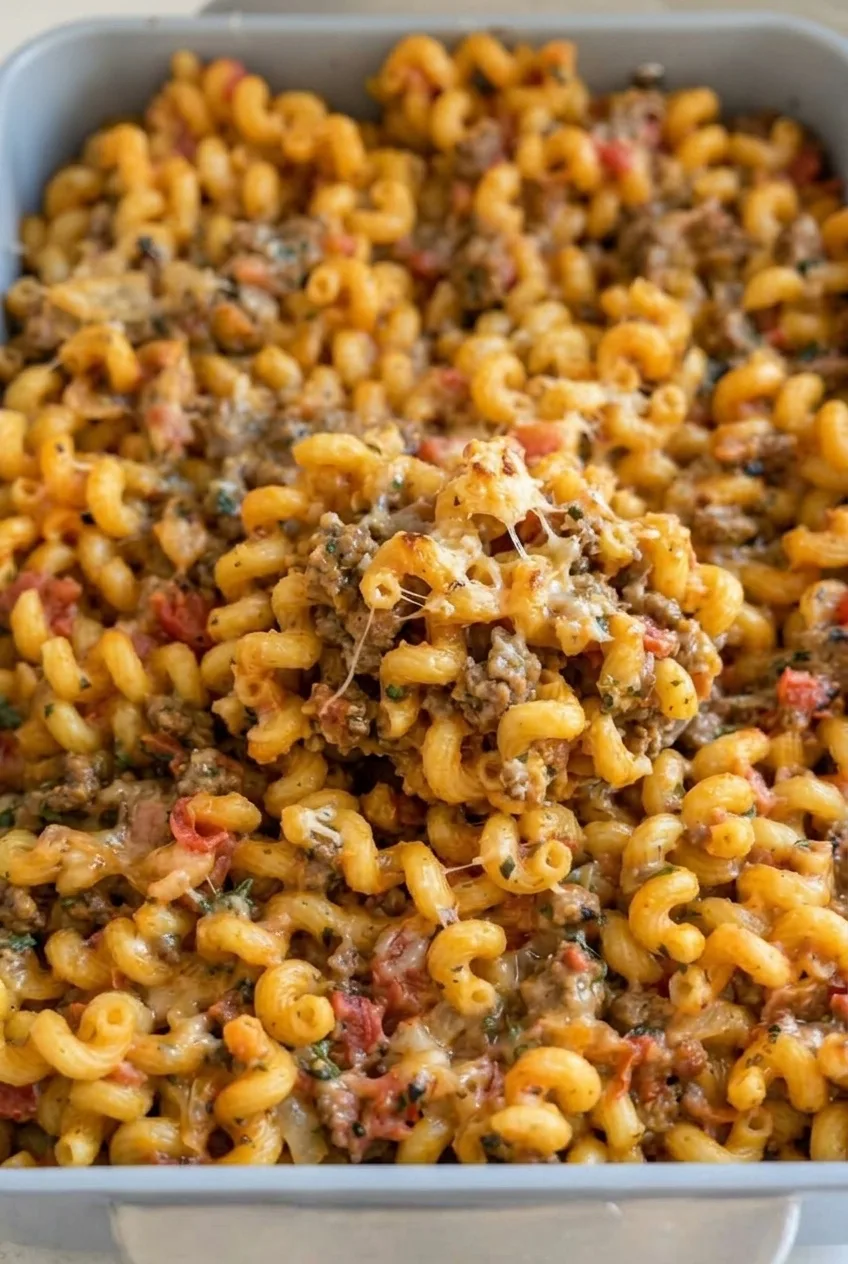
Close view of saucy cavatappi with sausage crumbles, diced tomatoes, and melted mozzarella from the pumpkin tomato pasta bake.

Makes 6 generous servings. Prep: 15 minutes. Cook: about 30 minutes, plus 5 to 10 minutes to rest.

  • 12 ounces cavatappi pasta (340g)
  • 1 pound Italian sausage, casings removed (450g)
  • 1 tablespoon olive oil, only if needed
  • 1 small yellow onion, finely diced (about 150g)
  • 3 garlic cloves, minced
  • 1 cup plain pumpkin puree (245g), not pumpkin pie filling
  • 1 can (15 ounces) tomato sauce (425g)
  • 1 can (14.5 ounces) diced tomatoes, drained
  • 3/4 cup chicken broth
  • 1/2 cup heavy cream
  • 1 teaspoon dried oregano
  • 1/4 teaspoon crushed red pepper flakes, or to taste
  • Kosher salt and black pepper, to taste
  • 3/4 cup grated Parmesan (about 75g), divided
  • 1 cup shredded low-moisture mozzarella (about 115g)
  • 2 tablespoons chopped parsley or basil, divided

Cavatappi catches the sauce in its curls, but penne or rigatoni will also work. Choose mild or hot Italian sausage according to how much heat you want.

How to Make Pumpkin Tomato Pasta Bake

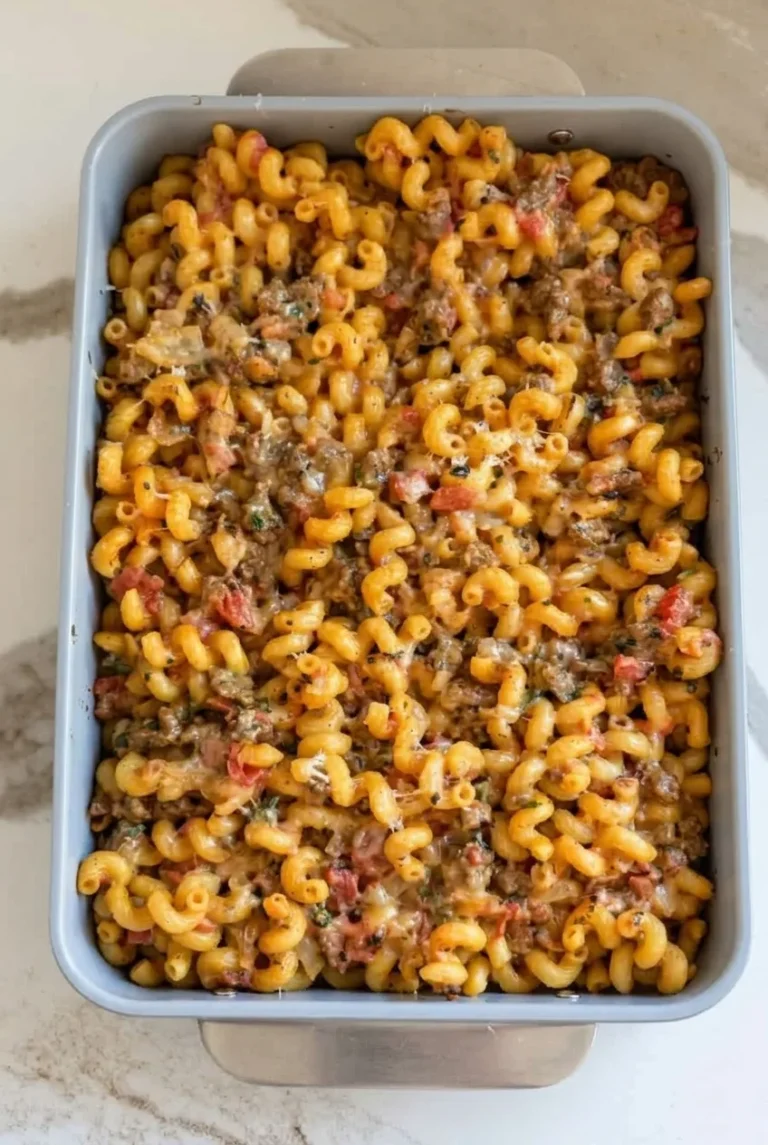
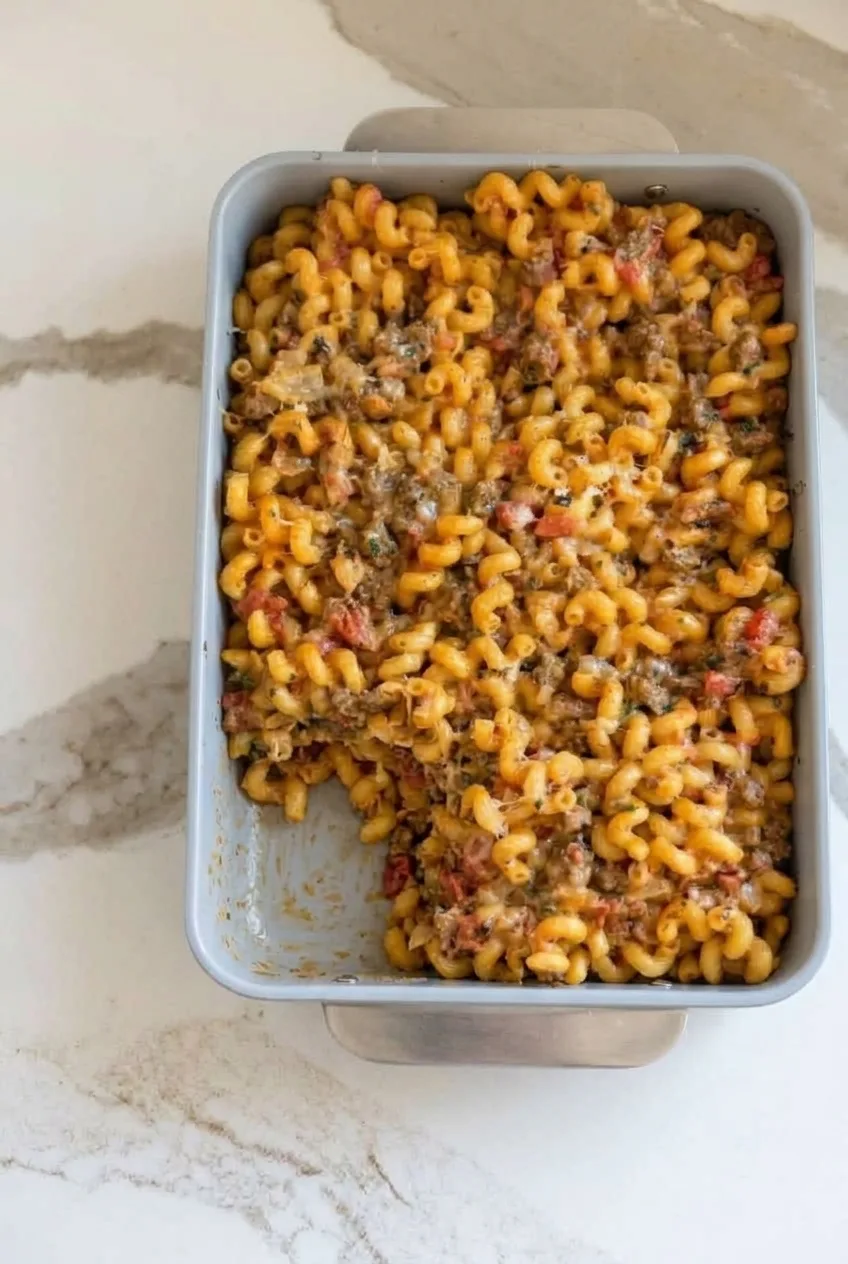
Near-overhead view of a rectangular pumpkin tomato sausage pasta bake with a spooned portion removed.
  1. Prepare the oven and dish: Preheat the oven to 400°F (205°C). Lightly grease a 9-by-13-inch baking dish. Bring a large pot of well-salted water to a boil.
  2. Boil the pasta: Cook the cavatappi 1 to 2 minutes less than the package’s al dente time, usually about 7 to 9 minutes. It should bend but still have a firm center. Reserve 1/4 cup pasta water, then drain without rinsing.
  3. Brown the sausage: Crumble the sausage into a large deep skillet or Dutch oven over medium-high heat. Cook for about 8 to 10 minutes, breaking it into uneven crumbles, until browned and fully cooked. Reduce the heat to medium. Add the olive oil only if the skillet is dry, then add the onion and cook until softened. Stir in the garlic for the final 30 seconds.
  4. Simmer the sauce: Stir in the pumpkin puree, tomato sauce, drained diced tomatoes, broth, cream, oregano, red pepper flakes, salt, and black pepper. Reduce the heat to medium-low and simmer gently for 5 to 7 minutes, stirring often. The sauce should coat a spoon but still flow easily, with visible tomato pieces. Taste and adjust the seasoning. If it looks too thick to coat the pasta generously, stir in reserved pasta water, up to 1/4 cup.
  5. Combine: Remove the skillet from the heat. Fold in the drained pasta, 1/2 cup Parmesan, and most of the herbs until the noodles are coated and the sausage and tomatoes are distributed throughout. Transfer to the baking dish and spread loosely without pressing the pasta down.
  6. Add the cheese: Scatter the mozzarella in irregular patches and sprinkle with the remaining 1/4 cup Parmesan. Leave plenty of pasta, sausage, and tomato visible.
  7. Bake and rest: Bake uncovered for 15 to 18 minutes, checking at 15 minutes. The edges should bubble, and the cheese should be melted with a few light golden spots. Rest for 5 to 10 minutes, then scatter over the remaining herbs and spoon into portions.

Why the Sauce Should Be Slightly Loose

The pasta continues absorbing liquid as it bakes and rests. Before it goes into the oven, the sauce should cling to the curls and pool lightly between them. If it looks thick in the skillet, loosen it with a little reserved pasta water; if the tomatoes have left it watery, let it simmer gently before adding the pasta.

The short oven time is a finishing bake for pasta that has already been boiled. Dry pasta needs a different amount of liquid and a much longer bake.

Pumpkin Tomato Pasta Bake Variations

Chicken or turkey sausage: Use 1 pound in place of pork Italian sausage. Add olive oil if the skillet is dry, and cook raw poultry sausage fully to 165°F (75°C) before making the sauce.

Vegetarian: Omit the sausage, sauté 8 ounces sliced mushrooms with the onion, and use vegetable broth. Season the sauce well, since the mushrooms will not contribute the seasoning found in Italian sausage.

Serving and Storage

Serve with a crisp green salad or roasted broccoli. For another pasta dinner, try Easy Pasta Carbonara (No Egg).

Cool leftovers promptly and refrigerate in an airtight container for 3 to 4 days. The pasta will soften somewhat as it sits. Reheat individual portions loosely covered in the microwave with a tablespoon of water or broth, stirring once if possible, until hot. To reheat in the oven, cover the baking dish and warm at 350°F (175°C) until hot, adding a splash of broth if the pasta looks dry.

To prep ahead, cook the pasta and make the sauce separately, then combine and bake shortly before serving. Holding the assembled casserole for too long can leave the pasta soft and the sauce less loose. Freezing is not the first choice because the cooked pasta and creamy sauce may change texture after thawing.

Nutrition

Approximate nutrition per serving, based on 6 servings: 670 calories, 32g protein, 34g fat, and 57g carbohydrates. Estimated values per 100g: 180 calories, 9g protein, 9g fat, and 15g carbohydrates. Values vary with the sausage, cheese, and final moisture of the casserole.

Pasta Bake with Pumpkin Tomato Sauce

Cavatappi, Italian sausage, and tomatoes are baked in a savory creamy pumpkin tomato sauce with Parmesan and mozzarella.
Course: Main Course
Cuisine: Italian
Prep: 15 min
Cook: 30 min
Total: 55 min
Servings: 6 Calories: 670 kcal

Equipment

  • 9-by-13-inch baking dish
  • large pot
  • colander
  • large deep skillet or Dutch oven

Ingredients

Pasta and Sauce

  • 12 ounces cavatappi pasta (340g)
  • 1 pound Italian sausage, casings removed (450g)
  • 1 tablespoon olive oil, if needed
  • 1 small yellow onion, finely diced (about 150g)
  • 3 garlic cloves, minced
  • 1 cup plain pumpkin puree (245g)
  • 1 can (15 ounces) tomato sauce (425g)
  • 1 can (14.5 ounces) diced tomatoes, drained
  • 3/4 cup chicken broth
  • 1/2 cup heavy cream
  • 1 teaspoon dried oregano
  • 1/4 teaspoon crushed red pepper flakes, or to taste
  • Kosher salt and black pepper, to taste

Cheese and Herbs

  • 3/4 cup grated Parmesan (about 75g), divided
  • 1 cup shredded low-moisture mozzarella (about 115g)
  • 2 tablespoons chopped parsley or basil, divided

Instructions

  1. Preheat the oven to 400°F (205°C). Lightly grease a 9-by-13-inch baking dish and bring a large pot of well-salted water to a boil.
  2. Cook the cavatappi 1 to 2 minutes less than the package al dente time, about 7 to 9 minutes. Reserve 1/4 cup pasta water, then drain the pasta without rinsing.
  3. Cook the sausage in a large deep skillet or Dutch oven over medium-high heat for 8 to 10 minutes, breaking it into uneven crumbles, until browned and fully cooked.
  4. Reduce the heat to medium. If the skillet is dry, add the olive oil, then add the onion and cook until softened. Stir in the garlic for the final 30 seconds.
  5. Stir in the pumpkin puree, tomato sauce, drained diced tomatoes, chicken broth, cream, oregano, red pepper flakes, salt, and black pepper.
  6. Reduce the heat to medium-low and simmer the sauce for 5 to 7 minutes, stirring often, until it coats a spoon but still flows easily. Add reserved pasta water, up to 1/4 cup, if needed to loosen the sauce.
  7. Remove the skillet from the heat. Fold in the pasta, 1/2 cup Parmesan, and most of the herbs until evenly coated.
  8. Transfer the mixture to the prepared baking dish and spread it loosely without pressing the pasta down.
  9. Scatter the mozzarella over the top in irregular patches, then sprinkle with the remaining 1/4 cup Parmesan.
  10. Bake uncovered for 15 to 18 minutes, until the edges are bubbling and the cheese is melted with a few light golden spots.
  11. Rest for 5 to 10 minutes, then sprinkle with the remaining herbs and serve.

Tips

  • Undercook the pasta slightly so it does not become too soft during baking.
  • Keep the sauce slightly loose before baking because the pasta will absorb liquid in the oven and while resting.
  • Add reserved pasta water a little at a time if the sauce becomes too thick.
  • Drain the diced tomatoes to prevent the sauce from becoming watery.
  • Leave some pasta, sausage, and tomatoes visible rather than covering the casserole with a thick layer of cheese.

Variations

  • Chicken or Turkey Sausage: Use 1 pound chicken or turkey sausage instead of pork sausage. Add olive oil if needed and cook poultry sausage to 165°F (75°C).
  • Vegetarian Mushroom Pasta Bake: Omit the sausage, sauté 8 ounces sliced mushrooms with the onion, and use vegetable broth. Season the sauce generously.

Notes

Refrigerate leftovers promptly in an airtight container for 3 to 4 days. Reheat individual portions with a tablespoon of water or broth, or warm covered at 350°F (175°C) with a splash of broth if needed. Freezing is not recommended because the pasta and creamy sauce may change texture.

Nutrition

Calories: 670 kcal | Protein: 32 g | Fat: 34 g | Carbohydrates: 57 g

Thanksgiving Margarita Recipe

Apple cider gives these margaritas their fall flavor, while cranberry juice cocktail adds a tart-sweet edge and a clear rosy color. Tequila, orange liqueur, and fresh lime keep the drink bright rather than heavy. Each cocktail is served over large ice in a rocks glass with a cinnamon-sugar rim, fanned apple slices, and whole cranberries.

Shake the drinks until cold, then strain them over fresh ice. This chills and lightly dilutes the cocktail without leaving it on the smaller ice from the shaker. The recipe makes two cocktails in about 10 minutes.

Ingredients for 2 Thanksgiving Margaritas

Close view of a pink Thanksgiving margarita with a cinnamon-sugar rim, clear ice, cranberries, and apple slices.
  • 4 ounces blanco tequila
  • 3 ounces chilled apple cider
  • 3 ounces chilled cranberry juice cocktail
  • 1 1/2 ounces orange liqueur, such as Cointreau or triple sec
  • 1 ounce fresh lime juice, plus lime wedges for the rims
  • 2 tablespoons granulated sugar (25g)
  • 1/2 teaspoon ground cinnamon
  • 1 small pinch fine sea salt
  • Large ice cubes, as needed
  • 6 to 8 thin red-skinned apple slices
  • 2 tablespoons fresh cranberries

Apple cider and cranberry juice cocktail vary in sweetness. If the mixed liquids taste too sweet, add a small extra squeeze of lime. Reposado tequila can replace blanco for a rounder flavor, though blanco keeps the fruit color brighter.

How to Make Thanksgiving Margaritas

Overhead view of two cranberry-apple margaritas in rimmed rocks glasses on pale stone.
  1. Rim the glasses: Mix the sugar, cinnamon, and salt on a shallow plate. Run a lime wedge around only the outside edge of two clear 10- to 12-ounce rocks glasses. Gently roll each moistened edge in the mixture until evenly coated. Let the rims sit for about 1 minute.
  2. Prepare the apples: Thinly slice the apple, leaving the red peel attached. Arrange 3 to 4 slices in a fan for each drink.
  3. Add serving ice: Fill the glasses about three-quarters full with large ice cubes.
  4. Shake: Add the tequila, apple cider, cranberry juice cocktail, orange liqueur, and lime juice to a cocktail shaker. Taste the mixture and add a little more lime if needed. Add a generous handful of ice and shake vigorously for 15 to 20 seconds, until the shaker feels very cold and frosty. If the shaker is small, make the drinks in two batches.
  5. Pour and garnish: Strain evenly over the fresh ice, leaving room for the fruit. Tuck an apple fan against the inside rim of each glass and scatter the whole cranberries among the ice. Serve immediately.

Make-Ahead and Pitcher Tips

Mix the cinnamon-sugar rim mixture ahead and store it airtight at room temperature. If slicing the apples more than a few minutes before serving, lightly brush or toss them with lime juice, then cover and refrigerate to slow browning.

For a pitcher, multiply the liquid ingredients by the number of two-drink batches needed. Cover and refrigerate without ice; the mixture is best used within 1 to 2 days. Stir before serving, then pour over fresh ice in individual rimmed glasses. A stirred batch will be less diluted than the shaken version, so shake portions with ice before straining if you want the same result. Add the fruit just before serving.

Serving and Variations

Serve before a holiday meal with Best Herb Butter Roast Turkey or Grandma’s Thanksgiving Dressing Recipe.

  • For a sparkling finish: Add 1 to 2 ounces of club soda or sparkling water to each poured drink before garnishing. Do not shake it or add it to a make-ahead pitcher.
  • For a smoky variation: Replace half or all of the tequila with mezcal; keep the cider, cranberry juice, lime, and garnishes the same.

Nutrition

Approximate nutrition per cocktail, including a share of the rim mixture and fruit garnish: 320 calories, 0g protein, 0g fat, and 35g carbohydrates. Approximate values per 100g, excluding ice: 135 calories, 0g protein, 0g fat, and 15g carbohydrates. Values vary with the brands of cider, cranberry juice cocktail, and orange liqueur, the dilution from shaking, and how much rim mixture is consumed.

Thanksgiving Margaritas

A fall margarita made with tequila, apple cider, cranberry juice cocktail, orange liqueur, and lime, served with a cinnamon-sugar rim and fresh fruit garnish.
Course: Drink
Cuisine: Mexican
Prep: 10 min
Total: 10 min
Servings: 2 Calories: 320 kcal

Equipment

  • Cocktail shaker
  • Fine-mesh strainer
  • 2 rocks glasses
  • Shallow plate
  • Jigger

Ingredients

For the Margaritas

  • 4 ounces blanco tequila
  • 3 ounces chilled apple cider
  • 3 ounces chilled cranberry juice cocktail
  • 1 1/2 ounces orange liqueur, such as Cointreau or triple sec
  • 1 ounce fresh lime juice
  • Large ice cubes, as needed

For the Cinnamon-Sugar Rim and Garnish

  • Lime wedges, for the rims
  • 2 tablespoons granulated sugar (25 g)
  • 1/2 teaspoon ground cinnamon
  • 1 small pinch fine sea salt
  • 6 to 8 thin red-skinned apple slices
  • 2 tablespoons fresh cranberries

Instructions

  1. Mix the sugar, cinnamon, and salt on a shallow plate.
  2. Run a lime wedge around the outside edge of two 10- to 12-ounce rocks glasses, then roll the moistened edges in the cinnamon-sugar mixture. Let the rims sit for 1 minute.
  3. Arrange 3 to 4 thin apple slices in a fan for each drink.
  4. Fill the rimmed glasses about three-quarters full with large ice cubes.
  5. Add the tequila, apple cider, cranberry juice cocktail, orange liqueur, and lime juice to a cocktail shaker. Taste and add a little more lime juice if needed.
  6. Add a generous handful of ice and shake vigorously for 15 to 20 seconds, until the shaker is very cold and frosty.
  7. Strain the cocktail evenly over the fresh ice, leaving room for the fruit garnish.
  8. Tuck an apple fan inside each glass and scatter the cranberries among the ice. Serve immediately.

Tips

  • Use chilled apple cider and cranberry juice so the cocktails stay cold without excessive dilution.
  • Rim only the outside edge of the glasses to keep the cinnamon-sugar mixture from falling into the drink.
  • Shake the drinks over ice, then strain over fresh serving ice for a cold, lightly diluted cocktail.
  • Taste the mixed liquids before shaking and add an extra squeeze of lime if the cider and cranberry juice are very sweet.
  • Make the drinks in two batches if using a small cocktail shaker.

Variations

  • Sparkling Thanksgiving Margarita: Add 1 to 2 ounces of club soda or sparkling water to each poured drink before garnishing. Do not shake the sparkling water.
  • Smoky Mezcal Margarita: Replace half or all of the blanco tequila with mezcal while keeping the cider, cranberry juice, lime, and garnishes the same.
  • Reposado Tequila Margarita: Use reposado tequila instead of blanco tequila for a rounder flavor, though the drink’s color will be less bright.

Notes

The cinnamon-sugar mixture can be made ahead and stored airtight at room temperature. For a pitcher, combine the liquid ingredients without ice and refrigerate for up to 1 to 2 days; add ice and fruit just before serving. Toss apple slices with a little lime juice and refrigerate if preparing them ahead.

Nutrition

Calories: 320 kcal | Protein: 0 g | Fat: 0 g | Carbohydrates: 35 g

Turkey Gravy from Drippings

Turkey pan drippings make a savory, golden-brown gravy that coats sliced meat without running off the plate. The browned bits left in the roasting pan add flavor, while a measured turkey-fat-and-flour roux gives the sauce its smooth, pourable body.

Make the gravy on the stovetop while the turkey rests. Because drippings vary in volume and saltiness, measure the defatted juices and add stock to reach the starting liquid amount. Hold back extra stock for thinning, and taste before adding salt.

Ingredients for Turkey Gravy from Drippings

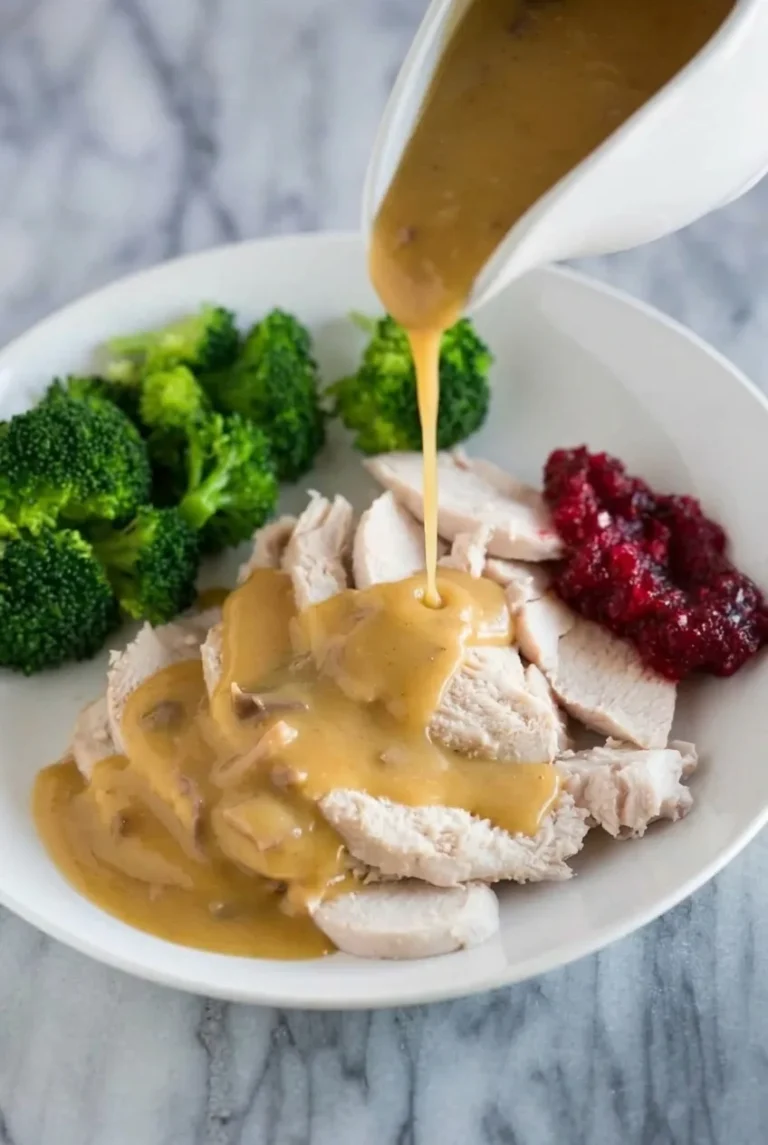
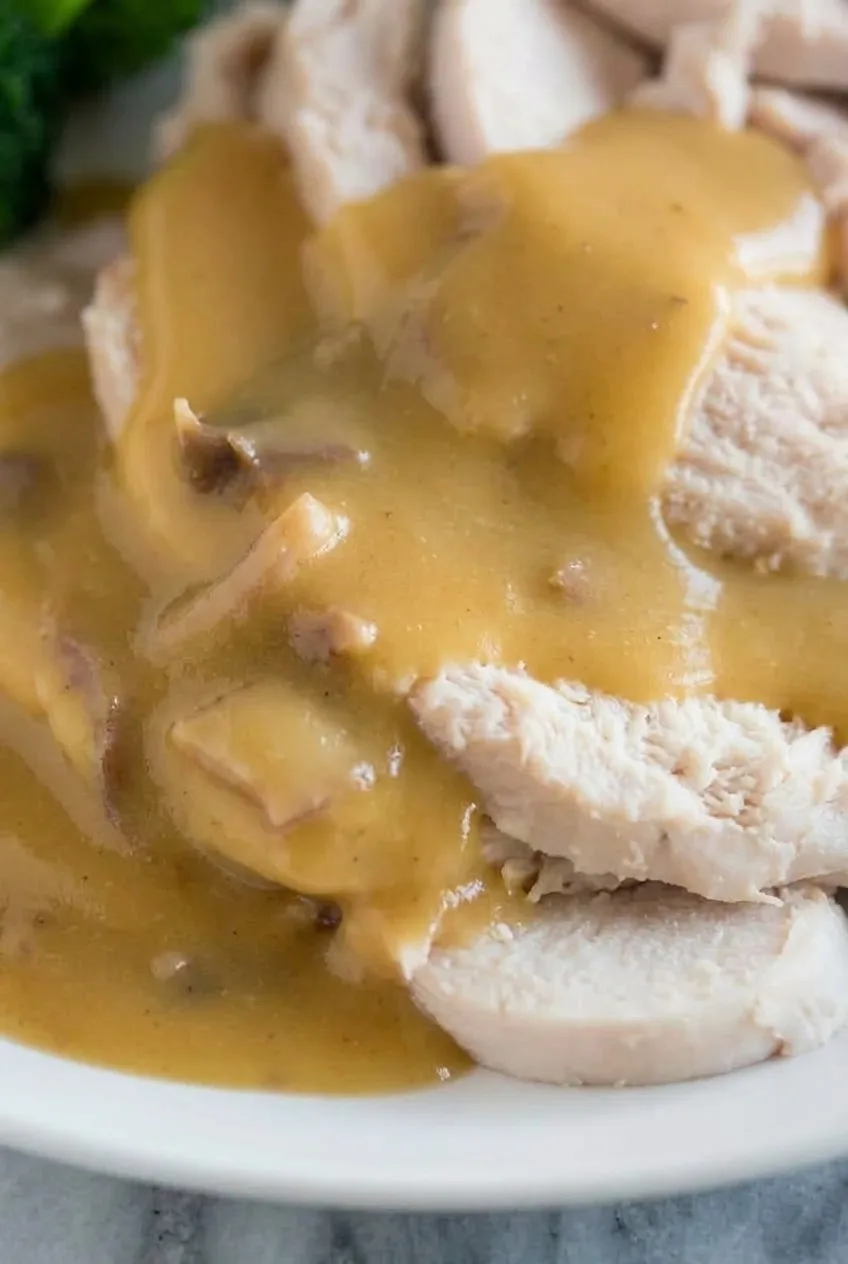
Close view of glossy turkey gravy coating tender sliced roast turkey with tiny roasted pan-bit flecks.
  • About 1 to 1 1/2 cups turkey pan drippings, before separating the fat
  • 1/4 cup rendered turkey fat from the drippings; add up to 2 tablespoons unsalted butter if needed to reach 1/4 cup total fat
  • 1/4 cup all-purpose flour (30g)
  • 1 to 2 cups unsalted or low-sodium turkey or chicken stock, as needed
  • 1/4 teaspoon freshly ground black pepper, plus more to taste
  • Kosher salt, only if needed after tasting

Yield: About 2 1/2 to 3 cups, or 8 to 10 servings. Time: 5 minutes prep, 10 to 15 minutes cooking; 15 to 20 minutes total.

Liquid measure: Start with 2 cups of defatted drippings and stock combined, not 2 cups of stock plus the drippings. Keep up to 1 additional cup of stock nearby to thin or extend the gravy.

How to Make Turkey Gravy from Drippings

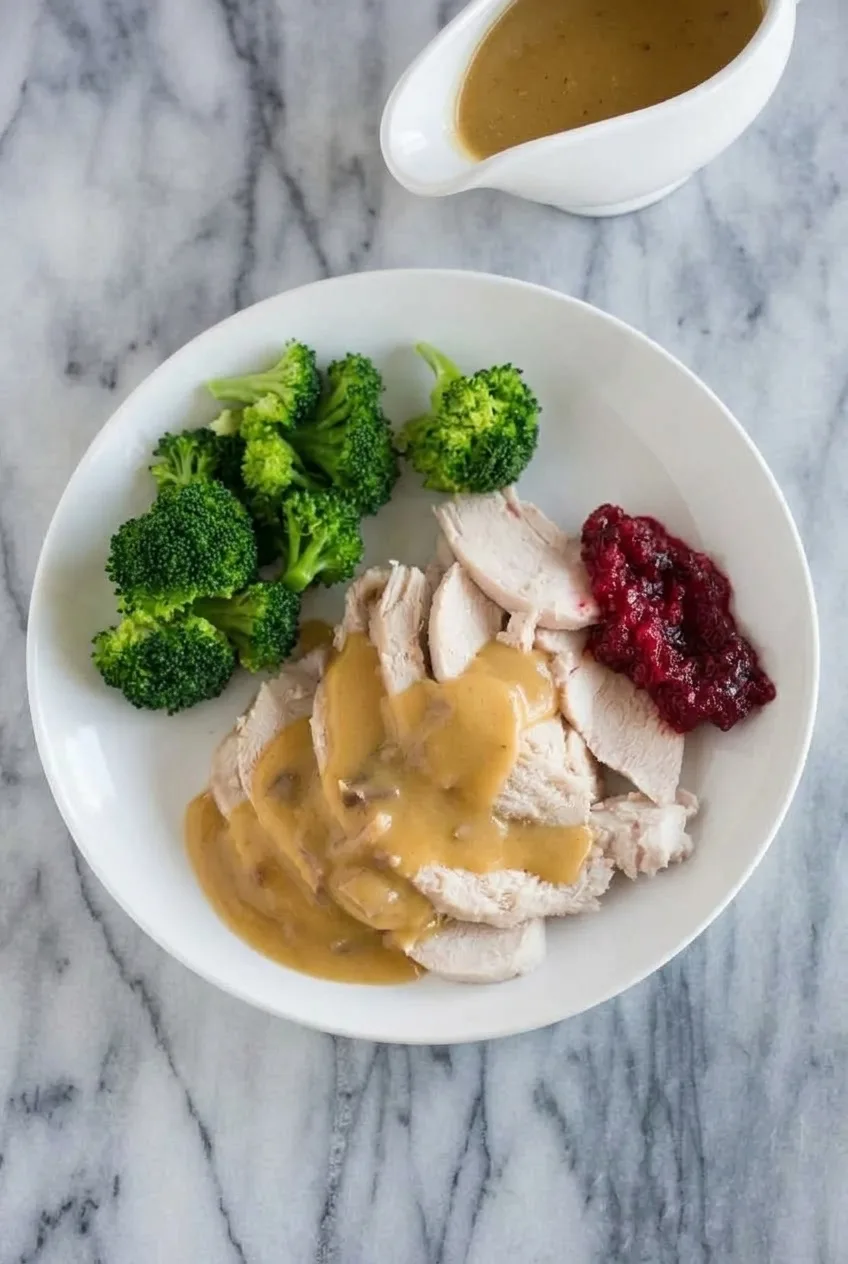
Overhead view of sliced roast turkey with golden-brown gravy and a white gravy boat on a neutral stone surface.
  1. Collect the drippings: Transfer the roasted turkey to rest. Pour the pan drippings through a fine-mesh strainer into a fat separator or heat-safe measuring cup. Loosen any browned bits in the roasting pan with a splash of stock or water and scrape them into the strainer. Leave burned black residue behind.
  2. Measure the fat and liquid: Let the drippings stand briefly so the fat rises. Reserve 1/4 cup turkey fat, adding unsalted butter if needed to make up the difference. Measure the defatted juices and add stock to make 2 cups total liquid. Set aside up to 1 additional cup of stock.
  3. Cook the roux: Heat the measured fat in a 2- to 3-quart saucepan over medium heat. Whisk in the flour and cook, whisking constantly, for 2 to 3 minutes, until the paste is smooth, pale golden, and lightly toasted-smelling.
  4. Add the liquid gradually: Whisk a small splash of the drippings-and-stock mixture into the roux until smooth. Add more in several small additions, whisking out the thick paste each time, then slowly whisk in the remaining liquid.
  5. Simmer and adjust: Bring to a gentle simmer, reduce the heat to medium-low, and cook uncovered for 5 to 8 minutes. Whisk frequently, reaching into the pan corners. Start checking after 5 minutes: the gravy should coat the back of a spoon and fall from it in a smooth ribbon. If it is too thick, whisk in reserved stock 1 to 2 tablespoons at a time. Stop when it is slightly looser than you want at the table; it thickens as it stands.
  6. Season and serve: Stir in the pepper and taste before adding salt, especially if the turkey was brined or heavily seasoned. Let stand for 2 to 3 minutes, whisk again, and pour into a warmed white gravy boat. Serve over sliced roast turkey.

How to Fix the Gravy’s Consistency

  • Too thick: Whisk in unsalted stock or water a little at a time until the gravy pours easily.
  • Too thin: Let it finish simmering first. If it still does not coat a spoon, mix 1 tablespoon cornstarch with 1 tablespoon cold water. Whisk a little of the slurry into the simmering gravy, allowing it to thicken before adding more.
  • Lumpy: Whisk vigorously, then strain the gravy if lumps remain.
  • Greasy: Use only the measured 1/4 cup fat for the roux and keep excess fat out of the defatted juices. If fat collects on the finished gravy, skim it from the surface.
  • Too salty: A little unsalted stock may help, though it will also thin the gravy. This is why it is best to use unsalted or low-sodium stock and wait until the end to add salt.

Optional Giblet Gravy

For a heartier gravy, simmer the turkey neck, heart, and gizzard separately until tender. Chop the cooked meat and stir up to 1/2 cup into the finished gravy. The giblet cooking liquid can replace some of the stock. Omit the liver for a milder flavor.

Serving, Storing, and Reheating

Serve the gravy warm over turkey, mashed potatoes, or stuffing. Homemade Cranberry Sauce with Orange makes a sweet-tart side for the meal.

Cool leftovers promptly and refrigerate in an airtight container for 3 to 4 days. Reheat gently in a small saucepan over low to medium-low heat, whisking often. Add a splash of stock or water if the chilled gravy is too thick.

To freeze, cool the gravy and seal it in a freezer-safe container for up to 2 months. Thaw overnight in the refrigerator, then reheat gently, whisking until smooth.

Nutrition

Approximate nutrition per serving, based on 10 servings: 70 calories, 1g protein, 6g fat, and 3g carbohydrates. Approximate values per 100g: 100 calories, 1g protein, 9g fat, and 4g carbohydrates. Values vary with the drippings, stock, and amount of butter used.

Turkey Gravy from Drippings

A smooth, savory turkey gravy made with pan drippings, a turkey-fat roux, and stock.
Course: Side Dish
Cuisine: American
Prep: 5 min
Cook: 15 min
Total: 20 min
Servings: 10 Calories: 70 kcal

Equipment

  • Fine-mesh strainer
  • Fat separator or heat-safe measuring cup
  • 2- to 3-quart saucepan
  • Whisk
  • Measuring cups

Ingredients

For the Gravy

  • 1 to 1 1/2 cups turkey pan drippings, before separating the fat
  • 1/4 cup rendered turkey fat from the drippings
  • Up to 2 tablespoons unsalted butter, if needed
  • 1/4 cup all-purpose flour (30 g)
  • 1 to 2 cups unsalted or low-sodium turkey or chicken stock, as needed
  • 1/4 teaspoon freshly ground black pepper, plus more to taste
  • Kosher salt, if needed

Instructions

  1. Transfer the roasted turkey to rest. Pour the pan drippings through a fine-mesh strainer into a fat separator or heat-safe measuring cup.
  2. Loosen browned bits from the roasting pan with a splash of stock or water, scrape them into the strainer, and leave behind any burned black residue.
  3. Let the drippings stand briefly so the fat rises. Reserve 1/4 cup turkey fat, adding unsalted butter if needed to reach 1/4 cup.
  4. Measure the defatted drippings and add stock to make 2 cups total liquid. Reserve up to 1 additional cup stock for thinning.
  5. Heat the measured fat in a 2- to 3-quart saucepan over medium heat. Whisk in the flour and cook for 2 to 3 minutes, whisking constantly, until smooth and pale golden.
  6. Whisk a small splash of the drippings-and-stock mixture into the roux until smooth. Continue adding the liquid in small additions, whisking smooth after each addition, then slowly whisk in the remaining liquid.
  7. Bring the gravy to a gentle simmer, reduce the heat to medium-low, and cook uncovered for 5 to 8 minutes, whisking frequently.
  8. Check the consistency after 5 minutes. When the gravy coats the back of a spoon and falls in a smooth ribbon, remove it from the heat. Whisk in reserved stock 1 to 2 tablespoons at a time if it is too thick.
  9. Stir in the pepper and taste before adding salt. Let stand for 2 to 3 minutes, whisk again, and serve warm.

Tips

  • Start with 2 cups total liquid made from defatted drippings and stock combined.
  • Use only 1/4 cup fat for the roux to prevent greasy gravy.
  • Add the liquid gradually to the roux to avoid lumps.
  • Stop cooking when the gravy is slightly looser than desired because it thickens as it stands.
  • Taste before salting, especially when the turkey was brined or heavily seasoned.
  • Strain the finished gravy if lumps remain after whisking.

Variations

  • Giblet Gravy: Simmer turkey neck, heart, and gizzard until tender, chop the meat, and stir up to 1/2 cup into the finished gravy. Use the giblet cooking liquid in place of some stock, and omit the liver for a milder flavor.

Notes

Refrigerate cooled leftovers in an airtight container for 3 to 4 days or freeze for up to 2 months. Reheat gently over low to medium-low heat, whisking often and adding a splash of stock or water if needed.

Nutrition

Calories: 70 kcal | Protein: 1 g | Fat: 6 g | Carbohydrates: 3 g

Grandma’s Thanksgiving Dressing

Chunky bread cubes, tender celery and onion, and sage make this a savory dressing baked in a casserole dish, not inside the turkey. The center should be moist and cohesive, with distinct pieces of bread beneath a craggy, golden-brown top.

Dry bread gives the dressing its structure, but the amount of broth it needs will vary. Add just enough to moisten the cubes, then bake the casserole covered to retain moisture and uncovered at the end to toast the exposed edges.

Ingredients for Grandma’s Thanksgiving Dressing

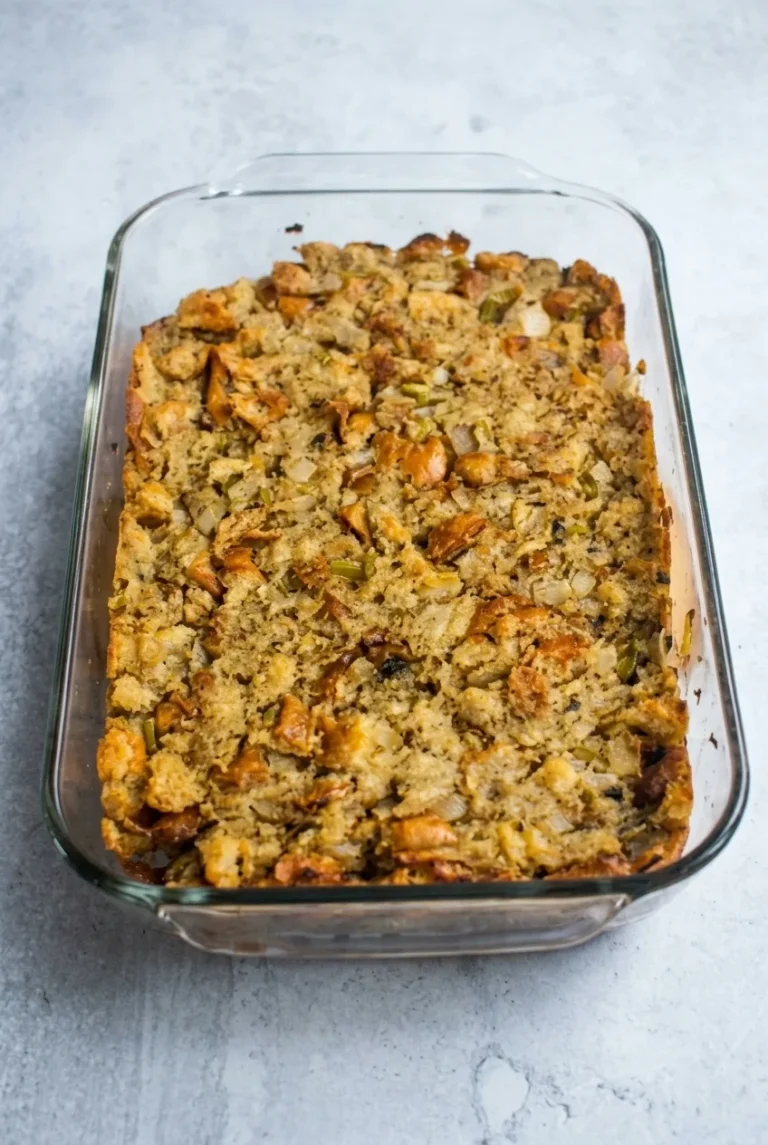
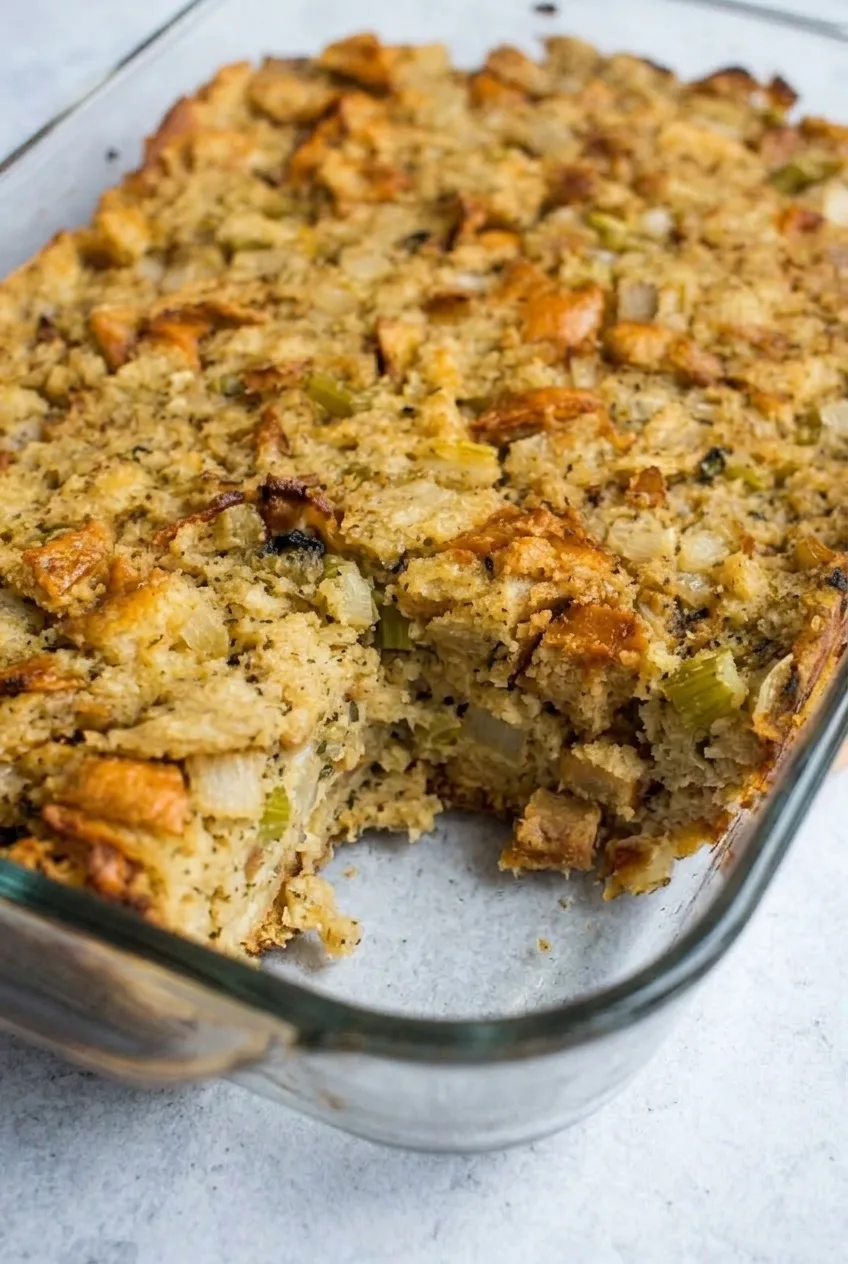
Overhead view of a full glass casserole of golden-brown Thanksgiving bread dressing on a pale stone surface.
  • 14 cups dried white or country-bread cubes (about 560g)
  • 1/2 cup unsalted butter (1 stick; about 115g), plus more for greasing the dish
  • 1 large yellow onion, finely diced (about 2 cups; 300g)
  • 4 celery ribs, diced (about 1 1/2 cups; 150g)
  • 3 to 4 cups low-sodium chicken or turkey broth, divided
  • 2 teaspoons poultry seasoning
  • 1 teaspoon dried rubbed sage
  • 1 teaspoon kosher salt, plus more to taste
  • 1/2 teaspoon black pepper

Yield: 10 to 12 side-dish servings. Time: 20 minutes prep, about 45 minutes baking, plus 10 minutes resting.

The bread cubes should feel dry and firm. Use dried stuffing cubes or leave cubed bread out at room temperature for 1 to 2 days. If using salted butter or regular-sodium broth, start with less salt and adjust after mixing.

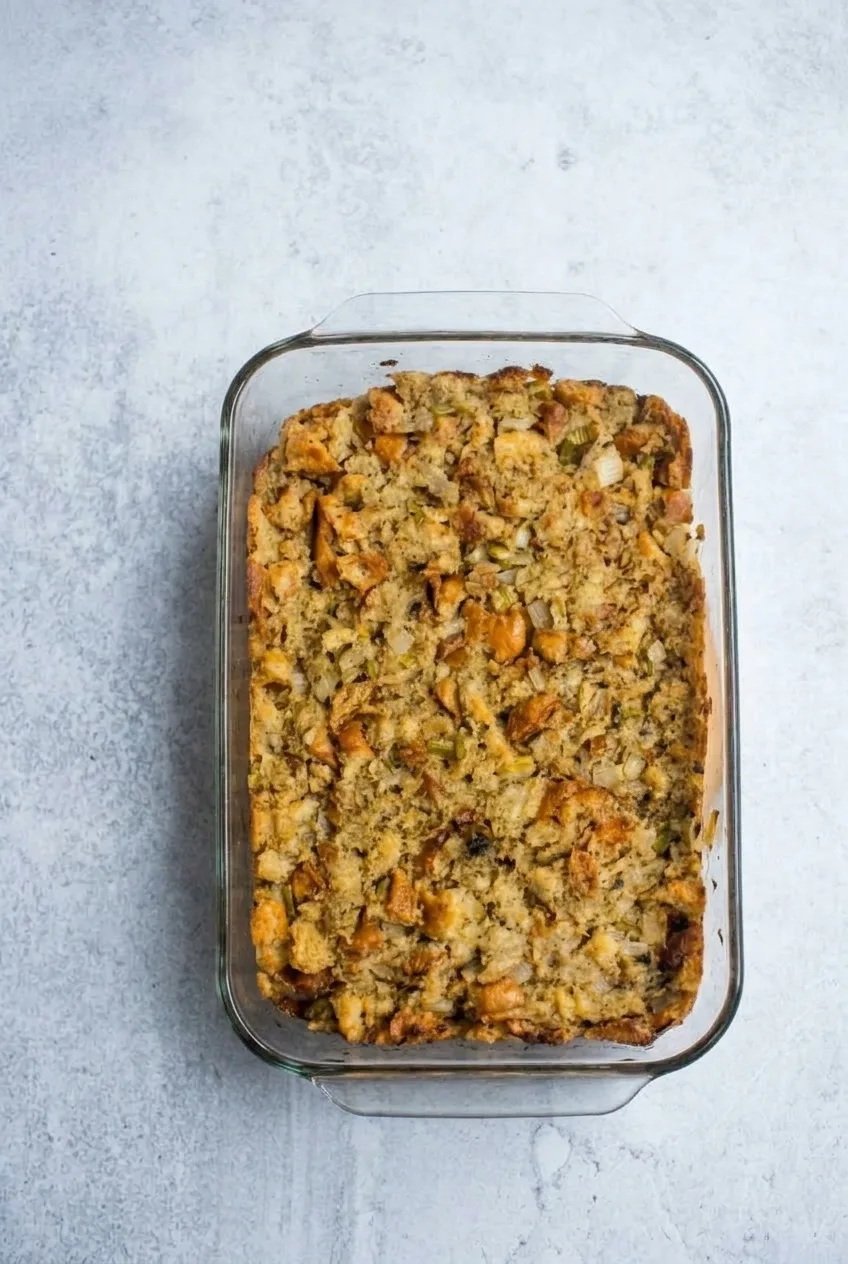
Close view of moist Thanksgiving dressing showing chunky bread, tender celery, onion, and toasted golden edges.

How to Bake Thanksgiving Dressing

  1. Prepare the dish: Set a rack in the center of the oven and preheat to 350°F (175°C). Grease a 9-by-13-inch baking dish. Put the dried bread cubes in a very large bowl.
  2. Cook the vegetables: Melt the butter in a large saucepan over medium heat. Add the onion and celery and cook until they begin to soften. Add 3 cups of the broth, the poultry seasoning, sage, salt, and pepper. Adjust the heat to maintain a gentle simmer and cook until the onion is translucent and the celery is tender, about 10 to 12 minutes total for this step.
  3. Moisten the bread: Pour the hot broth and vegetables over the bread. Fold gently to keep the cubes chunky. If dry pockets remain, add the reserved broth a little at a time. Stop when the bread is evenly moist and holds together when lightly pressed, with no liquid pooling in the bowl. Taste and adjust the salt if needed.
  4. Fill the dish: Spread the mixture evenly in the prepared dish without packing it down. Leave ridges and bread corners exposed on top.
  5. Bake covered: Cover tightly with foil and bake for 30 minutes to heat the center while retaining moisture.
  6. Brown the top: Remove the foil and bake for 12 to 15 minutes more. Start checking around 40 minutes of total baking time, especially if using a dark metal dish. The dressing is done when the center is hot and steamy and the top has golden-brown ridges and toasted edges.
  7. Rest: Let stand for 10 minutes before serving so the moist bread settles and is easier to spoon.

How Much Broth Should You Add?

Start with 3 cups and add up to 1 more cup only if the bread needs it. Very dry cubes absorb more broth than bread that is merely stale. Fold gently rather than stirring vigorously: the mixture should hold together while individual pieces remain visible, not turn pasty or sit in liquid.

Cooking the celery and onion in the seasoned broth before mixing gives them time to become tender. Adding them raw can leave crunchy pieces in the finished dressing.

Dressing vs. Stuffing

This recipe is baked in a casserole dish, outside the turkey. Its covered-then-uncovered baking time should not be used for stuffing cooked inside poultry. Serve the dressing alongside Best Herb Butter Roast Turkey and gravy.

Make-Ahead and Leftovers

For the best texture, moisten the bread close to baking time. If needed, assemble the dressing shortly ahead, cover and refrigerate it, then bake until the center is hot throughout; do not rely only on the clock.

Cool leftovers promptly and refrigerate in a covered container. To reheat, add a small splash of broth if the dressing looks dry, cover the baking dish, and heat until hot throughout. Uncover briefly at the end to refresh the top.

Nutrition

Approximate nutrition per serving, based on 11 side-dish servings: 225 calories, 6g protein, 10g fat, and 28g carbohydrates. Per 100g: approximately 135 calories, 3g protein, 6g fat, and 17g carbohydrates. Values vary with the bread, broth, and amount of liquid used.

Grandma's Thanksgiving Dressing

A savory baked bread dressing with tender celery, onion, poultry seasoning, and sage, finished with a moist center and golden-brown top.
Course: Side Dish
Cuisine: American
Prep: 20 min
Cook: 45 min
Total: 75 min
Servings: 11 Calories: 225 kcal

Equipment

  • 9-by-13-inch baking dish
  • very large bowl
  • large saucepan
  • aluminum foil

Ingredients

For the Dressing

  • 14 cups dried white or country-bread cubes (about 560 g)
  • 1/2 cup unsalted butter (1 stick; about 115 g), plus more for greasing
  • 1 large yellow onion, finely diced (about 2 cups; 300 g)
  • 4 celery ribs, diced (about 1 1/2 cups; 150 g)
  • 3 to 4 cups low-sodium chicken or turkey broth, divided
  • 2 teaspoons poultry seasoning
  • 1 teaspoon dried rubbed sage
  • 1 teaspoon kosher salt, plus more to taste
  • 1/2 teaspoon black pepper

Instructions

  1. Set a rack in the center of the oven and preheat to 350°F (175°C). Grease a 9-by-13-inch baking dish and place the dried bread cubes in a very large bowl.
  2. Melt the butter in a large saucepan over medium heat. Add the onion and celery and cook until they begin to soften.
  3. Add 3 cups broth, poultry seasoning, sage, salt, and pepper. Maintain a gentle simmer and cook until the onion is translucent and the celery is tender, about 10 to 12 minutes.
  4. Pour the hot broth and vegetable mixture over the bread cubes. Fold gently to combine without breaking up the bread.
  5. Add the remaining broth a little at a time only as needed, until the bread is evenly moist and holds together when lightly pressed without liquid pooling in the bowl. Taste and adjust the salt if needed.
  6. Spread the dressing evenly in the prepared dish without packing it down, leaving ridges and bread corners exposed on top.
  7. Cover tightly with foil and bake for 30 minutes.
  8. Remove the foil and bake for 12 to 15 minutes more, until the center is hot and steamy and the top is golden brown with toasted edges.
  9. Rest for 10 minutes before serving.

Tips

  • Use bread cubes that are dry and firm; leave cubed bread out for 1 to 2 days if needed.
  • Start with 3 cups of broth and add more only if dry pockets remain.
  • Fold the dressing gently so the bread stays chunky rather than becoming pasty.
  • Cook the celery and onion in the seasoned broth before mixing so they are fully tender.
  • Check the dressing around 40 minutes of total baking time, especially when using a dark metal baking dish.
  • Use less salt initially if using salted butter or regular-sodium broth.

Notes

This dressing is baked outside the turkey and should not be used as timing guidance for stuffing cooked inside poultry. Refrigerate leftovers promptly. Reheat covered with a small splash of broth if dry, then uncover briefly to refresh the top.

Nutrition

Calories: 225 kcal | Protein: 6 g | Fat: 10 g | Carbohydrates: 28 g

Baked Cranberry Brie Bites

These warm appetizer bites have open, ruffled puff-pastry edges around melted Brie and chunky cranberry sauce. Chopped pecans add crunch, while a short rosemary tip gives each bite a fresh finish. A standard muffin tin gives the pastry its cup shape. For golden edges and filling that stays inside, keep the pastry cold and use only a small amount of Brie and sauce in each cup.

Ingredients for Baked Cranberry Brie Bites

  • 1 sheet frozen puff pastry (about 8 oz/225g), thawed but cold
  • 4 oz Brie (about 115g), cold and cut into 9 cubes
  • 3 tablespoons thick whole-berry cranberry sauce
  • 2 tablespoons finely chopped pecans (about 15g)
  • 9 short, tender fresh rosemary tips
  • Nonstick cooking spray or softened butter, for the muffin tin
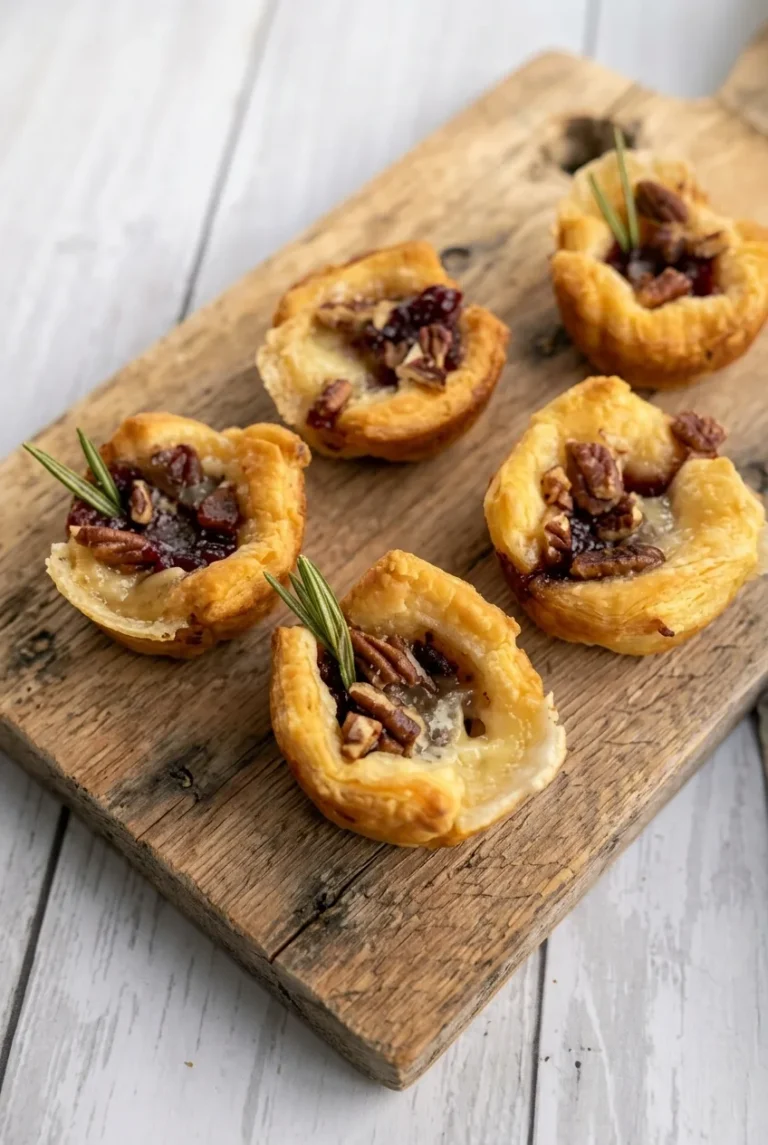
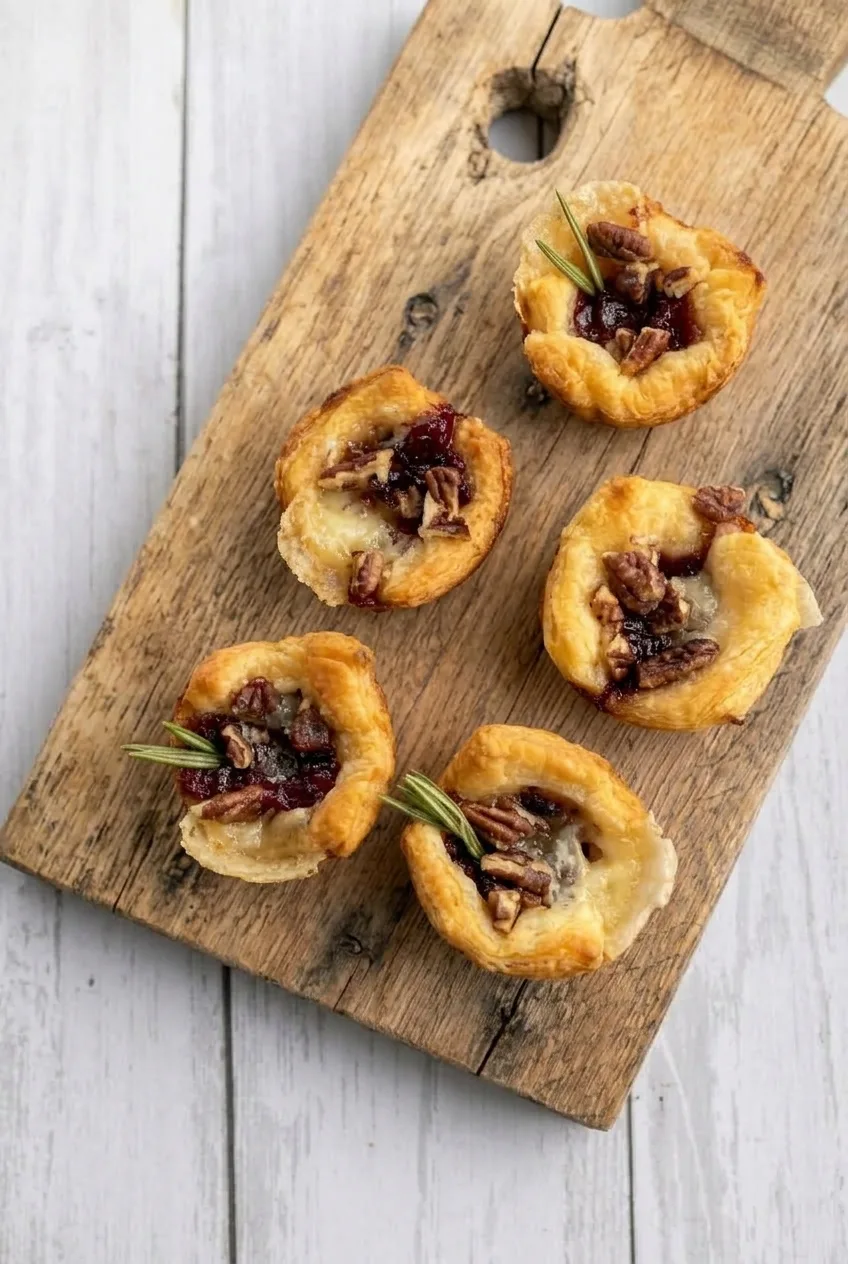
Overhead view of baked cranberry Brie bites arranged on a rustic wooden board with rosemary garnish.

Homemade, canned, or store-bought cranberry sauce works if it is thick and contains whole berries. The Brie rind is edible and can stay on; cold Brie is easier to cut cleanly.

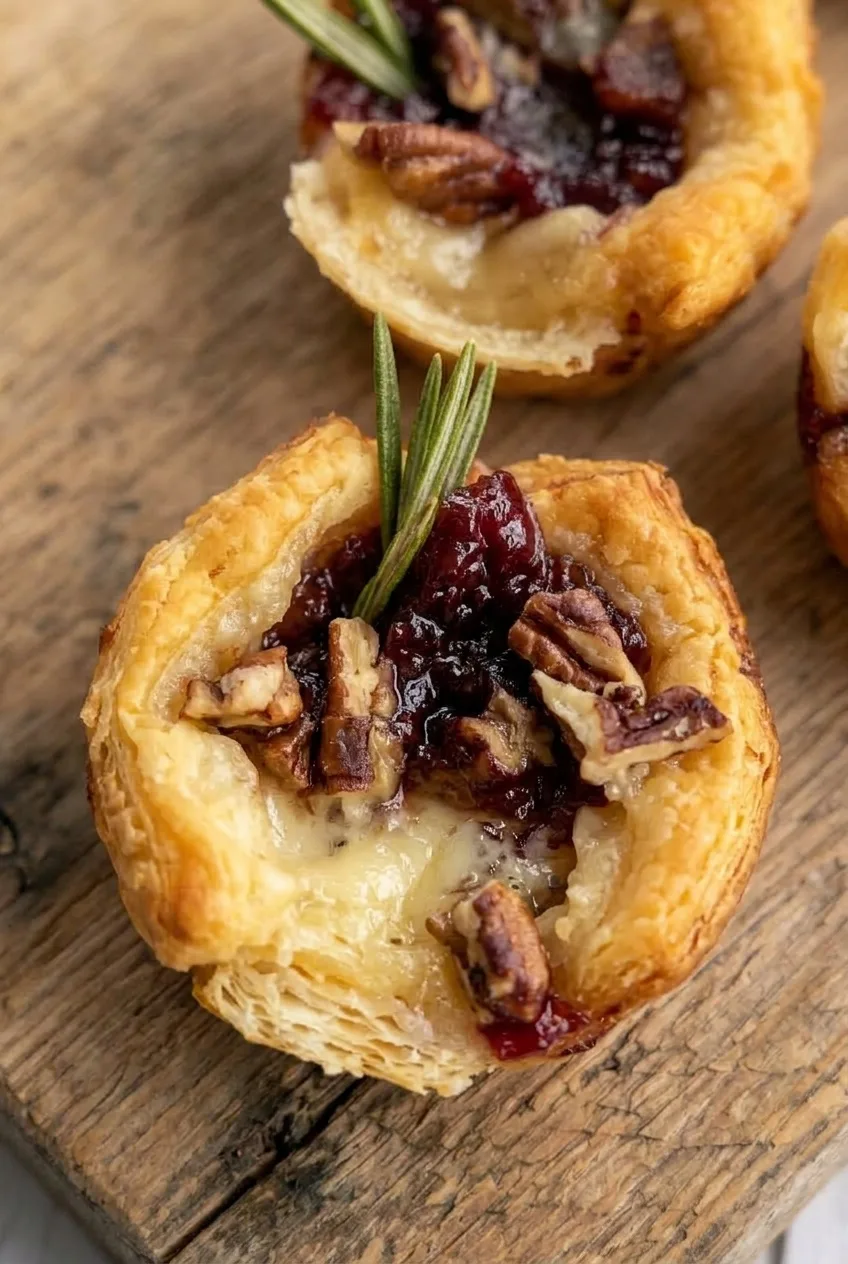
Close view of a cranberry Brie bite split to show flaky puff pastry, melted Brie, chunky cranberry sauce, and pecans.

How to Bake Cranberry Brie Bites

  1. Heat the oven: Preheat to 400°F (205°C). Lightly grease 9 wells of a standard 12-cup muffin tin. Keep the thawed puff pastry refrigerated until you are ready to cut it.
  2. Shape the cups: Unfold the cold pastry on a lightly floured surface if needed, and cut it into 9 equal squares. Press one square into each greased well, leaving the corners raised and the edges loosely folded. Do not stretch the pastry smooth. If it becomes soft or sticky, refrigerate the shaped cups briefly before filling.
  3. Add the filling: Place one Brie cube in each cup. Spoon about 1 teaspoon cranberry sauce over each cube, then scatter a small pinch of pecans on top. Keep the filling centered and the pastry edges exposed.
  4. Bake: Bake uncovered for 15 to 18 minutes, starting to check at 15 minutes. The pastry should be puffed and richly golden, with melted Brie bubbling around the hot, glossy cranberry sauce. Rotate the pan near the end only if one side is browning faster.
  5. Rest and serve: Let the bites stand in the tin for 5 minutes so the filling settles. Gently loosen each cup with a thin knife, transfer to a platter, and add a short rosemary tip to each. Serve warm.

How to Prevent Overflow and Soggy Pastry

Thawed puff pastry should bend without cracking but still feel cold. If it warms while you shape the cups, refrigerate it briefly; cold pastry holds its folds better before it reaches the hot oven.

Use one small Brie cube and about 1 teaspoon of cranberry sauce per cup. A little bubbling is normal, but extra filling can spill onto the tin and make the bites stick. The greased wells and five-minute rest also help the pastry release without tearing.

Use only short, tender rosemary tips or a few leaves, added after baking. Finely chopped walnuts can replace the pecans in the same amount. If using a mini muffin tin instead, cut smaller pastry squares, reduce the filling, and begin checking for doneness around 11 to 12 minutes rather than using the standard-cup timing.

Make-Ahead, Storage, and Reheating

To make the bites ahead, assemble them in the muffin tin, cover, and refrigerate for up to 3 days. Bake directly from chilled, allowing a little extra time if needed. Look for golden pastry and bubbling Brie, then add the rosemary after baking.

Cool baked leftovers before storing them in an airtight container in the refrigerator for up to 2 days. Reheat in a 350°F (175°C) oven for about 5 to 7 minutes, until hot, and refresh the rosemary. The pastry is crispest soon after its first bake.

Baked bites can also be frozen in airtight storage for up to 2 months. Reheat at 350°F until hot, and add fresh rosemary afterward.

For a larger holiday meal, serve the bites before Creamy Roasted Garlic Mashed Potatoes and Parmesan Roasted Brussels Sprouts.

Nutrition

Approximate nutrition per bite, based on 9 bites: 180 calories, 5g protein, 12g fat, and 13g carbohydrates. Per 100g: approximately 400 calories, 10g protein, 27g fat, and 29g carbohydrates. Values vary with the puff pastry, Brie, and cranberry sauce used.

Baked Cranberry Brie Bites

Flaky puff pastry cups filled with melted Brie, whole-berry cranberry sauce, pecans, and fresh rosemary.
Course: Appetizer
Cuisine: American
Prep: 15 min
Cook: 18 min
Total: 38 min
Servings: 9 Calories: 180 kcal

Equipment

  • Standard 12-cup muffin tin
  • Knife
  • Cutting board
  • Measuring spoons

Ingredients

For the Brie Bites

  • 1 sheet frozen puff pastry (about 8 oz/225 g), thawed but cold
  • 4 oz Brie (about 115 g), cold and cut into 9 cubes
  • 3 tablespoons thick whole-berry cranberry sauce
  • 2 tablespoons finely chopped pecans (about 15 g)
  • 9 short, tender fresh rosemary tips
  • Nonstick cooking spray or softened butter, for the muffin tin

Instructions

  1. Preheat the oven to 400°F (205°C). Lightly grease 9 wells of a standard 12-cup muffin tin.
  2. Keep the puff pastry cold, then unfold it on a lightly floured surface if needed and cut it into 9 equal squares.
  3. Press one pastry square into each greased muffin well, leaving the corners raised and edges loosely folded. Refrigerate briefly if the pastry becomes soft or sticky.
  4. Place one Brie cube in each pastry cup.
  5. Spoon about 1 teaspoon cranberry sauce over each Brie cube, then sprinkle with a small pinch of chopped pecans. Keep the filling centered and the pastry edges exposed.
  6. Bake uncovered for 15 to 18 minutes, until the pastry is puffed and deeply golden and the Brie and cranberry sauce are bubbling.
  7. Rest the bites in the muffin tin for 5 minutes. Loosen with a thin knife, transfer to a platter, and top each bite with a rosemary tip before serving warm.

Tips

  • Keep the puff pastry cold so it holds its folds and bakes into flaky, raised edges.
  • Use only one small Brie cube and about 1 teaspoon cranberry sauce per cup to prevent overflow.
  • Choose thick cranberry sauce with whole berries rather than thin or runny sauce.
  • Leave the Brie rind on if desired; it is edible and cold Brie cuts more cleanly.
  • Let the bites rest in the pan for 5 minutes before removing them to help the filling set.

Variations

  • Walnut Brie Bites: Replace the pecans with the same amount of finely chopped walnuts.
  • Mini Muffin Brie Bites: Use a mini muffin tin with smaller pastry squares and less filling, then begin checking for doneness after 11 to 12 minutes.

Notes

Assemble up to 3 days ahead and refrigerate covered; bake directly from chilled, adding time as needed. Store baked leftovers in the refrigerator for up to 2 days and reheat at 350°F (175°C) for 5 to 7 minutes. Freeze baked bites for up to 2 months and reheat at 350°F until hot.

Nutrition

Calories: 180 kcal | Protein: 5 g | Fat: 12 g | Carbohydrates: 13 g

Homemade Green Bean Casserole

This from-scratch green bean casserole has long, crisp-tender beans and browned mushrooms in a creamy sauce, with a generous pile of homemade fried onion strings on top. Blanching and drying the beans, then thickening the sauce before baking, keeps the filling from turning watery. A small portion of the onions bakes with the casserole; the rest goes on just before serving so it stays crisp.

Ingredients for Homemade Green Bean Casserole

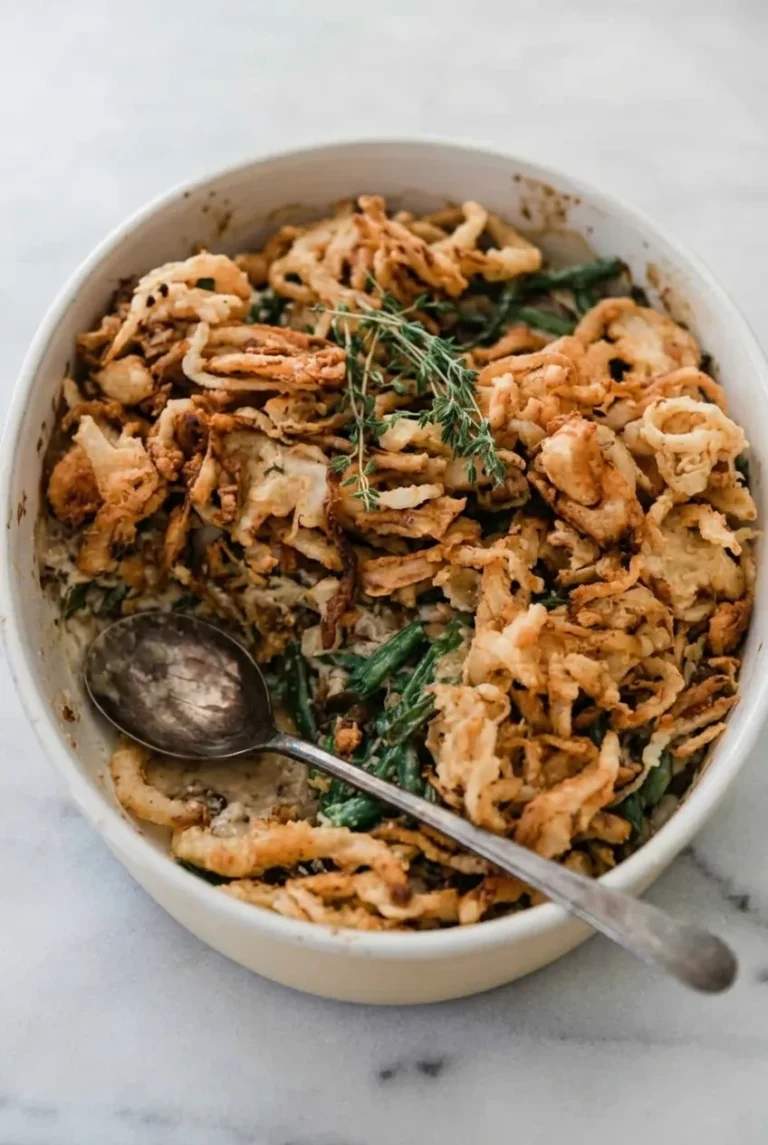
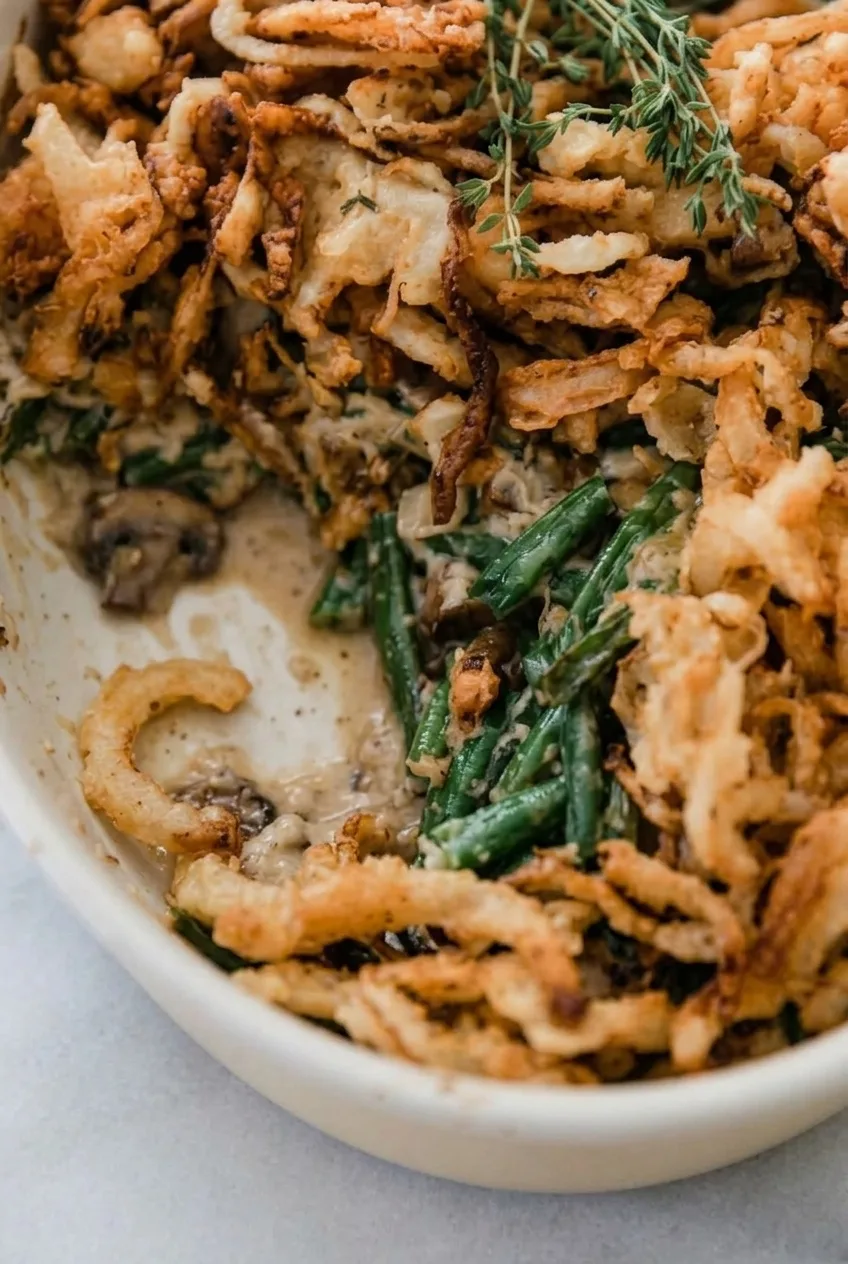
Close view of creamy green beans and browned mushrooms beneath crisp homemade fried onion strings.

Makes 8 side-dish servings.

  • 2 pounds fresh green beans, trimmed (about 900g)
  • 1 large yellow onion, very thinly sliced (about 250g)
  • 1/2 cup buttermilk (120g)
  • 3/4 cup all-purpose flour, divided (90g)
  • 1 1/2 teaspoons kosher salt, divided, plus more for the blanching water
  • 1 teaspoon black pepper, divided
  • About 3 cups neutral frying oil, such as vegetable or canola oil, or enough for a 1 to 1 1/2-inch depth
  • 4 tablespoons unsalted butter, plus a little for the baking dish (about 55g for the sauce)
  • 12 ounces cremini mushrooms, sliced (340g)
  • 2 garlic cloves, minced
  • 1 teaspoon fresh thyme leaves, plus a small sprig for garnish, if desired
  • 1 1/2 cups whole milk (360g)
  • 1/2 cup half-and-half (120g)
  • 1/2 cup low-sodium chicken or vegetable broth (120g)

How to Make Green Bean Casserole

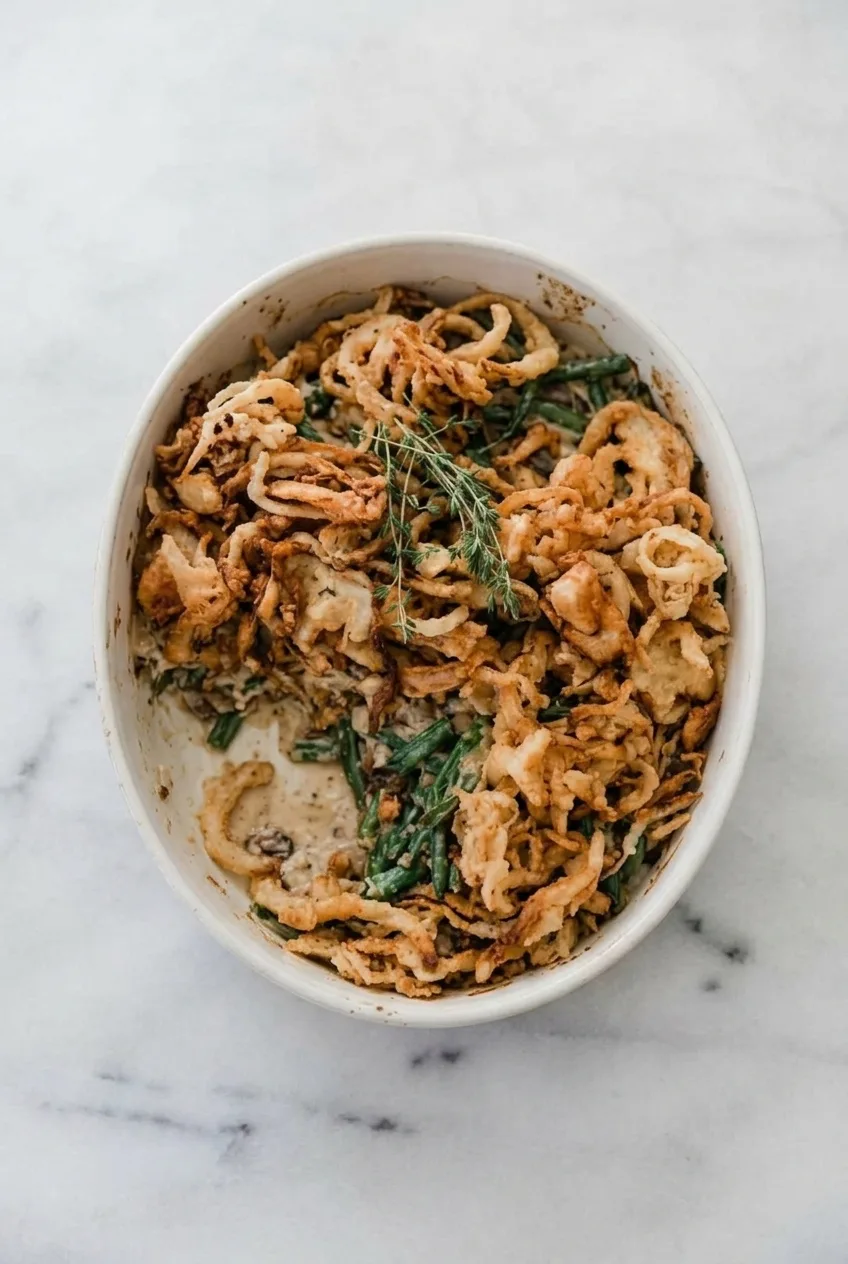
Overhead view of a full oval green bean casserole topped with golden fried onions and thyme.
  1. Blanch the beans: Heat the oven to 375°F (190°C) and lightly butter a 2-quart oval baking dish or 8-by-11-inch casserole dish. Bring a large pot of salted water to a boil. Cook the beans for 4 to 5 minutes, until bright green and barely crisp-tender. Transfer them immediately to ice water, then drain and dry thoroughly.
  2. Fry the onion strings: Toss the onion slices with the buttermilk. In another bowl, mix 1/2 cup of the flour with 1/2 teaspoon of the salt and 1/2 teaspoon of the pepper. Lift the onions from the buttermilk and toss them in the flour mixture until coated and shaggy. Heat 1 to 1 1/2 inches of oil in a small deep saucepan or Dutch oven to about 375°F. Fry the onions in small batches for 2 to 4 minutes per batch, turning gently, until golden brown with darker curled edges. Drain on a wire rack or paper towels and set aside.
  3. Brown the mushrooms: Melt 2 tablespoons of the butter in a 12-inch skillet over medium-high heat. Add the mushrooms and a pinch of the remaining salt. Cook for 8 to 10 minutes, stirring occasionally, until their liquid evaporates and their edges brown. Add the garlic and thyme leaves; cook for about 1 minute, until fragrant.
  4. Thicken the sauce: Reduce the heat to medium and melt the remaining 2 tablespoons butter in the skillet. Stir in the remaining 1/4 cup flour and cook briefly, until it no longer smells raw. Gradually whisk in the milk, half-and-half, and broth. Simmer gently for 6 to 8 minutes, until the sauce coats a spoon and a spoon drawn through it leaves a brief trail. Season with the remaining salt and pepper. If the sauce is thin, simmer it a little longer; if too thick, loosen it with a splash of milk.
  5. Assemble: Fold the dried beans into the mushroom sauce and spread them in the baking dish. Scatter about one-third of the fried onions over the top. Keep the rest separate and dry.
  6. Bake: Bake uncovered for 20 to 25 minutes, starting to check around 18 minutes. The sauce should bubble at the edges and in a few spots near the center, and the center should be hot. Let the casserole rest for 5 to 10 minutes.
  7. Finish: Pile the reserved onion strings over the casserole just before serving. Add the thyme sprig, if desired, and serve from the baking dish.

How to Keep the Filling Creamy and the Onions Crisp

The ice bath stops the beans from continuing to cook, while thorough drying keeps water from thinning the sauce. Let the mushrooms release their liquid and brown before adding the dairy. The sauce should already coat a spoon when it goes into the baking dish; the short bake is for heating the casserole, not thickening a watery filling.

Keep the frying oil near 375°F and avoid crowding the pot, which can leave the onion coating greasy or soft. Let the fried onions drain outside the casserole. Baking only a small portion on top and adding the rest after the casserole rests gives the finished dish a crisp, generous topping.

Make-Ahead and Bean Substitutions

Make ahead: Assemble the bean-and-sauce filling in the baking dish up to 24 hours ahead and refrigerate it without onions. Store fully cooled fried onions separately in an airtight container at room temperature, or fry them shortly before serving. Bake the chilled filling at 375°F until hot and bubbling, generally 30 to 35 minutes. Add a small portion of onions near the end if desired, then pile on the rest after baking. If the onions darken before the center is hot, loosely cover the dish with foil.

Bean substitutions: Thaw frozen green beans completely, pat them very dry, and skip blanching; they will be softer than fresh beans. Canned beans are already soft, so drain them well and start checking the casserole earlier, baking until the center is hot. To skip frying, use 1 1/2 to 2 cups store-bought crispy fried onions, reserving most until serving.

How to Store and Reheat Green Bean Casserole

Refrigerate cooled leftovers in an airtight container for up to 3 to 4 days. Store any extra fried onions separately when possible. Reheat the casserole covered at 350°F (175°C) until hot, about 20 to 30 minutes, then add crisp onions.

For longer storage, freeze the unbaked bean-and-sauce filling without onions for up to 1 month. Thaw overnight in the refrigerator, bake until hot and bubbling, and add crisp onions at the end. Freezing may soften the beans.

What to Serve with Green Bean Casserole

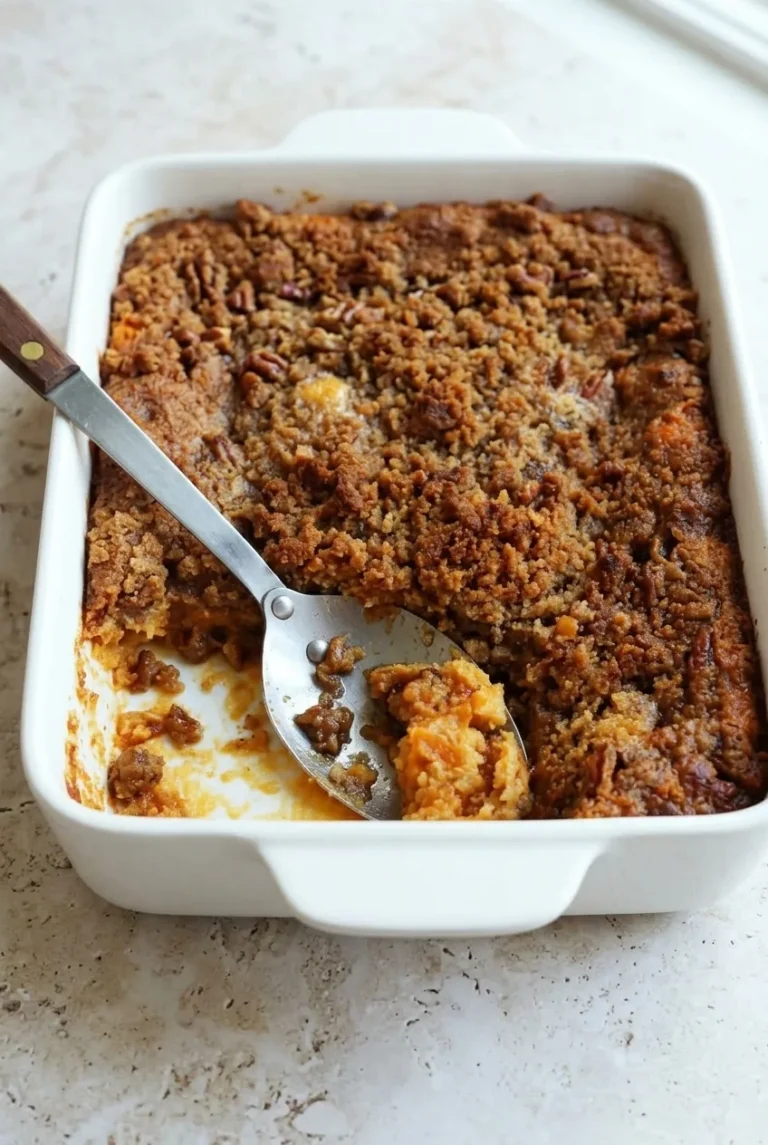
Serve alongside roast turkey or ham, with roasted garlic mashed potatoes. For a larger holiday spread, add sweet potato casserole with pecan crumble.

Nutrition

Approximate nutrition per side-dish serving (1/8 of the casserole): 265 calories, 7g protein, 16g fat, and 25g carbohydrates. Approximate values per 100g: 100 calories, 3g protein, 6g fat, and 9g carbohydrates. Estimates assume about 1/4 cup of frying oil is absorbed; the amount retained by the onions and the finished casserole’s weight will vary.

Homemade Green Bean Casserole

A from-scratch green bean casserole with crisp-tender beans, browned mushrooms in a creamy sauce, and homemade fried onion strings.
Course: Side Dish
Cuisine: American
Prep: 35 min
Cook: 45 min
Total: 90 min
Servings: 8 Calories: 265 kcal

Equipment

  • 2-quart baking dish
  • large pot
  • large bowl
  • small deep saucepan or Dutch oven
  • wire rack
  • 12-inch skillet
  • whisk

Ingredients

For the Casserole

  • 2 pounds fresh green beans, trimmed (about 900 g)
  • 4 tablespoons unsalted butter, divided, plus more for the baking dish (about 55 g)
  • 12 ounces cremini mushrooms, sliced (340 g)
  • 2 garlic cloves, minced
  • 1 teaspoon fresh thyme leaves
  • 1 1/2 cups whole milk (360 g)
  • 1/2 cup half-and-half (120 g)
  • 1/2 cup low-sodium chicken or vegetable broth (120 g)
  • 1/4 cup all-purpose flour
  • 1 teaspoon kosher salt, divided
  • 1/2 teaspoon black pepper

For the Fried Onion Topping

  • 1 large yellow onion, very thinly sliced (about 250 g)
  • 1/2 cup buttermilk (120 g)
  • 1/2 cup all-purpose flour
  • 1/2 teaspoon kosher salt
  • 1/2 teaspoon black pepper
  • About 3 cups neutral frying oil, such as vegetable or canola oil

For Garnish

  • 1 small sprig fresh thyme (optional)

Instructions

  1. Preheat the oven to 375°F (190°C). Lightly butter a 2-quart oval baking dish or 8-by-11-inch casserole dish.
  2. Bring a large pot of salted water to a boil. Blanch the green beans for 4 to 5 minutes, until bright green and barely crisp-tender.
  3. Transfer the beans to ice water, then drain and dry them thoroughly.
  4. Toss the sliced onion with the buttermilk. In a separate bowl, combine 1/2 cup flour with 1/2 teaspoon salt and 1/2 teaspoon pepper.
  5. Lift the onions from the buttermilk and toss them in the seasoned flour until coated.
  6. Heat 1 to 1 1/2 inches of oil in a small deep saucepan or Dutch oven to about 375°F. Fry the onions in small batches for 2 to 4 minutes, turning gently, until golden brown. Drain on a wire rack or paper towels.
  7. Melt 2 tablespoons butter in a 12-inch skillet over medium-high heat. Add the mushrooms and a pinch of salt, then cook for 8 to 10 minutes, stirring occasionally, until their liquid evaporates and the mushrooms brown.
  8. Add the garlic and thyme leaves and cook for about 1 minute, until fragrant.
  9. Reduce the heat to medium. Melt the remaining 2 tablespoons butter in the skillet, stir in the remaining 1/4 cup flour, and cook briefly until the flour no longer smells raw.
  10. Gradually whisk in the milk, half-and-half, and broth. Simmer for 6 to 8 minutes, until the sauce coats a spoon. Season with the remaining salt and pepper.
  11. Fold the dried green beans into the mushroom sauce and spread the mixture in the prepared baking dish. Scatter about one-third of the fried onions over the top.
  12. Bake uncovered for 20 to 25 minutes, until the sauce bubbles around the edges and the center is hot.
  13. Rest the casserole for 5 to 10 minutes. Top with the remaining fried onions and garnish with a thyme sprig, if desired.

Tips

  • Dry the blanched beans thoroughly so they do not thin the sauce.
  • Brown the mushrooms until their liquid has evaporated before adding the dairy.
  • Cook the sauce until it coats a spoon before transferring it to the baking dish.
  • Keep the frying oil near 375°F and fry onions in small batches to keep them crisp.
  • Reserve most of the fried onions for topping after baking so they stay crunchy.

Variations

  • Frozen Green Bean Version: Use fully thawed and thoroughly dried frozen green beans, skipping the blanching step. The finished casserole will be softer than one made with fresh beans.
  • Canned Green Bean Version: Use well-drained canned green beans and begin checking the casserole early, baking only until the center is hot.
  • Store-Bought Onion Topping: Skip frying and use 1 1/2 to 2 cups store-bought crispy fried onions, reserving most for topping after baking.

Notes

Refrigerate leftovers for 3 to 4 days and store extra fried onions separately. Reheat covered at 350°F (175°C) for 20 to 30 minutes, then add crisp onions. Freeze unbaked bean-and-sauce filling without onions for up to 1 month.

Nutrition

Calories: 265 kcal | Protein: 7 g | Fat: 16 g | Carbohydrates: 25 g

Sweet Potato Casserole

This oven-baked sweet potato casserole has a creamy cinnamon-vanilla filling under a thick brown sugar-pecan crumble. The goal is a filling that holds a soft mound when spooned, not one that runs across the plate. Drain the potatoes well before mashing, and judge the bake by the center as well as the browned topping.

It makes 10 to 12 side-dish servings in a 9-by-13-inch baking dish. Allow about 25 minutes of active preparation, 15 to 20 minutes to cook the potatoes, 35 to 45 minutes to bake, and 10 to 15 minutes to rest.

Ingredients for Sweet Potato Casserole

Close view of a spoonful of sweet potato casserole showing creamy orange filling and chunky browned pecan crumble.
  • 4 pounds orange-fleshed sweet potatoes (about 1,800g), peeled and cut into 1-inch chunks
  • 10 tablespoons unsalted butter (140g), melted and divided, plus a little for the dish
  • 1/2 cup whole milk (120g)
  • 2 large eggs
  • 1 cup packed light brown sugar (200g), divided
  • 2 teaspoons vanilla extract
  • 1 teaspoon ground cinnamon, divided
  • 3/4 teaspoon kosher salt, divided, plus salt for the cooking water
  • 1/2 cup all-purpose flour (60g)
  • 1 1/2 cups coarsely chopped pecans (165g)

How to Make Sweet Potato Casserole

Overhead view of pecan-topped sweet potato casserole in a white rectangular dish with a serving scooped out.
  1. Cook and drain the potatoes: Put the sweet potato chunks in a large pot, cover with salted water, and bring to a boil over medium-high heat. Reduce to a steady simmer and cook for 15 to 20 minutes, until a fork slides through without resistance. Drain thoroughly, then return the potatoes to the warm pot for 1 minute to let excess moisture evaporate.
  2. Prepare the oven and dish: Preheat the oven to 350°F (175°C). Lightly butter or spray a light-colored rectangular 9-by-13-inch baking dish.
  3. Mix the filling: Mash the potatoes until mostly smooth. Stir in 6 tablespoons of the melted butter, the milk, 1/2 cup of the brown sugar, the eggs, vanilla, 3/4 teaspoon of the cinnamon, and 1/2 teaspoon of the salt. Mix just until combined; a little potato texture is fine. The filling should mound softly on a spoon rather than pour.
  4. Make the pecan crumble: In a medium bowl, combine the flour, pecans, remaining 1/2 cup brown sugar, remaining 1/4 teaspoon cinnamon, and remaining 1/4 teaspoon salt. Add the remaining 4 tablespoons melted butter and toss until loose, coarse clumps form. The pecan pieces should remain visible.
  5. Assemble: Spread the filling in the prepared dish. Scatter the crumble evenly over the top without pressing it flat.
  6. Bake: Bake uncovered for 35 to 45 minutes, checking at 35 minutes. The topping should be deep golden brown, and the center should have only slight movement when the dish is gently nudged. If the topping gets very dark before the center sets, loosely tent the dish with foil and continue baking.
  7. Rest and serve: Let the casserole stand for 10 to 15 minutes so the filling firms slightly. Serve in spooned portions directly from the dish.

How to Keep the Filling Set and the Topping Crisp

Well-drained potatoes and the measured amount of milk help keep the filling creamy without making it watery. The 9-by-13-inch dish spreads the filling shallowly enough for the stated baking window; a smaller, deeper dish may take longer. If the center still looks wet or sloshy, keep baking even if the pecans have browned.

For a distinct crumble, stop mixing once loose clumps form and leave them uncompressed on the filling. Coarsely chopped pecans give the topping visible texture rather than a flat, sandy surface.

Make-Ahead and Leftovers

Prepare the filling up to 12 hours ahead and refrigerate it in the baking dish. Keep the pecan topping separate, then scatter it over the filling just before baking so it does not soften against the potatoes. A cold filling may need longer in the oven; use the set-center cue rather than the clock alone.

Cover and refrigerate leftovers. Reheat until warmed through; the crumble may soften after storage.

Variations and Serving Ideas

For a shortcut, use about 4 pounds of drained canned sweet potatoes and skip the boiling step. Add the milk gradually, as canned potatoes can vary in moisture.

For a marshmallow-topped version, omit the pecan crumble. Bake until the filling is nearly set, then add 3 to 4 cups of mini marshmallows during the last 5 to 8 minutes. Watch closely; marshmallows brown quickly.

Serve warm alongside roast turkey, ham, or chicken. Classic Green Bean Casserole with Crispy Onions and Garlic Butter Dinner Rolls provide savory contrast.

Nutrition

Approximate nutrition per serving, based on 12 side-dish servings: 410 calories, 6g protein, 21g fat, and 53g carbohydrates. Approximate values per 100g: 210 calories, 3g protein, 11g fat, and 27g carbohydrates. Values will vary with potato size, peeling, and serving size.

Sweet Potato Casserole

A creamy cinnamon-vanilla sweet potato casserole topped with a crisp brown sugar and pecan crumble.
Course: Side Dish
Cuisine: American
Prep: 25 min
Cook: 65 min
Total: 105 min
Servings: 12 Calories: 410 kcal

Equipment

  • Large pot
  • Colander
  • Potato masher
  • 9-by-13-inch baking dish
  • Medium mixing bowl

Ingredients

For the Sweet Potato Filling

  • 4 pounds orange-fleshed sweet potatoes (about 1,800g), peeled and cut into 1-inch chunks
  • 6 tablespoons unsalted butter (84g), melted
  • 1/2 cup whole milk (120g)
  • 2 large eggs
  • 1/2 cup packed light brown sugar (100g)
  • 2 teaspoons vanilla extract
  • 3/4 teaspoon ground cinnamon
  • 1/2 teaspoon kosher salt
  • Salt, for the cooking water
  • Butter or cooking spray, for the baking dish

For the Pecan Crumble

  • 1/2 cup all-purpose flour (60g)
  • 1 1/2 cups coarsely chopped pecans (165g)
  • 1/2 cup packed light brown sugar (100g)
  • 1/4 teaspoon ground cinnamon
  • 1/4 teaspoon kosher salt
  • 4 tablespoons unsalted butter (56g), melted

Instructions

  1. Place the sweet potato chunks in a large pot and cover with salted water. Bring to a boil over medium-high heat, then reduce to a steady simmer and cook for 15 to 20 minutes, until fork-tender.
  2. Drain the potatoes thoroughly and return them to the warm pot for 1 minute to let excess moisture evaporate.
  3. Preheat the oven to 350°F (175°C). Lightly butter or spray a 9-by-13-inch baking dish.
  4. Mash the sweet potatoes until mostly smooth.
  5. Stir 6 tablespoons melted butter, milk, brown sugar, eggs, vanilla, cinnamon, and salt into the mashed potatoes until just combined. The filling should hold a soft mound on a spoon.
  6. Combine the flour, pecans, remaining brown sugar, remaining cinnamon, and remaining salt in a medium bowl.
  7. Add the remaining 4 tablespoons melted butter to the pecan mixture and toss until loose, coarse clumps form.
  8. Spread the sweet potato filling evenly in the prepared baking dish. Scatter the pecan crumble evenly over the top without pressing it down.
  9. Bake uncovered for 35 to 45 minutes, checking at 35 minutes, until the topping is deep golden brown and the center has only slight movement when gently nudged.
  10. Loosely tent the casserole with foil if the topping darkens before the center is set.
  11. Rest for 10 to 15 minutes before serving.

Tips

  • Drain the cooked sweet potatoes very well, then let them steam dry in the warm pot for 1 minute.
  • Use a 9-by-13-inch dish so the filling bakes through within the stated time.
  • Mix the filling only until combined; some potato texture is fine.
  • Stop mixing the crumble once loose clumps form to preserve a crisp, textured topping.
  • Check that the center is set, not just that the pecans are browned.
  • Tent loosely with foil if the topping browns too quickly.

Variations

  • Canned Sweet Potato Shortcut: Use about 4 pounds of drained canned sweet potatoes and skip boiling; add the milk gradually because canned potatoes vary in moisture.
  • Marshmallow-Topped Sweet Potato Casserole: Omit the pecan crumble. Bake until the filling is nearly set, then add 3 to 4 cups mini marshmallows during the final 5 to 8 minutes of baking.

Notes

Prepare the filling up to 12 hours ahead and refrigerate it in the baking dish, keeping the topping separate until baking. Cover and refrigerate leftovers; reheat until warmed through. The crumble may soften after storage.

Nutrition

Calories: 410 kcal | Protein: 6 g | Fat: 21 g | Carbohydrates: 53 g