Author

Julia

Browsing

Green Bean Casserole

Green bean casserole should be creamy and spoonable beneath a crisp layer of French-fried onions. This oven-baked version uses canned green beans and condensed cream of mushroom soup. Drain the beans well so the sauce stays thick, and save most of the onions for the last few minutes of baking. The filling can then heat through without the topping turning soft or too dark.

Ingredients for Green Bean Casserole
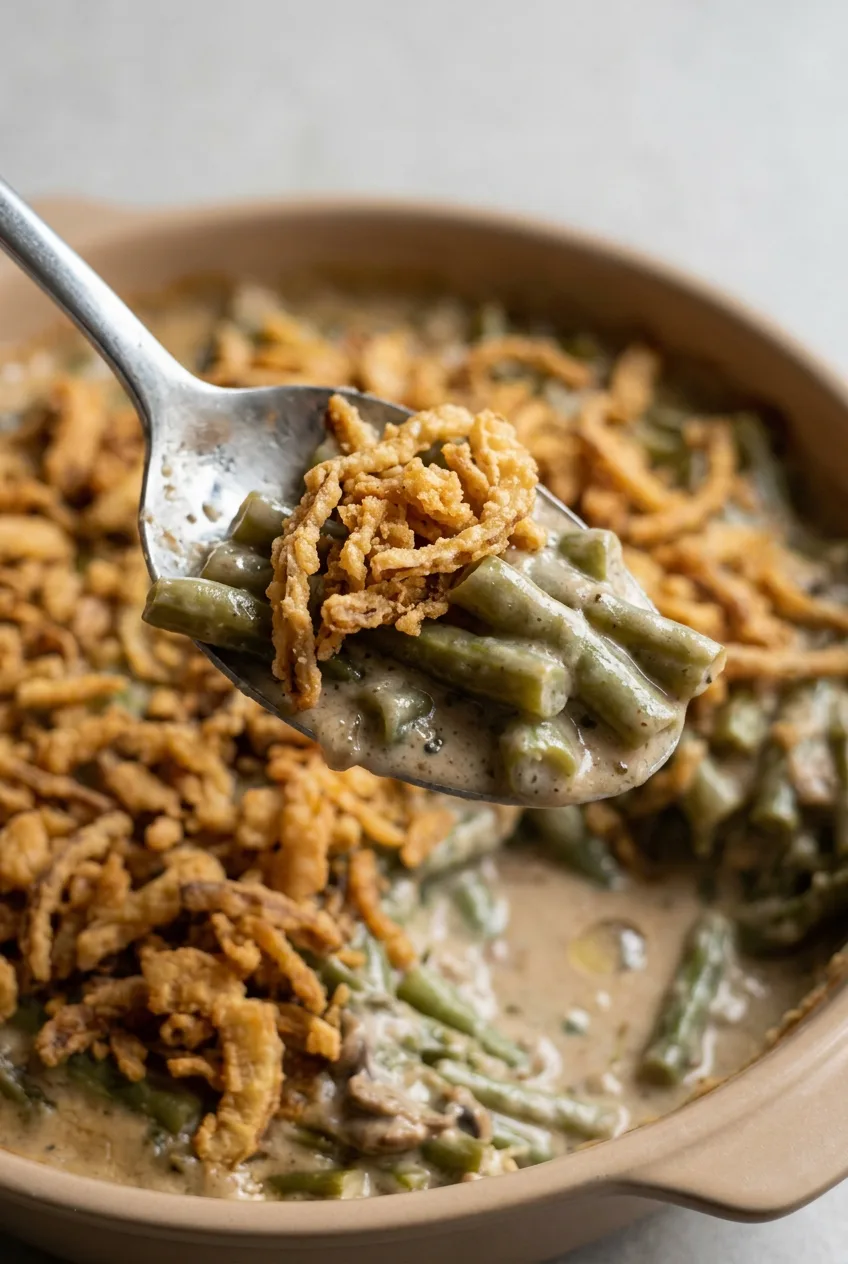
Close view of a spoonful of creamy green beans beneath crisp golden French-fried onions.
  • 4 cans (14.5 ounces each) cut green beans, drained very thoroughly
  • 2 cans (10.5 ounces each) condensed cream of mushroom soup (about 600g total)
  • 1/2 cup milk (120g)
  • 1 teaspoon soy sauce
  • 1/4 teaspoon ground black pepper
  • 1 1/3 cups French-fried onions (about 75g), divided

Yield: 6 to 8 side-dish servings. Time: About 10 minutes prep, 30 minutes baking, plus a 5-minute rest.

How to Make Green Bean Casserole
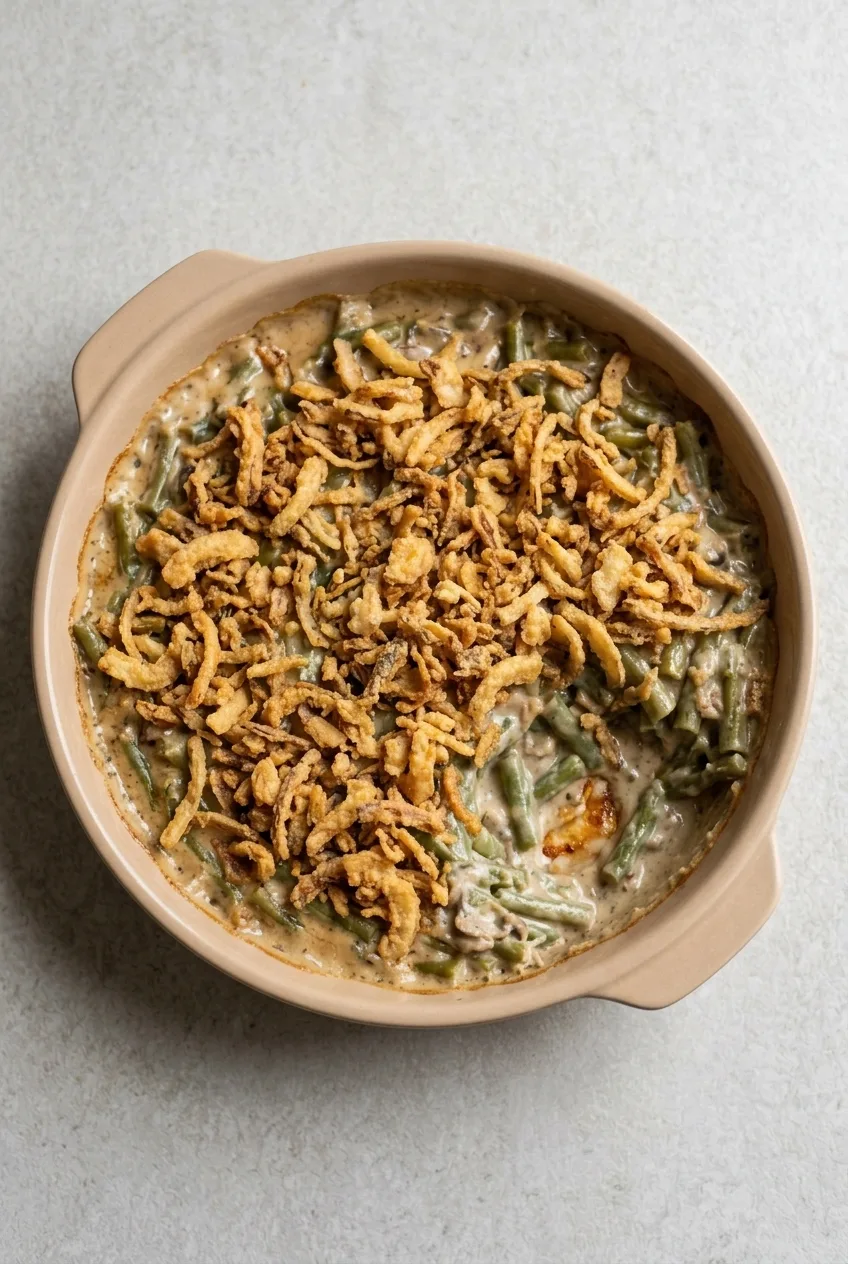
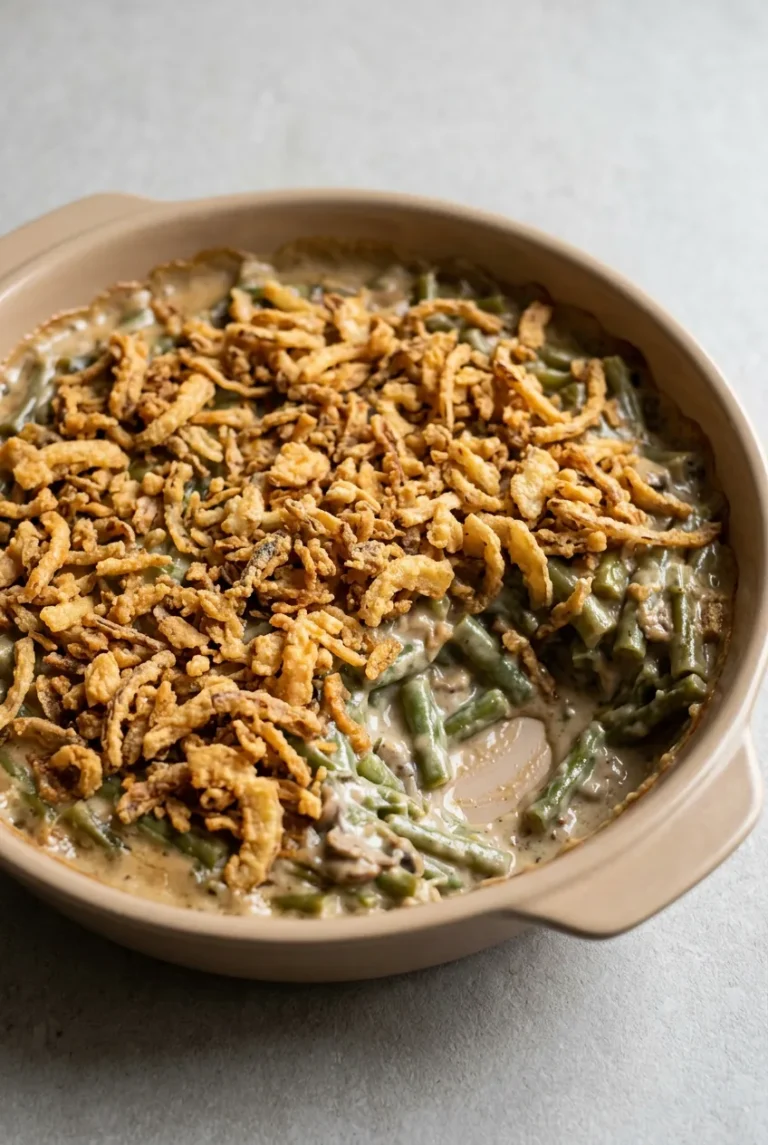
Overhead view of green bean casserole with golden fried onion topping in a shallow baking dish.
  1. Preheat the oven: Set a rack in the center and heat the oven to 350°F (175°C). Use a shallow 2-quart casserole dish, about 8 by 8 inches or a similar size. Lightly grease it if it is prone to sticking.
  2. Drain the beans: Pour the green beans into a colander. Let them drain while you mix the sauce; do not add the canning liquid to the casserole.
  3. Mix the filling: In a large bowl, stir the mushroom soup, milk, soy sauce, and pepper until smooth. Fold in the drained beans and 1/3 cup of the French-fried onions. Spread the mixture evenly in the dish and reserve the remaining 1 cup of onions.
  4. Bake the filling: Bake uncovered for about 25 minutes. Before adding the topping, check that the sauce is bubbling around the edges and the center is steaming hot when reached with a spoon. If the center is only warm, bake a few minutes longer.
  5. Add the topping: Scatter the reserved onions over the surface. Bake for about 5 minutes more, until the onions are golden and crisp and the filling is bubbling.
  6. Rest and serve: Let the casserole stand for 5 minutes so the sauce settles slightly, then serve hot.

How to Keep the Filling Creamy and the Topping Crisp

Thorough draining keeps excess bean liquid from thinning the mushroom sauce. A small amount of fried onions seasons the filling, while adding most of them at the end protects their crunch.

A deeper dish or a casserole assembled cold from the refrigerator may take longer to heat through. Check the center before adding the topping rather than relying only on the 25-minute mark.

Fresh beans need trimming and blanching before assembly. Frozen beans should be thawed and drained well. Neither is a direct timing swap for the canned beans used here.

What to Serve with Green Bean Casserole

Serve it alongside roast turkey, beef, or mashed potatoes. For a larger side-dish spread, add Slow Cooker Cheesy Scalloped Potatoes. Cranberry Jello Salad with Pineapple and Orange provides a sweet-tart contrast.

Make-Ahead, Storage, and Reheating

To make the casserole ahead, assemble the filling with the 1/3 cup of onions mixed in, but leave off the final topping. Cover and refrigerate for 1 to 2 days. Bake until the cold filling is hot and bubbling, allowing extra time as needed, then add the reserved onions for the final 5 minutes.

Cool leftovers and refrigerate them in an airtight container for up to 5 days. Reheat in the oven until hot and bubbling, about 20 to 30 minutes depending on portion size and starting temperature. If the topping darkens before the center heats through, cover the dish loosely, then uncover briefly to help the onions crisp. Refrigerated onions will soften somewhat.

Nutrition

Approximate nutrition per serving, based on 8 servings: 150 calories, 5g protein, 9g fat, and 17g carbohydrates. Per 100g: approximately 70 calories, 2g protein, 4g fat, and 8g carbohydrates. Values vary with the brands used and the drained weight of the beans.

Green Bean Casserole

A creamy baked green bean casserole with condensed mushroom soup and a crisp French-fried onion topping.
Course: Side Dish
Cuisine: American
Prep: 10 min
Cook: 30 min
Total: 45 min
Servings: 8 Calories: 150 kcal

Equipment

  • 2-quart casserole dish
  • large bowl
  • colander
  • mixing spoon

Ingredients

For the Casserole

  • 4 cans (14.5 ounces each) cut green beans, drained very thoroughly
  • 2 cans (10.5 ounces each) condensed cream of mushroom soup (about 600 g total)
  • 1/2 cup milk (120 g)
  • 1 teaspoon soy sauce
  • 1/4 teaspoon ground black pepper
  • 1 1/3 cups French-fried onions (about 75 g), divided

Instructions

  1. Preheat the oven to 350°F (175°C) and position a rack in the center. Lightly grease a shallow 2-quart casserole dish if needed.
  2. Drain the green beans thoroughly in a colander and discard the canning liquid.
  3. Stir the condensed mushroom soup, milk, soy sauce, and black pepper together in a large bowl until smooth.
  4. Fold the drained green beans and 1/3 cup of the French-fried onions into the sauce mixture.
  5. Spread the mixture evenly in the casserole dish and reserve the remaining 1 cup French-fried onions for topping.
  6. Bake uncovered for about 25 minutes, until the sauce is bubbling around the edges and the center is steaming hot.
  7. Scatter the reserved French-fried onions over the casserole and bake for about 5 minutes more, until golden and crisp.
  8. Rest the casserole for 5 minutes before serving.

Tips

  • Drain the canned beans very thoroughly so the sauce stays creamy and thick.
  • Mix only 1/3 cup of fried onions into the filling and add the rest near the end of baking to keep them crisp.
  • Check that the center is steaming hot before adding the topping; a deeper dish or cold casserole may need extra baking time.
  • Use a shallow 2-quart dish for more even heating and browning.
  • Thaw and drain frozen beans well, or blanch fresh beans before using them.
Notes

For make-ahead prep, assemble the filling without the final onion topping and refrigerate for 1 to 2 days. Bake until hot and bubbling, then add onions for the final 5 minutes. Refrigerate leftovers for up to 5 days and reheat in the oven until hot and bubbling.

Nutrition

Calories: 150 kcal | Protein: 5 g | Fat: 9 g | Carbohydrates: 17 g

Best Roast Turkey

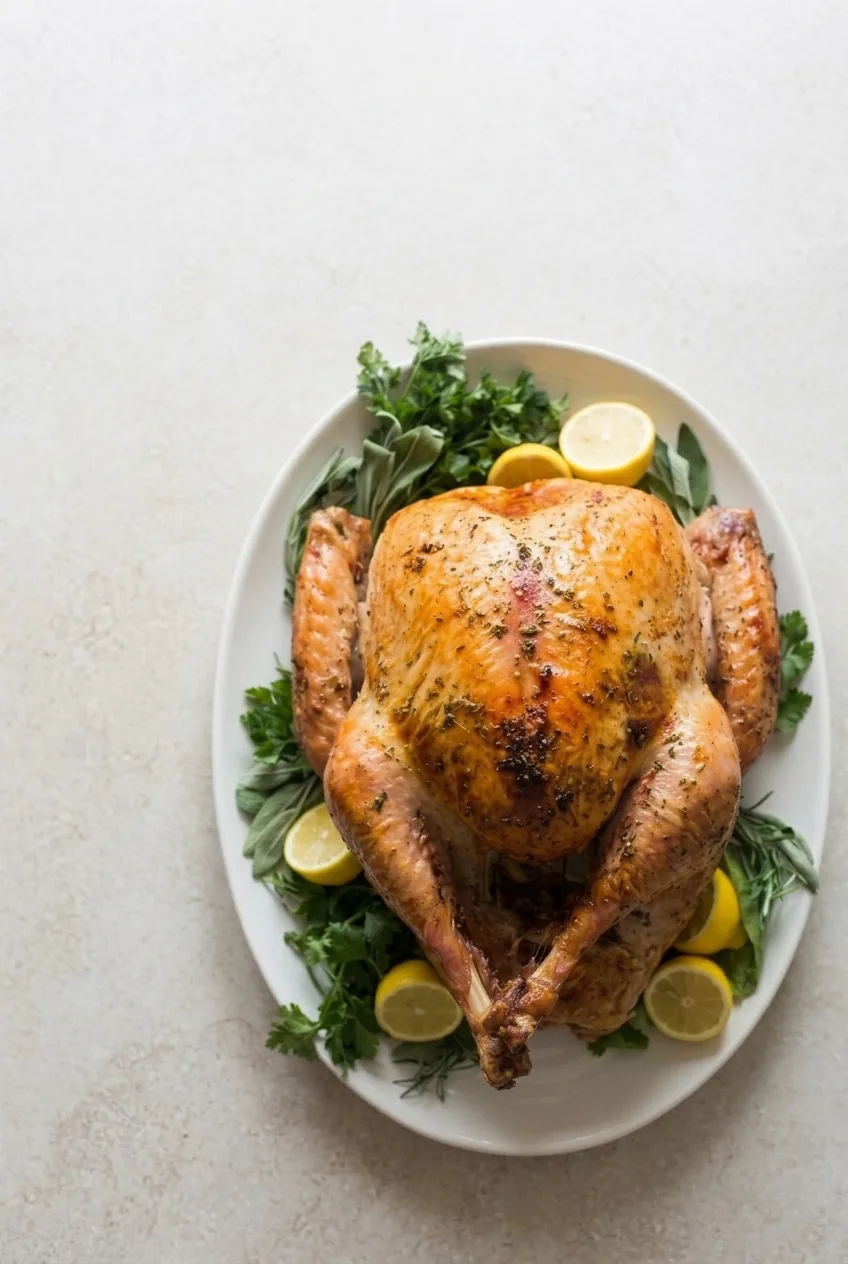
Herb butter beneath the breast skin seasons the meat, while a little rubbed over the outside helps the skin turn golden and flecked with herbs and pepper. Roast the whole turkey breast-side up at a steady 325°F (165°C), without routine basting. The key is to check both the breast and thighs with a thermometer: the skin can look ready before the meat is cooked through. Serve the bird intact on a white platter with fresh herbs and lemon, then carve.

Ingredients for Roast Turkey

  • 1 whole turkey (12 to 14 pounds), fully thawed, with neck and giblets removed
  • 1 cup (2 sticks) unsalted butter, softened (225g)
  • 1 tablespoon finely chopped fresh rosemary
  • 1 tablespoon chopped fresh thyme leaves
  • 1 tablespoon finely chopped fresh sage
  • 2 tablespoons finely chopped fresh parsley
  • 4 garlic cloves, minced
  • 2 teaspoons kosher salt, for an untreated turkey
  • 1 1/2 teaspoons black pepper
  • 2 lemons, divided
  • 1 large yellow onion, quartered
  • 3 celery ribs, cut into large pieces
  • 2 medium carrots, cut into large pieces
  • 1 cup low-sodium chicken or turkey stock, or water
  • 1 generous handful fresh rosemary, thyme, sage, and parsley sprigs, divided between the cavity and platter
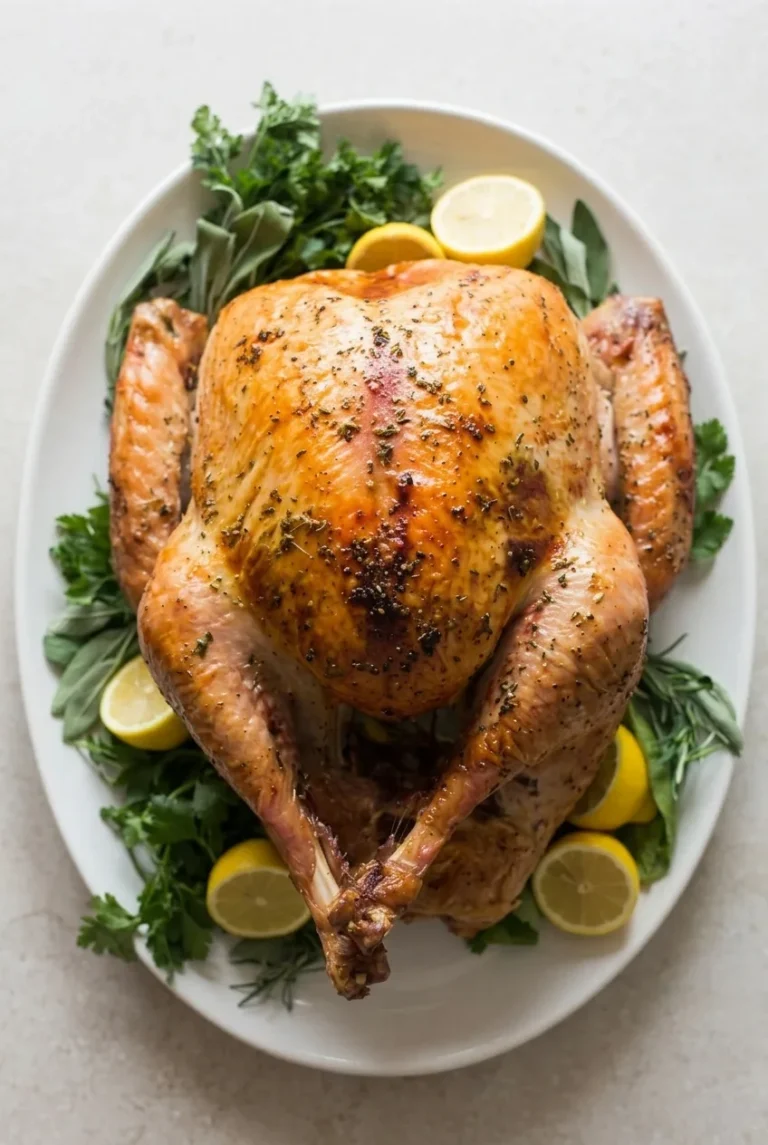
Overhead view of a whole golden roast turkey on a platter with lemon halves and green herb sprigs.

Check the turkey label before adding salt. If it says enhanced, self-basting, kosher, pre-brined, or contains a salt solution, reduce or omit the salt and do not brine it again. Brining is optional for an untreated turkey; this recipe does not require it.

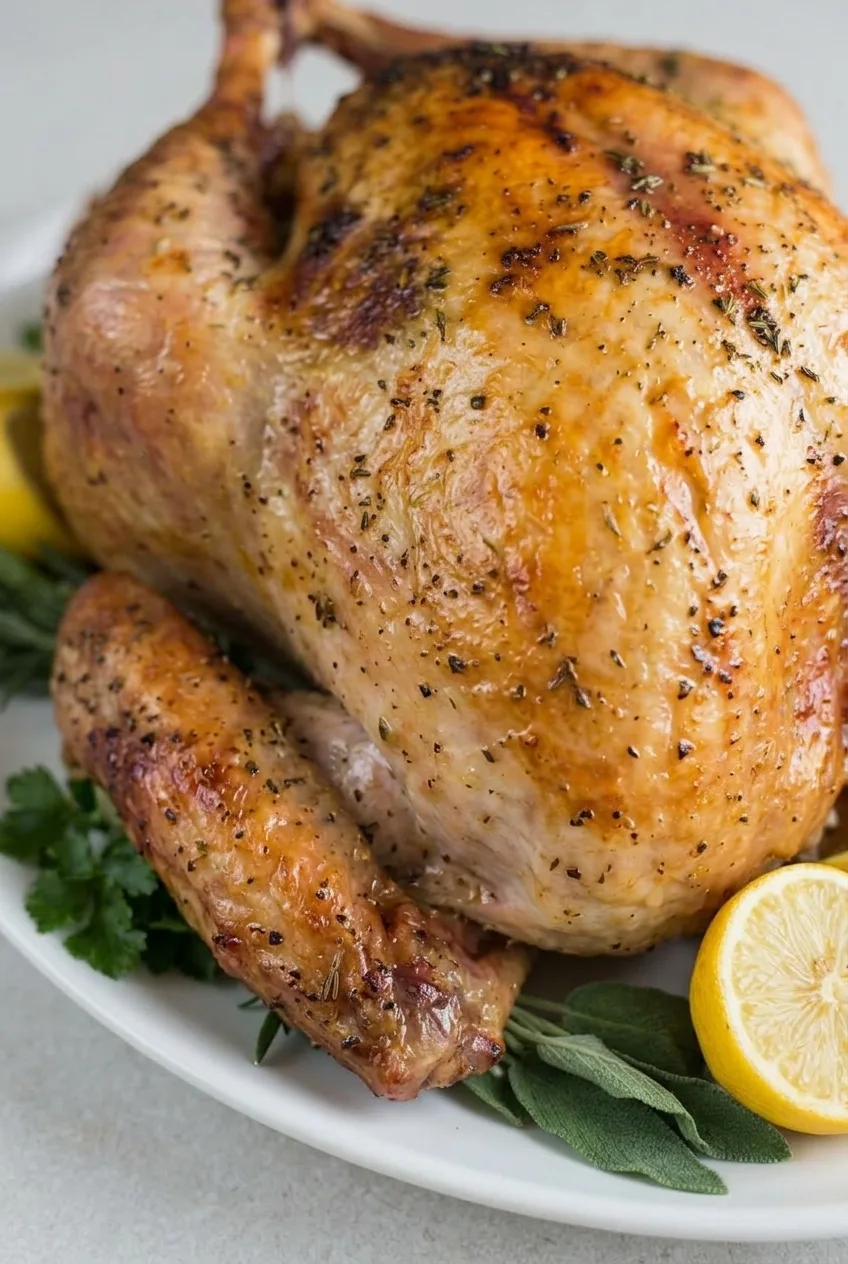
Close view of browned herb butter turkey breast skin, wing, lemon, and fresh herb garnish.

How to Roast Turkey

  1. Dry the turkey and preheat the oven: Check that no ice remains in the cavity. Pat the turkey very dry inside and out; do not rinse it. Let it stand at room temperature for 30 to 45 minutes while you position an oven rack in the lower third and preheat to 325°F.
  2. Make the herb butter: Mash the softened butter with the chopped rosemary, thyme, sage, parsley, garlic, salt, and pepper. Reserve 2 tablespoons for the outside of the turkey. The butter should be spreadable, not melted.
  3. Butter the breast: Gently loosen the skin over both breast halves without tearing it. Spread the remaining butter over the breast meat beneath the skin, then rub the reserved butter over the outside. Keep some herbs and pepper visible on the skin.
  4. Set up the pan: Put the celery, carrots, and some of the onion in a large roasting pan. Set a rack over the vegetables and pour the stock or water into the pan, keeping it below the rack. Loosely place one halved lemon, the remaining onion, and several herb sprigs in the cavity. Do not pack it tightly. Tuck the wing tips behind the body and set the turkey breast-side up on the rack.
  5. Roast uncovered: Roast for about 3 to 3 1/2 hours, using that range only to plan when to check. There is no need to baste routinely. Rotate the pan halfway through only if the turkey is browning unevenly. If the breast turns richly golden before the meat is done, lay foil loosely over the breast and top without pressing it against the skin. Add a little more stock or water below the rack only if the pan dries out.
  6. Check both breast and thighs: Begin checking about 45 minutes before the expected finish, generally around 2 1/2 hours. Insert a thermometer into the deepest part of the breast and the thickest part of each thigh without touching bone. Remove the turkey when the breast reaches 160°F (70°C) and the thighs reach at least 170°F (75°C). Check another spot if a reading seems inconsistent.
  7. Rest and serve: Carefully transfer the whole turkey to a large white platter. Tent it loosely with foil and rest for 30 to 45 minutes; check that the breast reaches 165°F (75°C) during the rest. Save the pan drippings for gravy. Just before serving, arrange the remaining lemon in halves or slices and the fresh herb sprigs around the turkey, leaving the browned breast visible. Carve after presenting it.

How to Tell When Roast Turkey Is Done

The skin should be golden to amber-brown, but color cannot confirm doneness. Turkey size, starting temperature, and oven heat can all change the finish time, so use the clock to decide when to start checking—not when to take the bird out. If the skin still needs color, leave it uncovered. If the breast has browned enough but the meat needs more time, keep the foil tent loose so it does not trap steam against the skin.

Bake bread stuffing separately rather than packing it into the cavity. If you do not have a roasting rack, sturdy, large pieces of onion, carrot, and celery can elevate the turkey above the pan liquid. For gravy, strain the reserved drippings and skim off excess fat; add stock if more liquid is needed.

Make-Ahead, Storage, and Reheating

Make the herb butter up to 2 days ahead and refrigerate it; soften it before spreading. The pan and cavity aromatics can be chopped a day ahead and refrigerated separately.

Refrigerate leftover turkey in shallow airtight containers within 2 hours. It keeps for 3 to 4 days. To reheat, cover sliced turkey with a splash of broth or gravy and warm it at 250°F (120°C) to 300°F (150°C) until hot. Freeze cooled sliced or shredded turkey, preferably with a little broth or gravy, for up to 3 months. Thaw overnight in the refrigerator before reheating.

Nutrition

Approximate per serving, based on 13 servings of cooked turkey with skin and some retained herb butter, without gravy: 515 calories, 56g protein, 31g fat, and 1g carbohydrates. Approximate per 100g of served turkey: 235 calories, 26g protein, 14g fat, and less than 1g carbohydrates. Values vary with the amount of meat, skin, and butter served; pan vegetables and liquid are not counted as a side dish.

Best Roast Turkey

A whole roast turkey with herb butter under the breast skin, roasted at 325°F until the breast and thighs reach their proper temperatures.
Course: Main Course
Cuisine: American
Prep: 45 min
Cook: 210 min
Total: 300 min
Servings: 13 Calories: 515 kcal

Equipment

  • Large roasting pan
  • Roasting rack
  • Meat thermometer
  • Aluminum foil
  • Large platter

Ingredients

For the Turkey

  • 1 whole turkey (12 to 14 pounds), fully thawed, with neck and giblets removed
  • 1 cup (2 sticks/225 g) unsalted butter, softened
  • 1 tablespoon finely chopped fresh rosemary
  • 1 tablespoon chopped fresh thyme leaves
  • 1 tablespoon finely chopped fresh sage
  • 2 tablespoons finely chopped fresh parsley
  • 4 garlic cloves, minced
  • 2 teaspoons kosher salt, for an untreated turkey
  • 1 1/2 teaspoons black pepper

For the Roasting Pan and Cavity

  • 2 lemons, divided
  • 1 large yellow onion, quartered
  • 3 celery ribs, cut into large pieces
  • 2 medium carrots, cut into large pieces
  • 1 cup low-sodium chicken or turkey stock, or water
  • 1 generous handful fresh rosemary, thyme, sage, and parsley sprigs, divided

Instructions

  1. Position an oven rack in the lower third of the oven and preheat to 325°F (165°C).
  2. Check that no ice remains in the turkey cavity. Pat the turkey very dry inside and out without rinsing it, then let it stand at room temperature for 30 to 45 minutes.
  3. Mash the softened butter with the chopped rosemary, thyme, sage, parsley, garlic, salt, and pepper. Reserve 2 tablespoons of herb butter for the outside of the turkey.
  4. Gently loosen the skin over both breast halves without tearing it. Spread the remaining herb butter directly over the breast meat beneath the skin.
  5. Rub the reserved herb butter over the outside of the turkey, leaving some herbs and pepper visible on the skin.
  6. Place the celery, carrots, and some of the onion in a large roasting pan. Set a rack over the vegetables and pour in the stock or water, keeping the liquid below the rack.
  7. Loosely place 1 lemon half, the remaining onion, and several herb sprigs in the turkey cavity. Tuck the wing tips behind the body and place the turkey breast-side up on the rack.
  8. Roast uncovered for about 3 to 3 1/2 hours. Rotate the pan halfway through only if the turkey is browning unevenly.
  9. Begin checking the turkey about 2 1/2 hours into roasting. Insert a thermometer into the deepest part of the breast and the thickest part of each thigh without touching bone.
  10. Remove the turkey when the breast reaches 160°F (70°C) and the thighs reach at least 170°F (75°C). If the breast browns too quickly, loosely tent the breast and top with foil.
  11. Transfer the turkey to a large platter, tent loosely with foil, and rest for 30 to 45 minutes. Confirm that the breast reaches 165°F (75°C) during resting.
  12. Save the pan drippings for gravy. Garnish the platter with the remaining lemon and herb sprigs, then carve and serve.

Tips

  • Check the turkey label before salting; reduce or omit salt for enhanced, kosher, self-basting, pre-brined, or salt-solution turkeys.
  • Do not rinse the turkey; patting it dry helps the skin brown and avoids spreading raw poultry juices.
  • Use a thermometer in both the breast and thighs because skin color alone does not indicate doneness.
  • Do not routinely baste the turkey, as steady roasting at 325°F is sufficient.
  • Loosely tent with foil only if the breast browns before the meat reaches temperature.
  • Bake stuffing separately rather than packing it into the turkey cavity.

Notes

Make the herb butter up to 2 days ahead and refrigerate; soften before using. Refrigerate leftover turkey within 2 hours for 3 to 4 days, or freeze sliced or shredded turkey with broth or gravy for up to 3 months. Reheat covered with a splash of broth or gravy at 250°F (120°C) to 300°F (150°C) until hot.

Nutrition

Calories: 515 kcal | Protein: 56 g | Fat: 31 g | Carbohydrates: 1 g

Cheesy Scalloped Potatoes

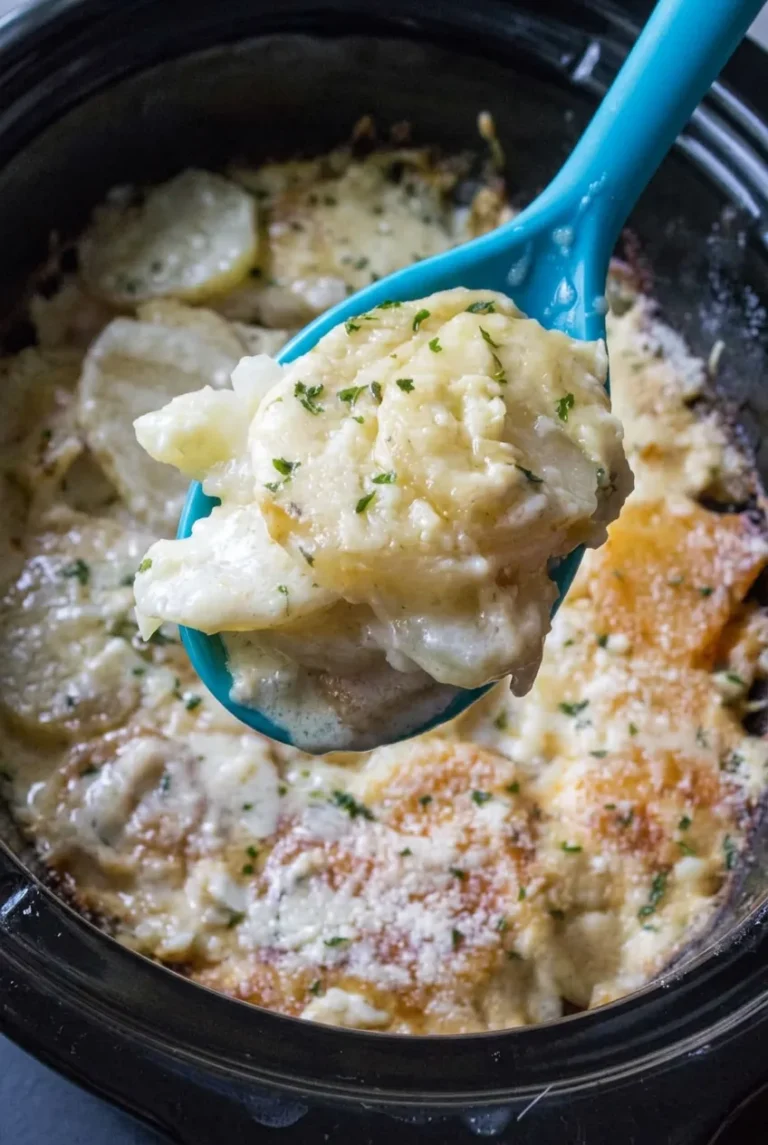
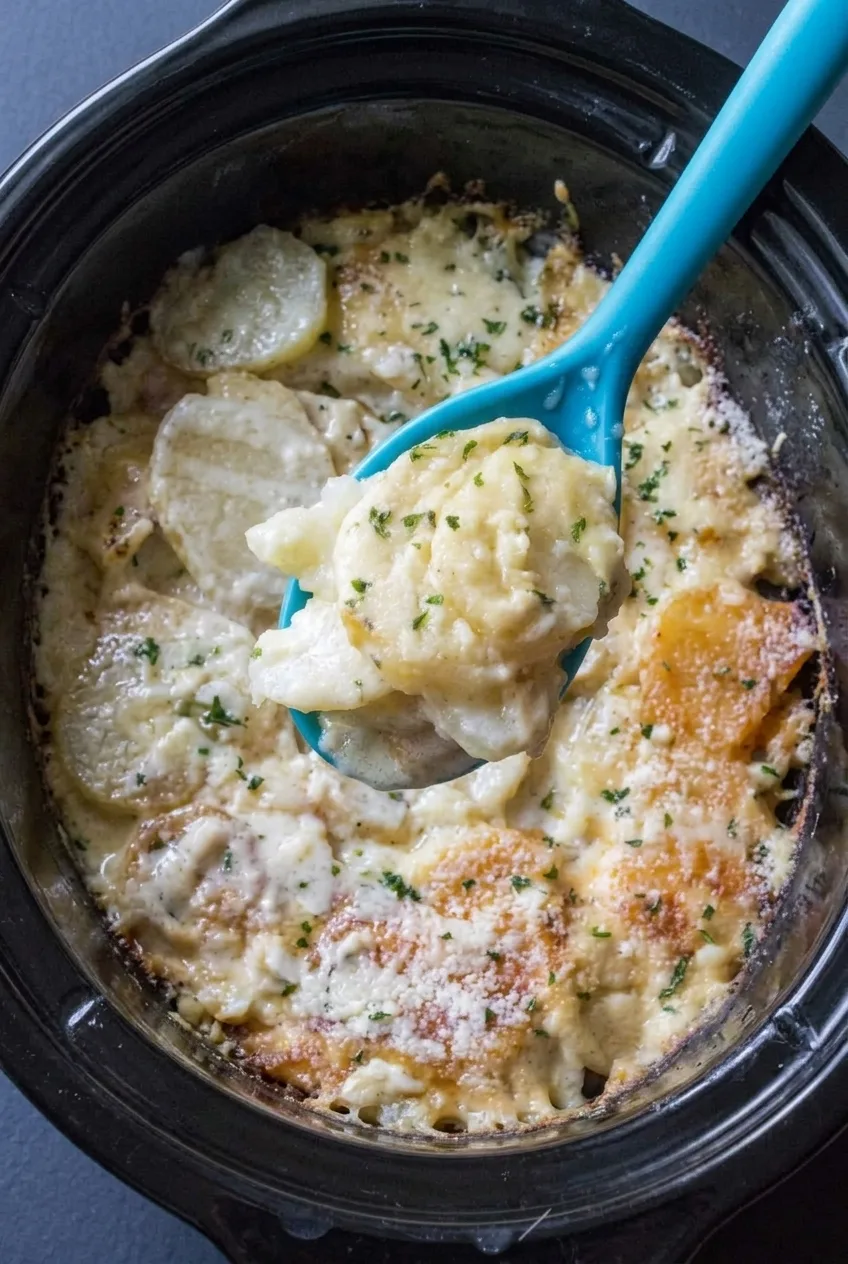
Thin Yukon Gold potatoes cook in layers of creamy cheddar sauce in a slow cooker, then get a melted cheddar-and-Parmesan topping. The finished potatoes are tender and saucy enough to scoop, rather than cut into squares. An oval cooker gives the slices room to form even layers while leaving the oven free.

Slice the potatoes uniformly, cook on HIGH, and begin checking the center at four hours. Once the potatoes are fork-tender, an uncovered rest helps the sauce cling to each spoonful.

Ingredients for Cheesy Scalloped Potatoes

Close view of tender scalloped potato slices coated in creamy cheddar-Parmesan sauce
  • 3 pounds Yukon Gold potatoes (about 1,350g), peeled or scrubbed
  • 3 tablespoons unsalted butter (about 45g), divided
  • 1 medium yellow onion (about 150g)
  • 1 1/2 cups whole milk (360g)
  • 3/4 cup sour cream (180g)
  • 2 1/2 cups freshly shredded sharp cheddar (about 285g), divided
  • 1/2 cup finely grated Parmesan (about 50g), divided
  • 1 1/2 teaspoons kosher salt
  • 1/2 teaspoon black pepper
  • 1/2 teaspoon garlic powder
  • 2 tablespoons chopped chives or flat-leaf parsley

Freshly shred the cheeses if possible; block cheese generally melts more smoothly than pre-shredded cheese. A mandoline makes the potato slices easier to keep at a consistent thickness. Use its guard or a cut-resistant glove.

How to Make Cheesy Scalloped Potatoes in the Slow Cooker

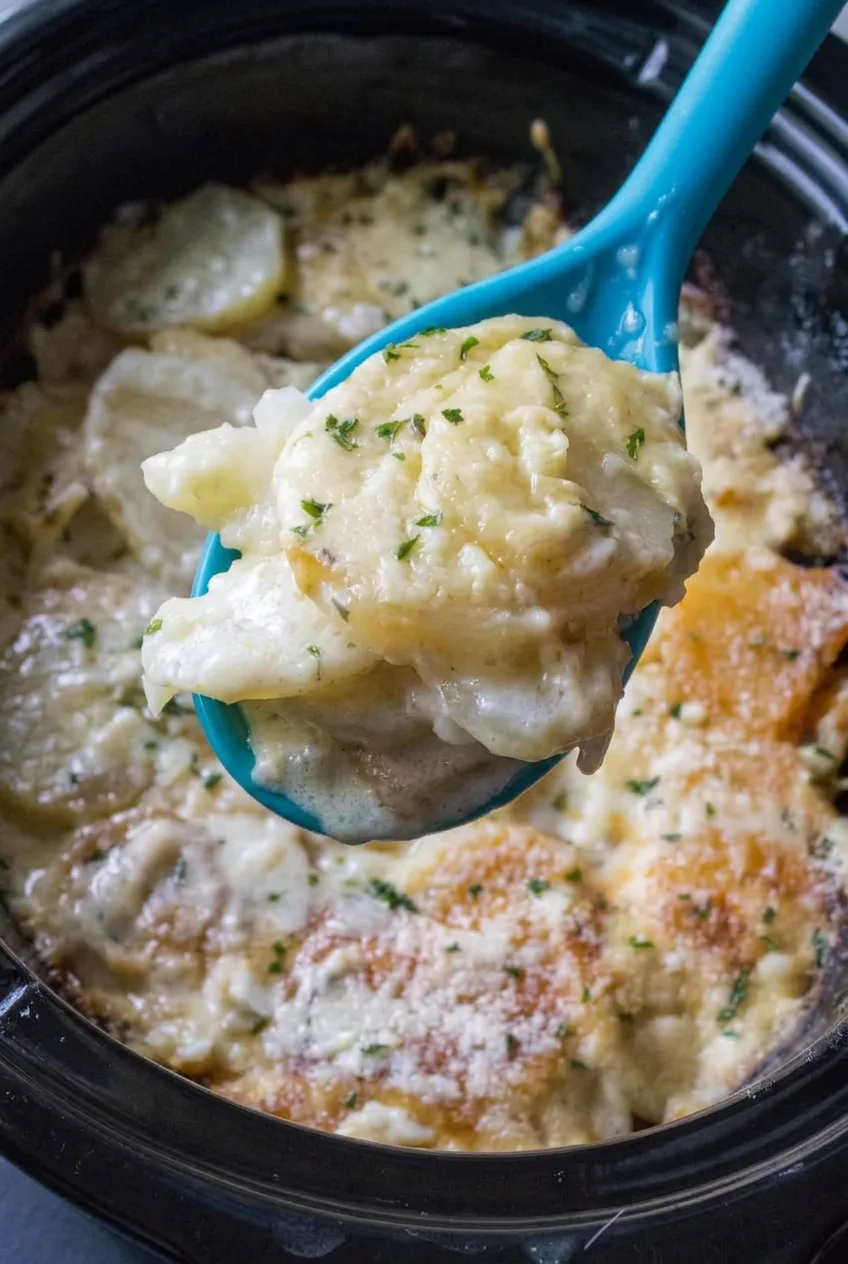
Overhead view of cheesy scalloped potatoes with melted cheese and herbs in a black oval slow cooker
  1. Prepare the cooker and vegetables: Coat the insert of a 5- to 6-quart oval slow cooker with 1 tablespoon butter. Slice the potatoes into uniform 1/8-inch rounds and the onion very thinly. Thick potato slices may still be firm when the thinner ones are done.
  2. Mix the sauce: Melt the remaining 2 tablespoons butter. In a large bowl, whisk it with the milk, sour cream, salt, pepper, and garlic powder. Stir in 1 1/2 cups cheddar and 1/4 cup Parmesan; reserve the remaining cheeses for the top. The mixture should be pourable, with visible cheese shreds.
  3. Build the layers: Arrange one-third of the potatoes in broad, overlapping layers in the insert. Add one-third of the onion and spoon over one-third of the sauce. Repeat twice, ending with sauce. Gently press the top slices into the liquid without packing the layers tightly. Keep the cooker no more than about three-quarters full.
  4. Cook until tender: Cover and cook on HIGH for 4 to 5 hours. Begin checking at 4 hours with a fork or thin knife, testing the center as well as the outer layers. If the potatoes resist, cover and check again every 15 to 20 minutes. Stop when the slices are easily pierced but still distinguishable and the sauce bubbles at the edges. Do not stir during cooking.
  5. Melt the topping: Scatter the reserved cheddar and Parmesan over the tender potatoes. Cover and cook on HIGH for 10 to 15 minutes more, until the cheese is melted and glossy.
  6. Rest and serve: Turn off the cooker and remove the lid. Let the potatoes stand uncovered for 10 to 15 minutes so the sauce thickens. Scatter the chives or parsley over the top and serve saucy spoonfuls from the insert.

What to Expect From the Slow-Cooker Finish

Use fork tenderness rather than the clock alone: the center can take longer than the layers near the hot outer edge, and slow cookers vary. Cooking on HIGH and stopping as soon as the potatoes are tender helps the slices hold their shape.

The topping will be melted and lightly mottled, not crisp like an oven-baked crust. For optional browning, transfer the cooked potatoes to a broiler-safe baking dish and broil briefly. Never put a slow-cooker insert under the broiler unless its manufacturer explicitly says it is broiler-safe.

Serving and Storing Leftovers

Serve alongside roasted chicken, grilled steak, or a green vegetable. For a sweet-tart side at a larger meal, add cranberry Jello salad with pineapple and orange.

Cool leftovers promptly, transfer them to a shallow airtight container, and refrigerate for 2 to 3 days. Reheat covered at 350°F (175°C) for about 30 minutes, or until hot throughout. Add a small splash of milk or cream if the potatoes look dry.

Nutrition

Approximate nutrition per serving, based on 8 side-dish servings: 420 calories, 17g protein, 24g fat, and 35g carbohydrates. Per 100g of finished potatoes: approximately 150 calories, 6g protein, 9g fat, and 13g carbohydrates. Values vary with ingredient brands, portion size, and moisture lost during cooking.

Cheesy Scalloped Potatoes

Thinly sliced Yukon Gold potatoes are layered with a creamy cheddar sauce in the slow cooker and finished with melted cheddar and Parmesan.
Course: Side Dish
Cuisine: American
Prep: 25 min
Cook: 315 min
Total: 355 min
Servings: 8 Calories: 420 kcal

Equipment

  • 5- to 6-quart oval slow cooker
  • mandoline or sharp knife
  • large bowl
  • whisk
  • measuring cups and spoons

Ingredients

For the Potatoes and Sauce

  • 3 pounds Yukon Gold potatoes (about 1,350g), peeled or scrubbed
  • 3 tablespoons unsalted butter (about 45g), divided
  • 1 medium yellow onion (about 150g), thinly sliced
  • 1 1/2 cups whole milk (360g)
  • 3/4 cup sour cream (180g)
  • 2 1/2 cups freshly shredded sharp cheddar (about 285g), divided
  • 1/2 cup finely grated Parmesan (about 50g), divided
  • 1 1/2 teaspoons kosher salt
  • 1/2 teaspoon black pepper
  • 1/2 teaspoon garlic powder

For Garnish

  • 2 tablespoons chopped chives or flat-leaf parsley

Instructions

  1. Coat the insert of a 5- to 6-quart oval slow cooker with 1 tablespoon butter.
  2. Slice the potatoes into uniform 1/8-inch rounds and slice the onion very thinly.
  3. Melt the remaining 2 tablespoons butter.
  4. Whisk the melted butter, milk, sour cream, salt, pepper, and garlic powder in a large bowl.
  5. Stir 1 1/2 cups cheddar and 1/4 cup Parmesan into the sauce mixture, reserving the remaining cheeses for topping.
  6. Arrange one-third of the potatoes in overlapping layers in the slow cooker. Top with one-third of the onion and one-third of the sauce.
  7. Repeat the layers twice, ending with sauce. Gently press the top potato slices into the liquid without packing them tightly.
  8. Cover and cook on HIGH for 4 to 5 hours. Start checking the center at 4 hours and continue checking every 15 to 20 minutes until the potatoes are easily pierced with a fork or thin knife.
  9. Scatter the reserved cheddar and Parmesan over the potatoes. Cover and cook on HIGH for 10 to 15 minutes, until the cheese is melted and glossy.
  10. Turn off the slow cooker, remove the lid, and let the potatoes rest uncovered for 10 to 15 minutes.
  11. Garnish with chives or parsley and serve.

Tips

  • Use a mandoline or sharp knife to keep potato slices an even 1/8-inch thickness.
  • Freshly shredded block cheese melts more smoothly than pre-shredded cheese.
  • Keep the slow cooker no more than about three-quarters full.
  • Test potatoes in the center, since the middle may cook more slowly than the outer layers.
  • Do not stir the potatoes while they cook.
  • Use fork tenderness rather than cooking time alone to judge doneness.

Variations

  • Broiled Cheese Topping: For a browned topping, transfer the cooked potatoes to a broiler-safe baking dish and broil briefly. Do not broil the slow-cooker insert unless the manufacturer confirms it is broiler-safe.

Notes

Cool leftovers promptly and refrigerate in a shallow airtight container for 2 to 3 days. Reheat covered at 350°F (175°C) for about 30 minutes, adding a small splash of milk or cream if needed.

Nutrition

Calories: 420 kcal | Protein: 17 g | Fat: 24 g | Carbohydrates: 35 g

Cranberry Breakfast Cake

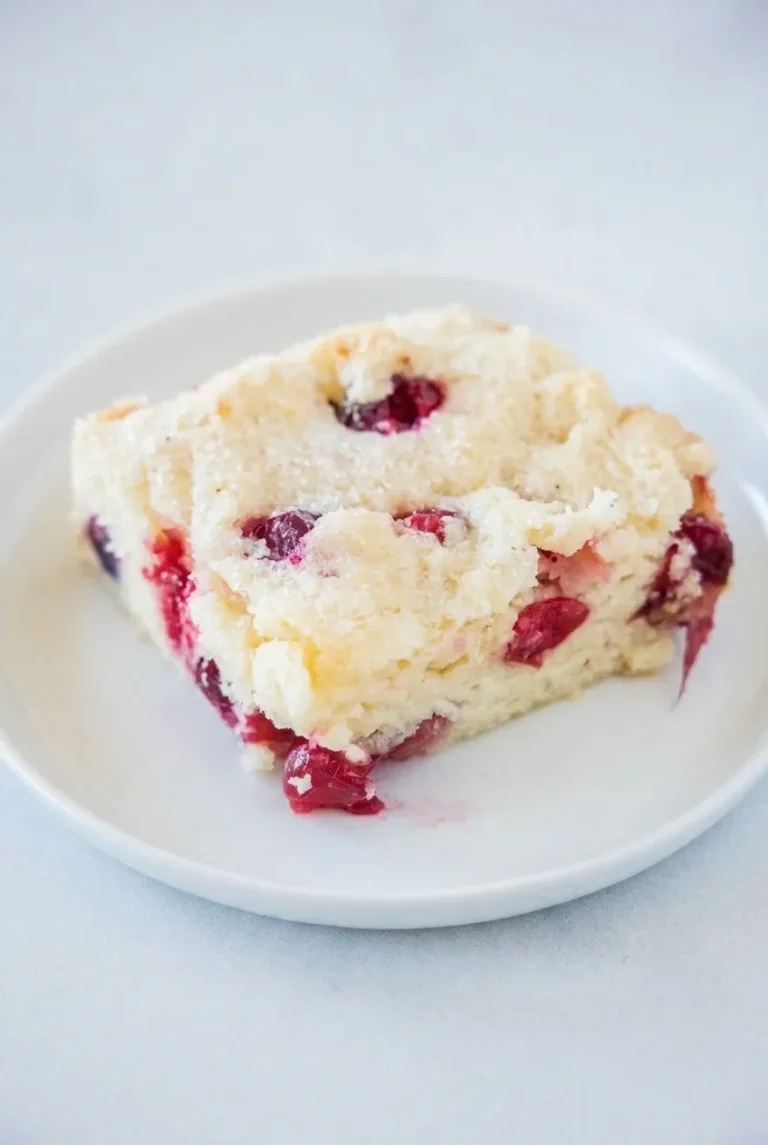
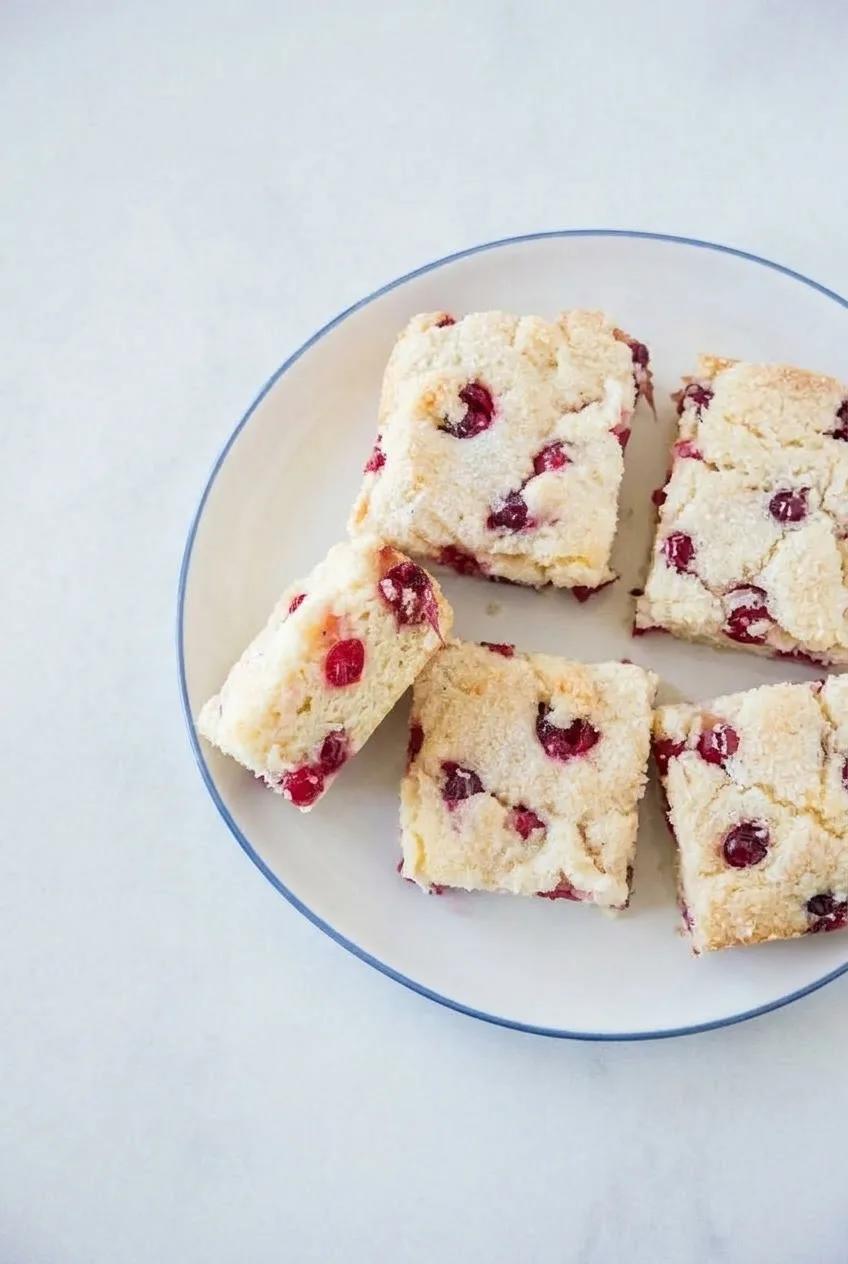
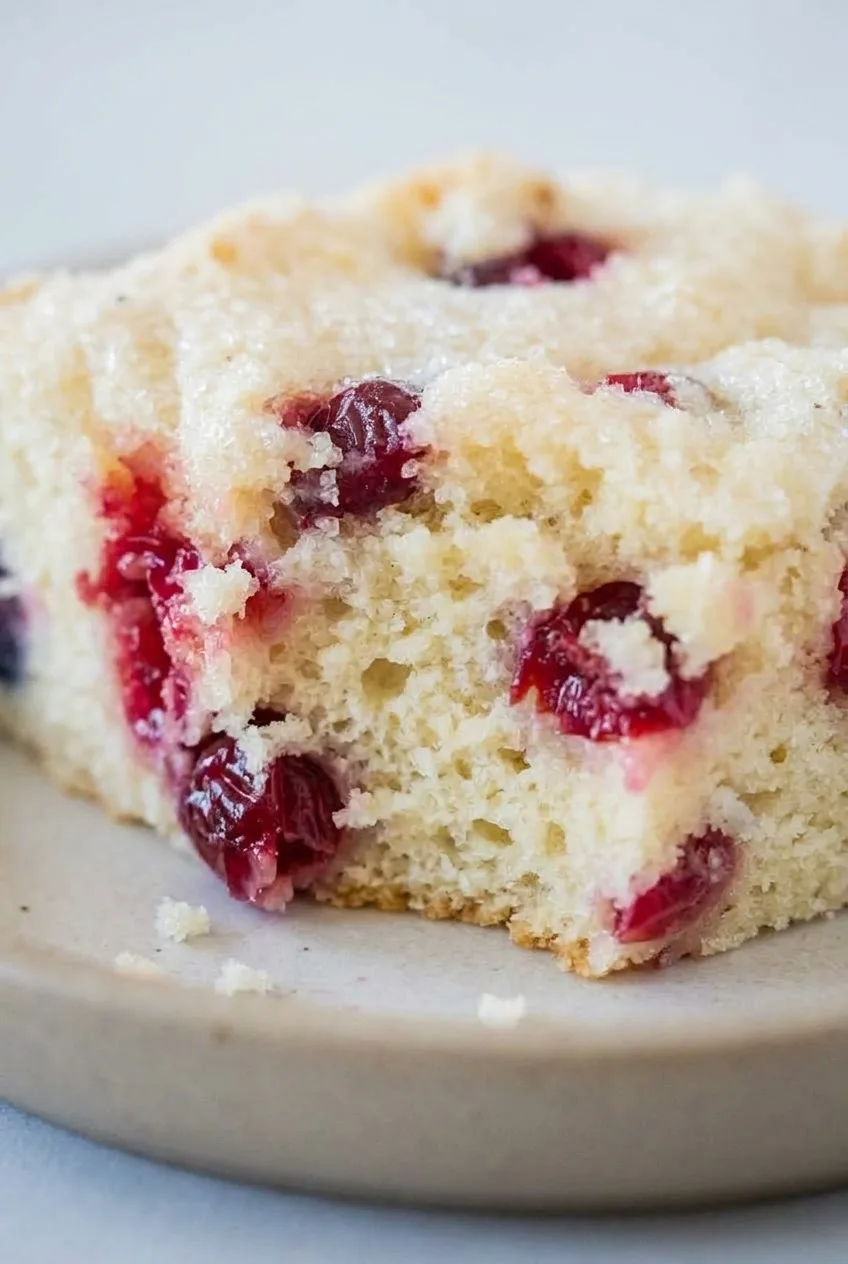
Whole cranberries leave tart, ruby-red pockets in this tender butter cake, while coarse sugar bakes into a lightly crisp top. Orange zest and vanilla add flavor without overpowering the berries. An 8-inch square pan gives the cake enough height to cut into thick squares for breakfast, brunch, or a snack.

The batter should be thick enough to hold the berries; there’s no need to thin it. Start checking before the suggested bake time ends, since a tester that pierces a cranberry can look wet even when the surrounding cake is done.

Ingredients for Cranberry Breakfast Cake

Overhead view of several thick cranberry breakfast cake squares with whole berries and coarse sugar topping.
  • 2 cups all-purpose flour (240g), divided
  • 2 teaspoons baking powder
  • 1/2 teaspoon fine salt
  • 1/2 cup (1 stick) unsalted butter, softened (113g)
  • 1 cup granulated sugar (200g)
  • 2 large eggs, at room temperature
  • 1 teaspoon vanilla extract
  • 1 tablespoon finely grated orange zest
  • 1/2 cup buttermilk, at room temperature (120g)
  • 2 cups fresh whole cranberries (200g)
  • 2 tablespoons coarse sparkling sugar or turbinado sugar (25g)

Using frozen cranberries? Substitute the same amount of frozen whole berries and fold them in without thawing. They may make the batter stiffer, so use a sturdy spatula. Dried cranberries won’t give the cake the same juicy pockets.

Close view of tender cranberry breakfast cake crumb with glossy whole cranberry pockets and sparkling sugar.

How to Bake Cranberry Breakfast Cake

  1. Prepare the pan and flour: Heat the oven to 350°F (175°C) with a rack in the center. Line an 8-inch square baking pan with parchment, leaving an overhang on two sides, and lightly grease the exposed sides. Reserve 1 tablespoon of the measured flour. Whisk the remaining flour with the baking powder and salt.
  2. Coat the cranberries: Pat fresh cranberries dry if needed, then toss them with the reserved flour until lightly dusted. If using frozen berries, keep them frozen and work quickly.
  3. Cream the butter and sugar: Beat the butter and granulated sugar for 2 to 3 minutes, until pale and fluffy. Beat in the eggs one at a time, scraping the bowl as needed. Mix in the vanilla and orange zest.
  4. Finish the batter: Add the flour mixture in two additions, alternating with the buttermilk. Mix on low just until the flour disappears. The batter will be thick and spreadable; extra beating can make the cake less tender.
  5. Add the berries and sugar: Gently fold in the cranberries until distributed, keeping them whole. Spread the batter into the pan’s corners and scatter the coarse sugar evenly over the top. The sugar balances the tart berries and adds a little crunch.
  6. Bake: Bake uncovered for about 38 to 45 minutes, starting checks at 35 minutes. The top should be set and lightly golden, and the center should spring back gently. Insert a tester into cake near the center, avoiding a cranberry. A few moist crumbs are fine, but wet batter means it needs more time; check again in 5-minute increments.
  7. Cool and cut: Let the cake cool in the pan for 15 to 20 minutes. Lift it out with the parchment if desired, then cool until warm before cutting into 9 thick squares. This gives the tender crumb and berry juices time to settle.

How to Tell When the Cake Is Done

Cranberry juice can leave a wet mark on a tester, so check the cake beside a berry rather than through one. Look for a set, lightly golden top and no wet batter in the center; deep browning isn’t necessary. A light-colored metal pan helps keep the edges pale. A dark pan may brown them sooner, and an uneven oven may benefit from one pan rotation near the end.

Serving and Make-Ahead Options

Serve the squares warm or at room temperature. For an almond-vanilla version, omit the orange zest and add 1/4 teaspoon almond extract with the vanilla. For another whole-berry breakfast bake in individual portions, try these Cranberry Orange Muffins with Whole Cranberries.

For a morning bake, cover and refrigerate the prepared batter overnight, separately from the pan. Transfer it to the prepared pan before baking. Cold batter may need closer to 45 to 50 minutes; use the same center-doneness cues rather than relying on the clock.

How to Store and Freeze Cranberry Breakfast Cake

Cool the cake completely before covering it so trapped warmth doesn’t make the sugar topping sticky. Store squares in an airtight container at room temperature for 2 to 3 days, or refrigerate for up to 5 days. Warm an individual slice briefly in the microwave if desired.

To freeze, wrap fully cooled squares individually and place them in an airtight freezer container for up to 2 months. Thaw at room temperature. For a warm slice, heat it briefly in a 300°F (150°C) oven after thawing.

Nutrition

Approximate nutrition per square, based on 9 squares: 320 calories, 5g protein, 12g fat, and 49g carbohydrates. Per 100g of finished cake: approximately 310 calories, 5g protein, 11g fat, and 48g carbohydrates. Values vary with ingredients and the cake’s final baked weight.

Cranberry Breakfast Cake

A tender butter cake with whole tart cranberries, orange zest, and a crisp coarse-sugar topping.
Course: Breakfast
Cuisine: American
Prep: 20 min
Cook: 45 min
Total: 85 min
Servings: 9 Calories: 320 kcal

Equipment

  • 8-inch square baking pan
  • parchment paper
  • mixing bowls
  • electric mixer
  • whisk
  • rubber spatula
  • cooling rack

Ingredients

For the Cake

  • 2 cups all-purpose flour (240g), divided
  • 2 teaspoons baking powder
  • 1/2 teaspoon fine salt
  • 1/2 cup (1 stick) unsalted butter, softened (113g)
  • 1 cup granulated sugar (200g)
  • 2 large eggs, at room temperature
  • 1 teaspoon vanilla extract
  • 1 tablespoon finely grated orange zest
  • 1/2 cup buttermilk, at room temperature (120g)
  • 2 cups fresh whole cranberries (200g)

For the Topping

  • 2 tablespoons coarse sparkling sugar or turbinado sugar (25g)

Instructions

  1. Preheat the oven to 350°F (175°C) with a rack in the center.
  2. Line an 8-inch square baking pan with parchment paper, leaving an overhang on two sides, and lightly grease the exposed sides.
  3. Reserve 1 tablespoon of the flour. Whisk the remaining flour with the baking powder and salt.
  4. Pat the cranberries dry if needed, then toss them with the reserved flour until lightly coated.
  5. Beat the softened butter and granulated sugar for 2 to 3 minutes, until pale and fluffy.
  6. Beat in the eggs one at a time, scraping down the bowl as needed. Mix in the vanilla and orange zest.
  7. Add the flour mixture in two additions, alternating with the buttermilk, and mix on low just until combined.
  8. Gently fold in the cranberries, keeping them whole.
  9. Spread the thick batter evenly into the prepared pan and sprinkle the coarse sugar over the top.
  10. Bake for 38 to 45 minutes, checking from 35 minutes onward, until the top is set and lightly golden and the center springs back gently.
  11. Test the cake near the center while avoiding cranberries; a few moist crumbs are fine, but wet batter needs more baking time.
  12. Cool the cake in the pan for 15 to 20 minutes, then lift out with the parchment and cool until warm before cutting into 9 squares.

Tips

  • Keep the batter thick; do not thin it before baking.
  • Test the cake beside a cranberry, since cranberry juice can make a tester appear wet.
  • Use frozen cranberries directly from the freezer without thawing.
  • Mix the batter only until the flour disappears to keep the cake tender.
  • Use a light-colored metal pan for paler, more evenly baked edges.
  • If using a dark pan, begin checking early because the edges may brown faster.

Variations

  • Almond-Vanilla Cranberry Cake: Omit the orange zest and add 1/4 teaspoon almond extract with the vanilla.

Notes

Store completely cooled cake in an airtight container at room temperature for 2 to 3 days or refrigerated for up to 5 days. Freeze individually wrapped squares for up to 2 months. Refrigerated overnight batter may need 45 to 50 minutes to bake.

Nutrition

Calories: 320 kcal | Protein: 5 g | Fat: 12 g | Carbohydrates: 49 g

Cranberry Orange Pecan Crisp

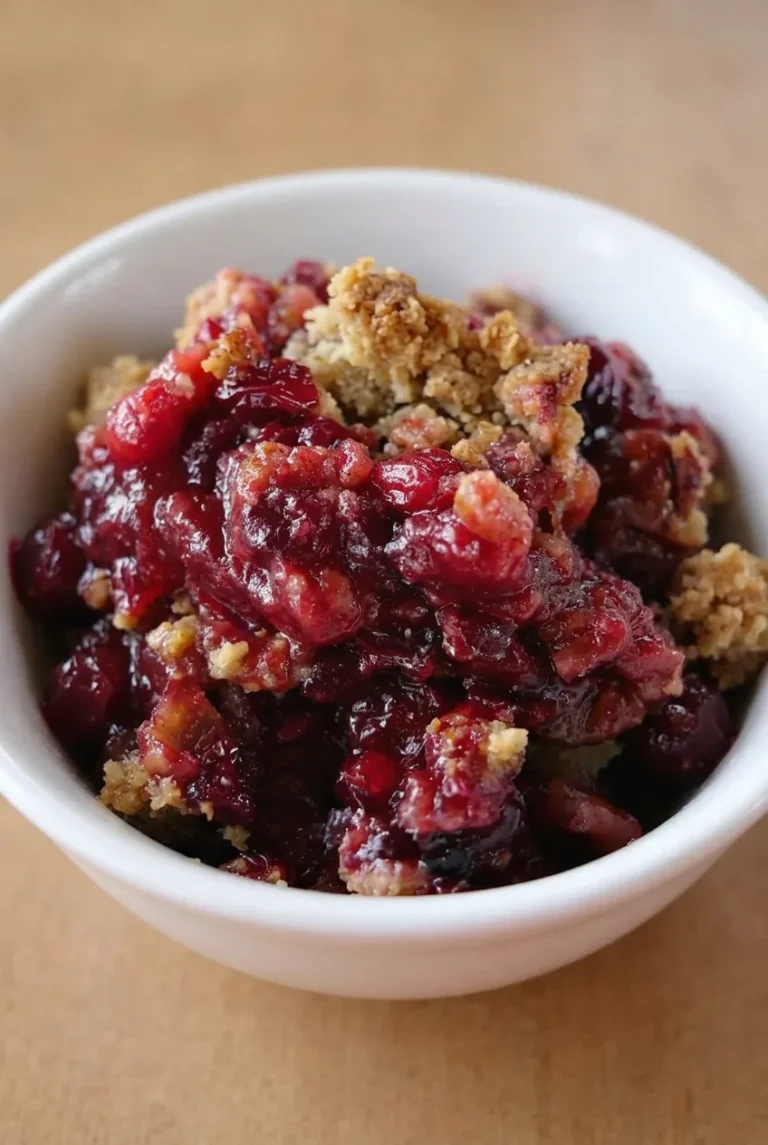
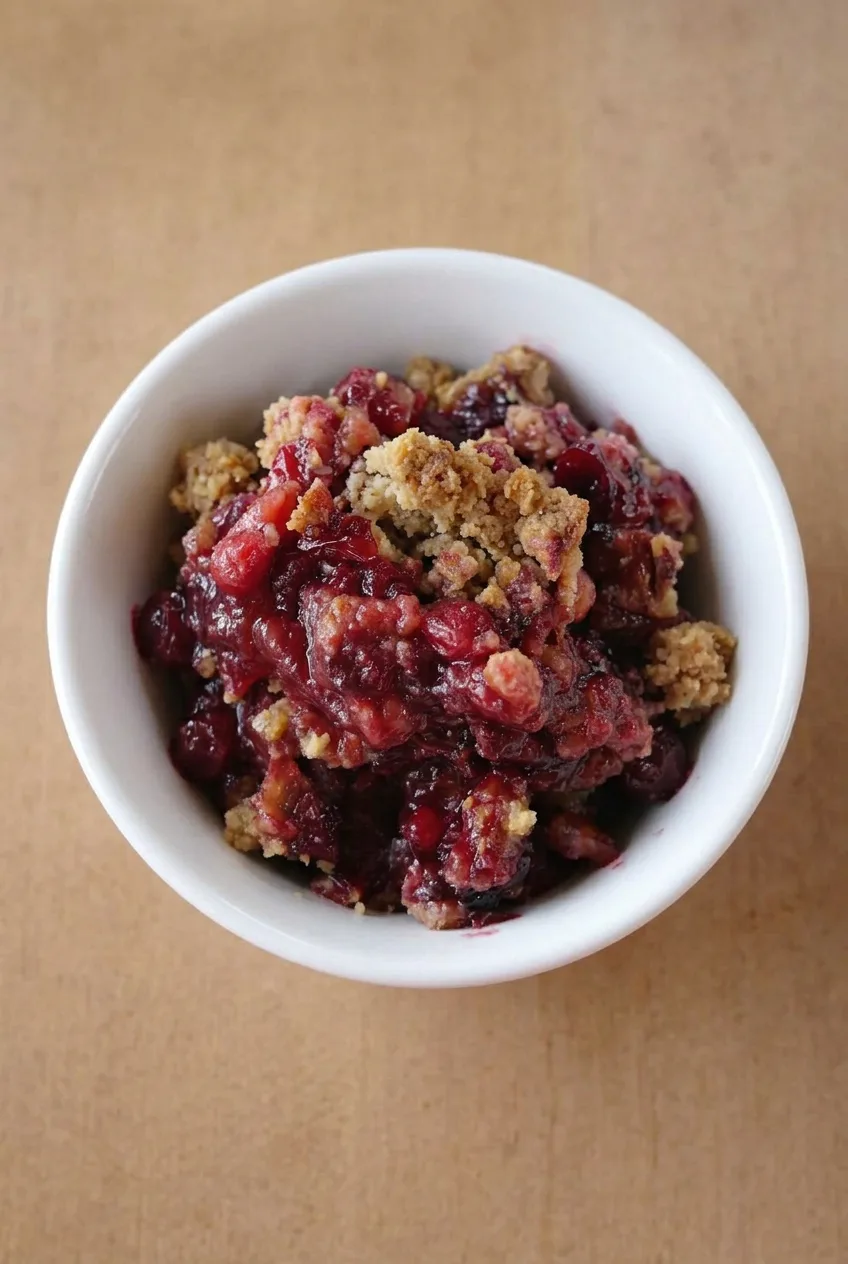
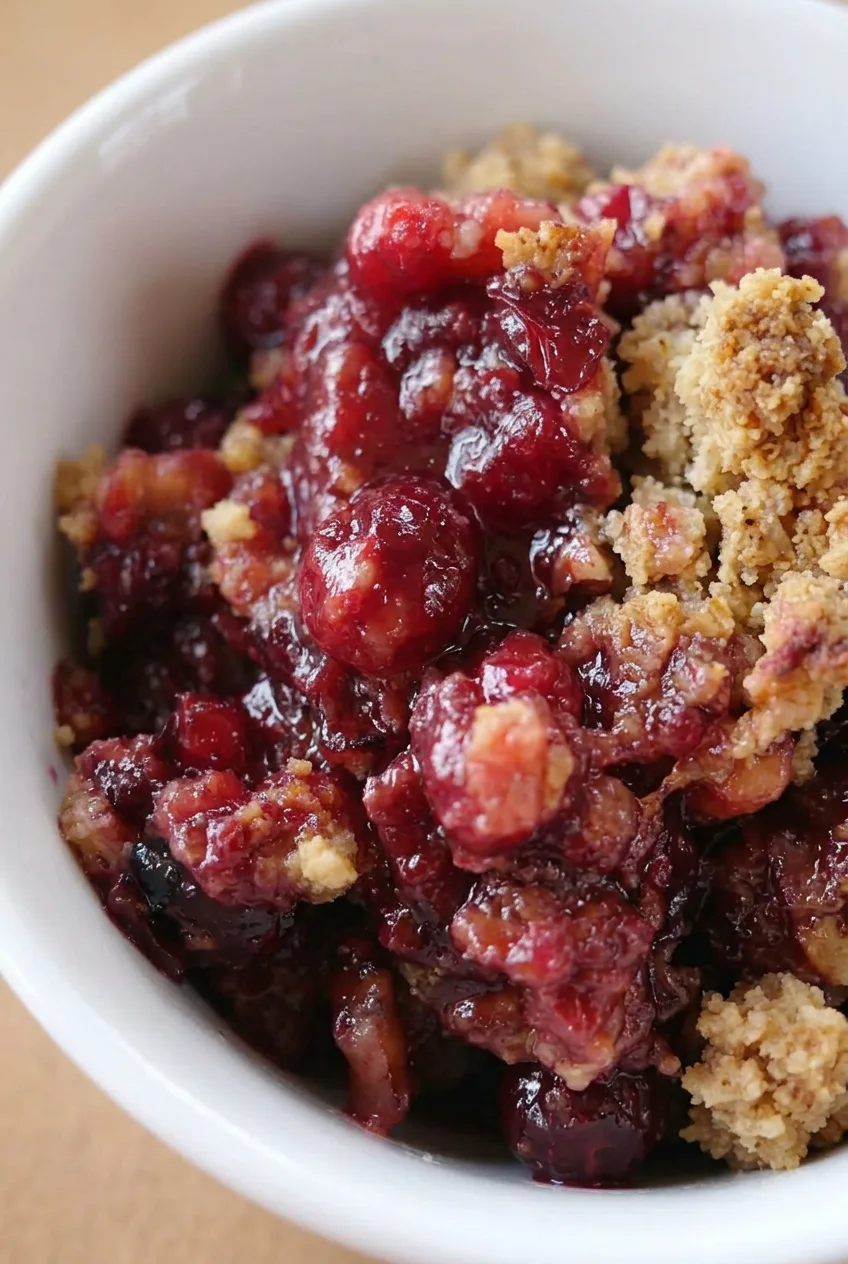
Tart cranberries bake with orange zest and juice into a glossy, spoonable filling beneath a golden oat-pecan crumble. Some berries burst while others stay whole, giving each warm serving plenty of texture.

The fruit goes into the dish uncooked. A little cornstarch helps thicken its juices, but the crisp still needs to bake until the filling bubbles—not just until the topping browns. Let it rest for 15 minutes before serving so the juices settle and thicken.

Ingredients for Cranberry Orange Pecan Crisp

Near-overhead view of a bowl of cranberry orange pecan crisp with ruby berry filling and golden pecan crumble

Cranberry filling

  • 4 cups fresh or frozen cranberries (400g)
  • 3/4 cup granulated sugar (150g)
  • 1 tablespoon finely grated orange zest
  • 1/3 cup fresh orange juice (80g)
  • 1 tablespoon cornstarch (8g)
  • 1/2 teaspoon ground cinnamon
  • 1/8 teaspoon kosher salt

Oat-pecan crumble

  • 3/4 cup old-fashioned rolled oats (70g)
  • 1/2 cup all-purpose flour (60g)
  • 1/2 cup packed light brown sugar (105g)
  • 3/4 cup chopped pecans (85g)
  • 1/8 teaspoon kosher salt
  • 6 tablespoons cold unsalted butter, cubed (85g)

Use frozen cranberries straight from the freezer; do not thaw them. They may need a few extra minutes in the oven. Dried cranberries will not make the same juicy filling. Walnuts can replace the pecans, though the topping will taste different.

Close detail of glossy burst cranberries and craggy toasted oat-pecan crumble in cranberry orange pecan crisp

How to Bake Cranberry Orange Pecan Crisp

  1. Prepare the oven and dish: Set a rack in the center of the oven and preheat to 375°F (190°C). Lightly butter or spray an 8-inch square or 9-inch round baking dish.
  2. Mix the filling: Toss the cranberries, granulated sugar, orange zest, orange juice, cornstarch, cinnamon, and 1/8 teaspoon salt in a large bowl until evenly coated, with no dry pockets of cornstarch. Transfer the fruit and all its juices to the dish.
  3. Make the crumble: Combine the oats, flour, brown sugar, pecans, and remaining 1/8 teaspoon salt in a medium bowl. Rub in the cold butter with your fingertips, a fork, or a pastry cutter until the mixture forms moist pea-size crumbs and a few larger clumps.
  4. Top the fruit: Scatter the crumble loosely over the cranberries, leaving a few small gaps for the filling to bubble through. Do not press it down. Set the dish on a rimmed baking sheet if it is very full.
  5. Bake uncovered: Bake for 35 to 40 minutes, beginning to check at 32 minutes. The crumble should be golden brown, and the juices should bubble actively around the edges and through the topping. Many berries will burst, while some remain whole. If the topping browns before the fruit bubbles, loosely tent it with foil and continue baking.
  6. Rest and serve: Let the crisp stand for 15 minutes so the hot juices thicken. Spoon warm portions into small bowls with plenty of berries and crumble. Serve with vanilla ice cream alongside, if desired.

How to Tell When the Crisp Is Done

A golden topping alone is not enough: look for active bubbling in the cranberry filling. Pan depth and material affect the timing; a dark metal dish may brown the crumble sooner, while frozen berries may take longer. After resting, the filling should be thick and glossy but still loose enough to spoon.

For a sliceable cranberry dessert instead, see these Cranberry Crumble Bars with Oat Crust.

Make-Ahead, Storage, and Reheating

To prepare ahead, cover and refrigerate the mixed filling and crumble separately for up to 1 day. Transfer the filling and any collected juices to the baking dish, then add the topping just before baking.

Cool leftovers completely before covering so trapped steam does not soften the crumble. Refrigerate in an airtight container for up to 5 days. Microwave individual portions in 1-minute intervals until warm, or reheat a larger portion uncovered at 350°F (175°C) until heated through. Oven reheating can restore some crunch, though the topping is crispest on baking day.

Fully cooled crisp can be frozen in an airtight freezer-safe container for up to 3 months. Thaw in the refrigerator before reheating. The topping may be softer after freezing, so oven reheating is preferable.

Nutrition

Approximate nutrition per serving, based on 6 servings without optional ice cream: 490 calories, 5g protein, 23g fat, and 70g carbohydrates. Per 100g of baked crisp: approximately 300 calories, 3g protein, 14g fat, and 43g carbohydrates. Values are estimates; portion size and moisture lost during baking will affect them.

Cranberry Orange Pecan Crisp

Tart cranberries with orange zest and juice bake beneath a golden oat-pecan crumble.
Course: Dessert
Cuisine: American
Prep: 20 min
Cook: 40 min
Total: 75 min
Servings: 6 Calories: 490 kcal

Equipment

  • 8-inch square or 9-inch round baking dish
  • large bowl
  • medium bowl
  • rimmed baking sheet
  • pastry cutter or fork

Ingredients

Cranberry Filling

  • 4 cups fresh or frozen cranberries (400 g)
  • 3/4 cup granulated sugar (150 g)
  • 1 tablespoon finely grated orange zest
  • 1/3 cup fresh orange juice (80 g)
  • 1 tablespoon cornstarch (8 g)
  • 1/2 teaspoon ground cinnamon
  • 1/8 teaspoon kosher salt

Oat-Pecan Crumble

  • 3/4 cup old-fashioned rolled oats (70 g)
  • 1/2 cup all-purpose flour (60 g)
  • 1/2 cup packed light brown sugar (105 g)
  • 3/4 cup chopped pecans (85 g)
  • 1/8 teaspoon kosher salt
  • 6 tablespoons cold unsalted butter, cubed (85 g)

For Serving

  • Vanilla ice cream (optional)

Instructions

  1. Set a rack in the center of the oven and preheat to 375°F (190°C). Lightly butter or spray an 8-inch square or 9-inch round baking dish.
  2. Toss the cranberries, granulated sugar, orange zest, orange juice, cornstarch, cinnamon, and 1/8 teaspoon salt in a large bowl until evenly coated and no dry cornstarch remains.
  3. Transfer the cranberry mixture and all juices to the prepared baking dish.
  4. Combine the oats, flour, brown sugar, pecans, and remaining 1/8 teaspoon salt in a medium bowl.
  5. Rub the cold butter into the oat mixture with your fingertips, a fork, or a pastry cutter until moist pea-size crumbs and a few larger clumps form.
  6. Scatter the crumble loosely over the cranberry filling without pressing it down. Place the dish on a rimmed baking sheet if it is very full.
  7. Bake uncovered for 35 to 40 minutes, checking at 32 minutes, until the topping is golden brown and the filling bubbles actively around the edges and through the topping.
  8. If the topping browns before the filling bubbles, loosely tent the dish with foil and continue baking.
  9. Let the crisp rest for 15 minutes before spooning into bowls. Serve warm with vanilla ice cream, if desired.

Tips

  • Use frozen cranberries directly from the freezer; do not thaw them.
  • Frozen cranberries may need a few extra minutes of baking time.
  • Bake until the filling bubbles actively, not just until the topping is browned.
  • Loosely scatter the topping so the cranberry juices can bubble through.
  • Let the crisp rest for 15 minutes so the filling thickens.
  • A dark metal baking dish may brown the topping sooner.

Variations

  • Walnut Cranberry Crisp: Replace the pecans with chopped walnuts for a different nutty topping.

Notes

Refrigerate cooled leftovers in an airtight container for up to 5 days. Reheat individual portions in 1-minute microwave intervals, or warm larger portions uncovered at 350°F (175°C). Freeze fully cooled crisp for up to 3 months; thaw in the refrigerator before reheating.

Nutrition

Calories: 490 kcal | Protein: 5 g | Fat: 23 g | Carbohydrates: 70 g

Cranberry Pecan Chicken Salad

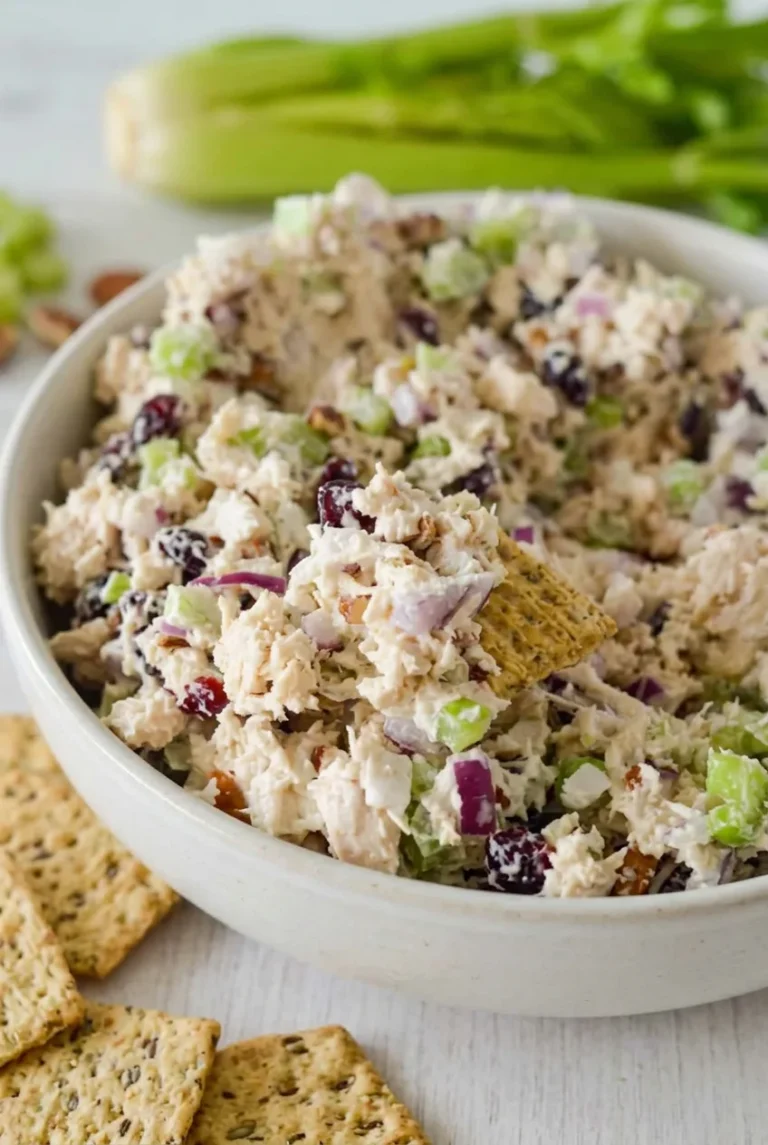
This cold chicken salad combines tender chicken with sweet-tart dried cranberries, crisp celery, finely diced red onion, and pecans. A thick mayonnaise-and-Greek-yogurt dressing holds the pieces together without turning them into a smooth spread, so a heaping scoop stays on a sturdy cracker.

Cooked, cooled rotisserie or leftover chicken keeps preparation quick. Serve the salad right after mixing, or chill it briefly before adding it to crackers, sandwiches, wraps, or greens.

Ingredients for Cranberry Pecan Chicken Salad

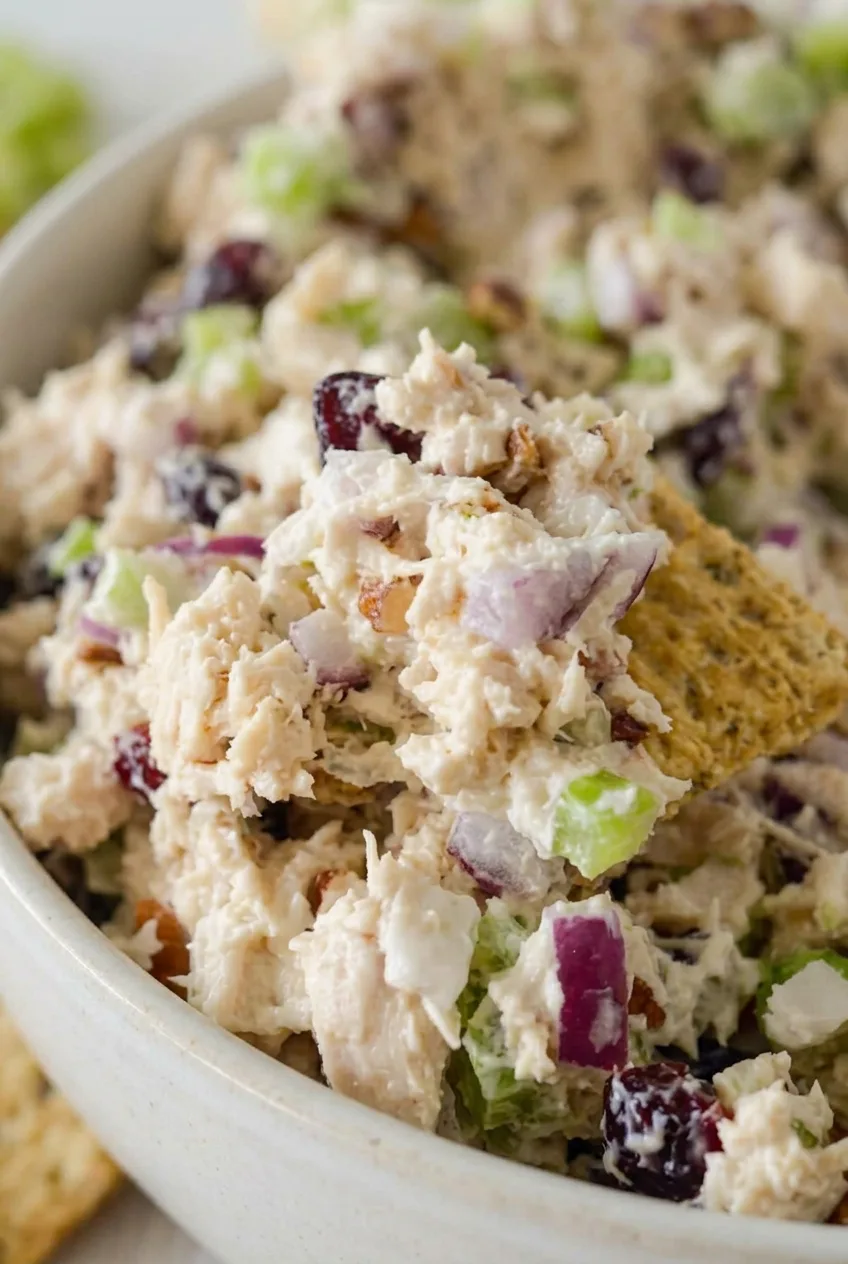
Close view of creamy cranberry pecan chicken salad showing shredded chicken, celery, onion, and pecans

Makes 4 lunch servings or about 8 cracker-snack servings. Prep time: 15 minutes, plus optional pecan toasting and 30 to 60 minutes of chilling.

  • 3 cups cooked, cooled chicken, shredded or chopped into small pieces (about 425g)
  • 1/3 cup mayonnaise (about 75g)
  • 1/4 cup plain Greek yogurt (about 60g)
  • 1 tablespoon fresh lemon juice
  • 2 celery ribs, finely diced (about 3/4 cup or 75g)
  • 1/4 cup very finely diced red onion (about 35g)
  • 1/2 cup dried cranberries (about 60g)
  • 1/2 cup chopped pecans (about 55g)
  • 1/2 teaspoon kosher salt, plus more to taste
  • 1/4 teaspoon freshly ground black pepper, plus more to taste

For a milder onion flavor, soak the diced onion in cold water for 5 to 10 minutes, then drain and pat it dry so it does not thin the dressing. For an all-mayonnaise dressing, replace the yogurt with another 1/4 cup mayonnaise.

How to Make Cranberry Pecan Chicken Salad

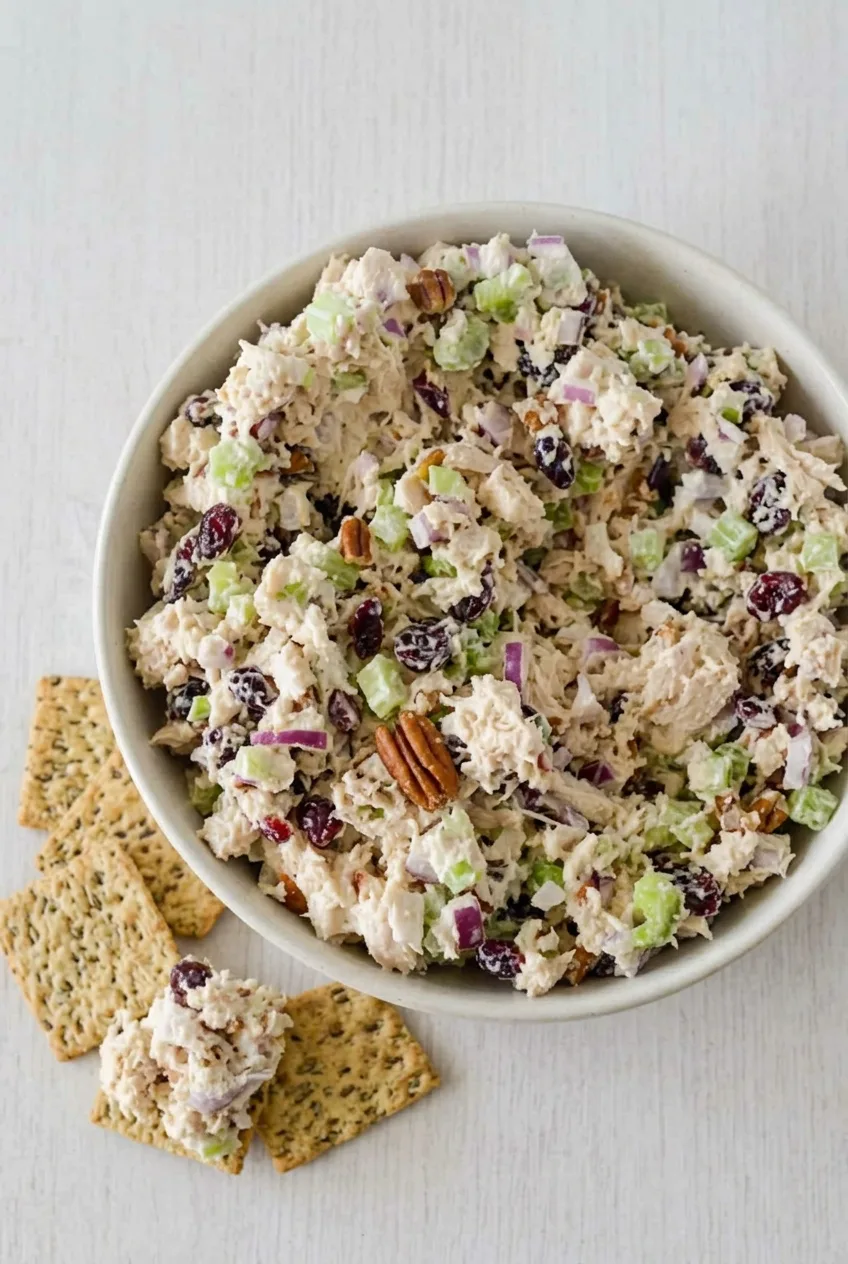
Overhead bowl of cranberry pecan chicken salad served with sturdy seeded crackers
  1. Toast the pecans, if desired: Stir them in a small dry skillet over medium-low heat for 3 to 5 minutes. Start checking after 2 minutes; transfer them to a plate when fragrant and lightly darkened. Let them cool completely. Untoasted pecans can be used without this step.
  2. Prepare the chicken and vegetables: Shred or chop the cooled chicken into small, irregular pieces. Finely dice the celery and red onion so they distribute evenly through the salad.
  3. Whisk the dressing: In a small bowl, whisk the mayonnaise, Greek yogurt, lemon juice, salt, and pepper until thick and smooth.
  4. Fold together: Put the chicken, celery, onion, cranberries, and pecans in a large bowl, reserving a spoonful of pecans for topping if desired. Add most of the dressing and fold gently. Add the rest only as needed to coat the ingredients. The salad should mound on a cracker without dressing pooling in the bowl. If it seems dry, add mayonnaise a spoonful at a time.
  5. Serve or chill: Taste and adjust the salt and pepper. Serve immediately, or cover and refrigerate for 30 to 60 minutes. Sprinkle with any reserved pecans just before serving.

How to Keep the Salad Scoopable

Use cooled chicken and fold gently to keep the strands and small pieces distinct. Shredded chicken makes a cohesive cracker scoop; small-chopped chicken gives sandwiches a chunkier bite. Add the dressing gradually, since rotisserie and leftover chicken can differ in moisture.

Serving and Storing Cranberry Pecan Chicken Salad

Serve cold with sturdy seeded, whole-grain, or butter crackers, or use the salad in sandwiches, wraps, or over leafy greens. If cooking chicken from scratch, this Greek chicken marinade for juicy grilled chicken is one option; cool the cooked chicken completely before adding it to the salad.

Refrigerate in an airtight container for up to 4 days, and return it to the refrigerator promptly after serving. The salad can be made several hours ahead or the day before, but pecans soften as they sit in the dressing. Add any reserved pecans just before serving for more crunch. Serve cold rather than reheating; freezing is not recommended because the dressing and crisp ingredients are likely to lose their texture.

Nutrition

Approximate nutrition per lunch serving, based on 4 servings and excluding crackers: 470 calories, 34g protein, 30g fat, and 18g carbohydrates. Per 100g: approximately 235 calories, 17g protein, 15g fat, and 9g carbohydrates. Values vary with the chicken, mayonnaise, and yogurt used.

Cranberry Pecan Chicken Salad

A cold chicken salad with dried cranberries, celery, red onion, pecans, and a thick mayonnaise-Greek yogurt dressing.
Course: Salad
Cuisine: American
Prep: 15 min
Total: 45 min
Servings: 4 Calories: 470 kcal

Equipment

  • Large bowl
  • Small bowl
  • Whisk
  • Knife
  • Cutting board
  • Dry skillet

Ingredients

For the Chicken Salad

  • 3 cups cooked, cooled chicken, shredded or chopped into small pieces (about 425 g)
  • 2 celery ribs, finely diced (about 3/4 cup or 75 g)
  • 1/4 cup very finely diced red onion (about 35 g)
  • 1/2 cup dried cranberries (about 60 g)
  • 1/2 cup chopped pecans (about 55 g), optional toasted

For the Dressing

  • 1/3 cup mayonnaise (about 75 g)
  • 1/4 cup plain Greek yogurt (about 60 g)
  • 1 tablespoon fresh lemon juice
  • 1/2 teaspoon kosher salt, plus more to taste
  • 1/4 teaspoon freshly ground black pepper, plus more to taste

Instructions

  1. Toast the pecans, if desired, in a dry skillet over medium-low heat for 3 to 5 minutes, stirring frequently. Transfer to a plate and cool completely.
  2. Shred or chop the cooled chicken into small pieces. Finely dice the celery and red onion.
  3. Whisk the mayonnaise, Greek yogurt, lemon juice, salt, and pepper in a small bowl until thick and smooth.
  4. Combine the chicken, celery, red onion, dried cranberries, and pecans in a large bowl. Reserve a spoonful of pecans for topping, if desired.
  5. Add most of the dressing and fold gently to coat the ingredients. Add the remaining dressing only as needed; the salad should hold together without pooling dressing.
  6. Taste and adjust the salt and pepper. Serve immediately or cover and refrigerate for 30 to 60 minutes before serving.
  7. Top with reserved pecans just before serving, if using.

Tips

  • Use cooled chicken so the dressing stays thick and the salad remains scoopable.
  • Add the dressing gradually because different cooked chicken can vary in moisture.
  • Soak diced red onion in cold water for 5 to 10 minutes for a milder flavor, then drain and pat dry.
  • Use shredded chicken for a cohesive cracker scoop or chopped chicken for a chunkier sandwich filling.
  • Add reserved pecans just before serving to keep them crunchy.

Variations

  • All-Mayonnaise Dressing: Replace the Greek yogurt with an additional 1/4 cup mayonnaise.

Notes

Refrigerate in an airtight container for up to 4 days. Serve cold and return leftovers to the refrigerator promptly. Freezing is not recommended because the dressing and vegetables lose texture.

Nutrition

Calories: 470 kcal | Protein: 34 g | Fat: 30 g | Carbohydrates: 18 g

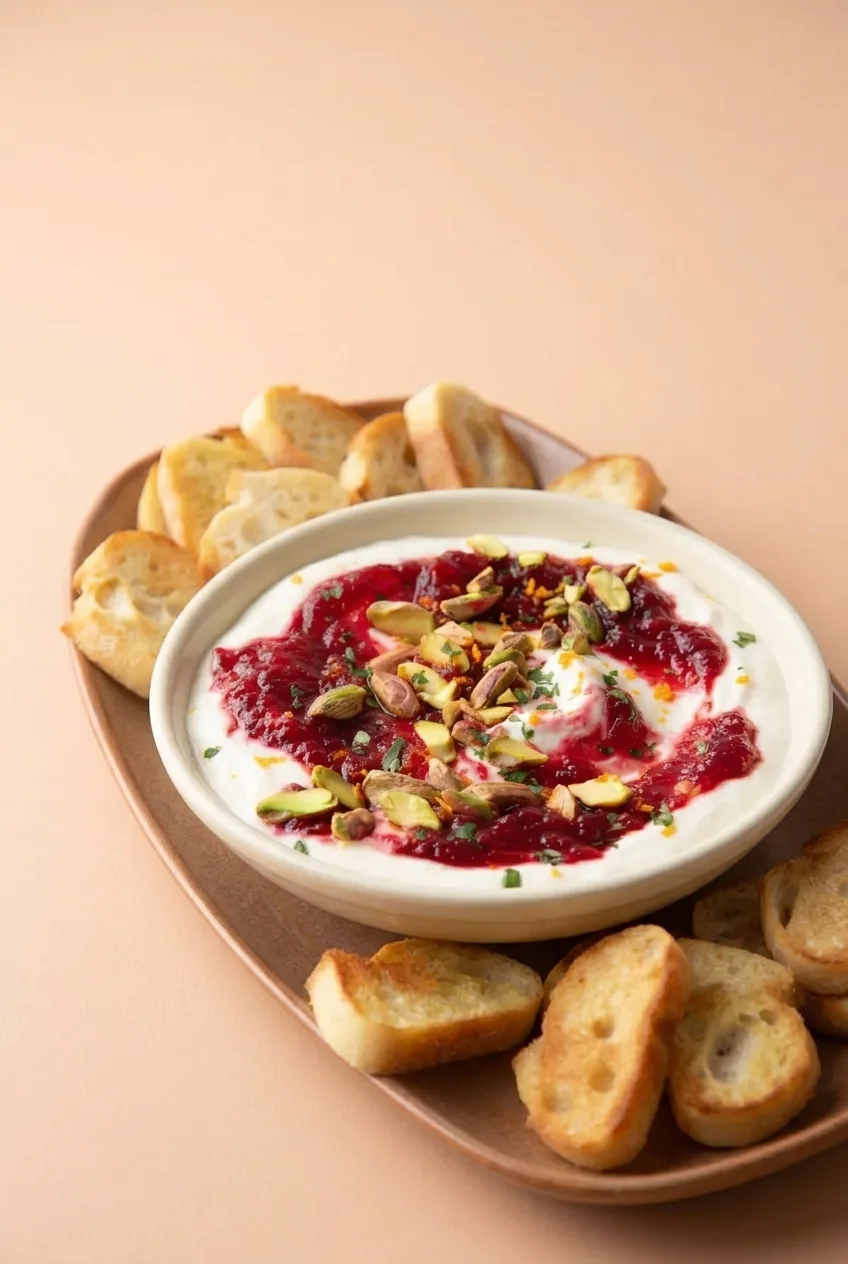
Cranberry Whipped Feta Dip

Salty, creamy whipped feta and sweet-tart cranberry-orange compote make a layered dip that scoops up both flavors without blending them into one. Spread the feta in a shallow dish, then spoon the thick cranberry topping across it in loose swaths, leaving some white feta visible. Pistachios, parsley, orange zest, and crisp baguette crostini finish the dip.

The key is to let the compote cool completely before assembly. It thickens as it cools; added warm, it can loosen the feta and blur the layers.

Ingredients for Cranberry Whipped Feta Dip

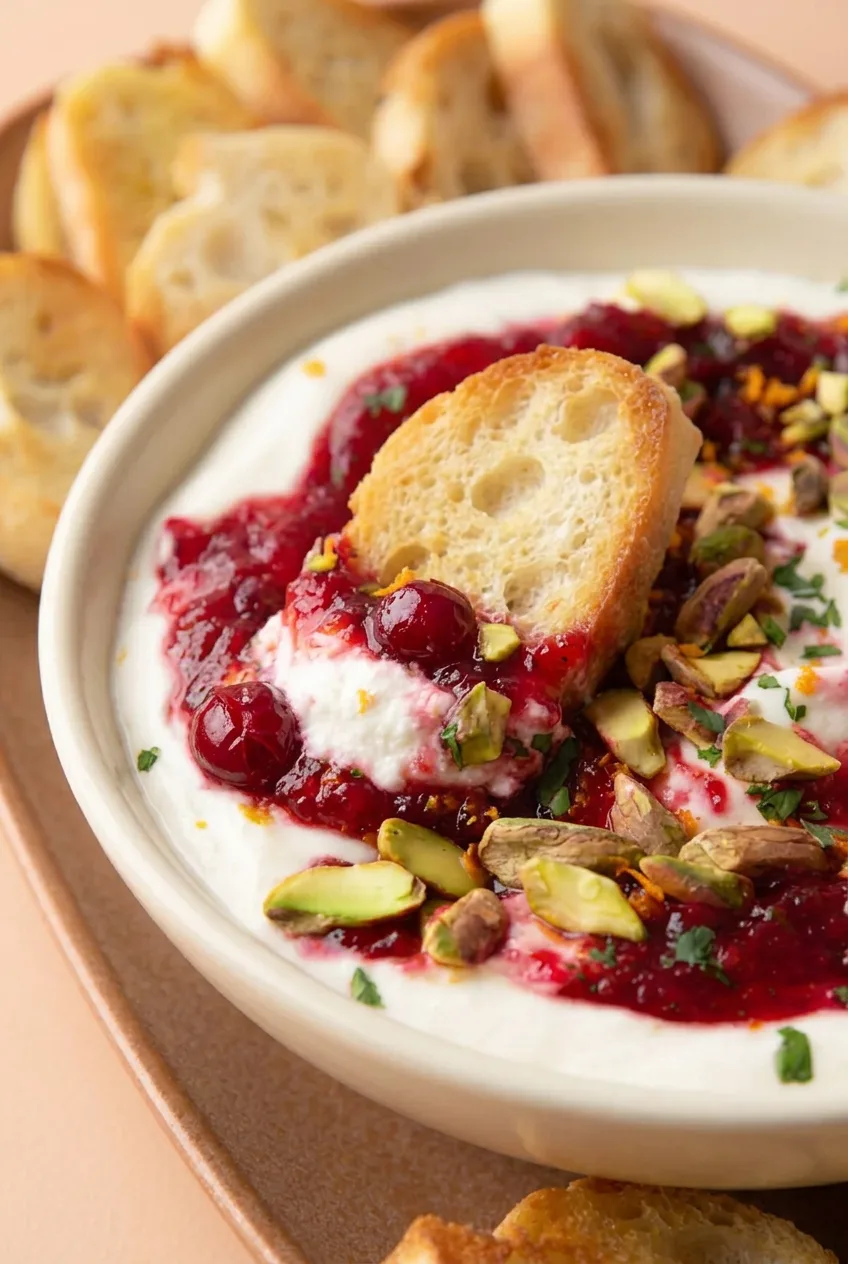
Close view of thick cranberry compote and pistachios over creamy whipped feta with a crostini scoop.
  • 12 ounces fresh or frozen cranberries (340g)
  • 1/2 cup orange juice (120g)
  • 1/3 cup honey (115g)
  • 2 teaspoons finely grated orange zest, divided
  • 2 tablespoons water
  • 8 ounces block feta, drained and crumbled (225g)
  • 4 ounces cream cheese, softened (115g)
  • 3 tablespoons extra-virgin olive oil (40g), plus more for brushing the crostini
  • 1 tablespoon fresh lemon juice
  • 1/3 cup roasted salted pistachios, roughly chopped (45g)
  • 2 tablespoons finely chopped fresh parsley
  • 1 small baguette, sliced (about 250g)

Use frozen cranberries without thawing them. Drained block feta generally blends more smoothly than dry pre-crumbled feta. Taste the whipped base before adding any salt; the feta may be salty enough.

How to Make Cranberry Whipped Feta Dip

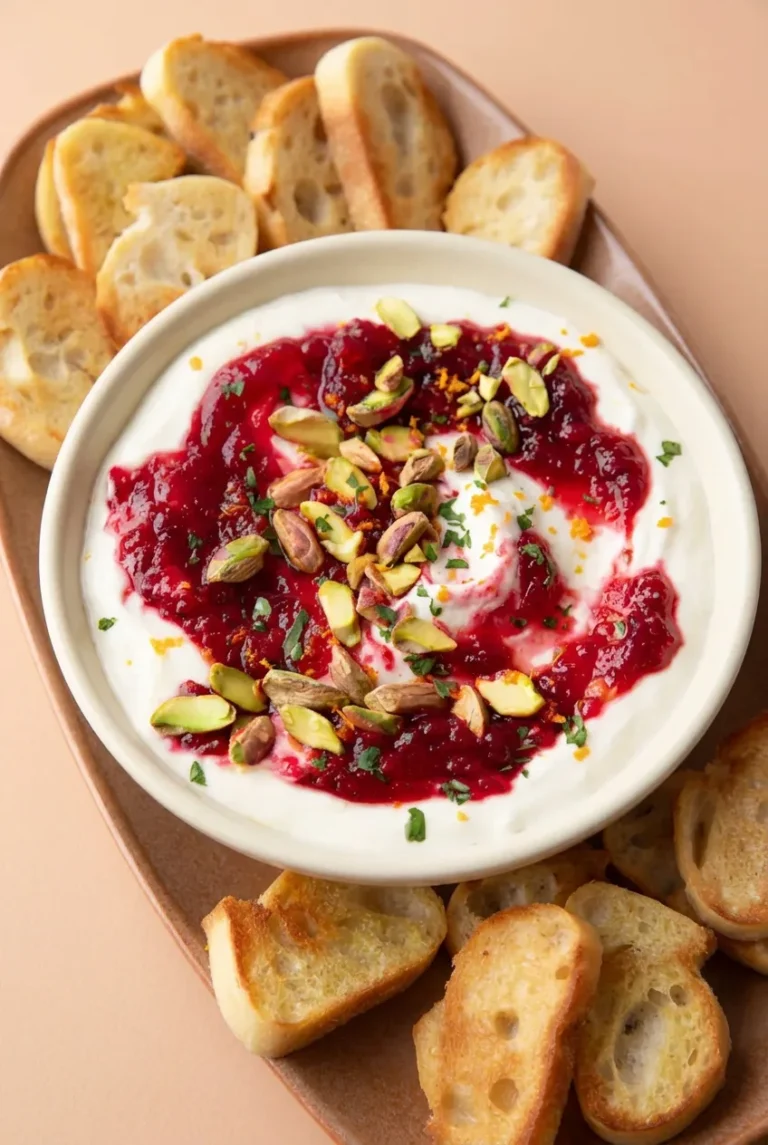
Overhead serving view of cranberry whipped feta dip surrounded by golden toasted baguette crostini.
  1. Cook the compote: Combine the cranberries, orange juice, honey, 1 teaspoon orange zest, and water in a small heavy-bottomed saucepan. Bring to a boil over medium-high heat, then reduce to medium-low. Simmer uncovered for 8 to 10 minutes, stirring often. Start checking around 7 minutes: most berries should have burst, and a spoon dragged across the pan should briefly leave a clear trail before the glossy sauce flows back.
  2. Cool it completely: Transfer the compote to a shallow bowl. Let it cool until no longer warm, about 15 to 20 minutes; refrigerate briefly if needed. It should sit in soft mounds on a spoon rather than pour like a thin sauce.
  3. Whip the feta: While the compote cools, process the drained feta, cream cheese, 3 tablespoons olive oil, lemon juice, and 1/2 teaspoon orange zest for 2 to 3 minutes. Scrape down the bowl once or twice. The mixture should be smooth, thick, and spreadable, with no dry feta crumbles.
  4. Make the crostini: Heat the oven to 400°F (205°C). Arrange the baguette slices in one layer on a baking sheet and brush lightly with olive oil. Bake for 8 to 10 minutes, turning once, until crisp with golden edges. Let cool slightly.
  5. Layer the dip: Spread the whipped feta nearly to the edges of an approximately 8-inch shallow serving dish. Spoon the fully cooled compote over it in irregular swaths, leaving white feta visible around and between them. Do not stir the layers together.
  6. Garnish and serve: Scatter the pistachios, parsley, and remaining 1/2 teaspoon orange zest over the dip just before serving. Serve with the crostini alongside.

Cranberry Whipped Feta Variations

Prepared cranberry sauce: Use 1 to 1 1/4 cups thick, cooled whole-berry cranberry sauce instead of making the compote. Stir in a little orange zest, and use it only if it is thick enough to mound on the feta. This Homemade Cranberry Sauce with Orange also works once fully cooled and thickened.

Greek yogurt base: Replace the cream cheese with 1/2 cup full-fat plain Greek yogurt for a tangier, softer dip. Blend it with the feta and olive oil, then taste before adding all the lemon juice.

Sturdy crackers or pita chips can replace the crostini, though toasted baguette slices give the featured dip its crisp contrast.

Make-Ahead and Storage

Make the whipped feta and cranberry compote up to 2 days ahead and refrigerate them in separate airtight containers. Let the feta stand at room temperature for 20 to 30 minutes before serving; stir or briefly rewhip it if firm. Assemble shortly before serving, and add the pistachios, parsley, zest, and crostini at the last minute.

For best quality, refrigerate leftover feta and compote separately for 2 to 3 days. An assembled dip can be covered and refrigerated, but the cranberry topping may soften the feta surface. Do not microwave the feta base or freeze the assembled dip; thawing can make the cheese grainy.

Nutrition

Approximately 355 calories, 9g protein, 19g fat, and 39g carbohydrates per serving, based on 8 appetizer servings with the full baguette. That is roughly 225 calories, 6g protein, 12g fat, and 25g carbohydrates per 100g. Values are estimates; crostini size, oil used for brushing, and how much the compote reduces will affect the totals.

Cranberry Whipped Feta Dip

Creamy whipped feta is layered with a thick cranberry-orange compote and finished with pistachios, parsley, orange zest, and crisp baguette crostini.
Course: Appetizer
Cuisine: Mediterranean
Prep: 20 min
Cook: 20 min
Total: 50 min
Servings: 8 Calories: 355 kcal

Equipment

  • Small heavy-bottomed saucepan
  • Shallow bowl
  • Food processor
  • Baking sheet
  • 8-inch shallow serving dish

Ingredients

For the Cranberry-Orange Compote

  • 12 ounces fresh or frozen cranberries (340g)
  • 1/2 cup orange juice (120g)
  • 1/3 cup honey (115g)
  • 2 teaspoons finely grated orange zest, divided
  • 2 tablespoons water

For the Whipped Feta

  • 8 ounces block feta, drained and crumbled (225g)
  • 4 ounces cream cheese, softened (115g)
  • 3 tablespoons extra-virgin olive oil (40g)
  • 1 tablespoon fresh lemon juice

For Serving

  • 1/3 cup roasted salted pistachios, roughly chopped (45g)
  • 2 tablespoons finely chopped fresh parsley
  • 1 small baguette, sliced (about 250g)
  • Extra-virgin olive oil, for brushing the crostini

Instructions

  1. Combine the cranberries, orange juice, honey, 1 teaspoon orange zest, and water in a small heavy-bottomed saucepan.
  2. Bring the mixture to a boil over medium-high heat, then reduce the heat to medium-low and simmer uncovered for 8 to 10 minutes, stirring often, until most berries have burst and the sauce thickens.
  3. Transfer the compote to a shallow bowl and cool completely, about 15 to 20 minutes. Refrigerate briefly if needed.
  4. Process the feta, cream cheese, 3 tablespoons olive oil, lemon juice, and 1/2 teaspoon orange zest in a food processor for 2 to 3 minutes, scraping down the bowl as needed, until smooth and spreadable.
  5. Preheat the oven to 400°F (205°C). Arrange the baguette slices in a single layer on a baking sheet and brush lightly with olive oil.
  6. Bake the crostini for 8 to 10 minutes, turning once, until crisp with golden edges. Cool slightly.
  7. Spread the whipped feta nearly to the edges of an 8-inch shallow serving dish.
  8. Spoon the fully cooled cranberry compote over the feta in irregular swaths, leaving some feta visible. Do not stir the layers together.
  9. Garnish with the pistachios, parsley, and remaining 1/2 teaspoon orange zest. Serve with the crostini.

Tips

  • Use frozen cranberries directly from the freezer; do not thaw them first.
  • Use drained block feta instead of pre-crumbled feta for the smoothest texture.
  • Cool the compote completely before layering it over the feta so the dip stays defined.
  • The compote should mound softly on a spoon rather than pour like a thin sauce.
  • Taste the whipped feta before adding salt, as feta may be salty enough on its own.

Variations

  • Prepared Cranberry Sauce: Use 1 to 1 1/4 cups thick, cooled whole-berry cranberry sauce instead of homemade compote, and stir in a little orange zest.
  • Greek Yogurt Base: Replace the cream cheese with 1/2 cup full-fat plain Greek yogurt for a tangier, softer whipped feta dip.
  • Cracker or Pita Chip Serving Option: Serve the dip with sturdy crackers or pita chips instead of baguette crostini.

Notes

Make the whipped feta and compote up to 2 days ahead and refrigerate separately. Let the feta stand at room temperature for 20 to 30 minutes before serving. Store leftovers separately for 2 to 3 days; do not microwave the feta base or freeze the assembled dip.

Nutrition

Calories: 355 kcal | Protein: 9 g | Fat: 19 g | Carbohydrates: 39 g

Cranberry Jello Salad

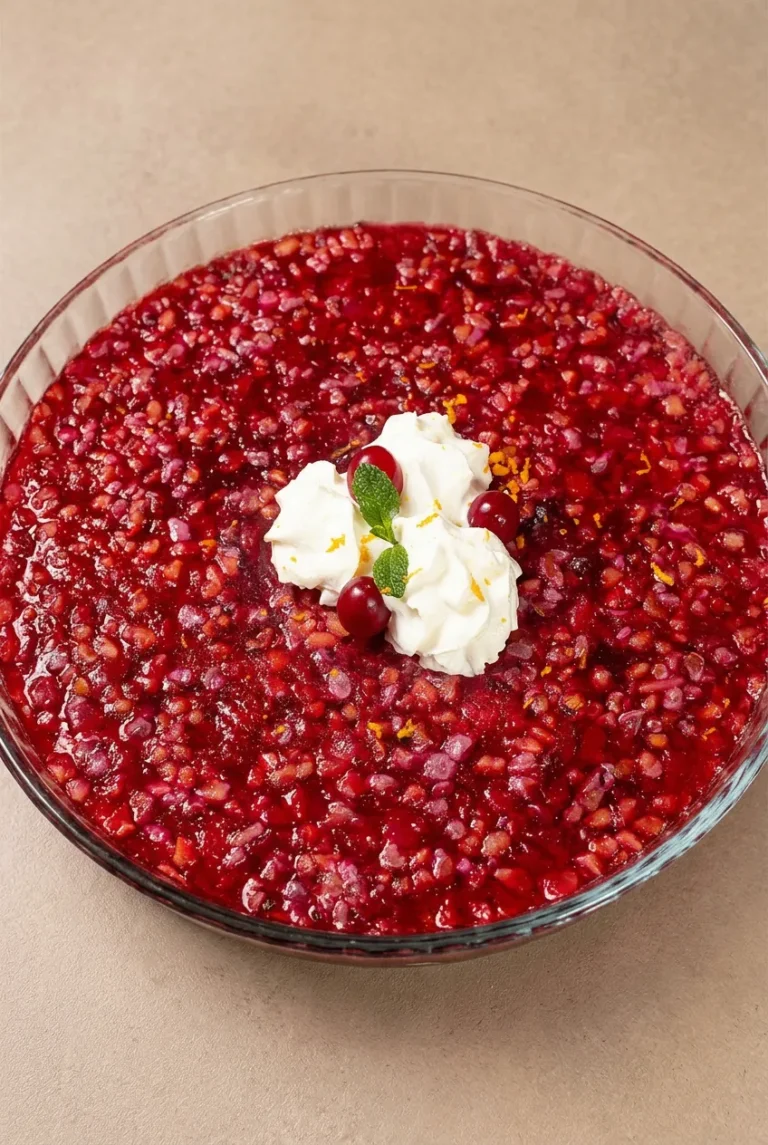
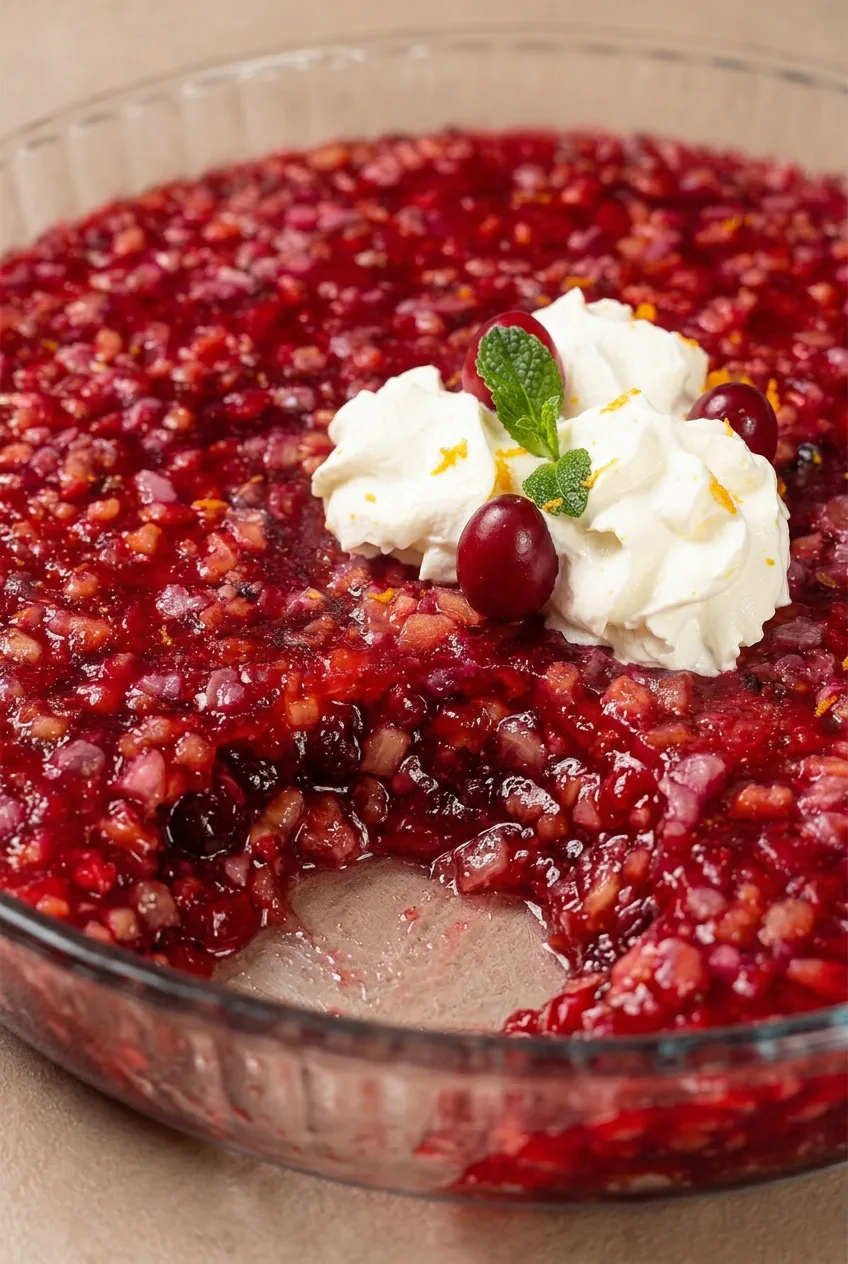
This cranberry Jello salad is glossy, fruit-studded, and softly set: it jiggles when the dish moves but holds a scoop on a serving spoon. Raspberry gelatin, whole-berry cranberry sauce, crushed pineapple, and orange give it a sweet-tart flavor and visible fruit throughout.

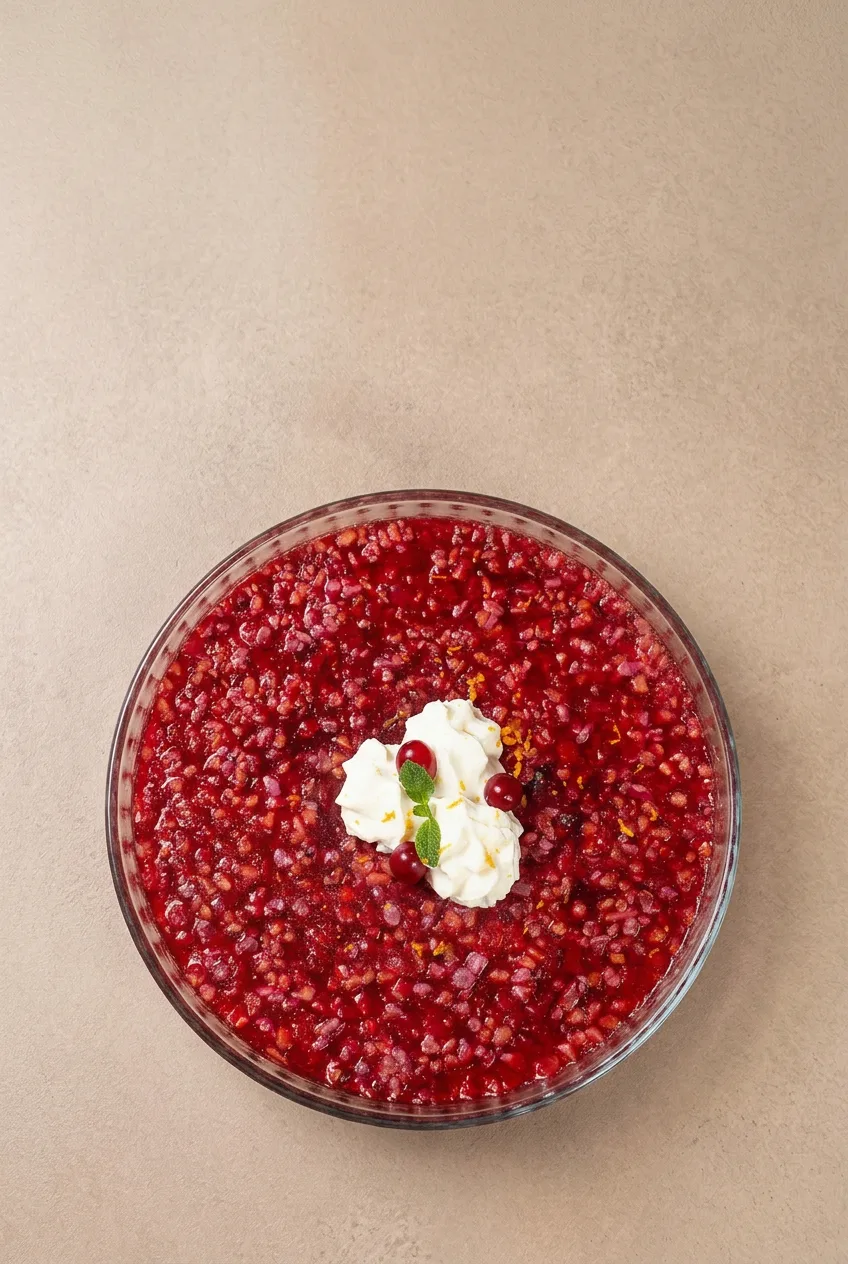
Chill it in a shallow clear glass dish rather than a mold, and plan on an overnight set. Just before serving, mound whipped cream in the center and finish with fresh cranberries, mint, and orange zest.

Ingredients for Cranberry Jello Salad

Close view of glossy cranberry Jello salad showing suspended cranberry and pineapple pieces beside whipped cream.
  • 2 (3-ounce) boxes raspberry gelatin dessert mix (170g total)
  • 2 cups boiling water
  • 1 cup cold water
  • 1 (14-ounce) can whole-berry cranberry sauce
  • 1 (20-ounce) can crushed pineapple in juice, undrained
  • 1/4 cup fresh orange juice
  • 1 teaspoon finely grated orange zest, plus a little more for garnish
  • 1 1/2 cups whipped cream or whipped topping
  • 3 to 5 fresh cranberries, for garnish
  • 1 small fresh mint sprig, for garnish

Use canned pineapple, not fresh: enzymes in fresh pineapple can prevent gelatin from setting. This recipe includes the canned pineapple juice in its liquid balance, so do not drain it or add extra liquid.

How to Make Cranberry Jello Salad

Overhead view of cranberry Jello salad in a clear round glass dish with central whipped cream garnish.
  1. Prepare the dish and garnish: Set out a shallow, round, clear glass serving dish that holds 2 1/2 to 3 quarts. Zest the orange and reserve a pinch of zest for garnish. Rinse and thoroughly dry the fresh cranberries and mint.
  2. Dissolve the gelatin: Put the raspberry gelatin mix in a large heat-safe bowl. Pour in the boiling water and whisk until no grains remain, about 2 minutes. Check the bottom of the bowl for gritty residue before adding the cold ingredients.
  3. Add the fruit: Whisk in the cold water and orange juice. Stir in the whole-berry cranberry sauce, breaking it into small pieces. Stir in the undrained pineapple and 1 teaspoon orange zest. The mixture should be evenly red, with fruit visible throughout.
  4. Chill until set: Pour the mixture into the dish and gently level the surface. Let stand for about 10 minutes, then cover and refrigerate at 40°F (5°C) or below for at least 6 hours, preferably overnight.
  5. Garnish and serve: Once the center is fully set, mound the whipped cream in the center. Add the fresh cranberries, mint sprig, and reserved orange zest. Serve cold with a large spoon directly from the dish.

How to Tell When It’s Set

Start checking after 6 hours. When you gently nudge the dish, the salad should jiggle as one mass, with the center set as firmly as the edges. A spoon should lift a soft, defined scoop rather than runny liquid. A deeper bowl may need more chilling time than the shallow dish used here.

Cranberry Jello Salad Variations

  • Cherry gelatin: Replace the raspberry gelatin with two 3-ounce boxes of cherry gelatin. Keep the other ingredients and chilling time the same.
  • Smoother cranberry texture: Use a 14-ounce can of jellied cranberry sauce instead of whole-berry sauce. The salad will have fewer visible berry pieces.
  • Optional crunch: Offer 1/2 cup toasted, cooled chopped pecans or walnuts alongside individual servings rather than scattering them over the dish.

Serving Cranberry Jello Salad

Serve it chilled as a holiday side dish or dessert-style fruit salad. For a savory cranberry starter before the meal, try this Cranberry Cream Cheese Dip with Orange and Scallions.

Make-Ahead and Storage

Prepare the gelatin base up to one day ahead and keep it covered in the refrigerator. Add the whipped cream and fresh garnish shortly before serving so the topping stays neat.

Cover leftovers and refrigerate for up to 3 days. Store any extra whipped cream separately if possible; cream left on the salad may soften. Do not freeze the finished salad, which can become watery or clumpy after thawing.

Nutrition

Approximate nutrition per serving, based on 11 side-dish servings with the whipped-cream garnish: 180 calories, 2g protein, 5g fat, and 32g carbohydrates. Per 100g: approximately 95 calories, 1g protein, 3g fat, and 17g carbohydrates. Values vary with the gelatin mix and whipped cream or topping used.

Cranberry Jello Salad

A softly set raspberry gelatin salad with cranberry sauce, crushed pineapple, orange, and a whipped cream garnish.
Course: Side Dish
Cuisine: American
Prep: 20 min
Total: 380 min
Servings: 11 Calories: 180 kcal

Equipment

  • 2 1/2- to 3-quart shallow glass serving dish
  • Large heat-safe bowl
  • Whisk
  • Citrus zester
  • Large spoon

Ingredients

For the Jello Salad

  • 2 (3-ounce) boxes raspberry gelatin dessert mix (170 g total)
  • 2 cups boiling water
  • 1 cup cold water
  • 1 (14-ounce) can whole-berry cranberry sauce
  • 1 (20-ounce) can crushed pineapple in juice, undrained
  • 1/4 cup fresh orange juice
  • 1 teaspoon finely grated orange zest

For Garnish

  • 1 1/2 cups whipped cream or whipped topping
  • 3 to 5 fresh cranberries
  • 1 small fresh mint sprig
  • Orange zest, for garnish

Instructions

  1. Set out a shallow, round, clear glass serving dish that holds 2 1/2 to 3 quarts.
  2. Finely grate the orange zest, reserving a pinch for garnish. Rinse and thoroughly dry the cranberries and mint.
  3. Place the raspberry gelatin mix in a large heat-safe bowl. Pour in the boiling water and whisk for about 2 minutes, until completely dissolved and no grains remain.
  4. Whisk in the cold water and orange juice.
  5. Stir in the whole-berry cranberry sauce, breaking it into small pieces, then stir in the undrained crushed pineapple and 1 teaspoon orange zest.
  6. Pour the mixture into the serving dish and gently level the surface. Let stand for about 10 minutes.
  7. Cover and refrigerate at 40°F (5°C) or below for at least 6 hours, preferably overnight, until fully set.
  8. Mound the whipped cream in the center just before serving. Garnish with fresh cranberries, mint, and reserved orange zest.
  9. Serve cold directly from the dish with a large spoon.

Tips

  • Use canned pineapple rather than fresh pineapple, since fresh pineapple enzymes can prevent gelatin from setting.
  • Do not drain the canned pineapple; its juice is included in the recipe’s liquid balance.
  • Whisk the gelatin thoroughly and check the bottom of the bowl for gritty, undissolved granules before adding cold ingredients.
  • Use a shallow dish for more even setting; a deeper bowl may require extra refrigeration time.
  • The salad is set when it jiggles as one mass and a spoon lifts a soft, defined scoop.

Variations

  • Cherry Gelatin: Replace the raspberry gelatin with two 3-ounce boxes of cherry gelatin and keep the remaining ingredients and chilling time the same.
  • Smoother Cranberry Texture: Use a 14-ounce can of jellied cranberry sauce instead of whole-berry cranberry sauce for fewer visible berry pieces.
  • Optional Nut Crunch: Serve 1/2 cup toasted, cooled chopped pecans or walnuts alongside individual portions rather than scattering them over the salad.

Notes

Prepare the gelatin base up to 1 day ahead and add whipped cream and fresh garnish shortly before serving. Refrigerate leftovers, covered, for up to 3 days. Do not freeze.

Nutrition

Calories: 180 kcal | Protein: 2 g | Fat: 5 g | Carbohydrates: 32 g

Cranberry Bliss Bars

These bars have a chewy brown sugar blondie base studded with dried cranberries and white chocolate. Orange zest brightens the blondie and cream cheese frosting, while a white chocolate drizzle and chopped cranberries finish the top. Bake the slab in a 9-by-13-inch pan, then cool, frost, chill, and cut it into rectangles.

For a chewy center, take the pan out when a toothpick brings up a few moist crumbs. Waiting for it to come out completely dry can leave the bars overbaked.

Ingredients for Cranberry Bliss Bars

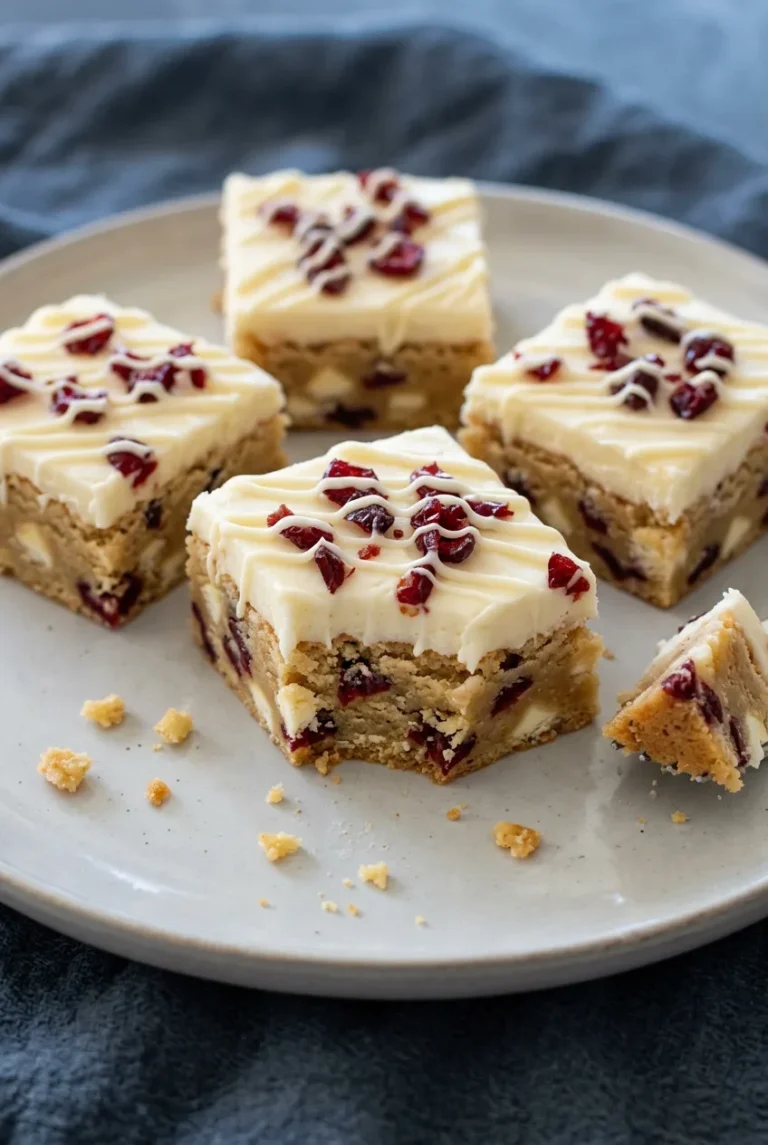
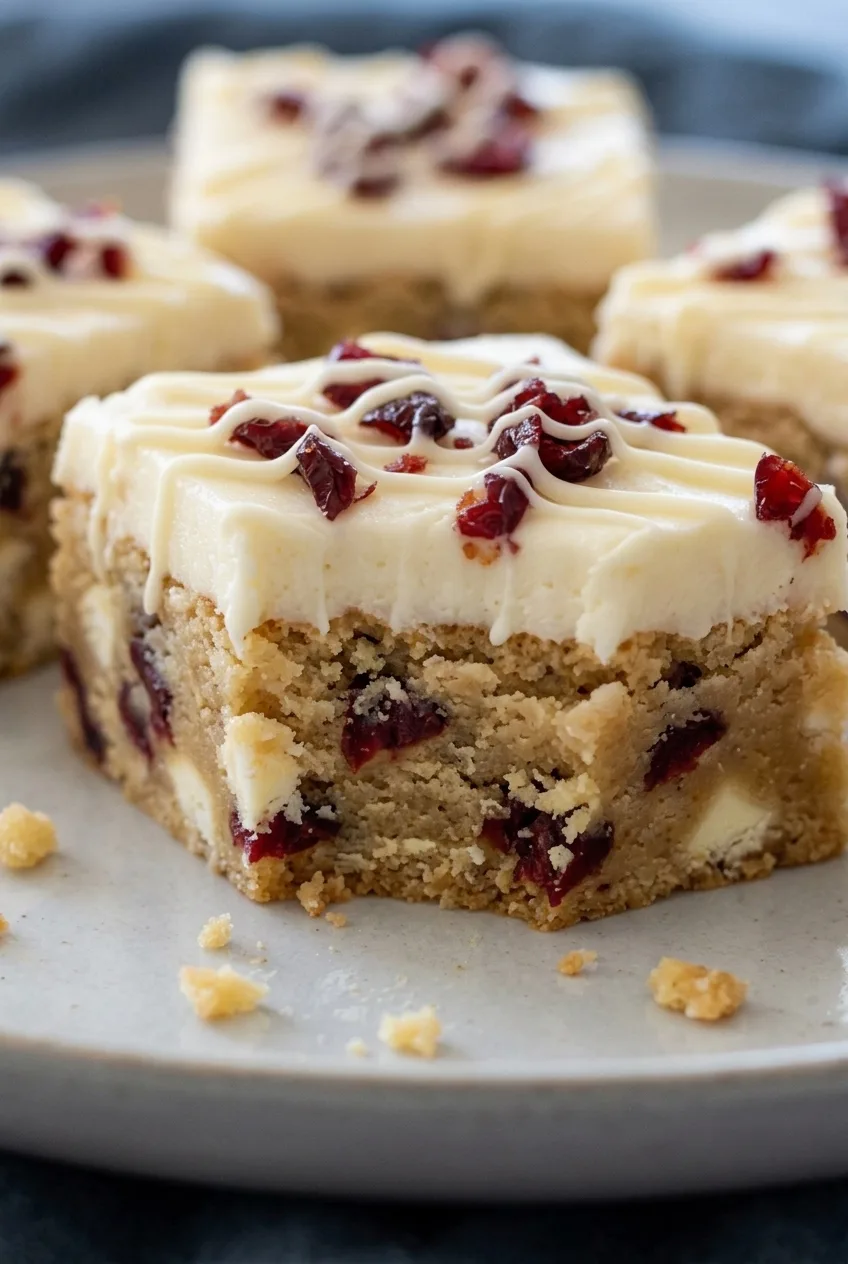
Close cross-section of a cranberry bliss bar showing chewy cranberry white chocolate blondie and thick cream cheese frosting.

Blondie base

  • 1 cup (2 sticks) unsalted butter, melted and slightly cooled (225g)
  • 1 1/2 cups packed light brown sugar (300g)
  • 1/2 cup granulated sugar (100g)
  • 2 large eggs
  • 2 teaspoons vanilla extract
  • 1 teaspoon orange zest
  • 2 1/4 cups all-purpose flour (280g)
  • 1 teaspoon baking powder
  • 1/2 teaspoon fine salt
  • 1 cup white chocolate chips or chopped white baking chocolate
  • 1 1/4 cups dried cranberries, chopped if large

Frosting and topping

  • 8 ounces full-fat block cream cheese, softened (225g)
  • 4 tablespoons unsalted butter, softened (55g)
  • 2 cups powdered sugar (240g)
  • 1 teaspoon orange zest
  • 1–2 teaspoons orange juice or milk, only if needed
  • 1/2 cup white chocolate chips or chopped white baking chocolate
  • 1/4 cup dried cranberries, chopped

Use dried cranberries rather than fresh or frozen ones. They provide chewy, tart-sweet pieces without adding excess moisture to the batter. For frosting that holds its shape, use block cream cheese and butter that is softened but not melted.

How to Make Cranberry Bliss Bars

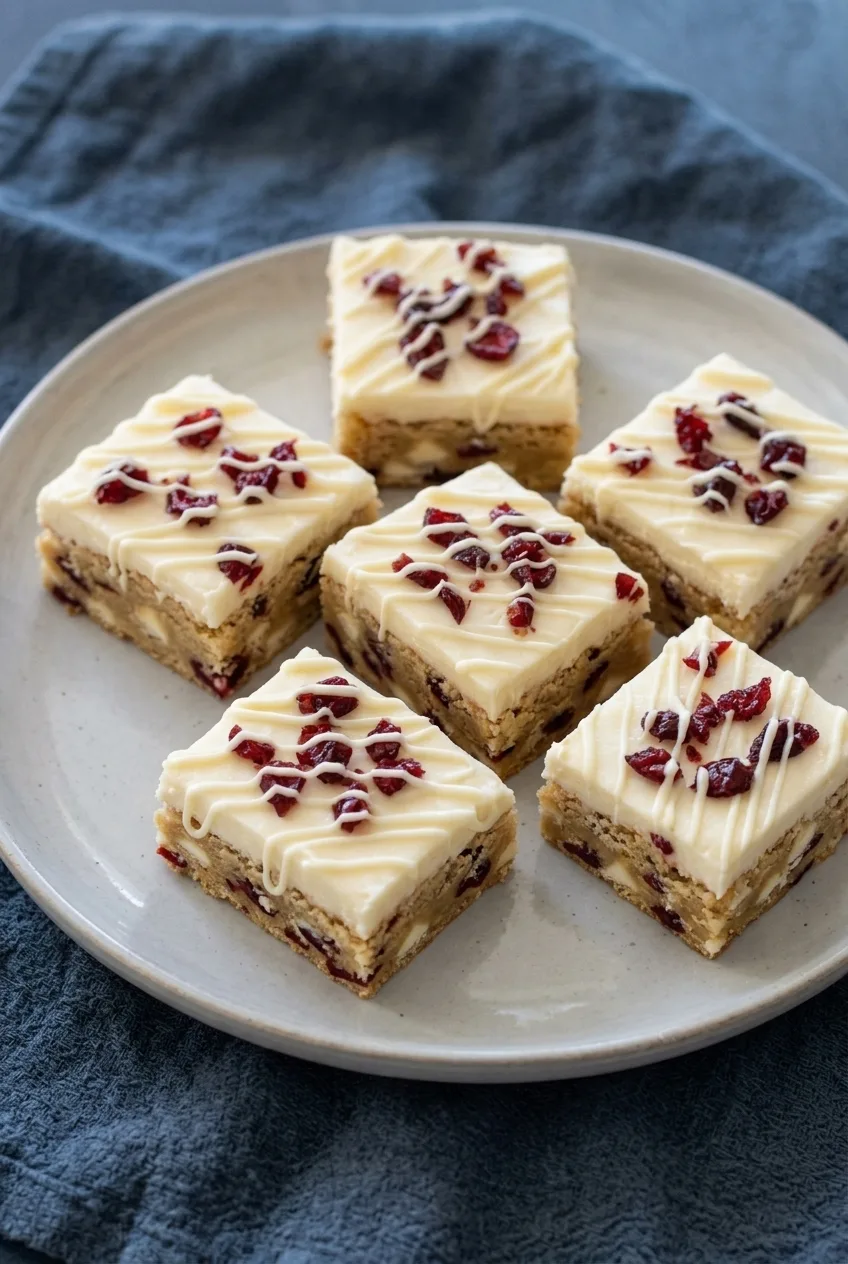
Overhead view of frosted cranberry bliss bars with white chocolate drizzle arranged on a ceramic plate.

Yield: 16 bars. Prep: About 25 minutes. Bake: 20–24 minutes. Total: About 2 hours 15 minutes, including cooling and chilling.

  1. Prepare the pan: Preheat the oven to 350°F (175°C). Line a light-colored metal 9-by-13-inch pan with parchment, leaving overhang on two sides for lifting out the bars.
  2. Mix the batter: Whisk the melted butter with both sugars until glossy. Whisk in the eggs, vanilla, and orange zest. Fold in the flour, baking powder, and salt just until no dry streaks remain. Separate any clumped cranberries, then fold in the white chocolate and cranberries. The batter should be thick and spreadable.
  3. Bake: Spread the batter evenly in the pan. Bake uncovered for 20–24 minutes, starting to check at 20 minutes. The edges should be set and lightly golden, and the center should no longer look wet or glossy. A toothpick inserted in the center should come out with a few moist crumbs, not raw batter. The center will firm as it cools.
  4. Cool completely: Leave the blondie slab in the pan until completely cool, about 1 hour. A warm slab can melt the frosting and make it slide.
  5. Frost: Beat the cream cheese and softened butter until smooth. Beat in the powdered sugar and orange zest. Add orange juice or milk only if the frosting needs it to become spreadable; it should remain thick enough to hold a soft peak. Spread over the cooled slab.
  6. Chill and decorate: Chill the frosted slab, uncovered, for 30–45 minutes, until the frosting feels firm. Gently melt the remaining white chocolate in short microwave intervals, stirring often, or over a gentle double boiler. Drizzle it over the frosting and immediately scatter the chopped cranberries on top. Let the drizzle set.
  7. Cut: Lift out the slab using the parchment overhang. Cut into 16 rectangles with a large sharp knife, wiping the blade between cuts. If the topping softens, chill the slab again briefly before slicing.

How to Keep the Bars Chewy

Once the flour goes in, mix only until it disappears. The 20–24-minute bake range is intended for a light-colored metal pan; a dark nonstick pan may brown the edges sooner, while a glass dish may take longer. In either case, use the lightly golden edges and moist-crumb center to judge doneness rather than the clock alone.

For a thin drizzle, melt white chocolate gently and keep water out of it. Chopped white baking chocolate often melts more smoothly than chips. If it is still too thick to drizzle, stir in 1/2 teaspoon neutral oil or refined coconut oil.

Variations and Related Bakes

For a nutty variation, fold 1/2 cup chopped toasted pecans into the batter with the cranberries. Keep the frosting, drizzle, and cranberry topping.

For the same cranberry-and-white-chocolate pairing in cookie form, try Thick White Chocolate Cranberry Cookies. Glazed Orange Cranberry Bread is another way to bake with cranberry and orange.

How to Store Cranberry Bliss Bars

Because of the cream cheese frosting, store the bars in an airtight container in the refrigerator for up to 4 days. Let the drizzle set before stacking, and separate layers with parchment. For a softer blondie texture, let refrigerated bars stand at room temperature for 15–20 minutes before serving; do not leave them out for extended storage.

To make them ahead, bake the slab one day in advance, cool it, cover, and refrigerate. Frost, drizzle, and cut the next day. Do not reheat frosted bars. Cut bars can be frozen in parchment-separated layers in an airtight container for up to 1 month; thaw overnight in the refrigerator.

Nutrition

Approximate nutrition per bar, based on 16 bars: 530 calories, 5g protein, 25g fat, and 73g carbohydrates. Approximate values per 100g: 435 calories, 4g protein, 21g fat, and 60g carbohydrates. Values are estimates and will vary with ingredients, portion size, and moisture lost during baking.

Cranberry Bliss Bars

Chewy brown sugar blondie bars with dried cranberries, white chocolate, orange zest, cream cheese frosting, and a white chocolate drizzle.
Course: Dessert
Cuisine: American
Prep: 25 min
Cook: 24 min
Total: 135 min
Servings: 16 Calories: 530 kcal

Equipment

  • 9-by-13-inch light-colored metal pan
  • parchment paper
  • mixing bowls
  • whisk
  • electric mixer
  • microwave or double boiler
  • large sharp knife

Ingredients

Blondie Base

  • 1 cup (2 sticks) unsalted butter, melted and slightly cooled (225g)
  • 1 1/2 cups packed light brown sugar (300g)
  • 1/2 cup granulated sugar (100g)
  • 2 large eggs
  • 2 teaspoons vanilla extract
  • 1 teaspoon orange zest
  • 2 1/4 cups all-purpose flour (280g)
  • 1 teaspoon baking powder
  • 1/2 teaspoon fine salt
  • 1 cup white chocolate chips or chopped white baking chocolate
  • 1 1/4 cups dried cranberries, chopped if large

Frosting and Topping

  • 8 ounces full-fat block cream cheese, softened (225g)
  • 4 tablespoons unsalted butter, softened (55g)
  • 2 cups powdered sugar (240g)
  • 1 teaspoon orange zest
  • 1–2 teaspoons orange juice or milk, if needed
  • 1/2 cup white chocolate chips or chopped white baking chocolate
  • 1/4 cup dried cranberries, chopped

Instructions

  1. Preheat the oven to 350°F (175°C). Line a light-colored metal 9-by-13-inch pan with parchment paper, leaving an overhang on two sides.
  2. Whisk the melted butter, brown sugar, and granulated sugar until glossy.
  3. Whisk in the eggs, vanilla extract, and orange zest.
  4. Fold in the flour, baking powder, and salt just until no dry streaks remain.
  5. Fold in the white chocolate and dried cranberries until evenly distributed.
  6. Spread the thick batter evenly in the prepared pan.
  7. Bake for 20–24 minutes, checking at 20 minutes. Remove when the edges are lightly golden and a toothpick in the center comes out with a few moist crumbs.
  8. Cool the blondie slab completely in the pan, about 1 hour.
  9. Beat the cream cheese and softened butter until smooth. Beat in the powdered sugar and orange zest, adding orange juice or milk only if needed for spreadability.
  10. Spread the frosting evenly over the cooled blondies.
  11. Chill the frosted slab uncovered for 30–45 minutes, until the frosting is firm.
  12. Melt the remaining white chocolate in short microwave intervals, stirring often, or melt it over a gentle double boiler.
  13. Drizzle the melted white chocolate over the chilled frosting and immediately sprinkle with chopped dried cranberries. Let the drizzle set.
  14. Lift the slab from the pan using the parchment overhang and cut into 16 rectangles, wiping the knife between cuts.

Tips

  • Use dried cranberries rather than fresh or frozen cranberries to avoid excess moisture in the batter.
  • Mix the flour into the batter only until it disappears to keep the blondies chewy.
  • Bake until a toothpick has a few moist crumbs; a completely clean toothpick can indicate overbaking.
  • Use block cream cheese and softened, not melted, butter for frosting that holds its shape.
  • Judge doneness by the lightly golden edges and moist-crumb center, especially when using dark or glass pans.
  • If melted white chocolate is too thick to drizzle, stir in 1/2 teaspoon neutral oil or refined coconut oil.

Variations

  • Pecan Cranberry Bliss Bars: Fold 1/2 cup chopped toasted pecans into the batter with the cranberries.

Notes

Store frosted bars in an airtight container in the refrigerator for up to 4 days, separating stacked layers with parchment. Let chilled bars stand at room temperature for 15–20 minutes before serving. Freeze cut bars for up to 1 month and thaw overnight in the refrigerator.

Nutrition

Calories: 530 kcal | Protein: 5 g | Fat: 25 g | Carbohydrates: 73 g

Cranberry Orange Sweet Rolls

These nine soft sweet rolls bake close together in a square dish, with deep-red cranberry spirals and a light orange glaze. The cranberry filling is cooked until thick and cooled before it goes on the dough; that keeps the swirls distinct and makes the log easier to roll. Orange zest adds citrus flavor to the filling, butter-sugar layer, and glaze. Shape the rolls the night before if you want to bake them for breakfast.

Ingredients for Cranberry Orange Sweet Rolls

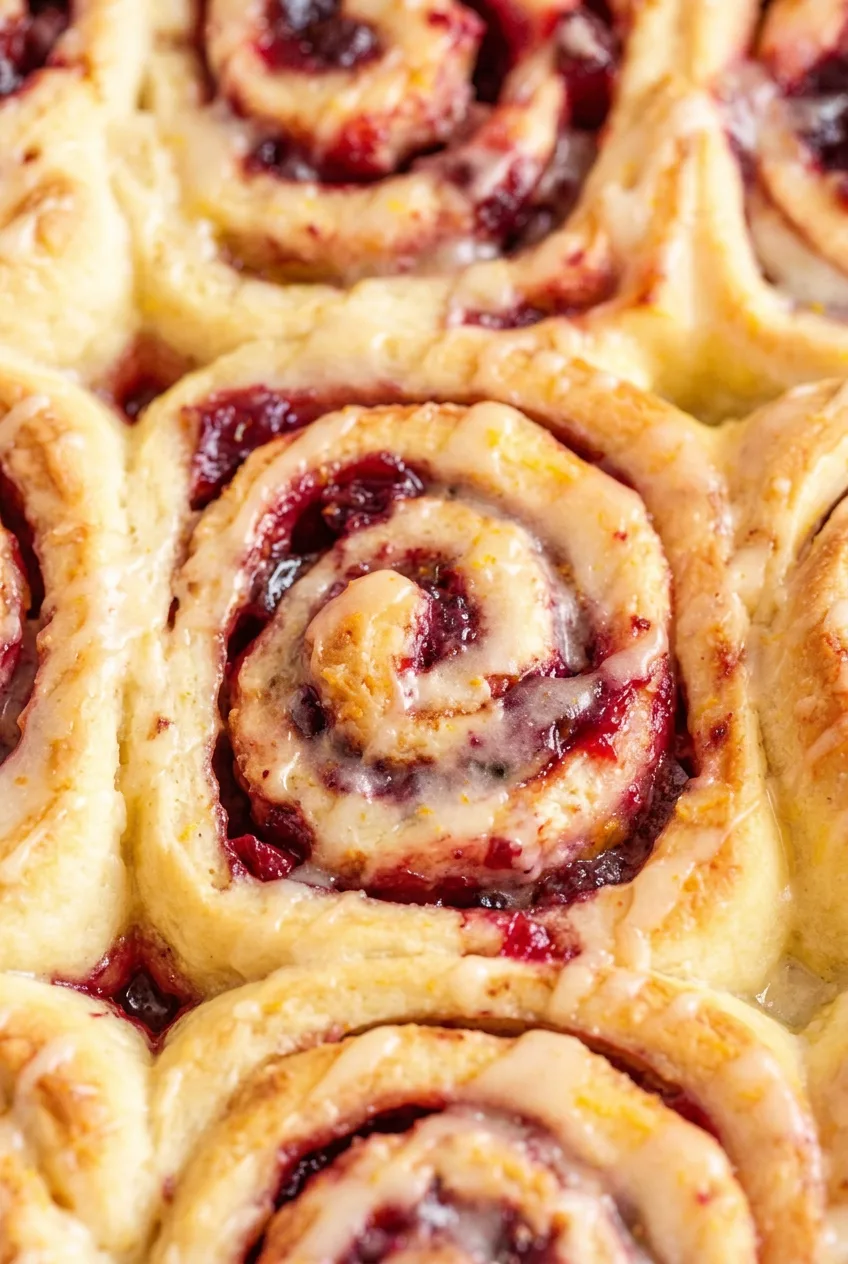
Close view of a golden cranberry orange sweet roll with chunky red cranberry filling and citrus glaze.

Cranberry filling

  • 12 ounces fresh or frozen cranberries (340g)
  • 1/2 cup granulated sugar (100g)
  • 2 large oranges, zested and juiced, divided among the filling, butter layer, and glaze
  • 1/2 teaspoon ground cinnamon

Dough and orange-butter layer

  • 3/4 cup whole milk, warmed to 105°F to 110°F (40°C to 45°C)
  • 2 tablespoons plus 2 teaspoons granulated sugar (about 35g)
  • 2 1/4 teaspoons active dry yeast (7g)
  • 7 tablespoons unsalted butter (about 100g), divided: 3 tablespoons melted for the dough, 3 tablespoons softened for the filling layer, and 1 tablespoon for the dish
  • 1 large egg
  • 3/4 teaspoon fine salt
  • 3 to 3 1/4 cups all-purpose flour, plus more only as needed (about 375g for 3 cups)
  • 1/3 cup packed light brown sugar (about 65g)

Orange glaze

  • 1 cup powdered sugar (120g)
  • 1 to 2 tablespoons reserved orange juice
  • A little reserved orange zest

How to Make Cranberry Orange Sweet Rolls

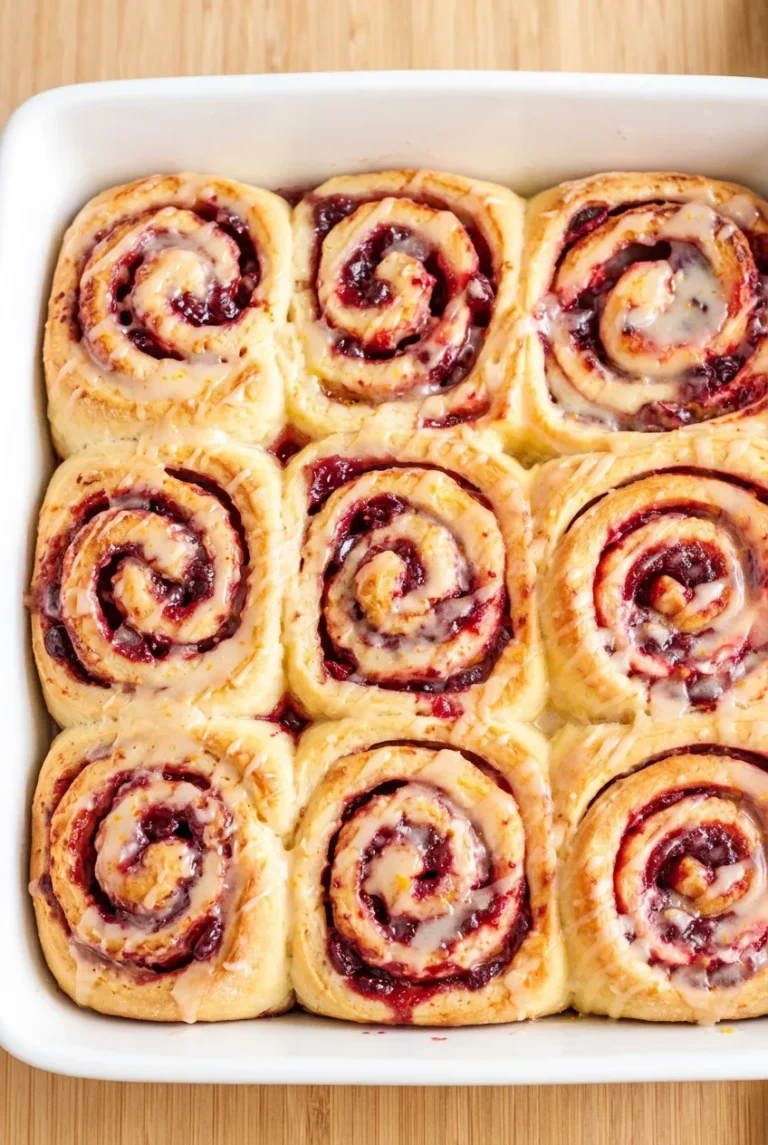
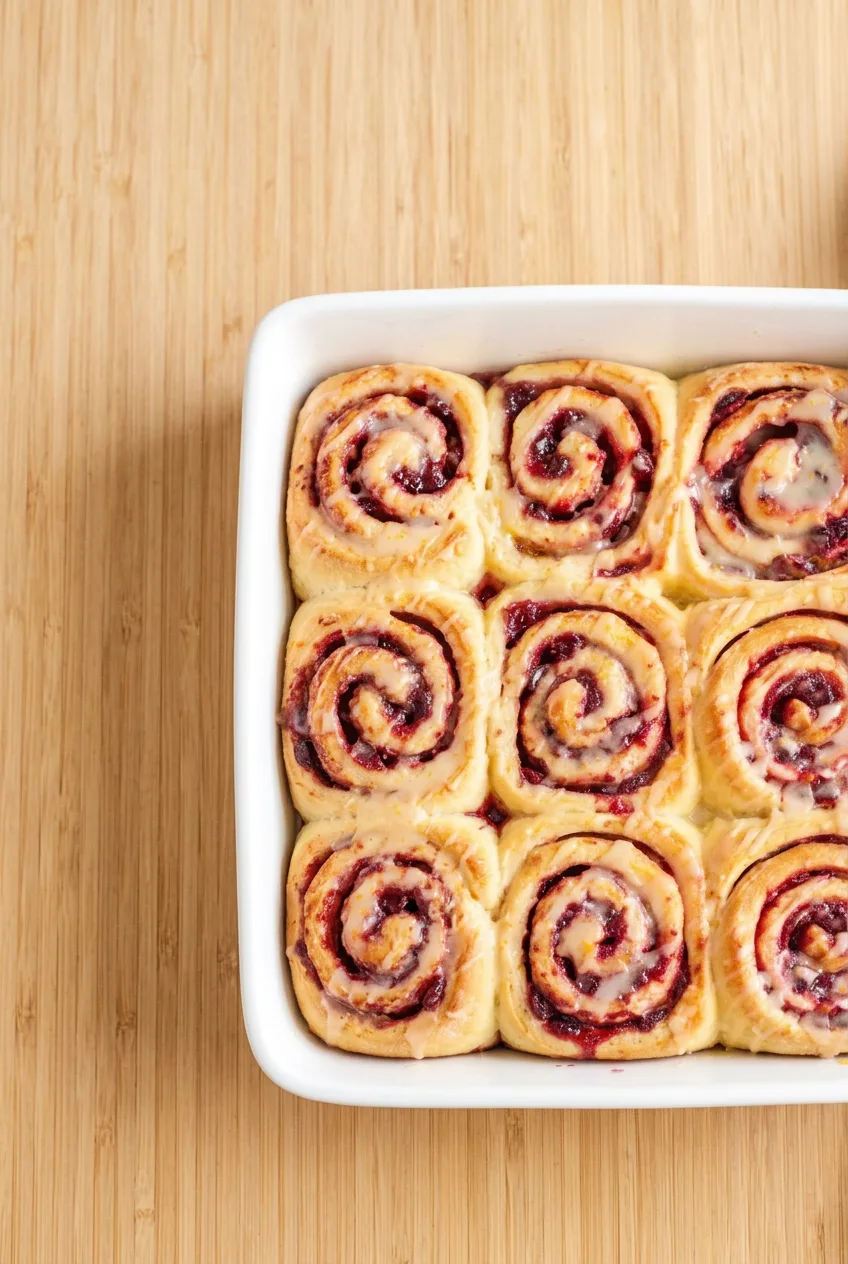
Overhead view of nine glazed cranberry orange sweet rolls baked together in a white square dish.
  1. Cook the filling: Reserve 1 to 2 tablespoons orange juice and a little zest for the glaze. Combine the cranberries, 1/2 cup granulated sugar, remaining orange juice, 1 tablespoon orange zest, and cinnamon in a medium saucepan. Cook over medium heat for 15 to 20 minutes, stirring often, until most berries burst and the mixture is thick enough to leave a brief trail when a spoon is drawn across the pan. Reduce the heat to medium-low if it sputters or sticks. Transfer to a shallow bowl and cool completely, about 30 to 45 minutes.
  2. Make the dough: Stir the warm milk, remaining granulated sugar, and yeast together. Let stand until foamy. Mix in 3 tablespoons melted butter, the egg, salt, and 3 cups flour. Knead until smooth and soft, adding flour from the remaining 1/4 cup only as needed. The dough should hold its shape but still feel slightly tacky, not dry or stiff.
  3. Let it rise: Place the dough in a bowl, cover, and let rise in a warm, draft-free spot until roughly doubled, about 60 to 90 minutes.
  4. Fill the dough: Butter a 9-inch square baking dish with the remaining tablespoon of butter. Roll the dough into an approximately 14-by-10-inch rectangle. Spread the 3 tablespoons softened butter thinly over it, then sprinkle with the brown sugar and remaining orange zest, saving a little zest for the glaze. Spread the cooled cranberry filling in a thin, even layer, leaving a 1-inch bare border along one long edge. Reserve any filling that does not fit comfortably.
  5. Shape nine rolls: Starting at the filled long edge, roll the dough snugly toward the bare border and pinch the seam closed. Cut into 9 equal rolls with unflavored dental floss or a sharp knife. Arrange them cut-side up in a 3-by-3 pattern in the prepared dish, with small gaps between them.
  6. Proof and preheat: Cover the dish and let the rolls rise until puffy, expanded, and nearly touching, about 35 to 50 minutes. As they finish rising, preheat the oven to 350°F (175°C).
  7. Bake: Bake uncovered for 22 to 28 minutes, beginning checks at 22 minutes. The tops and edges should be light golden brown, and the dough in the seams between the center rolls should no longer look wet or raw. If needed, continue baking in 2- to 3-minute increments. Tent loosely with foil if the tops brown before the centers cook through; rotate the dish if it is browning unevenly.
  8. Cool and glaze: Let the rolls cool in the dish for 10 to 15 minutes. Whisk the powdered sugar with 1 tablespoon reserved orange juice and a little reserved zest. Add more juice a teaspoon at a time until the glaze is pourable but still opaque. If it becomes too thin, whisk in a little more powdered sugar. Drizzle over the warm rolls, leaving the cranberry spirals visible.

How to Keep the Cranberry Filling Inside the Rolls

The filling should resemble thick jam, not loose sauce. Cooling it completely keeps it from melting the butter layer and sliding as you roll the dough. A thin layer and a bare border leave room to seal the log. A little cranberry bubbling at the edges during baking is normal; filling pooling across the dish suggests the layer was too loose or too thick.

Frozen cranberries can go straight into the saucepan without thawing, though they may need a few extra minutes to thicken. For a shortcut, use about 1 1/2 cups thick leftover cranberry sauce in place of the cooked filling and stir in orange zest. Reduce loose or watery sauce before spreading it on the dough.

Overnight Cranberry Orange Sweet Rolls

After shaping the rolls in the dish, cover and refrigerate for up to 12 hours instead of giving them their second rise at room temperature. In the morning, leave the covered dish out until the rolls look puffy and expanded, typically 45 to 90 minutes depending on the room. Bake as directed once they have risen; rely on their appearance rather than the clock alone.

For another seasonal brunch bake, try these Pumpkin Cinnamon Rolls with Maple Cream Cheese Icing.

Serving, Storage, and Reheating

Serve the rolls warm from the dish. A Honey Cinnamon Latte pairs well with them.

Let leftover rolls cool and the glaze set before covering tightly. Keep at room temperature for up to 2 days for the best texture. Warm an individual roll briefly in the microwave until just soft; overheating can toughen the bread. For longer storage, refrigerate tightly covered, though the rolls will firm up when chilled.

To freeze, wrap fully baked, completely cooled unglazed rolls tightly for up to 3 months. Thaw overnight, warm gently, and add fresh glaze before serving.

Nutrition

Approximate nutrition per large roll, based on 9 rolls: 420 calories, 6g protein, 11g fat, and 76g carbohydrates. Approximate values per 100g of finished rolls: 285 calories, 4g protein, 7g fat, and 51g carbohydrates. Values will vary with orange yield, flour used, and moisture lost during cooking and baking.

Cranberry Orange Sweet Rolls

Soft orange-zested sweet rolls with a thick cranberry filling and a light orange glaze.
Course: Breakfast
Cuisine: American
Prep: 55 min
Cook: 45 min
Total: 260 min
Servings: 9 Calories: 420 kcal

Equipment

  • Medium saucepan
  • Shallow bowl
  • Mixing bowl
  • Rolling pin
  • 9-inch square baking dish
  • Whisk
  • Dental floss or sharp knife

Ingredients

Cranberry Filling

  • 12 ounces fresh or frozen cranberries (340 g)
  • 1/2 cup granulated sugar (100 g)
  • 2 large oranges, zested and juiced, divided
  • 1/2 teaspoon ground cinnamon

Dough and Orange-Butter Layer

  • 3/4 cup whole milk, warmed to 105°F to 110°F (40°C to 45°C)
  • 2 tablespoons plus 2 teaspoons granulated sugar (about 35 g)
  • 2 1/4 teaspoons active dry yeast (7 g)
  • 7 tablespoons unsalted butter (about 100 g), divided
  • 1 large egg
  • 3/4 teaspoon fine salt
  • 3 to 3 1/4 cups all-purpose flour, plus more as needed (about 375 g for 3 cups)
  • 1/3 cup packed light brown sugar (about 65 g)

Orange Glaze

  • 1 cup powdered sugar (120 g)
  • 1 to 2 tablespoons reserved orange juice
  • Reserved orange zest

Instructions

  1. Reserve 1 to 2 tablespoons of orange juice and a little orange zest for the glaze.
  2. Combine the cranberries, 1/2 cup granulated sugar, remaining orange juice, 1 tablespoon orange zest, and cinnamon in a medium saucepan. Cook over medium heat for 15 to 20 minutes, stirring often, until the berries burst and the mixture thickens like jam. Transfer to a shallow bowl and cool completely, about 30 to 45 minutes.
  3. Stir together the warm milk, remaining granulated sugar, and yeast. Let stand until foamy.
  4. Mix 3 tablespoons melted butter, the egg, salt, and 3 cups flour into the yeast mixture. Knead until smooth and soft, adding flour from the remaining 1/4 cup only as needed.
  5. Place the dough in a covered bowl and let rise in a warm place until roughly doubled, about 60 to 90 minutes.
  6. Butter a 9-inch square baking dish with 1 tablespoon butter. Roll the dough into a 14-by-10-inch rectangle. Spread with 3 tablespoons softened butter, then sprinkle with brown sugar and remaining orange zest, reserving a little zest for the glaze.
  7. Spread the cooled cranberry filling evenly over the dough, leaving a 1-inch bare border along one long edge. Starting at the filled long edge, roll the dough snugly toward the bare border and pinch the seam closed.
  8. Cut the log into 9 equal rolls and arrange them cut-side up in a 3-by-3 pattern in the prepared dish.
  9. Cover and let the rolls rise until puffy and nearly touching, about 35 to 50 minutes. Preheat the oven to 350°F (175°C) as the rolls finish rising.
  10. Bake uncovered for 22 to 28 minutes, until the tops are light golden brown and the dough between the center rolls no longer looks wet. Tent loosely with foil if the tops brown too quickly.
  11. Cool the rolls in the dish for 10 to 15 minutes. Whisk the powdered sugar with 1 tablespoon reserved orange juice and reserved zest, adding more juice a teaspoon at a time until pourable but opaque. Drizzle over the warm rolls.

Tips

  • Cook the cranberry filling until it is thick like jam, not loose like sauce.
  • Cool the filling completely before spreading it over the dough so it does not melt the butter layer or slide out.
  • Spread the filling in a thin layer and leave a bare border to help seal the log.
  • Add flour sparingly; the dough should be slightly tacky rather than dry or stiff.
  • Check the seams between the center rolls for doneness, since they bake more slowly than the edges.
  • Use unflavored dental floss for clean cuts without crushing the rolls.

Variations

  • Overnight Cranberry Orange Sweet Rolls: After shaping the rolls, cover and refrigerate for up to 12 hours. Let them stand at room temperature until puffy, about 45 to 90 minutes, then bake as directed.
  • Leftover Cranberry Sauce Rolls: Use about 1 1/2 cups thick leftover cranberry sauce mixed with orange zest in place of the cooked cranberry filling. Reduce watery sauce before using.

Notes

Store covered at room temperature for up to 2 days. Warm individual rolls briefly in the microwave until soft. Freeze fully baked, cooled, unglazed rolls for up to 3 months; thaw, warm gently, and glaze before serving.

Nutrition

Calories: 420 kcal | Protein: 6 g | Fat: 11 g | Carbohydrates: 76 g