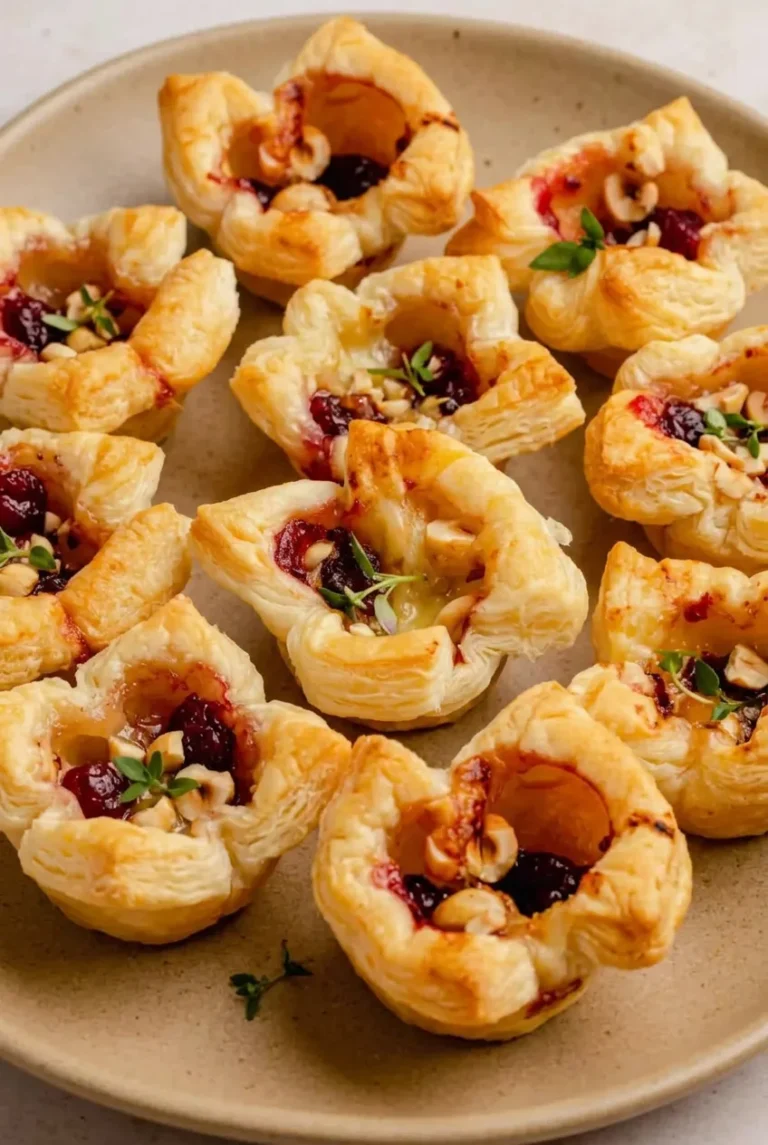
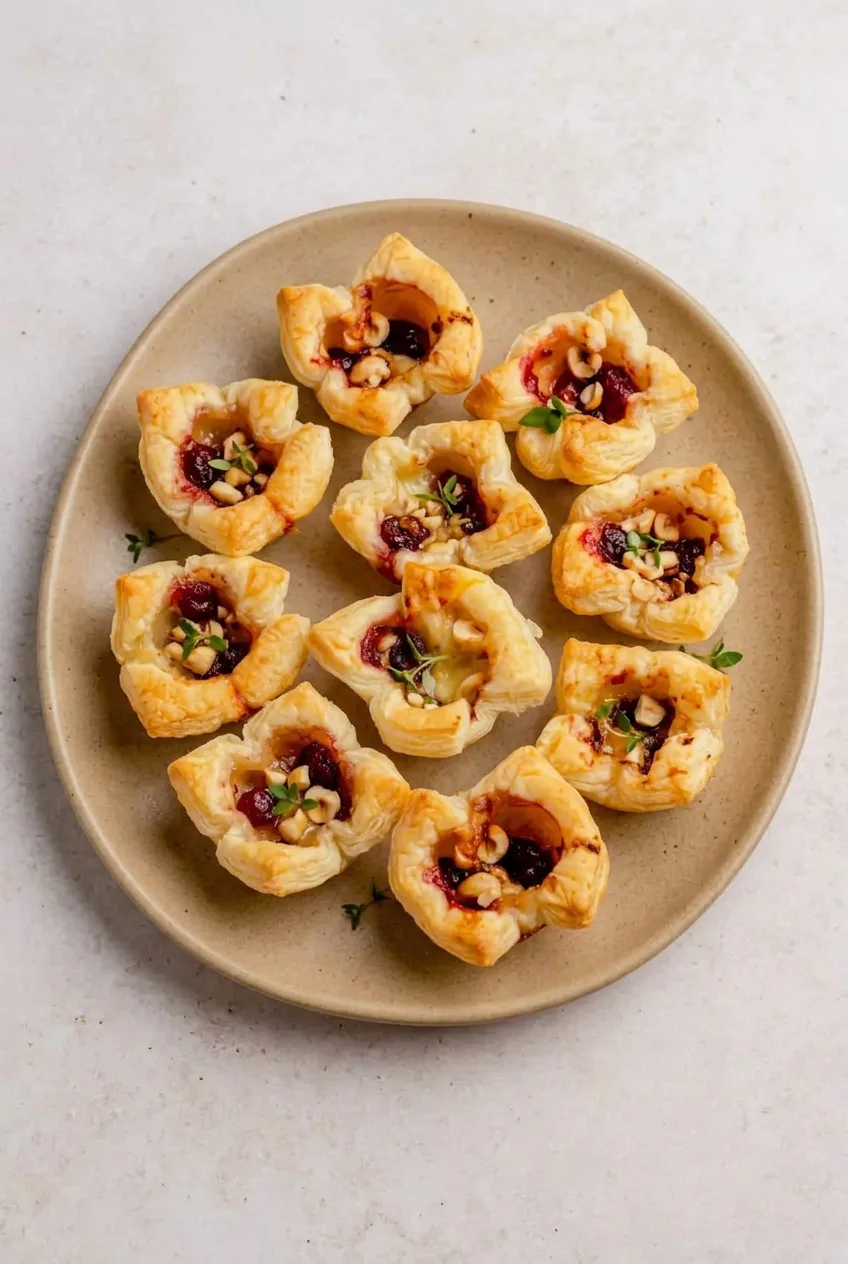
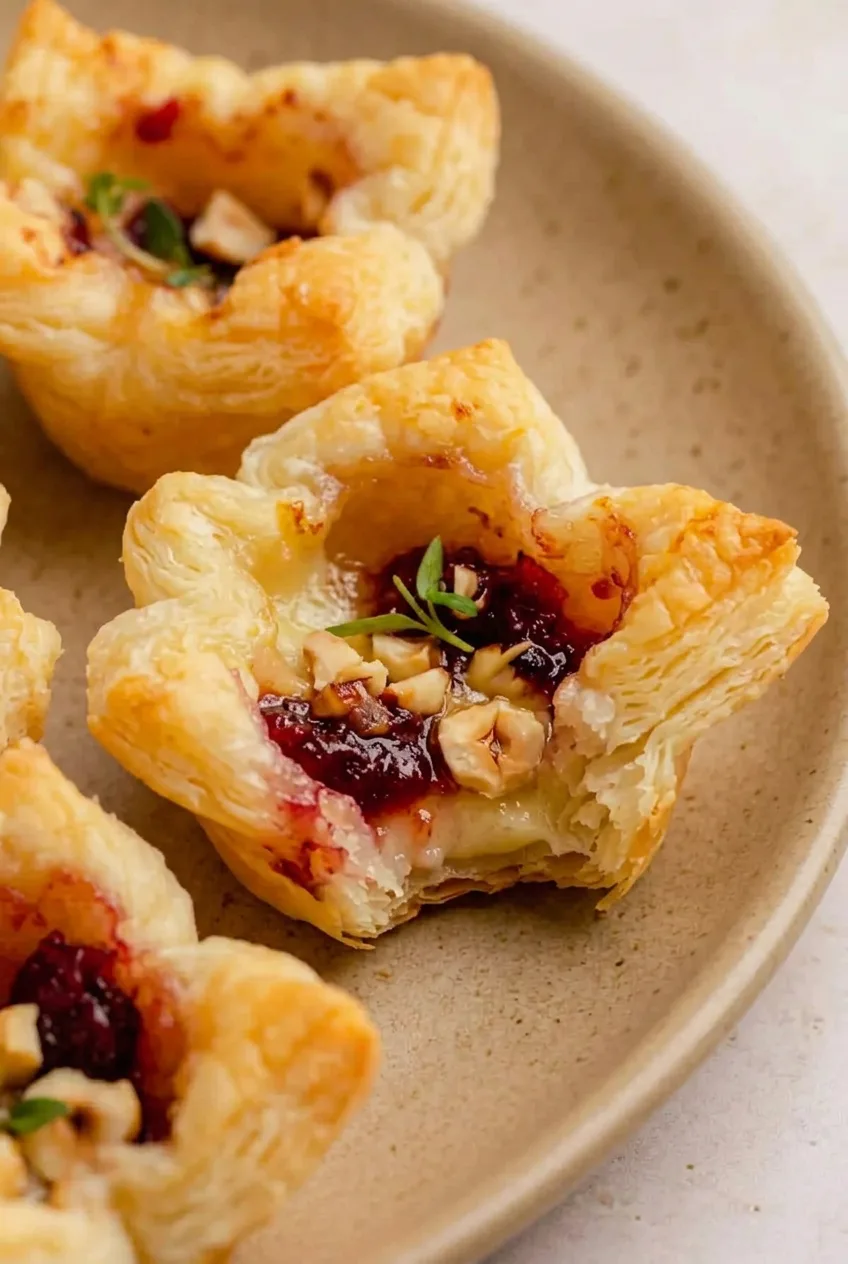
These cranberry Brie bites bake into open puff pastry cups with ruffled golden edges, soft Brie, and a spoonful of ruby-red cranberry sauce. A mini muffin pan supports the pastry as it rises, while chopped hazelnuts add crunch. Keep the pastry and Brie cold during assembly, and use just 1/2 teaspoon of thick sauce per cup to help prevent overflow and soggy bottoms. Serve the bites warm, while the pastry is crisp.
Prep time: 20 minutes. Bake time: 13 to 16 minutes. Makes 12 bites; serves 4 to 6 as an appetizer.
Ingredients for Cranberry Brie Bites
1 sheet frozen puff pastry (about 8 oz or 225g), thawed but cold
4 oz Brie cheese (about 115g), cold, rind on, cut into 12 small cubes
6 tablespoons thick whole-berry cranberry sauce (about 90g); use about 2 tablespoons for the bites
The Brie rind is edible and helps the cubes hold their shape as they soften. Pecans can replace the hazelnuts, or the nuts can be omitted.
How to Bake Cranberry Brie Bites
Prepare the oven and pan: Place a rack in the center of the oven and preheat to 400°F (205°C). Generously spray all 12 wells of a mini muffin pan. Set the pan on a rimmed baking sheet to catch any overflow.
Shape the pastry: Cut the cold puff pastry into 12 even squares, about 2 1/2 inches each. Gently press one square into each well without stretching it thin. Leave the corners standing upright in loose ruffles so the centers remain open.
Fill the cups: Place one cold Brie cube in each cup. Spoon about 1/2 teaspoon cranberry sauce over or beside each cube, then scatter the hazelnuts on top. Leave the filling visible and below the pastry rims; excess sauce can bubble over and soften the pastry.
Bake: Bake uncovered for 13 to 16 minutes, beginning checks at 12 minutes. The pastry should be puffed and golden on its ridges and corners, the Brie soft and glossy, and the sauce hot. Rotate the baking sheet near the end only if one side is browning faster. Pastry brand, square size, and pan material can affect when the bites are done, so use these cues rather than the clock alone.
Rest and serve: Let the bites rest in the pan for 3 to 5 minutes so the filling settles. Gently loosen them with a thin offset spatula or small knife, transfer to a platter, and garnish with thyme, if using. Serve warm.
Make-Ahead, Storage, and Reheating
To make the bites ahead, assemble them in the muffin pan, cover, and refrigerate for several hours. Bake directly from chilled, allowing an extra minute or two if needed and checking for golden pastry.
Refrigerate cooled leftovers in an airtight container for up to 3 days. Reheat at 350°F (175°C) for about 5 to 8 minutes, until the centers are warm and the pastry edges crisp again. A microwave will soften the pastry.
Fully cooled baked bites can be frozen in airtight packaging for up to 2 months, though they will be less crisp than freshly baked. Thaw or lightly thaw, then reheat in a 350°F oven until hot and crisped.
For another warm appetizer, serve these alongside Reuben Dip.
Nutrition
Approximate nutrition per bite, based on 12 bites and 1/2 teaspoon cranberry sauce in each: 150 calories, 4g protein, 11g fat, and 10g carbohydrates. Approximate values per 100g: 460 calories, 11g protein, 33g fat, and 30g carbohydrates. Values vary by puff pastry brand; unused cranberry sauce is not included.
Cranberry Brie Bites
Flaky puff pastry cups filled with soft Brie, cranberry sauce, and crunchy hazelnuts.
1 sheet frozen puff pastry (about 8 oz or 225 g), thawed but cold
4 oz Brie cheese (about 115 g), cold, rind on, cut into 12 small cubes
2 tablespoons thick whole-berry cranberry sauce
2 tablespoons chopped hazelnuts
Nonstick cooking spray
Optional Garnish
1 teaspoon fresh thyme leaves or 12 tiny thyme sprigs
Instructions
Place a rack in the center of the oven and preheat to 400°F (205°C). Generously spray all 12 wells of a mini muffin pan and set it on a rimmed baking sheet.
Cut the cold puff pastry into 12 even squares, about 2 1/2 inches each.
Gently press one pastry square into each muffin well without stretching it thin, leaving the corners upright in loose ruffles.
Place one cold Brie cube in each pastry cup.
Spoon about 1/2 teaspoon cranberry sauce over or beside each Brie cube, then sprinkle with hazelnuts. Keep the filling below the pastry rims.
Bake uncovered for 13 to 16 minutes, checking after 12 minutes, until the pastry is puffed and golden and the Brie is soft and glossy.
Rest the bites in the pan for 3 to 5 minutes.
Loosen the bites with a thin offset spatula or small knife, transfer to a platter, garnish with thyme if desired, and serve warm.
Tips
Keep the puff pastry and Brie cold while assembling for the best texture.
Use only about 1/2 teaspoon of thick cranberry sauce per cup to prevent overflow and soggy pastry.
Leave the pastry corners upright so the cups develop ruffled, golden edges.
Set the muffin pan on a rimmed baking sheet to catch any overflowing filling.
Judge doneness by golden, puffed pastry rather than the clock alone.
Variations
Pecan Cranberry Brie Bites: Replace the chopped hazelnuts with chopped pecans.
Nut-Free Cranberry Brie Bites: Omit the hazelnuts for a nut-free version.
Notes
Assemble up to several hours ahead, cover, and refrigerate; bake directly from chilled, adding 1 to 2 minutes if needed. Refrigerate leftovers for up to 3 days and reheat at 350°F (175°C) for 5 to 8 minutes. Freeze cooled baked bites for up to 2 months; reheat in a 350°F oven until hot and crisp.
Nutrition
Calories: 150 kcal|Protein: 4 g|Fat: 11 g|Carbohydrates: 10 g
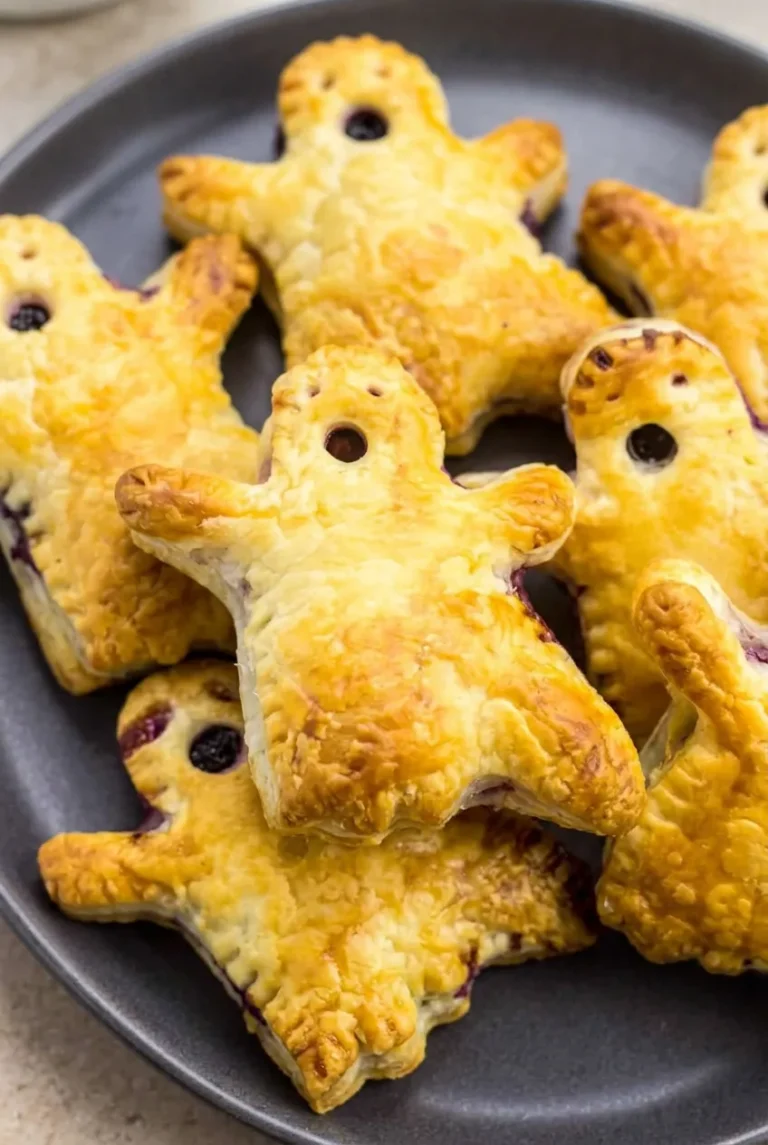
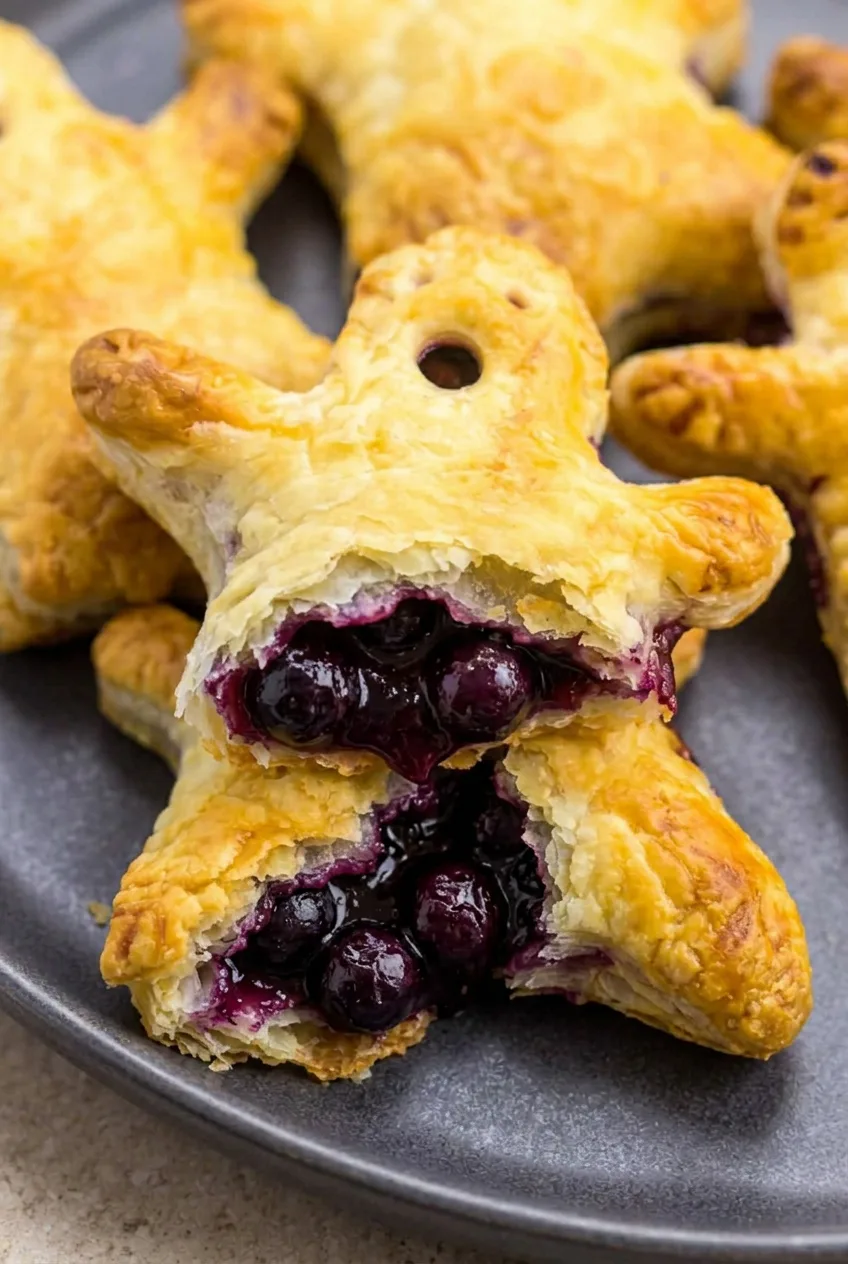
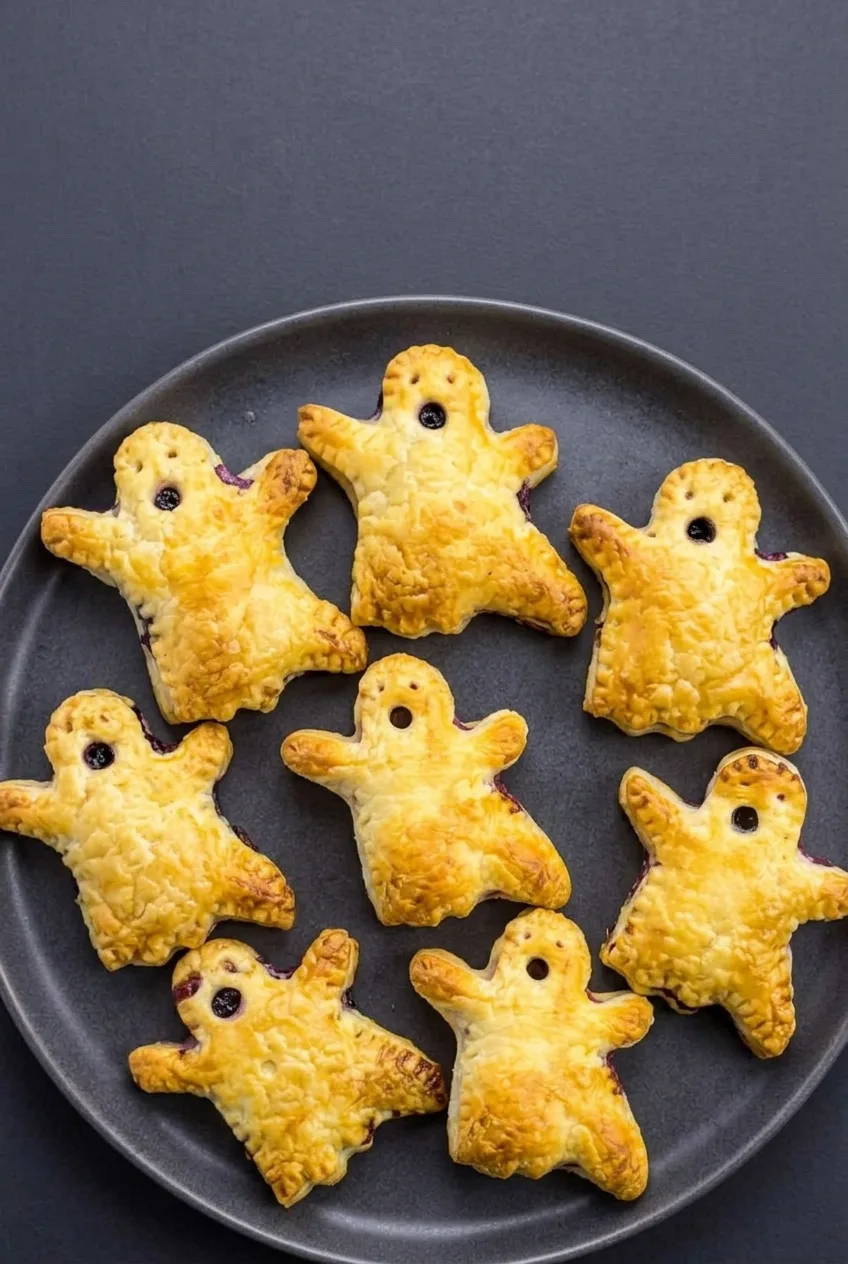
Boo Berry Ghosts are palm-size puff-pastry hand pies filled with thick blueberry-lemon compote. Two small eye holes and a larger mouth cut through the top pastry let the dark filling make each face—no icing needed. Keep the filling completely cool and the pastry cold so the ghosts hold their rounded shape and bake into flaky, golden layers.
Makes: 8 hand pies. Time: About 1 hour 15 minutes, including cooling and chilling.
Use a compact ghost cookie cutter or a paper template with a rounded head, short arms, and a broad wavy bottom. A drinking straw or small piping tip can cut the eyes; use a larger round tip or cutter for the mouth. Thin, delicate arms and tails can brown before the rest of the pastry.
How to Make Boo Berry Ghosts
Cook the filling: Combine the blueberries, sugar, lemon juice, cornstarch, and salt in a medium saucepan. Cook over medium heat for 6 to 10 minutes, stirring regularly, until the berries burst and the filling is glossy and jammy. It should mound on a spoon with very little loose liquid.
Cool completely: Spread the filling in a shallow bowl or on a plate. Let it cool, then refrigerate as needed until it is no longer warm. Warm filling softens puff pastry and makes leaks more likely.
Cut the ghosts: Preheat the oven to 400°F (205°C) and line a rimmed baking sheet with parchment. Lightly roll the cold pastry only if needed to smooth seams, then cut 16 matching, palm-size ghost shapes. In eight pieces, cut two small round eyes and one noticeably larger round or oval mouth. Puff pastry expands as it bakes, so make the openings large enough to remain visible. Refrigerate the cut pastry if it begins to soften.
Fill and seal: Whisk the egg with the water. Place the eight uncut bases on the baking sheet at least 2 inches apart. Add about 1 tablespoon of cooled filling to each, centered beneath the face area, leaving a clean 1/2-inch border. Lightly brush the borders with egg wash, add the face-cut tops, press the edges together, and crimp firmly with a fork. Do not flatten the filled centers.
Chill and brush: Refrigerate the assembled ghosts for 15 minutes to firm the pastry and help the shapes hold as they puff. Lightly brush the tops with egg wash, keeping it out of the face openings. Sprinkle with coarse sugar, if using.
Bake: Bake uncovered for 16 to 20 minutes, beginning to check at 15 minutes. Rotate the sheet after about 10 minutes if your oven browns unevenly. The pastry should be well puffed, dry-looking, flaky, and golden, with darker amber tips and thick blueberry filling visible through the faces. If the tips darken too quickly, loosely tent those areas. Cool for 10 minutes before serving; the filling will be hot.
If the ghosts will not fit with room to expand, bake one sheet at a time and refrigerate the waiting pastries. A very dark baking sheet may brown the bottoms sooner, so check early.
How to Keep the Blueberry Filling Inside
Use thick, completely cooled filling and keep to about 1 tablespoon per palm-size pie. Extra filling can push through the seams as the pastry rises. Leave the border free of fruit, apply only a thin layer of egg wash, and crimp all the way around. The face holes let steam escape, but they cannot make up for an unsealed edge.
Blueberry Jam Shortcut and Serving
Instead of cooking the compote, use about 1/2 cup of thick blueberry jam mixed with lemon juice and a tiny pinch of salt. Spoon about 1 tablespoon into each pie. Avoid thin preserves, which can run out during baking.
These hand pies are flakiest on the day they are baked. Cool leftovers completely, then refrigerate in an airtight container for up to 2 days, placing parchment between layers if stacking. Reheat in a toaster oven or a 350°F (175°C) oven until warm and re-crisped; a microwave will soften the pastry.
The blueberry filling can be made a day ahead and refrigerated. To freeze unbaked pies, arrange the assembled ghosts in a single layer on a parchment-lined sheet until firm, then transfer to a freezer-safe container or bag. Bake from frozen at 400°F, adding several minutes and checking for fully puffed, golden pastry. Do not thaw first.
Nutrition
Approximate nutrition per hand pie, based on 8 pies: 350 calories, 5g protein, 21g fat, and 37g carbohydrates. Approximate values per 100g of baked pastry: 370 calories, 5g protein, 22g fat, and 39g carbohydrates. Values exclude optional coarse sugar and vary with the puff-pastry brand, pie size, and moisture lost during baking.
Boo Berry Ghosts
Palm-size puff pastry hand pies filled with thick blueberry-lemon compote and cut with ghost faces that reveal the dark filling.
Combine the blueberries, sugar, lemon juice, cornstarch, and salt in a medium saucepan.
Cook over medium heat for 6 to 10 minutes, stirring regularly, until the berries burst and the filling is thick, glossy, and jammy with very little loose liquid.
Spread the filling in a shallow bowl or on a plate and cool completely. Refrigerate until cold if needed.
Preheat the oven to 400°F (205°C) and line a rimmed baking sheet with parchment paper.
Lightly roll the cold puff pastry only if needed to smooth the seams, then cut 16 matching palm-size ghost shapes.
Cut two small eye holes and one larger round or oval mouth in 8 of the ghost shapes. Refrigerate the cut pastry if it starts to soften.
Whisk the egg and water together to make an egg wash.
Arrange the 8 uncut ghost shapes on the prepared baking sheet, spacing them at least 2 inches apart.
Spoon about 1 tablespoon of cooled blueberry filling onto the center of each base, leaving a clean 1/2-inch border.
Brush the borders lightly with egg wash, place a face-cut pastry top over each filling portion, and press the edges together. Crimp firmly with a fork without flattening the centers.
Refrigerate the assembled hand pies for 15 minutes.
Brush the tops lightly with egg wash, avoiding the face openings, and sprinkle with coarse sugar if using.
Bake for 16 to 20 minutes, rotating the baking sheet after about 10 minutes if needed, until the pastry is puffed, flaky, dry-looking, and golden.
Cool for 10 minutes before serving, as the filling will be hot.
Tips
Use thick, completely cooled filling so it does not soften the puff pastry or leak through the seams.
Keep the puff pastry cold and refrigerate cut shapes if they begin to soften.
Make the eye and mouth openings slightly larger than desired because puff pastry expands during baking.
Keep the filling away from the edges and use only about 1 tablespoon per hand pie.
Crimp the edges firmly all the way around to prevent leaks.
Loosely tent delicate tips if they brown before the rest of the pastry.
Variations
Blueberry Jam Shortcut: Replace the cooked compote with about 1/2 cup thick blueberry jam mixed with lemon juice and a tiny pinch of salt.
Notes
Store cooled leftovers in an airtight container in the refrigerator for up to 2 days. Reheat in a toaster oven or 350°F (175°C) oven until warm and crisp; microwaving softens the pastry. Freeze unbaked pies and bake directly from frozen at 400°F, adding several minutes.
Nutrition
Calories: 350 kcal|Protein: 5 g|Fat: 21 g|Carbohydrates: 37 g
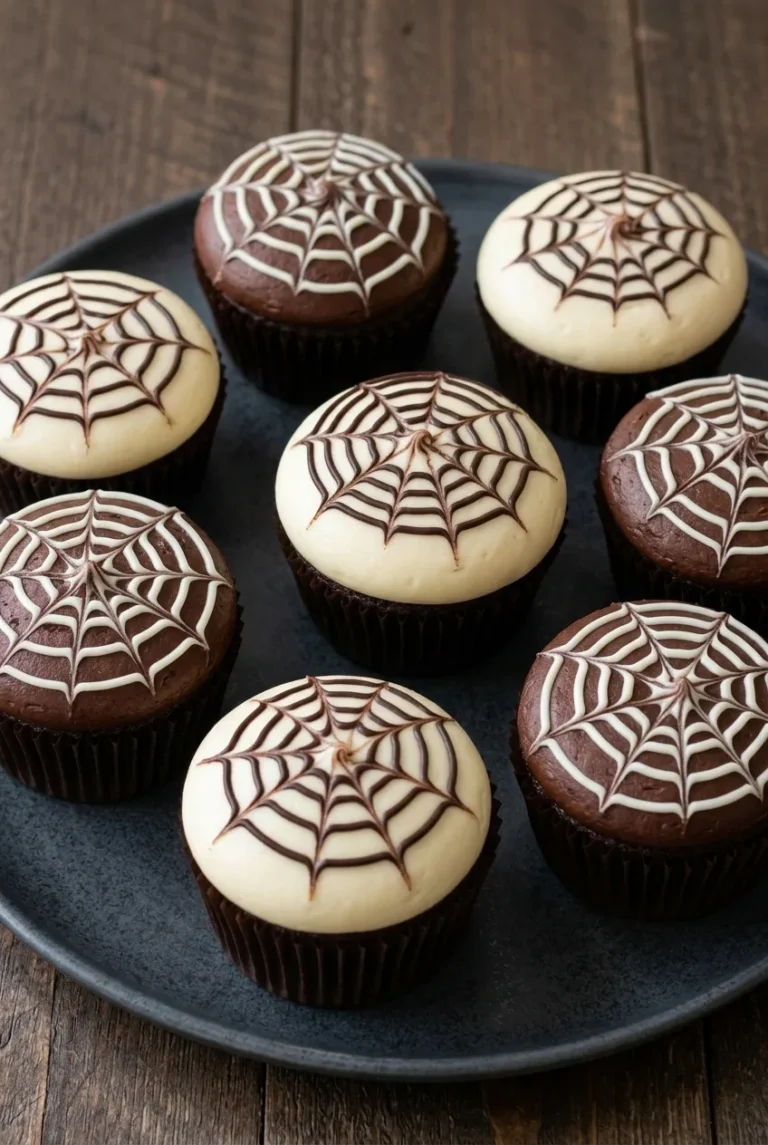
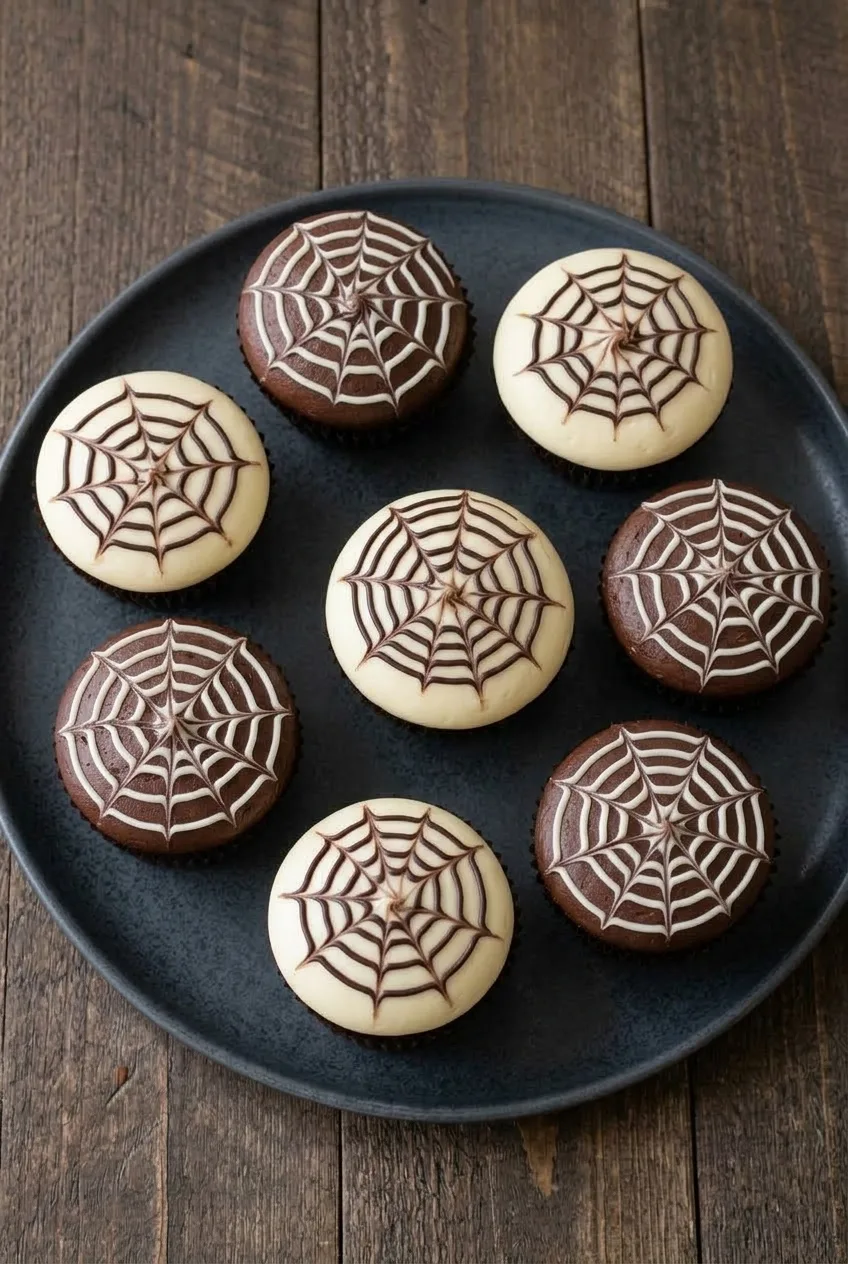
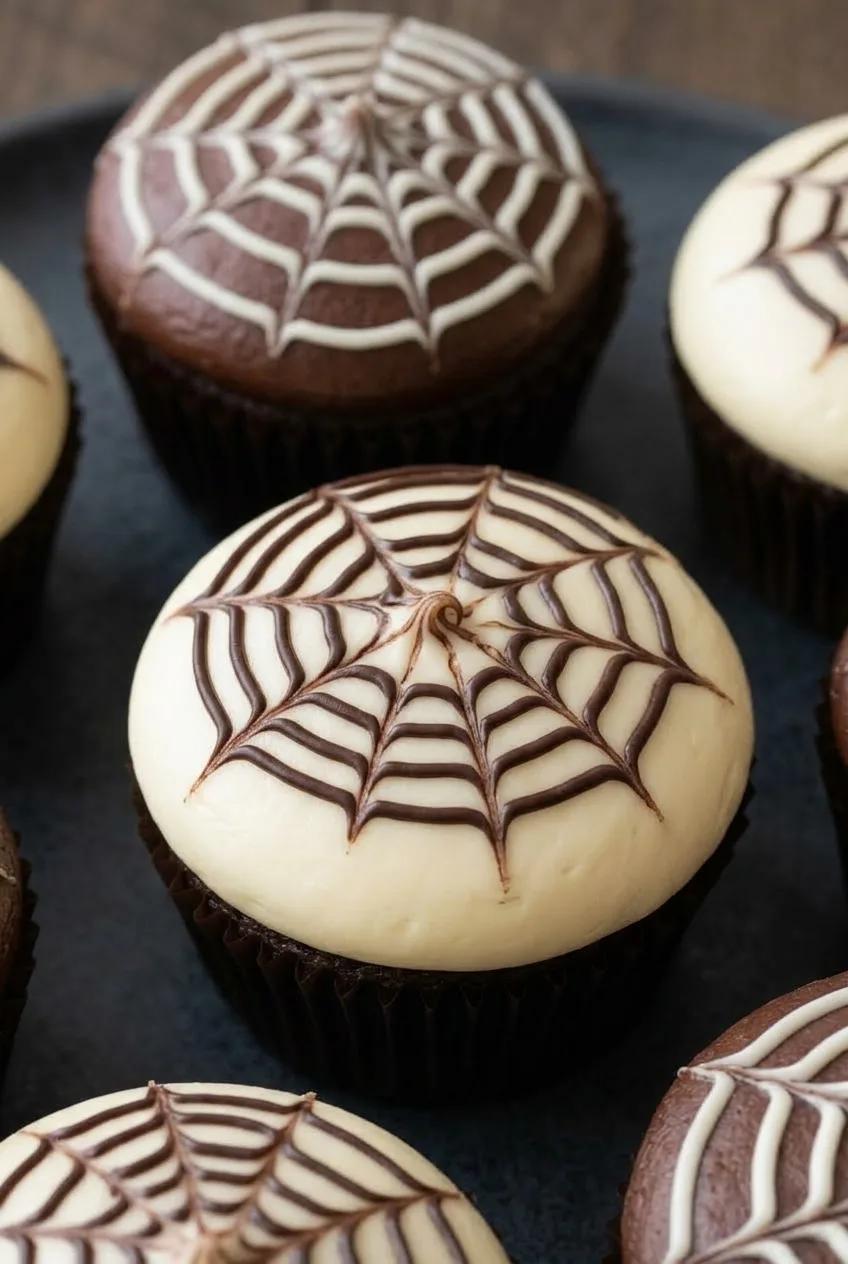
These chocolate cupcakes have smooth, flat frosting tops made for drawing spiderwebs. Half are frosted with ivory vanilla buttercream and dark chocolate webs; the other half have cocoa buttercream and white chocolate webs. Arranged together, they make a contrasting Halloween platter.
The trick is to work one cupcake at a time: pipe chocolate rings, then drag a toothpick through them before the chocolate sets. Bake the cupcakes ahead if you like, but let them cool completely before frosting. Makes 12 standard cupcakes.
3 ounces white chocolate melting wafers or white chocolate chips (85g)
3 ounces semisweet or dark chocolate chips (85g)
You’ll also need 12 dark paper cupcake liners. To replace the buttermilk, mix 1/2 cup plain milk with 1 1/2 teaspoons lemon juice or white vinegar. Let stand for 5 minutes before using.
How to Bake and Decorate Spiderweb Cupcakes
Prepare the pan: Position a rack in the center of the oven and preheat to 350°F (175°C). Line a standard 12-cup muffin pan with dark paper liners.
Mix the batter: Whisk the flour, 1/2 cup cocoa powder, sugar, baking soda, and salt in a large bowl. In a second bowl, whisk the egg, oil, buttermilk, and 1 teaspoon vanilla. Stir the wet ingredients into the dry just until no dry streaks remain. The batter should be pourable; stop mixing once the flour disappears.
Bake and cool: Divide the batter among the liners, filling each about two-thirds full. Bake uncovered for 20 to 23 minutes, starting to check at 20 minutes. The centers should spring back lightly, and a wooden pick should come out clean or with a few moist crumbs, not wet batter. Cool in the pan for 5 minutes, then transfer to a rack to cool completely, about 45 to 60 minutes.
Make the frostings: Beat the softened butter until creamy. Beat in the powdered sugar and remaining 1 teaspoon vanilla, adding just enough milk or cream to make a smooth, spreadable buttercream. Divide evenly. Leave one half ivory and beat the remaining 2 tablespoons cocoa powder into the other half.
Frost the cupcakes: Spread ivory frosting on six cupcakes and chocolate frosting on the other six. Smooth each top into a flat or gently domed circle with an offset spatula or small knife. If the frosting is too soft to hold fine lines, refrigerate the frosted cupcakes for 10 to 15 minutes.
Melt the chocolate: Melt the white and dark chocolates separately in short microwave bursts, stirring often until smooth. Let them cool briefly until fluid but not hot. Transfer each to a small piping bag or resealable bag with a tiny corner snipped off.
Draw the webs: Work on one cupcake at a time. Pipe a center dot and two or three concentric rings, or a loose spiral, using dark chocolate on ivory frosting and white chocolate on chocolate frosting. Immediately drag a toothpick from the center to the outer edge in 6 to 8 evenly spaced strokes. Wipe the toothpick between strokes so the lines stay distinct. Finish each web before piping the next.
Let the webs set: Leave the cupcakes at cool room temperature for 15 to 30 minutes, until the chocolate lines are no longer wet. Arrange the dark and ivory cupcakes alternately on a platter.
How to Keep the Spiderwebs Clear
A flat frosting surface keeps the piped circles visible; tall swirls interrupt the pattern. If the chocolate thickens in its bag, warm it briefly until it flows in a thin line again. Let it cool if it feels hot, or it may soften the buttercream. Drag each web while the chocolate is still wet—once it starts to set, the spokes can break instead of pulling into points.
No piping tip is needed if the bag opening is small. For a lighter cake flavor, use a favorite vanilla cupcake base, but keep the dark liners, two frosting colors, and contrasting chocolate webs.
Make-Ahead and Storage
Bake the cupcakes up to 1 day ahead and store them airtight once completely cool. Buttercream can be refrigerated for several days; bring it to room temperature and beat briefly until spreadable. Frost and decorate the cupcakes on the day of serving or the day before.
Store decorated cupcakes in an airtight container at cool room temperature for up to 2 days, preferably in a single layer. In a warm kitchen, refrigerate them covered and bring them toward room temperature before serving. Let the webs set before transporting, and do not stack the cupcakes. Unfrosted cupcakes can be wrapped well and frozen for up to 2 months; thaw them covered at room temperature before decorating. Do not reheat decorated cupcakes.
Approximate per cupcake, based on 12 cupcakes: 515 calories, 4g protein, 27g fat, and 67g carbohydrates. Approximate per 100g: 430 calories, 3g protein, 22g fat, and 56g carbohydrates. Values vary with the chocolate, dairy, and amount of milk or cream used.
Spiderweb Cupcakes
Chocolate cupcakes topped with ivory and cocoa buttercream and finished with contrasting chocolate spiderweb designs.
3 ounces white chocolate melting wafers or white chocolate chips (85g)
3 ounces semisweet or dark chocolate chips (85g)
For the Pan
12 dark paper cupcake liners
Instructions
Position a rack in the center of the oven and preheat to 350°F (175°C). Line a standard 12-cup muffin pan with dark paper liners.
Whisk the flour, 1/2 cup cocoa powder, sugar, baking soda, and salt in a large bowl.
Whisk the egg, oil, buttermilk, and 1 teaspoon vanilla extract in a second bowl.
Stir the wet ingredients into the dry ingredients just until no dry streaks remain.
Divide the batter among the liners, filling each about two-thirds full.
Bake for 20 to 23 minutes, until the centers spring back lightly and a wooden pick comes out clean or with a few moist crumbs.
Cool the cupcakes in the pan for 5 minutes, then transfer them to a wire rack and cool completely, about 45 to 60 minutes.
Beat the softened butter until creamy. Beat in the powdered sugar and remaining 1 teaspoon vanilla extract, adding enough milk or cream to make a smooth, spreadable buttercream.
Divide the buttercream evenly between two bowls. Leave one portion ivory and beat the remaining 2 tablespoons cocoa powder into the other portion.
Spread ivory frosting on 6 cupcakes and chocolate frosting on the remaining 6. Smooth the tops flat or into gentle domes.
Refrigerate the frosted cupcakes for 10 to 15 minutes if the buttercream is too soft to hold fine lines.
Melt the white chocolate and dark chocolate separately in short microwave bursts, stirring frequently until smooth. Cool briefly until fluid but not hot.
Transfer each melted chocolate to a small piping bag or resealable bag with a tiny corner snipped off.
Working with one cupcake at a time, pipe a center dot and 2 to 3 concentric rings or a loose spiral. Use dark chocolate on ivory frosting and white chocolate on cocoa frosting.
Immediately drag a toothpick from the center to the outer edge in 6 to 8 evenly spaced strokes, wiping the toothpick between strokes.
Let the cupcakes stand at cool room temperature for 15 to 30 minutes, until the chocolate webs are set.
Tips
Cool the cupcakes completely before frosting so the buttercream does not melt.
Keep the frosting surface flat so the spiderweb pattern stays visible.
Work on one cupcake at a time and drag the toothpick through the chocolate before it sets.
Use a very small bag opening to pipe thin, defined chocolate lines.
Warm thickened chocolate briefly until it flows smoothly, then let it cool if it feels hot.
Refrigerate frosted cupcakes briefly if the buttercream is too soft for clean web lines.
Variations
Vanilla Spiderweb Cupcakes: Use a favorite vanilla cupcake base while keeping the dark liners, two buttercream colors, and contrasting chocolate webs.
Notes
Bake cupcakes up to 1 day ahead and store airtight once cool. Store decorated cupcakes in a single layer at cool room temperature for up to 2 days; refrigerate in a warm kitchen and bring toward room temperature before serving. Unfrosted cupcakes can be frozen for up to 2 months. Do not stack or reheat decorated cupcakes.
Nutrition
Calories: 515 kcal|Protein: 4 g|Fat: 27 g|Carbohydrates: 67 g
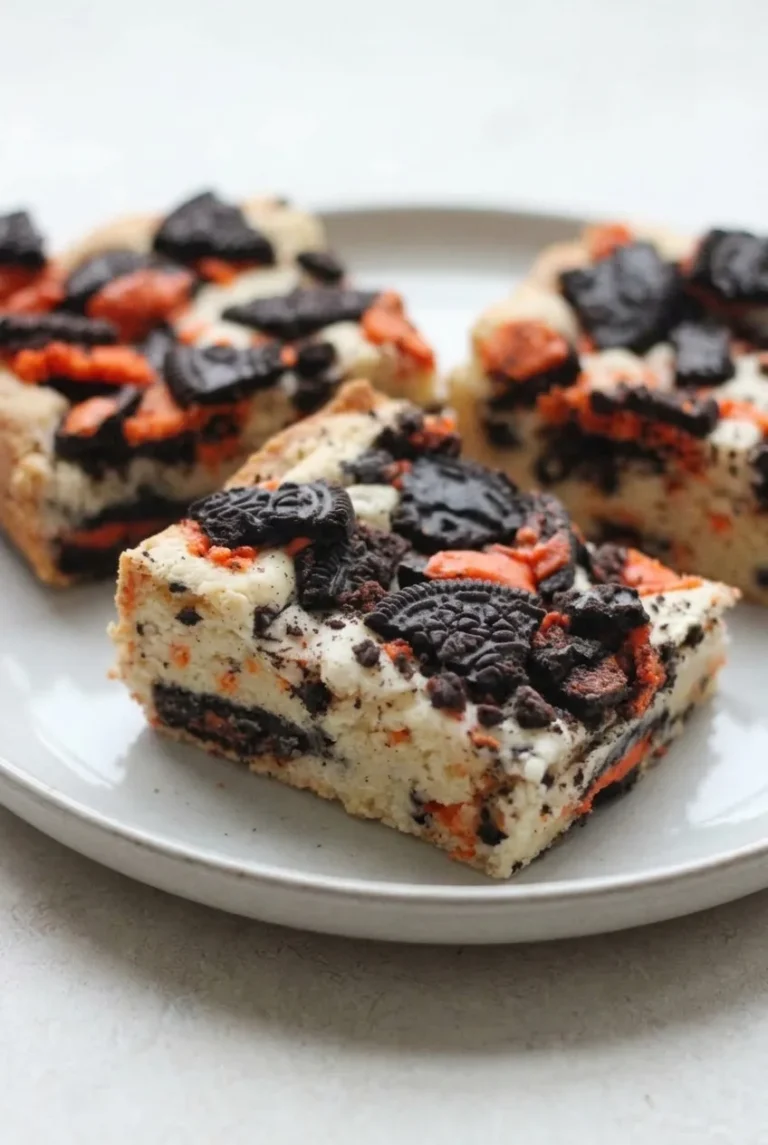
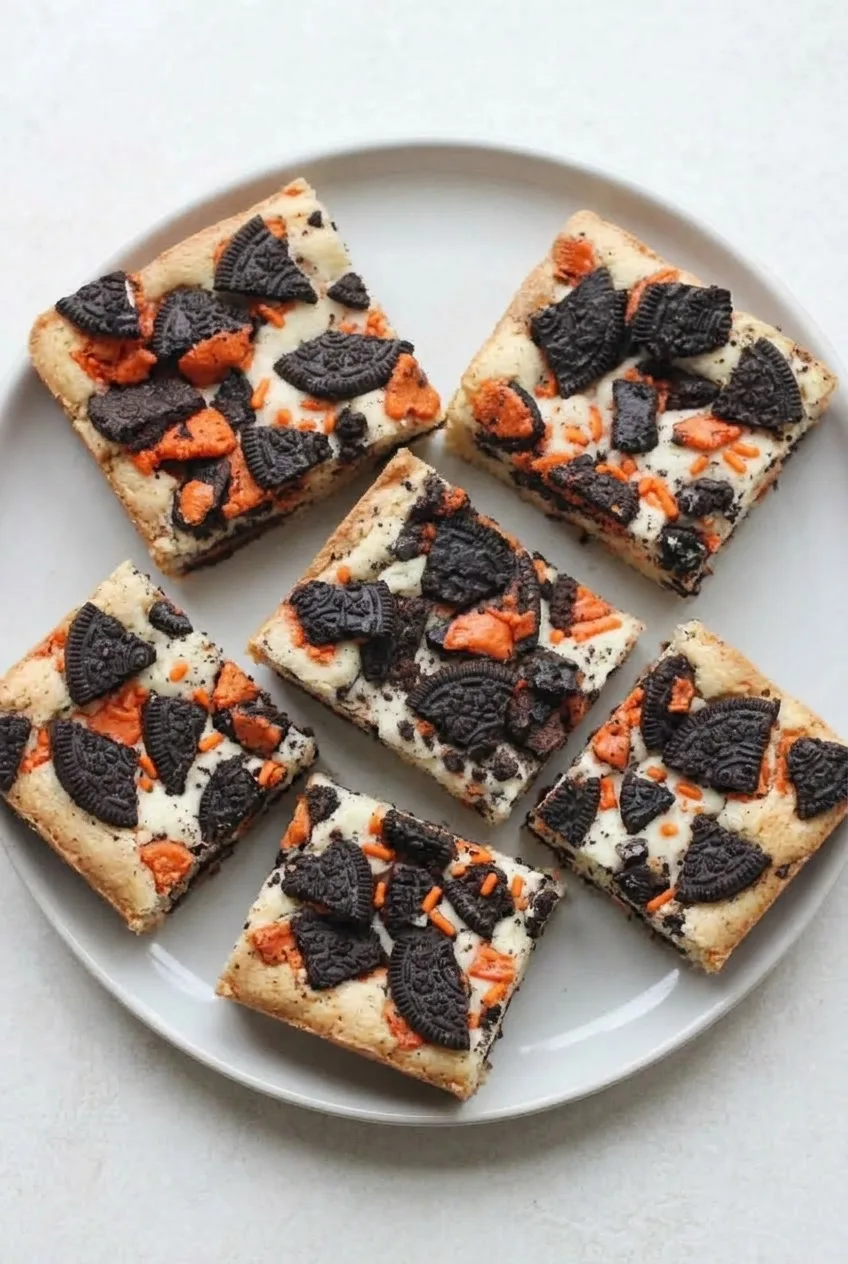
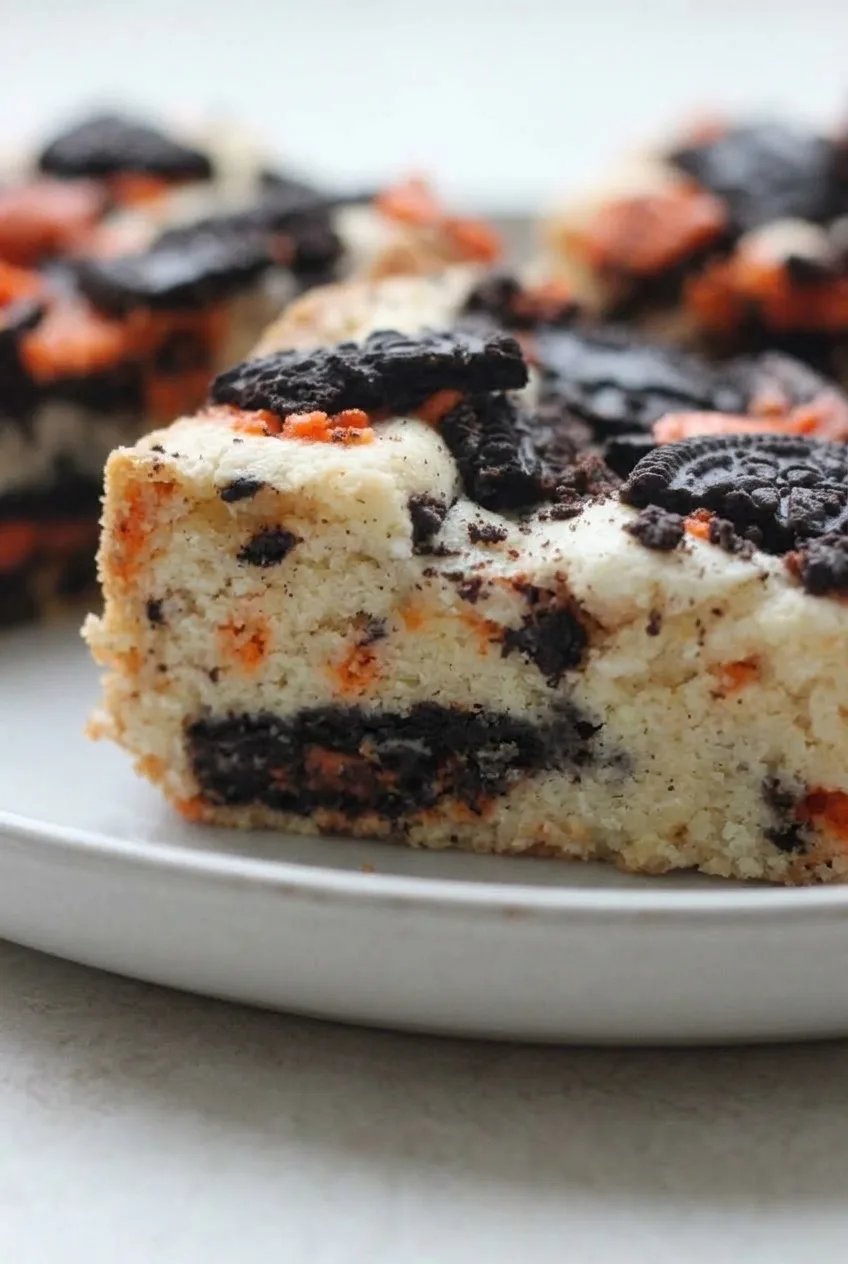
Halloween Oreo cake bars are thick, soft vanilla bars with coarse cookie pieces underneath and across the top. Orange-and-black sprinkles add the Halloween color without frosting. The cut bars are cakey and moist, not crisp like cookie bars.
The cake-mix batter is deliberately stiff. Dolloping it across the pan before spreading helps keep the bottom Oreo layer in place, and pressing the top pieces lightly into the batter helps them stay attached after baking. You’ll need one bowl and a 9-inch-square pan.
Ingredients for Halloween Oreo Cake Bars
1 standard box vanilla or French vanilla cake mix, about 15.25 ounces (430g)
Leave the Oreos in uneven, recognizable pieces rather than crushing them into crumbs. Regular Oreos also work; the sprinkles will provide the Halloween color.
How to Bake Halloween Oreo Cake Bars
Prepare the pan: Preheat the oven to 350°F (175°C). Line a 9-inch-square metal baking pan with two crossing strips of parchment, leaving at least 2 inches of overhang on two opposite sides. Lightly spray any exposed pan areas.
Layer the Oreos: Scatter about half of the chopped Oreos evenly over the bottom of the pan. Reserve the rest for the top.
Mix the batter: In a large bowl, mix the cake mix, eggs, milk, oil, and 1 tablespoon of the sprinkles until no dry streaks remain. The batter will be thick; do not add extra milk to thin it.
Spread and decorate: Dollop the batter in several spots over the Oreos. Lightly spray an offset or silicone spatula, then gently press and spread the batter to the corners without dragging the bottom cookies out of place. Scatter the reserved Oreos and remaining sprinkles over the surface. Press the Oreo pieces in lightly, leaving them partly exposed.
Bake: Bake uncovered for 20 to 25 minutes, beginning to check at 20 minutes. The edges should be lightly golden and the center set, not wet or glossy. A toothpick inserted into a cake-only area near the center should come out clean or with a few moist crumbs, not wet batter.
Cool and cut: Cool completely in the pan, about 45 to 60 minutes. Lift out the slab by the parchment overhang and cut into 12 small squares or rectangles. Wipe the knife between cuts for neater edges.
How to Tell When the Bars Are Done
The 20-to-25-minute range applies to this one-box batch in a 9-inch-square metal pan; it does not carry over to a doubled batch in a 9-by-13-inch pan. Test through the cake rather than an Oreo pocket, which can make the toothpick result misleading. A few moist crumbs are fine, but a glossy center or wet batter needs more time.
If using a glass or ceramic pan, begin checking at 22 minutes and use the same doneness cues rather than relying on the clock alone.
Serving and Variations
Serve the cooled bars plain as a hand-held dessert, or add vanilla ice cream alongside a bar for a plated serving. For an Oreo-themed dessert table, add No-Bake Witch Hat Oreos.
Halloween funfetti cake mix can replace the vanilla mix. If it already contains plenty of sprinkles, reduce or omit the added sprinkles, but keep the coarse Oreo topping.
Storage and Make-Ahead
Store fully cooled bars in an airtight container at room temperature for up to 1 week. Their soft texture and topping look best within about 3 days. Place parchment between layers if stacking. To make them up to 24 hours ahead, let them cool completely before covering.
For longer storage, freeze cooled bars in a freezer-safe bag or airtight container for up to 3 months, with parchment between layers. Thaw overnight in the refrigerator, then serve at room temperature. Reheating is unnecessary.
Nutrition
Approximate nutrition per bar, based on 12 bars: 295 calories, 4g protein, 12g fat, and 44g carbohydrates. Approximate values per 100g of finished bars: 390 calories, 5g protein, 16g fat, and 59g carbohydrates. Values will vary with the cake mix, cookies, sprinkles, and final baked weight.
Halloween Oreo Cake Bars
Soft vanilla cake bars layered and topped with chunky Halloween Oreos and orange-and-black sprinkles.
Line a 9-inch-square metal baking pan with two crossing strips of parchment paper, leaving at least 2 inches of overhang on opposite sides. Lightly spray exposed pan areas with nonstick cooking spray.
Scatter half of the chopped Oreos evenly over the bottom of the prepared pan.
Mix the cake mix, eggs, milk, oil, and 1 tablespoon of sprinkles in a large bowl until no dry streaks remain. Keep the batter thick; do not add extra milk.
Dollop the batter over the Oreo layer. Lightly spray an offset or silicone spatula, then gently spread the batter to the corners without moving the bottom cookie pieces.
Scatter the remaining chopped Oreos and sprinkles over the batter. Lightly press the Oreo pieces into the surface, leaving them partly exposed.
Bake uncovered for 20 to 25 minutes, checking at 20 minutes. The edges should be lightly golden and the center should be set.
Test a cake-only area near the center with a toothpick; it should come out clean or with a few moist crumbs, not wet batter.
Cool completely in the pan for 45 to 60 minutes.
Lift out the slab using the parchment overhang and cut into 12 squares or rectangles, wiping the knife between cuts.
Tips
Keep the Oreos in coarse, uneven pieces instead of crushing them into crumbs.
Dollop the thick batter over the bottom Oreo layer before spreading so the cookies stay in place.
Lightly spray the spatula to make spreading the stiff batter easier.
Check doneness in a cake-only area, not through an Oreo pocket.
For glass or ceramic pans, begin checking at 22 minutes and use the visual doneness cues.
Variations
Funfetti Halloween Bars: Use Halloween funfetti cake mix in place of vanilla cake mix; reduce or omit the added sprinkles if the mix already contains plenty.
Regular Oreo Bars: Use regular Oreos instead of Halloween Oreos and keep the orange-and-black sprinkles for Halloween color.
Notes
Store cooled bars airtight at room temperature for up to 1 week, though texture and appearance are best within 3 days. Freeze for up to 3 months with parchment between layers; thaw overnight in the refrigerator and serve at room temperature.
Nutrition
Calories: 295 kcal|Protein: 4 g|Fat: 12 g|Carbohydrates: 44 g
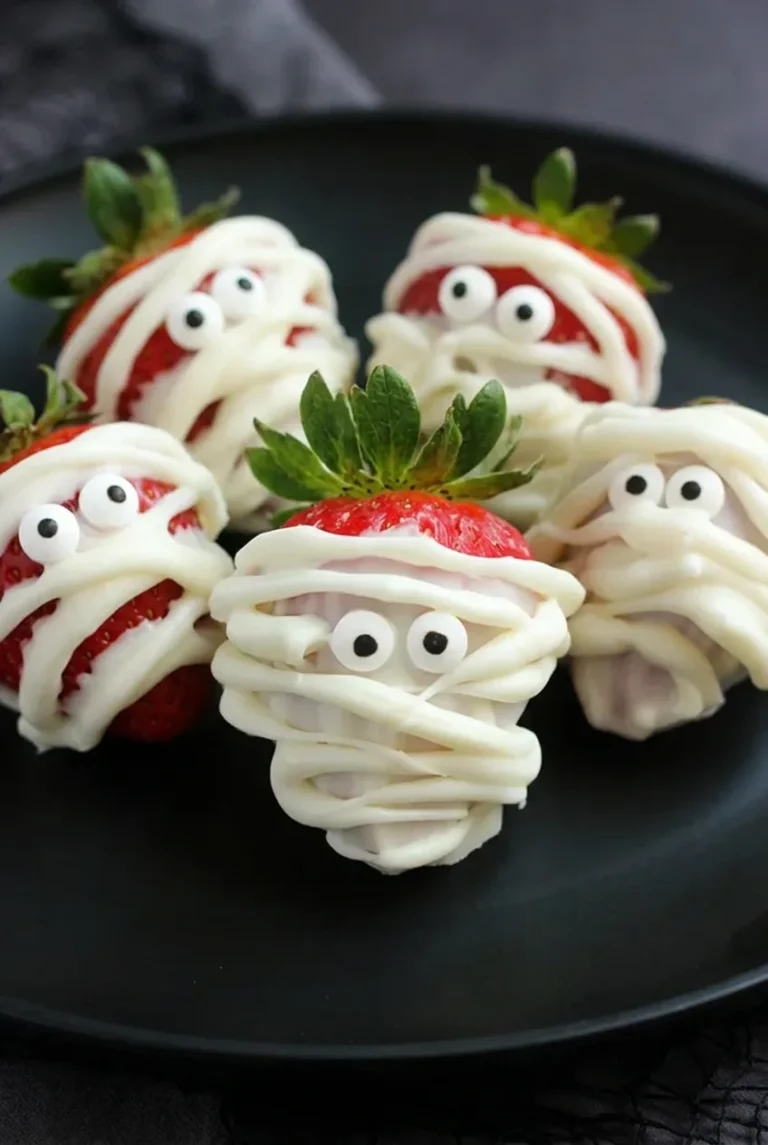
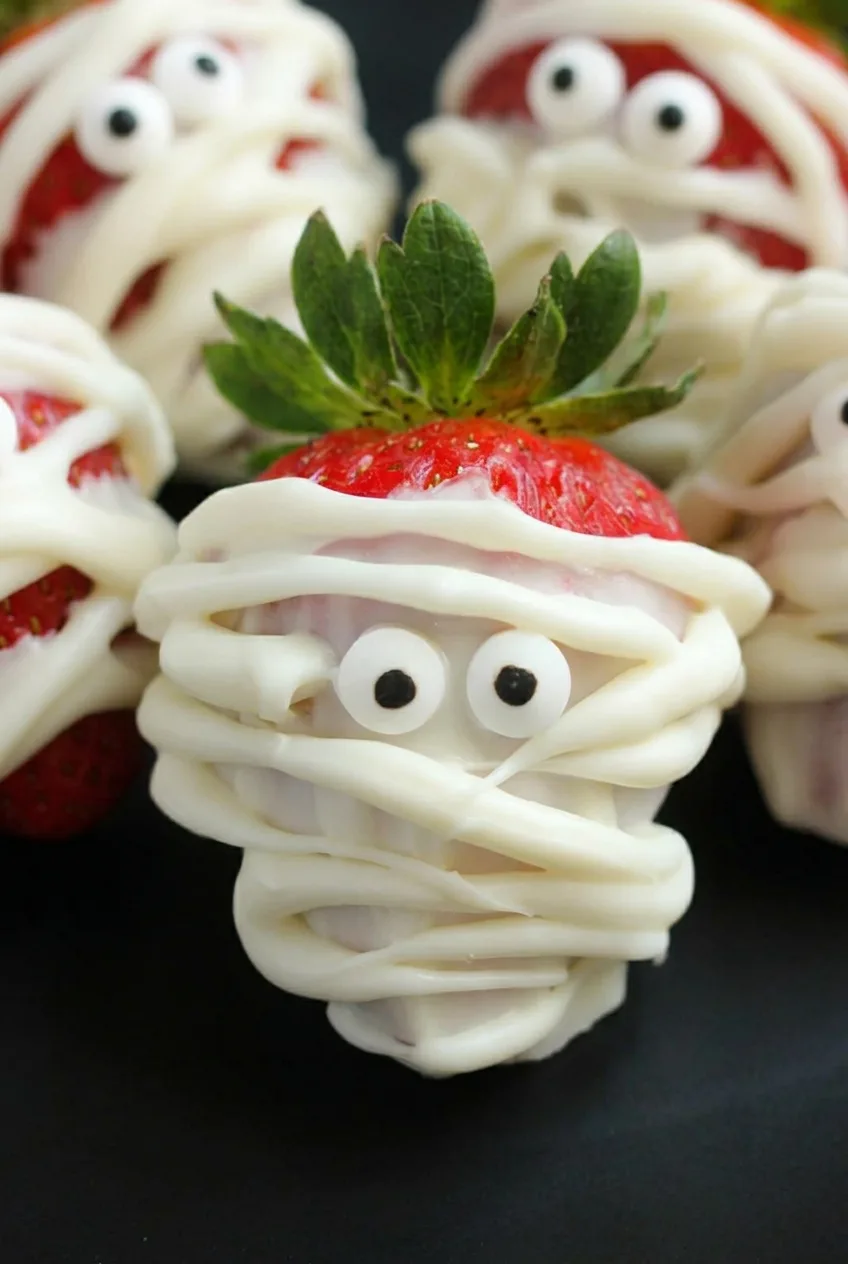
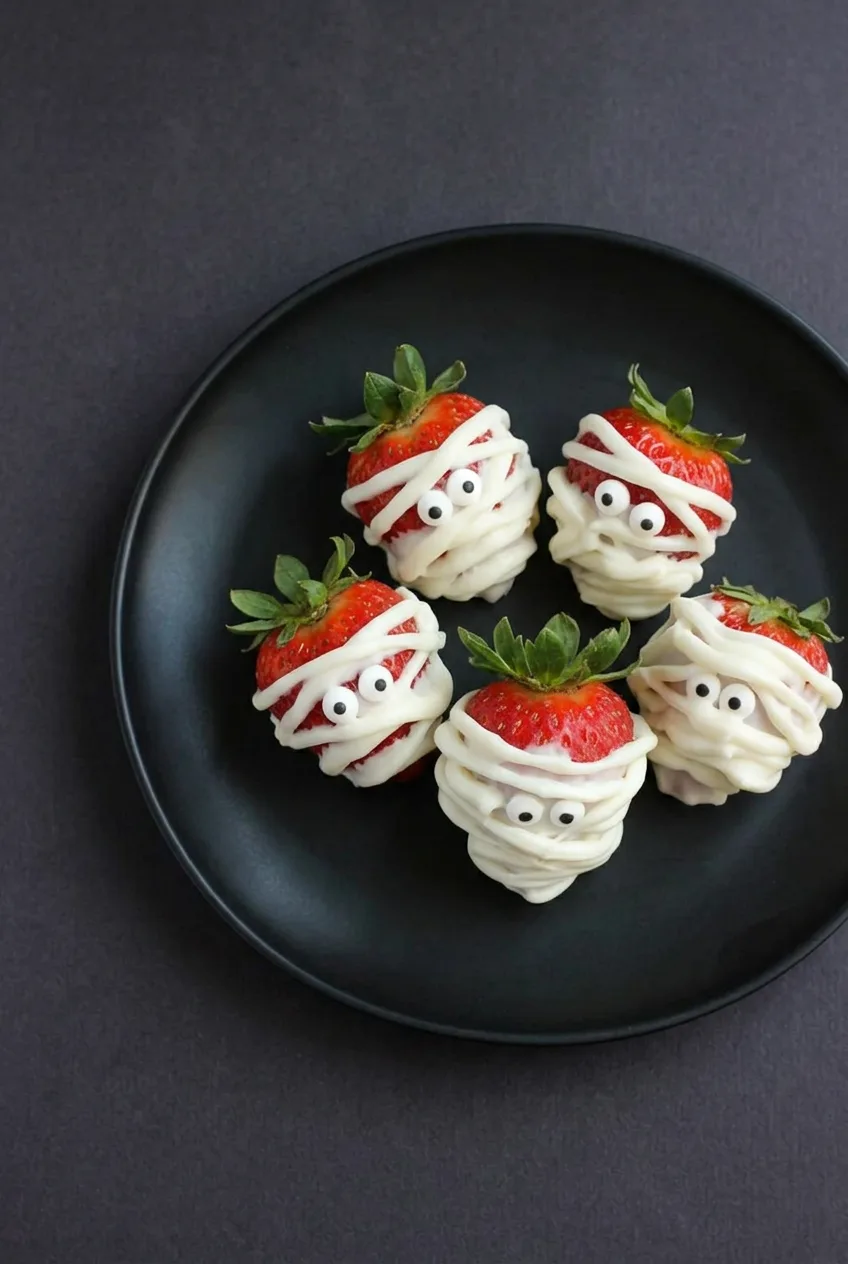
These no-bake mummy strawberries stay bright red beneath thick, uneven bands of white coating. Two candy eyes sit in an open space between the wraps, and the green tops remain attached as handles. Each berry can look a little different; loose, overlapping lines make better bandages than precise stripes.
Dry the strawberries completely before decorating so the coating adheres. White candy melts are easy to pipe into raised bands, and the finished berries are best served the day they are made.
Ingredients for Mummy Strawberries
12 whole strawberries with green tops intact, about 1 1/2 lb (680g)
12 oz white candy melts or white melting wafers (340g)
24 small candy eyes
You will also need parchment or wax paper and a small piping bag or sturdy zip-top bag. White chocolate can replace the candy melts, but it needs gentler melting and may flow or set differently.
How to Make Chocolate-Covered Mummy Strawberries
Yield: 12 strawberries. Time: About 20 minutes to prepare, plus 5 to 15 minutes for the coating to set. Allow extra time if the berries need to air-dry.
Dry the berries: Wash if needed, then pat the fruit and leafy tops thoroughly dry. Let any remaining moisture evaporate, and blot away condensation if the berries were refrigerated. Line a tray or plate with parchment or wax paper, leaving room between the berries.
Melt the coating: Put the candy melts in a completely dry microwave-safe bowl. Microwave at 50% power in 15- to 20-second bursts, stirring well after each one. Stop heating when a few pieces remain and stir until smooth. The coating should fall from a spoon in a thick ribbon.
Add a small anchor and the eyes: Holding each berry by its top, dip only the pointed end in coating or spoon a small patch onto its lower front. Let the excess drip off, then set the berry on the lined tray with most of its red surface exposed. Let the patch set briefly. Attach two candy eyes around the middle of the berry with tiny dots of melted coating, leaving space around them for the wraps.
Pipe the wraps: Transfer the remaining coating to a piping bag or zip-top bag and snip a small corner, large enough to make thick lines. Pipe loose, uneven bands above, below, and around the eyes. Gently rotate each berry to carry some bands around its sides. Overlap a few lines, but leave red gaps and keep the eyes uncovered.
Let them set: Leave the berries uncovered on the tray until the bands are firm and dry to the touch, generally 5 to 15 minutes. Lift them by their tops and arrange them with the faces visible.
How to Keep the White Coating Smooth
Keep water and steam away from the melted coating: damp berries or utensils can make it thicken or turn lumpy. If it thickens while you decorate, rewarm it briefly and stir rather than heating it for a long stretch. For raised bands, the coating should pass through the bag without immediately flattening against the fruit.
A spoon can make loose wraps if you do not have a piping bag, though the lines will be less controlled. If using white chocolate instead of candy melts, follow its melting directions and thin it only if needed with a suitable thinning aid.
Serving and Storing Mummy Strawberries
For the freshest fruit and cleanest-looking wraps, make the berries a few hours before serving and serve them the same day. They can share a Halloween dessert tray with Spider Web Pretzels or No-Bake Witch Hat Oreos.
If needed, refrigerate the fully set berries in a single layer in an airtight or closely covered container for up to 1 to 2 days. Do not stack them. Condensation can soften the fruit and affect the coating, so their appearance may decline after the first day. Do not freeze; thawed strawberries can become watery.
Nutrition
Approximate nutrition per strawberry, based on 12 pieces: 175 calories, 1g protein, 9g fat, and 24g carbohydrates. Approximate values per 100g: 205 calories, 1g protein, 11g fat, and 28g carbohydrates. Values vary with berry size, coating brand, and how much coating remains in the bowl.
Chocolate-Covered Mummy Strawberries
Fresh strawberries are decorated with thick, uneven white candy coating bands and candy eyes for an easy Halloween dessert.
12 whole strawberries with green tops intact, about 1 1/2 lb (680 g)
12 oz white candy melts or white melting wafers (340 g)
24 small candy eyes
Instructions
Wash the strawberries if needed, then thoroughly pat the berries and leafy tops dry. Let any remaining moisture evaporate.
Line a tray or plate with parchment or wax paper, leaving space between the strawberries.
Place the candy melts in a completely dry microwave-safe bowl. Microwave at 50% power in 15- to 20-second bursts, stirring after each burst, until smooth.
Hold each strawberry by its green top and dip the pointed end into the melted coating, or spoon a small patch onto the lower front. Let excess coating drip off.
Set the strawberries on the lined tray with most of the red surface exposed. Let the coating patches set briefly.
Use small dots of melted coating to attach two candy eyes around the middle of each strawberry.
Transfer the remaining melted coating to a piping bag or sturdy zip-top bag. Snip a small corner to make thick piping lines.
Pipe loose, uneven bands above, below, and around the eyes, rotating the strawberries gently to wrap some bands around the sides. Leave red gaps and keep the eyes uncovered.
Leave the strawberries uncovered until the coating is firm and dry to the touch, about 5 to 15 minutes.
Arrange the mummy strawberries with the faces visible and serve.
Tips
Dry the strawberries completely before coating them to prevent the candy melts from thickening or seizing.
Melt candy coating in short bursts at reduced microwave power and stir well between bursts.
Let the first coating patch set briefly before attaching the candy eyes.
Use loose, overlapping lines instead of precise stripes for more natural-looking mummy bandages.
If the coating thickens, rewarm it briefly and stir rather than heating it for a long period.
Keep the piping opening small enough for raised bands that do not immediately flatten.
Variations
White Chocolate Mummy Strawberries: Use white chocolate instead of candy melts, following its melting directions and thinning only if needed with a suitable thinning aid.
Spoon-Drizzled Mummy Strawberries: Use a spoon to drizzle loose white coating wraps if you do not have a piping bag.
Notes
Serve the strawberries the day they are made for the best appearance. Refrigerate fully set berries in a single layer in a covered container for up to 1 to 2 days; do not stack or freeze.
Nutrition
Calories: 175 kcal|Protein: 1 g|Fat: 9 g|Carbohydrates: 24 g
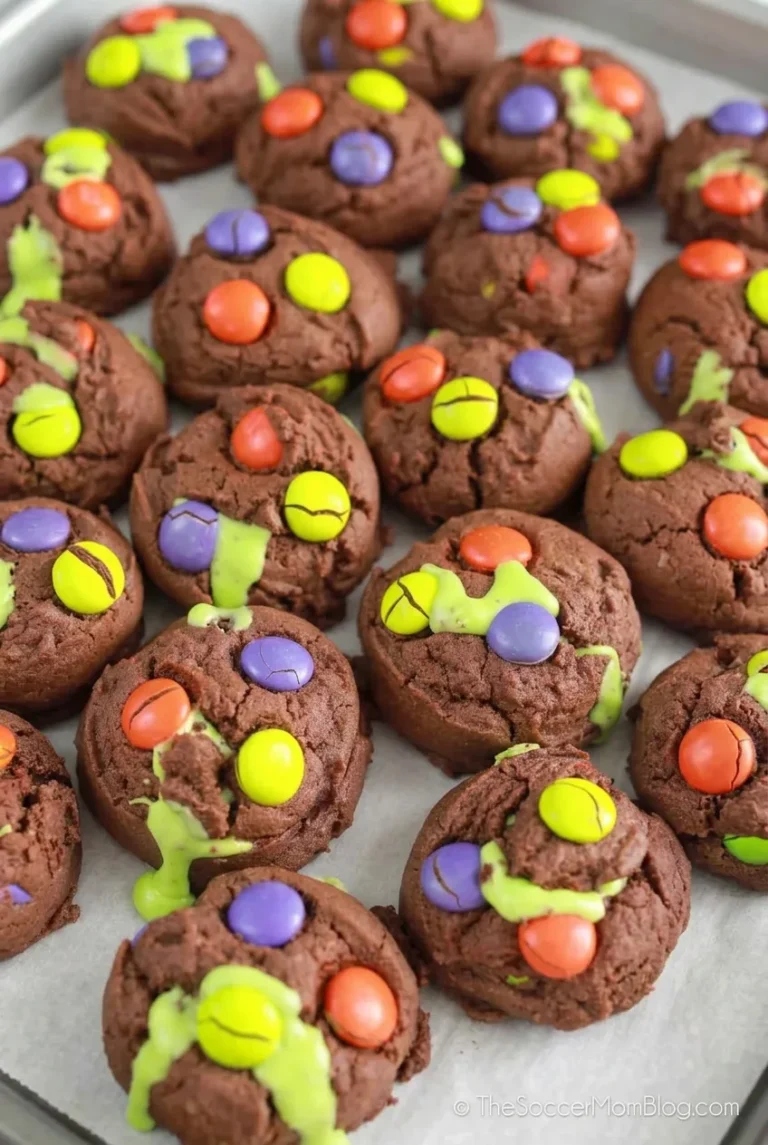
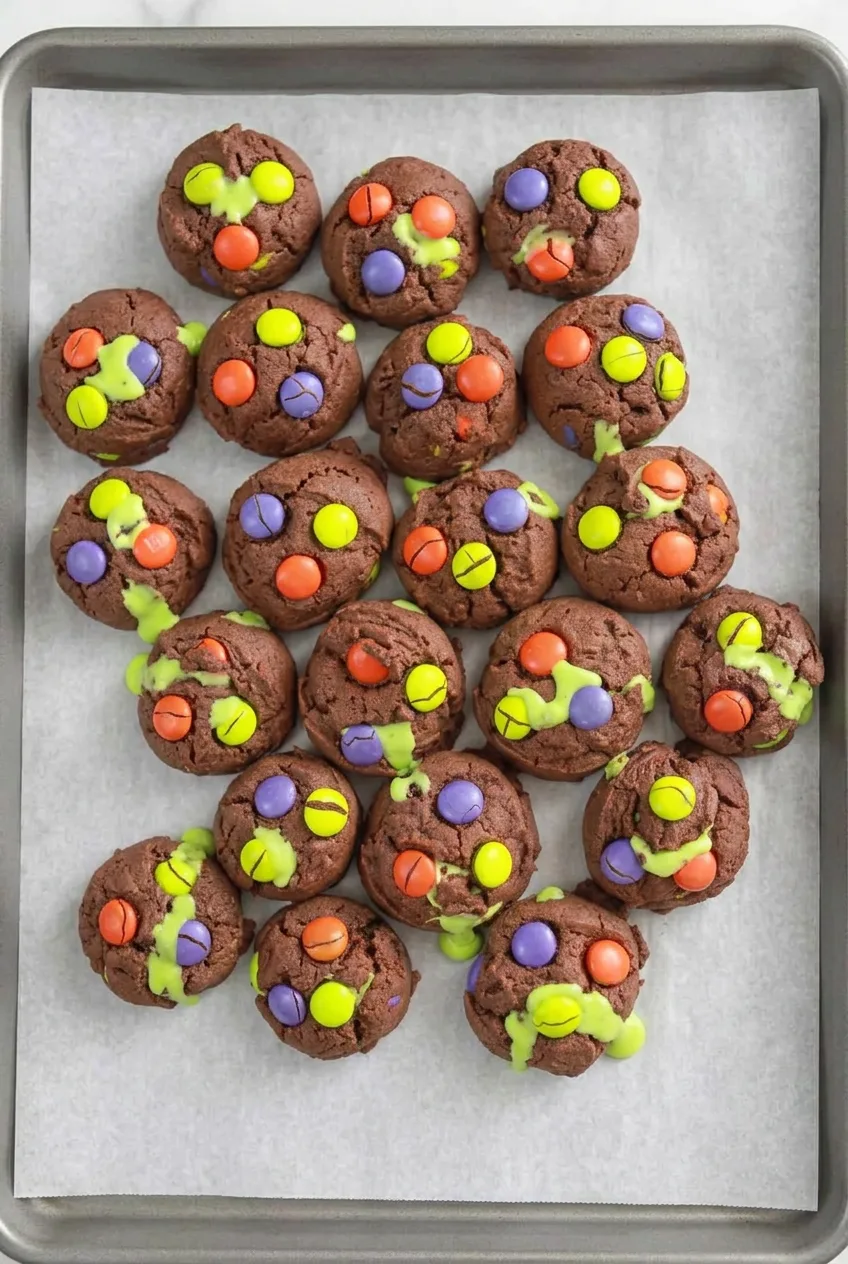
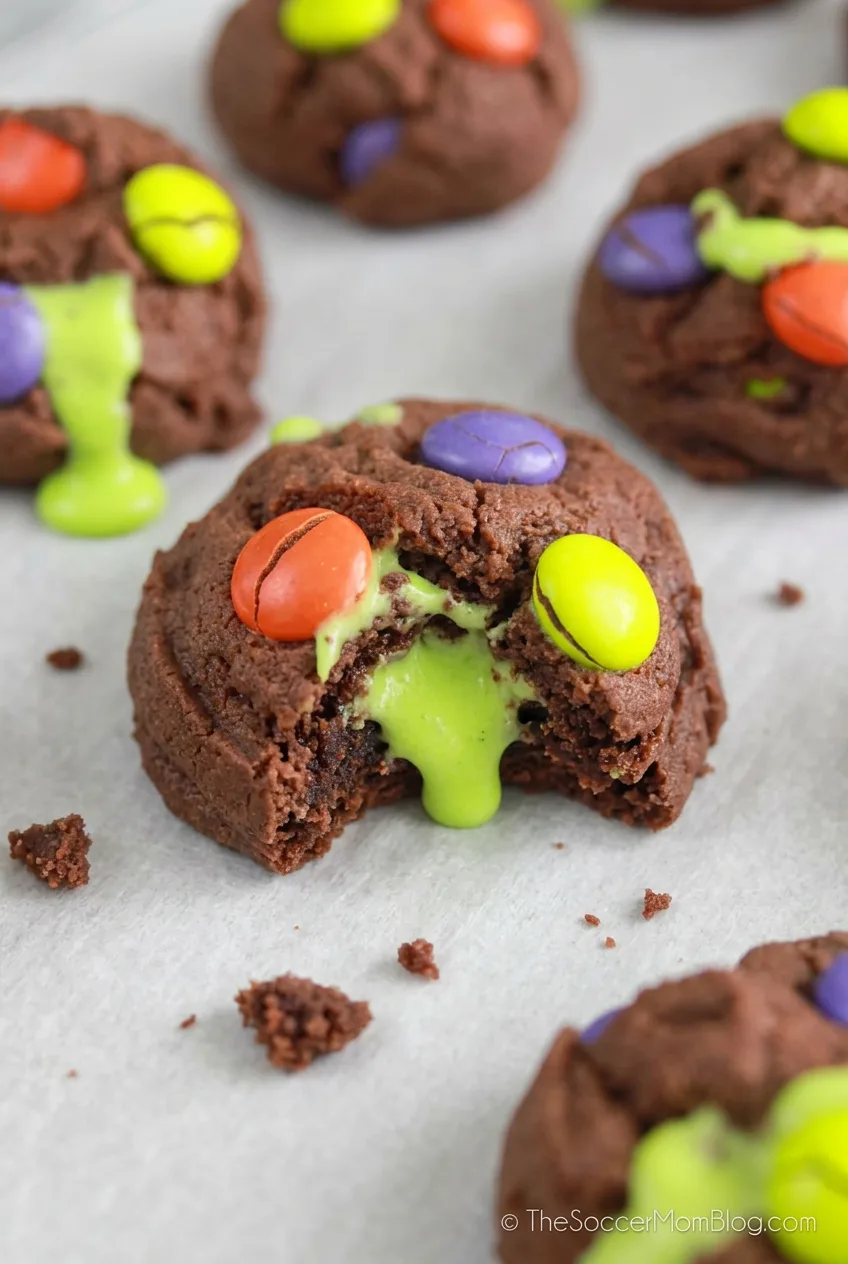
Thick chocolate cookies, orange, purple, and neon-green candies, and a bright green frosting center give this version of Hocus Pocus cookies its Halloween look. Unlike a marbled sugar cookie, the dough is cocoa-based, with soft centers and craggy tops.
The frosting goes into the cookies after they cool, so it stays vivid and can peek through a crack or edge. For the right texture, take the cookies out when the edges are set but the centers still look soft; they will finish setting on the baking sheet.
Yield: 18 cookies. Prep: About 25 minutes. Bake: 9–11 minutes per sheet, plus cooling and optional chilling time.
Neon-green gel food coloring, about 1/4 teaspoon or as needed
1–2 teaspoons milk, only if needed to loosen the frosting
Set aside 1/2 cup of the candies for the tops. Candies mixed only into the dough may disappear from view, while the reserved pieces keep all three colors visible. Gel coloring makes the frosting bright green without adding much liquid.
How to Bake Hocus Pocus Halloween Cookies
Prepare the pans: Preheat the oven to 350°F (175°C). Line two light-colored baking sheets with parchment paper.
Mix the dry ingredients: Whisk the flour, cocoa powder, cornstarch, baking soda, and salt in a medium bowl until evenly combined.
Make the dough: Beat the softened butter, granulated sugar, and brown sugar until creamy. Beat in the eggs and vanilla. Add the dry ingredients and mix just until no dry streaks remain. Fold in 1 cup of the candies. The dough should be thick and scoopable.
Chill if needed: If the dough is sticky or too soft to scoop cleanly, cover and refrigerate it for about 20 minutes. If it is already firm, portion it right away.
Portion and decorate: Scoop 2-tablespoon portions onto the prepared sheets, leaving about 3 inches between them. Keep the dough balls tall rather than flattening them. Press 3–5 reserved candies into each top, using all three colors where possible.
Bake and cool: Bake one sheet at a time on the center rack for 9–11 minutes, starting checks at 9 minutes. The edges should be set, the tops puffed and cracked, and the centers still soft rather than wet or shiny. Cool on the pan for 8–10 minutes, then transfer to a rack to cool completely.
Tint the frosting: Stir the gel coloring into room-temperature vanilla frosting. If it is too stiff to pipe, add milk 1 teaspoon at a time. The frosting should flow under gentle pressure but not be runny.
Fill the cookies: Using a piping bag with a small round tip or a squeeze bottle, insert the tip into the bottom or side of each completely cooled cookie. Pipe in about 1–2 teaspoons of frosting, stopping as soon as a little green appears through a crack or at an edge. Forcing in more can split the cookie.
Let the filling set: Leave the cookies for 15–20 minutes before serving or stacking to reduce smearing.
How to Keep the Cookies Thick and Soft
Use softened butter, not melted butter. If the dough feels warm or sticky, the short chill helps limit spreading; generous spacing keeps the cookies from running together. Do not wait for the centers to look fully dry before removing the cookies from the oven, or the thick cocoa cookies may be hard once cooled. A few cracked candy shells are normal.
How to Fill the Cookies Without Splitting Them
Cool the cookies completely before adding frosting; warmth can make it leak. If the piping tip is difficult to insert, make a small guide hole in the bottom with a skewer. A resealable plastic bag with a tiny corner snipped off can work in place of a piping bag, but fill slowly and stop at the first green peek. Some cookies will show more filling than others.
Let the frosting set before storing. Keep the cookies airtight in a single layer, or separate layers with parchment. If using shelf-stable frosting and the kitchen is cool, store at room temperature for up to 2 days. Follow the frosting label if it requires refrigeration. Refrigerate cookies made with perishable homemade frosting in an airtight container for up to 3 days, then let them sit at room temperature for 15–20 minutes before serving.
For a cleaner finish, bake the unfilled cookies a day ahead and pipe in the frosting before serving. Unfilled baked cookies can also be frozen airtight with parchment between layers for up to 2 months. Thaw at room temperature before filling; freezing filled cookies may affect the frosting’s appearance. Do not microwave filled cookies, as the frosting can melt and leak.
Nutrition
Approximate nutrition per cookie (1 of 18): 315 calories, 4g protein, 14g fat, and 45g carbohydrates. Per 100g: approximately 445 calories, 5g protein, 20g fat, and 64g carbohydrates. Values vary with the candies, frosting, and finished cookie weight.
Hocus Pocus Halloween Cookies
Thick cocoa cookies packed with colorful candy-coated chocolates and filled with bright neon-green vanilla frosting.
Neon-green gel food coloring, about 1/4 teaspoon or as needed
1 to 2 teaspoons milk, if needed
Instructions
Preheat the oven to 350°F (175°C). Line two light-colored baking sheets with parchment paper.
Whisk the flour, cocoa powder, cornstarch, baking soda, and salt in a medium bowl.
Beat the softened butter, granulated sugar, and brown sugar until creamy.
Beat in the eggs and vanilla extract until combined.
Add the dry ingredients and mix just until no dry streaks remain.
Fold in 1 cup of the candy-coated chocolates. Reserve the remaining 1/2 cup for topping the cookies.
Cover and refrigerate the dough for about 20 minutes if it is sticky or too soft to scoop.
Scoop 2-tablespoon portions of dough onto the prepared baking sheets, spacing them about 3 inches apart. Keep the dough balls tall and do not flatten them.
Press 3 to 5 reserved candies into the top of each dough ball, using a mix of colors when possible.
Bake one sheet at a time on the center rack for 9 to 11 minutes, checking at 9 minutes. Remove the cookies when the edges are set, the tops are puffed and cracked, and the centers are still soft.
Cool the cookies on the baking sheet for 8 to 10 minutes, then transfer them to a wire rack to cool completely.
Stir neon-green gel food coloring into the vanilla frosting. Add milk 1 teaspoon at a time only if needed to make the frosting pipeable.
Insert a small round piping tip or squeeze-bottle tip into the bottom or side of each cooled cookie. Pipe in about 1 to 2 teaspoons of frosting, stopping when a little green frosting appears at a crack or edge.
Let the filled cookies stand for 15 to 20 minutes before serving or stacking.
Tips
Use softened butter rather than melted butter to help the cookies stay thick.
Chill sticky or warm dough for about 20 minutes to reduce spreading.
Keep the dough balls tall and leave generous space between them for thick cookies.
Remove the cookies while the centers still look soft; they will finish setting on the baking sheet.
Cool cookies completely before filling so the frosting does not melt or leak.
Pipe slowly and stop as soon as frosting peeks through to avoid splitting the cookies.
Notes
Store filled cookies airtight in a single layer or between parchment sheets. Cookies made with shelf-stable frosting can be kept at cool room temperature for up to 2 days; refrigerate cookies with perishable homemade frosting for up to 3 days. Unfilled cookies can be frozen for up to 2 months and filled after thawing.
Nutrition
Calories: 315 kcal|Protein: 4 g|Fat: 14 g|Carbohydrates: 45 g
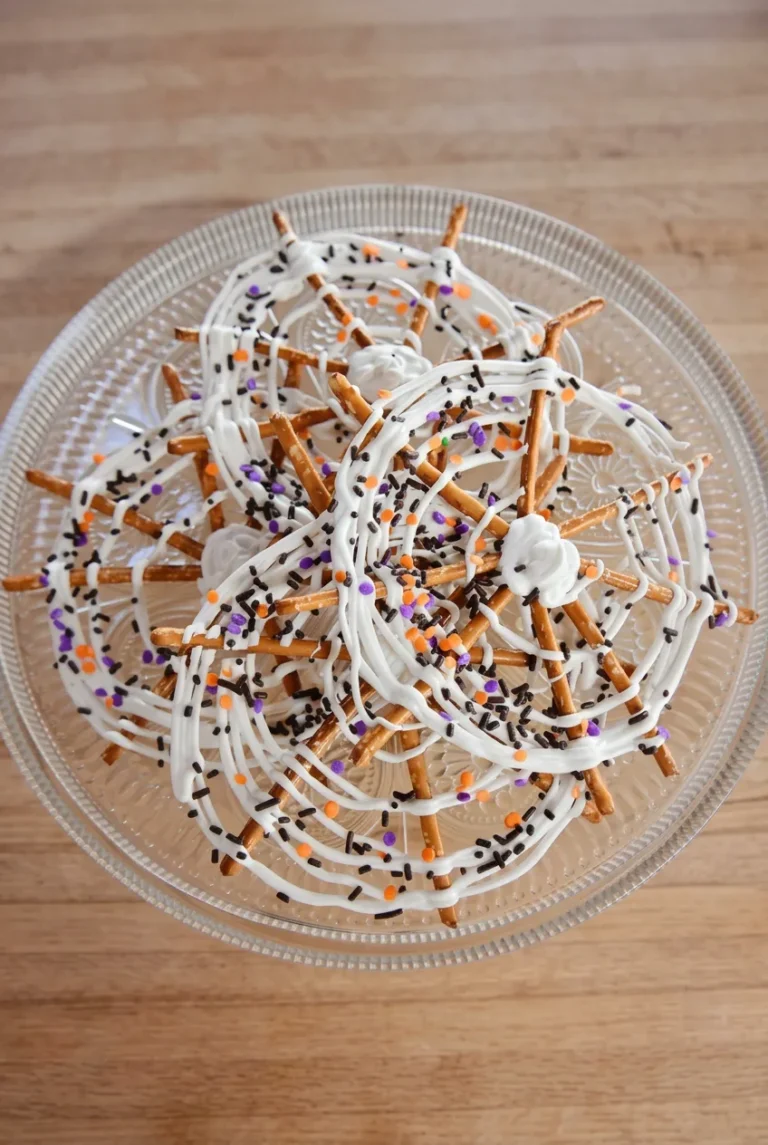
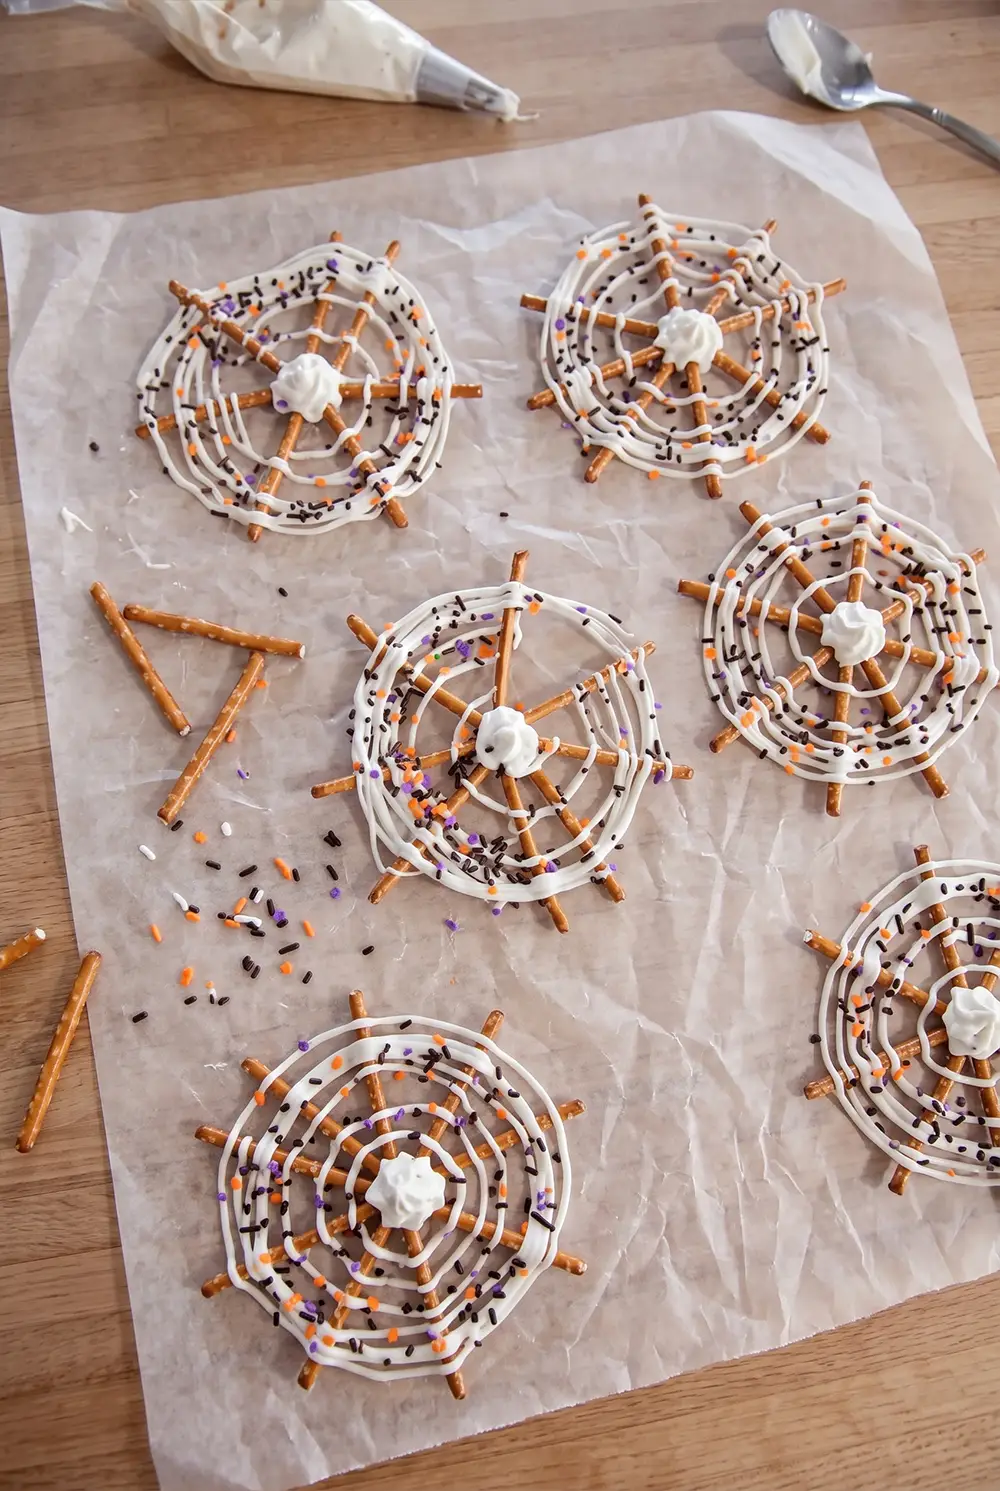
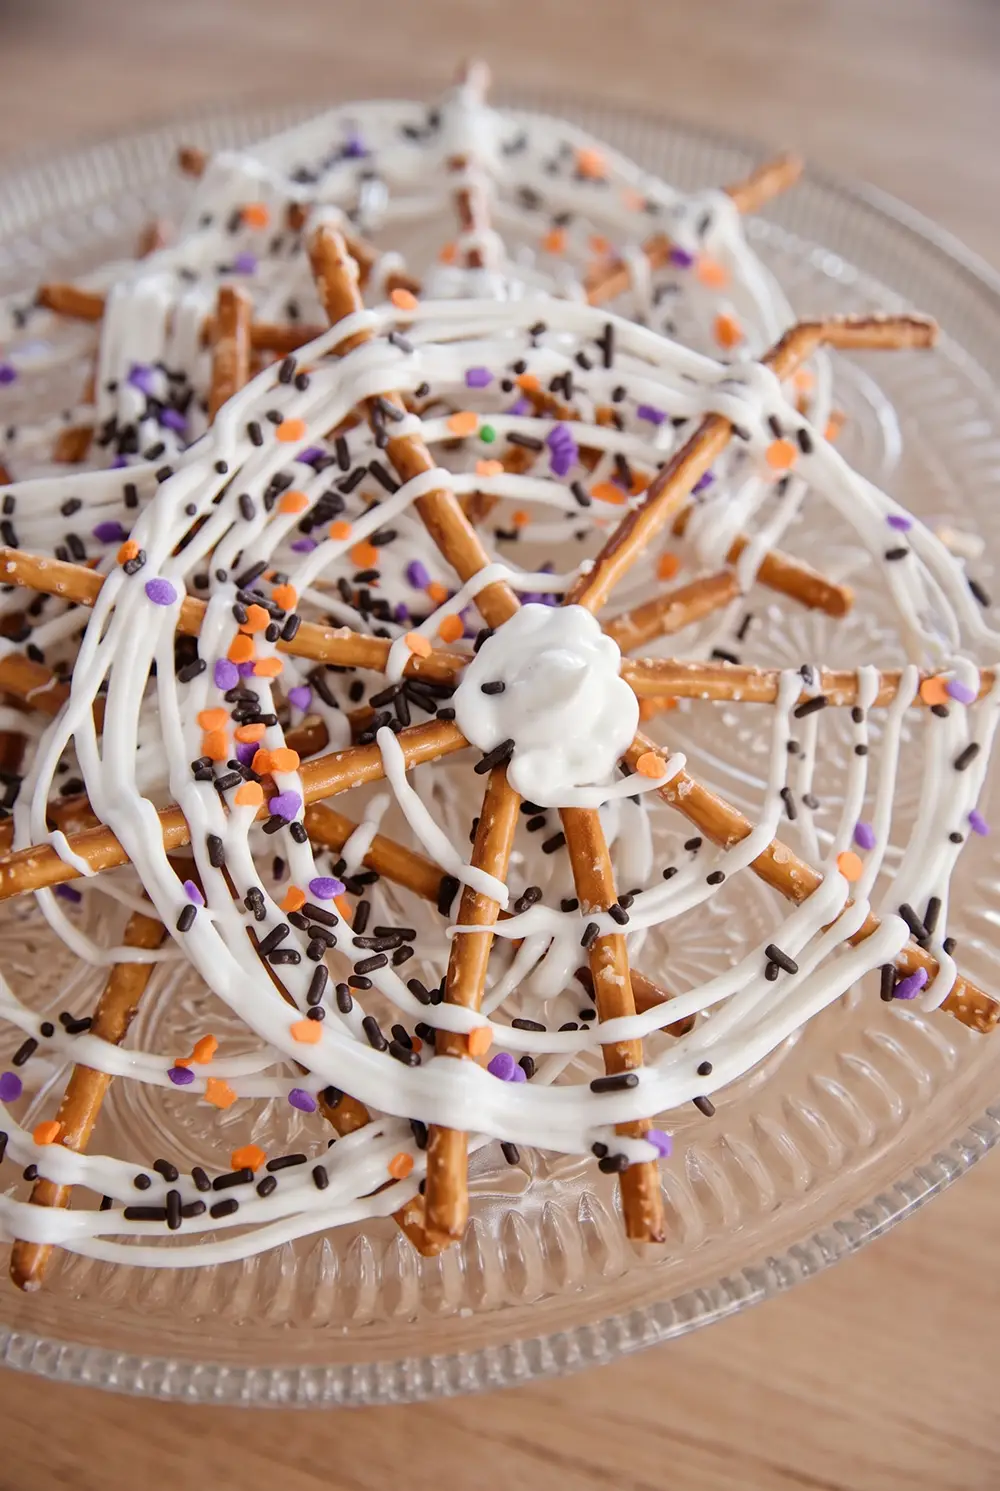
Spider Web Pretzels are no-bake Halloween treats made from crisp, salty pretzel sticks and piped white candy coating. Each web has eight exposed pretzel spokes, thick rings, and scattered black, orange, and purple sprinkles. The coating draws the pattern and holds the pretzels together, so a generous center anchor and a complete outer ring matter more than perfectly even piping.
This recipe makes 10 webs. Plan on about 25 minutes of prep and 1 hour for the coating to set before lifting them from the parchment.
Ingredients for Spider Web Pretzels
80 pretzel sticks, about 5 oz (150g), plus a few extra in case of breakage
16 oz white candy melts or white candy melting wafers (450g)
3 tablespoons Halloween sprinkle mix with black jimmies and orange and purple confetti sprinkles (about 30g)
White candy melts provide the bright web color and a firm set. Almond bark or white chocolate can be used instead, but they may pipe and set differently.
How to Make Spider Web Pretzels
Arrange the spokes: Line one or two rimmed baking sheets with parchment. For each web, arrange eight pretzel sticks in a starburst with their inner ends touching. Leave room between webs so the coating will not join them; work in batches if needed. Each web should be roughly 5 to 6 inches across.
Melt the coating: Melt the candy melts according to the package directions, using short microwave intervals and stirring between them until smooth. Keep water out of the bowl. Transfer the coating to a piping bag with a small opening, or snip a tiny corner from a zip-top bag.
Anchor and pipe: Pipe a generous puddle over the center of one web, touching every inner pretzel end. Add a small ring close to the center, then pipe three or four loose, connected rings outward across the spokes. Finish with a continuous outer ring, making a second pass if it looks thin. Leave the pretzel tips exposed. Thick, slightly uneven lines give the webs their handmade shape.
Add sprinkles: Scatter black, orange, and purple sprinkles over the wet coating immediately. Pipe and decorate one or two webs at a time so the sprinkles adhere before the coating sets.
Let the webs set: Leave the trays uncovered at room temperature for about 1 hour. Start checking after 45 minutes. The coating should be firm and dry to the touch, and the center should not flex. For a quicker set, refrigerate the trays uncovered until firm; the time will vary.
Lift and serve: Gently loosen each web from the parchment, sliding a thin offset spatula underneath if needed. Support both the center and an outer edge as you lift. Arrange the webs in a loose, overlapping pile on a clear platter with the sprinkles facing up.
How to Keep the Webs From Breaking
If a web feels tacky or bends at the center, leave it on the parchment longer. Do not pull it up by a single pretzel spoke. Wait until each web lifts cleanly before stacking, and avoid pressing down on the finished pile.
Storage and Party Serving
Once fully set, store the webs in an airtight container in a cool, dry place for 2 to 3 days. Separate layers with parchment if stacking is necessary, and transport them gently. No reheating is needed. Freezing is not recommended; condensation may affect the coating and pretzel texture.
Approximate nutrition per web (1 of 10): 310 calories, 3g protein, 15g fat, and 43g carbohydrates. Approximate values per 100g: 490 calories, 5g protein, 24g fat, and 67g carbohydrates. Values vary with the pretzels, candy melts, and sprinkles used.
Spider Web Pretzels
No-bake Halloween treats made with pretzel stick spokes, white candy coating, and colorful sprinkles.
80 pretzel sticks, about 5 oz (150 g), plus extra for breakage
16 oz white candy melts or white candy melting wafers (450 g)
3 tablespoons Halloween sprinkle mix with black jimmies and orange and purple confetti sprinkles (about 30 g)
Instructions
Line one or two rimmed baking sheets with parchment paper.
Arrange 8 pretzel sticks for each web in a starburst pattern with the inner ends touching. Leave space between webs and make each web about 5 to 6 inches across.
Melt the candy melts according to the package directions, using short microwave intervals and stirring until smooth. Keep water out of the coating.
Transfer the melted coating to a piping bag fitted with a small opening, or use a zip-top bag with a tiny corner snipped off.
Pipe a generous puddle of coating over the center of each pretzel starburst, making sure it touches every inner pretzel end.
Pipe a small ring near the center, then add 3 or 4 loose connected rings moving outward across the pretzel spokes.
Finish each web with a continuous outer ring, making a second pass if needed. Leave the pretzel tips exposed.
Immediately scatter black, orange, and purple sprinkles over the wet coating. Decorate 1 or 2 webs at a time so the sprinkles adhere.
Let the webs set uncovered at room temperature for about 1 hour, checking after 45 minutes for a firm, dry coating.
Gently loosen each web from the parchment with a thin offset spatula if needed, supporting both the center and an outer edge as you lift.
Tips
Use a generous center puddle of coating to securely anchor all eight pretzel sticks.
Make the outer ring continuous and thick enough to help prevent the webs from breaking.
Pipe and decorate only 1 or 2 webs at a time so the sprinkles stick before the coating sets.
Do not lift a web by a single pretzel spoke.
If a web feels tacky or bends at the center, let it set longer before moving it.
Refrigerate uncovered for a faster set, if needed.
Variations
Almond Bark or White Chocolate Webs: Use almond bark or white chocolate in place of white candy melts, keeping in mind that piping and setting may vary.
Notes
Store fully set webs in an airtight container in a cool, dry place for 2 to 3 days. Separate layers with parchment if stacking. Do not freeze, as condensation can affect the coating and pretzel texture.
Nutrition
Calories: 310 kcal|Protein: 3 g|Fat: 15 g|Carbohydrates: 43 g
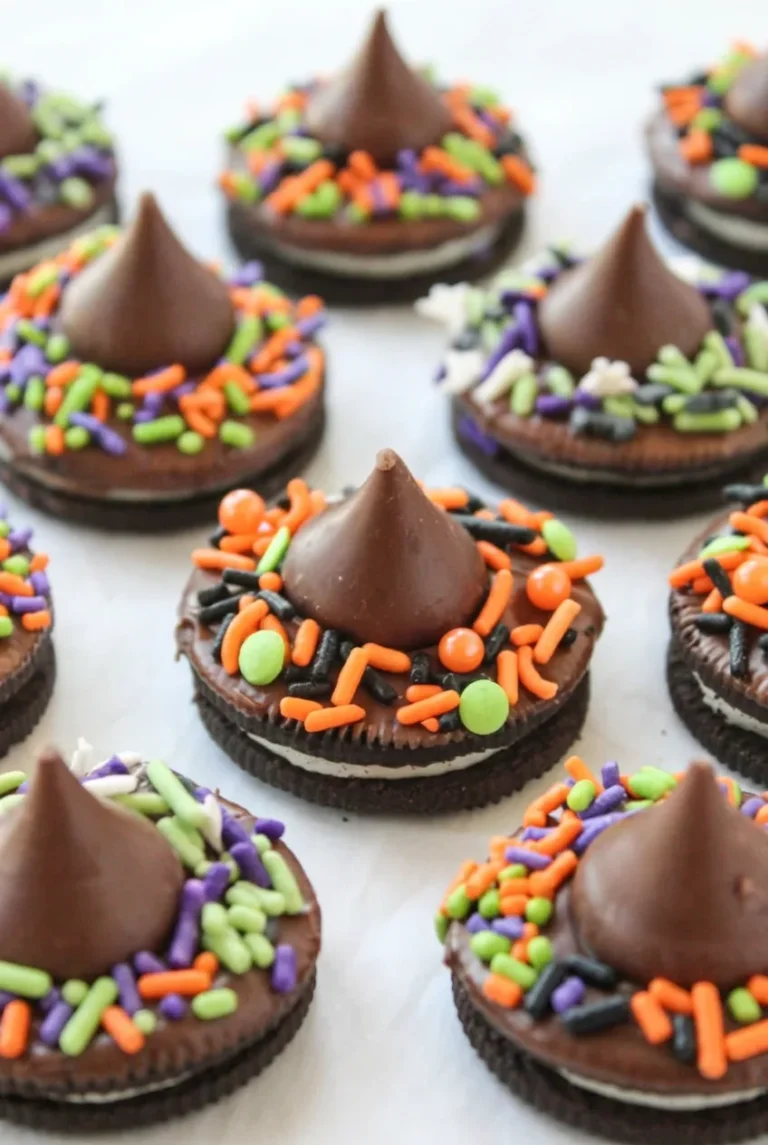
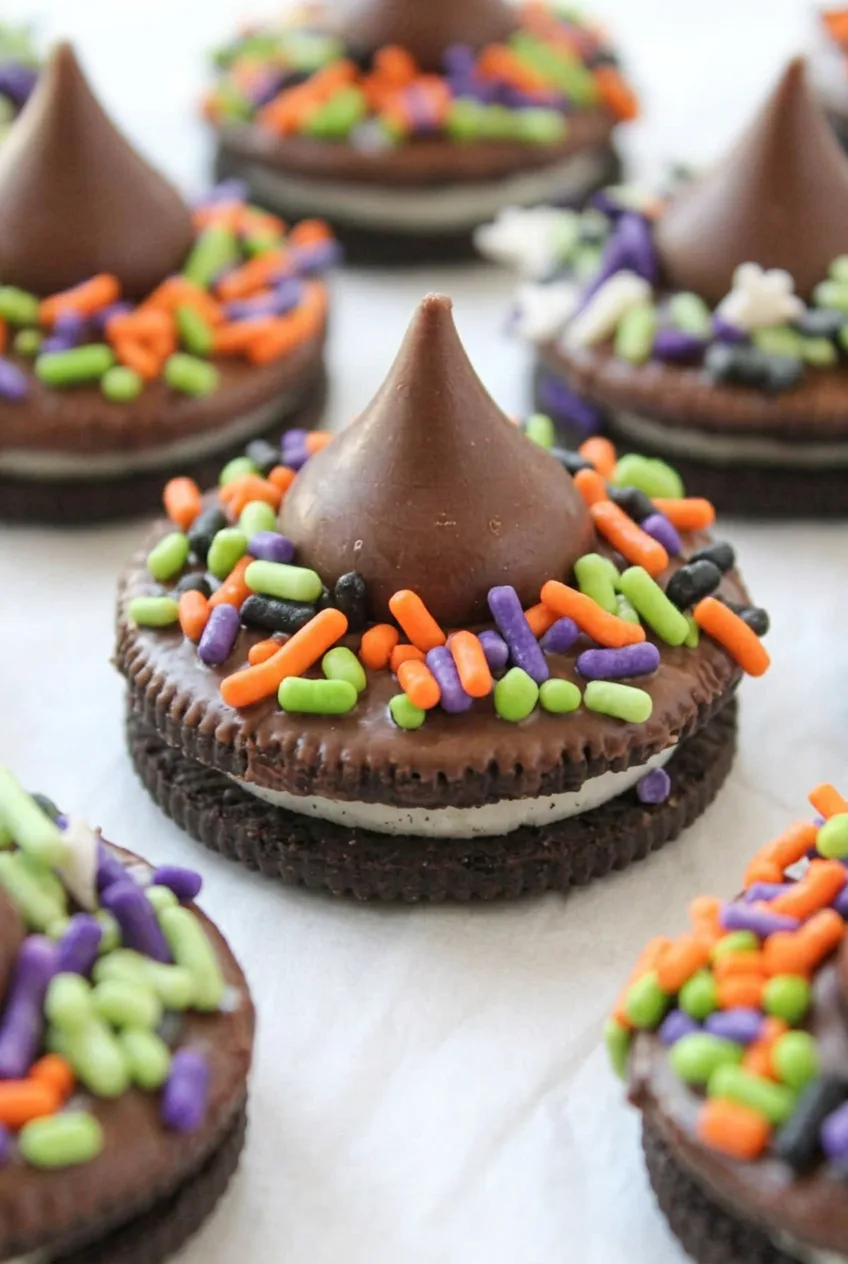
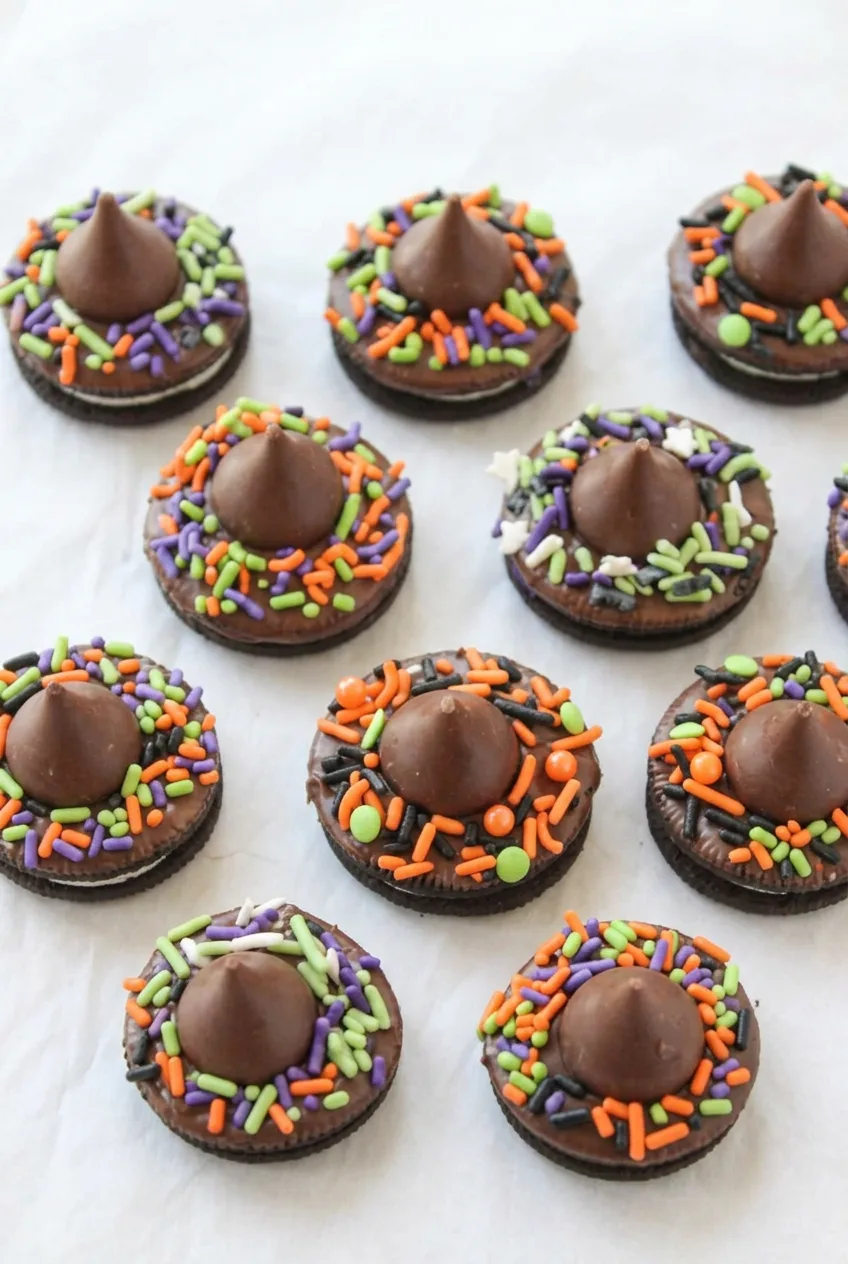
Whole Oreos become the brims of these miniature witch hats. Melted semisweet chocolate coats each cookie top and holds an upright chocolate Kiss, while a thick ring of Halloween sprinkles makes the hatband. The ridged cookie edges and white creme layer stay visible beneath the chocolate.
Have the candies unwrapped and sprinkles ready before melting the chocolate. Decorate each cookie while its coating is still wet, then chill the finished hats briefly to secure the Kisses and sprinkles.
Ingredients for No-Bake Witch Hat Oreos
18 regular Oreo sandwich cookies
1 cup semisweet chocolate chips (170g)
18 milk chocolate Hershey’s Kisses, unwrapped
1/3 cup Halloween sprinkle mix (about 55g), with orange, black, purple, and green pieces
Yield: 18 witch hat Oreos. Prep: 20 minutes. Chill: 10 to 15 minutes. Total: About 35 minutes.
How to Make Witch Hat Oreos
Prepare the tray: Line a rimmed baking sheet or tray with parchment paper. Arrange the intact Oreos in a single layer with a little space between them. Unwrap the Kisses and open the sprinkles before melting the chocolate.
Melt the chocolate: Put the chocolate chips in a completely dry microwave-safe bowl. Microwave at 50% power in 15- to 20-second bursts, stirring thoroughly after each, until smooth and spreadable, about 1 to 2 minutes total. Stop heating when any remaining chips melt with stirring.
Coat and decorate: Work with 3 or 4 Oreos at a time. Spoon about 1 teaspoon of melted chocolate onto one cookie and spread it nearly to the ridged edge, leaving the sandwich-cookie edge and white creme layer visible. Immediately center a Kiss, pointed side up, and press lightly into the wet chocolate. Scatter sprinkles generously around its base to form a thick, irregular hatband. Repeat with the remaining cookies.
Chill until set: Refrigerate the tray uncovered for 10 to 15 minutes, checking after 10 minutes. The chocolate should feel firm and dry to a gentle touch, with the Kisses upright and the sprinkles attached.
If the Chocolate Is Too Thick
Stir thoroughly before heating it again; the warmth of the melted chocolate may smooth out the remaining chips. If it is fully melted but still too thick to spread, stir in up to 1/2 teaspoon neutral vegetable oil. Do not add water or milk.
Assemble the hats directly on the tray so they can chill without being moved while the chocolate is wet. Press each Kiss only lightly to avoid cracking the Oreo.
Witch Hat Oreo Variations and Serving
Double Stuf Oreos can replace regular Oreos for a thicker cookie base. Another Kiss flavor also works if the candy has the same pointed shape. Keep the cookies whole, with chocolate-coated tops and generous sprinkle bands, to retain the witch-hat look.
Make the hats up to 1 day ahead. Once the chocolate is firm, store them in an airtight container in the refrigerator. For best cookie texture and appearance, use within 3 to 4 days. If stacking, separate layers with parchment to protect the Kisses and sprinkle bands.
Keep the treats cool and out of direct sunlight during transport; warmth can soften the chocolate attachment. If it softens, refrigerate the hats again until firm. Do not reheat. Freezing is not preferred because condensation after thawing may affect the sprinkles and cookie texture.
Nutrition
Approximate nutrition per witch hat Oreo (1 of 18): 135 calories, 2g protein, 7g fat, and 19g carbohydrates. Per 100g: approximately 475 calories, 6g protein, 23g fat, and 68g carbohydrates. Values vary by cookie, candy, chocolate, and sprinkle brand.
No-Bake Witch Hat Oreos
Whole Oreos are topped with melted chocolate, a Hershey's Kiss, and Halloween sprinkles to make miniature no-bake witch hats.
Line a rimmed baking sheet with parchment paper and arrange the Oreos in a single layer with space between them.
Unwrap the Hershey’s Kisses and have the sprinkles ready before melting the chocolate.
Place the chocolate chips in a completely dry microwave-safe bowl.
Microwave at 50% power in 15- to 20-second bursts, stirring thoroughly after each burst, until smooth and spreadable, about 1 to 2 minutes total.
Work with 3 or 4 Oreos at a time. Spoon about 1 teaspoon melted chocolate onto each cookie and spread it nearly to the ridged edge, leaving the cookie edge and white creme layer visible.
Immediately place one Hershey’s Kiss in the center of each cookie, pointed side up, and press lightly into the melted chocolate.
Scatter sprinkles generously around the base of each Kiss to create a thick, irregular hatband.
Refrigerate the tray uncovered for 10 to 15 minutes, until the chocolate is firm and dry to a gentle touch.
Tips
Have the Kisses unwrapped and sprinkles ready before melting the chocolate.
Work in small batches so the chocolate stays wet while decorating.
Stop heating when the remaining chocolate chips can melt from stirring.
Stir thick chocolate thoroughly before heating it again.
If fully melted chocolate is still too thick, stir in up to 1/2 teaspoon neutral vegetable oil.
Press the Kisses lightly to avoid cracking the Oreos.
Variations
Double Stuf Witch Hats: Use Double Stuf Oreos for a thicker cookie base.
Flavored Kiss Witch Hats: Use another Hershey’s Kiss flavor as long as it has the same pointed shape.
Notes
Make up to 1 day ahead. Store set cookies in an airtight container in the refrigerator for 3 to 4 days, separating stacked layers with parchment. Keep cool during transport and do not freeze, as condensation can affect the sprinkles and cookie texture.
Nutrition
Calories: 135 kcal|Protein: 2 g|Fat: 7 g|Carbohydrates: 19 g
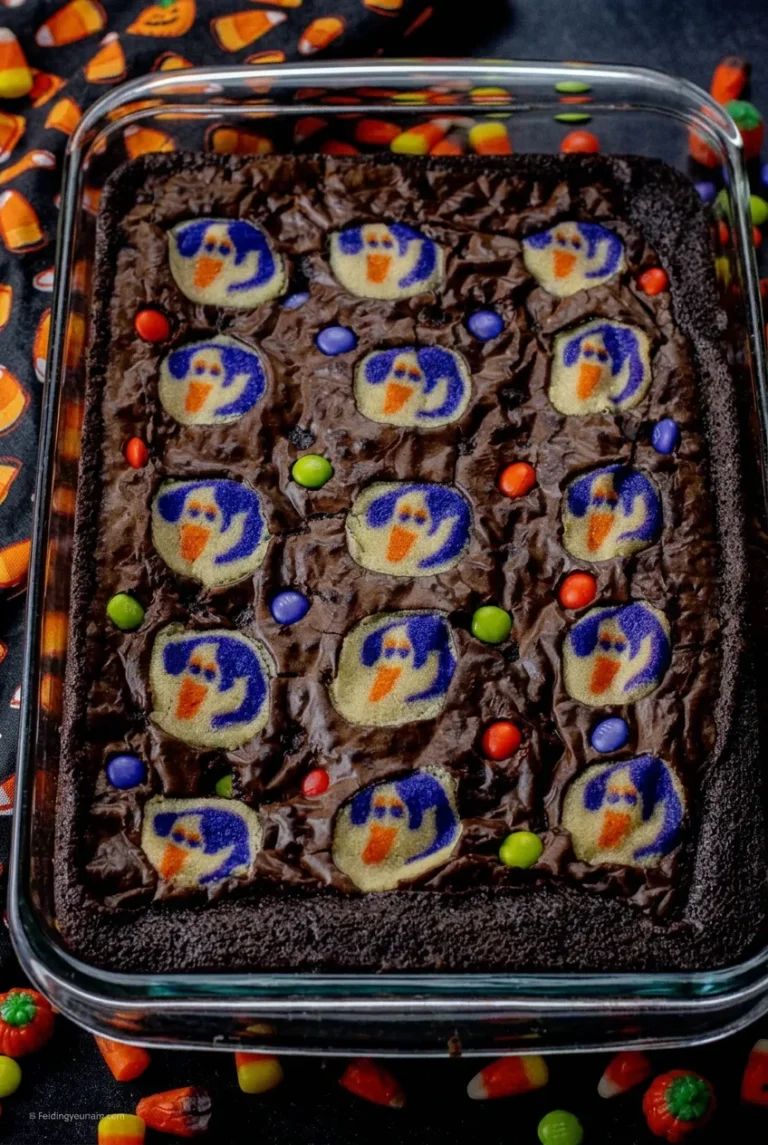
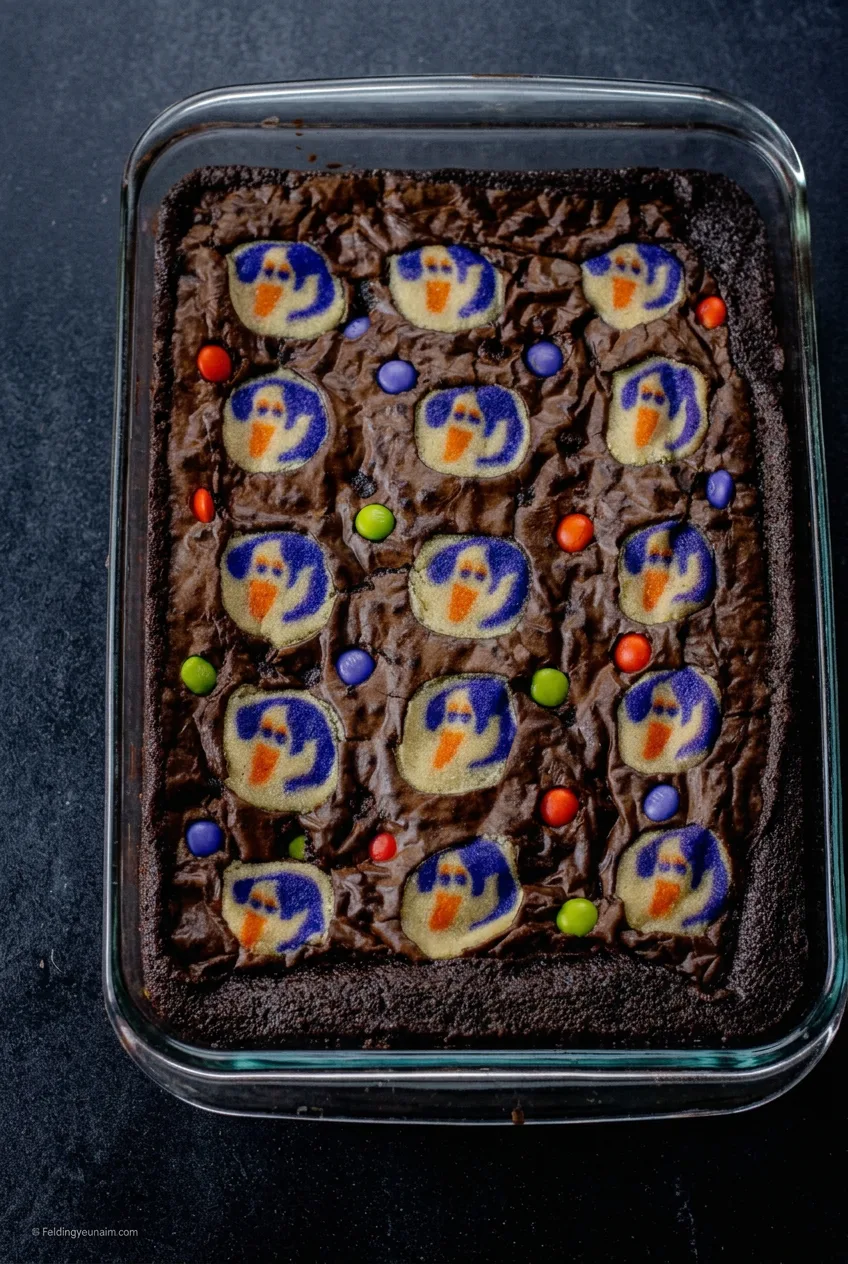
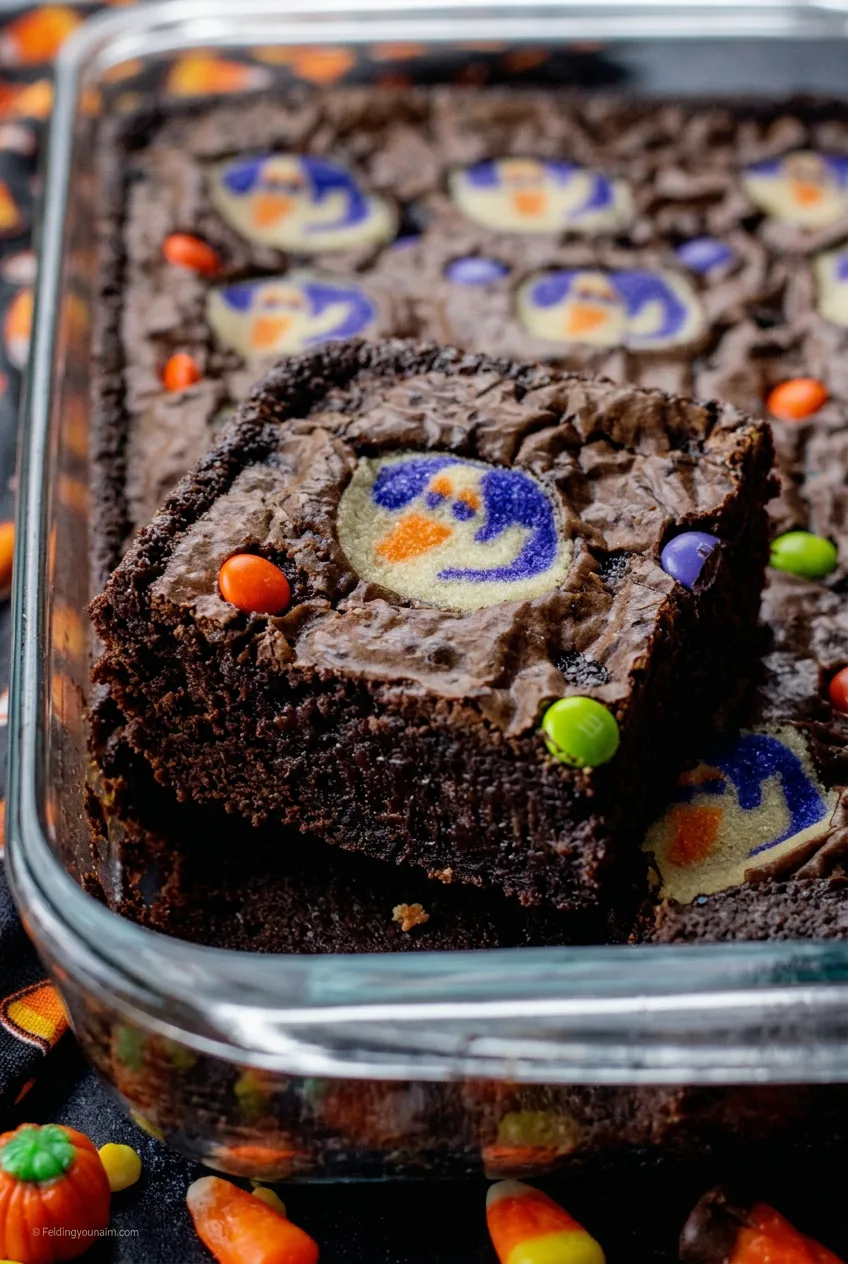
These Halloween brookies bake into a fudgy brownie slab with soft, ghost-shaped sugar cookies on top. Refrigerated cookie dough and a boxed brownie mix keep the prep short, while candy-coated chocolates add color between the ghosts. Space the dough pieces apart so their shapes stay distinct, then test the exposed brownie—not the cookies—for doneness. Let the pan cool completely before cutting so the bars hold together.
Ingredients for Halloween Brookies
1 package fudge brownie mix sized for a 9 x 13-inch pan, about 18–19 ounces (about 510g)
Eggs, oil, water, and any other ingredients required by the brownie-mix package, in the amounts specified
1/2 cup Halloween-color candy-coated milk chocolates, divided (about 100g)
Use a brownie mix intended for a 9 x 13-inch pan. A mix sized for a smaller square pan will spread too thinly. Follow your mix’s directions for the required eggs, oil, and water; amounts vary by brand.
How to Bake Halloween Brookies
Prepare the pan: Preheat the oven to 350°F (175°C). Line a 9 x 13-inch baking pan with parchment, leaving overhang on the long sides for lifting, or grease a glass baking dish well if serving from it.
Mix the brownie batter: Prepare the mix with the ingredients required on its package. Stir until no dry pockets remain, then spread the batter evenly into the pan.
Add the ghosts and candy: Scatter half the candy-coated chocolates over the batter. Arrange the ghost cookie-dough pieces in loose, spaced rows, printed sides up. Set them lightly on the batter without flattening or burying them. Scatter the remaining candies in the open spaces, away from the ghost faces.
Bake: Bake uncovered for about 28–32 minutes, starting to check at 28 minutes. The edges should look set and slightly firm, and the exposed brownie surface should be crinkled rather than wet. A toothpick inserted into brownie away from the cookies and candy should come out with a few moist crumbs, not raw batter. The ghosts should look set and lightly puffed, not deeply browned.
Cool and cut: Cool completely in the pan on a rack, about 1 hour. Lift the slab out with the parchment or cut it directly in the dish. Cut into 15 large bars or 20 smaller bars. For especially neat cuts, refrigerate the cooled slab for 20–30 minutes before slicing.
If your brownie mix gives substantially different baking guidance for a 9 x 13-inch pan, begin checking near its stated bake window and rely on the doneness cues rather than the clock alone. A metal pan may bake differently from glass, so check it a few minutes early.
Keeping the Ghost Shapes Visible
Leave room between the dough pieces so they can puff without joining together. Keep the candies on the exposed brownie instead of covering the printed ghost details. If ghost-shaped dough is unavailable, another pre-cut Halloween sugar-cookie shape will bake the same way, though the finished bars will look different.
Once completely cool, store the bars in an airtight container at room temperature for several days. Place parchment between layers if stacking; the cookies may soften slightly during storage. You can bake the brookies a day ahead and keep them covered at room temperature. No reheating is needed.
Nutrition
Approximate nutrition per smaller bar, based on 20 bars: 250 calories, 2g protein, 12g fat, and 35g carbohydrates. Approximate values per 100g: 450 calories, 5g protein, 22g fat, and 65g carbohydrates. Values vary with the brownie mix, its required additions, and the cookie dough used.
Halloween Brookies
Fudgy brownie bars topped with soft ghost-shaped sugar cookies and colorful candy-coated chocolates.
1/2 cup Halloween-color candy-coated milk chocolates, divided (about 100 g)
Instructions
Preheat the oven to 350°F (175°C). Line a 9 x 13-inch baking pan with parchment paper, leaving overhang on the long sides, or grease a glass baking dish well.
Prepare the brownie mix according to the package directions using the required eggs, oil, water, and other additions.
Stir the batter until no dry pockets remain, then spread it evenly in the prepared pan.
Scatter half of the candy-coated chocolates over the brownie batter.
Arrange the ghost cookie-dough pieces in spaced rows, printed sides up. Set them lightly on the batter without flattening or burying them.
Scatter the remaining candies in the open spaces, keeping them away from the ghost faces.
Bake uncovered for 28 to 32 minutes, checking at 28 minutes. The brownie edges should be set, the exposed surface should look crinkled, and a toothpick inserted into brownie away from cookies and candy should have a few moist crumbs.
Cool completely in the pan on a wire rack for about 1 hour.
Lift out the slab with the parchment and cut into 20 smaller bars or 15 large bars. Refrigerate the cooled slab for 20 to 30 minutes before slicing for cleaner cuts, if desired.
Tips
Use a brownie mix formulated for a 9 x 13-inch pan so the brownie layer does not bake too thinly.
Follow the brownie mix package directions for eggs, oil, and water because amounts vary by brand.
Space the cookie dough pieces apart so the ghost shapes can puff without joining together.
Keep candies on the exposed brownie areas so they do not cover the ghost details.
Test doneness in exposed brownie batter, not through the cookies or candy.
Check a metal pan a few minutes early, as it may bake differently than glass.
Variations
Alternative Halloween Shapes: Use another pre-cut Halloween sugar-cookie shape if ghost-shaped dough is unavailable.
Notes
Store completely cooled bars in an airtight container at room temperature for several days, placing parchment between layers if stacking. The brookies can be baked one day ahead and do not need reheating.
Nutrition
Calories: 250 kcal|Protein: 2 g|Fat: 12 g|Carbohydrates: 35 g
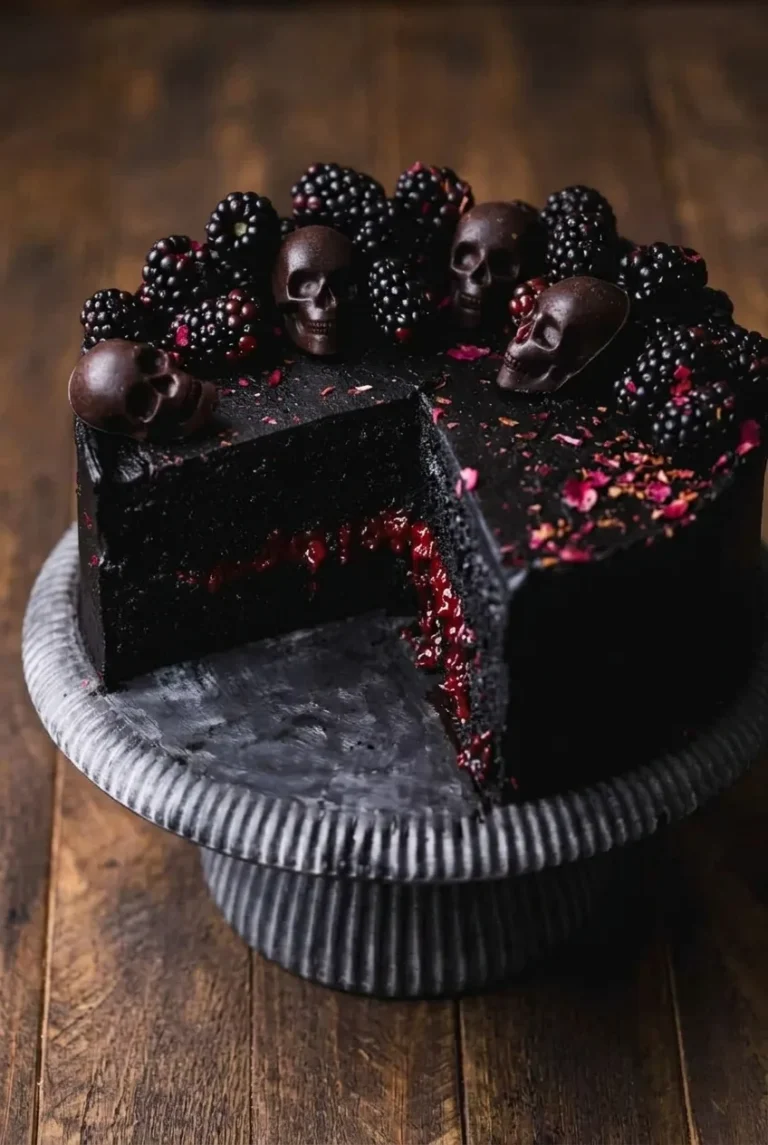
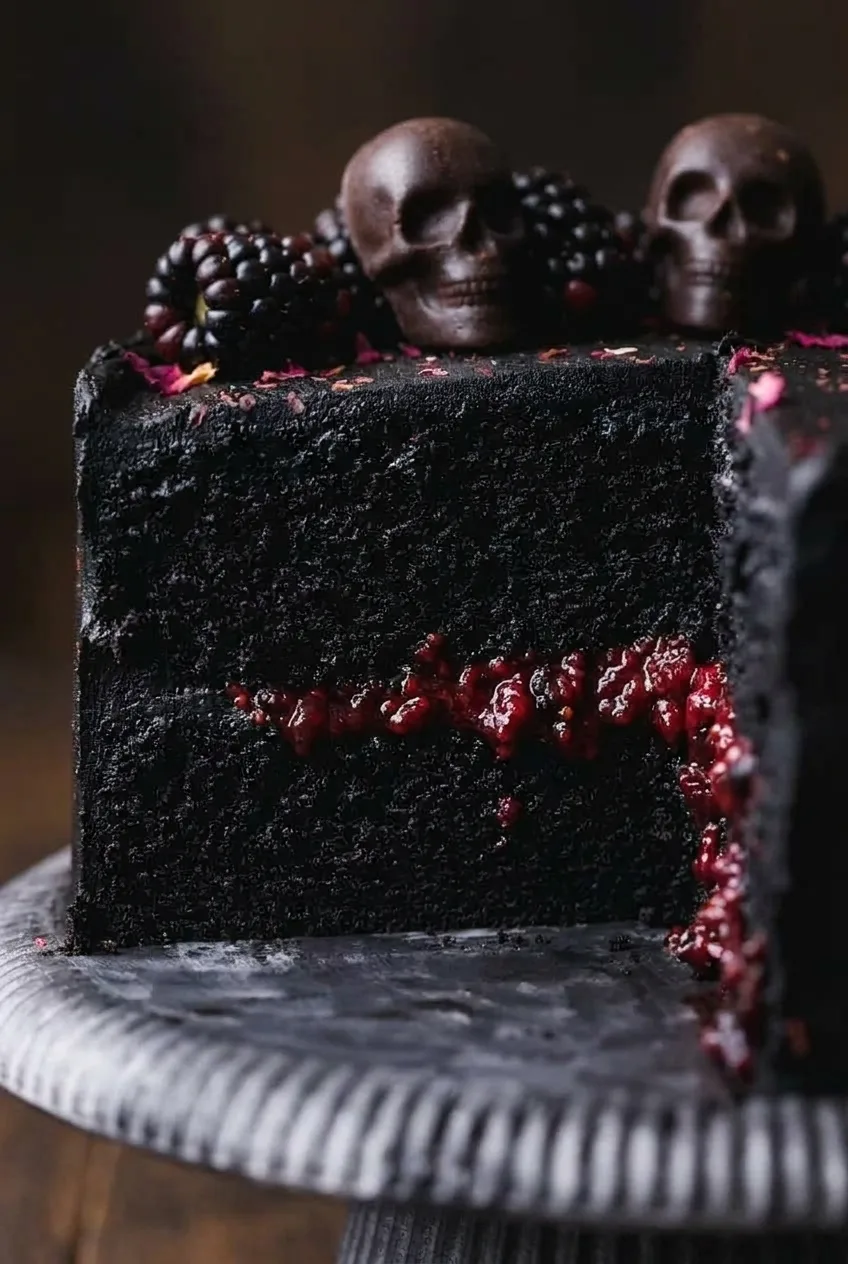
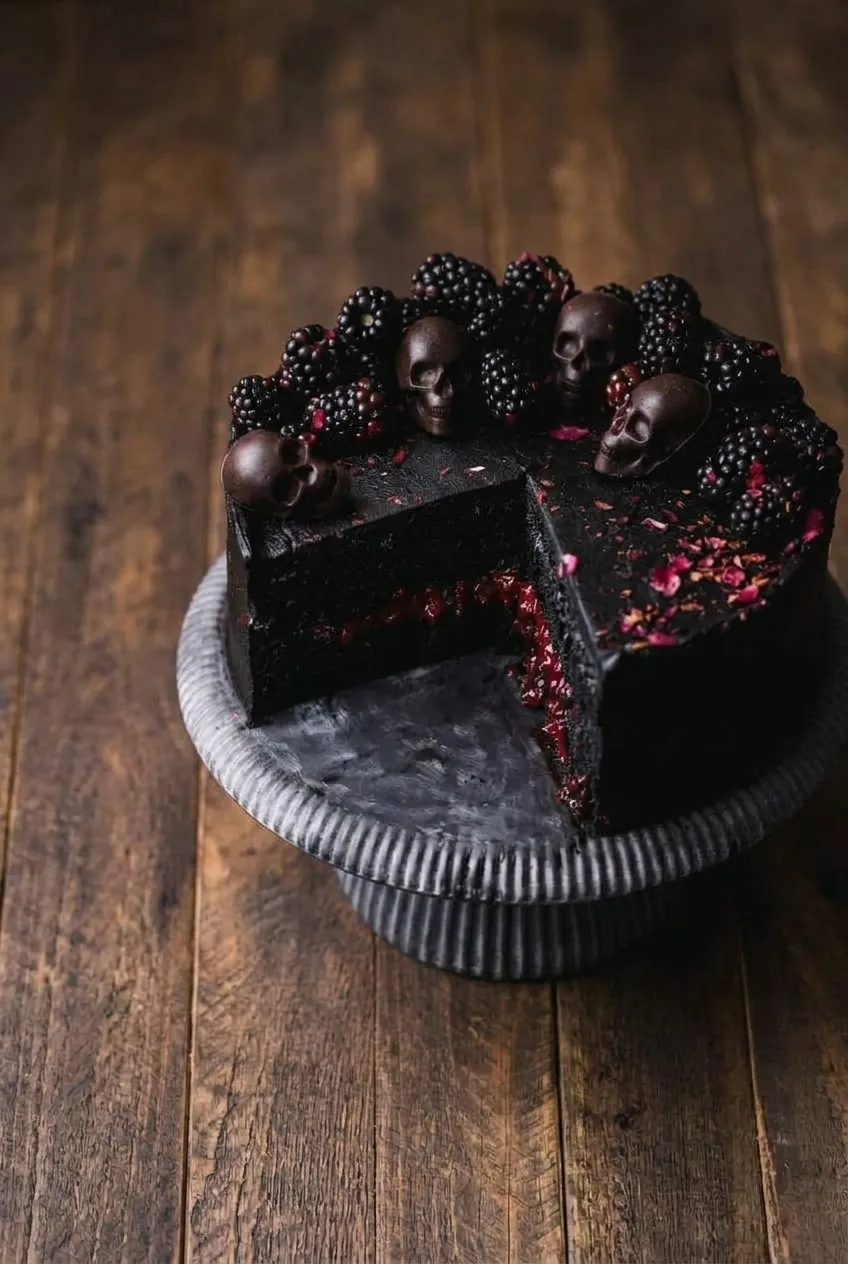
Black cocoa gives this two-layer cake a near-black crumb and a mellow chocolate-cookie flavor. A thick blackberry filling adds a glossy dark-red stripe that shows when you remove a wedge, while black cocoa buttercream, chocolate skulls, and fresh blackberries finish the top.
The filling must be thick and completely cool before assembly. A buttercream ring holds it between the layers, and a chilled crumb coat keeps dark cake crumbs out of the final frosting. Black cocoa varies by brand, so the finished cake may range from deep charcoal to black.
Ingredients for Black Velvet Halloween Cake
Black velvet cake
2 cups all-purpose flour (240g), spooned and leveled or weighed
1/2 cup black cocoa powder (about 45g)
1 3/4 cups granulated sugar (350g)
1 1/2 teaspoons baking powder
1 teaspoon baking soda
1/2 teaspoon fine salt
2 large eggs, at room temperature
1/2 cup neutral oil (110g)
1 cup buttermilk (240g), at room temperature
1 teaspoon vanilla extract
3/4 cup hot brewed coffee
Blackberry filling
2 cups fresh or frozen blackberries (280g)
1/3 cup granulated sugar (about 65g)
1 tablespoon cornstarch (about 8g)
1/8 teaspoon fine salt
Black cocoa buttercream and decoration
1 1/2 cups unsalted butter (340g), softened but not melted
5 1/2 cups powdered sugar (660g)
1/4 cup black cocoa powder (about 25g)
1 teaspoon vanilla extract
1/8 teaspoon fine salt
Milk or cream, as needed for a spreadable frosting
5 to 7 small edible dark chocolate skull candies or molded chocolate skulls
1 to 1 1/2 cups fresh blackberries (about 180g), for decorating
Optional: 1 teaspoon lemon juice for the filling; a few drops of black gel food coloring for darker frosting; or 1 to 2 teaspoons dried edible rose petals or freeze-dried raspberry crumbs for a light finishing scatter.
How to Make Black Velvet Halloween Cake
Yield: One two-layer 8-inch cake, about 10 to 12 slices. Allow about 3 hours 15 minutes, including cooling and chilling.
Prepare the pans: Preheat the oven to 350°F (175°C) with a rack in the center. Grease two 8-inch round cake pans, line the bottoms with parchment rounds, and grease the parchment.
Cook the filling: Combine the filling blackberries, sugar, cornstarch, and salt in a small saucepan. Add the lemon juice if using. Cook over medium heat for 10 to 15 minutes, stirring often and gently crushing some berries. The compote is ready when it is glossy, mounds on a spoon, and leaves a clear trail when a spatula is drawn across the pan. Transfer to a shallow bowl and cool completely.
Mix the batter: Whisk the flour, 1/2 cup black cocoa, cake sugar, baking powder, baking soda, and 1/2 teaspoon salt in a large bowl. In another bowl, whisk the eggs, oil, buttermilk, and 1 teaspoon vanilla. Stir the wet ingredients into the dry just until no flour streaks remain. Whisk in the hot coffee just until the thin batter is uniform; do not continue beating.
Bake the layers: Divide the batter evenly between the pans. Bake uncovered for 30 to 36 minutes, beginning to check at 30 minutes. The tops should spring back lightly, the edges should begin to pull from the pans, and a toothpick inserted in the centers should come out clean or with a few moist crumbs, not wet batter. Cool in the pans for 10 to 15 minutes, then turn out onto wire racks and cool completely.
Make the buttercream: Beat the softened butter until creamy. Gradually beat in the powdered sugar and remaining 1/4 cup black cocoa, then add 1 teaspoon vanilla and 1/8 teaspoon salt. Add milk or cream a little at a time, only until the frosting spreads easily and holds a soft peak. Add black gel coloring if desired. If the buttercream becomes too soft, chill it for 10 to 15 minutes, then rewhip.
Fill the cake: Level the fully cooled layers if domed. If they feel delicate, wrap and chill them for 20 to 30 minutes before handling. Place one layer on a cake board or serving plate. Pipe or spread a thick ring of buttercream around its outer edge, then spoon the completely cooled blackberry filling inside the ring without overfilling it. Set the second layer on top.
Crumb coat and frost: Spread a thin coat of buttercream over the top and sides to trap loose crumbs. Chill uncovered for 20 to 30 minutes, until firm to the touch. Cover with the remaining buttercream, leaving an opaque, lightly textured finish. If the layers shift while frosting, chill the cake before continuing.
Decorate and serve: Pat the garnish blackberries dry. Arrange them across the top with the chocolate skulls, pressing the skulls gently into the buttercream so they sit securely. Chill briefly to set the decoration. Add optional edible flecks just before serving. Cut and remove a front wedge to reveal the filling, and let the chilled cake stand for 20 to 30 minutes before serving.
How to Keep the Blackberry Filling in Place
Warm or runny compote can seep through the frosting and make the top layer slide. Cook it until it holds on a spoon, cool it completely, and keep it inside the buttercream ring. Chilling tender cake layers before assembly also makes them easier to level and stack without tearing.
Black Cocoa and Ingredient Substitutions
Black cocoa gives the cake its dark color and mild chocolate-cookie flavor. Dutch-process cocoa can replace it, but the cake and frosting will look brown rather than nearly black. Black gel coloring can deepen the frosting if desired; it is not needed in the batter.
Hot water can replace the coffee, though the coffee deepens the chocolate flavor. Frozen blackberries work in the filling without thawing first. If substituting thick blackberry preserves for the cooked filling, use only preserves firm enough to stay inside the frosting ring.
Bake the cake layers up to 2 days ahead. Cool completely, wrap tightly, and keep at room temperature until assembly. The compote can be refrigerated for 2 to 3 days. Buttercream can be made a day ahead; refrigerate it, then bring it to room temperature and rewhip before frosting.
Refrigerate the assembled cake in a covered cake container for up to 3 days for best texture and appearance. Chill it uncovered until the frosting is firm before covering so the decorations are not crushed. Let the cake or individual slices stand for 20 to 30 minutes before serving; do not reheat.
For longer preparation, freeze tightly wrapped, unfrosted layers for up to 2 months. Thaw them while wrapped before frosting, and add the fresh blackberry garnish after thawing.
Nutrition
Approximate nutrition per slice, based on 12 slices: 790 calories, 6g protein, 34g fat, and 115g carbohydrates. Approximate values per 100g: 350 calories, 3g protein, 15g fat, and 51g carbohydrates. Values vary with slice size and the amount of frosting, filling, and chocolate decoration in each slice.
Black Velvet Halloween Cake
A two-layer black cocoa cake with thick blackberry filling, black cocoa buttercream, chocolate skulls, and fresh blackberries.
5 to 7 small edible dark chocolate skull candies or molded chocolate skulls
1 to 1 1/2 cups fresh blackberries (about 180g), for decorating
1 to 2 teaspoons dried edible rose petals or freeze-dried raspberry crumbs, optional
Instructions
Preheat the oven to 350°F (175°C). Grease two 8-inch round cake pans, line the bottoms with parchment rounds, and grease the parchment.
Combine the blackberries, sugar, cornstarch, salt, and optional lemon juice in a small saucepan. Cook over medium heat for 10 to 15 minutes, stirring often and gently crushing some berries, until glossy and thick enough to mound on a spoon. Transfer to a shallow bowl and cool completely.
Whisk the flour, black cocoa powder, sugar, baking powder, baking soda, and salt in a large bowl.
Whisk the eggs, oil, buttermilk, and vanilla in a separate bowl. Stir the wet ingredients into the dry ingredients just until no flour streaks remain.
Whisk in the hot coffee just until the thin batter is smooth and uniform.
Divide the batter evenly between the prepared pans. Bake for 30 to 36 minutes, checking at 30 minutes, until the tops spring back and a toothpick inserted in the centers comes out clean or with a few moist crumbs.
Cool the cakes in the pans for 10 to 15 minutes, then turn them out onto wire racks and cool completely.
Beat the softened butter until creamy. Gradually beat in the powdered sugar and remaining black cocoa, then beat in the vanilla and salt. Add milk or cream a little at a time until the frosting is spreadable and holds a soft peak. Add optional black gel coloring if desired.
Level the cooled cake layers if needed. Place one layer on a cake board or serving plate and pipe or spread a thick buttercream ring around the edge.
Spoon the completely cooled blackberry filling inside the buttercream ring. Place the second cake layer on top.
Apply a thin buttercream crumb coat over the top and sides of the cake. Chill uncovered for 20 to 30 minutes, until firm.
Frost the cake with the remaining buttercream, leaving a lightly textured finish.
Pat the garnish blackberries dry and arrange them on top with the chocolate skulls. Chill briefly to set the decorations, then add optional rose petals or raspberry crumbs before serving.
Let the chilled cake stand at room temperature for 20 to 30 minutes before slicing and serving.
Tips
Cook the blackberry filling until it leaves a clear trail when a spatula is drawn across the pan.
Cool the filling completely before assembling the cake to prevent sliding layers.
Keep the filling inside a thick buttercream dam to prevent it from seeping out.
Chill delicate cake layers for 20 to 30 minutes before leveling and stacking if needed.
Chill the crumb-coated cake until firm so dark crumbs do not show through the final frosting.
If the buttercream becomes too soft, chill it for 10 to 15 minutes and rewhip.
Variations
Dutch Cocoa Version: Replace the black cocoa with Dutch-process cocoa for a brown chocolate cake with a similar flavor.
Coffee-Free Version: Replace the hot brewed coffee with hot water for a milder chocolate flavor.
Preserves Filling Version: Use thick blackberry preserves instead of cooked filling, provided the preserves are firm enough to stay inside the buttercream ring.
Notes
Store the assembled cake covered in the refrigerator for up to 3 days. Let chilled cake or slices stand for 20 to 30 minutes before serving. Unfrosted cake layers can be frozen, tightly wrapped, for up to 2 months.
Nutrition
Calories: 790 kcal|Protein: 6 g|Fat: 34 g|Carbohydrates: 115 g