Author

Julia

Browsing

Witch Hat Cookies

Thick, softly crackled purple cookies form the brims of these witch hats. Each cooled cookie gets an upright milk chocolate kiss, a raised purple frosting band, and small Halloween sprinkles. White cake mix makes a pale dough that takes purple coloring well. Bake the cookies just until set so they stay soft, then cool them completely before decorating; warmth can soften the frosting and make the chocolate peaks lean.

Ingredients for Witch Hat Cookies
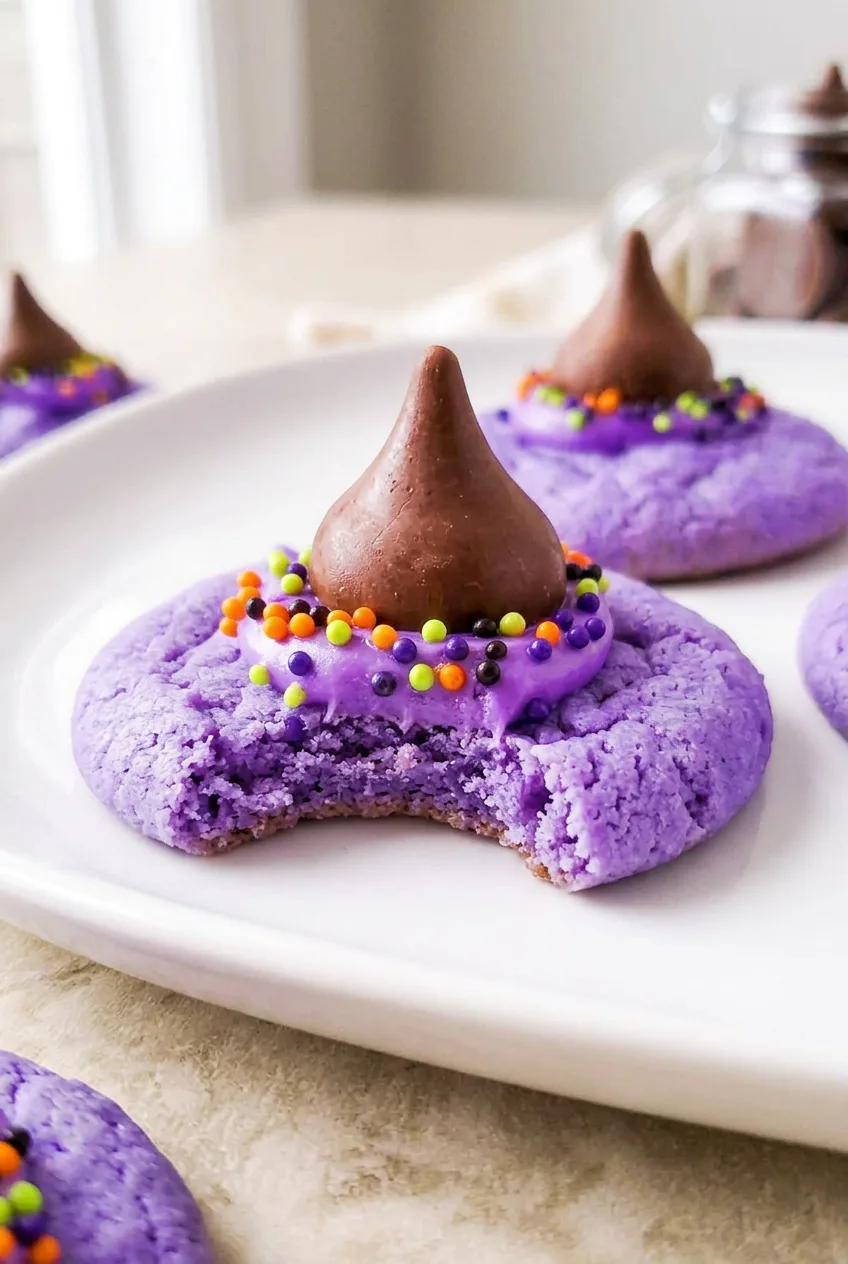
Close view of a soft crackled purple Witch Hat Cookie with purple frosting, Halloween sprinkles, and a chocolate kiss.

Makes about 24 cookies; the yield depends on scoop size.

  • 1 box (15.25 ounces) white cake mix (about 430g)
  • 2 large eggs
  • 1/2 cup vegetable or canola oil
  • 1/2 to 1 teaspoon purple gel food coloring, for the dough
  • 1 container (16 ounces) prepared vanilla frosting (about 455g)
  • 1/4 to 1/2 teaspoon purple gel food coloring, for the frosting
  • 24 milk chocolate kisses, unwrapped
  • 1/4 cup small round Halloween sprinkles in orange, green, purple, and black (about 45g)

Gel coloring gives the dough and frosting a strong purple color without adding much liquid. Yellow cake mix can replace white, though it will give the cookies a warmer purple shade.

How to Make Witch Hat Cookies
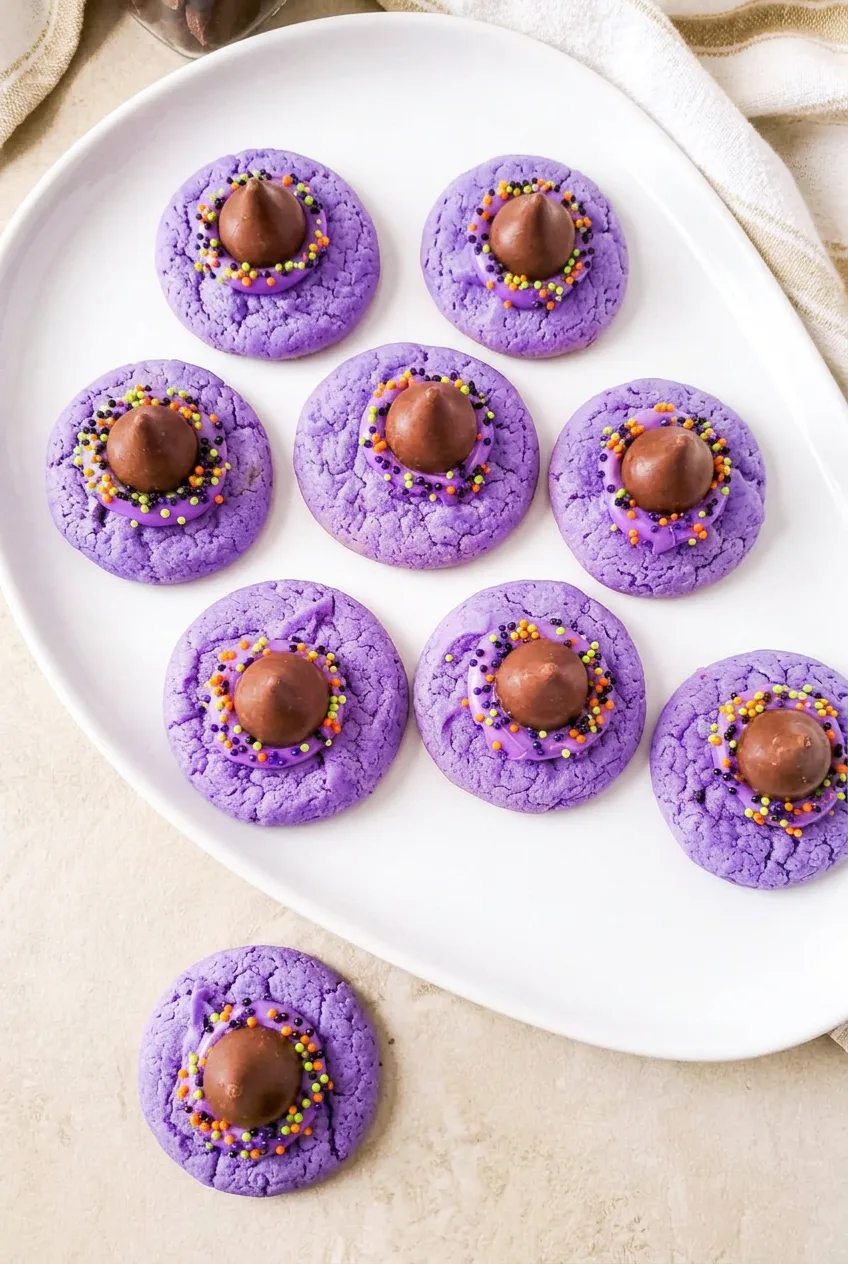
Overhead platter of purple Witch Hat Cookies with chocolate kiss crowns and colorful Halloween sprinkles.
  1. Prepare the oven and pans: Preheat the oven to 350°F (175°C). Line light-colored baking sheets with parchment. For dark or nonstick sheets, use 325°F (165°C) to limit browning.
  2. Mix the dough: Stir the cake mix, eggs, oil, and 1/2 teaspoon purple gel coloring until no dry streaks remain. Add more coloring as needed for an even lavender-purple dough. Stop mixing once the dough is uniform.
  3. Shape the brims: Scoop roughly 1 1/2-tablespoon portions of dough onto the sheets, spacing them 2 inches apart. Gently press down any very tall mounds to encourage wide, thick cookies with room for the decorations.
  4. Bake: Bake uncovered for 8 to 10 minutes per sheet, starting to check at 8 minutes. The edges should look set and the centers should no longer look wet or glossy, though they may still be soft and slightly puffy. Remove the cookies before they brown much. Bake one sheet at a time when possible.
  5. Cool and tint the frosting: Leave the cookies on the sheets for 5 minutes, then transfer them to a wire rack to cool completely, about 30 to 40 minutes. Stir 1/4 teaspoon purple gel coloring into the frosting, adding more as needed for a deeper purple than the cookies.
  6. Pipe the hatbands: Transfer the frosting to a piping bag with a medium round or star tip, or use a resealable bag with a corner snipped off. On four to six cookies at a time, pipe a thick ring about 1 1/2 inches across in the center of each, leaving the outer cookie edge visible as the brim. The ring should be raised enough to form a visible band and hold the candy upright.
  7. Add the peaks and sprinkles: Immediately press one chocolate kiss upright into the center of each ring and scatter sprinkles over the exposed frosting. Repeat with the remaining cookies. Let the frosting set lightly before serving or storing.

Serving and Storage

Arrange the cookies in a single layer on a platter to protect the raised hats. For another Halloween dessert, serve them alongside Pumpkin Rice Krispie Treats with Pretzel Stems.

Once the frosting has set, store the cookies in a single layer in an airtight container in a cool, dry place at room temperature for 3 to 4 days. Stacking can crush the chocolate peaks and smear the frosting bands.

To make them ahead, bake the undecorated cookies up to 2 days in advance and store them airtight. Undecorated baked cookies can also be frozen for up to 2 months; thaw them at room temperature before frosting. Avoid freezing fully decorated hats when appearance matters, as condensation and handling can damage the decorations.

Nutrition

Approximate nutrition per cookie, based on 24 cookies: 235 calories, 2g protein, 12g fat, and 35g carbohydrates. Approximate values per 100g: 460 calories, 3g protein, 23g fat, and 69g carbohydrates. Values vary with the cake mix, frosting, candy, and cookie size.

Witch Hat Cookies

Soft purple cake mix cookies are decorated with chocolate kiss peaks, purple frosting bands, and Halloween sprinkles.
Course: Dessert
Cuisine: American
Prep: 35 min
Cook: 20 min
Total: 90 min
Servings: 24 Calories: 235 kcal

Equipment

  • Light-colored baking sheets
  • Parchment paper
  • Mixing bowl
  • Cookie scoop
  • Wire rack
  • Piping bag
  • Medium round or star piping tip

Ingredients

For the Cookies

  • 1 box (15.25 ounces) white cake mix (about 430 g)
  • 2 large eggs
  • 1/2 cup vegetable or canola oil
  • 1/2 to 1 teaspoon purple gel food coloring

For the Decorations

  • 1 container (16 ounces) prepared vanilla frosting (about 455 g)
  • 1/4 to 1/2 teaspoon purple gel food coloring
  • 24 milk chocolate kisses, unwrapped
  • 1/4 cup small round Halloween sprinkles in orange, green, purple, and black (about 45 g)

Instructions

  1. Preheat the oven to 350°F (175°C) and line light-colored baking sheets with parchment paper. If using dark or nonstick baking sheets, preheat to 325°F (165°C).
  2. Stir the cake mix, eggs, oil, and 1/2 teaspoon purple gel food coloring until no dry streaks remain. Add more coloring as needed for an even lavender-purple dough.
  3. Scoop about 1 1/2 tablespoons of dough per cookie onto the prepared baking sheets, spacing them 2 inches apart. Gently flatten any tall mounds.
  4. Bake for 8 to 10 minutes, checking at 8 minutes. Remove the cookies when the edges are set and the centers no longer look wet or glossy.
  5. Cool the cookies on the baking sheets for 5 minutes, then transfer them to a wire rack and cool completely, about 30 to 40 minutes.
  6. Tint the vanilla frosting with 1/4 teaspoon purple gel food coloring, adding more as needed for a deeper purple than the cookies.
  7. Transfer the frosting to a piping bag fitted with a medium round or star tip. Pipe a thick, raised ring about 1 1/2 inches across in the center of each cookie.
  8. Immediately press one chocolate kiss upright into the center of each frosting ring and scatter sprinkles over the exposed frosting.
  9. Let the frosting set lightly before serving or storing.

Tips

  • Use gel food coloring for strong color without thinning the dough or frosting.
  • Bake the cookies only until set to keep them soft and prevent browning.
  • Bake one sheet at a time when possible for more even results.
  • Cool the cookies completely before frosting so the chocolate kisses do not lean or melt.
  • Decorate a few cookies at a time so the sprinkles stick to the fresh frosting.

Variations

  • Yellow Cake Mix Version: Use yellow cake mix instead of white cake mix for a warmer shade of purple.

Notes

Store decorated cookies in a single layer in an airtight container at room temperature for 3 to 4 days. Bake undecorated cookies up to 2 days ahead, or freeze them for up to 2 months and thaw before decorating.

Nutrition

Calories: 235 kcal | Protein: 2 g | Fat: 12 g | Carbohydrates: 35 g

Witch Finger Pretzel Rods

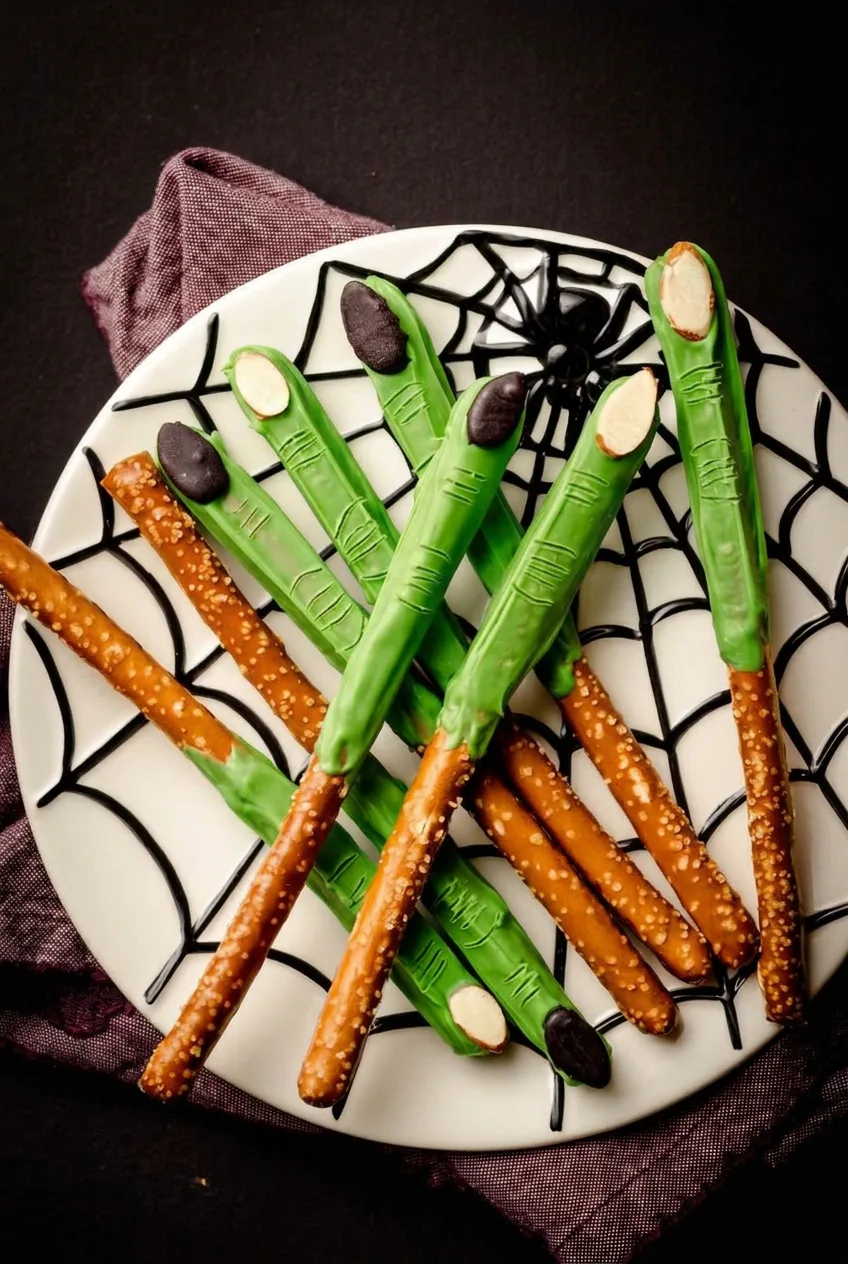
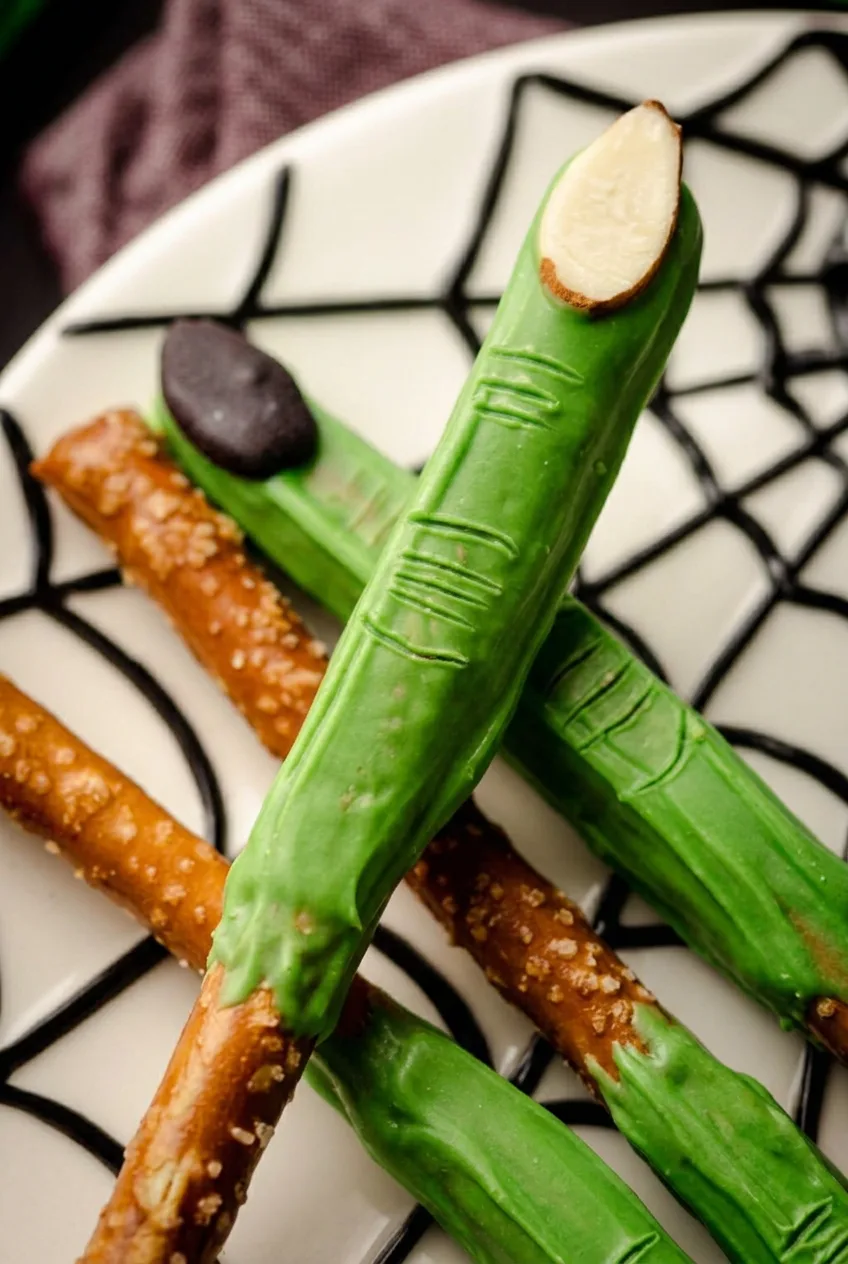
Whole salted pretzel rods become long witch fingers when their upper two-thirds are dipped in bright-green candy coating. The exposed ends stay crisp and give guests a clean place to hold them. Almond fingernails and toothpick-made knuckle wrinkles complete the shape.

Press the nails on while the coating is soft, but wait until it looks mostly matte before marking the wrinkles. A mix of natural and black-coated almonds adds contrast, and a slightly uneven green shell suits the handmade look.

Ingredients for Witch Finger Pretzel Rods

Close view of a green witch finger pretzel rod with almond nail and knuckle wrinkles.
  • 12 large salted pretzel rods (about 150g)
  • 16 ounces green candy melts or green candy coating (about 450g)
  • 12 whole almonds, blanched or skin-on (about 15g)
  • 2 ounces black candy melts or dark chocolate (about 55g), for coating 6 almonds

Black candy melts give the nails a nearly black finish; dark chocolate will make them dark brown. Keep the almonds, bowls, and utensils dry, since moisture can make melted candy coating thicken or clump.

How to Make Witch Finger Pretzel Rods

Overhead Halloween platter of green witch finger pretzel rods with exposed salted handles.
  1. Prepare the tray and nails: Line a rimmed baking sheet with parchment paper or a silicone mat. In a dry microwave-safe bowl, melt the black candy melts or dark chocolate in short bursts at 50% power, stirring between bursts. Dip or brush the visible face of 6 almonds and let them firm up. Leave the other 6 natural.
  2. Melt the green coating: Microwave the green candy melts in a dry bowl at 50% power in 15- to 20-second intervals, stirring well after each. Stop heating when a few pieces remain, then stir until smooth. Transfer to a tall, narrow heat-safe cup for dipping.
  3. Dip the rods: Working one at a time, coat the upper two-thirds of each whole rod, leaving about 2 1/2 to 3 inches of brown pretzel exposed. Lift and rotate the rod over the cup, gently tap off excess coating, and place it on the lined tray with space around it.
  4. Add the nails: Immediately press one almond lengthwise onto each coated tip, with its pointed end facing the exposed handle. Use 6 natural and 6 dark-coated almonds, pressing just enough to secure them in the soft coating.
  5. Mark the knuckles: Check the first rods as you continue dipping. When the coating looks mostly matte but still yields to a toothpick, indent two or three short horizontal wrinkle lines on each finger. If the toothpick pulls up sticky strands, wait a little longer; if the coating cracks, it has set too far.
  6. Let them set: Leave the rods uncovered until the coating is firm and dry to a gentle touch and the nails stay in place, usually about 15 to 25 minutes at room temperature. A brief refrigerator chill can speed setting if needed; bring the rods back to room temperature before serving.

Keeping the Coating Easy to Dip

A tall, narrow cup helps coat the long finger portion without covering the handle. If you do not have one, roll the upper portion of each rod in coating spread in a narrow, shallow dish. The coating line may be less even, but the brown handle should remain visible.

If the coating stiffens while you work, stir it before heating it again. Use another short microwave burst only if needed, and do not add water or water-based coloring. A slightly ridged coating is fine; it does not need to be perfectly smooth.

Serving and Variations

Fan the finished rods on a Halloween platter with their exposed handles facing outward. For a larger dessert tray, add Pumpkin Rice Krispie Treats with Pretzel Stems or Peanut Butter Spider Cookies.

For a simpler look, leave all 12 almond nails natural. The standard recipe contains tree nuts. If you need a nut-free version, use shaped fondant nails, dark licorice pieces, or chocolate-dipped candy corn instead, and check all packaged ingredients for allergen suitability. These nails will look different from almonds.

Storage and Make-Ahead

Once the coating is completely hard, store the rods in an airtight container at room temperature. Place parchment between layers if stacking them to protect the nails and wrinkles. For the best crunch and appearance, serve within about one week. No reheating is needed.

Nutrition

Approximate nutrition per witch finger pretzel rod, based on 12 rods: 280 calories, 2g protein, 12g fat, and 40g carbohydrates. Per 100g: approximately 495 calories, 4g protein, 22g fat, and 71g carbohydrates. Values are estimates and will vary with the ingredients and how much coating remains on each rod.

Witch Finger Pretzel Rods

Salted pretzel rods dipped in green candy coating and finished with almond nails and knuckle wrinkles for a Halloween treat.
Course: Dessert
Cuisine: American
Prep: 25 min
Total: 50 min
Servings: 12 Calories: 280 kcal

Equipment

  • Rimmed baking sheet
  • Parchment paper or silicone mat
  • Microwave-safe bowls
  • Tall narrow heat-safe cup
  • Toothpick

Ingredients

Witch Finger Pretzels

  • 12 large salted pretzel rods (about 150 g)
  • 16 ounces green candy melts or green candy coating (about 450 g)
  • 12 whole almonds, blanched or skin-on (about 15 g)
  • 2 ounces black candy melts or dark chocolate (about 55 g)

Instructions

  1. Line a rimmed baking sheet with parchment paper or a silicone mat.
  2. Melt the black candy melts or dark chocolate in a dry microwave-safe bowl in short bursts at 50% power, stirring between bursts.
  3. Dip or brush the visible face of 6 almonds with the black coating, then let them firm up. Leave the remaining 6 almonds natural.
  4. Melt the green candy melts in a dry microwave-safe bowl at 50% power in 15- to 20-second intervals, stirring well after each interval. Stop when a few pieces remain and stir until smooth.
  5. Transfer the melted green coating to a tall, narrow heat-safe cup.
  6. Dip the upper two-thirds of each pretzel rod in the green coating, leaving 2 1/2 to 3 inches of pretzel exposed as a handle.
  7. Lift and rotate each rod over the cup, gently tap off excess coating, and place it on the lined baking sheet.
  8. Immediately press one almond lengthwise onto the coated tip of each rod, with the pointed end facing the exposed pretzel handle. Use 6 natural almonds and 6 dark-coated almonds.
  9. When the coating looks mostly matte but still yields to a toothpick, make 2 or 3 short horizontal wrinkle marks below the nail to create knuckles.
  10. Let the pretzel rods stand uncovered until the coating is firm and dry to a gentle touch, about 15 to 25 minutes at room temperature.

Tips

  • Keep the almonds, bowls, and utensils completely dry so the candy coating does not seize or clump.
  • Use a tall, narrow cup to coat the finger portion while keeping the pretzel handle exposed.
  • Press the almond nails into the coating while it is still soft.
  • Wait until the coating is mostly matte before making knuckle marks with a toothpick.
  • If the coating thickens, stir it first and reheat only briefly if needed.
  • Do not add water or water-based food coloring to melted candy coating.

Variations

  • Natural Almond Nails: Leave all 12 almond nails uncoated for a simpler look.
  • Nut-Free Witch Fingers: Replace almonds with shaped fondant nails, dark licorice pieces, or chocolate-dipped candy corn, checking packaged ingredients for allergens.

Notes

Store completely hardened pretzel rods in an airtight container at room temperature, separating layers with parchment. For the best crunch and appearance, serve within 1 week. A brief refrigerator chill can speed setting; return rods to room temperature before serving.

Nutrition

Calories: 280 kcal | Protein: 2 g | Fat: 12 g | Carbohydrates: 40 g

Pumpkin Rice Krispie Treats

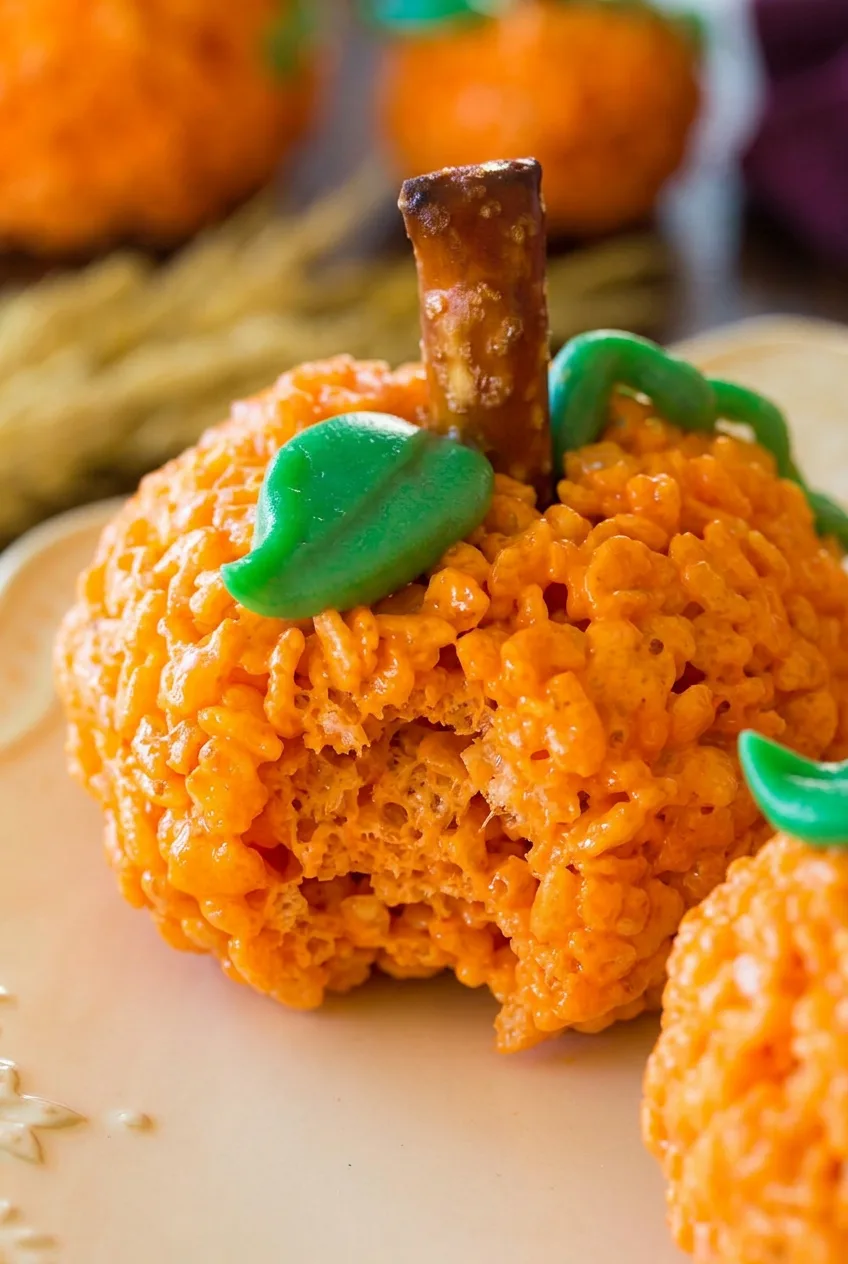
These Pumpkin Rice Krispie Treats are classic marshmallow cereal treats shaped into individual pumpkins. They get their orange color from food coloring, not pumpkin purée, so the crispy rice stays visible beneath the pretzel stems and piped green leaves and vines.

Shape the mixture while it is warm enough to hold together but cool enough to handle. Insert the stems before the pumpkins firm, then wait to add the icing until the treats can hold their shape.

Ingredients for Pumpkin Rice Krispie Treats

Close view of a Pumpkin Rice Krispie Treat showing glossy puffed-rice texture, pretzel stem, and green icing vine.
  • 4 tablespoons unsalted butter (55g)
  • 10 ounces mini marshmallows (285g)
  • Orange gel food coloring, about 8 to 12 drops, or as needed
  • 6 cups crispy rice cereal (150g)
  • 6 to 8 pretzel rods or thick pretzel sticks, broken into twelve 1-inch stem pieces
  • About 1/2 cup green decorator icing or firm vanilla frosting tinted green
  • Nonstick cooking spray or a little extra butter, for hands and tools

Use icing thick enough to hold leaves and curls; a thin glaze will run off the textured treats. Regular marshmallows can replace mini marshmallows at the same weight.

How to Make Pumpkin Rice Krispie Treats

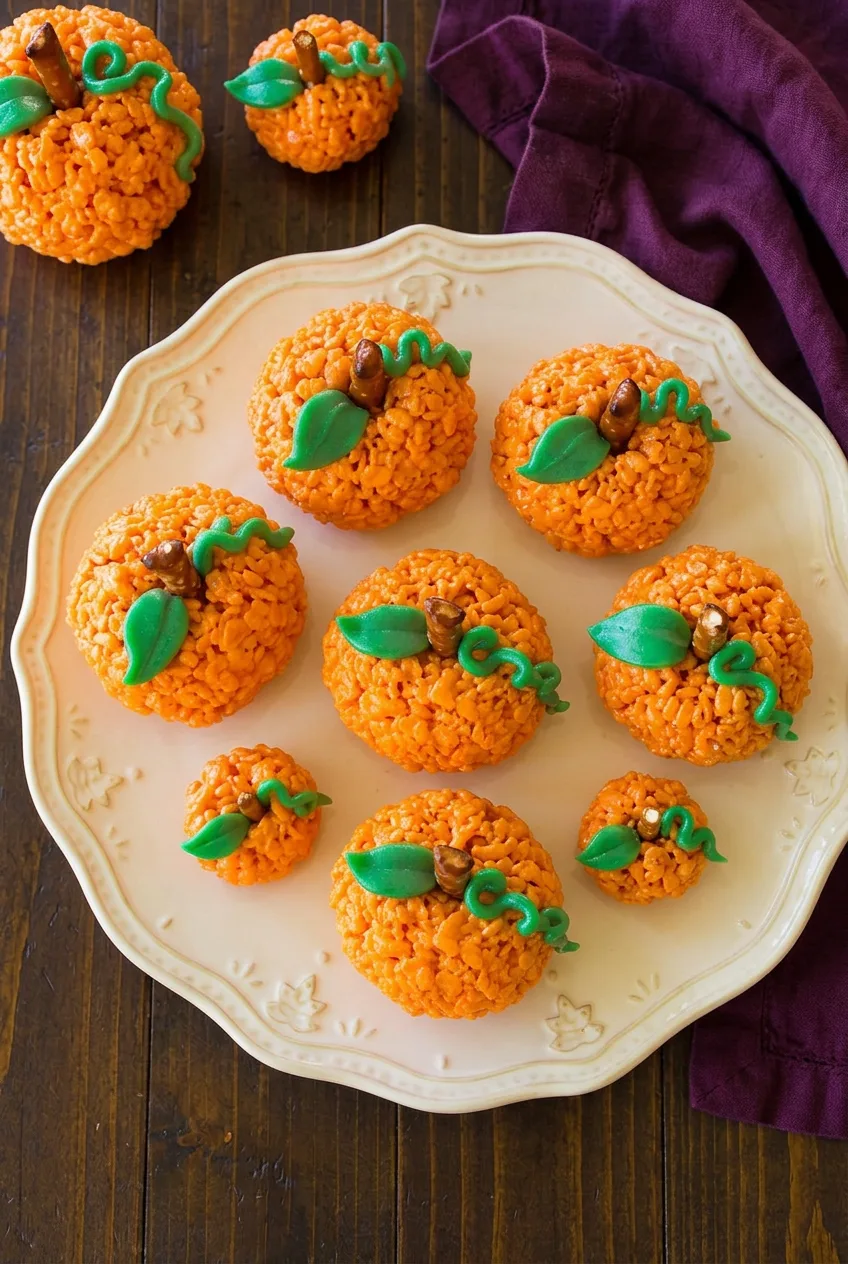
Overhead platter of orange Pumpkin Rice Krispie Treats in varied sizes with pretzel stems and green icing leaves.

Yield: 12 medium pumpkins. Prep: 20 minutes. Cook: About 5 minutes. Total: About 45 minutes, including firming time.

  1. Prepare the work area: Line a baking sheet or work surface with parchment. Lightly grease the parchment, your hands, and a scoop or spoon. Break the pretzels into stem pieces and put the green icing in a piping bag or small zip-top bag.
  2. Melt and color the marshmallows: Melt the butter in a large saucepan over low heat. Add the marshmallows and stir frequently for 3 to 5 minutes, until melted and glossy. Do not let them brown. Stir in the orange gel coloring a little at a time until the color is even.
  3. Add the cereal: Remove the pan from the heat. Gently fold in the crispy rice cereal for 1 to 2 minutes, until no dry pockets remain and the mixture holds together when pressed. Avoid crushing the cereal.
  4. Shape the pumpkins: Let the mixture cool just until it is comfortable to handle, usually 2 to 4 minutes. Divide it into 12 portions. With lightly greased hands, press each portion together and form a slightly uneven round pumpkin. Flatten the bottom a little so it stands. Work promptly, but do not pack the cereal so tightly that the treats become hard.
  5. Add the stems: While the pumpkins are still warm, press a pretzel piece upright into the top of each one, leaving about 1/2 inch exposed. Gently press the cereal around each stem to anchor it.
  6. Let them firm: Leave the pumpkins uncovered at room temperature for 15 to 20 minutes, until they hold their shape and feel firm to a light touch.
  7. Decorate: Pipe one or two green leaves beside each stem, then add small curling vines. Use a leaf tip if you have one, or cut a small opening in a zip-top bag. Let the icing set before covering or stacking the treats.

How to Keep the Pumpkins from Falling Apart

If the mixture sticks to your hands, reapply a very thin coating of spray or butter. If a pumpkin cracks, press a pinch of still-warm mixture over the gap. Shaping while the cereal is pliable and flattening each base slightly will help the pumpkins stand without compressing them into dense balls.

Serving and Storage

Serve at room temperature, with a mix of small and medium pumpkins on a platter. For a Halloween dessert spread, pair them with Peanut Butter Spider Cookies.

Once the icing has set, store the treats in an airtight container at room temperature for up to 5 days. Place parchment between layers to protect the leaves, vines, and stems. The treats can be made a day ahead; refrigeration is unnecessary except for brief firming if needed. Do not reheat the finished pumpkins.

Nutrition

Approximate nutrition per pumpkin, based on 12 treats: 210 calories, 1g protein, 6g fat, and 39g carbohydrates. Approximate values per 100g: 390 calories, 2g protein, 11g fat, and 72g carbohydrates. Values will vary with the pretzels, icing, and portion sizes used.

Pumpkin Rice Krispie Treats

Classic marshmallow crispy rice treats shaped into pumpkins with pretzel stems and green icing leaves.
Course: Dessert
Cuisine: American
Prep: 20 min
Cook: 5 min
Total: 45 min
Servings: 12 Calories: 210 kcal

Equipment

  • Baking sheet
  • Parchment paper
  • Large saucepan
  • Spoon or scoop
  • Piping bag or zip-top bag

Ingredients

For the Pumpkin Treats

  • 4 tablespoons unsalted butter (55 g)
  • 10 ounces mini marshmallows (285 g)
  • 8 to 12 drops orange gel food coloring, or as needed
  • 6 cups crispy rice cereal (150 g)
  • 6 to 8 pretzel rods or thick pretzel sticks, broken into 12 1-inch pieces

For Decorating

  • About 1/2 cup green decorator icing or firm vanilla frosting, tinted green
  • Nonstick cooking spray or extra butter, for hands and tools

Instructions

  1. Line a baking sheet or work surface with parchment paper and lightly grease it. Grease your hands and a scoop or spoon, break the pretzels into stem pieces, and place the green icing in a piping bag or small zip-top bag.
  2. Melt the butter in a large saucepan over low heat.
  3. Add the marshmallows and stir frequently for 3 to 5 minutes, until melted and glossy. Do not let them brown.
  4. Stir in the orange gel food coloring a little at a time until the marshmallow mixture is evenly colored.
  5. Remove the saucepan from the heat and gently fold in the crispy rice cereal for 1 to 2 minutes, until no dry pockets remain.
  6. Let the mixture cool for 2 to 4 minutes, until it is comfortable to handle but still pliable.
  7. Divide the mixture into 12 portions and, using lightly greased hands, shape each portion into a slightly uneven round pumpkin. Flatten the bottom slightly so it stands upright.
  8. Press one pretzel piece upright into the top of each pumpkin, leaving about 1/2 inch exposed. Gently press the cereal around the stem to secure it.
  9. Let the pumpkins stand uncovered at room temperature for 15 to 20 minutes, until firm.
  10. Pipe one or two green leaves beside each stem and add small curling vines. Let the icing set before covering or stacking the treats.

Tips

  • Use thick decorator icing or firm frosting so the leaves and vines hold their shape.
  • Apply only a thin coating of butter or cooking spray to your hands and tools to prevent sticking.
  • Shape the treats while the mixture is pliable, but not hot enough to handle comfortably.
  • Avoid packing the cereal mixture too tightly or the treats can become hard.
  • If a pumpkin cracks, press a small pinch of still-warm mixture over the gap.
  • Flatten each pumpkin base slightly to help it stand upright.

Variations

  • Regular Marshmallow Version: Use regular marshmallows instead of mini marshmallows, keeping the total weight at 10 ounces.

Notes

Store in an airtight container at room temperature for up to 5 days, placing parchment between layers to protect the decorations. The treats can be made 1 day ahead; refrigeration is generally unnecessary. Do not reheat finished pumpkins.

Nutrition

Calories: 210 kcal | Protein: 1 g | Fat: 6 g | Carbohydrates: 39 g

Peanut Butter Spider Cookies

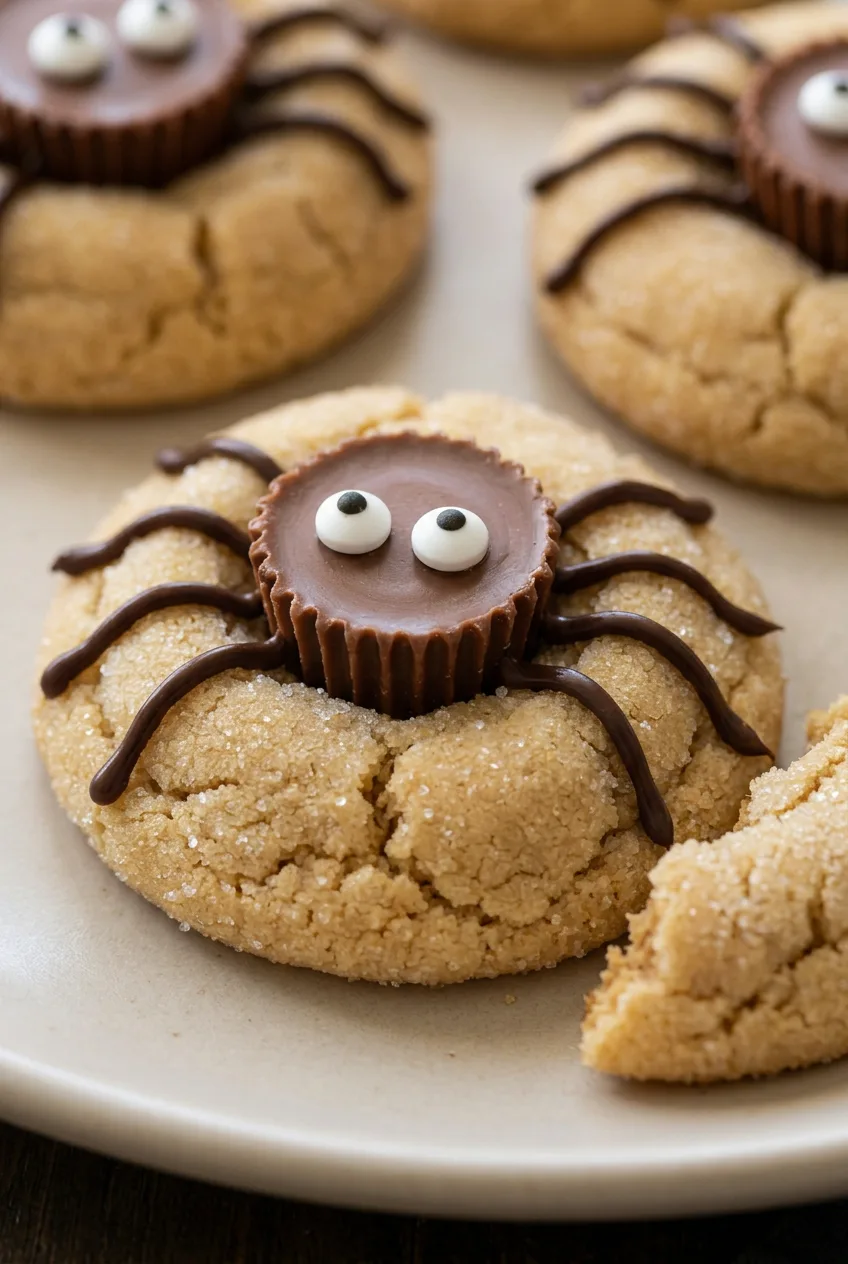
Soft peanut butter cookies become spiders with a miniature peanut butter cup for each body, two candy eyes, and eight piped chocolate legs. The cookies are lightly sugared, with crackled edges and centers that stay soft after cooling.

Unwrap and chill the peanut butter cups before baking so they’re ready to press into the warm cookies. Leave the cookies on the baking sheet until the bases stabilize, then wait until they’re completely cool before piping the legs.

Ingredients for Peanut Butter Spider Cookies

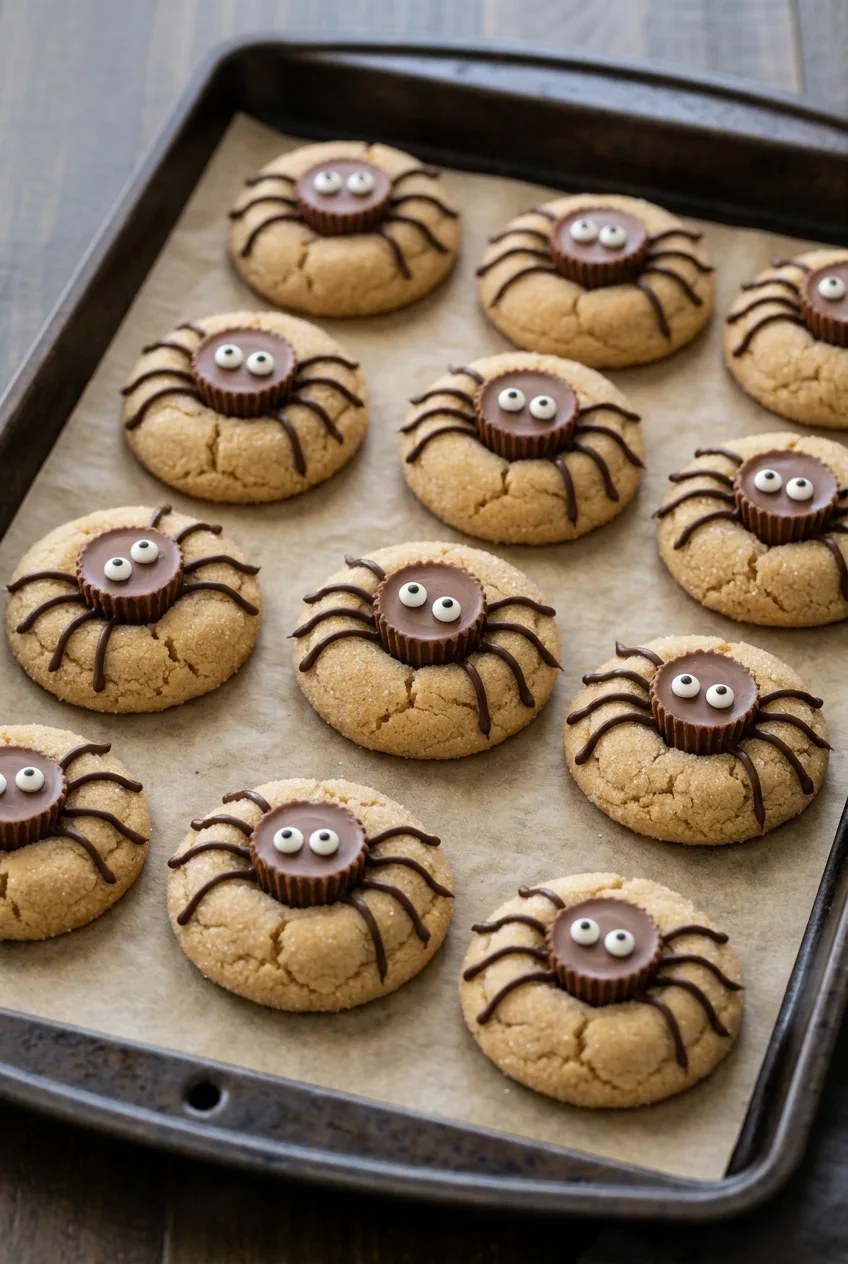
Close view of a peanut butter spider cookie showing its crackled sugared surface, candy cup body, eyes, and chocolate legs.
  • 1 3/4 cups all-purpose flour (220g), spooned and leveled
  • 1 teaspoon baking soda
  • 1/2 teaspoon fine salt
  • 1/2 cup unsalted butter (115g), softened
  • 3/4 cup conventional creamy peanut butter (190g)
  • 1/2 cup granulated sugar (100g), plus 1/4 cup (50g) for rolling
  • 1/2 cup packed light brown sugar (105g)
  • 1 large egg
  • 1 teaspoon vanilla extract
  • 24 miniature peanut butter cups, unwrapped and chilled
  • 1/2 cup semisweet chocolate chips (85g)
  • 48 small candy eyes

Use a conventional no-stir creamy peanut butter. Natural peanut butter with separated oil can change the dough’s consistency and is not a dependable direct substitute.

How to Make Peanut Butter Spider Cookies

Overhead platter of peanut butter spider cookies with candy eyes and eight thin chocolate legs on each cookie.
  1. Chill the candy and prepare the pans: Unwrap the peanut butter cups and chill or freeze them on a small tray. Preheat the oven to 350°F (175°C). Line two large, light-colored baking sheets with parchment paper.
  2. Mix the dough: Whisk the flour, baking soda, and salt in a medium bowl. In a large bowl, beat the butter, peanut butter, 1/2 cup granulated sugar, and brown sugar until creamy. Beat in the egg and vanilla. Add the flour mixture and mix just until the flour disappears.
  3. Shape and coat: Scoop about 1 1/2 tablespoons of dough per cookie and roll into balls. Roll in the remaining 1/4 cup granulated sugar, then place about 2 inches apart on the baking sheets.
  4. Bake: Bake one sheet at a time for 9 to 11 minutes, starting to check at 9 minutes. The edges should be lightly golden and beginning to crack; the centers should look set but still soft. Do not wait for the cookies to become firm or deeply browned.
  5. Add the spider bodies: Immediately press one chilled peanut butter cup upside down into the center of each warm cookie, just firmly enough to seat it. Leave the cookies on the baking sheet for 15 minutes so the bases stabilize around the cups. Transfer carefully to a wire rack and cool completely.
  6. Pipe the legs and attach the eyes: Melt the chocolate chips in a microwave-safe bowl in 15-second intervals, stirring between each, until smooth. Transfer to a small piping bag or zip-top bag and snip a tiny opening. Pipe four thin, gently bent legs on each side of each cup. Dab two spots of fresh melted chocolate near the front of each cup and immediately attach the candy eyes.
  7. Let the chocolate set: Leave the cookies at room temperature for 20 to 30 minutes, or refrigerate briefly, until the decorations are firm. Serve in a single layer so the legs remain intact.

How to Keep the Chocolate Legs Neat

Wait until both the cookies and candy cups are cool before piping; warmth can make the chocolate run. A tiny opening gives you more control over the legs. If the chocolate thickens in the bag, warm the bag briefly in warm water while keeping the opening dry. If needed, stir up to 1/2 teaspoon neutral oil into the melted chocolate to loosen it. Let the legs set fully before moving or stacking the cookies.

Storage and Make-Ahead

Store fully set cookies in an airtight container at room temperature for up to 3 days, with parchment between layers. They can be refrigerated for up to 1 week; let them sit briefly at room temperature before serving for a softer texture. Do not reheat decorated cookies, as the chocolate can soften.

For a sturdy make-ahead option, freeze uncoated dough balls until solid, then store airtight for up to 3 months. Thaw briefly if needed to roll them in sugar, and bake using the visual doneness cues above. Fully decorated cookies can also be frozen in a rigid container for up to 3 months, but their chocolate legs may break during handling.

Nutrition

Yield: About 24 cookies. Approximate nutrition per cookie: 230 calories, 4g protein, 12g fat, and 28g carbohydrates. Approximate nutrition per 100g: 490 calories, 9g protein, 26g fat, and 59g carbohydrates. Values vary with the candy and finished cookie size.

Peanut Butter Spider Cookies

Soft peanut butter cookies topped with miniature peanut butter cup spider bodies, candy eyes, and piped chocolate legs.
Course: Dessert
Cuisine: American
Prep: 30 min
Cook: 20 min
Total: 90 min
Servings: 24 Calories: 230 kcal

Equipment

  • 2 large baking sheets
  • parchment paper
  • mixing bowls
  • whisk
  • electric mixer
  • cookie scoop
  • wire rack
  • microwave-safe bowl
  • piping bag or zip-top bag

Ingredients

For the Peanut Butter Cookies

  • 1 3/4 cups all-purpose flour (220g), spooned and leveled
  • 1 teaspoon baking soda
  • 1/2 teaspoon fine salt
  • 1/2 cup unsalted butter (115g), softened
  • 3/4 cup conventional creamy peanut butter (190g)
  • 1/2 cup granulated sugar (100g)
  • 1/2 cup packed light brown sugar (105g)
  • 1 large egg
  • 1 teaspoon vanilla extract
  • 1/4 cup granulated sugar (50g), for rolling

For the Spider Decorations

  • 24 miniature peanut butter cups, unwrapped and chilled
  • 1/2 cup semisweet chocolate chips (85g)
  • 48 small candy eyes

Instructions

  1. Unwrap the miniature peanut butter cups and chill or freeze them on a small tray.
  2. Preheat the oven to 350°F (175°C) and line two large light-colored baking sheets with parchment paper.
  3. Whisk the flour, baking soda, and salt in a medium bowl.
  4. Beat the butter, peanut butter, 1/2 cup granulated sugar, and brown sugar in a large bowl until creamy.
  5. Beat in the egg and vanilla extract.
  6. Add the flour mixture and mix just until the flour disappears.
  7. Scoop about 1 1/2 tablespoons of dough per cookie and roll into balls.
  8. Roll each dough ball in the remaining 1/4 cup granulated sugar and place about 2 inches apart on the prepared baking sheets.
  9. Bake one sheet at a time for 9 to 11 minutes, until the edges are lightly golden and beginning to crack while the centers remain soft.
  10. Immediately press one chilled peanut butter cup upside down into the center of each warm cookie.
  11. Leave the cookies on the baking sheet for 15 minutes, then carefully transfer them to a wire rack and cool completely.
  12. Melt the chocolate chips in a microwave-safe bowl in 15-second intervals, stirring between intervals, until smooth.
  13. Transfer the melted chocolate to a small piping bag or zip-top bag and snip a tiny opening.
  14. Pipe four thin, gently bent chocolate legs on each side of every peanut butter cup.
  15. Use fresh melted chocolate to attach two candy eyes near the front of each peanut butter cup.
  16. Let the chocolate decorations set at room temperature for 20 to 30 minutes, or refrigerate briefly until firm.

Tips

  • Use conventional no-stir creamy peanut butter; natural peanut butter can make the dough too inconsistent.
  • Chill the peanut butter cups before baking so they hold their shape when pressed into the cookies.
  • Remove the cookies while their centers are still soft; they will finish setting as they cool.
  • Wait until the cookies and candy cups are completely cool before piping the chocolate legs.
  • Use a very small piping-bag opening for cleaner, more controlled legs.
  • If the melted chocolate thickens, briefly warm the bag in warm water while keeping the opening dry.

Notes

Store fully set cookies in an airtight container at room temperature for up to 3 days, with parchment between layers. Refrigerate for up to 1 week and let sit briefly before serving. Do not reheat decorated cookies. Uncoated dough balls may be frozen for up to 3 months.

Nutrition

Calories: 230 kcal | Protein: 4 g | Fat: 12 g | Carbohydrates: 28 g

Bourbon Apple Cider Cake

This apple cider cake bakes up soft and warmly spiced, with concentrated apple flavor in the layers and a tangy bourbon cream cheese frosting on top. It is a good fall cake, but the method is simple enough for any time you want an easy layer cake.

Reducing the cider before mixing the batter gives the cake more apple flavor without making it wet or heavy. The apple puree keeps the crumb moist, and the batter comes together with basic mixing steps and two round pans.

If you want another apple cider dessert, you may also like this Apple Cider Cheesecake.

Ingredients for Bourbon Apple Cider Cake

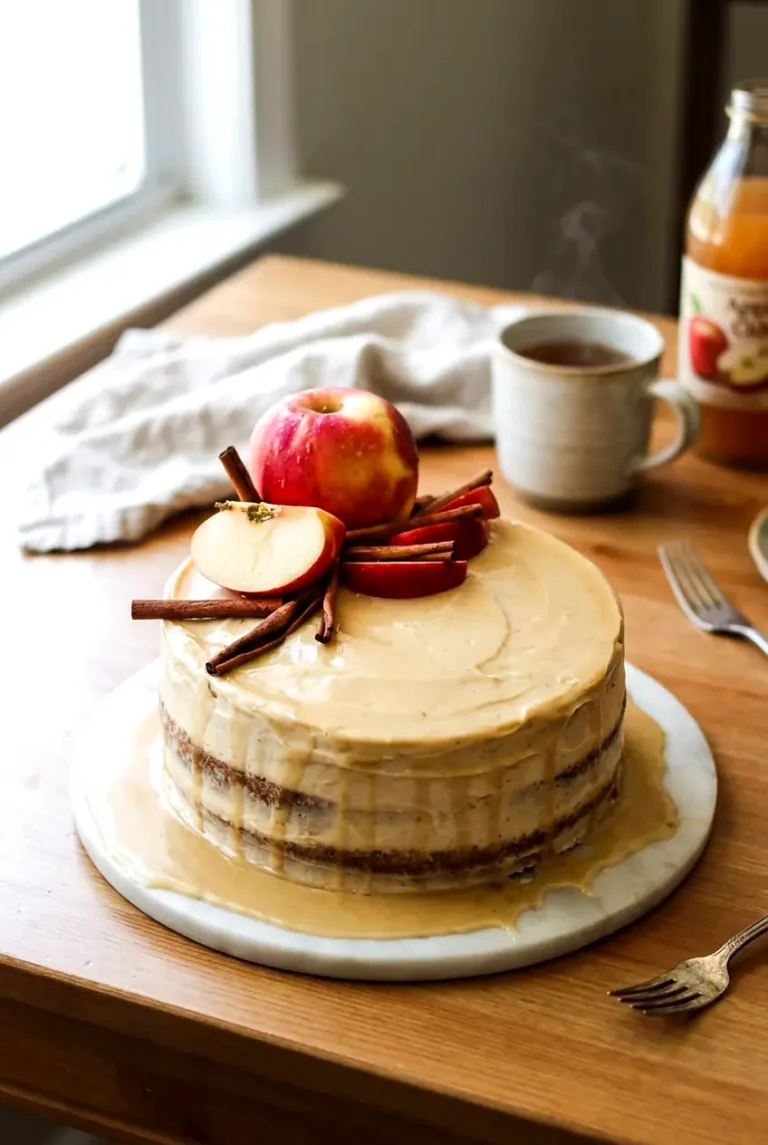
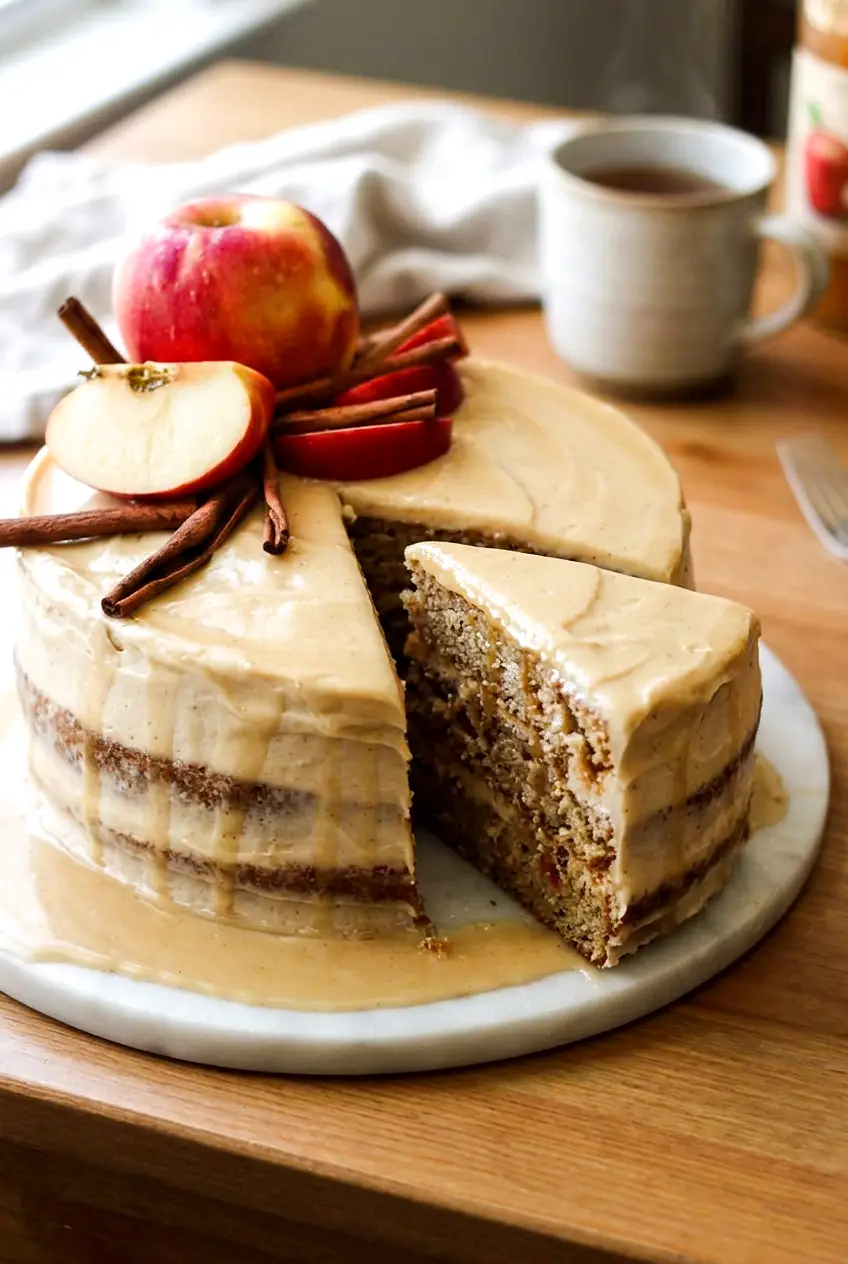
A slice of bourbon apple cider cake on a marble plate with glossy honey glaze
  • 2 cups apple cider (480g), for reducing
  • 1 cup peeled and pureed apples (240g), preferably Honeycrisp; Fuji or Gala also work
  • 2 1/2 cups all-purpose flour (300g)
  • 2 teaspoons baking powder
  • 1/2 teaspoon baking soda
  • 1/2 teaspoon salt
  • 1 to 2 teaspoons ground cinnamon
  • 1/4 teaspoon ground cloves
  • 1/4 teaspoon ground nutmeg
  • 1/4 teaspoon ground allspice
  • 1 cup unsalted butter (225g), softened
  • 1 1/2 cups granulated sugar (300g)
  • 3 large eggs, room temperature
  • 2 teaspoons vanilla extract
  • 1/2 cup milk (120g), room temperature

For the bourbon cream cheese frosting:

  • 8 ounces full-fat cream cheese (225g), softened
  • 1/2 cup unsalted butter (115g), softened
  • 3 to 4 cups powdered sugar (360g to 480g)
  • 1 to 2 tablespoons bourbon, added gradually

Optional for serving: caramel sauce, honey, dulce de leche, extra cinnamon, or thin apple slices

How to Make Bourbon Apple Cider Cake

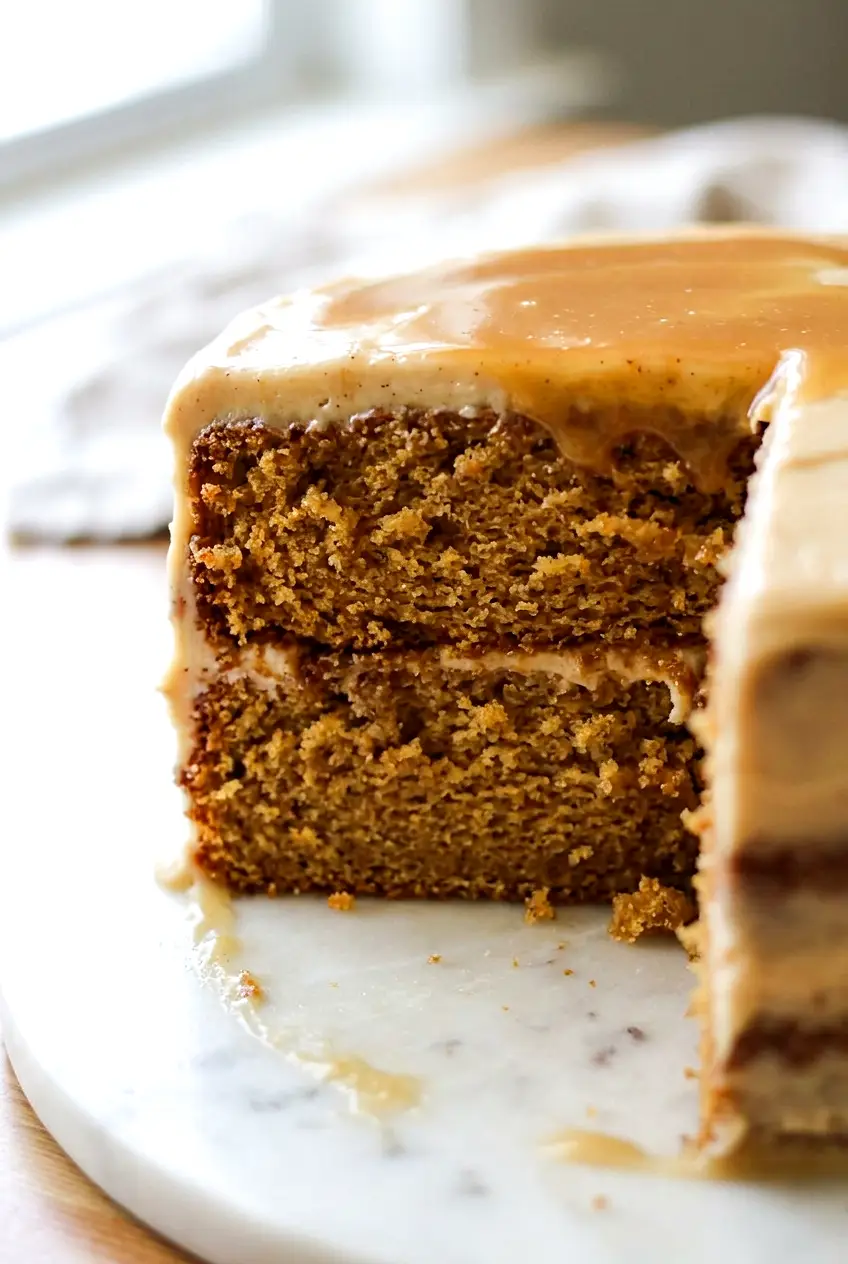
Close-up of bourbon apple cider cake showing the soft crumb and glaze on top
  1. Reduce the cider: Pour the apple cider into a small saucepan and bring it to a simmer over medium heat. Cook for 10 to 15 minutes, until reduced and slightly syrupy. Set aside to cool completely so it does not warm the batter.
  2. Prep the oven and pans: Heat the oven to 350°F. Grease two 8-inch or 9-inch round cake pans, line the bottoms with parchment, and lightly flour the pans if you want extra insurance against sticking.
  3. Whisk the dry ingredients: In a medium bowl, whisk together the flour, baking powder, baking soda, salt, cinnamon, cloves, nutmeg, and allspice until evenly combined.
  4. Cream the butter and sugar: In a large bowl, beat the softened butter and granulated sugar with a hand mixer or stand mixer until lighter in color and fluffy, about 3 to 5 minutes. Add the eggs one at a time, beating well after each addition, then mix in the vanilla.
  5. Add the apple puree and cider: Beat in the apple puree and the cooled reduced cider until combined. If the mixture looks slightly uneven, that is fine.
  6. Finish the batter: Add the dry ingredients in batches, alternating with the milk. Mix just until no dry flour streaks remain. The batter should be thick but spreadable.
  7. Fill the pans: Divide the batter evenly between the prepared pans, filling them about two-thirds full. Tap the pans gently on the counter once or twice to release any large air pockets.
  8. Bake: Bake for 25 to 35 minutes, until the tops are lightly golden, the centers spring back when touched, and a toothpick inserted in the middle comes out clean or with a few moist crumbs. If your oven bakes unevenly, rotate the pans once near the end.
  9. Cool: Let the cakes cool in the pans for about 10 minutes, then turn them out onto a rack and cool completely before frosting.
  10. Make the frosting: Beat the cream cheese and butter until smooth and creamy. Add 3 cups of powdered sugar and mix well, then add the bourbon a little at a time. Add more powdered sugar as needed until the frosting is spreadable and holds soft peaks. If it gets too loose, chill it briefly before using.
  11. Assemble the cake: Place one layer on a plate or cake stand and spread frosting over the top. Add the second layer, then frost the top and sides as lightly or fully as you like.

Why This Cake Stays Moist Instead of Heavy

Reduced cider gives the batter stronger apple flavor without too much extra liquid, and the apple puree adds moisture to the crumb. Room-temperature butter, eggs, and milk help the batter mix more evenly, and stopping as soon as the flour is incorporated helps keep the layers tender.

Cupcake Option

You can bake this batter as cupcakes instead of cake layers. Line muffin tins, fill each cup about two-thirds full, and start checking earlier since cupcakes bake faster than full cake layers. Frost only after they are completely cool.

Serving Ideas

Serve the cake as is, or spoon a little caramel sauce, honey, or dulce de leche over each slice. A light dusting of cinnamon or a few thin apple slices also work well.

For another seasonal sweet, try these Pumpkin Pie Cake Pops.

For a simpler apple dessert, check out these Apple Pie Bars with Oat Streusel and Caramel.

How to Store Bourbon Apple Cider Cake

Because of the cream cheese frosting, store the cake covered in the refrigerator. A cake dome or airtight container works well. Let slices sit at cool room temperature for a short time before serving so the frosting and crumb soften slightly.

You can also bake the cake layers a day ahead. Cool them completely, then frost the cake later. This cake is best served cool or at room temperature rather than warmed.

Nutrition

Nutrition is approximate and will vary based on ingredient brands, exact amounts, frosting quantity used, and serving size.

  • Serving size: 1 slice, based on 12 slices
  • Calories: about 490
  • Protein: 5g
  • Fat: 24g
  • Carbohydrates: 65g
  • Per 100g: about 340 calories, 4g protein, 17g fat, 46g carbohydrates

Bourbon Apple Cider Cake

A softly spiced layer cake with concentrated apple flavor from reduced cider and apple puree, finished with a tangy bourbon cream cheese frosting.
Course: Dessert
Cuisine: American
Prep: 40 min
Cook: 30 min
Total: 150 min
Servings: 12 Calories: about 490

Equipment

  • saucepan
  • 8- or 9-inch round cake pans
  • parchment paper
  • hand mixer or stand mixer
  • mixing bowls
  • cooling rack
  • measuring cups and spoons
  • spatula
  • whisk

Ingredients

Cake

  • 2 cups apple cider (480g), for reducing
  • 1 cup peeled and pureed apples (240g)
  • 2 1/2 cups all-purpose flour (300g)
  • 2 teaspoons baking powder
  • 1/2 teaspoon baking soda
  • 1/2 teaspoon salt
  • 1 to 2 teaspoons ground cinnamon
  • 1/4 teaspoon ground cloves
  • 1/4 teaspoon ground nutmeg
  • 1/4 teaspoon ground allspice
  • 1 cup unsalted butter (225g), softened
  • 1 1/2 cups granulated sugar (300g)
  • 3 large eggs, room temperature
  • 2 teaspoons vanilla extract
  • 1/2 cup milk (120g), room temperature

Bourbon Cream Cheese Frosting

  • 8 ounces full-fat cream cheese (225g), softened
  • 1/2 cup unsalted butter (115g), softened
  • 3 to 4 cups powdered sugar (360g to 480g)
  • 1 to 2 tablespoons bourbon, added gradually

Optional for serving

  • caramel sauce (optional)
  • honey or dulce de leche (optional)
  • extra cinnamon (optional)
  • thin apple slices (optional)

Instructions

  1. Pour the apple cider into a saucepan and simmer over medium heat for 10 to 15 minutes until reduced and slightly syrupy; set aside to cool completely.
  2. Preheat the oven to 350°F (177°C).
  3. Grease two 8-inch or 9-inch round cake pans, line the bottoms with parchment, and lightly flour the pans if desired.
  4. Whisk together the flour, baking powder, baking soda, salt, cinnamon, cloves, nutmeg, and allspice in a medium bowl until combined.
  5. Beat the softened butter and granulated sugar with a mixer until light and fluffy, about 3 to 5 minutes.
  6. Add the eggs one at a time, beating well after each, then mix in the vanilla.
  7. Beat in the apple puree and the cooled reduced cider until combined.
  8. Add the dry ingredients in batches, alternating with the milk, and mix just until no dry flour streaks remain; the batter should be thick but spreadable.
  9. Divide the batter evenly between the prepared pans, filling each about two-thirds full, and tap the pans on the counter to release any large air pockets.
  10. Bake for 25 to 35 minutes, until tops are lightly golden, centers spring back when touched, and a toothpick inserted in the center comes out clean or with a few moist crumbs; rotate pans once near the end if needed.
  11. Let the cakes cool in the pans for about 10 minutes, then turn them out onto a cooling rack and cool completely before frosting.
  12. Beat the cream cheese and butter until smooth and creamy, add 3 cups powdered sugar and mix, then add bourbon a little at a time; add more powdered sugar as needed until the frosting is spreadable and holds soft peaks, and chill briefly if it becomes too loose.
  13. Place one cake layer on a plate or cake stand and spread frosting over the top, add the second layer, then frost the top and sides as desired.

Tips

  • Reduce the cider to concentrate apple flavor without adding extra liquid to the batter.
  • Use room-temperature butter, eggs, and milk for even mixing and a tender crumb.
  • Stop mixing as soon as the flour is incorporated to avoid a dense cake.
  • Tap filled pans gently on the counter to release large air pockets before baking.
  • If frosting becomes too loose, chill briefly to firm it before spreading.

Variations

  • Cupcake option: Bake batter as cupcakes in lined muffin tins, filling each cup about two-thirds full and bake for a shorter time; frost after they are completely cool.
  • Topped slices: Serve slices with caramel sauce, honey, or dulce de leche and add thin apple slices or a dusting of cinnamon.

Notes

Because of the cream cheese frosting, store the cake covered in the refrigerator; let slices sit at cool room temperature briefly before serving. Cake layers can be baked a day ahead and frosted later.

Nutrition

Calories: about 490 | Protein: 5 g | Fat: 24 g | Carbohydrates: 65 g

Pumpkin Pie Cake Pops

Pumpkin pie cake pops are soft, creamy, and easy to dress up for a fall dessert tray. They have the flavor of pumpkin pie in a bite-size form, with a white candy shell and a little pumpkin pie spice on top.

The method is simple, but texture matters. Start with well-chilled pie, including the crust, and add graham cracker crumbs only until the mixture holds together. You can make them on sticks like classic cake pops or skip the sticks and serve them as truffle-style bites.

Ingredients for Pumpkin Pie Cake Pops

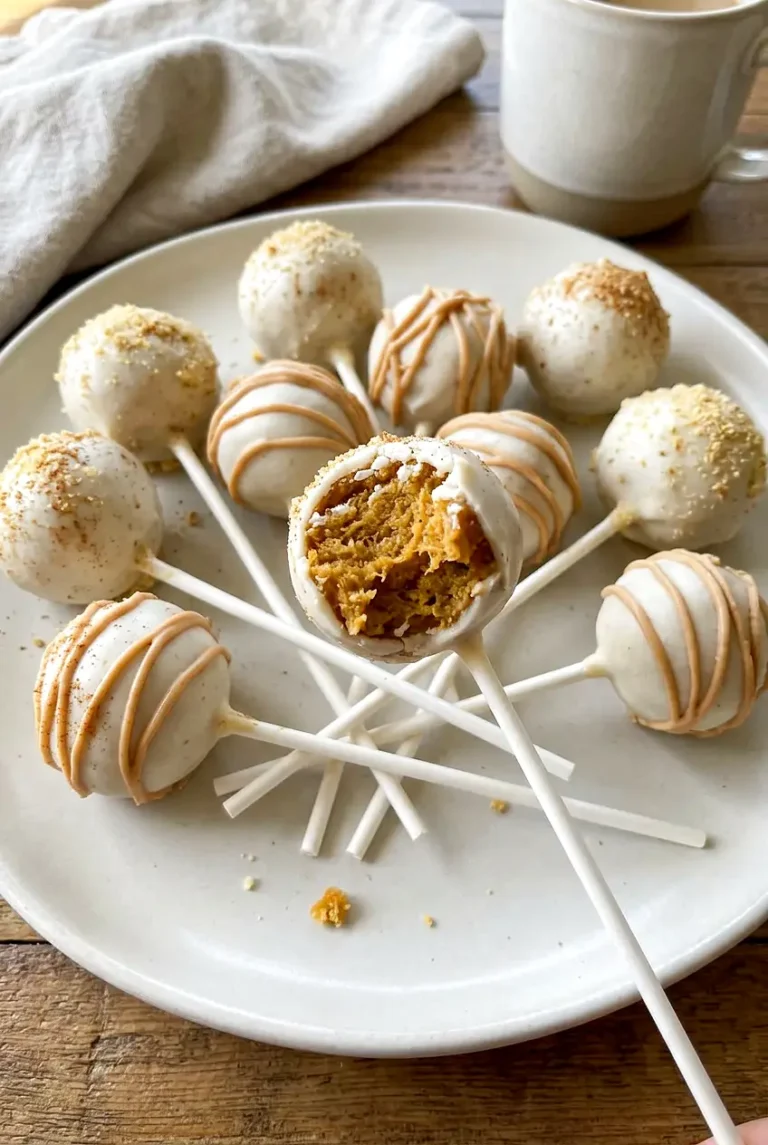
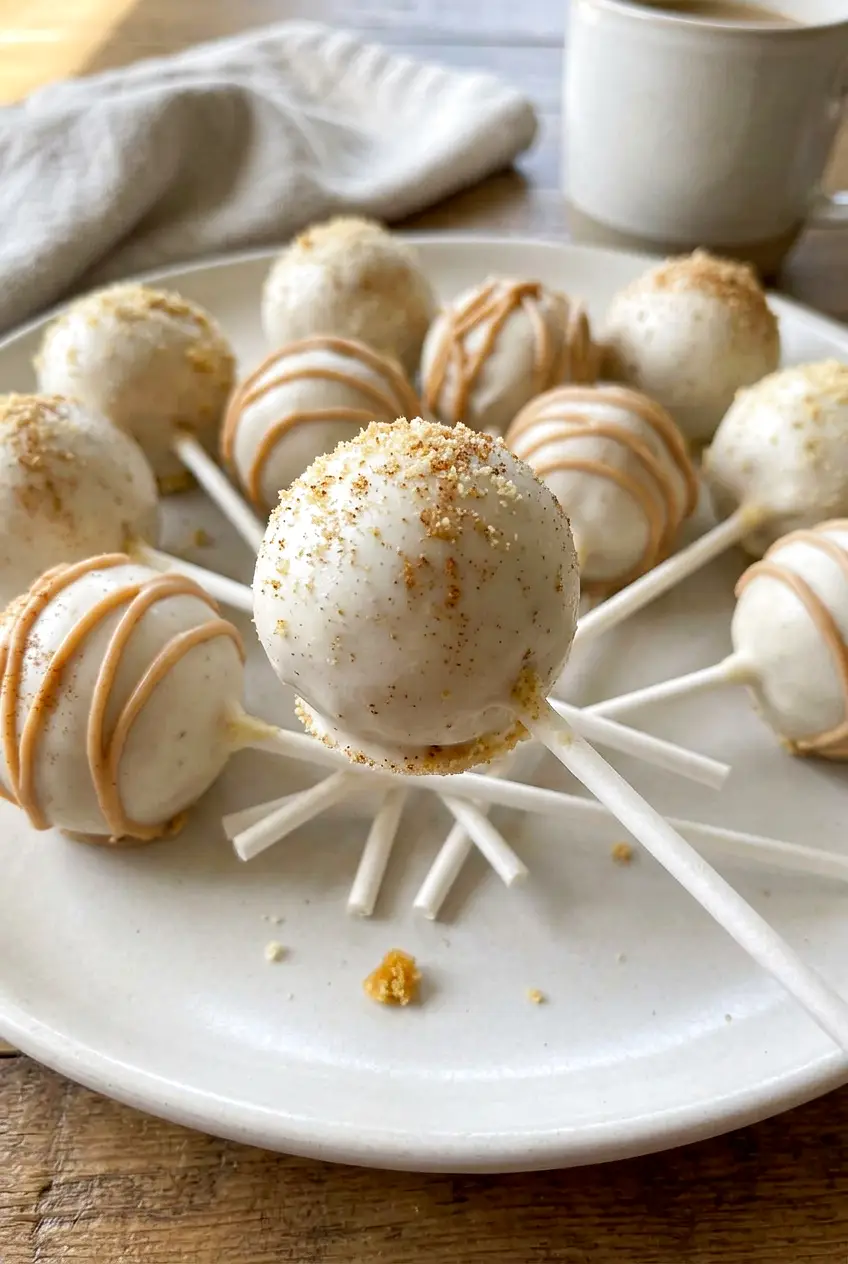
Pumpkin pie cake pops arranged on parchment with a few sprinkled toppings visible
  • 2 cups chopped leftover pumpkin pie, chilled, including crust (480g)
  • 1 to 1 1/2 cups graham cracker crumbs (120g to 180g), plus extra for topping if desired
  • 1/2 cup vanilla frosting (120g)
  • 12 to 16 ounces white candy coating or Almond Bark (340g to 455g)
  • 1/2 to 1 teaspoon pumpkin pie spice
  • 18 to 24 lollipop sticks, optional
  • 1/4 to 1/2 cup sprinkles or other decorative toppings

Start with the smaller amount of graham cracker crumbs and add more only if the mixture still feels too soft. Different pumpkin pies can be looser or firmer, so the exact amount may vary.

White candy melts also work here. For the easiest version, leave out the sticks and make truffle-style bites.

How to Make Pumpkin Pie Cake Pops

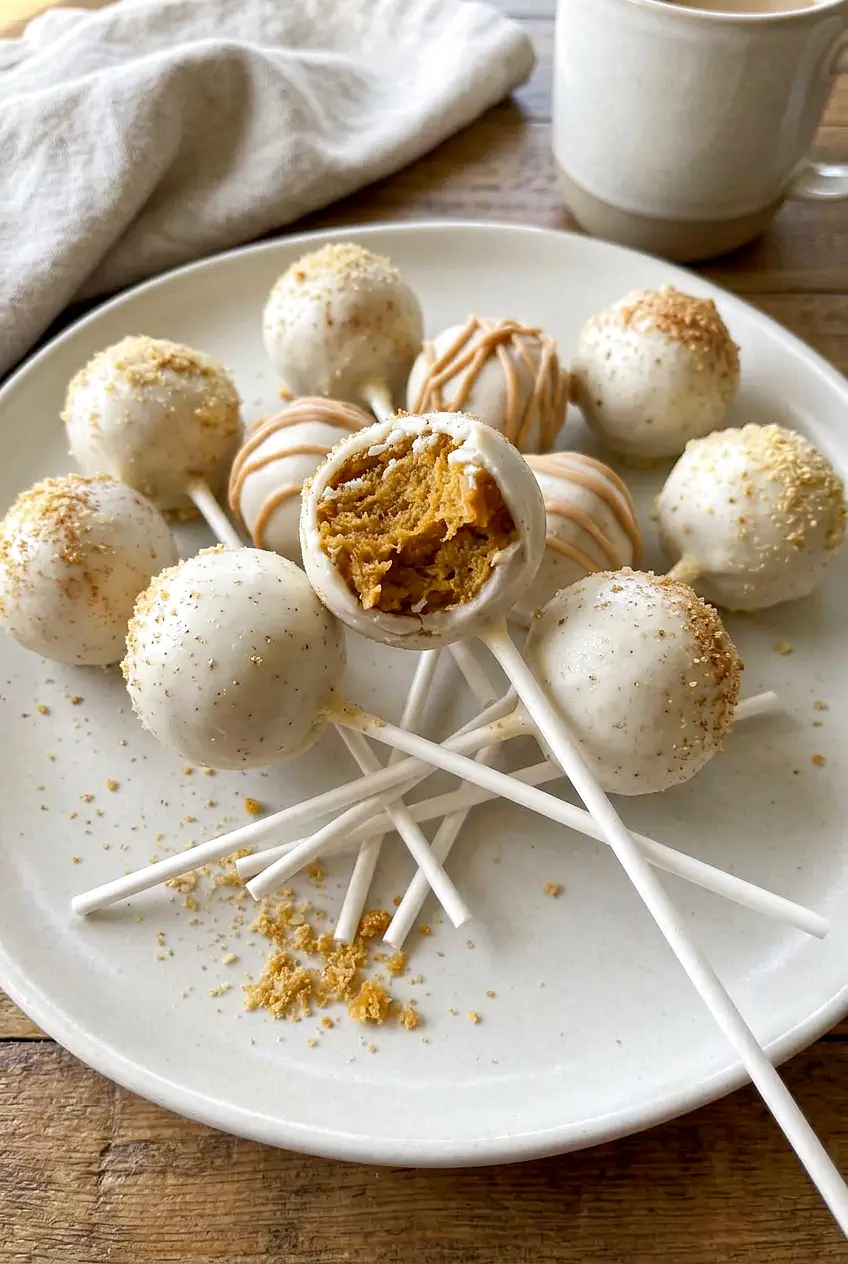
Close-up of pumpkin pie cake pops showing the creamy filling under the white shell
  1. Chop the pie: Break the chilled pumpkin pie into small pieces, including the crust, and place it in a medium bowl. Cold pie is much easier to mix and shape than room-temperature pie.
  2. Mix the filling: Add 1 cup graham cracker crumbs and the vanilla frosting. Stir with a fork or spoon until the mixture comes together. Squeeze a little in your hand to check the texture. It should hold its shape and feel moist, but not sticky or wet. If it is too soft, add more graham cracker crumbs a little at a time. If it seems dry and crumbly, add 1 to 2 tablespoons more frosting only as needed.
  3. Shape the balls: Line a baking sheet or tray with parchment paper. Roll the mixture into 18 to 24 balls, depending on size. A small cookie scoop helps keep them even. Place them on the lined pan with a little space between them.
  4. Chill until firm: Refrigerate for 20 to 30 minutes, or longer if needed, until the balls feel firm and hold their shape well. If they still feel soft, chill longer before dipping.
  5. Melt the coating: Place the white candy coating in a microwave-safe bowl or melt it in a double boiler. Heat gently in short bursts, stirring often, or over low heat until smooth and glossy. Stir in the pumpkin pie spice. The coating should be fluid enough for dipping, but not hot.
  6. Insert the sticks: If making cake pops, dip the tip of each lollipop stick into the melted coating, then insert it about halfway into a chilled ball. Work in small batches so the rest stay cold.
  7. Dip and decorate: Dip each pop or truffle into the melted coating, let the excess drip off, then return it to the parchment-lined pan. Add sprinkles, crushed graham crackers, or chopped nuts right away while the coating is still tacky. For a drizzle, let the first coating begin to set, then drizzle with a little extra melted coating.
  8. Let them set: Leave the pops undisturbed until the shell is firm and dry to the touch, about 15 to 30 minutes at room temperature or a little faster in the refrigerator. They should lift cleanly from the parchment once set.

How to Keep Them Firm Enough to Roll

If the mixture feels sticky or slumps after rolling, it needs either more graham cracker crumbs or more chill time. Start with fully chilled pie and add the frosting carefully, since too much frosting makes the filling softer and harder to coat cleanly.

If the mixture cracks and will not hold together, mix in a small spoonful of frosting and try again.

Why Cake Pops Can Fall Apart While Dipping

  • The balls are too soft: Chill them longer before dipping.
  • The mixture is too wet: Add more graham cracker crumbs a little at a time.
  • The stick slips out: Dip the end of the stick in melted coating before inserting it.
  • The coating is too hot: Let it cool slightly so it does not soften the filling.
  • The coating is too thick: Warm it gently and stir until smooth.

Variation

Truffle-Style Pumpkin Pie Bites

Skip the sticks and shape the filling into small balls. Dip them the same way and finish with sprinkles, crushed graham crackers, chopped nuts, or a little extra melted coating on top.

Serving Ideas

Serve these on a dessert platter for a fall party, holiday table, or potluck. They pair well with coffee, tea, or hot cider.

If you want another cozy fall dessert, try Apple Cider Cheesecake with Caramel Topping.

For another easy fall dessert, you might also like Apple Pie Bars with Oat Streusel and Caramel.

For a fun party treat, these also pair well with Chocolate Covered Caramel Apple Slices.

How to Store Pumpkin Pie Cake Pops

Store the finished cake pops or truffles in an airtight container in the refrigerator. Keep them in a single layer if possible, or separate layers with parchment paper to protect the coating.

They are best within a few days. You can also shape and chill the undipped balls ahead, then coat them later the same day. These are meant to be served cold or cool, so no reheating is needed.

Nutrition

Nutrition is approximate and will vary based on ingredient brands, exact amounts used, coating amount, and serving size.

  • Serving size: 1 cake pop or truffle, based on 24 pieces
  • Calories: about 120
  • Protein: 1g
  • Fat: 5g
  • Carbohydrates: 20g
  • Per 100g: about 300 calories, 3g protein, 13g fat, 47g carbohydrates

Pumpkin Pie Cake Pops

Bite-size pumpkin pie-flavored cake pops coated in white candy with a sprinkle of pumpkin pie spice.
Course: Dessert
Cuisine: American
Prep: 25 min
Total: 60 min
Servings: 24 Calories: 120 kcal

Equipment

  • mixing bowl
  • fork or spoon
  • baking sheet
  • parchment paper
  • small cookie scoop (optional)
  • microwave-safe bowl or double boiler
  • lollipop sticks (optional)
  • refrigerator

Ingredients

For the cake pops

  • 2 cups chopped chilled pumpkin pie, including crust (480g)
  • 1 to 1 1/2 cups graham cracker crumbs (120g to 180g), plus extra for topping if desired
  • 1/2 cup vanilla frosting (120g)
  • 12 to 16 ounces white candy coating or Almond Bark (340g to 455g)
  • 1/2 to 1 teaspoon pumpkin pie spice
  • 18 to 24 lollipop sticks (optional)
  • 1/4 to 1/2 cup sprinkles or other decorative toppings

Instructions

  1. Break the chilled pumpkin pie into small pieces, including the crust, and place them in a mixing bowl.
  2. Add 1 cup graham cracker crumbs and the vanilla frosting to the bowl and stir until the mixture comes together.
  3. Squeeze a small amount in your hand to test the texture; add graham cracker crumbs a little at a time if it’s too soft, or 1 to 2 tablespoons more frosting if it’s dry and crumbly.
  4. Line a baking sheet with parchment paper and use a small cookie scoop or your hands to roll the mixture into 18 to 24 balls; place them on the prepared sheet with a little space between.
  5. Refrigerate the balls for 20 to 30 minutes, or longer, until they are firm and hold their shape.
  6. Melt the white candy coating in a microwave-safe bowl in short bursts, stirring often, or melt in a double boiler; stir in the pumpkin pie spice and let the coating cool until fluid but not hot.
  7. If using sticks, dip the tip of each stick into the melted coating and insert it about halfway into a chilled ball, working in small batches so the remaining balls stay cold.
  8. Dip each pop or truffle into the melted coating, let excess drip off, and return to the parchment-lined sheet; add sprinkles, crushed graham crackers, or chopped nuts immediately while the coating is tacky.
  9. If desired, let the first coating begin to set and then drizzle with a little extra melted coating for decoration.
  10. Let the pops set undisturbed until the shell is firm and dry to the touch, about 15 to 30 minutes at room temperature or a little faster in the refrigerator.

Tips

  • Start with fully chilled pumpkin pie — cold pie is easier to mix and shape.
  • Add graham cracker crumbs gradually to avoid a dry or overly soft filling.
  • Chill the rolled balls until firm before dipping to prevent them from falling apart.
  • Dip the tip of the stick in coating before inserting to help hold the stick in place.
  • Let the coating cool slightly before dipping so it doesn’t soften the filling.

Variations

  • Truffle-Style Pumpkin Pie Bites: Skip the sticks and shape the filling into small balls, dip them the same way, and finish with sprinkles, crushed graham crackers, or chopped nuts.

Notes

Store finished pops in an airtight container in the refrigerator in a single layer or separated with parchment; best within a few days. You can shape and chill undipped balls ahead and coat them later the same day. Serve cold or cool; do not reheat.

Nutrition

Calories: 120 kcal | Protein: 1 g | Fat: 5 g | Carbohydrates: 20 g | Per100g Calories: 300 kcal | Per100g Protein: 3 g | Per100g Fat: 13 g | Per100g Carbohydrates: 47 g

Apple Cider Cheesecake

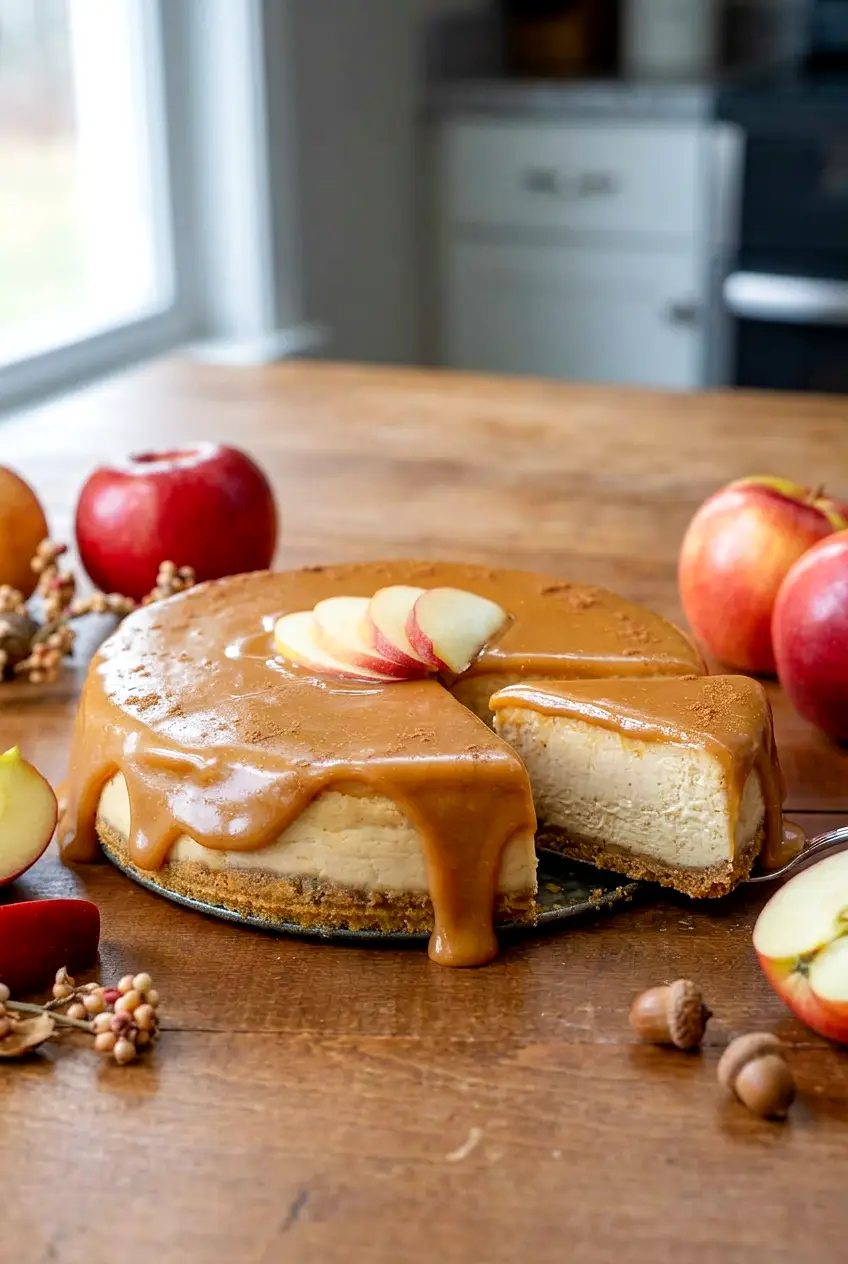
Apple cider cheesecake has a creamy baked filling, a simple graham cracker crust, and a clear apple flavor that comes from reducing the cider before it goes into the batter. It is finished with a homemade caramel topping that fits the apple flavor without making the cheesecake overly sweet.

The method is straightforward: reduce the cider, mix the filling gently, bake the cheesecake in a water bath, and chill it until fully set. For doneness, look for set edges and a center that still has a slight wobble.

Ingredients for Apple Cider Cheesecake

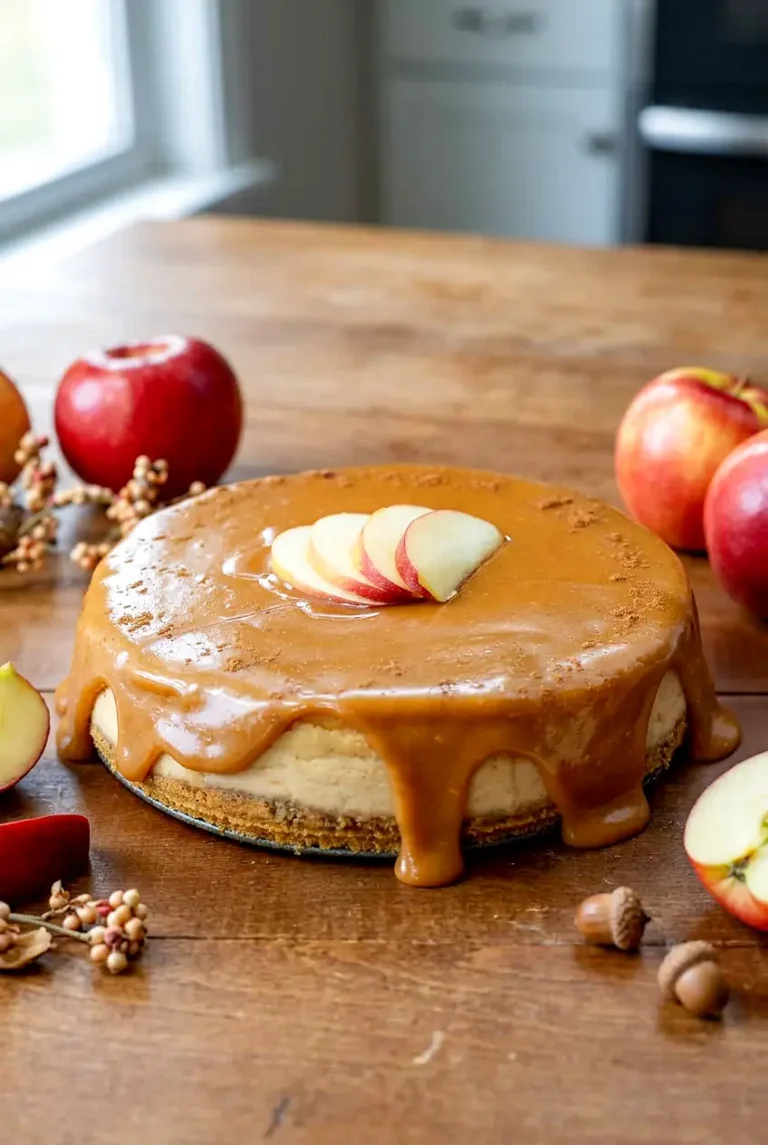
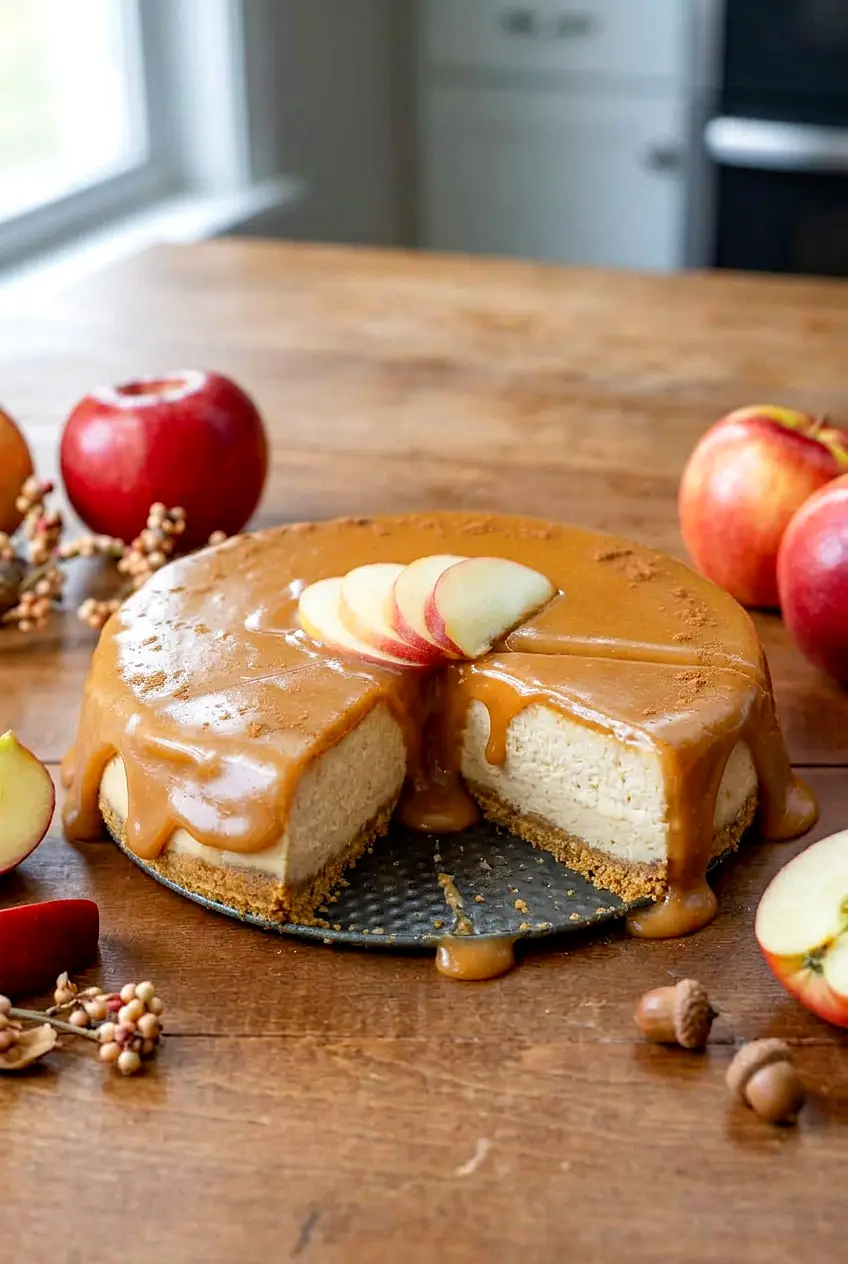
Apple cider cheesecake with one slice separated on a wooden table
  • For the crust:
  • 1 1/2 cups graham cracker crumbs (150g)
  • 6 tablespoons melted butter (85g)
  • 1/4 cup granulated sugar (50g)
  • Pinch of salt
  • For the filling:
  • 2 cups apple cider, reduced to 1 cup
  • 24 ounces full-fat block cream cheese, softened (675g)
  • 1 cup granulated sugar (200g)
  • 1 cup sour cream (240g)
  • 3 large eggs
  • 1 teaspoon ground cinnamon
  • 1 teaspoon vanilla extract
  • 1/4 teaspoon salt
  • For the apple cider caramel topping:
  • 1 cup granulated sugar (200g)
  • 4 tablespoons butter (55g)
  • 1/2 cup heavy cream (120g)
  • Pinch of salt

Use block cream cheese here, not whipped or tub-style cream cheese. Let the reduced cider cool completely before adding it to the filling so the batter stays smooth and thick.

How to Make Apple Cider Cheesecake

Slice of apple cider cheesecake showing creamy filling and caramel topping
  1. Reduce the cider: Pour the apple cider into a small saucepan and simmer over medium heat for 15 to 25 minutes, until it reduces from 2 cups to 1 cup and looks slightly syrupy. Set aside and cool completely.
  2. Preheat the oven and prepare the pan: Heat the oven to 325°F. Wrap the outside of a 9-inch springform pan well with heavy-duty foil to help keep water out. Lightly grease the inside if you like.
  3. Make the crust: Stir together the graham cracker crumbs, melted butter, sugar, and salt until the crumbs are evenly coated and hold together when pressed. Press the mixture firmly into the bottom of the pan and slightly up the sides.
  4. Mix the filling: Beat the softened cream cheese and sugar until smooth. Mix in the sour cream. Add the eggs, reduced cider, cinnamon, vanilla, and salt, then mix just until smooth and combined. Stop once the lumps are gone so you do not beat in too much air.
  5. Fill the pan and set up the water bath: Pour the filling over the crust and smooth the top. Place the foil-wrapped springform pan inside a large roasting pan. Set the roasting pan in the oven, then carefully pour hot water into the outer pan until it comes partway up the sides of the springform pan.
  6. Bake the cheesecake: Bake for 55 to 70 minutes, checking near the lower end. The edges should look set, the center should still have a slight jiggle, and the top should stay fairly pale. If you want to check by temperature, the center should be about 150°F.
  7. Cool gradually: Turn off the oven and let the cheesecake cool gradually in the oven using your usual cheesecake method. Then remove it from the water bath and set it on a rack to cool to room temperature.
  8. Chill until firm: Refrigerate for at least 4 to 6 hours, or overnight, until fully set.
  9. Make the caramel: When ready to serve, cook the sugar in a saucepan over medium heat until melted and amber. Watch closely so it does not scorch. Carefully stir in the butter until melted, then slowly add the heavy cream and salt. Stir until smooth. If the caramel tightens, keep stirring over lower heat until it loosens again.
  10. Finish and serve: Let the caramel cool slightly, then spoon or drizzle it over the chilled cheesecake just before serving. Slice and serve cold.

Why the Cheesecake Stays Smooth

Three things make the biggest difference here: fully softened cream cheese, cooled reduced cider, and gentle mixing once the eggs go in. Overmixing can add too much air, which makes the cheesecake more likely to puff, crack, or bake up less evenly.

The water bath also helps the filling bake more gently. It will not guarantee a perfectly smooth top, but it does help the cheesecake cook more evenly from edge to center.

Why Reduce the Apple Cider First

Apple cider adds flavor, but it also adds water. Reducing it first concentrates the apple flavor without thinning the cheesecake batter too much. If your cider tastes especially sweet, reducing it a bit farther can help keep the flavor more focused.

Simple Variations

With Spiced Apples and Pecans

Top the chilled cheesecake with softly cooked spiced apples and a small sprinkle of chopped pecans, either instead of the caramel or with a light drizzle. Let the apples cool before adding them.

Salted Caramel Finish

For a slightly sharper finish, add a small pinch of flaky salt over the caramel just before serving.

How to Store Apple Cider Cheesecake

Store the cheesecake covered in the refrigerator for up to 4 to 5 days. For the cleanest slices and best texture, keep the caramel separate and add it just before serving.

You can freeze individual slices tightly wrapped for longer storage. Thaw them in the refrigerator before serving. Serve the cheesecake chilled; it does not need reheating.

If you want to make it ahead, bake the cheesecake a day in advance so it has time to chill and fully set. The caramel can also be made ahead and gently rewarmed if it becomes too thick.

More Apple Dessert Ideas

If you want another apple dessert with caramel notes, try these Apple Pie Bars with Oat Streusel and Caramel.

For a no-bake apple treat, check out these Chocolate Covered Caramel Apple Slices.

If you like the same flavor profile in bar form, try these Caramel Apple Cheesecake Bars.

Nutrition

Nutrition is approximate and will vary based on ingredient brands, exact amounts, caramel yield, and slice size.

  • Serving size: 1 slice out of 12
  • Calories: about 500
  • Protein: 7g
  • Fat: 31g
  • Carbohydrates: 50g
  • Per 100g: about 325 calories, 5g protein, 20g fat, 33g carbohydrates

Apple Cider Cheesecake

A creamy baked cheesecake flavored with reduced apple cider and finished with an apple cider caramel.
Course: Dessert
Cuisine: American
Prep: 40 min
Cook: 70 min
Total: 470 min
Servings: 12 Calories: about 500 kcal

Equipment

  • 9-inch springform pan
  • heavy-duty foil
  • large roasting pan
  • small saucepan
  • medium saucepan
  • electric mixer
  • mixing bowls
  • wire rack

Ingredients

For the crust

  • 1 1/2 cups graham cracker crumbs (150g)
  • 6 tablespoons melted butter (85g)
  • 1/4 cup granulated sugar (50g)
  • Pinch of salt

For the filling

  • 2 cups apple cider, reduced to 1 cup
  • 24 ounces full-fat block cream cheese, softened (675g)
  • 1 cup granulated sugar (200g)
  • 1 cup sour cream (240g)
  • 3 large eggs
  • 1 teaspoon ground cinnamon
  • 1 teaspoon vanilla extract
  • 1/4 teaspoon salt

For the apple cider caramel topping

  • 1 cup granulated sugar (200g)
  • 4 tablespoons butter (55g)
  • 1/2 cup heavy cream (120g)
  • Pinch of salt

Instructions

  1. Pour the apple cider into a small saucepan and simmer over medium heat until reduced from 2 cups to 1 cup, about 15 to 25 minutes; set aside and cool completely.
  2. Preheat the oven to 325°F (163°C). Wrap the outside of a 9-inch springform pan well with heavy-duty foil and lightly grease the inside if desired.
  3. Combine graham cracker crumbs, melted butter, sugar, and a pinch of salt until crumbs are evenly coated; press firmly into the bottom and slightly up the sides of the pan.
  4. Beat the softened cream cheese and sugar with an electric mixer until smooth. Mix in the sour cream.
  5. Add the eggs, cooled reduced cider, cinnamon, vanilla, and salt; mix just until smooth and combined, stopping once lumps are gone.
  6. Pour the filling over the crust and smooth the top. Place the foil-wrapped springform pan inside a large roasting pan.
  7. Set the roasting pan in the oven, then carefully pour hot water into the outer pan until it comes partway up the sides of the springform pan to create a water bath.
  8. Bake for 55 to 70 minutes, checking near the lower end; the edges should be set, the center should still have a slight jiggle, and the top should remain fairly pale. For doneness, the center will be about 150°F (66°C).
  9. Turn off the oven and let the cheesecake cool gradually in the oven (you may crack the door) until it stops steaming; then remove from the water bath and set on a wire rack to cool to room temperature.
  10. Refrigerate the cheesecake for at least 4 to 6 hours, or overnight, until fully set.
  11. To make the caramel, cook the sugar in a medium saucepan over medium heat until melted and amber, watching closely. Stir in the butter until melted, then slowly add the heavy cream and salt, stirring until smooth; if the caramel tightens, stir over low heat until it loosens.
  12. Let the caramel cool slightly, then spoon or drizzle it over the chilled cheesecake just before serving. Slice and serve cold.

Tips

  • Fully soften block cream cheese before mixing to avoid lumps.
  • Allow the reduced cider to cool completely so the batter stays thick and smooth.
  • Mix gently after adding eggs to avoid incorporating excess air and prevent cracking.
  • Use a water bath to help the cheesecake bake evenly and reduce cracking.
  • Check for set edges and a slight jiggle in the center rather than relying only on baking time.

Variations

  • With Spiced Apples and Pecans: Top the chilled cheesecake with softly cooked spiced apples and a sprinkle of chopped pecans instead of or along with the caramel.
  • Salted Caramel Finish: Finish with a small pinch of flaky salt over the caramel just before serving for a brighter contrast.

Notes

Store covered in the refrigerator for up to 4 to 5 days; keep the caramel separate and add before serving for clean slices. Freeze individual slices tightly wrapped and thaw in the refrigerator before serving.

Nutrition

Calories: about 500 kcal | Protein: 7 g | Fat: 31 g | Carbohydrates: 50 g

Apple Pie Bars

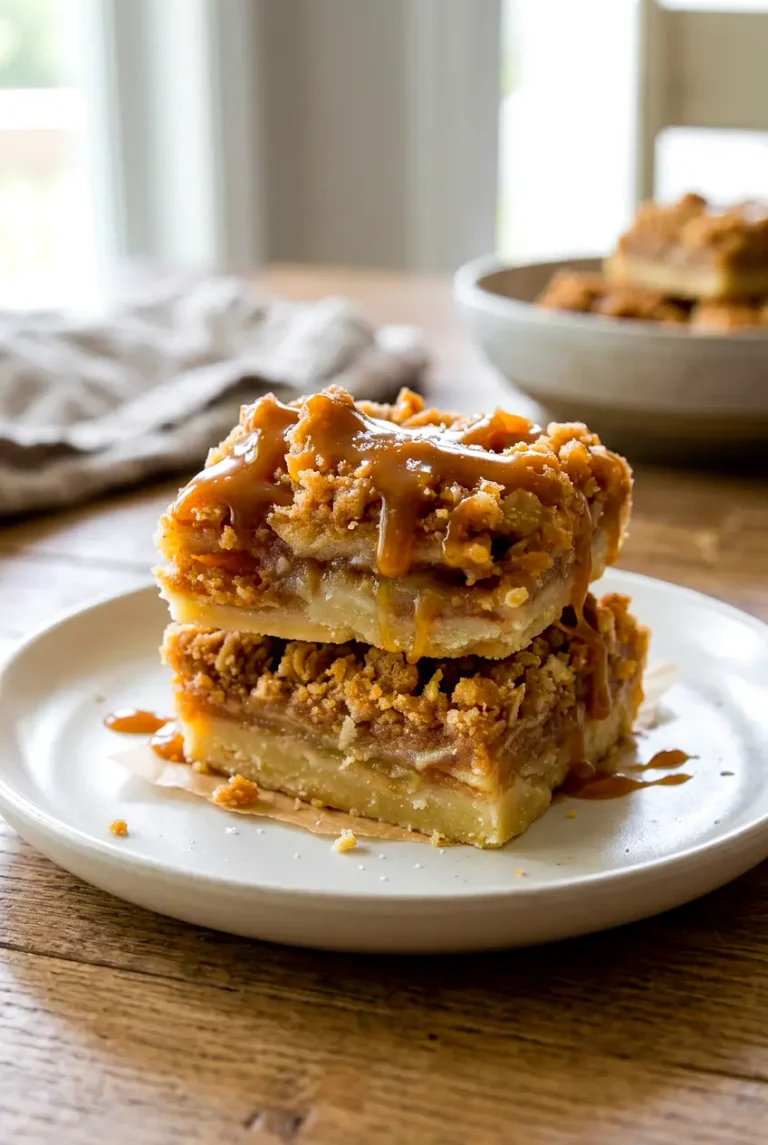
These apple pie bars have a buttery shortbread base, a thick layer of spiced apples, and a simple oat streusel on top. A drizzle of salted caramel finishes them off, but the bars are sturdy enough to slice and serve neatly.

The method is straightforward: bake the crust first, toss the apples with a little flour so the juices thicken, and chill the pan before cutting. That keeps the layers from turning soft or sliding apart.

If you want another caramel-apple dessert, try these Chocolate Covered Caramel Apple Slices.

Ingredients for Apple Pie Bars

  • 2 1/2 cups all-purpose flour, divided (315g)
  • 1/2 cup granulated sugar (100g)
  • 1 cup unsalted butter, divided (225g), melted and softened as needed
  • 2 teaspoons vanilla extract
  • 1 teaspoon salt, divided
  • 7 to 8 cups peeled and sliced apples (about 850g)
  • 3/4 cup brown sugar, divided (150g)
  • 2 teaspoons ground cinnamon
  • 1/4 teaspoon ground nutmeg
  • 1 cup old-fashioned oats (90g)
  • 1/2 cup salted caramel sauce, plus more if you like

Optional: 1 to 2 tablespoons lemon juice, 1 to 2 tablespoons coarse sugar for the top, and 1/2 teaspoon extra cinnamon for the streusel.

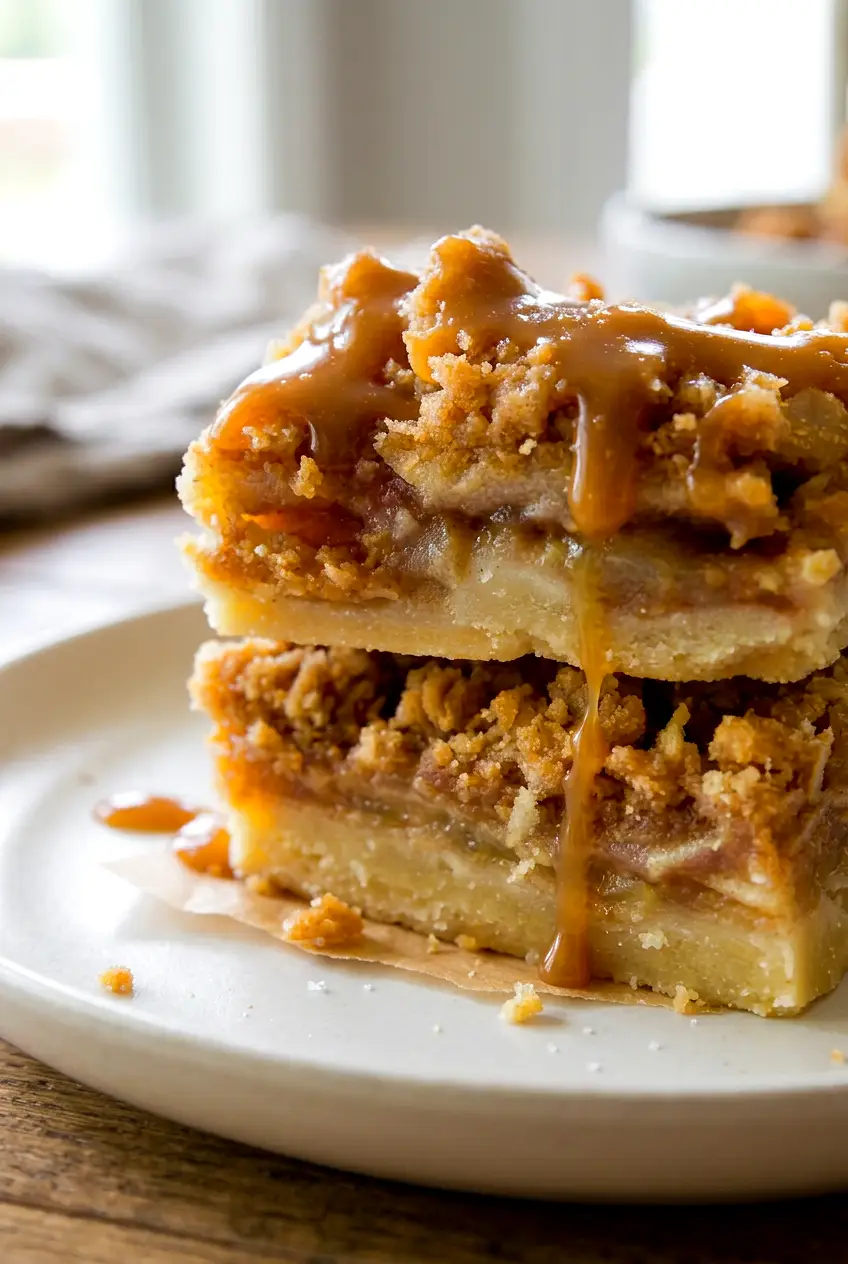
A sliced apple pie bar with caramel on top, showing the neat layered edges

Best Apples to Use

A mix of sweet and tart apples gives the best flavor and texture here. Try Honeycrisp or Pink Lady with Granny Smith or Braeburn. Using two kinds helps the filling stay balanced and keeps the apples from baking down into one soft layer.

How to Make Apple Pie Bars

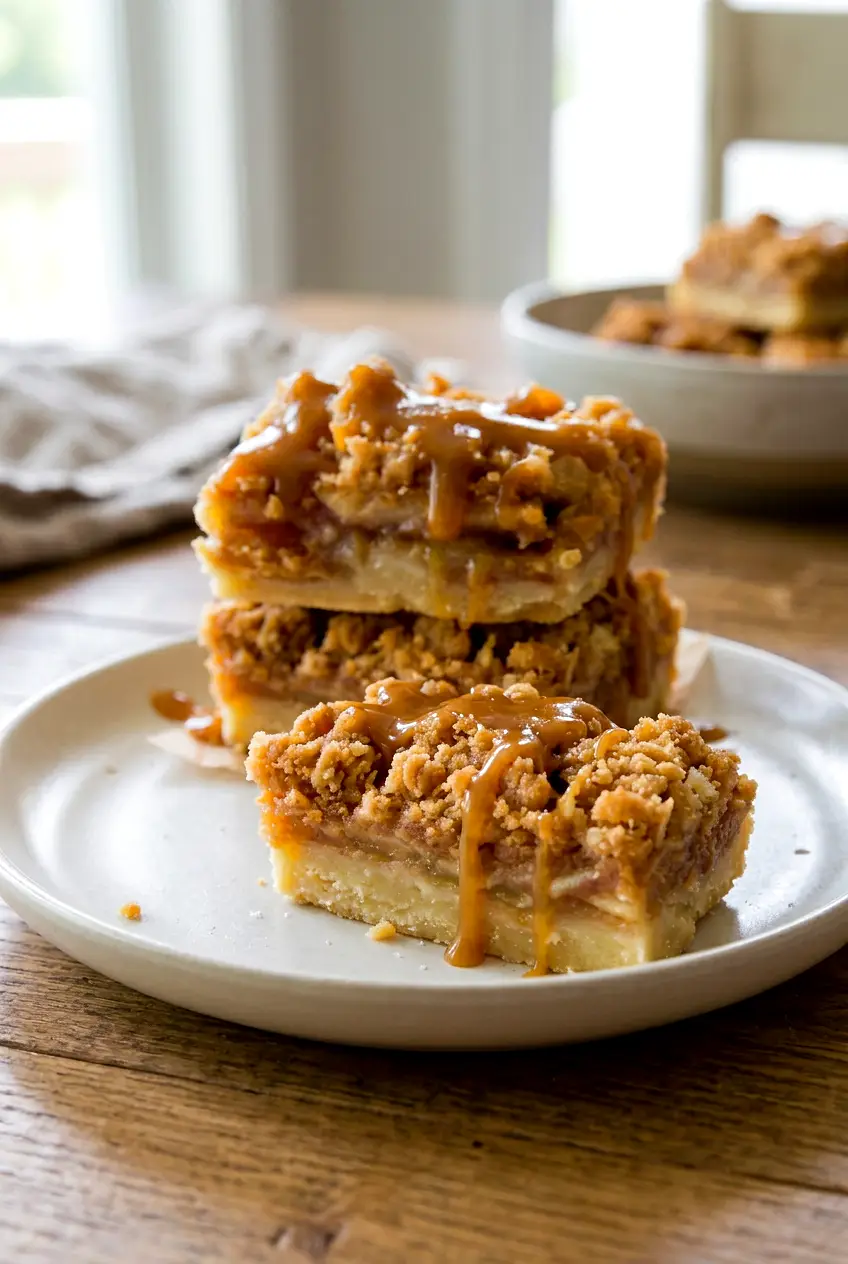
Close-up of apple pie bars showing the spiced apple layer and oat streusel topping
  1. Preheat the oven and line the pan: Heat the oven to 350°F. Line a 9×13-inch baking pan with parchment, leaving overhang on at least two sides so you can lift the bars out later.
  2. Make the crust: In a mixing bowl, combine 2 cups of the flour, the granulated sugar, 1/2 teaspoon of the salt, 3/4 cup of the butter, and 1 teaspoon of the vanilla. Mix until a soft dough forms, then press it firmly into an even layer in the prepared pan.
  3. Parbake the crust: Bake for 15 to 20 minutes, until the crust looks set and matte with lightly golden edges. It should not be deeply browned yet.
  4. Mix the apple filling: In a large bowl, toss the apples with 1/2 cup of the brown sugar, the remaining 1/2 cup flour, the cinnamon, nutmeg, remaining 1/2 teaspoon salt, and the remaining 1 teaspoon vanilla. Add the lemon juice if using. Toss well so the apples are evenly coated and no dry flour pockets remain.
  5. Make the streusel: In another bowl, combine the oats, remaining 1/4 cup brown sugar, and remaining 1/4 cup butter. Mix with a fork or pastry cutter until you have coarse crumbs with some clumps. Add the extra cinnamon here if using.
  6. Assemble the bars: Spread the apple mixture over the hot crust and press the slices into a fairly tight, even layer. Scatter the streusel over the top from edge to edge without pressing it down. Sprinkle with coarse sugar if using.
  7. Bake: Return the pan to the oven and bake for 30 to 35 minutes more. The bars are done when the apples are tender when pierced with a knife, the filling bubbles lightly around the edges, and the streusel is golden brown. Rotate the pan once halfway through if your oven bakes unevenly. If the top starts browning too quickly, tent it loosely with foil.
  8. Cool and chill: Let the pan cool on a wire rack until it reaches room temperature. Refrigerate for 1 to 2 hours, or until firm enough to slice cleanly.
  9. Finish and cut: Lift the chilled bars out with the parchment. Drizzle with salted caramel, then cut into 16 bars. Wipe the knife between cuts if needed for cleaner edges.

How to Keep the Bars from Getting Soggy

  • Parbake the crust so the apple juices do not soak into it.
  • Use the flour in the filling to help thicken the juices as the bars bake.
  • Press the apples into a compact layer instead of leaving loose piles.
  • Bake until the filling bubbles at the edges and the apples are tender.
  • Cool completely, then chill before slicing.

Serving Ideas

Serve these bars cold for the neatest squares, at room temperature for a softer texture, or lightly warmed after slicing. They are good plain, with extra salted caramel, or with a small scoop of vanilla ice cream.

For a richer apple-caramel dessert, see these Caramel Apple Cheesecake Bars.

How to Store and Reheat Apple Pie Bars

Once the bars are fully cooled, store them covered in the refrigerator for up to 4 days. Because of the fruit filling and caramel, they hold best when chilled.

These are easy to make ahead. Bake the bars a day in advance and chill them overnight for cleaner slices. Add the caramel after the bars have cooled.

To serve warm, warm individual slices briefly after cutting, then drizzle with caramel just before serving.

To freeze, wrap individual bars well and thaw them in the refrigerator before serving.

Nutrition

Nutrition is approximate and will vary based on ingredient brands, exact amounts, caramel used, and serving size.

  • Serving size: 1 bar
  • Calories: about 300
  • Protein: 3g
  • Fat: 13g
  • Carbohydrates: 46g
  • Per 100g: about 275 calories, 3g protein, 12g fat, 41g carbohydrates

Apple Pie Bars

Buttery shortbread crust topped with a spiced apple layer, oat streusel, and a drizzle of salted caramel.
Course: Dessert
Cuisine: American
Prep: 25 min
Cook: 55 min
Total: 140 min
Servings: 16 Calories: about 300 kcal

Equipment

  • 9×13-inch baking pan
  • parchment paper
  • mixing bowls
  • pastry cutter or fork
  • wire rack
  • knife
  • peeler
  • oven

Ingredients

For the crust

  • 2 cups all-purpose flour
  • 1/2 cup granulated sugar (100g)
  • 1/2 teaspoon salt
  • 3/4 cup unsalted butter, melted
  • 1 teaspoon vanilla extract

For the apple filling

  • 7 to 8 cups peeled and sliced apples (about 850g)
  • 1/2 cup brown sugar
  • 1/2 cup all-purpose flour
  • 2 teaspoons ground cinnamon
  • 1/4 teaspoon ground nutmeg
  • 1/2 teaspoon salt
  • 1 teaspoon vanilla extract
  • 1 to 2 tablespoons lemon juice (optional)

For the streusel

  • 1 cup old-fashioned oats (90g)
  • 1/4 cup brown sugar
  • 1/4 cup unsalted butter, softened
  • 1/2 teaspoon ground cinnamon (optional)

Topping

  • 1/2 cup salted caramel sauce, plus more if desired
  • 1 to 2 tablespoons coarse sugar for top (optional)

Instructions

  1. Preheat the oven to 350°F (177°C). Line a 9×13-inch baking pan with parchment, leaving an overhang on at least two sides.
  2. Make the crust: in a mixing bowl combine 2 cups flour, granulated sugar, 1/2 teaspoon salt, 3/4 cup melted butter, and 1 teaspoon vanilla; mix until a soft dough forms.
  3. Press the dough firmly into an even layer in the prepared pan.
  4. Parbake the crust for 15 to 20 minutes, until set and edges are lightly golden.
  5. Toss the apples: in a large bowl combine the apples, 1/2 cup brown sugar, 1/2 cup flour, cinnamon, nutmeg, remaining 1/2 teaspoon salt, and 1 teaspoon vanilla; add lemon juice if using and toss until evenly coated.
  6. Make the streusel: in a bowl combine the oats, 1/4 cup brown sugar, and 1/4 cup softened butter; mix with a fork or pastry cutter until coarse crumbs form.
  7. Spread the apple mixture over the hot crust and press the slices into a compact, even layer.
  8. Scatter the streusel evenly over the apples and sprinkle with coarse sugar if using; do not press the streusel down.
  9. Bake for 30 to 35 minutes more, until the apples are tender, the filling bubbles at the edges, and the streusel is golden; rotate the pan halfway through and tent with foil if the top browns too quickly.
  10. Cool the pan on a wire rack to room temperature, then refrigerate for 1 to 2 hours until firm enough to slice.
  11. Lift the chilled bars from the pan using the parchment overhang, drizzle with salted caramel, and cut into 16 bars, wiping the knife between cuts for cleaner edges.

Tips

  • Parbake the crust so apple juices don’t soak into it.
  • Toss apples with flour to help thicken juices while baking.
  • Press apples into a compact layer to prevent shifting and sogginess.
  • Bake until the filling bubbles at the edges to ensure the apples are cooked through.
  • Chill the bars before slicing for the cleanest cuts.

Notes

Store fully cooled bars covered in the refrigerator for up to 4 days. Add caramel after cooling. Freeze individually wrapped bars and thaw in the refrigerator before serving. Warm individual slices briefly before serving if desired.

Nutrition

Calories: about 300 kcal | Protein: 3 g | Fat: 13 g | Carbohydrates: 46 g | Per100g: about 275 kcal, 3 g protein, 12 g fat, 41 g carbohydrates

Chocolate Covered Caramel Apple Slices

Chocolate-covered caramel apple slices are easier to serve than whole caramel apples and much less messy to eat. You still get the crisp apple, chocolate coating, caramel drizzle, and crunchy toppings in a simple hand-held dessert.

The method stays straightforward: dry the apple slices well, coat them with melted chocolate wafers, chill briefly, then finish with warm caramel and toppings. Keeping the apples as dry as possible is the main step that helps the chocolate stick cleanly.

Ingredients for Chocolate Covered Caramel Apple Slices

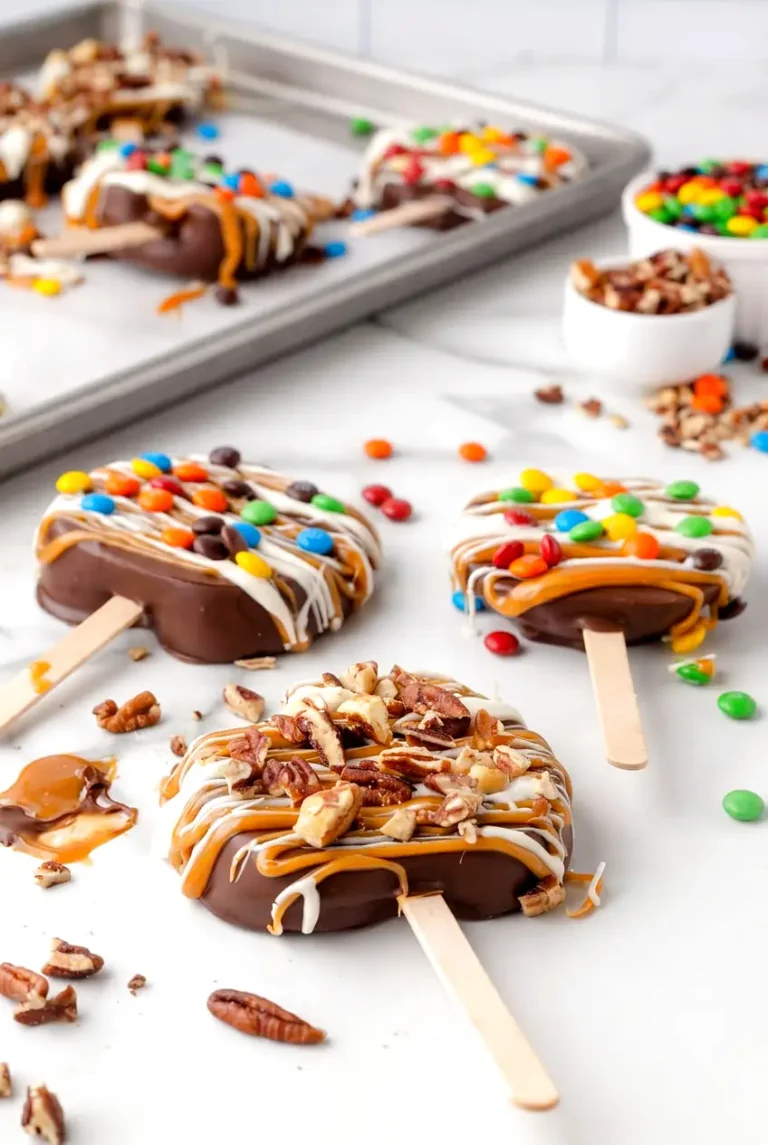
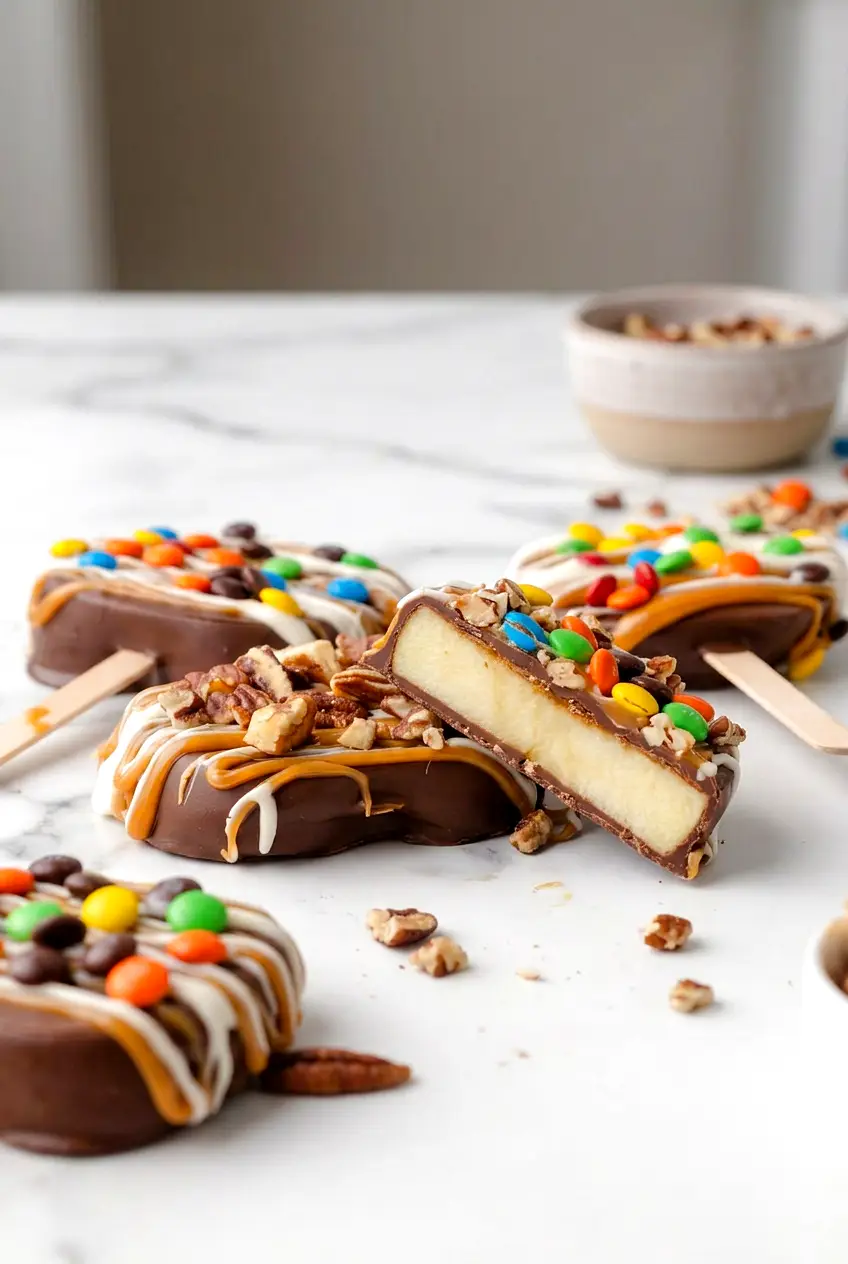
Side view of a chocolate covered caramel apple slice showing the chocolate coating and crunchy toppings
  • 3 large Granny Smith or Honeycrisp apples (about 500g)
  • 1 to 2 tablespoons lemon juice, optional
  • 12 ounces chocolate melting wafers or candy melts (340g)
  • 10 ounces soft caramels, unwrapped (285g)
  • 2 to 4 tablespoons heavy cream, as needed to loosen the caramel
  • 8 to 10 popsicle sticks or sturdy paper lollipop sticks
  • 1/2 to 1 cup toppings such as M&M’s Minis, Reese’s Pieces, chopped nuts, mini chocolate chips, or crushed cookies (about 75g)
  • 1 to 2 sheets parchment paper

Granny Smith gives a tarter contrast, while Honeycrisp makes a sweeter slice. Chocolate wafers or candy melts are the easiest choice here because they melt smoothly and set more cleanly than regular chocolate chips.

How to Make Chocolate Covered Caramel Apple Slices

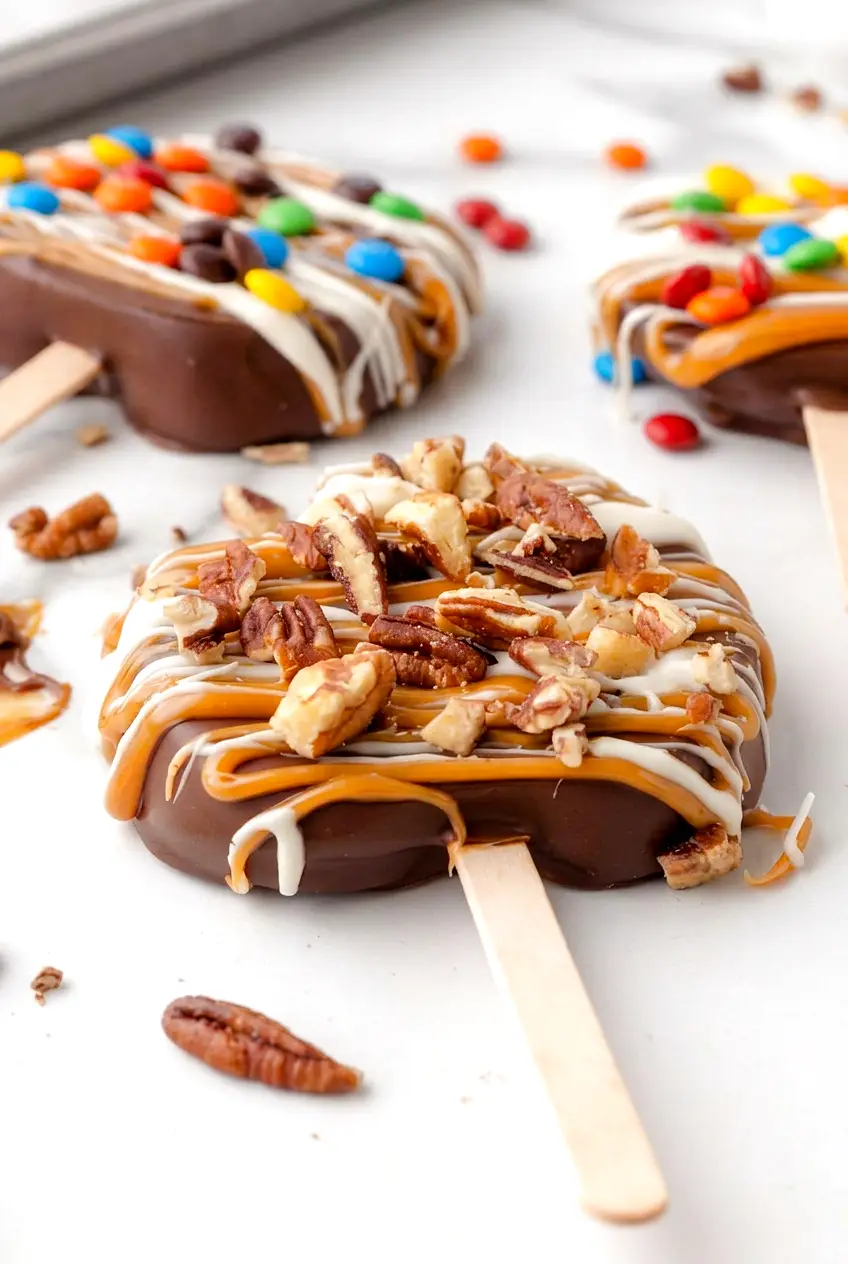
Close view of chocolate covered caramel apple slices with caramel drizzle, candies, and chopped nuts
  1. Prep the apples: Wash the apples and dry them very well. Slice into thick rounds or wedges, removing seeds and any tough core pieces. Pat the cut sides dry again with paper towels. If you need a little extra time before dipping, lightly brush or toss the slices with lemon juice, then pat them dry so the surface is not slick. Insert sticks into slices that are thick enough to hold their shape.
  2. Line a tray: Line a baking sheet or large tray with parchment paper and keep it nearby for the dipped slices.
  3. Melt the chocolate: Place the chocolate wafers in a dry microwave-safe bowl. Microwave in short bursts, stirring well between each, until smooth and glossy, about 1 to 3 minutes total depending on your microwave. You can also melt them over low heat in a double boiler. Stop as soon as the chocolate is fully melted so it does not overheat.
  4. Coat the apple slices: Dip each apple slice into the melted chocolate, or spoon the chocolate over the slice if that is easier. Let the excess drip off, then place the slices in a single layer on the lined tray. Work in batches if needed so the apples stay dry and the chocolate stays workable.
  5. Chill the chocolate layer: Refrigerate for 10 to 15 minutes, or until the chocolate feels set and does not smear when touched lightly.
  6. Melt the caramel: Combine the soft caramels and 2 tablespoons of heavy cream in a microwave-safe bowl or small heatproof bowl. Warm in short bursts in the microwave or over low heat, stirring often, until smooth and spoonable, about 2 to 5 minutes. Add a little more cream only if needed. The caramel should be warm and drizzleable, not thin.
  7. Drizzle and top: Drizzle the caramel over the chilled apple slices with a spoon or fork. Add toppings right away while the caramel is still tacky. Press lightly if needed so they adhere.
  8. Chill briefly and serve: Return the tray to the refrigerator for 5 to 10 minutes if the caramel needs to firm up. Serve within a few hours for the best texture.

Why Did the Coating Slide Off?

  • The apples were too wet: Dry them well after washing and again after slicing.
  • The chocolate was not set yet: Chill the coated slices before adding caramel.
  • The caramel was too thin: Use only enough cream to make it drizzleable.
  • The toppings were too heavy: Use a lighter layer or smaller toppings like mini candies or mini chocolate chips.

Easy Variations

Sea Salt Caramel Apple Slices

After drizzling the caramel, add a very light pinch of flaky sea salt. This works especially well with dark or semi-sweet style chocolate wafers.

Apple-Cider Caramel Apple Slices

If you have apple-cider-style caramel, use it for the drizzle. Keep it thick enough to sit in ribbons on top instead of running off the slices.

How to Store Chocolate Covered Caramel Apple Slices

These are best the same day, within a few hours of assembly. For a short hold, refrigerate them in a single layer on a parchment-lined tray or in a container lined with parchment. Do not stack them, or the chocolate, caramel, and toppings can smear.

For make-ahead prep, slice the apples and get the toppings ready in advance, but dip and drizzle the apples close to serving time. This recipe is not meant for reheating.

What to Make Next

If you want another caramel-apple dessert, try these Caramel Apple Cheesecake Bars.

For another cozy fall dessert, pair these with Brown Butter Pumpkin Chocolate Chip Cookies.

If you like easy apple desserts, you may also enjoy this No Bake Caramel Apple Cake.

Nutrition

Nutrition is approximate and will vary based on ingredient brands, exact amounts, toppings used, and serving size.

  • Serving size: 1 apple slice
  • Calories: about 250
  • Protein: 2g
  • Fat: 10g
  • Carbohydrates: 41g
  • Per 100g: about 270 calories, 2g protein, 11g fat, 44g carbohydrates

Chocolate Covered Caramel Apple Slices

Sliced apples dipped in melted chocolate, drizzled with warm caramel, and finished with crunchy toppings for an easy handheld dessert.
Course: Dessert
Cuisine: American
Prep: 20 min
Cook: 5 min
Total: 50 min
Servings: 12 Calories: about 250 kcal

Equipment

  • baking sheet
  • parchment paper
  • microwave-safe bowl
  • double boiler (optional)
  • spoon
  • popsicle sticks

Ingredients

Apples

  • 3 large Granny Smith or Honeycrisp apples (about 500g)
  • 1 to 2 tablespoons lemon juice (optional)

Coating and drizzle

  • 12 ounces chocolate melting wafers or candy melts (340g)
  • 10 ounces soft caramels, unwrapped (285g)
  • 2 to 4 tablespoons heavy cream, as needed

Assembly and toppings

  • 8 to 10 popsicle sticks or sturdy paper lollipop sticks
  • 1/2 to 1 cup toppings (M&M’s Minis, Reese’s Pieces, chopped nuts, mini chocolate chips, or crushed cookies) (about 75g)
  • 1 to 2 sheets parchment paper

Instructions

  1. Wash apples and dry them very well; slice into thick rounds or wedges and remove seeds and any tough core pieces.
  2. Pat the cut sides dry again with paper towels and, if desired, lightly brush or toss with 1 to 2 tablespoons lemon juice then re-pat dry.
  3. Insert sticks into slices that are thick enough to hold their shape.
  4. Line a baking sheet or large tray with parchment paper and set nearby.
  5. Place the chocolate wafers in a dry microwave-safe bowl and melt in short bursts, stirring between each, until smooth and glossy (about 1 to 3 minutes), or melt over low heat in a double boiler.
  6. Dip each apple slice into the melted chocolate or spoon chocolate over the slice, let excess drip off, and place slices in a single layer on the prepared tray; work in batches as needed.
  7. Refrigerate the chocolate-coated slices for 10 to 15 minutes, until the chocolate feels set and does not smear when touched.
  8. Combine the unwrapped caramels with 2 tablespoons heavy cream in a microwave-safe or heatproof bowl and warm in short bursts or over low heat, stirring often, until smooth and drizzleable (about 2 to 5 minutes); add more cream only if needed.
  9. Drizzle the warm caramel over the chilled chocolate-coated apple slices and immediately add toppings while the caramel is still tacky, pressing lightly so they adhere.
  10. Return the tray to the refrigerator for 5 to 10 minutes if the caramel needs to firm up, then serve within a few hours for best texture.

Tips

  • Dry the apple slices thoroughly after washing and again after slicing so chocolate adheres cleanly.
  • Chill the chocolate-coated slices before adding caramel to prevent sliding or smearing.
  • Keep the caramel thick and drizzleable—use only enough cream to loosen it; avoid making it too thin.
  • Use lighter or smaller toppings (mini candies or mini chips) if heavier toppings cause sliding.
  • Use chocolate melting wafers or candy melts for smoother melting and cleaner setting than regular chocolate chips.

Variations

  • Sea Salt Caramel Apple Slices: After drizzling the caramel, add a very light pinch of flaky sea salt for a sweet-salty finish.
  • Apple-Cider Caramel Apple Slices: Use apple-cider-style caramel for the drizzle, keeping it thick enough to sit in ribbons on top of the slices.

Notes

Best eaten within a few hours of assembly; refrigerate in a single layer on parchment and do not stack. Slice apples and prep toppings ahead, but dip and drizzle close to serving time. Not intended for reheating.

Nutrition

Calories: about 250 kcal | Protein: 2 g | Fat: 10 g | Carbohydrates: 41 g

Caramel Apple Cheesecake Bars

These caramel apple cheesecake bars have a buttery crust, a creamy cheesecake layer, tender spiced apples, and an oat streusel topping. They give you the classic apple-cheesecake-caramel combination in a bar that is much easier to slice, store, and serve than a full cheesecake.

The method is simple: par-bake the crust, layer on the filling and apples, add the streusel, then chill before slicing. The main thing to watch is moisture. Keep the apples lightly coated, not wet, so the bars bake up set instead of soggy.

Ingredients for Caramel Apple Cheesecake Bars

A square of caramel apple cheesecake bars with a caramel drizzle and crumbly topping, seen from the side
  • 2 1/2 cups all-purpose flour, divided (300g)
  • 1 cup unsalted butter, melted (2 sticks; 225g)
  • 1/2 cup granulated sugar (100g)
  • 3/4 cup packed brown sugar (165g)
  • 16 ounces cream cheese, softened (450g)
  • 2 large eggs
  • 2 teaspoons vanilla extract
  • 3 medium tart apples, peeled and diced, about 3 cups (450g)
  • 1 1/2 teaspoons ground cinnamon
  • 1/4 teaspoon ground nutmeg
  • 3/4 cup old-fashioned oats or quick oats (60g)
  • 1/2 teaspoon salt
  • 1/2 to 3/4 cup caramel sauce, for serving

Optional: 1 tablespoon lemon juice for the apples, and 1 to 2 tablespoons flour or cornstarch if the apples seem especially juicy.

Granny Smith apples are a reliable choice here because they hold their shape and balance the sweetness. Quick oats make a finer streusel, while old-fashioned oats give a chunkier topping.

How to Make Caramel Apple Cheesecake Bars

Close-up of caramel apple cheesecake bars showing the cheesecake layer, apples, and oat streusel
  1. Preheat and line the pan: Heat the oven to 350°F. Line a 9×13-inch metal or glass baking pan with parchment paper, leaving overhang on the long sides for easy lifting later.
  2. Make the crust: In a mixing bowl, stir together 2 cups of the flour, the granulated sugar, and 1/2 cup of the melted butter until evenly moistened. Press the mixture firmly into the prepared pan in an even layer.
  3. Par-bake the crust: Bake for 10 to 12 minutes, until the crust looks set and is lightly golden around the edges.
  4. Mix the cheesecake filling: While the crust bakes, beat the softened cream cheese until smooth. Add the eggs and vanilla, and mix just until combined. Spread the filling evenly over the warm crust.
  5. Prepare the apples: Toss the diced apples with the cinnamon and nutmeg. If using, add the lemon juice and 1 to 2 tablespoons flour or cornstarch if the apples are releasing a lot of juice. The apples should look lightly coated, not watery. Spoon them evenly over the cheesecake layer.
  6. Make the streusel: In another bowl, mix the remaining 1/2 cup flour, the brown sugar, oats, salt, and remaining 1/2 cup melted butter until crumbly. Sprinkle the streusel over the apples, leaving some larger crumbs for texture.
  7. Bake the bars: Bake for 32 to 45 minutes, until the streusel is golden brown and the cheesecake layer is set around the edges with a slight jiggle in the center. Rotate the pan once near the end if your oven browns unevenly. If the top is darkening too quickly, loosely tent with foil.
  8. Cool and chill: Set the pan on a wire rack and cool to room temperature. Refrigerate until fully chilled and firm, at least 2 hours, before lifting out and slicing.
  9. Serve: Cut into 16 bars. Drizzle with caramel just before serving, or serve the caramel on the side for cleaner, neater bars.

How to Tell When the Bars Are Done

Start checking near the low end of the baking range. Oven hot spots, pan material, and filling depth can all change the timing.

  • Crust: lightly golden after the par-bake
  • Streusel: golden brown, not deeply browned
  • Cheesecake layer: set around the edges with a slight jiggle in the center
  • Apples: tender-looking, not wet or pooled with juice

If the center still looks loose instead of softly set, bake a few minutes longer and check again.

How to Keep the Bars from Getting Soggy

Three things make the biggest difference here: par-bake the crust, use apples that are lightly coated instead of wet, and chill the bars fully before slicing. If your apples are especially juicy, tossing them with a little flour or cornstarch helps absorb excess moisture during baking.

How to Store Caramel Apple Cheesecake Bars

Once cooled, store the bars covered in the refrigerator for up to 5 days. Keep them in a single layer when possible, or separate layers with parchment paper so the topping stays intact.

These bars are best served chilled or slightly cool, so reheating is not needed. For the cleanest presentation, add the caramel just before serving rather than storing the bars already drizzled.

They also work well as a make-ahead dessert. Bake them a day ahead, chill overnight, and slice the next day for cleaner edges.

More Fall Dessert Ideas

If you want another fall bake, try these Brown Butter Pumpkin Chocolate Chip Cookies.

For a no-bake version of the same flavor combination, try this No Bake Caramel Apple Cake.

If you like layered desserts, you may also enjoy this Pumpkin Lush Dessert.

Nutrition

Nutrition is approximate and will vary based on ingredient brands, exact amounts, caramel used, and serving size.

  • Serving size: 1 bar
  • Calories: about 310
  • Protein: 4g
  • Fat: 18g
  • Carbohydrates: 35g
  • Per 100g: about 300 calories, 4g protein, 17g fat, 34g carbohydrates

Caramel Apple Cheesecake Bars

Buttery-crusted bars with a creamy cheesecake layer, spiced diced apples, and an oat streusel, finished with caramel.
Course: Dessert
Cuisine: American
Prep: 25 min
Cook: 57 min
Total: 202 min
Servings: 16 Calories: about 310

Equipment

  • 9×13-inch baking pan
  • parchment paper
  • mixing bowls
  • electric mixer
  • measuring cups and spoons
  • wire rack

Ingredients

For the crust

  • 2 cups all-purpose flour
  • 1/2 cup granulated sugar (100g)
  • 1/2 cup unsalted butter, melted (part of 1 cup total)

For the cheesecake filling

  • 16 ounces cream cheese, softened (450g)
  • 2 large eggs
  • 2 teaspoons vanilla extract

For the apples

  • 3 medium tart apples, peeled and diced, about 3 cups (450g)
  • 1 1/2 teaspoons ground cinnamon
  • 1/4 teaspoon ground nutmeg
  • 1 tablespoon lemon juice (optional)
  • 1 to 2 tablespoons flour or cornstarch (optional, if apples are very juicy)

For the streusel

  • 1/2 cup all-purpose flour
  • 3/4 cup packed brown sugar (165g)
  • 3/4 cup old-fashioned oats or quick oats (60g)
  • 1/2 teaspoon salt
  • 1/2 cup unsalted butter, melted (part of 1 cup total)

To serve

  • 1/2 to 3/4 cup caramel sauce, for serving

Instructions

  1. Preheat the oven to 350°F (177°C). Line a 9×13-inch baking pan with parchment paper leaving an overhang on the long sides.
  2. In a bowl, stir together 2 cups flour, 1/2 cup granulated sugar, and 1/2 cup melted butter until evenly moistened; press firmly into the prepared pan in an even layer.
  3. Par-bake the crust for 10 to 12 minutes, until set and lightly golden at the edges.
  4. While the crust bakes, beat the softened cream cheese until smooth, then add the eggs and vanilla and mix just until combined.
  5. Spread the cheesecake filling evenly over the warm crust.
  6. Toss the diced apples with the cinnamon and nutmeg; if using, add lemon juice and 1 to 2 tablespoons flour or cornstarch only if apples are very juicy so they remain lightly coated, not wet.
  7. Spoon the apples evenly over the cheesecake layer.
  8. In another bowl, mix 1/2 cup flour, the brown sugar, oats, salt, and remaining 1/2 cup melted butter until crumbly; sprinkle the streusel over the apples, leaving some larger crumbs for texture.
  9. Bake for 32 to 45 minutes, until the streusel is golden brown and the cheesecake is set around the edges with a slight jiggle in the center; rotate the pan once if needed and tent with foil if the top is darkening too quickly.
  10. Set the pan on a wire rack and cool to room temperature, then refrigerate until fully chilled and firm, at least 2 hours.
  11. Use the parchment overhang to lift the slab from the pan and cut into 16 bars. Drizzle with caramel just before serving or serve caramel on the side.

Tips

  • Par-bake the crust to prevent a soggy bottom.
  • Keep the apples lightly coated, not wet, to avoid excess moisture in the bars.
  • If apples are very juicy, toss them with 1–2 tablespoons flour or cornstarch to absorb liquid.
  • Chill the bars fully before slicing for cleaner edges.
  • Tent the pan with foil if the streusel or top is browning too quickly.

Variations

  • Old-fashioned oats streusel: Use old-fashioned oats for a chunkier, chewier streusel topping.
  • Quick oats streusel: Use quick oats for a finer, more delicate streusel texture.

Notes

Store covered in the refrigerator for up to 5 days. Add caramel just before serving for the cleanest presentation. Bars are best chilled or slightly cool.

Nutrition

Calories: about 310 | Protein: 4 g | Fat: 18 g | Carbohydrates: 35 g