Author

Julia

Browsing

Apple Fritter Bread

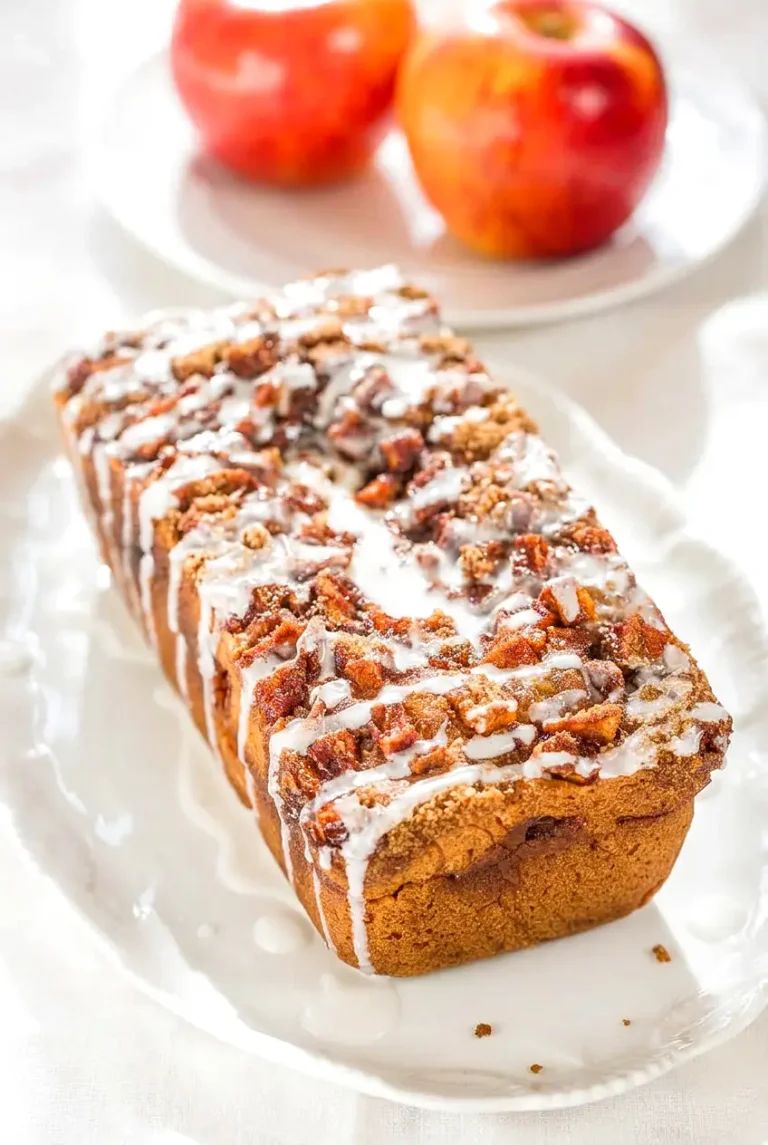
Apple fritter bread is a soft, tender loaf with small pieces of apple, a cinnamon-brown sugar swirl, and a simple glaze on top. It has the flavor of an apple fritter in an easy quick bread form, with no frying or yeast.

The method stays simple: one loaf pan, two bowls, and no mixer. Keep the apple pieces small and stir the batter just until the flour disappears so the loaf stays moist without turning heavy.

Ingredients for Apple Fritter Bread
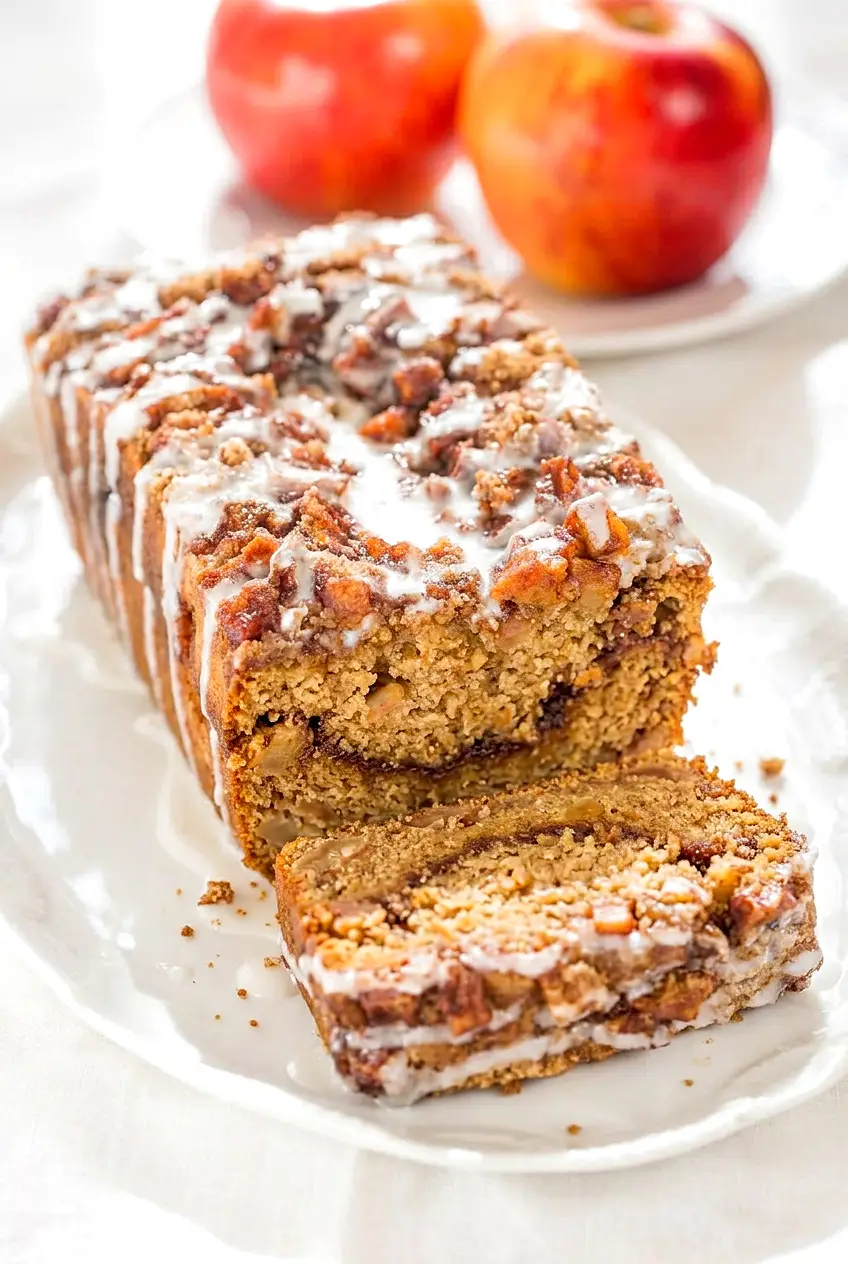
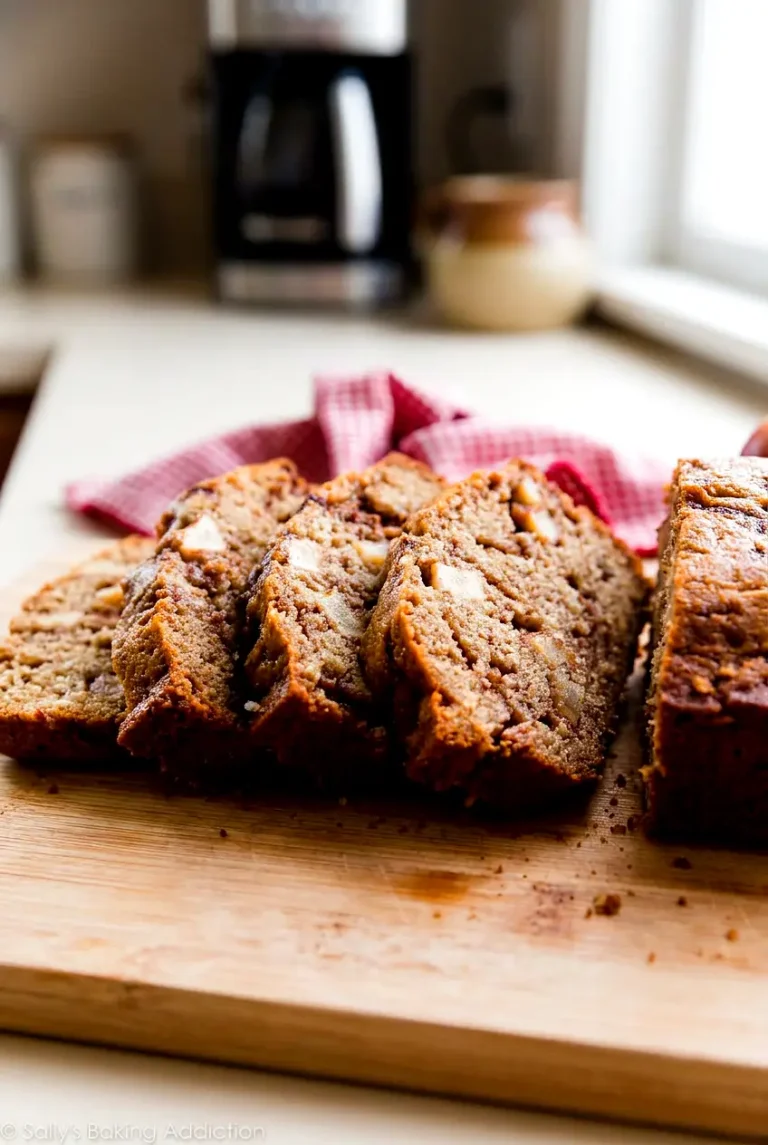
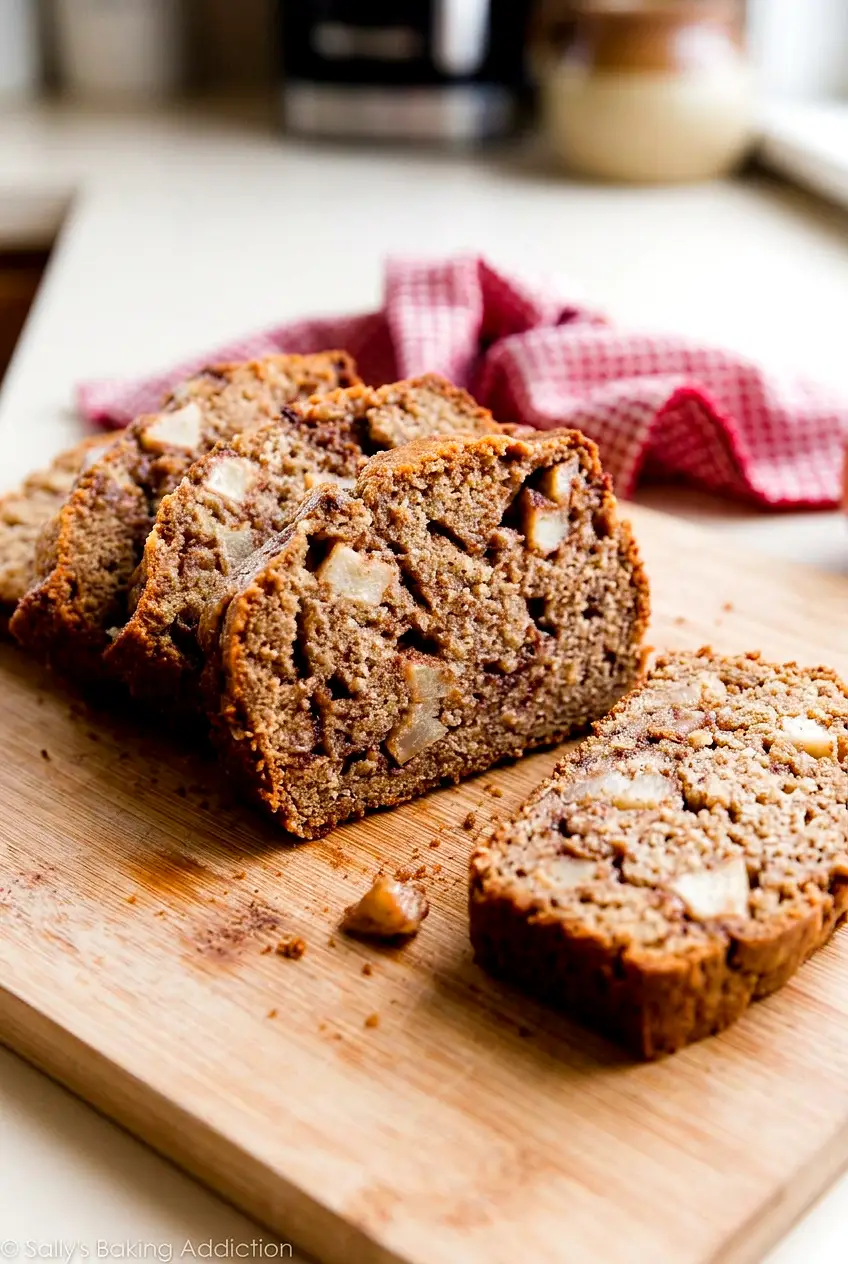
Side angle of apple fritter bread on a white platter with a slice showing tender apple-studded crumb
  • 2 cups all-purpose flour (240g)
  • 1 teaspoon baking soda
  • 1/2 teaspoon salt
  • 2 teaspoons ground cinnamon, divided
  • 3/4 cup granulated sugar (150g)
  • 1/2 cup packed brown sugar (100g)
  • 1 large egg
  • 1/2 cup vegetable oil or canola oil (120g)
  • 1/2 cup sour cream or plain Greek yogurt (120g)
  • 1 teaspoon vanilla extract
  • 2 medium apples, peeled and chopped small (about 260g total)
  • 1 cup confectioners’ sugar (120g)
  • 2 to 3 tablespoons milk, added gradually for the glaze

Firm apples work best here, including Granny Smith, Honeycrisp, Gala, Fuji, Braeburn, or Envy.

Optional: Sprinkle 1 to 2 tablespoons coarse sugar over the top before baking for a little crunch, or add a small pinch of cinnamon to the glaze.

How to Make Apple Fritter Bread
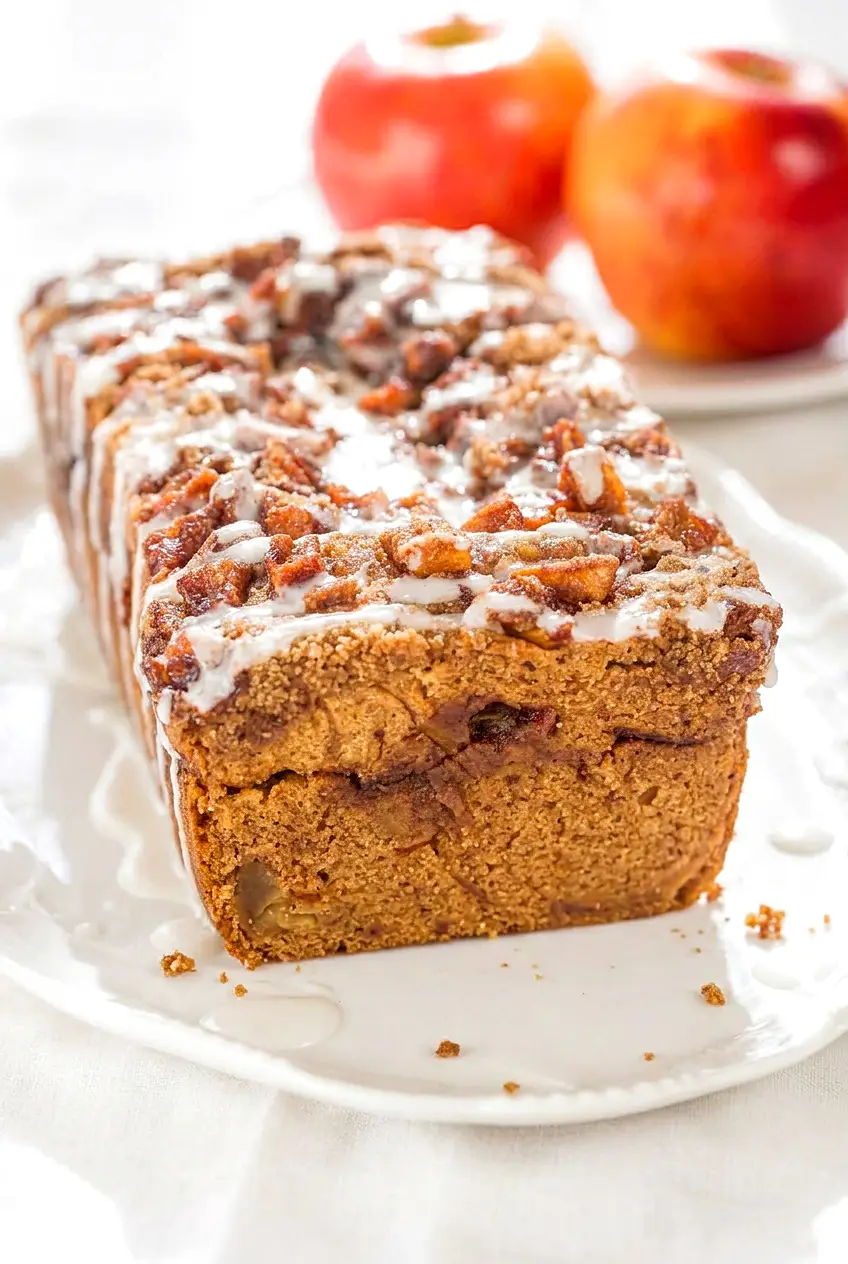
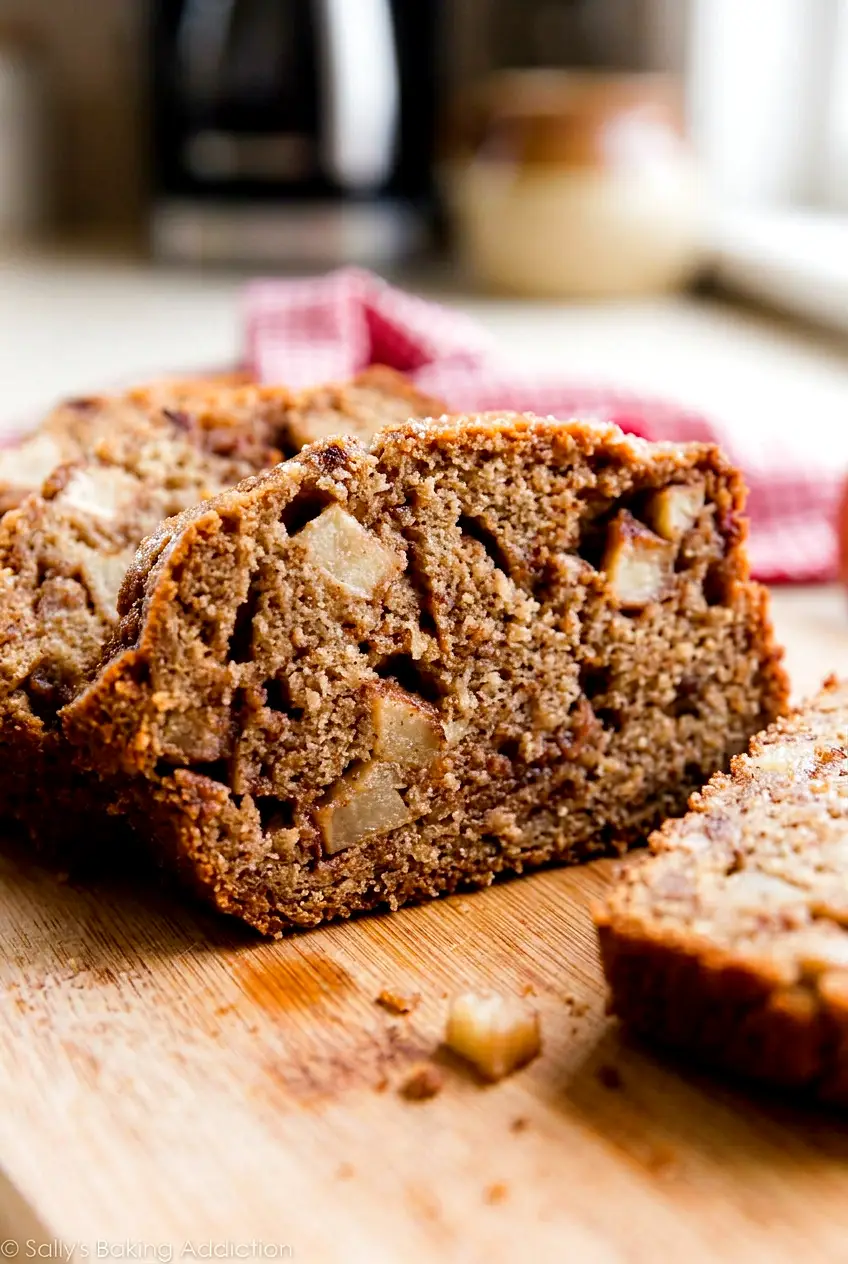
Close view of apple fritter bread showing the glazed top and cinnamon swirl in the loaf
  1. Preheat and prepare the pan: Heat the oven to 350°F. Grease a 9×5-inch loaf pan or line it with parchment for easier removal. Peel and chop the apples into small, even pieces.
  2. Mix the dry ingredients: In a medium bowl, whisk together the flour, baking soda, salt, and 1 teaspoon of the cinnamon.
  3. Mix the wet ingredients: In a large bowl, whisk together the granulated sugar, egg, oil, sour cream or Greek yogurt, and vanilla until smooth.
  4. Make the batter: Add the dry ingredients to the wet ingredients and stir gently until almost combined. Fold in most of the chopped apples, reserving a small handful if you want some in the middle layer. Stir just until no dry flour remains. The batter will be thick.
  5. Layer the loaf: In a small bowl, mix the brown sugar with the remaining 1 teaspoon cinnamon. Spoon half of the batter into the prepared pan and spread it into an even layer. Sprinkle over about half of the cinnamon-brown sugar mixture and, if using, some of the reserved apples. Add the remaining batter, then top with the rest of the cinnamon-brown sugar mixture. Lightly swirl a knife or skewer through the top portion of the loaf so the swirl stays distinct.
  6. Bake: Bake for 50 to 65 minutes, until the top is golden brown and lightly domed, the center no longer looks wet, and a toothpick inserted in the middle comes out with a few moist crumbs. If the top is browning too quickly, tent the loaf loosely with foil during the last 10 to 15 minutes. Rotate the pan once near the end if your oven bakes unevenly.
  7. Cool: Let the loaf cool in the pan for 10 to 15 minutes, then transfer it to a rack. Cool at least 30 minutes more before glazing.
  8. Glaze the loaf: In a small bowl, whisk the confectioners’ sugar with 2 tablespoons of milk. Add more milk a little at a time until the glaze is thick but easy to drizzle. Spoon or drizzle it over the cooled loaf and let it set slightly before slicing.

Best Apples to Use

Firm apples hold their shape better as the loaf bakes. Granny Smith gives a more tart flavor, while Honeycrisp, Gala, Fuji, Braeburn, and Envy make a slightly sweeter loaf. Whatever kind you use, keep the pieces small so they soften fully without making the center soggy.

How to Tell When the Center Is Done

Start checking near the early end of the baking range since loaf pans and ovens vary. Look for a deep golden top, a center that no longer looks wet, and a toothpick that comes out with moist crumbs instead of raw batter. If you use a thermometer, the center is usually done around 200°F to 205°F.

Why the Loaf Can Turn Dense

The most common cause is overmixing once the flour is added. Stir only until the flour is absorbed, then stop. Small apple pieces also help, since large chunks can weigh down the batter and slow the center from baking through.

Serving Apple Fritter Bread

Serve it slightly warm or at room temperature for breakfast, brunch, a snack, or dessert. It goes well with coffee, tea, fresh fruit, or yogurt.

For another cozy breakfast bake, try these Pumpkin Cinnamon Rolls with Maple Cream Cheese Icing.

If you like bakery-style breakfast bakes, you may also enjoy these Pumpkin Cream Cheese Muffins with Crumb Topping.

How to Store and Reheat Apple Fritter Bread

Let the loaf cool completely before wrapping or storing. Keep it tightly covered or in an airtight container at room temperature for 2 to 3 days. If your kitchen is warm, refrigerate it for a few extra days.

For longer storage, freeze individual slices wrapped well and sealed in a freezer bag or airtight container. Thaw at room temperature.

To reheat, warm individual slices briefly in the microwave or toaster oven until just warmed through. Avoid overheating, which can dry out the crumb. The glaze may soak in a little more after storage, but the loaf will still slice well.

If you want another apple bread to try next, see this Cinnamon Apple Bread with Tender Apple Pieces.

Nutrition

Nutrition is approximate and will vary based on ingredient brands, exact apple size, glaze amount used, and slice size.

  • Serving size: 1 slice, based on 8 slices per loaf
  • Calories: about 370
  • Protein: 4g
  • Fat: 15g
  • Carbohydrates: 57g
  • Per 100g: about 290 calories, 3g protein, 12g fat, 45g carbohydrates

Apple Fritter Bread

A soft quick bread with small apple pieces, a cinnamon-brown sugar swirl, and a simple glaze.
Course: Breakfast
Cuisine: American
Prep: 15 min
Cook: 65 min
Total: 125 min
Servings: 8 Calories: 370 kcal

Equipment

  • 9×5-inch loaf pan
  • mixing bowls
  • whisk
  • spatula
  • small bowl
  • rack
  • knife or skewer
  • measuring cups and spoons

Ingredients

For the Bread

  • 2 cups all-purpose flour (240g)
  • 1 teaspoon baking soda
  • 1/2 teaspoon salt
  • 2 teaspoons ground cinnamon, divided
  • 3/4 cup granulated sugar (150g)
  • 1/2 cup packed brown sugar (100g)
  • 1 large egg
  • 1/2 cup vegetable oil or canola oil (120g)
  • 1/2 cup sour cream or plain Greek yogurt (120g)
  • 1 teaspoon vanilla extract
  • 2 medium apples, peeled and chopped small (about 260g total)

For the Glaze

  • 1 cup confectioners’ sugar (120g)
  • 2 to 3 tablespoons milk, added gradually for the glaze
  • Pinch of cinnamon (optional)

Optional Topping

  • 1 to 2 tablespoons coarse sugar (optional, for a crunchy top)

Instructions

  1. Preheat the oven to 350°F (177°C). Grease a 9×5-inch loaf pan or line it with parchment. Peel and chop the apples into small, even pieces.
  2. In a medium bowl, whisk together the flour, baking soda, salt, and 1 teaspoon of the cinnamon.
  3. In a large bowl, whisk the granulated sugar, egg, oil, sour cream or Greek yogurt, and vanilla until smooth.
  4. Add the dry ingredients to the wet ingredients and stir gently until almost combined. Fold in most of the chopped apples, reserving a small handful if you want some in the middle layer. Stir just until no dry flour remains; the batter will be thick.
  5. In a small bowl, mix the brown sugar with the remaining 1 teaspoon cinnamon.
  6. Spoon half of the batter into the prepared pan and spread into an even layer. Sprinkle about half of the cinnamon-brown sugar mixture over the batter and add the reserved apples if using. Add the remaining batter, then top with the rest of the cinnamon-brown sugar. Lightly swirl a knife or skewer through the top layer to create a distinct swirl.
  7. Bake for 50 to 65 minutes, until the top is golden brown, the center no longer looks wet, and a toothpick inserted in the middle comes out with a few moist crumbs. If the top browns too quickly, tent loosely with foil for the last 10 to 15 minutes. Rotate the pan once near the end if your oven bakes unevenly.
  8. Let the loaf cool in the pan for 10 to 15 minutes, then transfer it to a rack. Cool at least 30 minutes more before glazing.
  9. In a small bowl, whisk the confectioners’ sugar with 2 tablespoons of milk. Add more milk a little at a time until the glaze is thick but easy to drizzle. Spoon or drizzle over the cooled loaf and let set slightly before slicing.

Tips

  • Keep apple pieces small so they soften without making the center soggy.
  • Stir the batter only until the flour is absorbed to avoid a dense loaf.
  • Start checking doneness near the early end of the bake time.
  • Tent loosely with foil if the top is browning too quickly.
  • Use firm apples such as Granny Smith, Honeycrisp, Gala, Fuji, Braeburn, or Envy.

Variations

  • Crunchy Top: Sprinkle 1 to 2 tablespoons coarse sugar over the top before baking for added crunch.
  • Cinnamon Glaze: Add a small pinch of cinnamon to the glaze for extra warm spice.
  • Greek Yogurt Swap: Use plain Greek yogurt instead of sour cream for a slightly tangier loaf and a lighter texture.
Notes

Cool completely before storing. Keep covered at room temperature for 2 to 3 days or refrigerate if your kitchen is warm. Freeze individual slices wrapped well. Reheat briefly in a microwave or toaster oven; avoid overheating. Center is typically done around 200°F to 205°F.

Nutrition

Calories: 370 kcal | Protein: 4 g | Fat: 15 g | Carbohydrates: 57 g

Pumpkin Pecan Cobbler

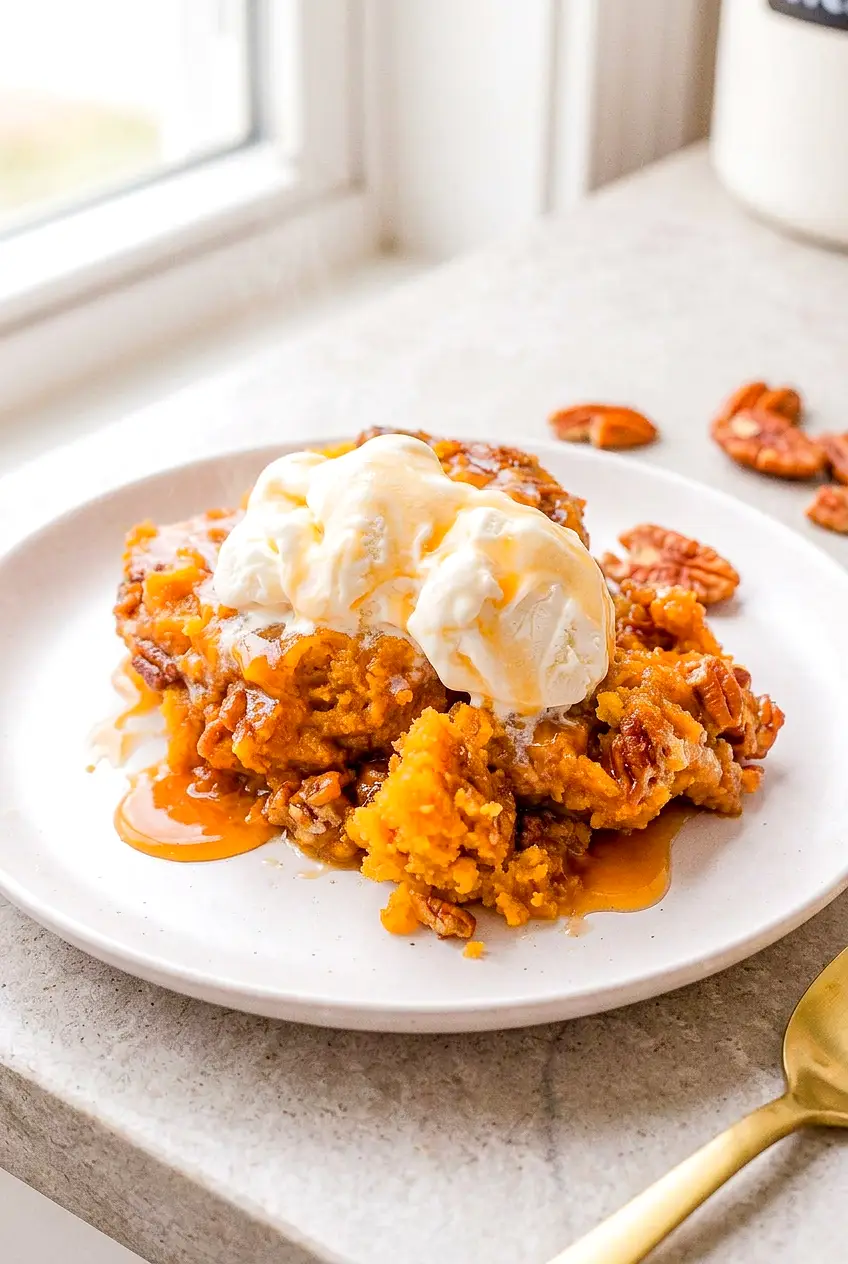
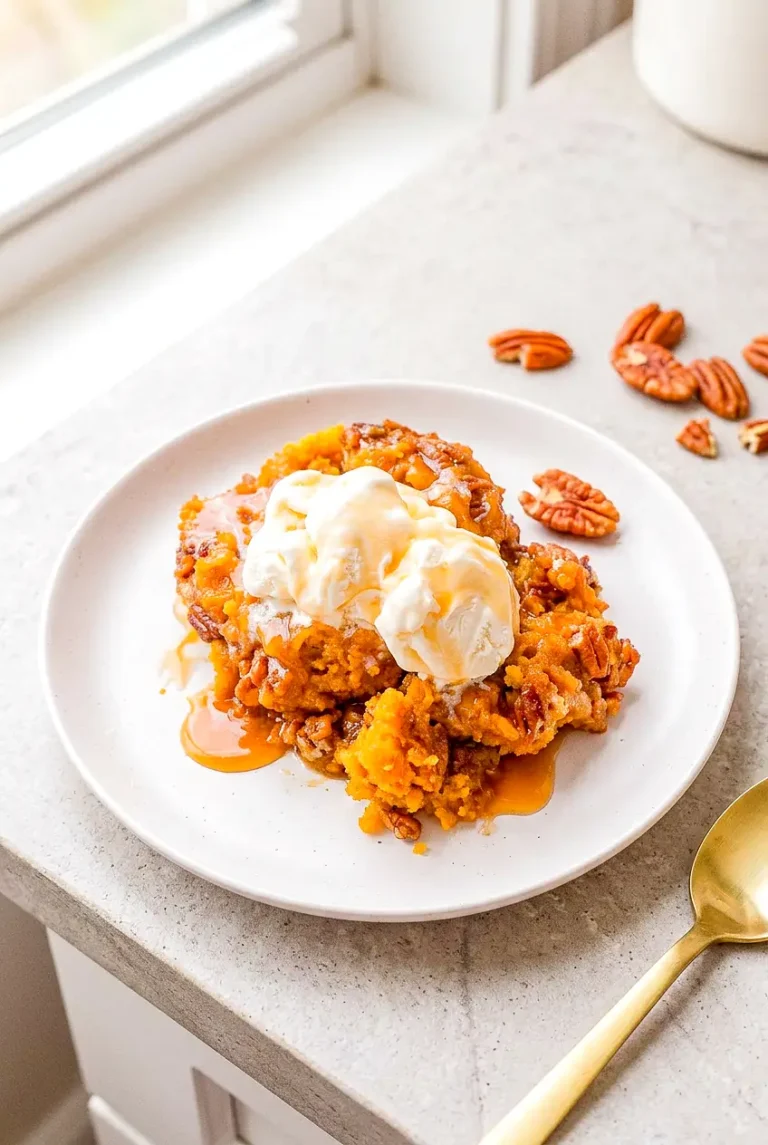
Pumpkin pecan cobbler bakes up with two layers in one pan: a soft, cake-like pumpkin base and a rich sauce that settles underneath and around the edges. Serve it warm in bowls so you get some of both in every scoop.

The method is simple and a little unusual. You spread the batter in the dish, sprinkle the brown sugar and pecans over the top, then pour very hot water over everything without stirring. It will look loose before baking, but that is what helps the sauce form.

Ingredients for Pumpkin Pecan Cobbler

Side view of pumpkin pecan cobbler on a white plate, showing the soft pumpkin layer and sauce around the edges.
  • 1 cup pumpkin purée (240g), not pumpkin pie filling
  • 1 cup all-purpose flour (120g)
  • 3/4 cup granulated sugar (150g)
  • 2 teaspoons baking powder
  • 2 teaspoons pumpkin pie spice
  • 1/2 teaspoon salt
  • 1/2 cup milk (120g)
  • 1/3 cup neutral oil (65g)
  • 1 teaspoon vanilla extract
  • 3/4 cup packed brown sugar (165g)
  • 1 cup chopped pecans (110g)
  • 1 1/2 cups very hot or boiling water (360g)

Optional for serving: vanilla ice cream, whipped cream or whipped topping, extra caramel sauce, or extra chopped pecans.

How to Make Pumpkin Pecan Cobbler

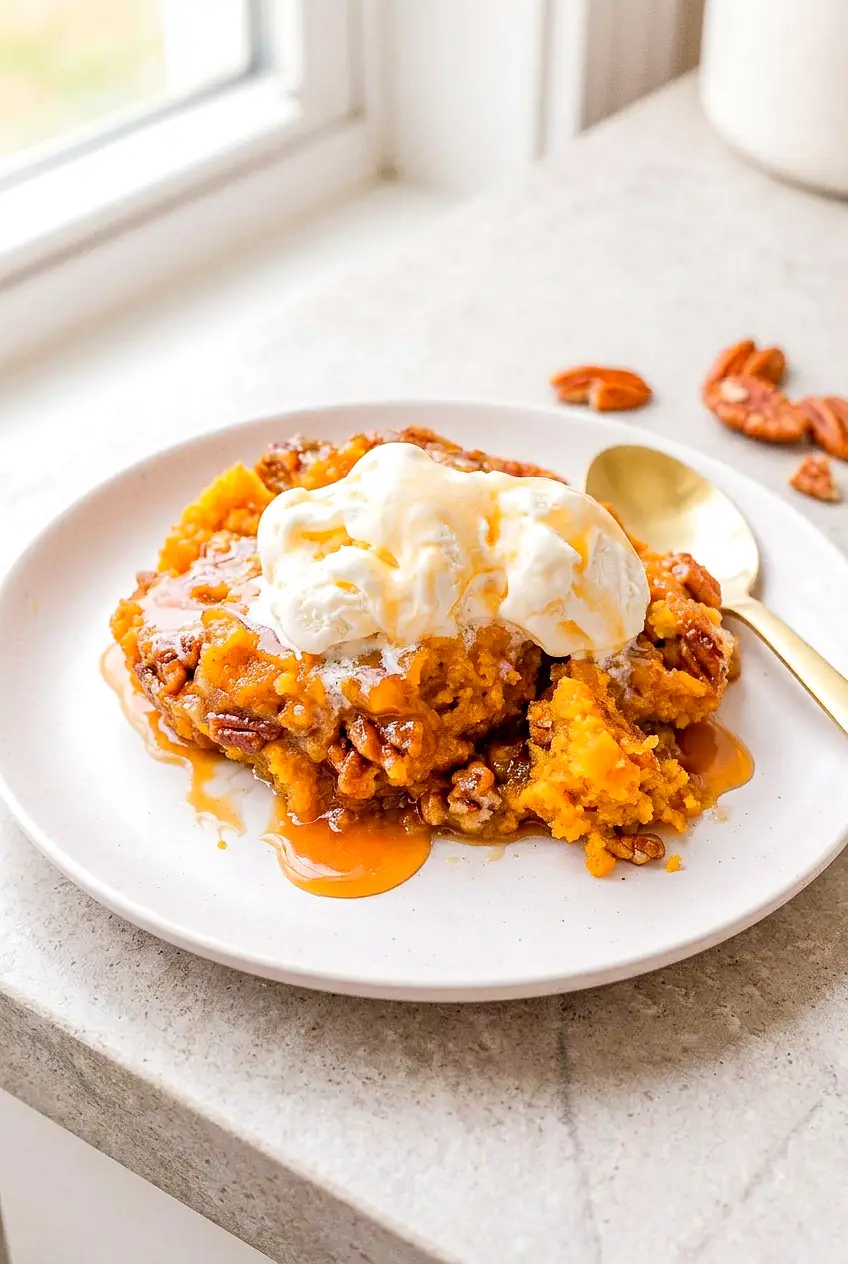
Close view of pumpkin pecan cobbler with melting vanilla ice cream, caramel sauce, and chopped pecans.
  1. Preheat the oven: Heat the oven to 350°F. Lightly grease a 9×5-inch loaf pan, 9×9-inch baking dish, or 2-quart casserole dish. Set the dish on a baking sheet to catch any bubbling overflow.
  2. Mix the batter: In a medium bowl, whisk together the pumpkin purée, flour, granulated sugar, baking powder, pumpkin pie spice, salt, milk, oil, and vanilla until smooth. The batter should be thick and spoonable, with no dry streaks left.
  3. Spread in the pan: Spoon the batter into the prepared dish and spread it into an even layer, reaching the corners.
  4. Add the topping: In a small bowl, stir together the brown sugar and chopped pecans. Sprinkle the mixture evenly over the batter. Do not stir it in.
  5. Pour over the hot water: Slowly pour the very hot or boiling water over the top. Pour gently so the layers stay mostly in place, then leave the dish undisturbed. Do not stir.
  6. Bake: Bake for 45 to 60 minutes, checking around 40 to 45 minutes. The cobbler is done when the edges are bubbling, the top is lightly browned, and the center looks set but still soft. A tester inserted into the cake layer should come out with moist crumbs, not wet batter.
  7. Tent if needed: If the top browns too quickly before the center is set, loosely cover the dish with foil for the rest of the baking time.
  8. Rest and serve: Let the cobbler rest for 10 to 15 minutes before serving. The sauce will settle slightly as it stands. Spoon warm into bowls and serve with ice cream or whipped topping if you like.

How to Tell When the Cobbler Is Done

Bake time can vary with the pan shape and depth. A loaf pan usually takes longer than a wider 9×9-inch dish, so use the look of the cobbler more than the clock.

  • The edges should be bubbling.
  • The top should be lightly browned.
  • The center should look set but still soft, not sloshy.
  • A tester in the cake layer should come out with moist crumbs.

Serving Ideas

This cobbler is best served warm while the sauce is still loose. Vanilla ice cream melts nicely into the warm pumpkin layer, and whipped cream or whipped topping works well if you want something lighter. A few extra chopped pecans on top add a little crunch.

How to Store and Reheat Pumpkin Pecan Cobbler

Let the cobbler cool, then cover the dish or transfer leftovers to an airtight container. Refrigerate for up to 3 to 4 days. The sauce will thicken in the refrigerator, which is normal.

Reheat individual portions gently in the microwave, or warm the whole dish covered in a low oven until heated through. Reheat just until warm so the sauce does not dry out. For the softest texture, this dessert is best baked close to serving time rather than fully made ahead.

For a more classic pumpkin bake, try Pumpkin Bundt Cake with Maple Icing.

If you like cozy baked desserts with nuts, you may also enjoy Baked Pears with Walnut Oatmeal Crumble.

If you want another easy fall dessert, Maple Glazed Apple Blondies are a good next stop.

Nutrition

Nutrition is approximate and will vary based on ingredient brands, exact amounts, and serving size.

  • Serving size: about 1/8 of the cobbler
  • Calories: about 300
  • Protein: 4g
  • Fat: 13g
  • Carbohydrates: 46g
  • Per 100g: about 240 calories, 3g protein, 10g fat, 37g carbohydrates

Pumpkin Pecan Cobbler

A two-layer cobbler with a spoonable pumpkin cake on top and a rich pecan-brown-sugar sauce that settles beneath and around the edges.
Course: Dessert
Cuisine: American
Prep: 15 min
Cook: 55 min
Total: 80 min
Servings: 8 Calories: about 300

Equipment

  • 9×5-inch loaf pan or 9×9-inch baking dish or 2-quart casserole dish
  • baking sheet
  • mixing bowl
  • whisk
  • measuring cups and spoons
  • spoon

Ingredients

Cobbler batter

  • 1 cup pumpkin purée (240g) (not pumpkin pie filling)
  • 1 cup all-purpose flour (120g)
  • 3/4 cup granulated sugar (150g)
  • 2 teaspoons baking powder
  • 2 teaspoons pumpkin pie spice
  • 1/2 teaspoon salt
  • 1/2 cup milk (120g)
  • 1/3 cup neutral oil (65g)
  • 1 teaspoon vanilla extract

Topping

  • 3/4 cup packed brown sugar (165g)
  • 1 cup chopped pecans (110g)

To pour

  • 1 1/2 cups very hot or boiling water (360g)

Optional for serving

  • vanilla ice cream (optional)
  • whipped cream or whipped topping (optional)
  • extra caramel sauce (optional)
  • extra chopped pecans (optional)

Instructions

  1. Preheat the oven to 350°F (177°C). Lightly grease a 9×5-inch loaf pan, 9×9-inch baking dish, or 2-quart casserole dish and set the dish on a baking sheet to catch any overflow.
  2. In a medium mixing bowl, whisk together the pumpkin purée, flour, granulated sugar, baking powder, pumpkin pie spice, salt, milk, oil, and vanilla until smooth and thick with no dry streaks.
  3. Spoon the batter into the prepared dish and spread into an even layer, reaching the corners.
  4. In a small bowl, stir together the brown sugar and chopped pecans, then sprinkle the mixture evenly over the batter without stirring it in.
  5. Slowly and gently pour the very hot or boiling water over the top so the layers remain mostly in place; do not stir.
  6. Bake for 45 to 60 minutes, checking around 40 to 45 minutes. The cobbler is done when the edges are bubbling, the top is lightly browned, and the center looks set but still soft. A tester inserted into the cake layer should come out with moist crumbs, not wet batter.
  7. If the top browns too quickly before the center is set, loosely cover the dish with foil for the remaining baking time.
  8. Let the cobbler rest for 10 to 15 minutes before serving so the sauce settles slightly, then spoon warm into bowls and serve with ice cream or whipped topping if desired.

Tips

  • Set the baking dish on a baking sheet to catch any bubbling overflow.
  • Pour the very hot water slowly and gently over the top without stirring to allow the sauce to form.
  • Check doneness around 40 to 45 minutes since pan shape and depth affect bake time.
  • Tent loosely with foil if the top is browning too fast before the center is set.
  • Let the cobbler rest 10 to 15 minutes so the sauce thickens slightly before serving.

Notes

Cool completely before covering or transferring leftovers. Refrigerate for 3 to 4 days; the sauce will thicken. Reheat individual portions gently in the microwave or warm the covered whole dish in a low oven until just heated through. Best baked close to serving time for the softest texture.

Nutrition

Serving Size: about 1/8 of the cobbler | Calories: about 300 | Protein: 4 g | Fat: 13 g | Carbohydrates: 46 g | Per100g: about 240 calories, 3 g protein, 10 g fat, 37 g carbohydrates

Pumpkin Cinnamon Rolls

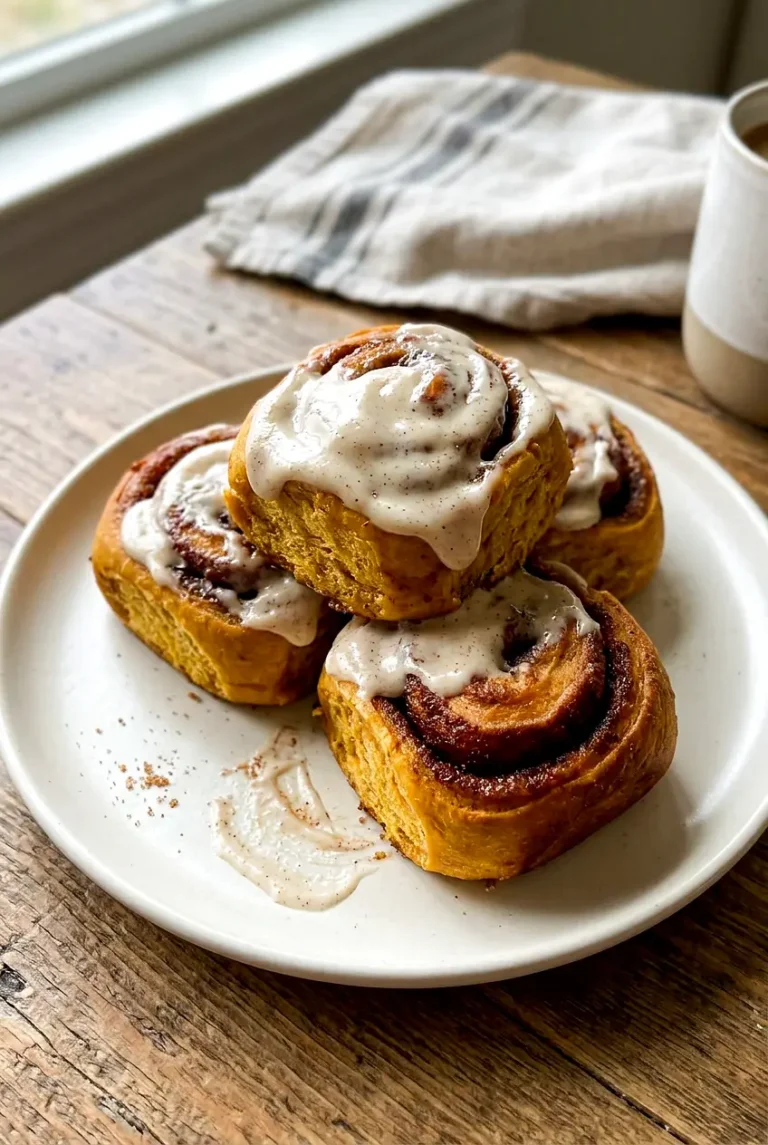
These pumpkin cinnamon rolls bake up soft and fluffy with a rich brown sugar filling and a thick maple cream cheese icing. The pumpkin adds moisture and a gentle fall flavor without changing the classic cinnamon roll feel too much.

The dough is naturally softer and a little stickier than plain cinnamon roll dough, so the main trick is to add only enough flour to make it workable. That keeps the rolls tender instead of heavy. This is a good weekend baking project, and the rolls also work well for overnight prep or freezing.

Ingredients for Pumpkin Cinnamon Rolls

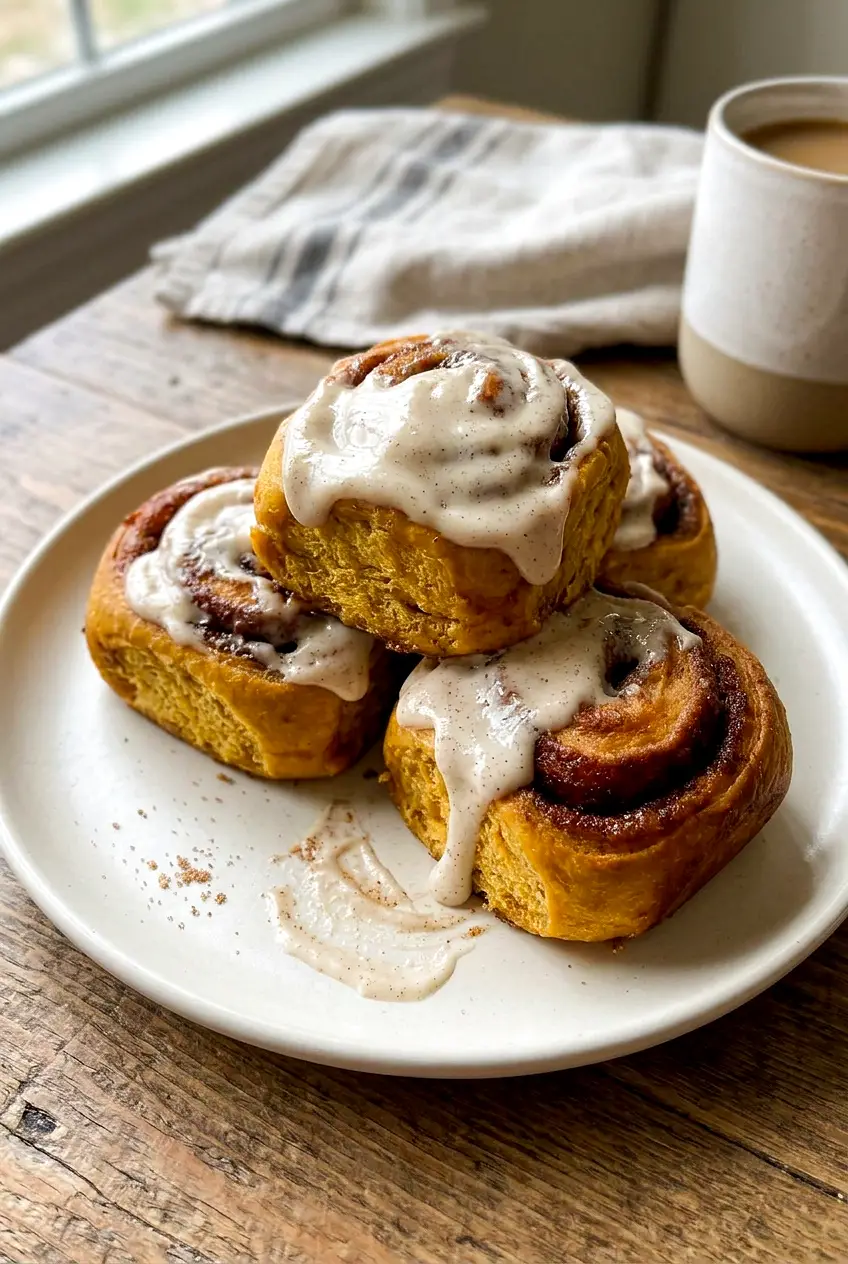
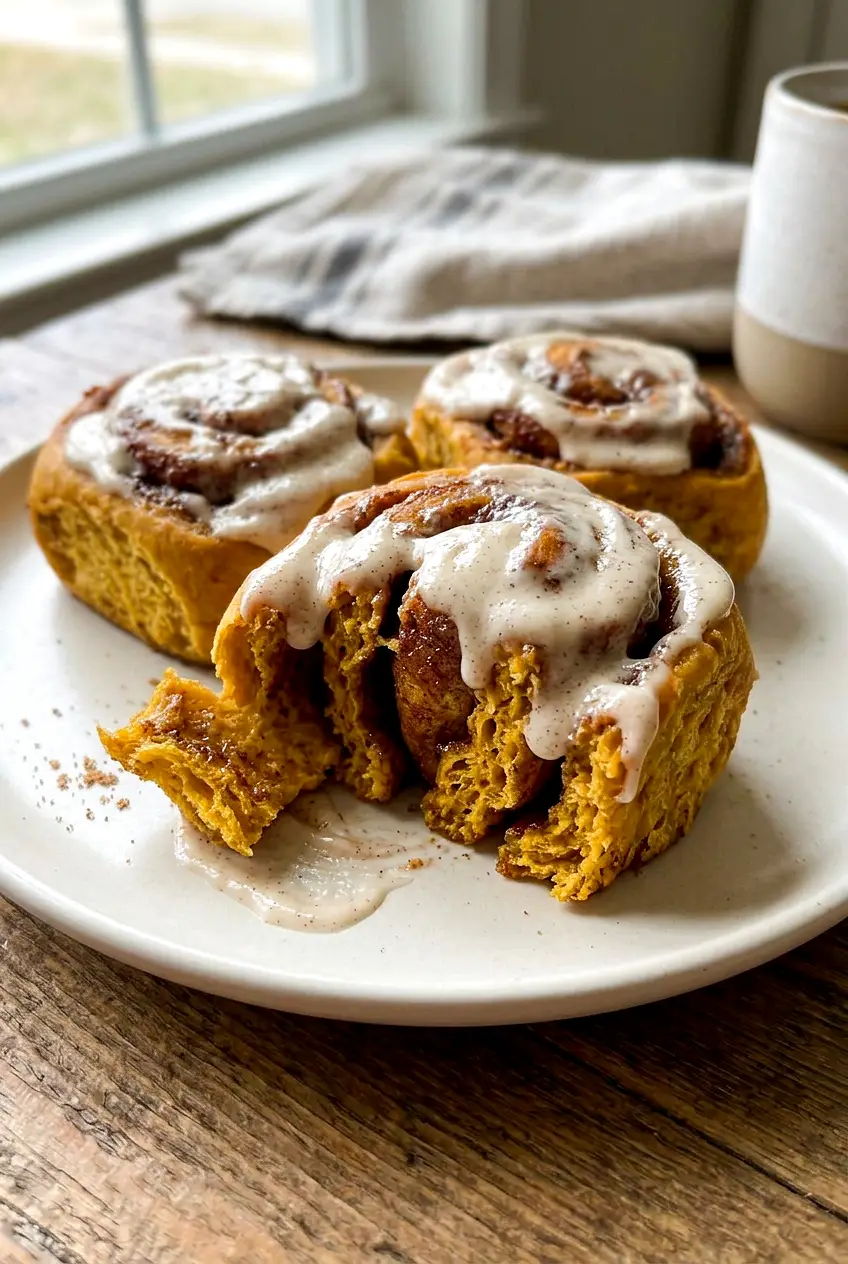
A warm pumpkin cinnamon roll with icing and visible cinnamon swirl on a plate
  • All-purpose flour: 4 to 4 1/2 cups (about 550g), plus a little more only if needed for handling
  • Active dry yeast or instant yeast: 2 1/4 teaspoons (7g)
  • Warm milk: 3/4 cup (180g)
  • Unsalted butter: 1/4 cup, melted (about 55g), plus more for greasing
  • Granulated sugar: 1/4 cup (50g)
  • Pumpkin puree: 3/4 cup (180g); use plain pumpkin puree, not pumpkin pie filling
  • Egg: 1 large
  • Salt: 1 teaspoon
  • Ground nutmeg: 1/2 teaspoon

For the filling

  • Brown sugar: 3/4 cup packed (165g)
  • Ground cinnamon: 1 to 1 1/2 teaspoons
  • Pumpkin pie spice: 1 to 2 teaspoons
  • Melted butter: 1 to 2 tablespoons, for spreading over the dough

For the maple cream cheese icing

  • Cream cheese: 4 ounces (115g), softened
  • Confectioners’ sugar: 1 to 1 1/2 cups (120g to 180g)
  • Maple syrup: 1 to 2 tablespoons
  • Milk: 1 to 2 tablespoons, as needed for consistency
  • Ground cinnamon: 1/4 teaspoon

Whole milk or nondairy milk both work in the dough. If you use salted butter, reduce the added salt slightly. Instant yeast may rise a little faster than active dry yeast.

How to Make Pumpkin Cinnamon Rolls

Close-up of pumpkin cinnamon rolls with thick maple icing and swirled filling
  1. Make the dough: In the bowl of a stand mixer or a large mixing bowl, combine the warm milk, yeast, granulated sugar, pumpkin puree, melted butter, egg, salt, and nutmeg. Add most of the flour and mix until a soft dough forms.
  2. Knead: Knead with a dough hook or by hand for 10 to 15 minutes, adding only enough of the remaining flour to keep the dough from being unworkably sticky. The dough should feel soft and slightly tacky, not stiff. Keep kneading until it is smooth and elastic. If you stretch a small piece, it should come close to passing a windowpane test instead of tearing right away.
  3. Let the dough rise: Lightly grease a bowl, place the dough inside, and turn it once to coat. Cover and let rise in a warm, draft-free spot for 60 to 90 minutes, or until visibly puffy and nearly doubled. A gentle press should leave an indentation that springs back slowly.
  4. Prepare the filling and pan: In a small bowl, mix the brown sugar, cinnamon, and pumpkin pie spice. Lightly grease a 9×13-inch baking dish.
  5. Roll out the dough: Turn the dough onto a lightly floured surface and roll it into an even rectangle. Brush or spread the surface with 1 to 2 tablespoons melted butter, then sprinkle the filling evenly over the dough, going close to the edges in a thin, even layer.
  6. Shape and cut: Starting from a long side, roll the dough up tightly into a log. Cut into 12 even pieces and place them in the greased baking dish with a little space between them.
  7. Second rise: Cover the pan and let the rolls rise for 30 to 45 minutes, until puffy and airy. When gently nudged, they should not spring back right away.
  8. Bake: Heat the oven to 375°F. Bake for 22 to 28 minutes, rotating the pan halfway through if needed for even browning. If the tops are browning too quickly, tent loosely with foil after about 15 minutes.
  9. Check for doneness: The rolls are done when the tops are golden brown, the center rolls look set and puffed, and the middle no longer looks doughy. The edges may pull slightly from the pan. If you want to use a thermometer, the center roll should read about 190°F to 200°F.
  10. Make the icing: Beat the cream cheese, confectioners’ sugar, maple syrup, cinnamon, and 1 tablespoon milk until smooth. Add a little more milk only if needed to make it spreadable. Keep the icing fairly thick so it sits on the warm rolls instead of running off.
  11. Finish: Let the rolls cool for a few minutes so they are warm but not piping hot, then spread or drizzle the icing over the top.

Why Pumpkin Cinnamon Roll Dough Feels Sticky

Pumpkin adds moisture, so this dough often feels softer than standard cinnamon roll dough. That is normal. If you keep adding flour until it feels dry, the baked rolls can turn out dense.

Use the flour range as a guide, but go by texture. The dough should be manageable, smooth, and slightly tacky. Lightly flour the counter and your hands as needed, but avoid working in too much extra flour during kneading and shaping.

How to Tell When the Rolls Are Fully Baked

Sweet rolls can look finished on top before the centers are fully baked. Check the middle of the pan, not just the edges. The center rolls should look puffed and set, with no wet or doughy patch in the spiral.

If the tops are getting dark before the centers are done, loosely tent the pan with foil and keep baking until the middle is baked through.

Make-Ahead Options

For overnight rolls, shape and cut the rolls, place them in the greased pan, cover, and refrigerate overnight. In the morning, let them sit at room temperature until they look puffy, then bake as directed. Depending on how cold your refrigerator runs, they may need a little extra time before baking.

You can also freeze shaped unbaked rolls or fully baked rolls. Thaw unbaked rolls before the final rise and baking, or thaw baked rolls before reheating.

Serving Ideas

Serve these warm with coffee or tea for breakfast or brunch. They also fit well on a fall breakfast spread. For another pumpkin breakfast idea, try these Pumpkin Cream Cheese Muffins with Crumb Topping. If you like cozy fall bakes, you may also enjoy this Cinnamon Apple Bread with Tender Apple Pieces. For another breakfast roll with a different fall flavor, see these Apple Cinnamon Rolls with Caramel Icing.

How to Store and Reheat Pumpkin Cinnamon Rolls

Let the rolls cool before covering them. If they are iced with cream cheese frosting, store them covered in the refrigerator. If they are unfrosted, they can sit at room temperature for a short time, but keep them tightly covered so they do not dry out.

To reheat, warm individual rolls gently in the microwave or place the pan in a low oven until just warmed through. Avoid overheating, which can dry the dough. Add a little extra icing after reheating if needed.

Nutrition

Nutrition is approximate and will vary based on ingredient brands, exact amounts used, icing amount, and serving size.

  • Serving size: 1 roll
  • Calories: about 310
  • Protein: 5g
  • Fat: 8g
  • Carbohydrates: 55g
  • Per 100g: about 320 calories, 5g protein, 8g fat, 57g carbohydrates

Pumpkin Cinnamon Rolls

Soft, tender cinnamon rolls enriched with pumpkin and finished with a maple cream cheese icing.
Course: Breakfast
Cuisine: American
Prep: 40 min
Cook: 25 min
Total: 210 min
Servings: 12 Calories: about 310 kcal

Equipment

  • oven
  • stand mixer or large mixing bowl
  • dough hook (optional)
  • rolling pin
  • 9×13-inch baking dish
  • measuring cups and spoons
  • small bowl
  • electric mixer or whisk

Ingredients

Dough

  • 4 to 4 1/2 cups all-purpose flour (about 550g), plus a little more only if needed for handling
  • 2 1/4 teaspoons (7g) active dry yeast or instant yeast
  • 3/4 cup (180g) warm milk (whole or nondairy)
  • 1/4 cup melted unsalted butter (about 55g), plus more for greasing
  • 1/4 cup (50g) granulated sugar
  • 3/4 cup (180g) pumpkin puree (not pumpkin pie filling)
  • 1 large egg
  • 1 teaspoon salt
  • 1/2 teaspoon ground nutmeg

Filling

  • 3/4 cup packed (165g) brown sugar
  • 1 to 1 1/2 teaspoons ground cinnamon
  • 1 to 2 teaspoons pumpkin pie spice
  • 1 to 2 tablespoons melted butter, for spreading

Maple cream cheese icing

  • 4 ounces (115g) cream cheese, softened
  • 1 to 1 1/2 cups (120g to 180g) confectioners’ sugar
  • 1 to 2 tablespoons maple syrup
  • 1 to 2 tablespoons milk, as needed for consistency
  • 1/4 teaspoon ground cinnamon

Instructions

  1. In a stand mixer bowl or large mixing bowl, combine the warm milk, yeast, granulated sugar, pumpkin puree, melted butter, egg, salt, and nutmeg.
  2. Add most of the flour and mix until a soft dough forms.
  3. Knead with a dough hook or by hand 10 to 15 minutes, adding only enough of the remaining flour to keep the dough manageable; dough should be smooth, elastic, and slightly tacky.
  4. Lightly grease a bowl, place the dough inside, turn once to coat, cover, and let rise in a warm, draft-free spot 60 to 90 minutes until visibly puffy and nearly doubled.
  5. In a small bowl, mix the brown sugar, cinnamon, and pumpkin pie spice for the filling.
  6. Lightly grease a 9×13-inch baking dish.
  7. Turn the dough onto a lightly floured surface and roll it into an even rectangle.
  8. Brush the dough with 1 to 2 tablespoons melted butter and sprinkle the filling evenly in a thin layer, going close to the edges.
  9. Starting from a long side, roll the dough tightly into a log, cut into 12 even pieces, and place them in the prepared baking dish with a little space between each.
  10. Cover the pan and let the rolls rise 30 to 45 minutes until puffy and airy.
  11. Preheat the oven to 375°F (190°C).
  12. Bake the rolls 22 to 28 minutes, rotating the pan halfway if needed; if tops brown too quickly, tent loosely with foil after about 15 minutes.
  13. Check doneness: tops should be golden, center rolls set and puffed, or the center roll registers about 190°F to 200°F (88°C to 93°C).
  14. Beat the cream cheese, confectioners’ sugar, maple syrup, cinnamon, and 1 tablespoon milk until smooth; add more milk only if needed to reach a spreadable but fairly thick consistency.
  15. Let the rolls cool a few minutes, then spread or drizzle the icing over the warm rolls.

Tips

  • Use the lower end of the flour range while mixing; add more only as needed to keep the dough tender.
  • The dough should be soft and slightly tacky—avoid adding so much flour that it becomes dry.
  • If the tops brown before centers are done, loosely tent the pan with foil and continue baking.
  • For overnight prep, shape the rolls, place them in the pan, cover, and refrigerate; in the morning let them warm and puff before baking.
  • You can freeze shaped unbaked rolls (thaw before final rise) or freeze fully baked rolls and reheat gently.

Notes

Store iced rolls covered in the refrigerator; unfrosted rolls can be kept tightly covered at room temperature for a short time. Reheat gently in the microwave or a low oven to avoid drying; add extra icing after reheating if desired.

Nutrition

Calories: about 310 kcal | Protein: 5 g | Fat: 8 g | Carbohydrates: 55 g

Pumpkin Cream Cheese Muffins

These pumpkin cream cheese muffins bake up soft and well-spiced, with a creamy center and a brown sugar crumb topping. They work well for breakfast, brunch, or an afternoon snack, and they hold up nicely for make-ahead baking.

The method is straightforward: mix the batter gently, keep the cream cheese filling thick, and start the muffins in a hot oven so the tops rise quickly before the centers finish baking.

Ingredients for Pumpkin Cream Cheese Muffins

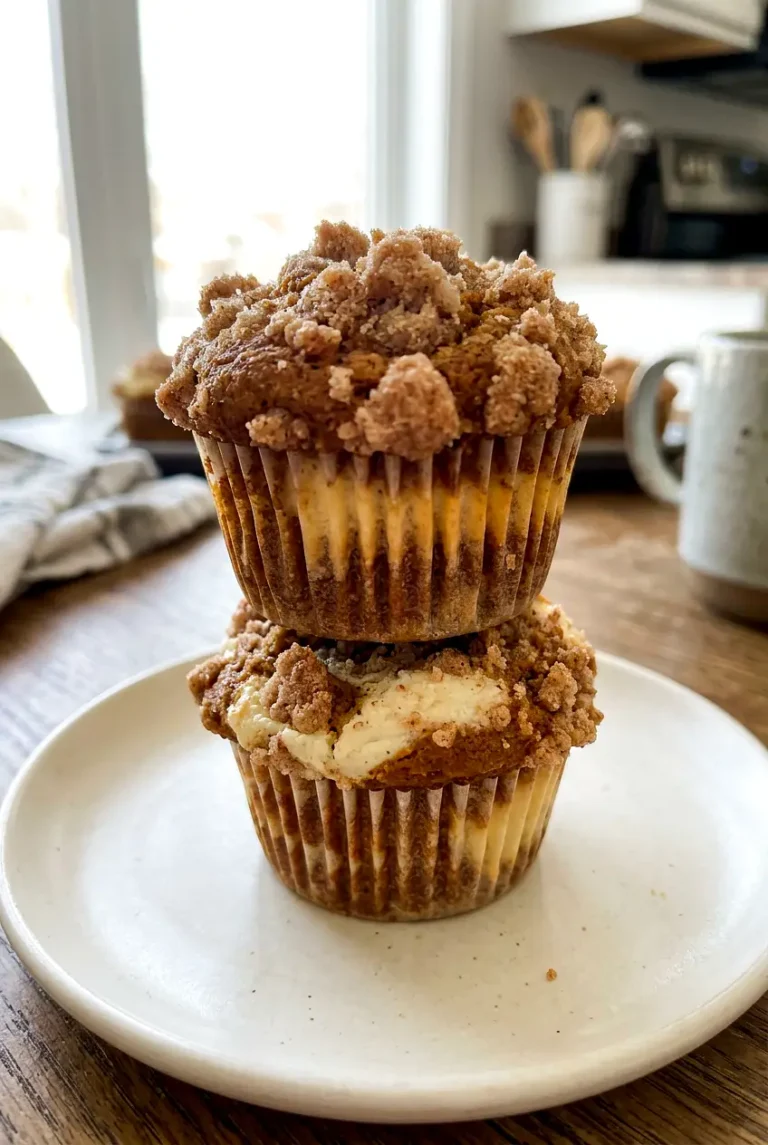
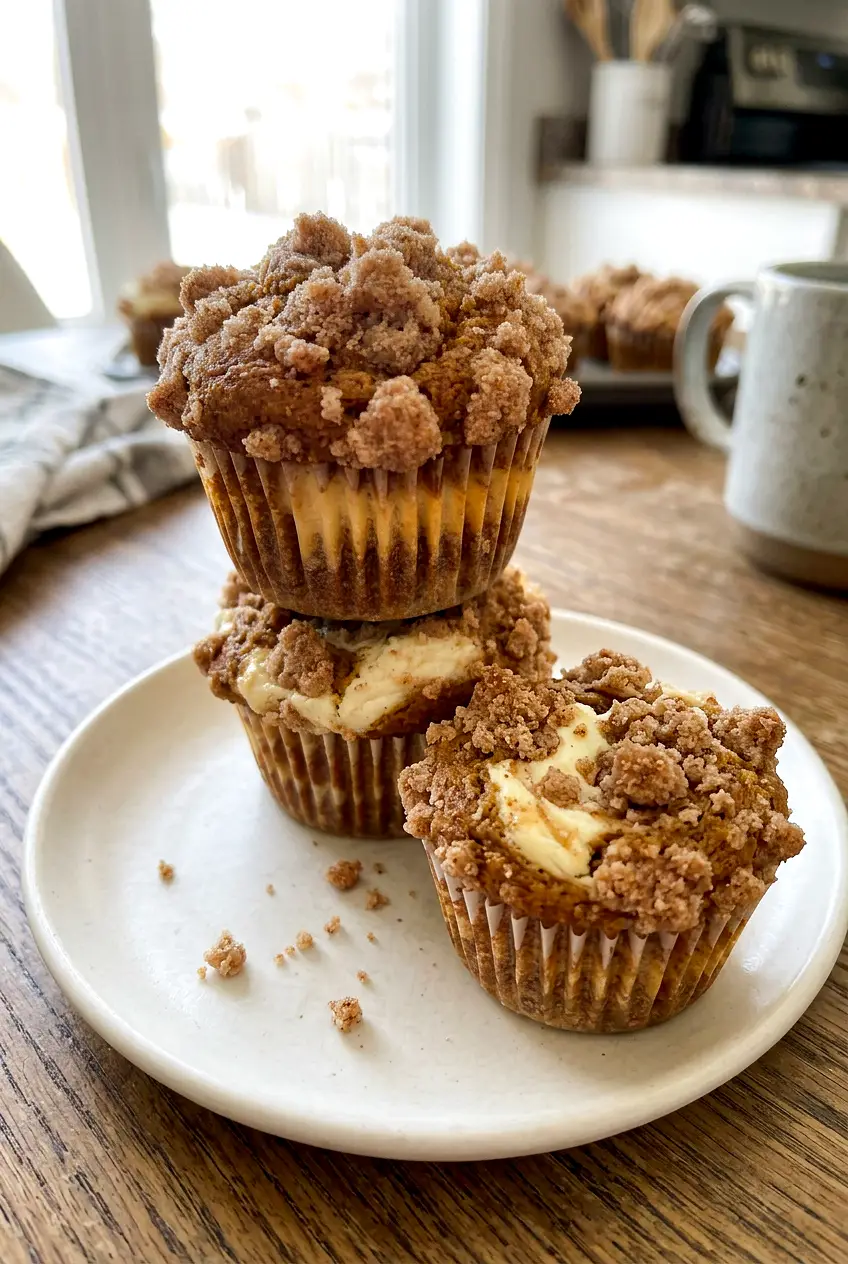
Pumpkin cream cheese muffin on a small plate with a lightly browned top and visible filling
  • All-purpose flour: 2 1/4 cups (270g), divided
  • Baking powder: 2 teaspoons
  • Baking soda: 1 teaspoon
  • Pumpkin pie spice: 1 1/2 teaspoons
  • Salt: 1/2 teaspoon
  • Pumpkin puree: 1 cup (245g); use canned pumpkin puree, not pumpkin pie filling
  • Granulated sugar: 3/4 cup (150g), plus 1/4 cup (50g) for the filling
  • Brown sugar: 1/2 cup packed (100g)
  • Eggs: 2 large
  • Neutral oil or melted butter: 1/2 cup (120g)
  • Milk: 1/4 cup (60g)
  • Cream cheese: 8 ounces (225g), softened
  • Egg yolk: 1 large
  • Vanilla extract: 1 teaspoon
  • Unsalted butter: 1/4 cup (55g), melted, for the crumb topping
  • Ground cinnamon: 1 teaspoon, for the crumb topping

Optional toppings: 1/3 cup chopped pecans or walnuts, 1/2 cup mini chocolate chips, or 1 to 2 tablespoons coarse sugar.

How to Make Pumpkin Cream Cheese Muffins

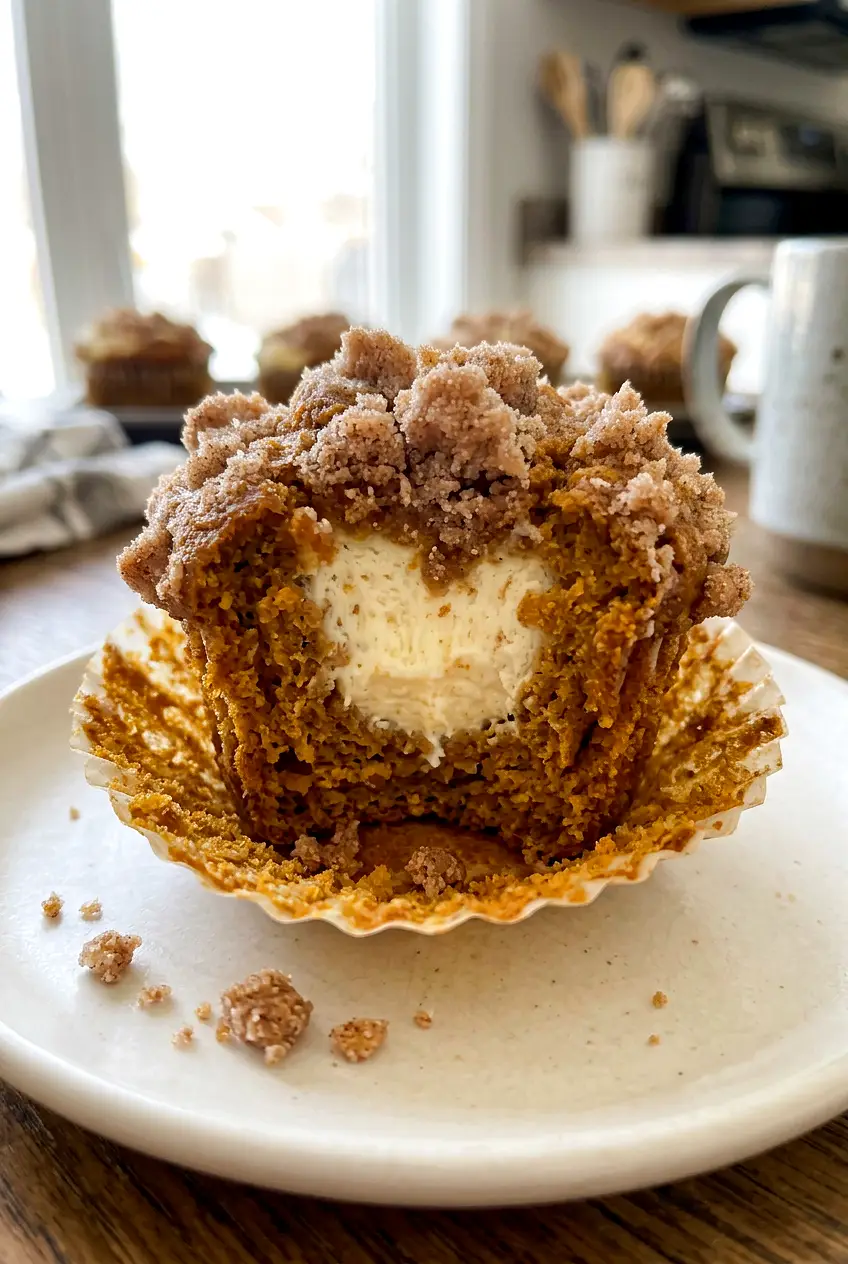
Close view of a pumpkin cream cheese muffin showing the creamy center and crumb topping
  1. Preheat the oven: Heat the oven to 425°F. Line or grease a standard 12-cup muffin pan.
  2. Make the crumb topping: In a small bowl, stir together 1/2 cup (60g) of the flour, the brown sugar, cinnamon, and melted butter until the mixture looks sandy with some clumps. Set aside.
  3. Mix the filling: In a medium bowl, beat the softened cream cheese, 1/4 cup (50g) granulated sugar, egg yolk, and vanilla until smooth and thick. It should be spoonable, not runny.
  4. Whisk the dry ingredients: In a large bowl, whisk together the remaining 1 3/4 cups (210g) flour, baking powder, baking soda, pumpkin pie spice, and salt.
  5. Whisk the wet ingredients: In another bowl, whisk together the pumpkin puree, remaining 3/4 cup (150g) granulated sugar, eggs, oil or melted butter, and milk until smooth.
  6. Mix the batter: Pour the wet mixture into the dry ingredients and stir with a spatula just until no dry streaks remain. The batter should be thick but scoopable. Do not overmix.
  7. Fill the muffin cups: Spoon batter into each cup until about halfway full. Add a small mound of cream cheese filling to the center of each, then top with a little more batter so the filling is mostly covered. Keep the cups around 3/4 full.
  8. Add the topping: Divide the crumb topping over the muffins and press it on lightly so it sticks. Add any optional nuts or coarse sugar now.
  9. Bake at high heat first: Bake for 6 to 8 minutes at 425°F, until the tops begin to puff.
  10. Lower the heat and finish baking: Without opening the oven, reduce the temperature to 350°F and bake for 12 to 16 minutes more. The muffins are done when the tops are domed and lightly browned, the centers spring back lightly when touched, and a tester inserted into the muffin portion comes out clean or with a few moist crumbs. Avoid testing straight through the cream cheese center.
  11. Cool before serving: Let the muffins cool in the pan for 10 to 15 minutes, then transfer to a wire rack. This helps the filling set and keeps the bottoms from getting soggy.

Why the Muffins Rise Better With a Hot Start

Starting at 425°F gives the batter a quick lift, which helps create taller muffin tops. Lowering the oven to 350°F lets the pumpkin batter and cream cheese center finish baking through without browning too fast on top.

Start checking near the early end of the baking time if your oven runs hot. If needed, rotate the pan once during the lower-temperature part of baking for more even browning.

Why Are My Muffins Dense or Undercooked?

Dense muffins: The batter was likely overmixed. Stir only until the flour is absorbed.

Filling that sinks or leaks: The cream cheese mixture may be too loose, or the muffin cups may be overfilled. The filling should hold its shape when spooned.

Crumb topping that melts into the batter: The butter may have been too hot, or the crumb mixture was too soft. Making it first and letting it sit while you prep the batter helps.

Centers still wet: Filled muffins often need the full baking time. Check the muffin portion, not the cream cheese center, and look for tops that spring back lightly.

Easy Variations

Plain Pumpkin Muffins

Skip the cream cheese filling and crumb topping, then bake the pumpkin batter as regular muffins. A light sprinkle of cinnamon sugar works well on top. Start checking a little early since plain muffins may bake faster.

Pumpkin Crumb Muffins

Use the pumpkin batter and crumb topping, but leave out the cream cheese filling for a simpler coffee-cake style muffin.

Serving Ideas

Serve these muffins warm or at room temperature with coffee or tea. They also fit well on a brunch table. If you want another cozy bake, try this cinnamon apple bread with tender apple pieces.

How to Store and Reheat Pumpkin Cream Cheese Muffins

Let the muffins cool completely before storing. Because of the cream cheese filling, keep them in an airtight container in the refrigerator. The crumb topping will soften a little over time, which is normal.

To reheat, warm a muffin briefly in the microwave or in a low oven until just heated through. You can also make the crumb topping and cream cheese filling ahead of time to make assembly faster on baking day.

For another sweet breakfast bake, these apple cinnamon rolls with caramel icing are a good next option. For a lighter muffin recipe, try these protein blueberry muffins.

Nutrition

Nutrition is approximate and will vary based on ingredient brands, exact amounts, and serving size.

  • Serving size: 1 muffin
  • Calories: about 275
  • Protein: 5g
  • Fat: 14g
  • Carbohydrates: 34g
  • Per 100g: about 310 calories, 6g protein, 16g fat, 39g carbohydrates

Pumpkin Cream Cheese Muffins

Soft, spiced pumpkin muffins with a creamy cream-cheese center and a brown-sugar crumb topping.
Course: Breakfast
Cuisine: American
Prep: 20 min
Cook: 24 min
Total: 60 min
Servings: 12 Calories: 275 kcal

Equipment

  • 12-cup muffin pan
  • mixing bowls
  • whisk
  • spatula
  • hand mixer
  • wire rack
  • measuring cups and spoons

Ingredients

Dry ingredients for batter

  • 1 3/4 cups (210g) all-purpose flour
  • 2 teaspoons baking powder
  • 1 teaspoon baking soda
  • 1 1/2 teaspoons pumpkin pie spice
  • 1/2 teaspoon salt

Wet ingredients for batter

  • 1 cup (245g) pumpkin puree
  • 3/4 cup (150g) granulated sugar
  • 2 large eggs
  • 1/2 cup (120g) neutral oil or melted butter
  • 1/4 cup (60g) milk

Cream cheese filling

  • 8 ounces (225g) cream cheese, softened
  • 1/4 cup (50g) granulated sugar
  • 1 large egg yolk
  • 1 teaspoon vanilla extract

Crumb topping

  • 1/2 cup (60g) all-purpose flour
  • 1/2 cup packed (100g) brown sugar
  • 1/4 cup (55g) unsalted butter, melted
  • 1 teaspoon ground cinnamon

Optional toppings

  • 1/3 cup chopped pecans or walnuts (optional)
  • 1/2 cup mini chocolate chips (optional)
  • 1 to 2 tablespoons coarse sugar (optional)

Instructions

  1. Preheat the oven to 425°F (218°C). Line or grease a standard 12-cup muffin pan.
  2. Make the crumb topping: in a small bowl stir together 1/2 cup (60g) flour, 1/2 cup packed (100g) brown sugar, 1 teaspoon cinnamon, and 1/4 cup (55g) melted butter until sandy with some clumps; set aside.
  3. Make the cream cheese filling: beat the softened cream cheese, 1/4 cup (50g) granulated sugar, 1 egg yolk, and 1 teaspoon vanilla until smooth and thick and spoonable.
  4. Whisk the dry batter ingredients: in a large bowl whisk together the remaining 1 3/4 cups (210g) flour, 2 teaspoons baking powder, 1 teaspoon baking soda, 1 1/2 teaspoons pumpkin pie spice, and 1/2 teaspoon salt.
  5. Whisk the wet batter ingredients: in another bowl whisk together 1 cup (245g) pumpkin puree, 3/4 cup (150g) granulated sugar, 2 eggs, 1/2 cup (120g) oil or melted butter, and 1/4 cup (60g) milk until smooth.
  6. Combine batter: pour the wet mixture into the dry ingredients and stir with a spatula just until no dry streaks remain; batter should be thick but scoopable—do not overmix.
  7. Fill muffin cups: spoon batter into each cup until about halfway full, add a small mound of the cream cheese filling to the center of each, then top with a little more batter so the cups are about 3/4 full.
  8. Add the topping: divide the crumb topping over the muffins and press lightly so it sticks; add optional nuts or coarse sugar if desired.
  9. Bake at 425°F (218°C) for 6 to 8 minutes, until the tops begin to puff.
  10. Without opening the oven, reduce the temperature to 350°F (177°C) and bake 12 to 16 minutes more, until tops are domed and lightly browned and the muffin portion springs back lightly; test the muffin portion (avoid testing through the cream cheese).
  11. Cool in the pan for 10 to 15 minutes, then transfer muffins to a wire rack to finish cooling.

Tips

  • Start baking at high heat to encourage taller, domed muffin tops.
  • Stir the batter only until the flour is absorbed to avoid dense muffins.
  • Keep the cream cheese filling thick and spoonable so it holds its shape.
  • Avoid testing through the cream cheese center; test the muffin portion instead.
  • Make the crumb topping first and let it sit so it firms up slightly before using.

Variations

  • Plain Pumpkin Muffins: Skip the cream cheese filling and crumb topping and bake the pumpkin batter as regular muffins; sprinkle with cinnamon sugar if desired.
  • Pumpkin Crumb Muffins: Use the pumpkin batter and crumb topping but omit the cream cheese filling for a coffee-cake style muffin.

Notes

Cool muffins completely before storing; refrigerate in an airtight container because of the cream cheese filling. Reheat briefly in the microwave or a low oven. Crumb topping will soften over time.

Nutrition

Calories: 275 kcal | Protein: 5 g | Fat: 14 g | Carbohydrates: 34 g | Per100g: about 310 kcal, 6 g protein, 16 g fat, 39 g carbohydrates

Baked Pears with Walnut Oatmeal Crumble

These baked pears are soft and warm with a simple oat-and-walnut crumble on top. The fruit stays tender without falling apart, and the topping adds just enough crunch to make it feel like dessert without much work.

Prep is straightforward: halve the pears, scoop out the cores, stir the crumble together in one bowl, and bake. Use pears that smell ripe but still feel fairly firm near the stem so they soften in the oven while holding their shape.

Ingredients for Baked Pears with Walnut Oatmeal Crumble

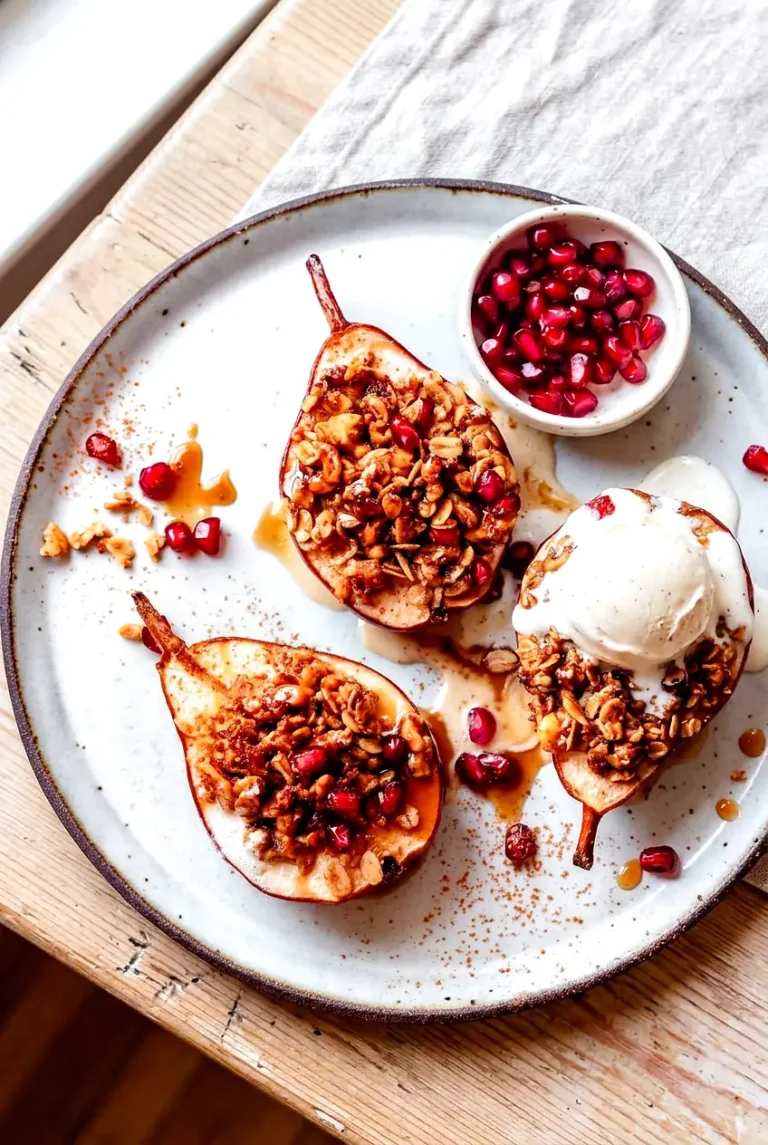
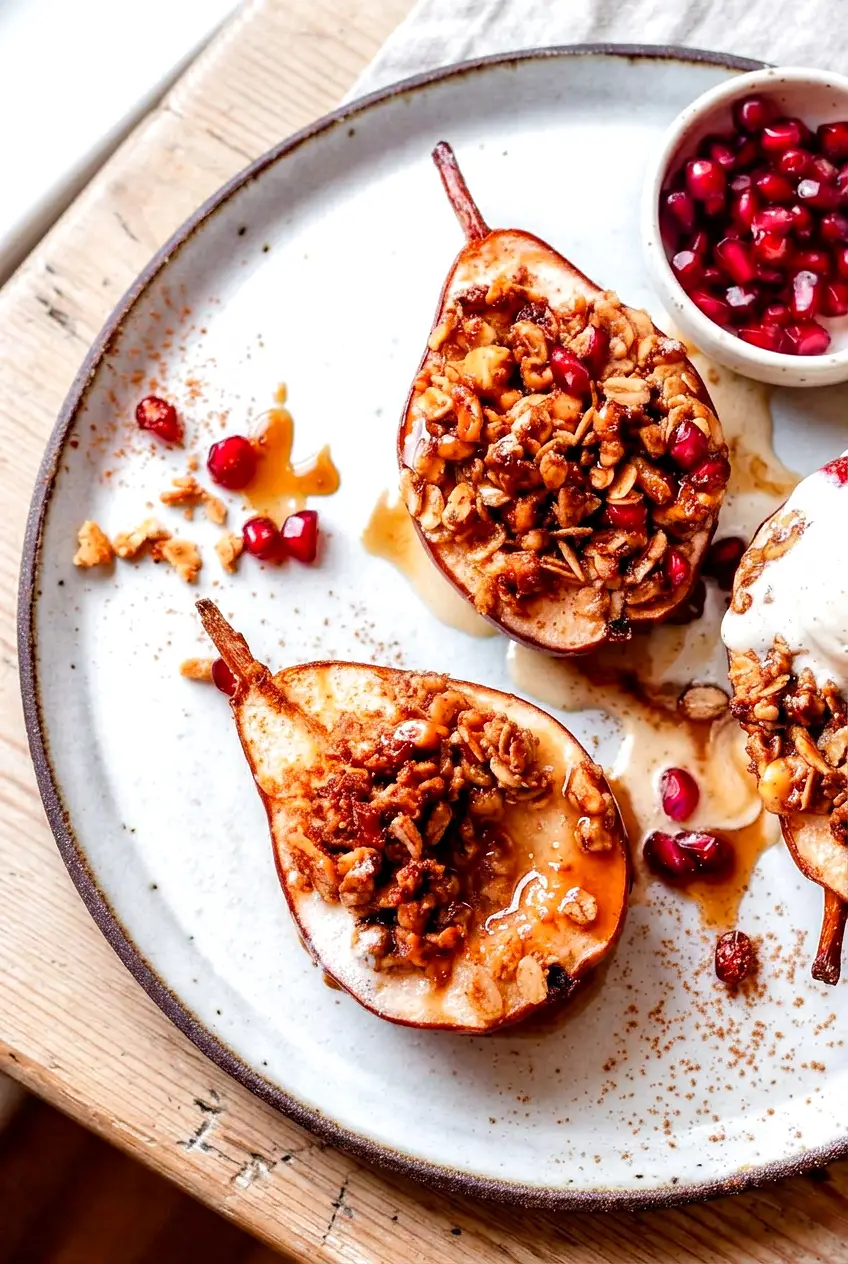
Overhead view of baked pears on a plate with sauce, ice cream, and scattered pomegranate arils
  • 4 medium firm-ripe pears, such as Bosc, Bartlett, D’Anjou, or Starkrimson (about 725g)
  • 1 tablespoon lemon juice
  • 3/4 cup old-fashioned rolled oats (about 60g)
  • 1/2 cup chopped walnuts (about 60g), preferably toasted
  • 1/3 cup brown sugar (about 70g)
  • 1 teaspoon ground cinnamon
  • 1/4 teaspoon salt
  • 3 tablespoons melted butter or plant butter (about 40g)

Optional for serving: vanilla ice cream, butterscotch sauce, pomegranate arils, or a small splash of vanilla extract stirred into the melted butter.

How to Make Baked Pears with Walnut Oatmeal Crumble

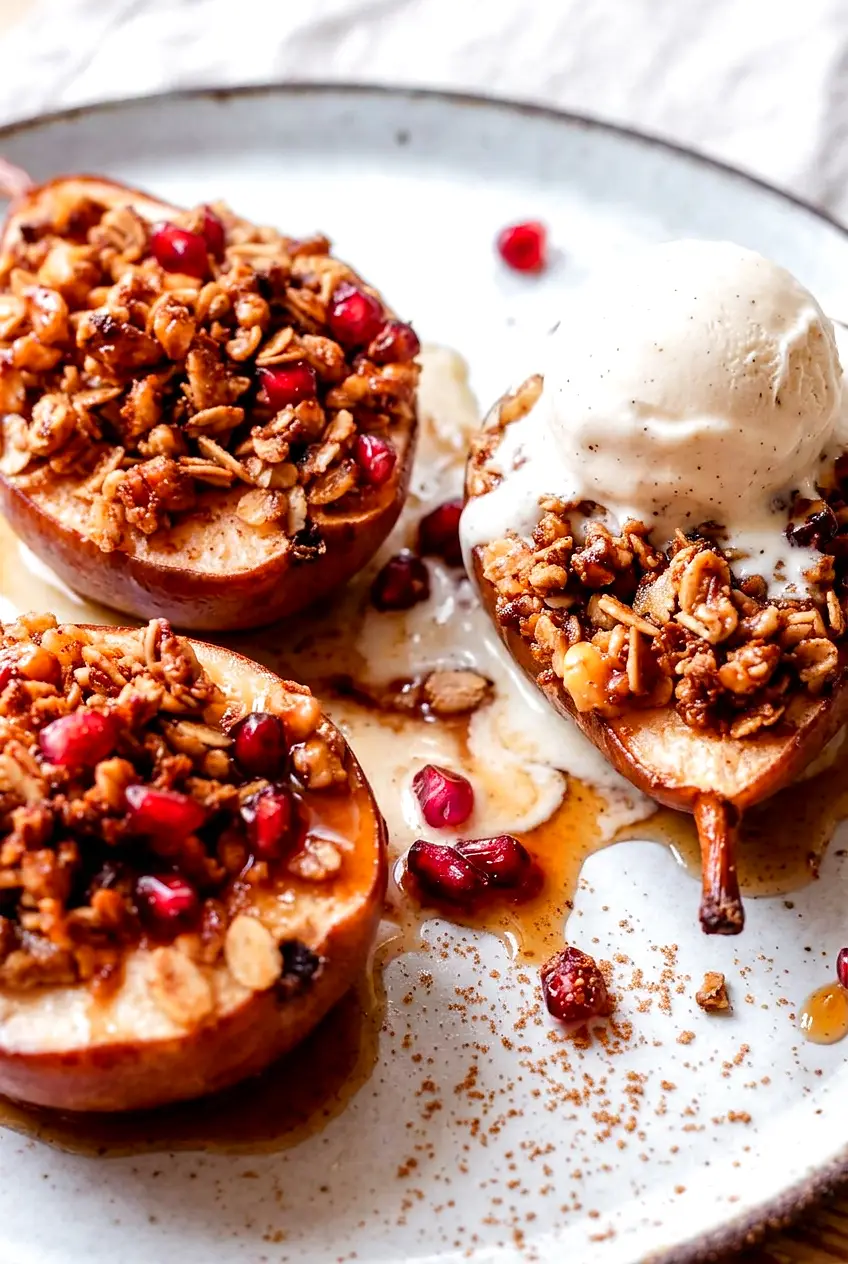
Close view of baked pear halves with golden walnut oat crumble, melty ice cream, and pomegranate arils
  1. Preheat the oven: Heat the oven to 375°F.
  2. Prep the pears: Halve the pears lengthwise and scoop out the cores. If needed, trim a very thin slice from the rounded back so they sit flat. Arrange them cut-side up in an 8×8-inch baking dish or similar small casserole dish in a snug single layer. Brush or rub the cut sides with the lemon juice.
  3. Make the crumble: In a mixing bowl, stir together the oats, walnuts, brown sugar, cinnamon, and salt. Pour in the melted butter or plant butter and stir until evenly moistened. The mixture should clump lightly when pressed and should not look dry.
  4. Top the pears: Spoon the crumble into the center of each pear half and press it on gently so it stays in place. If your pears are large, mound the topping in the middle rather than spreading it all the way to the edges.
  5. Bake: Bake for 25 to 40 minutes, rotating the dish halfway through if your oven browns unevenly. Start checking earlier if the pears are small or already fairly ripe.
  6. Check for doneness: The pears are ready when a fork or knife slides into the thickest part with little resistance, the fruit still holds its shape, the juices are lightly bubbling, and the topping is golden around the edges.
  7. Adjust if needed: If the crumble is browning before the pears are tender, loosely cover the dish with foil and keep baking. If the pan looks dry and the pears are still quite firm, add a small splash of water or apple juice to the bottom of the dish, just enough to help them finish without softening the topping too much.
  8. Rest and serve: Let the pears rest for 5 to 10 minutes before serving. Serve warm or at room temperature, plain or with vanilla ice cream.

Best Pears for Baking

Bosc, D’Anjou, Bartlett, and Starkrimson all work well here. Choose pears that are fragrant but still firm. Very hard pears may need the full baking time, while very ripe pears can soften too quickly and release more juice.

Leave the skins on. They help the halves keep their shape and make prep easier.

How to Keep the Crumble from Getting Soggy

Pears release juice as they bake, so use a baking dish that holds the halves snugly without crowding them. That helps keep the topping in place and prevents the pears from slumping as they soften.

Try not to add extra liquid unless the pan looks dry and the pears are still firm. Toasted walnuts also help the topping taste richer, and pulling the pears once the juices are just lightly bubbling helps avoid a watery pan.

Easy Variations

Vegan Baked Pears

Use plant butter in place of dairy butter.

Gluten-Free Baked Pears

Use certified gluten-free oats if needed.

Extra-Garnished Finish

For a richer finish, drizzle the baked pears with butterscotch sauce and scatter pomegranate arils over the top just before serving.

Serving Ideas

Vanilla ice cream is the easiest pairing, especially when the pears are still warm. They also work well at room temperature if you want to make dessert ahead a little more flexible.

If you want another cozy dessert for fall, try this Pumpkin Bundt Cake with Maple Icing.

For another easy seasonal dessert, you might also like these Maple Glazed Apple Blondies.

If you want a no-bake fall treat instead, check out these Pumpkin Oreo Balls.

How to Store and Reheat Baked Pears

Let leftovers cool, then cover the dish or transfer the pears to an airtight container and refrigerate for up to 3 days. The topping will soften as it sits.

Reheat gently in a low oven until warmed through, or microwave briefly if needed. For the best texture, you can mix the crumble ahead and refrigerate it separately, then top the pears and bake just before serving.

Nutrition

Nutrition is approximate and will vary based on ingredient brands, exact pear size, and serving size.

  • Serving size: 1 baked pear half
  • Calories: about 230
  • Protein: 3g
  • Fat: 10g
  • Carbohydrates: 36g
  • Per 100g: about 135 calories, 2g protein, 6g fat, 21g carbohydrates

Baked Pears with Walnut Oatmeal Crumble

Halved pears baked with a simple oat-and-walnut crumble for a warm, lightly sweet dessert.
Course: Dessert
Cuisine: American
Prep: 15 min
Cook: 35 min
Total: 60 min
Servings: 8 Calories: 230 kcal

Equipment

  • oven
  • 8×8-inch baking dish (or small casserole dish)
  • mixing bowl
  • measuring cups
  • measuring spoons
  • spoon or spatula

Ingredients

Pears

  • 4 medium firm-ripe pears (about 725g), halved and cored
  • 1 tablespoon lemon juice

Walnut Oatmeal Crumble

  • 3/4 cup old-fashioned rolled oats (about 60g)
  • 1/2 cup chopped walnuts (about 60g), preferably toasted
  • 1/3 cup brown sugar (about 70g)
  • 1 teaspoon ground cinnamon
  • 1/4 teaspoon salt
  • 3 tablespoons melted butter or plant butter (about 40g)

To Serve (optional)

  • Vanilla ice cream
  • Butterscotch sauce
  • Pomegranate arils
  • Small splash of vanilla extract stirred into the melted butter

Instructions

  1. Preheat the oven to 375°F (190°C).
  2. Halve the pears lengthwise and scoop out the cores; trim a thin slice from the rounded back if needed so halves sit flat.
  3. Arrange the pear halves cut-side up in an 8×8-inch baking dish in a snug single layer.
  4. Brush or rub the cut sides of the pears with the lemon juice.
  5. In a mixing bowl, stir together the oats, walnuts, brown sugar, cinnamon, and salt.
  6. Pour the melted butter or plant butter into the oat mixture and stir until evenly moistened and lightly clumping.
  7. Spoon the crumble into the center of each pear half and press gently so it stays in place; mound in the center for large pears.
  8. Bake for 25 to 40 minutes, rotating the dish halfway through if oven browns unevenly; start checking earlier for small or very ripe pears.
  9. Check doneness by inserting a fork or knife into the thickest part—pears should be tender with little resistance, juices lightly bubbling, and topping golden.
  10. If the crumble browns before pears are tender, loosely cover the dish with foil and continue baking; if the pan looks dry and pears are still firm, add a small splash of water or apple juice to the bottom.
  11. Let the pears rest for 5 to 10 minutes before serving and serve warm or at room temperature, plain or with vanilla ice cream.

Tips

  • Choose pears that smell ripe but remain fairly firm near the stem so they soften without falling apart.
  • Leave the skins on to help the halves keep their shape during baking.
  • Toast the walnuts first for a richer topping flavor.
  • Avoid adding extra liquid unless the pears are still firm and the pan looks dry.
  • Cover the dish with foil if the crumble is browning before the pears are done.

Variations

  • Vegan Baked Pears: Use plant butter in place of dairy butter.
  • Gluten-Free Baked Pears: Use certified gluten-free oats.
  • Extra-Garnished Finish: Drizzle with butterscotch sauce and scatter pomegranate arils over the top before serving.

Notes

Store leftovers covered in the refrigerator for up to 3 days; topping will soften. Reheat gently in a low oven or microwave briefly. You can prepare the crumble ahead and refrigerate separately to preserve texture.

Nutrition

Calories: 230 kcal | Protein: 3 g | Fat: 10 g | Carbohydrates: 36 g

Pumpkin Bundt Cake

This pumpkin Bundt cake bakes up moist, dense, and warmly spiced, with a soft crumb that slices cleanly once cooled. It works just as well for a holiday dessert table as it does for an everyday fall bake.

The batter comes together in two bowls with canned pumpkin, oil, and pantry spices. The main things that matter here are preparing the Bundt pan well and baking until the center is fully set.

Ingredients for Pumpkin Bundt Cake

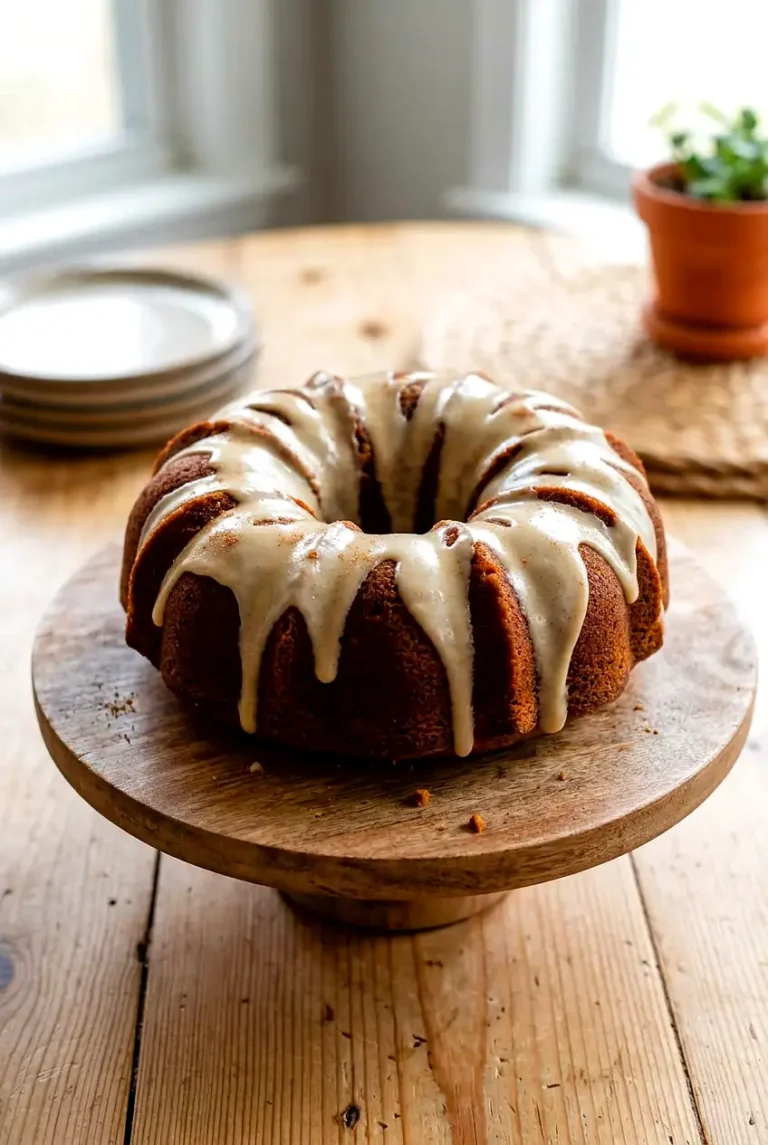
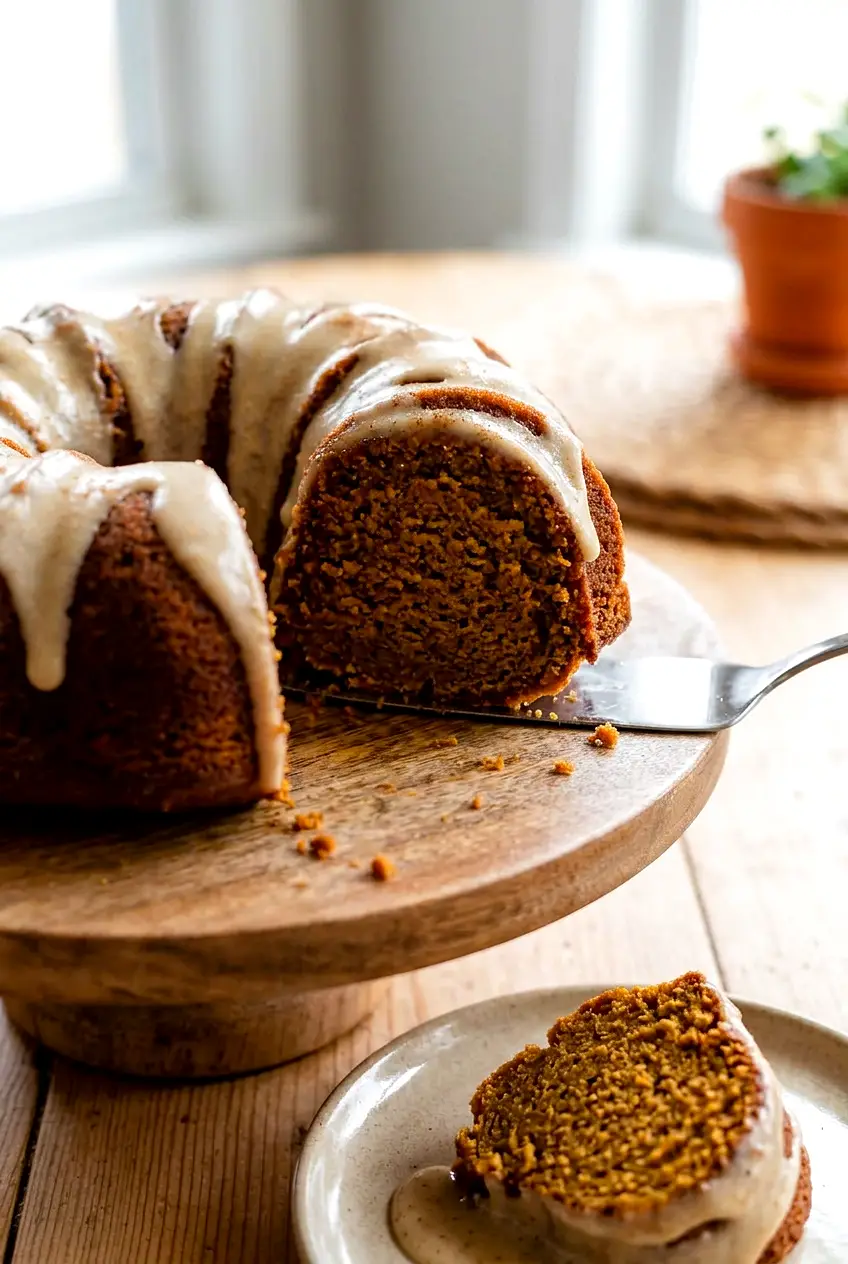
Slice of pumpkin Bundt cake on the wooden stand with maple icing and spice on top
  • 2 1/2 cups all-purpose flour (300g)
  • 1 1/2 teaspoons baking soda
  • 2 teaspoons ground cinnamon
  • 1 teaspoon ground ginger
  • 1/2 teaspoon ground nutmeg
  • 1/4 teaspoon ground cloves
  • 1 teaspoon salt
  • 1 1/2 cups canned pumpkin puree (340g), plain pumpkin puree, not pumpkin pie filling
  • 1 cup vegetable oil (220g), or another neutral oil
  • 1 cup granulated sugar (200g)
  • 1 cup packed light brown sugar (215g)
  • 3 large eggs
  • 2 teaspoons vanilla extract

Optional add-ins: 1 cup chocolate chips or 3/4 cup chopped walnuts or pecans.

Optional finish: Powdered sugar, maple icing, cream cheese glaze or frosting, or a spoonful of salted caramel after the cake cools.

How to Make Pumpkin Bundt Cake

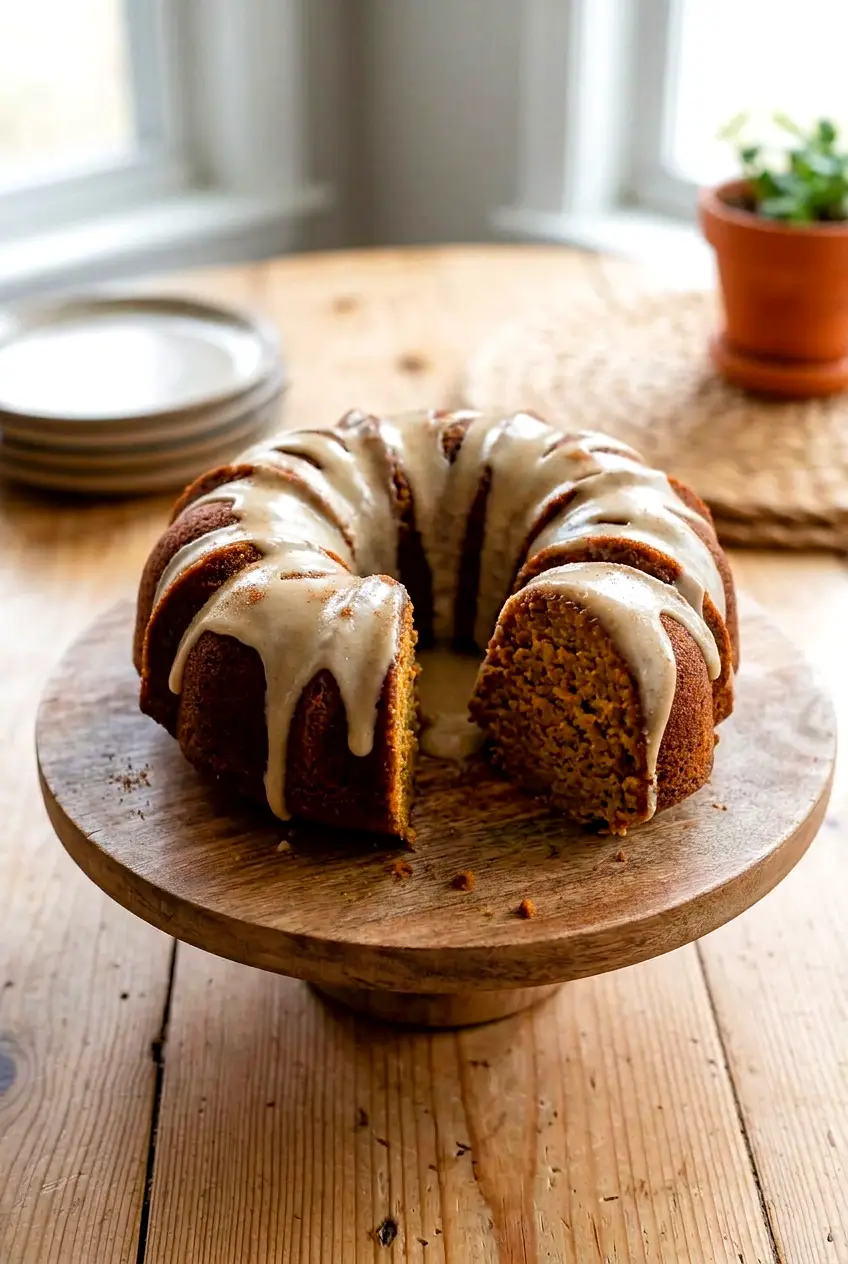
Close view of pumpkin Bundt cake showing the moist crumb beneath the maple icing
  1. Preheat and prepare the pan: Heat the oven to 350°F. Generously grease a 9.5- to 10.5-inch Bundt pan, making sure every groove is coated. For extra insurance, dust it lightly with flour after greasing, or use a baking spray made for baking pans.
  2. Whisk the dry ingredients: In a large bowl, whisk together the flour, baking soda, cinnamon, ginger, nutmeg, cloves, and salt until evenly combined.
  3. Mix the wet ingredients: In a second large bowl, whisk the pumpkin puree, oil, granulated sugar, brown sugar, eggs, and vanilla until smooth and glossy. The mixture will be thick.
  4. Combine the batter: Add the dry ingredients to the wet ingredients. Stir with a spatula or spoon just until no dry streaks remain. Do not overmix. If using chocolate chips or chopped nuts, fold them in now.
  5. Fill the pan: Spoon the batter into the prepared Bundt pan and smooth the top. The pan should be no more than about two-thirds to three-quarters full so the cake has room to rise and the center can bake through.
  6. Bake: Bake for 50 to 65 minutes. Start checking near the low end, since ovens and Bundt pans vary. The cake is done when the top is deeply golden and set, the center springs back lightly, and a toothpick inserted into the thickest part comes out with a few moist crumbs rather than wet batter.
  7. Cool in the pan: Let the cake cool in the pan on a rack for 15 to 20 minutes. This helps it firm up enough to release cleanly.
  8. Release and cool completely: Invert the cake onto a cooling rack. If it resists, let it sit a few more minutes before trying again. Cool completely before glazing or frosting.

How to Keep a Pumpkin Bundt Cake from Sticking

Bundt pans need thorough greasing, especially with a moist batter like this one. Coat every ridge well, then add a light dusting of flour if you want extra help with release. Letting the cake rest for 15 to 20 minutes before inverting also gives it time to pull away slightly from the sides.

How to Tell When the Center Is Done

Use the visual cues more than the clock. Look for a browned top, a center that feels set, and a tester that comes out with moist crumbs. If the toothpick still has wet batter on it, keep baking and check again in a few minutes.

Optional Variations

Cinnamon Swirl

Mix 1/3 cup brown sugar with 1 to 2 teaspoons cinnamon. Spread half the batter in the pan, sprinkle in the swirl mixture, then top with the remaining batter. Keep the layer light so it does not create a wet center.

Cream Cheese Filling

For a richer version, use a thick cream cheese filling made with 8 ounces cream cheese, sugar, and vanilla. Layer some batter into the pan, add the filling in the center, then cover with the remaining batter. Keep the filling away from the sides of the pan so it stays centered while baking.

Chocolate Chip Pumpkin Bundt Cake

Fold 1 cup of chocolate chips into the finished batter before transferring it to the pan.

Serving Ideas

Serve the cake plain, dusted with powdered sugar, or topped with a light glaze once cooled. It pairs well with coffee or tea. If you want another easy fall dessert, try these Maple Glazed Apple Blondies. For a no-bake pumpkin treat, you might also like these Pumpkin Oreo Balls. For a bite-size option, these Pumpkin Cheesecake Truffles are another seasonal dessert.

How to Store and Freeze Pumpkin Bundt Cake

Let the cake cool completely before storing. An unglazed or lightly glazed cake can be kept covered at room temperature for 2 to 3 days. If you use cream cheese frosting or a cream cheese filling, refrigerate it instead.

Wrap leftover slices tightly so they do not dry out. For longer storage, freeze individual slices well wrapped and thaw as needed.

If serving chilled slices, let them come to room temperature first or warm them briefly in the microwave. Reheat just enough to take the chill off so the cake stays moist.

You can also bake the cake a day ahead. The flavor settles well overnight, which makes it a practical make-ahead dessert.

Nutrition

Nutrition is approximate and will vary based on ingredient brands, exact amounts, add-ins, and serving size.

  • Serving size: 1 of 12 slices
  • Calories: about 445
  • Protein: 5g
  • Fat: 20g
  • Carbohydrates: 62g
  • Per 100g: about 350 calories, 4g protein, 16g fat, 49g carbohydrates

Pumpkin Bundt Cake

A moist, warmly spiced pumpkin Bundt cake that slices cleanly once cooled.
Course: Dessert
Cuisine: American
Prep: 20 min
Cook: 60 min
Total: 140 min
Servings: 12 Calories: about 445 kcal

Equipment

  • 9.5-10.5 inch Bundt pan
  • mixing bowls
  • whisk
  • spatula or spoon
  • measuring cups and spoons
  • cooling rack
  • toothpick or cake tester

Ingredients

Cake

  • 2 1/2 cups all-purpose flour (300g)
  • 1 1/2 teaspoons baking soda
  • 2 teaspoons ground cinnamon
  • 1 teaspoon ground ginger
  • 1/2 teaspoon ground nutmeg
  • 1/4 teaspoon ground cloves
  • 1 teaspoon salt
  • 1 1/2 cups canned pumpkin puree (340g) (plain pumpkin puree, not pumpkin pie filling)
  • 1 cup vegetable oil (220g) or another neutral oil
  • 1 cup granulated sugar (200g)
  • 1 cup packed light brown sugar (215g)
  • 3 large eggs
  • 2 teaspoons vanilla extract

Optional add-ins

  • 1 cup chocolate chips (optional)
  • 3/4 cup chopped walnuts or pecans (optional)

Optional finishes

  • Powdered sugar
  • Maple icing
  • Cream cheese glaze or frosting
  • Salted caramel

Instructions

  1. Preheat the oven to 350°F (177°C). Generously grease a 9.5- to 10.5-inch Bundt pan, coating every groove; optionally dust lightly with flour or use baking spray.
  2. In a large bowl, whisk together the flour, baking soda, cinnamon, ginger, nutmeg, cloves, and salt until evenly combined.
  3. In a second large bowl, whisk the pumpkin puree, oil, granulated sugar, brown sugar, eggs, and vanilla until smooth and glossy.
  4. Add the dry ingredients to the wet ingredients and stir with a spatula or spoon just until no dry streaks remain; do not overmix.
  5. If using chocolate chips or chopped nuts, fold them into the batter now.
  6. Spoon the batter into the prepared Bundt pan, smoothing the top; fill the pan no more than about two-thirds to three-quarters full.
  7. Bake for 50 to 65 minutes, starting to check near 50 minutes. The cake is done when the top is deeply golden and set, the center springs back lightly, and a toothpick inserted in the thickest part comes out with a few moist crumbs.
  8. Let the cake cool in the pan on a rack for 15 to 20 minutes to firm up.
  9. Invert the cake onto a cooling rack and release it; if it resists, let it sit a few more minutes before trying again.
  10. Cool completely before glazing, frosting, or serving.

Tips

  • Grease every ridge of the Bundt pan and optionally dust lightly with flour for best release.
  • Do not overmix when combining wet and dry ingredients to keep the crumb tender.
  • Start checking doneness near the lower end of the bake time since ovens and pans vary.
  • Keep the pan no more than two-thirds to three-quarters full so the center can bake through.
  • Let the cake rest 15 to 20 minutes in the pan before inverting to reduce sticking.

Variations

  • Cinnamon Swirl: Mix 1/3 cup brown sugar with 1 to 2 teaspoons cinnamon; spread half the batter in the pan, sprinkle the swirl mixture, then top with remaining batter for a cinnamon ribbon.
  • Cream Cheese Filling: Use a thick cream cheese filling made with 8 ounces cream cheese, sugar, and vanilla; layer batter, add filling centered in the pan, then cover with remaining batter.
  • Chocolate Chip Pumpkin Bundt Cake: Fold 1 cup chocolate chips into the finished batter before transferring it to the pan.

Notes

Cool the cake completely before glazing. Store an unglazed or lightly glazed cake covered at room temperature for 2–3 days; refrigerate if using cream cheese frosting or filling. Wrap slices well for freezing and thaw as needed.

Nutrition

Calories: about 445 kcal | Protein: 5 g | Fat: 20 g | Carbohydrates: 62 g

Maple Glazed Apple Blondies

These apple blondies bake up soft, chewy, and lightly spiced, with small bits of apple throughout and a maple glaze on top. They work well as an easy fall dessert, snack, or coffee break treat.

The method is simple: mix one thick batter, fold in finely diced apple, and bake just until the center is set. Keeping the apple pieces small and not overmixing the batter helps the bars stay chewy instead of turning cakey or gummy.

Ingredients for Maple Glazed Apple Blondies

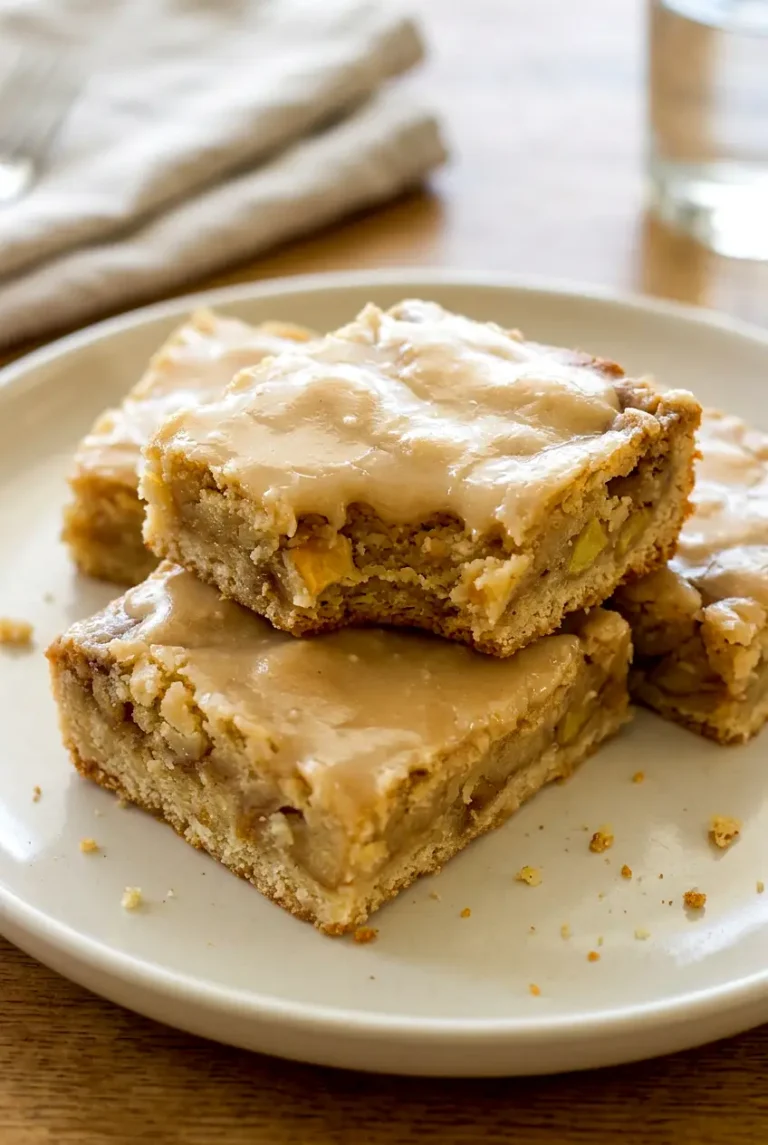
A separated square of maple glazed apple blondie with set glaze and lightly browned edges
  • 1 1/2 cups all-purpose flour (180g)
  • 1/2 teaspoon baking powder
  • 1/2 teaspoon salt
  • 1 teaspoon cinnamon
  • 1/2 cup unsalted butter, melted (115g)
  • 3/4 cup brown sugar (150g)
  • 1/3 cup pure maple syrup (110g)
  • 1 large egg
  • 1 teaspoon vanilla extract
  • 1 to 1 1/2 cups apple, peeled and diced small (about 150g)
  • 3/4 to 1 cup powdered sugar (about 90g), for the glaze
  • 2 to 3 tablespoons maple syrup or milk, for the glaze

Use a firm apple such as Honeycrisp or Granny Smith so the pieces hold their shape as the blondies bake. Pure maple syrup gives the best flavor here since it is used in both the batter and the glaze.

Optional: Fold in 1/2 cup chopped pecans with the apples, or add a pinch of nutmeg with the dry ingredients.

How to Make Maple Glazed Apple Blondies

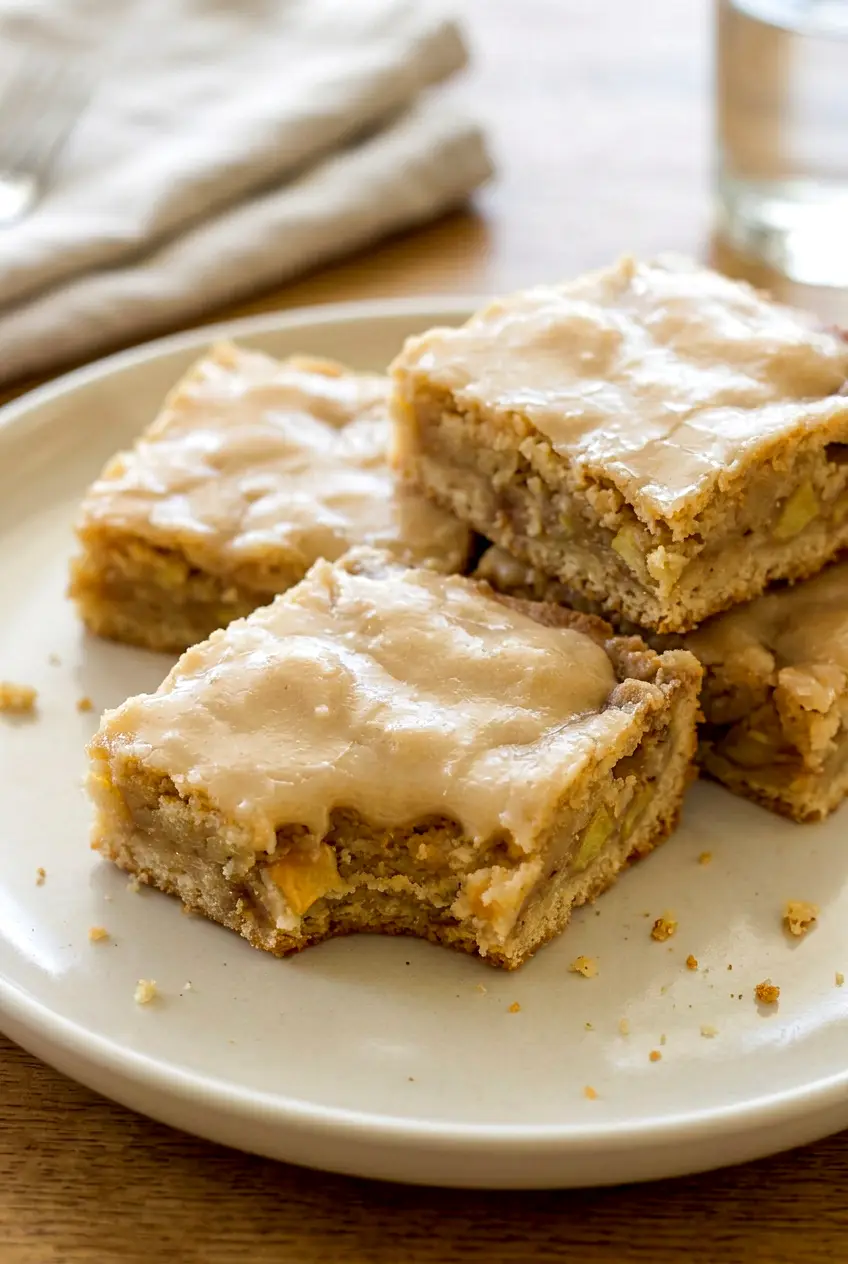
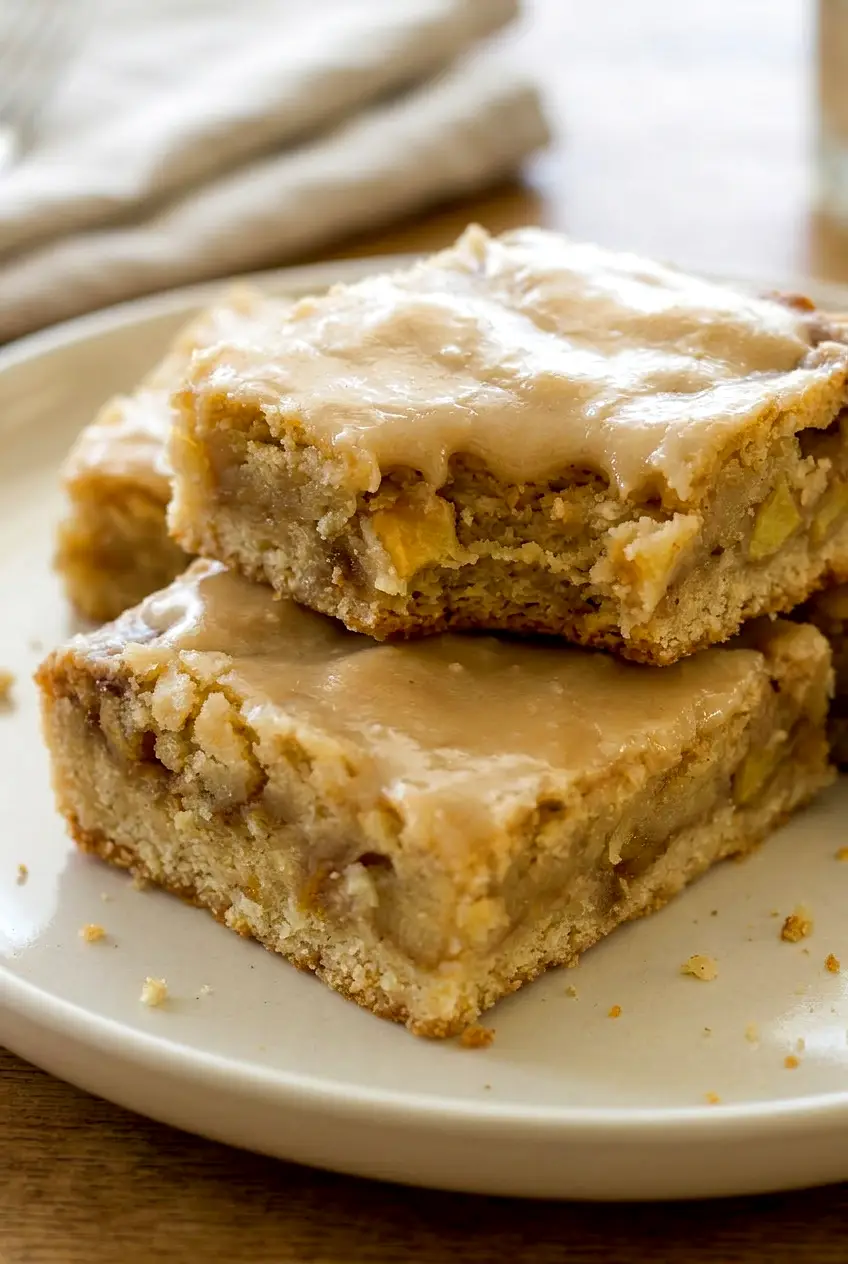
Close-up of maple glazed apple blondies showing the chewy crumb and diced apple pieces
  1. Prep the pan and oven: Heat the oven to 350°F. Line an 8×8-inch or 9×9-inch baking pan with parchment, leaving overhang on the sides. Peel and dice the apple into small, even pieces.
  2. Mix the dry ingredients: In a medium bowl, whisk together the flour, baking powder, salt, and cinnamon.
  3. Whisk the wet ingredients: In a separate bowl, whisk the melted butter, brown sugar, maple syrup, egg, and vanilla until smooth and glossy.
  4. Combine the batter: Add the dry ingredients to the wet ingredients and stir just until no dry flour remains. Fold in the diced apple and pecans, if using. The batter should be thick.
  5. Spread in the pan: Transfer the batter to the prepared pan and spread it into an even layer.
  6. Bake: Bake for 25 to 35 minutes. Start checking near the lower end if using a 9×9-inch pan. The edges should look set and lightly golden, and the center should look just set rather than wet or loose. A toothpick inserted in the center should come out with a few moist crumbs, not raw batter. Rotate the pan near the end if your oven browns unevenly.
  7. Cool: Let the blondies cool in the pan for 20 to 30 minutes. They should be warm, not hot, before glazing.
  8. Make the glaze: In a small bowl, stir together the powdered sugar and 2 tablespoons maple syrup or milk. Add more liquid a little at a time if needed until the glaze is smooth and thick enough to drizzle. It should ribbon slowly off the spoon.
  9. Glaze and slice: Drizzle the glaze over the warm blondies and let it set. Lift the bars out of the pan and cut into 9 larger bars or 12 smaller bars.

Why Is the Center Gummy?

A gummy center usually comes from one of two things: apple pieces that are too large or too much mixing once the flour is added. Small diced apple distributes more evenly and bakes through faster, and gentle mixing keeps the texture dense and chewy instead of heavy.

It also helps to pull the pan when the middle looks just set. If the center still looks wet, give it a few more minutes. If you wait for the whole pan to look completely dry, the bars can overbake.

Maple Glaze Tips

Start with less glaze liquid than you think you need. A slightly thicker glaze sits on top better and gives the bars a more finished maple flavor. If it gets too thin, stir in a little more powdered sugar. If it is too thick to drizzle, add another teaspoon of maple syrup or milk.

Let the blondies cool until they are no longer steaming before glazing. If they are too hot, the glaze will melt into the surface instead of setting on top.

How to Store and Reheat Maple Glazed Apple Blondies

Let the bars cool completely before storing. Keep them in an airtight container at room temperature for 2 to 3 days, or refrigerate for longer storage.

If you need to stack them, place parchment between the layers so the glaze stays in better shape. The bars will soften a little as they sit because of the apple.

To serve after refrigerating, let them come closer to room temperature first for the best texture. If you want them slightly warm, reheat briefly and expect the glaze to soften.

You can also bake the blondies ahead and glaze them after they cool.

More Fall Dessert Ideas

If you want another easy seasonal sweet, try these Pumpkin Oreo Balls.

For a bite-size dessert option, see these Pumpkin Cheesecake Truffles.

If you like simple bar desserts, you may also like these Pumpkin Bars with Cream Cheese Frosting.

Nutrition

Nutrition is approximate and will vary based on ingredient brands, exact amounts, glaze amount used, and serving size.

  • Serving size: 1 of 12 bars
  • Calories: about 175
  • Protein: 2g
  • Fat: 6g
  • Carbohydrates: 29g
  • Per 100g: about 310 calories, 4g protein, 11g fat, 51g carbohydrates

Maple Glazed Apple Blondies

Soft, chewy blondie bars studded with small diced apple and finished with a maple glaze.
Course: Dessert
Cuisine: American
Prep: 20 min
Cook: 30 min
Total: 75 min
Servings: 12 Calories: about 175

Equipment

  • 8×8 or 9×9-inch baking pan
  • parchment paper
  • mixing bowls
  • whisk
  • spatula
  • measuring cups and spoons

Ingredients

For the blondies

  • 1 1/2 cups all-purpose flour (180g)
  • 1/2 teaspoon baking powder
  • 1/2 teaspoon salt
  • 1 teaspoon cinnamon
  • 1/2 cup unsalted butter, melted (115g)
  • 3/4 cup brown sugar (150g)
  • 1/3 cup pure maple syrup (110g)
  • 1 large egg
  • 1 teaspoon vanilla extract
  • 1 to 1 1/2 cups apple, peeled and diced small (about 150g)
  • Optional: 1/2 cup chopped pecans
  • Optional: pinch of nutmeg

For the glaze

  • 3/4 to 1 cup powdered sugar (about 90g)
  • 2 to 3 tablespoons maple syrup or milk

Instructions

  1. Preheat the oven to 350°F (177°C). Line an 8×8-inch or 9×9-inch pan with parchment, leaving an overhang.
  2. Peel and dice the apple into small, even pieces.
  3. In a medium bowl, whisk together the flour, baking powder, salt, and cinnamon.
  4. In a separate bowl, whisk the melted butter, brown sugar, maple syrup, egg, and vanilla until smooth and glossy.
  5. Add the dry ingredients to the wet ingredients and stir just until no dry flour remains.
  6. Fold in the diced apple and pecans if using; the batter should be thick.
  7. Spread the batter into an even layer in the prepared pan.
  8. Bake for 25 to 35 minutes, checking near 25 minutes if using a 9×9 pan; the edges should be set and lightly golden and the center should be just set with a few moist crumbs on a toothpick.
  9. Let the blondies cool in the pan for 20 to 30 minutes; they should be warm but not hot before glazing.
  10. In a small bowl, stir together the powdered sugar and 2 tablespoons maple syrup or milk; add more liquid a little at a time until the glaze is smooth and thick enough to drizzle.
  11. Drizzle the glaze over the warm blondies and let it set.
  12. Lift the bars from the pan using the parchment overhang and cut into 9 larger bars or 12 smaller bars.

Tips

  • Dice the apple small so pieces bake through and don’t create a gummy center.
  • Stir just until no dry flour remains to avoid overmixing and a cakey texture.
  • Pull the pan when the middle looks just set rather than waiting until completely dry to avoid overbaking.
  • Start with less glaze liquid; add more powdered sugar if the glaze becomes too thin.
  • Let blondies cool until not steaming before glazing so the glaze sets on top.

Variations

  • Pecan Maple Blondies: Fold in 1/2 cup chopped pecans with the apples for added crunch.
  • Spiced Apple Blondies: Add a pinch of nutmeg to the dry ingredients for extra warm spice.

Notes

Store cooled bars in an airtight container at room temperature for 2–3 days or refrigerate for longer; separate layers with parchment when stacking. Reheat briefly if you prefer them warm and expect the glaze to soften.

Nutrition

Serving Size: 1 of 12 bars | Calories: about 175 | Protein: 2 g | Fat: 6 g | Carbohydrates: 29 g | Per100g: about 310 calories, 4 g protein, 11 g fat, 51 g carbohydrates

Cinnamon Apple Bread

Cinnamon apple bread has a soft, cake-like crumb, plenty of warm spice, and tender apple pieces layered through the loaf. It works well for breakfast, an afternoon snack, or a simple dessert.

The method stays easy: one 9×5-inch loaf pan, common pantry ingredients, and a thick batter that comes together quickly. Layering the cinnamon-sugar apples helps spread them through the loaf, and a loose foil tent is useful if the top starts browning before the center is baked through.

Ingredients for Cinnamon Apple Bread

  • 2 cups all-purpose flour (240g)
  • 1 teaspoon baking powder
  • 1/2 teaspoon baking soda
  • 1 1/2 teaspoons ground cinnamon, divided
  • 1/4 teaspoon ground nutmeg
  • 1/2 teaspoon salt
  • 1/2 cup unsalted butter (115g), melted or softened
  • 3/4 cup granulated sugar (150g)
  • 1/2 cup packed brown sugar (100g), divided
  • 2 large eggs
  • 1/2 cup unsweetened applesauce, sour cream, or plain yogurt (120g)
  • 1/4 cup milk (60g)
  • 1 teaspoon vanilla extract
  • 2 medium apples, peeled and chopped (about 300g)

Optional: Sprinkle the top with 1 to 2 tablespoons turbinado sugar or extra brown sugar before baking.

Optional add-in: Fold in 1/2 cup chopped walnuts or pecans with the finished batter.

A slice of cinnamon apple bread on a wooden cutting board with a moist, spiced crumb

Best Apples to Use

Use firm apples that hold their shape as the loaf bakes. Granny Smith, Honeycrisp, Fuji, and Pink Lady all work well. Tart apples give the strongest contrast against the sweet bread, but a mix of sweet and tart apples is also a good choice.

How to Make Cinnamon Apple Bread

Close-up of cinnamon apple bread slices showing the soft crumb and apple pieces
  1. Prep the pan and oven: Heat the oven to 350°F. Grease a 9×5-inch loaf pan and line it with parchment if you want easier removal.
  2. Mix the dry ingredients: In a medium bowl, whisk together the flour, baking powder, baking soda, 1 teaspoon of the cinnamon, the nutmeg, and the salt.
  3. Mix the wet ingredients: In a large bowl, beat or stir the butter, granulated sugar, and 1/4 cup of the brown sugar until mostly combined. Add the eggs, applesauce or sour cream or yogurt, milk, and vanilla, then mix until smooth. If the mixture looks slightly curdled, that is fine.
  4. Make the batter: Add the dry ingredients to the wet ingredients and fold just until no dry streaks remain. The batter should be thick and spreadable, not thin. If using nuts, fold them in with just a few strokes.
  5. Coat the apples: In a small bowl, toss the chopped apples with the remaining 1/4 cup brown sugar and remaining 1/2 teaspoon cinnamon.
  6. Layer the loaf: Spread about half of the batter in the prepared pan. Scatter over about half of the apple mixture. Top with the remaining batter, then finish with the rest of the apples. Lightly swirl the top with a knife if you want a little marbling, but do not fully mix the layers together. Sprinkle with turbinado sugar or extra brown sugar if using.
  7. Bake: Bake for 50 to 65 minutes. Start checking near the early end if your oven runs hot or you are using a dark pan. If the top is browning too quickly, loosely tent the loaf with foil during the second half of baking.
  8. Check for doneness: The bread is done when the top is golden and set, the center springs back lightly when pressed, and a toothpick inserted in the middle comes out with a few moist crumbs instead of wet batter. The loaf may also pull slightly from the sides of the pan. For an extra check, the center should be about 200°F to 205°F.
  9. Cool: Let the loaf cool in the pan for 10 to 15 minutes, then transfer it to a rack. Cool completely before slicing so the crumb can finish setting.

How to Keep the Loaf Moist

The butter, applesauce or dairy, and chopped apples all add moisture, but mixing is what makes the biggest difference in the final texture. Fold the batter only until the flour is absorbed. Overmixing can make the loaf heavy, and slicing too soon can make the center seem gummy even when it is baked through.

Why Is the Center Still Undercooked?

Apple bread can look done on top before the middle is fully baked. If the center is still wet, keep baking and cover the loaf loosely with foil if needed so the top does not get too dark. Use the visual cues more than the clock: the top should look set, the loaf should feel lightly springy in the middle, and the toothpick should come out with moist crumbs rather than raw batter.

Simple Variations

Apple Cinnamon Muffins

Use the same batter in a muffin pan for smaller portions. Start checking early since muffins bake faster than a full loaf.

Mini Apple Cinnamon Loaves

Divide the batter among mini loaf pans for smaller loaves. Watch them closely near the end since they can overbake faster than a standard loaf.

Crumb-Topped Apple Bread

Add a crumb topping before baking if you want a more dessert-like finish. You may need to tent the loaf with foil a little earlier if the topping browns quickly.

Serving Ideas

Serve the bread slightly warm or at room temperature. It is good plain, with a little butter, or with a light drizzle of brown sugar icing or salted caramel once cooled. If you want another apple-cinnamon breakfast bake, try these apple cinnamon rolls with caramel icing. For a savory breakfast option, try this quick cheesy breakfast quesadilla.

How to Store and Reheat Cinnamon Apple Bread

Let the loaf cool completely before wrapping or storing. Keep it tightly wrapped or in an airtight container at room temperature for 2 to 3 days.

For longer storage, refrigerate it. The crumb will firm up a bit when chilled, but it softens again once brought to room temperature or gently reheated.

To freeze, wrap the whole loaf or individual slices well and freeze for longer storage. Thaw before reheating so the outside does not dry out while the center is still cold.

To reheat, warm individual slices briefly in the microwave or toaster oven. The loaf is also a good make-ahead bake and usually slices more neatly the next day. For another easy breakfast to keep on hand, these protein blueberry muffins are a good option.

Nutrition

Nutrition is approximate and will vary based on ingredient brands, exact apple size, and serving size.

  • Serving size: 1 slice, based on 8 slices per loaf
  • Calories: about 330
  • Protein: 5g
  • Fat: 12g
  • Carbohydrates: 51g
  • Per 100g: about 270 calories, 4g protein, 10g fat, 42g carbohydrates

Cinnamon Apple Bread

A moist, cake-like quick bread studded with spiced apple pieces and warm cinnamon.
Course: Breakfast
Cuisine: American
Prep: 20 min
Cook: 60 min
Total: 95 min
Servings: 8 Calories: about 330 kcal

Equipment

  • 9×5-inch loaf pan
  • mixing bowls
  • whisk
  • spatula
  • knife and cutting board
  • toothpick or cake tester
  • oven
  • parchment paper (optional)

Ingredients

Main

  • 2 cups all-purpose flour (240g)
  • 1 teaspoon baking powder
  • 1/2 teaspoon baking soda
  • 1 1/2 teaspoons ground cinnamon, divided
  • 1/4 teaspoon ground nutmeg
  • 1/2 teaspoon salt
  • 1/2 cup unsalted butter (115g), melted or softened
  • 3/4 cup granulated sugar (150g)
  • 1/2 cup packed brown sugar (100g), divided
  • 2 large eggs
  • 1/2 cup unsweetened applesauce, sour cream, or plain yogurt (120g)
  • 1/4 cup milk (60g)
  • 1 teaspoon vanilla extract
  • 2 medium apples, peeled and chopped (about 300g)

Optional

  • 1 to 2 tablespoons turbinado sugar or extra brown sugar (for sprinkling)
  • 1/2 cup chopped walnuts or pecans (fold into batter)

Instructions

  1. Preheat the oven to 350°F (177°C). Grease a 9×5-inch loaf pan and line with parchment if desired.
  2. In a medium bowl, whisk together the flour, baking powder, baking soda, 1 teaspoon cinnamon, nutmeg, and salt.
  3. In a large bowl, beat or stir the butter, granulated sugar, and 1/4 cup brown sugar until mostly combined.
  4. Add the eggs, applesauce (or sour cream or yogurt), milk, and vanilla to the butter mixture and mix until smooth.
  5. Add the dry ingredients to the wet ingredients and fold just until no dry streaks remain; the batter should be thick and spreadable. If using nuts, fold them in with a few strokes.
  6. In a small bowl, toss the chopped apples with the remaining 1/4 cup brown sugar and remaining 1/2 teaspoon cinnamon.
  7. Spread about half of the batter in the prepared pan. Scatter half of the apple mixture over it. Top with the remaining batter and finish with the remaining apples. Lightly swirl the top with a knife if desired and sprinkle with turbinado sugar or extra brown sugar if using.
  8. Bake for 50 to 65 minutes, starting to check near the early end. If the top is browning too quickly, loosely tent the loaf with foil during the second half of baking.
  9. Check for doneness: the top should be golden and set, the center should spring back lightly, and a toothpick inserted in the middle should come out with a few moist crumbs. The center temperature should be about 200°F to 205°F (93°C to 96°C).
  10. Let the loaf cool in the pan for 10 to 15 minutes, then transfer to a rack and cool completely before slicing.

Tips

  • Fold the batter only until the flour is absorbed to avoid a heavy loaf.
  • Use firm apples (Granny Smith, Honeycrisp, Fuji, Pink Lady) so pieces hold their shape while baking.
  • Tent the loaf loosely with foil if the top browns before the center is done.
  • Slice only after the loaf has cooled completely so the crumb can finish setting.
  • Check doneness visually and with a toothpick rather than relying solely on the clock.

Variations

  • Apple Cinnamon Muffins: Use the same batter in a muffin pan and start checking earlier since muffins bake faster.
  • Mini Apple Cinnamon Loaves: Divide the batter among mini loaf pans for smaller loaves; watch baking time closely.
  • Crumb-Topped Apple Bread: Add a crumb topping before baking for a more dessert-like finish; tent with foil earlier if topping browns quickly.

Notes

Let the loaf cool completely before wrapping. Store airtight at room temperature for 2–3 days or refrigerate for longer storage. Freeze whole loaf or slices well wrapped and thaw before reheating. Reheat slices briefly in the microwave or toaster oven.

Nutrition

Calories: about 330 kcal | Protein: 5 g | Fat: 12 g | Carbohydrates: 51 g

Pumpkin Oreo Balls

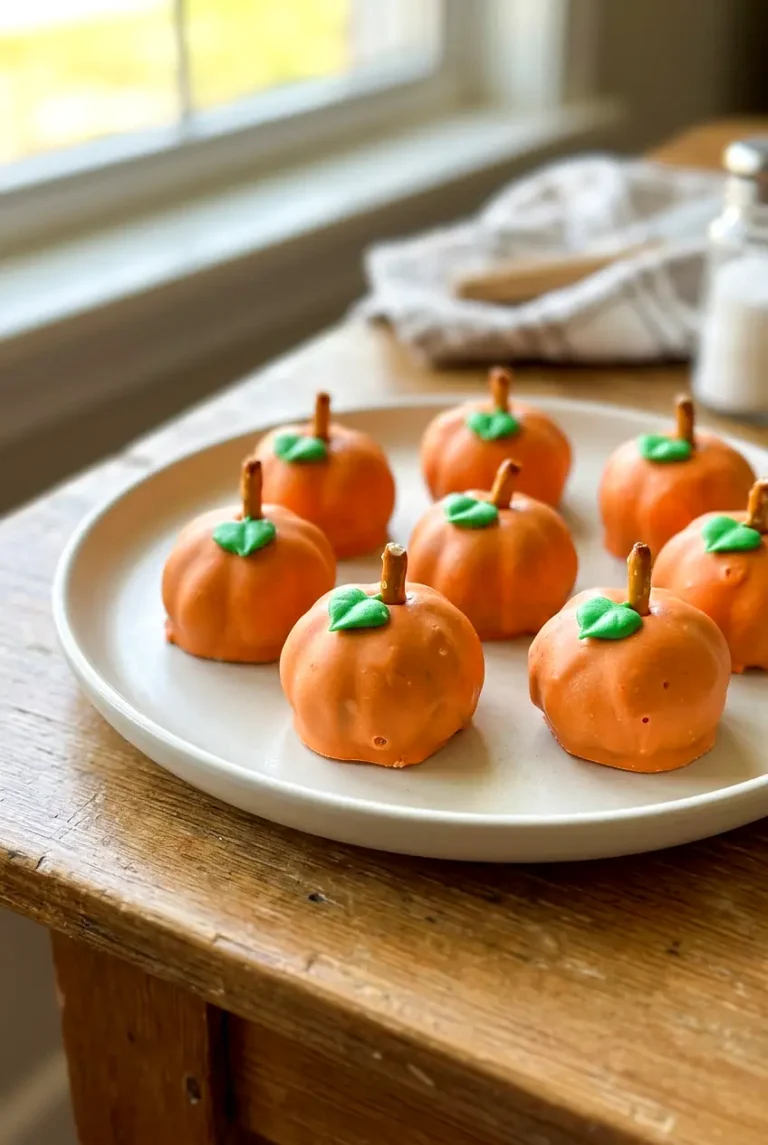
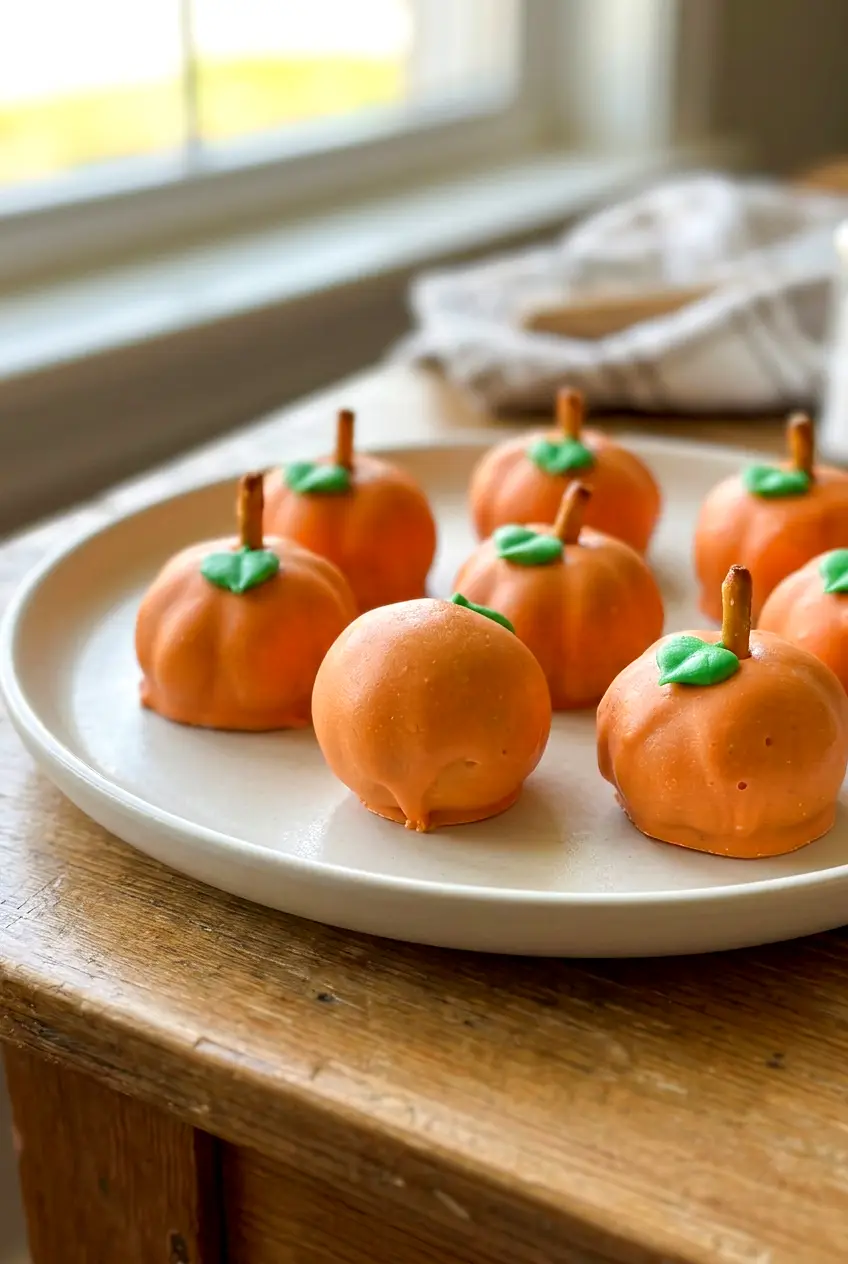
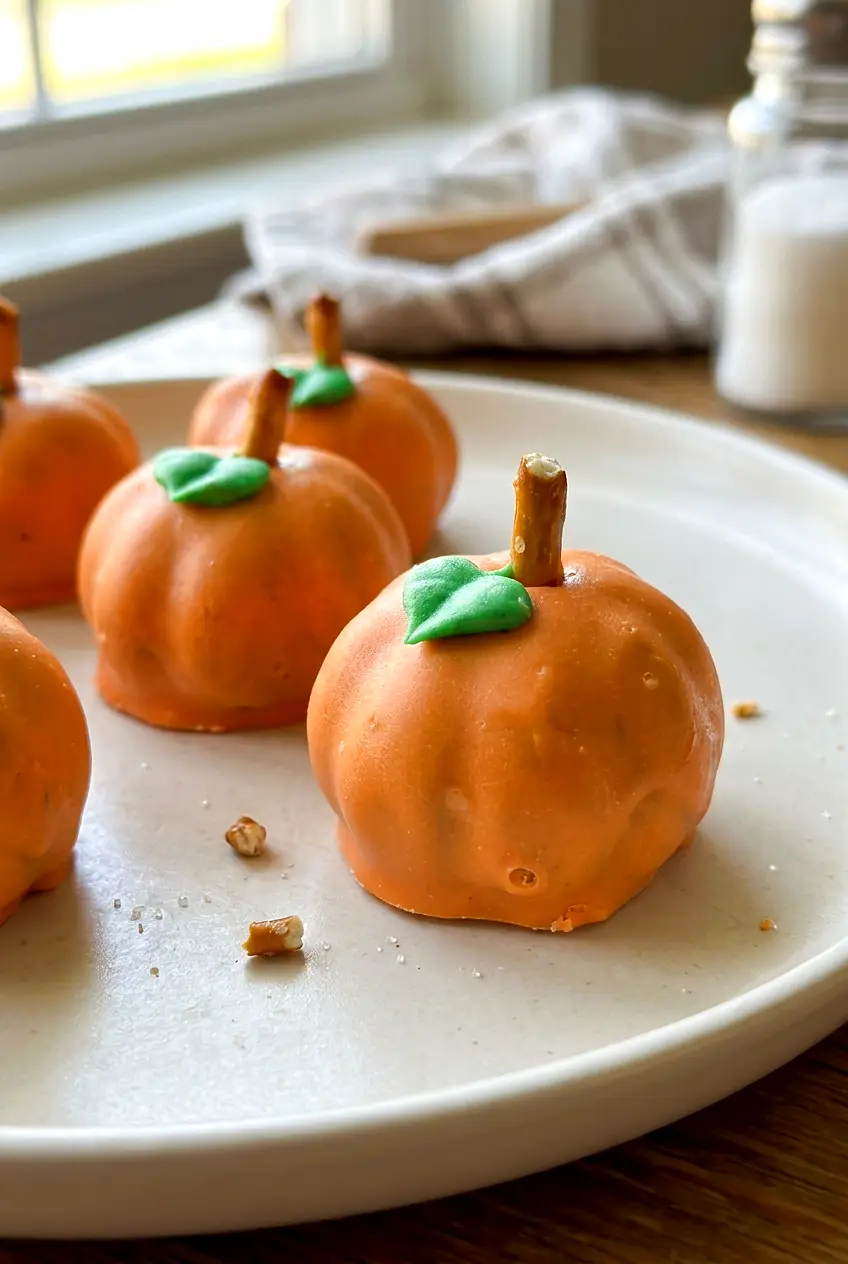
Pumpkin Oreo balls are an easy no-bake treat with a soft cookies-and-cream center and a crisp orange coating. The pretzel stem and small green garnish give them a simple pumpkin look without adding much extra work.

The method is straightforward: crush the cookies very finely, mix with softened cream cheese, chill until firm, then dip. Keeping the centers cold makes them much easier to coat neatly.

Ingredients for Pumpkin Oreo Balls

Pumpkin Oreo balls from the side with pretzel stems and a slightly imperfect homemade shape
  • 1 standard 14.3-ounce package Oreo cookies (about 405g): use the whole cookies, including the filling
  • 8 ounces cream cheese, softened (225g): softened cream cheese mixes more evenly with the crumbs
  • 10 to 12 ounces orange candy melts or orange melting wafers (285 to 340g): for the coating
  • 18 to 24 pretzel stick pieces: for the stems
  • A small amount of green icing or green candy pieces: for the leaf detail
  • 1 to 2 teaspoons vegetable shortening or coconut oil, optional: use only if the melted coating seems too thick

You can use pumpkin spice Oreos instead of regular Oreos for a stronger fall flavor.

How to Make Pumpkin Oreo Balls

Close-up of a pumpkin Oreo ball showing the smooth orange shell and cookies-and-cream center
  1. Crush the Oreos: Add the whole cookies to a food processor and pulse into very fine crumbs. If needed, crush them in a zip-top bag with a rolling pin. The crumbs should be even, with no large pieces.
  2. Mix the filling: Transfer the crumbs to a mixing bowl if needed. Add the softened cream cheese and mix until a thick, smooth dough forms with no dry crumb pockets, about 5 minutes.
  3. Scoop and shape: Line a tray or baking sheet with parchment. Use a small cookie scoop to portion the mixture, then roll into smooth balls. For a pumpkin shape, gently flatten the tops and bottoms a little if you like.
  4. Chill until firm: Refrigerate the shaped balls for 20 to 30 minutes, or until they feel firm enough to dip without softening quickly.
  5. Melt the coating: Melt the orange candy melts in a microwave-safe bowl or over a double boiler, stirring until smooth. If the coating seems too thick, stir in shortening or coconut oil 1 teaspoon at a time until it loosens slightly.
  6. Dip the balls: Working with a few chilled balls at a time, dip each one into the melted coating with a fork or dipping tool. Let the excess drip off, then return it to the parchment-lined tray.
  7. Add the decorations: Before the coating sets, press a small pretzel stick piece into the top of each ball for the stem. Add a tiny green icing leaf or green candy piece next to the stem. If you want ridges, lightly score lines once the coating is mostly set.
  8. Chill to set: Refrigerate the finished pumpkin Oreo balls for 15 to 30 minutes, or until the coating is fully firm and easy to lift from the parchment.

How to Get a Smooth Coating

Use very fine cookie crumbs so the centers roll smoothly and hold together well. If the mixture feels sticky or starts to flatten after shaping, chill it longer before dipping.

It also helps to keep the coating warm but not overheated. If it gets too thick, the shell can look heavy. If it is too hot, it can melt the chilled centers and cause cracks later.

Why Did My Pumpkin Oreo Balls Turn Out Messy?

  • The centers are too soft: Chill them longer before dipping.
  • The coating is too thick: Melt it gently and thin it with a small amount of shortening or coconut oil if needed.
  • The coating cracked: Very cold centers and very hot coating can cause cracking, so let the coating cool slightly before dipping.
  • The decorations would not stick: Add the pretzel stem and green garnish while the coating is still tacky.
  • The shapes look uneven: Use a small cookie scoop to portion the filling evenly.

Variations

Pumpkin Spice Oreo Balls

Use pumpkin spice Oreos instead of regular Oreos. The shaping, chilling, and dipping steps stay the same.

Sprinkle-Topped Version

Add orange or Halloween sprinkles before the coating sets. Keep them light so the pumpkin shape still shows.

How to Store Pumpkin Oreo Balls

Store the pumpkin Oreo balls in an airtight container in the refrigerator. If you need to stack them, separate the layers with parchment paper.

They keep well for several days. For the best texture, keep them chilled until shortly before serving, and do not leave them at room temperature for more than about 1 hour.

These are also a good make-ahead dessert since they need chilling anyway. Make them in advance and refrigerate until ready to serve.

More Fall Dessert Ideas

If you want another no-bake pumpkin dessert, try these Pumpkin Cheesecake Truffles.

For a baked option, you may also like these Pumpkin Bars with Cream Cheese Frosting.

Nutrition

Nutrition is approximate and will vary based on ingredient brands, the amount of coating used, and serving size.

  • Serving size: 1 truffle, based on 24 truffles
  • Calories: about 140
  • Protein: 2g
  • Fat: 7g
  • Carbohydrates: 20g
  • Per 100g: about 450 calories, 5g protein, 22g fat, 65g carbohydrates

Pumpkin Oreo Balls

No-bake truffles made from crushed Oreos and cream cheese, dipped in orange candy coating and decorated to look like mini pumpkins.
Course: Dessert
Cuisine: American
Prep: 20 min
Total: 95 min
Servings: 24 Calories: 140 kcal

Equipment

  • food processor (or zip-top bag and rolling pin)
  • mixing bowl
  • cookie scoop
  • baking sheet
  • parchment paper
  • microwave-safe bowl or double boiler
  • fork or dipping tool
  • refrigerator

Ingredients

For the pumpkin Oreo balls

  • 1 standard 14.3-ounce package Oreo cookies (about 405 g), whole cookies including filling
  • 8 ounces cream cheese, softened (225 g)
  • 10 to 12 ounces orange candy melts or orange melting wafers (285 to 340 g)
  • 18 to 24 pretzel stick pieces, for stems
  • Small amount green icing or green candy pieces, for leaf detail
  • 1 to 2 teaspoons vegetable shortening or coconut oil (optional, to thin coating if needed)

Instructions

  1. Add the whole Oreo cookies to a food processor and pulse until very fine crumbs; if you don’t have a food processor, place cookies in a zip-top bag and crush with a rolling pin until even.
  2. Transfer crumbs to a mixing bowl if needed and add the softened cream cheese.
  3. Mix until a thick, smooth dough forms with no dry crumb pockets, about 5 minutes.
  4. Line a baking sheet with parchment paper and use a small cookie scoop to portion the mixture, then roll into smooth balls; gently flatten tops and bottoms slightly if you want a pumpkin shape.
  5. Refrigerate the shaped balls for 20 to 30 minutes, or until firm enough to dip without softening quickly.
  6. Melt the orange candy melts in a microwave-safe bowl or over a double boiler, stirring until smooth; if the coating is too thick, stir in shortening or coconut oil 1 teaspoon at a time until loosened.
  7. Working with a few chilled balls at a time, dip each ball into the melted coating with a fork or dipping tool, letting the excess drip off before returning it to the parchment-lined sheet.
  8. Before the coating sets, press a small pretzel stick piece into the top of each ball for the stem and add a tiny green icing leaf or green candy piece next to the stem; optionally score light ridges once the coating is mostly set.
  9. Refrigerate the finished pumpkin Oreo balls for 15 to 30 minutes, or until the coating is fully firm and easy to lift from the parchment.

Tips

  • Process the cookies to very fine crumbs so the centers roll smoothly and hold together.
  • Chill the shaped centers longer if they feel sticky or start to flatten before dipping.
  • Keep the coating warm but not overheated; if it thickens, thin it with 1 teaspoon portions of shortening or coconut oil.
  • Let the coating cool slightly before dipping if it’s very hot to avoid cracking.
  • Press stems and decorations into the coating while it is still tacky so they stick.

Variations

  • Pumpkin Spice Oreo Balls: Use pumpkin spice Oreos instead of regular Oreos for a stronger fall flavor; follow the same shaping, chilling, and dipping steps.
  • Sprinkle-Topped Version: Add orange or Halloween sprinkles to the coating before it sets for extra decoration; keep sprinkles light to maintain the pumpkin shape.

Notes

Store finished truffles in an airtight container in the refrigerator, separating layers with parchment if stacking. Keep chilled until serving and do not leave at room temperature for more than about 1 hour.

Nutrition

Calories: 140 kcal | Protein: 2 g | Fat: 7 g | Carbohydrates: 20 g

Apple Cinnamon Rolls

These apple cinnamon rolls bake up soft and fluffy with a rich dough, a brown sugar-cinnamon swirl, and little pieces of apple tucked into every layer. They work well for a weekend breakfast or a brunch bake when you want something homemade but still straightforward.

The method is simple: make a soft yeast dough, roll it out, add the filling, and bake until the center rolls are set. Keep the apples finely chopped so the filling stays easier to roll and slice, and tent the pan with foil if the tops brown before the middle is done.

Ingredients for Apple Cinnamon Rolls

Apple cinnamon rolls in a glass baking dish with one roll slightly separated to show the filling
  • 4 to 4 1/2 cups all-purpose flour (about 525g), plus a little more only if needed
  • 2 1/4 teaspoons instant yeast (7g)
  • 1/4 cup granulated sugar (50g)
  • 1 cup whole milk (240g), warmed
  • 1/4 cup unsalted butter (55g), melted
  • 1 large egg
  • 1 teaspoon salt
  • 2 medium apples, peeled and finely chopped (about 300g)
  • 3/4 cup brown sugar (150g)
  • 1 1/2 to 2 teaspoons ground cinnamon
  • Softened unsalted butter, for the filling
  • About 1/2 cup caramel sauce or 1 cup powdered sugar glaze, for finishing

Optional: 1 teaspoon vanilla extract for the glaze, 1/2 cup chopped pecans or walnuts for the filling, and 1 to 2 teaspoons lemon juice to toss with the apples while you prep.

Use a firm apple that holds its shape in the oven. Whole milk gives the dough a softer texture, but lower-fat milk can work if that is what you have.

How to Make Apple Cinnamon Rolls

Close-up of apple cinnamon rolls with caramel icing showing the soft swirls and baked edges
  1. Mix the dough: In a large bowl or the bowl of a stand mixer, combine the warm milk, yeast, granulated sugar, melted butter, egg, salt, and 4 cups of the flour. Mix with a dough hook or sturdy spoon until a soft dough forms. If it is very sticky, add the remaining flour a little at a time. The dough should be soft and slightly tacky, not dry.
  2. Knead the dough: Knead for 10 to 15 minutes, by mixer or by hand, until the dough is smooth, stretchy, and cohesive. It should feel elastic and hold together well.
  3. Let it rise: Lightly grease a bowl, place the dough inside, and turn it once to coat. Cover and let rise at warm room temperature for 45 to 90 minutes, or until doubled in size and puffy.
  4. Prepare the filling: Grease a 9×13-inch baking dish. In a bowl, mix the chopped apples with the brown sugar and cinnamon. Keep the apple pieces small so the rolls are easier to shape and the filling does not get too wet.
  5. Roll out the dough: Turn the risen dough onto a lightly floured surface and roll it into a large rectangle. If it keeps shrinking back, let it rest for 5 minutes, then continue.
  6. Add the filling: Spread the dough with softened butter, leaving a small border along one long edge. Scatter the apple mixture evenly over the top. If using nuts, sprinkle them over the filling.
  7. Shape the rolls: Starting from a long side, roll the dough into a fairly tight log and pinch the seam to seal. Cut into 12 even rolls with a sharp knife or unflavored dental floss. Arrange them cut side up in the baking dish.
  8. Let the rolls rise again: Cover and let rise for 20 to 40 minutes, until noticeably puffy. Meanwhile, preheat the oven to 350°F.
  9. Bake: Bake for 20 to 30 minutes, until the tops are deep golden brown and the center rolls look set rather than doughy between the layers. If the tops brown too quickly, loosely tent the pan with foil and keep baking until the middle is done.
  10. Finish and serve: Let the rolls cool for 5 to 10 minutes, then drizzle with caramel sauce or powdered sugar glaze while still warm. Serve warm.

How to Keep the Filling from Getting Watery

Finely chopped apples work better than larger chunks here. They fit into the spiral more evenly, make the log easier to roll, and keep the filling from creating wet pockets in the center.

It also helps not to overload the dough. Too much fruit can make the rolls harder to slice neatly and can leave the middle underbaked.

How to Tell When the Rolls Are Done

Start checking on the early side, especially if your apples are juicy or your oven runs hot. The tops should be golden brown, the edges should look set, and the center rolls should no longer look wet or raw between the layers.

If the tops are done before the middle, tent the pan loosely with foil and continue baking. That is better than pulling them early and ending up with doughy centers.

Make-Ahead Tips

You can shape the rolls, place them in the baking dish, cover, and refrigerate them overnight. The next day, let them sit at room temperature until they lose some of their chill and look slightly puffy, then bake as directed.

You can also freeze them to split up the work, but keep an eye on proofing so the dough does not overrise. If you plan to ice them after storing or reheating, wait until the rolls are warm again so the topping does not melt away too much.

Topping Ideas

Caramel sauce is the richer option and pairs especially well with the apple filling. A powdered sugar glaze is simpler and lighter. If you like, stir a little vanilla into the glaze.

If you want another easy morning bake, try these Protein Blueberry Muffins.

How to Store and Reheat Apple Cinnamon Rolls

Let the rolls cool before storing. Keep them covered in an airtight container at room temperature for a short time, or refrigerate them for longer storage, especially if the filling or topping is quite moist.

To reheat, warm individual rolls briefly in the microwave, or cover a small batch loosely and warm them in a low oven until heated through. Do not overheat them or the dough can dry out.

For a savory breakfast alongside the sweet rolls, make this Quick and Cheesy Breakfast Quesadilla.

Nutrition

Nutrition is approximate and will vary based on ingredient brands, exact flour amount, how much butter you use in the filling, and whether you finish the rolls with caramel sauce or glaze.

  • Serving size: 1 roll
  • Calories: about 310
  • Protein: 6g
  • Fat: 7g
  • Carbohydrates: 56g
  • Per 100g: about 280 calories, 5g protein, 6g fat, 50g carbohydrates

Apple Cinnamon Rolls

Soft yeast cinnamon rolls filled with finely chopped apples and a brown sugar–cinnamon swirl, finished with caramel or a powdered sugar glaze.
Course: Breakfast
Cuisine: American
Prep: 30 min
Cook: 30 min
Total: 190 min
Servings: 12 Calories: about 310 kcal

Equipment

  • mixing bowl
  • stand mixer (optional)
  • dough hook (if using mixer)
  • rolling pin
  • 9×13-inch baking dish
  • sharp knife or unflavored dental floss
  • measuring cups and spoons
  • plastic wrap or clean towel
  • aluminum foil
  • oven

Ingredients

Dough

  • 4 to 4 1/2 cups all-purpose flour (about 525 g), plus more if needed
  • 2 1/4 teaspoons instant yeast (7 g)
  • 1/4 cup granulated sugar (50 g)
  • 1 cup whole milk (240 g), warmed
  • 1/4 cup unsalted butter (55 g), melted
  • 1 large egg
  • 1 teaspoon salt

Filling

  • 2 medium apples, peeled and finely chopped (about 300 g)
  • 3/4 cup brown sugar (150 g)
  • 1 1/2 to 2 teaspoons ground cinnamon
  • Softened unsalted butter, for spreading
  • Optional: 1/2 cup chopped pecans or walnuts
  • Optional: 1 to 2 teaspoons lemon juice (to toss with apples)

Finish

  • About 1/2 cup caramel sauce or 1 cup powdered sugar glaze, for finishing
  • Optional: 1 teaspoon vanilla extract (for the glaze)

Instructions

  1. Combine warmed milk, instant yeast, granulated sugar, melted butter, egg, salt, and 4 cups of flour in a large bowl or the bowl of a stand mixer; mix with a dough hook or sturdy spoon until a soft dough forms, adding remaining flour a little at a time only if very sticky.
  2. Knead the dough for 10 to 15 minutes by hand or with the mixer until smooth, elastic, and cohesive.
  3. Lightly grease a bowl, place the dough inside and turn to coat; cover and let rise at warm room temperature for 45 to 90 minutes or until doubled and puffy.
  4. Grease a 9×13-inch baking dish and preheat the oven to 350°F (177°C) toward the end of the second rise step.
  5. In a bowl, mix the finely chopped apples with the brown sugar and cinnamon (and lemon juice if using); keep apple pieces small.
  6. Turn the risen dough onto a lightly floured surface and roll into a large rectangle; let rest 5 minutes if the dough springs back and then continue rolling.
  7. Spread the rolled dough with softened butter, leaving a small border along one long edge, then scatter the apple mixture evenly over the butter and sprinkle nuts if using.
  8. Starting from a long side, roll the dough into a tight log and pinch the seam to seal; cut into 12 even rolls with a sharp knife or unflavored dental floss and arrange cut side up in the prepared baking dish.
  9. Cover and let the rolls rise for 20 to 40 minutes until noticeably puffy while the oven finishes preheating.
  10. Bake the rolls for 20 to 30 minutes until deep golden brown on top and the centers look set; if the tops brown too quickly, loosely tent with foil and continue baking until the middle is done.
  11. Let the rolls cool for 5 to 10 minutes, then drizzle with caramel sauce or powdered sugar glaze (stir in vanilla if using) and serve warm.

Tips

  • Finely chop the apples so the filling rolls more evenly and doesn’t make wet pockets.
  • Do not overload the dough with fruit to avoid underbaked centers and difficult slicing.
  • If the dough keeps shrinking while rolling, let it rest 5 minutes before continuing.
  • Use a firm apple variety that holds its shape in the oven.
  • Tent with foil if the tops brown before the centers are set.

Variations

  • Nutty Apple Rolls: Add 1/2 cup chopped pecans or walnuts to the apple filling for extra crunch and flavor.
  • Vanilla Glaze Finish: Use a powdered sugar glaze and stir in 1 teaspoon vanilla extract for a lighter finish instead of caramel.

Notes

Shape the rolls ahead and refrigerate overnight; bring to room temperature and let puff before baking. Store cooled rolls covered at room temperature short-term or refrigerate for longer storage. Reheat gently to avoid drying the dough.

Nutrition

Calories: about 310 kcal | Protein: 6 g | Fat: 7 g | Carbohydrates: 56 g